
Leaderboard


Popular Content
Showing content with the highest reputation on 09/28/17 in all areas
-
.5 points
-
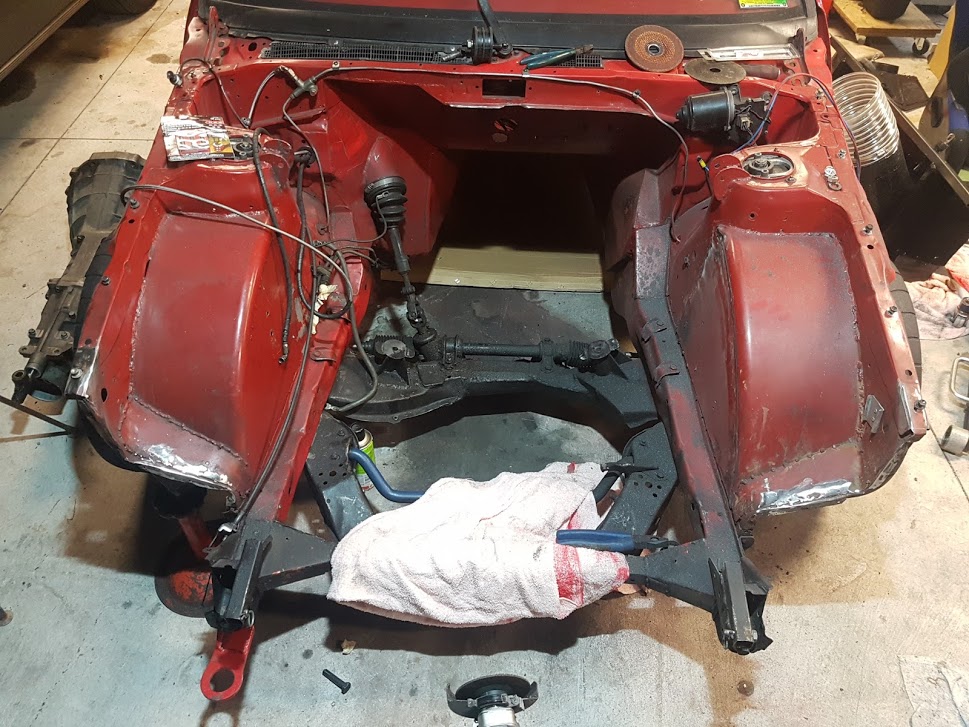
Its been unfortunately off to pretty slow start just been doing some bigger hours at work to pay for parts, good news is I ended up buy a manual. Its a small world ended up putting a post on Facebook and a guy in Hamilton had a 5 speed Toyota W50 box with a Castlemaine adapter that he had had forever. Turns out once talking to him he recognized the rotisserie frame from the photo and we figured out it was his old truck that he started building in August 2000. The Toyota box was what he had originally used to set up the chassis but he held on to the motor/ box when he sold it which has worked out well for me. The turbo 350 never lined up at all with the gearbox mounts so it was a pleasant surprise that the Toyota box fitted perfectly. He also found the driveshaft that he got built and balanced when he was building it, am super stoked. Im a little bit concerned that the box might be a bit small once I go to a hotter 350 in the long term but it should be sweet behind the 305 for now, apparently the stronger W series boxes are all about the same size and have the same bolt pattern so can always go bigger later. Here are some pictures the original owner gave to me of when he was working on it. And classic early 2000 Barry shot I love it And some pictures of the gearbox fitted up to the chassis At the moment the cab is at a mates I have been peeling the cowl off but this is how the chassis is sitting at the moment at home. Sorry my potato is not the greatest at night time photos.4 points
-
Nice work Solar battery charger on the pole?2 points
-
Tentative, still waiting to see if someone can cover my night shift.2 points
-
Shout out to GC @Vintage Grumble, sorted me a couple belts, chur my bro2 points
-
My parents spotted this in their travels in the USA, so sweet!2 points
-
so, were was I? ah yes friday. I phoned around a few places and found Autostop are the only people that carry Bosch car parts these days, asked about a GT40T (for transformer) coil, no worried the helpful young man said, I 'll ring ya back once the van drops it off, sorted. at about noon the guy rings me back, the coils here in the local shop, but for some reason I double checked, it is the small square one right? no its the round cylinder one, doh! no worries he assures me, I'll get it on the next van, I get another call at about 3, square coil is here, sweet! so I bunk off work early as I have the wifes car for the day to go and pick it up, get home on the double time just as Darrell does and we install the new one and she fires straight up!Once I got the old coil out it was obvious it had see better days, but in my defence most of that great crack was hidden from view under the mounts, and I was more worried about the clutch and piston rings still working etc..all this pissing about with the coil had at least given me time to sort a few other small but important things.these are my jets.as I said in the earlier winge post everything has been checked and double checked, which does at least give me more confidence in the old girl.gave the last few parts of the sunroof mech a lick of paint and duct taped the old cover on for now.water tight bugwhich bring us back to friday night and a for the first time a running car. First job, wash all the dust and cat paw prints off it.jeah.stood back enjoyed a beverage until it was nearly dark.once the kids were in bed and I'd realized the only things stopping a wof was a front number plate, wipers and them brakes, or lack there of. I then remembered I hadn't yet had another go at adjusting the rear drums and noticed when I pulled the handbrake on, I had a good pedel, hmmmm.Sure enough they were miles out, whats next? wipers and a plate? might as well keep going!I have some how amassed quite a collection of wiper arms and blades over the years and so had a nice working matching pair, something else new of this car, polished up the old black plate, so many battle scars, but I love it.By now its 11.30, fuck it, I'm going for a drive!now it get this thing legal. I have however driven it on private roads and those twin carbys are transformed this car into a bit of a beast.that little 1600 revs feels like it wants to rev to the moon! still needs a bit of work on the timing and jetting, but dear god it pulled 50mph in second gear today! a little bit scary with drum brakes! so friggin loud though, no headlining at all, my brother said after I took him for a wee blast, it like sitting in the engine bay! it kind of hard to drive normal as it so much fun to wind out.2 points
-
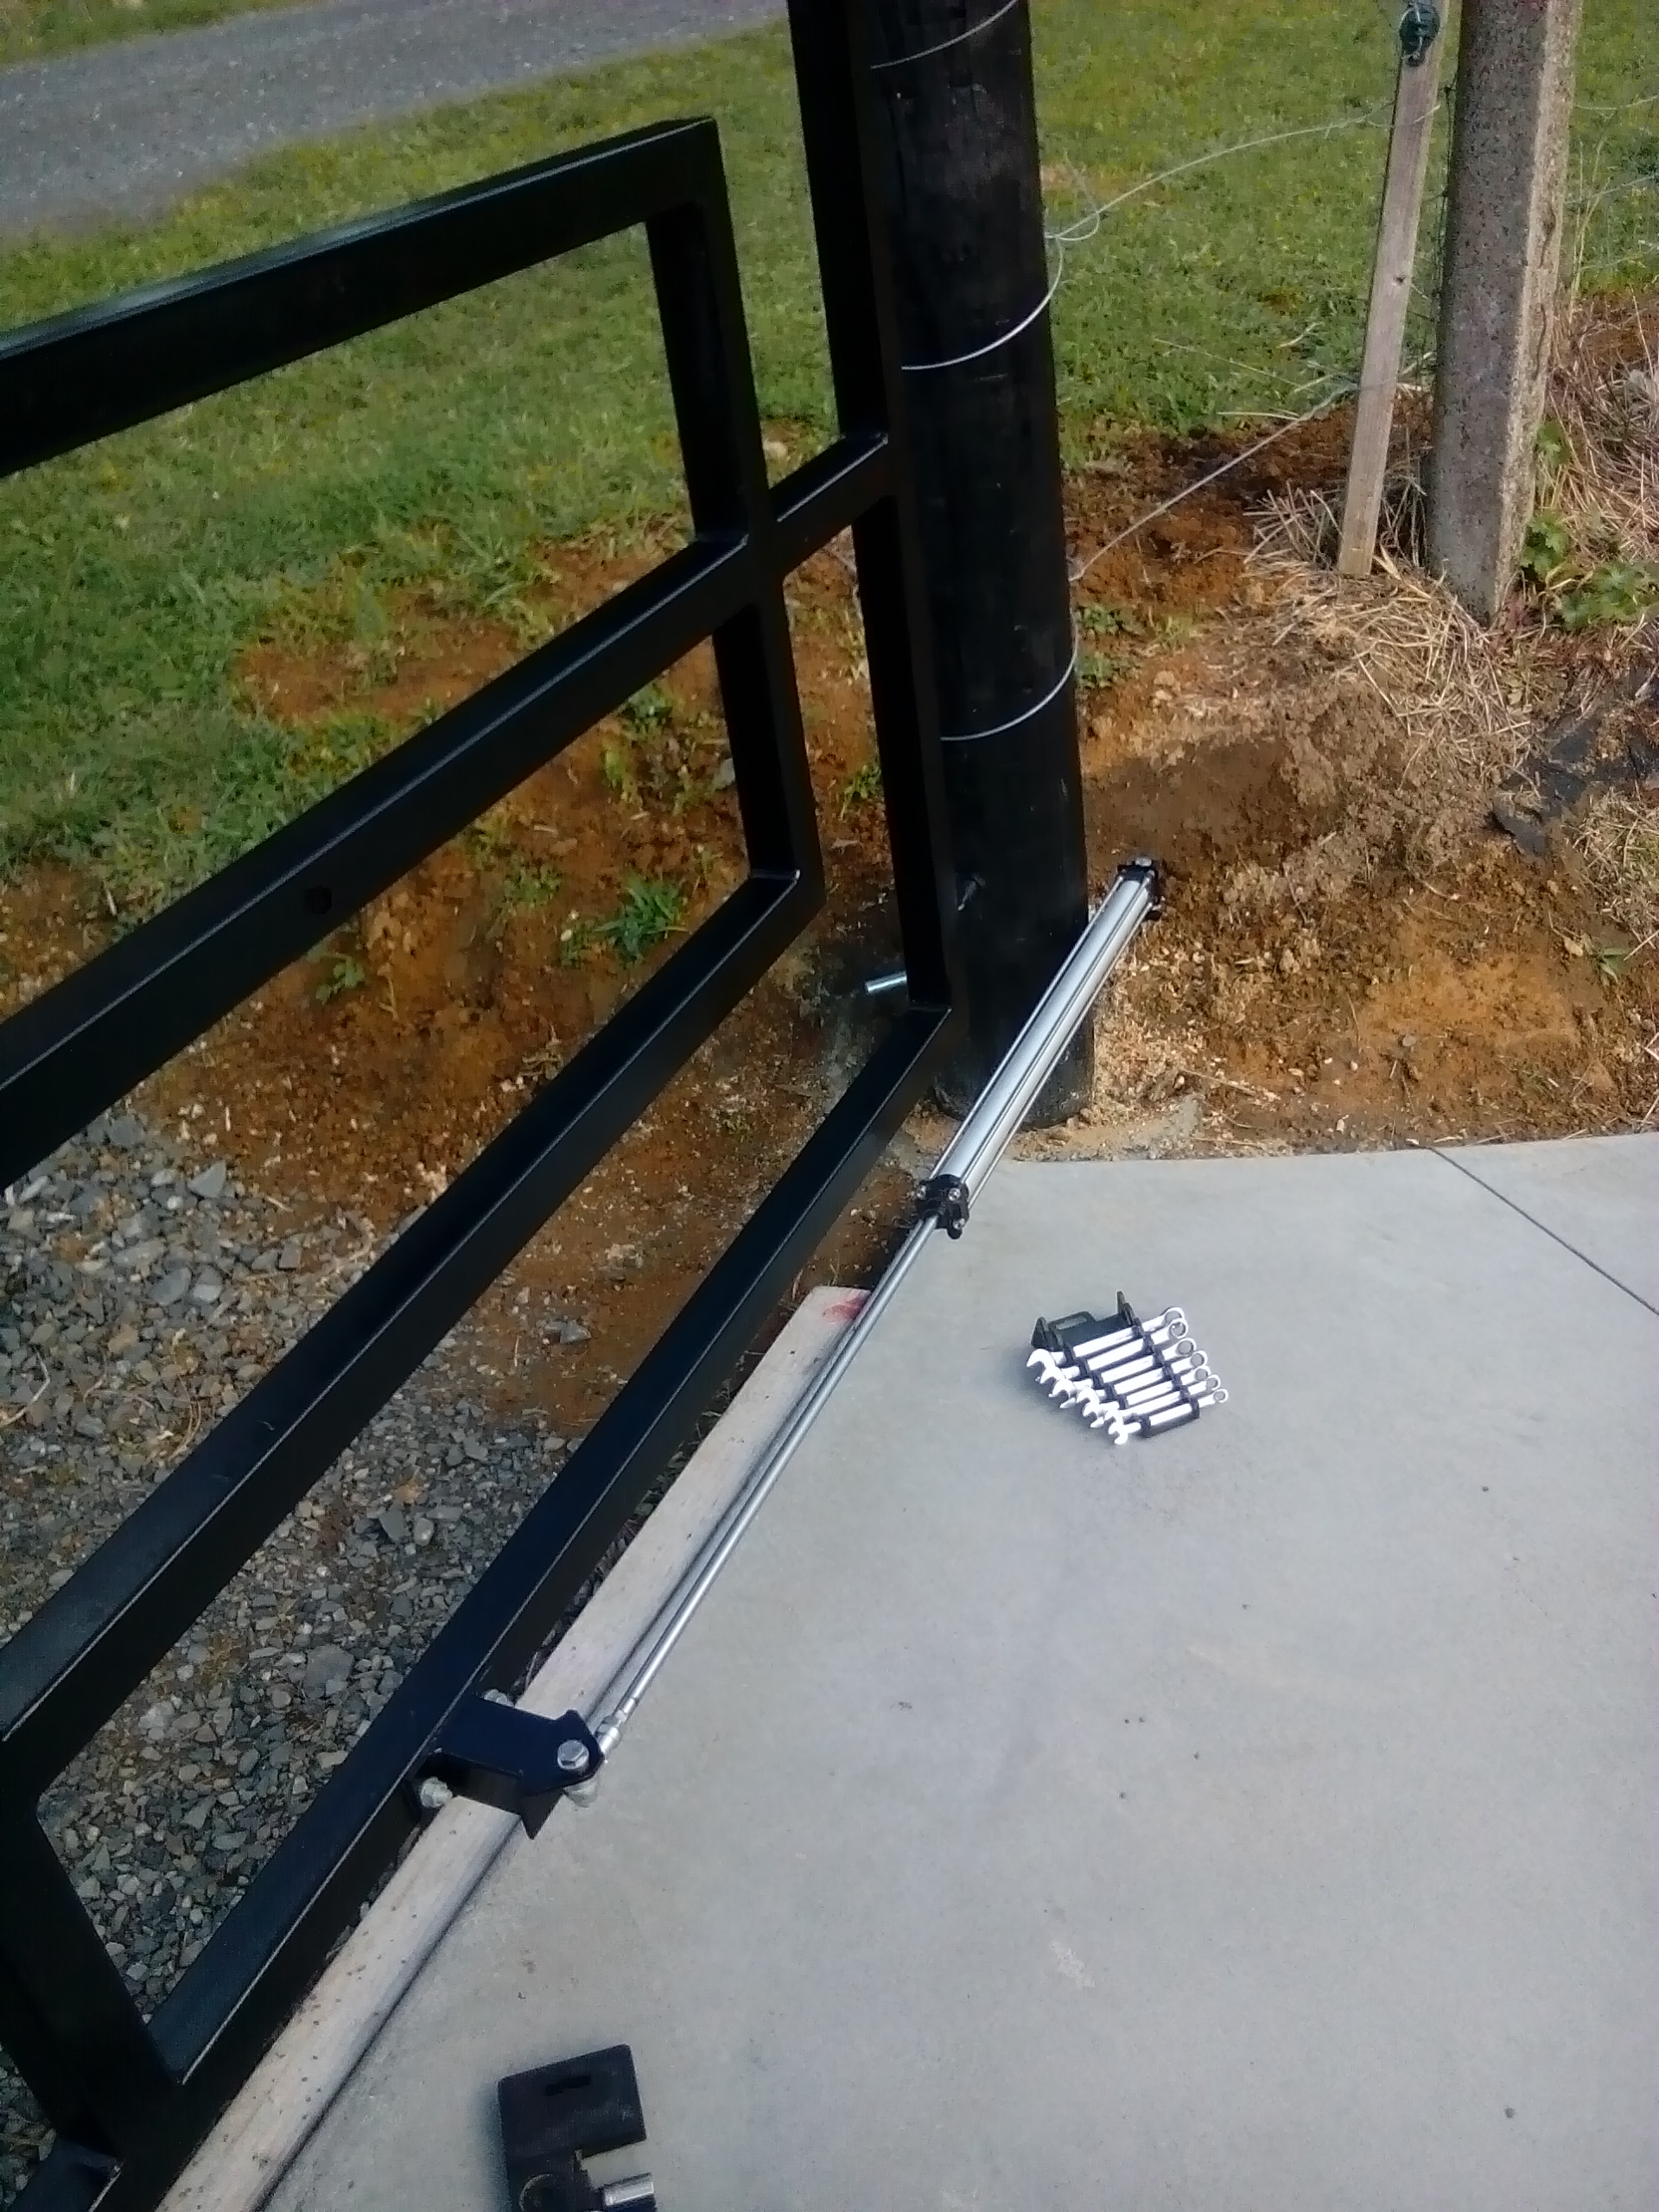
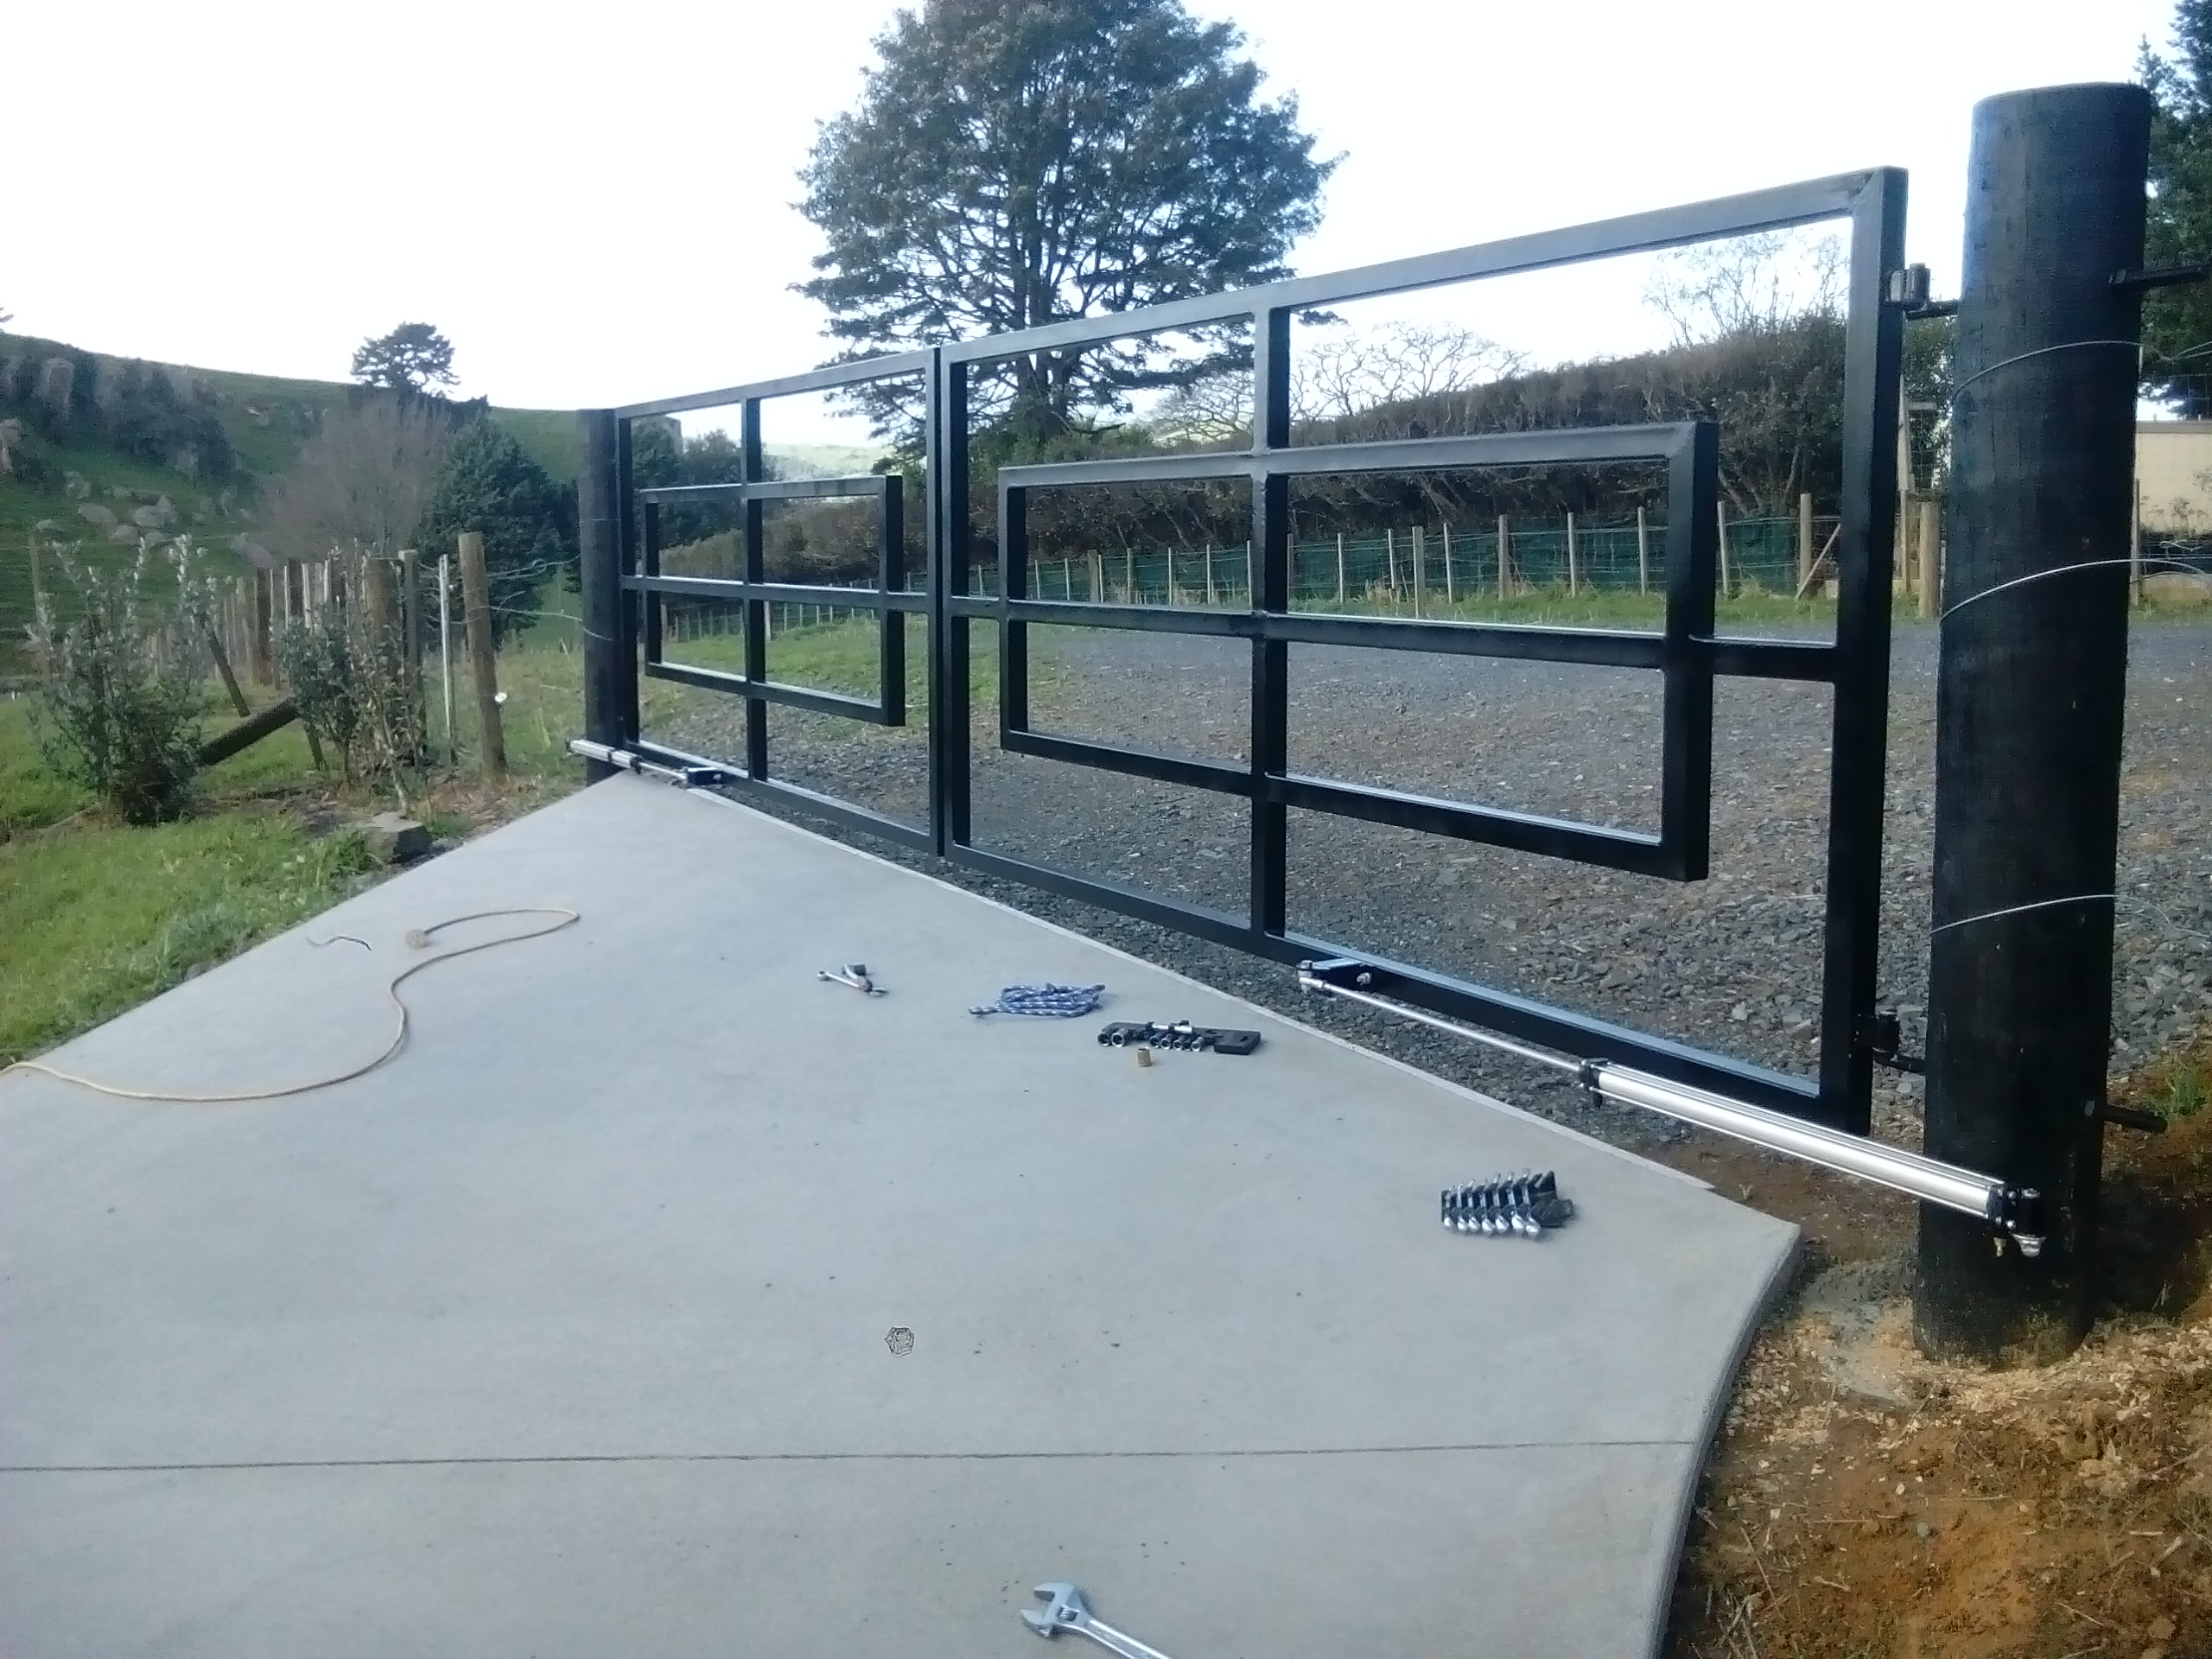
Pneumatic cylinders fitted up. The one on the left has a dummy barrel added to try balance the symmetry better, as it only had a 190mm stroke. They swing and stop perfectly, which was fantastic as all that maths paid off big time. Just got to get a few pneumatic fittings and some air line and it will be all go.
 2 points
 -
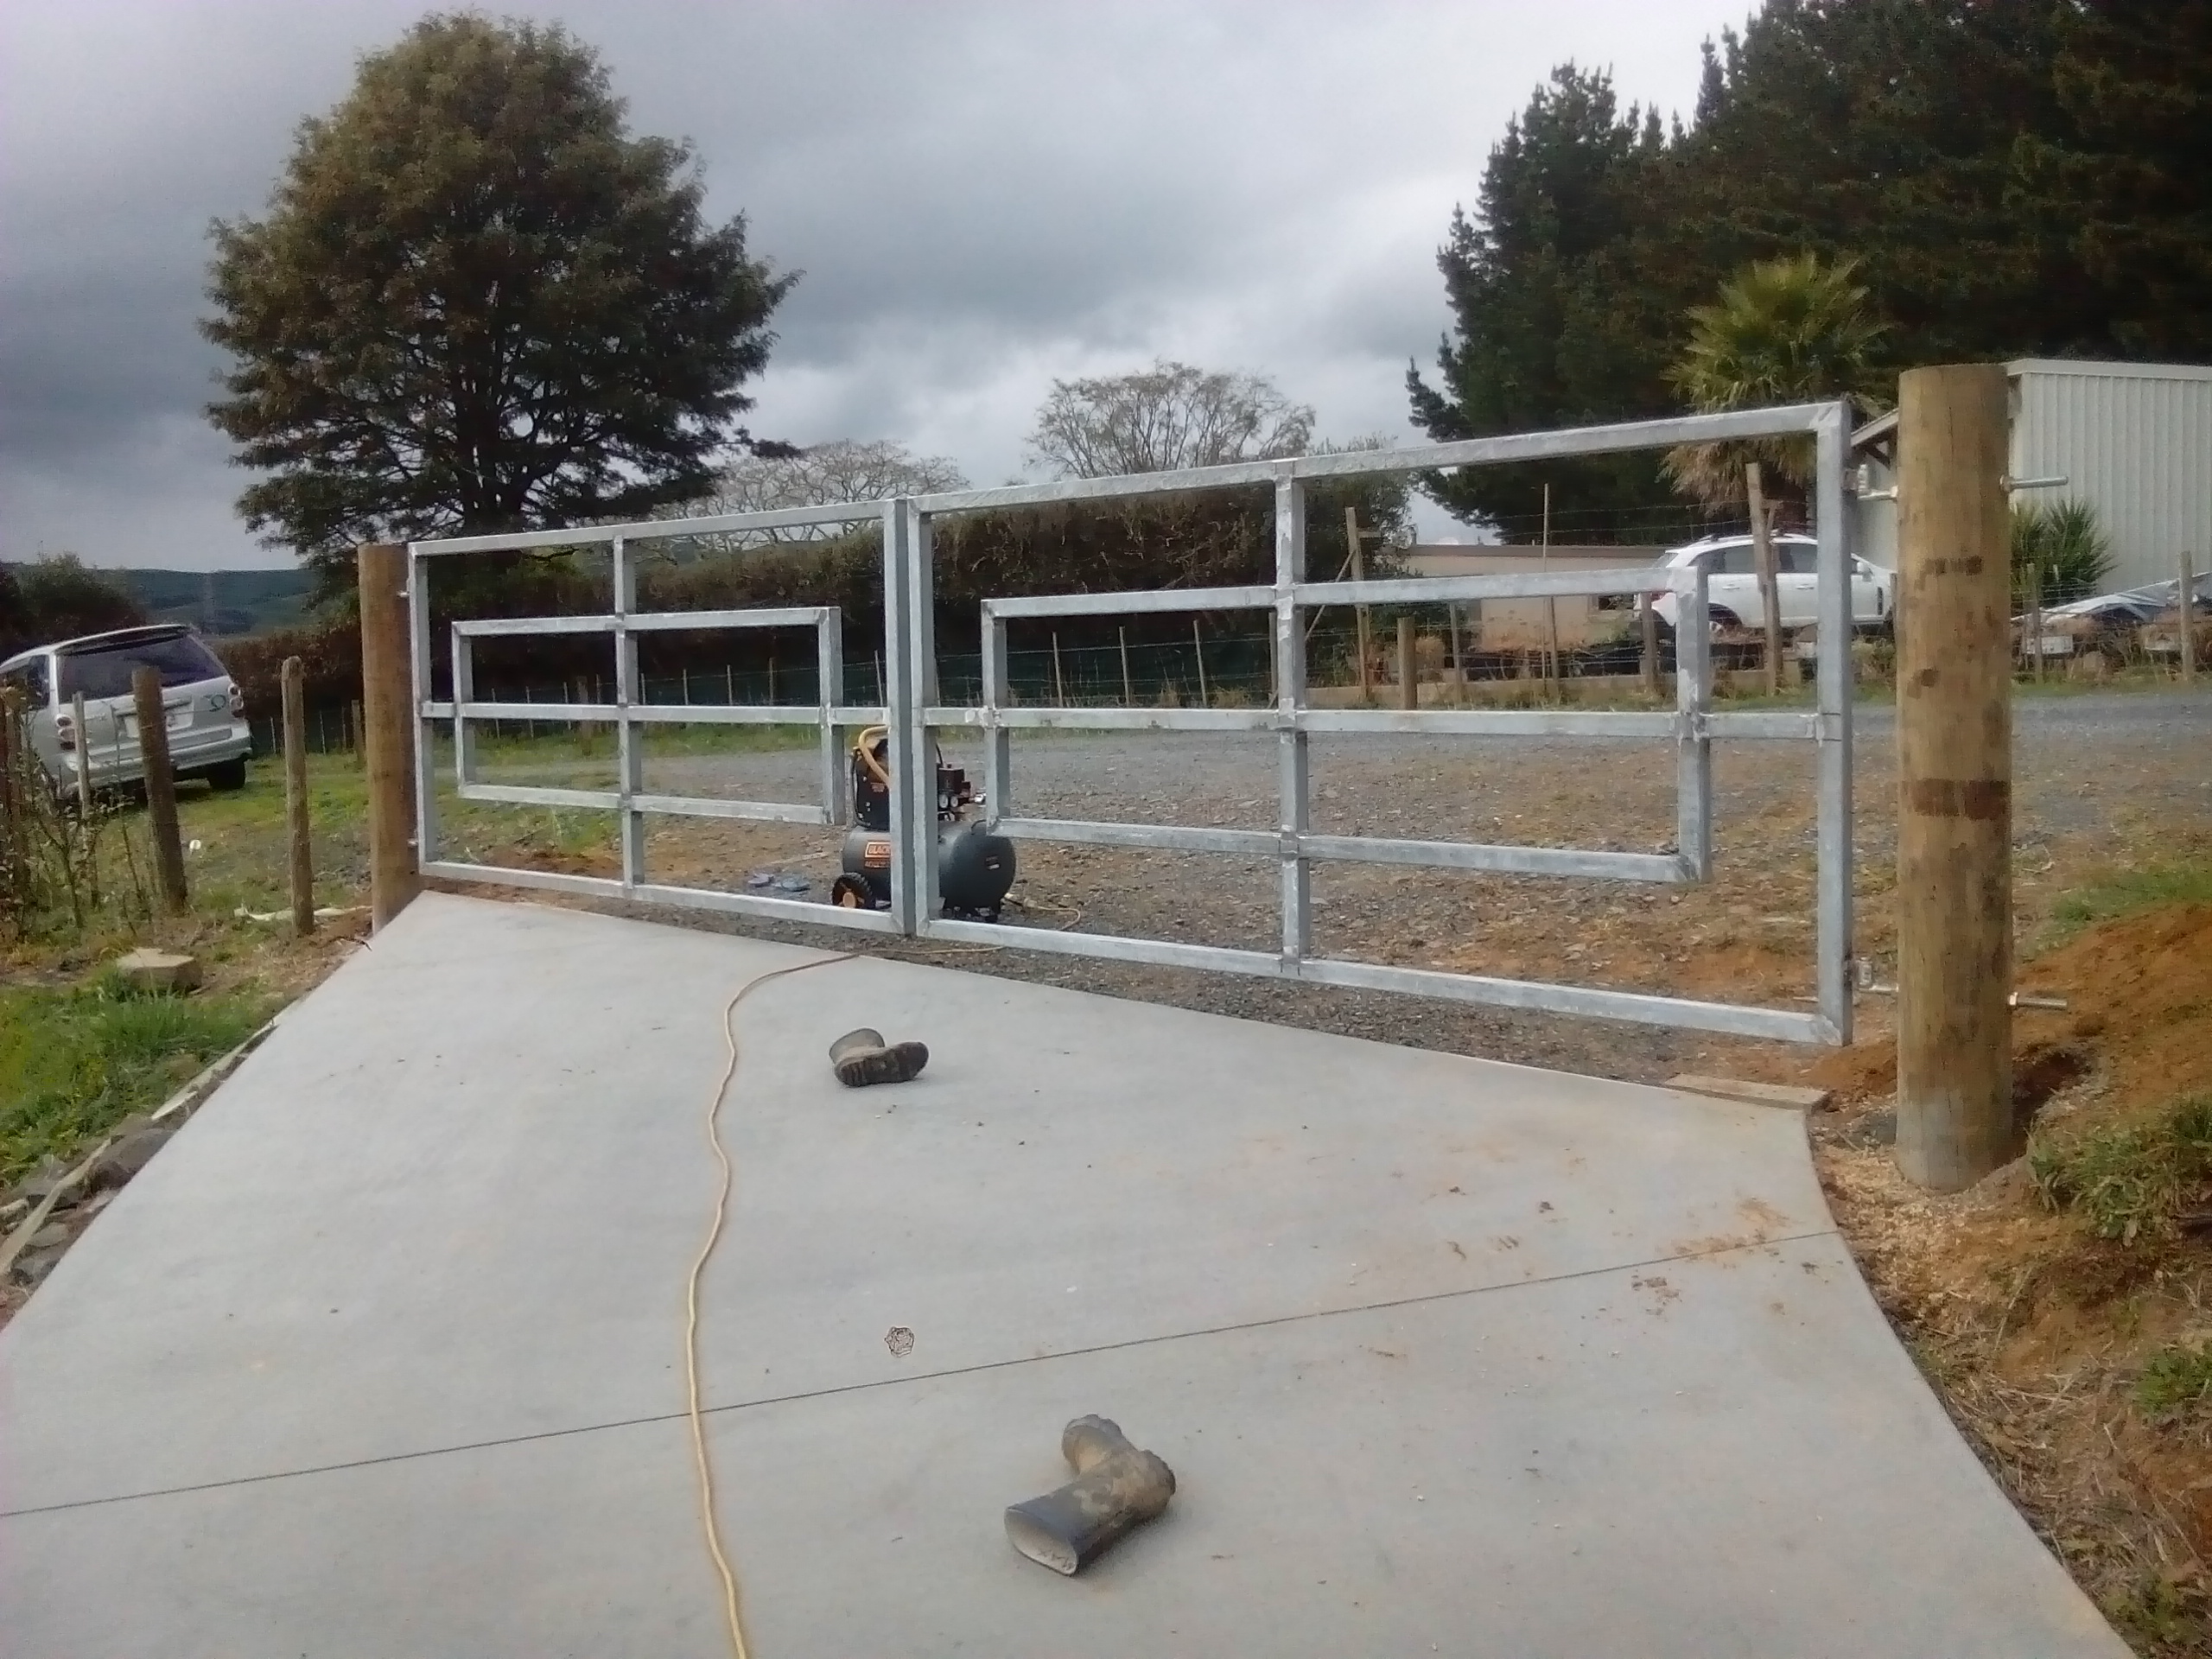
Posts in Holes drilled, hinges fitted...and gates well hung (okay, that joke got worn out a fair bit). Then it rained! So painting them black never happened, and the gates are now back in the shed. Waiting on a fine day to paint them outside, as I don't want to deal with over spray issues right now in my shed.
2 points
-
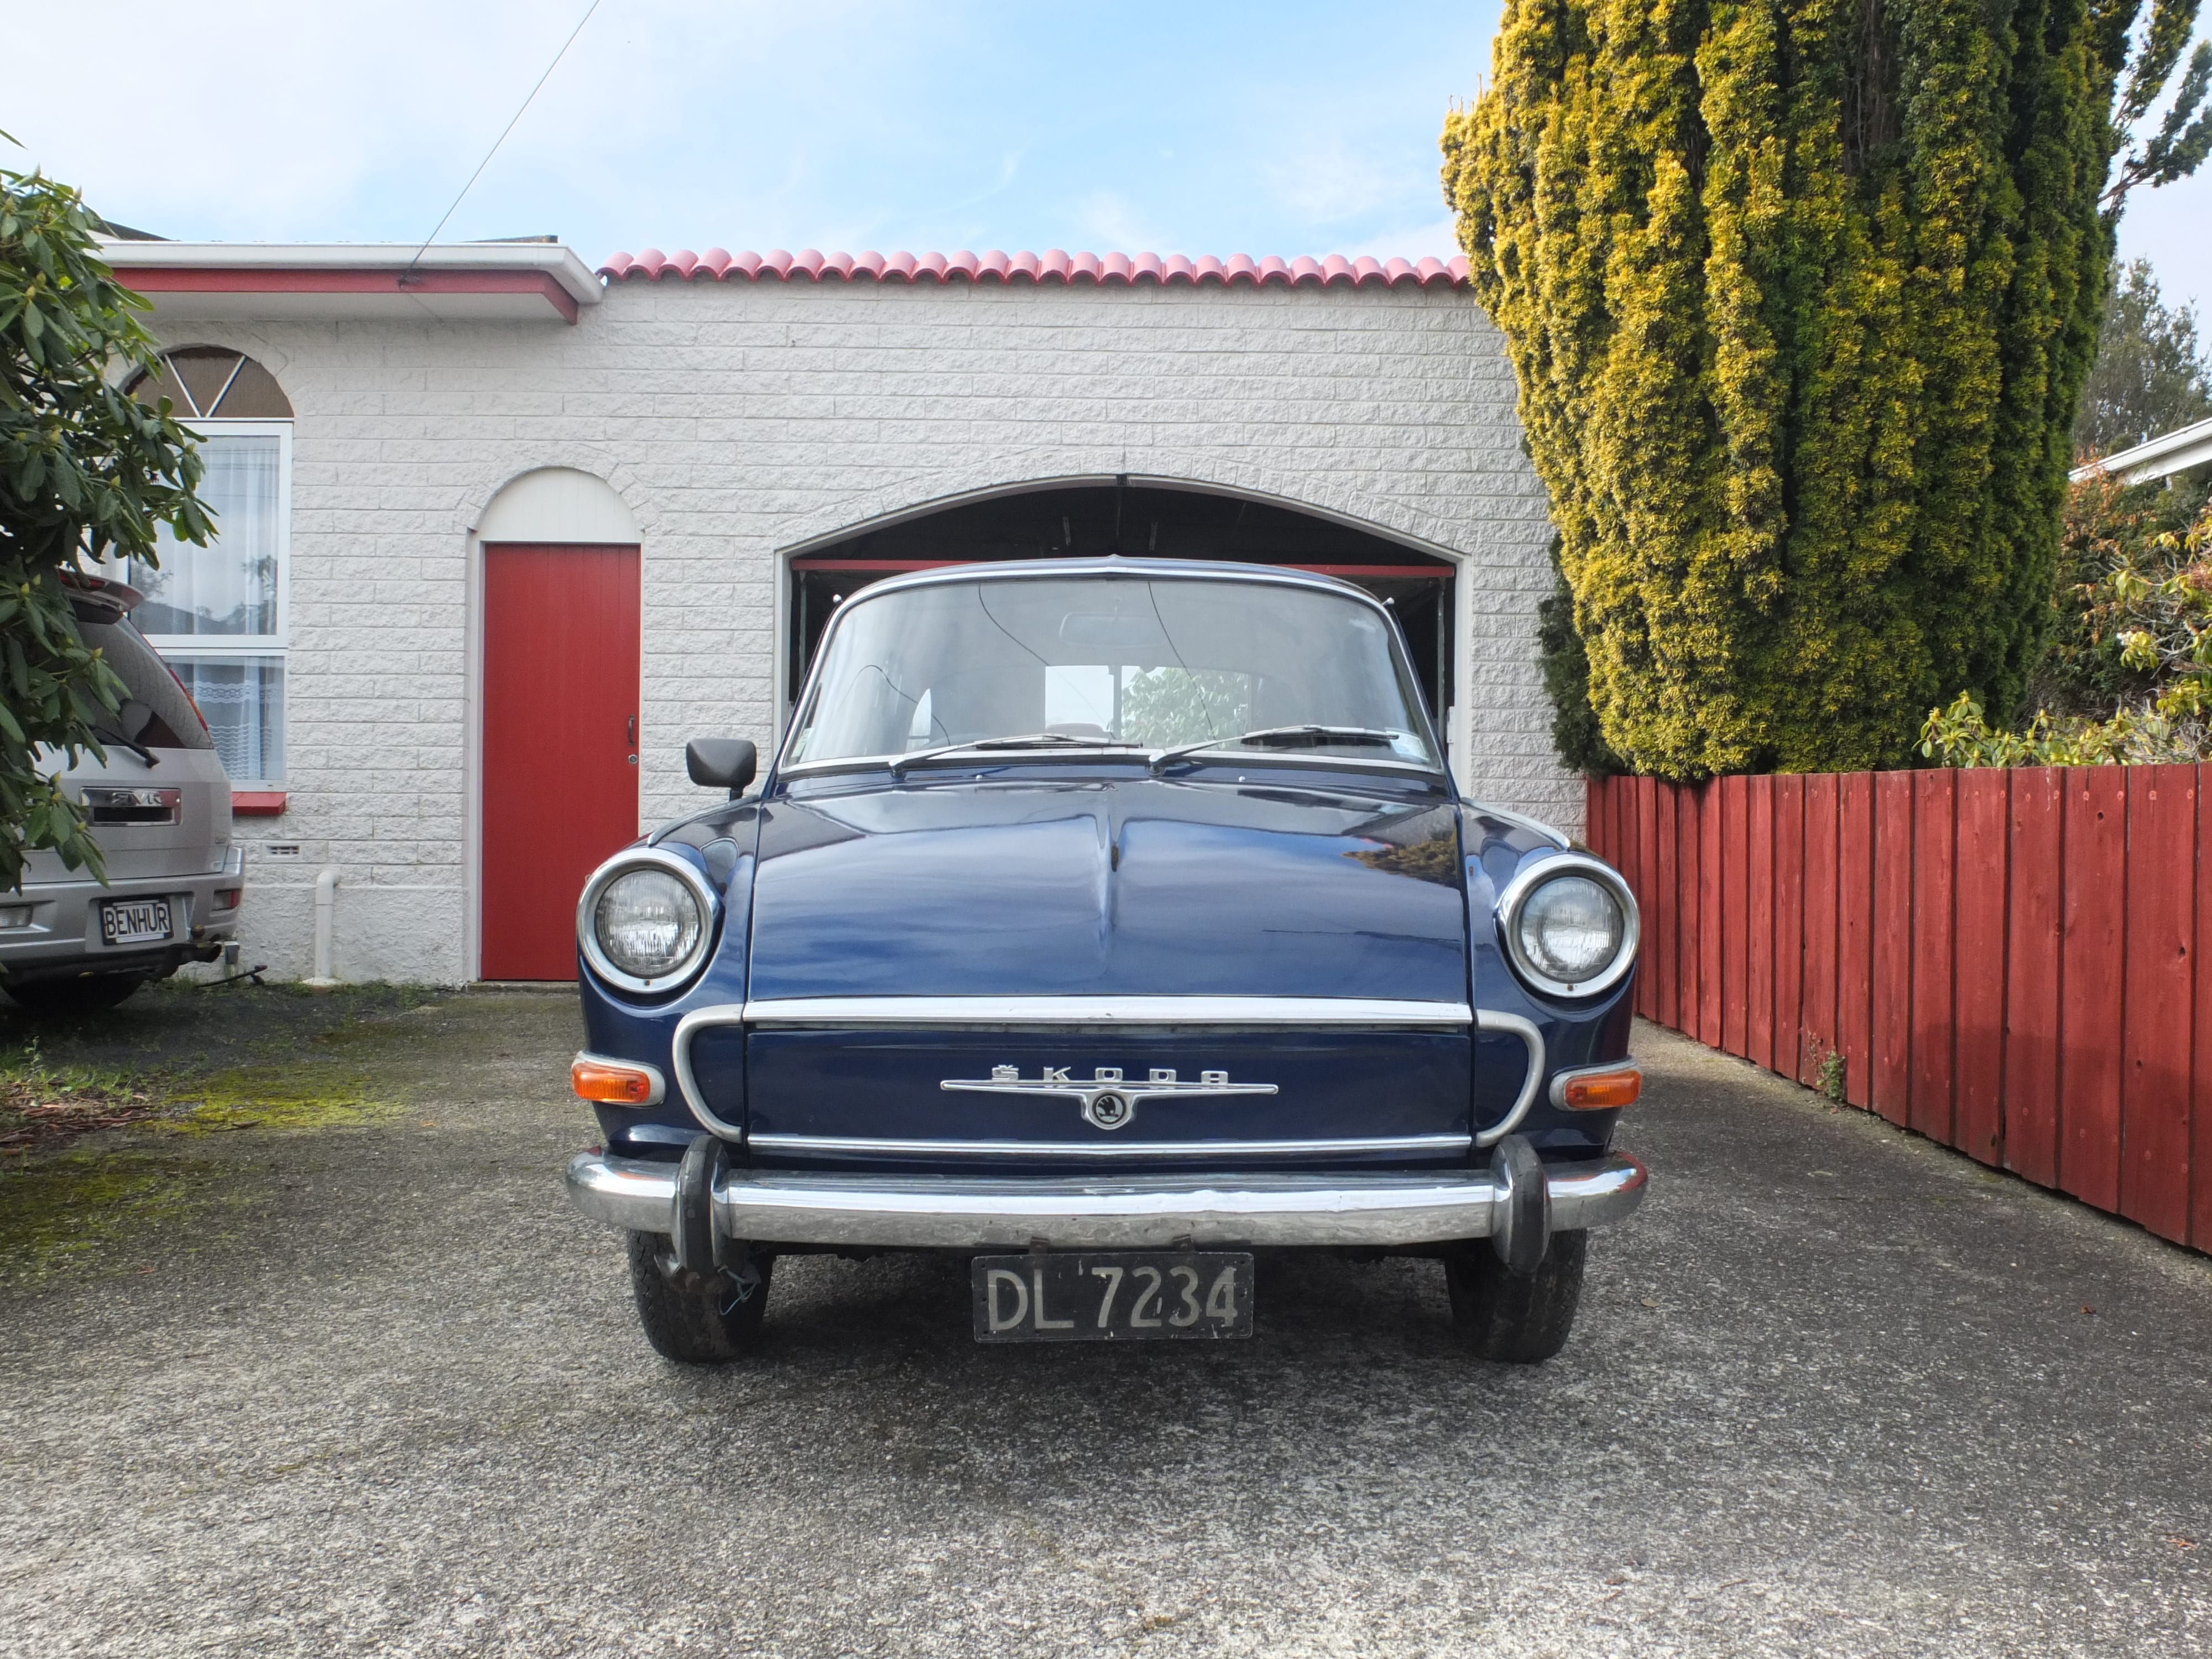
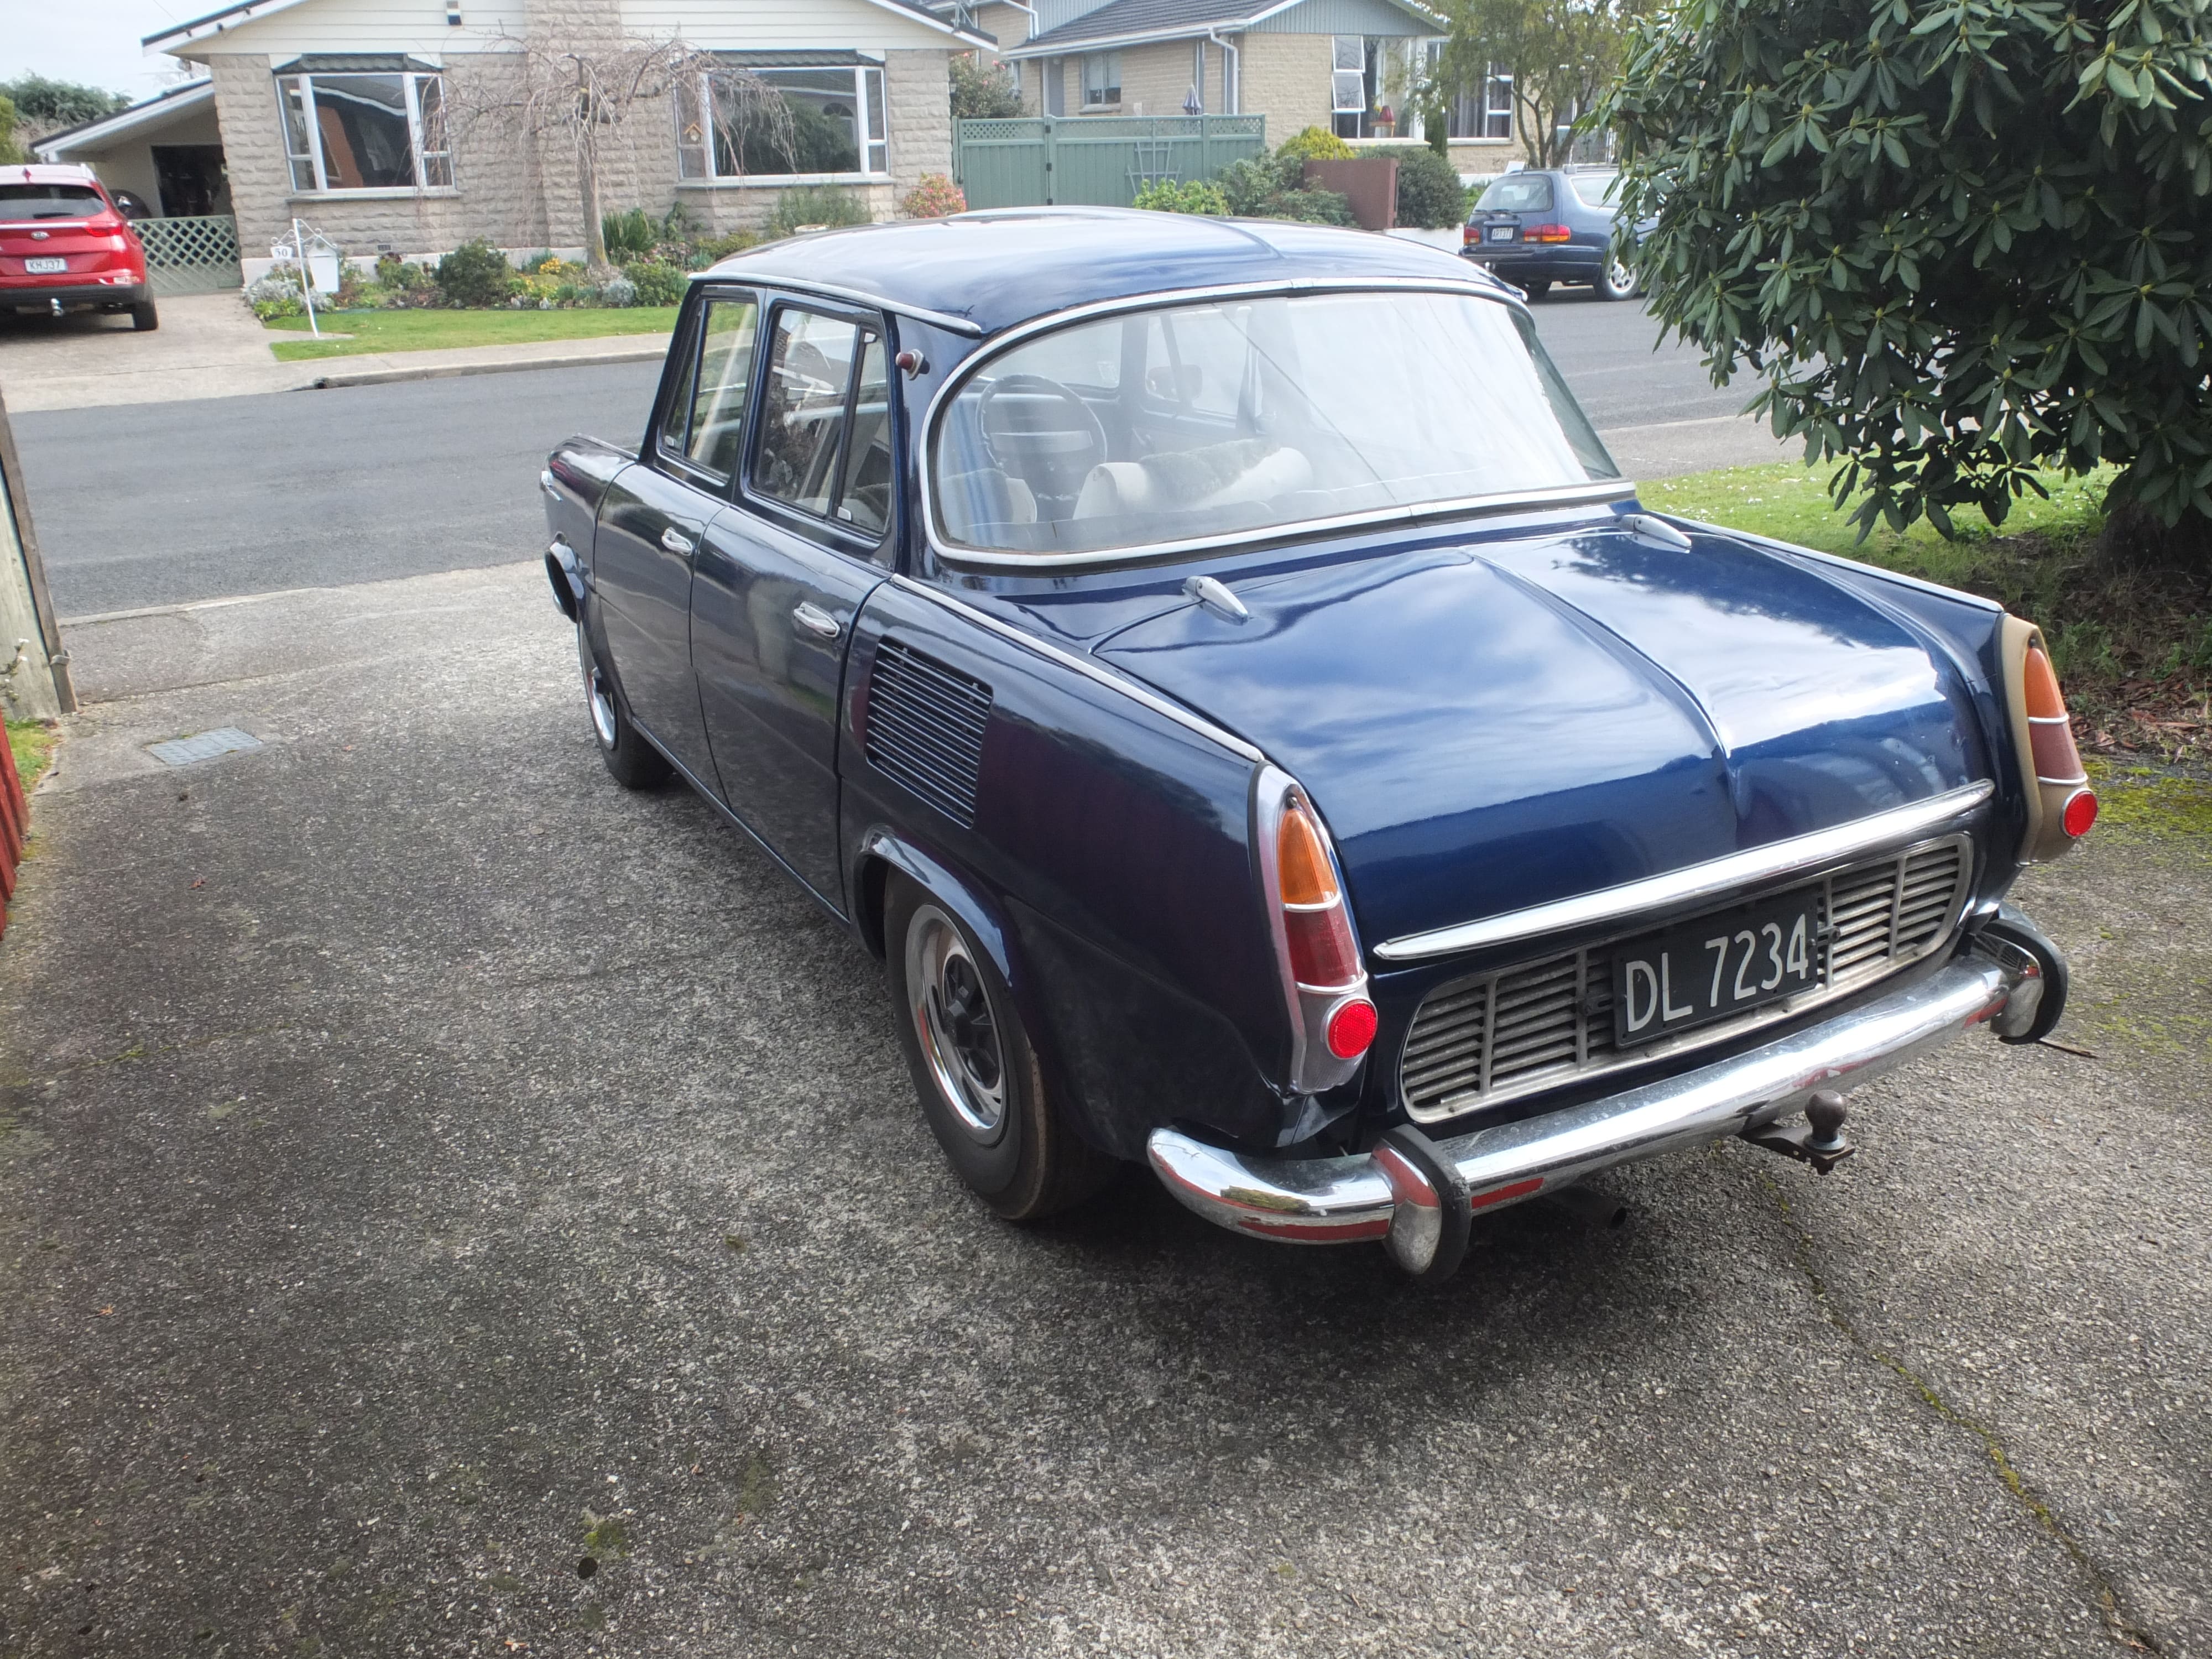
LINK TO DISCUSSION: Okay so I've been on the site for a while but contributed very little to date so here it is. This is my 1969 Skoda Sabre (1000MB outside of NZ), was my Grandfathers and comes with lots of parts. Rego is currently on hold, failed its wof a few weeks ago on tyres and a leaking brake cylinder and it should be back on the road in a few months. Plans are to convert to 5-speed (have a gearbox waiting) and potentially get a 1300cc motor from a Favorit too. All long-ish term plans subject to time, space, money etc so they might change. First though will be to swap out the existing front axle for a later 110L model to get front disc brakes and to do some interior work like headlining, carpets etc. Anyway here are some recent photos.
1 point
-
G'day All, Figured I may as well make a little project log thingy for my newest project, a '62 Morris Mini Minor. I picked this thing up not too long ago and have been getting stuck in with ambitions to have it done early next year. I've been on the hunt for a MK1 for ages now so I'm super stoked to get into it. The car had been stripped down and semi-restored some 20 years ago by the previous owner, but never quite finished. This has led to the paint deteriorating, and heaps of parts disappearing over time. This prompted me to buy a '62 parts car from some guys lawn for its engine/interior bits/suspension parts. I've got almost all of the parts for it now! Its just a matter of painting it and getting it back together and on the road again As far as plans go I'm still not totally sure what color id like it to be. Wheels can be changed to suit, but I guess paint's a different story. Was thinking something along the lines of a light metallic blue with an old English white roof, wide steels/mags and a mesh sun visor for that retro mod kinda look. Something that could be taken back to original spec if need be. Was even thinking of doing it black or just standard white, but I'm not too sure. Cheers guys, looking forward to getting more involved on the forum. -Jack. -The 850cc engine in the front end of the less than fortunate parts car. 25 years of sitting on a lawn didn't stop it from running - it fired right up the day after it fell out of the van and onto the driveway. Wasn't seized, and has only done 40,000 miles. Just hoping that the 850 will be enough for me to keep up with traffic!1 point
-
2017 Event - A few of us are planning to ride on smaller bikes from Whakatane(ish) around the East Cape and back over 3 days, at the end of November when its nice and warm but not too busy. No requirement on bikes, something unsuitable and small is preferable though. I'll be on a CT110, VG his NBC110, couple friends on scooters(~50cc). Looking at about 600km, about 200km/day. Thinking a riding speed around 50km/h should give plenty of time for looking around and activities and sightseeing during the day, but not too fast for the smaller bikes. Where possible the route is off busier state highways so there will be some longish sections of windy gravel, but little traffic and no rush means you'll be fine. Accommodation around Whakatane, Hicks Bay, and Gisborne should be easy to arrange, be it campgrounds, cabins etc. There will be a ute and/or trailer that can carry fuel/luggage/spare bikes as well if anyone wants/needs to sit out any parts. Coast trip Total by John Bell, on Flickr Things to see and do on the route may include but not be limited to Serenity Lighthouses Wharves Churches Time travel. Horses, all of the horses Gangs Waterfalls Slip'n'slides And some of this You got 3 months Holla at cha boy, what do you reckon?1 point
-
Most certainly my good man. Plenty of off street parking at my joint and im in town. Just leave the keys here..........1 point
-
I did a thing to the thingy to make it shiny Things will happen to these thingys tomorrow It is still for sale if anyone wants it. I'm doing bits of work to tidy up things that annoy me when I drive it.1 point
-
Me! unsure on accom @MopedNZ had booked something but location changed? I think?1 point
-
I have now got an electronic hall effect distributor and high energy coil, I carn't use copper leads anymore as they give off interference witch can screw with the trigger.1 point
-
Showed a borrowed S13 rear subframe the the undergarments of my triumph. It looks feasible... I used the diff output flanges as my reference point. The rear mounts on the car just need to be moved back 30mm, shortened and moved further apart, don't even need to cut into the box section the existing mounts are attached to. And make a couple of 'scallops' into the boot floor to clear the rear mounts on the subframe. The front mounts are actually about 50mm lower than the floor, so the floor/sill/inner guard would need some reinforcing and mounts built down to the subframe. Here's a shit picture. The subframe would be 110mm higher than this photo. There is a bracket there preventing me from moving it higher, and I ran out of blocks of wood to stack on the jack. I've drawn in the mount, it would actually be partly in the boot to get it back far enough. Those dashed lines are where I would make a scallop thing into the boot space. Aaaaaand I need to narrow the subframe 200mm, and make custom driveshafts, like @sheepers did. But, first. keep fixing the rust. sigh.
1 point
-
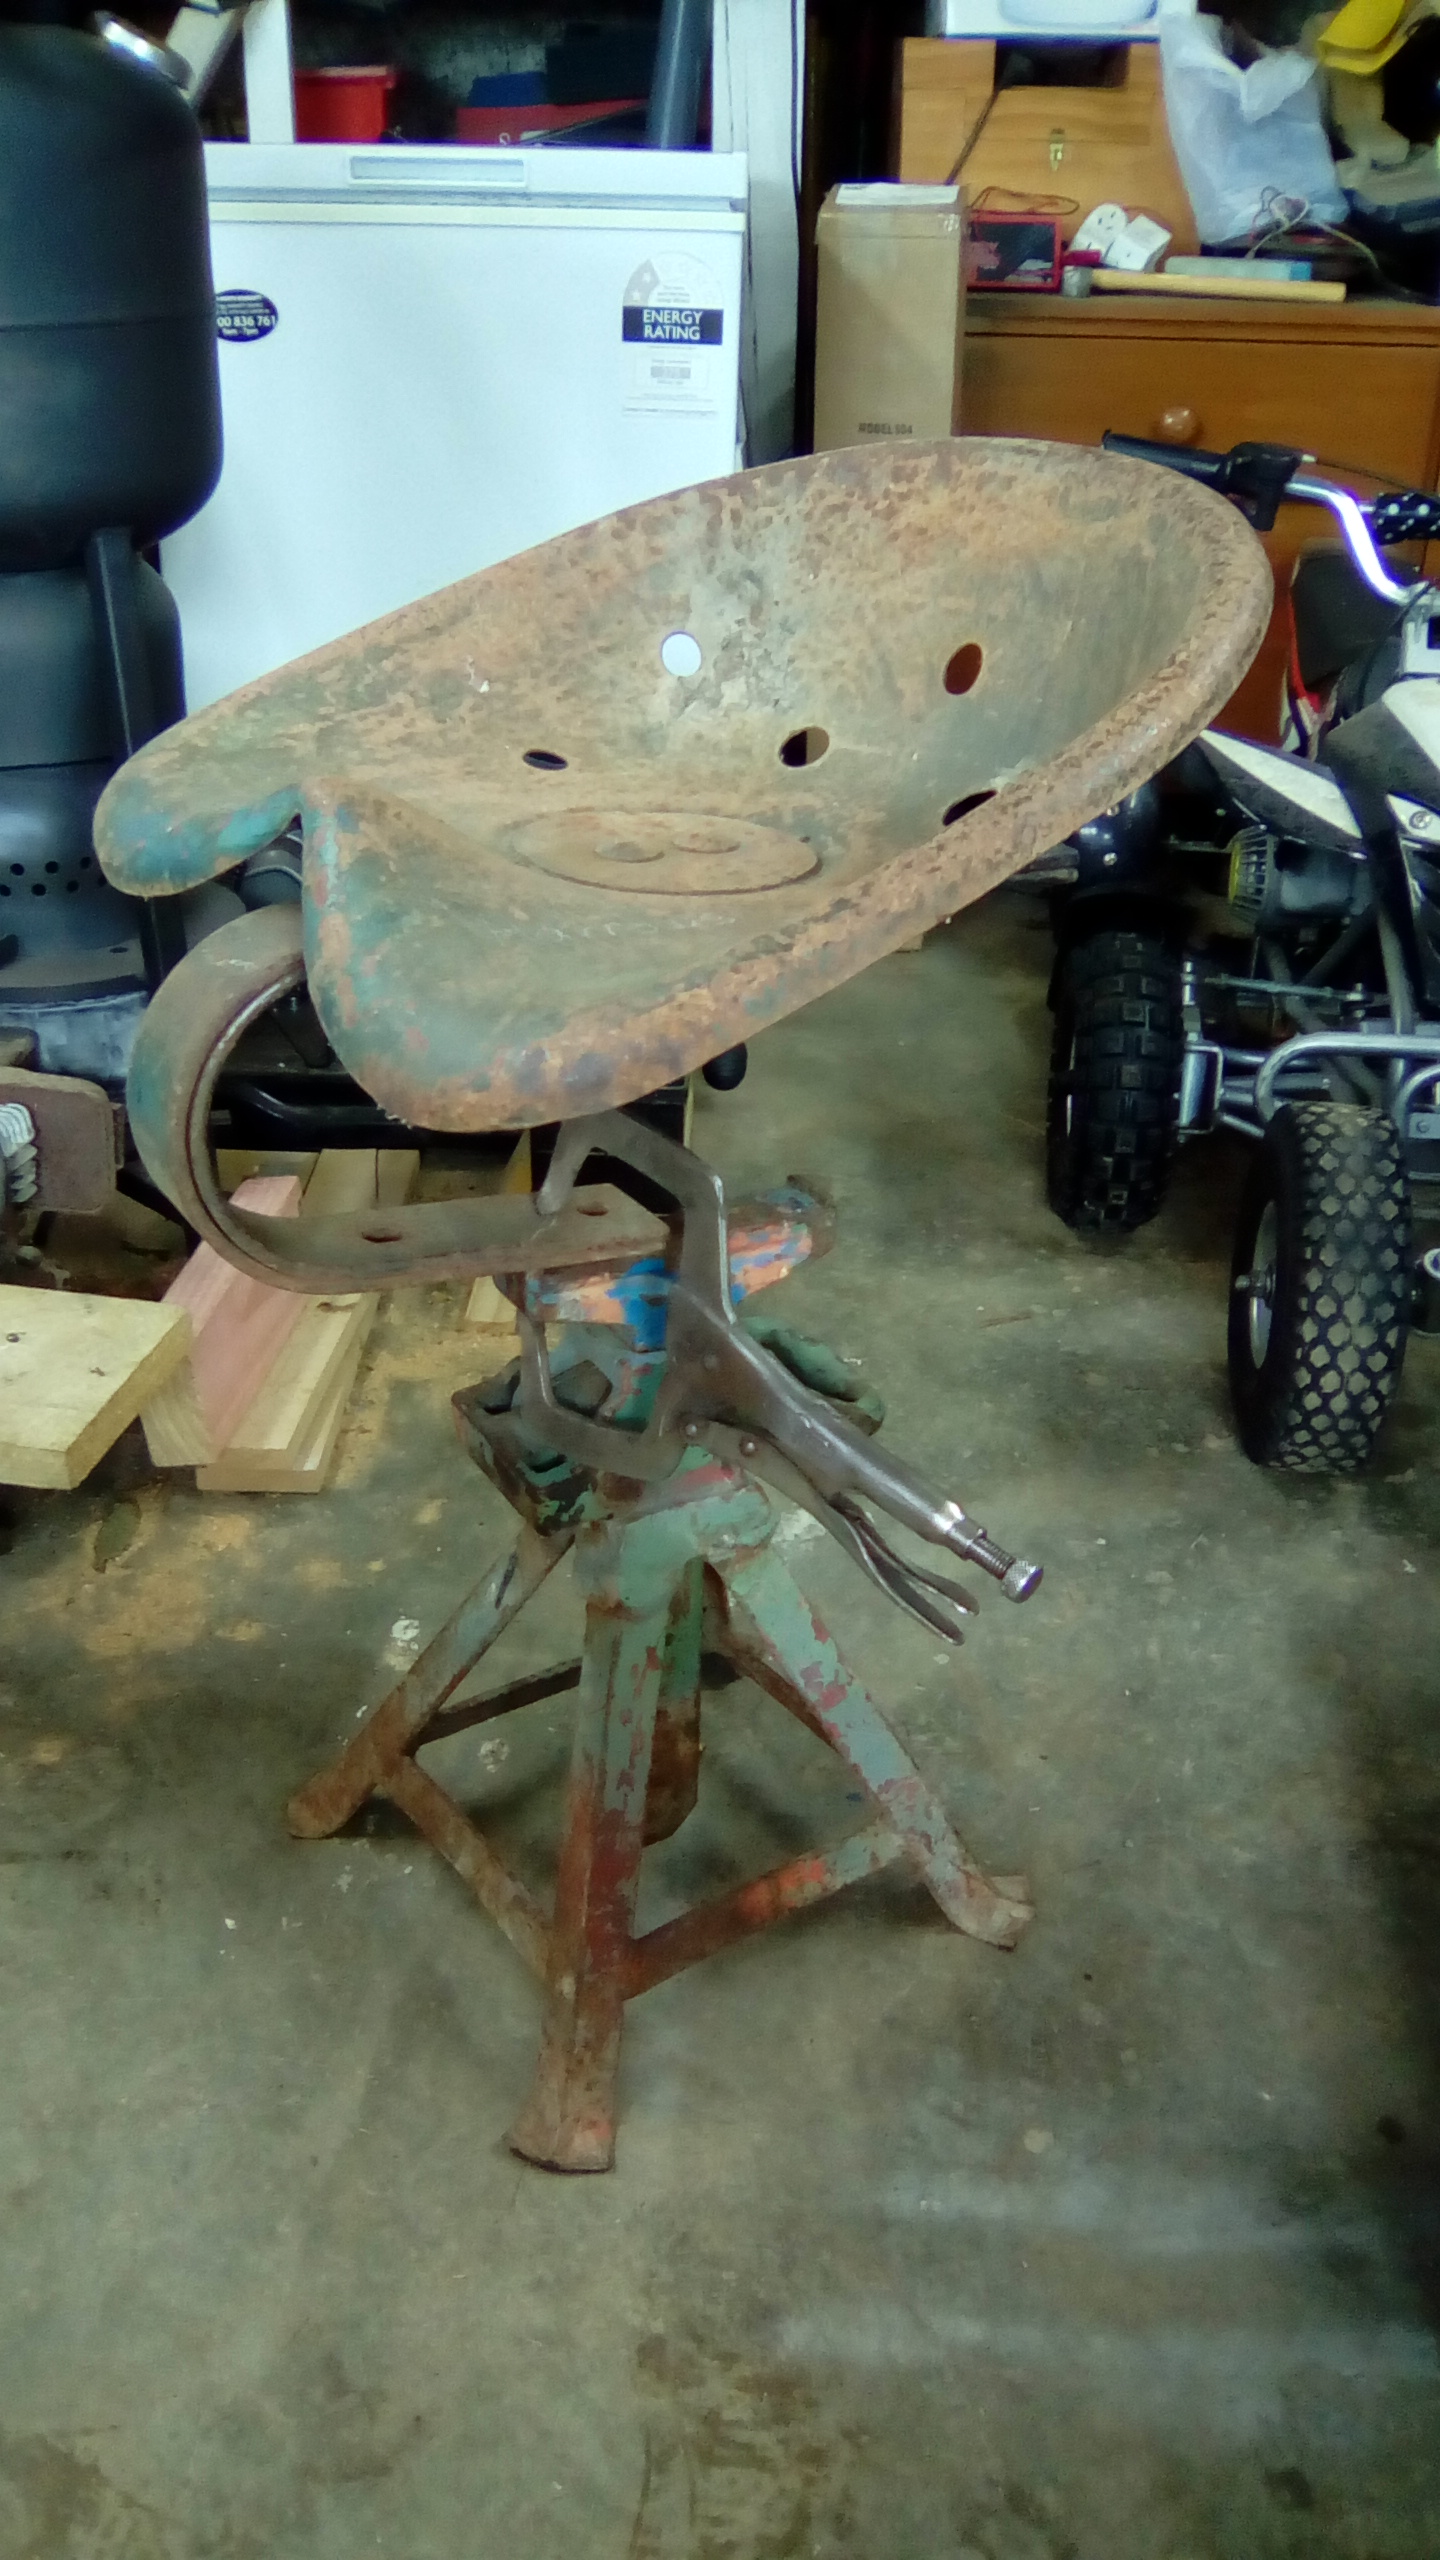
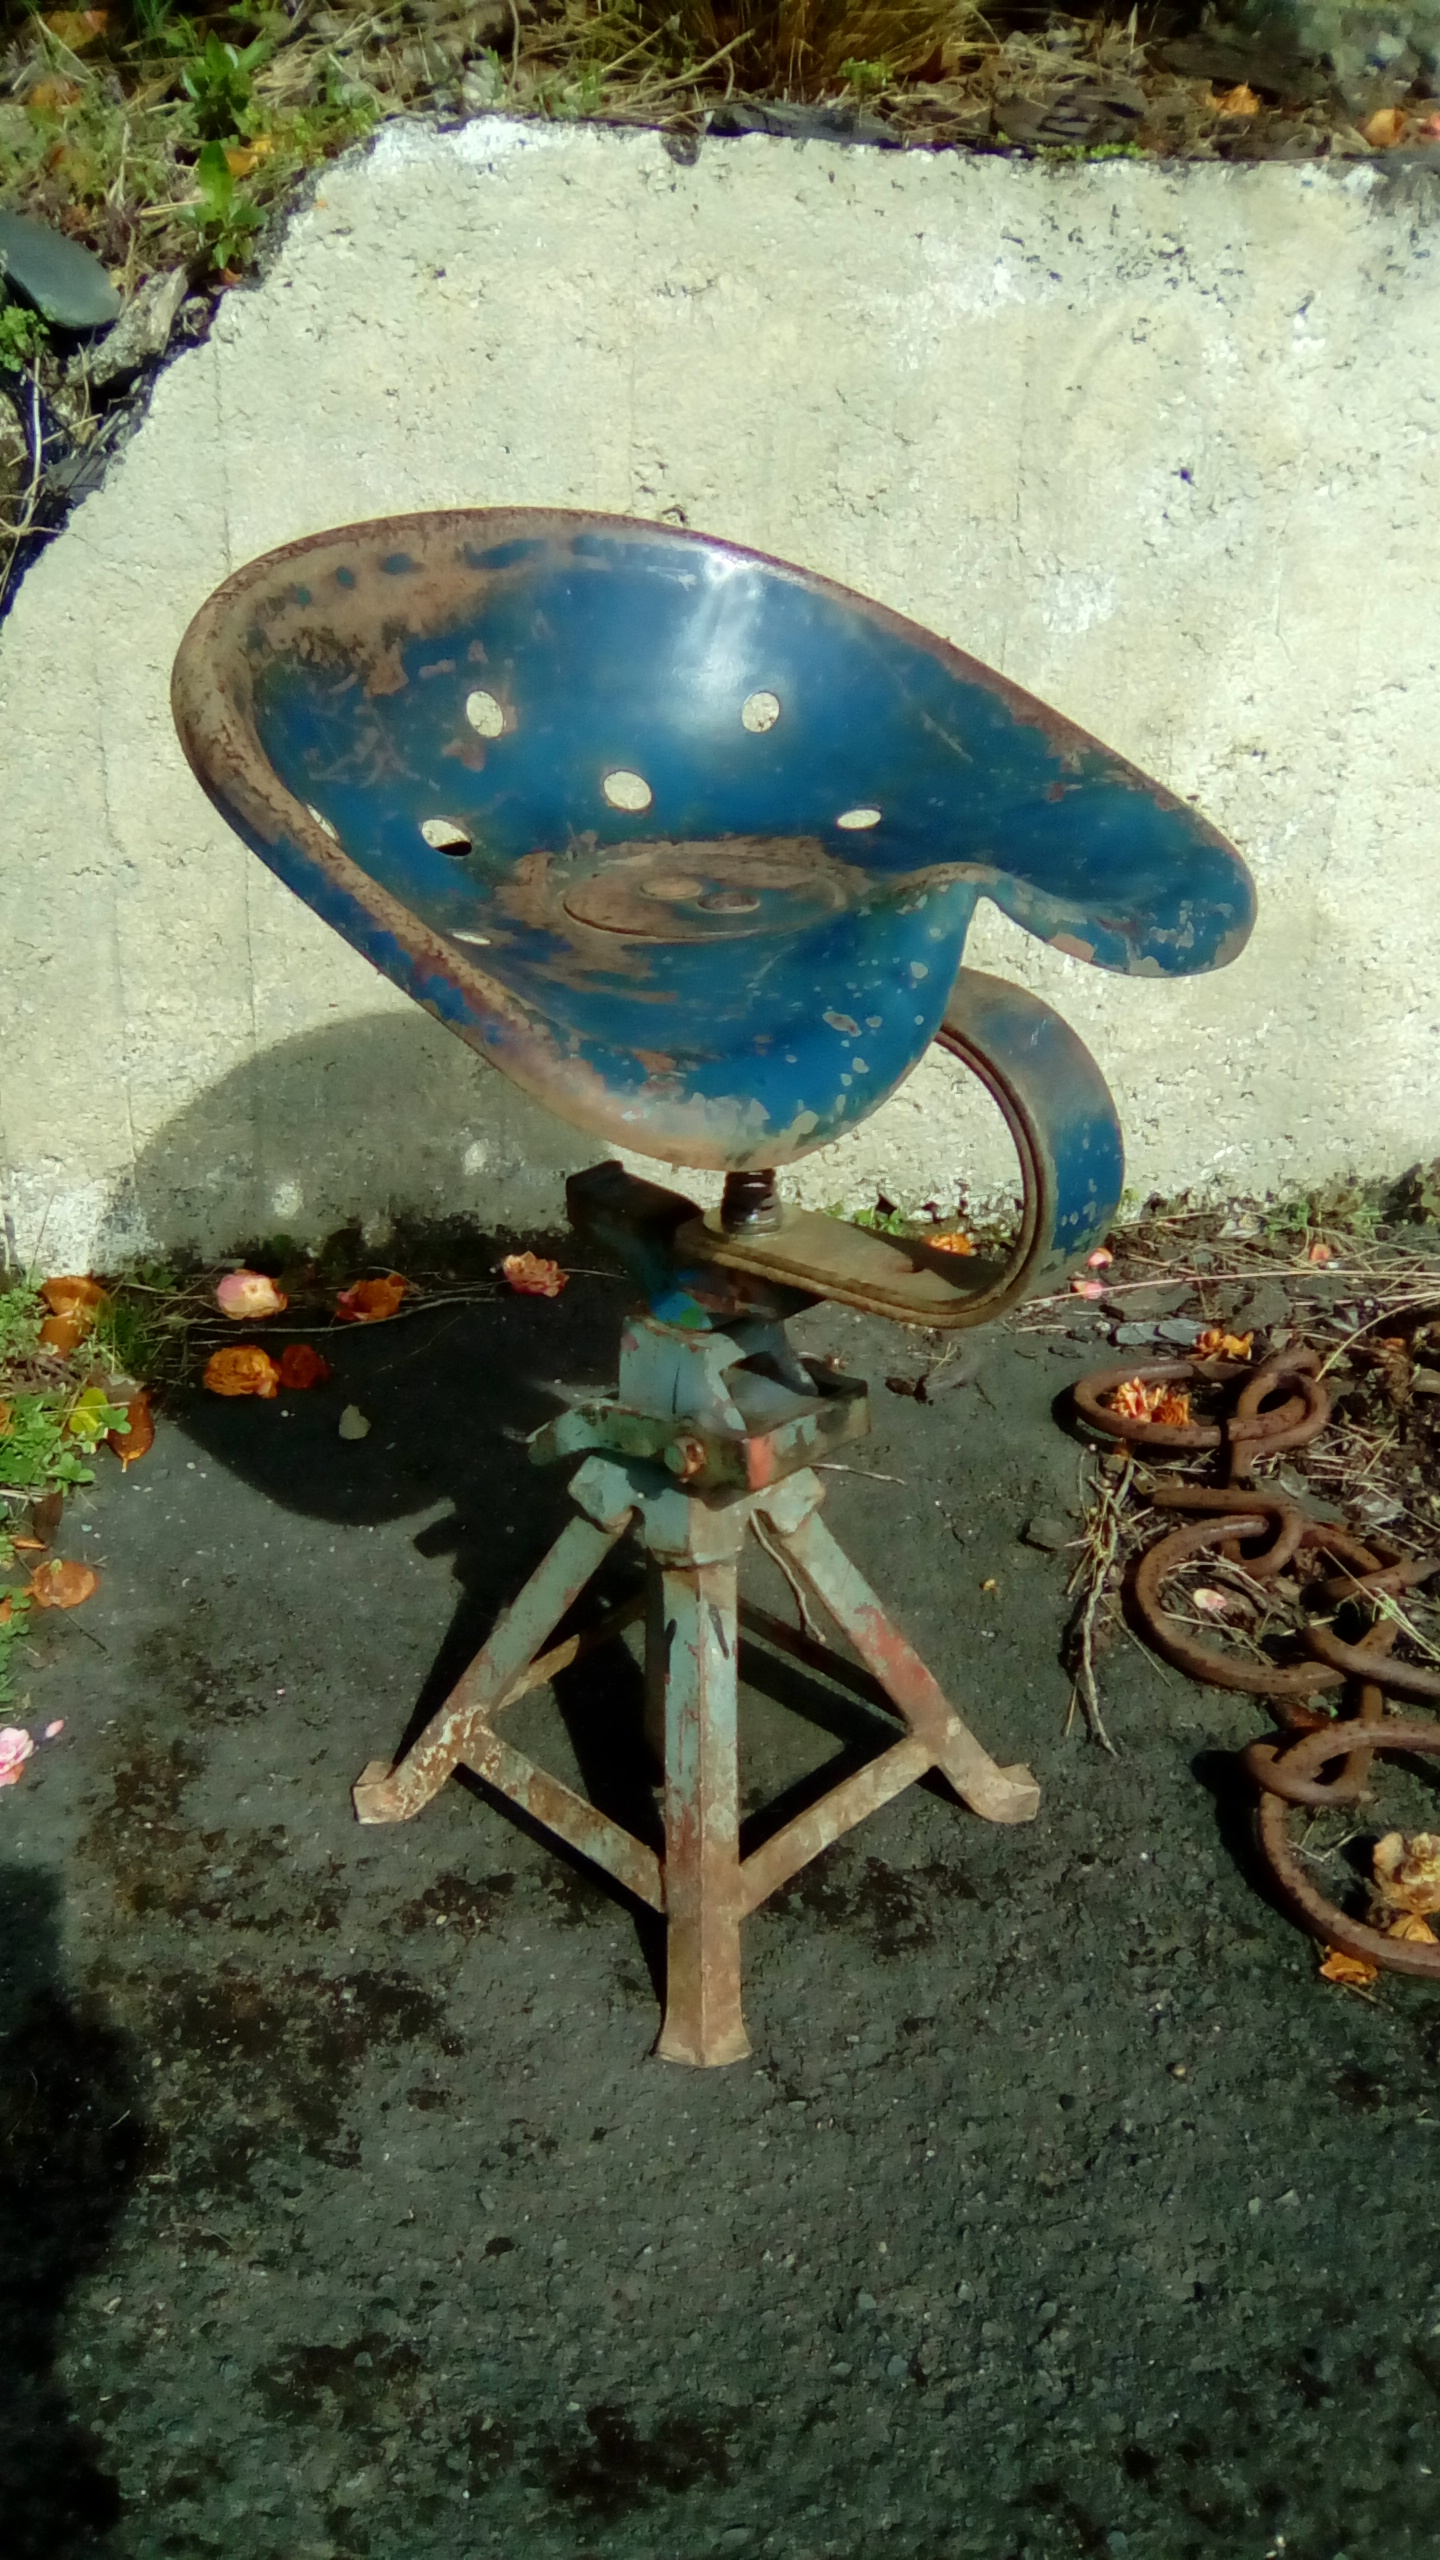
I've got a customer that collects interesting pieces of old farm machinery etc then gives them to me to make something out of. The simple things are sometimes the best. A mock up of a tractor seat and stand And bolted in place and a light wet sand to bring out what's left of the ford blue paint.
1 point
-
Have finished the majority of the rust in the doors, just one little hole on the side of one to go. I have welded on a new folded over flangey bit and painted all in there on the photo below. Has come out pretty good. The other door was pretty much the same deal. Another thing I did was make the cowl vent bracket fit this dash. Since it's changed to the RHD dash and I'm still using the LHD vent bracket it ended up mounting in the same place the glove box hinge was, so cut it up and drilled some new holes. That's the vent fully opened, can also be set to be slightly opened. Needs a different seal as the current one is too stiff and doesn't allow the vent to pull down flush, otherwise it operates pretty well. Filled up the two holes that were left at the top of the firewall as well, probably should do the same to those other two. Hooked up the accelerator cable. Then did some average panel beating and bogging to fix where the panel warped when I welded the bracket to the back of the firewall. Might need a bit more work one day. The part that clips in to the firewall for the accelerator cable was a bit loose and needed some sort of spacer, so laser cut out some circlip sort of things. Cable ties are sweet to hook the cable to the pedal right?! It does work well though, has good travel, feel etc. Received the seatbelt mounts back from getting passivated. Today I made up this after work. It is to mount the steering column to the firewall. Making a cone that small out of 2mm stainless without using rollers isn't very fun! Pretty happy with how it turned out though. Don't think I could make the steering column any shinier if I tried! Haha Borrowed a wheel off the Mercury to see what whitewalls look like. They're a bit wider and higher profile than what I'll be using, looks so sweet though!1 point
-
More progress over the weekend. Car is pretty much sorted now for the Track day just need a wheel alignment now. As for getting it legal I will leave most of that till after Taupo now. Fitted up the larger of the AE86 accelerator pedals. Mine had the smaller plastic one which was useless for heel-toe action. Ive since painted it black. Also finally received my replacement Speedo driven gear, I ended up buyng from Amayama as it was half the price from local Toyota dealer. The one I had was 33/10 (driven gears/drive gears) the replacement is 35/10. Slammed it in and now the Speedo is pretty much bang on. Also made a last minute purchase of Cusco front and rear swaybars, we installed them over the weekend and man do they make a difference! I just need to find 20mm rear swaybar bushes in Prothane/Nolathane. The ones that came in my bush kit only go up to 16mm I think. Factory rubber ones will have to suffice for now. Cant wait to give this thing a good thrash at Taupo now.1 point
-
No worries! Looking forward to seeing your vast collection of reel mowers one day!1 point
-
Filled one hole Also zapped some small holes in the horizontal part. Just need to fix a bit of the pinch weld on this side and it will be done. Took the glass out of the other side. I can see why it was a bit leaky there.1 point
-
Can probably get it done with a vice and some big sockets. Have done it that way with some success1 point
-
I have never replaced a UJ but can bring out a full tool box and jacks and stuff and give it a go?1 point
-
1 point
-
Sounds like a tractor right now but least it sounds healthy! https://youtu.be/jMt_PyWnPLw1 point
-
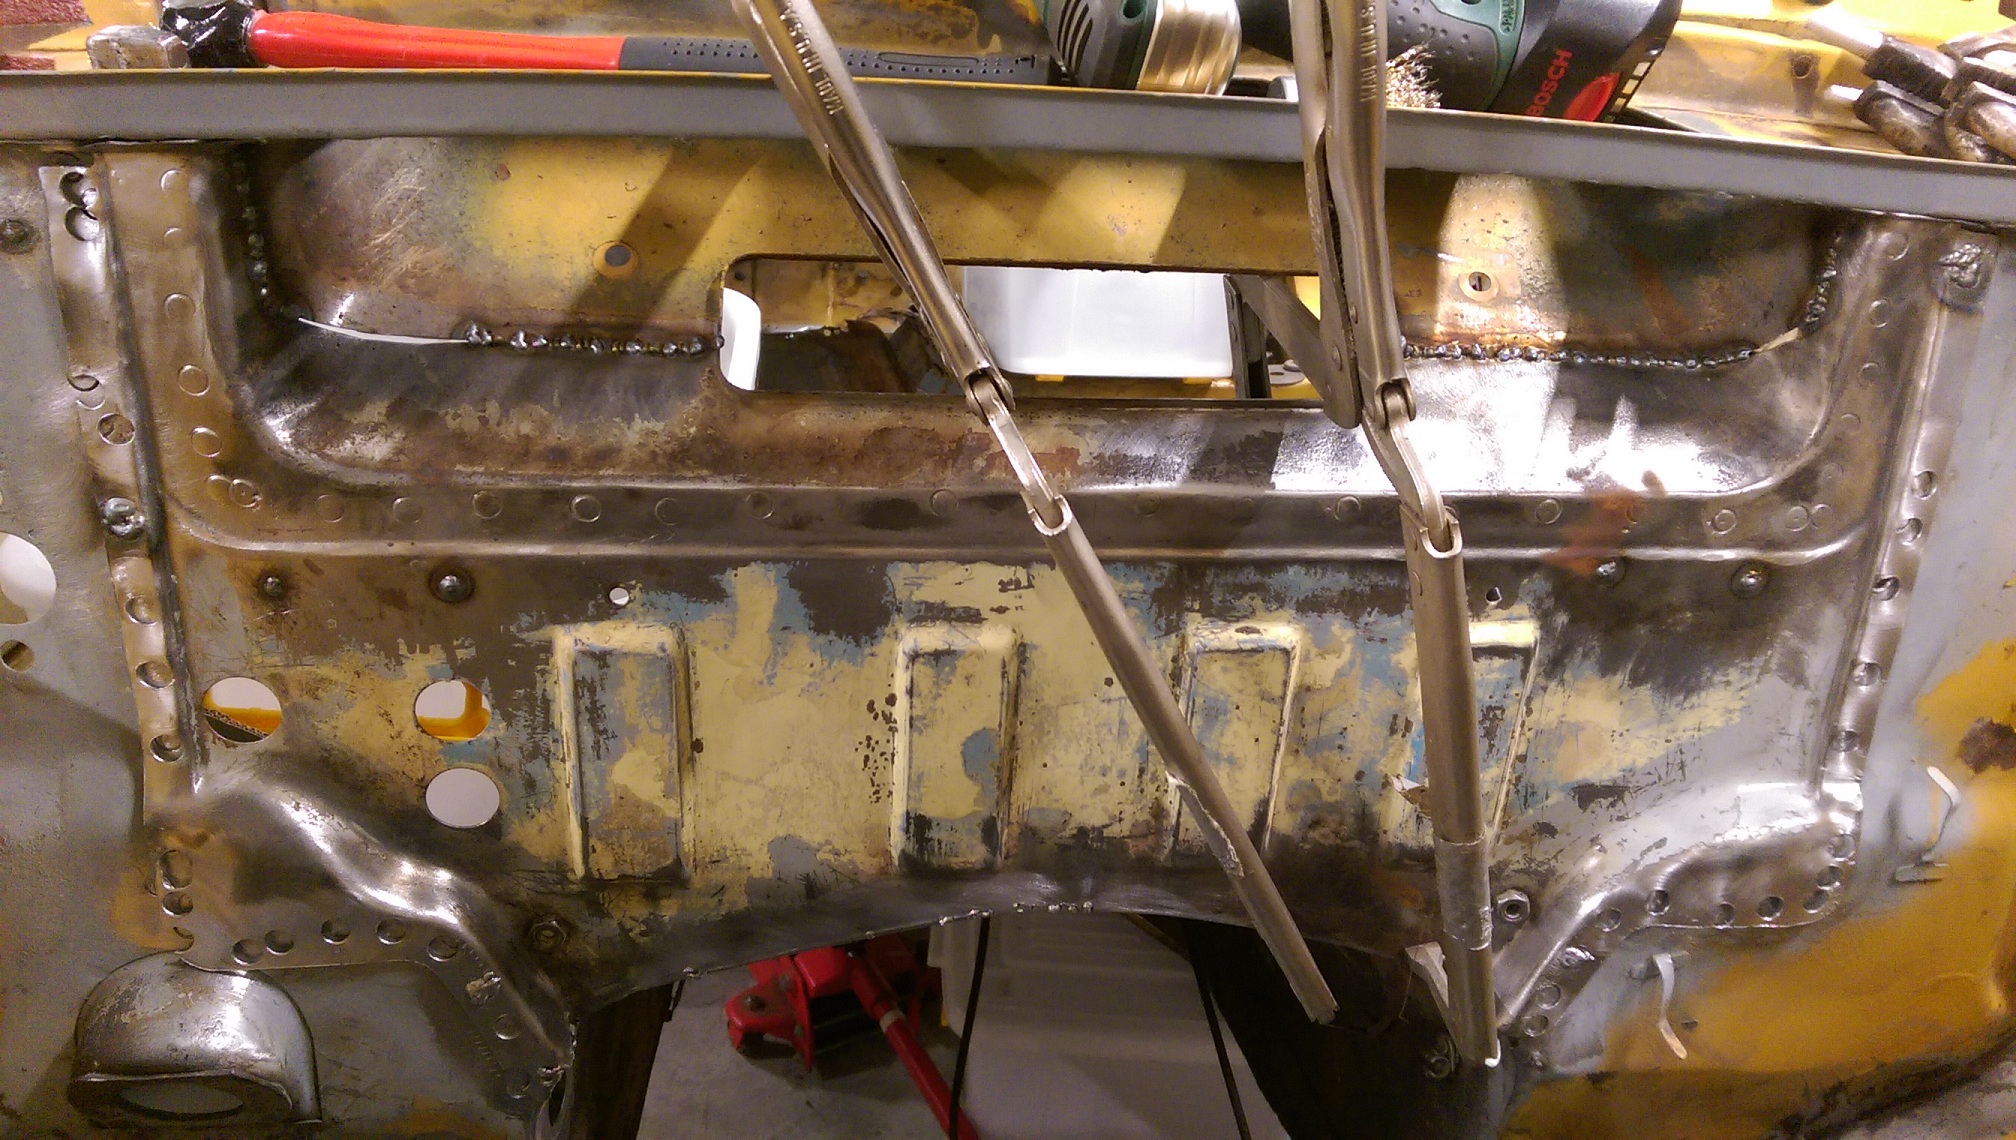
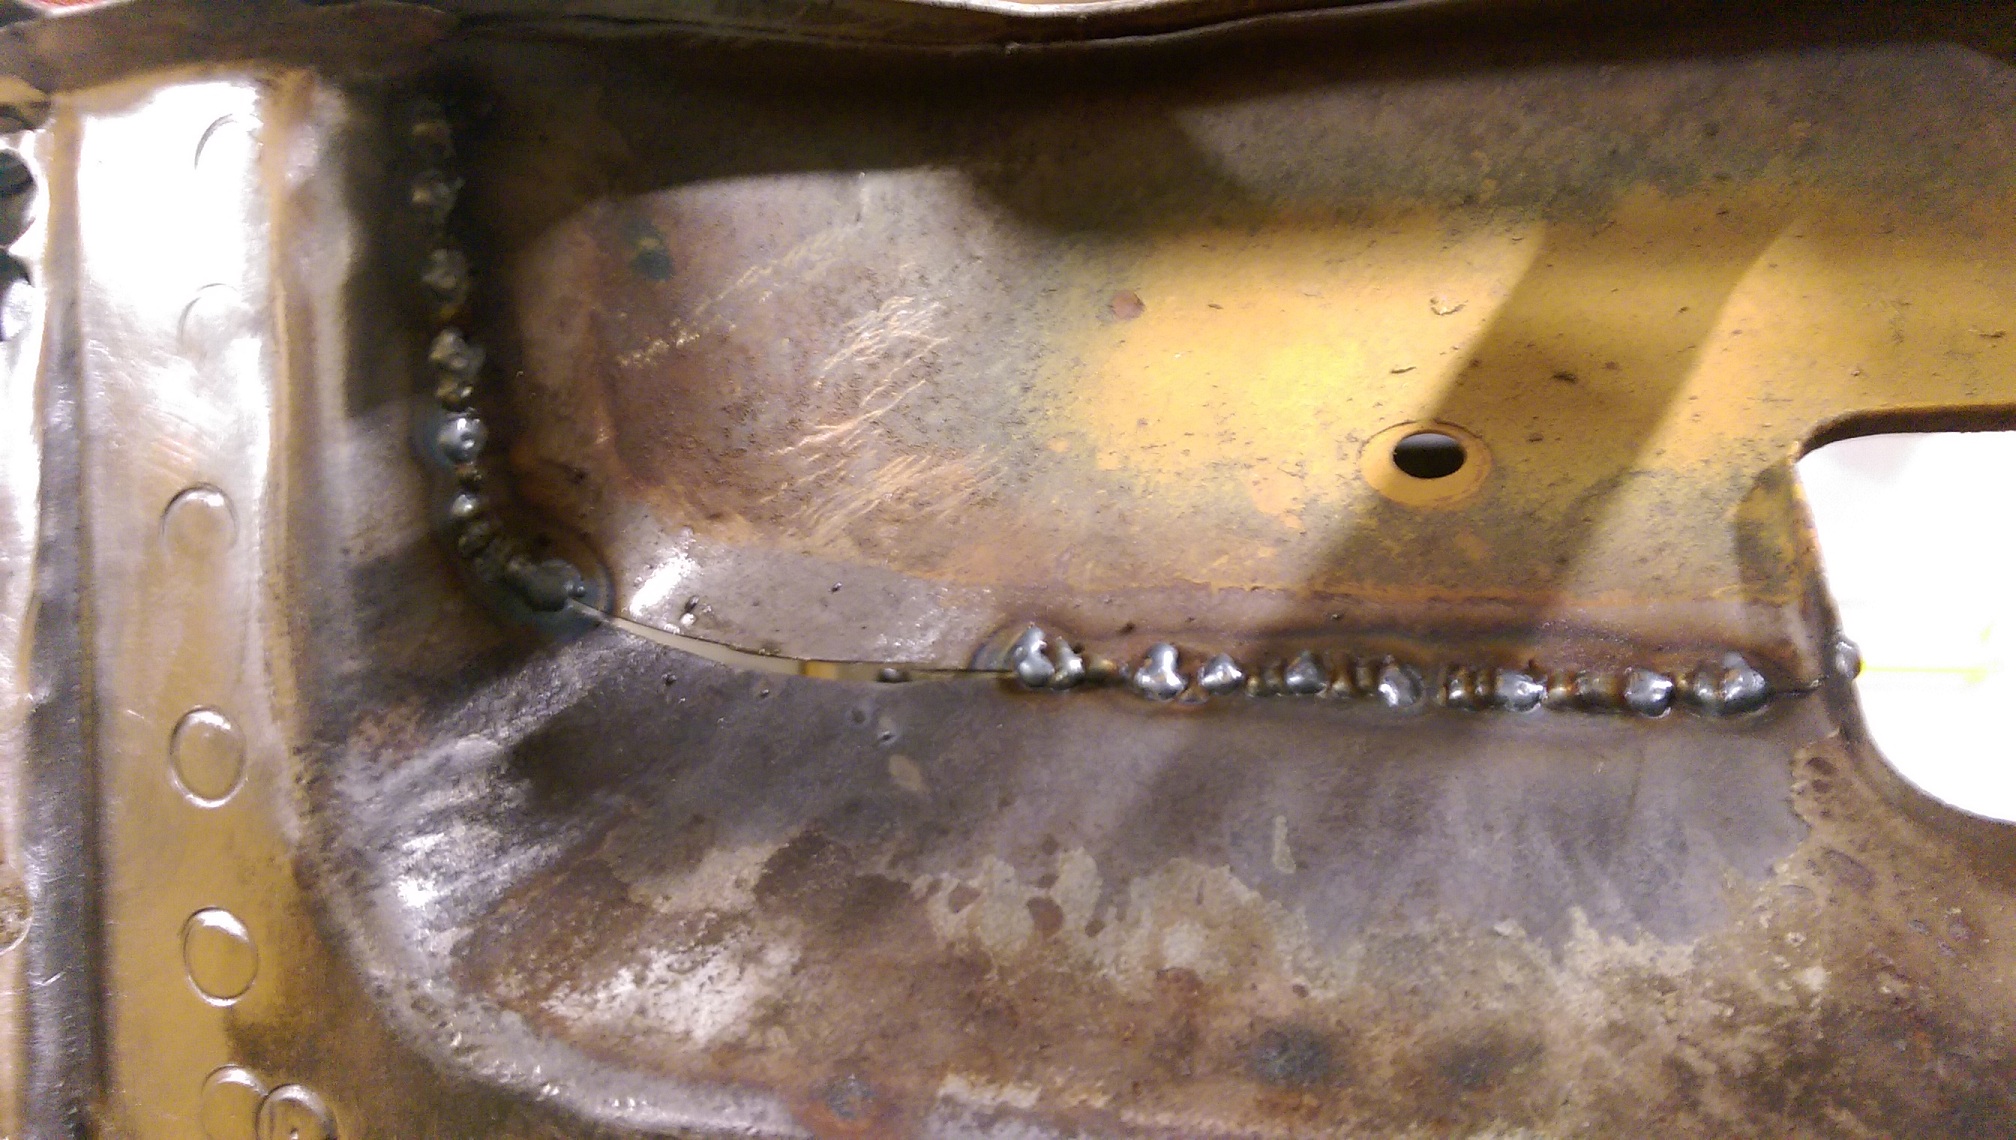
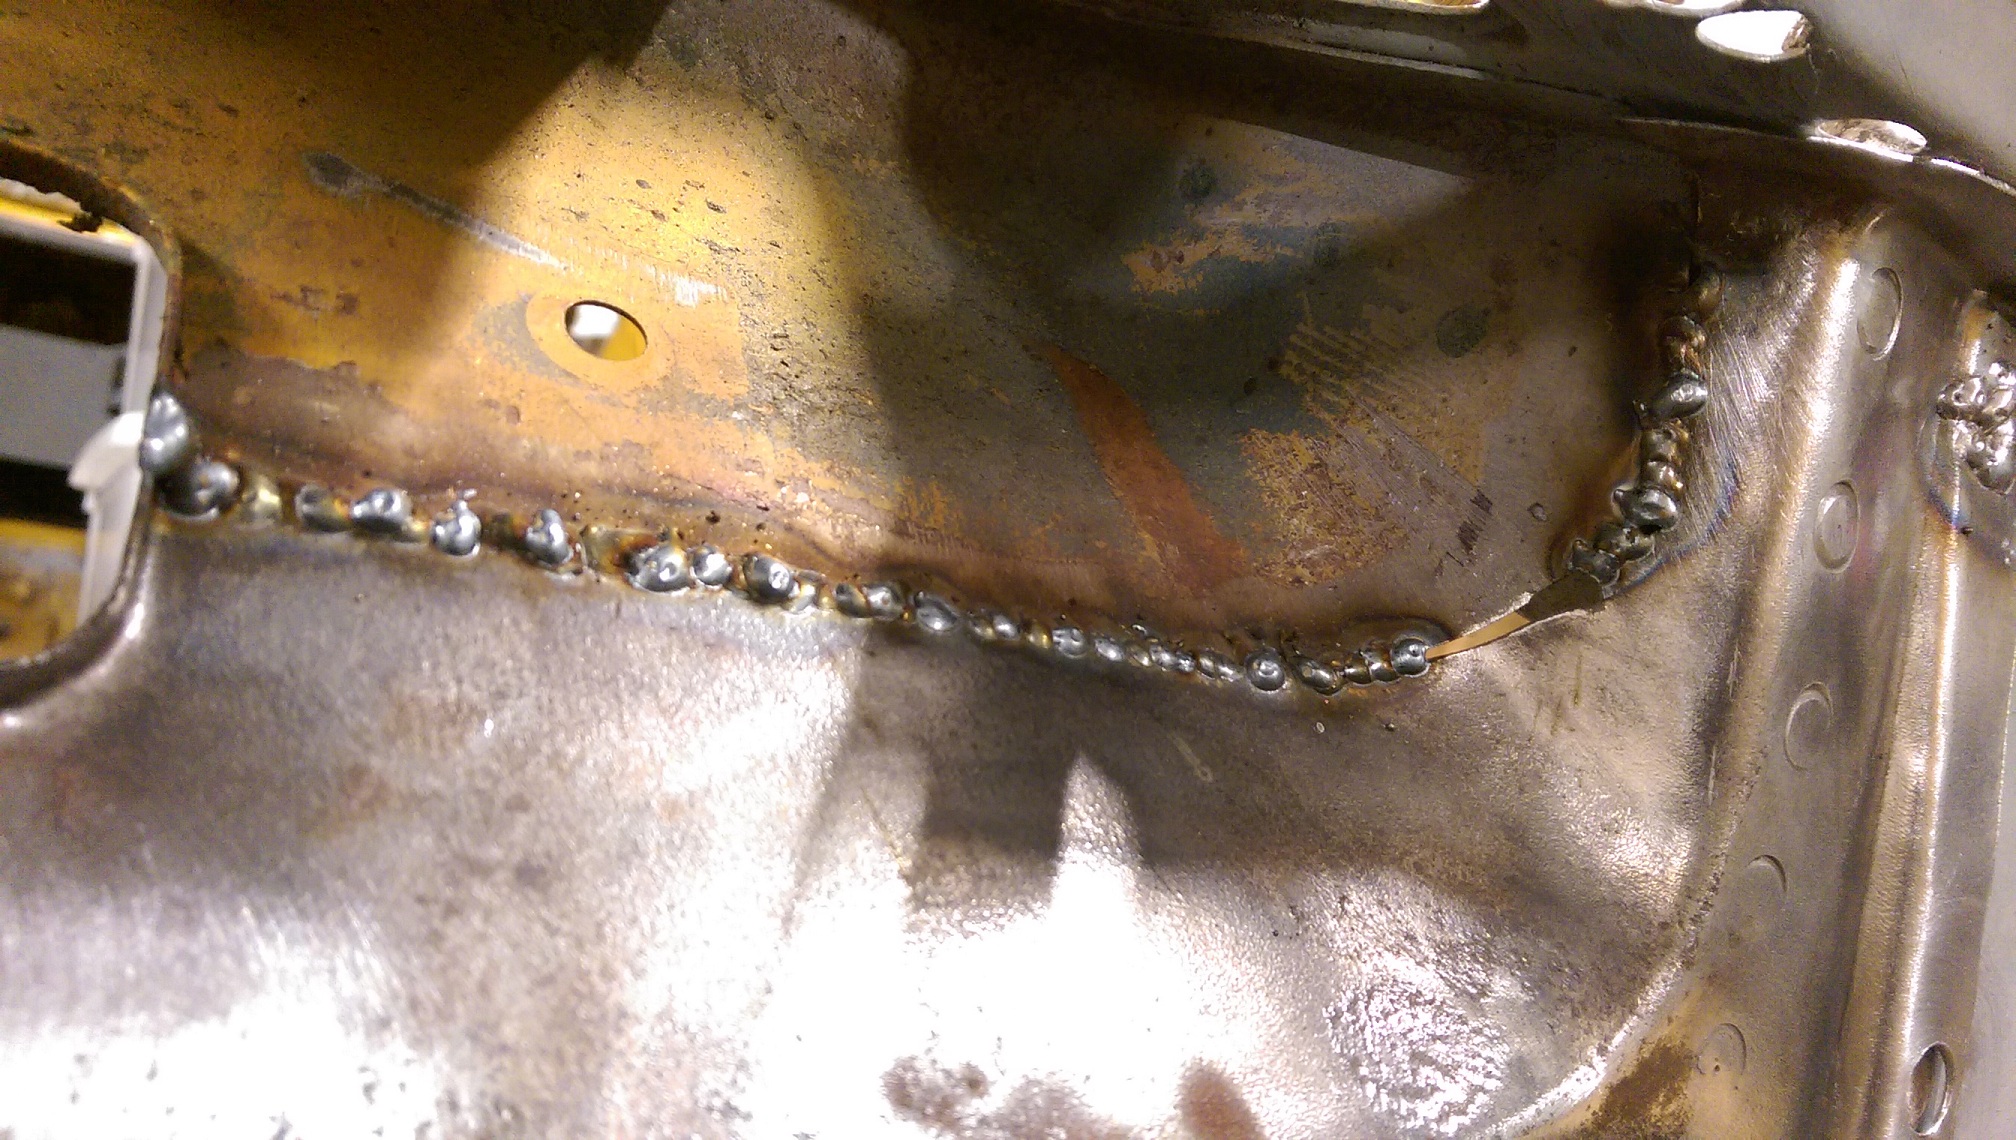
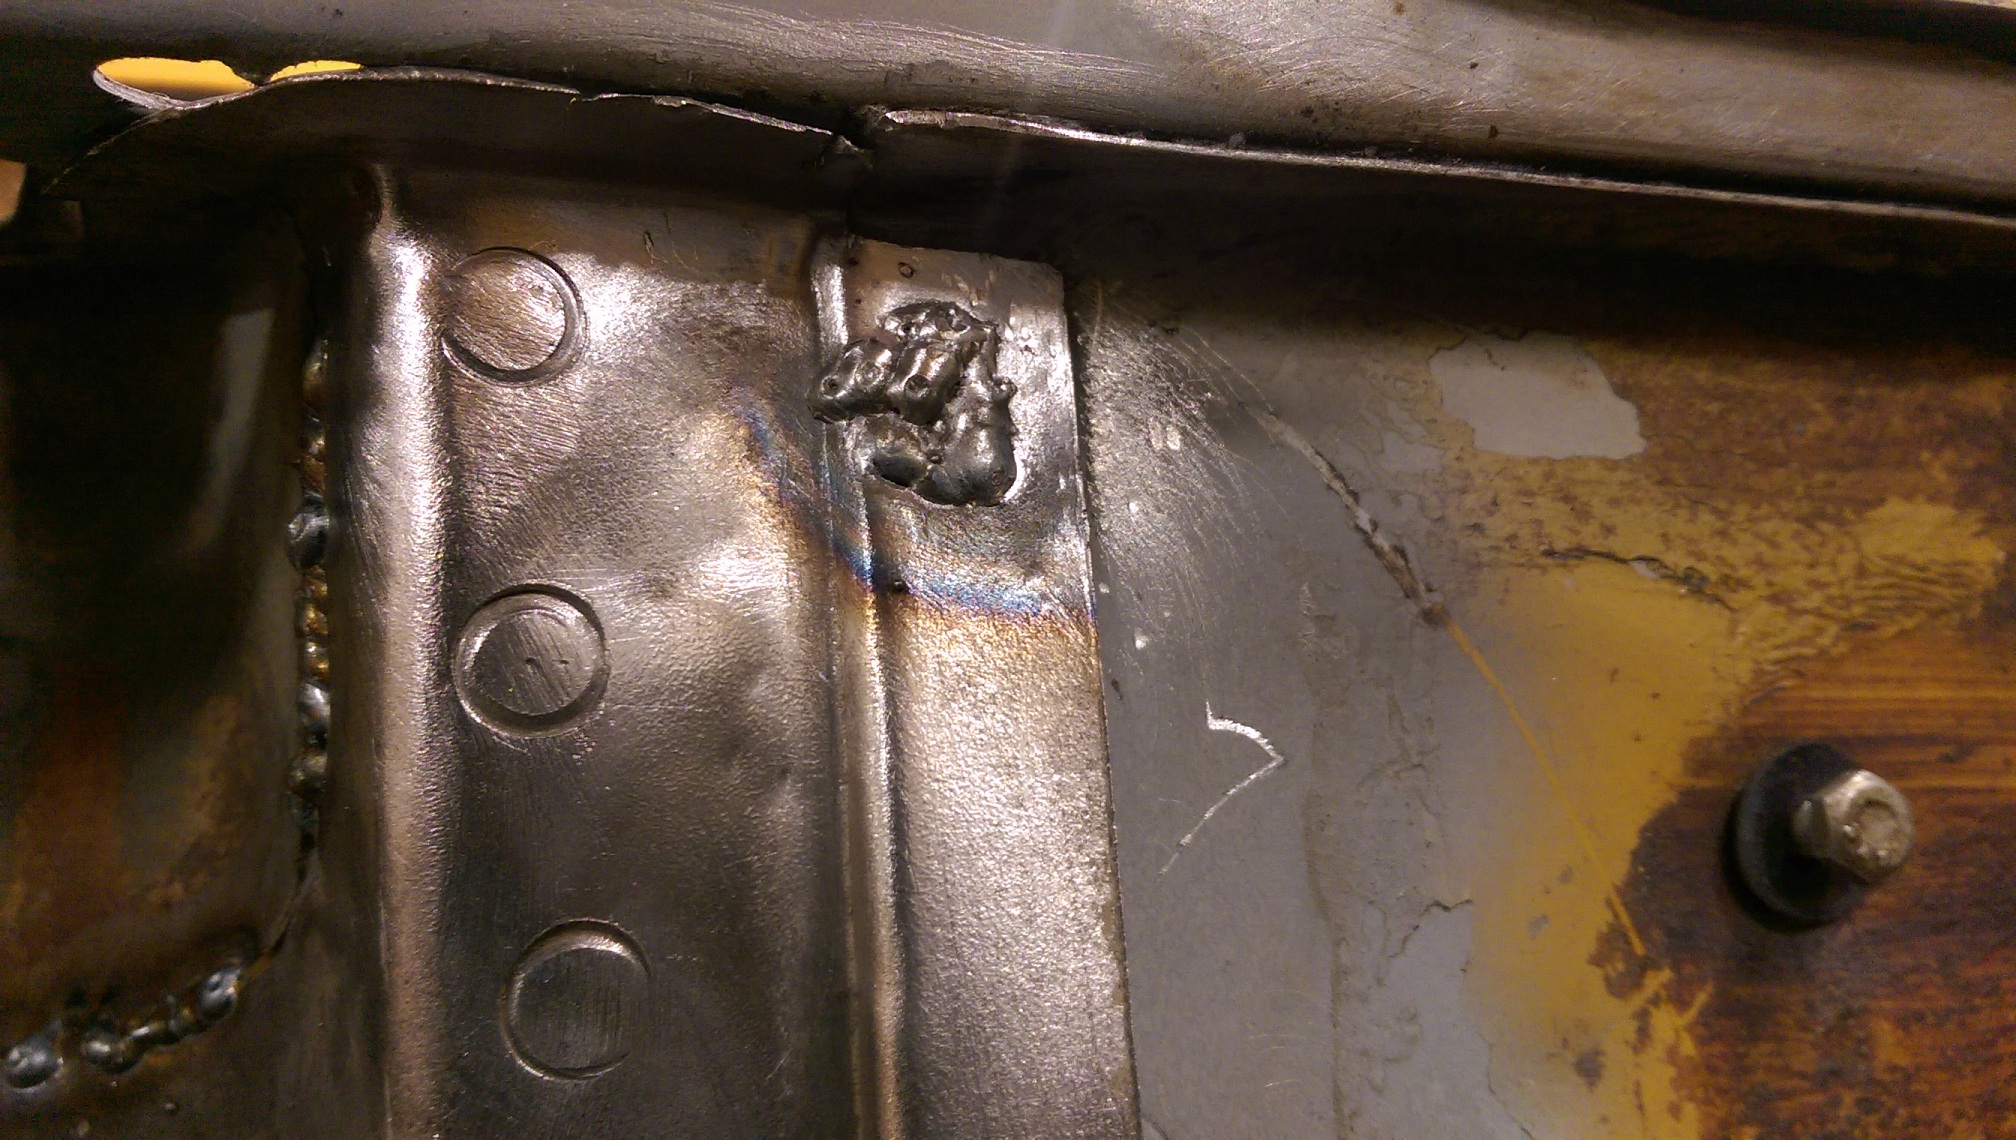
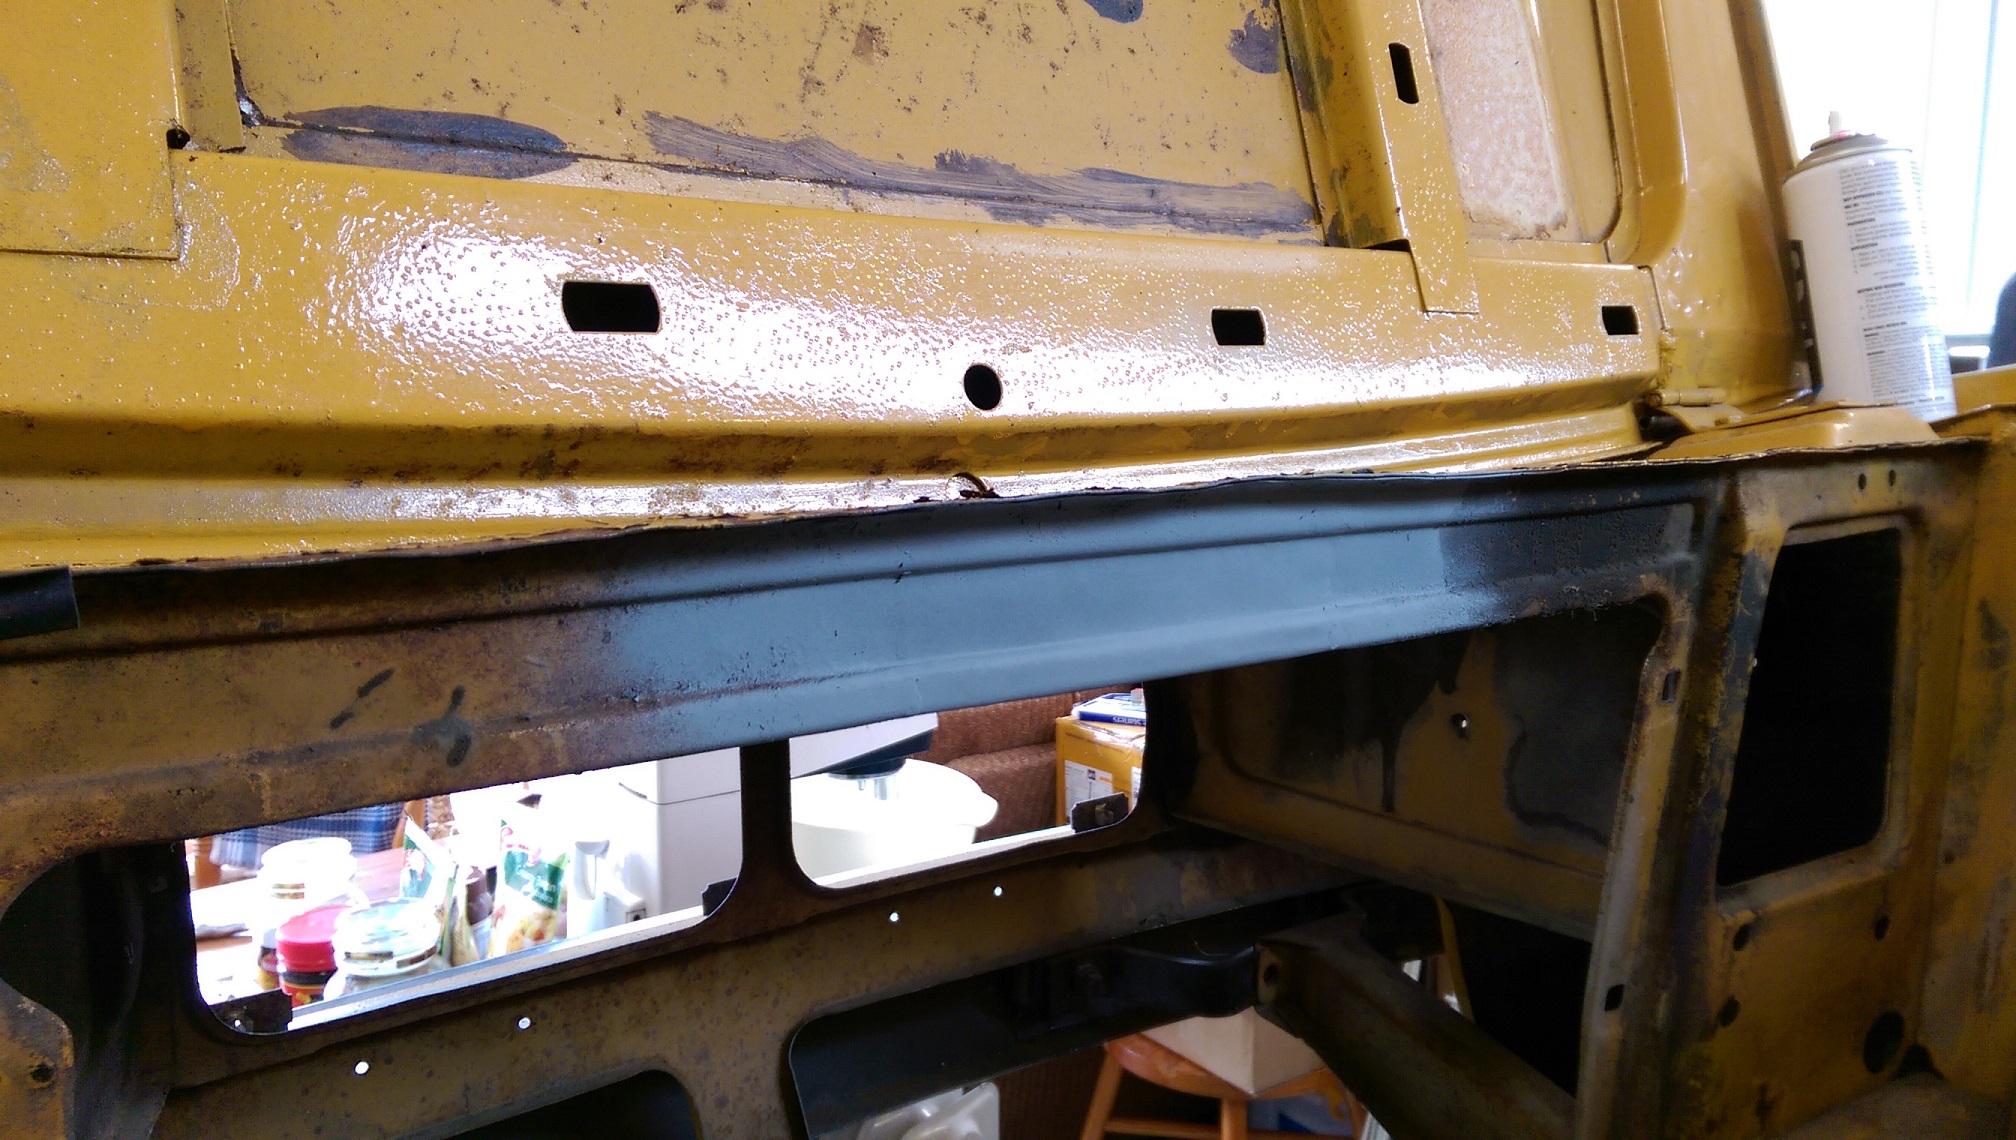
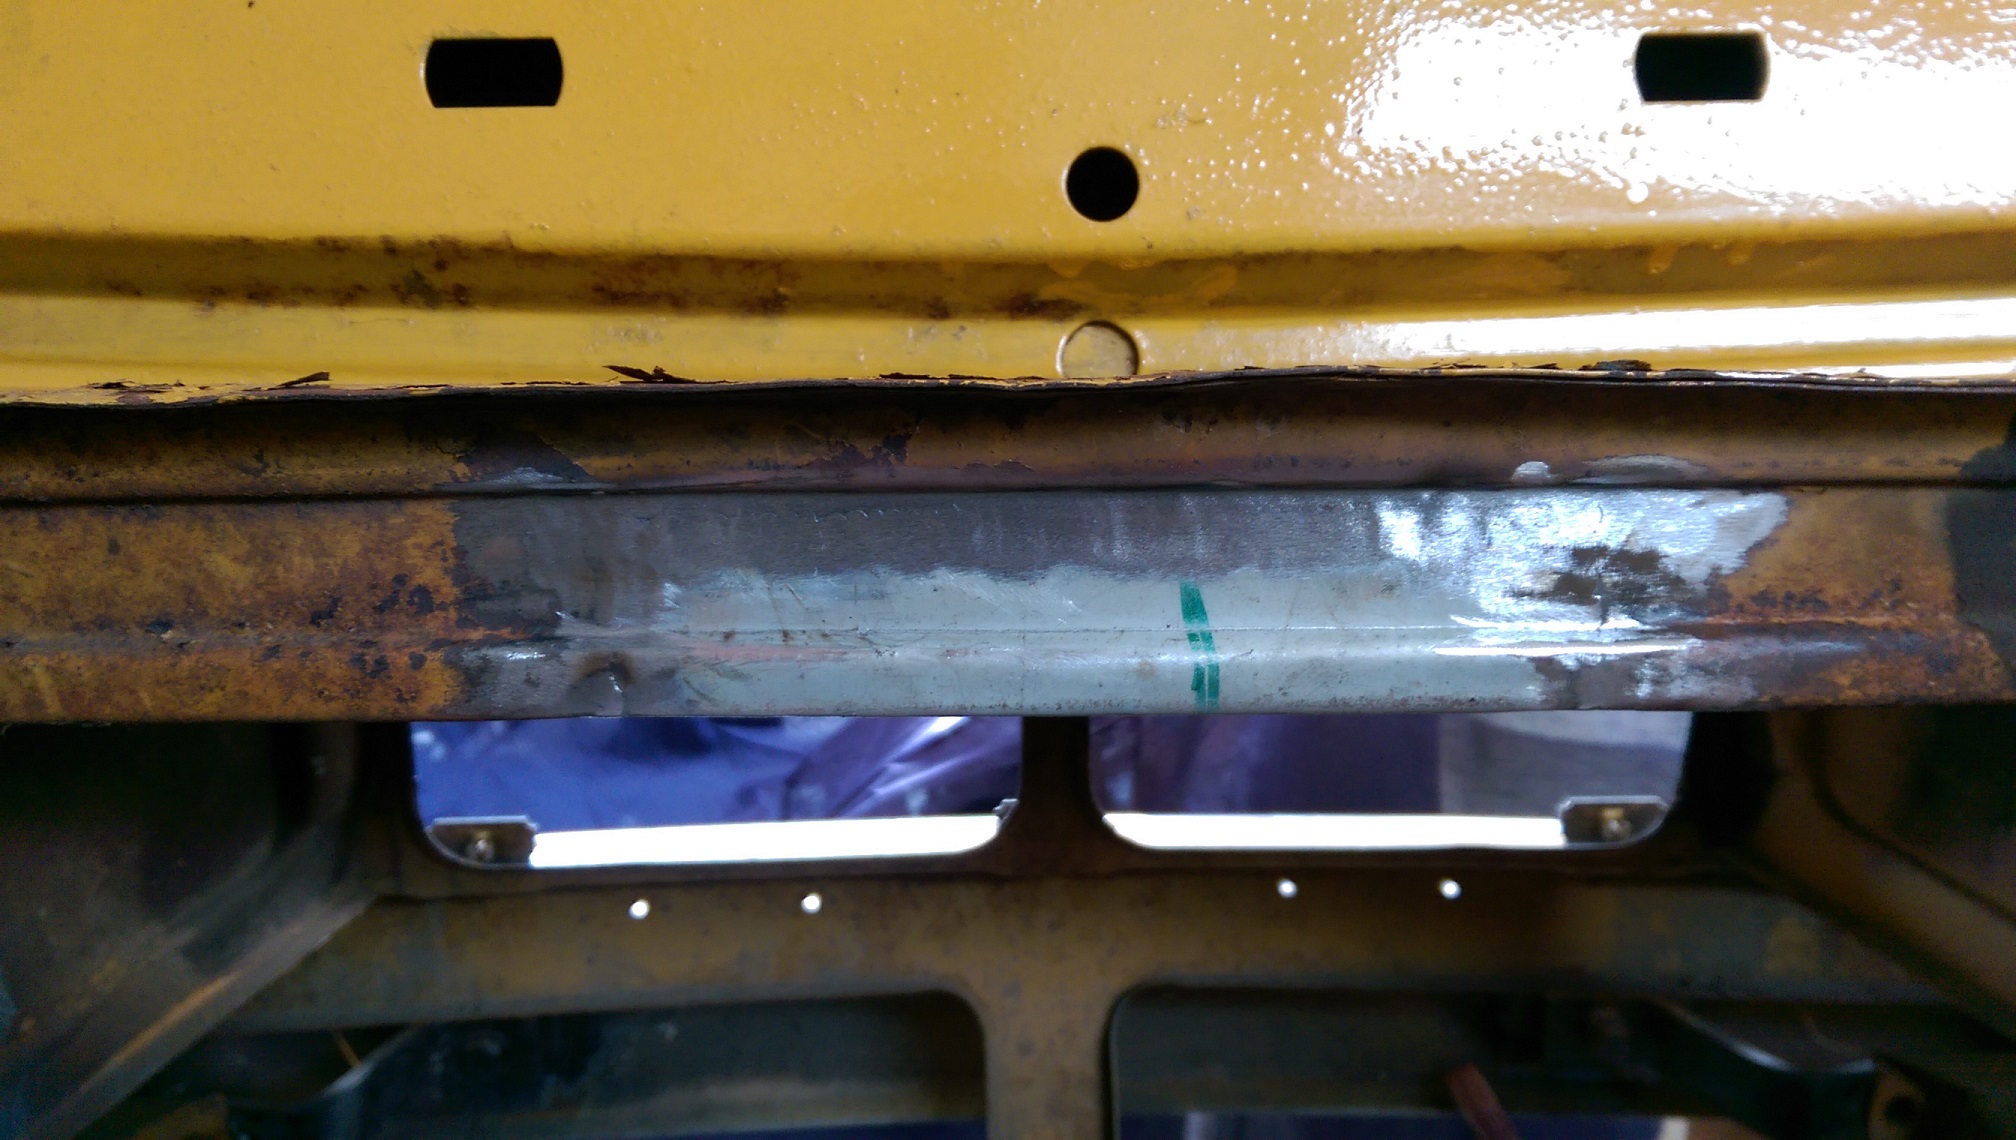
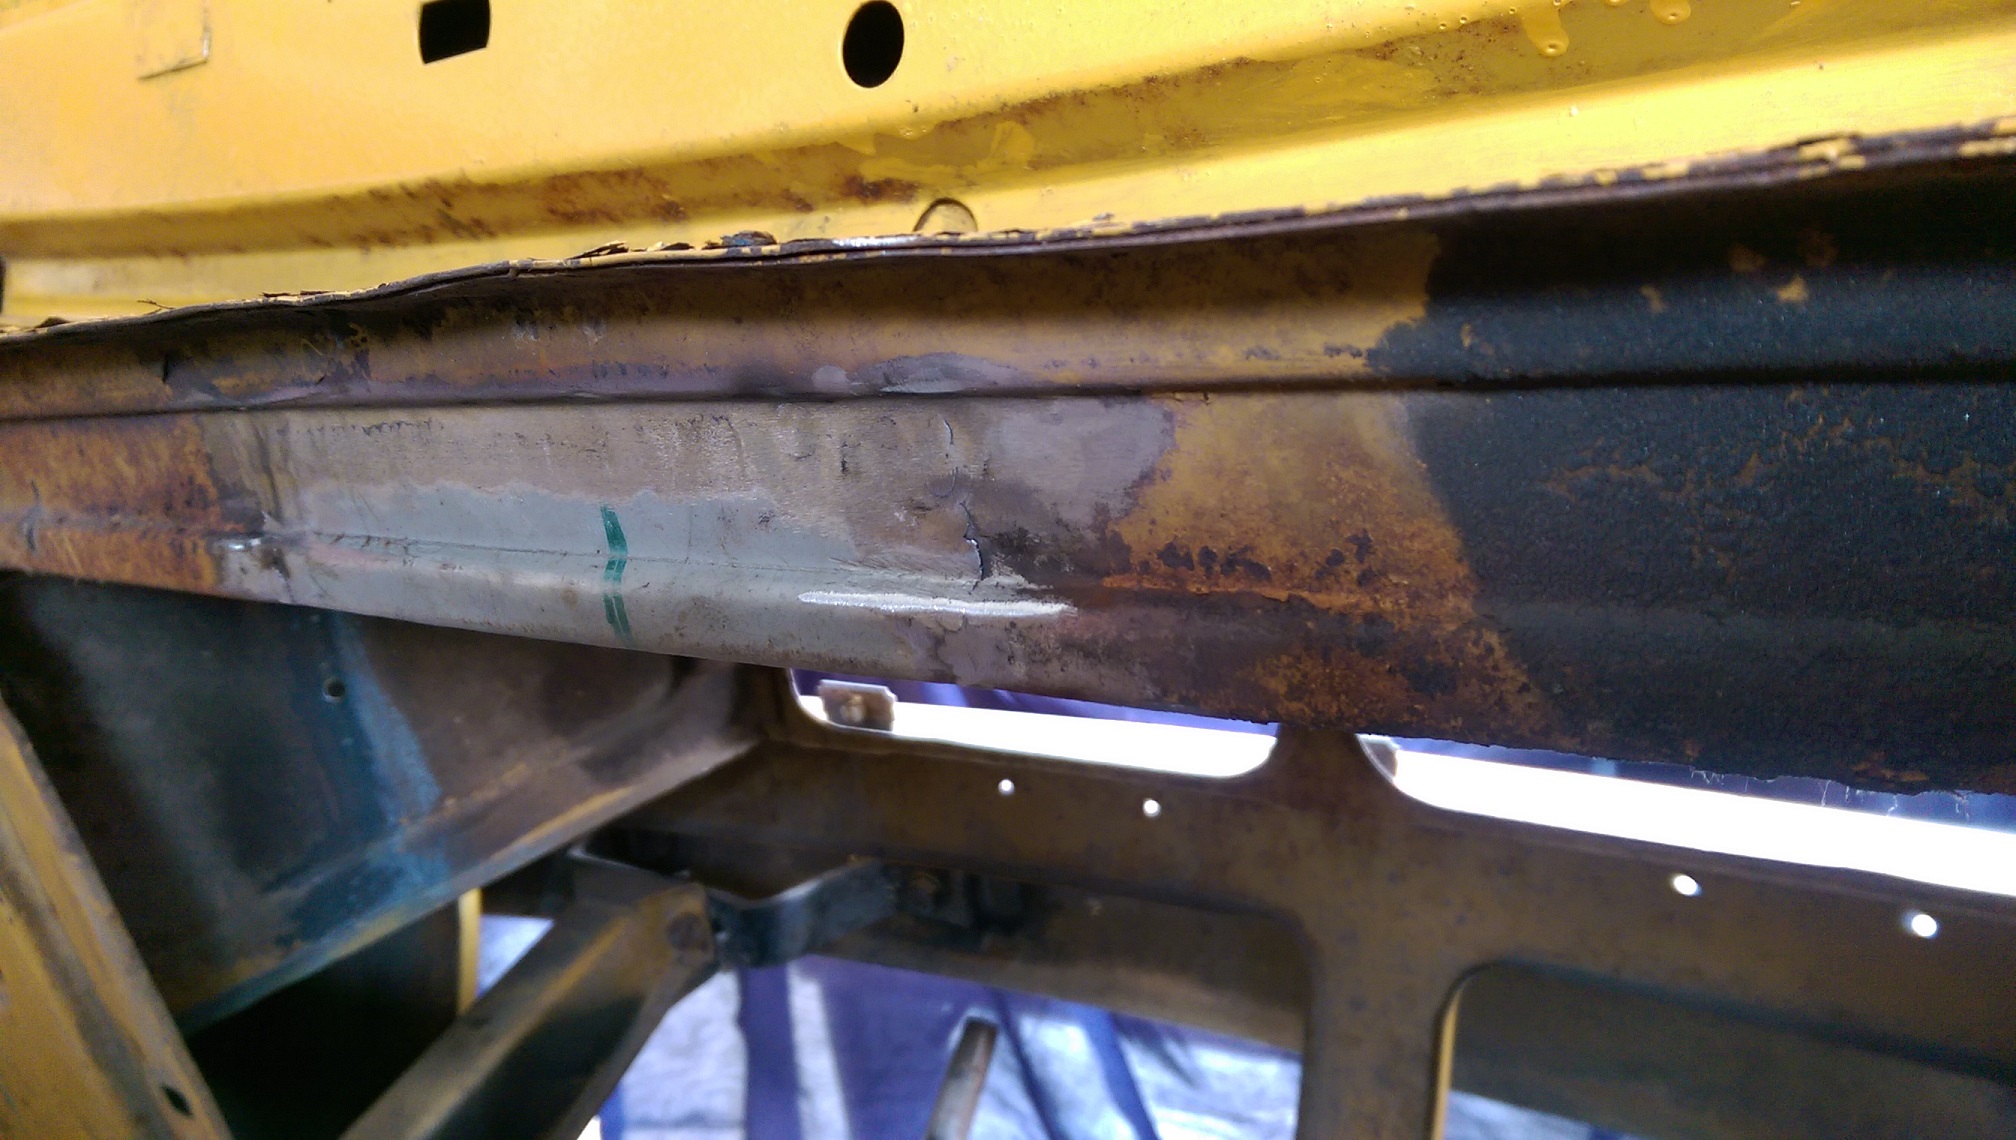
After much cutting, grinding, trimming, filing, bashing and trial fits, I got the firewall patch to fit acceptably. I also cut off the lower flange and bent up a flange on the top of the tunnel so I get rid of the lip that catches water and shit. I used crc zinc weld through primer on both faces where the panel overlapped. I tried some spots and tacks... Weld though primer is only kinda weld through, my welds looked shit as. So I stopped. Today I got a selection of wire brushes and did my best to clean off the primer through the spot holes. There was success. I'll do some more welding on the weekend. I kept getting blinded when doing those spots along the top because that gutter would block the sensors on my helmet.
1 point
-
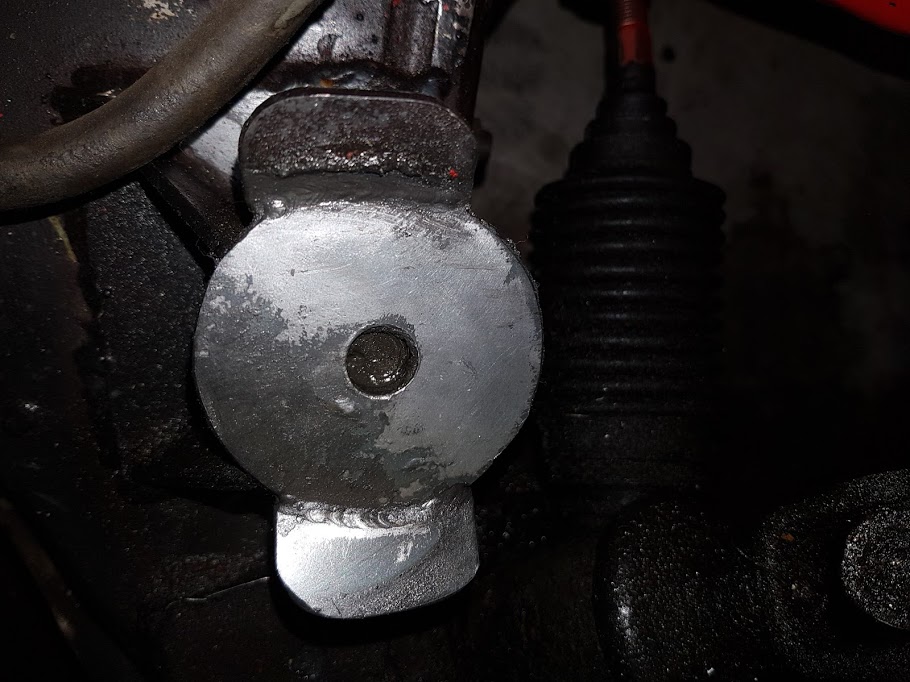
Everyone should have one of these. They make it super easy to get into tight spaces to clean up welds etc. They're on special for $99 at the Toolshed this month too. Got stuck into the engine bay with the powerfile and a flap disc. Still a bunch of finishing work to do, but the powerfile did an awesome job of the radius on this weld: Also bought myself a set of step drills. Their first job was to make the correct sized holes for the new engine mount threads: The nuts sit in there really nicely. It's a slight hammer fit to get them below/even with the surface and they can't drop any lower because the hole steps down as it gets deeper. The nuts need to be tigged in and tidied up, then that job's done.
1 point
-
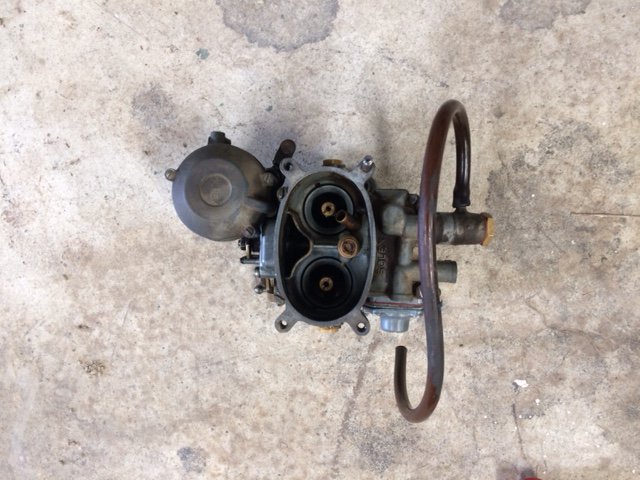
Thanks to @azzurro I have another carb to try. Out with the old: In with the new (well, older actually) I'm getting quite quick at removing and installing Fiat 125 Carburettors. As you can see, it is slightly different around the fuel inlet side and is missing the breather hose thingy. Must have been pretty well dialled in because it fired up straight away. I then took it for a hoon down the road and maaaayte it's much better. Some fine tuning to be done with the idle but very driveable. I'm calling it a win.
1 point
-
When kids ask what's the point of Maths, from now on I'll be able to reference you/this diagram...1 point
-
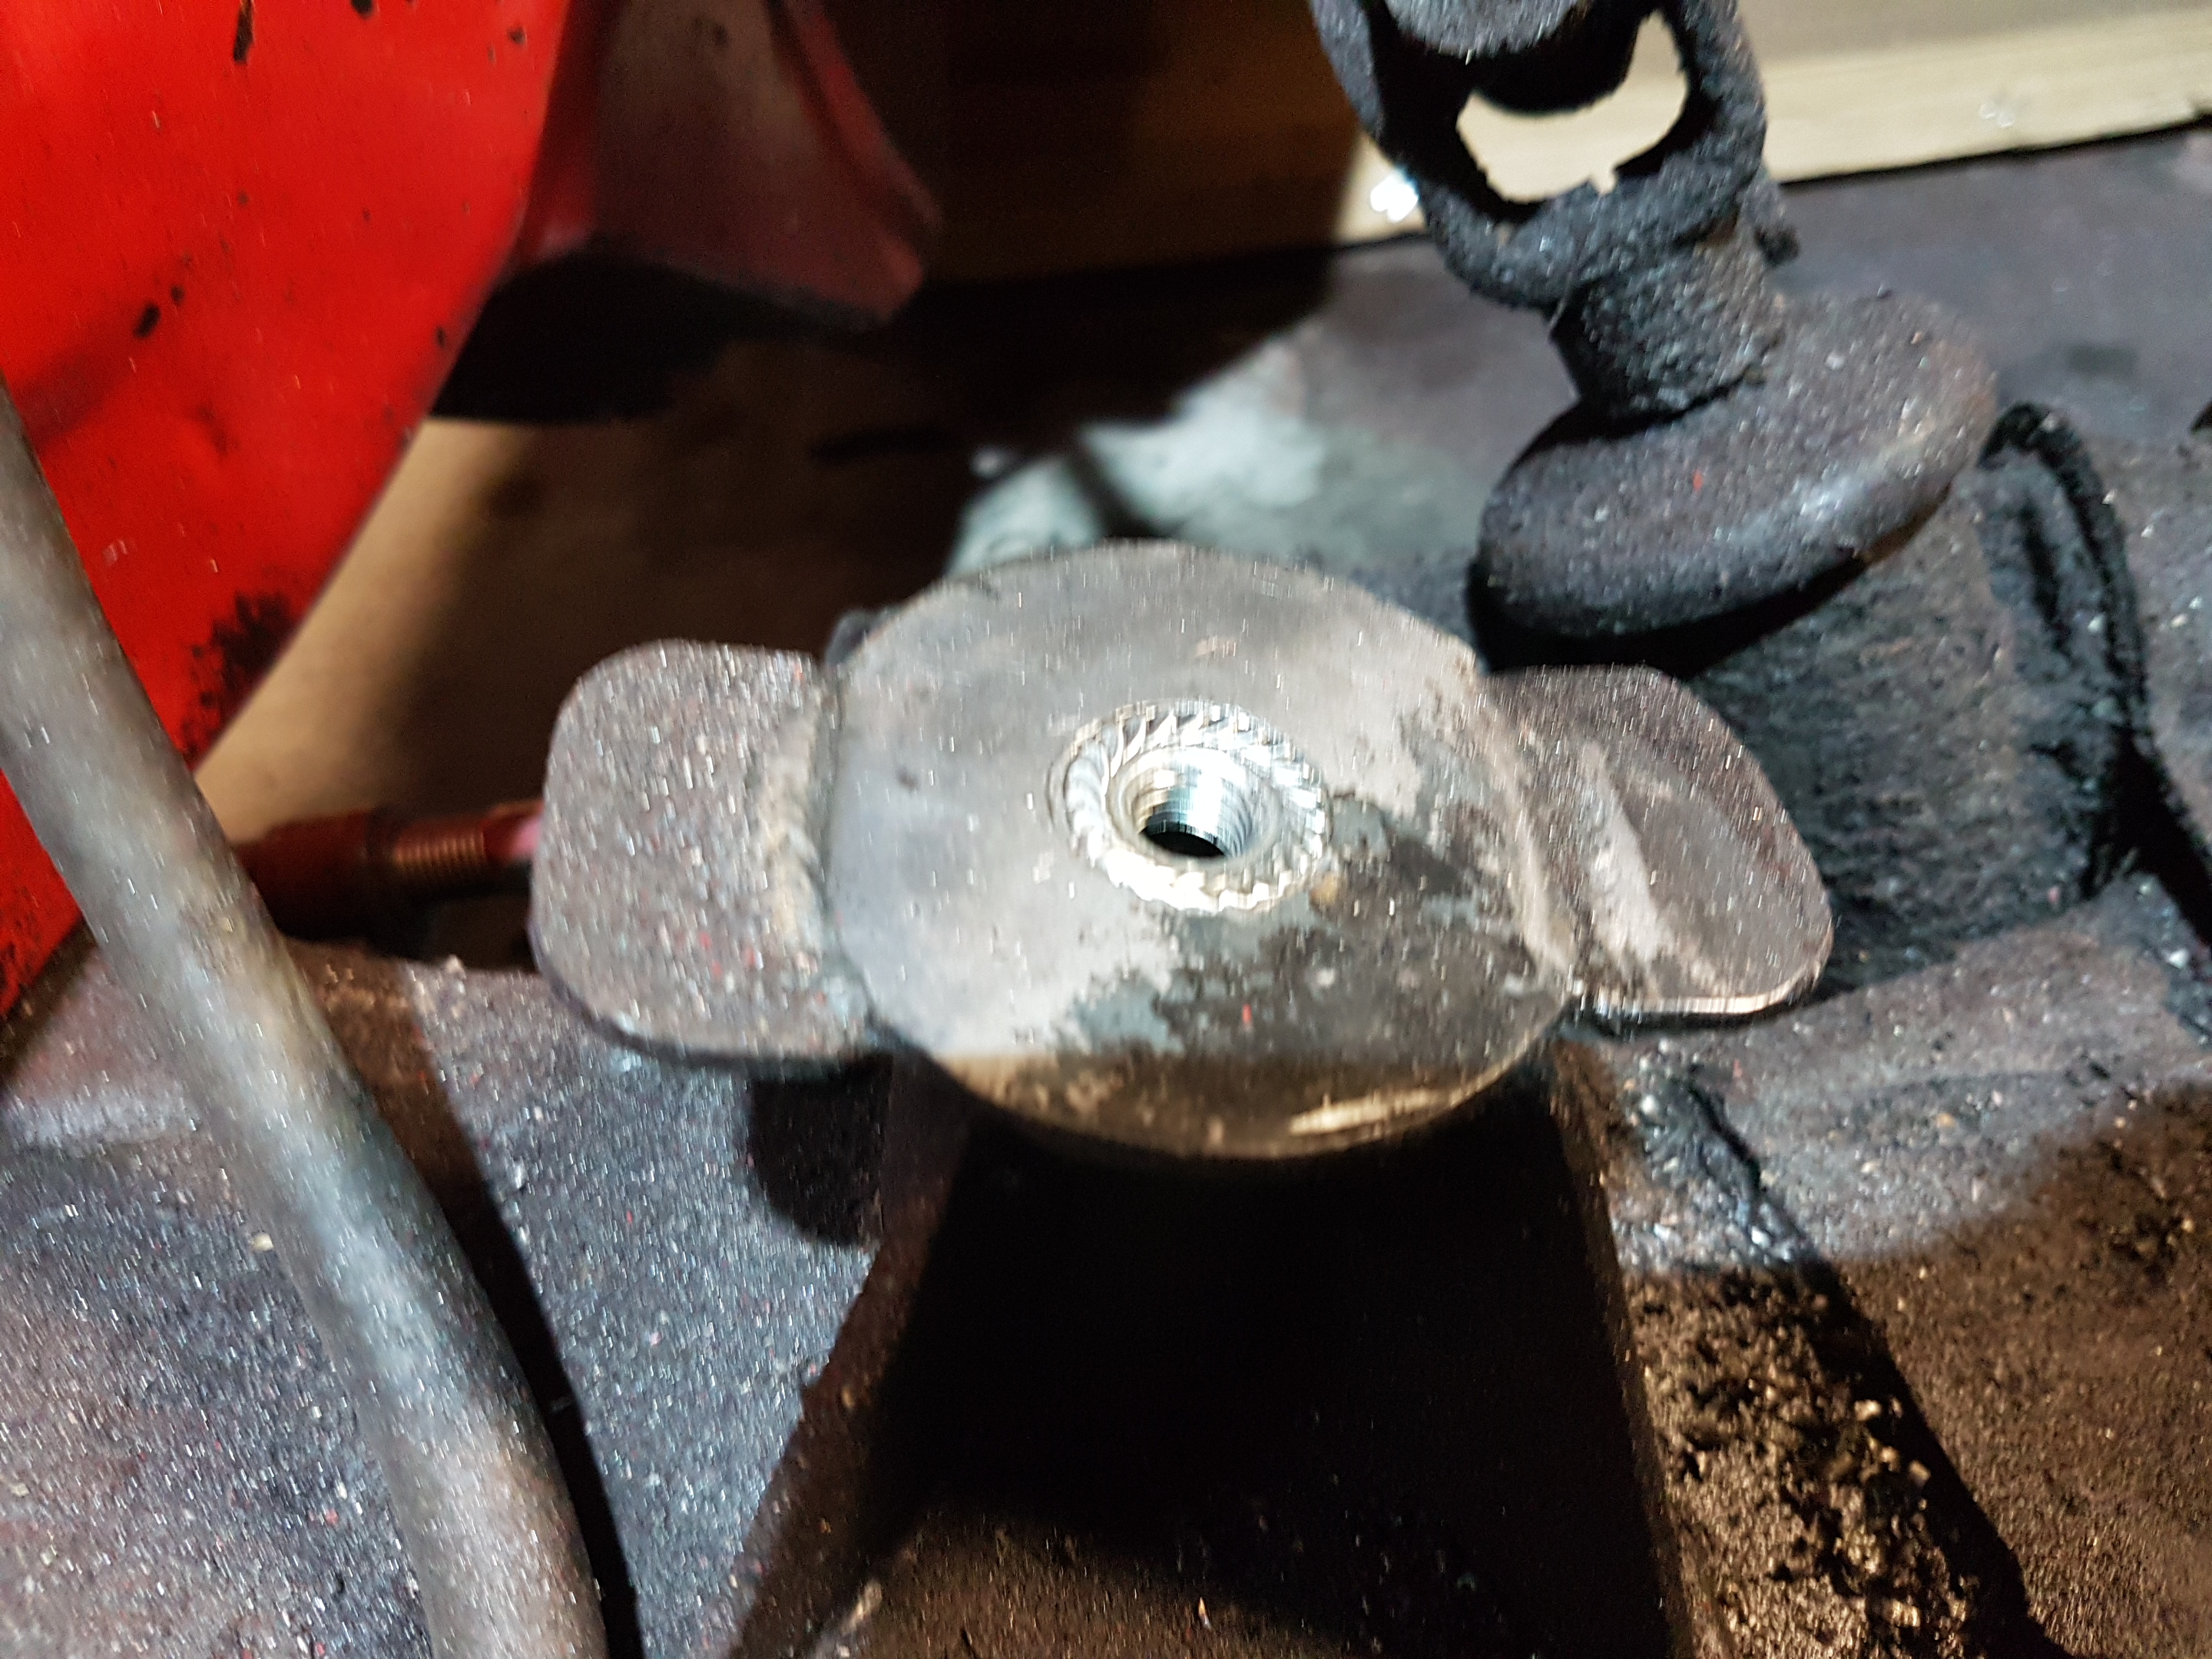
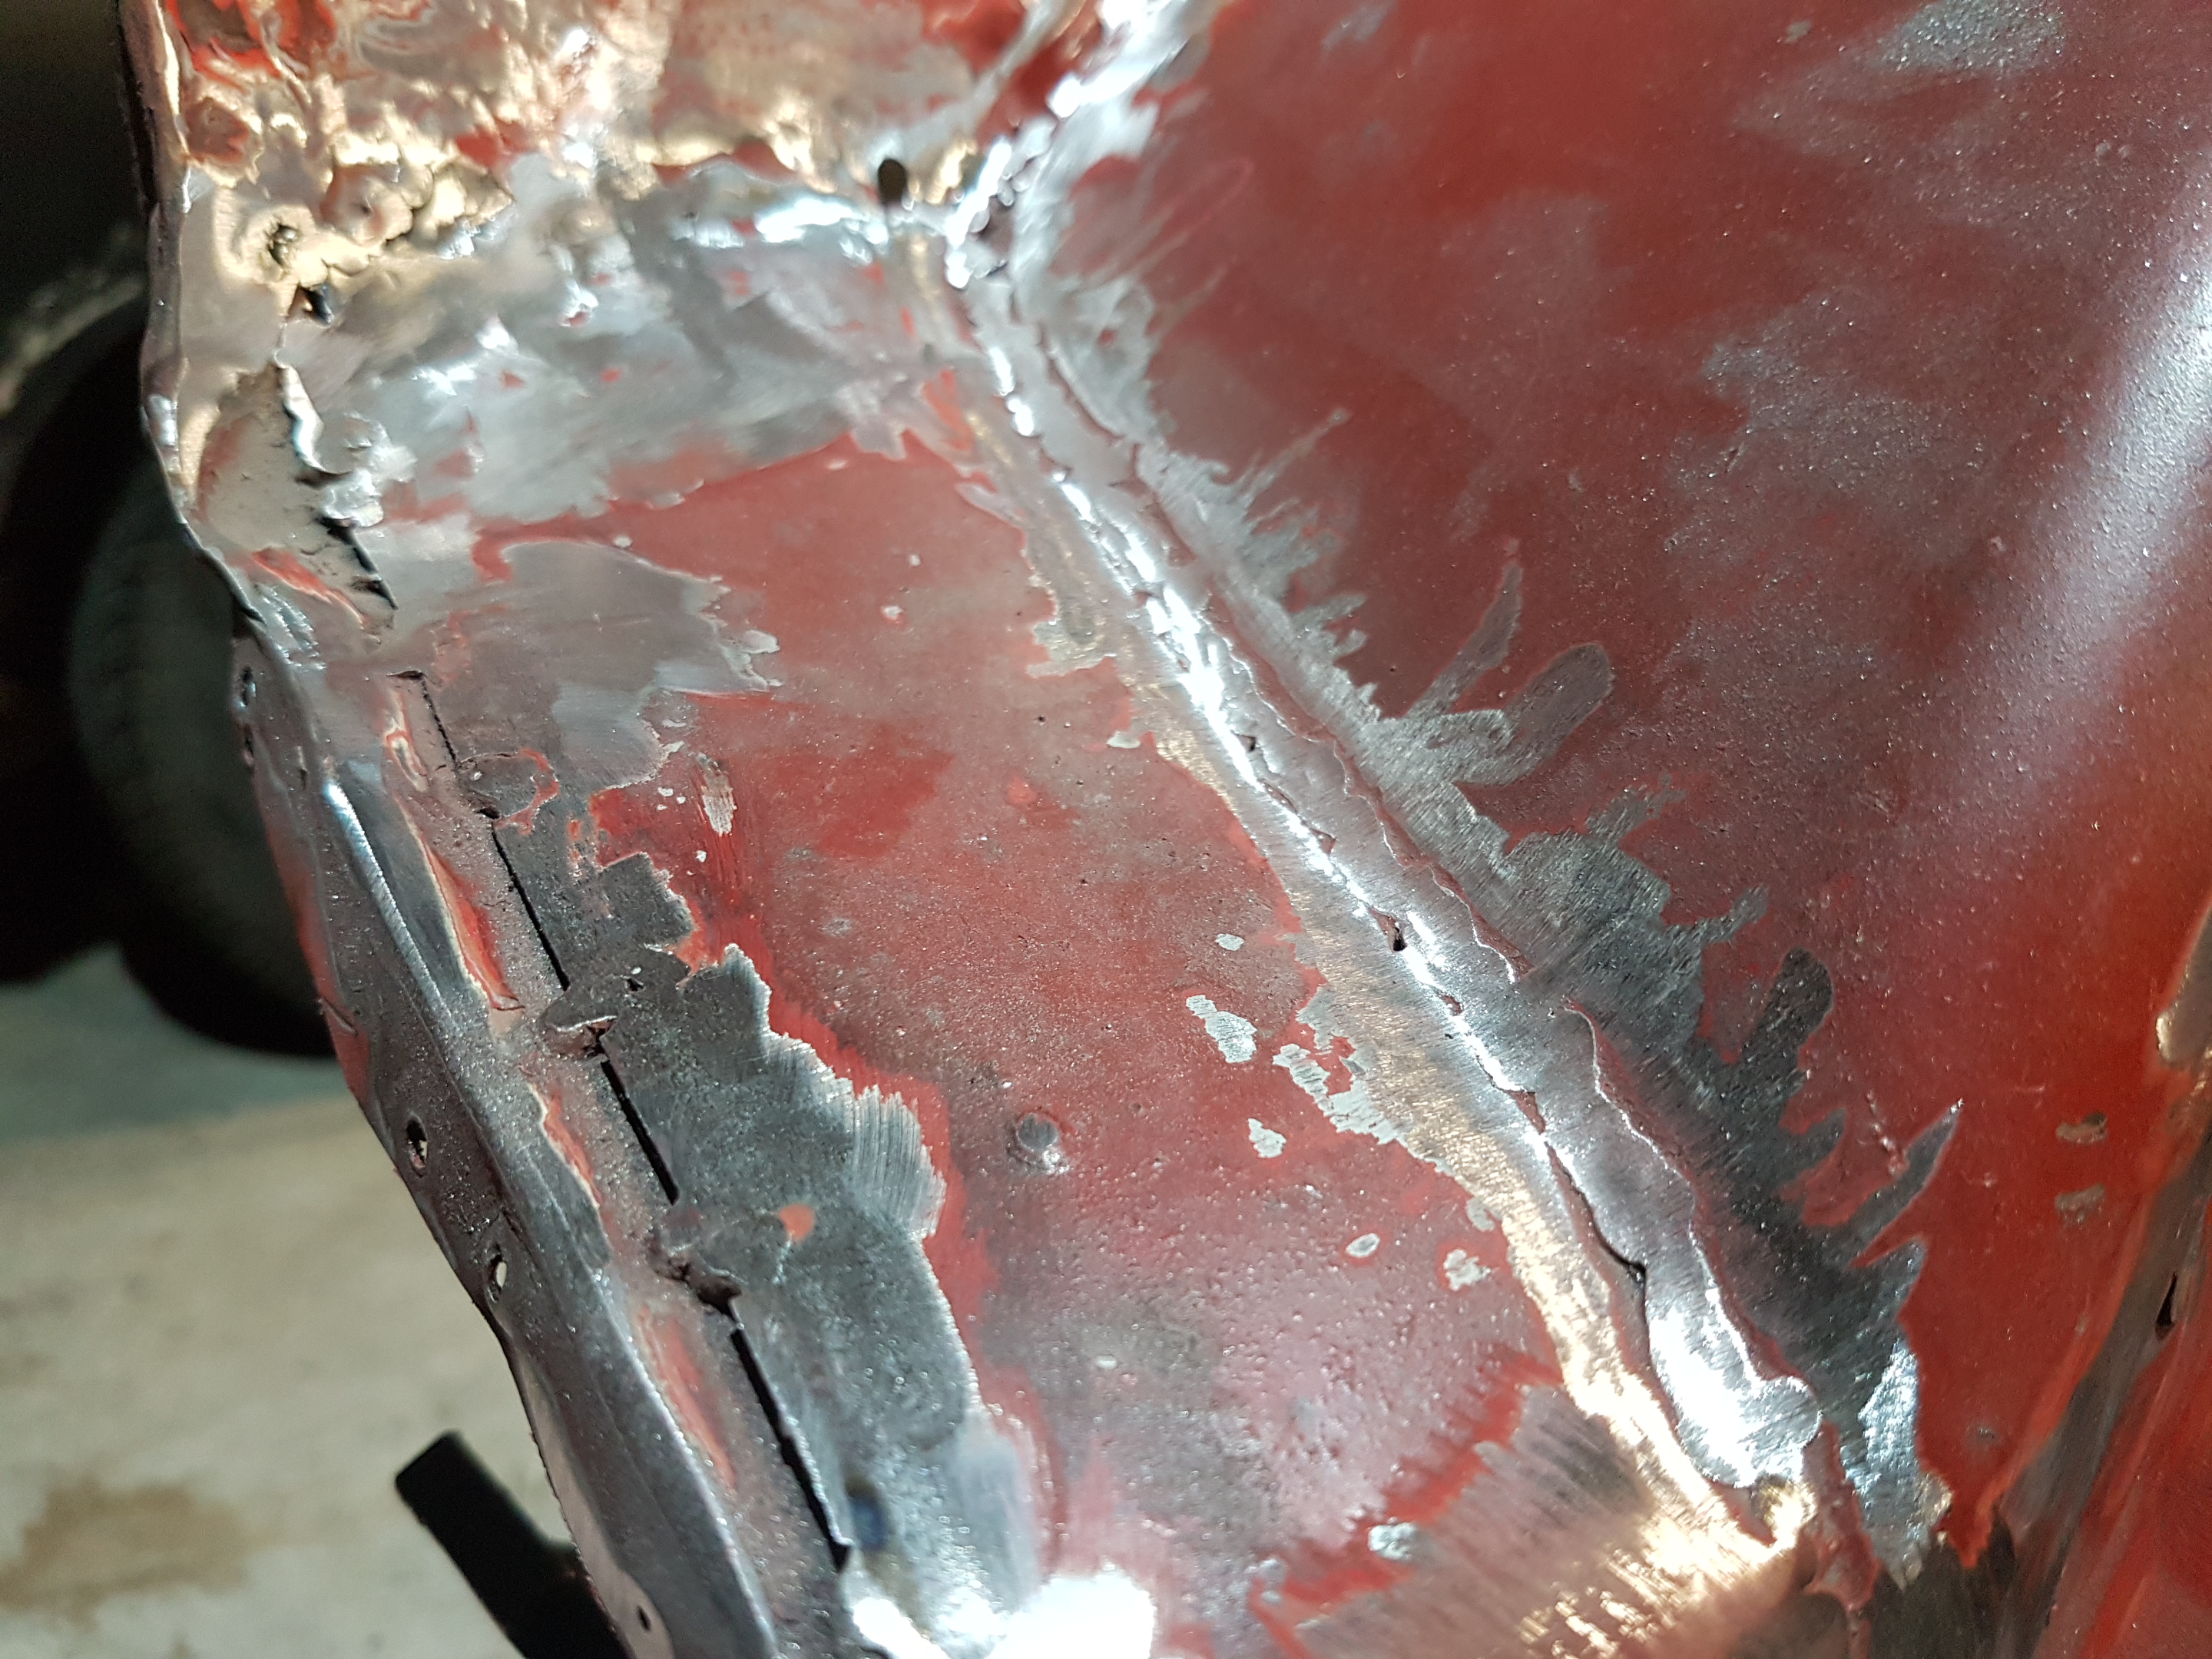
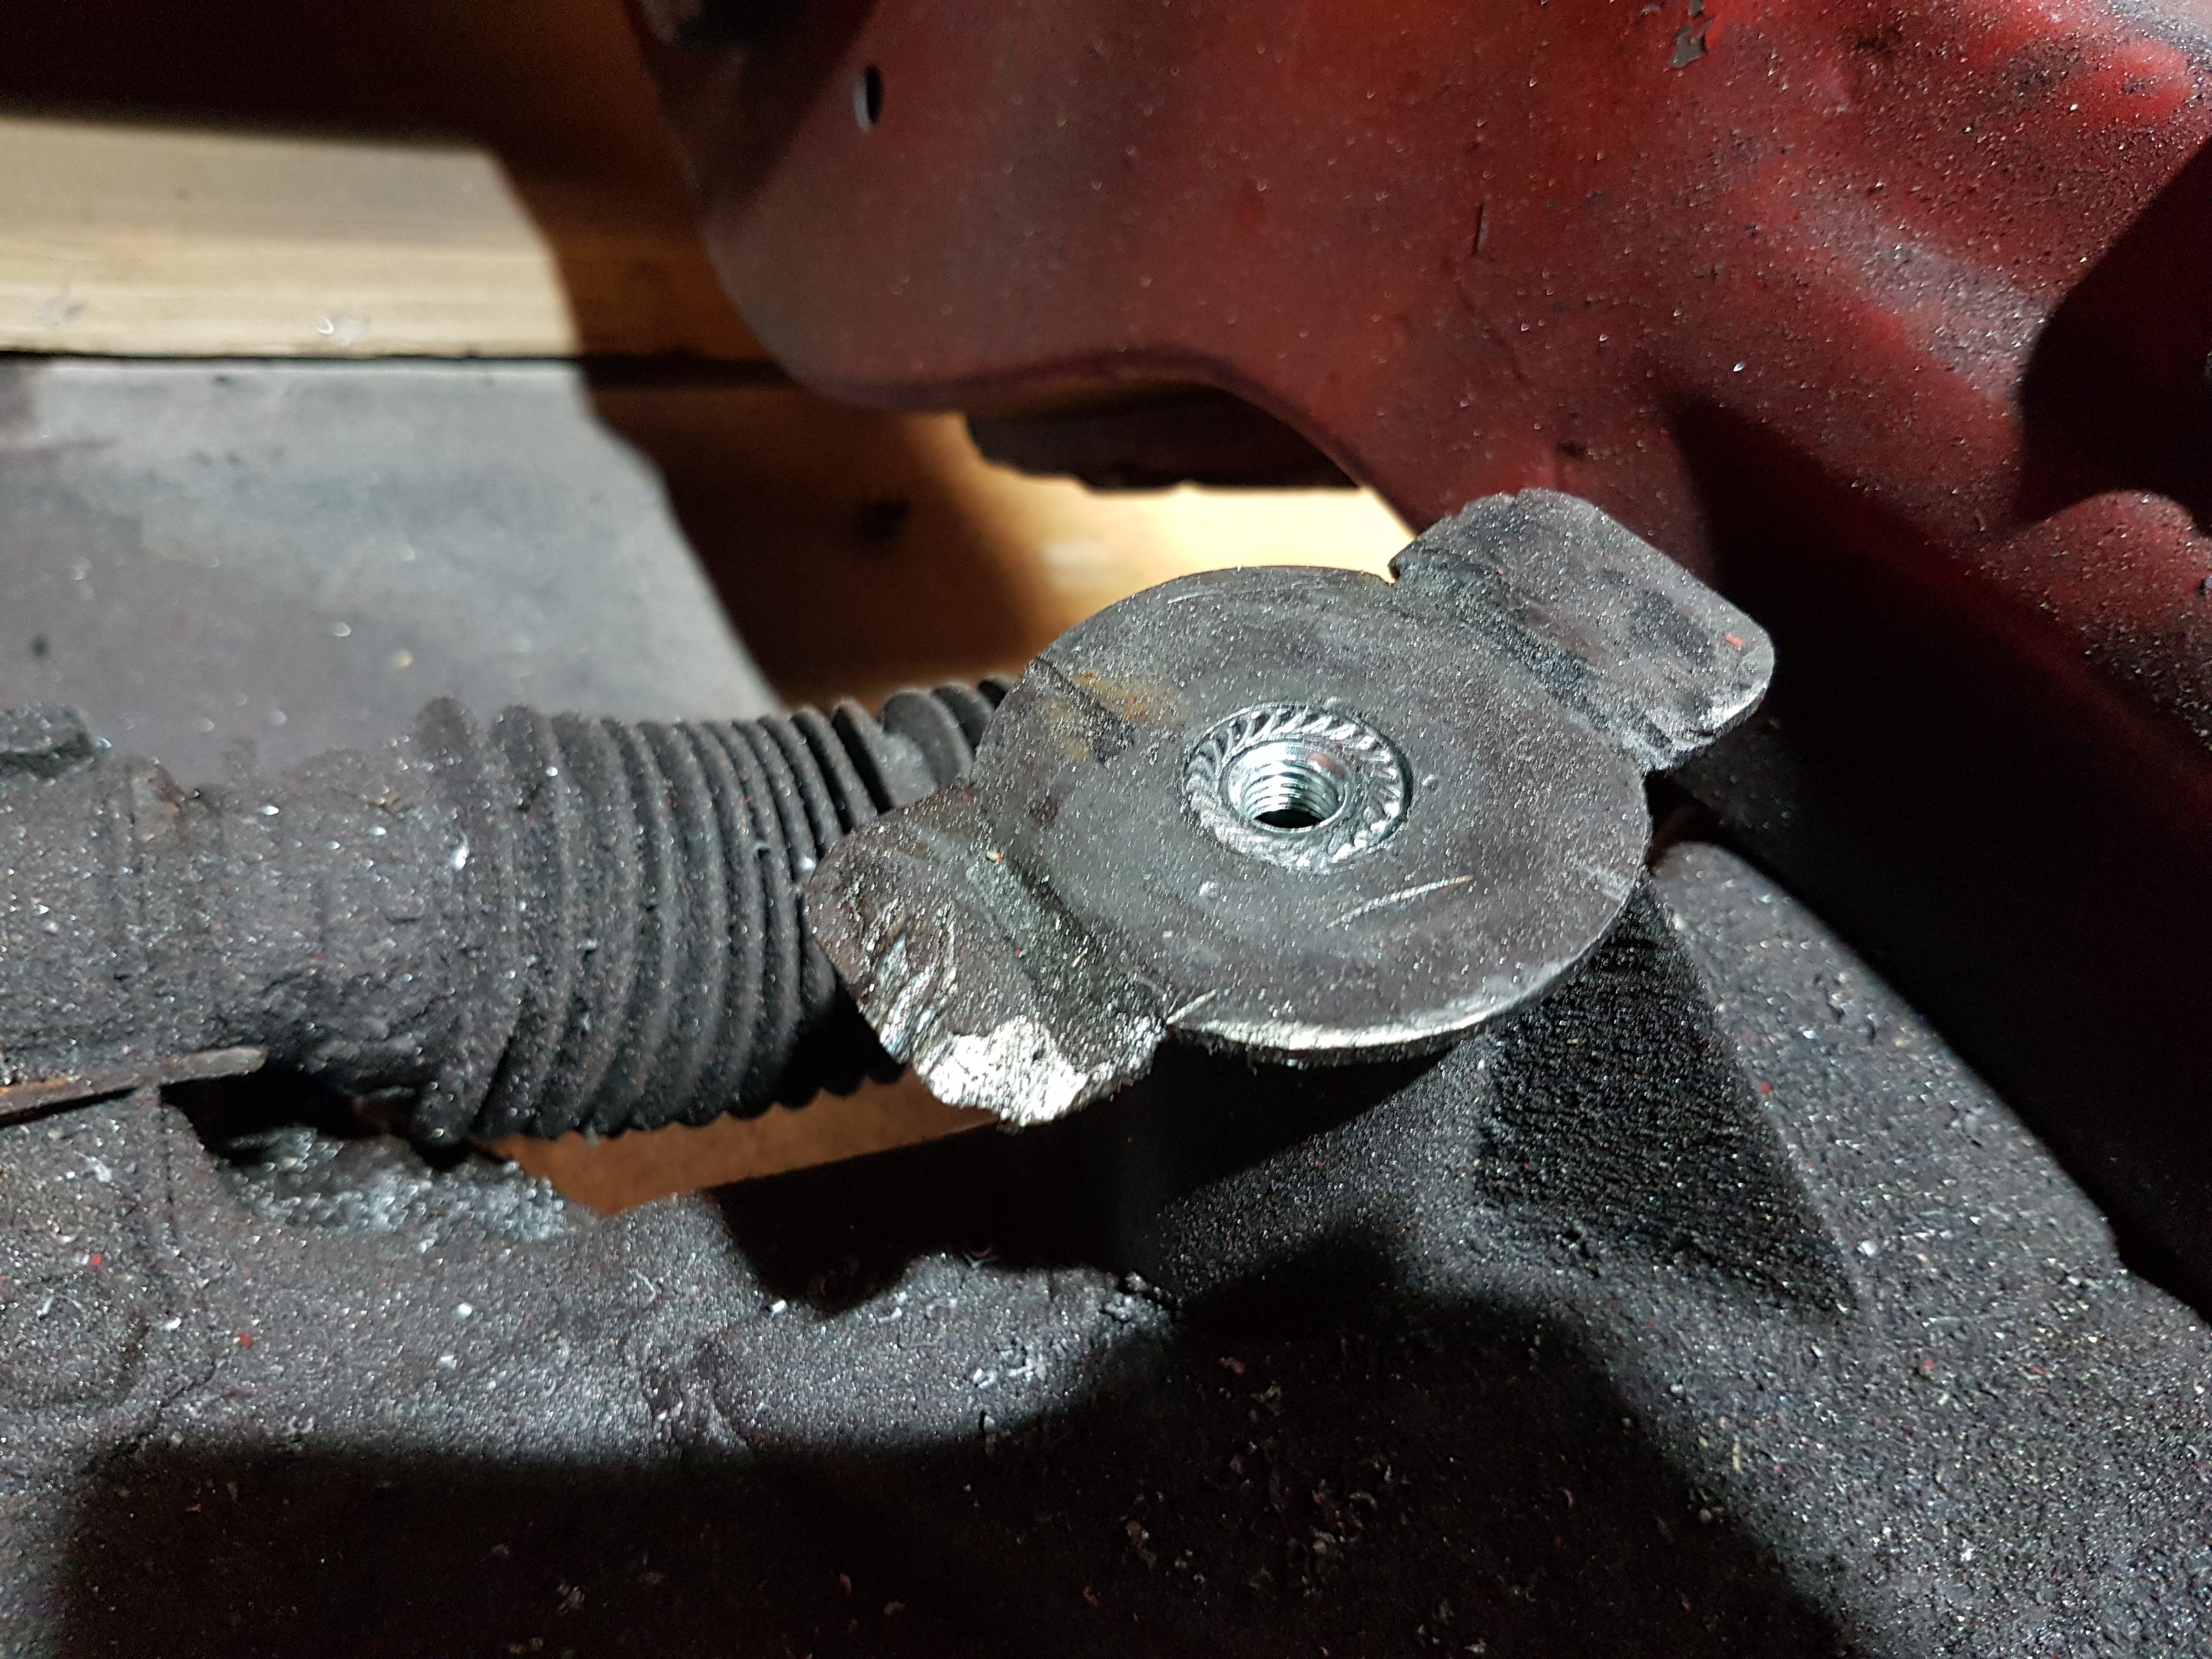
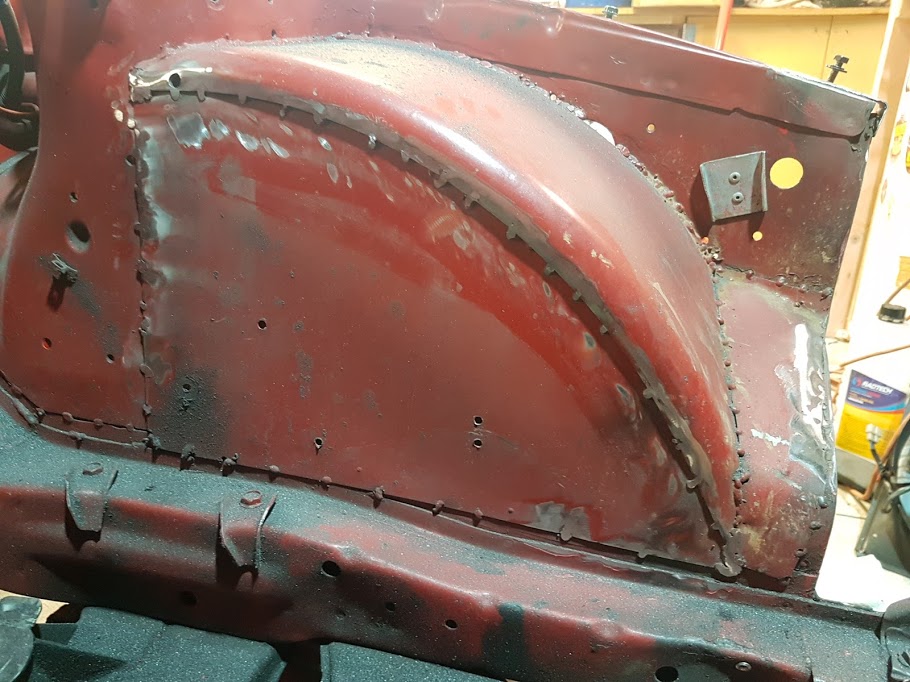
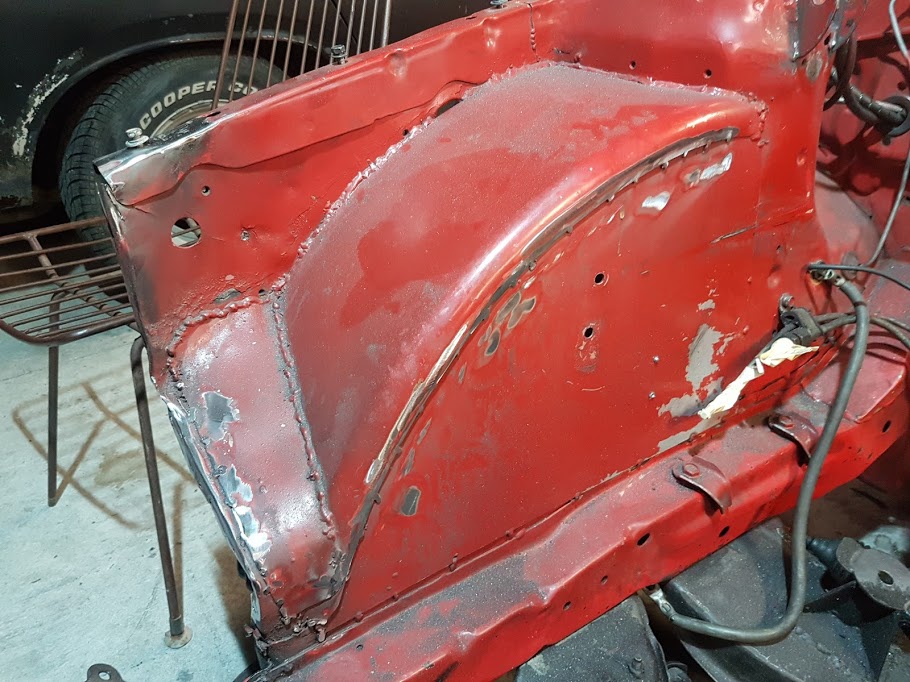
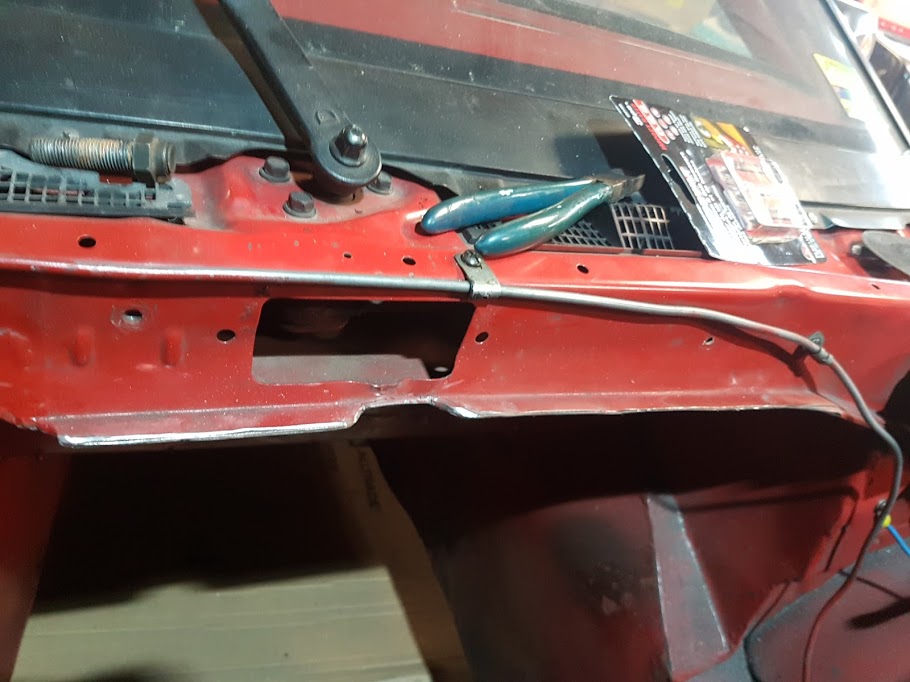
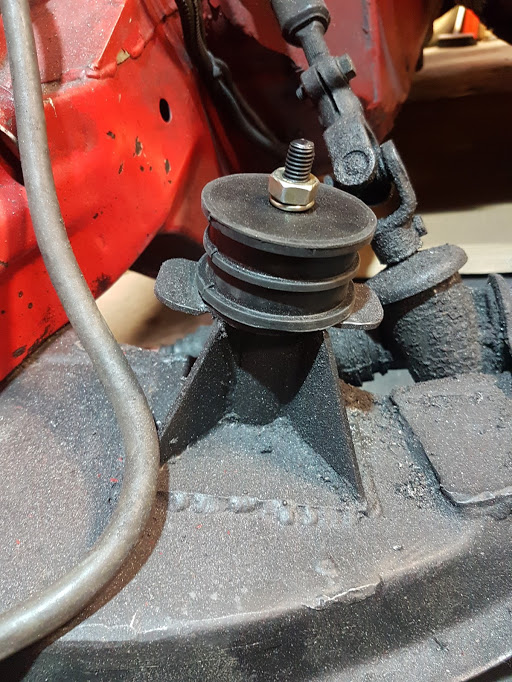
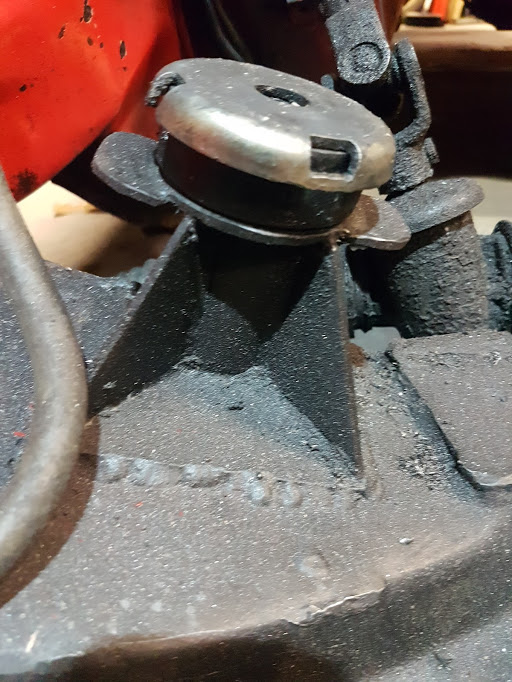
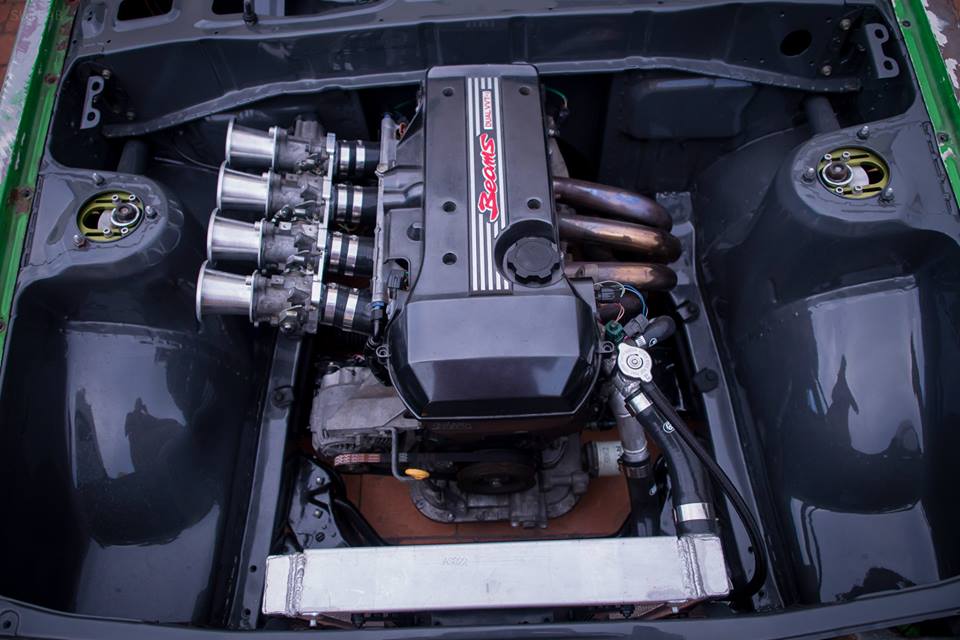
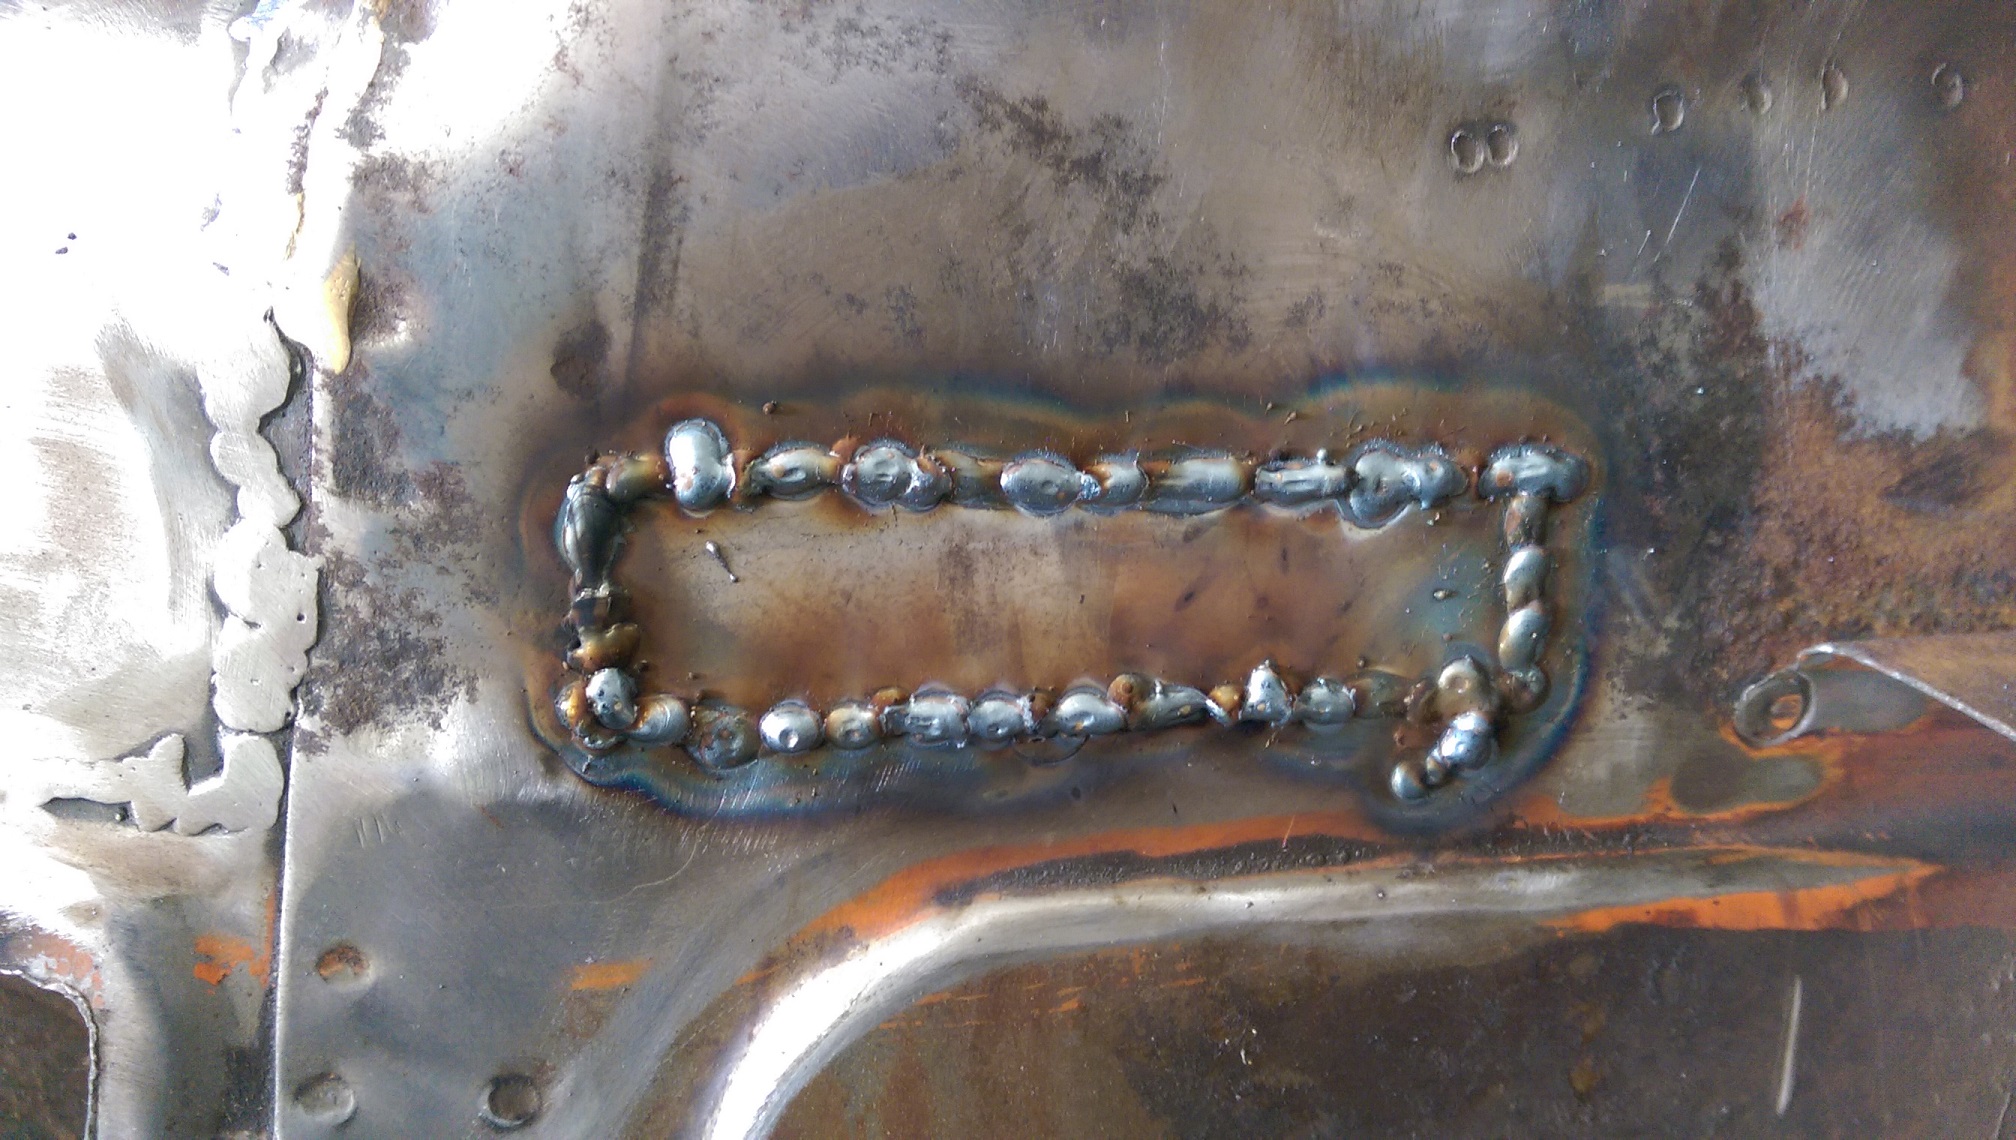
Back to those bad decisions... I don't really want to share these photos, but am going post them for the sake of good record keeping. I did all this with maximum haste and minimum care and it shows. First up, half assed tub job. From what I remember, I left the paint on for most of these welds. I also did the tubs and "wedge" sections before the front rad support panel was removed, so it was hard to get in there.... But never cleaned up the welds after removing the slam panel. Started by attacking them with a flap wheel to get rid of all the super high spots. I'm going to clean all the welds up as much as possible and will re-weld some parts. There will be grinding.... And welding.... And cleaning.... And filler. The inside is just as bad: Like, what the actual fuck 23 year old Markku? You didn't even cut the bottom edge straight! Oh well, just weld'er'up anyway I guess!?!?! Firewall - not finished and the welding at the back needs to be taken away and shot. Firewall notch to get the coil pack out - this was done at the track or on the dyno when we realised that the coil hit the seam: Started by cleaning up the edges and will weld parts of the seam: Next issue - engine mounts. The original idea consisted of pancaking a piece of Urethane between the engine mount and the pedestal with a bolt going through. In other words, it was basically solid mounted... Until the bolts snapped from the torque, vibrations and bumps. This was the situation when I removed the engine: On top of that, 3 out of 4 of my gearbox mount bolts had disappeared! So the engine and box would have been flubbering around like a kitty on crack. The best solution is a set of Land Rover engine mounts as seen in @DAD's KP build thread. These are 10mm taller than what I had before (26mm vs 36mm), but I've got another solution in the works to get the height right. Old: New: I'll also need to re-set a captured nut into the pedestal. I'm currently trying to decide on the strongest way to do this... The pedestals are welded onto the crossmember, so the only way in is from the top... I can either drill a big hole and weld a flange nut in there from above OR drill a bigger hole and weld an extra plate on top of the pedestal with a nut welded from underneath. I'm open to ideas - what have you got? So I'm taking the run bearing as a blessing after seeing the sum total of issues that need to be sorted. I'll be spending the next few months getting this right and am taking ti as an opportunity to learn some new skills and will take my time to get it looking good. Luckily I work for a company that sells flap wheels, grinding discs and linishing belts! Here's a pic of @nothingsfree's engine bay for inspiration:
1 point
-
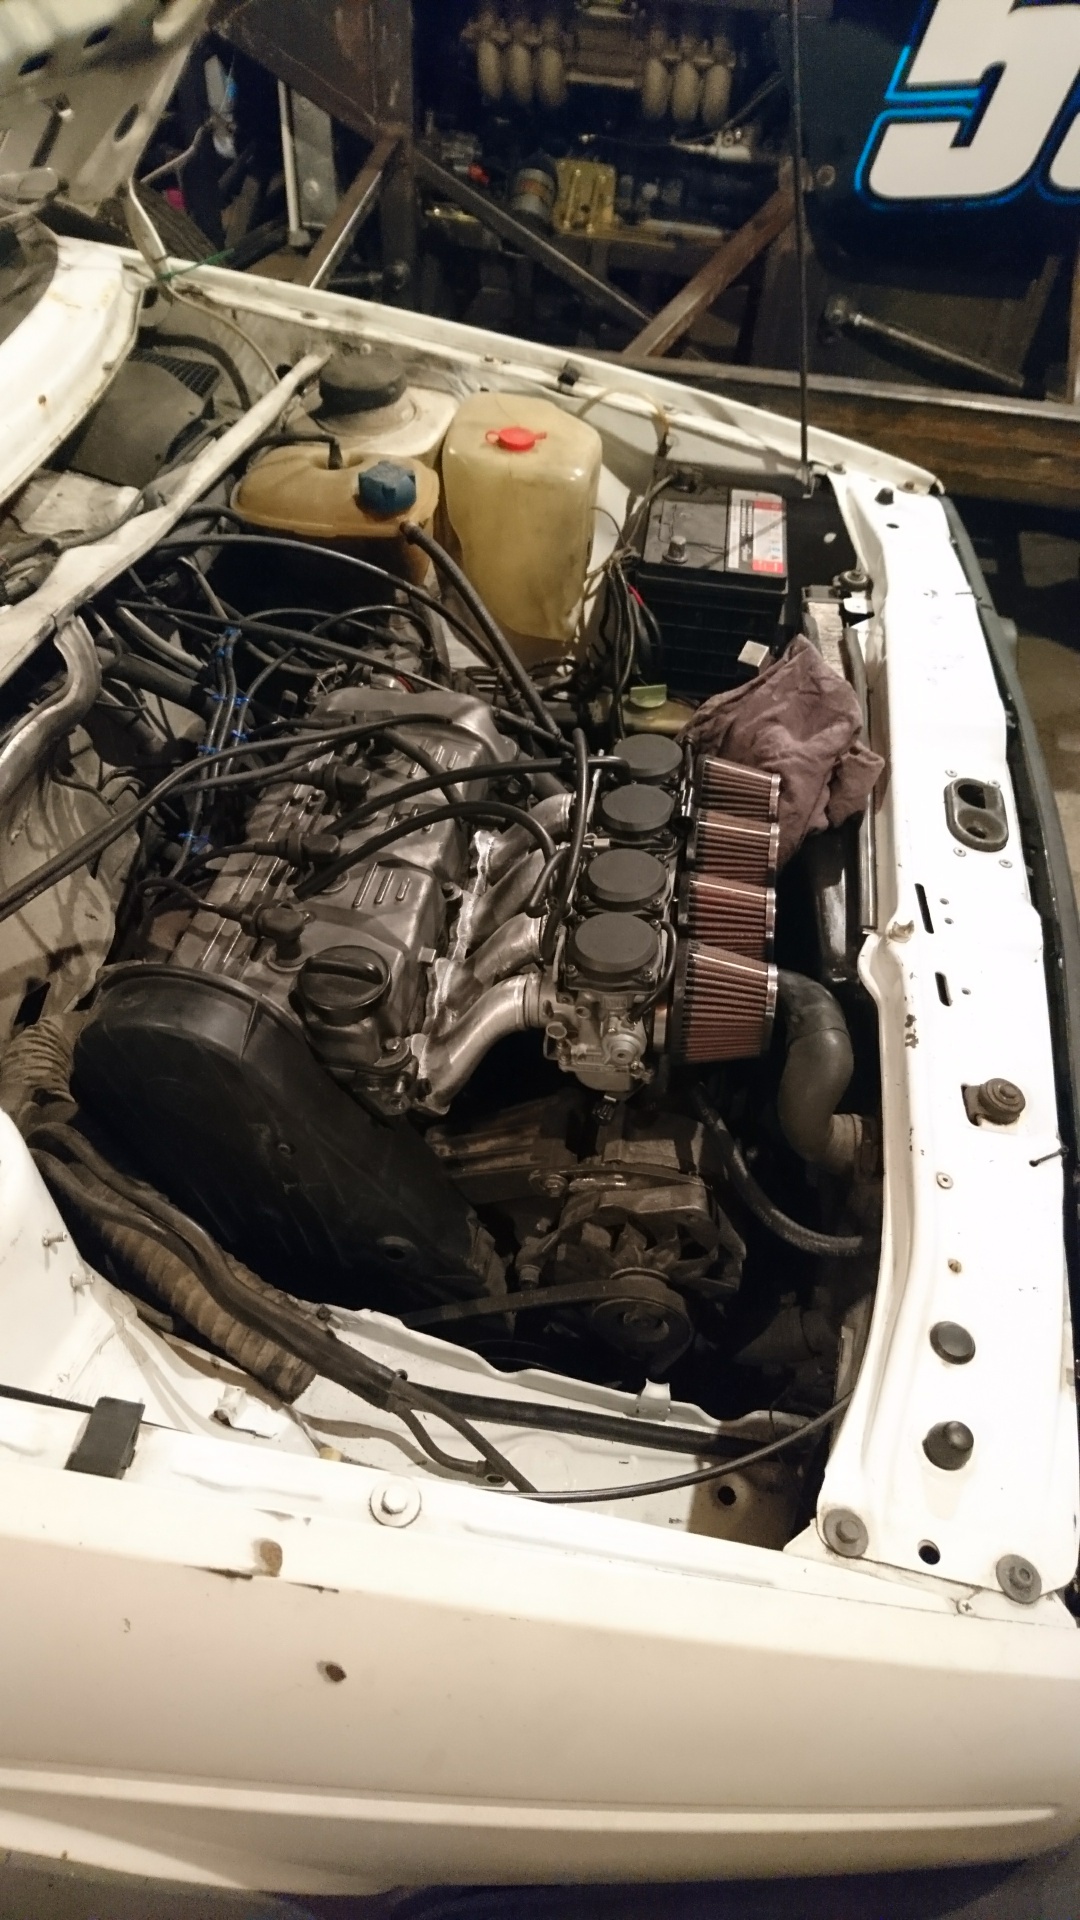
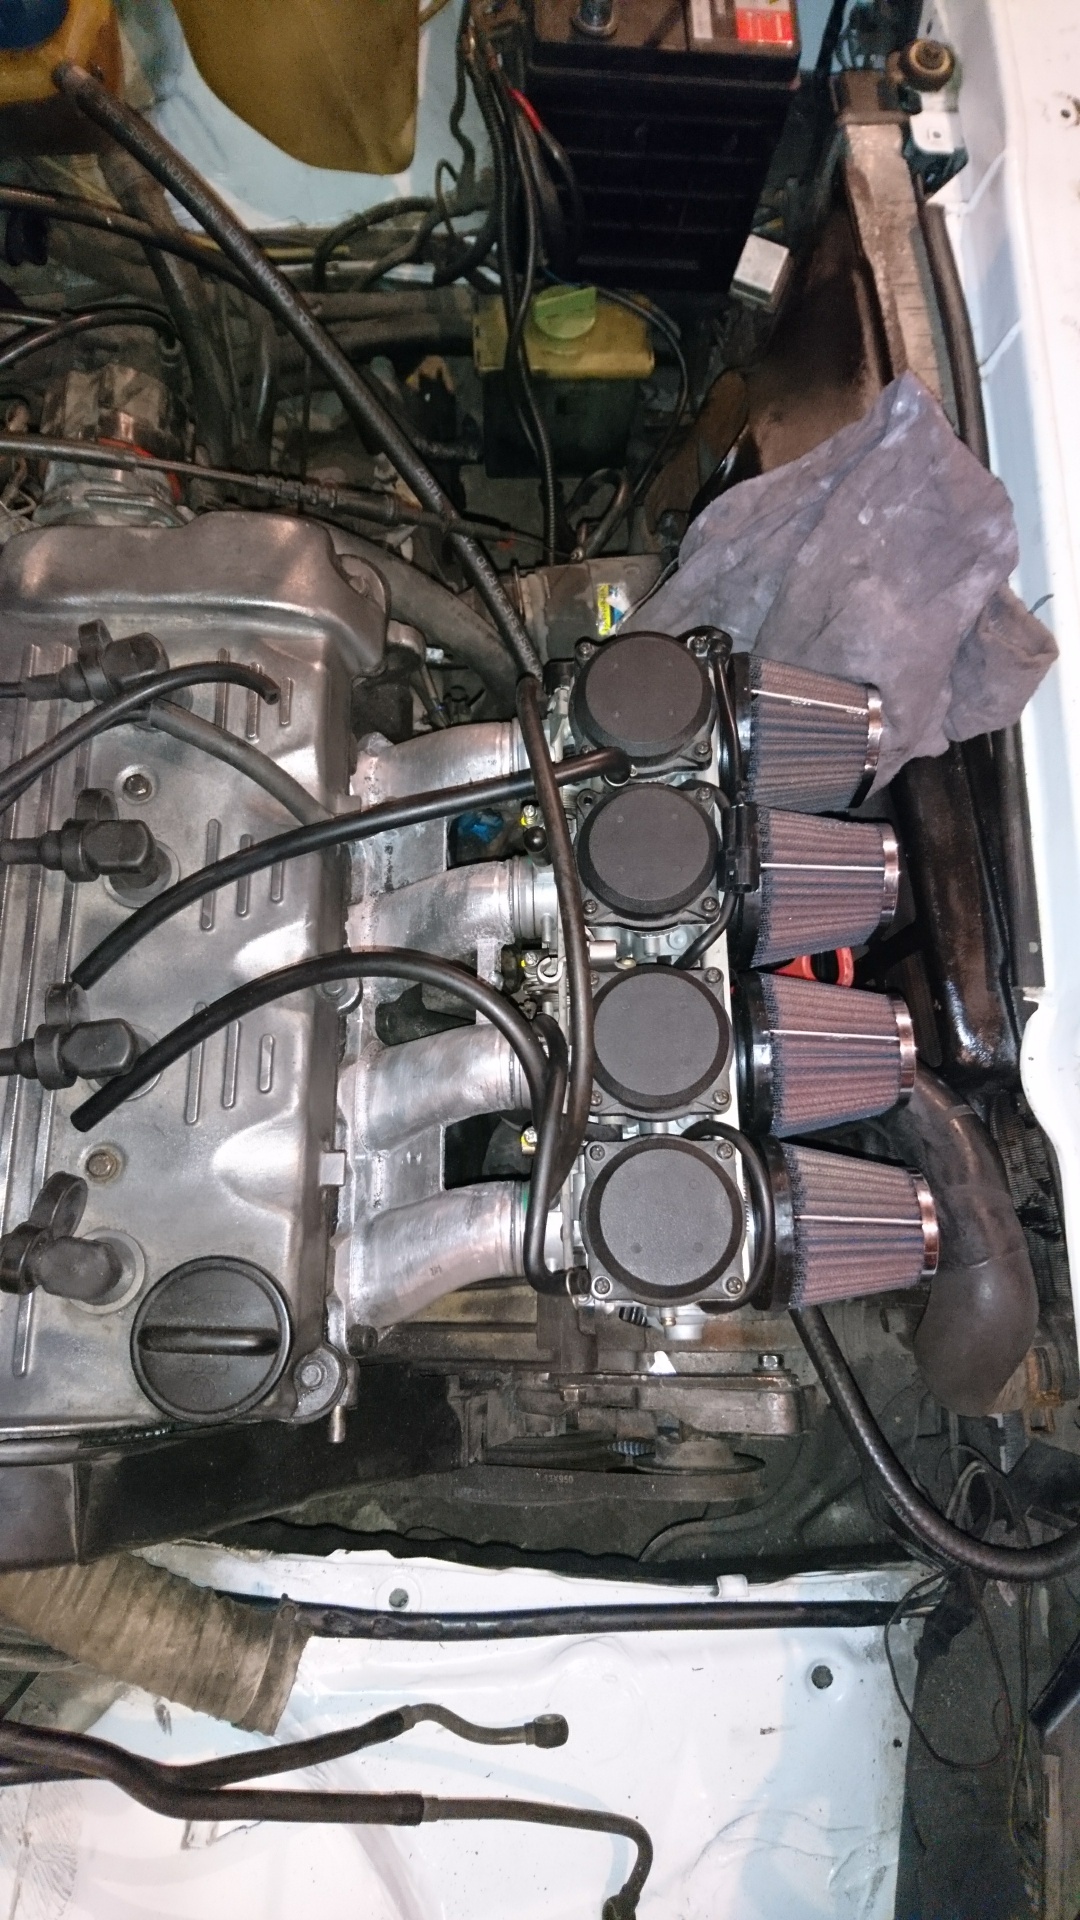
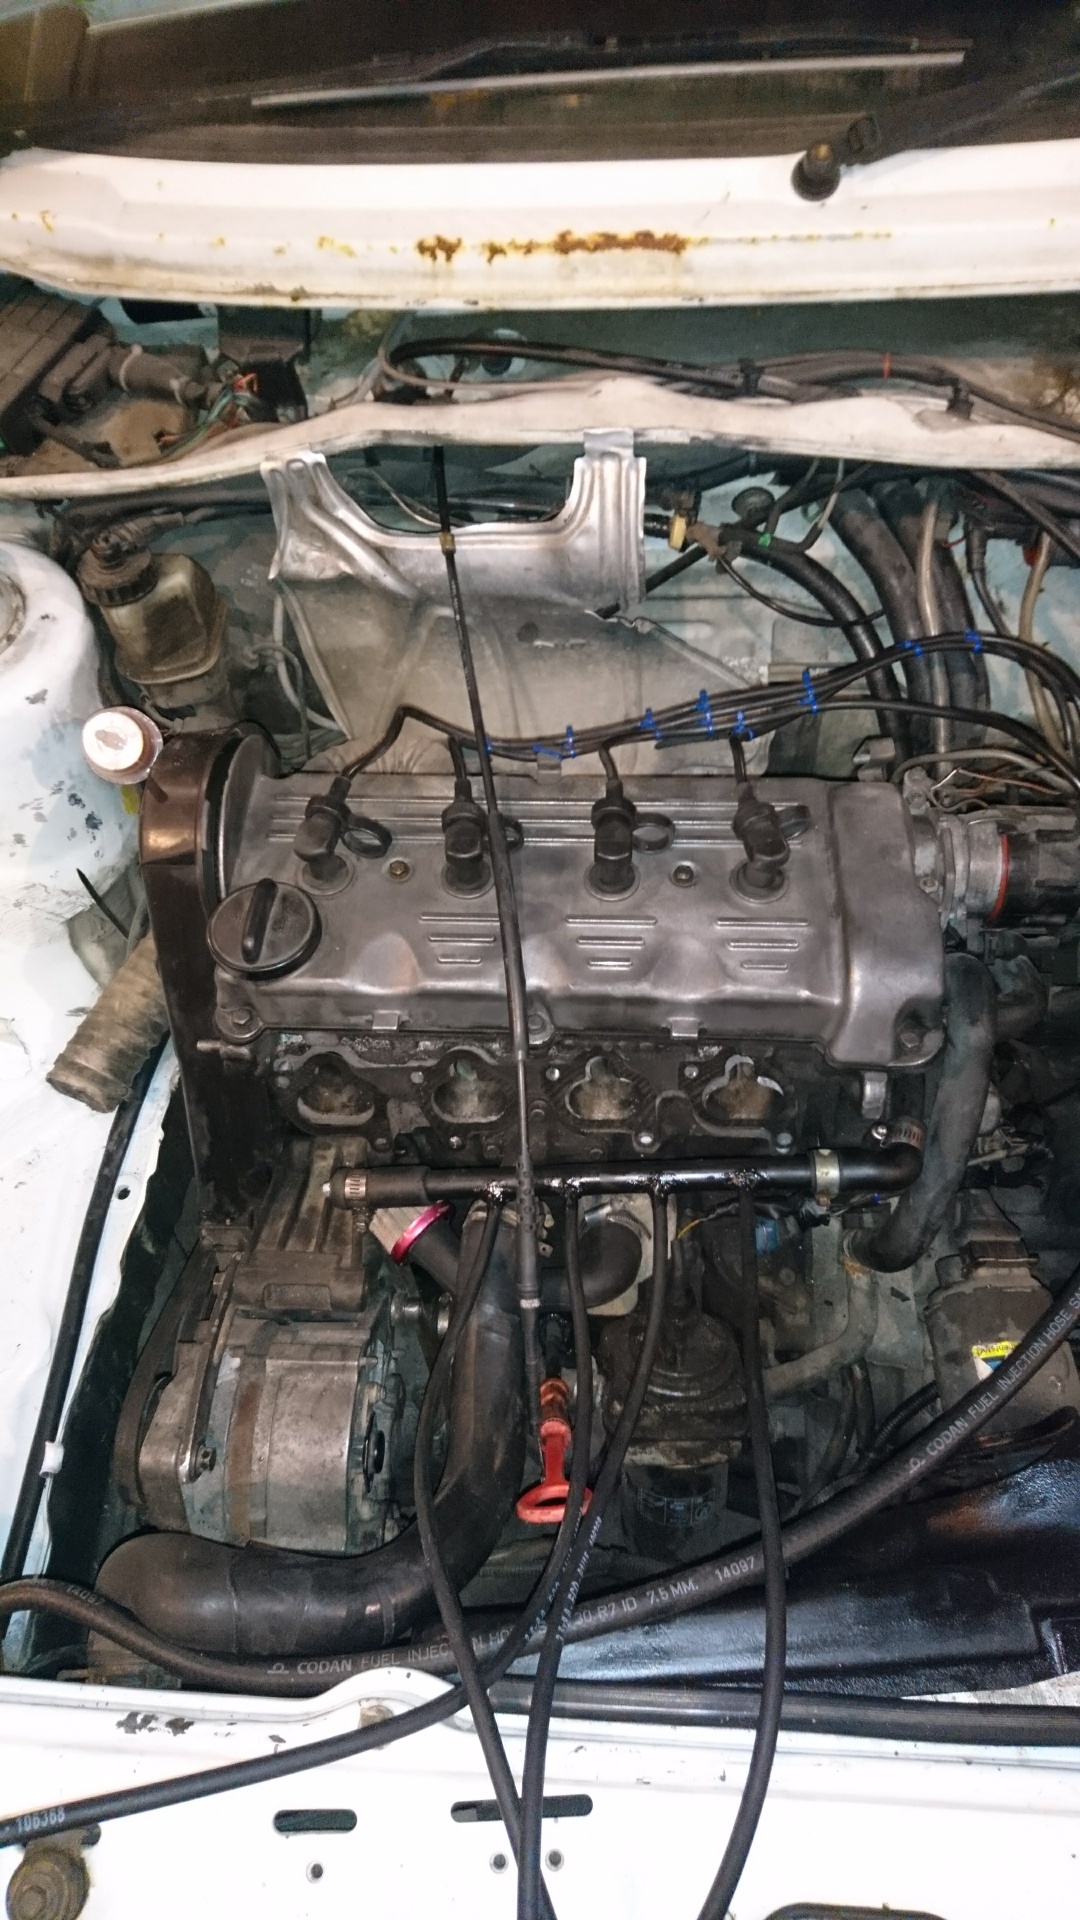
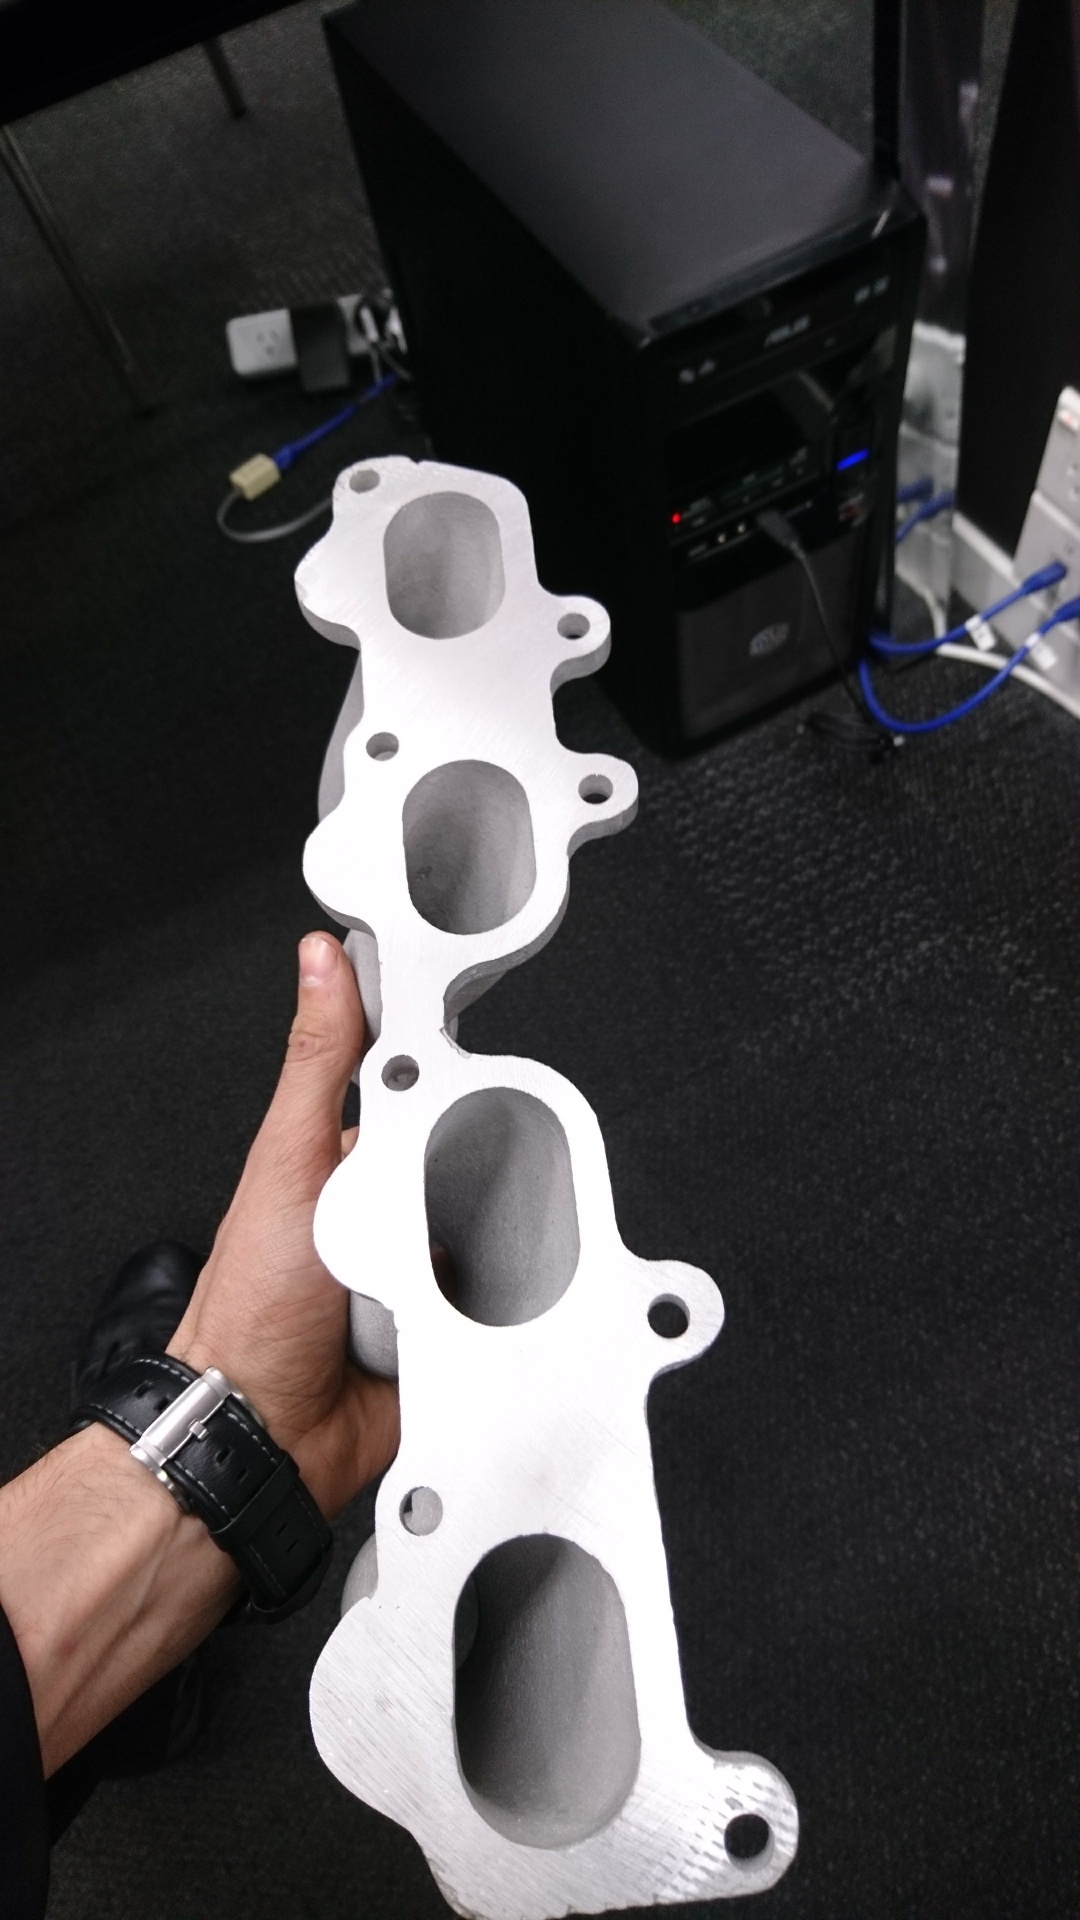
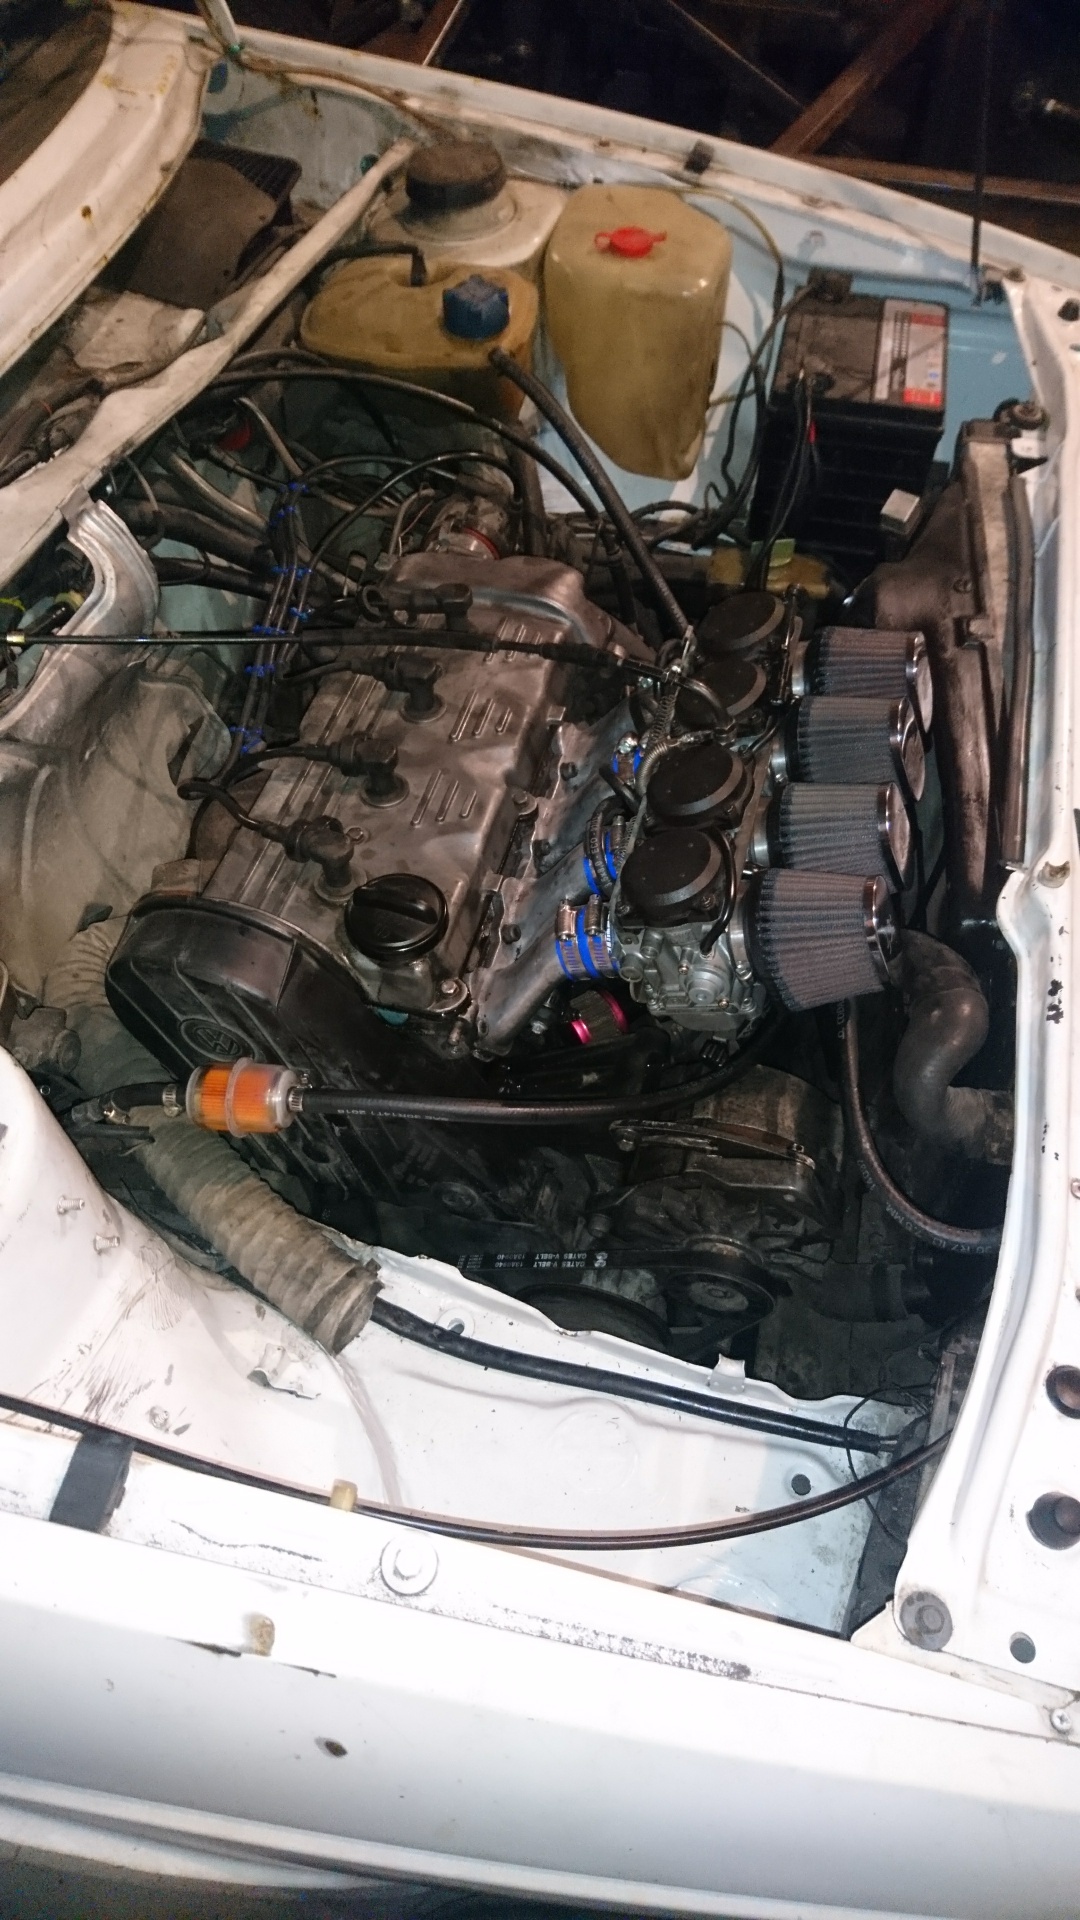
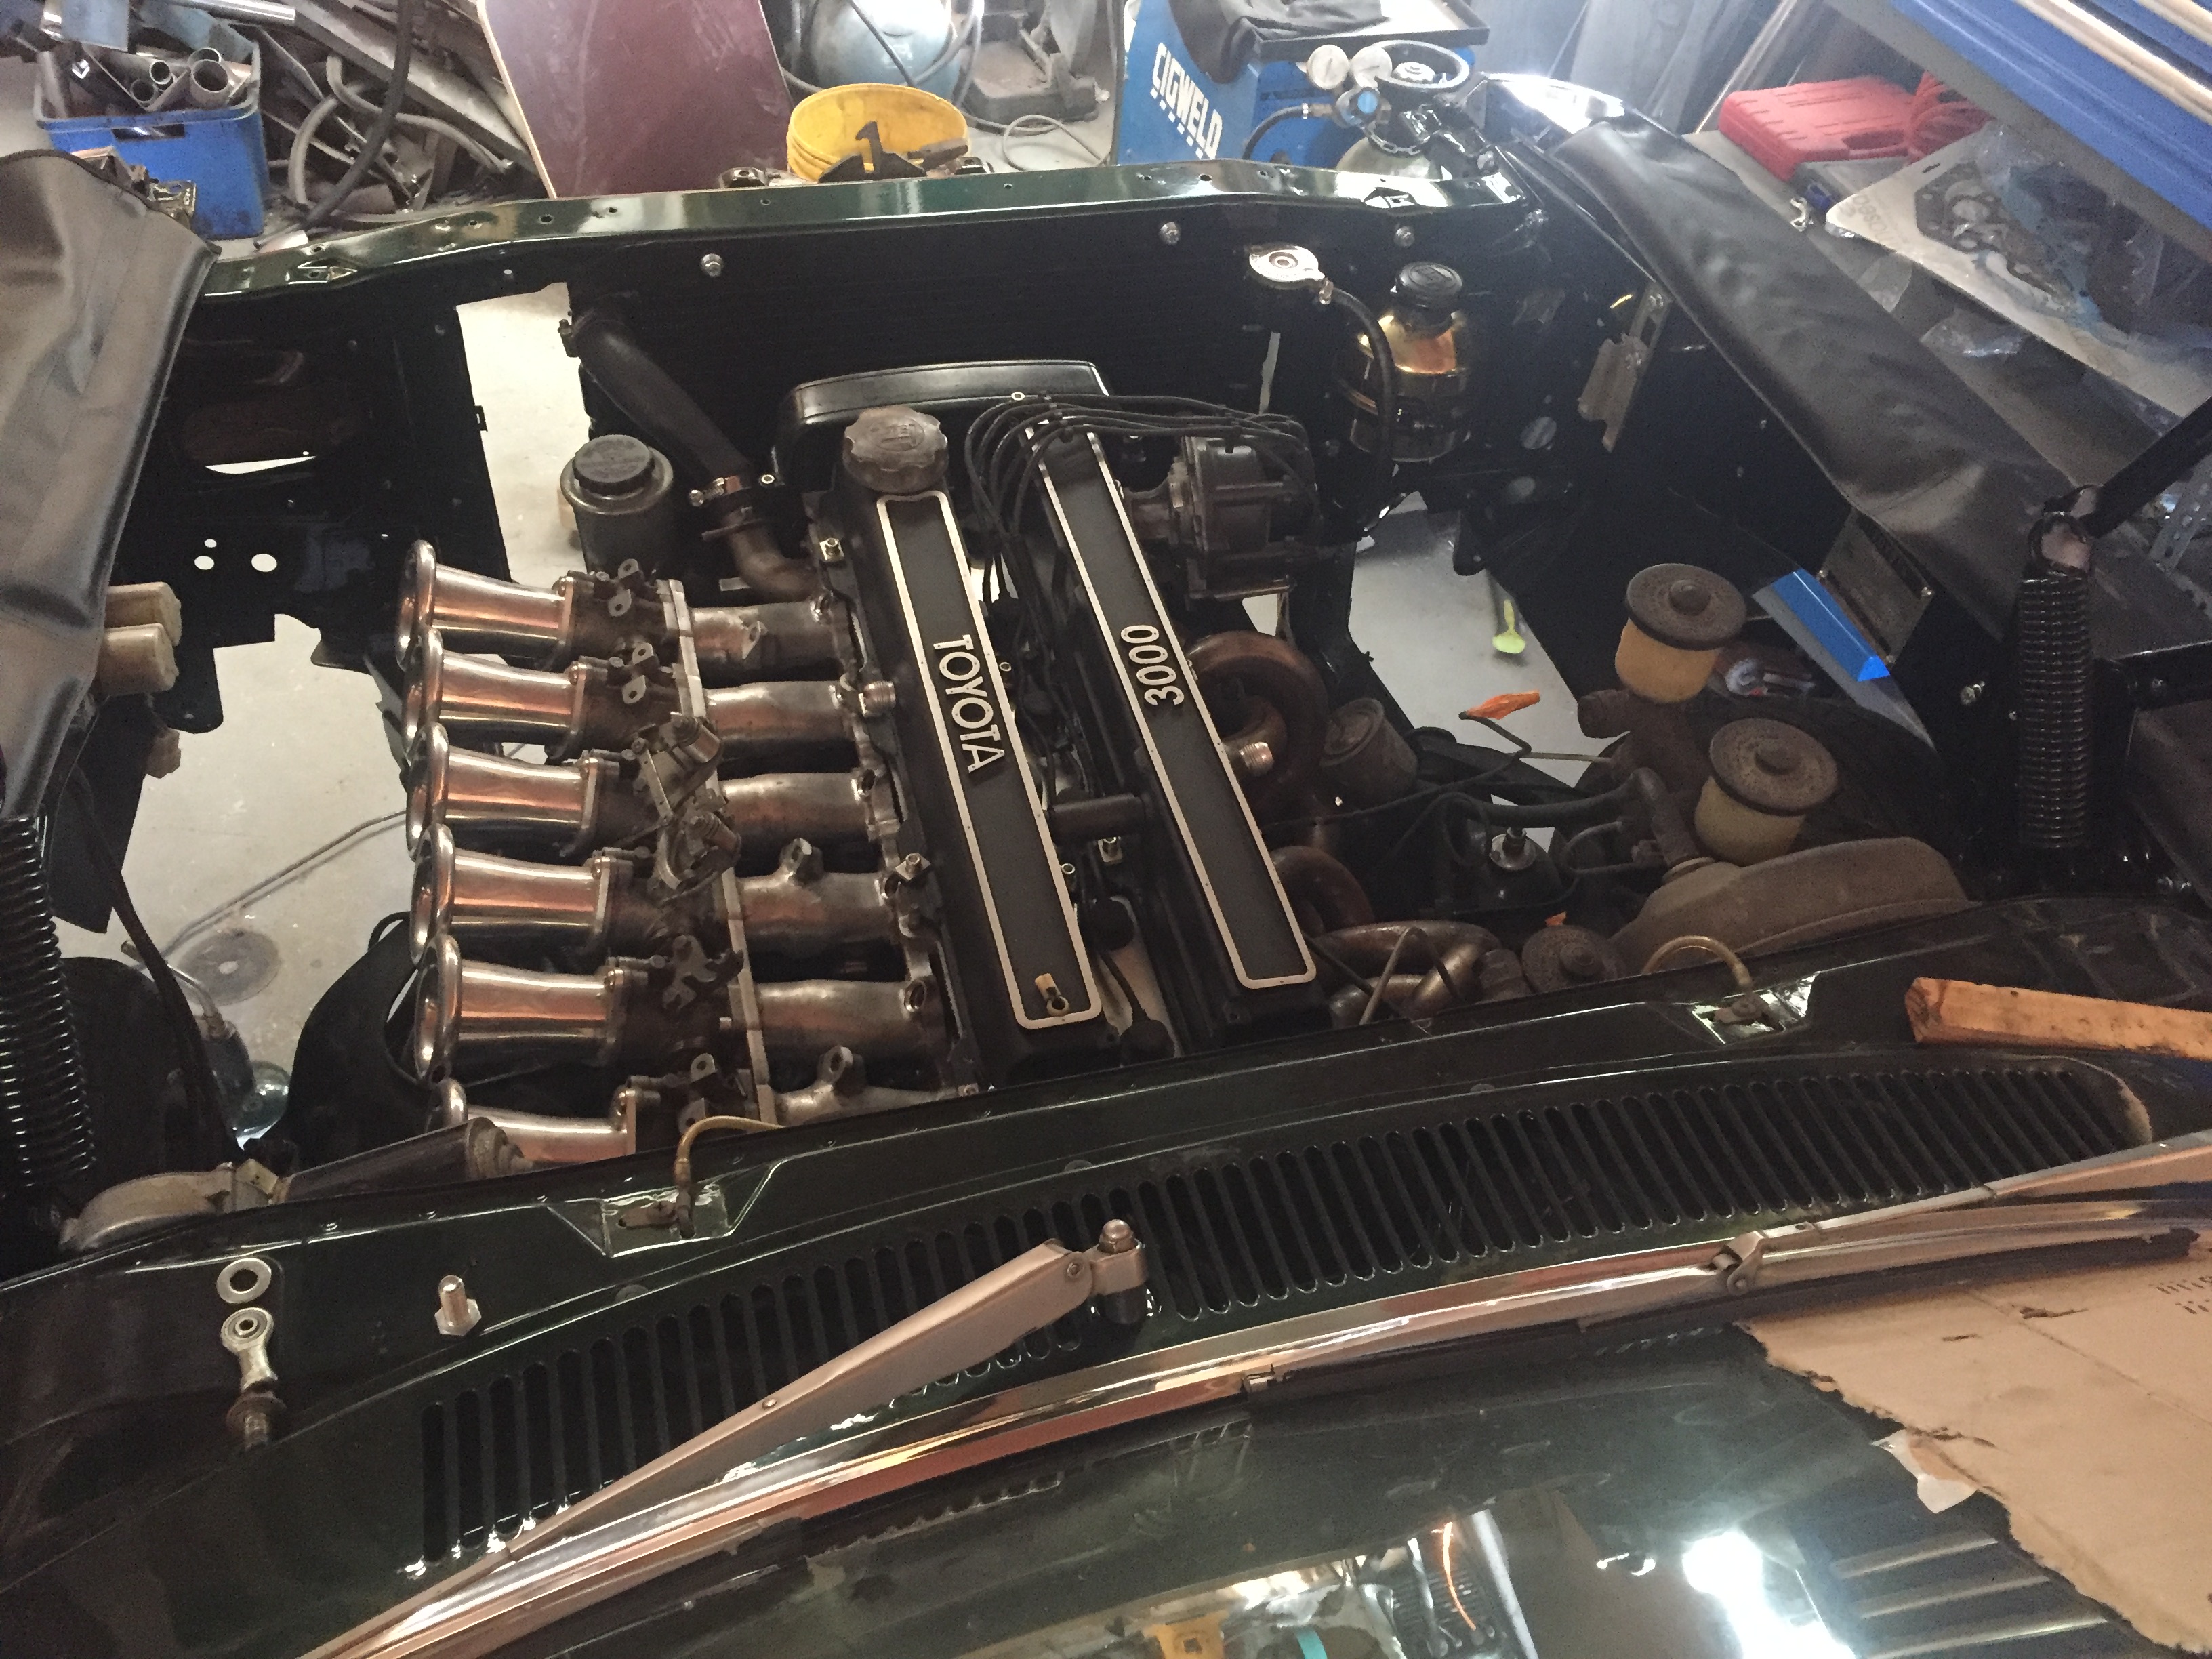
So, with the help of a friend, finished off the throttlecable for the manifold. Decided I'd make a log manifold for the vacuum ports off the carbs, used seam sealer on some factory plastic pipe and capped the end- hoping for the advance and maybe boosted brakes but who knows how well it will work.. Whitleytune Manifold fitted perfectly, looks very smart indeed - I've had it blasted after being machined. Back of the manifold after being surface ground flat. Running the original intank lift pump. After the first fire up it was leaking out the carbs, and had a puddle under the floor. I left it for the night, came back in the morning to find I'd left the barb fitting loose from where I'd put the inline filter & hose, and the carbs were most likely leaking from sitting from a sticky needle/float valves. Need to balance them properly, however for 5 min of running they are running beautifully - better than the CIS unit ever did in my ownership.. Cannot thank Rob enough for his work and persistence in making the manifold, and friend Gary for his help modifying the original cable to work. Can even shut the bonnet without it hitting anything! Discuss; //oldschool.co.nz/index.php?/topic/48778-chriss-1987-mkii-golf-eurocup-racer-car-with-added-moss/
1 point
-
Time for the annual thread update. Haven't done anything to this. Pumped up the tyres and went for a skid out at Pukekohe. You will note I've done nothing about fixing the windscreen wipers. At one point the drivers side one overshot and went past the A-pillar but came back again. Maybe I'll fix that next year. For some reason they ran the old track at Puke with the long back straight. Top end of 5th gear got a bit interesting, and not particularly reassuring that the only thing preventing overshoot and possible death was brake calipers off a 1970s Austin Princess. Listen the the symphony of thrashing a 4AGE and a diff with slightly the wrong clearances (sorry, it's not straight cut gears).1 point
-
Dug out some bog from the guy who did a rust repair on this for me a few years back. What a shit job. Good news is only a small rust patch needing doing here.And then this bit on the side of the rear screen. Then this thing will be cured of this bit of tinworm. Until some more emerges.1 point
-
So with the help of a friend we managed to get a reasonable tune on it before the laptop battery died. It's currently running way too rich at low loads at around 3000 rpm so I'll need to deal with that next time I drive it, other than that the fuel map is pretty good now. The car runs smoother now throughout most of the map than it ever did on the carb and seems to have a little more power. The fuel pump is quite noisy though, I'll have to coat it with a silicone sock or something at some point to make it quiet. I'll need to tackle warmup enrichment over the coming week. So the remaining jobs are: - Put a permanent MAP sensor onto it, I have one now. - Make a brace to hold air cleaner in place - Tune and hoon It's amazing how much of a difference it instantly makes when someone adjusts the fuel numbers in the table, at first the car would run out of puff at about 5000 RPM and be way too rich, now it pulls happily right up to the 6000 RPM rev limiter in the gears I have tried it in. Going up a hill is great when the numbers get adjusted and it starts making power. I'll get around to a more technical post once I have had lunch/dinner/done more hooning1 point
-
Then I cleaned it with wax and grease remover and warmed it up with the heat gun before putting some zinc weld through primer on. I have done the back of the radiator panel, I just didn't take a photo.
1 point
-
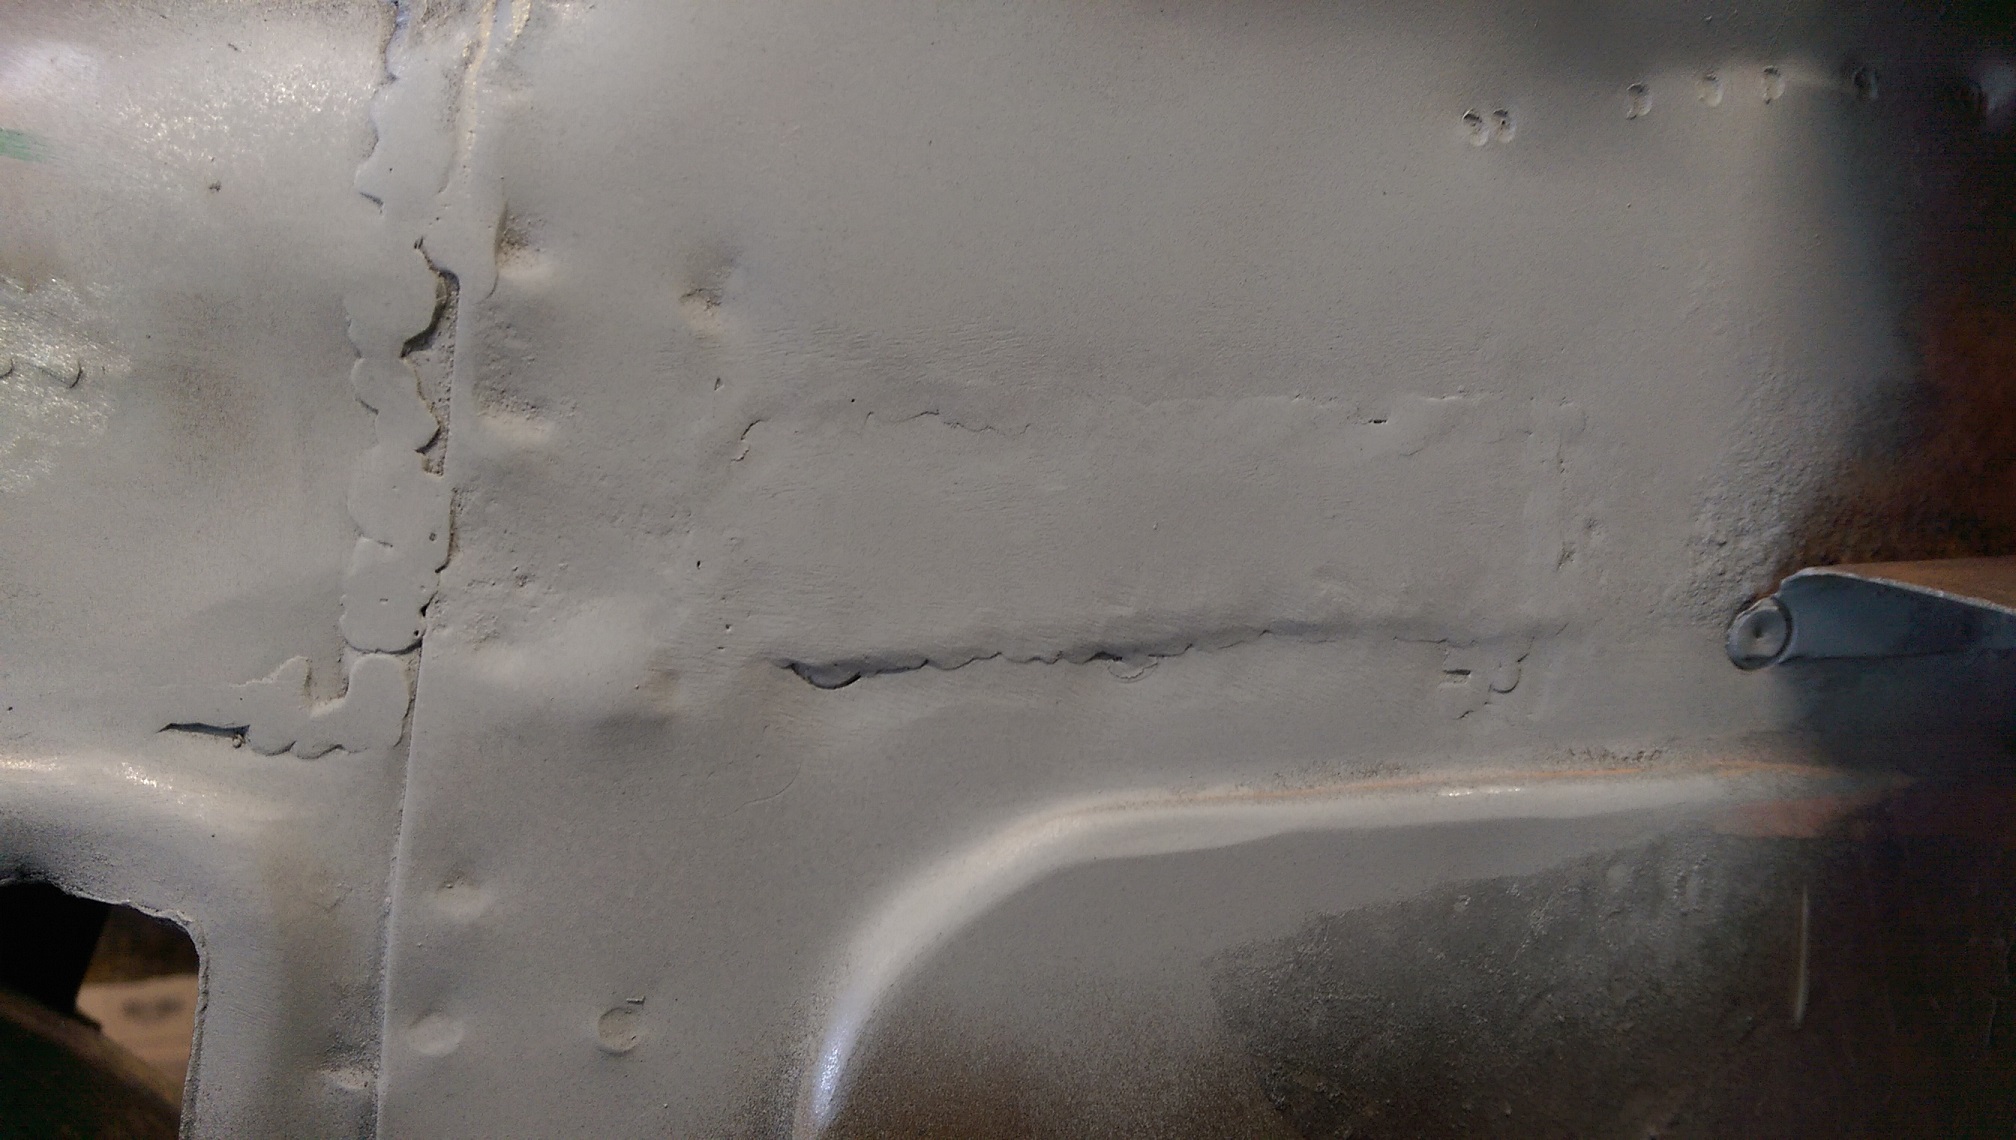
Glued in some bits. Came out well. The flat patch will never be seen once I rebuild the box section that goes over it.
1 point
-
Whilst prepping the raditor overflow tank for paint,it turns out they are made from brass.so instead repainting black i gave it a polish instead,looks the part
1 point
-
1 point
-
just fitted a one piece driveshaft. old two piece had an original celica center bearing in it. as you can well imagine after 16 odd years of massive abuse it was fucked. you cant get a replacement that isint garbage so i decided to go to a one piece. ages ago i tried to use a much stronger center bearing but because of many issues including weird gearbox and diff angles and an inability to get it sitting in the right place it never really worked very well. so, one piece shaft. its a 75mm diameter tube and its max RPM is about 8000, or 255KPH. i can live with that. fitted it tonight and took it for a test hoon. christ what a difference. its probably about 50% how fucked the old shaft was and 50% how stunningly smooth the new shaft is. its like a new car.1 point
-
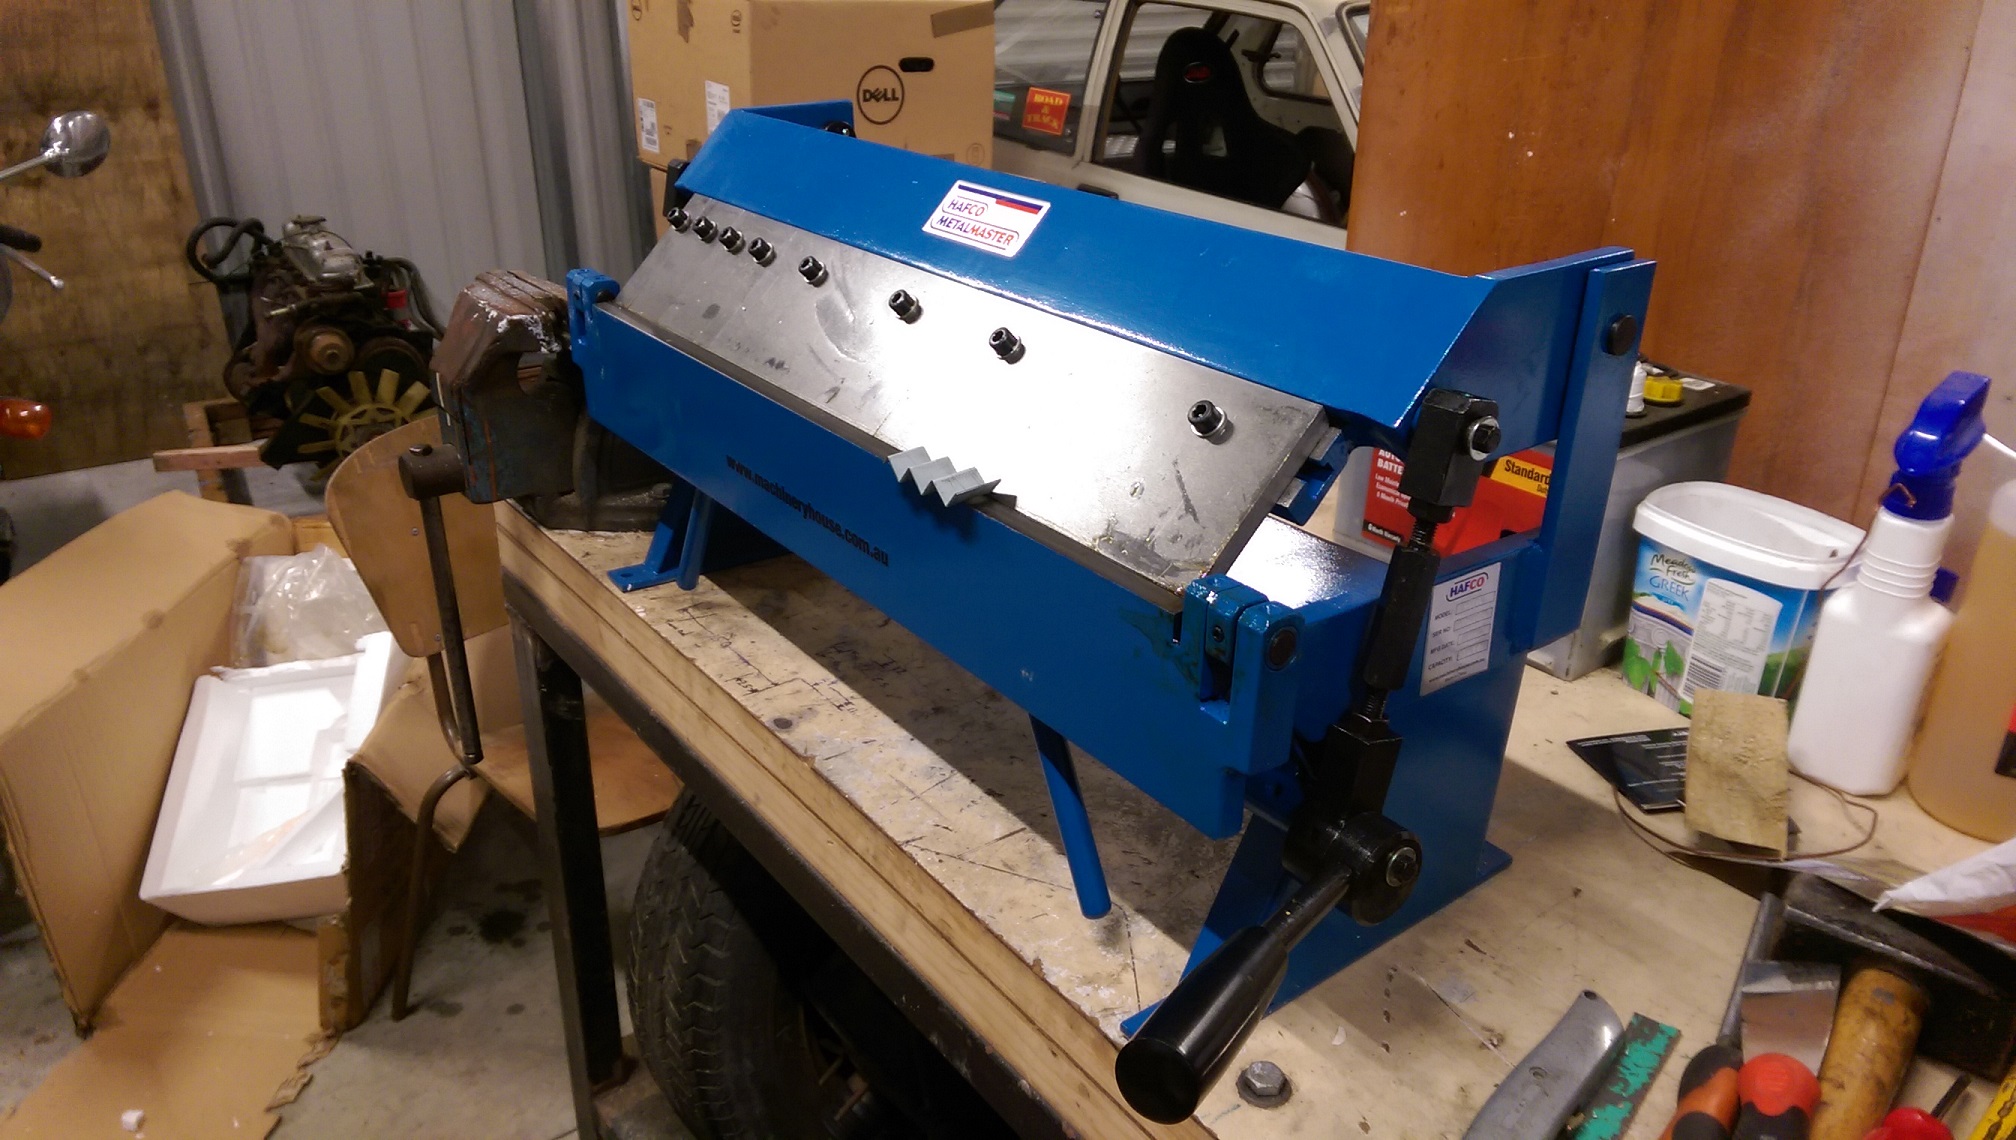
I bought a thingy. Got a $50 voucher for signing up to MachineryHouse, so it was basically free freight. So much easier than using the vice and bits of angle iron. It does up to 1mmX610mm. The majority of stuff I will be doing is 0.8mm, so it's fine.
1 point
-
quick update re did a bunch of things no one would notice and installed a water injection and still didn't make a proper tune returned this to nats did some nats nanging/banging/popping/farting bunged the exhaust on the way back form nats then fixed it betterer Had a brainwave during/on way back from nats as to cause of terrible misfires above 4000rpm, general shit running, and smell of excessive unburnt fuel out the exhaust this being that the excessively large (1000cc) injectors can inject the full amount of fuel in a very short period - such that the period of intake/exhaust valve overlap is quite a significant amount of that injection event even at 7000rpm, full load, let alone at lower rpm and lower loads. basically if the fuel gets injected at the wrong time a heap of it fucks off straight into the exhaust. so did some more research into this and found some some stuff like this then drew up my own version with numbers for the actual cam timing in my engine. changed my injector pairing and injection timing such that half the fuel for each cylinder is injected prior to intake valve opening and the other half is injected after exhaust valve closing but still while the intake valve is open. presto no more misfire over 4000rpm and things running much better. still need to tune more now, but everything is now finally making sense so its a lot more straightforward than trying to do so while going round in circles trying to figure out strange misfires, pops and bangs.
1 point
-
Still for sale everyone, although now Rego and Wof and running perfectly!1 point
-
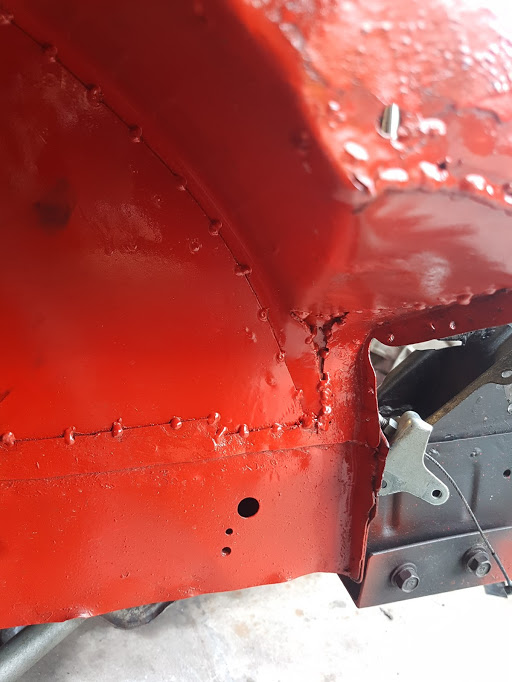
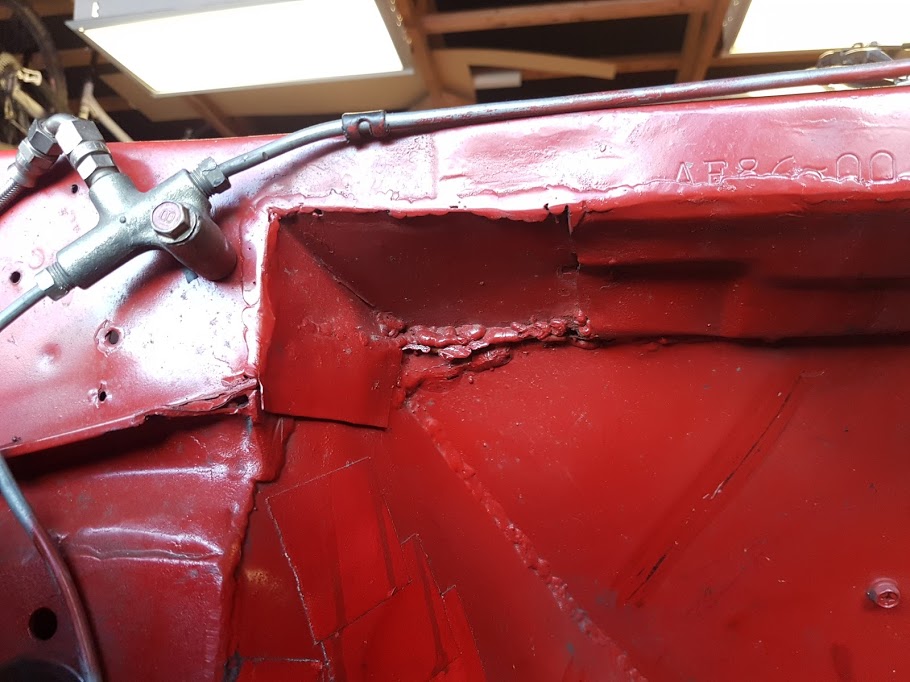
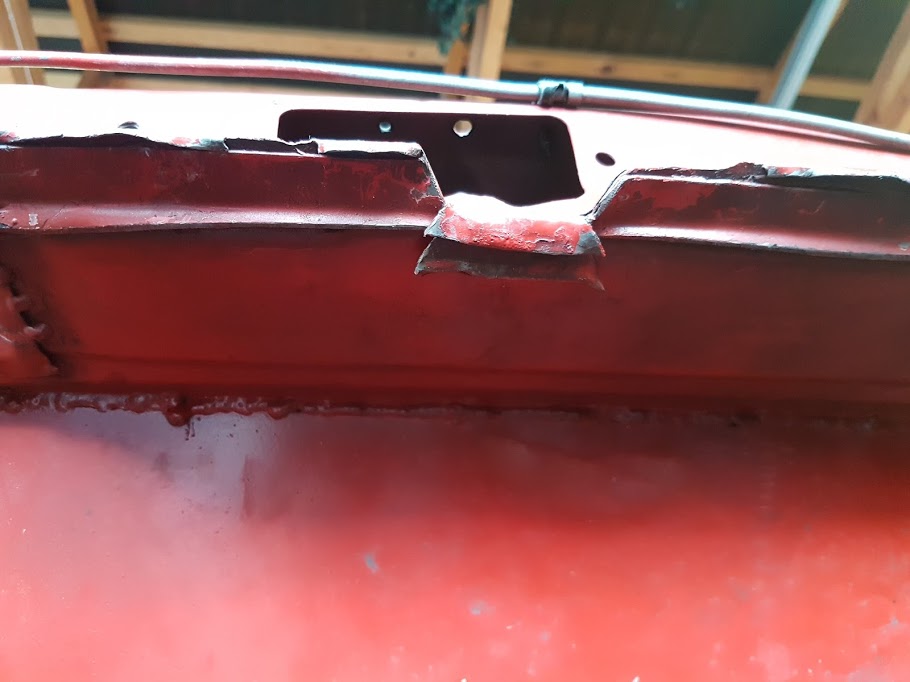
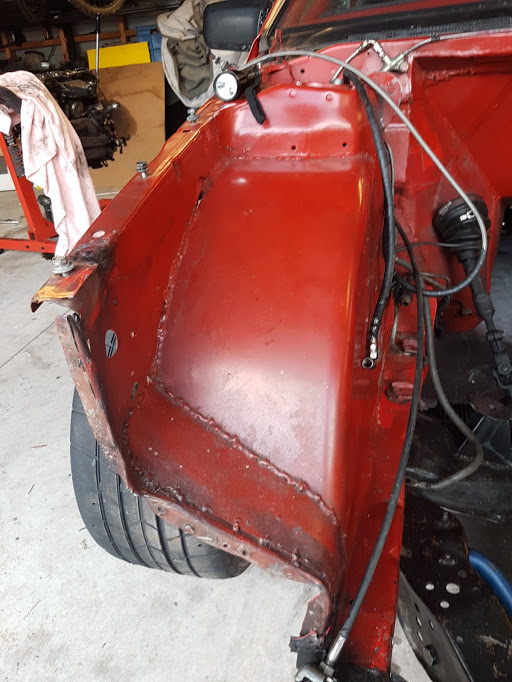
Things are looking good.Surgery was required & the firewall was cut up a lil bit. This has meant the engine could be brought back a bit whats solved a raft of issues. Clearances for PS rack hose connections solved. It was right up against the sump. But now we have ample room. Able to bring the engine into the center more. Its now only slightly offset by about 20mil. Engine mounts will work way better. Able to get the carbs to the ideal flat positioning as it was on a bit of an angle. Positioning for bracing to join the two sides of the rails will be better. Being able to go under the engine in a bolt in set up. How the trans will sit along with the two piece drive shaft will be way better and pretty much flat whilst not having to modify the floor pan other than maybe slightly at the very front. The distributor will be hidden more. I wanted wires out of sight as much as possible so this suits me. Being a pertronix unit I shouldn't need to get to it much but if needs be will still be able to with out to much hassles. Weight and center of gravity move a bit more back behind the front wheels instead of over them. better clearances for sump. Doing all this means we may have a heap of room up front. Not what I really want but we will have to wait and see how it all looks with the alt, PS pump, radiator and fans. the custom fan shroud I was envisioning may need to be bigger than I was thinking to help fill the gap. Time will tell. once I have the panels on & rad in.Speaking of the radiator. i have decided to keep the original Hudson radiator. Its getting re-cored by a local shop Timaru Radiator Repairs. Russell the guy in charge is a top man and been bloody helpful with some great input. Gave options for different cores etc for the old four core copper rad that included different row spacing etc.Since the tanks are off etc im getting him to do a few other modifications. moving the bottom outlet to the other side to match the Nailheads inlet then shifting the radiators top inlet to the center to match the Nailheads centrally mounted thermostat. Thinking of using a flexy hose to give it that vintage look you see in all the old 50's and 60s mags. Plus the ribbing will go with the fins on the engine.Since its not a great idea to have the filler at the same point as the inlet due to pressure etc im getting it moved to one side on the top but im also getting a dummy one added to the opposite side. This is merely to please my OCD nature. when im standing with the hood up looking down at the engine I want to see the top hose running center rad to center engine then two caps to add balance on either side. My train of thought was with just the one to one side it would be a bit lopsided for the look im after. The dummy will also have a dummy overflow pipe just to keep it symmetrical. OCD much? /twitchA slight notching is needed on the chassis rail above for the steering arm.The engine mounts minus the side supports shown. Along with PS hose clearance. Once the trans is lifted slightly and bolted up it will get the carbs flat along with increasing clearances around the racks hose fittings & rocker covers. Hard to tell from that photo but its looking like very little if any modifications will be required to the floor pan. Will pop it in soon to have a look. Should still be nice and tucked up even at air out.A look at the old Hudson rad and where everything is being shifted to.1 point
-
So after getting it legal i decided that it needed to sit a little bit lower. To do so i sent the rear springs off to Chamberlians (If that is how you spell it) and get them compressed by 52mm (transferring to 65mm at the wheel.) The fronts we were told we could just cut and they would still be captive which was true. it sat a little bit lower but i still would've liked for it to be slightly lower. This is the perfect height as it doesn't rub what so ever and only catches on the front guard corner on the center of the tyre when at a certain angle. heres how it sits: We then took it for a run to ensure it was all going well for the Kaikoura Hop, taking it to the Amberly RocknWheels meet and the Kustom Car Club Breakfast. It preformed amazingly and got alot of attention for being a different and rareish car.1 point
-
they are pretty good tbh, the base plate bolts to the ground and has welded uprights and rachets, all the members clip together and the factory cover ties it all down and in with the rachets, and each end has a fixed cross tie as well. in my application i replaced the factory cover with a tarp and rachet straps to tie it together, no cross tie and inverted the arch to make it taller and narrower. The tarp i got is silver and black so its dark under it, factory cover is white and it was very bright inside. My place gets pretty windy, and its held up fine, curved shape and being open at both ends and the base probably helps spill any wind that does get under it, and so it rocks and creaks a bit but on a relatively sheltered flat site out of the box i wouldnt worry about it structurally at all, . Only thing is the cover (mine was second hand and had been up for 5 years) got a bit perished and would likley rip eventually, but you can buy new ones from them. Given they are supposed to be 'temporary shelters' thats pretty good. Mine is the 'Le Grande Garage' and its massive, ive left off one whole arch section lengthwise and had to narrow it as well. A+ would trade again1 point
-
Progress has been slow over winter. I've been trying to find new front guards for her as the ones on there have speed holes. Have successfully acquired motor to drop in. Its a 4G63, nothing special but should run nicely. Came with a parts ute for my ute wrapped around it. Makes it much easier to remove a motor with no body in the way. Ripped it out and starting stripping the cambelt off to be replaced and to start to paint it up. Will look similar to my utes motor just going to use a metallic orange instead of the red.
1 point
-
Before I did that, I removed the underseal used as seam sealer, so I could located the spot welds. Underseal...Dicks. I used petrol, a rag and a 3M paint removal thingy on the drill(on go slow so I didn't spray it everywhere). My choice of solvent was possibly not a fantastic idea cause I had to put all the rags outside and vent the gara...bedroo...kitche...lounge, by opening all the doors for a while, to clear the fumes.1 point
-
Cool I collected some 50x50 box 2 weeks ago to build my sliding gate. 4.5m long x 2m high. My wife is a Saffa and has complained that she is not keen to go back to living is a compound. I don't care. Big gate coming up.1 point
-
Stop making the rest of us look like chumps please.1 point


This leaderboard is set to Auckland/GMT+12:00