Leaderboard
Popular Content
Showing content with the highest reputation since 29/06/25 in all areas
-
Fuck did i have some issues getting it running. On the plus side I now know what every single wire on the ecu plug does, and that it's properly connected and working, as well as 90% of the entire cars looms. One i got the thing to actually run i thought the sensible thing to do would be take it for a drive. It's still running like a dog but I drove it anyway. Fuck it's choice, even though I've only driven it 10ks in a fucking cyclone I can already feel how amazing the thing is. I'M HAVING A BEER WHO'S WITH ME!!!!!!62 points
-
So.. When you have too many projects..... An old mate has had a Mk1 Cortina since 1997. Started as a run about, turned into a project, then along came life, so it was parked for ??? years. The time has come to bring it out of hibernation and see if some life can be breathed into it. Disclaimer: This is not my car, this is not my project, but I'm involved and connected and figured some of your might enjoy the thing. Also disclaimer, the owner and chap who's restoring it are 100% happy for me to share the project here. Step 1: Unbury The light of day for the first time in ???? Load 'er up Delivered down to the (Hawkes) Bay and ready for revival. Since the car was imported pre 19?? it doesn't have a vin. Annoyingly the rego had lapsed with an address change, so it required a trip to VTNZ for us to tell them how to do their jobs and get the car a VIN. Tow vehicle activated. As we'd researched the process and let VTNZ know what to do we got through this pretty easily so the car was back to the workshop in good company. Some tidy up required. Throttle body was pretty well stuck, fuel tank has a leak, oil was ??? years old. Some remedial work and.. Gotta love that toyota reliability and a link ECU with an good link base map, albeit a bit rich. The body looks pretty straight, it's had some repair in the right rear at some point in the distant past. There's some re-work to do on some questionable mounting that was done in it's early mod life but nothing that can't be fixed etc. Other projects have been moving in the right direction so there will be some more movement on this coming soon. Further disclaimer, Projects are fun but take time and I have little of the latter. I'll try to keep the updates rolling as they come in but don't expect them weekly. P.P.P.S. I'll get an engine bay shot next time I'm there. LeftChevronThree.37 points
-
Got 2 great sump castings and a 3rd with a small defect that would be fine once welded.27 points
-
extension housing finished, installed and cynically painted in a coat of hammerite direct-to-shit silver. presented on this angle which just so happens to hide every single weld, how convenient. Ended up having to ream it out as the selector rod kept getting locked up mounts welded up and pretty much finalised, these are comprised of 80% stock triumph mounts on their side and 20% bunnings pool umbrella stand. chassis came back, one of my guys got to play "mark all the cracks" uh oh. as suspected, it was definitely time for a birthday. (Also, are all chassis welds this bad under the paint?) RHS lower wishbone attach point lots of other bits came back at the same time I was having a mental health moment earlier, the diff did NOT have a drain port. It does now. crush tubes going in for where the mounts will sit. I guess I could have welded the brackets on directly but it might've made getting the engine back out a bit funny. Plus the chassis is so thin I'd much rather have the big bolt sandwich Frustratingly I don't have half the suspension bushes that I need, otherwise I'd probably have the chassis repainted and all the doodads back on it this week. Also waiting on a new clutch and drive axles.24 points
-
23 points
-
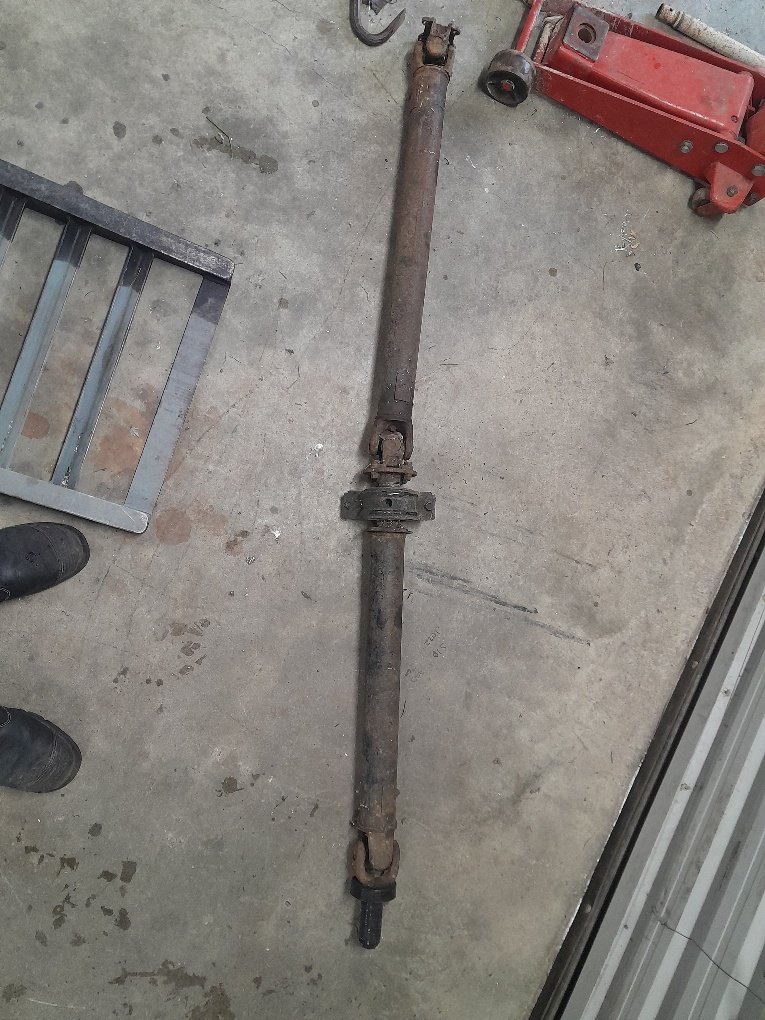
Avoiding making the pedal work with that ^ So started on some other stuff that i haven't finished either I have a 2 piece hilux driveshaft, which has the right ends and the hanger bearing will directly fit in the chassis, once zing the captive nuts off. Just need shorten both the front and rear shafts. plan was to just cut the end off each. shorten, weld, done. But decided to put front half the lathe as is and dial it up, before giving it the chop. turns out it spun like a skipping rope with around 0.7mm run out on both ends. Mr toyota just wacked some balancing weights on the low side at both ends. And yeah turns out the tube wasn't just welded on the piss. the bits the tube spigot onto were machined wack. So far i have trued up the hanger bearing end, building up the low side a touch then machined to a tolerance fit . Got the tube on there and is bang on. Probably getting way to picky but yeah. Rest is on hold till new uni's show up Next for no particular reason. decided to do some stuff with radiator Old setup used to look like this Some kinda nissan radiator. which i still had. was too tall to sit in normal place without sticking up and looking ugly, so done some butchery to the bottom tank to drop it down further Buying a radiator that fits may sound wise. but I wanted to make a gap on the intake side to feed the intake cold air. so an ae86 specific one would need to be cut anyway. So yep i cut some more off the side of this one which you can kinda see the rough cut above^ That meant the twin fans wouldn't fit anymore (they didnt fit good anyway) Again a normal person would have brought a fan that works But i despise junk aftermarket fans. So i cut one of the twin fans out leaving a flange around it. made an ali shroud. then wasted half of my life making this plastic ring to clamp the fan to the shroud Would have been a good job for a 3d printer and made in a couple of bits. but i have lathe and a bit of acetal that has been hanging around forever I haven't finished it yet either. still need to attach shroud to radiator and but made an amazing mess23 points
-
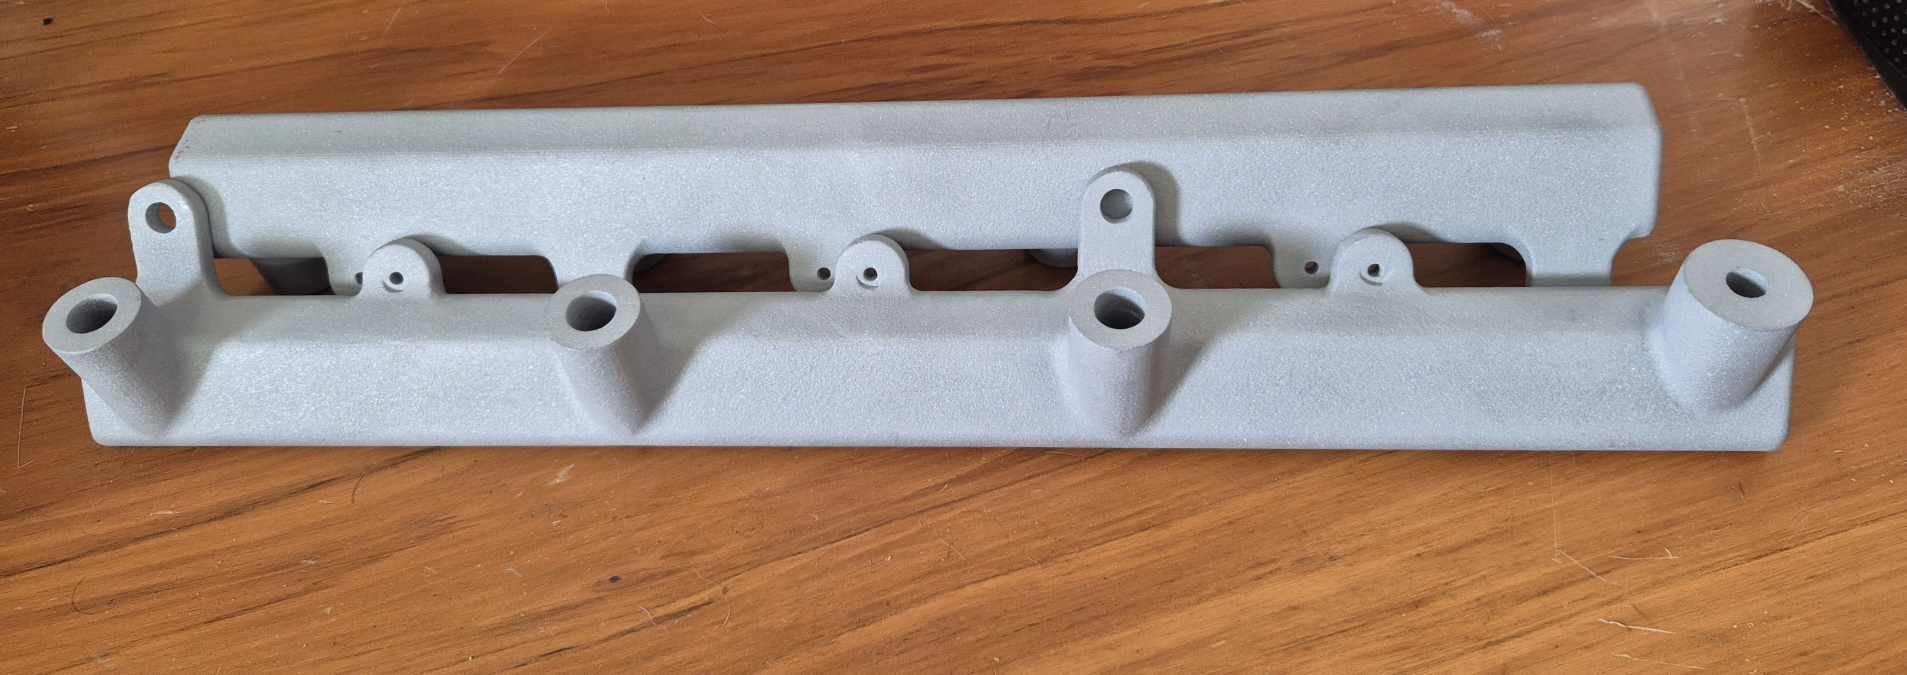
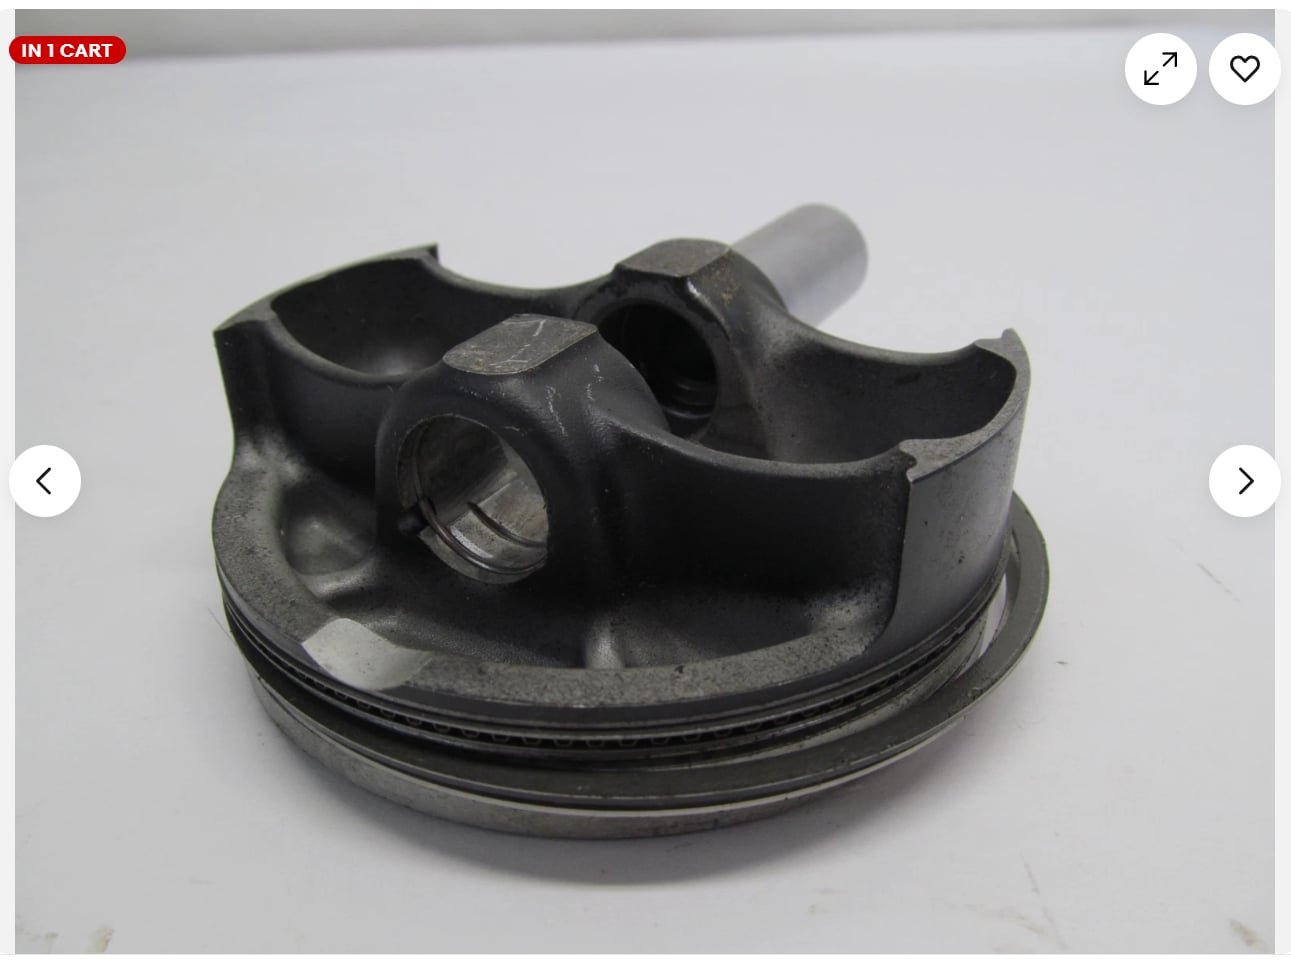
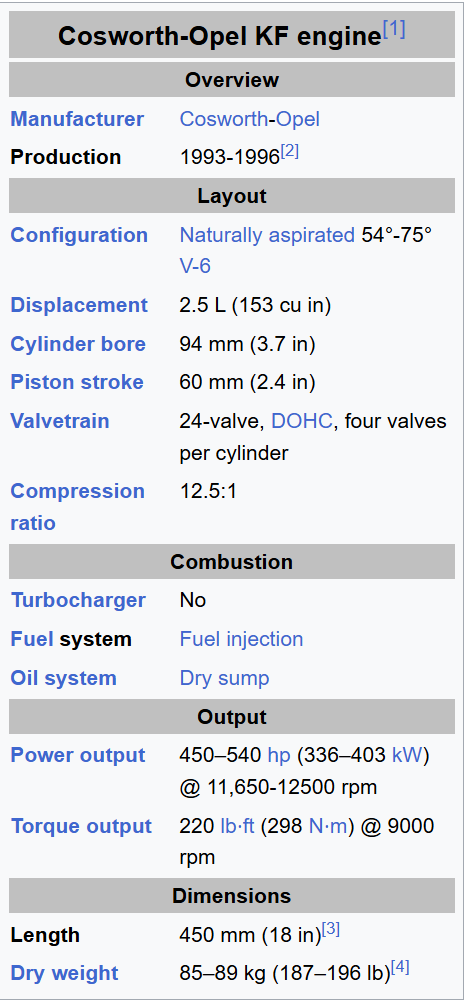
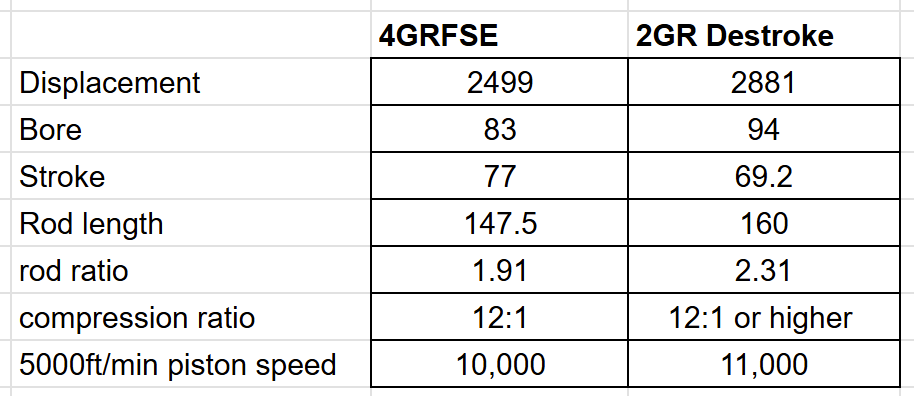
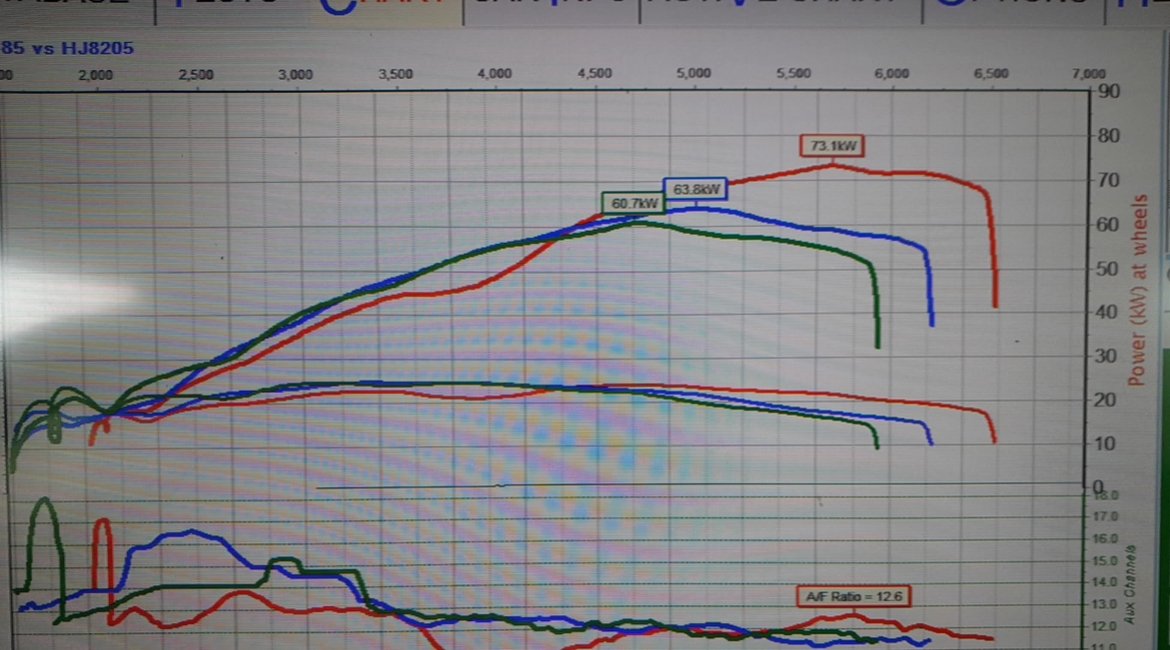
I got my throttle pulleys machined down to a smaller size, so they can open the throttles all of the way (Thanks Dad!) So this is all now working GREAT. and it's super snappy. So I started doing some tuning to try figure out the area just off idle, and why its such a bag of crap. I found that adding considerably more ignition timing helped a lot, and increasing injection timing to around 600deg (usually 400) However, at a fairly early stage I managed to blitz one of my ethrottle motors with about 100 amps too many haha. It still worked, but smelled funky. Well, it ended up crapping itself. So I've ordered another one but it's still a few weeks away which is annoying. Since I couldnt do anything else meaningful for that stuff, I figured probably a good idea to take all of the exhaust completely off and check it. I found a worst case scenario leak for my extractors on both sides. There were signs of a small leak coming from somewhere between the 3 pipes, up the middle of them. Blargh! Impossible to get to this to fix it without cutting everything up. I was fretting about it for longer than it actually took to fix. I cut off the collectors just slightly up past the 3x pipes. Then fully welded both halves, flattened it off, then welded back together. No more leaks and it solved what one of the ticking noises from the motor was. Even if these extractors eventually crack or something. I'm still absolutely stoked to have made these myself. My new fuel rails turned up, but I havent had them machined yet. But fits a lot better. Given the available space I think I'm gonna give up on having a front feed airbox. So thinking dual sides instead. I guess these could both rejoin around the front and grab some air from on top of the radiator. Or I could have air intakes behind the headlights, and go back to a full height radiator. Which probably isnt a bad plan. I cant fit the entire thing on my printer but I can do half at a time. So just banging one out to test fit. 2GRFSE Scheming "Since I am doing this, may as well do this" Since I need a custom rod for the 2GR destroke scheme. Has made me consider piston options. The factory piston is typical Toyota stuff, fairly big and chunky/strong. But for high rpm the lighter the better... No point in reinventing the wheel if something else already exists? I found a 94mm piston from a 400cc quad bike that runs 10k rpm from factory. Cheap and easily available, and nice and light! It has a 22mm pin so might even fit the 2GR rod (apart from that the rod is too short) So I've ordered one of these to test fit and see what sort of compression ratio will be achievable. A destroked 2GR doesnt end up tooooooo far off the geometry of the Opel Calibra DTM car which was absolutely hectic. I wonder if you could grind the journals down to lose another 9mm stroke out of it... Would only need 4.5mm taken off one side I think? Just to be 100% clear though, none of the above are detracting from getting the car onto the dyno ASAP! Once my ethrottle motor turns up, its ready to go. 2GR Destroke comparison for future scope creeping:17 points
-
Got the fan mounted properly. waiting to see what water pump, top outlet etc can get hold before weld on tabs to mount in car. as may have to relocate the top pipe. Redone the tab on clutch pedal. so clutch master should be good to go Been making a new 2-1 section on headers specific to this car. Was going to use what was left of the test setup as starting point. but needed to gain a little more length, to get the correct length, before it got to the spot for the first muffler. so started from scratch my normal stainless place stopped selling the size i need for the 2-1 section, so the pipe is some crappy china stuff. which sucks to weld due to wall thickness being all over the shop. but got it done. will see how long before it cracks. i may change the flange for slip joints if has issues Somehow it all worked out after all that testing, that the correct length just happens to fit perfect in the car. the first muffler will go almost directly after the megaphone. If the 4-2 section wasn't the loop design, would have gone straight past the spot for the muffler. which would be a bad day. as need to have all of them to shut up a na 4age. 2-1 length is just under 700mm long17 points
-
Oh yeah plugs and leads arrived…. no spark Ordered coil and rotor dist cap arrived 6am this morning so will try tonight buuuut turns out these things run a mono leaf rear with 2 vertical air shocks run off a compressor and reg and two horizontal shocks air shocks are shot hence it squatting its arse these seem to be NLA 335MM compressed 485mm extended found these with similar specs (another 50mm extension) https://www.summitracing.com/parts/gab-49205#overview any reason they shouldn’t work? I’m sure I can manipulate the regulator to get the correct ride height/make it adjustable even Disregard, more googling shows rock auto list them for 1968 on ones it’ll be fiiiiiine14 points
-
14 points
-
Recently got a bit more done on the trailer. Made sure it was about the right size etc, and made the up rights/sides. For ease of use and simplicity, the front and back tailgate board things just slide into slots made from angle and flat off cuts, Then I figured out where the axle needs to be, then whipped up said axle on the BIL's lathe, made some mounts and welded it on, As you can see in the background of the pic posted above in the last update, the alloy wheels were very oxidized (they have been outside for years) so I gave them a water blast, spray painted them black, and then buffed the paint off the face of the wheel to make them all shiny again. Slapped some tyres on that match the cruisers, and good to go. Then I whipped up some mud guards. Decided just to make them out of 3mm thick steel and not bother with mounts, and just weld them directly to the frame. Found an off cut of steel, cut the desired shape out, removed the rust, and put them in my fancy press brake and bent them into shape. I don't know why, but I find the little mud guards soooo adorable! Now I just have to cut and mount the wood, paint everything, and its done. Regards VG. P.S. Say hi to your mum for me.14 points
-
12 points
-
The eggball helpers didn't last very long. Gearbox in the back seems to have finished them off The auto box has decided it wants to randomly shift from overdrive 4th to 3rd when cruising down the motorway It may be related to the stationary cooling system test but who knows. I'll service the merc trans and if I have leftover fluid I'll check the mussos level is correct and top it up if needed11 points
-
11 points
-
There's been a bit of progress. My paint order for the halftrack & the Chevy's never arrived, there's another on the way apparently. Once the small block for the street racer was completed the lack of detail was a bit obvious. That, and @Indiana_Jones's fancy spark plug leads, made me push on a bit. Fuel line, carb linkage & plug leads on the way. Bonnet will be mostly shut but meh. Also, despite the lack of paint, I got the SdKfz 250 back on track. / d'ya see what I did there ?10 points
-
10 points
-
Yeah I am thinking later on I will probably do an X pipe and 2x pipes to the back. All of the good sounding 2GR MR2s are X pipe and 2 pipes to the back. However, in the fairly immediate future I just need to consolidate what I'm doing and get the car to a drivable state. The current exhaust is good enough to get the car onto the dyno and so on. I'm keen to put down a baseline number, then put big cams in, then see how it's going. I've been very lucky that Stu has loaned me his tig setup over the last long while, but he needs it back to make some progress on his own projects. So no more exhaust stuff for now. So I'll be putting a tig setup into the budget at some point. Super 5000% glad that I persisted with it and can now weld alright. Invaluable skill.9 points
-
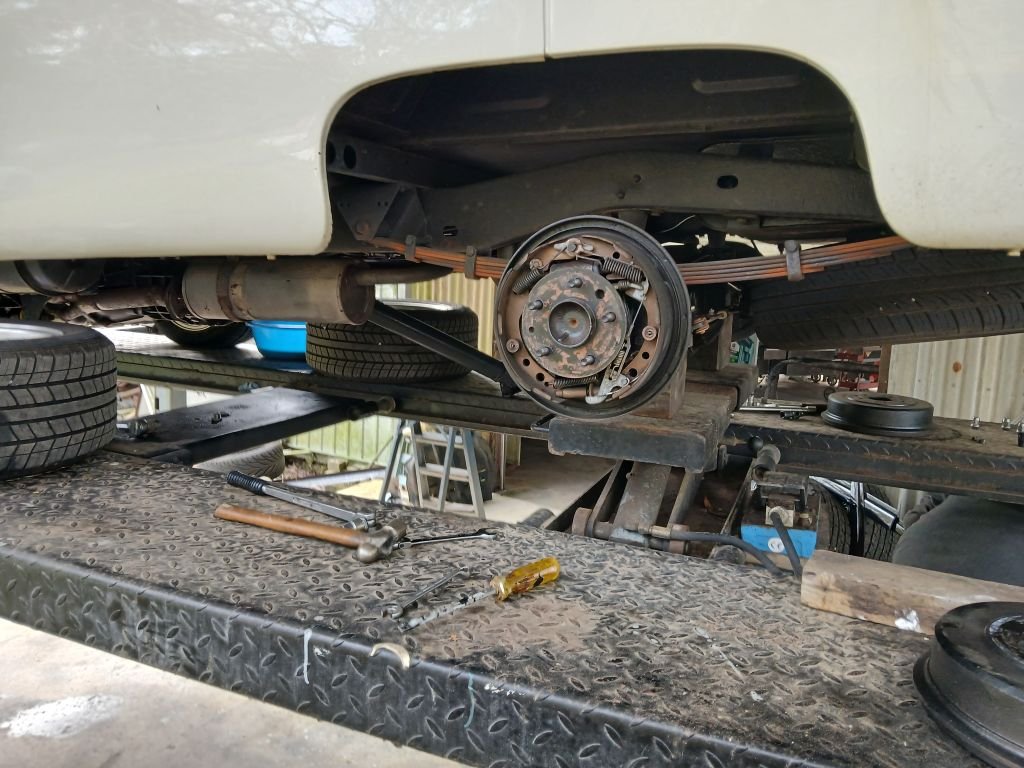
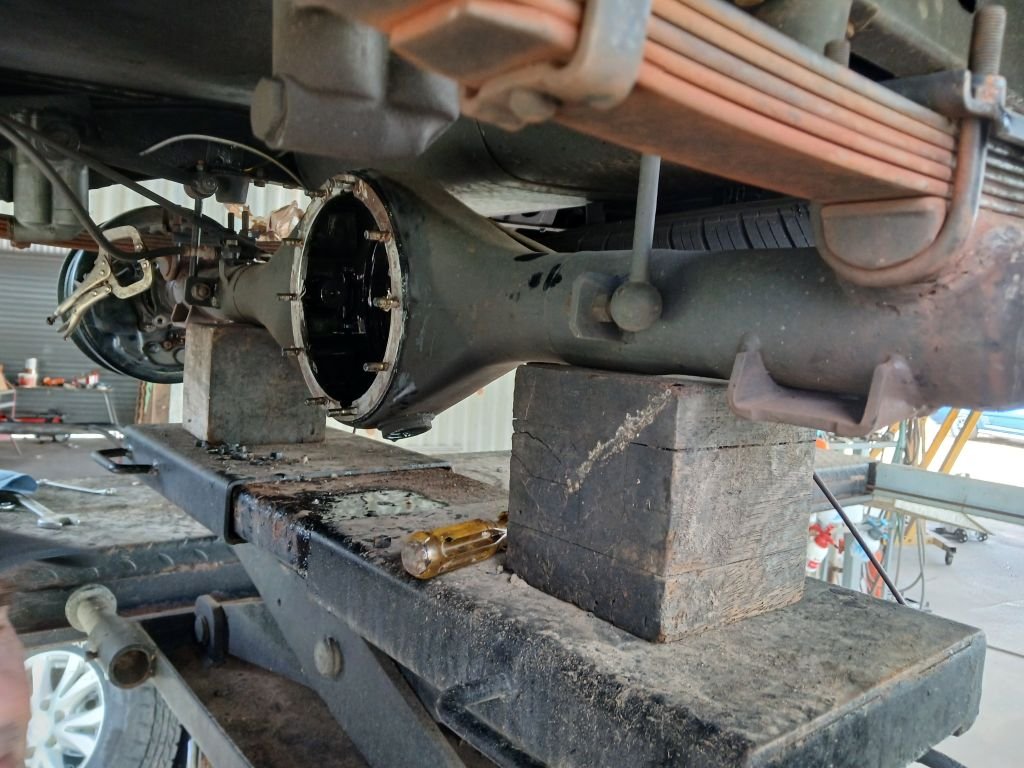
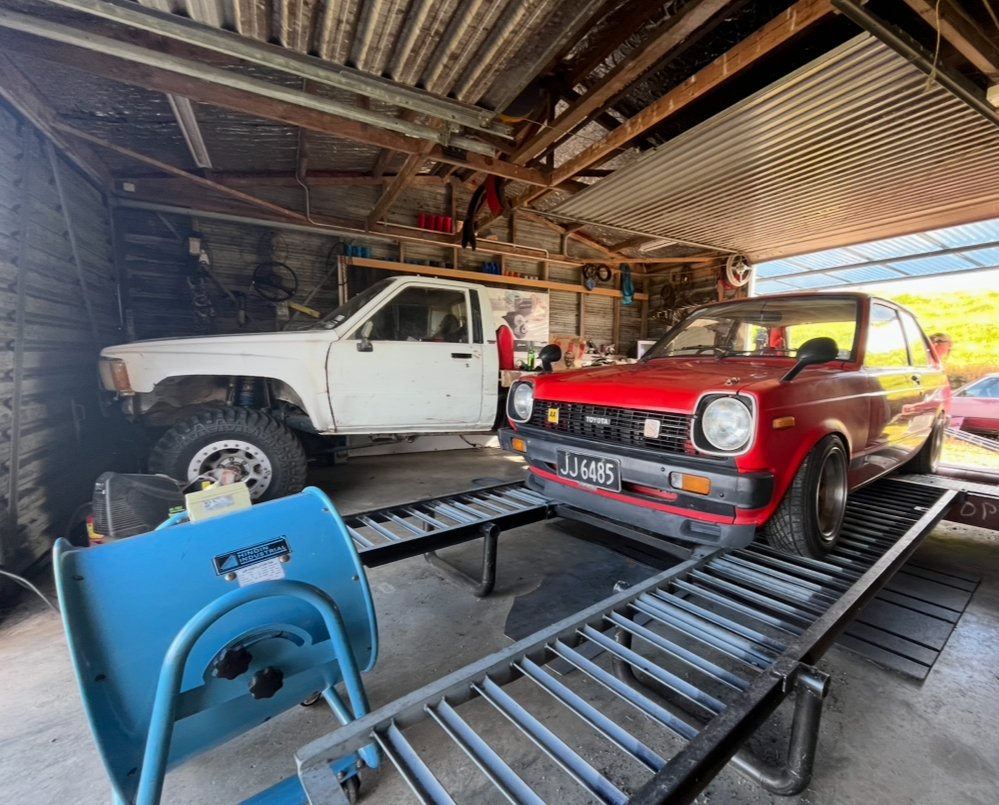
It's been almost 3 months since my last update on the Thames and he is still running like a champ. So following the old adage of "if it's not broken why fix it" ringing in my ears I figured now was a good time to stuff around with something. These days I've given up using first gear as its just too short and since the old Thames seems happy enough to pull off in second, things are hunky dory. But in the back of my mind I've been wondering what life would be like with a taller ratio diff. So a good 4 or so years back a mate of mine was parting out a Toyota Surf 4x4 and donated the diff to my Thames project. Winner I thought as it is a 4.1 ratio LSD and apparently an easy bolt in modification to replace the Y series HiAce factory 4.3 open diff that my van is blessed with. On Friday last week my mate Grunty had his hoist available, so I loaded up my tools and the spare diff centre and headed over to his place for a bit of spannering. And this is where the wheels on my plan literaly and figuratively start to fall off: When I pulled the original pumpkin I immediately spotted the "post factory" gasket sealer - a sure sign that someone had been in here before. I'm obviously a bit slow as I still didn't smell a rat: Anyhoo buggerlugs here carries on regardless and chucks in the pumpkin from the Surf together with lashings of super spendy fancy gear oil that the LSD apparently needs. Got everything together again and headed out for a test drive. Now those of you who may have watched an episode of the TV show called "The Nanny" back in the day will hardly forget the voice of the leading actress, a lady called Fran Drescher. Well when I tell you that the old Surf pumpkin whined worse than Fran does, you will have an idea of how bad it was. Yikes ! To add insult to injury the bloody gearing seemed no better. How can that be I figured. Now being the numpty that I am, I never physically checked the diff ratio when I transplanted the HiAce axle into the Thames. I'd always assumed it was the factory original 4.3 ratio based on the Toyota factory data plate that I found attached to the donor van chassis. Not so grasshopper. On doing a teeth count on the original pumpkin it turns out that old mate had swapped out the factory diff for a 4.1 somewhere along the line. What a rookie mistake. So now its late Friday arvo. I'm cold and hungry and my van sounds bloody terrible. My mate Grunty took pity on me and suggested I leave the van on the hoist over the weekend and then shoot back out on Monday to swap the original diff centre back in. Being the GC that he is he even gave me a lift home in his work ute. So yesterday in the pouring rain I hopped in Mrs Flash's Moke and headed on out to Grunty's to reverse the swap. I'm glad to say that the Thames is now back to normal and I'm now giving some thought to my next steps in terms of the diff. At least all the experiment cost me was some wasted LSD oil, a bit of gasket sealer and a few hours of discomfort out in the cold. Ideally I'd like to replace the current diff with a taller ratio so that I can make decent use of 1st gear and at the same time drop the revs down a bit when I am cruising in 5th gear. In hindsight I can't really justify fitting an LSD. So I'm currently thinking about sourcing a reco'ed pumpkin from a crowd down in Gympie, but I'm not sure whether to go for a 3.9 or a 3.7. I'd love to get some advice from those who know more about diff ratios than I do, so any suggestions via my discussion thread would be greatly appreciated. Thanks for reading folks.9 points
-
9 points
-
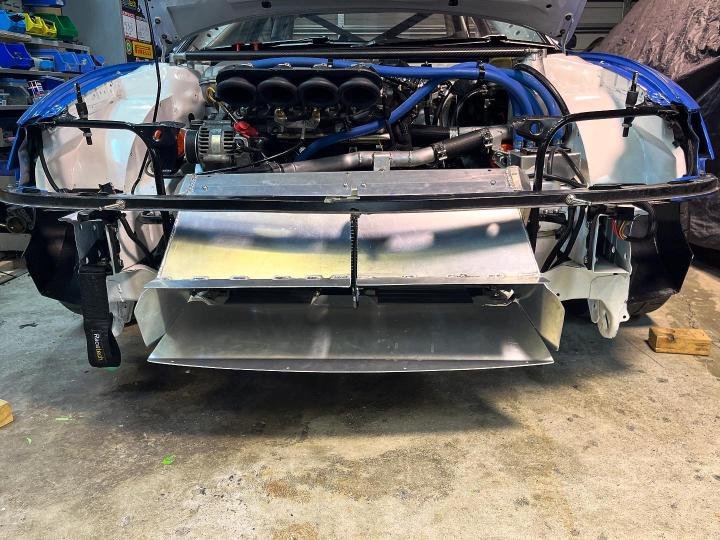
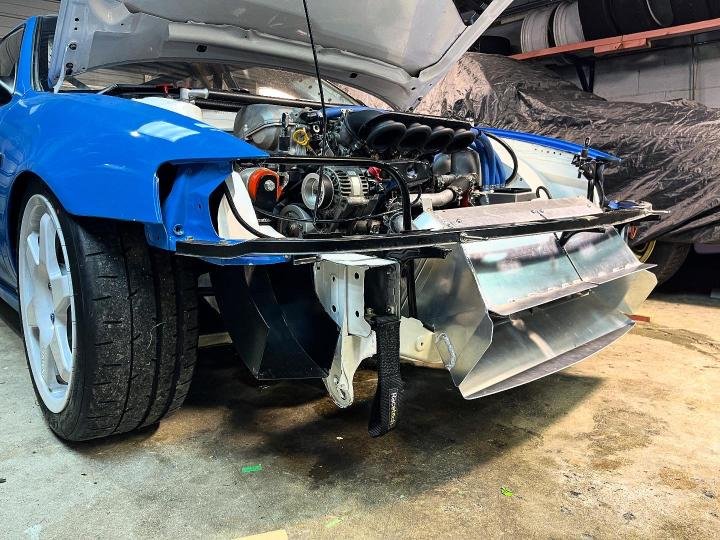
Life's been pretty hectic lately with kids, work and being sick. Managed to make a few small bits of progress. 1x door car nearly all fitted up. Still need to do a few mounts across the top and drivers side when I get a day that I can push car outside, I have an hour or two free, and it's not raining. Had issues with rubbing in the rear with the 215 semi slicks being about 7mm wider than the cheap shitty tyres I had to push it around on. Meaning I had zero camber in the rear, and more rubbing than I was comfortable with, and no room between the tyre and the strut either. Luckily, I have a spare matching set of rims that's 7.5" wide instead of 8". Mounted tyres onto these rims and offset worked out pretty good. I created about 15mm extra inner space so I could use the camber washers to lean the tyre over, then push the LCA's out. Ended up with about 3.5-4deg which I'm happy with, and may even take a little more out and raise it 10-15mm for more clearance. Going to be annoying not having even-sized wheels front/back and unsure what I'll do for spares, but it's a good solution for now. Radiator ducting done. The main goal was to hide the white lower rad cross-member, but also won't hurt cooling. So the design isn't optimised, but it should look the part once powdercoated. Ended up metal-glueing a few pieces together to make the shape because my brain/cardboard failed me with some silly mistakes. Oh well, it isn't visible so it'll be fine, and I reinforced a few areas I knew would get high load/vibration with doubler plates. one of the main goals was to make it easy for bumper to come on/off. So the lower section is attached to the bumper and slides into place. Once powdercoated I'll be putting foam tape of every surface to prevent as many rattles as possible, but it may not be perfect. Next on the list of parts-to-finish that require outsourcing for finishing is the Airbox. I put this on the back burner when I was working towards the last dyno session, but picking it up again now, as I've figured out what I'm going to do with it. Basically, it has some clearance issues (hitting stuff) and fitment issues (flange being warped from mold, and not quite right angle). I've figured if I solve the clearance issues (easy mods to make), the fitment issues (hard/$$ mods to make) can be addressed more cheaperer by printing another set of trumpets. After some testing, I've concluded the flange has quite a bit of flex in it, so can be pulled straight with bolting flange, so it's mainly the 4-5deg angle I need to work out. This approach will allow me to use the next dyno session at KPR's to work out the ideal length and adjust my design for what the engine wants to do, then incorporate the flange angle/position change to close up the gaps I've got. Durp got this measurement wrong.. Needs a 15mm notch where it sits on top of radiator to help with bonnet clearance. Can do without this if needed, but it will help it fit a lot better so going to get on with it. Shouldn't impact airflow, it's plenty big enough. The extra bulge around the battery post is a bit tight for clearance, but my gut feel is it'll be fine once the trumpet gets (probably) a little longer. Current length is 370mm to valve on the centreline. Should have these fixed up in the next week or two. Car is now ready to head back to the Dyno, but I haven't managed to find time in my calendar until probably August, unfortunately. Keen to see what a bit more testing can do. The list is slowly getting shorter, but the jobs are getting more complex!!9 points
-
9 points
-
Suck it up, throw ya nuts over your shoulder, crank some Slayer, and fix it properly. If everything else has been done then its just lazy leaving that shit.9 points
-
8 points
-
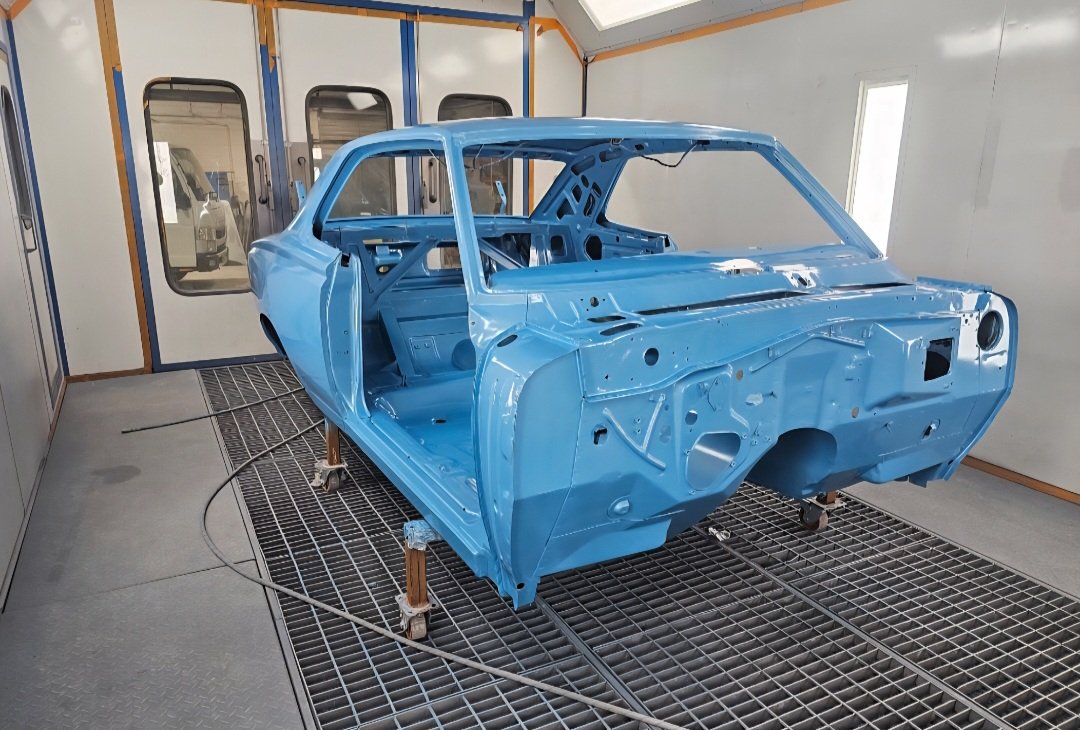
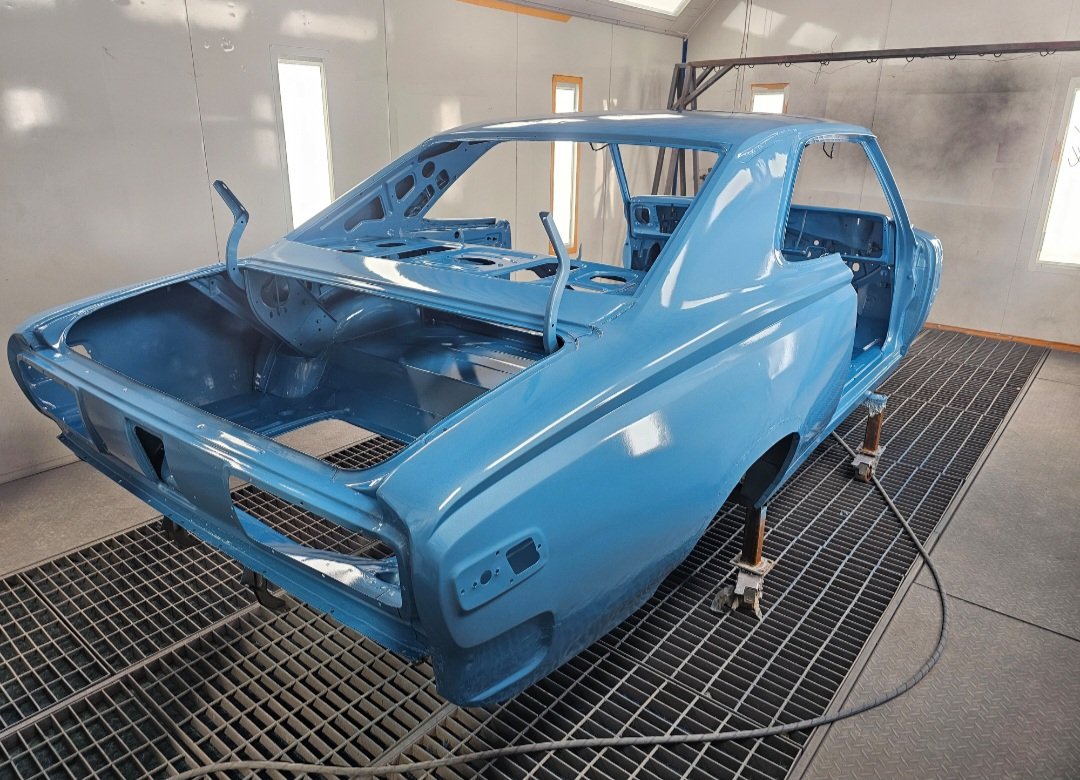
Feel like we have come so far in the last few days. Went with a #ppg direct to metal in Toyota 8v7 instead of an epoxy primer. Will get the car revined and on the road like this so they can see all repairs and modifications done. Then will pull back down and do filler work, primer and top coat. Once back on the road and certified. Thanks to the team and Canterbury auto fab Warrick, josh and josh8 points
-
7 points
-
Found rear seat and carpet etc Went to jaycar and got a shift light, and a momentary button for launch control, so when it gets final tune that will be an option, drilled through the gear shift but doesn't interfere in the thread or how you put it on.. you do have to press it in fairly hard so wont hit it on accident shifting gears etc, both go through relays and fuses, i may change it to steering wheel maybe will see how it works.7 points
-
So.. I got a bit distracted... Short version. I picked this up with a carb issue and dead reg since 1990. Have now fixed the carb, and working on re-reg with black plates. I'll pop in some updates as that progresses. Bit of a side quest but I'll pop in some updates. This is a catch and release so if anyone's interested in a 1983 GSX550E with 25k's on the clock, fire me a line. It'll be road registered with classic reg and ready to go. Anyway, back to the subject.. big box of parts for the RD 50 has arrived so I'll be getting stuck into that in the next few weeks. Leftchevronthree7 points
-
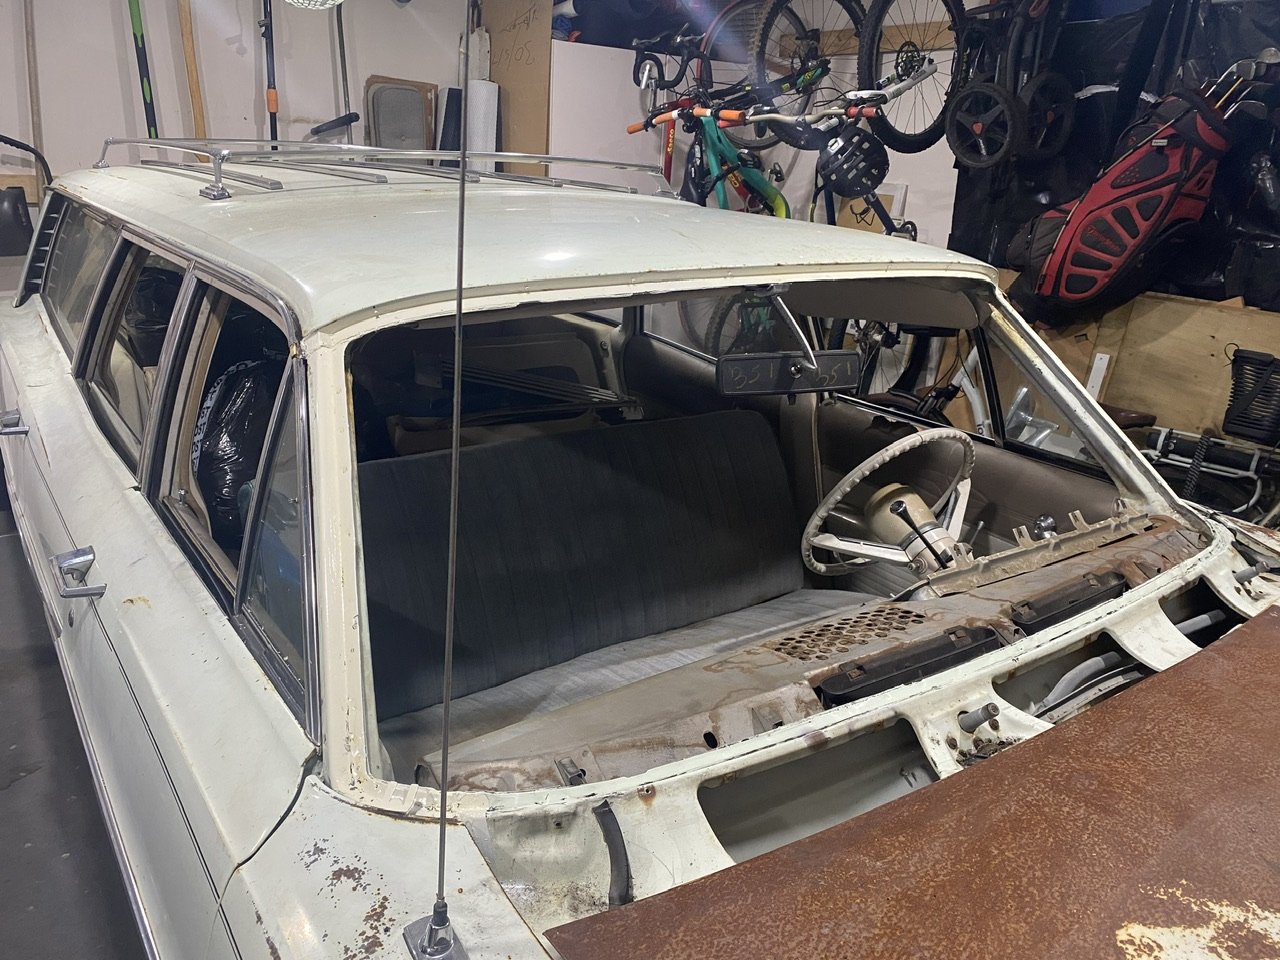
Have mainly been doing a lot of stripping work on the wagon as of late and have been working on the rear tailgate section. Stripped all the sound deadening from the foot well area for the rear seat and found some more rust so have sprayed it with rust converter and working on some new metal to go in.7 points
-
Yeah.... you're right. Damn it. My friend has decided to cut it out and do it properly. SIGH Thanks guys7 points
-
6 points
-
6 points
-
6 points
-
6 points
-
they do have a lovely selection of pies there good work sheepers, i am impressed at your complete lack of ; lollygagging mucking around lazing about thumb twiddling hesitation dilly dallying goofing off dawdling6 points
-
Russell, drive shaft specialists, Andromeda crescent east tamaki is who I usually recommend He's reasonably priced and does good work.6 points
-
Well just learned if you blow an intercooler pipe off after the MAF turbo moves so much air through the system the injectors go max duty cycle and foul the plugs near instantly...... I rolled 1.5ks home and made it up drive and couldn't push brakes hard enough to not go into fence so handbrake to rescue! I may need to extend some pipework so I can get everything pushed in nice again, pretty sure I rushed the installation of the maf too maybe left a clamp loose. Goes great though!6 points
-
6 points
-
There is a 15hp Chrysler for sale Im eyeing off as an aux kicker next to it. Considering I wanted to get a small tinny to test out my outboards I can state that I failed this mission successfully.6 points
-
I have one of those already haha6 points
-
6 points
-
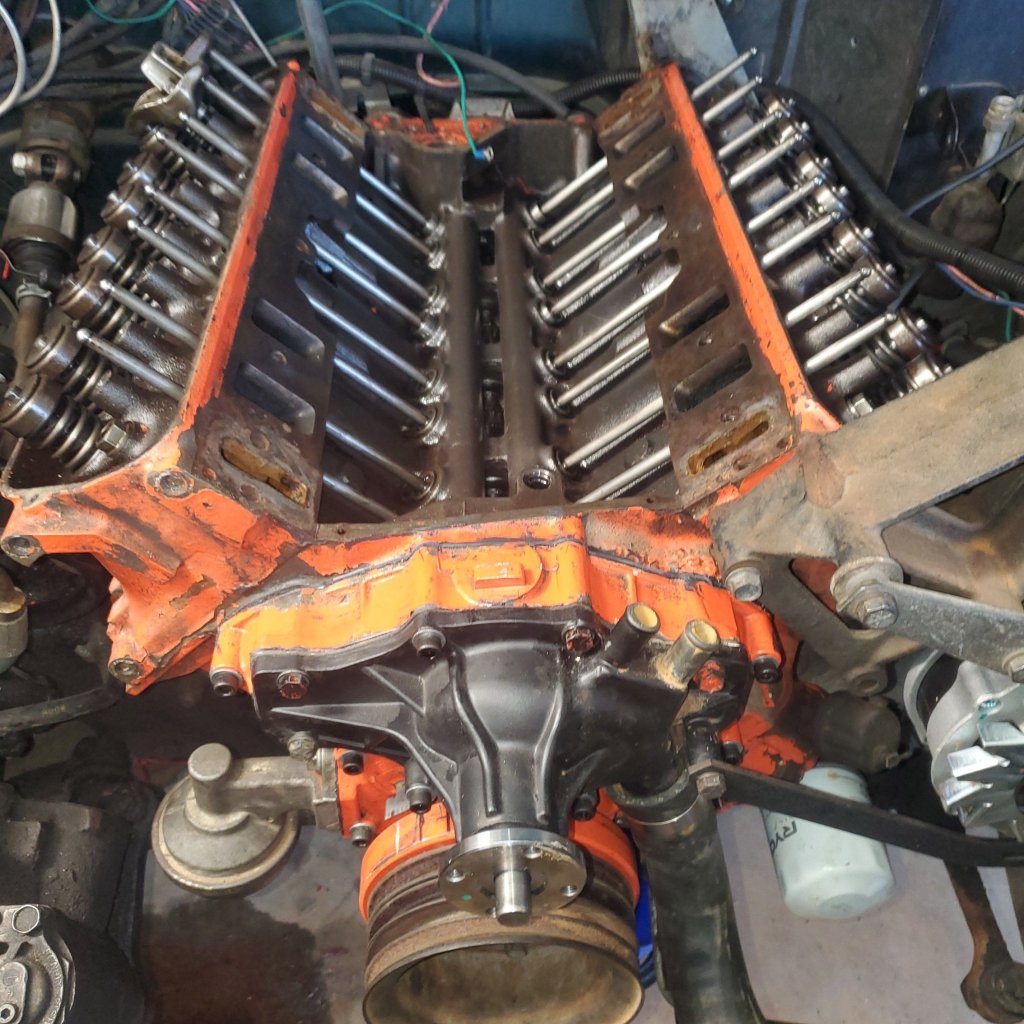
I've got a lead on a healthy high compression 173 which barry said has some trick head work and was built for boost, might be a easier option than pulling and refreshing 202 and putting the cam etc in6 points
-
6 points
-
6 points
-
6 points
-
5 points
-
To distance my brain from carb life for a while I decided to look into another thing that's been bugging me. The weird thing about this car is it's never got up to temperature, well at least it never seemed to get past the first little line on the gauge. Because of this I've always wondered if the thermostat was working properly and today I took apart some of the system to check it all. Once I took the hoses off it became clear that there was a thermostat problem, however it was the opposite to what I was expecting. This thing is jammed shut. I was expecting one to either be jammed open or not there at all. This might be the original (or very old at any case) thermostat, so definitely due for replacement. Also abundantly clear that there's been no water circulating in the engine for some time as the coolant that came out of the radiator was green, not mud. This got me wondering.. has there ever been any in there since I've owned it? How long has there not been water circulating ? I have actually taken this car to some events in the not so distance past and the temperature never moved then either. Does this engine somehow have the power to never overheat? This radiator has seen better days but it never leaked from memory so I don't think it was blocked and stopping flow. That said I might get it reconditioned or replace it anyway for peace of mind. As well as replace the radiator hoses as they looked pretty second hand. I'll also be bypassing the heater core so the hoses along the top here are being removed. So now I'm thinking I need to get new thermostat, pipes, some block off caps, a few gaskets and perhaps I should check the water pump as well.. it's probably not been doing a whole lot.5 points
-
Christ you just triggered a memory. In my apprenticeship the factory owner had a flash ski boat and he wouldnt even let us look at it. I dont mean lifting up the engine hatch or anything. Literally in it's direction. So when us dickhead kids walked past we had to face the other direction and sort of crab walk. What a cunt5 points
-
5 points
-
5 points
-
Kinda 3d print thread, but also here. I have decided that I do need a little bit of dust collection on my thickensser as have a project upcoming where I'll be using it alot. I made up a simple 2 piece collector housing to go on the thickesser and printed it out in PETG, found a cheap vortex separator on Temu (though in hindsight I could have printed that too), then a bunnings bucket + hose completed the ensumble. Isnt 100% (but I dont need it to be) and a quick test run has it working fine as long as you're not expecting it too much of it. Beware of the 'dust collection barry' rabbithole which exists on the internet. Continuing the wood tool theme.... I very much like the concept of a track saw (and will be handy to process some beams I have here) but refuse to pay the $$ that is demanded by festool + others considering. Found some alloy extrusions from Temu for ~$40 which come close to the Festool profile and the printed a 'sled' which matches the groove profile + my skilsaw base. Doest have the depth of cut as a retail plunge saw but worth it for the $ I have into the whole affair.5 points
This leaderboard is set to Auckland/GMT+12:00


