gibbon
-
Posts
2,733 -
Joined
-
Last visited
-
Days Won
7


gibbon's Achievements
Committed (5/5)
8.9k
Reputation
-
looks like it's a somewhat common thing now, I make no apologies for being stuck in 1993. but yes looks like I'll go with a nonreturn system to save the extra plumbing
-
yeah I think that's the thingy I'm looking at, reasonably priced too. Are there any downsides for a non bleeding edge application?
-
going to EFI on the triumph. next up is the fuel system I see there are arrangements which cap the return on the fuel rail, and the fuel pressure regulator is located way back at the outlet of the fuel pump and does everything from there. seems like a simple and easy way to setup a "return" system without meters of hard pipe. but conspicuously the OEM doesn't do it, so what's the story?
-
I typed out a big long answer to this while thinking "surely this guy already knows about the datsun diff mod".. then realised I meant to say R160!
-
was disappointed to discover that our inverter TIG welder won't weld aluminium. "oh you need an AC welder for that" "But this has an inverter, doesn't that produce AC current?" "No it inverts your AC into a DC output" ....why aren't they called a Rectifier TIG welder?
-

Gibbon’s 1971 GT6 bothering - comment here
gibbon replied to VitesseEFI's topic in Project Discussion
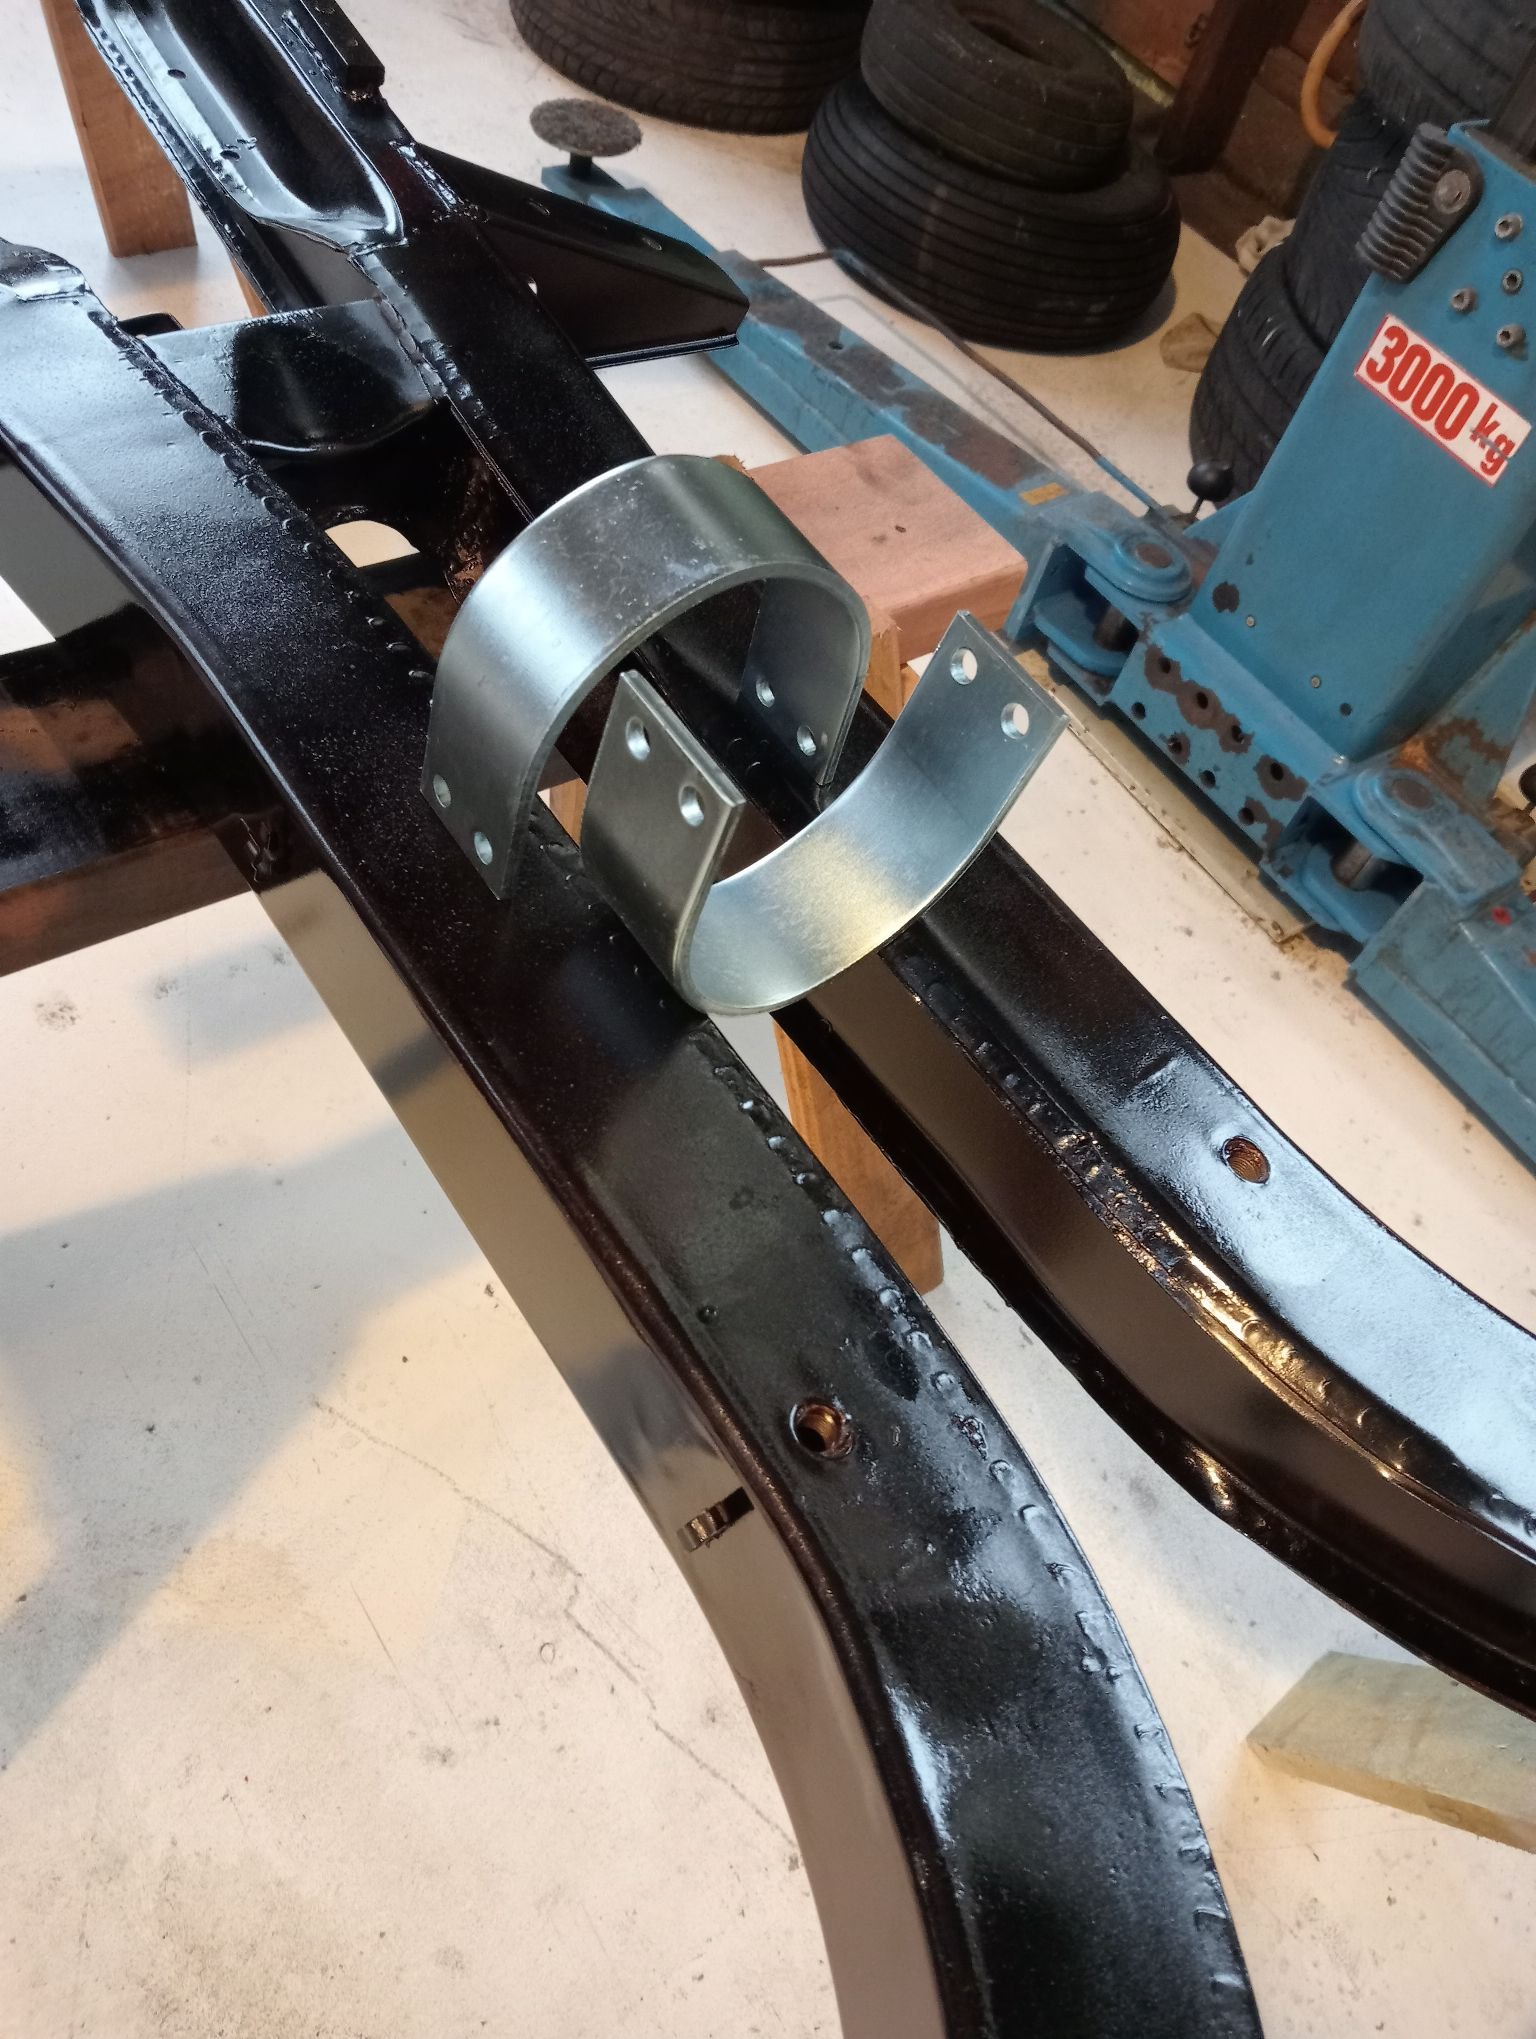
so what the heck am I going to do about a driveshaft hoop? will I get away with just a flap strap of metal top and bottom of the chassis? I don't think there'll ever be enough clearance to get an actual circular hoop around it -
Gibbon's 1971 triumph GT6 that everyone told him not to mess with
gibbon replied to gibbon's topic in Projects and Build Ups
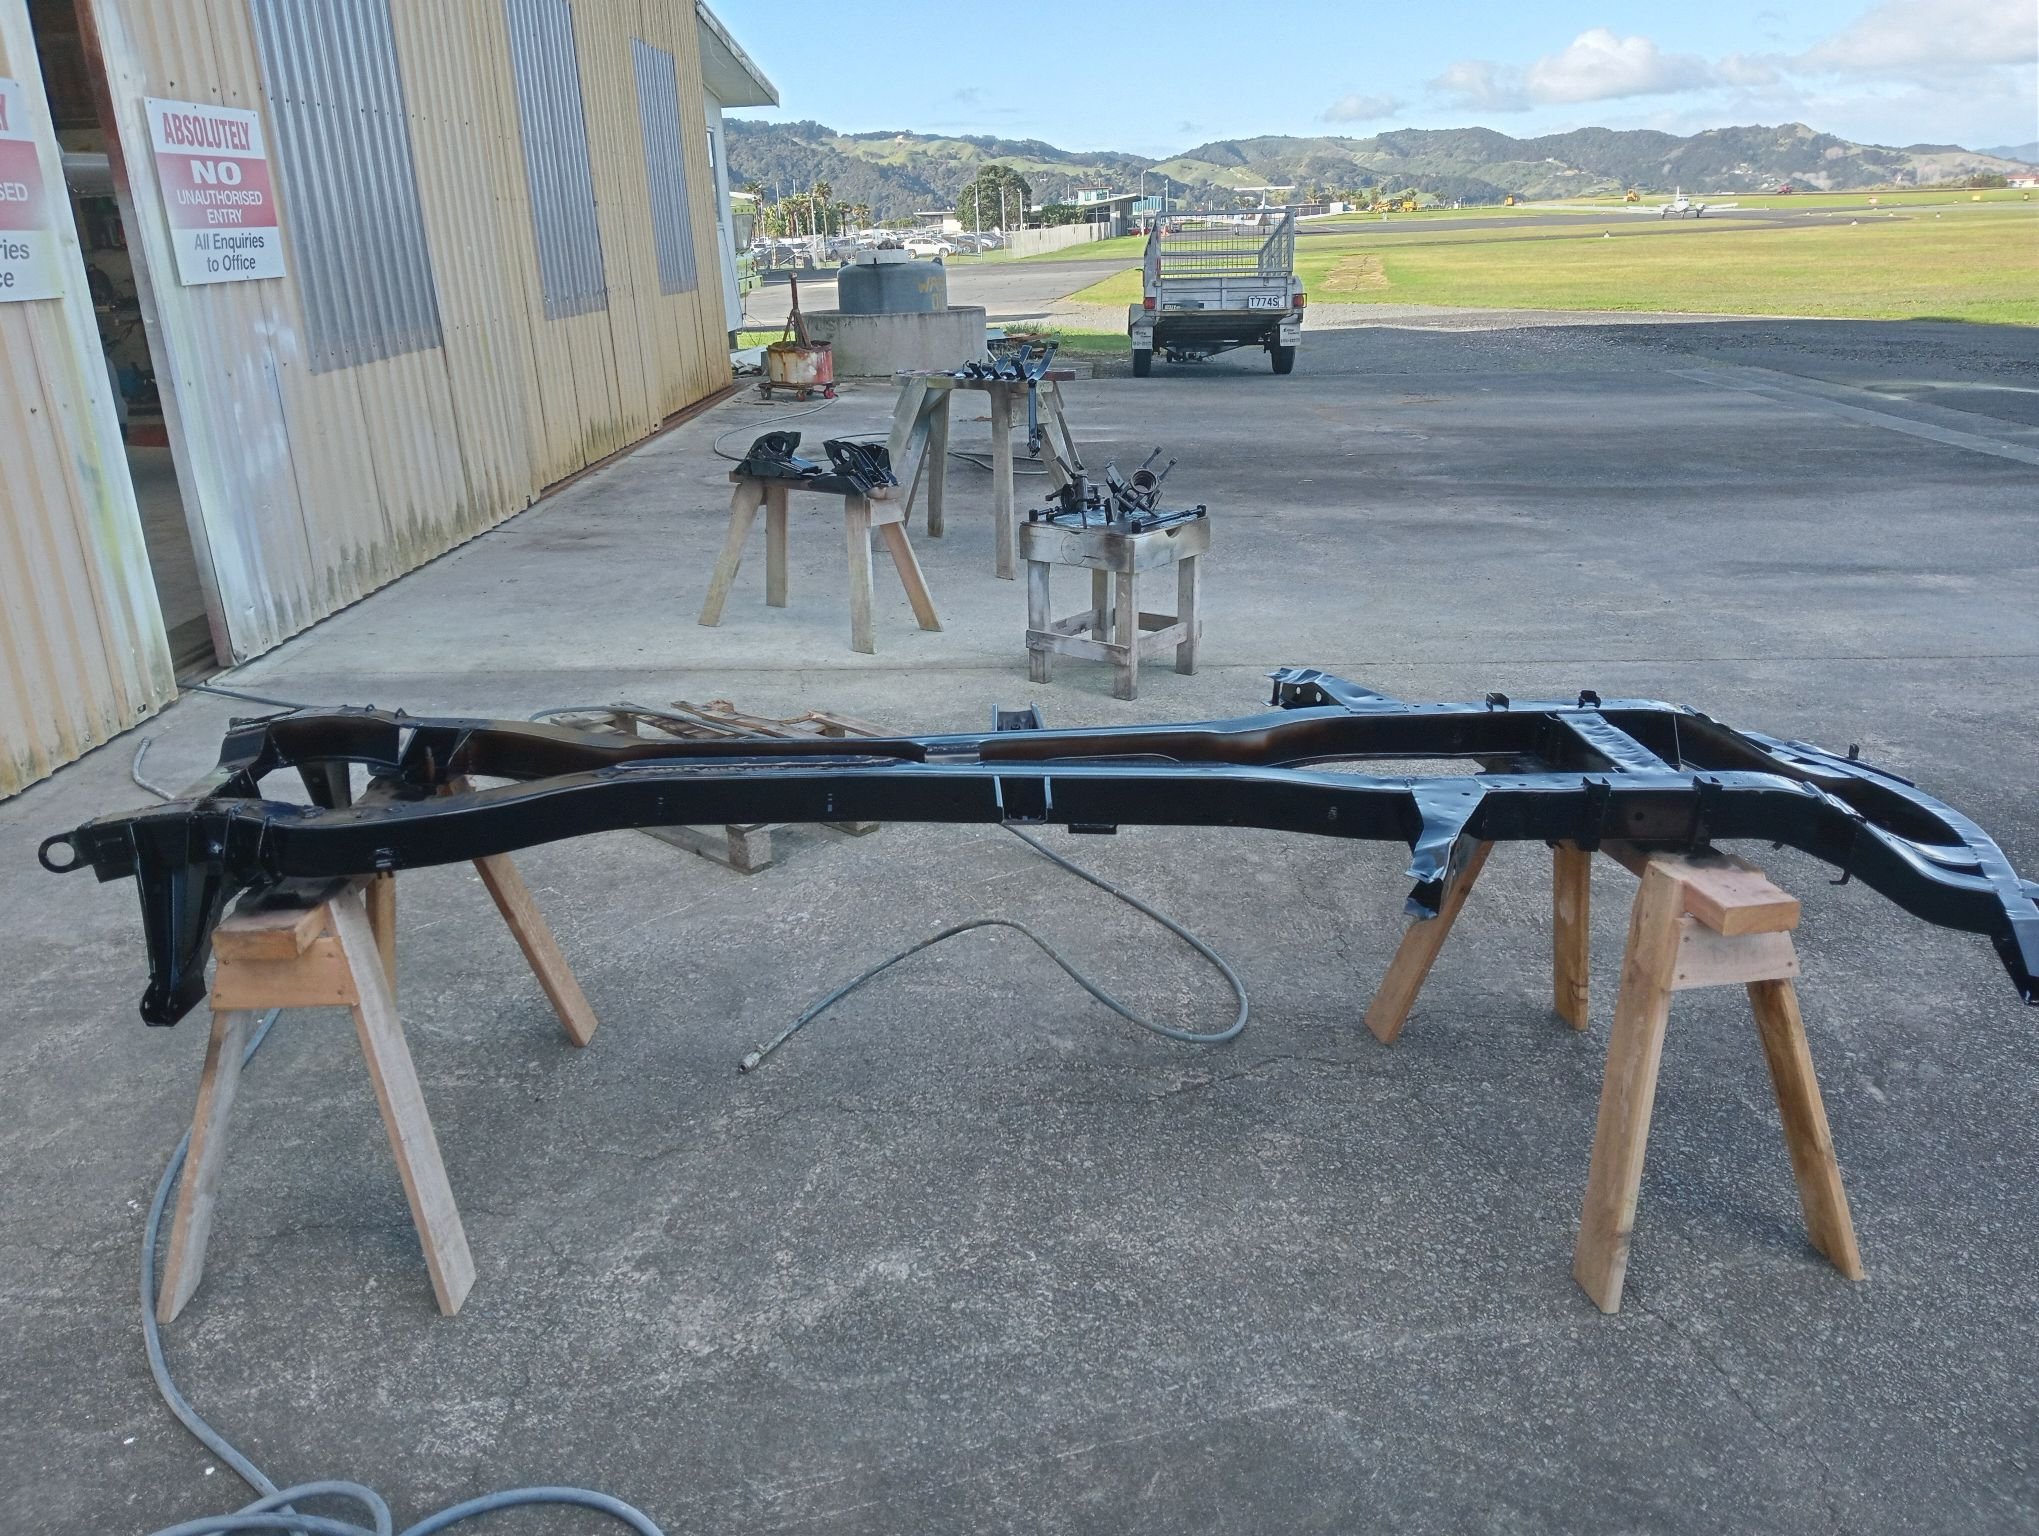
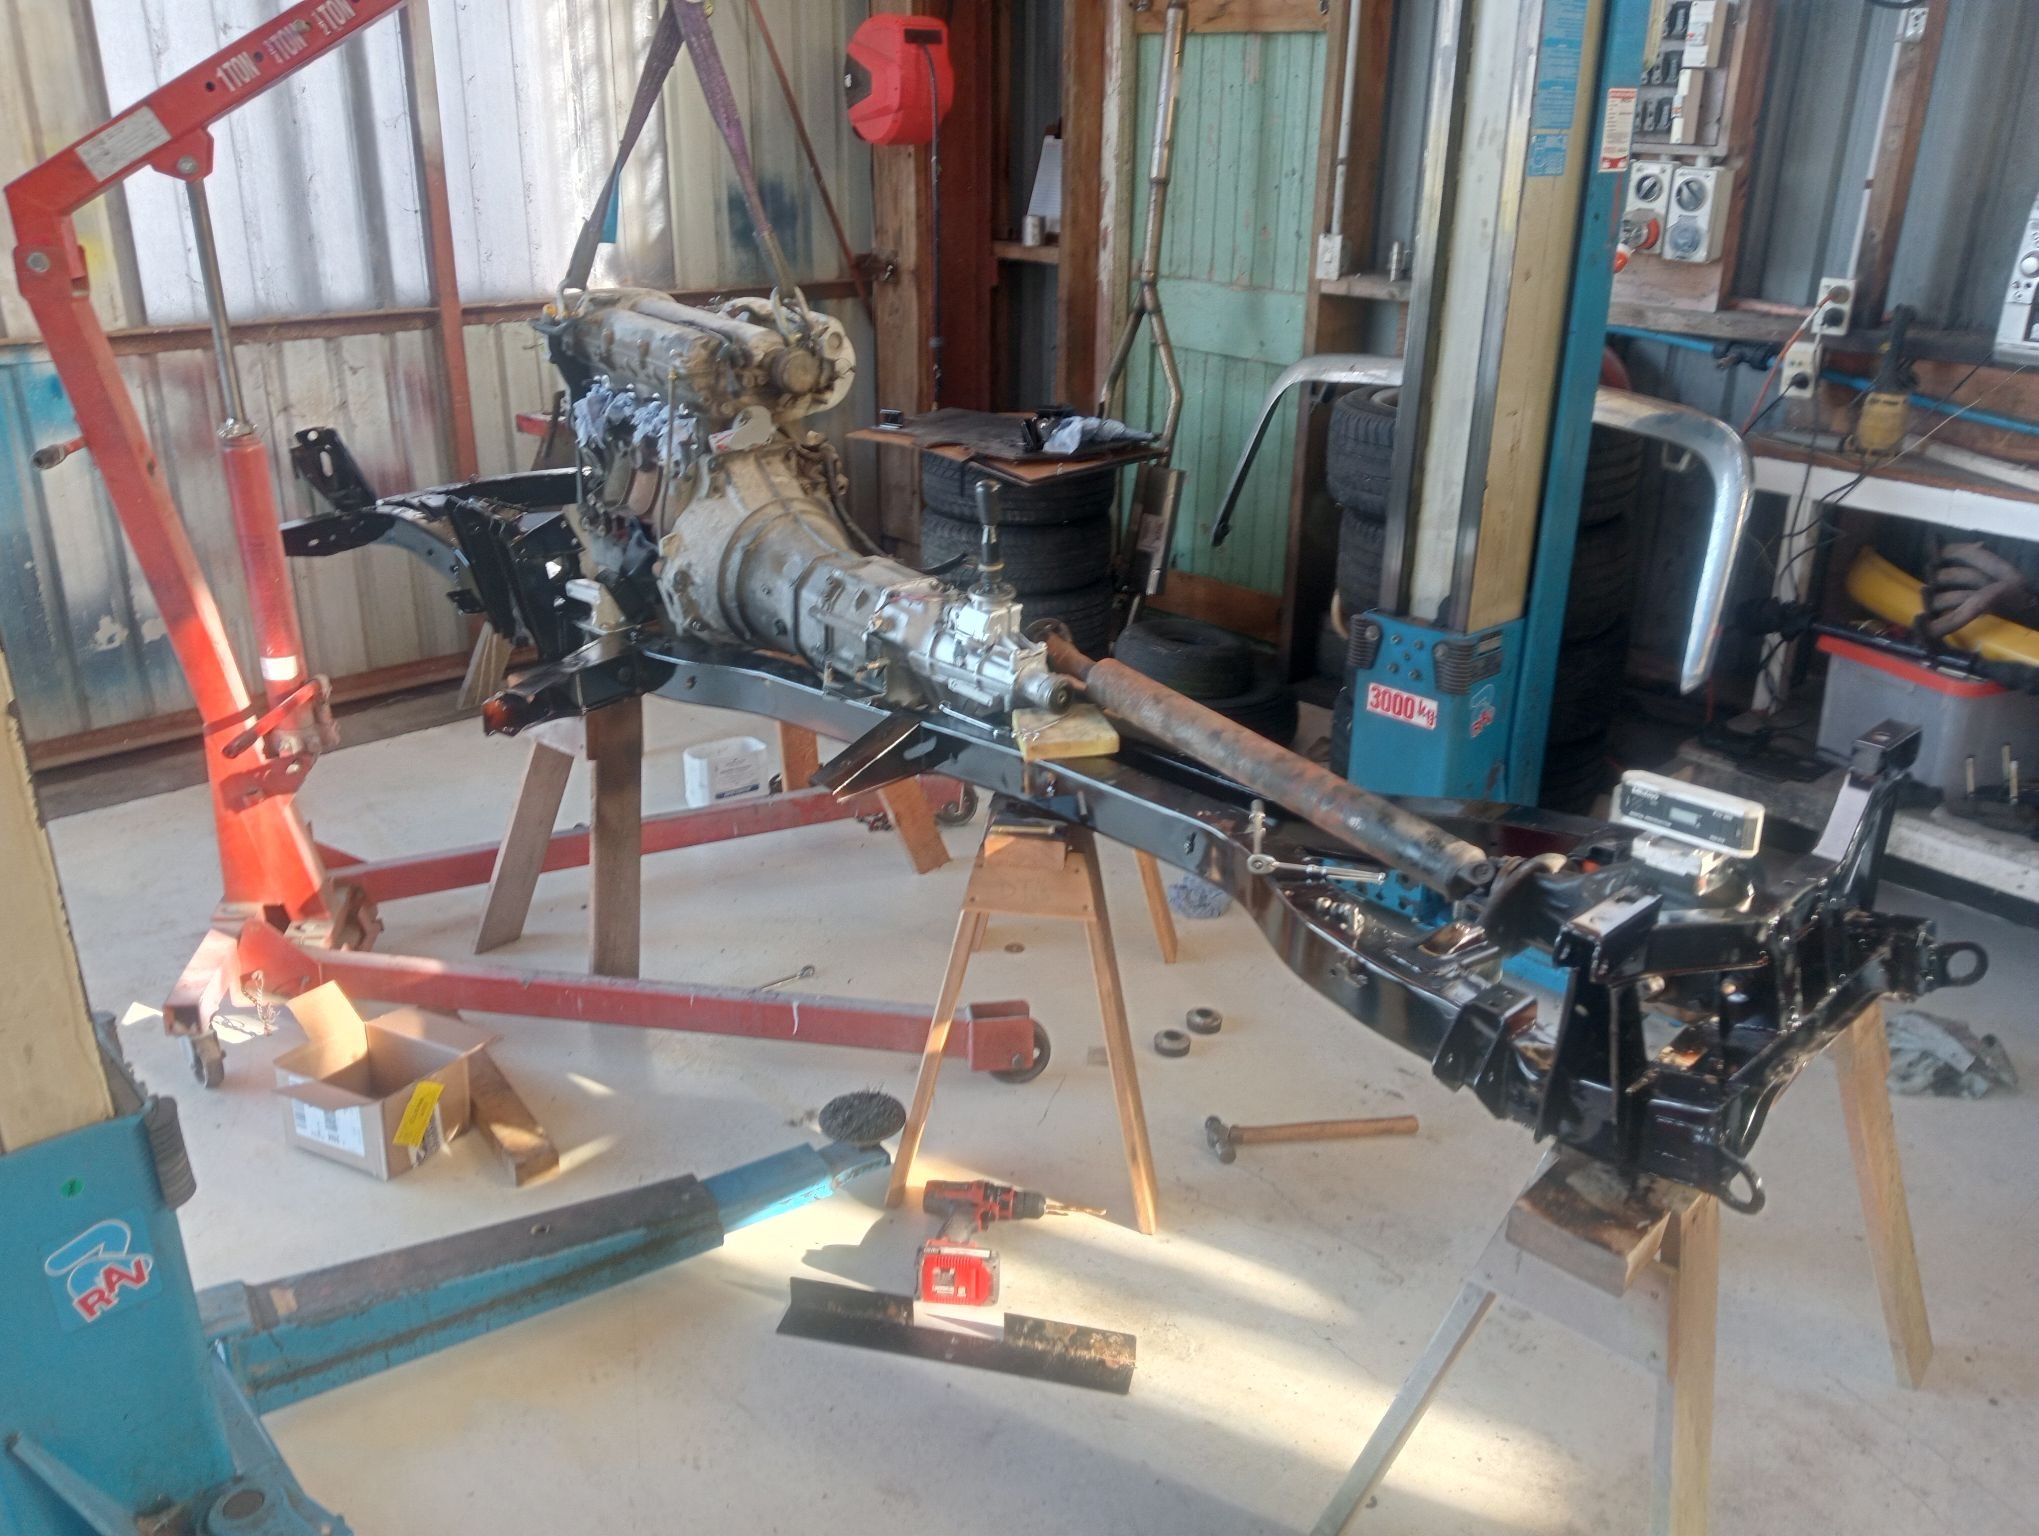
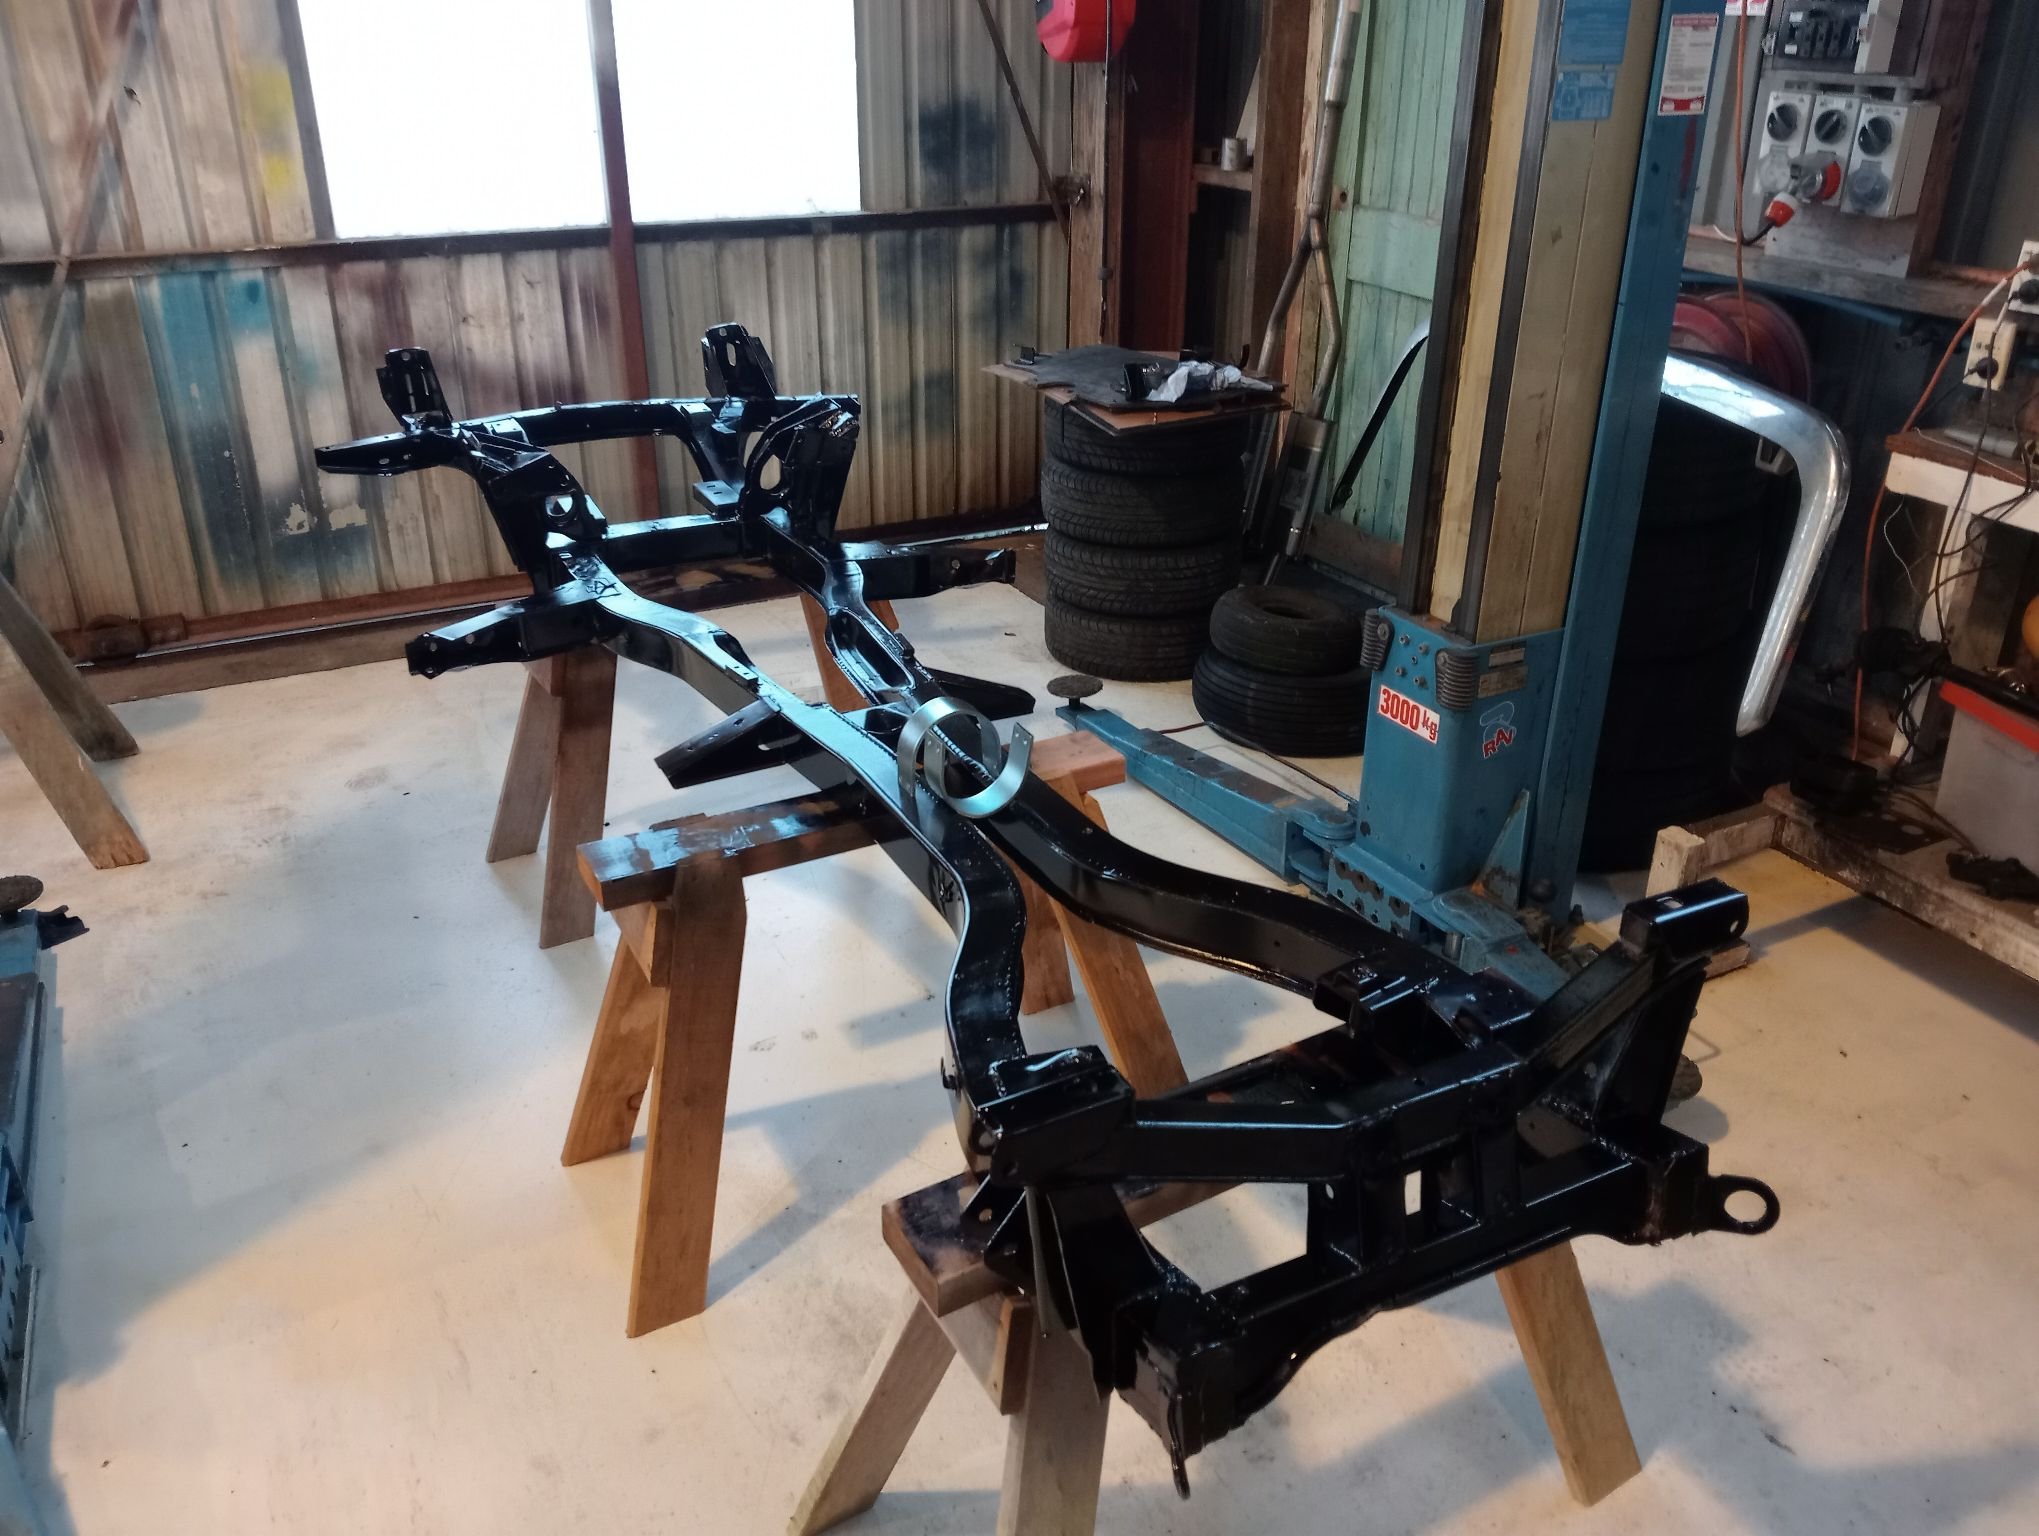
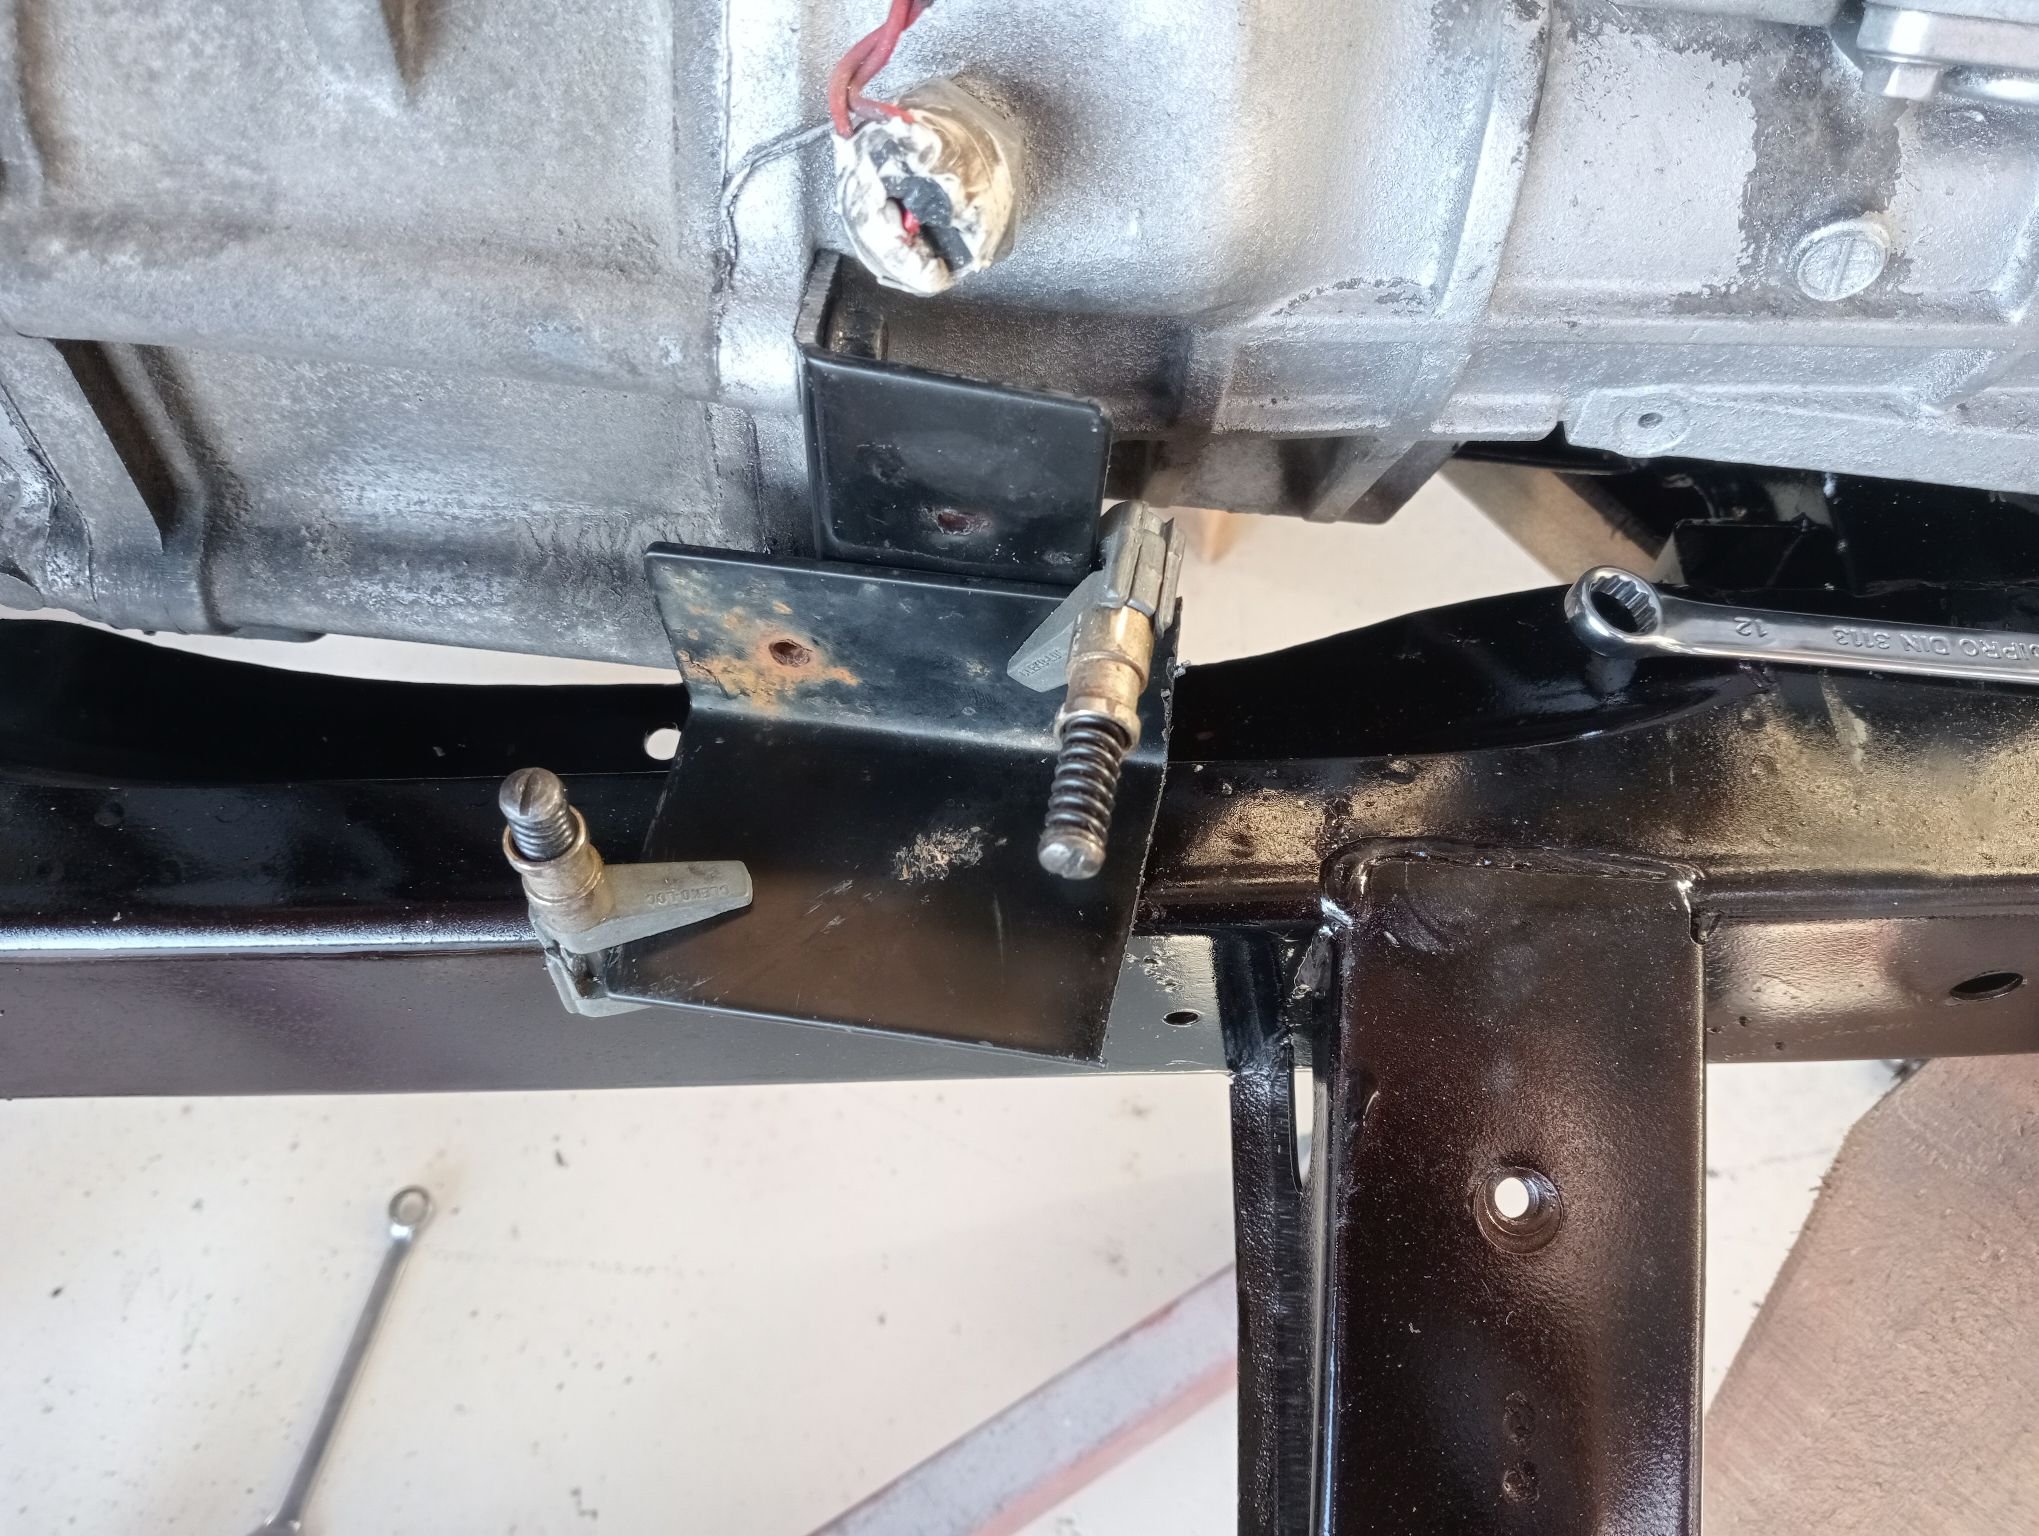
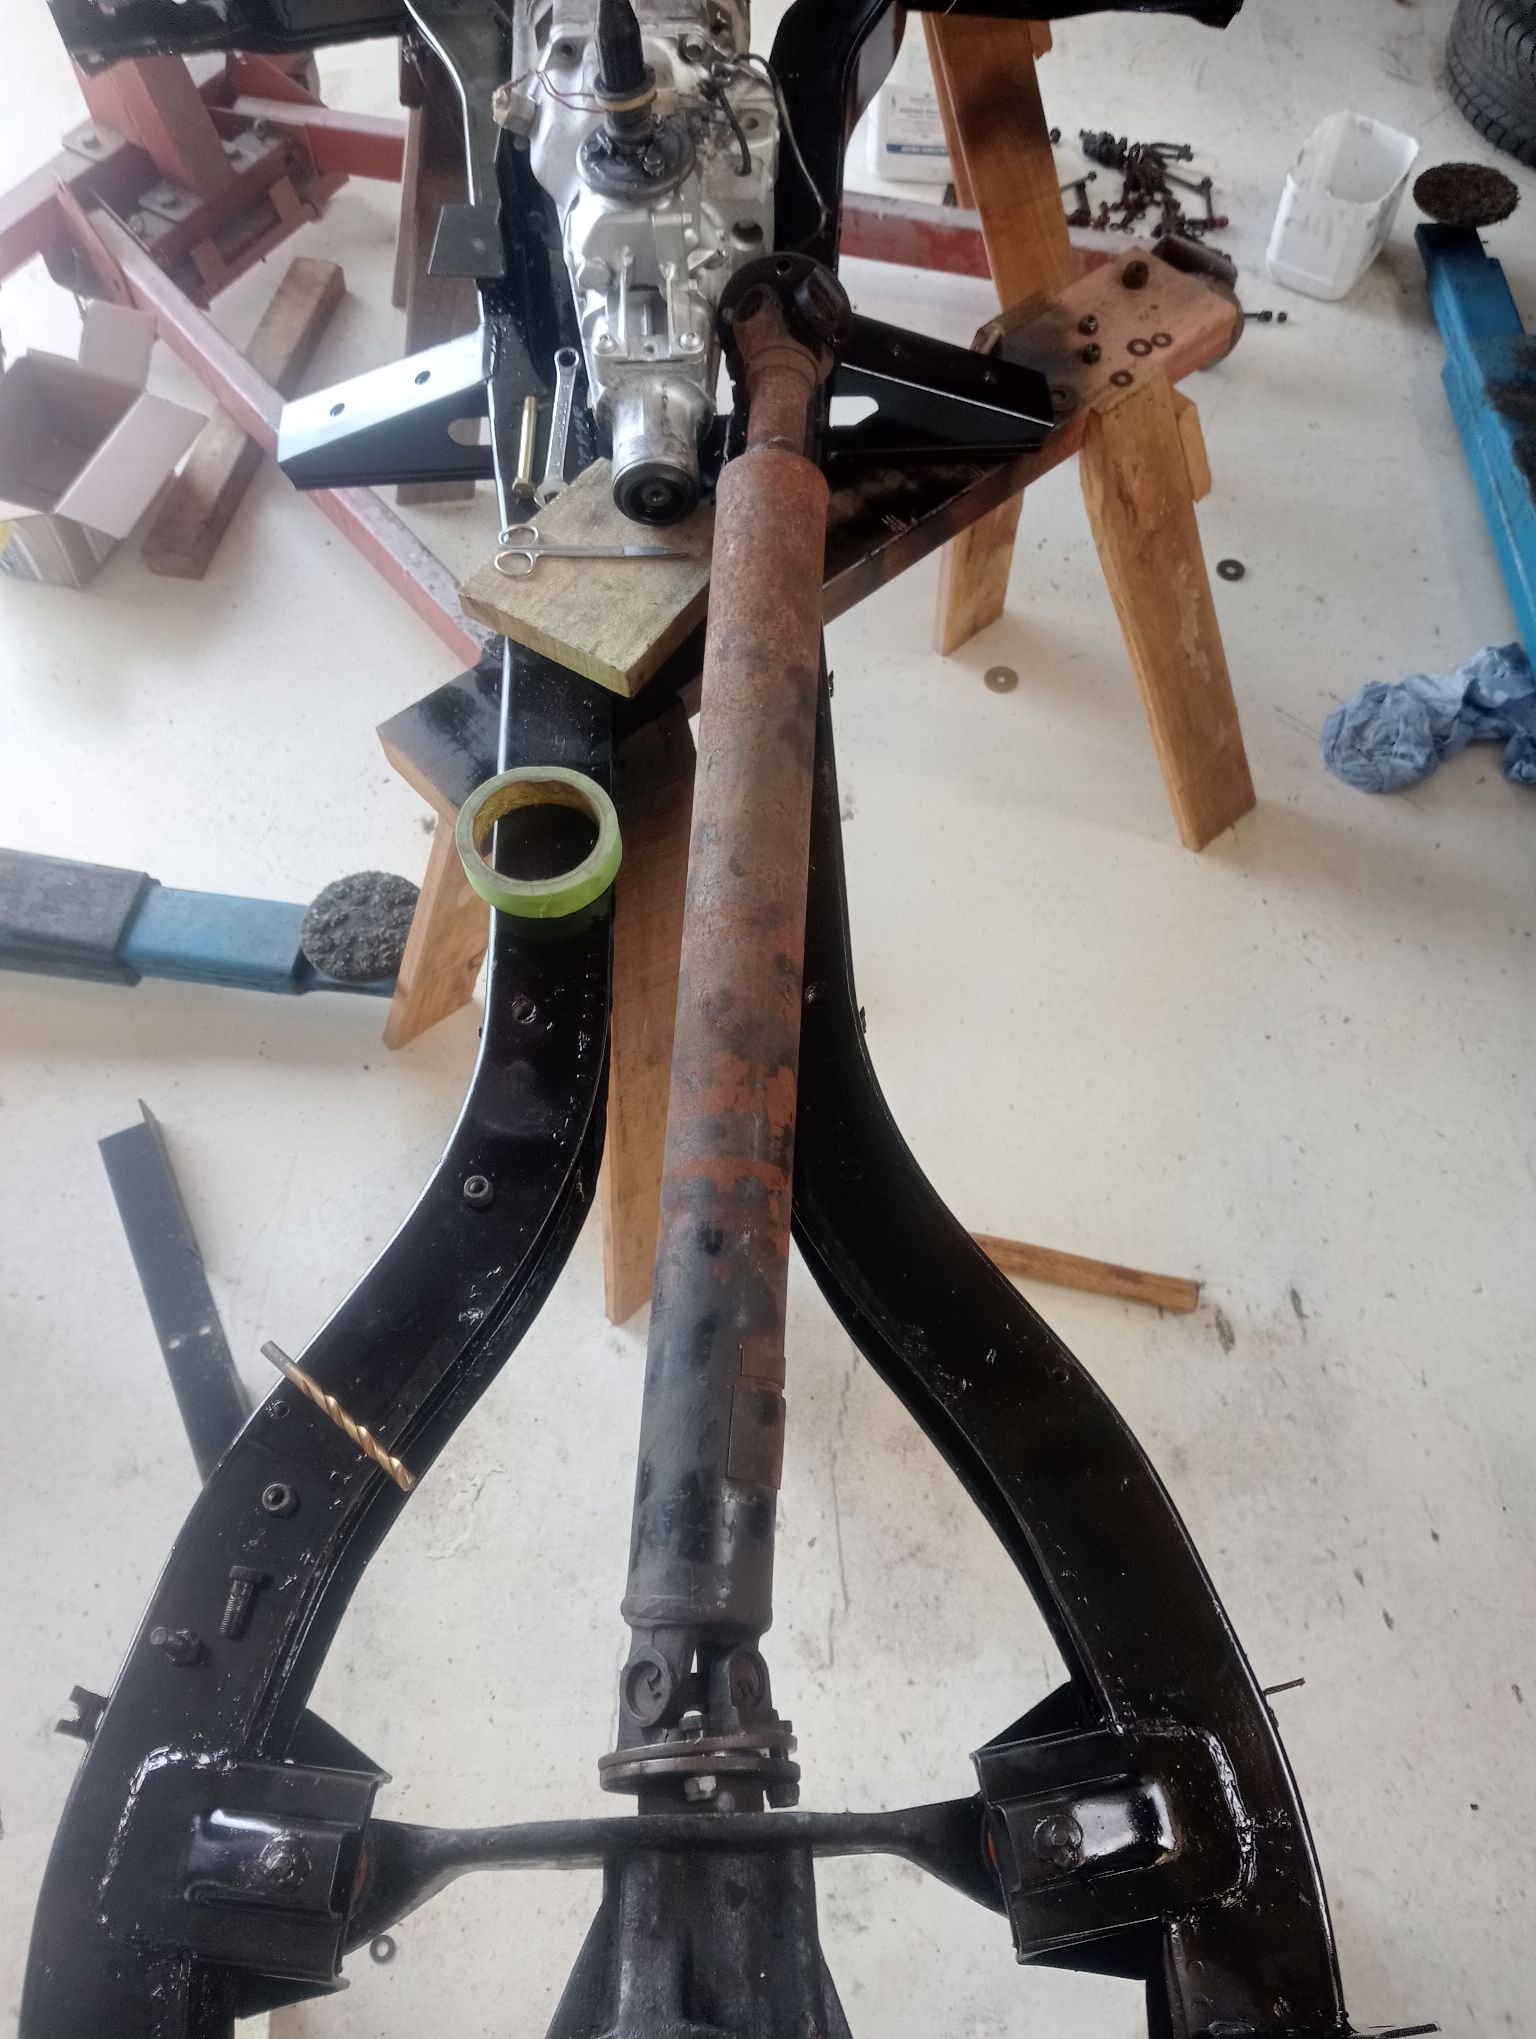
painted the everything the other day. I went down to the paint shop and asked for something appropriately hard for a chassis, got given a tin of chassis black. "is this that shit that never really goes off and just gets everywhere?" I asked suspiciously. "nah" said the guy behind the counter. "look, it's got 'fast drying' written on it". both the guy behind the counter and the assholes who made this stuff were full of shit. "fast drying" relative to the geological epochs involved in forming it's bitumen component perhaps, but that's about it. at least it's sprayable with a gun so I wasn't ambling around with a paintbrush dripping shit everywhere. began to get a nagging feeling that I wasn't 100% sure exactly how all this stuff goes back together. chassis has also gained an appreciable weight in entombed blast media but hopefully it'll eventually makes it's way out driveshaft hoop arrived, and... oh.... at least it's another bit of wisdom I can pass on to the next guy in fact... will the DRIVESHAFT even fit? err.... obviously the length was always going to be wrong but I was hoping i could at least be a cheapass and just cut and modify the forward end of the old shaft. the gap between the rails is 75mm give or take, and the driveshaft is pretty much exactly the same. the rails aren't perfect box sections, there's a 5mm or so overhang lip on the inboard ends, gosh I'm so tempted to just smack that down with a hammer to get the clearance it's starting to look somewhat purposeful now at least. several onlookers have been fooled into thinking that the "hard work has been done" sorting out the mounting for the gearbox actually took a little longer than I expected because there's just so many good places to do it, it's hard to settle on one. I eventually went off the extension housing bolts, onto a little welded block on the top of the chassis (which I think the big radio support yoke doodad bolts to?). This is largely because I forgot to weld crush tubes back here for a mount and didn't want to set three litres of tar on fire by attempting to do so now. Only really started mocking this up (Bunnings umbrella steel again) then realised it needed proper bushings. surprisingly hard to find off-the shelf spindle mounts with an imperial thread these days. BUT, easy to find mounts for british stuff. So I have a whole bunch of rubber mounts To Suit Norton Commando heading my way Also began reassembling the suspension because I need to make this thing mobile again. Unfortunately found the polybush suspension kit for the rear completely nonfit for purpose, in fact it's totally fucking rubbish. Most of the bits are just dimensionally wrong. I rechecked the packaging and sure enough it says Rotoflex GT6, but I have been able to use about a quarter of the packet, even with modification. The control arm outer bushes are too small and literally slop around, the inner one doesnt even have a top hat/thrust section, the rear spring bushes were far too long for their steel tube (and for the spring).... just crap and I'm still pissed off about it stay tuned for next time and I'll tell you about my amazingly silly 3d printing adventure
- 8 replies
-
- 14
-

-
I actually ended up buying a drop-in LSD unit which replaces the weakest part of the diff, so kept what I have and hopefully that will be enough. bought an off-the shelf CV axle conversion kit as well, the whole cost being.... oh shit probably more than an R200 and conversion kit, whoops
-
how did you get on?
-
Point of interest, "Russell, drive shaft specialists, Andromeda crescent east tamaki" found the company you mentioned. But actually using their name; "Driveshaft Specialists Nz Ltd" brings up a load of fucking garbage including 800 people in hard hats and a six story crane. Search engines are completely poisoned
-
awesome thanks
-
Normally I'd just throw this in tech spam but thought I might get more responses here Google has failed me, I want the contact details of a local company staffed by human beings who can talk to me in english and assemble a driveshaft. Northland would be perfect, auckland good enough The Internet keeps directing me to globocorp engineering ltd with 800 people in hard hats and a six story crane in the background
-
Gibbon’s 1971 GT6 bothering - comment here
gibbon replied to VitesseEFI's topic in Project Discussion
jesus that's a lot of work... I think they're stretching the definition of "the engine fits". I wonder what would actually happen if he floored it -
Gibbon’s 1971 GT6 bothering - comment here
gibbon replied to VitesseEFI's topic in Project Discussion
I had heard that they were "non-replaceable" - didn't know if that meant you couldn't just cut behind them and join the tubes, but then again i appreciate not having to have a new driveshaft made if a u-joint wore out That gearbox and it's variants got used in a few other cars, I wonder if any other models were lucky enough to get replaceable u-joints, did Ford use them as well? anyway the long story short - so there's no reason for me to buy an mx5 shaft? -
Gibbon’s 1971 GT6 bothering - comment here
gibbon replied to VitesseEFI's topic in Project Discussion
hey @VitesseEFI, what's the best bet for a custom propshaft, just a MX5 front and GT6 rear somehow mated together?