
Leaderboard


Popular Content
Showing content with the highest reputation since 25/06/25 in all areas
-
So.. When you have too many projects..... An old mate has had a Mk1 Cortina since 1997. Started as a run about, turned into a project, then along came life, so it was parked for ??? years. The time has come to bring it out of hibernation and see if some life can be breathed into it. Disclaimer: This is not my car, this is not my project, but I'm involved and connected and figured some of your might enjoy the thing. Also disclaimer, the owner and chap who's restoring it are 100% happy for me to share the project here. Step 1: Unbury The light of day for the first time in ???? Load 'er up Delivered down to the (Hawkes) Bay and ready for revival. Since the car was imported pre 19?? it doesn't have a vin. Annoyingly the rego had lapsed with an address change, so it required a trip to VTNZ for us to tell them how to do their jobs and get the car a VIN. Tow vehicle activated. As we'd researched the process and let VTNZ know what to do we got through this pretty easily so the car was back to the workshop in good company. Some tidy up required. Throttle body was pretty well stuck, fuel tank has a leak, oil was ??? years old. Some remedial work and.. Gotta love that toyota reliability and a link ECU with an good link base map, albeit a bit rich. The body looks pretty straight, it's had some repair in the right rear at some point in the distant past. There's some re-work to do on some questionable mounting that was done in it's early mod life but nothing that can't be fixed etc. Other projects have been moving in the right direction so there will be some more movement on this coming soon. Further disclaimer, Projects are fun but take time and I have little of the latter. I'll try to keep the updates rolling as they come in but don't expect them weekly. P.P.P.S. I'll get an engine bay shot next time I'm there. LeftChevronThree.36 points
-
Got 2 great sump castings and a 3rd with a small defect that would be fine once welded.30 points
-
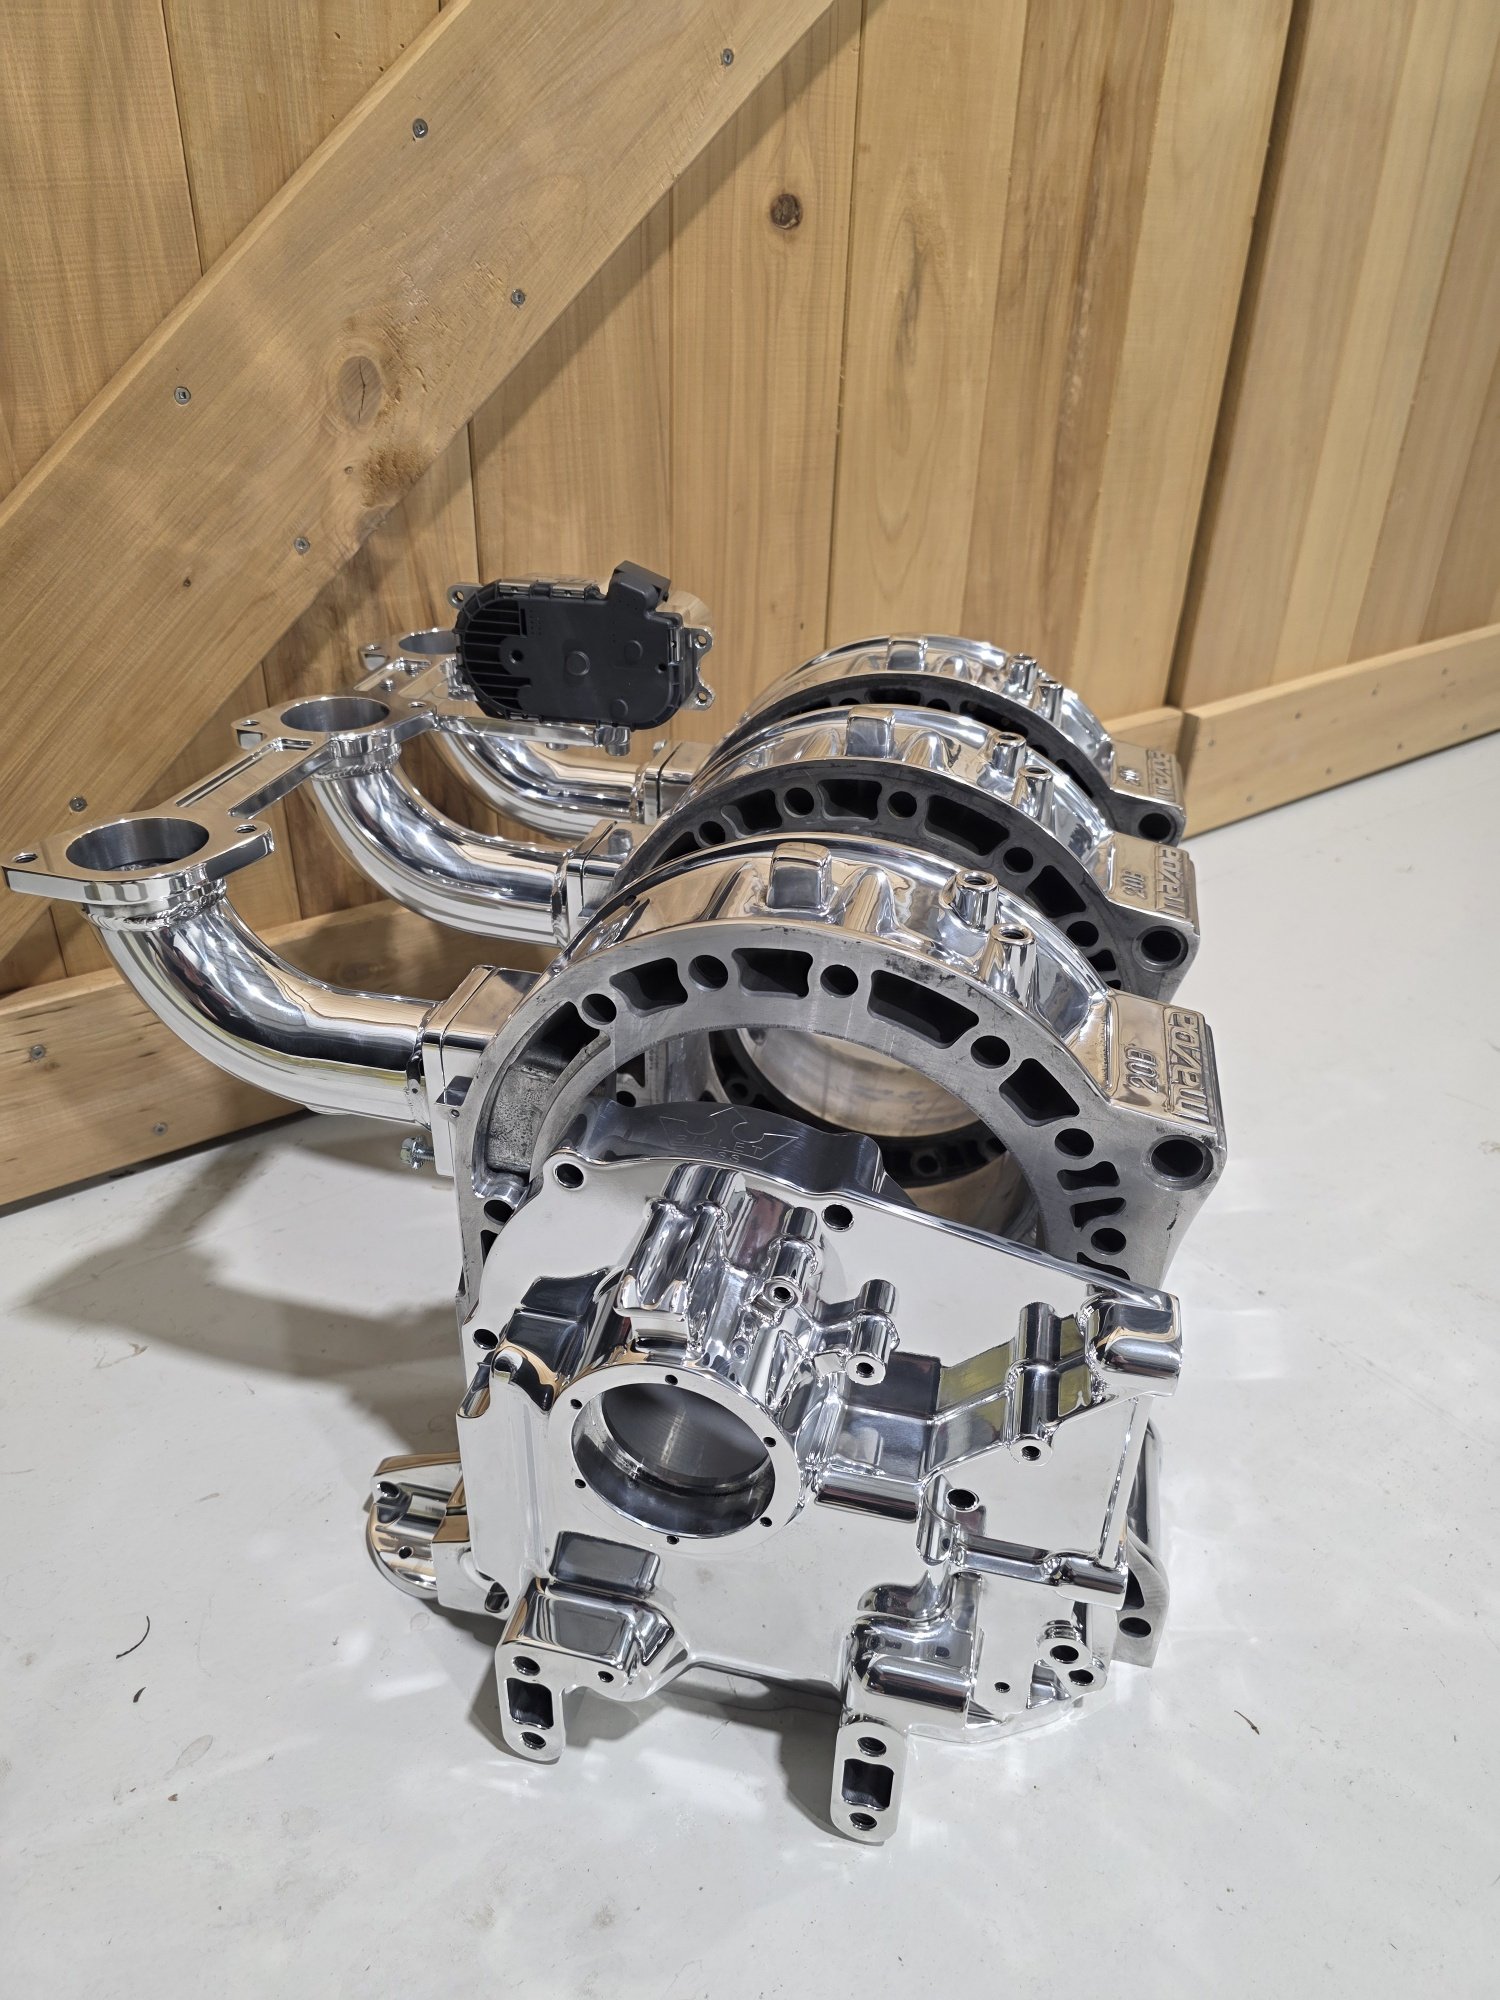
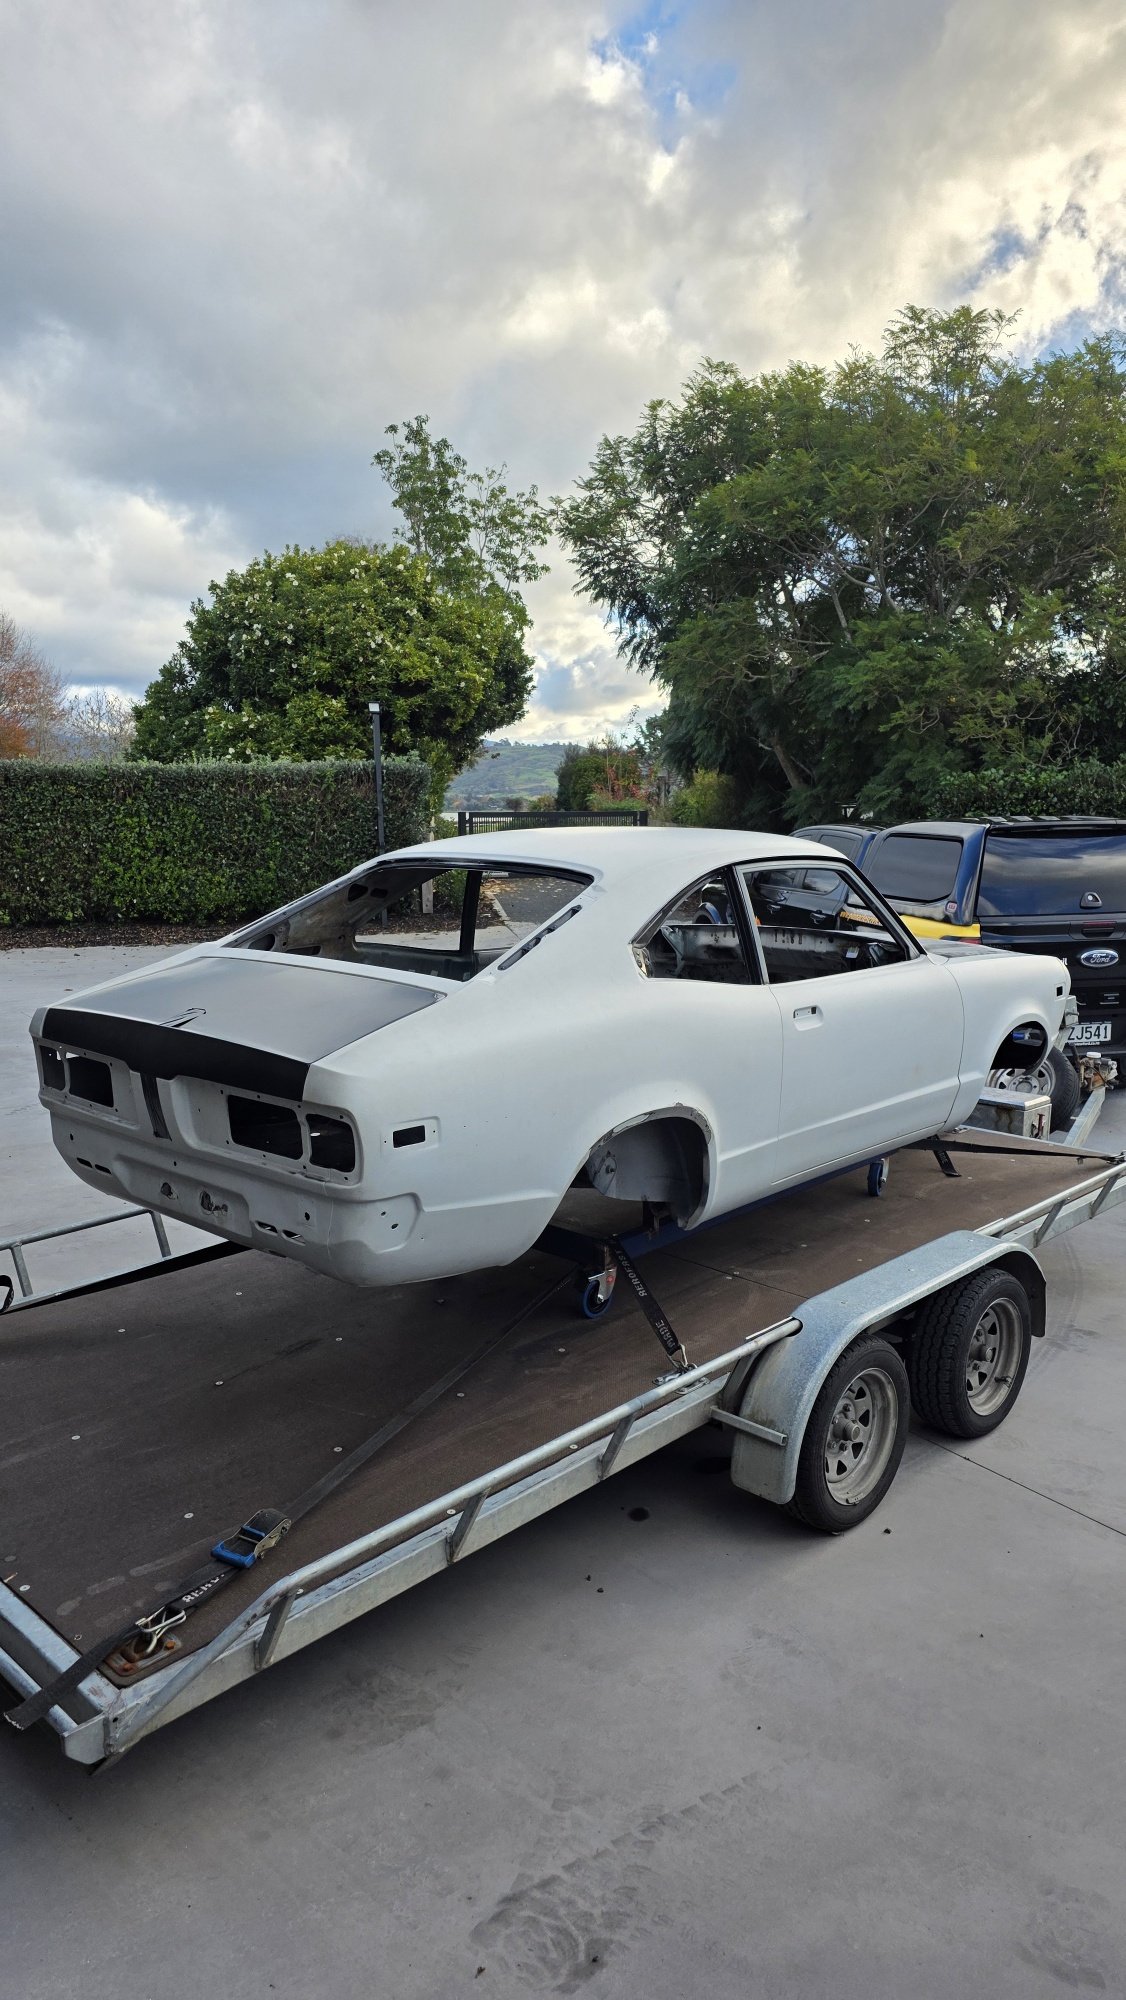
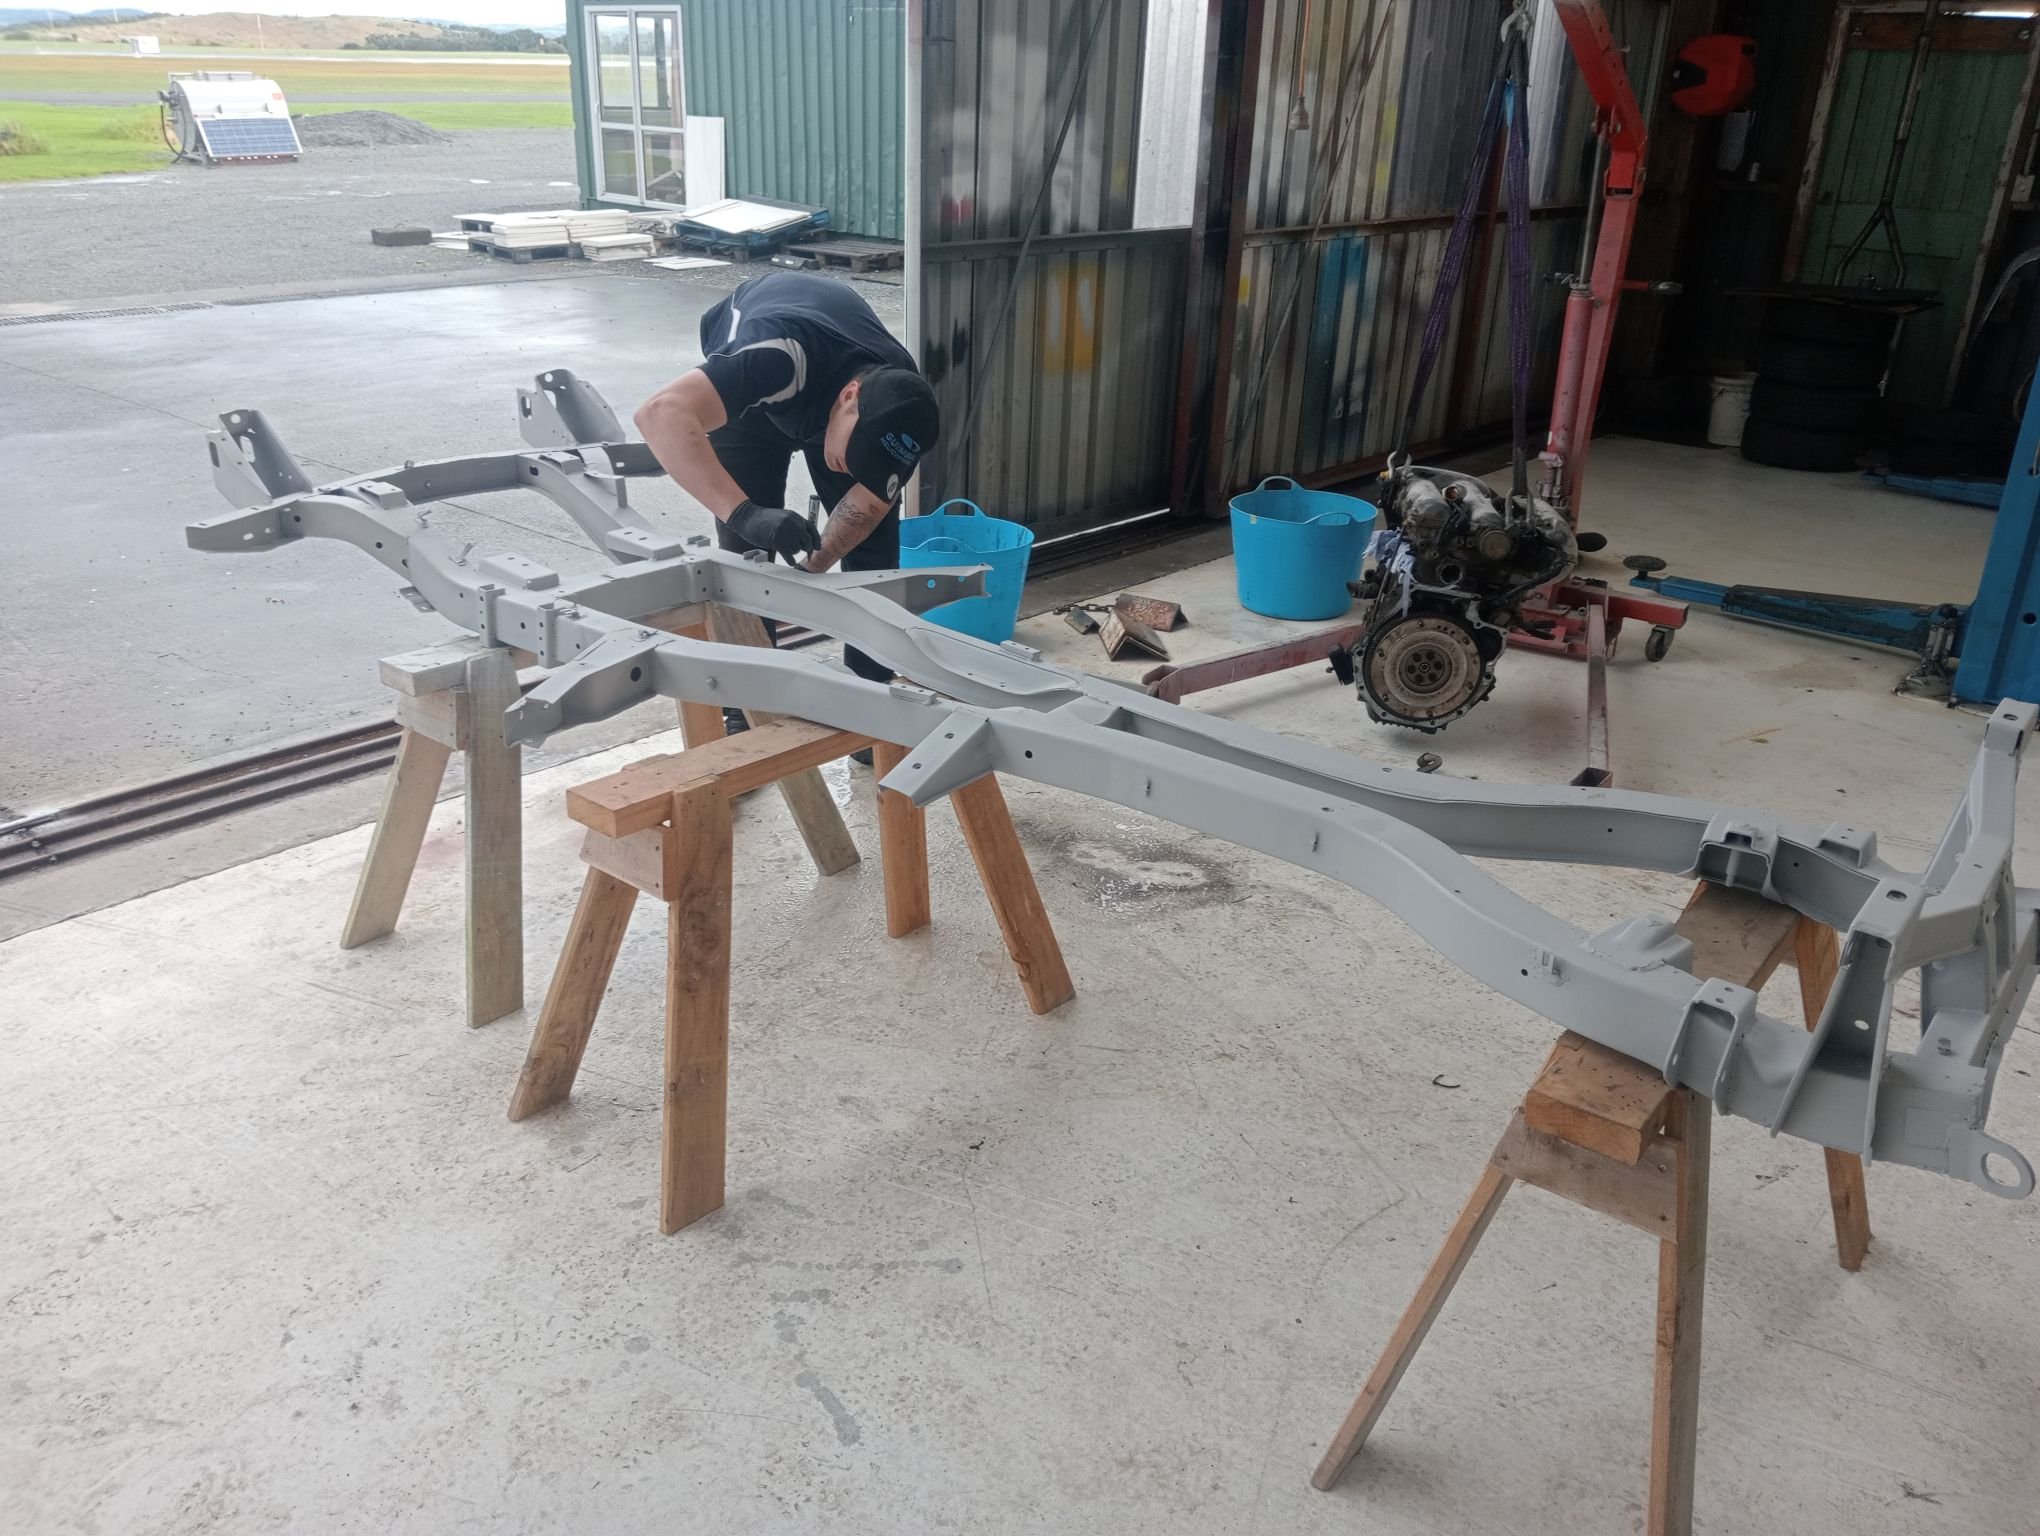
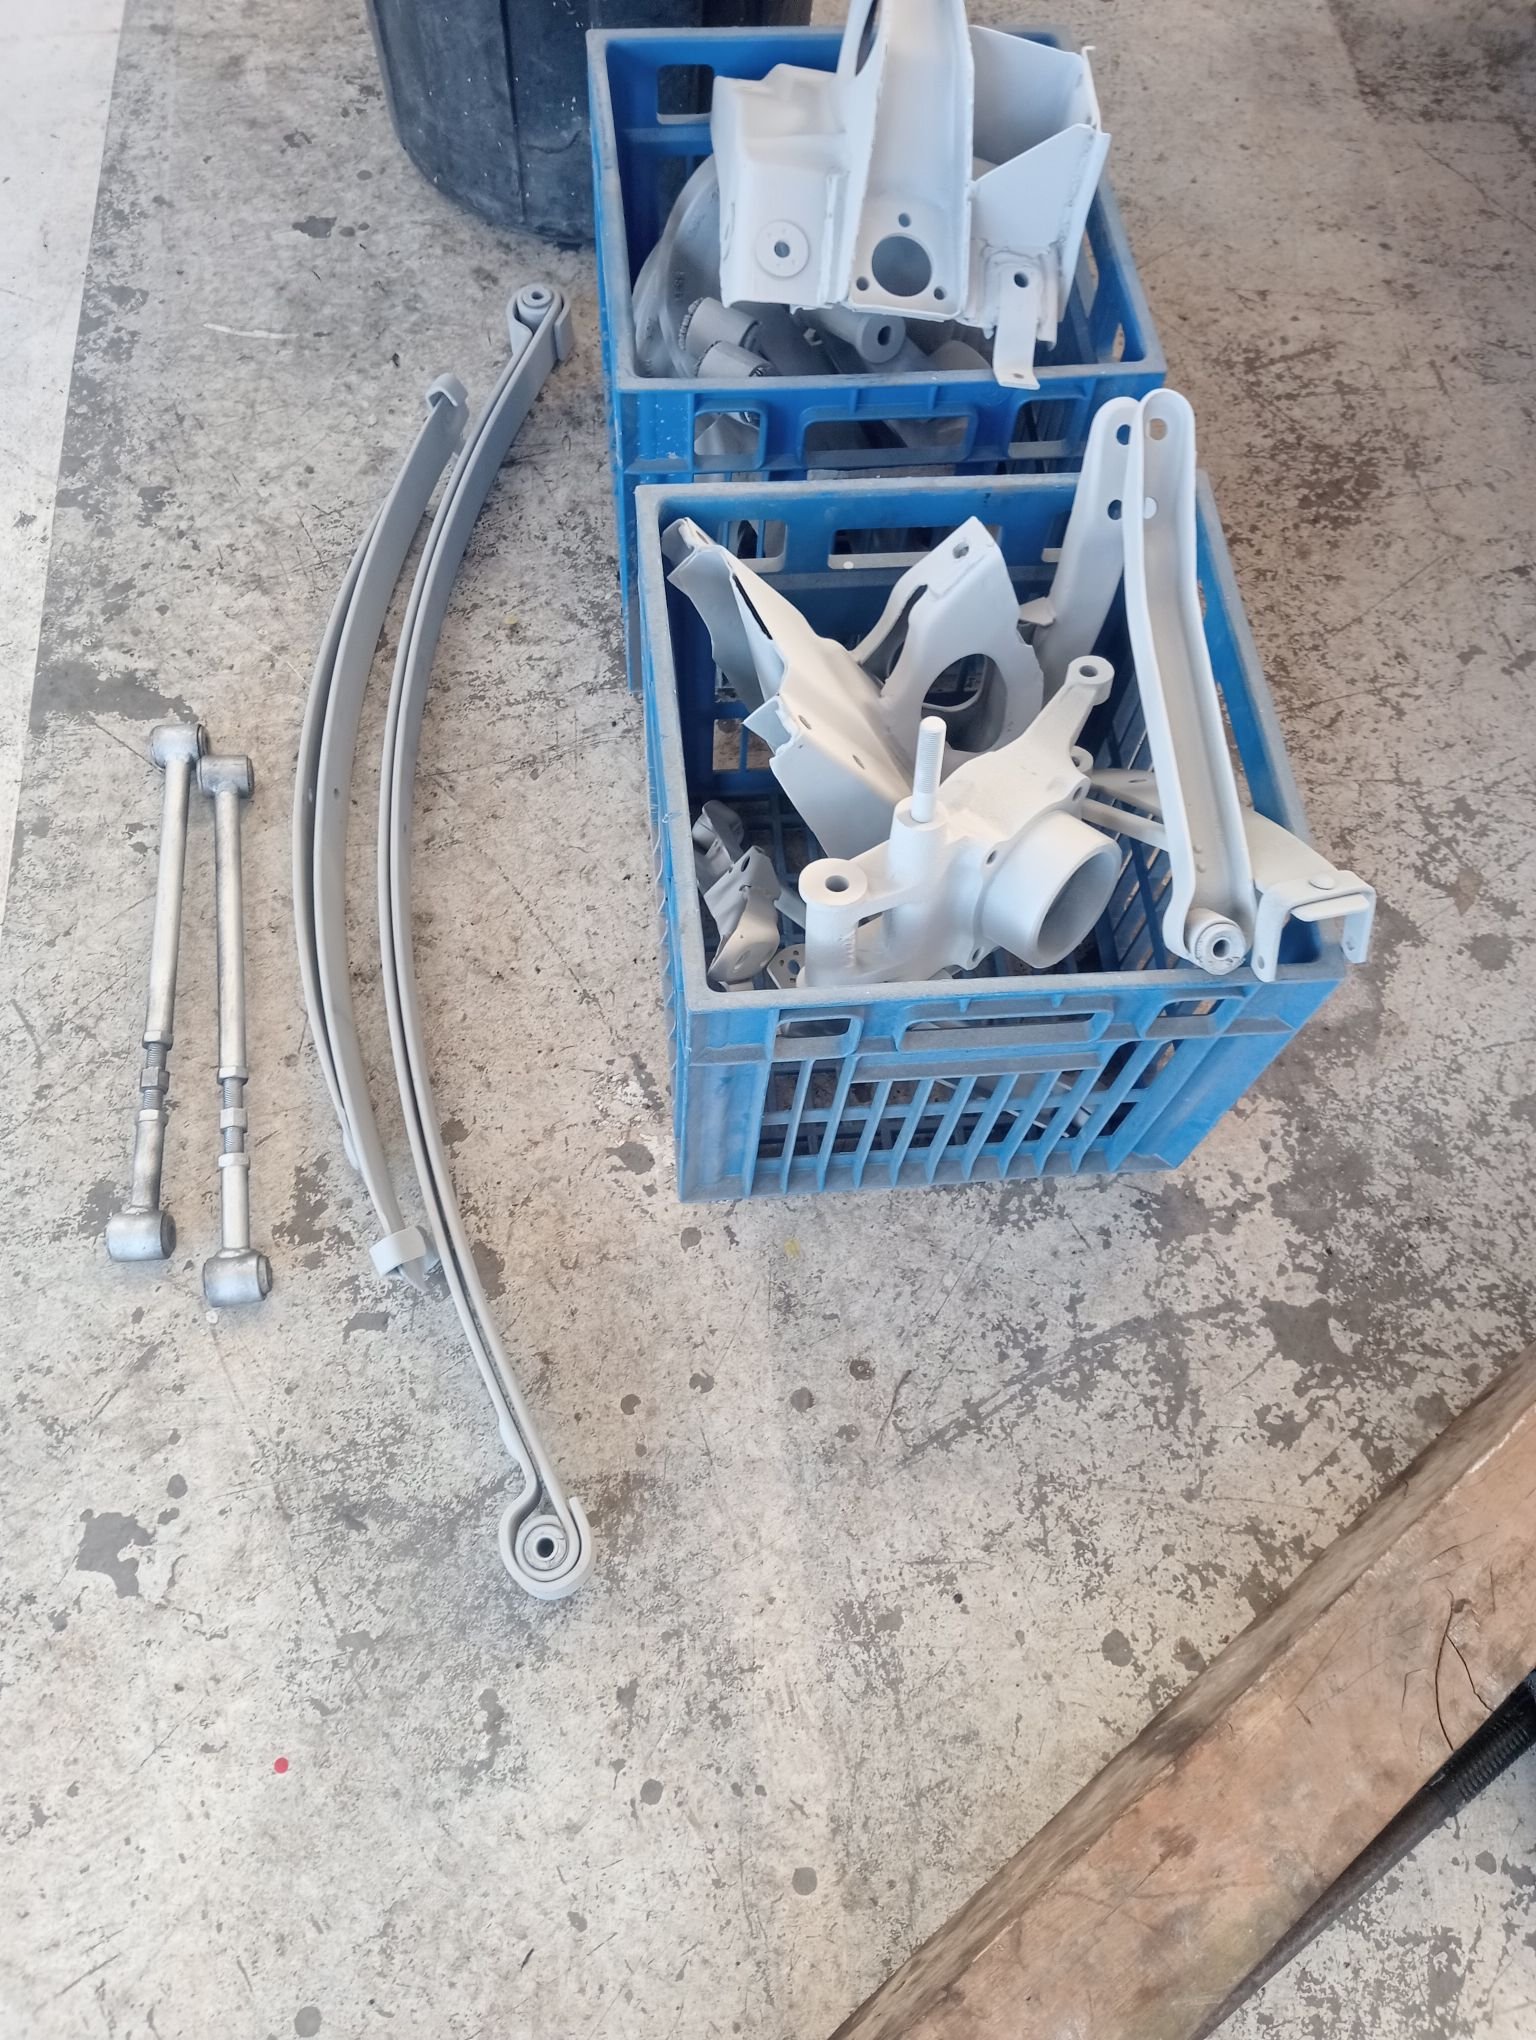
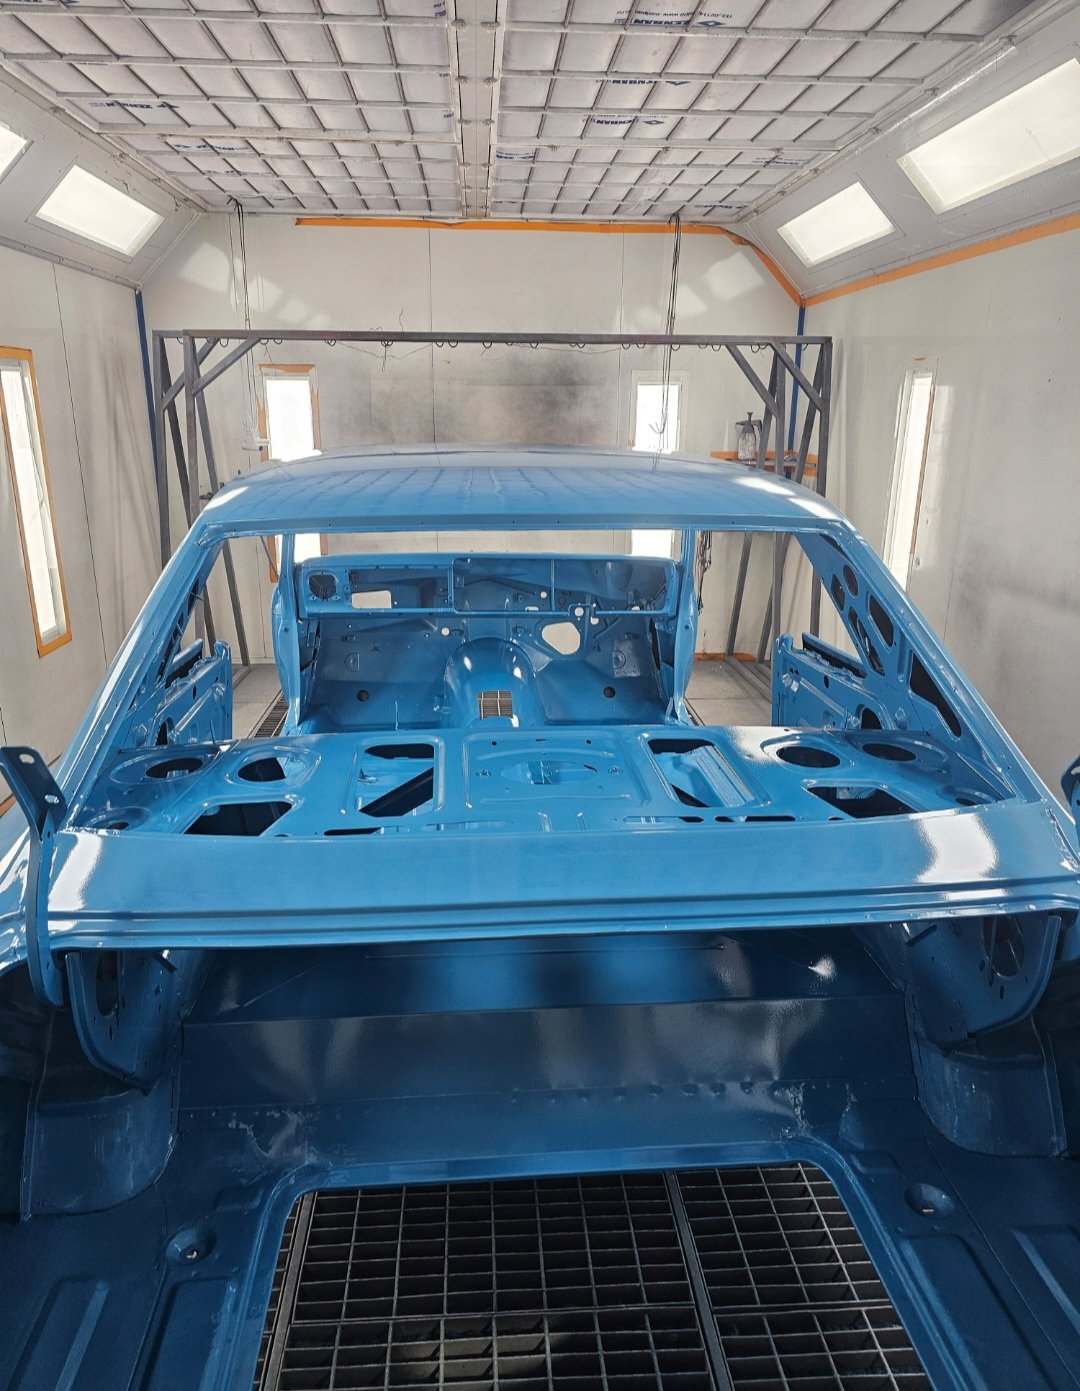
Well shes been all bloody go round here! Progressing along real nice getting alot of finishing touches off Got a ton of stuff powder coated, subframe, lower arms, gearbox xmember, radiator, oil cooler, catch can, over flow, all the dash brackets, a ton of brackets made for the loom etc. Came up bloody mint! Also got a few engine bits and gearbox adaptor etc anodized black. And RKM polished my housings, front cover, intake manifold, water pump adaptor, EWP etc. Came up bloody mint And the shell has been back at my painter for about 4 weeks. All go, Blocked in 80g and 140g and about to hit it with the 240g before final prime. Body lines, gaps etc are coming up mint! Photo before the journey to painter, looking alot different now!
 27 points
 -
Just a quick update. After a visit to the local compliance centre we've put the car in storage awaiting the results of our "request To Use Alternative Documents" (CA30) application. Have to say once they saw the car they the guys from the North Shore Compliance Centre were very enthusiastic and have gone out of their way to be helpful. I've sent over 15 MB of documentation and affidavits to to VINZ - so fingers crossed!
27 points
-
One. Two. Miss a few. 99. Paint! Came out good enough. Satin black for the pillars. PPG 2K epoxy primer, seam sealed & Deltron single stage. The previous repairs stand out quite a bit. There's a bit of dust in these photos from removing the masking.26 points
-
its hard to keep track of all of the different revenue gathering that us certifiers do, especially after i hurt my head diving into my swimming pool full of money, i wasnt thinking about my money diving because i was preoccupied with thinking up new random rules to make things difficult for the peasants modifiying their motor vehicles and also trying to find a new hitler uniform because my old one is worn out from wearing it to work (where i do 10 minutes of work and write out an invoice for $2500) also i have a tiny penis, that is why i became a certifier21 points
-
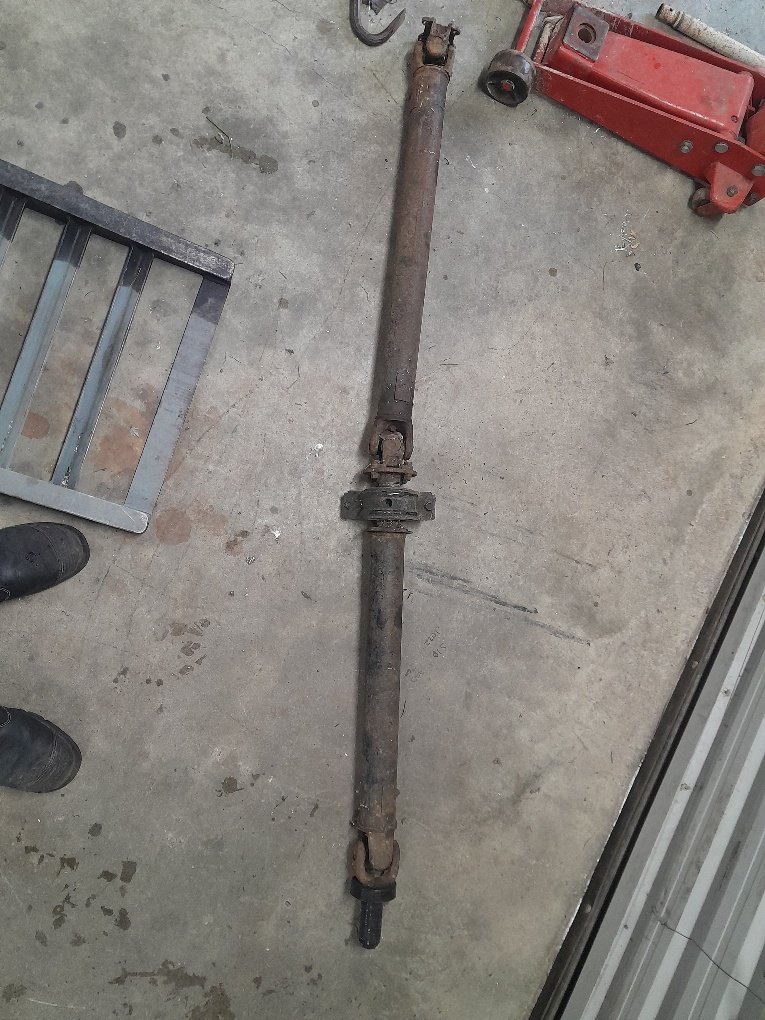
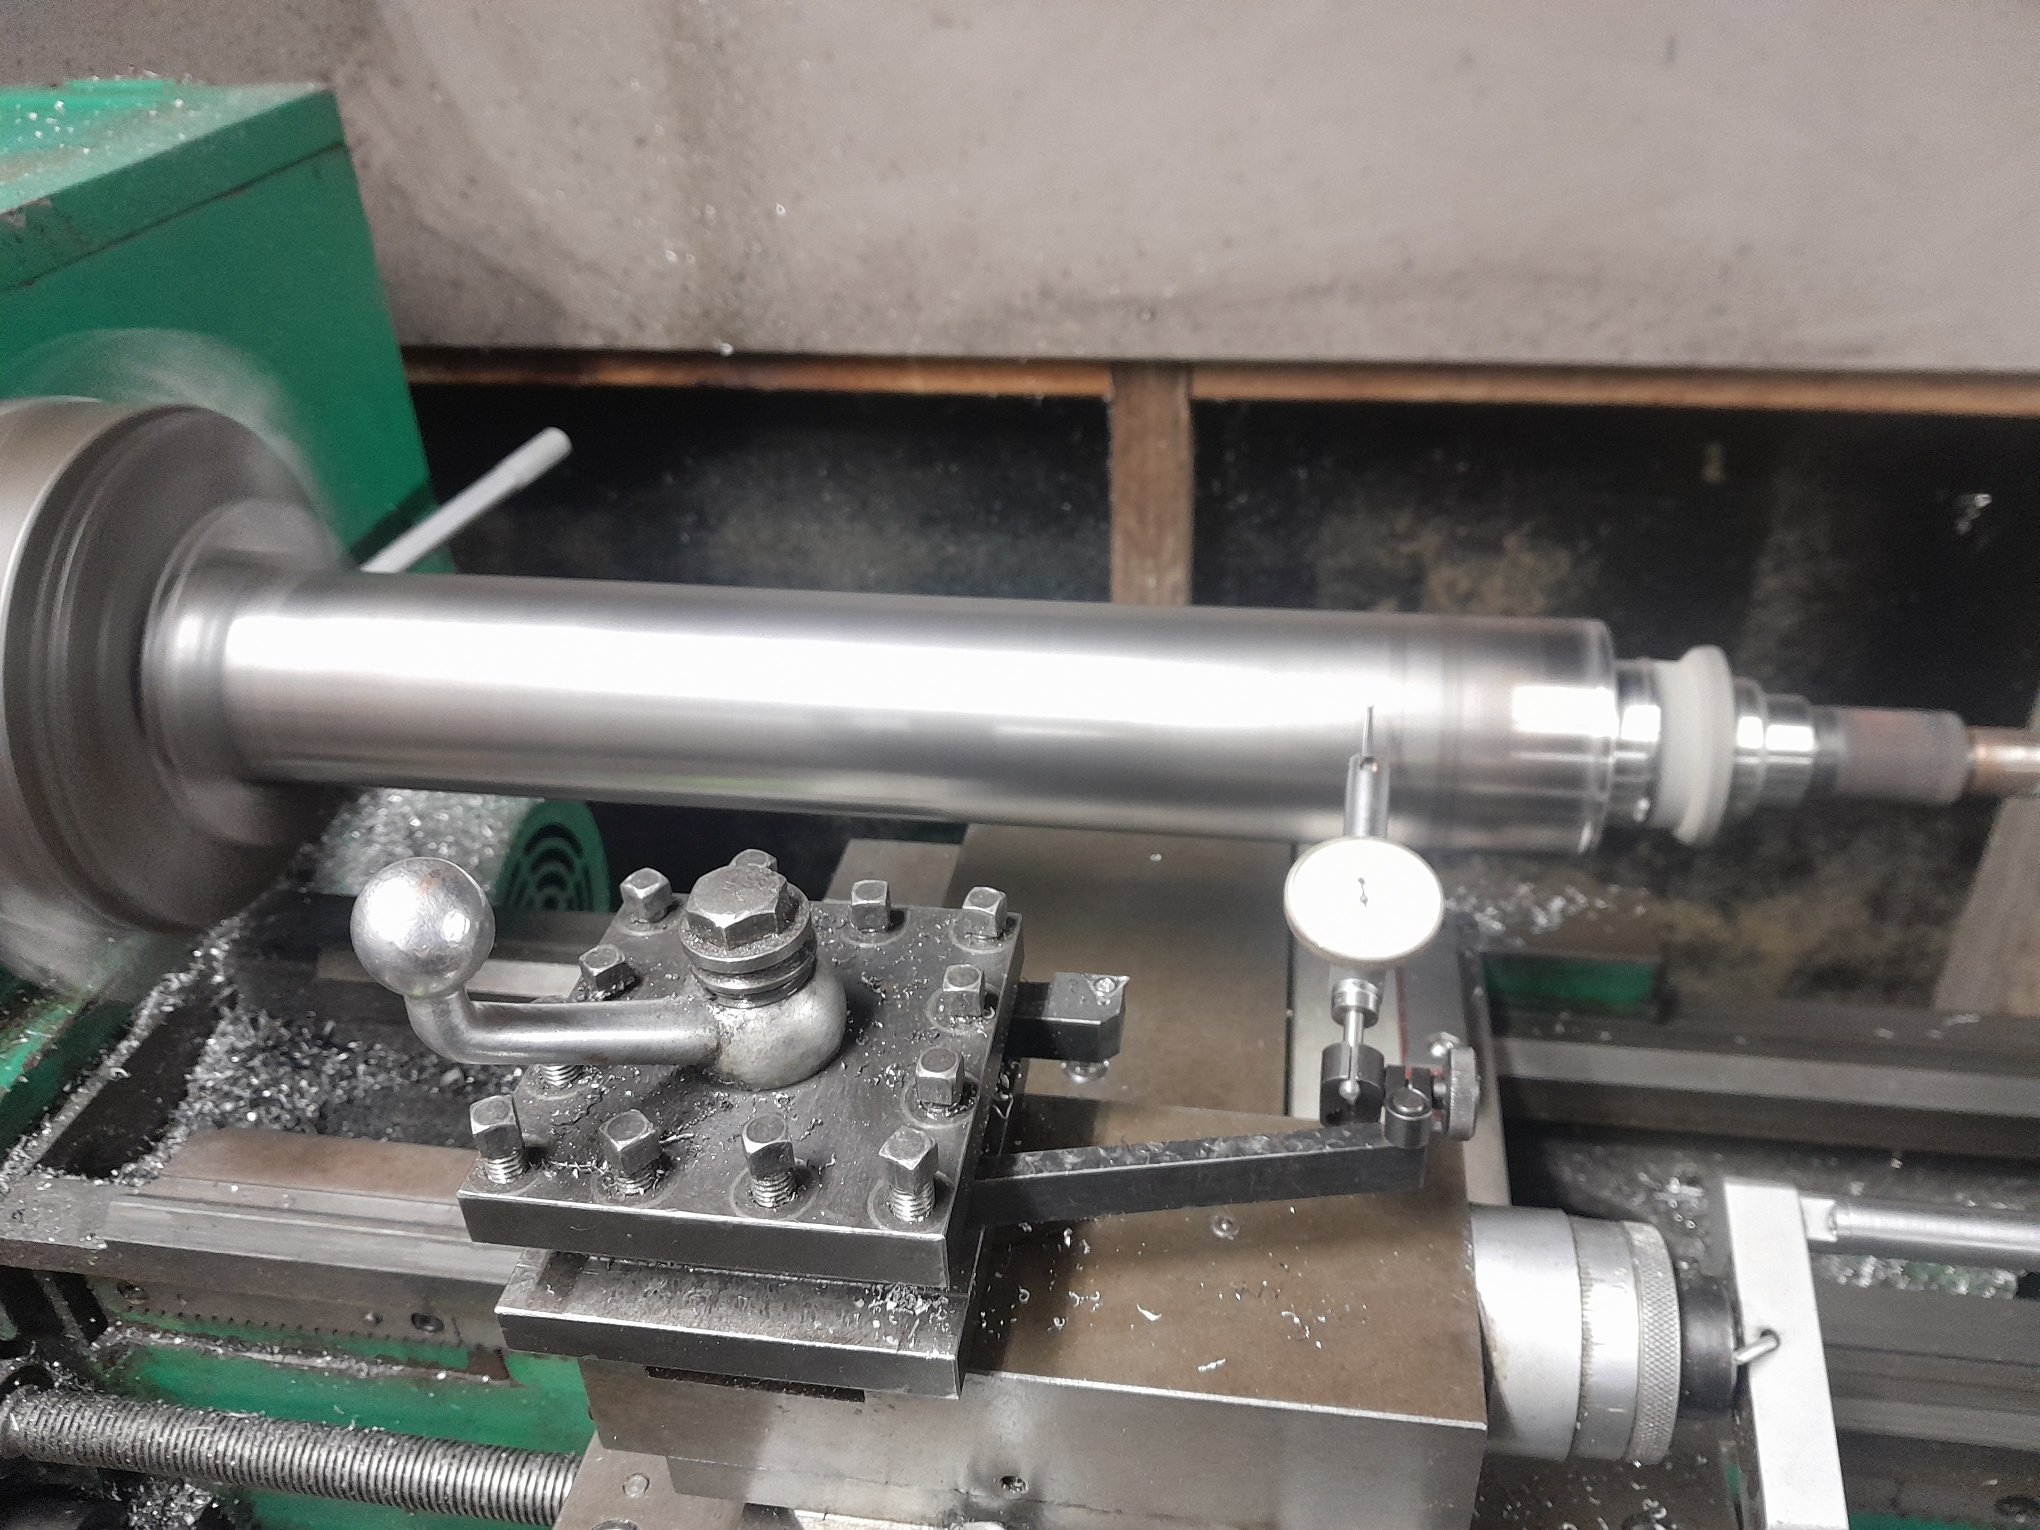
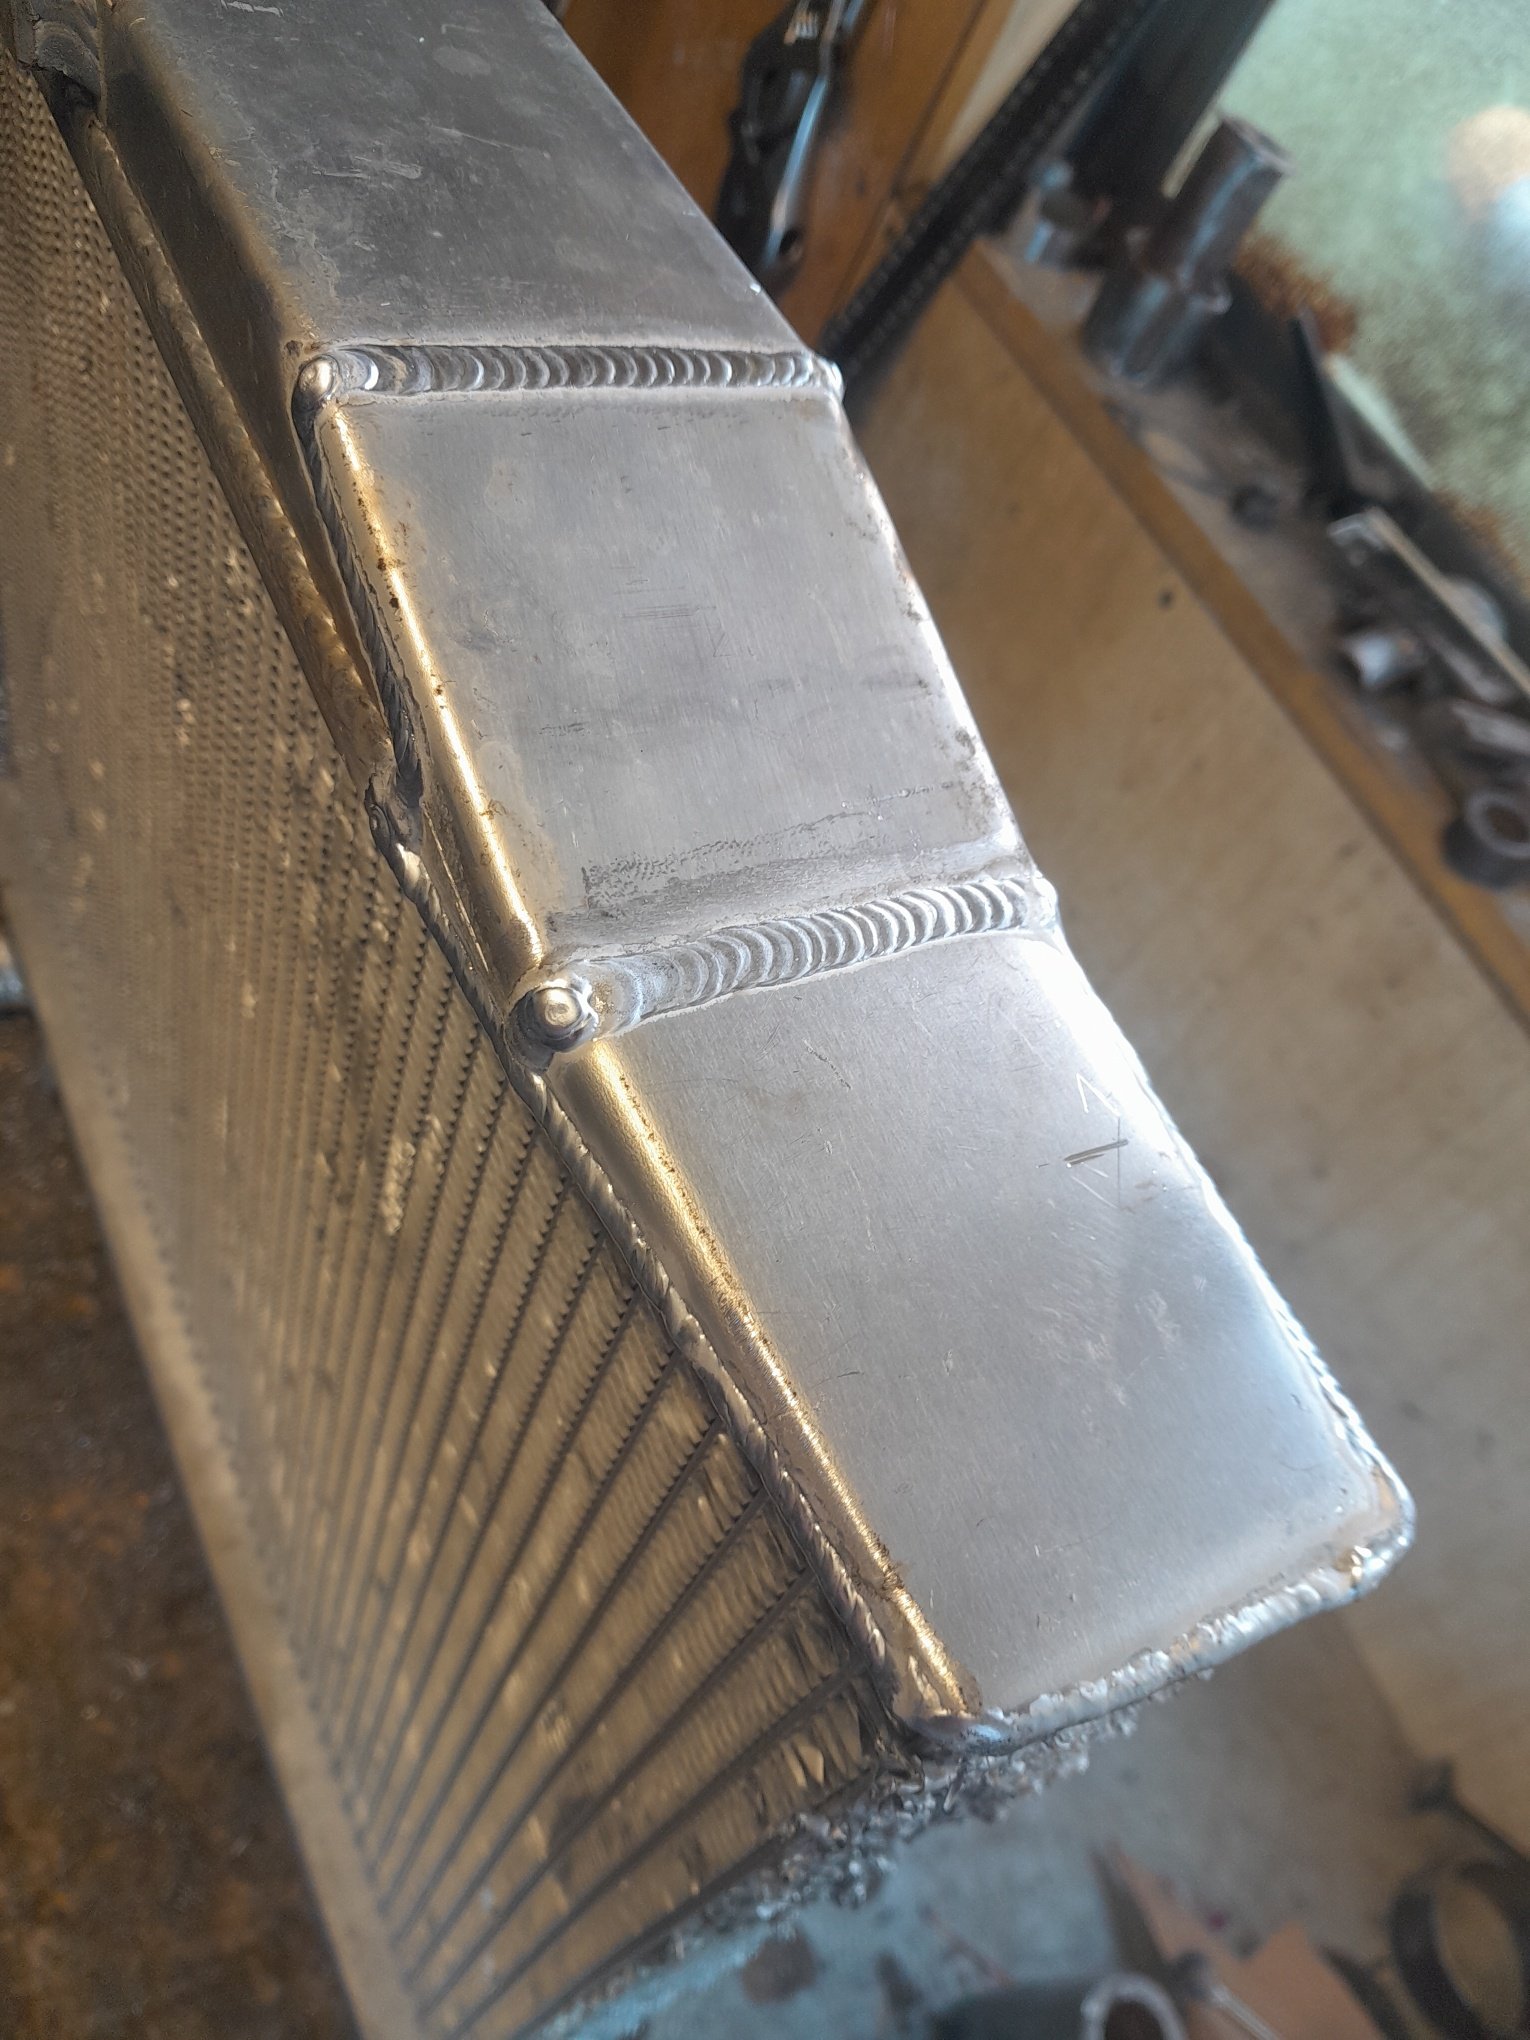
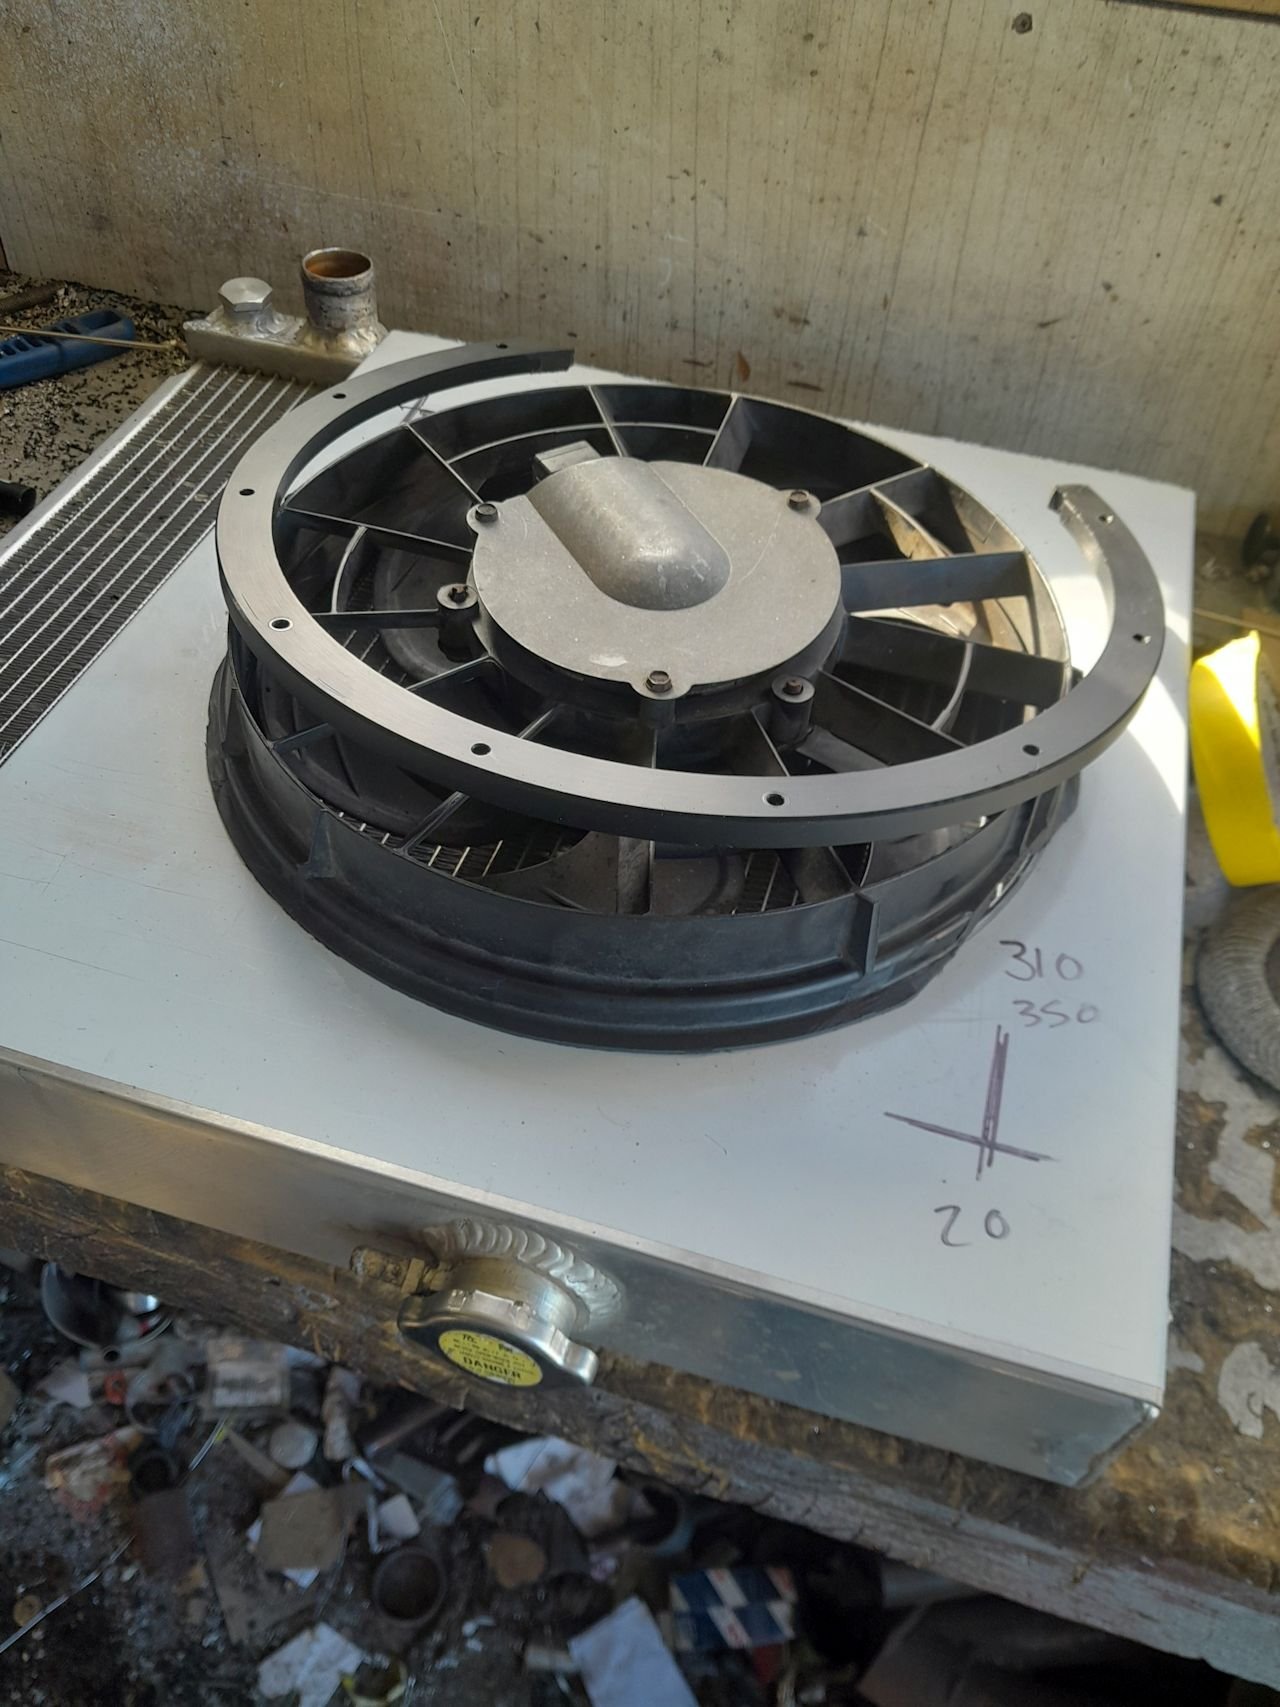
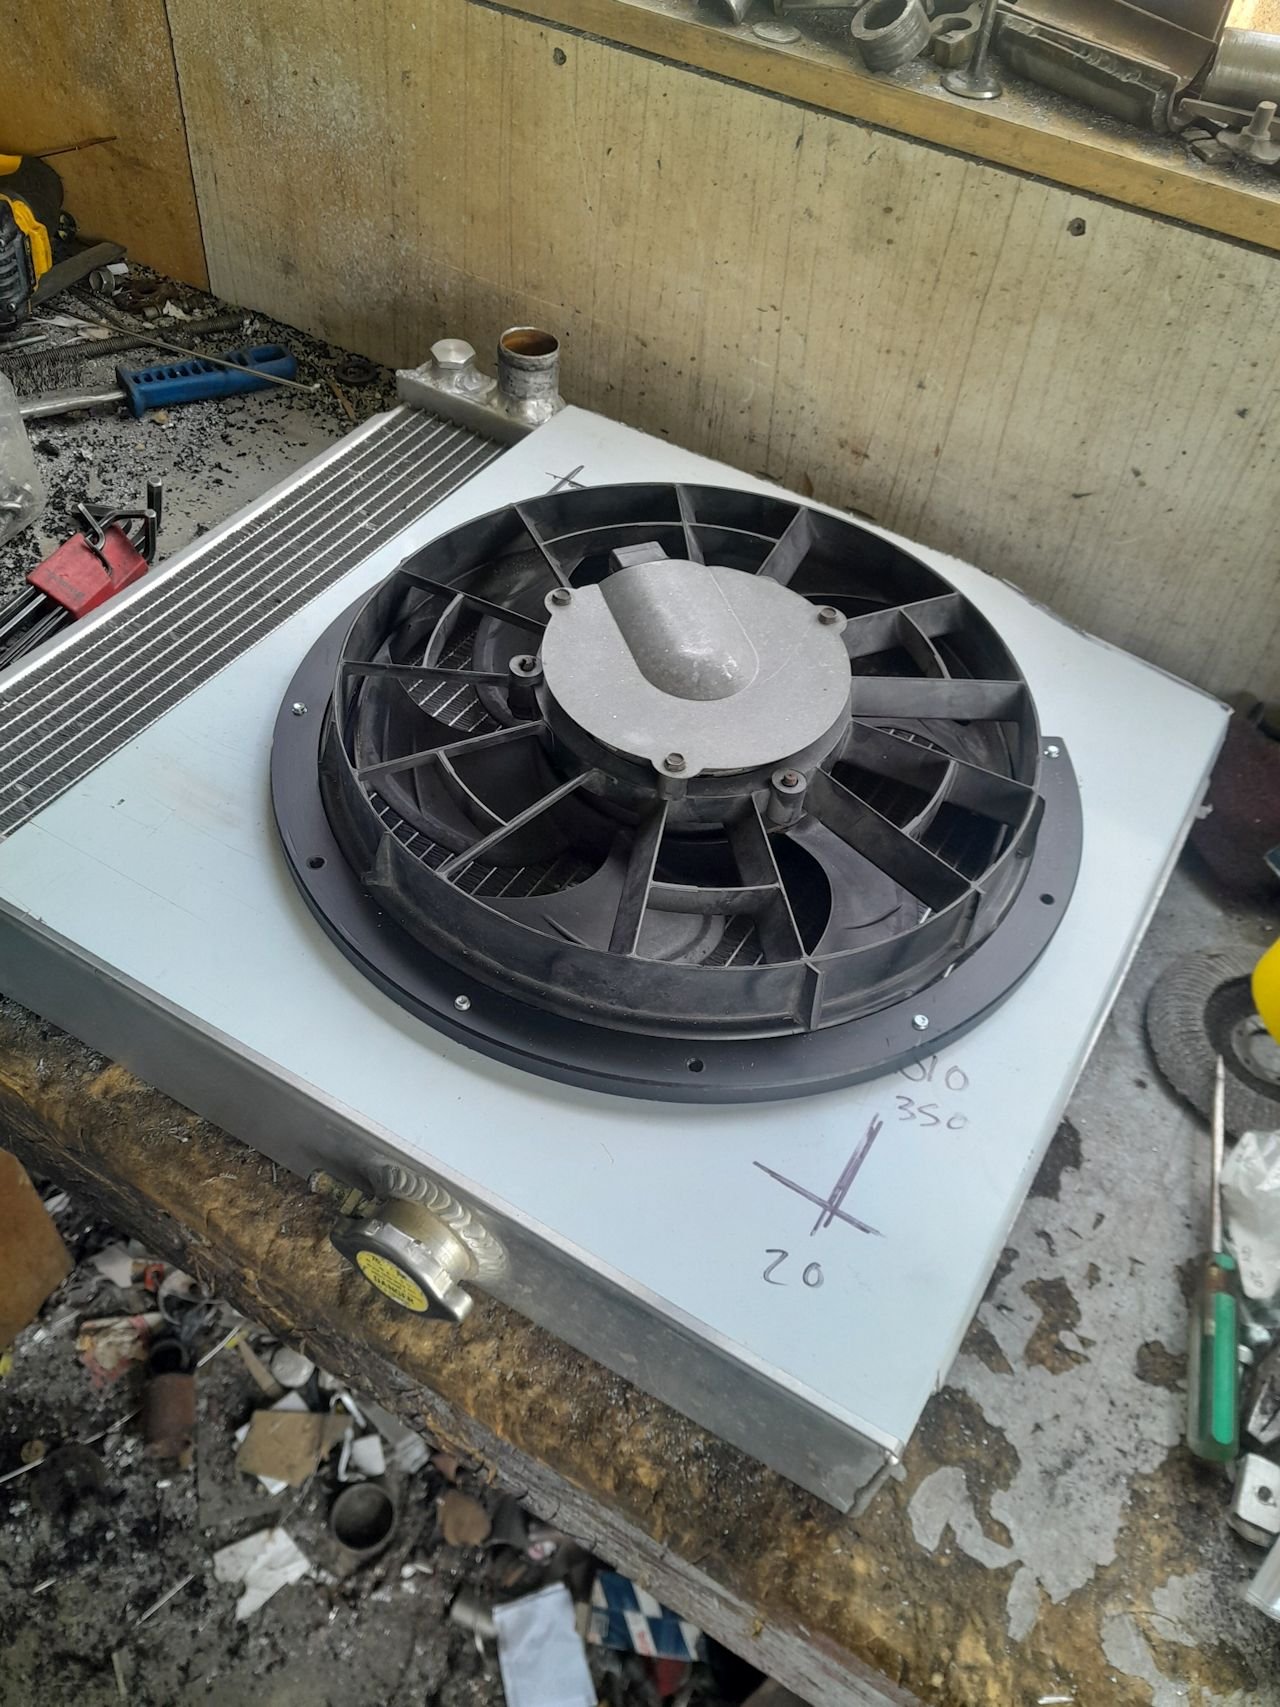
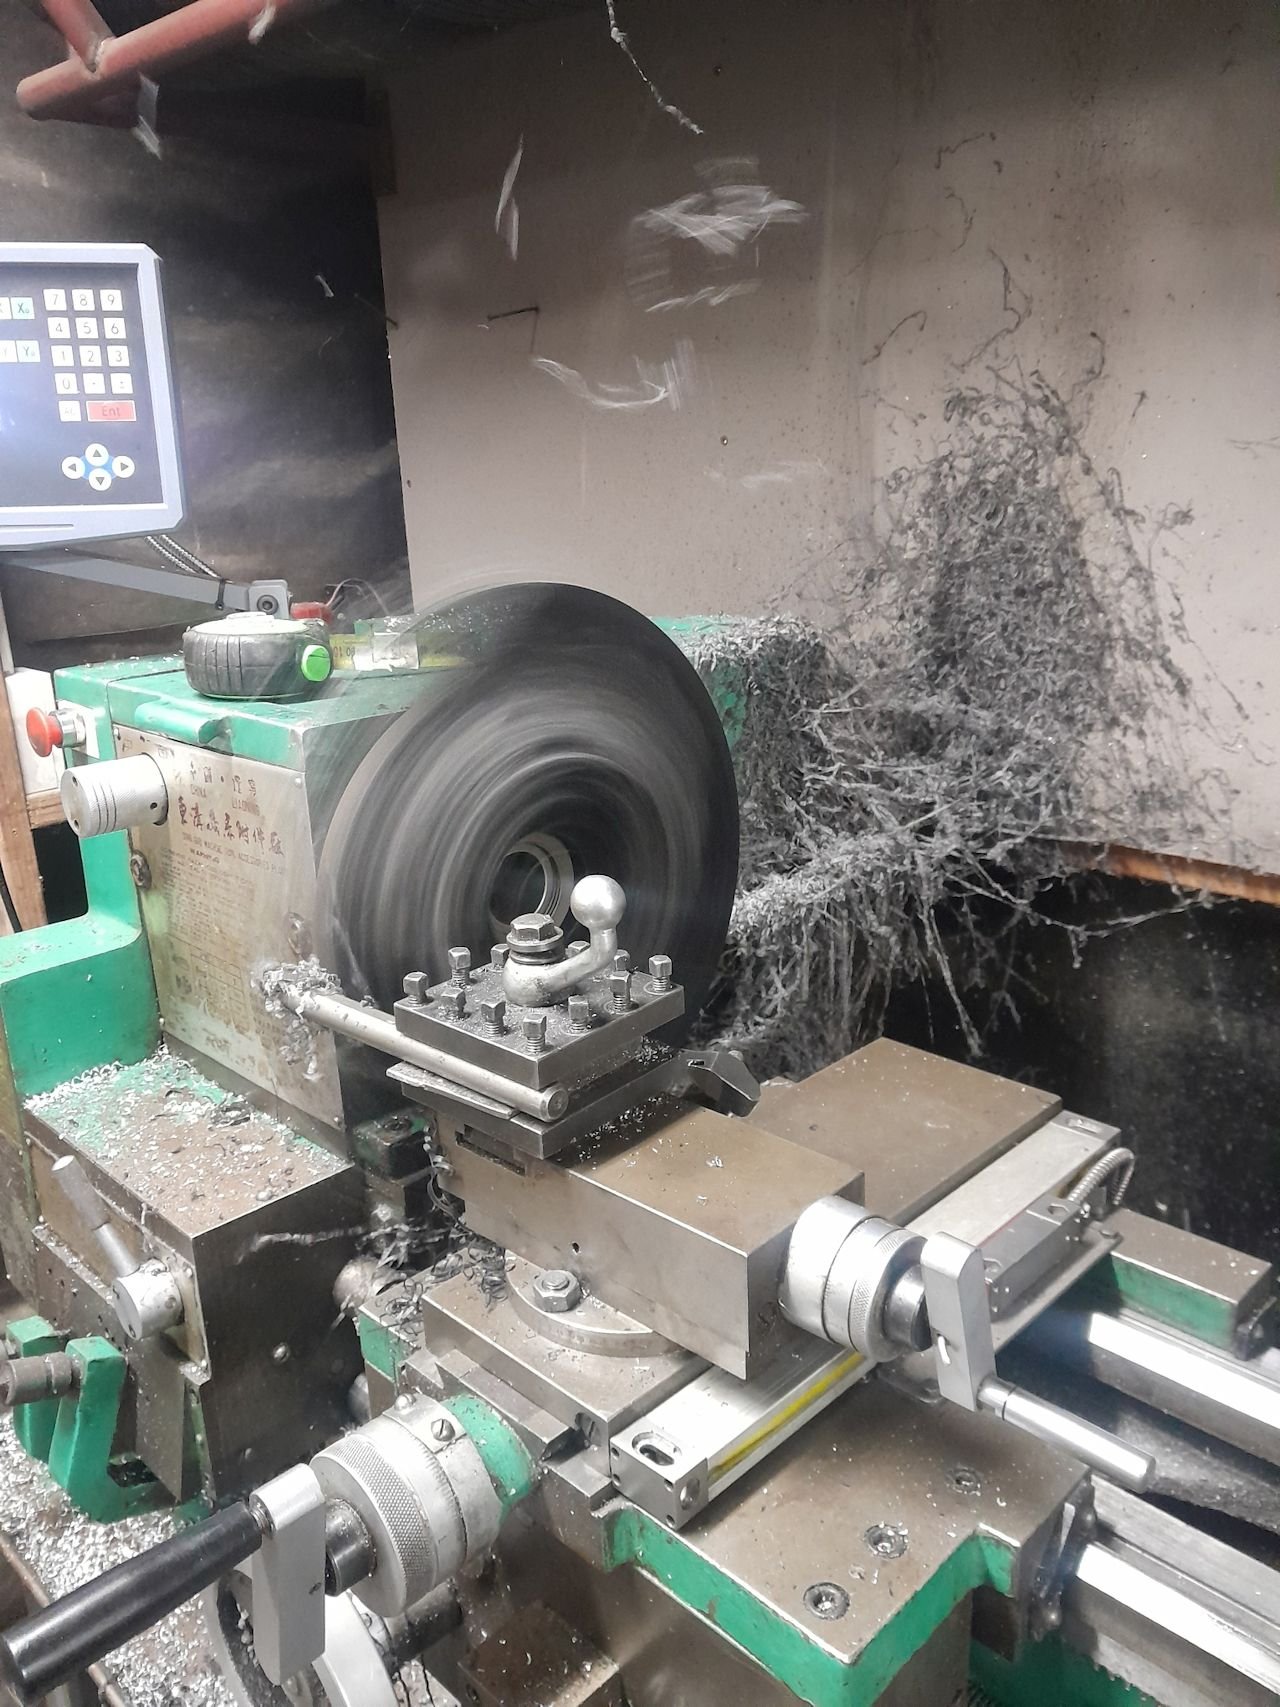
Avoiding making the pedal work with that ^ So started on some other stuff that i haven't finished either I have a 2 piece hilux driveshaft, which has the right ends and the hanger bearing will directly fit in the chassis, once zing the captive nuts off. Just need shorten both the front and rear shafts. plan was to just cut the end off each. shorten, weld, done. But decided to put front half the lathe as is and dial it up, before giving it the chop. turns out it spun like a skipping rope with around 0.7mm run out on both ends. Mr toyota just wacked some balancing weights on the low side at both ends. And yeah turns out the tube wasn't just welded on the piss. the bits the tube spigot onto were machined wack. So far i have trued up the hanger bearing end, building up the low side a touch then machined to a tolerance fit . Got the tube on there and is bang on. Probably getting way to picky but yeah. Rest is on hold till new uni's show up Next for no particular reason. decided to do some stuff with radiator Old setup used to look like this Some kinda nissan radiator. which i still had. was too tall to sit in normal place without sticking up and looking ugly, so done some butchery to the bottom tank to drop it down further Buying a radiator that fits may sound wise. but I wanted to make a gap on the intake side to feed the intake cold air. so an ae86 specific one would need to be cut anyway. So yep i cut some more off the side of this one which you can kinda see the rough cut above^ That meant the twin fans wouldn't fit anymore (they didnt fit good anyway) Again a normal person would have brought a fan that works But i despise junk aftermarket fans. So i cut one of the twin fans out leaving a flange around it. made an ali shroud. then wasted half of my life making this plastic ring to clamp the fan to the shroud Would have been a good job for a 3d printer and made in a couple of bits. but i have lathe and a bit of acetal that has been hanging around forever I haven't finished it yet either. still need to attach shroud to radiator and but made an amazing mess
20 points
-
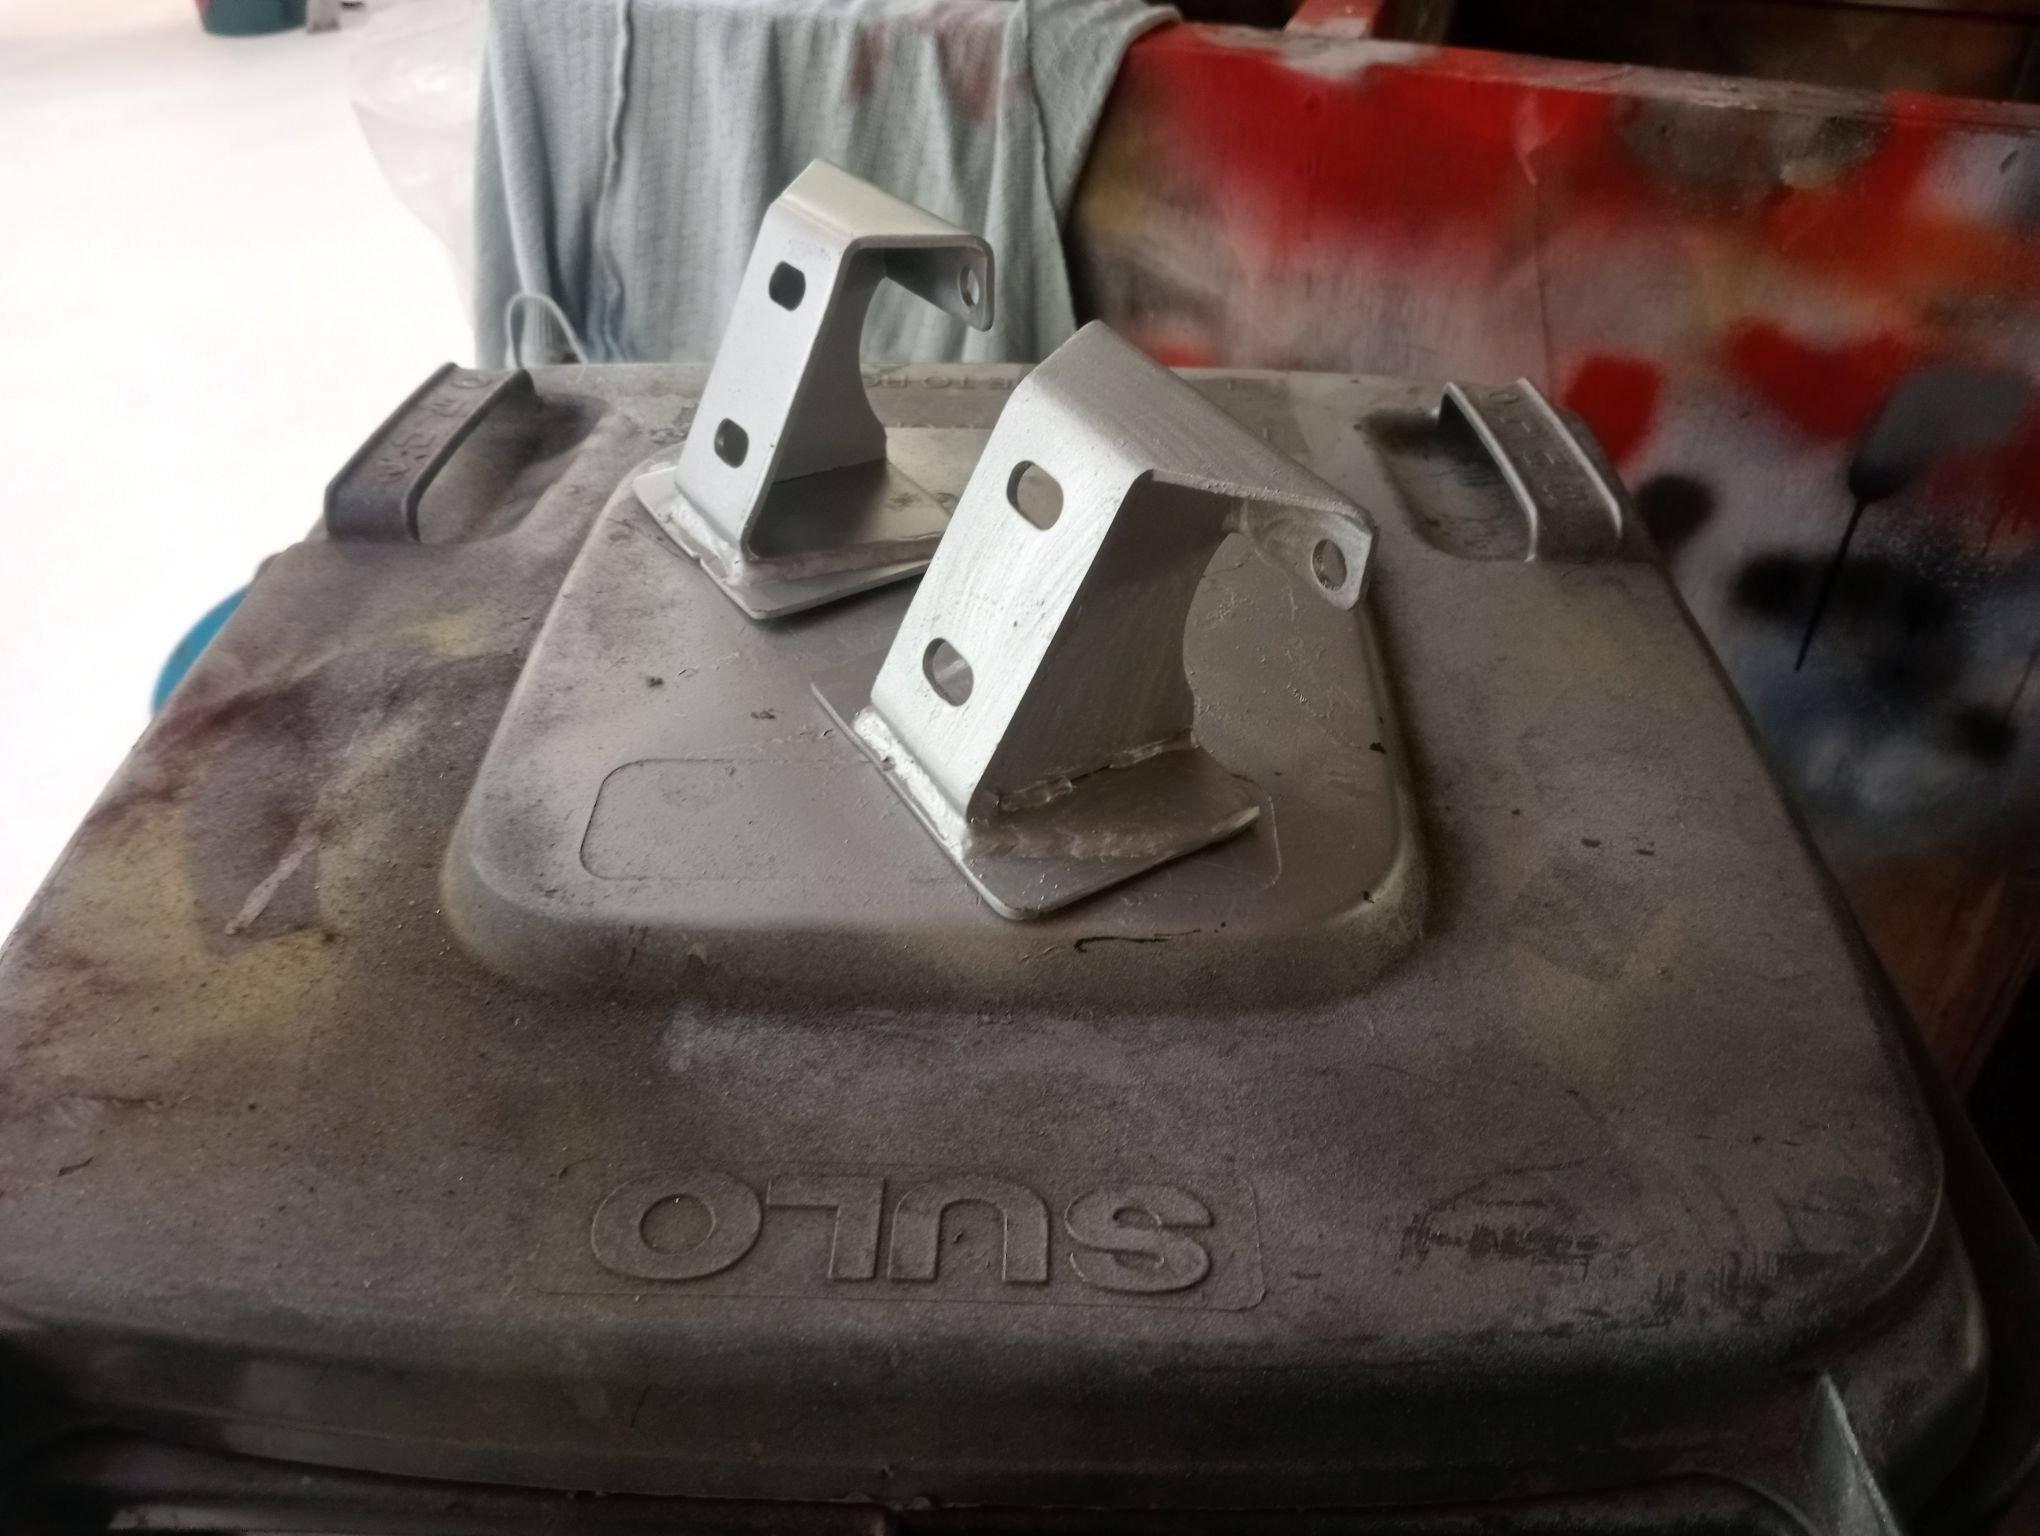
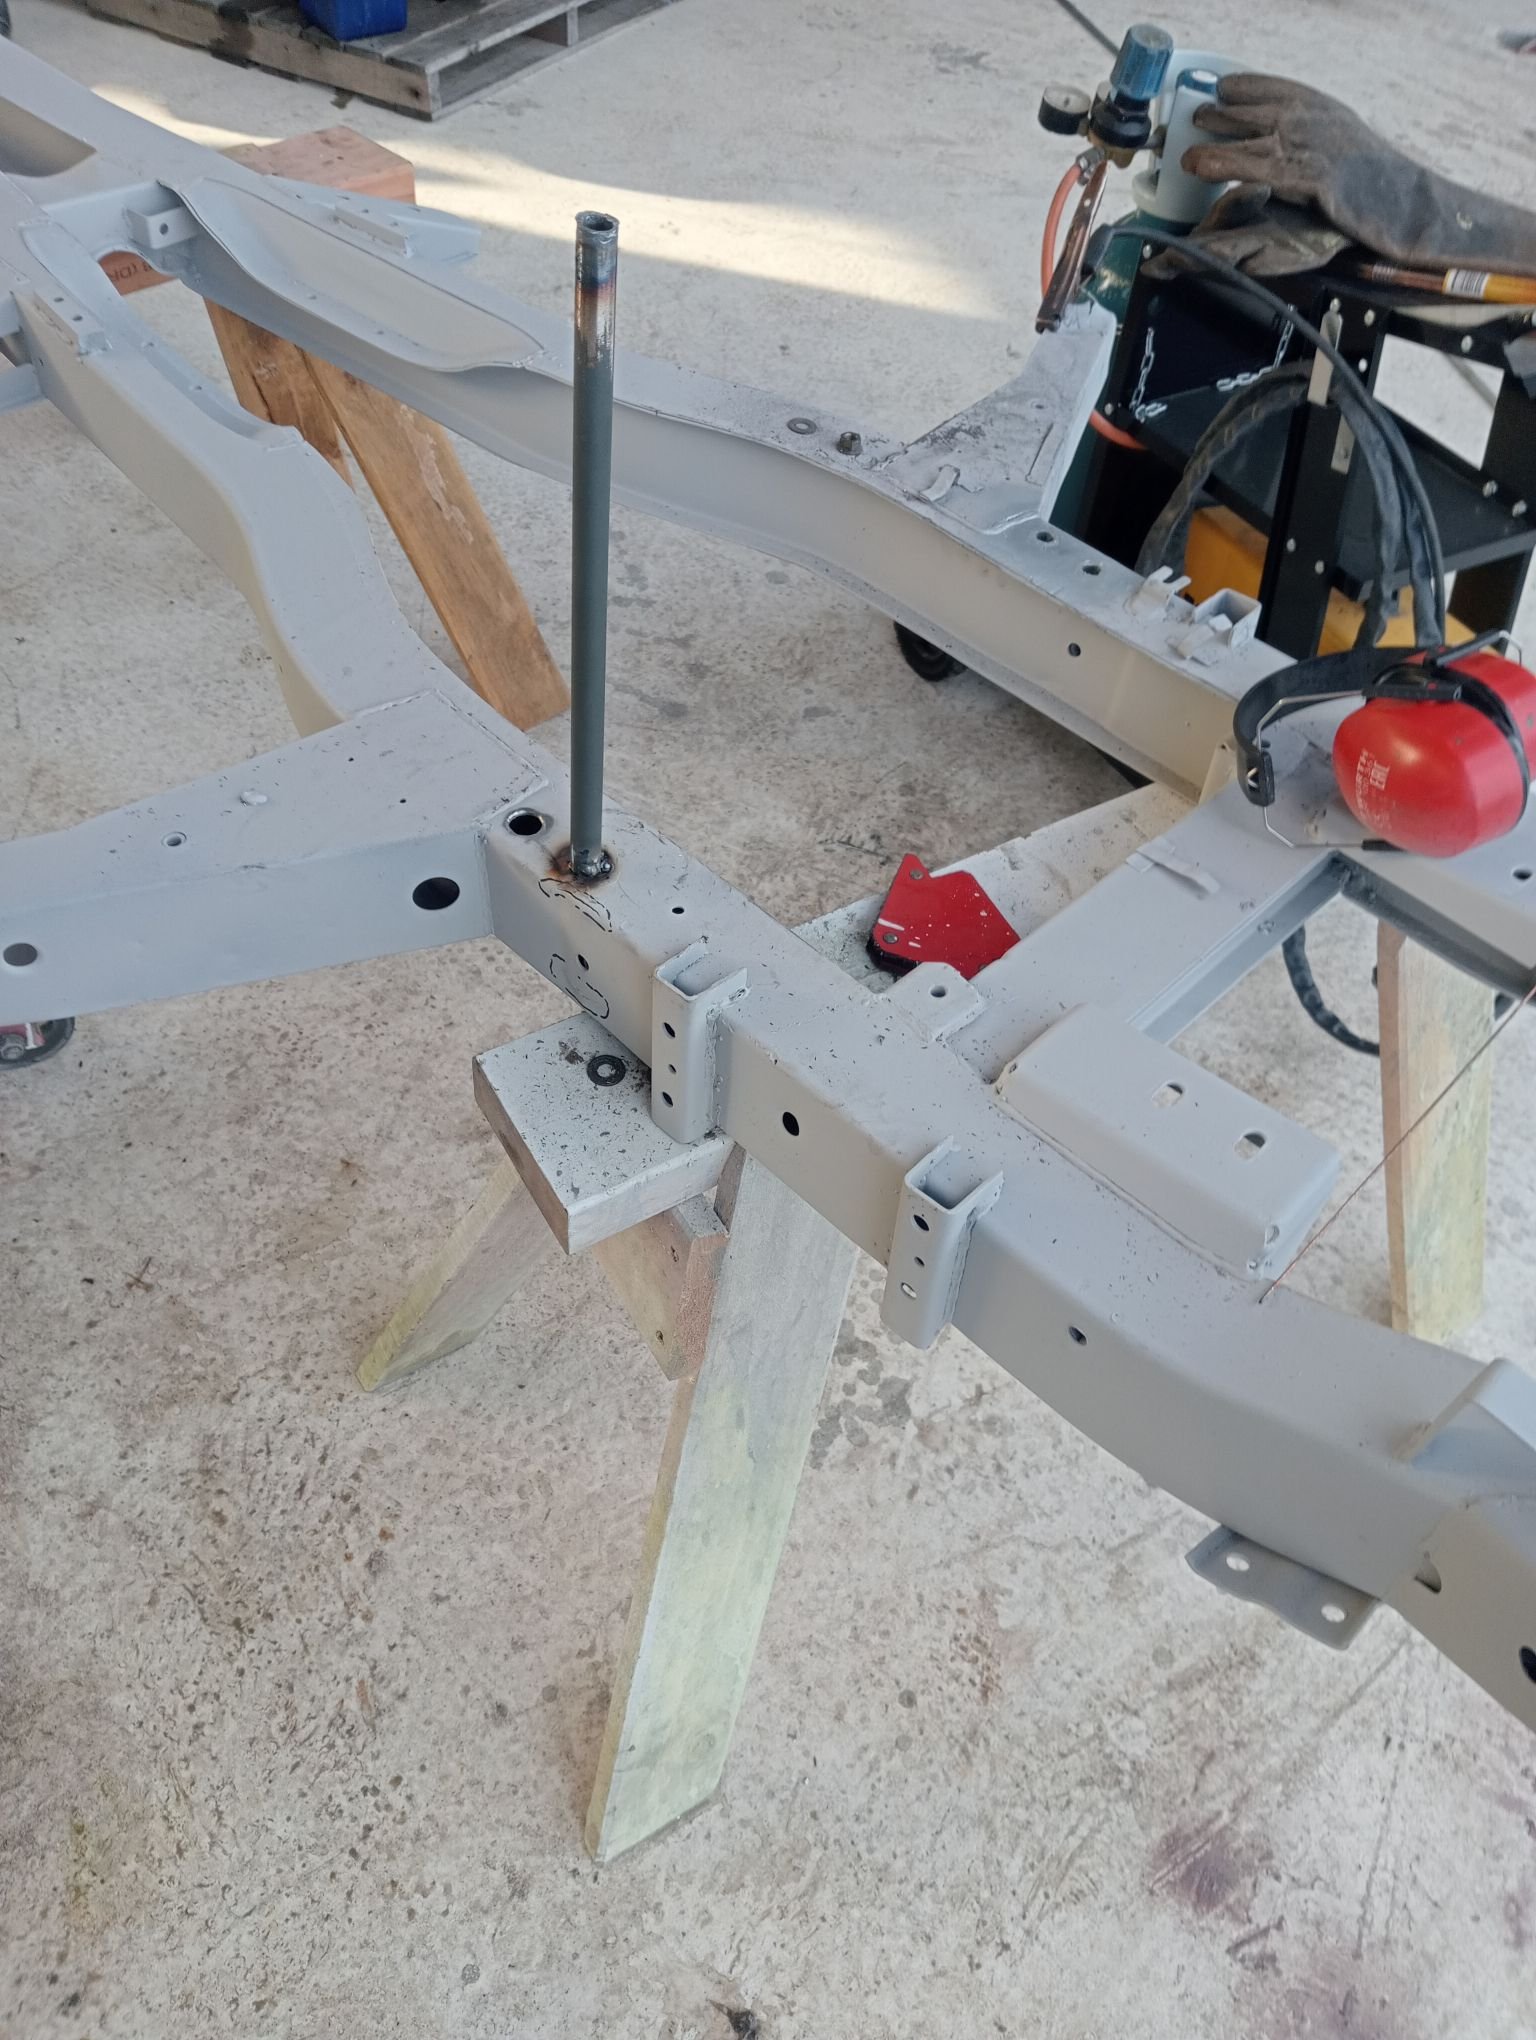
extension housing finished, installed and cynically painted in a coat of hammerite direct-to-shit silver. presented on this angle which just so happens to hide every single weld, how convenient. Ended up having to ream it out as the selector rod kept getting locked up mounts welded up and pretty much finalised, these are comprised of 80% stock triumph mounts on their side and 20% bunnings pool umbrella stand. chassis came back, one of my guys got to play "mark all the cracks" uh oh. as suspected, it was definitely time for a birthday. (Also, are all chassis welds this bad under the paint?) RHS lower wishbone attach point lots of other bits came back at the same time I was having a mental health moment earlier, the diff did NOT have a drain port. It does now. crush tubes going in for where the mounts will sit. I guess I could have welded the brackets on directly but it might've made getting the engine back out a bit funny. Plus the chassis is so thin I'd much rather have the big bolt sandwich Frustratingly I don't have half the suspension bushes that I need, otherwise I'd probably have the chassis repainted and all the doodads back on it this week. Also waiting on a new clutch and drive axles.
20 points
-
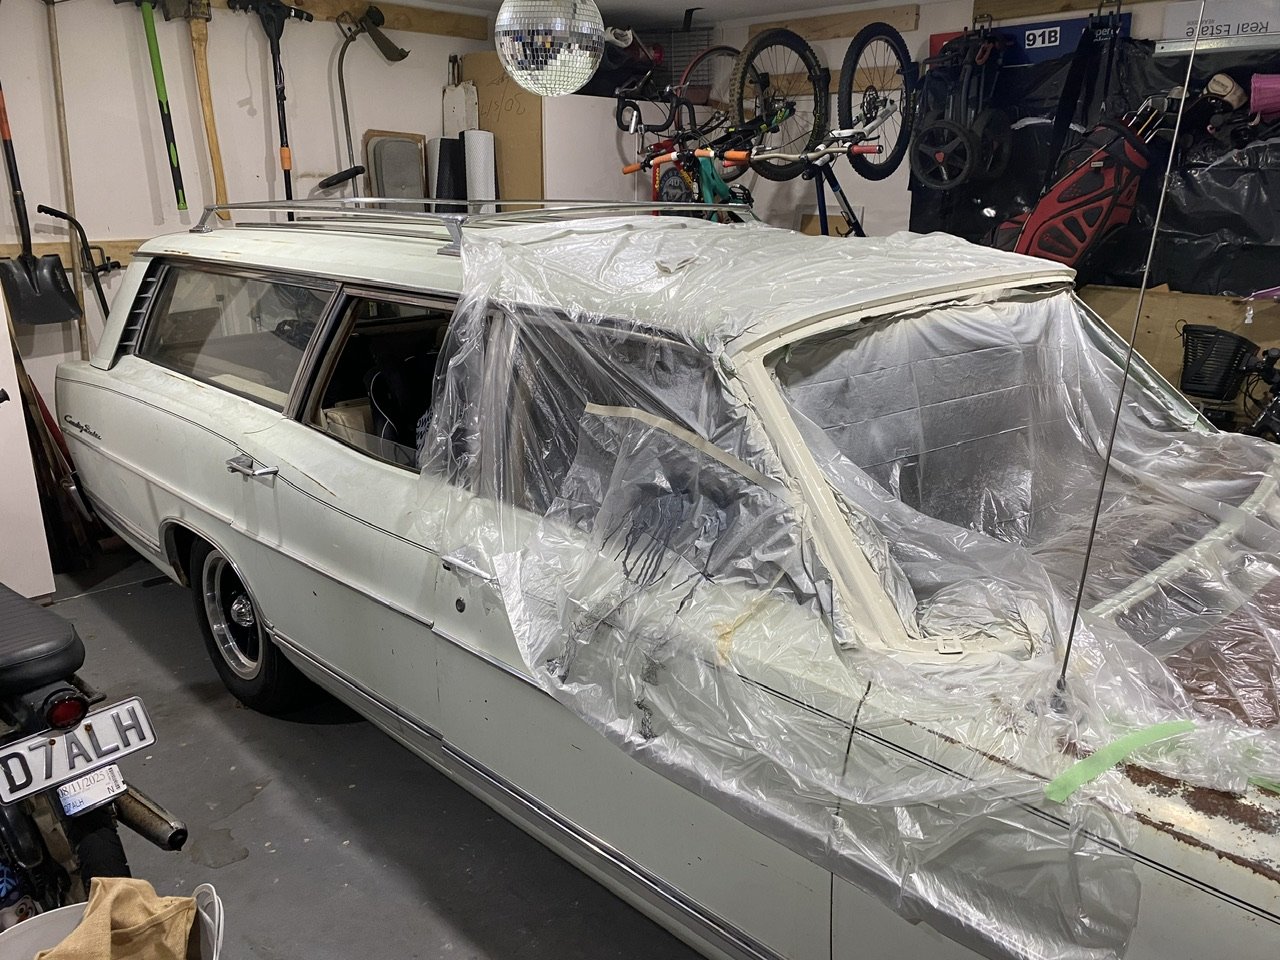
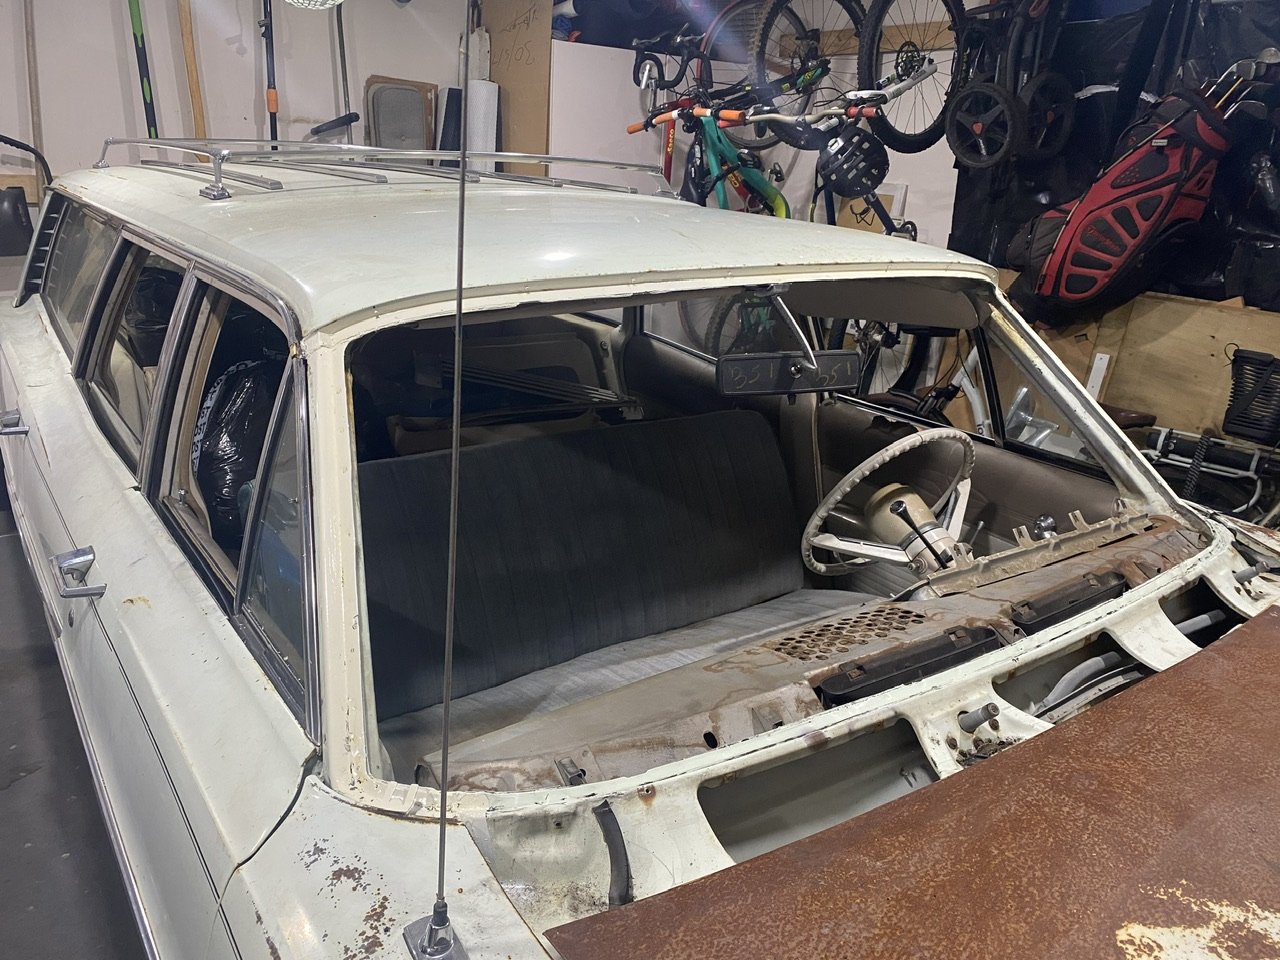
I’ve been spending some time locked in my garage with a heater running and some strong aerosol paint fumes this week. Primed it, smoothed out some pitting, primered again, and sprayed white. Don’t let me forget the clearcoat… I only remembered that as I’m writing this… It’s nearly ready for the windscreen to go back in. I also fitted the roof rack. It’s a proper wagon now.
18 points
-
15 points
-
15 points
-
Suck it up, throw ya nuts over your shoulder, crank some Slayer, and fix it properly. If everything else has been done then its just lazy leaving that shit.11 points
-
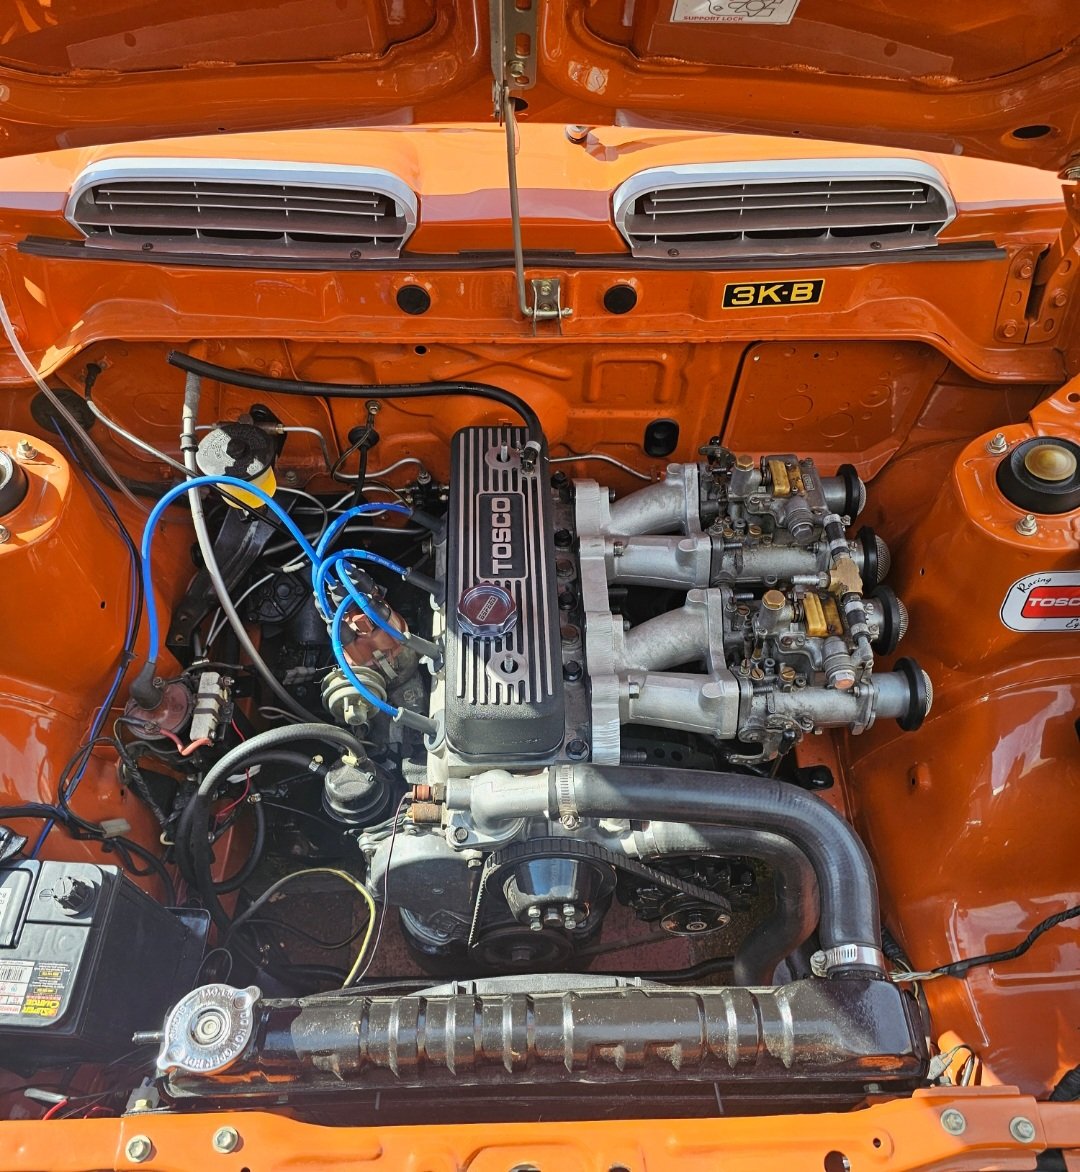
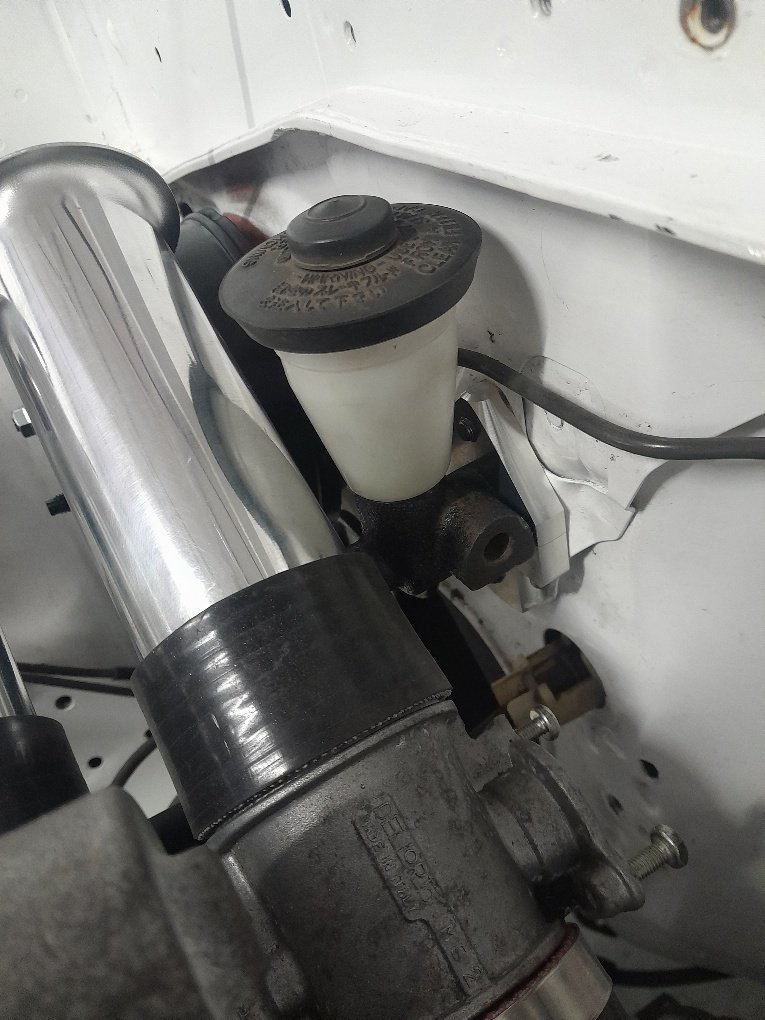
I really struggle for free time these days but have been ticking off the odd job when I can. Now the engine is in I could continue with the game of making the trumpets fit. In the last photo of the previous post the rear pair of trumpets weren't fitted as they hit the brake booster. I had various schemes in mind for sorting this including a change of angle for the quads, or printing different trumpets, but an easy solution was to change the booster to a smaller unit. Quite a while back I managed to pickup a second hand KE70 booster to measure up, and seeing as it looked like it would all work I got a new one and finally got around to fitting it. Here's the comparison: I also picked up a new master cylinder and threw that in. The rubber line from the reservoir to the master touches the strut tower but I'll muck around with that later on. At least now there is ample room: Also finished up the fuel rail spacers and fitted the rail Got some new cam cover washers so bolted them down properly and fitted the coils: Can't decide which spark plug cover to run, tempted to stain the wood version and run that till it catches on fire: I also took the starlet for a quick loop around the neighbourhood, When I got back one of my nieghbours was waiting for me which made me worry for a bit, but he just wanted a ride... Poor things gets warmed up then trashed, then put away again. One day I will revisit it and make it betterer... or worserer... but definitely faster. Anyway, thats all for now. PS: All of this is @kpr's fault11 points
-
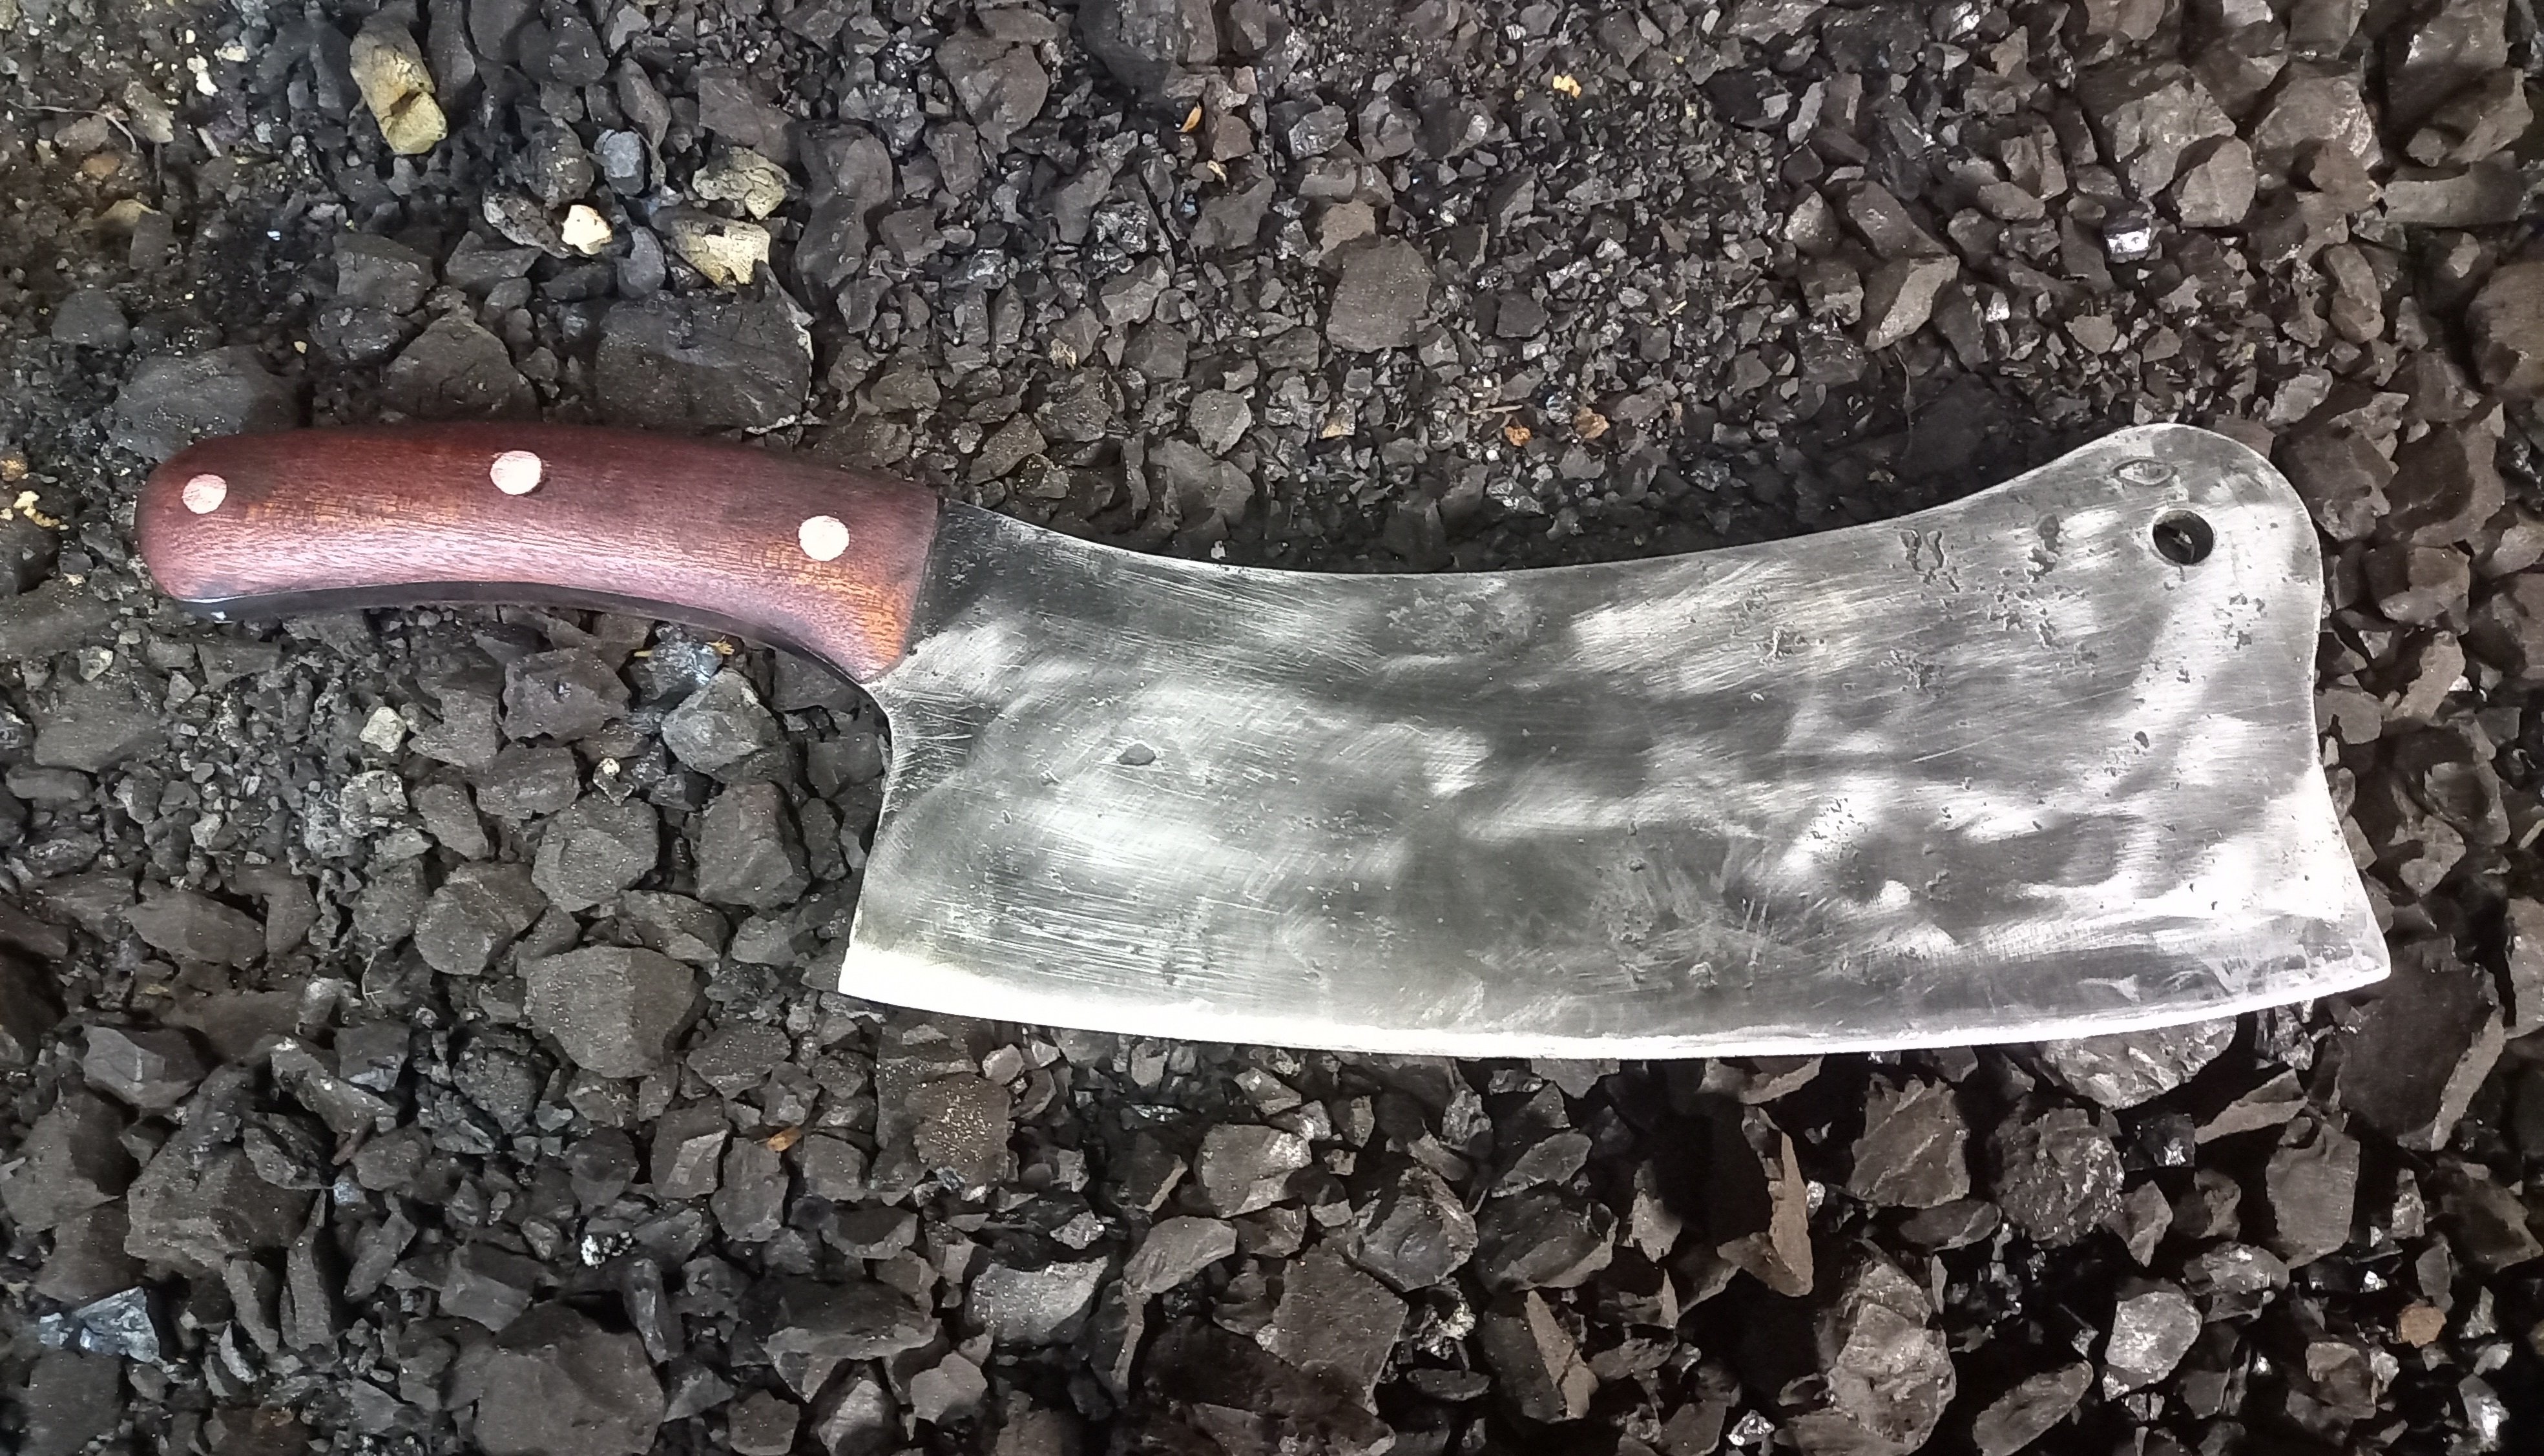
Heavy duty meat cleaver I forged, its not cut from plate, it will cut virtually anything and hold an edge, I spent the afternoon splitting fire wood with it and cut an old tire off a rim with it.
10 points
-
Oh yeah plugs and leads arrived…. no spark Ordered coil and rotor dist cap arrived 6am this morning so will try tonight buuuut turns out these things run a mono leaf rear with 2 vertical air shocks run off a compressor and reg and two horizontal shocks air shocks are shot hence it squatting its arse these seem to be NLA 335MM compressed 485mm extended found these with similar specs (another 50mm extension) https://www.summitracing.com/parts/gab-49205#overview any reason they shouldn’t work? I’m sure I can manipulate the regulator to get the correct ride height/make it adjustable even Disregard, more googling shows rock auto list them for 1968 on ones it’ll be fiiiiiine10 points
-
Recently got a bit more done on the trailer. Made sure it was about the right size etc, and made the up rights/sides. For ease of use and simplicity, the front and back tailgate board things just slide into slots made from angle and flat off cuts, Then I figured out where the axle needs to be, then whipped up said axle on the BIL's lathe, made some mounts and welded it on, As you can see in the background of the pic posted above in the last update, the alloy wheels were very oxidized (they have been outside for years) so I gave them a water blast, spray painted them black, and then buffed the paint off the face of the wheel to make them all shiny again. Slapped some tyres on that match the cruisers, and good to go. Then I whipped up some mud guards. Decided just to make them out of 3mm thick steel and not bother with mounts, and just weld them directly to the frame. Found an off cut of steel, cut the desired shape out, removed the rust, and put them in my fancy press brake and bent them into shape. I don't know why, but I find the little mud guards soooo adorable! Now I just have to cut and mount the wood, paint everything, and its done. Regards VG. P.S. Say hi to your mum for me.10 points
-
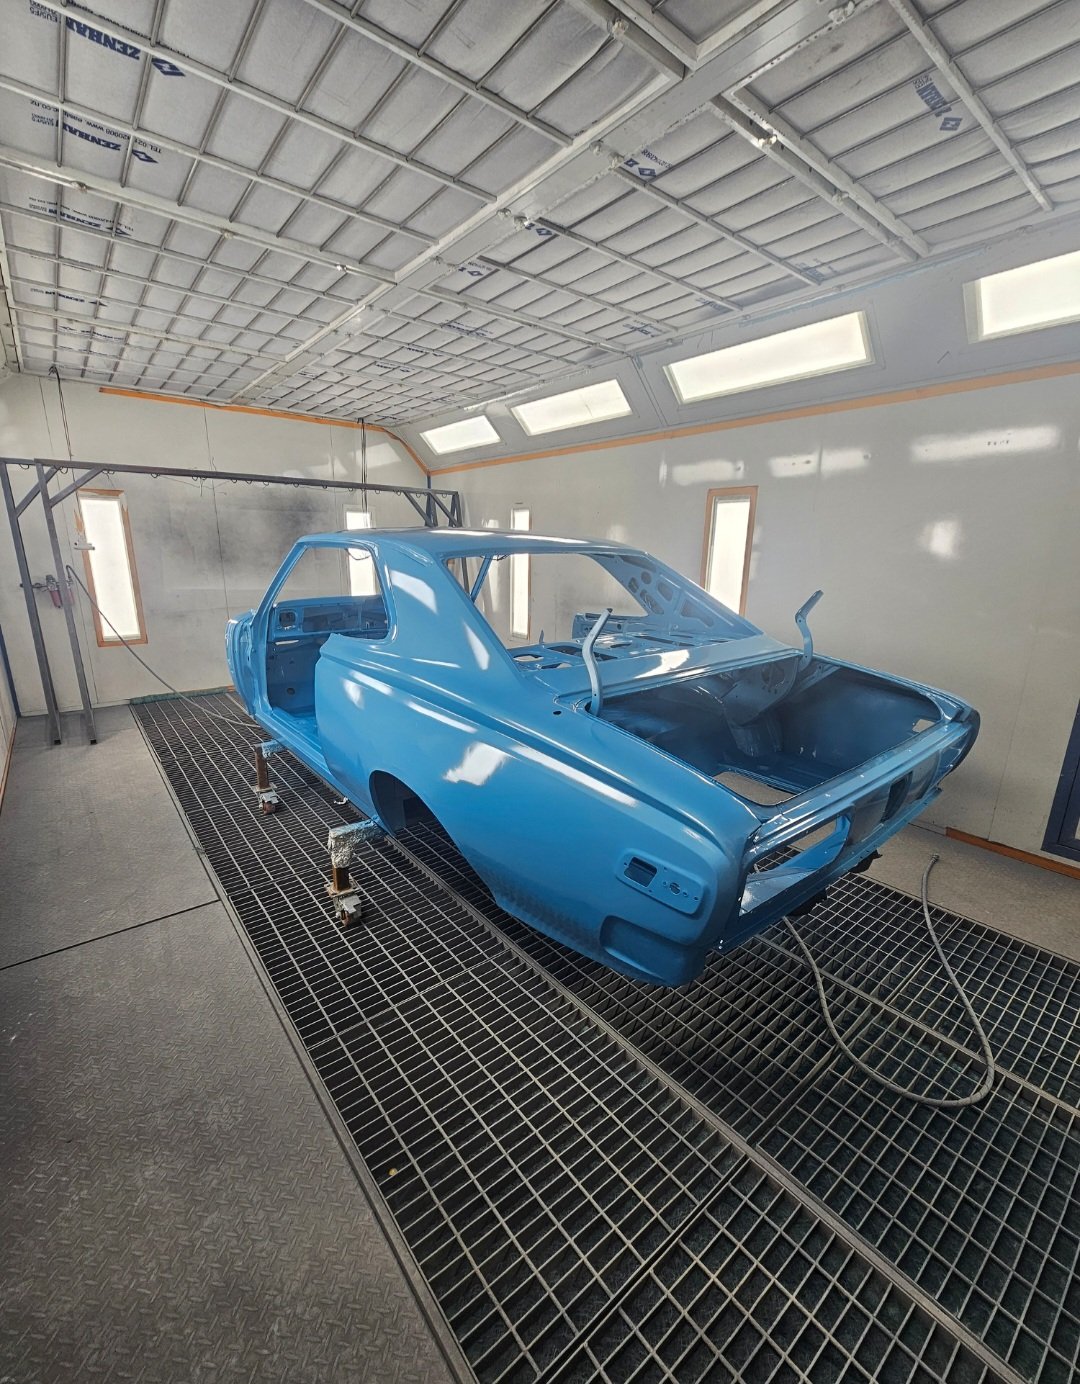
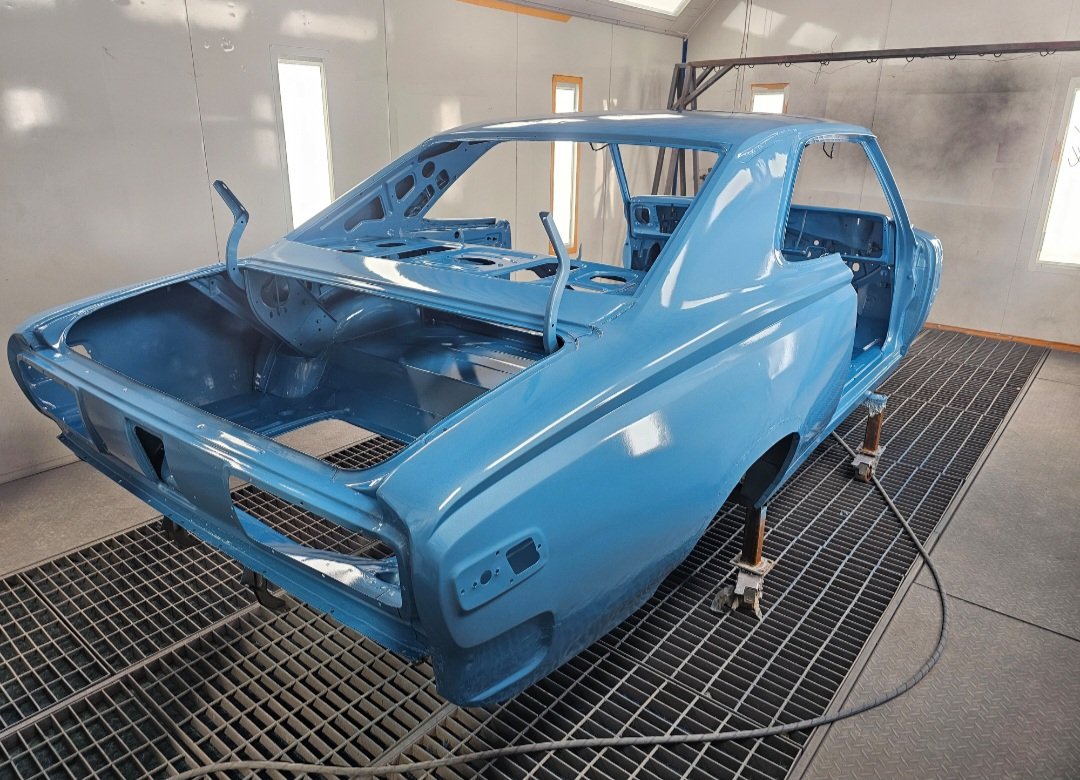
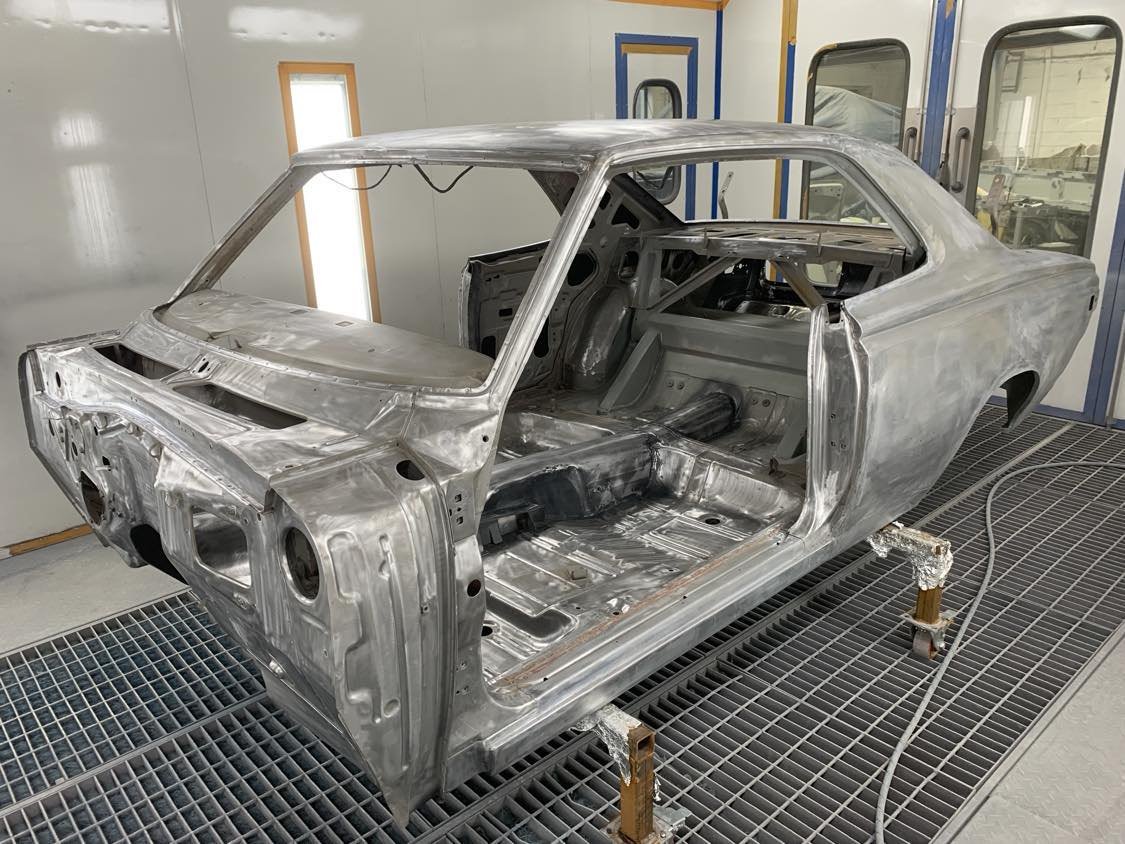
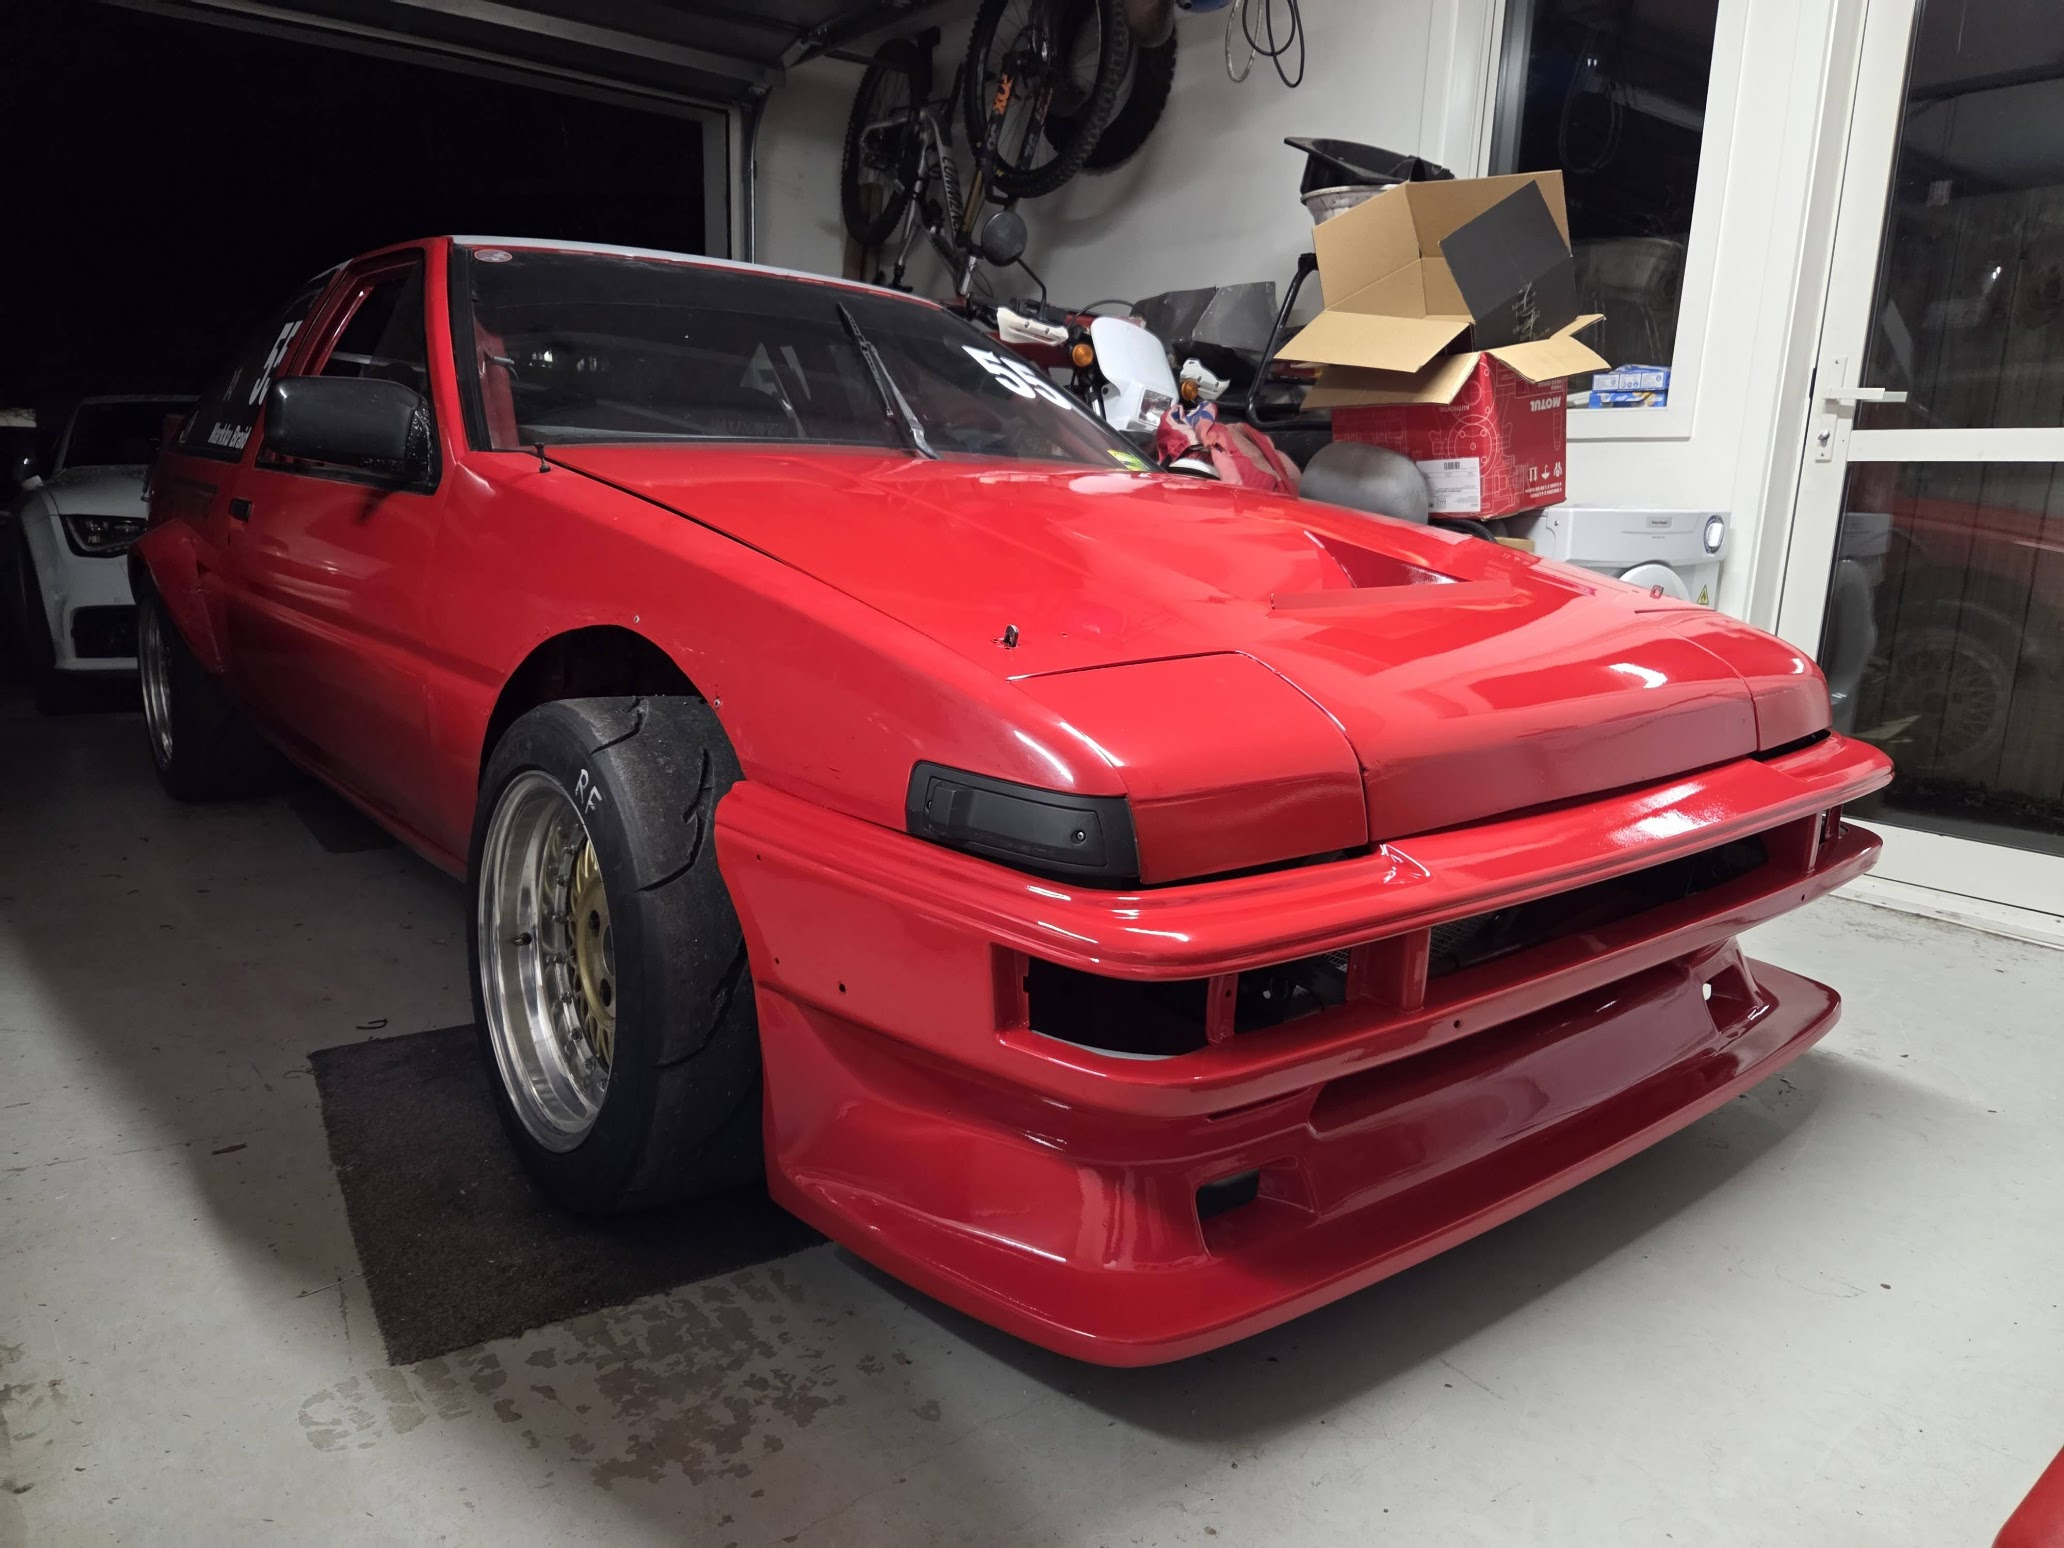
Feel like we have come so far in the last few days. Went with a #ppg direct to metal in Toyota 8v7 instead of an epoxy primer. Will get the car revined and on the road like this so they can see all repairs and modifications done. Then will pull back down and do filler work, primer and top coat. Once back on the road and certified. Thanks to the team and Canterbury auto fab Warrick, josh and josh
10 points
-
The paint match is not even close 😅 Not a drama though as it will all be covered by the glue and chrome. It was a good test for the rust repair I have to do though. For that I might have to take the fuel door off and get it paint matched by the laser paint matcher thing.
10 points
-
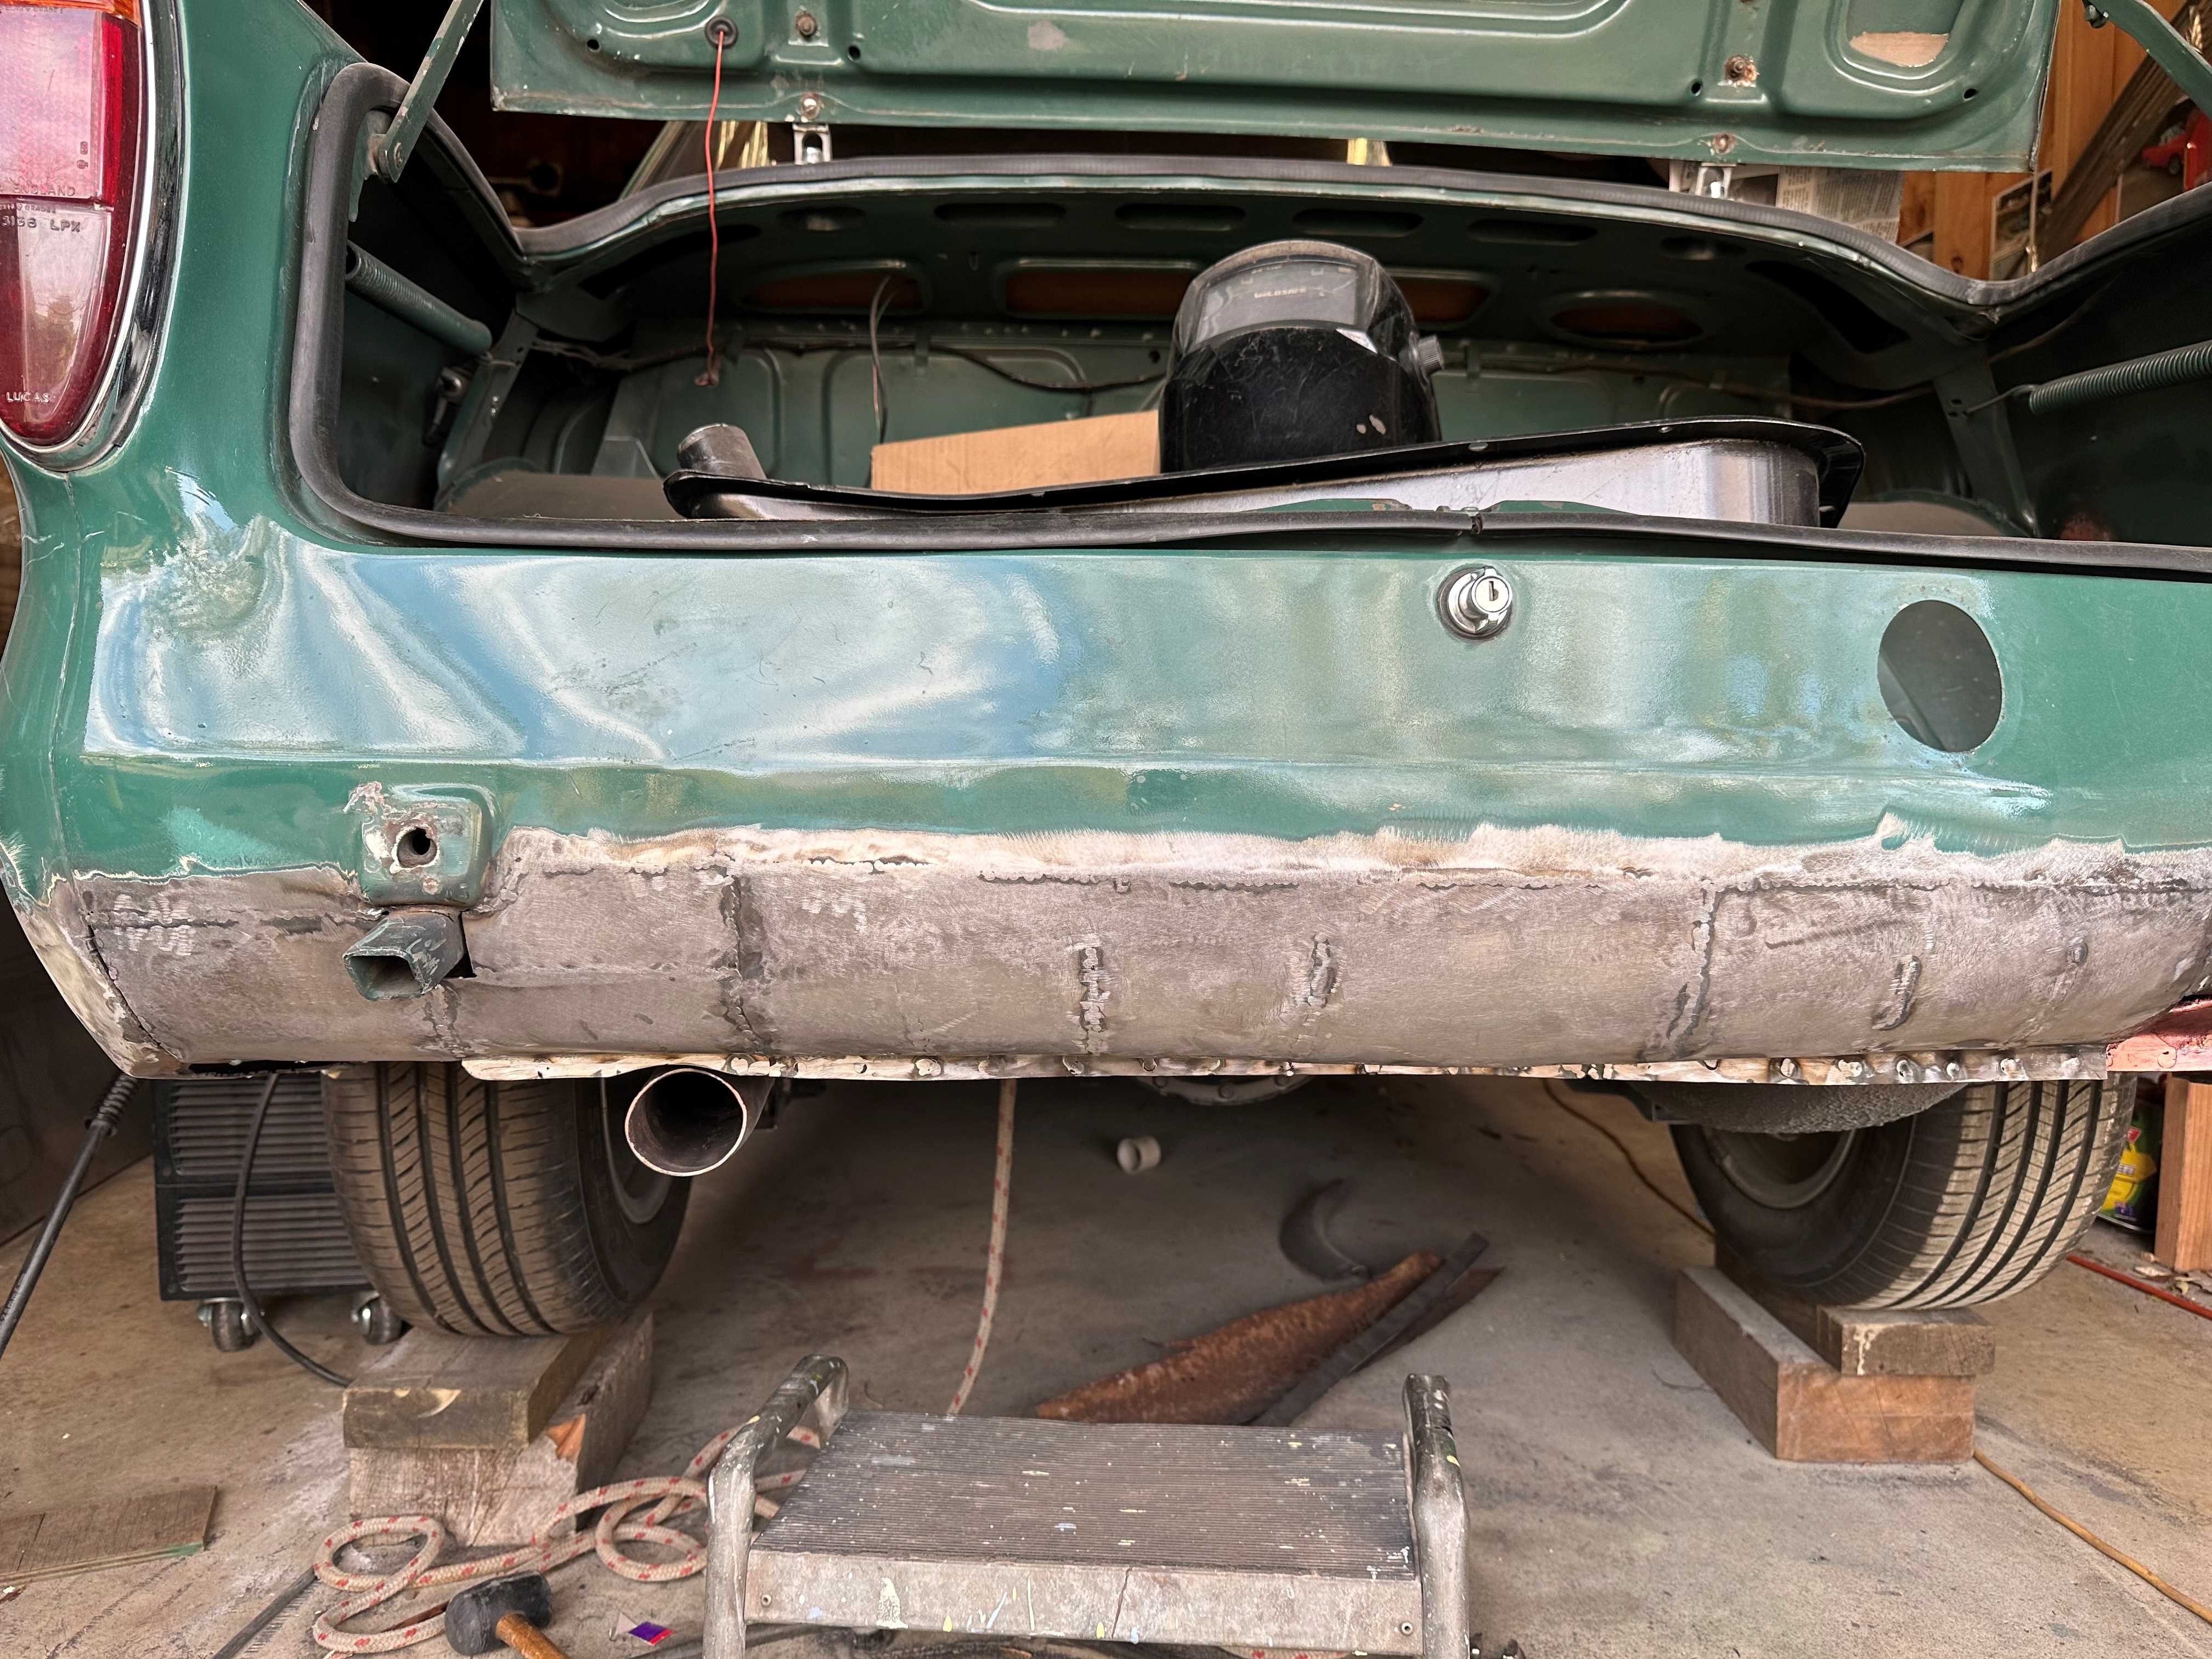
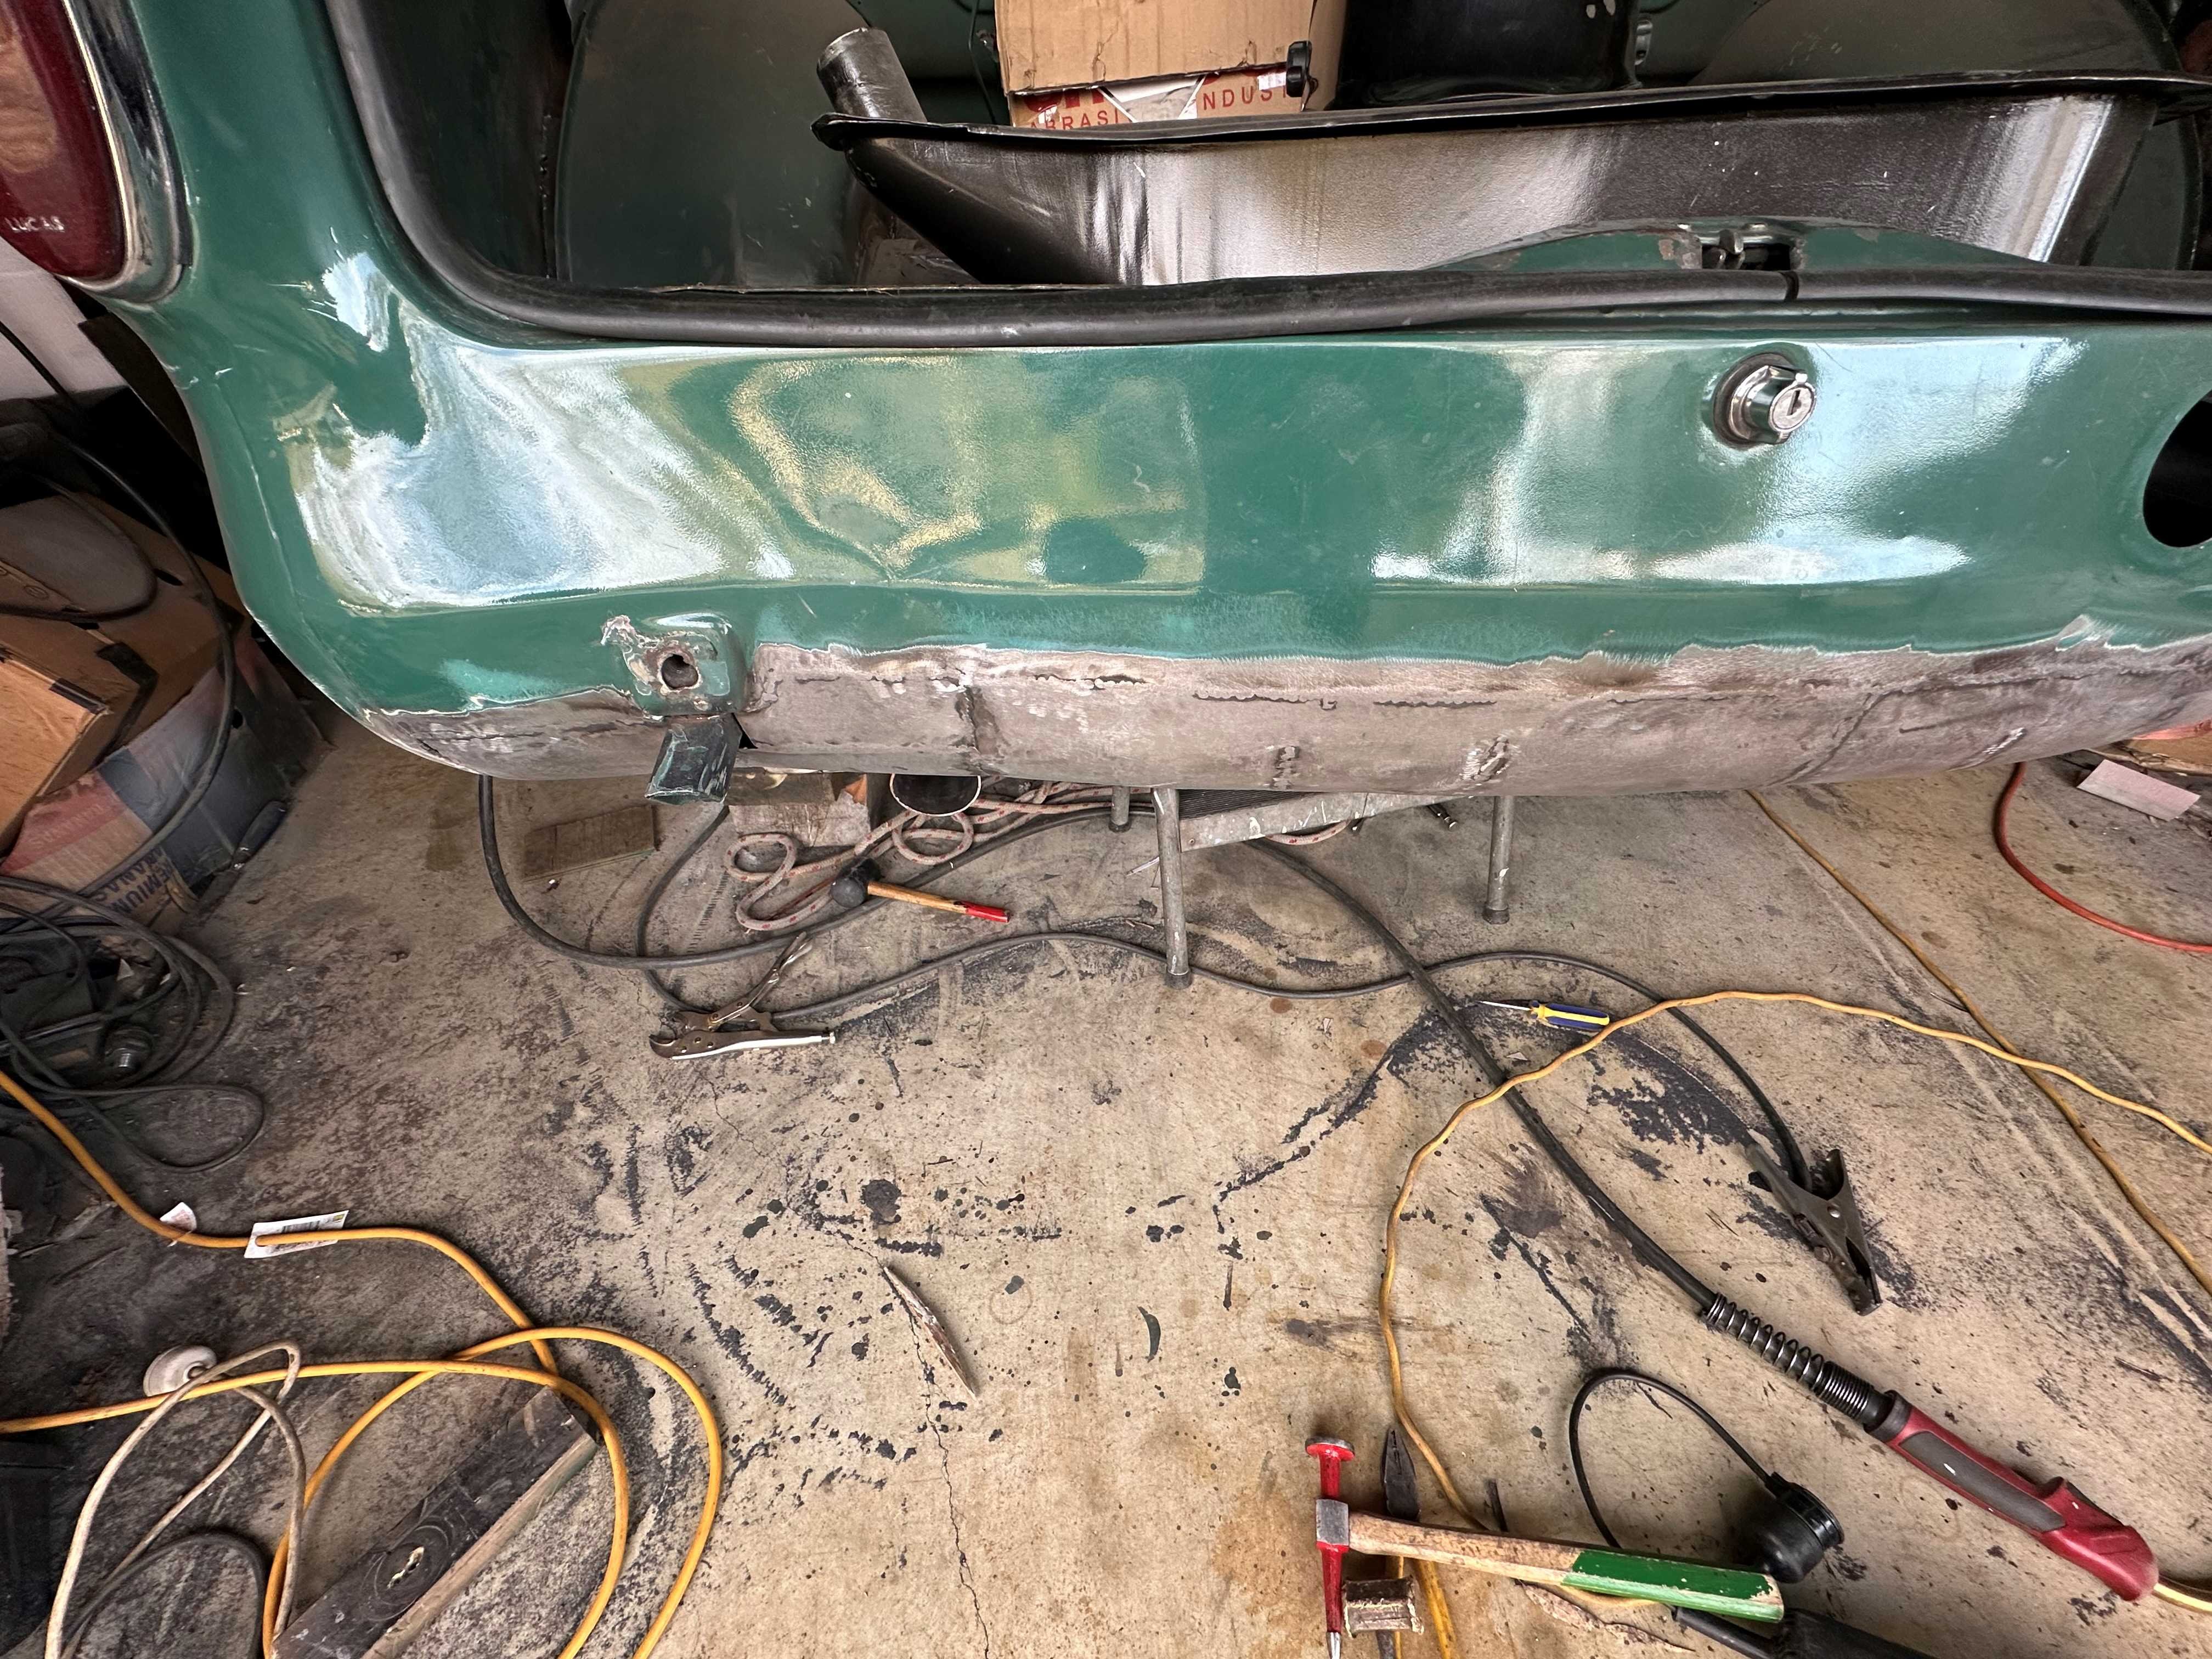
Yea, nearly all done. Still the bottom of the drivers side to do which won't be that much. I had to cut the large panel I made again as once I had the center panel in the outer didn't quite fit correctly. It's turned out ok for a novice. Quite a bit of curvature to it. If I got a job in a panel shop I might be allowed to sweep the floor lol. Which is obviously something I don't do very often looking at the pic's.
10 points
-
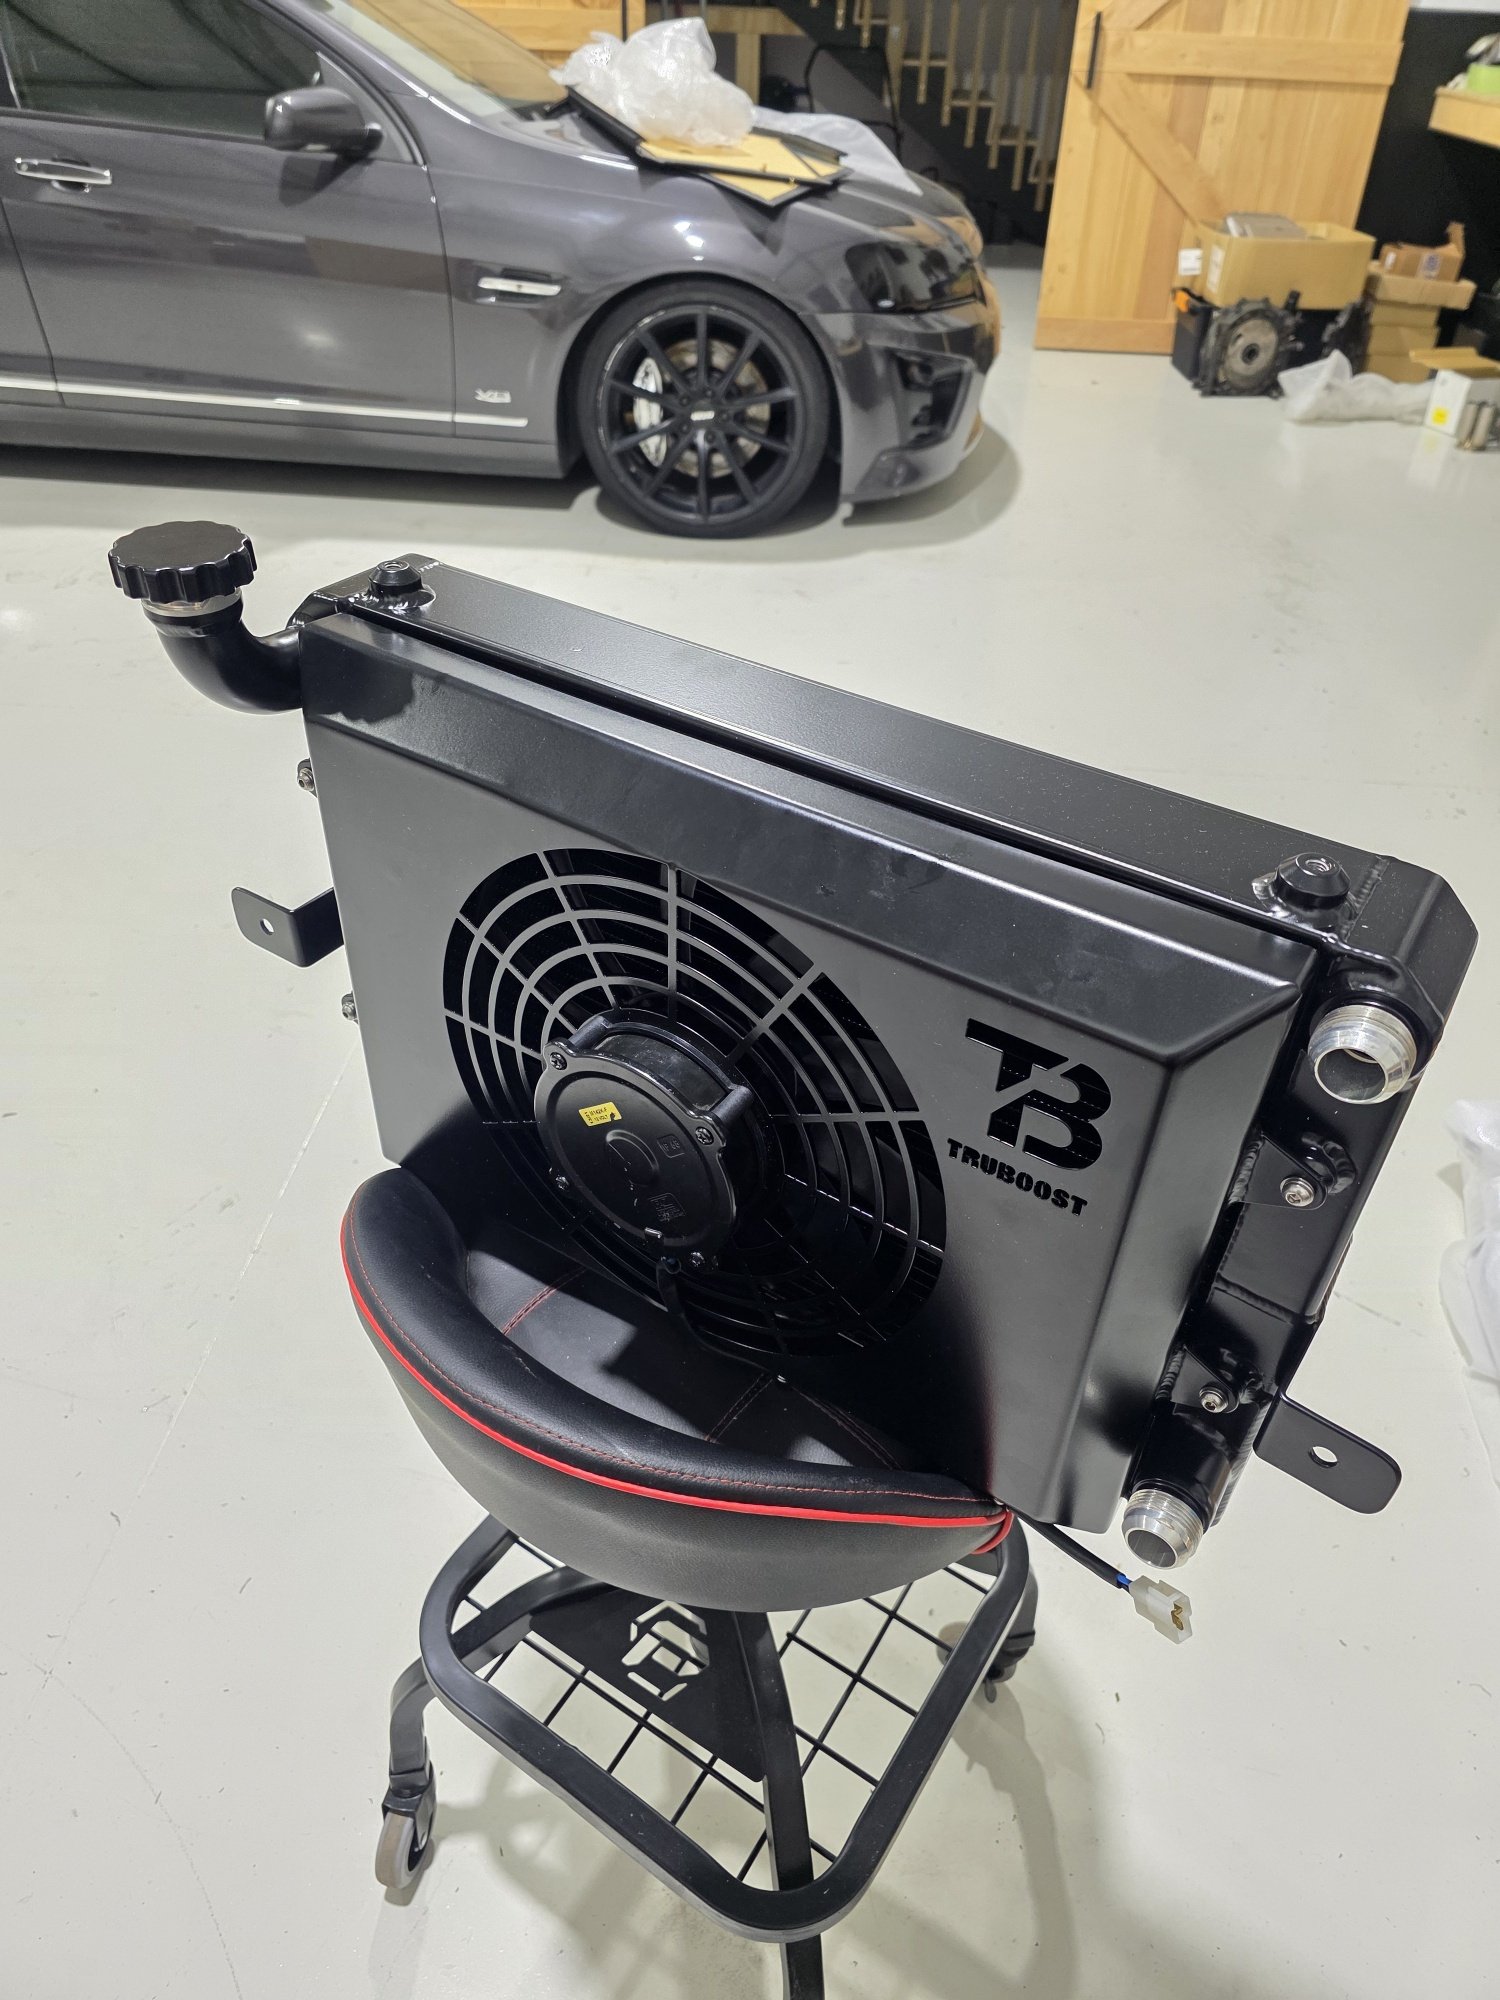
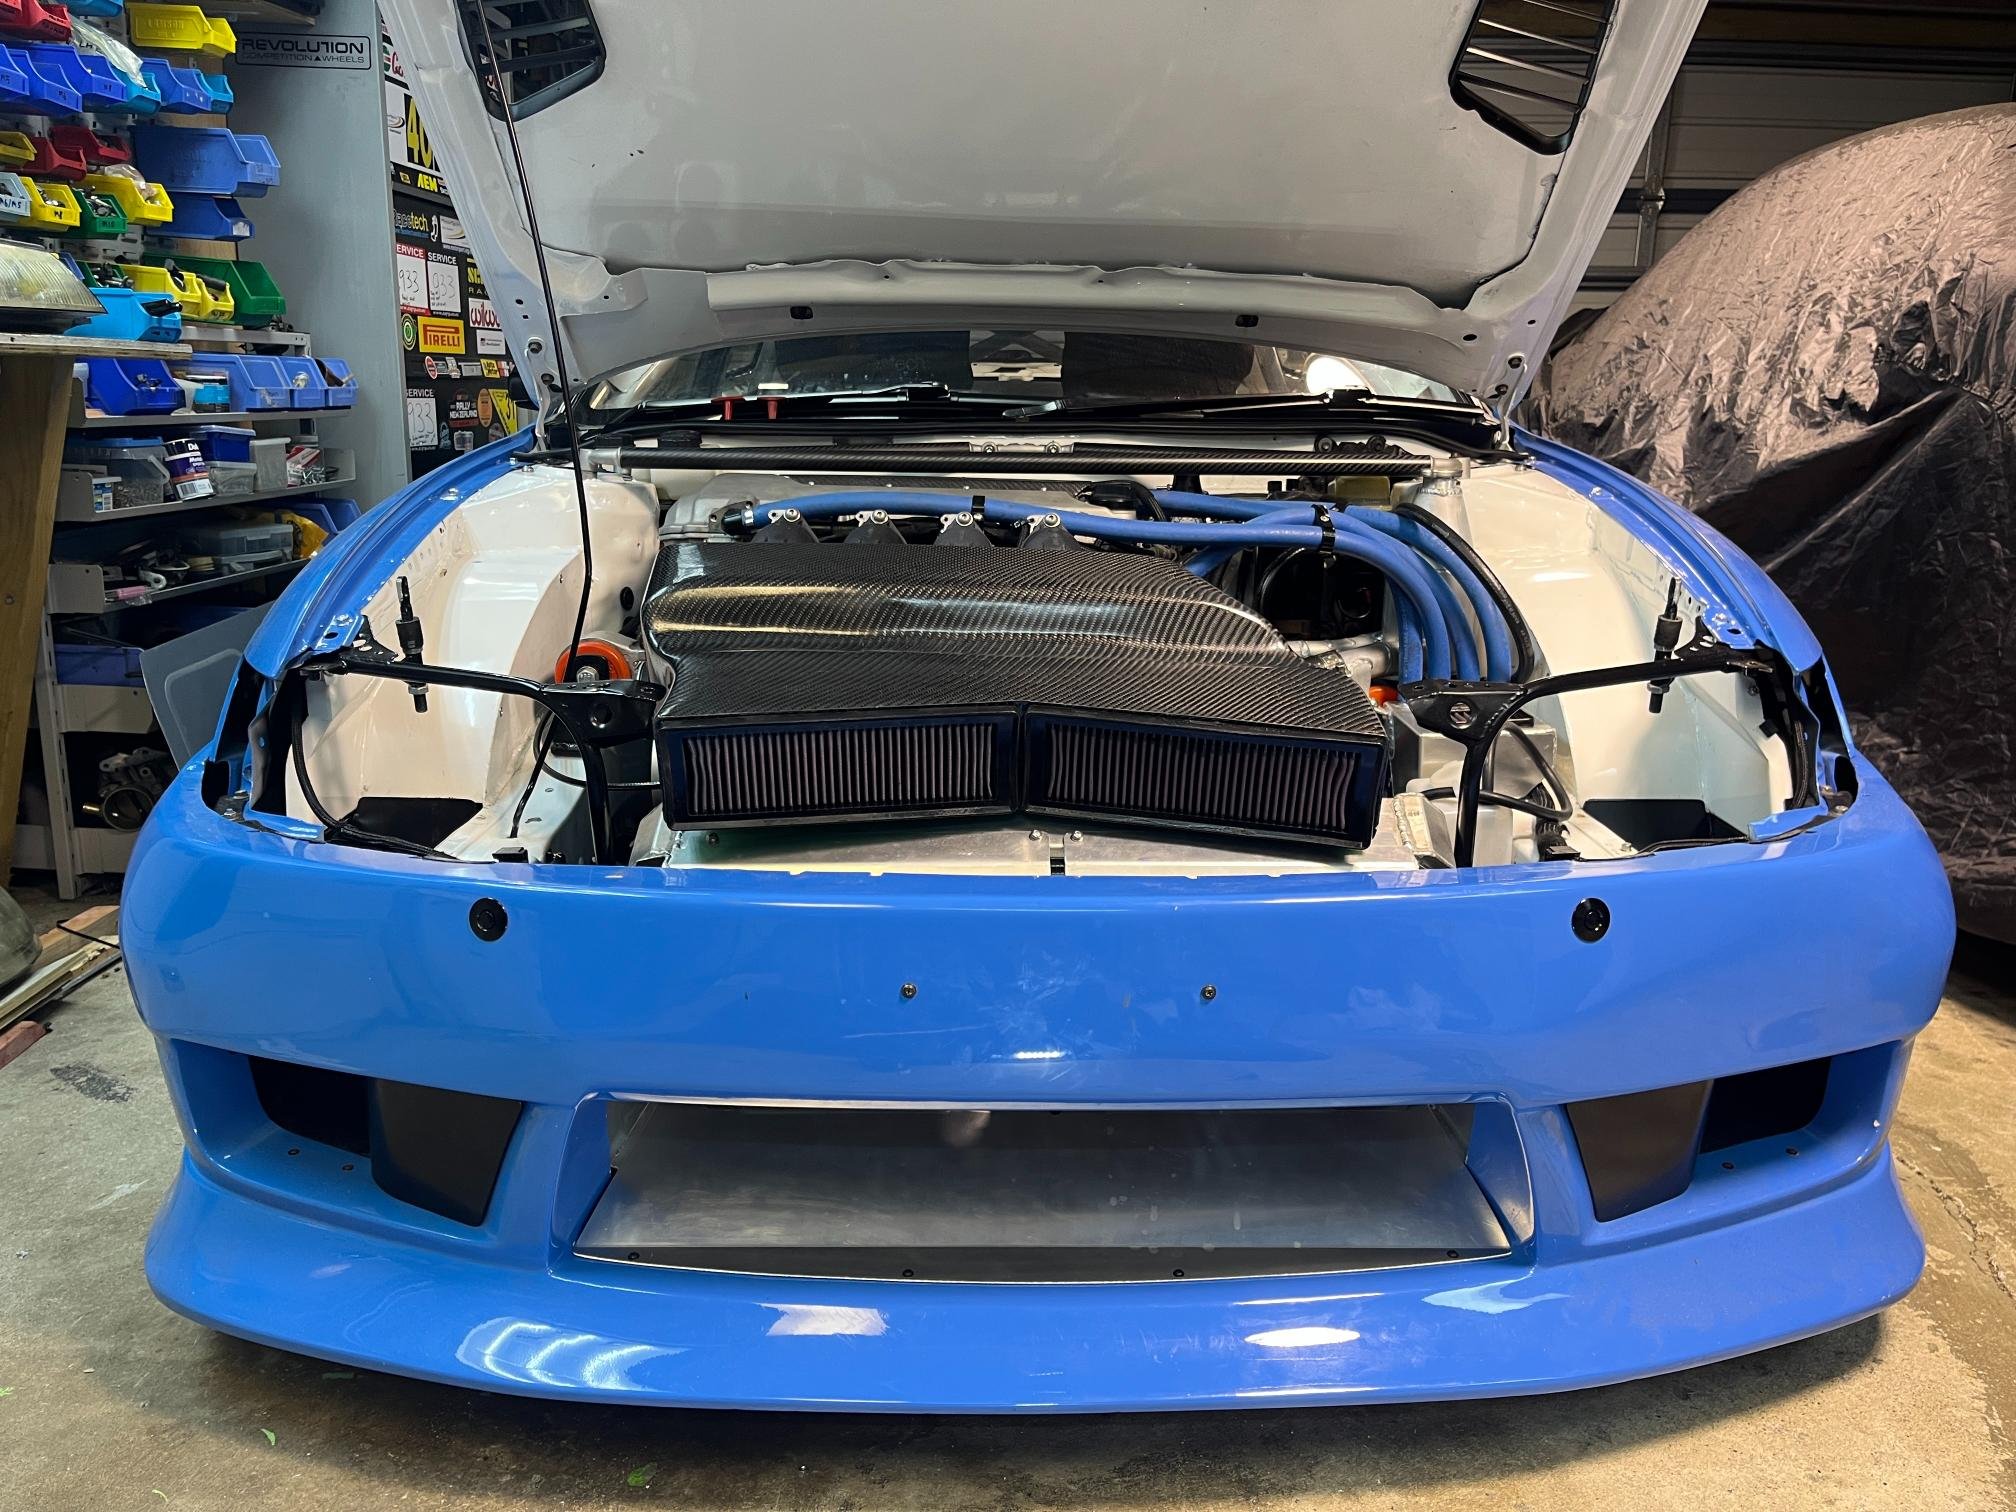
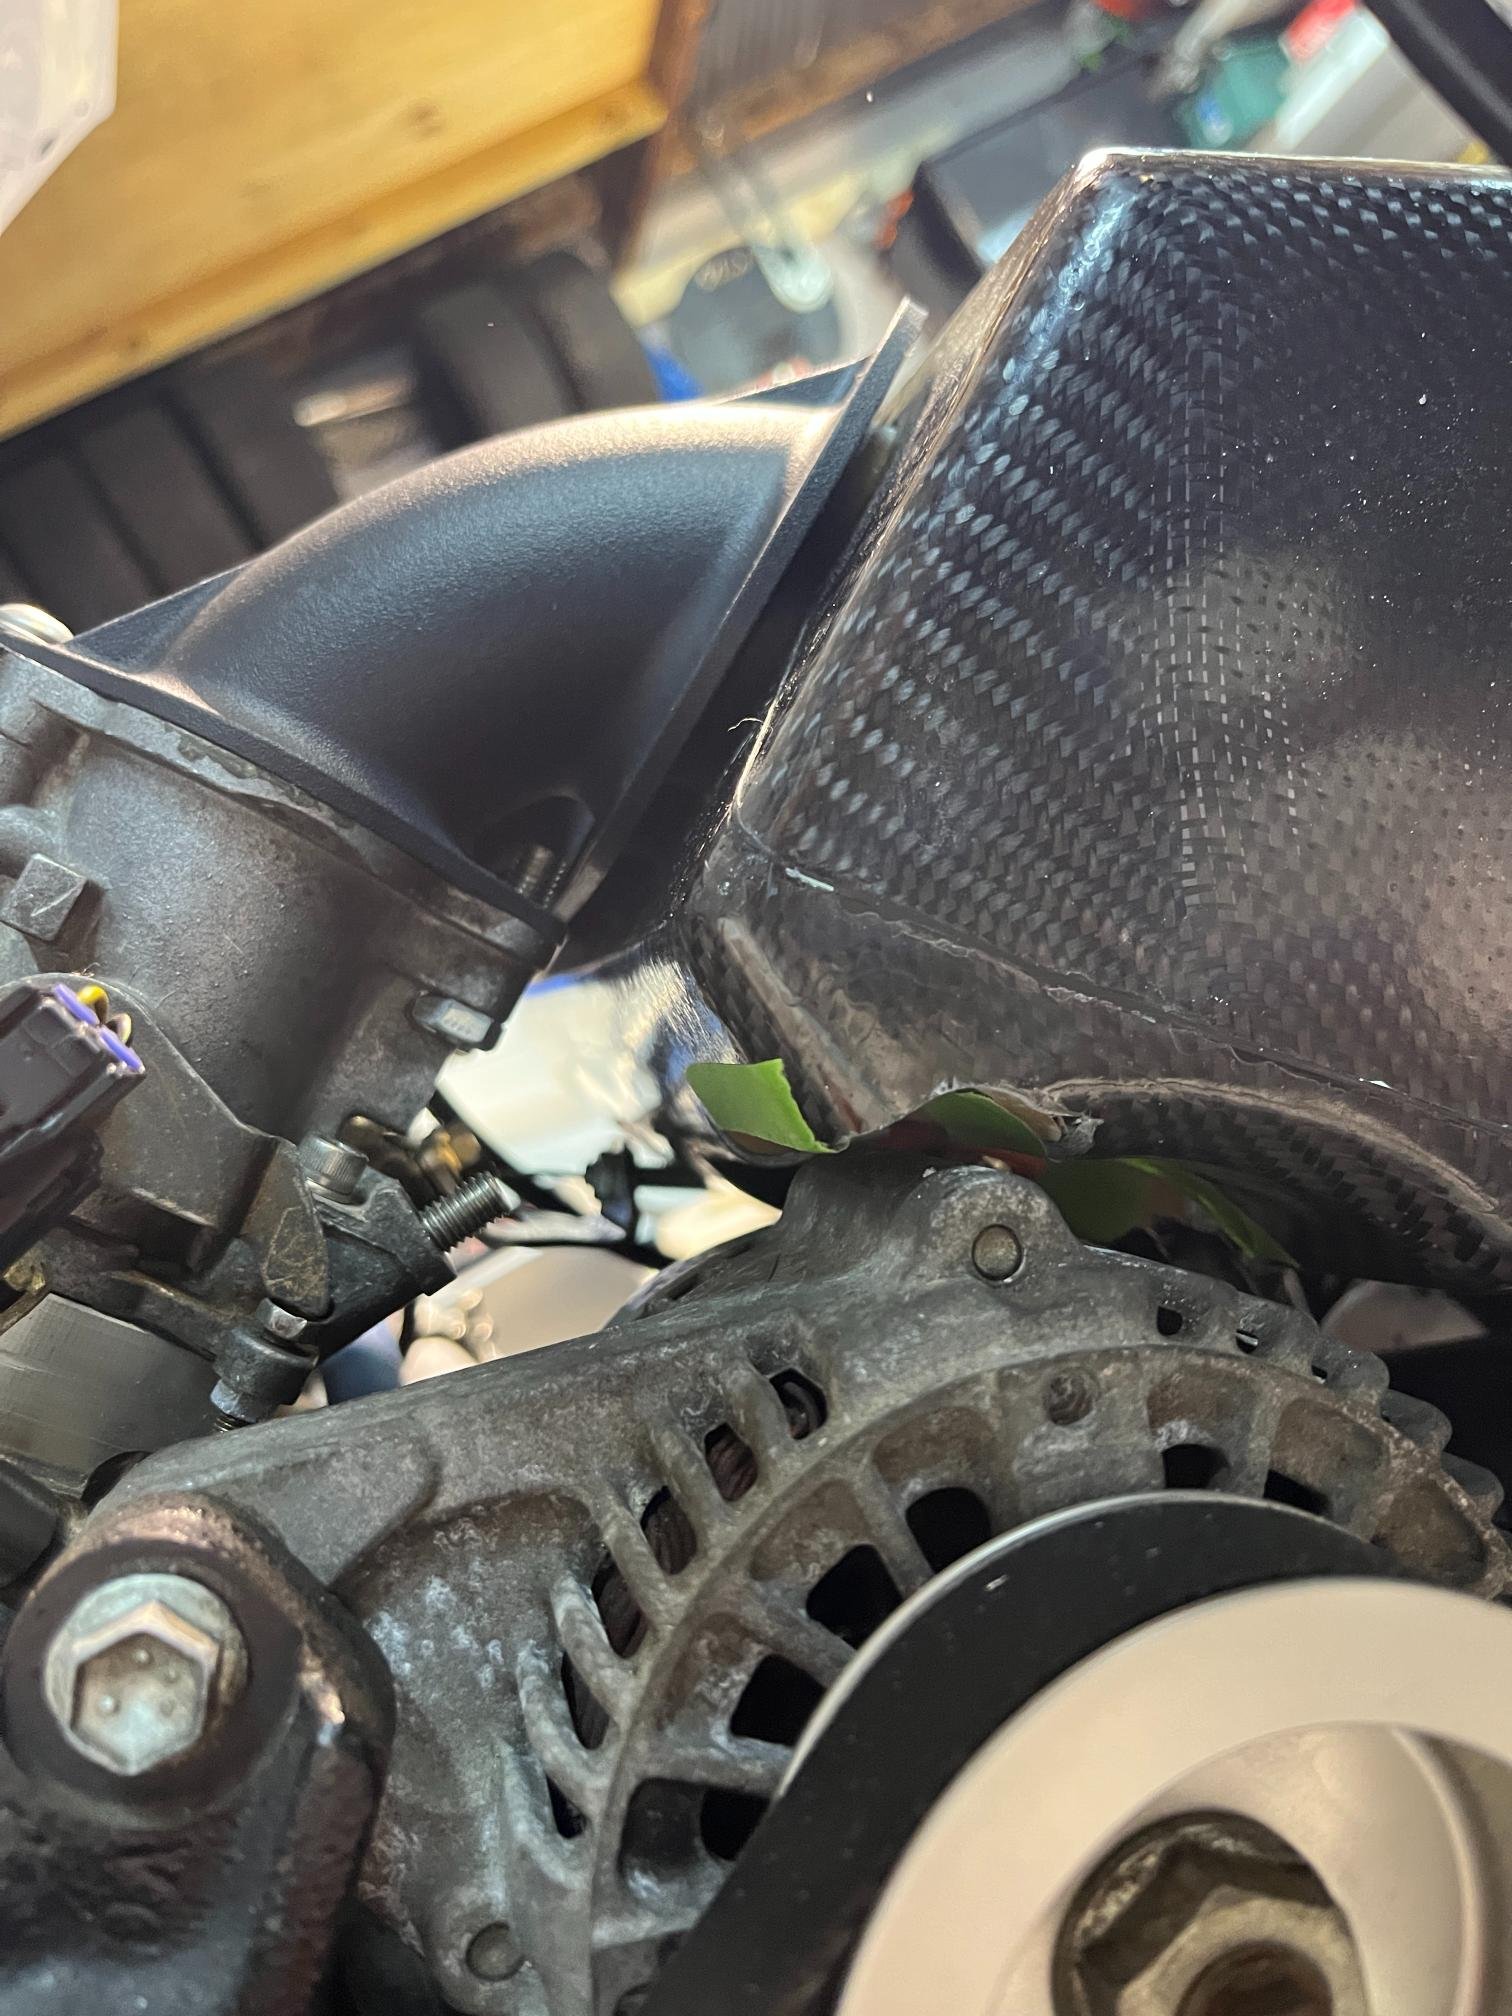
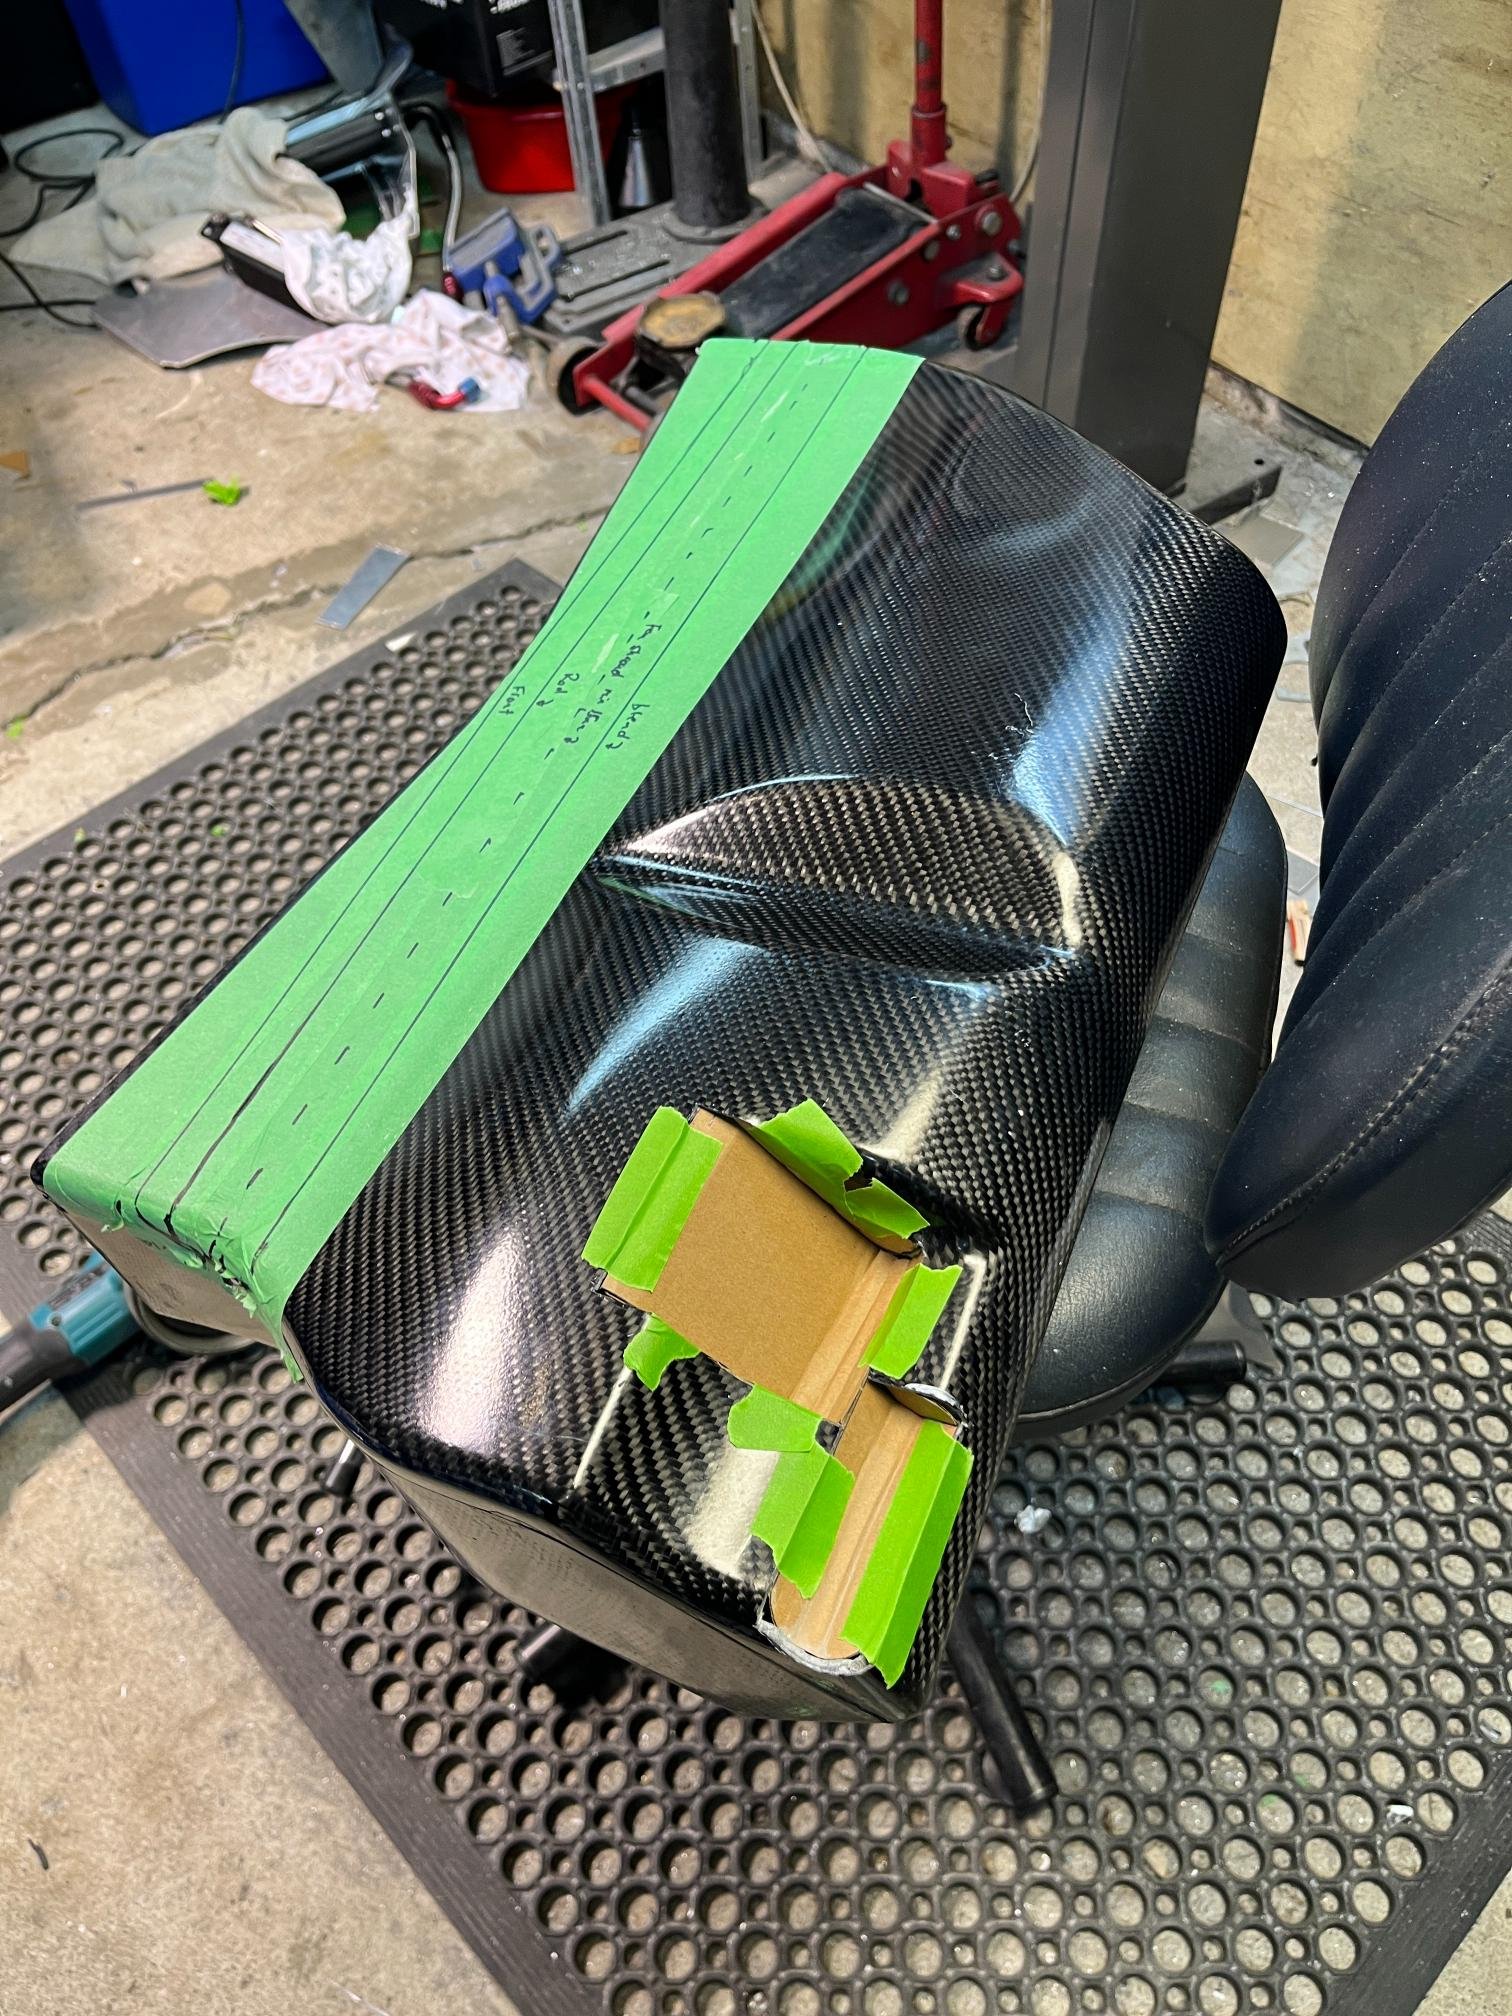
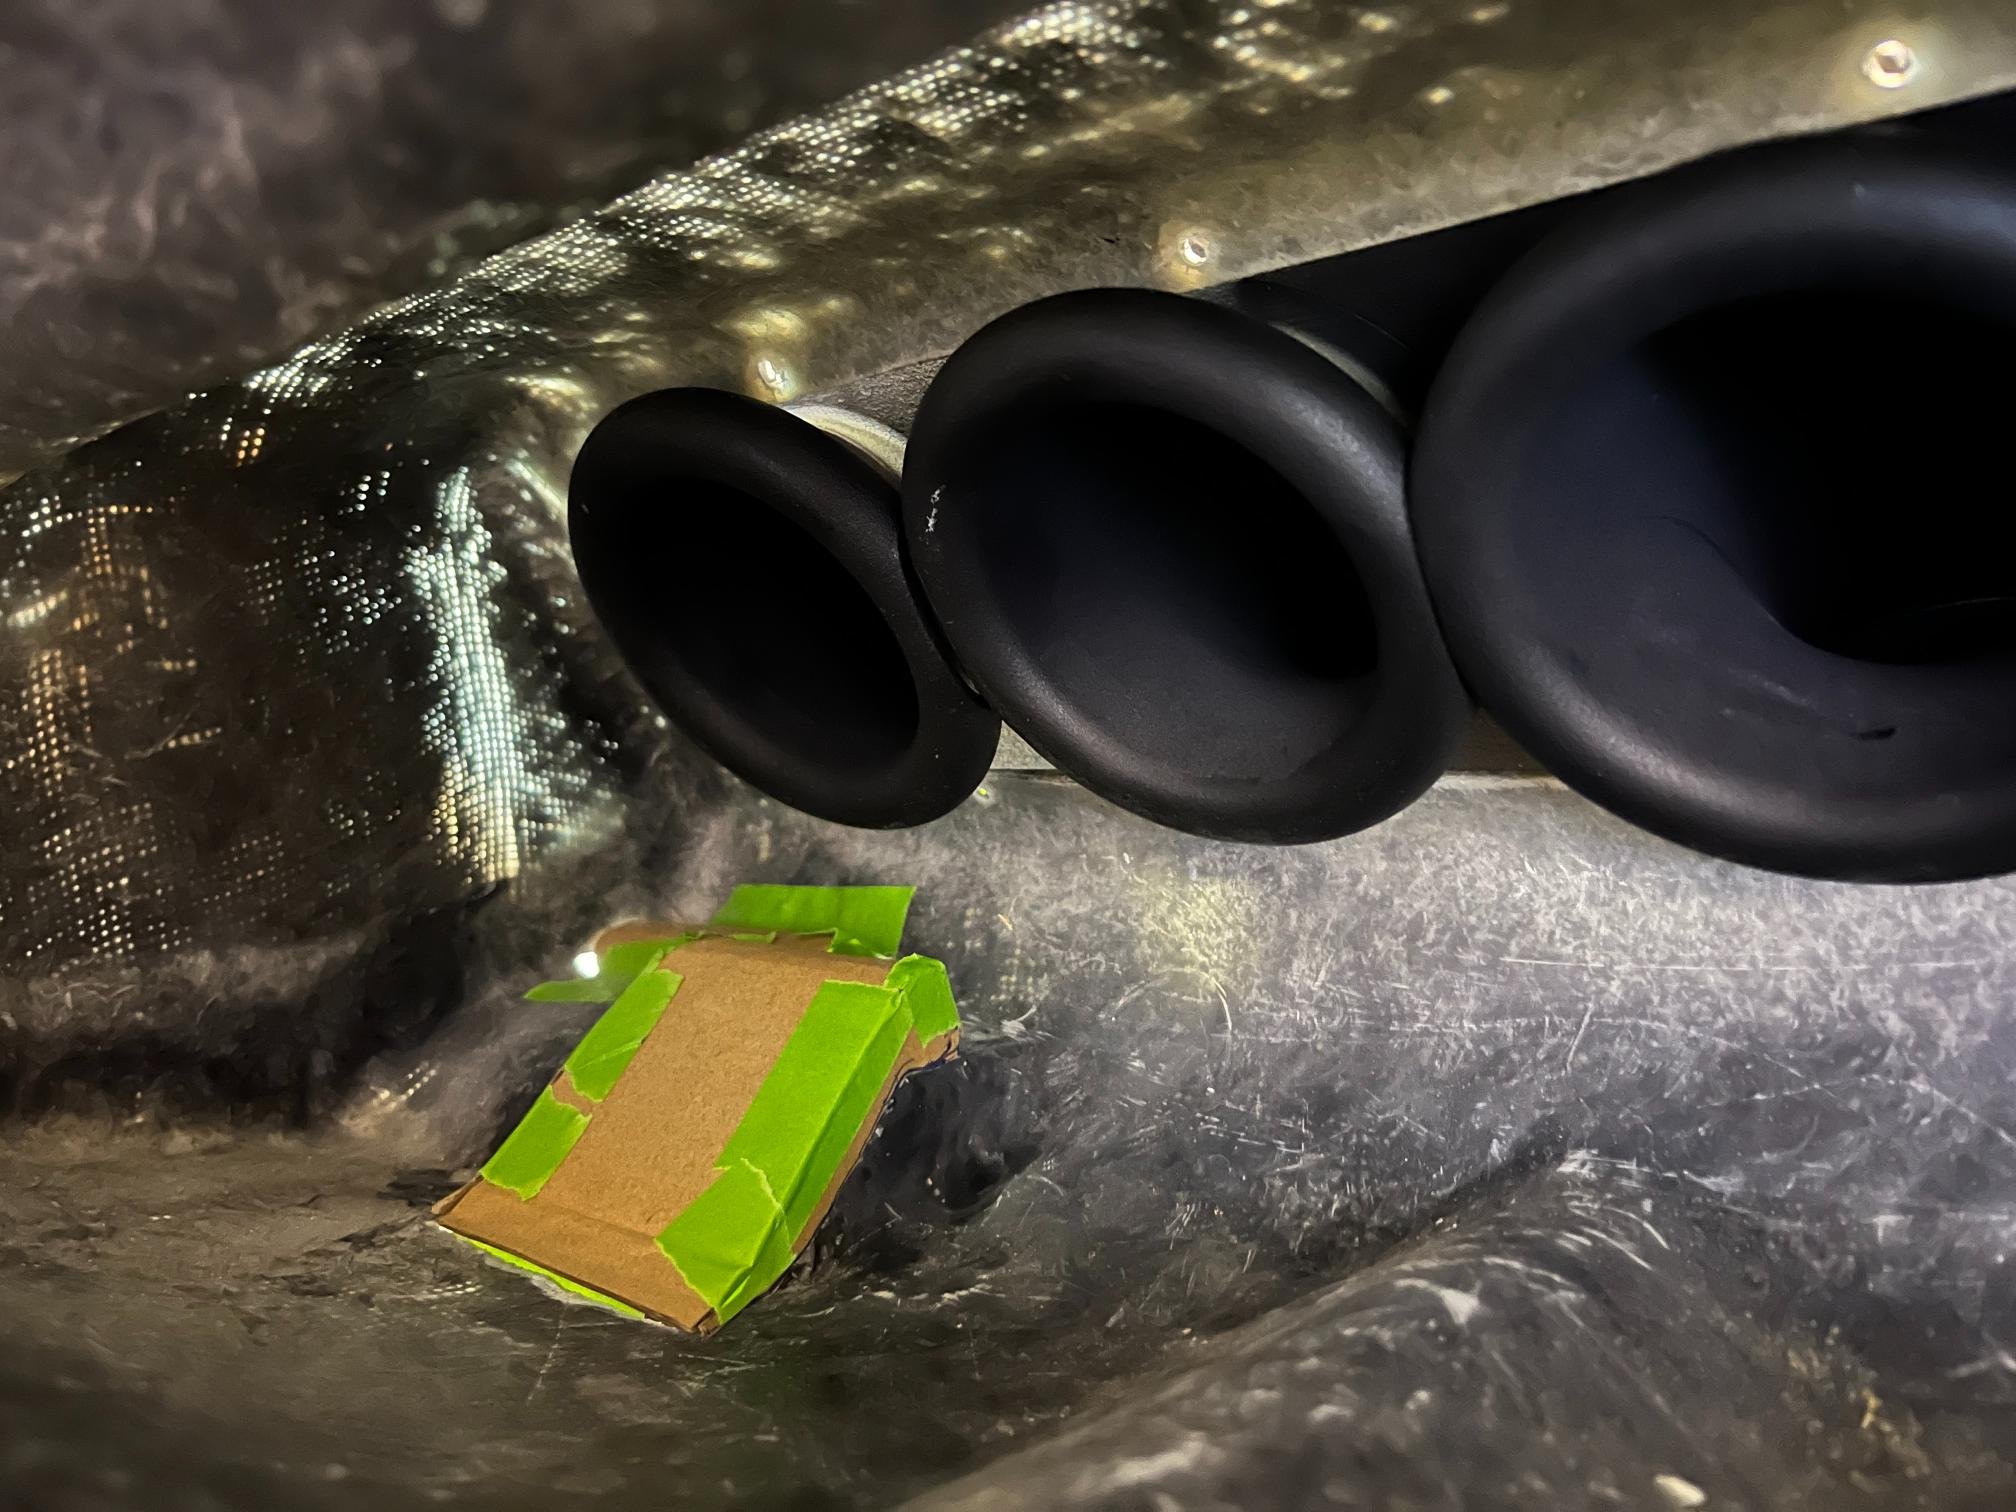
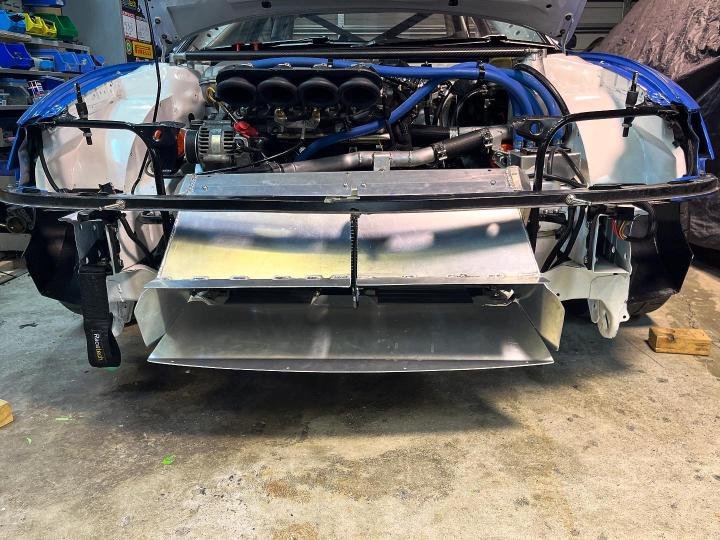
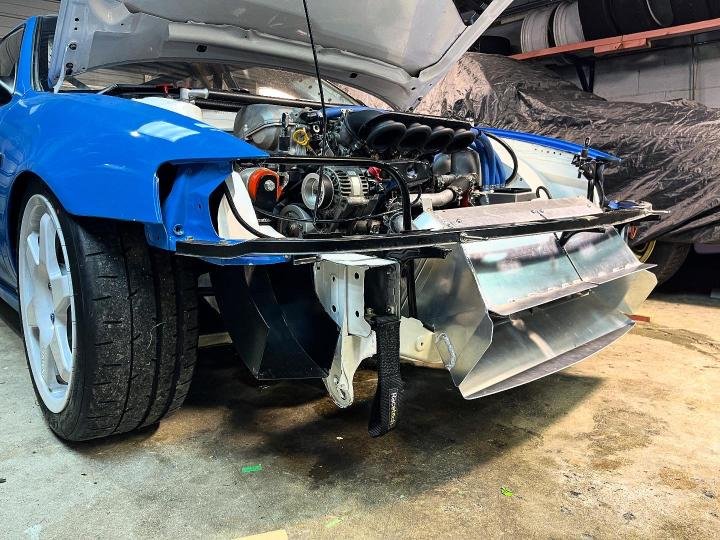
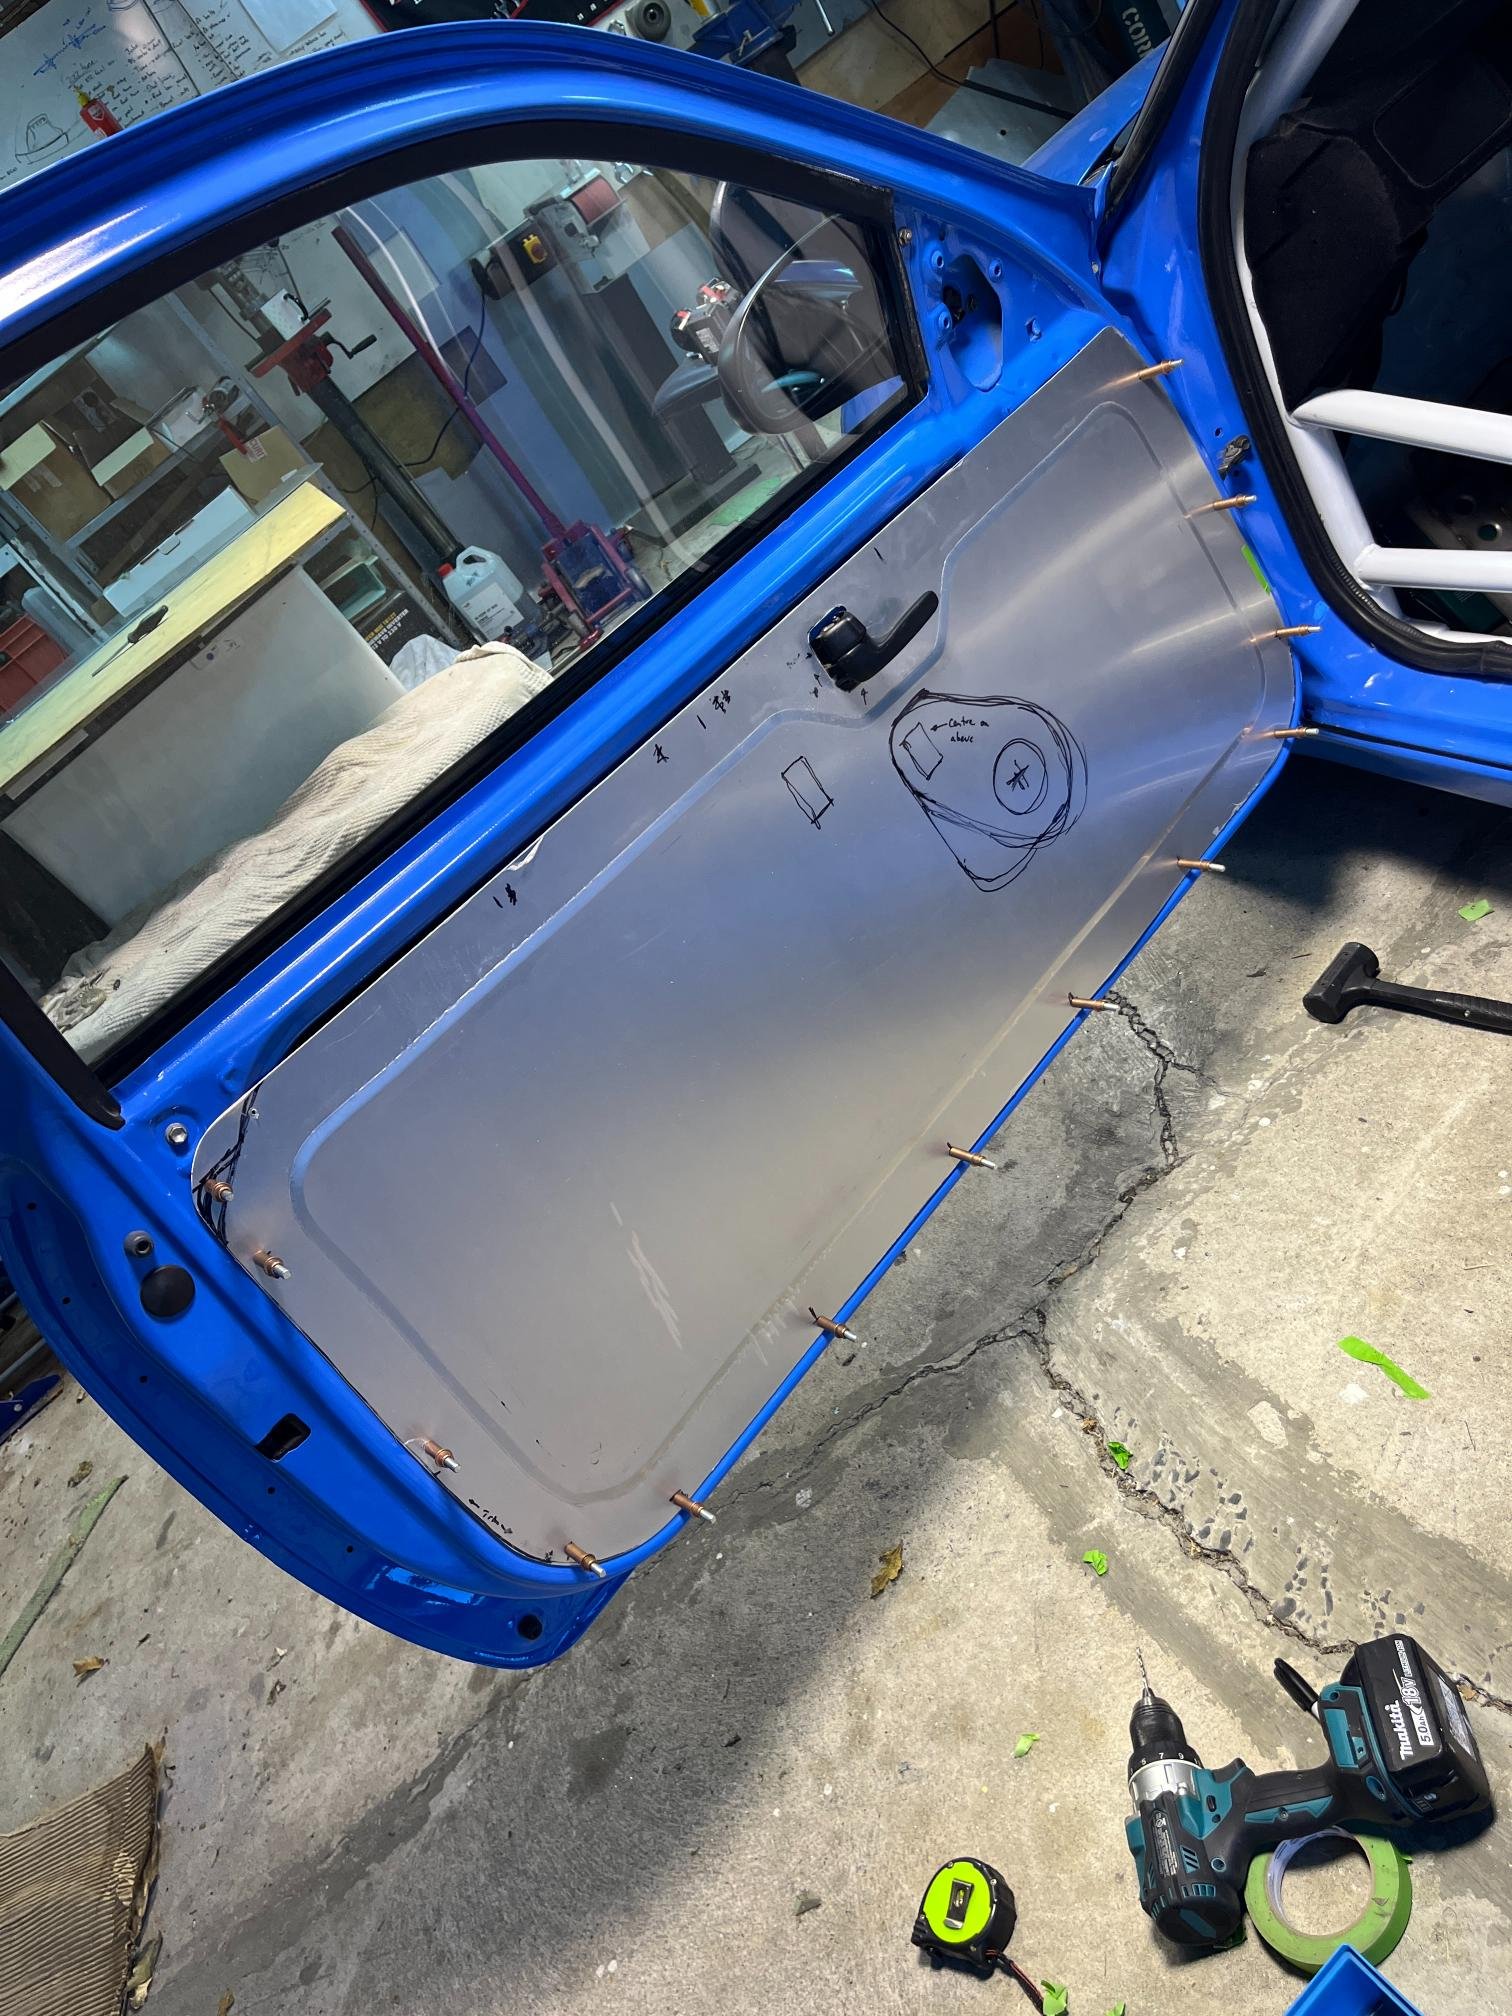
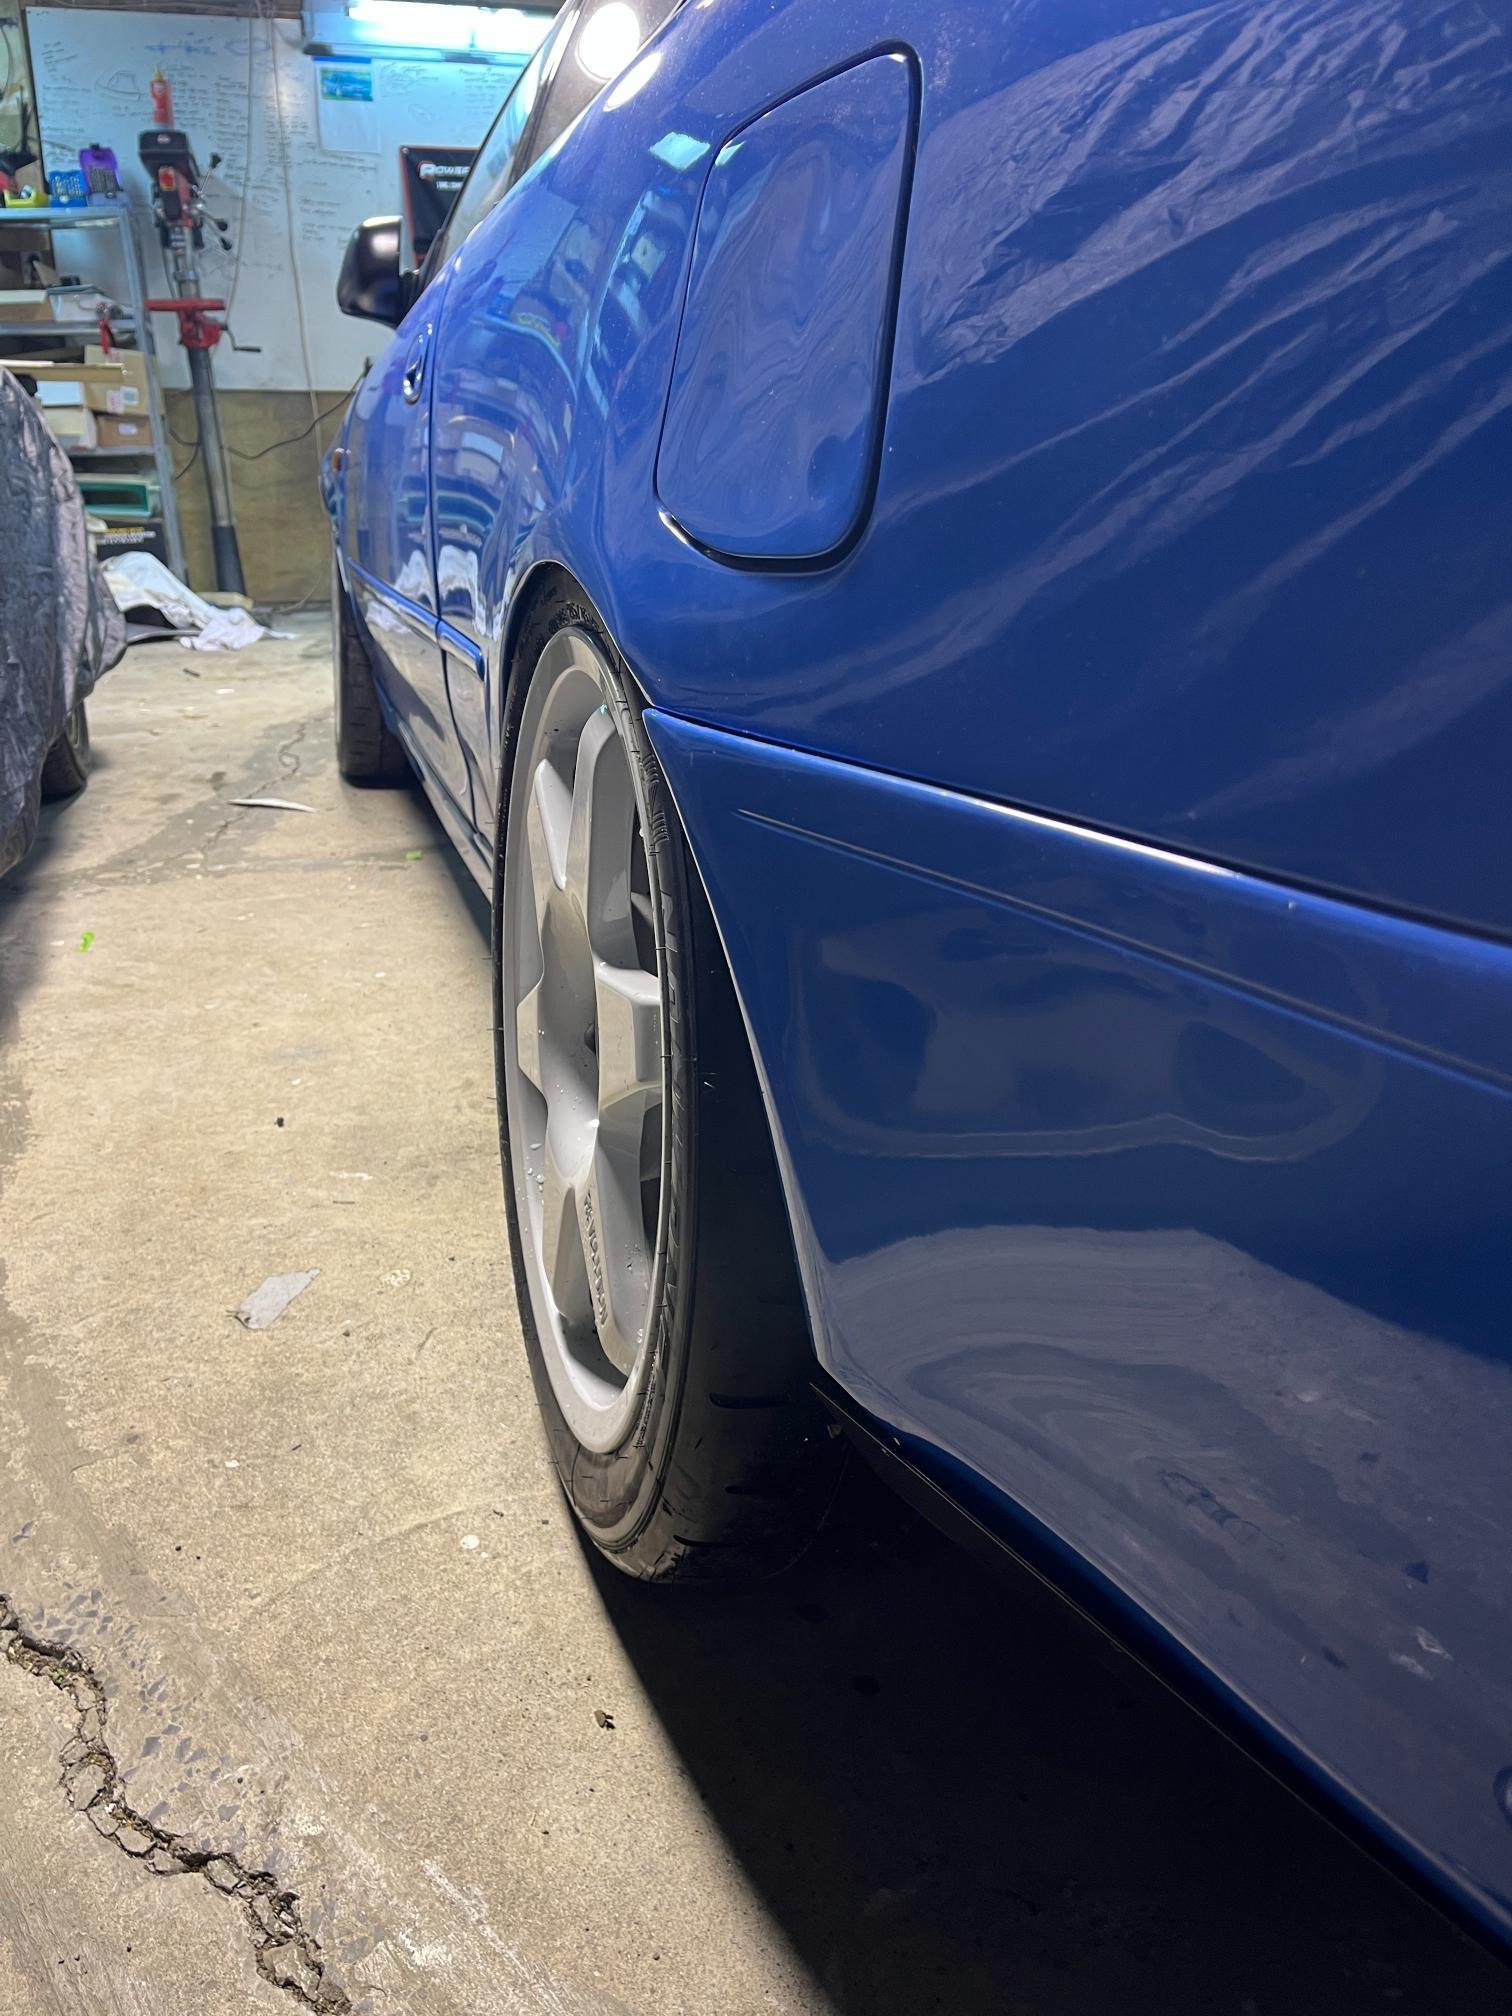
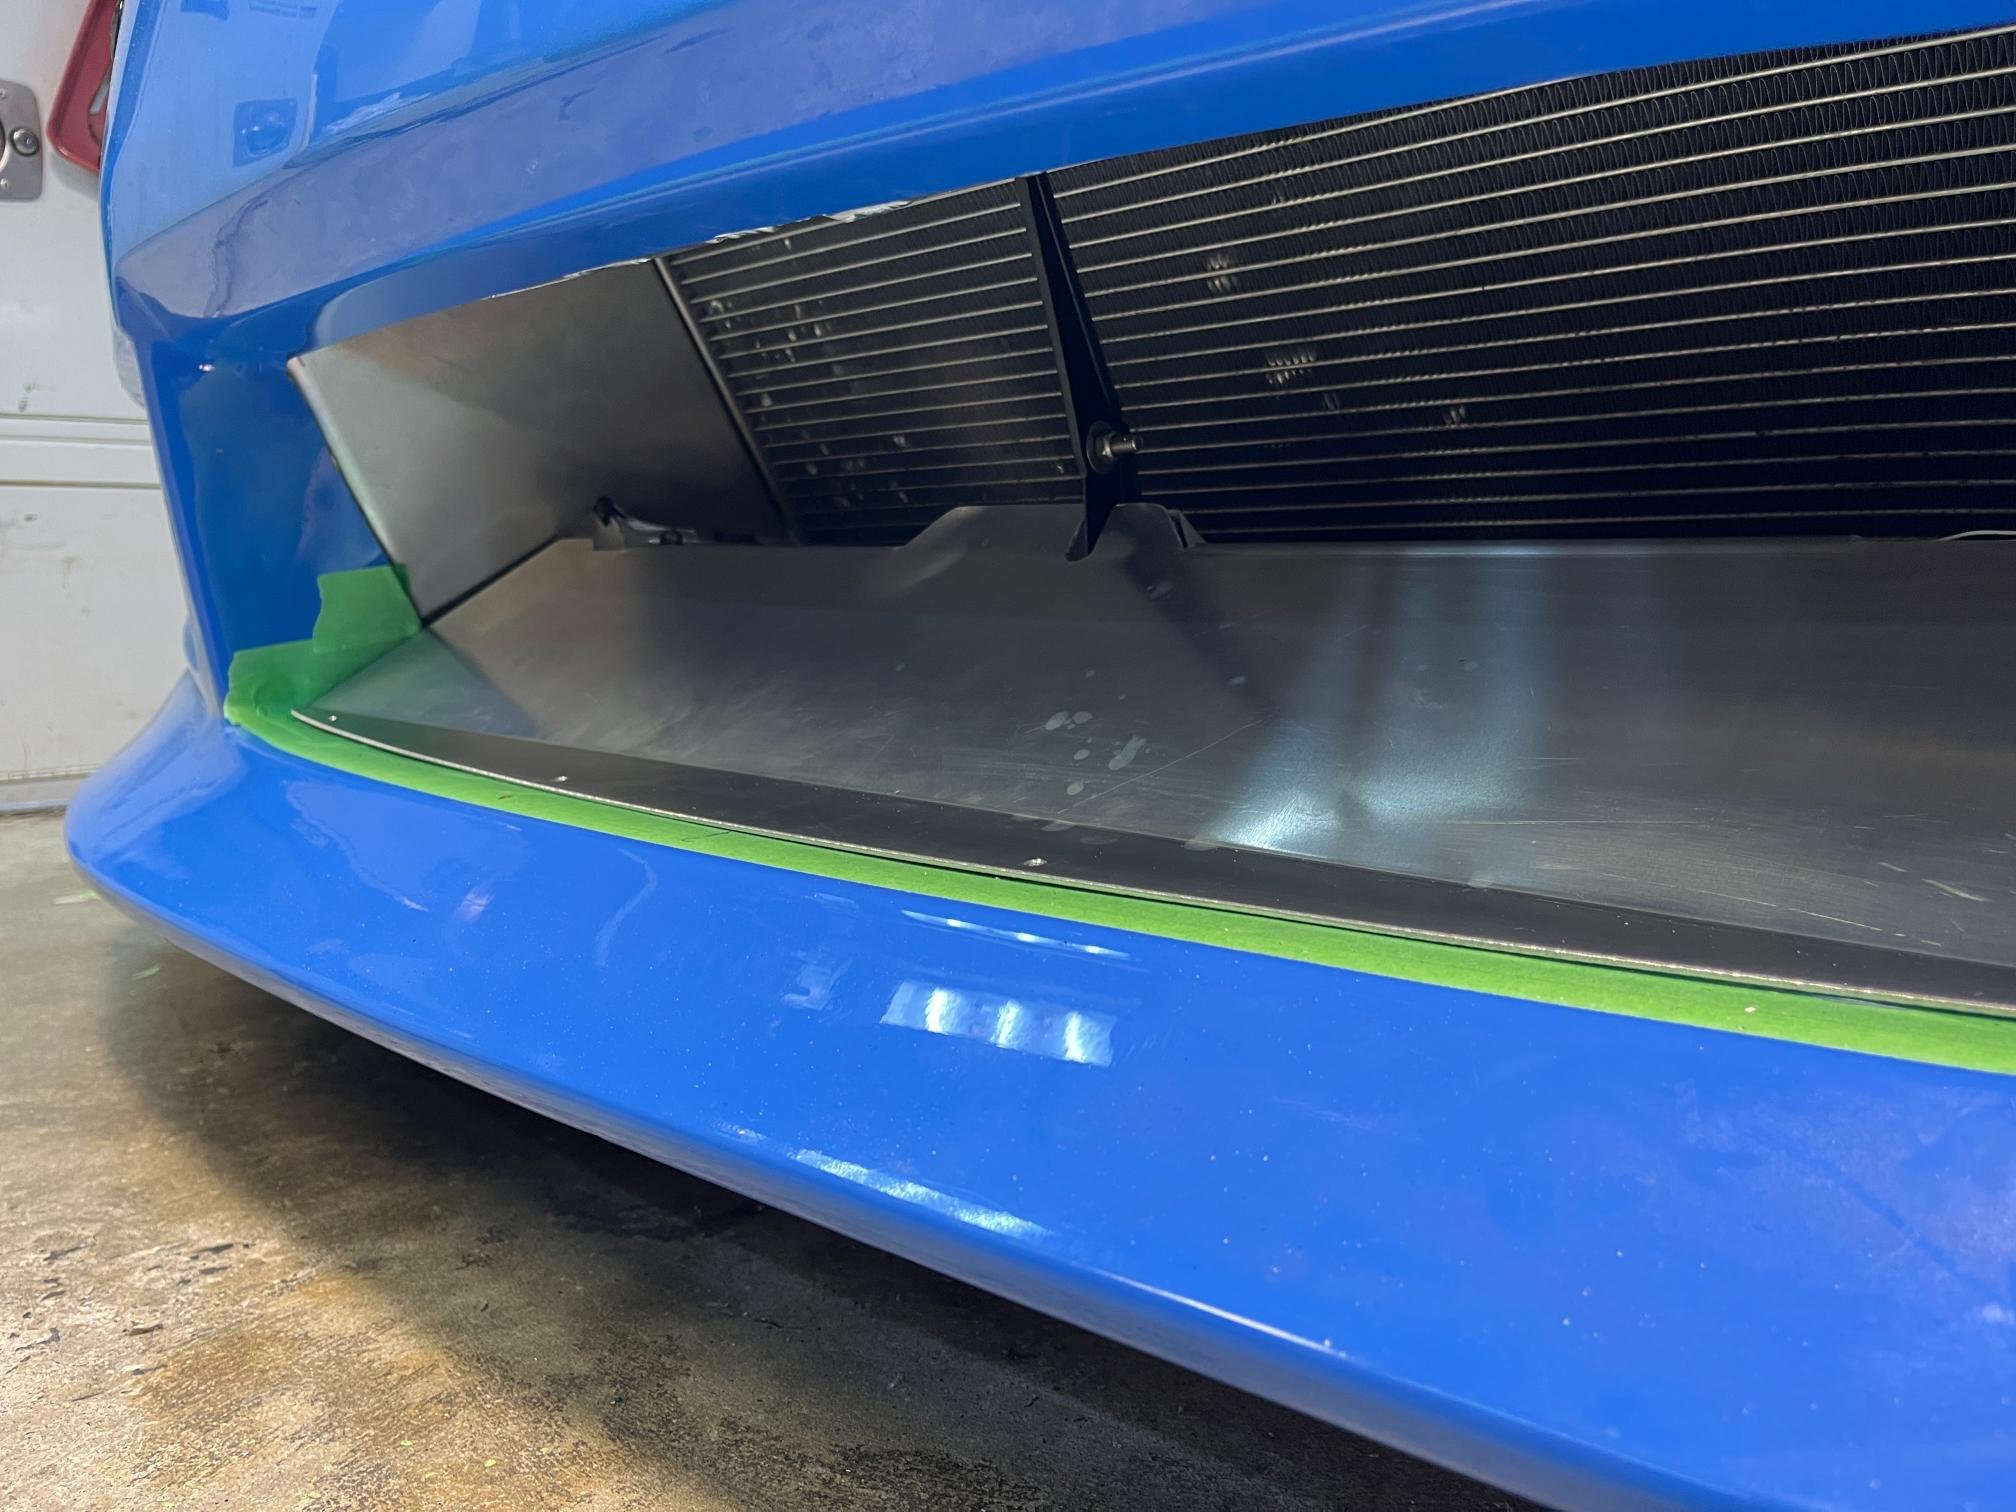
Life's been pretty hectic lately with kids, work and being sick. Managed to make a few small bits of progress. 1x door car nearly all fitted up. Still need to do a few mounts across the top and drivers side when I get a day that I can push car outside, I have an hour or two free, and it's not raining. Had issues with rubbing in the rear with the 215 semi slicks being about 7mm wider than the cheap shitty tyres I had to push it around on. Meaning I had zero camber in the rear, and more rubbing than I was comfortable with, and no room between the tyre and the strut either. Luckily, I have a spare matching set of rims that's 7.5" wide instead of 8". Mounted tyres onto these rims and offset worked out pretty good. I created about 15mm extra inner space so I could use the camber washers to lean the tyre over, then push the LCA's out. Ended up with about 3.5-4deg which I'm happy with, and may even take a little more out and raise it 10-15mm for more clearance. Going to be annoying not having even-sized wheels front/back and unsure what I'll do for spares, but it's a good solution for now. Radiator ducting done. The main goal was to hide the white lower rad cross-member, but also won't hurt cooling. So the design isn't optimised, but it should look the part once powdercoated. Ended up metal-glueing a few pieces together to make the shape because my brain/cardboard failed me with some silly mistakes. Oh well, it isn't visible so it'll be fine, and I reinforced a few areas I knew would get high load/vibration with doubler plates. one of the main goals was to make it easy for bumper to come on/off. So the lower section is attached to the bumper and slides into place. Once powdercoated I'll be putting foam tape of every surface to prevent as many rattles as possible, but it may not be perfect. Next on the list of parts-to-finish that require outsourcing for finishing is the Airbox. I put this on the back burner when I was working towards the last dyno session, but picking it up again now, as I've figured out what I'm going to do with it. Basically, it has some clearance issues (hitting stuff) and fitment issues (flange being warped from mold, and not quite right angle). I've figured if I solve the clearance issues (easy mods to make), the fitment issues (hard/$$ mods to make) can be addressed more cheaperer by printing another set of trumpets. After some testing, I've concluded the flange has quite a bit of flex in it, so can be pulled straight with bolting flange, so it's mainly the 4-5deg angle I need to work out. This approach will allow me to use the next dyno session at KPR's to work out the ideal length and adjust my design for what the engine wants to do, then incorporate the flange angle/position change to close up the gaps I've got. Durp got this measurement wrong.. Needs a 15mm notch where it sits on top of radiator to help with bonnet clearance. Can do without this if needed, but it will help it fit a lot better so going to get on with it. Shouldn't impact airflow, it's plenty big enough. The extra bulge around the battery post is a bit tight for clearance, but my gut feel is it'll be fine once the trumpet gets (probably) a little longer. Current length is 370mm to valve on the centreline. Should have these fixed up in the next week or two. Car is now ready to head back to the Dyno, but I haven't managed to find time in my calendar until probably August, unfortunately. Keen to see what a bit more testing can do. The list is slowly getting shorter, but the jobs are getting more complex!!
9 points
-
9 points
-
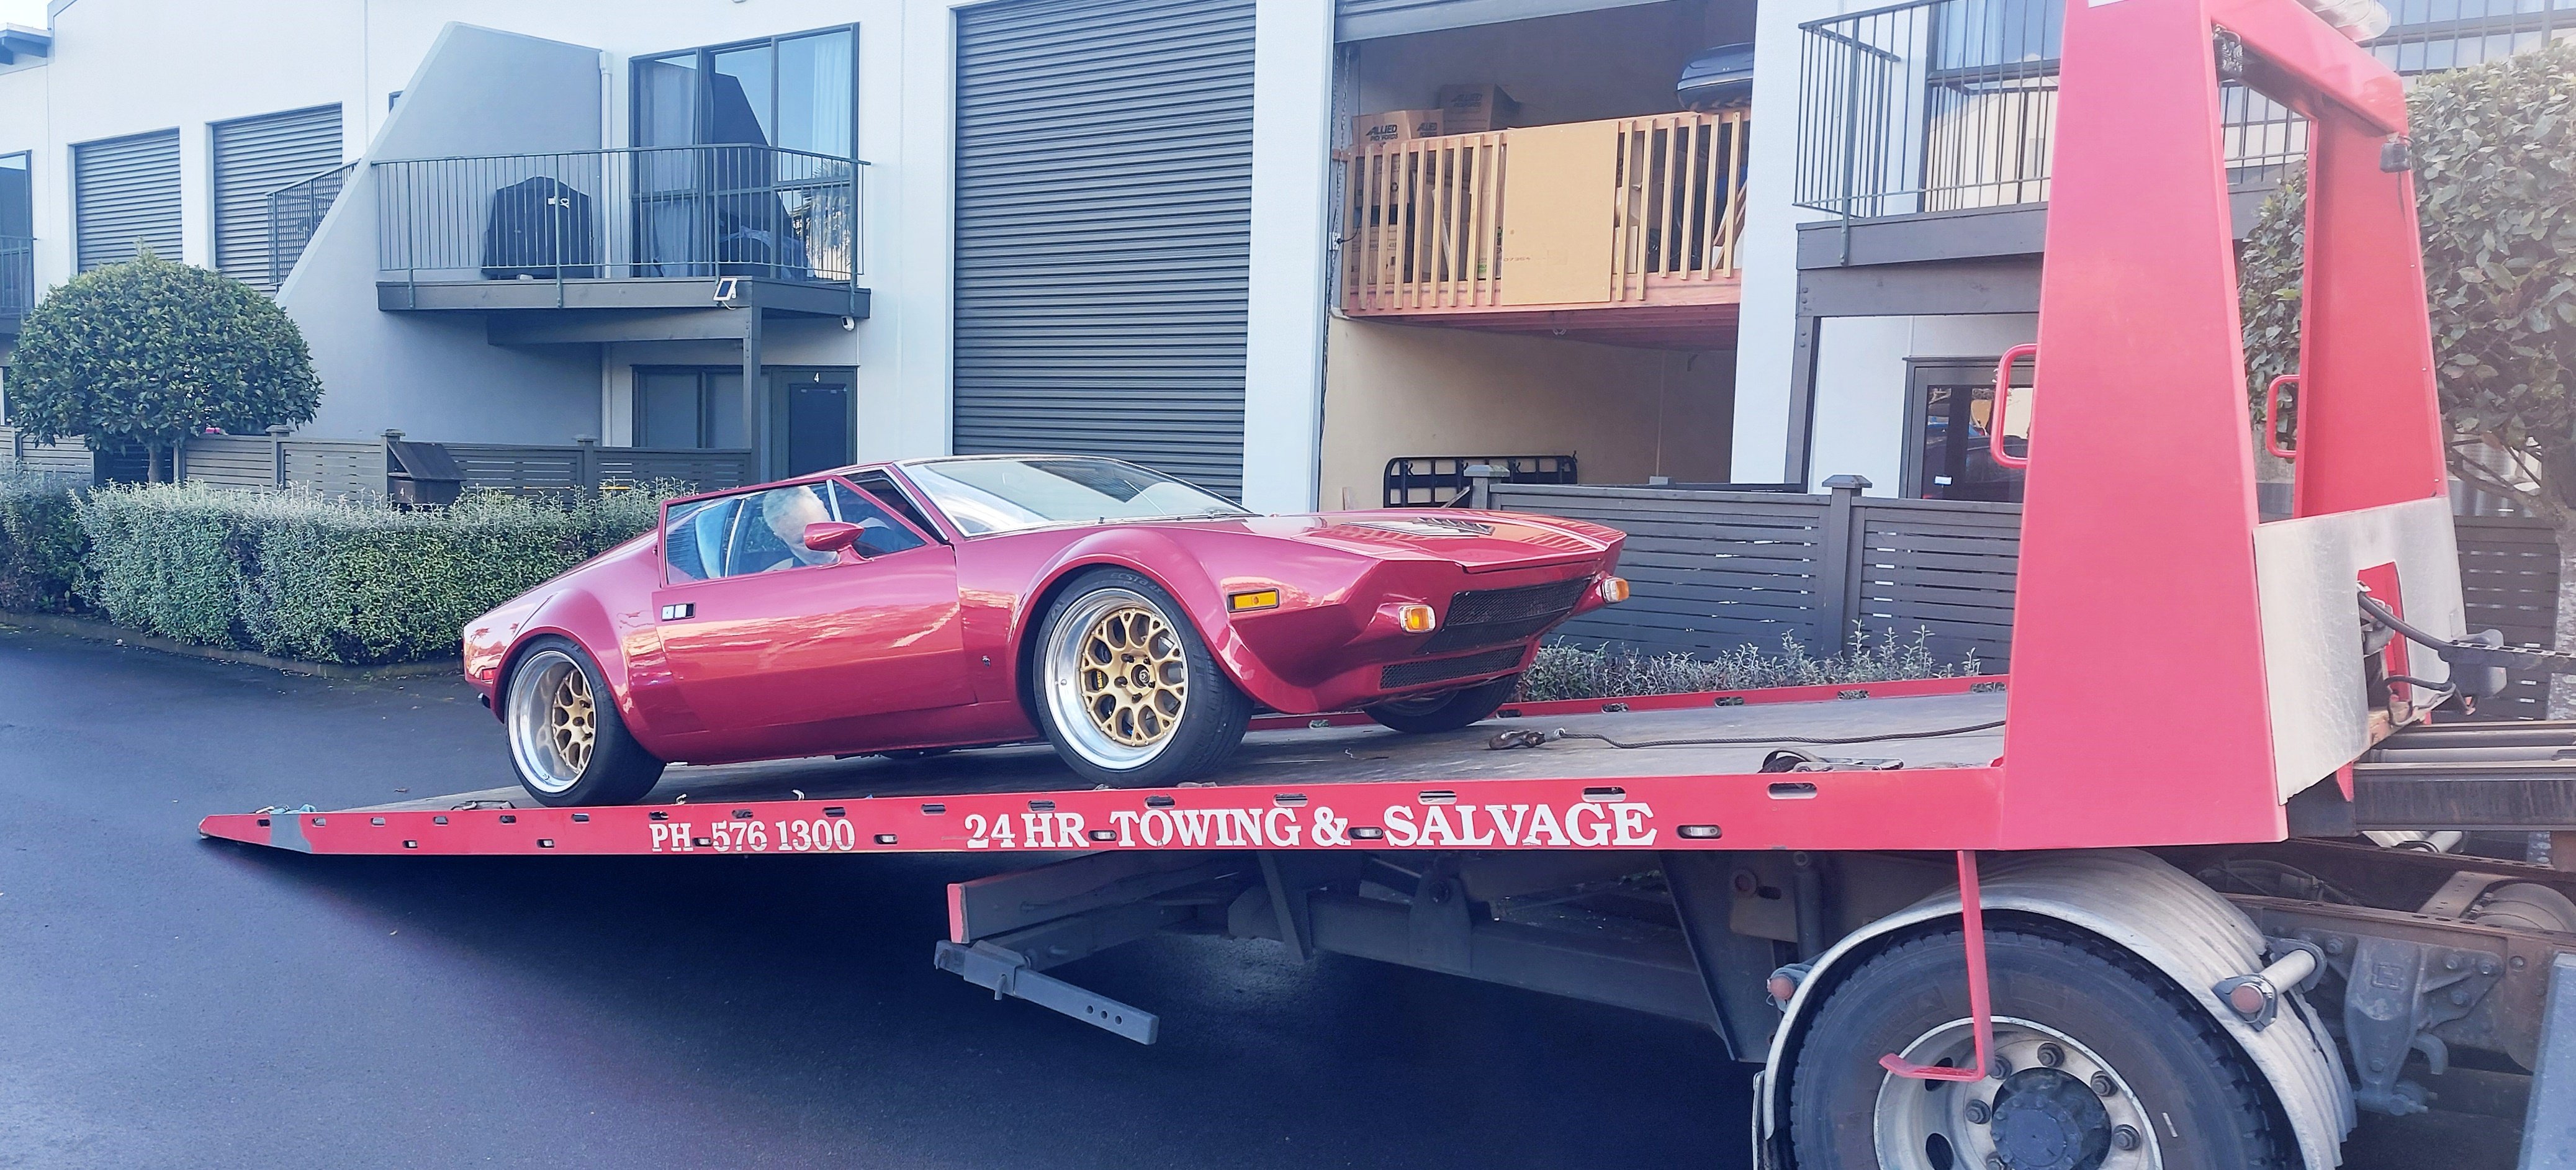
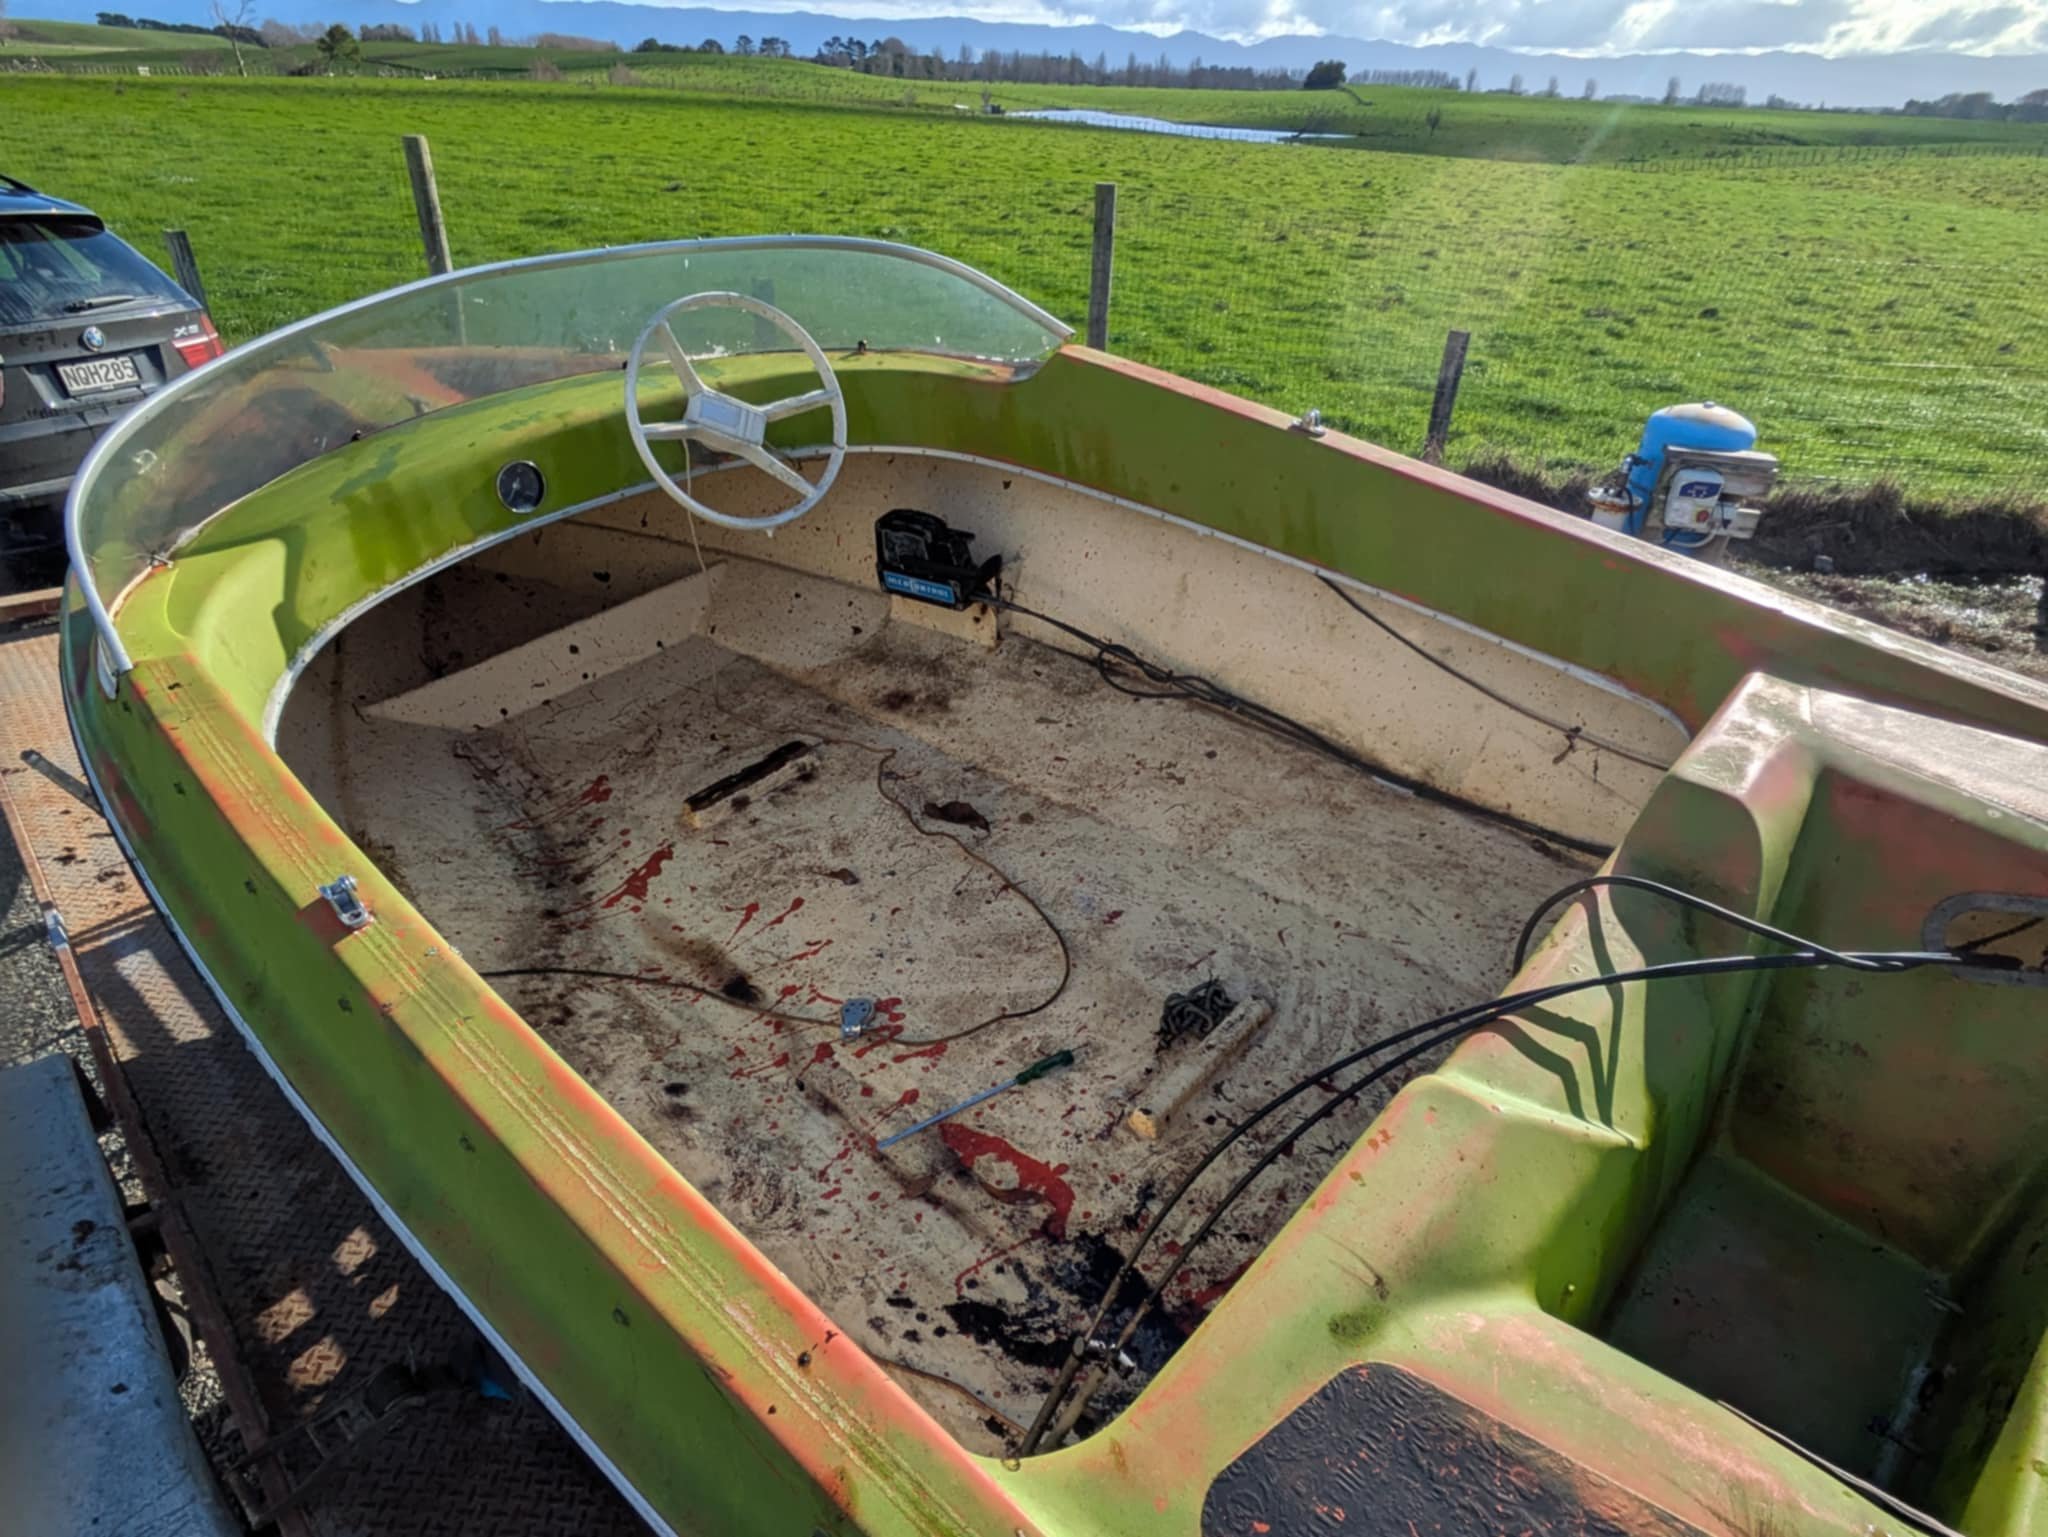
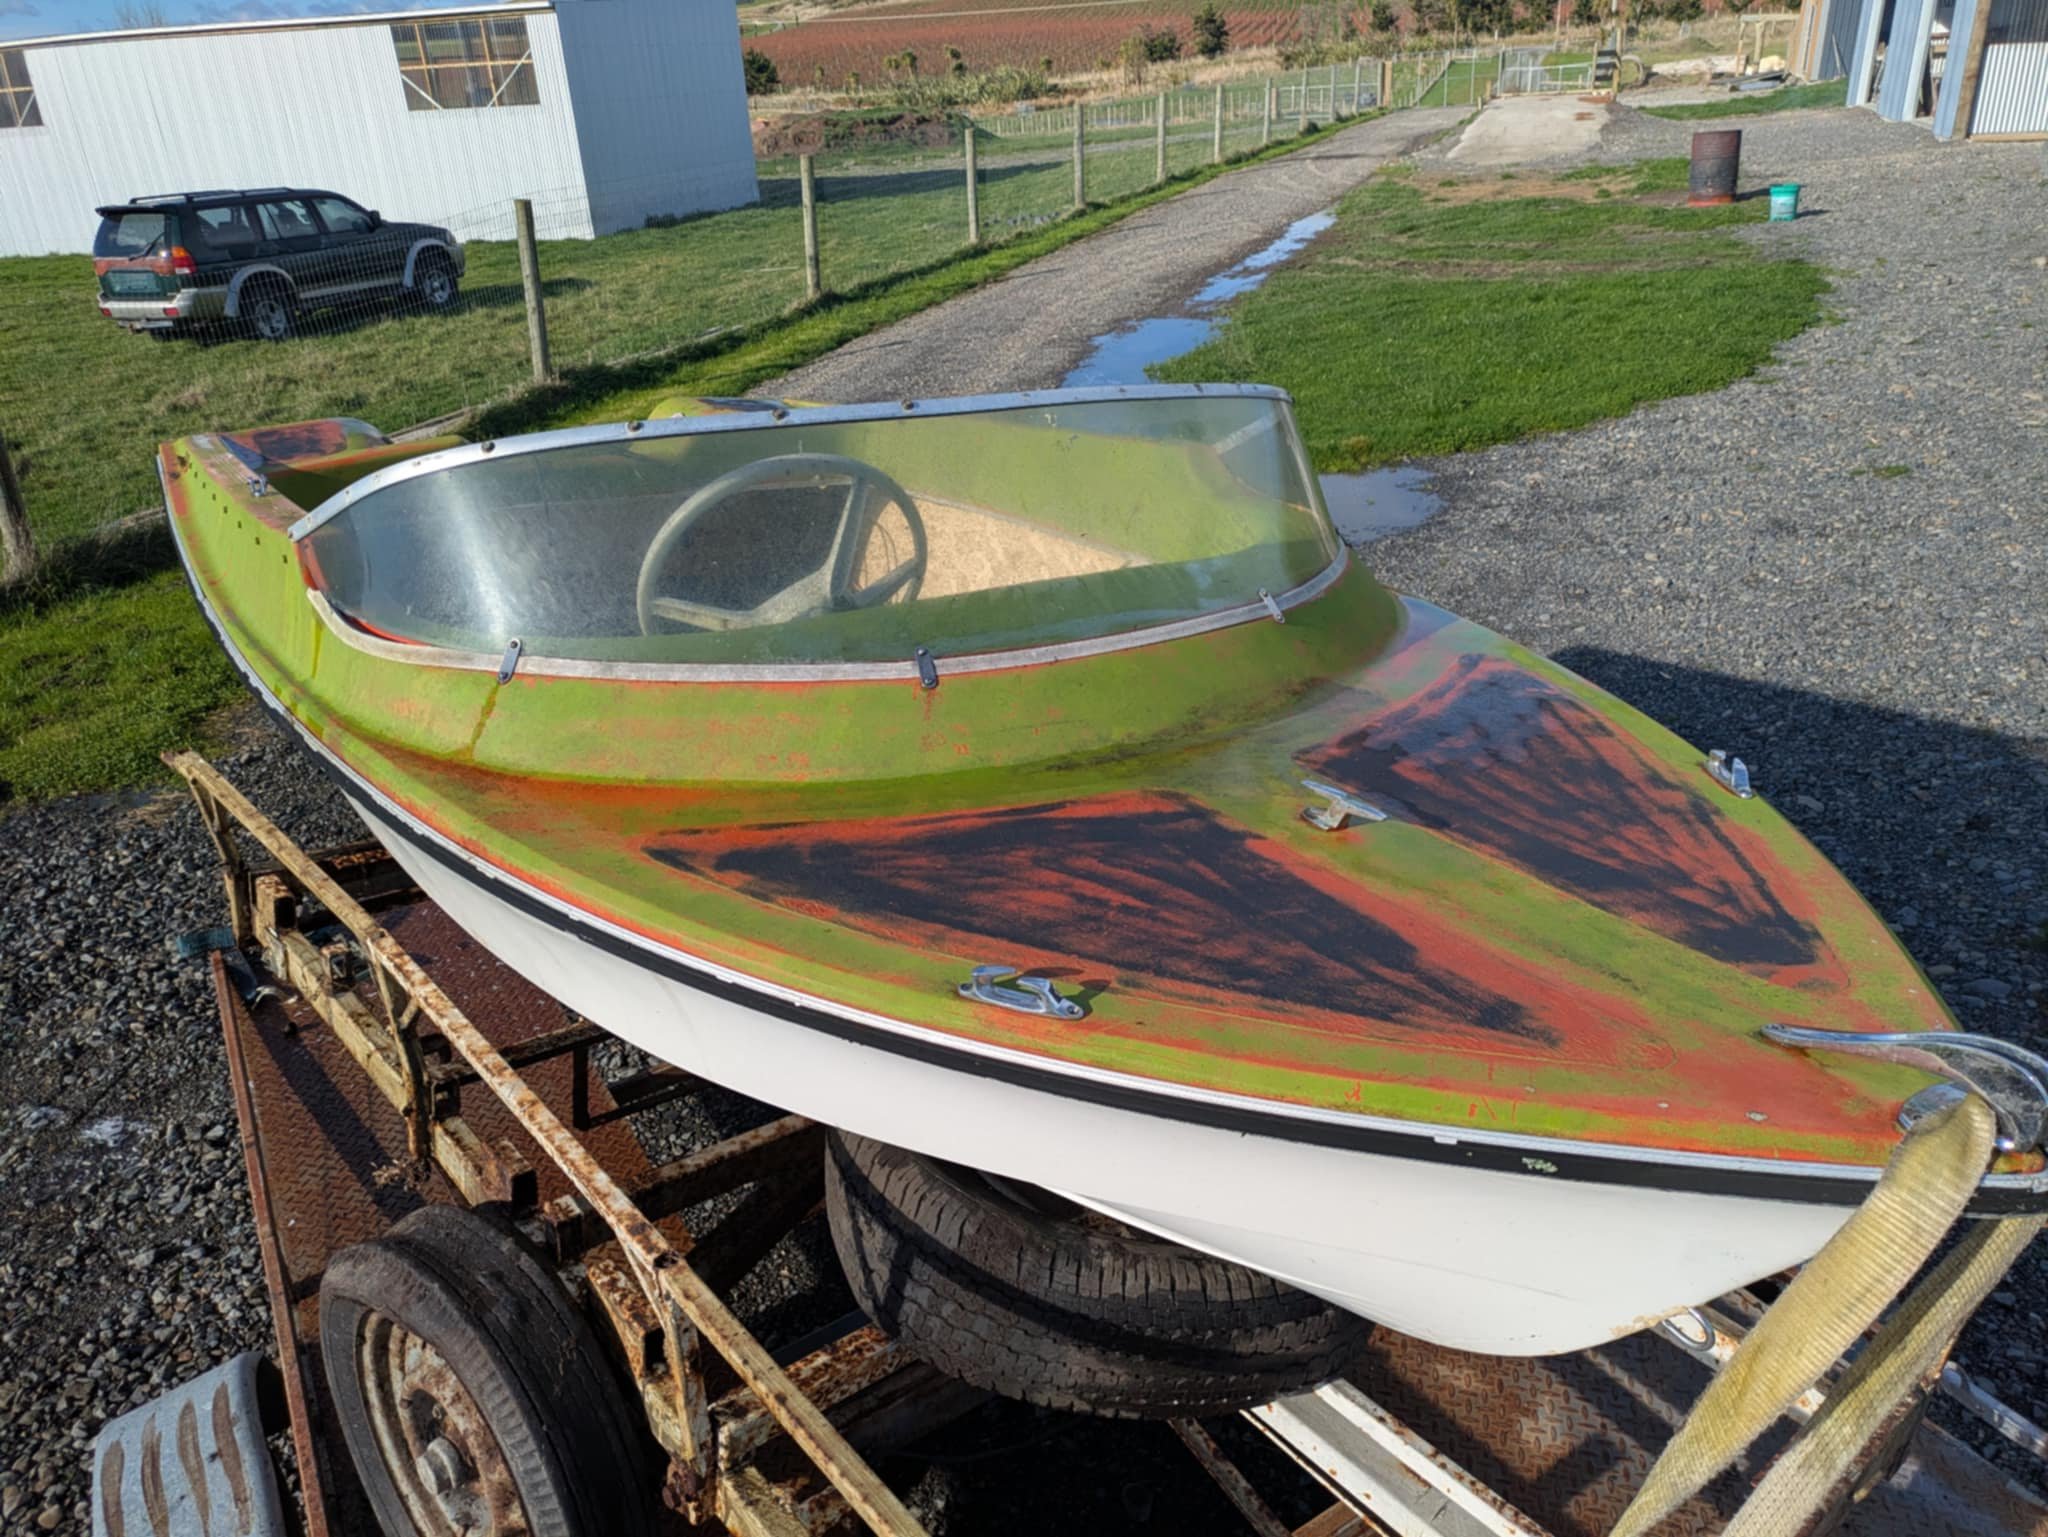
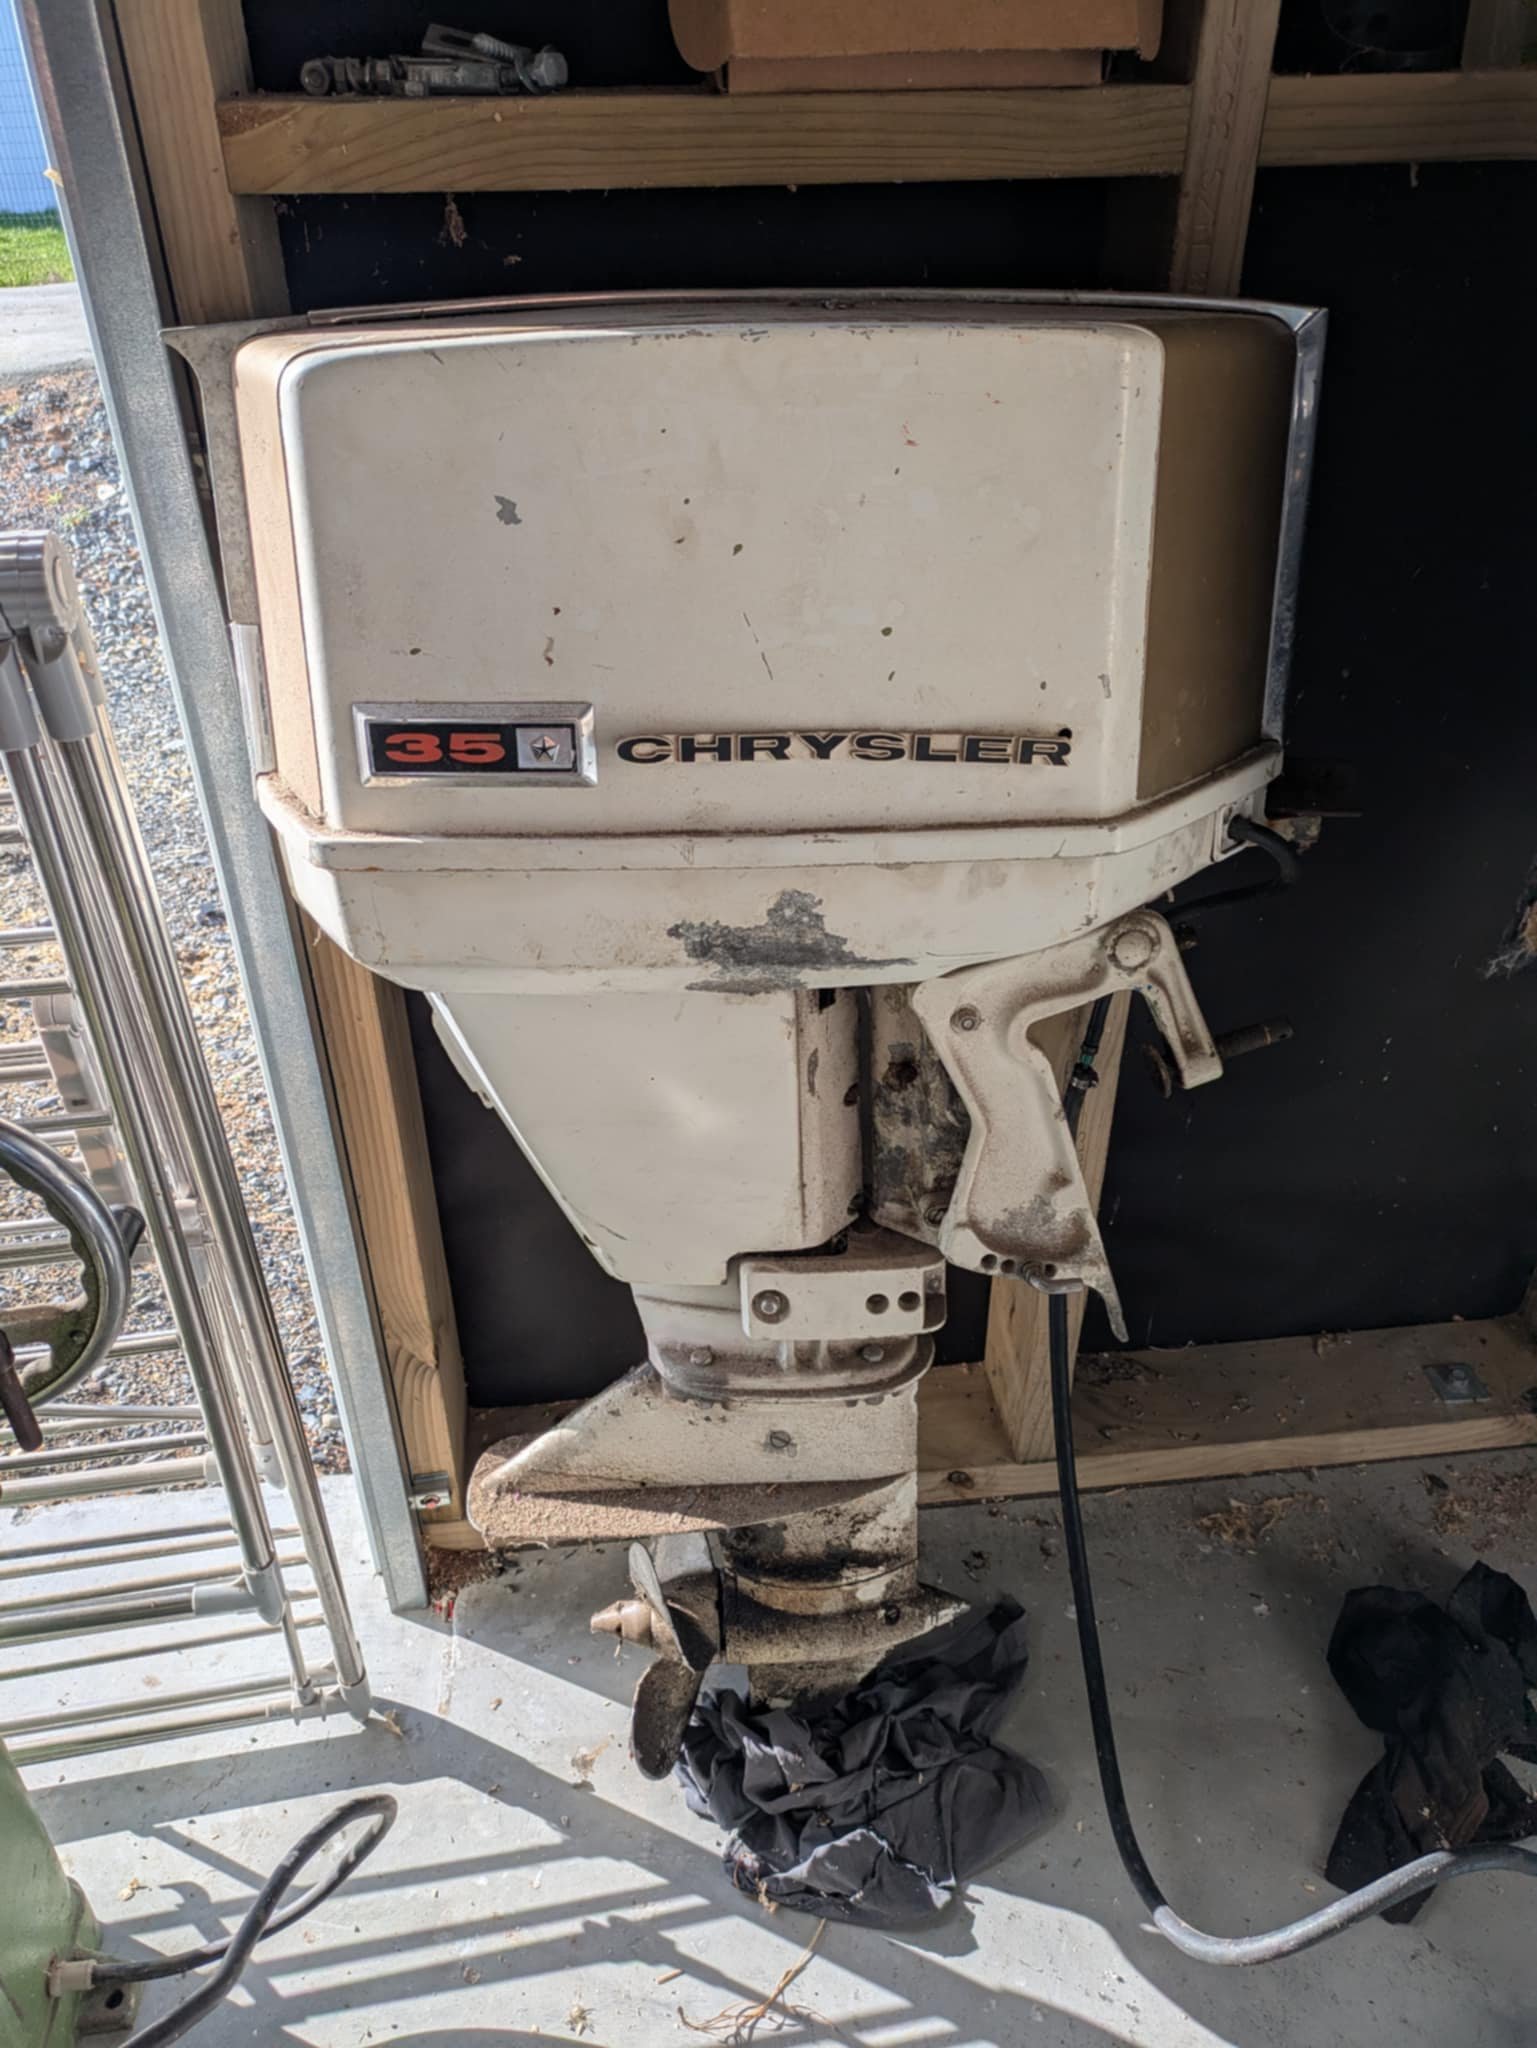
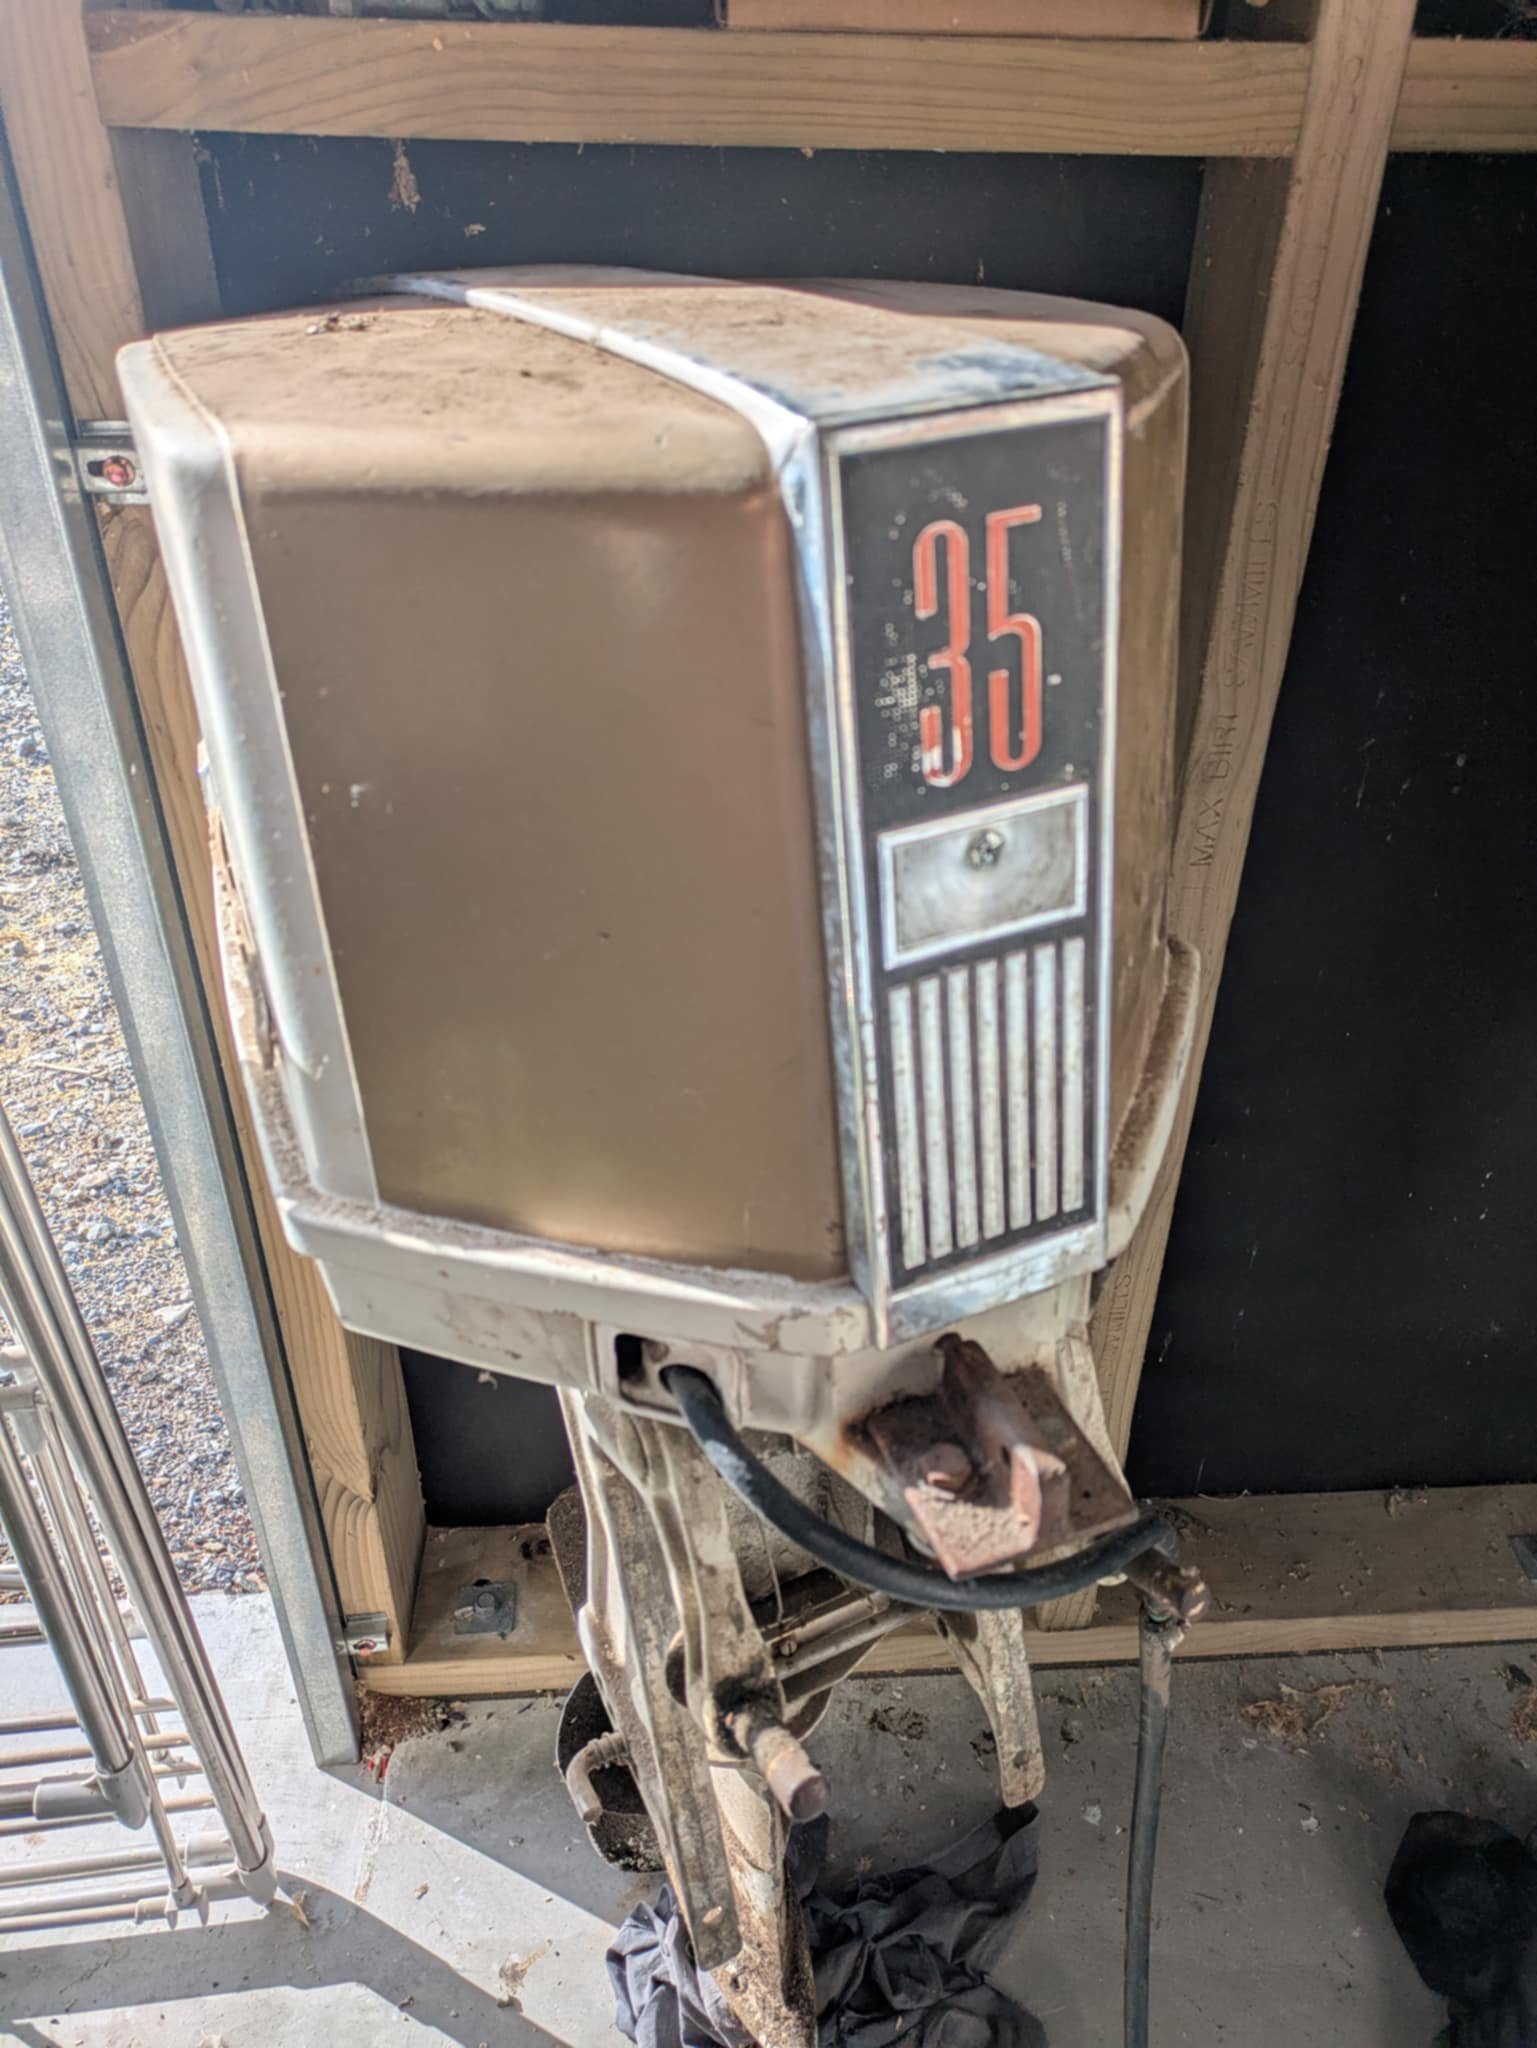
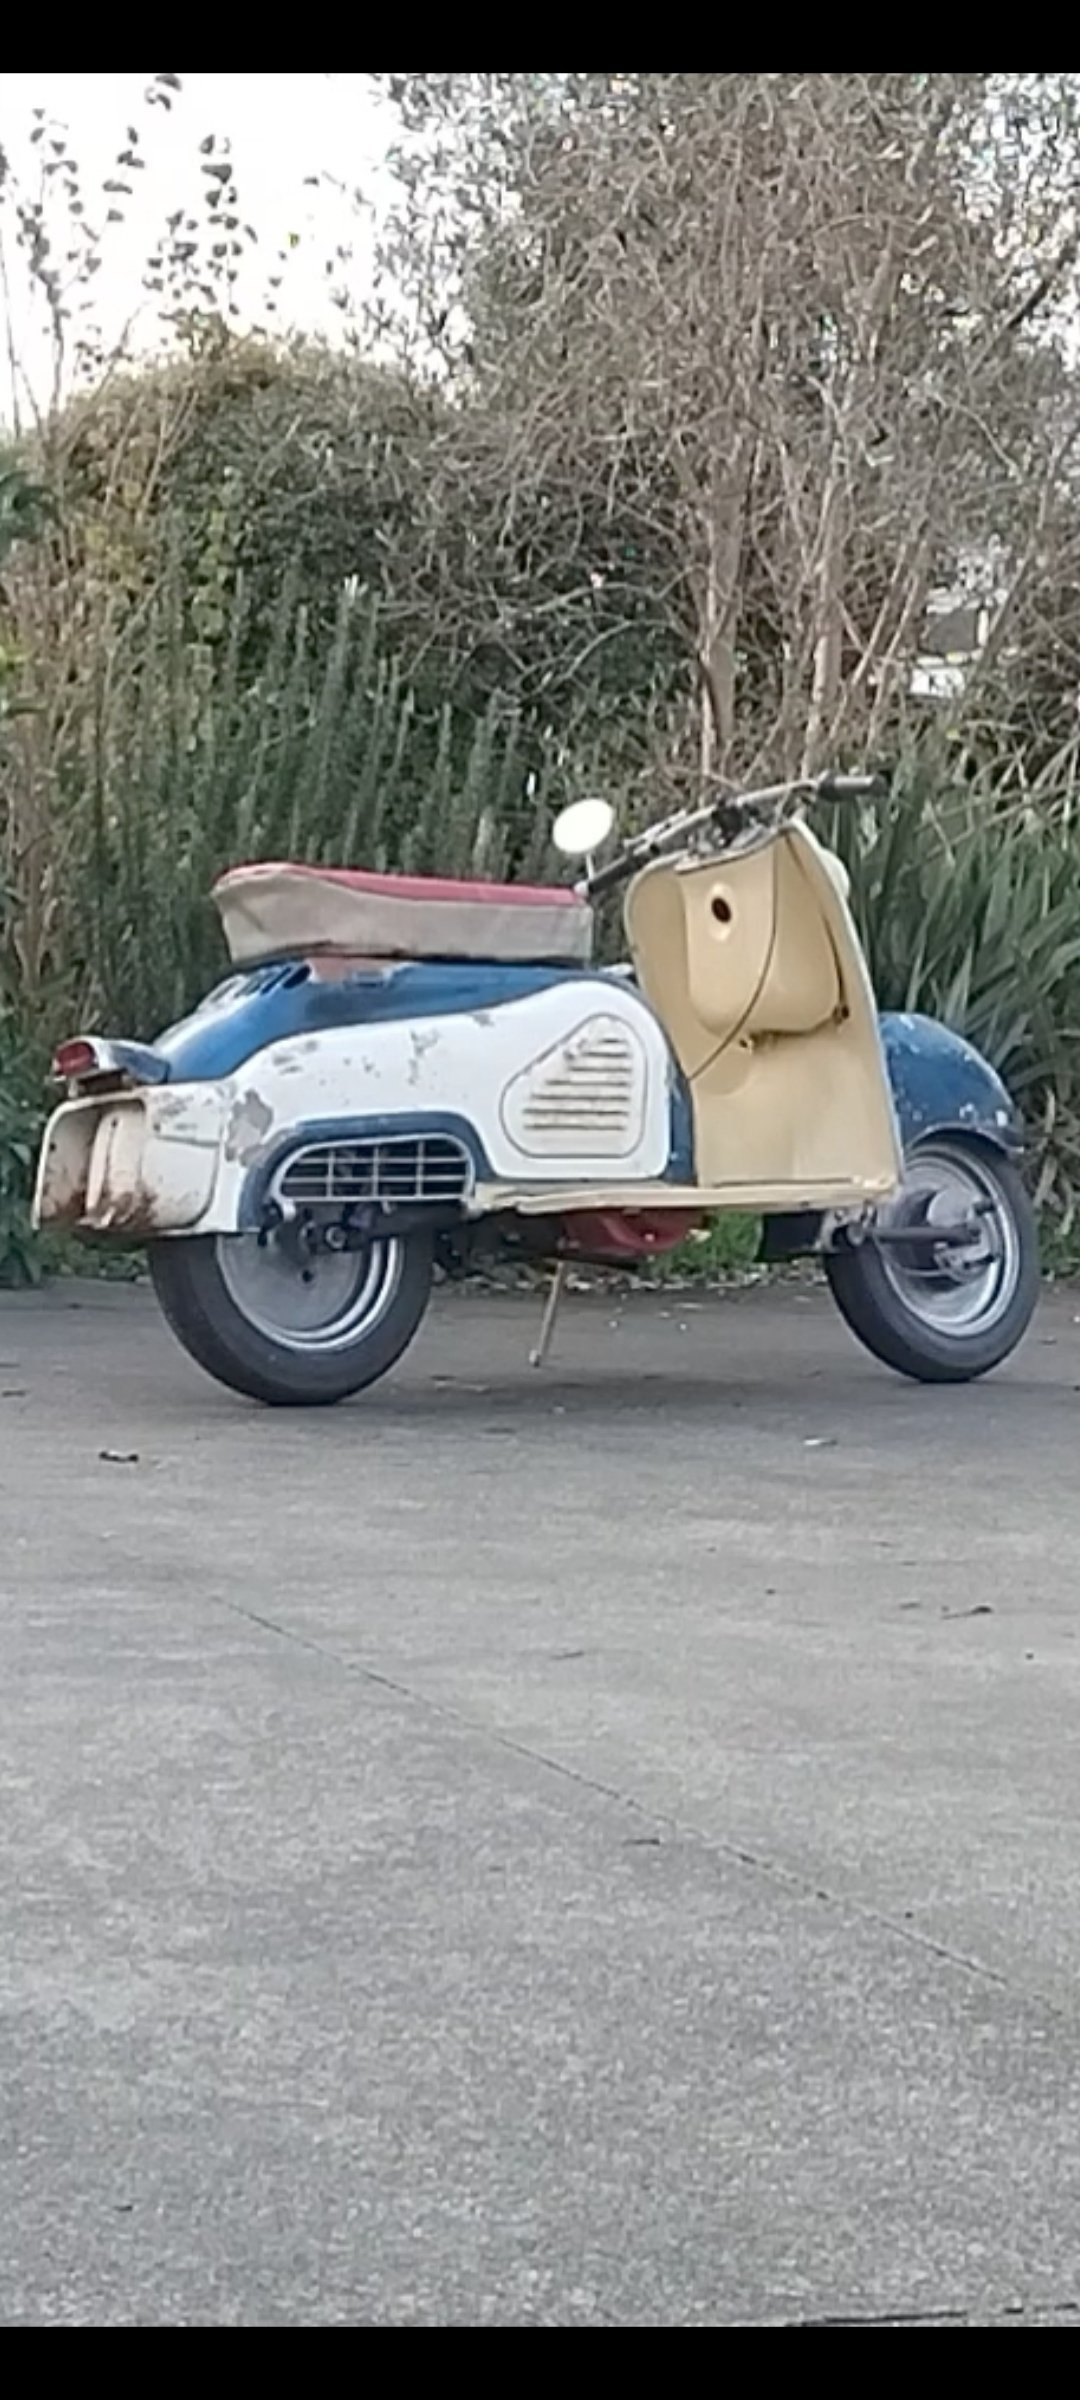
For no reason at all this followed me home. Love it. Mental the size of that engine that's only 35hp too. Trailer already taken to the tip too.
9 points
-
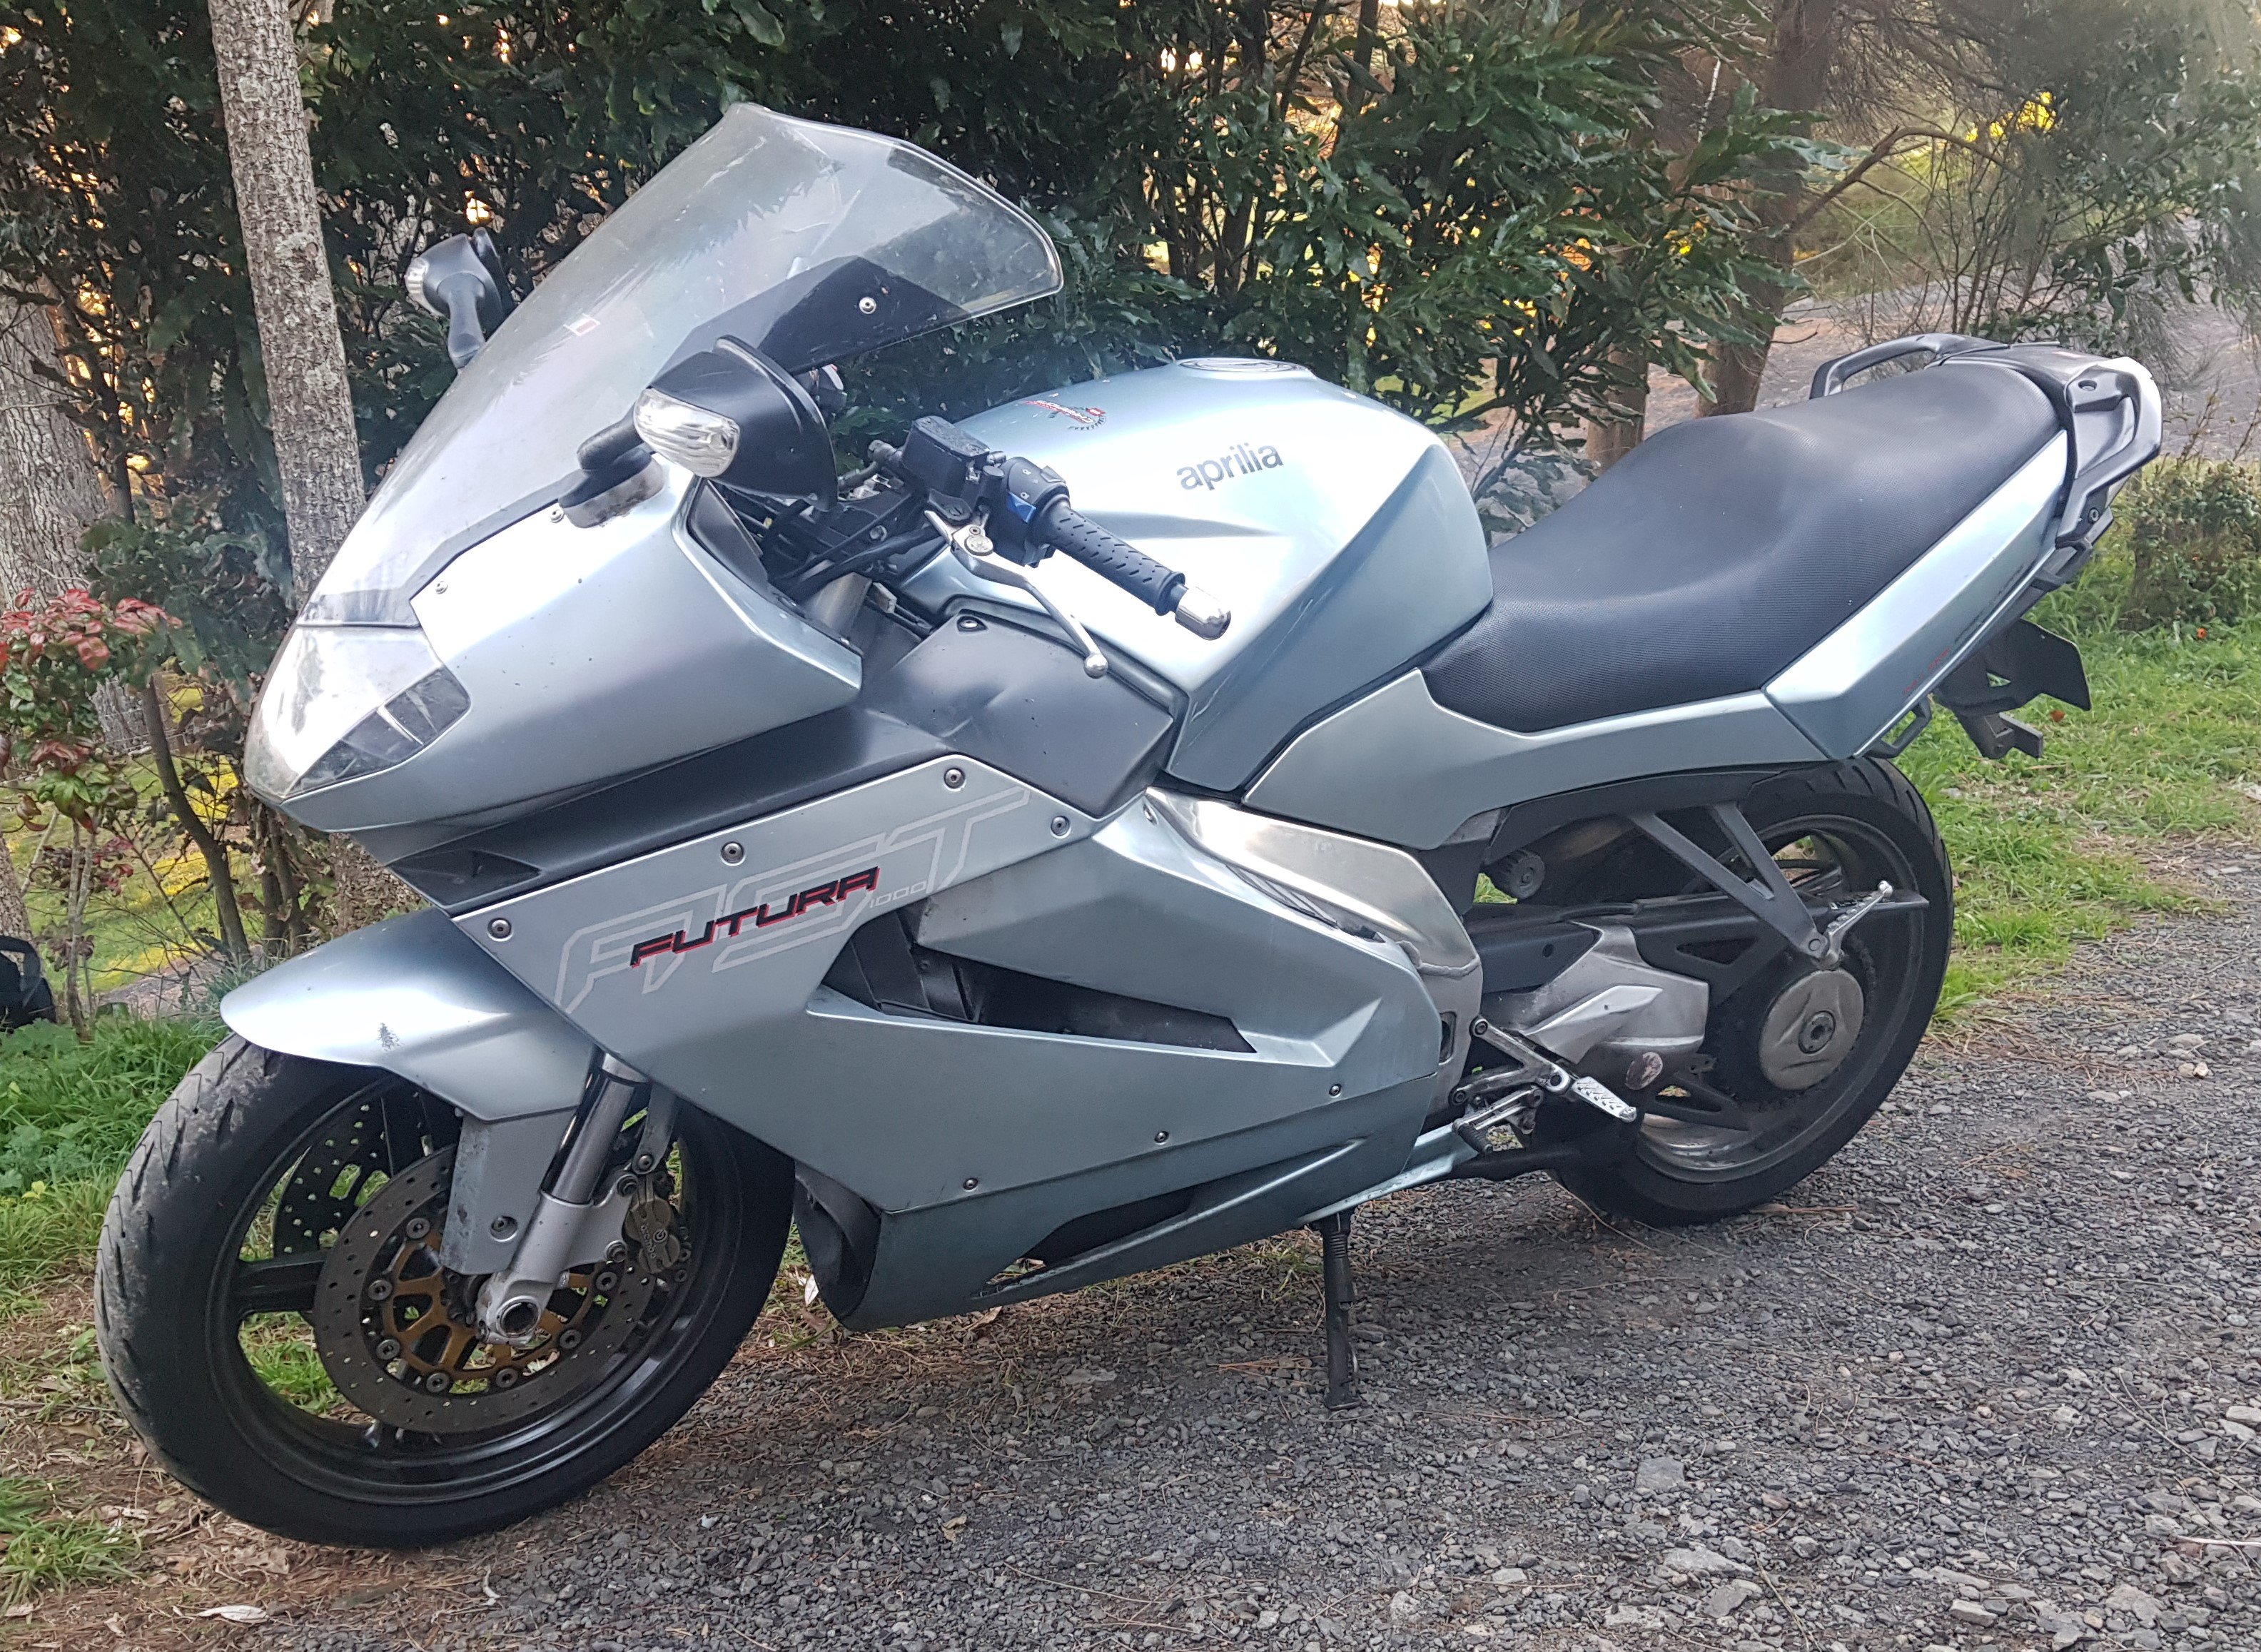
I'm trying to assemble my 'bucket list' of bikes. These are bikes I have always wanted and now it seems also unusual bikes that I never knew I wanted.... Back in the UK I had a Fireblade RRW, a Triumph Daytona 955 and a Ducati ST4 and I loved it, loved it and hated it in that order. These were sold when I came to NZ some 14 years ago and I think it's about time that I got the Honda/Triumph/Italian combo back in my garage. The Honda Blackbird in my profile pic is my long term keeper. I always wanted one, and it's a bike that has 100% lived up to the expectation. It's fast (very), comfortable, refined and very pretty. I've owned it for around 5 years now and can't imagine I'll ever part with it. Early this year I was lucky enough to get one of the original Triumph Speed Triples. Great bike, another one that lived up to the hype. It's brash and loud and just extreme fun to ride. For the third bike to join them I was looking at another Ducati V-twin, probably something like a Multistrada - something that would contrast with the styles of the other two. Late night trawling TradeMe and Facebook is a dangerous place, and I came across this: It's an Aprilia RST 1000 Futura and I don't think I've ever even seen one before. They were never popular worldwide and there's probably less than a handful in NZ. Although it looks good in the photo it's actually a bit of a project as there are paint, corrosion and wiring issues as well as it needing a damn good clean up! If there's any interest I'll post up some of the fabrications modifications and repairs on the three. Comments welcome!
9 points
-
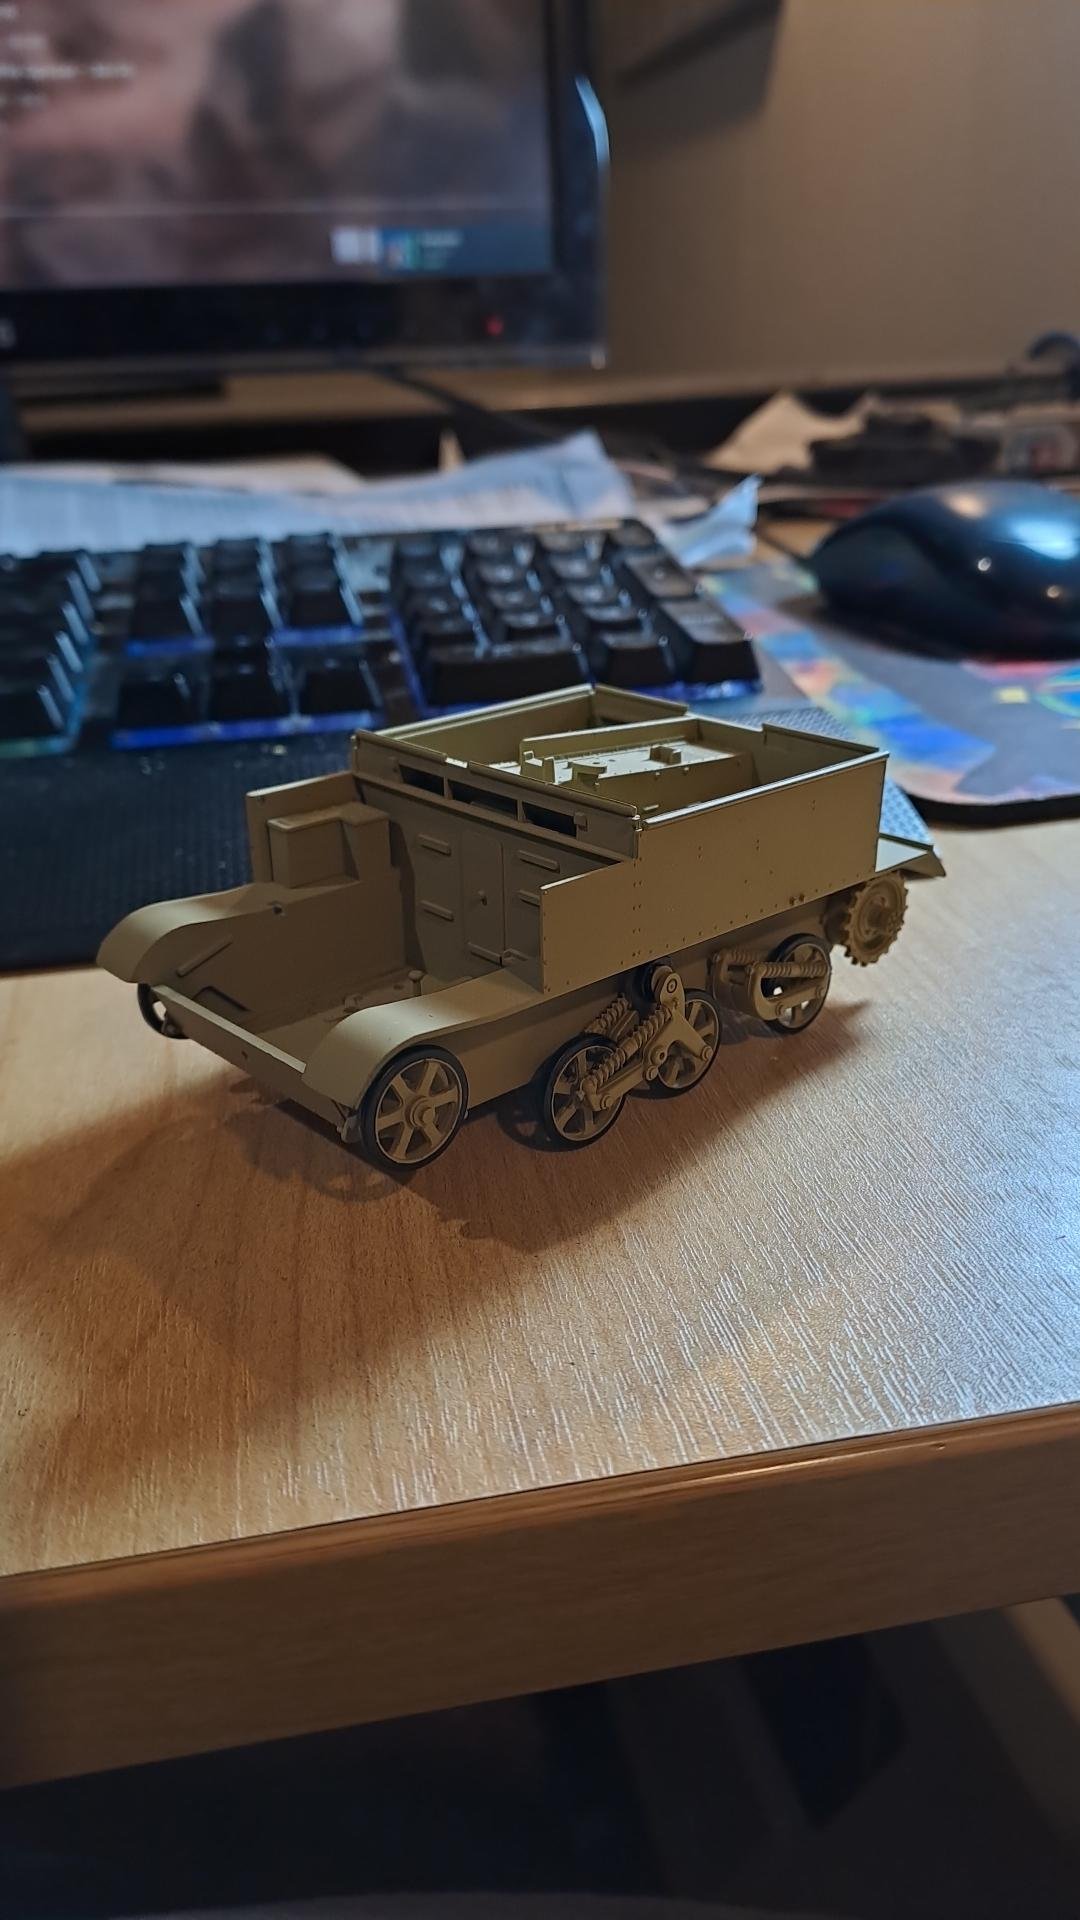
There's been a bit of progress. My paint order for the halftrack & the Chevy's never arrived, there's another on the way apparently. Once the small block for the street racer was completed the lack of detail was a bit obvious. That, and @Indiana_Jones's fancy spark plug leads, made me push on a bit. Fuel line, carb linkage & plug leads on the way. Bonnet will be mostly shut but meh. Also, despite the lack of paint, I got the SdKfz 250 back on track. / d'ya see what I did there ?8 points
-
8 points
-
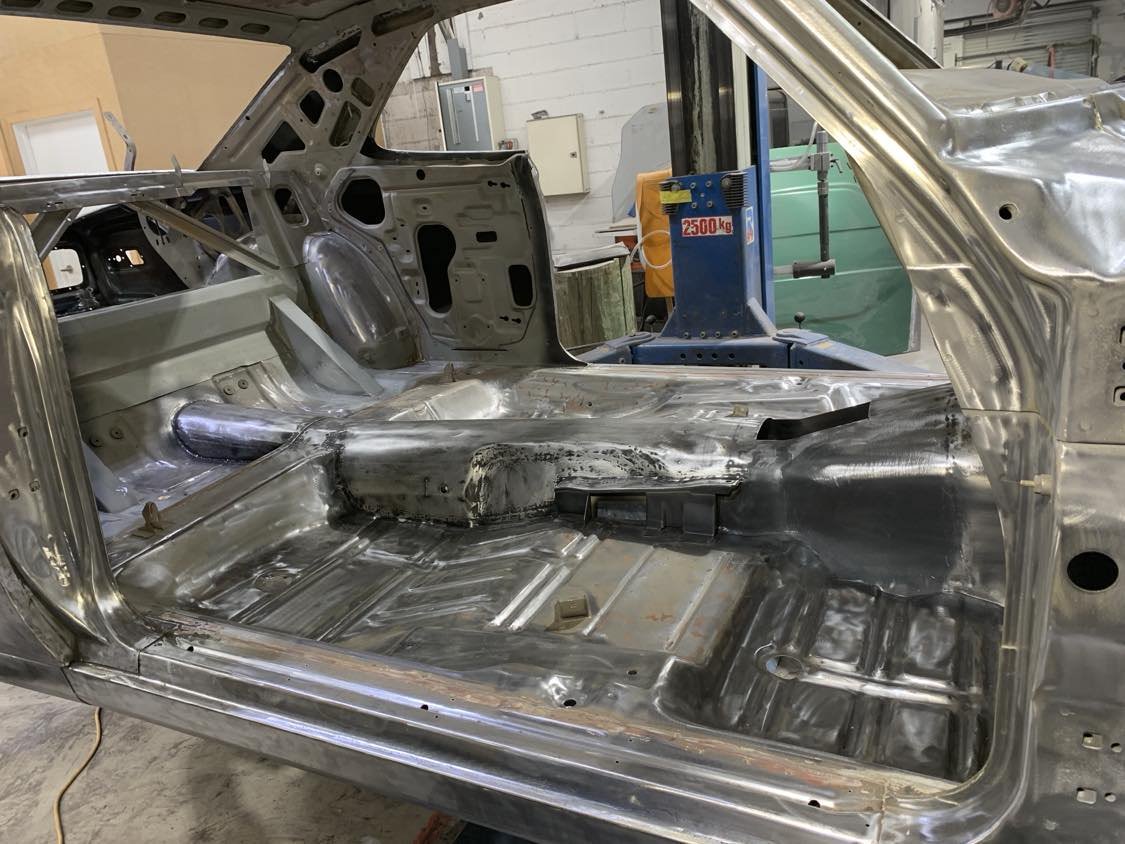
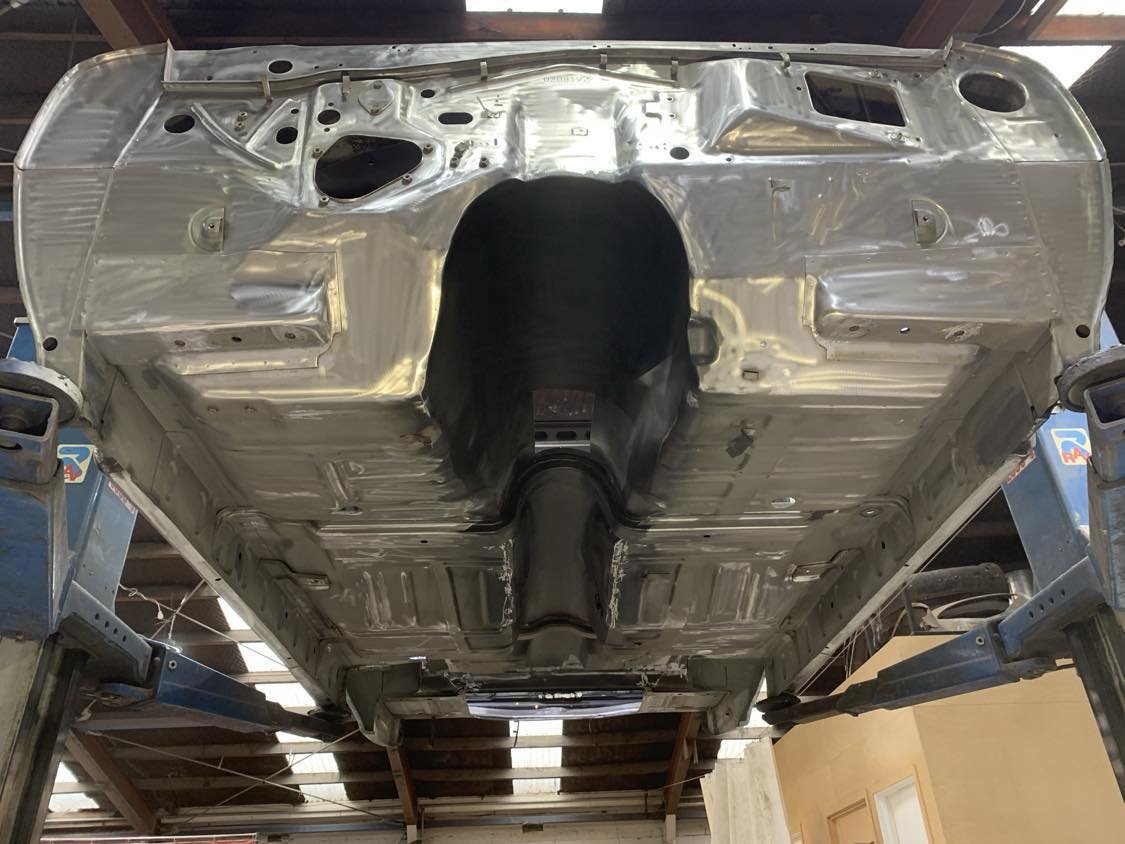
Crown has had some work done in the past week at canterbury auto fab. Body back off and wire wheel and sand to remove any surface rust and kefos
8 points
-
But sir, if I change one component of my car that influences all the components that I have previously had certed and were working in harmony why does this one component's relationship with all these other components need to be checked? I built this table with four legs the same length and I've had those legs certified, but now I've put a new top on the table that I've attached to said legs with bubble gum and two of the legs don't touch the ground anymore, but why should the certifier check the legs again??8 points
-
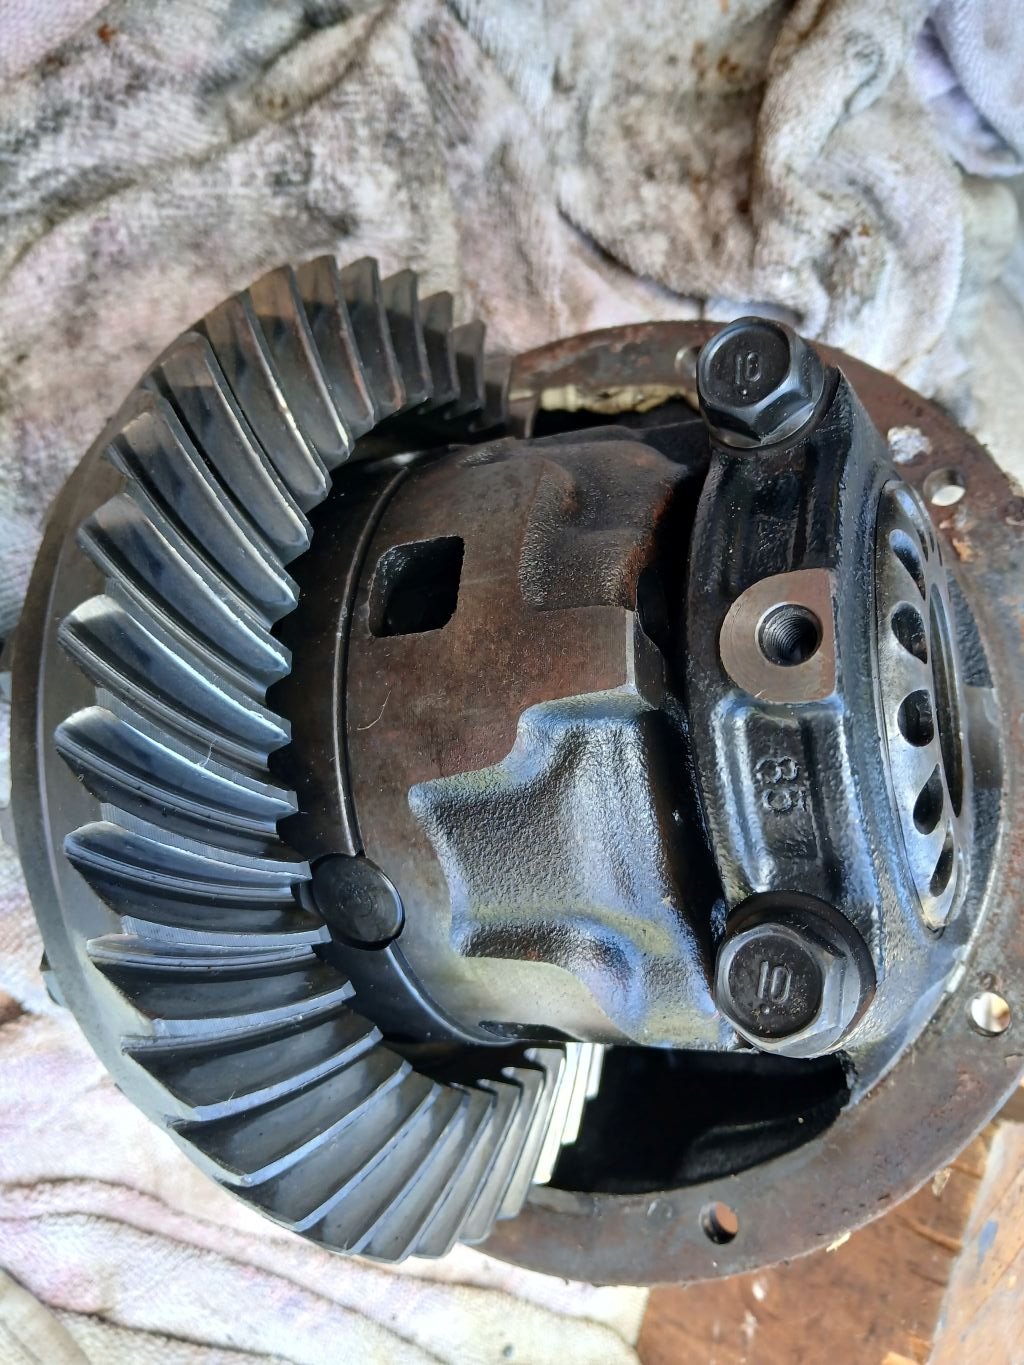
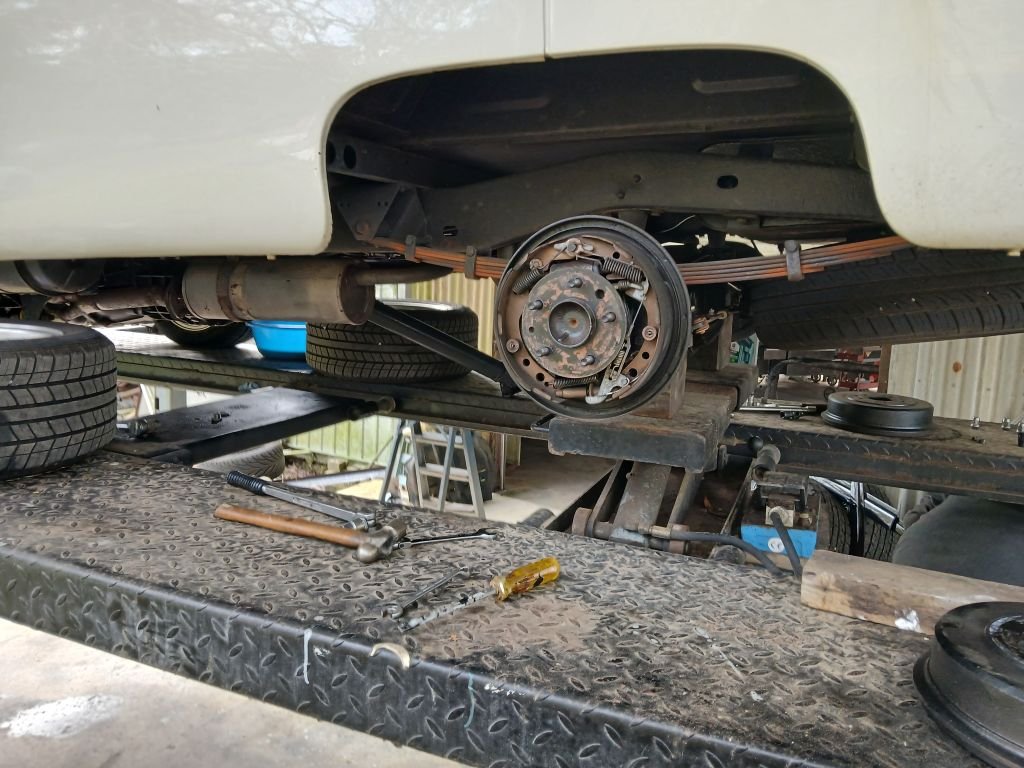
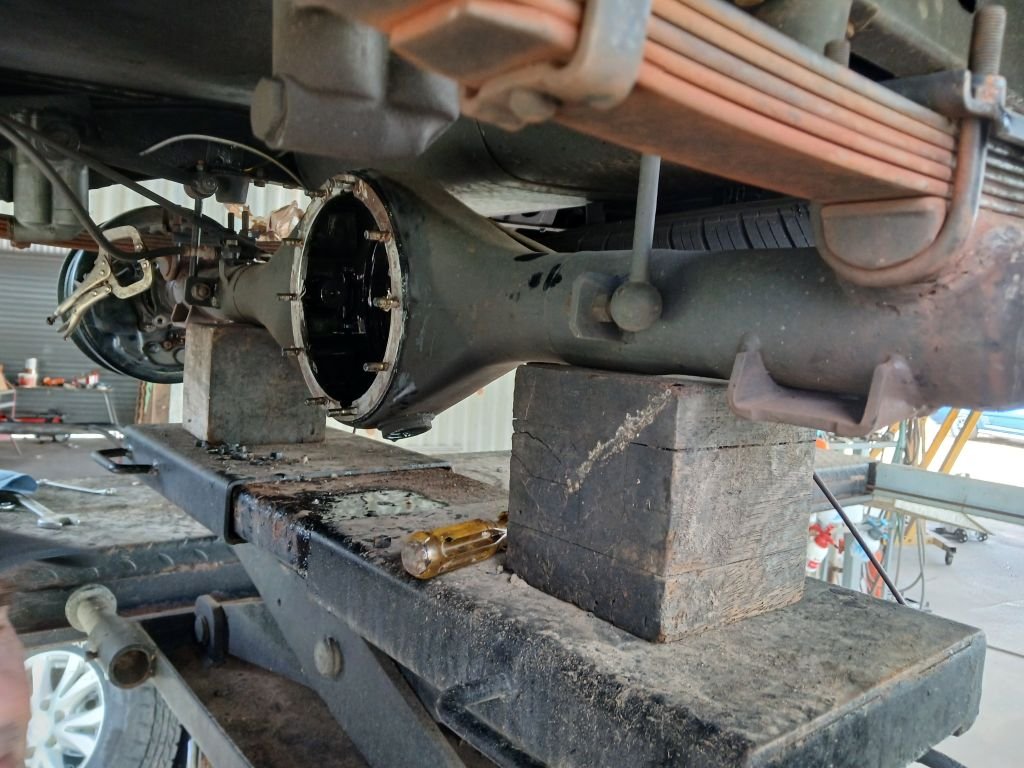
It's been almost 3 months since my last update on the Thames and he is still running like a champ. So following the old adage of "if it's not broken why fix it" ringing in my ears I figured now was a good time to stuff around with something. These days I've given up using first gear as its just too short and since the old Thames seems happy enough to pull off in second, things are hunky dory. But in the back of my mind I've been wondering what life would be like with a taller ratio diff. So a good 4 or so years back a mate of mine was parting out a Toyota Surf 4x4 and donated the diff to my Thames project. Winner I thought as it is a 4.1 ratio LSD and apparently an easy bolt in modification to replace the Y series HiAce factory 4.3 open diff that my van is blessed with. On Friday last week my mate Grunty had his hoist available, so I loaded up my tools and the spare diff centre and headed over to his place for a bit of spannering. And this is where the wheels on my plan literaly and figuratively start to fall off: When I pulled the original pumpkin I immediately spotted the "post factory" gasket sealer - a sure sign that someone had been in here before. I'm obviously a bit slow as I still didn't smell a rat: Anyhoo buggerlugs here carries on regardless and chucks in the pumpkin from the Surf together with lashings of super spendy fancy gear oil that the LSD apparently needs. Got everything together again and headed out for a test drive. Now those of you who may have watched an episode of the TV show called "The Nanny" back in the day will hardly forget the voice of the leading actress, a lady called Fran Drescher. Well when I tell you that the old Surf pumpkin whined worse than Fran does, you will have an idea of how bad it was. Yikes ! To add insult to injury the bloody gearing seemed no better. How can that be I figured. Now being the numpty that I am, I never physically checked the diff ratio when I transplanted the HiAce axle into the Thames. I'd always assumed it was the factory original 4.3 ratio based on the Toyota factory data plate that I found attached to the donor van chassis. Not so grasshopper. On doing a teeth count on the original pumpkin it turns out that old mate had swapped out the factory diff for a 4.1 somewhere along the line. What a rookie mistake. So now its late Friday arvo. I'm cold and hungry and my van sounds bloody terrible. My mate Grunty took pity on me and suggested I leave the van on the hoist over the weekend and then shoot back out on Monday to swap the original diff centre back in. Being the GC that he is he even gave me a lift home in his work ute. So yesterday in the pouring rain I hopped in Mrs Flash's Moke and headed on out to Grunty's to reverse the swap. I'm glad to say that the Thames is now back to normal and I'm now giving some thought to my next steps in terms of the diff. At least all the experiment cost me was some wasted LSD oil, a bit of gasket sealer and a few hours of discomfort out in the cold. Ideally I'd like to replace the current diff with a taller ratio so that I can make decent use of 1st gear and at the same time drop the revs down a bit when I am cruising in 5th gear. In hindsight I can't really justify fitting an LSD. So I'm currently thinking about sourcing a reco'ed pumpkin from a crowd down in Gympie, but I'm not sure whether to go for a 3.9 or a 3.7. I'd love to get some advice from those who know more about diff ratios than I do, so any suggestions via my discussion thread would be greatly appreciated. Thanks for reading folks.
7 points
-
I know heaps of people have been having problems downloading the Car Construction Manual. So here is the download link for it. https://www.lvvta.org.nz/documents/nz-car-construction-manual/NZ-Car-Construction-Manual-Full-Version.pdf7 points
-
Yeah.... you're right. Damn it. My friend has decided to cut it out and do it properly. SIGH Thanks guys7 points
-
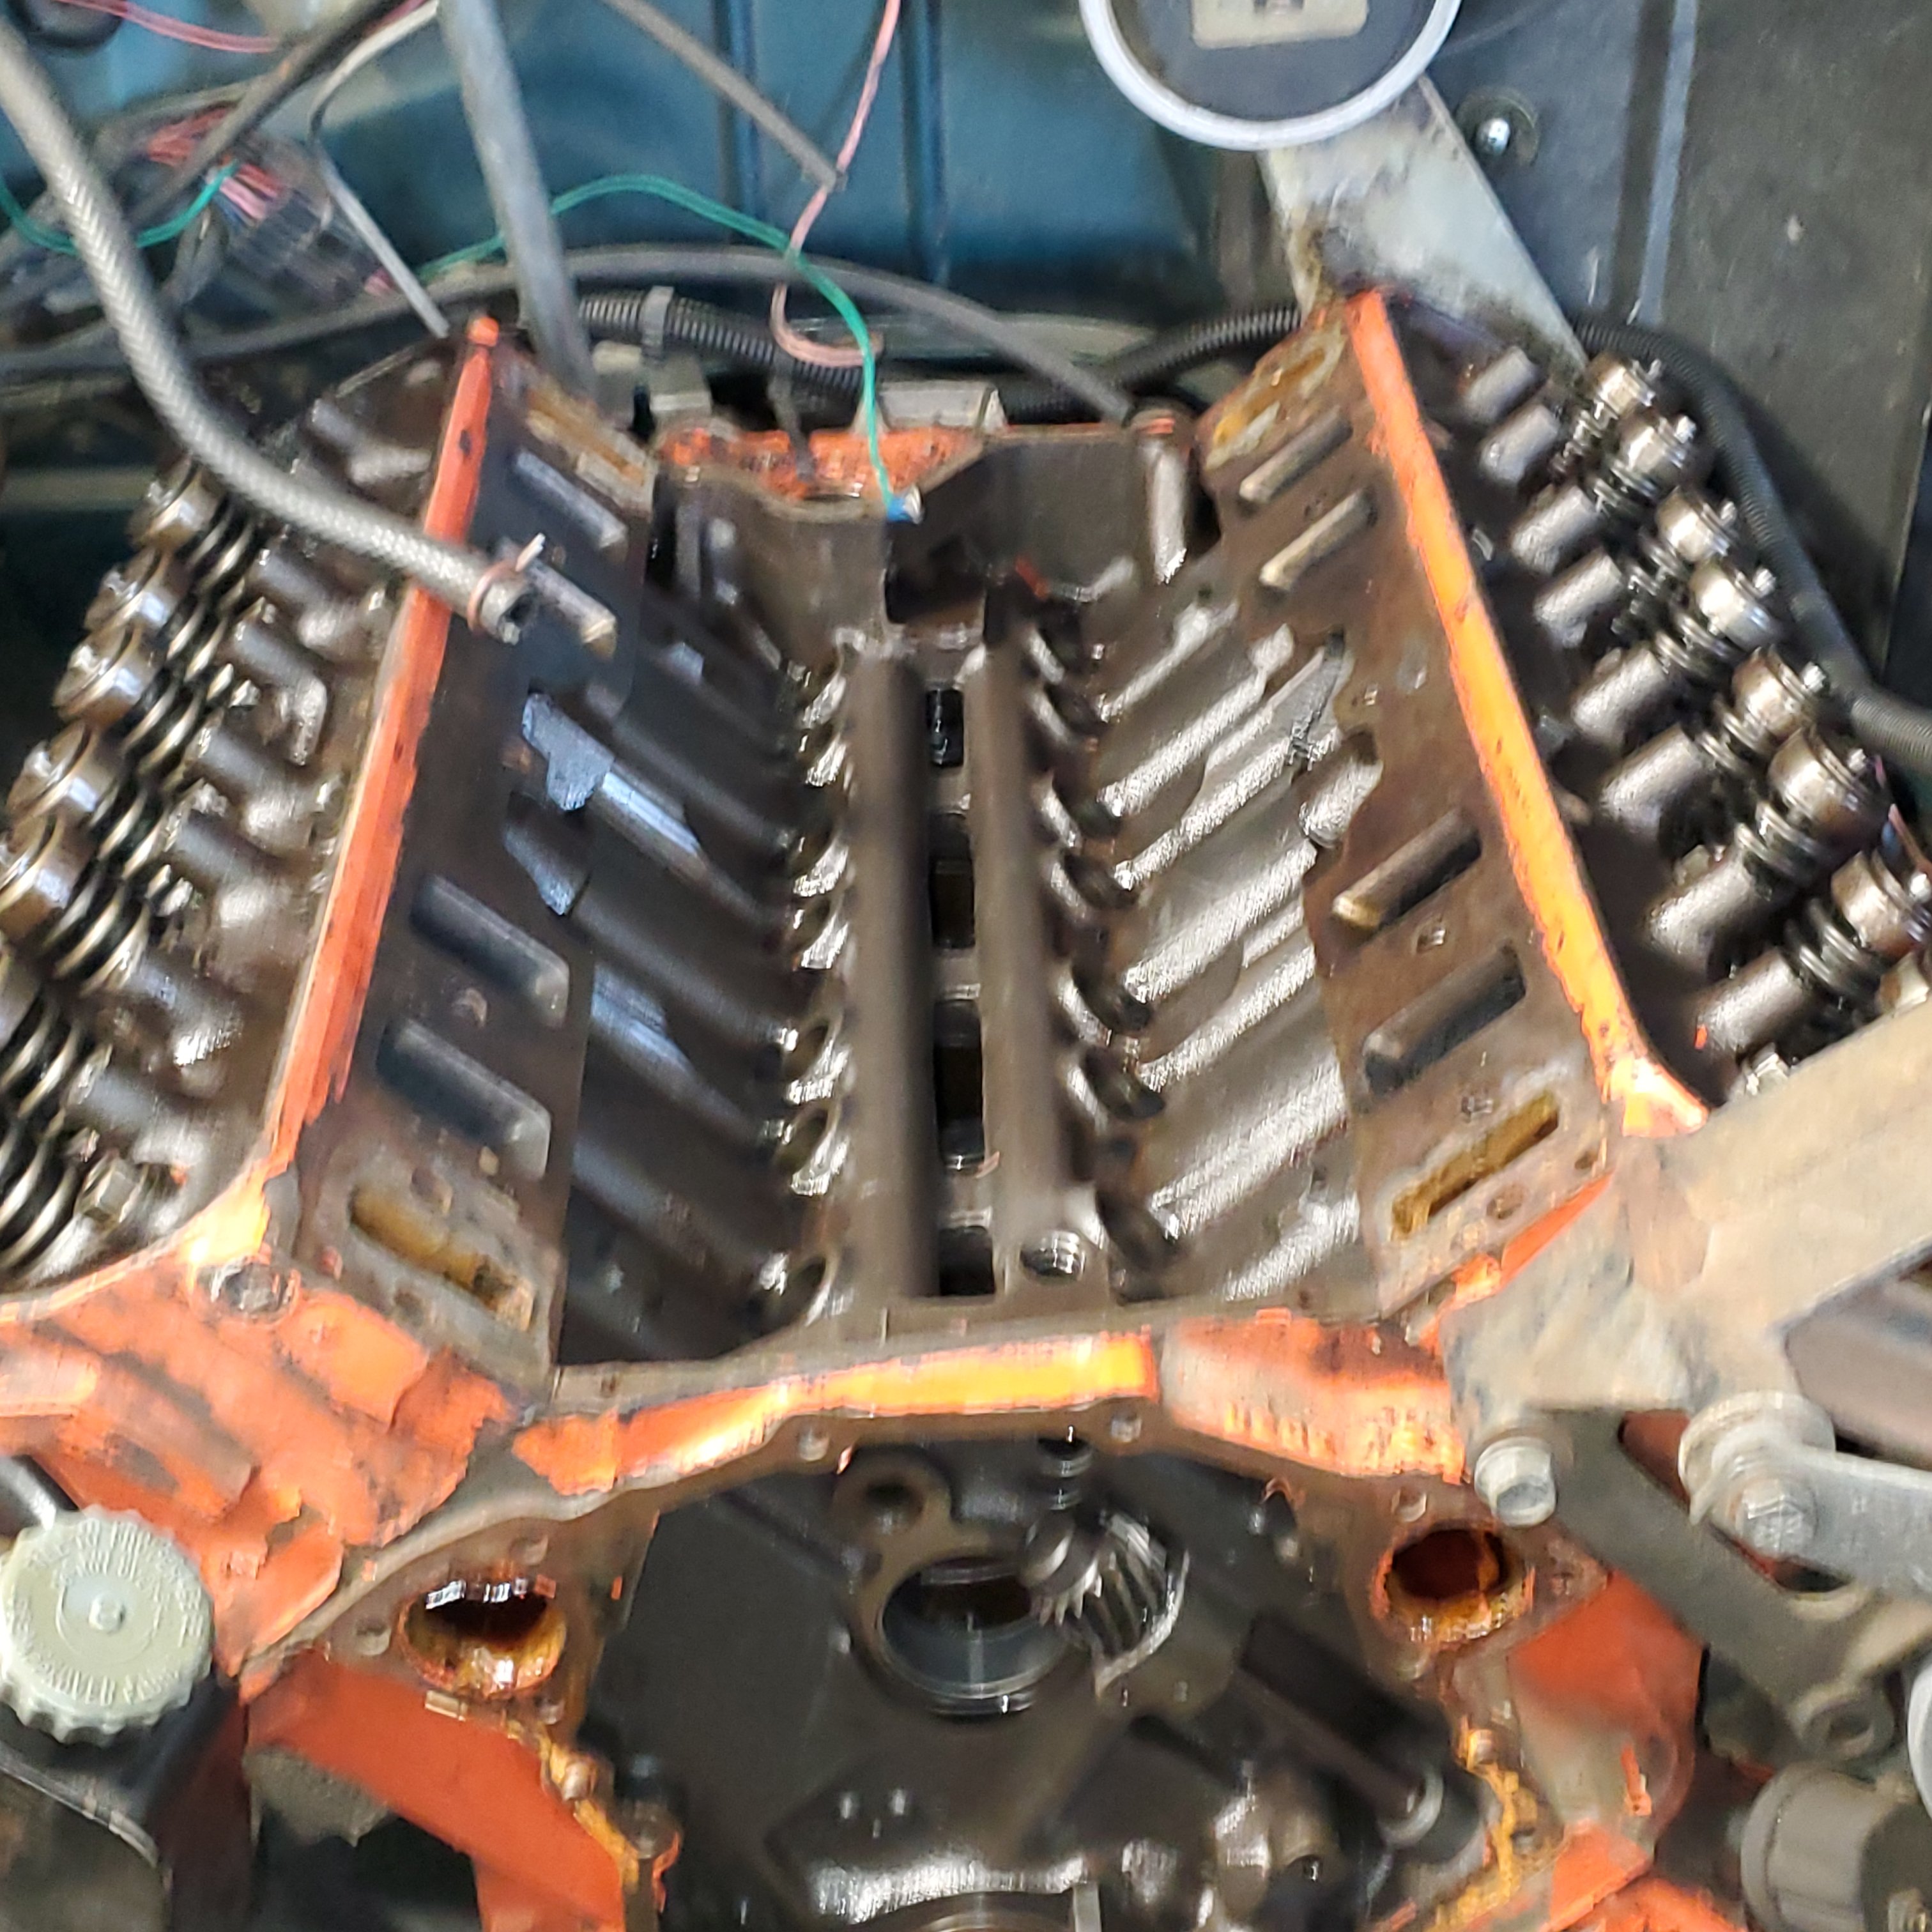
so , for the last 10 years. I've had a cam , in an engine. that's being choked out by restricted exhaust manifolds , a 2.6:1 diff . and probably generally shit tuning. and I did 5000ks in it haha. the funniest thing though, and mods you may tell me off for this. one of the arguments I had with my ex-wife was kinda funny now I think about it. She drove the car for a short period while I sorted her car out ( bad idea) anyways after a week, she's spouting off at me during one of our weekly arguments ( this was in the final year of marriage when we just weren't getting along) " I know that old car better than anyone" do you really? hahahahahaha small ironies. anyways back to the car . I have two options either get a tamer camshaft or........... build the rest of the engine car to suit the cam. thoughts please in the the discussion thread. pic for fred
7 points
-
Aren't we all...7 points
-
No safety features what so ever just pure mechanical inertia and petrol fumes. I think i might fab up a chute over blade in case i ever go over handlebars as i certainly came close heaps first time out.
7 points
-
As a WOF guy I have seen stretched tyres that I thought would fail, but were ok according to the LVVTA tyre chart, so if they are outside of the tyre chart specs they must be obviously super stretched and you should fail. Bloody kids these days. Get off my lawn.7 points
-
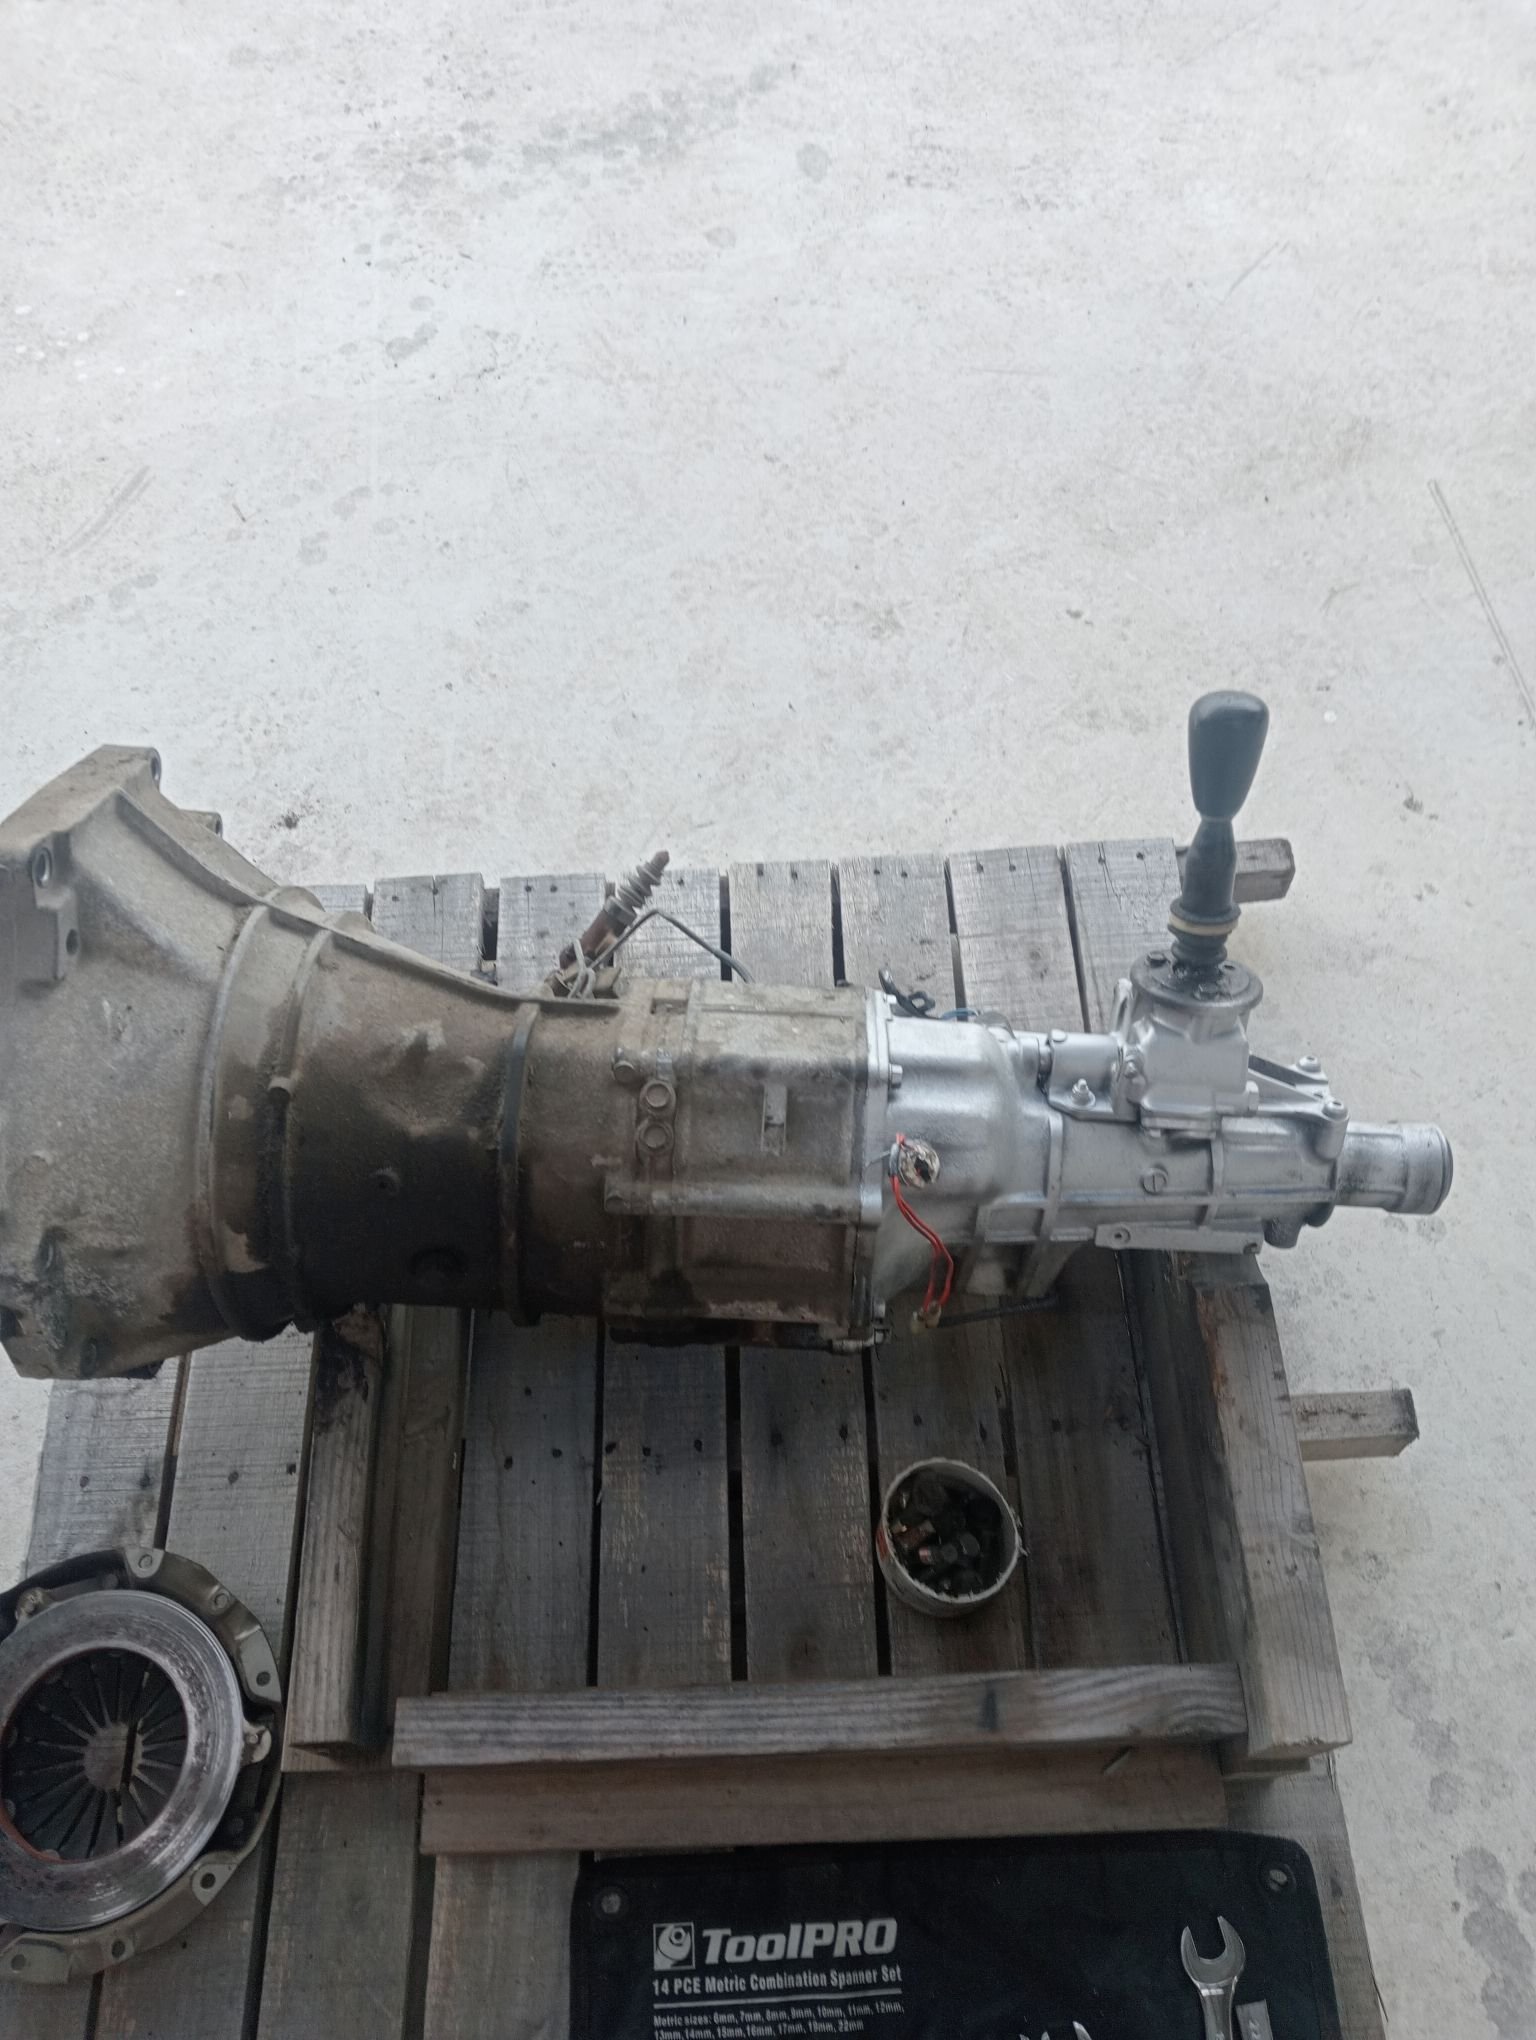
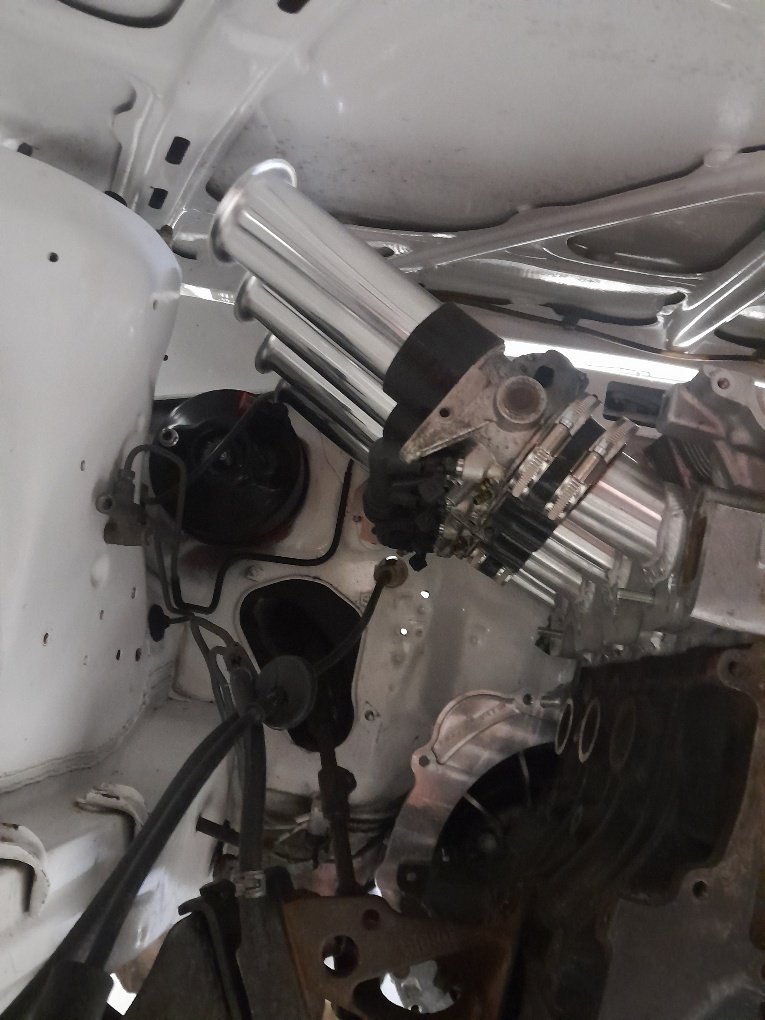
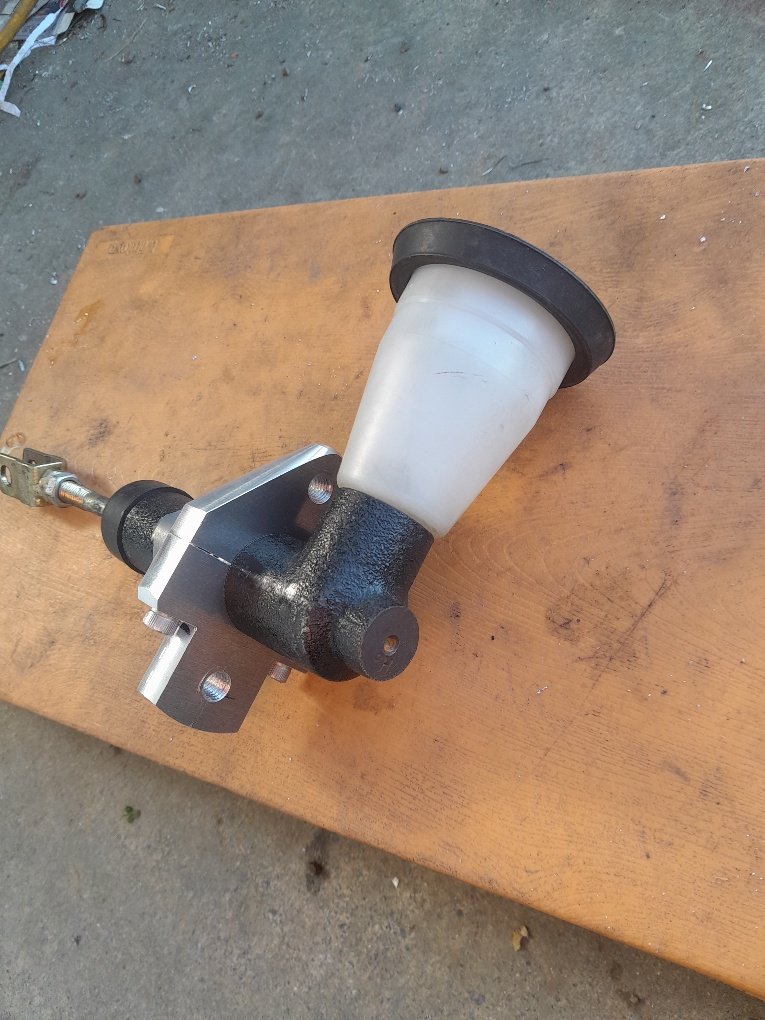
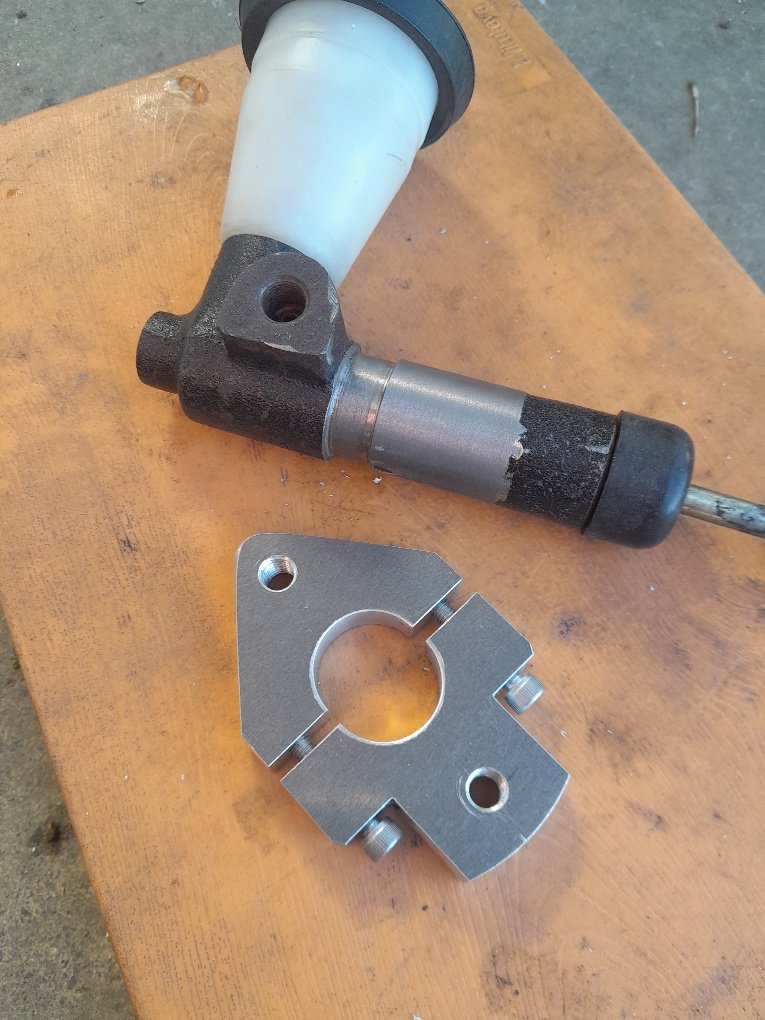
Got gearbox mounted, which isn't exciting update wise. But means i can confirm everything fits and start on things it was holding up. intake runner number 4 is tight on the brake booster. but can tweak the intake or trumpets up a touch and should be happy days. as have a little clearance left on number 1 to the bonnet I was going to do a reverso mount on the clutch master like a fellow os geezer done. but ended up with a little more room than expected. So a shorter master or one that mounts closer to the firewall looked like it should fit. Rather than spending forever trying to find something that would work. picked up the angle grinder and zinged the flange off the one i already had. Tidied it up in the lathe and cut a groove in it. then wasted half my life making a clamp on flange.
7 points
-
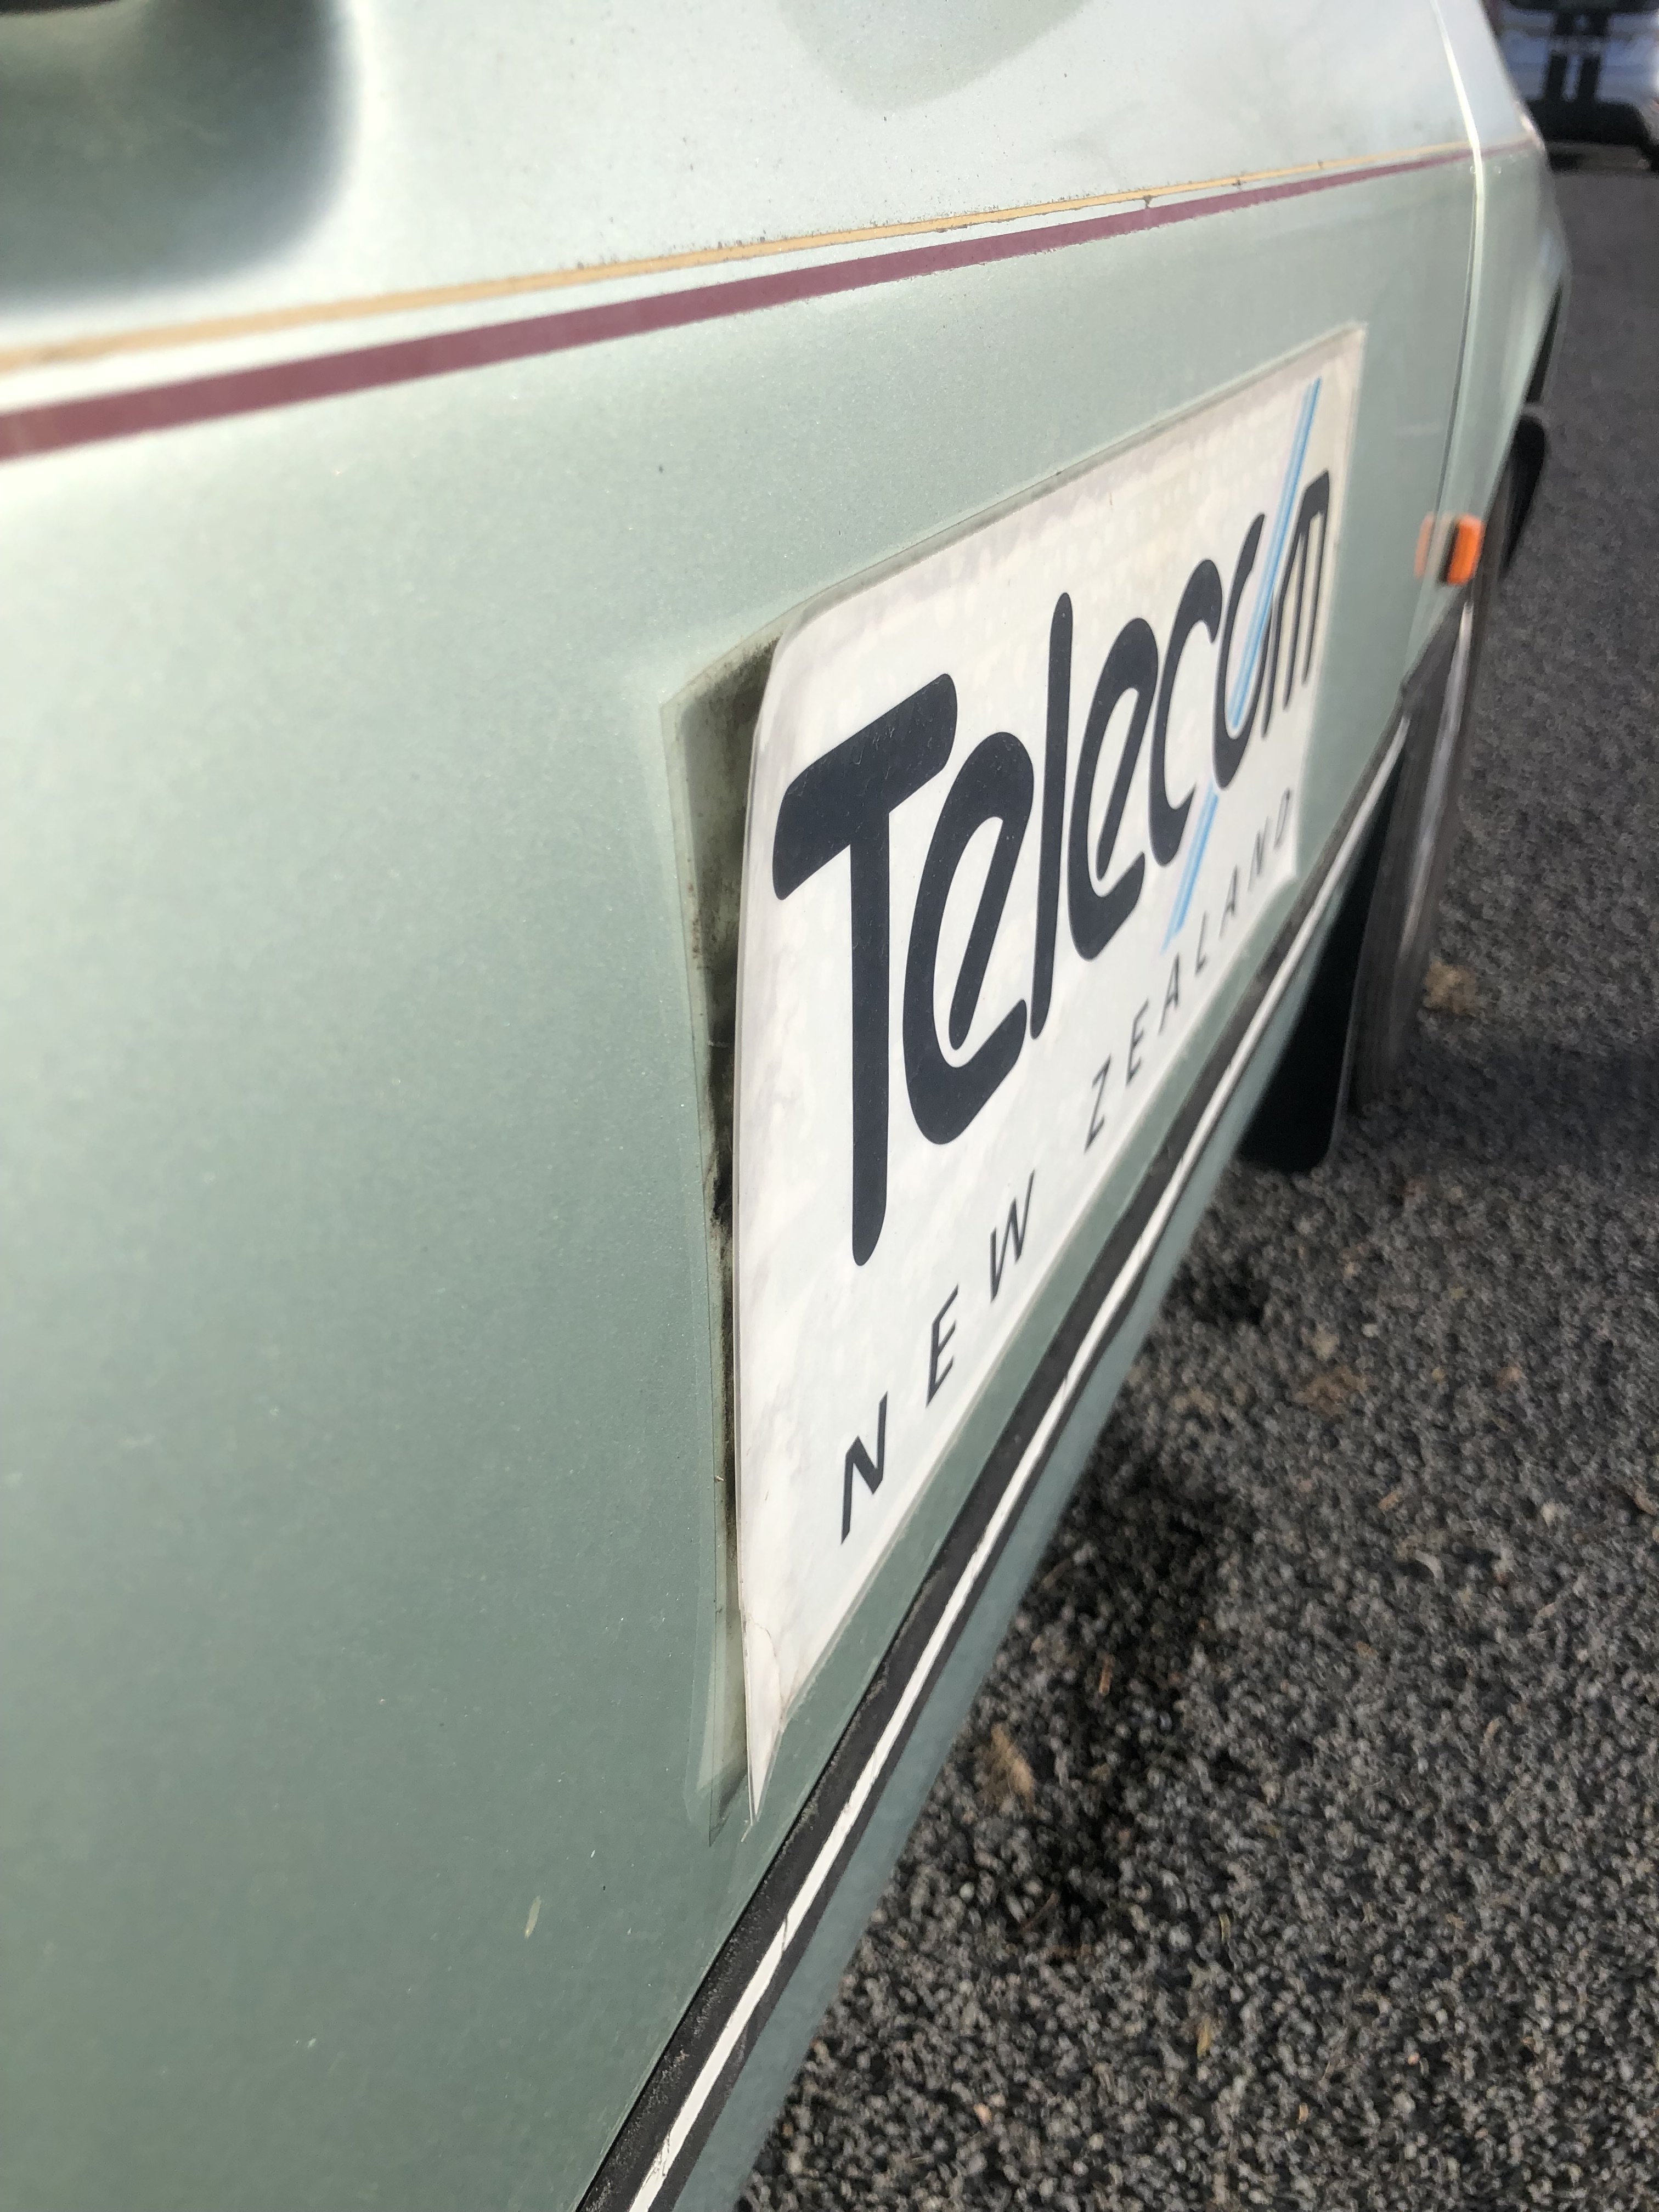
NNNoooooo............... Im penning a strongly worded letter to my signwriter. (In Comic Sans and Wingdings, of course.)
6 points
-
Nice stuff @CarolsHusband. I've been trying to push on too, have been so slack. Last night I managed to get all the wheels and gears on for the Bren gun carrier.
6 points
-
As a reminder of not what to do?6 points
-
6 points
-
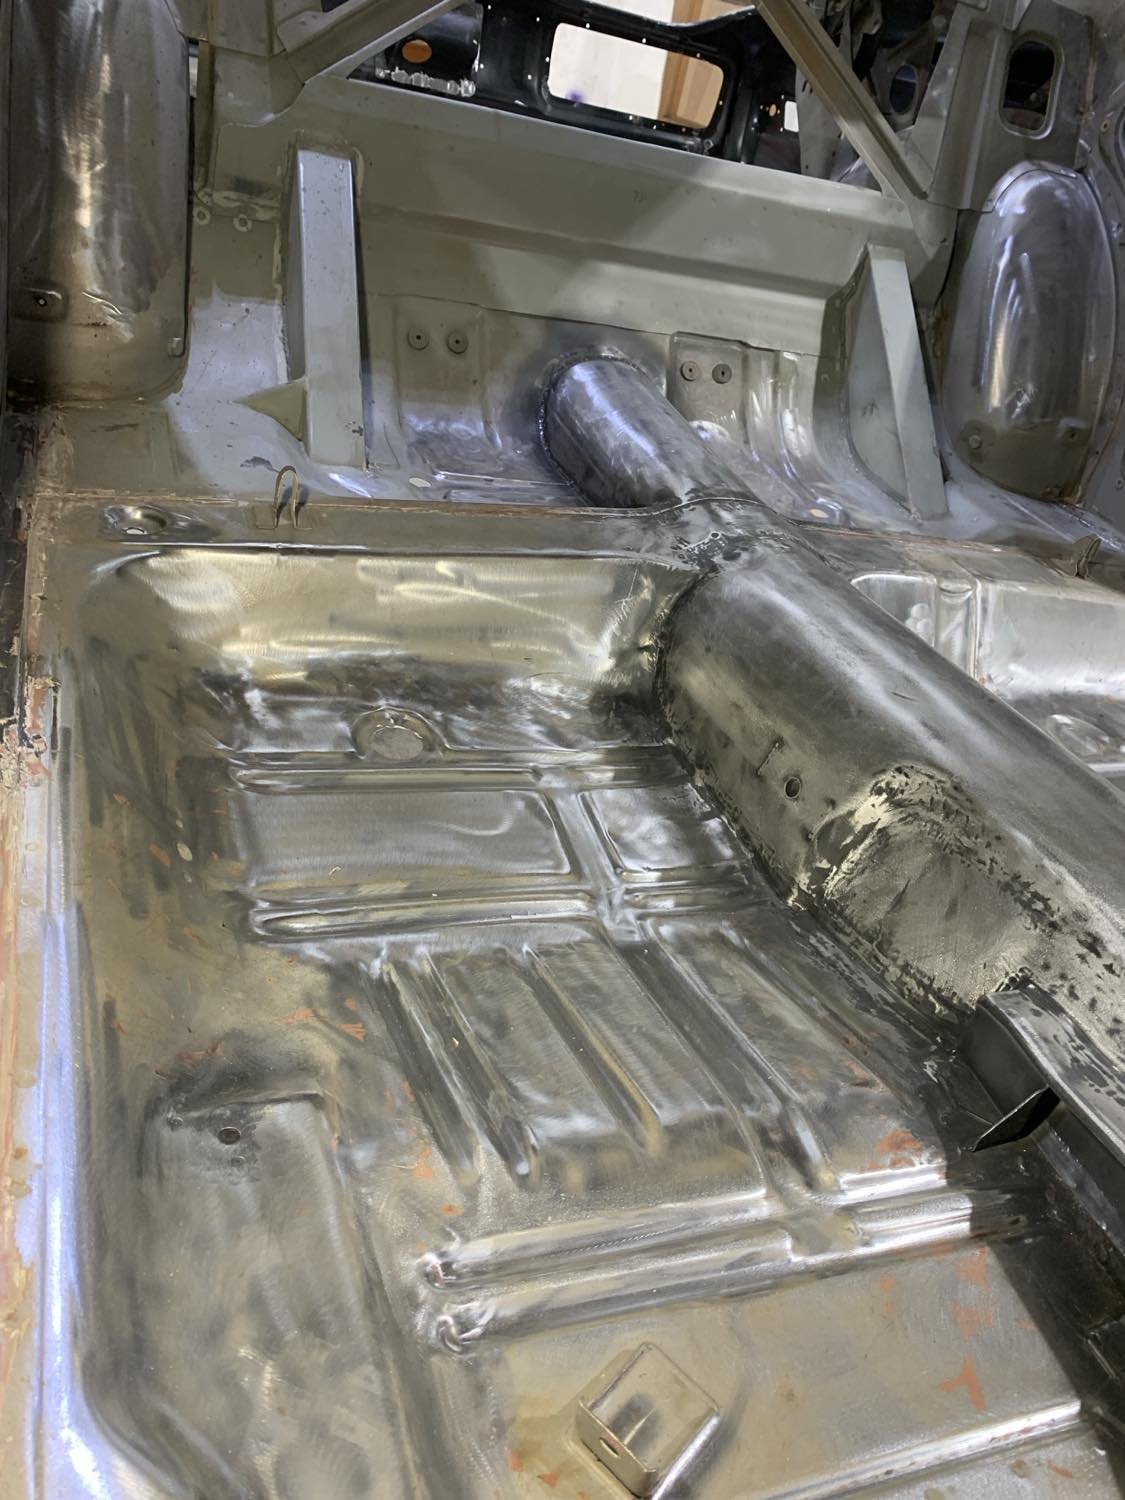
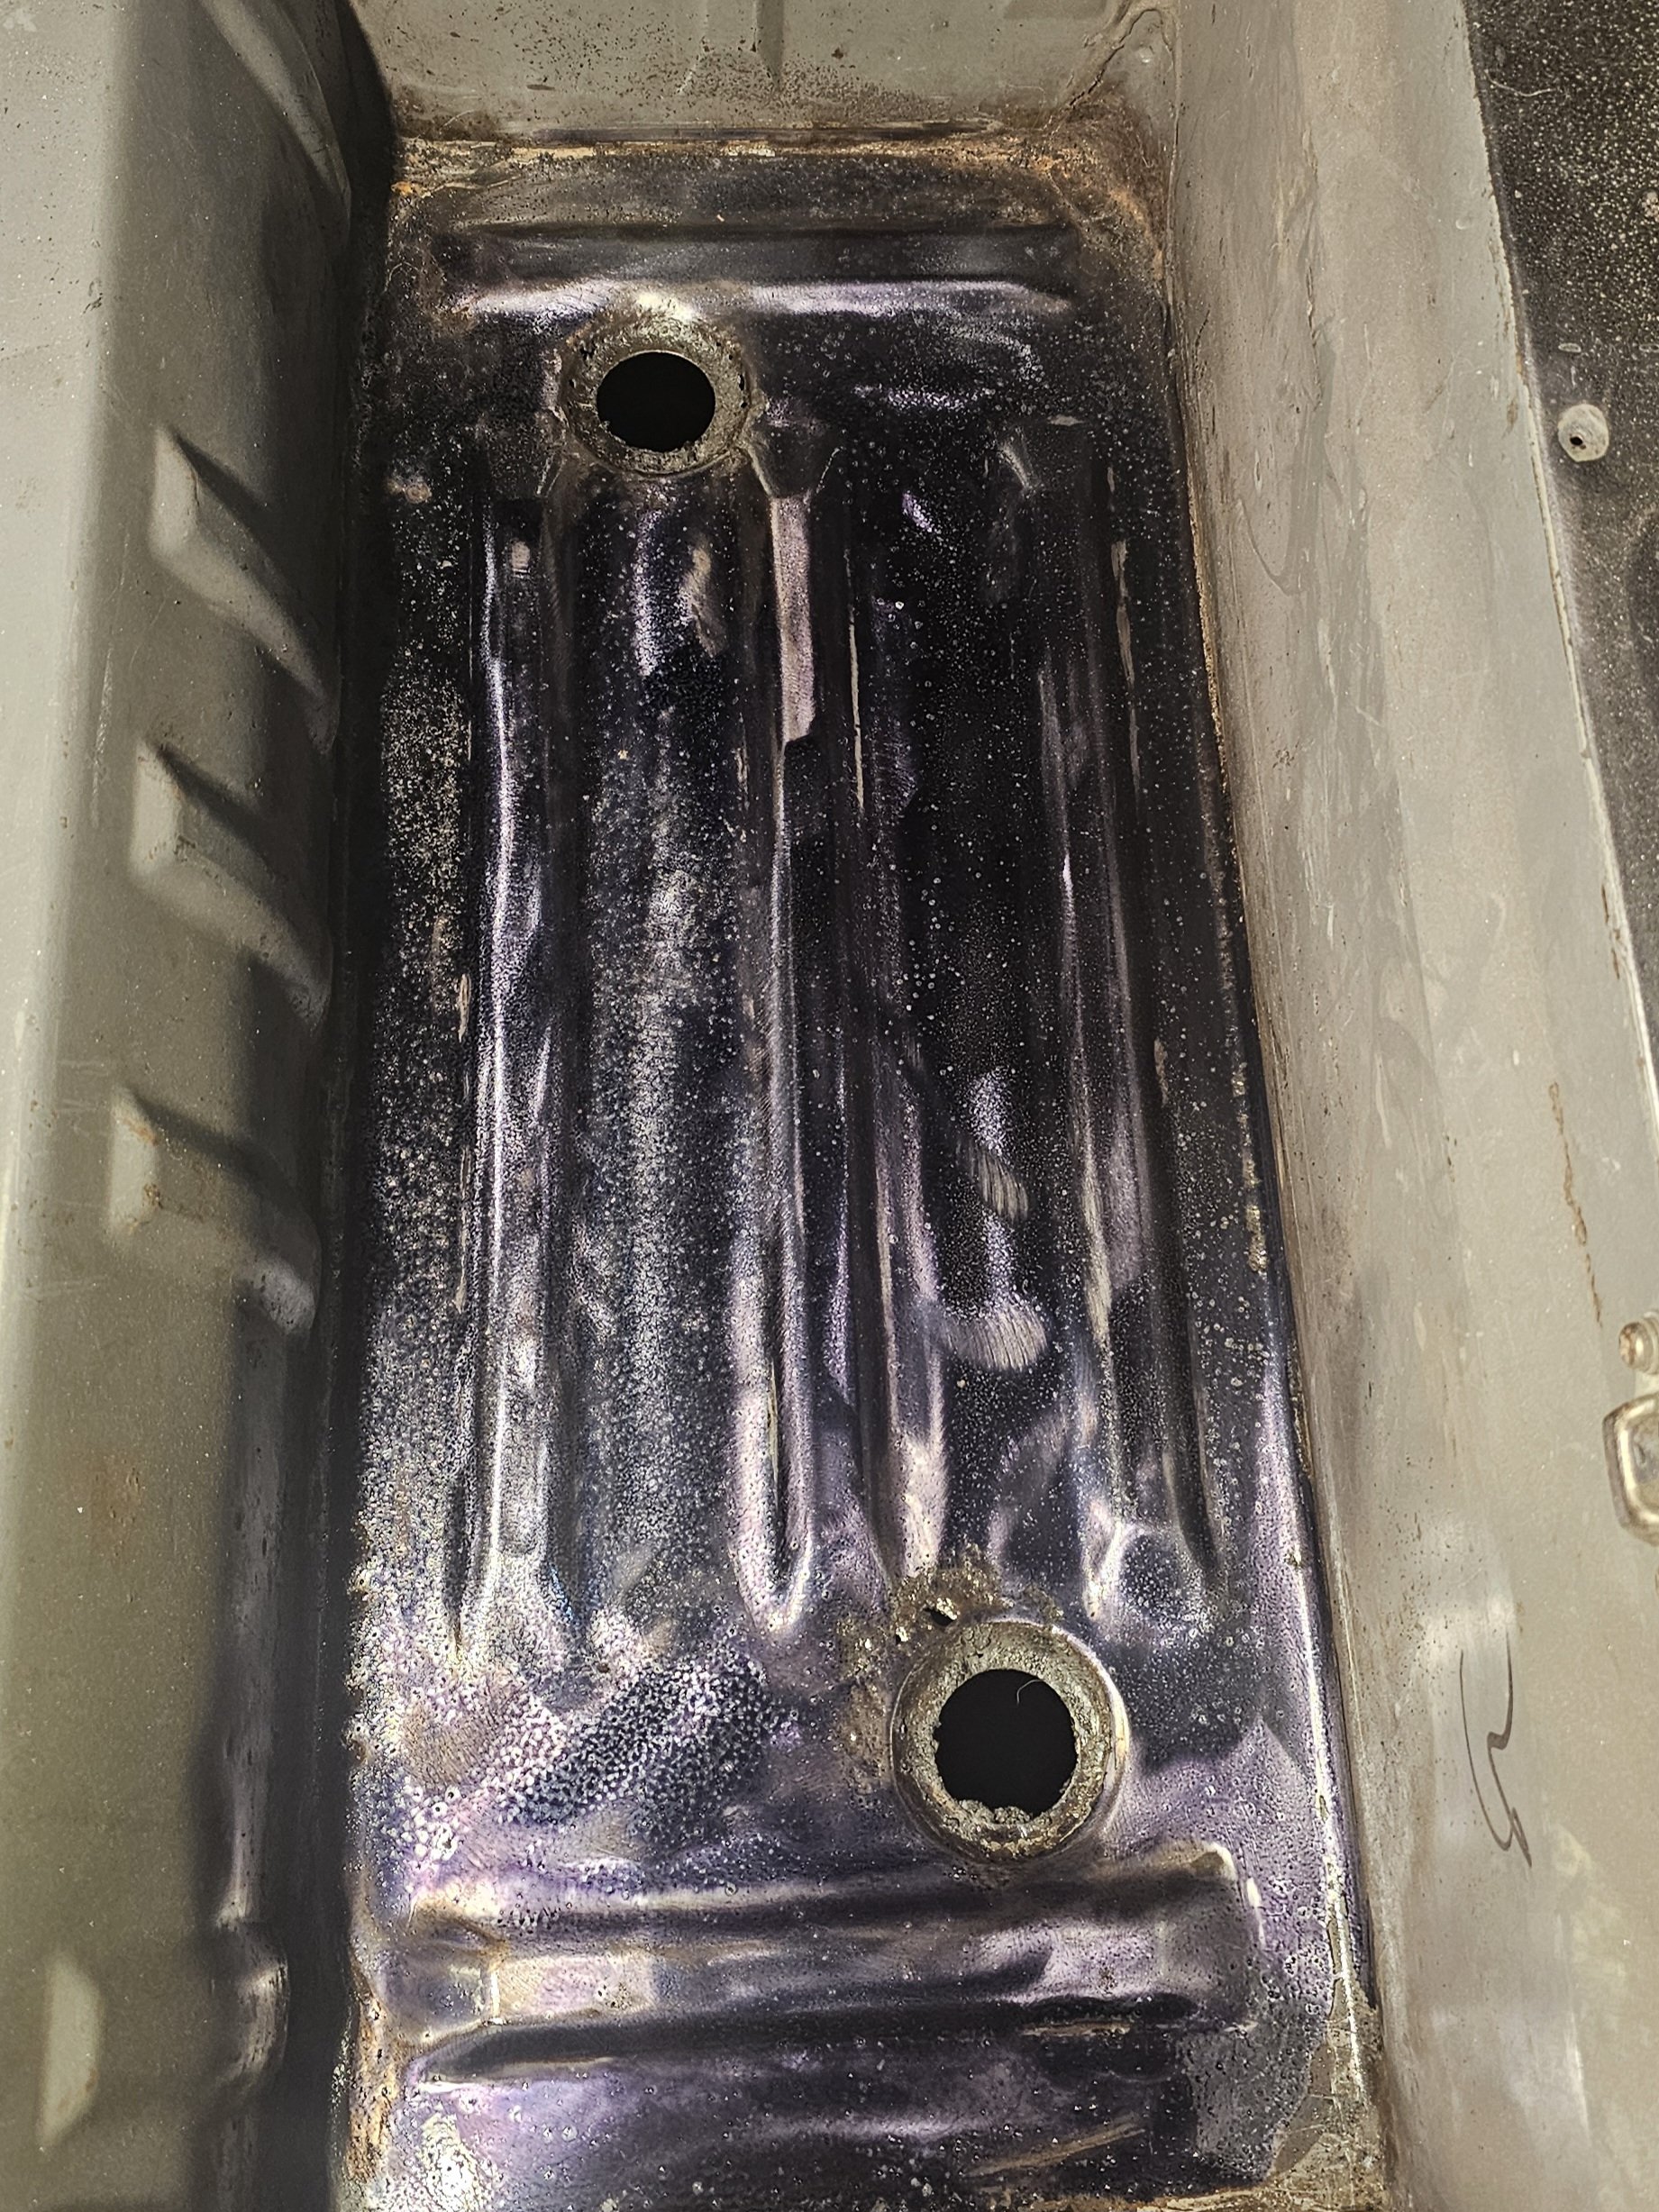
Have mainly been doing a lot of stripping work on the wagon as of late and have been working on the rear tailgate section. Stripped all the sound deadening from the foot well area for the rear seat and found some more rust so have sprayed it with rust converter and working on some new metal to go in.
6 points
-
Oh, 4" CRT for your vector line drawing needs! https://vi.aliexpress.com/item/1005001892618952.html Someone (cough, @Roman) should totally do a period looking ECU display on one of these!
6 points
-
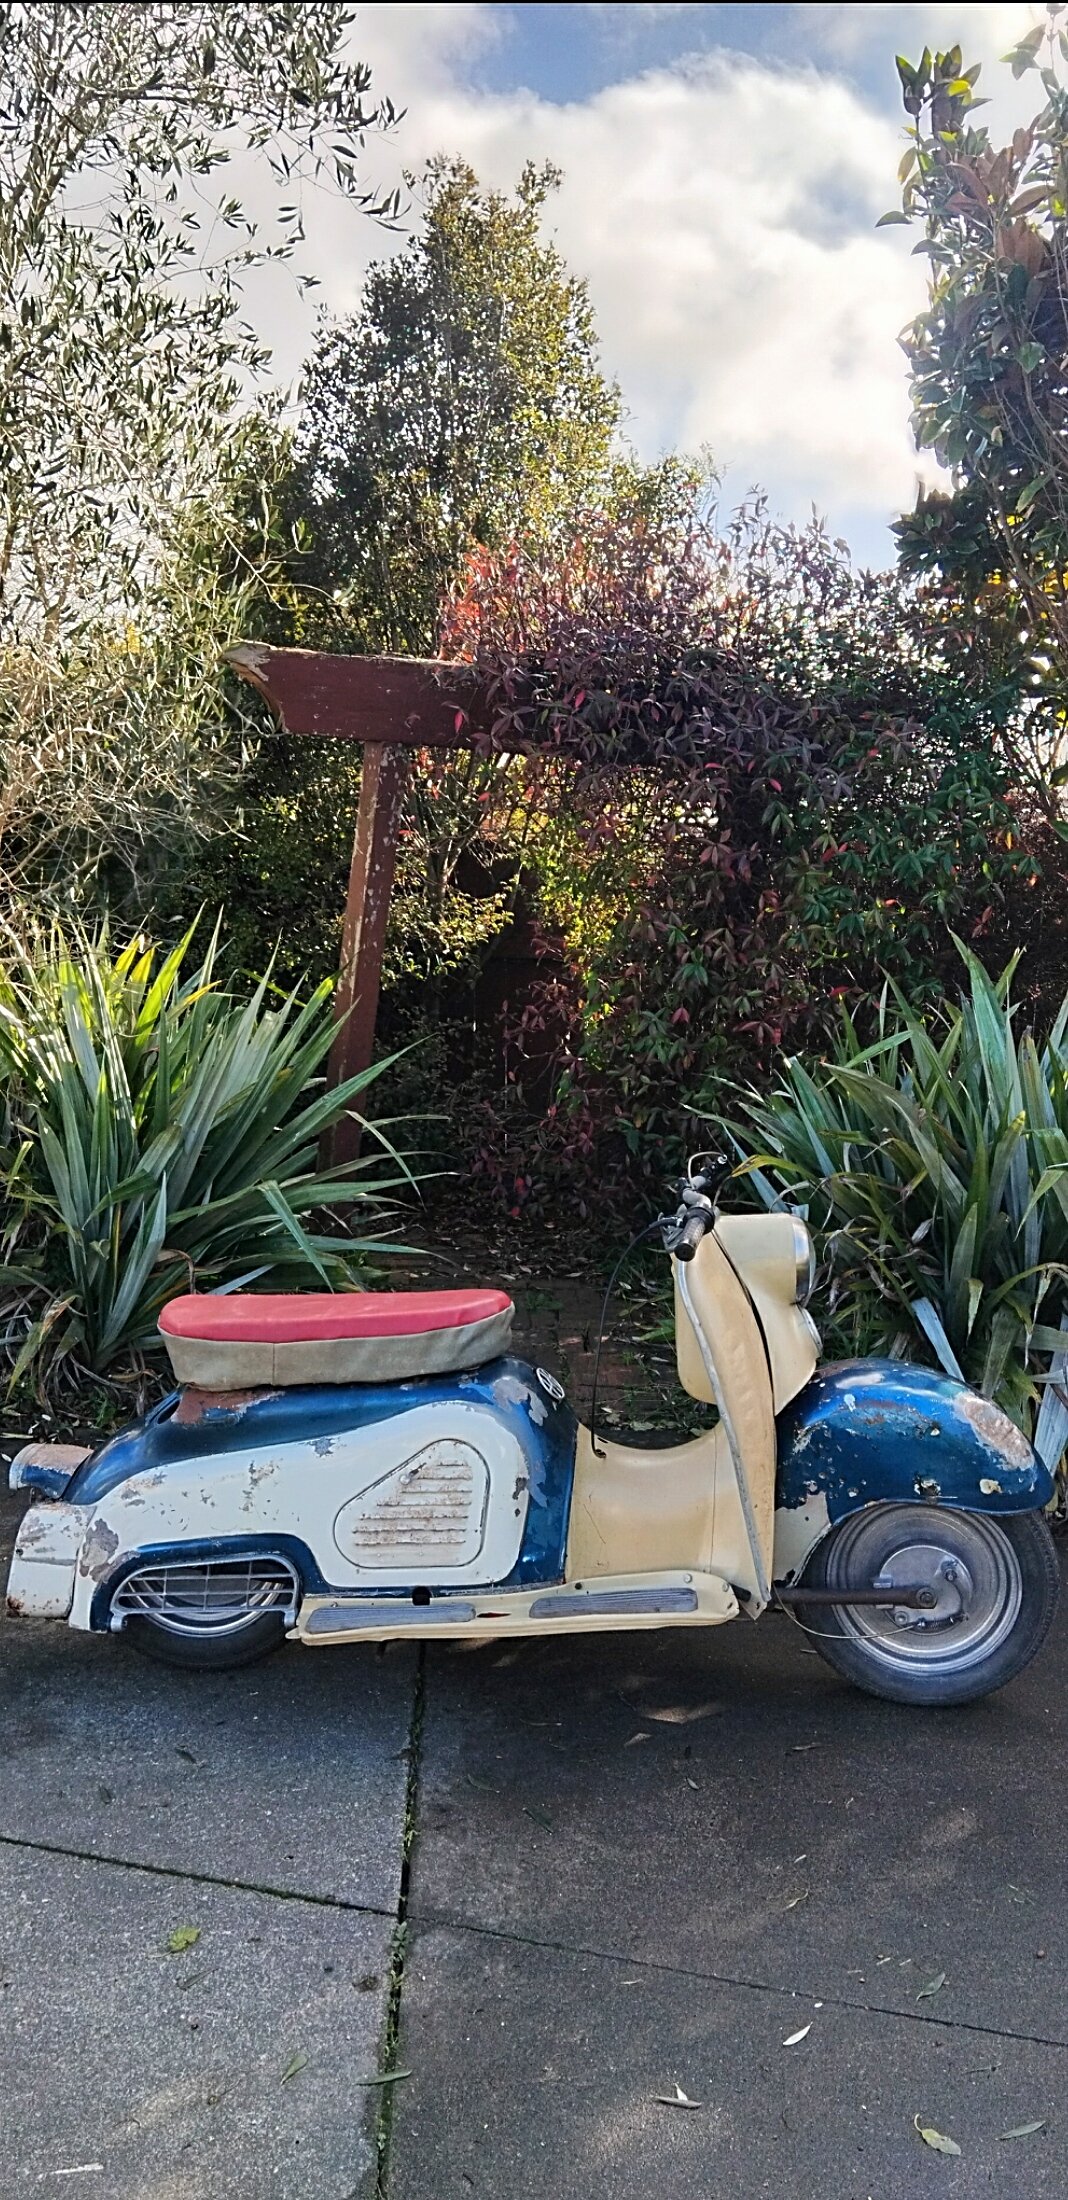
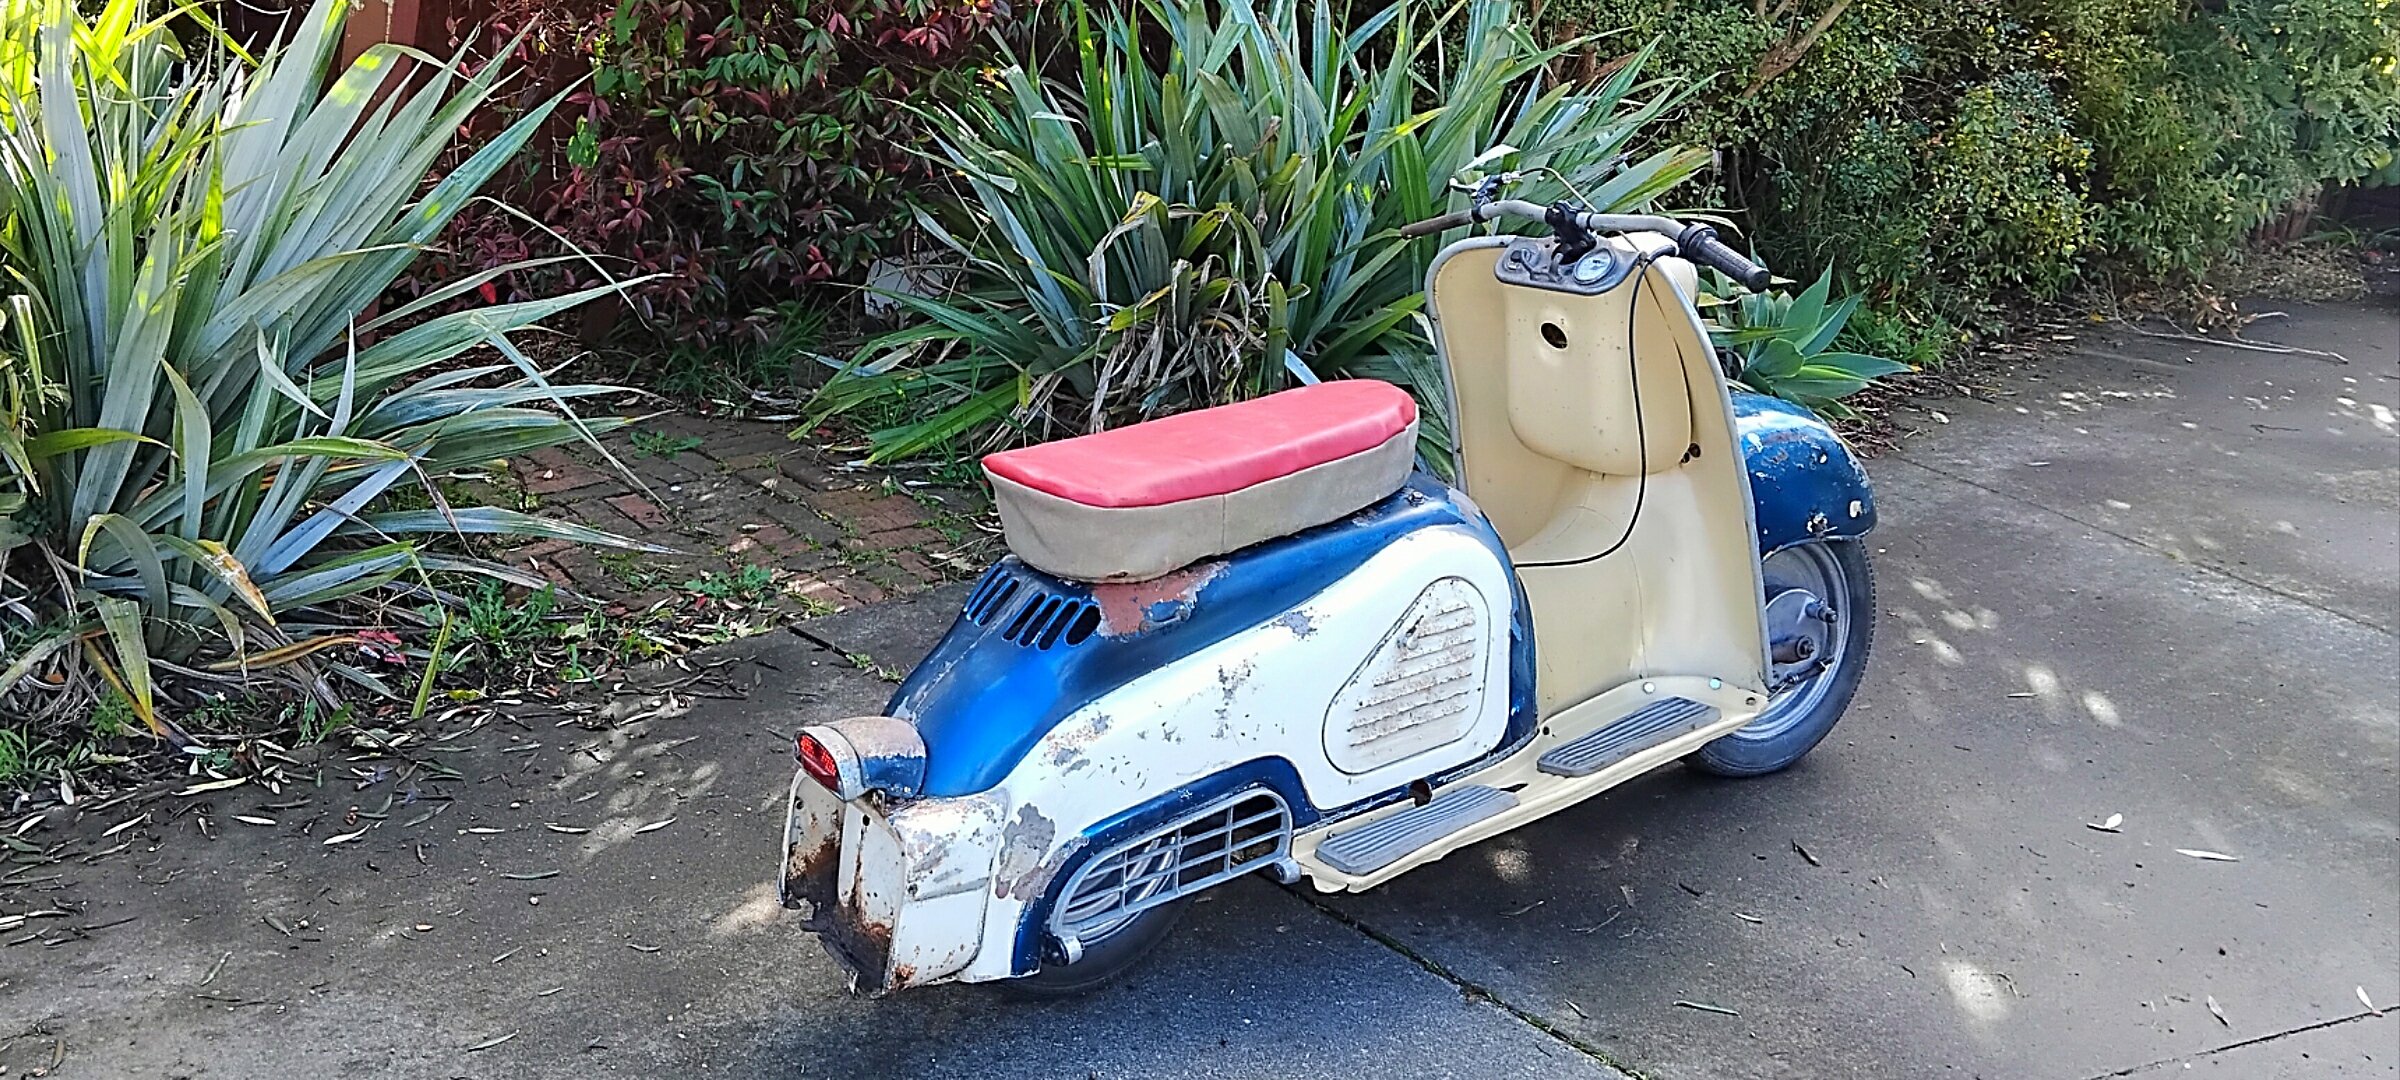
Ok so both wheels are rusted thru. They hold air but the tubes poke thru the rims. Wheel bearing in rear wheel brake hub is rusted siezef Front wheel brake is siezed in the hub. Motor has some compression. Will check for spark but the wires I was hoping were for lighting circuit are for a kill switch that have been cut Swingarm came off ok. Im putting a longer one on. Chain was rusted and almost solid But.... The frame is solid. I also have a nice front guard. So Im thinking.. 90cc lifan is taking up space in shed New loom so I can run lights.. Paint frame New tank New plastics New wheels New exhaust New lights New longer swing arm Gonna be awesome!!.6 points
-
6 points
-
Interestingly , lately the more common situation, because of the stretched tyre look no longer being cool - and people being more aware of what sizes are allowed, is people putting too wide tyres on narrow rims- usually older blokes who get a bit fizzed up when their hot rod or beach hop special fails because they put 275 60s on a 7 inch wide rim and I tell them it's because of the young buggers who stretch their tyres so now we have this chart thing "aww bloody ridiculous it's been like this for years it's just revenue gathering bloody LTNZ etc etc"6 points
-
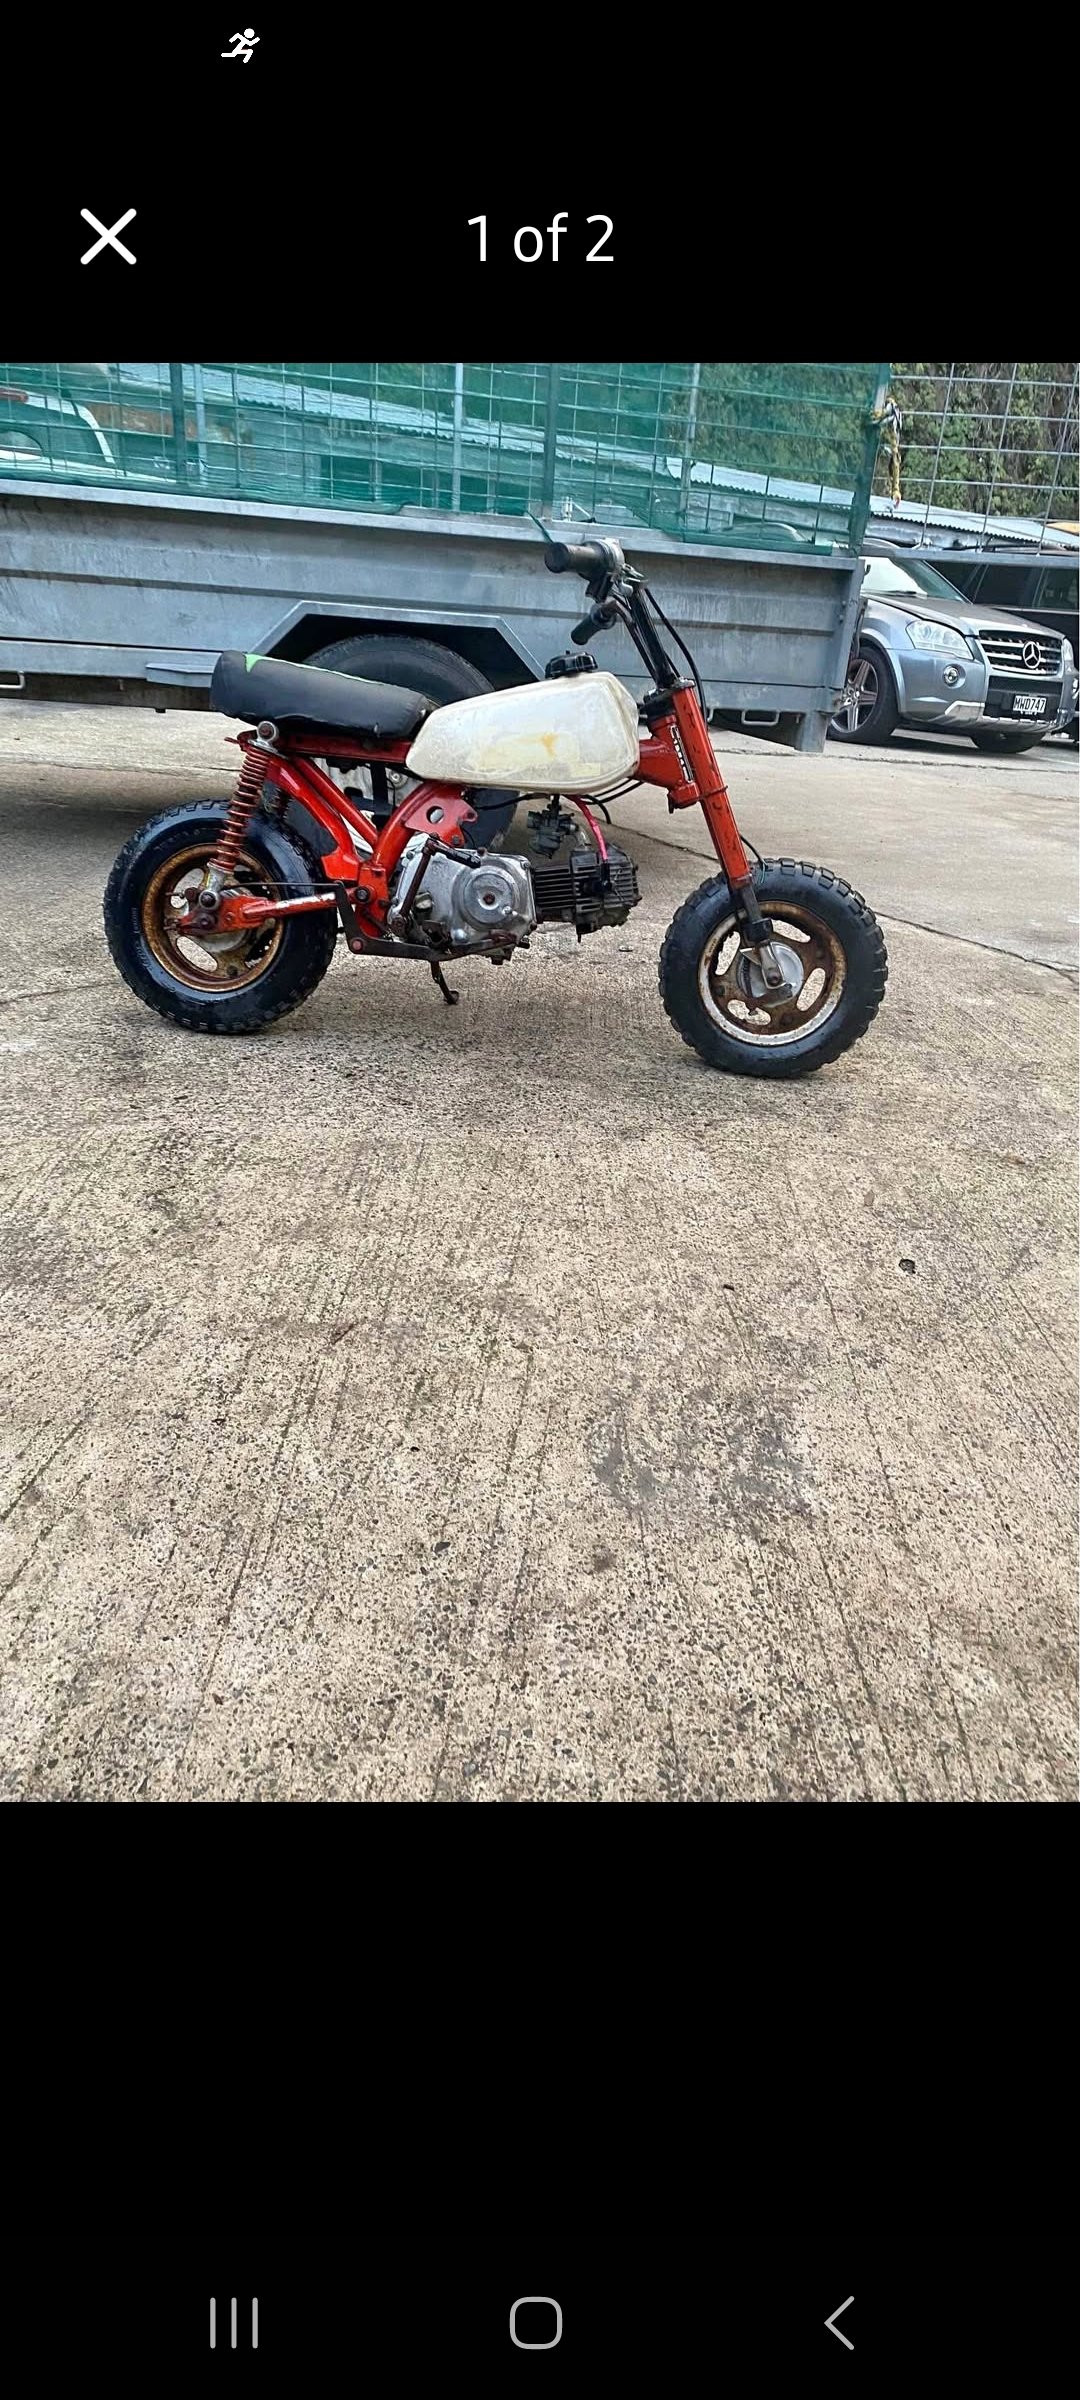
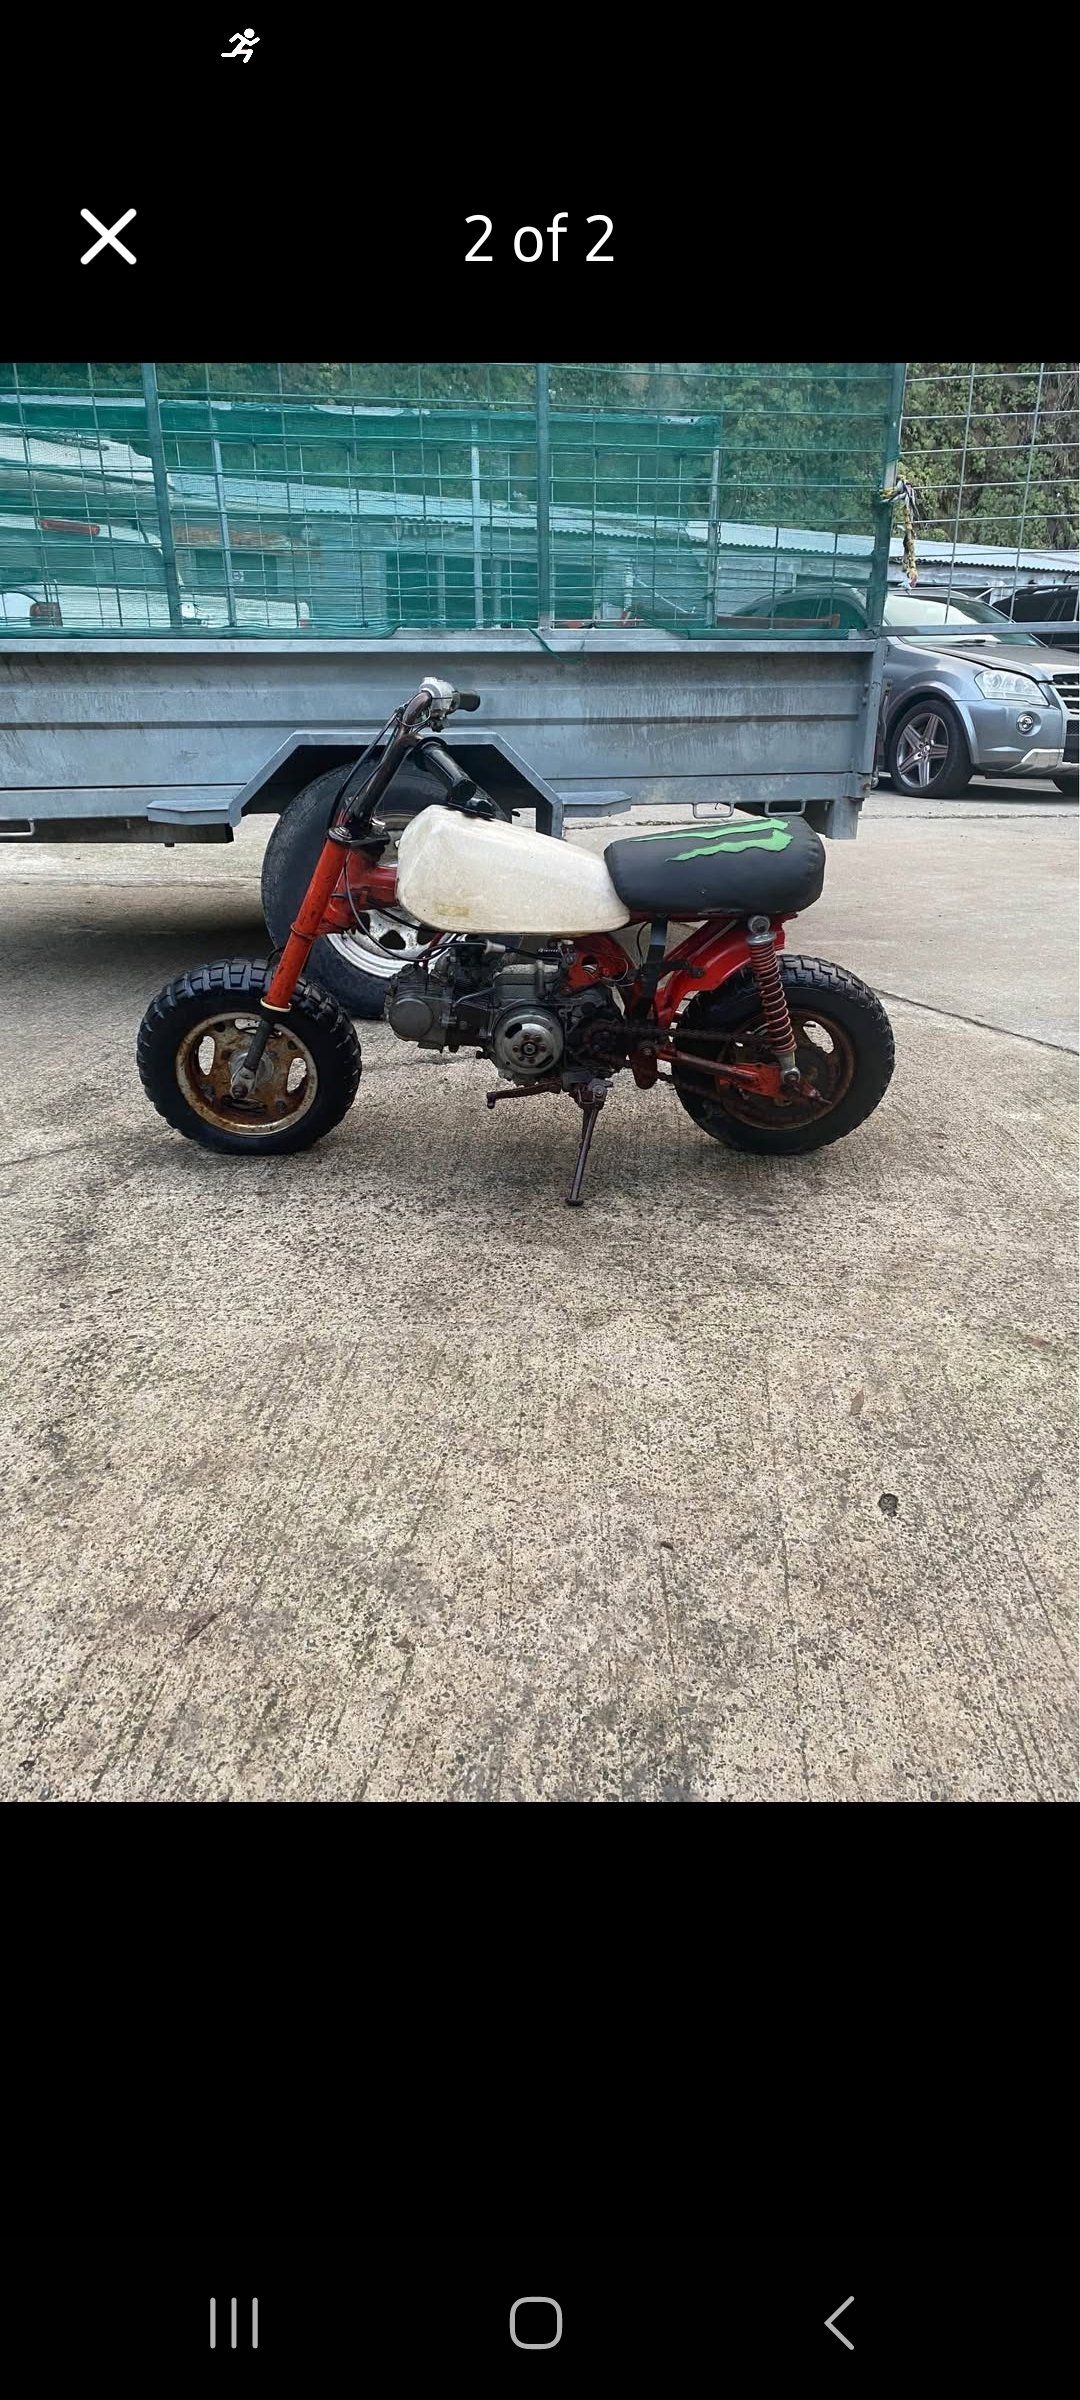
Hi Everyone, as the title states I got a monkey, a Z50R from a chap in chch. Its a bit rough, but it runs. The Z50r never had lights etc so to get this on the road for Syds will be a mish. Plans include: Clean (or replace) Carb and air filter Get the missing bits (side covers, engine side cover) Change the stator to one has enough wires to power lights/ indicators/ horn (12v conversion) Mount above electrics Paint Ride In reality it will probably just be a bike that is left as is and jammed in the back of my truck for a camp ground hack, but I will have much loathing if thats the case I do have a smokey 90cc Lifan I could jam in this but I think that @Hunterkiwi01 wants that for one of his C100 projects.. Pic off marketplace as I get it tomorrow
5 points
-
So.. I got a bit distracted... Short version. I picked this up with a carb issue and dead reg since 1990. Have now fixed the carb, and working on re-reg with black plates. I'll pop in some updates as that progresses. Bit of a side quest but I'll pop in some updates. This is a catch and release so if anyone's interested in a 1983 GSX550E with 25k's on the clock, fire me a line. It'll be road registered with classic reg and ready to go. Anyway, back to the subject.. big box of parts for the RD 50 has arrived so I'll be getting stuck into that in the next few weeks. Leftchevronthree5 points
-
I have one of those already haha5 points
-
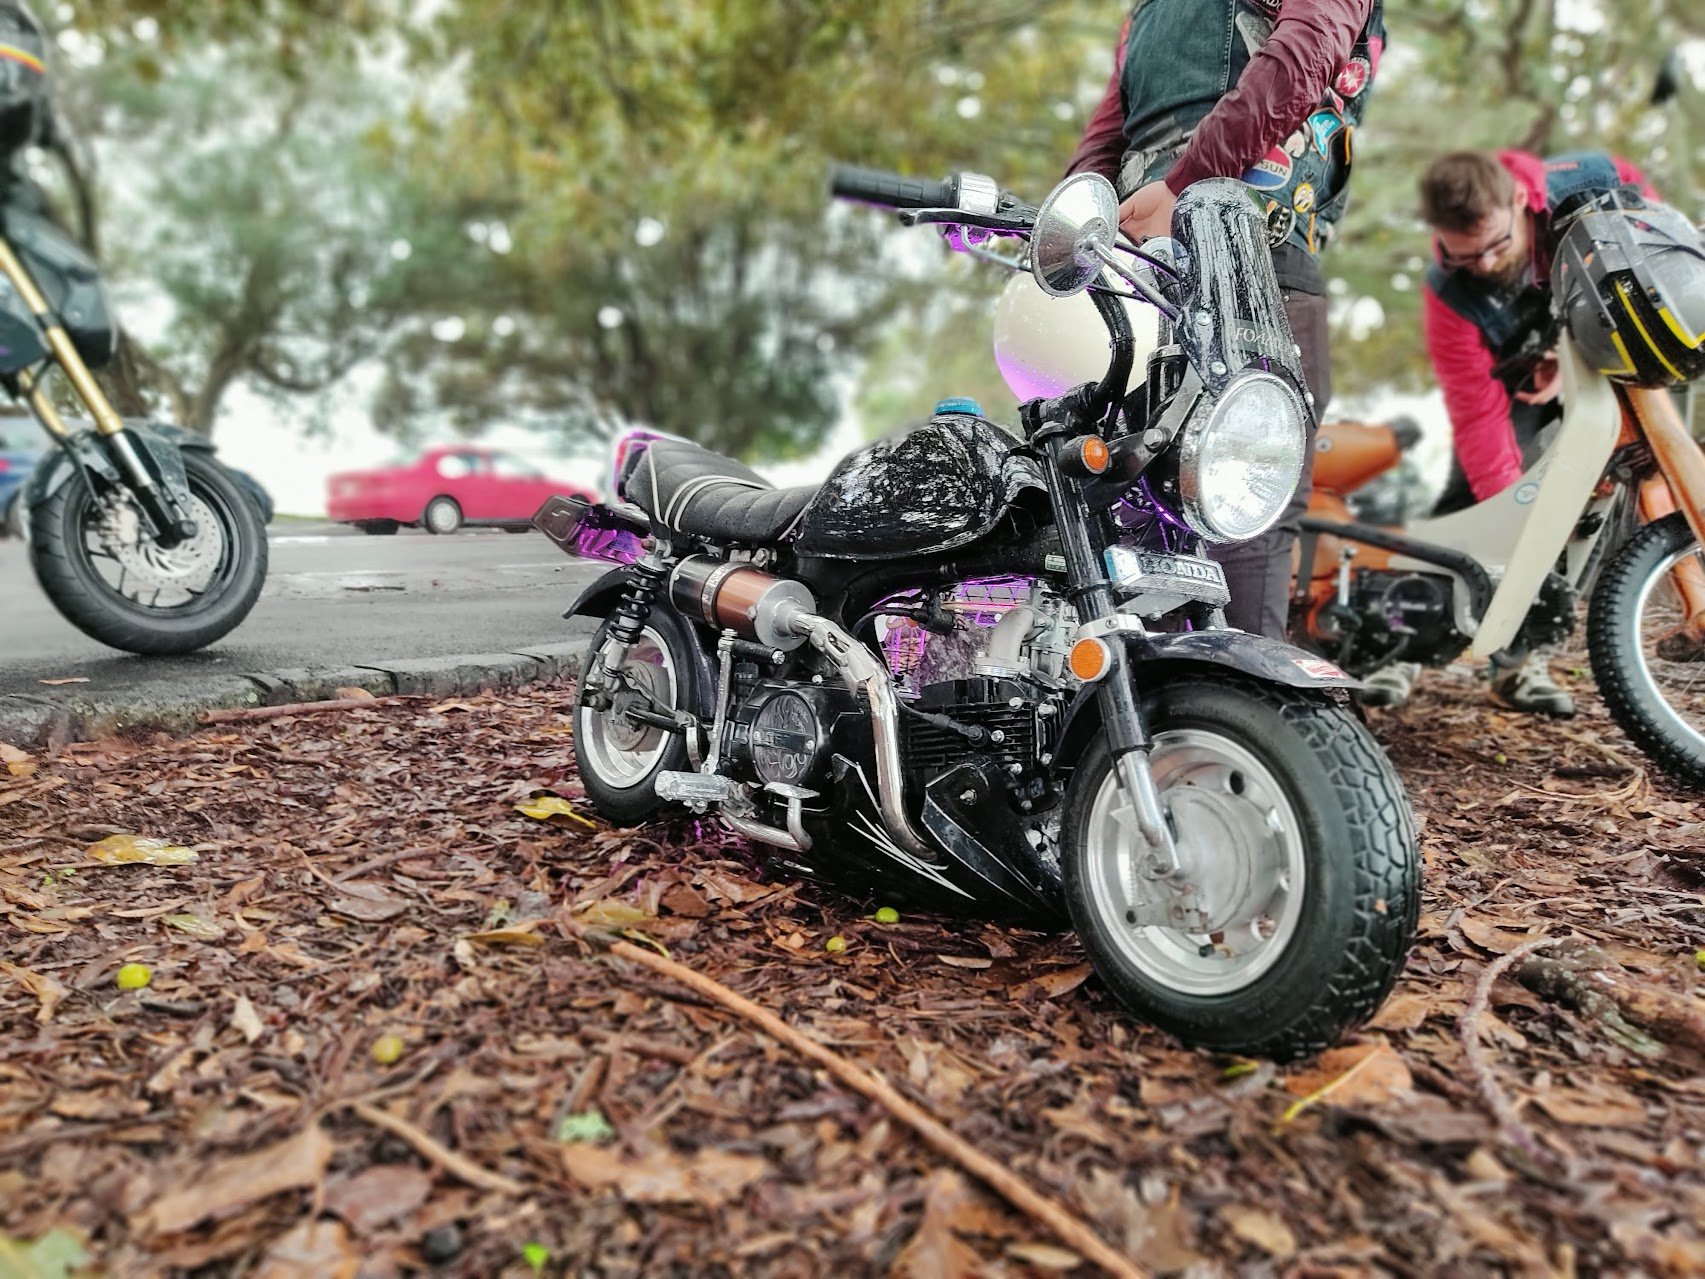
@Shakotom's old one
5 points
-
It isn't doing a full resto it is called fixing the damn thing properly.5 points
-
Not bad.
5 points


.thumb.jpg.570970b401ac8d26ce9af7c1bf2bd8cd.jpg)


This leaderboard is set to Auckland/GMT+12:00