.jpg.5c4231f170be3d5df27018991775568c.jpg)
Tiger Tamer
-
Posts
1,214 -
Joined
-
Last visited
-
Days Won
1


Tiger Tamer's Achievements
Committed (5/5)
6.8k
Reputation
-
Your friend is lucky to have you as a friend. I think he should shout you a beer.
-
Maybe POR 15 with fiber glass tape and an underseal product over the top may work. It would have to be done properly to keep any moisture out from the rust otherwise it will trap moisture in there. Where does the water go to through the rust holes?. Never used it for that type of repair myself so not talking from experience.
-
.thumb.jpg.570970b401ac8d26ce9af7c1bf2bd8cd.jpg)
Tiger Tamers 1964 Hillman Minx Project
Tiger Tamer replied to Tiger Tamer's topic in Projects and Build Ups
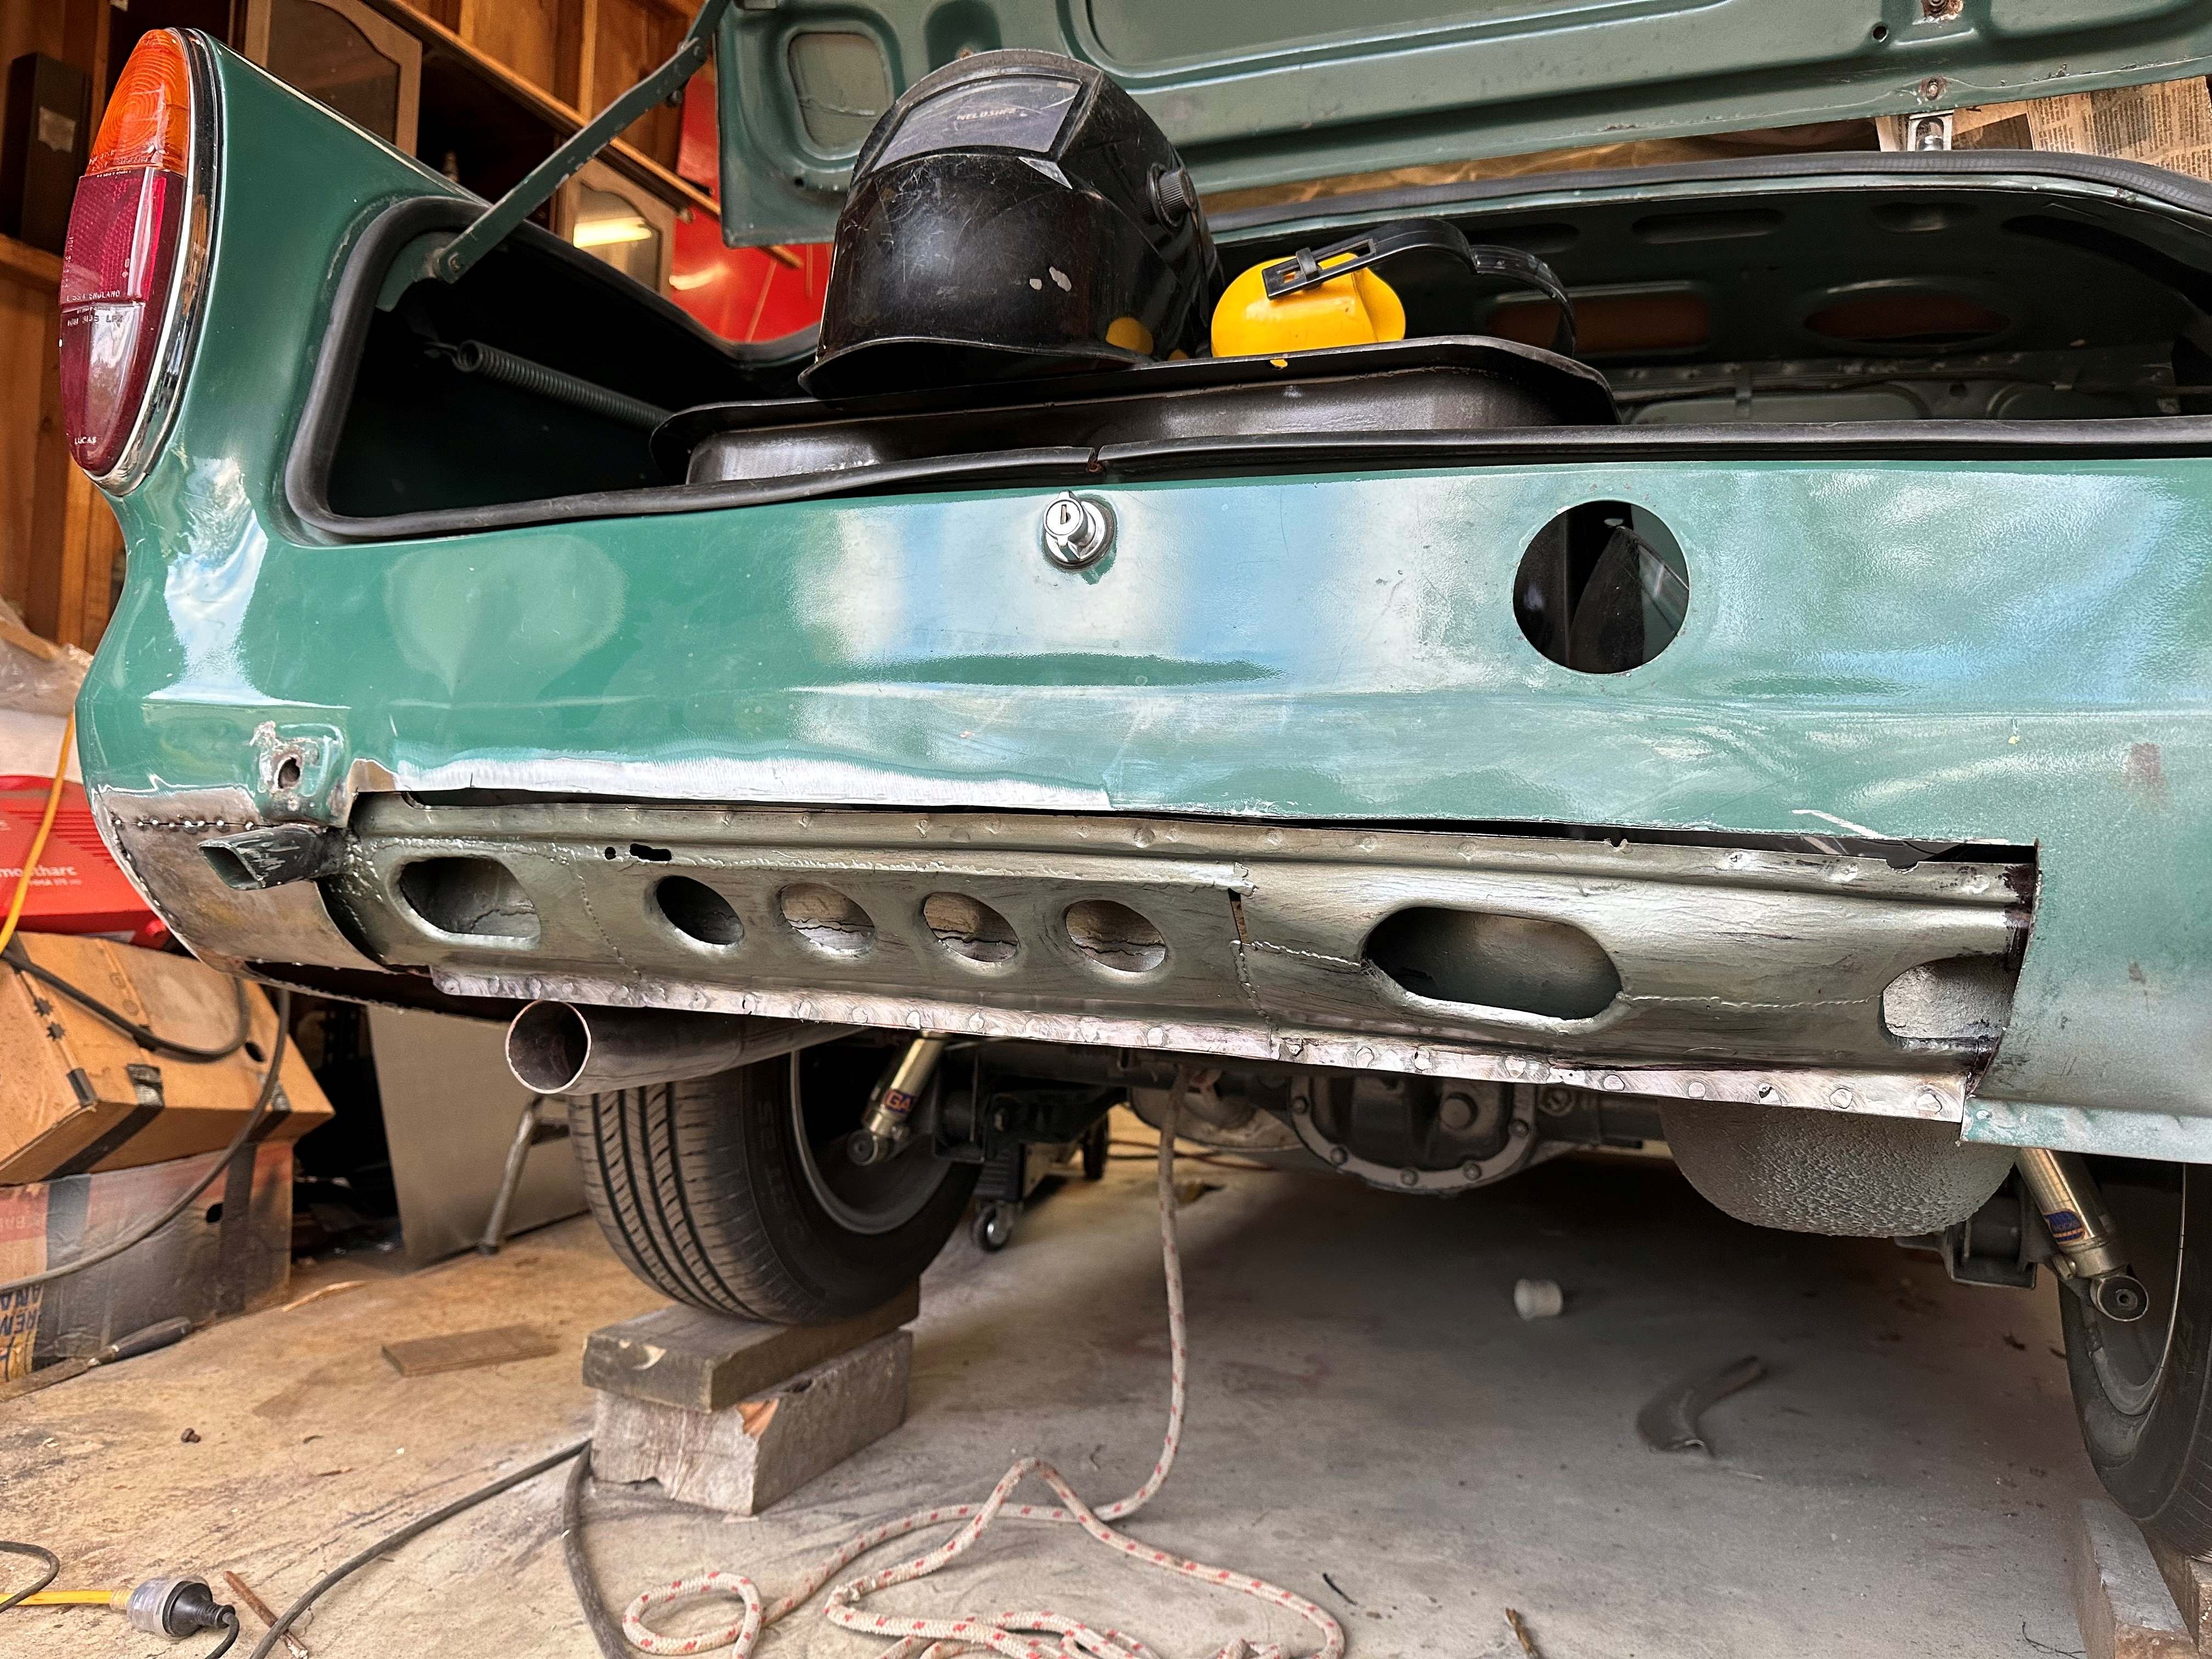
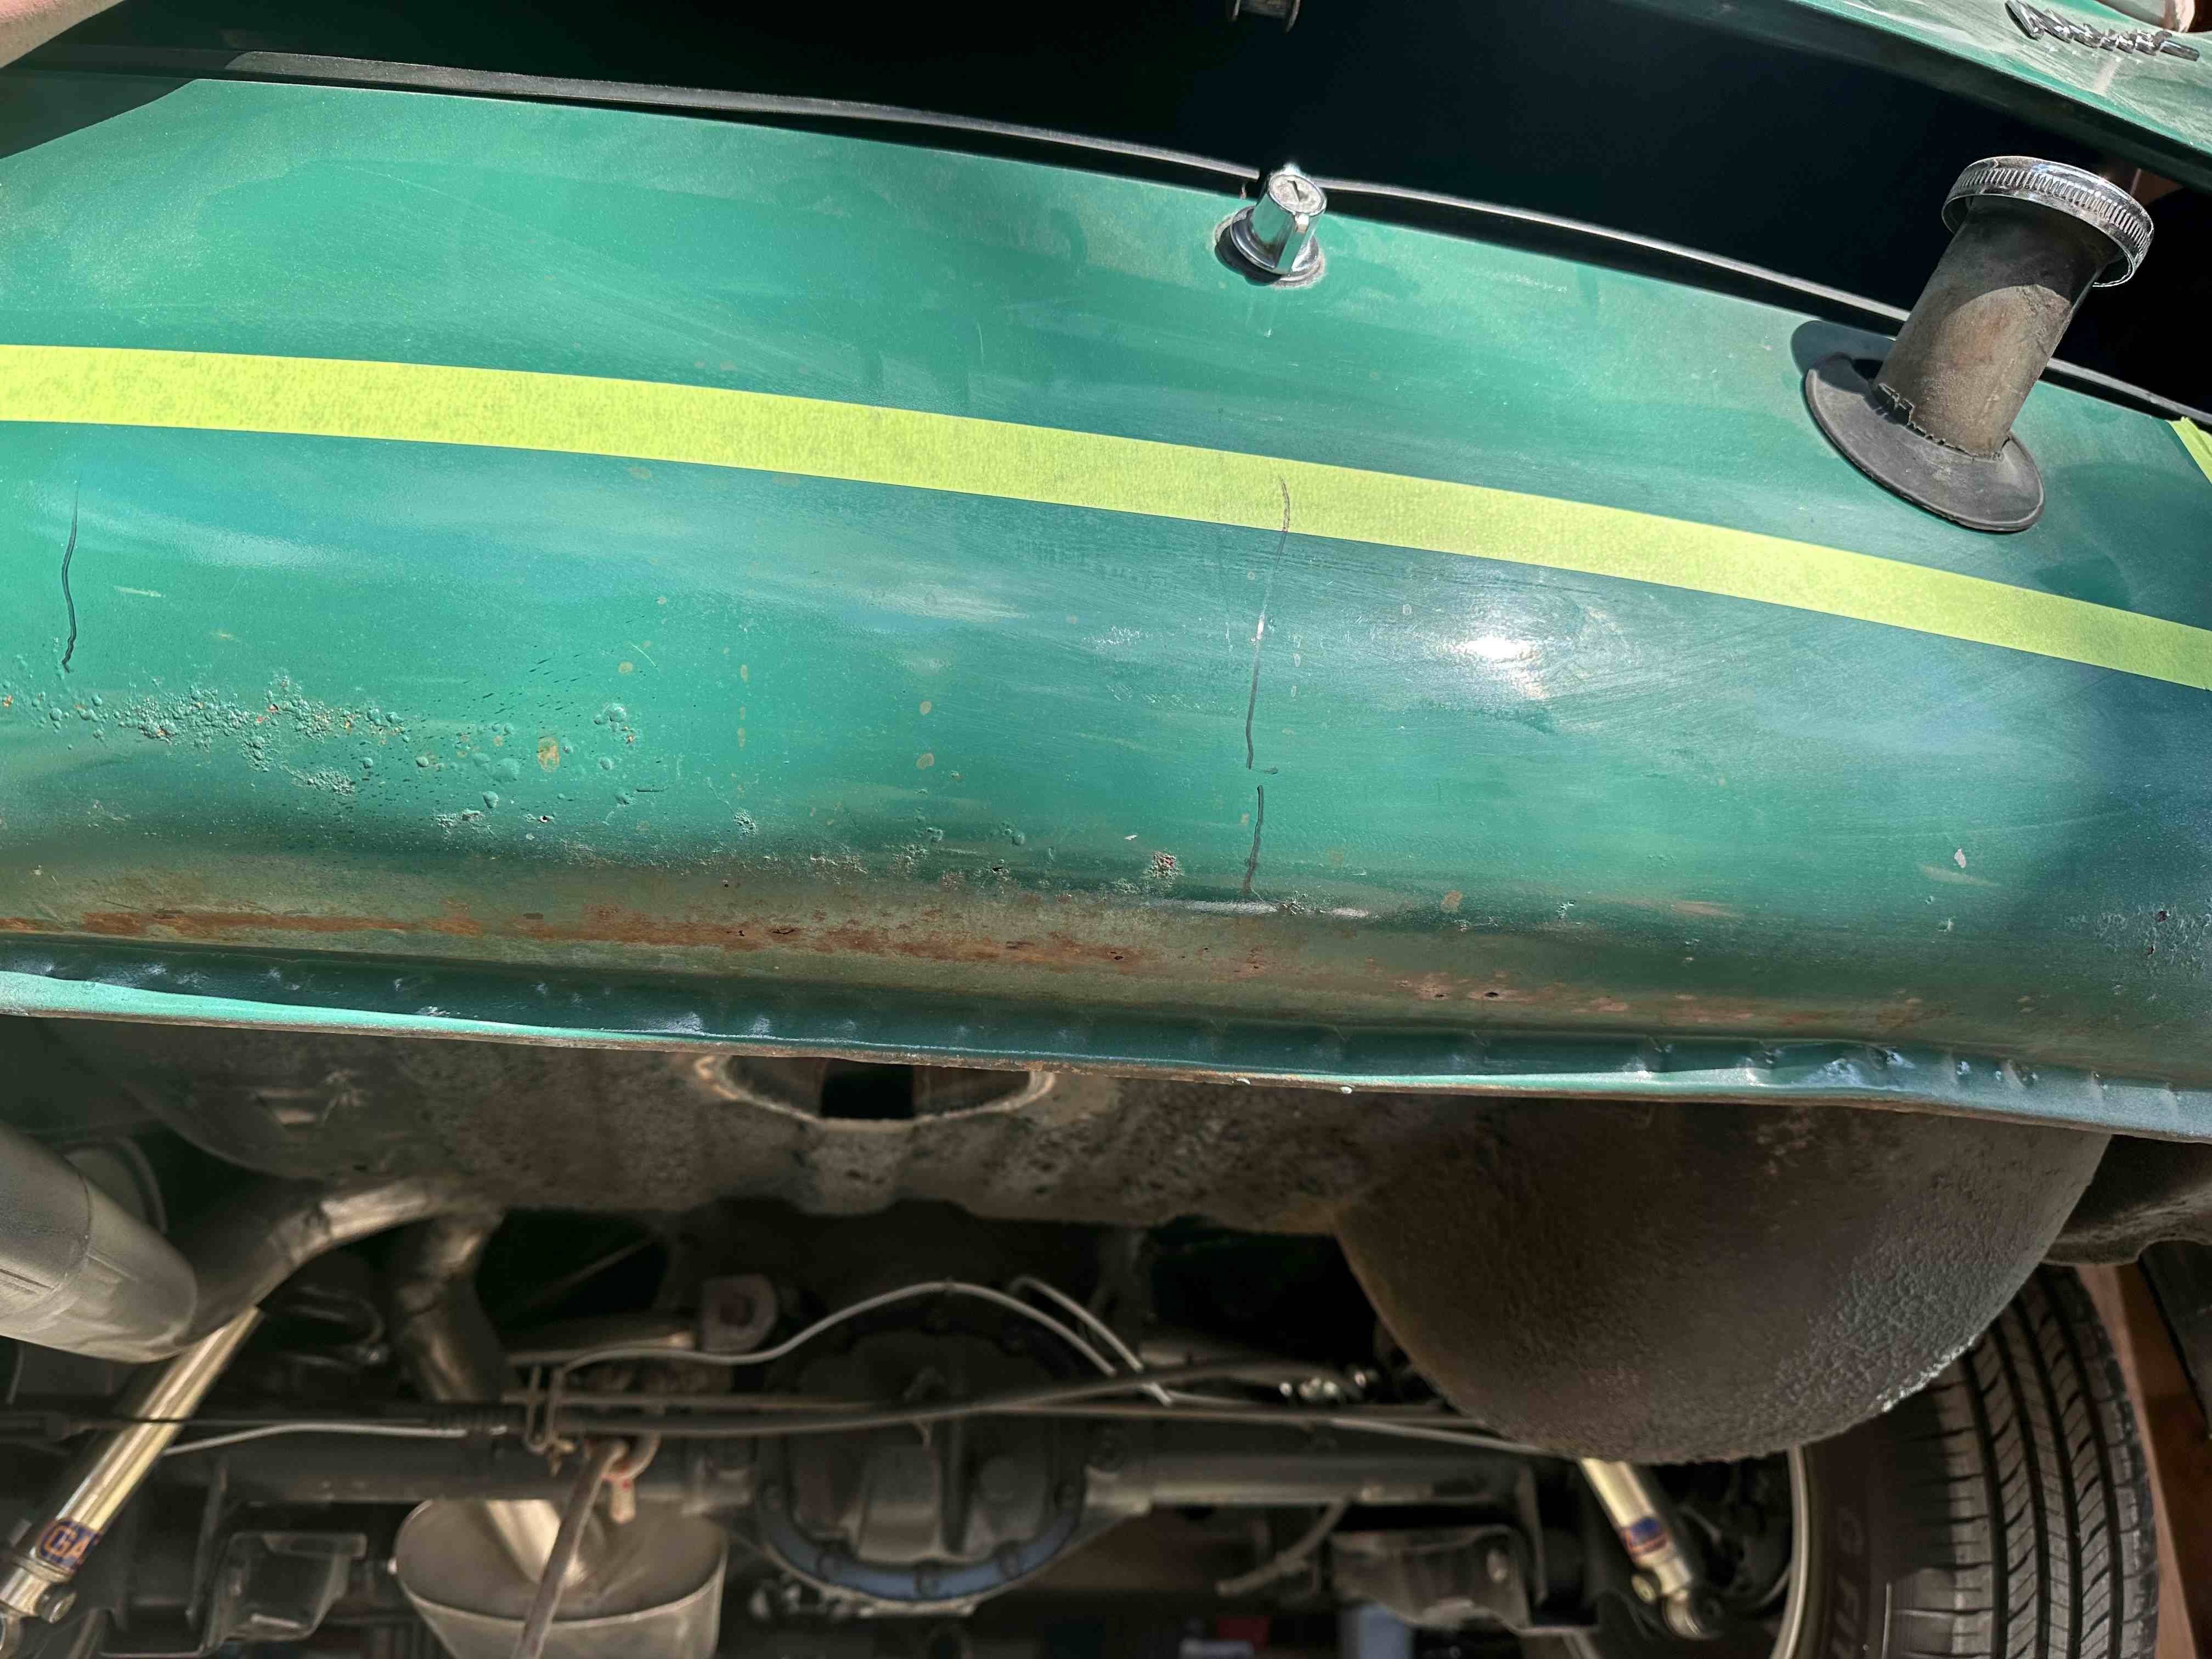
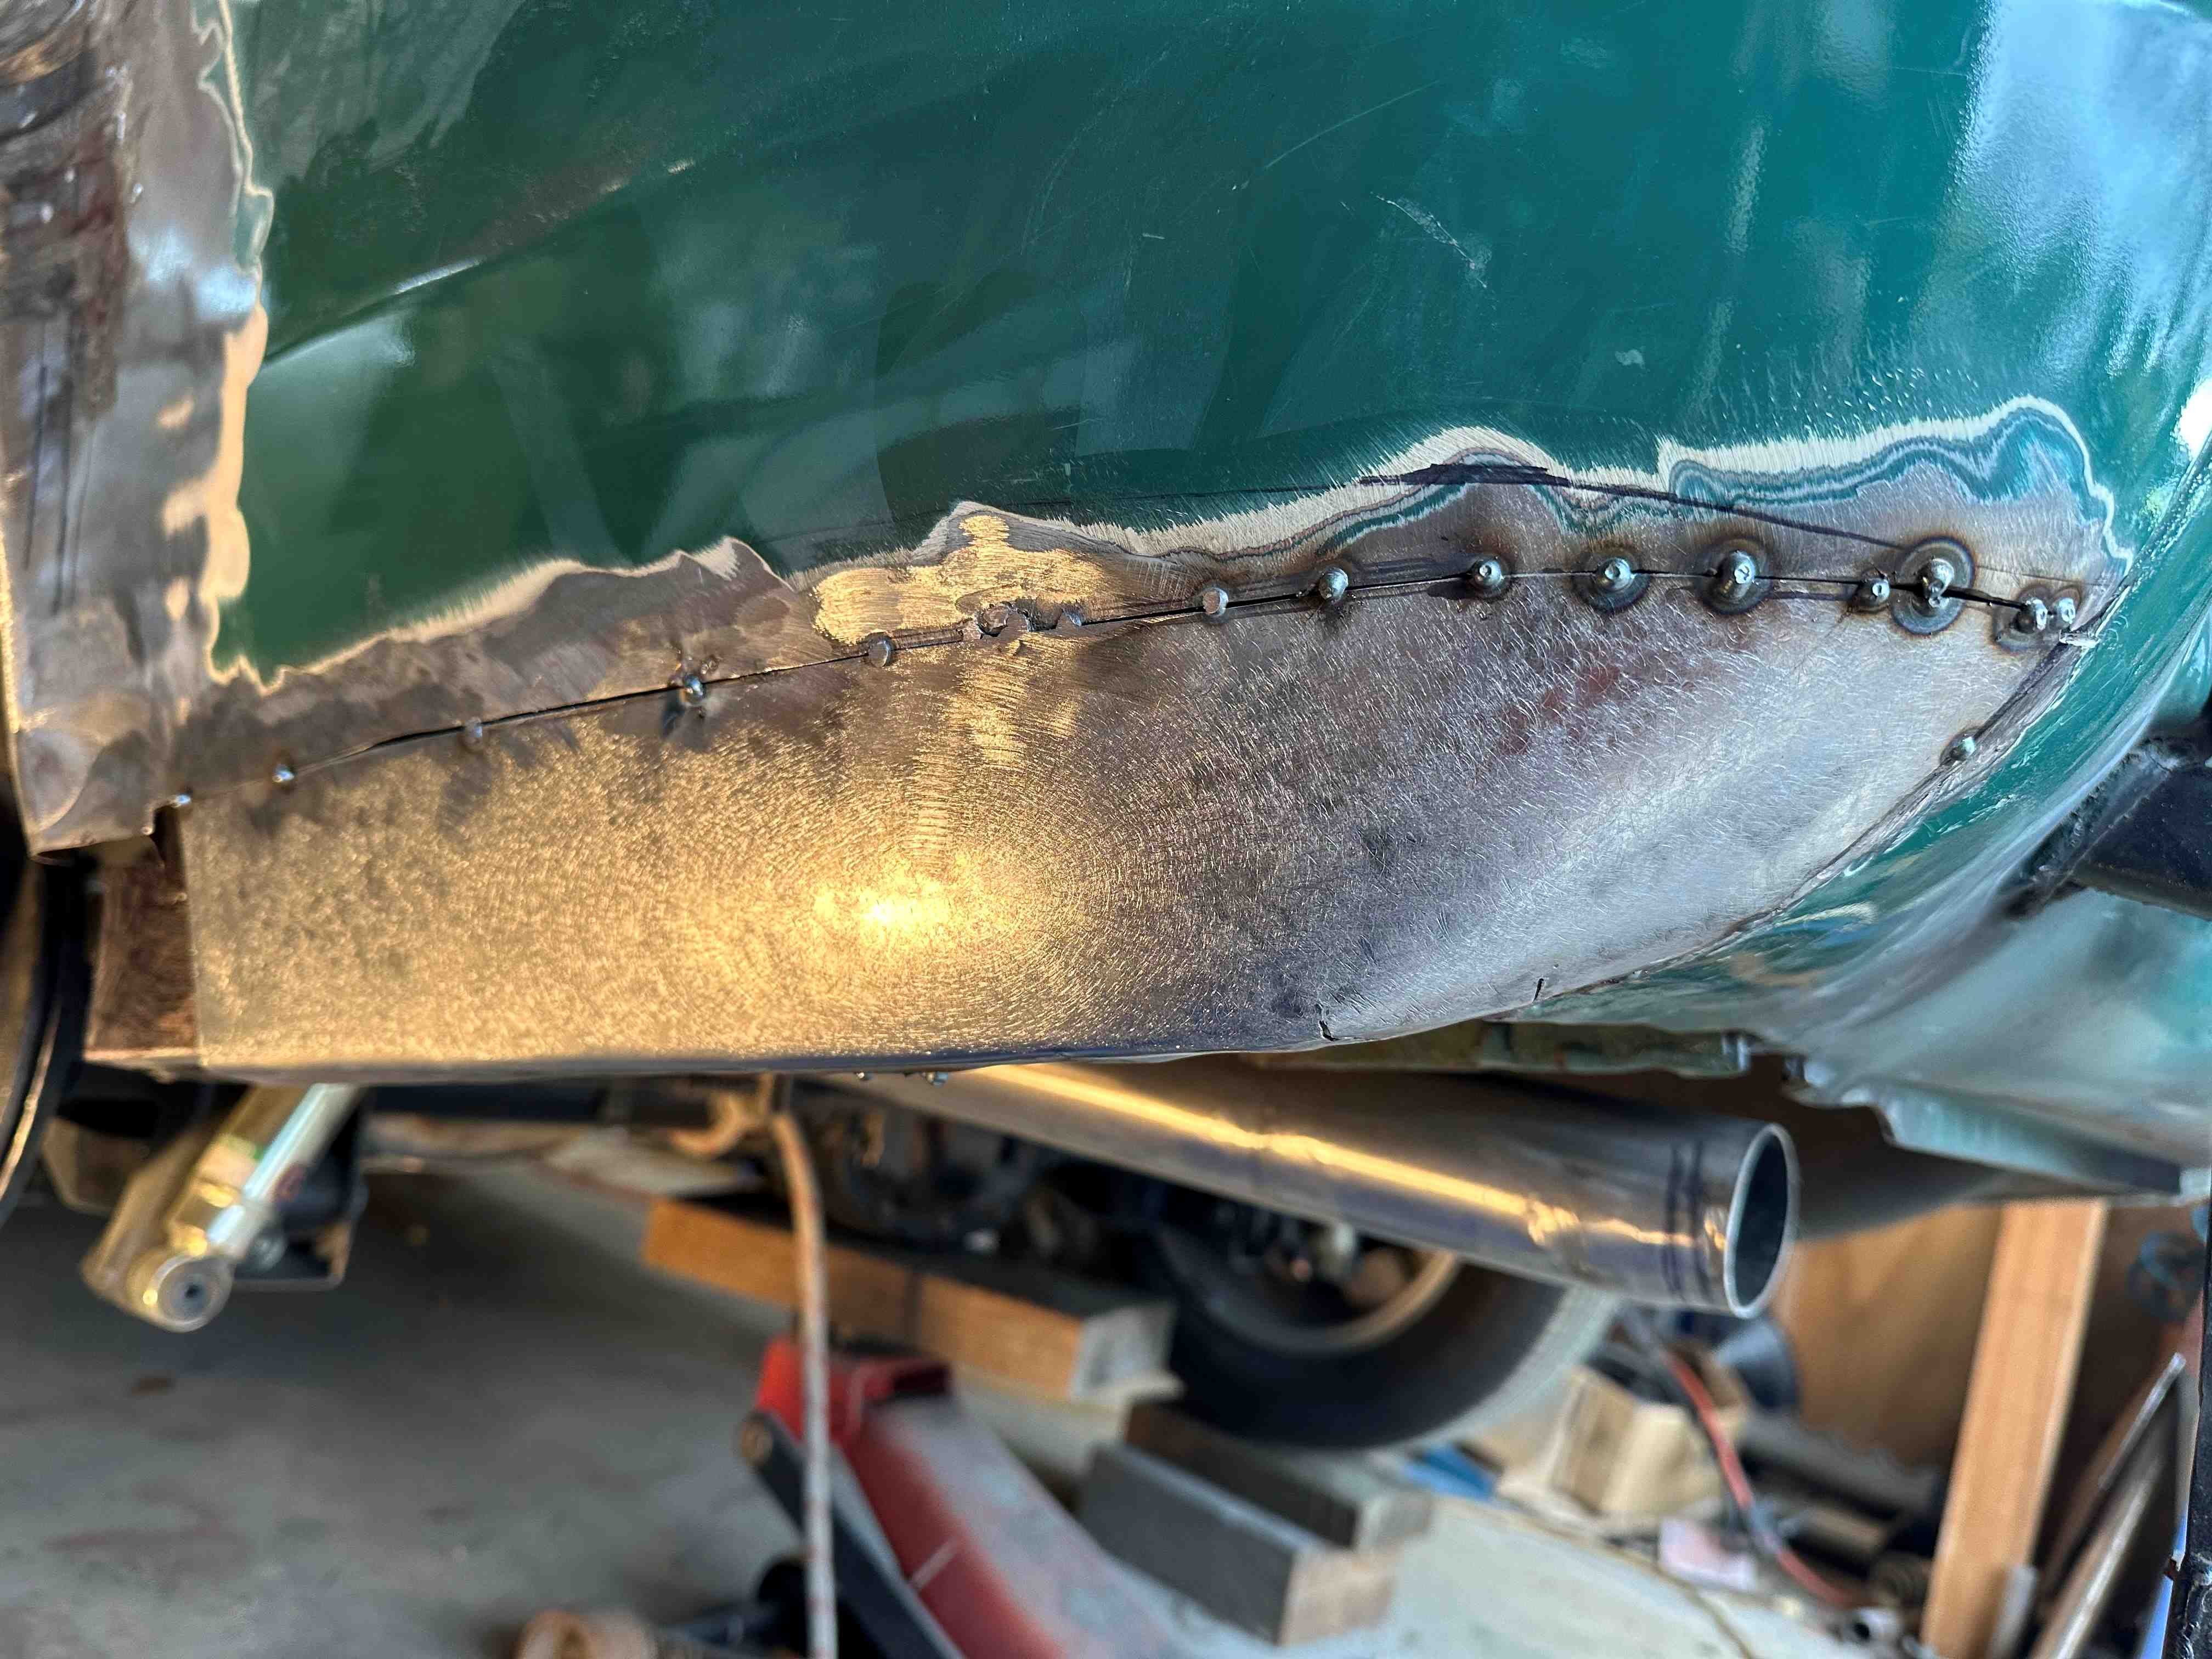
I finished of the metal work yesterday and gave it a coat of epoxy by brush and left it overnight to harden. Then gave it a light sand with 80grit and some scotch brite which took the shine off the low spots. Today I used a very very small amount of filler (yes I know what your thinking) which is why it only took me approx three hours to do. Anyway I cleaned and degreased it and sprayed another coat of epoxy primer on it. I can see i need to add a bit more filler where the arrow is and shape the opposite side more to get them more symmetrical. Probably not hugely important to be perfectly the same but closer would be better. There are still a few high spots etc to iron out but overall I am pretty happy about it.
-
Tiger Tamers 1964 Hillman Minx Project
Tiger Tamer replied to Tiger Tamer's topic in Projects and Build Ups
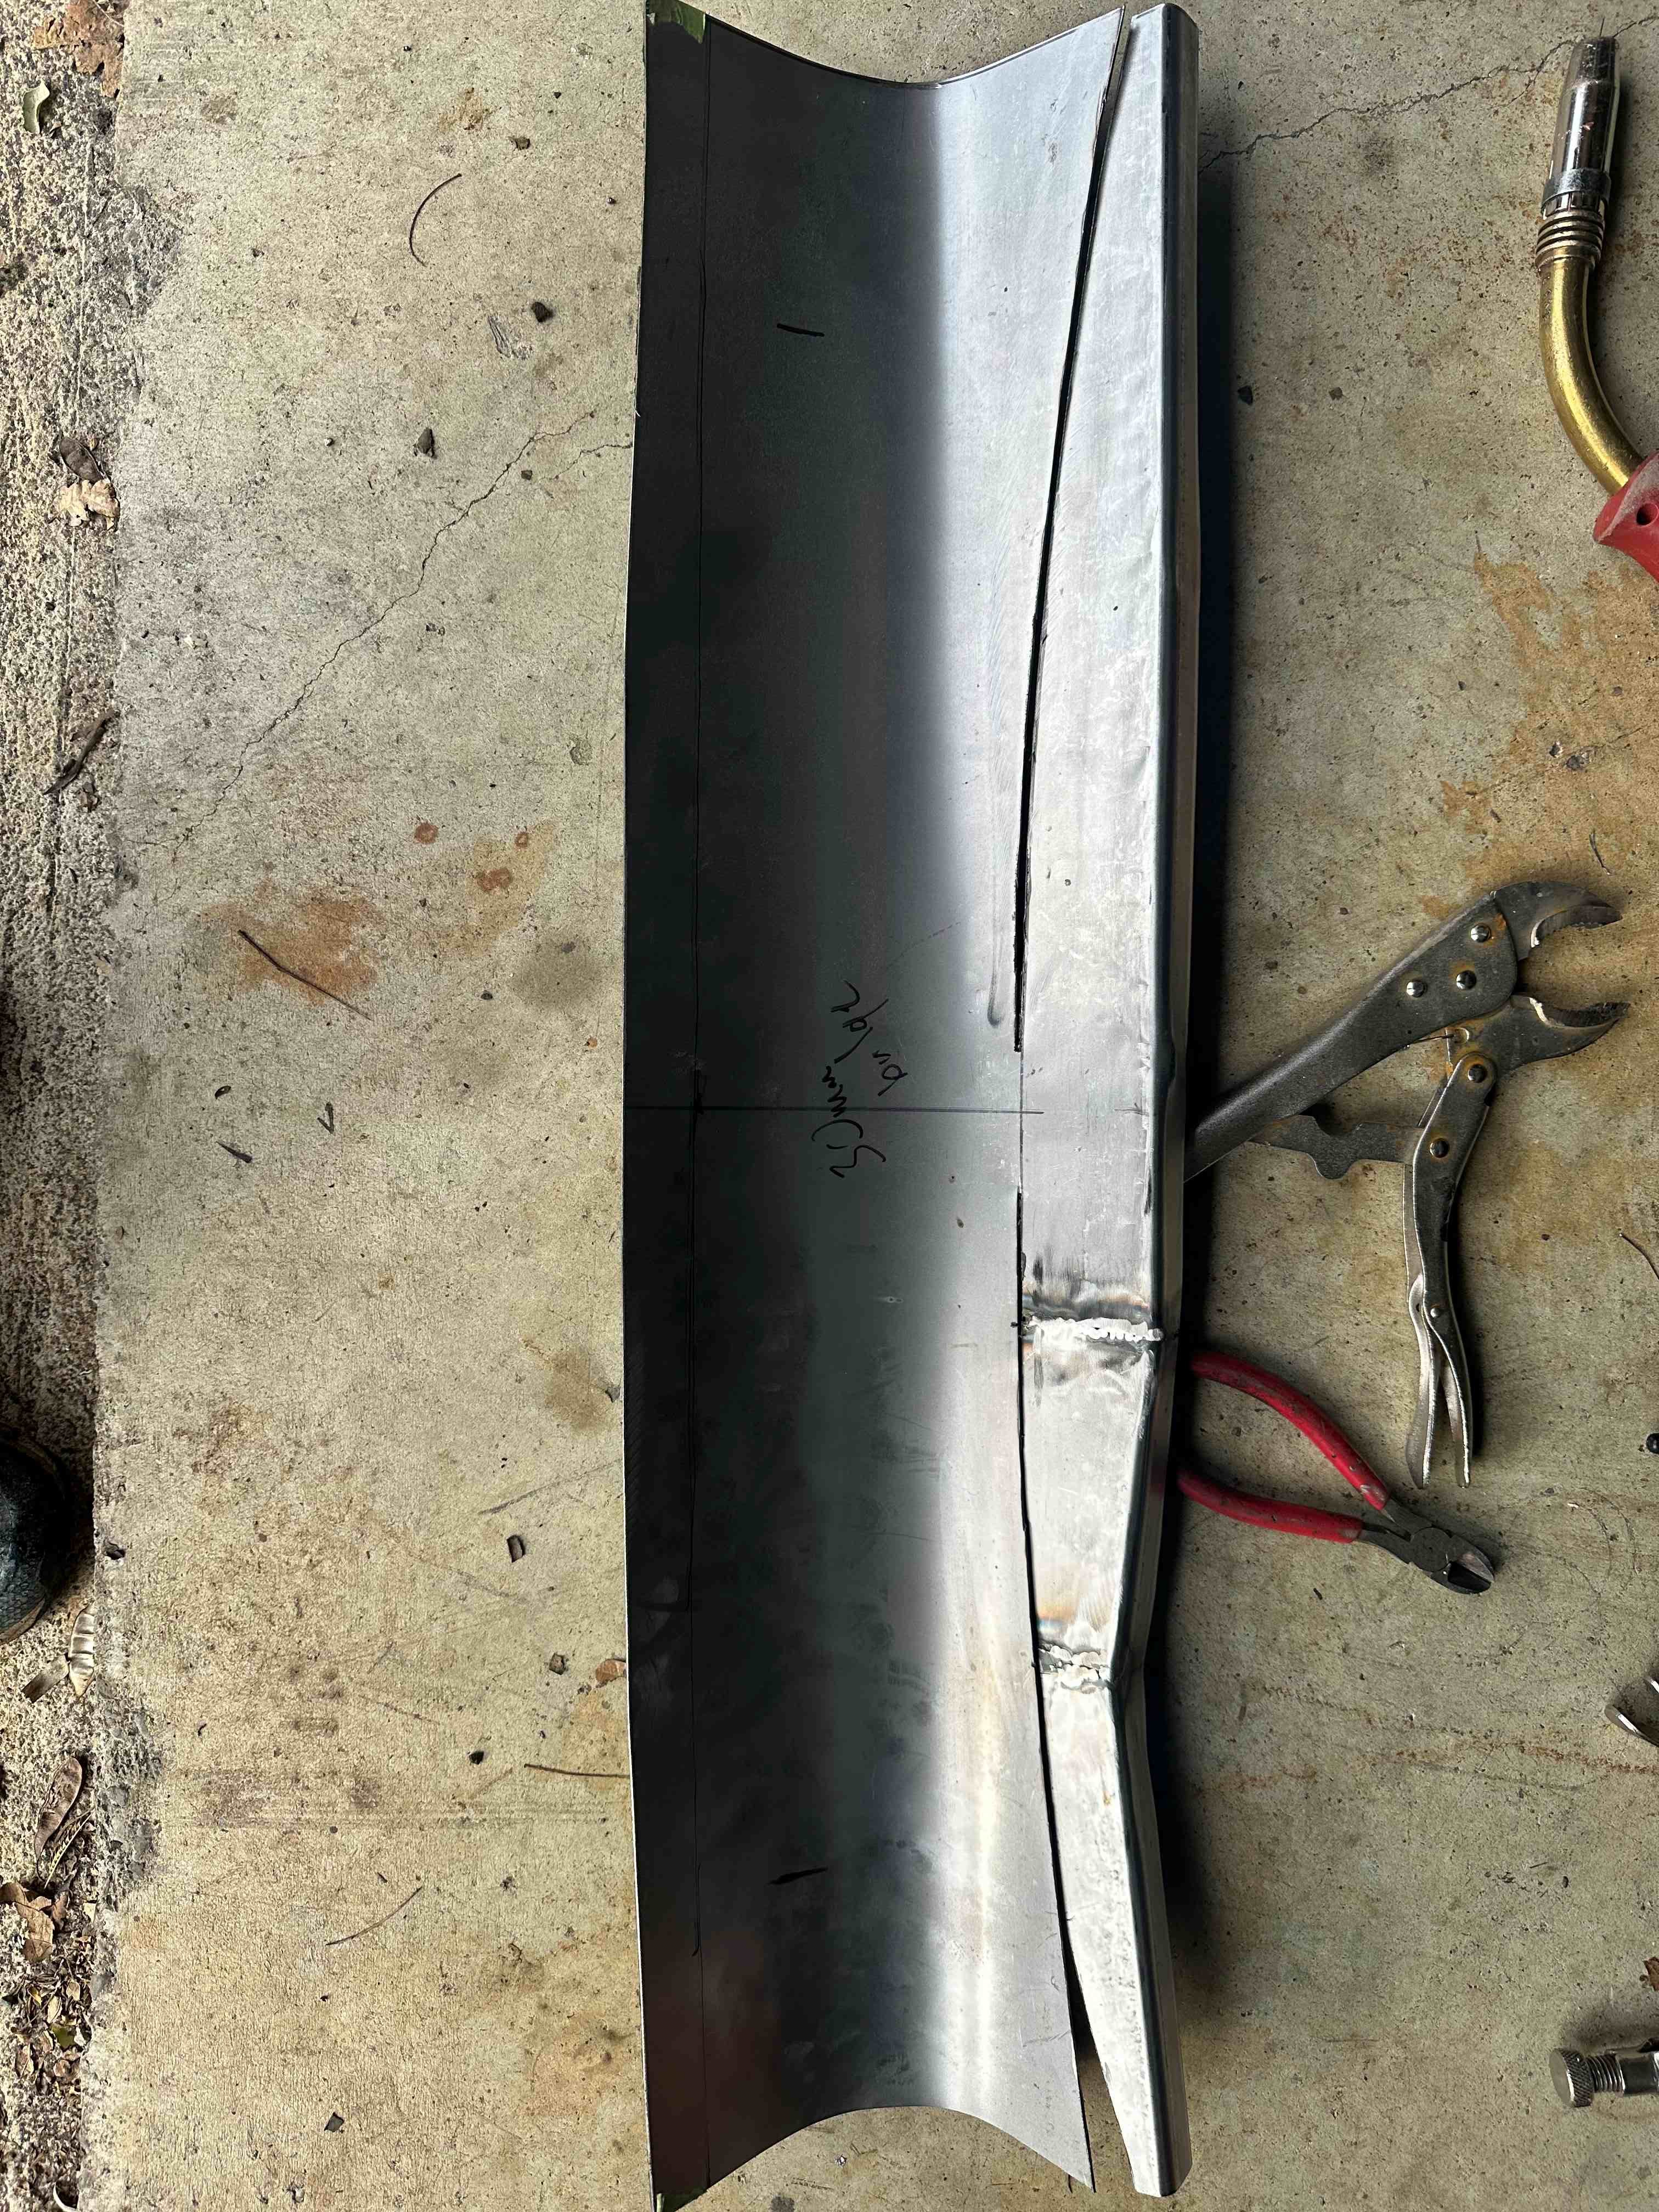
Yea, nearly all done. Still the bottom of the drivers side to do which won't be that much. I had to cut the large panel I made again as once I had the center panel in the outer didn't quite fit correctly. It's turned out ok for a novice. Quite a bit of curvature to it. If I got a job in a panel shop I might be allowed to sweep the floor lol. Which is obviously something I don't do very often looking at the pic's.
- 124 replies
-
- 10
-

-

-

-
Tiger Tamers 1964 Hillman Minx Project
Tiger Tamer replied to Tiger Tamer's topic in Projects and Build Ups
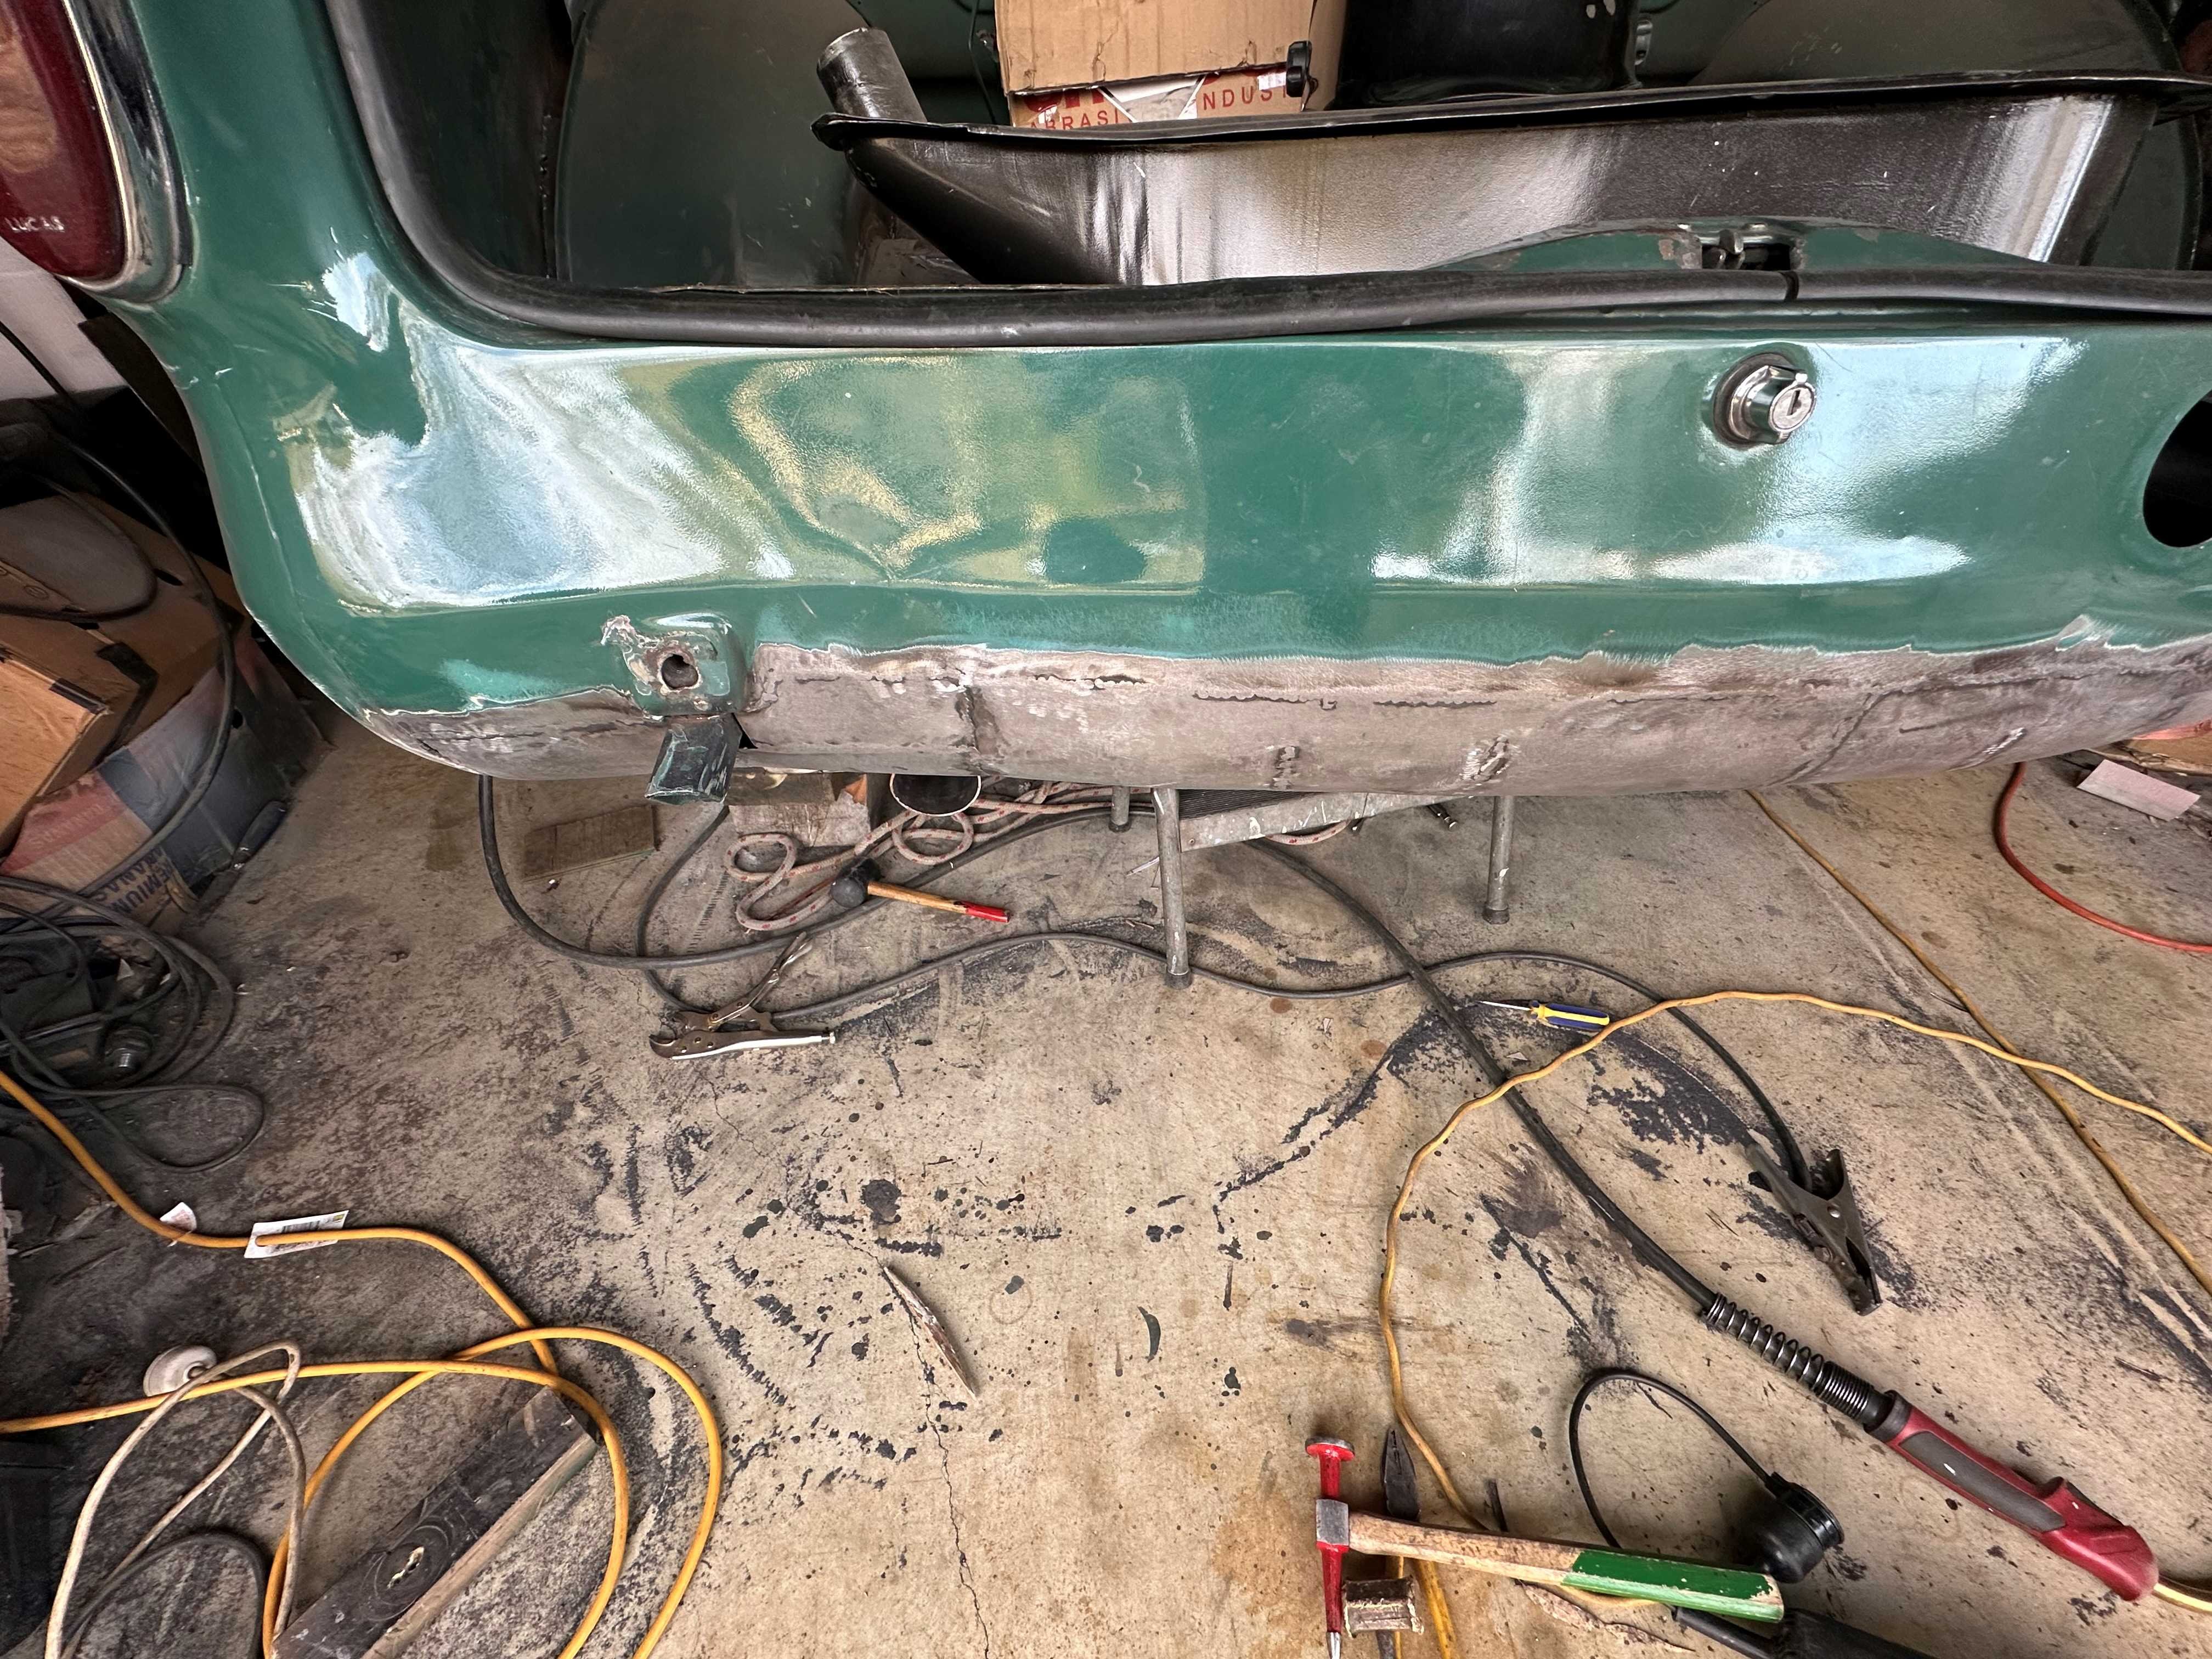
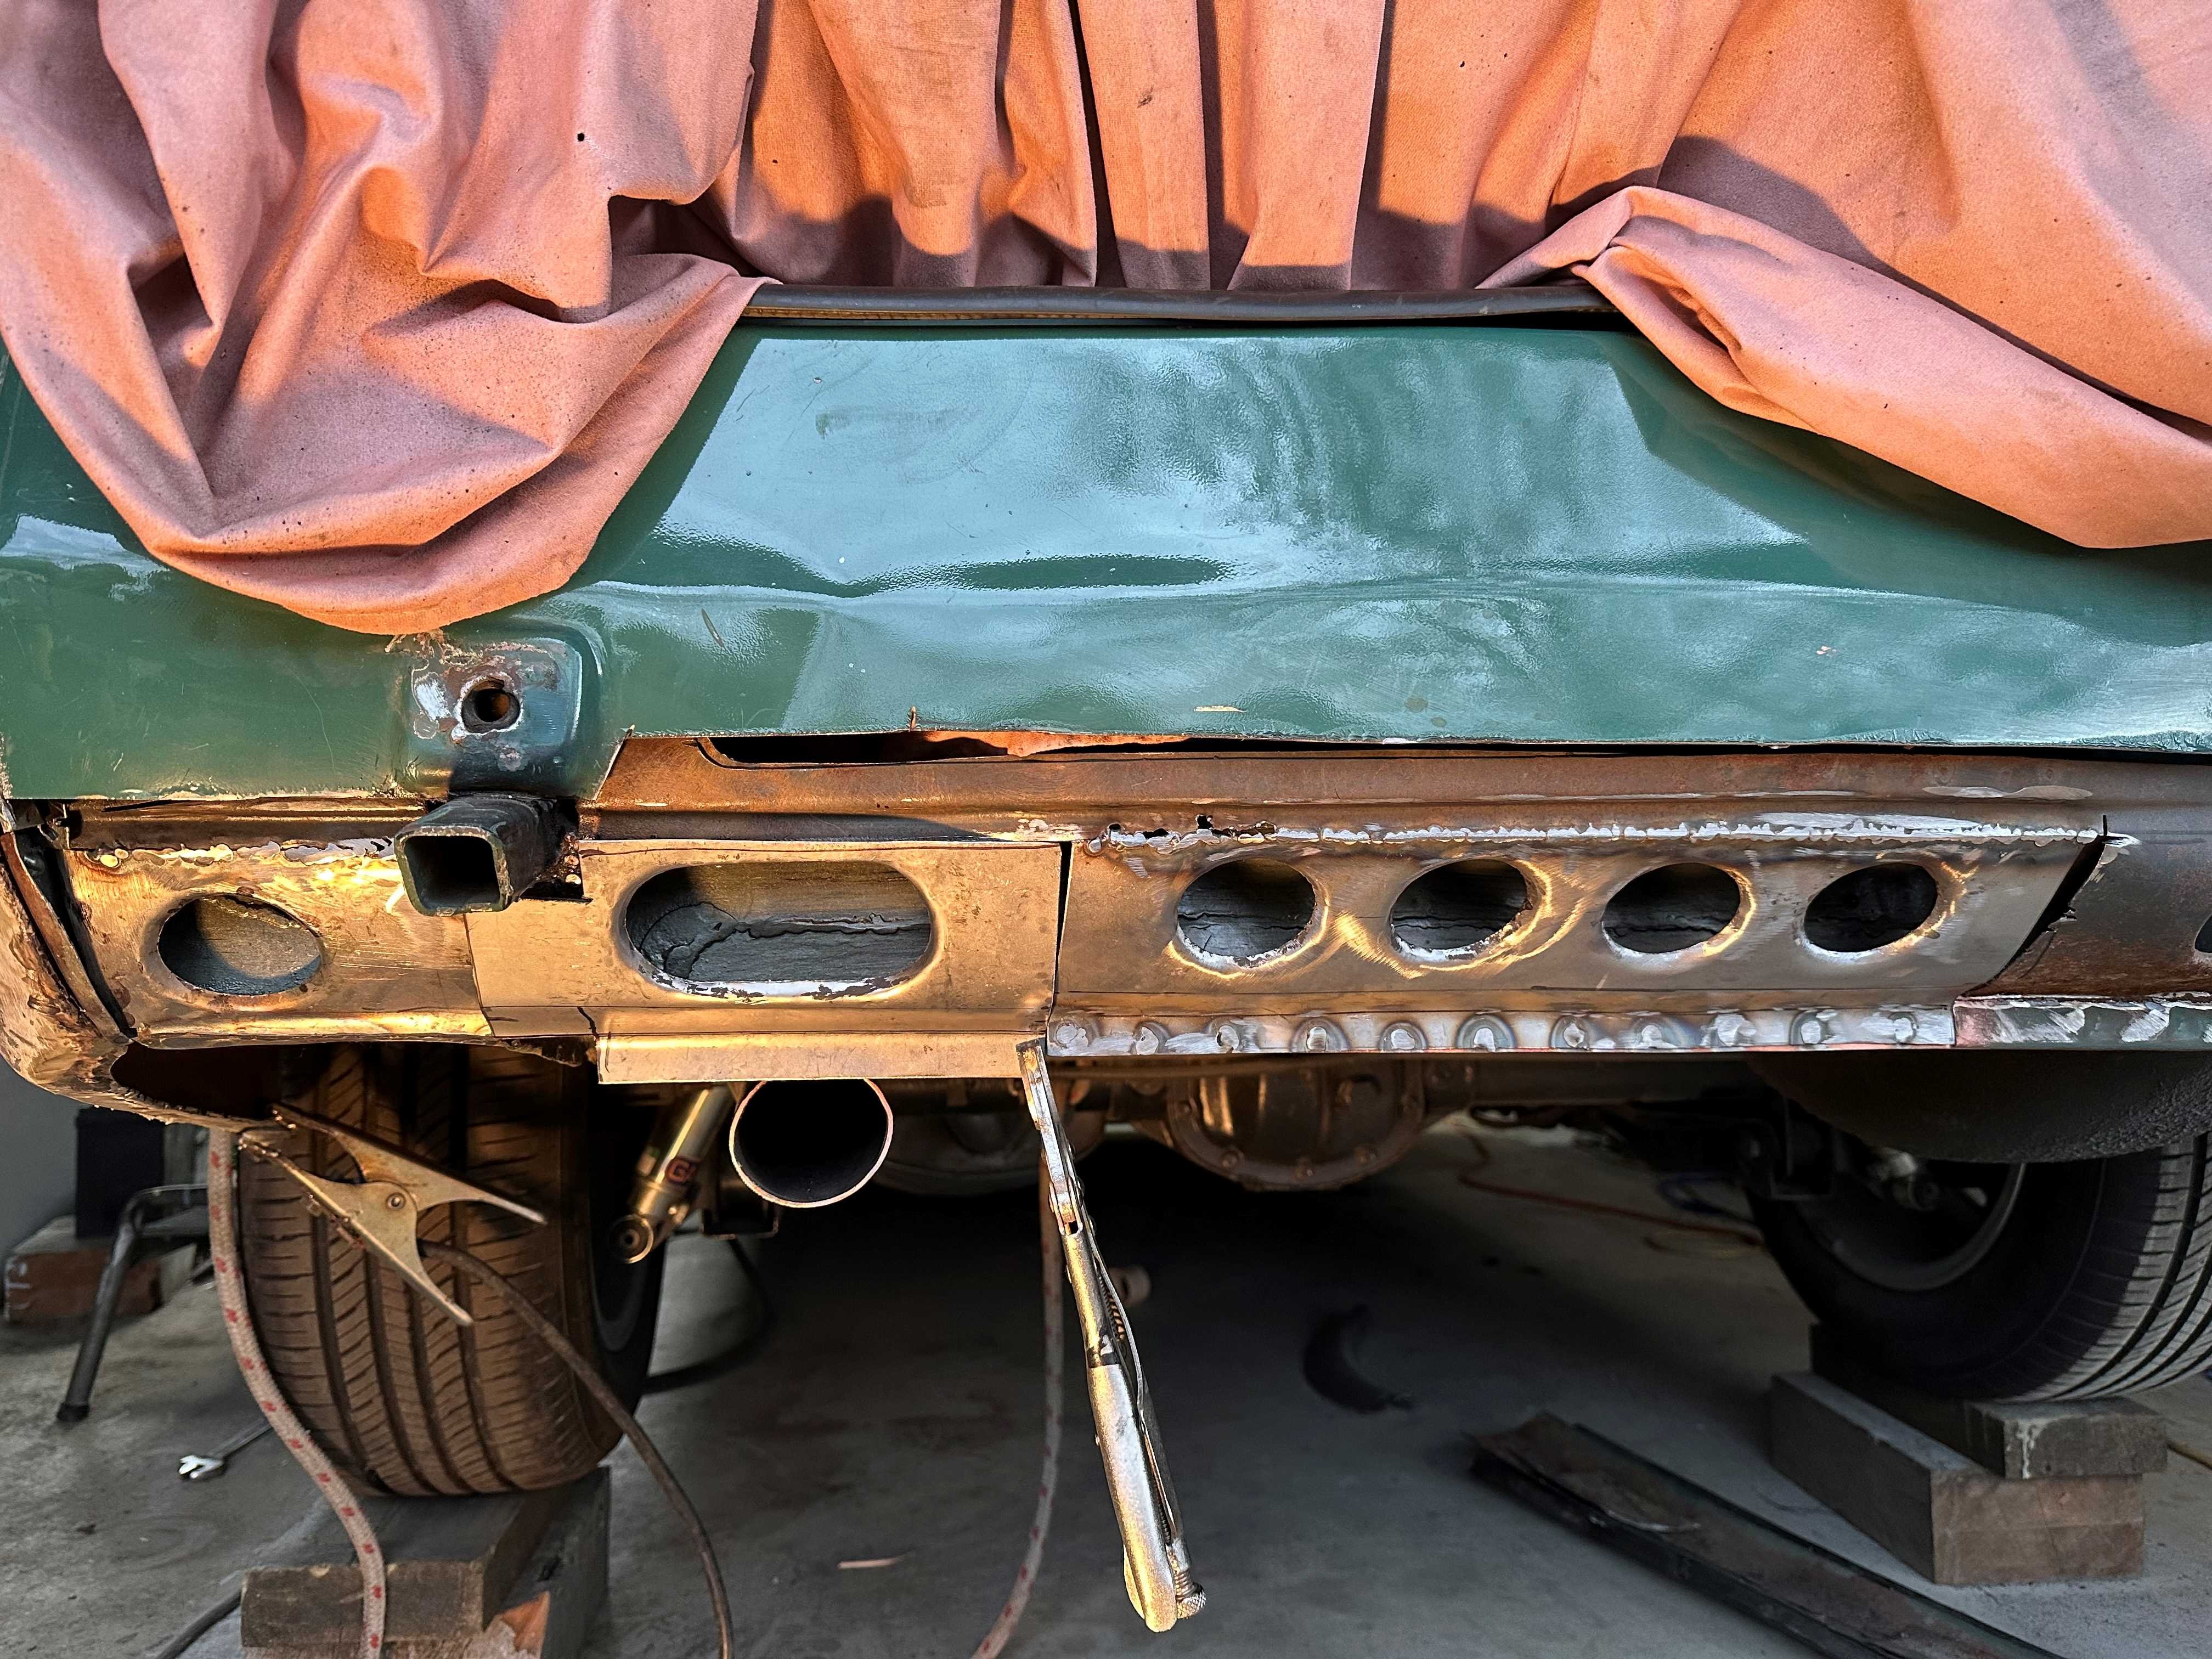
A small update. I have rebuilt the internal panel and epoxy primed it and put some topcoat paint on to stop it rusting again. I also so a piece of sponge and soaked it in paint so I could coat the welds on the inside of the panel. I have also started on the outer panel and tac welded in the left side corner. It has curves going in opposite directions which is quite tricky to do but I seemed to do it with the planisher, not perfectly but ok. Did a bit more on the larger center section and primed the inside. On the right side the rust seems lower down on the inner panels so i am only going to remove the panel about half the height of what I have done so far hoping it will be enough. I did blow some holes through above the first round hole on the left. I used a carbide bur to open them up to solid steel and will leave them. No need to repair them being there.
- 124 replies
-
- 11
-
-
Tiger Tamers 1964 Hillman Minx Project
Tiger Tamer replied to Tiger Tamer's topic in Projects and Build Ups
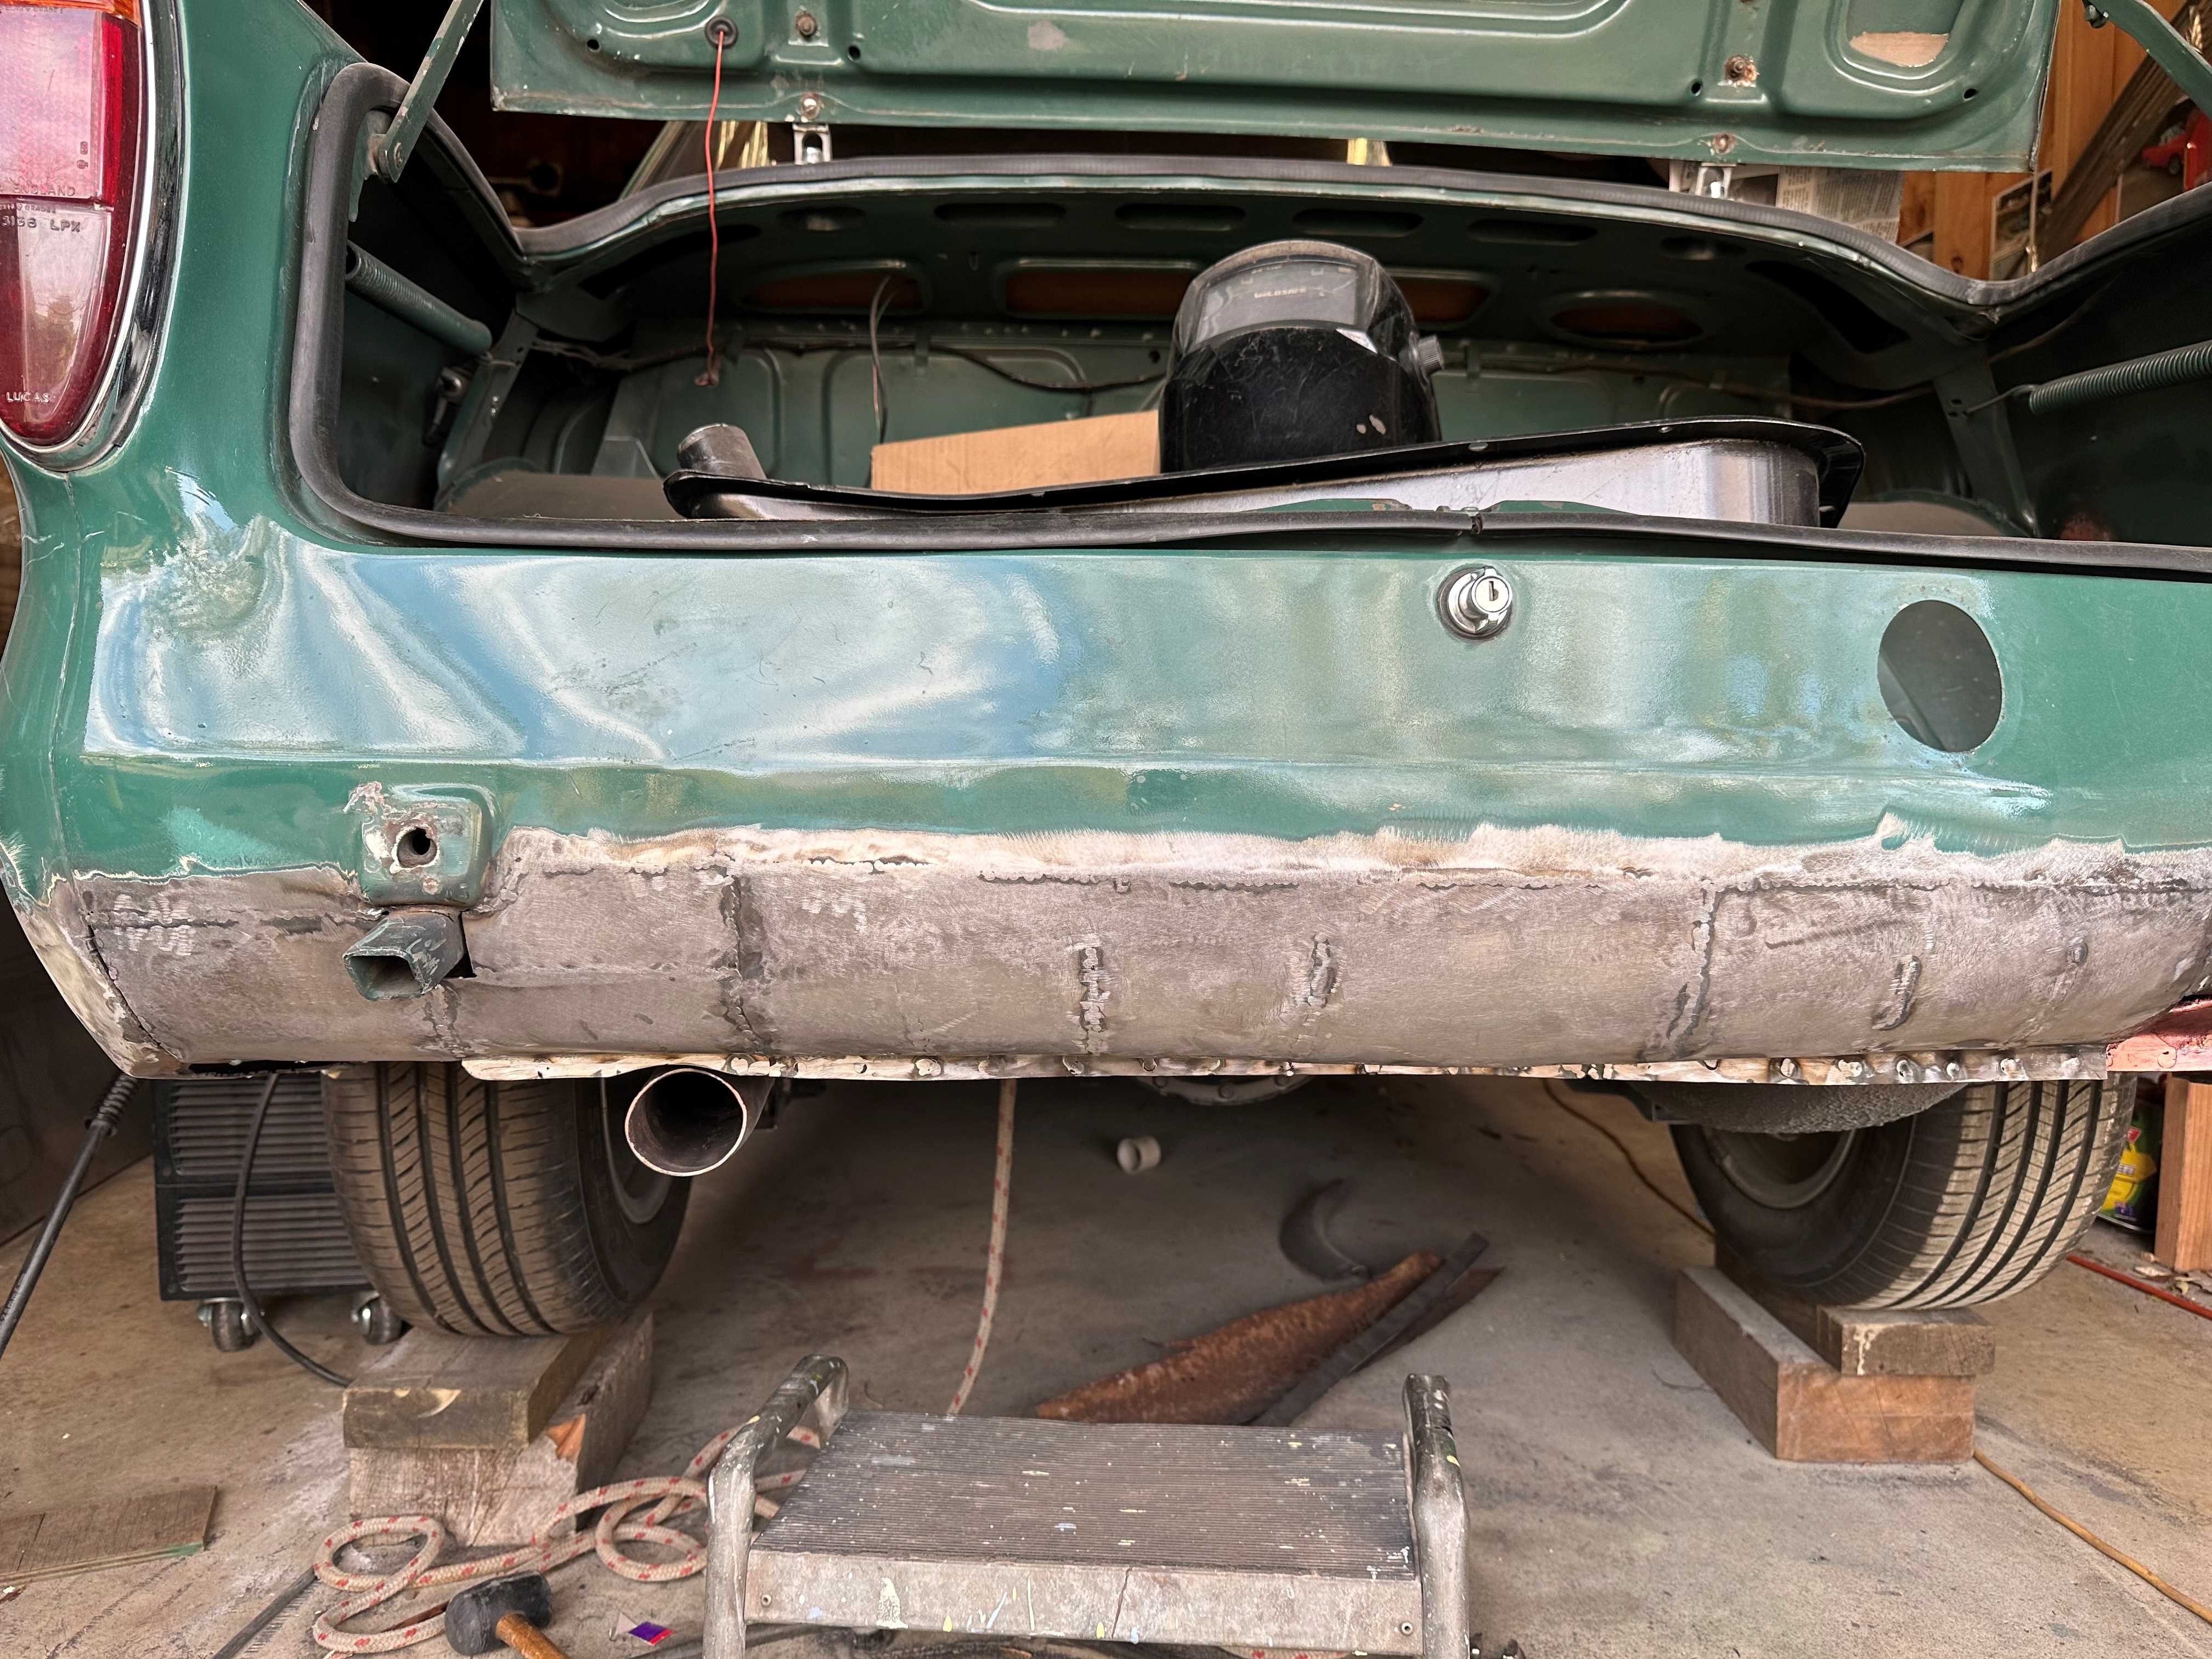
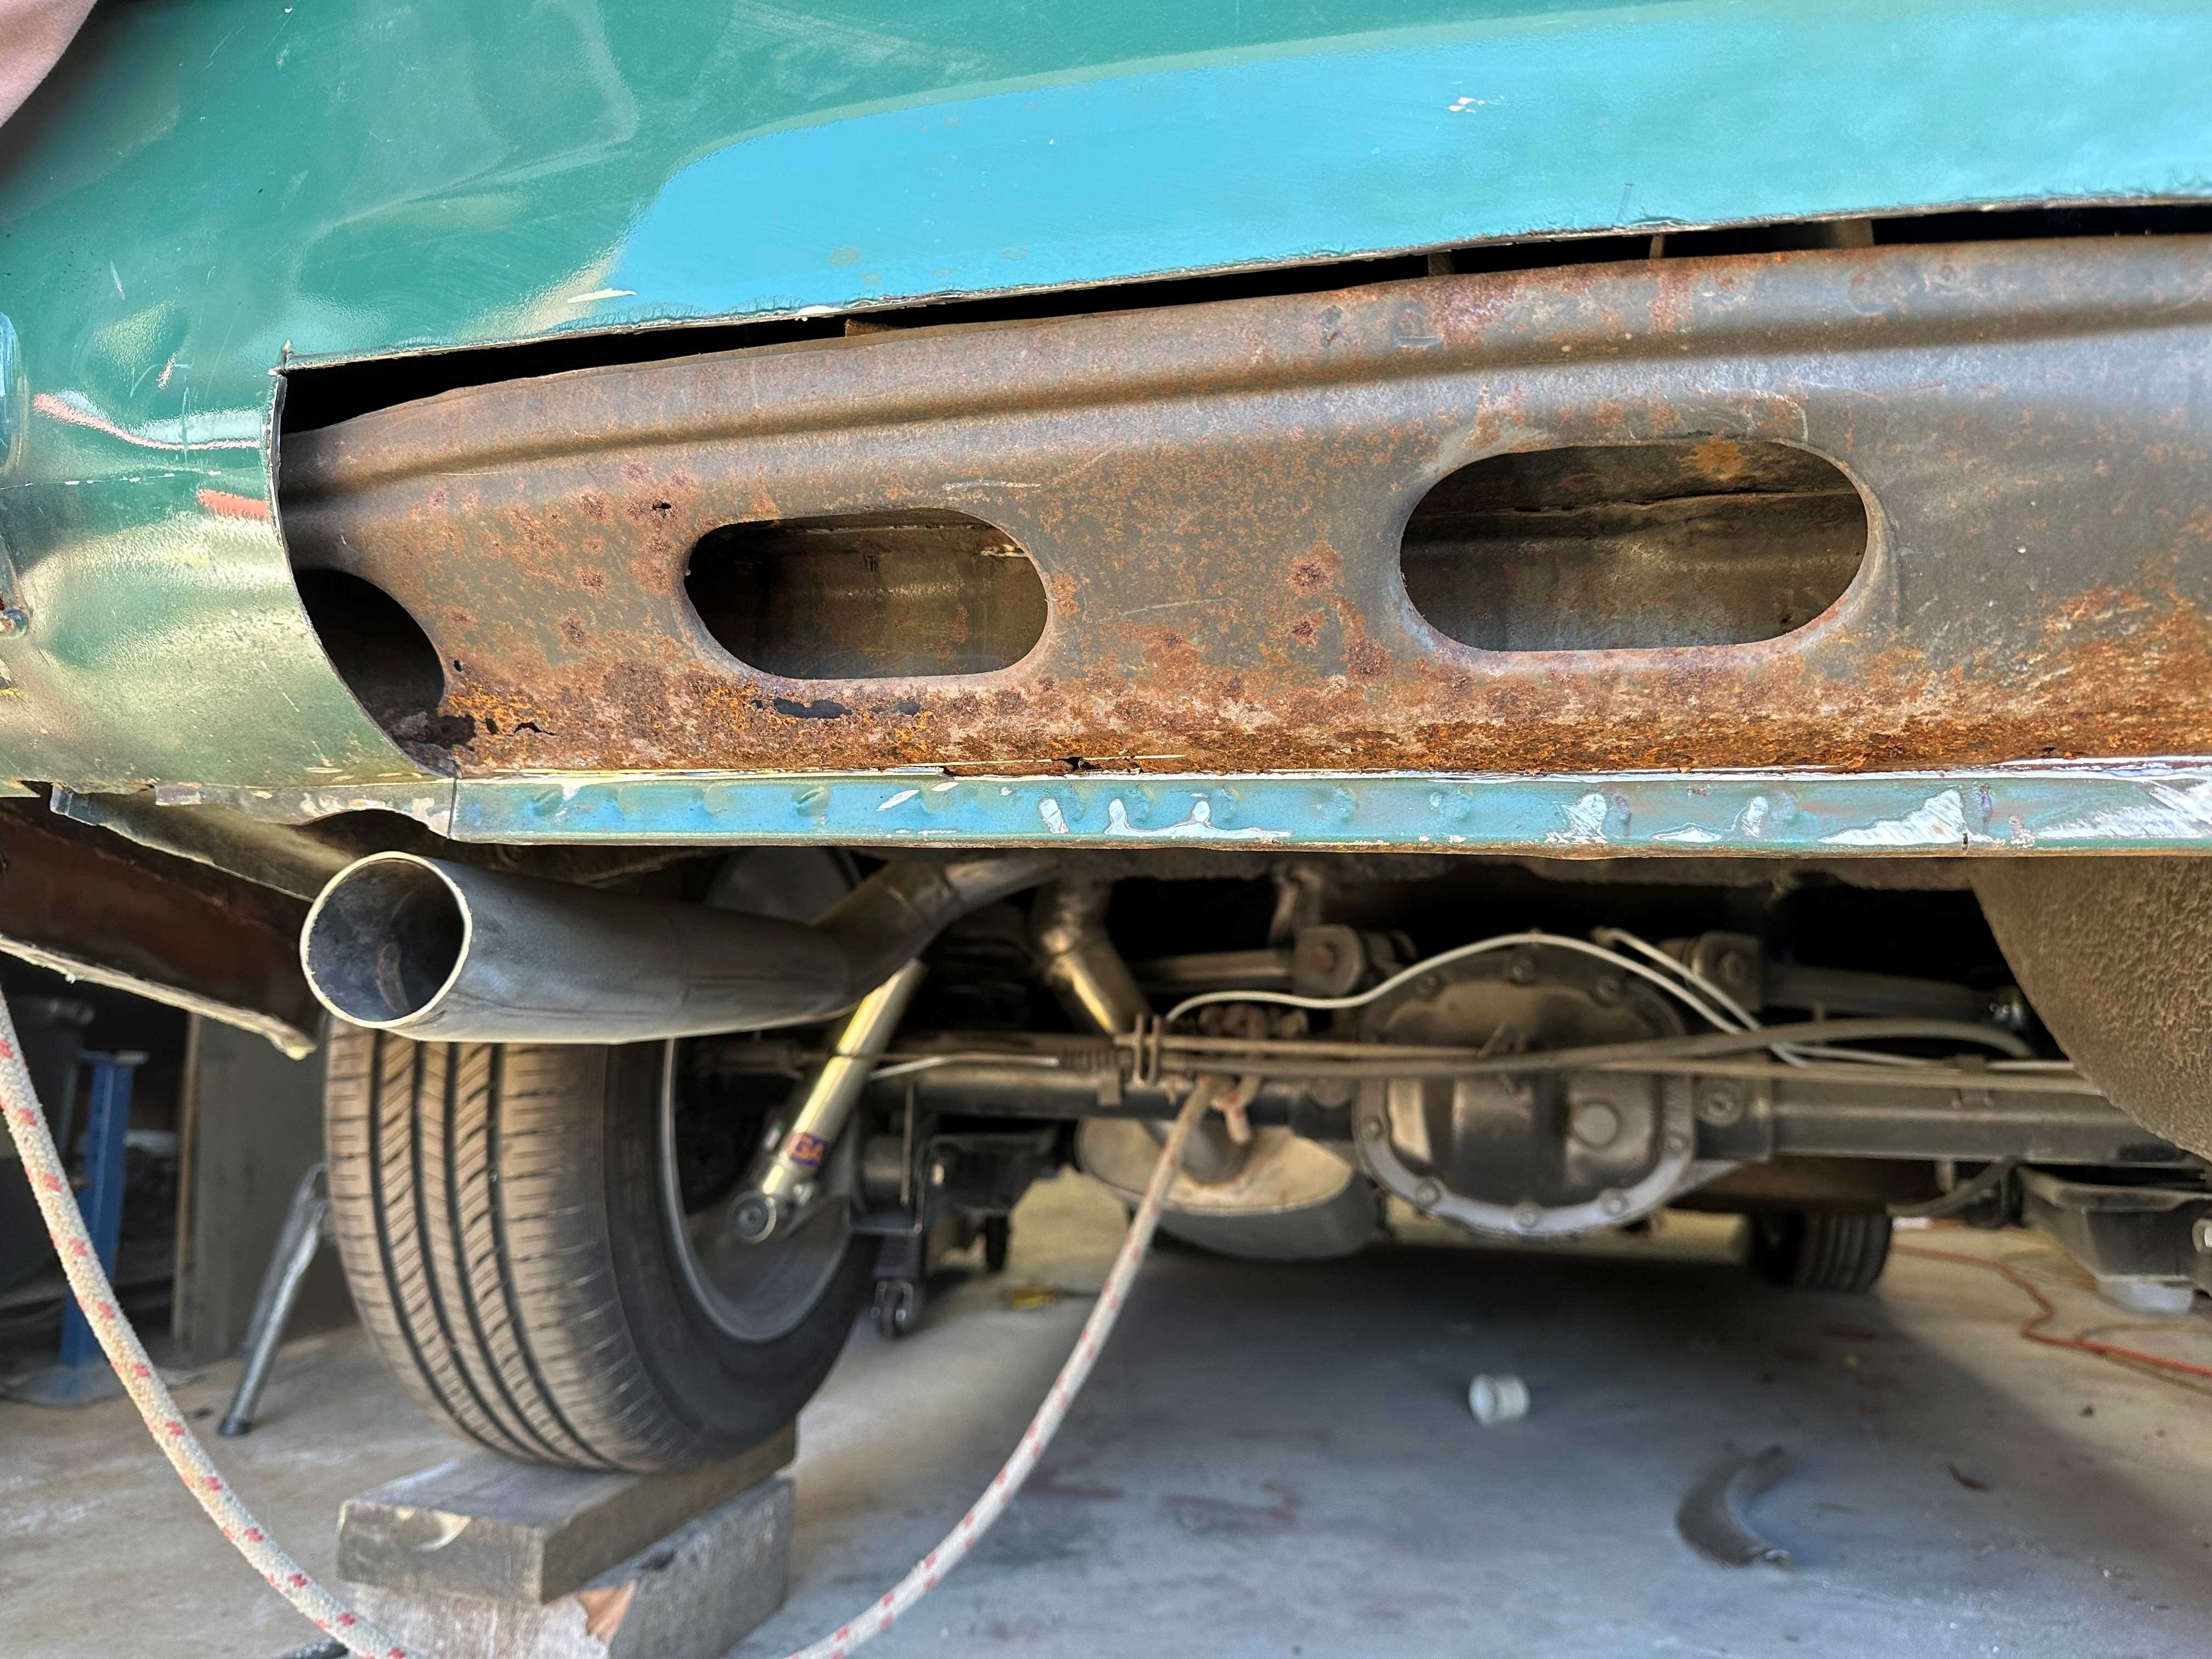
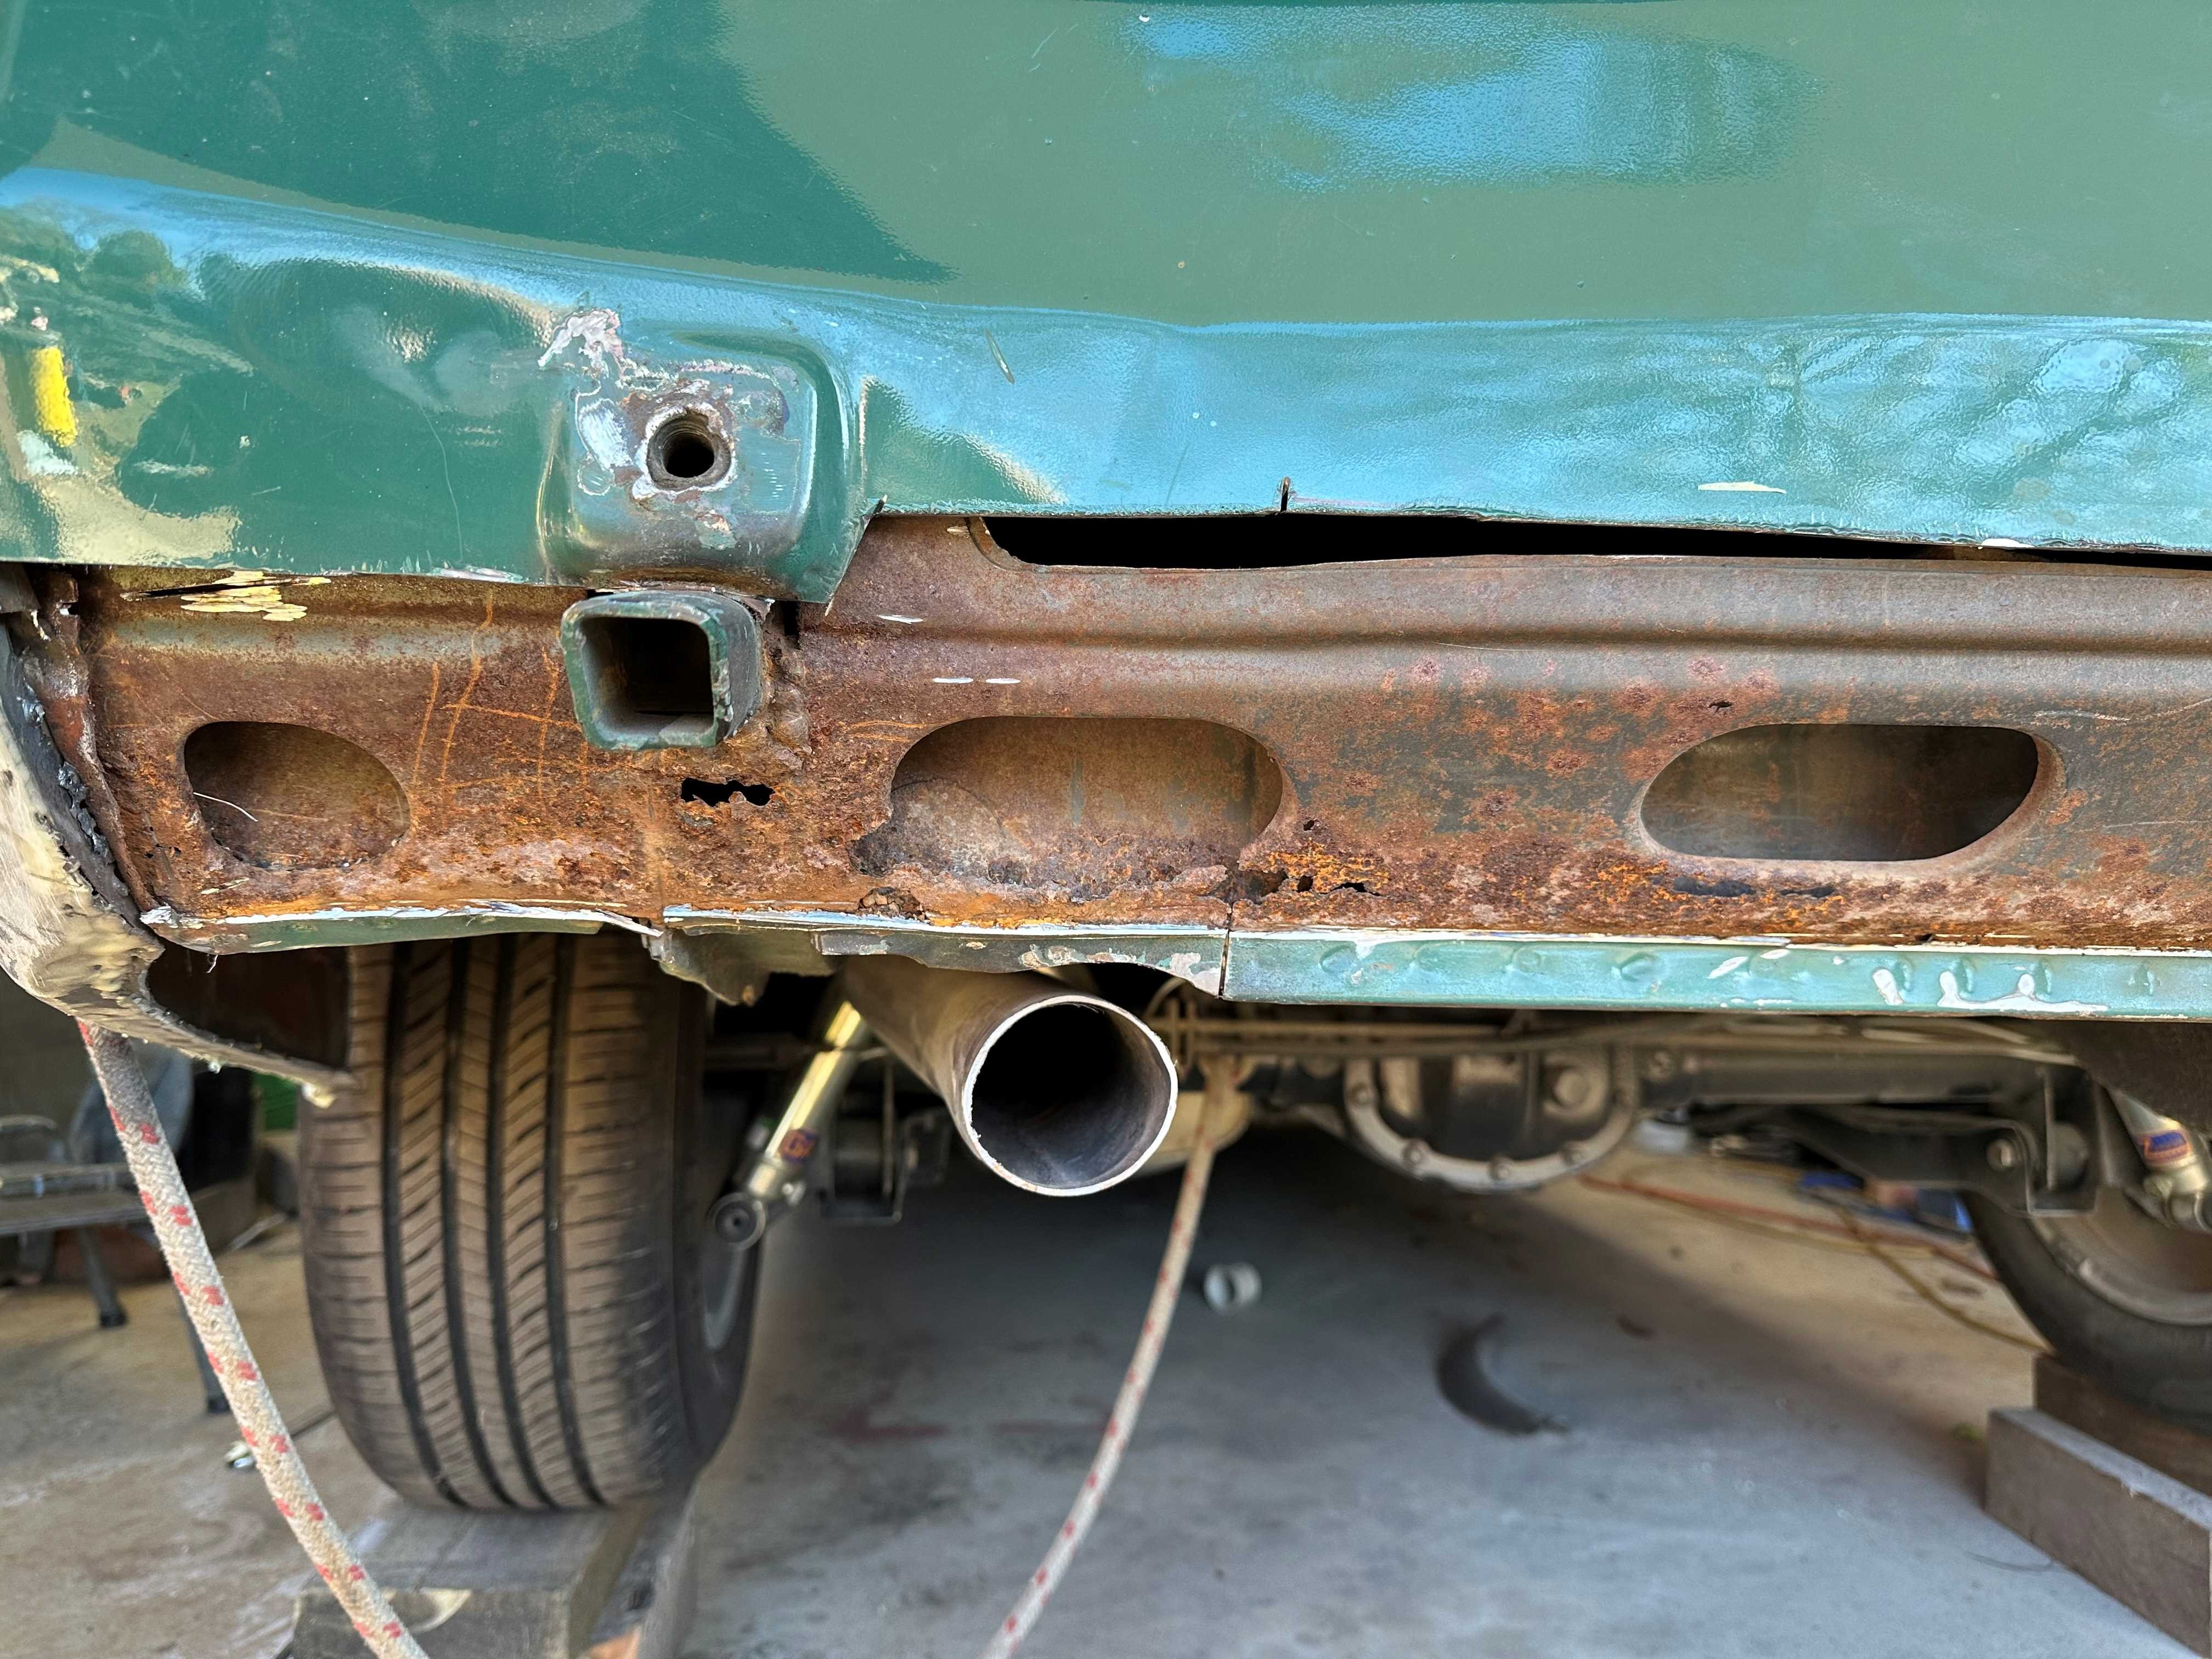
Once I had removed the inner stiffener panel I could see I would need to replace only the bottom half of the outer under car panel as well. Top half was nice and solid. Once I had that done it got a good wire brush and a couple of coats of Brunox to prime and treat any surface rust. With a little help with the heat gun it then got a couple of coats of a topcoat paint. In between all this I made up the new inner panel and painted the inside of them as well. I have most now welded in and the last piece for this side still needs a bit more adjusting. Then I will need to do the right side.
- 124 replies
-
- 11
-
-
Tiger Tamers 1964 Hillman Minx Project
Tiger Tamer replied to Tiger Tamer's topic in Projects and Build Ups
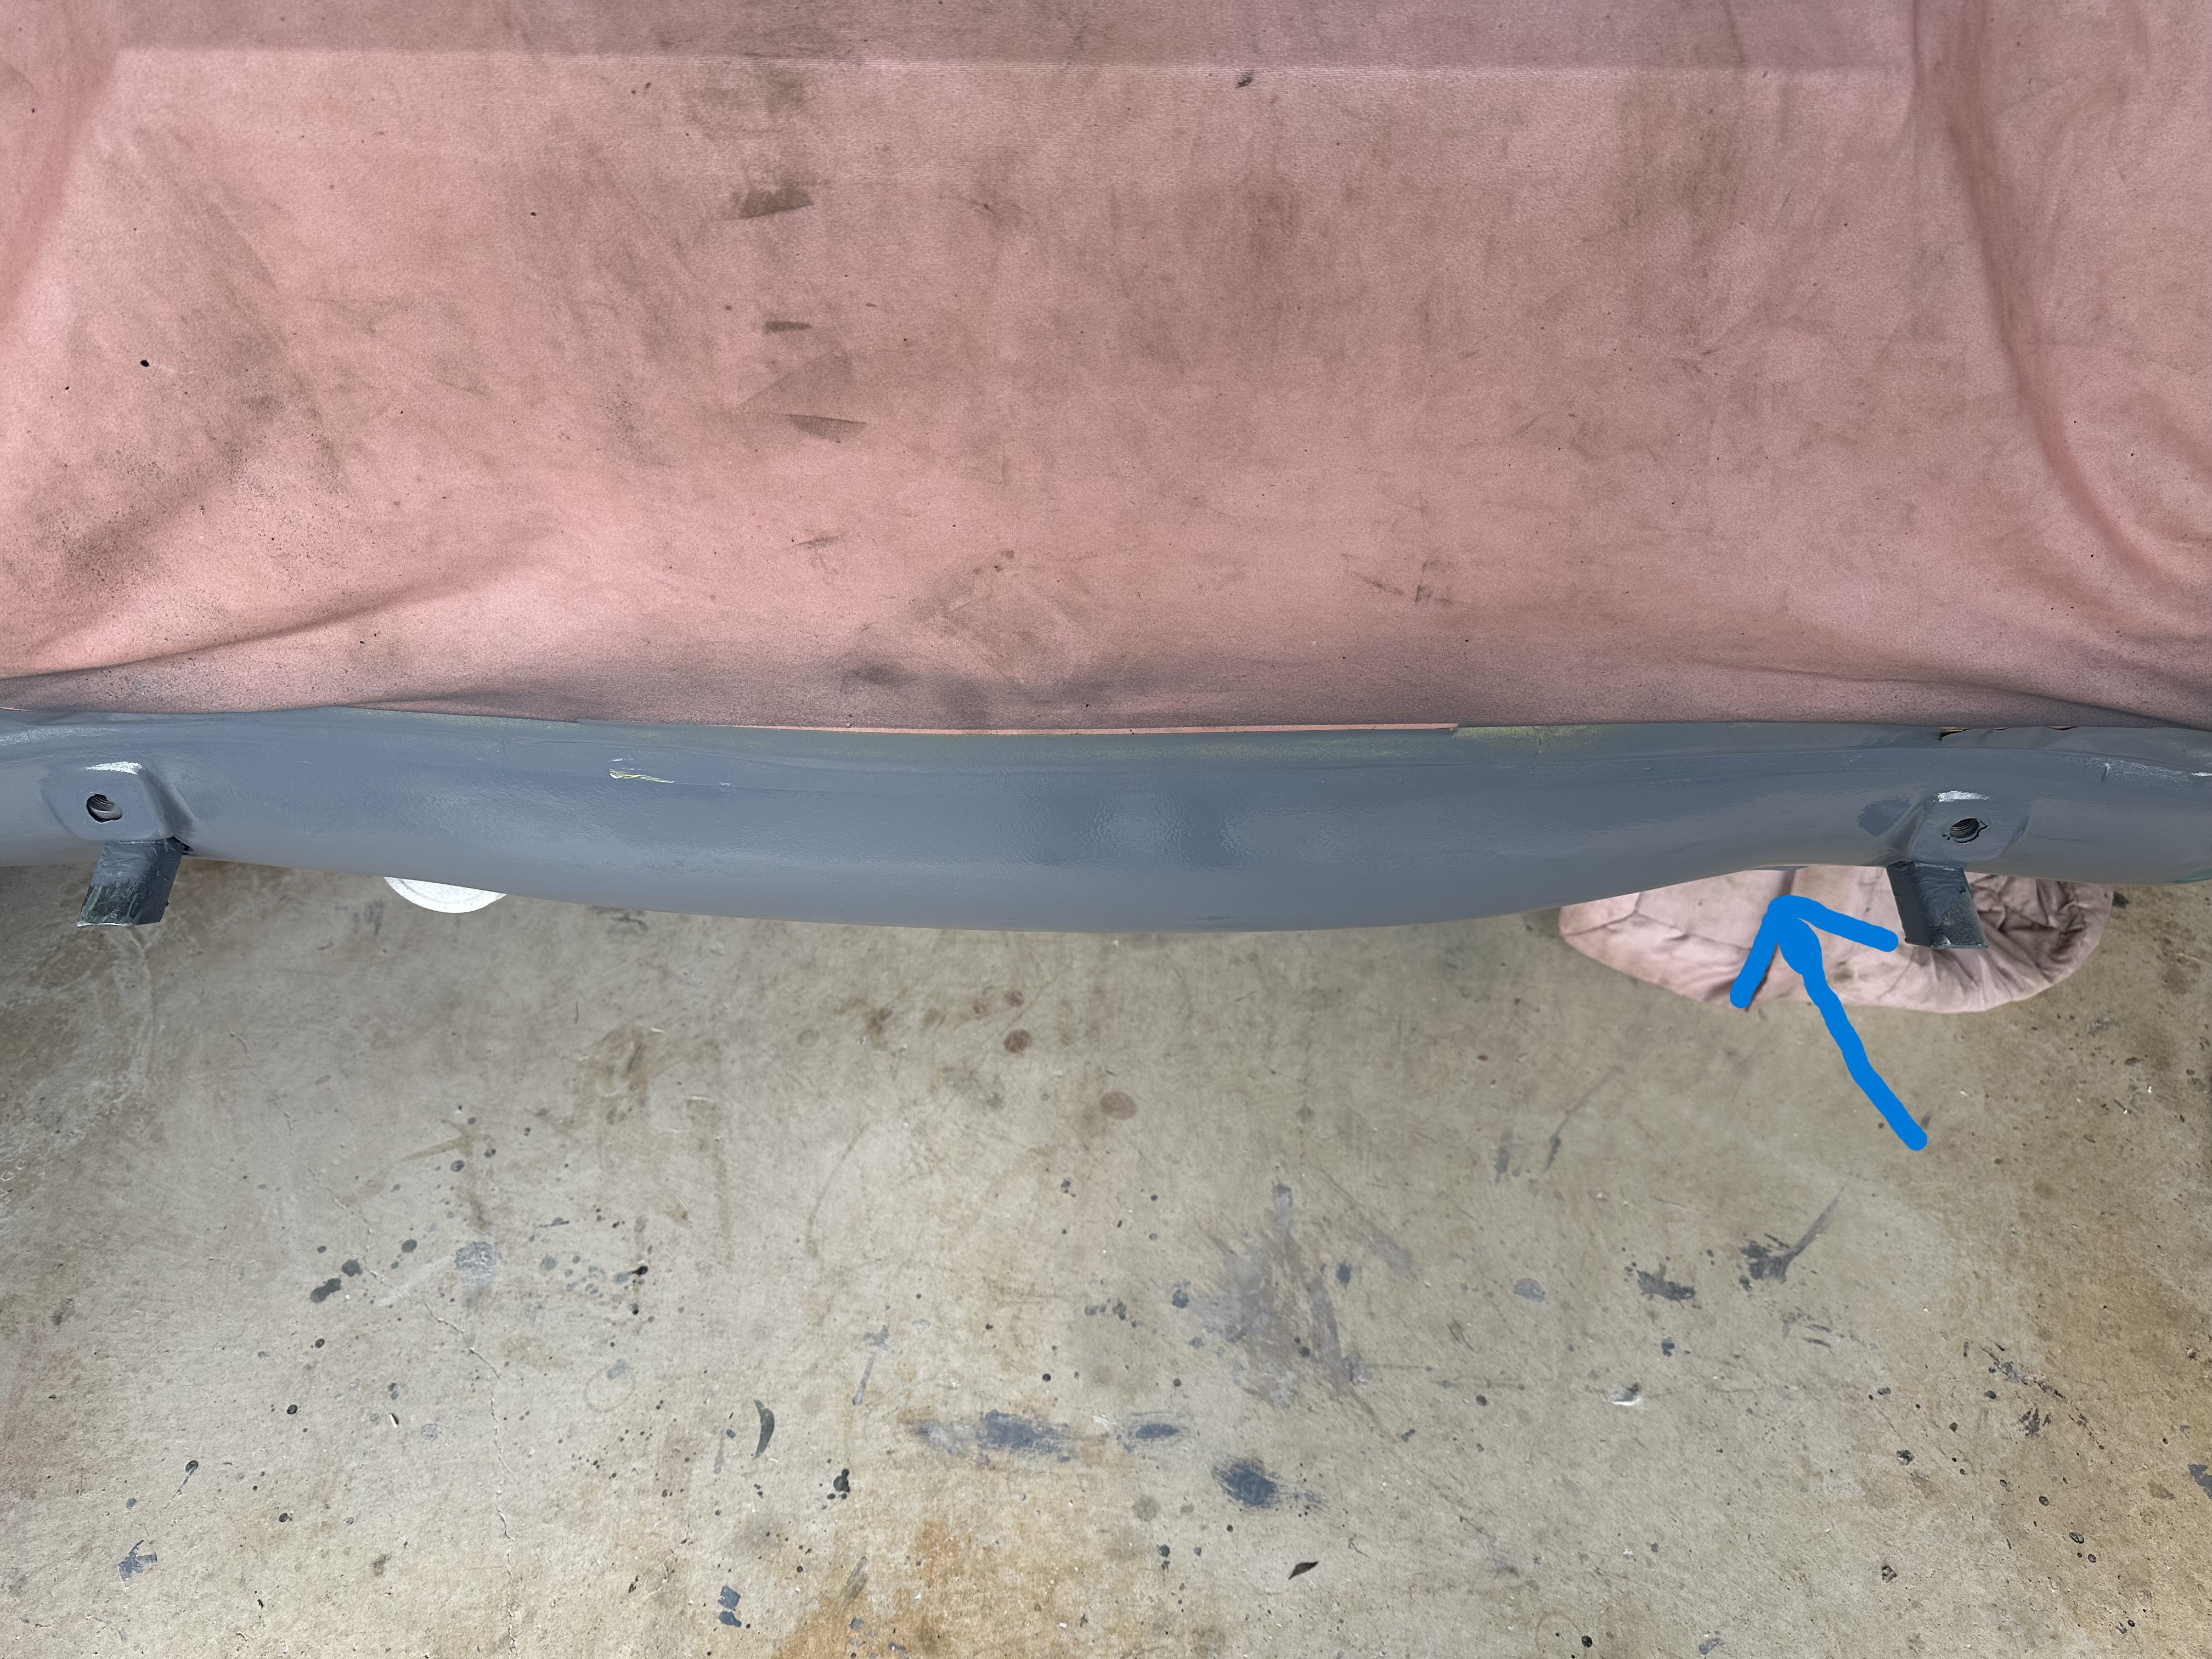
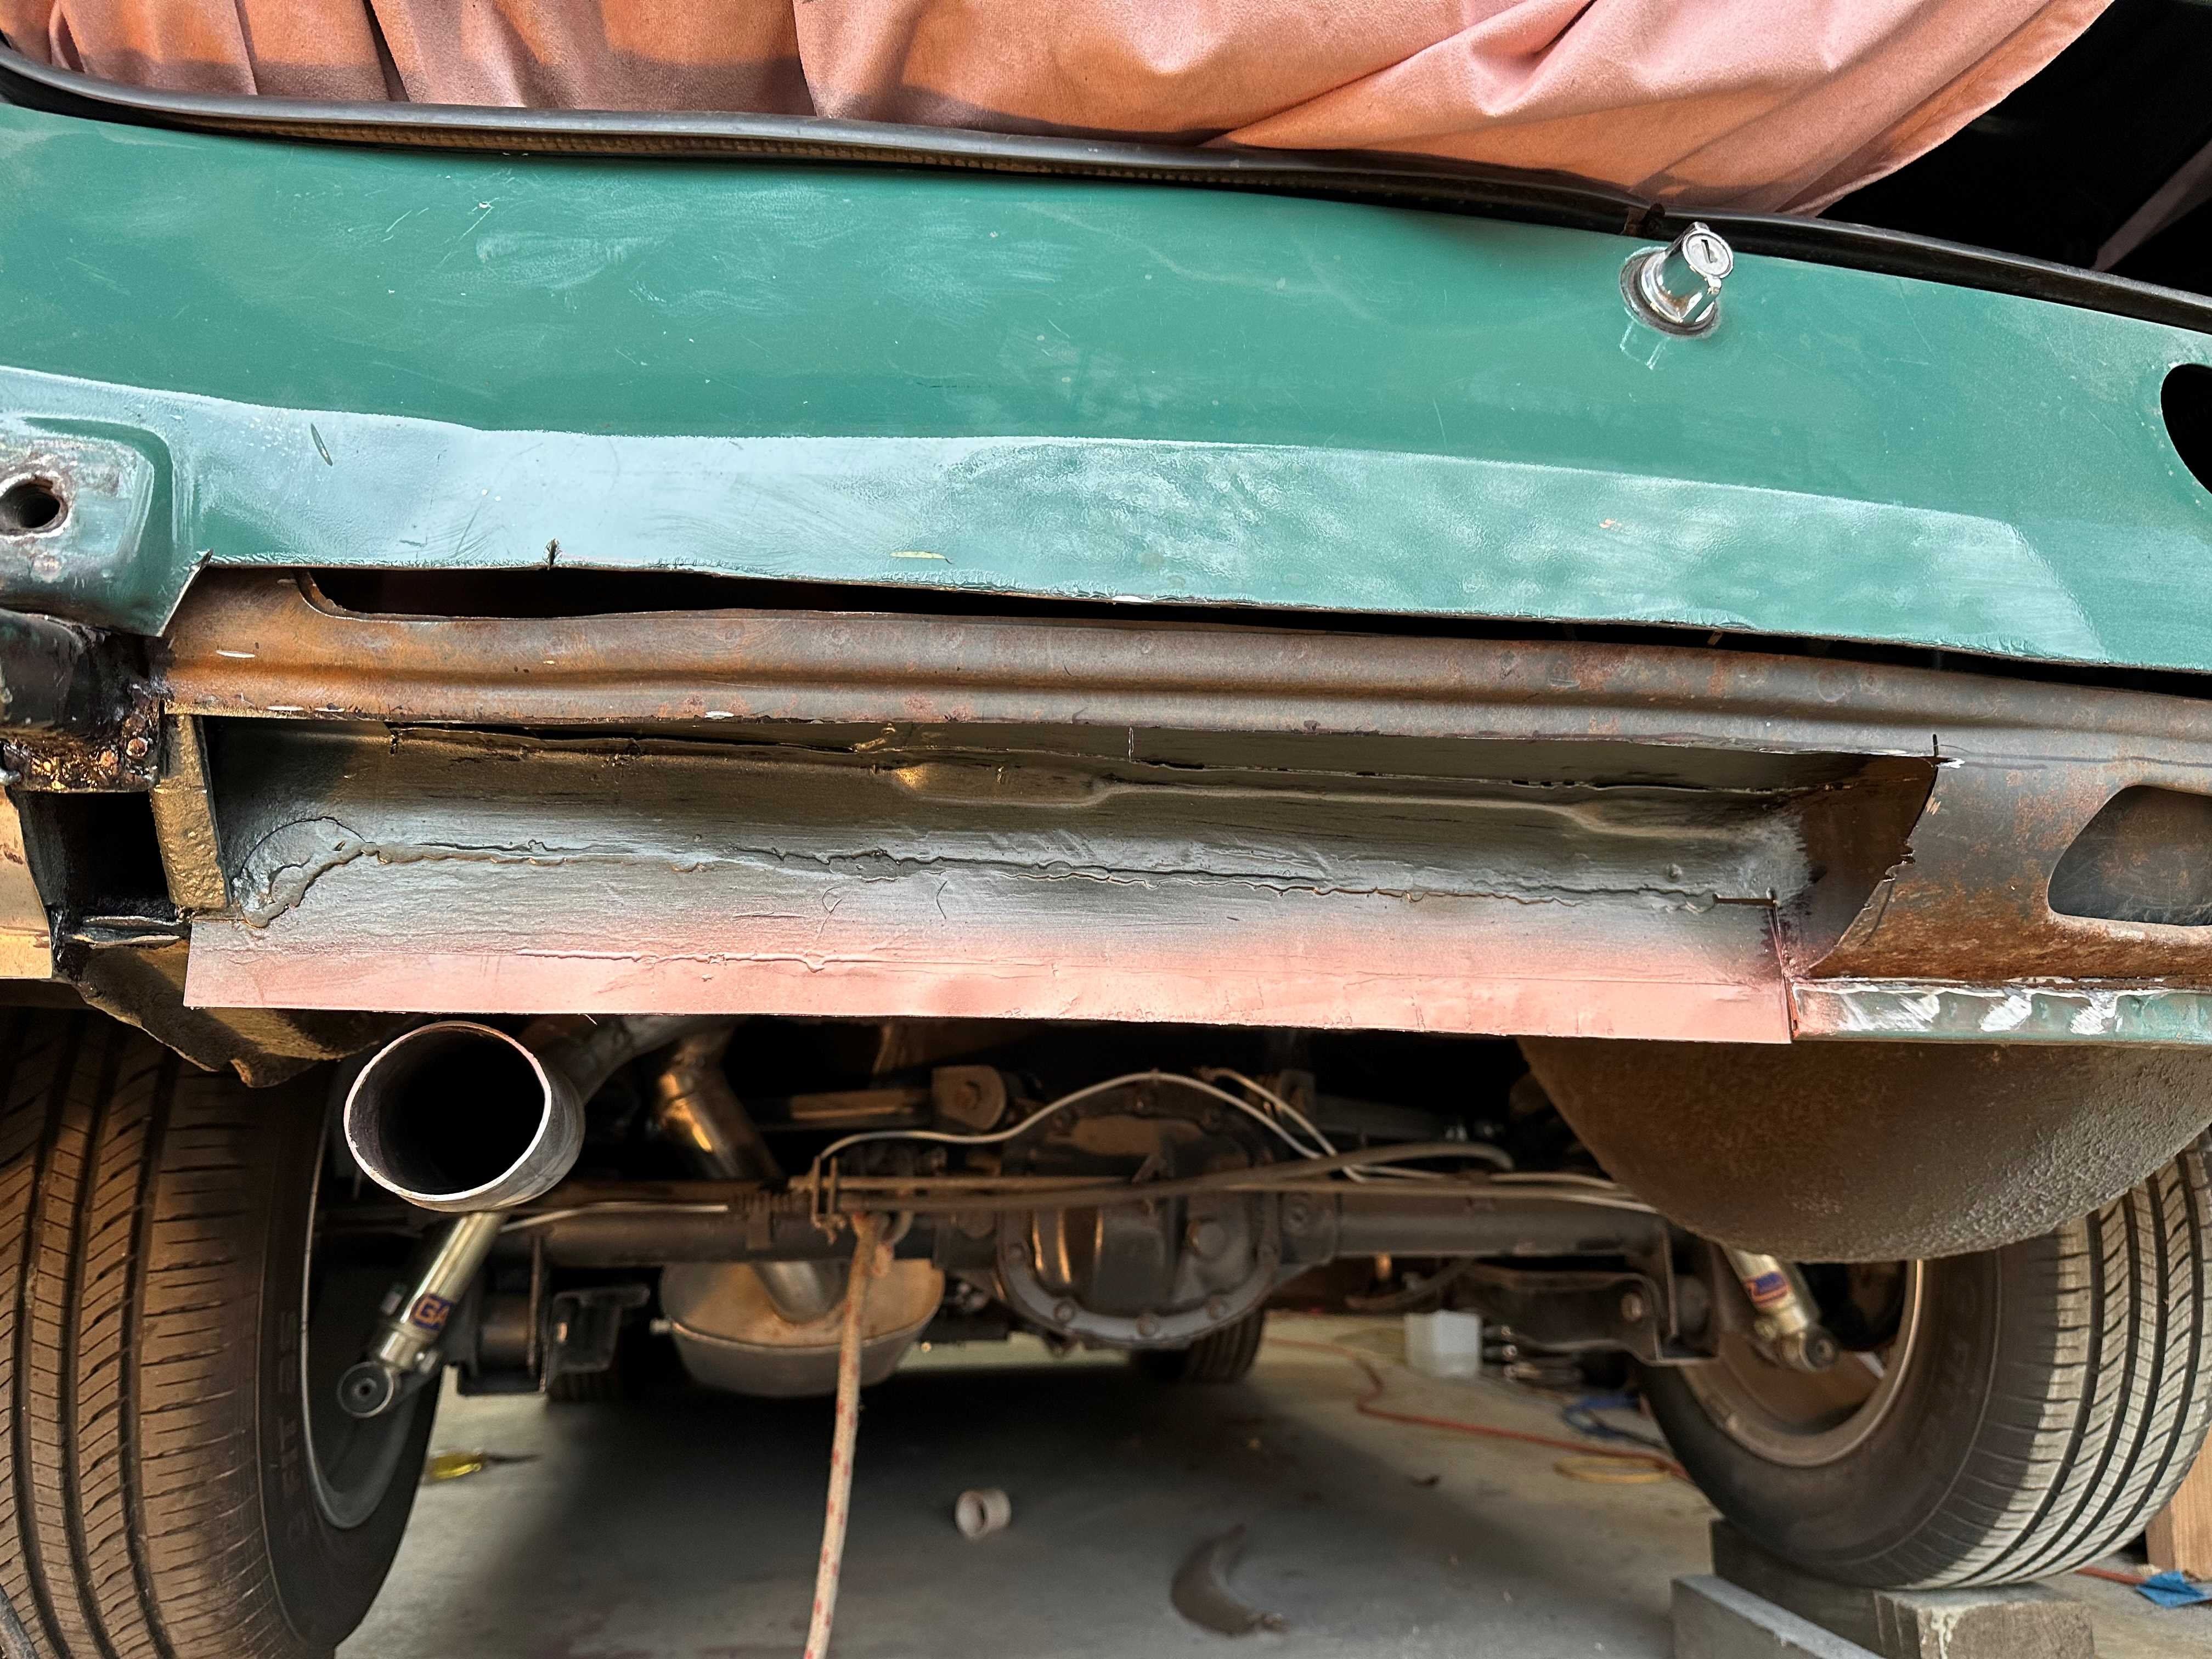
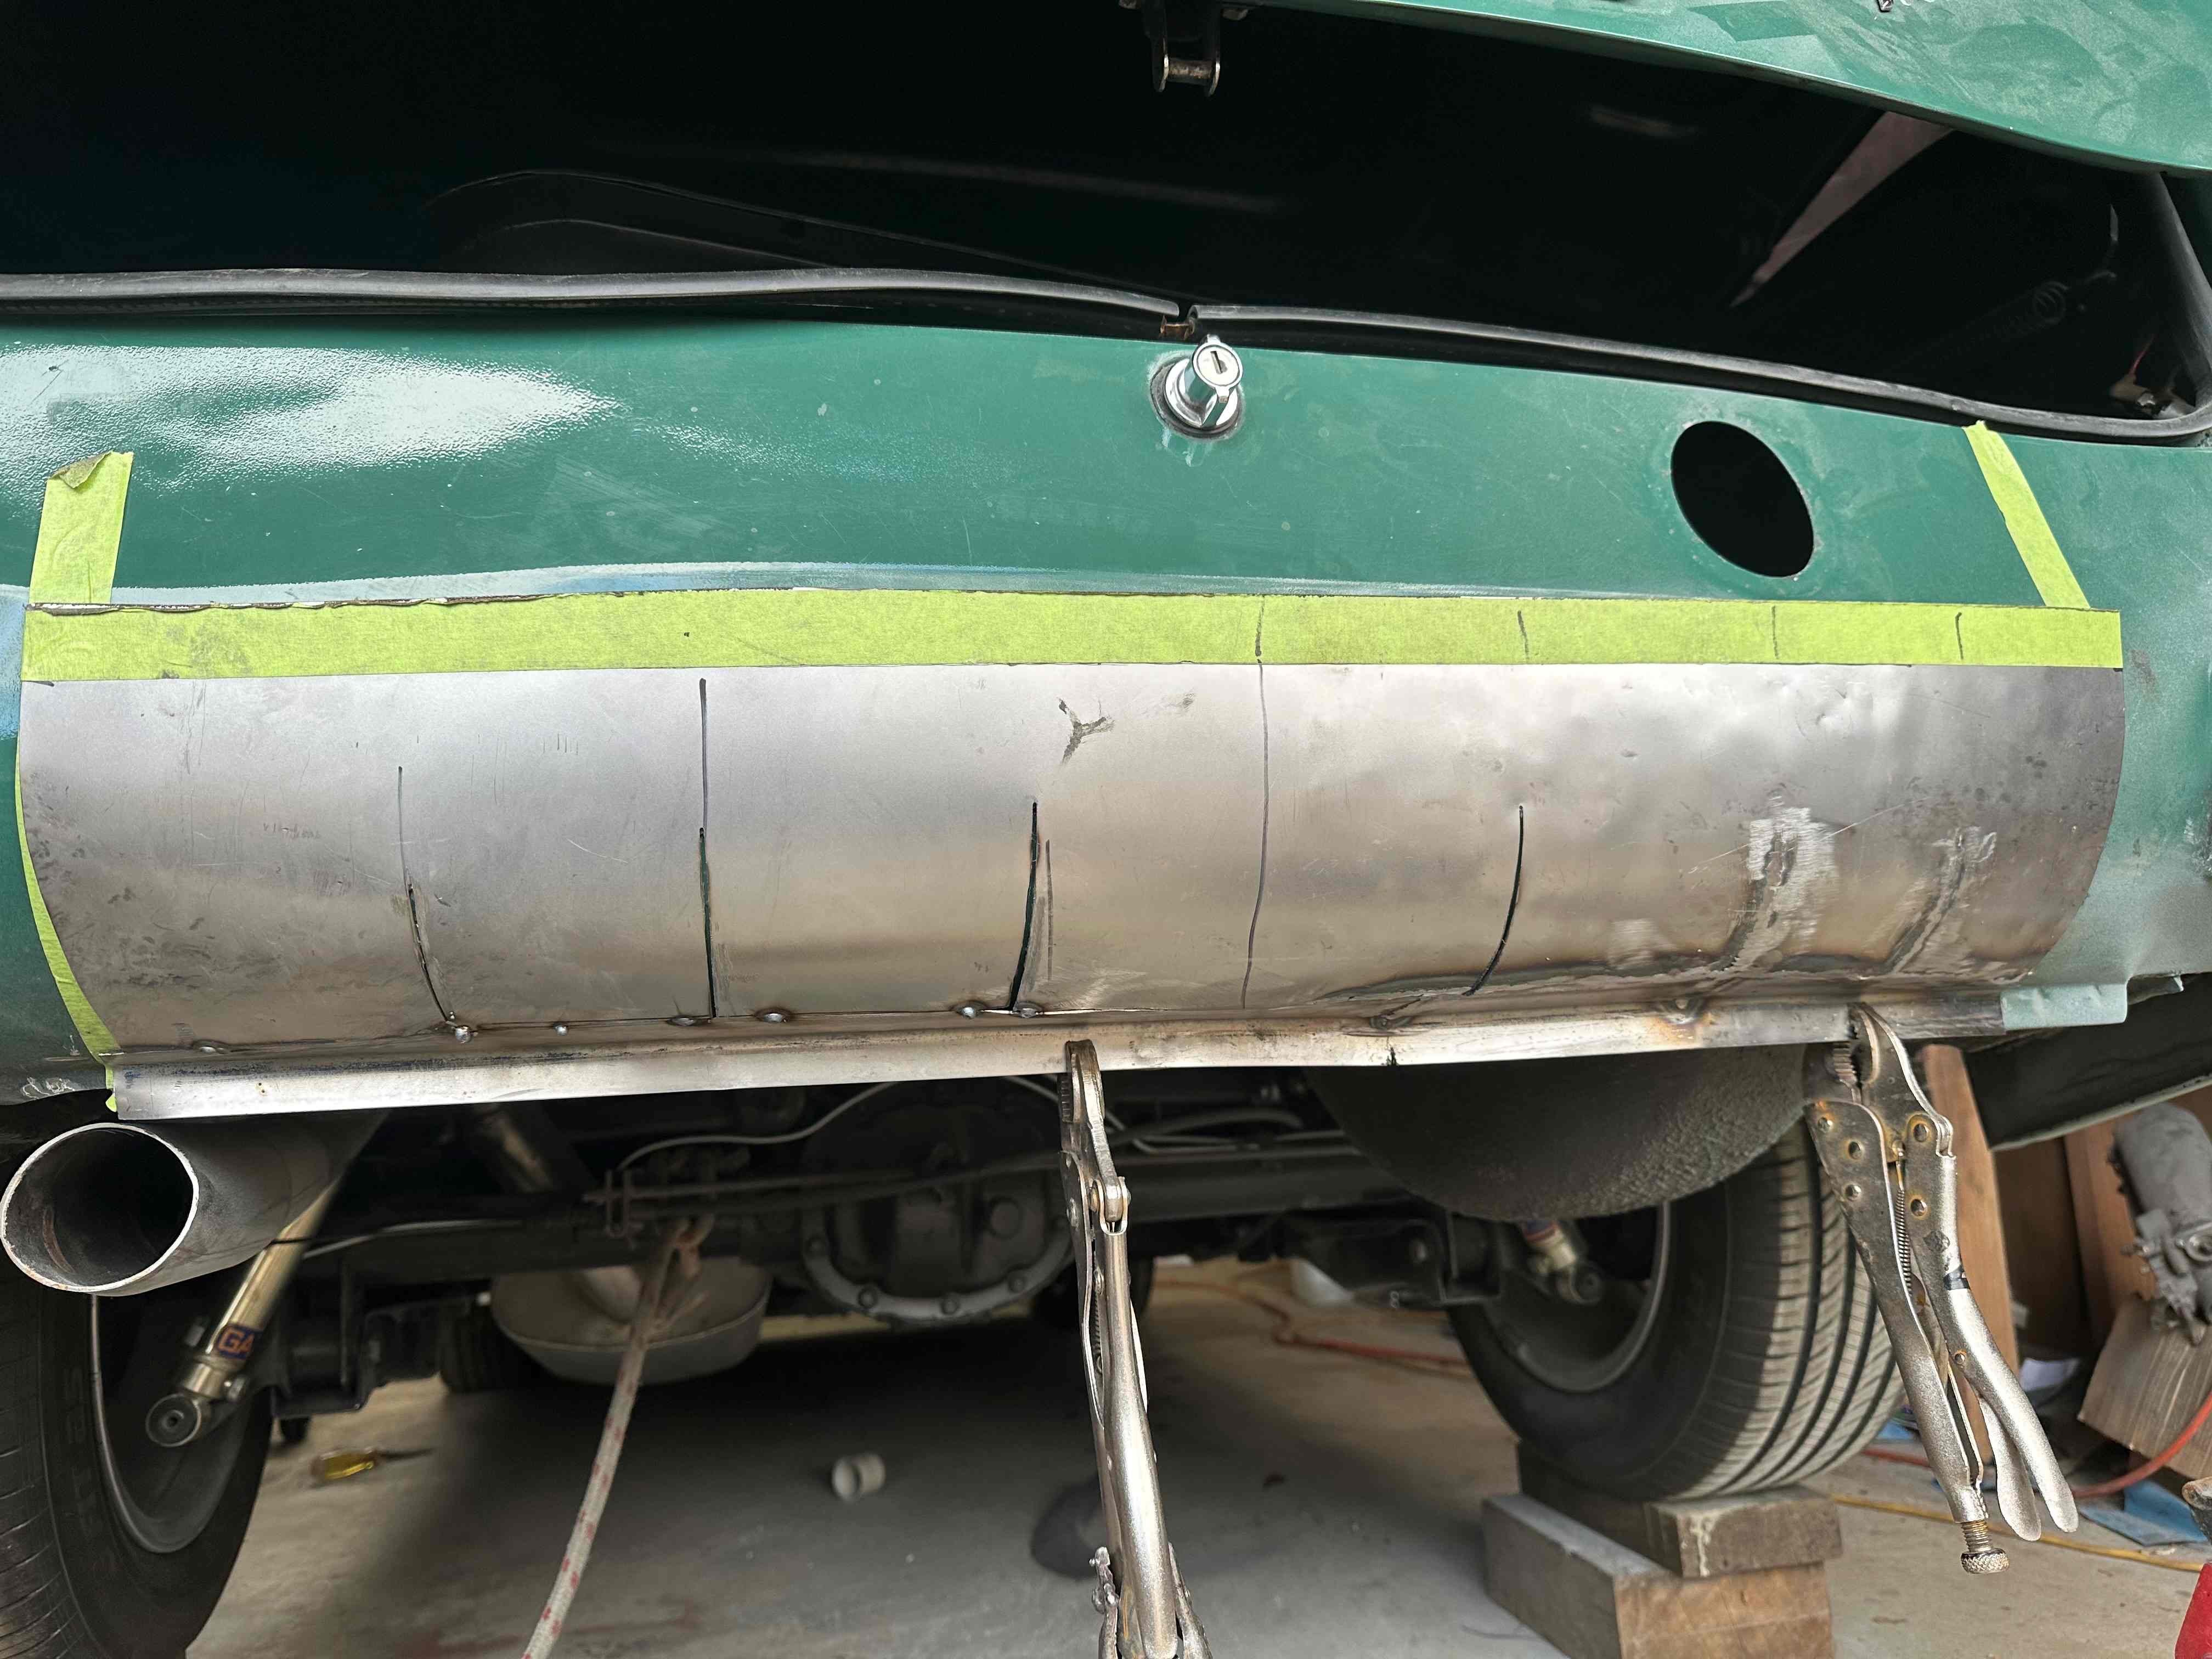
And of course, where there are rust bubbles coming through the outer panel there will be more in behind it. And it didn't disappoint. There is a stiffening panel there that has rotted out in it's bottom half mainly and will need replacing. It gets worse in the left corner so more of the valance had to be removed.
-
Tiger Tamers 1964 Hillman Minx Project
Tiger Tamer replied to Tiger Tamer's topic in Projects and Build Ups
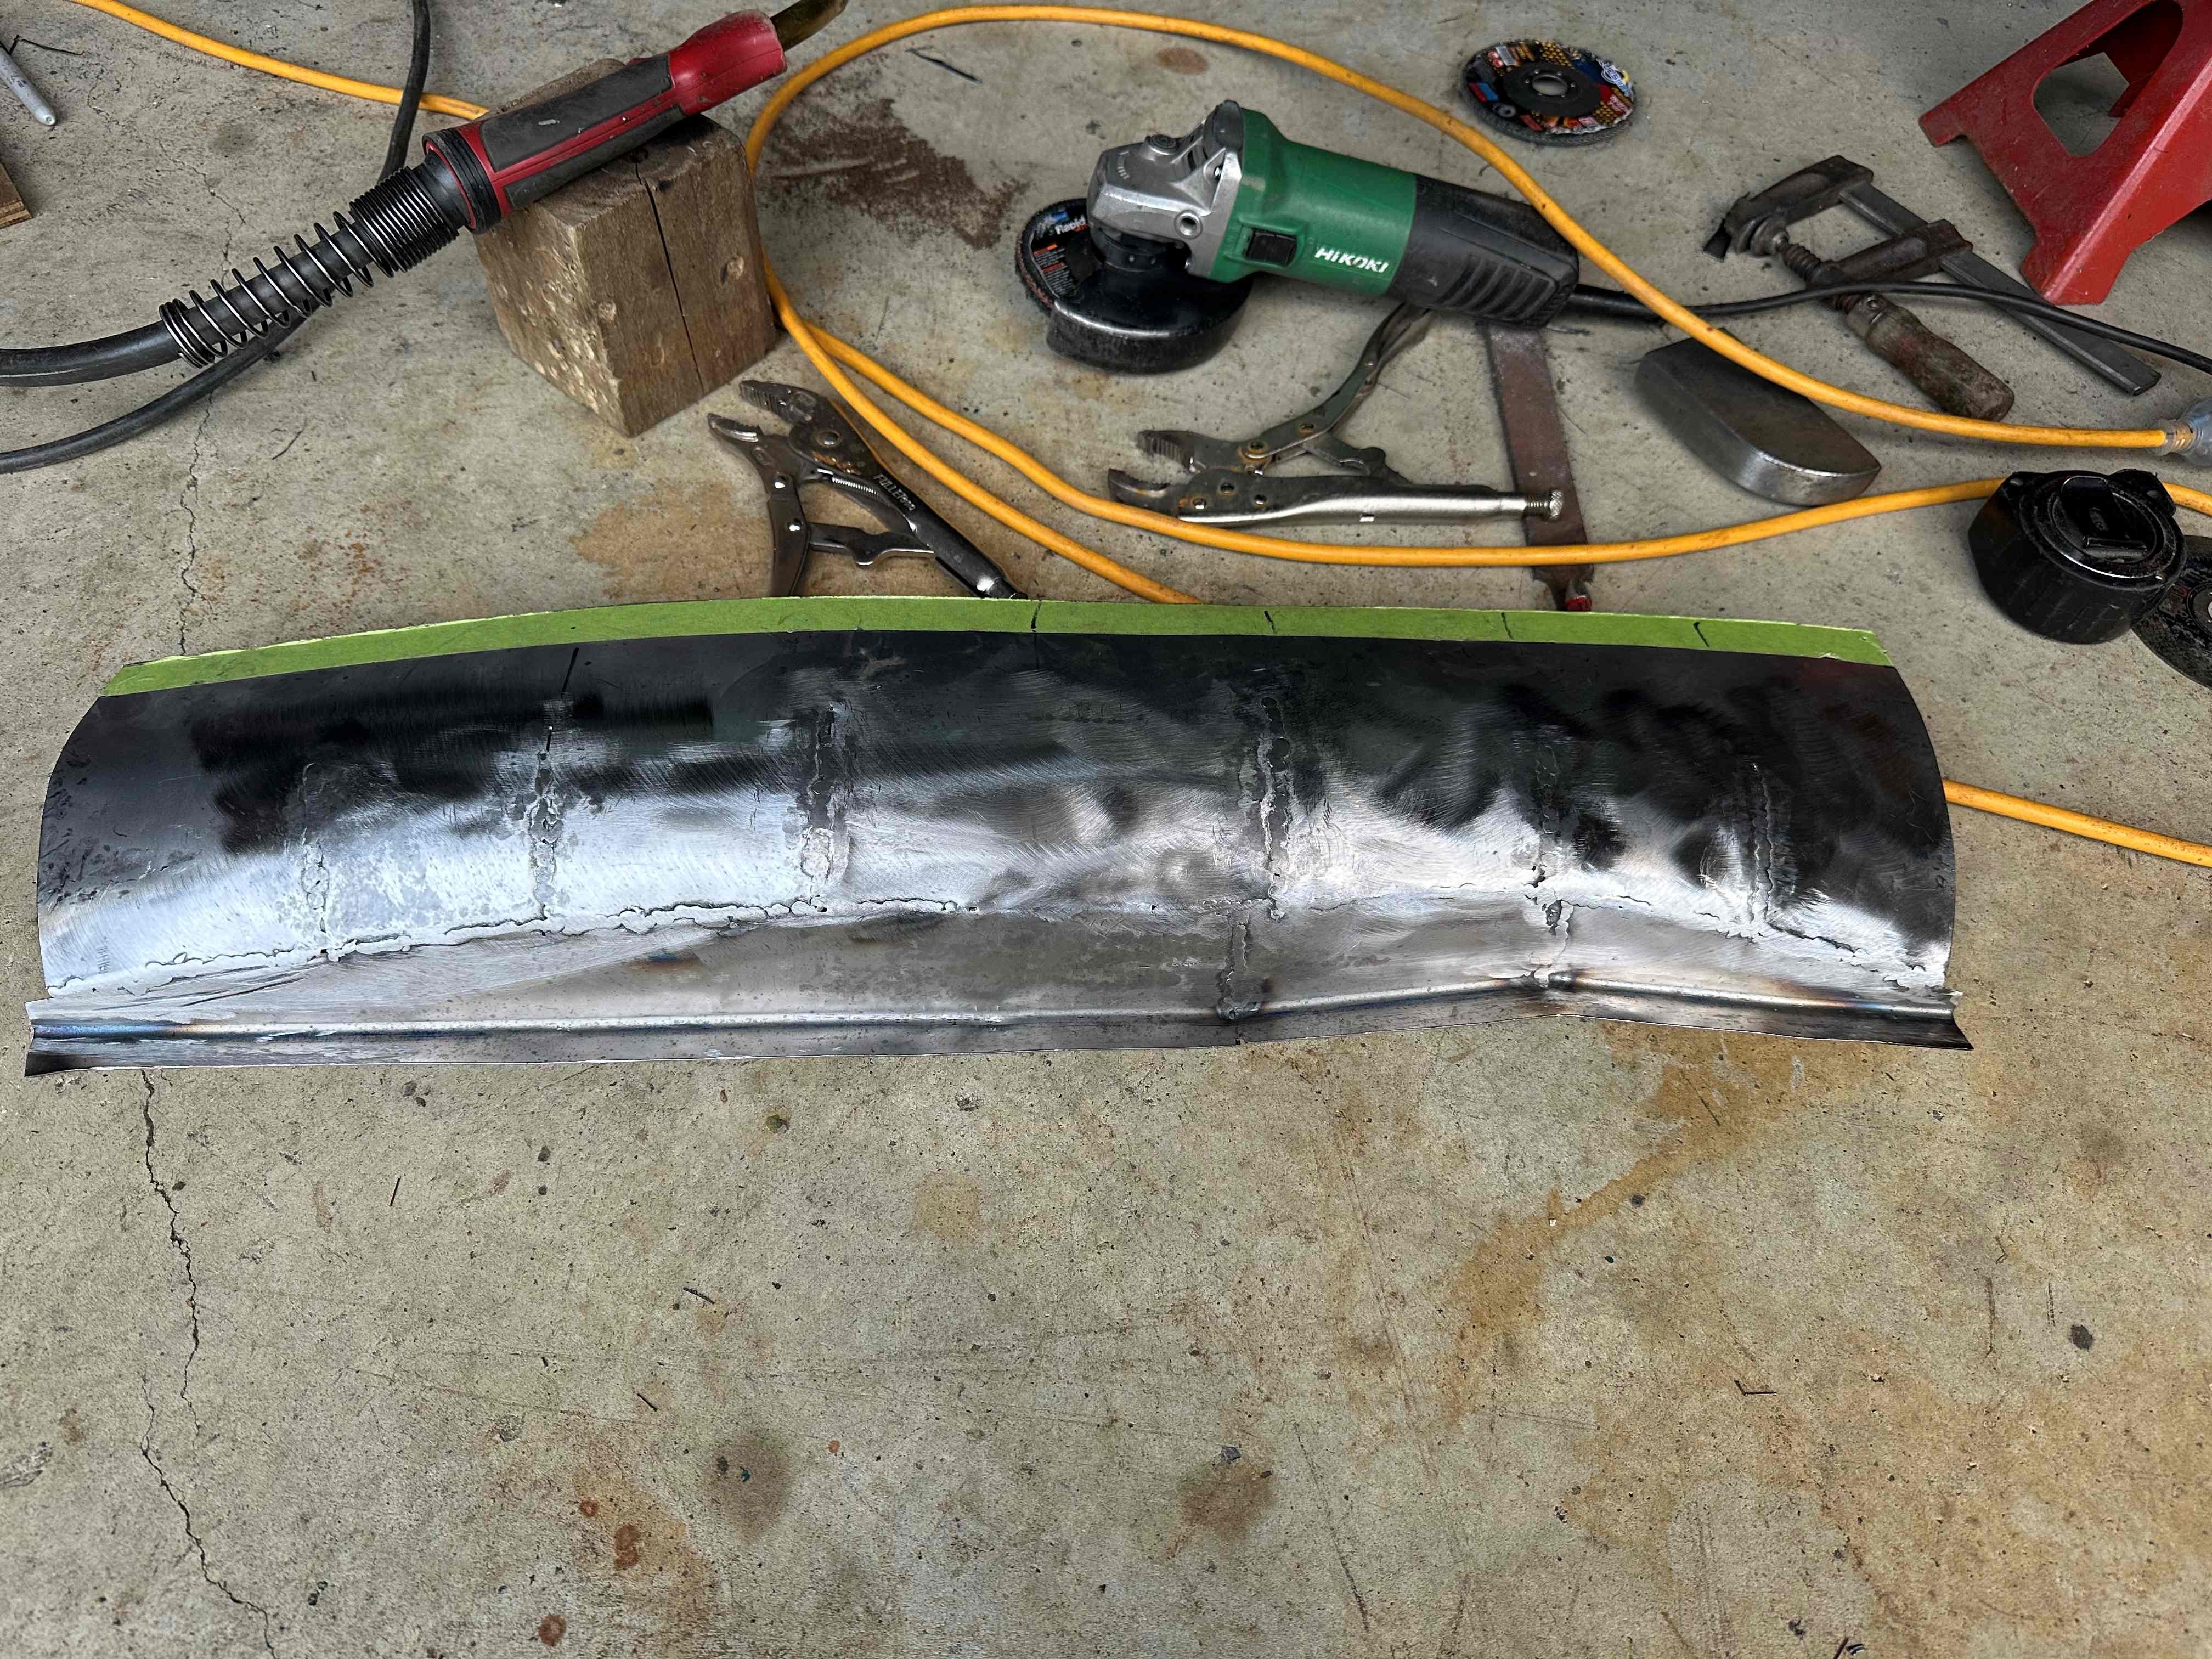
Then clamped it to the car and bent the panel up to put the main curve into it. Then it was a matter of putting in some vertical cuts in so I could the shape width wise into the panel. Then tack weld it together as i held the curve in place and finally weld up the cuts and grind them down. I have used the planisher on the welds to help smooth them down and tomorrow I will go over the whole panel to smooth and even it out some more.
- 124 replies
-
- 10
-
-
Tiger Tamers 1964 Hillman Minx Project
Tiger Tamer replied to Tiger Tamer's topic in Projects and Build Ups
The rear valance panel has a fair amount of rust coming through and needs to be replaced. I was going to leave this until the car was going but decided to start working on it now while I was finishing the left side flare. The panel is quite curvy, so I wasn't too sure how I was going to make it. Anyway, I firstly decided to leave the rusted pane on and cut the section out later. So firstly I put the 90deg spot weld flange on and then shape it to the shape of the car.
-
Tiger Tamers 1964 Hillman Minx Project
Tiger Tamer replied to Tiger Tamer's topic in Projects and Build Ups
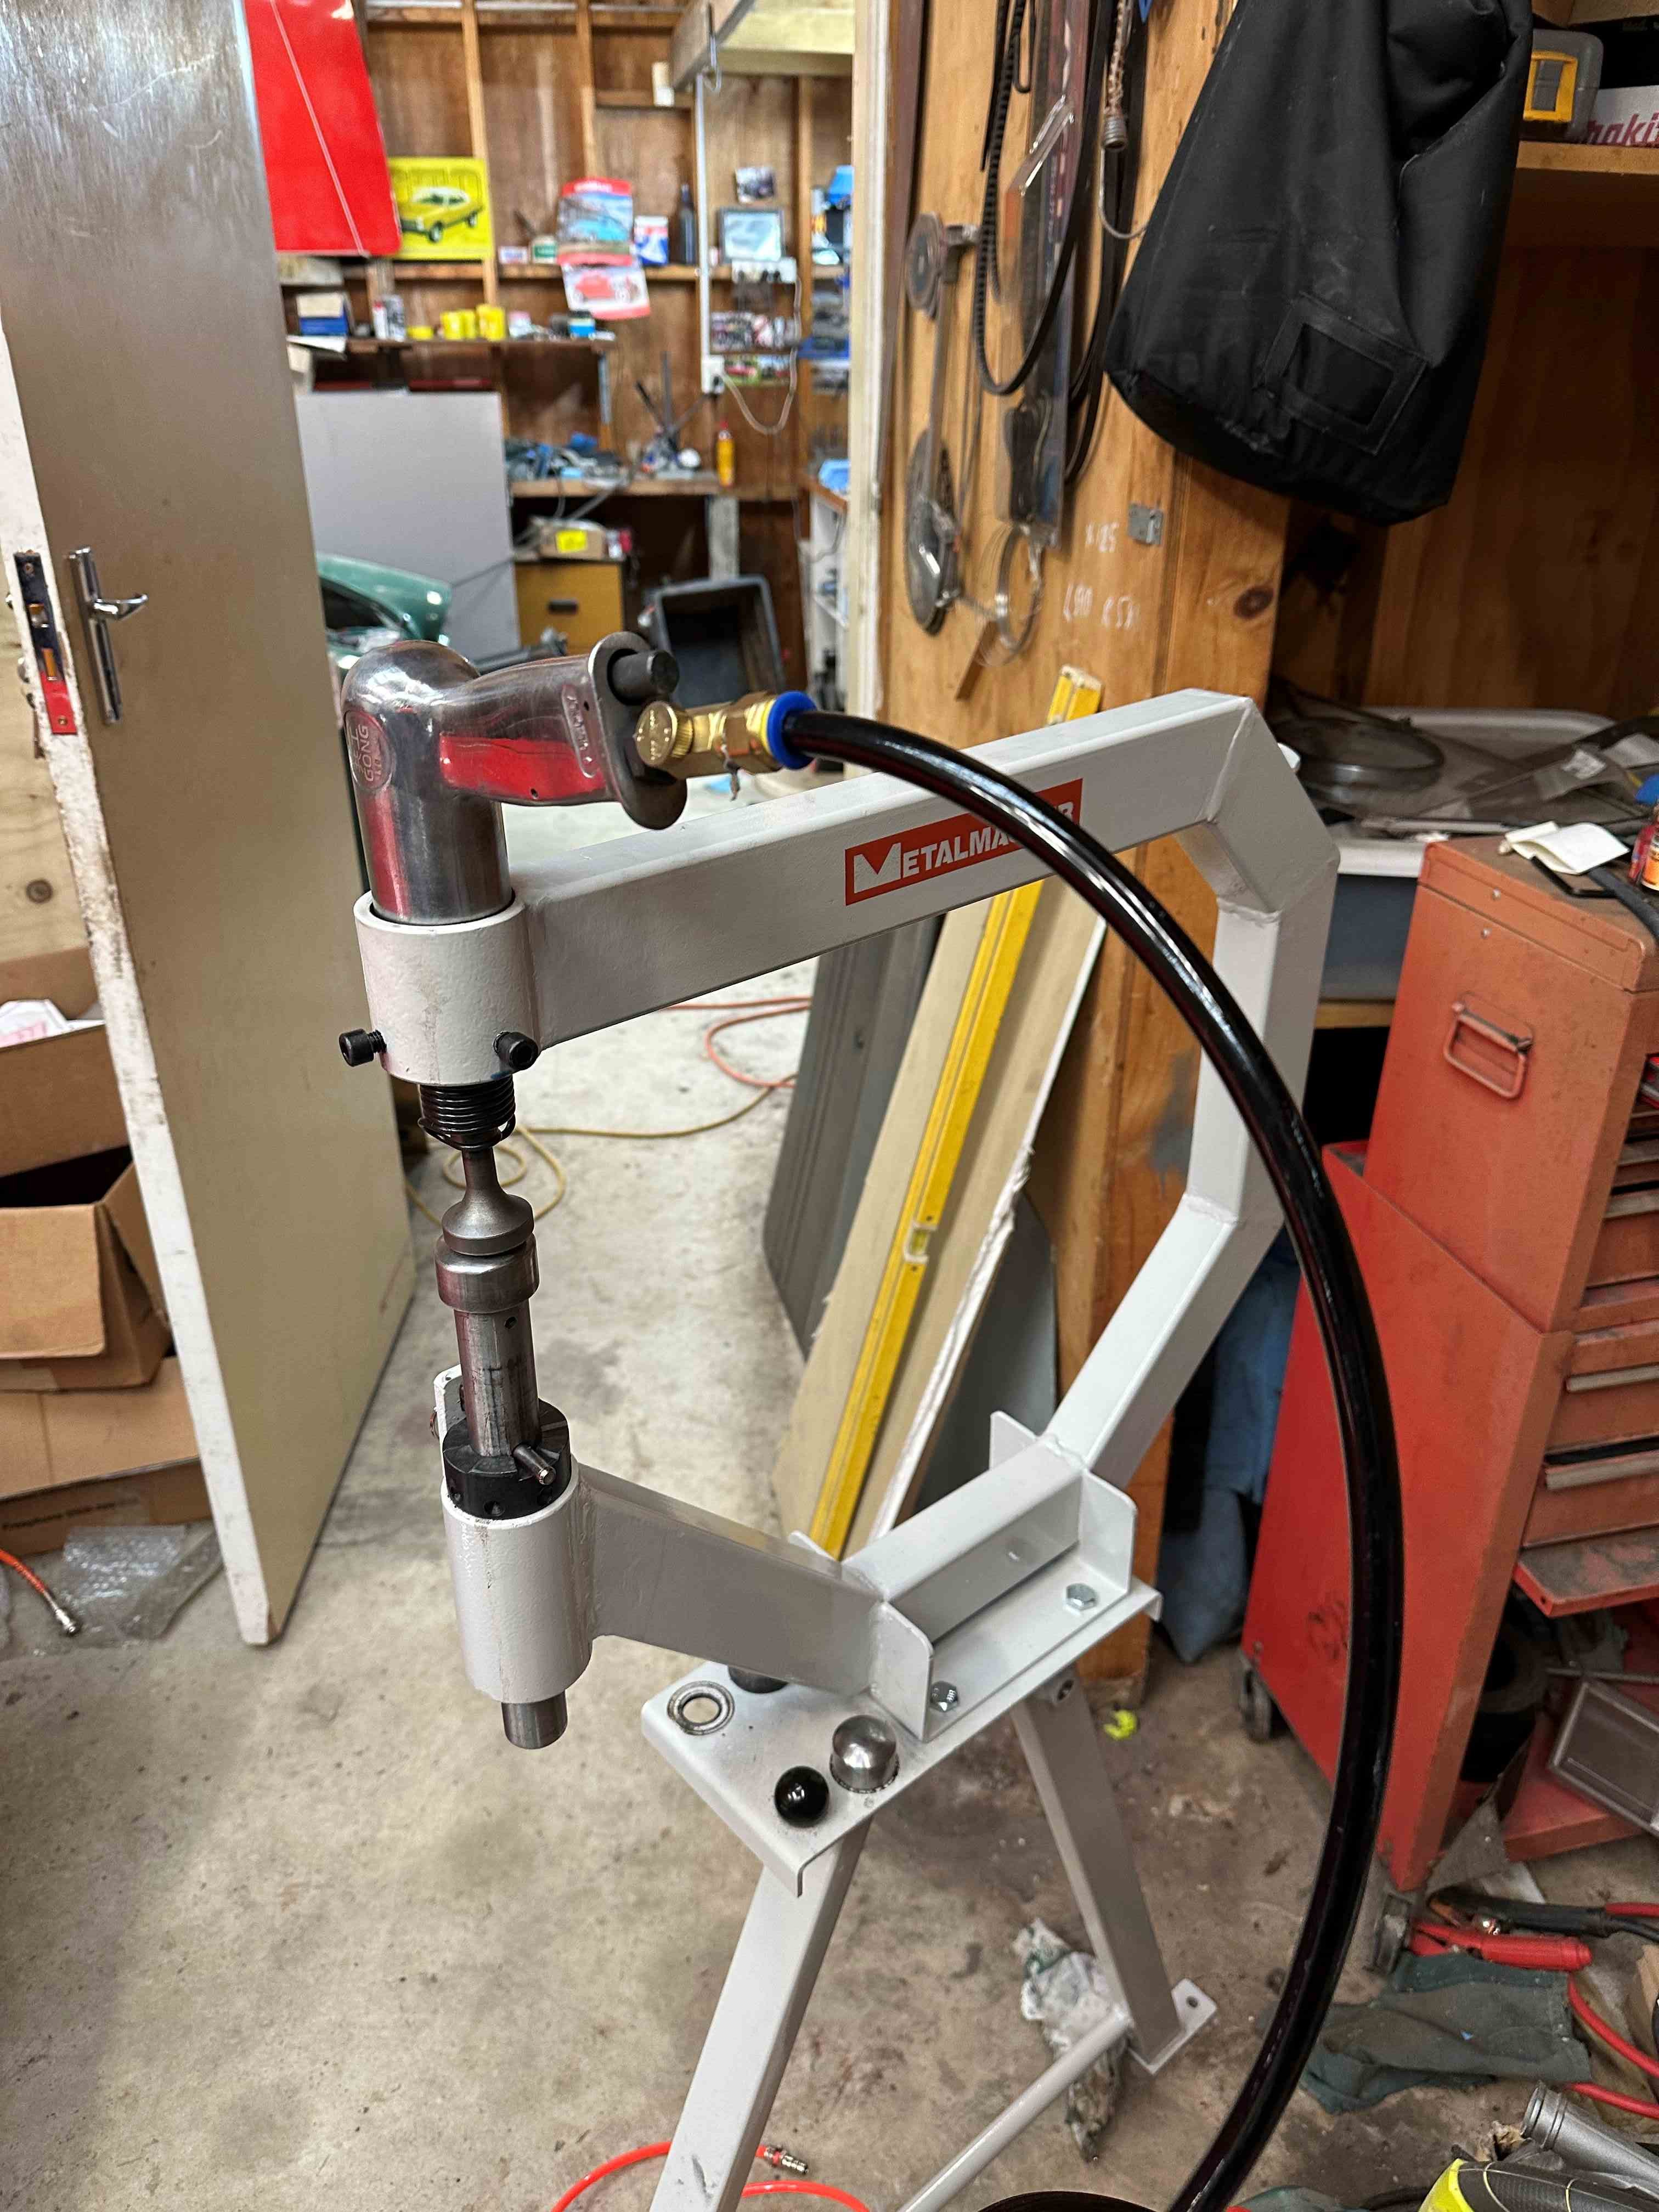
As I mentioned earlier, I bought a planishing hammer to help smooth and shape patch panels. It's just the basic one but seems to work well enough. You can bash a piece of panel steel into shape and the planisher will smooth out all the hammer marks and dents you have made. I still found to finish it a hammer and dolly was the way to go but I still need to learn how to use the planisher properly. So I made up the bottom patch panel for the passenger side and welded it in. It came up quite close to shape but will still need a little filler. The car has had panel damage this side so there is quite a bit of lead and filler there. I think I will leave it alone as it seems to be done well.
- 124 replies
-
- 16
-
-
I called into BOC yesterday for some 0.6 wire for my mig. I needed some cutting and sanding (Flap ) disc's as well. It was a good day to call in as they had a special on and the 125mmx1mm cutting discs were 99c each and the flapper discs $2.99 each. They usually are better priced than others for these items than others anyway. I have seen one flapper disc at Mitre 10 for $ before. I decided not to say how much Mitre 10 charged for them in case Boc saw, LOL.
-
Perhaps a bit of use to get the trans oil nice and hot as well and then flush the trans fluid before the new filter. It's probably going to be a bit cruddy in there. Our American friends don't seem to change the fluid out too much.
-
Some nice boats in the above pic's. The whaler (Mistal Too) seems to be a sensible compromise, and the height of the cabin is not too high that it looks like a house boat. Interior pic's make it look usable on your knees. It's a small boat so you are never going to be able to walk around in a cabin. I love the little black hulled boat. Looks nice with the lowish cabin. Has a rather large rudder but, must need it and could do with a longer trailer I would think. Anyway I am impressed in how you can build a third of a boat build in the time it takes me to flare one guard on my Hillman project. It takes a lot of work plaining all the stringers and planking. Cheers
-
Tiger Tamers 1964 Hillman Minx Project
Tiger Tamer replied to Tiger Tamer's topic in Project Discussion
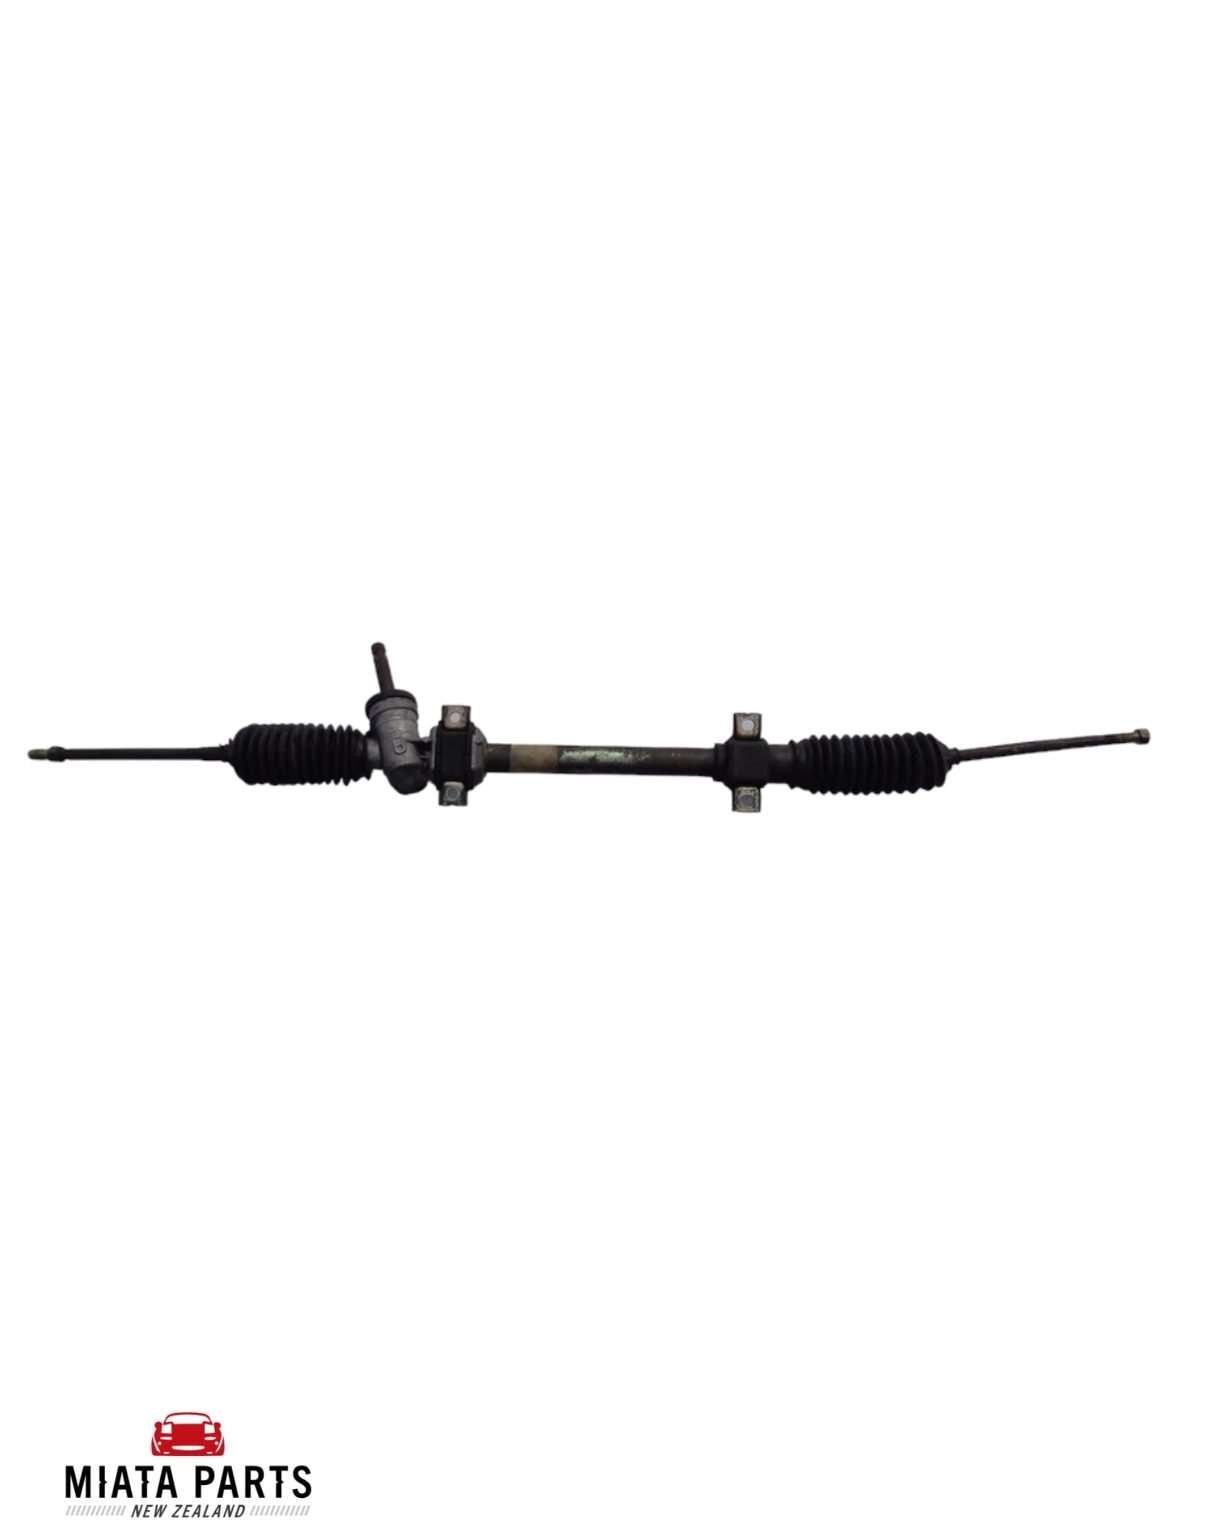
Apparently, the manual rack is a slower ratio than the power steering rack, so I will stick with the power rack and perhaps reduce the fluid flow to reduce assist. I am using a MR2 pump for the rack and the MR2 had assist that was controlled so you had more at slow speed and less at higher speeds. Now that would be nice to have but I am not that smart. -
Tiger Tamers 1964 Hillman Minx Project
Tiger Tamer replied to Tiger Tamer's topic in Project Discussion
I have set up the steering with a Mx5 power steering rack and column which has worked out perfectly for placement. I have a MR2 electric hyd pump to provide the fluid. I even had the rack rebuilt, BUT, the steering is really quite light without the pump probably because I had to set the engine back further than the original Hillman engine. I don't want to have a rebuilt rack depowered as you need to do for cert. Though, on trade me there is a manual rack for sale for a far more than you would pay for a power rack. I presume a manual rack is quite rare therefore the price. There seems to be some on the forum that play with mx5's so they might know how rare they are and a fair price for one . $ 580 is pretty steep for a well used part. Cheers. MX5 NA Manual Steering Rack | Trade Me Motors