kp60nick
-
Posts
355 -
Joined
-
Last visited


kp60nick's Achievements
Advanced Member (3/5)
1.3k
Reputation
-

Ga3_zo and kp60nick's honda logo of head turning fun.
kp60nick replied to kp60nick's topic in Other Projects
Thanks for the advice. -
Ga3_zo and kp60nick's honda logo of head turning fun.
kp60nick replied to kp60nick's topic in Other Projects
Thanks for the advice. I've already got a super thick front bar. The front spring rates are only 2kg or something like that. I have some fit coilovers that I've got to try make work at some stage. Up until then I'll make it work with cheap fixes. -
Ga3_zo and kp60nick's honda logo of head turning fun.
kp60nick replied to kp60nick's topic in Other Projects
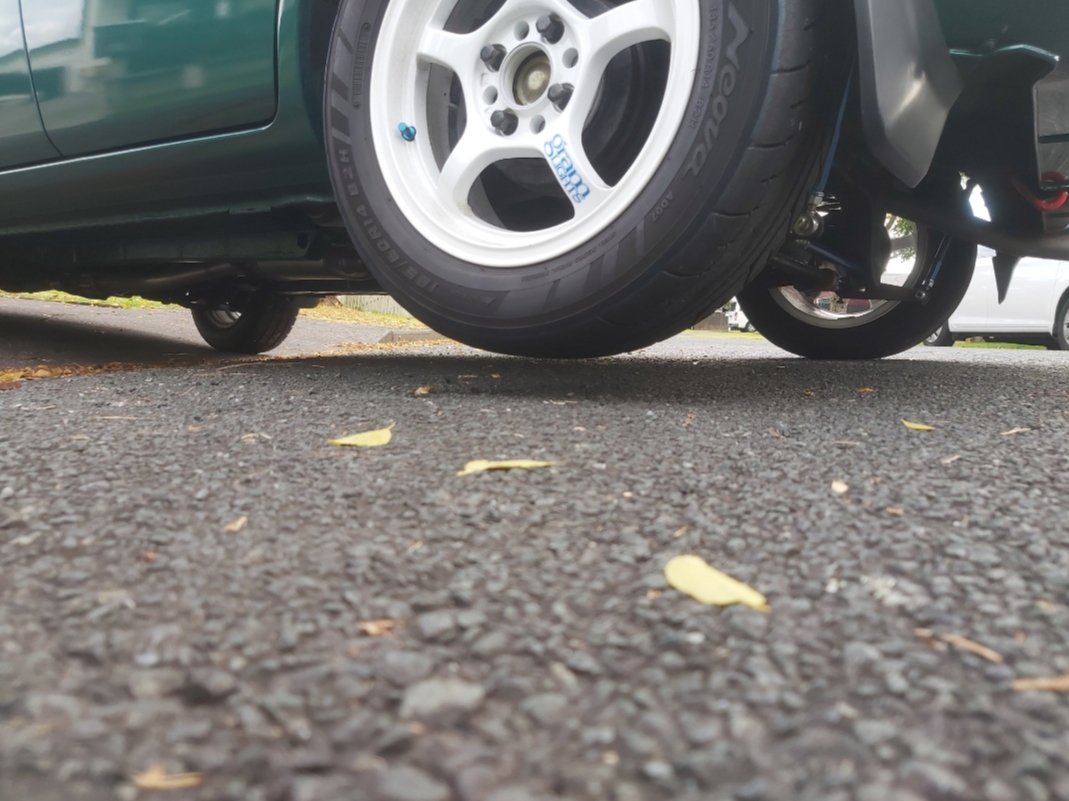
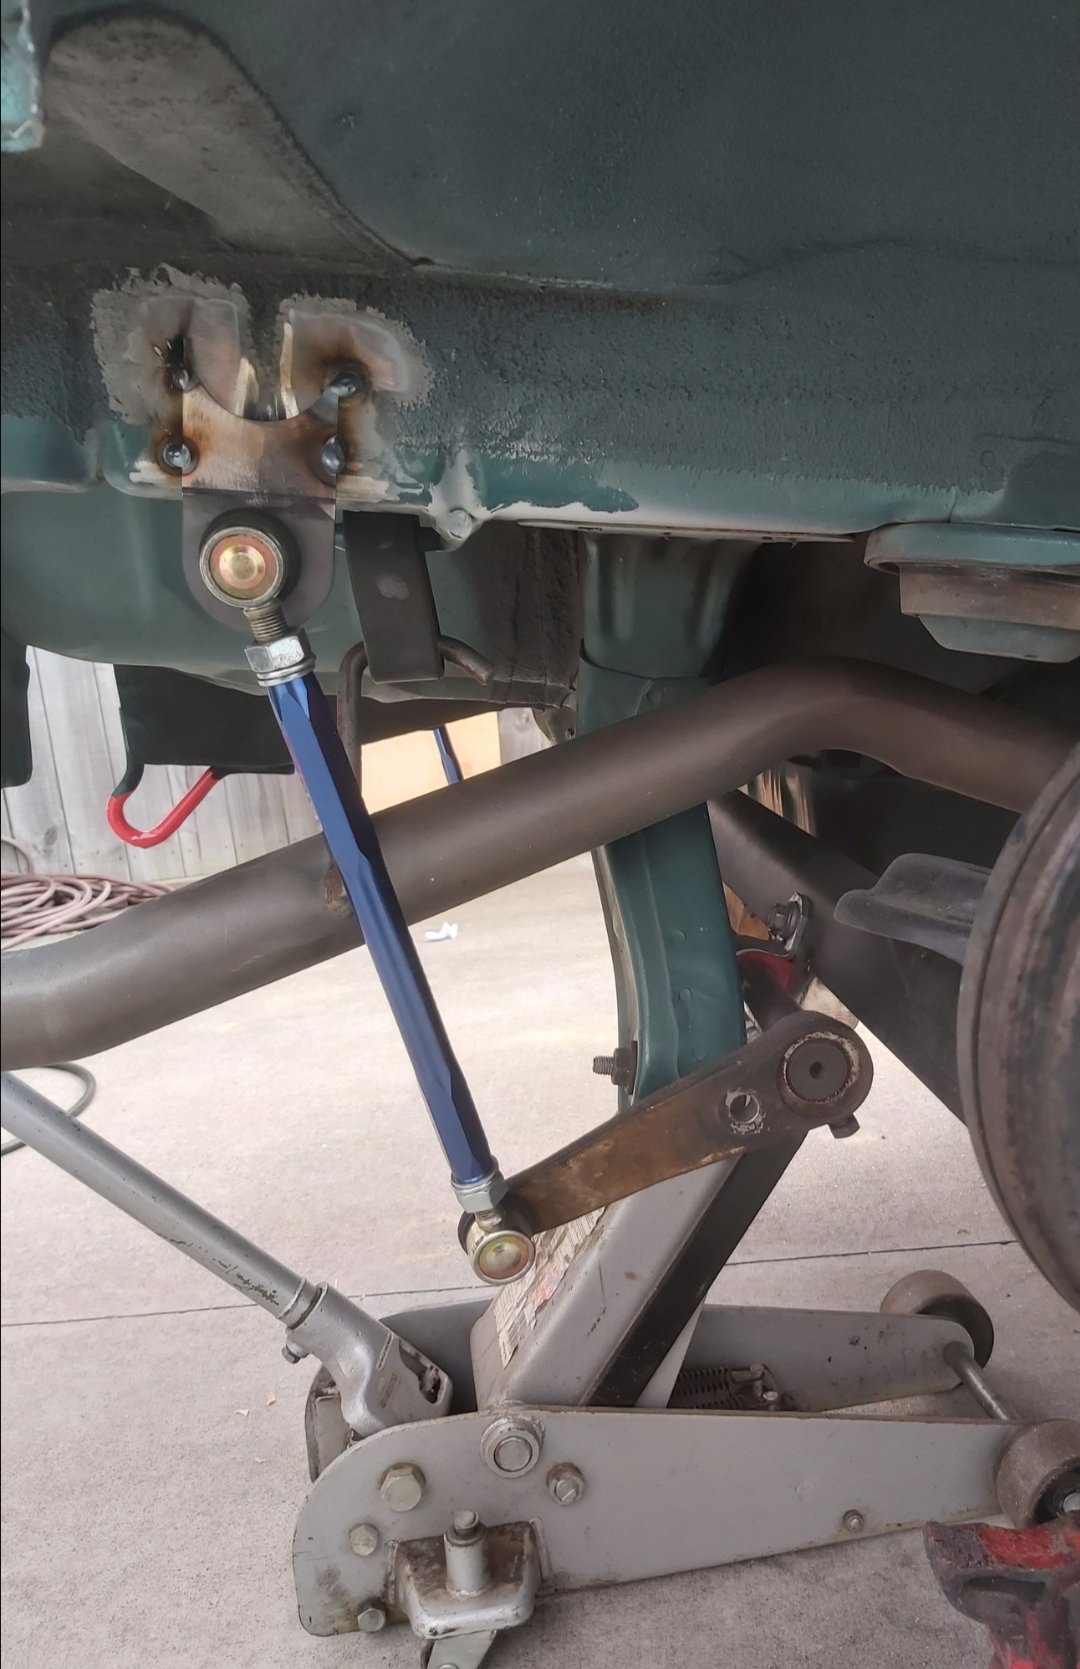
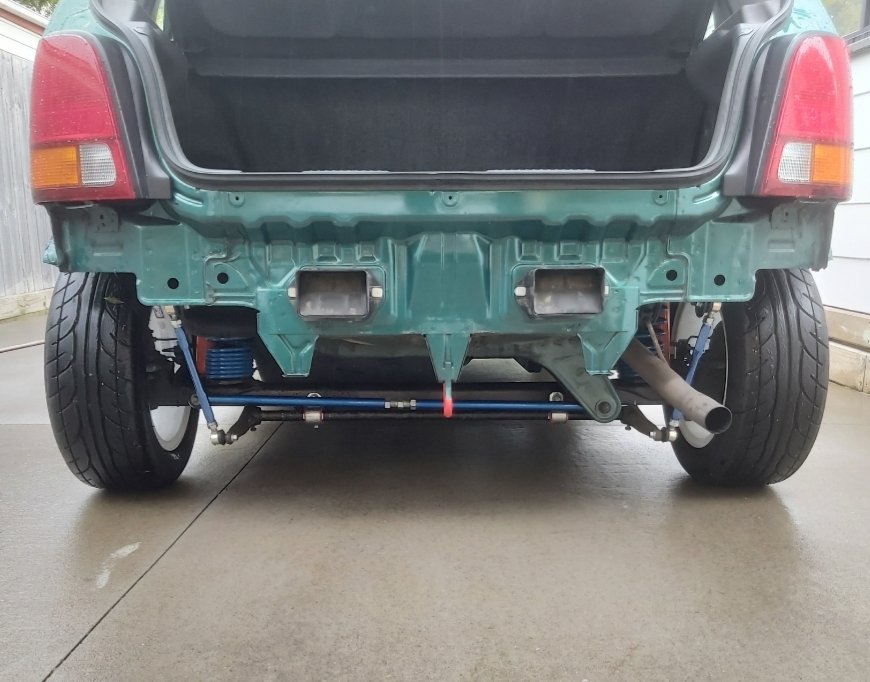
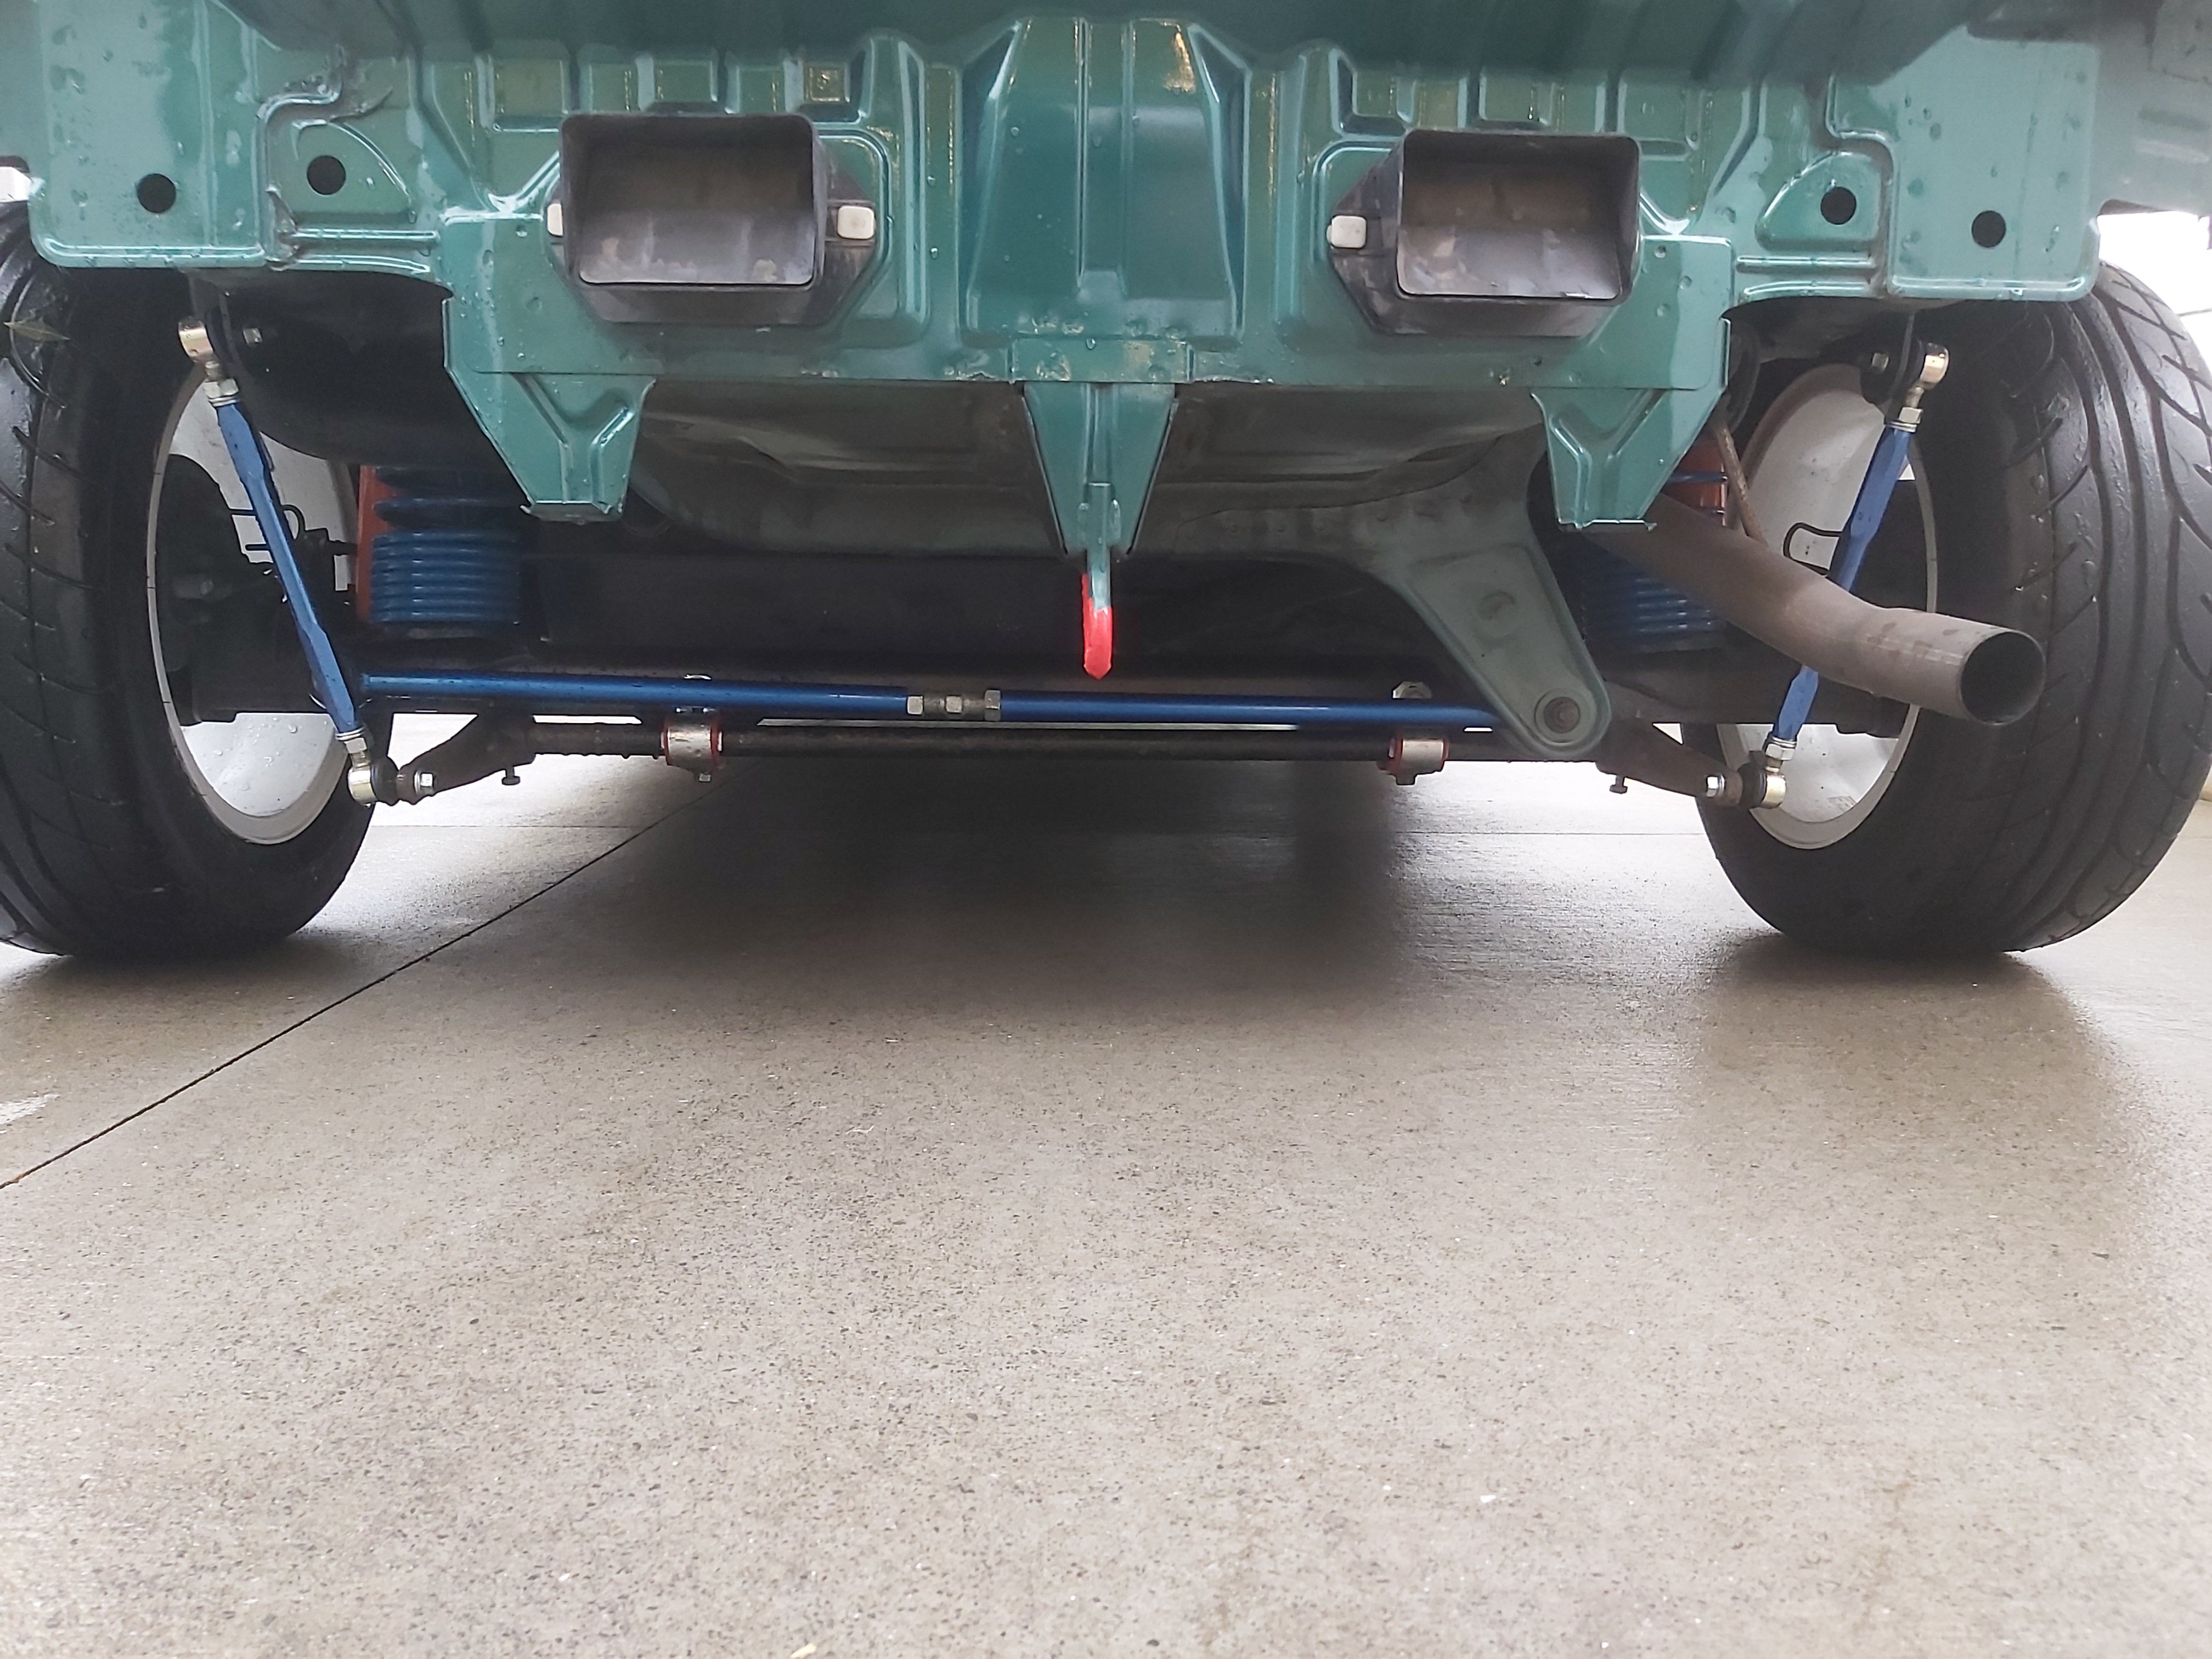
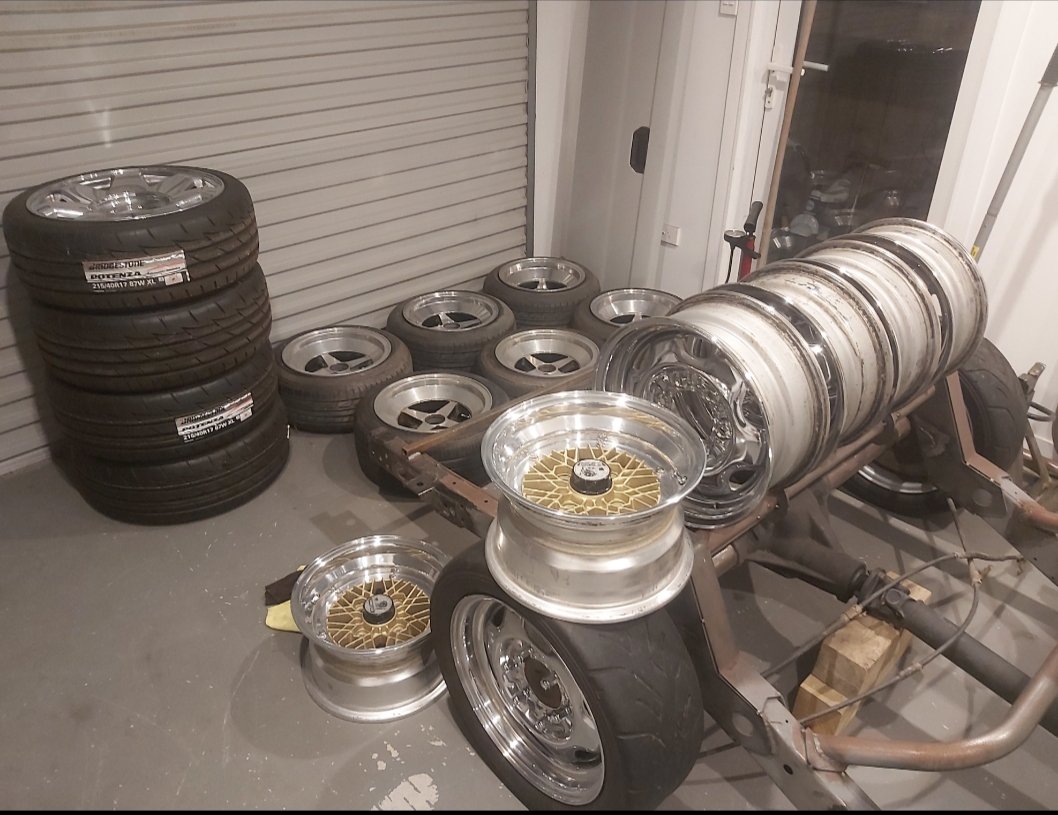
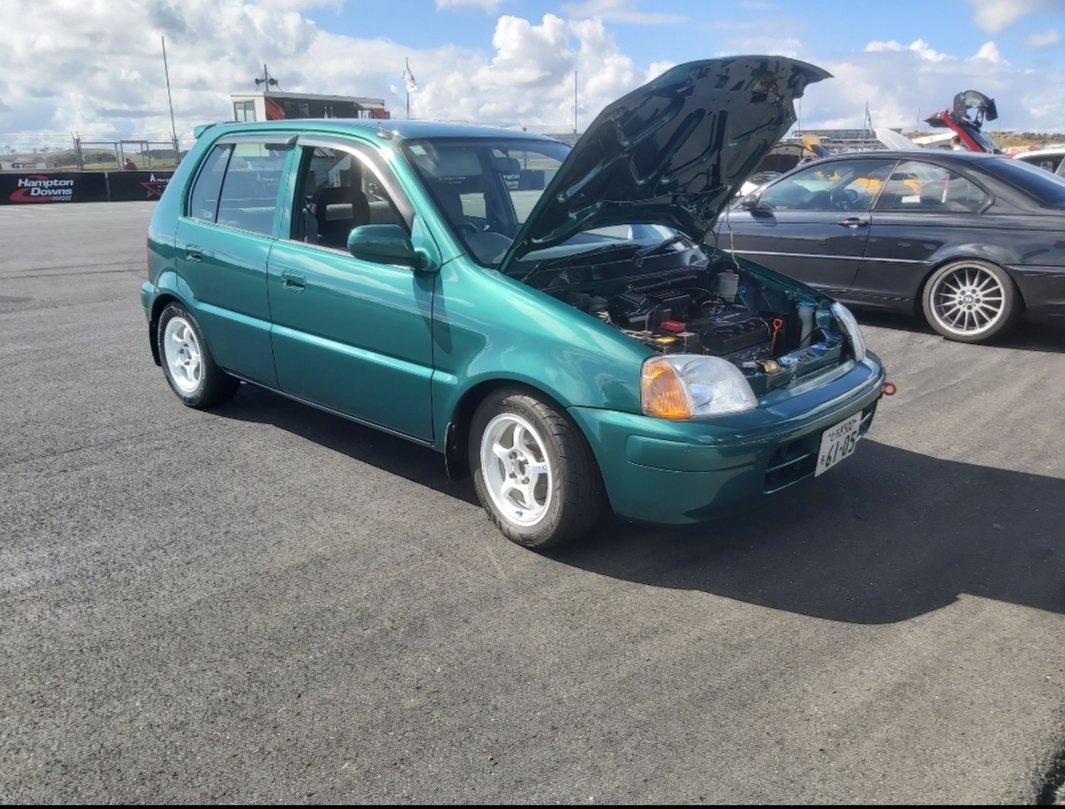
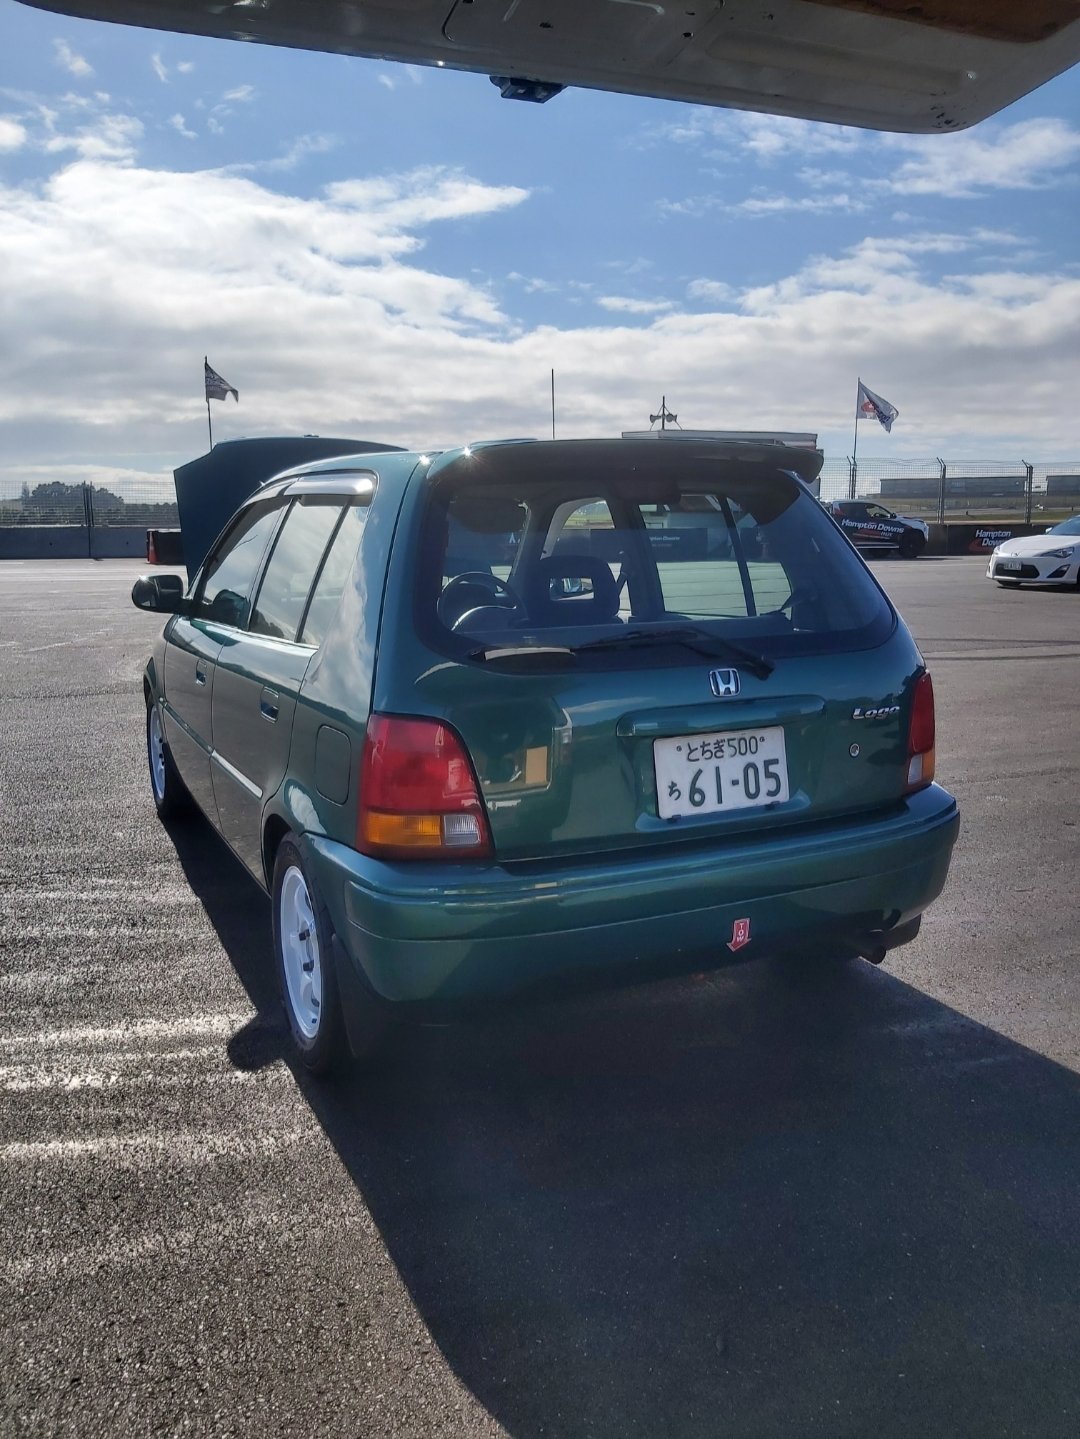
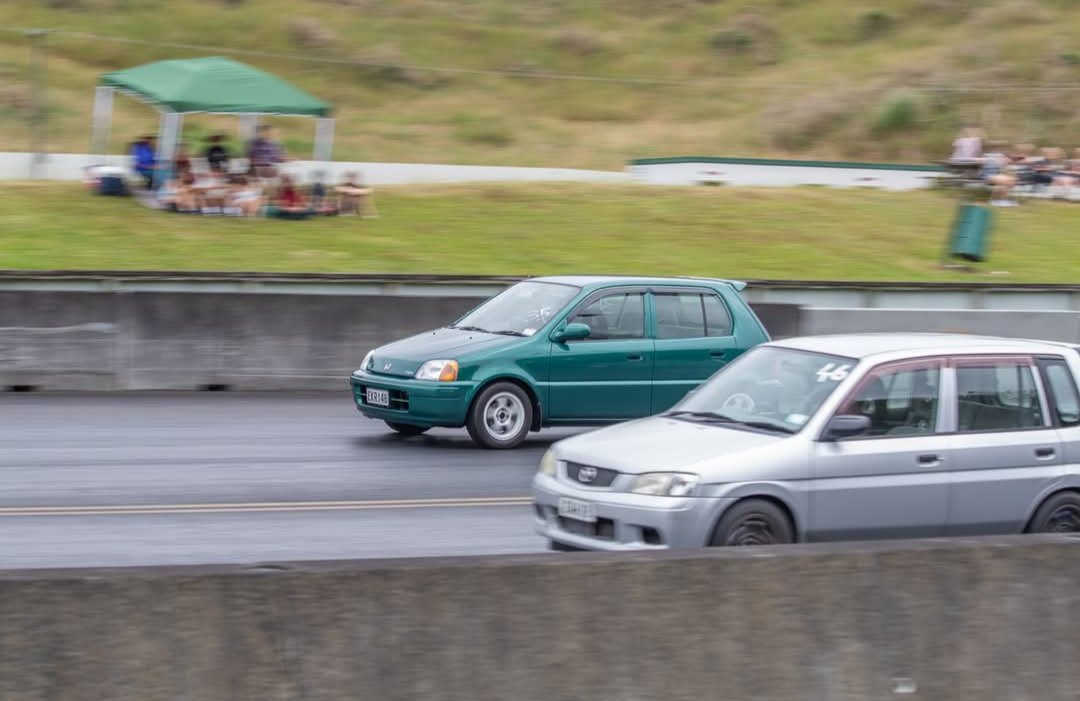
Just ticked off the 3rd track day over the weekend. We had a good 6 weeks between days so I had a bit of time to try out improvements. First thing was trying to tackle the aggresive left front tyre wear by killing the understeer and body roll. I asked a few fellow fwd racers and they all said stiff rear / big bar. No factory rear sway for the logo this meant anything I did would need to be custom. I already had a rear sway bar from integra but it was only about 10mm to 12mm so didnt feel it was worth making it work because the difference wouldn't be noticeable. I was poking around the garage and I came across the 24.5mm torsion bars from my Narava. Then came across some honda fit sway bar links. Opened my parts drawer and found some starlet sway bar bushes. Started with making some mounts for the bar to mount to the axle. Originally wanted to mount it underneath facing forward but fuel tank was in the way. Facing backward and underneath fouls the panhard as it goes through its travel but the closer it is the arc of the arms doesn't interfere with the panhard. So I made mounts that mount it about level with the bottom on the back face of the axle. There is just enough room between the axle and panhard for everything. That was the trickiest part after that finding mounting for the body mounts was somewhat easier but still unsure if where I've actually put them is any bit legal but could cut them off and make them bolt on. (Just tacked in photo) When testing, I was finding the bar was shifting to the left potentially due the arc of the panhard when going over bumps. I've since put some bolt up hose clamps that seems to have stopped the problem. Also doing test drives it's now started lifting rear wheels when cornering hard and entering driveways. Other notable things I changed was trying out some semi slick ish tyres for the front the are pretty meaty but seem soft and they are cheap. So of course I needed another set of rims which of course needed a complete restoration. So blasted the centers and had Arrow wheels take out the buckle and weld the lips and re polish. Then painted the centers in gloss white. The improvements are definitely noticeable I can now keep my foot flat in 3rd gear going into t3 t4 at Hampton club circuit. I was lifting before entering previously. Just feels so much better all round. Could definitely do with a heavier front spring to stop the rear wheel lifting so high (was told almost 200mm high) but still in the testing stages and still managed to consistently be doing 46 seconds (dont know what it was before never had lap timer untill the last two sessions of the day) All in all everything was good had a small event with the hub nut starting to come loose but thankfully that was found quickly. Looking forward to the next day later this year going to take the winter off to do some other things while weather is crappier.
- 51 replies
-
- 10
-

-

-
Thanks I'll give this a try
-
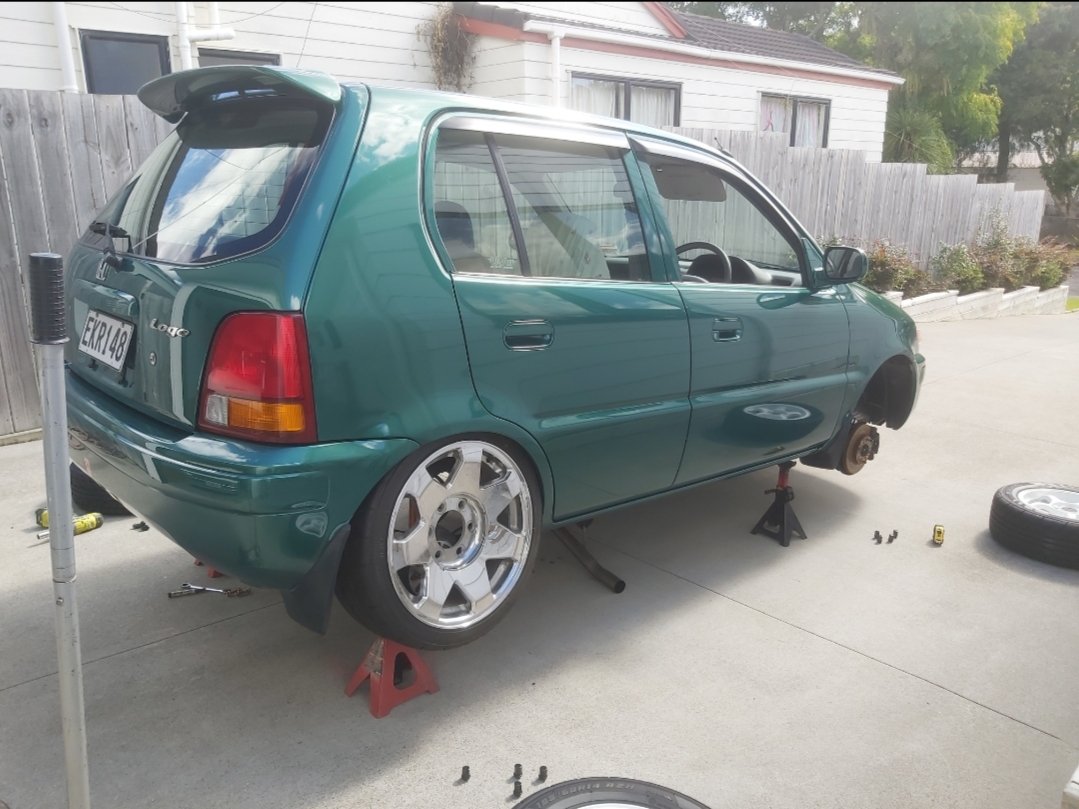
Not sure if this is the right place to post this. I dont usually post stuff till I have finished in fear of being ridiculed but I need help / suggestions As of recently I've been taking my honda logo to the track. The thing that needed addressing first is the body roll. If all ready seen my build thread you would have seen I've already done front sway bar. I'm in the process of fitting a custom rear sway which comprises of stuff I've found in my garage. Parts list • 1x Navara torsion bar • 2x Navara torsion bar ends • 2x fit sway bar links • 2x starlet sway bar nolathane clamps • 6x laser cut brackets I had left over I've made all the mounts got it all fitted to the car and it's made a big difference only problem is the sway bar is now sliding to the left. Potentially from the panhard pushing the axle sideways? There is sway bar clamps available but not for my bar size. Any suggestions for making something or better yet someone to actually make some and get them on the car before next sunday.? Thanks in advance.
-
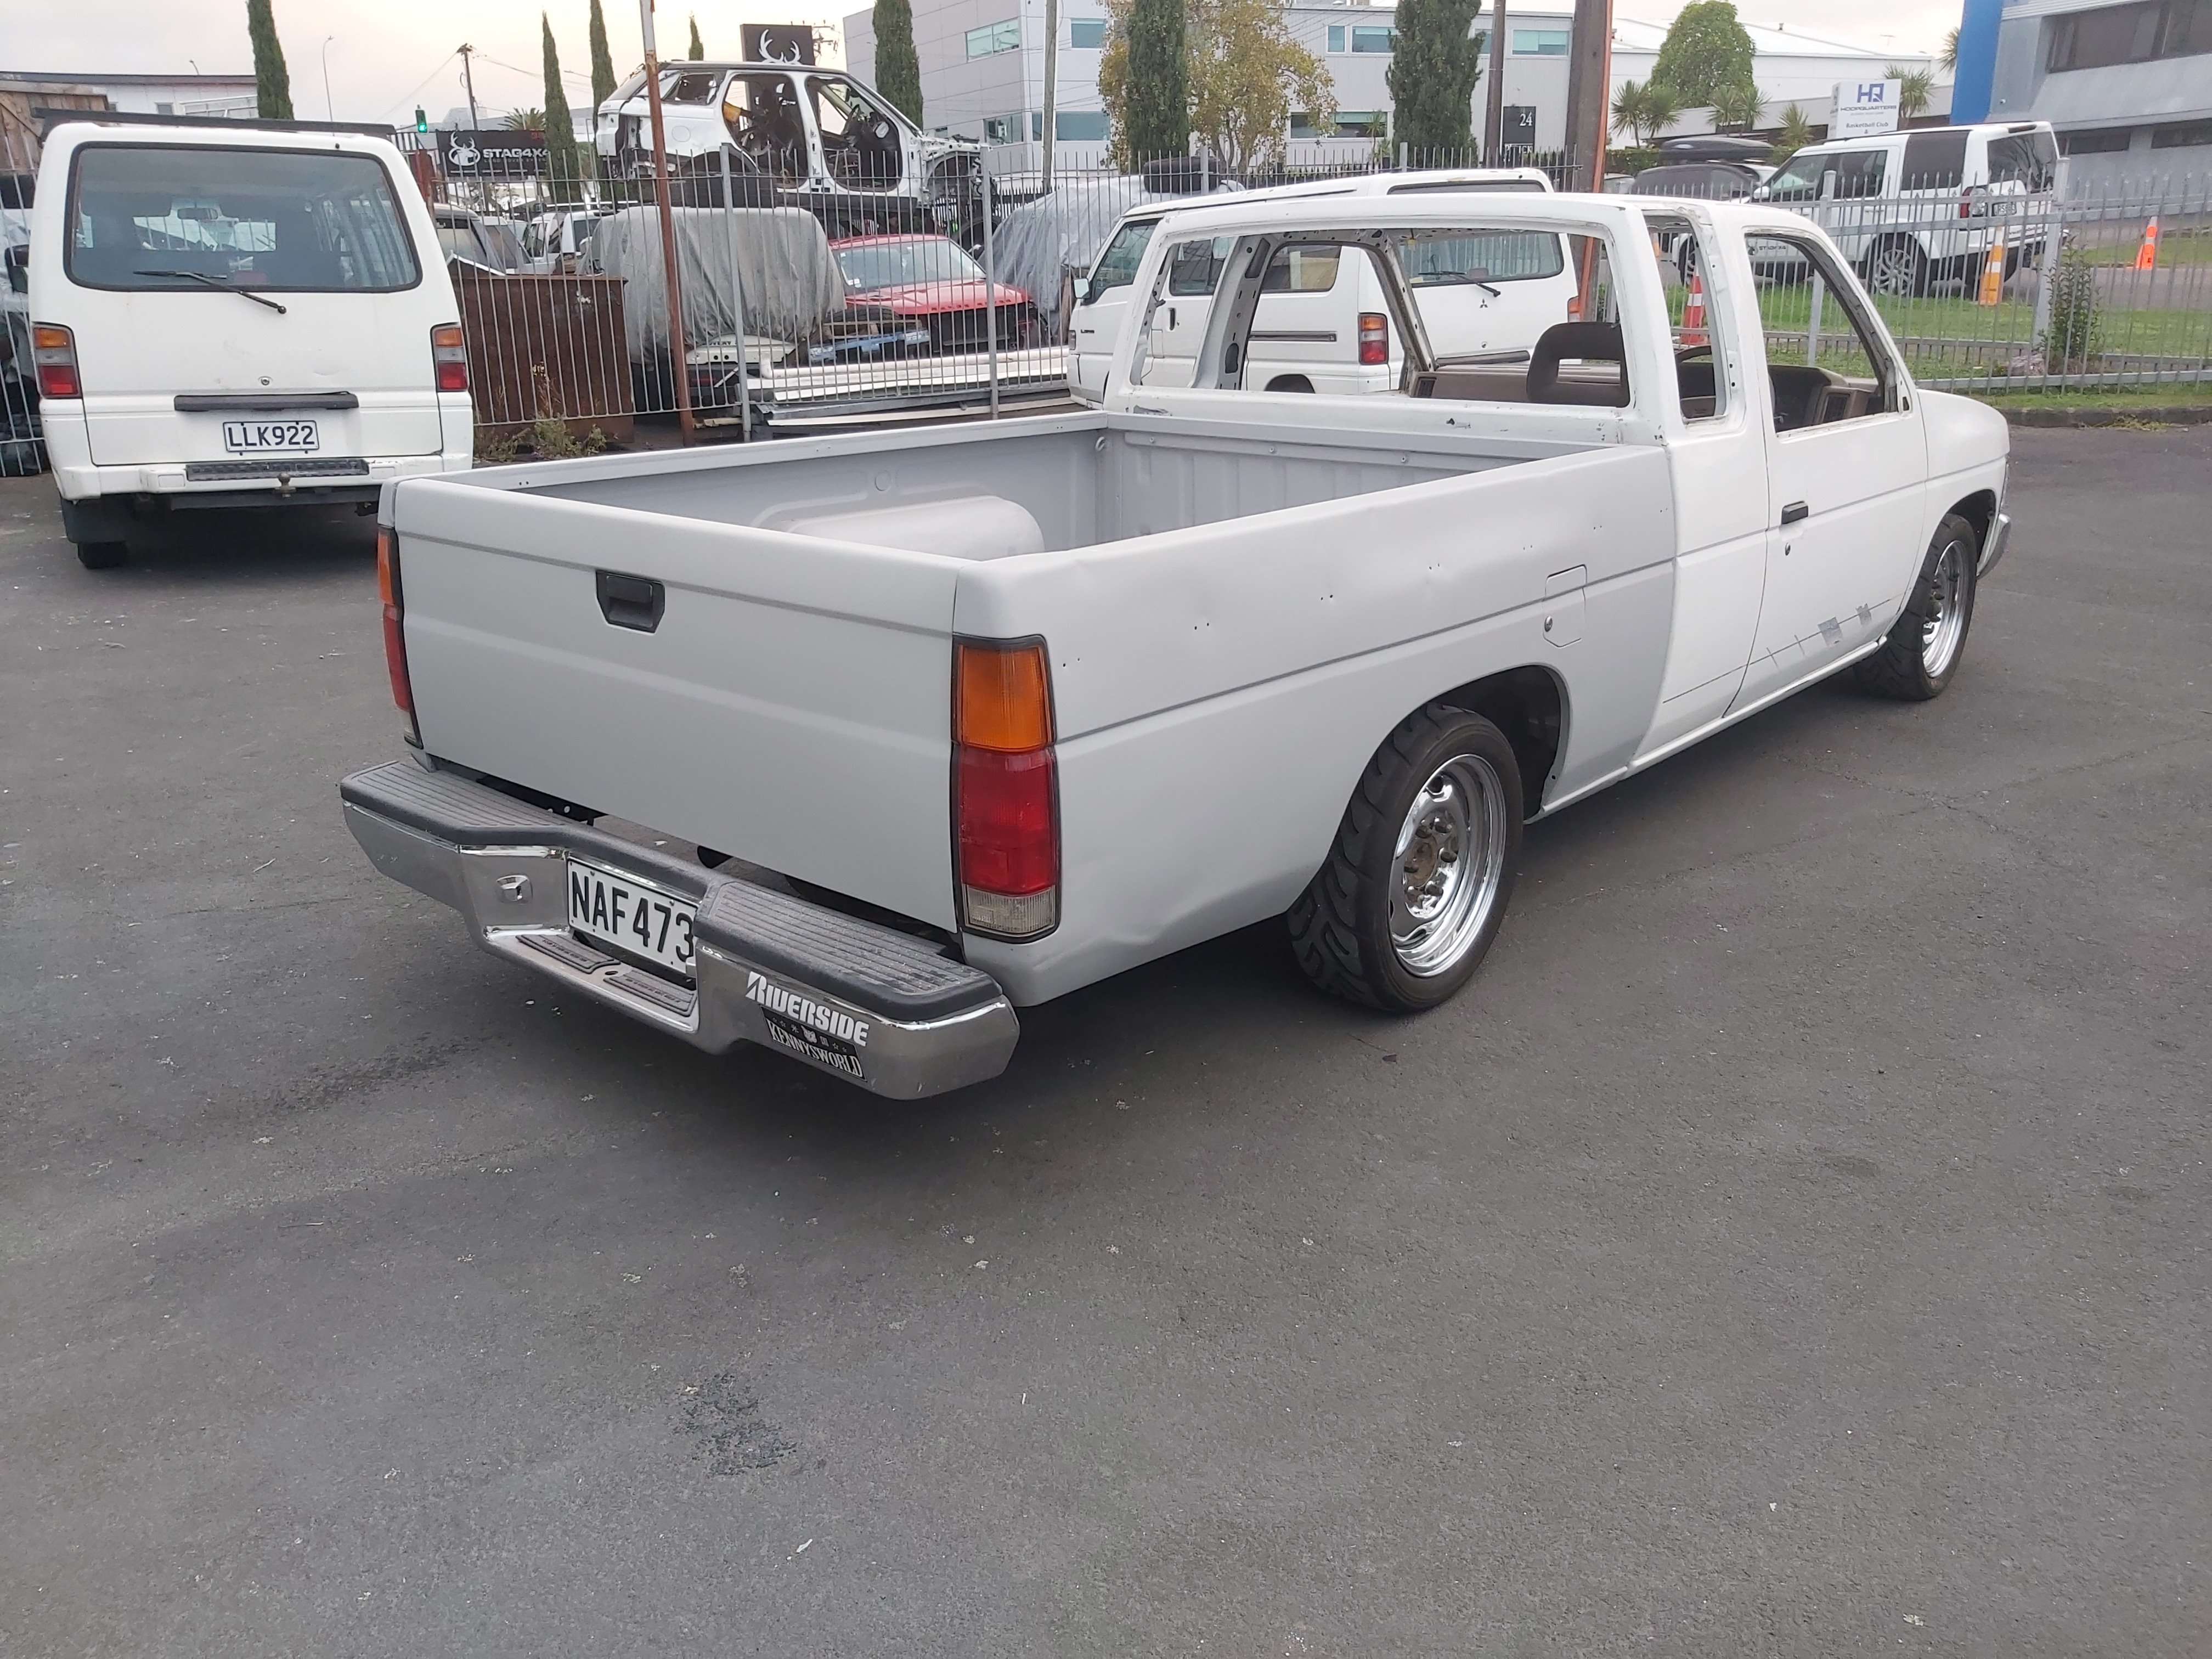
Kp60nick's D21 kingcab Soon to be Bagged on Cadillac Escalade rims
kp60nick replied to kp60nick's topic in Other Projects
But Hondaaaaaaaaaa! One more track day end of this month then I'm back on board with this. I've had lots of time to think. In the meantime the notch makes for a great wheel rack Bonus imagine my seven year old daughter took when she got my phone. She keeps asking when it's going to be finished. Lol
- 57 replies
-
- 10
-
-
Ga3_zo and kp60nick's honda logo of head turning fun.
kp60nick replied to kp60nick's topic in Other Projects
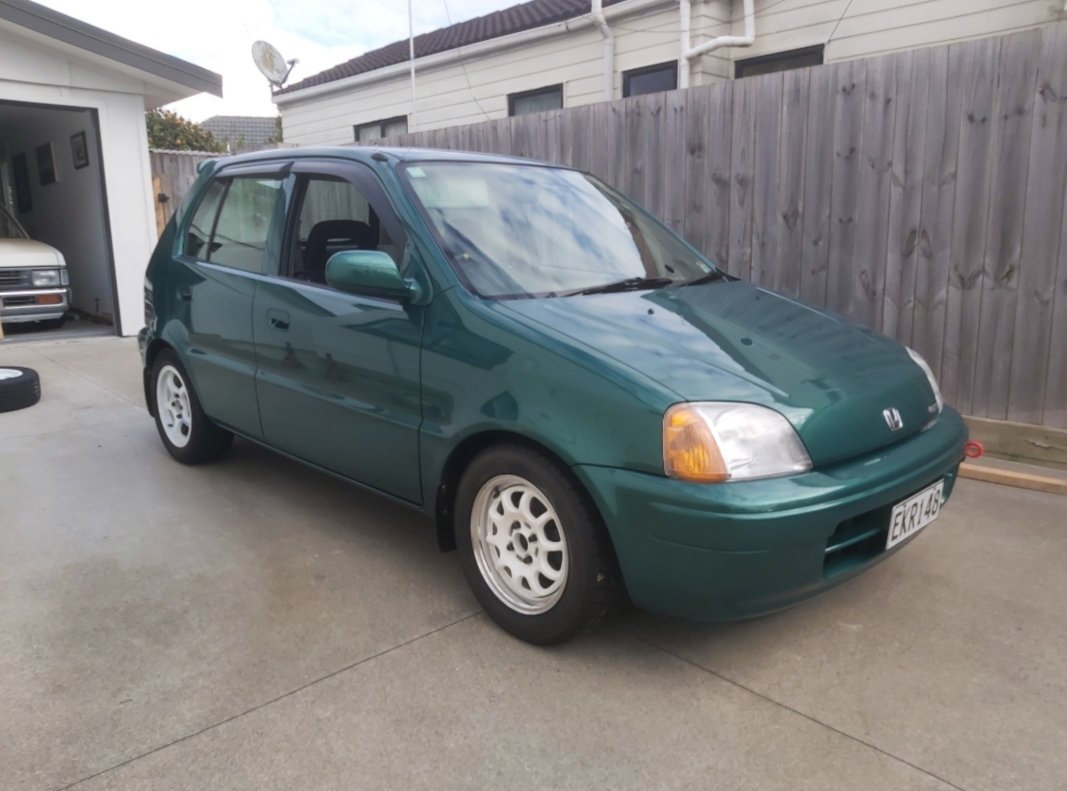
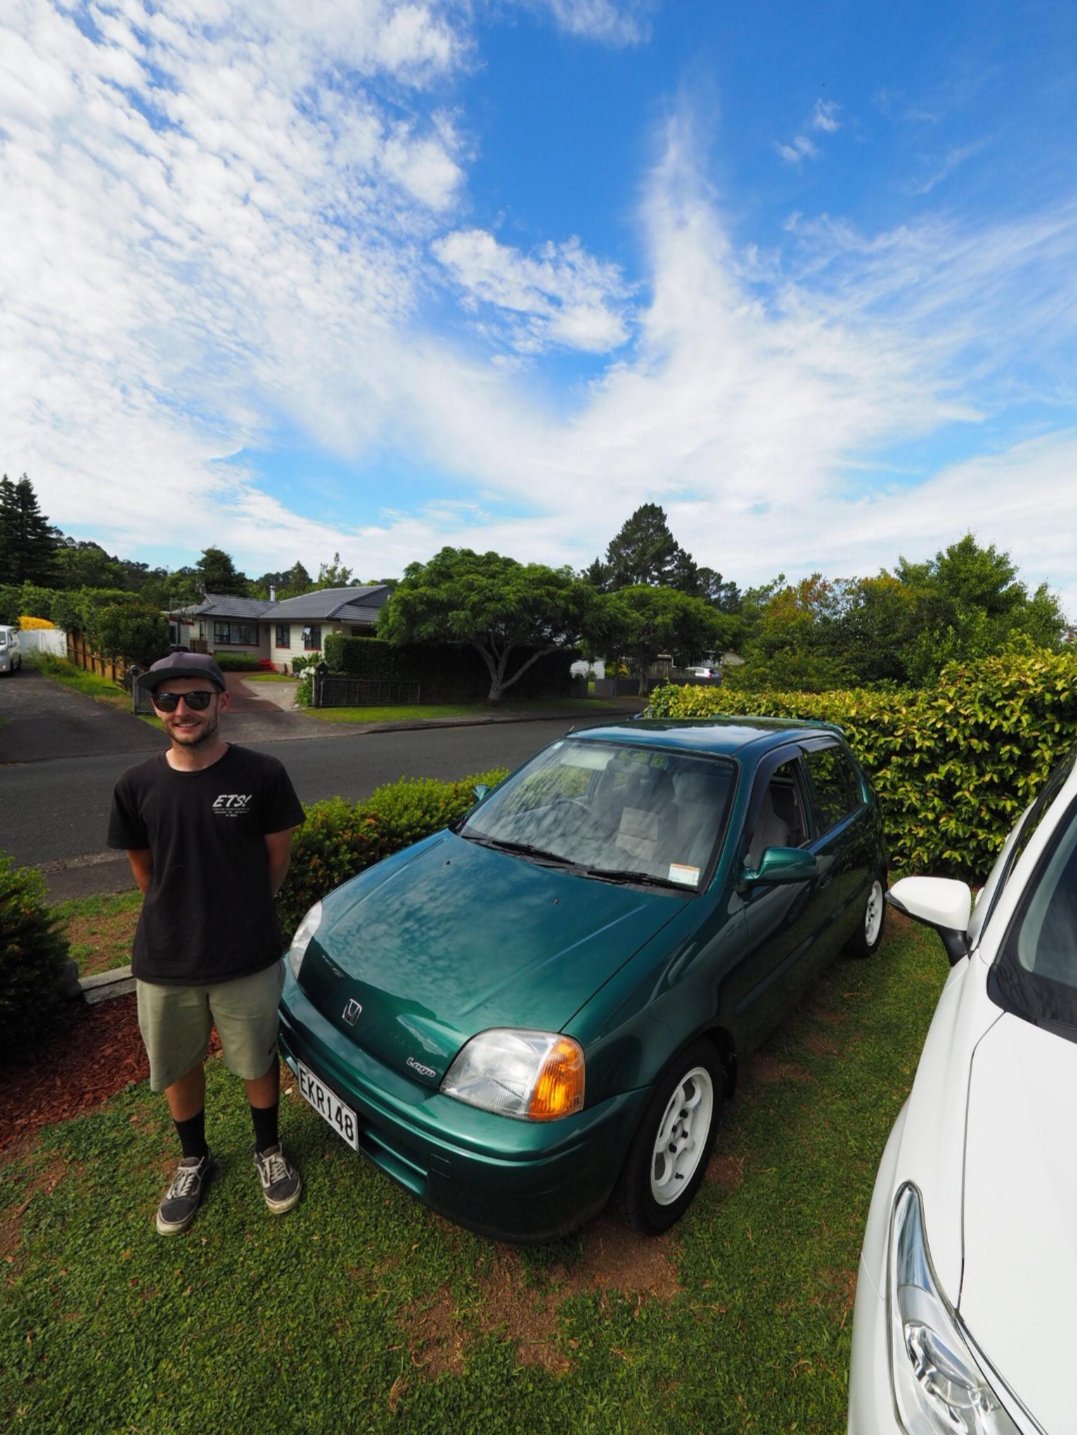
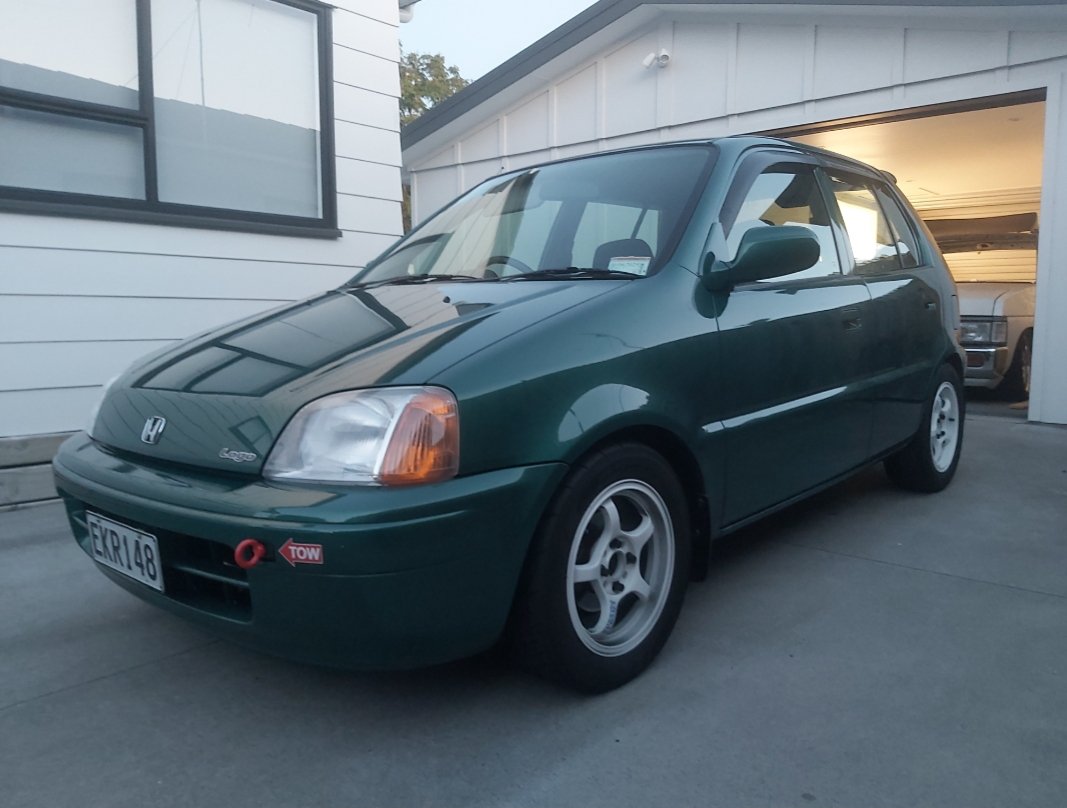
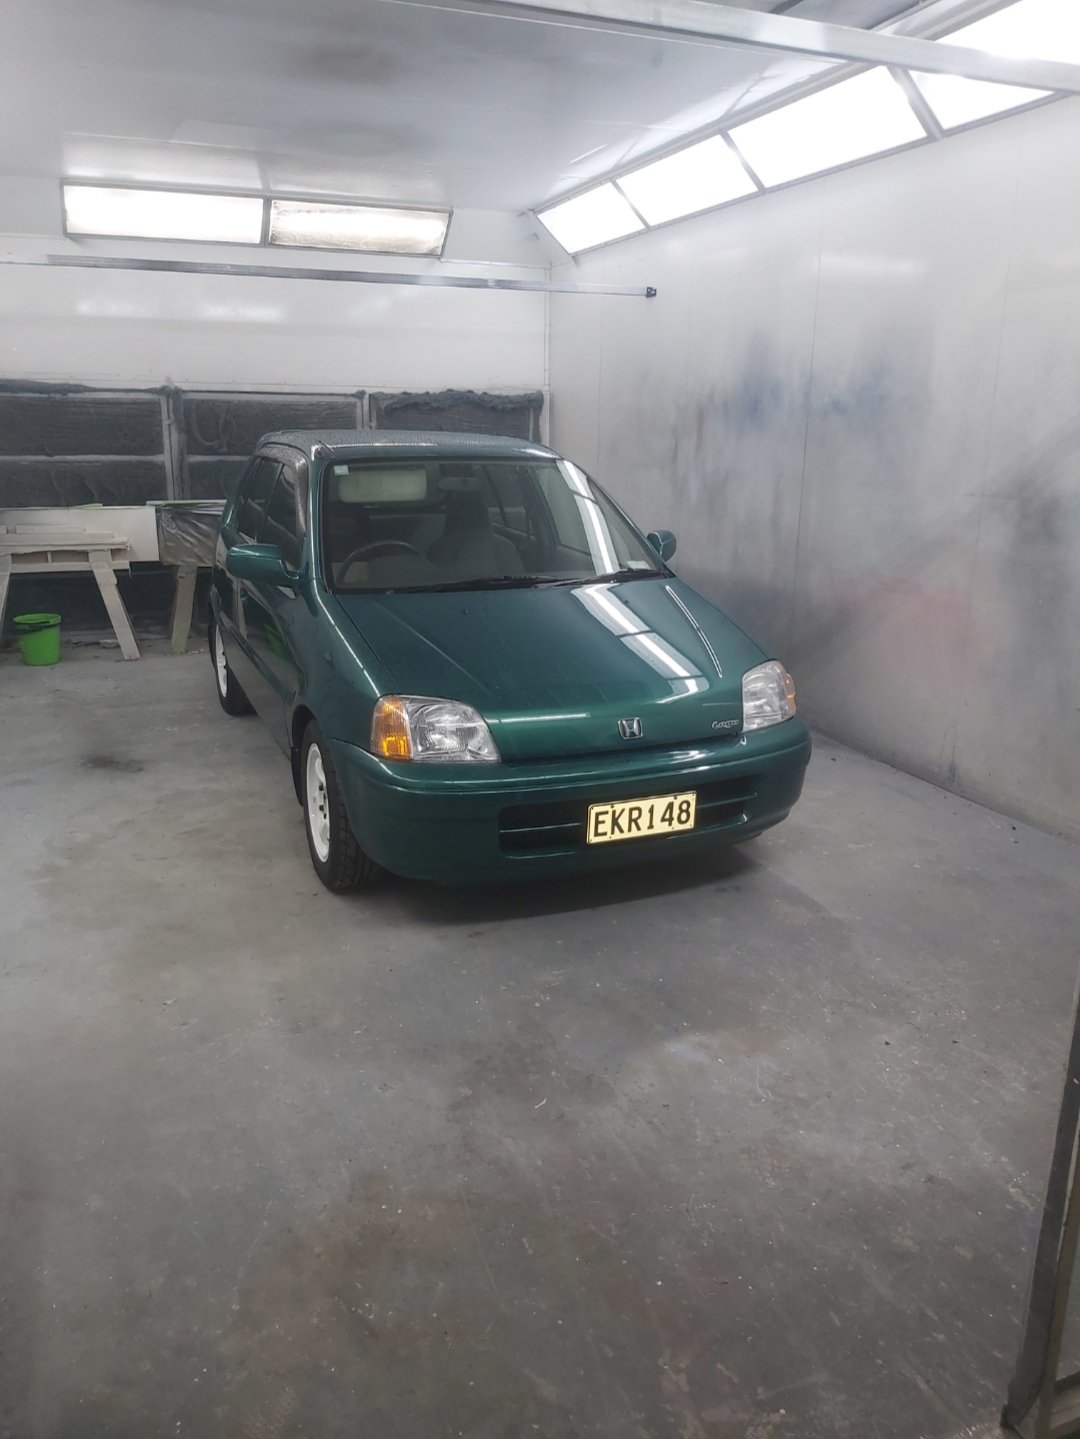
Just ticked over one year of ownership with this. The past two months I've been doing the HD auto club circuit days. So far haven't had any problems. It's been so fun squeezing everyone of the 60 horses it has. Its got plenty of body roll but have a plan to solve that with a rear sway bar. Getting tyre pressure right has been a bit of a trick probably need to get a better tyre pressure gauge. Next day is the 25th may. Also removed the rear muffler and I'm now running it on npd 100 octane not sure if it helps but it sure smells good. Here's some photos from the last few months
- 51 replies
-
- 12
-
-
-
Ga3_zo and kp60nick's honda logo of head turning fun.
kp60nick replied to kp60nick's topic in Other Projects
Maybe this could work?
-
Ga3_zo and kp60nick's honda logo of head turning fun.
kp60nick replied to kp60nick's topic in Other Projects
Apparently yes. They are still in the d series family. Not sure about the electronics. Could be done I'm sure of it. -
Ga3_zo and kp60nick's honda logo of head turning fun.
kp60nick replied to kp60nick's topic in Other Projects
Cheers. I've recently stopped using it as a daily so it's now patiently waiting for the right engine to come up. Plan to keep it in the d series family so should hopefully make it easier. -
Ga3_zo and kp60nick's honda logo of head turning fun.
kp60nick replied to kp60nick's topic in Other Projects
Hello, @Todd C please find attached image. There are plenty of Honda logos located New Zealand wide at your nearest pick a part. Thanks Nick
-
My younger self threw away a few of these bumpers. Older me brought one from rock auto paying moon beams on shipping. How things changed. Looks like a mint bumper.
-
Ga3_zo and kp60nick's honda logo of head turning fun.
kp60nick replied to kp60nick's topic in Other Projects
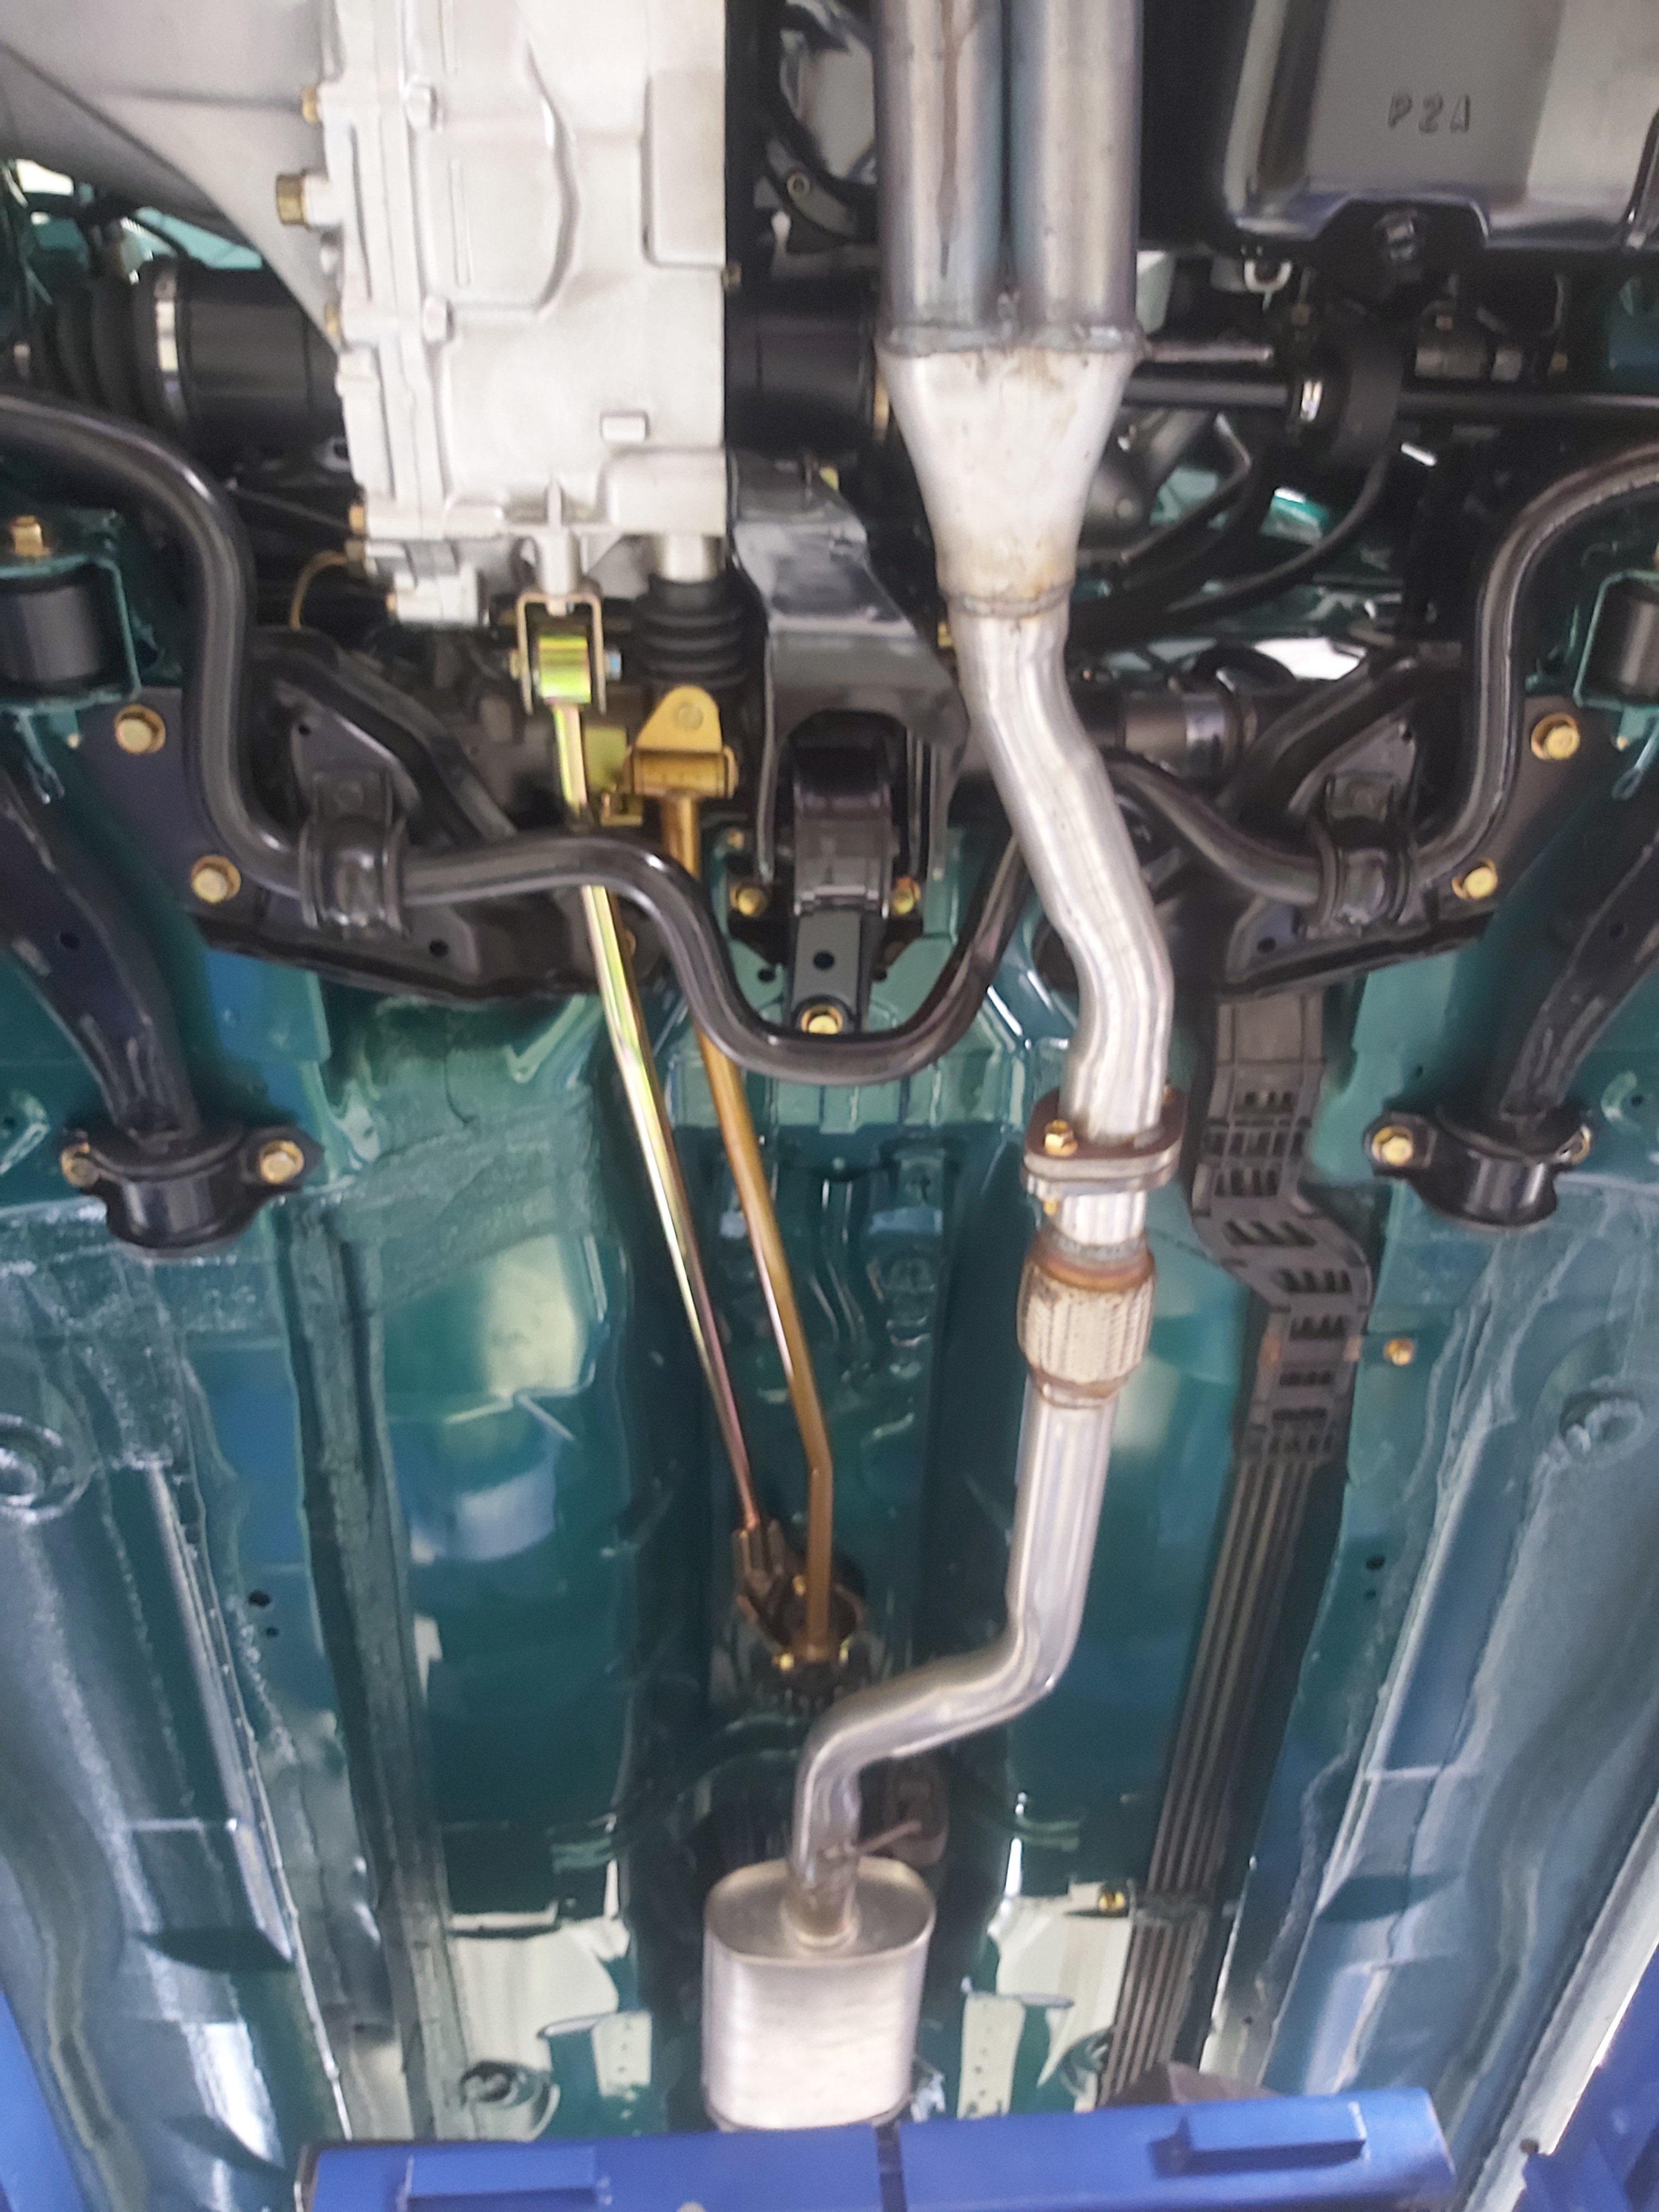
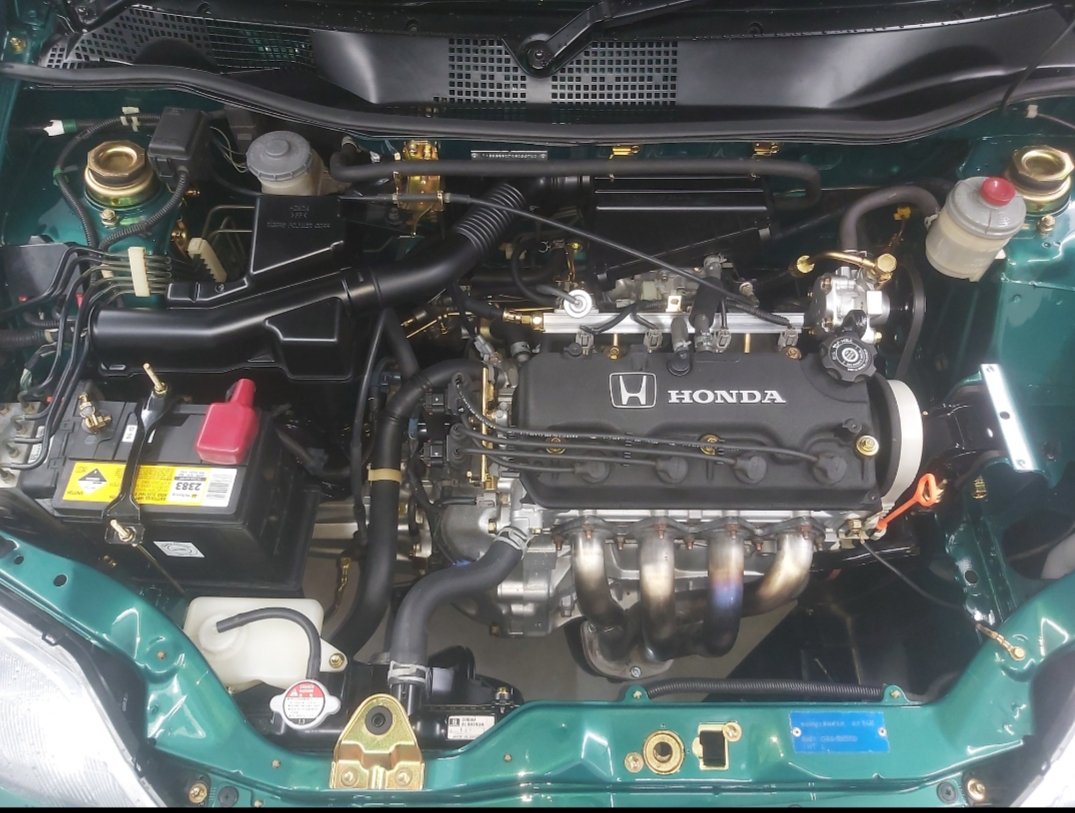
Nearly 1000km since it overhaul, still looks good under here. Have got a small leak from the ps pump. Probably because I split it when I got the bolts re zinc coated. Maybe the o ring isn't sitting right. Also had to get a wheel alignment from the goat @Furai Kieran before he finished at bush road tyres.
-
Ga3_zo and kp60nick's honda logo of head turning fun.
kp60nick replied to kp60nick's topic in Other Projects
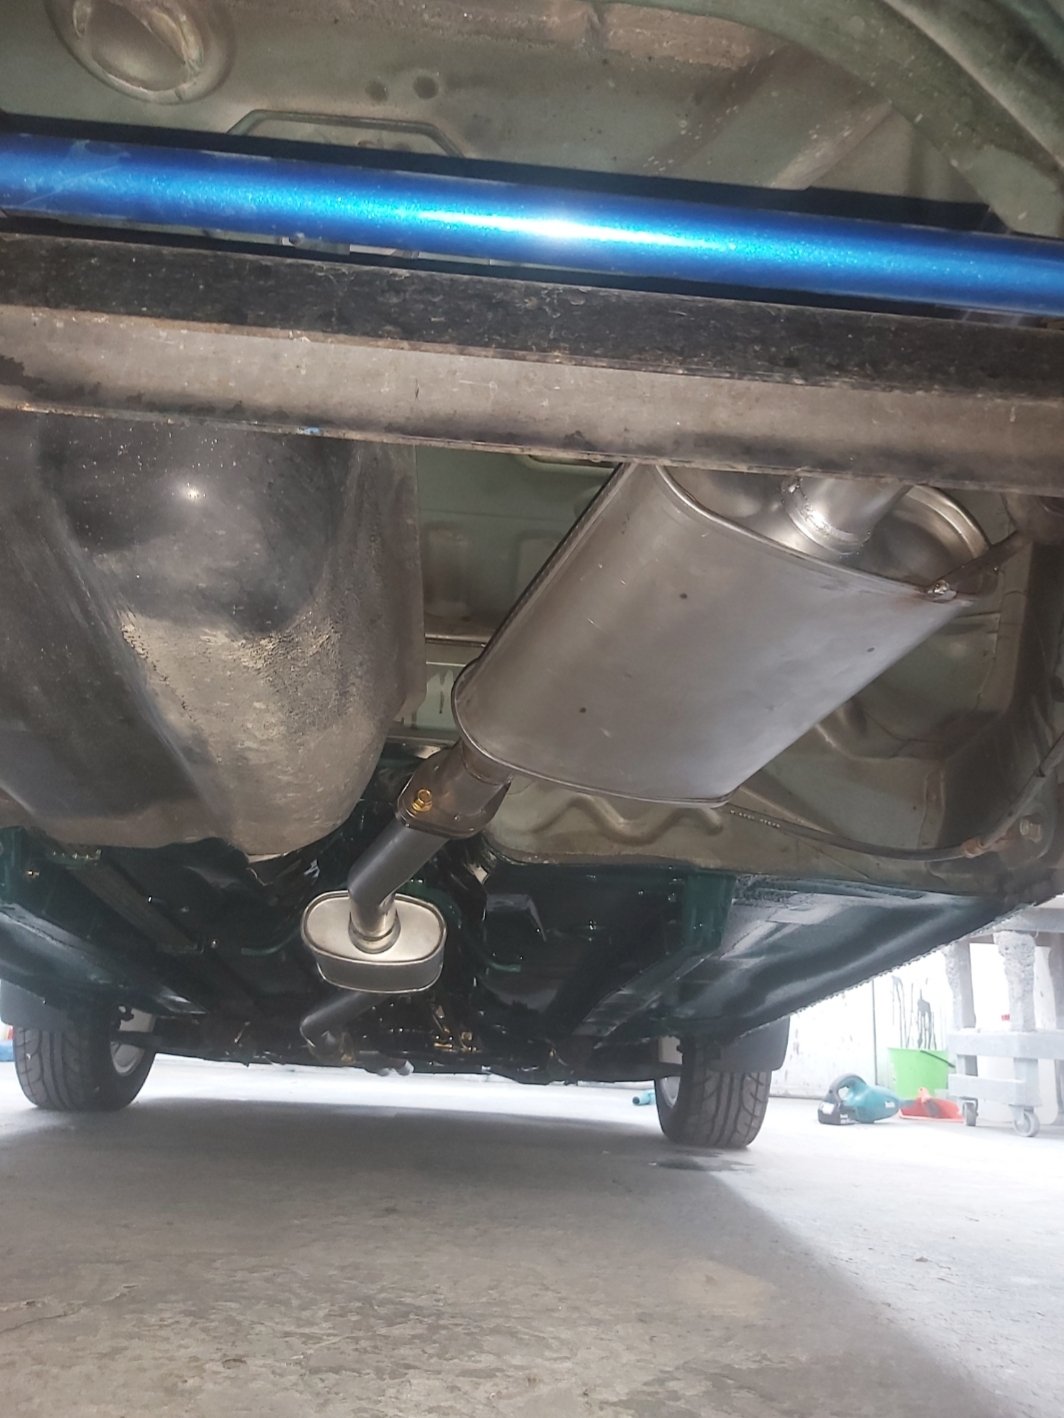
Here's the finished exhaust and the half finished floor. That's a job for next year. I didnt want the yuck paint burning off the headers smell so I paint stripped them before hand. Will get them pro coated next year. All done ready to go. Crazy 5 weeks. Photo from Roman Dave. Racing with Kieran. He help me so much with finding parts and even getting the engine in the car. Even if he doesn't understand my ways he's always there to help out. Thanks mate.
- 51 replies
-
- 14
-
-
Ga3_zo and kp60nick's honda logo of head turning fun.
kp60nick replied to kp60nick's topic in Other Projects
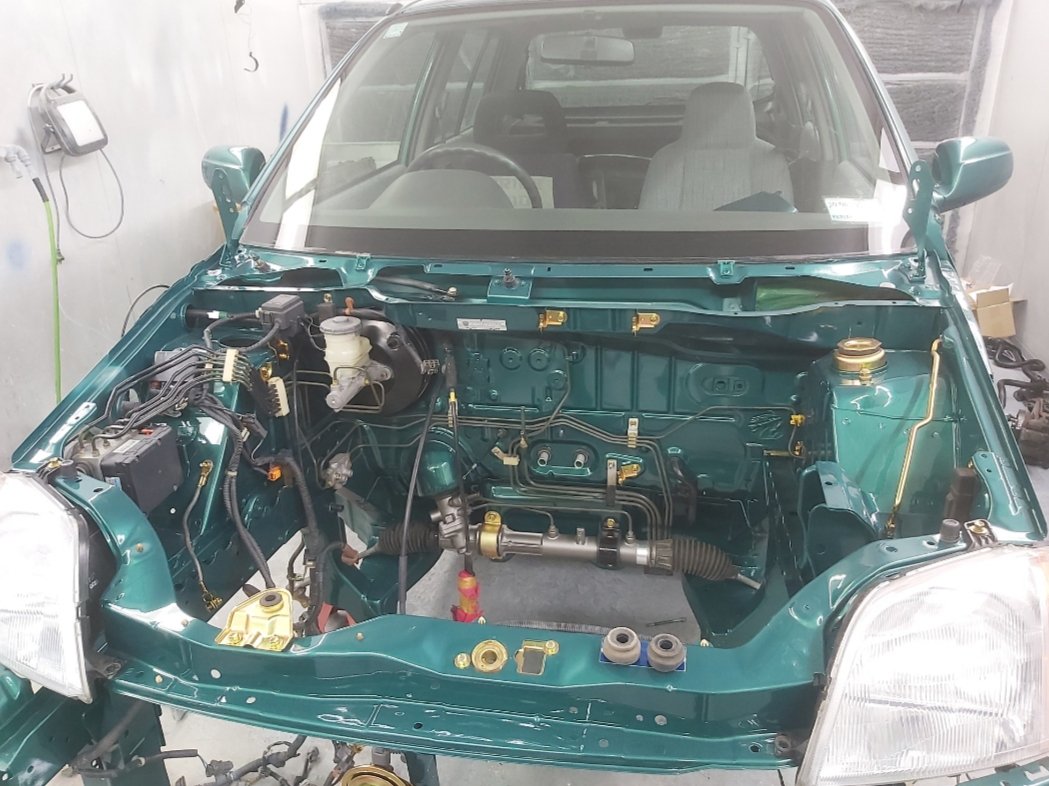
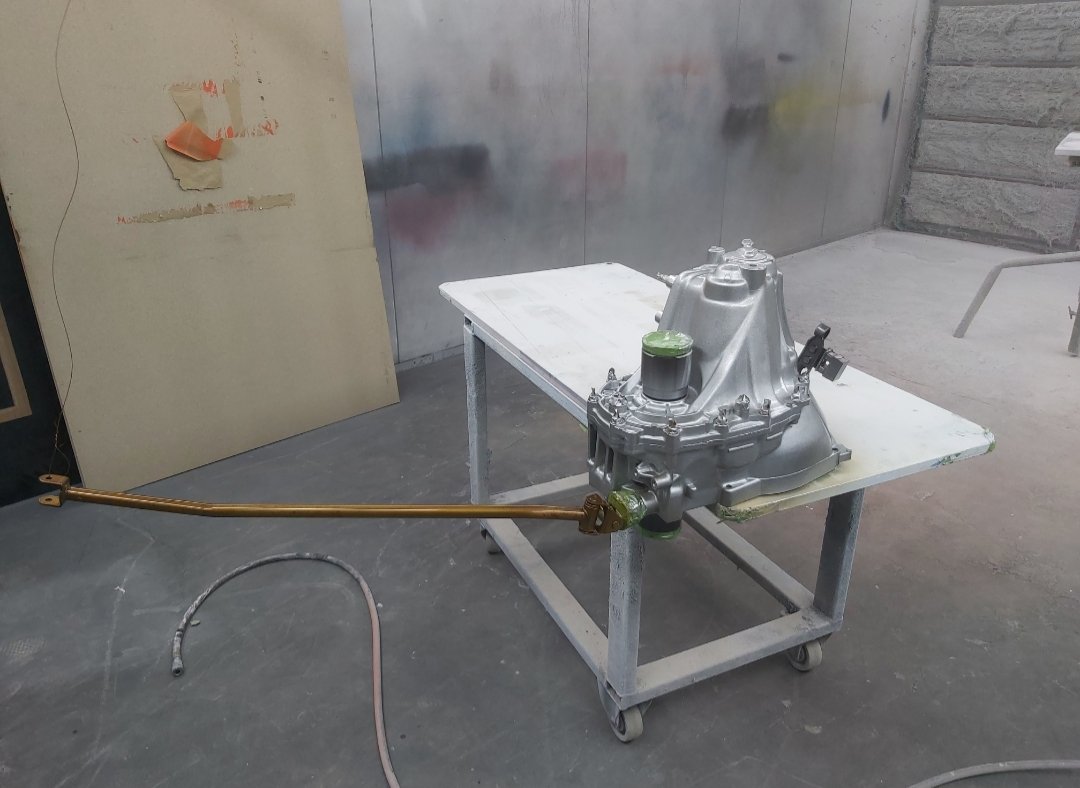
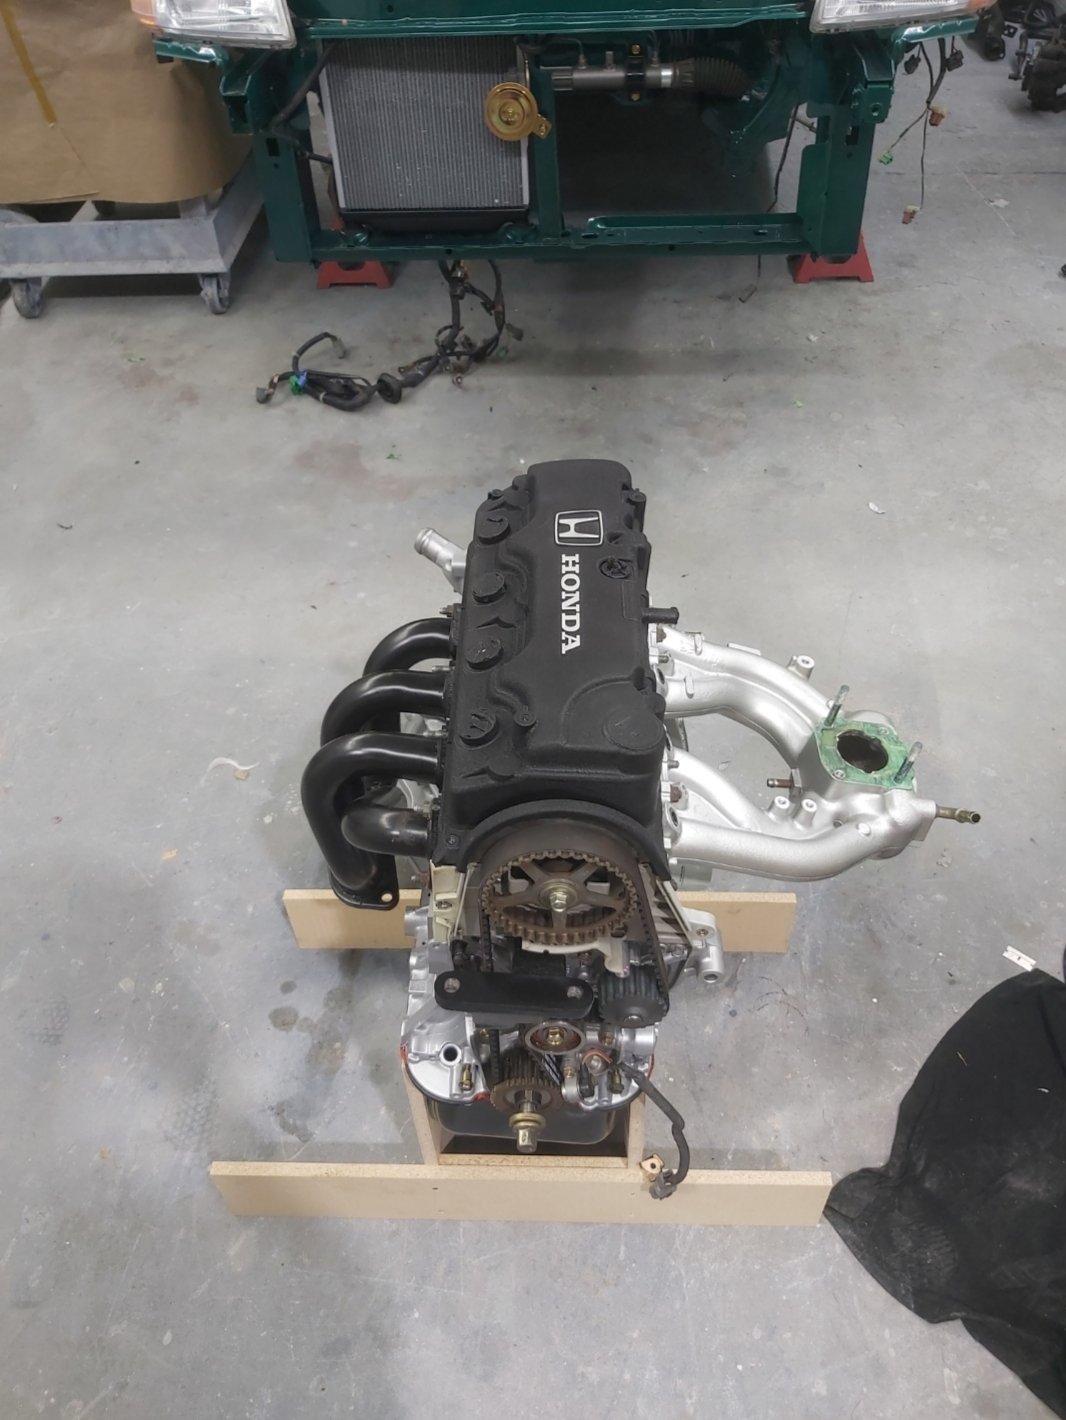
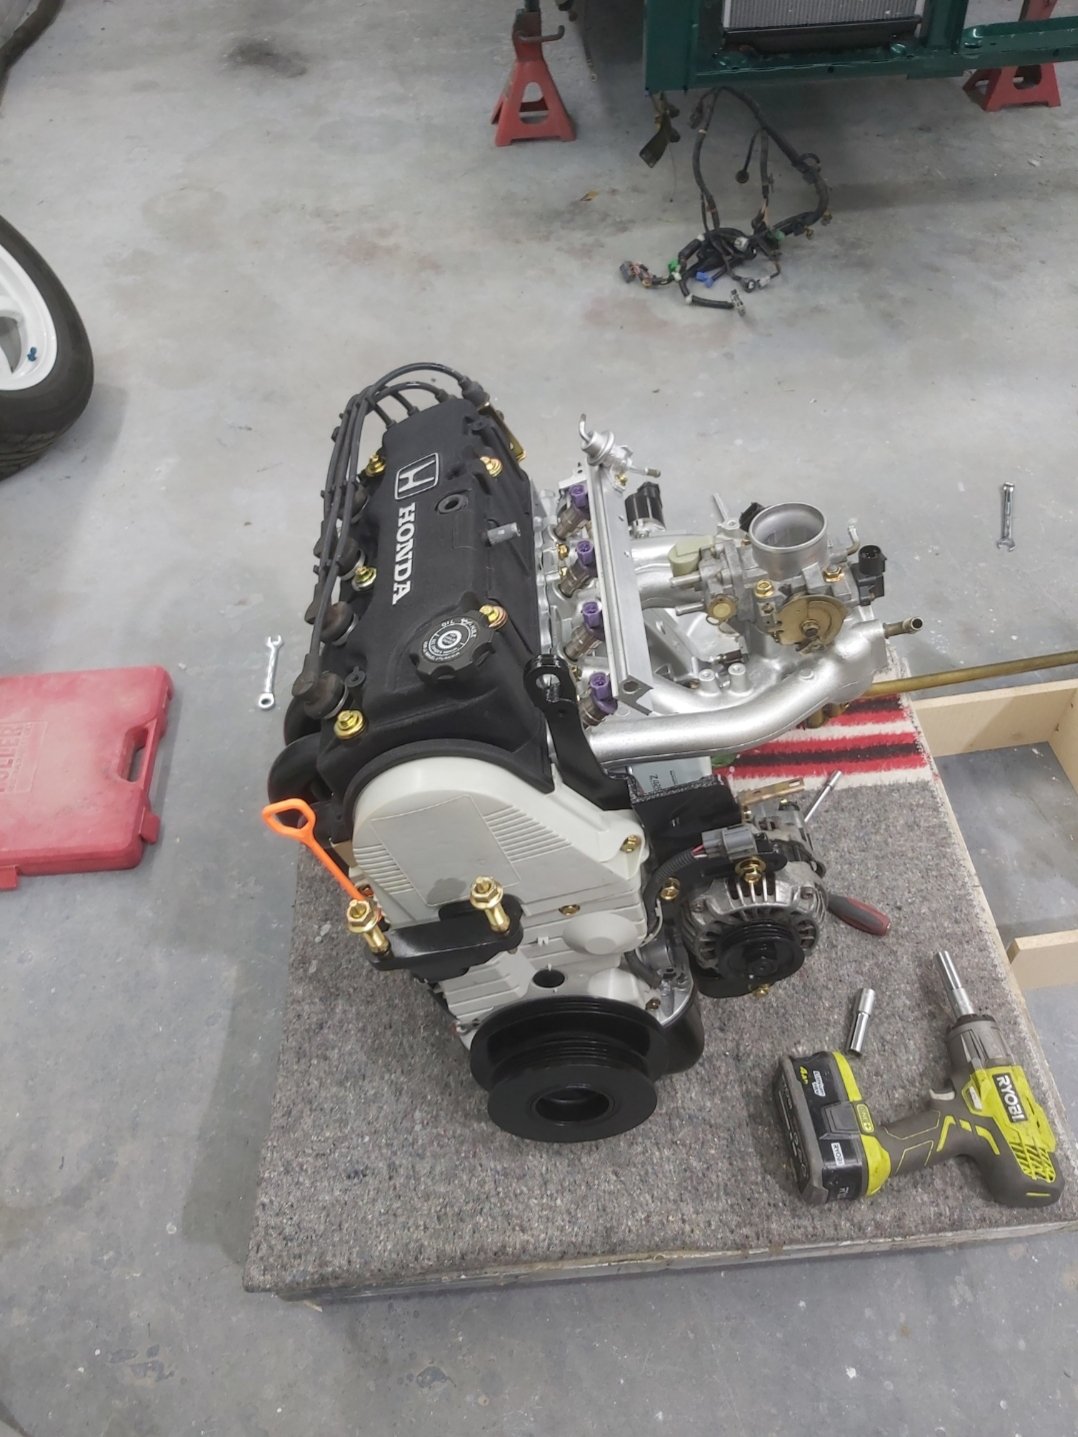
Here is some photos. Couldn't fit them all in one post It's a honda so it has to have a wrinkle finish rocker cover. Also while engine was out I did cambelt and water pump. The timing Marks were a bit confusing but looked into it online and found the timing Marks on the back of cam gear line up to the head while rocker cover is off. I guess it's so you can see while engine is still in the car. Did the sump gasket while it was on the engine stand. unfortunately I couldn't get the shifter linkage off the gearbox so I painted it with a zinc coating and clear coated it. Kept the axle ends in to stop overspray getting in the box and them blacked them after. Note: brand new genuine Honda dipstick.
- 51 replies
-
- 13
-