sr2
-
Posts
788 -
Joined
-
Last visited
-
Days Won
1
Recent Profile Visitors
6,134 profile views


.thumb.jpeg.e0a4bff61111e0c8c7396950fcc94da1.jpeg)

sr2's Achievements
Post Fiend (4/5)
4.3k
Reputation
-
Just a quick update. After a visit to the local compliance centre we've put the car in storage awaiting the results of our "request To Use Alternative Documents" (CA30) application. Have to say once they saw the car they the guys from the North Shore Compliance Centre were very enthusiastic and have gone out of their way to be helpful. I've sent over 15 MB of documentation and affidavits to to VINZ - so fingers crossed!

- 41 replies
-
- 27
-

-

-
What type of HQ steering arms are you running? (The HQ “power steering" arms are 90 mm from the centre of the ball joint hole to the centre of the next closest hole, the "non power steering arms are 120mm).
-
I had a lot to do with brake boosters in the early 80’s working for an authorized PBR agent in Queensland and then setting up a booster repair department and training staff for APPCO Brake & Clutch on my return to NZ. The original VH44’s were built by PBR in Australia; they were prone to push rod seal failure which is the archilles heel of most inline (Hydrovac) boosters. The casting and the aluminium used on the slave cylinder wasn’t very flash and yes the bores did wear. On the plus side they were cheap to make, readily available and in their day were a big improvement on the earlier style of boosters. We were originally re-sleeving them in brass using an interference fit but then stainless steel sleeves became the norm and they were glued in. The problem with re-sleeving was that the circlip groove that retained the push rod seal bush was cut into the sleeve and once in a blue moon the sleeve would crack where the groove had weakened it resulting in the total loss of brakes - in a single circuit system! I recently fitted a new aftermarket (presumably Chinese) VH44 to a mates MGBGT. Being a suspicious, cynical old bastard I stripped it down for a look-see and found it to be quite a faithful copy that did not vary in any way from the original. I obviously had no way of knowing the quality of the rubber components but they looked the part and I suspect most of the brake seals we buy this day come from China? Have to say when fitted, I was pleased with the result. My advice would be to pass on the remanufactured one and go with the cheap Chinese knockoff. I’ll also point out the 1st link in your post, (Hawkswood Car Parts are a great company by the way) is not a VH44- it’s the English Lockheed equivalent that was fitted in NZ to a million and one Hillman Hunters and many other Pommy cars. Slightly less boost and the plastic control valve assembly just clipped together and did not grow old gracefully! Hope this helps.
-
Yes it does look very much like a replica with the fabricated chassis and of course the fiberglass body. To the best of my knowledge there were a number of Pantera kit cars made in the states of varying quality. Would be great to learn the history behind this one.
-
LOL, it would be great if it was! The car is at Hampton Downs, the yellow car is a fiberglass kit car. The rumour mill has it that the Yellow Pantera was stolen by some gang; have to say I cannot think of a more conspicuous car to choose to steal! (Mental image of some guy in a South Auckland public bar - "hey bro - wanna buy a cheap De Tomaso?).
-
I’m presuming you’re running standard brakes with non-ventilated discs on the front, drums on the rear and, a single circuit master-cylinder and a Hydrovac (inline) booster? (From memory there were some B1600’s with front drums but please don’t quote me). Short answer is boosting the front only will result in a serious front brake bias, it won’t make the pedal heavier it will just significantly reduce braking to the rear to the point where quite possibly it becomes an issue at WOF time. My recommendation (i.e. cheapest path of least resistance) would be to go for the twin boosters option; a 2nd unit under the deck would work well – just make sure the air inlet is well shielded from water splashes. A twin circuit master-cylinder running two Hydrovacs will give you the same amount of boost and a similar pedal feel to a single Hydrovac boosting a single circuit master cylinder system, (presuming both single and dual master-cylinders have the same bore, and the Hydrovacs are the same). As an added bonus if in the future you are looking at a brake upgrade (RX7 would be an obvious choice) it’s relatively easy to adjust (or compensate) front/rear bias by changing bore and/or control sizes on the respective boosters. Hope this helps.
-
Sadly no, he's had his wife and his secretary search high and low and all they have is a couple of grainy photo's that do not show the number plate. Bugger! (Thanks for the offer mate, this forum rocks).
-
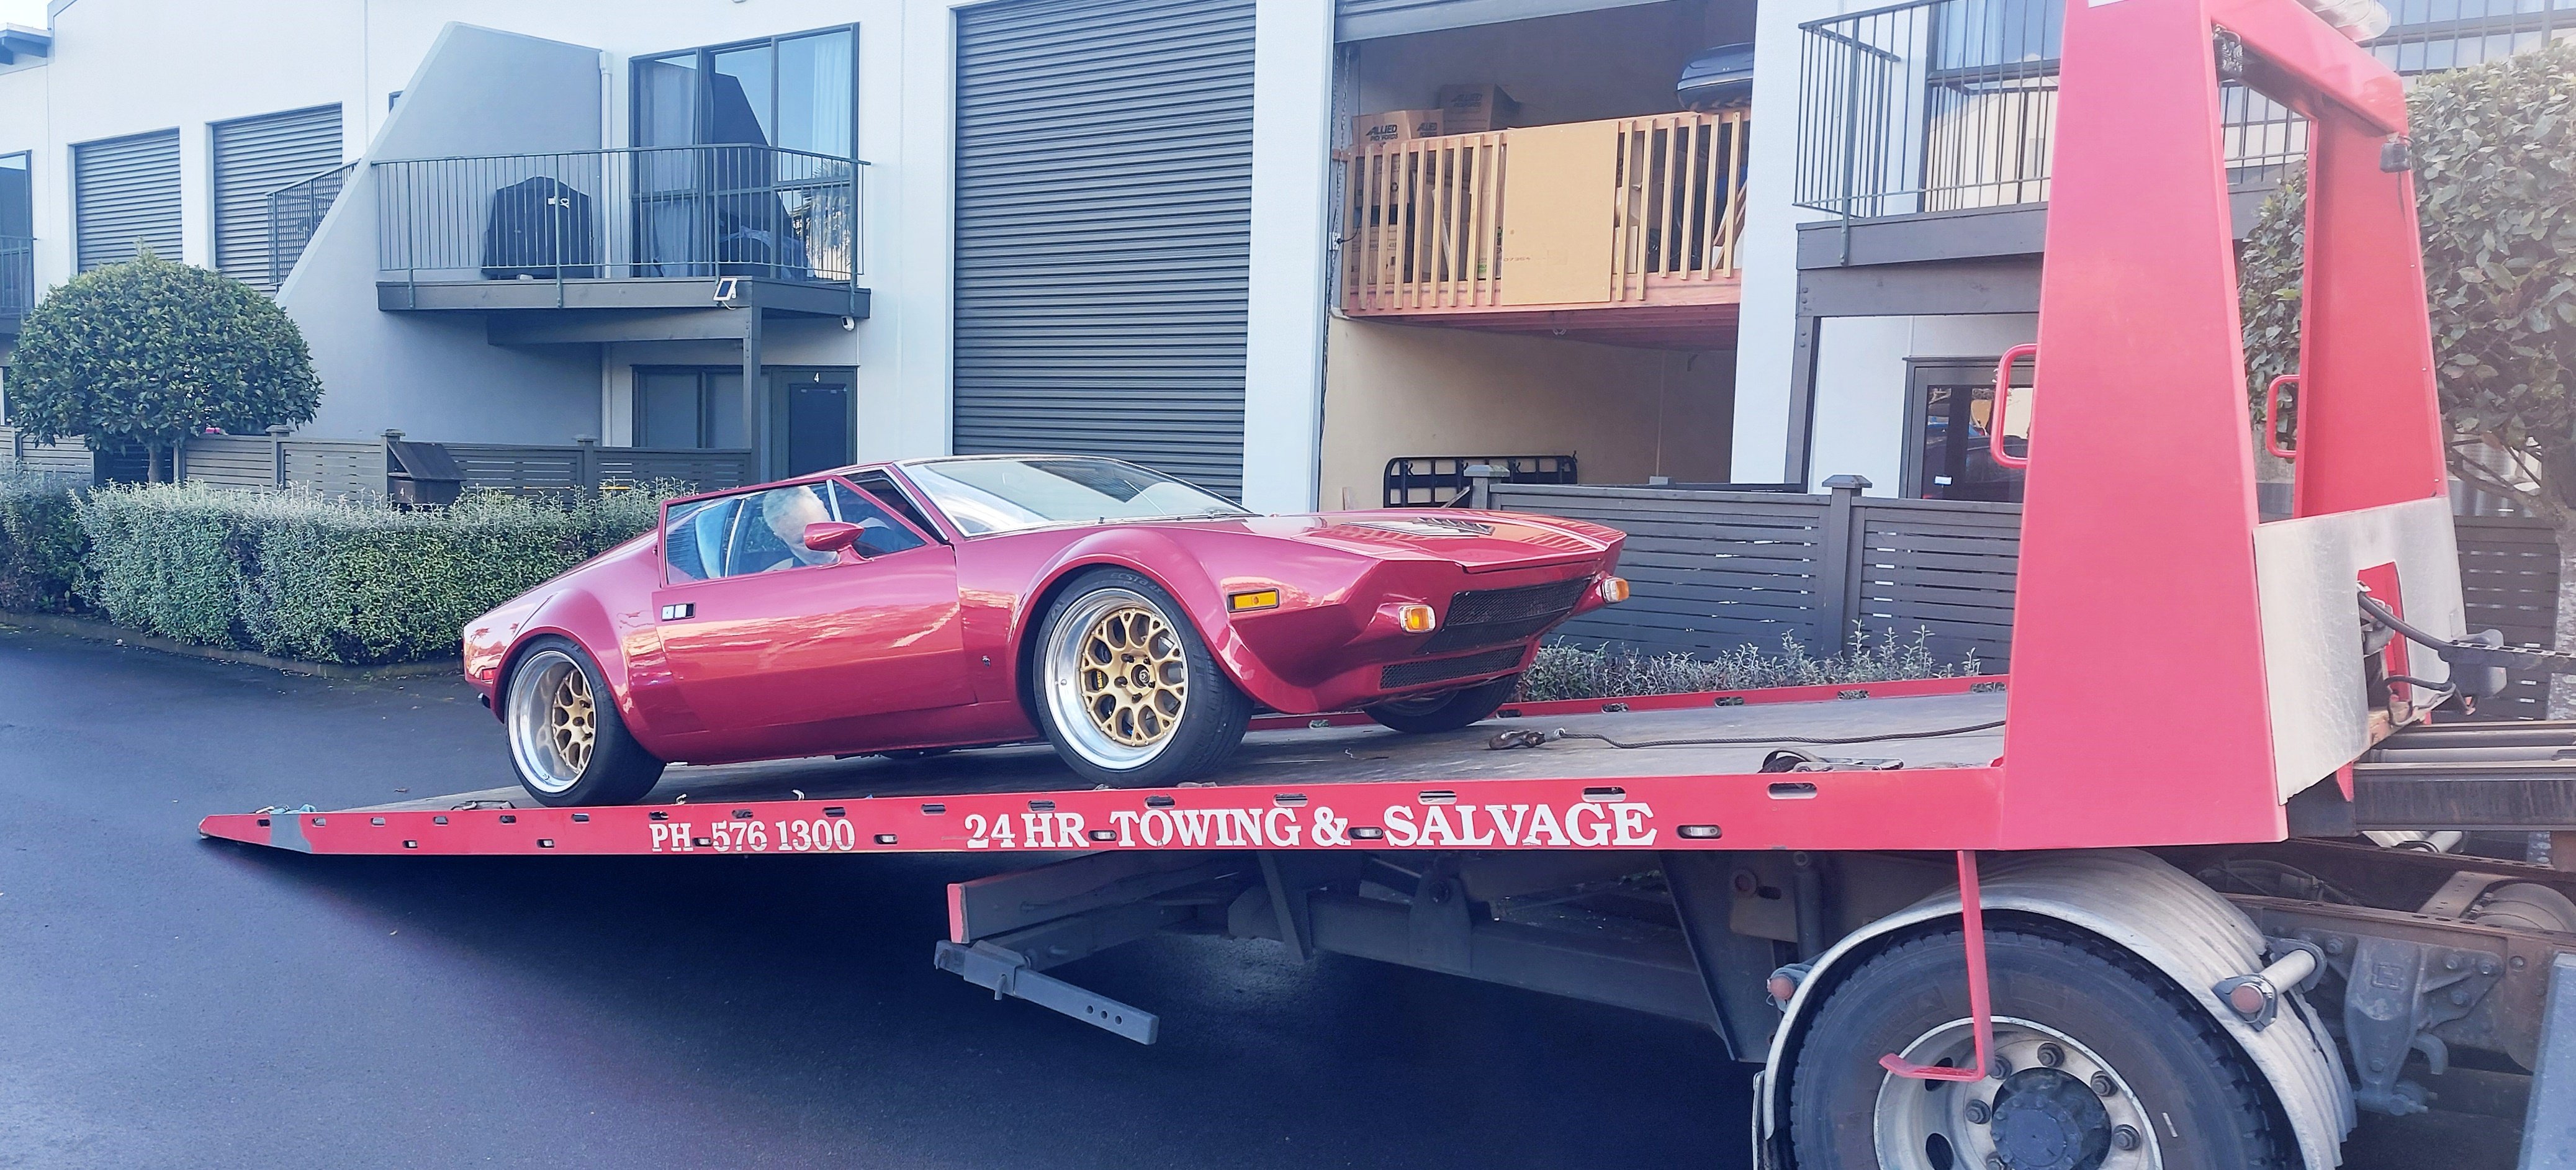
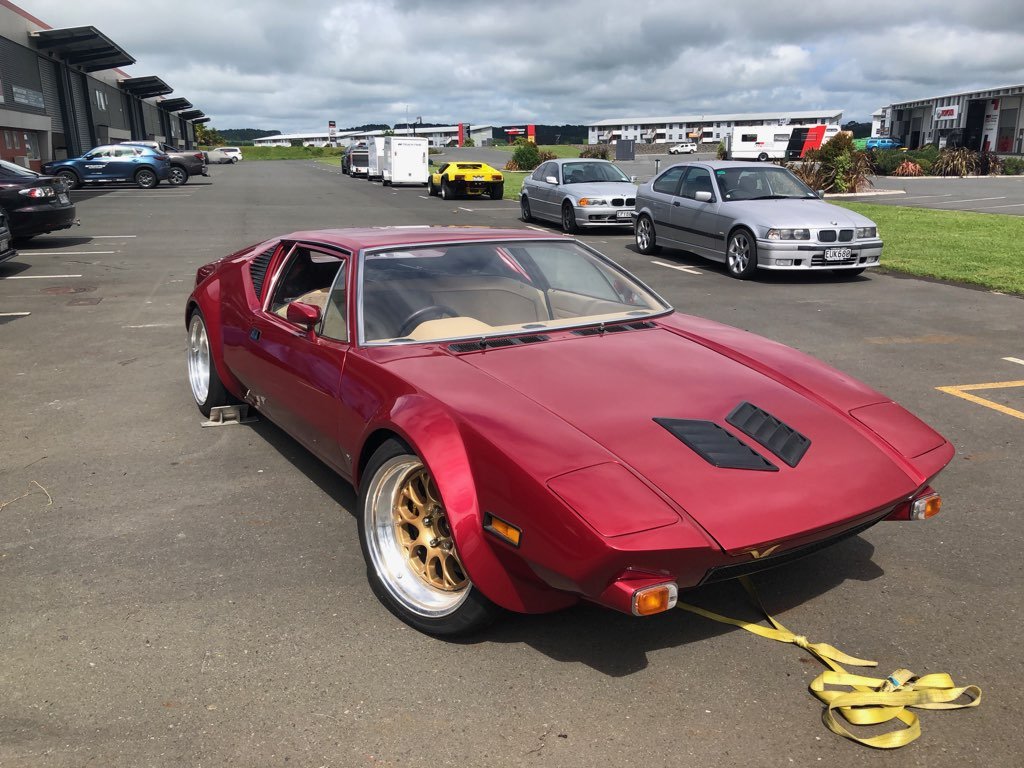
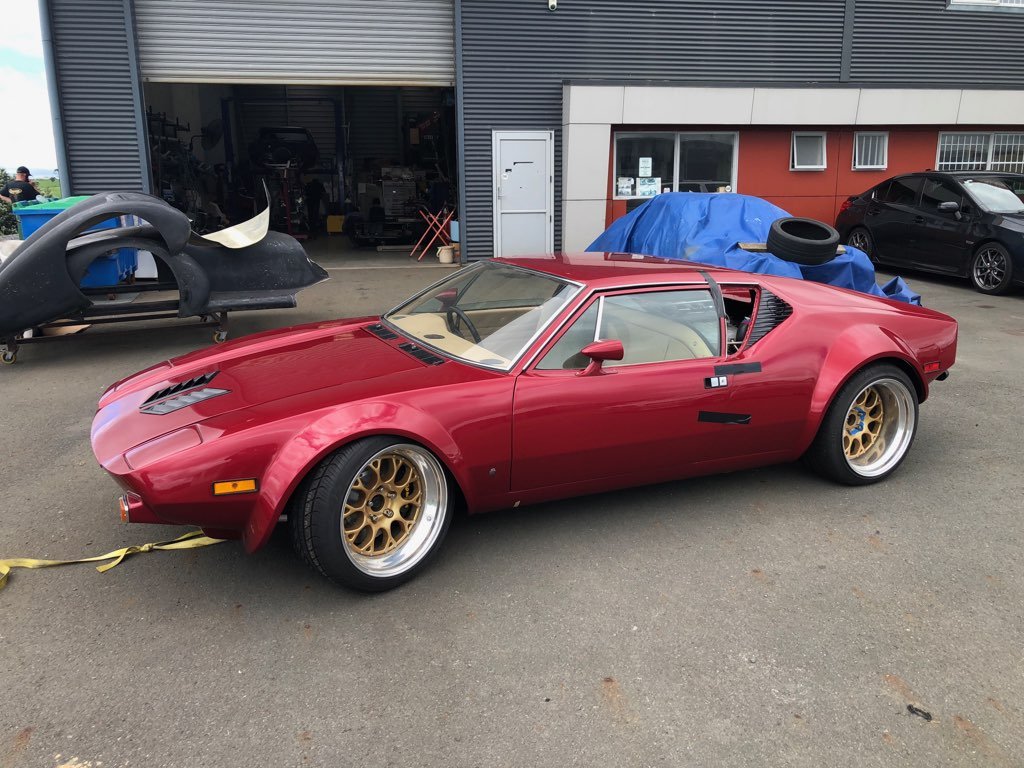
Just a quick update. I've been in contact with the original NZ owner, he's a real character. At the age of 85 he's just bought a McLaren only to find he couldn't get in or out of it, so has bought a new supercharged Vantage as well! (Oh how the other half live). Good news is that he's helping all he can and although he hasn't any registration details he does have some early pictures and has offered to swear an affidavit saying that to the best of his knowledge it is the same car. Being an ex MP and well known public figure it will hopefully add some weight when we put in an "alternative documents application" to NZ Transport. I'm still researching the cars history; we bought it as a pile of parts from a Turners Police auction after it had been confiscated in 2000 under the proceeds of crime act and had been in police storage for about 6 years, (the previous owner had been locked up for manufacturing meth!). It's a crazy story and I'll post a quick thread of the rebuild when the history is all confirmed. A quick few pictures of the almost completed car.
- 41 replies
-
- 37
-
-
-

SR2’s 1947 Vauxhall “Rigamortice” Discussion thread.
sr2 replied to sr2's topic in Project Discussion
Thanks for that, will do. -
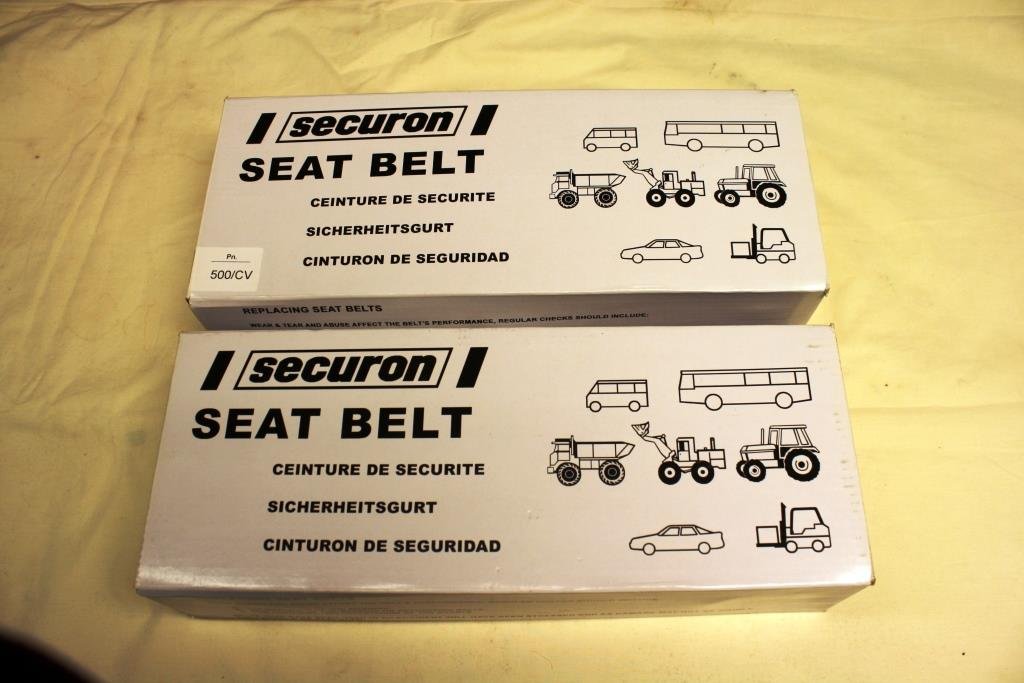
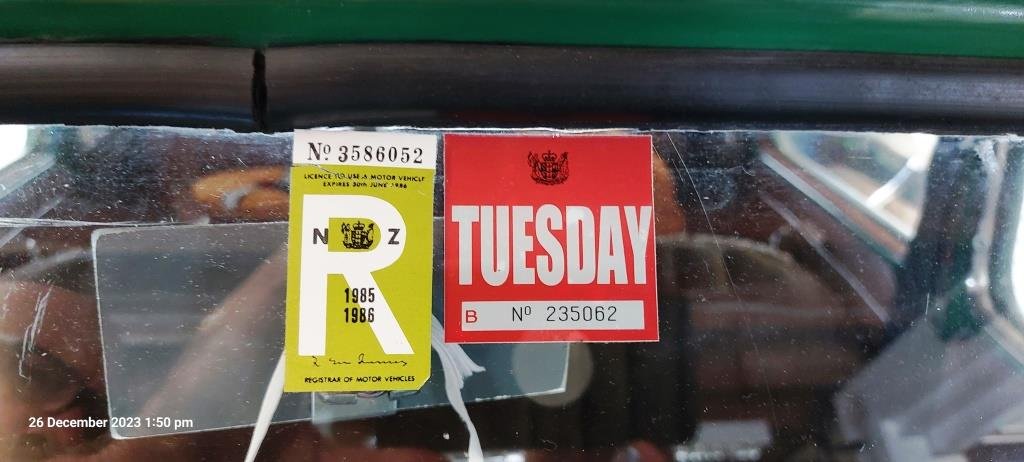
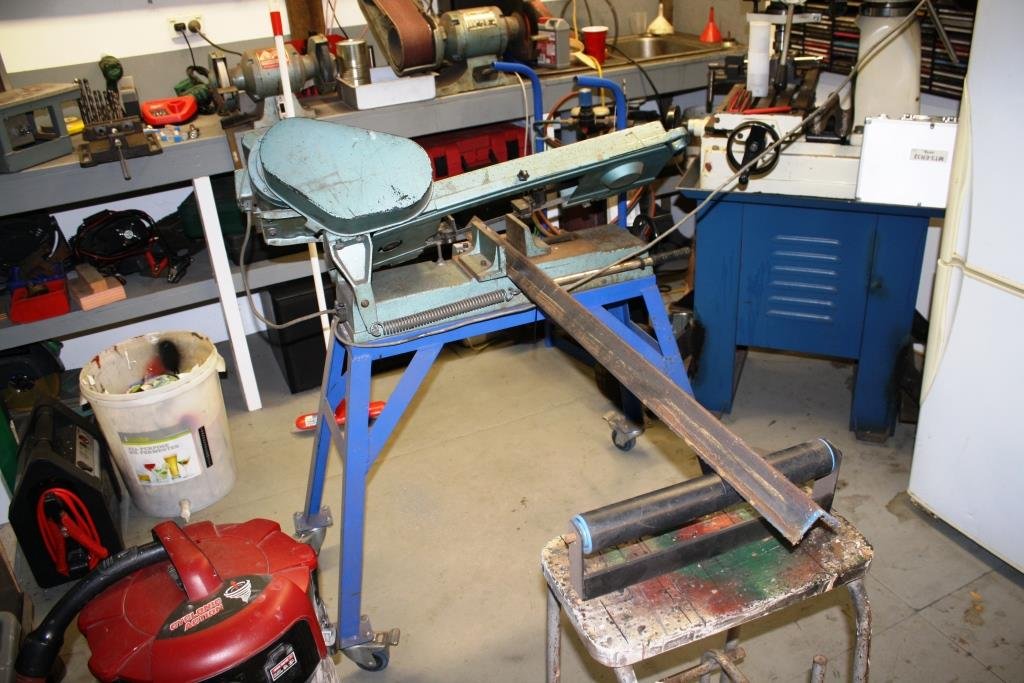
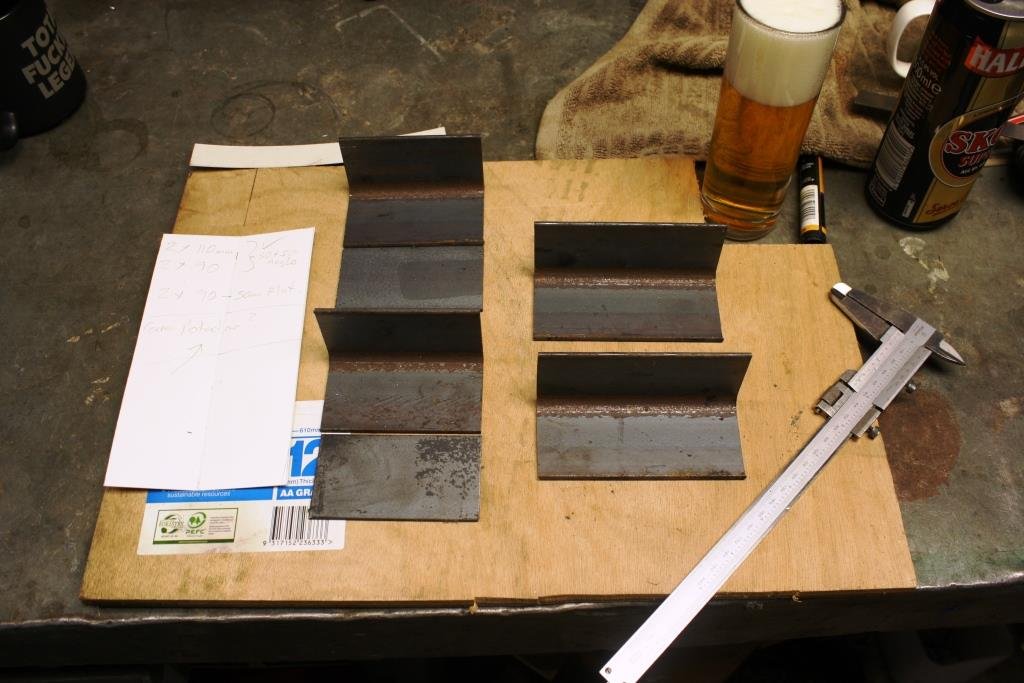
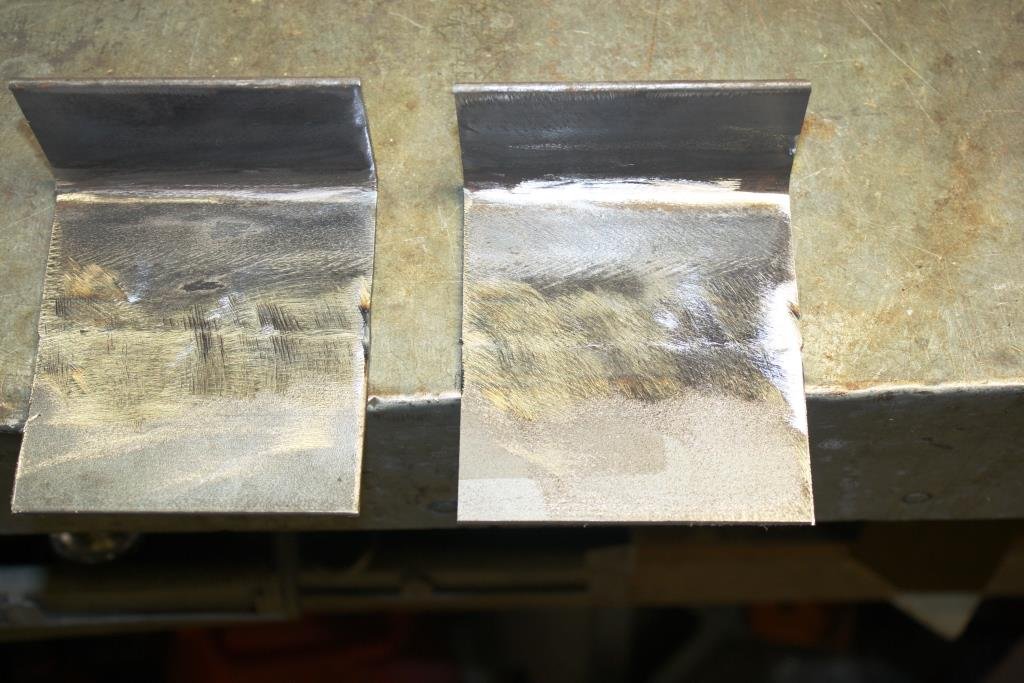
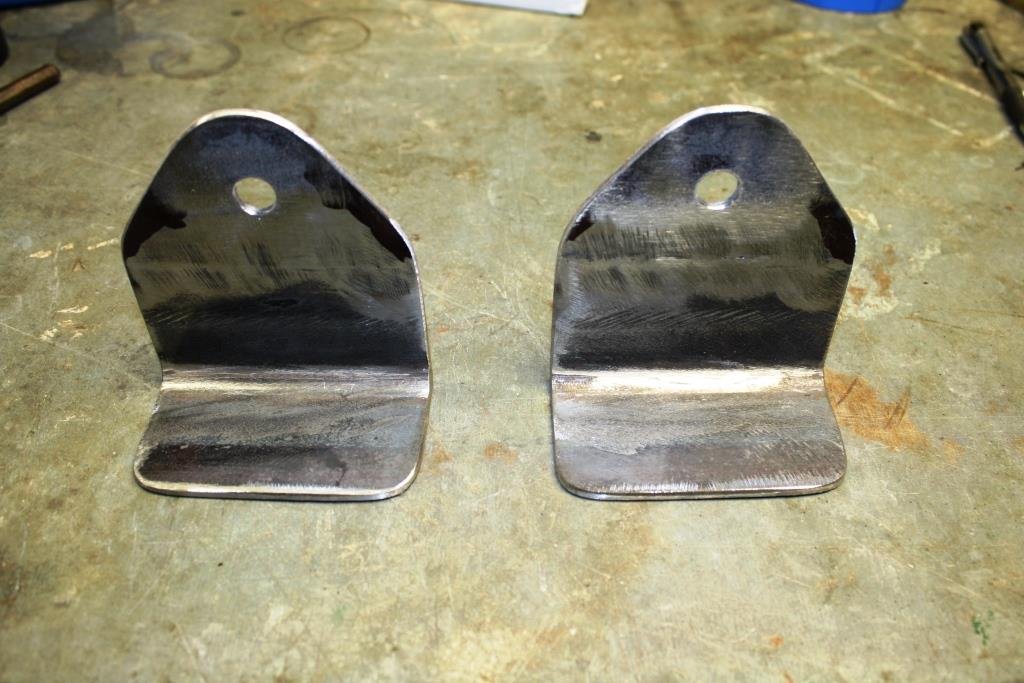
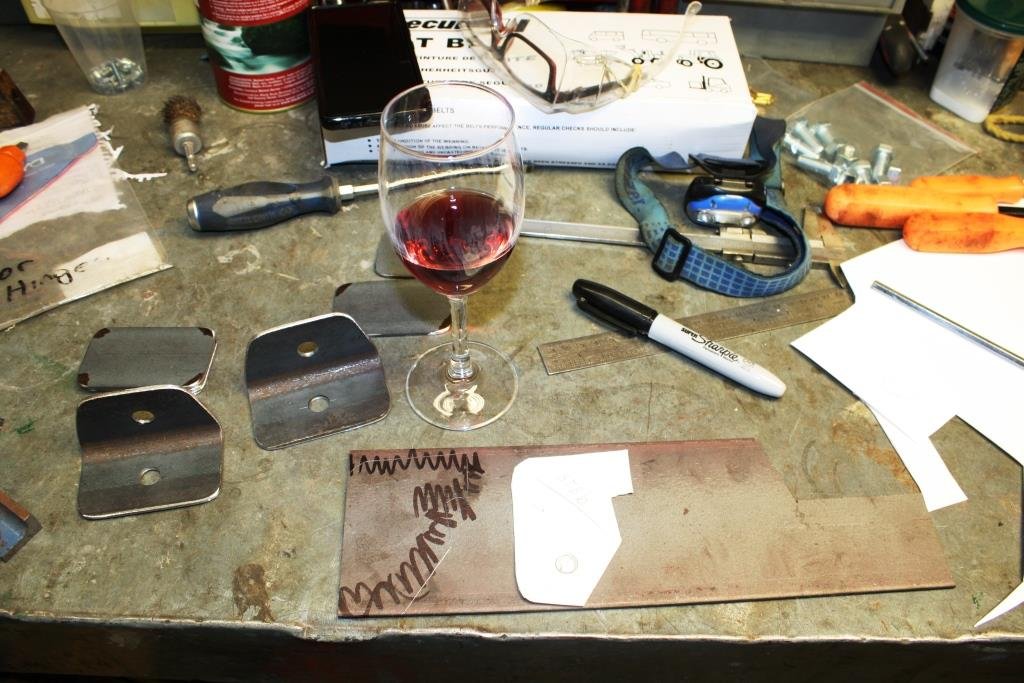
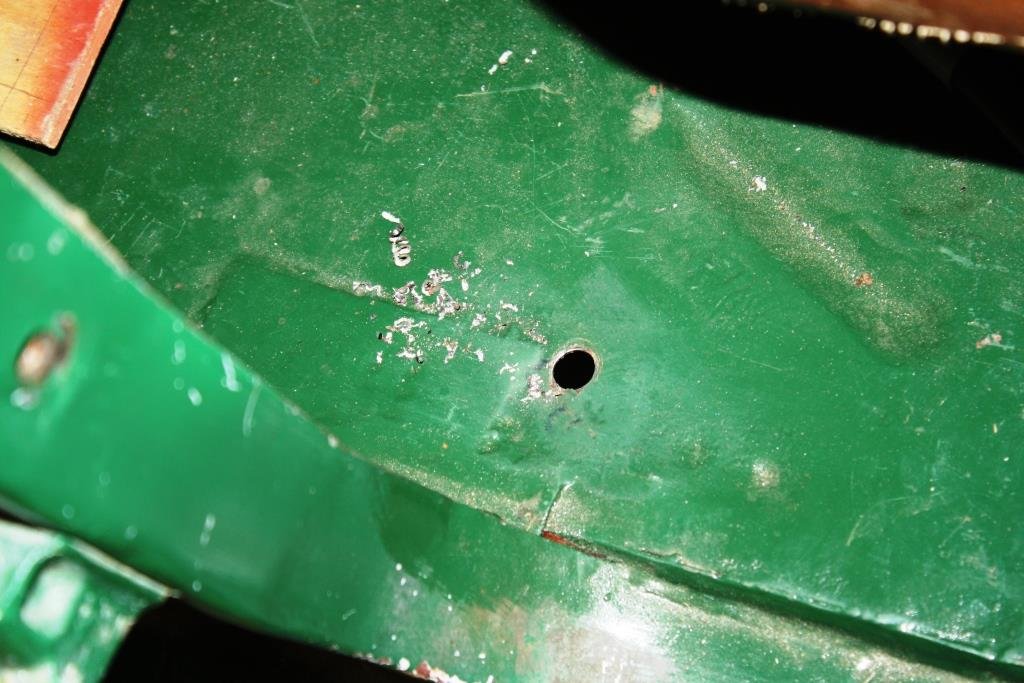
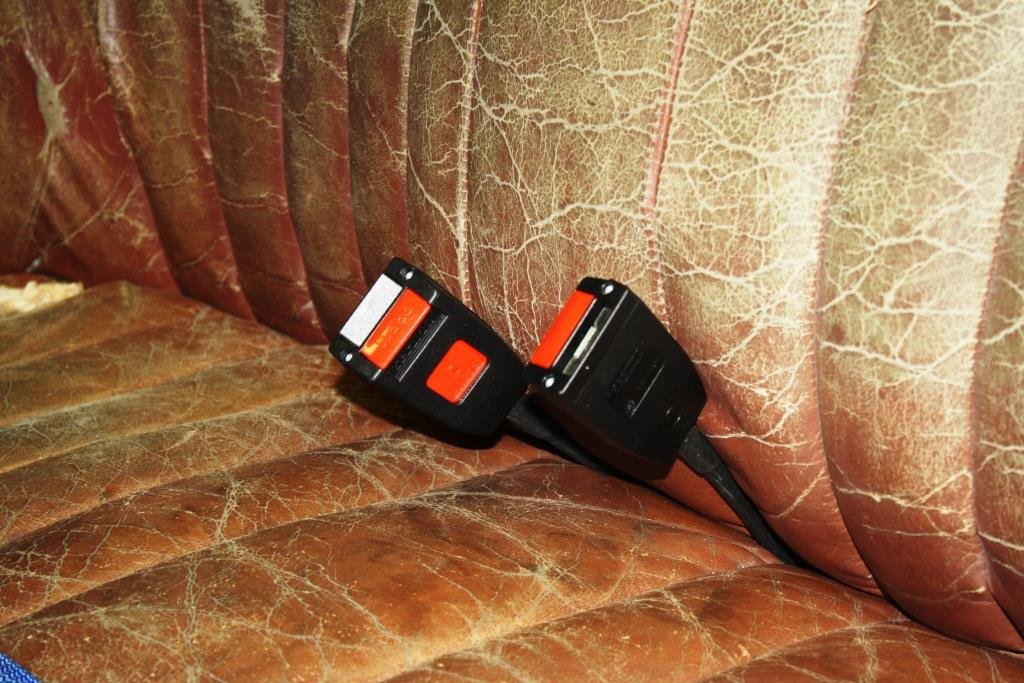
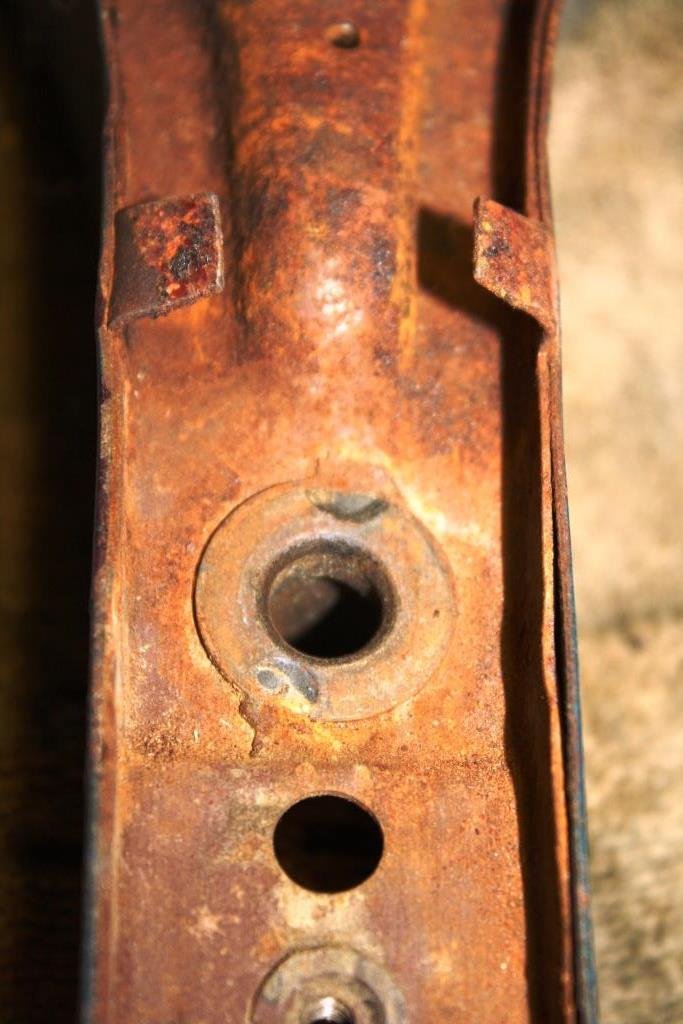
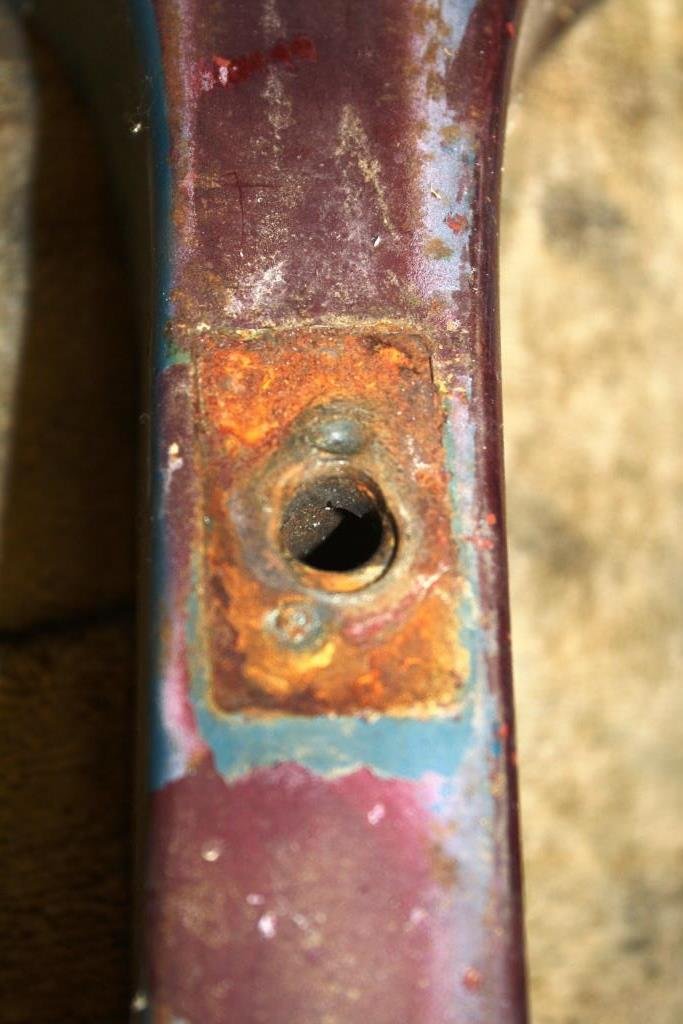
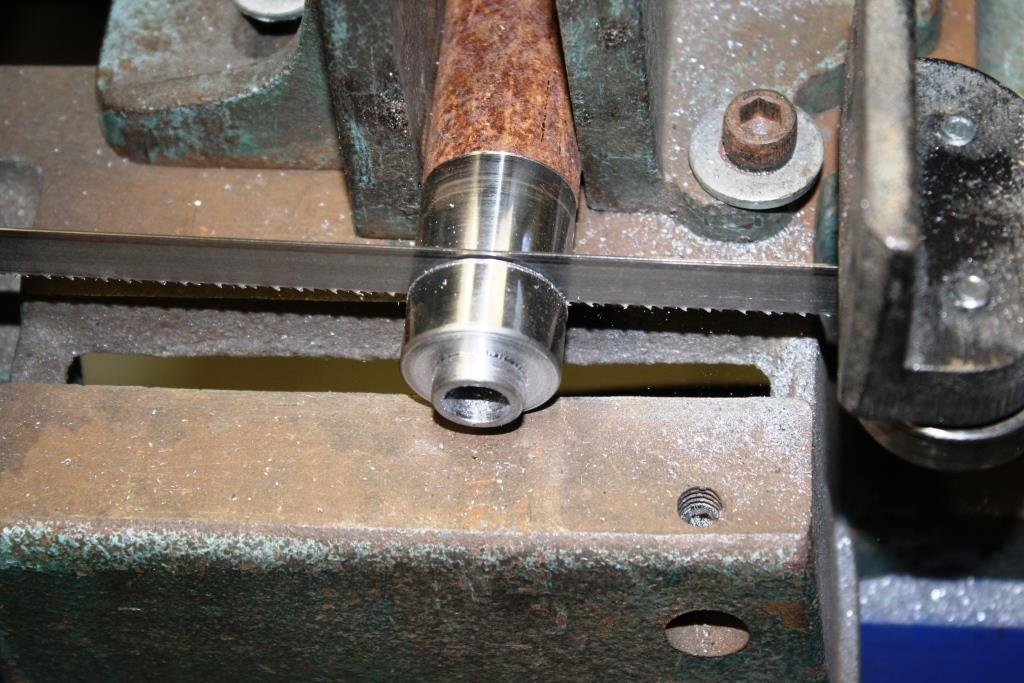
One thing I’ve learnt from 25 plus years of building and racing Targa cars (after surviving a number of unintended high speed off road excursions i.e. I’m a slow learner) is that seat-belts are a great idea - so Rigamortice and I bought a very flash pair of these. In 1947 when Rigamortice was first registered they had yet to be invented that alone crumple zones, airbags, ABS, etc. This raised a bit of a dilemma……. The cleverly cunning and fiendish plan I have in place is to drive Rigamortice on public roads doing frequent “one wheeler peelers” while in ignorant bliss, enjoying the pure anarchy of having only these two stickers on the windscreen. (A massive thanks to V8Pete for the carless day sticker and yes the 1985 rego is genuine!). If they ever catch us driving on a Tuesday my plan B, (neither clever, cunning nor to that matter fiendish) is to simply go and get a WOF while proudly displaying my 1992 “Vehicle Modification Declaration” form - see page one of this thread. Yes there is a reason why I have kept this build as a restoration and yes the registration is still on hold. The elephant is the room is that in theory the only way I can legally fit modern seatbelts (the old lap belts I fitted in the mid 80’s were not mentioned on the declaration) is to have the whole car certified. One can only wonder what small minded LVVTA bureaucratic bozo thought that was a good idea! Only solution I can think of is to fit the belts and tell my friendly WOF man I’ll remove them if it’s an issue. I had a chat to the Cert guy we use on our rally-cars and while agreeing the situation was total B/S he suggested I make sure the installation at the least confirmed to LVVTA standards. This could only mean one thing……….. Please…….please……….noooo………… ….not the………Dreaded……..Hobby Car Technical Manual……..! Rule number-one is there is no problem that you cannot drink or fabricate your way to a solution, (the world according to Wild Turkey, home brew, Rigamortice & sr2). Swallowing my brutalised pride I bought some angle and some flat and started cutting. Thirsty work………. I couldn’t find the right size odd-angle so I made my own. The sandwich plate at the bottom of the B pillar had to be a strange shape to fit flush so I made it larger than needed while still keeping the correct radius on the corners. A little spray of insipid green paint……. It still doesn’t feel right drilling holes in a 77 year old car...... Looking a little out of place but hopefully we’ll live with it………(excuse the bad pun!). Decided the mounts for the external hinges on the B pillars were the strongest and best placed positions for the diagonals. You can see in these two pictures (off a spare pillar) that it even comes complete with the required crush sleeve. I spun up a slightly thicker spacer than the one that came with the belts………. And with a new, longer high tensile bolt it fits perfectly and is more than strong enough. Hopefully the WOF man will let this one slip through but I’m still feeling us car guys are badly served by the LVVTA who appear to prioritise justifying their own existence over everything else. Hate to get political but I cannot think of another regulatory body in NZ that is privately owned, makes up its own rules, has no complaint process in place and appears to be increasingly out of touch with their certifiers (the good guys). No wonder there is a growing shortage of them. Rant over – almost time for Rigamortice and me to be on the road cruising. All I need now is a sound system and a heater!
- 185 replies
-
- 14
-
-
Guys, thanks for all the response / advise. I think we may have made contact through a 3rd party with the original NZ owner. I have to respect the mans privacy (he's 85 years old) so can't mention names, will keep you all informed with progress.
- 41 replies
-
- 19
-
-
Thought I'd post a few pic's.
- 41 replies
-
- 25
-
-
-
Hey guys. Made the mistake of putting this up in the For Questions Regarding WOFs/CERTs/NUMBER PLATEs instead of creating a separate thread. There's a lot happening here, would like to keep all up to speed with any progress made. How do I move it to it's own thread?
-
Thanks mate - wish me luck.
-
We are presuming that by now the registration has expired.