
Leaderboard


Popular Content
Showing content with the highest reputation on 09/09/20 in Posts
-
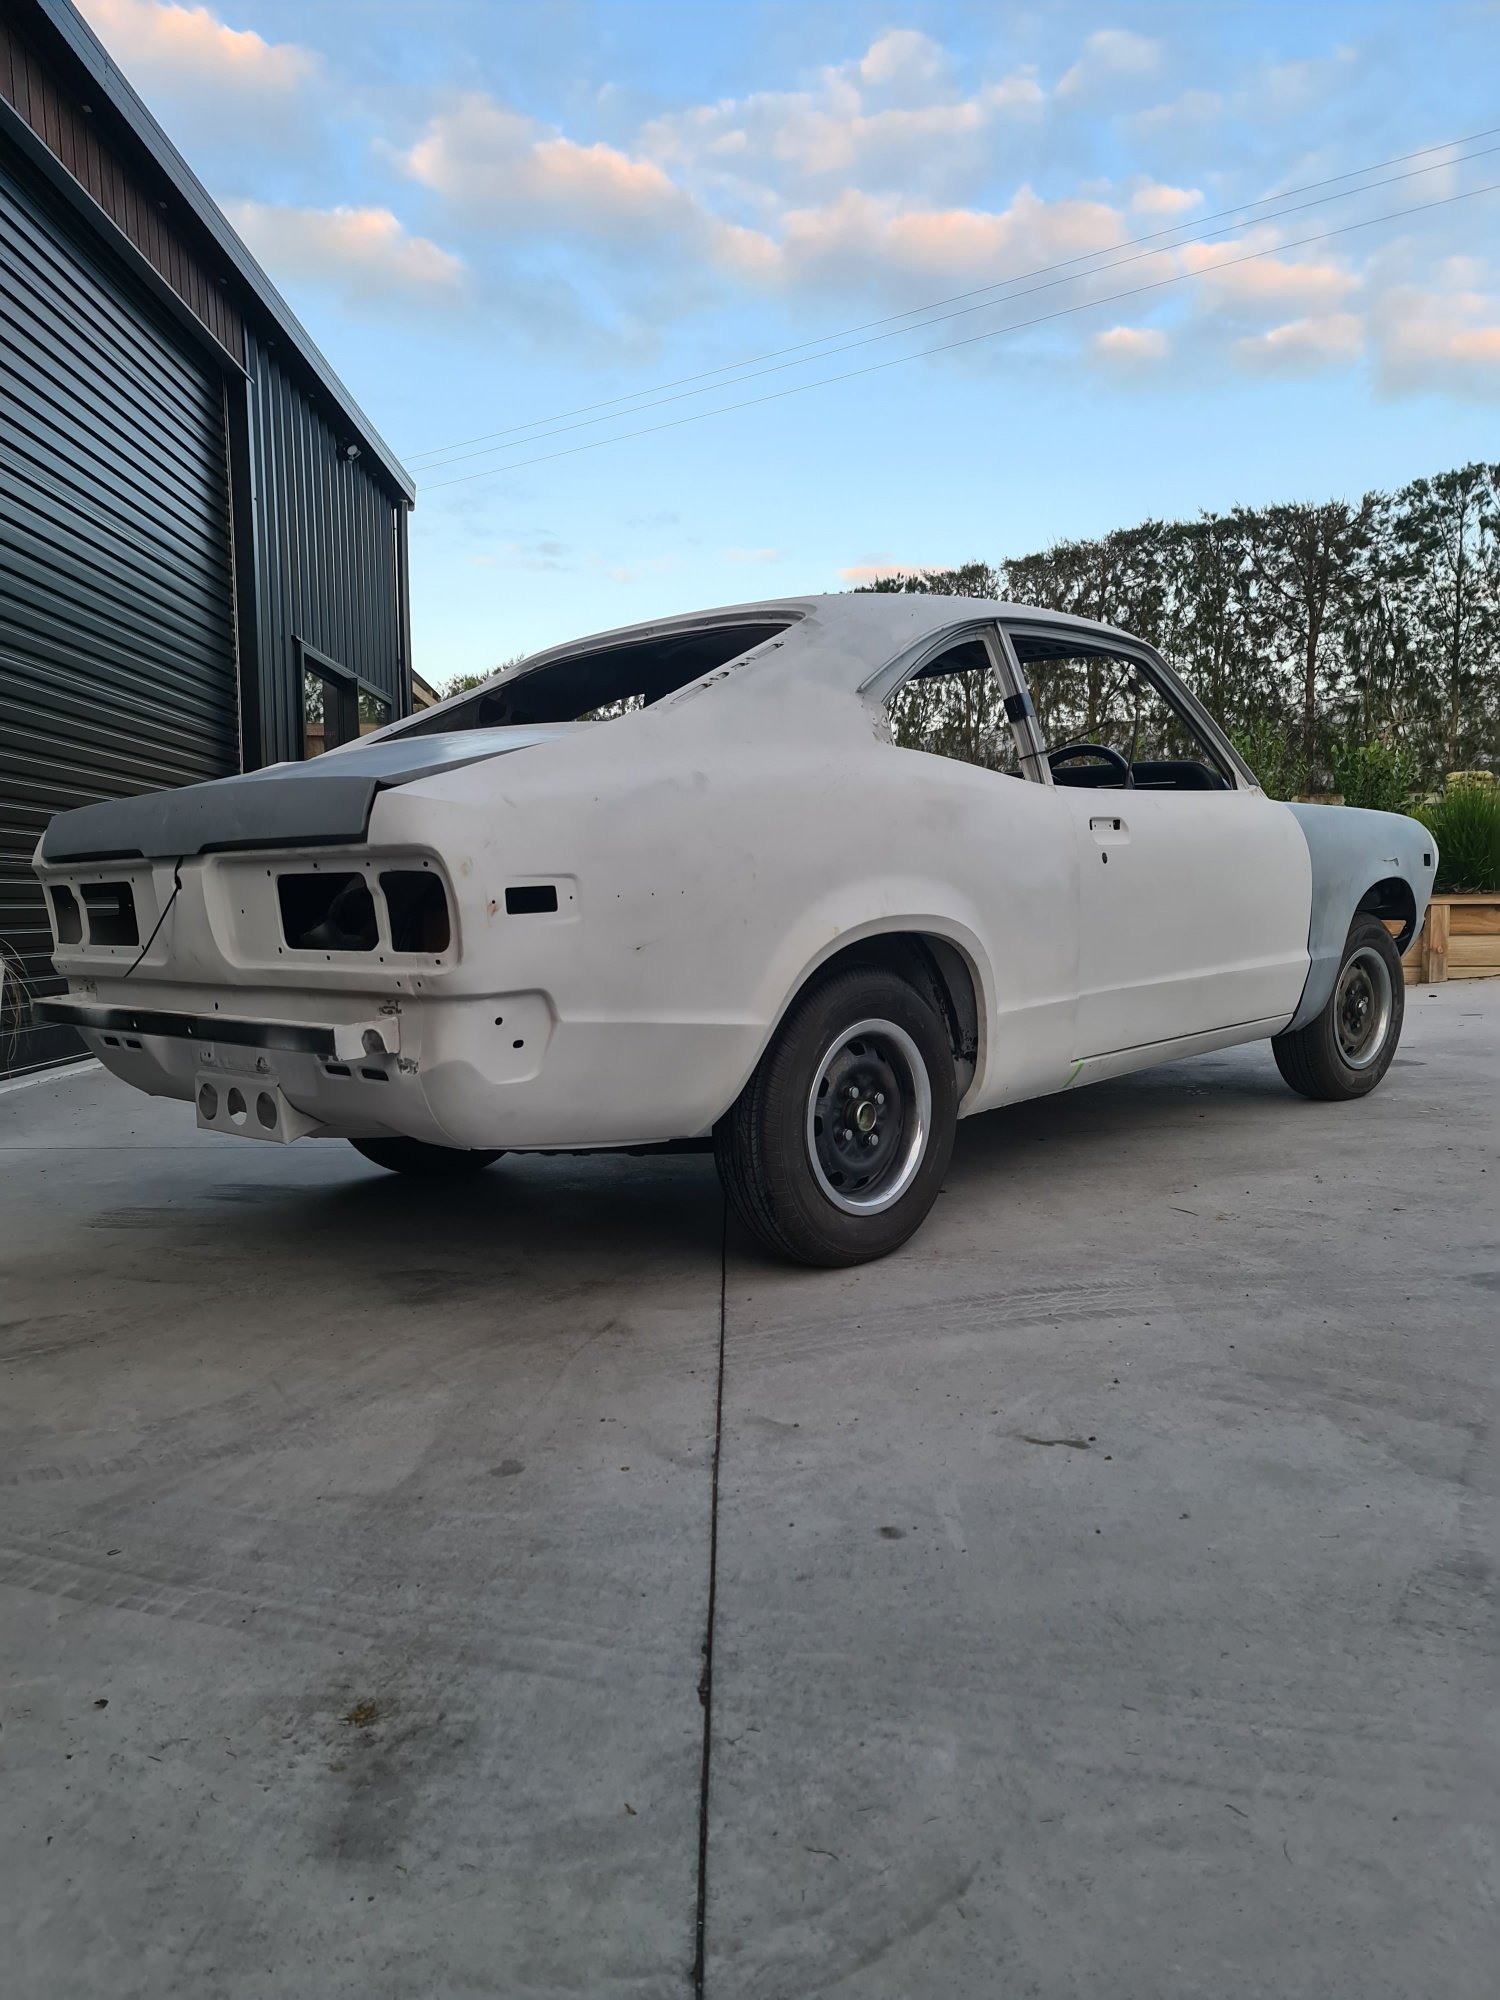
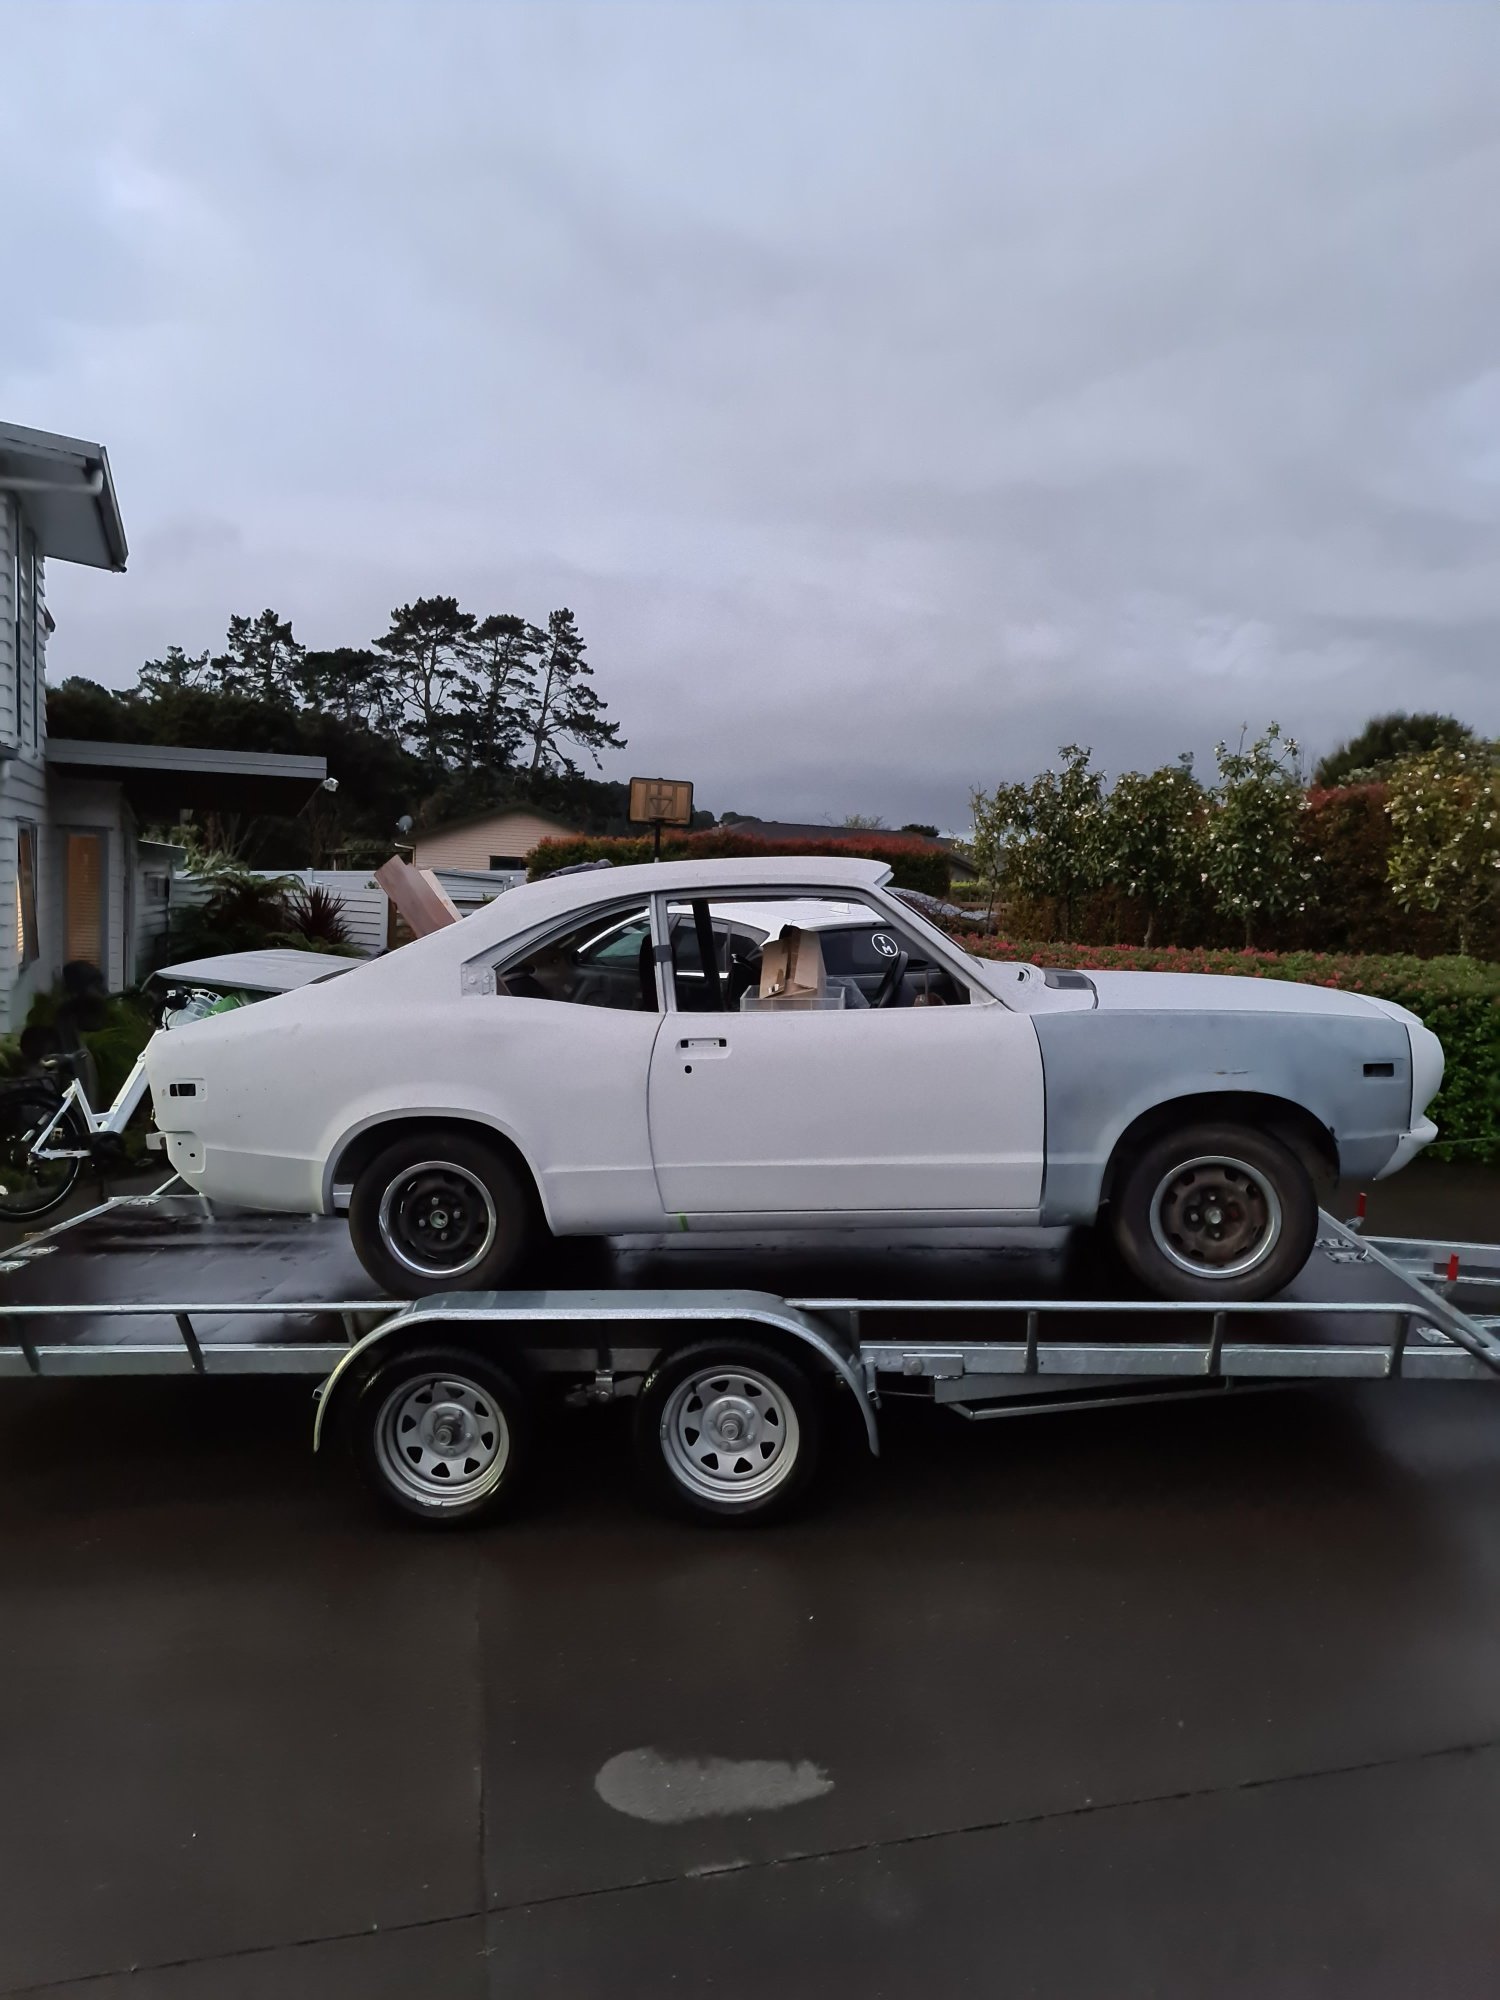
Well the 808 made way to make way for this...... By a chance conversation at Chrome 2020 I found out about this car, 1973 Mazda RX3 Coupe. Complete car minus a motor, Cars been baremetalled, rust done and most of the prep for paint has been done which is awesome. Came with a heap of extra parts and upgrade parts including -S5 RX7 gearbox -B2000 LSD diff thats been narrowed, with RX8 Rear calipers/rotors -Front coilovers -Factory suspension and diff as well -Lots of new bushes, rack ends, lights, badges etc etc Cars been real well done this far in and perfect base to build how it want and do it once and do it properly. Tell me im crazy and iv got a big job ahead of me here haha
 10 points
 -
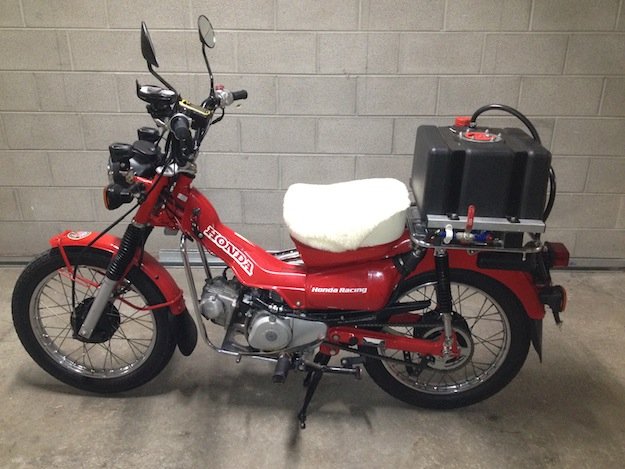
I bought a bike for this last night. Talk about glamping. Fly up, get picked up, bike already at the J-5 ranch. Smash out ride, fly home. What a jetsetter!8 points
-
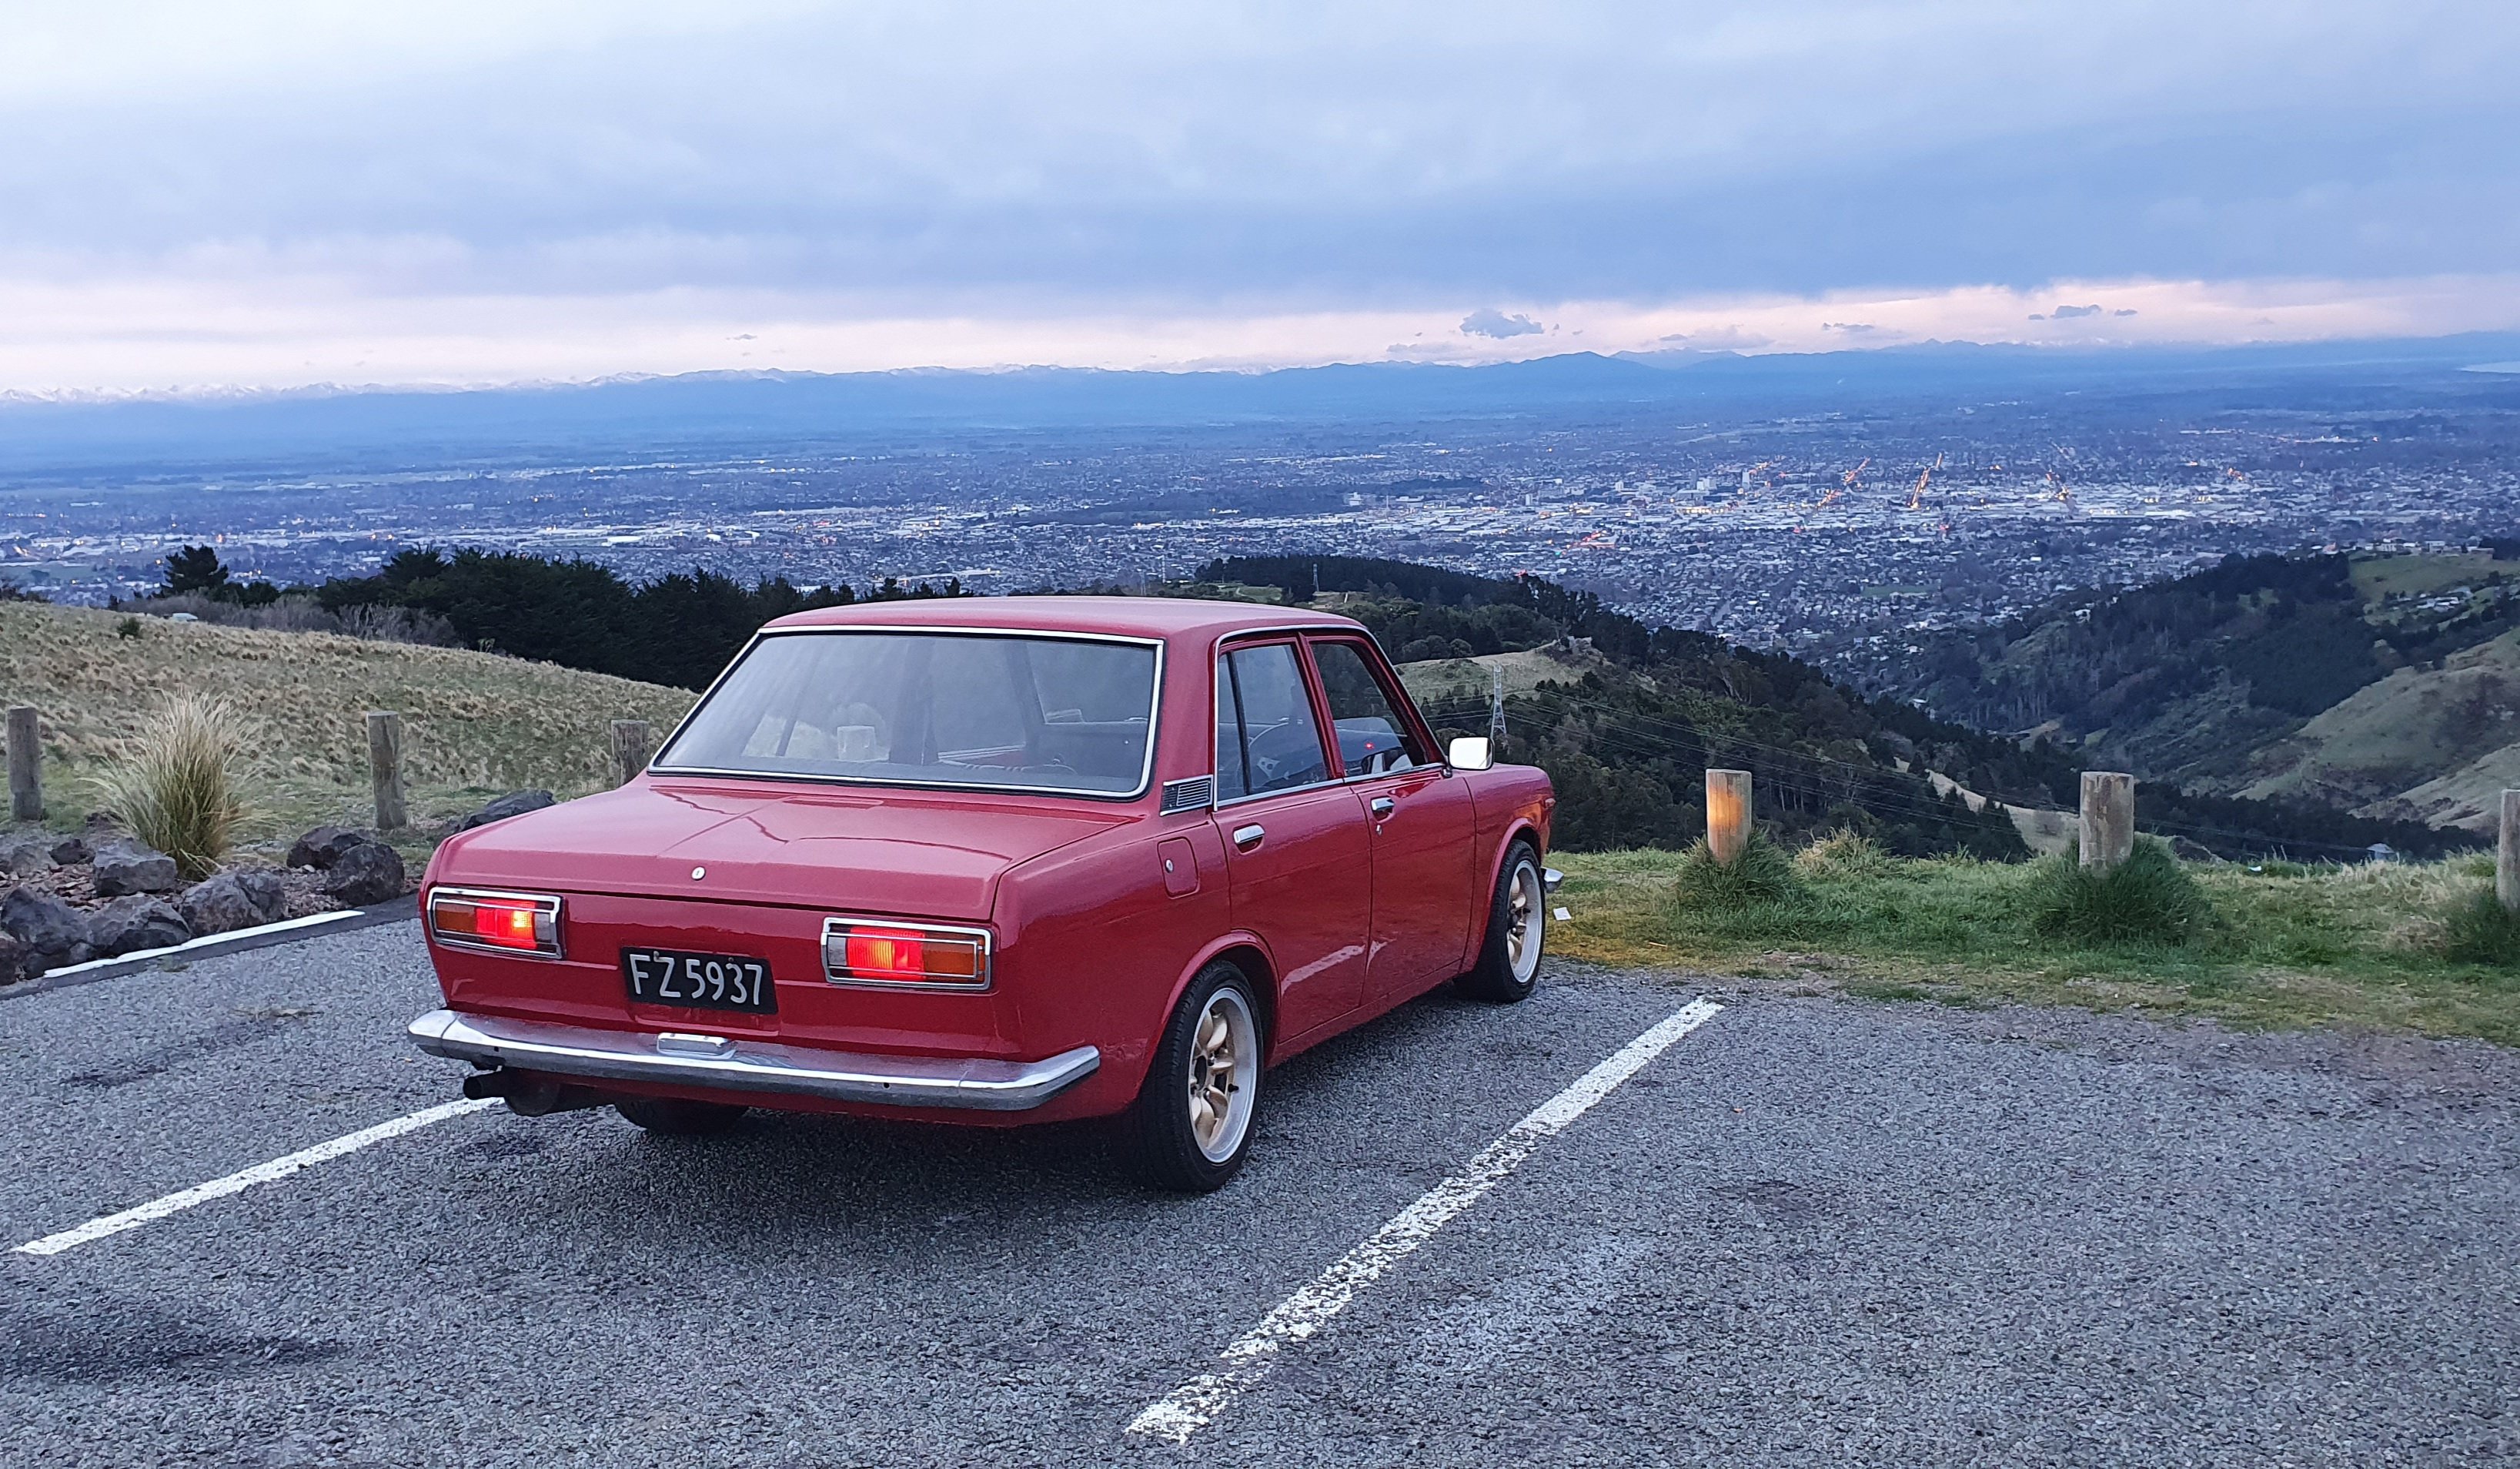
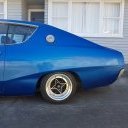
I've been working away at this determined to have it done before November. It'll be a stretch but to see that fresh wof sticker land on my windscreen will be a bloody good feeling. I repaired a small section of corrosion damage to my front nose panel (surprisingly good nic overall) and gave it a rough and ready base/clear paint-up, I'm not fussed getting an average finish because the whole thing will get a birthday next year anyway. I threw it back together and sat it on the car, now it awaits my inner guards to come back from blasting, and for me to finish working on the top panel, so it can be reunited with the front guards and bonnet. I've also re-co'd some bits to go back in once my floor is painted and the interior can go back in. I purchased a new ignition and keys because the old one was so worn it didn't actually need a key to turn so while it was apart I painted the column and cleaned my gauges. Next up, i'll be working on installing front suspension bushes, trans filter kit, and doing some mechanical maintenance to bring it up to daily driver standard. The points need doing, and I'll probably do the cap and rotor while I'm at it. Runs o.k, but with the worn points and sub-par gas it misses and coughs and all that carry on. Also swapped out the manual pedals for the larger auto brake pedal. The car was half manual converted (roughly too) so it's headed back to auto and will probably stay that way. Fitted up the 14x8 wheels to the rear. Unfortunately the rears don't take hubcaps but the fronts do, so it'll have a bit of an oldschool drag look to it. I'd also like another inch out of the ride height.8 points
-
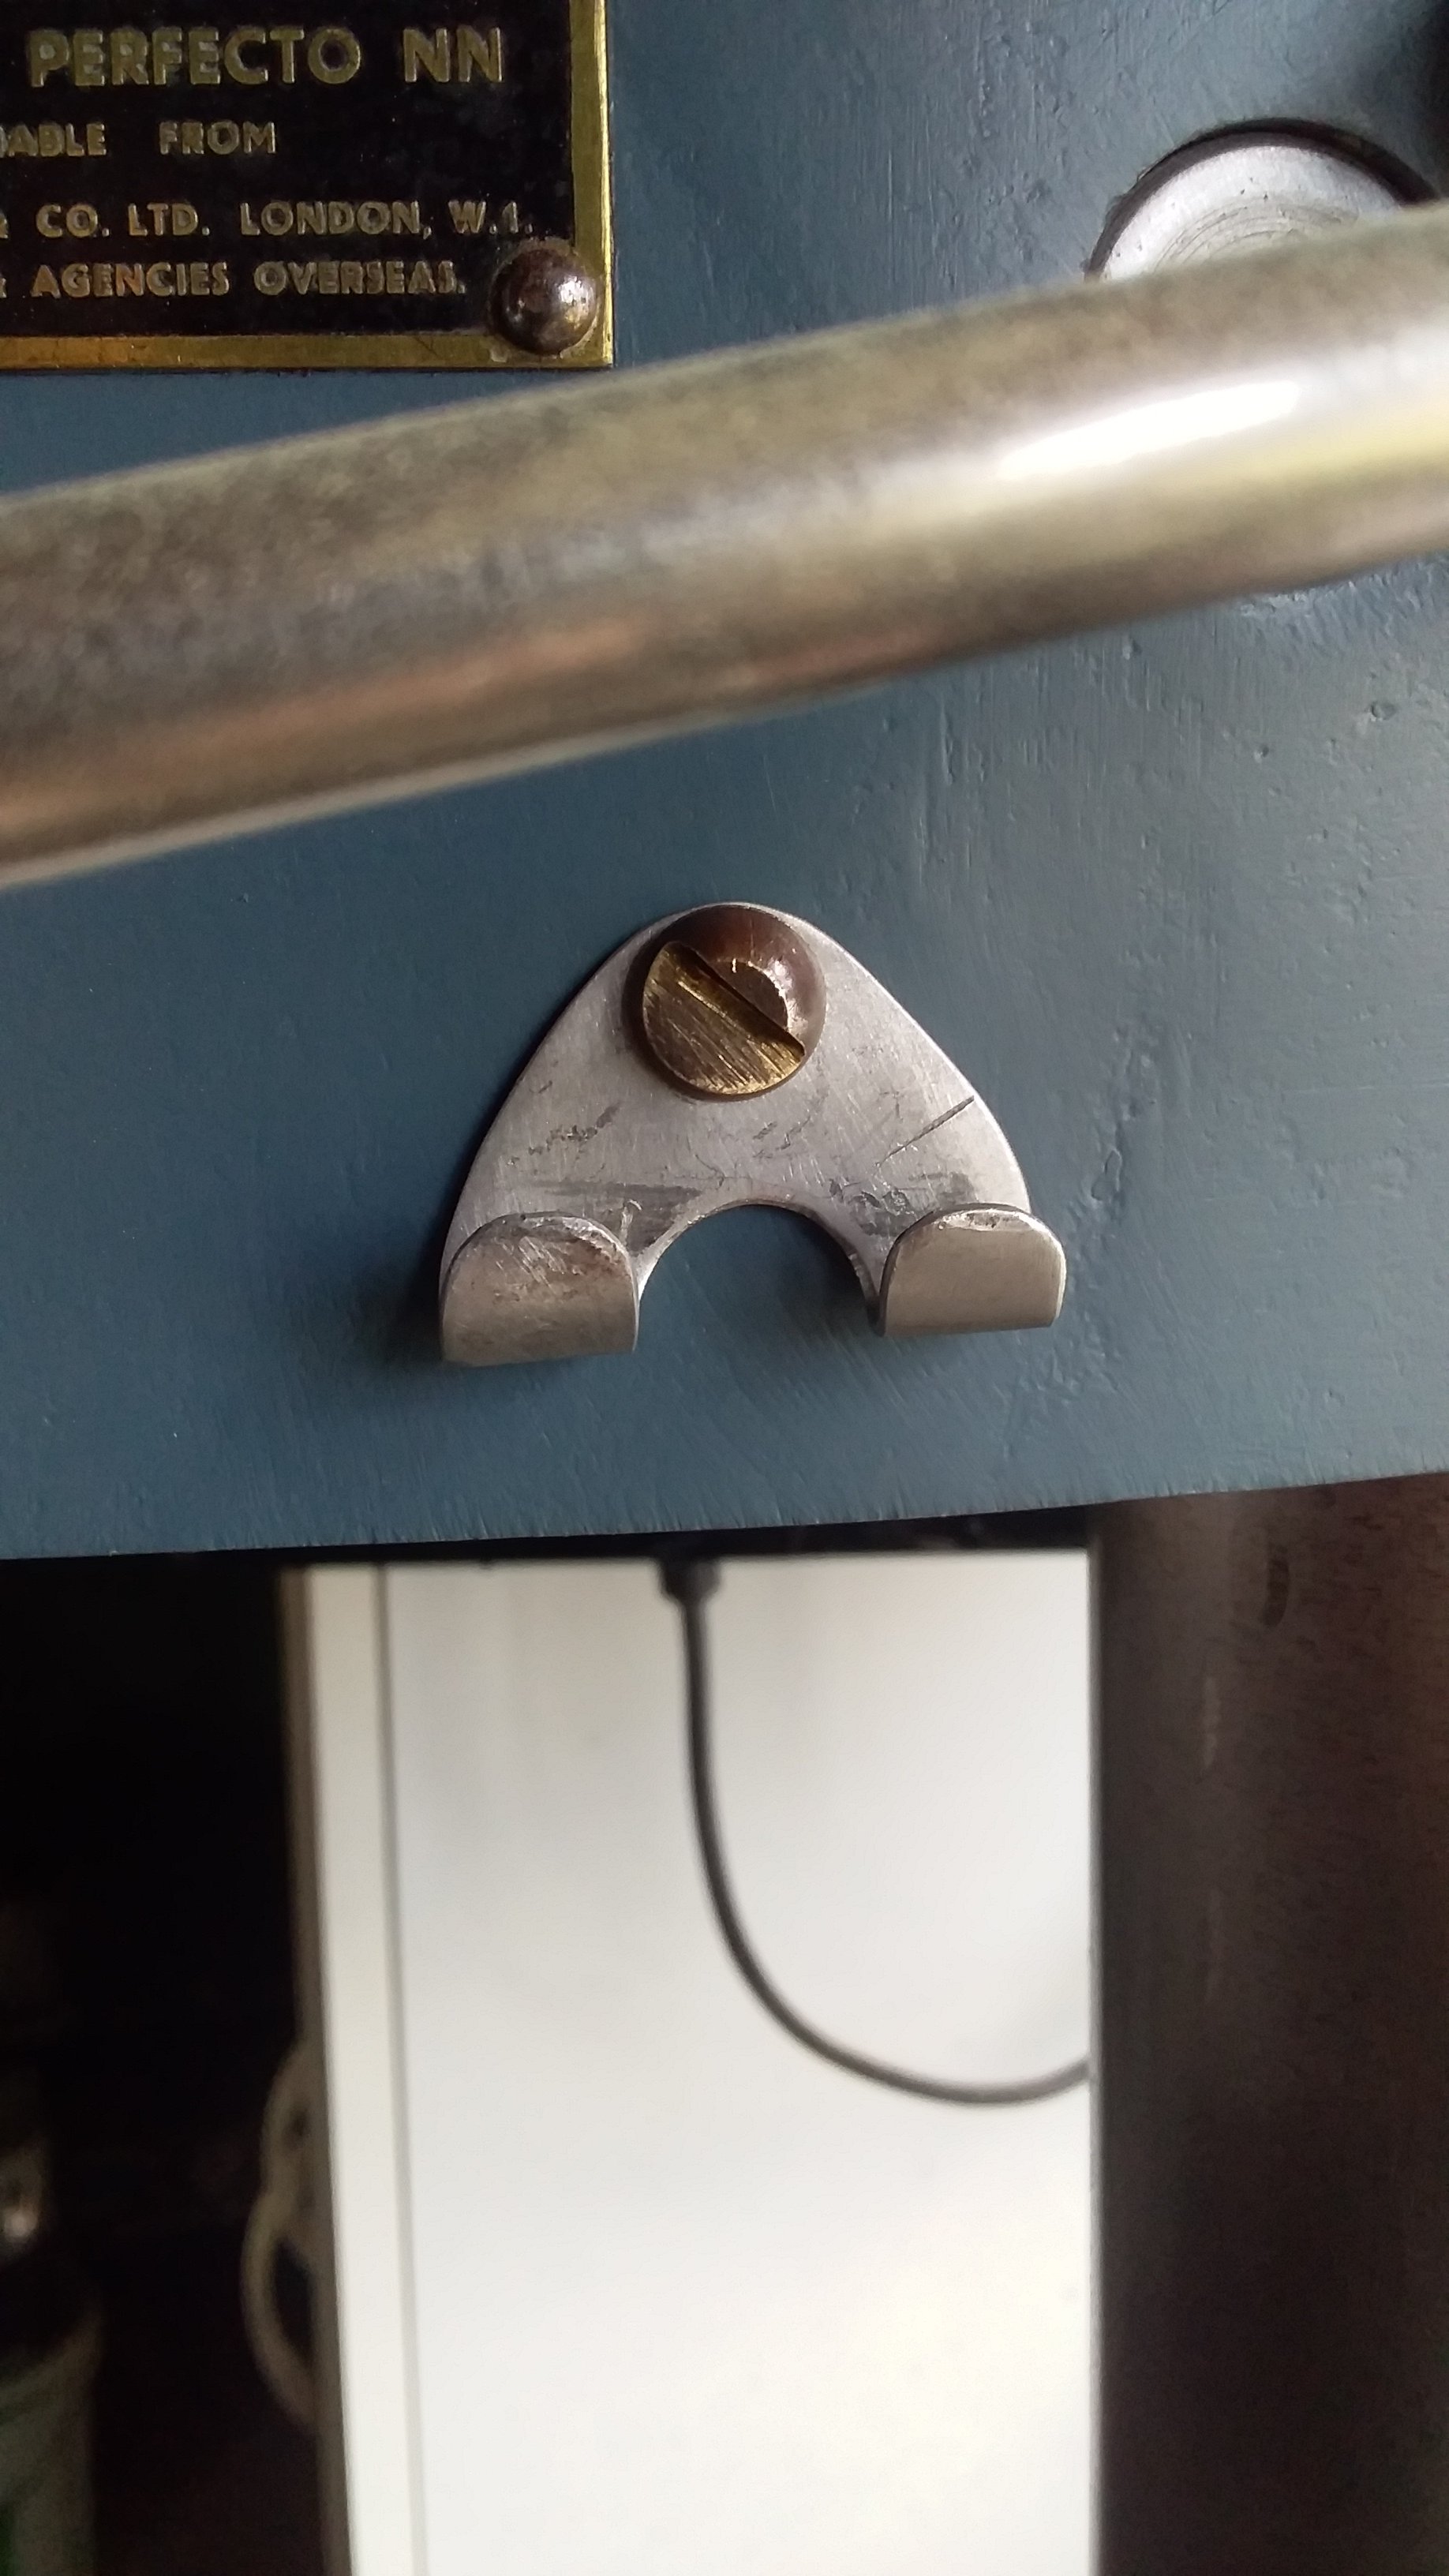
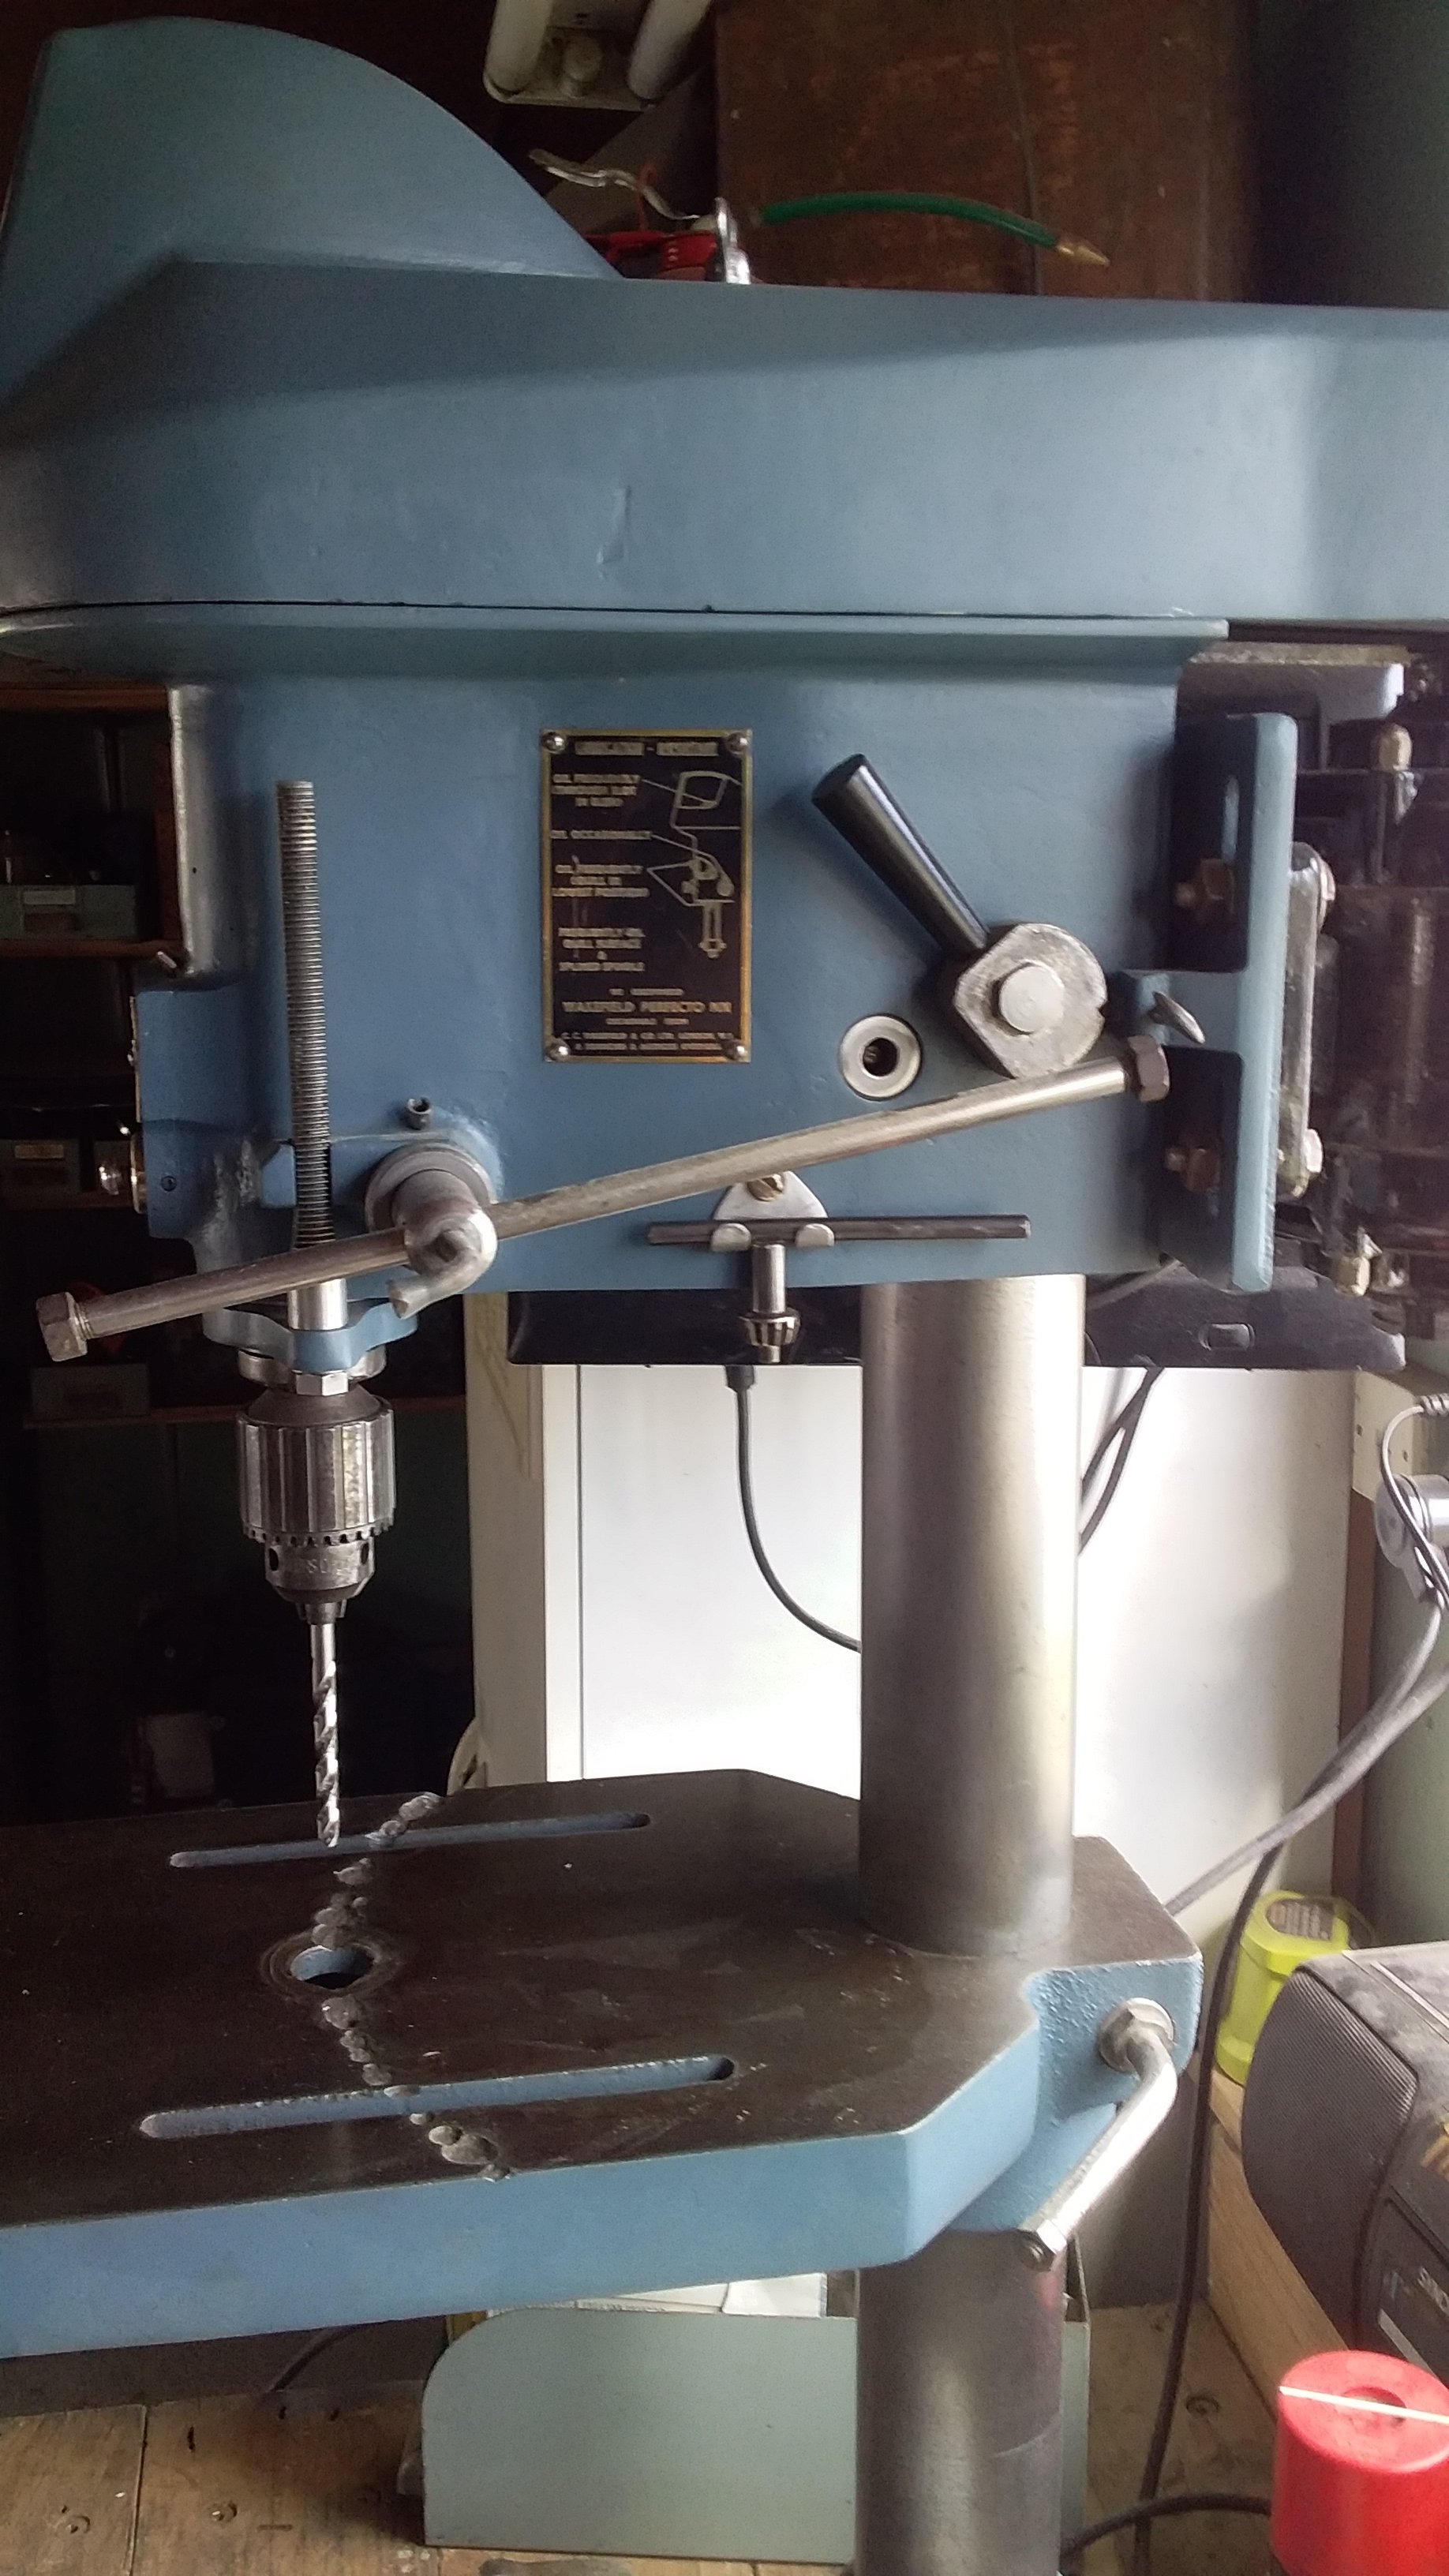
Cut up my first failed version of the switch plate today and turned it into a chuck key holder. Ye olde drill press had this weird half brass screw already, so I made use of it.
5 points
-
On Monday I dropped off my steering column at the local Engineering Works to have the L300 bottom portion welded to the Thames upper portion. Trevor has a mate who can issue a Dye Penetration report for Cert so he'll arrange that for me at the same time. So while I wait for Trevor to do his magic, I'm ticking a few smaller things off the "to do" list. For a while I've been giving some thought to how I'm going to power the L300 power steering rack. With real estate around the engine pretty scarce BrownDog suggested I use an electro hydraulic pump like he is using on his MK1 Transit. It is a really neat solution, but the Mercedes unit that BrownDog is using has a built in fluid reservoir which wouldn't work where I need to mount the pump on the Thames. Holden Astra pumps are plentiful and cheap here in Straya, but again has an incorporated reservoir. The earlier generation MR2 pumps were a popular choice a while back as they have a remote reservoir. Problem is they are pretty thin on the ground now and they are pretty pricey. The early 2000 BMW Mini Coopers run a ZF unit that has a remote reservoir. A company here in OZ sells a complete brand new kit for $1400. Way out of my price range. Phoned around the local wreckers (there are only two in town so choice is limited), but no luck on the Cooper front. Then I had a bit of a think about the donor L300 that I pulled the power rack from. Climbed underneath to suss out the original manual pump and it's a pretty small unit. Thought I'd take a punt and pull it out for a closer look. Threw a few spanners around, gave it a clean up and mocked it up on the 3Y to see if it would fit. Good news is that it tucks up nicely on the side of the engine. Looks like I'll just need to fabricate a small flat adapter plate to bolt the original L300 bracket to the side of the 3Y, so that's another potential win. Was thinking about trying to run a single serpentine belt as the harmonic balancer on the front of the 3Y is a single pulley unit. Asked for some advice on the Tech Forum and it looks like a dual belt system would be the better way to go. So I'm currently trying to chase down a dual pulley balancer for the 3Y. Wish me luck. I'll keep you posted. Thanks for reading
5 points
-
If so, ol Bort gone from one extreme to the other. Bet he finds it boring this year..5 points
-
I hopefully wont be the last rider anymore. Never mind that I dont have a motorcycle license, and have never ridden a bike with gears further than around a DEKA car park as a kid. If in doubt, SEND IT?4 points
-
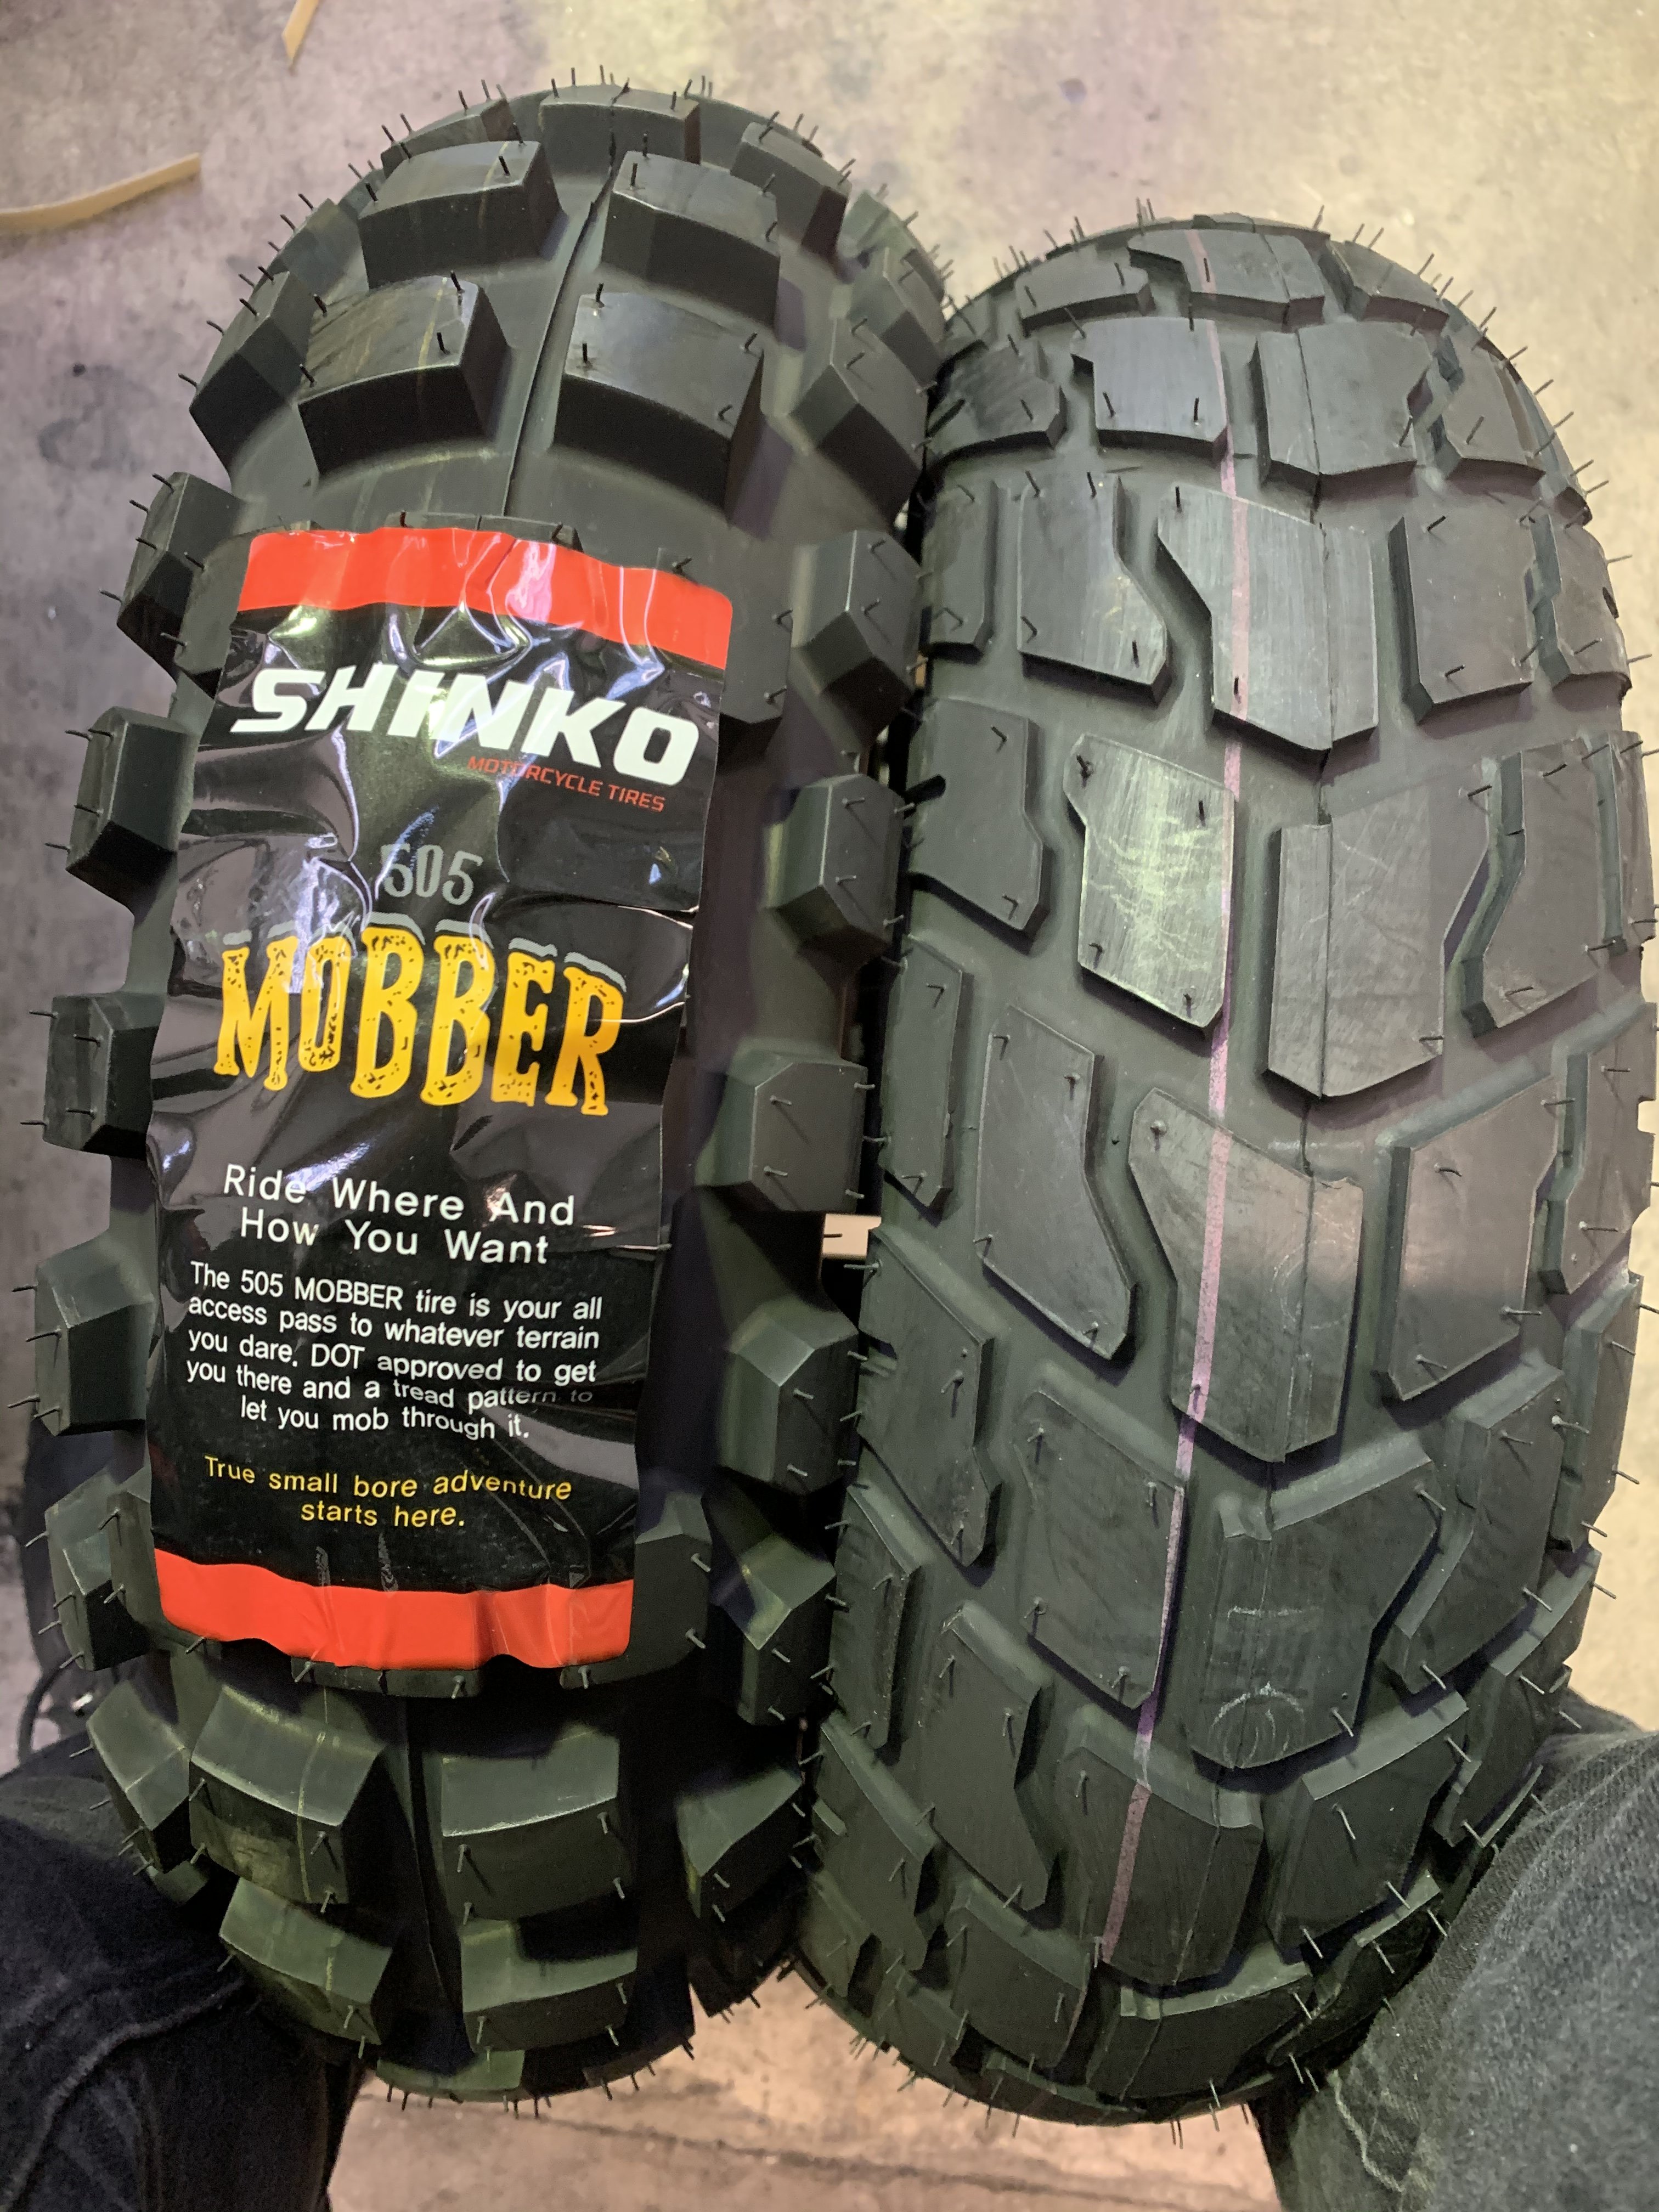
12” options for the Grom and Street magic kids.
4 points
-
Next level challenge4 points
-
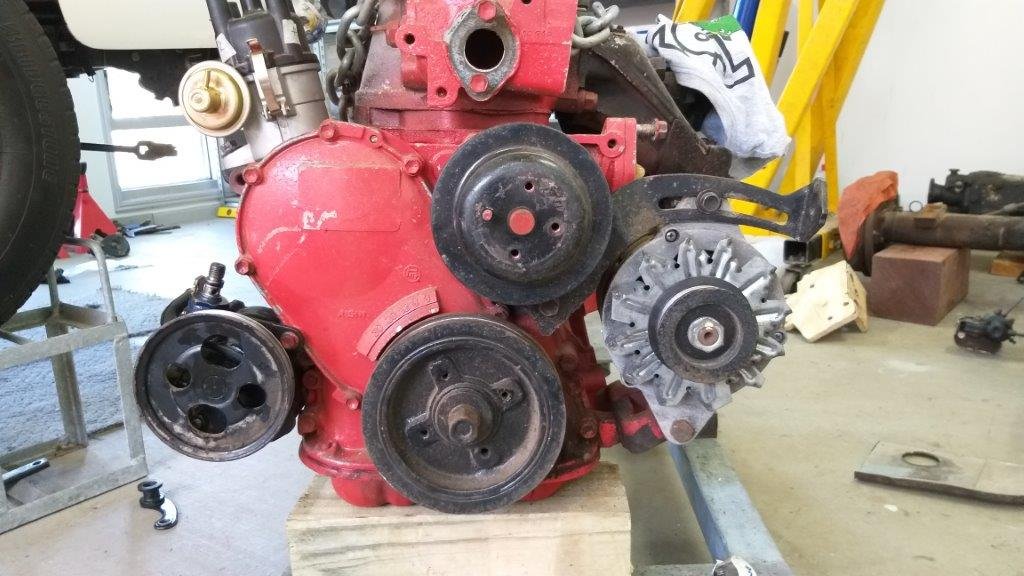
put the motor back in. did some wiring tidy up and some other shit to. put a new core in the radiator because it had a leaking tube. that was a cunt of a job. then i went to fill it up with water and the heater core tubes were cracked. not surprised really, ive never had the heater out of this car in the 20 years ive had it and the brass tubes get a fucking workout everytime i take the motor out what with getting the hoses on and off. so out with the heater box and repair the core. the tubes themselves were all out of shape and deformed so i was able to reshape them back to round and tidy them up so thats good. it'd be nice to get this thing back on the road some time soon, this clutch replacement has taken fucking ages. 2020-08-24_09-04-40 by sheepers, on Flickr 2020-09-08_07-43-55 by sheepers, on Flickr 2020-09-08_07-44-09 by sheepers, on Flickr 2020-09-08_07-44-16 by sheepers, on Flickr 2020-09-08_07-44-25 by sheepers, on Flickr 2020-09-08_07-44-32 by sheepers, on Flickr4 points
-
There are allowances for old cars if you cant get the anchorages in the allowable area, as generally it's still safer to have a seatbelt in the wrong area than not have one at all3 points
-
Are cabins still $20 a night at Reefton ? Pretty keen to get amongst this on 2 wheels tbh irl3 points
-
Fill that fuel cell up with Purple Goanna and we're on.3 points
-
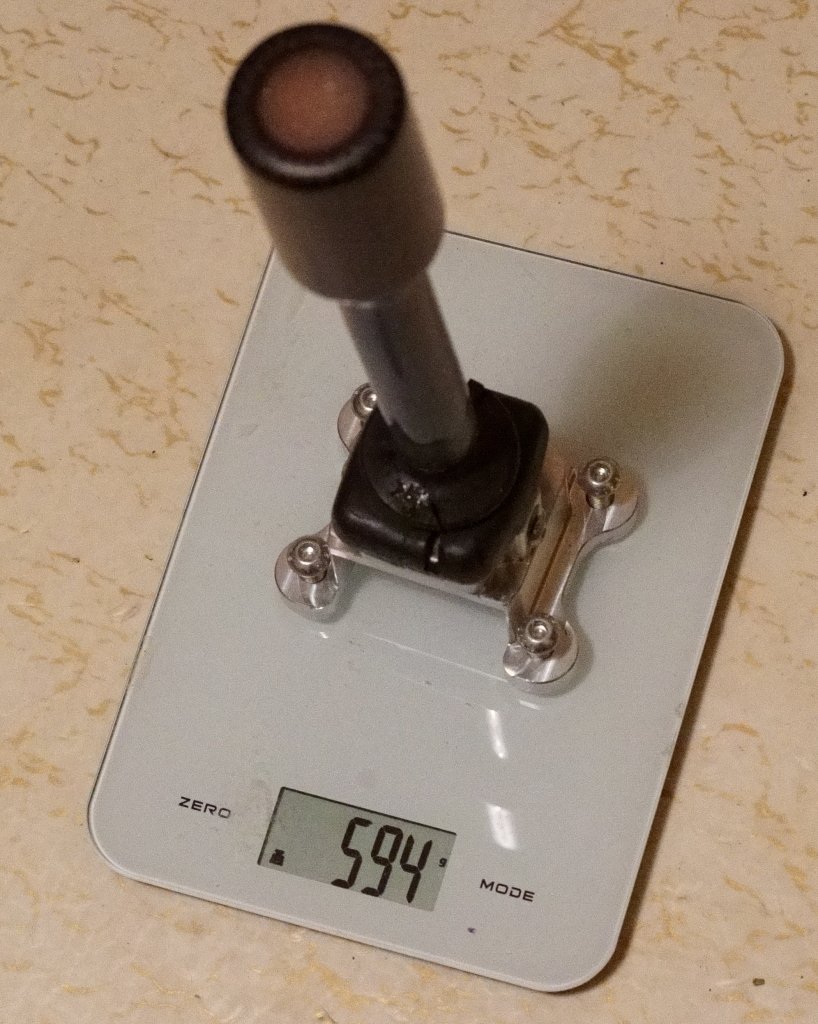
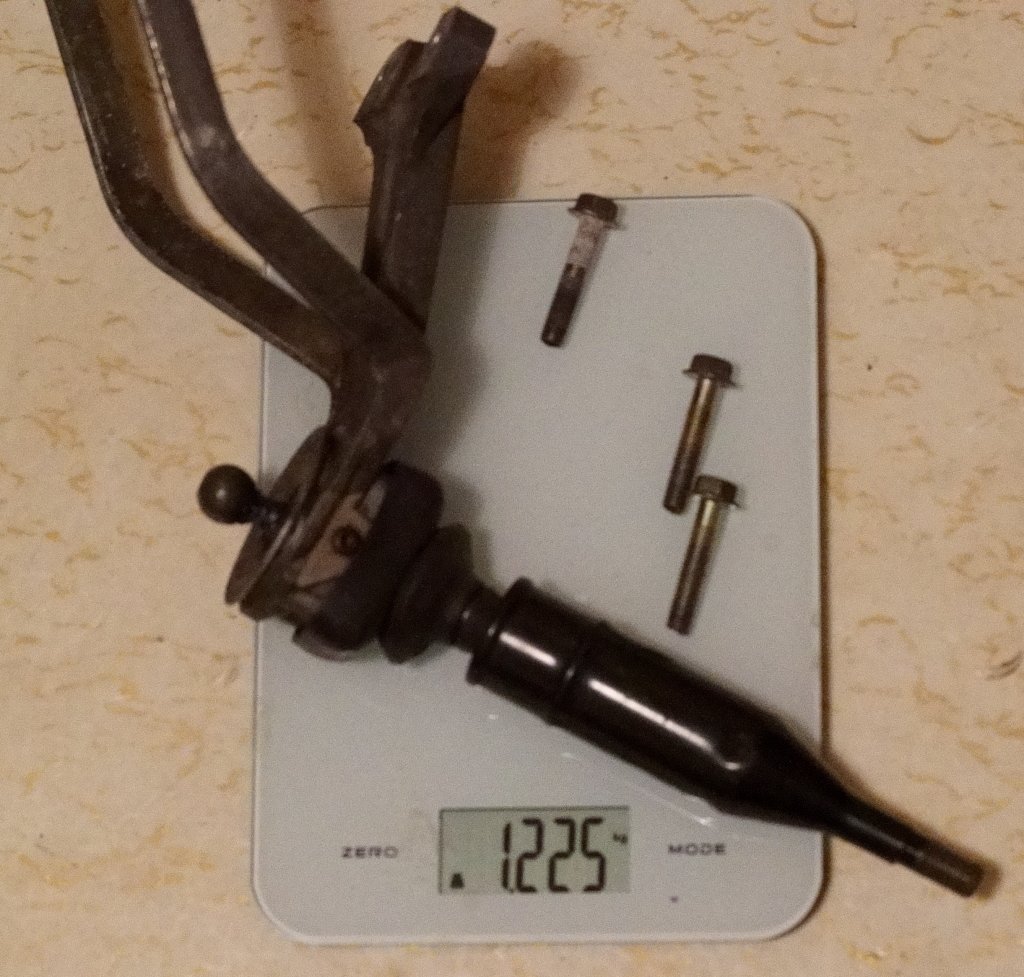
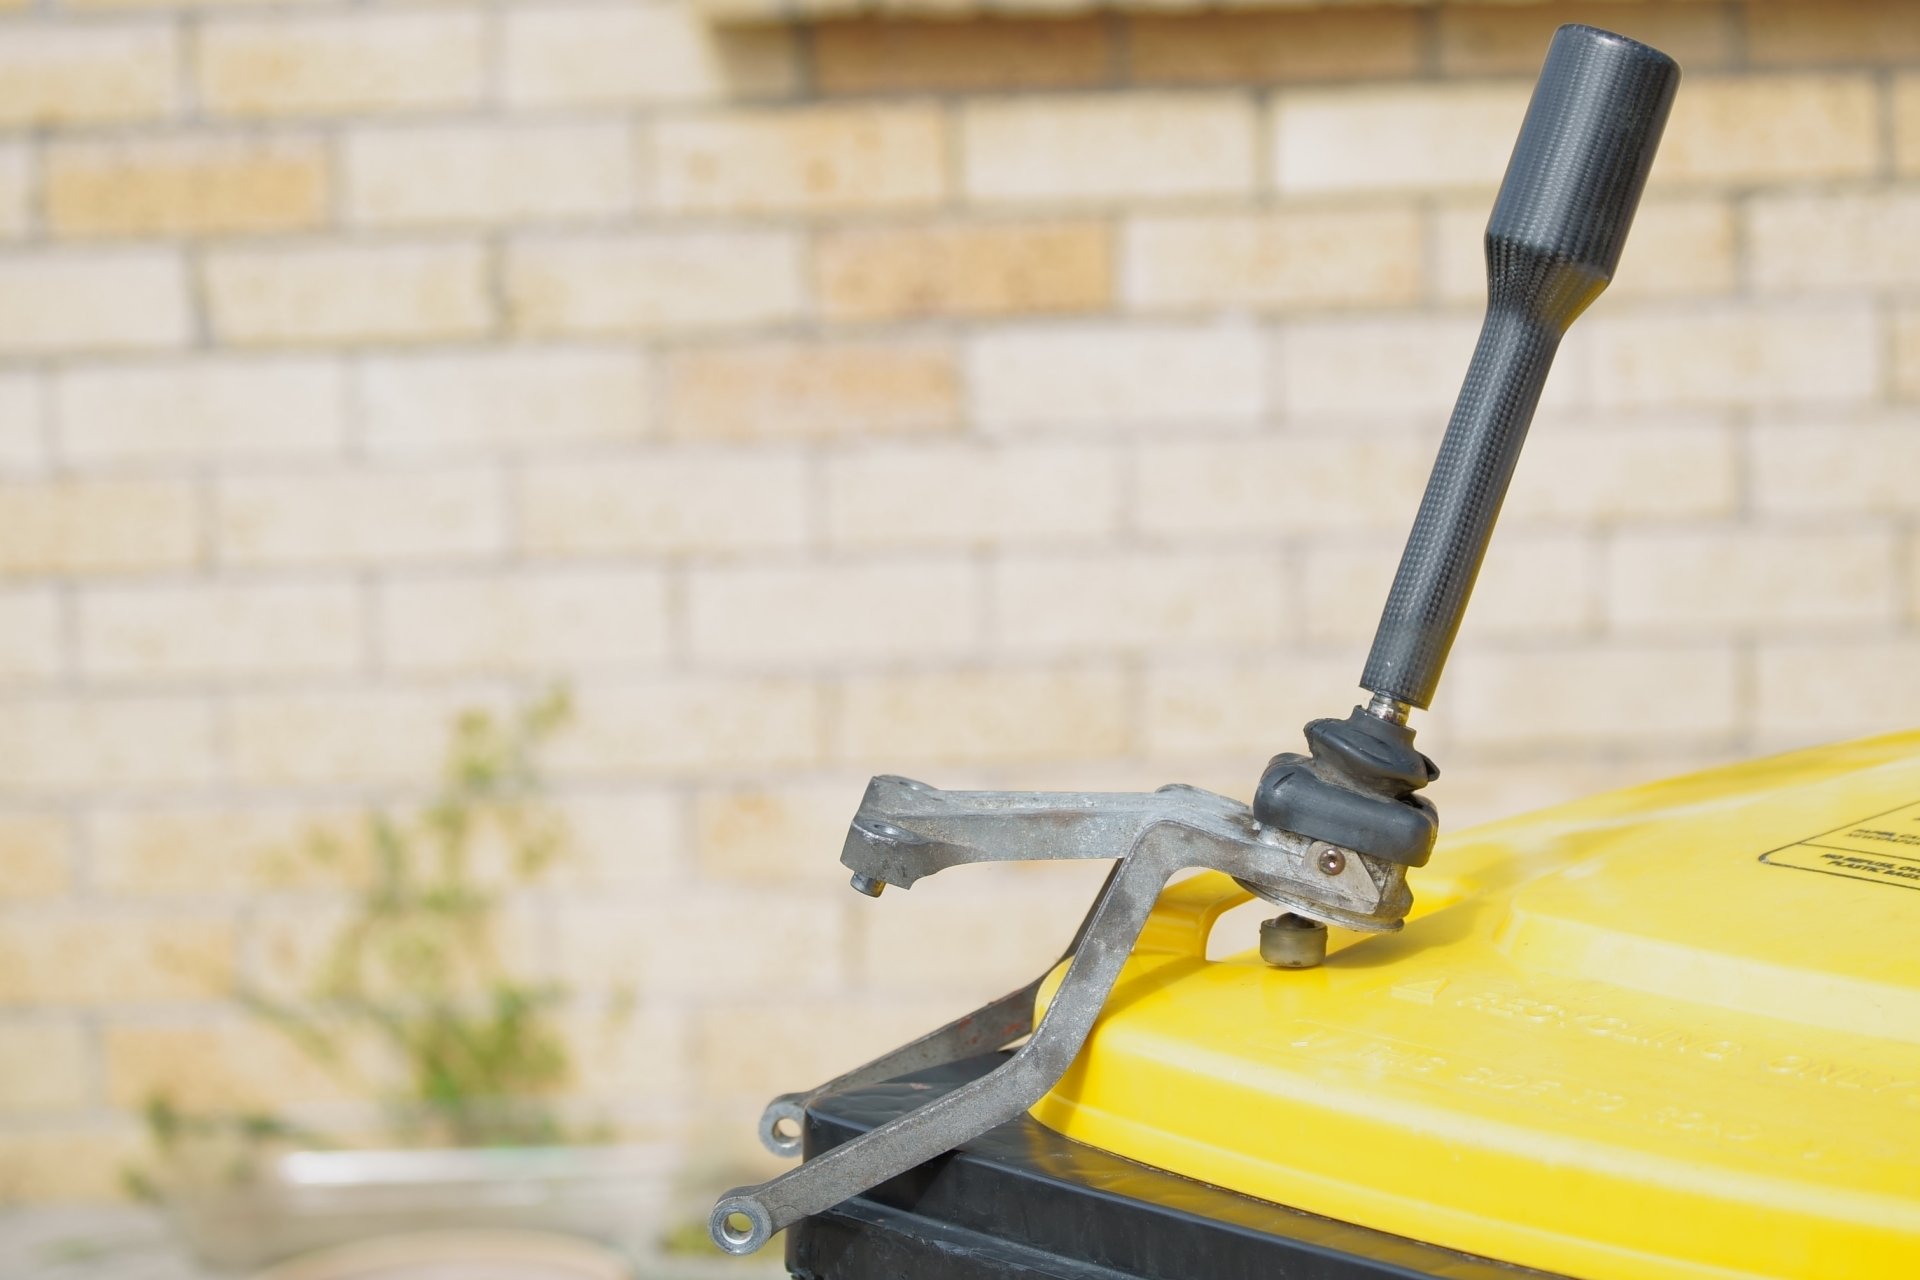
Some minor progress on making things a bit lighter and a bit fancier. Made a new shifter with a 3d printed dissolvable inner and some carbon sleeve. Turns out nice this way because there are no seam lines like you get with flat sheets. I was grizzling about how that bottom bracket seems heavier than it needs to be too, but then I remembered I've got the SQ Engineering relocation kit thing so that gets replaced too. And then to the most important part of anything I'm involved with, max effort for negligable differences and pointless graphs: I couldnt find the old gearknob but I think I remember Nic saying it was about 60 grams. and missing one of the bolts which are 20 grams so around 1400 all up. "That's fine dave, thanks, I can see difference from the pics" No, no, I insist Also bought a brand new OEM Silvia 6th gear kit finally. Looking forward to those sweet sweet sub 3000rpm cruising speeds... What fuel economy dreams are made of. Still no progress on getting a new shed built before I can do any major stuff needed, so probably a few other random additions like this in the meantime.
3 points
-
Classic! Can’t polish a turd, but you can roll it in glitter ;- )2 points
-
Well....., to put it bluntly, I've done SFA lately on these wee bikes, apart from get them all out and line them up in a shed So I think the plan is to get rid of the GSXR750 or strip the engine out for a go-cart or some kind of think that I wont kill myself in, get rid of the Vespa, CT90 and the get the FR50 and at least 2 of the AC50's going. Have just sent the 5KW hub for the FA50 away to get it laced into the 12" Rim, should have a fair amount of torque being on such a small rim so I'm looking forward to getting that back2 points
-
Just attach a 5L Heineken keg on the back with strops and she'll be alright!2 points
-
oops I accidentally deleted photos on the previous post...
2 points
-
You guys reckon this would cut it for an aux petrol tank? And how plush is that seat?
2 points
-
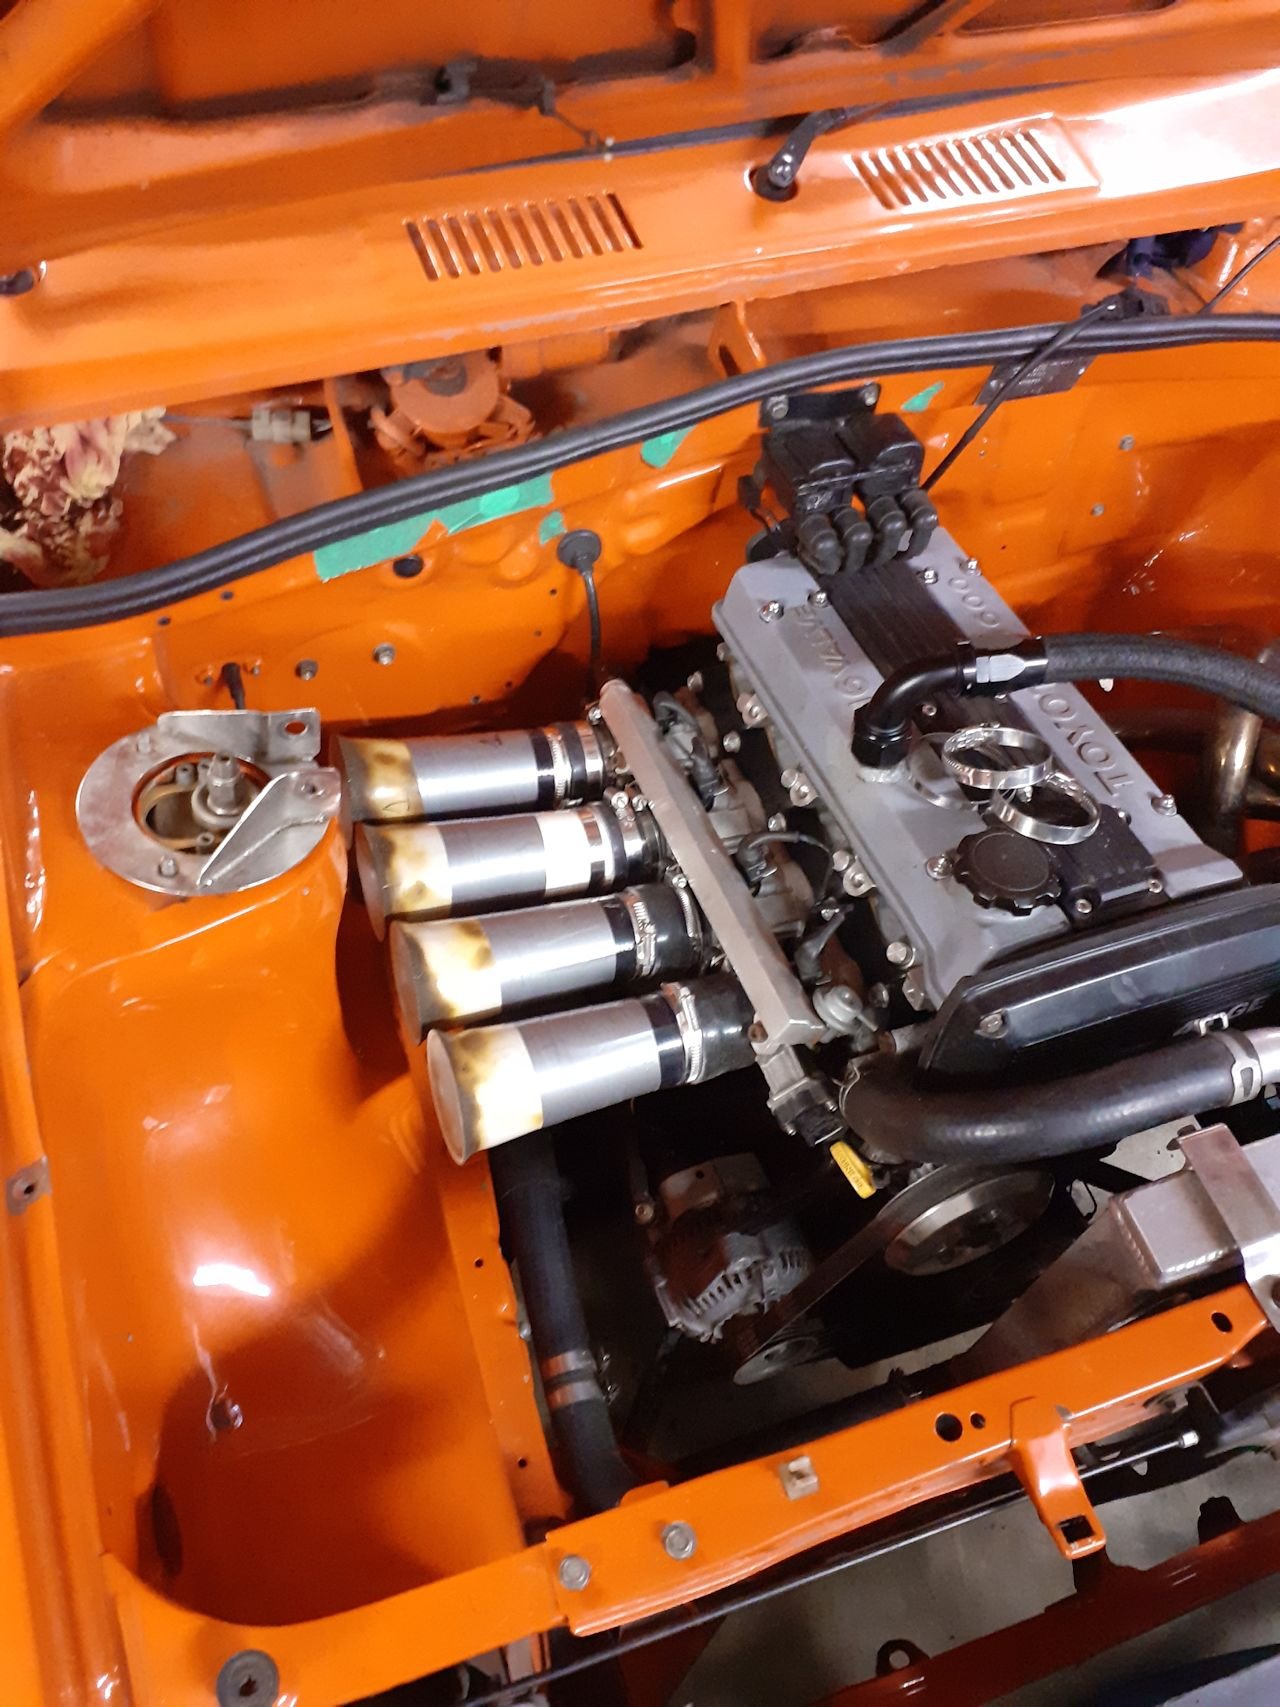
Little bit stuck cause getting motor mounts done and plumbing brake and fuel lines is all good and well. However they all run down the inner drivers side chassis rail. unfortunity this leaves bugger all room for exhaust manifold and turbo down pipe incl clearance to meet ver requirements. i have a feeling there’s gonna be a significant amount of time and money spent here. good news though, if I get fuel running to it and finish the ecu wiring there’s no reason I can’t get it started now I’ve got a manifold made
2 points
-
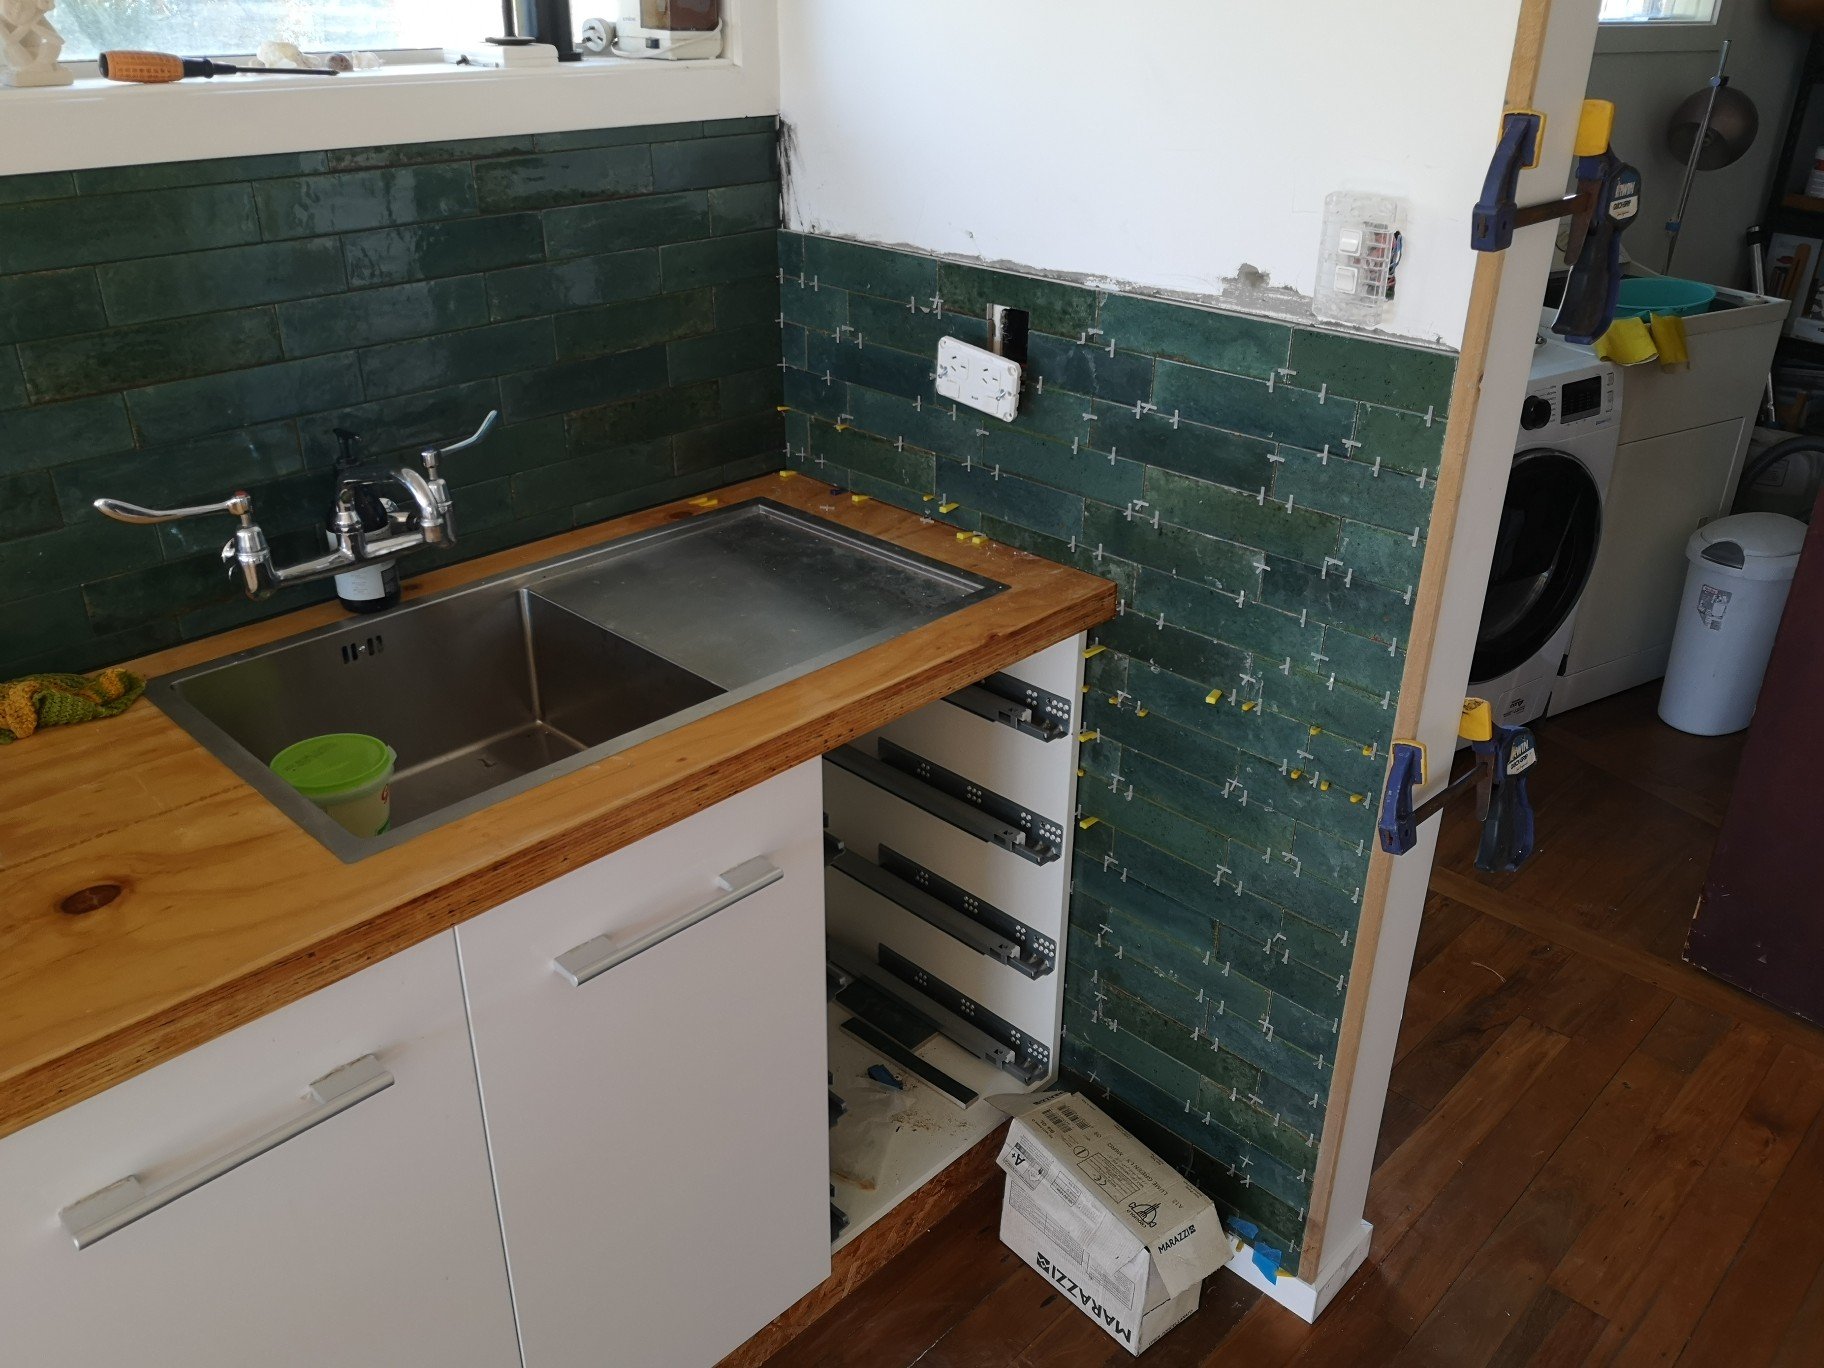
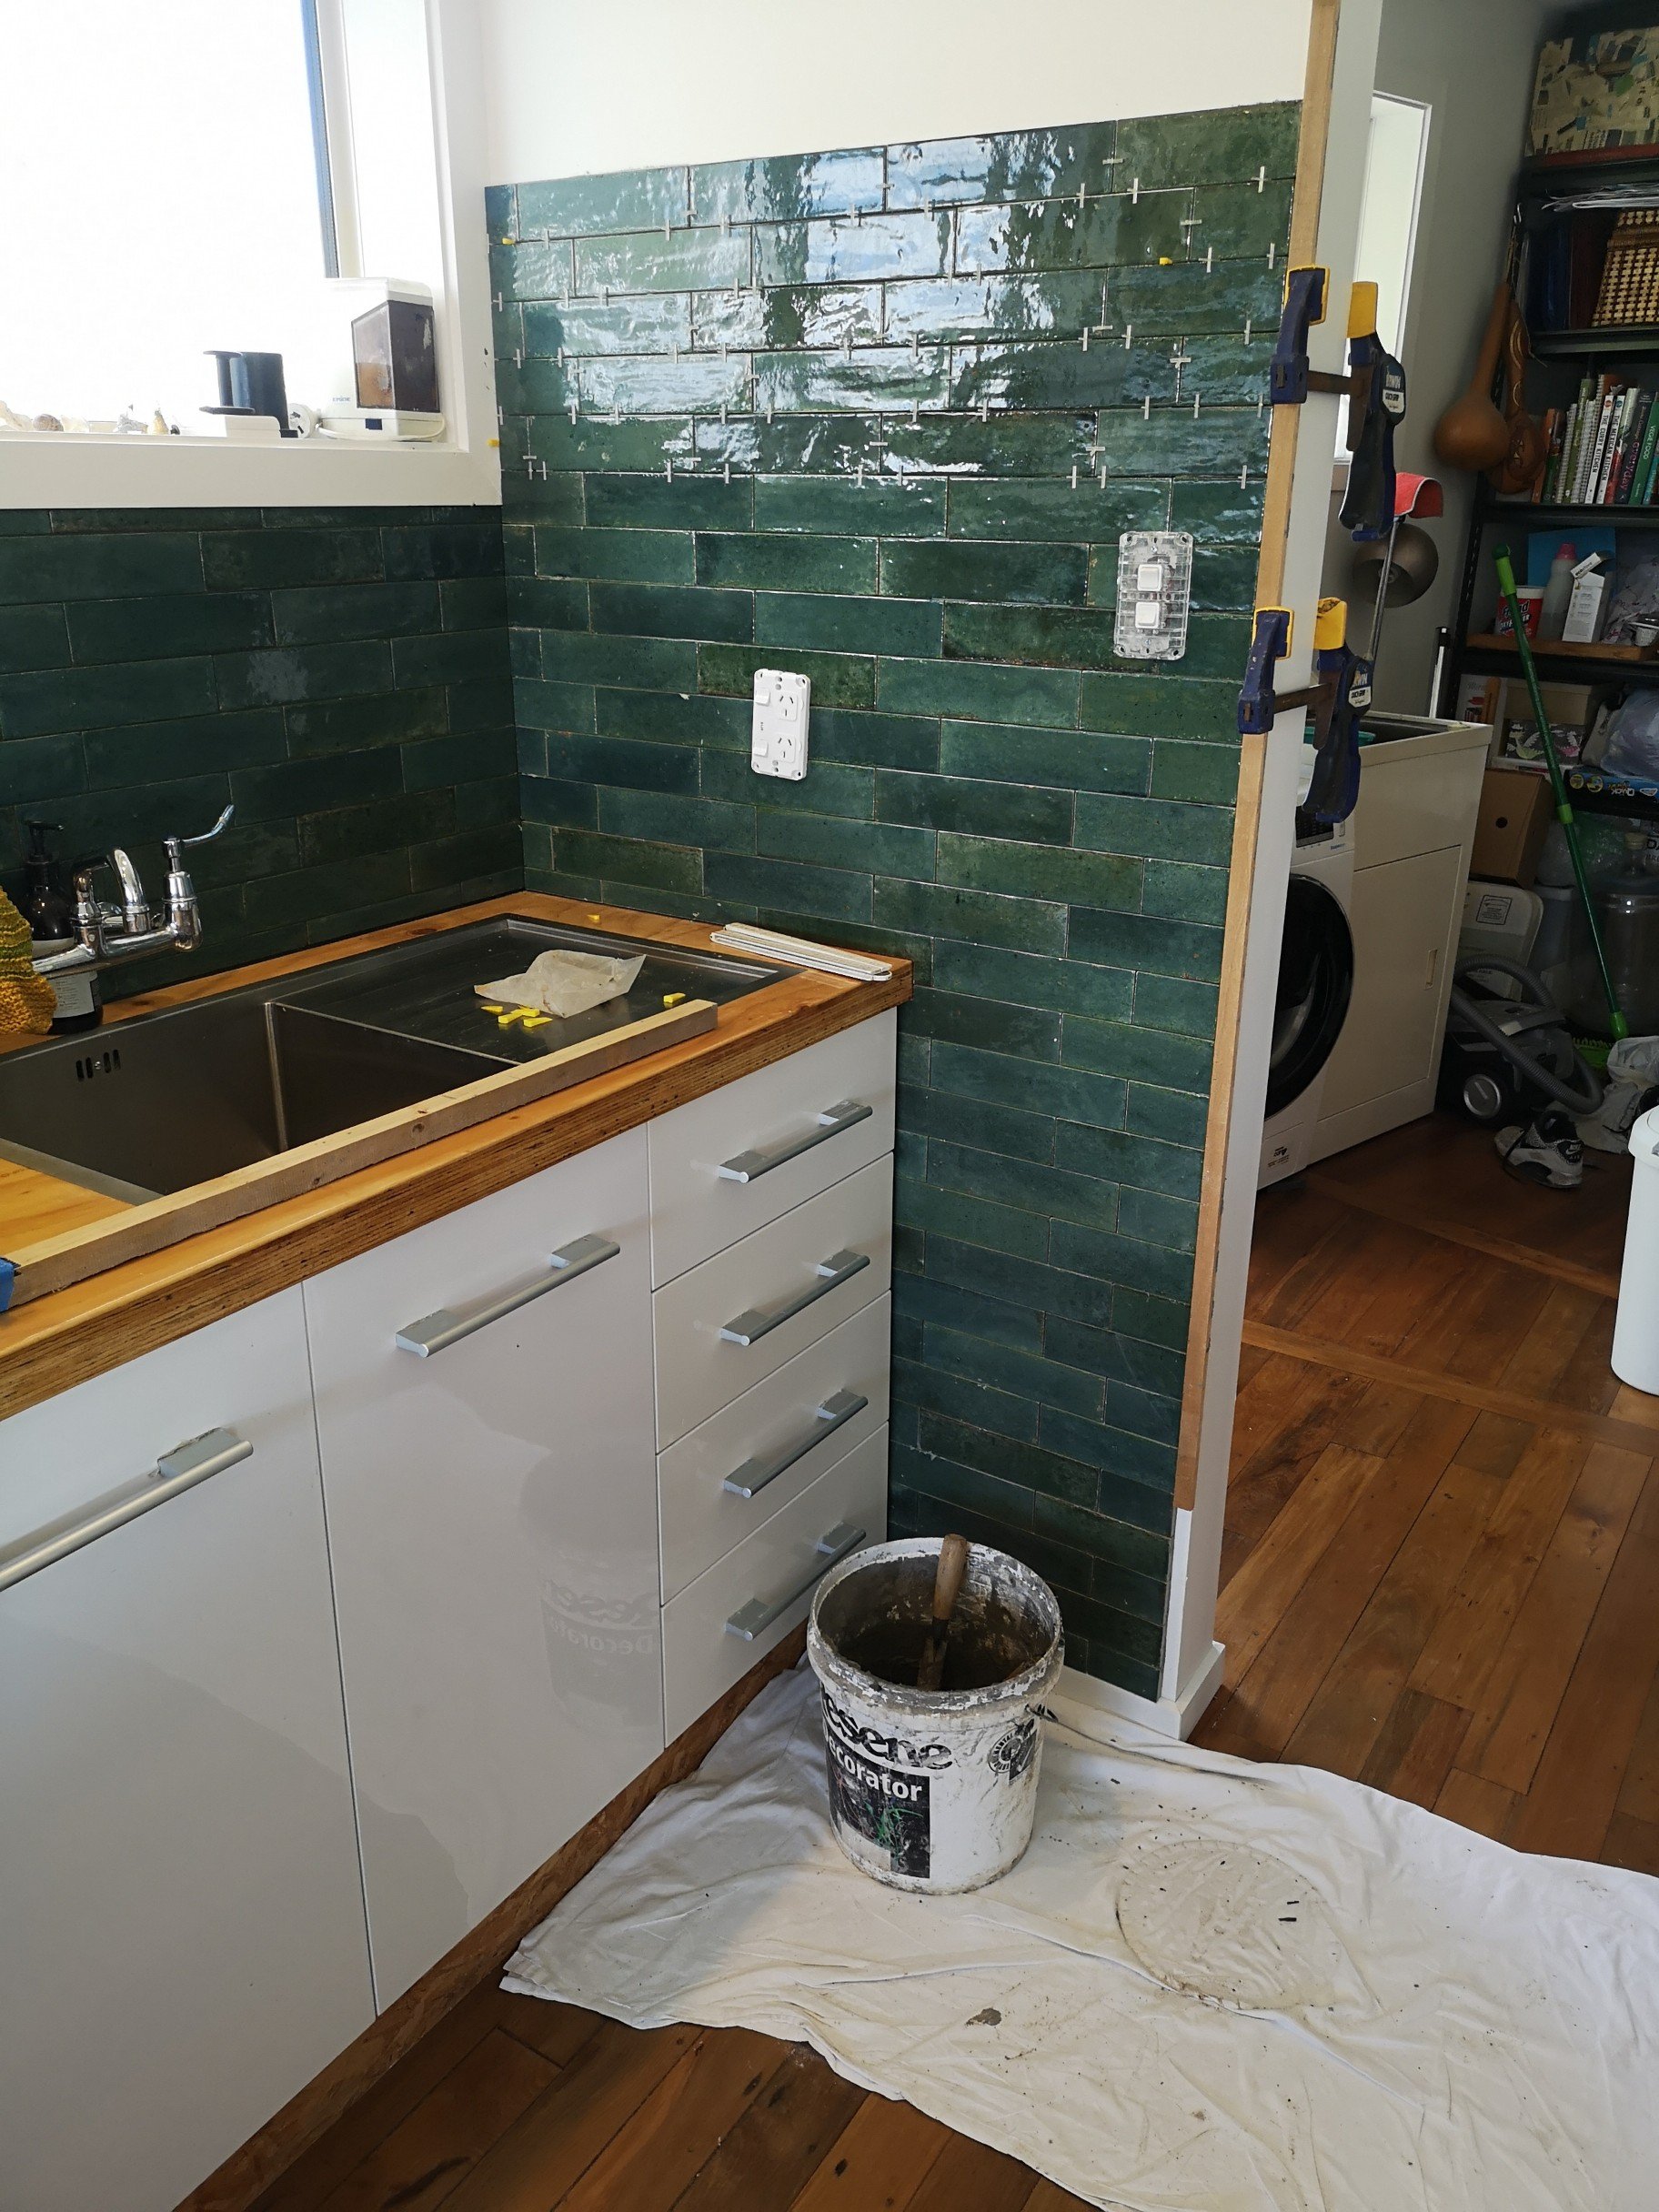
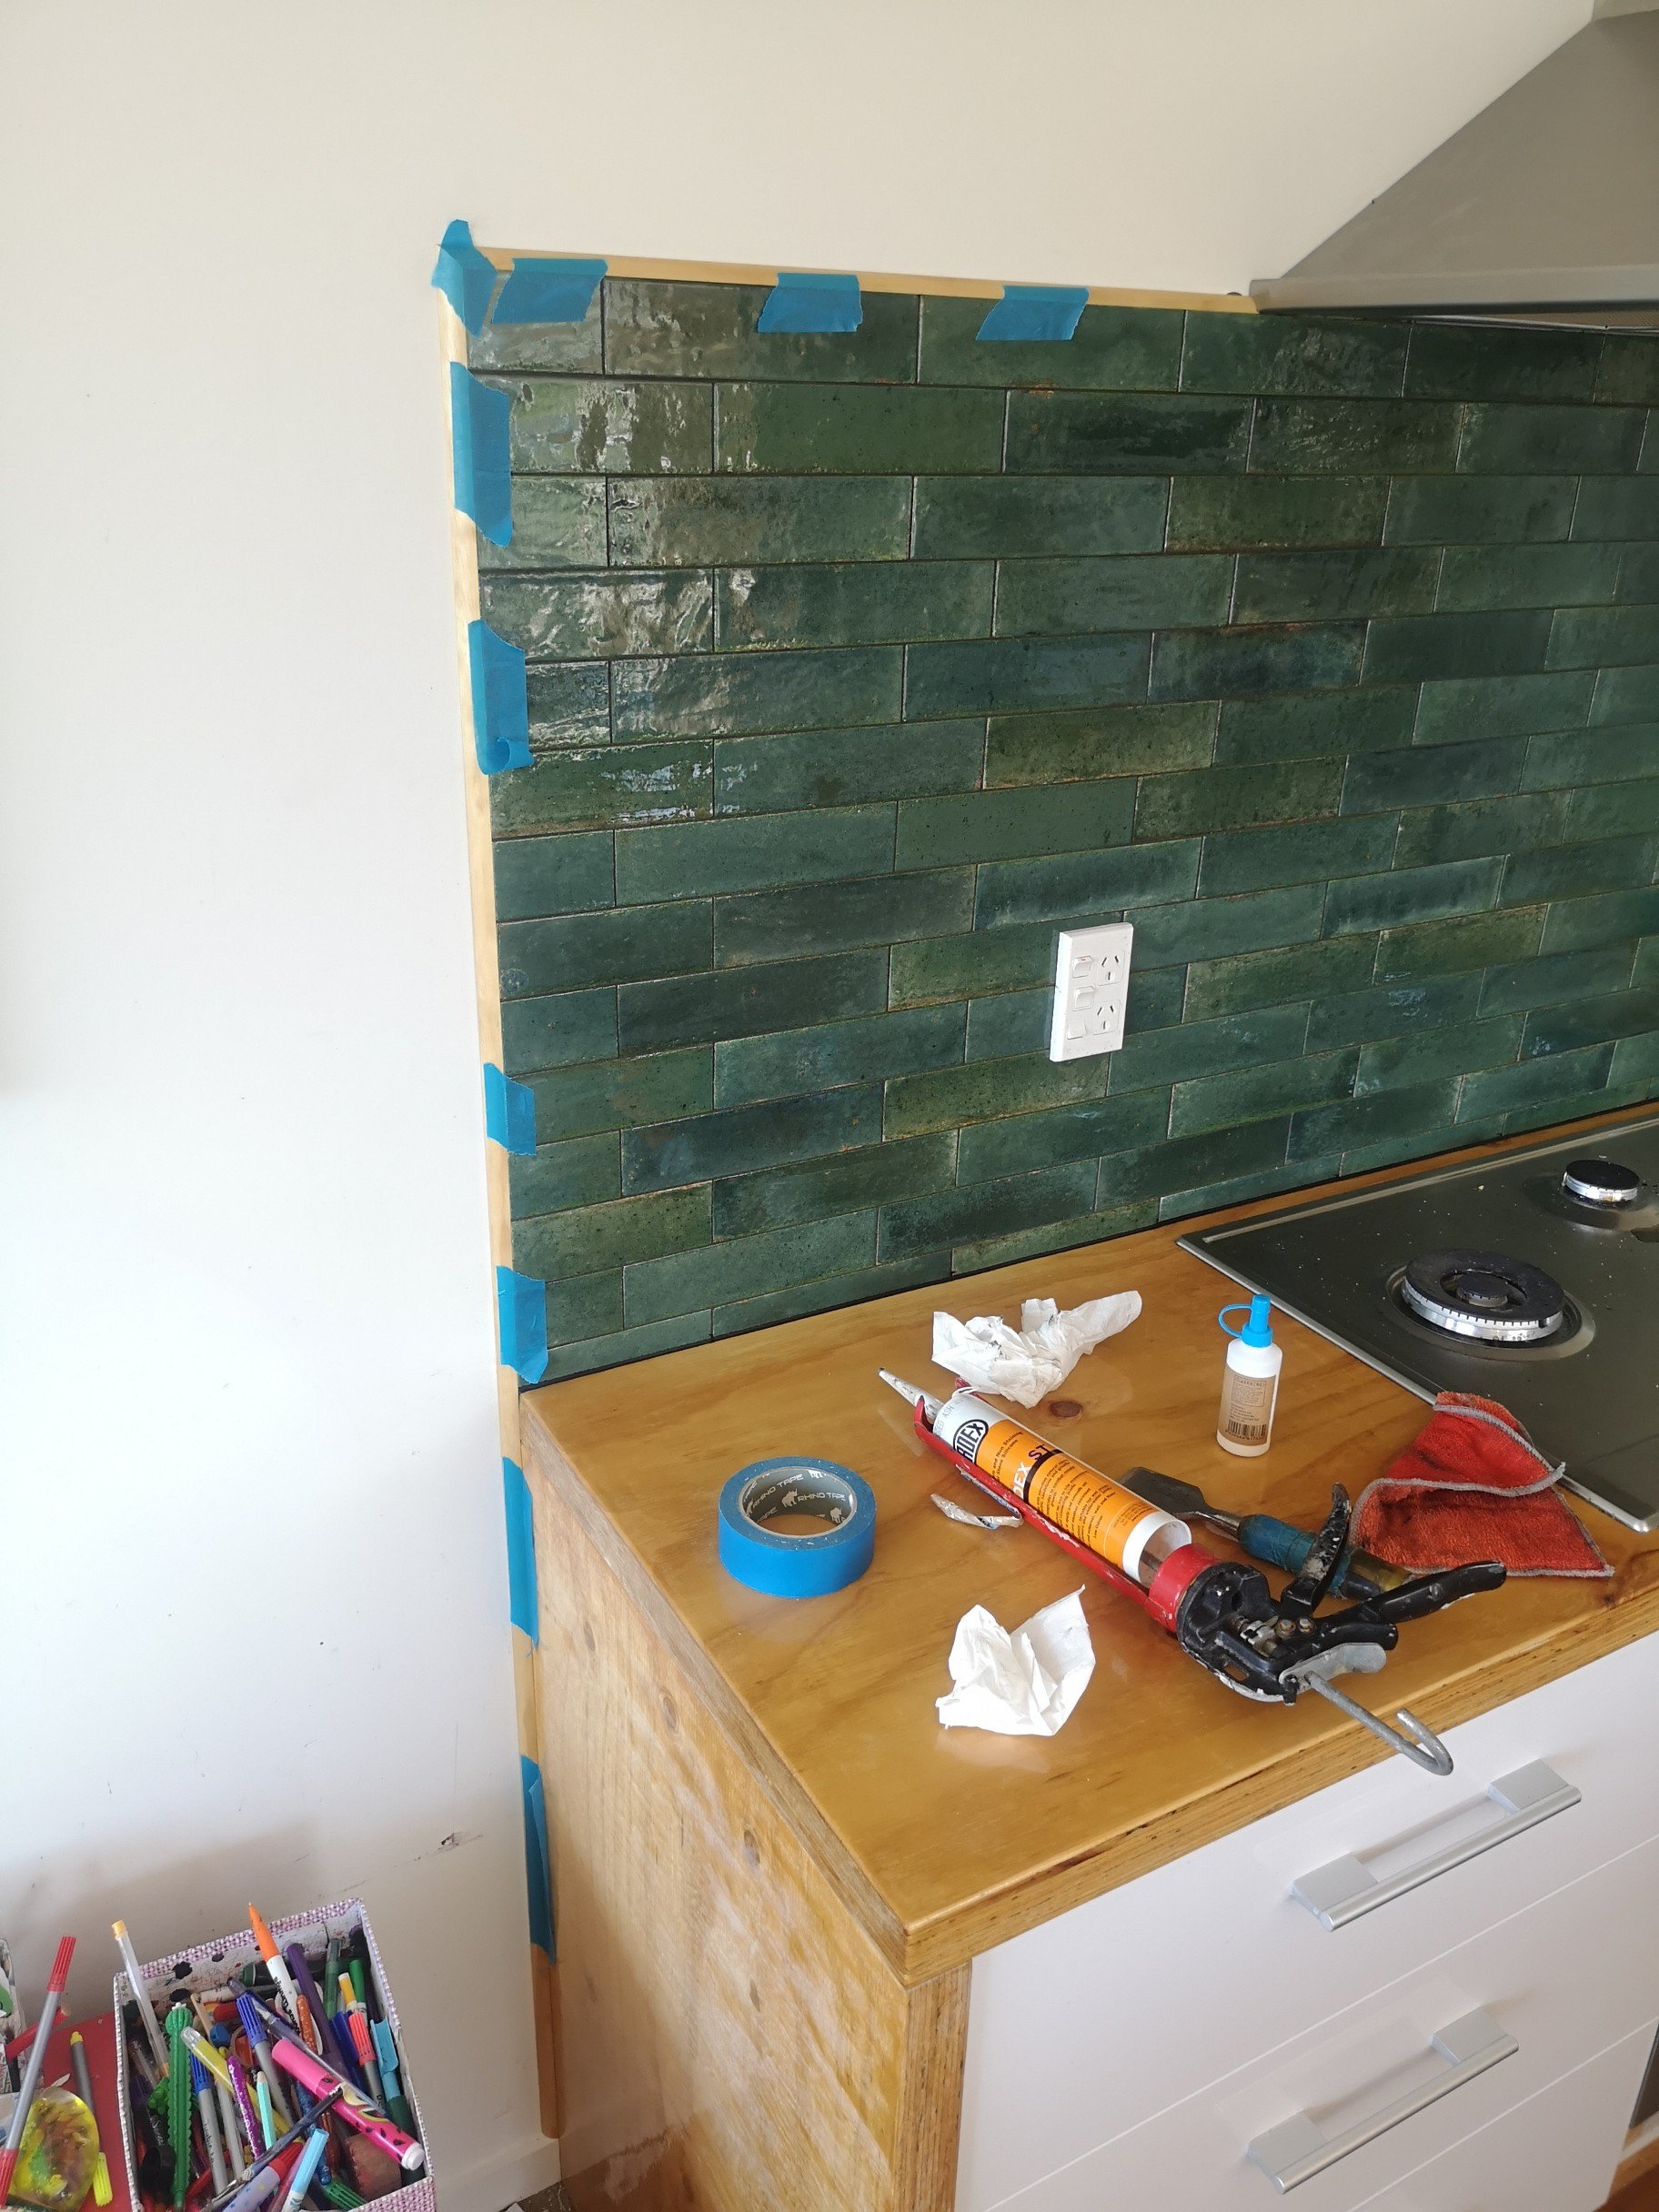
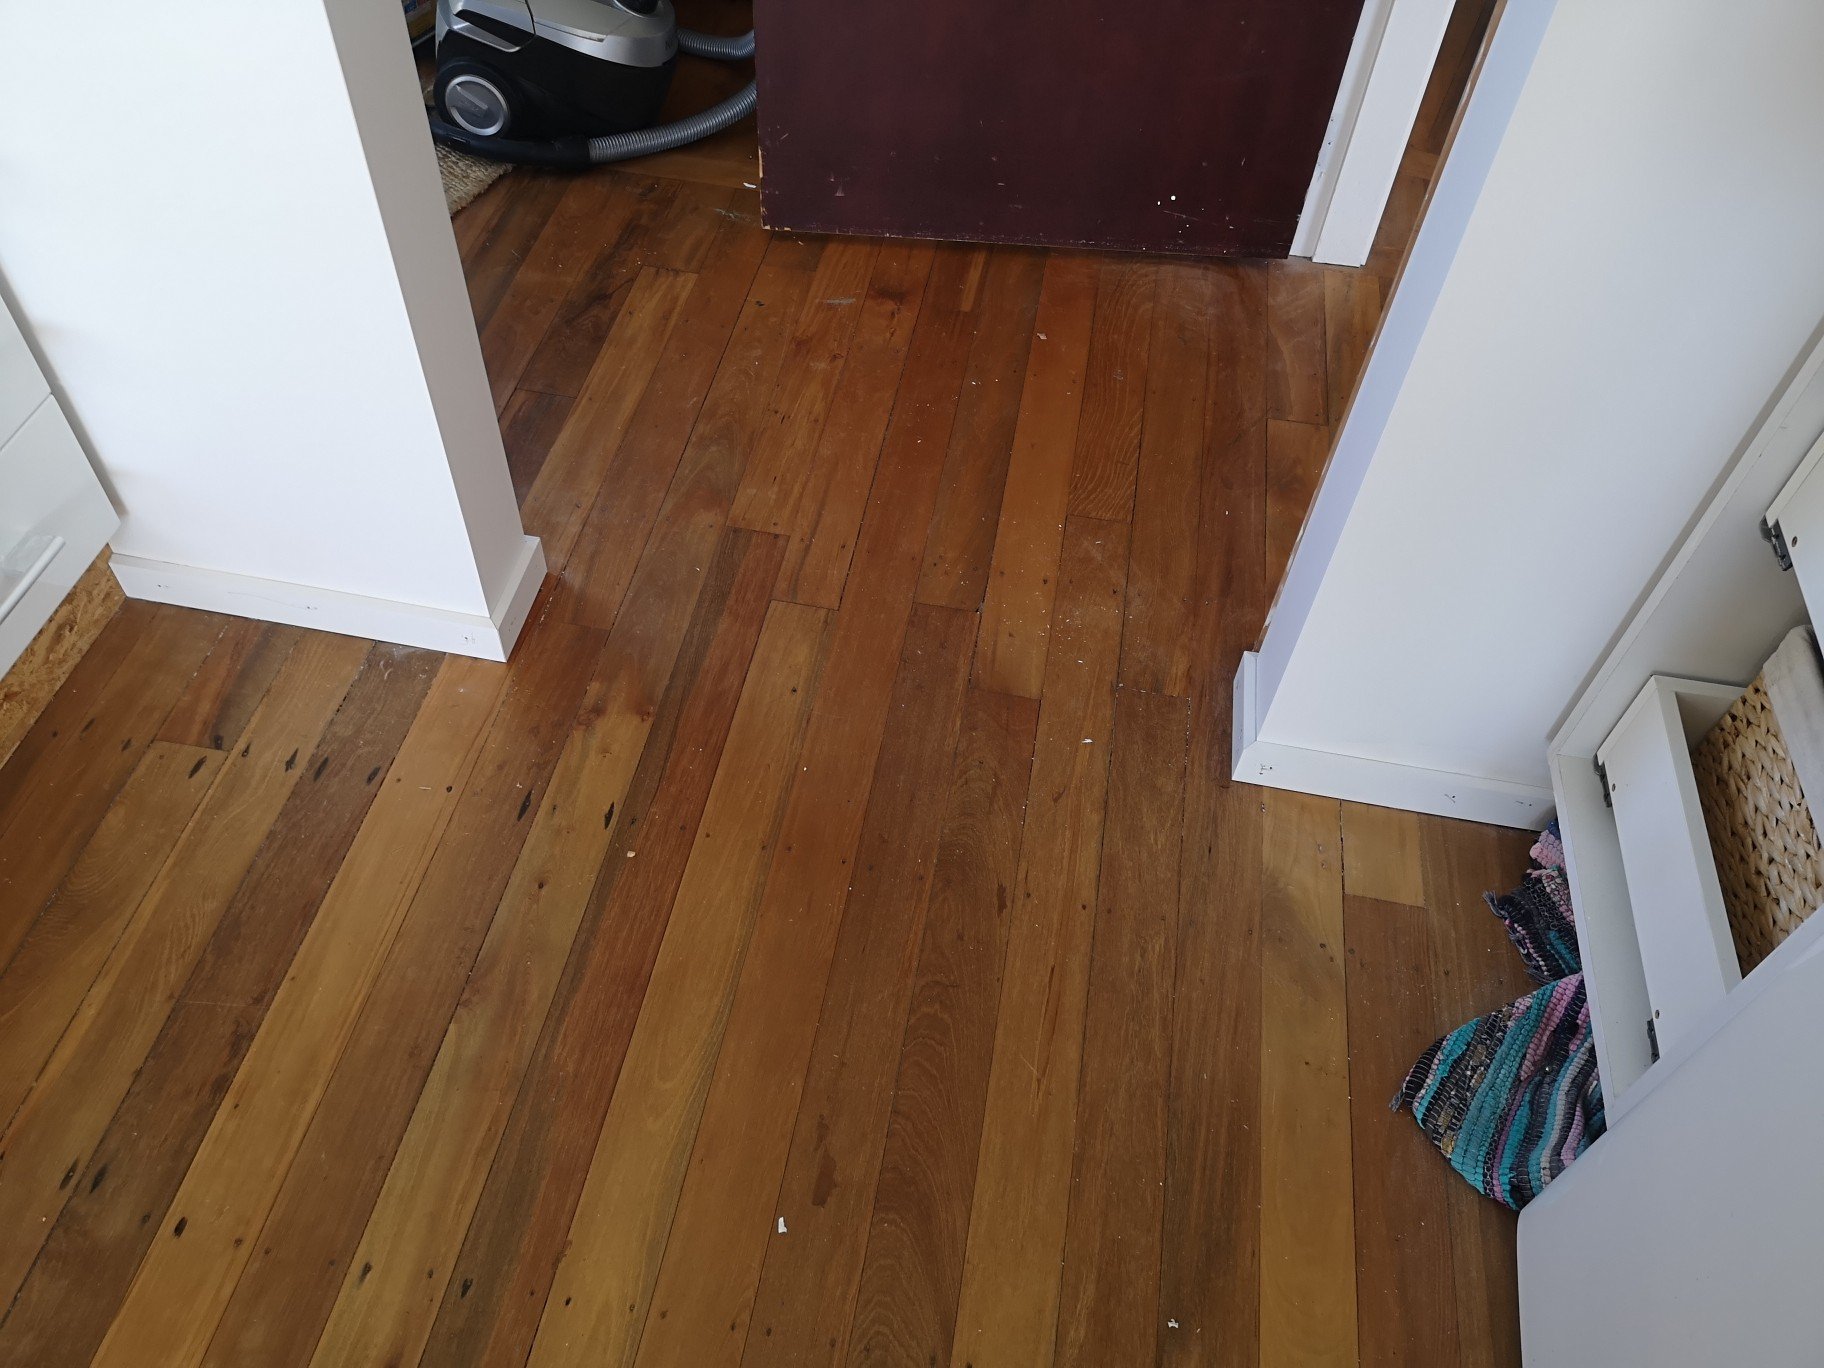
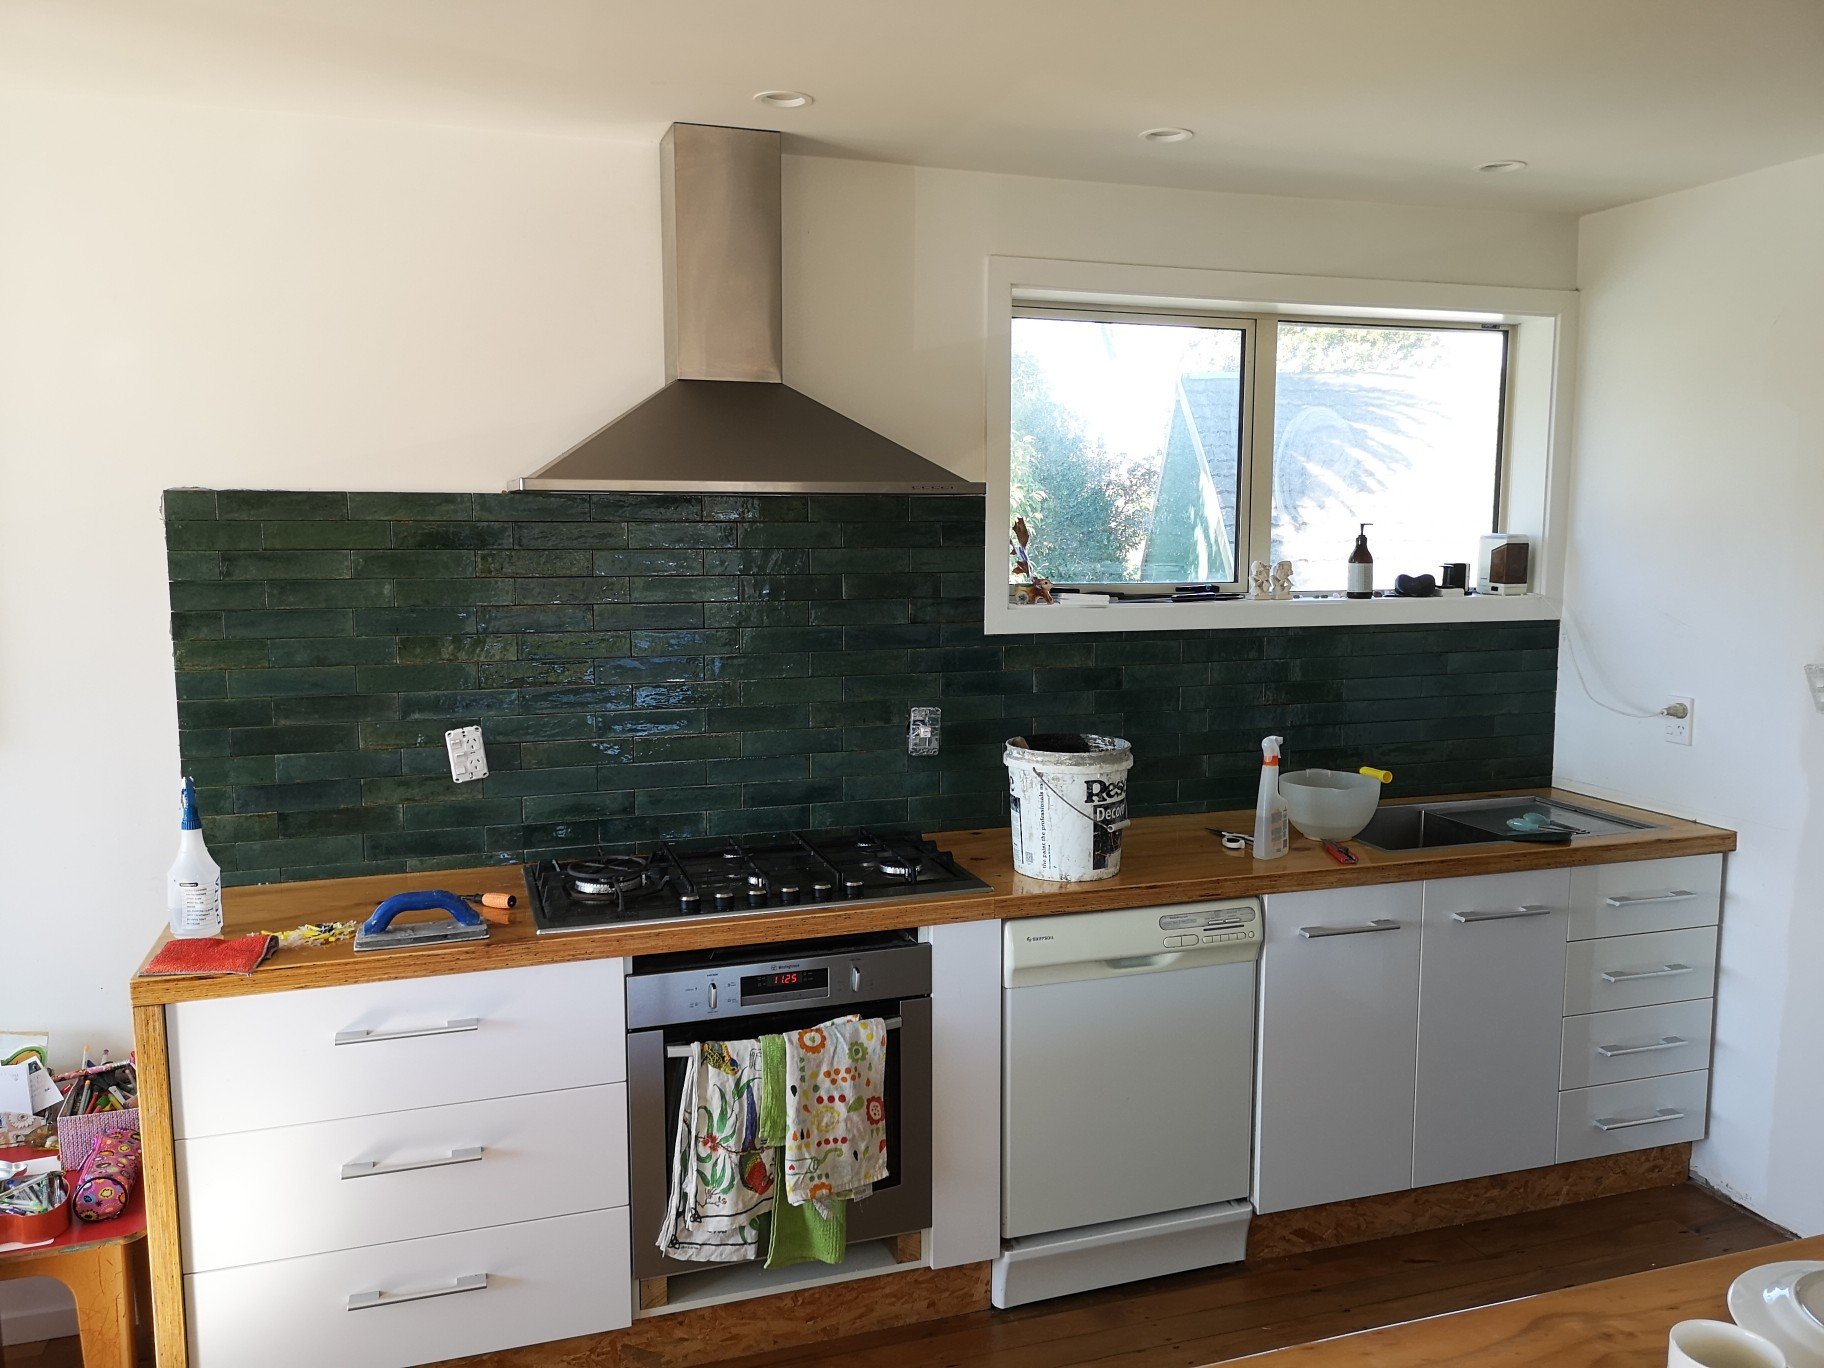
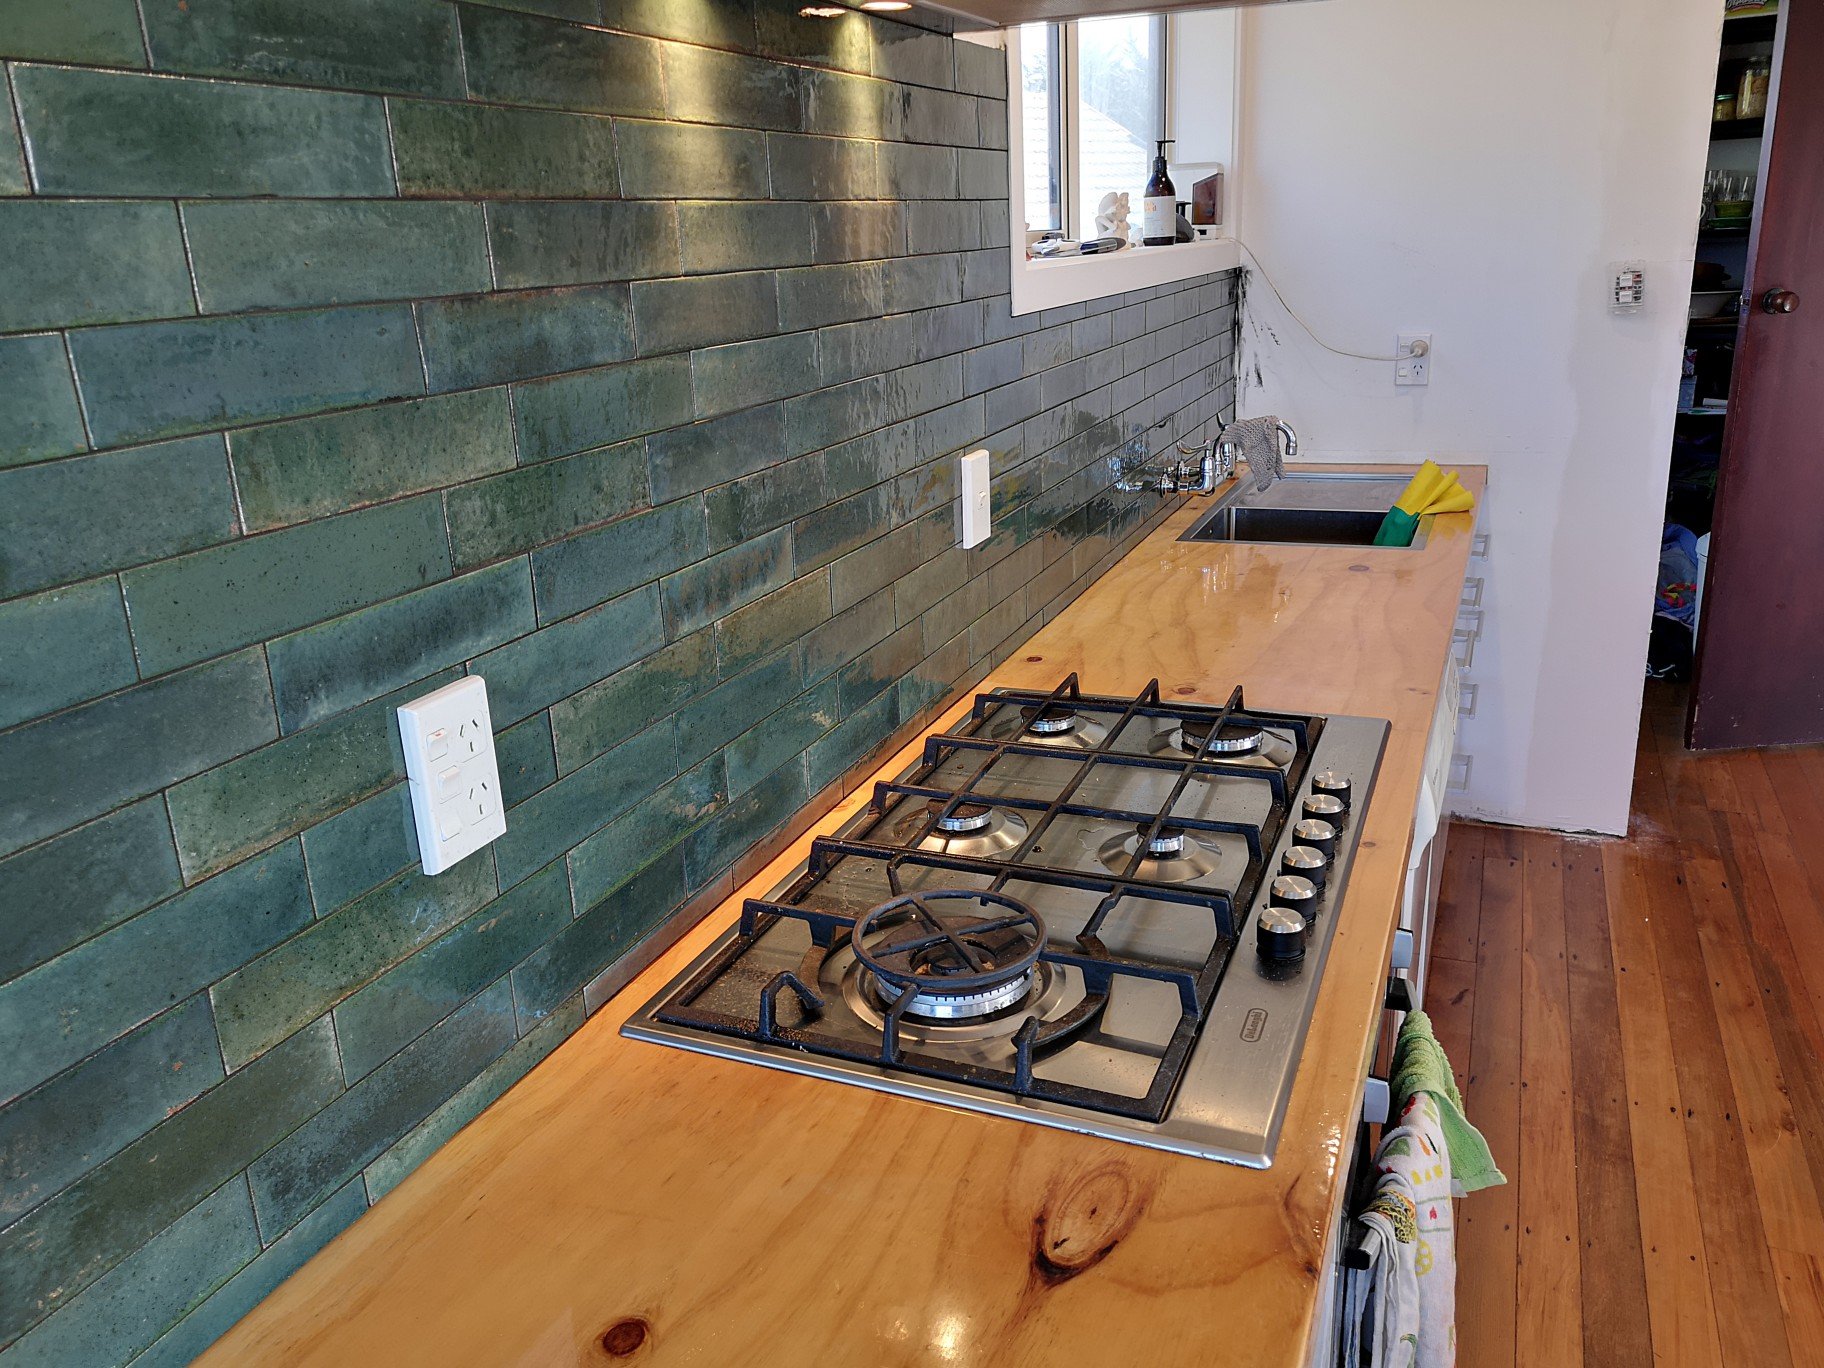
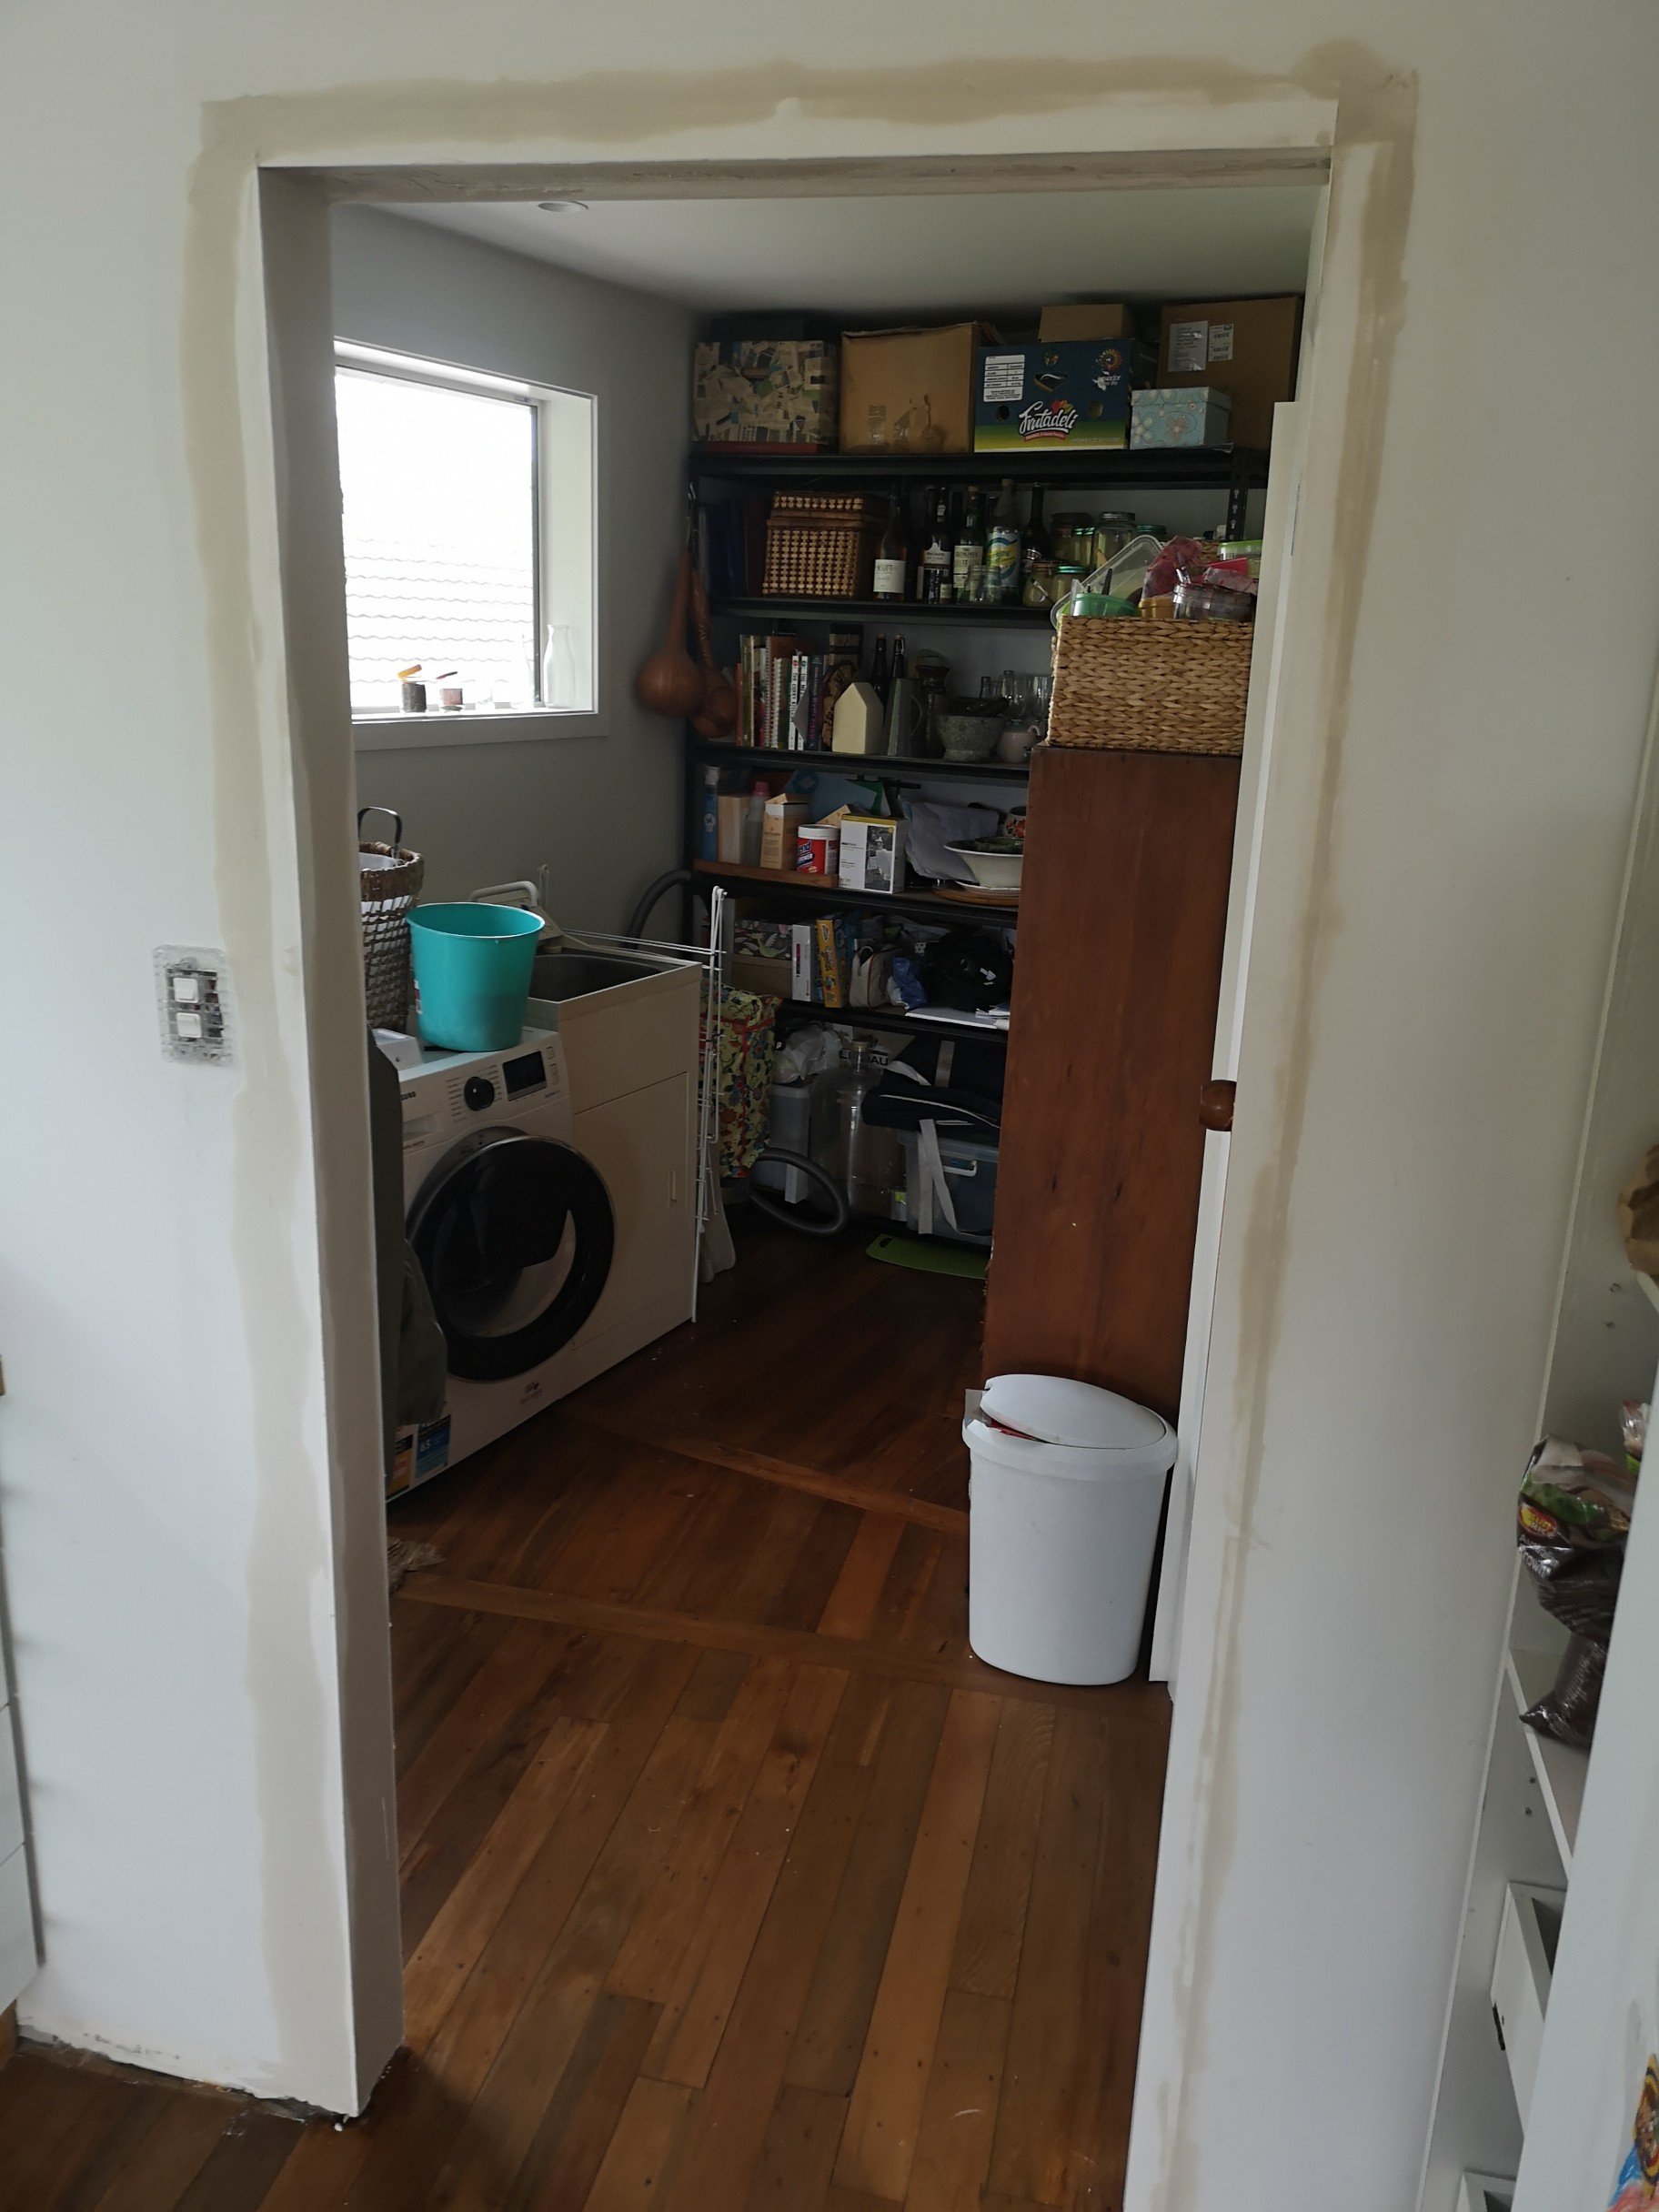
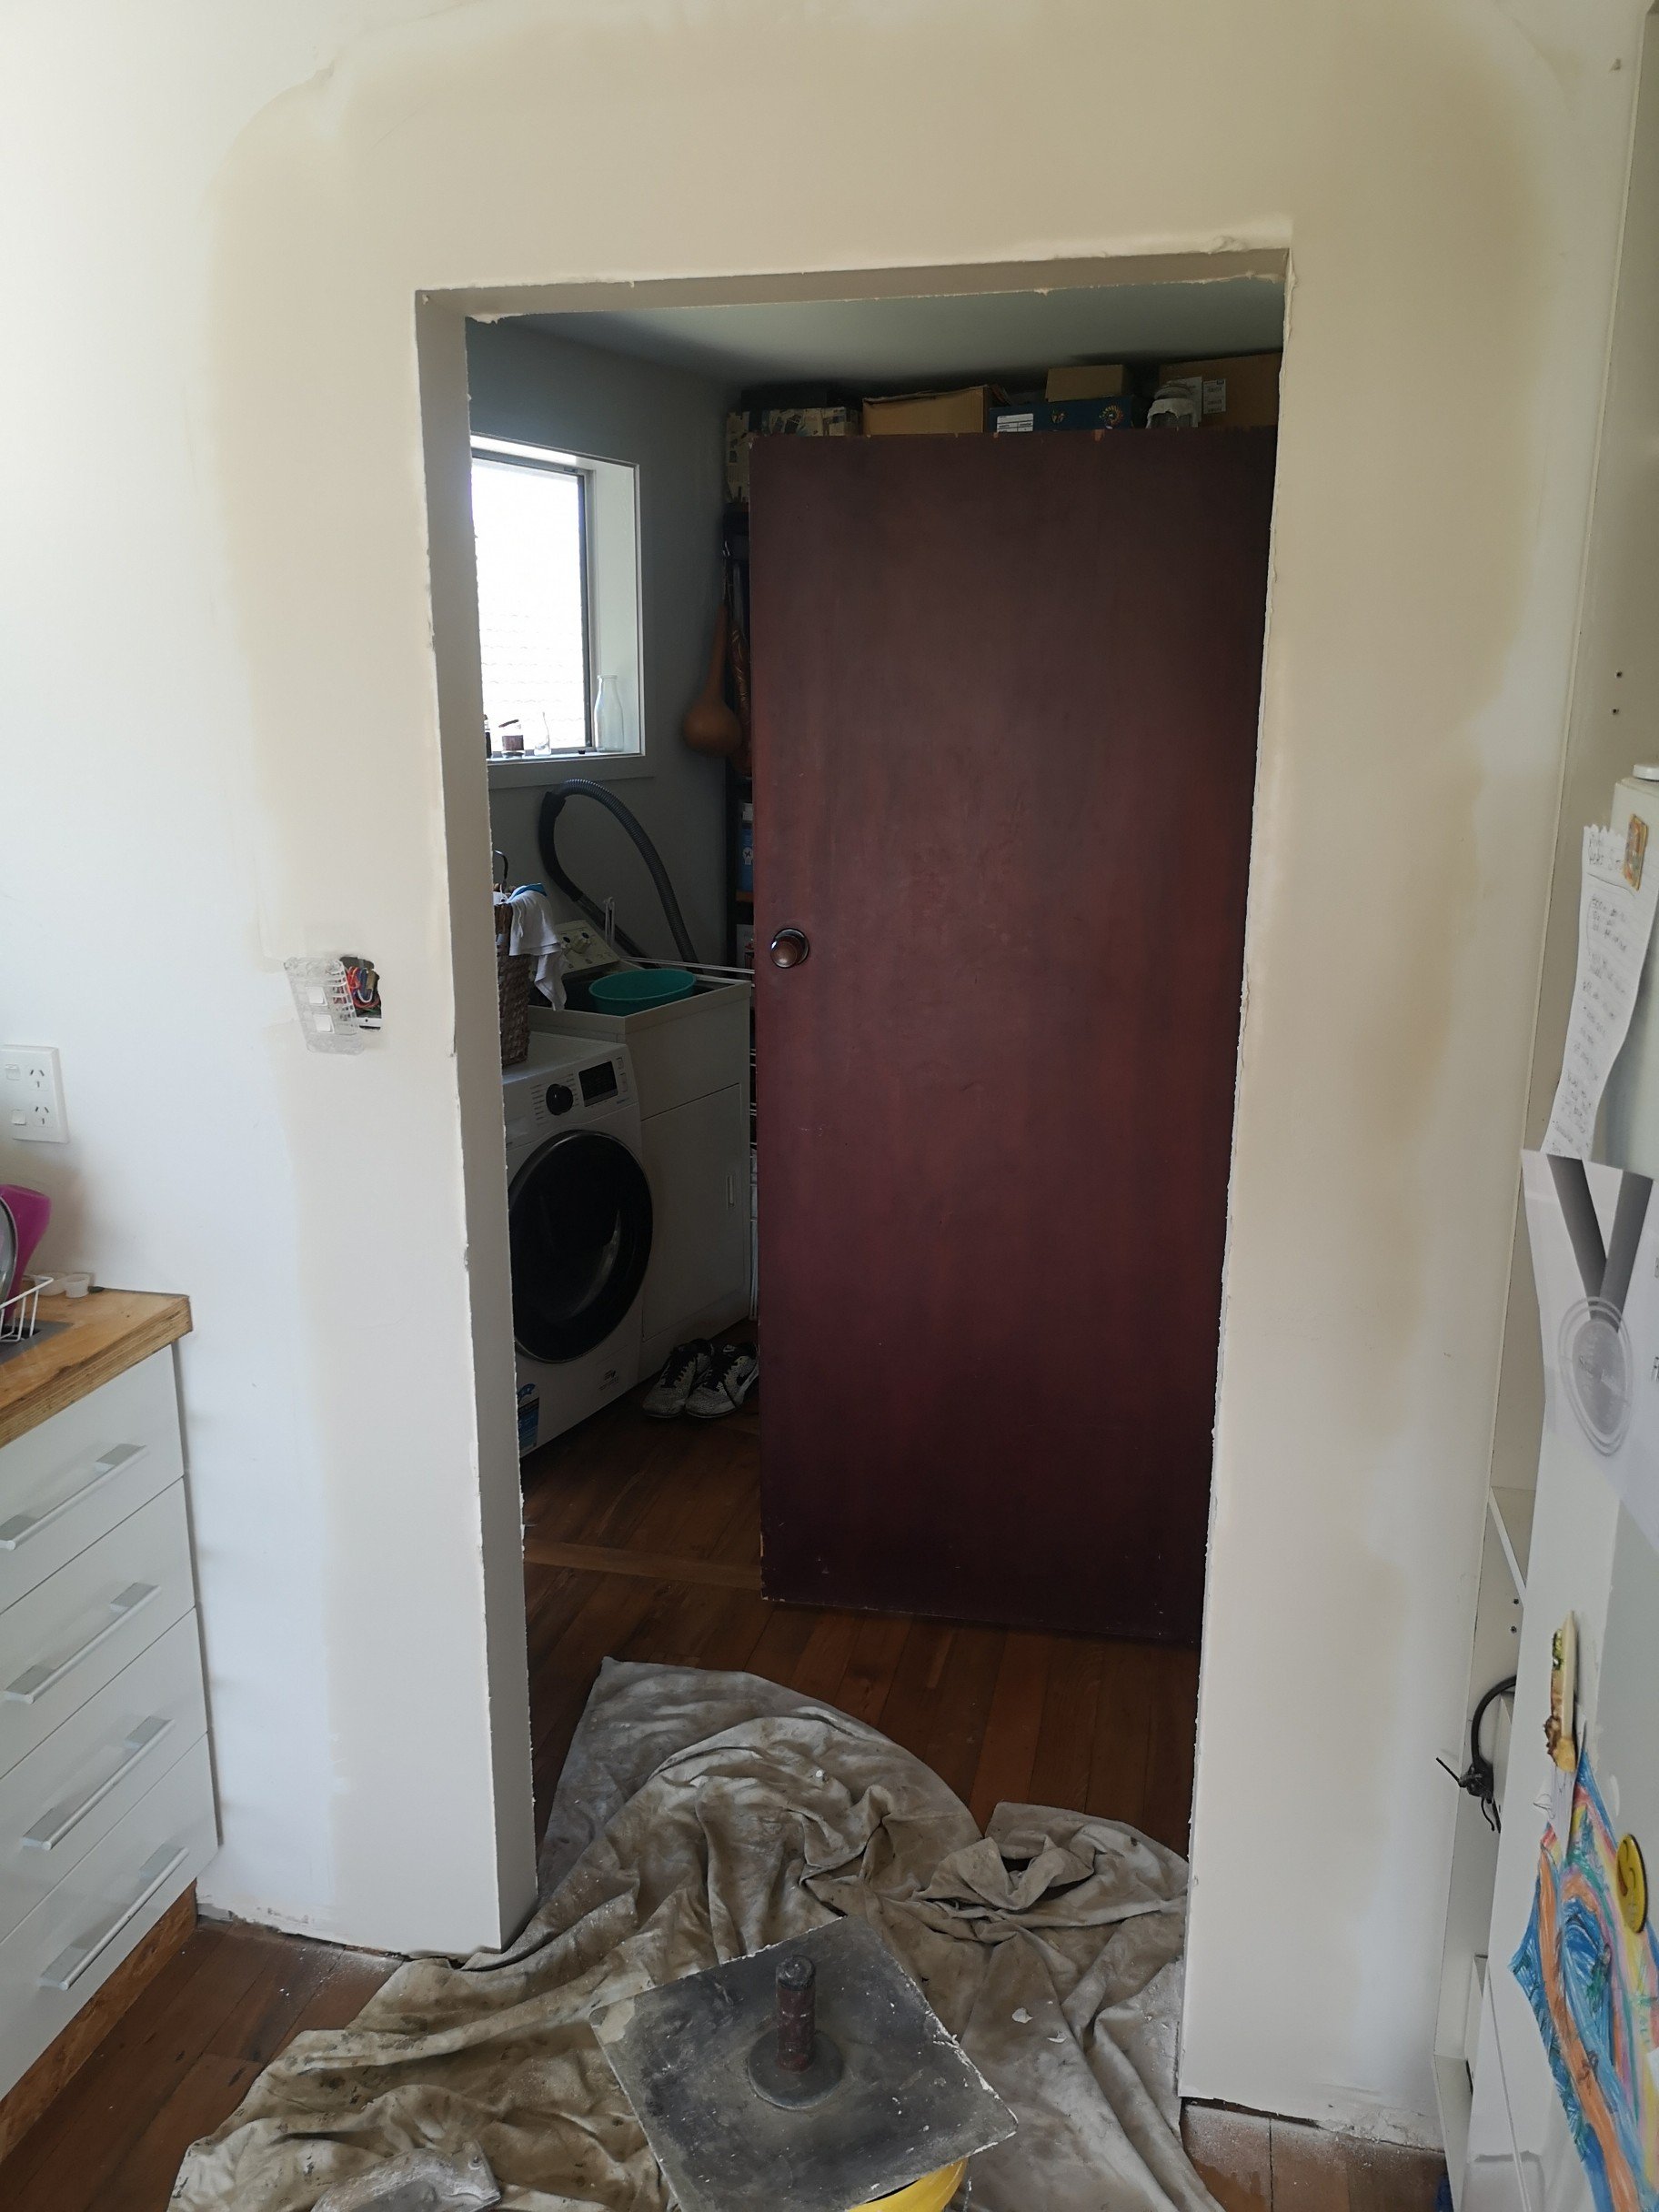
The other problem with a half tile under the window was that when I returned back to the laundry doorway I couldn't just finish at the height of the window architrave as that would mean a half tile to finish on which isn't ideal but putting a full tile there means a step in the line of the architrave, again, also not ideal. I was 2 tiles short of being able to finish on the line of the range hood but luckily the tile warehouse supplied us three tiles for nothing.. Win. Put the new skirtings on, Worked out where I needed to start to meet the course of the initial tiles, meant starting on another cut (roll eyes) got it right tho and didn't have to do any last minute adjustments to the course. I'm also not a huge fan of generic tile edges so I decided to use a 12mm quad instead. Oiled with the same stuff as the floor. Still have to grout and install the edging on the return tiles.. Came up pretty good tho.
2 points
-
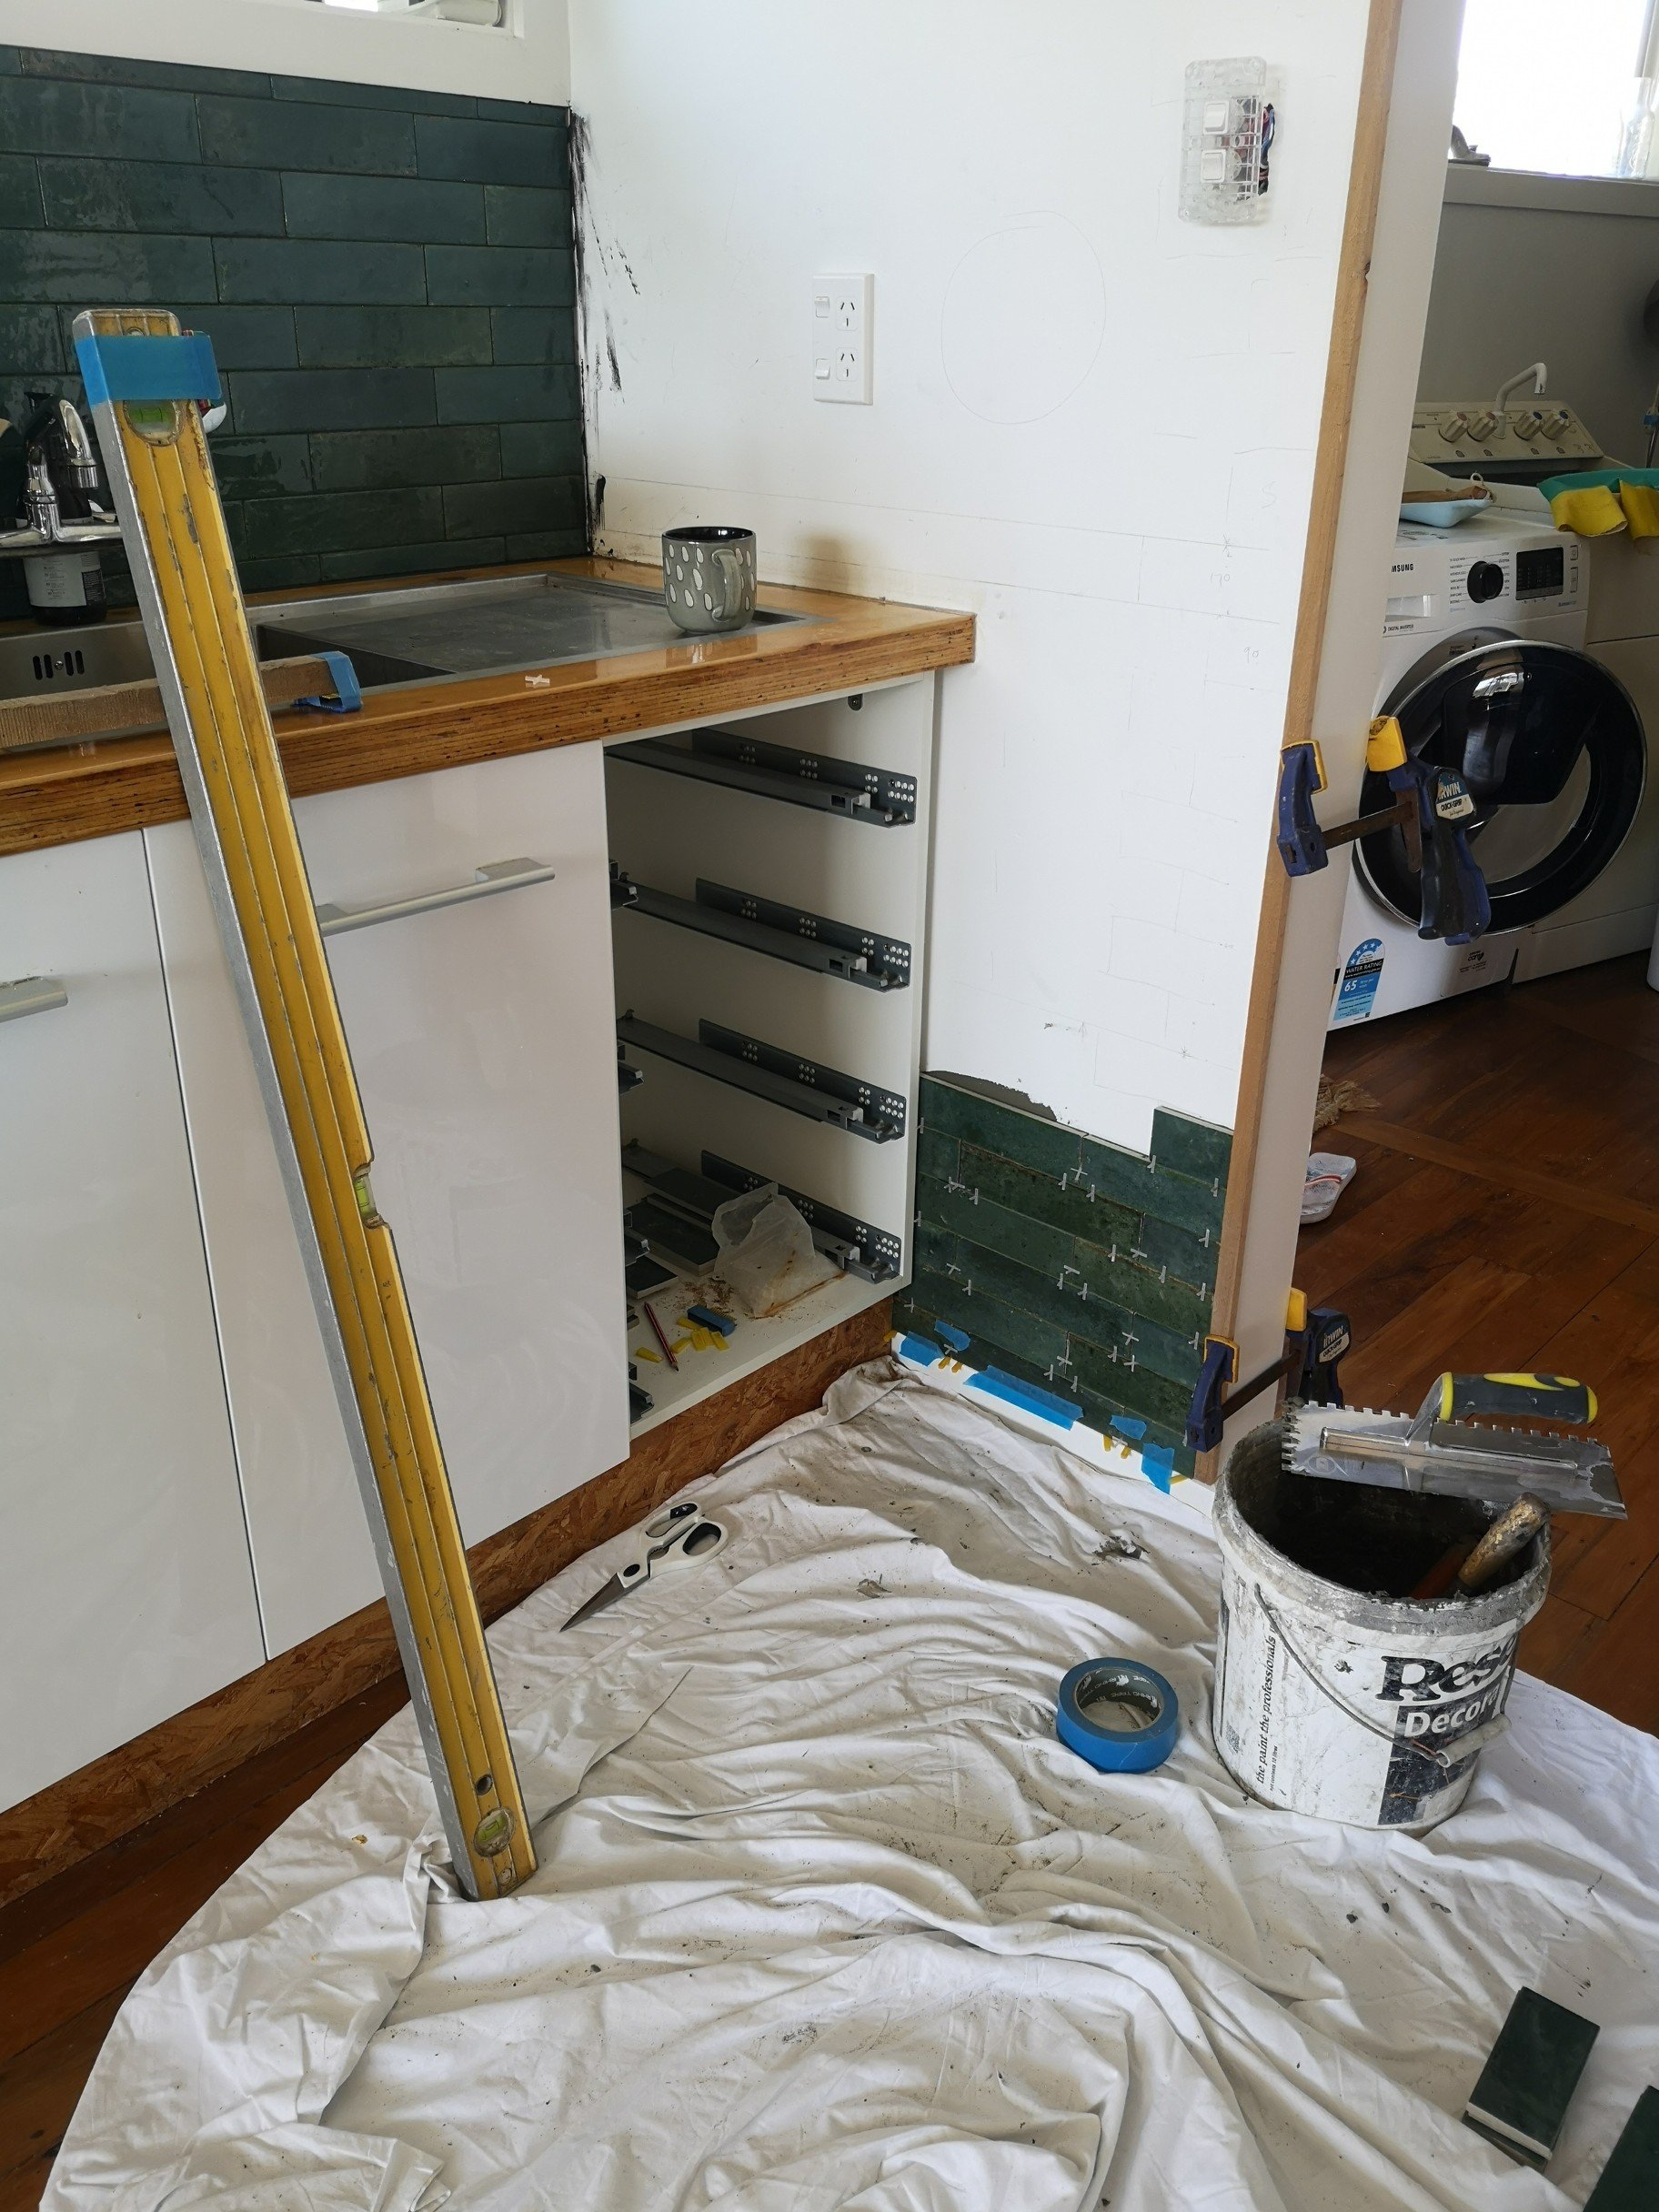
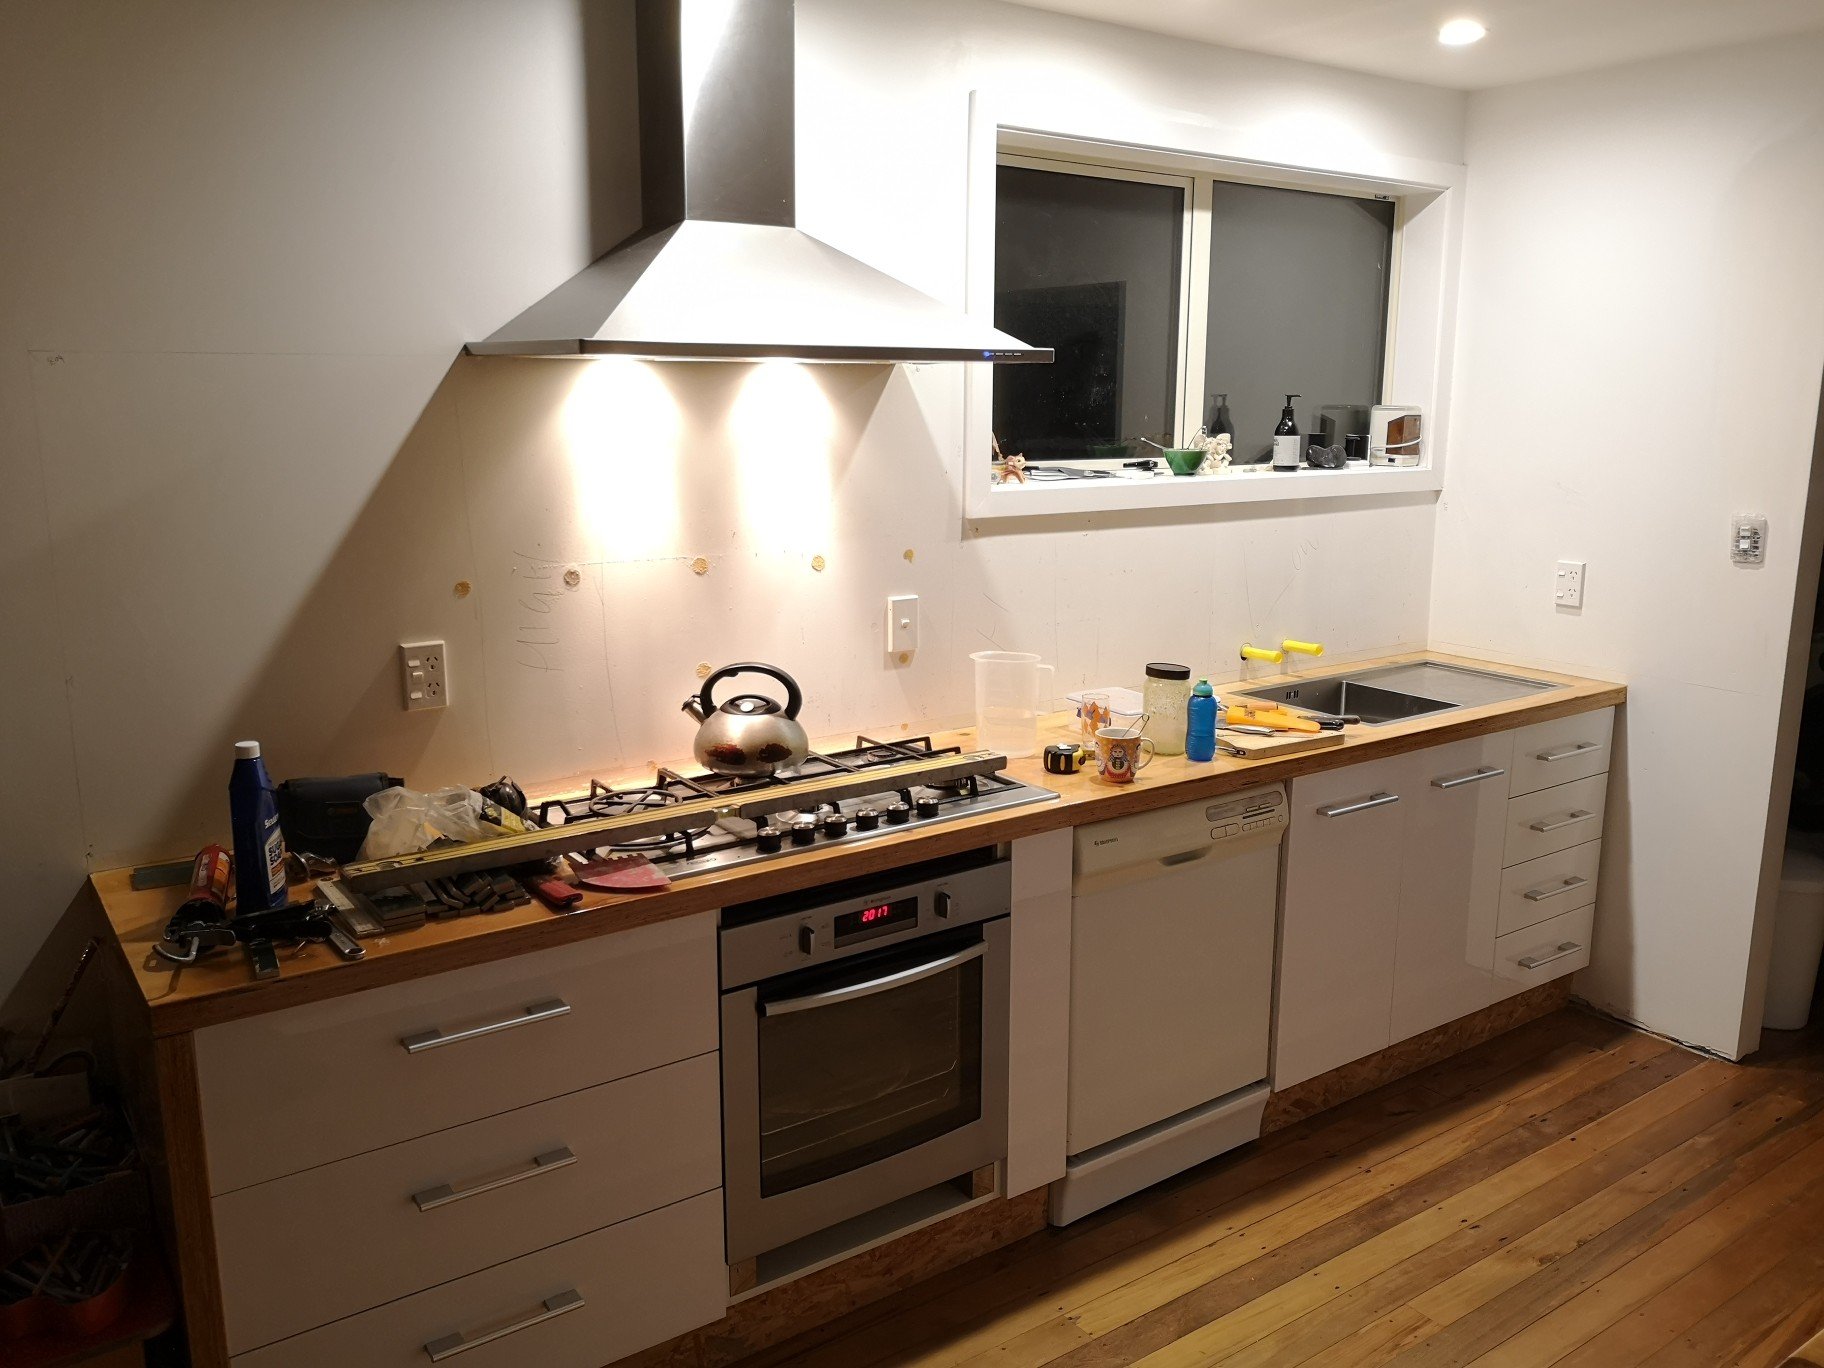
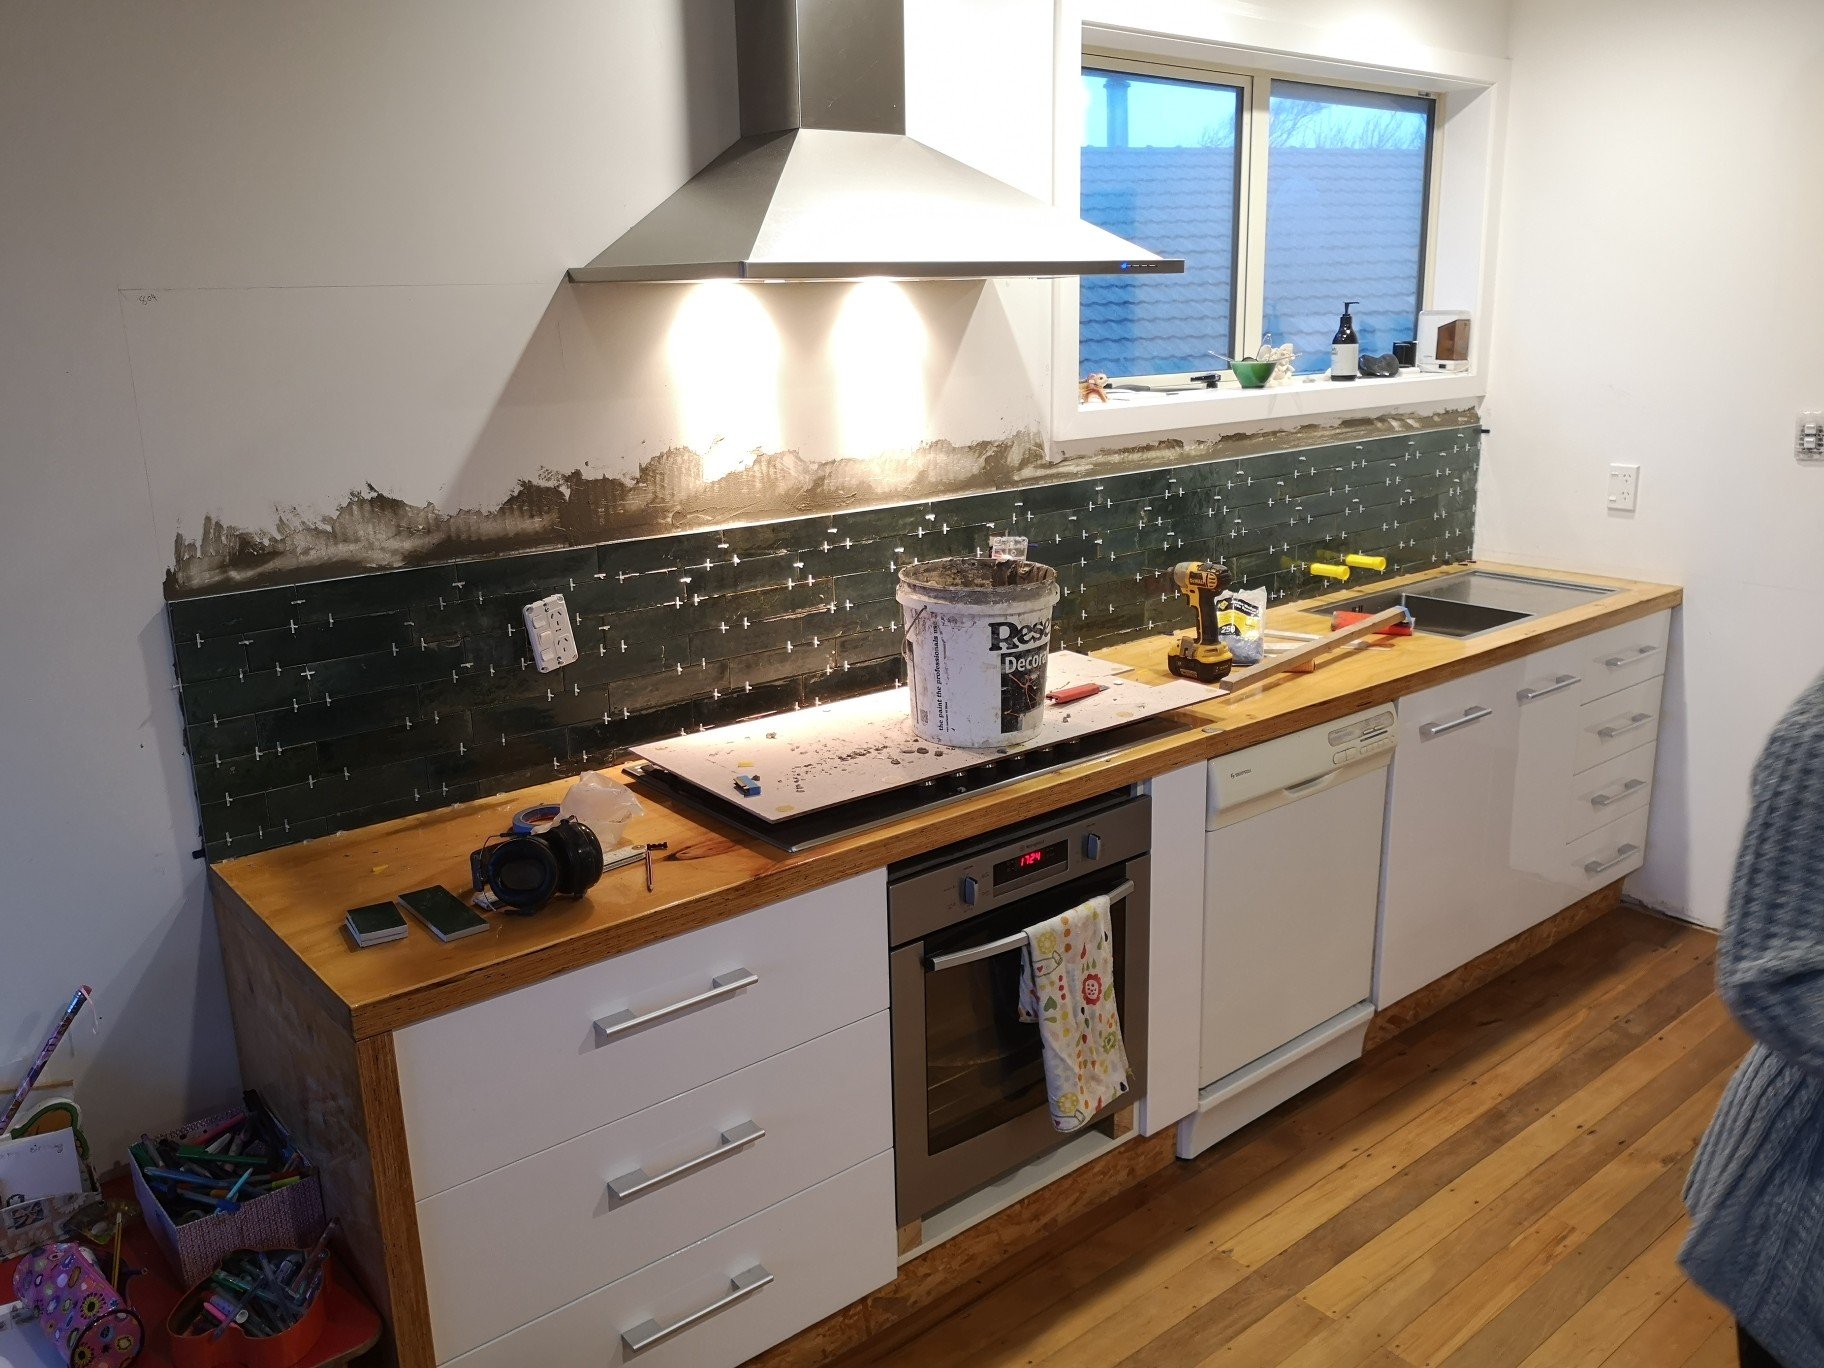
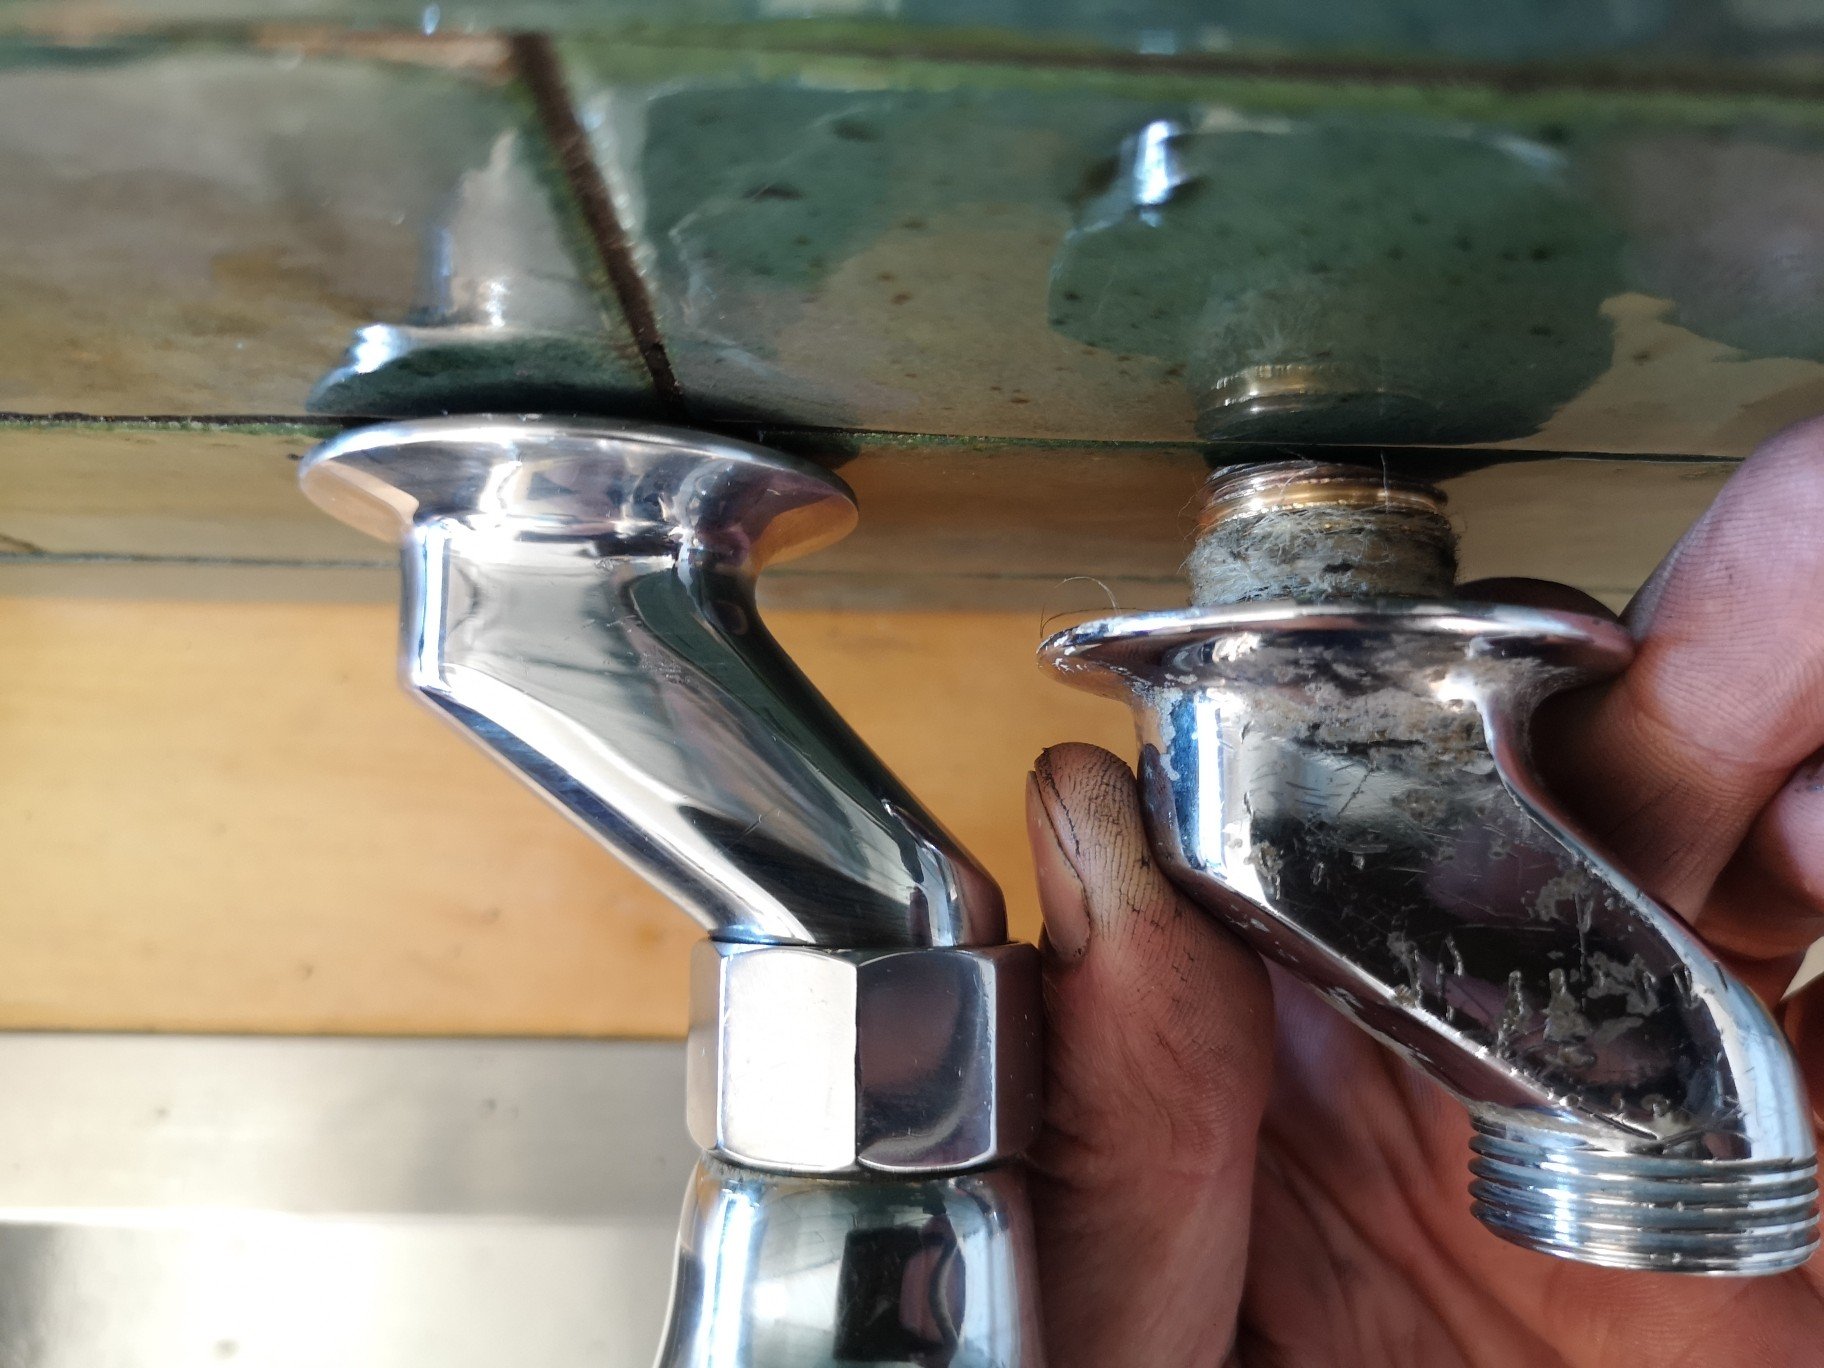
Finally finishing plastering was spurred on by the fact I had some tiling to do.. Decided on a handmade Italian subway style green tile.. Not a huge fan of tiling either, mainly due to tiling over an abundance wobbly floors and walls. That sort makes tiling extremely painful, my house was no fucken different.. After doing some measurements I found that I was going to have to start with a half tile cut at the bottom to meet the extractor with a full tile at the top. I could've moved the range hood to make it work but I really couldn't be fucked and the tiles are dark enough that you wouldn't really notice a half tile under the window either.. As you can see my original mixer adaptors were pretty munted looking, went to miter10 to see what they had on the shelves and what do you know.. Free. Look a better now.
2 points
-
2 points
-
So rebuilt myself a 300nm torque wrench today essentially was put into work and found to be uneconomic to repair, the good thing is when you get enough broken ones you can raid parts to make a good one. Made it work than decided to try calibrate off my aviation spec deflection beam warren&brown Worked a bloody treat! Got it bang on. Excuse the shit on floor ive been active in shed recently.
2 points
-
Essentially ready for a warrant check now. Almost everything seems to work as it is supposed to. Yeah sweet.
2 points
-
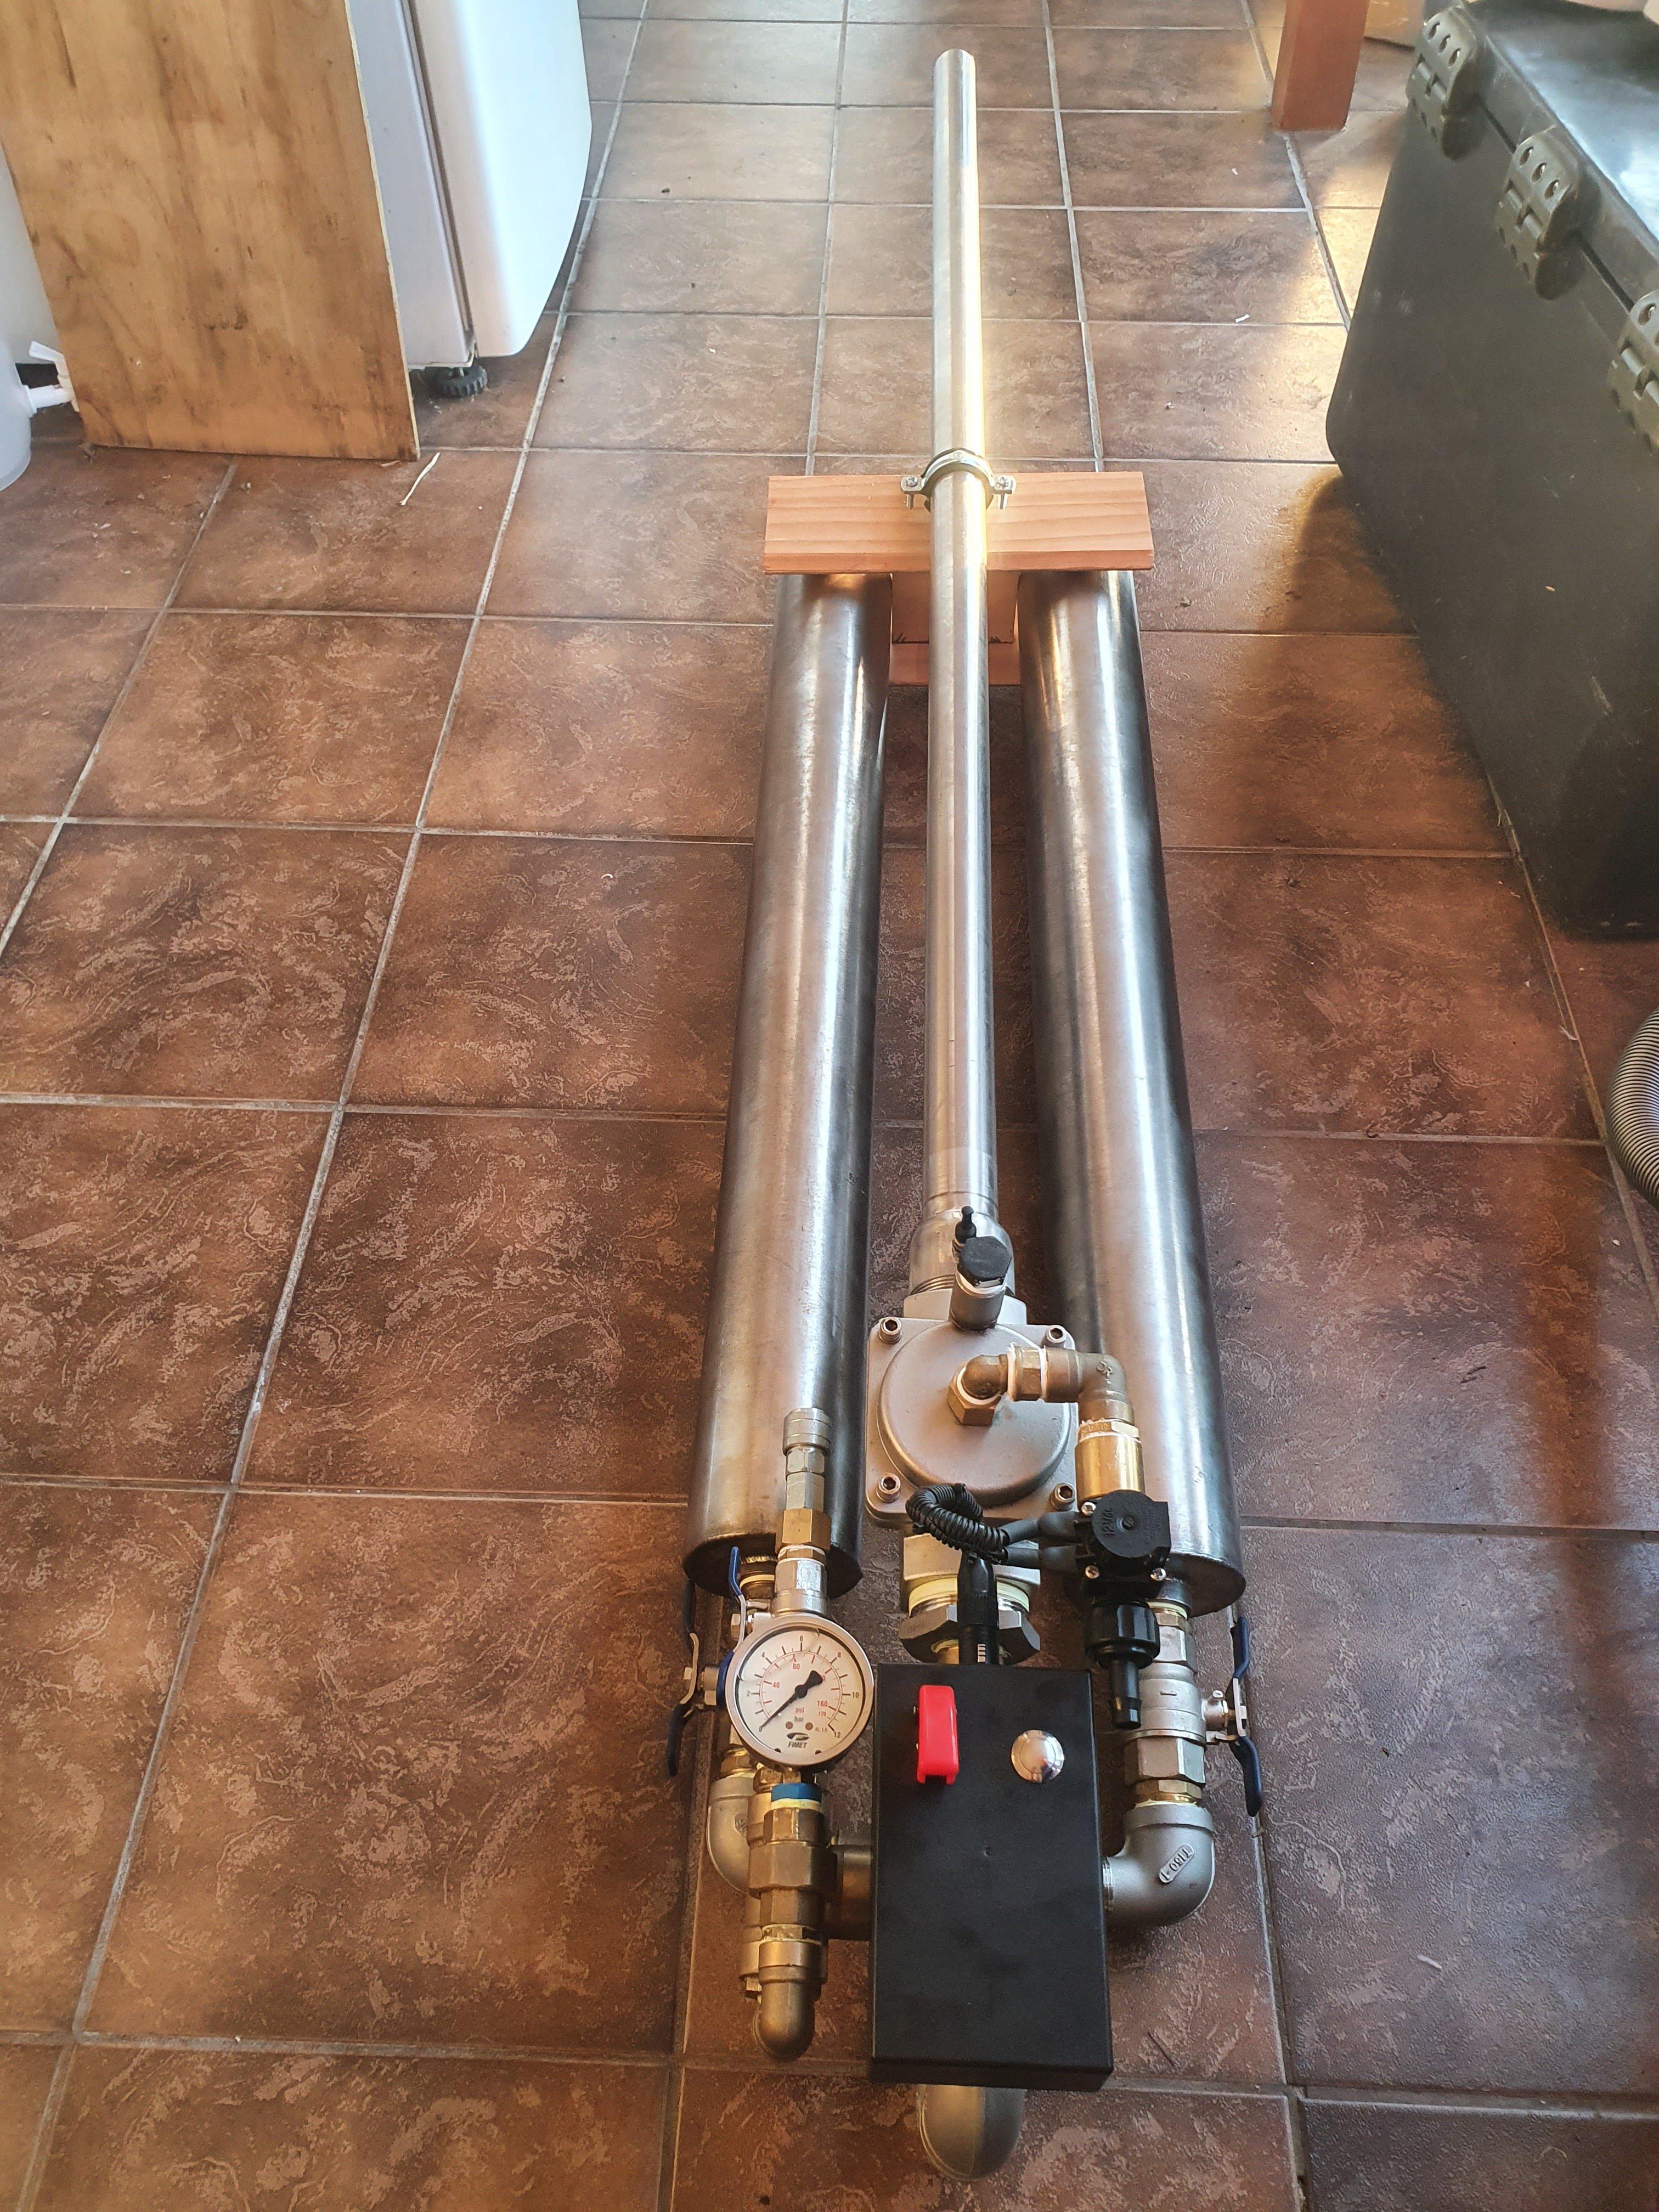
Made an upgraded bait launcher / spud gun. Should work well Twin 100mm stainless tanks, each able to be isolated separately. 50mm stainless irrigation valve, modified to be released via push button trigger. Its a tad overkill haha.
2 points
-
About a year ago, I indulged myself in my sickest fantasies and got myself an XJ40 Jaguar. Was planning on getting a later (post 1990) 4.0L one, but this one came up for sale closer to home at a reasonable price, so instead I ended up at the other end of the spectrum (oh there's a spectrum involved here) and got a pretty early (around Jan/Feb '87, production started in Oct/Nov '86) 3.6L Sovereign, complete with 80s funk digital dash. She's fairly solid/tidy, haven't done many km's in her due to being busy as fuck at work, study and home DIY, but have sorted out a list of things to sort out. Only major work done so far has been replacing the water pump, due to it leaking all the new coolant I placed into it out of its weep hole. Other issue I have at the moment is that I think the alternator is playing out, as I'm having charging issues, so need to look into that more. Pics for thread (yes, I know the chrome arch covers are gross as fuck and I shall remove them in time, just afraid of what lays under them).1 point
-
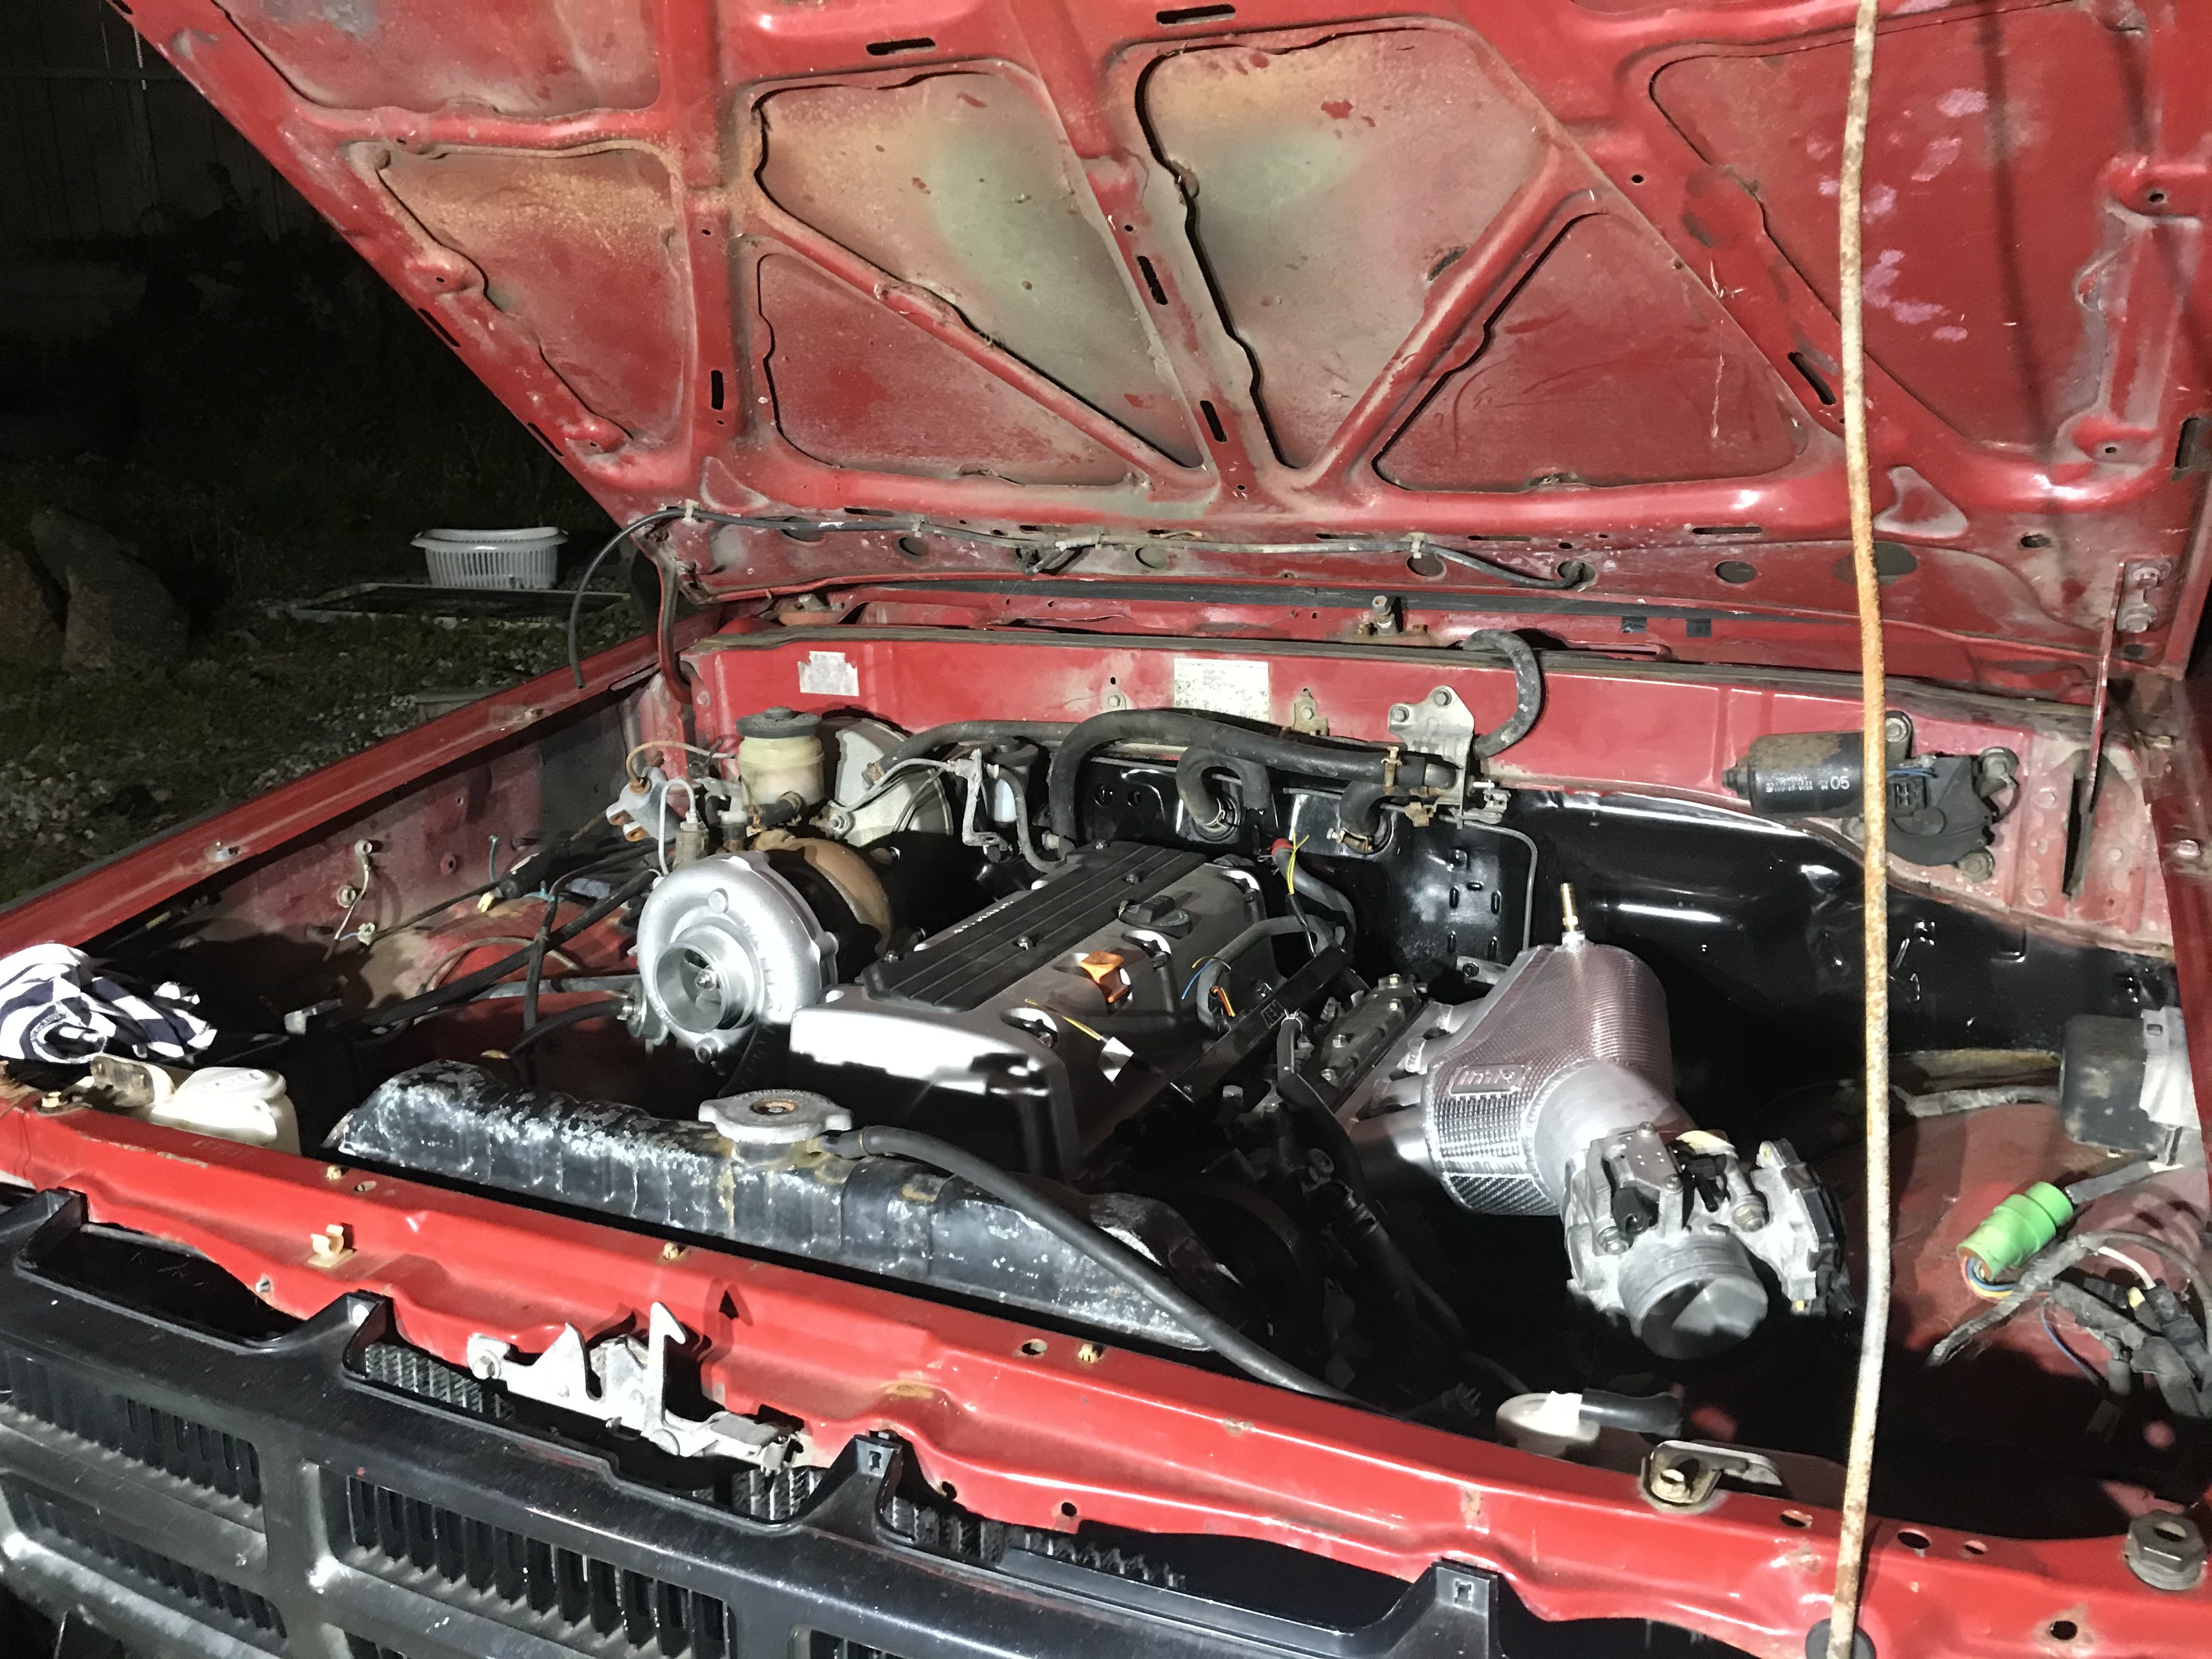
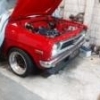
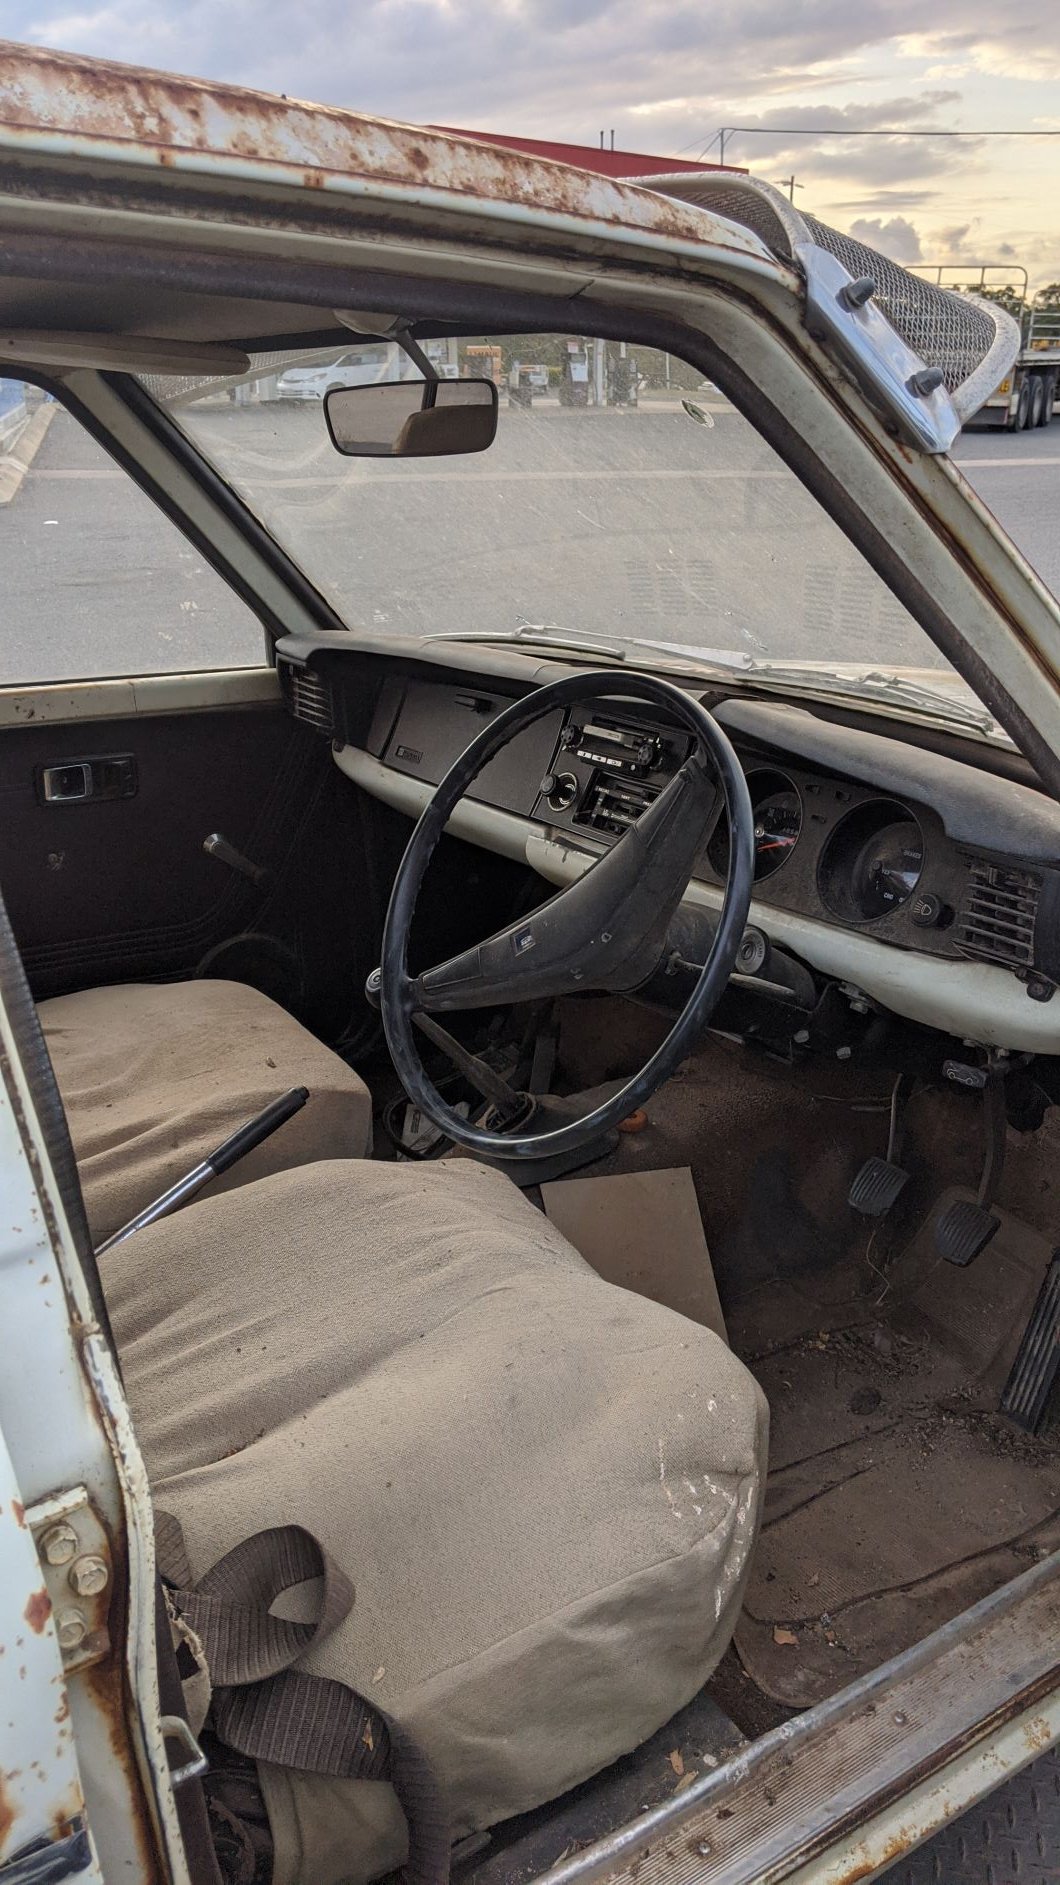
Sold my GX toyotas and acquired this gold HQ kingswood, tastefully equipped with a 202/traumatic. Reg on hold was the main selling point, plus I decided it looked reasonably solid during a hastily organised nighttime inspection. Got it home and dug straight into it! First to go were the VC commodore plush front seats, I've never sat in something so comfortable in my life but they're definitely not staying. After looking it over a while, I've found a few areas that need reconstruction but overall it's pretty solid for what these are. Standard bog spots around the place but overall a great base and something I can have on the road reasonably soon. For the next year or so I'll be keeping with the 6 cylinder powerplant, however next year I'd like to go for a V8. I have a few ideas but not letting them get the better of me at this stage, hoping to have this down to beach hop in November/OS drag day in December. Plan is simply get wof, tidy paint, wide steelies (or period mags potentially), and a few other mandatory wag bits and it'll handle daily duties as work's close/why not. cheers Gross under the bonnet. Inner guards are at the blasters, and this motor has been swapped out in favour of a good runner. The interior, with a hacked dash and VC seats before I stripped it.1 point
-
.... with a bunch of weirdos Oh, wait...1 point
-
600. I am monitoring oil level. Have seen oil being "made" by overfuelling in truck engines1 point
-
Yeah, much more affordable that spending a weekend in Cromwell...1 point
-
dang, im gona steal that1 point
-
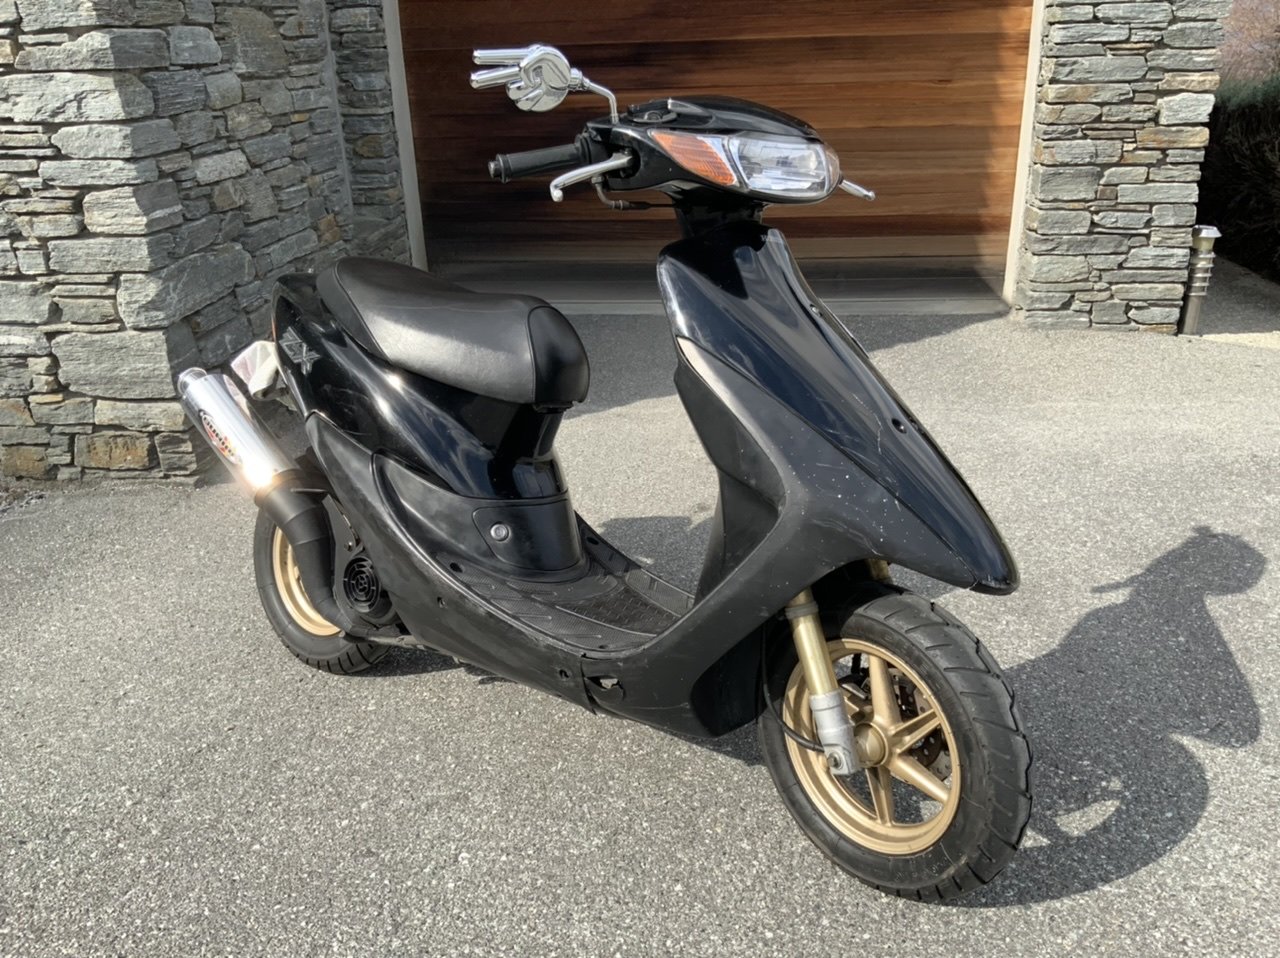
my project was completed. Yes I think so. I intended to get new plastics, but my circumstances have changed and I need to stop myself spending money!!1 point
-
He didn't say a price, but was like "gimme a call when you have exact numbers and we'll sort out a price, it won't be much" so yeah I'd say we'll get a group discount. But yeah they're cheap as fuck haha. Omg yes plz that would be brilliant.1 point
-
Haha yeah I saw that, and then I saw the price too. Depending on the exchange rate and shipping I shouldn’t be too far off getting two of them to me for similar money (I hope haha)1 point
-
STICK A VIVID ON IT AND DRAW REALLY ACCURATE COCKS!!!1 point
-
And fuck it, let's add the Z axis. Also I spent some hours learning how to set up the vfd/spindle. This should be good to go as soon as I find some four core cable for it.1 point
-
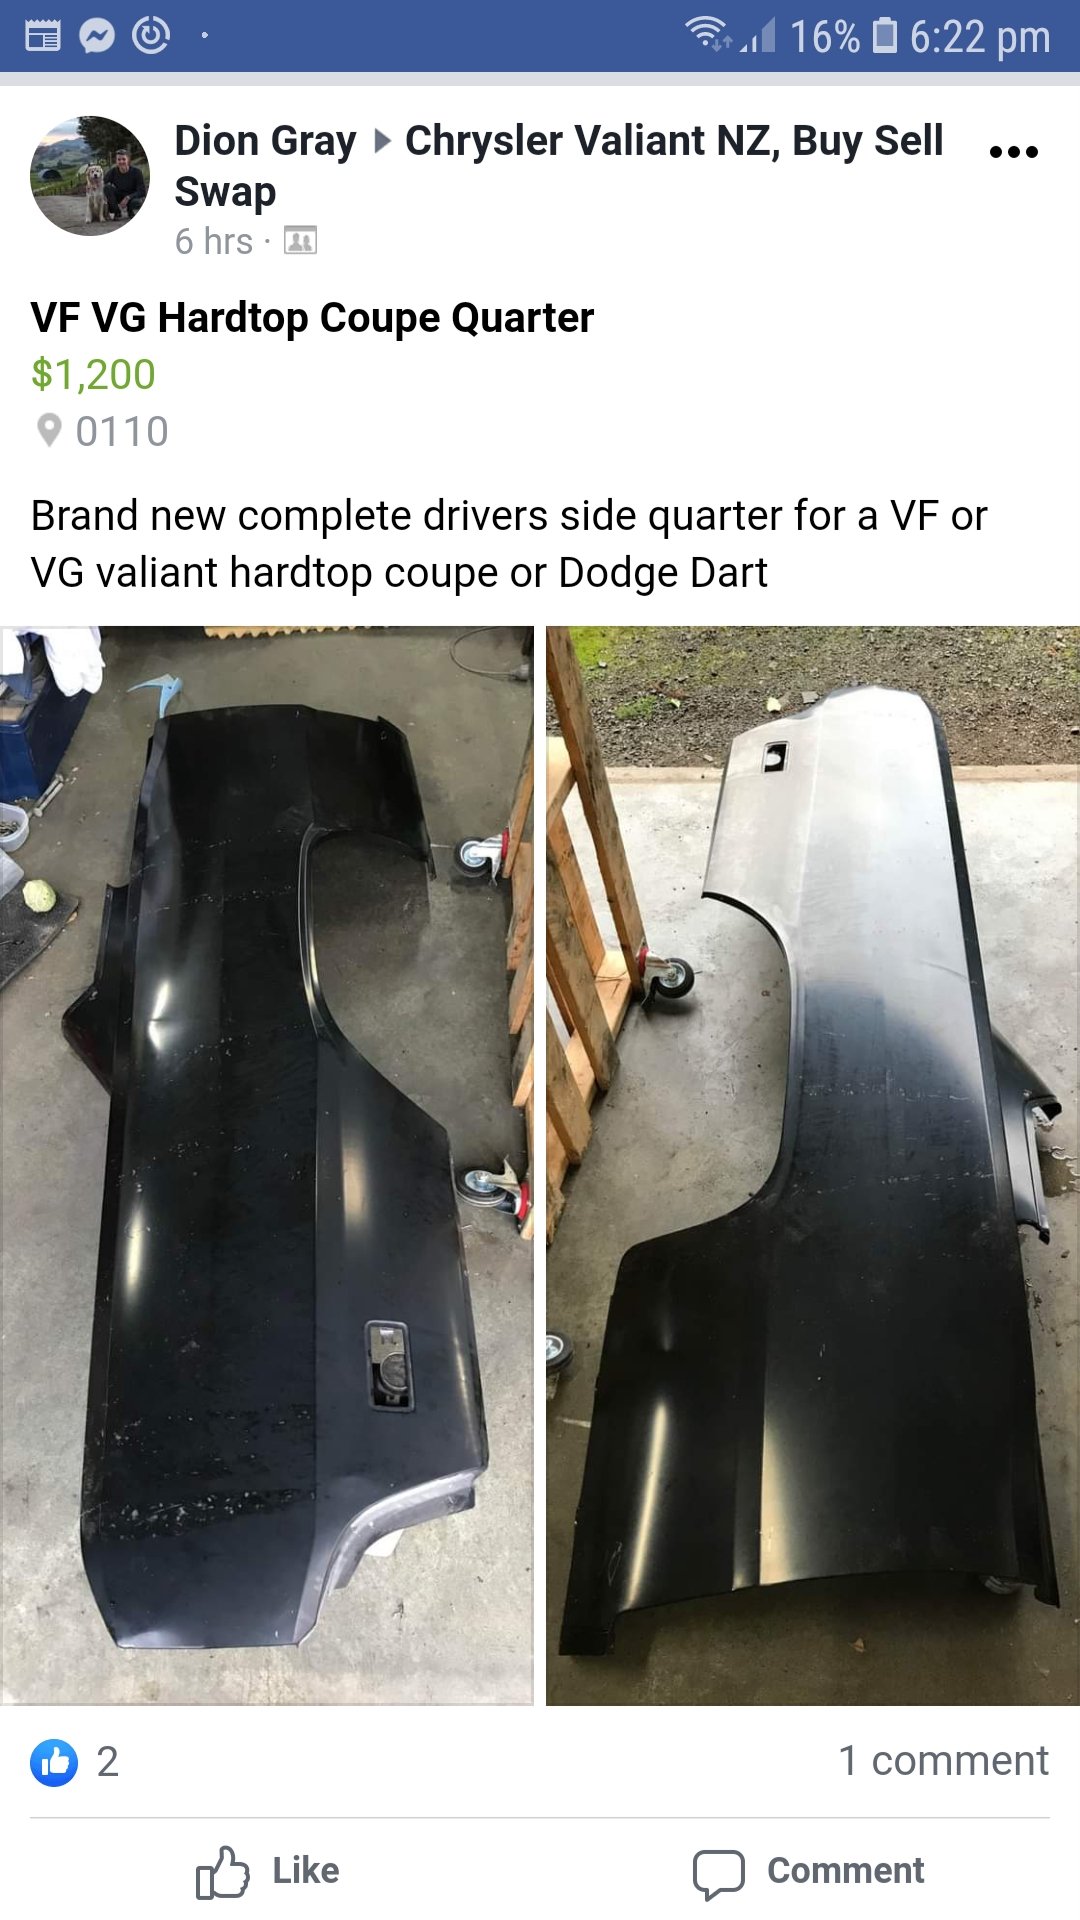
Hey @f100_dreamin, I saw this and thought of you. EDIT, that's a lot of money for one, before I posted I thought it was both sides
1 point
-
Did I say I hate plastering? It stayed unsanded like that till the beginning of August such is my complete lack of enthusiasm for all things drywall. That and I assumed plaster could be used anytime. Found out it had a shelf life of about 18 months, Tradeset 90 goes off in about 15min once its 4 years old(eye rollingly annoying) then I found no-one stocked lite blue in 5kg bags. When I say I don't like drywall, I also don't like driving round getting supplies for said drywall.
1 point
-
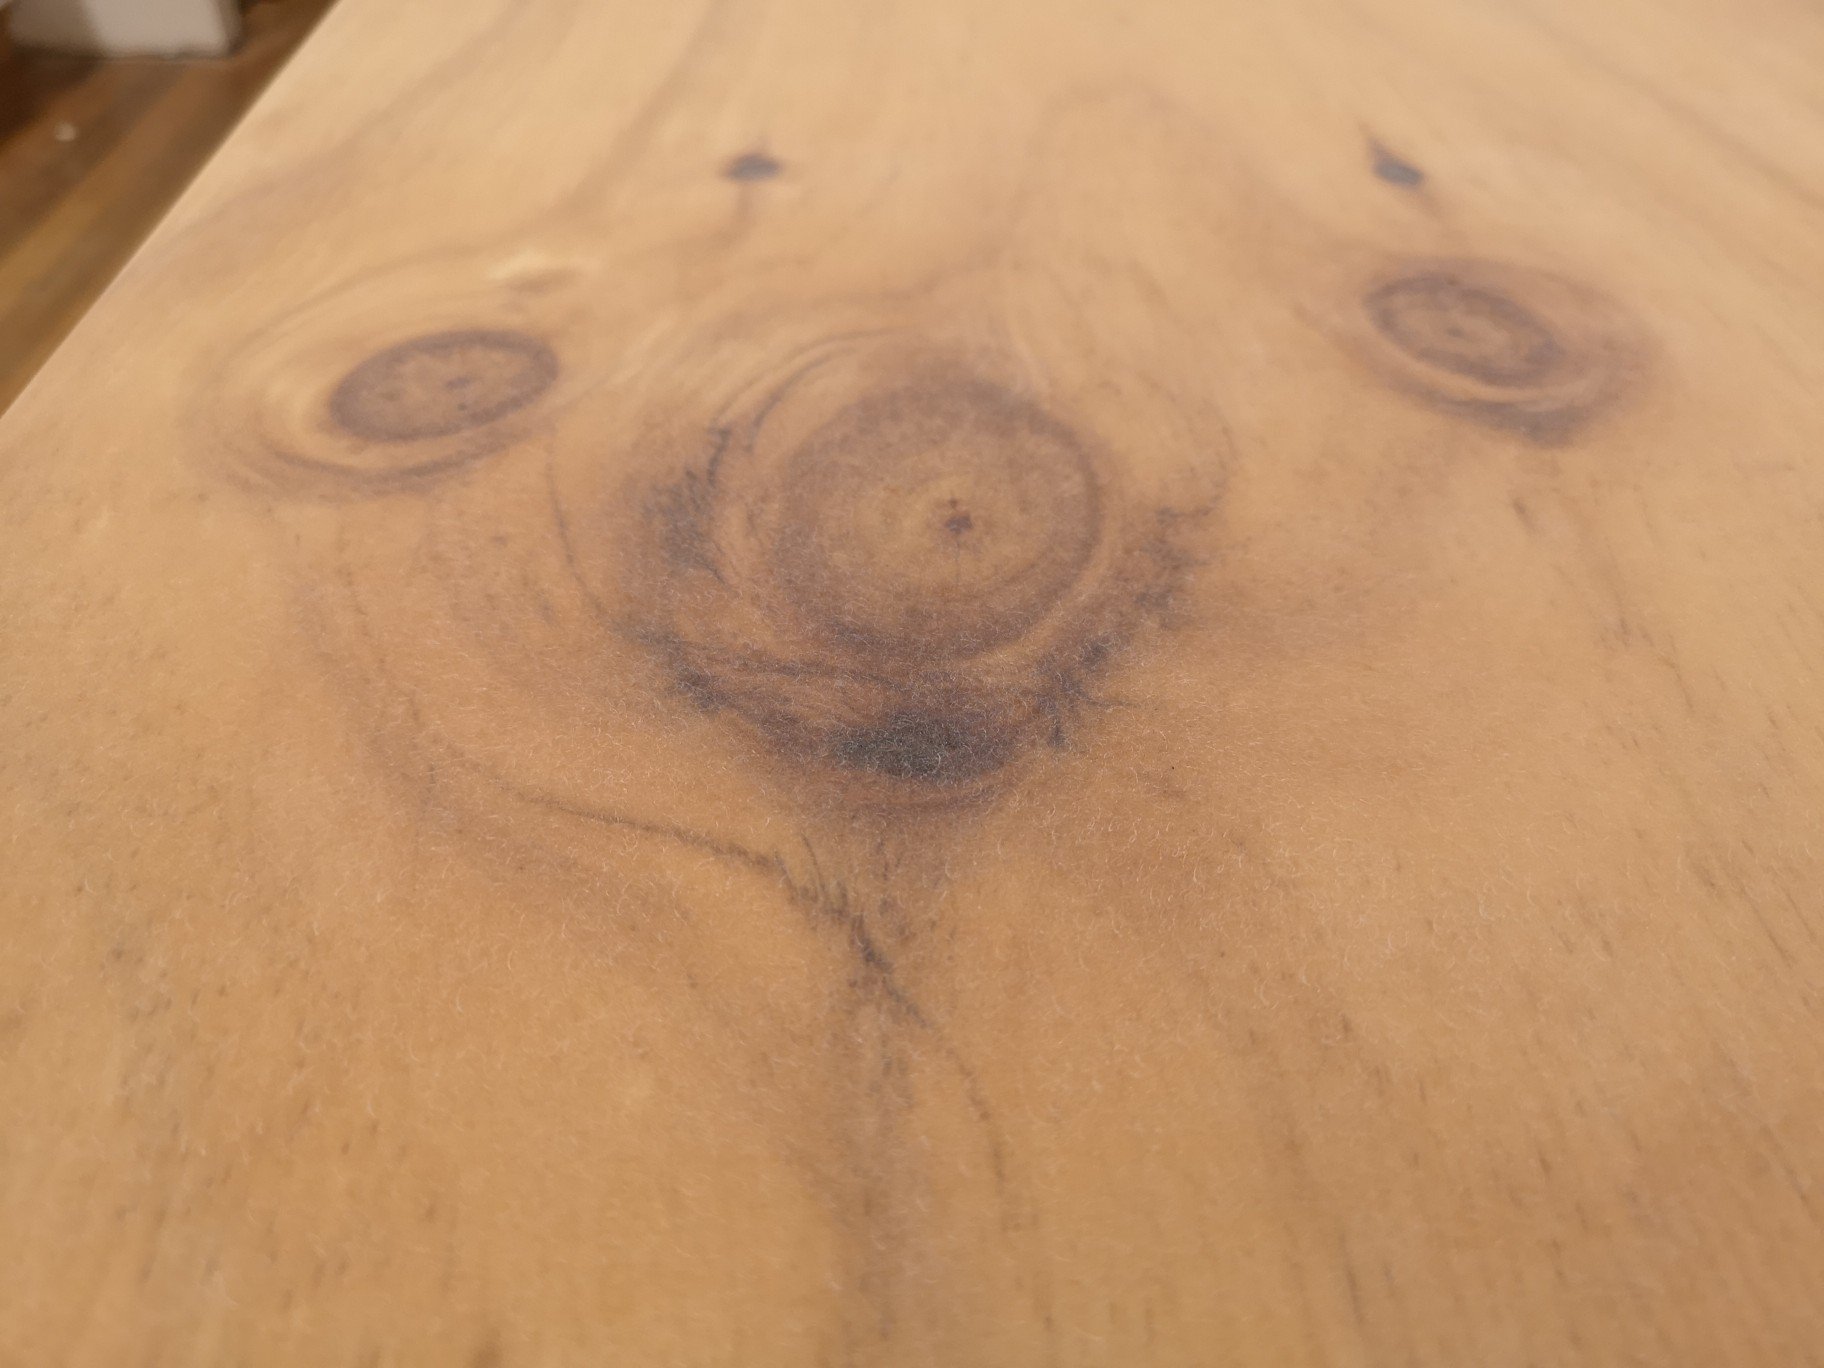
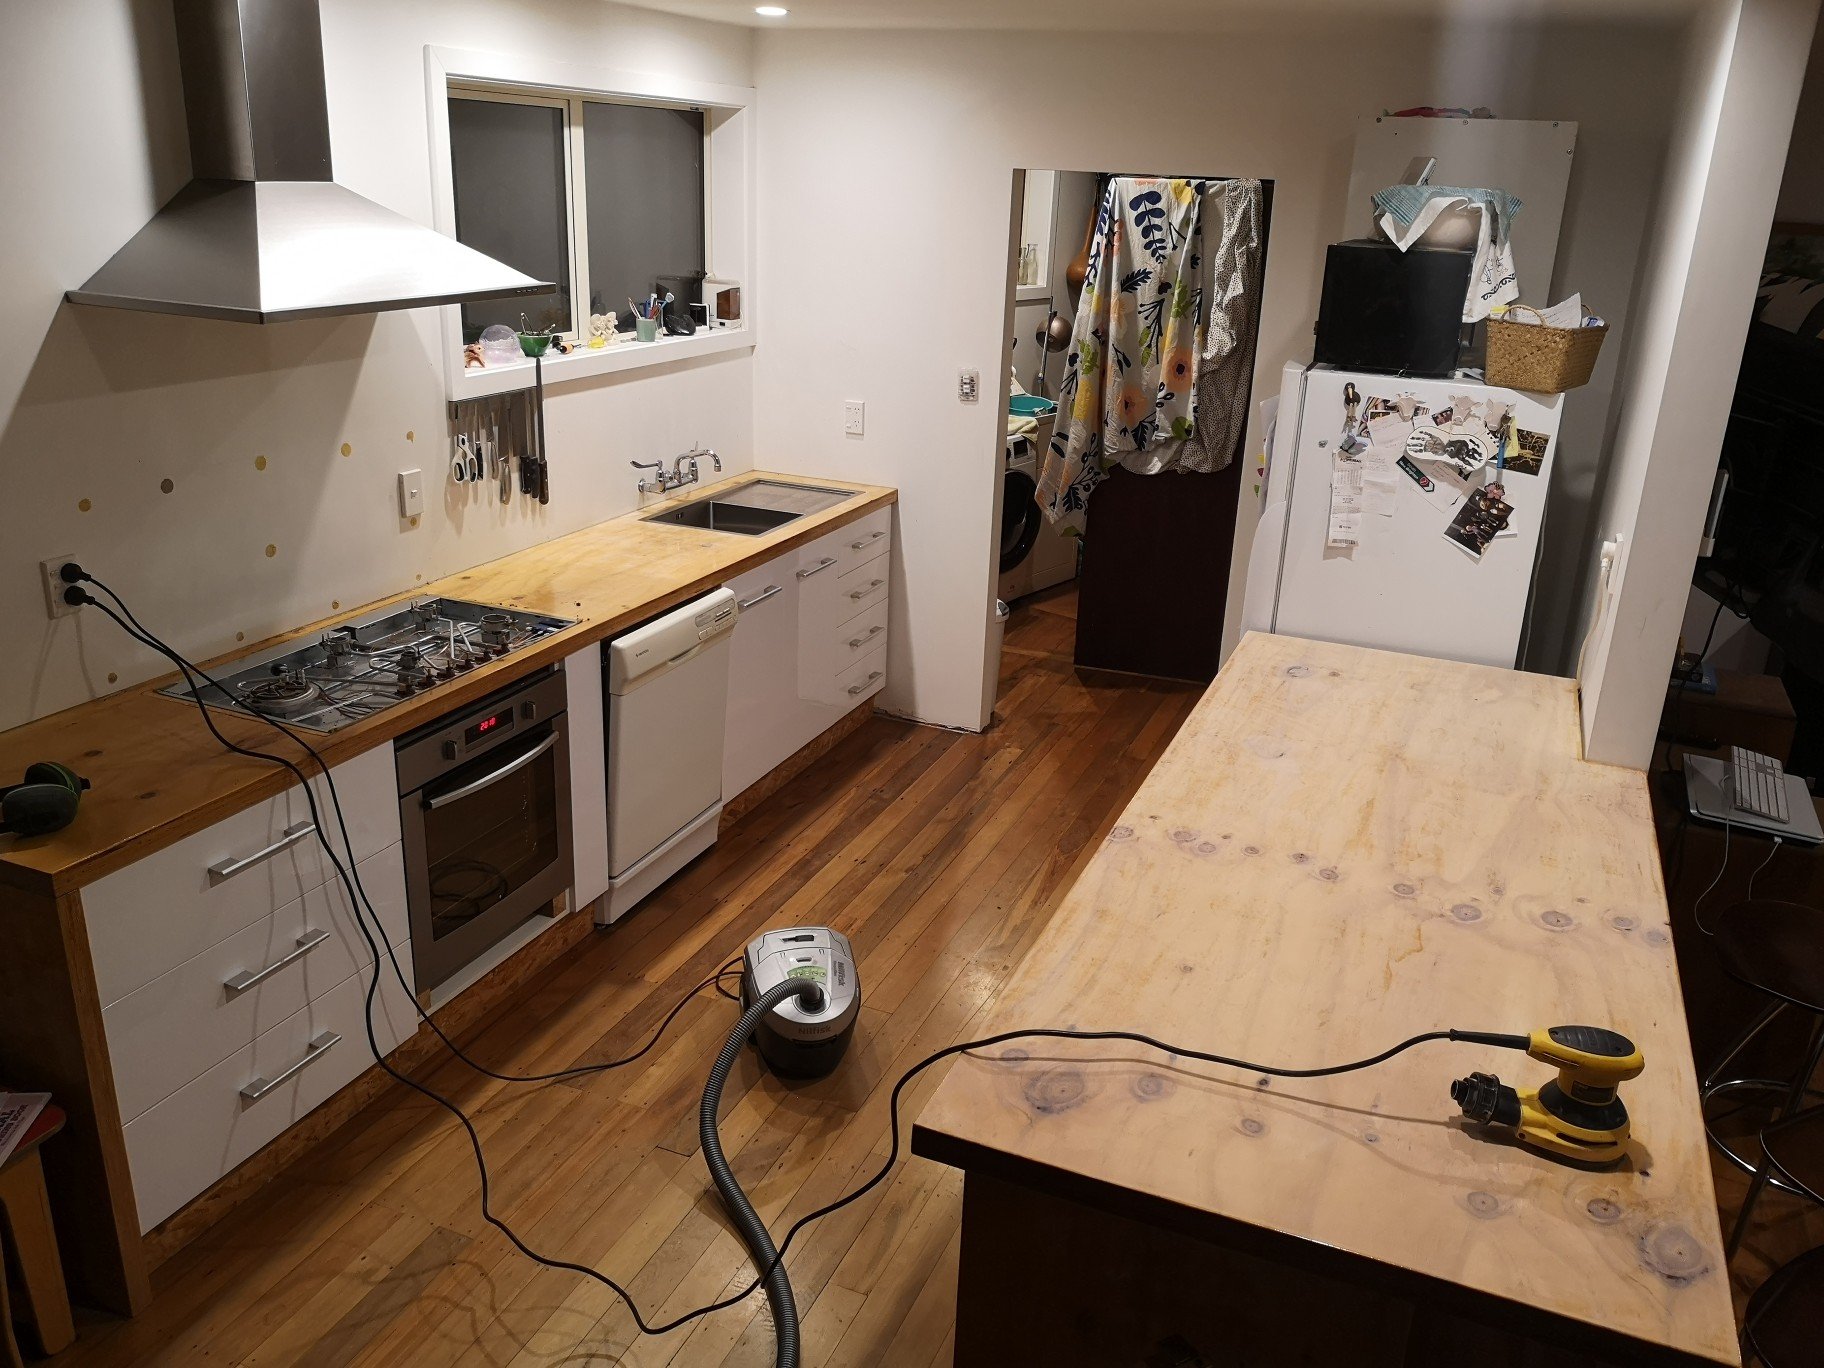
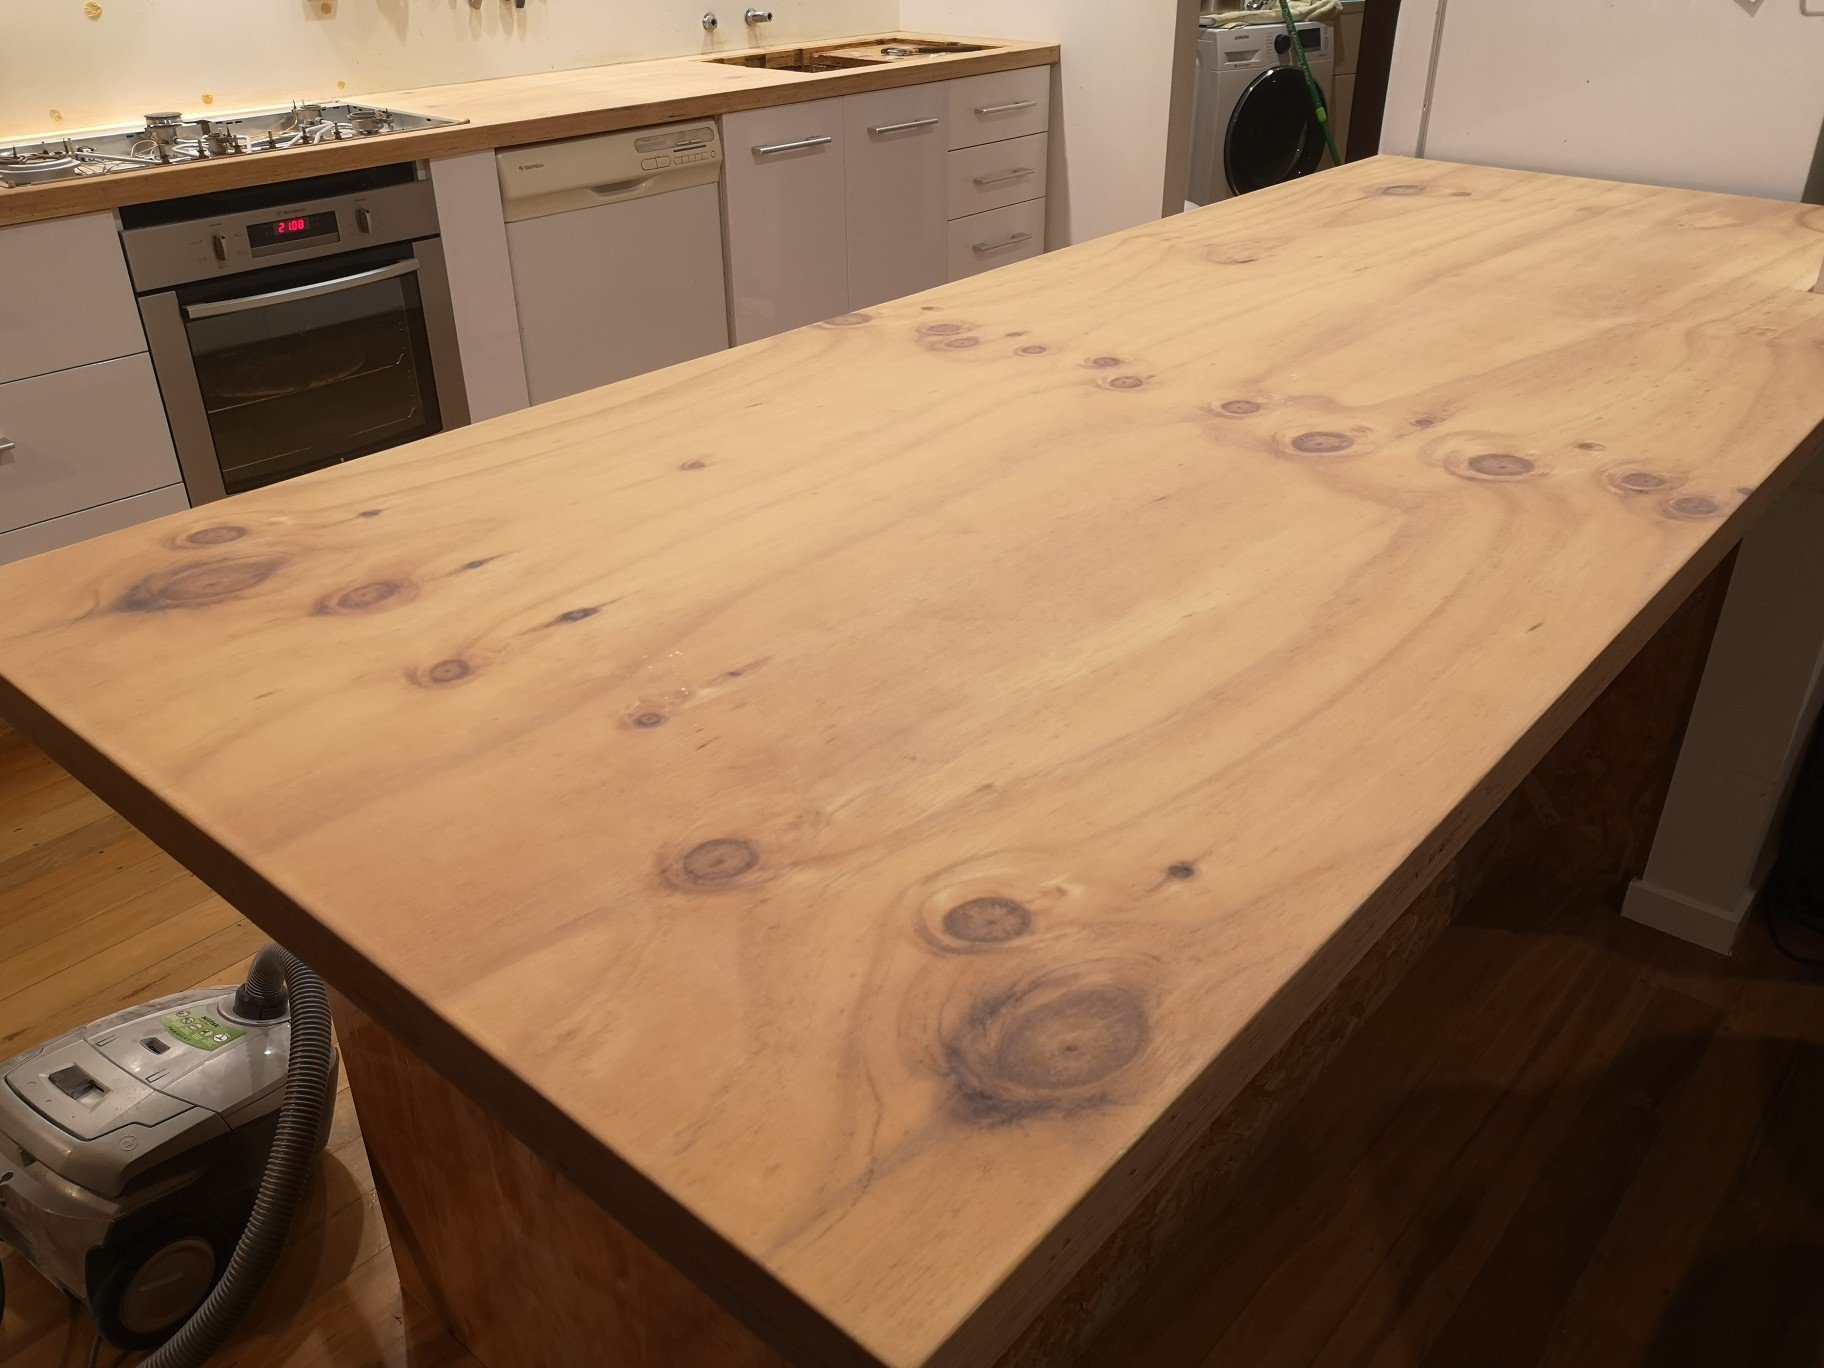
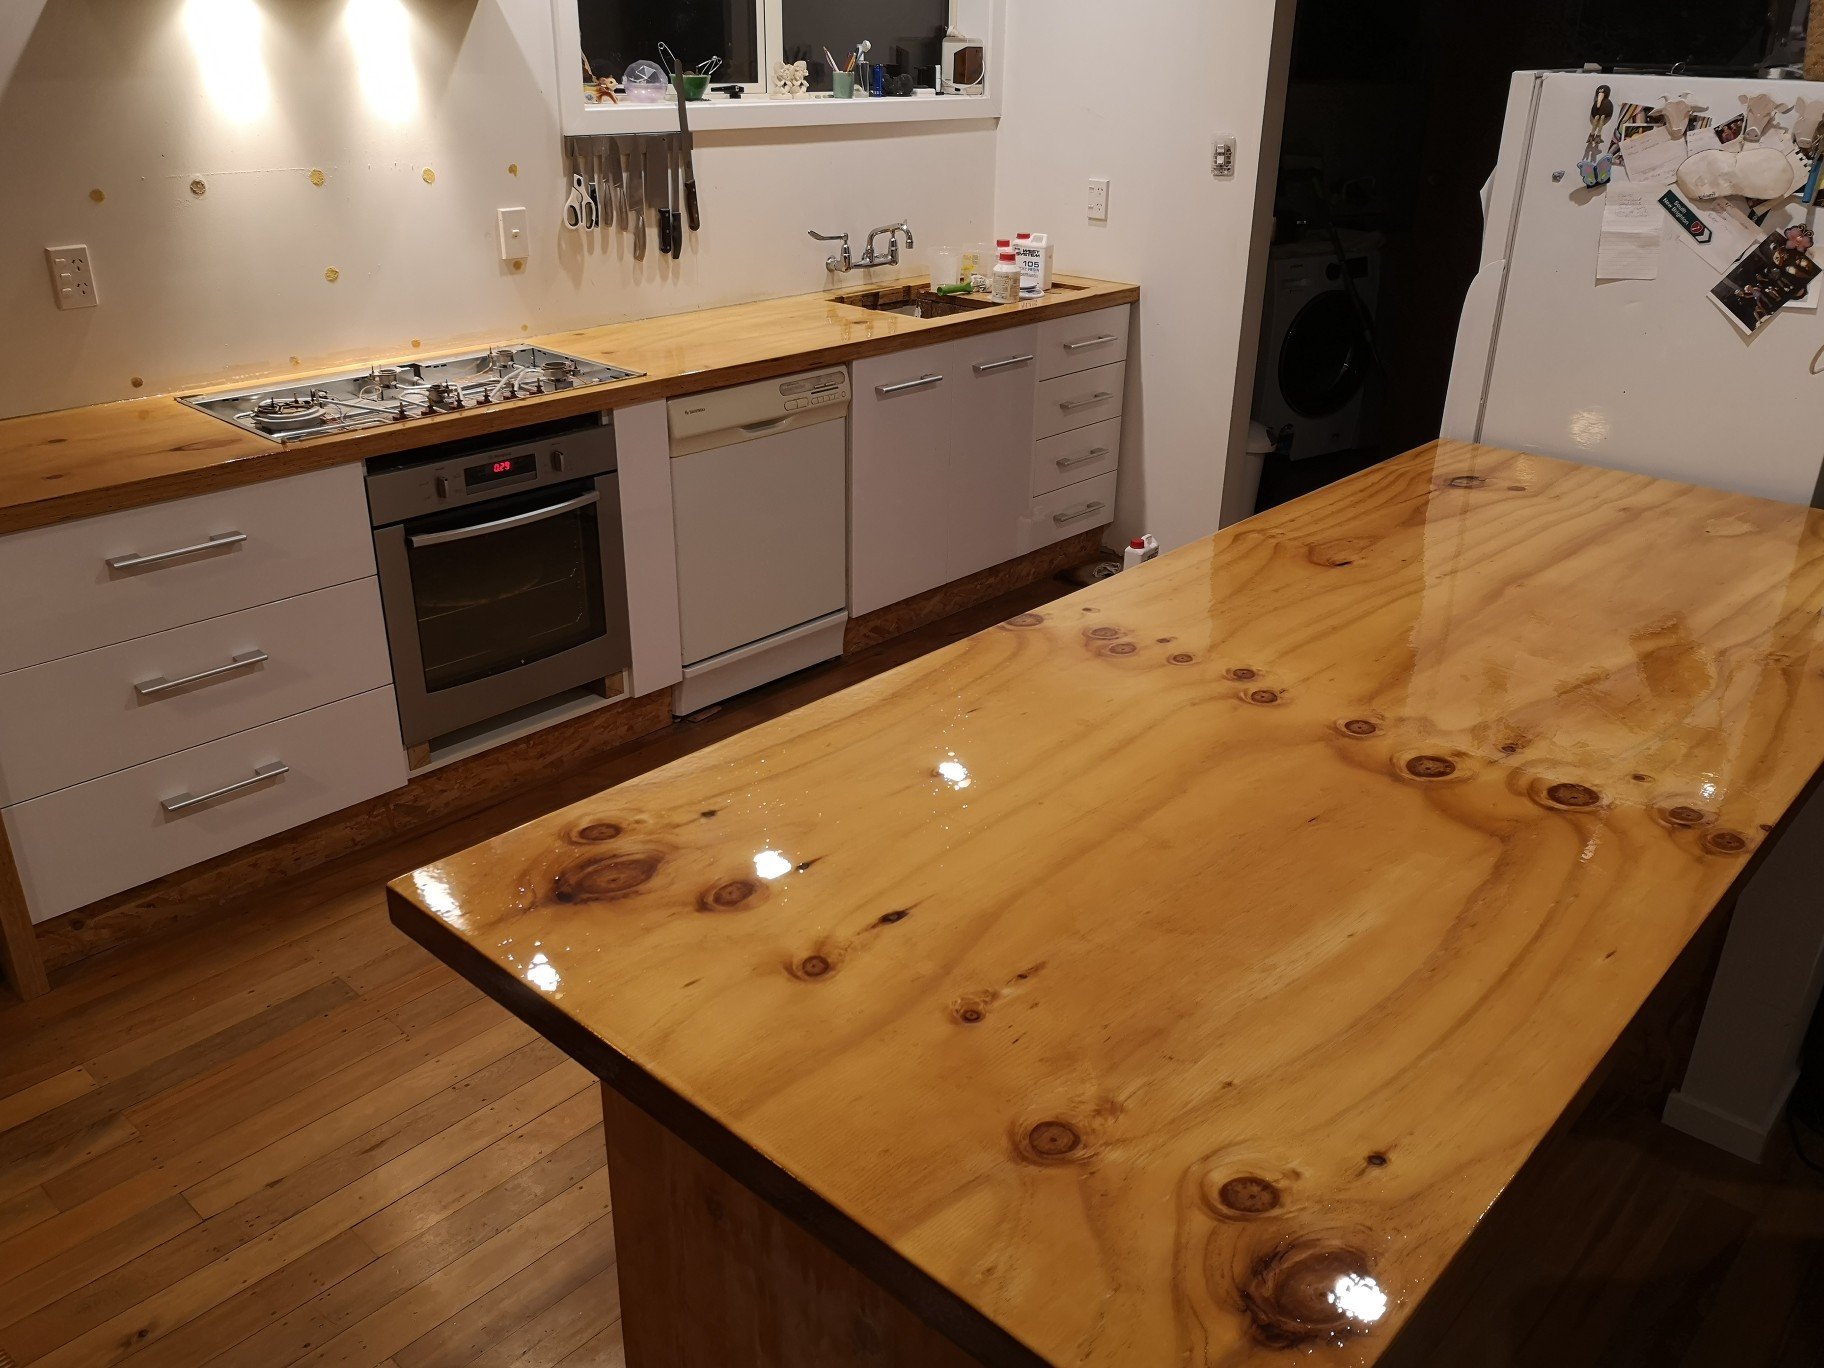
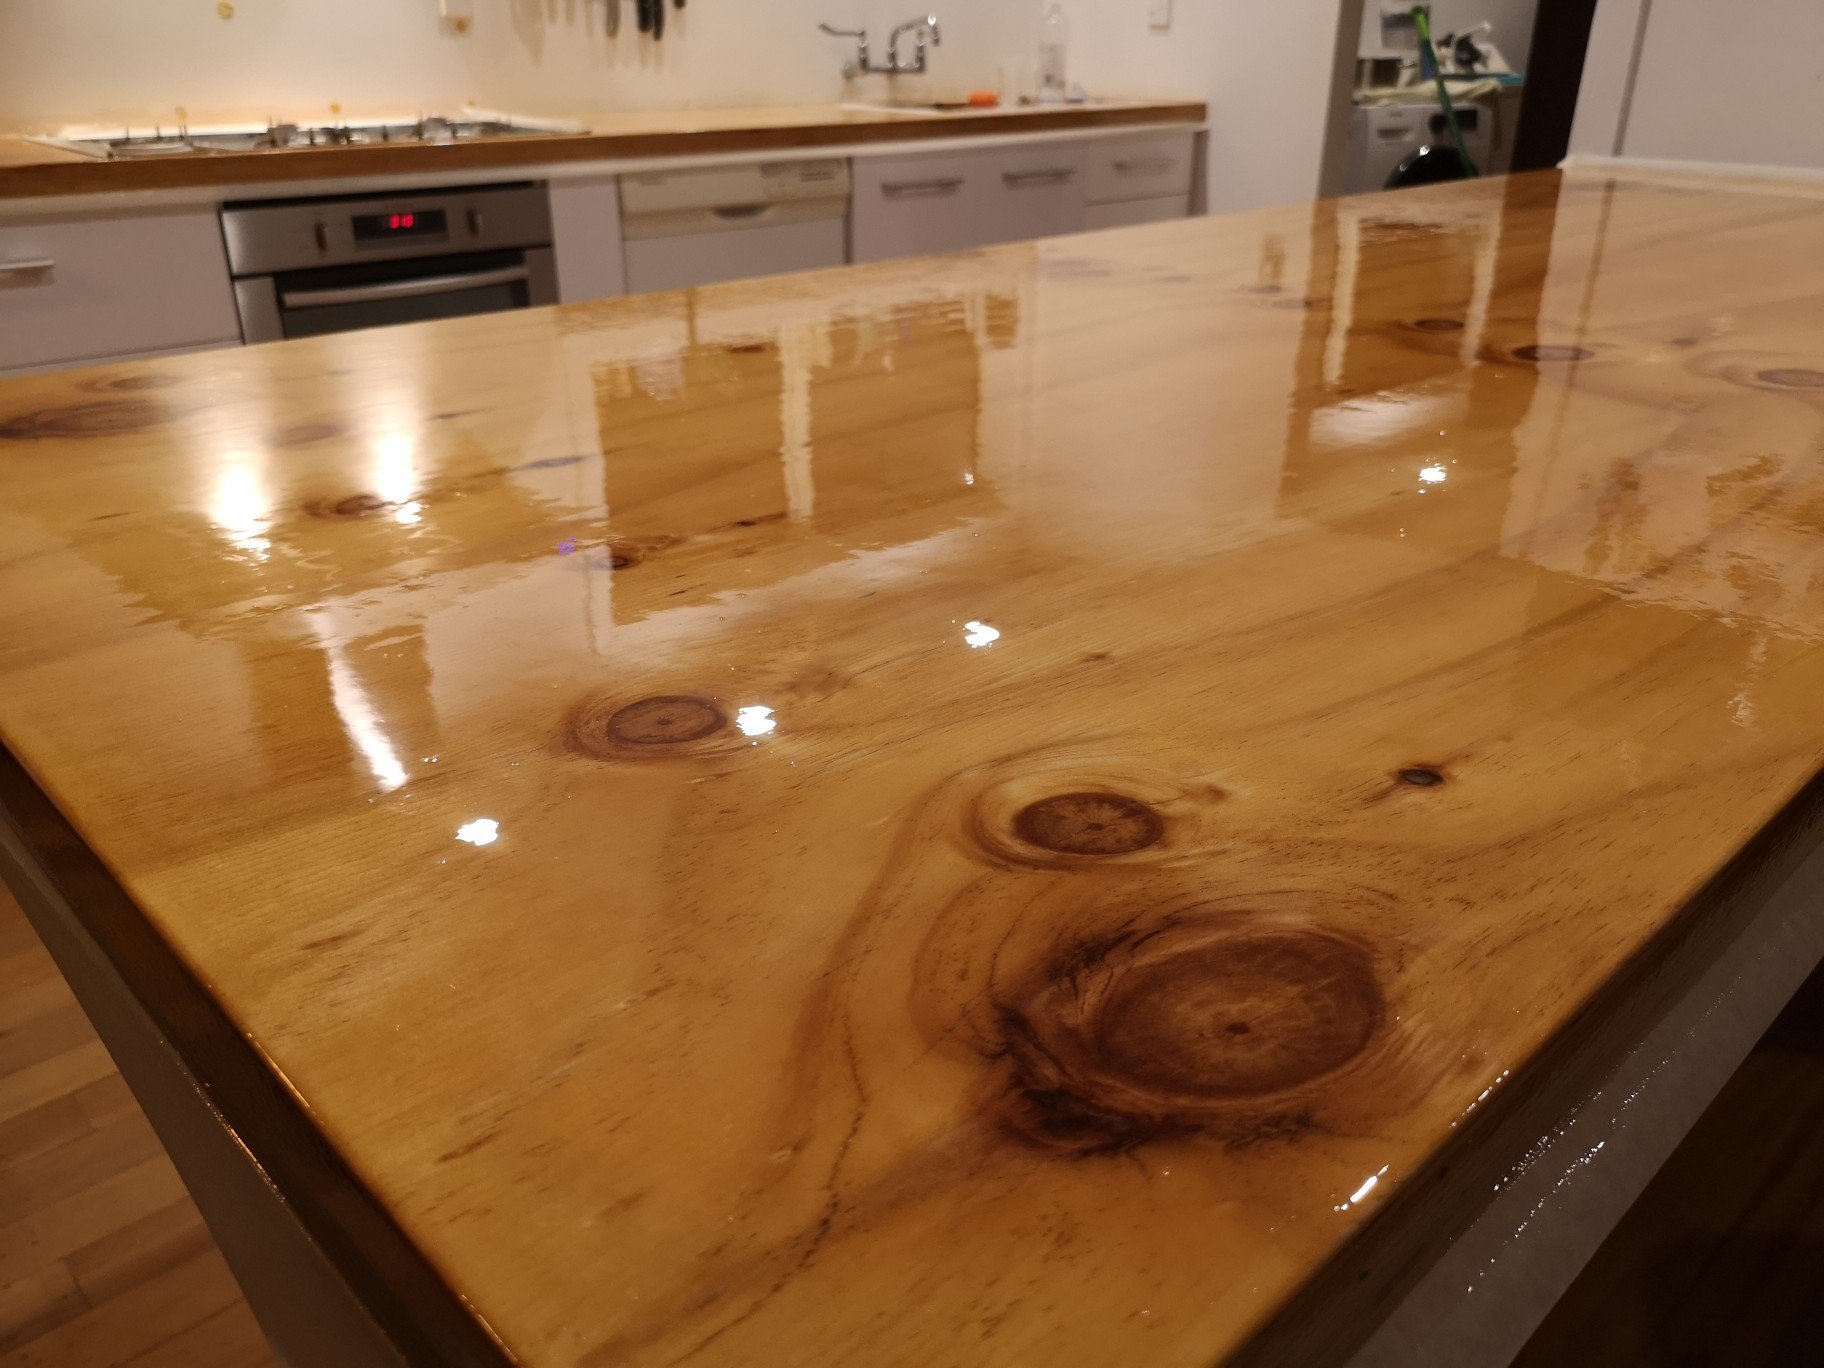
Before I set it in for good I recoated both benches in epoxy , the island bench was still ok but the wall bench was my first go and only had one coat on it that was full of air bubbles and was quite rough. It was also easily damaged. Before I started I had to repair the joint between the two sheets of ply that made up the wall bench, epoxy plus fuck off batten screw works.. Next I sanded it all back with 60 grit for keying purposes, looks quite nice just like that. Awesomely, the sander I bought last time I did the bench packed up half way through sanding the island bench, cunt, had to buy a new one. Went over it with liberal amounts of prepsol and gave it two coats of epoxy. This time I did it with a microfiber nook and cranny roller as it was too hard to do it with a window squeegee in place. Worked good until I went too hard with the roller and it broke leaving little bits of foam in the epoxy (FUUUCK!!!)... Plus once it cured there were a bunch of little fish eys in the finish Cue round two of sanding, Worth it tho, results speak for themselves. Much better finish, only problem I have is that next time I do this I'll be sure to strain the epoxy first as when I finished the older epoxy a big solid lump came out of the pottle after I had already made and applied half a coat.. consequently, what I thought was bits of roller in the first coat actually turned out to be bits of coagulated epoxy in both coats. I picked as much as I could out of the final coat but still missed a couple. Can always give it a light sand and polish further down the track... *probably won't....
1 point
-
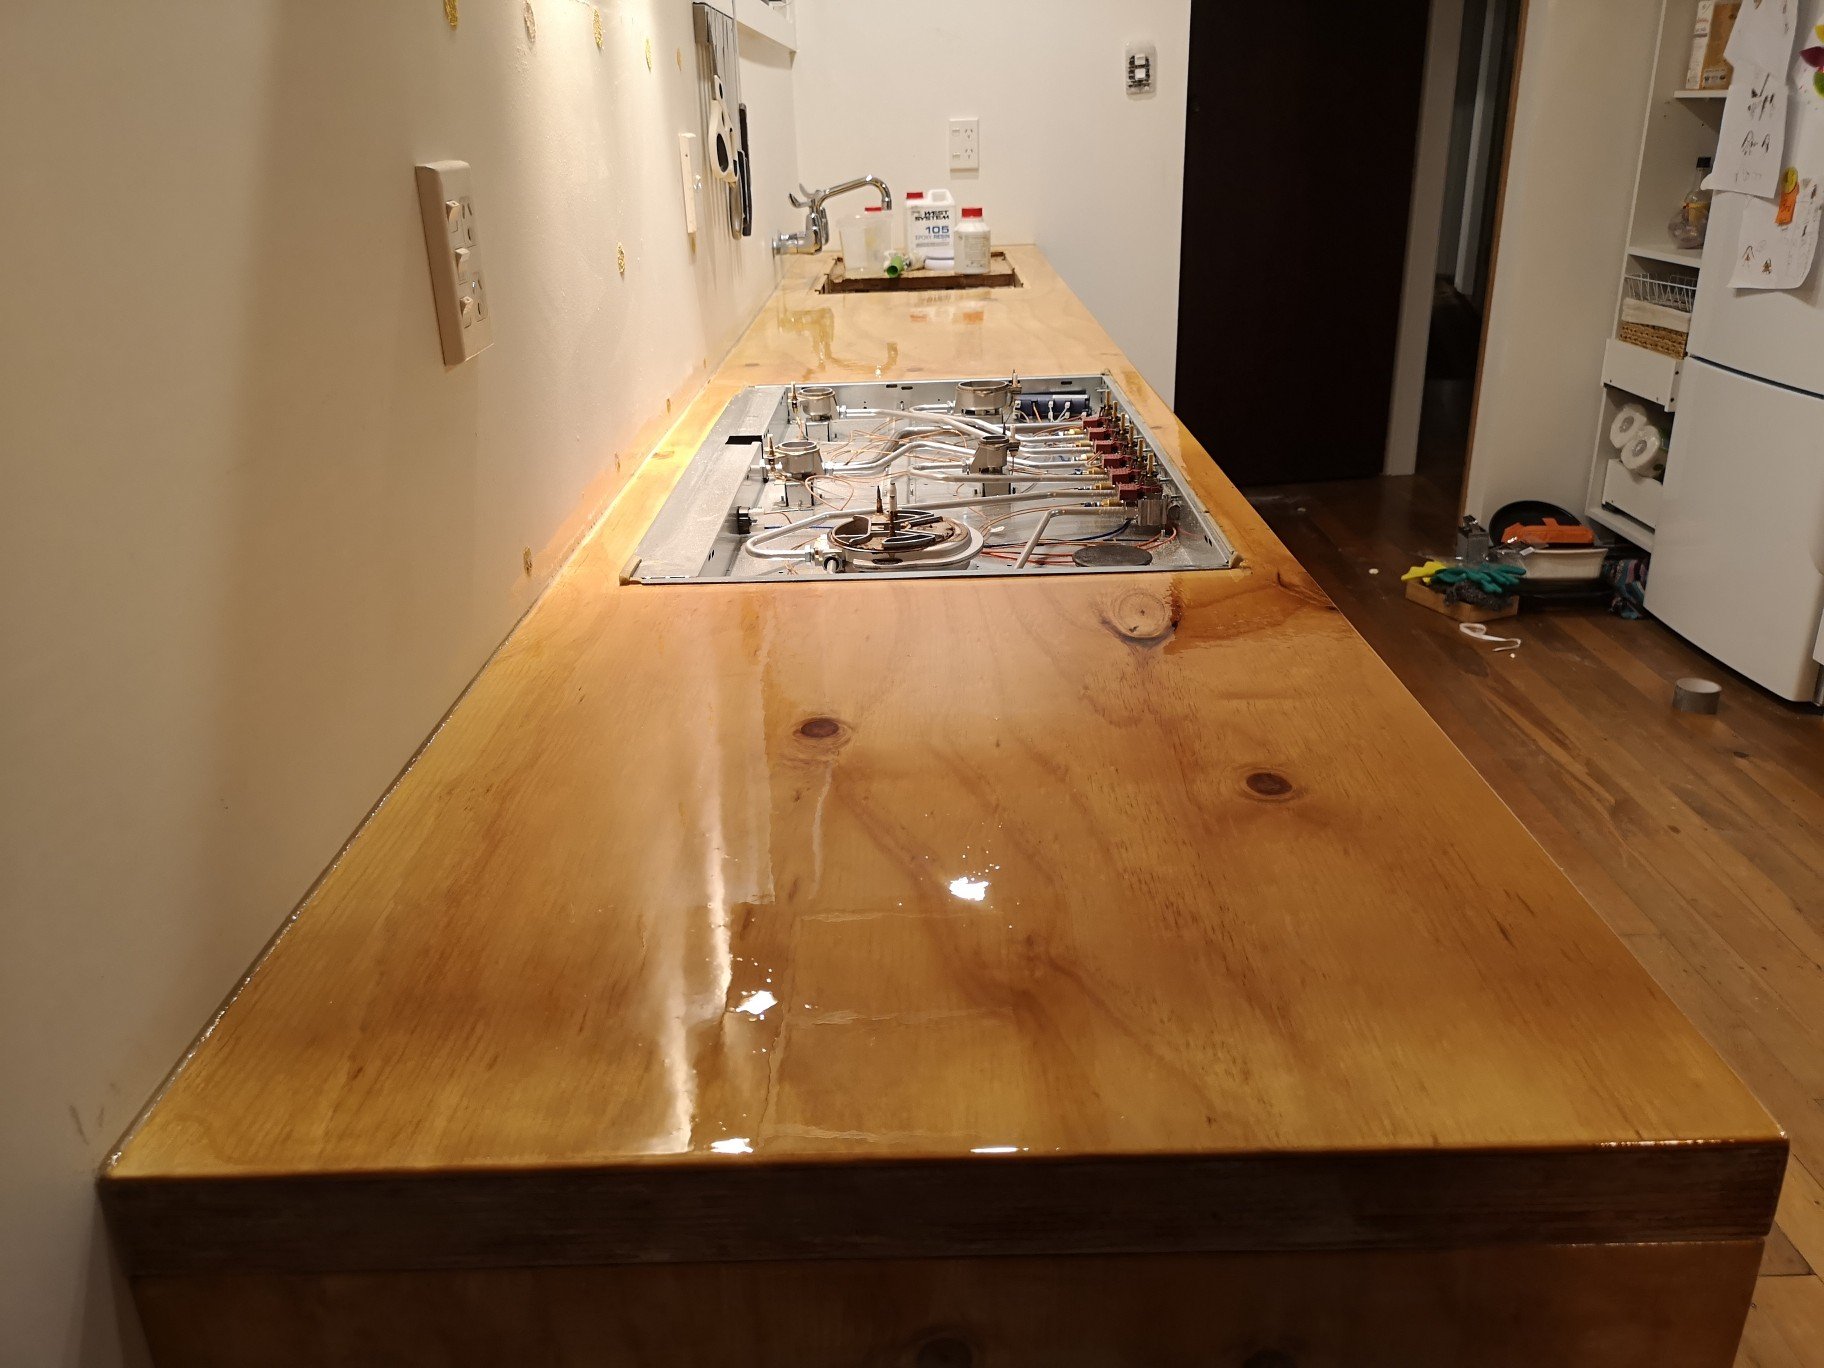
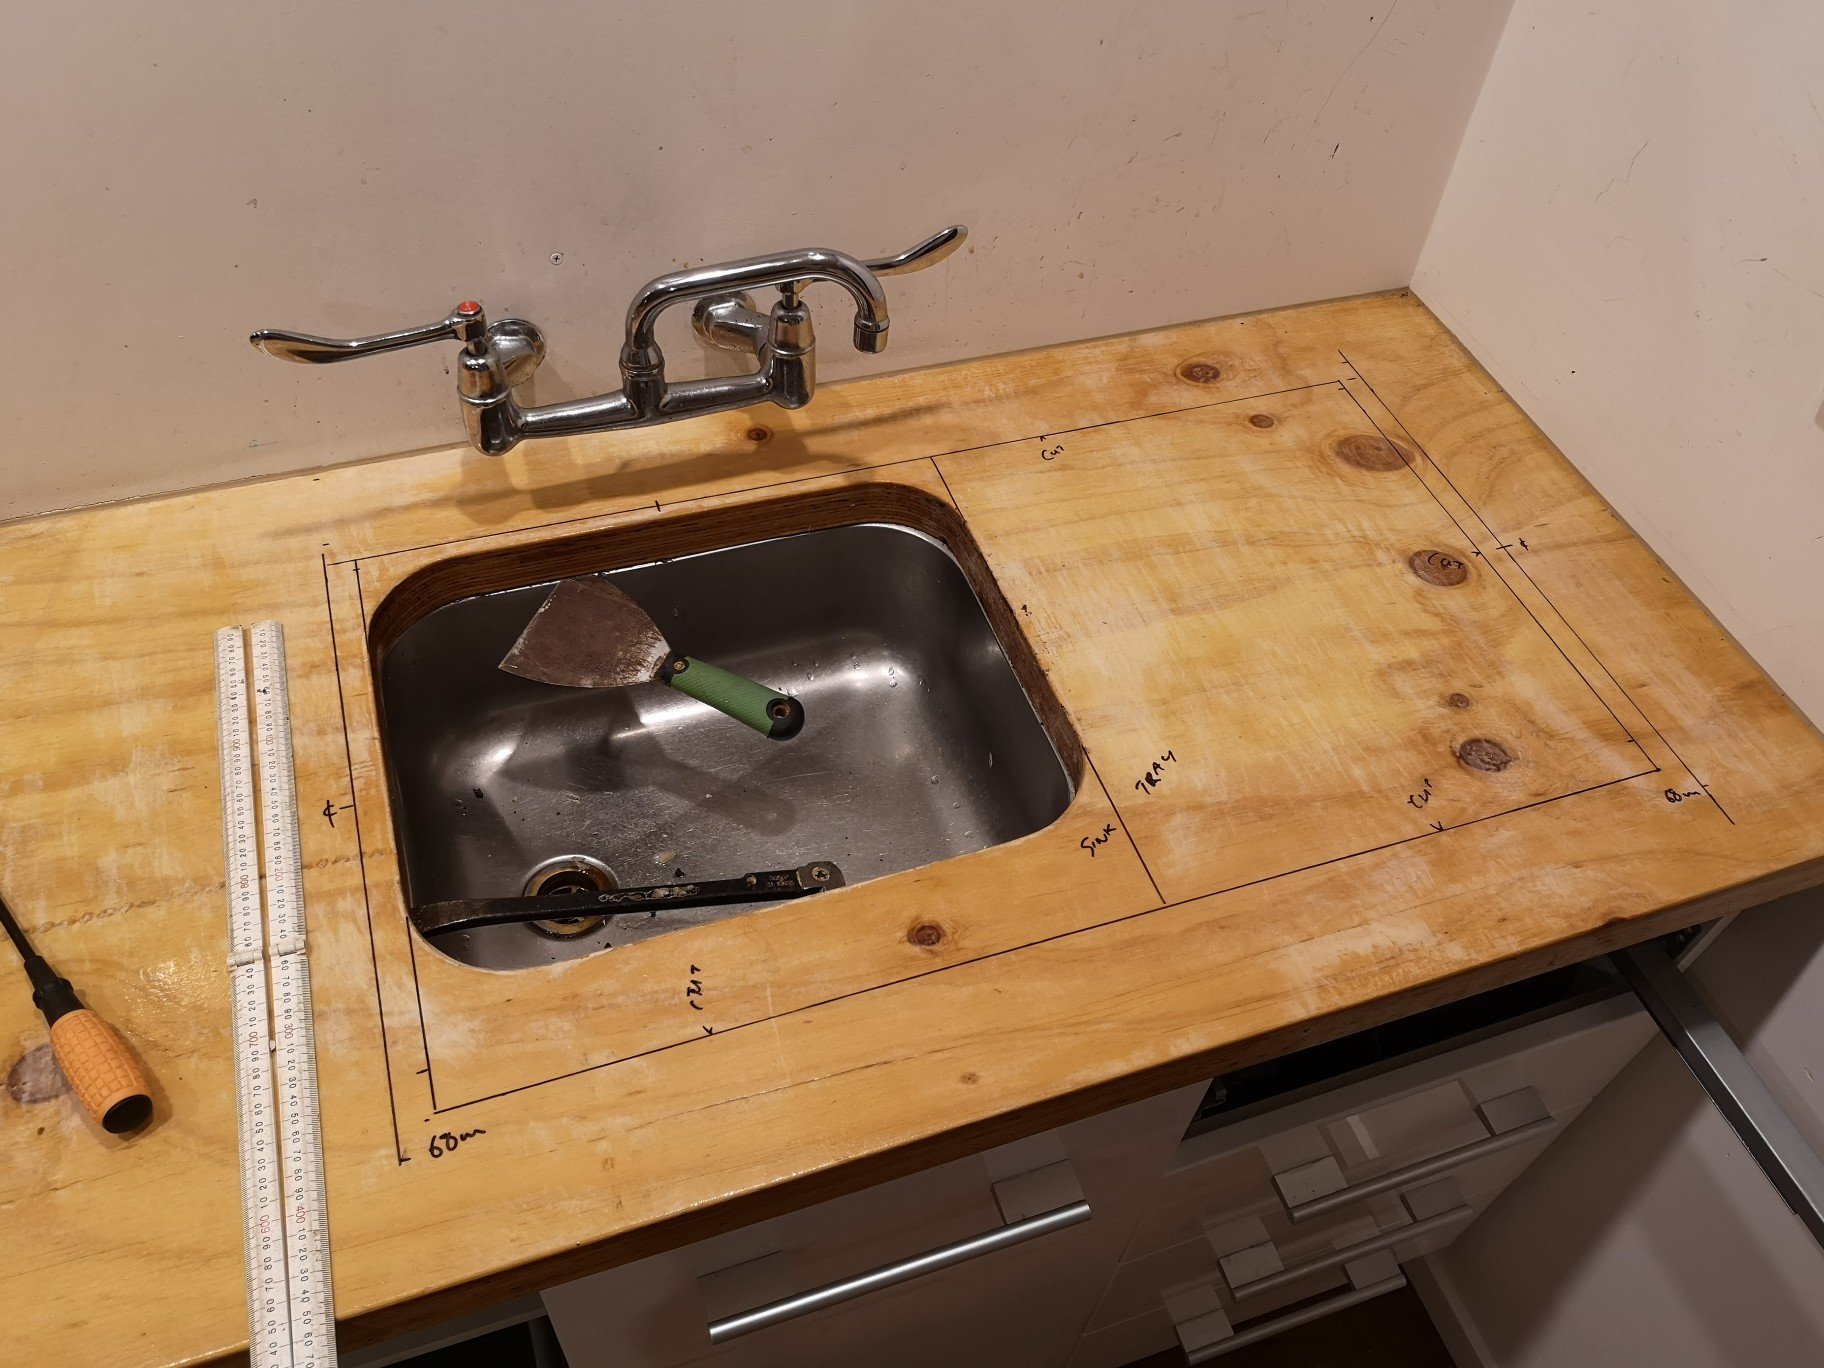
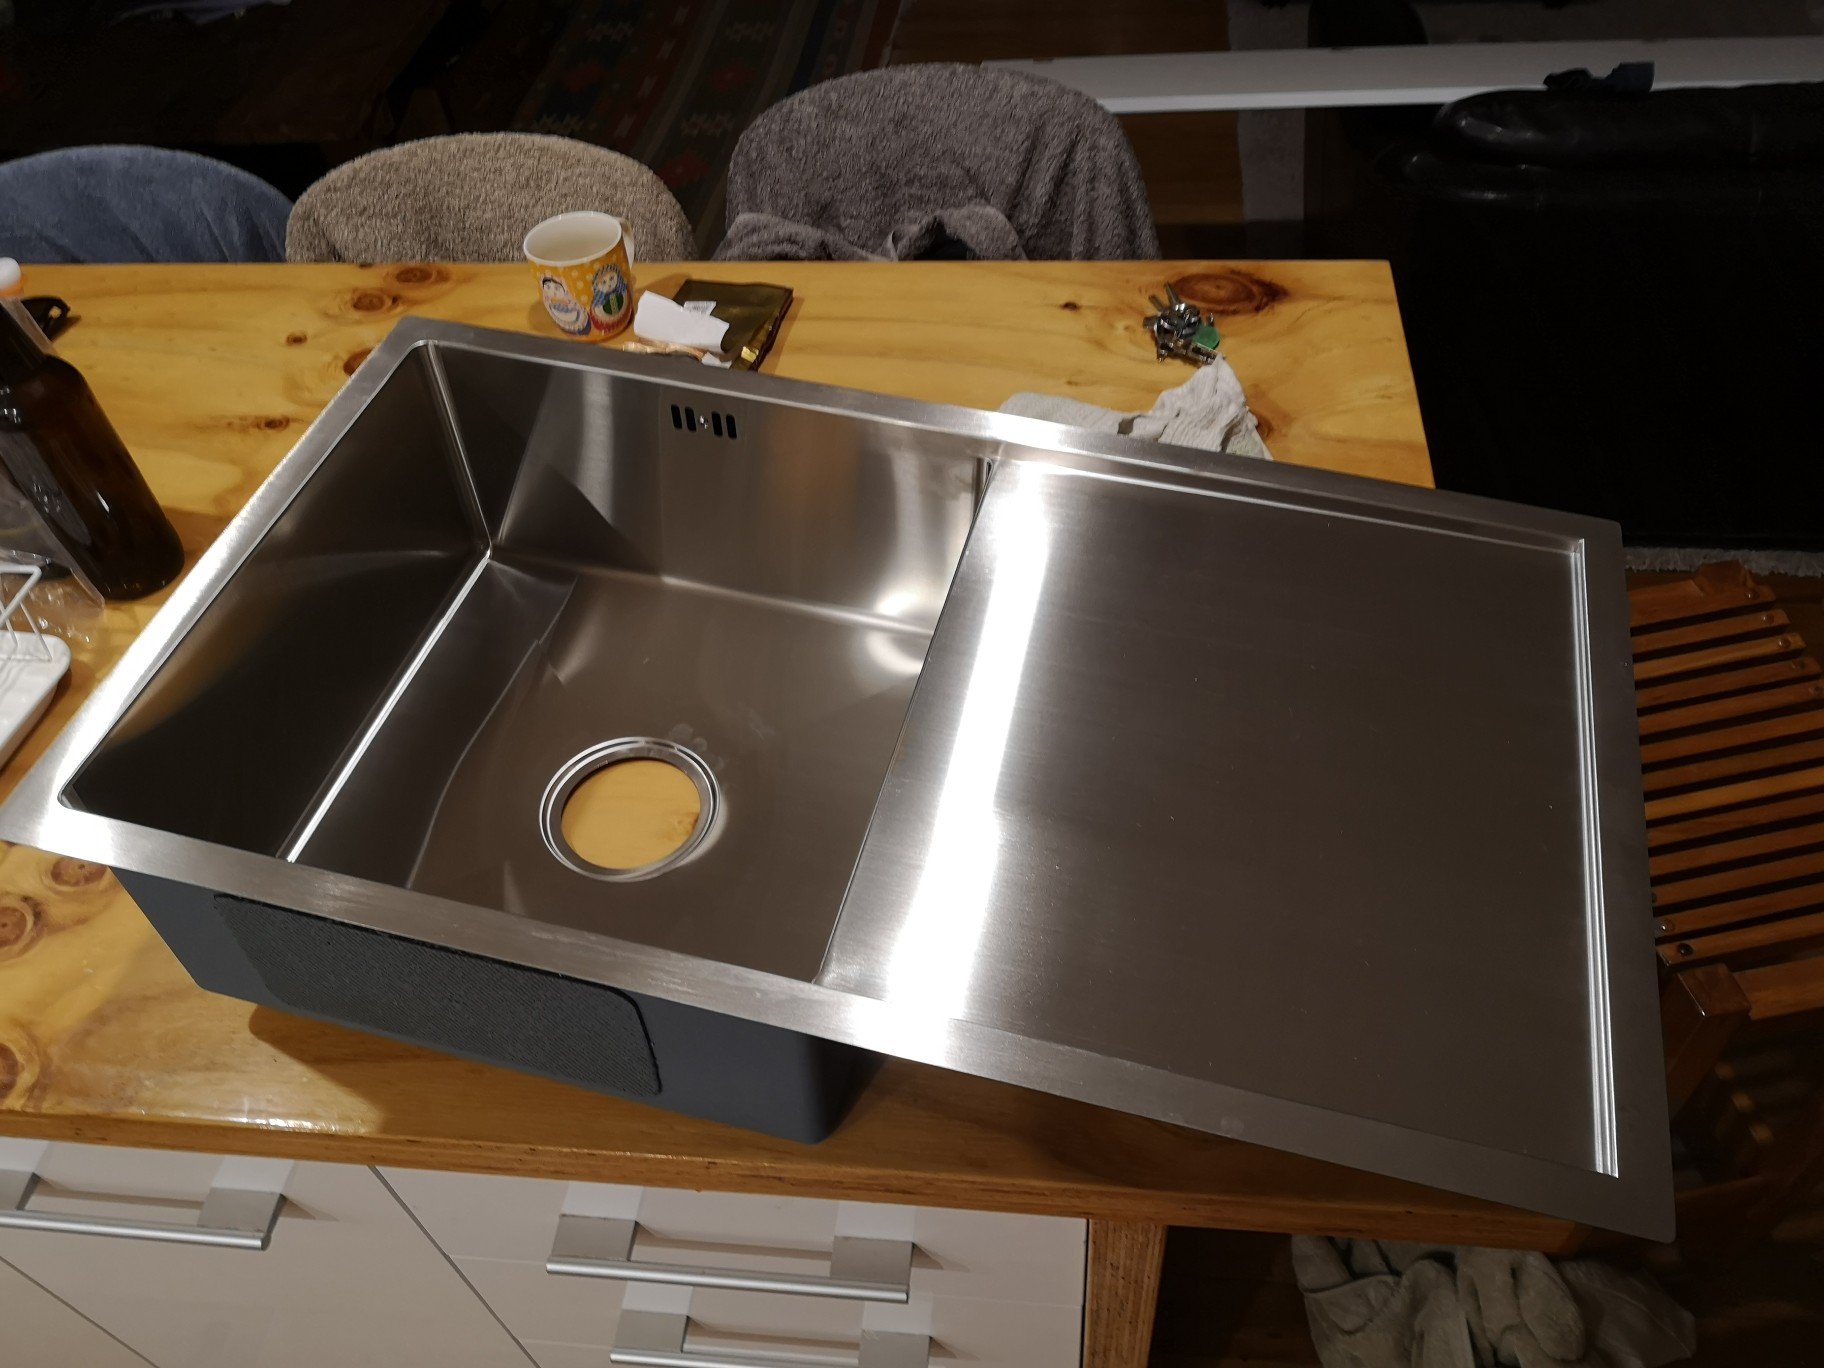
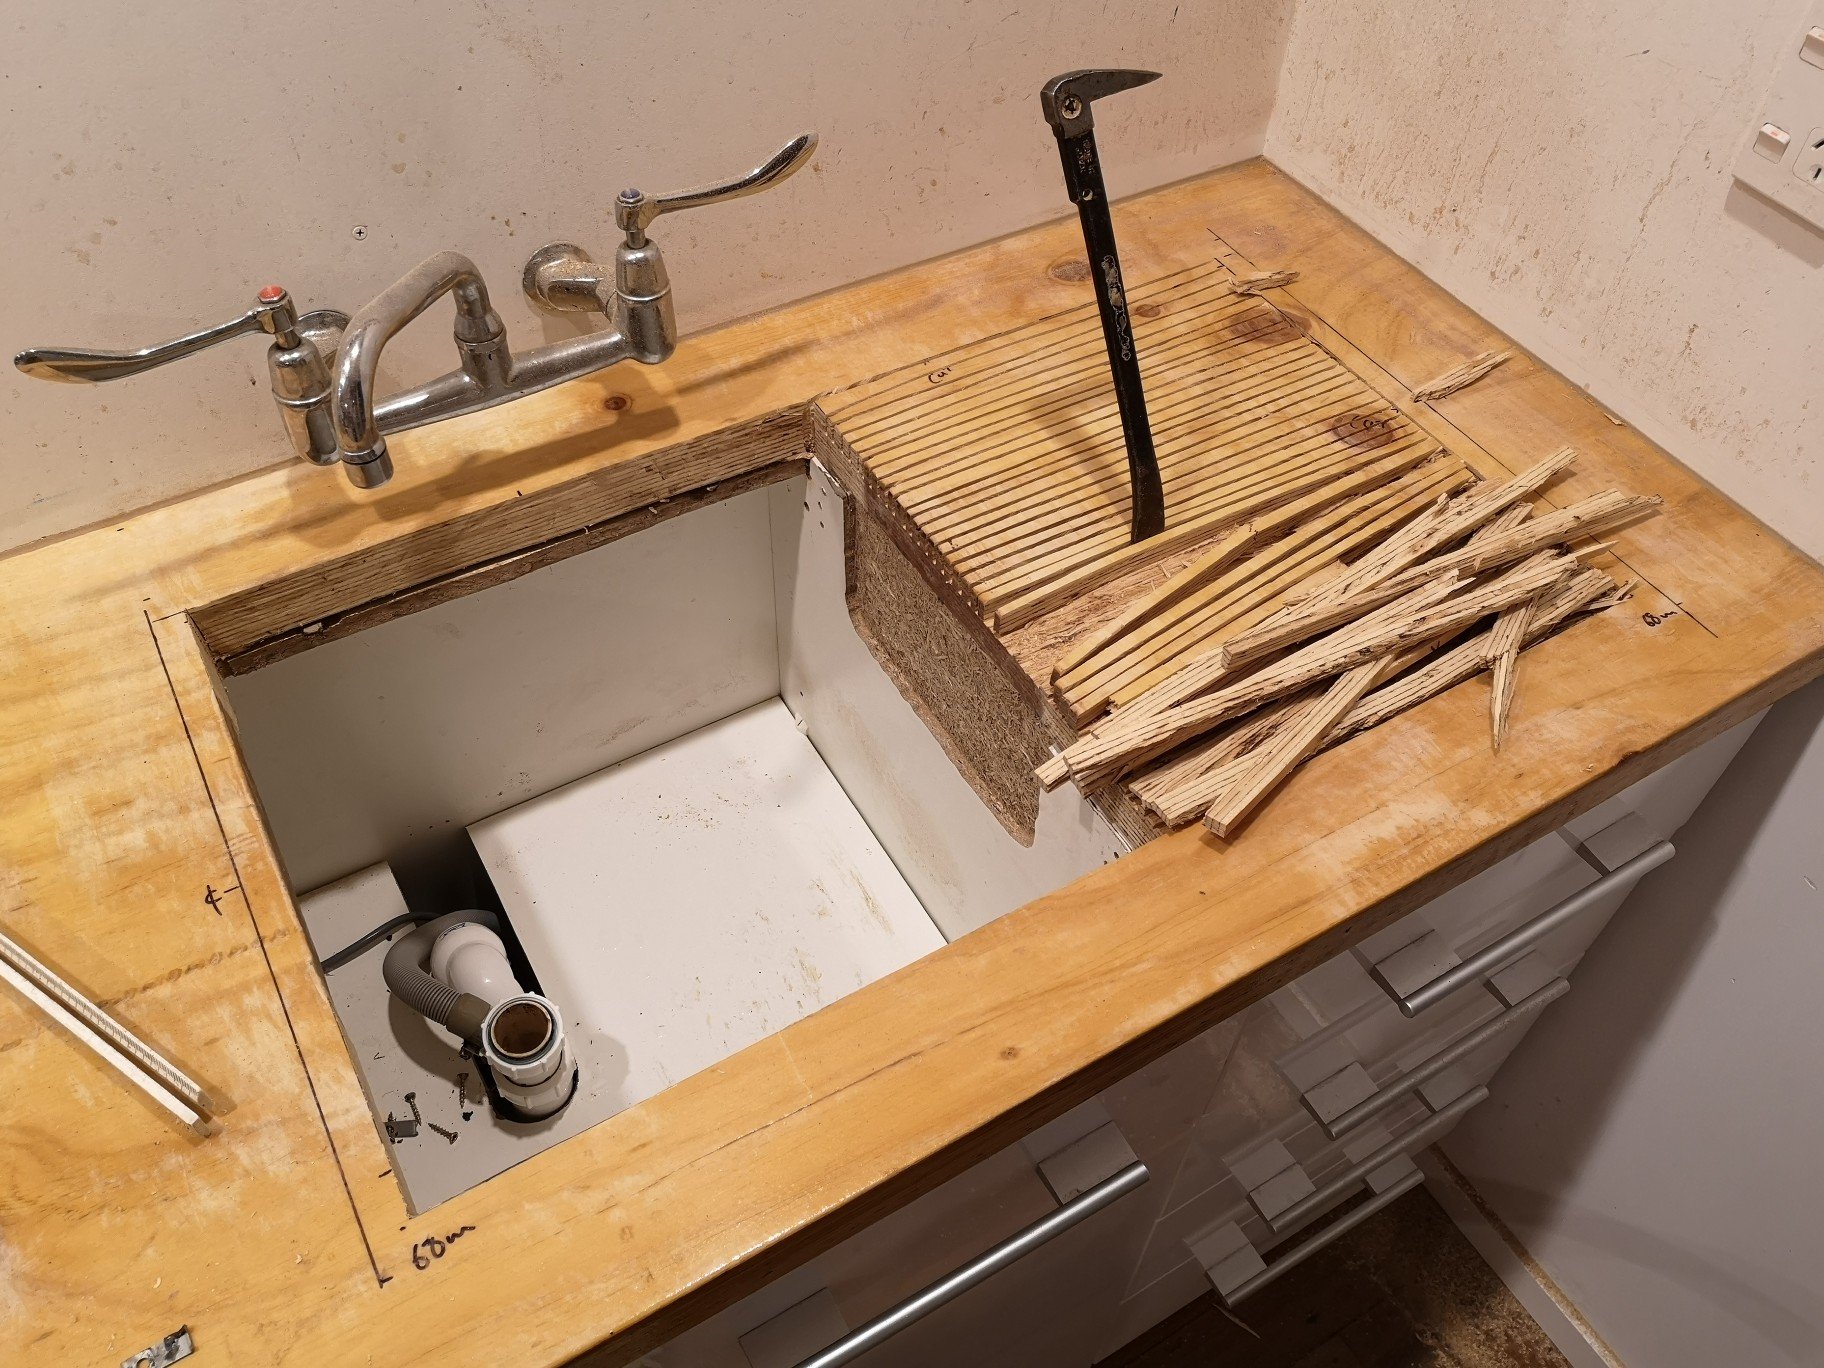
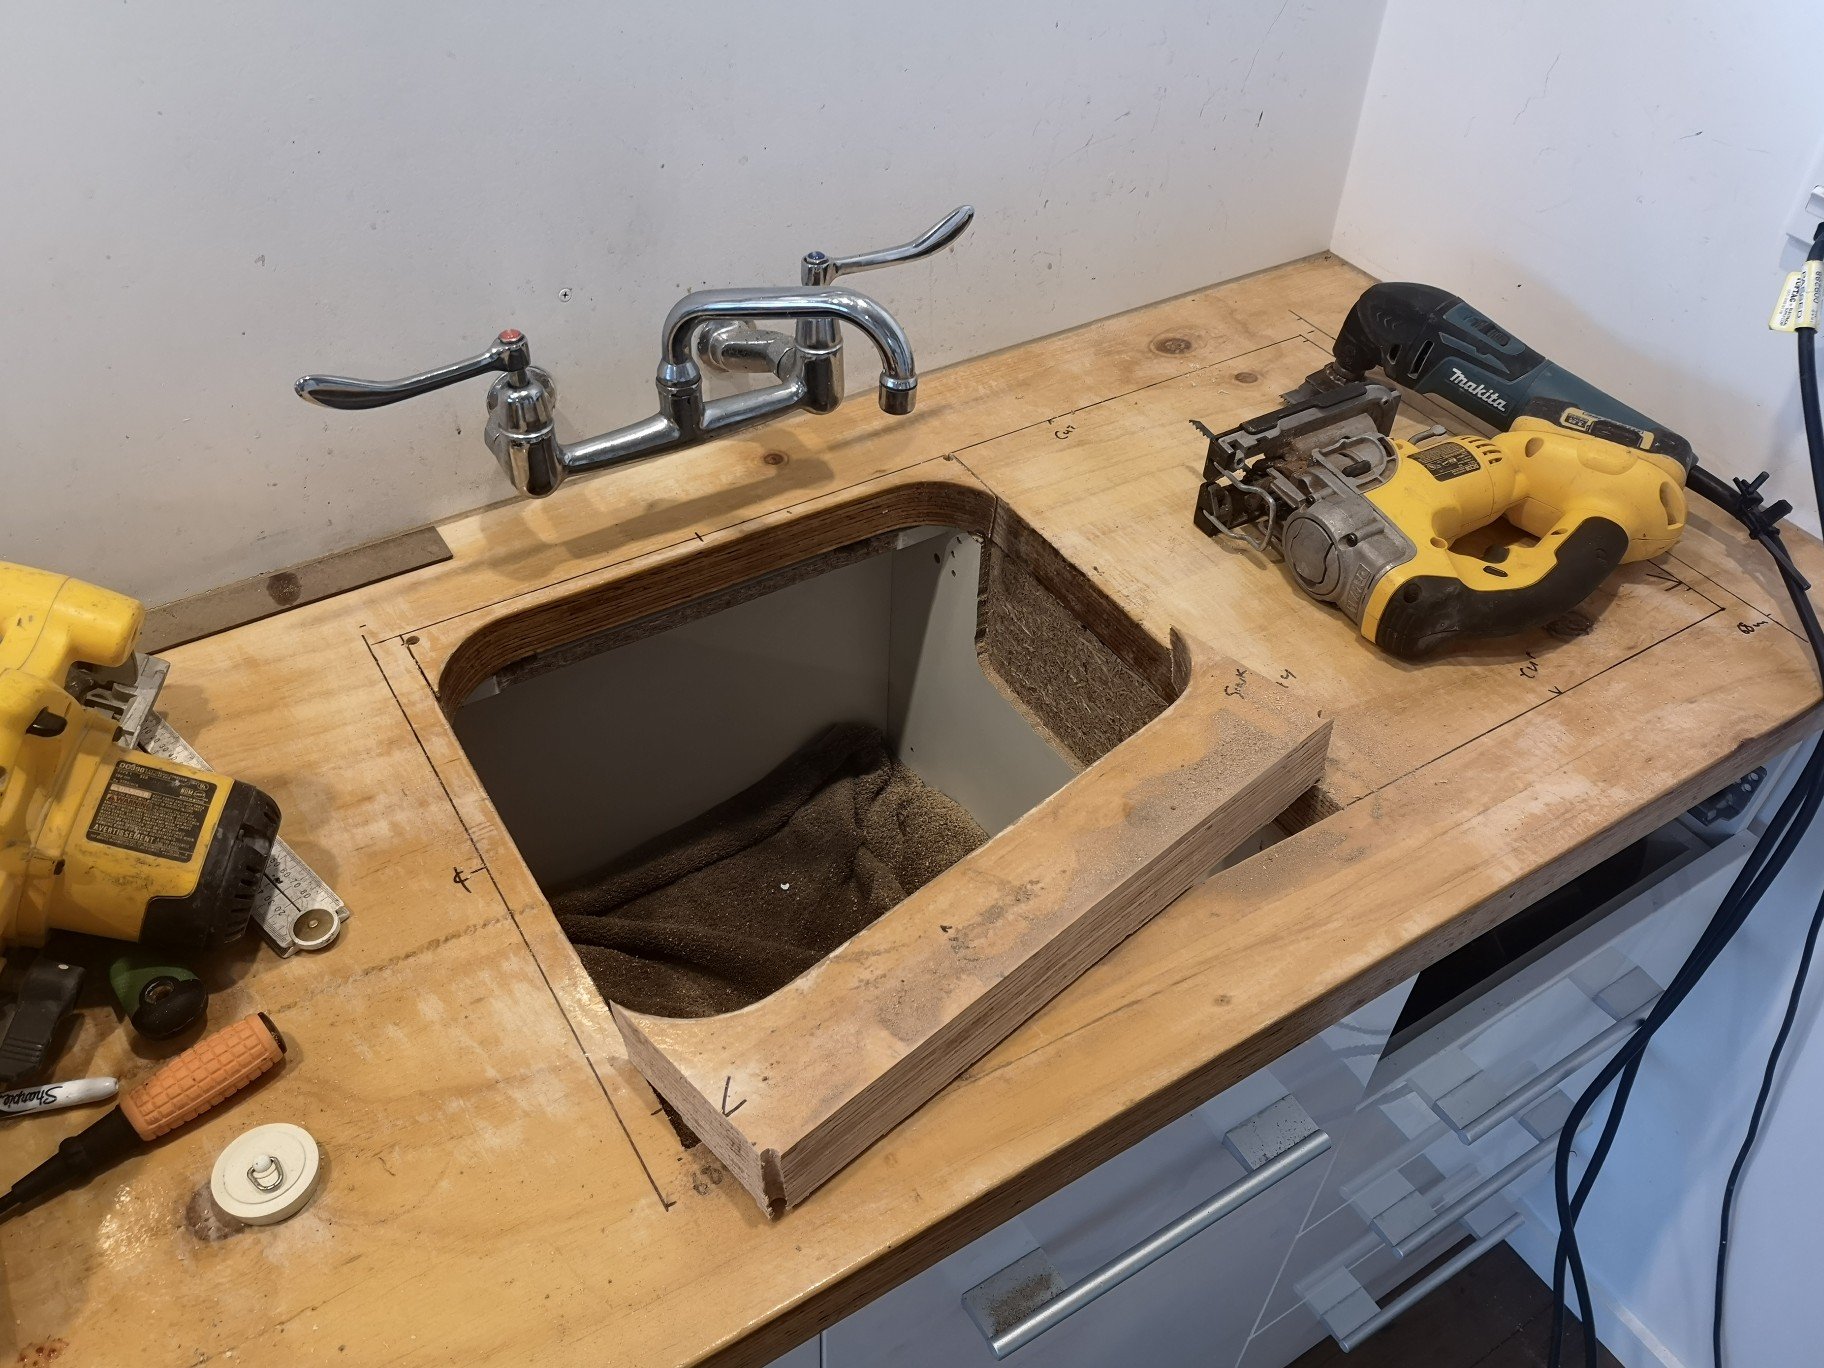
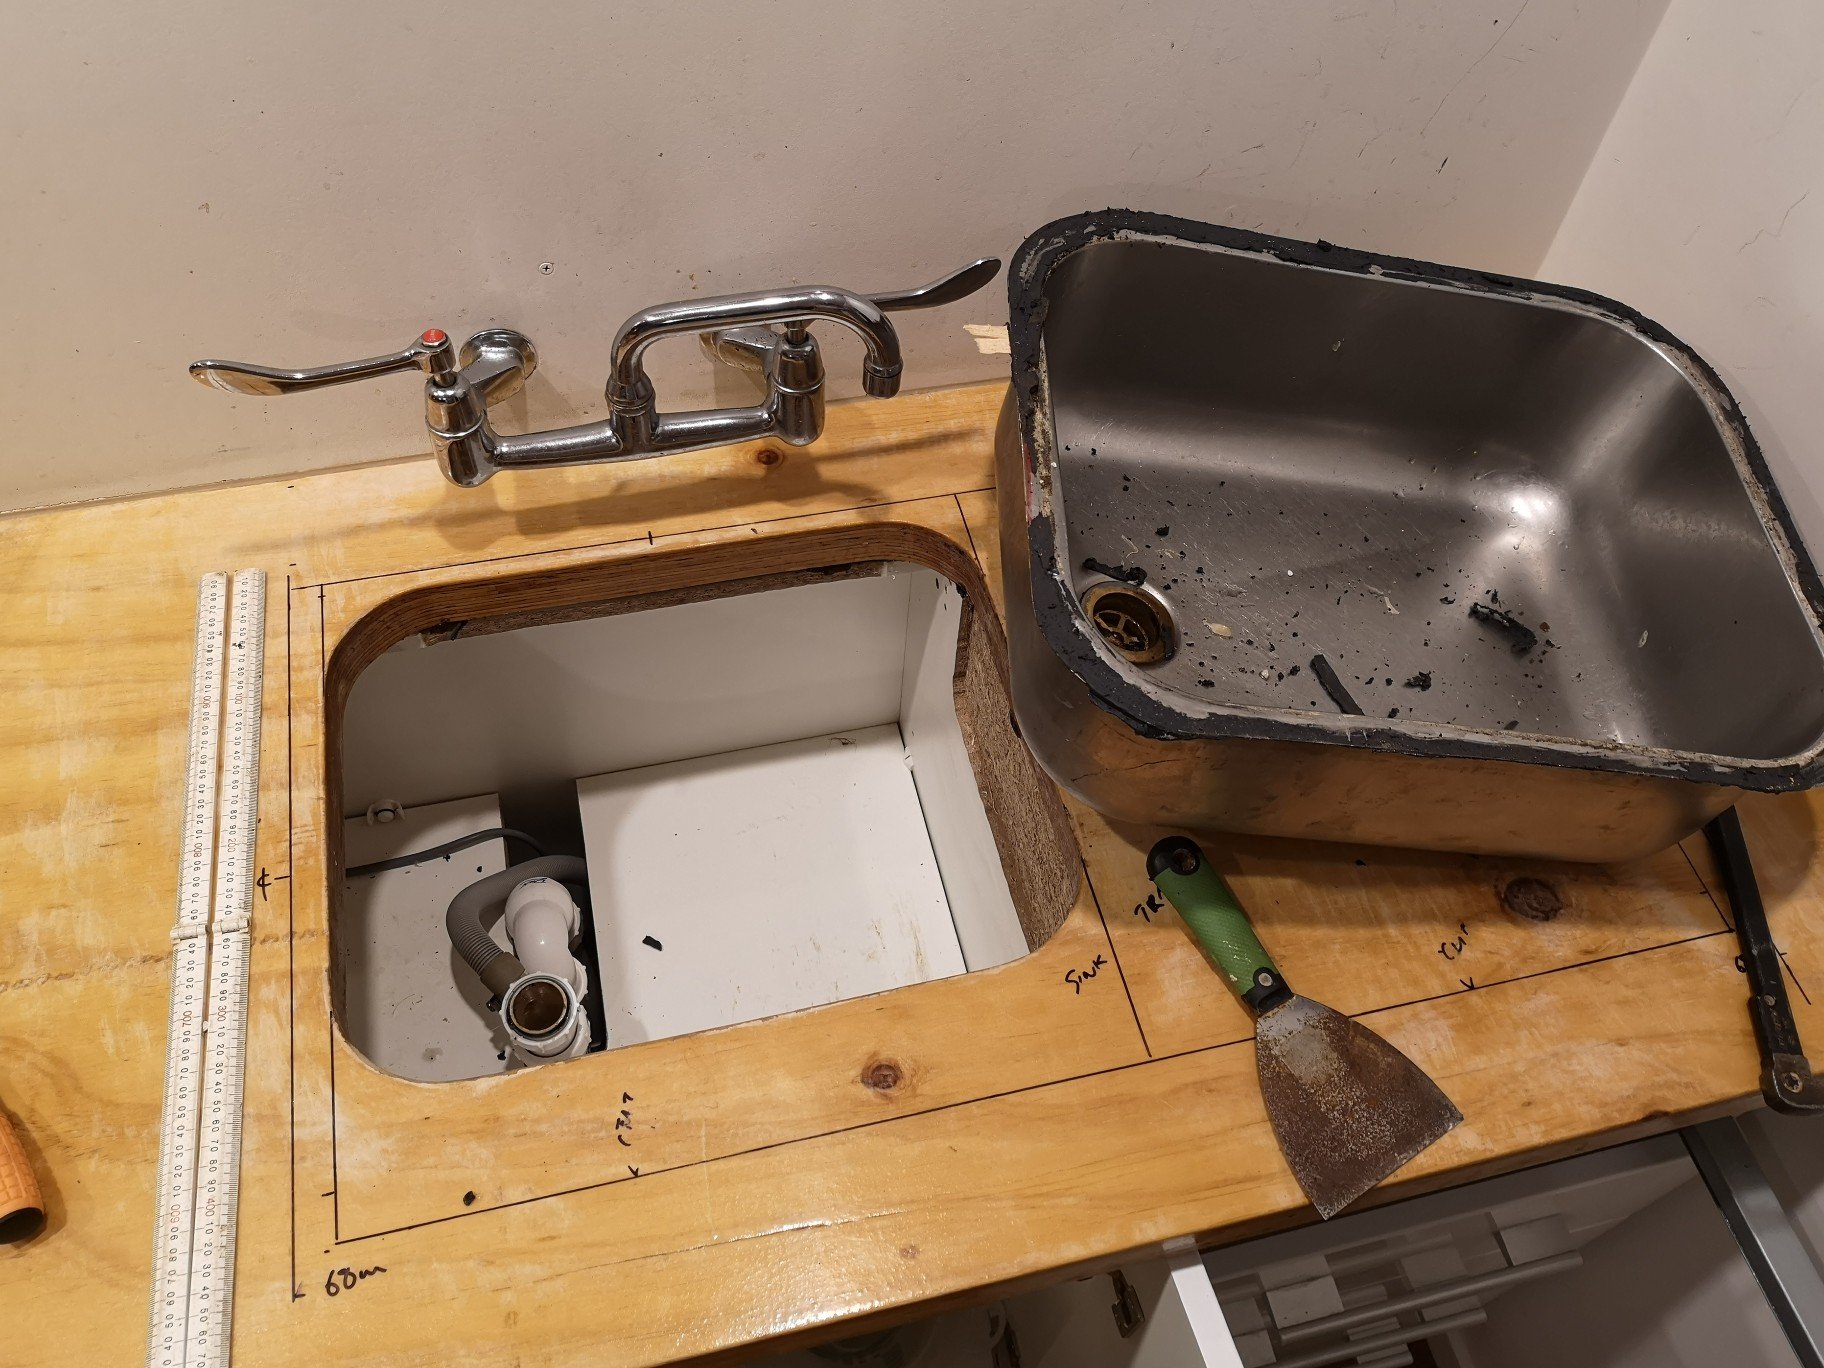
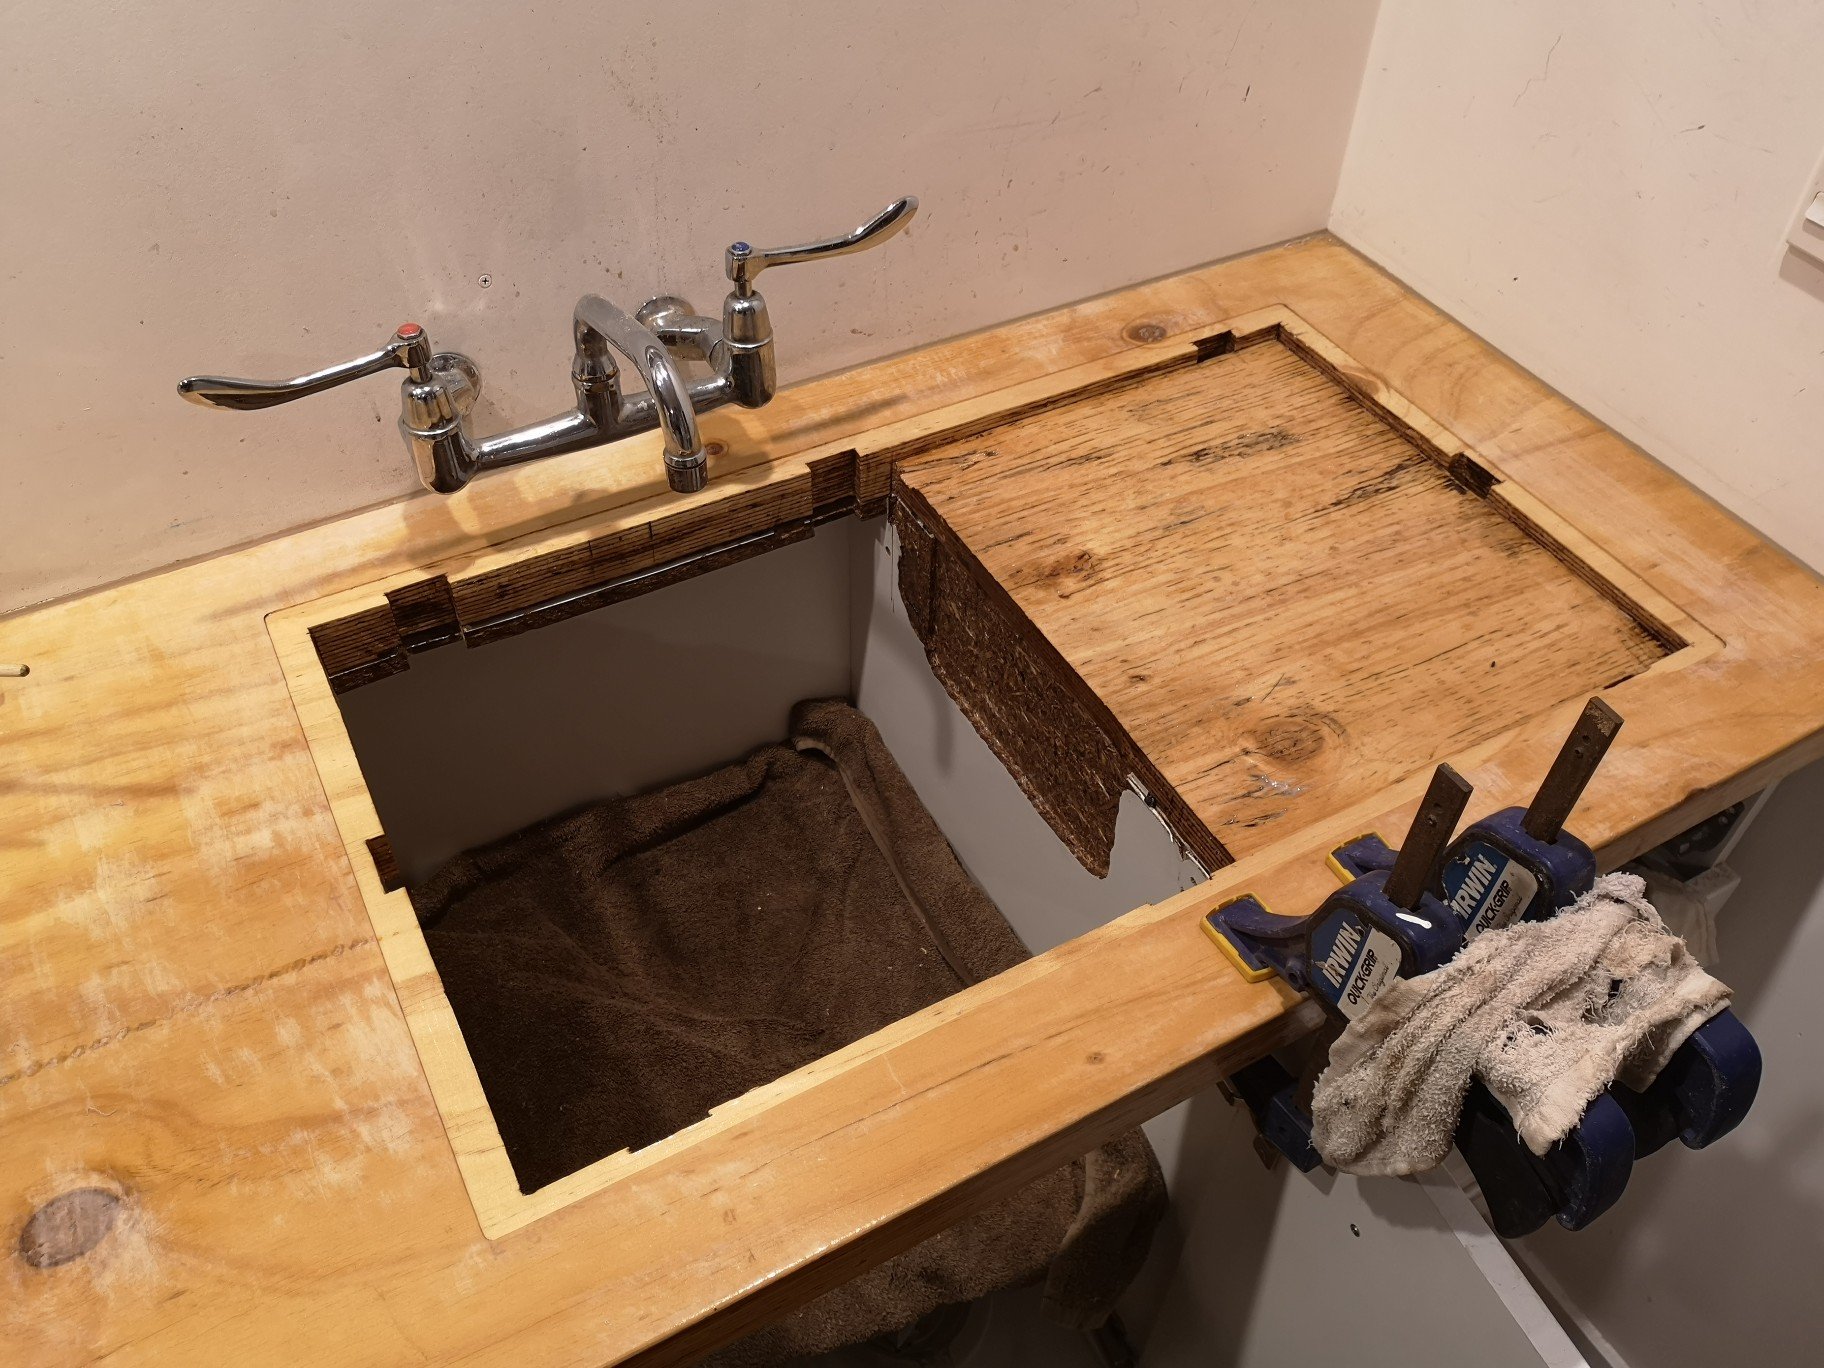
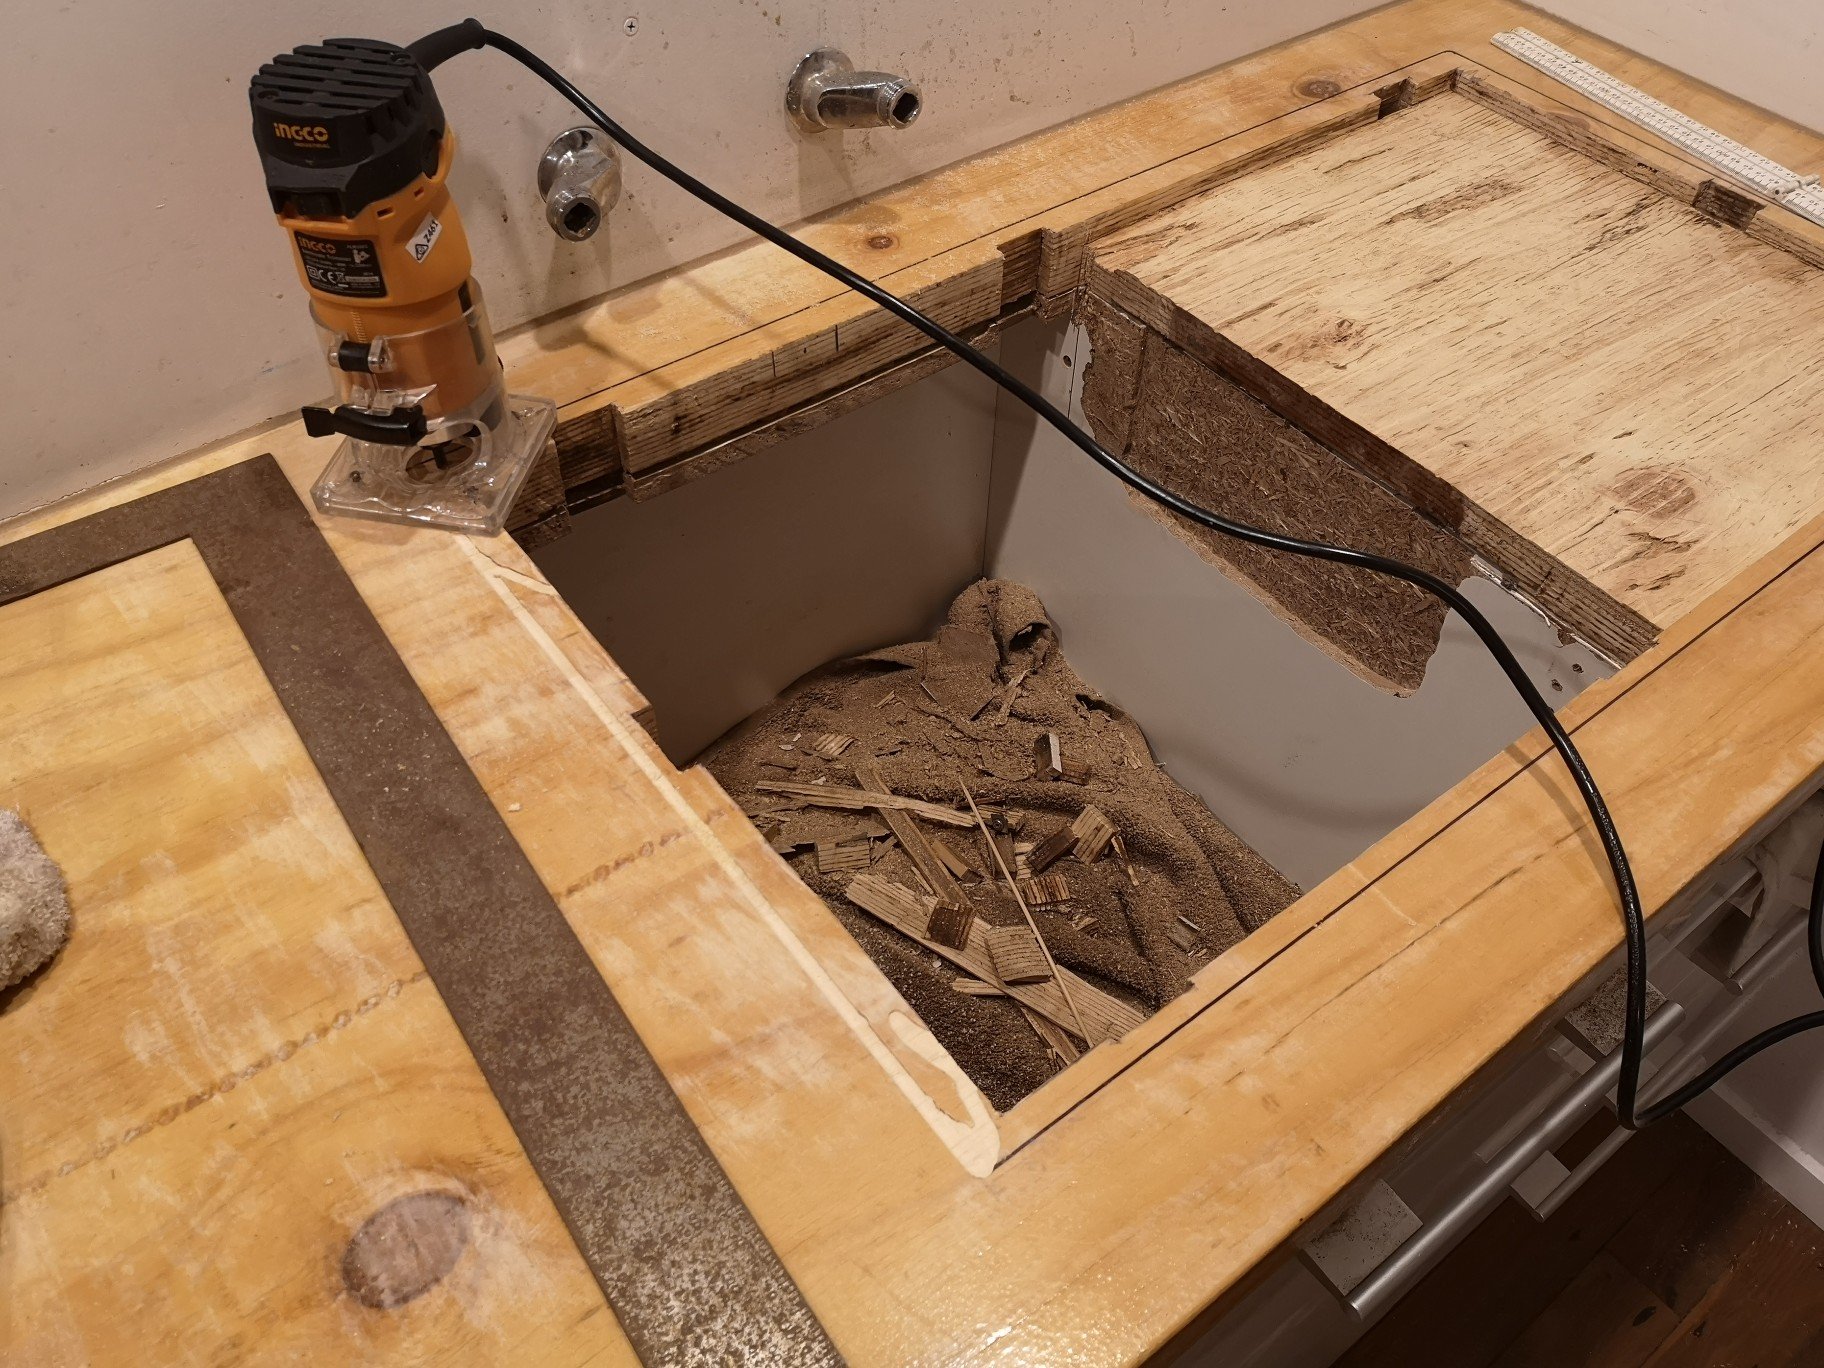
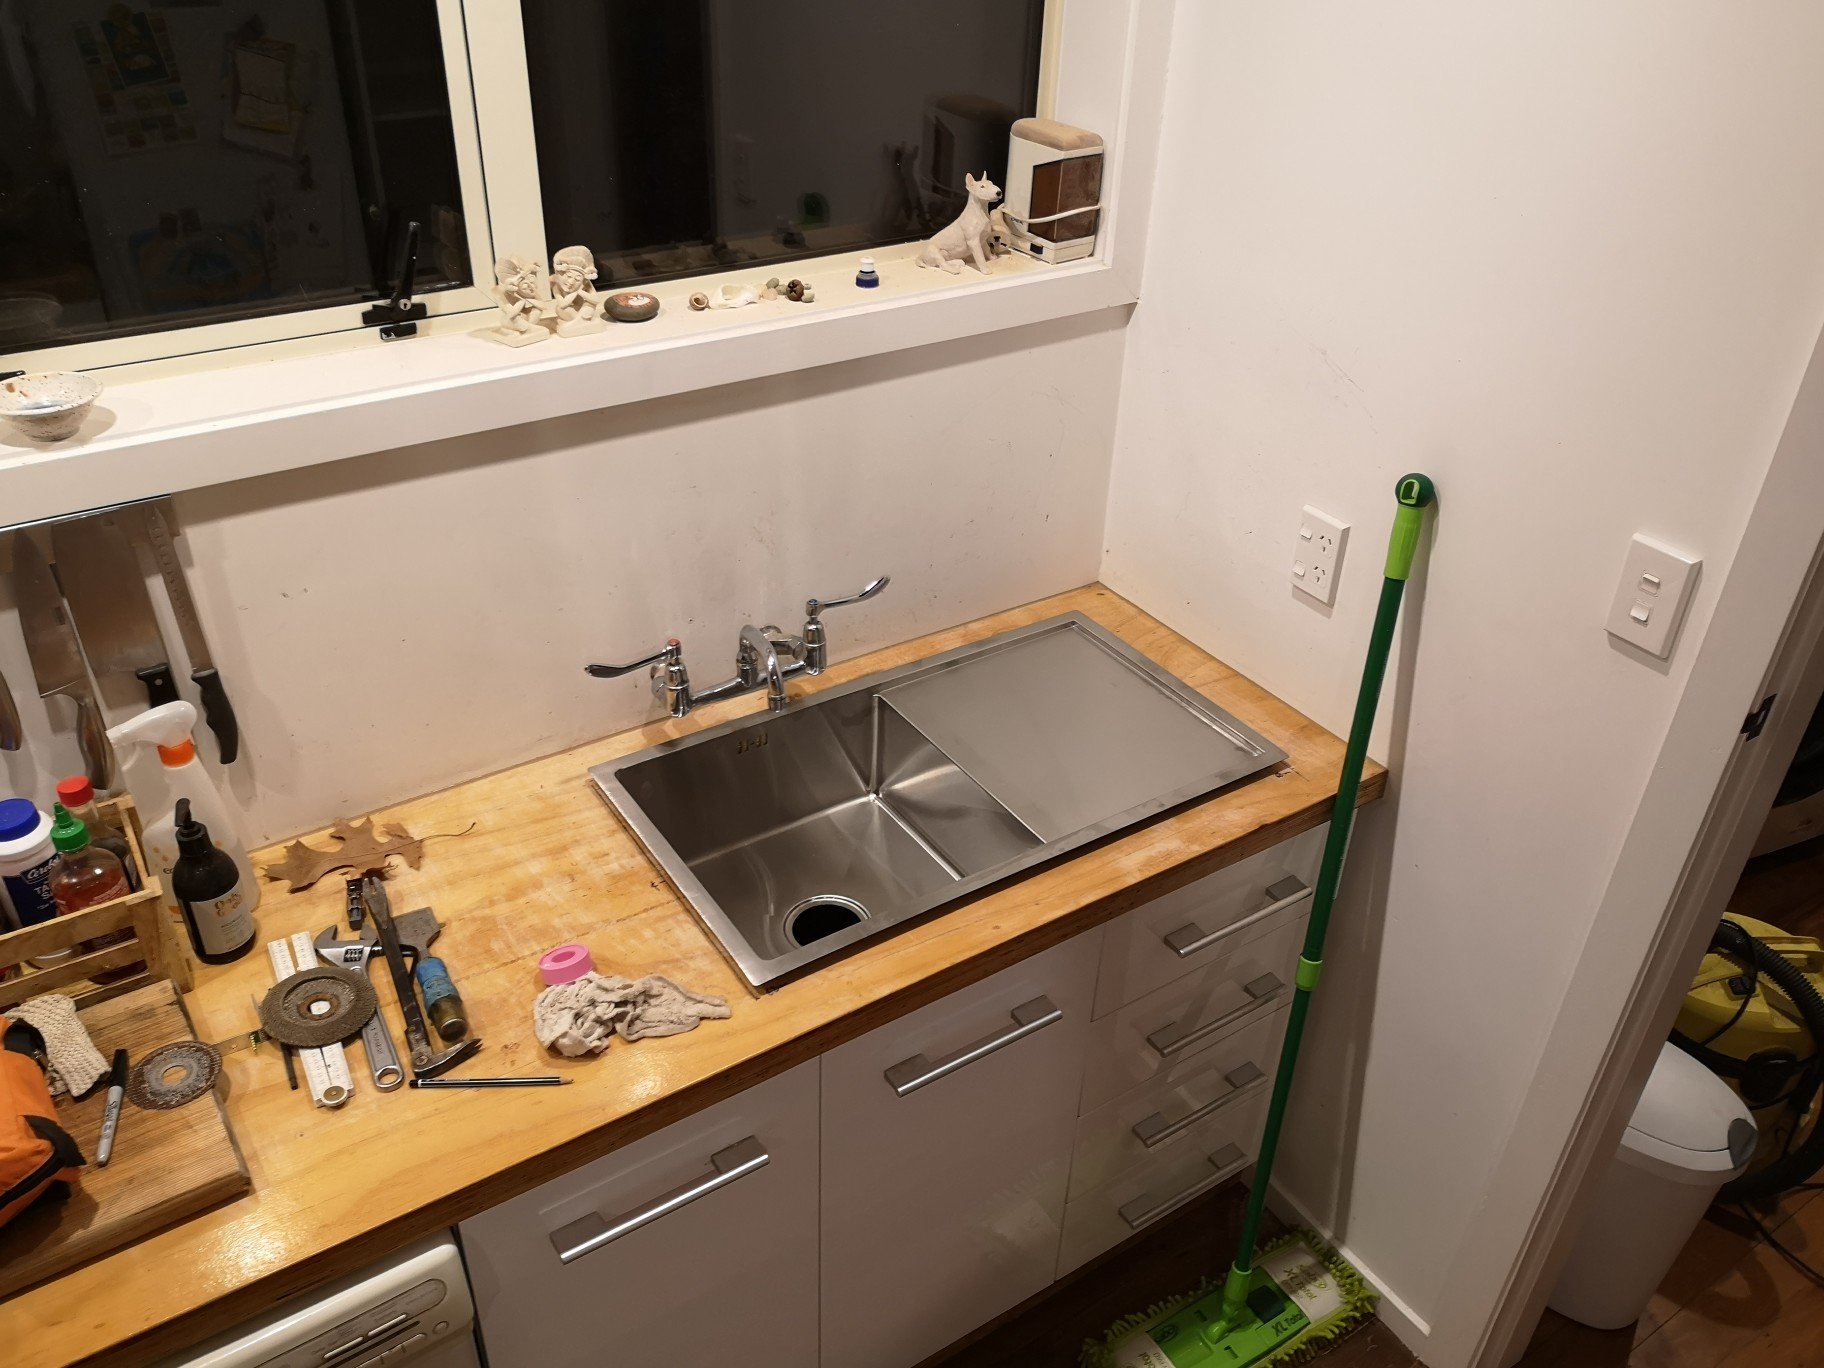
In other news.. Started the interior finishing touches just after lockdown 1.0... Just after nys I bought the rest of the cabinetry to go in the laundry/skullery which included a new sink for the kitchen. I was sick of the old one as it was way too small and asymmetrical. Mmmm, shiney Bit of a measure up, was gonna try and bring it evenly spaced between the front of the bench and the wall but the door hinges had the final say. Out with the old, And time to make a massive mess, luckily the fam was away. Trial fit and edge confirmation. Semi free hand routing, consists of me holding the square with one hand and routing with the other. Has a couple of layers of epoxy on all the rebates just incase of water.
1 point
-
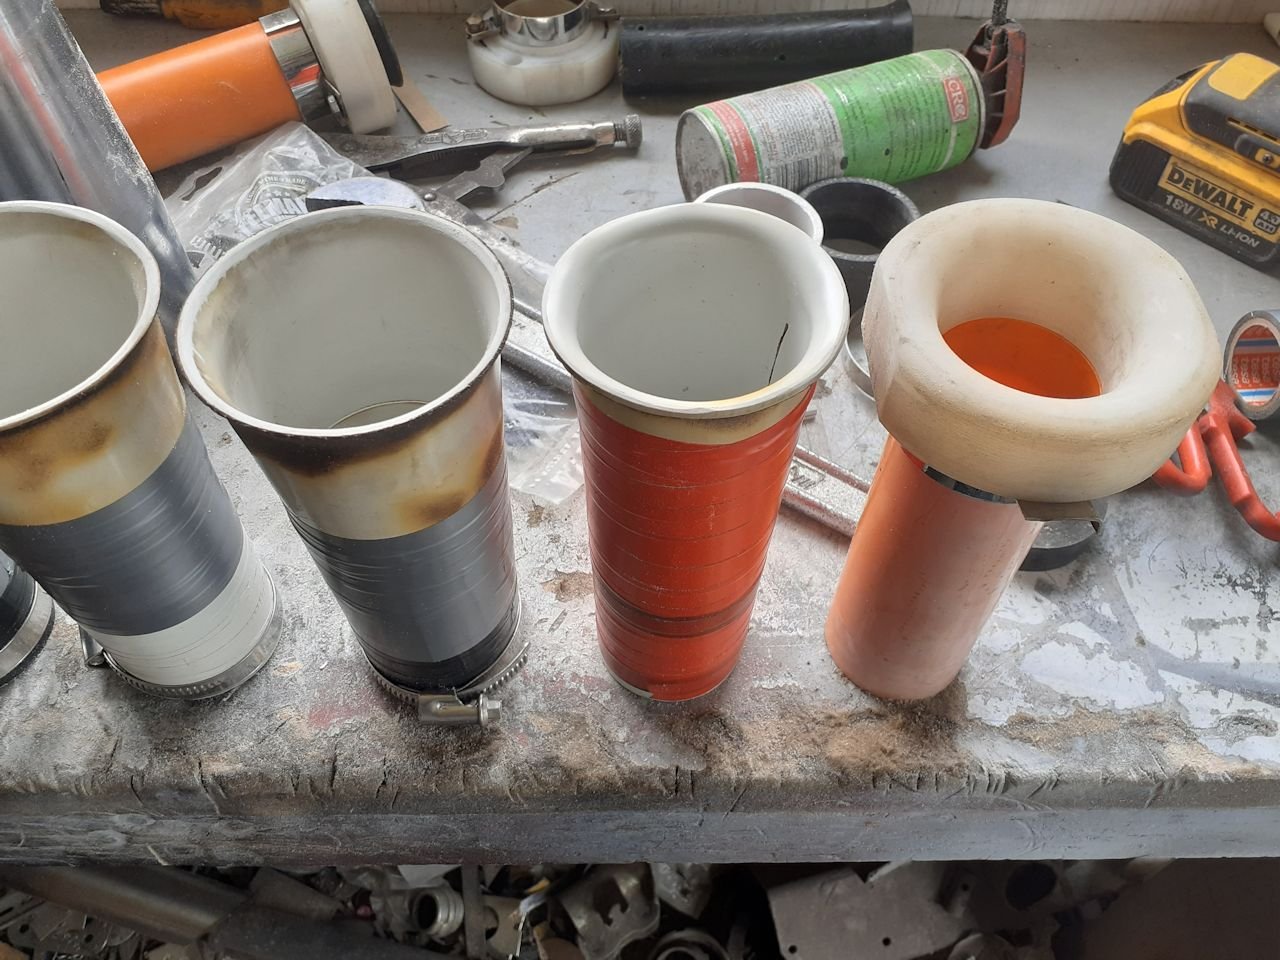
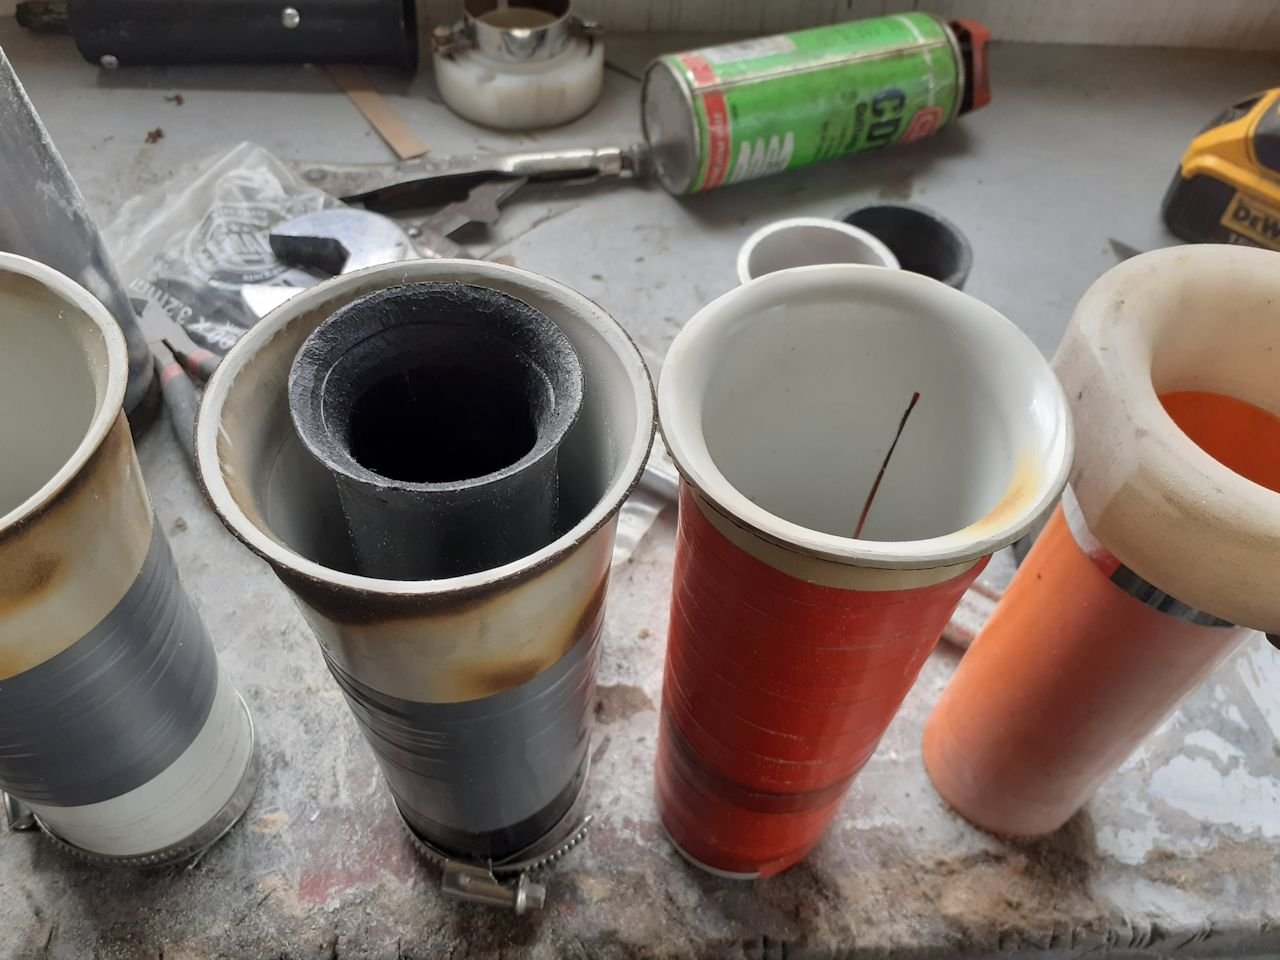
Made even bigger taper runners. the 2 on the left are new ones, 70mm - 52mm . then the red tape one is the 62mm-51mm that worked best so far. then the 51mm straight. Will be a little while before can test them. but the plan is to test them as is. then jam the small one down the middle. see if its possible to make top end power with the 2nd pipe in the middle.
1 point
-
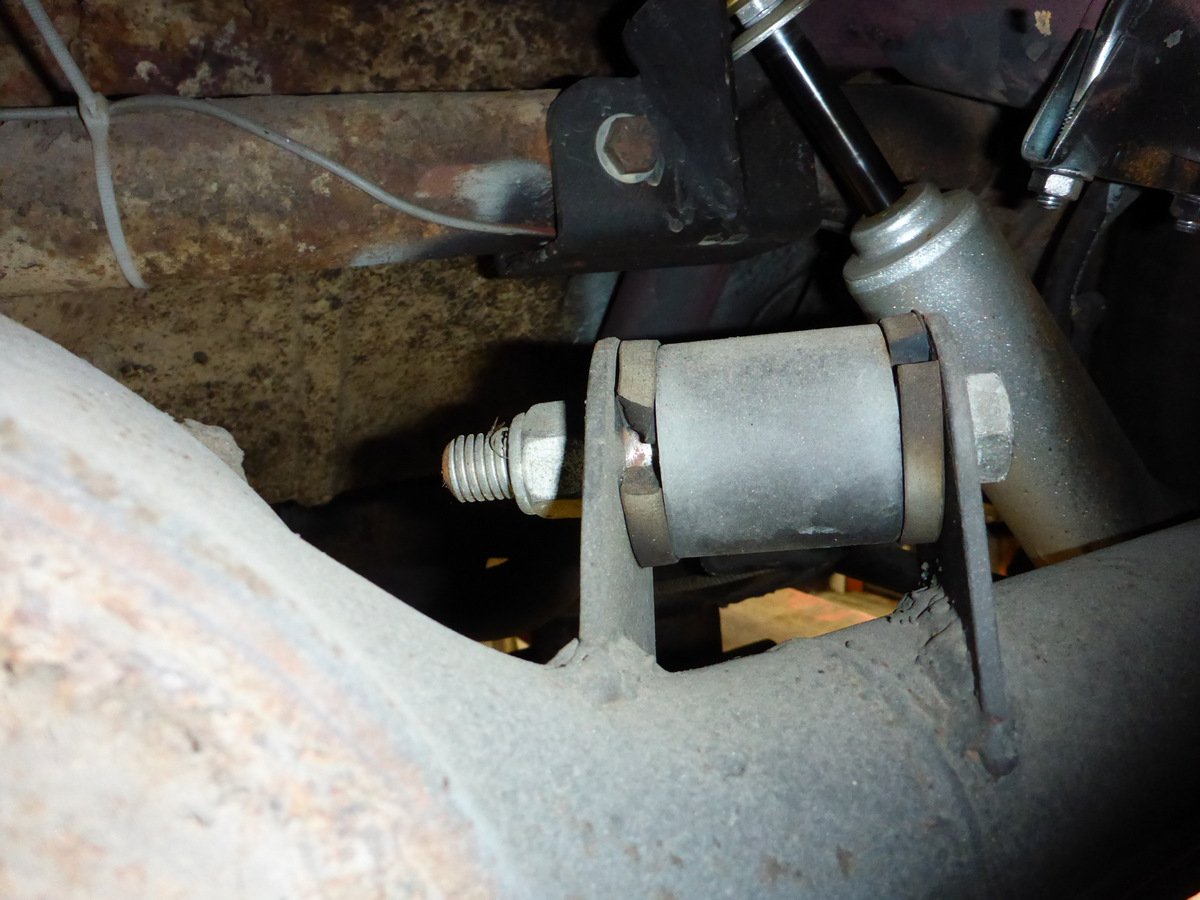
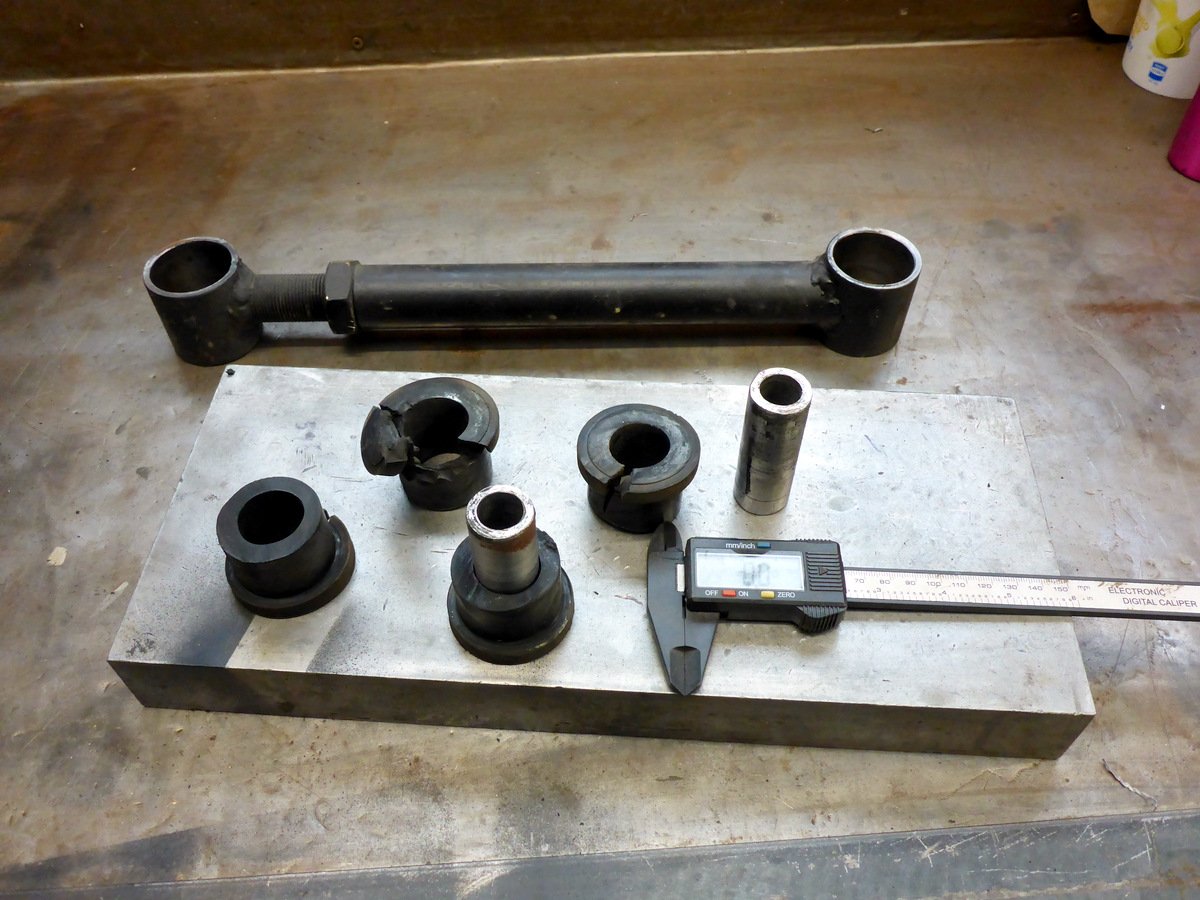
This split bush has been noted on the last couple of WOF checks, thought it was time I replaced it (while the Woodie is off the lift) Yep, pretty toasted, the ones on the other 4-link bars look OK. Might smear some rubber grease around the new ones. Luckily I kept the receipt for what they are from, dang Mitsi parts!
1 point
-
First things first, was to strip the horrid interior, and remove the front end to see what I was facing. It's been off the road since '03, where it appears someone had begun a teardown of the front suspension for a rebuild, but instead gave up, lost some important nuts, and roughly bolted it back together. Front steering joints had been unbolted, which made transporting it a mission. However this problem is fixed, and it only needs some new bushes/brake bleed to be operational. I sourced a brown ute bench seat (ute's have headrests and sedans/wags don't). Much harder to do than I had anticipated! But it's improved it 100%. I also found a premier wood dash facia, and a nice black dashpad that needs some straightening. I took the column apart and have restored all that, ready for reinstallation once my interior is black. Should give a much nicer feeling once I get it back together than mouldy, faded and split brown! Next up, I installed a 202/trimatic that came from an HZ ute. Runs nicely, and didn't take long at all to swap in as most of the engine mount bolts had been lost. The car didn't come with a driveshaft but I've managed to find one which is great. I took a look at my rad support panel to find that rust had gotten the better of the lower section, as they so commonly do with these. A replacement rare spares panel and a few hours later and it's as new. Spent today chopping away at the body, but also got keen to tackle the exhaust and get that setup. @MACKAZ did me a deal on a 2 barrel inlet/headers which is awesome, for now the 2 barrel setup will wait for the future but I thought to fit the headers as a start. However I didn't consider that these (probably commodore) headers may have fitment issues and found that they hit the firewall when I tried bolting them on. Some cutting and welding later and they fit and the exhaust is done. Fuel tank is full of 17 years of water/varnish mix and to be honest I'm not sure the engine enjoys running on it but nonetheless goes. Need to pull tank and drain, the lovely folk at holden didn't install a drain bung for me. The car as it sits. These come apart so easy, it's super good. Painted my steering wheel up and came out better than I thought. Hopefully it doesn't wear too bad.1 point
-
Had a solid weekend on this, I now have all the belts attached and tensioned up, plus all the servos mounted. It all moves pretty freely so I guess in the next day or two I will hook up the control stuff and see if it will move...1 point
-
After 6 years of it being off the road its finally certed ,wof and reg . so stoked to have reached this point now its off to the dyno then i can enjoy it
1 point
-
I feel kind of dirty saying this but I really like it.1 point
-
Been chipping away at this of an evening, I always seem to not have exactly the right fasteners. ie last night I discovered the gantry rails took M5 screws not M6, but I only had M6 nuts for the T slot extrusion. It was only the head that didn't fit so I spent an hour on the lathe turning 30 or so down so they worked. Getting there though. All this runs nice and smooth. I am just waiting for the long side rails to get the ends machined so I can butt them up a bit nicer and that can all go together.1 point
-
goes without saying really but ive driven the crap out of this, drove it to work every day, supermarket, all that shit. anywho the clutch slave shit itself which tbh isnt that big of a surprise. the pedal pressure on the clutch was immense, the whole fire wall flexed so much the brake master hit the strut tower. the clutch that was in it was the highest pressure 250mm exceedy clutch you can buy. and it had started slipping. so Richard gave me a hand (because i dropped an engine on one of mine) and we took the JZ out to replace clutch slave and clutch. im just going to replace the seals in the clutch slave because fuck you cardwells you thieving bunch of cunts. and im replacing the old clutch with a twin disk OS Giken unit which requires less force on the spring tines but has double the clamping pressure. its a sprung center unit and fingers crossed its actually drivable on the street. consensus is that it will be fine once i get the hang of it so thats good with me. ill do a few other things while the motor is out because why the fuck not and then ill chuck it back together. then do a skid i would expect. 2020-07-25_03-40-31 by sheepers, on Flickr 2020-07-25_03-40-21 by sheepers, on Flickr 2020-07-25_03-40-04 by sheepers, on Flickr 2020-07-25_03-39-53 by sheepers, on Flickr1 point
-
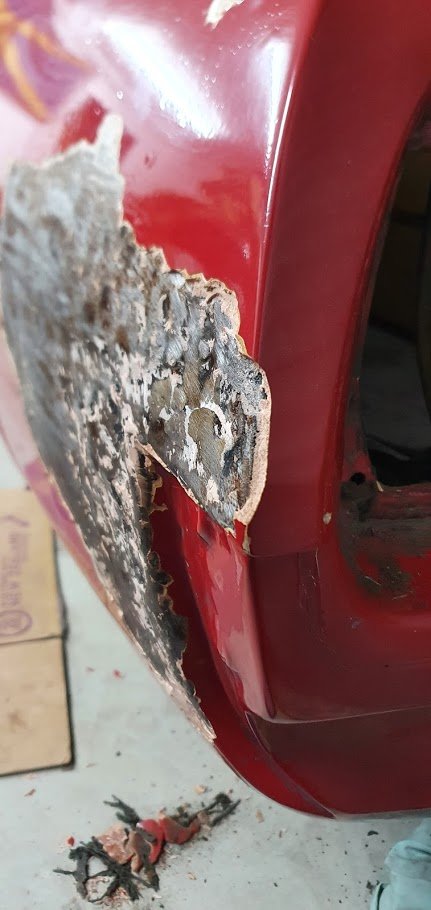
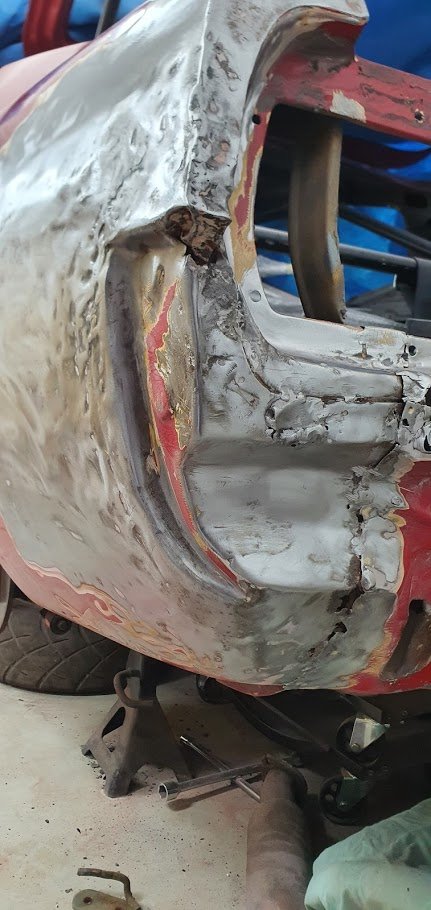
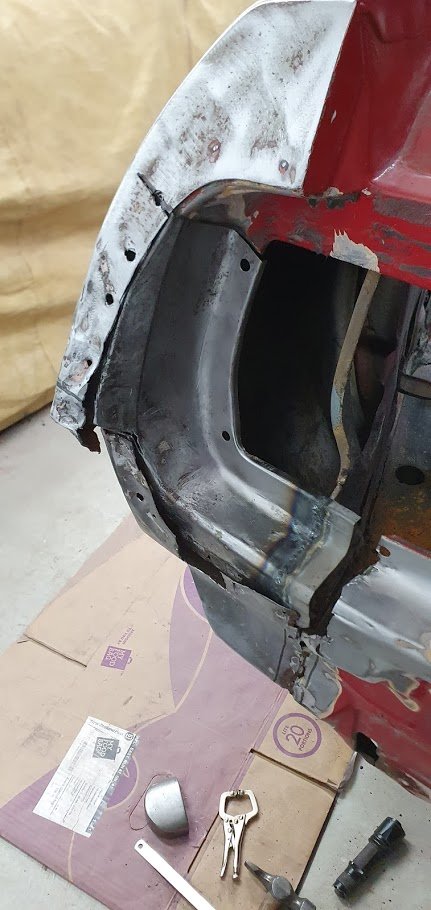
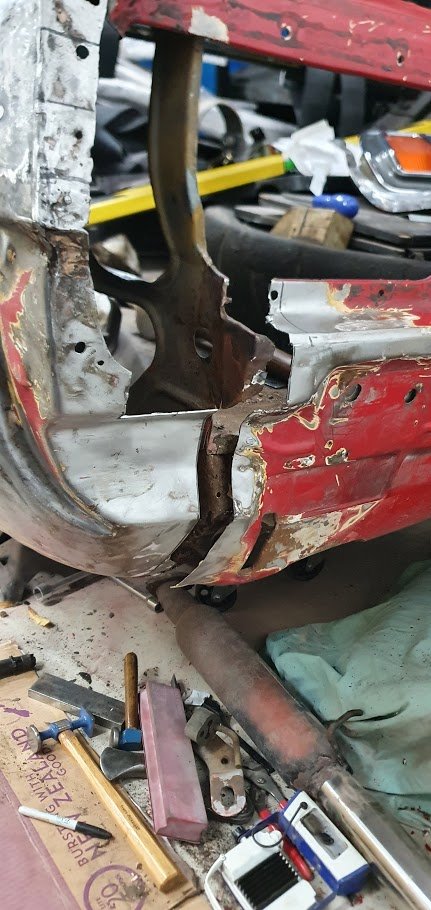
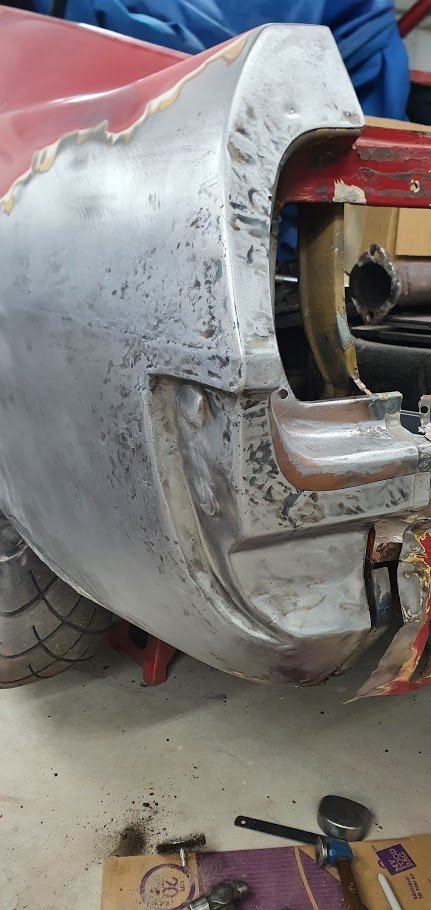
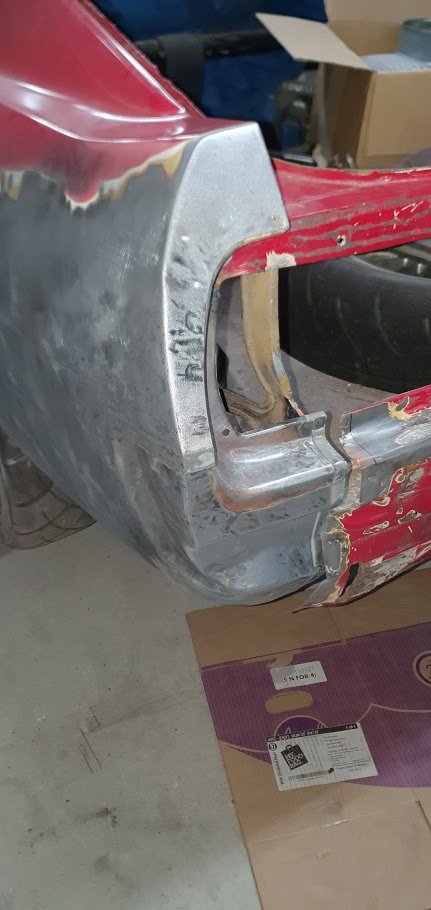
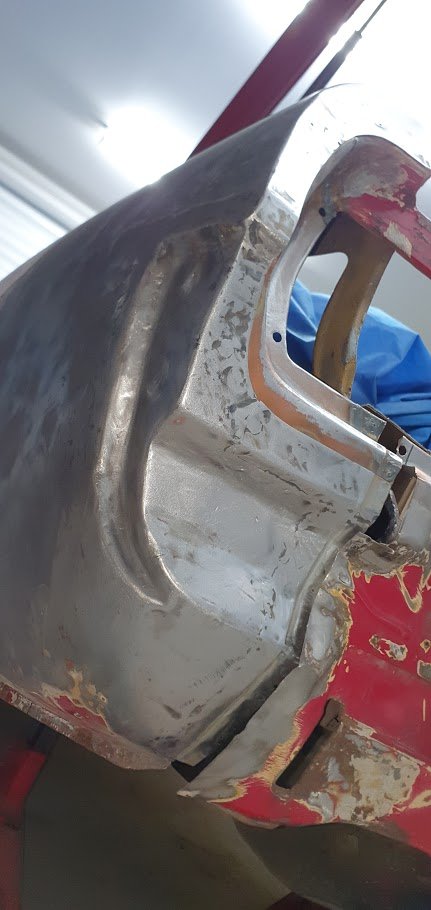
Keeping on theme with the left-hand side... Rear quarter has taken a hit at some point and been "dent-pullered" out, and smoothed over. So i un-stitched all the mess and started again. Due to me being a muppet - lots happened and no pics got taken!! So.. many hours of hammer and dolly, welding etc. etc. Still have the rear valance to straighten, lengthen, and reattach..
1 point


This leaderboard is set to Auckland/GMT+12:00