
Leaderboard


Popular Content
Showing content with the highest reputation on 08/05/19 in all areas
-
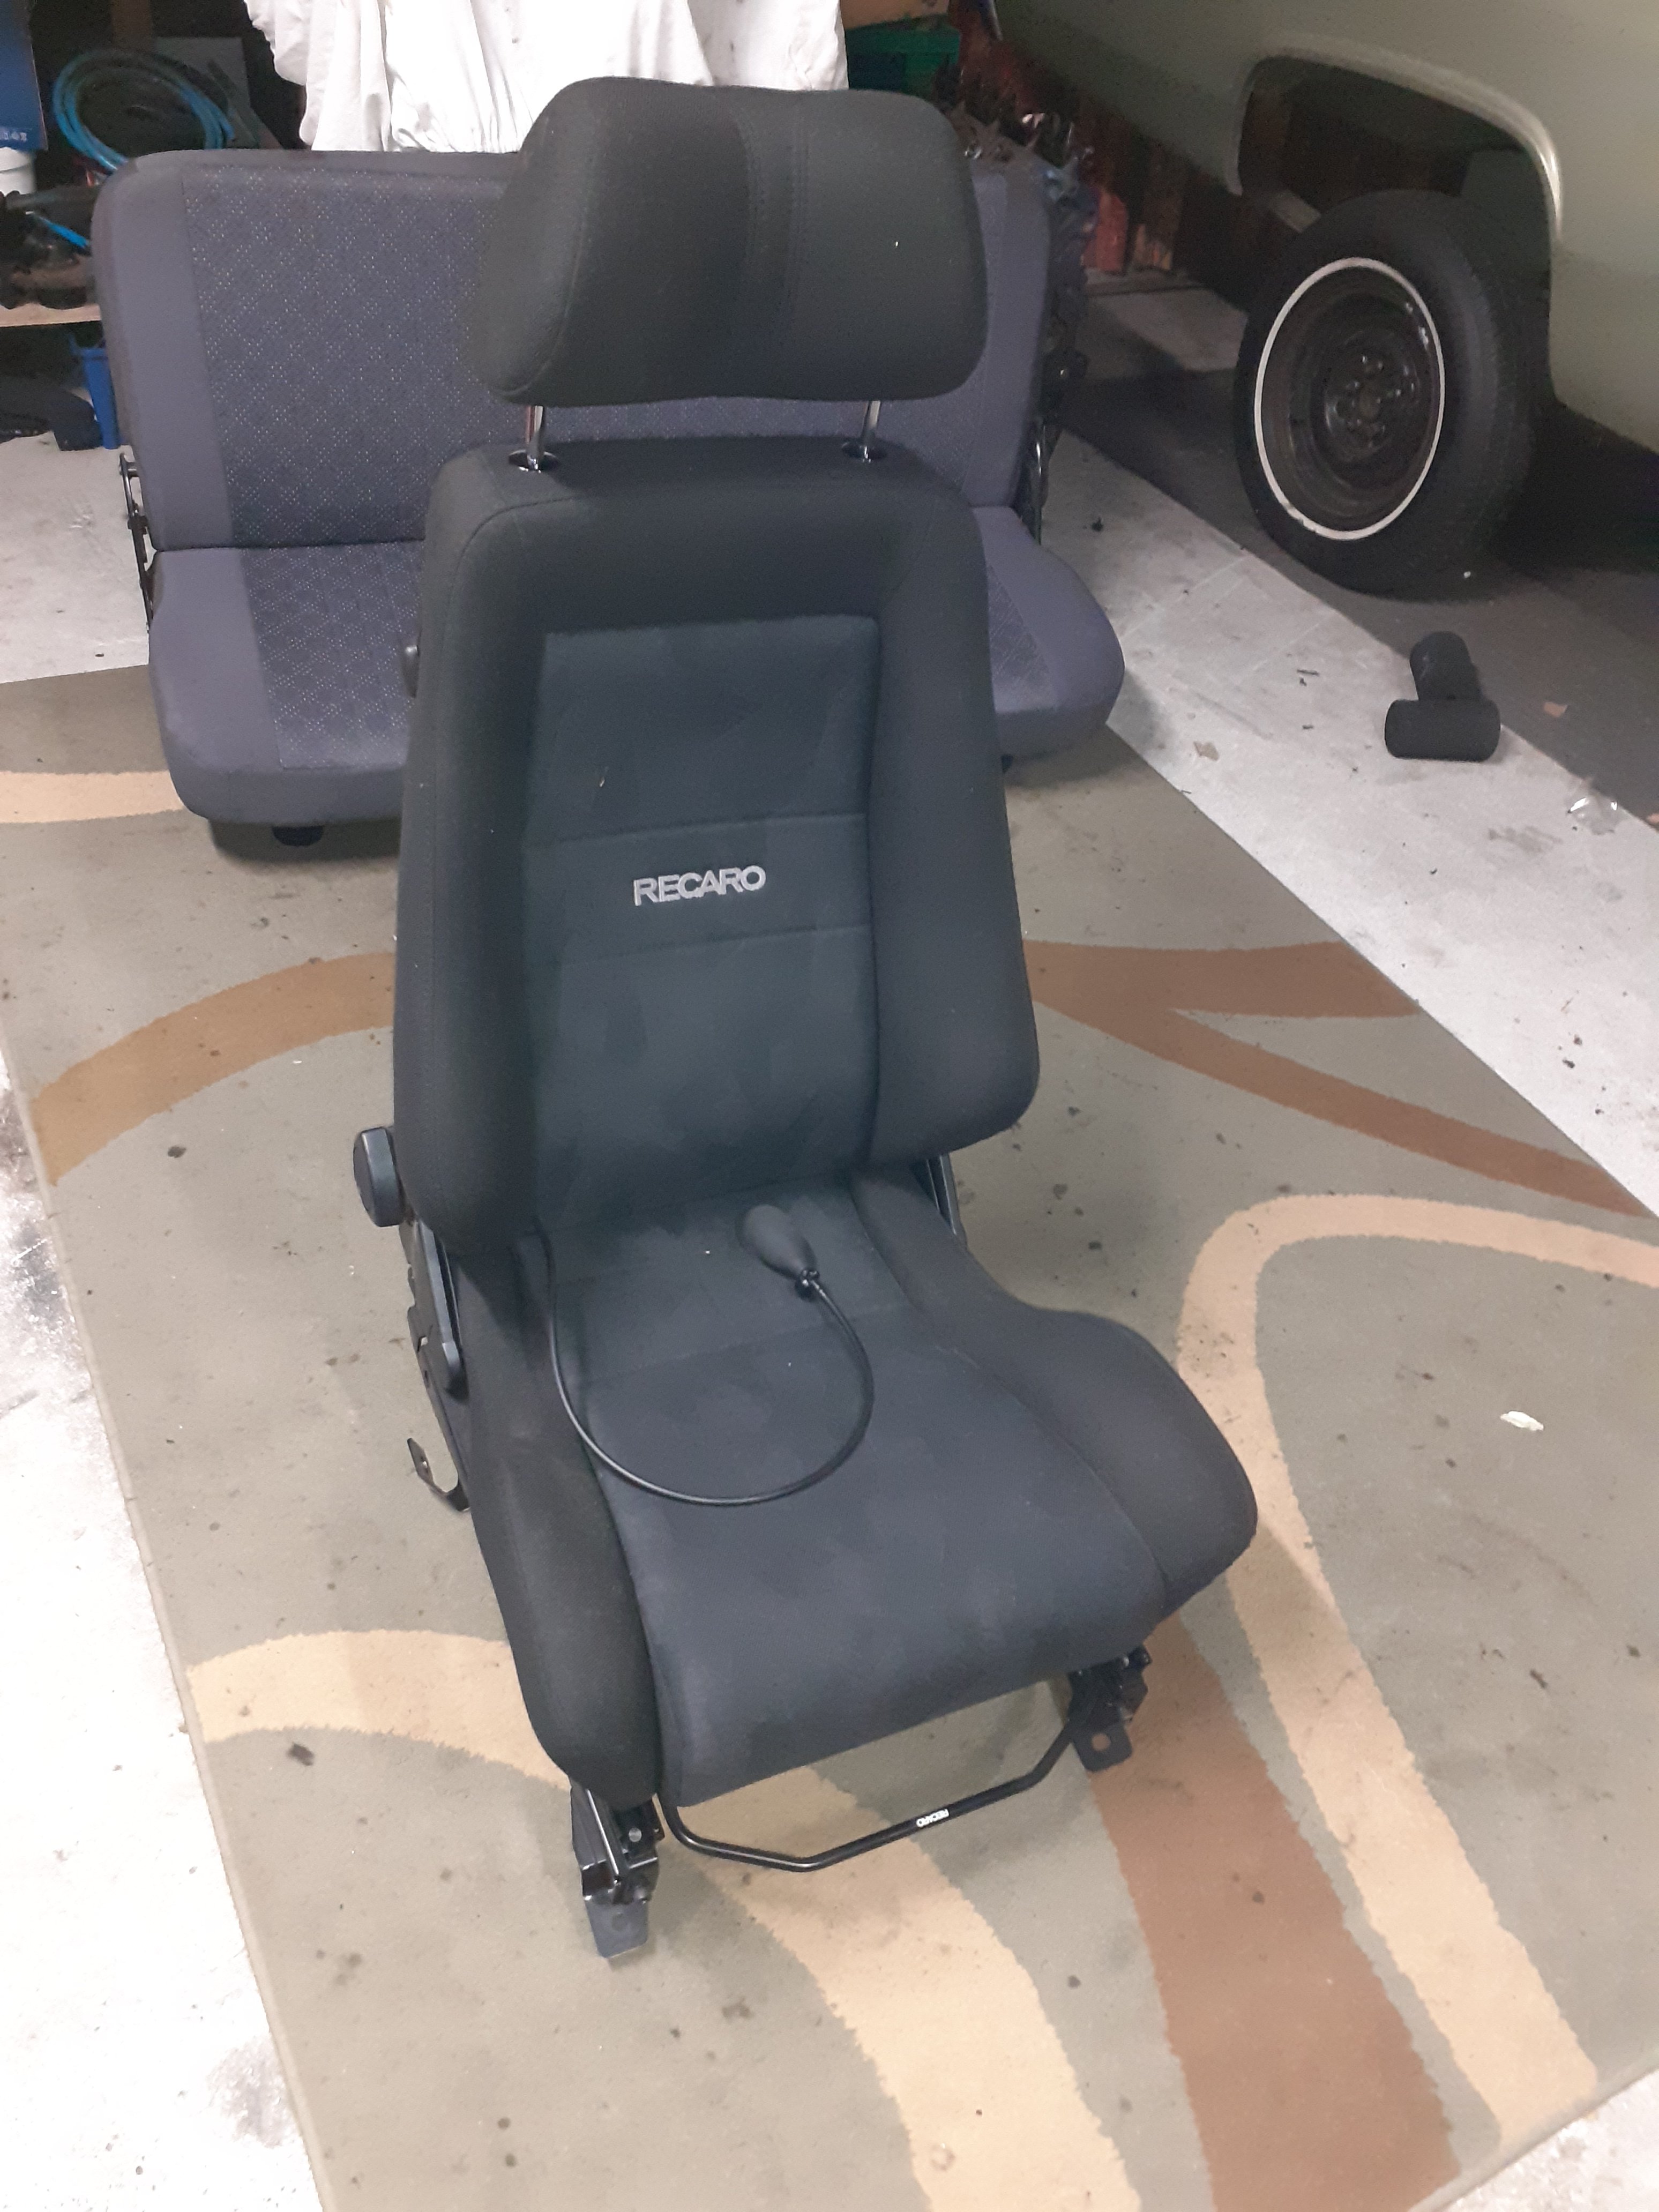
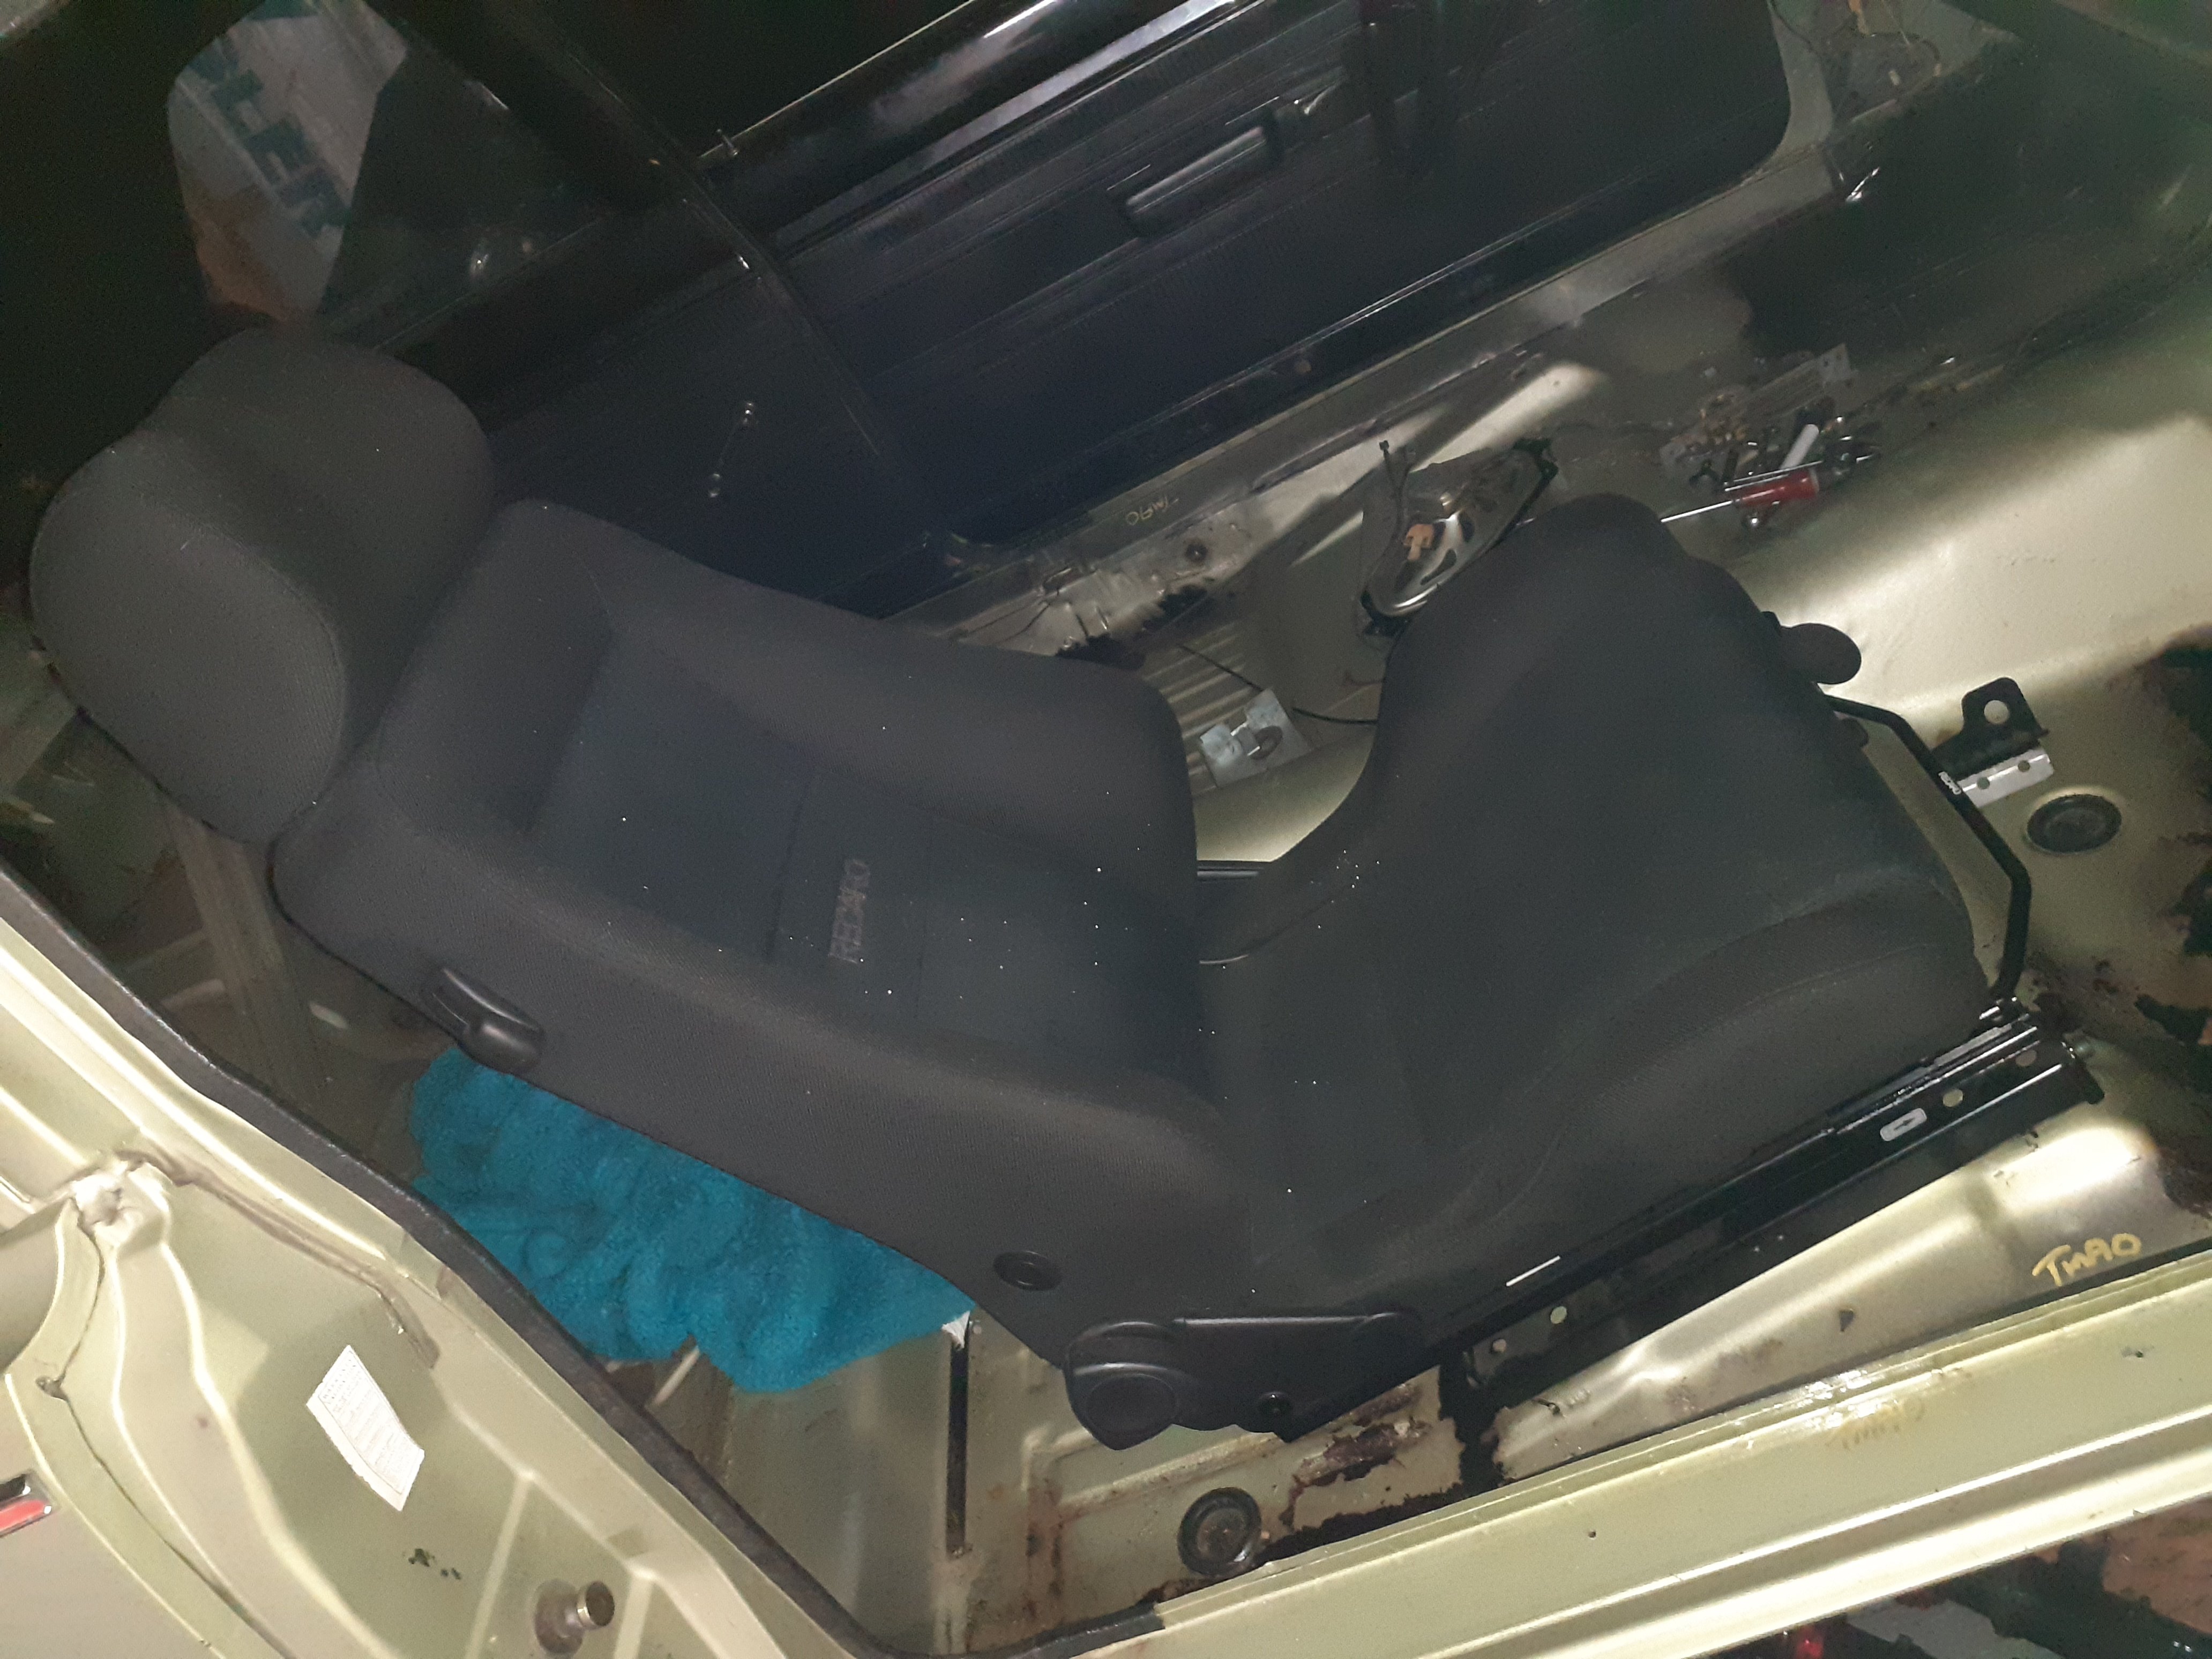
Was at a compliance center today and they had a pair of seats they had taken out of a Prius of all things... anyway I asked if they were for sale and now I own them. Head rests are a bit big, but they are very tidy with no rips and the foams in the base are good. I put one in the car and it looks like they are going to be very easy to fit, if I swap a couple of brackets side to side, the inside will bolt in with some doubler plates, and the outer will bolt on to the bench seat mounts. They even have a pump up lumbar thing so I can take old man @sheepers for a ride and his vertebrae will be suitably supported
 15 points
 -
I thought that bulb was for inserting in your anus and it blew up when you got on boost. Just so you knew how hard to push it.6 points
-
6 points
-
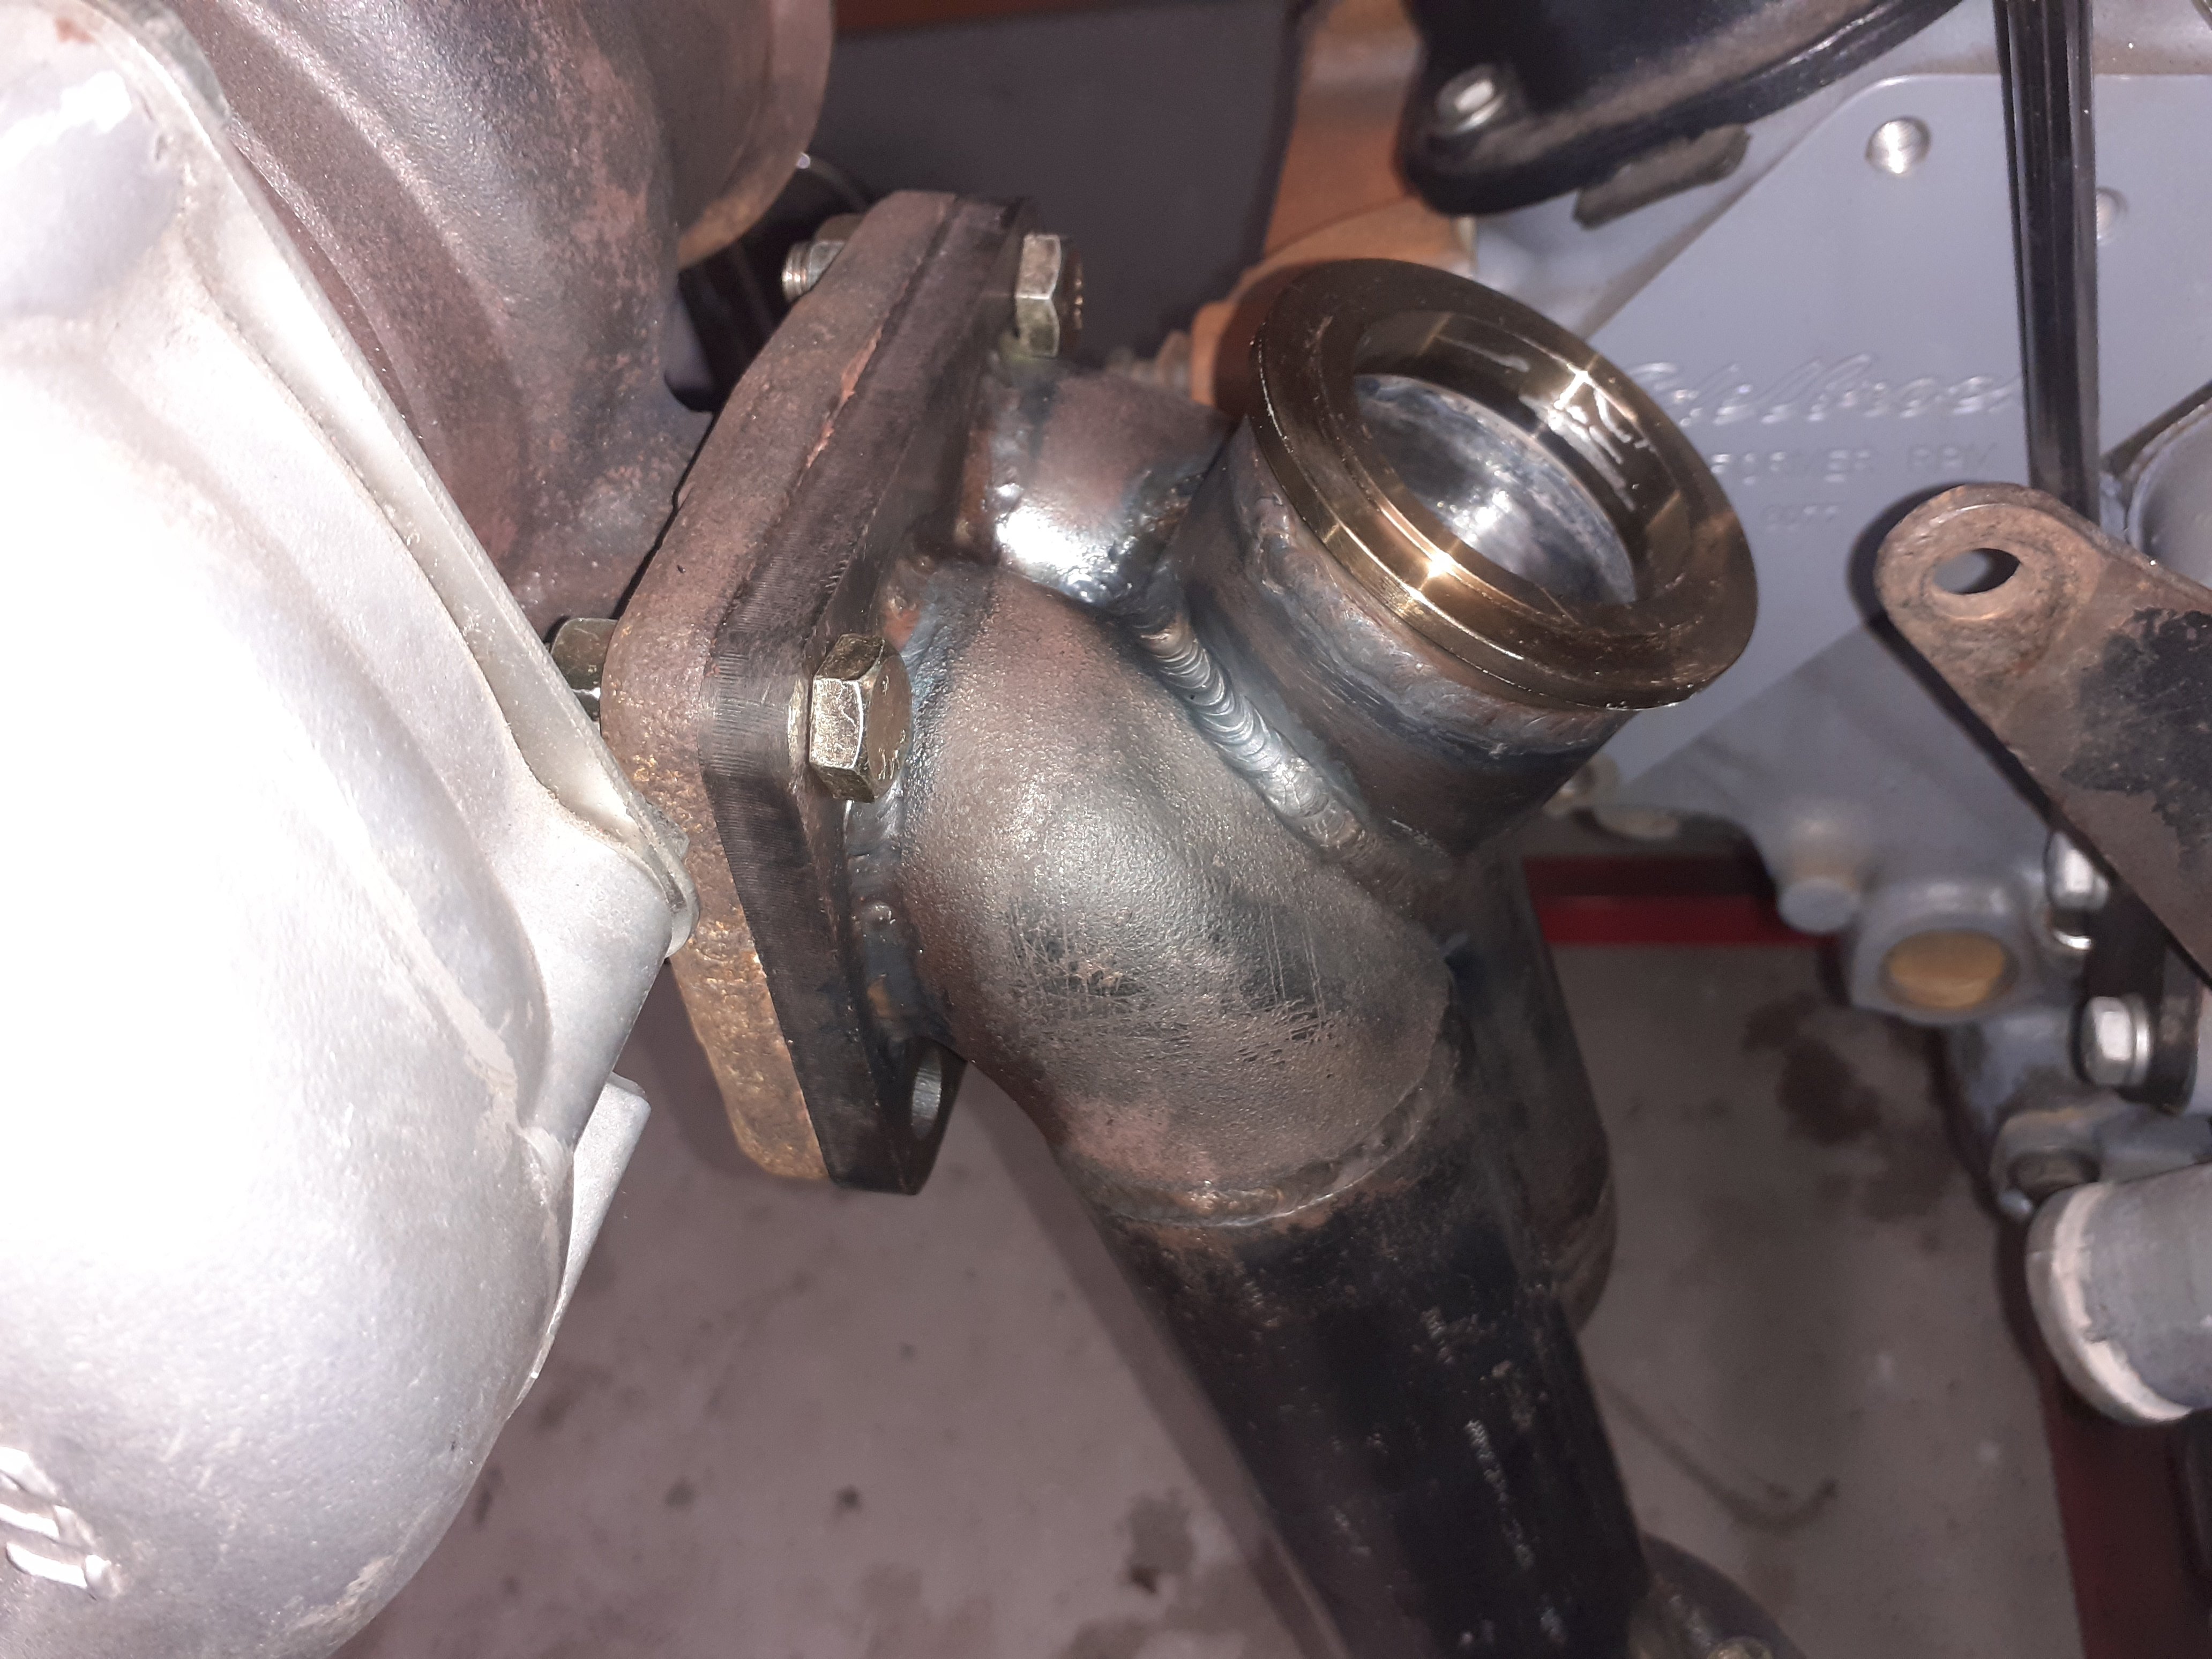
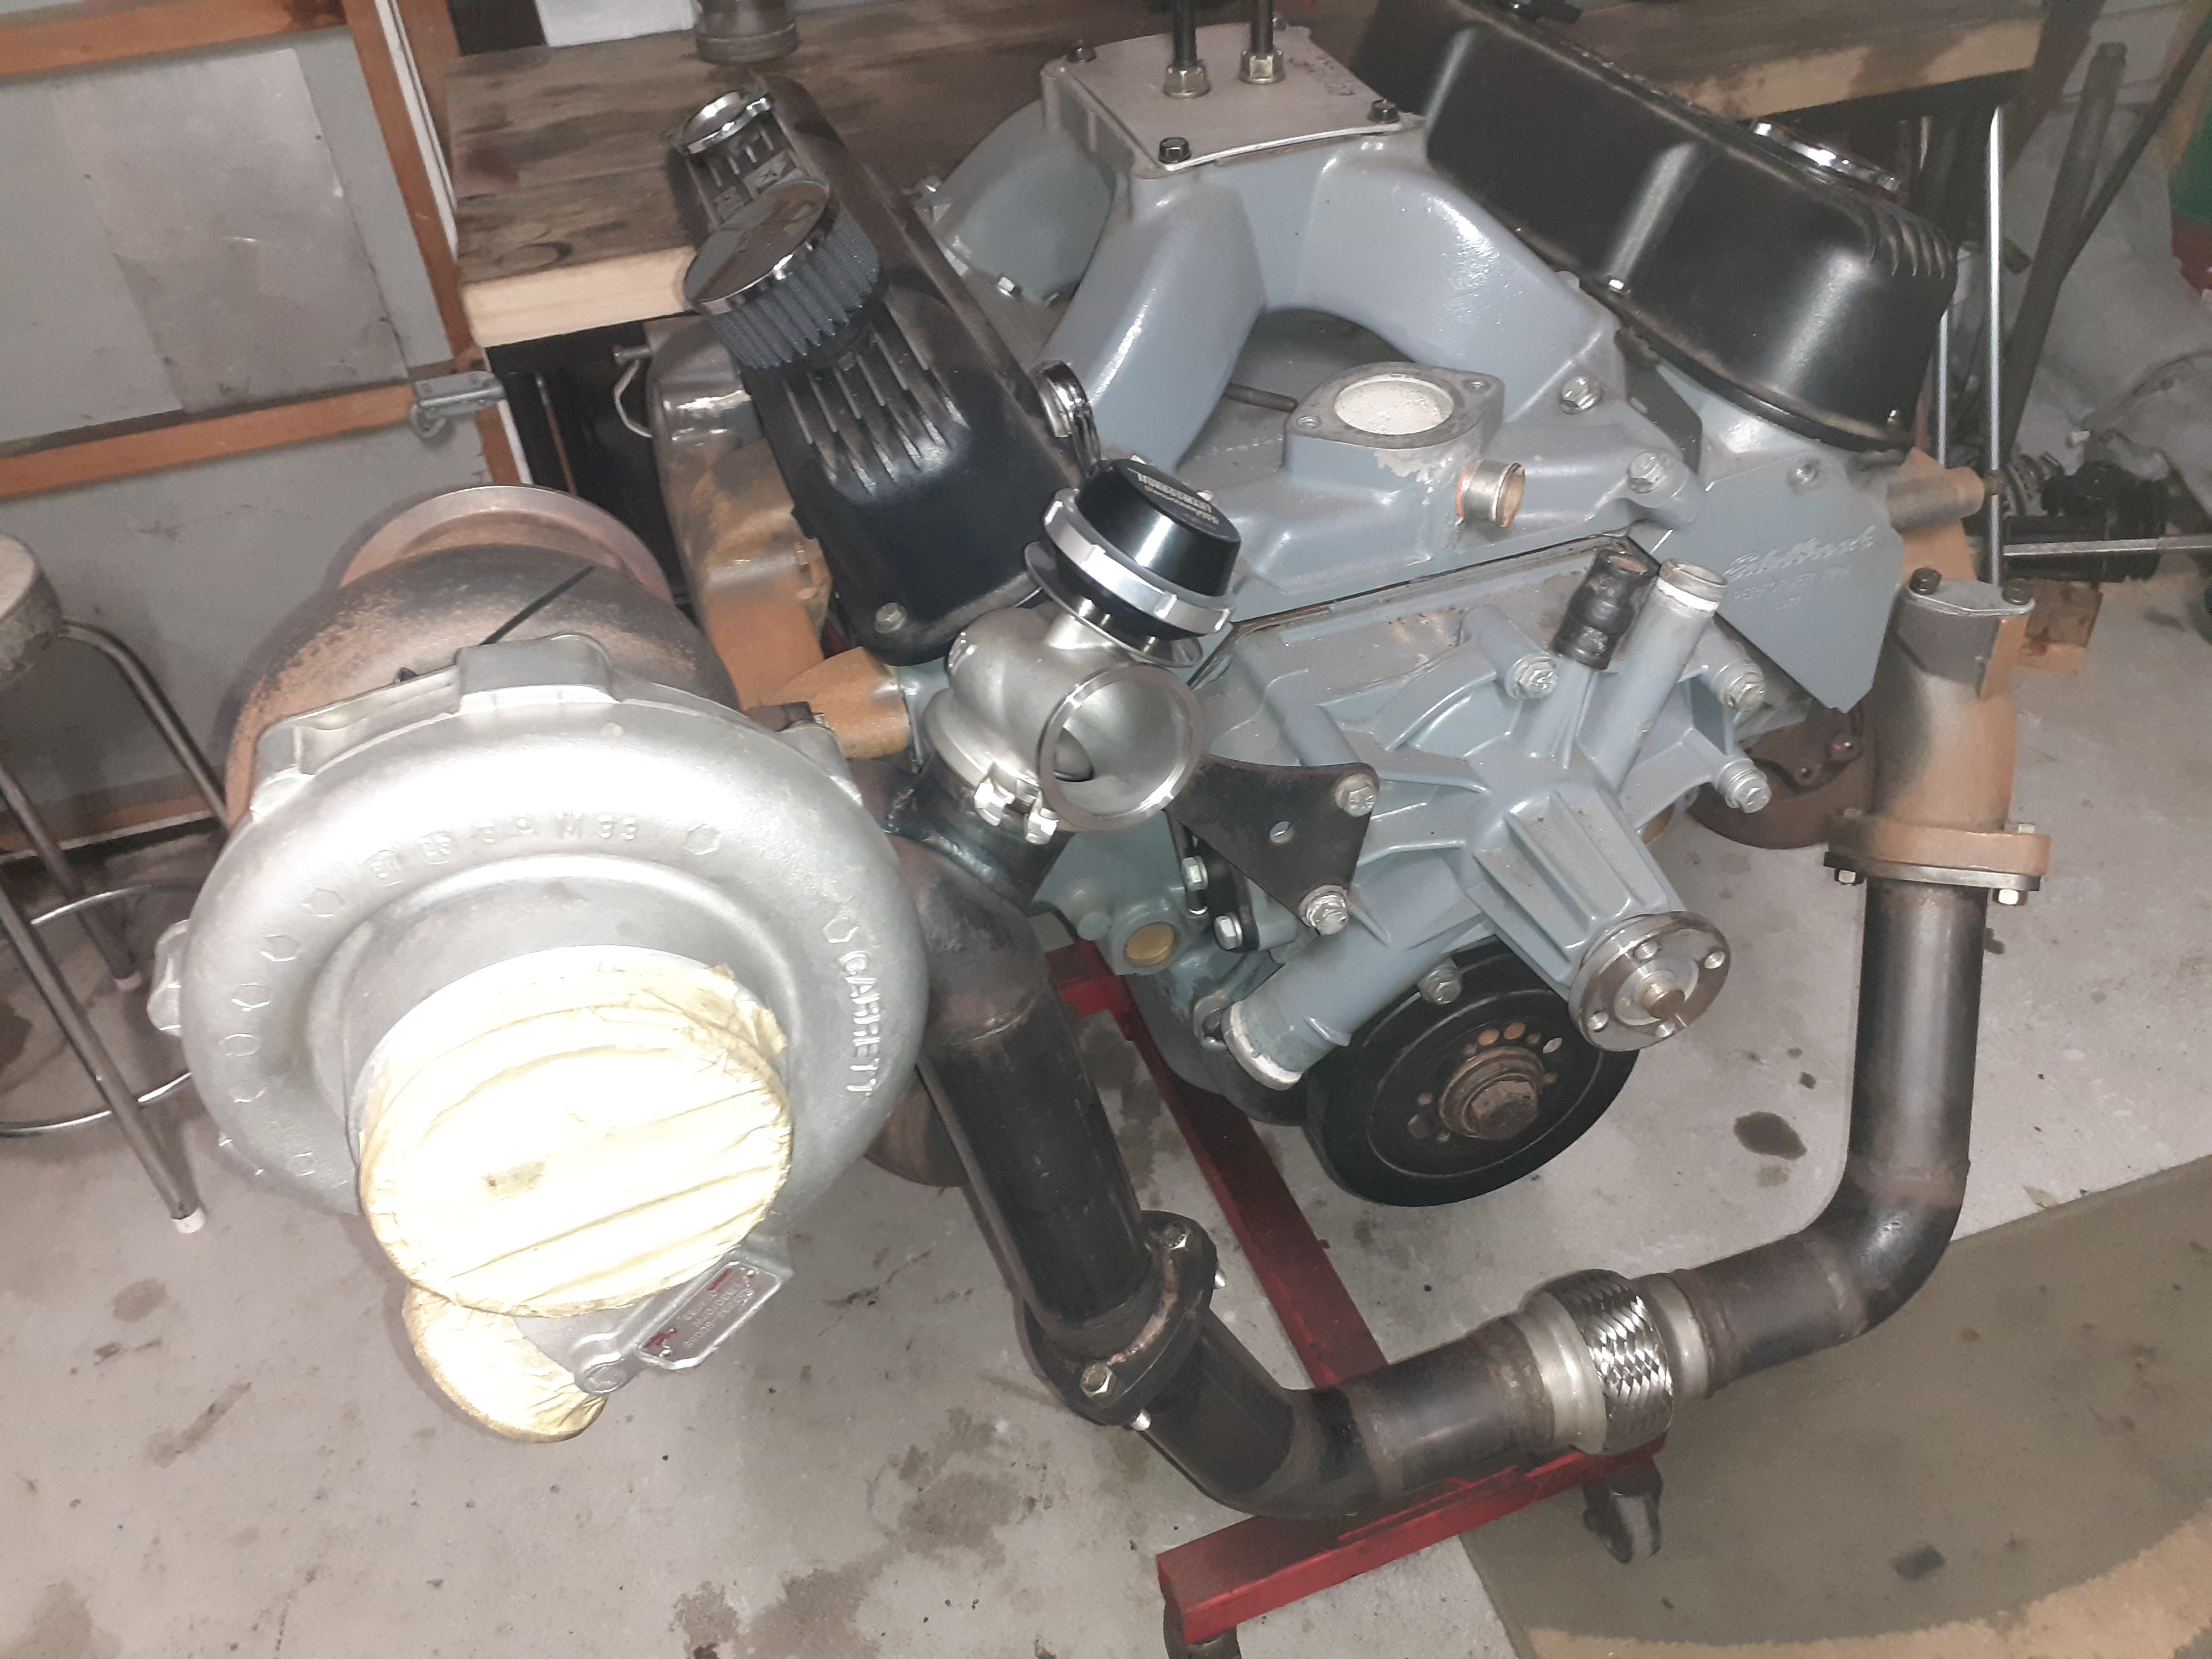
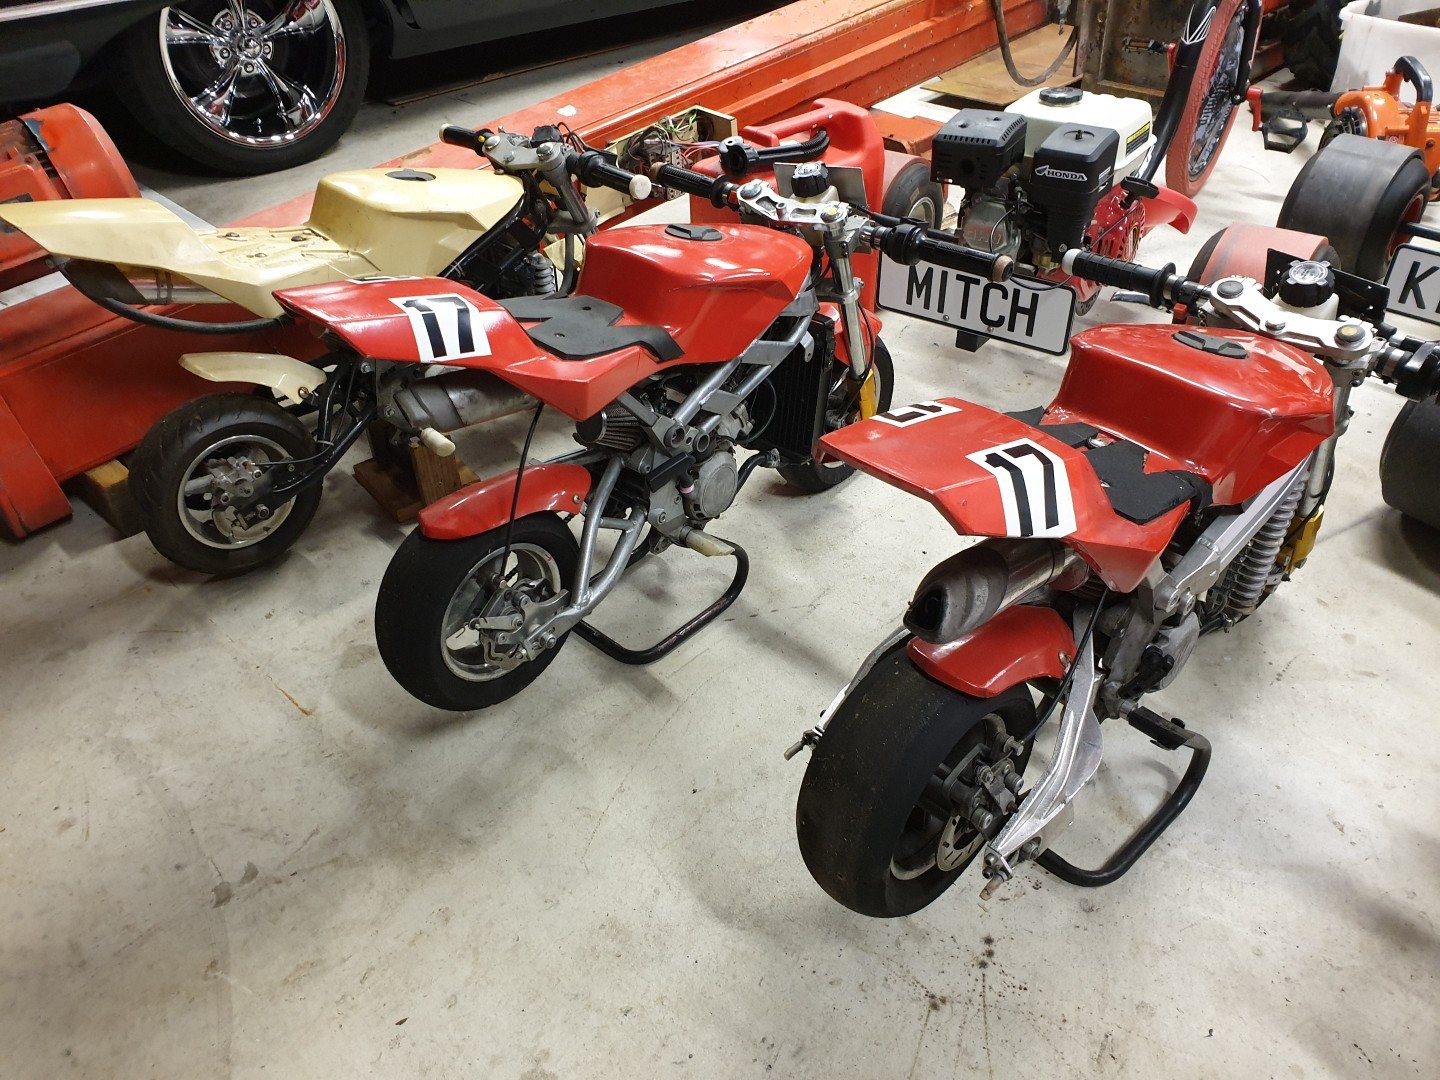
With raglan nats already organized I thought that would be a good target to aim to get this done by. Parked motorbikes at the back of the garage to avoid distractions for now Ordered a few bits for it this week, fingers crossed rockauto solves my brake caliper issue. and fitted a wastegate this weekend. I think the next step is put the engine in the hole and start making exhaust and intercooler piping
6 points
-
I had a lot of issues with the printer. Clogging, warping, delaminating, poor quality 10kg of material wasted and 3 weeks changing parameters but learnt a lot and got it sorted. Now I need to figure out if I can recycle this stuff!5 points
-
Supposedly it doesnt close until 31 October so there could be more opportunity but @V8Pete is in town so gunna hit Mercs for some nostalgia THURSDAY 1230pm @UTERUS @Testament @Poo @sentra @sheepers @Corbie4 points
-
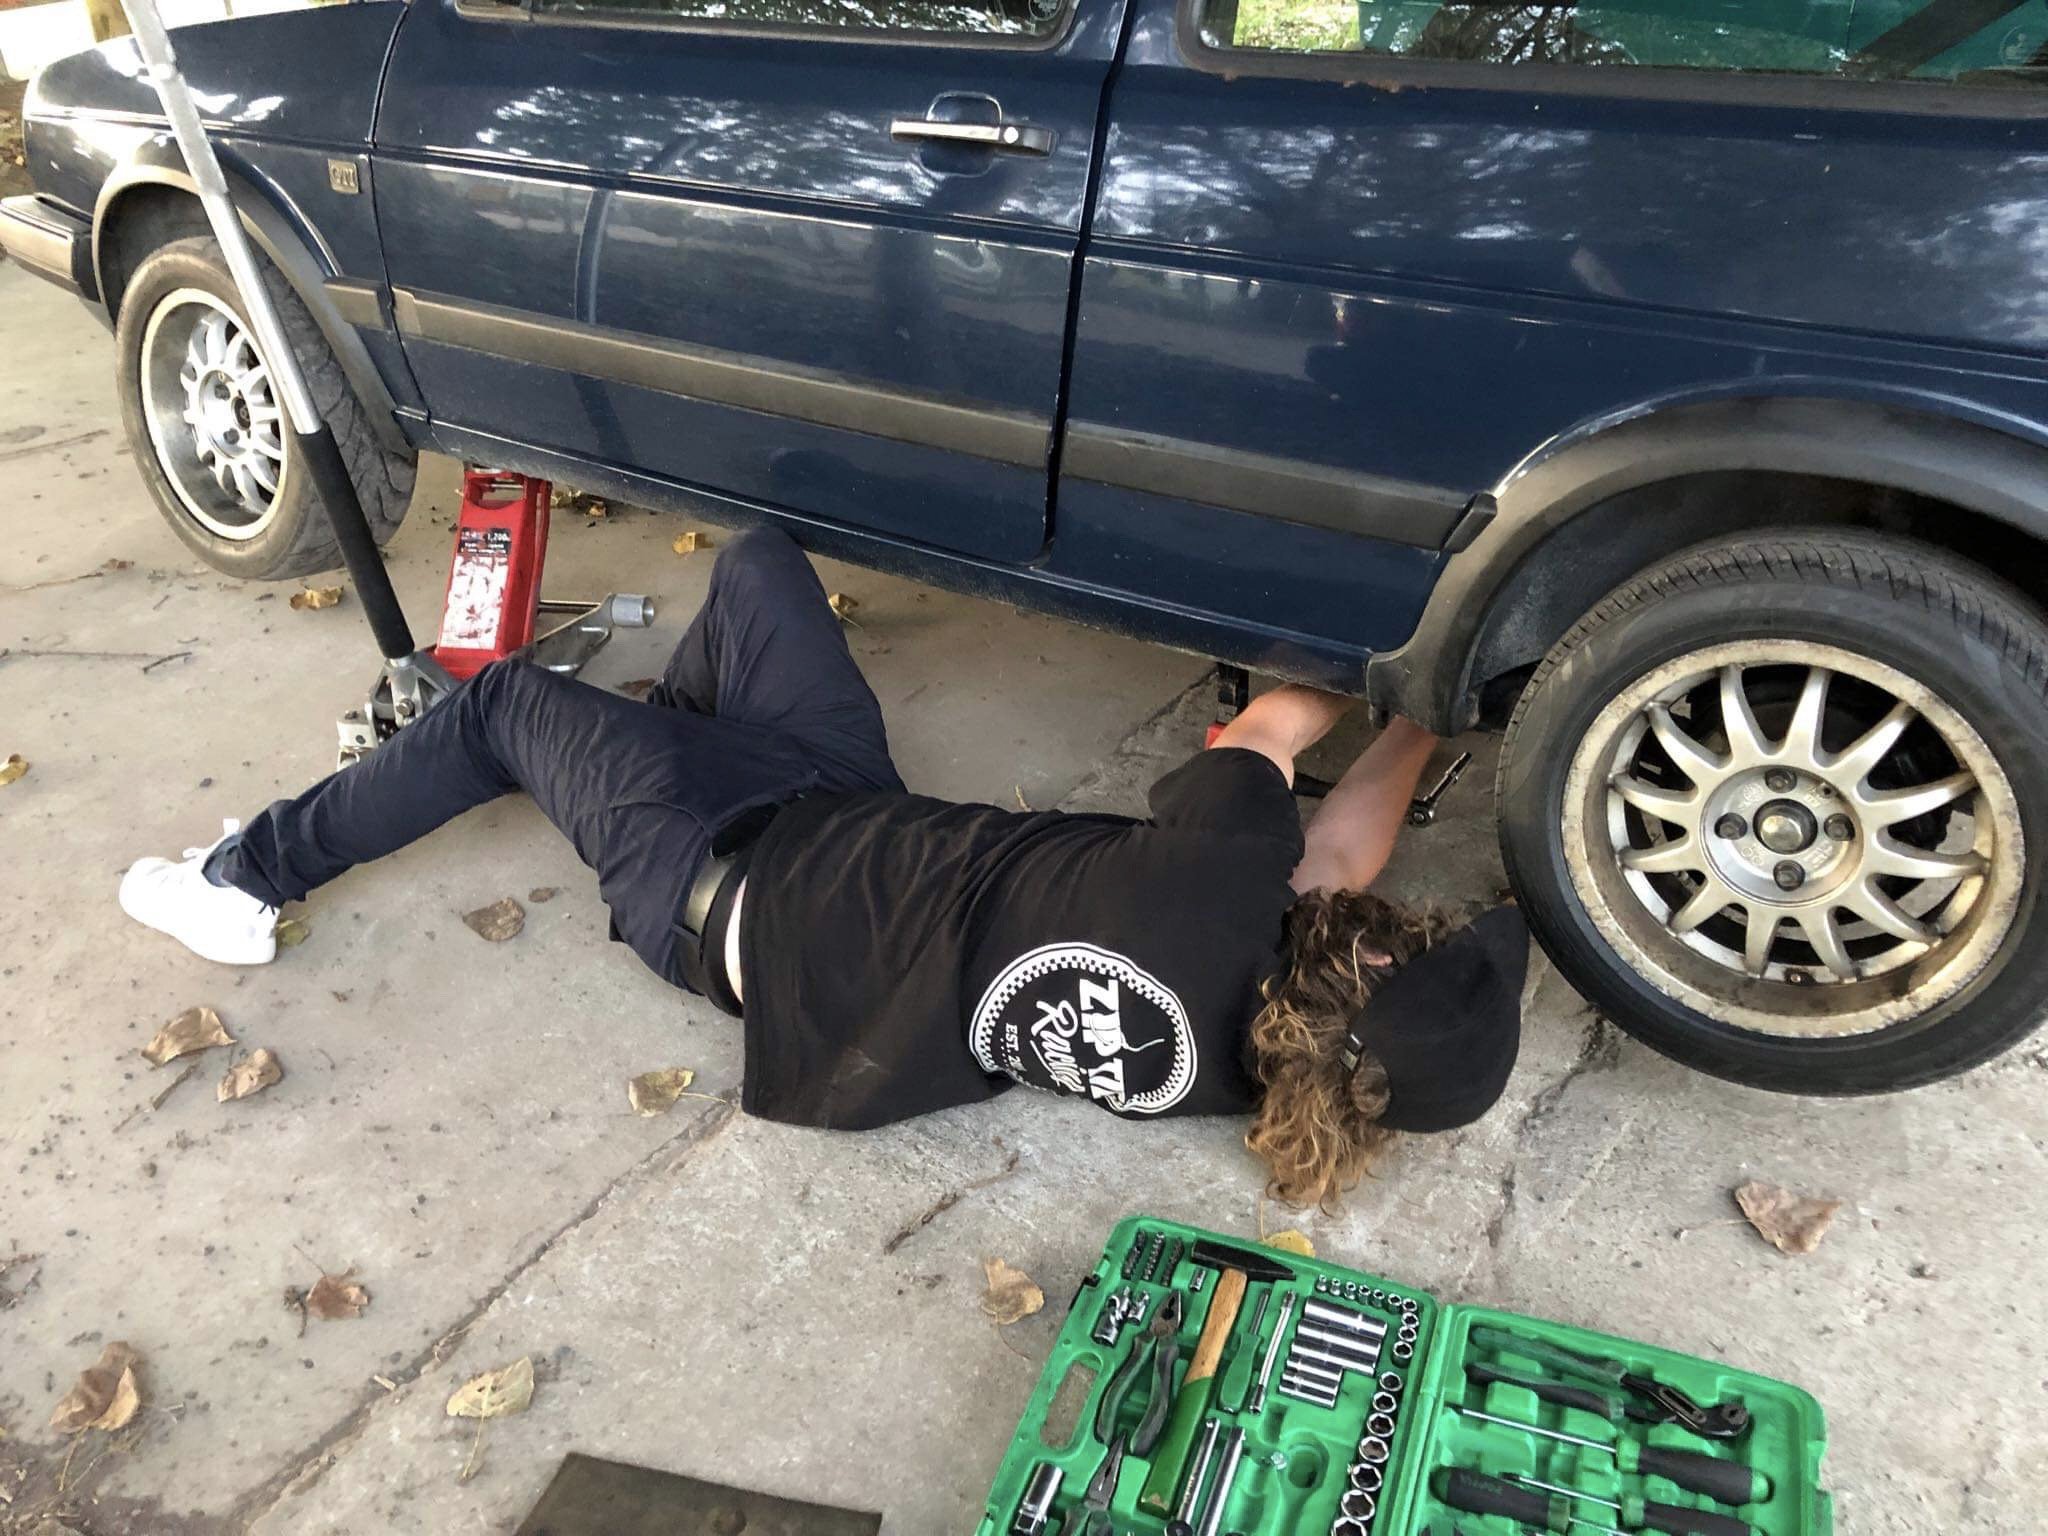
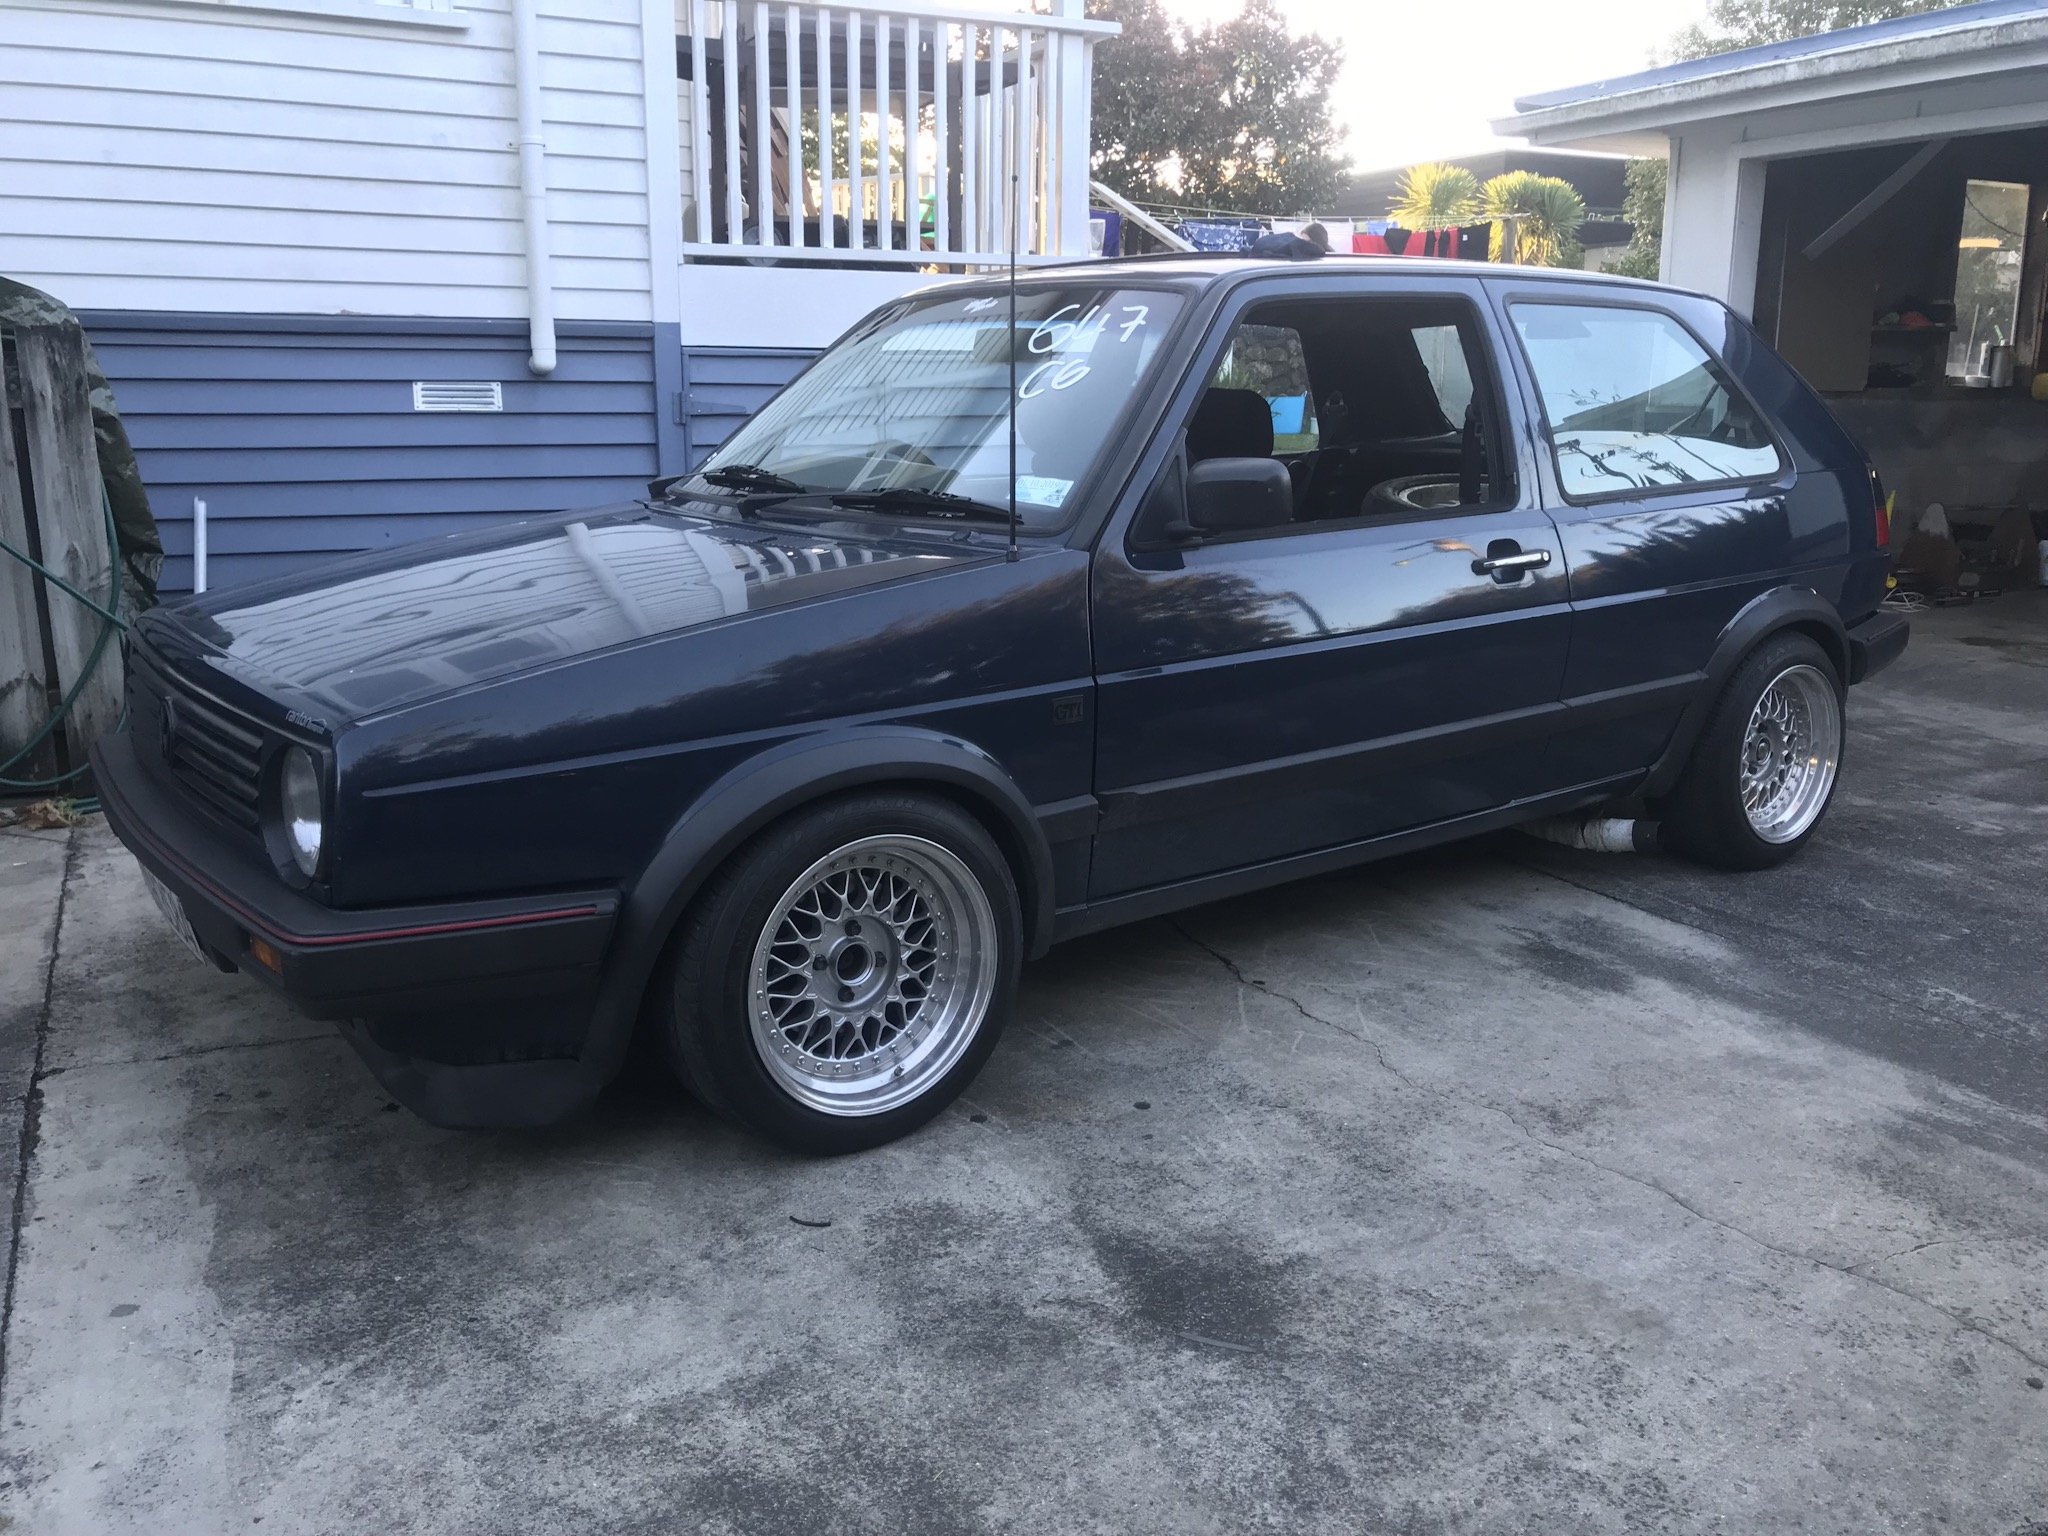
We never got onto the interior, got a bit side tracked with my mazda. But after hunting off and on for some other wheels, a mate spotted these on facebook. Stoked with the fitment, and best of all, Rebekah agrees with me that it needs more low, so I've been given the go ahead to go down another inch and a half. After a morning at the hotrod breakfast, she now wants a small front chin spoiler/air dam.
4 points
-
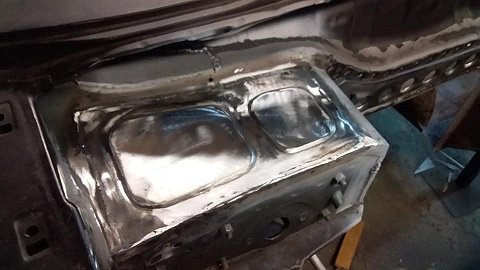
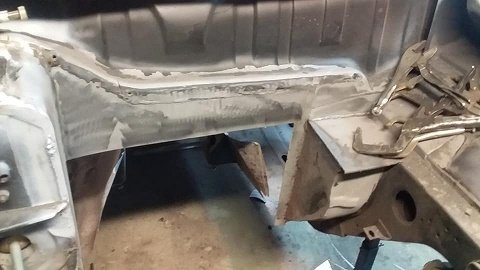
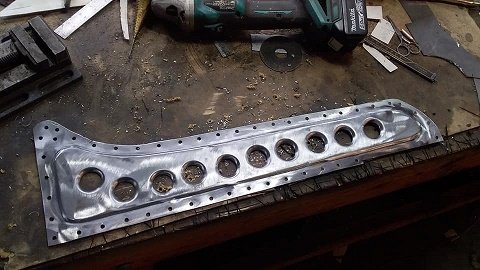
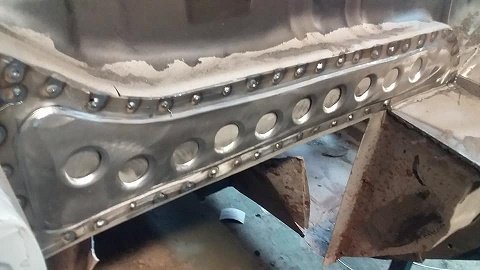
The better half and my self have been honing our skills of late. Thats right boss. Hours of hard yards have been put in out in the garage. You all know it and have no doubt also spent many hours doing it. .... Standing there with a beverage staring at an old jalopy, talkn shit and do'in sweet fek all. But seriously what have we been up to other than throwing back jars and chin wagging you say whilst dressed in trendy garage attire. Well ladies and gentlemen wait no longer for here is yet another riveting update to cover the little bit of work we actually did. Radiator all plumbed up. the finned metal hoses bend and hold shape well. like how its kinda central in the engine bay. Replaced the hose clamps that came with it with stronger jobbies as I couldn't be feked with hoses blowing off and coolant going everywhere. Moved on to hooking up the column shift to the trans. Using an IDIDIT GM/700R4 universal shift kit. Thinking being since im using an IDIDIT column it would all just be bolt on. Well that was the theory anyway. Basically it would work fine if I was LHD. the instructions are nice and simple and kit straight forward and well made. Would just bolt in. Being RHD its all opposite though and naturally the American brand dosnt included any instructions and when I contacted support I got no help and basically told me to fek off. LHD shifting would pull the cable out as it moves from park through the gears. RHD we push it in as we move through the gears from Park - 1st. Rejigging at the column is an easy fix. just throw the car in park pull out the cable and hook it up (As pictured). Basically doing opposite as instructed. The bracket that fits to the trans had to be bent so the tab that holds the cable pointed upwards not downwards. Then an extension made up for it. Reason being that the shift arm on the trans is made to point downwards and pull through the gears. Since im pushing through the gears it had to be mounted up top. So the bracket that holds the cable in place had to also point up. Simple enough I know but thought since IDIDIT support and engineers where about as useless as tits on a bull I would flick it up encase any other Kiwis or RHD owners needed a bit of help. Shifts easy though the gears. Clicks from Park to 1st. Ordered a heap of fittings for the fuel system. But before I start hooking all that guff up it was deemed time to finally finish up the gas tank thats mentioned in a previous post. Its made to nestle up nice and happy in this rather large hole that was cut in the boot/trunks floor. Its hard to tell but the hole has been braced up fro the underside so when its all together the floor will be sandwiched and nice and sturdy. Since the lid was still off it seemed a good time to put together the in tank fuel pump. Overkill to be sure since its only driving a few carbs and not fuel injection. But it has good reviews and is supposed to be pretty quiet so I was like mehhh seems easy enough and should be "hook it up and forget about it". Its an Aeromotive Phantom in-tank carb setup. Basically meaning it has a regulator (pictured there front center) that drops the 320psi pump down to 15psi. Also has its return blocked with a removable cap. Comes with pre-filter pictured along with that sponge tube that you cut a tad higher than your tank and acts as a filter and a baffle. Also put together the Dakota Digital universal sender. As with all there stuff its a nice bit of kit with simple instructions. Has the ability to fit in a huge range of depth tanks and works with many gauges. Anyway lid all TIGed up. Thanks lads at Kirk Irrigation for that by the way. Also got them to attach the filler neck and drain. Holes added before assembly to make life easier. Then the sender and pump just all dropped on in to place. Under the car it sits up nice. tucked just above the lowest part of the chassis. Should be no scrub line issues. Also still has a nice amount of clearance from exhaust - its why its an odd T shape. Up top it is about level with the lip of the opening. Will have a floor mounted above it latter down the track. The rest of the other bits of the fuel filler neck still to attach pictured above. Also pictured is the cradle to hold the battery box that we wiped up to hold it all nice and secure on the right side. Just using a standard marine battery box. Fits up nice in the back fender as shown. Can vent it through the floor. Will have a panel to hide it from view down the track. The battery only just fits in whats good i guess - no slipping about. The big bugger should power everything I need and flick over the engine no worries. Looking at either welding cable or 1guage wire to carry the current up the front. earths all over the place of course. So picture the above with panels. sides to hide the battery and tool kit along with fuel neck that will live on the other side. floor to protect the tank then front panel to hide the airtank and amp whilst also adding sound deadening to the shut up those two pumps. Now getting back to my original comments in this post. That being the standing staring at the car. Maybe moving something a fraction taking a drink and repeating the process. Side pipes seemed like a good excuse to practice this. We had to go through the process of draining a few cans to use to hold the pipes in place first of course. Sacrifices we make aye. Note the said cans are crimpled in the middle otherwise they are much to high to suit the air out stance with the pipes. Front grill also seemed like a good excuse. Pondering a 1950 Buick grill. Middle section should fit in well once pushed back but its overall width is wider than the car. Dont really want to cut the chrome as it is so nice so I guess if we use it we may need to flair the guards a bit. Already planned to do this a bit to get better wheel travel for steering when air out but hmm I think this is something a few more brews and staring might require. All this is much down the track of course. Tiki - such a great helper. You got a wire he will attack it. Drop a nut and he will soon have it flying across the garage floor ending up down the side of some thing out of reach or under some other heavy obstacle. Told him I would stuff him is such a pose if he keeps annoying me. Guess he is happy with that idea as the little shit hasn't stopped.3 points
-
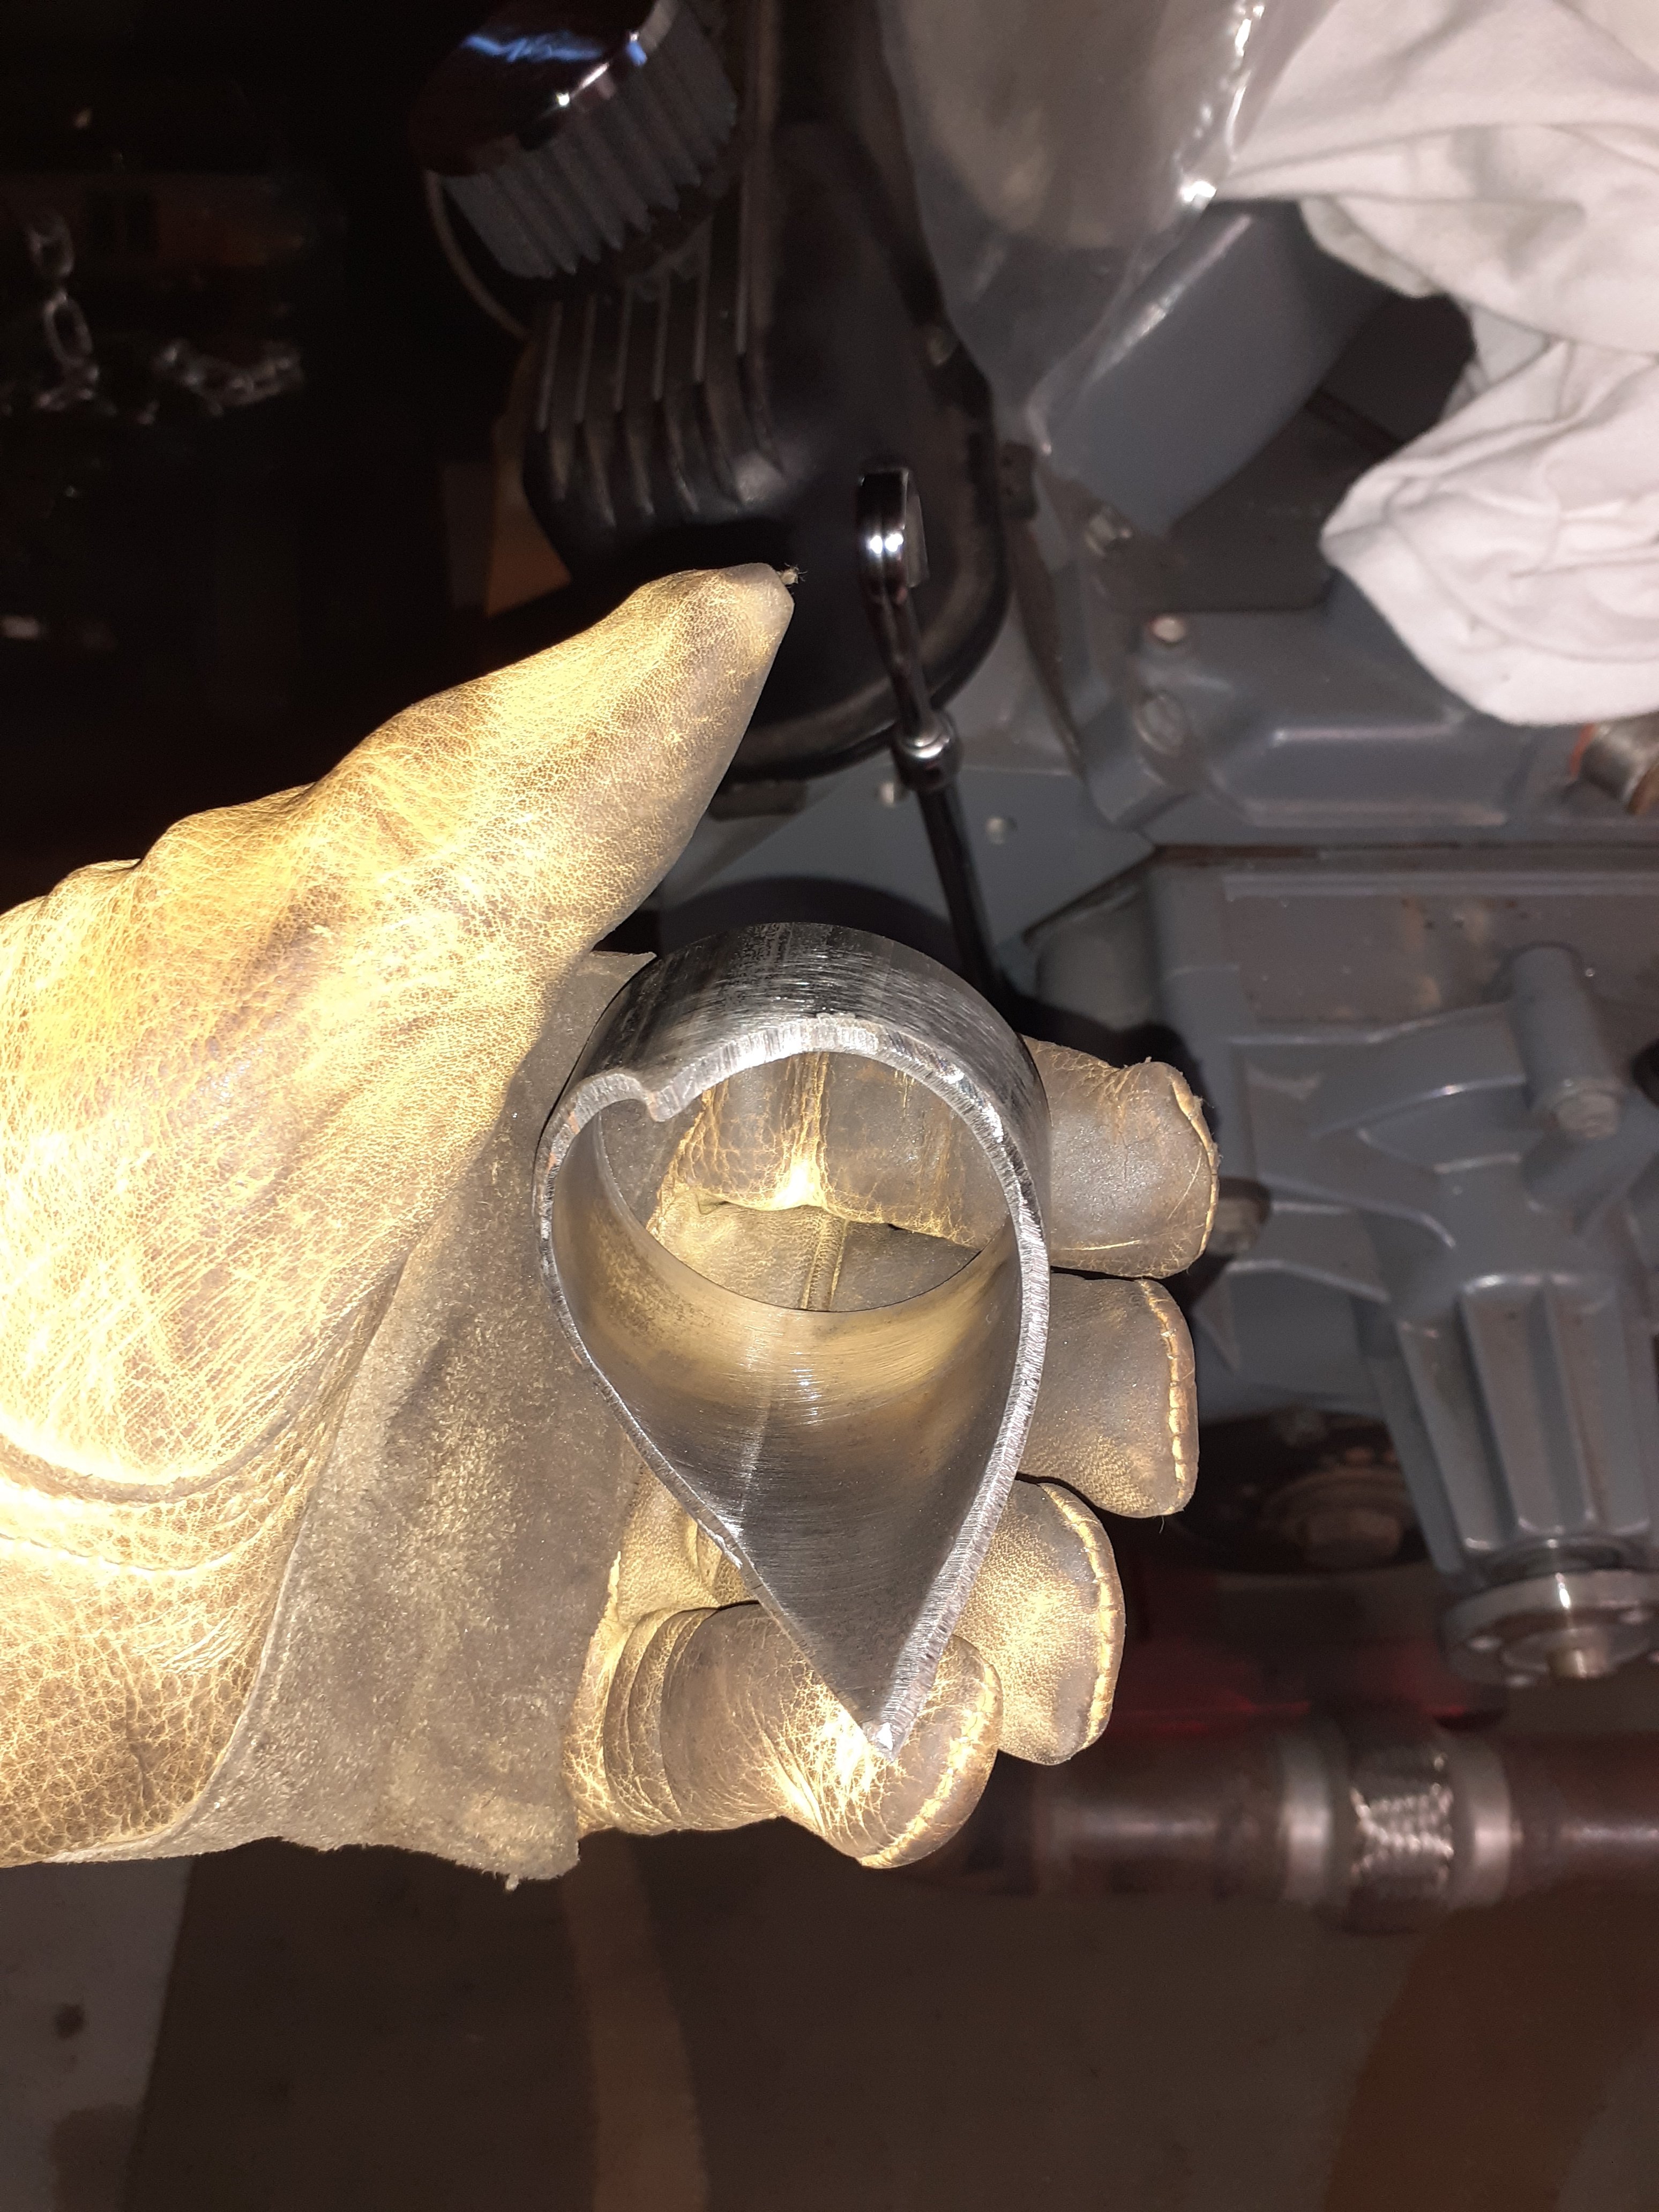
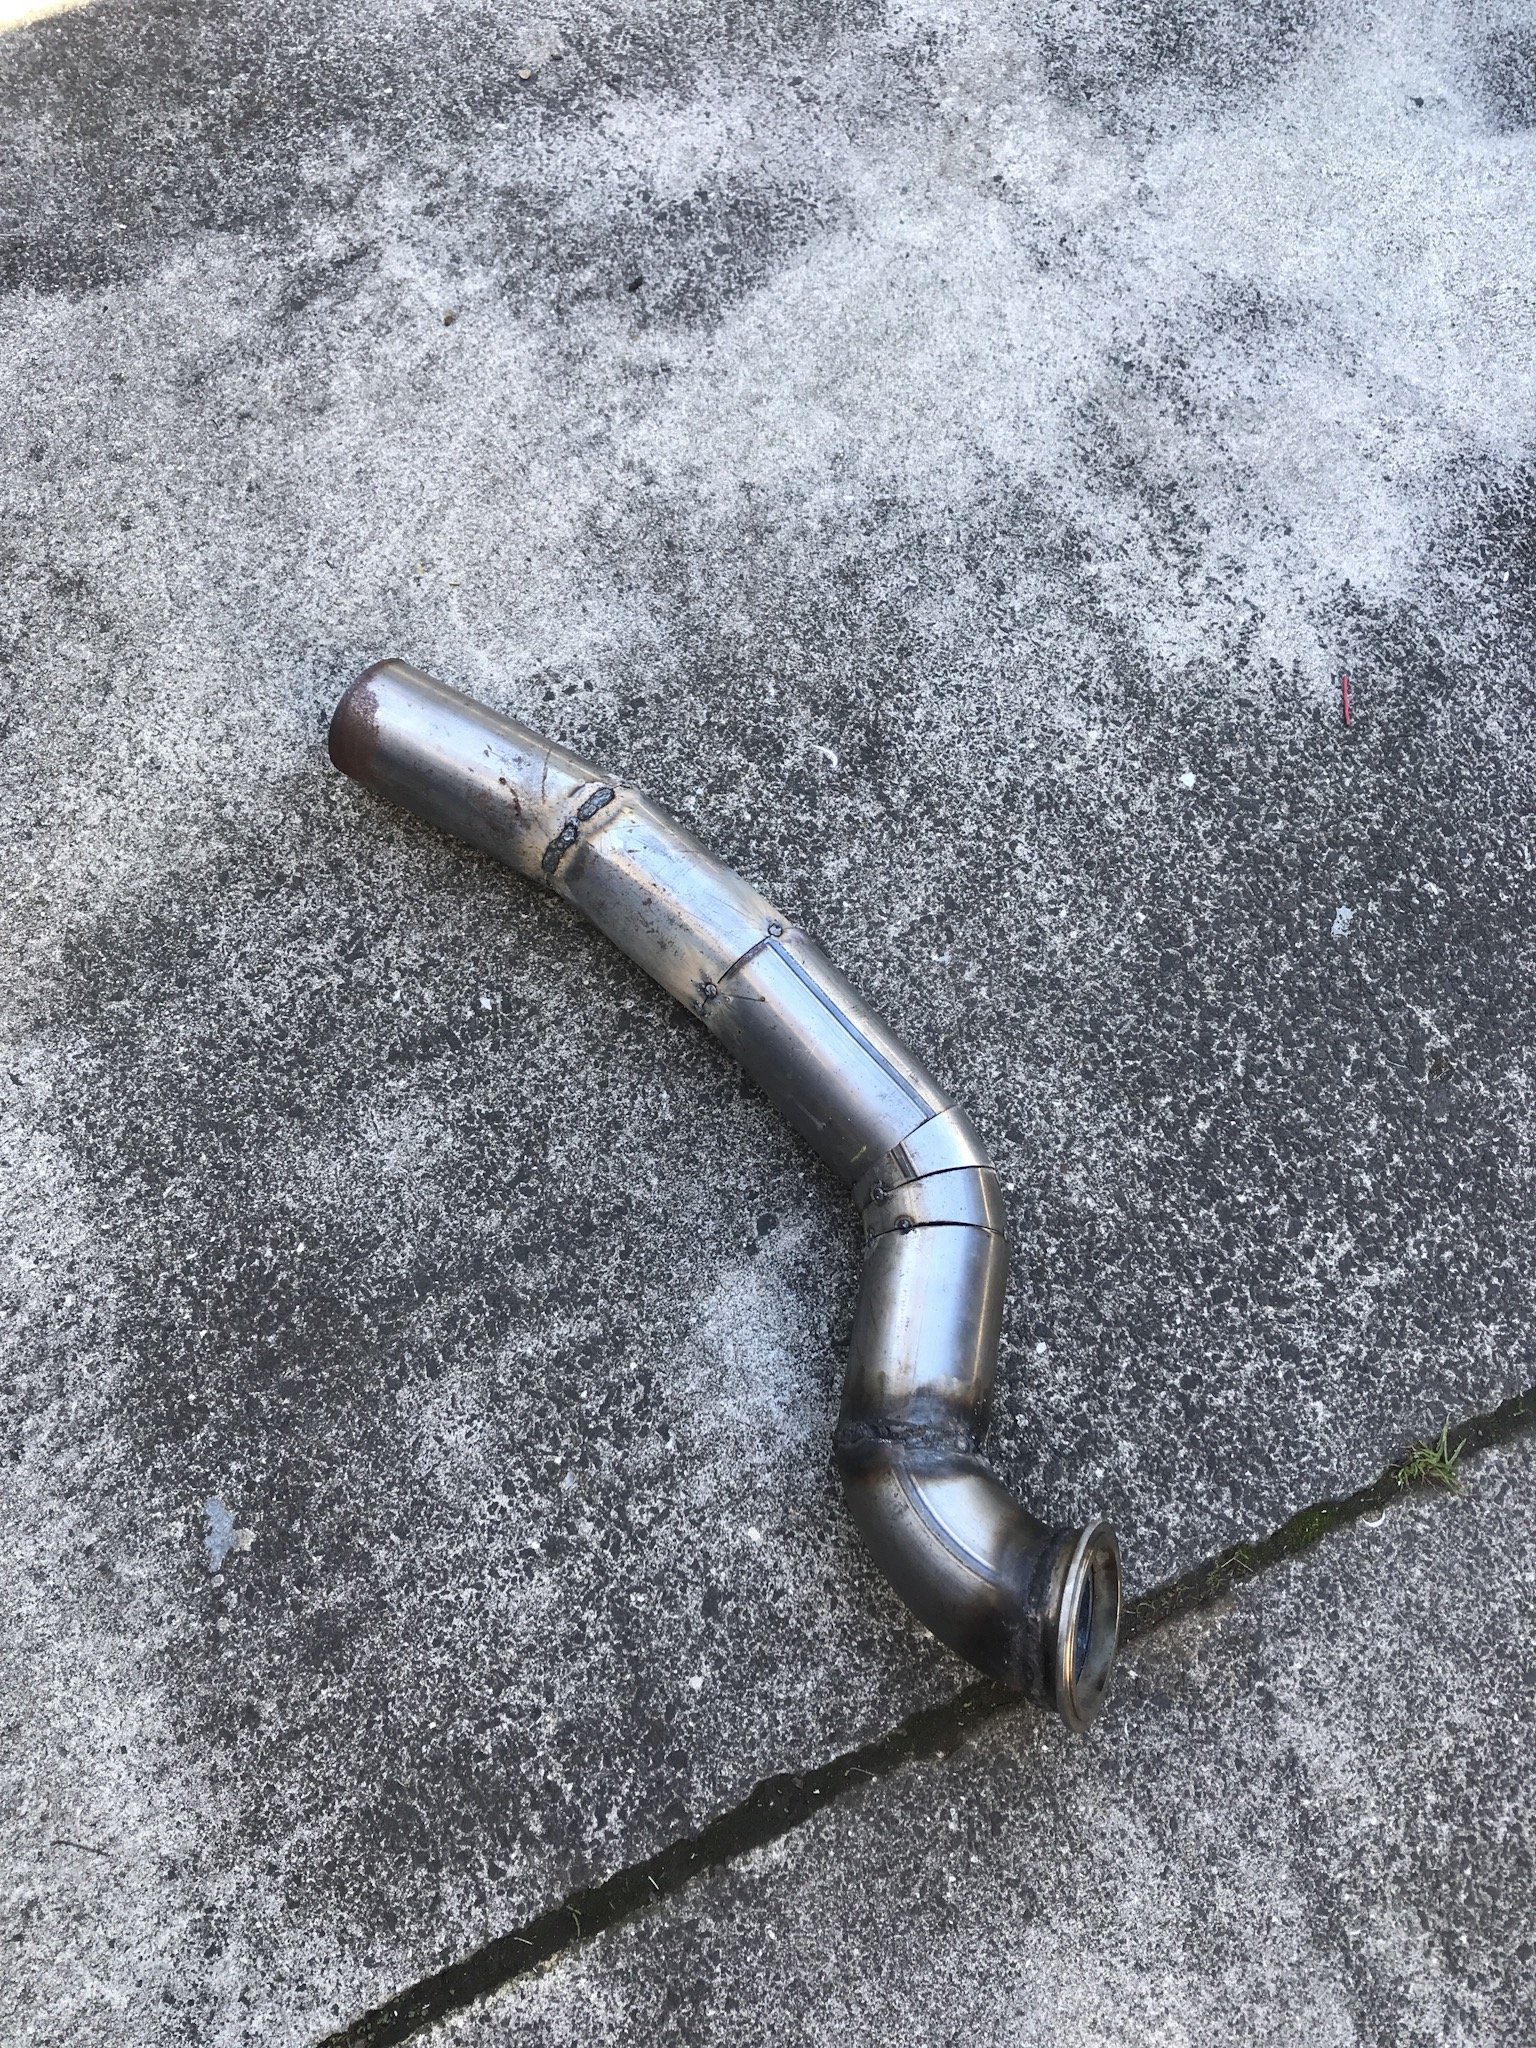
Ended up cutting a strip of paper that fitted around the pipe then fold it in half and cut tapering angles on it, worked well, It was confusing with all the talk about degrees and stuff that was unnecessary3 points
-
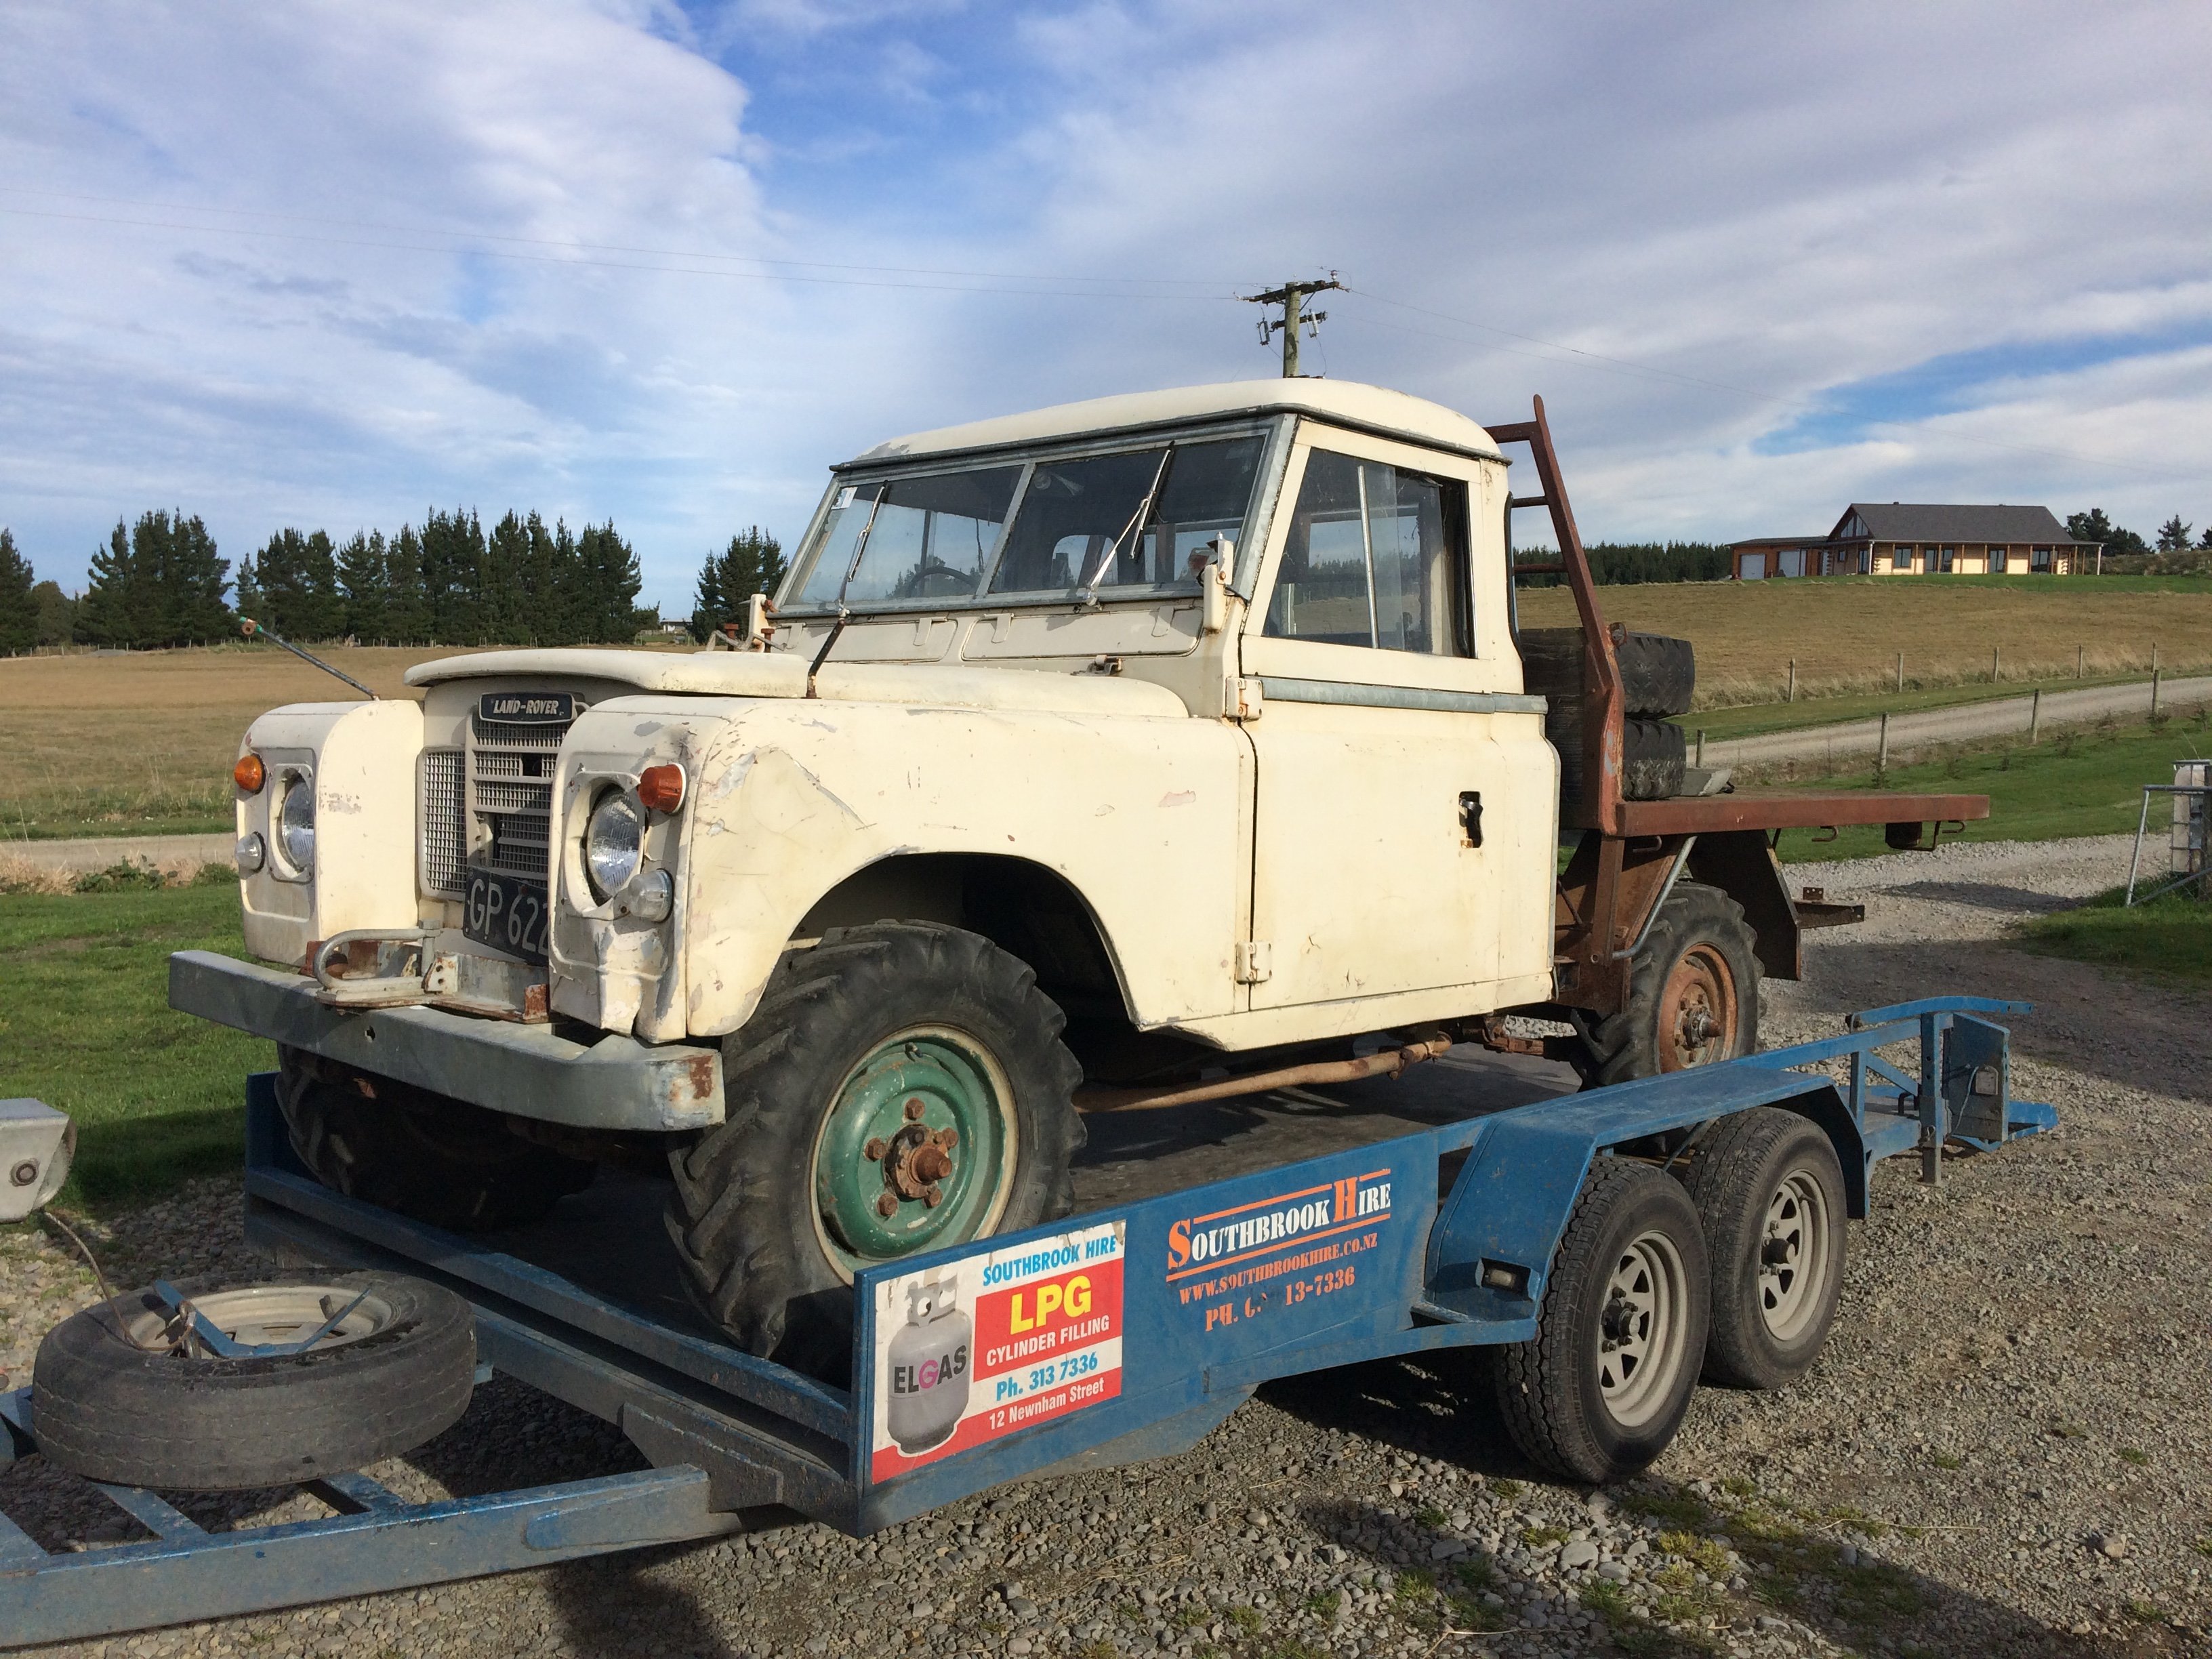
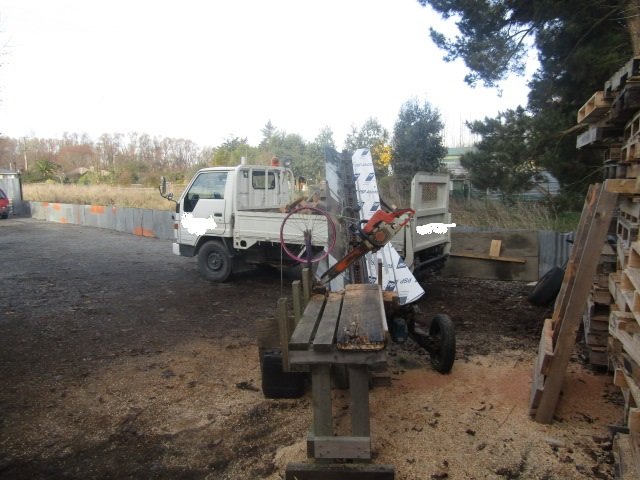
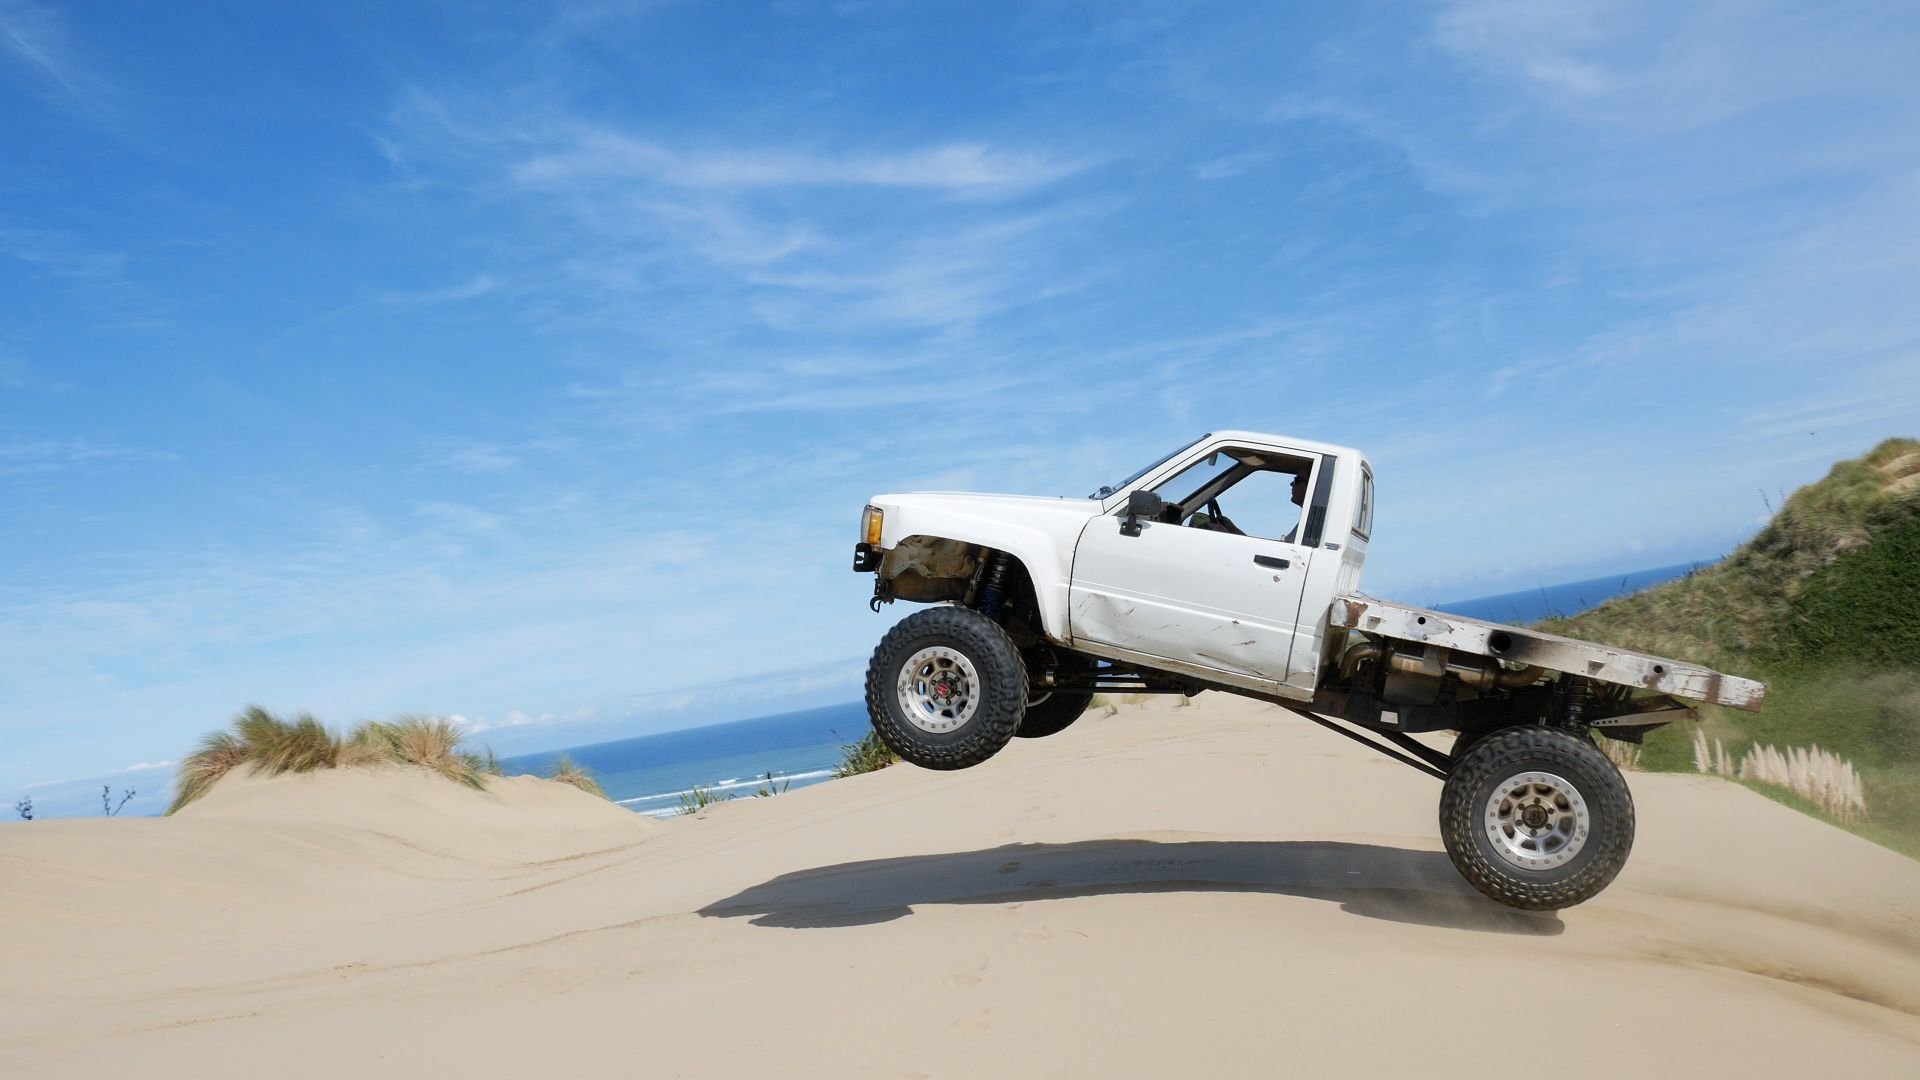
I am practically a farmer so I need a truck. Made sure my Tetanus shots were up to date and got this. But I really don’t need another project. Wow, I suck at this. Mean tractor grips though, so WIN. Thread of discussion
2 points
-
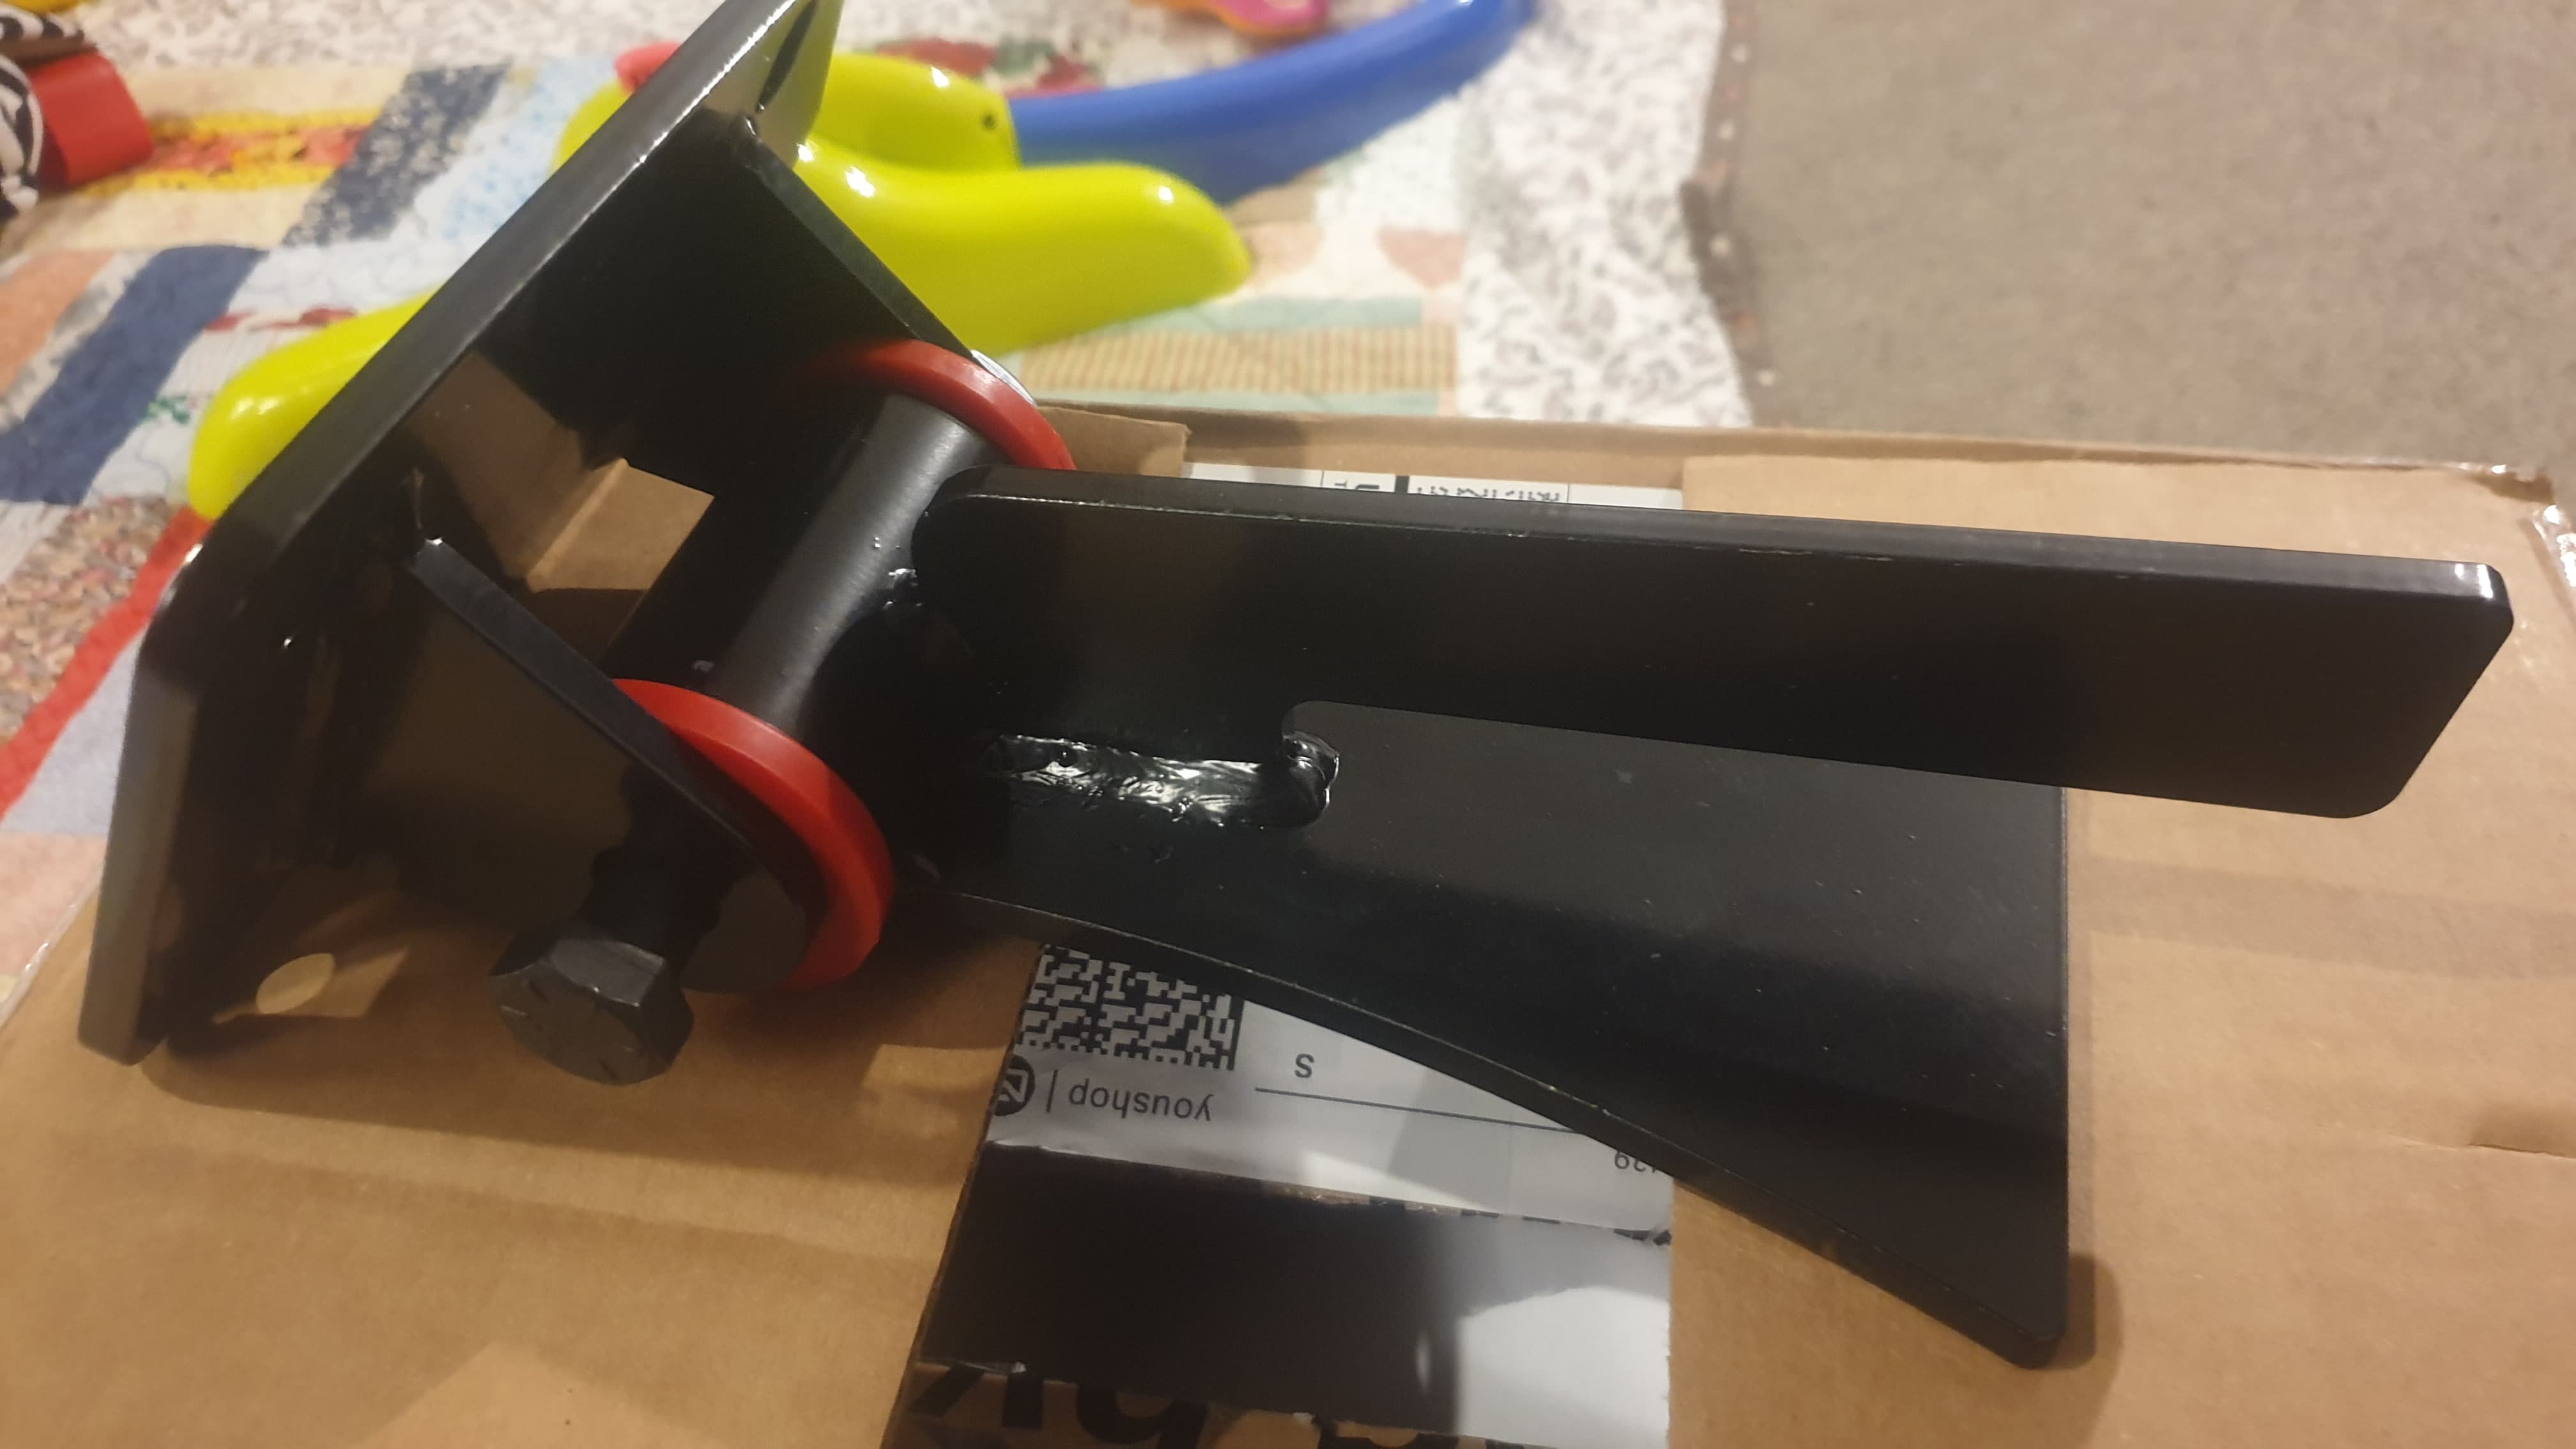
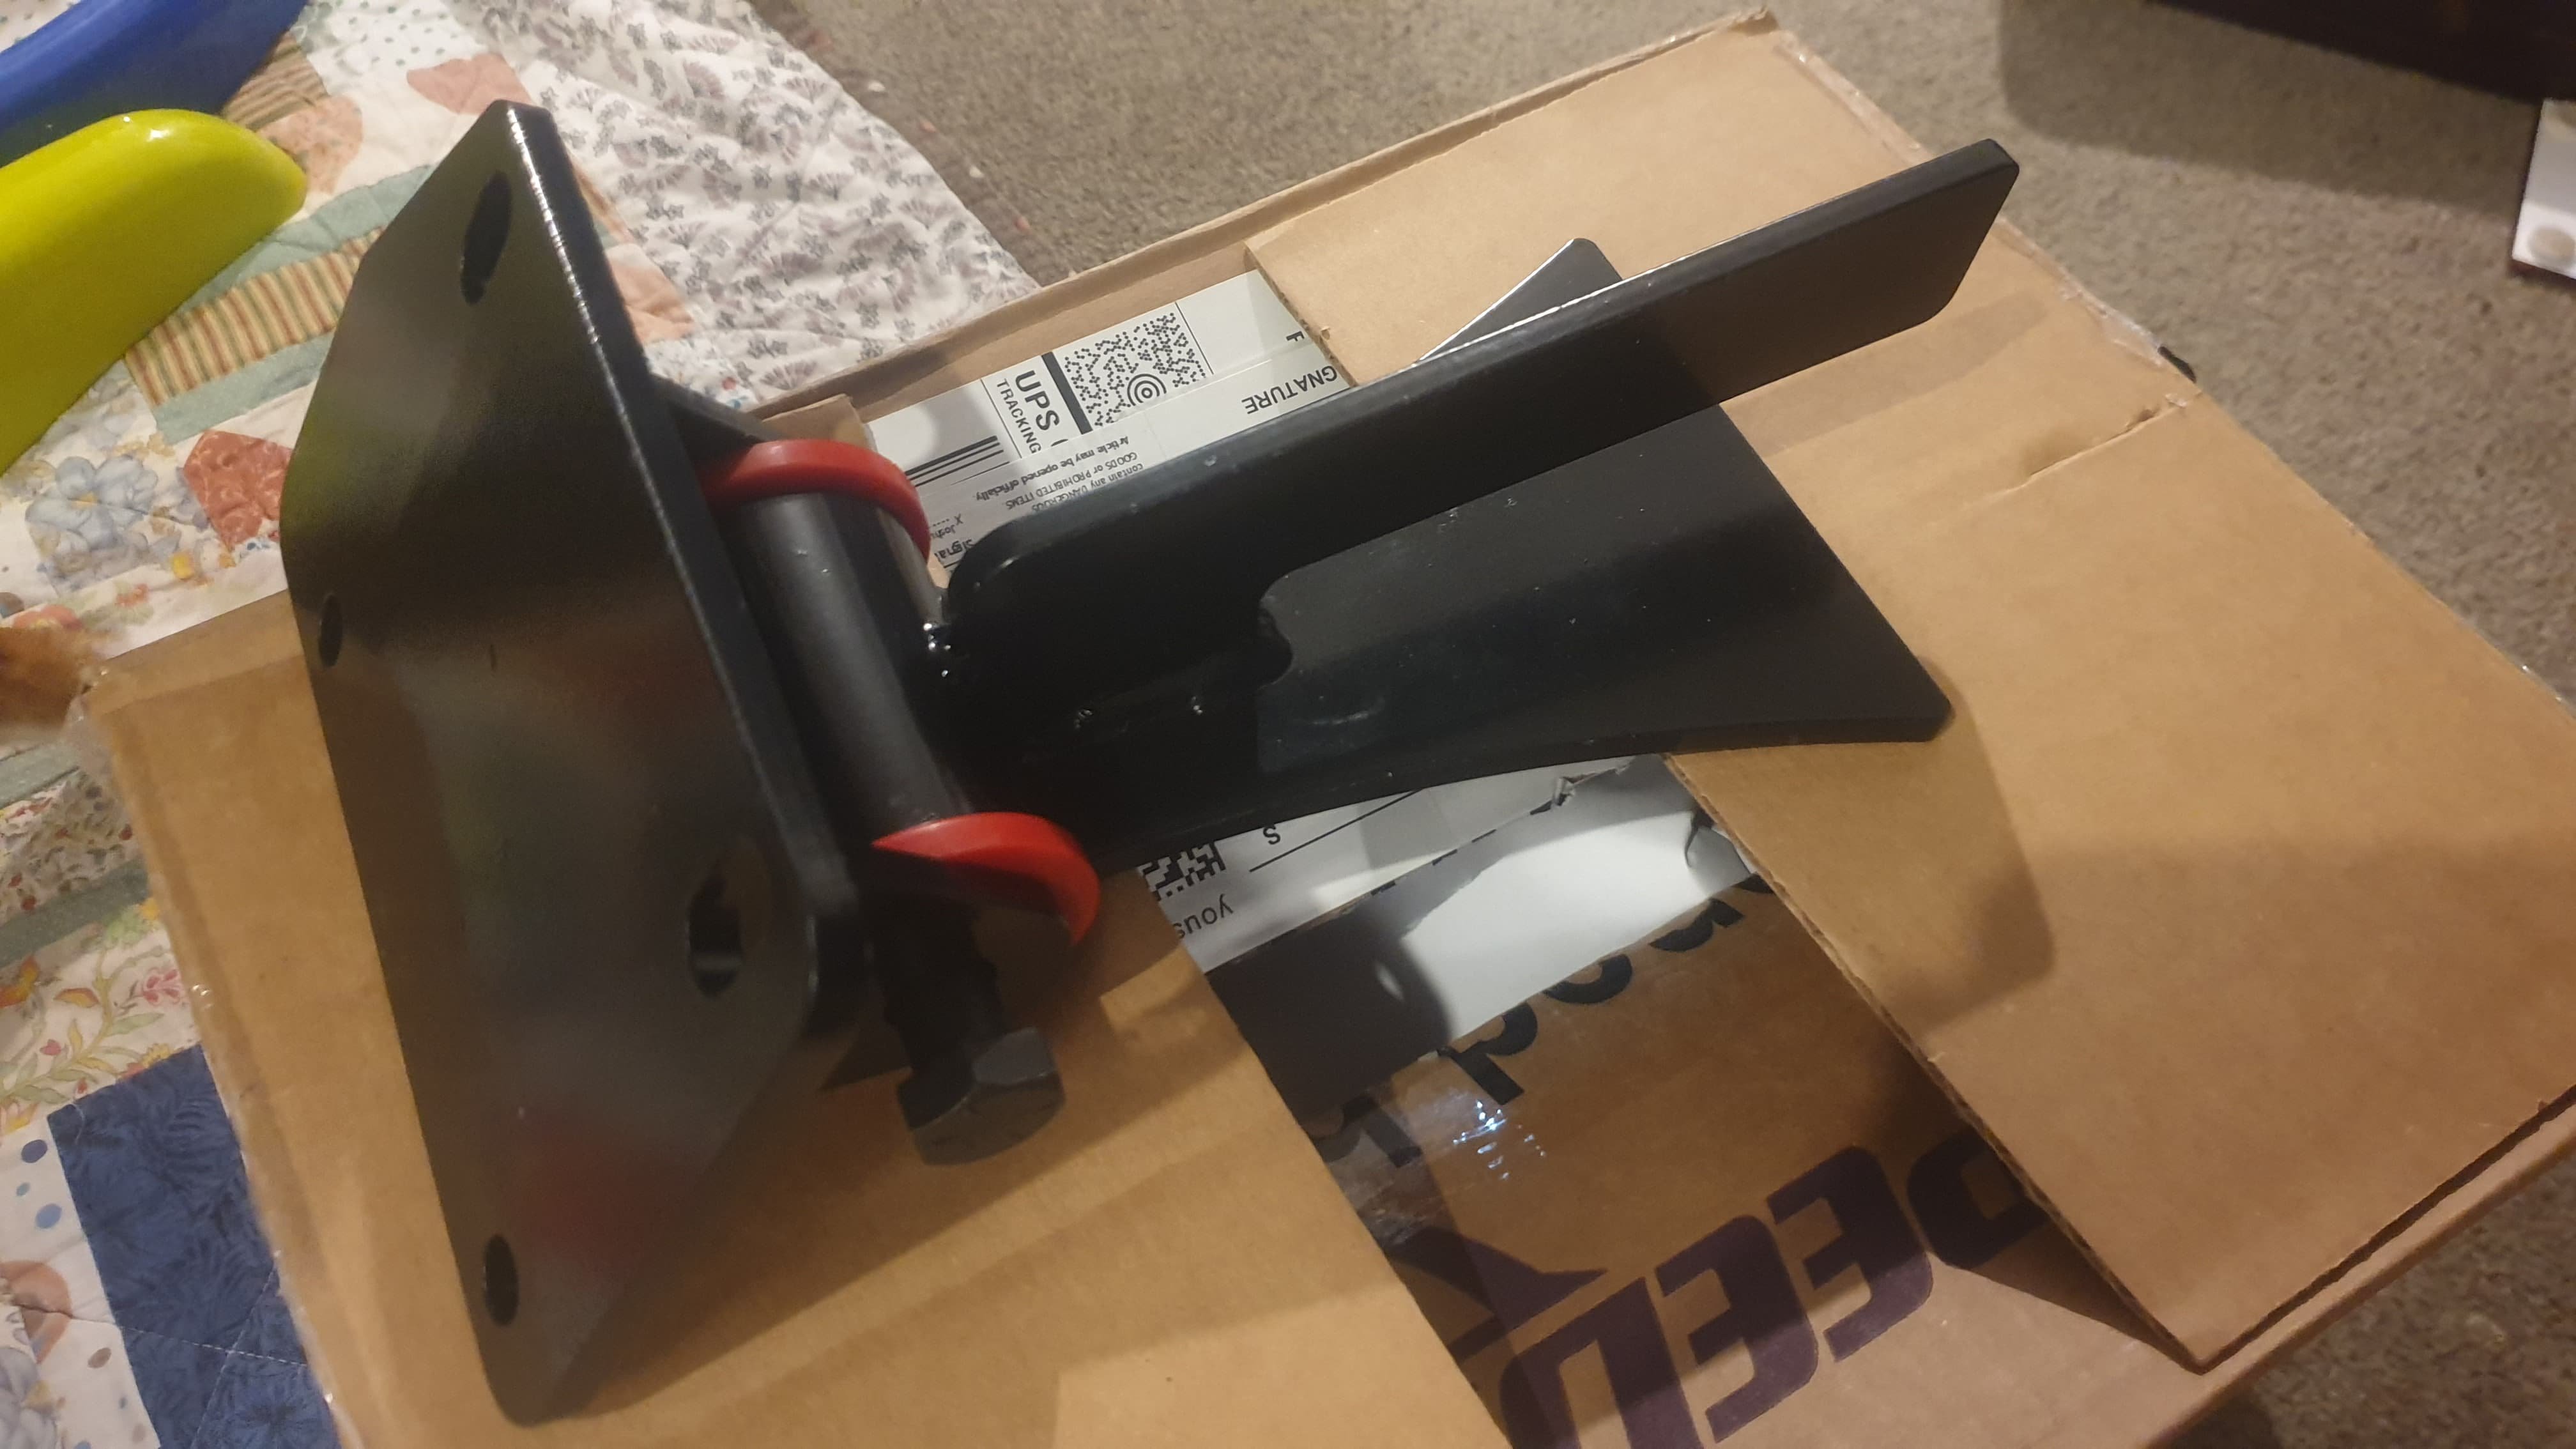
on the suggestion of runamuck, i posted in this forum looking for wiring info, and user on there was very kind and gave me a bunch of info which should hopfully sort me out, i was gonna dump all the info in here but sort of cant be bothers, plus give those guys the traffic eh? https://www.forabodiesonly.com/mopar/threads/4-7l-corsair-wiring-diagrams.440431/ also had my weld in 'project car' engine mounts turn up from speedway motors in america, grunty looking things! they are actually for the new gen Hemi, but for the price, i couldnt have bought the materials and if they don't fit the block then worst case is a redrill or a new engine plate. easy as! hope to have the engine "fitted" soon.
2 points
-
Another typical MACKAZ pictureless update. Been put on hold again so I can get my house completely finished off. I'm gonna have a go at fitting a Holden MC6 "Torquemaster" 4 speed gearbox behind the Hemi. Workmate and I intend to strip the box down, cut the belhousing casting away, then Mill the front flat and build an adapter plate to mate it to the Valiant bellhousing. Am I mad? Yep. For added wank factor it's the same gear pattern as an original Chrysler 4 speed I had in my Charger, to the left and up2 points
-
@Yowzer had the flex plate i needed so i went down to the Ham on Sunday and got it. so that should be everything major. the driveshaft is with Aiden at Drive Inn services to get shortened. Ill get a new gearbox mount because the one i have is fucked and ill replace the front and rear seals in the gearbox as well as replacing the rear crank seal while im at it. ive still go to make a system for the kick down. old one was rod operated and the new one is cable so ill need to do something there. what else? the threads in the box for the oil cooler feed and return are a fucking weird size with an oring type seal and i dont have the proper fittings. however its close enough to 1/8NPT that i can run a tap down the hole and bring the thread out to take an NPT fitting. easy.2 points
-
You can never 100% plan for idiots unfortunately. Back should be good, I am going to be easing back into the gym this month, at the recommendation of my physio, so gives an idea of how far it's come already. I have a little Suzuki Vitara offroader, a Lexus LS430 UL daily, and the tiny house, so the plan is to do a "Hayden's other projects" thread where I exhibit how fuckin' good I am at spending all of my time and money on stuff and things (this doesn't include my Suzuki GSF250, the trailer project I bought and haven't done anything with yet or the other 1,000,000 things on my to-do list).2 points
-
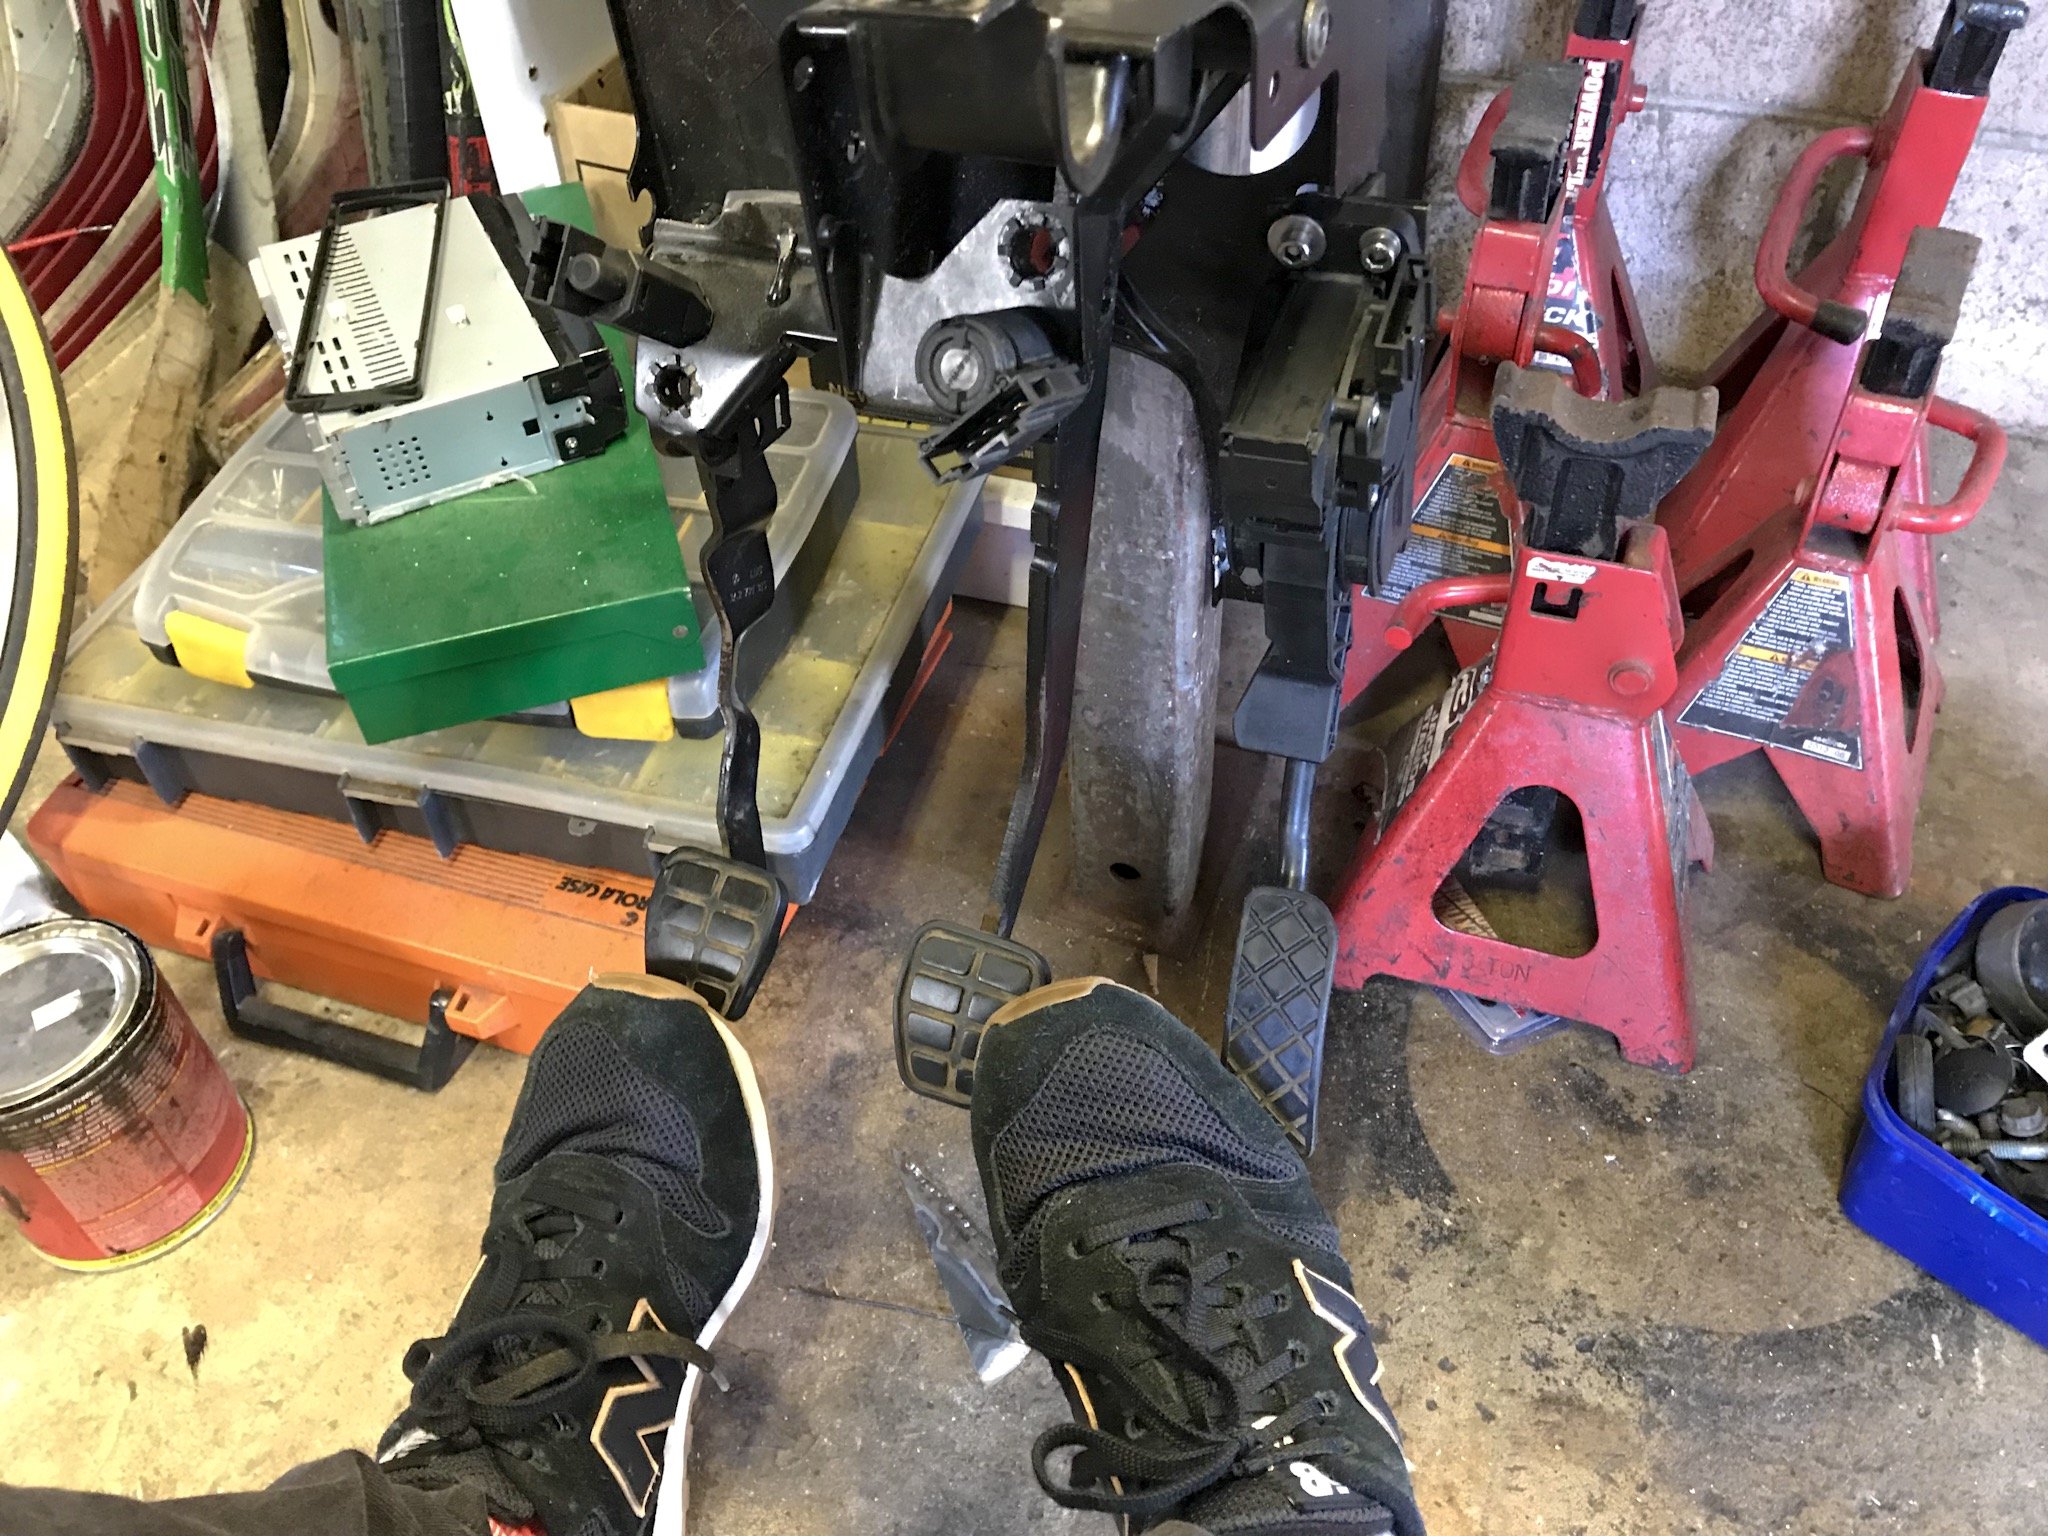
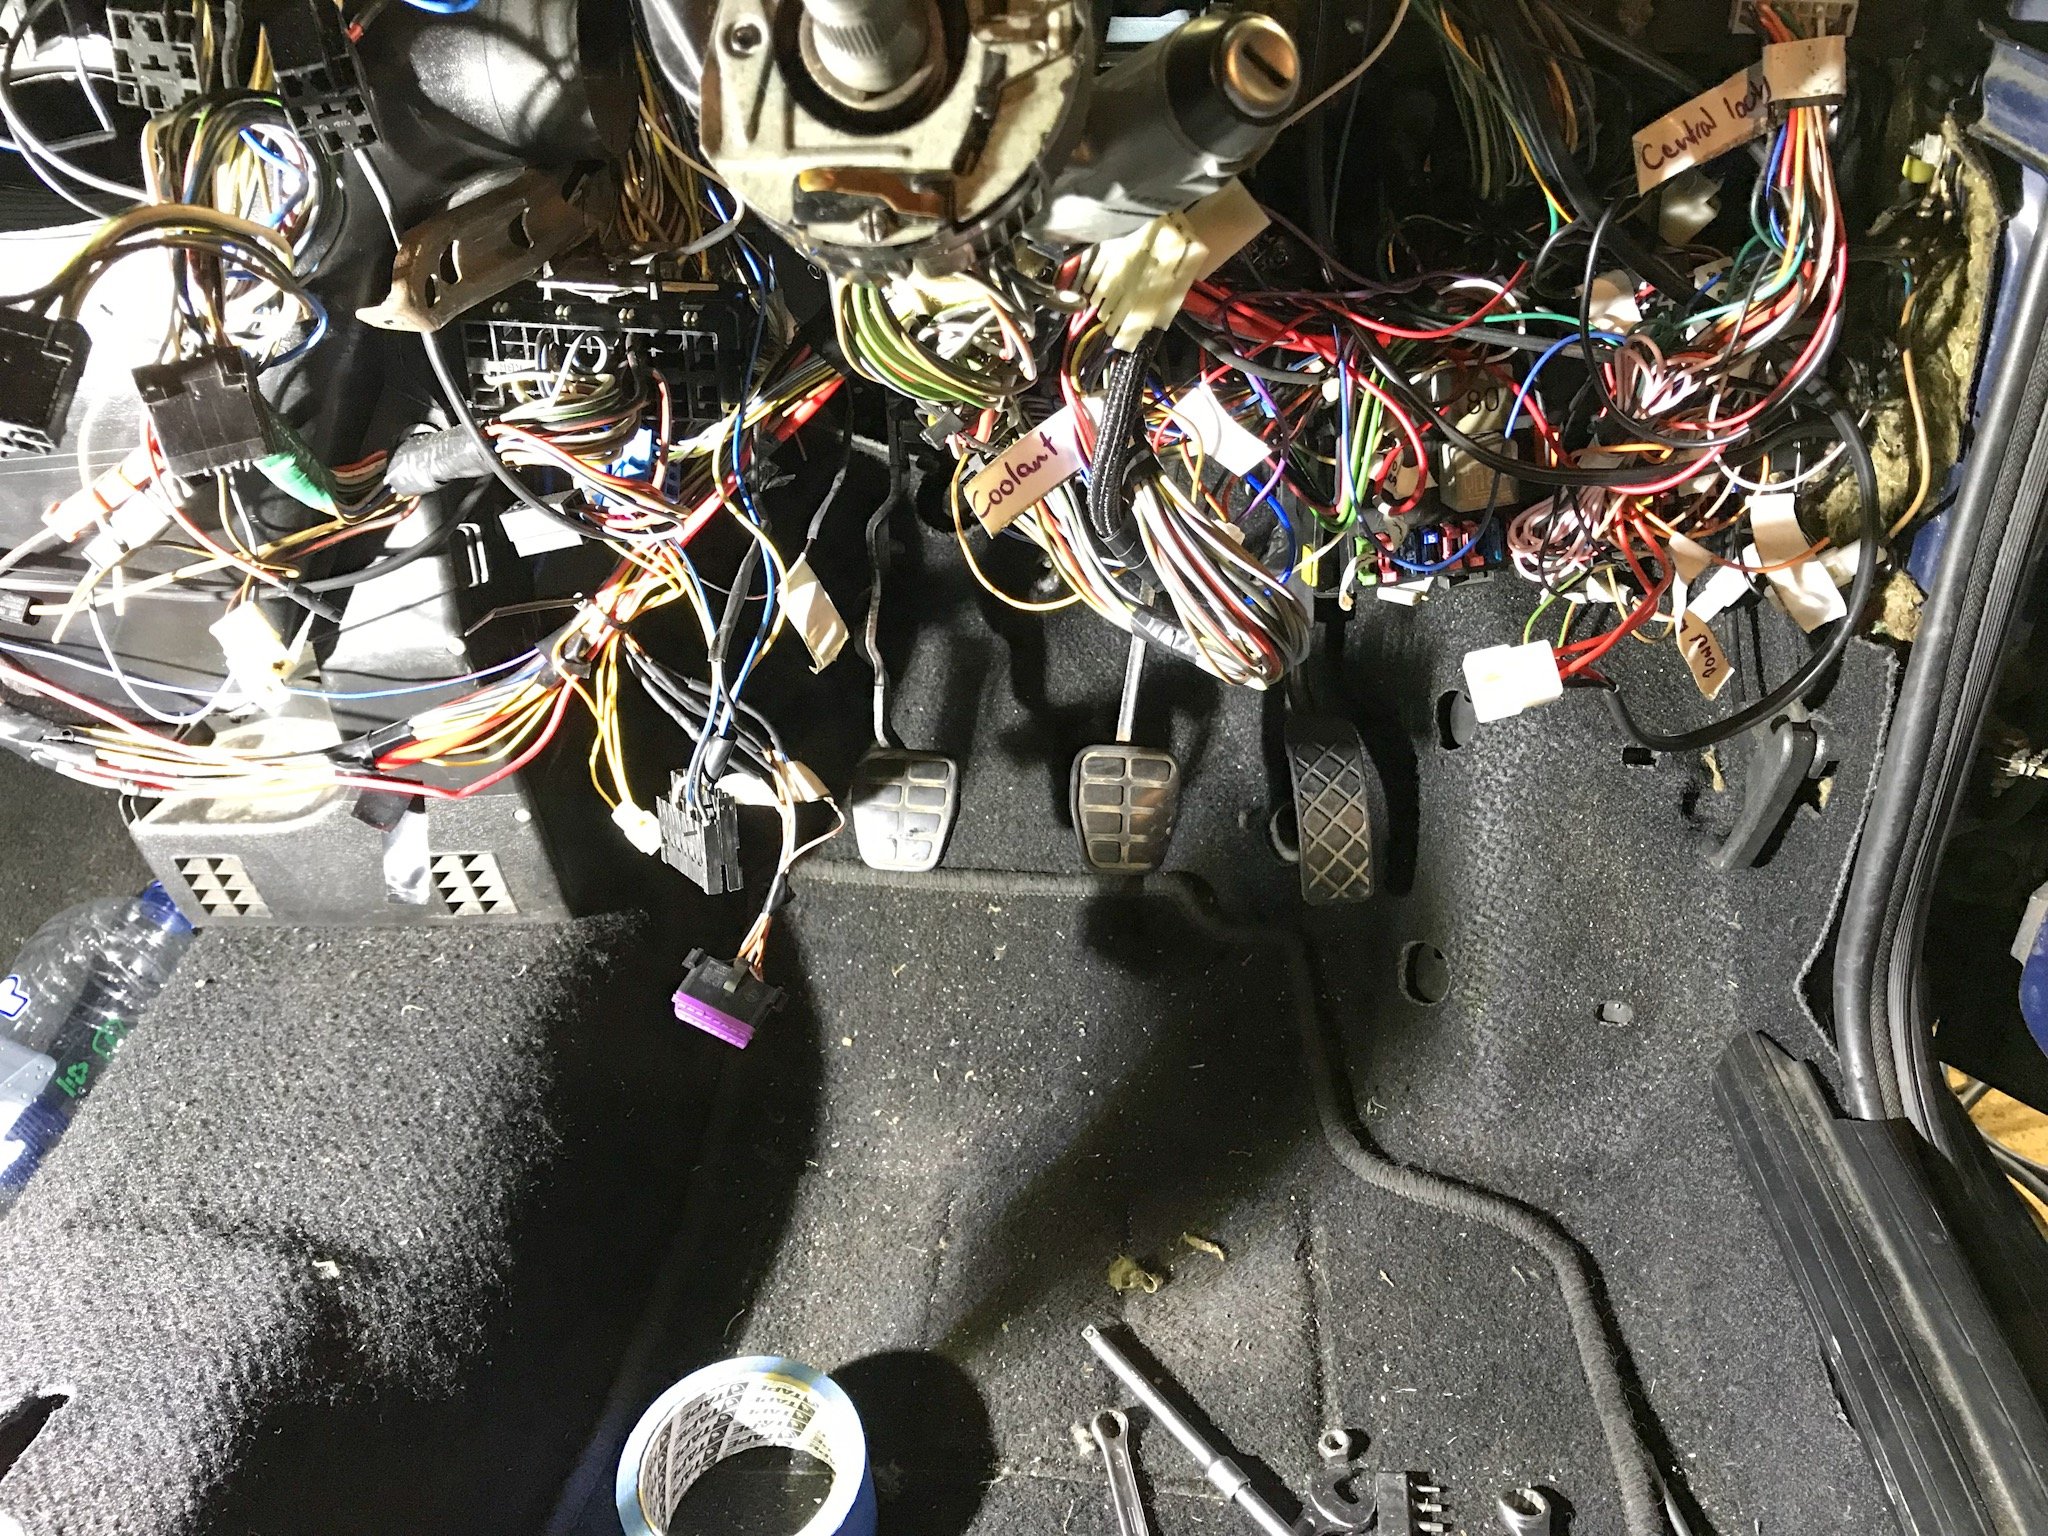
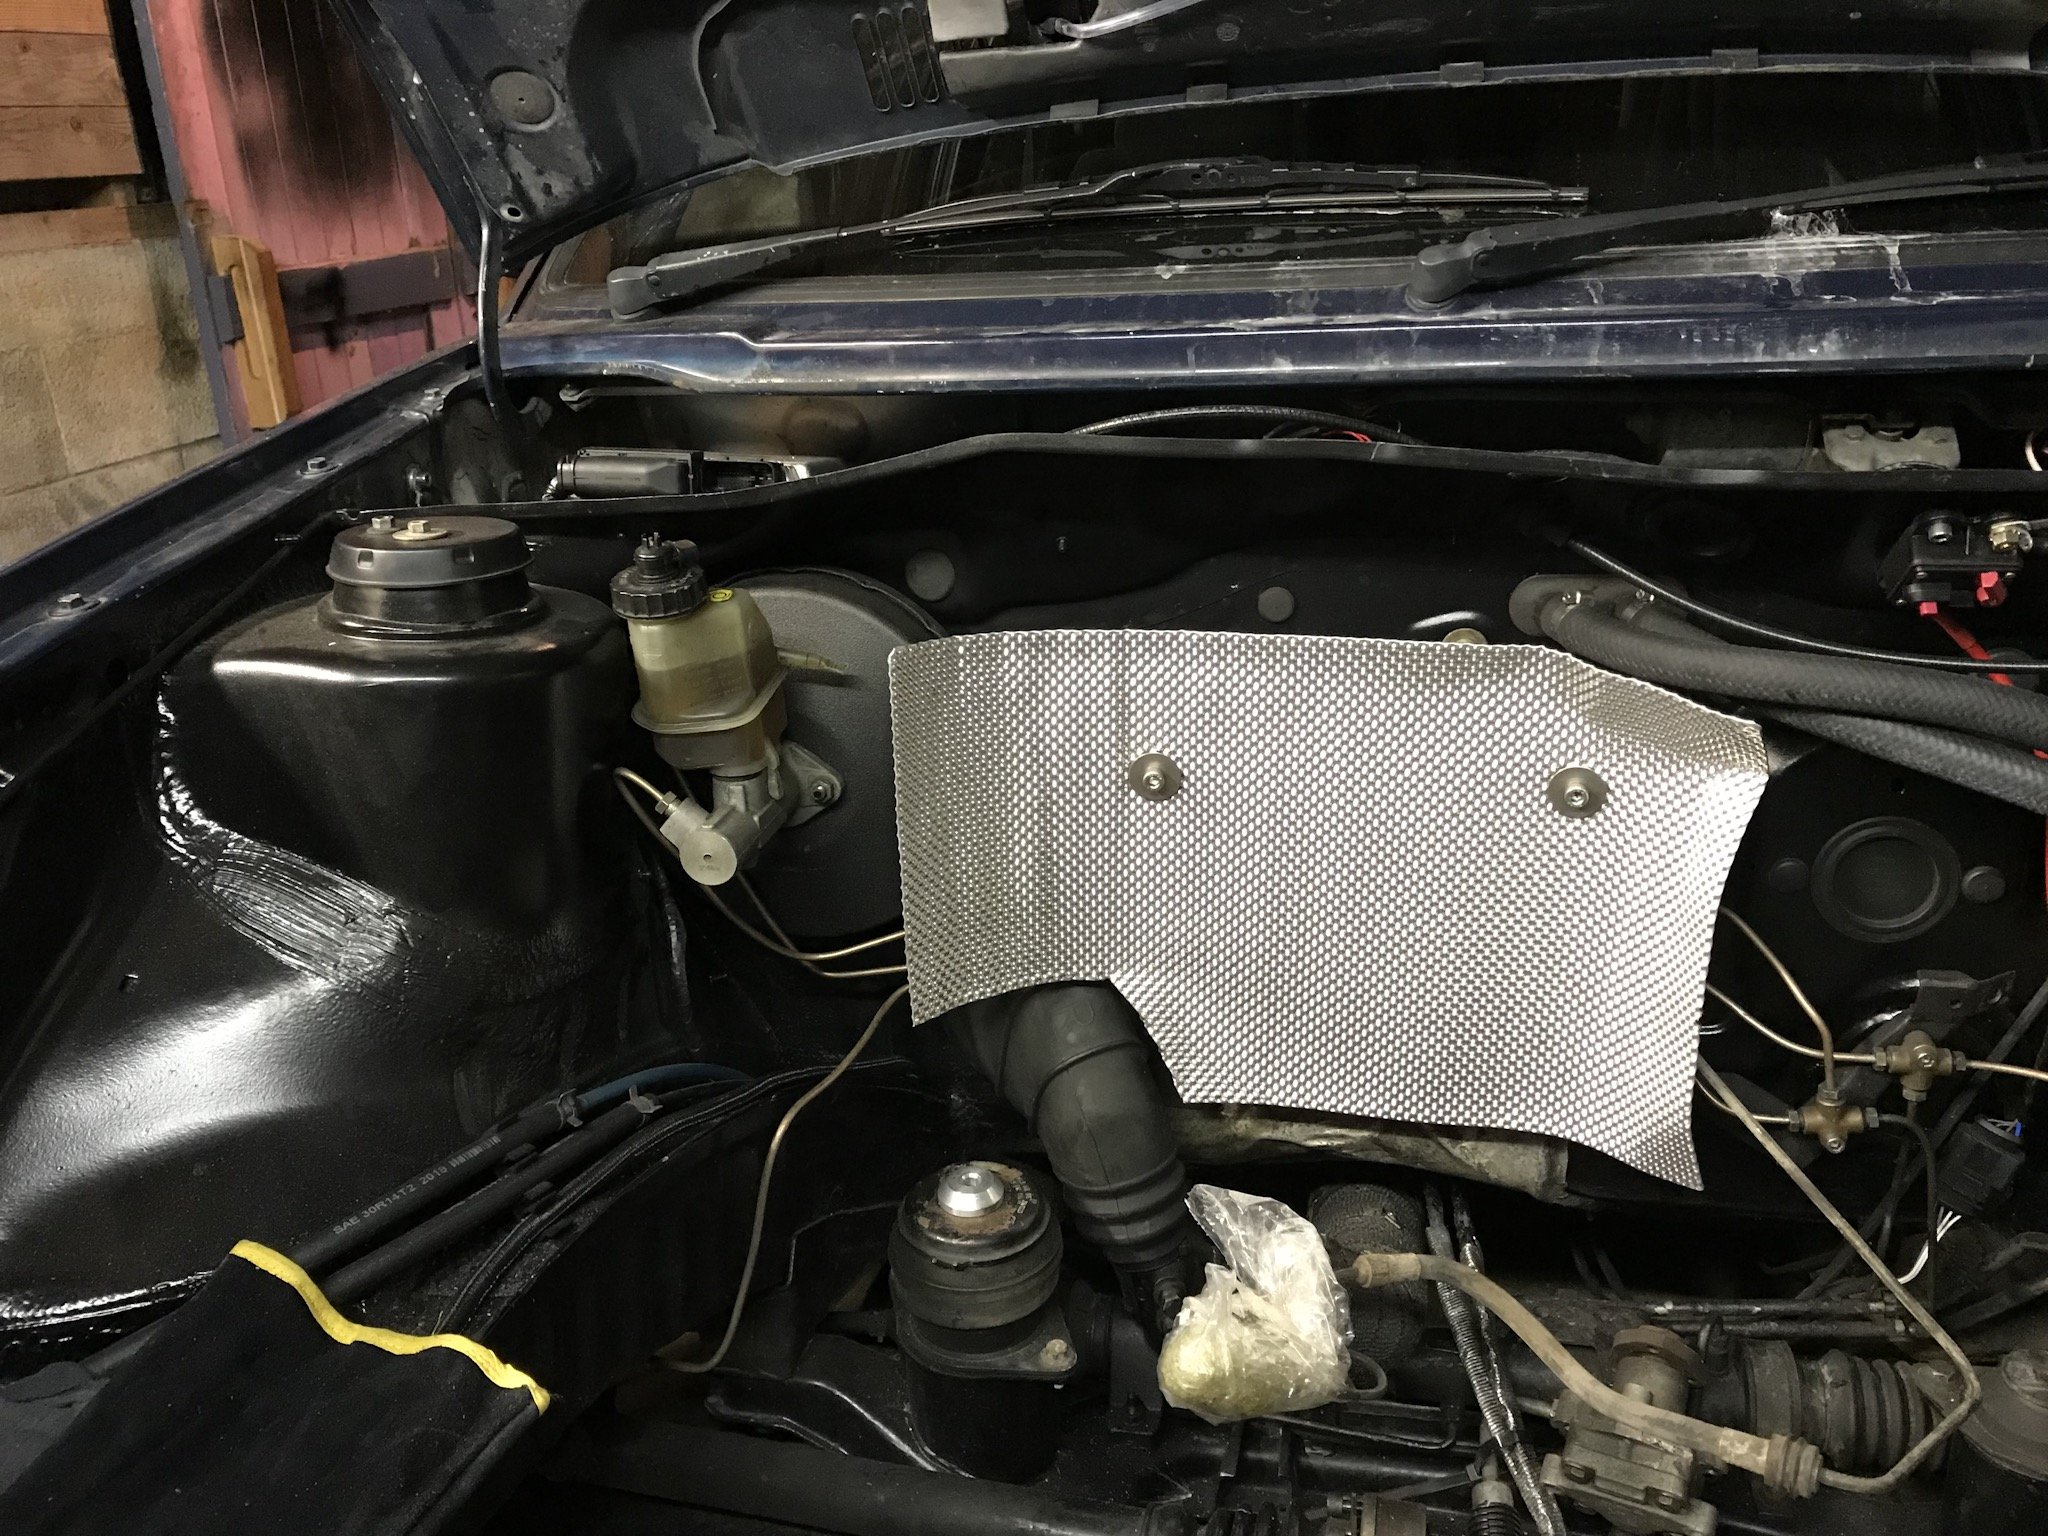
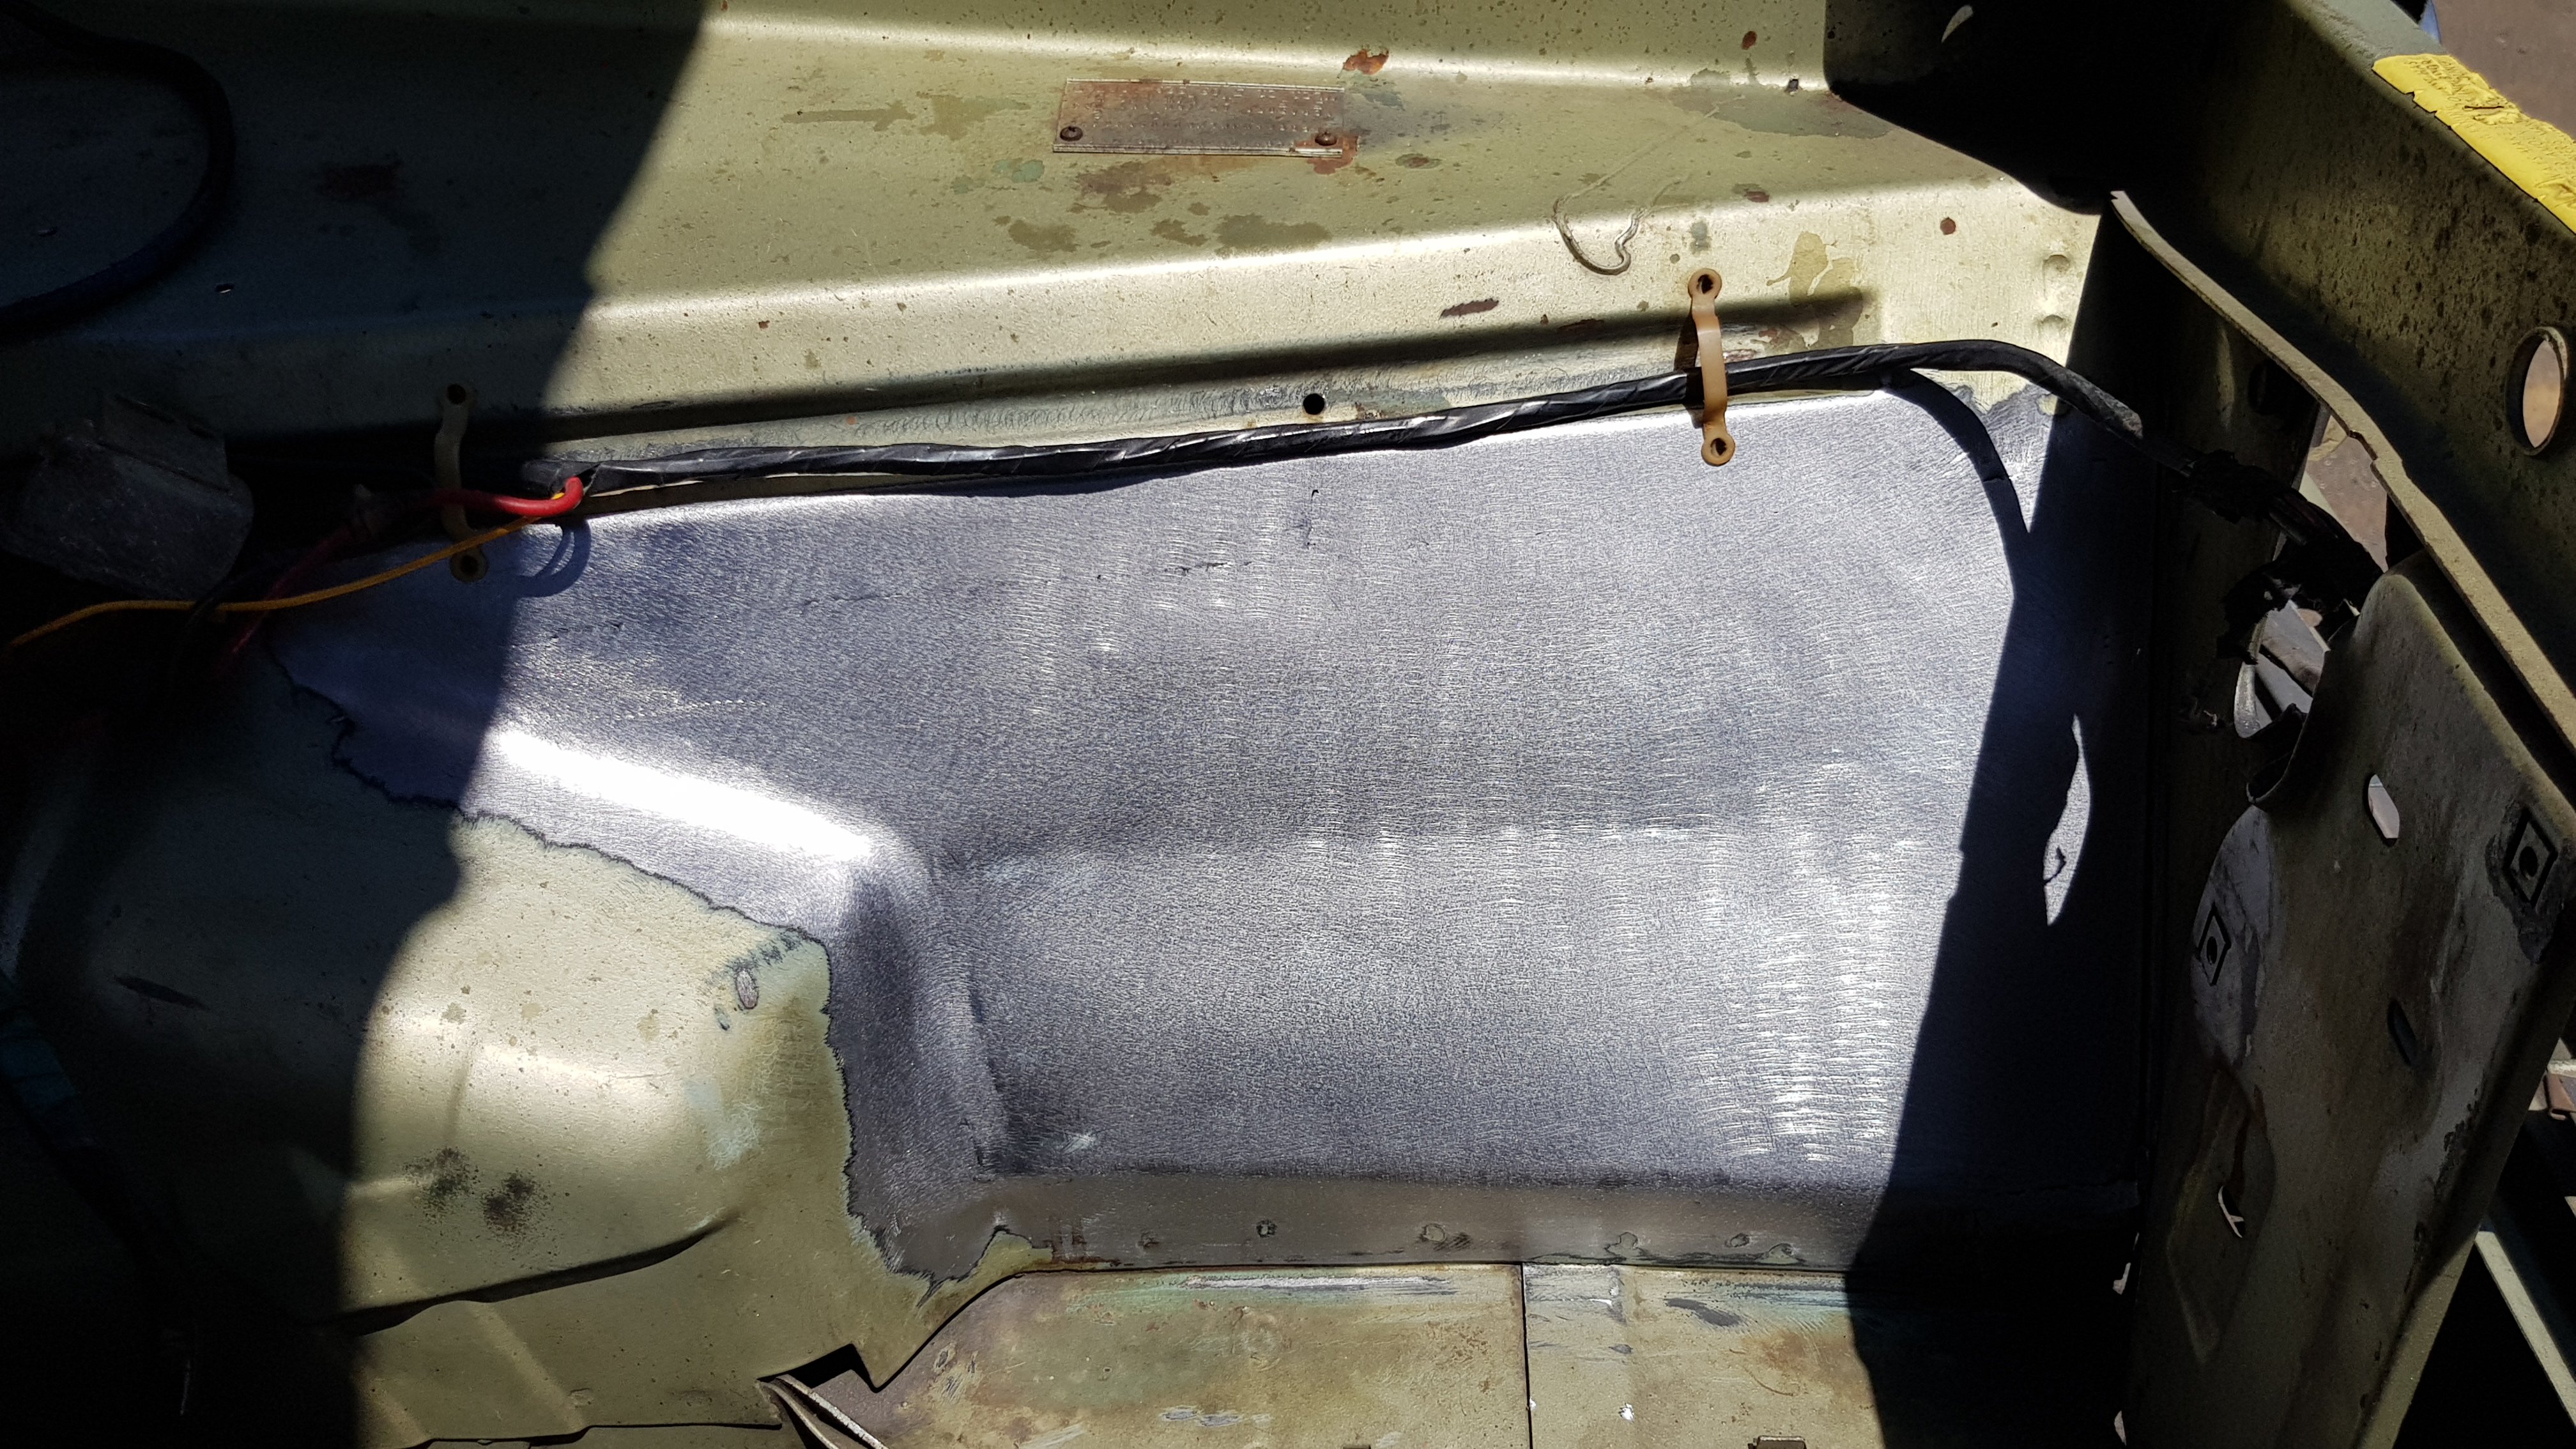
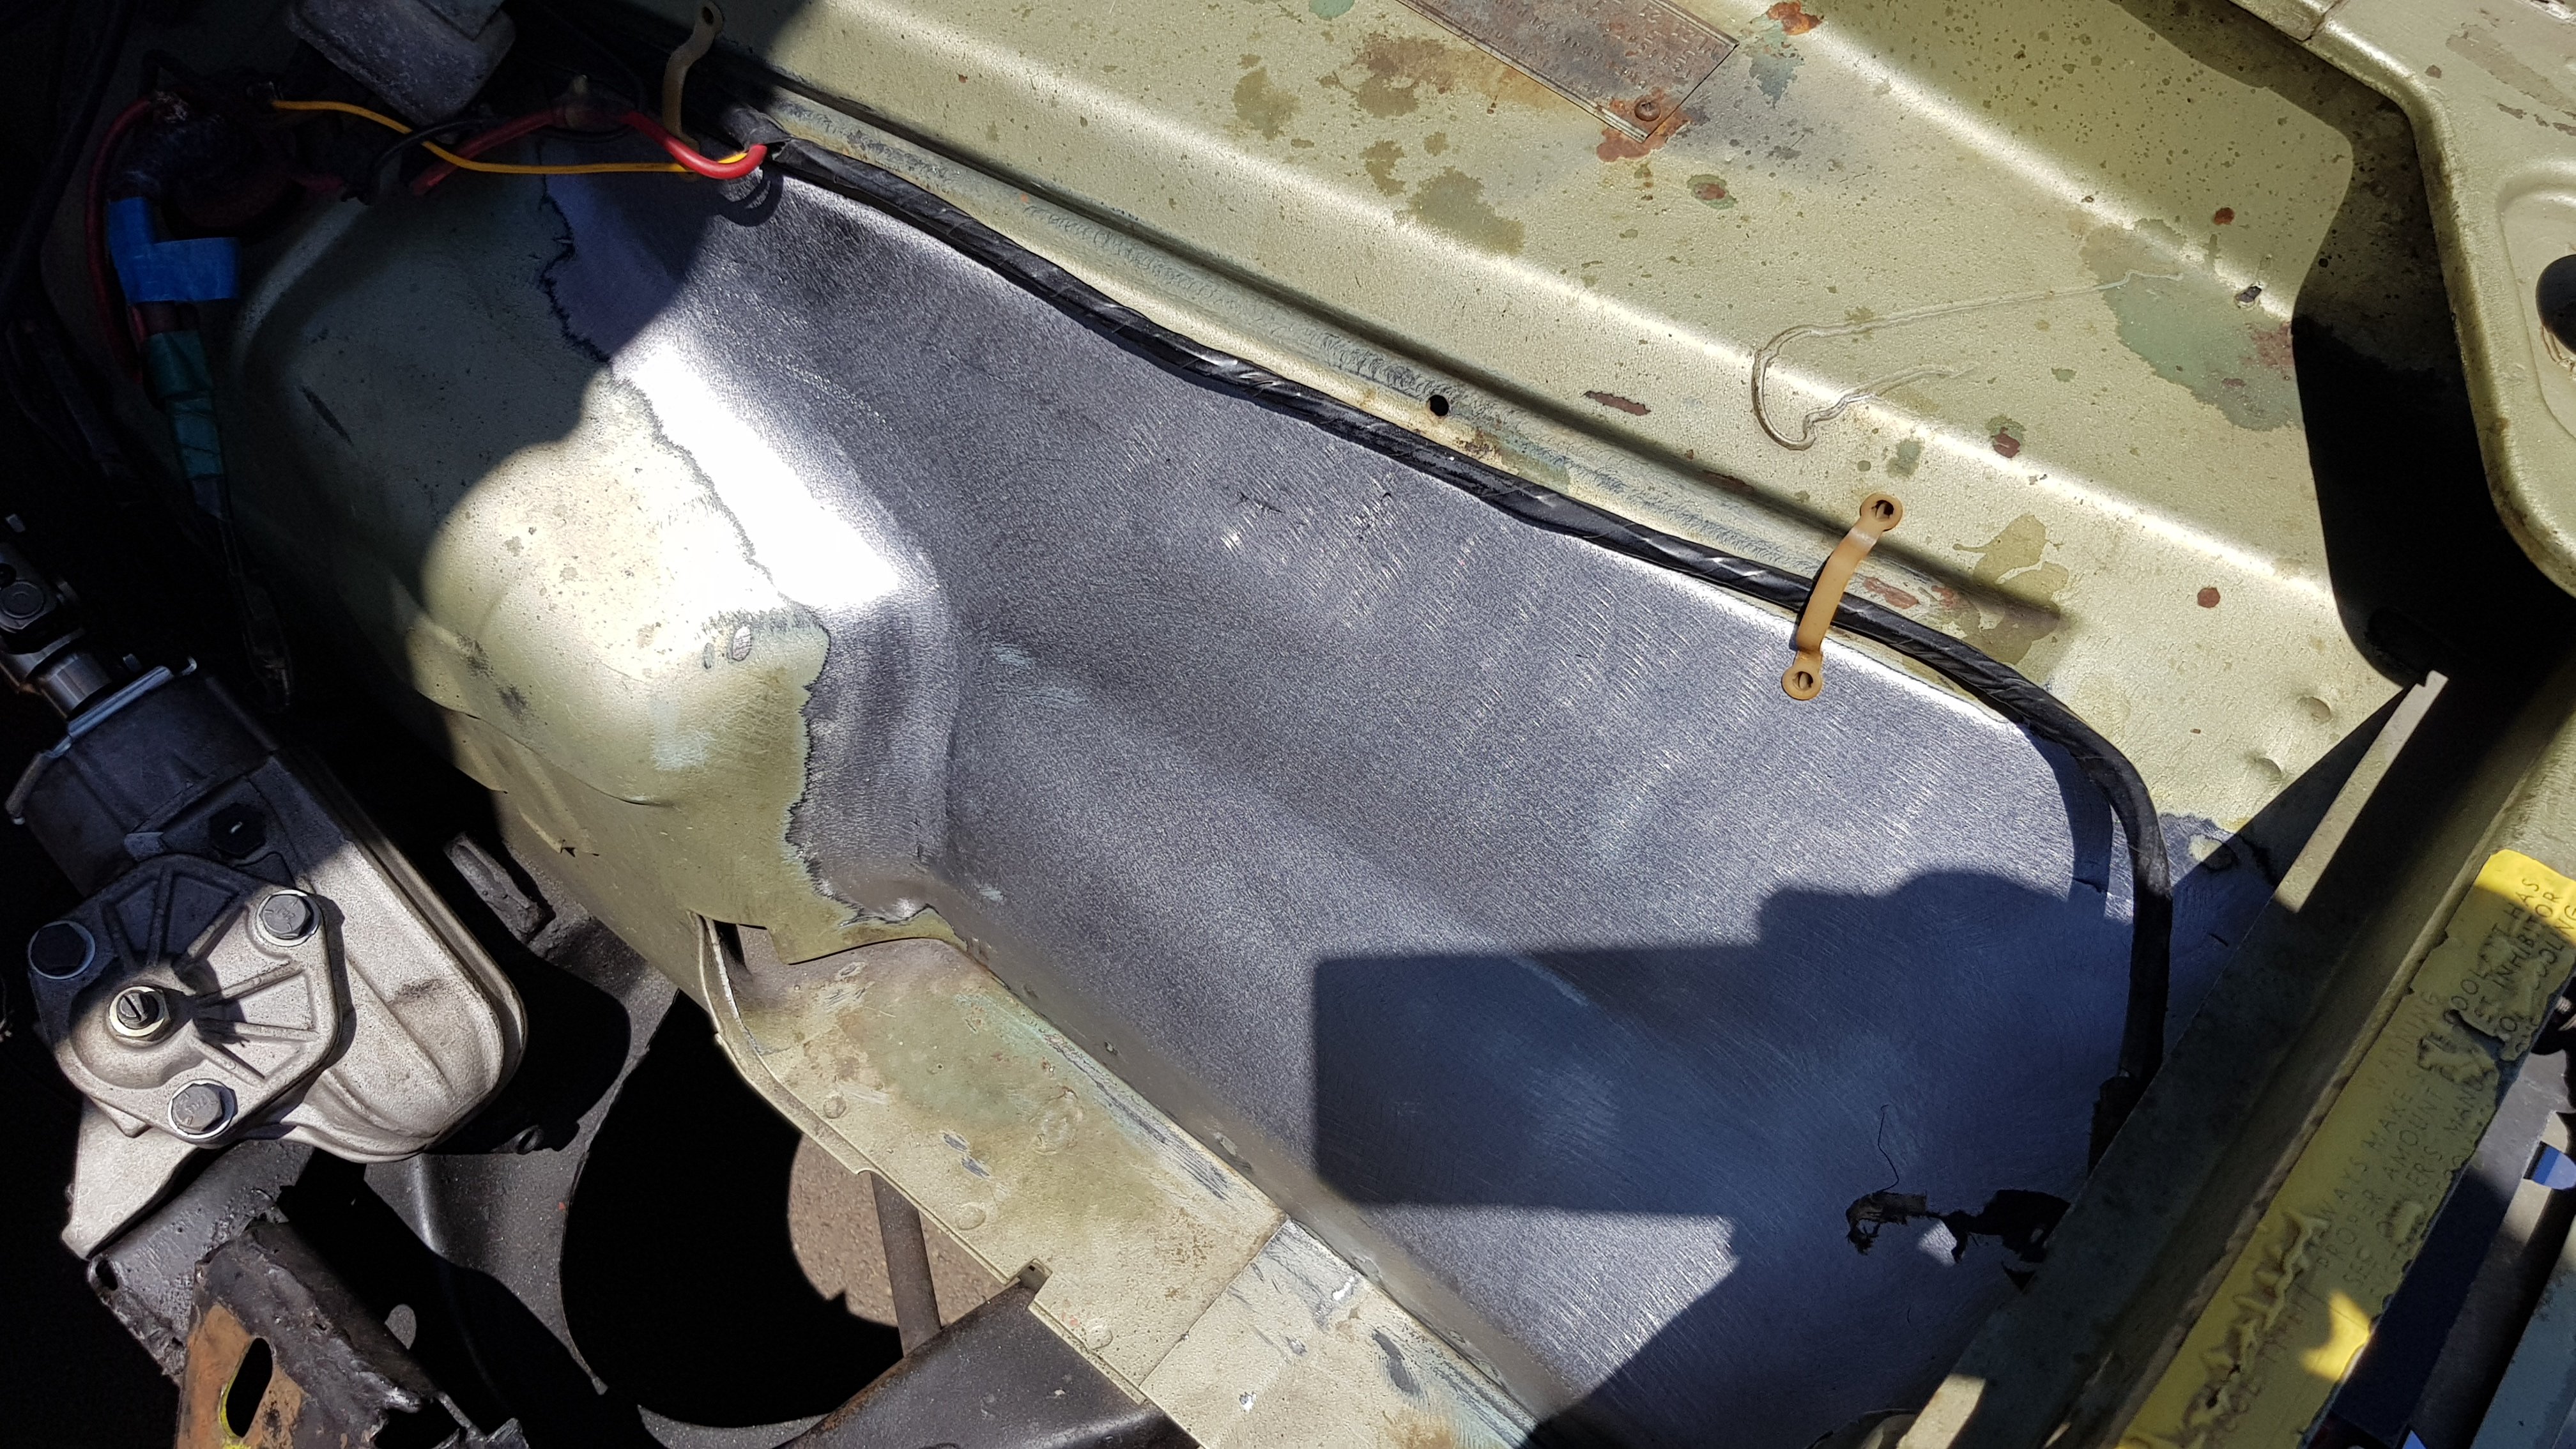
theres a fair amount of beating of the firewall and it was never going to look completely factory but I’m not worried (function over form) on that note I spent a lot of time trying to get my perfect pedal position for some heel toe action as I have to mount the drive by wire pedal to the pedal box again. clamped to my work bench you can only make car noises and pretend to heel and toe for so long before you realise you should get something done. As far as I can see now I’m very happy with the result now that I have it back in, although I really hope I get a good pedal feel. It’s all completely hidden behind the heat shielding cause the exhaust manifold is right there. I think that’s enough for tonight as I’m trying to tidy up an mistakes I’ve made so want to keep on going while I’m fresh. Hopefully the motor should be back in and running again soon.
2 points
-
Photo upload limit....
2 points
-
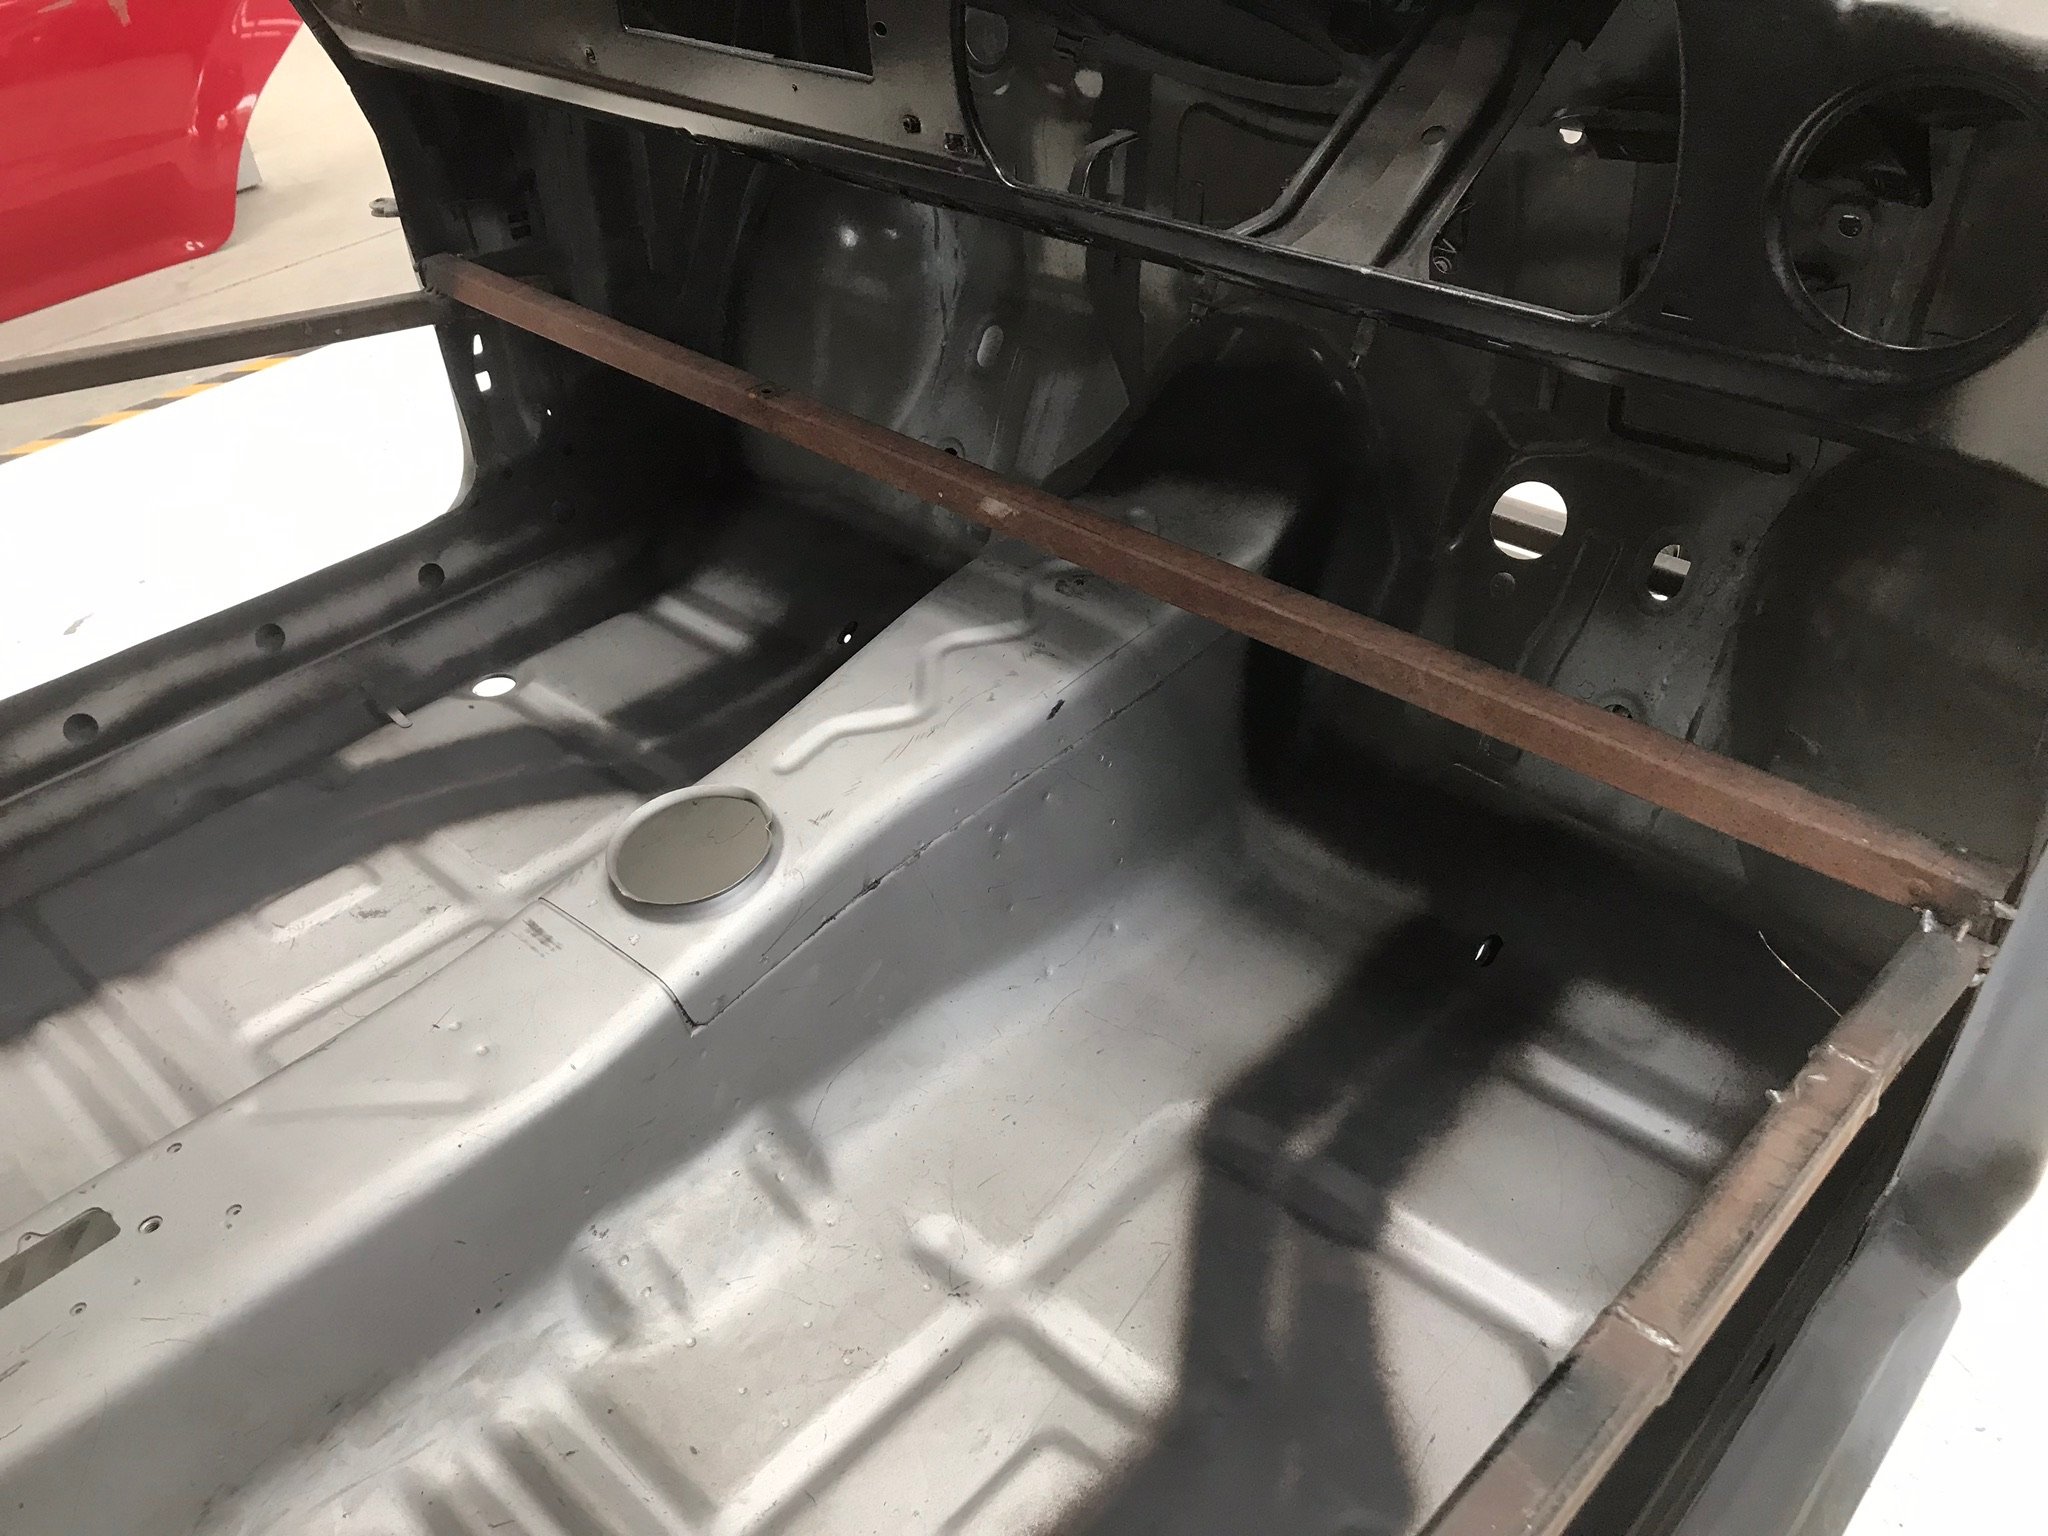
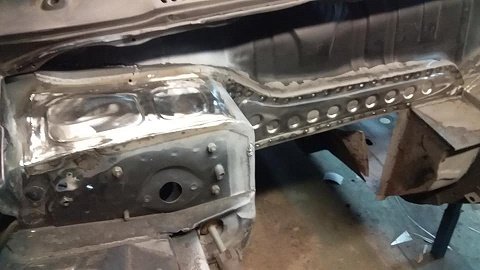
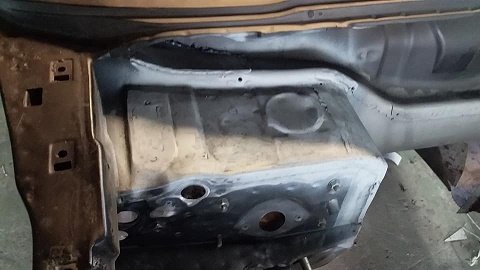
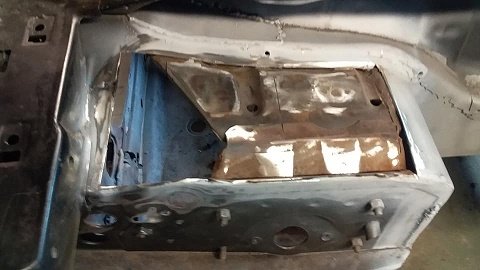
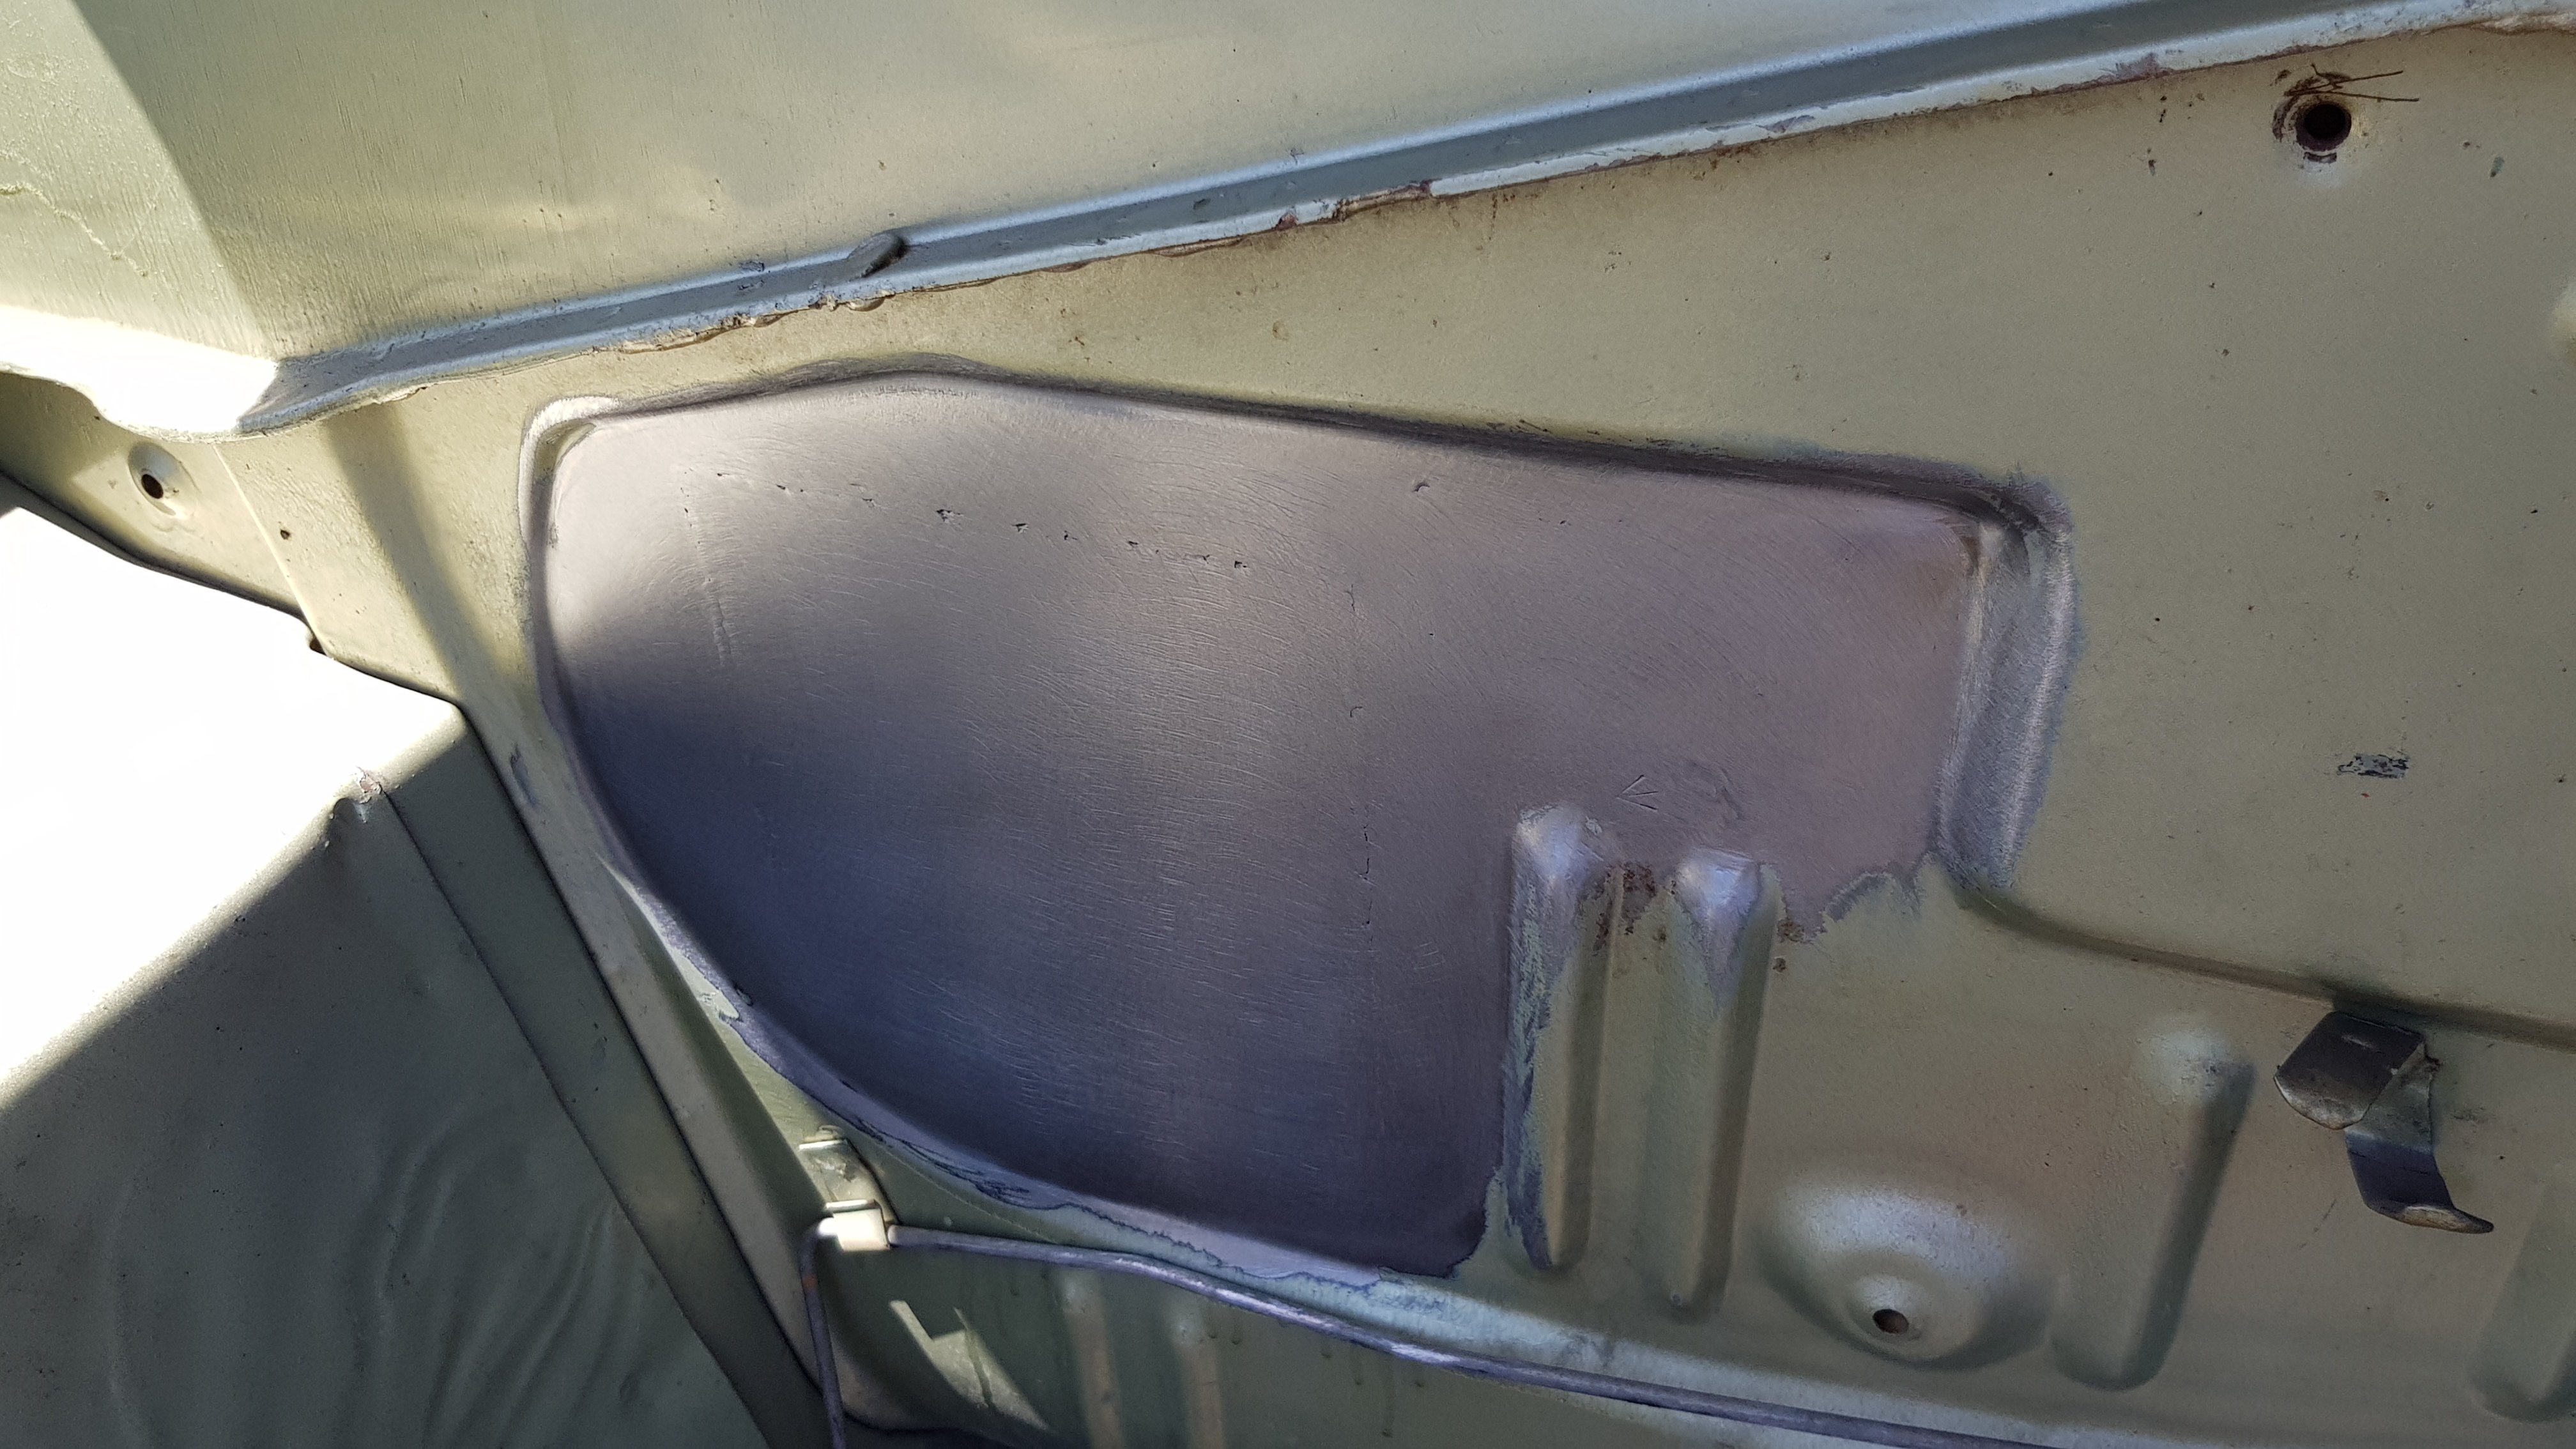
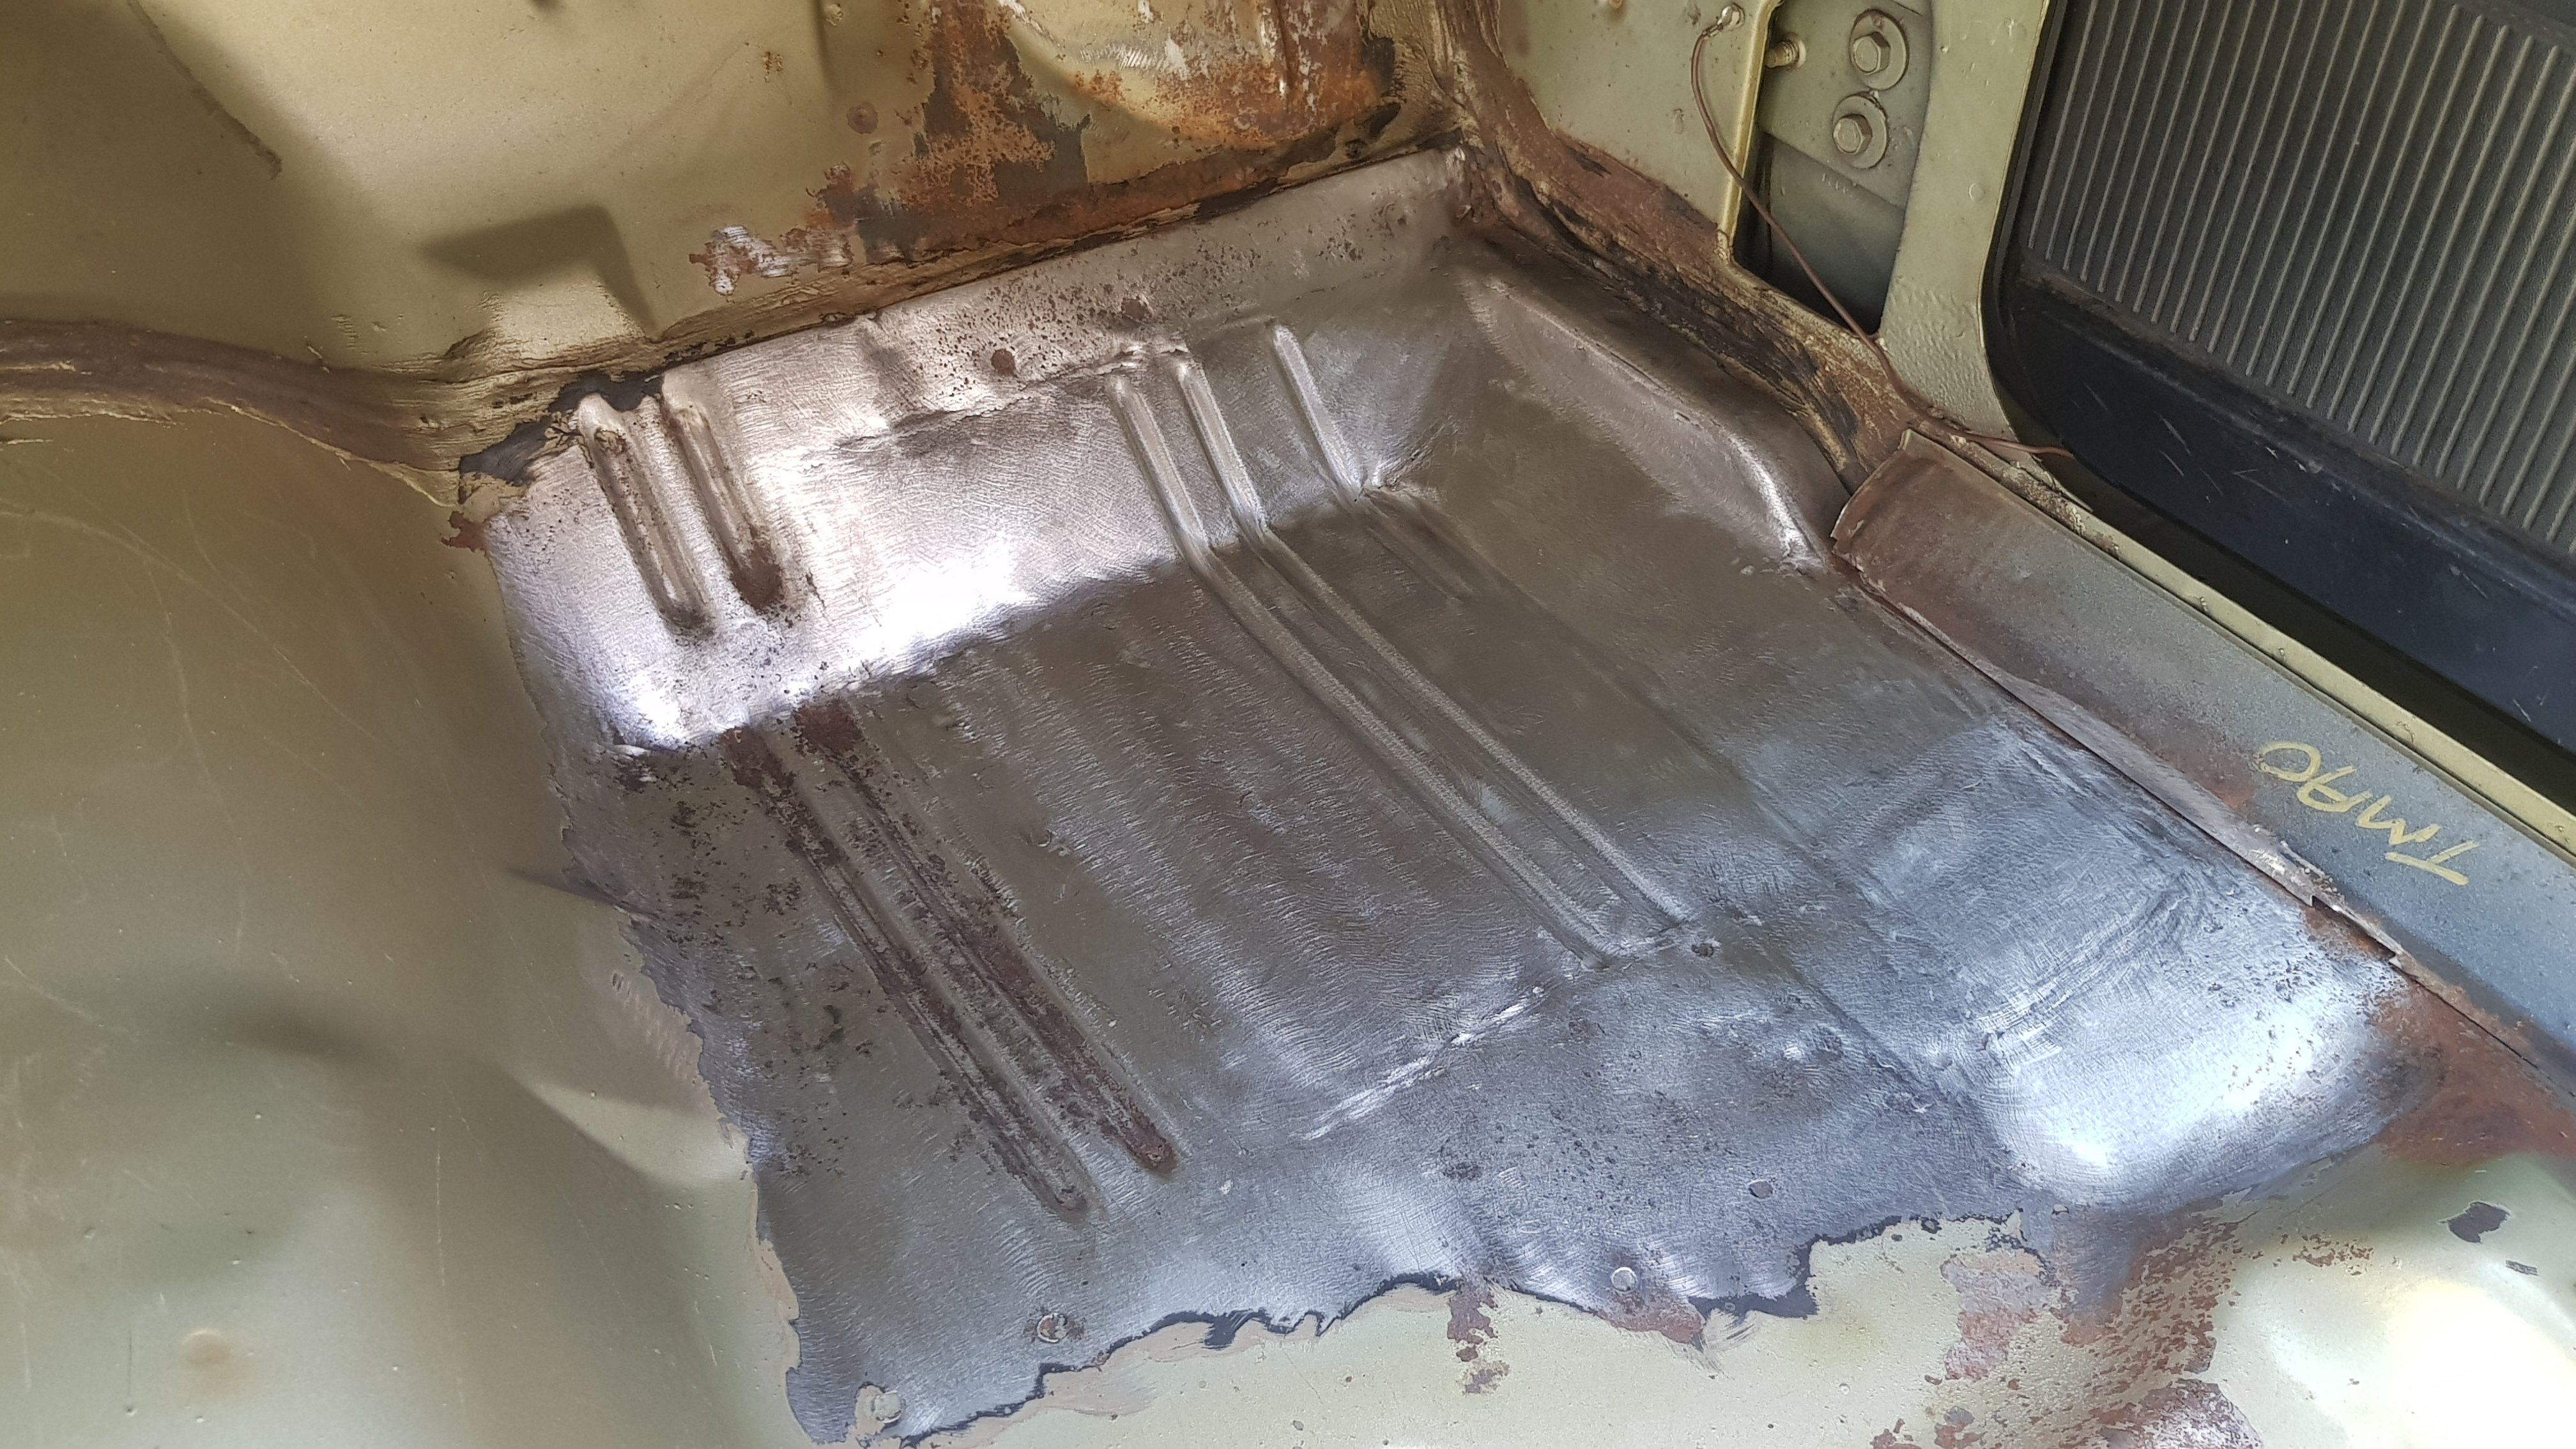
Floor, firewall, sills and door posts so far......
2 points
-
2 points
-
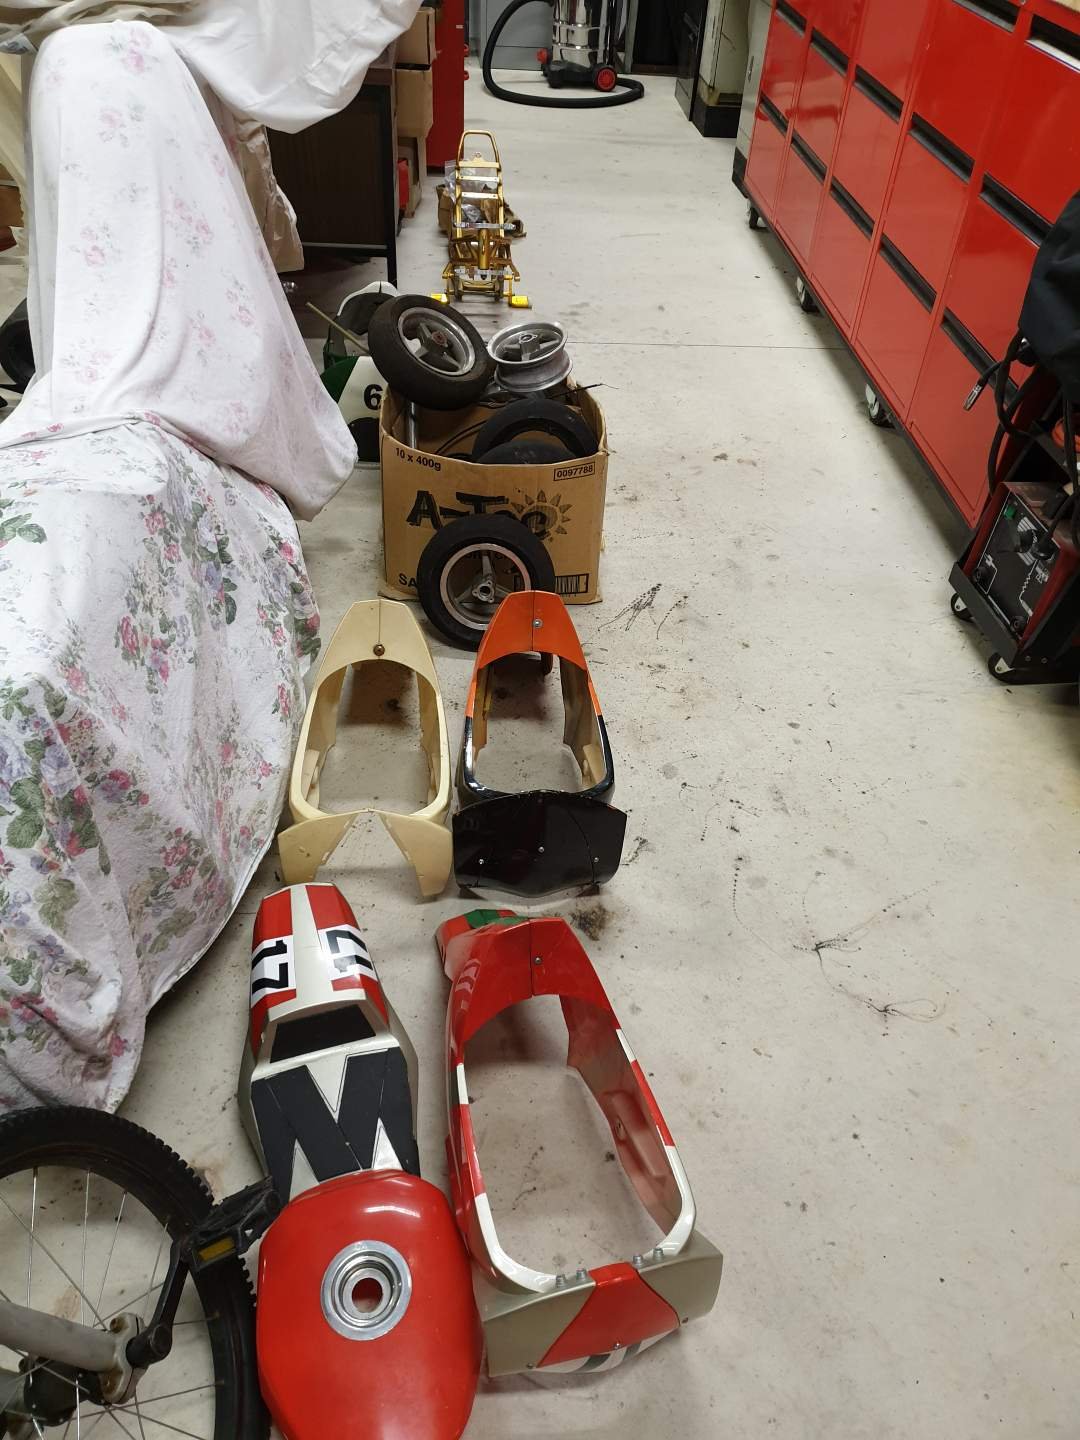
So I wanted to do something about the front guard. Decided I could make the factory one fit.....had so cut a fair bit off so it didn't hit the motor, but otherwise works a treat. Then decided o would try make the leg shield fit. Surprisingly little cutting, obviously had to make a hole for the carb, bit otherwise just a bit of trimming for the motor and exhaust. Super happy with how it looks now, the frames on these don't suit the stripped down look in my opinion. Oh and also put the chain guards back on.
2 points
-
@ajg193 am I doing this right?
2 points
-
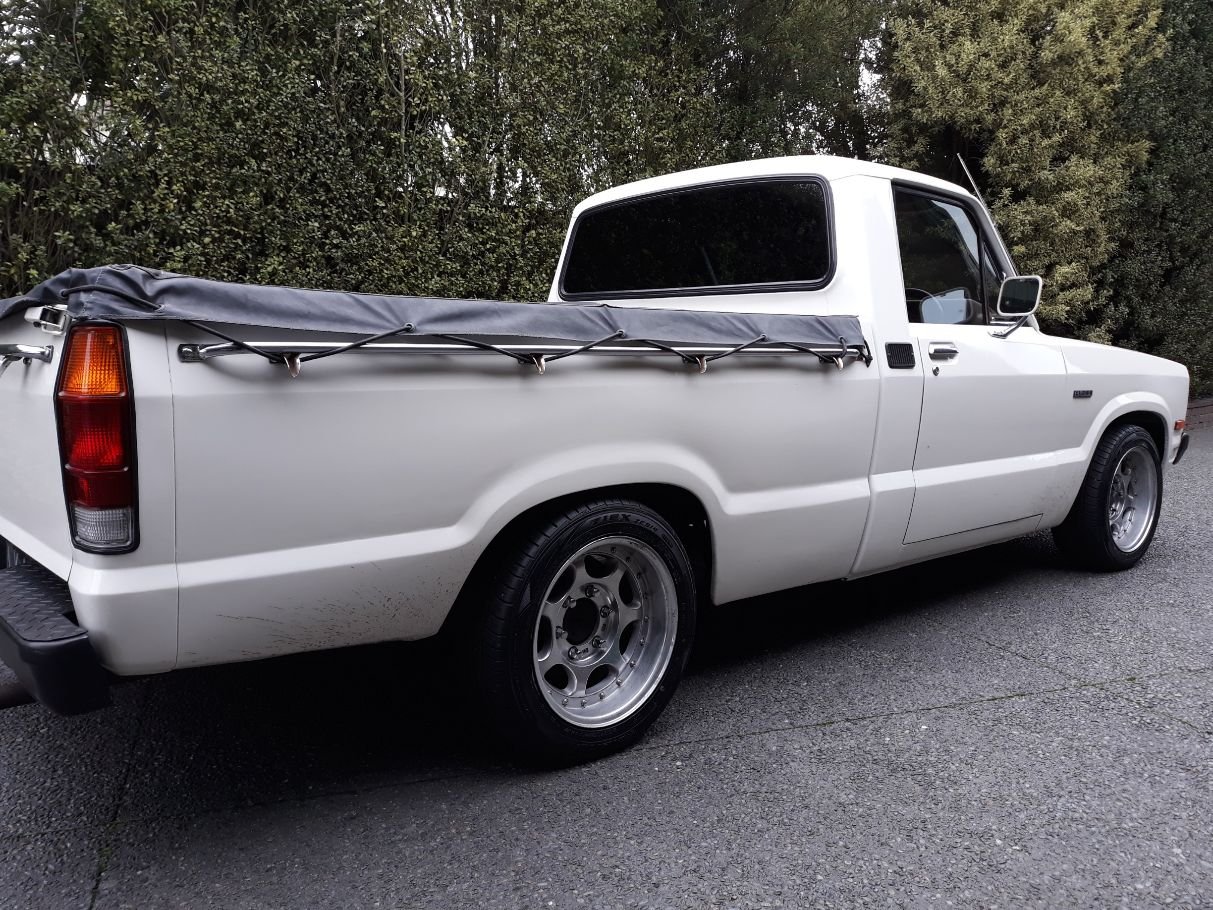
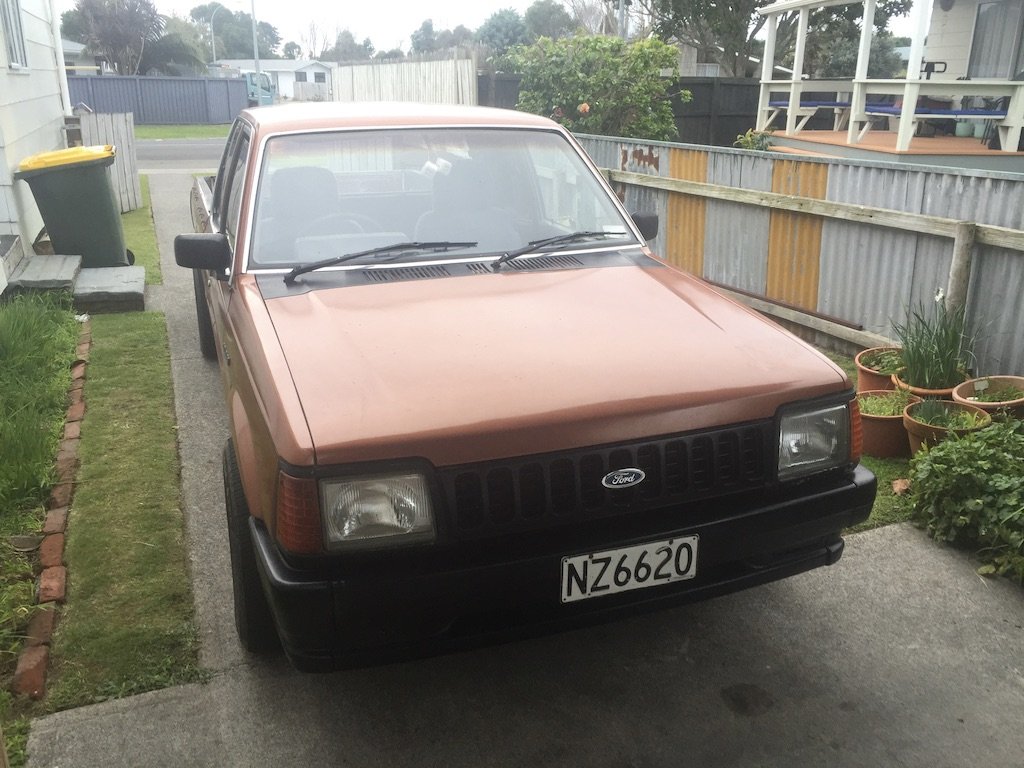
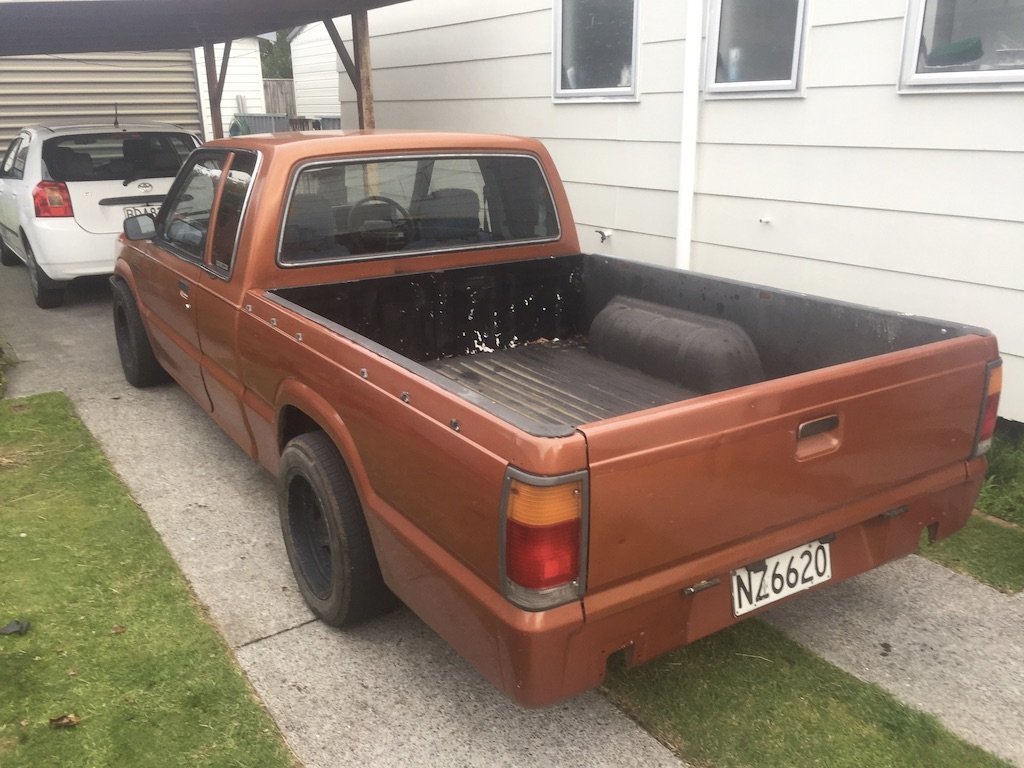
Hey Team. Been AWOL quite a long time. Had some serious hickups in life that slowed me down and forced me to let go of my last project. a mk3 Ford Cortina. And frankly, I went through a pretty nasty period of depression. But you can't keep a good guy down. And you won't stop a grease monkey eventually getting covered in grease. Around a month ago, My Daily Driver 2000 Ford Mondeo slipped a tooth on the timing belt on the exhaust cam, and did some bendy valve stuff. A friend had this sitting in his hay shed taking up space. And Rather than try and rebuild the Mondeo motor (Which had only done 30,000k since I did a rebuild on it anyway) I jumped at the chance to get into something RWD, with a carb, and a tray. Repainted sometime in its past, But rather neglected of late. I saw this as a chance to tinker with something oldish again. Fresh Battery and some fuel and she fired right up. She didn't sound right, but she did start. Got her home running like a bag full of assholes. Popped the bonnet to find green alien blood pretty much pissing out the Number 4 exhaust. (Sigh... Headgasket) So.... List of things on the to do list... Head Gasket (Or just pull the motor and rebuild the whole thing, It's done 300,000+ k) The steering wheel is toast. The Fuel Sender is bung (This is pretty common in these from what I've read) The tray needs that water trap bedliner scrapped and a spray on liner done. The offset on those rims is FAR too positive. Add more tie down points. Fix the Fuel door Stupid little interior blanks with holes drilled in them need sorting Screws missing in the interior. Giant speaker holes in the door cards. Apply power steering (If I can find the stuff to do it) Headunit with bluetooth. Other minor cosmetic things. Sort the suspension. Answer every question/problem in life with "Just chuck it on the back of the ute" Create discussion thread.
1 point
-
I'm extremely disappointed that you're not fitting knock off chinese Bride seats, procured off a sideways hat page on farcebook. You'll never be able to rip.it like Lil jonny without them. you'll likely also not suffer back injuries from broken seats either.1 point
-
Can we goto las vegas for dessert?1 point
-
Faaaaaark @ that crash. Seeing that only goes to put another nail in the coffin for our van. Ours is a 4wd hiace too. It puts the willies up me when we find a tourist coming round a corner on our side so I tend to drive it in super slow cautious mode. But not much one can do when a drink idiot crosses a centre line etc. We've been planning a replacement for many years now, similar to what you're doing but with an old Bedford truck cab. Anything that ends up higher and with an engine in the front eh. I hope your back recovers awap and it all comes right. Really interested to see your tiny house build. It's certainly something we'll see more of as house prices get ever more ridiculous eh!1 point
-
Really like working on bike motors, don't need lifting gear to get all the bits off!1 point
-
Ok the 5V takes 5.3L, no info on a 4V though but that should be on the money. 20w50 apparently.1 point
-
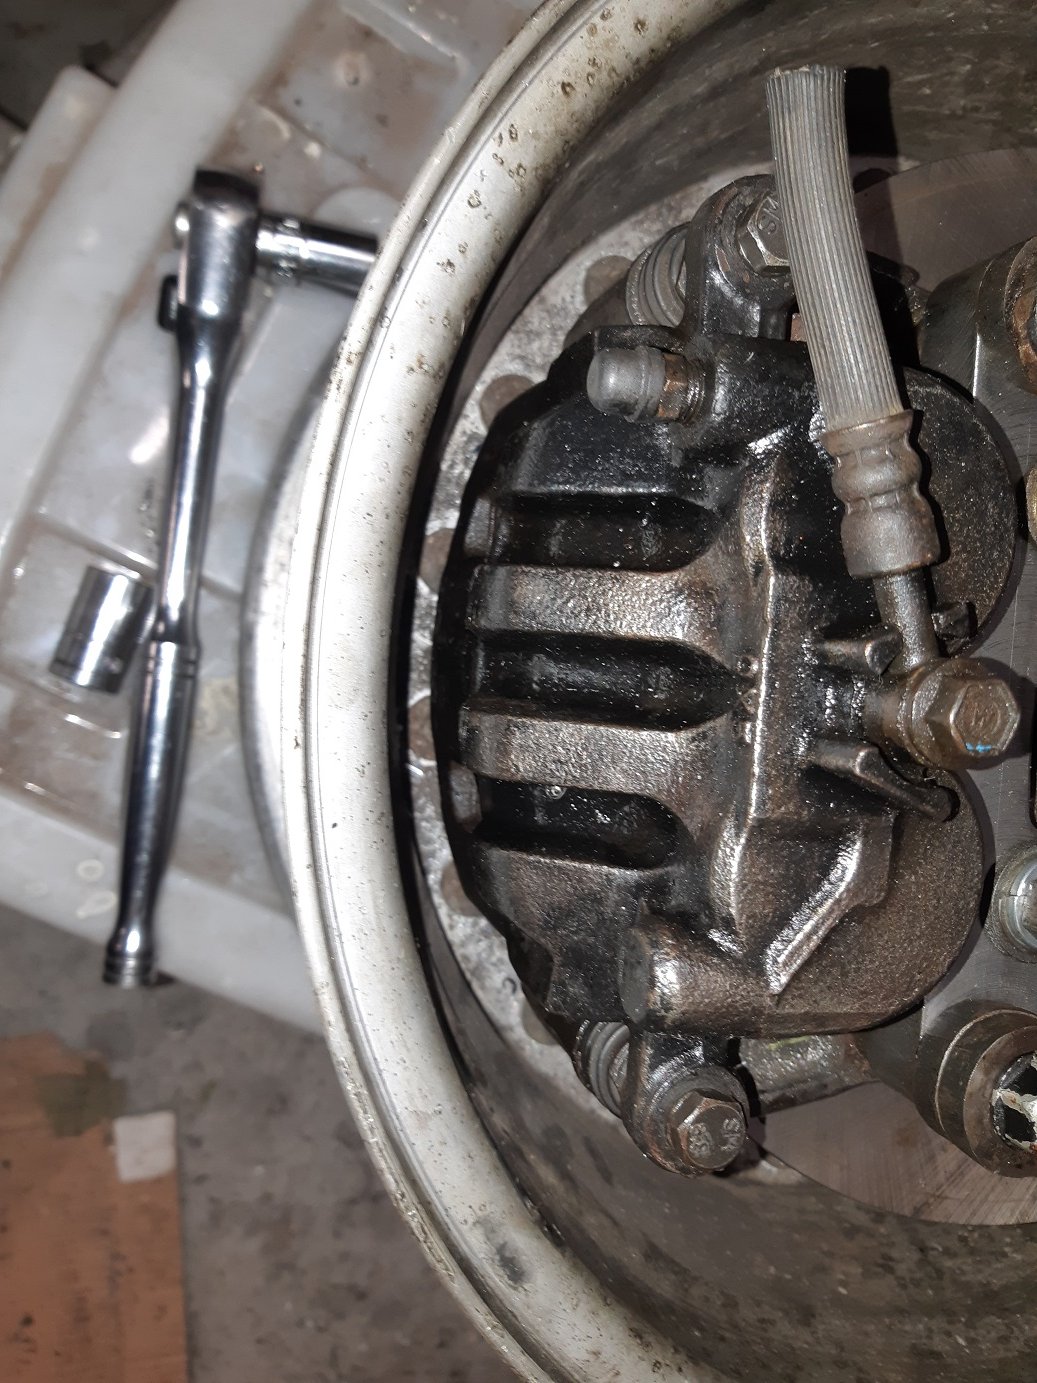
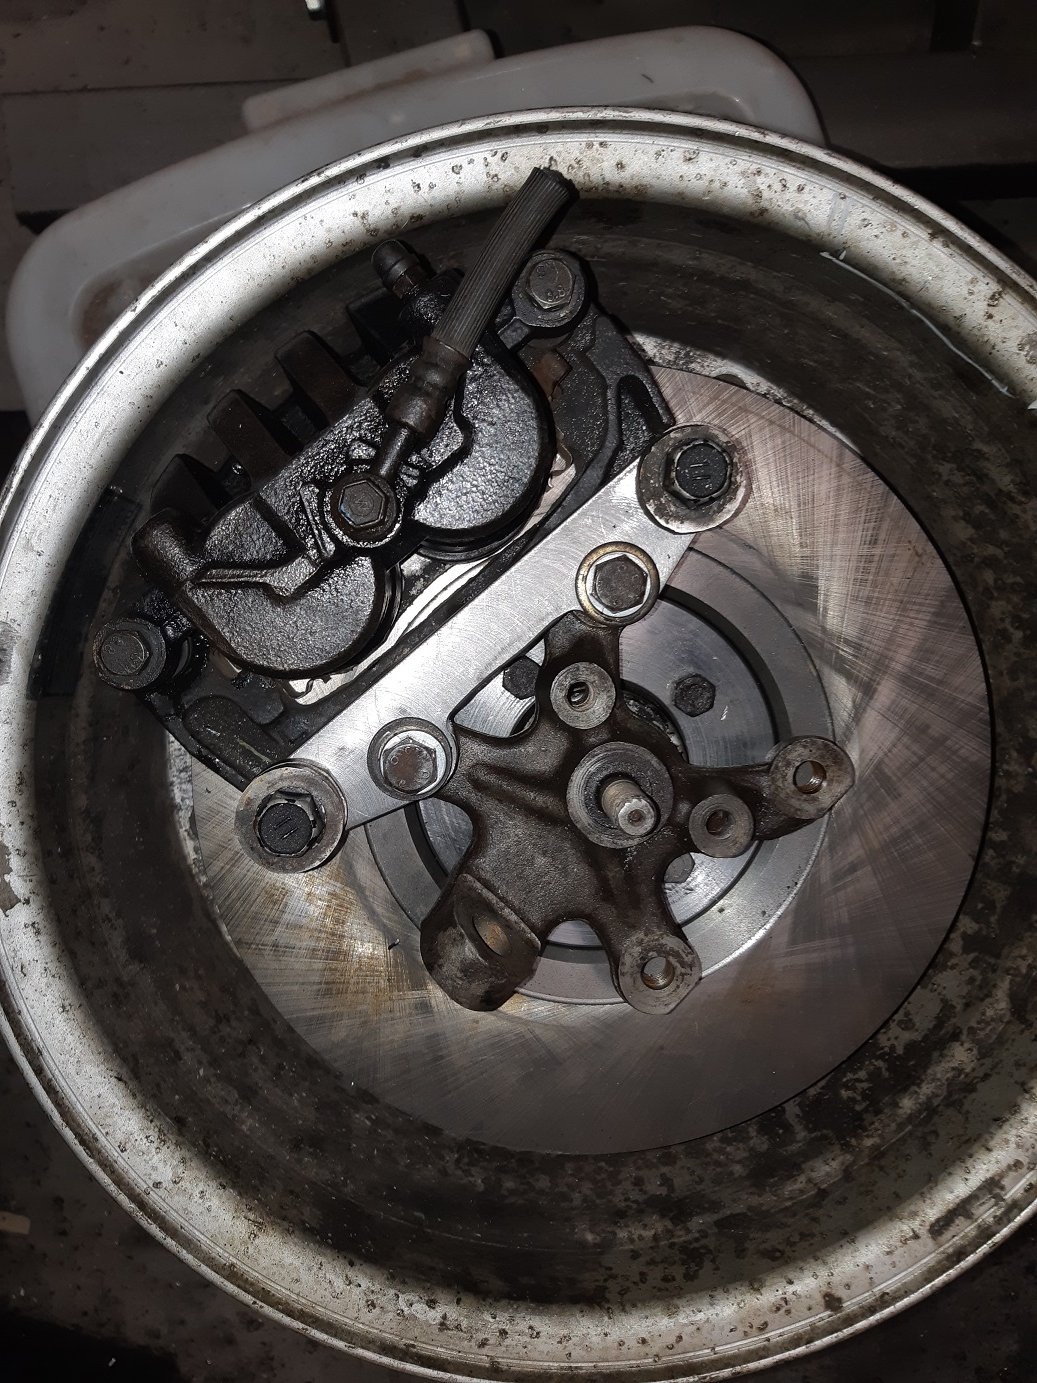
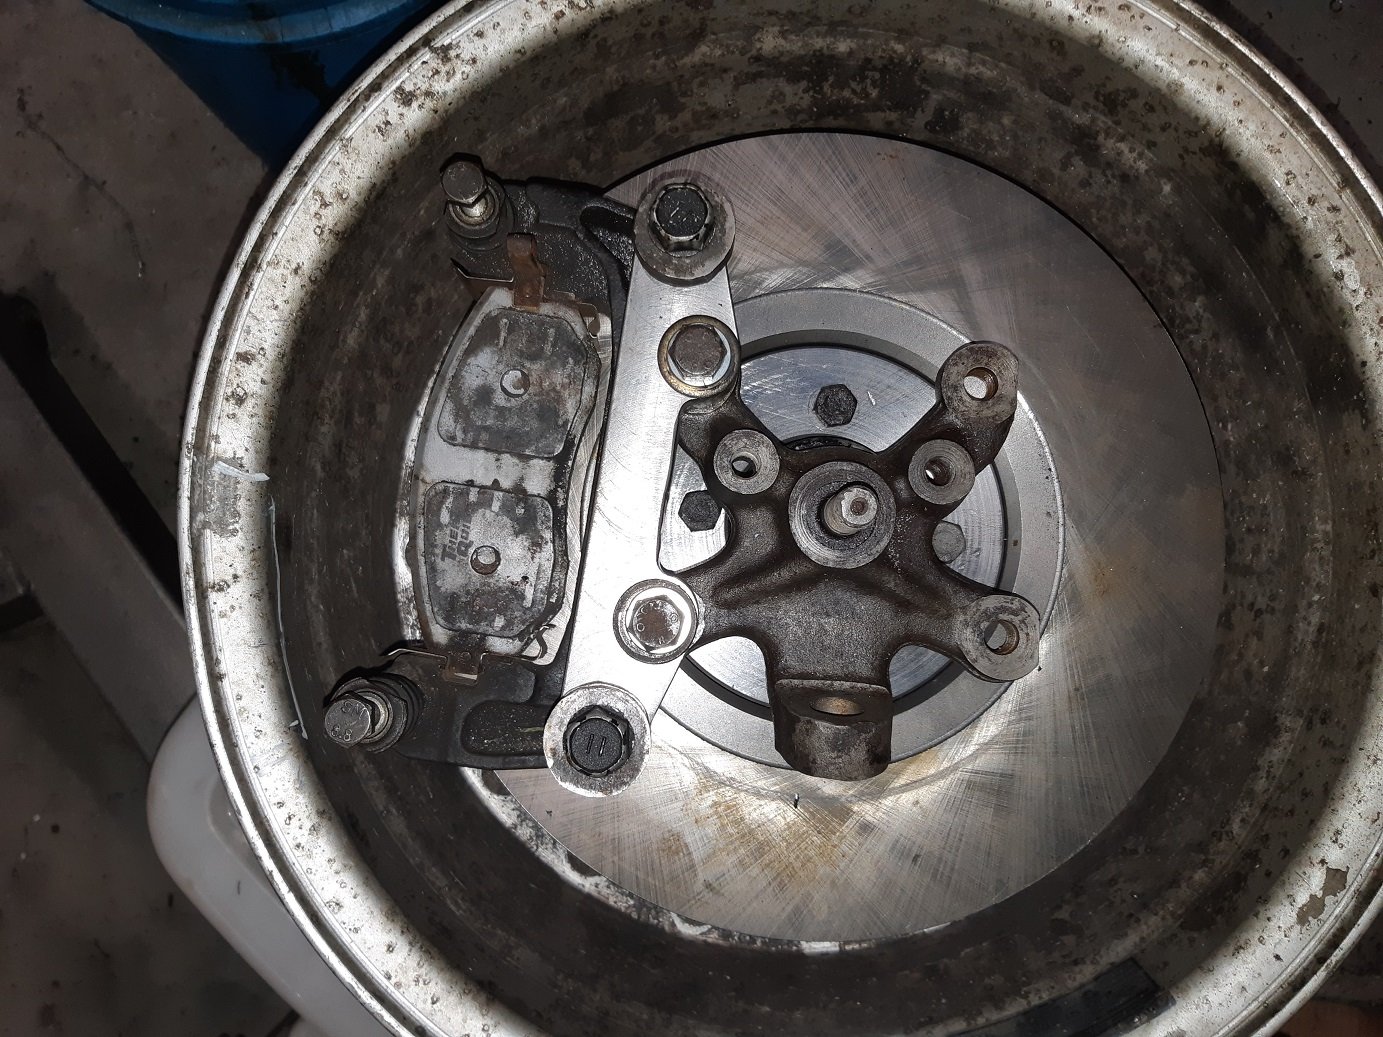
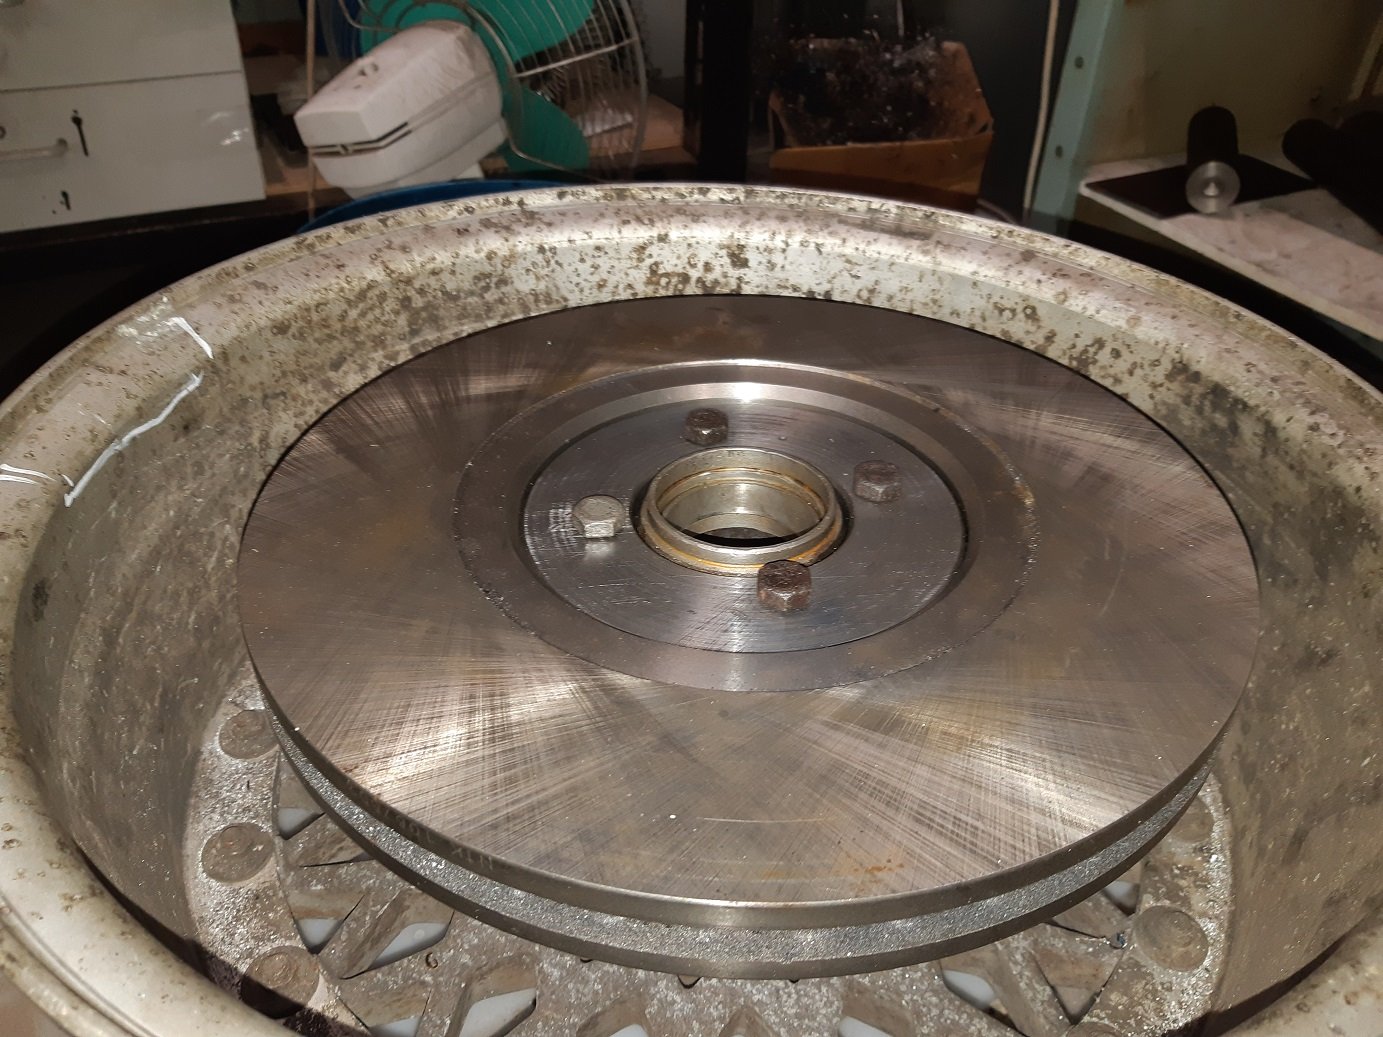
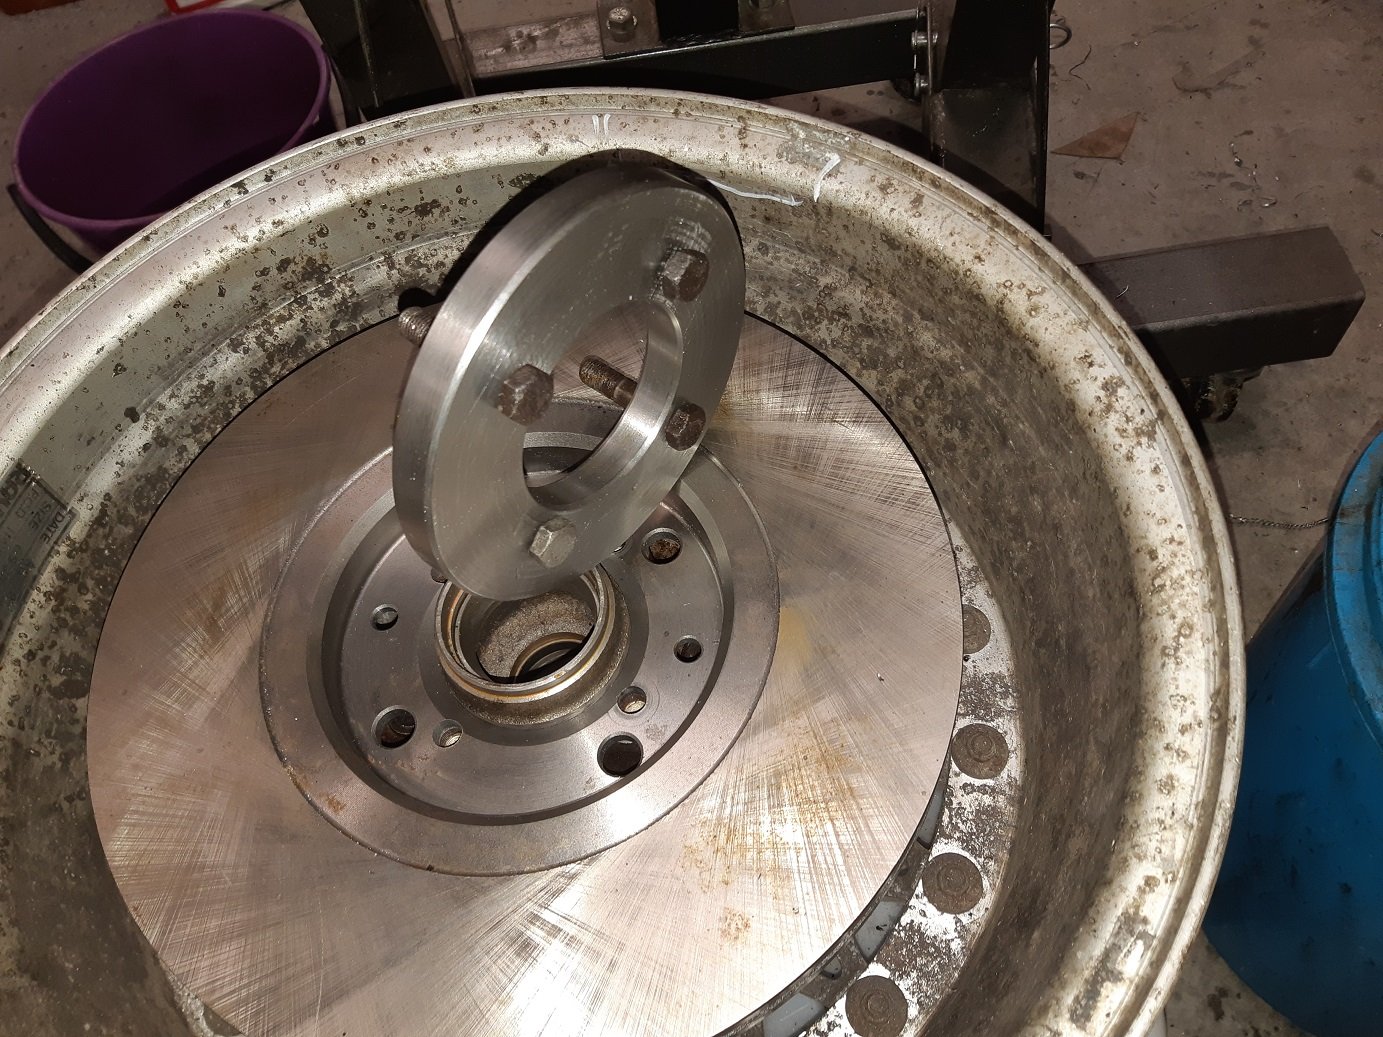
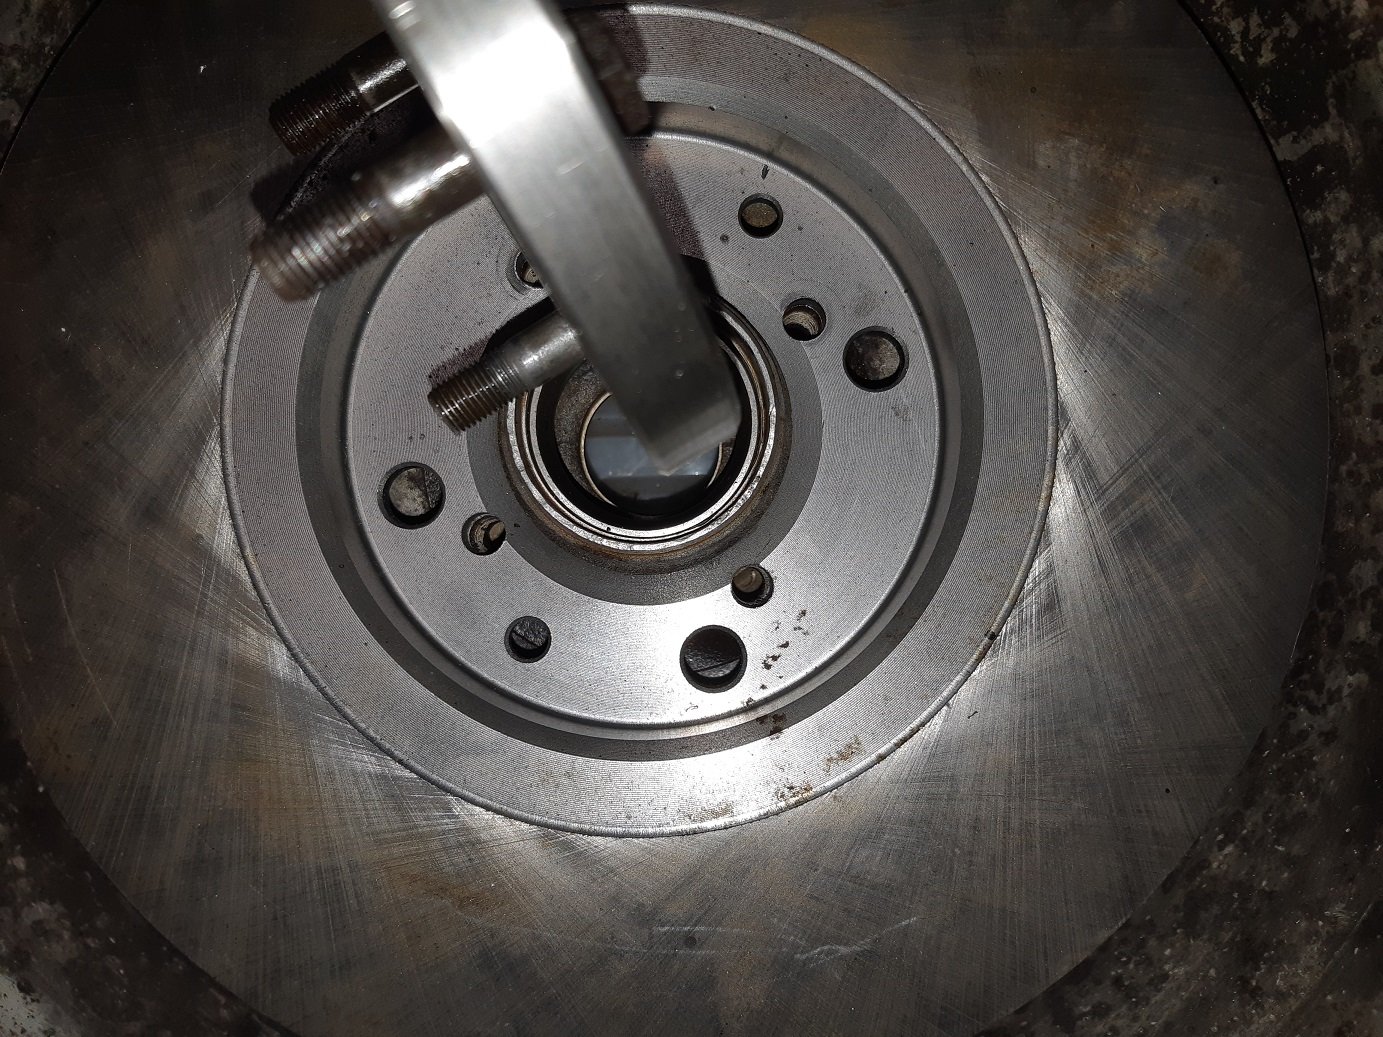
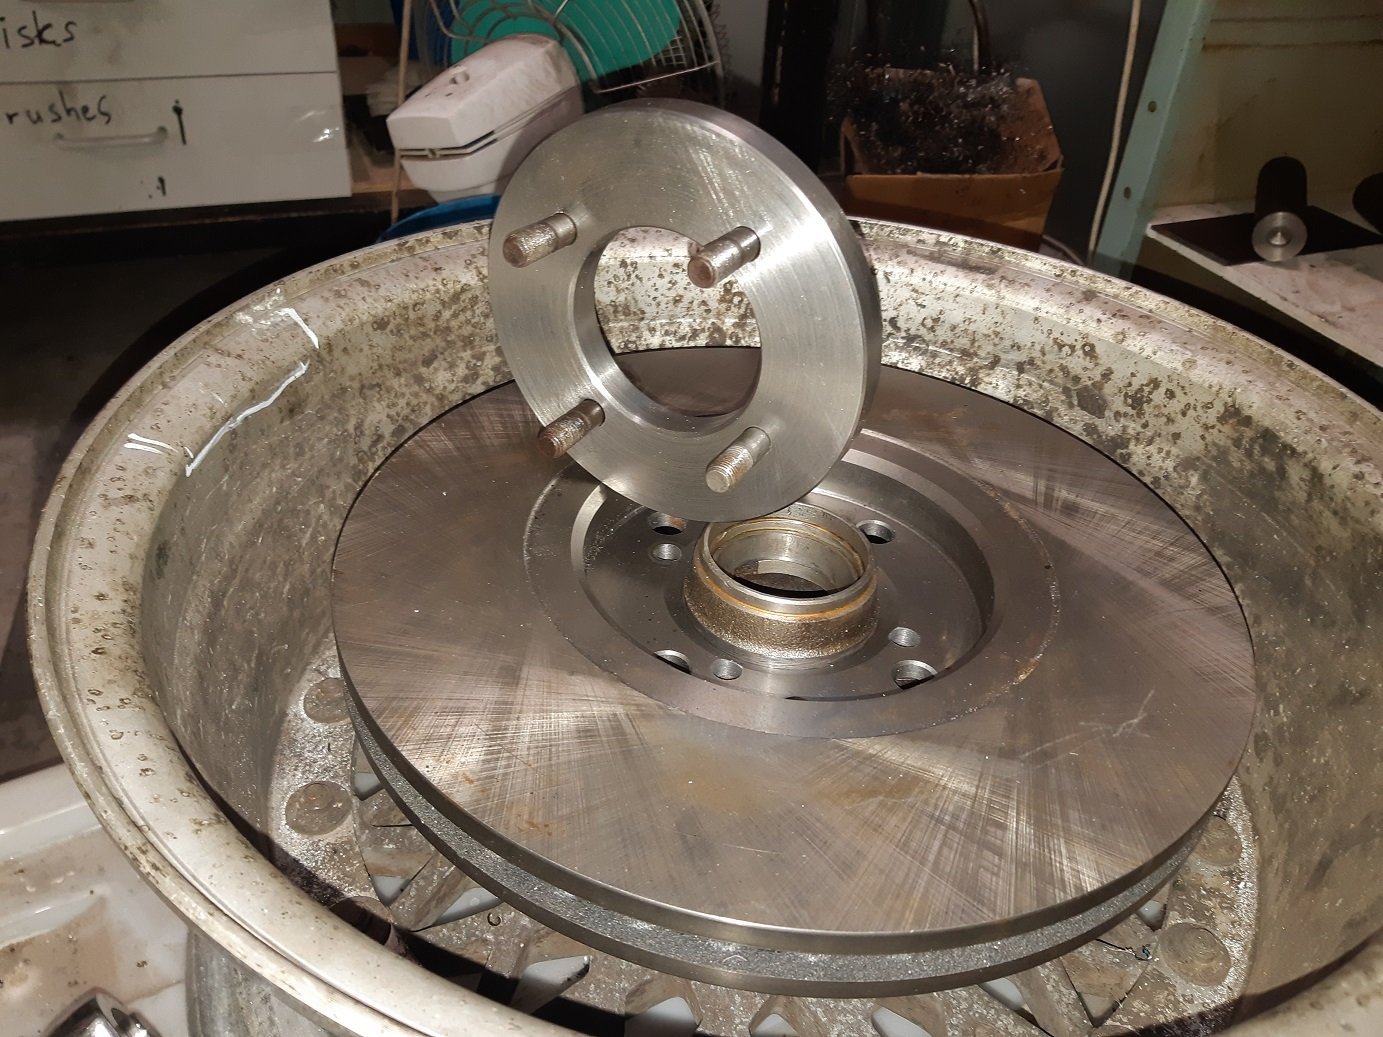
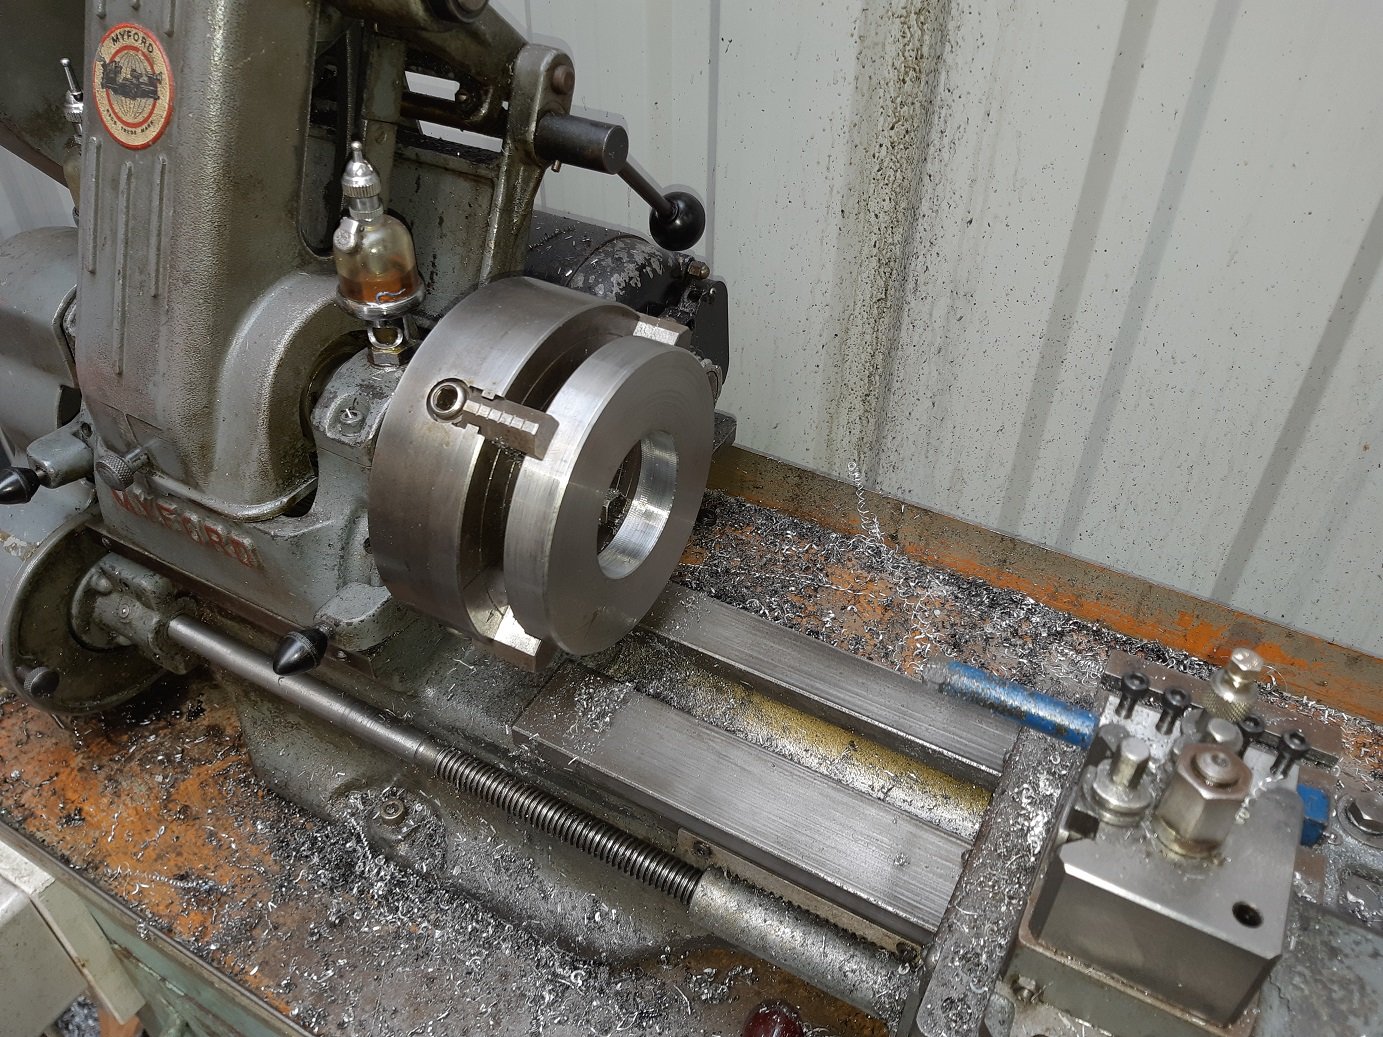
Sorted out the bore size so it's the same as the disc bore. Then I made a mandrel to stack the disc and the sandwich plate and the old disc, so I could use the holes in the old disc as a drilling guide.
1 point
-
Some things arrived. The rad is just mocked up for now, I will add some mounts and change the lower outlet angle.. The driveshaft is sorted, I had some adaptors machined out of 7075 ally at Topliss (I am sure I have a pic somewhere), then dumped it all at marine and turbochargers to get shortened and balanced. The shortened extension (you wot mate???) Is a 2wd Hilux shaft. I bought a new hangar bearing for it as well, so that shit represents over a grand of accumulated investment. Gulp. After having a quick check to see that it basically fit (and damaging the fins and spending 20mins with a tiny screwdriver pushing them all into place again and taping some cardboard over the tiny little fucks so I didn have to do it again), I made a fake one out of rod to get the position roughly right. Cable tied in place. Tacked in place I removed the cab to make this bit easier, I have quite a few cab off jobs to get through anyway. I did some other shit but forgot pics so that's all you get for now.1 point
-
while im waiting for my engine hoyst back i thought i would clean up some parts of the engine starting with the area at the top that has the fuse box .....also welded up all the engine bay loom plug holes. then i looked at the wirewall didnt want to start from scratch but it needed to look cleaner . much better
1 point
-
I'm happy with the valve size. So I cut seats into the new valve inserts. I cut all the seats as close to the same height as possible. Al my work mate had done some research into the best seat angles, and we used a radius throat cutter profile. Once they are all cut to the right depth and right size to get the 45degree seating where we want it on the valve face we are ready to synchro seat the seats with the stone gear. We believe this gives a good sealing finish on the seats. I didn't get any pictures of this, but basically you face the valve seat grinding stone on the valve facer to get the same exact angle. Here's a picture of me stoning the seat. You can see the seats are polished up. I now check to see if they are seating the whole width on the valve face. I didn't get a picture of this. But we use a engineers blue to wipe on the valve the put the valve into the head and push the valve onto the seat and look to see if the engineers blue makes full contact from the valve to the seat. So the valve and seats are done. So I need some valve springs so I went down to Kennelly Cams to see PK and Adam. They have a good selection of springs in stock. This is also where I got my cam reground. So running the FE Mazda valves I need to use a different valve spring retainer to the stock xflow item. I looked at using the FE retainers but unfortunately that was going to make my spring install height to tight. The spring install height is the measurement from the spring seat on the head to the valve spring retainer. Stock xflow is around 33mm. So that's what I'm trying to get close to. So Al grabbed a Toyota 1kz retainer and we took a measurement and they looked like they would do the job with a bit of turning in the lathe. You can see the spring isn't sitting in the right spot. So I made a arbor to spin the retainers in the lathe Finished retainers sitting on the spring.
1 point
-
Bought some new high rise handlebars off trade me, imported some Vans x Cult BMX grips, jammed OG light back in the front. All terrain tyres, New cables, made brackets to hold ‘scrambler’ type short guards (stock front fender cut in half and re shaped) Mounted a tail light on the guard and ran some wires. had a jam today at making a seat pan out of some scrap steel. turned out okay, not bad for a first attempt but when I get some clean steel will try again1 point
-
But then decide to commit and attack the frame with a grinder. At this point I was seriously looking for a replacement frame as I felt well past my comfort zone. Hand cut some motor mounts/ frame reinforcements out of plate check fitment/ alignments etc box in the front of the frame, leave allocation for wiring / spark plug lead and glue it all in place1 point
-
today went better than last night thank fuck. the super good cunt @Yowzer has the flex plate i need and im going to go down the the ham tomorrow and get it. i spent most of the today measuring things and modifying the shift linkage. i made a new detent lever because i didn't have one and i shortened the shifter arm. the bell housing clears and there seems to be enough room for that part of the trans. i will need to mod the end of the shifter lever that pokes through the floor to clear the back of the box. also need to move the gearbox cross member back about 60mm which shouldn't be a drama. 2019-08-03_04-11-29 by sheepers, on Flickr 2019-08-03_04-11-38 by sheepers, on Flickr1 point
-
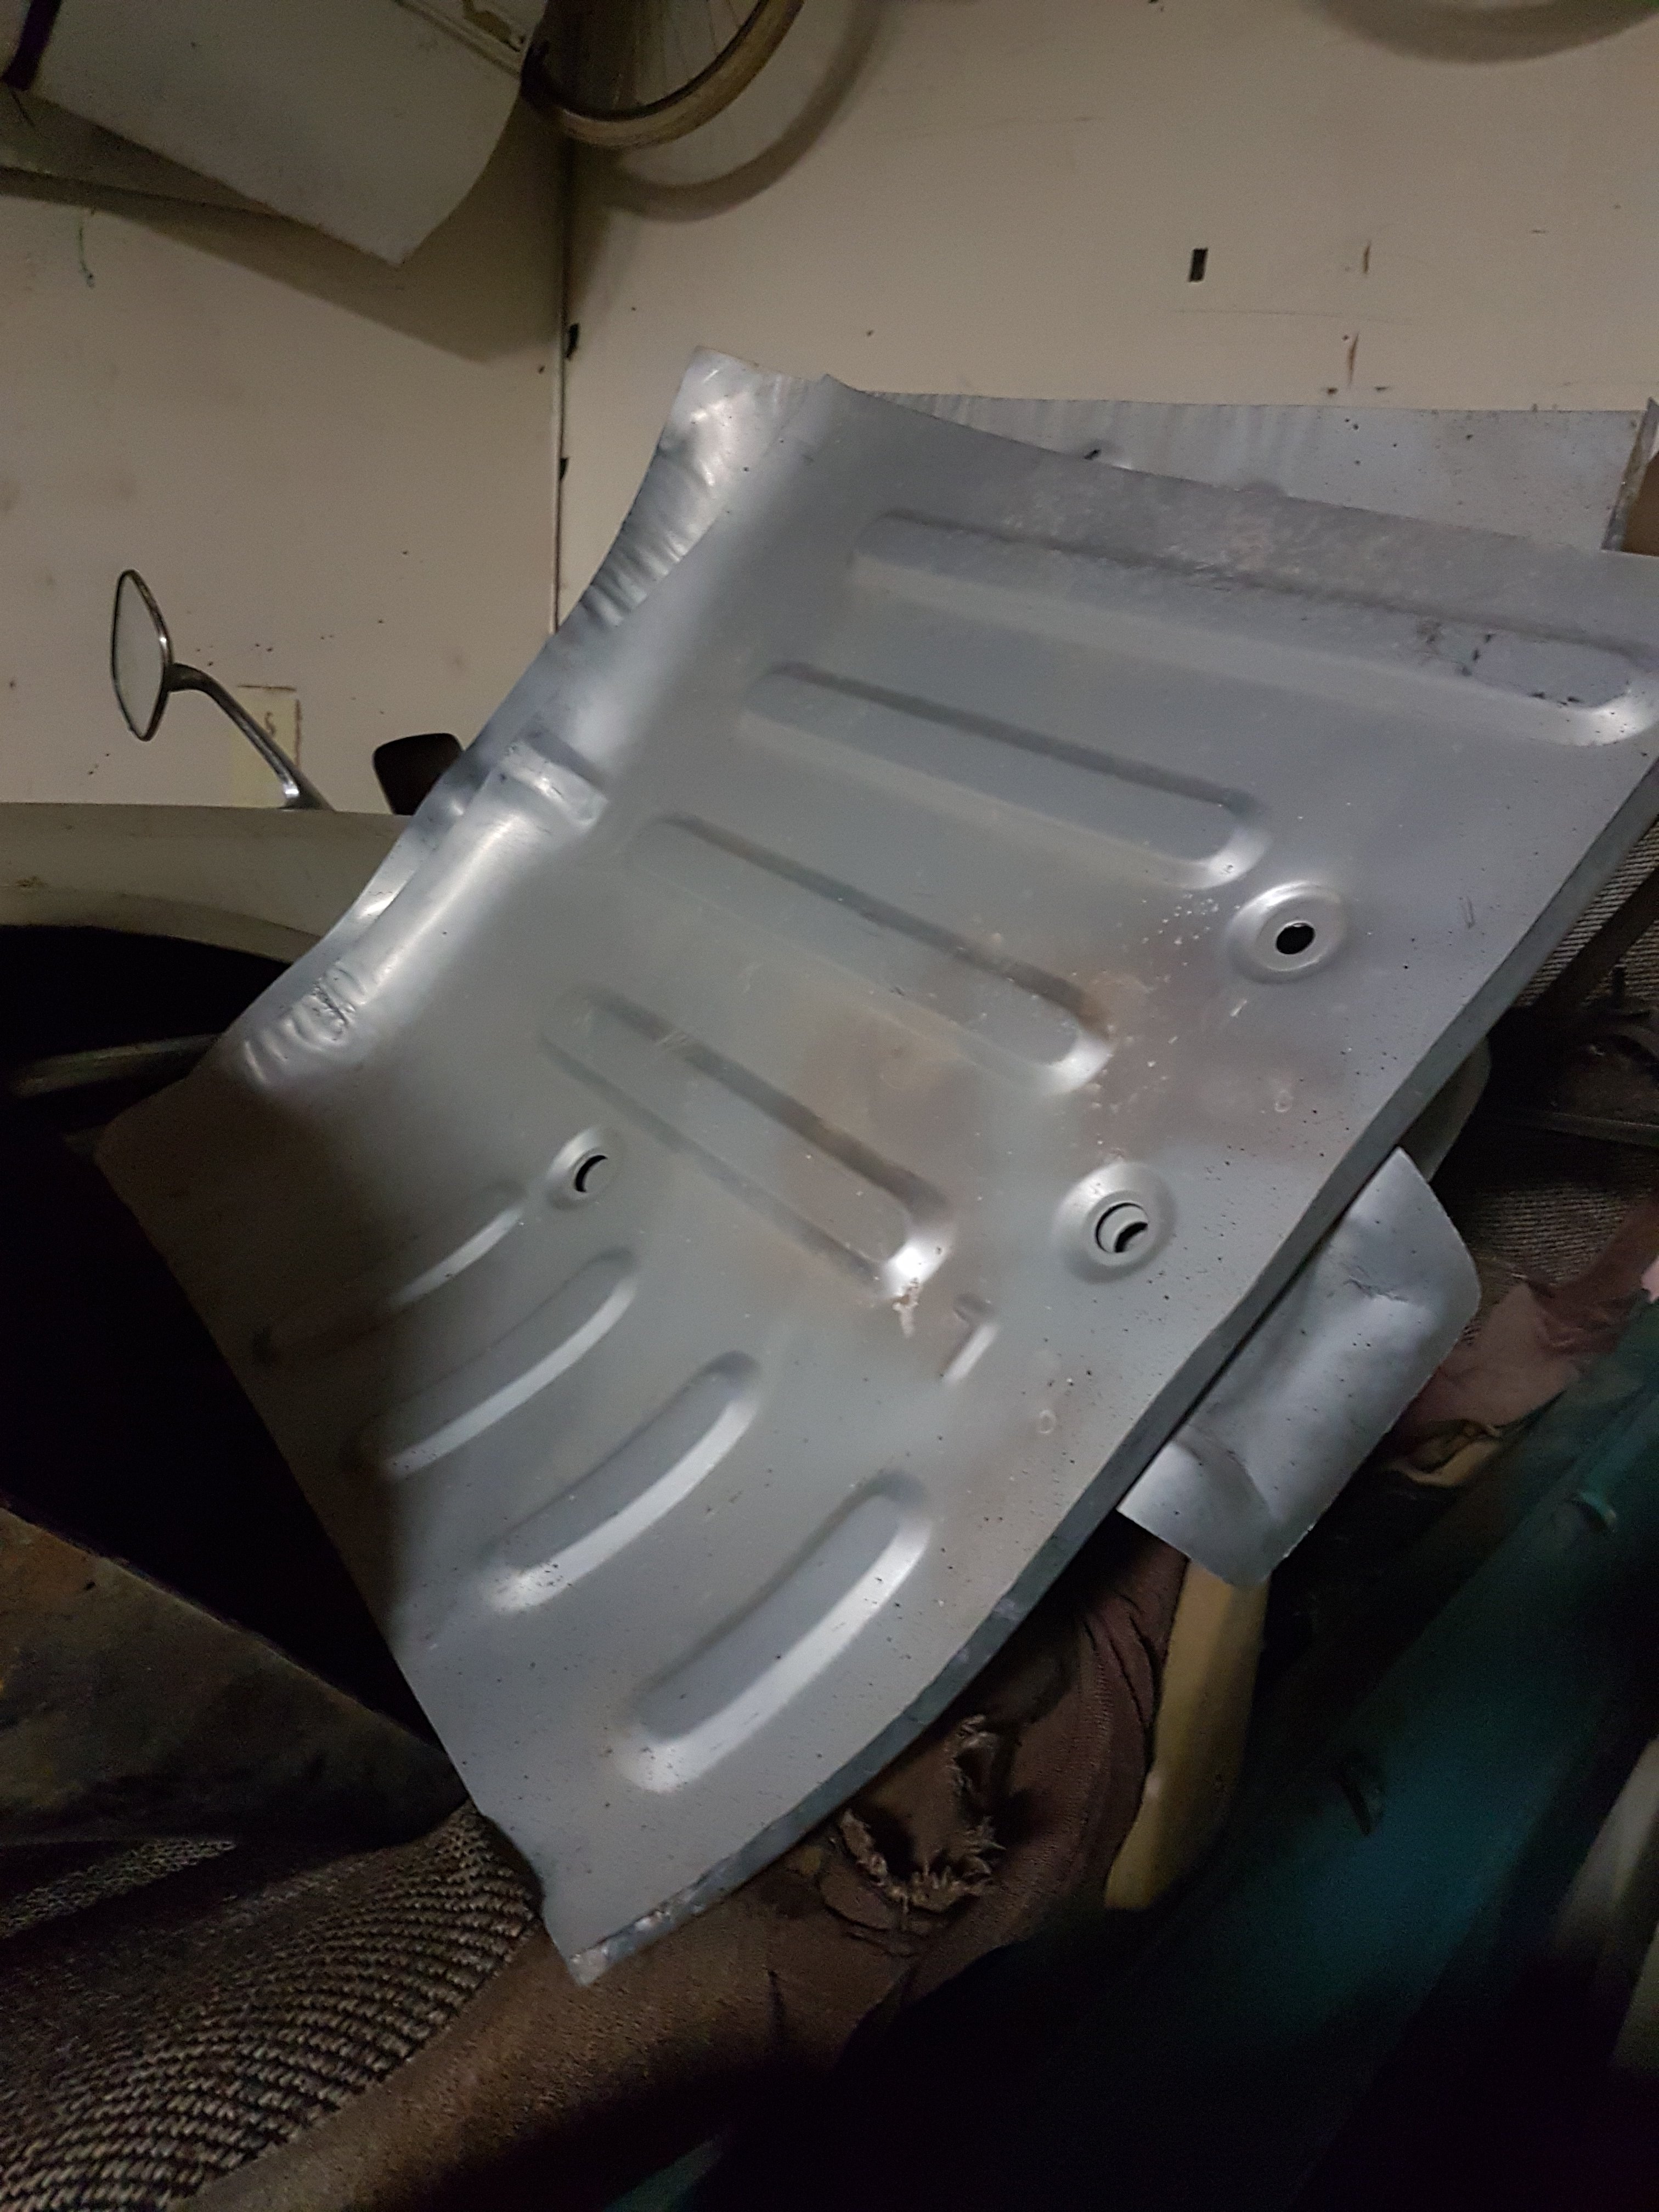
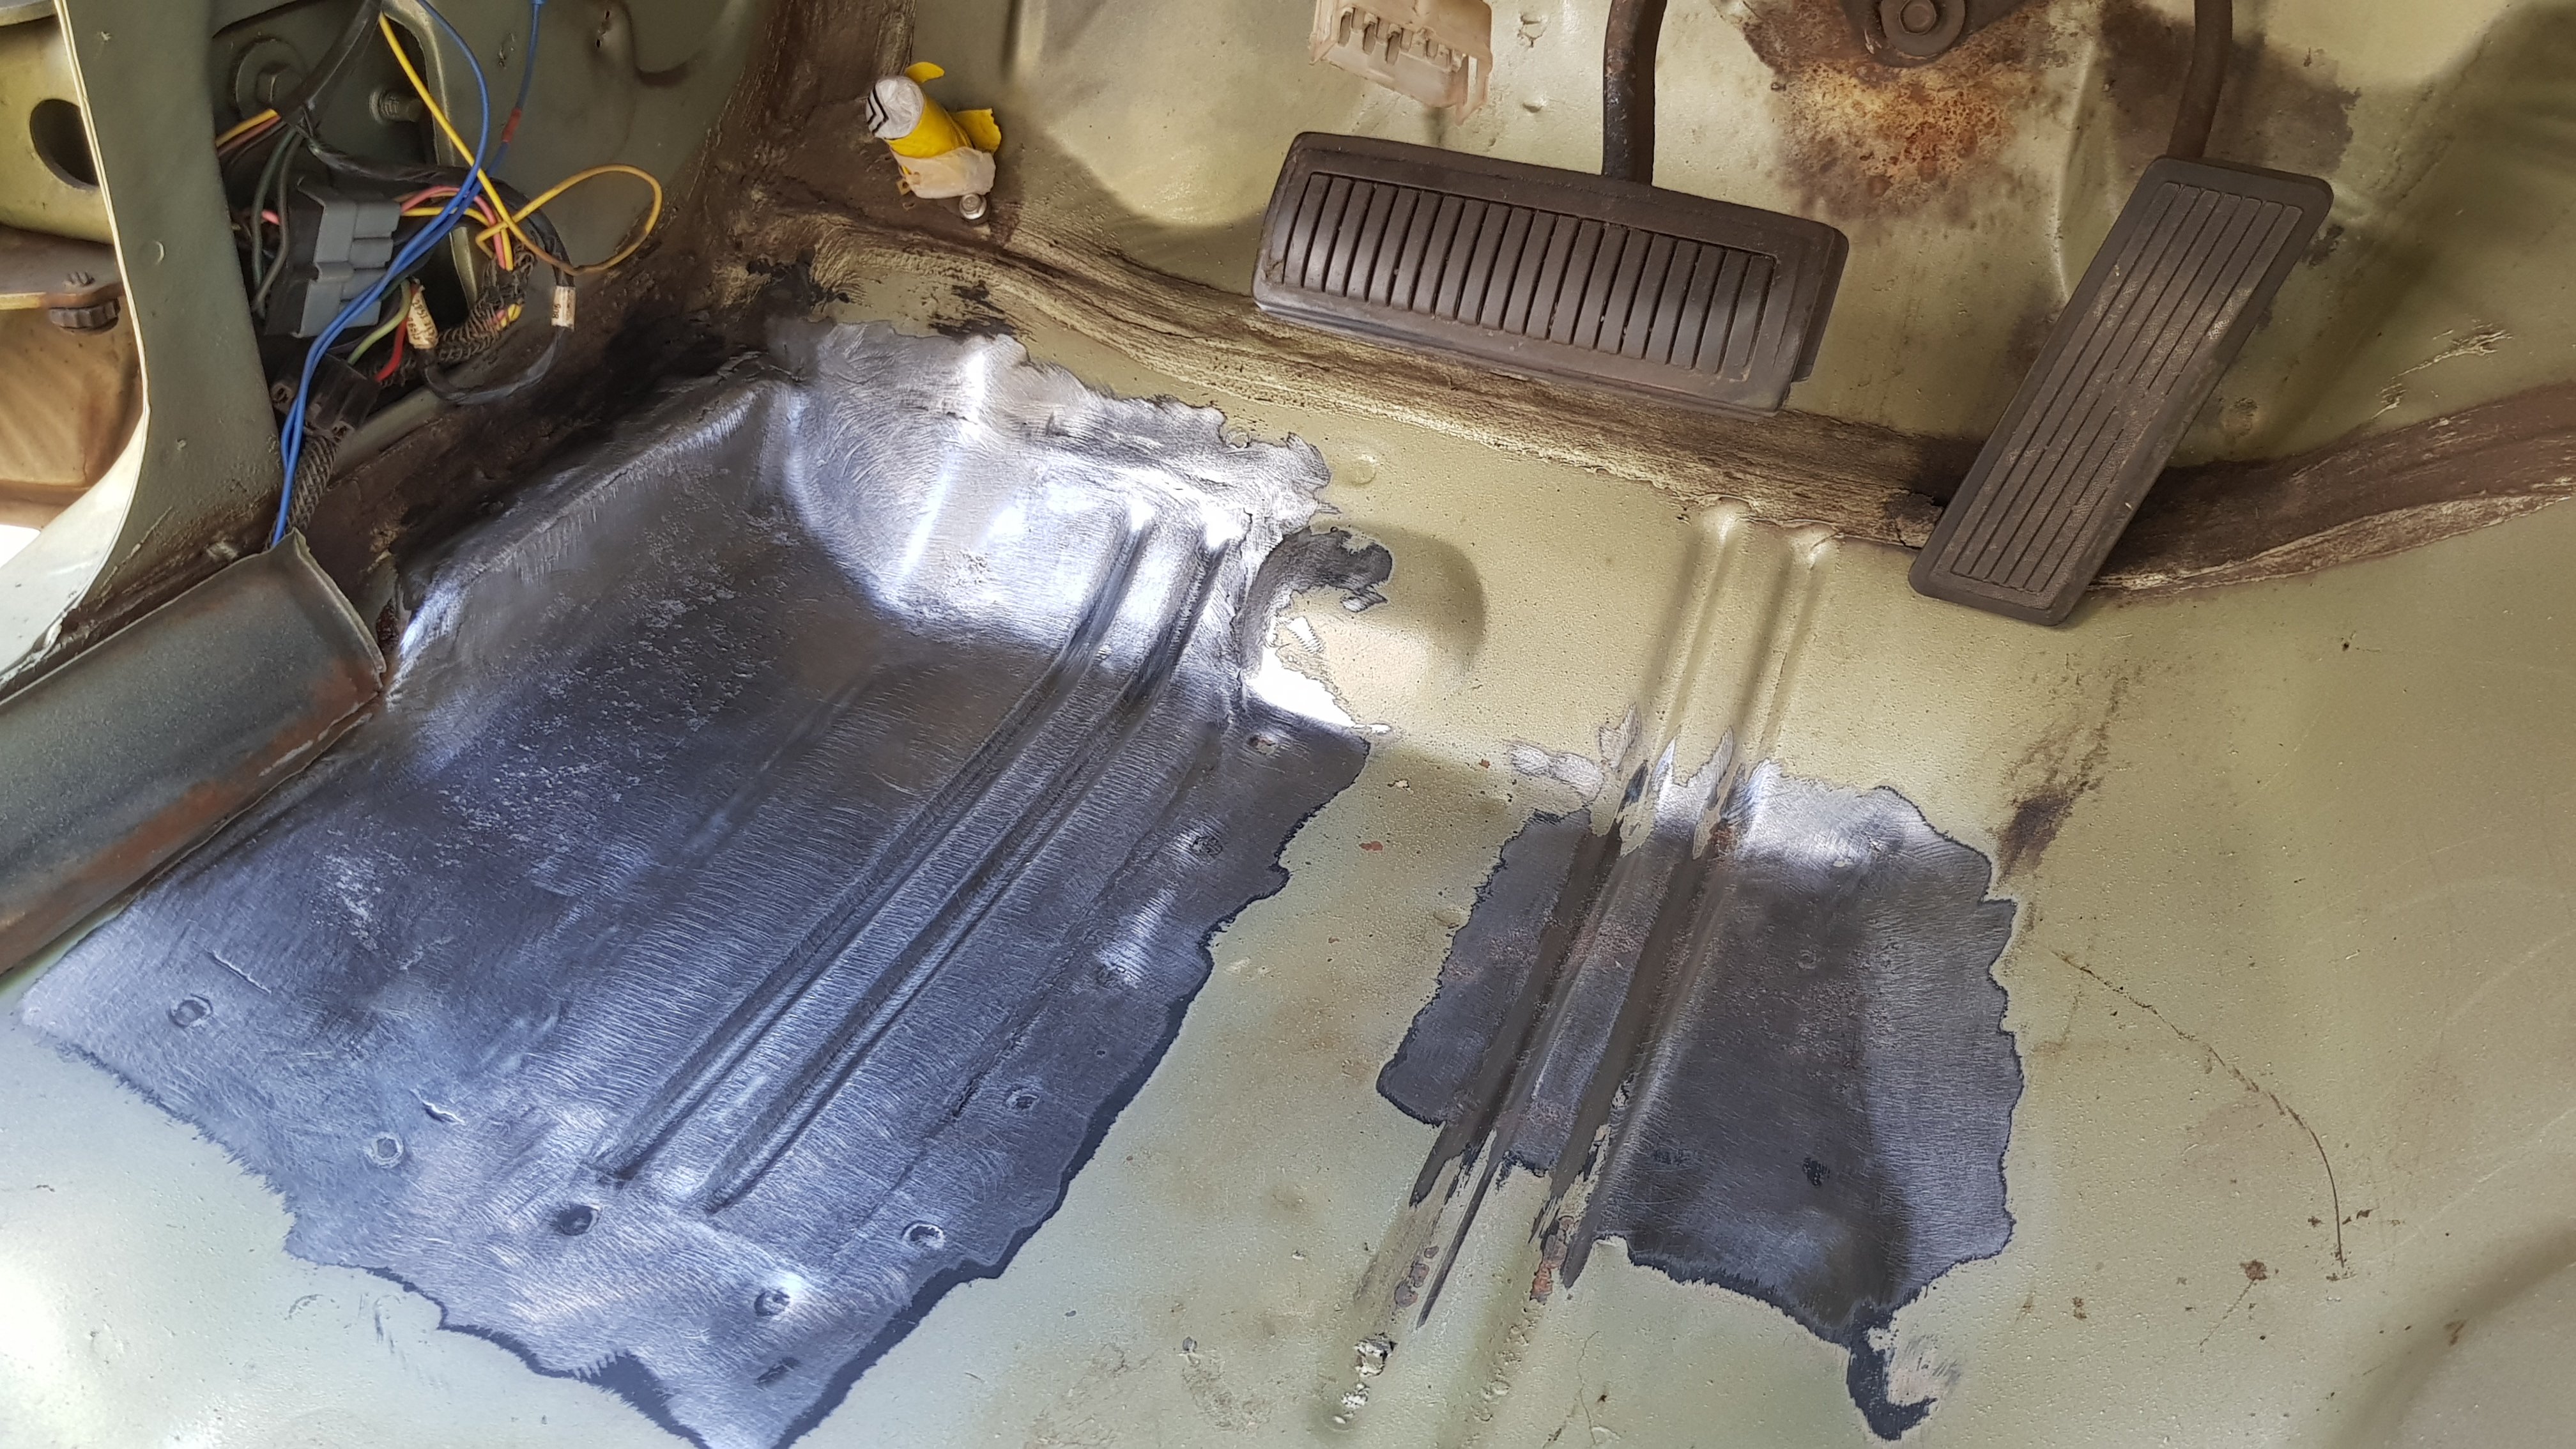
This is the method, phosphoric acid and scotch brite, then epoxy. Don’t use single stage rust treatment paints they don’t have very good adhesion compared to acid wash then 2 part epoxy primer.1 point
-
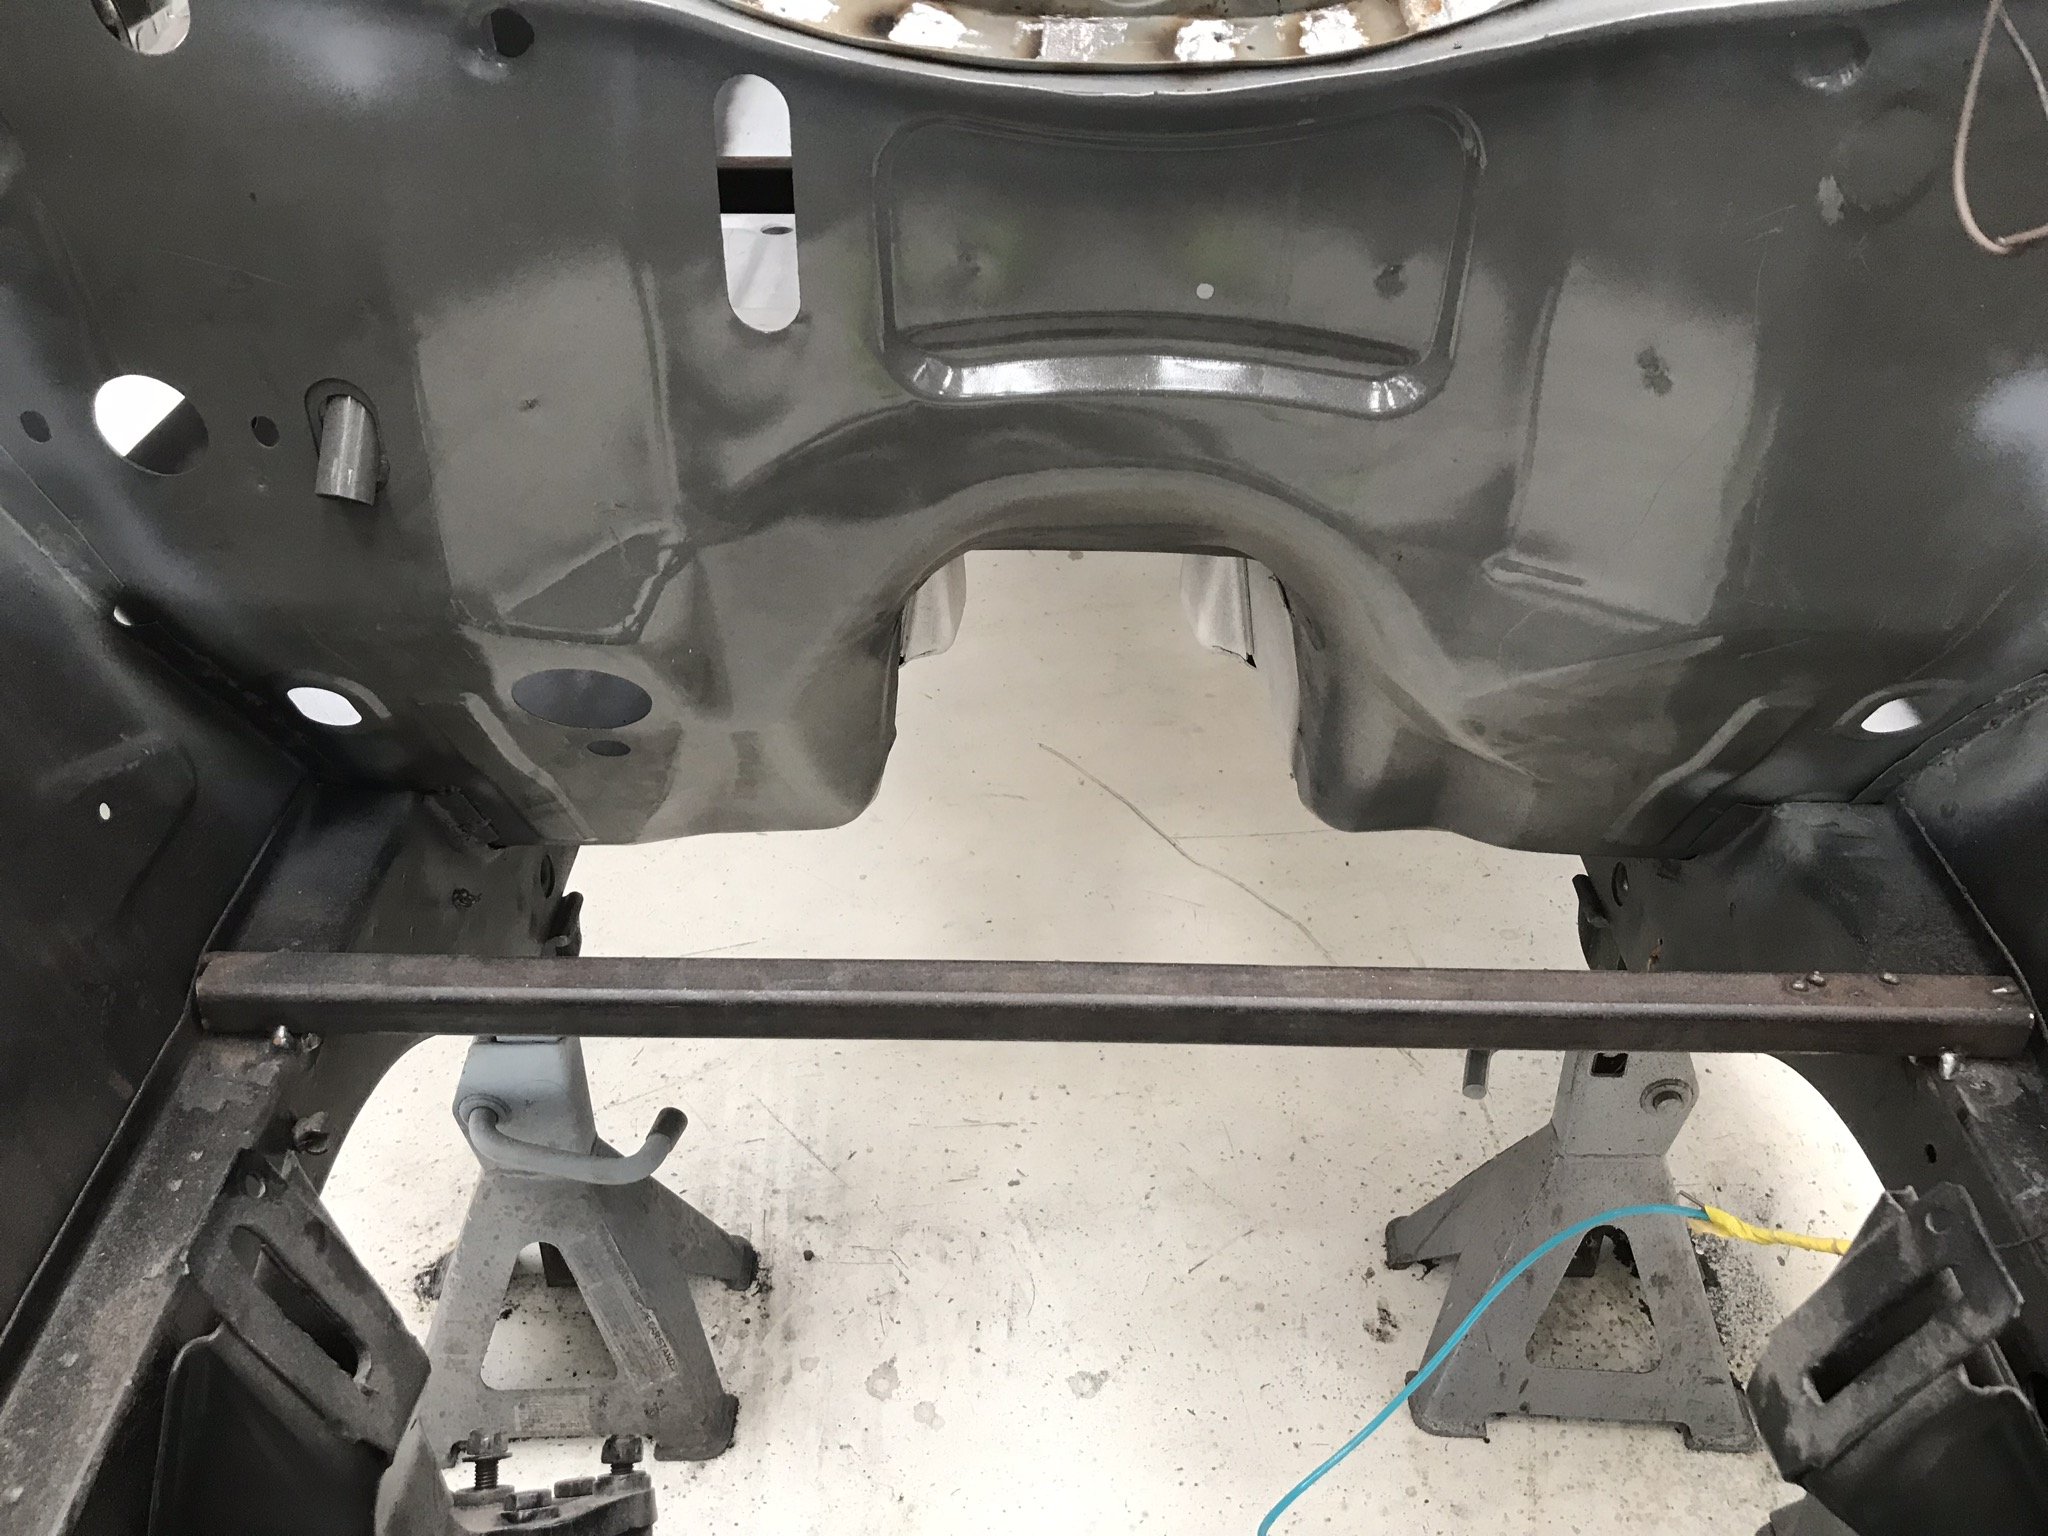
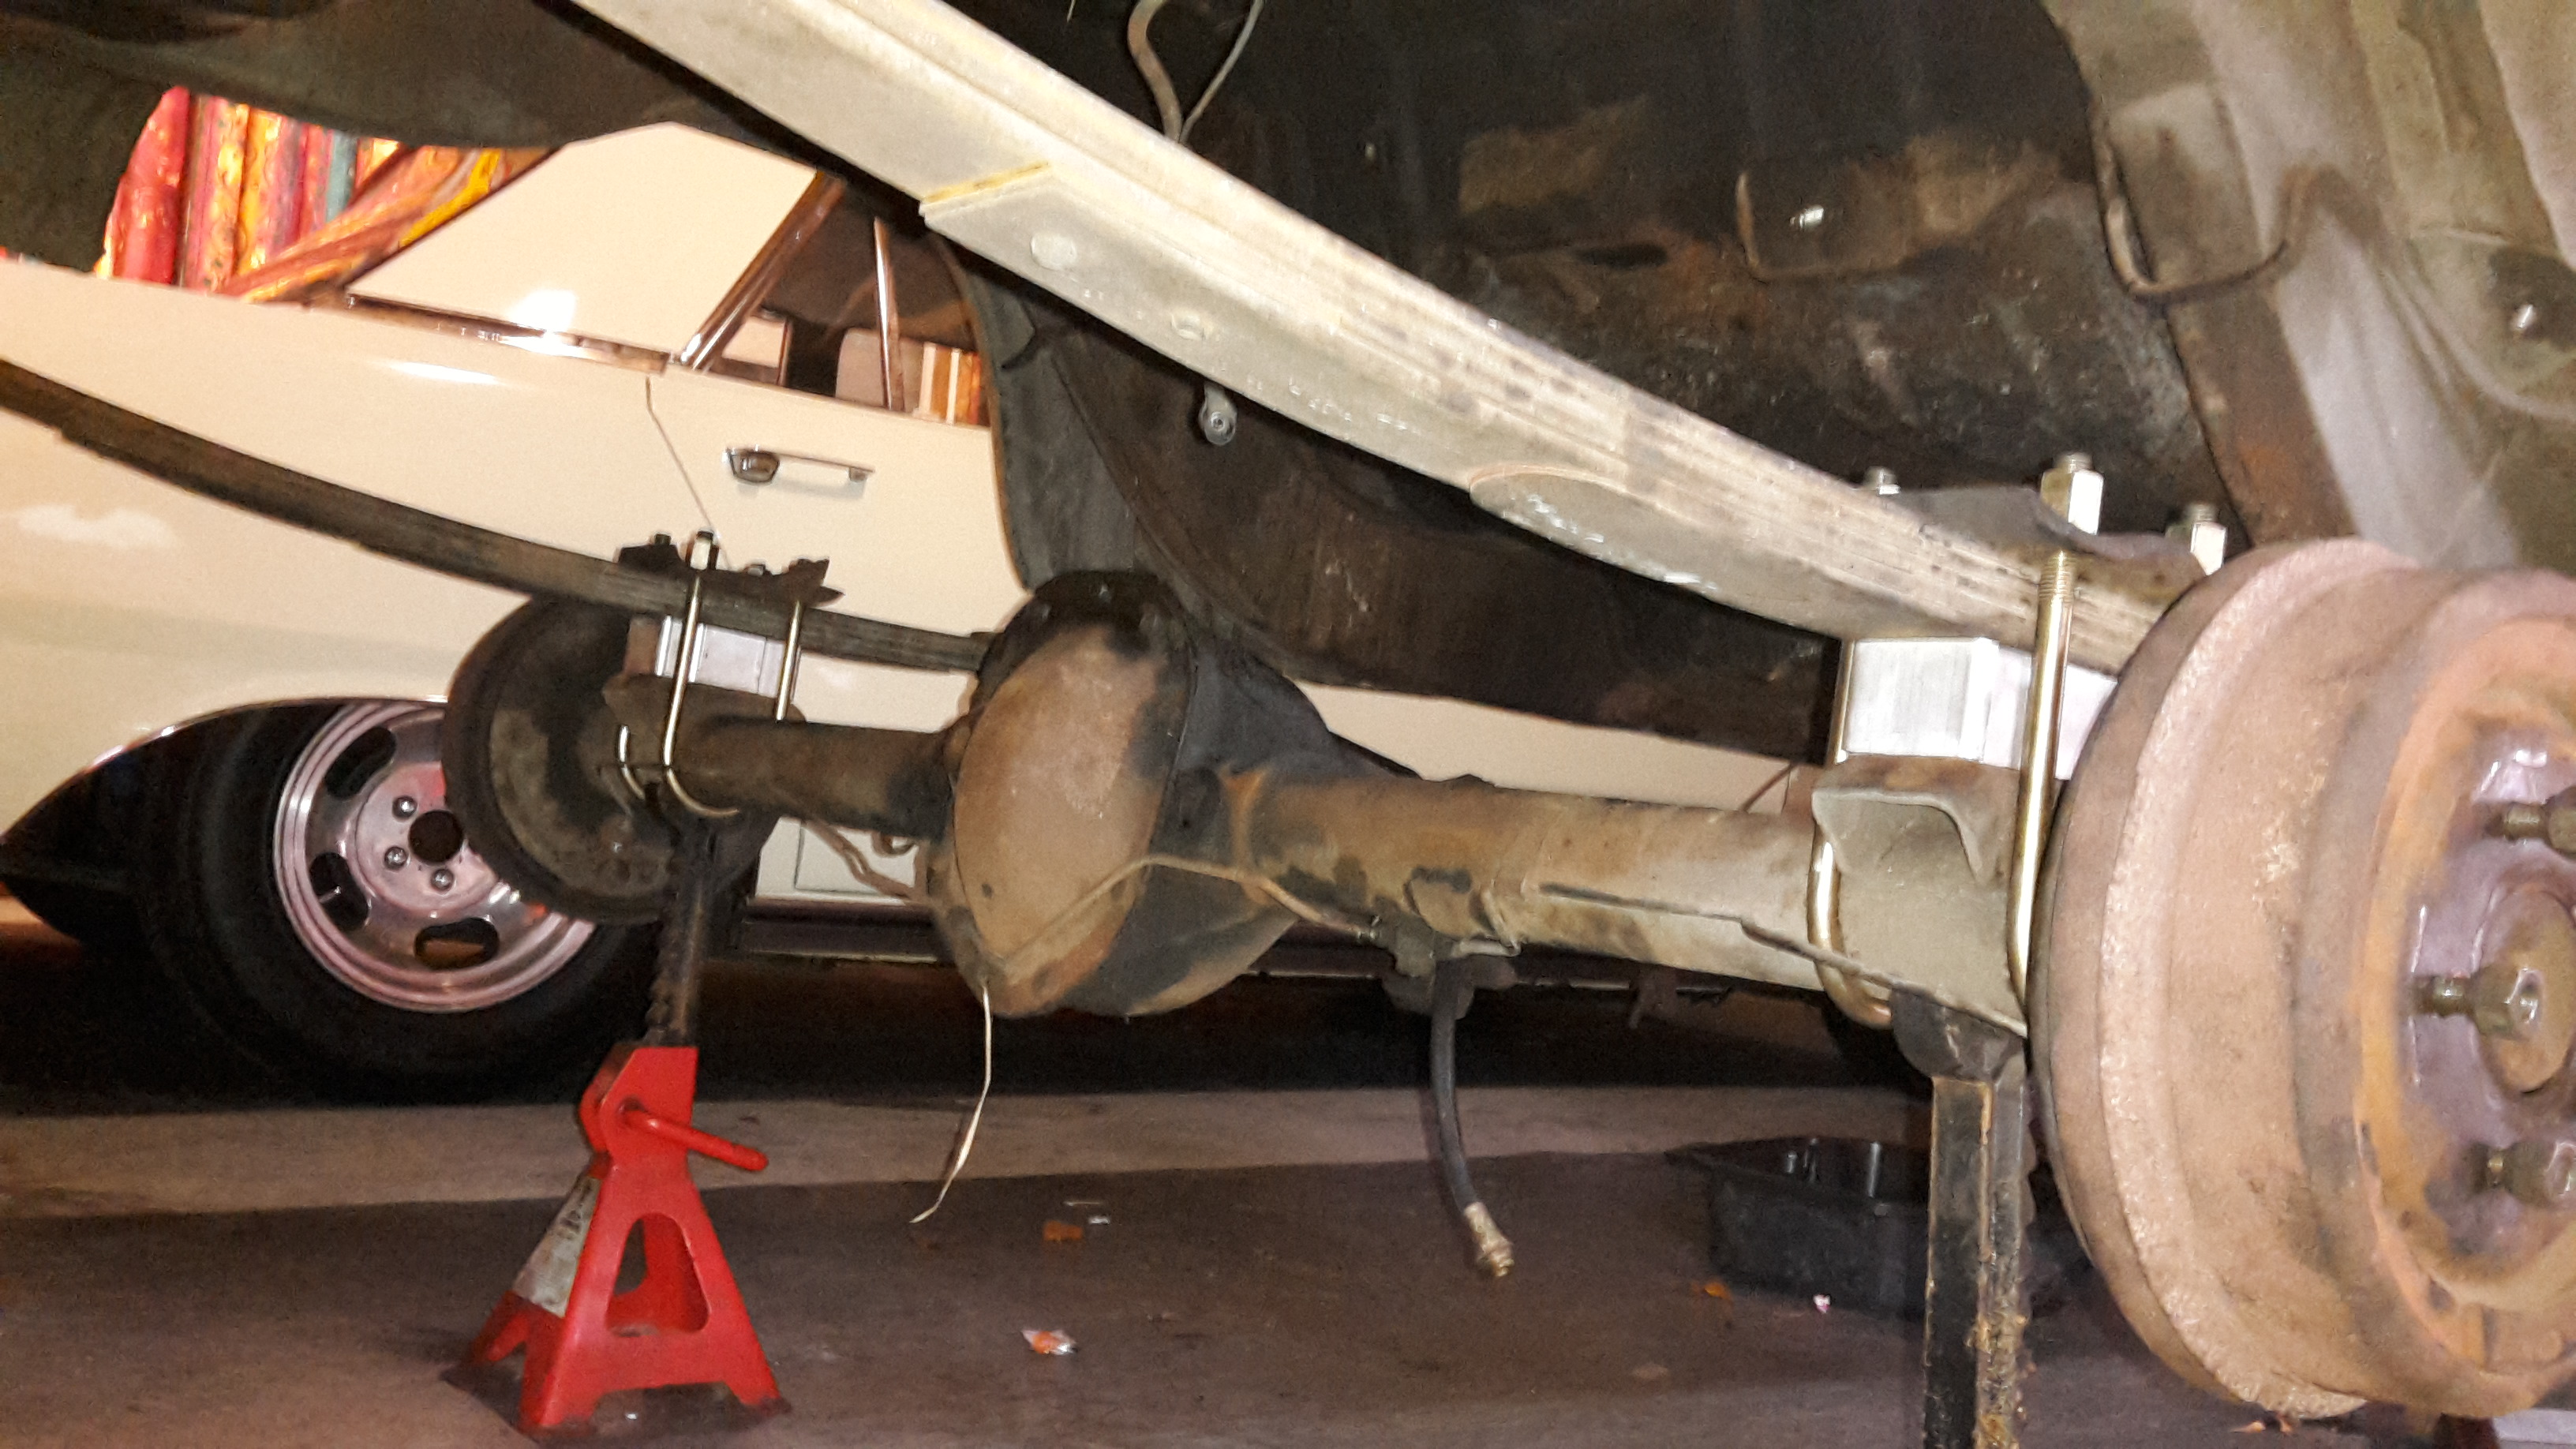
Just thought I would update this just so it didn't disappear into the nevernever, but then realised I had actually made progress since I last posted on this thread. So firstly my excuses for not doing much... Got hit by a drunk driver, (he was speeding, no license, no WOF/reg since 2008, etc, real winner), lost control and crossed the centre line at well over 100kmh. Hit us and we did a barrel roll (at least one, not quite sure). Mum and our little dog were in the passenger seat, were mostly fine (Mum headbutted the window) but luckily avoided worse through sheer luck (it didn't actually land on her side at the front, went driver front, passenger rear, etc) and Mum held the dog as we went over so she came out unscathed. I however fractured my spine (roof came down to say hi to my head), luckily nothing too major as far as spinal injuries go (compression wedge fracture in my thoracic spine, loss of about 35% height on one side of one of the vertebra), but meant that I couldn't lift anything for what turned out to be about 3 1/2 months. Stupid thing was I was also reaaaallllly gutted about losing the van too (I know "it's just a vehicle, they're replacable, bla bla") but it was a 92 4WD 1KZ-TE Hiace Supercustom, and was fucking awesome. In really good nick, only 200,000kms on it (not a lot for one of them). Only had it about 5 months. Anywho, have mostly recovered from that (happened mid March), and then the other thing that has eaten my time is the tiny house in the background. Been working on it off and on, a lot of off while I did my study etc, for about 3 1/2 years, and it's finally almost done, move in in August is the goal. Will share photos in another thread at some point once it's finished and looks less like a building site. On to the ute, before the accident, I had actually made some progress and taken a few photos, so here goes: Bought adjustable arms for the rear, RAW shocks, Dobinson 4" lift springs, as well as an adjustable panhard rod, all roughly set up until I get the engine properly mounted and the front done so I can measure the angle on the output of the gearbox to get them equal. Sat the body on, and the shortened tray. Need to lower the cross bar to the height of the piece of timber that's clamped on there. Body is just sitting on the pieces of timber at the moment, but that puts it at the right height for everything to fit Mocked the front end up, tacked together the shs rad support so that I could mount up the radiator and intercooler (which is probably to small, will likely get on same thickness and width, just taller and notch the bumper so it sits in, then holesaw the front for airflow. Have done a bunch of research, small jobs, bits and pieces etc, since then, but not a lot. Once the container is done in the coming month, this will start getting time and money thrown at it again. I desperately need to get some paint on it soon (probably just primer until I have everything properly mounted and can do the bodywork), as the fine rust film on it is getting less fine, and it is a Datsun. A big part of going forward with this is getting the engine (RB25/30DET) so that will require some financing, hopefully in the form of selling my Mitsubishi Challenger. If anyone knows of one, preferably a runner as I don't want to do a refresh on it (for the sake of time/expense) at this stage, let me know. Also need to order some parts from Superior Engineering in 'Straya, so that is gonna cost some money too. Let me know what you think in the discussion thread: Cheers, Hayden.1 point
-
So, I picked this lot up... all water cooled 39cc ~8hp motors. Yes, approximately 8hp! So many parts, enough to make a 4th working bike....and another spare engine for ummm, yeah...maybe, hmmmm???
1 point
-
Random slightly cool things working together.
1 point
-
Actually, i did buy some floor pans! Kinda progress..
1 point
-
It'll fit. probably1 point
-
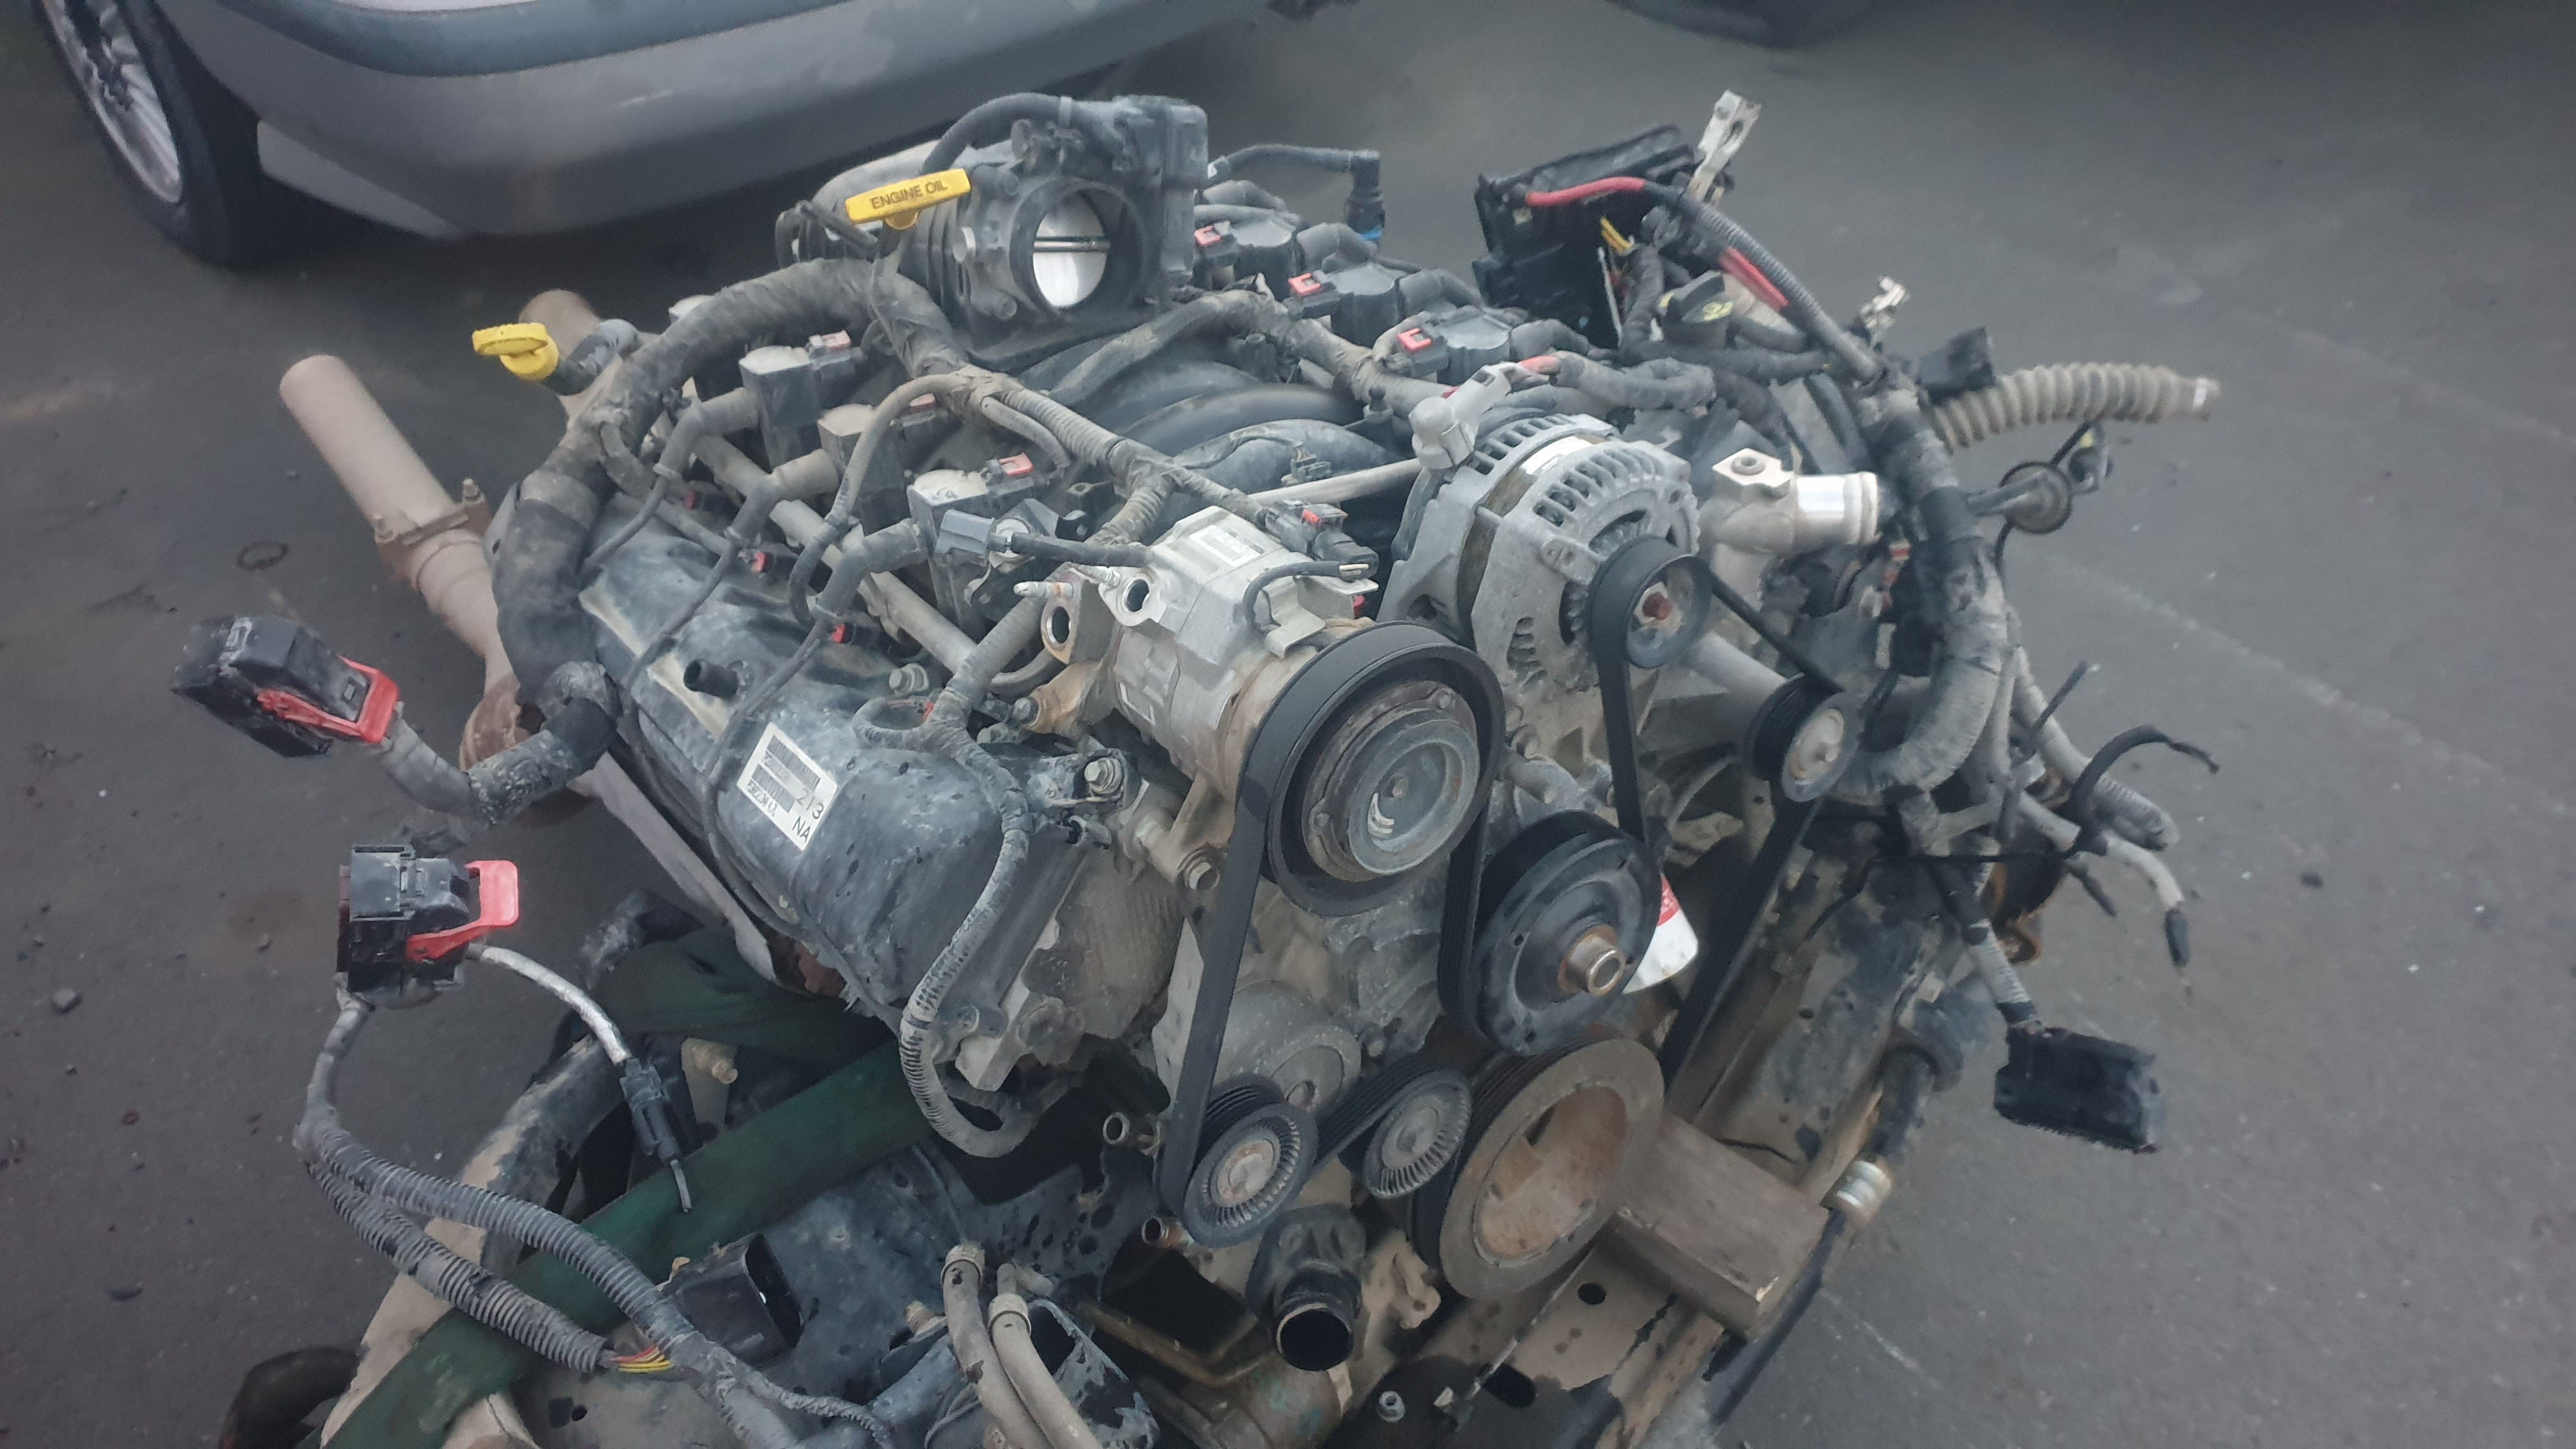
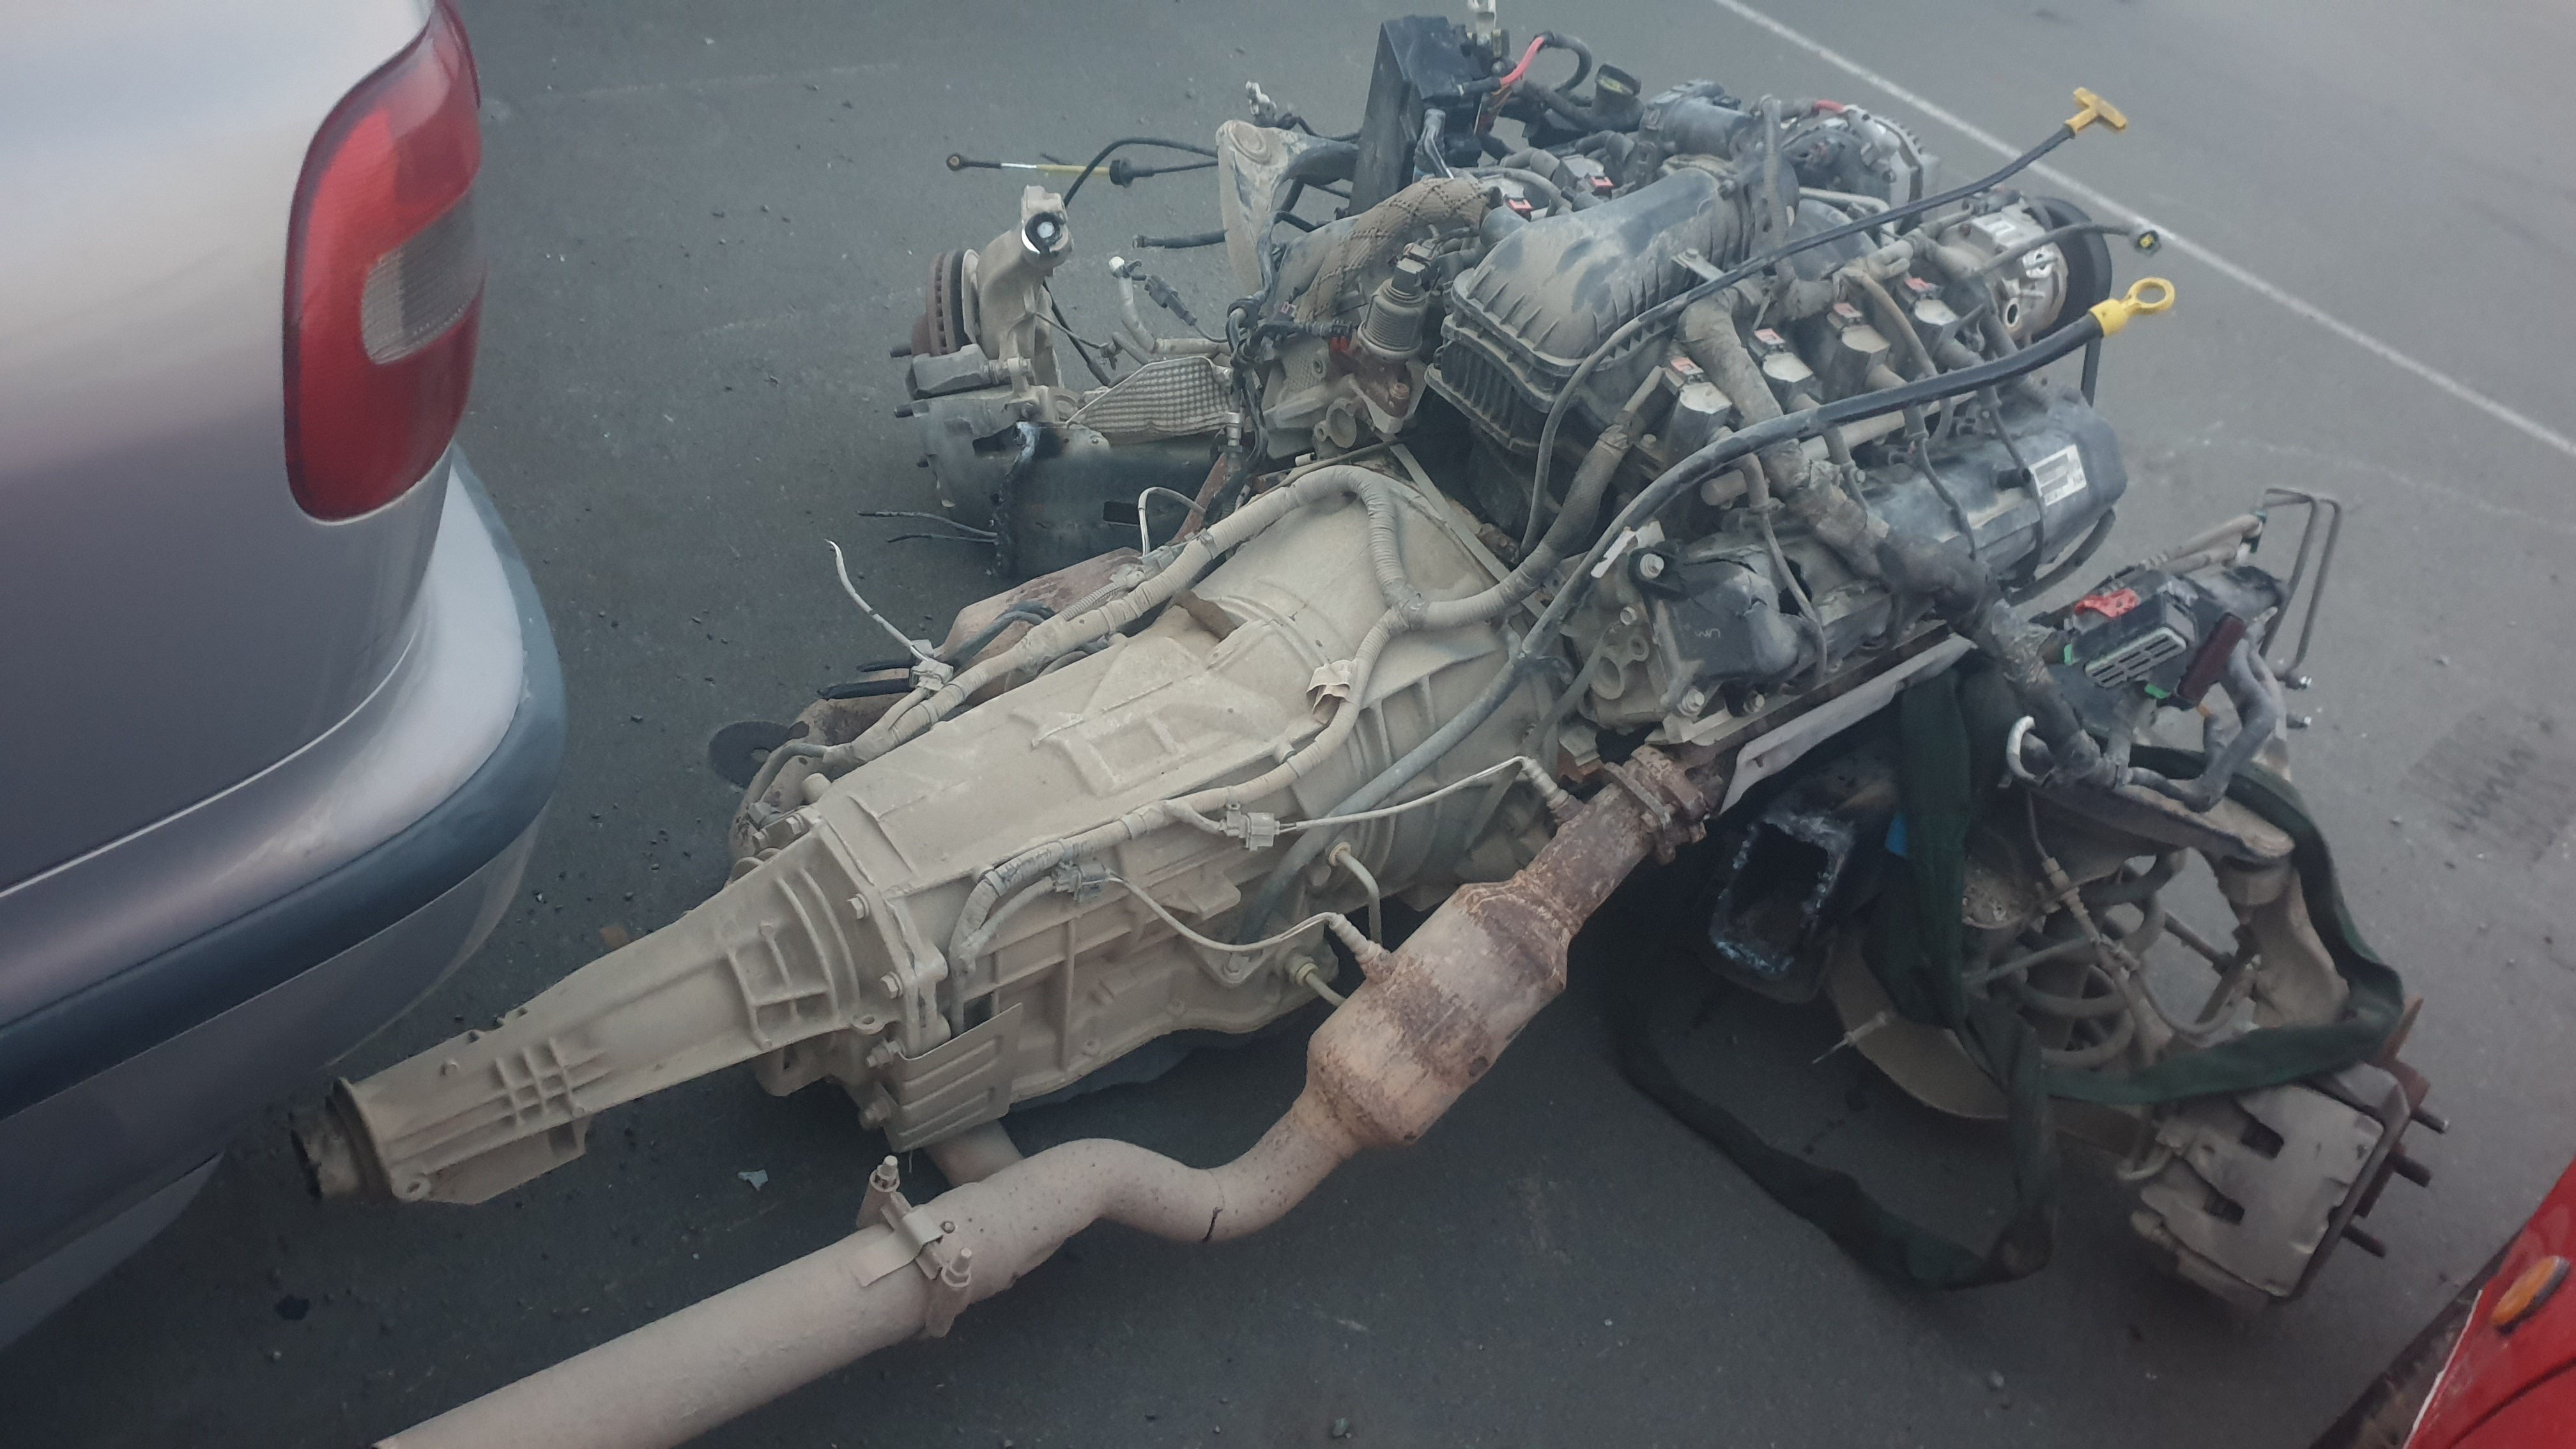
The engine is a nothing flash 4.7l V8. making a reasonably flash for an mx5 310hp and 400 something nm filthy, but not an ugly motor which is nice. i plan to keep the automatic and manualise it. the trans computer should be able to to be programmed to behave like a sequential manual trans and ill make a big gear chopping stick. and the goal for this car is to be as fun as possible for as cheap as possible. it wont be a competitive race car. but it will be a stupid amount of fun
1 point
-
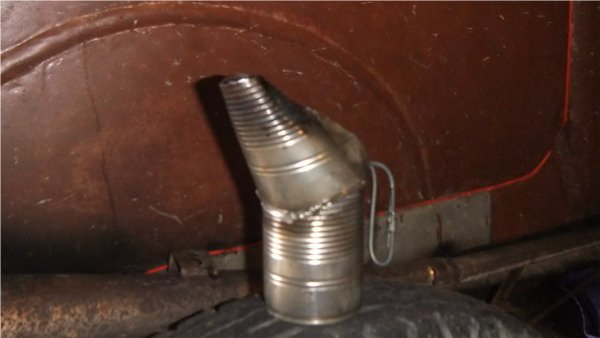
Can't decide if i should have put this in the wombling thread lol. It's an oil can by the way.
1 point
-
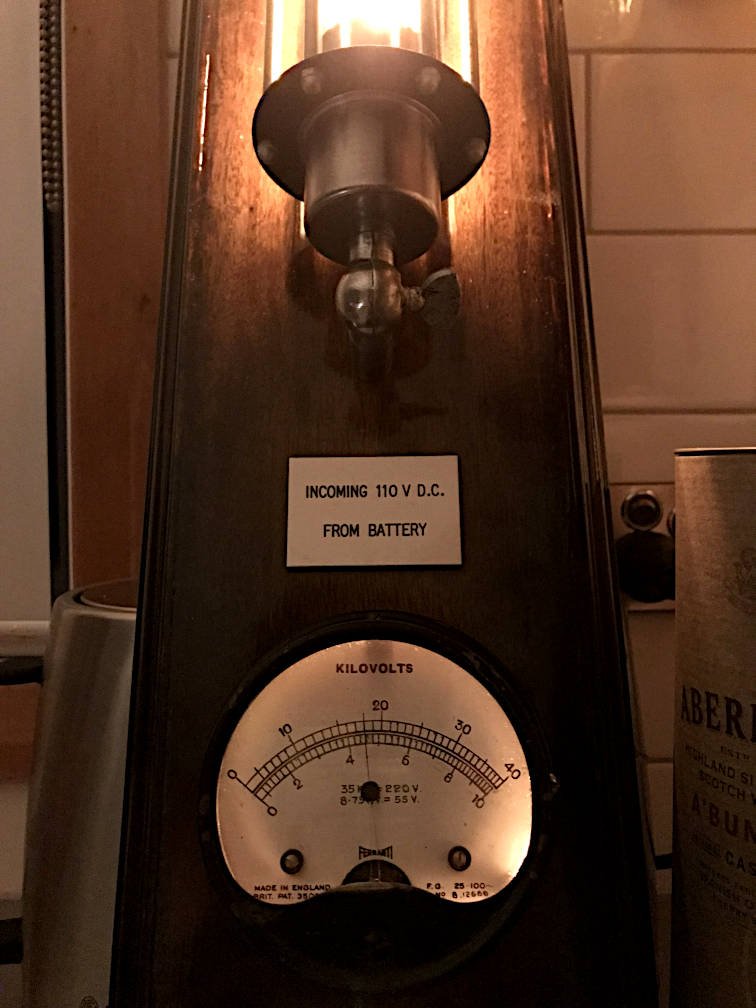
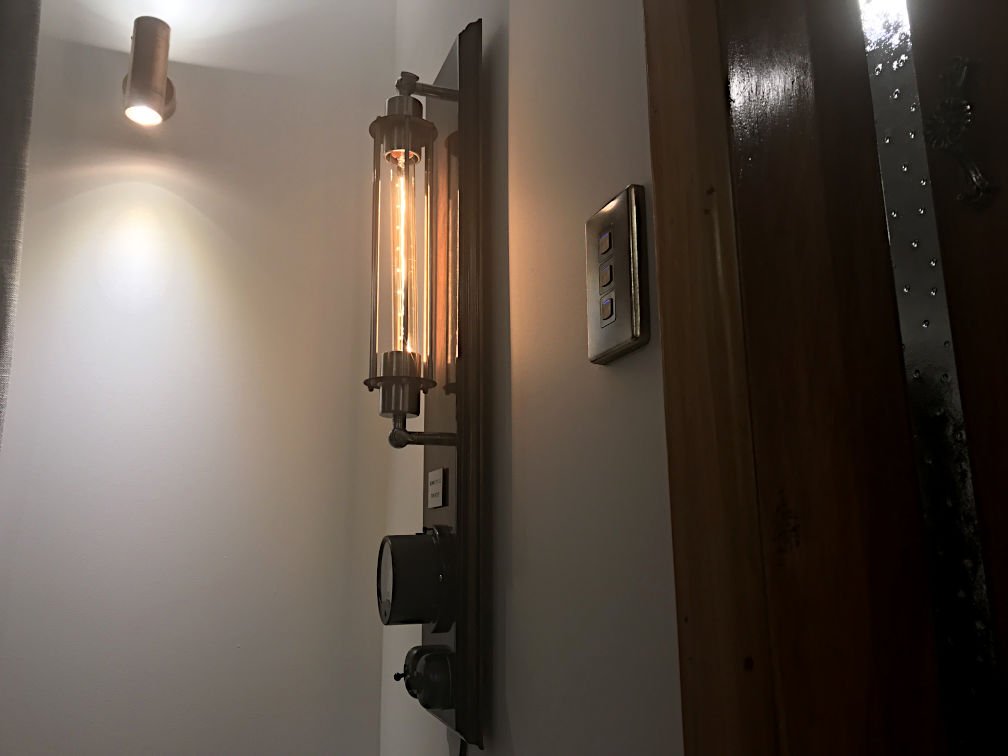
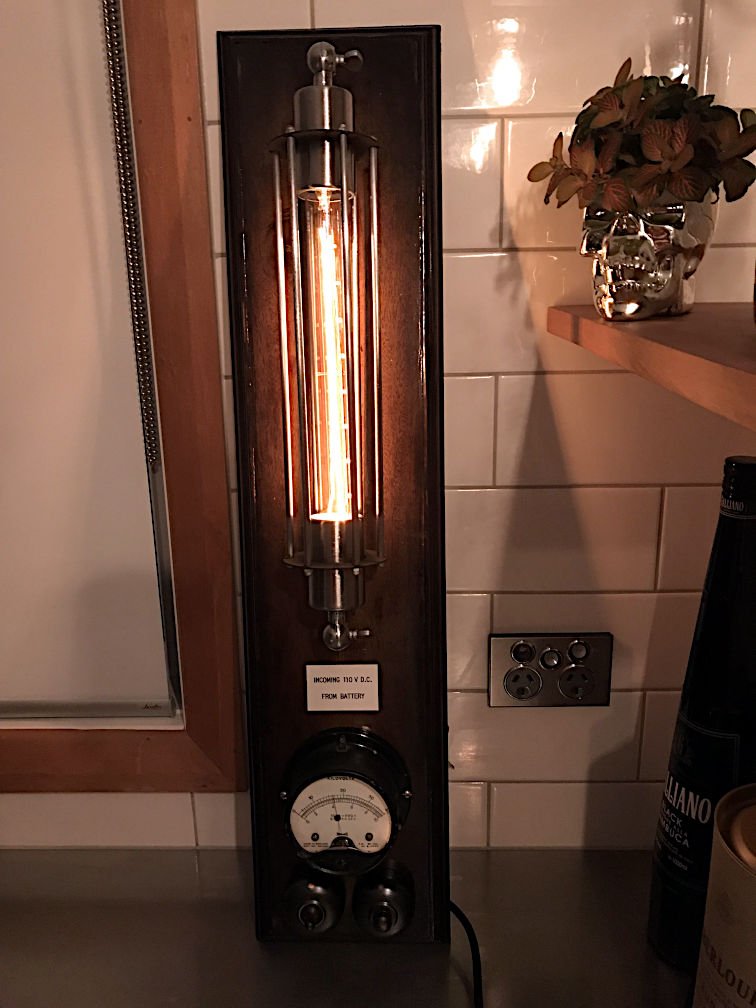
Another one of my patented useless projects which didn't turn out as good as I hoped.. I added some decorative edging to a plank of wood, stained it, mounted an Edison cage sconce light thingy, a retro switch and dimmer, an 'incoming 110V DC' plaque from oldschool Secret Santa, and this old analogue voltage gauge I got off TradeMe: I've attempted to add backlighting to the gauge, using period-correct incandescent bulbs for that extra crappy glow. Conveniently, if you use the right input terminals on the gauge, full scale is about 245V so you get to watch the needle go up and down as you operate the dimmer. Entertainment value: ~5 seconds. Eventually I'll pick a spot on the wall for this stupid thing to live, and if I'm feeling extra keen, I'll find a way to run power to it inside the wall. Artist's impression: The trouble is I really messed up the staining and varnishing of the board, and I don't know if I can be bothered taking the whole thing to bits and redoing it. I sanded through the dark stain in a few spots while trying to fix my first attempt at varnishing. =(
1 point
-
Do a wheelie bro
1 point
-
So first driving impressions were ‘who the hell thought it would be a good idea to put this much power to the front wheels’ but I’m very happy with not going any bigger of a turbo as it seems to have the power right where I want. It has great low end torque and a decent top end aswell. Anyhow, the car was running so good and even though I never really intended to build the car for it the last night speed drag was were coming up. There were import things to do like change the engine oil and get some semi slicks mounted up. But I did also have a bunch of left over exhaust pipe and a spare v band so it would be silly not to make a side pipe first? don’t worry I finished welding it and then gave it a bit of exhaust wrap and paint. installing it at the drags cause I didn’t need any attention from the police. had a tonne of fun, only managed 4 runs and blew a tire on the last run. First time ever drag racing so times were nothing special (14.6 was my best and I missed a gear) but I’m already looking forward to next season night speed wars.
1 point
-
Made this at work.
1 point
-
Engines aren't here yet, but a pile of bits are. New engine to be fitted is a 265 Hemi Valiant. 200hp standard vs Holdens 92hp will propel this pile of parts much quicker.1 point
-
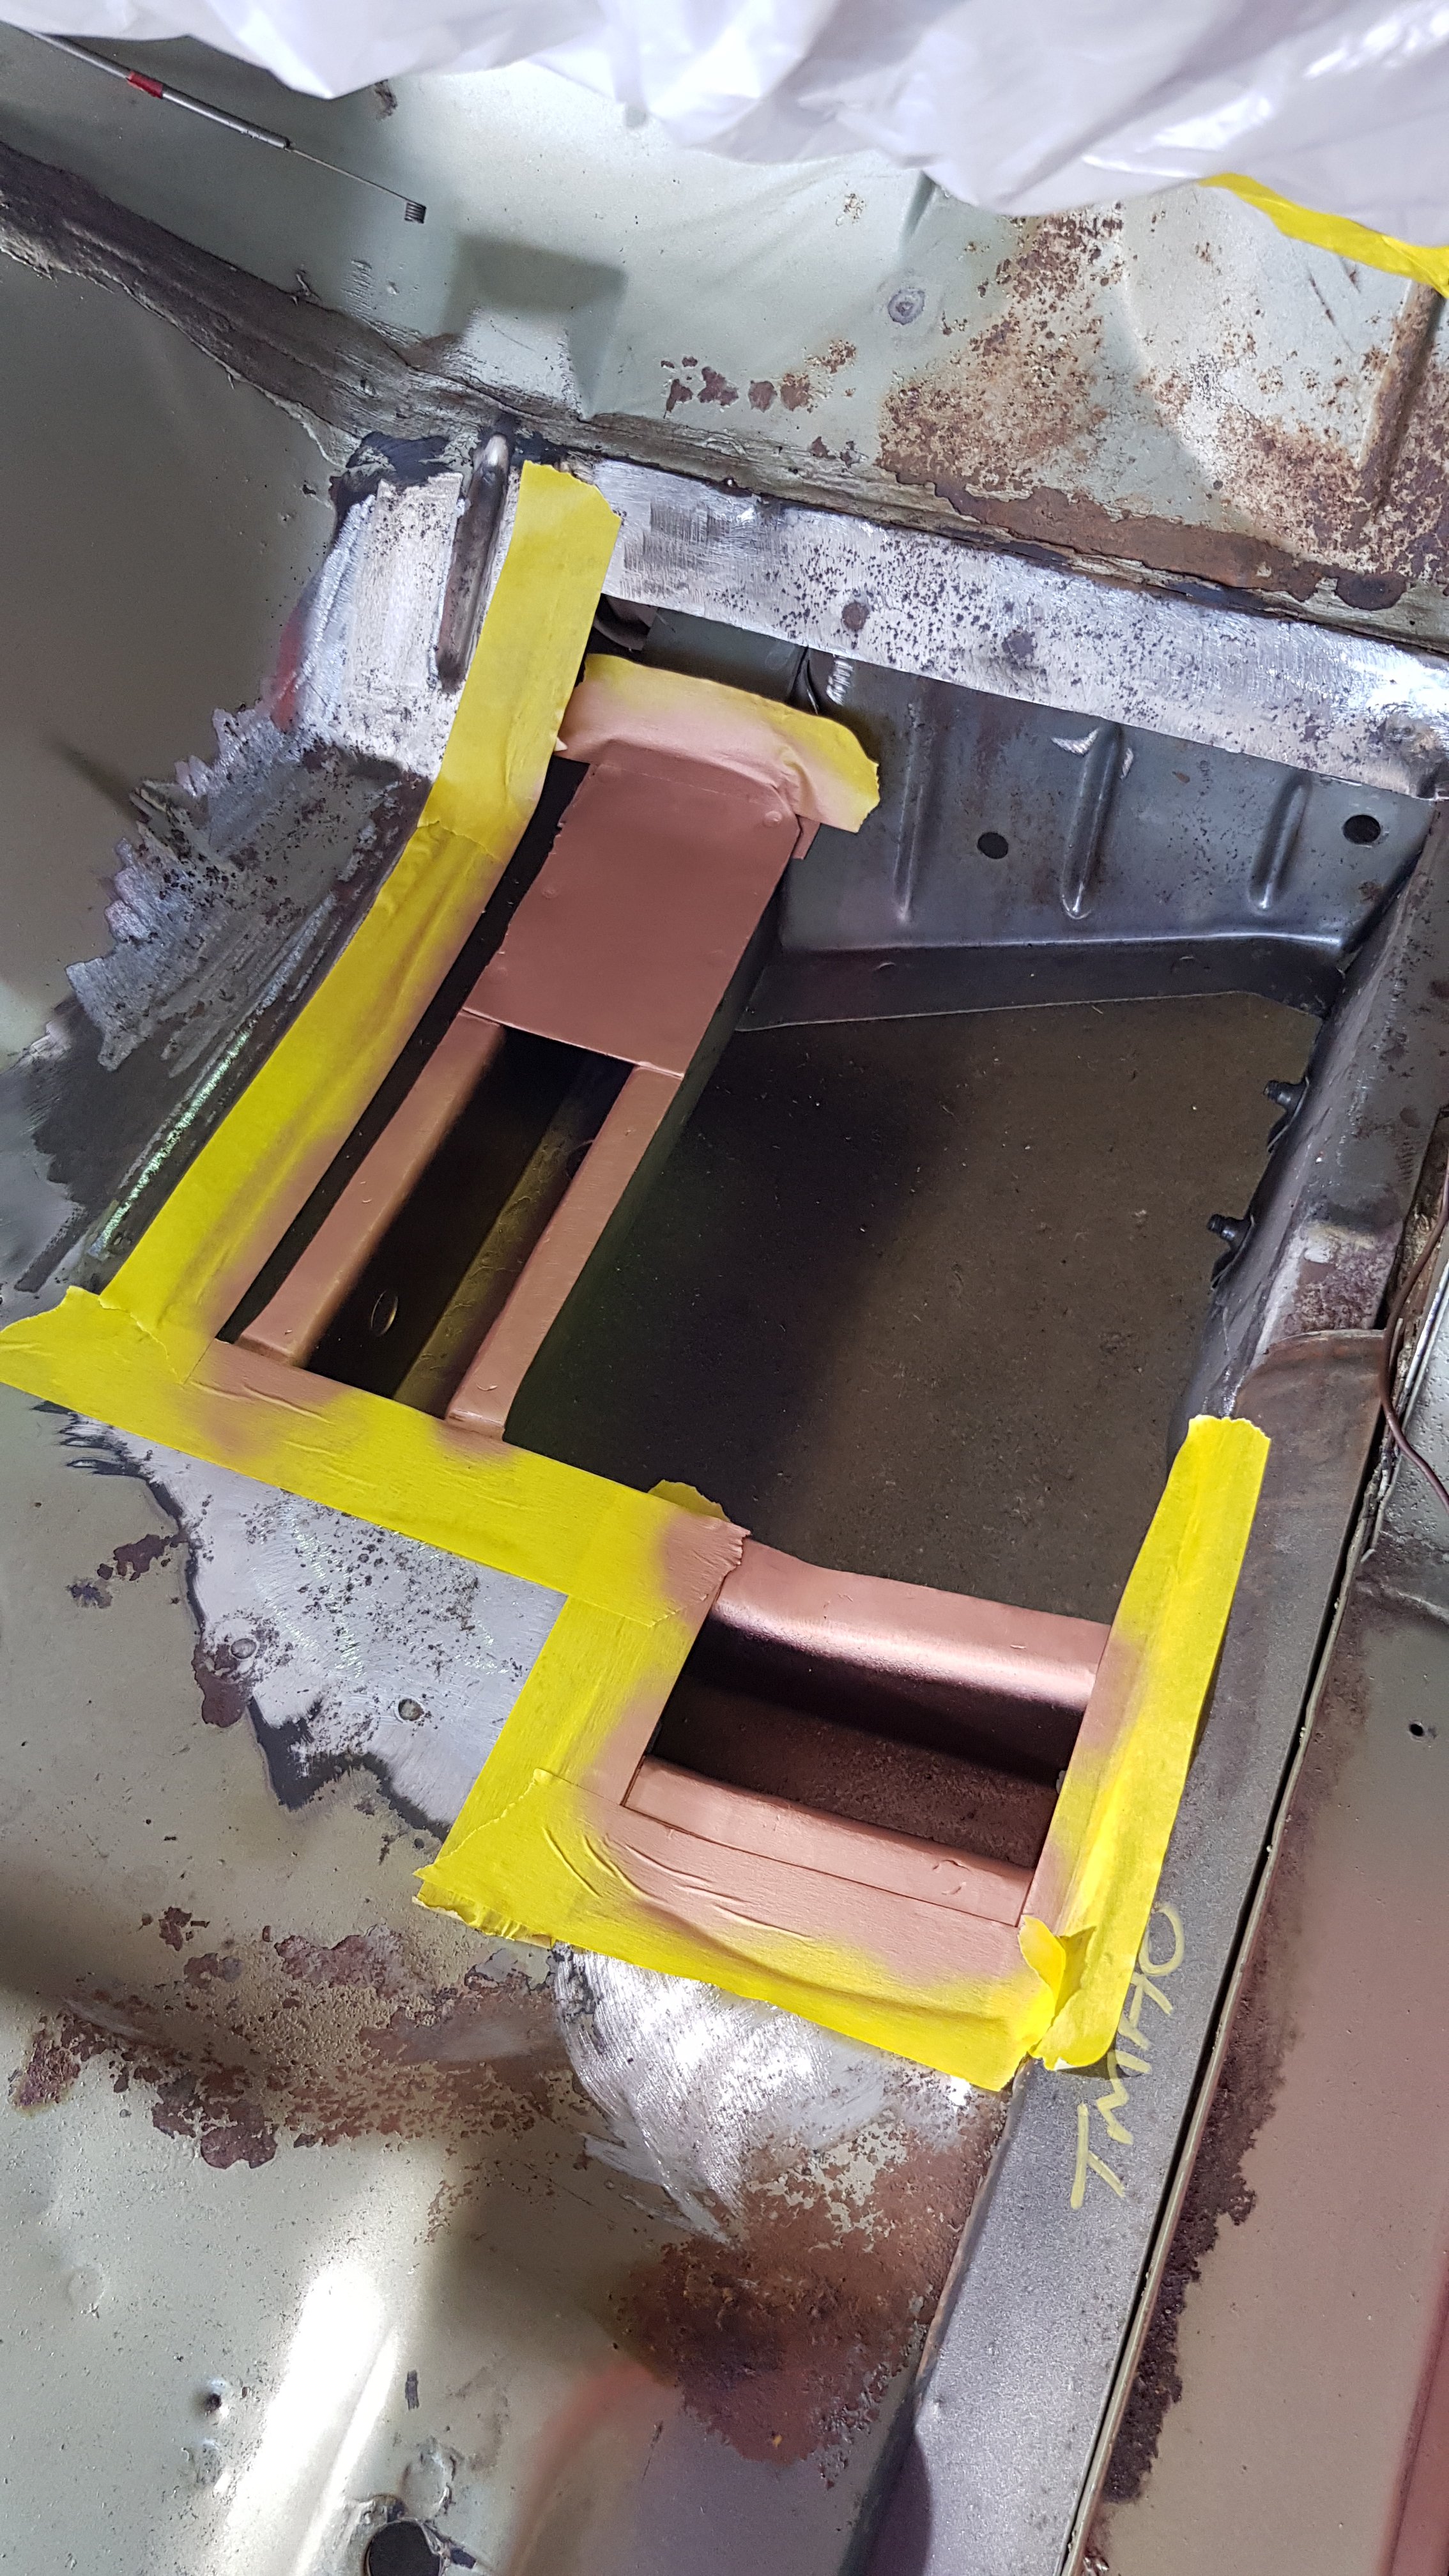
Matt sent me some better pics of when he was doing the floor and stuff
1 point
-
Havnt updated for a while. Been in the US living up the Freedoms. Ive been working on a lot of CAD over the last 1-2years and have just recently bought a massive 3D printer to make casting patterns. The plan is to stock pile patterns and then hit it hard when Im back in NZ Currently doing patterns for the crankcase. I'll update more on Instagram. @Barlow.Jobs1 point
-
Exhaust is done for the time being. Sure we will take it off to weld up and paint in the coming weeks but this is as far as we will go on it until it is sitting back on ground. Added in the two mid/front sections of pipe. Had to off-set one slightly to get better clearances etc as it comes forward to the trans. the H will be in the next section. As for the back. Well cut the holes for where the exhaust will pass through the frame but really need the car on the ground with the bumper on to get this bit sorted. Will tidy this up next week I guess. As you can see in the below pic everything is tucked up nicely. Those mufflers are 5 inch thick. Yip the big fat mothers are sitting flush with everything else and not dangling low whilst they have about half inch clearance from muffler to heat and sound treated floor. Also started the park brake. Using a Lokar kit. The Wilwood disks at the back have a drum assembly as well for the park brake and everything just clipped together easy. Routed the cables through the frame. Used a bit of airhose to insulate/protect the cables even though they are in a heavy duty housing. Thats what the blue pipes are on the top pic. Yeah not the best looking I know but really who cares. They will get painted up and after driving will be coated in road gunk in no time. Made up a mounting plate with a access hole to get to the bolt under it. Idea is the front handbrake cable(using the stock Hudson one) will run along the inside of the outer frame to a lever we will make up next week that will attach to these brake cables. Lever so we can apply more force and thus lock those brakes up more effectively. You might of spotted the brake booster is in place. Was all very good chatting about levers etc for the handbrake but with real-estate under the car being restrictive we had to make sure both the brake booster and park break lever would fit in the same area together. As you can see – plenty of room for the rest of the park break system/lever. The placement of the brake booster worked out ace. way better than I hoped for to tell the truth. All I had thought was along the lines of ” I want it out of sight maybe hidden away under the floor like the original Hudson system.” Well how Flockie designed up the front sub frame works so well with the setup. Will bolt right up to the frame as you can see and it aligns right up with the hole in the firewall for the brake pedal assembly. Only issue was we had to cut a bleeping hole in the floor. Sigh. But what can you do? It hardly pokes through and with luck once its carpeted up with wont be noticeable. Guess I will give a run down on what im using. Hydrotech hydro boost unit. Supposed to be the bee’s knees with more stopping power than a vacuum booster. Runs off the PS pump not the engines vacuum so may free up a few HP. Has an accumulator that gives three or so full pressure presses of the pedal should a failure happen to the PS pump or something. Then the system would work like manual brakes. Then a dual master cylinder. Bore of 1.125 in./1.578 in. Have a remote cap & reservoir to throw on it so I dont need to worry about access holes in the floor and lifting carpet etc to check the brake fluid etc. More on all this latter down the track I guess. Will reposition the proportioning value under the MC instead of pointing down. Will also change out some of the hydraulic fittings to banjo’s /90’s. But yeah happy how it all mounts up & aligns up. Was thinking we might have to make big brackets to hold it in etc but how it lines up and mounts up with the frame is ace.1 point
-
Almost finished! Bores have cleaned up without any defects. Ports look a fraction off on some of the bores though so hopefully I can cut some valve seats that work! Not going to lie, its quite exciting!1 point


.jpg.6bad9a6445b94f09aa1f2c7b8234b610.jpg)
.jpg.545f8d51bfdc7a5686662b67bbd75739.jpg)
.jpg.3227af7b75300c0b66faf772e209db31.jpg)
.jpg.5f805a6cfb842fa8306033f88f8916e3.jpg)
.jpg.85d77c8af690c47279b517535edb8caf.jpg)
.jpg.581c90704662574e0a970a55f37722c7.jpg)
.jpg.5fa267efc35a6bf42cb348ed931d77c3.jpg)
.jpg.af1c754ef7f486cec470f40f3756f389.jpg)


This leaderboard is set to Auckland/GMT+12:00