
Leaderboard


Popular Content
Showing content with the highest reputation on 06/19/19 in all areas
-
2019-06-19_01-30-25 by sheepers, on Flickr 2019-06-19_12-40-53 by sheepers, on Flickr 2019-06-19_12-40-43 by sheepers, on Flickr24 points
-
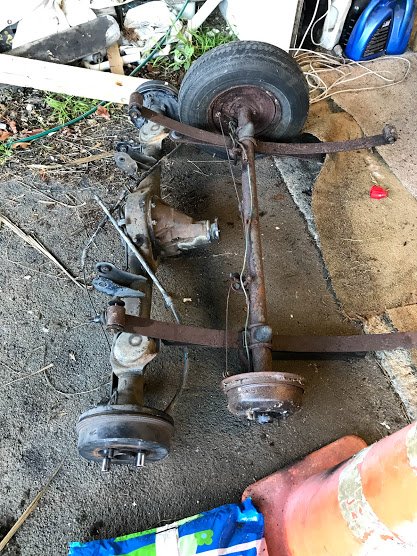
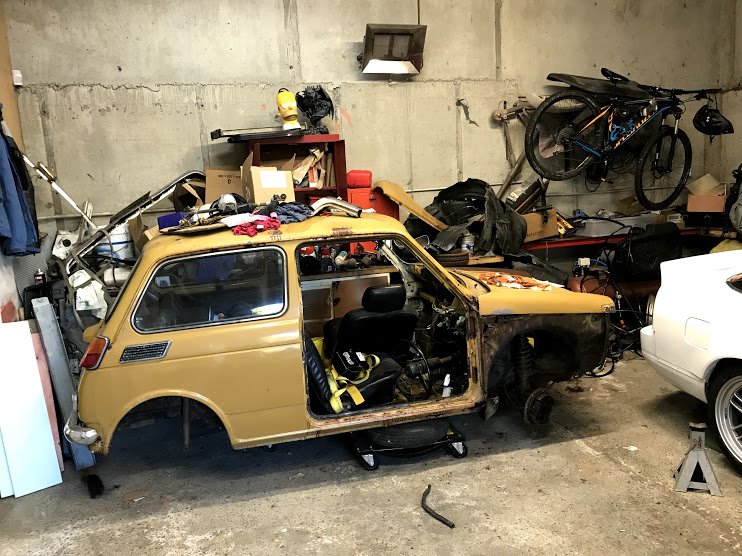
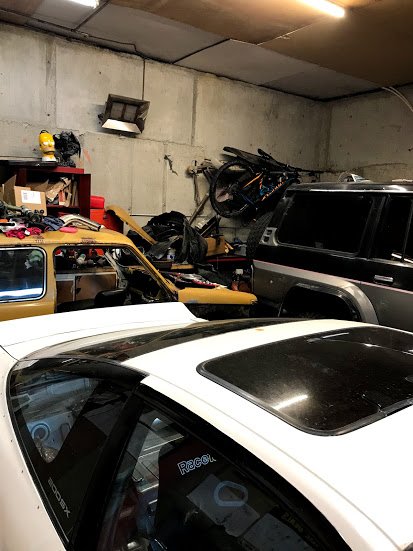
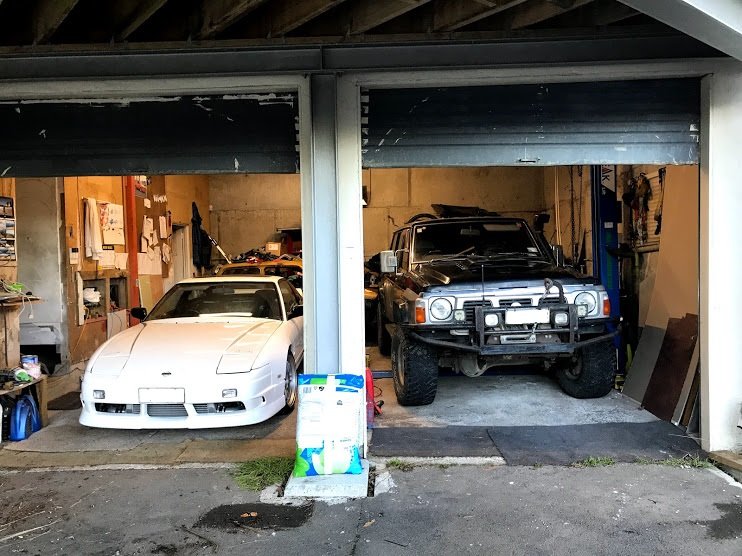
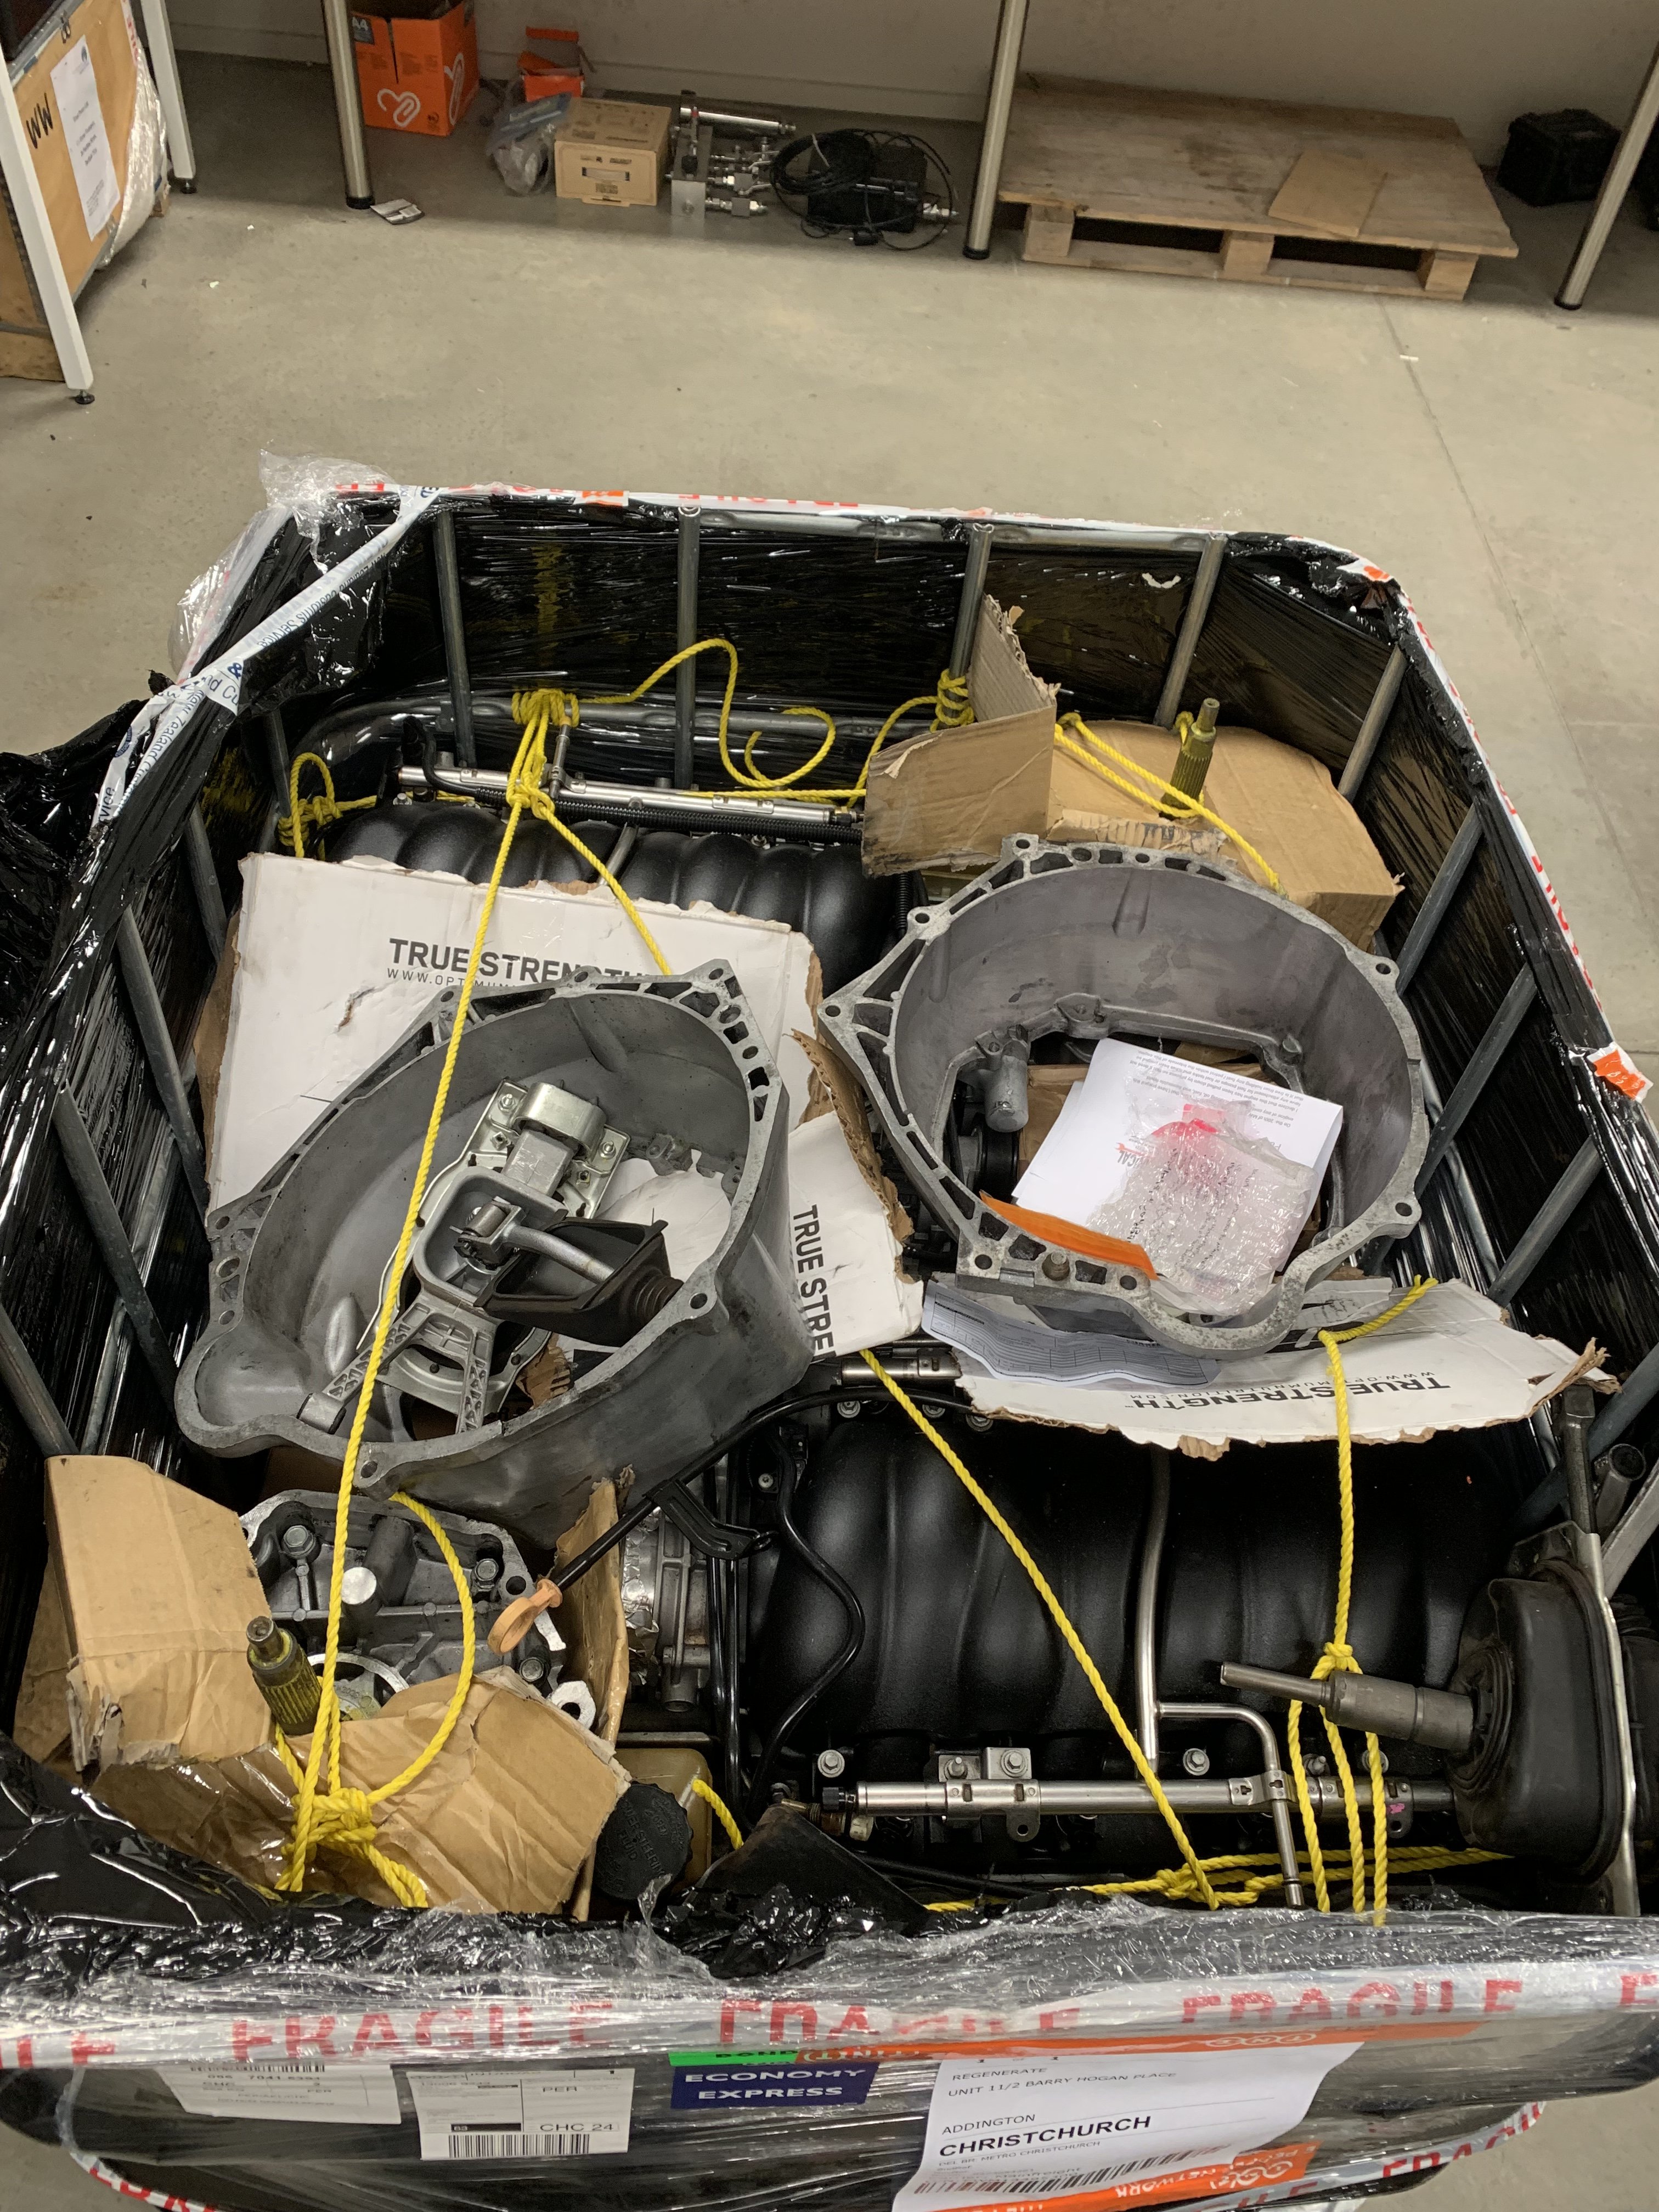
Took the axle and leaves off, jesus its tiny versus the Toyota t series one: Then played car Tetris: Just fits:
 11 points
 -
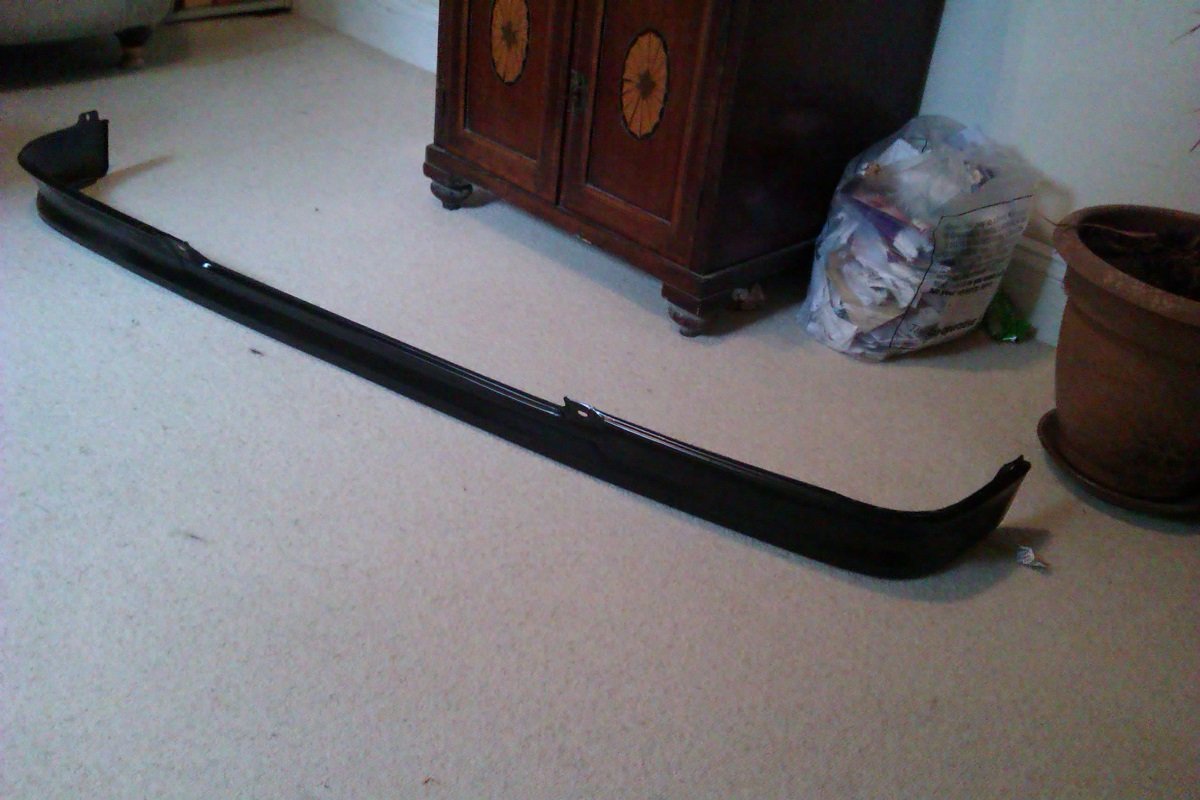
And this arrived today... Reckon the old crate's gonna look right fancy soon. Prepping and priming once I've put all the brakes n ting on the boxy car.
6 points
-
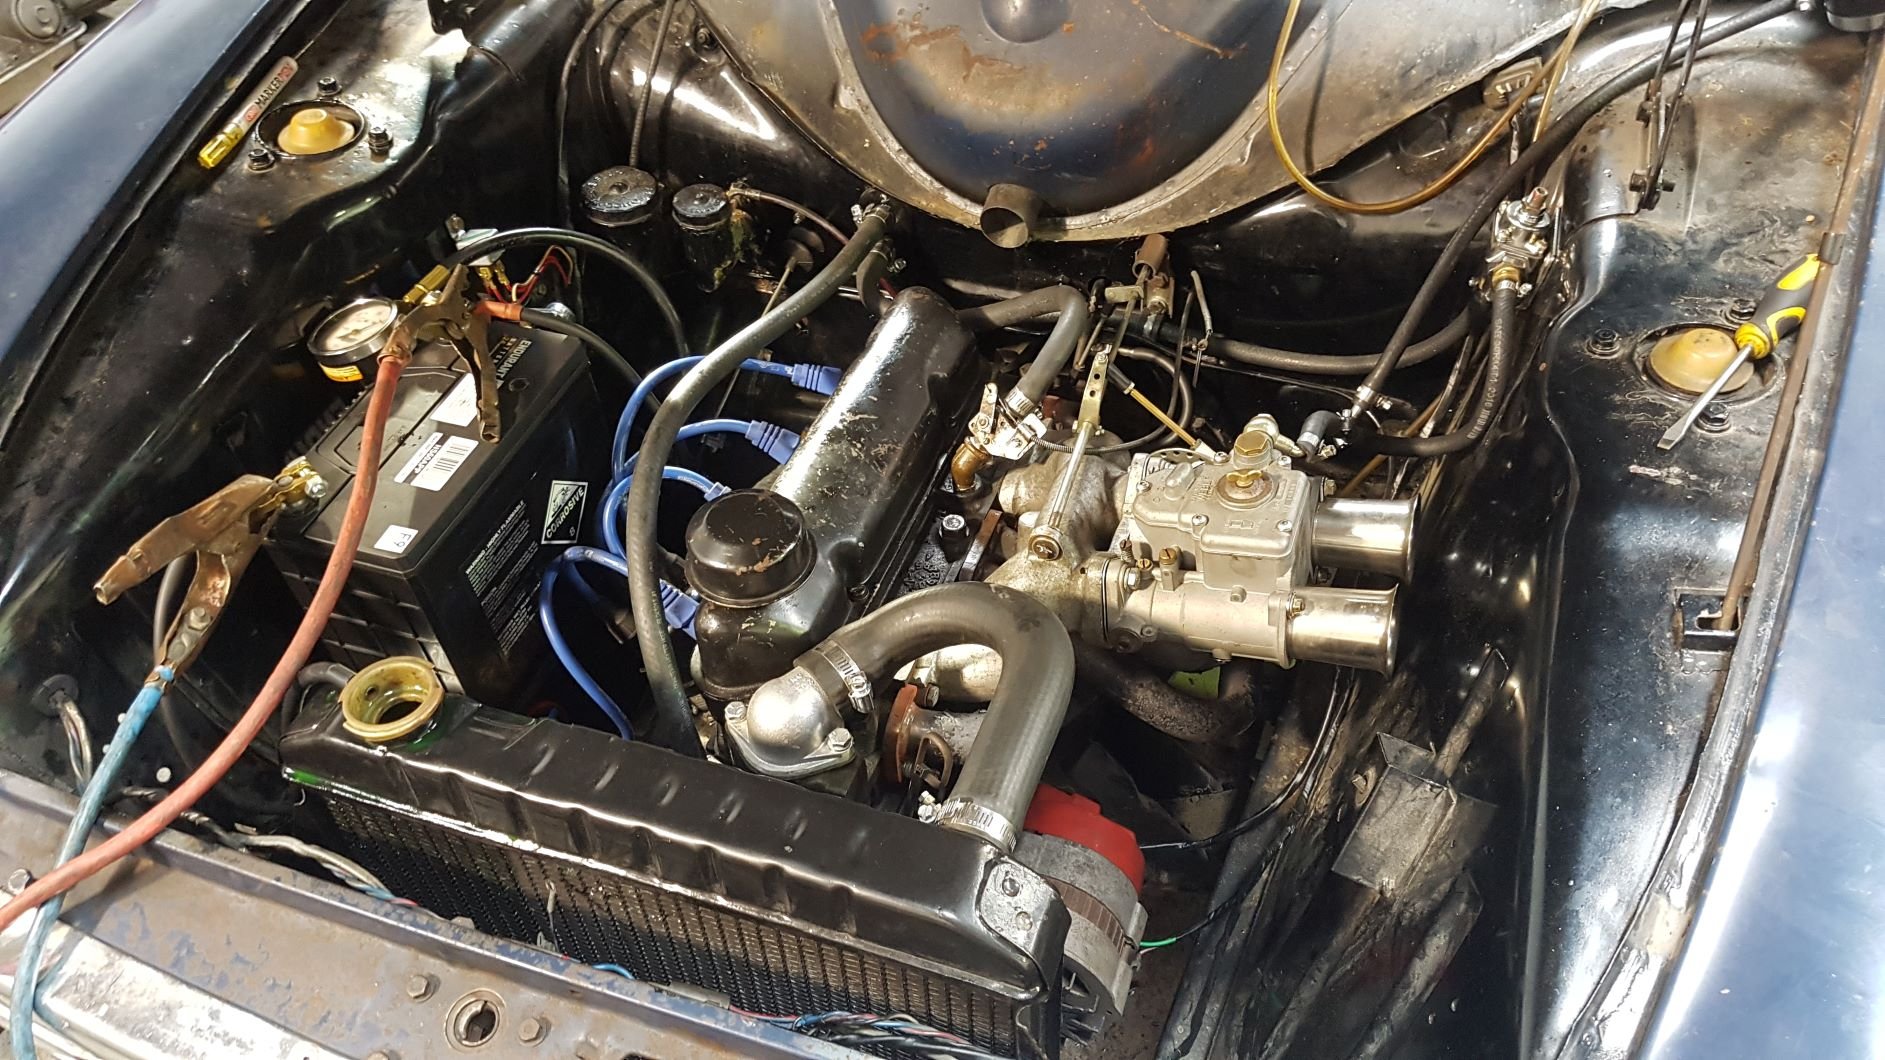
This bitch is finally alive. Started yesterday with no exhaust so fairly rowdy. Just needs exhaust sorting, cooling fan found (looking for one currently let me know if you have one please!) I seem to have lost it over the last decade. Pretty pumped as I got the engine rebuilt over 12 years ago and was a bit worried there would be issues. Will need a tune etc and no doubt some other issue will show itself but its getting damn close. Looking forward to taking it for a fang!
4 points
-
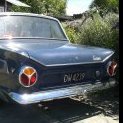
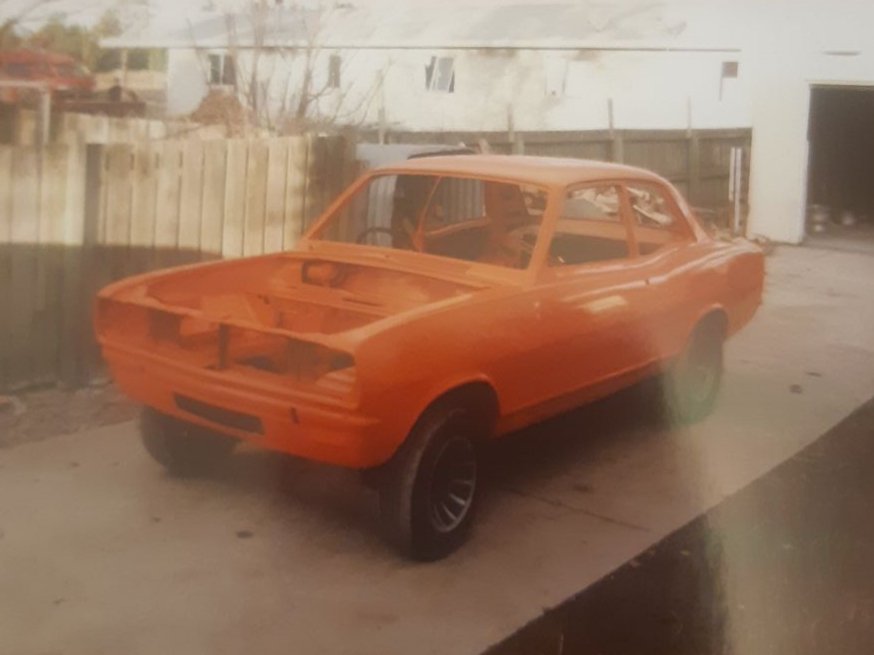
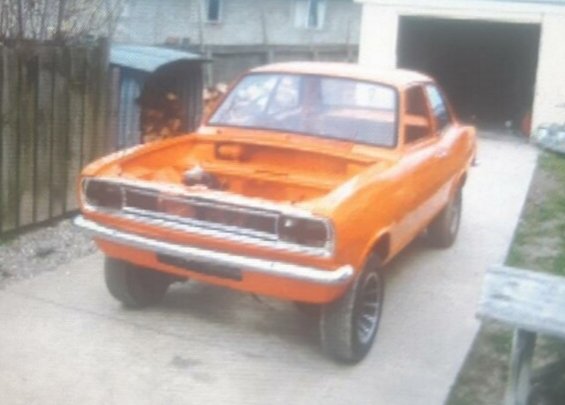
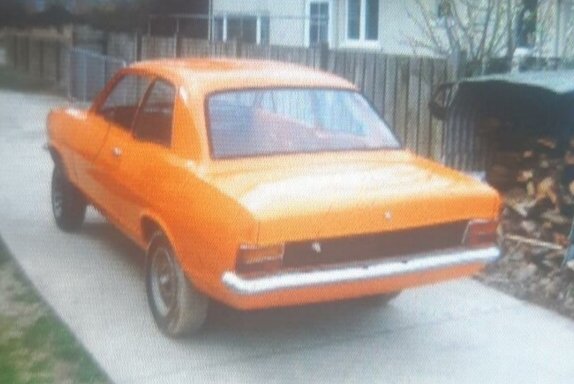
Gidday, Thought I'd start a thread on an HB viva I've just bought. It comes with a built 2.3l slant engine which apparently is a certified ripper but has probably been sitting for 10 years... I actually know very little about it, it's been a friends for as long as I can remember and he had some motivation a while back and got the body work done & painted it. Put in the GT grill and got GT badges. But these days he hasn't looked at it for years. Talking turkey with him at New Year 2018-19 and I said I'd look to buy it off him and finish it up and just sealed the deal about 6months later. I'm guessing the job list is: Strip engine, inspect, hone and replace rings. Build exhaust & extractors Rebuild carbs Radiator Install driveline. Clutch, gearbox & diffs largely unknown. But I think there are some spares from a 1.3l HC viva... Install MSNZ cage Entier braking system Poly bushes Springs & shocks Wheels & tyres Race seats, harness Fit enough interor to meet HSC class That should be the worst of it haha Anyway, I'm keen on some guidance on how to set this car up. E.g. springs to suit the 2.3l. Tips and tricks to set the car up for circuit racing. Brake components from other vivas etc. Won't be much work happening until I go collect it from the South Island which I think is going to be New Year 2019-20. Just want to get a bit of a plan in place and start keeping an eye out for any parts needed to get this finished up. Discussion thread here: Cheers, Pete
2 points
-
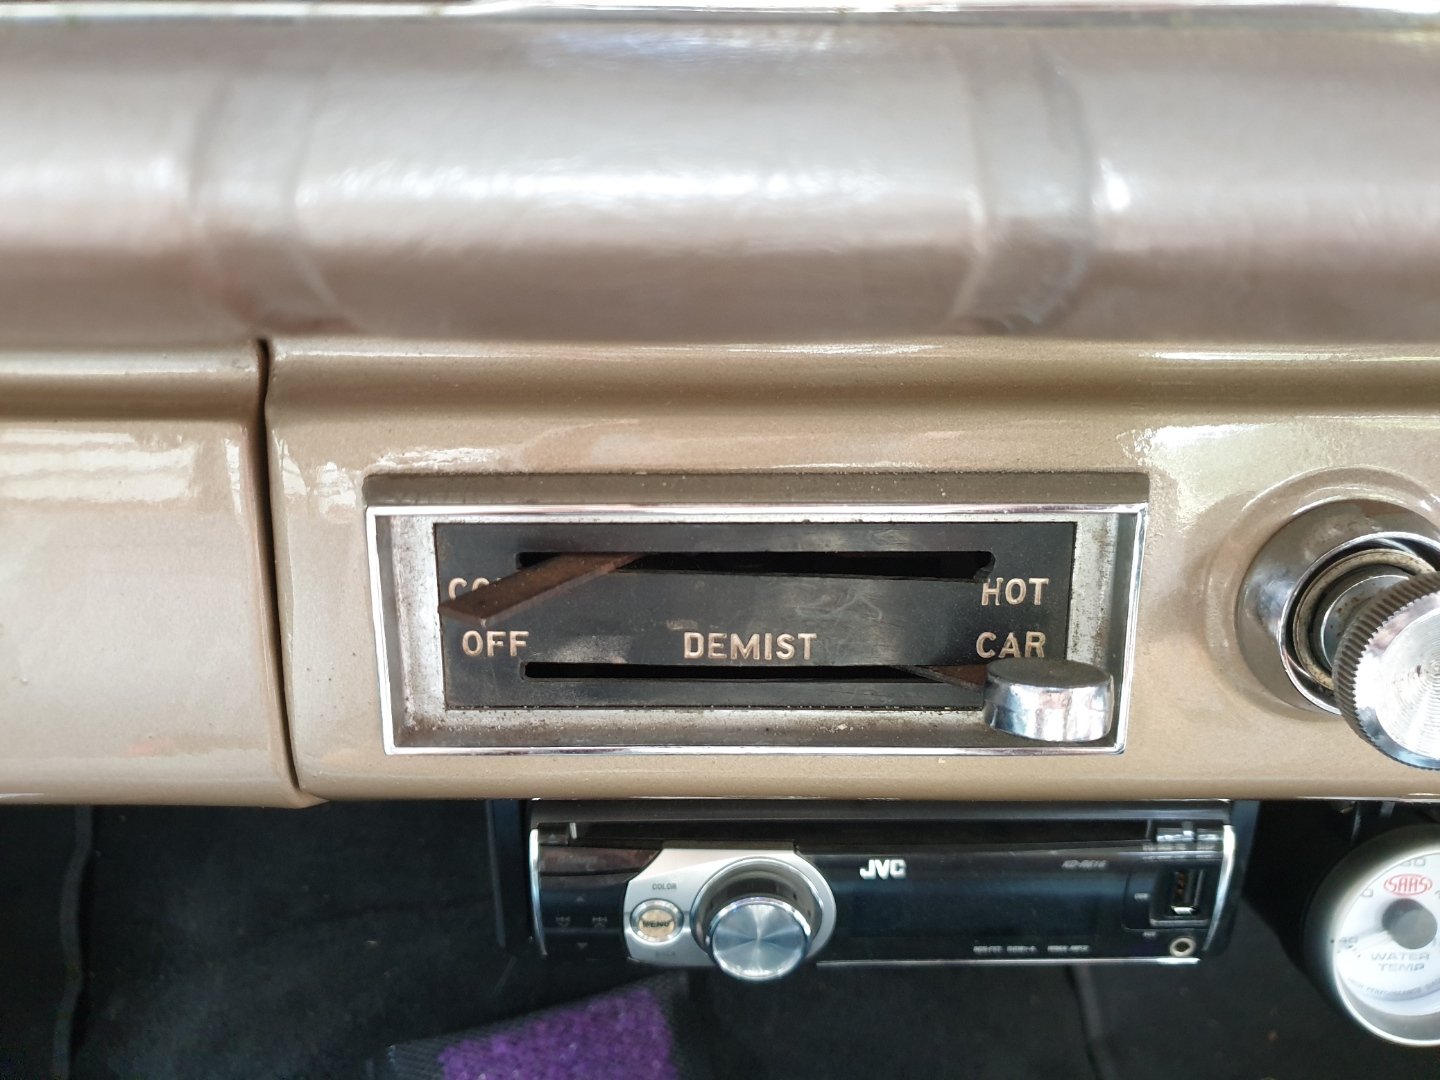
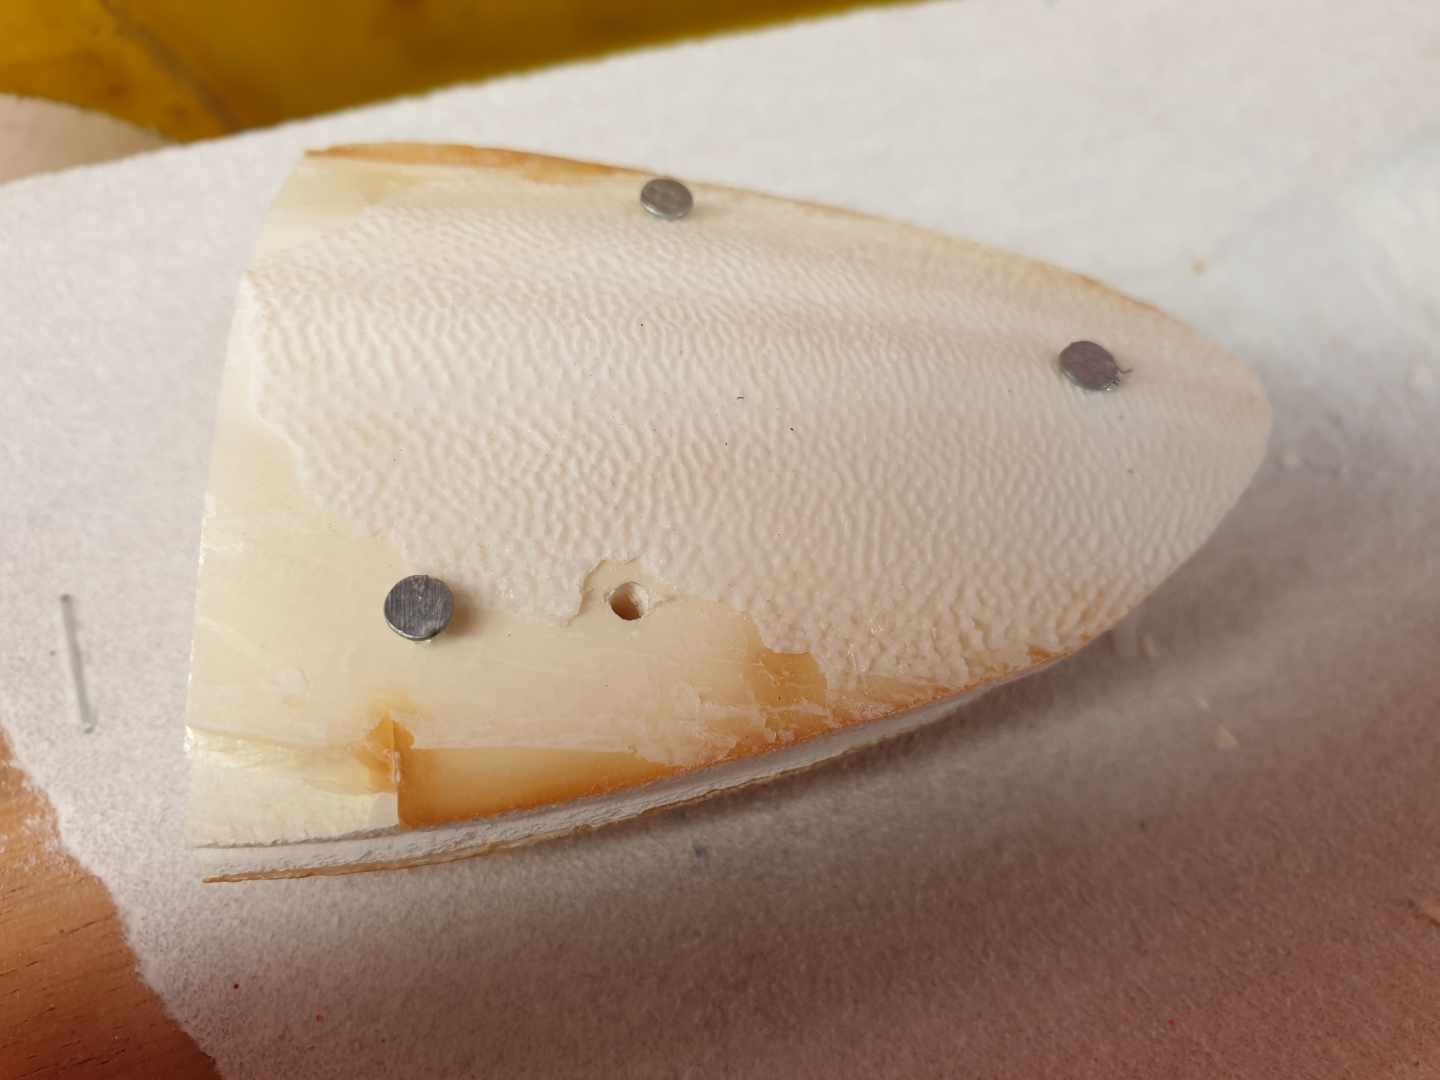
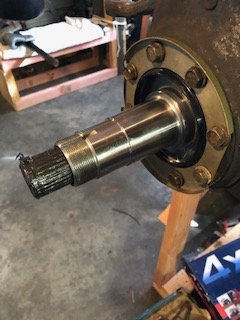
Is the rocker tip sweeping off the edge of the valve stem and into the chamfer? Certainly needs looking at carefully, I'd be getting out the engineers blue and looking at the sweep over the valve stem and the adjuster. Looks to me like the base circle has been dropped quite a bit with the added lift, which lifts the rocker arm up at the valve end. So you wind out the adjuster to make up this clearance but now the adjuster tip moves outwards on the valve stem. Not much you can do to fix that on this motor unless you hardface the follower pad at the other end of the rocker. Lash caps might help too but I am sure Kelford can help you out with this. Large radiused tip adjusters are certainly a good idea seeming you've got like 5mm more lift than OEM. Those L200 ones look the ticket. Worth spending $8 to find out. p.s. nice Big cam! Edit/ 4g63 sohc don't have a cam tunnel haha2 points
-
Bin it, buy new oil Or build a centrifuge2 points
-
Welcome back viewers to yet another ever so thrilling update on the old Huddyson. Sitting here and looking back over the last few years I must scratch my head and ask where has all that time gone. I really did believe it would of been driveable by now - road legal or not legal. Life has its way of derailing such grand time frames as im sure you all are aware and the fact that even though the parts im using may not be the most expensive out there they sure dont come cheap. To paraphrase Oedipus, Hamlet, Lear, and all those guys, "I wish I had known this some time ago." Everything was such a damned nice idea when it was an idea yet as with everything How you look at it is pretty much how you'll see it I guess. And looking at it I can see the old gal ride low n slow down the street fast n loud on the highways everytime im out working on the old beast. God i got a tad philosophical there for a moment... what are they adding to the water around these parts. /twitch Enough of that nonsense. let start the normal barrage of images and brief explanations. Back floor all patched up over four link brackets. Holes added for access & removal of the top bars bolts. Sparks and smoke flying up front as the Trans cover was all made up like a big jigsaw. To help pull the drivers side floor up the brake boosters cover has been incorporated onto the trans cover to add rigidity. Since the brakes are all tucked away under the floor and me being a bit of a lazy sod im using a remote reservoir. The brake pedal was a bit of a sod that took up a heap of time. Due to the floors sloping angle and other factors we couldn't do a normal pivoting bar as the inside push rod where you stand would be pointing towards the floor. So a duel/tandem lever was made up. its somewhere between 4:1 and 5:1 ratio. Still got to get the adjustable top links. but tested with a bit of bar and have heaps of travel for the booster. Grease nipples all over the place. Machined up brass bushes and ya its solid as. Have to get the actual pedal and the other lever bar it connects to tested still. Moving on to smaller jobs now. Power steering. As i have mentioned I think some time ago im using a PSC setup made for rock-crawlers. So if its powerful enough to drive and survive the crazy setups they have it should be fine for my setup. Now I didnt want to take away from the finned engine dress-up stuff when you open the hood. So a low mount bracket was fabbed up. The little pump has a heap of adjustment, lines up nicely with the other pulleys and is tucked nice and low that will not only keep it out of eye sight but since the pump is gravity feed from the reservoir that will be mounted up by the radiator it will have ample full as well. Mounted up the trans cooler up front of the radiator after I drilled a few holes and added grommets for the hoses. Should be hidden away enough not to be noticed. Got the cad skills out again to design up the gas tank. Its about 19Gallons/72litres. The tail pipes are rather close together so the plan is cut a hole in the trunks floor and have half the tank through this and then the other half taking up much of the trunks floor space. Baffles will also add bracing for those times I may throw heavy loads like tires ontop of it. The bottom should be flush or just tucked up with the bottom of the chassis whilst the top will come nearly up to the trunks lip/bottom of the door. So it shouldn't be a hindrance or noticeable. One end is slightly deeper for the pump and sender. Josh and the guys at Apex in Oamaru cut n folded it up. Top guys with some great kit that I highly recommend. They also made up that Hudson logo for a bit of fun what was nice of them and chucked it in. Until I figure out what to do with it I plan to use it as a stencil to tag a few things around the garage. \,,/(-.-)\m/ On a bit of a separate note the missus has taken up slinging a bit of one shot paint of late. Hell yeah I say. Im more than happy to buy the brushes, paints and what ever if it means I can get some lines laid down on pretty much what ever I want. I think she is busting it out but naturally I may be a tad one eyed, biased and not the best judge in the matter. Take a look any way. Some panels up near the top of below pic in my garage. Cooler to go with her Morrie Door she made up for Flockie on an old 40s Ford pickup door. And of course hand bags... she has a thing for handbags.2 points
-
2 points
-
Thanks for posting up about the engine building, it's really interesting seeing the work involved!2 points
-
Next meet: 21st of July 2020 Will start these up again and see how things go. Back to the plaza this month. Meet at the Tesla charging side of the carpark at 6:30pm. Facebook Event Discussion Thread1 point
-
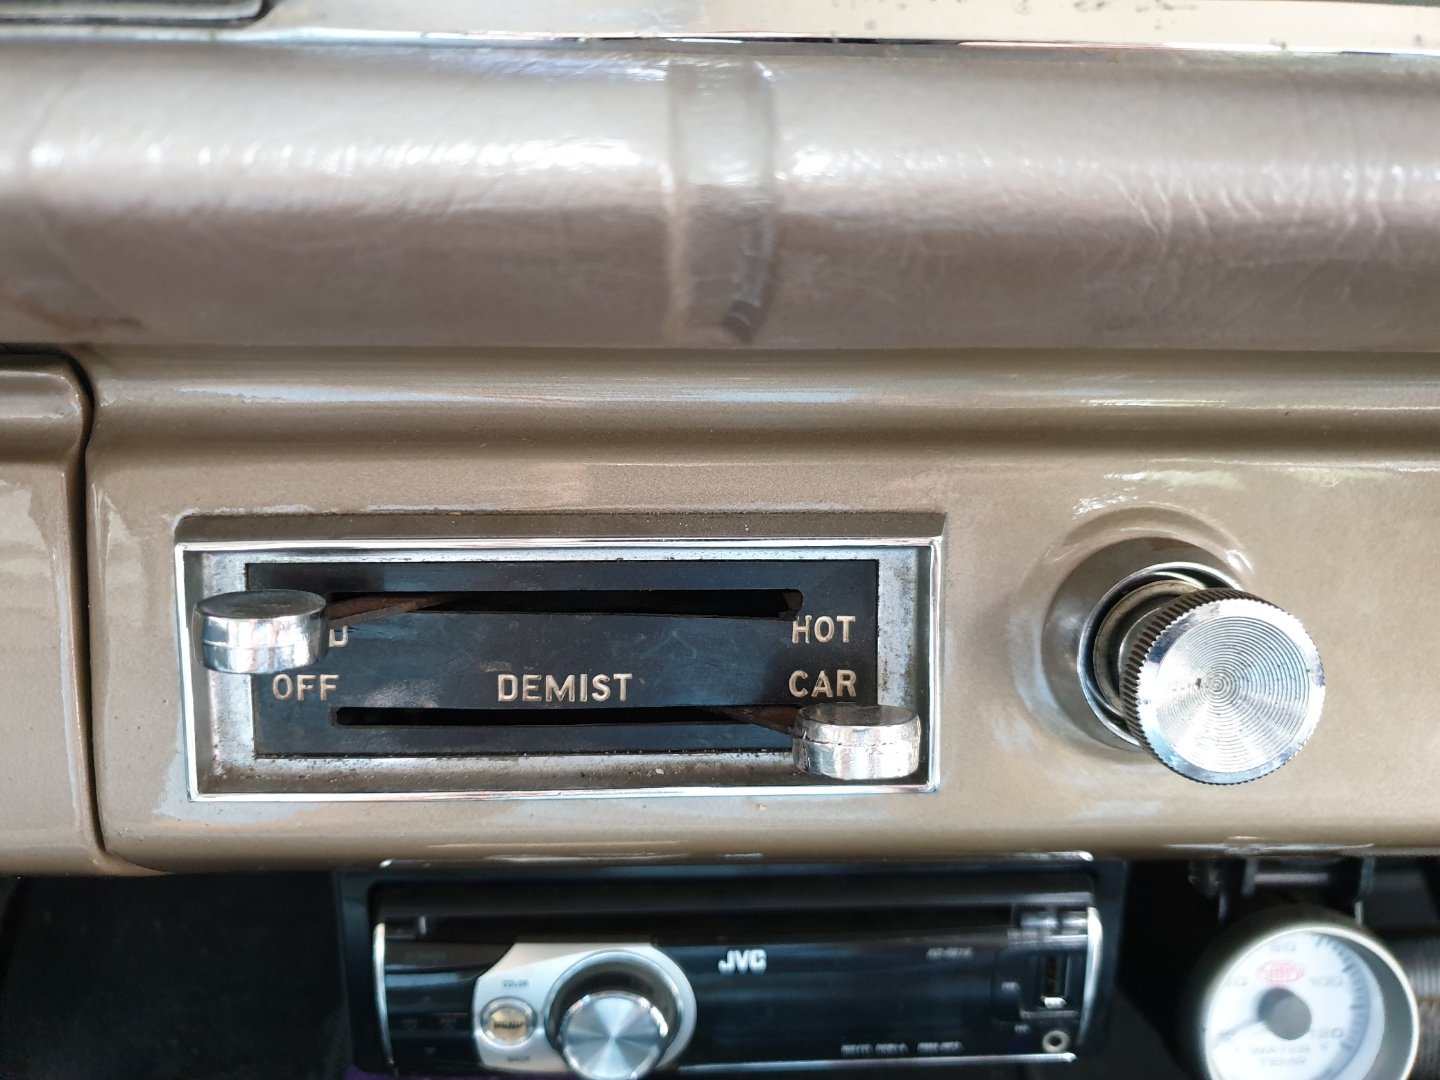
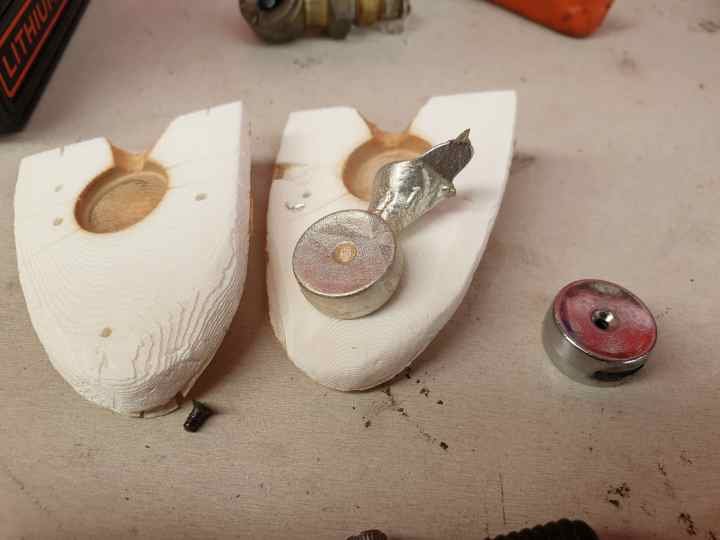
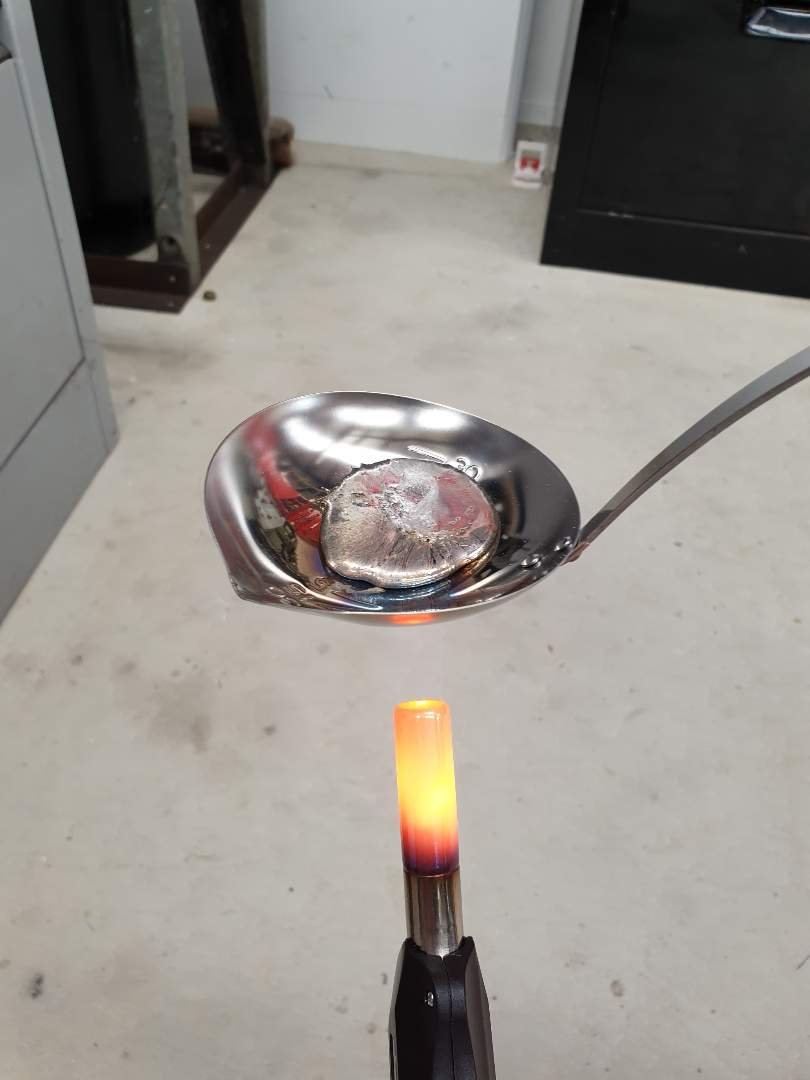
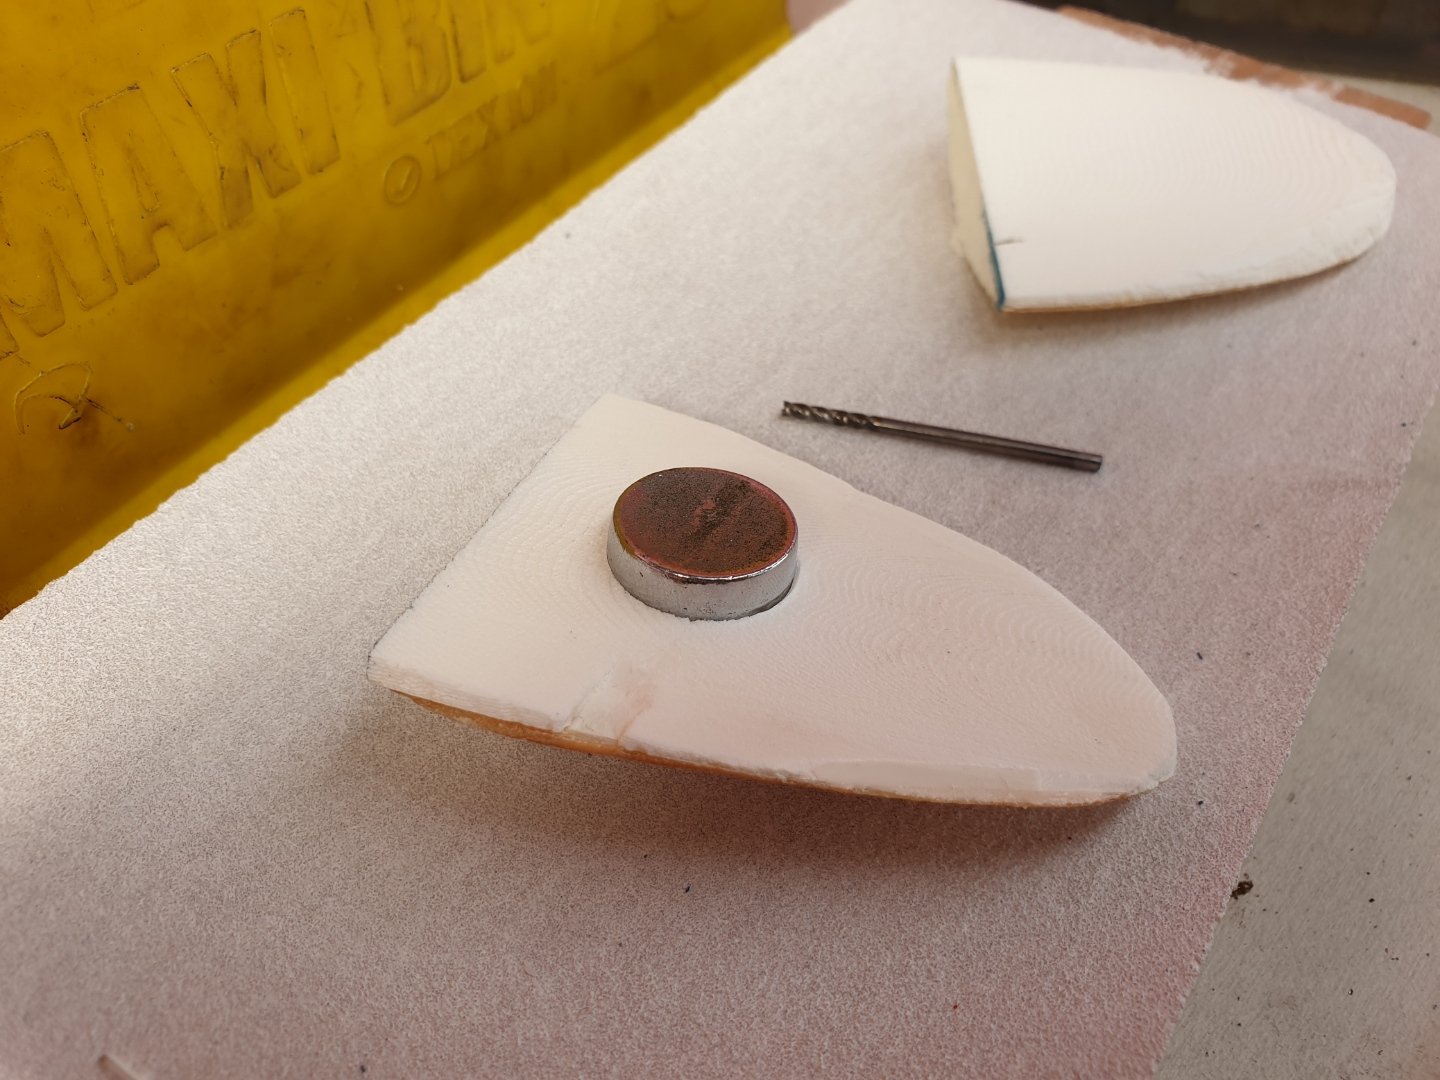
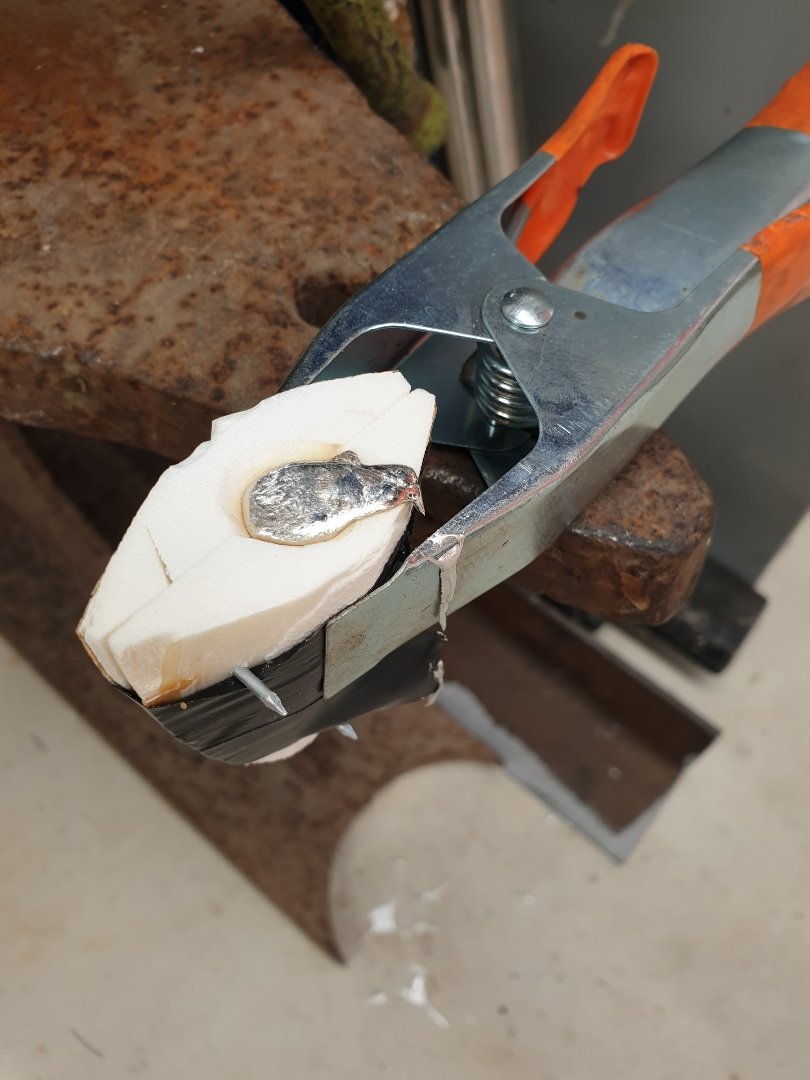
My impala was missing a knob. No one likes being knobless, so I thought I'd treat it to a brandnew knob! A Google search or two later and I was shocked at how expensive it was going to be, $30USD + $25USD postage!!! WTF!!! That's like $100DNZ. So I thought about turning one up one the lathe, but it would've looked too perfect. Then I remembered casting metal for small projects about 20 years ago when I was a student. So I thought I'd give it a go. I really wanted to capture the imperfections of the original. Original old parts have a certain amount of soul to them...new parts often don't. So here's how it went down: DIY sanding board. $2 cuttlefish from a pet store. It's that white shit you'll see budgies pecking at inside their prison cage of broken dreams and mental hell. I cut it into two halves, and then sanded each half flat. Next push in your original work piece as much as possible. Take it out, scrape away some of the indentation...repeat...repeat...repeat, until it's nicely sitting halfway in. Now match the otherside the same way. You'll need to cut a pouring funnel into the top, to get the metal in. And hard to see, but I cut 4 very small air vents on each half, to let the air out. Then I pinned the mould together to keep the alignment of the two halves squared away. Time to heat up metal. I'm using lead free pewter, same as jewelers use to make rings and necklaces etc. $14/100g online from a craft shop in Auckland. I only needed about 20g...but at that price, I thought I may make something else later? Melting it is as easy as it looks. A $2 shop ladle that I tweaked with a panel hammer to put a pouring spout into. And a blow tourch. Pouring the mould. Opening for the moment of truth...fuck yeah, nailed it first pop!!! Yeeee-fucking-ha!!! A quick tidy up, dremel a slot, buff up on the polishing wheel, scotchbright to dull it down a little to match the original patina...booyah! And what it's all about. Installed in the car. It competes me! I'm so happy with how its turned out.
1 point
-
Sweet, I’ll let you know what they reply with1 point
-
I can still hear that Corolla....1 point
-
Pour it through a loaf of bread, then buy new oil1 point
-
Since then? Not a lot has happened. Just the monthly drive out to the local car show. My daughter is nearly one year old now, and family has taken up most of my time - which has been very enjoyable. I’ve driven only 1500 kms since she was born! Future plans for the RX7 at the moment are unclear. But it’s no worry having it wait in the garage for now.1 point
-
February 2019 Instead of going to Rotary REUnion, I did an Auckland Car Club race event. I raced in the Dual and Multi car sprints. This was my first real race meeting. Staying in the pits, talking to actual racers, and driving with legit race cars on track was rather great. I was the only road car in the sprint class, which was surprising. All the other class entrants were racers just getting some extra laps in. So of course I was slowest! (Excuses!) The day was very hot, at 27c before lunch. The track temp must have been over 50c. I put some effort into my tyre pressures. Havingi started with F30 R28 psi, they got really slippery and up to 36 even after the practice session. By the end of the day I had dropped the cold pressure to 25, which heated up to 33F 31R (measured in the pits after a cool down lap). The car was much grippier and predictable with the lower pressure, plus the wear seems more even. The road tyres don't get as much of those melted lumps and strips. The Hampton Downs National circuit is so much faster than the club. I was easily hitting 200 on the straight. I just tried to get my lines and braking consistent all day. My oil catch can works! No more oil spraying out of the BOV on to the exhaust! But the can leaks! After draining it, duct tape saved the day. I’ll need to replace it with a better setup. Overall I certainly get more driving time at a track day, but this was worth doing. The engine still has some rough spots. I reckon its turbo related. The boost fluctuates, and I can hear turbo spooling and slowing like an on-off oscillation. It will go away and run normally if I back off for a bit. Time to again look into the turbo control system…1 point
-
December 2018 A good old fashioned car park motorkhana / autotest / autocross, with the Sports Car Club of NZ.1 point
-
November 2018 Time for a sound system upgrade! Nothing major, just a kit to improve on the worn out factory stuff. This car doesn’t have the crazy Bose setup like some RX7s, so it’s just a simple 4+1 speaker ‘90s system, that rattles like crazy. The crusty old front speakers in their bespoke bracket. With some help from carspeakeradapters.com, the new Sony 6” split component speakers are mounted. Tweeters are worth having. The rear speakers are a drop in fit 6x8” Pioneer, and I’ve also fitted a compact powered 8” subwoofer in the boot. The head unit remains the same Sony media player. A cheap and cheerful setup overall.1 point
-
August 2018. We are back at Chrome. It was fun, but not great like last year. Too much waiting and traffic on track. The car ran well and fast. The Blitz blow off valve is puffing blowby oil, directly on to the exhaust manifold, and started smoking. I’ve bought a catch can. It only happens on track cornering. One suggestion I’ve read is to keep the oil level around half full, but that is not a risk I’m willing to take! On the way home from the track I got a lovely golf ball sized dent in my bonnet from a truck kicking up a stone. It probably would have gone straight through my windscreen, so that was some luck I guess. The headlights, poor by modern standards, have been upgraded to the most expensive halogen bulbs I could find - NARVA PLATINUM PLUS 130. They are noticeably brighter.1 point
-
Wow it has actually been a year since I updated this blog! June 2018 At the sprint event I damaged the front spoiler, as the road was very bumpy at 200 kph! It had never looked very good, and had obvious fading and plastic welding marks. I removed the front spoiler, with many rusted mounting bolts breaking. Thankfully there was no damage under the car. I sanded off all the scratches and plastic welding marks from previous repairs, straightened it out, replaced the mounting bolts and clips, and painted it with spray on black Plastidip. It came out quite well for a first attempt. Much better than the very temporary “black restorer” goo. When the Plastidip coating gets damaged again I’ll do some more sanding to get it even smoother, and try to avoid bubbling. I also cleaned the filthy front bumper with wax and grease remover, sanded off some old overspray, and adjusted the brake duct fitment. The FD has legit brake cooling ducts below the oil coolers, but they do get damaged sitting below the bumper there. I have invested in a clay bar, orbital polisher, polish and wax kit, as I need to get rid of all sorts of blemished spots. The paint has been a bit neglected because I don’t really enjoy washing cars. Luckily the red looks great in good sunlight even unpolished. Spot the differences with this fully restored RX7!1 point
-
Those have “49cc” cast into the cylinder and no one will ever know it’s 60cc anyway. It still won’t be fast, but at least it won’t be so slow .1 point
-
Another good burger, more sharns and as usual people turning up in new old cars. OS life.1 point
-
I think a cop car did a loop around us just before security turned up and kicked us out. Plaza management seen the facebook event and sent out an email to security to get it shutdown. Was a pretty good turn out before that happened, maybe 20+ cars and some were pretty cool! Have sent the Plaza an email, just waiting to see what they say, otherwise we’ll have to think of somewhere else to go. Seen you parked up down Main Street, sorry we didn’t stop, didn’t know you were broken down!1 point
-
I'll try to make it, to be social and all that1 point
-
Get one of these up ya: https://www.treatland.tv/suzuki-FA50-45mm-cylinder-kit-p/suzuki-fa50-45mm-kit.htm 60cc and should be ready to bolt on and go.1 point
-
Hey no worries. Us engine reconditioners can get a bit of a hard time for being expensive. Just trying to show where alot of the time goes into reconditioning a engine.1 point
-
I just got an HKB one from Scarles1 point
-
1 point
-
The more oldschoolers the merrier. Most turn up in modern dailies during winter. It’s more about the jugs and ribs than the rust and slam this time of year.1 point
-
Paging @BobbyBreeze, do you read me.1 point
-
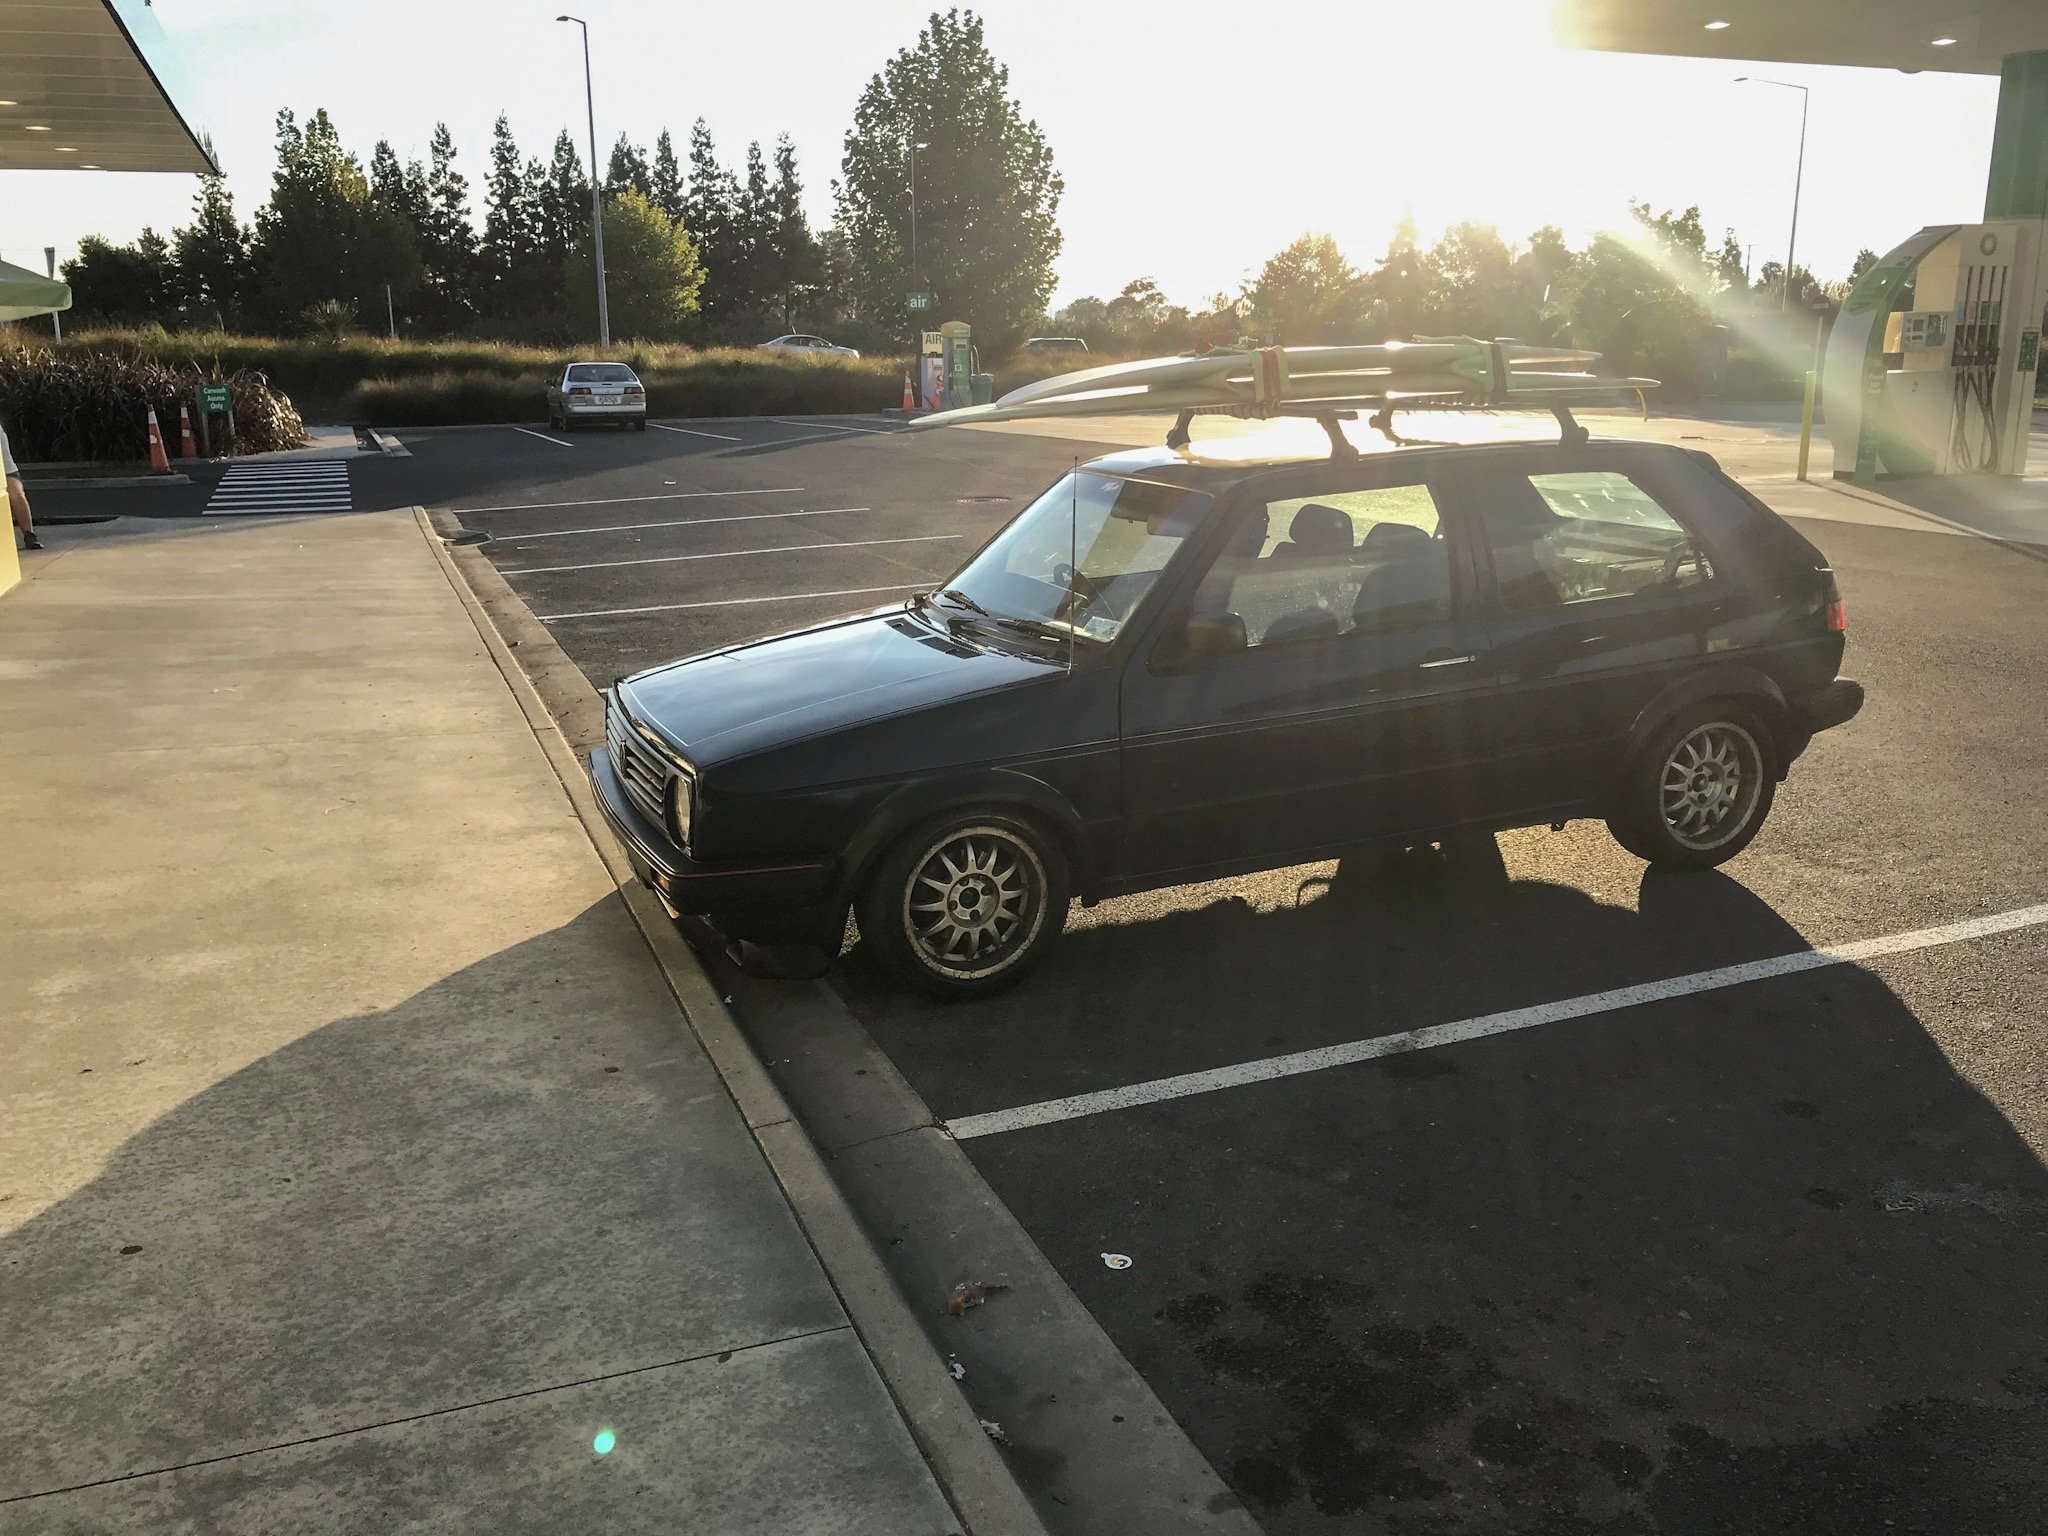
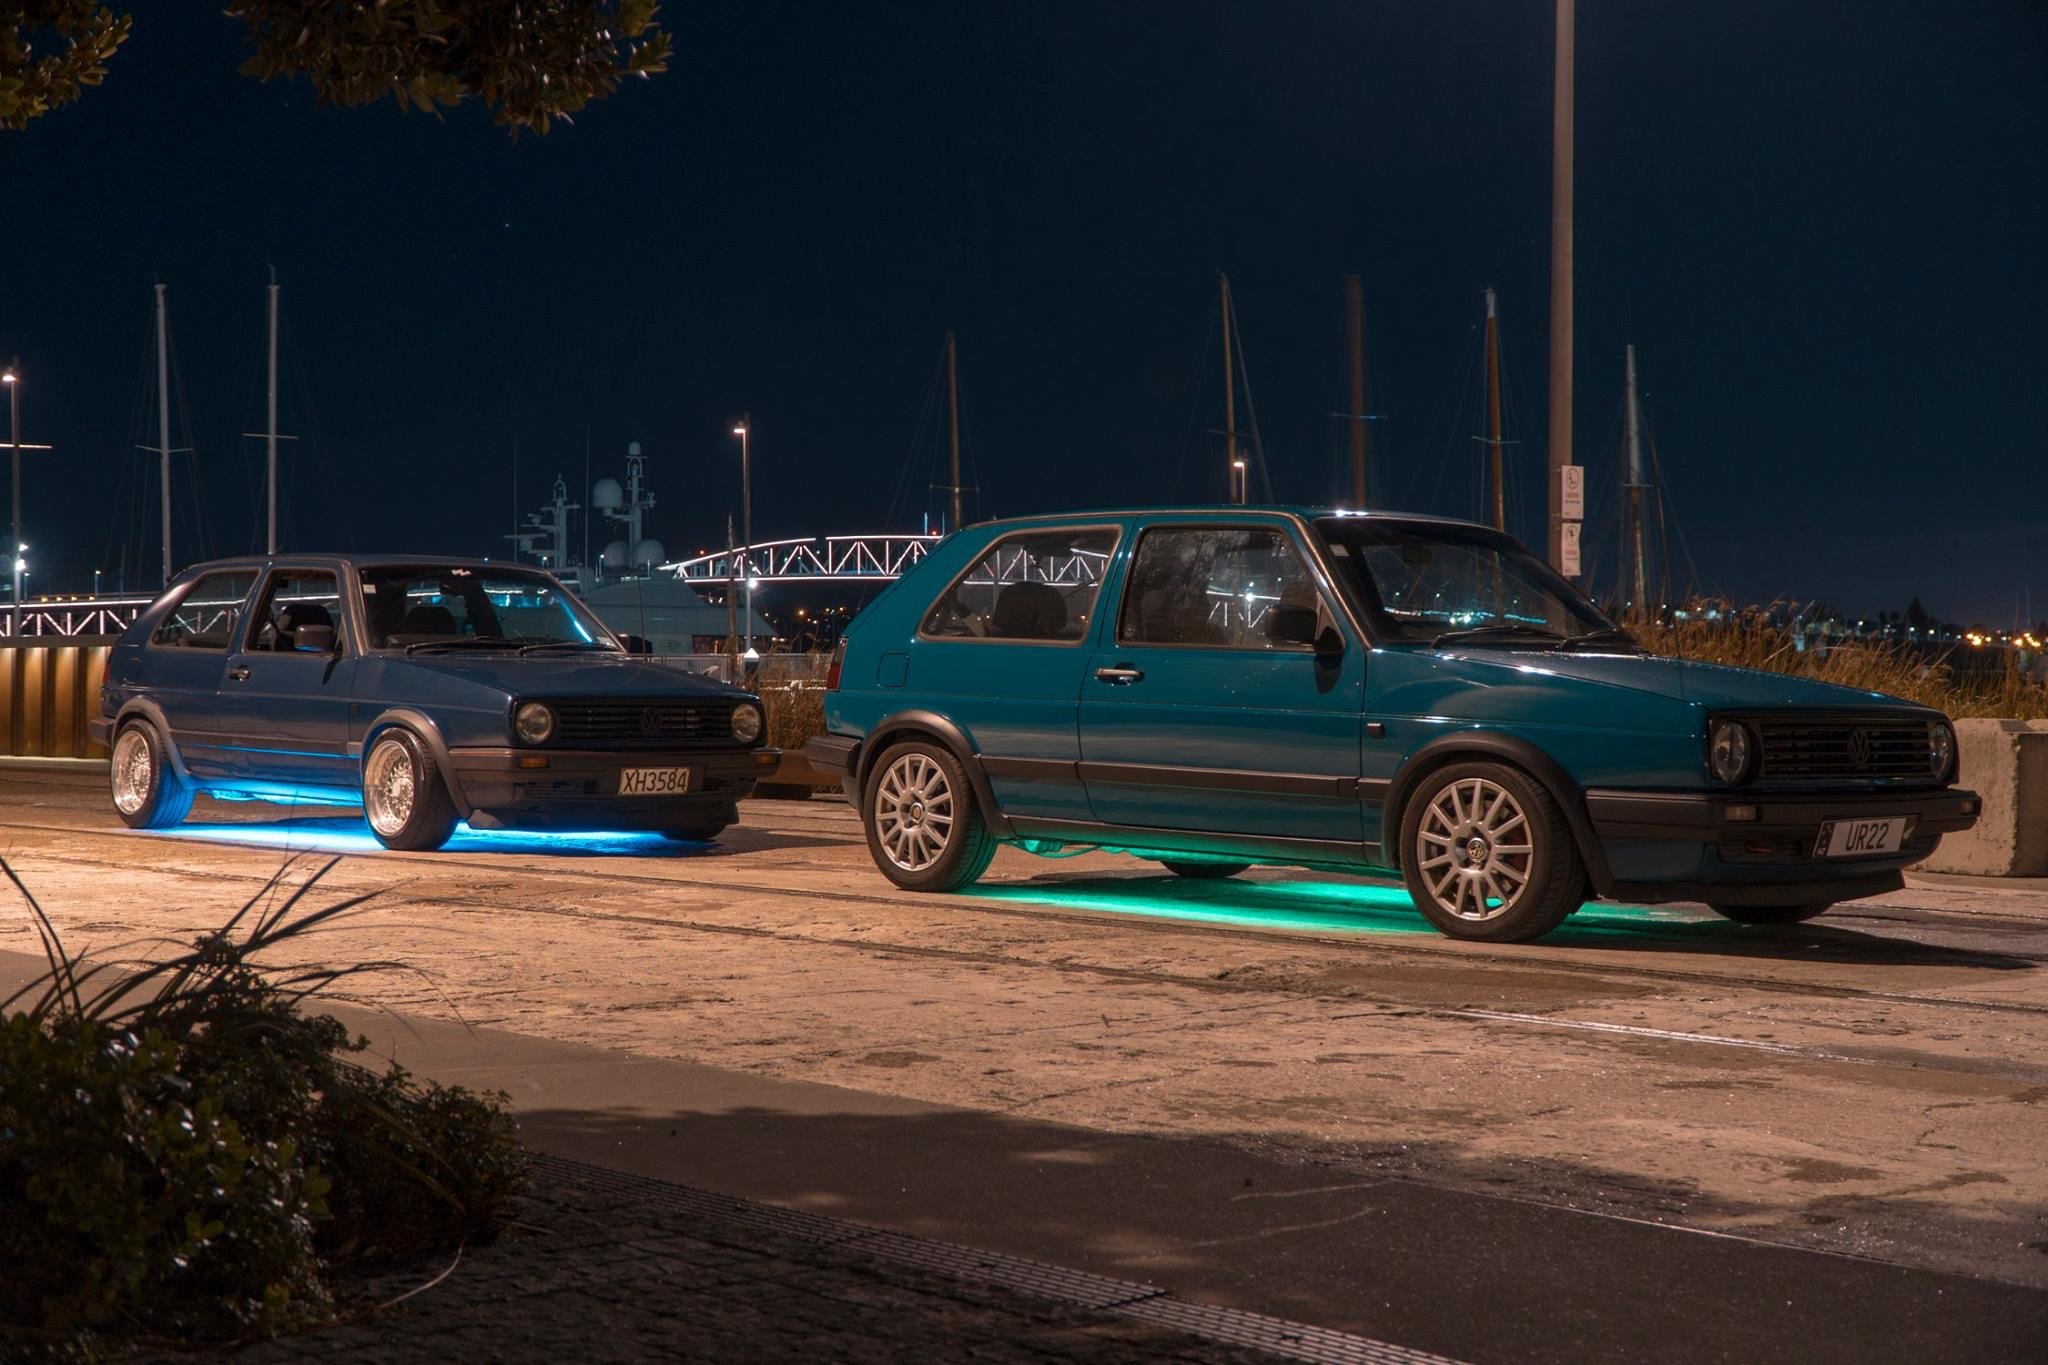
Made a bit of a drive to raglan so we could go for a surf. Made for a brilliant cruise, really couldn’t be happier, would be nice to put a lower 5th gear in it for cruising but I’m not to fussed. Also made sure to take the piss a bit with the neons
1 point
-
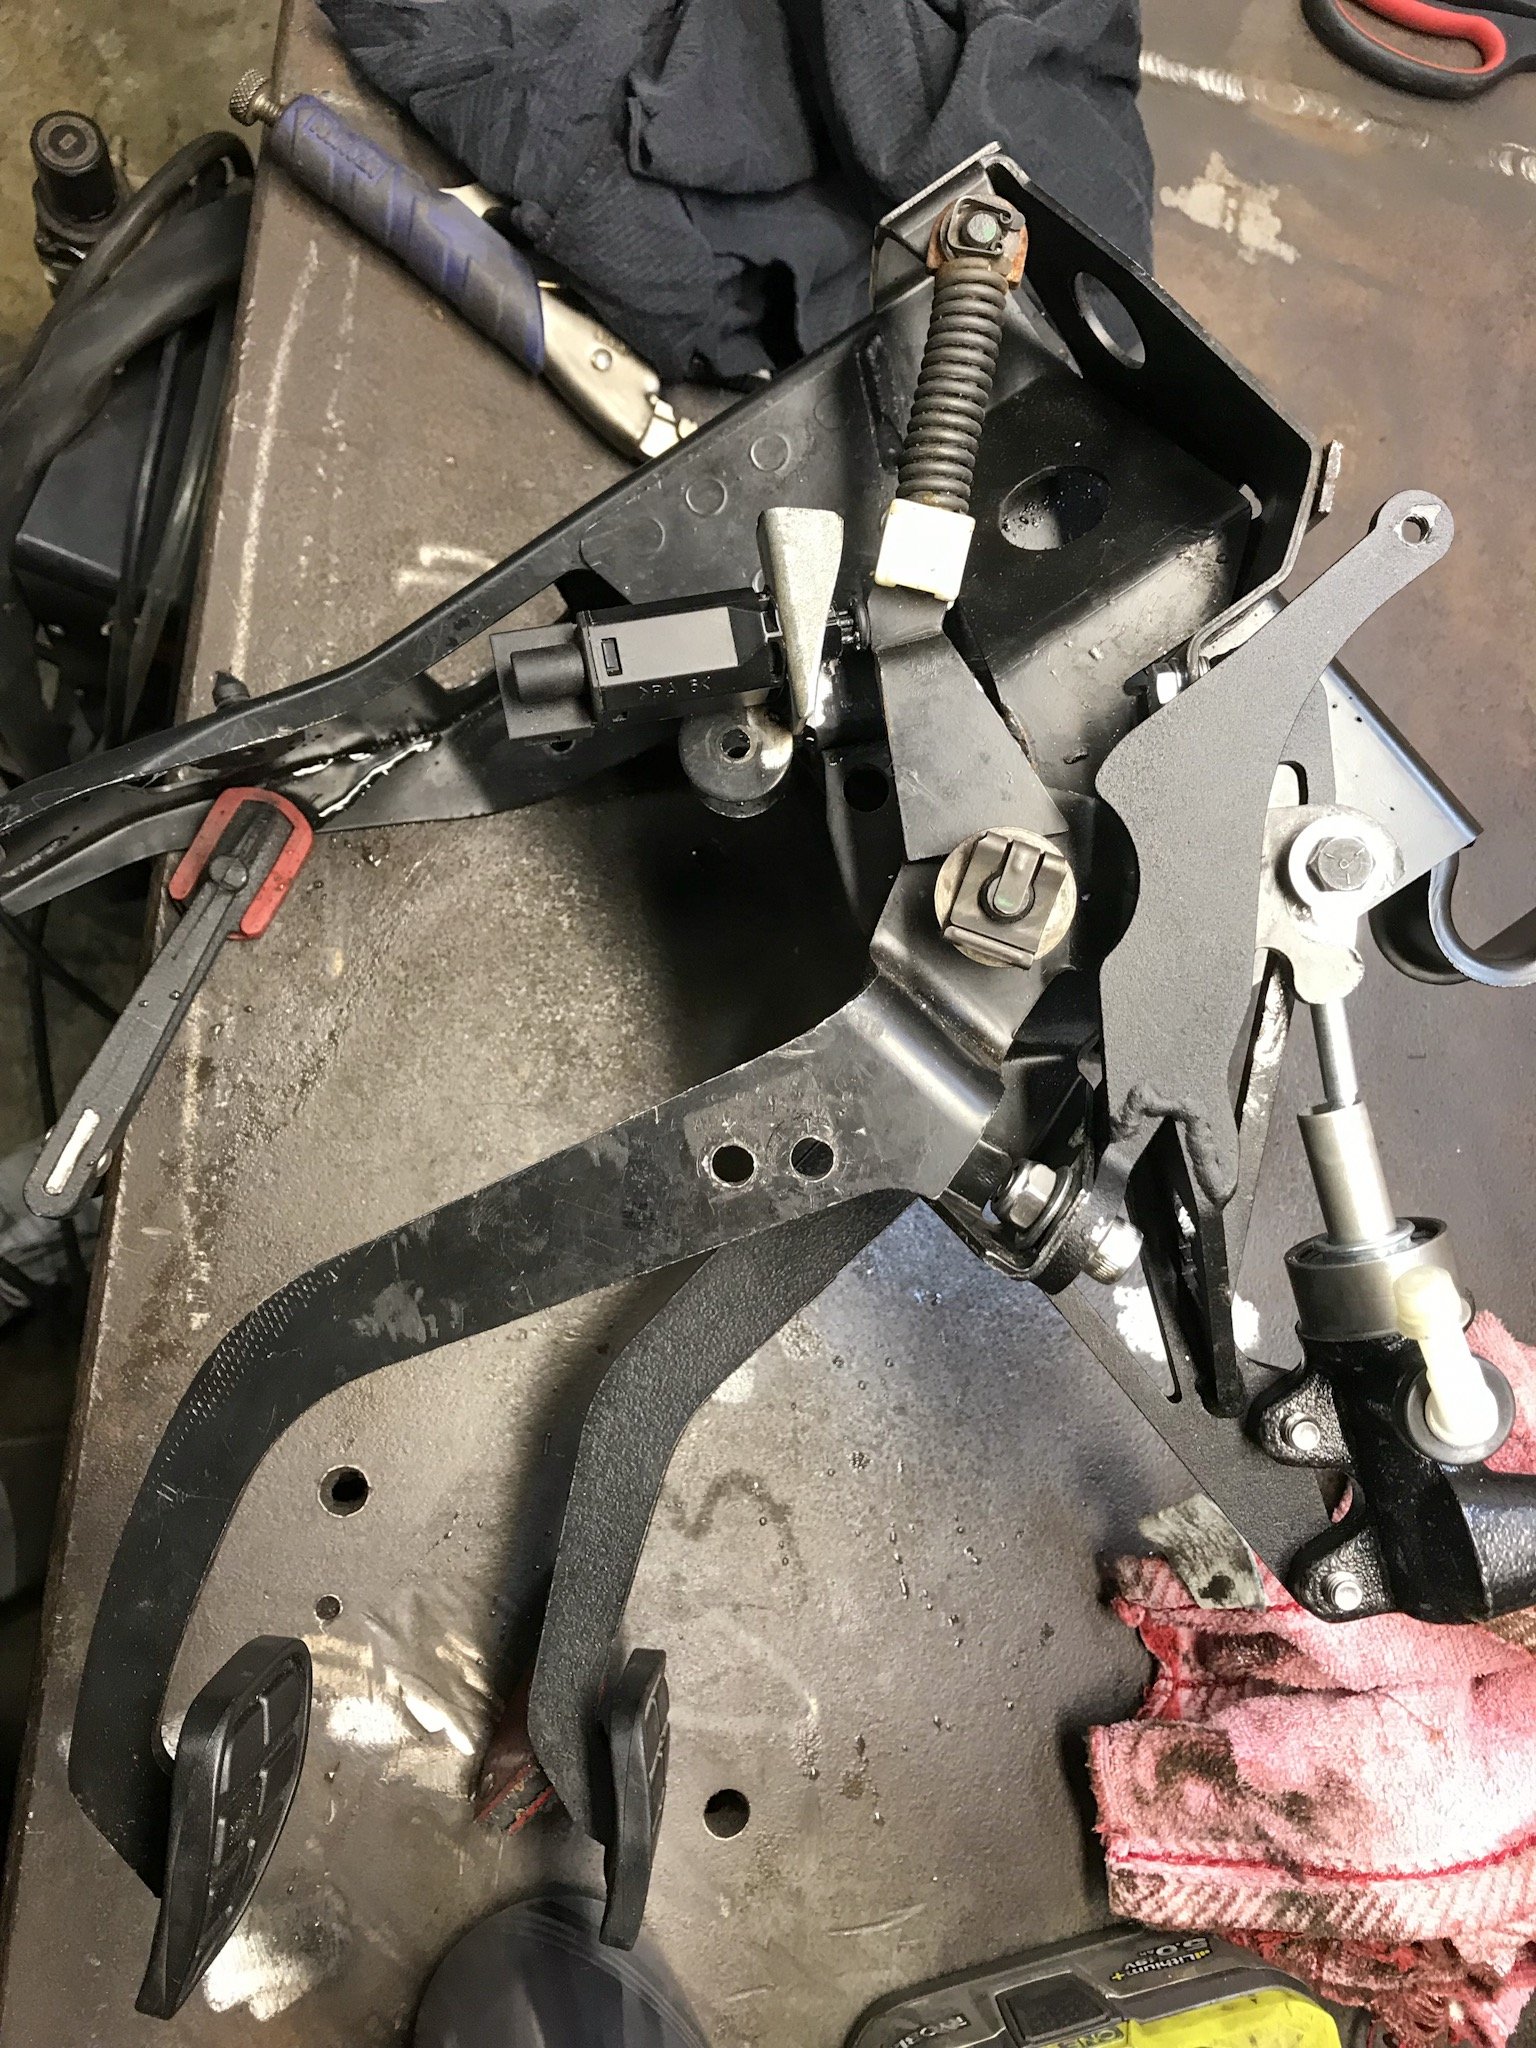
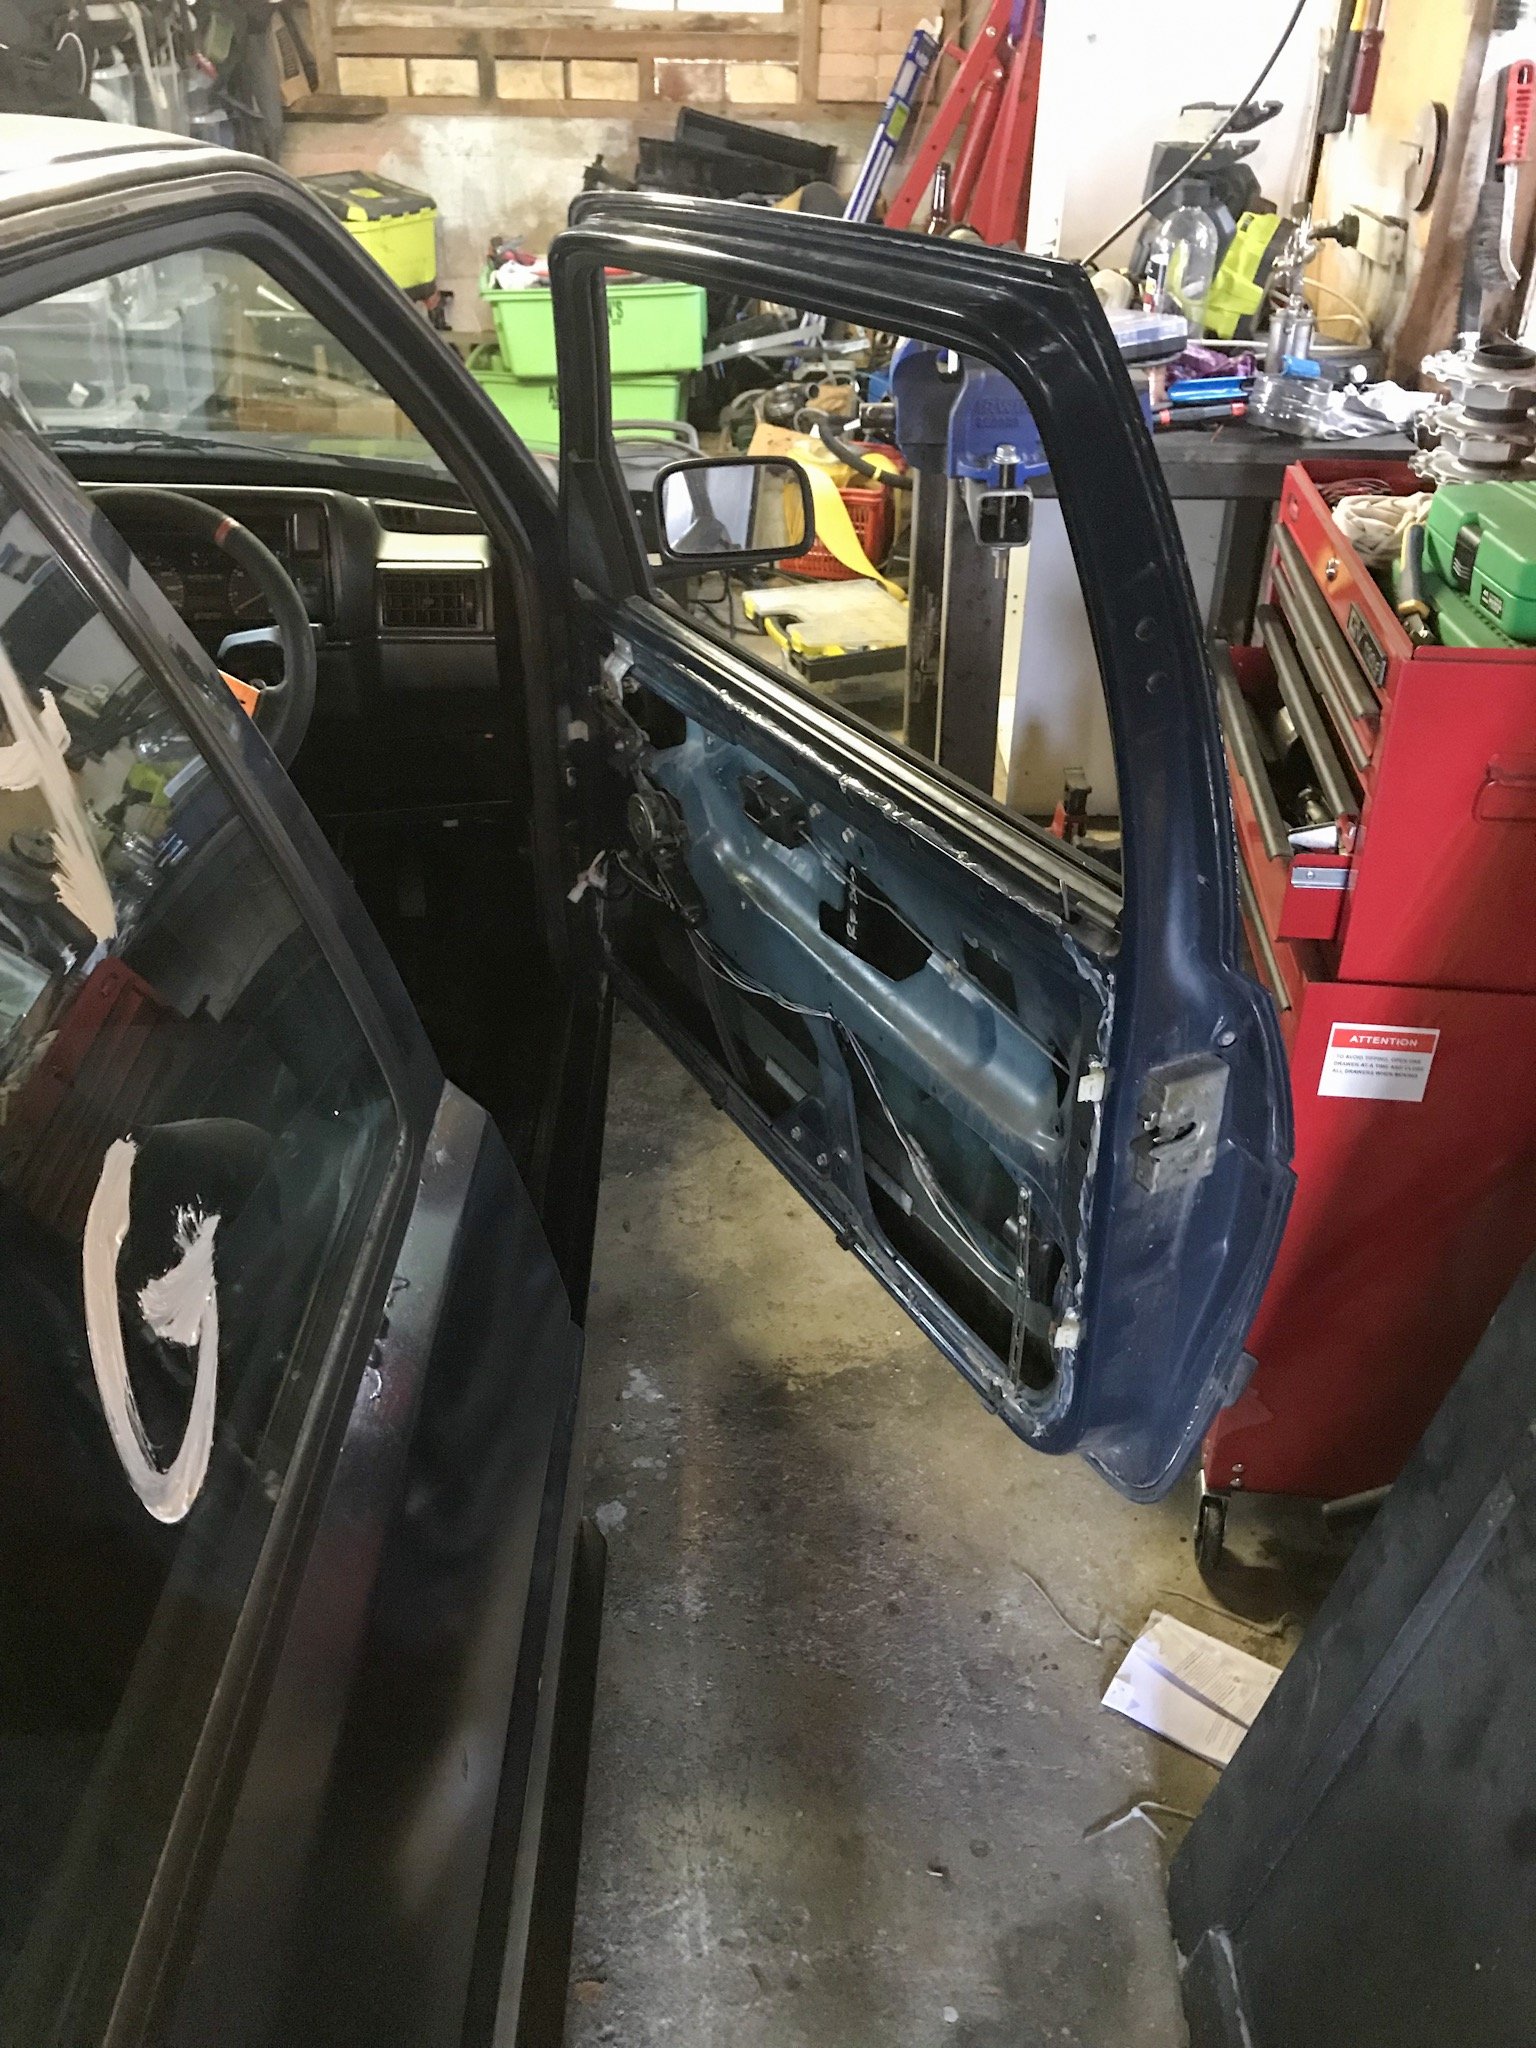
Still having issues refining the clutch but I took the dash out and removed the pedal box completely so I could sort things out such as master cyclinder binding up. Aswell as my quickly engineered clutch switch I did the first time was a pretty flexible bolt on option which put a lot of strain on the switch itself. So with the pedal box out I was able to weld my little bracke in place. Went drag racing again on cheap street tires, Got a new pb of 14.3 I had a bit of issue trying to shift quickly so thinking I might need to get a rebuild kit for my shift tower but had a bunch of fun. As we got to the drags my window fell straight to bottom of the door which was a bit of a pain, had to cable tie it in place so I could race for the day but fortunately I had a old regulator so just swapped it over a couple days later.
1 point
-
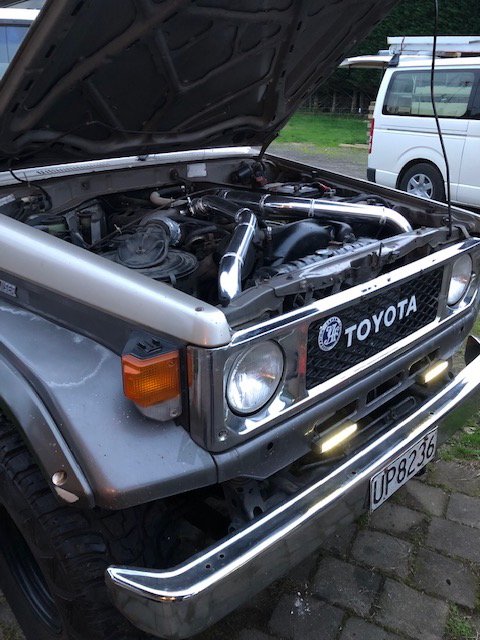
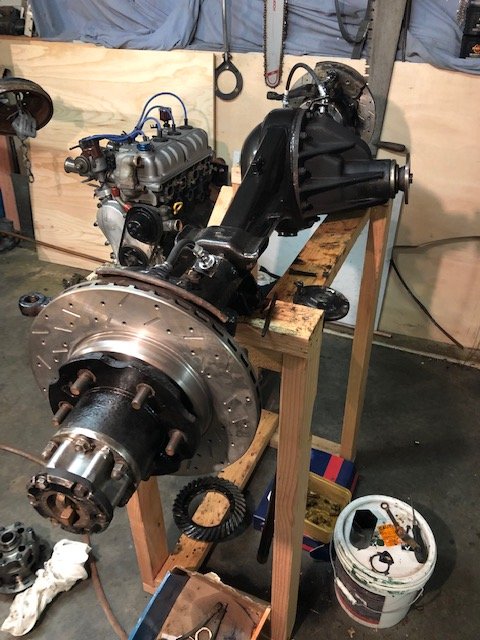
jeez 6 months to put a diff together. made a intercooler setup for it too, can't feel any difference might have to wind up the fuel and turbo a bit but worried about how old the motor is. spaced the radiator back and put the cooler in front of it and lowered it down 50mm at the same time. found a genuine arb locker for the rear second hand\new in the box for a good price so thats going in at some point too. really keen on a haynes manual as i have to do things twice or more to get things right, an example got the diff together to realise i had left the wheel studs off the disc's.
1 point
-
Tumblr isn't performing so well, but you get the idea. I made some progress.1 point
-
Tried more stuff, ended up back in the same place. Including this: -50kw was trying to find the first reflective wave. chased it along the rpm range cutting the pipe down 200mm at a time., but just found negative results. half way thru noticed the silicone joiners wern't playing the game and doing some crazy stuff. possibly giving some wack results. but pretty sure i seen what i needed to see. seems the loss in the super long pipe with bends in it offsets anything that would be gained from the reflective wave. Got the bmw throttles on there now running the big injectors further back in the throttle bodies. makes exactly same power throughout the curve as with the 47mm 20v throttles and injectors in the head. But soon as you mess with this: drop the top trumpets off and goodbye 10 -15kw everywhere. so yeh that setup seems to be on point green: current setup. with small extractors red: old engine big extractors blue: old engine small extractors And.. road test, not having the hole at 4500rpm plus bit more up top, shit hustles of the mark through 1st and 2nd gear. throttle bit too touchy for my liking though, need to revise the linkage setup.1 point
-
Finally, engines have arrived!
1 point
-
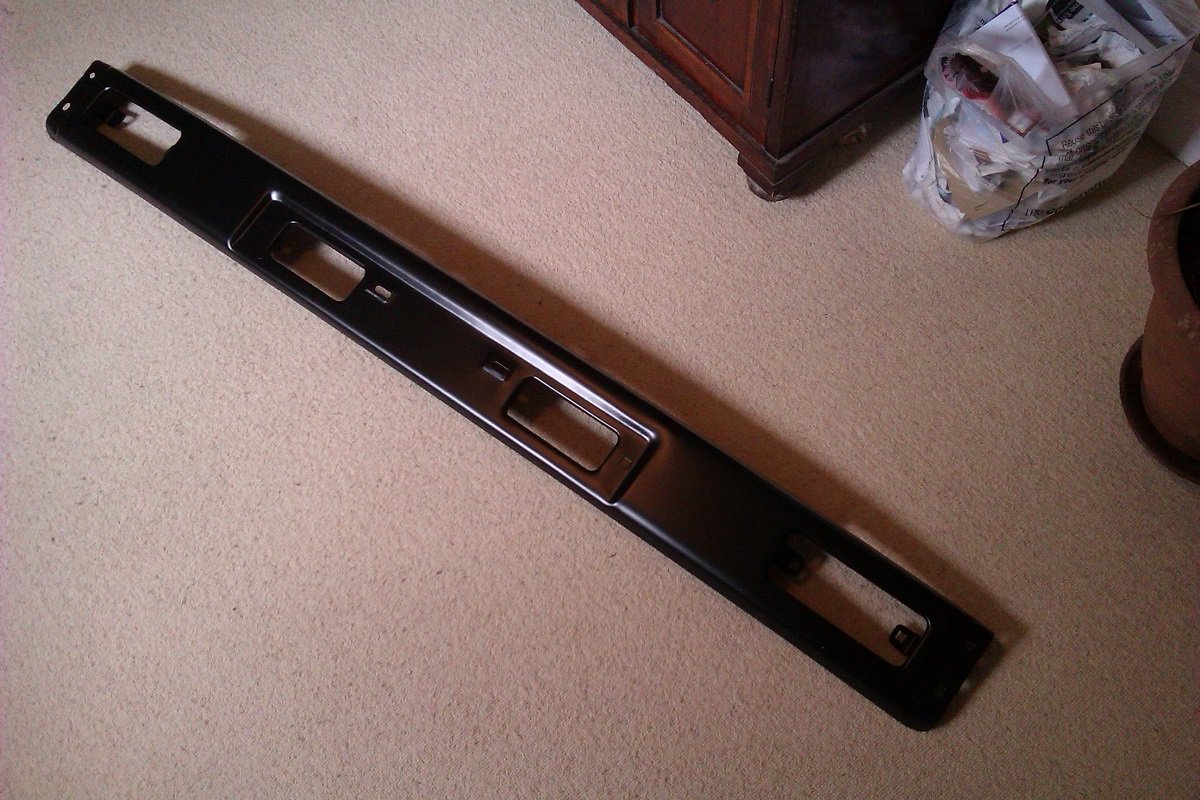
Well gosh dang it, possum on a gum bush, etc. Bumper arrived in less than 3 days, 4 days early. It's good quality, painted nicely not just primed & only cost 9 quid. Bargain. Save the tea for next time @Dell'orto God Bless 'Murica.
1 point
-
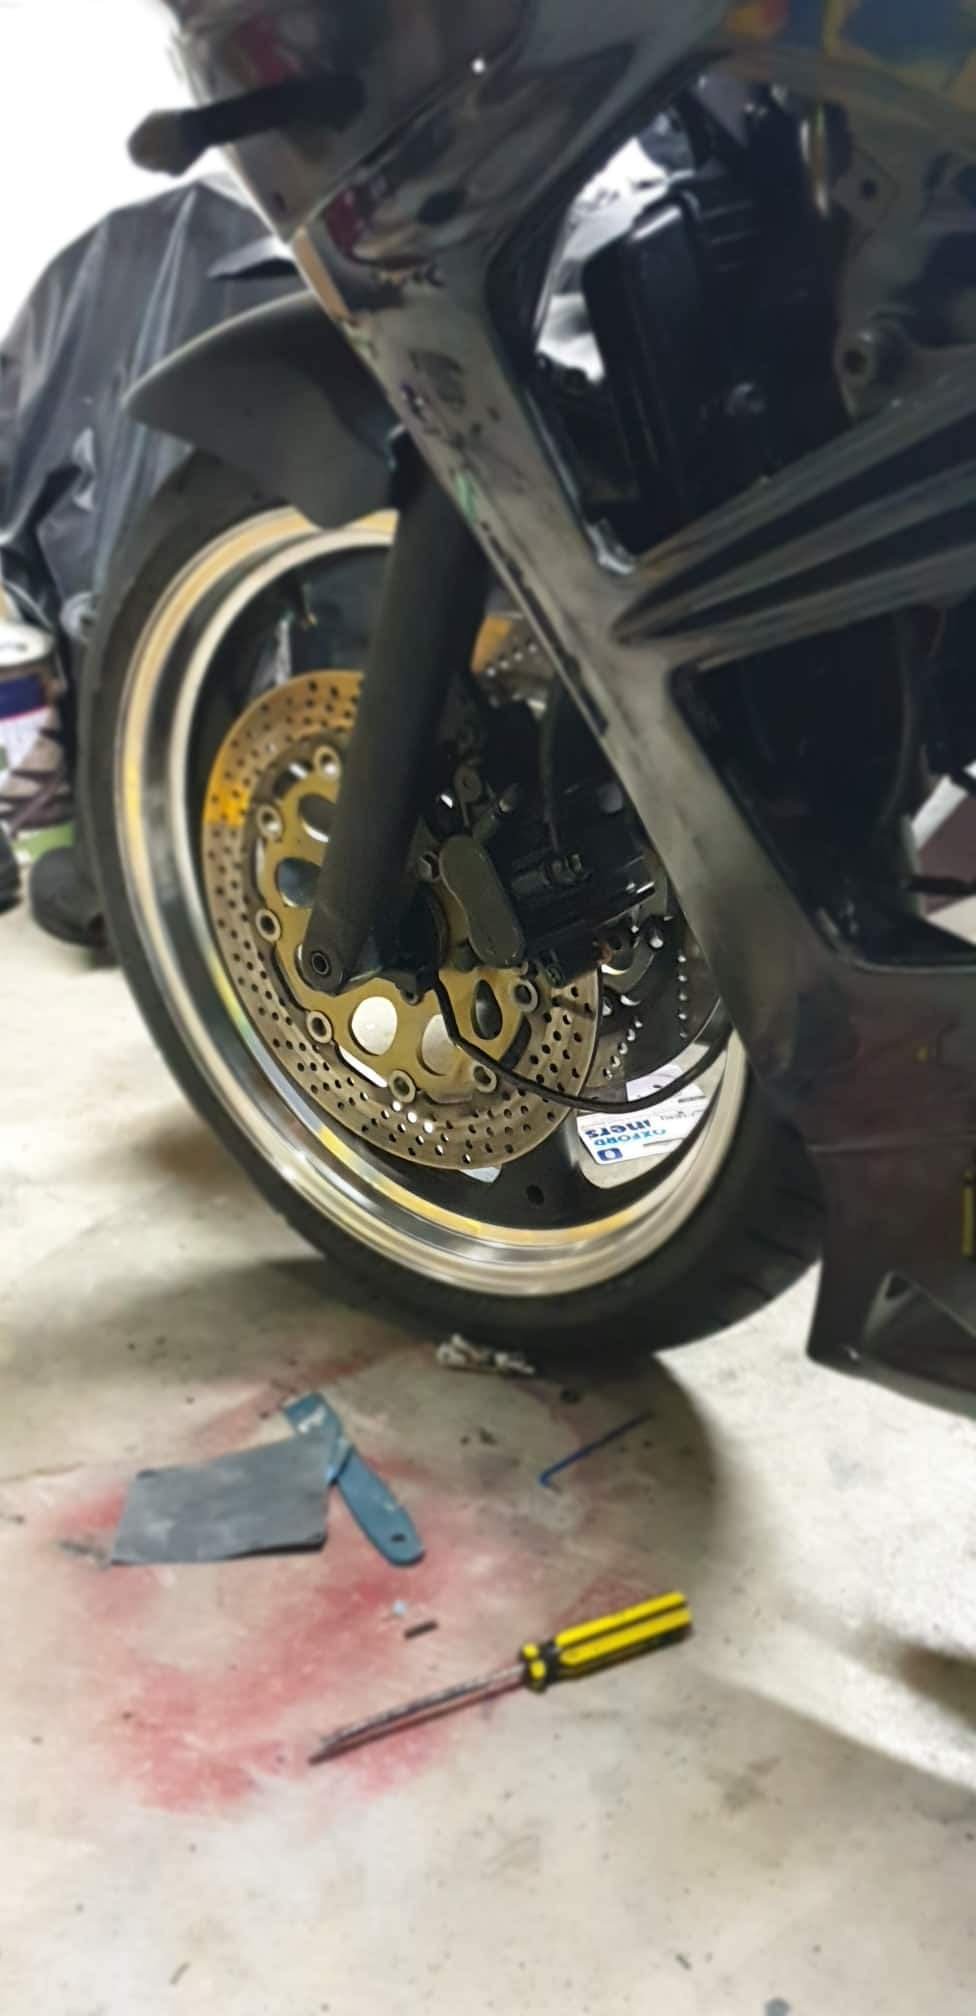
more progress these last couply weeks, ordered a bunch of parts which have arrived but still few more yet to come. todays job was fork seals, everybodys favourite. Yamaha's quality suspension components were on display when removing the old seals... yay for hoarding parts bikes! lots of rust and old fork oil sludge. now forks are back together looking a lot better than when they started. the stanchions came up alright with sandpaper and steel wool, the super rusty shit is gone but there is still a fair bit of pitting in spots, i am skeptical as to what the WOF man will say come re-vin time. i will just whack a pair of gaiters on in a half-assed effort at hiding it. bikes coming together! waiting for headset bearings to arrive this week, then can keep assembling bike. Then fit new tyres, rebuild carb, sort out front brakes, get her running and take it for a skid!1 point
-
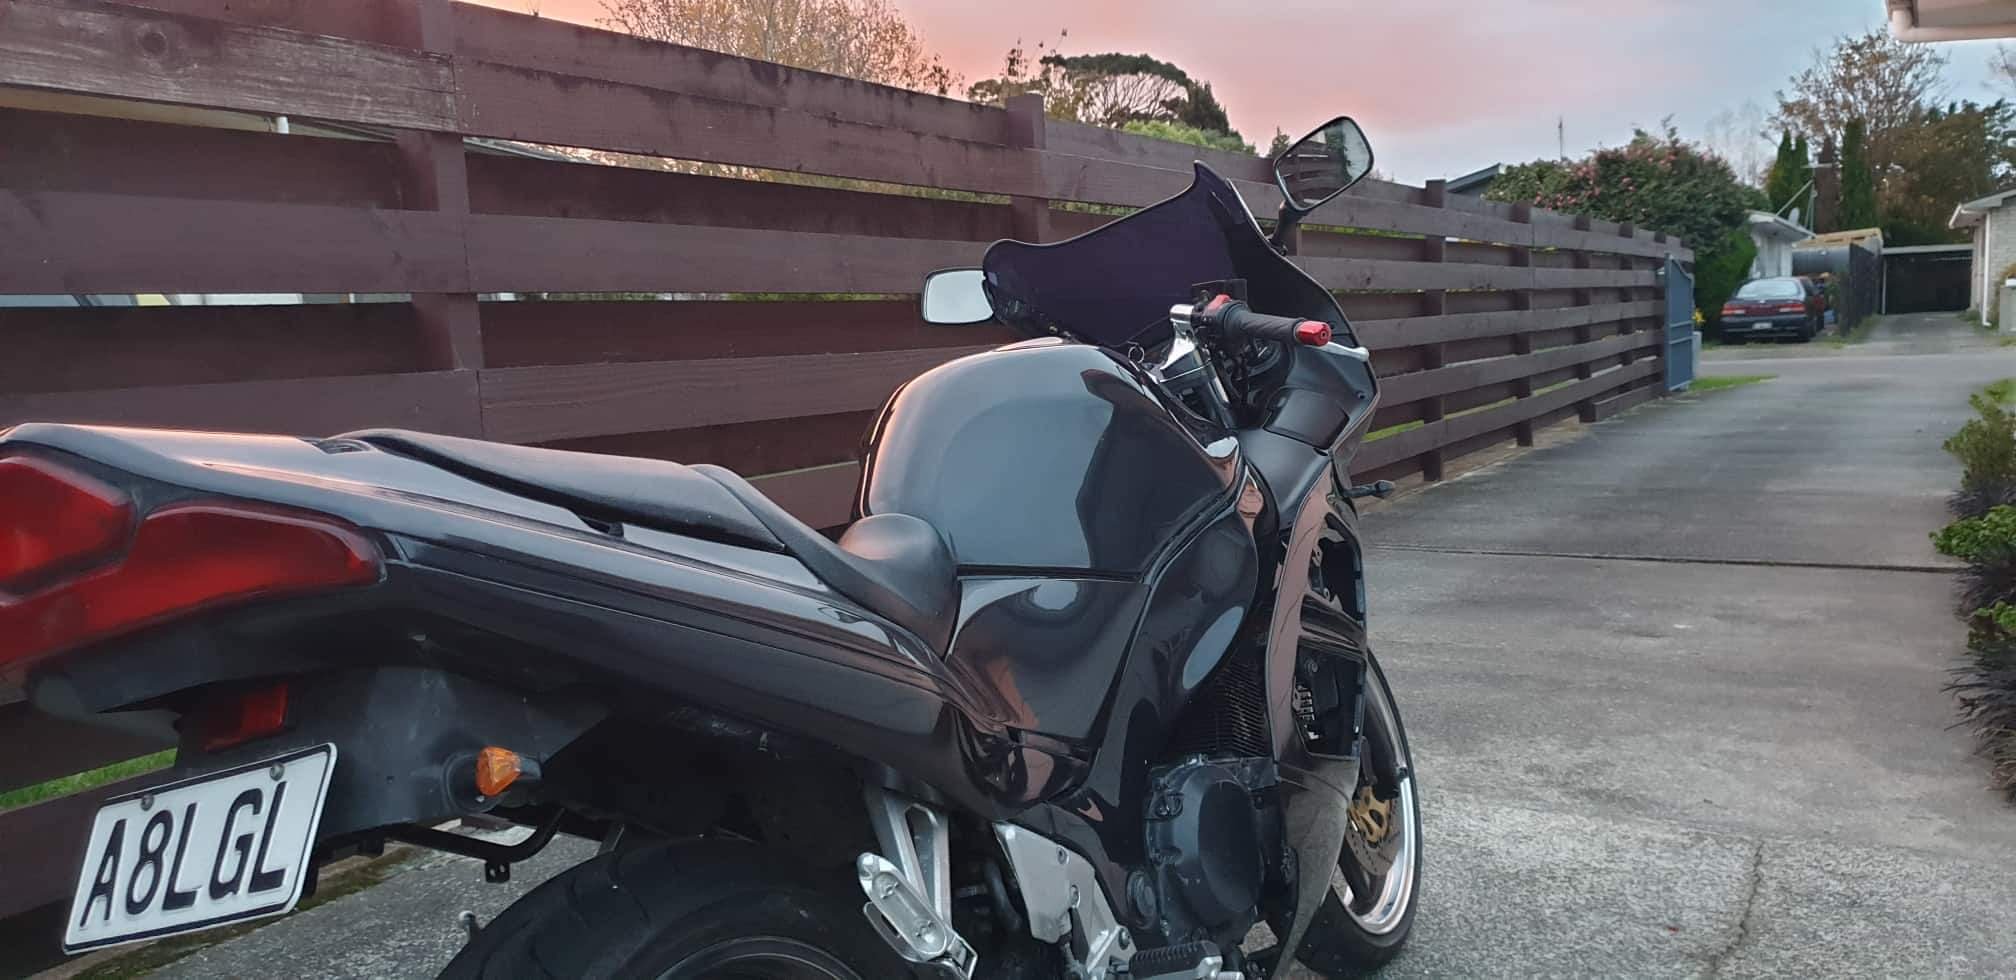
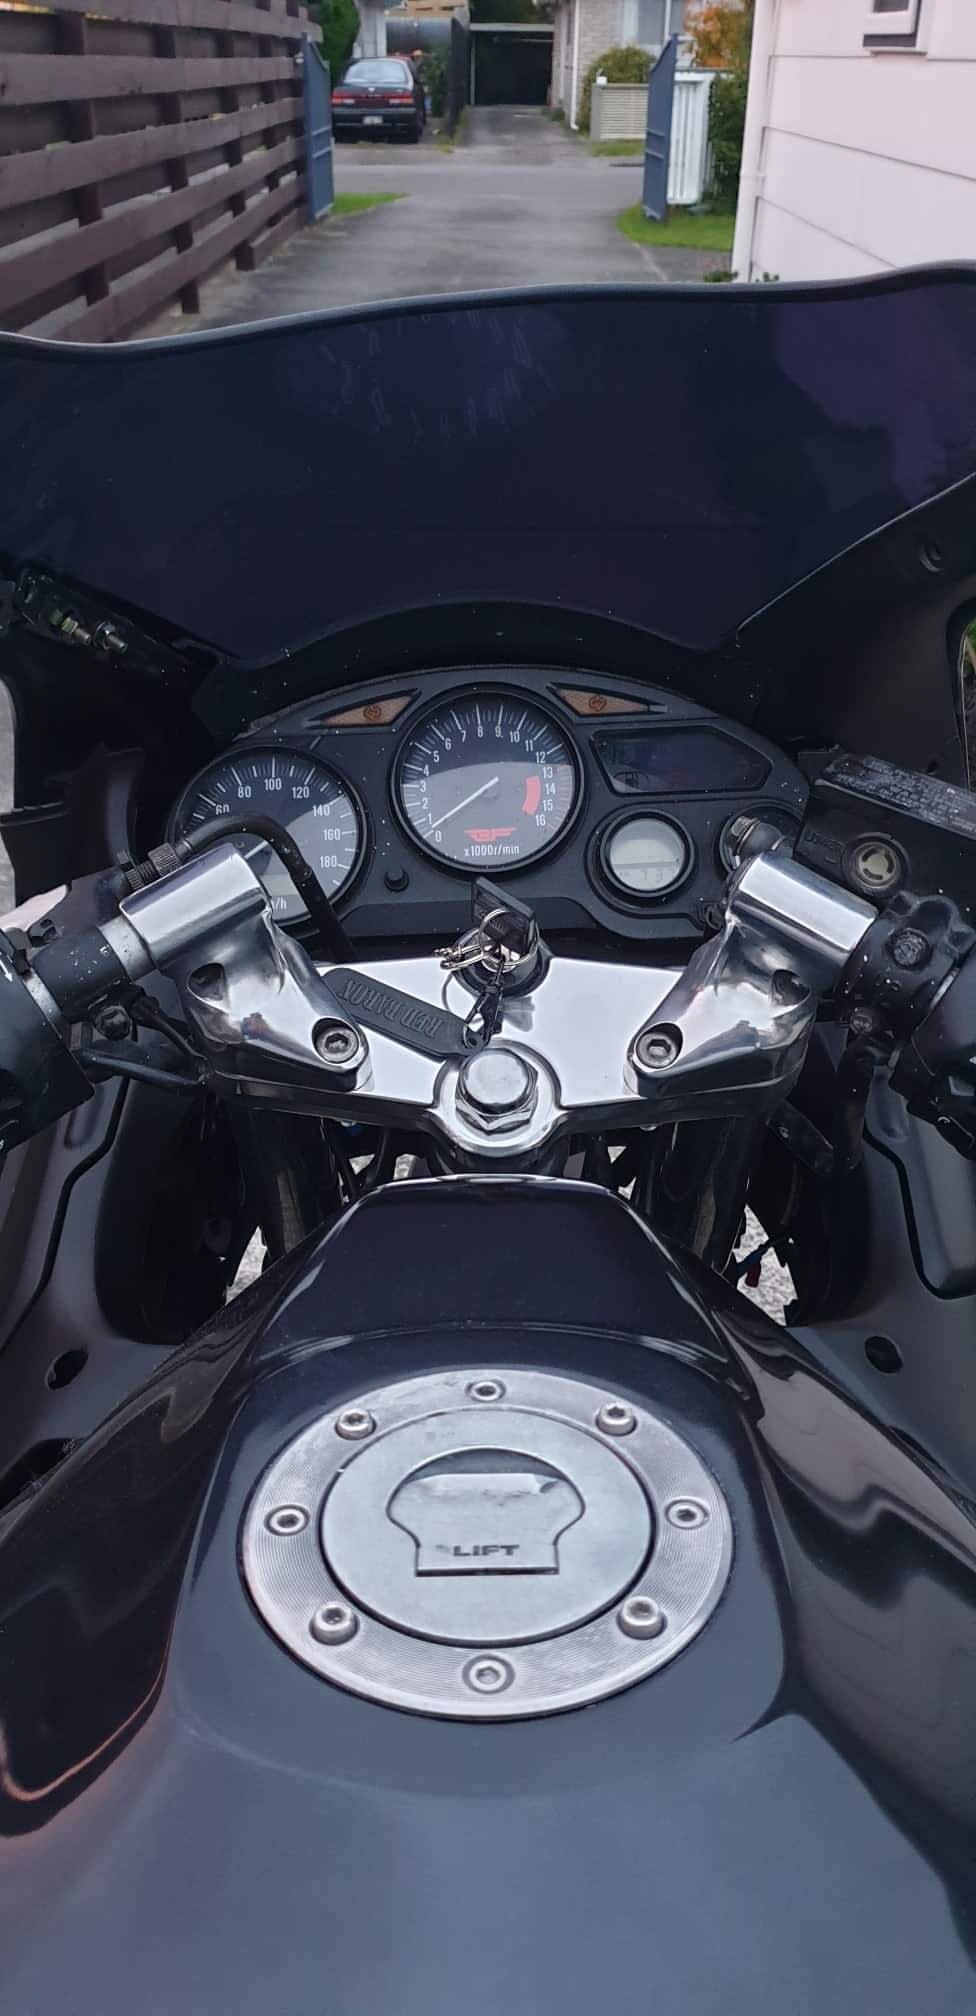
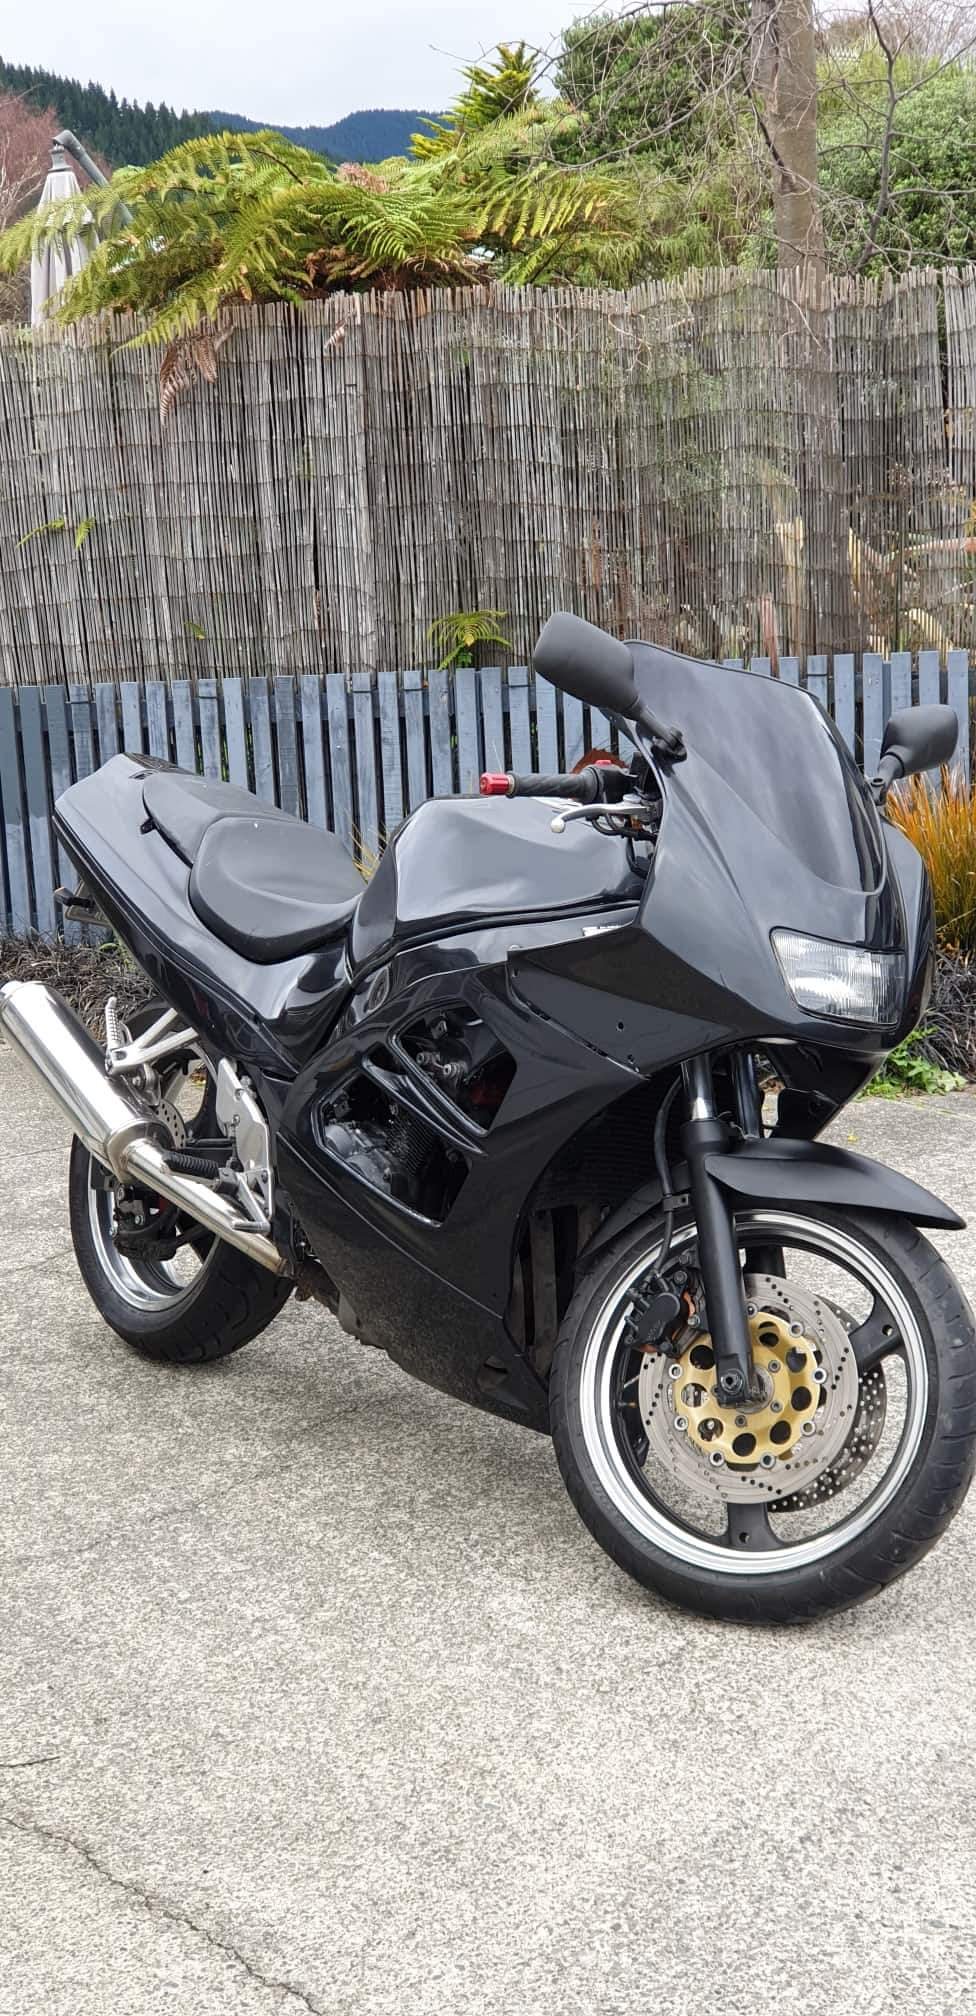
Been chipping away at this, I gave up on the perennially leaking forks, and took them to a shop on the hutt to sort. Turns out the bushes I was supplied were wrong, so genuine ones from Japan were ordered and installed with new seals. At the same time I picked up some sintered pads, and painted the front disc centres as one was red and one silver. The front wheel was pretty rough, having sat for a couple of years with fork oil slowly eating away at the paint on the lips. So I decided to strip the lips back and polish the alloy. Also polished up the top triple tree and bar risers. Also bought some mirrors for $20 from aliexpress, and have ordered a fairing bolt kit. Mirrors have arrived and bolts are on their way. So left to do is sort the front indicators out, finish polishing the rear wheel, throw on the under bike exhaust hanger and bolt up all the fairing. Then wof Still have to sort out the testarossa style side vents, and all the infill plastics which are in progress, but can also wait for a bit.
1 point
-
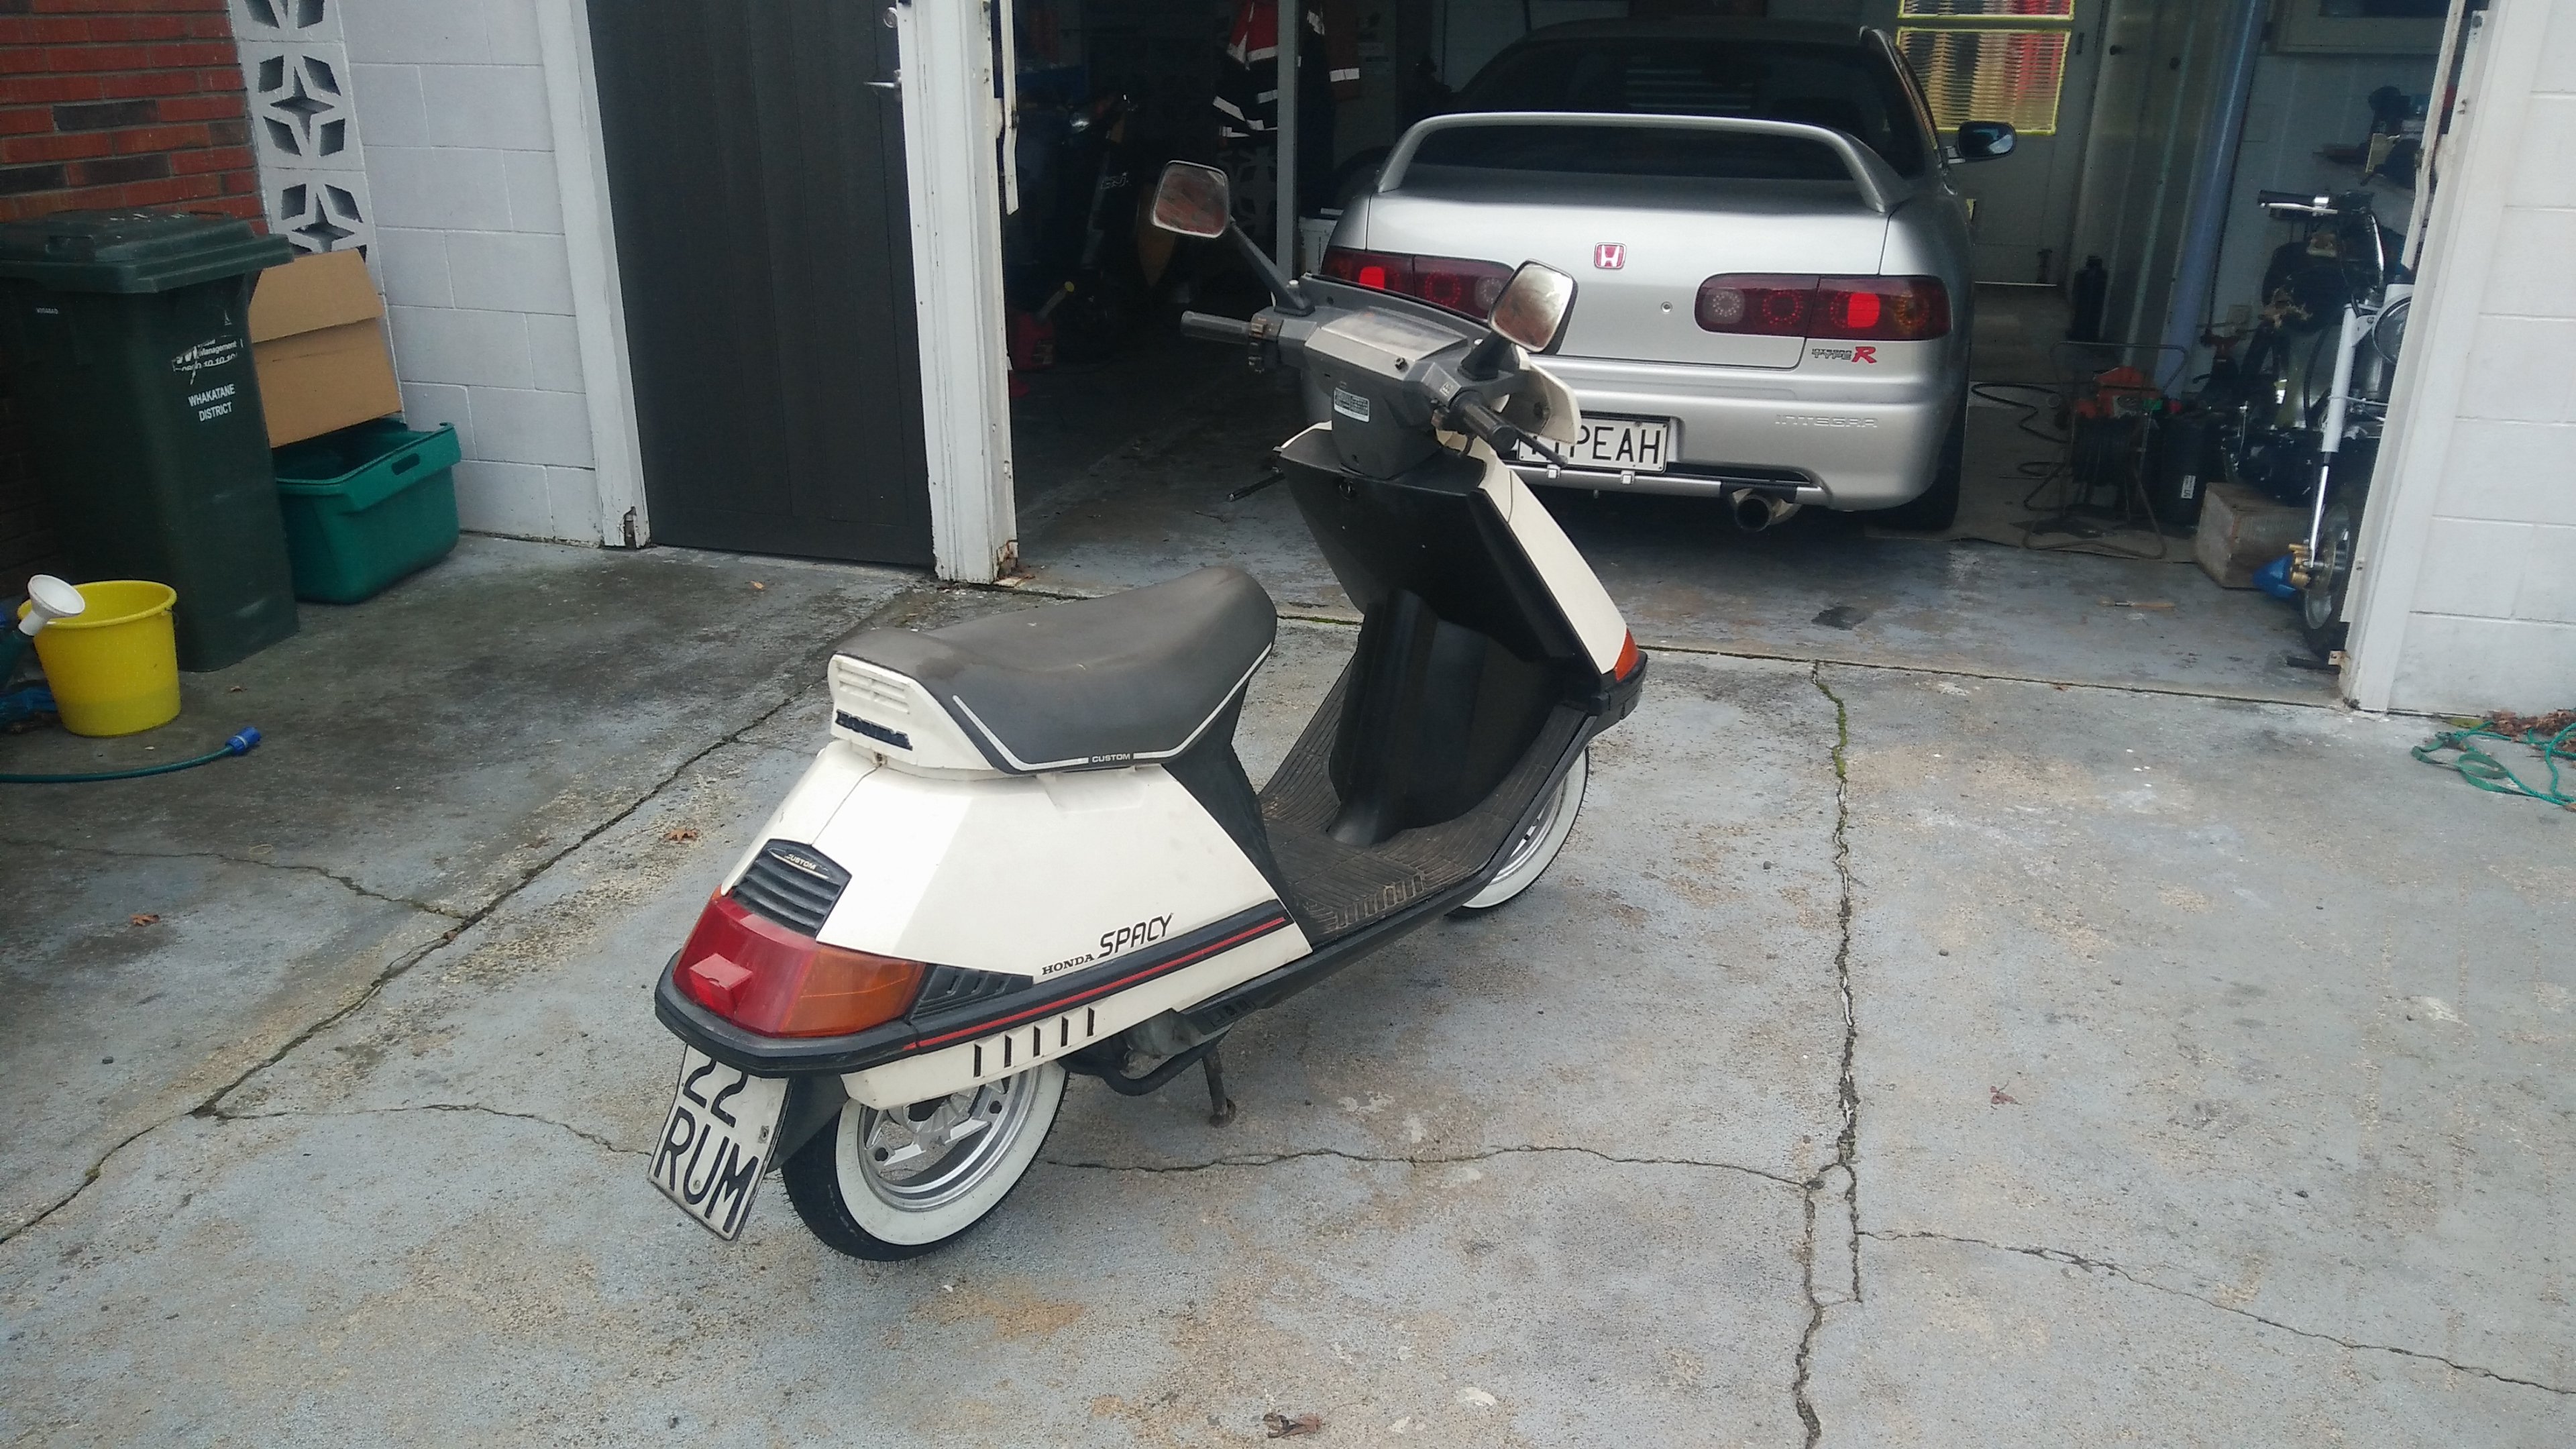
Finished assembly and took it for its maiden voyage around the block. Acceleration is pretty average but once it gets into top gear it goes pretty good. Need to adjust idle as once warm it wants to stall
1 point
-
I read this and knew it was from you without even seeing the name.1 point
-
Really fun weekend at the Kaspa Transmissions CAR-nival. It's a 3 day track meet with cruising, drags, drift, burnouts and racing. The drag racing was super fun. The car was hooking up perfectly and I managed to win the drag racing tournament in the Naturally Aspirated class!! I was up against some tough competition in the form of a 300KW Holden Commodore, and 396ci big block Holden Premier and another big block HQ Holden. I also went up against a 323, Intgra Type R and an RX7 but that wasn't really a fair fight. I was quite surprised that I managed to beat the big block chevs, I guess it was just down to how light my wagon is and how well it hooks up. Here is a video of all of my runs, I went undefeated 7-0 nd they had a sweet as trophy, I also won best engine bay but they didn't have the trophy there so they will send it out to me. Had a real blast hooning around the track. Went a bit too hard on the first day and wore out my brake pads. It was a total nightmare trying to find some Wilwood race pads at 4:30pm on a Friday in Taupo. None of the brake shops down there had any so I had to call around my friends and found one of them who had a close enough match, so I had to drive out to his place with pretty much no brakes and swap some pads over. In the morning I had to go get the rotors skimmed. The petrol stations loved me down there. The Avenger is pretty good on gas when you are on the road, but it chews through the gas on the track. Discuss1 point
-
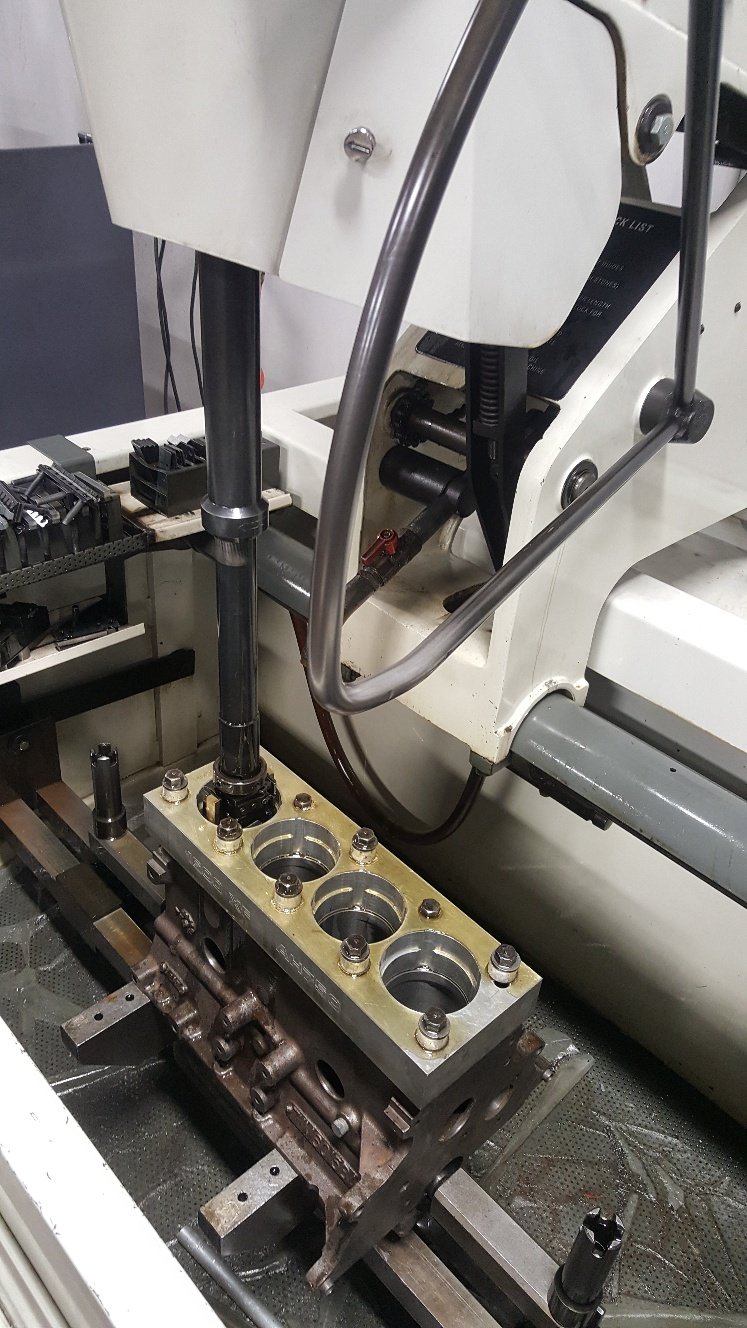
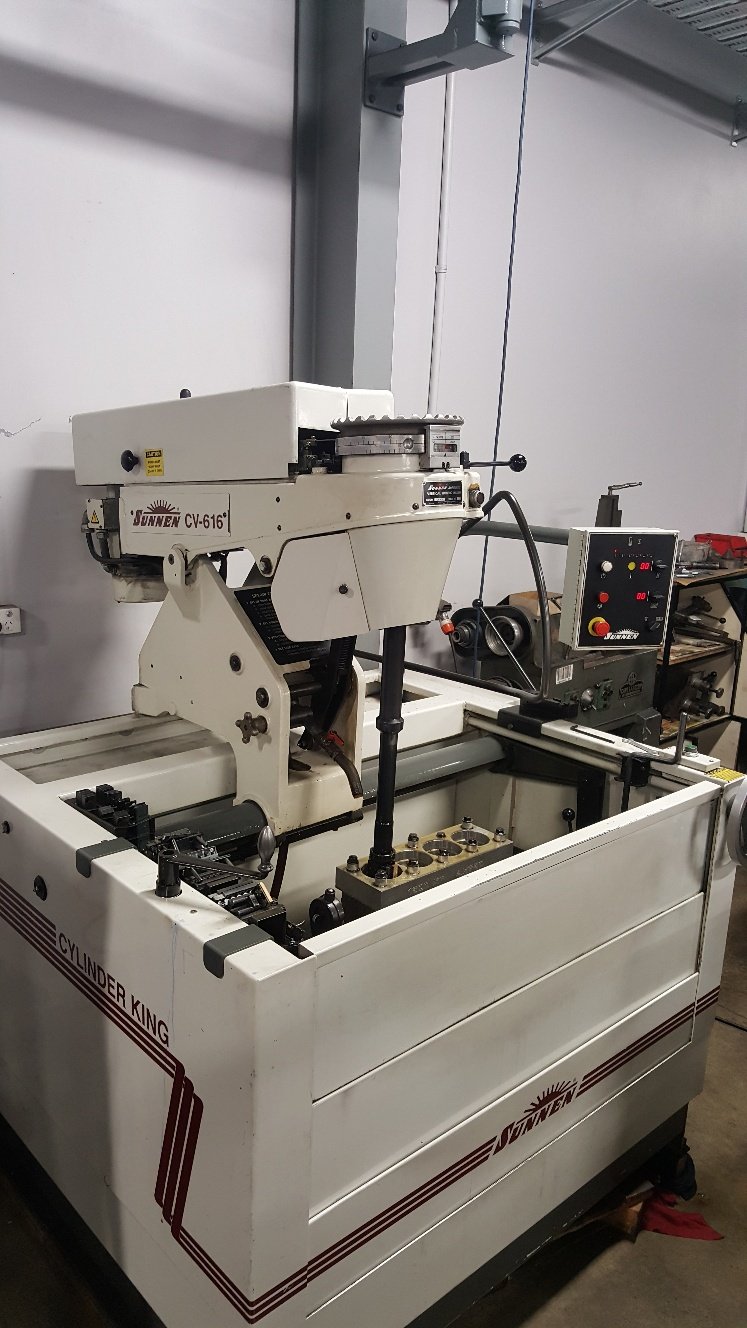
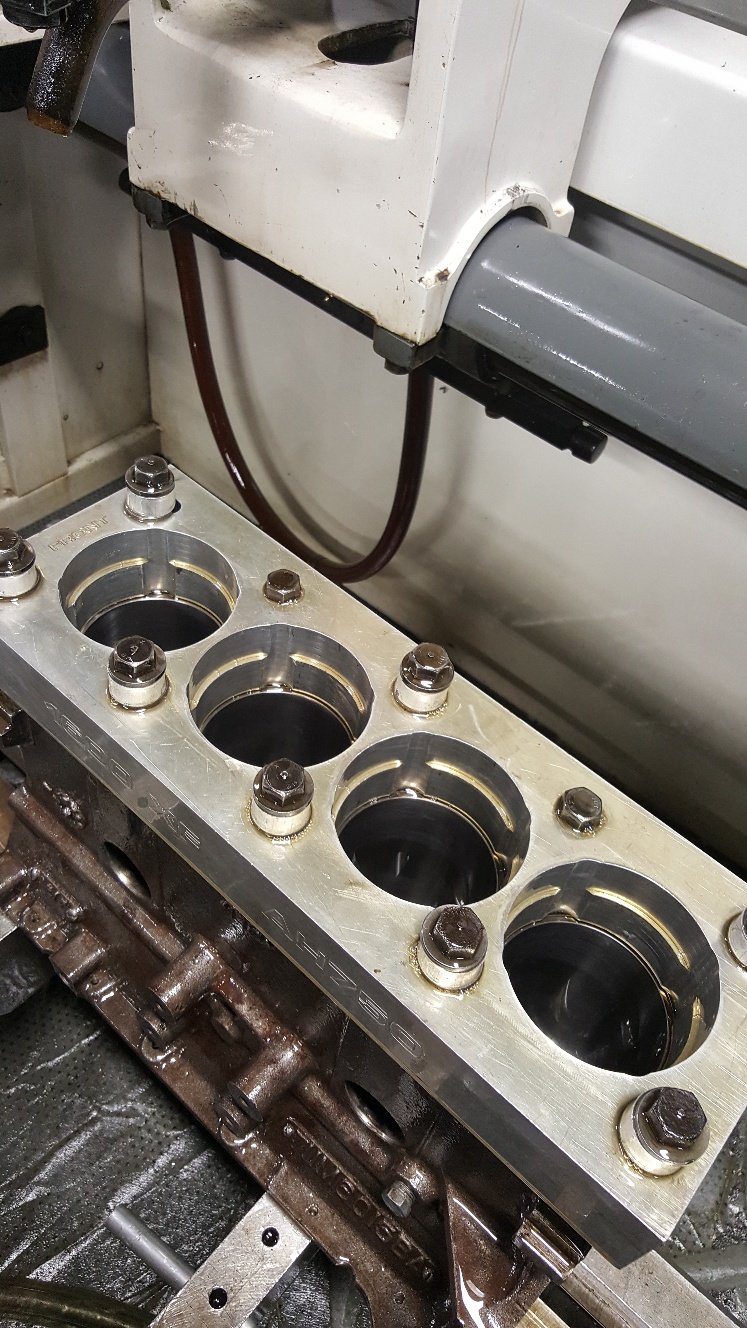
So i fitted the torque plate for the honing process. We only have torque plates for certain engine's. But lucky Ford xflow's are in formula Ford's so the boss saw the need to get one made. The torque plate allows you to simulate the tension of the cylinder being fitted to the block while honing. Some blocks move considerably from the head bolts being torqued up. This can distort the bore, sometimes up to 2 thou on various blocks. So it's like honing them in there assembled running state. I have heard stories of shops honing with hot coolant running through the water jackets to simulate total running conditions. All in the name of perfect ring seal you need a perfectly round and straight cylinder. We leave 4 thou of material to hone out as this gives us a good base to start achieving good rk rvk and there's another value aswell but I can't think of it right now. But we start off honing with a course stone which gives us a deep groves and removes material quickly. Once we've removed 3 thou we change stones to a smoother grit this removes the tops from the course stones while taking more material out. I'm also happy say I have removed all the bore wear marks after removing 2 thou of material. Now we move to a finer stone again same thing applies. Each different grade of stone removes material in different ways. Some stones will take more out of the bottom middle or top of the bore, so you have to measure the bore to make sure you're keeping it straight. The stones also react to load. Theres a round handle onto of the machine that applies load to the stones in the bore. If you wind to much load up it normally takes more material from the middle of the bore as there's no real strength there. Extra load can also create heat which will give you a false reading of size from the material expanding. Once we are at finish size we have what we call plateau stones. These are 800grit they don't really take much material out but smooth the tops off from the previous set of stones. Then we move to our cork stones. Which look nothing like cork. These are really good a removing left over honing material out of the cross hatch. We only give the bore a couple of strokes with these. Once a year we clean the machine out. It normally has about two 20 liter buckets fill of cast iron sludge sitting in the bottom of it. This machine runs 200 liters of honing fluid. Which is great as one of the jobs of the fluid is to keep the block cool as well as wash the honed material away from the honing head while honing. A drum of honing fluid isn't cheap at $2500 Then there's all the stones we burn through. So the honing process has one the highest consumables cost in the workshop per year. From start to finish it can take a hour to two hours to hone a block after a rebore. A deglaze or what we call a rering hone is normally about three quaters to a hour.
1 point
-
fuck me, so they've done the compliance check all ready. failed on park brake warning light not working ( i stupidly forgot to plug it in) and rear brake imbalance. all the rear brakes are new so i should be able to fuck around with adjusters and sort it out. that's it. i am fucking stoked. i really needed some good news and this will do nicely. the other thing that happened is that Alex who runs Western compliance tried to buy the car off me, which is a complement i suppose. so ill go pick it up Wednesday night and take it from there.1 point
-
Burger Knight. An old loner on a crusade to champion the cause of the appetite, the stomach, the tastiness, in a world of parking that's located above the store.
1 point
-
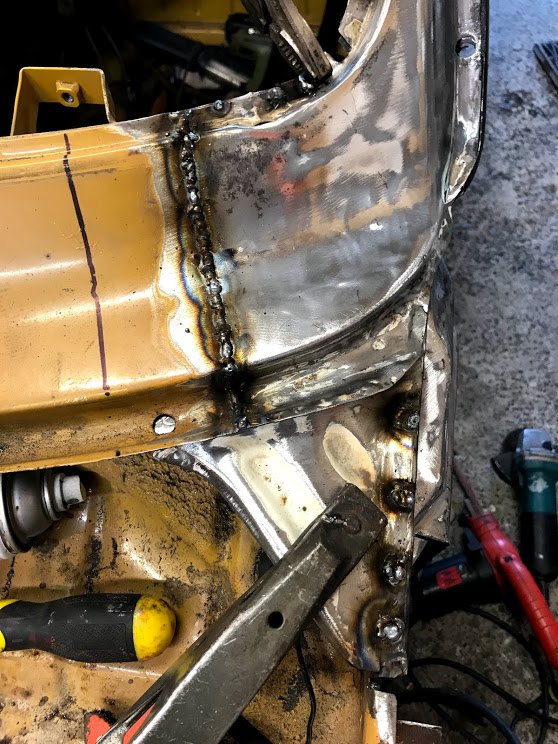
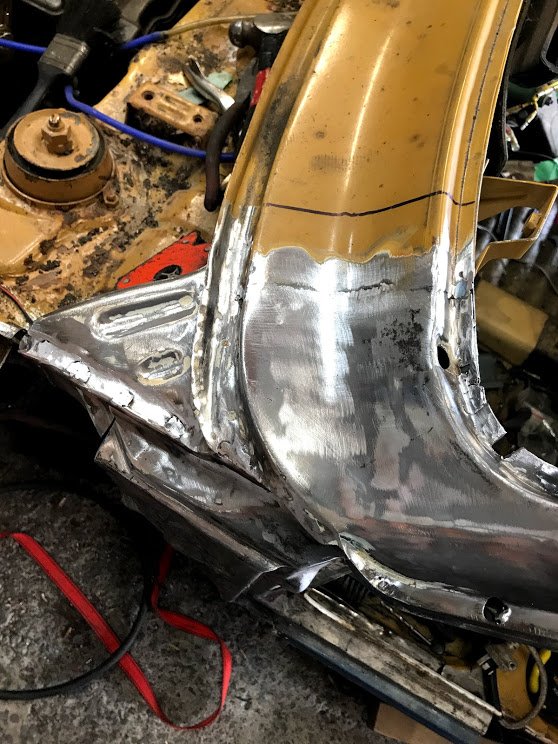
More chemotherapy for the little Honda. Not the tidiest welds, I was very conscious of not putting too much heat into it. But its solid and straight and rust free.
1 point
-
1 point
-
midschool.co.ng
1 point


This leaderboard is set to Auckland/GMT+12:00