
Leaderboard


Popular Content
Showing content with the highest reputation on 04/30/19 in all areas
-
So I flicked the 944. It wasn't something I was intending to do, but a fella on the Porsche Transaxle NZ Facebook page popped up a 'WTB' post and I responded. With a high price. He initially declined, I didn't budge an inch and then a few days late the wife had mysteriously allowed him to purchase the car. He drove across from Tauranga, was rapt with it, and drove it home. Am I upset? No not really, I didn't get especially attached to that one since it burnt me (and my wallet) a lot during my near 2-years of ownership. Decided I wanted another DC2R, some of you might remember my 96-spec I had about 2007-8 and came along to a couple of NZH NIMM's in etc etc way back then. I put the word out that I wanted another one, and happened to meet Tim Bell (unsure if he's on the forum yet?) around this time through some of the other Hamilton fellas and a group chat. Tim being both an excellent human and the owner of a minty fresh DC2R put the word out among of his Type R friends, and turned up this car. DC2R Phone (1)-Edit by Richard Opie, on Flickr It's a 2000 Integra Type R-X. The 'X' is basically the final run of these cars, from late '99 through to mid 2000. You all know what a 98-spec car had over a 96-spec. But the R-X added to the list with a few more luxury mod cons. Power folding mirrors, 6-speaker audio, blue-tinged faux carbon trim, privacy glass, bla bla bla. Basically the best spec they came in, unless you reckon no options at all is the best. Which is kind of is. But anyway. It took a little bit of negotiation. The seller got semi-cold feet about the whole thing, had a change of heart, then another, and I ended up buying it for a fairly premium price. But it's clean and tidy, with absolutely minimal molestation. When I first viewed it, the car was on TE37, had a Recaro SPG on a fixed rail, was running a Neptune-chipped ECU via adaptor harness (yay no splices etc) but I was happy enough to not bother with all of that as I wanted as close to stock as possible. As it stands, the car has a Mugen Gen 1 exhaust (cat delete via welded in stainless pipe), and Ohlins adjustable coilovers as it's only mods. Which is fine. Oh and a very terribad Japan-spec hodgepodge stereo of shitness. DC2R Phone (2)-Edit by Richard Opie, on Flickr But the good! It's clean, straight, has new rotors, Endless pads, 160000km on the odo, a VERY clean engine inside and out, great even compressions, the suspension has $1700 worth of recent rebuild receipts, excellent black Recaros, tidy dash and is the perfect base for what I want. Actually I need to speak to @64valiant about replacing the bolster on one side of the drivers Recaro. DC2R Phone (4)-Edit by Richard Opie, on Flickr My plans? Chuck some nice fresh audio at it - I've bought a stack of Focal speakers, have a nice Image Dynamics amp and an Alpine bluetooth headunit for it. Tidy up the alarm/install a new one, refurbish the tired OEM wheels, go through all of the tarnish fasteners beneath the bonnet and replace with nice fresh ones. You get the idea. DC2R Phone (5)-Edit by Richard Opie, on Flickr I'll leave you with these phone shots for now - once I have the wheels done and dusted I'll be heading out for some proper shots with my big boy camera at some stage. Nice to be back though. Forgot how addictive these wee engines really are. And how rattly and generally shitty they are/racecar.21 points
-
I reckon the light fitting would be shower proof if mounted up the right way, but the fake rust finish they come with would soon turn into real rust. I bought two, so there's still one in the cupboard for future ideas. Here's a little project that's still on the go. It's a TradeMe bargain educational skull made of resin, and I cut out his eye sockets and stuck in those 230V neon spring bulbs. He's headbanging thanks to a car's rear wiper mechanism running off a battery charger. His headbanging is so slow that the only music I'll be able to play is Funeral Doom. Unless I give him more voltage, then perhaps we can have an Electric Funeral.... As soon as I've stopped the mounting from eventually working loose, I'll make some shoulder framing, give him some death shrouds and bogan hair and work out a power source.
 15 points
 -
There's fuck all work on at the mo so took the day off and put the LSD in. Yay for twin spin.13 points
-
Yeah so the 155s on this have been getting a bit low on tread so figured a new set of tyres was on the cards. Was also kind of sick of the stretched look and the fact that they had fuck all grip around any corner. So shelled out for some 185/55r14s. Much happier with how it looks and drives now, wish I'd done it sooner!9 points
-
OK so as you can sort of see in those initial shots, the wheels have seen better days. The rest of the car has definitely seen some paint in it's life, it's a bit peely and not super amazing but luckily white tends to hide it a bit. But those wheels. Yeah I needed to do something about those. DC2R Phone (7) by Richard Opie, on Flickr One short trip down to Kwikstrip in Te Atatu, and these were done. Old mate turned them around THE SAME DAY. Who even offers that level of service anymore? Admittedly he did say they didn't have a lot on that particular day so yeah, result. I chose to dip, as it preserves the edges on the spokes nicely, if a blaster isn't careful they can be rounded off etc, end up with slightly different profiles on each spoke. Not ideal. Next step. GT Refinishers. Grant and Ben gave em a coat of champ white. Pretty fresh out of the booth when I picked them up, look not bad at all. Went out for the night so popped them in the living room with the heat pump maxed to try and get the paint to harden a bit quicker. DC2R Phone (8) by Richard Opie, on Flickr The idea was to have them ready to fit tyres on the Saturday. But when we got home it still smelled of paint fumes a bit, so figured they should probably spend a day in the sun. And I just wanted to see them in the daylight. DC2R Phone (6) by Richard Opie, on Flickr Anyway, I didn't fit the tyres then... they were sorted out yesterday. On the car now but ran outta time to go take a reasonable picture. Shit it lifts the appearance maaaassssively.6 points
-
Skids for the kids Finally got this old girl driving for the first time in about 15-20 years. We've got a long road ahead, pulling off the body and fixing up the chassis. There's now a time restraint too as my brother wants it as a wedding car! Enjoy and discuss:4 points
-
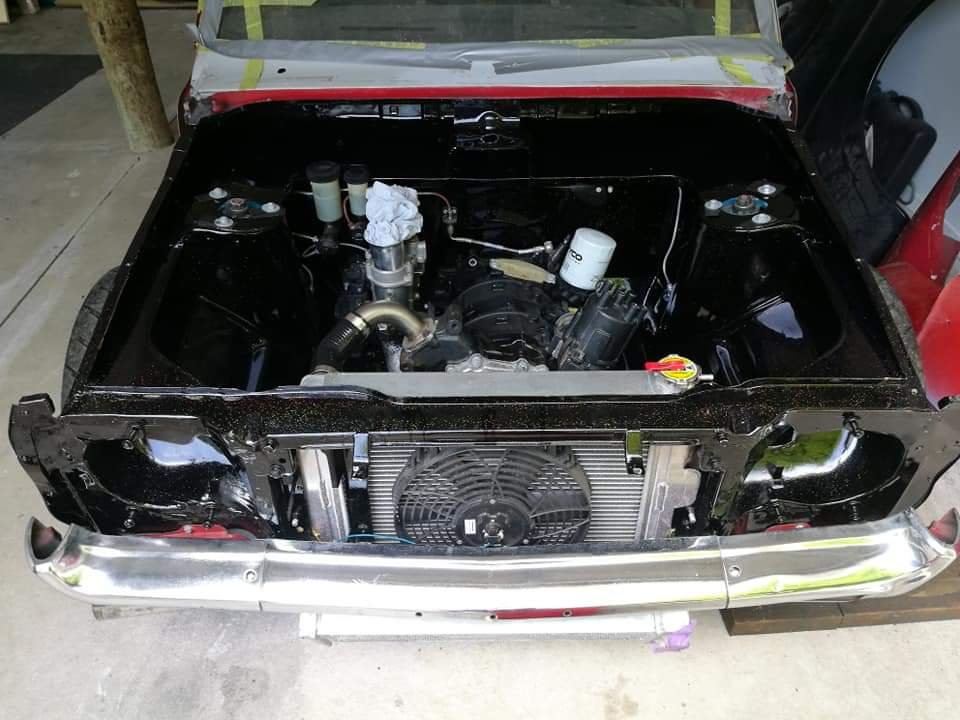
So this died a few months back going to the shops, so suspected fuel pump. So it's been sitting round doing nothing, but bought some cheap coilovers for the rear which looked like they'd fit up going by measurements, so fitted them up, but the one crucial measurement I forgot to get was the length haha, so yeah it slammed it to the point of it being undriveable Then decided to throw the 4g63 from the galant in for shits and giggles, and put fuel pump from that in also, now its back up and running and running 2 litre POWAHHH. Very straightforward swap, looms are the same so only had to swap ECUs and a few linkages and mounts as I kept the galant gearbox on the '63 as well. Definitely goes a lot better now, though not as rev happy.3 points
-
When you get your engine built get them to make it a side valve, they love low octane.3 points
-
Went to Whangarei swap meet. Came back empty handed. Anyways plans for the Hemi are 6 straight pipes, necked down to 3/4 inch 19mm at the ends to shut her up. Also looking at making a "high-rise" inlet manifold from exhaust tubing and a lump of 75x50mm boxsection, topped with a trio of Holden single barrel carbs. Also on the cards a third pedal MIGHT possibly get squeezed in the footwell3 points
-
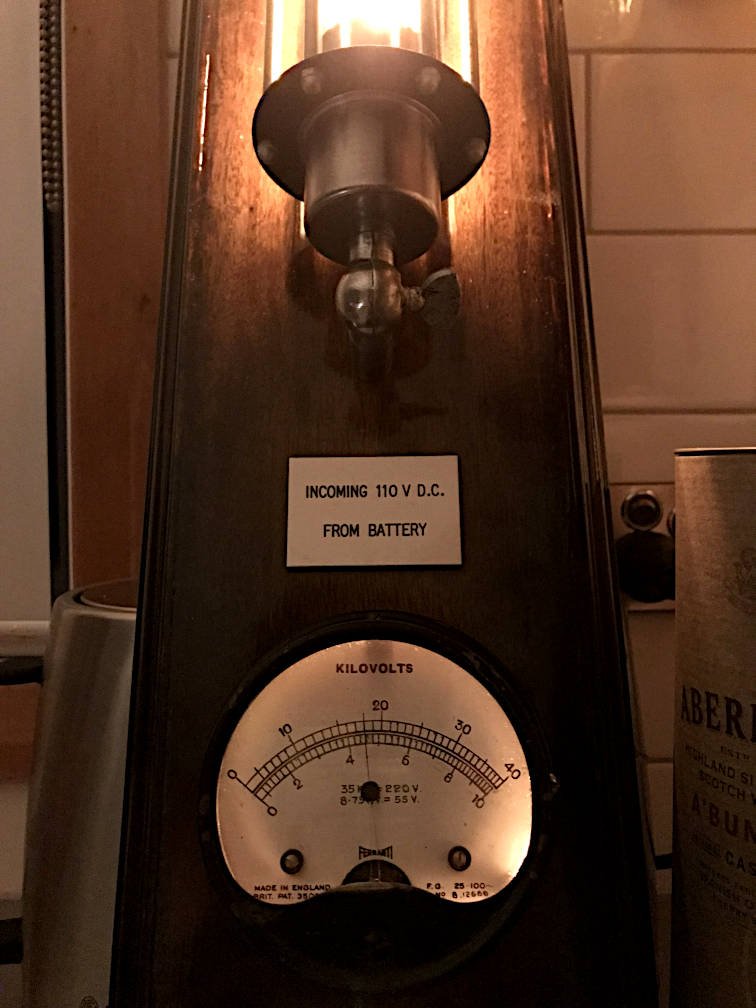
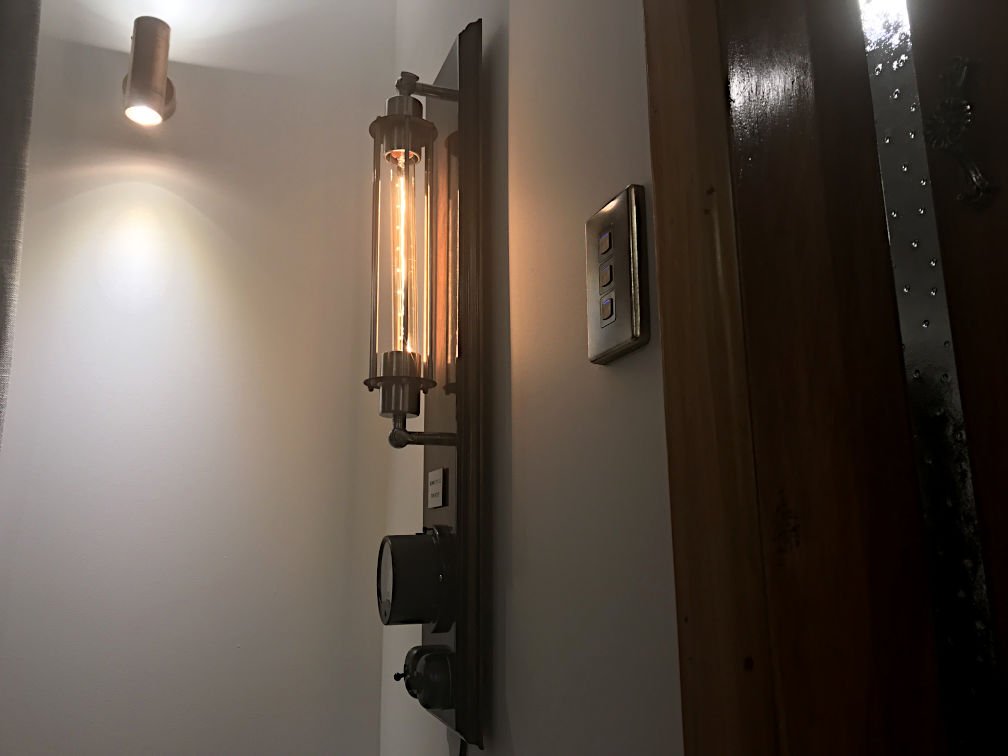
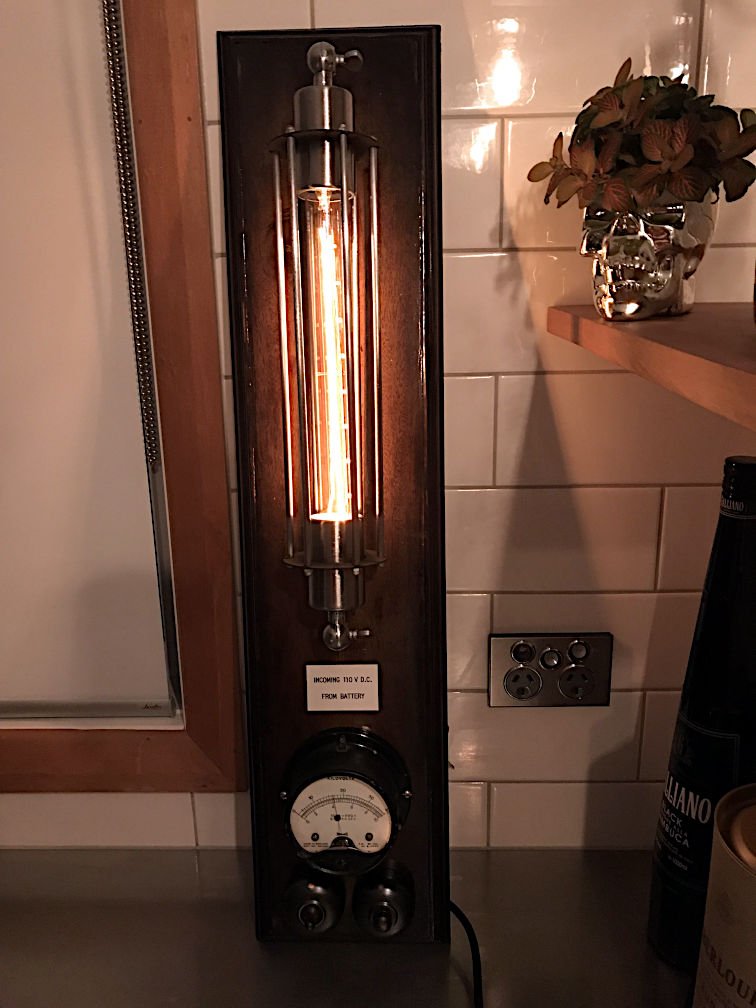
Another one of my patented useless projects which didn't turn out as good as I hoped.. I added some decorative edging to a plank of wood, stained it, mounted an Edison cage sconce light thingy, a retro switch and dimmer, an 'incoming 110V DC' plaque from oldschool Secret Santa, and this old analogue voltage gauge I got off TradeMe: I've attempted to add backlighting to the gauge, using period-correct incandescent bulbs for that extra crappy glow. Conveniently, if you use the right input terminals on the gauge, full scale is about 245V so you get to watch the needle go up and down as you operate the dimmer. Entertainment value: ~5 seconds. Eventually I'll pick a spot on the wall for this stupid thing to live, and if I'm feeling extra keen, I'll find a way to run power to it inside the wall. Artist's impression: The trouble is I really messed up the staining and varnishing of the board, and I don't know if I can be bothered taking the whole thing to bits and redoing it. I sanded through the dark stain in a few spots while trying to fix my first attempt at varnishing. =(
3 points
-
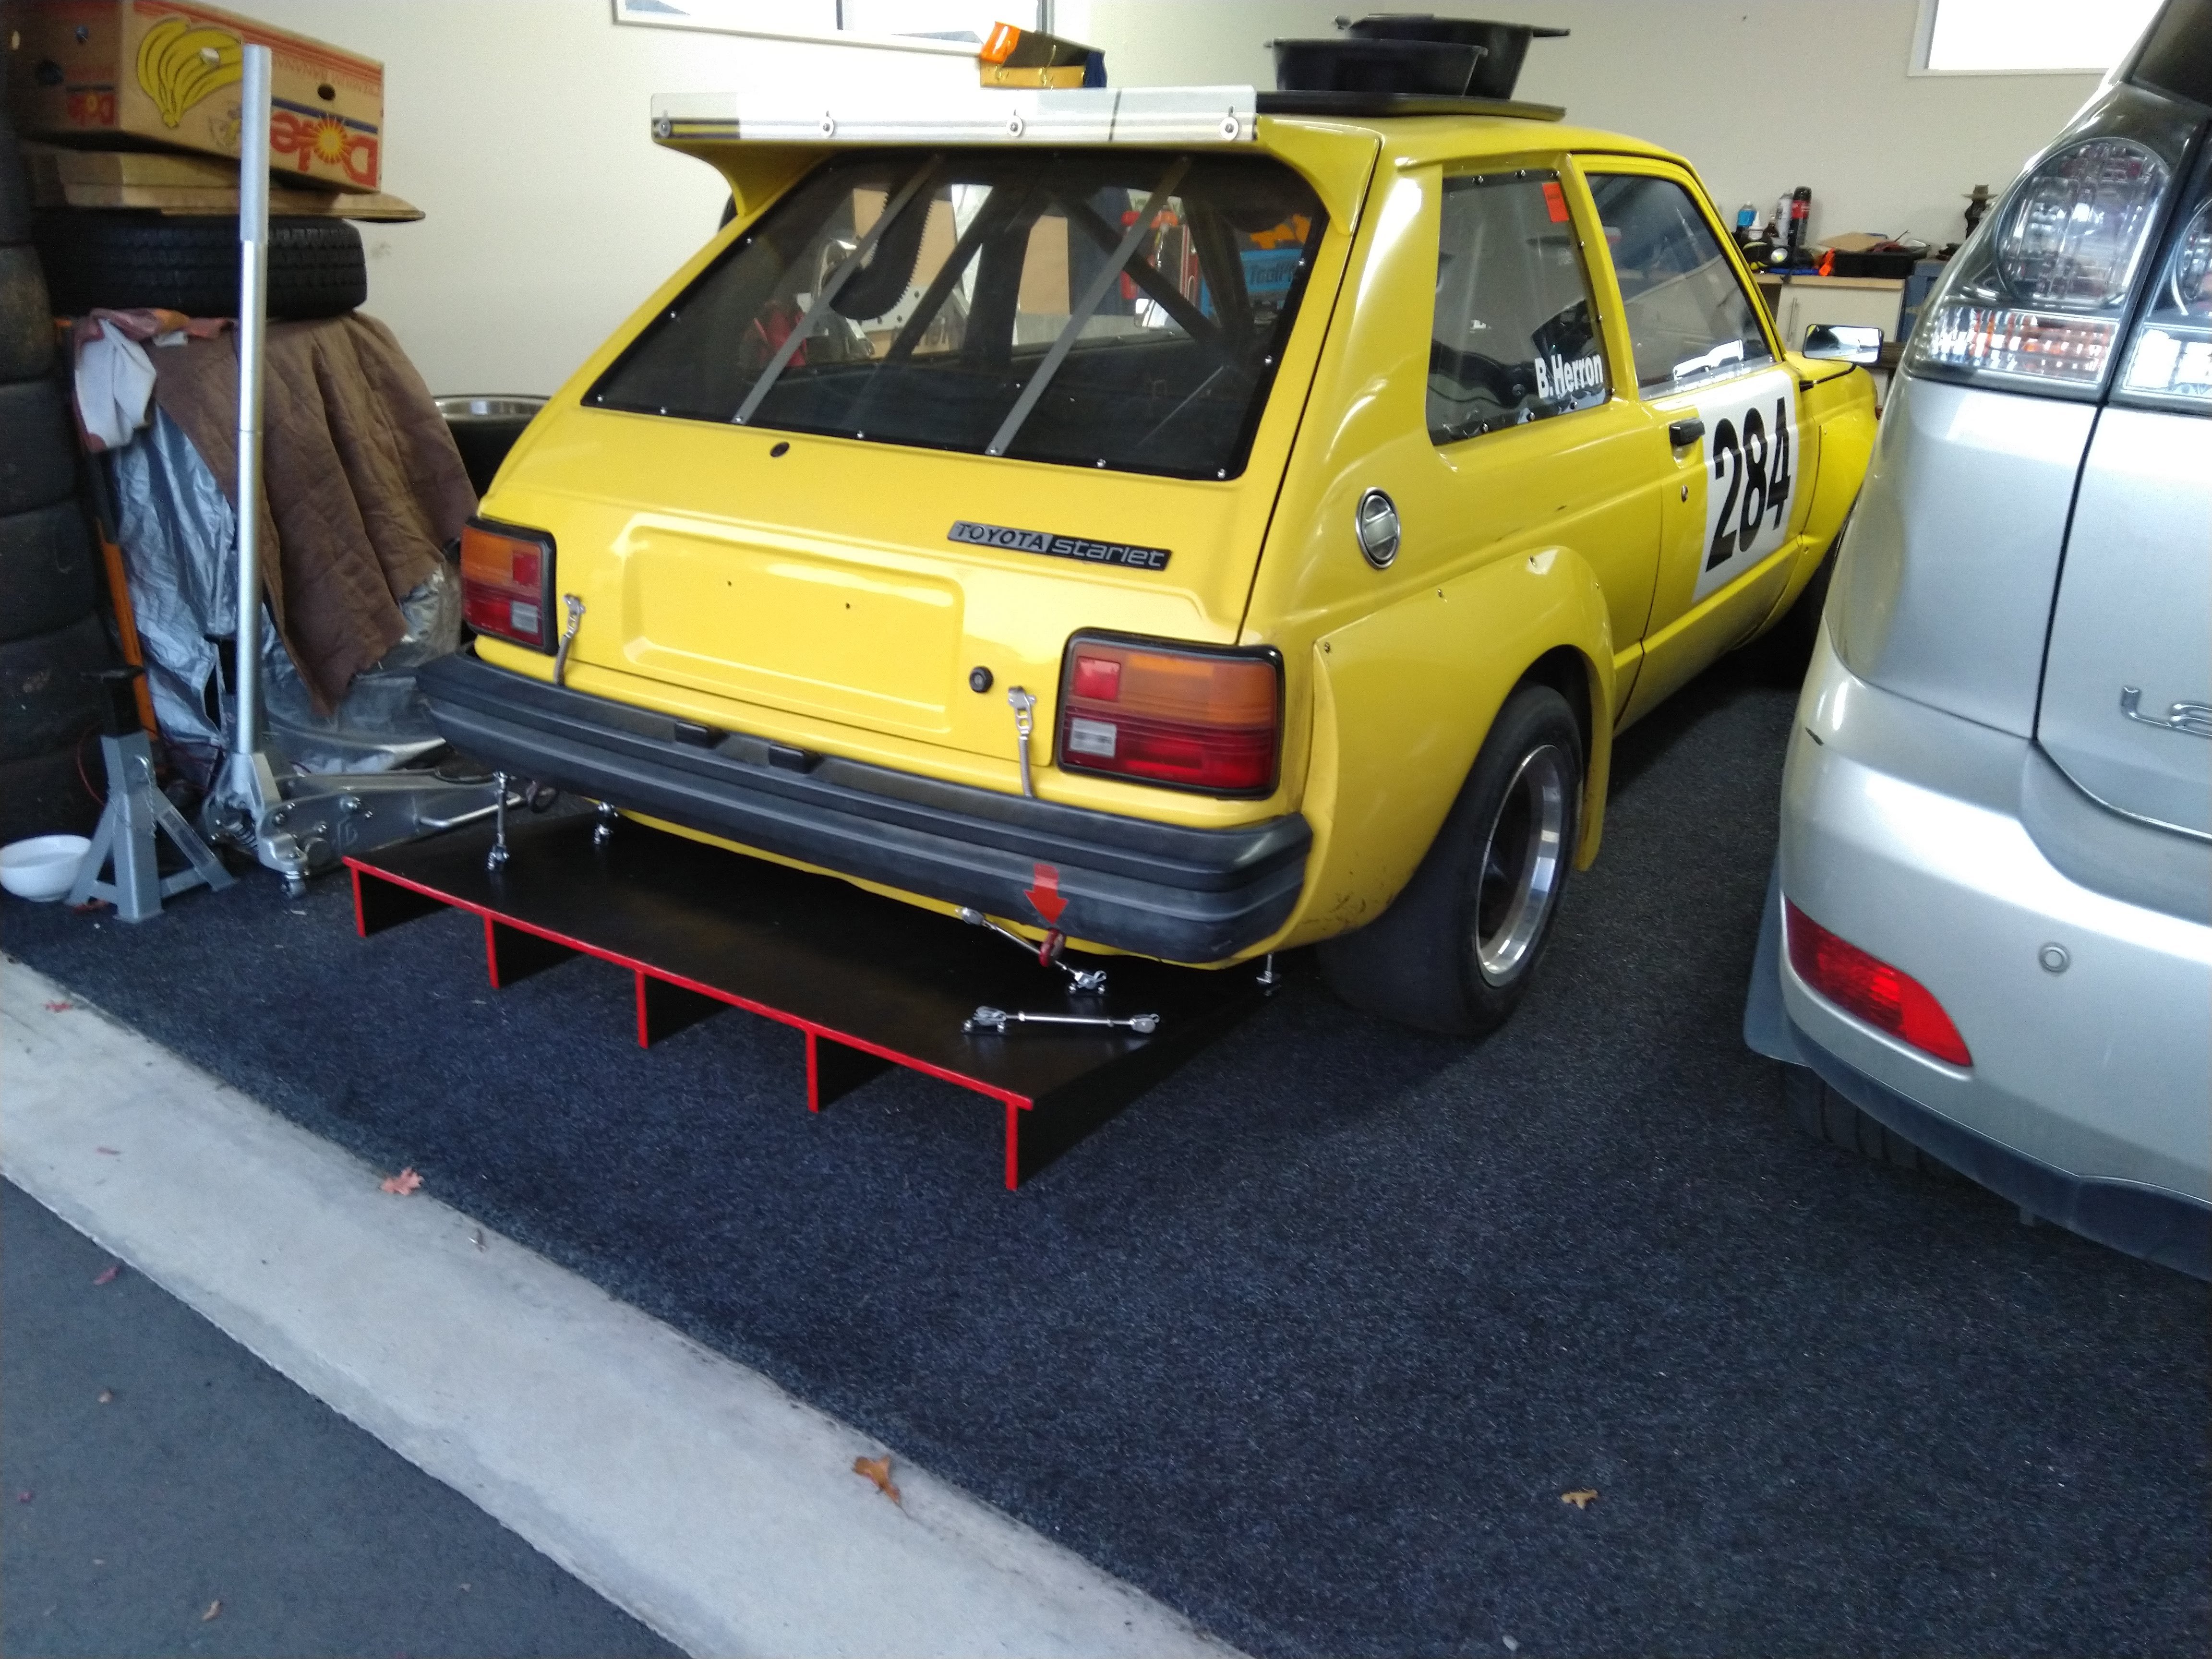
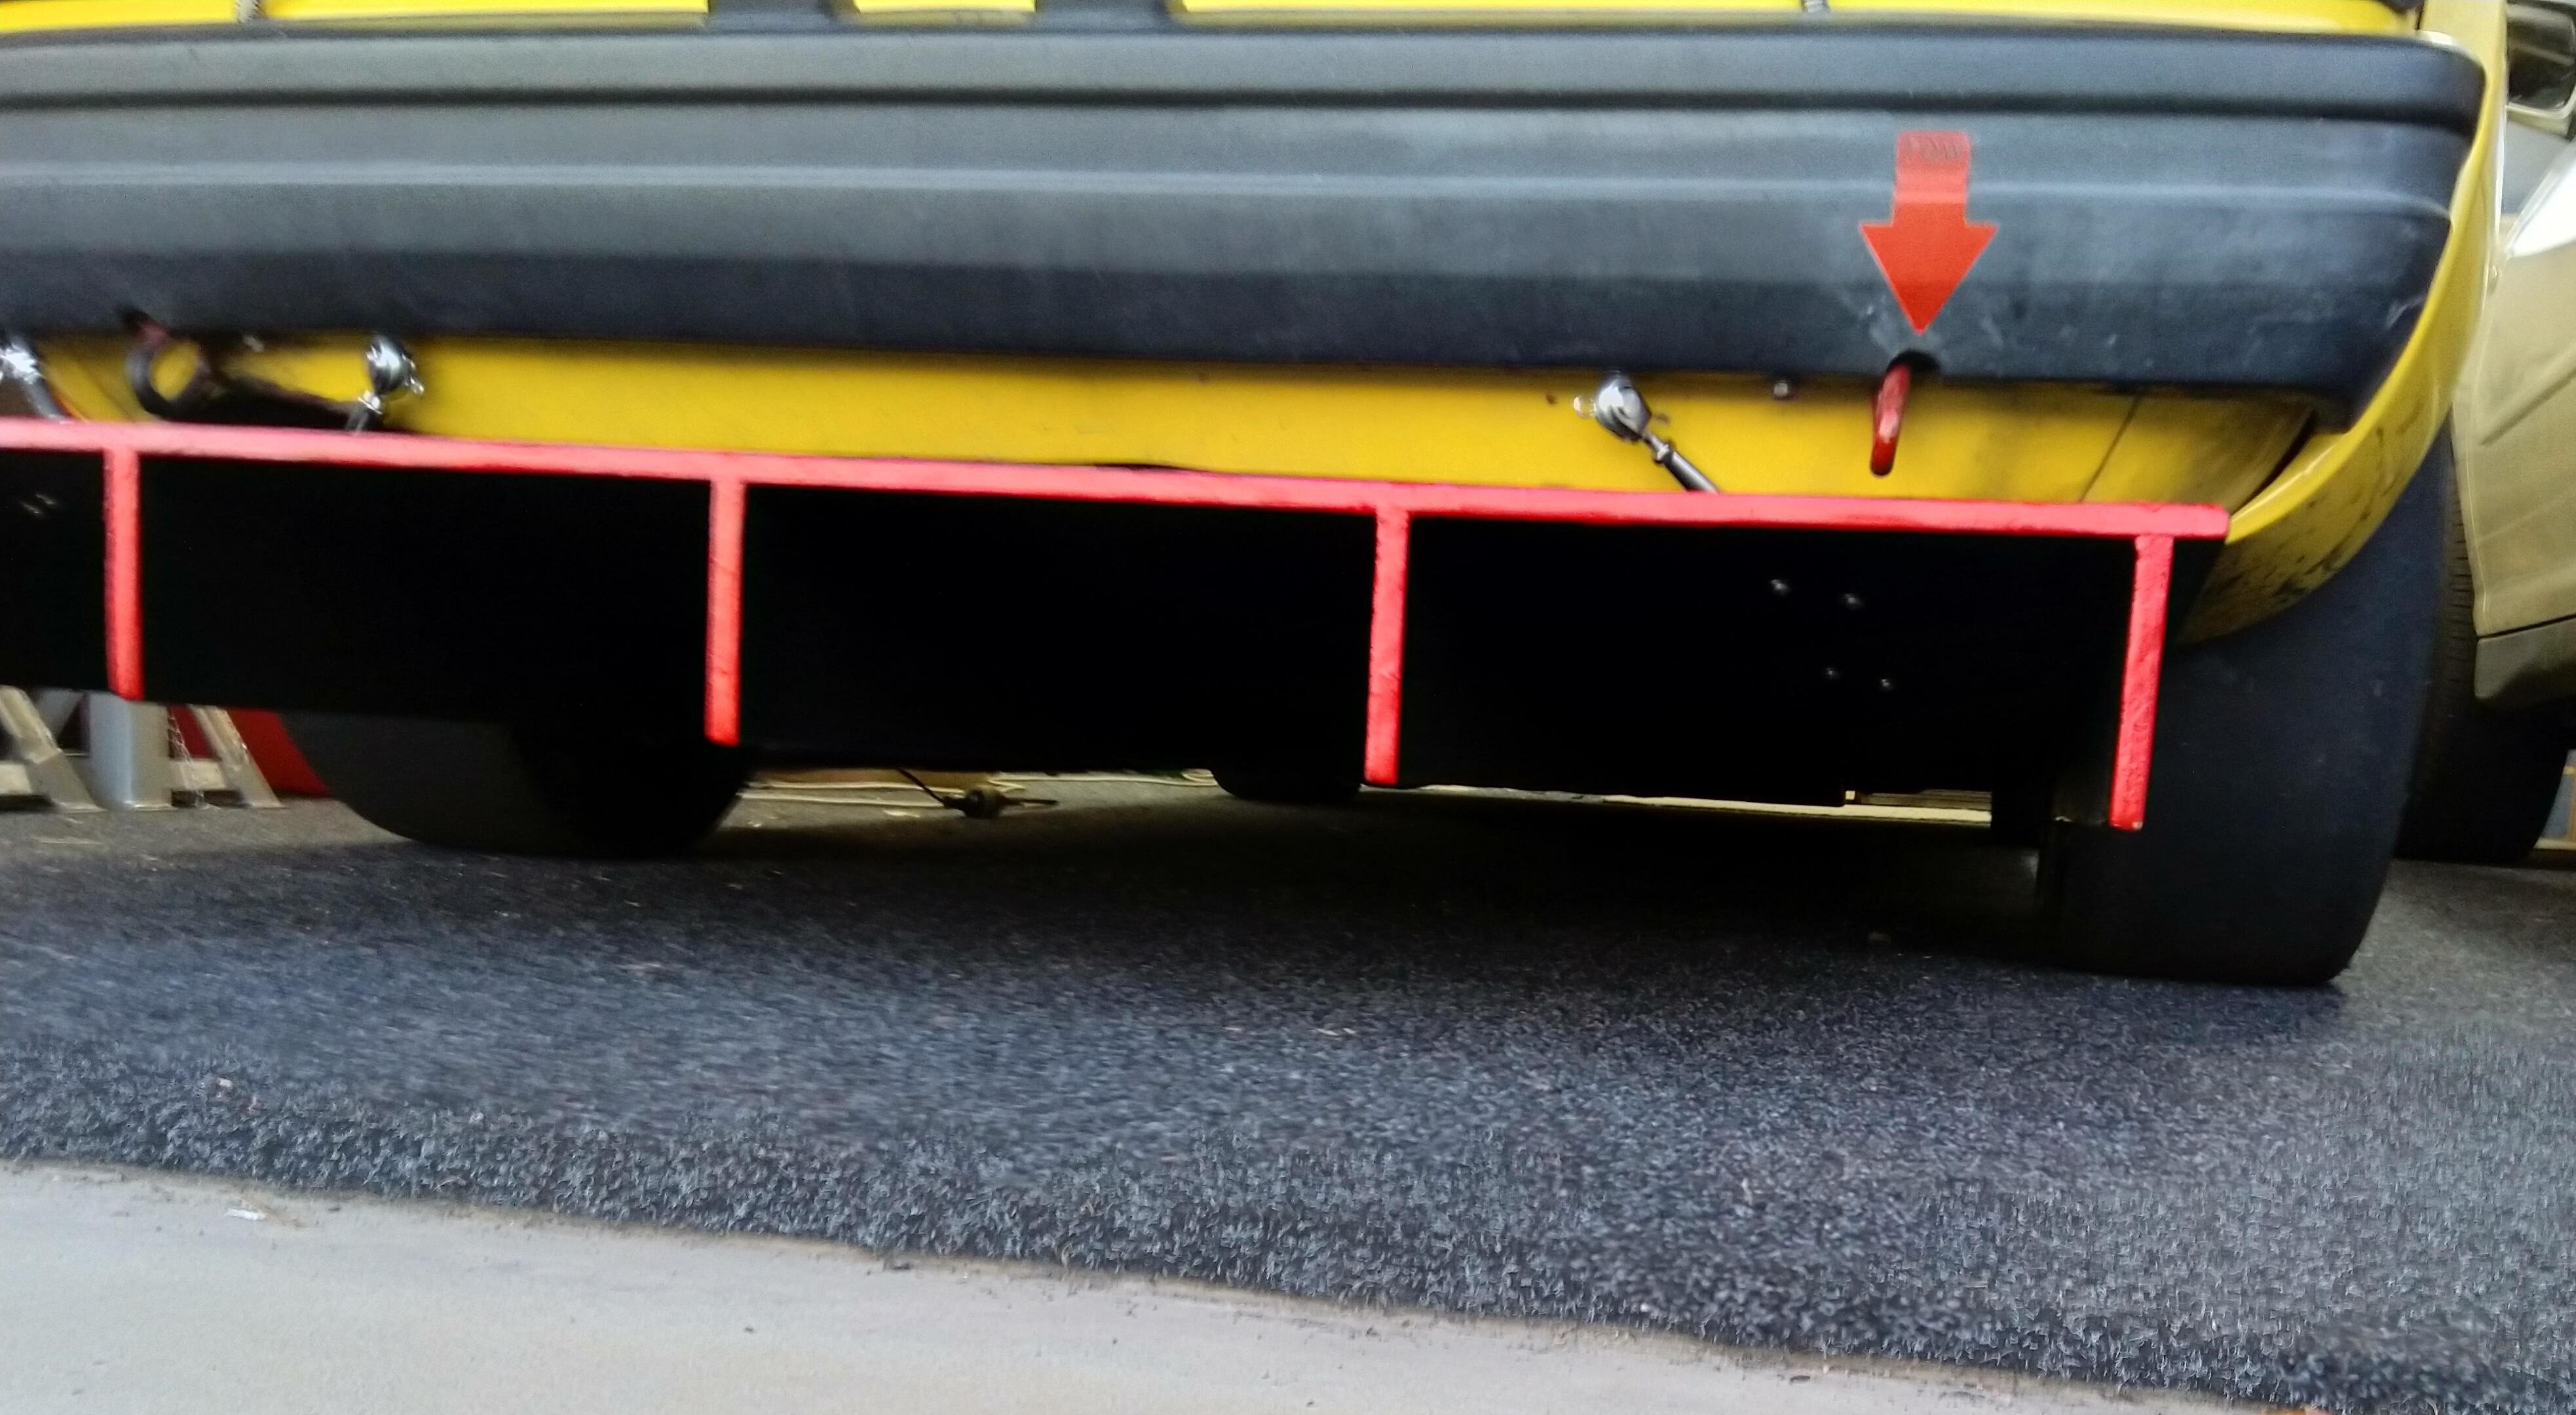
Finished Version, just waiting on one mounting point to arrive. Ended up sticking out further then what i was originally planning as I moved it back from the diff for clearance. But shouldn't have a negative affect on the aero (opposite probably), and could still go out another 200mm within the rules! Can always cut it down later if needed Only concern is it getting hit by another car, so painted the back red to stand out...
2 points
-
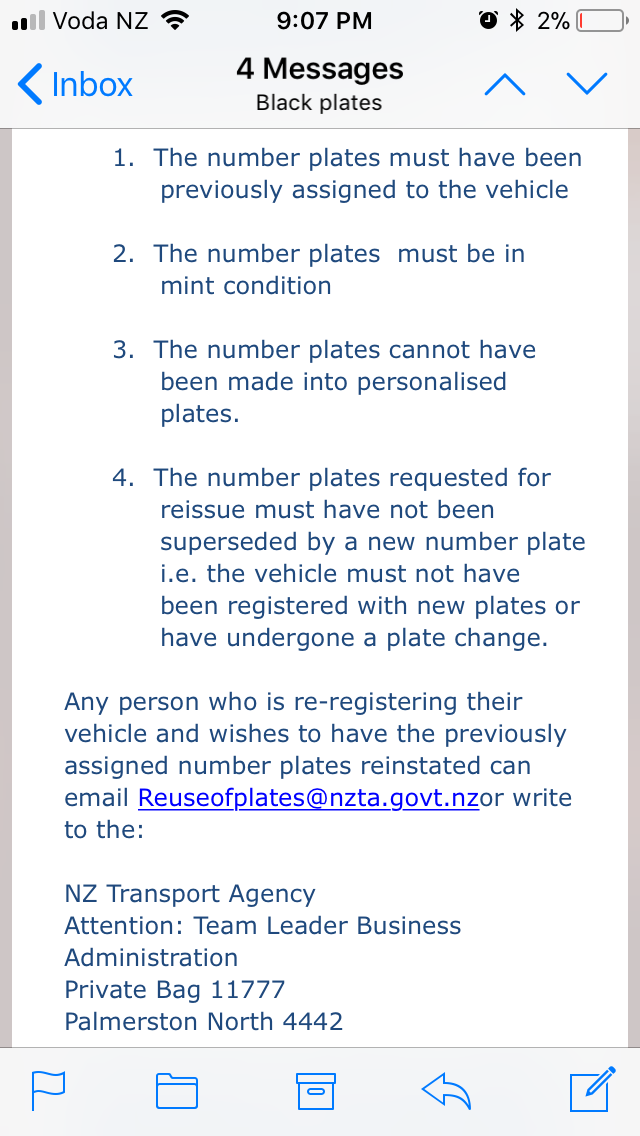
took 2 weeks for my scooter plates (pretty sure thats standard for others too) just found the auto reply it said 10 day (working i guess) turn around, if your query is urgent phone 0800 366 988 ext 8364 which the confirmation email from tania taite had that as her phone number
2 points
-
but yeah : nice man, real sharp instrument ya got there2 points
-
Let's be honest, a safari bogged to the door handles is as heavy as a container ship.2 points
-
Bit more progress on this old chap today, Harry has finished doing the Rust on it so swapped the good doors off the red one onto it. And fitted a tailgate I bought aaaaaages ago to it as well. Also tried swapping instrument clusters over as only the speedo and handbrake light and fuel light work on mine haha, but different plugs so was a no go. Also swapped shifter and linkage assembly from red van as mine were sloppy as fuck, so now she’s noice and toight! So it’s mismatched and ugly now but much more rust free. Won’t be far off going down for a wof!2 points
-
I lol heartily at these 1jz comments dropkick posts. Don't even sound like a six.1 point
-
Lol why would you even bother bringing up rock crawling, there's fuck all of that in the North. This thing is dope for what terrain we have, mud and sand.1 point
-
I want to get an engine built in the usa. Q: how do I describe 95 or 98 octane to the engine builder? We use RON ratings while they use (RON+MON)/2 to work out AKL ratings. So, if I want to run my engine on NZ 95 octane what is the equivalent in usa.1 point
-
Their 86 is our 91.1 point
-
95 is pretty much their 911 point
-
http://www.pencilgeek.org/2009/05/octane-rating-conversions.html1 point
-
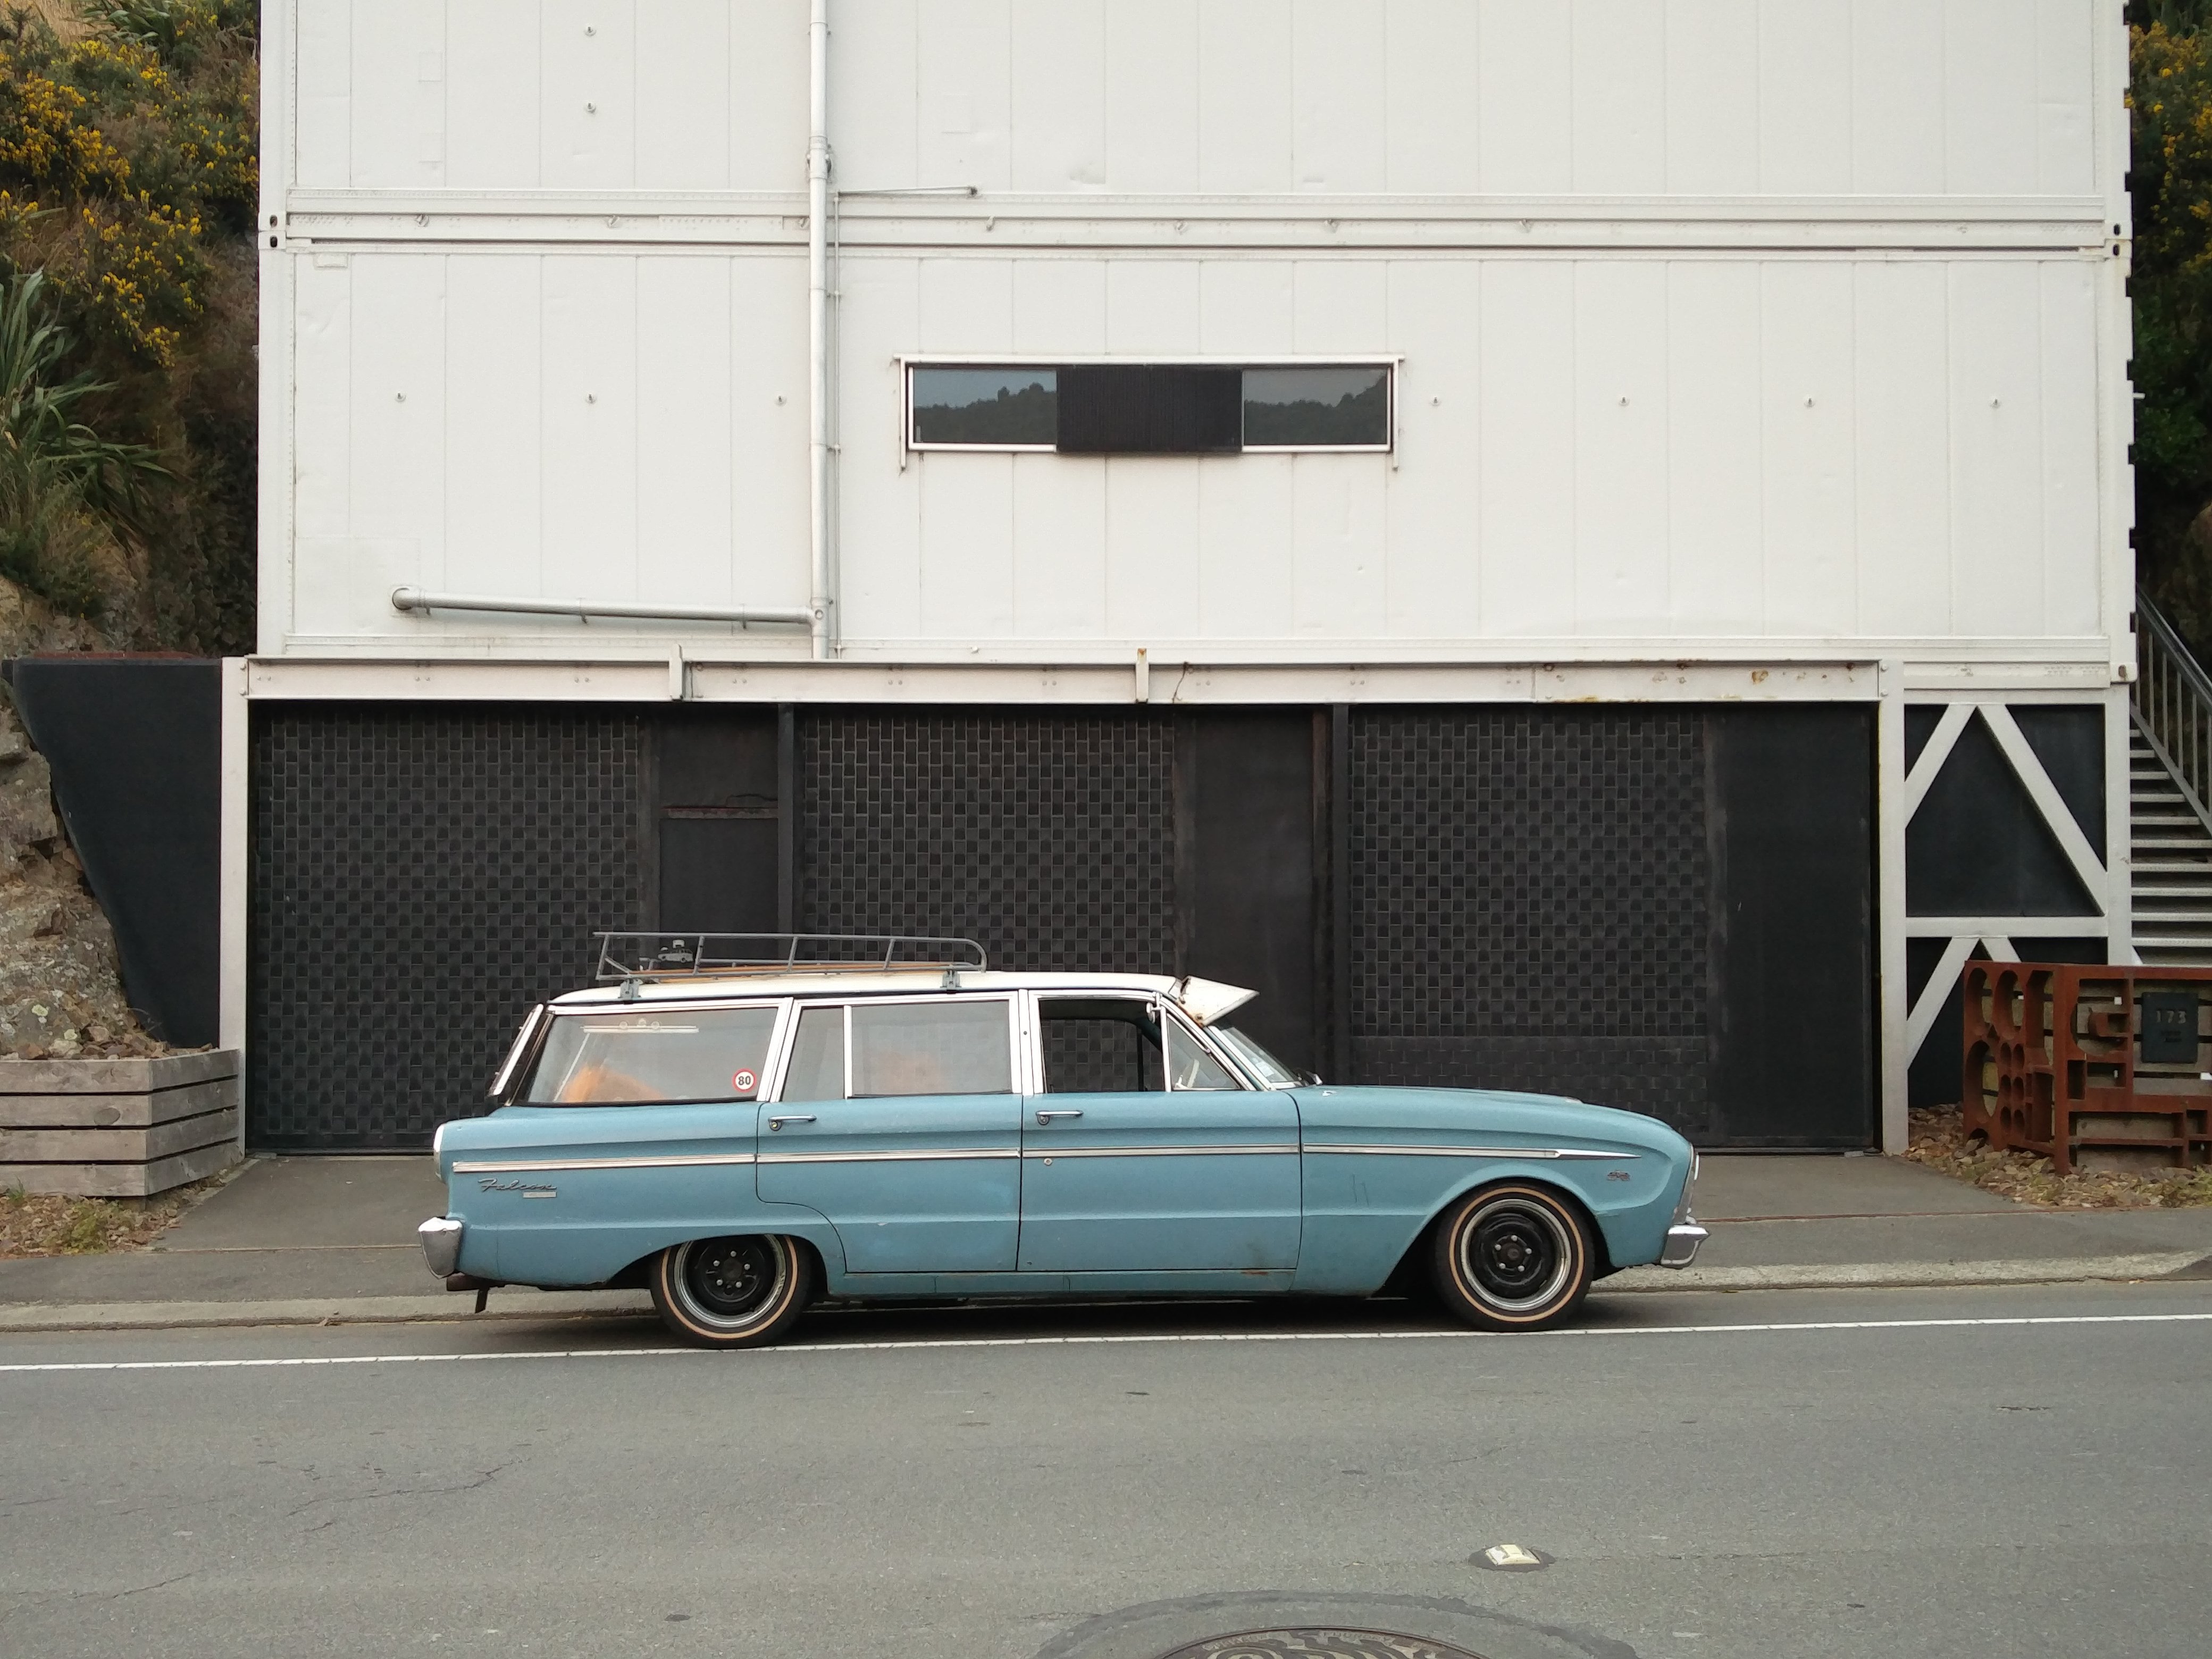
More adventures in my wagon. Decided to break out the old DLSR camera and take some nice shots of the wagon, instead of just using my iPhone Lots more car shows. Went to the Waiau Pa Hop and Papakura Club car shows. Parked up with my mate Hamish in his 1978 Avenger GLS Went to the Renegade Hot Rod and Custom Anzac show and one Best Other Went up to Whangarei for the Rev Up show. Parted up with Kevin's 1979 Avenger, love the shade of green, it looks so beautiful in person We then drove out to the Packard museum The day after that I cruised over to Caffeine and classics with my neighbour Rob in his 1974 UK imported NZ new wagon. It his so interesting seeing them parked side by side. They almost don't even look like the same car. Mine is so much lower and as a result looks really wide, where his looks tall and skinny Here is a good shot of how much lower mine is, and how big the back wheels are With the wagons, the only thing they changed over the years were the front lights. Mine is a later model Chrysler and Rob's is an early hillman. The wagons are super rare, there is only 28 left registered in New Zealand, including ones with their rego on hold, so I would guess that maybe half of them would be still on the road. So maybe just over a dozen left driving around. To see two of them parked next to each other like this would be extremely rare. Discuss1 point
-
Discuss: //oldschool.co.nz/index.php?/topic/30773-sp450andles-dads-daimler-sp450/ So I've been putting off starting this thread for a while, as not much has been happening with Dad's Dart. But recently I've had a boost of enthusiasm, and have started doing more bits and pieces on it. So here's the specs... >Originally an auto 1962 Daimler SP250 Dart. >Engine converted (by Hans Ording from Mangonui) to the 4.5 V8 from the Daimler Majestic Major. These produces around 260 bhp from the factory, and 384nm of torque. But the the bhp is officially stated as being 220, because the Daimler dynamometer only went up to 220 bhp! >Toyota Celica 5-speed gearbox >Ford 9" rear diff >XJ6 hubs in the rear >14" steelies up front, 15" steelies at the rear The car was raced by the previous owner (Jim Gilchrist from Birkdale) at Meremere, and used to get mid 12's to low 13's on street crossplies, and in full street trim, and would drive it to and from the track. Recently I have been tidying it up, replacing all the yucky old bits, and we are getting closer to getting the engine started now. I cant be bothered typing up what I have done so far, so I will leave you with some pics and a vid of the car... G3BXDDwSDYo1 point
-
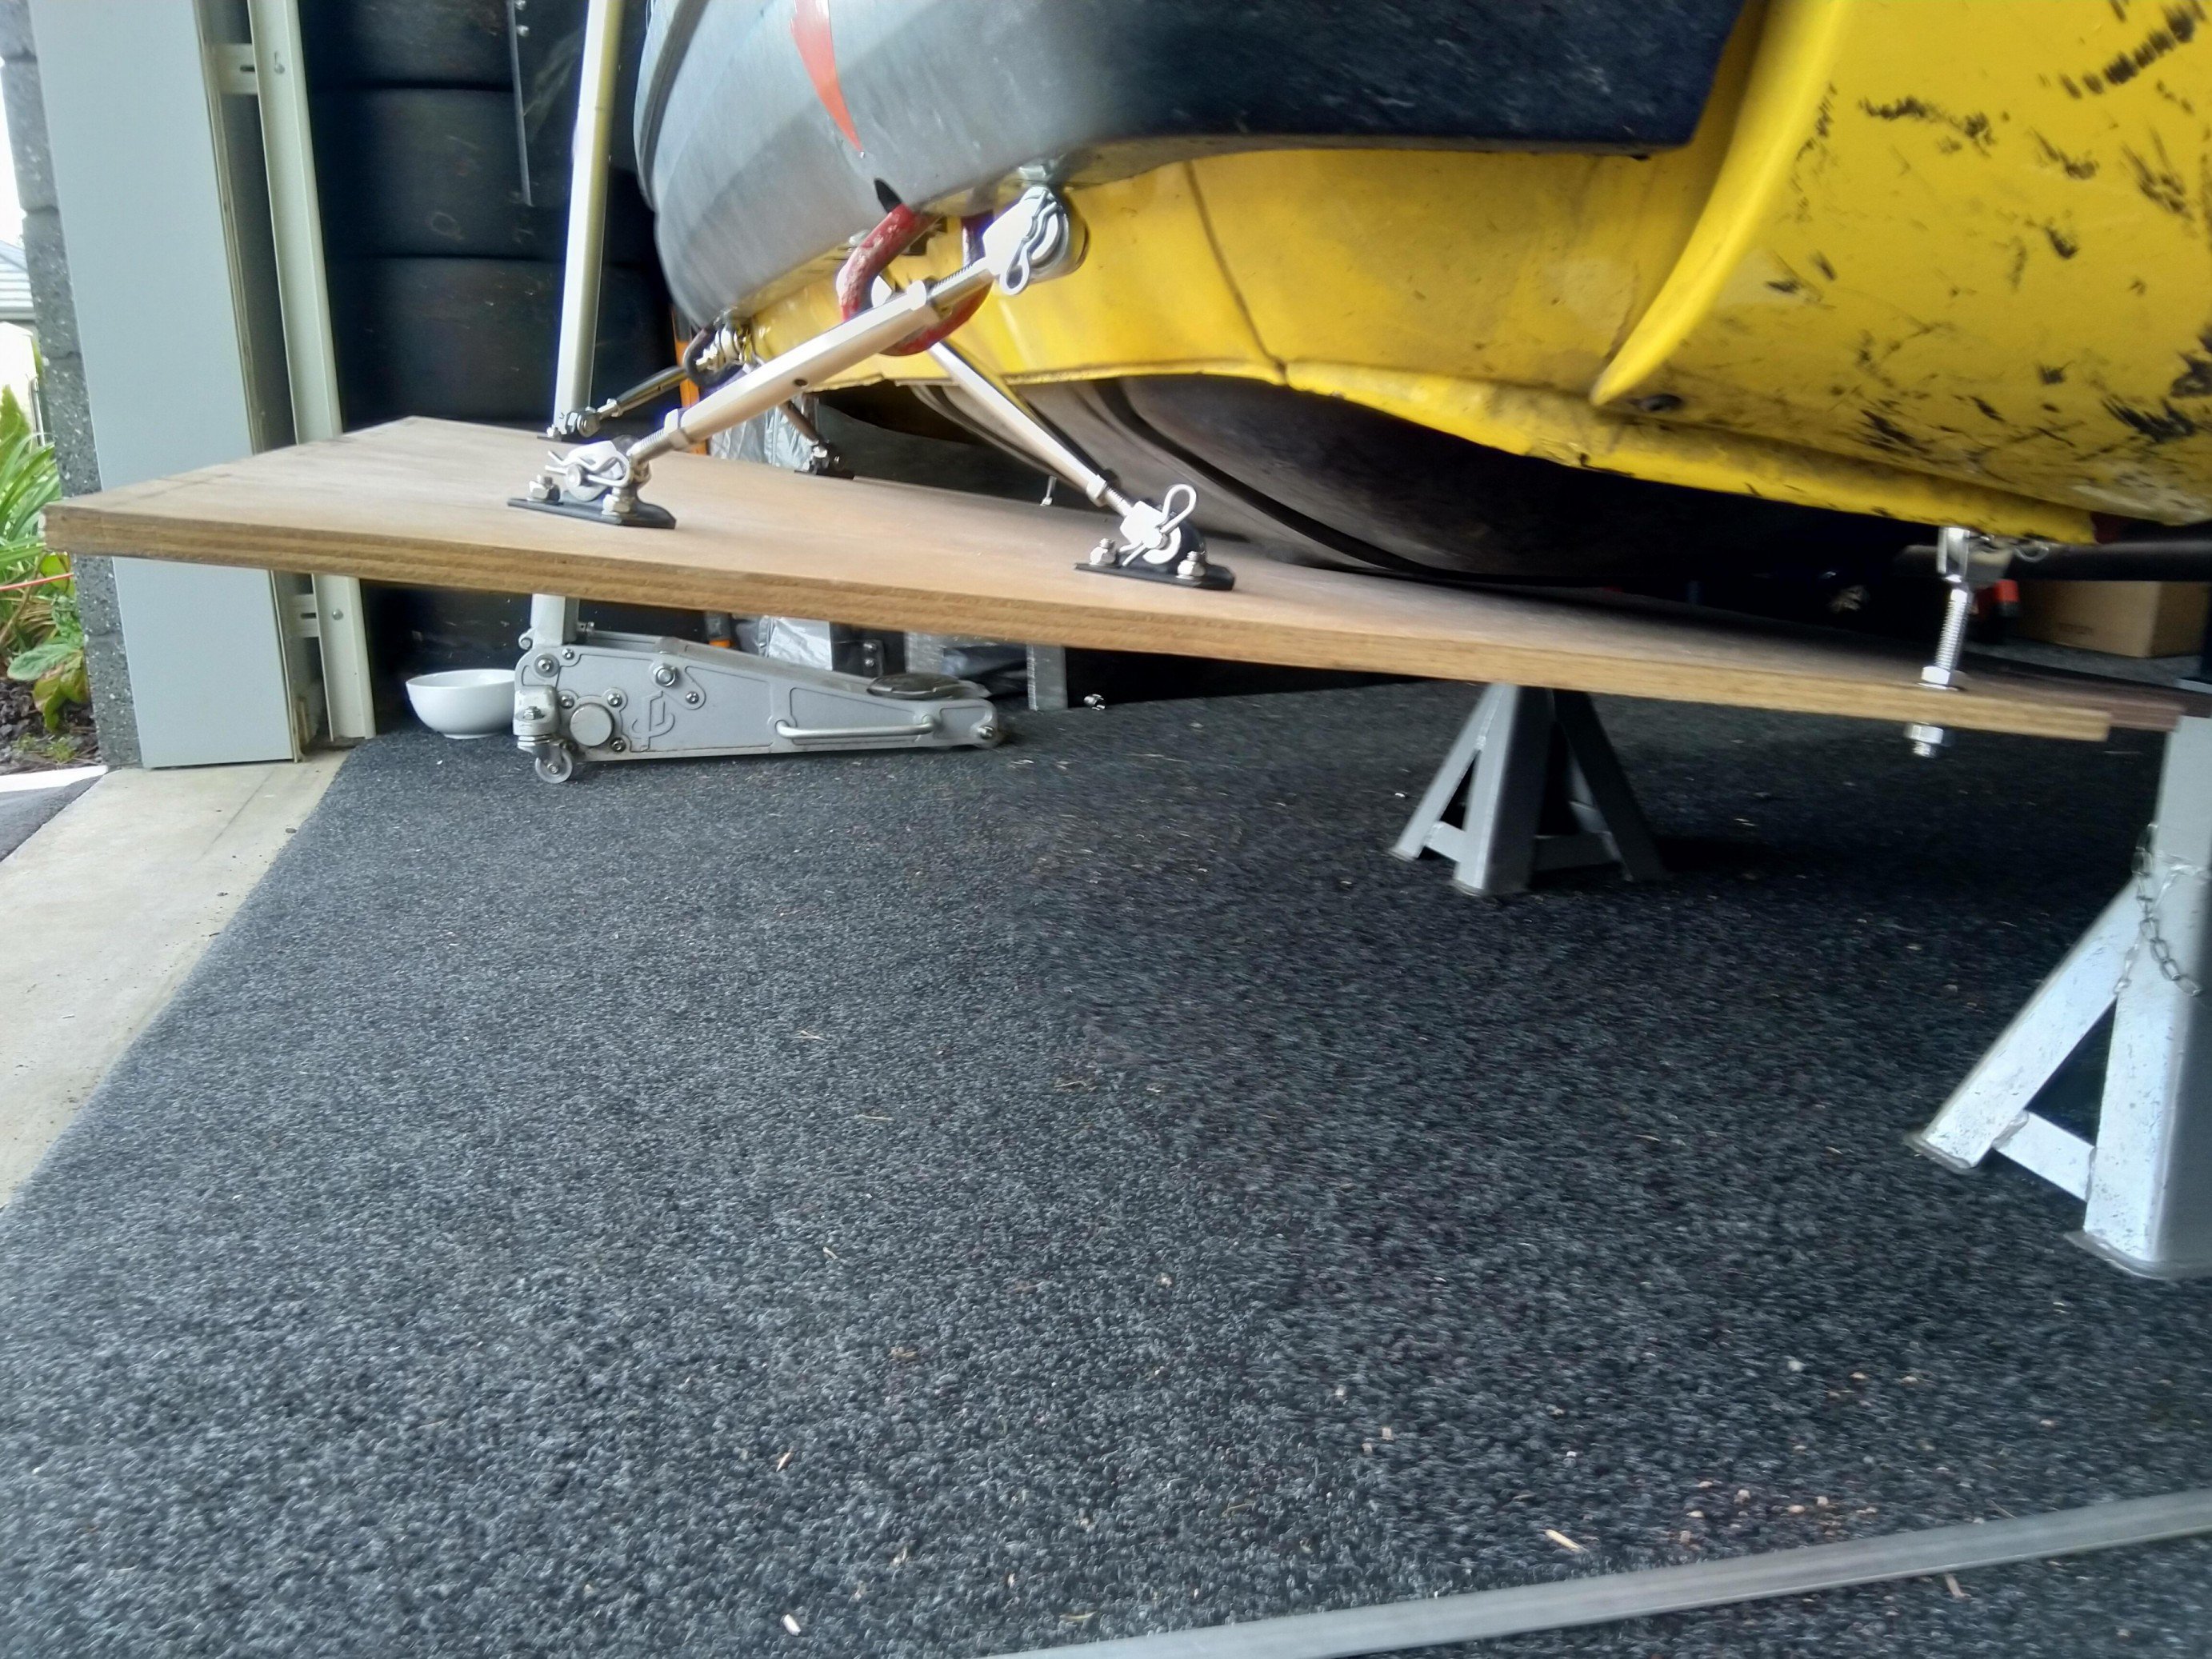
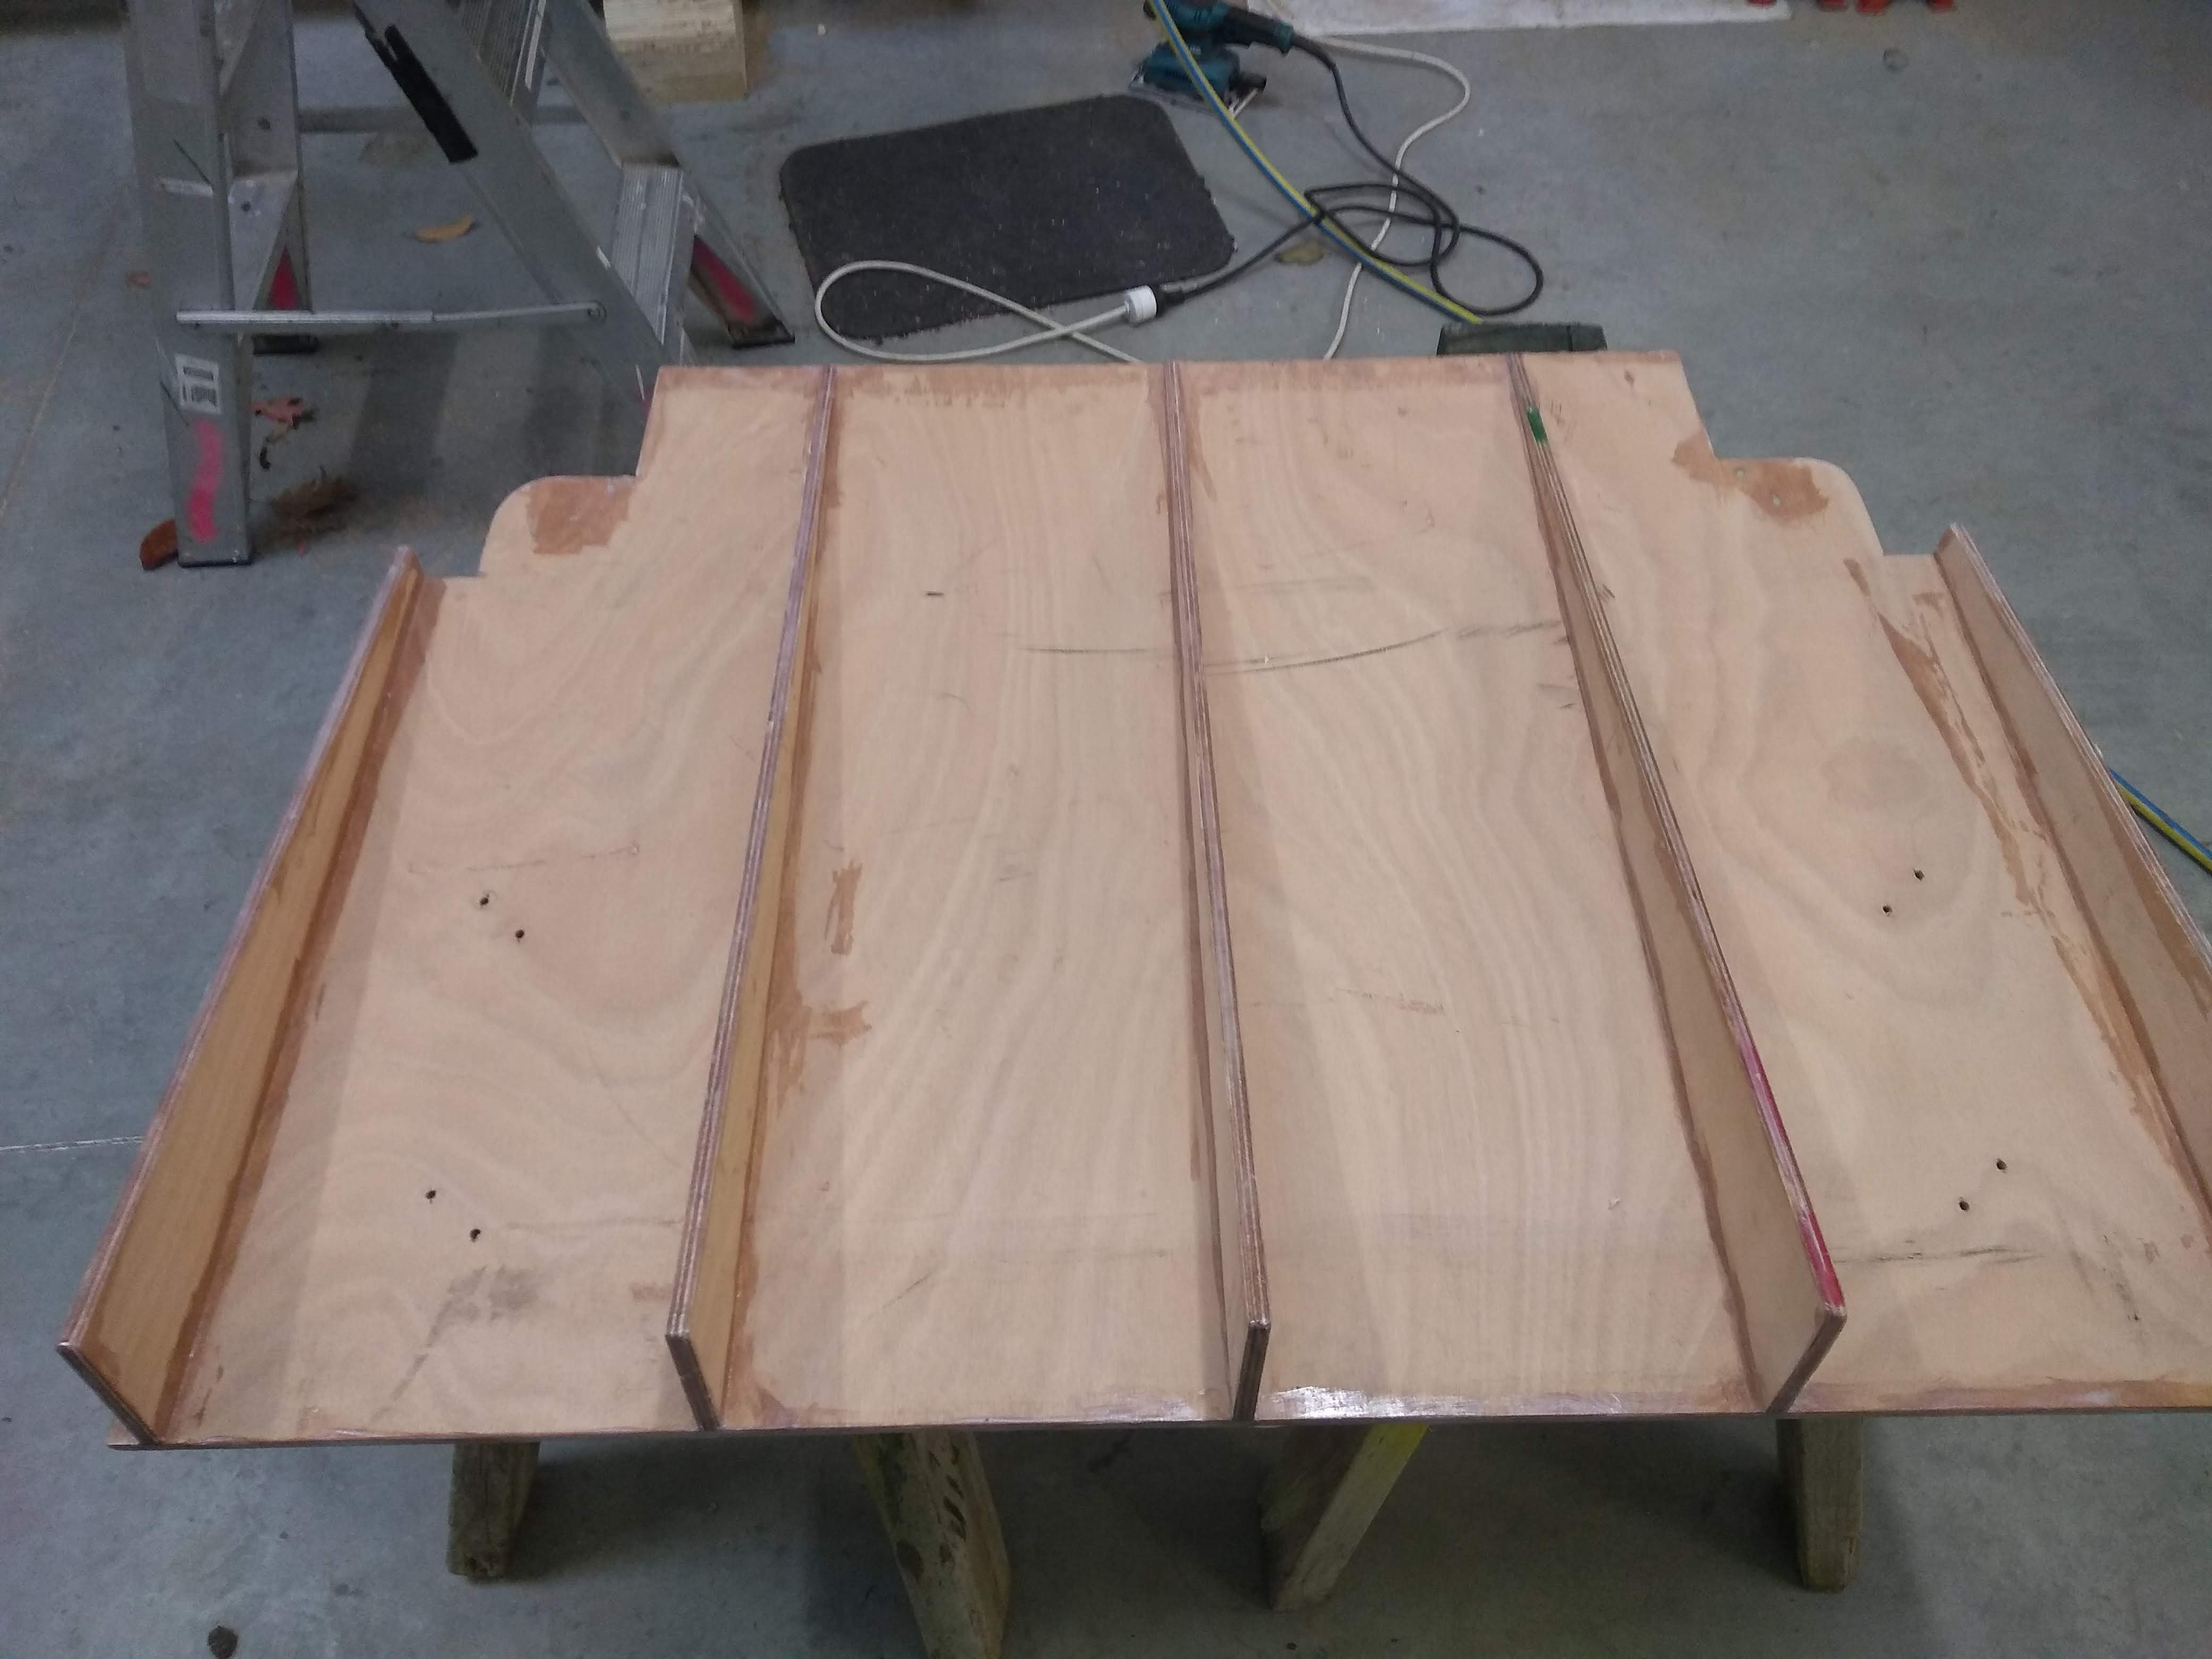
And finally to balance out the splitter I created a diffuser, again out of 12mm ply as that was easiest (prototype for now), mounting was really tricky but got their in the end. Have made some strakes for it and it's getting painted black to match splitter. It's height and angle adjustable, and is again quick release as i'm guessing it won't fit on the trailer. All ready to go for the last club day of the season Sun 5th May (Next weekend).
1 point
-
the PV skyline ones are big compared eh. unfortunately I found another car on Facebook that’s very similar in colour to what I had in mind for all these years. Essentially, I’ll have more stripes and gold pearl.. so will press on with plan, lol.1 point
-
I added another gay Honda to the collection (temporary) today. I wasted no time in putting the factory shocks back in so I could nab the konis for the crx. The teg is reg on hold but has a bit of A pillar rust and a rust hole by the rear window. I'm hoping some other sicko buys it as is or I'll part it out when I get back. Its got aftermarket cams exhaust and prelude brakes. Got a few goodies for the crx and shuttle too, spoon baffled sump, spare cv shafts and starter. Koni damper adjustable shocks and a set of hawk pads for the big brakes on the shuttle Oh and a b20 with spare type r head. I got lucky and the b20 has the higher compression pistons - it should be about 10.4:1 with the vtec head. I'll slowly get parts and build the 2 litre up for the crx as the b18 is getting smokey1 point
-
So yeah, took this to the beach. About to go out to the shed and watch it dissolve into a pile of rust. but for now a video: Gearing isn't the best for sand. but other than that and melting the clutch once, it went real well1 point
-
bit more carb tutuing, upped the main jet to 135, better on transition, but maybe too rich on WoT. diddled with the the idle mix, ok, but still a bit funny. Read and reread my various carb books. decided to tweaked the floats, as the carbs are on a 12* angle to horizontal, (max recommended is 5*), the lower or inside side float will tend to cut off the needle valve earlier than it should making the fuel level low, especially in the upper or outside fuel well: ...and as it is written, so it comes to pass... Bent the inside float up a bit, and left the outer as it was (factory 25mm). Average fuel level is probably still a bit low, but too high will be bad too. WAAAAAAAY better now, i think the idle jets were sucking a bit of air every know and again or something, and the progression flat spot is much improved as the ETs have a few more holes covered. Tweaked the timing a bit more advanced as well (12-15* at idle) and the whole thing is now much livelyer. Idle is smoother and i leaned it back to a 'steady' 13.5 AFR, at 800rpm, when before it wouldnt idle under 1000rpm or 12.5 AFR At WoT AFR is dipping into the low 10s sometimes even the 9s, so i will try the 125 mains again. Time for a few other things (there is always something!) REDUCING NOISE Steering tie rod vs exhaust downpipe interference caused a disconcerting rattle though the steering wheel on hard right (parking style) turns These pipes are 80's muffler shop specials and will be replaced eventually, meantime a wee tickle from Mr Grinder on the excess threads appears to have the desired effect INCREASING NOISE 'customised' some op shop $5 low impedance (6ohm) speakers using a skill saw, ply offcuts and builders adhesive that i really think have nailed the 'builders least favourite apprentice' aesthetic. They fit under the back of the seats where no one can see them, and are 11ty times better than the old 4inch pioneer box speakers, and were within my budget, I am not ashamed. Related, I also installed a switch so the head unit will run without the key in the ON position (dash lights on, fuel pump chunting away). This hack is needed because my 'cheapest on ebay' Ducato ignition switch doesn't have a flippin ACC position. Now that's austerity. Chucked on a new sticker holder sticker And piled the girls in for a hoon. For the first time it feels like its actually running well, which means i will be using it quite a bit more.1 point
-
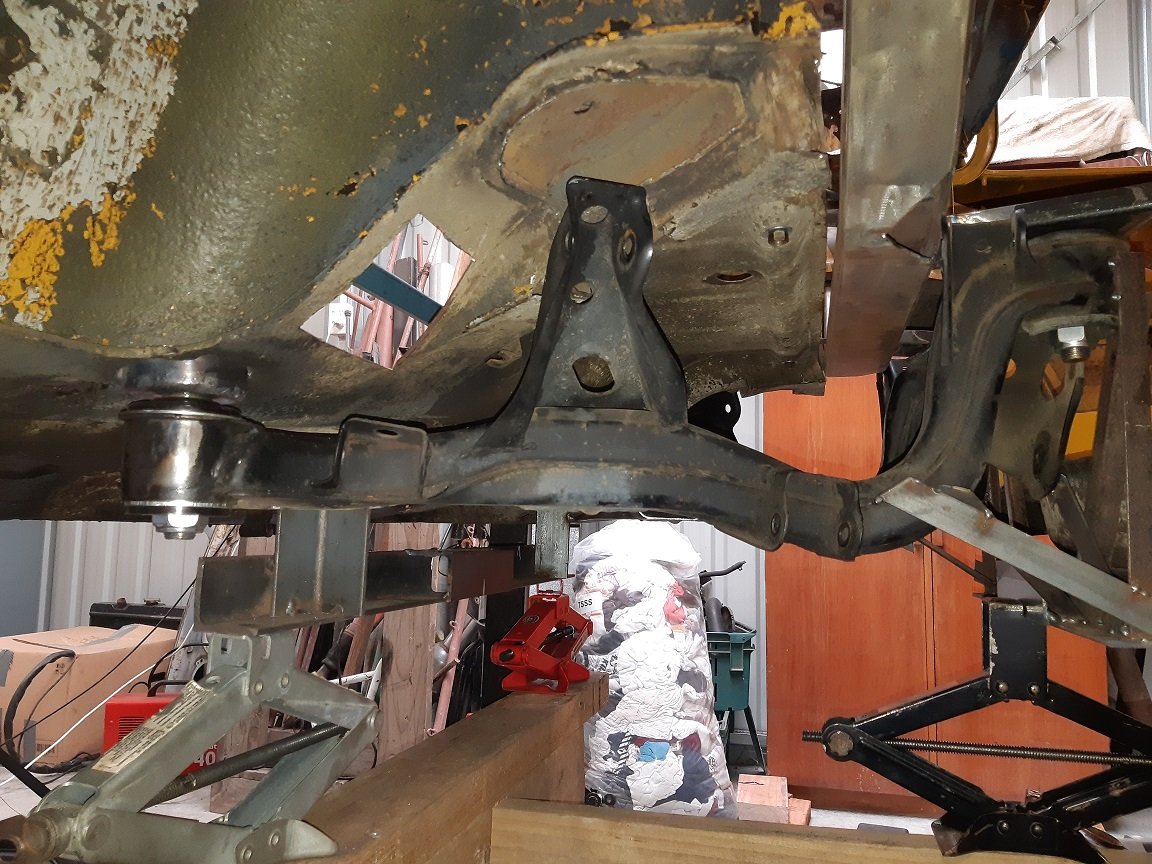
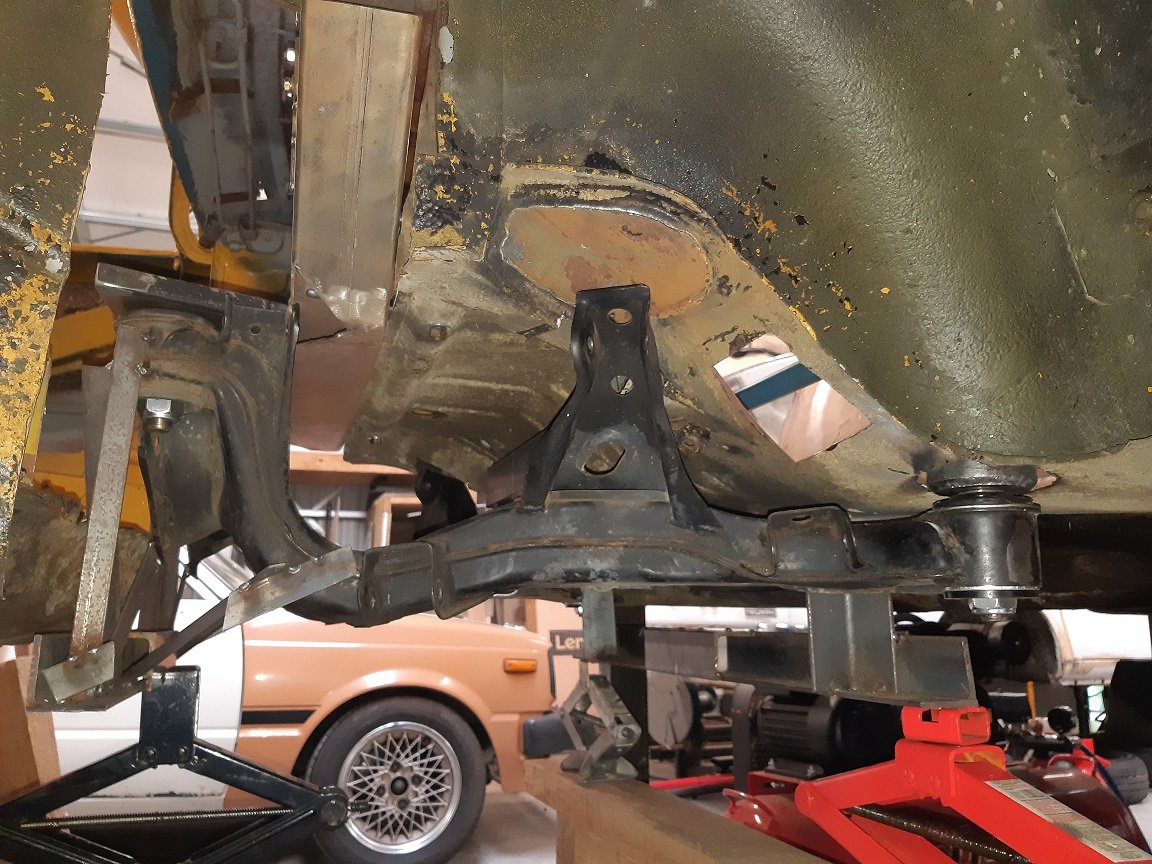
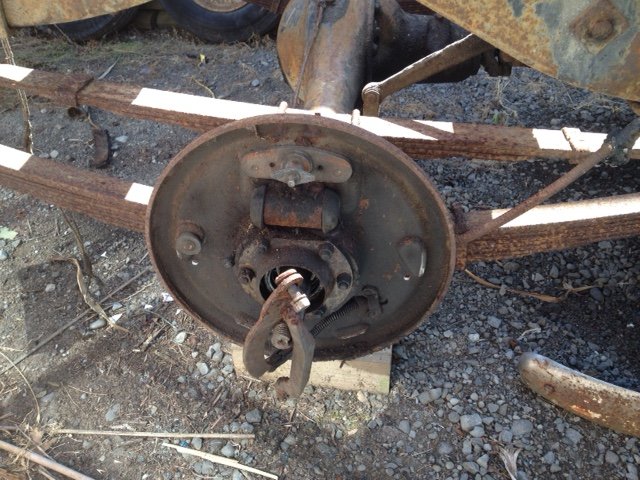
I guess I finally got enough courage to fix the rest of the rust. Had plenty of spare time over Easter so thought I'd better do something and was sick of having a puddle on the floor each time it rained heavily. The rust hole under the wiper motor was the worst of it, kept putting it off because of the location and how tight the space is to get at. Ground the mounting plate off, the rust was a little worse than I thought it was gonna be. Made a patch to fit and then cut a much bigger hole. Took a few attempts to get the patch the right shape. All welded in, didn't come out too bad. Got a rust cut from Olds Cool Autos as the wiper mount was a bit past it after I cut it off. Carefully removed the lower skin and gave it all a sandblast. Welded it in place after testing the wipers still worked properly. Had to pull out the mig welder for the first time in a few years since i couldn't get the rear plug welds with the tig. Mig does plug welds nicer any way. The drivers door had quite a few holes on the bottom. Also had some tiny holes on the outer skin in the front corner, was easier to just cut that whole piece out and make a new patch. Made a couple of patches for the inner skin and welded them in, then brushed on some paint. Next made up the outer skin patch, welded that up and then hammered the edge over. The outside has a little distortion since I couldn't get a dolly in there properly to stretch the weld out, but nothing a light skim of bog won't fix. Another few patches further down which finished off the rust in this door. Was a good time to fill up the original side mirror mount holes. Cutting out 6mm diameter circles wasn't that easy! Underneath the fuel cap was some more rust coming through. Sanded it back and just the top needed replacing with new steel. Rust killed it all after patching it and then seam sealed it back up. Both A-pillars had some rust coming through, no holes though, so rust killed them. Still need to fill the antenna holes.1 point
-
Alrighty, cert check has been done and I've got a list. Nothing too bad, maybe some will be a little annoying to sort out. - Front bump stops missing - need to find BC ones I guess. - Spring washers on the brake caliper brackets (only came with normal washers) - easy - Caster arms don't have a brand and have play in rose joint - will get some hardrace ones after confirming with cert man. - Spring washers on engine mount brackets (again, only supplied with normal washers) - easy enough bit hard to get to some of them though. - Engine mounts need spring washers (not supplied with them) - seems to be a theme here but I may need longer bolts to do this. - Gearbox mount nylocks don't have enough thread showing on the studs. - Was worried about this one, will have to see if I can fit longer studs or maybe bolts if it works. - More spring washers on drive shaft loop bolts (think he means a couple that arent the floor mount part). - easy. - Seat bolts need spring washers - easy...pretty sure the passenger one which is standard, never had any. - easy except maybe the two studs for seatbelt buckles which might not be long enough due to thickness of the seat mount base steel. - Drivers seat buckle not easy to access next to bucket seat. This one might be difficult, because it mounts to a stud. Unless it is acceptable to mount it to an extension bar (will have to ask cert man). Maybe it's an option to make a raised tab on the race seat base? It is made of 5mm steel.... this is an annoying one. Maybe even moving the seat over a bit. - Need to see proof of welds on rear quarters. Will see if the photos are ok from before it was painted. - maybe easy. - Calibrate speedo - should be easy. So over all, I need to throw a fist full of spring washers at everything that looks like a bolt.1 point
-
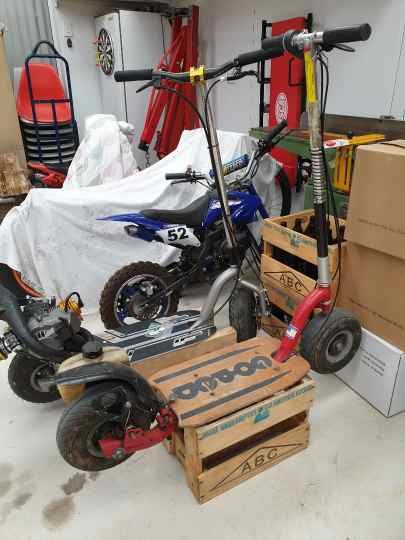
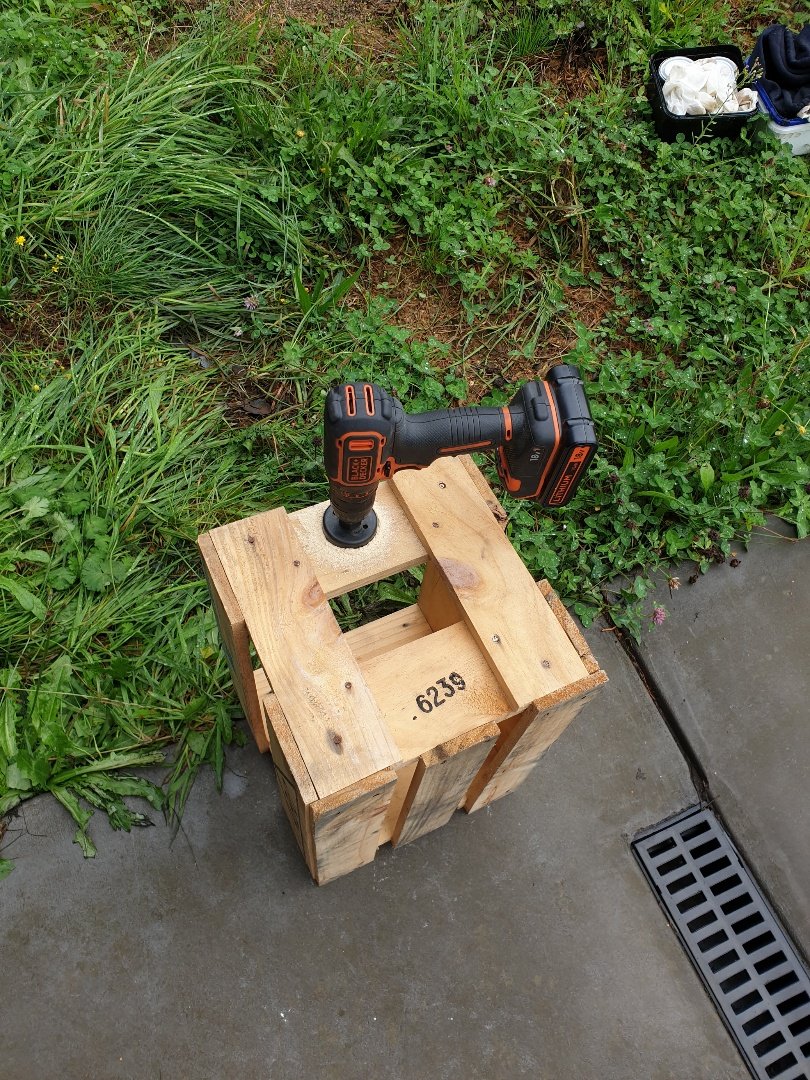
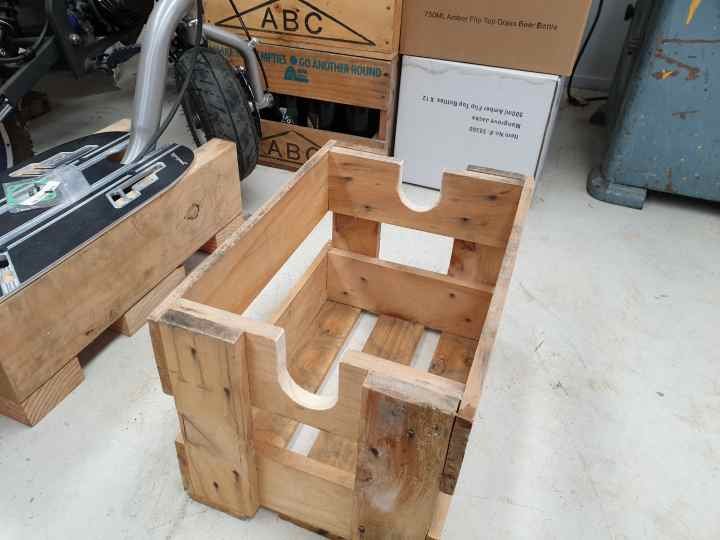
Drinking too much piss isn't all that bad. You get to hang out with your mates, talk shit and occasionally come up with the odd good idea. So when your first world problems begin to get you down...I look towards alcoholism to solve them. Problem: Fucking gopeds everywhere, I'm sick of tripping over them!!! Ah yes, I have alcohol- therefore I have a solution! And just like that, all your problems go away once alcohol is involved... Boom!!!
1 point
-
Budget shelter nearly finished. We had to add 4 more ribs today to get the iron to sit better. Aesthetically its quite poor. Practicality, and budget wise it's very good.1 point
-
And these!! Painted rocks with the kids one day.
1 point
-
Yeah, but only 7 people in nz are going to know that.1 point
-
Engines aren't here yet, but a pile of bits are. New engine to be fitted is a 265 Hemi Valiant. 200hp standard vs Holdens 92hp will propel this pile of parts much quicker.1 point
-
Worst one Hammer and dolly to fit As you can see from all the fresh steel, this one was pretty thin1 point
-
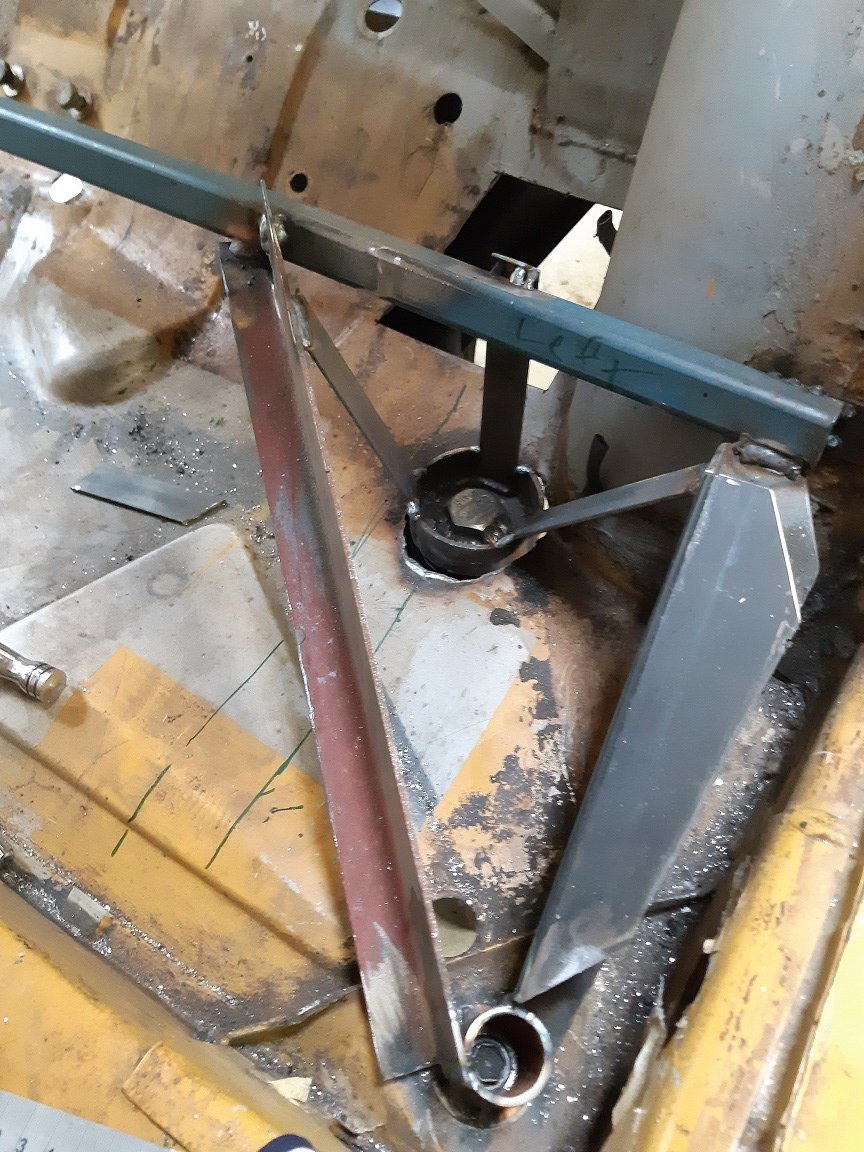
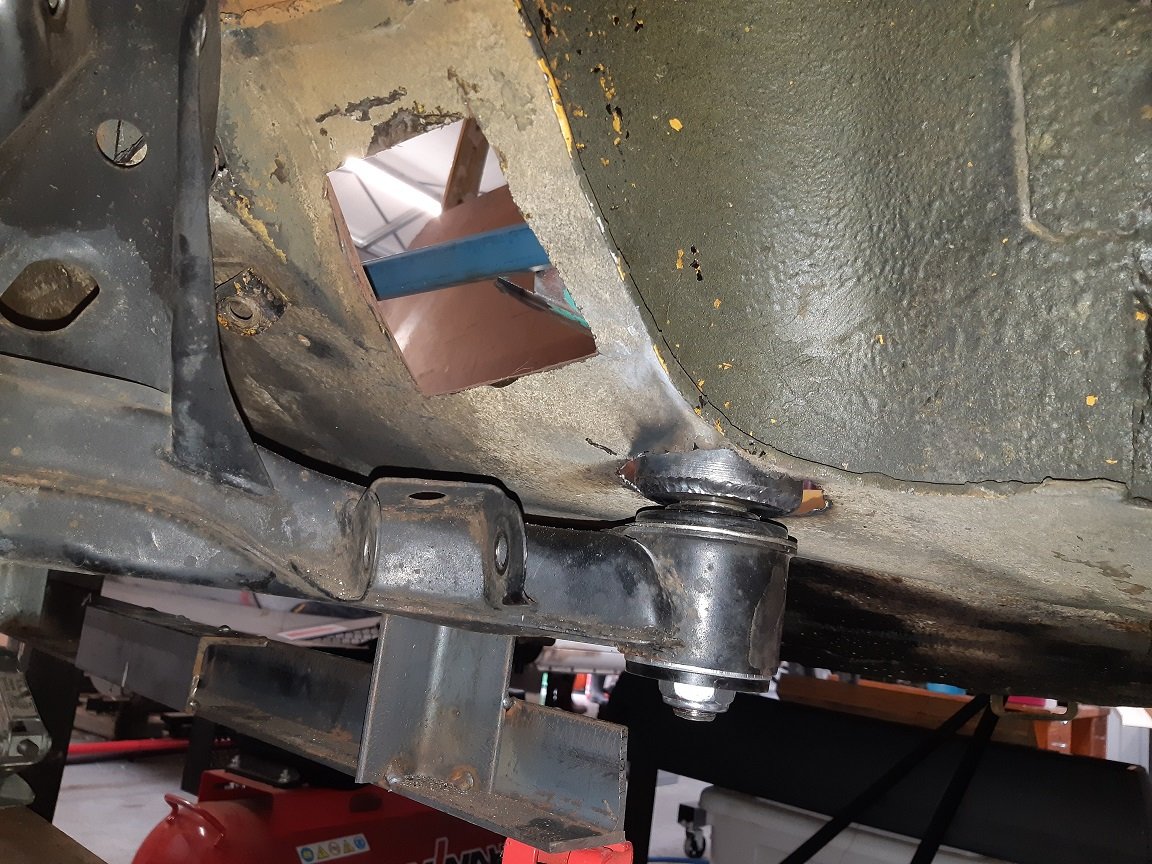
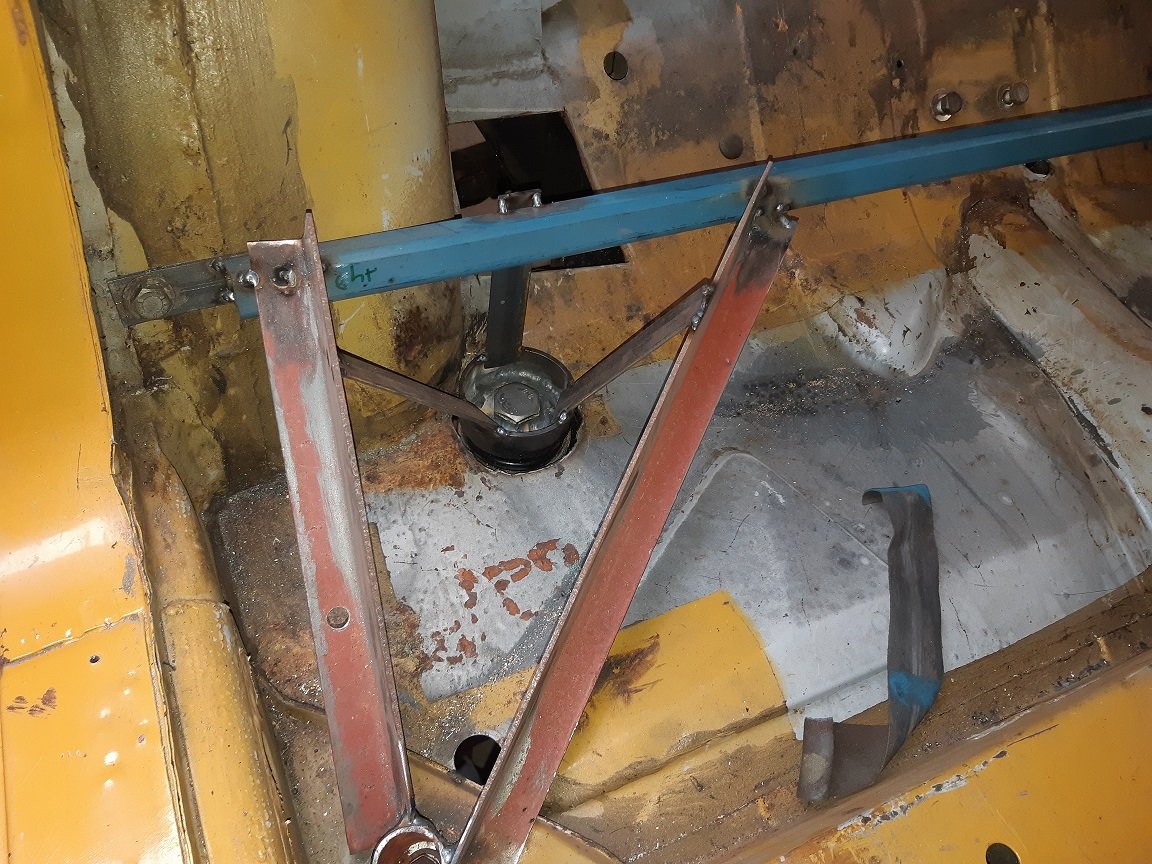
Subframe front mounts and the jig to allow me to transfer it to the other car. My current thinking is to plate the floor and some of the wheel well, around the front mounts, with 2.5mm, on the inside of the car. If it's not solid enough, I'll tie it into the sill.
1 point
-
Wof'ed up! Wagnats time. Pretty sure somethings touching something so there are some/many vibes but yeah, wagnats.
1 point
-
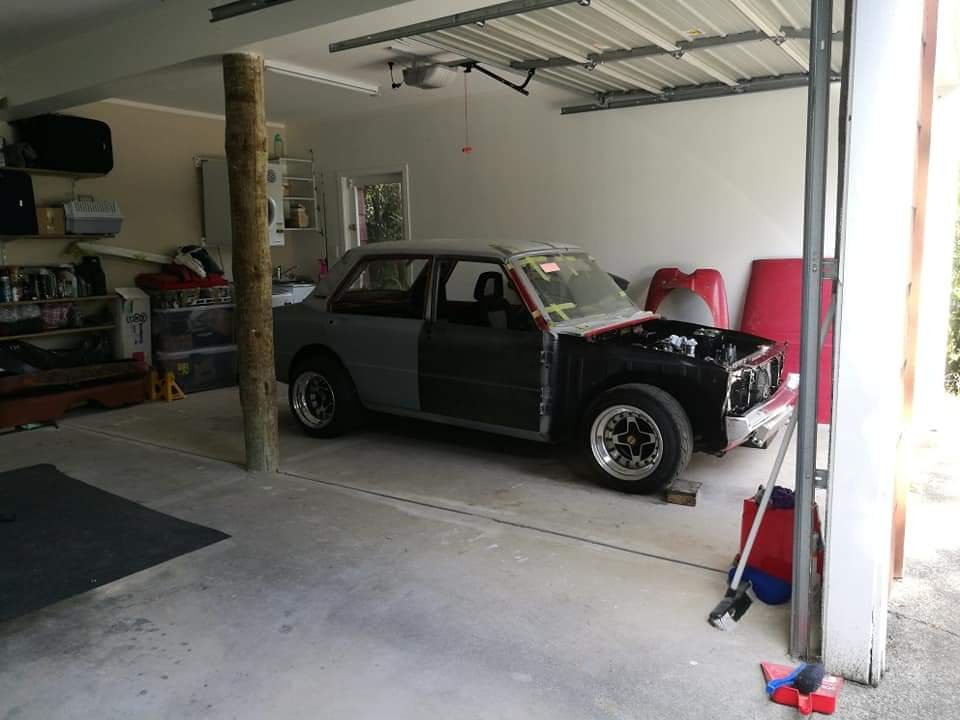
Not really a proper update but I've stripped some bits and pieces off it, cleaned out all the parts that I was storing in it and reorganised them in the garage and given it a bit of a clean up in preparation for some work to be carried out on it soon. Hopefully it will be getting picked up with a trailer in the Next few weeks if all works out!
1 point
-
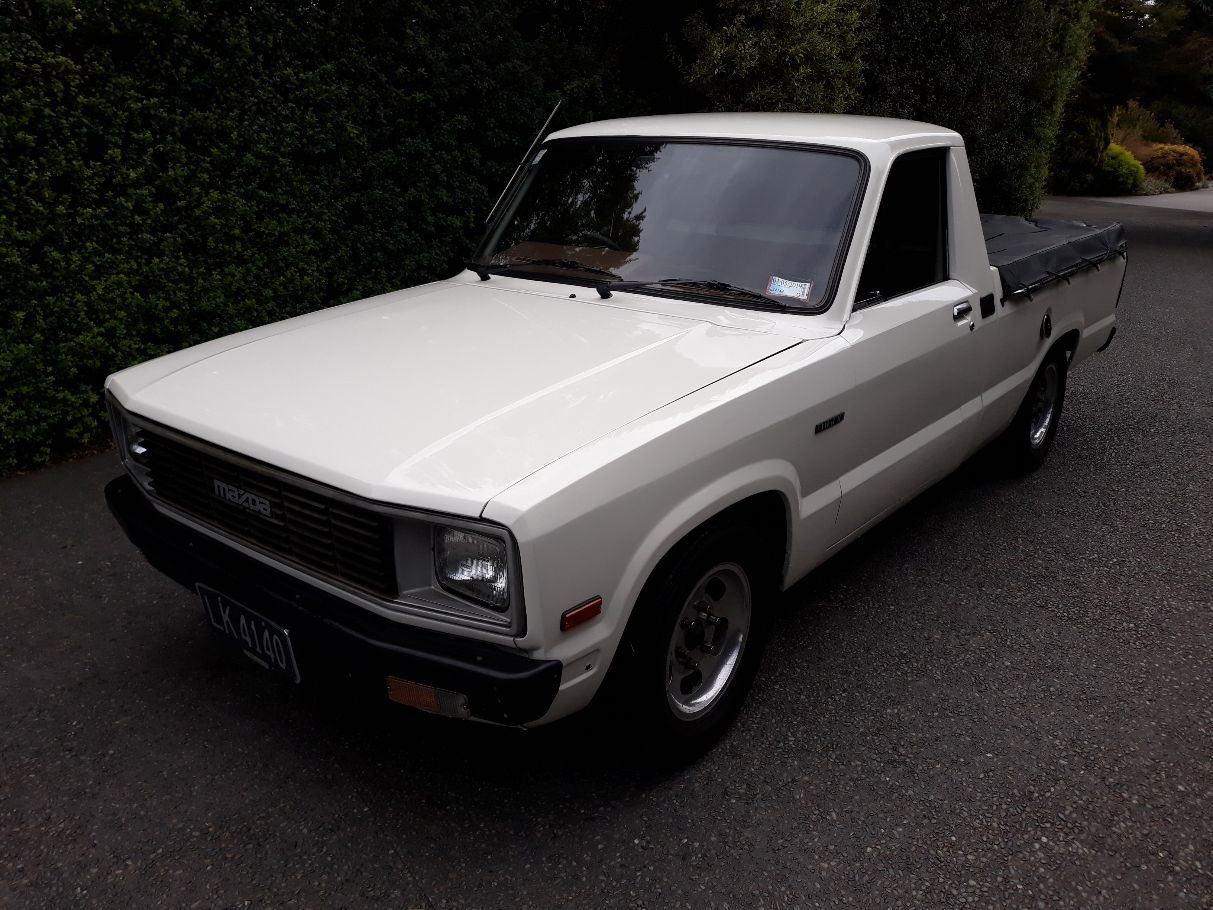
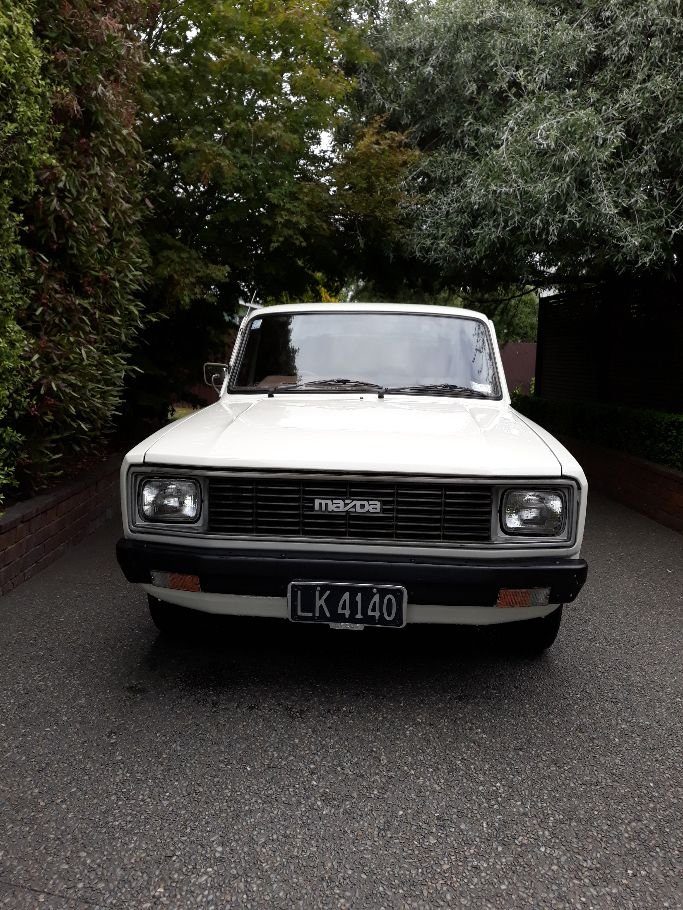
So, 10 months on from the first wof, we have loved using the wee ute, a couple of things have been changed. We got the windows tinted, it's a very small cab and gets bloody hot, and most importantly the height has been changed, not low enough for me, but Rebekah loves to remind me it's her ute, not mine. She now has the bug, and in the next month or so we will be getting the interior sorted.
1 point
-
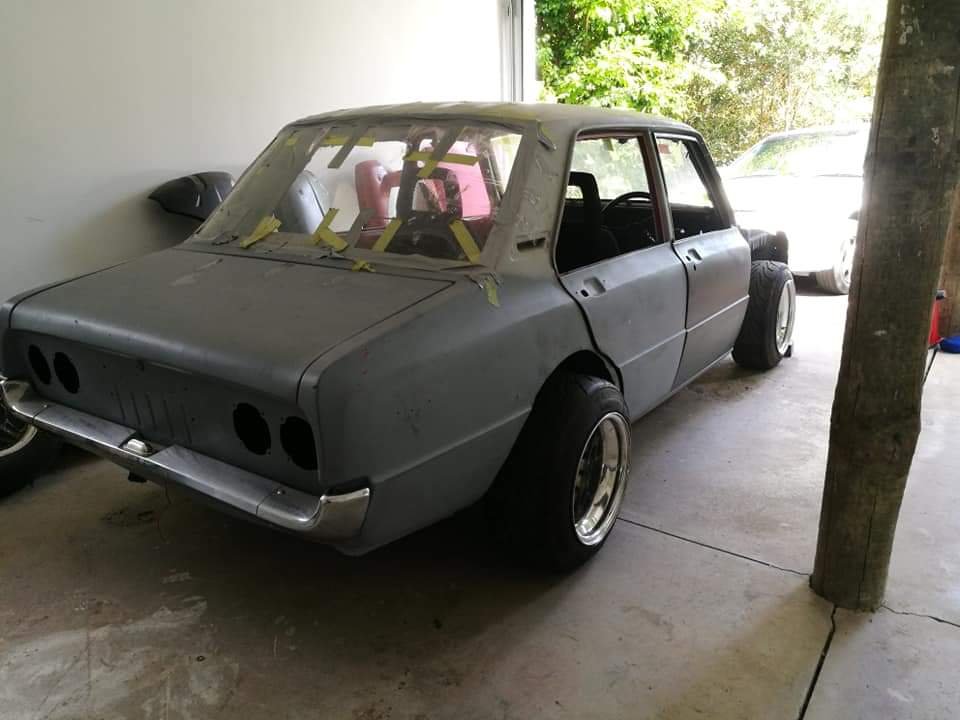
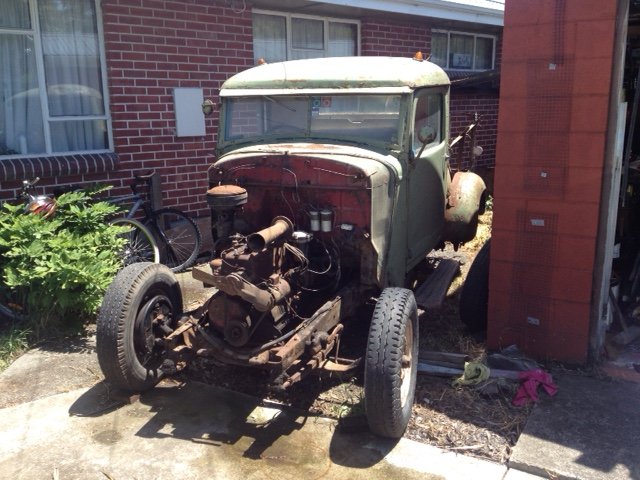
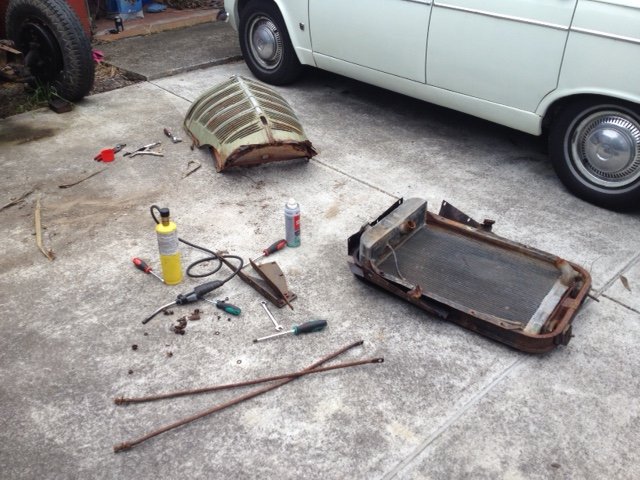
What a slack guy! I've been pretty busy over Christmas, but got a chance to put a few hours into this lately. We finished pulling the nose to bits and sent the panels away for a bit of love. Next step is getting the body off so I can fit this thing in my garage and crane out the engine. The radiator really fought us coming out, it's away getting a re-core priced up. And the rear brakes are also getting rebuilt. Once that's done we should be able to push it by hand, prob for the first time in 20 years!
1 point
-
Minor update, horied up the end of the exhaust to get rid of the muffler. Being a Sunday, nowhere was open to get exhaust tubing so had to piece together offcuts that I could find around the workshop Hahaha, works though.1 point
-
Save that cat shit its worth something to ya at the right scrap yard.1 point
-
Now some low required1 point
-
Finished! Bit of machining porn for you!1 point
-
Almost finished! Bores have cleaned up without any defects. Ports look a fraction off on some of the bores though so hopefully I can cut some valve seats that work! Not going to lie, its quite exciting!1 point
-
Chucked some sounds in this weekend, pretty basic set up pair of 6.5" jbl components up front and pair of 6.5" kenwood shitters in the back, had some Orion speaker grilles lying around so jammed them on. Older but decent sony headunit with usb, triple pre-outs etc so when I eventually wanna chuck an amp on to run the speakers I can. Yes I know hacking up door cards is frowned upon but they are faded and Shit so I don't care haha. And as always Lemmy giving me tips and pointers on what I should do.1 point
-
Dropped the second half on with no drama. So its all bolted up now and ready to go to the foundry at the end of the week. Nailed it Thats like 1000hrs work right there!1 point
-
First sand core. Cylinder and port core.1 point
-
Fitting 3D printed patterns to get the CAD right.1 point


.jpeg.ef59de6afbbf6f31315a91380539a132.jpeg)


This leaderboard is set to Auckland/GMT+12:00