
Leaderboard


Popular Content
Showing content with the highest reputation on 15/10/18 in all areas
-
Introducing the newest member to the rotary international auckland, in the form of a super project Mazda Rx2 Coupe straight outta somewhere near Compton but might take a while in the LA traffic. Back in February there was slight intoxication involved when this little red coupe showed up on a Facebook group, and thought 'yes this could be a nice daily'. Not overly reasonable considering it was in LA, and there was no garage space available, but no amount of sense-talking could stop the purchase and after being told our Mexican mate would sell it to another guy for double, I taught him a lesson by sending him money, chucked Stephen's RX7 out in the rain, and arranged shipment. Supposedly from the Arizona desert (yet with several crowbar dents around main entrance points) it has survived hot sun, a brick through the windscreen, and a seemingly nasty break up thanks to Jessica being a tramp and a too-timer: As far as we know it’s a 1973 RX2 S1/S2, with a poorly pulled apart factory 12a twin dizzy which fascinatingly was resting on the crossmember as an engine bracket, surviving a bumpy boat ride and several tow trucks. The list of what it has is far shorter than what it needs as it included the seats, engine and auto gearbox, couple of bits of chrome, old mates dad's truck rear view mirror, half of the Arizona desert in the doors, and a creepy Christmas doll decoration. Sorted: Thankfully don't have to invest in a paint job, as Jessica's ex has done the custom airbrushing. Got an extra windscreen as sadly the brick shattered the one in it. Plans: Not sure of engine yet as deciding between keeping original or moving to a 13B. Received an upholstery quote so that will be instead be mostly done by Rotorhoe's hobby shop. Widened steels, slam as per rules, get on road with guidance of supertrapp and jillyz music (cost effective as no radio required) Your kind thoughts and sympathy are appreciated12 points
-
Another productive weekend. Was able to get the doors mounted and hanged correctly so the line up with the latchey-loopey thing on the chassis perfect so the doors close with ease. Windows going in from the outside lighting you can see it took a while to get everything sorted: Window cleaning, rubber channel moulding, remembering how the divider piece went between the rear glass and rear quarter glass, then finding the correct bolts/screws... Proud owner of NOS rear vent trim Outside photoz _MG_0338 by phillipbaines, on Flickr Loving the hi-deluxe chrome Door cards a bit dirty, rear seat very very very dirty, undecided if will keep or find the other 'full vinyl' type BIG battery which is just there for temp use. I may relocate to the back yet if I can be bothered, is fine where it is for now Time to start putting the dash back together I am waiting on a KE35 loom before I install the instrument cluster as they vary between KE30 and KE35. *KE35 instrument cluster has factory tacho meter, KE30 does not Yes... I missed a spot on the LF door... will have to fix that Build discussion:9 points
-
Right, so it’s been 2 weeks since this came into my possession. Have done clutch master and slave cylinder, rear wheel cylinders, got good parts off of the other ladas, polished all the chrome (which has come up amazing! Fitted brake master off of yellow lada which was good but doesn’t seem to want to bleed up, fitted the good fuel pump from the yellow lada too so it now runs and drives under its own power! Have also polished paintwork, it’s pretty crap really but did shine up ok! Took it to the chachacha auto fiesta meet up today, bit dodgey only having handbrake but all went well! Does get pretty hot though, never went into the red but did get close. Drives really bloody well actually! Oil cap was pretty milky when I checked but hoping it was just some condensation as oil is still golden and coolant is still green. Ohyeah I also gave her the much needed slam treatment today too! Looks much better. Here it is in all its low glory.9 points
-
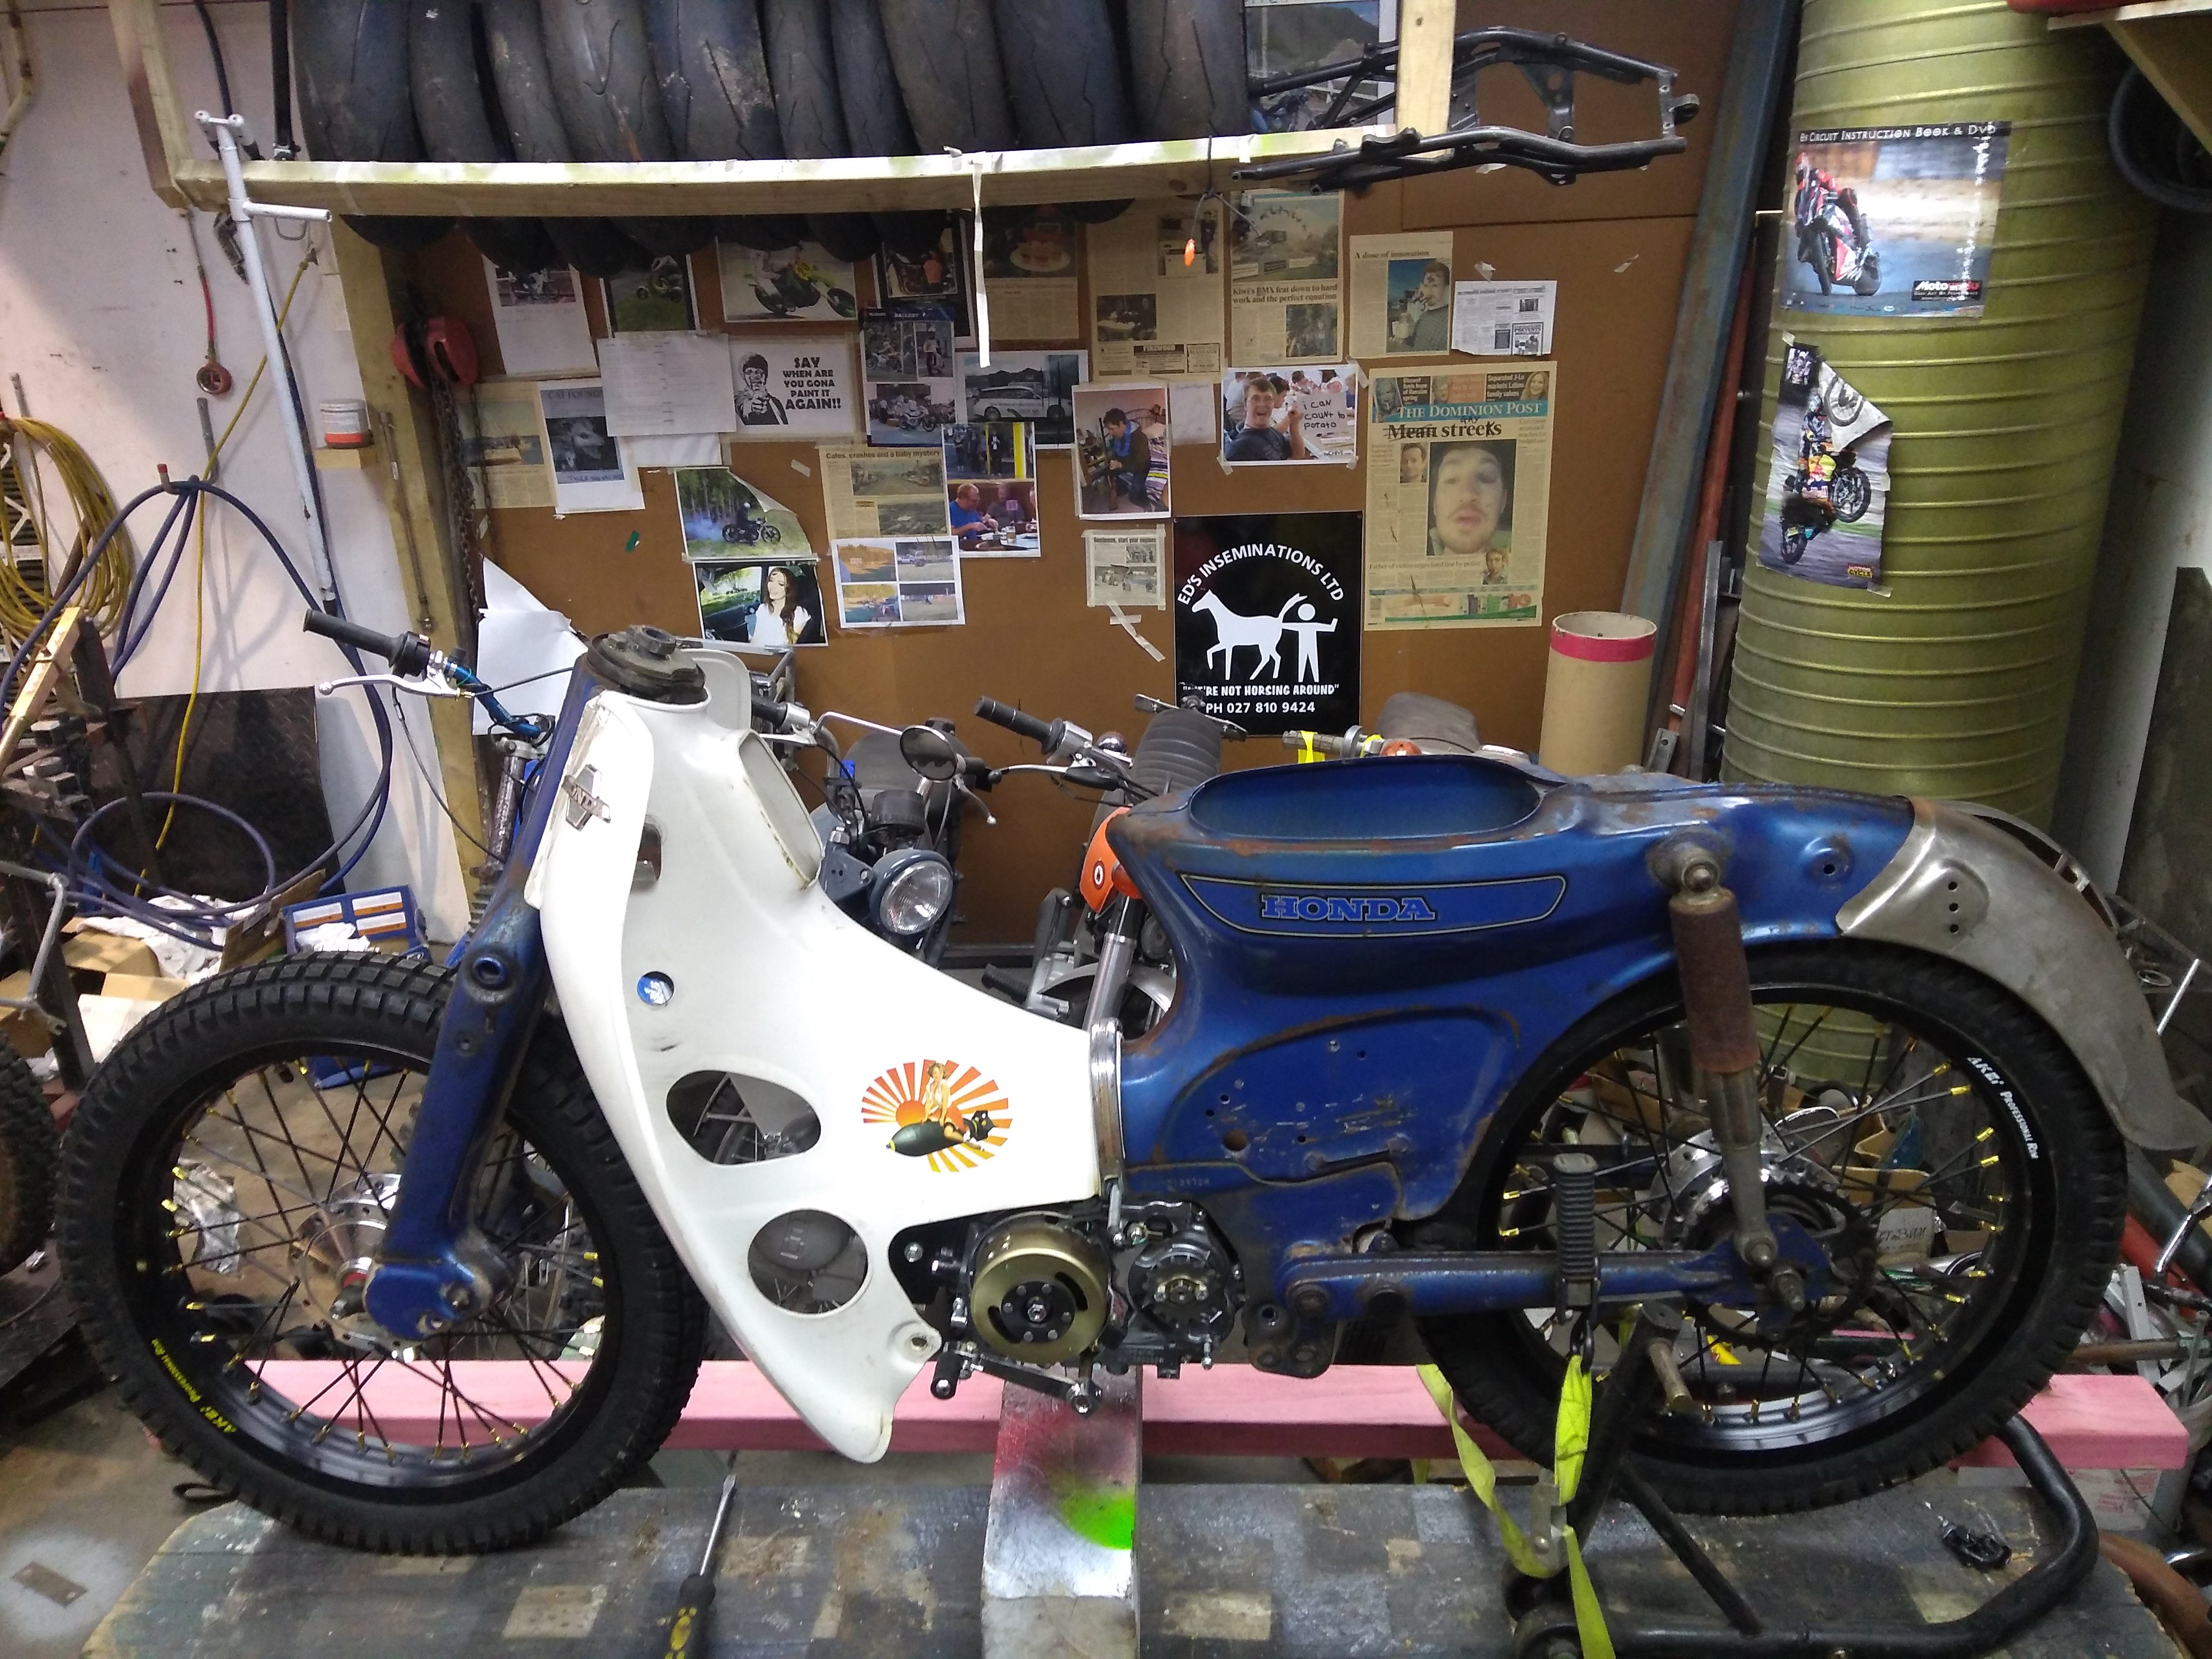
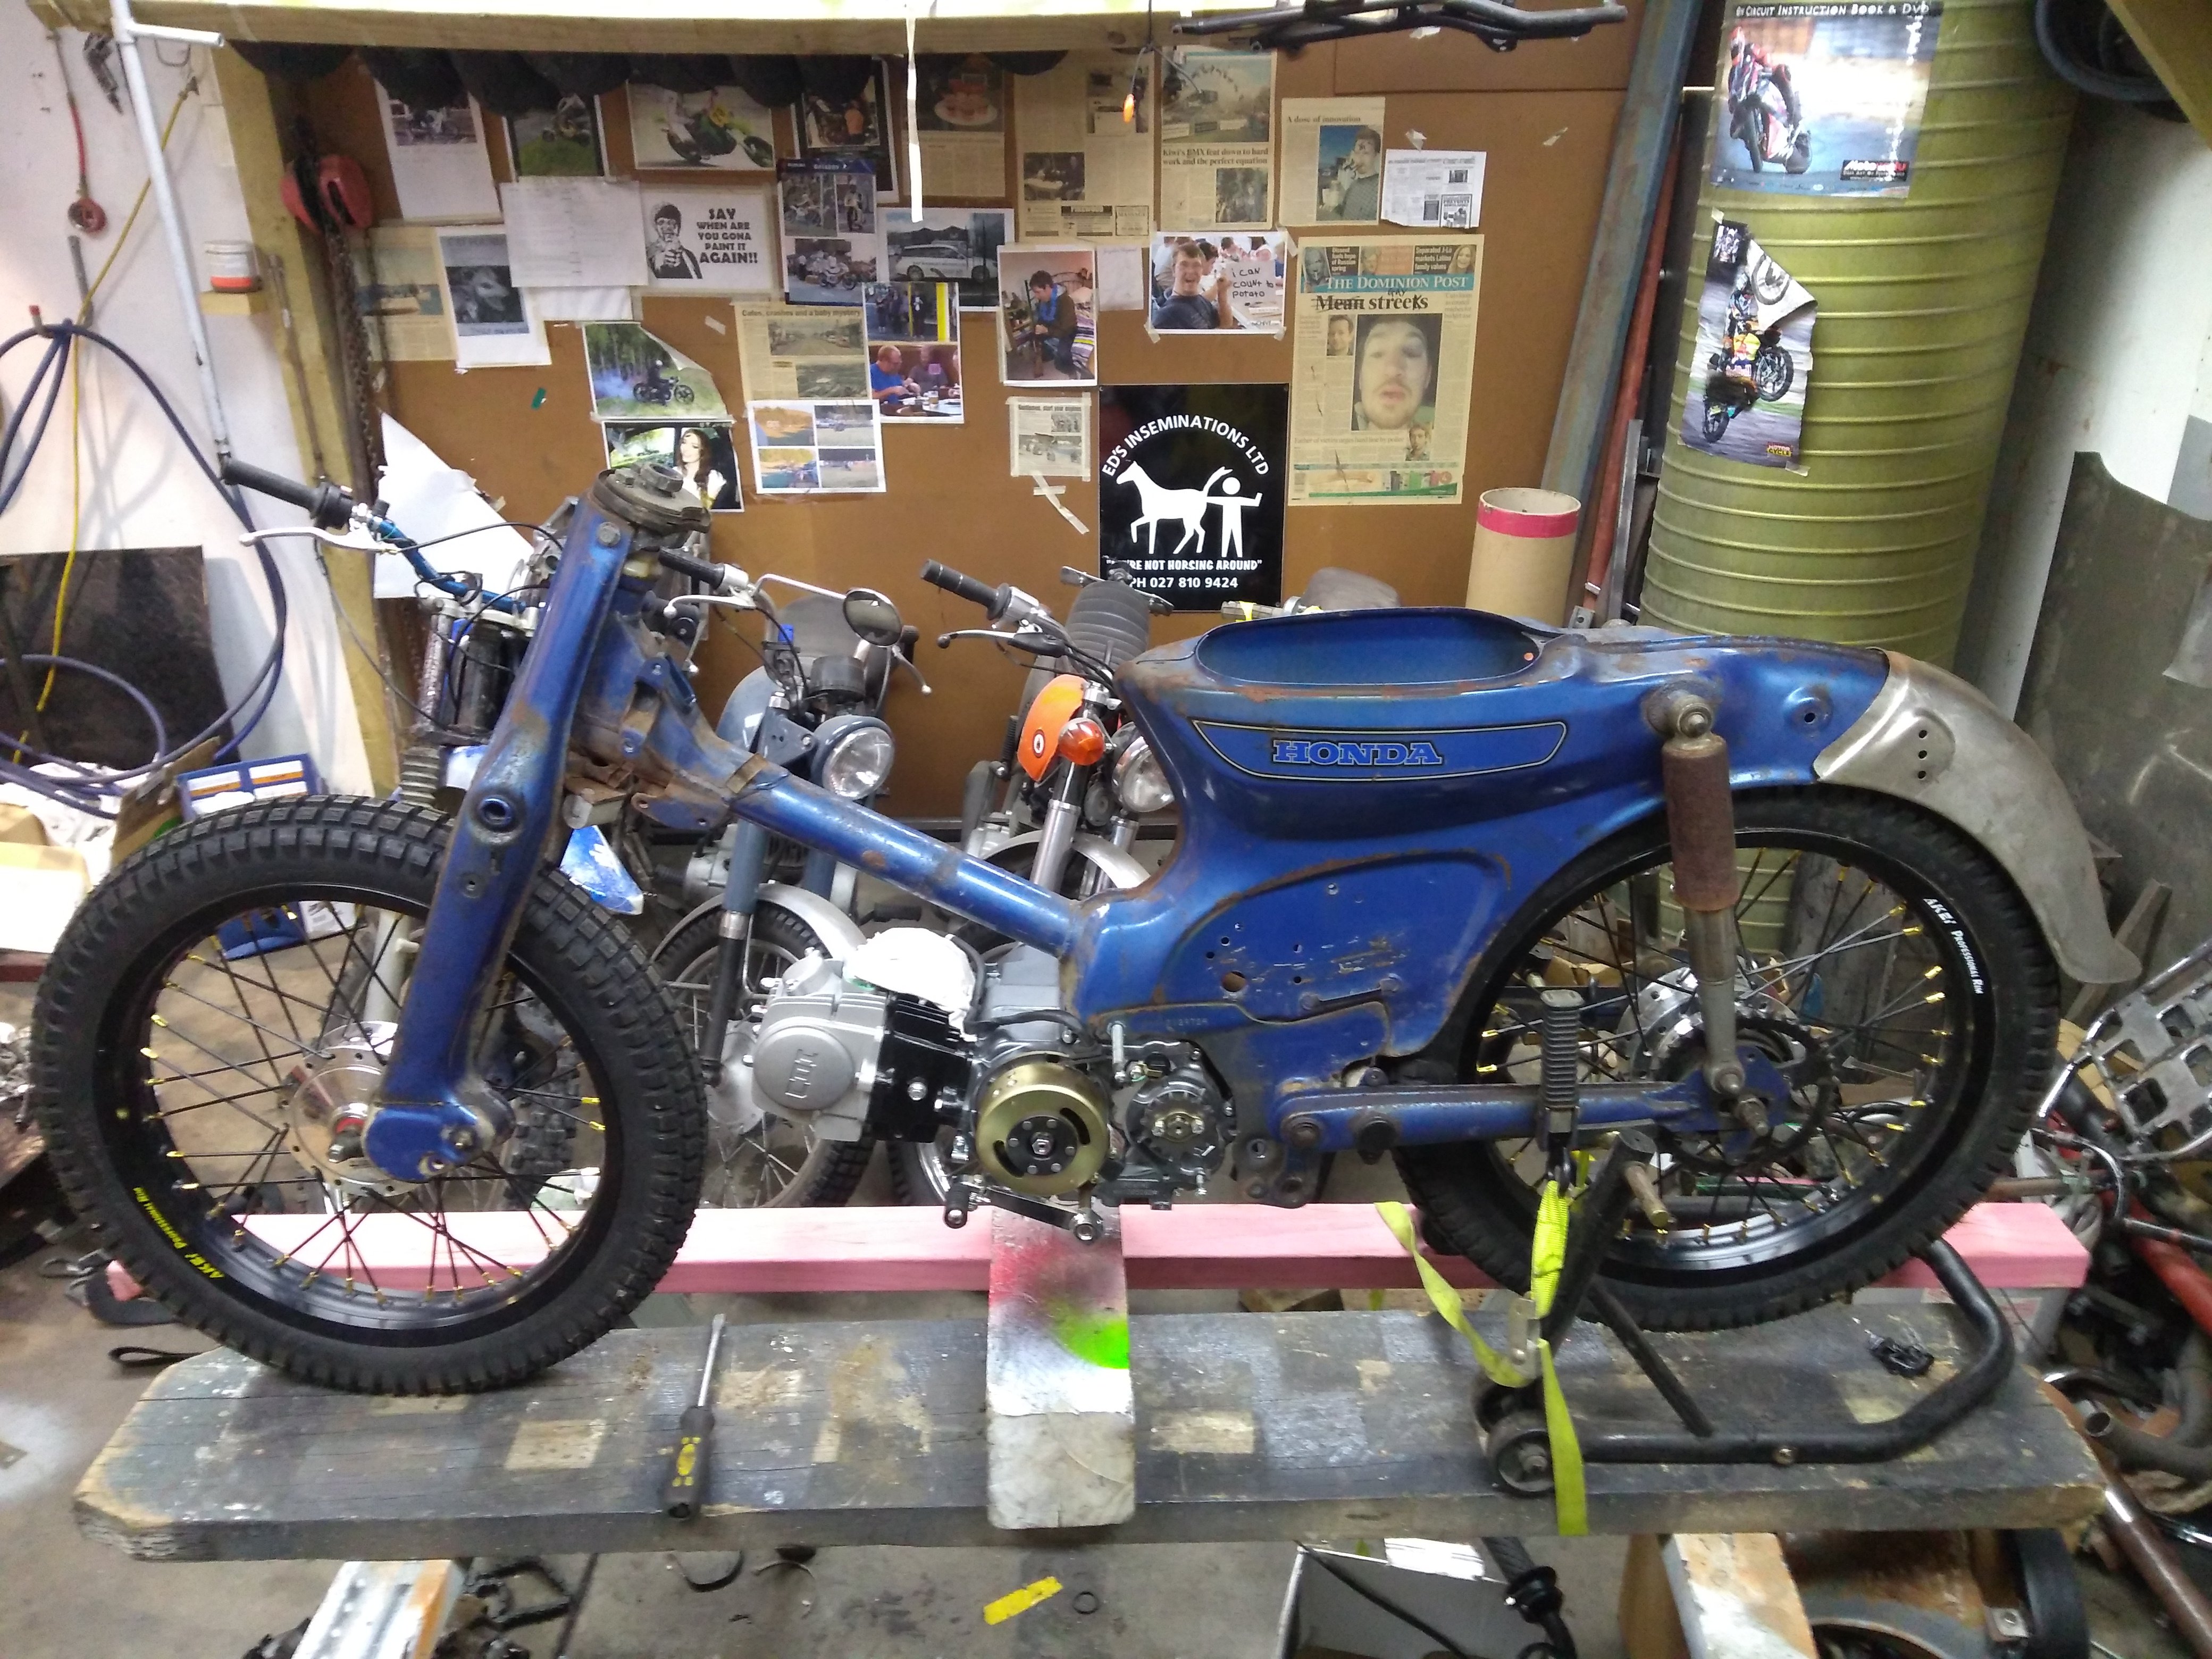
Fucked my back at the end of August, taken a few weeks to get my back sorted enough to bend over to do the twist and shout. I spent a couple of hours mocking up some more tonight. Tomorrow handlebars and weld on the rear guard... Not sure if I want to rock the leg shield or not, easy enough to make the call once it's nearly finished though.
 7 points
 -
Mustangs for everyone!6 points
-
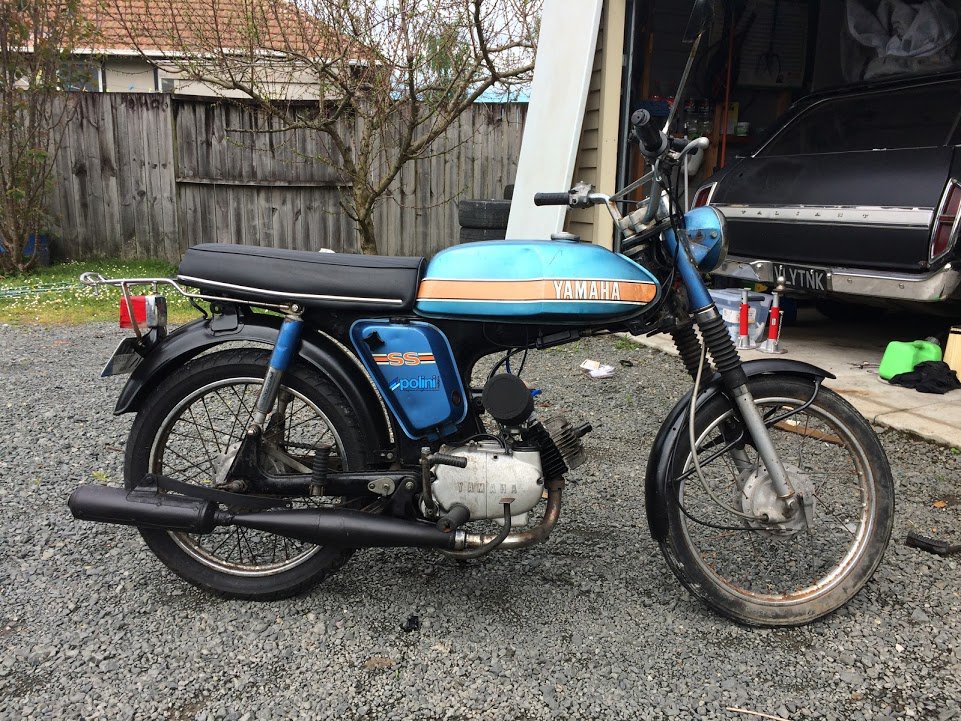
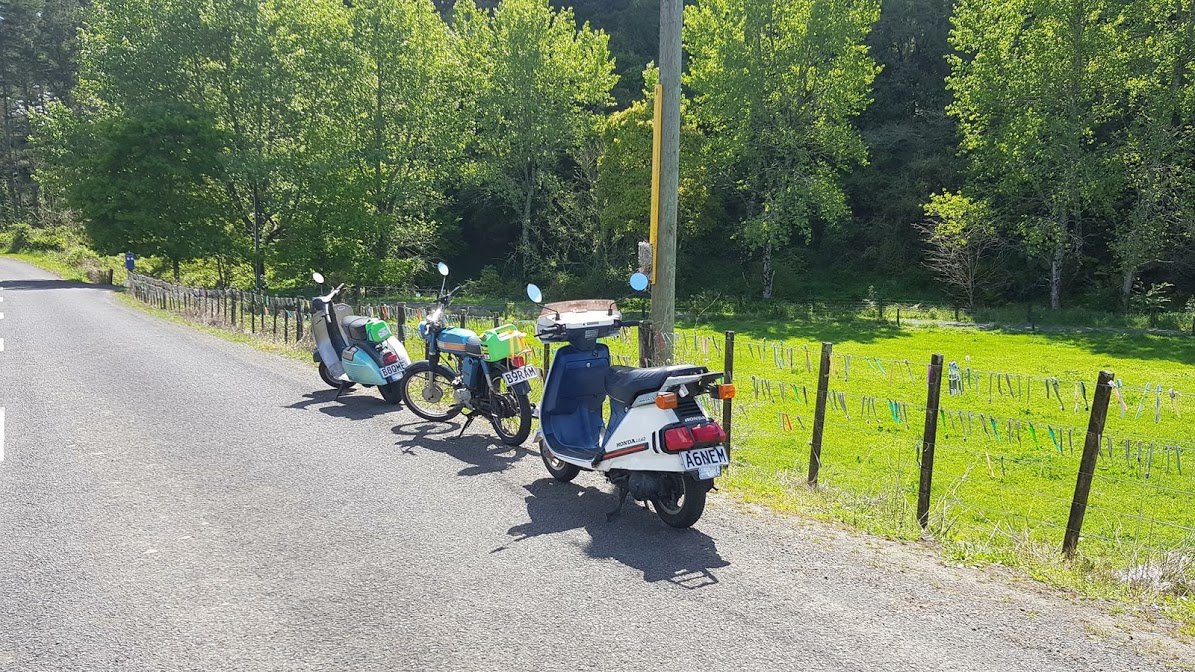
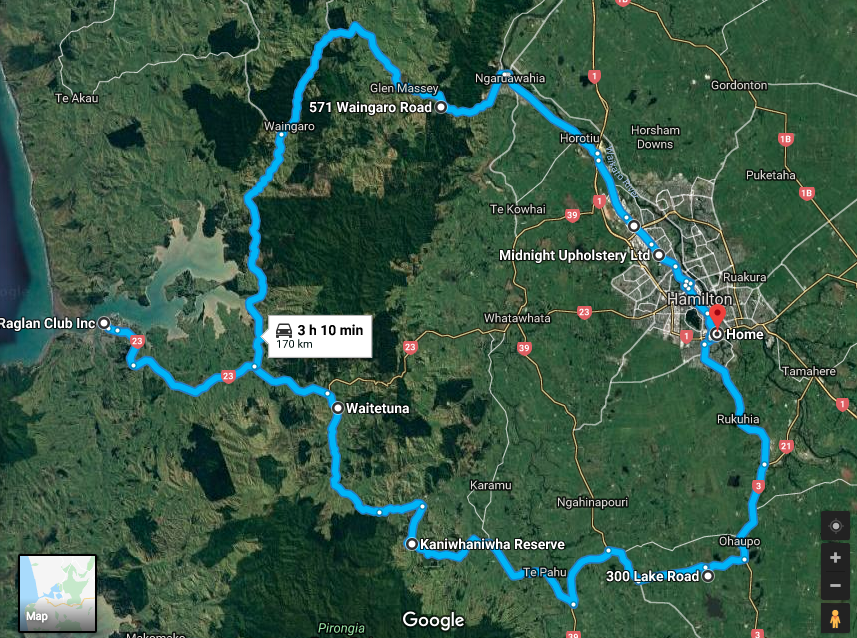
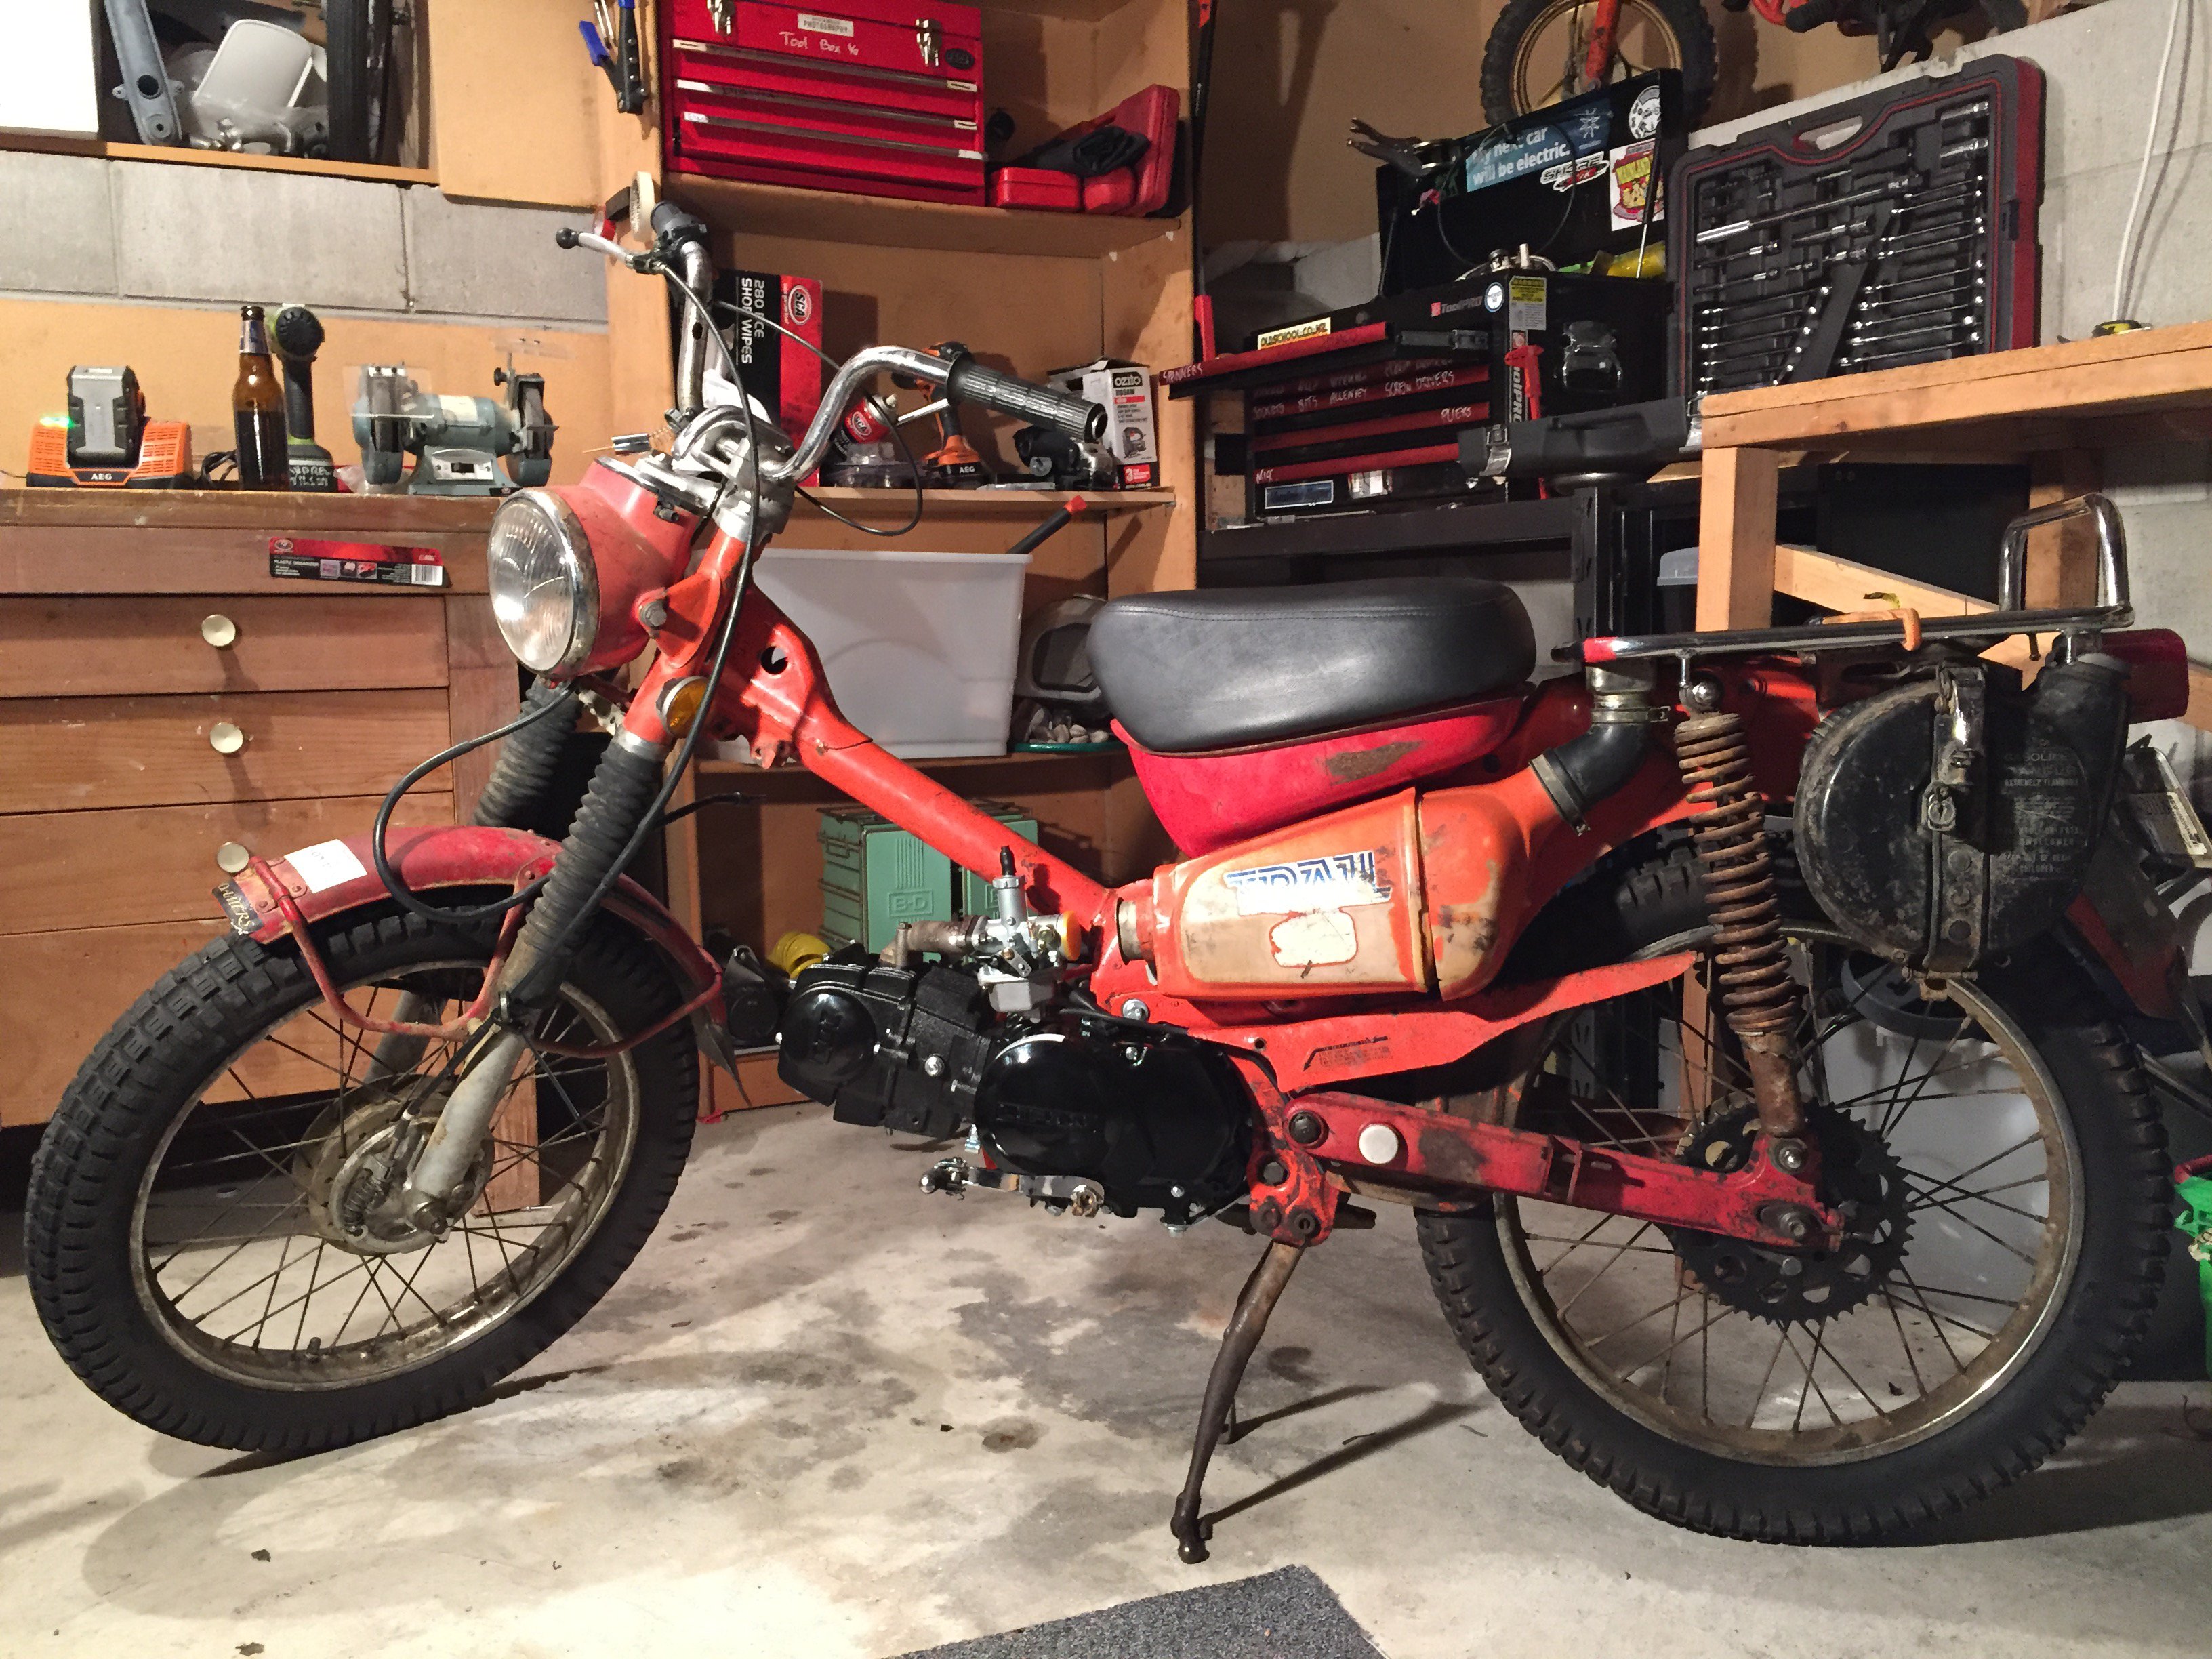
Did a 100km Raglan trip with @64valiant and @Truenotch on Saturday. Got just over 100kms to the 7L tank so happy with that range. Bike ran good but had head light on the whole time and half way it started robbing voltage from the ignition system which meant it started missing so head light of and did the rest of the trip fine. Need to sort that out and give the lead a good check over and I think I'm good to go.6 points
-
so i think next on the list of things to do was modify a rack and bolt that to the bike for extra gasoline. cut here add here bobs your uncle bottom two are riv nuts and the top one is welded in. This rack was of a 100 suzuki that i bent into shape and then cut the front off and welded my front tap to. jerry can fits perfect, bit since riding it a fair amount ive decided that its not going to go there and ill relocated it to another place, this weeks job hopefully. the other day i had my main hub nut come off on me pretty much the hole way which i wasnt overly happy about. had a really weird feeling going on just didnt feel nice at all. quick fix and away again for a bit. while parts from auckland arrived so while i done that i thought id do a few other things to it. oh and my side panel had shit set up and it feel off last time i went to raglan so i removed that and put riv nuts in place and put new bolts with a bunch of lock tight on them so it worn be falling off, but to do that i had to remove my tank. while the tank was out i did this. what on earth is this thing on top. and i couldnt get it off so an easy fix. put that bad boy back in and man my headlight now touches the ground!!!! its bloody amazing. done a bunch of riding in the dark and a hell of alot of kms, clocked up over 200kms in the weekend of bathurst. My speedo stopped working as well so i use google to track my kms since then i have been clocking up the kms and making sure its going well. but have been sick of not having a mirror so that was next on the list of things to do. had a bit of flat bar at work so i drilled a couple of holes and cleaned the edges up a bit, while welding a nut on the front for it. these holes are factory mounted holes for a mirror which was bloody handy. its a bit short but im not faised at all lest i now have one, i do have to look through my armpit though. went for a shack down ride with @mark105 and @Truenotch and done 130 kms on it, fuel tap getting turned on at 90km mark and running out going down my drive way on the way to work on sunday at 130kms stopped off at the tooth brush fence cause well if its not on the internet its not real then the raglan pub. then when 105 broke down, at this stage markku also had no kick start so i was push starting him on my vespa with one leg out. and we made it back to mine just in time to get our drank on for my house warming. also here are some other random photos of scooter stuff. the view from home doing drop offs at the post shop. how low can you go, well low enough to scrape the kick start. also here is my last ride on the gyro.5 points
-
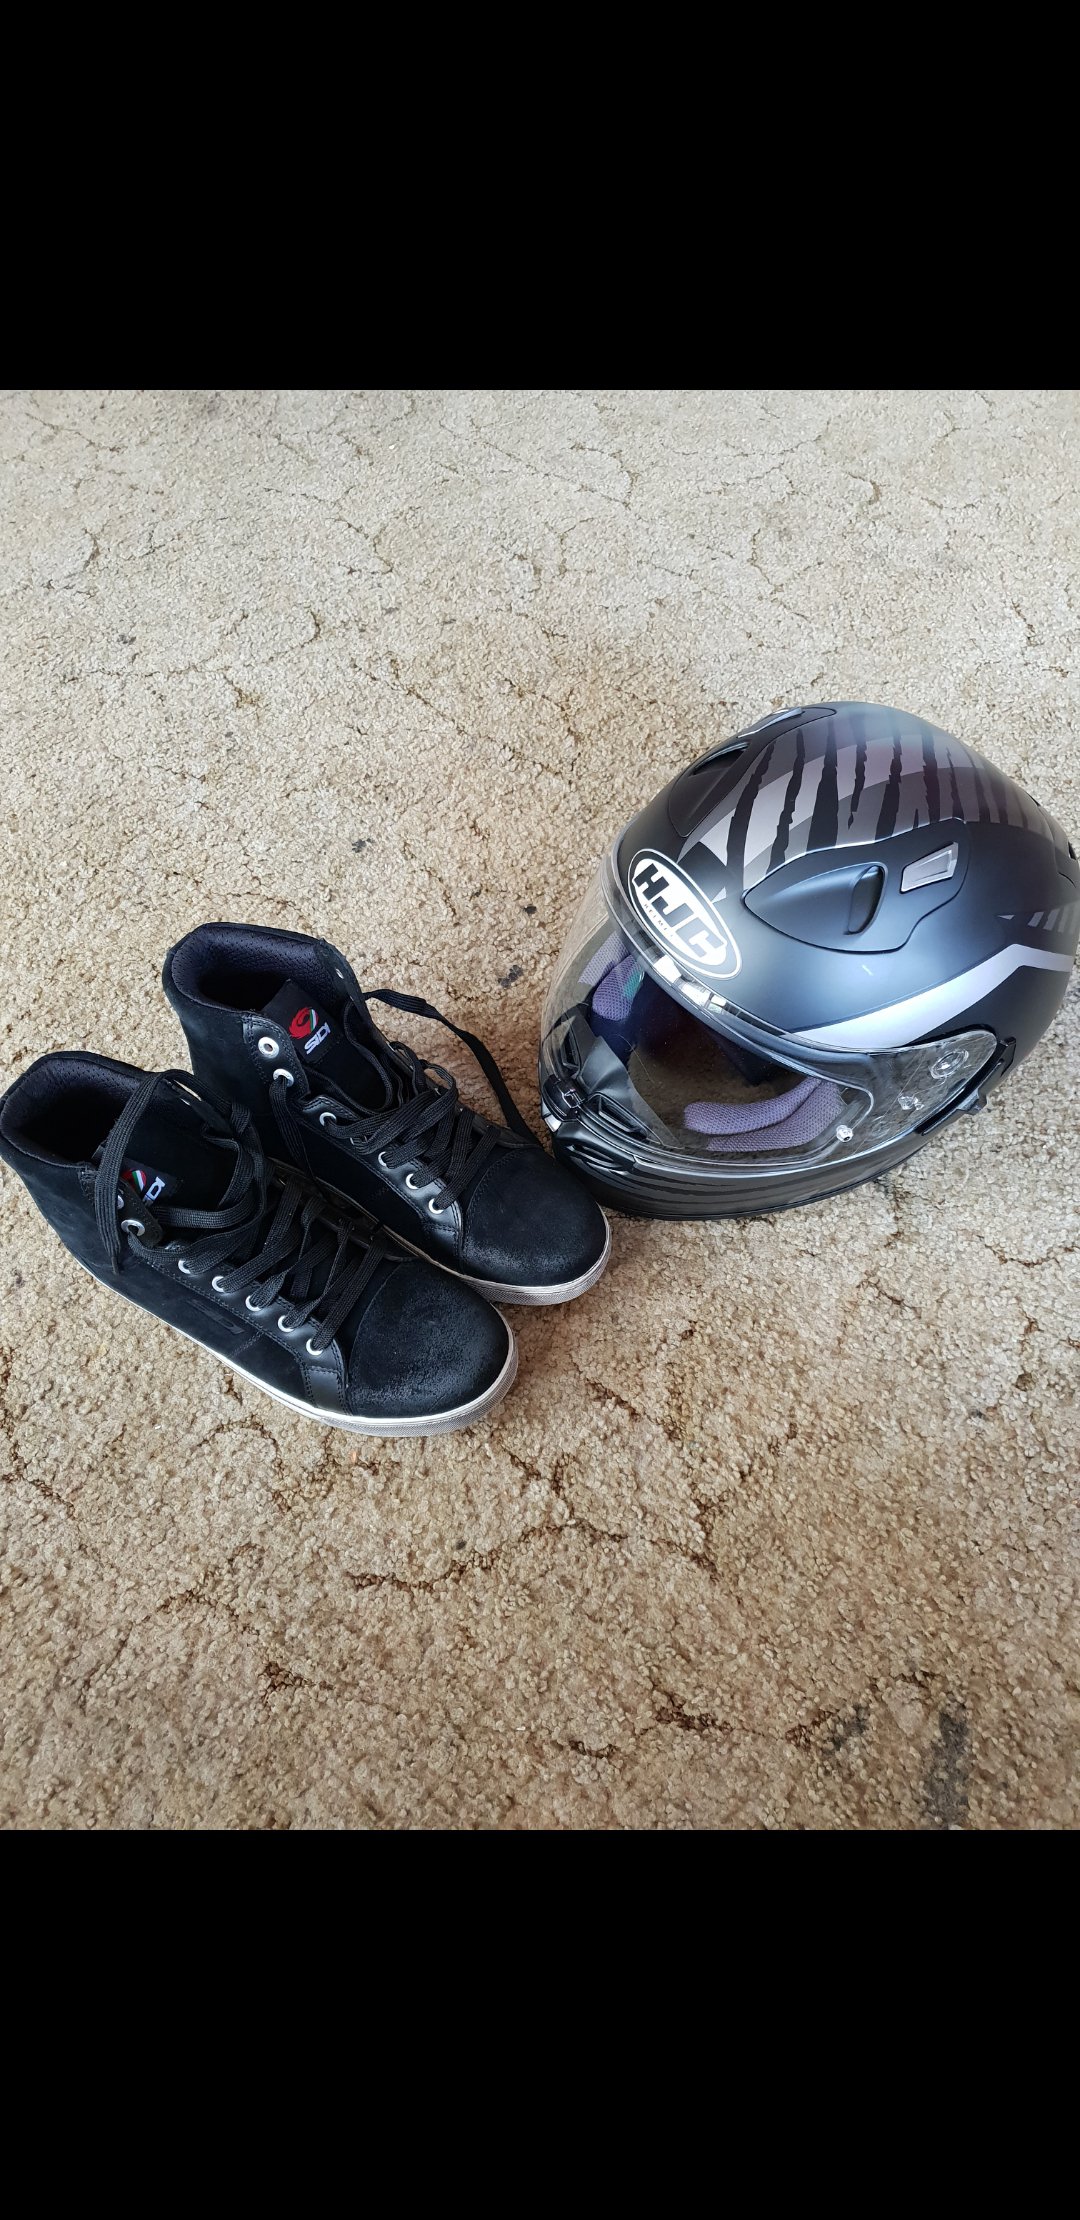
New Sidi boots & HJC FG helmet purchased. Fizzing to wear this new gears for the ride
5 points
-
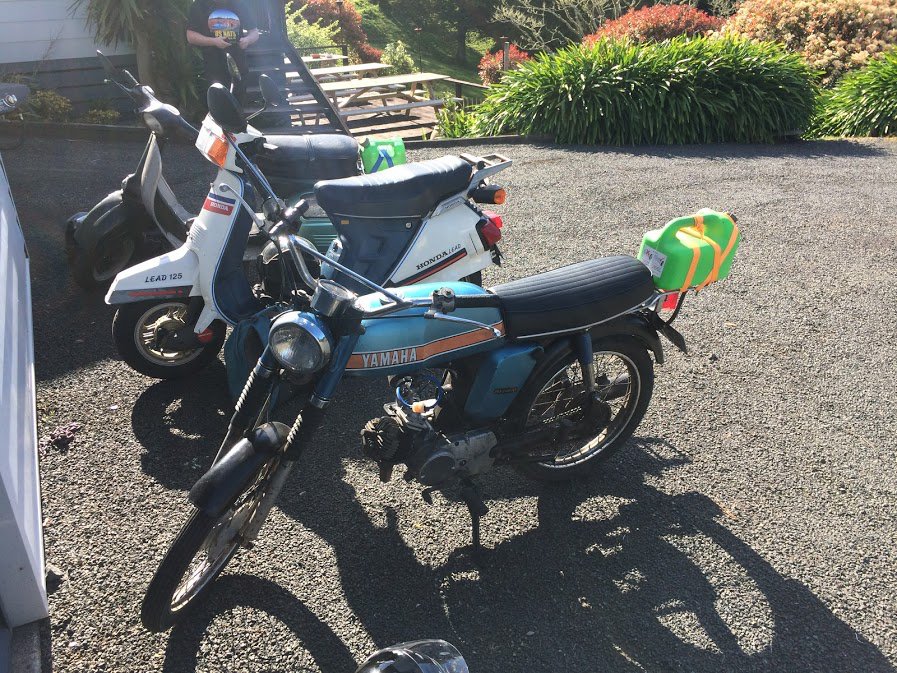
Got the cylinder back from the machine shop on Friday afternoon and fitted it that night. I decided to use the original 50cc head, rather than the new 45mm head. It goes a LOT better than it did before machining! I'm currently running it with no head gasket, just copper spray and it's got about .8mm squish at its tightest point when cold. Decided to take it for a test hoon with @mark105 and @64valiant on Saturday. It ran really well! I was doing 70-80kph on most of the flat stuff, had enough torque to make it up hills and even managed a peak speed of over 100kph on a downhill run. It's a pretty wild time at 100! The lead and the Vespa both leave me for dead up hills due to their big block engines, but I'm happy with my performance now. We started at 10-5's place and headed out to Raglan via Limeworks loop and Waitetuna Valley road. Before ending up at Greg's place on Saturday afternoon: Here's my full journey for the weekend: Pretty happy with it TBH! The only issue I had was a flogged out kickstart lever... I've ordered a new one from the Netherlands and I'm pretty sure the spline on the shaft will live to see another day. There's definitely more performance to be had if I spend some time on expansion chamber design. The current setup feels like it makes peak power at mid RPM, so the pipe needs to be shorter overall to achieve proper resonance, but it's good to get some K's under my belt! I also did a plug chop on the way home and the AFR is looking pretty good on the current setup. Oh yeah, and my favourite thing about this bike is the sound! It sounds like a grumpy little race bike.
5 points
-
Drove this around a bit int he last few weeks, and its going better for it. Ebay treasures Driving it showed there is still a few things to sort out and, the flippin left turning noise is back. General running, engine is a bit tappy. Checked the valve clearances, its about -0.15 tight all round so i reckon the cam box gaskets have been compressed over time. Except a couple of exhaust valves which were a bit tighter which could be recession, but probably not. Anyway, I set those 2 back to -0.15 out all round. engine runs a bit smoother and quieter. Horn stopped working, and both of these (polish made, high and low tone) tested dead on the bench replaced with a random toyota low tone from under the house untill i go to PaP again and raid another euro (they have the best horns) This 132 front brake kit showed up on trademe for cheap, slightly bigger diameter discs and calipers (with new pads) and carriers, these bolt on to 125 hubs so will suit the ute or sedan. Not decided yet. 20mm larger diameter and a bit thicker with aftermarket vented discs available There is a pretty serious oil leak from the bottom of the bell housing, and i dont want to be 'that guy' at drag day. i suspect the main seal.and the clutch is getting pretty low on adjustment and feels is a bit gummed up and grabby but slippy at the same time. I also think that the turning noise may be gearbox/clutch related even though i cant fell it in the stick and the box changes well. Specifically the spigot bearing, or the main shaft roller ball bearing in the front of the case. Ive been chasing rainbows on this one for a while and seem some shit man, so im not ruling anything out. Changing the clutch means dropping the box, so ill be able to check and fix a lot of stuff out in this area. Ive ordered a clutch kit and bearings and have most of the seals and gaskets 'in stock' So in preperation for it being a gearbox issue, I dragged this from storage and gave it a waterblast, its a low km FSO 5 speed box from a Polonez car someone stripped when it turned up at PaP. This is a copy of the 'late type' Fiat boxes and is the same as the one in my truck at the moment. Looks pretty clean on the outside now, and apart from the dirty oil, the inside looked ok too. If i do have to swap boxes the bell housing needs to swap to the fiat one in the truck already, to put the starter on the other side of the engine. This particular bell housing will be kept around as it will let me bolt one of these Colotti 5 speeds to the 2300 engine if the column change every goes bad (please dont go bad!).5 points
-
made a bit more zorst but its way to loud. ill get a muffler for the back tomorrow and finish it off. Rhona has decided she wants to help with this build/ she thinks its her car for some reason so today she helped swap the ball joints. we'll do the other side when i turn the car around. 2018-10-14_01-03-23 by sheepers, on Flickr5 points
-
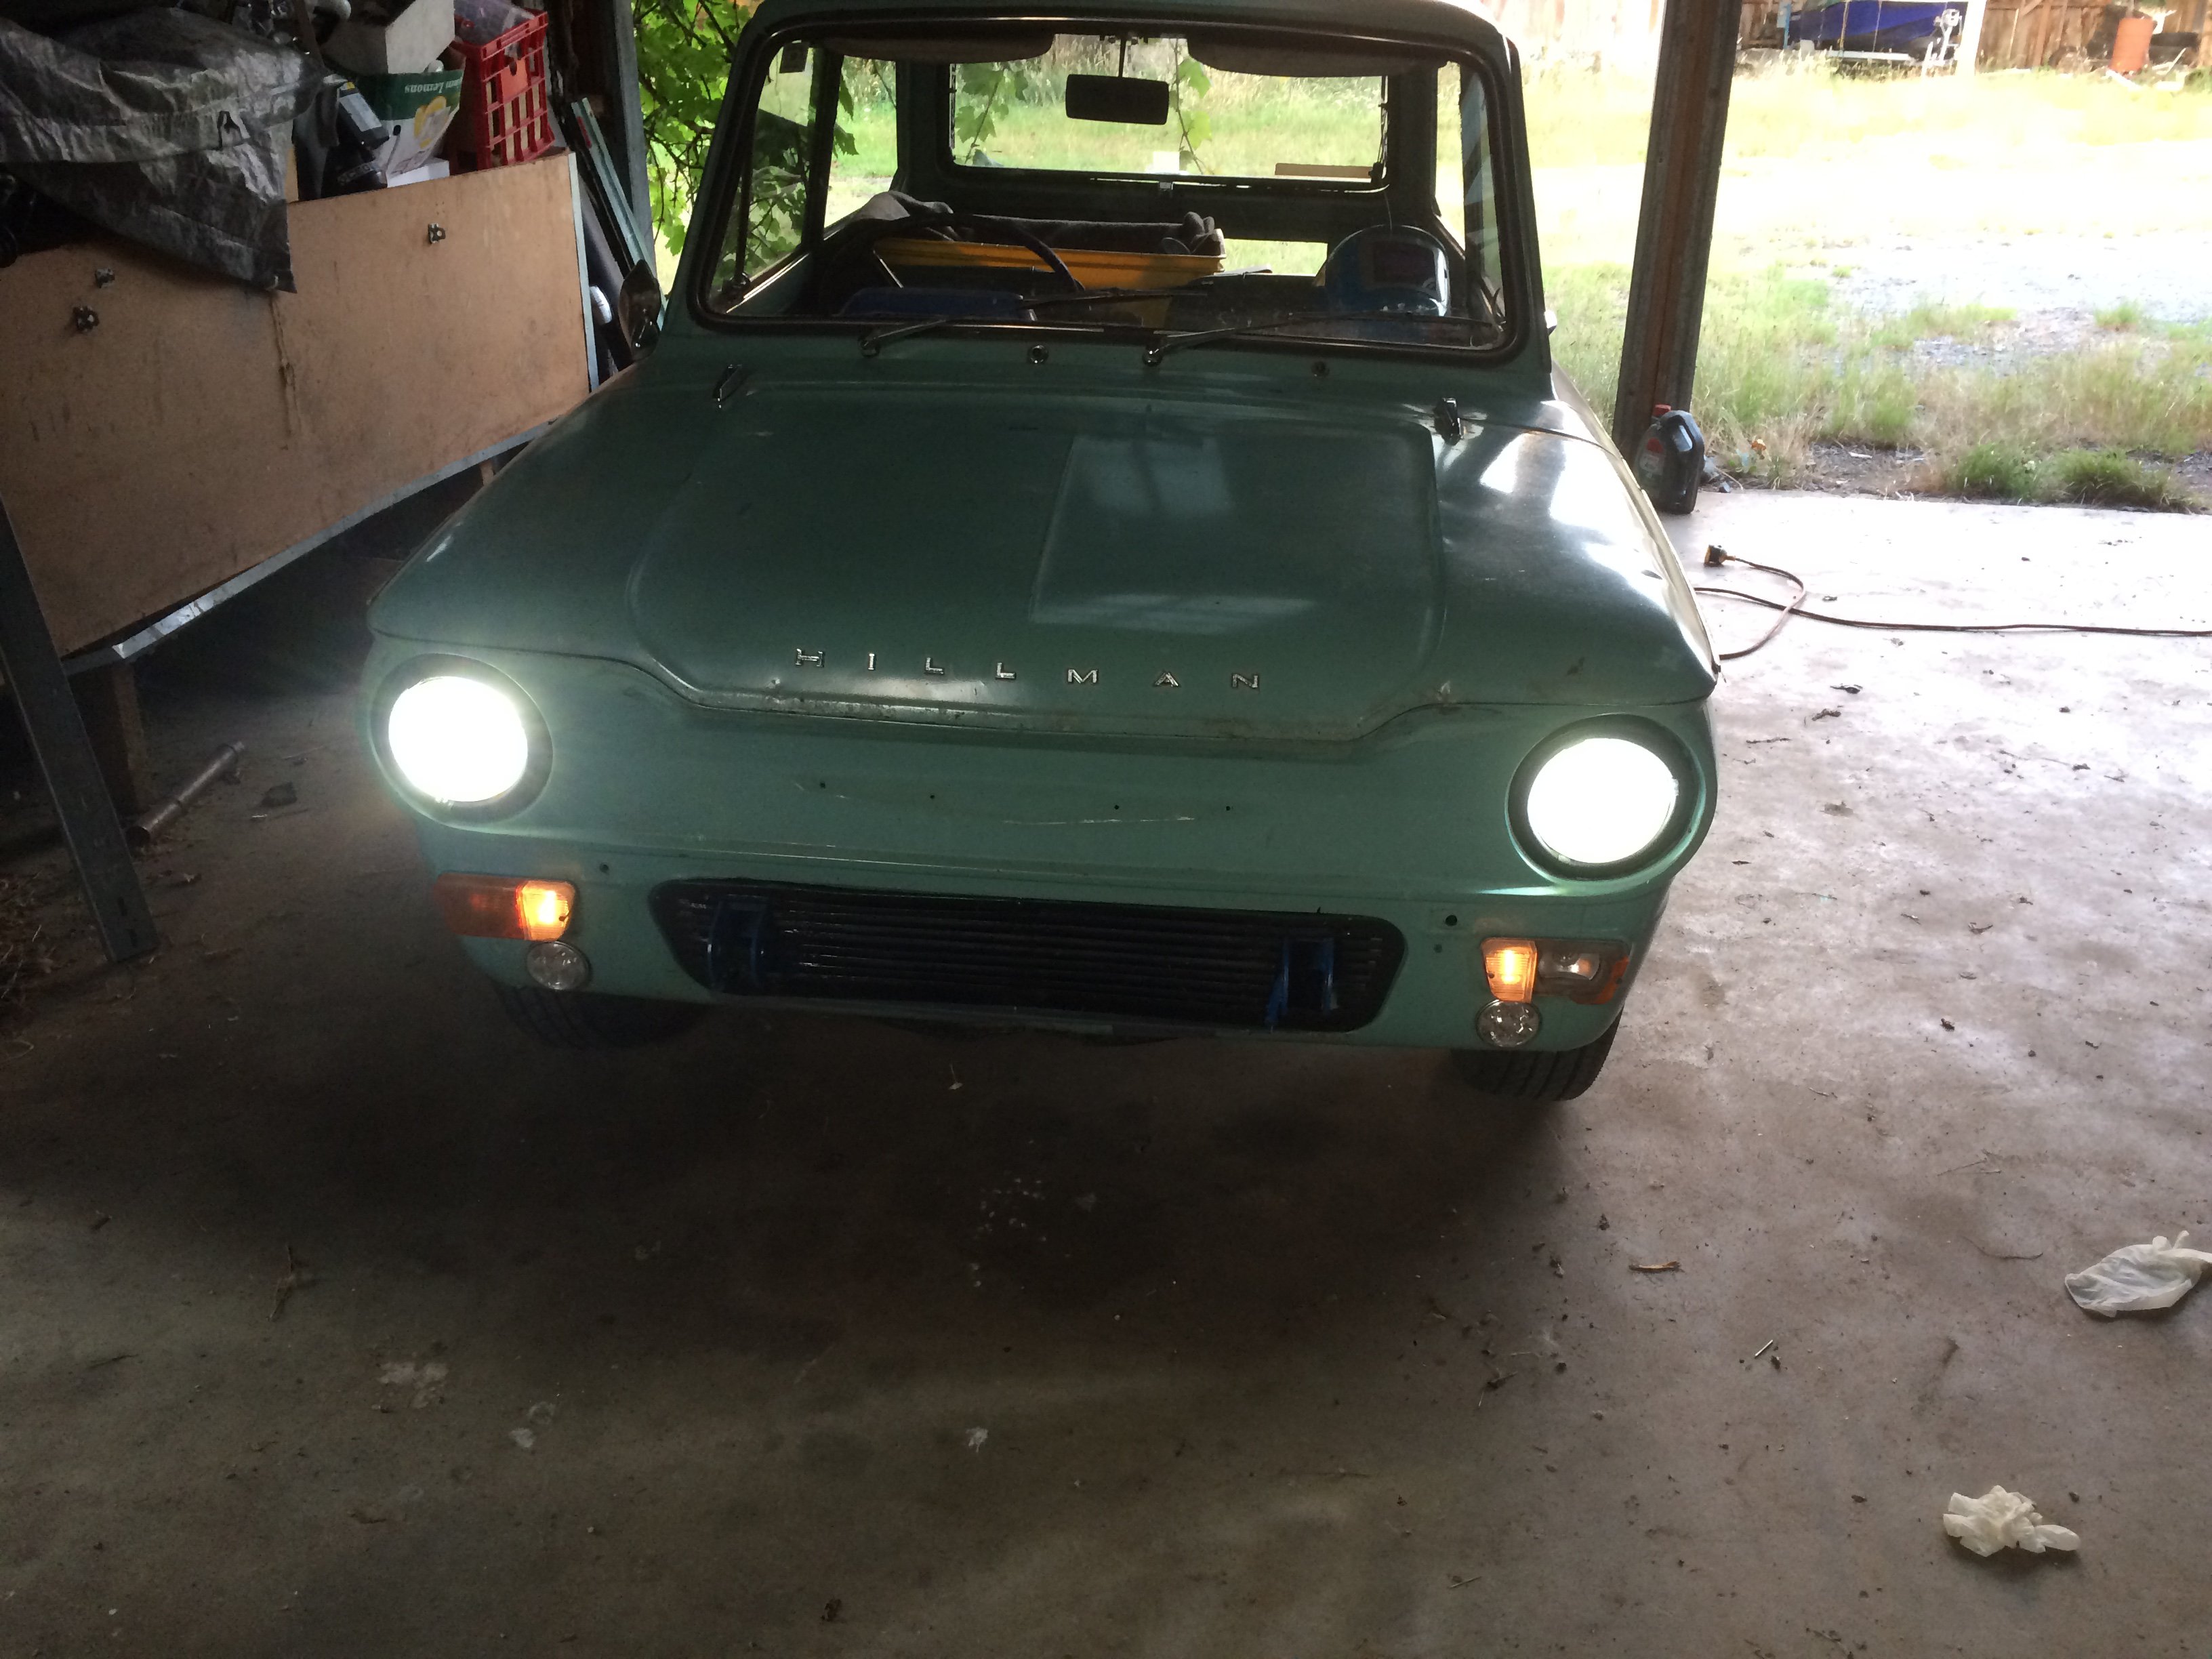
WOOHOO!!! FRAK YEAH!! SHE IS ALL ROAD LEGAL!!!!! I'm going away to the South Island next Wednesday so it has been a mad rush to get it finished in time. Still a little list of things that I want to finish of but it drives really nice. I took it for it's first proper drive today and it is such a fun car to drive, stupidly quick and OMG does it ever sound amazing!! Got the cert plate back today, passed with flying colours. Here is the cert plate listing all the mods Got it's warrant of fitness. And registration First night back at home Here is a before shot, I love how you can barely tell I put the V8 in it. Such a sleeper. The big back wheels are pretty much the only thing that gives it away, they look so cool. Back in the garage with my other cars Other little updates. Painted the centre caps of the temporary front wheels. Doesn't actually look too bad now that it is all murdered out. Swapped over the front bumpers. The early Hillmans used a much smaller bumper than the late model Chrysler's. They don't bolt straight up, you need to drill a couple of holes then after that it bolts right up. You can see a good shot of the old bumper in the before photo above. Finished mounting the brake bias valve.5 points
-
So I'm still rolling around here... I still have an A35 in the shed and my AE92 GT which needs work one day (plus other things, but really need a decent sized workshop to do it) but I was browsing TM one evening and saw a mini shell for CHEAP which I thought could be a good basis for a project. I've always liked the early minis, so it was chance more than anything as to why I ended up with this one. Now the reason it was cheap is that someone had cut the front of it off (very cleanly though) to make a flip front. Other than that the shell had virtually no rust, is very clean and has been dry stored since the early 90s.... A quick trip up to Cantebury and it was home.... It came with enough bits to make it a roller but very little else. Luck would have it that a very rusty (but mostly complete) one turned up locally on TM a week later, so I made it mine also. So I'm about halfway through aligning this front end to TIG back on..... Plan is to give it a quick scotch n' spray in the British Racing Green it has on it, then start transfering the bits from the yellow and rebuilding along the way. Should be fun, feels great to get into another project like this one.3 points
-
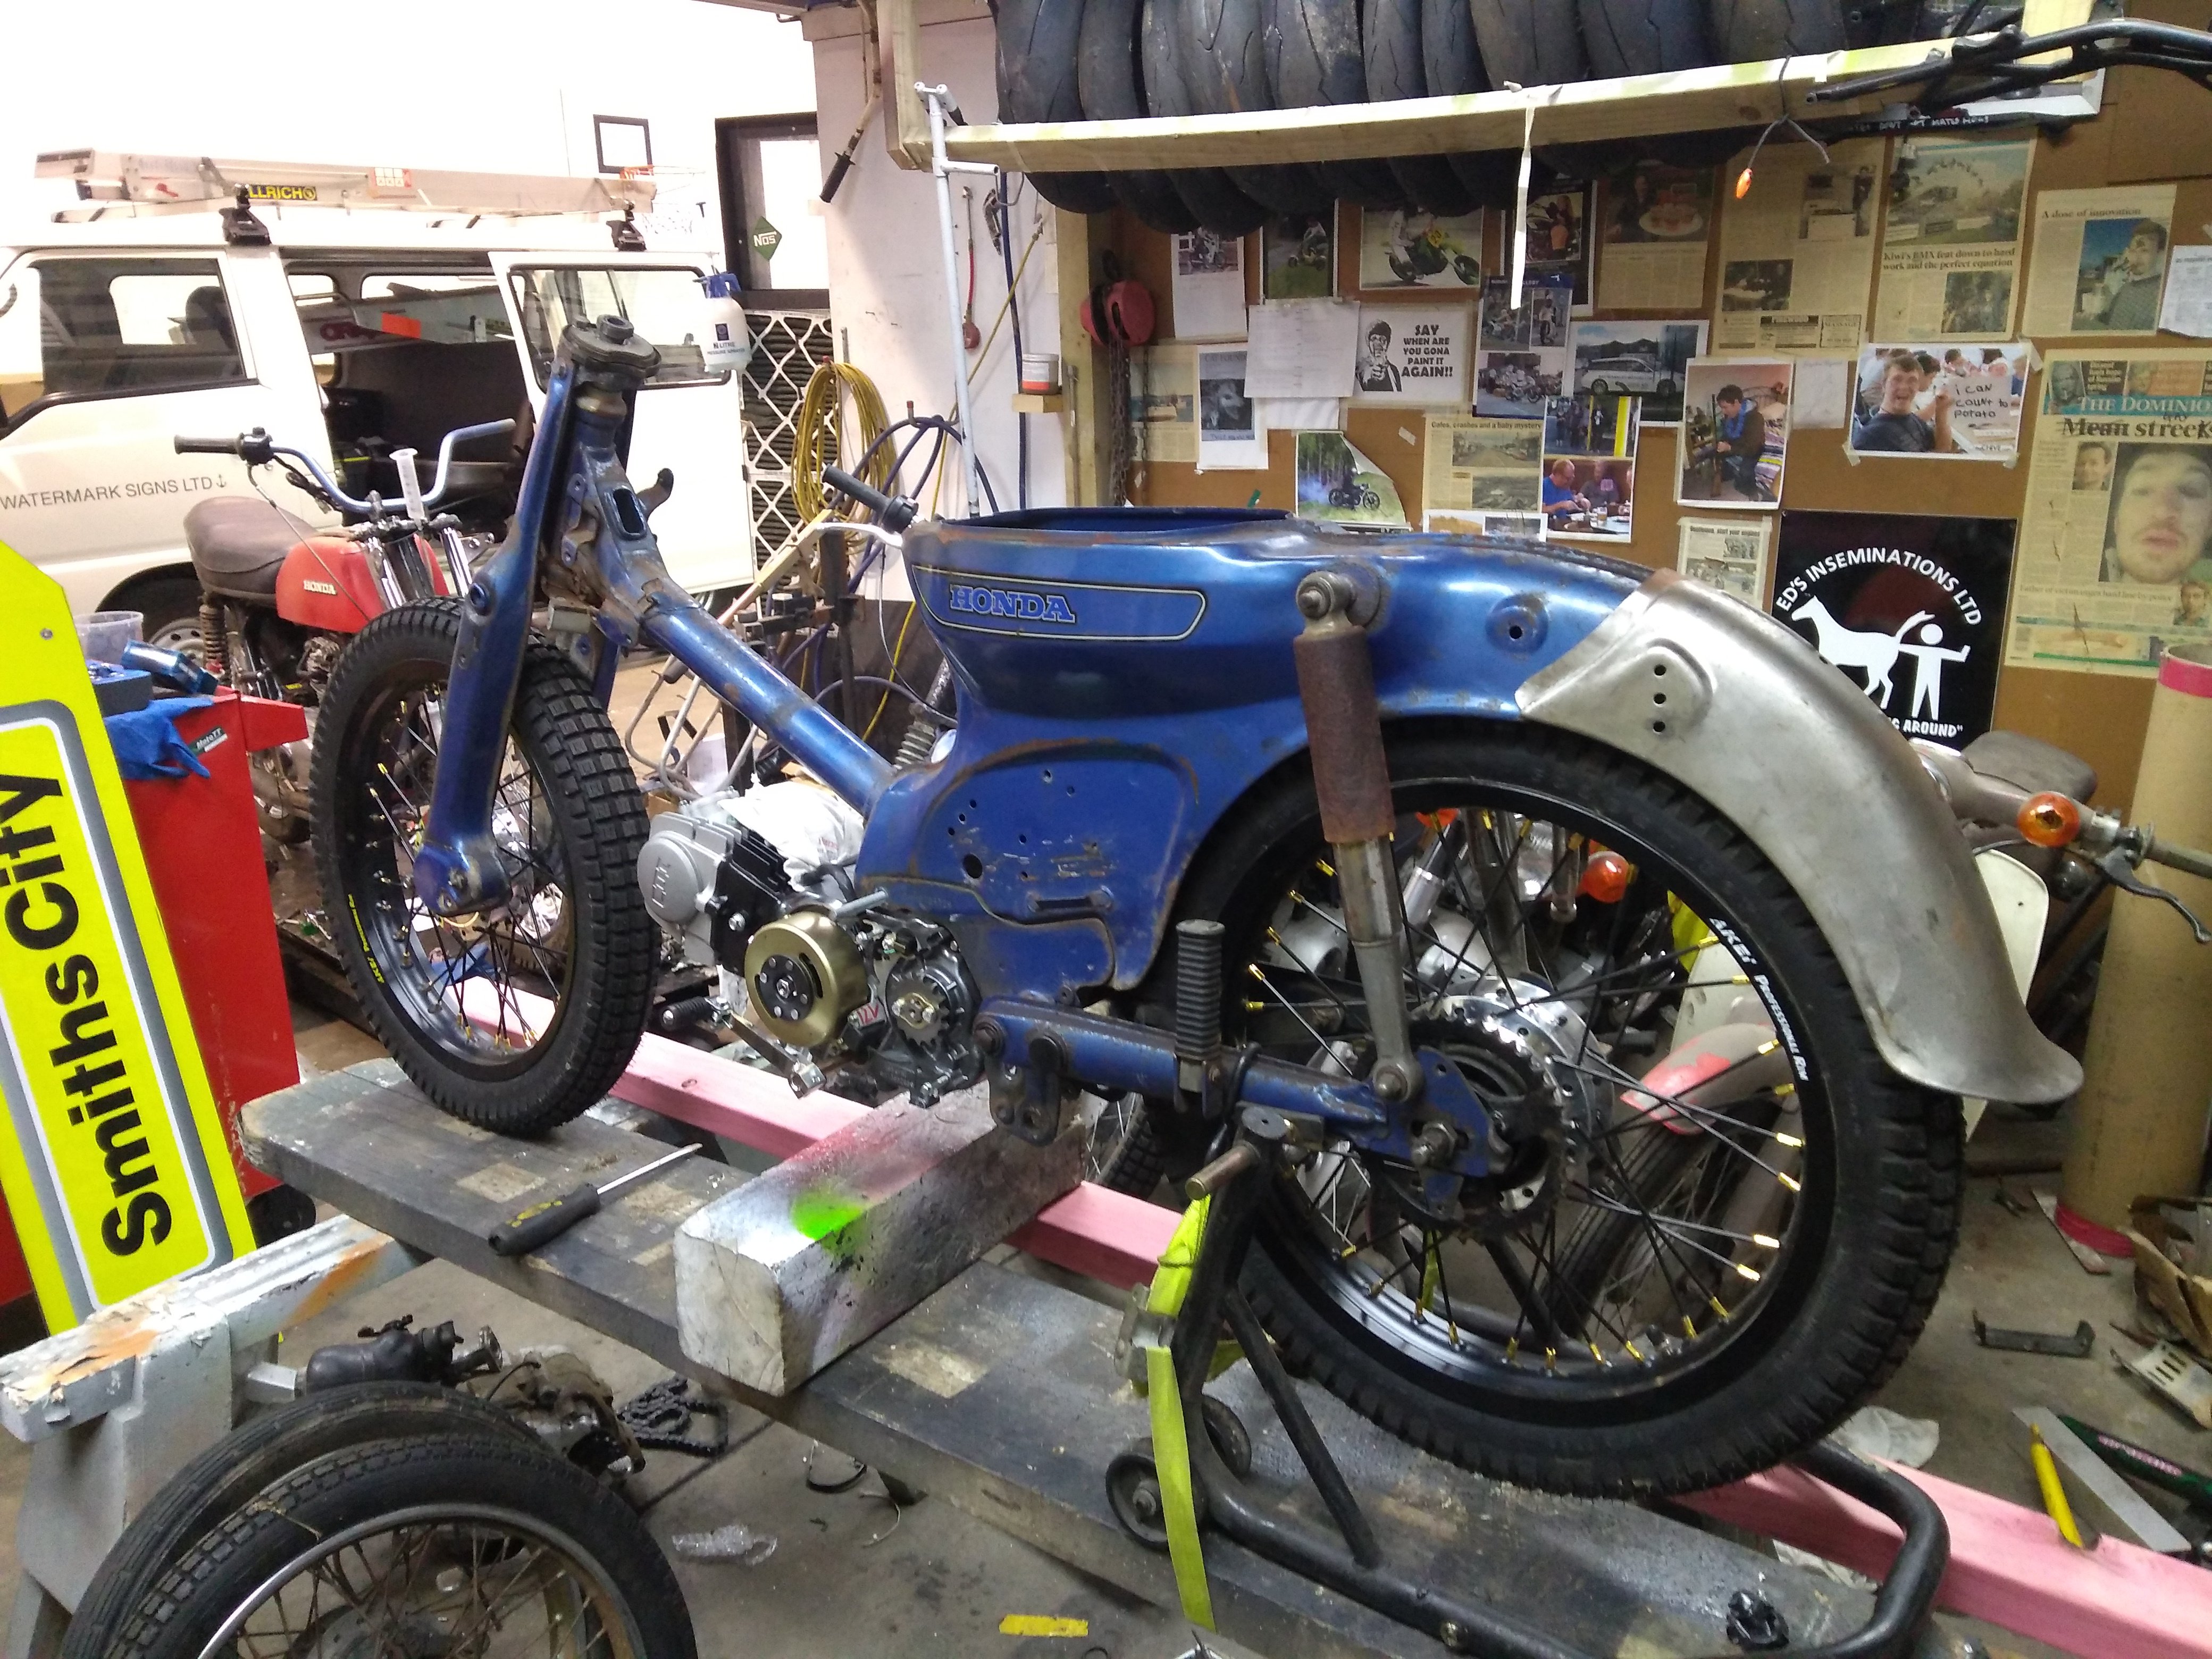
My bike is complete at this point, it has run but not since it has been properly back together. Will wait until its not late at night to do some testing. Oil pump has a slow leak but shouldnt be a show stopper, can always change to premix if needed, and carb has finally stopped leaking after I pulled the bowl off 15 times, but I am a bit concerned it might shit the bed again so will need to keep an eye on it. the reed valves were out of spec too, so have ordered some new reed material. Otherwise I need to get on it and ride, find out how many other things are buggered on it Also entered and paid now
3 points
-
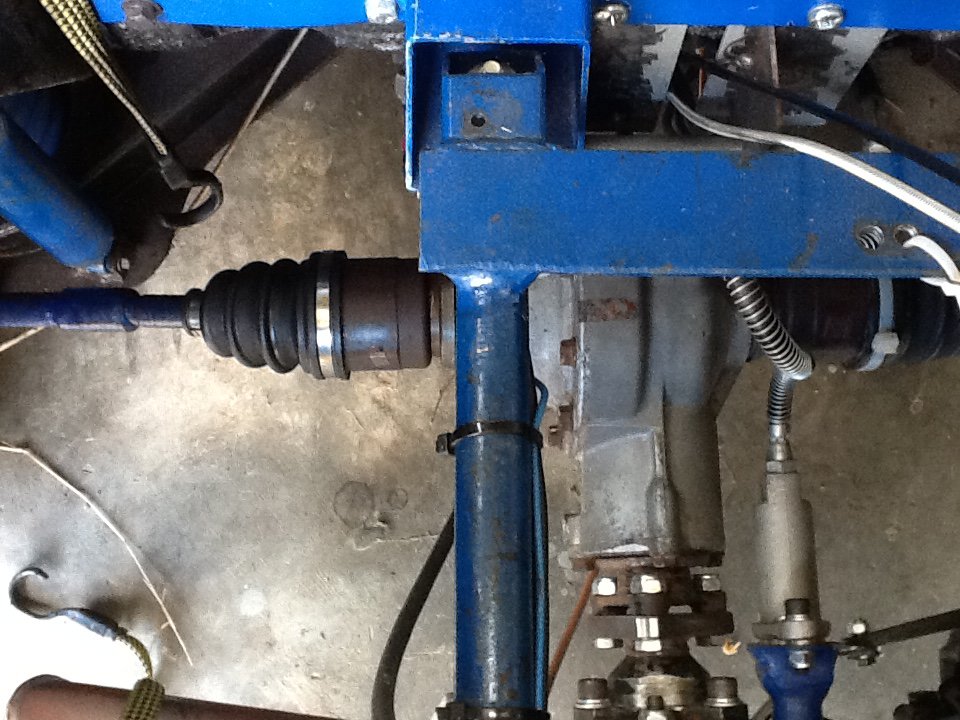
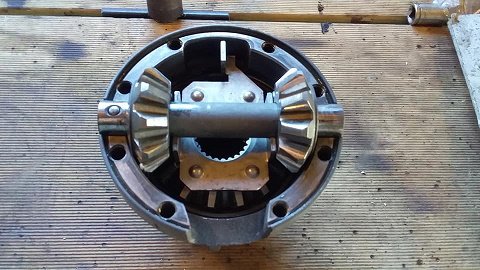
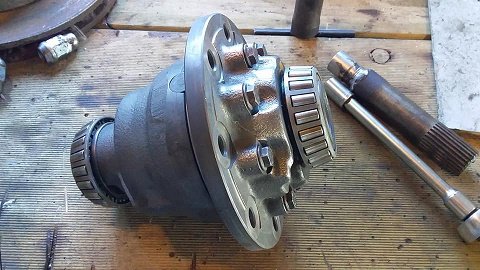
diff and engine set up
3 points
-
3 points
-
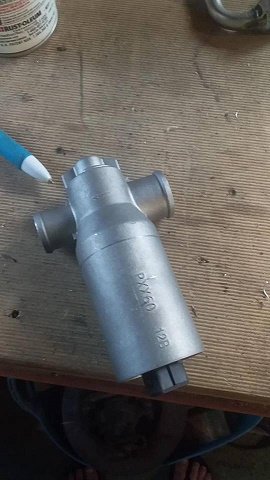
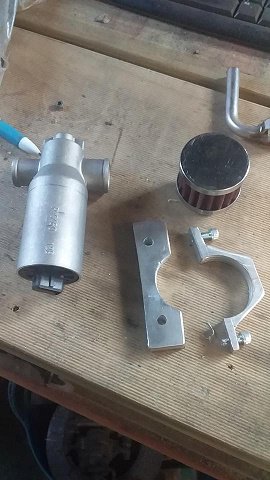
Spent a few hours taking the clutch apart and cleaning it, it was stuck like chuck and full of rust and crap, fitted new bearings to, the blue thing on the right is the hydraulic valve and reservoir, the ram is on the bottom, that was another shitty job rebuilding it. I did the carb to, took a lot of time to get that apart with out fucking something. the accelerator pump diaphragm mad gone hard and crispy long ago and had been removed but the piston was there so I ground the top off the rivet and made a new diaphragm from an old fuel pump diaphragm, it would of pissed fuel everywhere before. put the engine back in and made a new horizontal exhaust.
2 points
-
Good to see your sign made the photo =)2 points
-
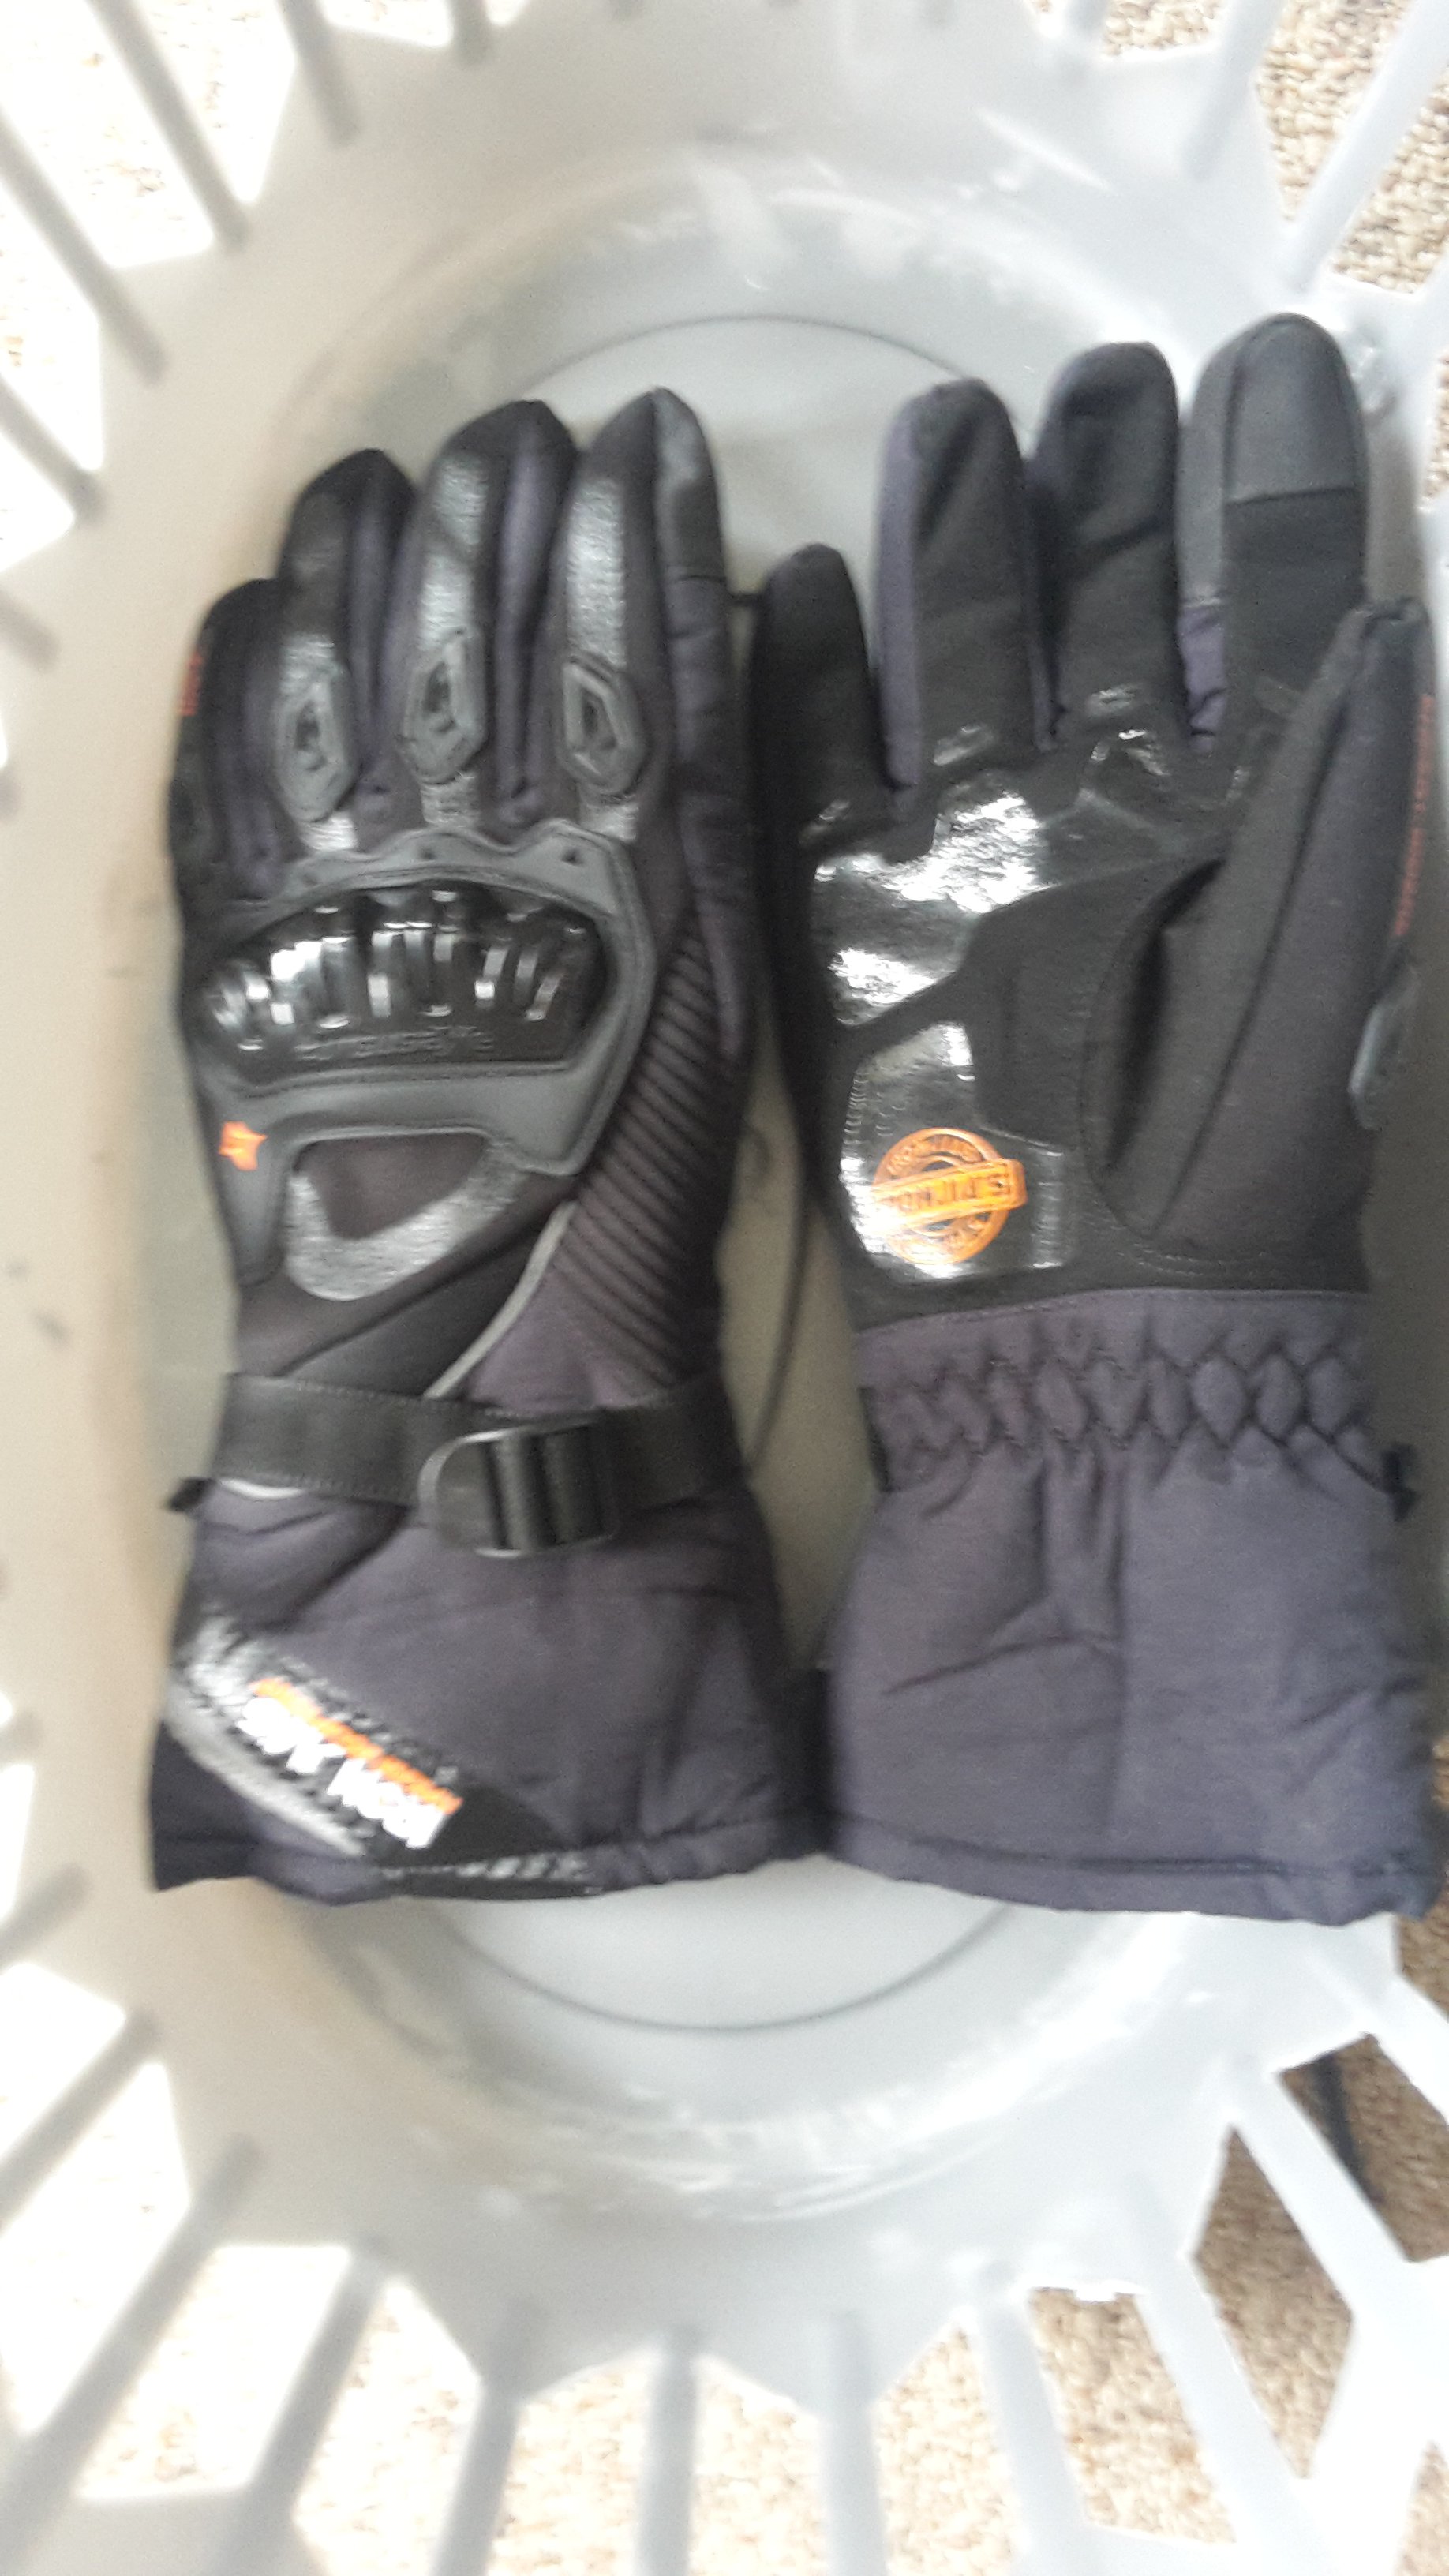
In other news my aliexpress gloves arrived
2 points
-
Looks ok. The rod end will need a jam nut to lock it into the blue sleeve thing, make sure the threads go in 1.5x thread diameter, make sure the rod end doesn't bind at full suspension travel, including compressing the bump stop a bit, the rod end will need a large flat washer as a failsafe , and the bolt that holds it on should have a shank that is a good fit in the arm2 points
-
If I can sort out my XR I'll try do a quick run through and have a nosey closer to the time2 points
-
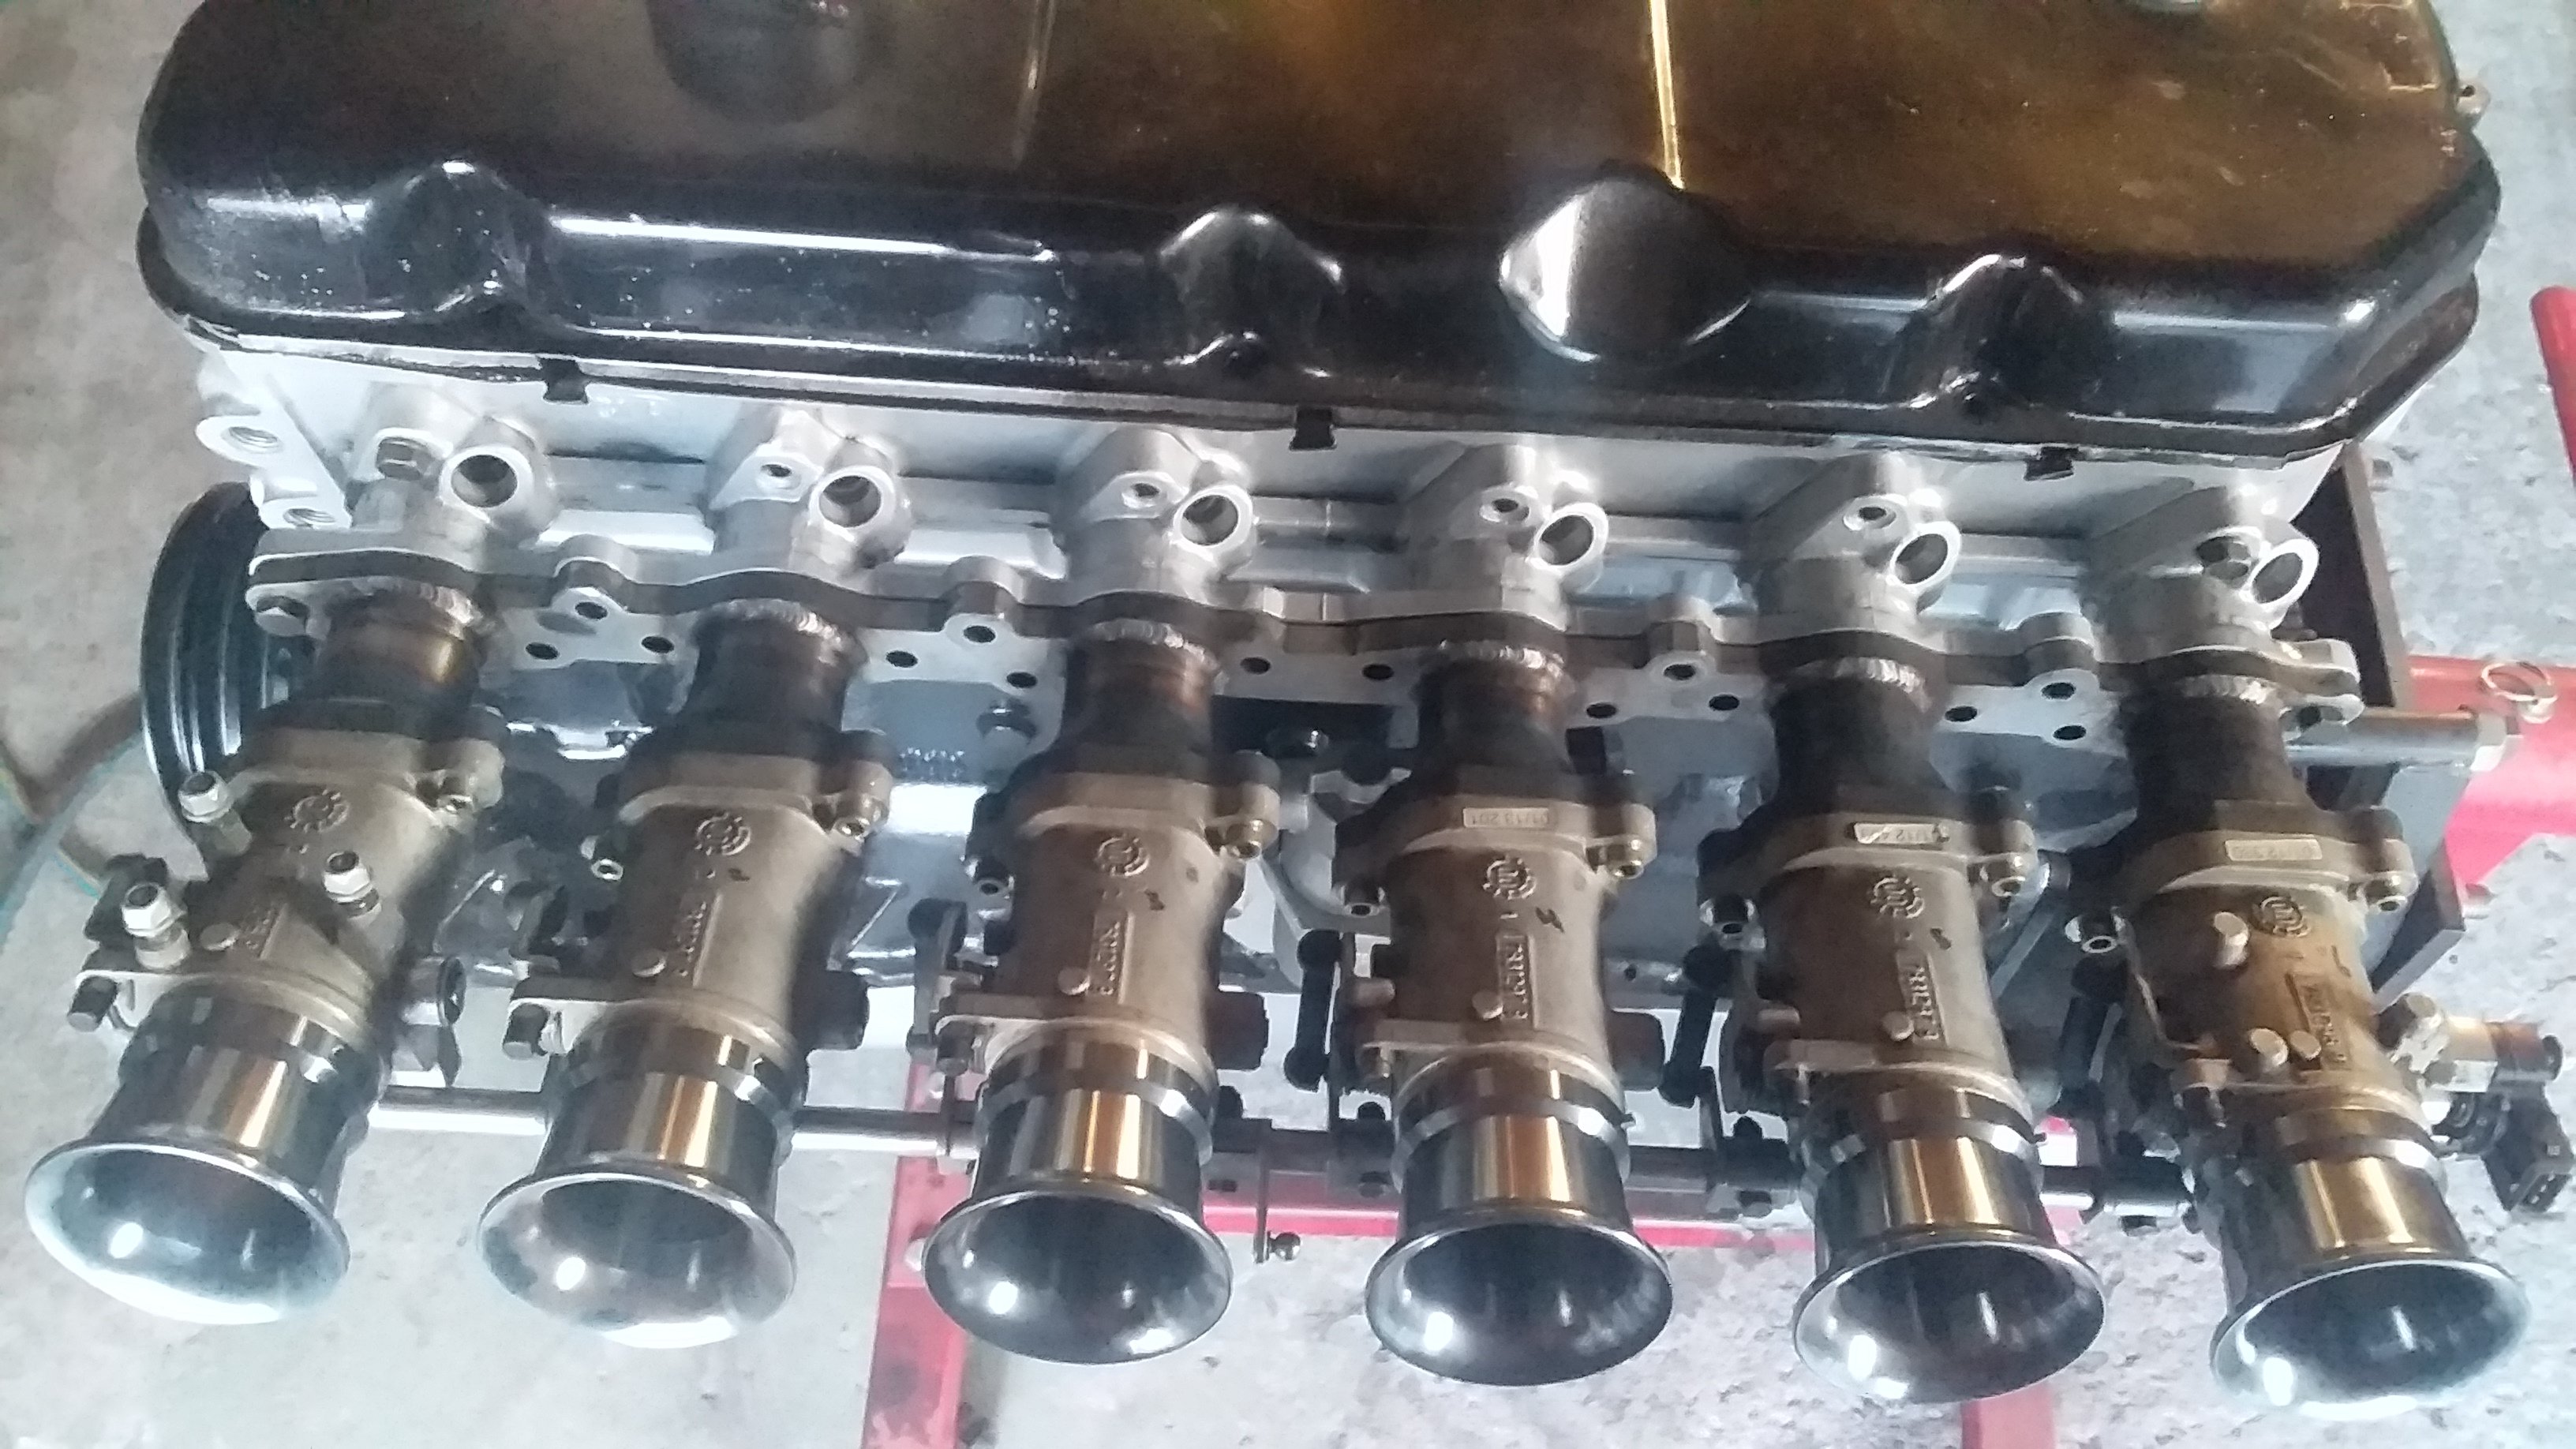
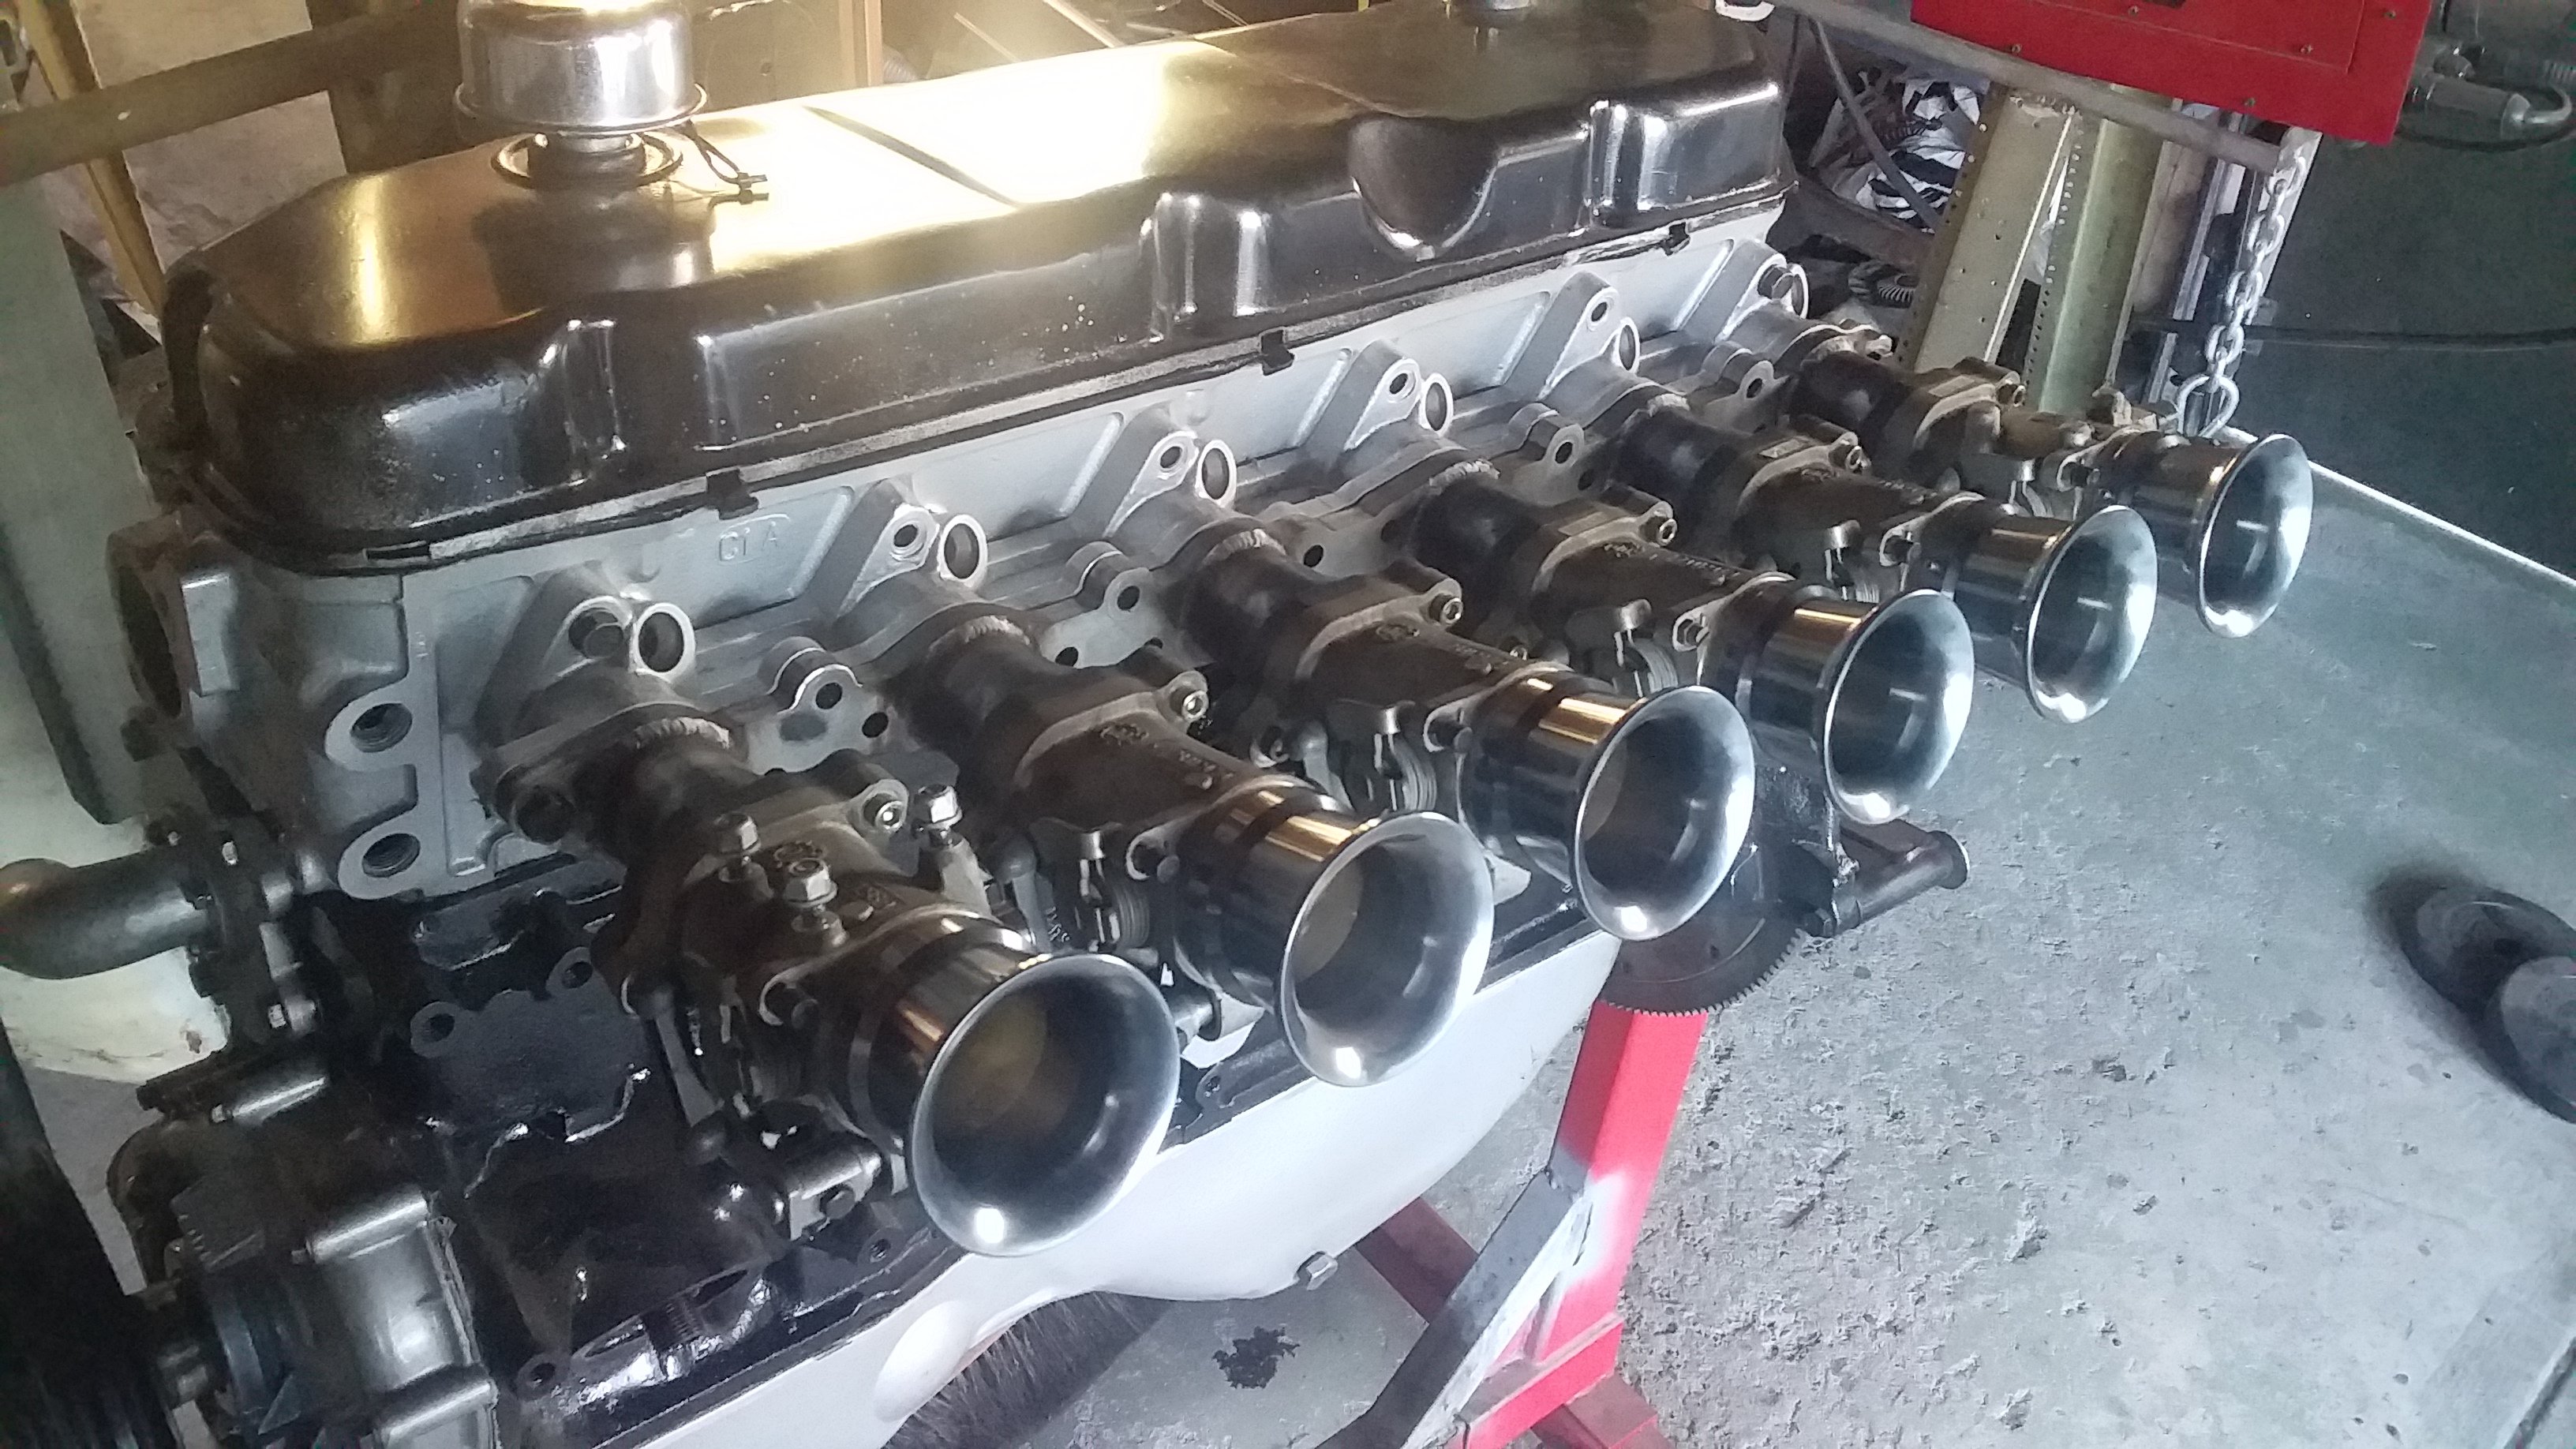
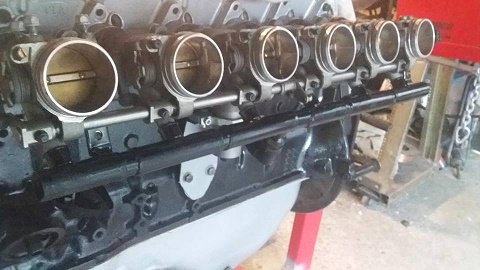
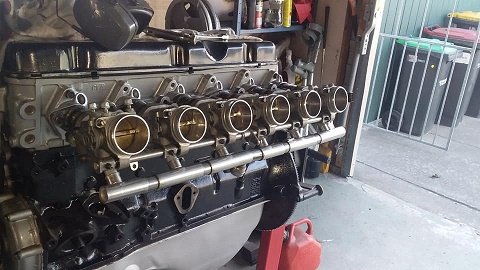
Afterfucking around with different trumpets I hated them all part from the 1st ones I bought... So I bit the bullet and got a mate to macihne down the tips of the ITBs and now im happy ....how i wanted it from the start ant not a fuckinh silicone joiner in sight
2 points
-
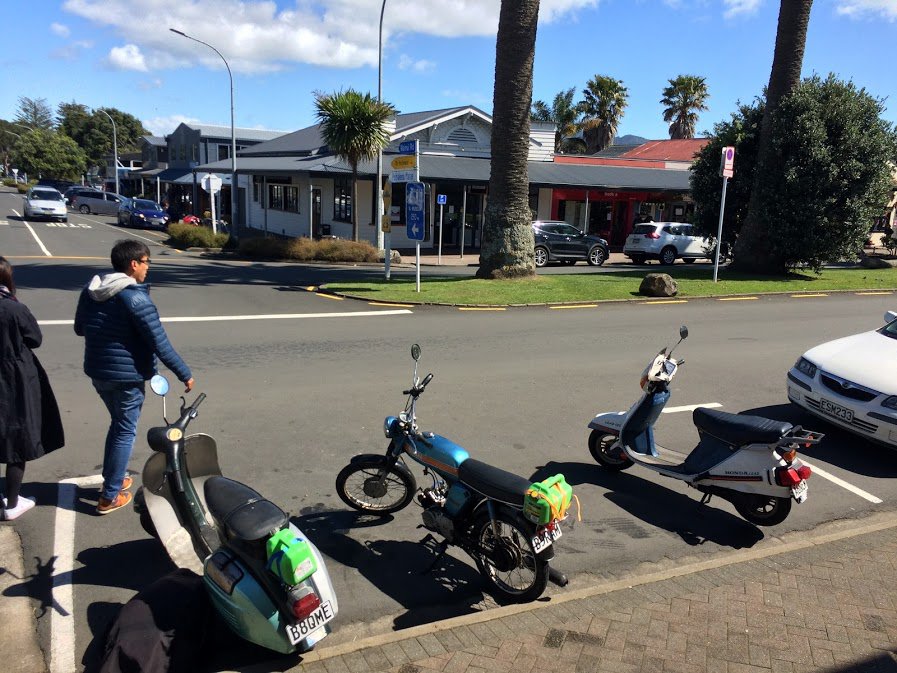
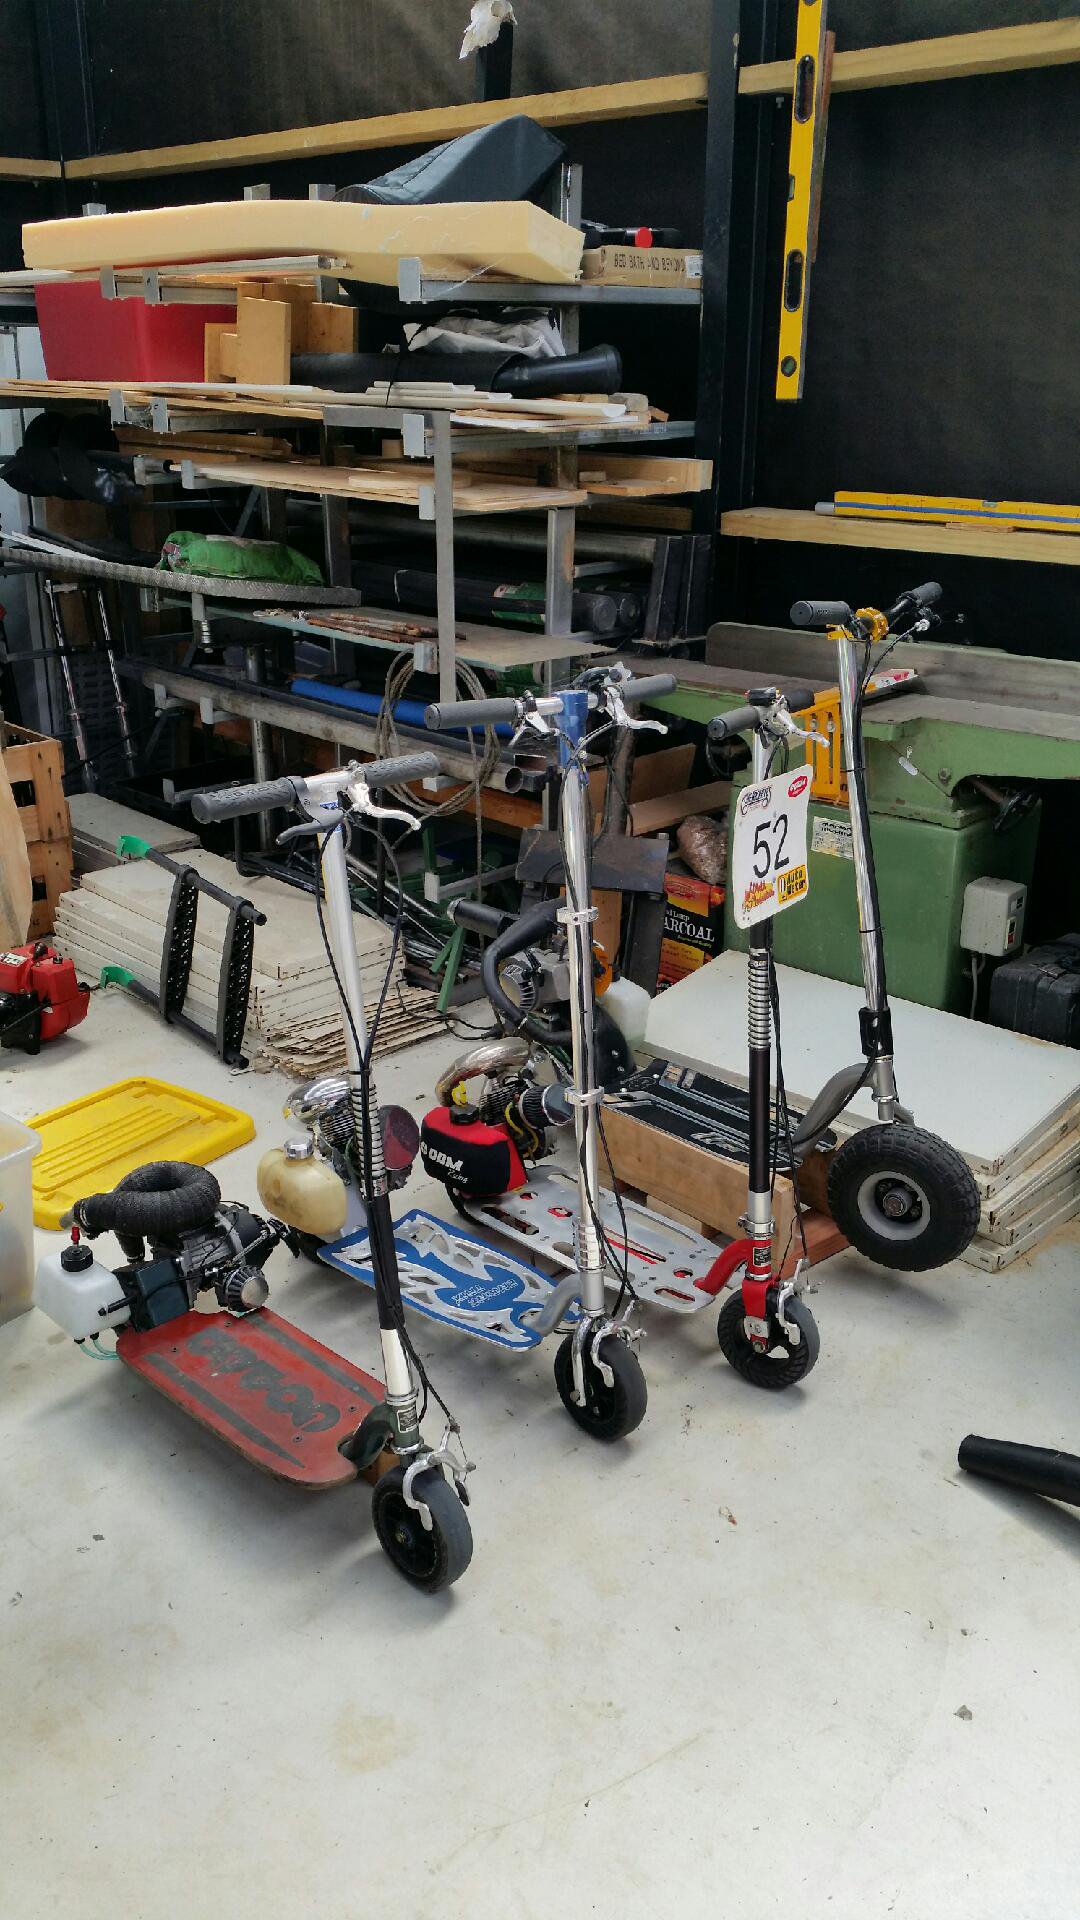
Yip! Sure is. It's not quite in tune yet, and I want to experiment with closing the hole down a bit on the pipes exit, as I think I'll make more back pressure and that could be beneficial? Here it is parked up with some of the fleet;) Sad thing is there's many more to come...
2 points
-
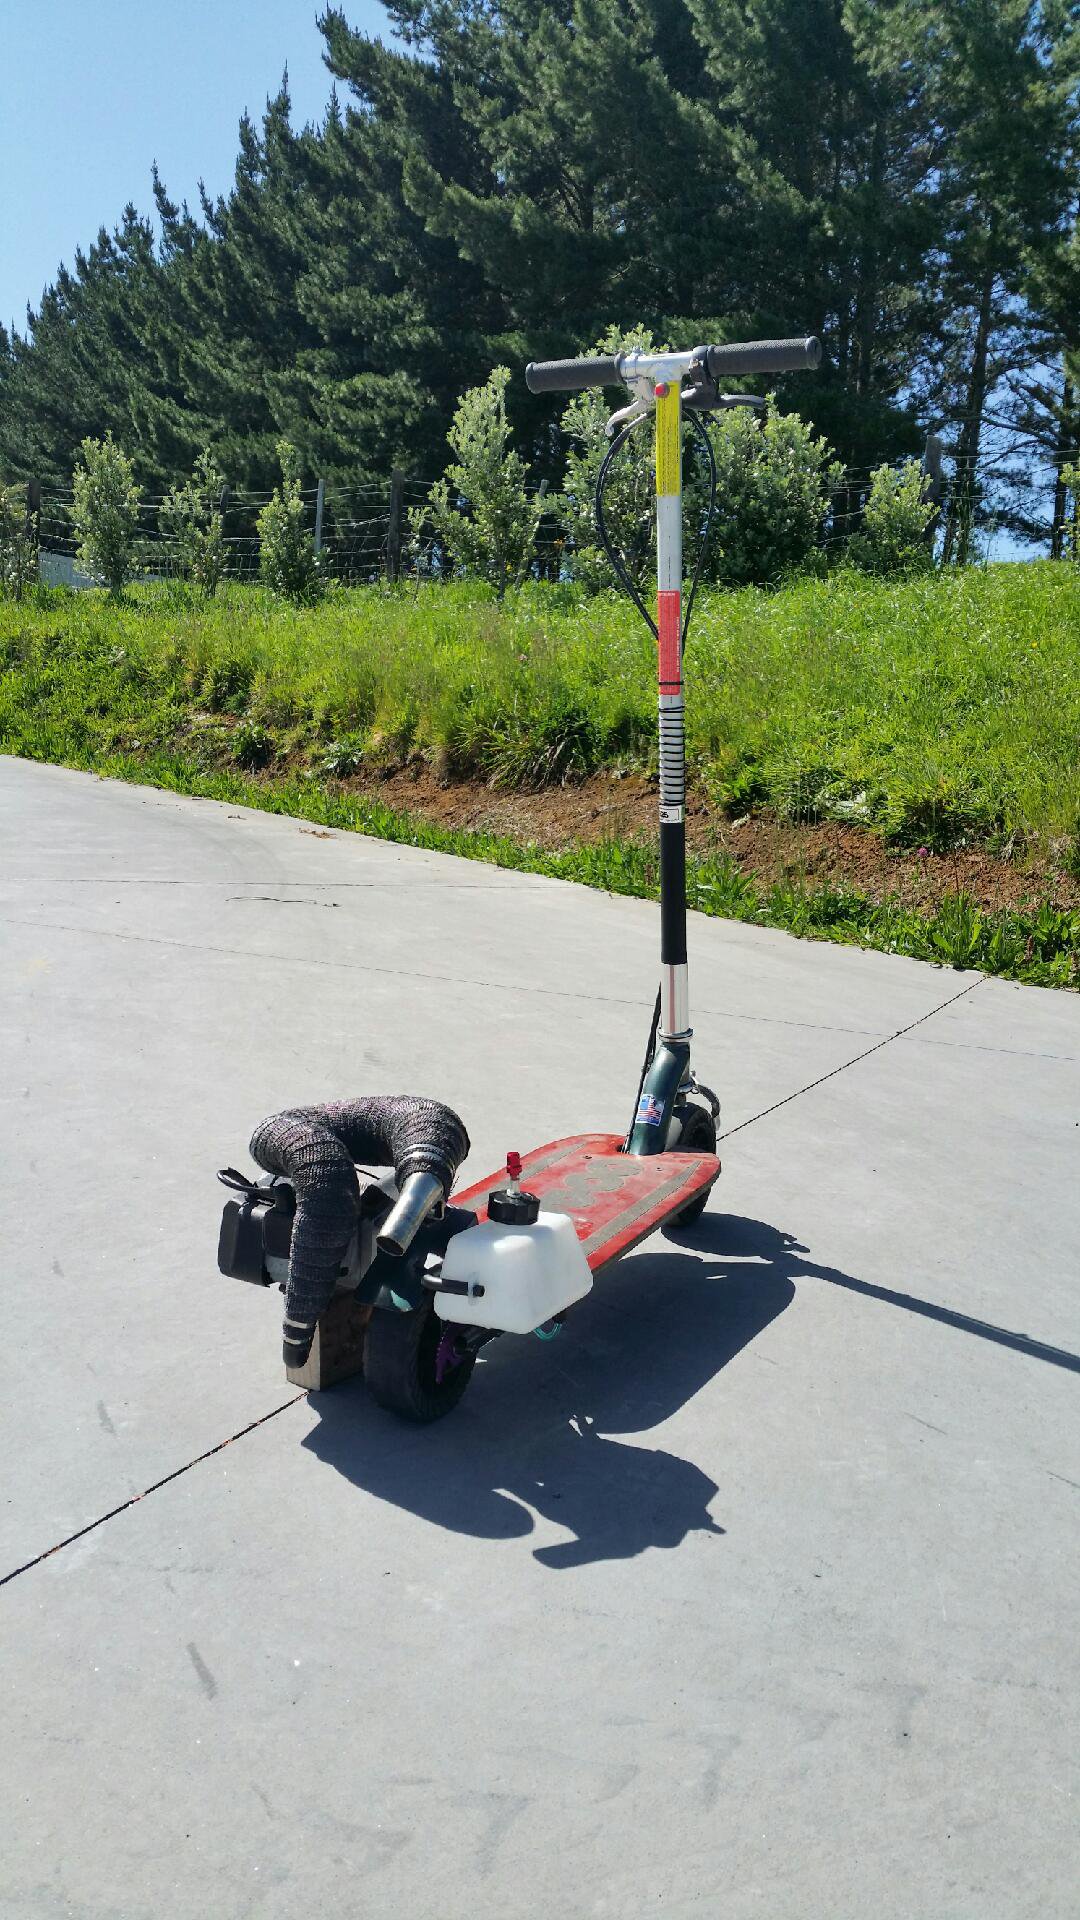
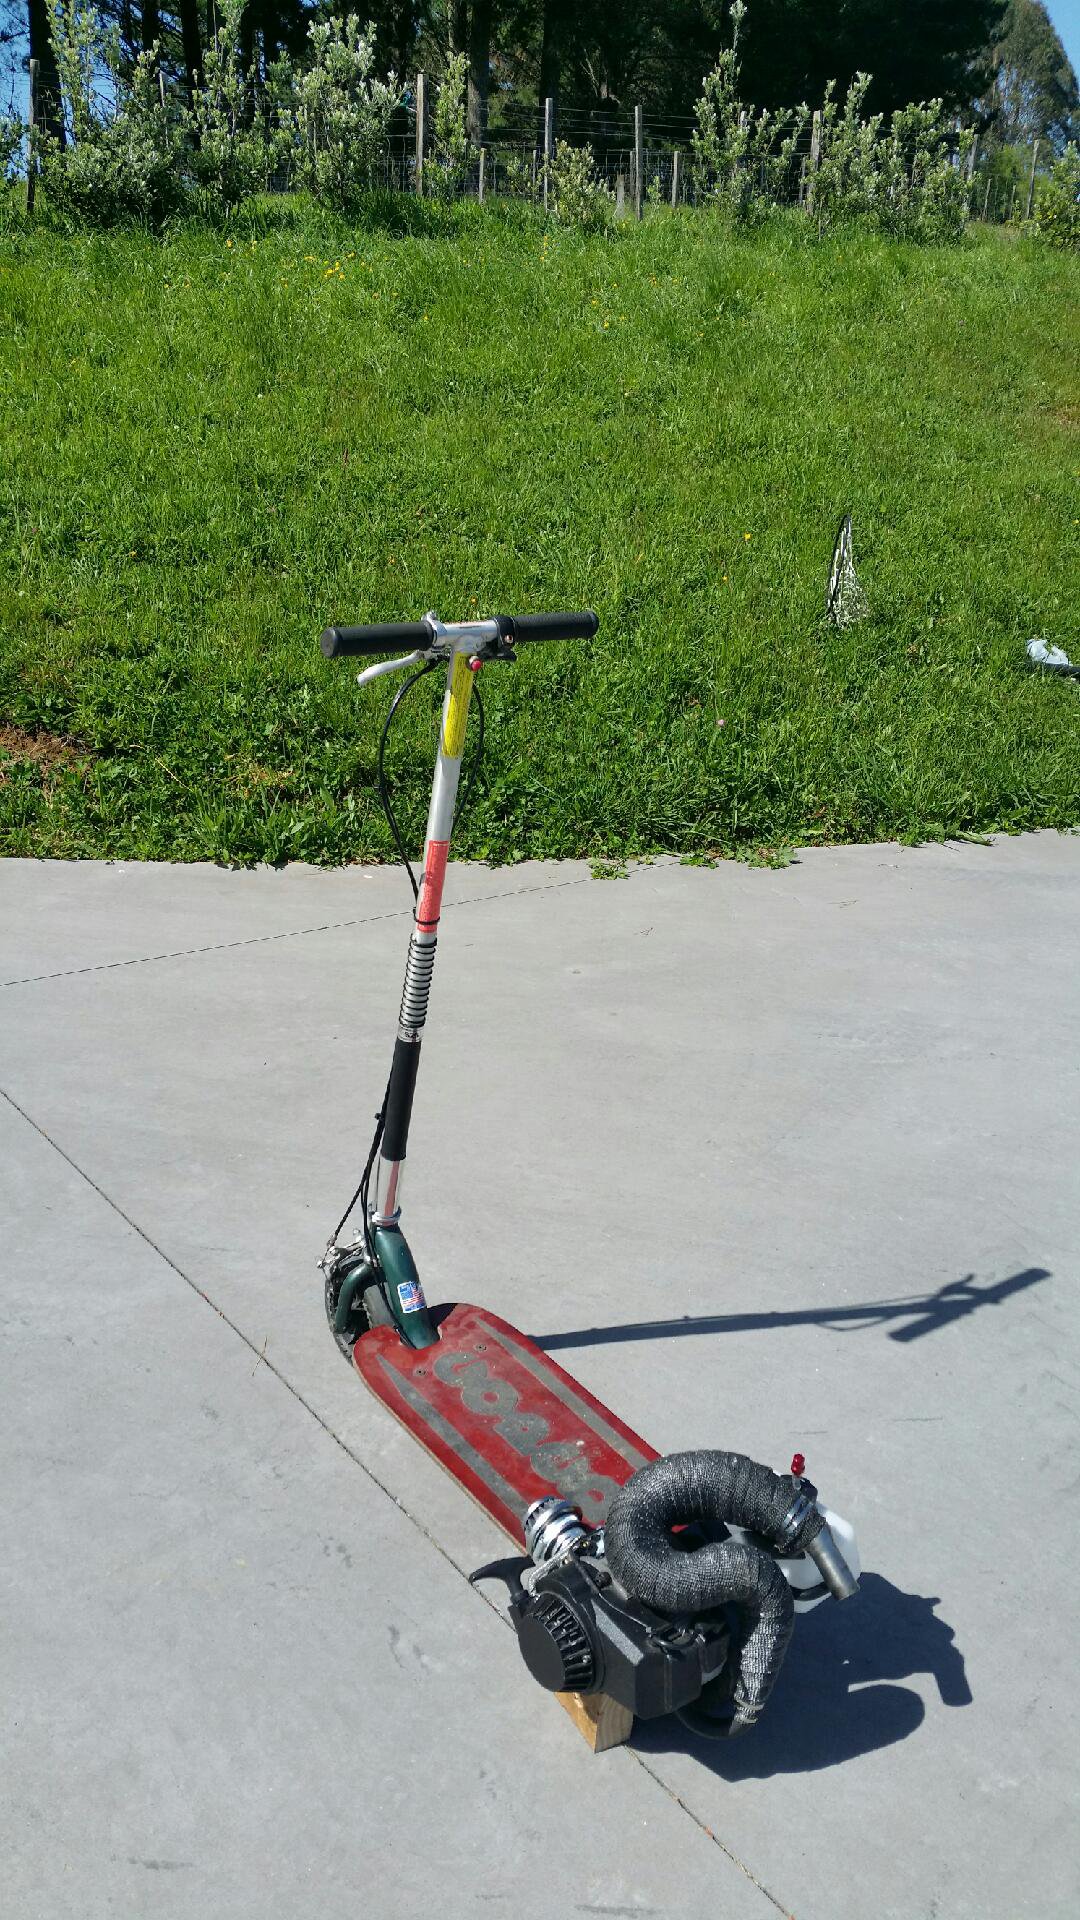
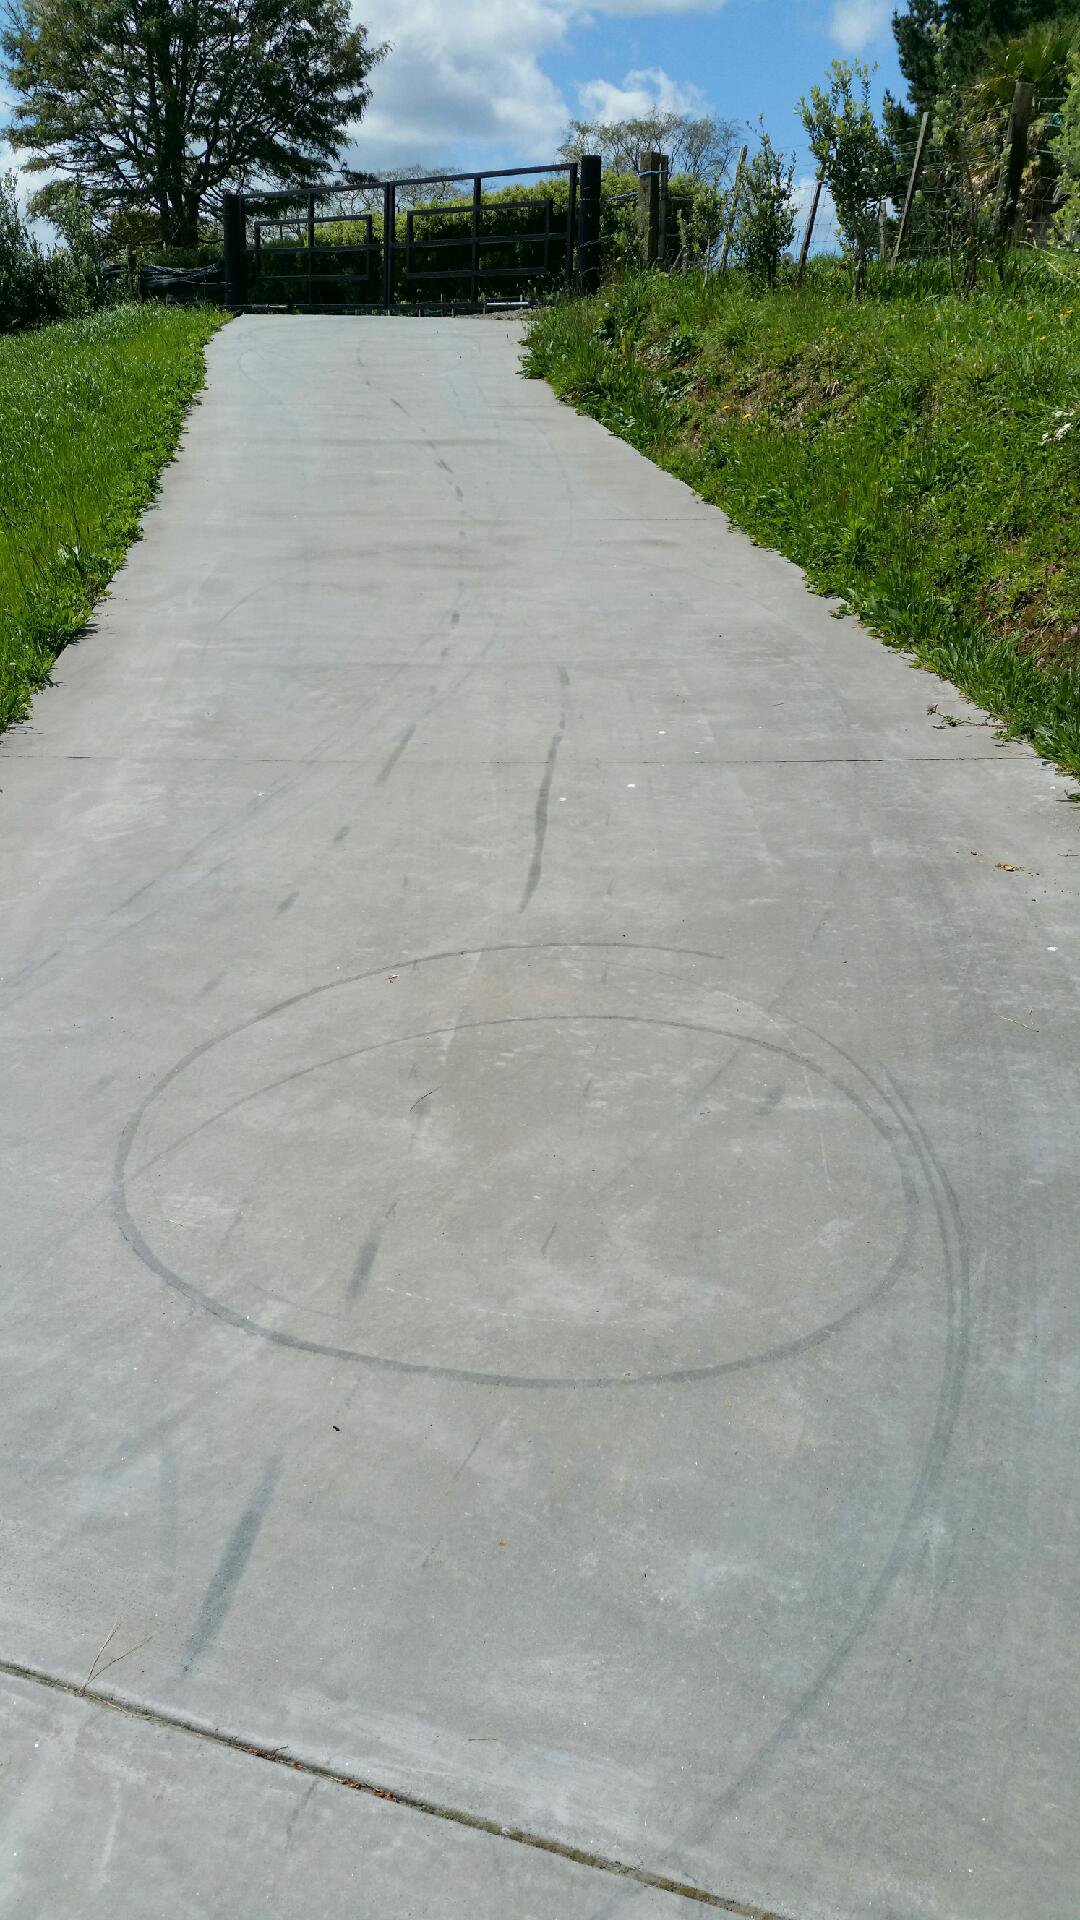
Yes...yes it is! Finished. 49cc of stupidly fast goped!!! It's slipping on the wheel a bit, as the wheel is worn-out and has become egg shaped. However that is genuine wheel spinning power your witnessing in that youtube clip. Seriously when in powerband it spins the rear wheel! Yeah buddy...it rips!!! Wheel spinning goodness. This hard tyre goped is awesome! Back to basics motorised fun!
2 points
-
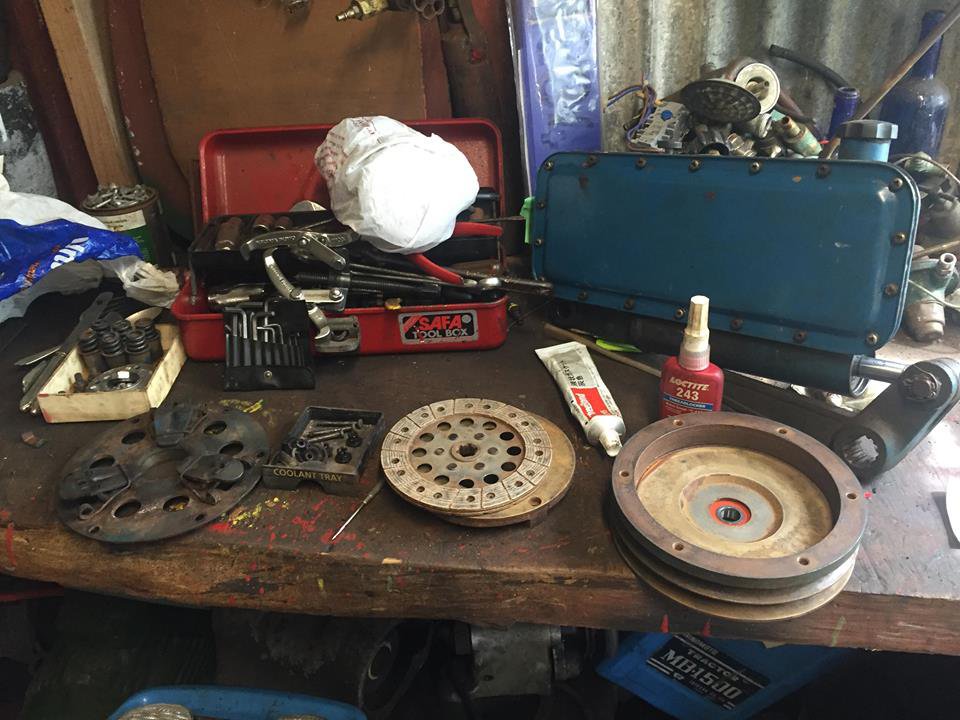
Shit guys you won't believe what I found abandoned in an old barn. Must have been there since the 50s! Time for my 2 yearly do some work on this thing again. Cleared the shit off and around it. Wow half my list has already been done. I assume it was me rather than the garage gnomes. Ran twin carb fuel lines Started up right away Got some bits to get me started Pulled exhaust and put new muffler in the original position. Can bin the bends as the new manifolds will line up properly with the heat shield under the passenger floor Reinstalled it and ran the numbers. Ordered some new bends and a flange to finish the down pipe Had some wicked clutch shudder. So had ordered a new kit. The one in there now is a mix of parts from scrapped cars, probably soaked in oil, and I just realised the guy that lightened my flywheel probably never machined the face. So gearbox out. Annnnnnd I done played myself. Apparently I never made the nuts for the cross member captive. So master cylinder out too. Gearbox out and there's plenty of oil between the block and bellhousing but the flywheel and clutch are nice and dry which is surprising. Might be a slight leak from the input shaft and the rear main seal but it's British. And about now I remembered I can't get the flywheel off without taking the sump off which is a pain in the ass so next weekend. Also put a bunch of trim back on and a few little things2 points
-
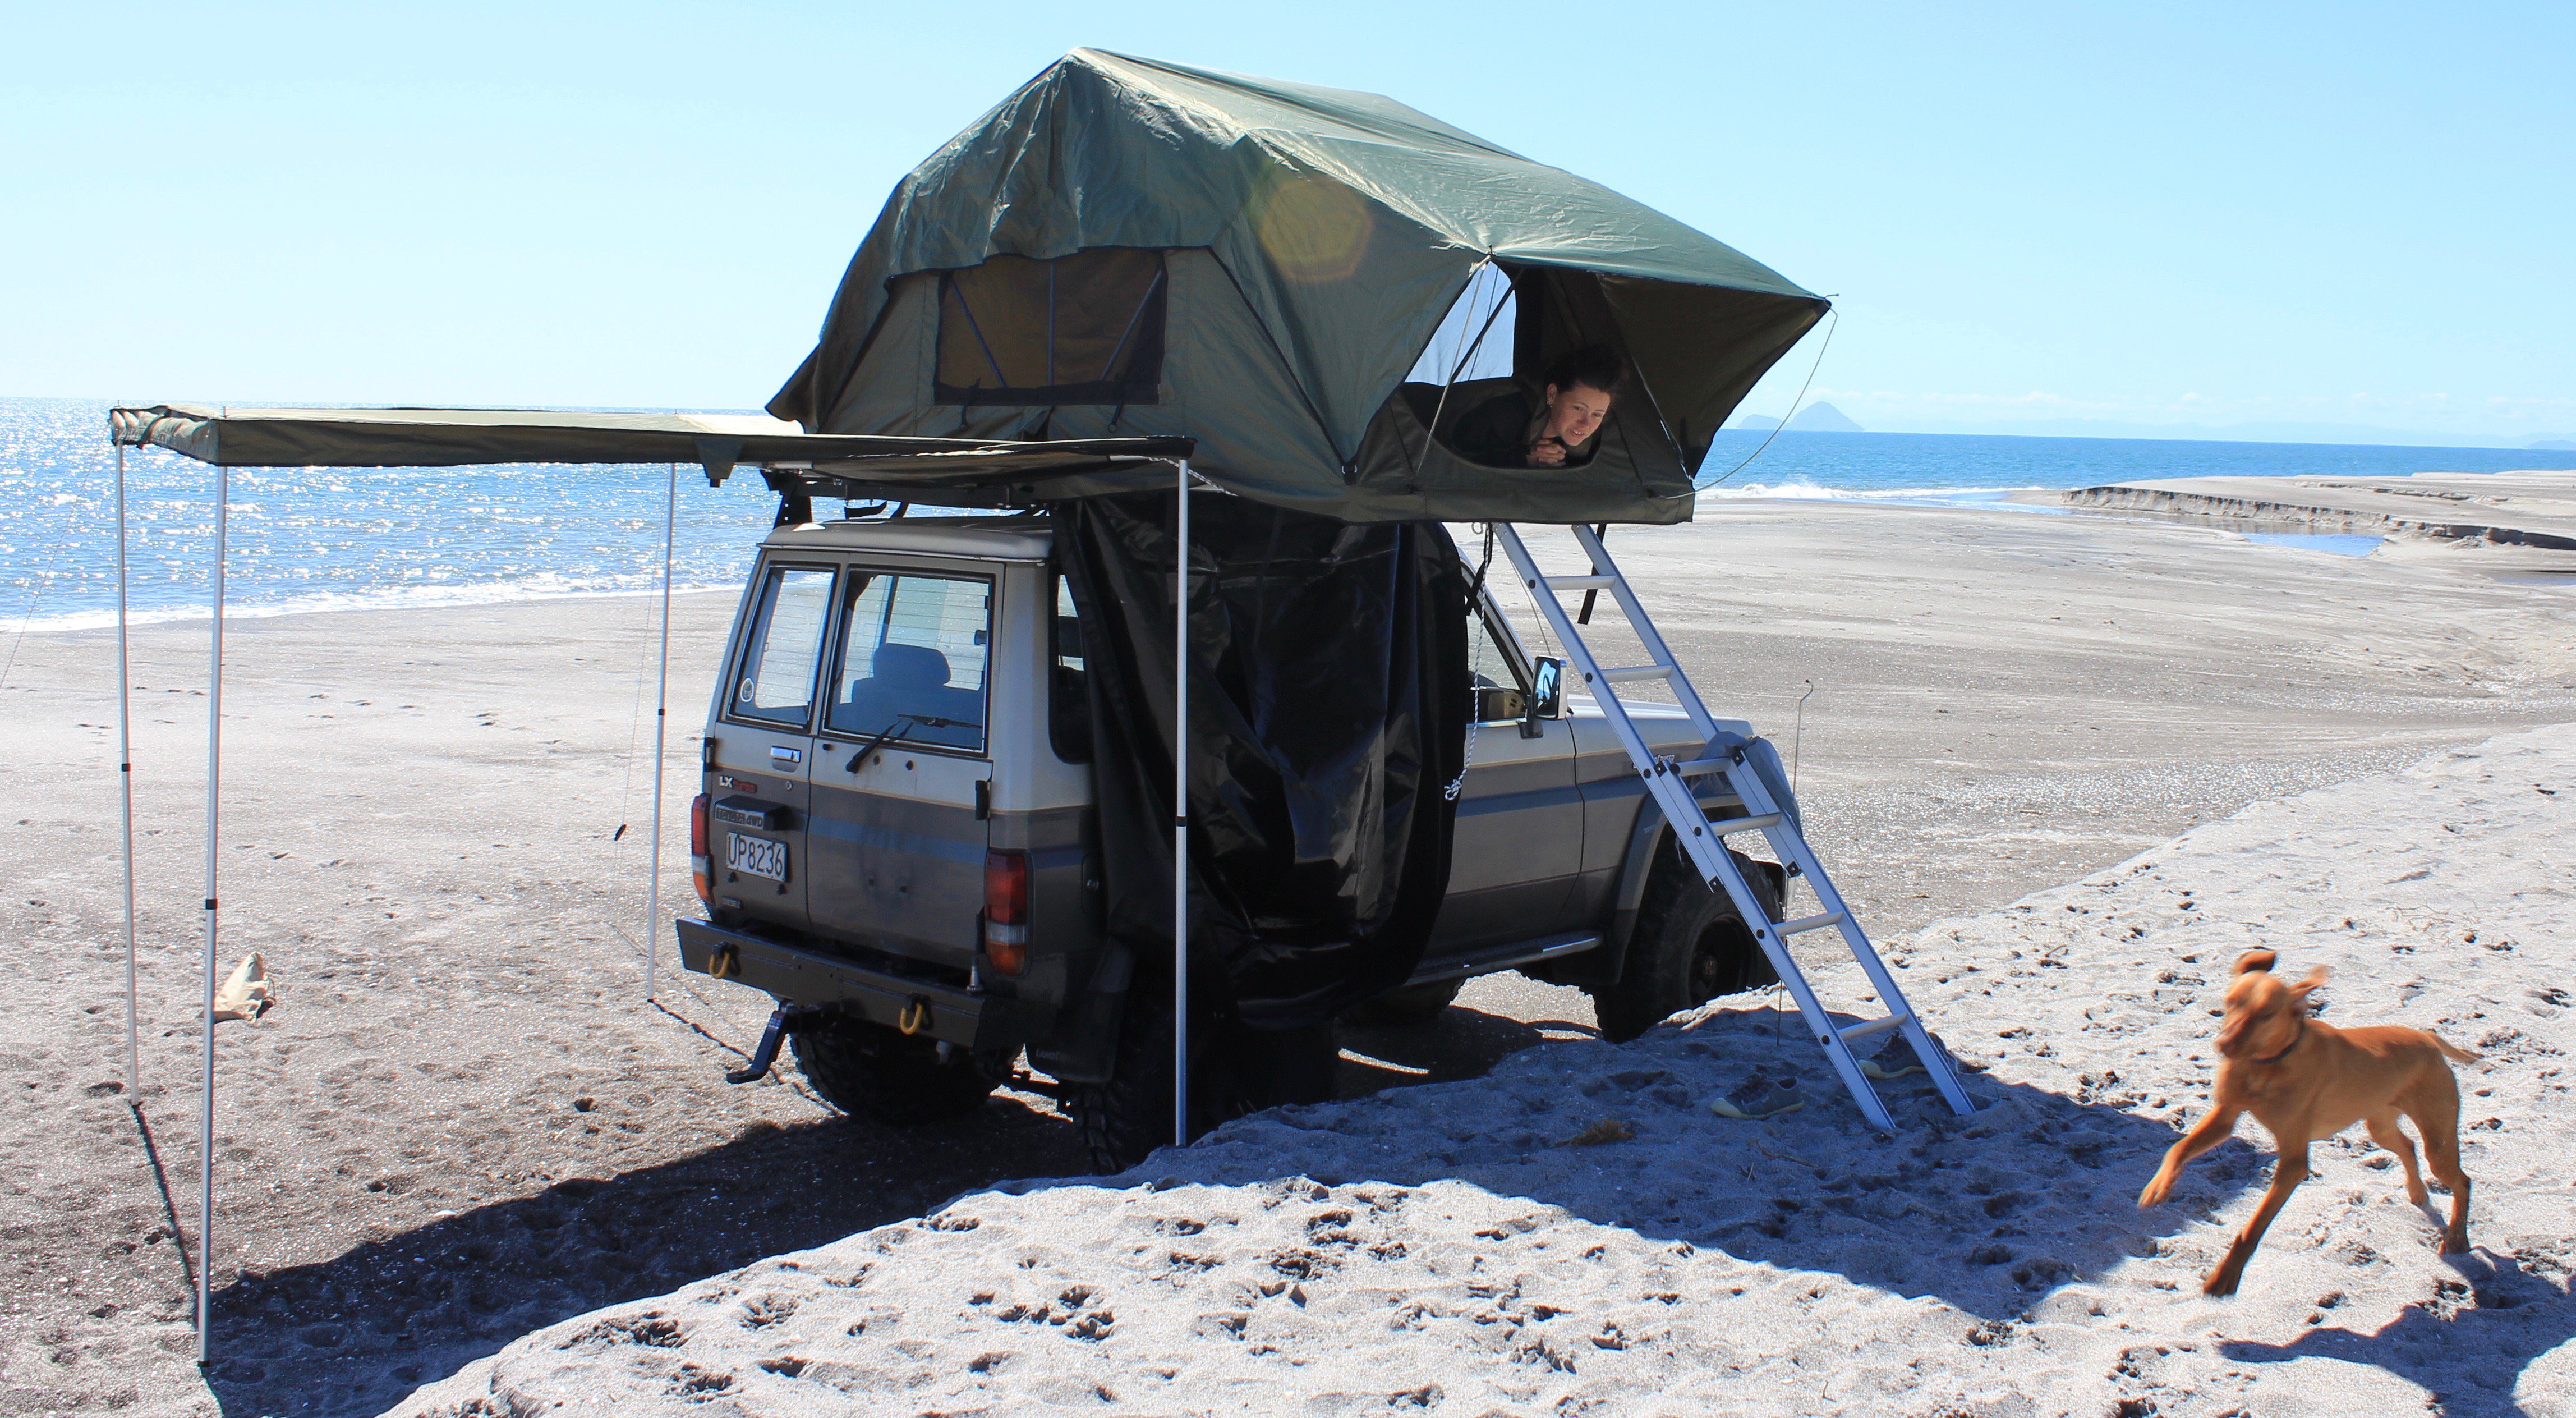
tent, wife, and spaz
2 points
-
Mmmmmm, strawberries, frozen yog, fresh WOF, and a blast on country roads!
2 points
-
Borrowed the special tool spring compressor from Mr @EURON8 to jam the springs back in after popping everything back together with (some) new bushes. I left the other upper wishbone bushes in place as they were fine really, and replaced only the lower ball joints. The tire rod ends seemed pretty new too, so left them as is also cleaned up the front calipers, just a dissemble, clean and paint without removing the brake lines. I said up there i didnt want to go too low, but then i slapped myself upside the head and did as per the sedan 5.5 coils Also found a broken connector on the dizzy to HDI wire so re soldered and heat shrunk that, and then reset the timing a bit more advanced. Seems to run much better now for both reasons. Then a test utilization to a mates place to steal some gravel for a garden project. and to settle the suspension. Doggo loves ute Pretty happy with the stance and feel of the front suspension now, about 2" lower but still supple even with the lot shorter springs and new shocks. Rear is still very stiff but went well with a load on, and the rattly noise is still present. I think it may be a bearing in the gearbox or something. also stuck a 'period' sun visor sticker i got of TradeMe for $5, i did a fucken terrible job of it in the windy dark it looks like its been there for years.2 points
-
Discussion: https://oldschool.co.nz/index.php?/topic/57479-hyperblades-kp61-racecar-beams61-discussion/ Moving over my project from the club-k forums to make it a bit more public for those interested. So it started when I brought this 1984 Toyota Starlet Racecar, I wanted something I could drive to the track, while still being safe during racing, hence the roll cage. It came with a 2L Altezza 3SGE BEAMS engine with the 6 Speed box, already in it and a really good build history from the original owner. Sale thread here has some more details: https://oldschool.co.nz/index.php?/topic/38220-fs-1981-kp61-starlet-race-car-certifed-homologated/ More to come...1 point
-
So shakedown didn’t go so well. Aside from a flat rear tyre second gear has gone in this lifan 150, I’d say it either has worn dogs or a worn selector fork, either way I’m not pulling it apart as I just don’t have the time to get it sorted and then tested to be reliable. Last thing I wanted to do was pull apart the C50 to pull engine out as it likely won’t go back together ha, but it’s just an excuse to buy another 140 really. When I got the puncture and waiting for sparkle to go grab his Ute I pretty much pulled the engine on the side of the road, finished the swap over a few beers last night, different CDIs and looms meant a bit of a re wire. yx140 now installed. For some reason the lifan 150 blew the tail light and usd port, never had that problem with the trombone, thinking of adding a battery into this to smooth it out. Another test this arvo for 50km and it’s sorted, maybe a little rich spot mid throttle on the needle but it’s liveable. Just need to replace tail light and USB port and I’m good. Gets around 60-70 km per tank so I should be good for at least 120km with the fuel on me which should just suffice1 point
-
Lifan the world.
1 point
-
4.56s will be awesome, were in my truck that also had H55F - motor was a fair bit revvier than your diesel but sounds like 4.1s ain't doing it for you so you obviously know what yer in for. Here's a couply pics of the bumpers I built for my lump, I removed the PTO as was a massive overhang and with the better approach angles found I barely needed a winch.
1 point
-
1 point
-
1 point
-
Weird that it's on the same day as their normal event1 point
-
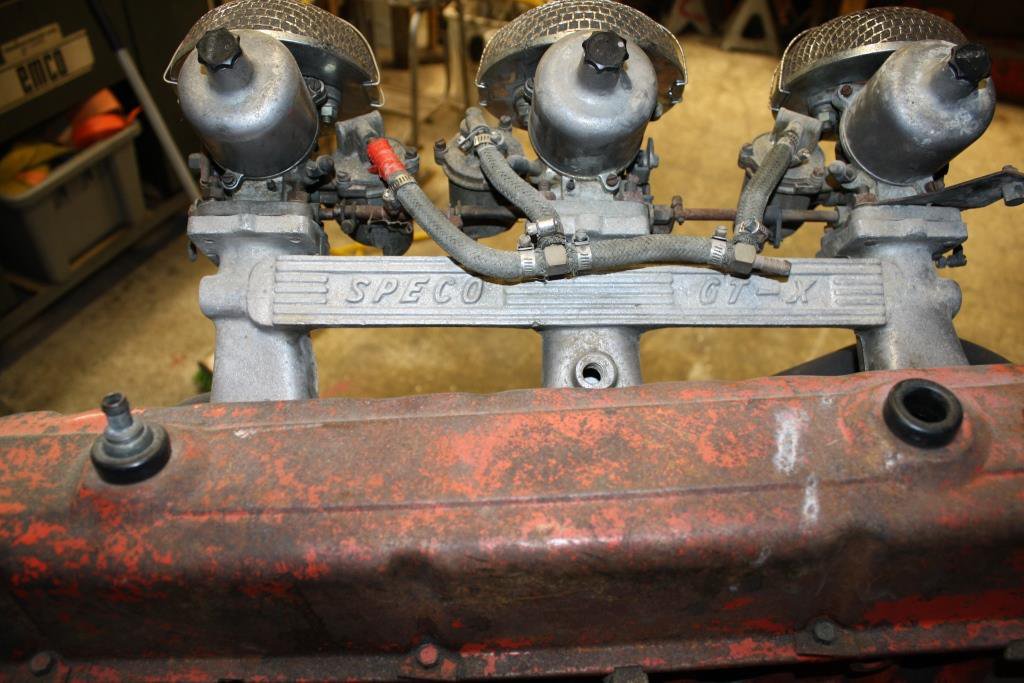
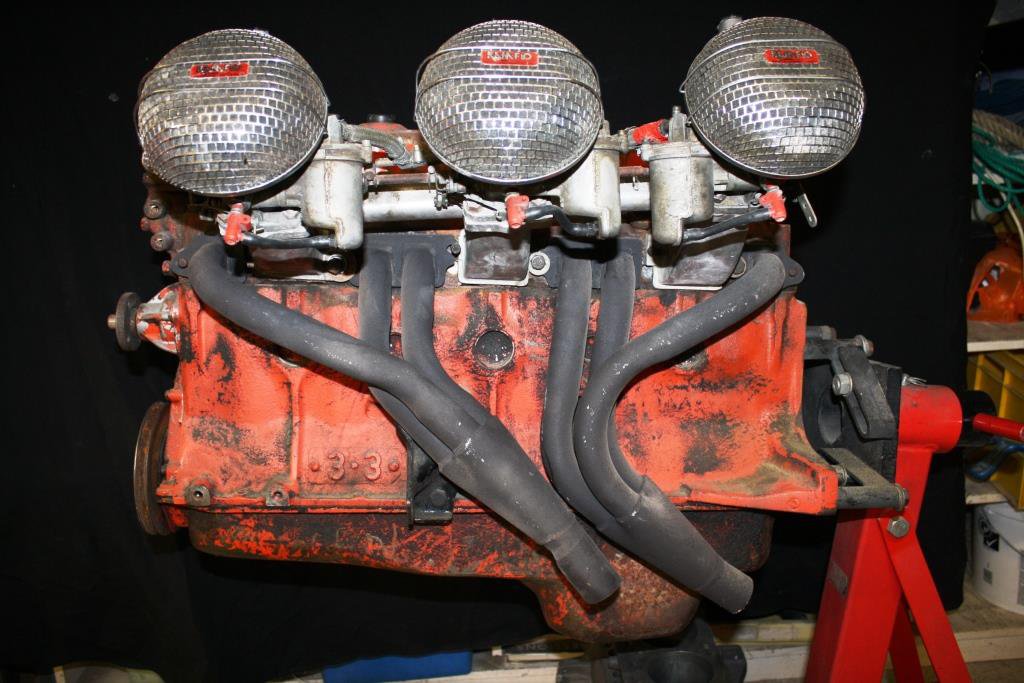
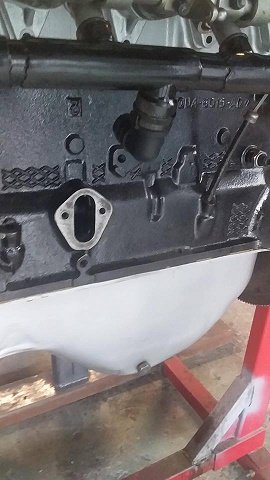
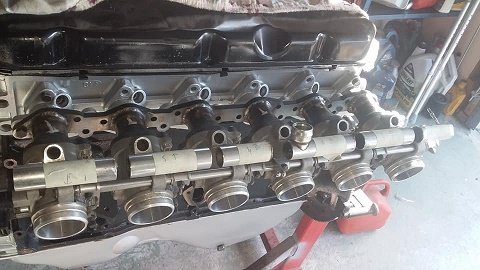
Some six months or so ago, after considerable research, (drunken chewing of the fat with our mates) and in depth self-analysis, (a Bottle of 101 Wild Turkey) both Rigamortice and myself came to the inevitable conclusion that the ideal carburation solution for the new 208ci “186 X2” had to be the period correct set of 3x 1¾ HS6 SU carbs on the vintage Speco manifold. We will however run the motor in and get the dodgy legals done with the tried and proven Weber DCD setup. (Anyone after a triple set of 40 DEOCE’s and a 9 port manifold – just ask). I did a quick dummy assembly with a spare motor for a bit of man-cave decoration.
1 point
-
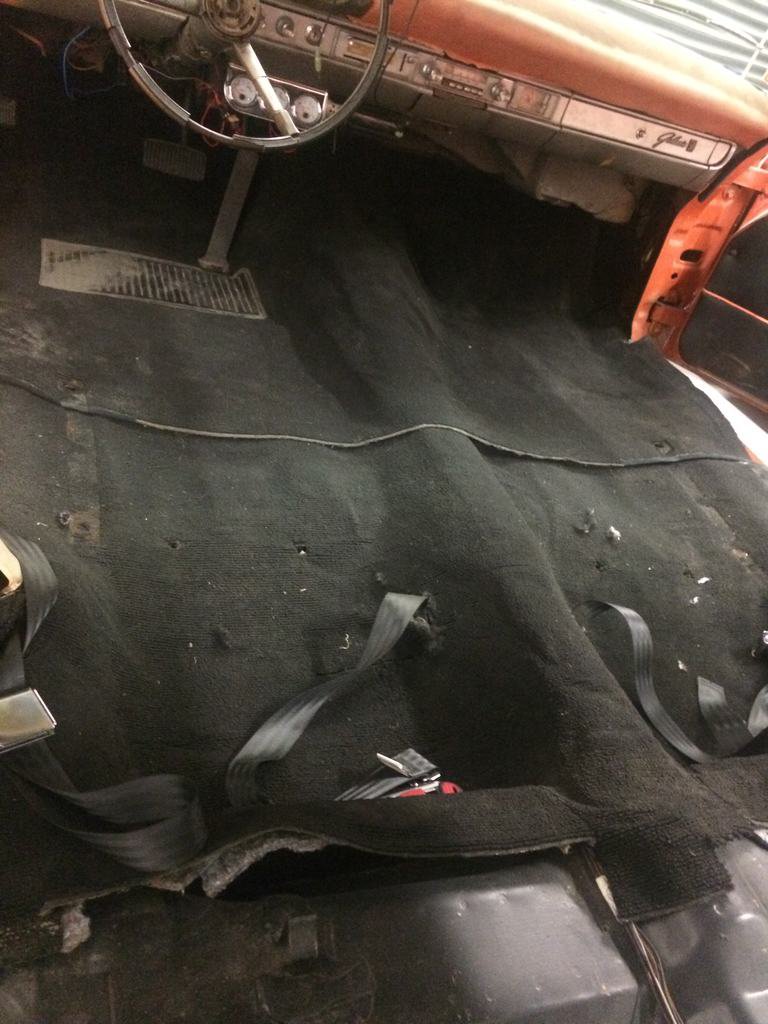
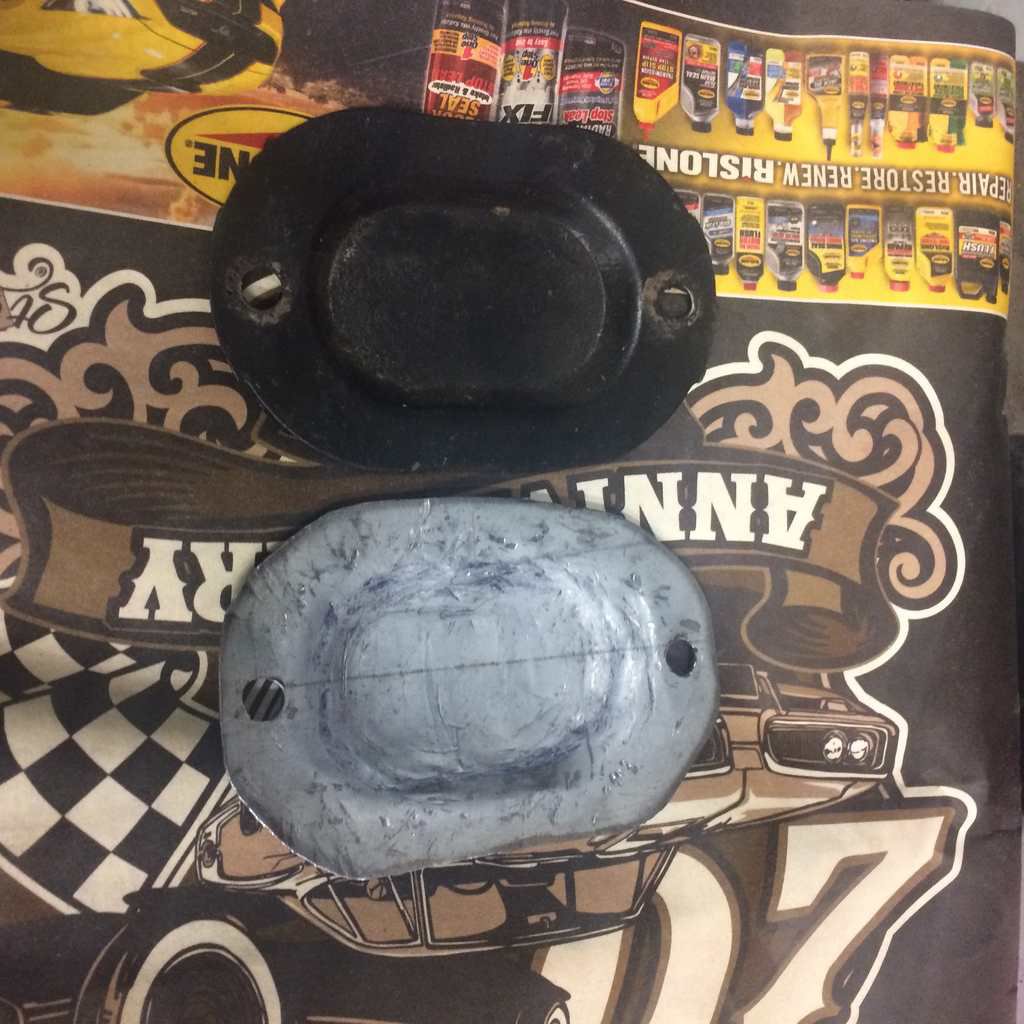
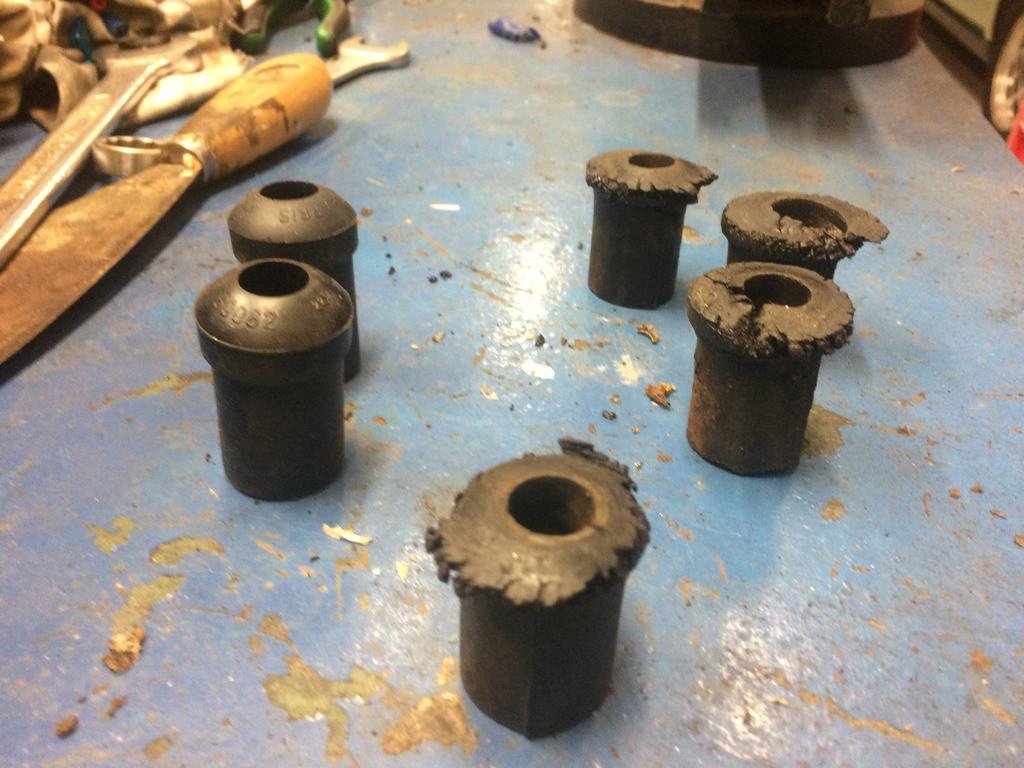
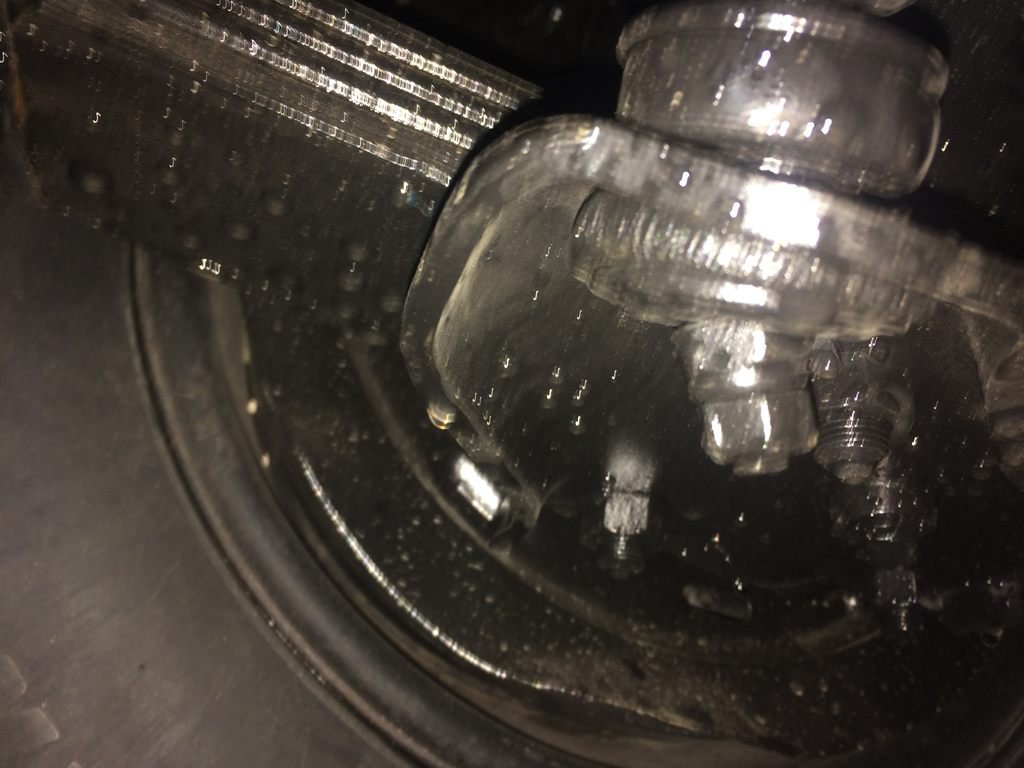
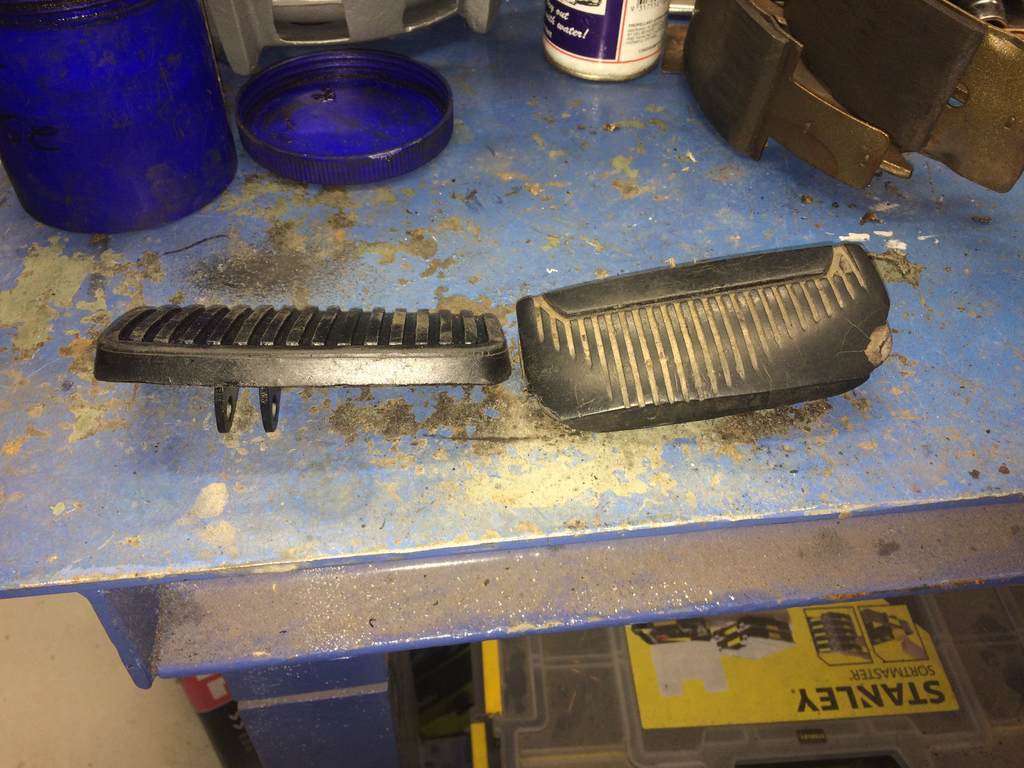
looooong overdue update. got the old girl all legal in August a week before going away on holiday last month. so with the steering joint done i did some of the other failed items which was the brake pedal rubber being worn on the edge so new one of those got put on and rear shock bottom thread bent. so out came a socket and hammer and job done and they also failed all of the rear spring bushes incl the rubber spring pads so replaced the rear shackle ones as had them in stock already but as you can see the bushes are more perished than worn due to the Arizona heat and the spring pads and front bushes on the rear springs i pulled out and showed the compliance inspector that they are cracked from age and Arizona heat. so politely showed him and told him that he doesn't really know what hes doing. Not bloody worn and as you can expect i was not impressed being a mechanic myself and them inspecting the car twice before. so lubed the bushes and spring pads and put them back in. and that fixed the rear end squeak too! took the car back and got the wof label on the window. then took a old girl home after a bit of a drive and made a floor bung and placed the carpet and other trims back in.
1 point
-
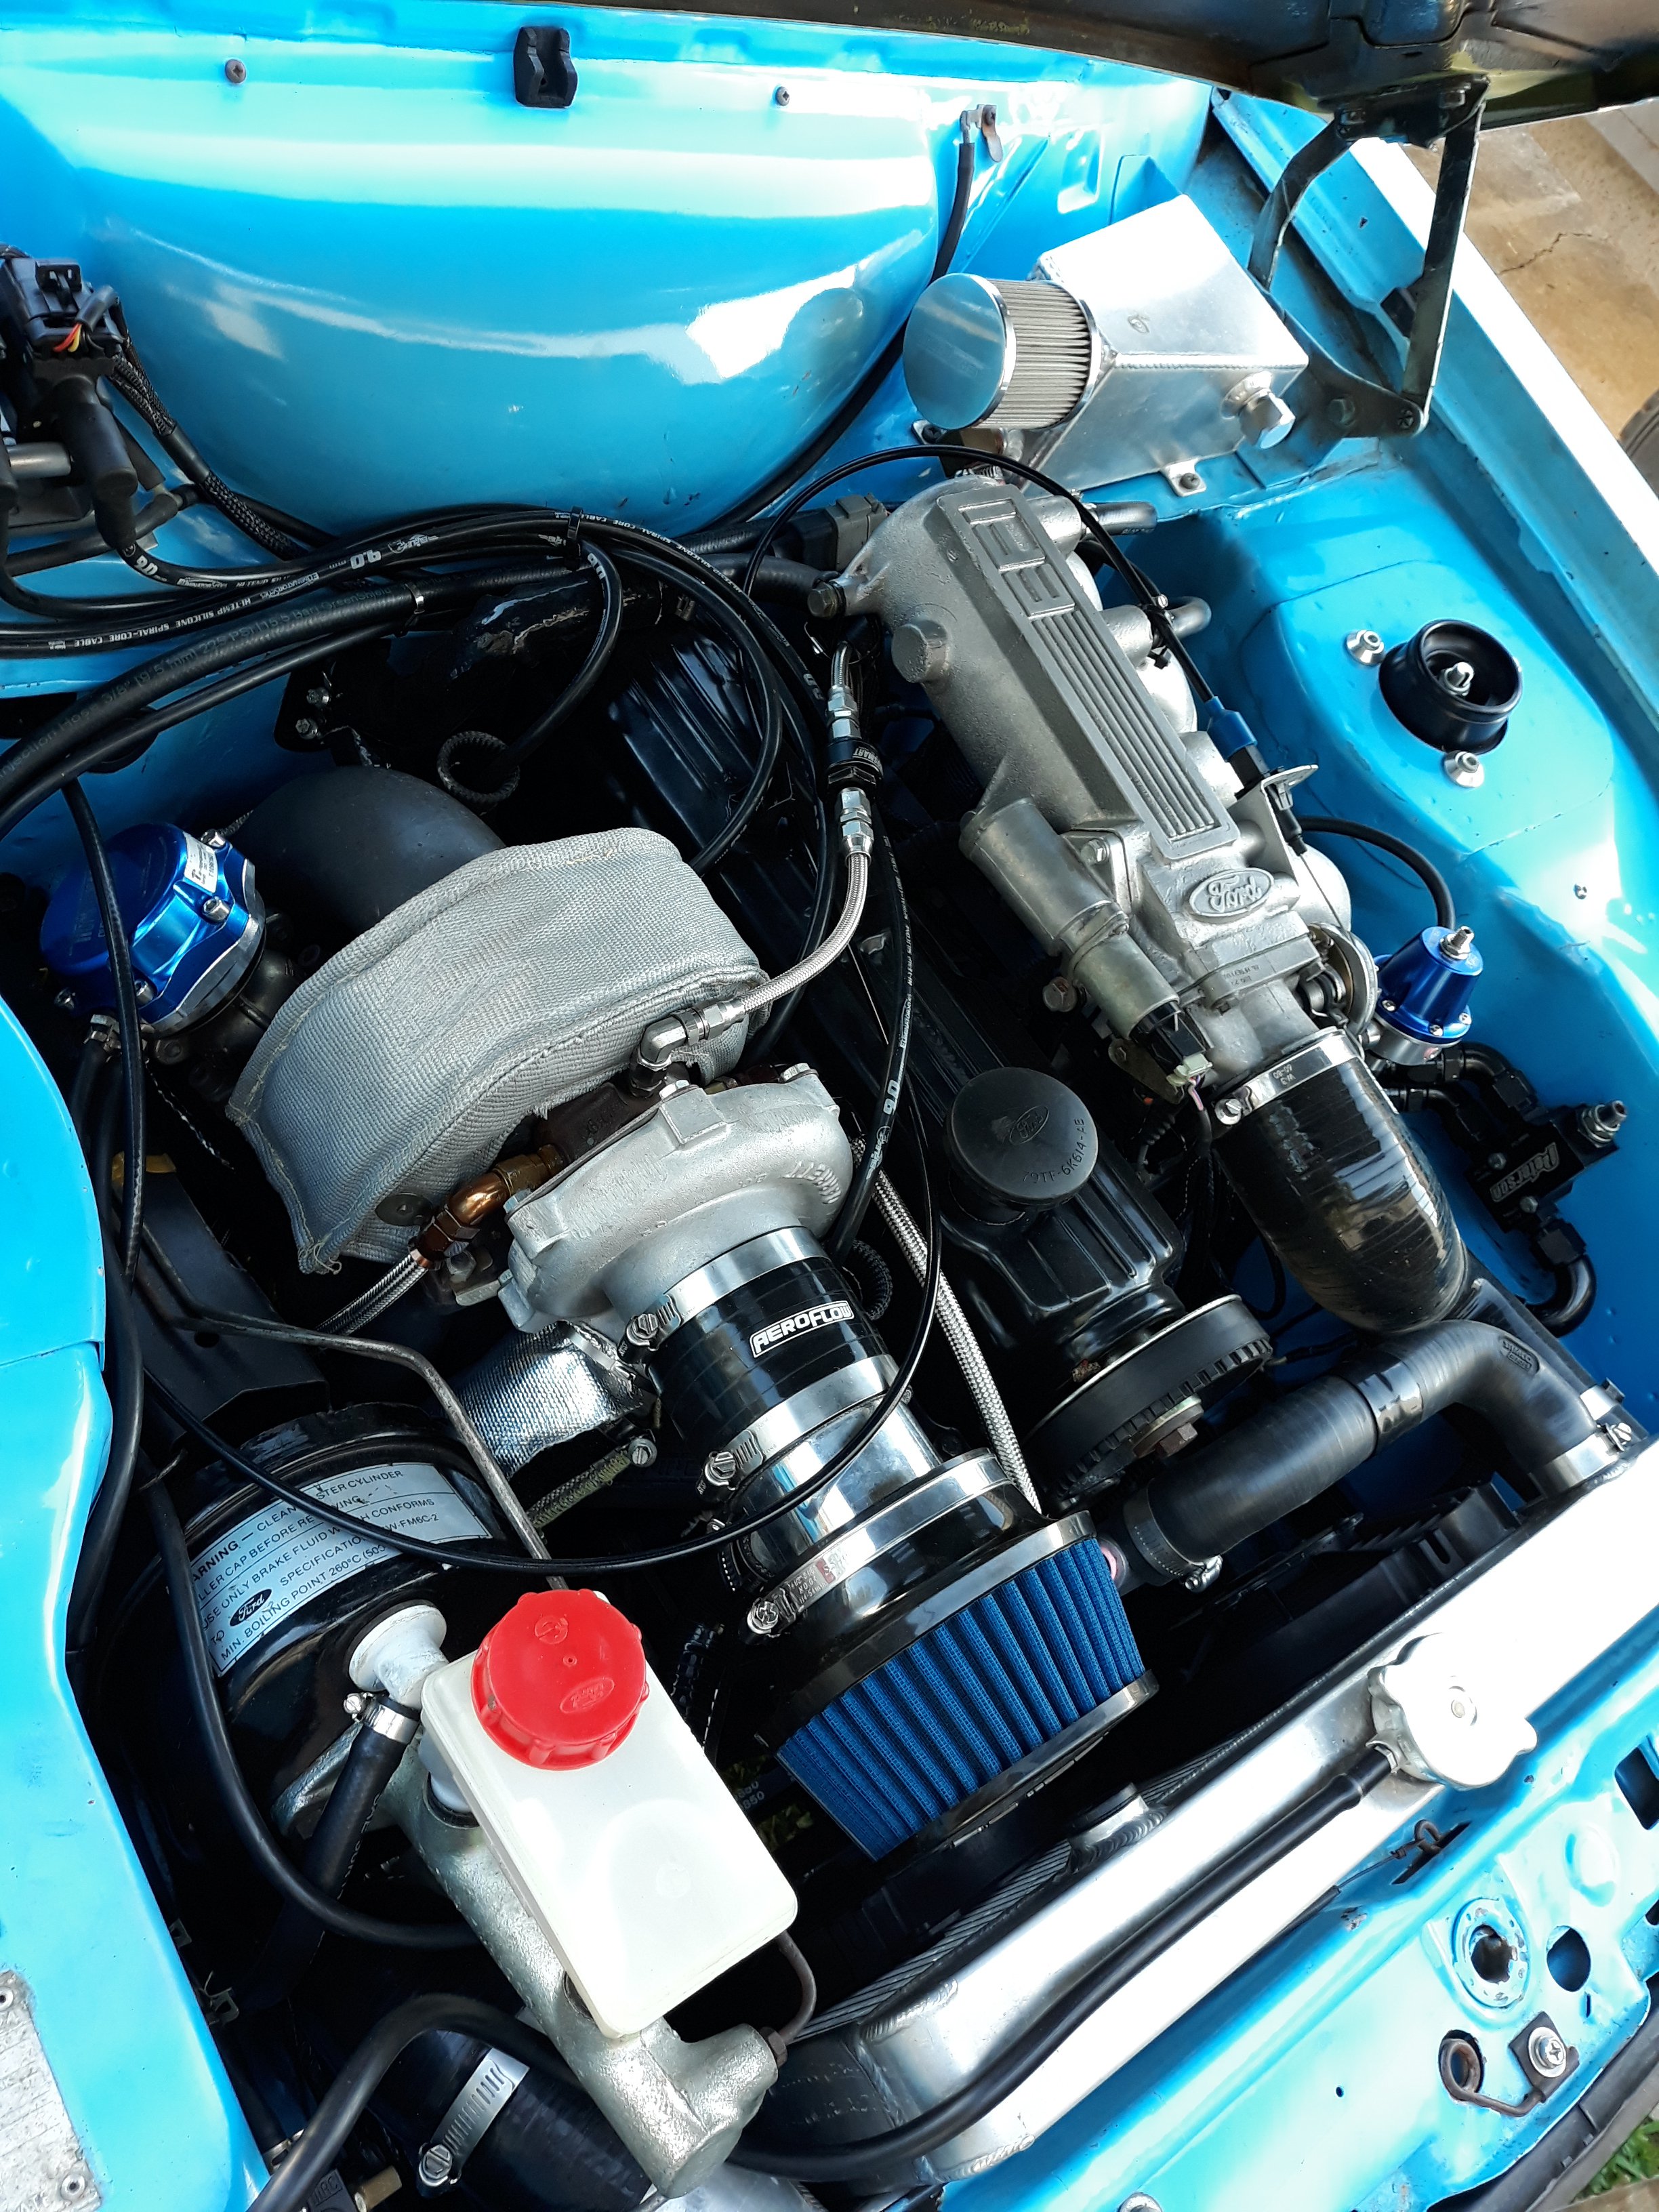
Hi guys. It's been a while since last post. The car has been performing great and I'm still getting out an about in it, mostly on weekends. There's always something on at the local track every couple of months. I really wanted to get back onto the forum after growing somewhat tired of facebook and all the crap it can add to this hobby. Anyway... as far as developing the car. I have learned that gearbox ratios are very important. The W58 I have is quite low in first and second gear and a bit of a gap to third. Typical of road ratios. Well, a 600hp XR6T i've not been able to beat at roll racing finally fell behind me the last time out because I rolled on in 3rd instead of 2nd. 3rd has much longer legs and I didn't lose the speed changing from 2nd to third. So I looked into close ratio gear sets for the W58 and turns out they are available. At a cost of around $4500. Needless to say, the CR gearbox can wait. But gee it would make a difference. Also, the temptation to add more power has gotten the better of me. I have bought a used HKS GT2835R-56T , it's a Garrett GT3071R with a back cut rear wheel so it fits in the T25 exhaust housing. Compressor wheel will go from 47mm-60mm 62 trim, to 53.1mm-71mm 56 trim and more importantly the turbine, from 54mm-47mm 76 trim to 56mm-53mm 90 trim. I'm aiming to add around 30 or 40hp so 330~340hp at the wheels. My current GT2860RS is pretty much out of puff @ 300whp. At first I was going to fit a 67mm GTX billet wheel, effectively turning it into a GTX 2867R. It could probably make that extra power but nowhere near as efficiently as the GT2835R-56T. The larger turbine is where the benefits will come from. A larger set of Siemens Deka injectors will also be fitted. Jumping from 60lb (630cc) to 80lb (840cc) I took it to the drags a few months ago and it went 12.75 @ 113 mph (2sec 60ft) . Hoping with the new turbo and tune to crack into high 11's. If not I will just live with it because any more power will result in problems like gearbox failure, clutch failure, cracked block etc etc. So here's a pic of the car launching when I ran the 12 with 205 60 13 rear tyres. I was only able to achieve low 13's with 185 60 13 tyres, as soon as the 205's went on it was into the 12's. I might put in some 3.45 diff gears with the 185 tyres which would work out about the same as 205's and 3.9. Cheers
1 point
-
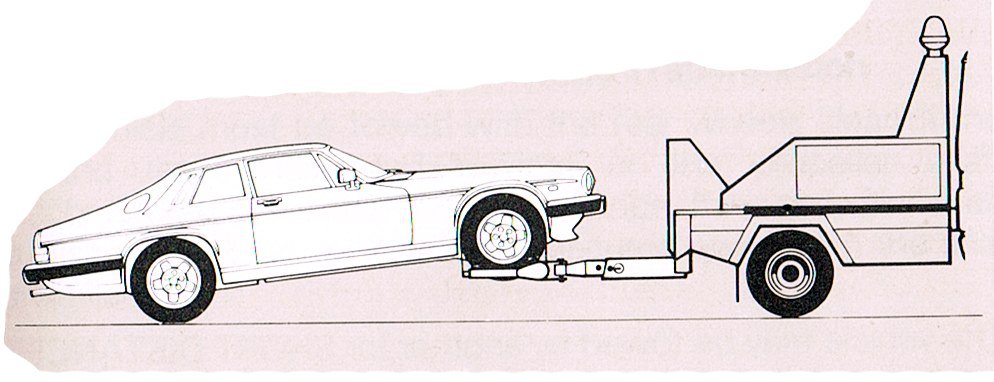
My Jag has finally been returned to me! The bill was very scary , because.... I ended up having to cover the funeral expenses of the mechanics who decided to try their luck in the next life. And then the rest of them went on trauma counselling / bereavement leave*, so the job took two months... I listened to the survivors tell their tale. Every nut and joint put up a fight and had to be soaked overnight, the whole rear subframe ended up coming out, and it was all because someone had apparently installed the handbrake pads upside down! This allowed the pads to move such that the backing plates were grinding away at the discs and starting to chip bits off. Jaguar changed the rear suspension for the last four years of XJS production, moving the rear discs outboard. Can't think why. After having not exactly the kindest introduction to the costs of old British luxury grand tourer ownership, I've made myself a new t-shirt design out of owners manual images: Still, I can't say I didn't warn me. And now I have nice brakes, a new WOF and reg and my 'zorst volume is turned up! What does an AJ6 ('the other Jaguar engine') sound like with half its mufflers removed? Not as good as a garbage Rover straight six ironically, but stay tuned! * Not really. Nobody died. Geez.
1 point
-
Crikey, i've been slack I stripped out the inside of the bumper with the wire wheel, used a rust cover primer and then slapped some black gloss on the inside. it was in good shape which was good The donkey went in, slowly. This is why you need to check your fuel sensor.... NOS vs OG Everything inside the bay now After being a retard and plugging one plug in the wrong slot and trying to spend an hour wondering why all my lights were being weird and the wrong ones flickered when I put the indicators on... it's all hunkey dorey! inside dust prevention Base laid down with Shiny! put the roof gutter chrome on For someones first time and only a rough clue of what is going on, I think this looks bloody mint *** I decided that I didn't like the early tail lights with the full chrome circle so got to swapping over the loom to the later type lights. Once I track down where my center trim has ended up I shall mount that too, but I think that looks much better After days of trying to get these wobbly doors right, I got them to the "best I can do" point, based and cleared them and they've come out pretty good I think. will assemble this weekend! Will put the potato phone-cam away next weekend and take some decent photos of the old girl. Build discussion:1 point
-
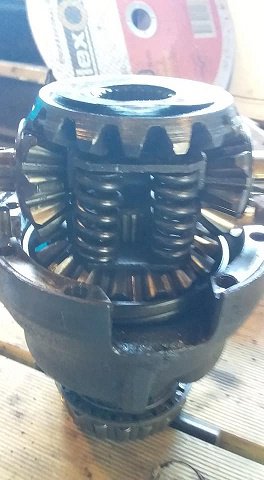
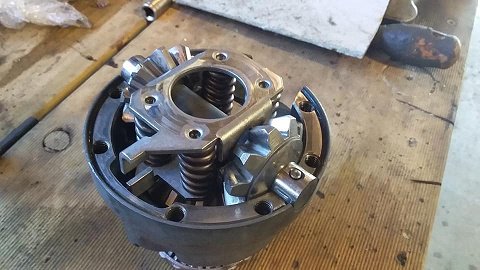
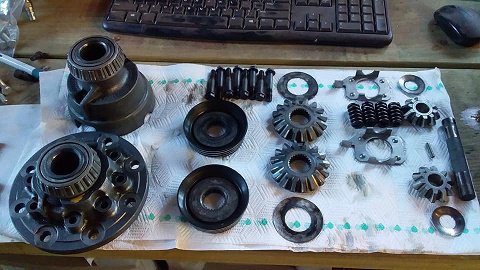
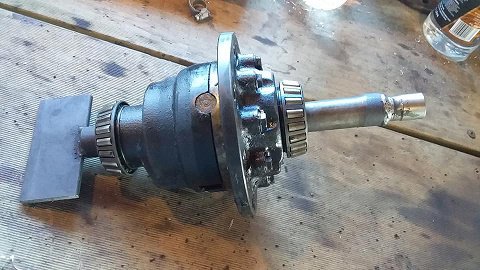
huge thats to Pete (valiant) for a 25 spline LSD carrier and the tools he made to check the breakaway. and it ends up being 100 ft = 135.5nm so thats pretty good led me to think it may have been shimmed . Pete also said it could be dirt /rust. i decided to pull it apart and soak it for a few days but it turns out its pretty blood clean so i cleaned it up anyway and it turns out it is shimmed. i rebuilt it with some LSD oil i couldn't find the torque specs for the diff ( @RUNAMUCK has some)but they didnt feel to tight taking them apart so i just torqued them down to 30ftlbs. (will do for now as its only getting wrapped in cling film and put on the shelf till the complete diff is ready to be put together.) i did recheck the breakaway torque again and it was spot on 100 ft again so that's awesome
1 point
-
Scrubbed it up today! Came up pretty damn well I think. Still stinks from Saturday night when we were sitting in it smoking cigars though hahahahaha. And I’m super happy it came with the complete factory toolkit in the bag!1 point
-
@Leebo3 You should schedule some business in Wellington for this day, Come and service our knobs.1 point
-
The throttle linkage is very shit, i think its from the (131?) donor car the twin cam came from and has been hacked in, rubs on the hood latch and rattles a lot. So very shit. Had to cut it to get it out. I was happy to make it inoperable. $18 Pile of likely looking bits from pickapart, mostly from a Toyota AE82 hatch Firewall cable mount just tucked in behind the loom hole, worked out perfect Had to bend the pedal a bit to suit the curve of the tyre well/firewall, and still could do with a bit of tweaking to get it sitting just right but stoked. Carb end worked out well too but will probably need to remake the cable mount a bit stiffer sooner rather than later but it got dark/no photos. Test drive tomorrow,1 point
-
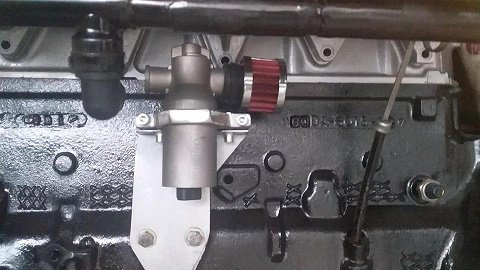
so its about 1 hose 150mm long away from having a bmw idle air control system ready to go on a old school 250 xflow. the bmw IACV (same on e use with these ITBs on the m3) using my trusty grinder and drill i made some brackets (about as engineering as i get ) found a place to mount it all and cover up the old fuel pump hole at the same time. welded the IACV pipe and painted it black and all in place just got to get a hose
1 point
-
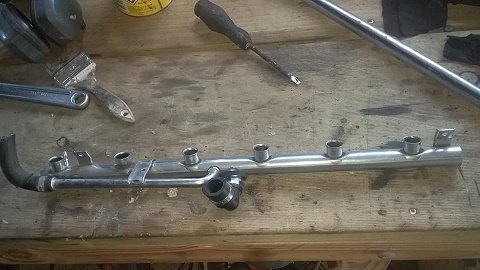
started playing with the factory bmw idle air control system today .. so i flipped the ITBs upside down to make life easier to work on. (normally in the bmw they would have run this way but i wanted them all on the underside to keep it cleaner) and grabbed the factory bar for the idle air control and cut it up as the ITBs have been made to match the xflow inlets. i also removed a few things not needed and just keep the factory inlet.....and i swapped the ends over to keep it cleaner. i had some stainless that was the same size diameter as the inside of the rail so perfect.....cut them up and slid them into the tubes as far as i can for strength flipped it back to where it should be and its perfect ...just need to weld them up.
1 point
-
one of the pioneer box speakers blew , possibly because of the aliexpress head deck, so swapped the woofers with the 4" sonys that where hanging out the door cards when i got the truck. they were not exactly one of pioneers best efforts so nothing of value really lost, the mid range 'speaker' is just a plastic moulding. New JVC mechless head unit delivered for <$90, sounds pretty good now, i reckon at least 3x better than the $30 aliexpress special. This is what success looks like. Yes, that bed is coming into my house, not going to the dump.1 point
-
According to the FSM, spring details Wishbones inclusing spares from a 125 sedan Judith crushing the old bushings out TOP 125 (post vinegar bath) and BOTTOM 125P lower wishbones. Grabbed one from the spares to swap out the bent one. They are the same length but away bar attachment is quite different (125p has a big square hole for drop link vs 125 has 2 holes for a u-bolt), so rather than cutting the other one, i heated the bent one with a propane torch and smashed it with the sledge and now its not quite as bent. that went in the vinegar bath for a few hours Wow! - vinegar bath for 2 days + water blasted. Clean one was worse then the still rusty one when it went in. Vinegar seems to get under the rust and it just blasts off like dirt. Recommended! 8l of vinegar was $14 Welded up the engine mounts on the cross member - they were not really loose as had i thought, but this should stiffen them up anyway Coat of rust converter then primered pretty sure none of this was the source of the noise, but there were a few little things that have been sorted now or ticked off the mental 'possibilities' list, and the front end will be tidy and tight when i put it back together with mostly new parts over the next week or so.1 point
-
Some of my Ebay stuff has started arriving too, This sweet (english) factory manual (most of the engine pictures are from the Fiat 1300/1500 manual and the body stuff from the 125), it is however missing any electrical diagrams, which is the main thing i actually wanted And a 1:43 model. The canopy and pizza cutters didnt last long Weirdly the number plate is almost an exact match, only 1 character is not shared.1 point
-
Then today at work we were all sitting around laughing about what the hell id bought and I thought I'd see if it was seized or not, didn't have very high hopes, but, it turned pretty freely, stoked! Then the obvious next step was to see if it started, cleaned up the plugs and points and hooked up a Jerry can to the fuel pump and it took a few tries but it eventually fired into life, soon after I had a gander and found someone had fucked with the throttle linkages and they were all round the wrong way and pointing in all directions so hooked them back up to what looked to be right and then it actually got off idle! Been thrashing it round the yard after work this evening. Shit it's a hoot to drive and runs so damn well too!! Have a video or 2.1 point


-(ZF-9942-13940-1-001).jpg.4db3eaf210c1f16d2aae8ed5f17d8b11.jpg)


This leaderboard is set to Auckland/GMT+12:00