
Leaderboard


Popular Content
Showing content with the highest reputation on 07/02/22 in all areas
-
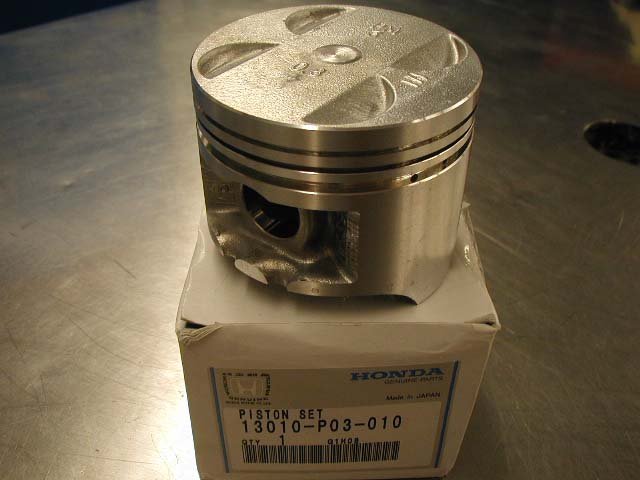
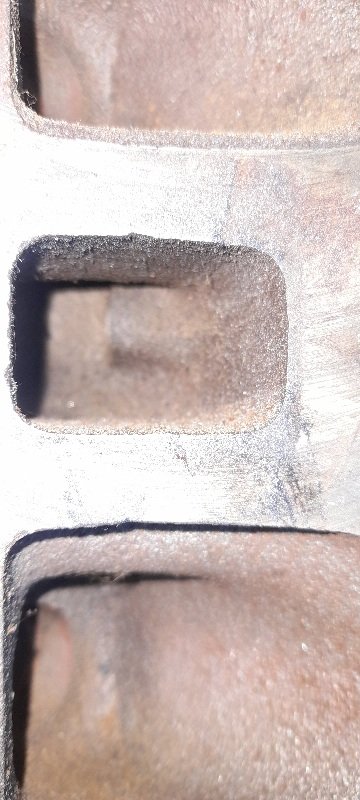
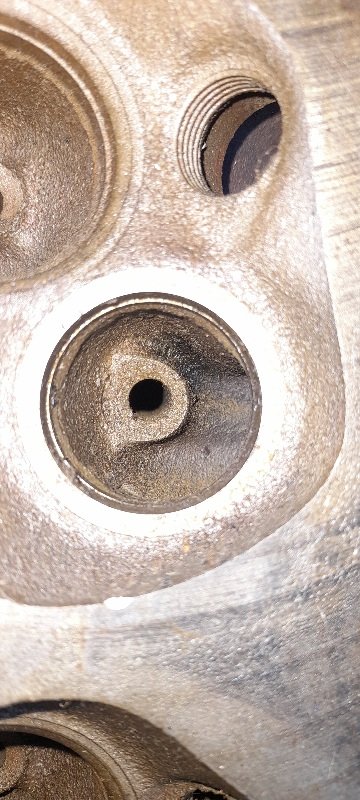
Thanks to everyone that pitched in some bucks for a new motor! I closed the page after there was enough to buy one. So thanks an incredible amount. Will have the money through some time next month, so will buy a motor when I can. Hopefully I wont let you all down somehow. I've been doing a bit more nerding with the piston/rod situation. I've been thinking that maybe one day I might be able to CNC a piston from billet, so drew one up with all of the important dimensions as per a standard 1NZ piston. I've made it so that all of the internal piston geometry has no overhangs that you couldnt machine from a vertical tool head. So it looks like it would be possible to machine this in 4 main operations. But I also have absolutely no bloody clue how much extra complication there is in real life to do this. However while doing this, it got me more thinking about how universal pistons and rods potentially are. The only things about a rod that need to be correct are the big end diameter matching your crank, the pin hole matching the piston, and the overall length matching the piston and rod's combined height to top of the block. So the main things I've needed to look for are: 43mm big end, 18mm piston pin, 140.9mm rod length if using standard pistons. The 1NZ has quite a long rod, so although there are some other Toyota engines with a 43mm big end and 18mm pin (4EFTE) they have much shorter rods. Around 130mm or there abouts. Early 4AGE have a 43mm big end as well, but also shorter rods and I think they had a 20mm pin. There were some non Toyota engines that had a 43/18 combo, but rods too short. Since I'm potentially looking to use a bike piston which has a lower compression height (center of the pin to top of piston) I need to find a rod that's a little longer than 140.9mm to make up the difference. The GSX1000R pistons look really nice and light, and they're cheap and normally do 11,000rpm. Buuuutttt the piston top to pin distance is 4.16mm shorter than 1NZ pistons. So to run those with no other changes I'd need a rod around 145mm long. However, despite a caffinated internet binge until 2am. No luck. The only rods that are longer than 1NZ with the correct sized big end that I've found are from a Honda L15A motor. Which is the 1500cc engine out of the Jazz etc. These motors have a smaller bore and an even longer stroke, and have a 149mm rod. (Wow!) and a matching 43mm big end and 18mm pin. MaxSpeeding makes rods for these motors as well. The problem with a 149mm rod is that even with the shorter bike pistons they would stick out the top of the block by about 4mm which is too much to be able to machine off the top safely. However this rod might work for a 2NZ crank in a 1NZ block setup. For some mega revs. The long rod setup, for a 1NZ piston needs a rod which is 152mm long. So that's 3mm difference than what I get with the L15 rod - Meaning if I can find a piston with 3mm larger compression height, it would be bang on. 1NZ compression height is 27.6mm D16 Honda motor is 29.5mm 4EF(T)E is 29.9mm D15B honda 30.7mm So a 1NZ block, 2NZ crank, L15 rod, and a D15 piston would be 0.1mm taller than the original 1NZ piston deck height. Hah! These pistons have a flat top on them, so still might end up with a good compression ratio. So this has been a fairly pointless exercise in terms of finding any better pistons or rods for the 1500 setup. If pistons want to keep flying apart I'll just have to save up some bucks for forged 1NZ pistons. However it would be interesting if this 1300 combo could be chucked together for cheap-ish.
 16 points
 -
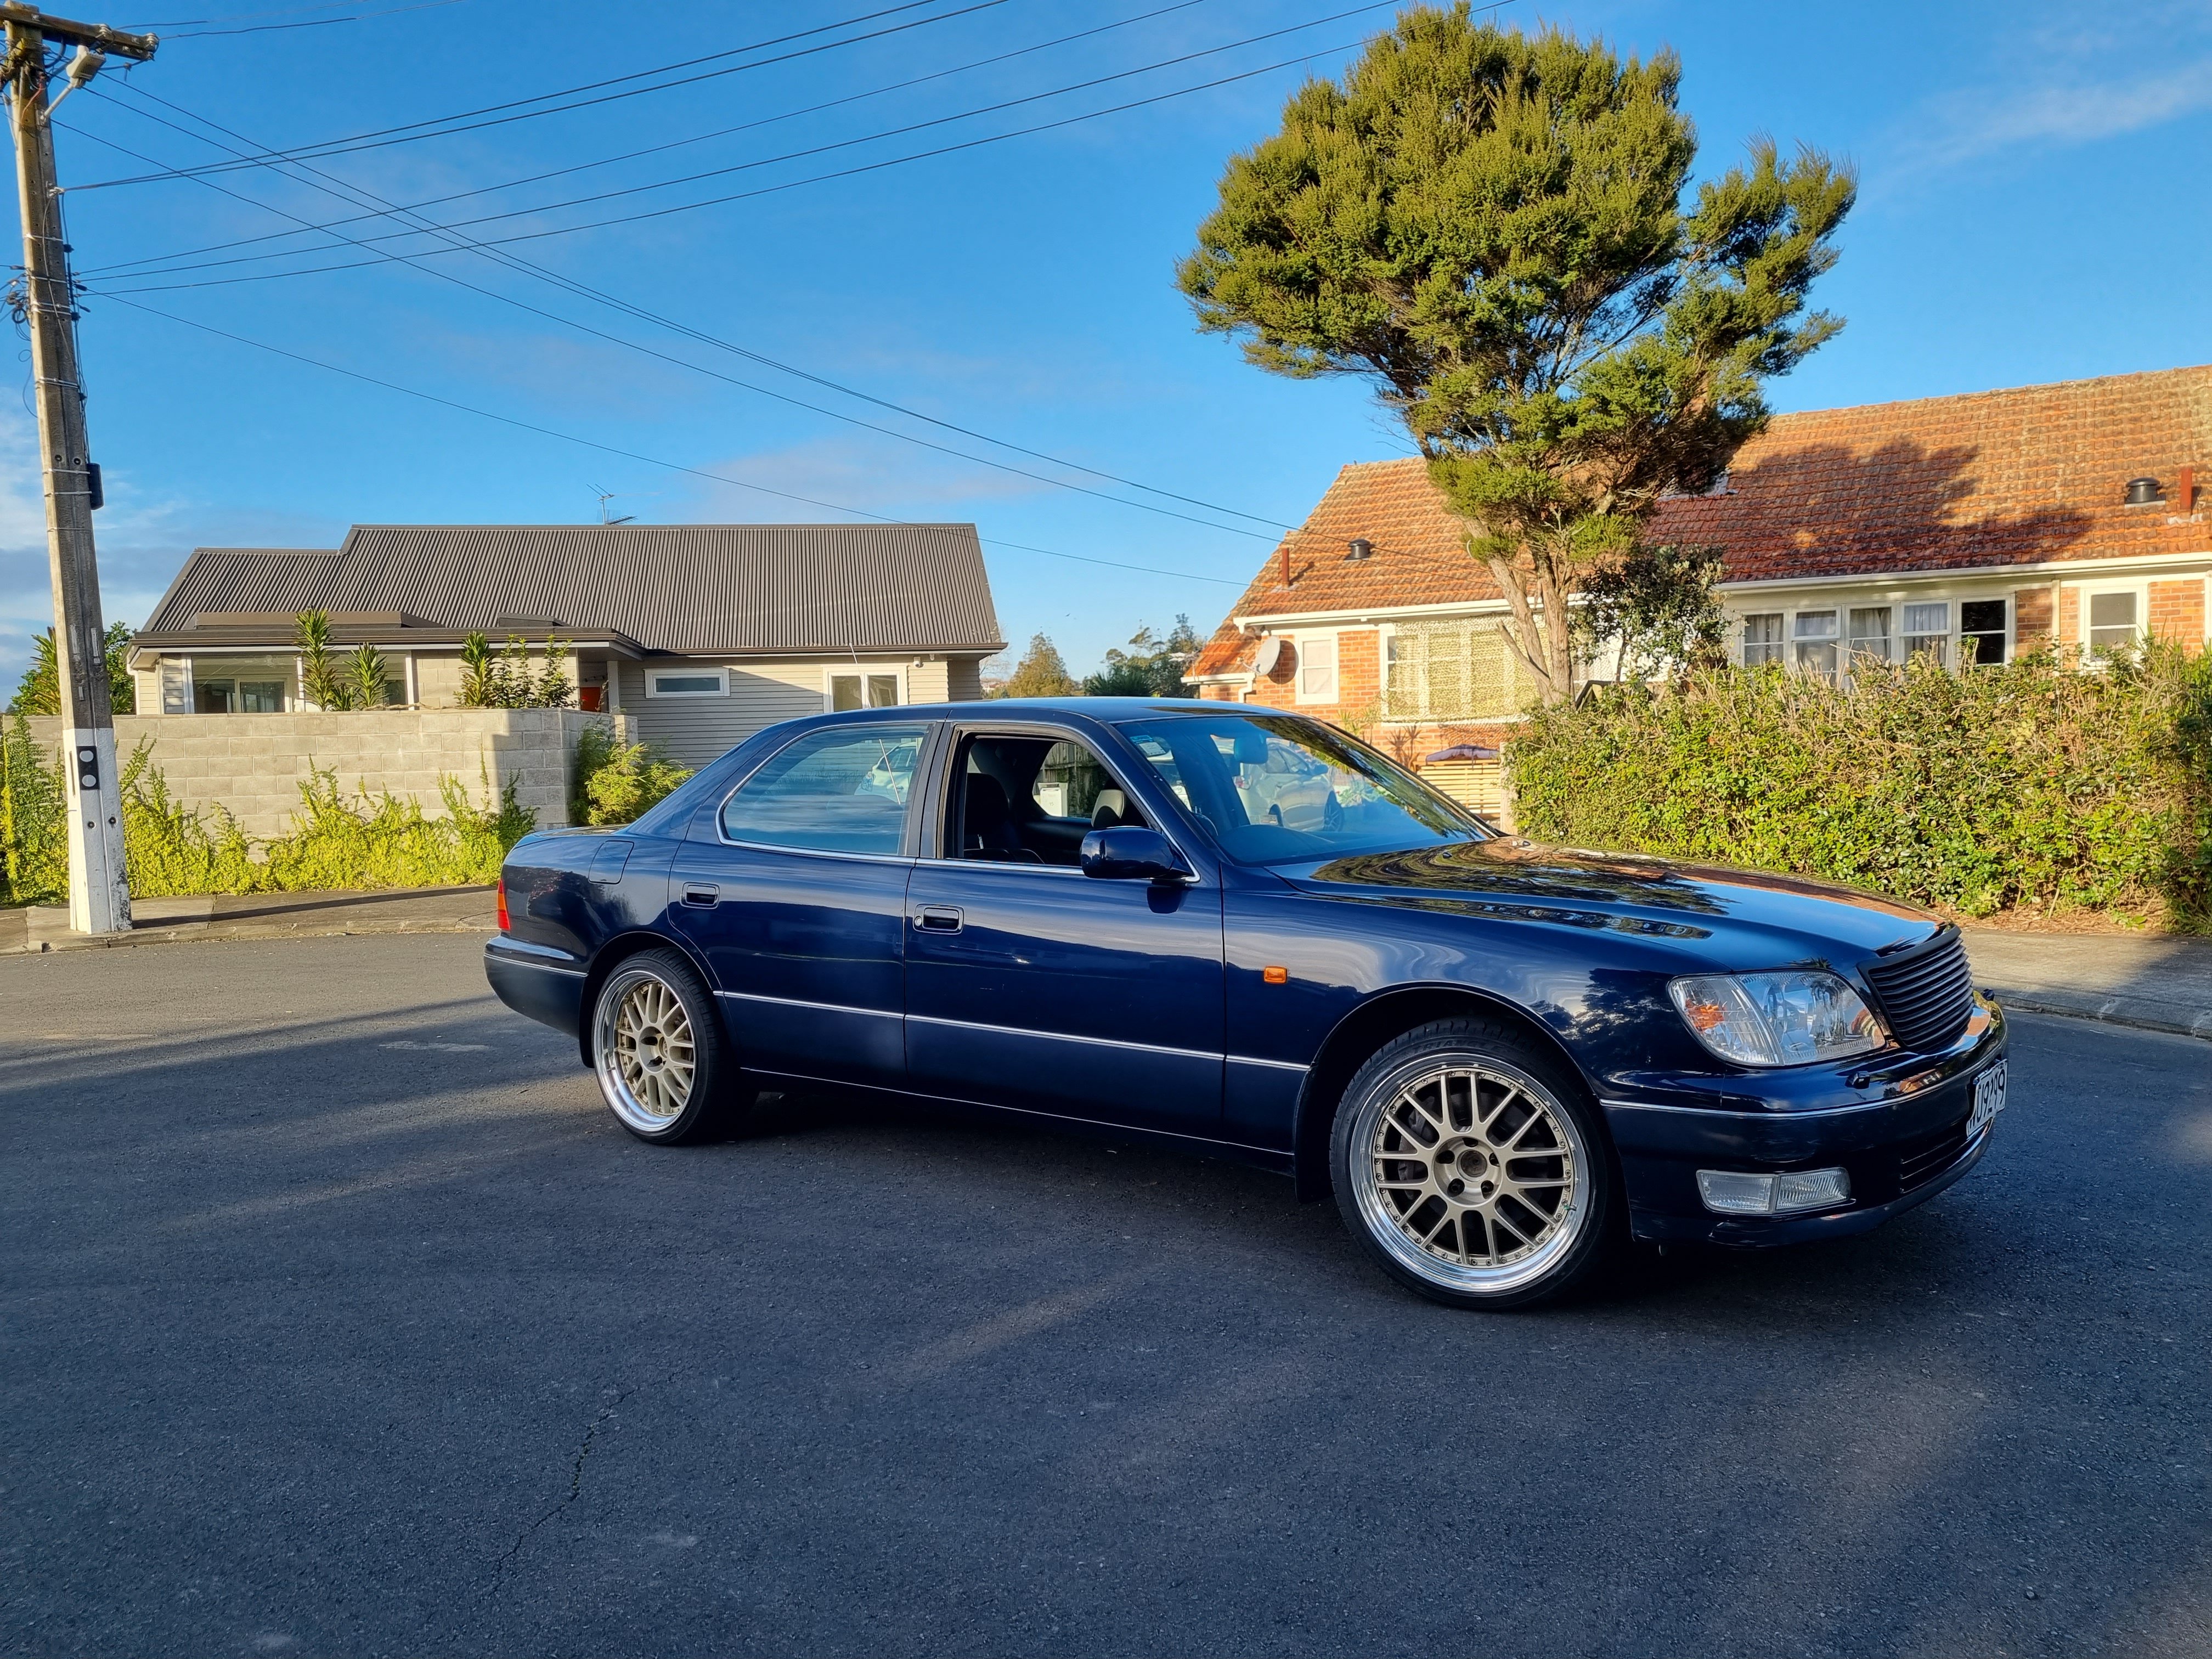
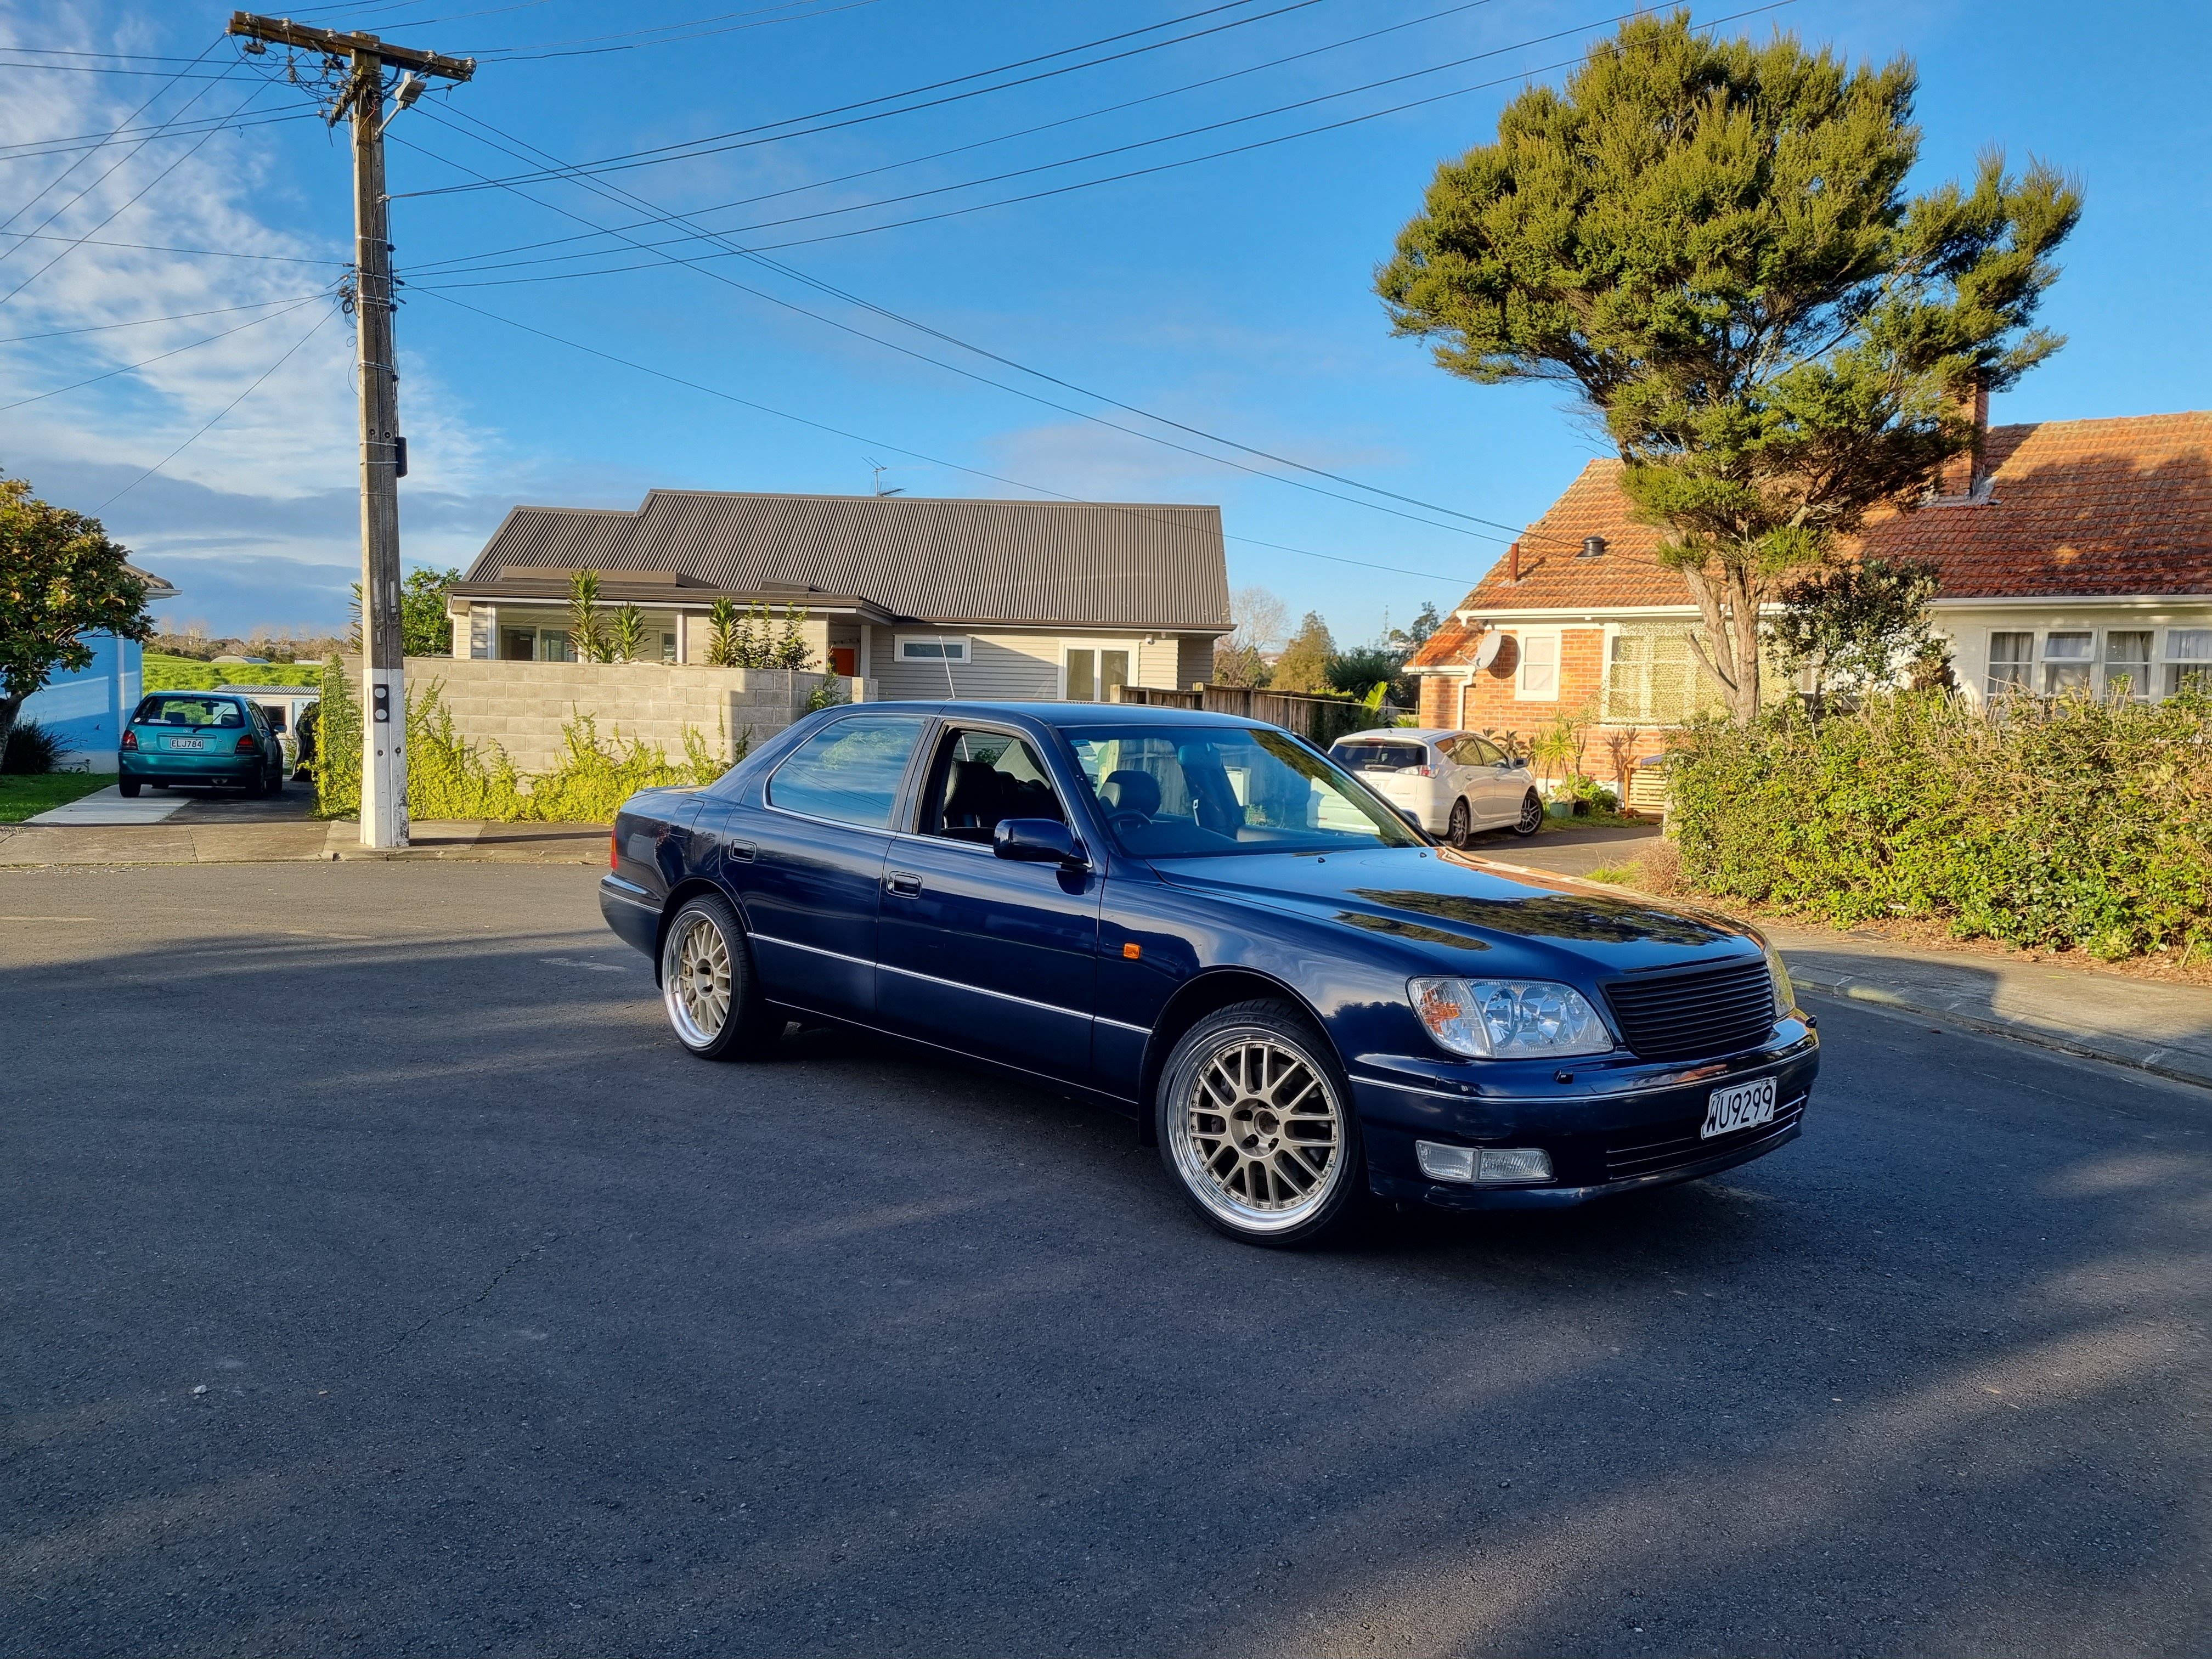
Richie is a good cunt. Not only did he find me a good set of wheels on marketplace, he went to Wellington and checked them out for me, then he bought them for me. Then he bought them to auckland for me. I take back some of the things I said about him. SSR MS1s. 19x 8.5 +25 front 19x 9.5 +22 rear. Fucking stoked. Now it really really needs to come down.
13 points
-
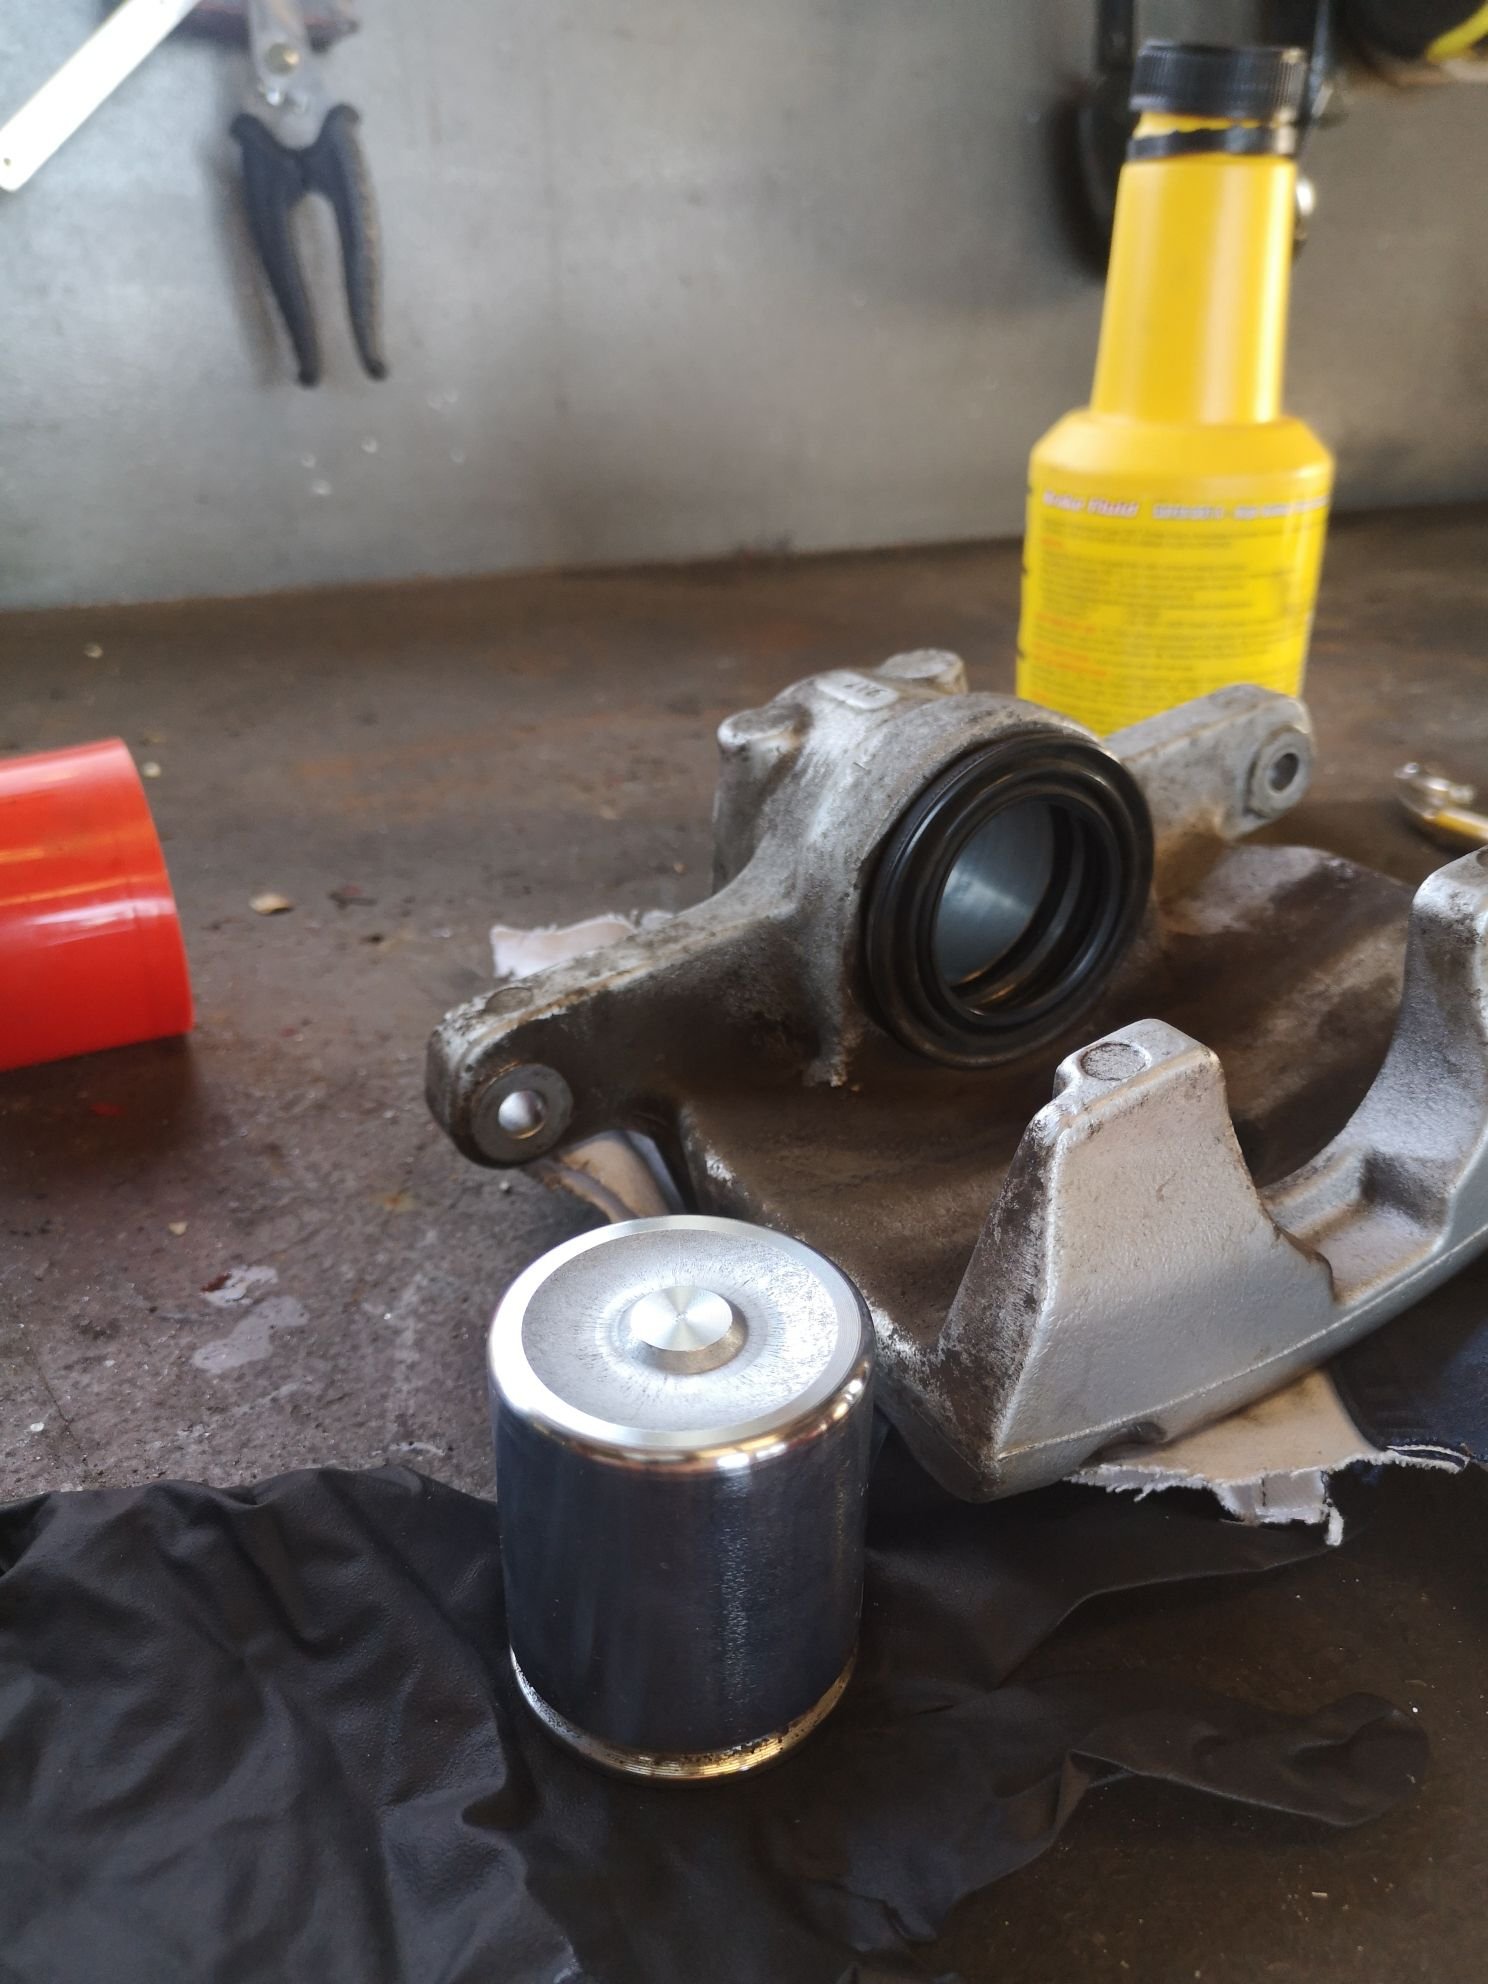
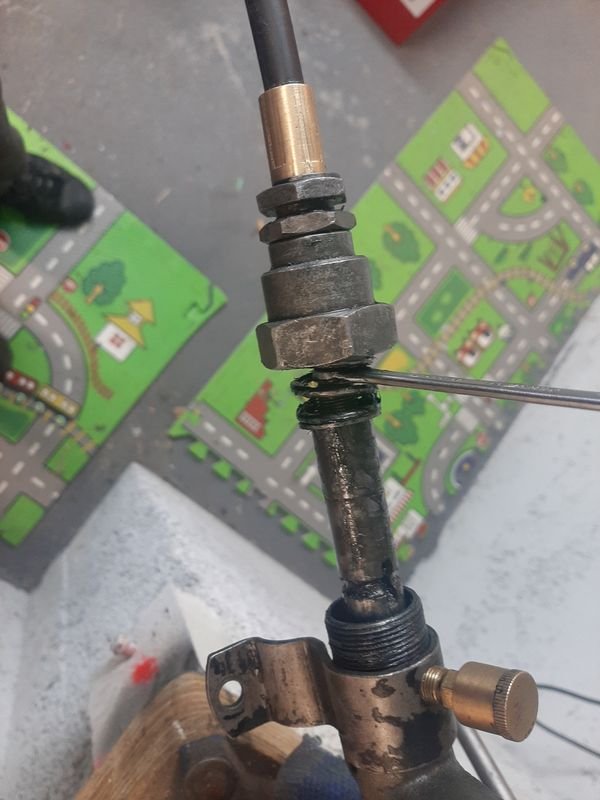
RLCA-san still needs that sleeve. LLCA-san does too, I'm not sure why everyone's latched on to righty's story, but who am I to withhold him from his fans? Back to Handymate's press! First we add a couple of bracing bolts to the inside of the arm to prevent it from just bending again. Then we (I) pucker up and get pressing... Success! Then with some lube, light fingering and some consensual force we get the bushings and their inners in place. I think this is technically the first ever instance of some Joining Of The Finished Parts on this project. May it continue!8 points
-
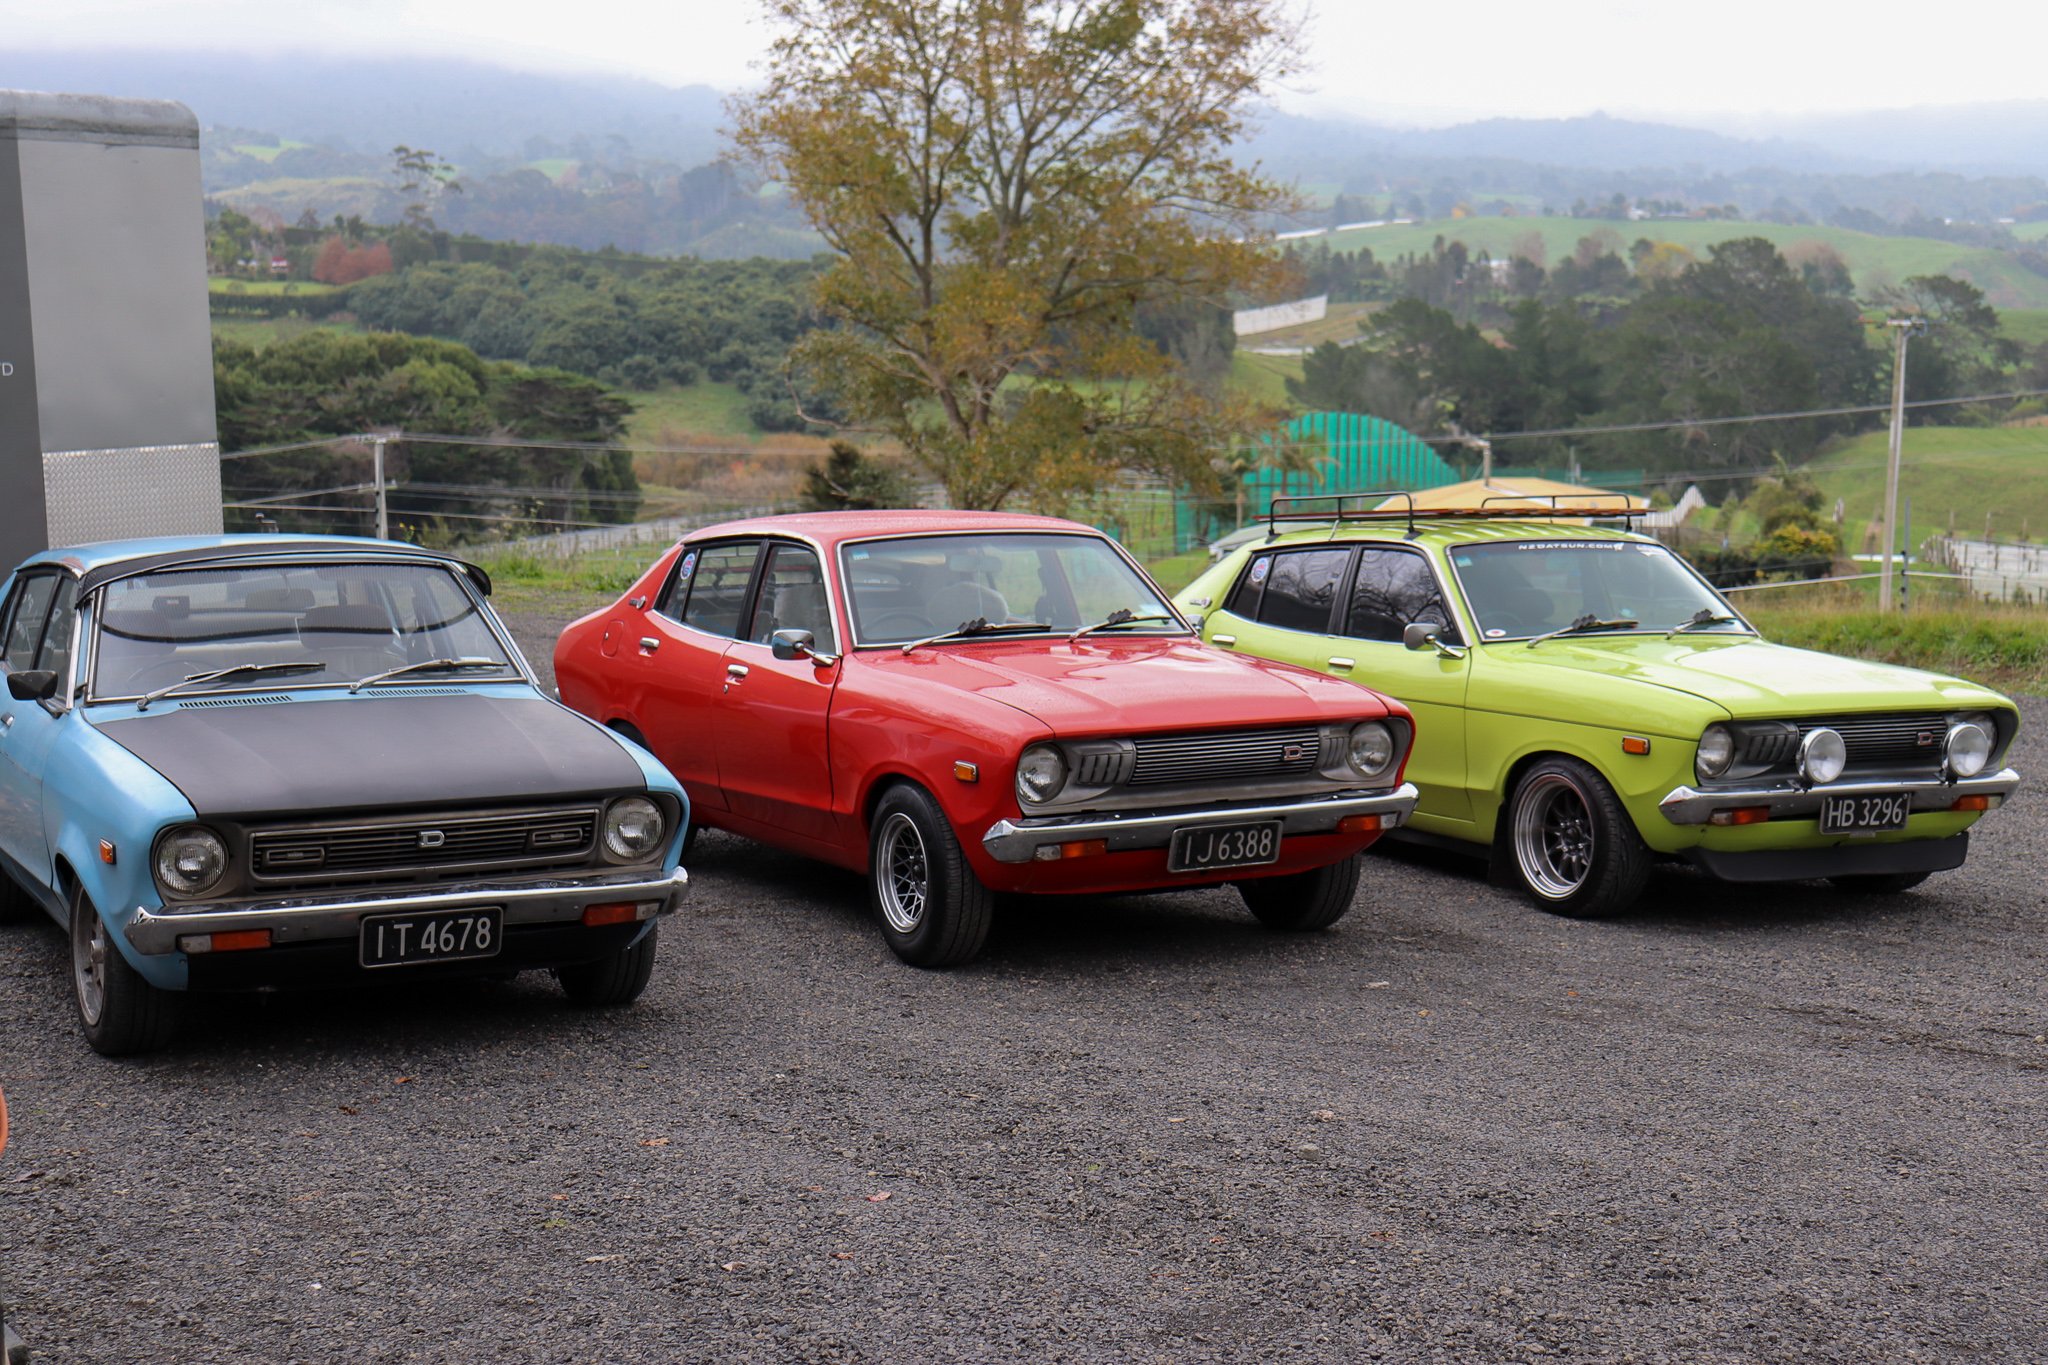
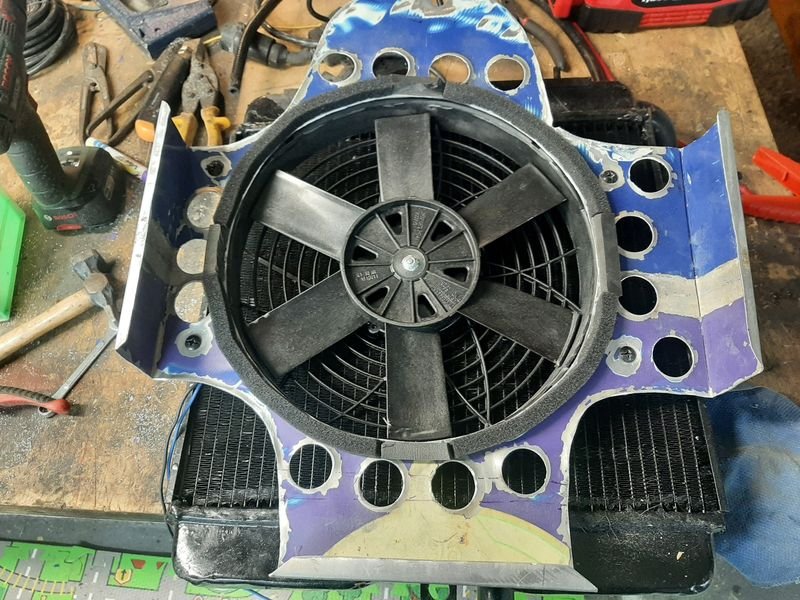
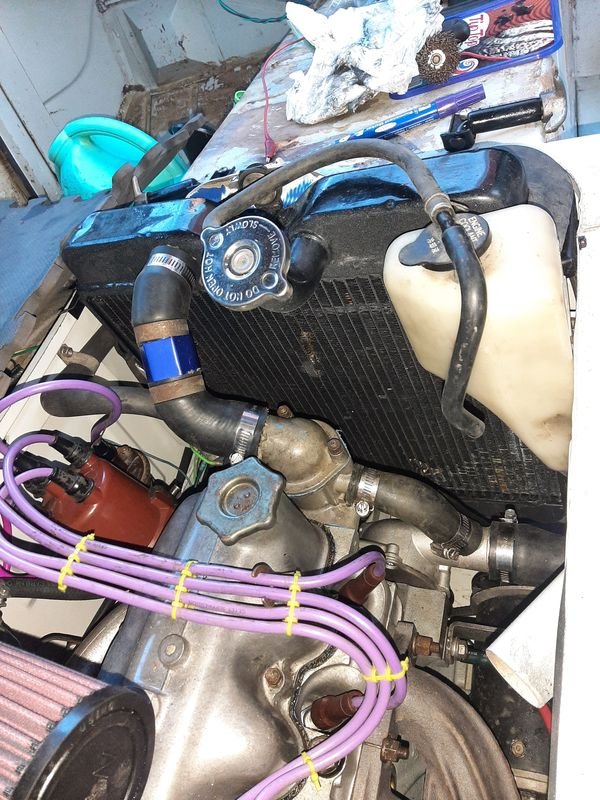
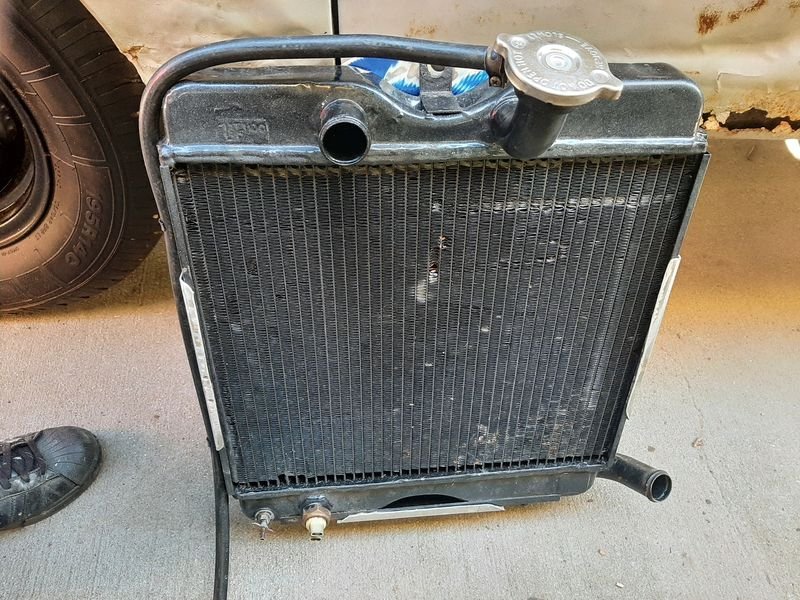
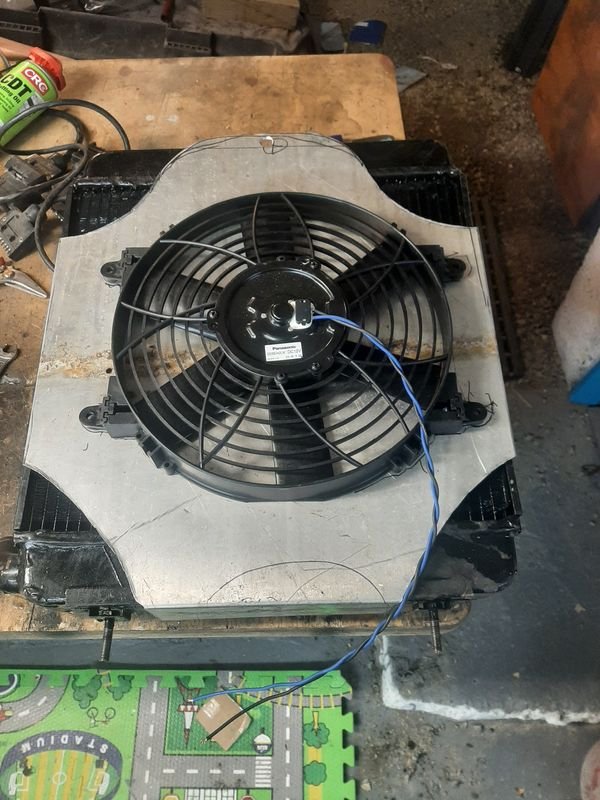
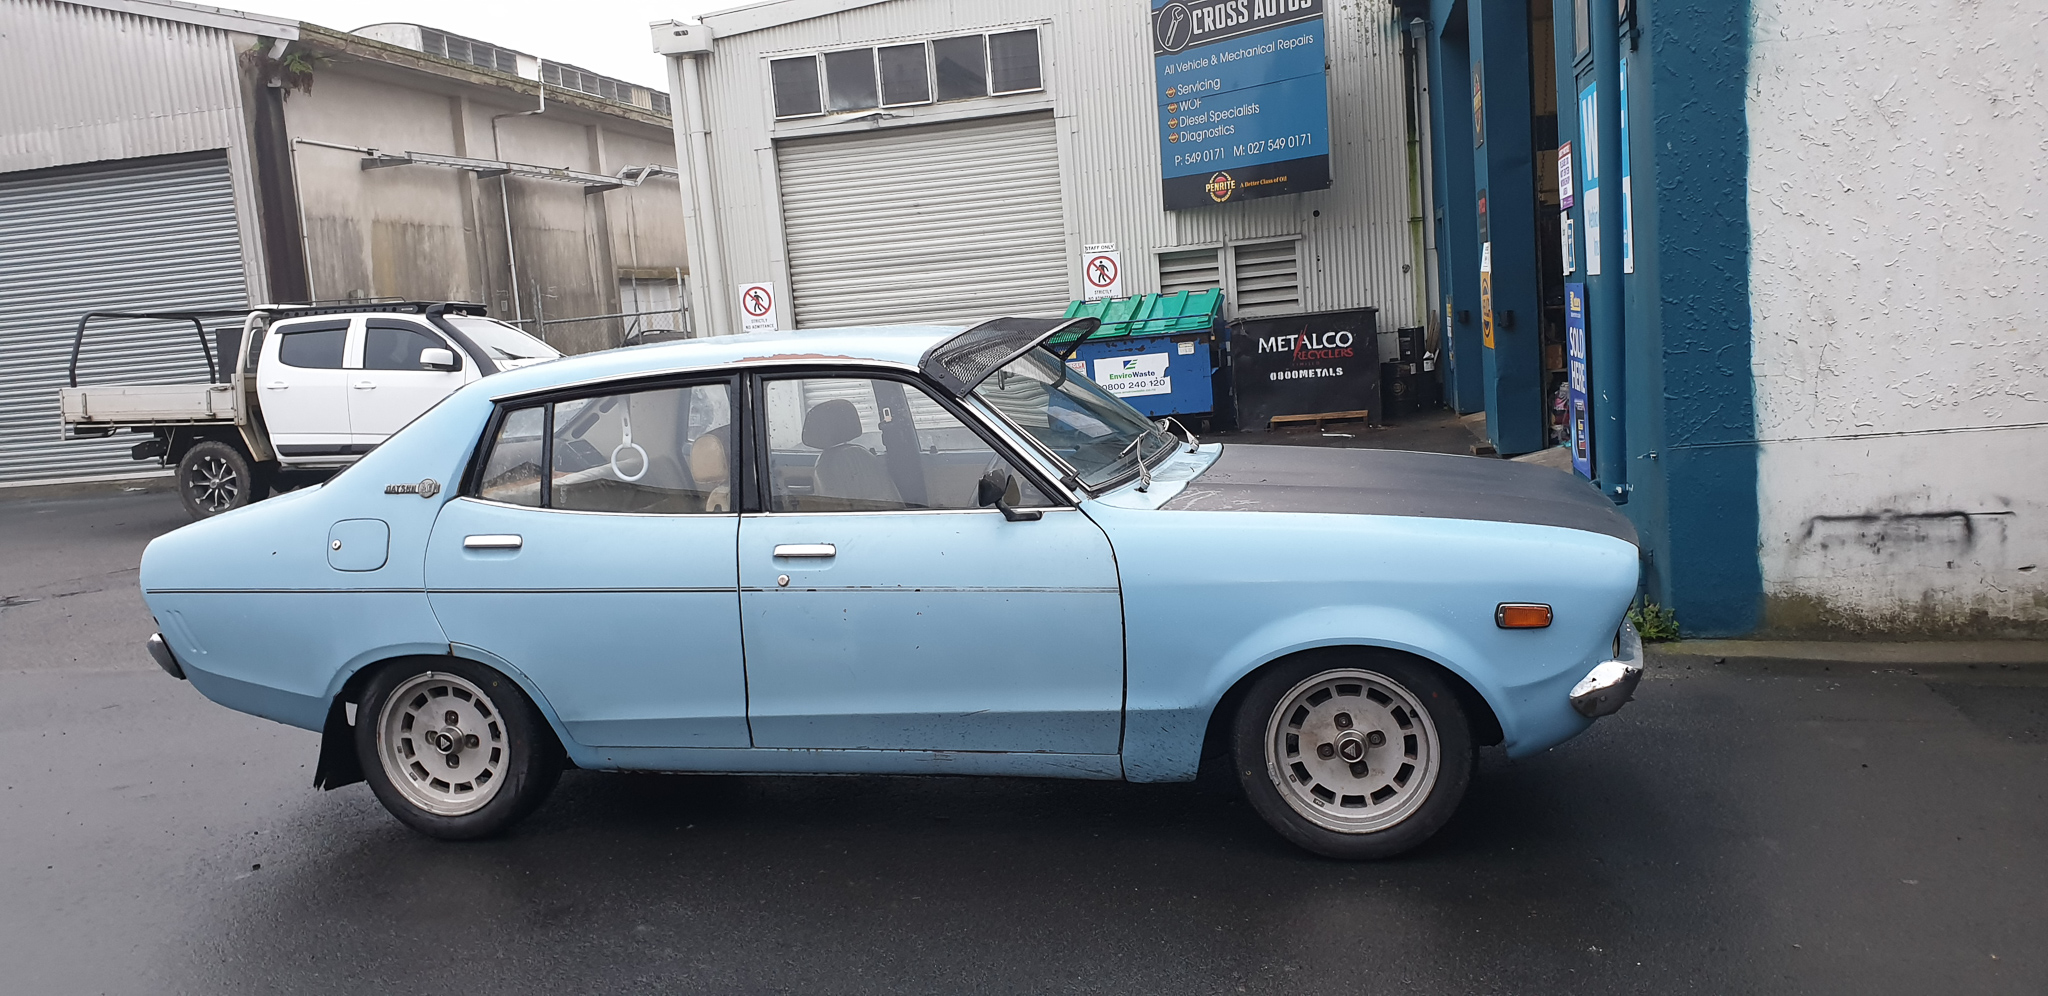
Baby blue has been trucking along well. Ive rebuilt some b210 struts and brakes to put back in (currently has b310 struts and brakes), so we will lose the spring binding issue when it hits bumps. Radiator rebuilt and new hoses throughout. Currently our cheapest car to run with the a12 and single carb
8 points
-
Sheds happening at a good pace.. And a nicely lowered internet bee To make it symmetrical, I got the only cheap chrome remote-control valiant door mirror on trademe..$40 delivered. Been watching them for a year and they hover around $150 Probably scruffy but it will match the other side, hasn’t arrived yet but I’ll give it a spruce up when it does.7 points
-
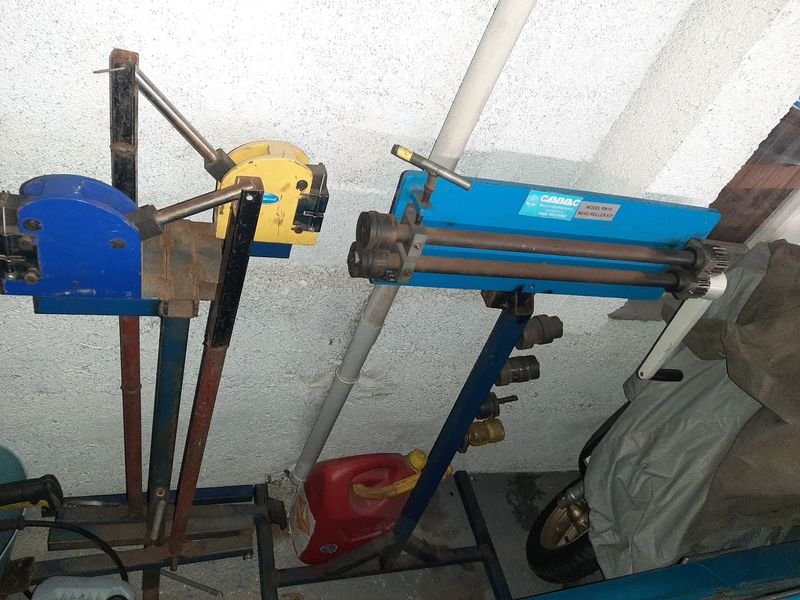
Meanwhile, in another part of the garage... This rear suspension has been leaning up against the garage for too long. Also being on its end means that the already-leaky diff is extra-leaky and that gear oil is really stinking things up. Ugh. Oh that red thing off to the corner is my partner's new, fun, totally functional car that she can tinker on and then have on the road again in the same weekend. It's fine, I'm fine. No honestly I'm fine. Let's focus back on the rear subframe? First thing after disassembly is to drain the rear diff. Better late than never? But PLOT TWIST I won't be using that diff! A rare narrowbody LSD popped up on trademe then somehow was removed within a few hours of its listing and ended up on my lawn. It even came with a free torque tube! I can't leave it in this state though so let's disassemble it to make cleaning up and painting easier. Cover comes off. At this point, I could have done some checking to see if the gears line up OK and the lashing and whatever, but I didn't. Bearing thingies out. The diff was scarily difficult to get out. For me anyway. A new gear puller helped get the rest of it done. I think I preferred my torque tube over the LSD's one, and they seem to be the exact same part so all good (?). That gets disassembled for clean up too. And the universal joints from the drive shaft. It's all manky, one of the UJ's seems a bit stiff too. And while we're at it let's clean the grease out of the front hubs and remove the seals, bearings and races. We'll file down some particularly gross parts of the casting too. A nice little side quest which will also be continued...6 points
-
Another side quest. One of the towing hooks and suspension rod linkage thingy mounts are bent/mangled. They still work but... The towing hook is easy to fix with heat, a hammer and a file. And someone has left another Starion parked nearby for ages, so I snuck over under the cover of noon to perform a switcheroo on the mount. I doubt they'll notice. Man I'm really amassing a number of stripped down parts here huh. They need to be blasted and then painted I guess. With that shitty little blaster set up.5 points
-
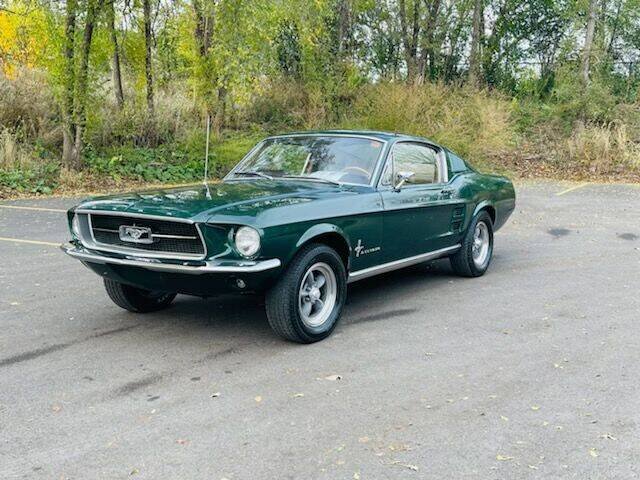
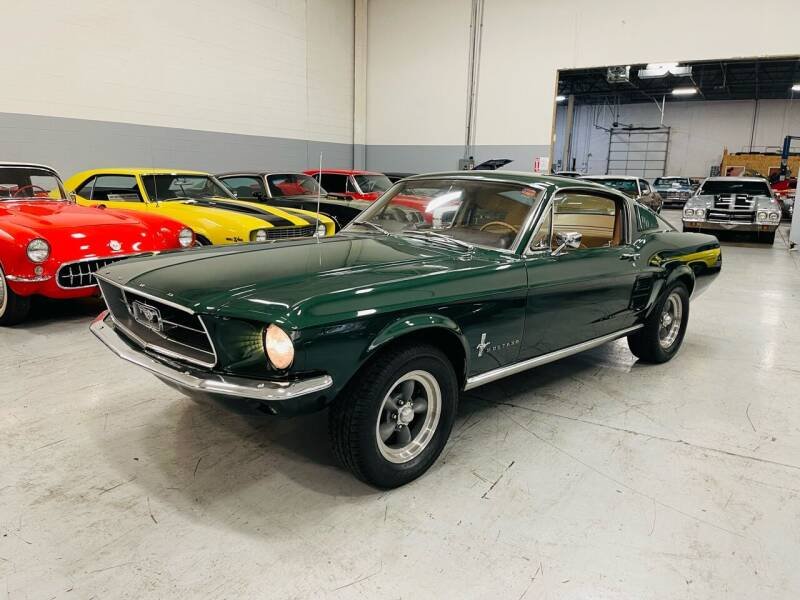
This really belongs to my dad but I’d like to chuck a build thread up for those that are interested. This a 68 gt390 Mustang that my dad bought out of the states at the start of the year. He’s always wanted a “bullit” mustang after seeing the movie when it came out, fast forward 50 odd years, and he finally can afford one. The Plan was to get it vinned and ready for the road but unfortunately we ran out of time as he flys out to the states tomorrow with my mum. 2 years ago she was diagnosed with stage 4 bowel cancer at the age of 65 and is now travelling to Houston as a last ditch effort to receive some effective treatment. So my brother and I will be hoping to have the car ready for them when they return in about 12-18 weeks.
4 points
-
Looking for expressions of interest. I can organise a Saturday of power runs at Flame Performance of we have enough cars. 8 to 10 cars would be ideal. Would be around $100 per car for a few runs and a print out of the results. Probs sort a BBQ and what not and made a day of it. See if your Morris minor can crack 15hp.4 points
-
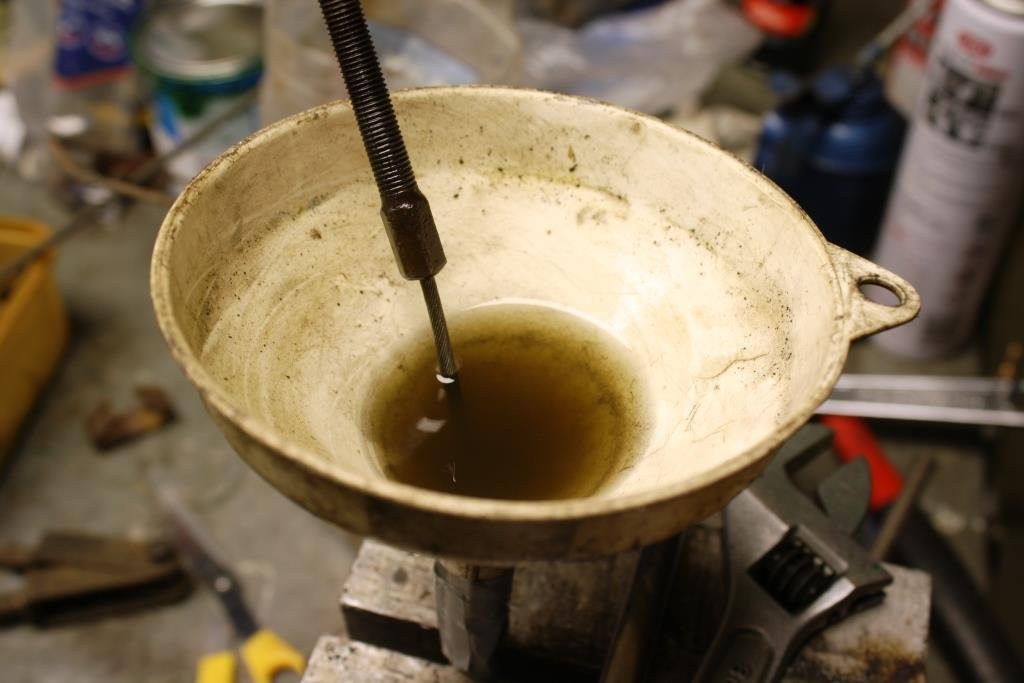
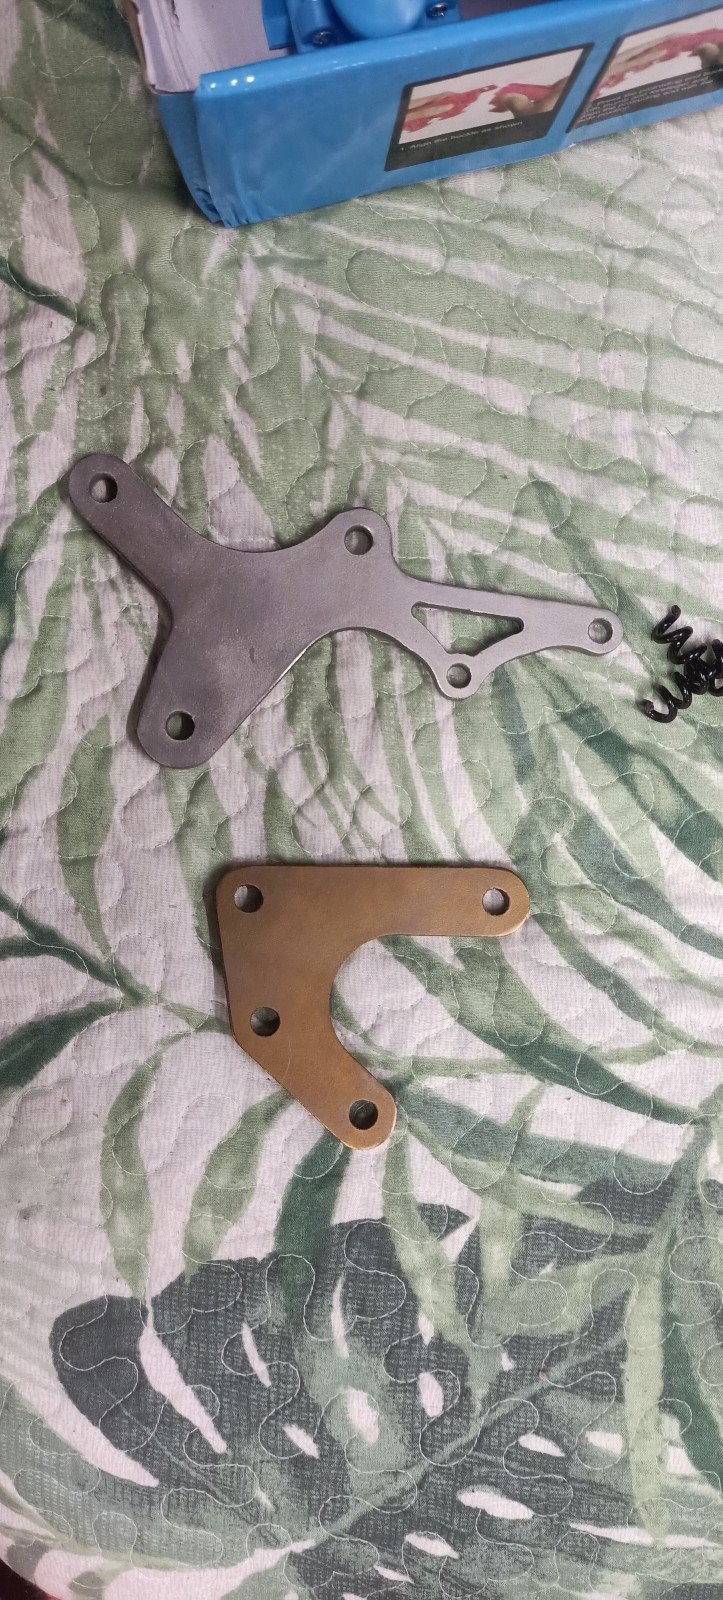
Now, I've got all of these tasty new poly bushings - but I need to re-use all of the steel cores. That means removing them from the old bushings. They didn't really suit the press, so Handymate and I tried a few things... saws, drills... till I decided to just go home and try the burning method. My mate thought that it just meant burning all the rubber away, but apparently that's a very common misconception. Some further research revealed the proper method which is to heat the metal around the rubber, which causes the rubber to literally boil and separate. At that point you can just poke it out with something that isn't your flesh. It worked really well! However I did it in the wrong order: I should have burned the inner sleeves out first as they would have been easier to push out while the rubber was still being held by the part they're in. It wasn't a huge deal though, I just decommissioned some kitchen tongs and managed. After some acetone and wire wheeling, they came up great! (If you want to follow in my footsteps, pro tip, give them some paint or oiling or something now because by about a month later they were orange with rust :D. I ended up coming back with the wire wheel again and some CRC black to prevent any further rust) Some mocking up with the new bushings. Let me dream. But... what is this? Right-side Lower Control Arm-san is not very happy with his new bushings. The outer bushing was never meant to be pressed out of the arm. D'oh! How will this be resolved? Will Right-side Lower Control Arm-san get his metal sleeve pressed back in? Or will he be forever doomed to a bushless existence? Stay tuned...4 points
-
Probably last time at that testing station, mostly because they missed bulging tyre and a crack in the rim. Into the caliper strip.
4 points
-
Time to sort out the hand brake linkage. It’s a big under the dash ratchetty thing that looks like it came from a 1920’s Allis Chambers bulldozer. The original Bowden cable was extremely gunked up so I taped a funnel to one end and started flushing it with kerosene. The amount of sludge that came out was very impressive……… It had a grease nipple in the middle (as they did in those days) so I pumped it full of grease. Found a fire-wall grommet that sort of worked and re-fitted the cable.
4 points
-
Once I've moved house and sold the old one I'll not be in such dire financial situation. Will just be a while. So if it needs pistons I'll buy them eventually. Goals for the meantime is make it to OS drags, and the Toyota Festival trackday at Hampton. Then whatever else comes up. Then also see how the 1300 setup goes.3 points
-
Hi! We're still working on this, it's just been a bit slow with life stuff like house painting and work things and laziness. Also, the frame rail thing is pretty disheartening. I think I'm on now the right path towards resolving that but there's other stuff to do while I wait and let the funds build. Ugh I've left this thread too long and now have to sift through some old ass photos. There's a bunch of things on the go but the biggest is the suspension and drive train. One of the first goals after the shell is repaired will be to get it back on wheels instead of a trolley so it's a decent place to focus on. Where to start? Eh, blasting? We borrowed a mate's blasting cabinet and went to down with it. I'm really happy we splashed on our compressor as it can keep up 100%. However something about the setup sucks. We've got 3x water traps (ignore the back-to-front one in the pic, it's proper way around now) yet still will get a decent amount of moisture spraying out of the gun. This means that things clump up pretty rapidly and lots of gun-bashing is necessary to get it going again... for a couple seconds before it clogs again. The longer the session, the worse it gets. The cabinet is also poorly designed in the pick up department and we have to tilt the whole thing every minute or so to get the sand back near the pick up. But the results are decent. Oh I should probably get the bushings out of the control arms before I blast them. A quick trip to my mate's place who has a press and they're out. Keep on blasting... Wait hang on, one of the arms is bent? It's OK, said handy mate to the rescue The saga of Right-side Lower Control Arm is to be continued...3 points
-
Not helpful but just go to wof place that doesn't use brake rollers.....I had the same issue with my navara (shitty early 90s drums). New everything but couldn't get them balanced. Stopped perfectly fine and no pulling so gave up on brake rollers and got the local garage to wof it, no drama.3 points
-
Pop the pistons out of the calipers, give it a good clean up with a scotchbrite on the piston and bore. Carefully pluck the seal out and check there isn't a crud build up in the grove where they sit. If you're careful you can re use your seals and dust boots. Good blead up and it should be good. Pushing the pistons back and forward doesn't really remove the crud, it doesn't take much crud to make an imbalance either. Better living everyone.3 points
-
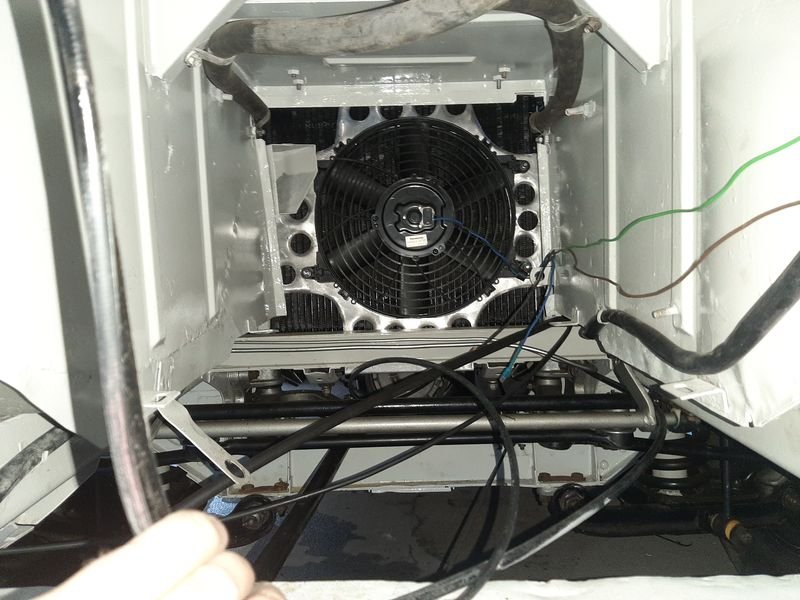
An update on the bus/shed heater. It is now powered by a 30A power supply, and the exhaust is extracted with a 150mm fan and ducting. I got a whole lot of ducting leftovers for $60 off marketplace. The fan was a freebee from when I worked at a tech company in chch, they cleared the storage out and let us take what we wanted, I grabbed loads of shit. I still have boxes of ally brackets and bus bars in my container... The fan is pulling right on that exhaust so I checked the temps while running it, it hits 43 degrees on high, 30 on low. That ducting isn't sealed so it is sucking air as well. The fan is a Pabst that is rated for 70+ deg so should be sweet. Still need to mount the supply and an RCD in a box for safetys and cut a hole in the shed to waft the fumes out.
3 points
-
I ended up replacing my sacrificial anode with a sheet of steel. More surface area and easier to wipe the scum off. Pretty much all the rust is gone, except for the bit in the middle due to the size of my container. A lot of the paint came off too. I did no scrubbing, just shot it with the water blaster. Most of the grease came off(it turned white) but probably due to soaking for days in the washing soda that's used to make the electrolyte solution. I got mine from Mitre10 ages ago but I can't find it anymore, it's this stuff. https://www.countdown.co.nz/shop/productdetails?stockcode=276728&name=greenwood-washing-soda-crystals
3 points
-
Tool some brave pills today and got out the extension and the holesaw Took a couple of cuts to find where the top was. Hind site says dropping the subframe would have made that easier but the cbfs were strong The shifter lines up nicely with the console which is nice, I might need to cut/weld/adjust the shifter so its not so far back but I'll wait until its bolted in and the steering wheel/column back in Cv boots arrived for the rear, Fitted them and the crv diff when I was under there CRV diff (right hand side)looks slightly different but bolts in the same2 points
-
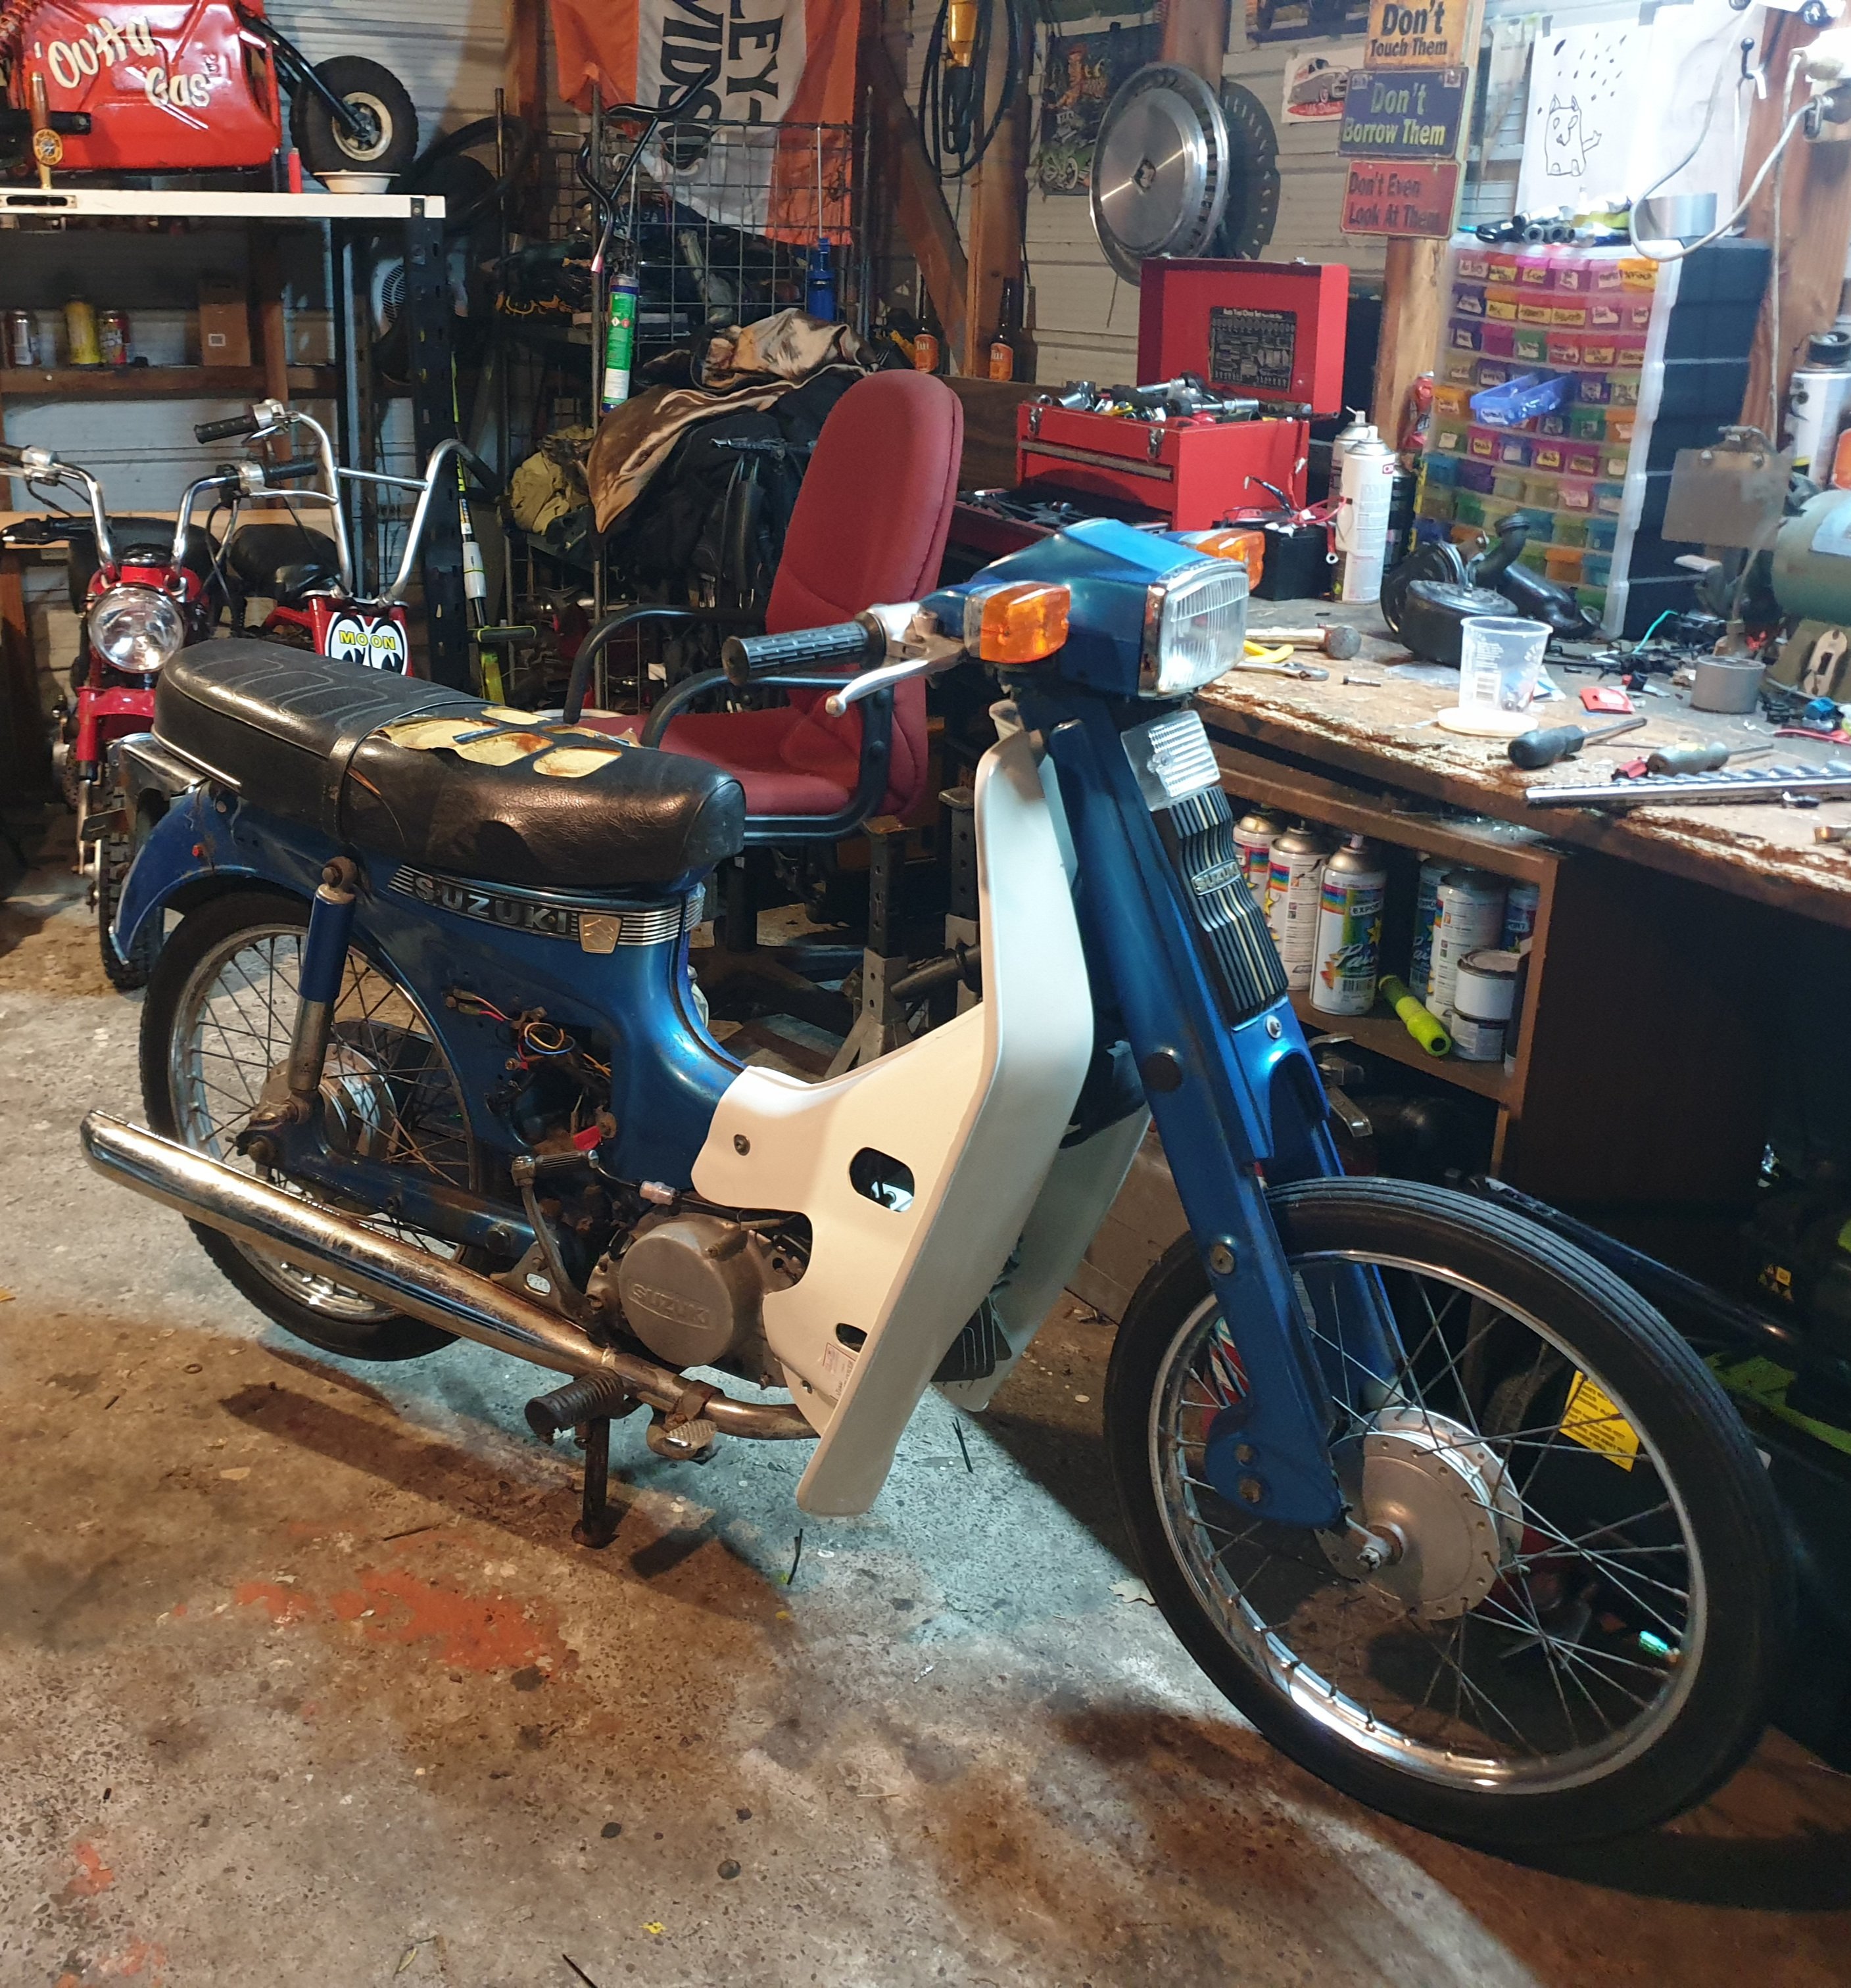
Managed to get a new leg shield Air box Headlight And cleand the carb Replace leaky fuel tap
2 points
-
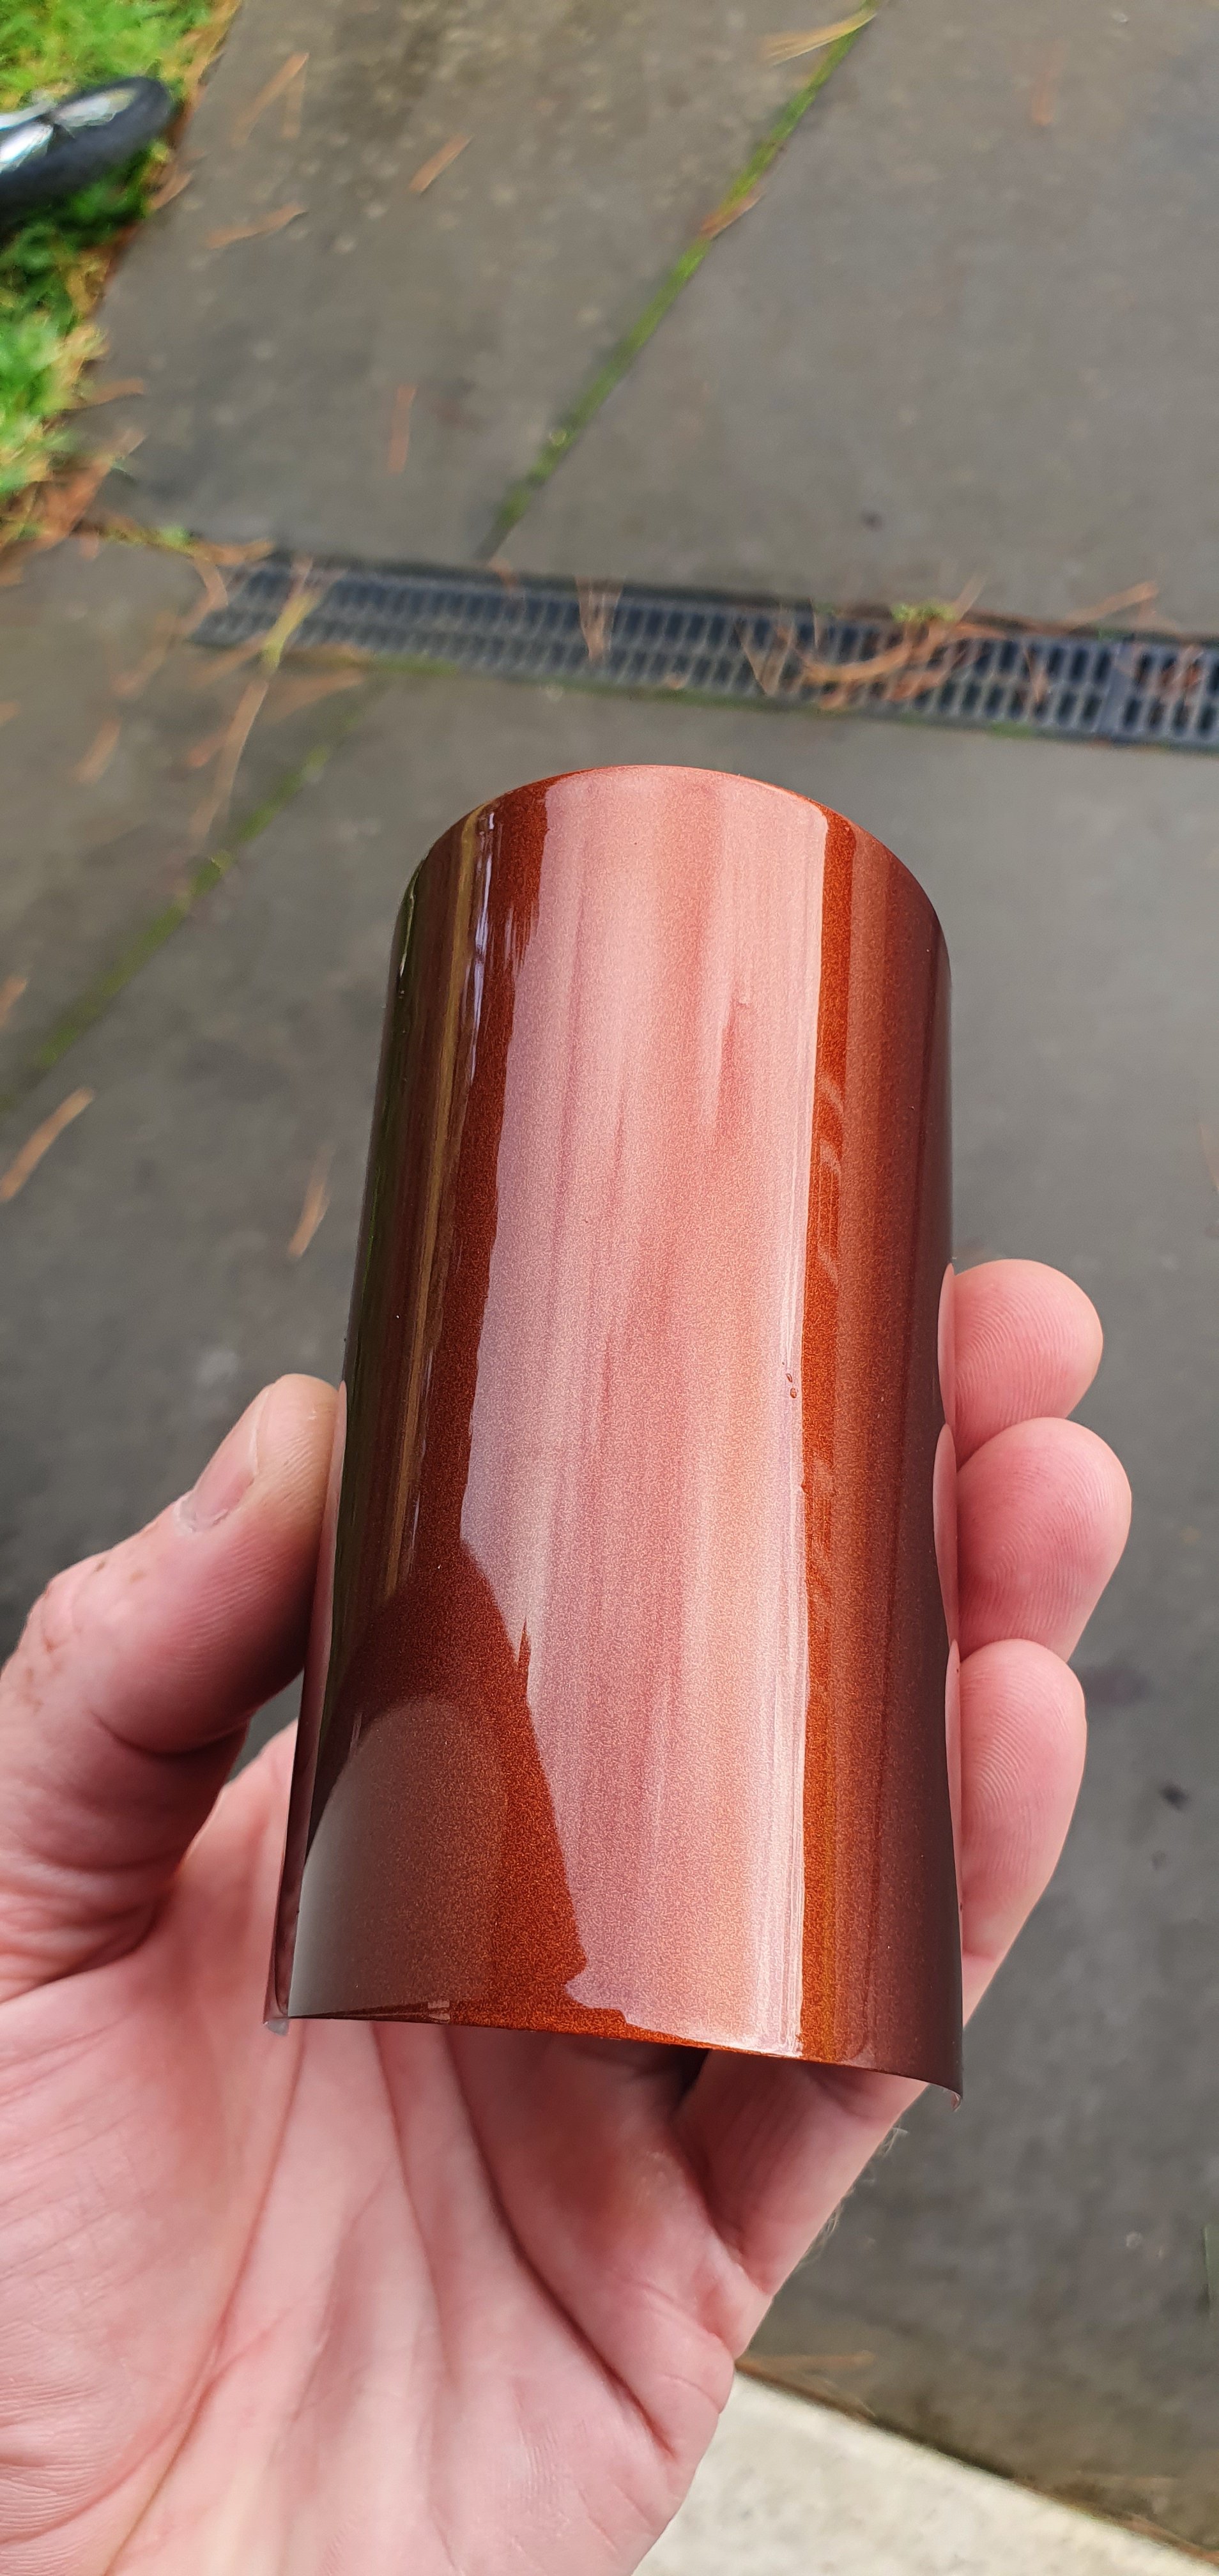
Paint card...mmmm...rootbeer #brownisthenewblack
2 points
-
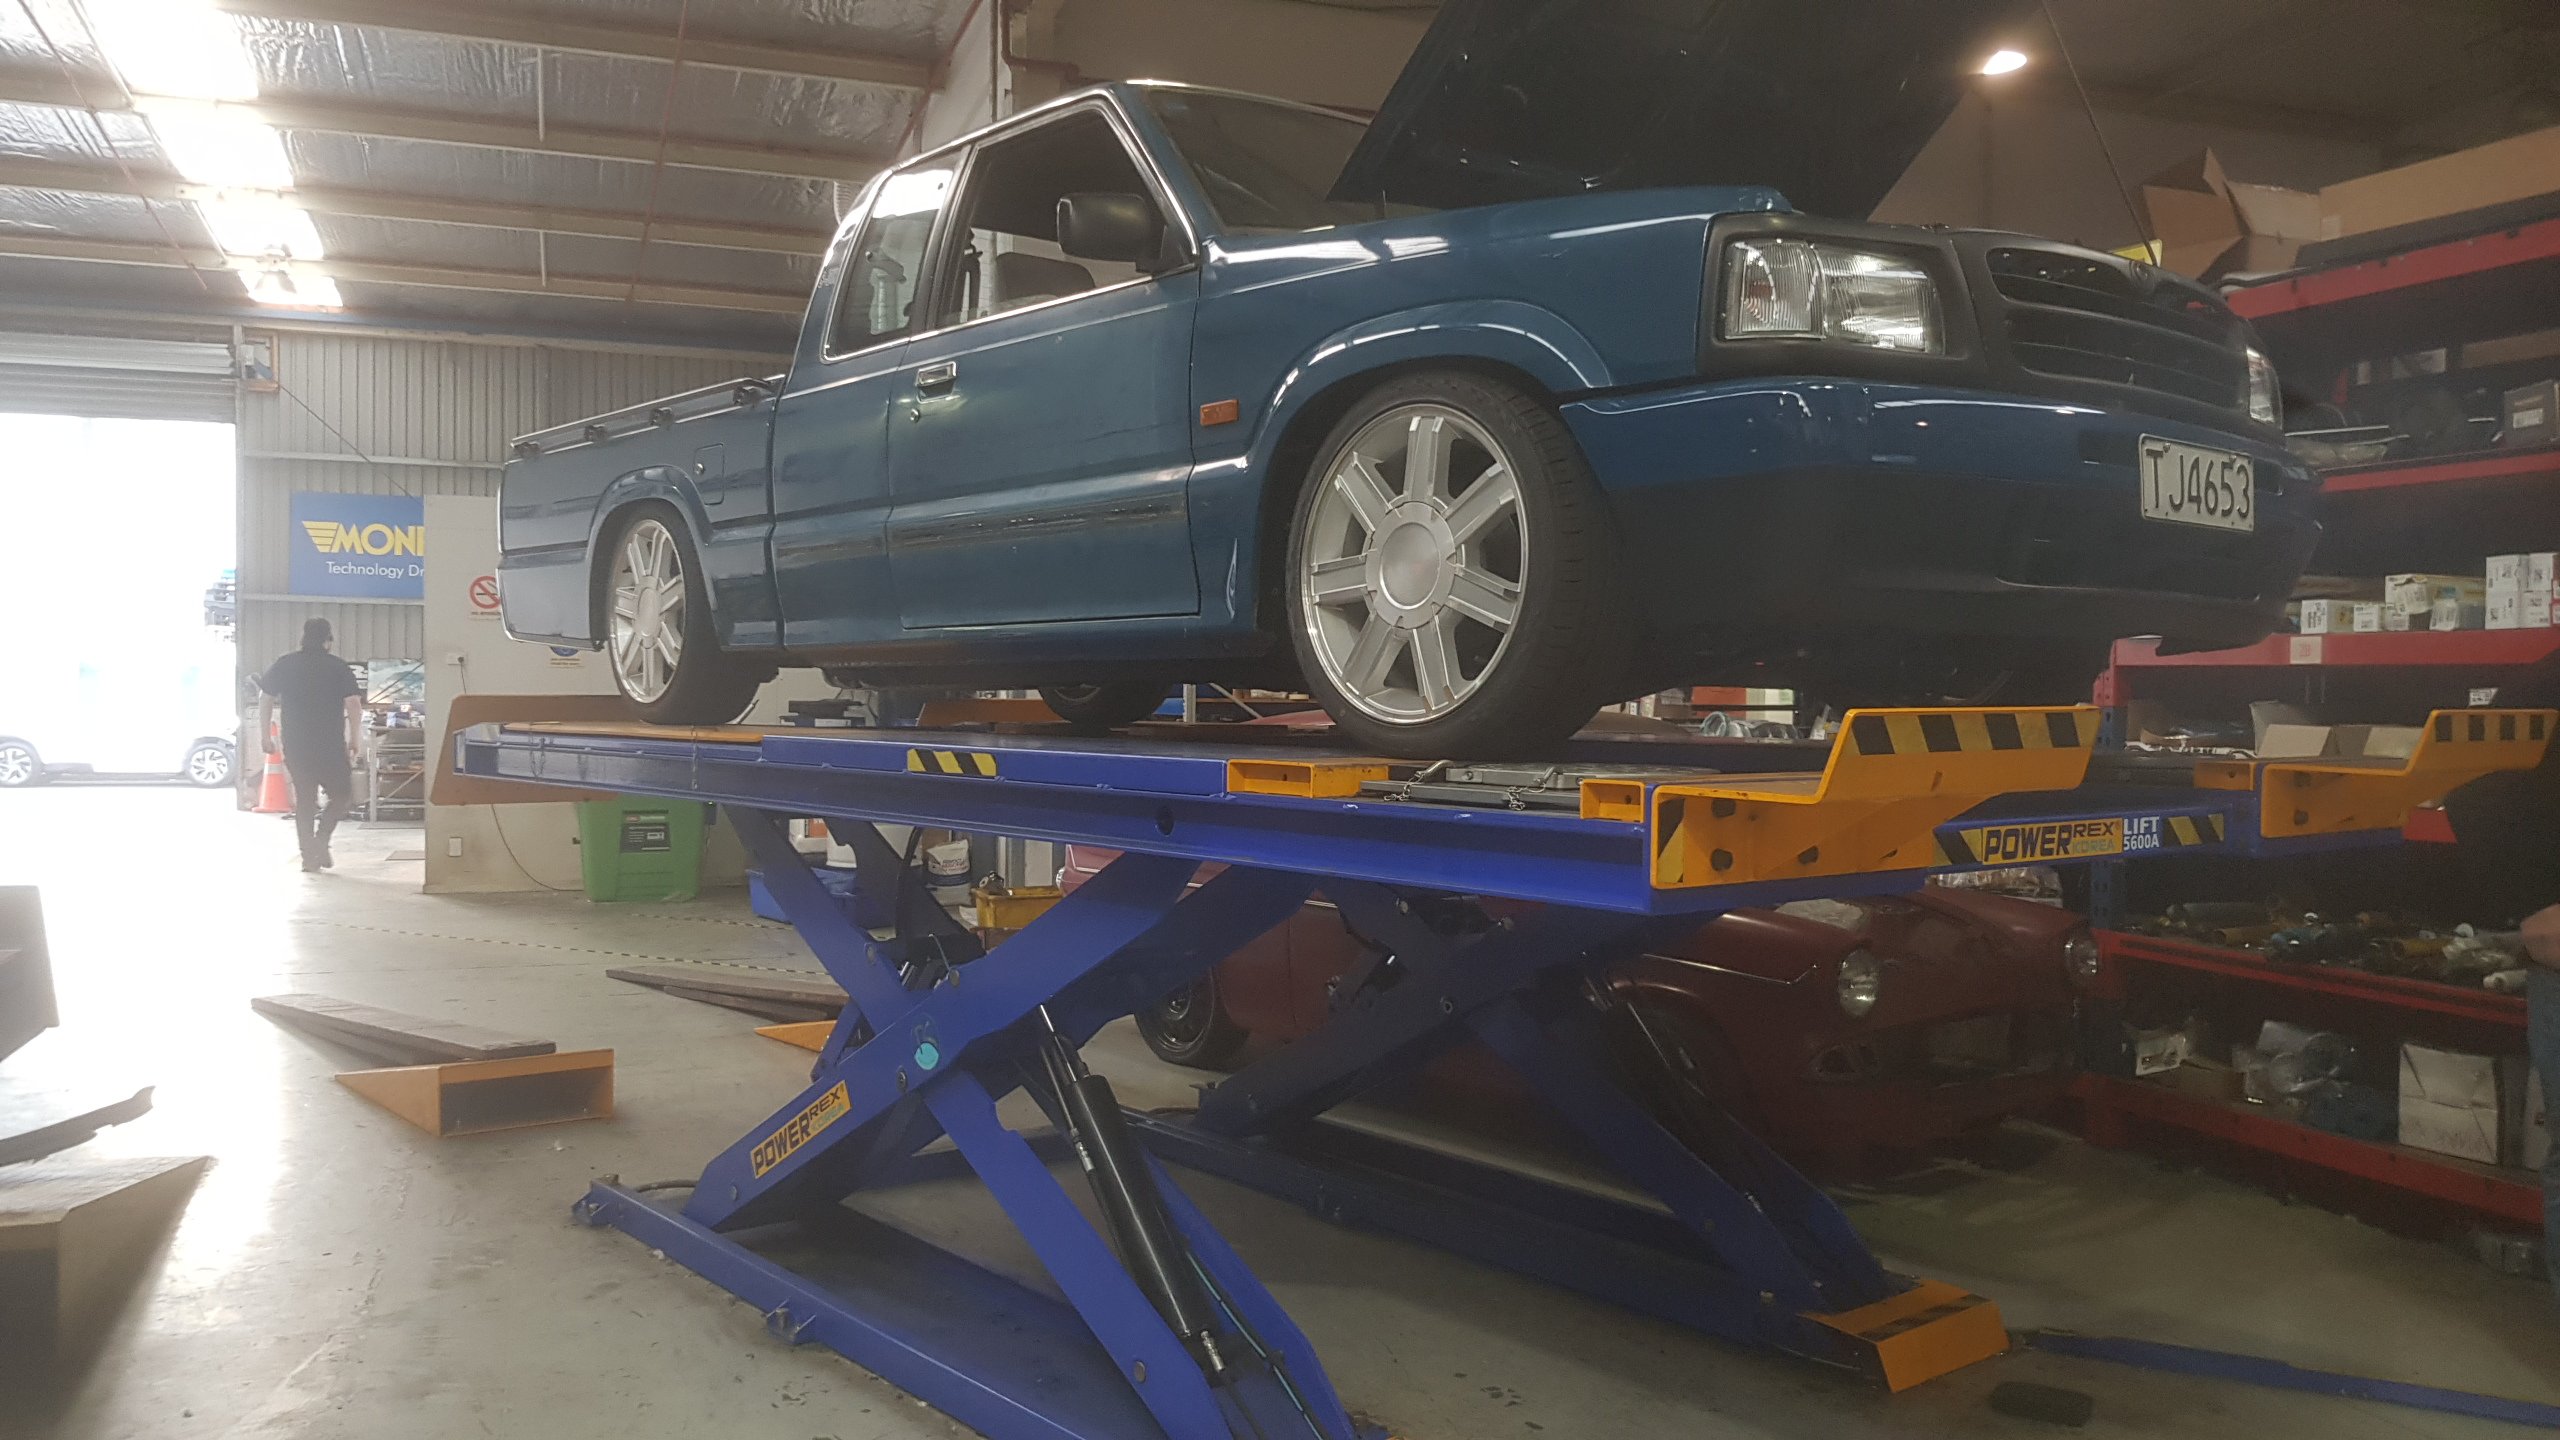
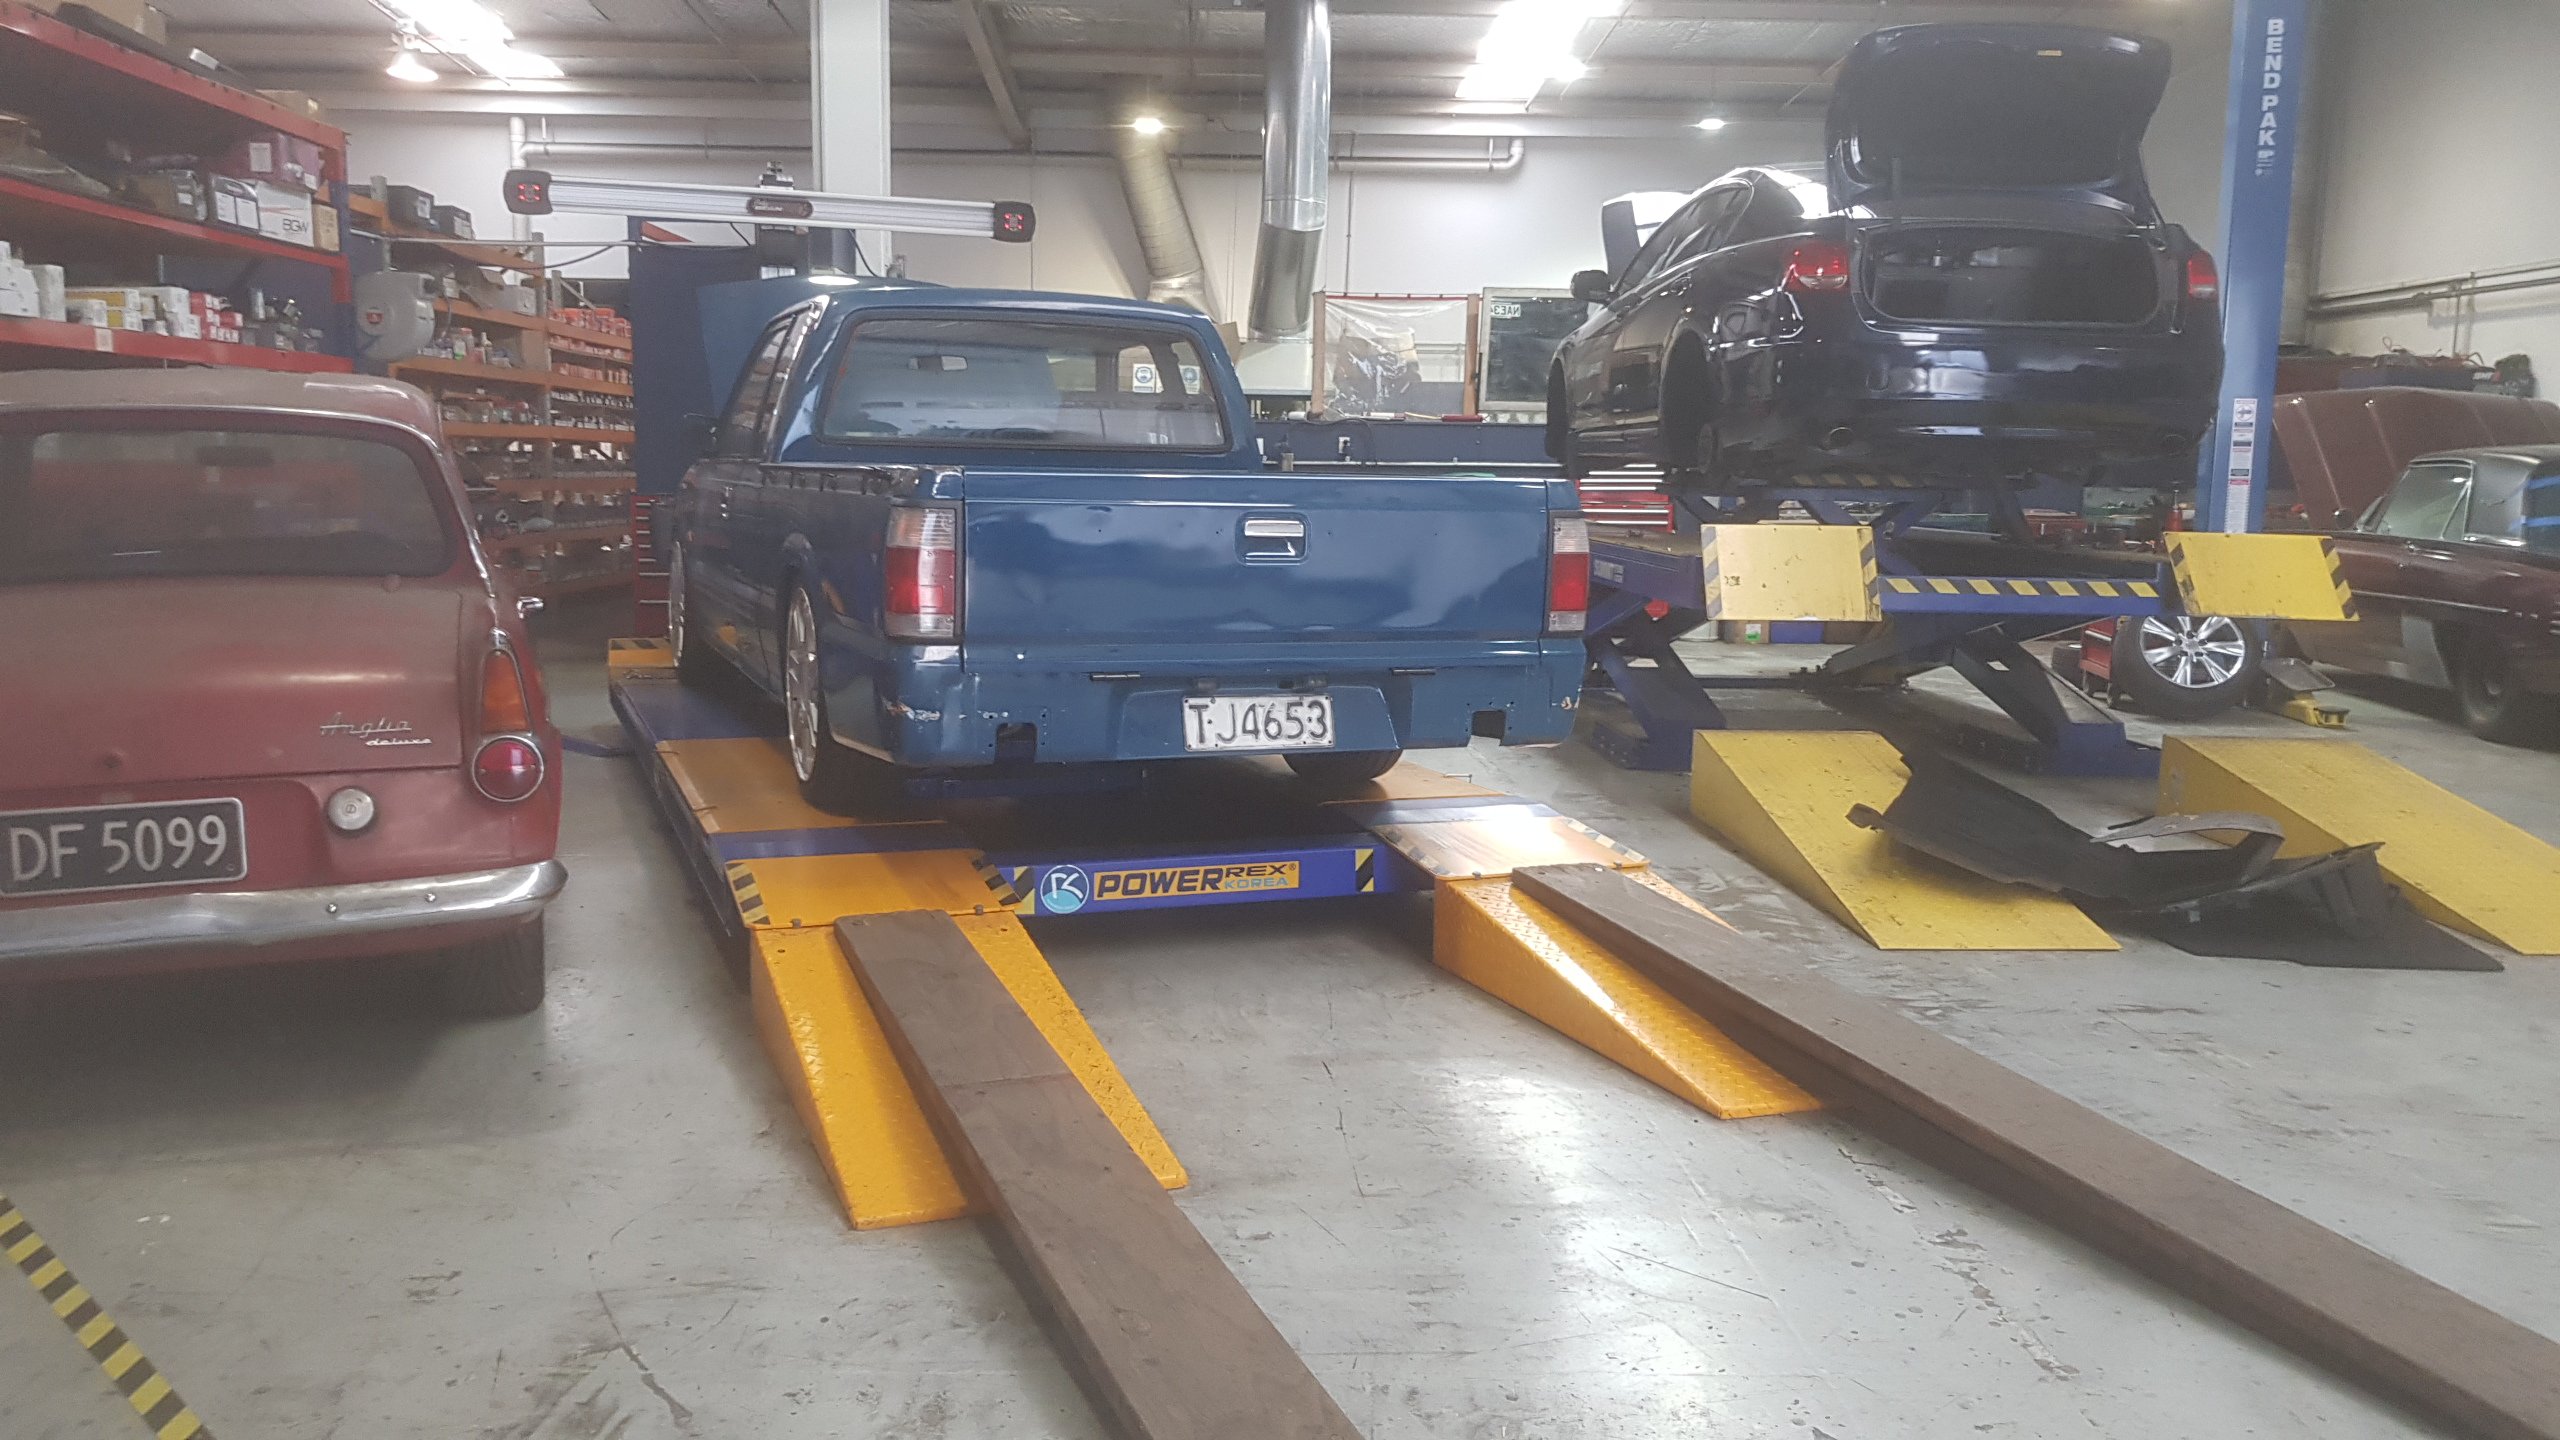
Truck went on a hot date with Iain at Racelign Tuesday and he dialled it in a bit more. Turns out my eyes are pretty well calibrated. All my eyeball front caster/camber/toe settings were within spec. Almost ready to take this thing for a hoon around the neighbourhood. 1 week til Cert day with @cletus. Still got a bit to button up but I'l make it happen.
2 points
-
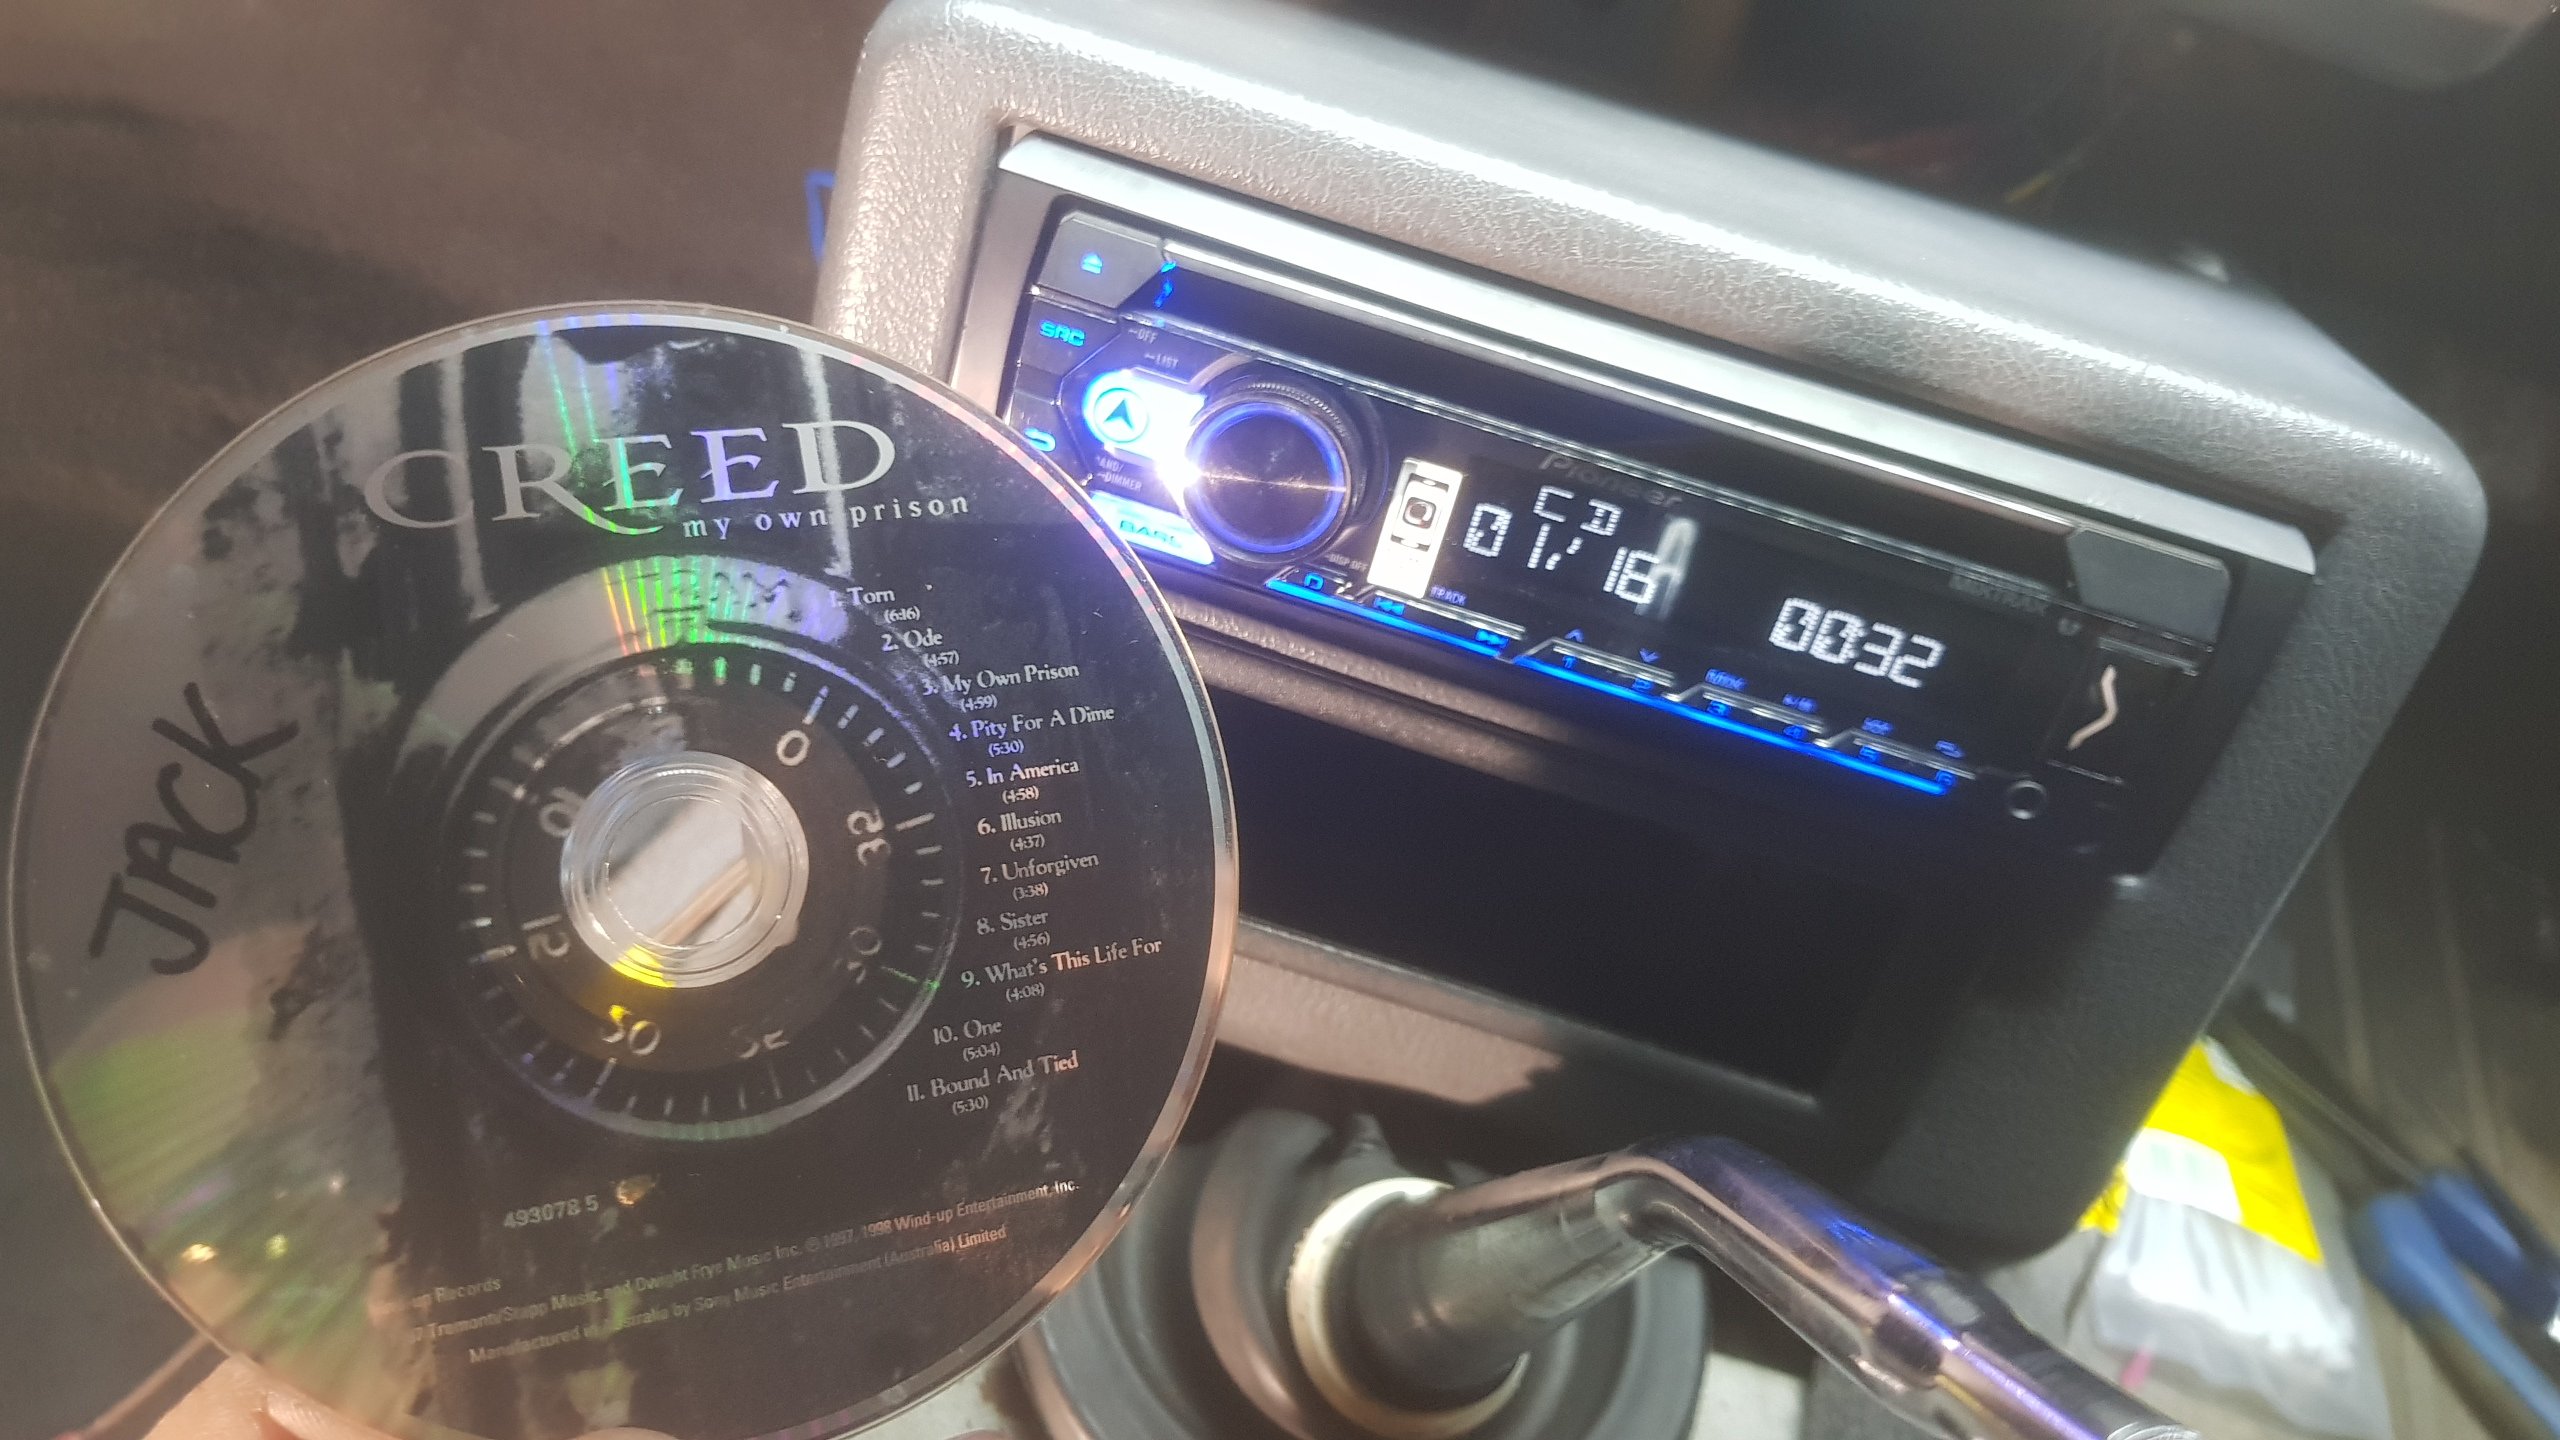
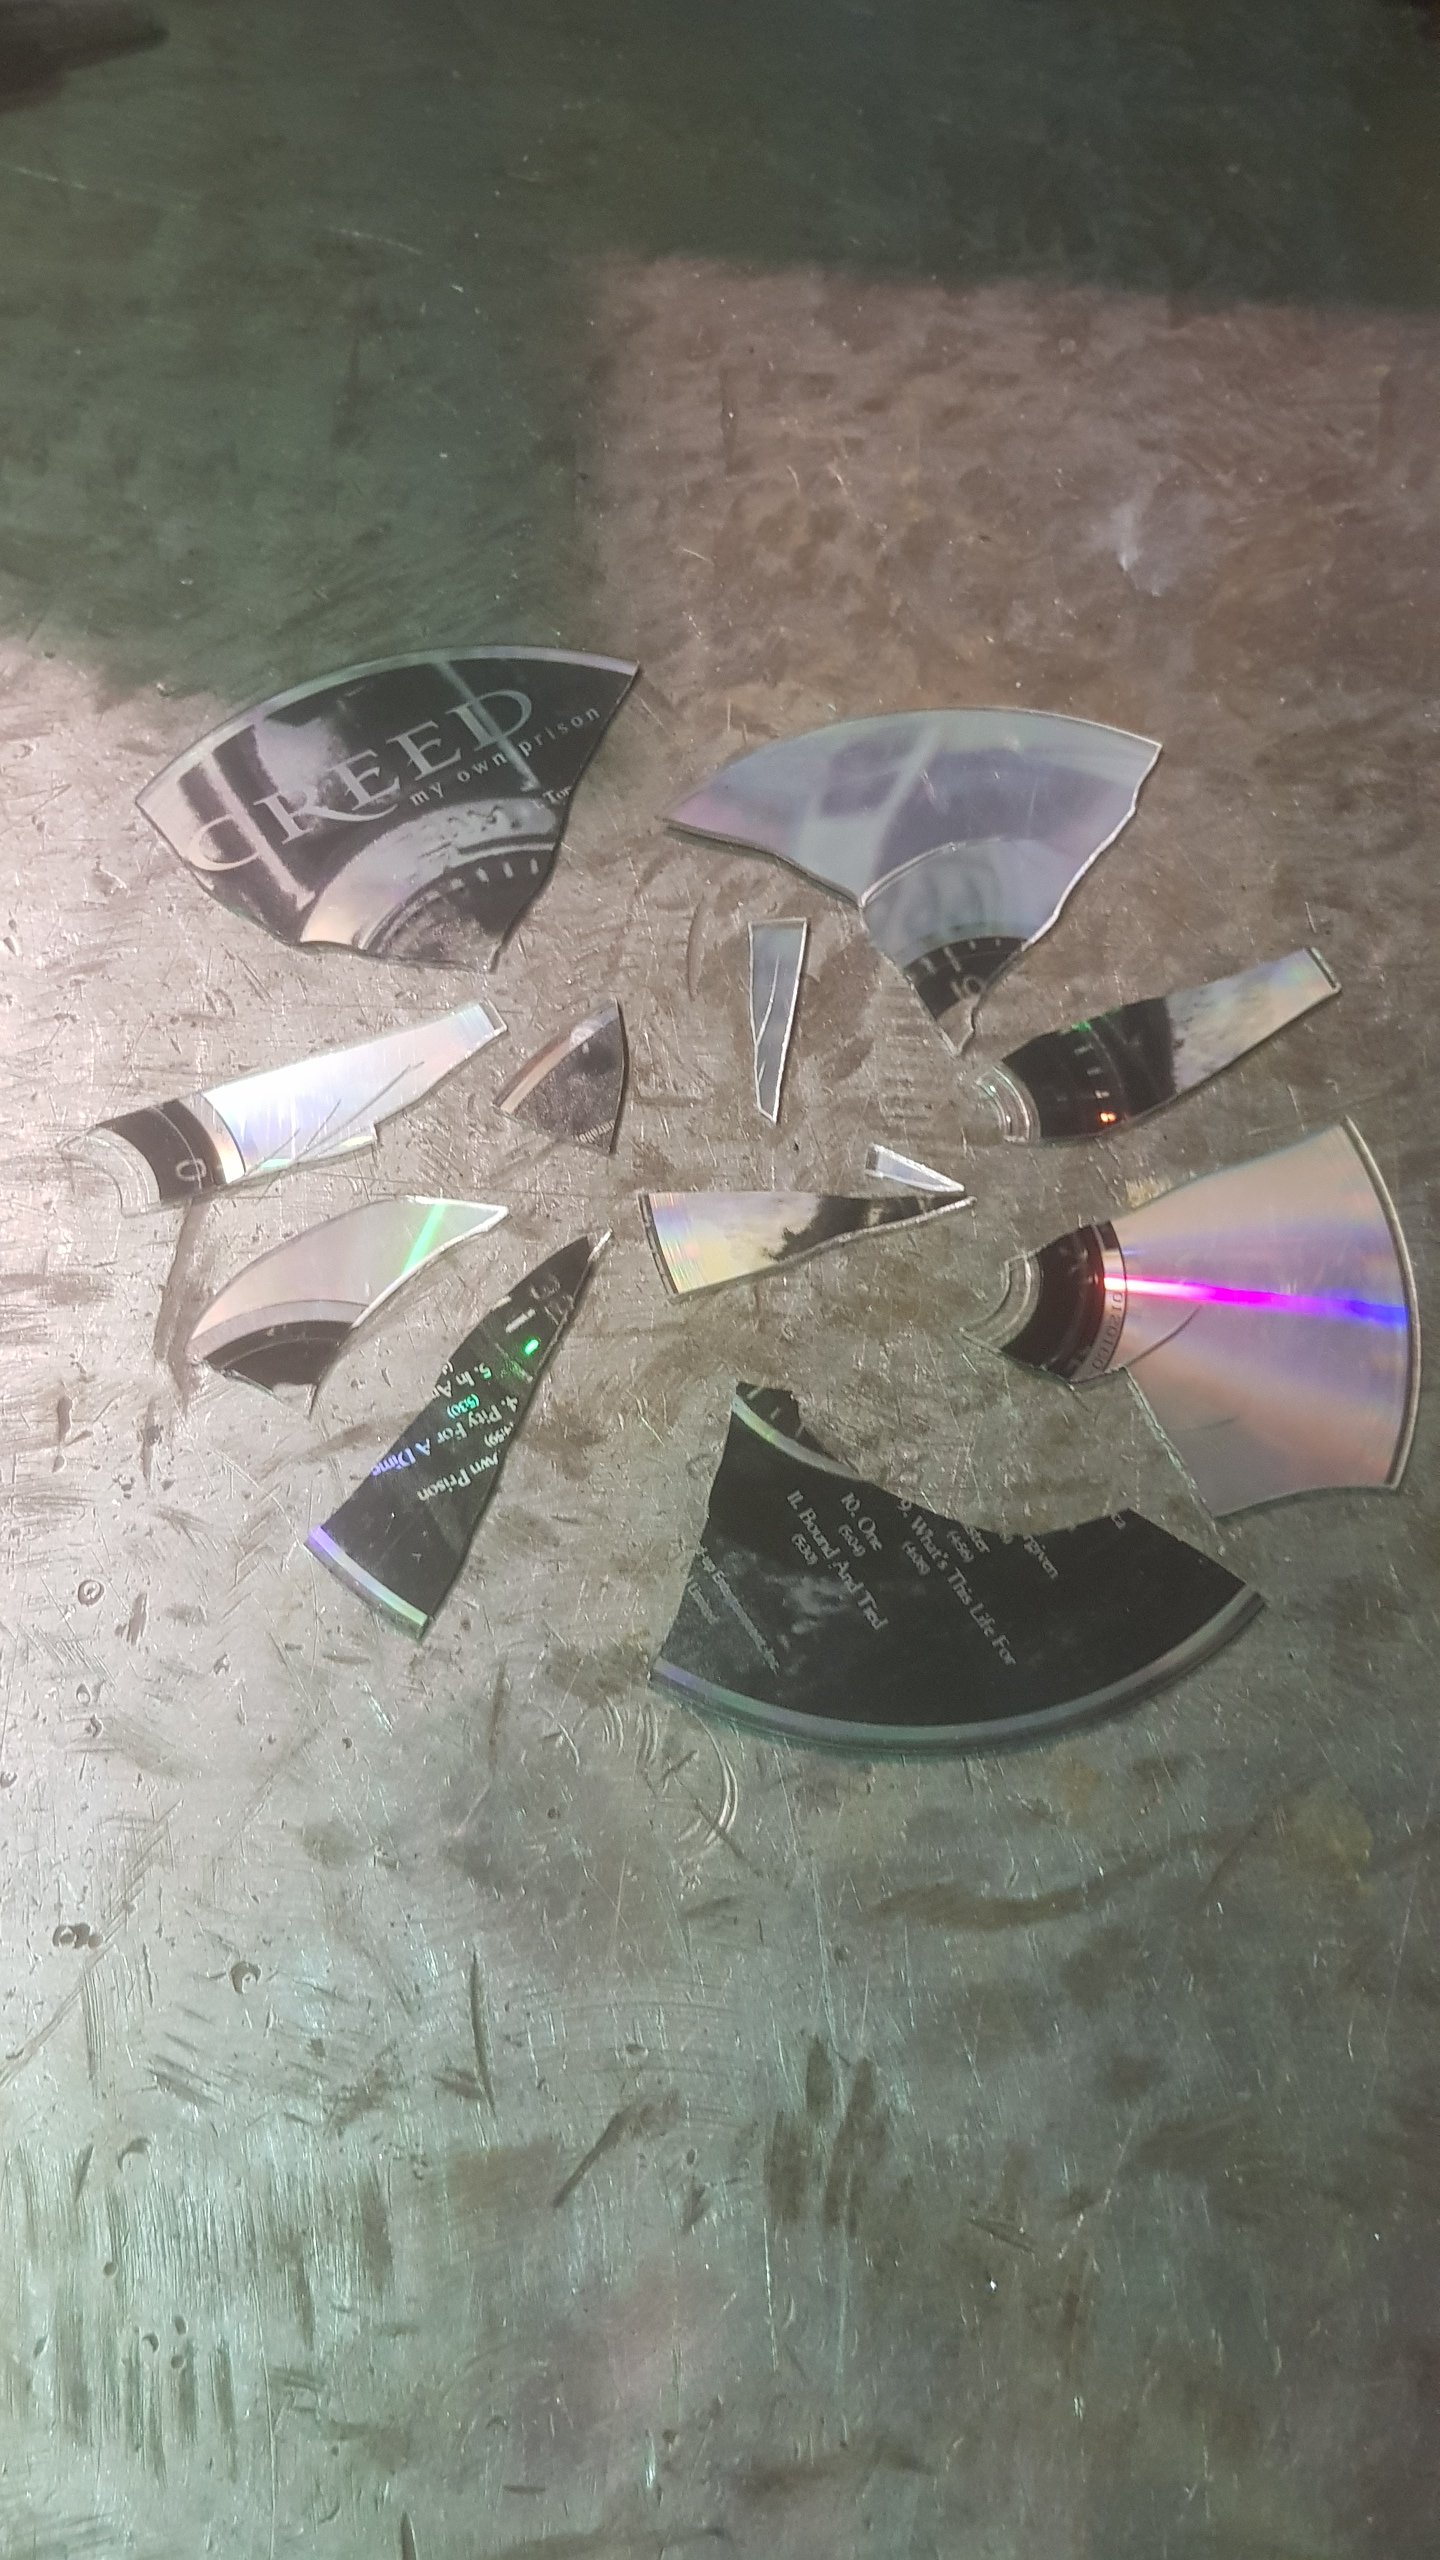
Got the all the wiring run, main fuse to Amp mounted and front speakers mounted. Wired headunit and powered it up. It spits out a Creed CD, so I did the world a favour.
2 points
-
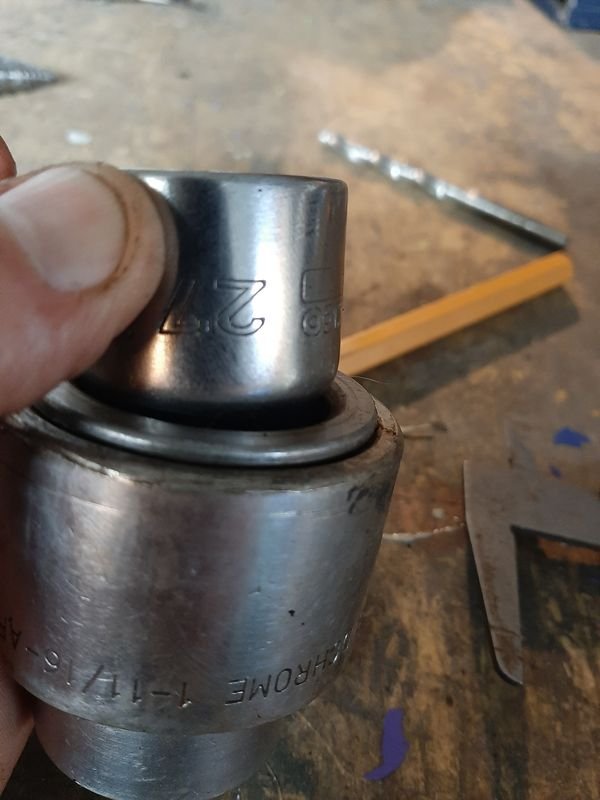
I was taught they're actually elliptical, and they're finish ground using a cam grinder style set up? Log the number of 9k pulls before it goes bang. (Then show your findings on a graph) The after you replace the next engine, start fund raising for forgies and rods when you hit half the number of pulls. In my experience, by the time you fit your third engine, the enthusiasm begins to fade.1 point
-
Oh hi. I am a wof inspector. Here is my interpretation. 1) if a rotor face is rusty, and the braking performance passes I would not fail, but others at my workplace would. My personal opinion outside of the virm is get some new rotors or at least get the old ones skimmed as brakes are important. 2) mazda 3 rear bump stop above the arm, if it looks fucked, fail, replace it. 3) any play in a driveshaft spline is a big fat fail. edit: see the definition of corrosion in the notes… https://vehicleinspection.nzta.govt.nz/virms/in-service-wof-and-cof/general/brakes/service-brake-and-parking-brake#note2 pitting in the rotors should be a fail. Light rust should knock off with some heavy braking.1 point
-
Used quite a bit for tooling repairs in nz, farking amazing to watch on a big screen, tiny little beads can build up in like 0.1mm steps, was a game changer for fixing fark ups or repairs.1 point
-
Interesting! Did not know that. Will take some measurements when I've pulled out one of the more intact pistons haha.1 point
-
we often had semi-seized pistons in the Falcons, especially the utes . maybe from burnouts or too many heavy loads rooting the prop. valve1 point
-
Yeah both mine were on ae111 chassis. One disc, one drum. Took a lot less time to work out the second time! Mine were not too far out, but nothing I did would get it closer.1 point
-
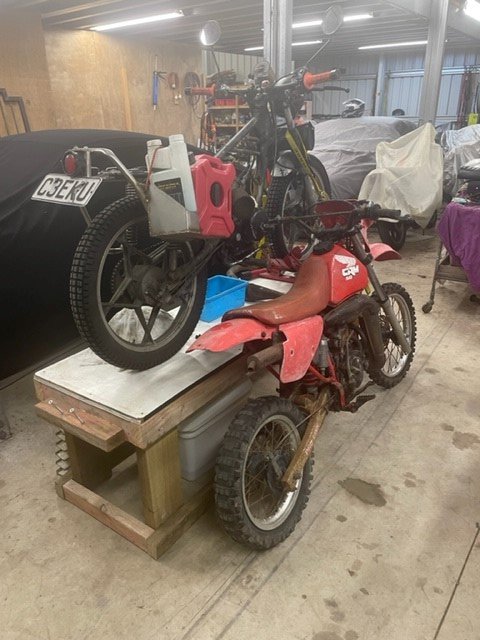
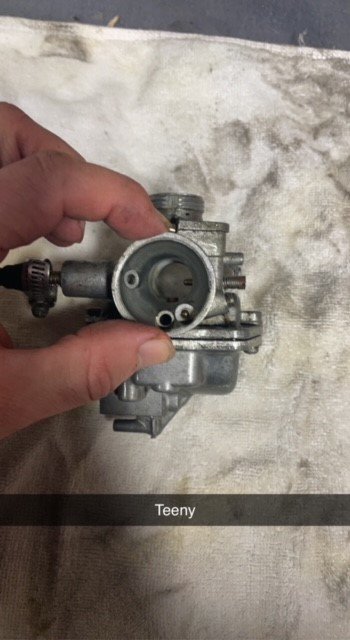
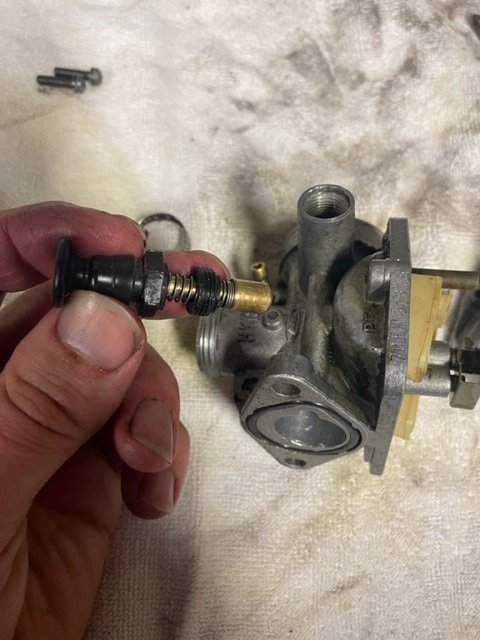
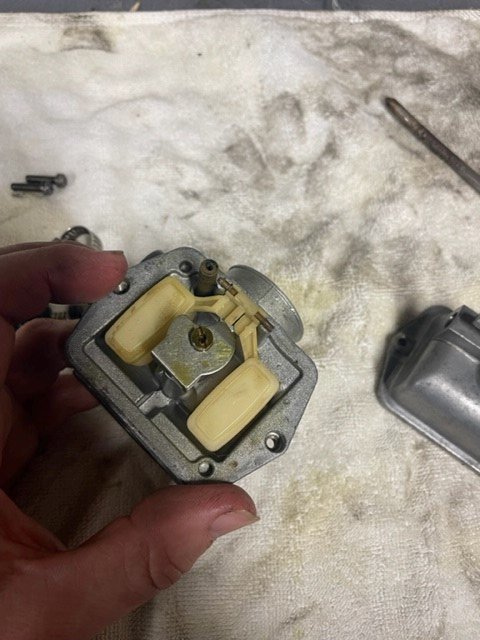
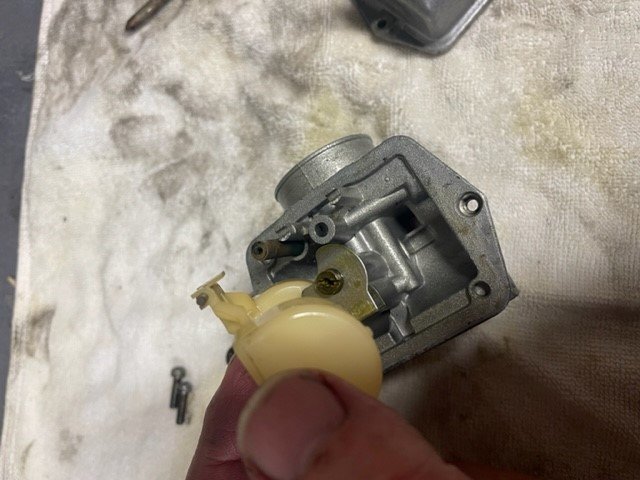
OK so my small bike experience has started to escalate... so I'm changing this thread to be a catch-all... First is the GT"50" - Silver Bullet Then there is the GT50. Its tucked away waiting its turn - hint, its been queue jumped... The RGV50 Frame is still in the shed. I still haven't quite figured out why I brought it. And then this happened... Scrolling the old Facebook buy and sell one night, and up popped this CRM50. It looked rough in the photos but mostly complete, the price was OK, and it was local! So I jumped on it and started messaging. Then I started getting messages from other oldschoolers asking if I could go and look at an old Honda for them haha. No sorry, its mine! Its been tucked in the shed for a few months due to lack of time, but with the next east cape ride looming I've decided to start seeing if I can get it sorted. Seller says "It will run, but pisses fuel out of the carb". I've had it started, so it does run, which is great! Last night I pulled the carb out for a look-see. There as definitely been some diddle fingers here... First thing is the choke plunger is broken and was held together with a hose clamp. Then I pulled the bowl off to clean and set the float needle. That doesn't quite look right The float needle is missing.
1 point
-
My mate fritz made a video of our trip back from Christchurch last July in this thing1 point
-
And I replaced all of the bikes steel tophat bushes with aluminum items, made in NZ this time.
1 point
-
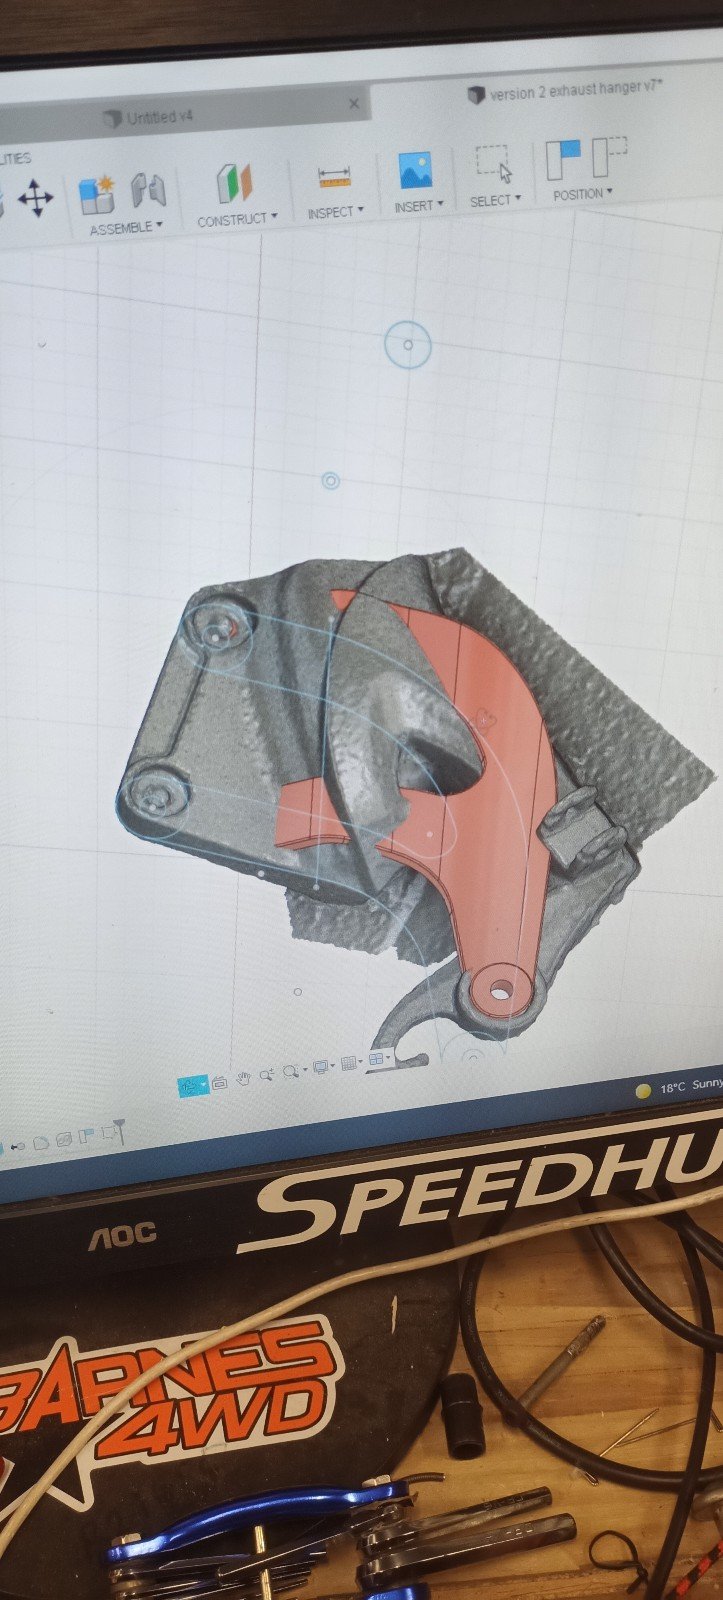
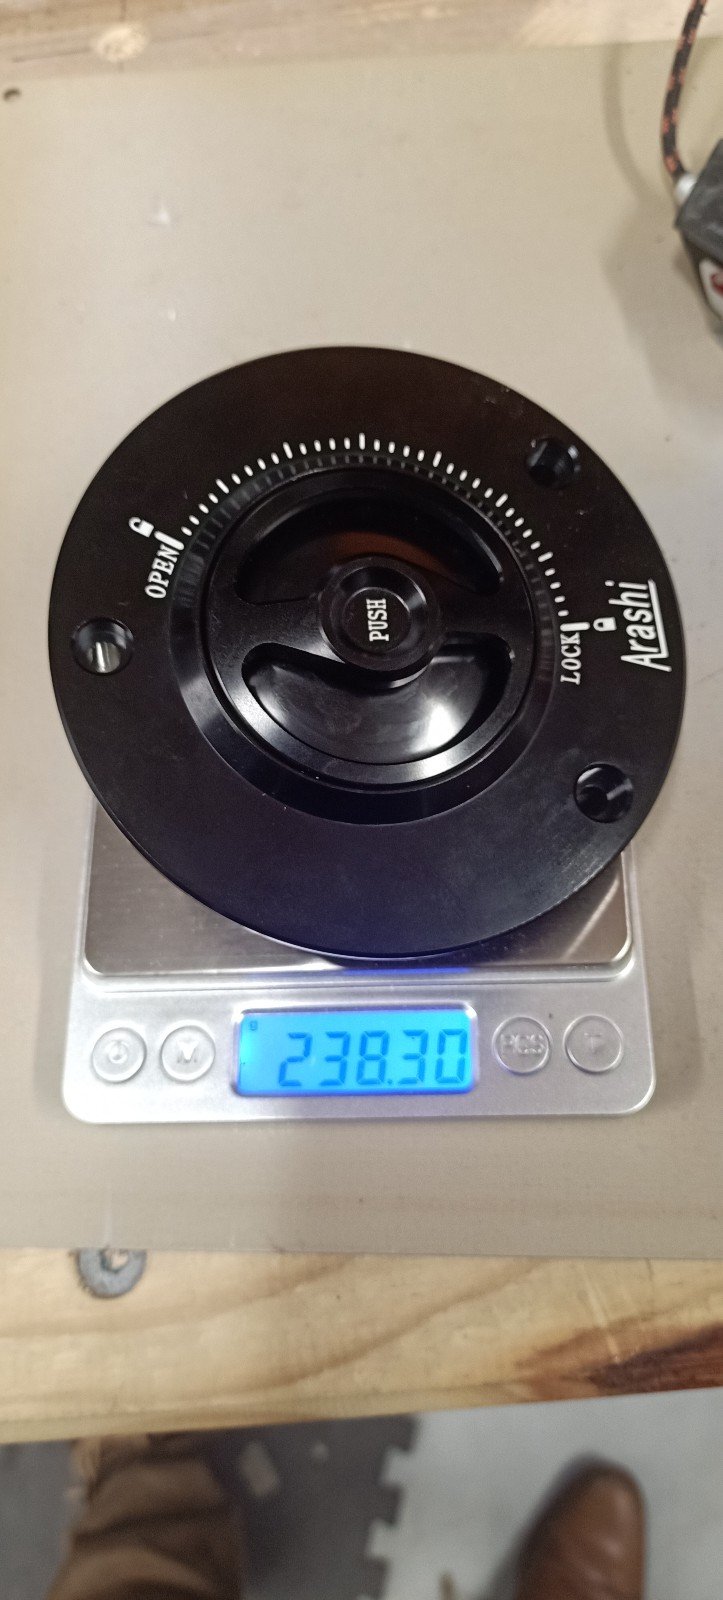
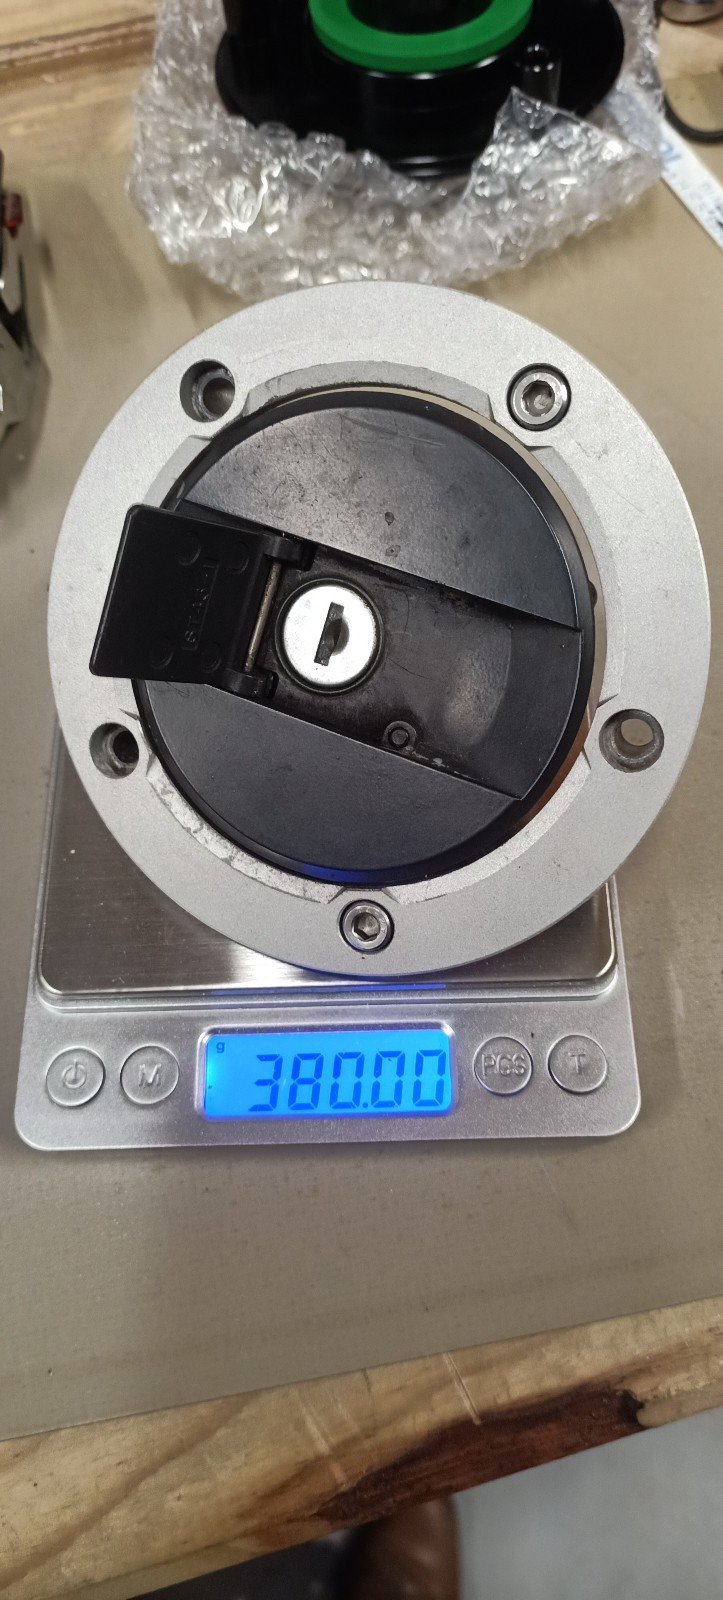
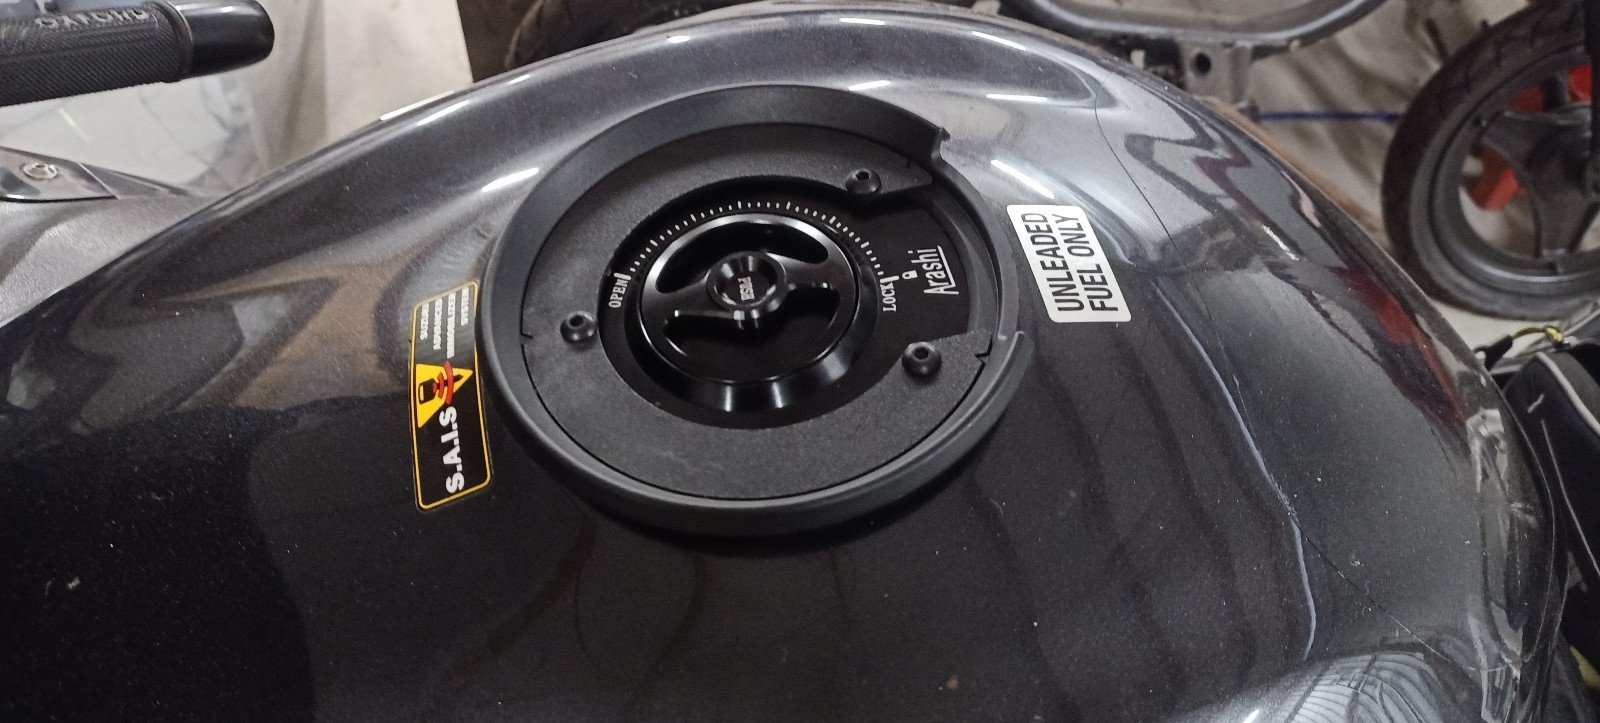
The exhaust hanger thing was still Happening in the background. It's a tough shape that has to come out of the factory fairing in a very specific place. To double check it's shape (so that I didn't waste any more of Davids printer flament) I took a scan of the factory part and merged them together. This worked extremely well!! And yes, it fit. Ali express provided a new light weight fuel cap for an insanely good price. Very happy with quality too
1 point
-
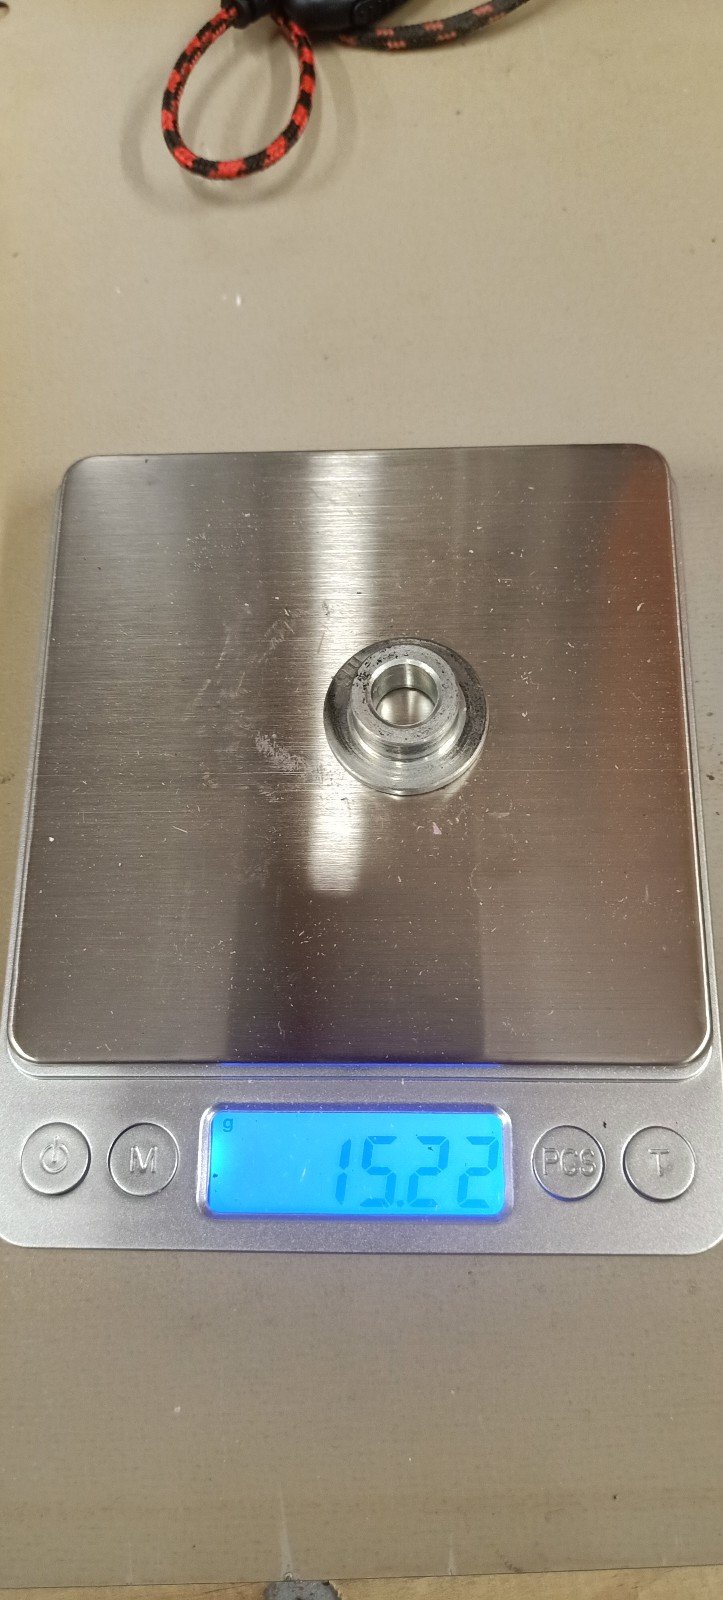
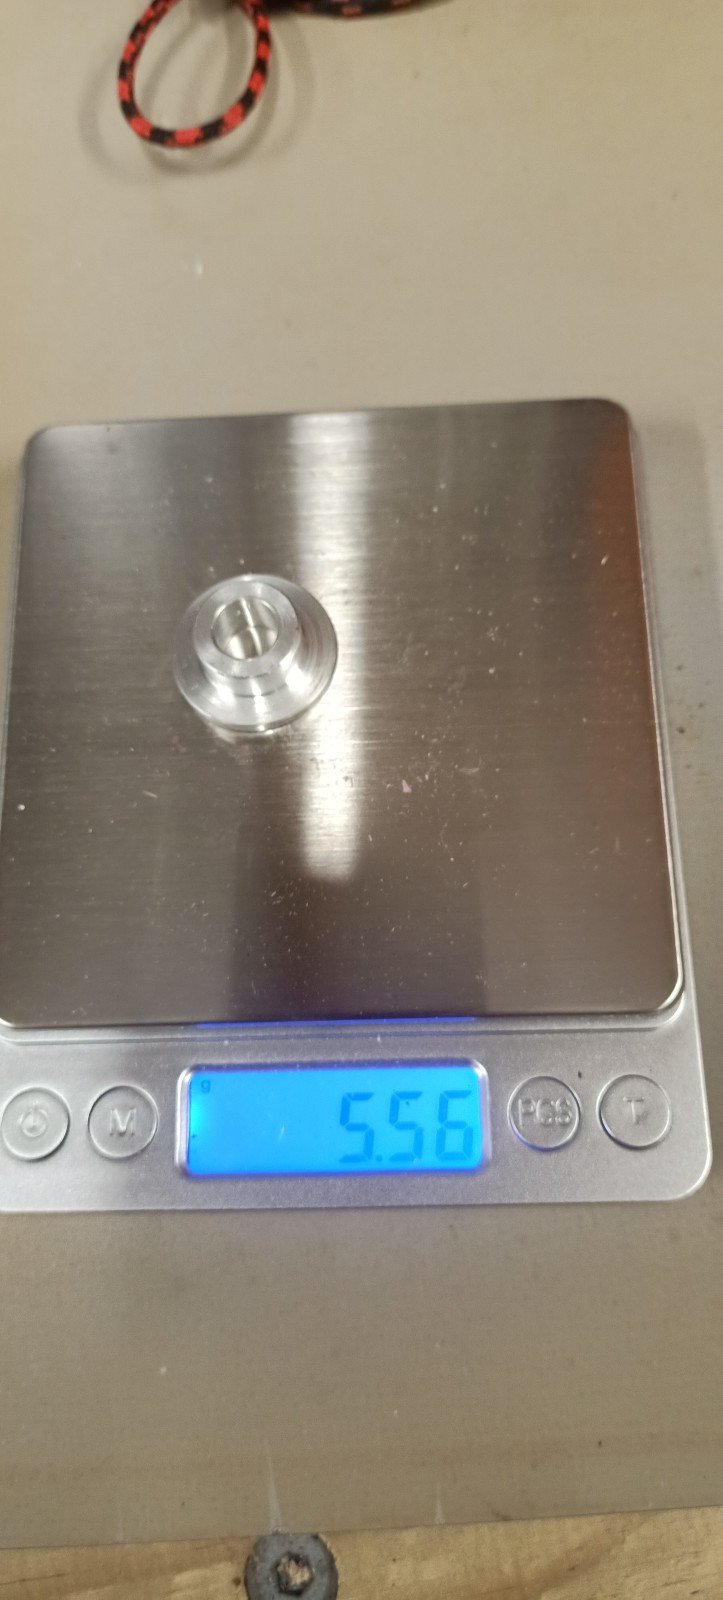
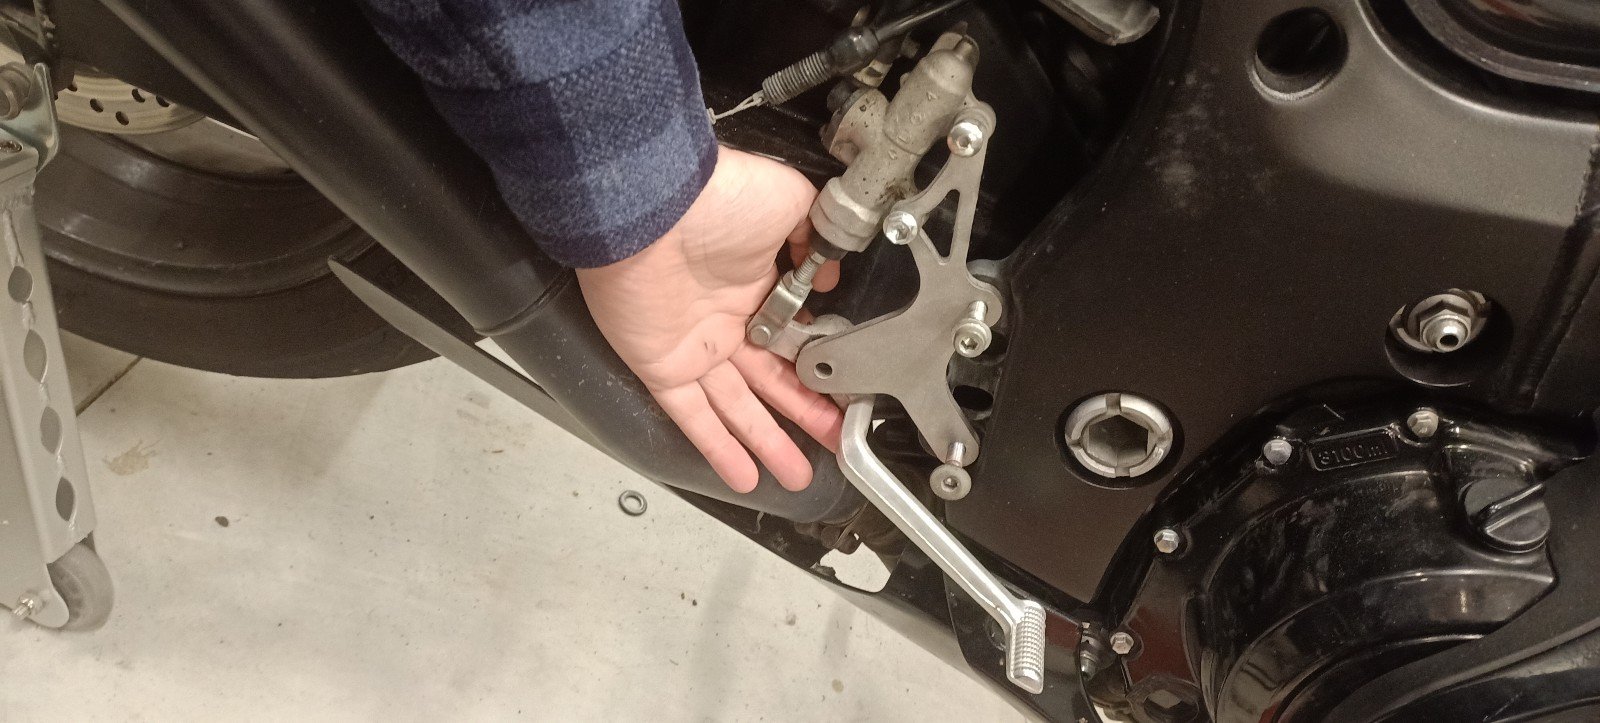
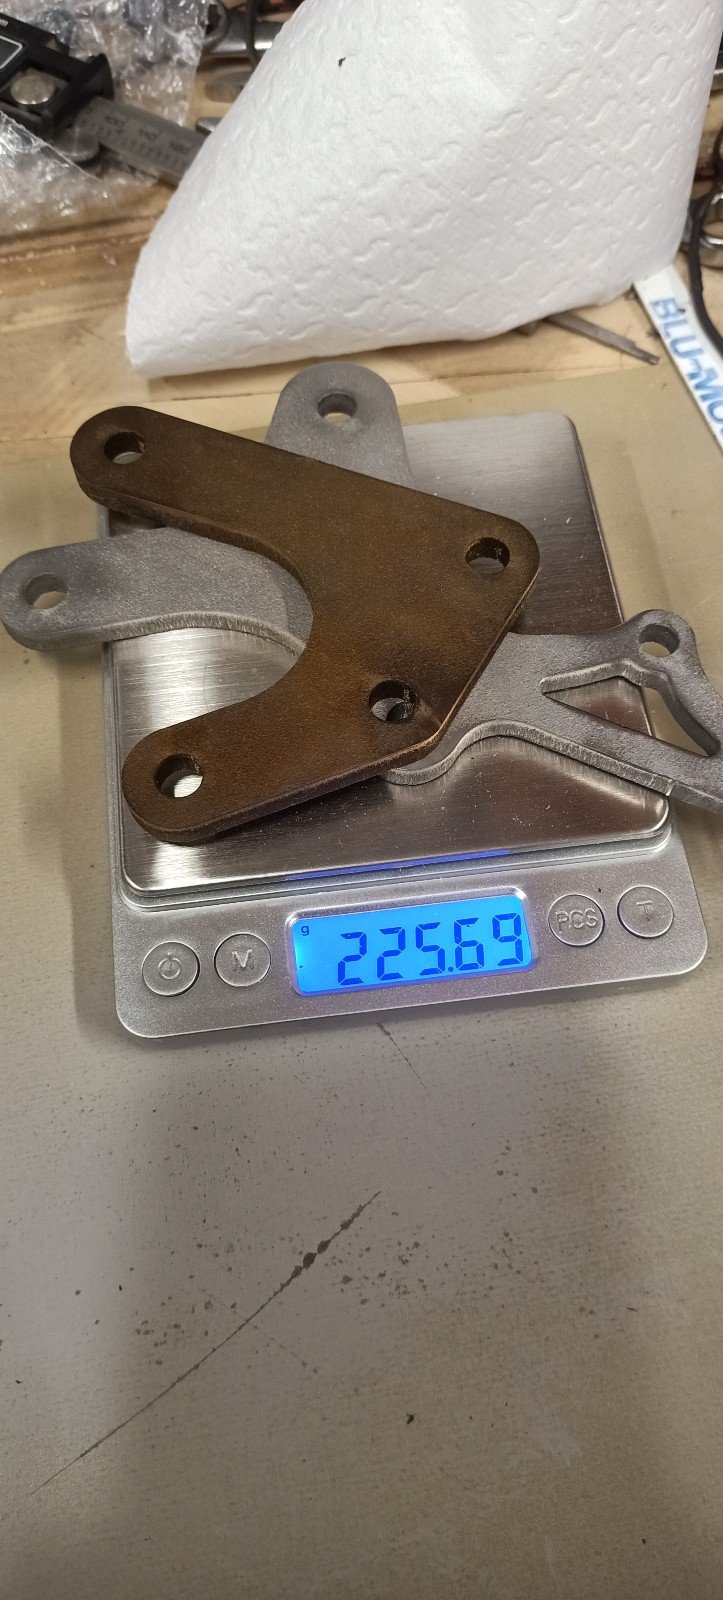
So I started again with grade 5 titanium. By this stage I'd stopped taking photos as I'd run so many simulations it was getting a bit old, but the results were good, the anticipated weight of each component was great, and I'd never played with titanium before so seemed like a good time. I sent some emails out within NZ and China. Its sad because companies in NZ really can't be fucked with smaller jobs and the associated admin. I got a few replies after waiting a few days and these replies ranged from not being able to secure the material (they couldn't be bothered) to having a minimum cut fee which made this only economically viable if I got three sets cut (I ain't paying for enough material to make that happen). China made me feel like a king with absolutely great customer service, though I was still not 100% that I wasnt getting scammed... But after a few weeks my titanium rearset plates arrived! I haven't had much time for filling around but need to tap some holes and buy some pegs, then they are good to go on permanently. Weight saving from the change to these Ti plates is 500g, however when I include the change to the associated light weight pegs, nicer bolts etc will be well over 1kg. Colour change is due to some DIY anodising- super easy with titanium!!
1 point
-
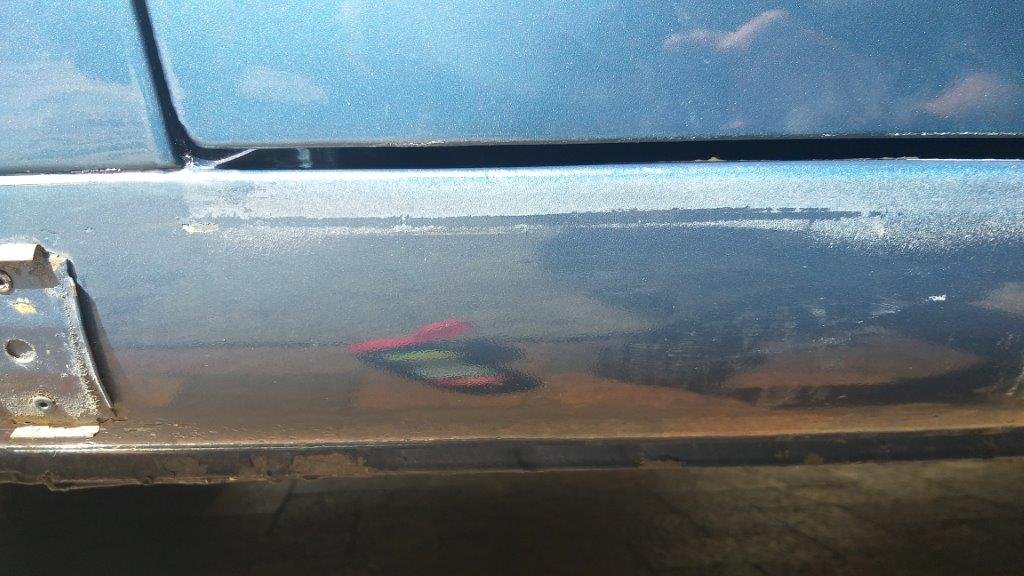
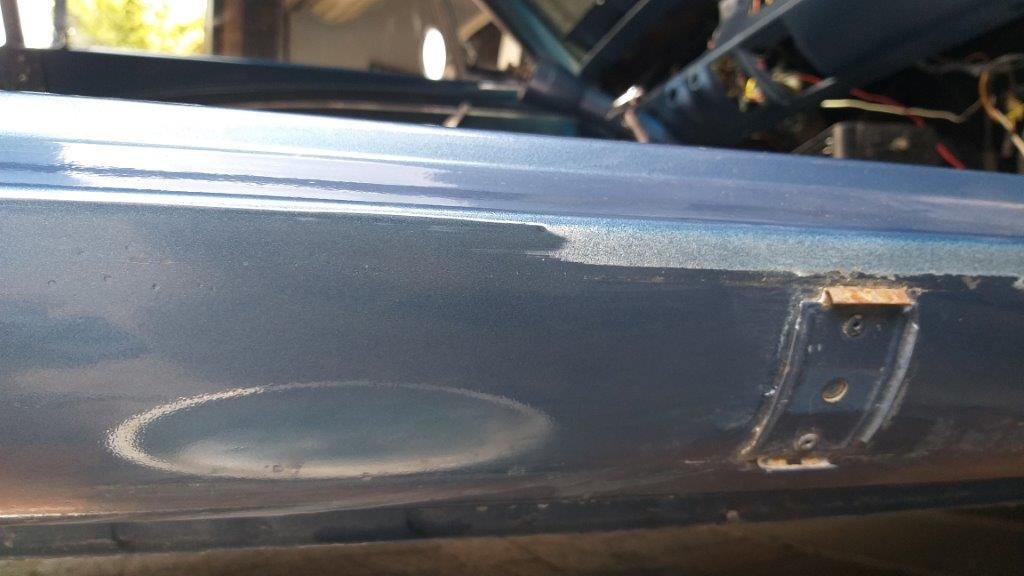
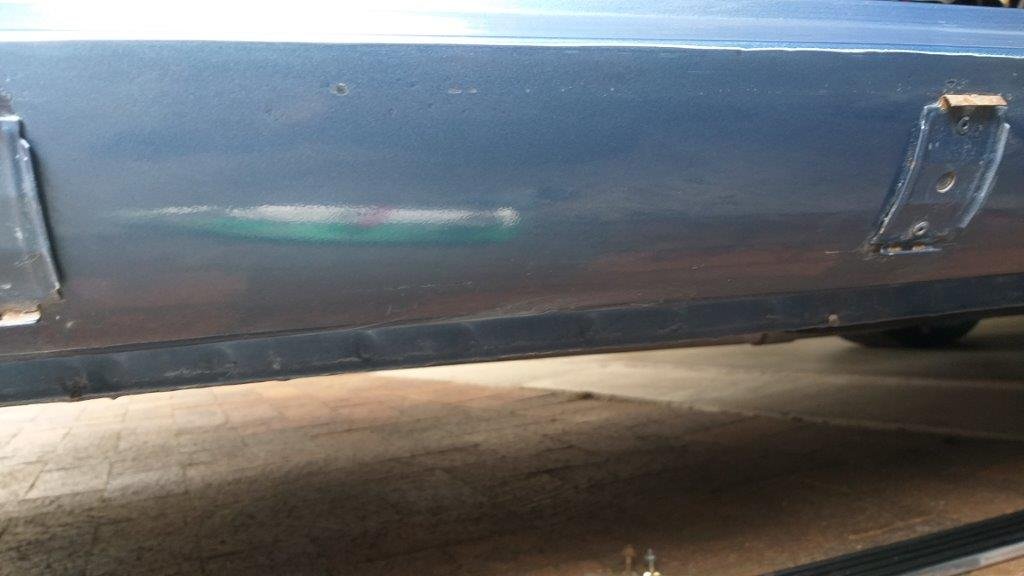
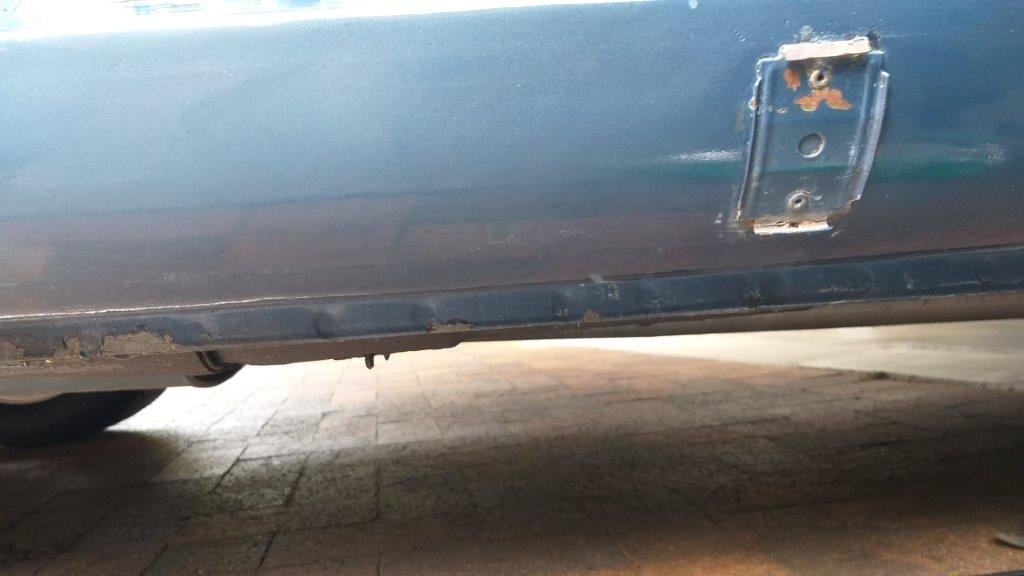
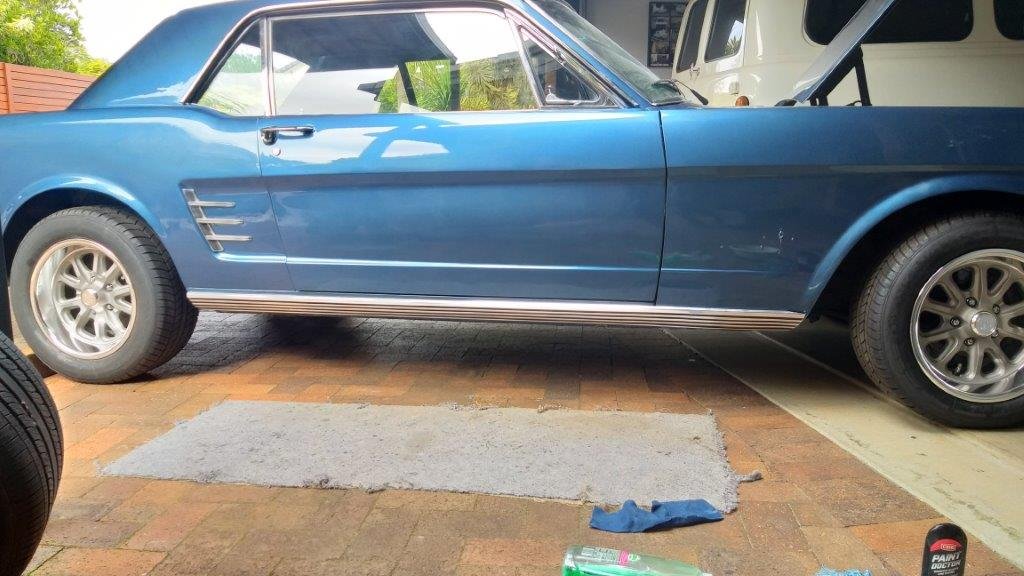
Thought I'd quickly chuck the side trim on this morning before moving on to other things. Err....... no ..... The $1,000 USA respray from 2010 comes back to haunt me once again. Looks like the door jambs must have been painted after the lower side valance and I only noticed the ugly over spray when I got down and personal. If it was just colour that would have been okay, but it's bloody primer too. If I'd have noticed it earlier we could have painted it at the same time as the doors, but oh well. Managed to ease most of it off with a piece of 1200 grit water paper followed by a bit of rubbing compound. It's not perfect, but it's a lot better than it was. Thanks for looking.
1 point
-
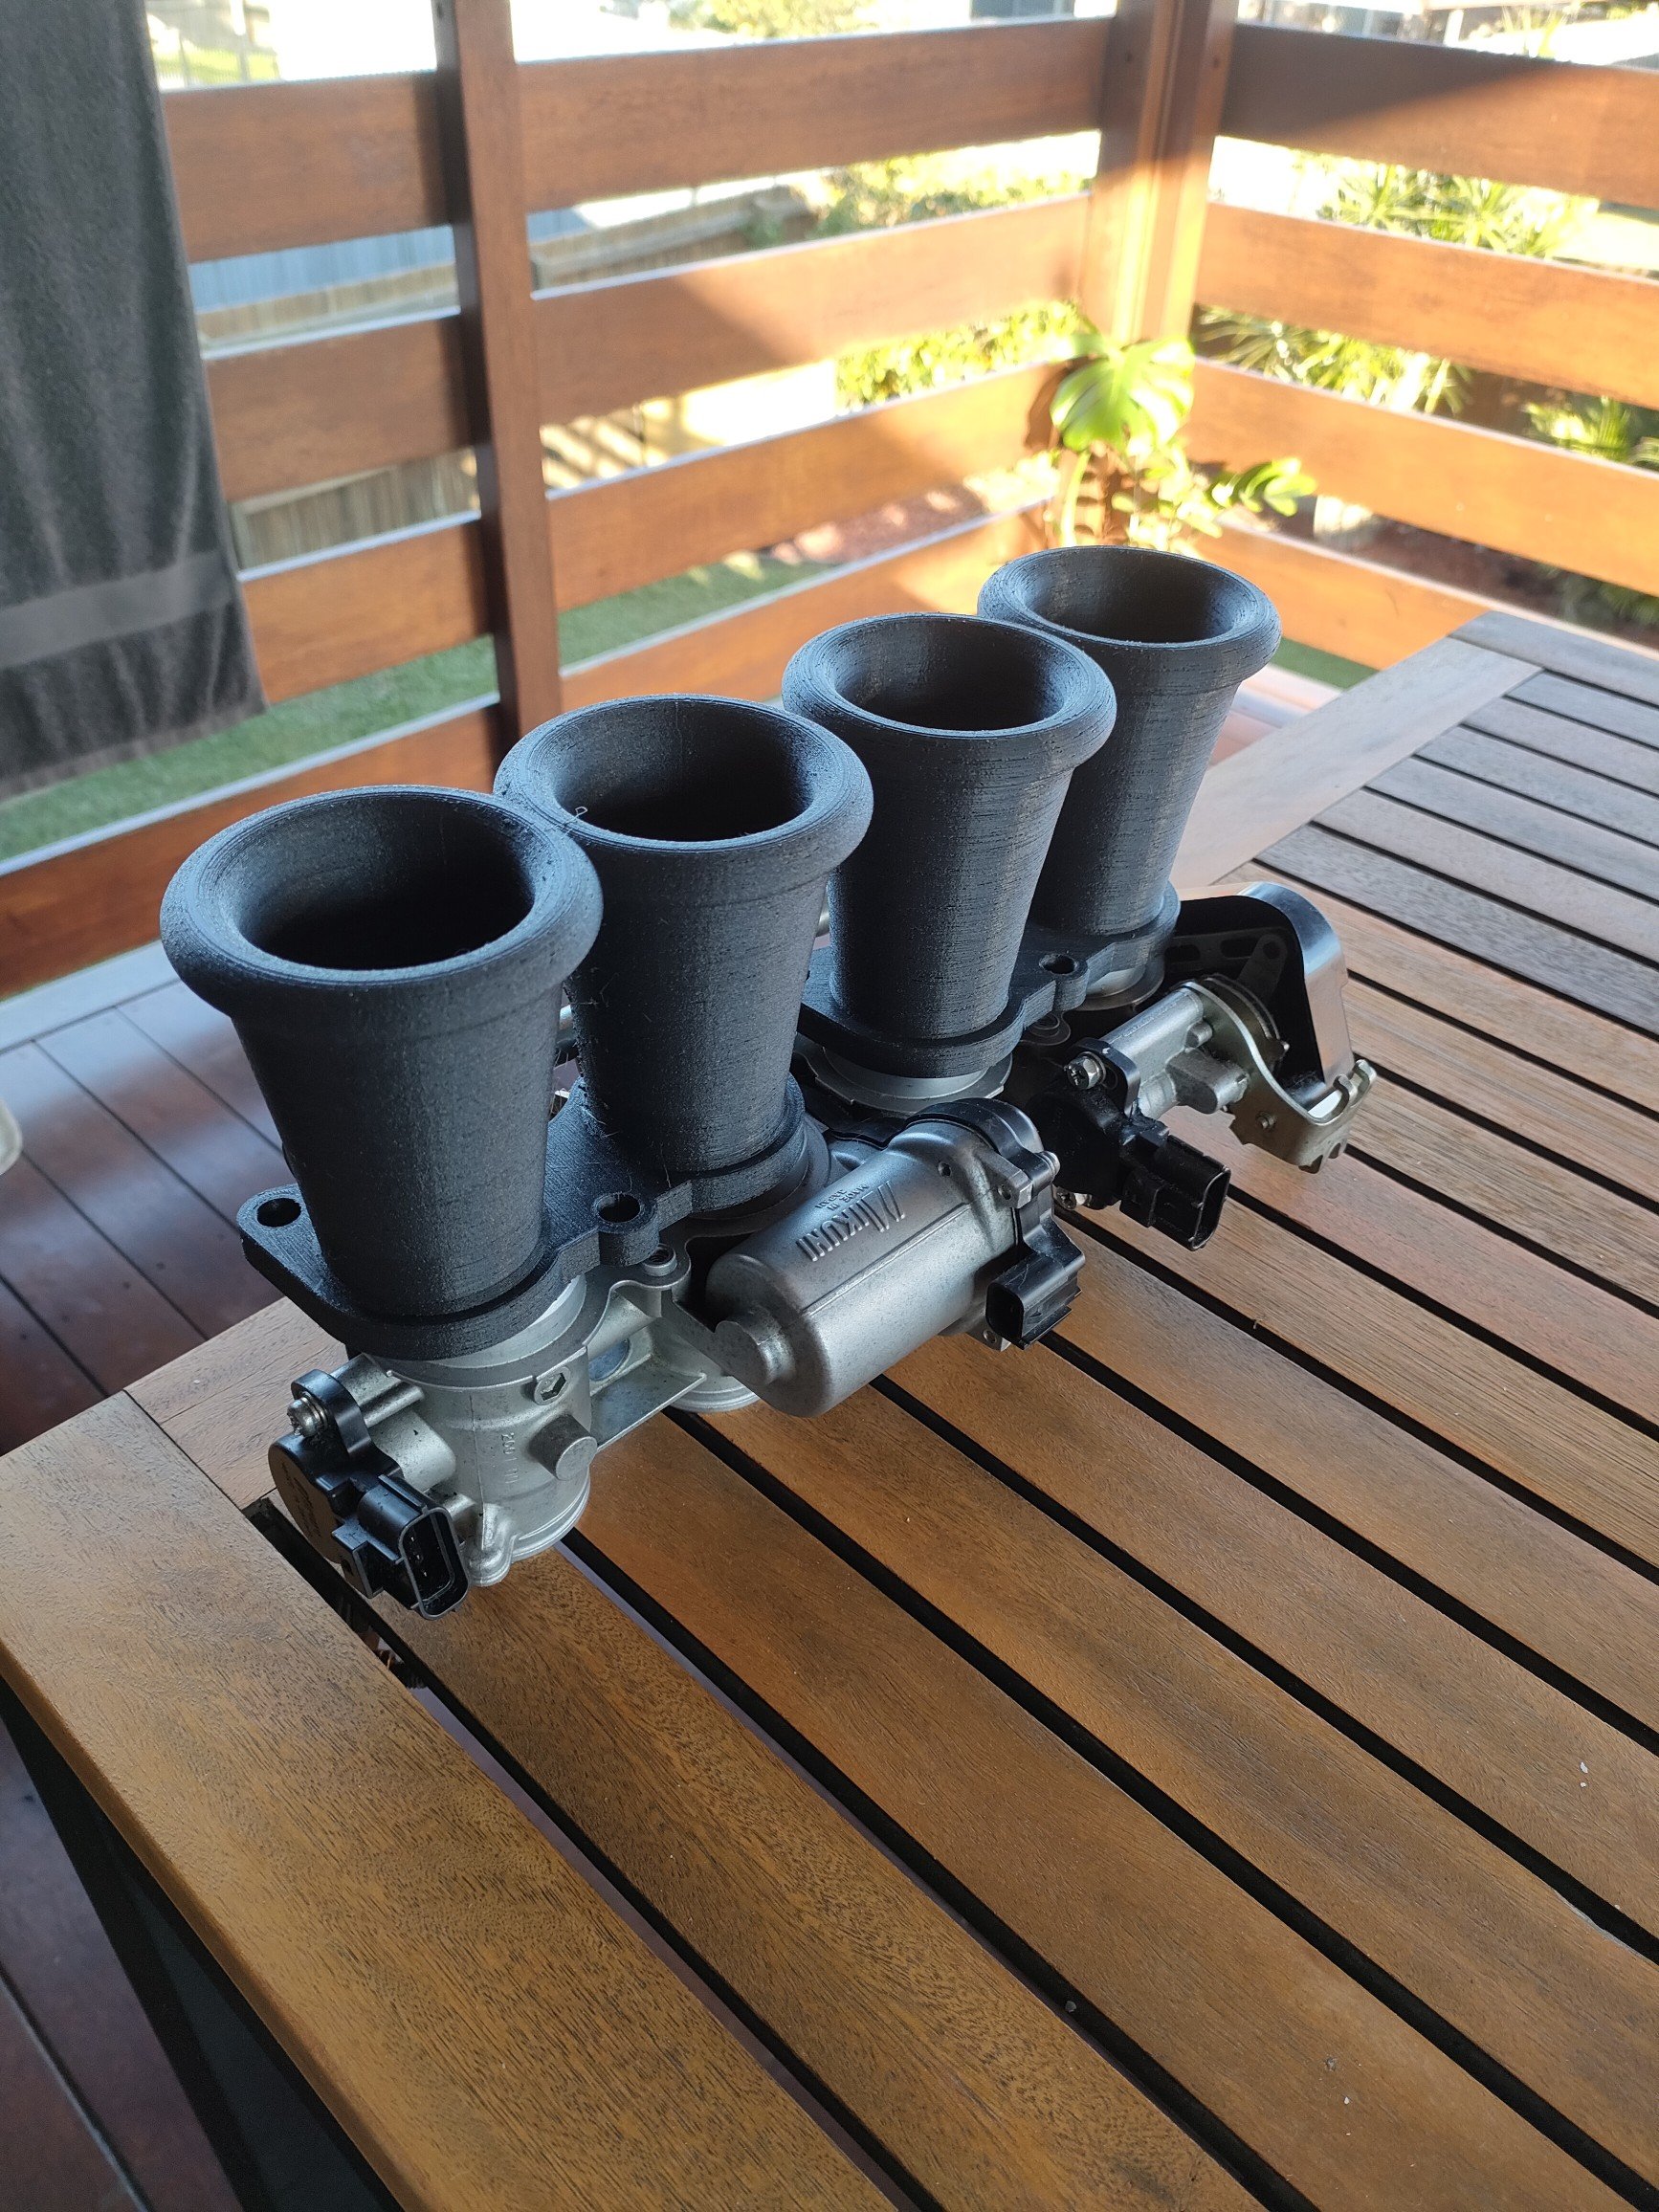
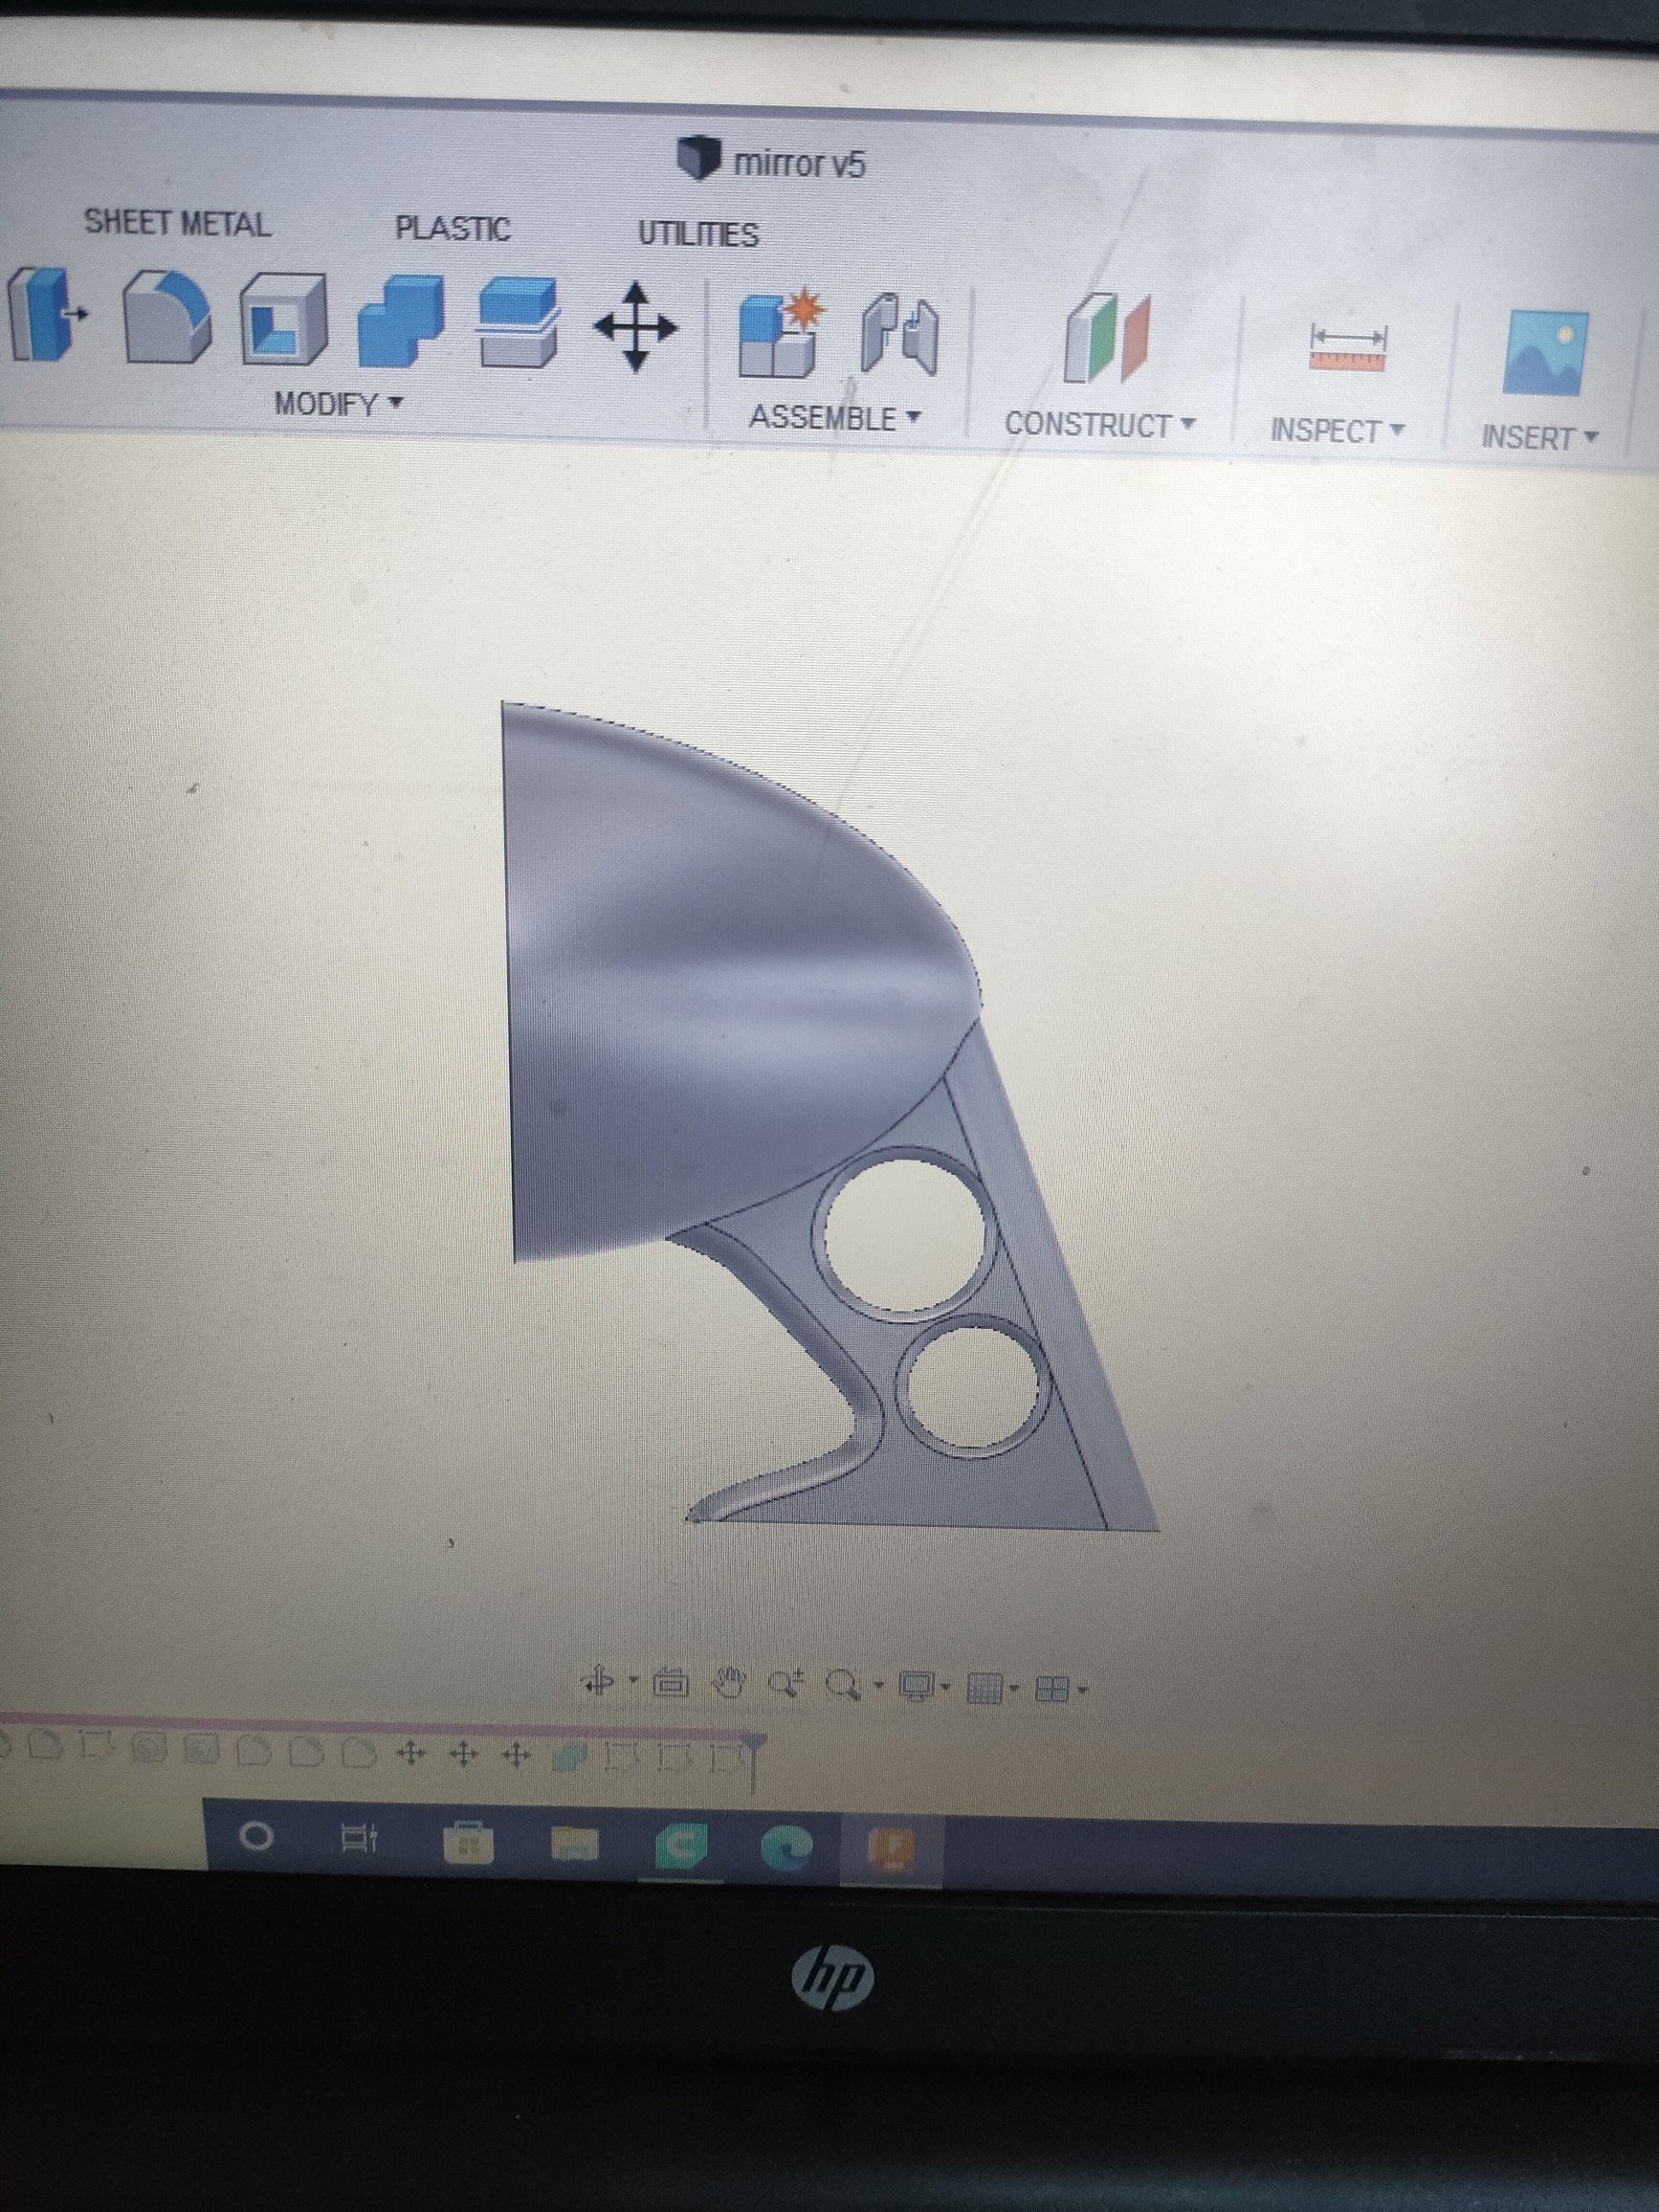
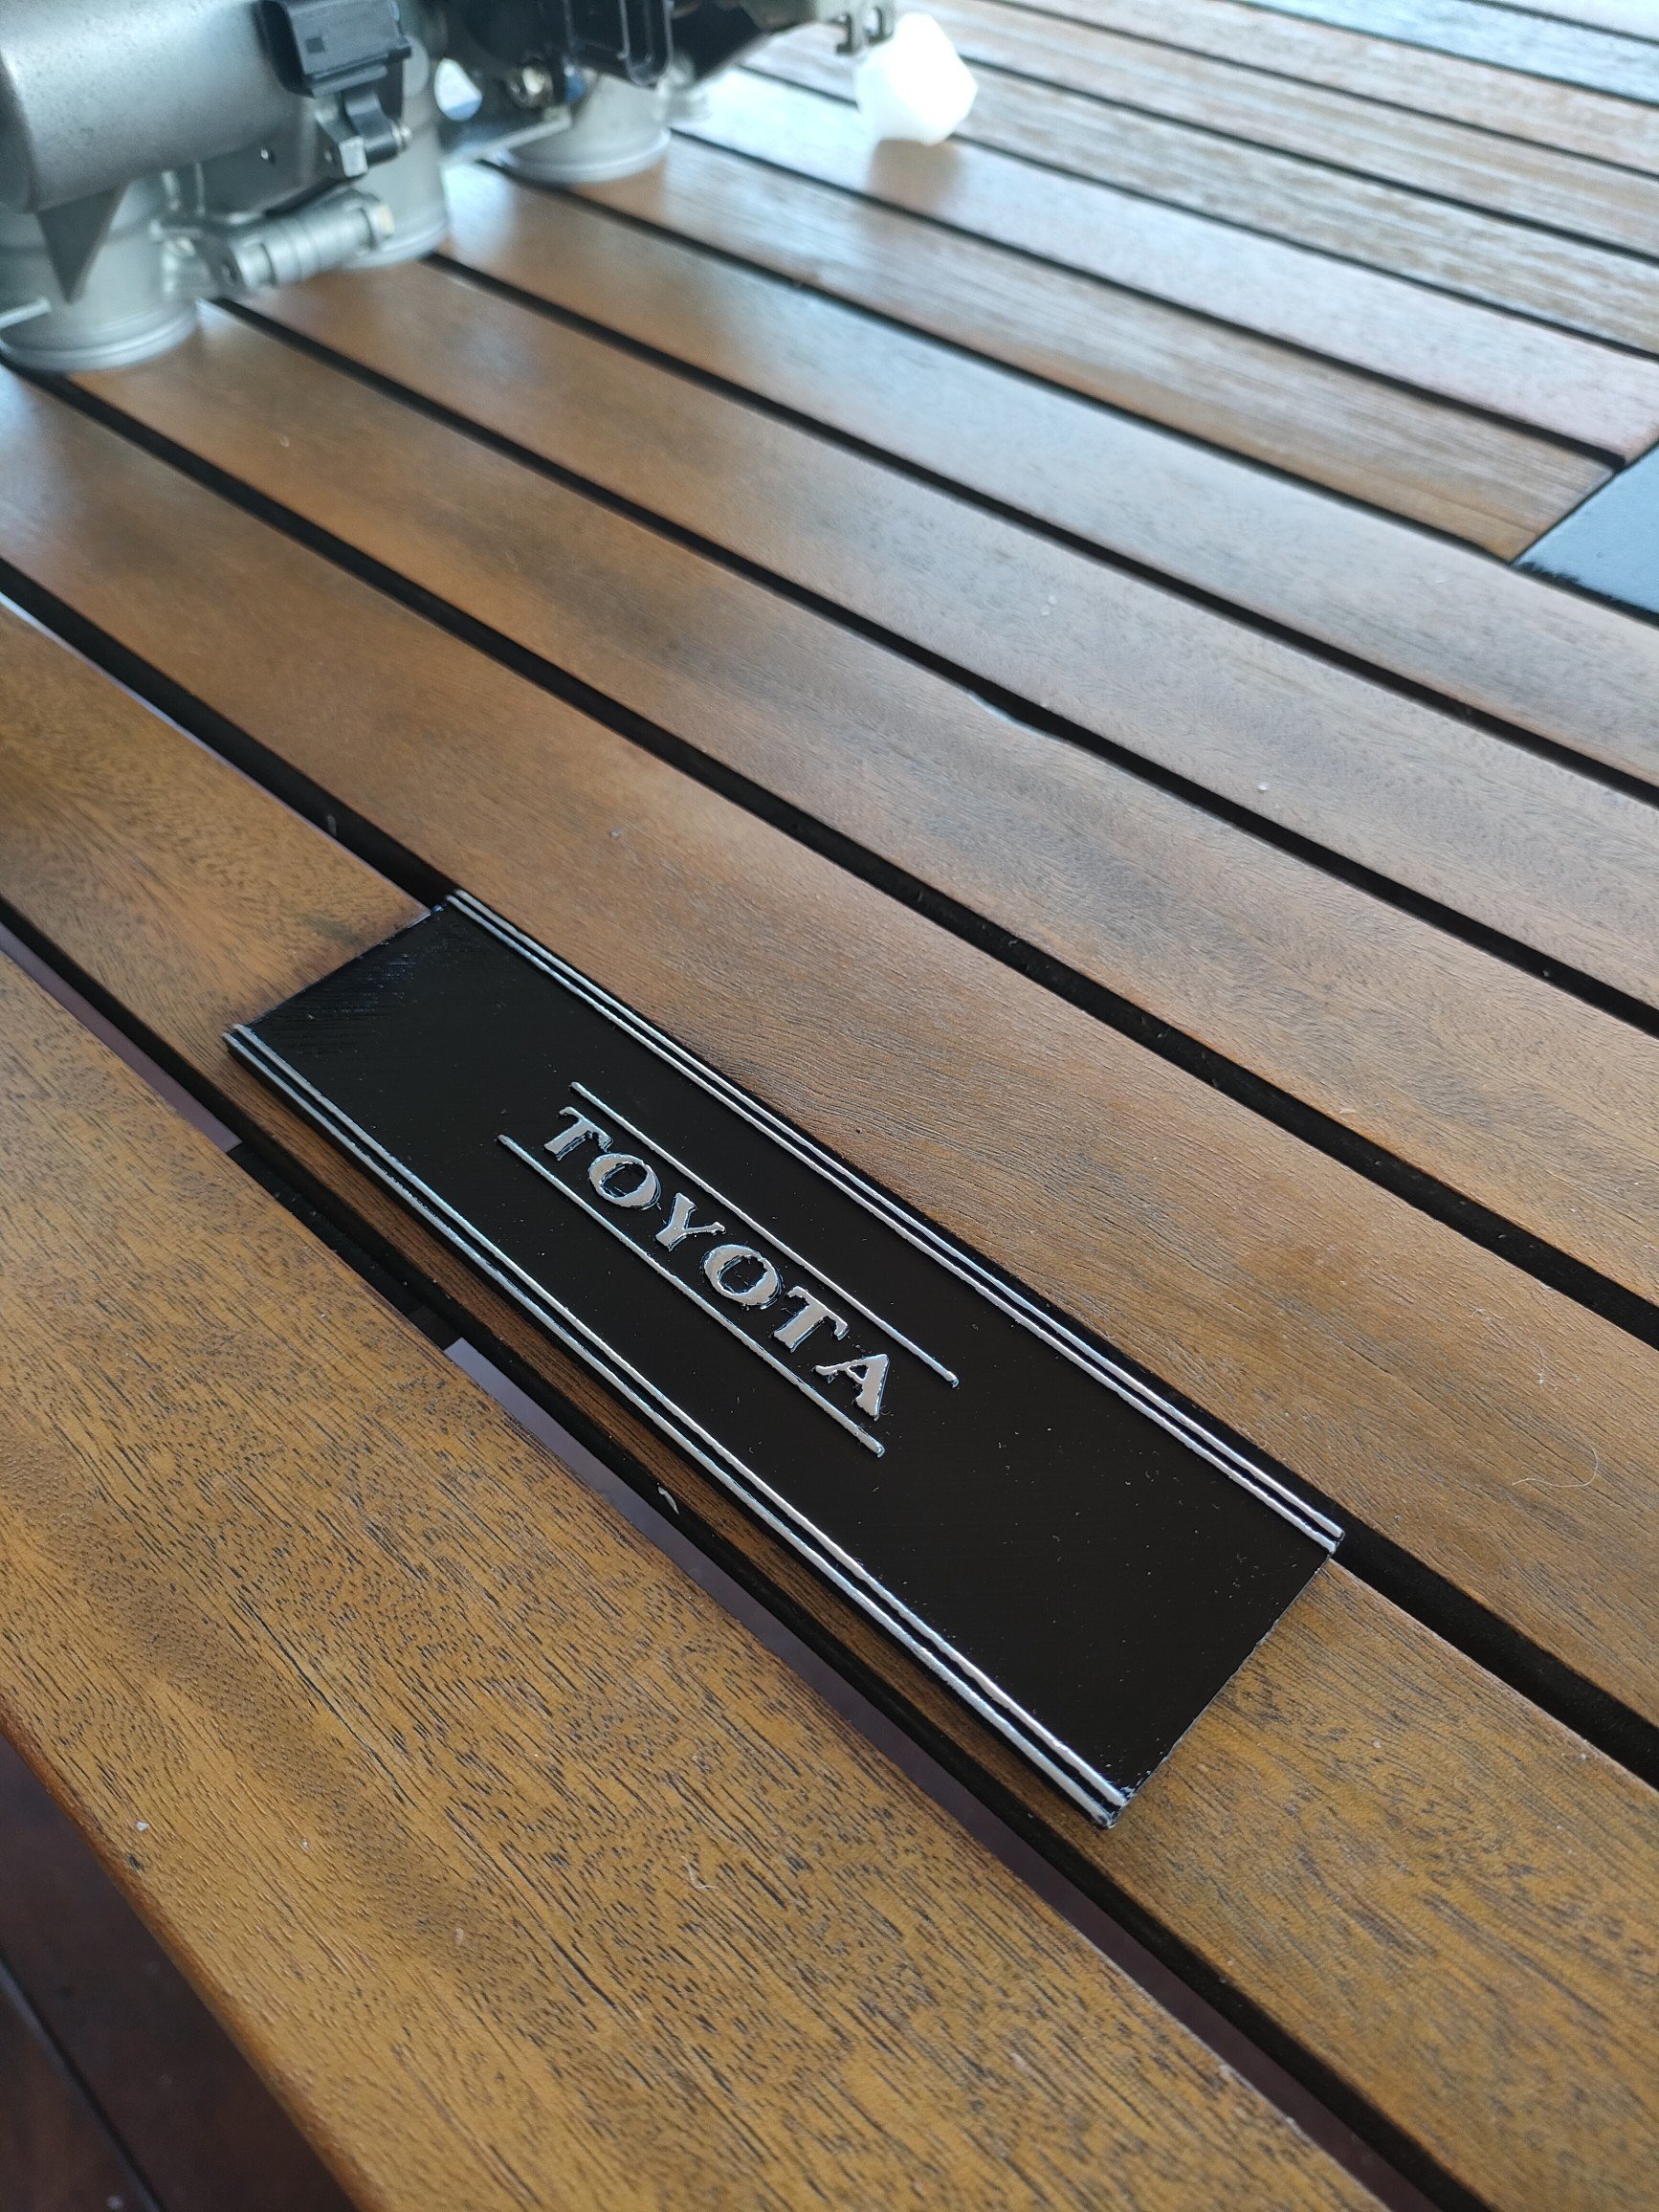
Not much progress on this lately, unfortunately. Looks like I'll be changing plans to a different style IRS rear end. If I use the MX5 one, I can't run a rear seat. I did however buy a 3d printer. So been learning how to use fusion 360. So far made some velocity stacks for some R1 itbs, and a radio delete plate for the wagon. Will try a flatter paint next time. Was supposed to be satin, but looks too glossy for for my liking. Some guard mirrors are next. If anyone has dimensions for either the mirrors, or radio plate, that would be amazing.
1 point
-
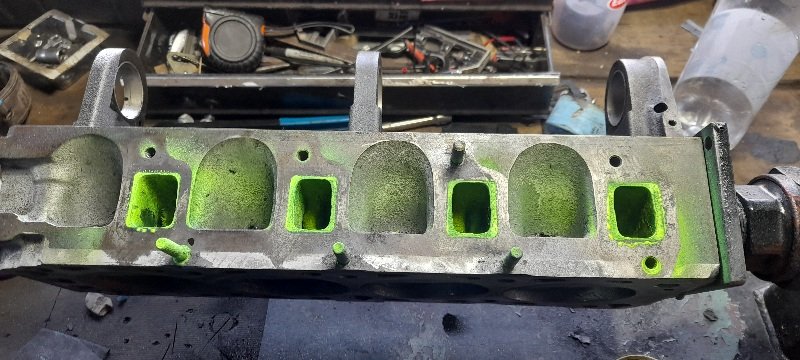
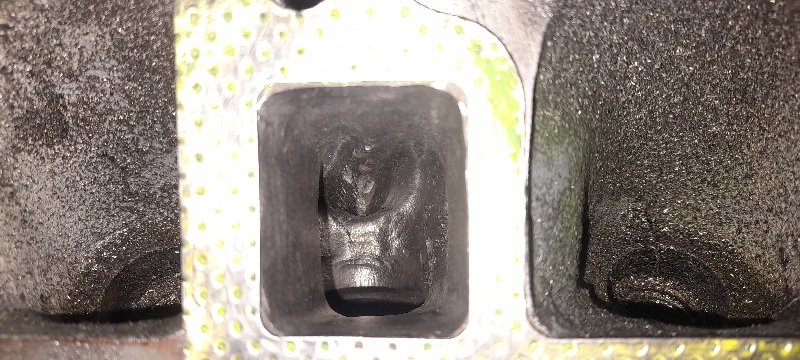
I made a start on the head today ( bit of work ). the exhaust ports are going to be opened up being a turbo so I started with that side .. might just do a bit in the evenings after work.. this is a standard pinto exhaust port. the manifold is allready matched to the gasket so I just put the gasket on the head and painted it to give me some guide lines. and here's what I've done so far ... I'm paranoid about going through in one side where it is thin so I didn't do that much that side ... just opened it all up.. still only roughed at this point.
1 point
-
bits and pieces have arrived for the motor (still bits to come) but most importantly the pistons have ..so I can putva rod and pistion together and check the compression ratio to see if I need to deck the block.. turns out it's 8.263 -1 .. I'm pretty happy happy with that to run boost.. also huge thanks to nismo-Capri for rods... and info on porting heads... that will be next on the list . while I wait for some bit to turn up.
1 point
-
It drives. Got a few bugs to work out though. The main one is it gets hot, and can't cool itself down. This might be a bit of a prick to sort out as there's no room left I think it has more boost than it should do Brakes are a bit spongy, might need next size up master cyl, might improve once they bed in a bit Seats are a bit low Needs something to stop the pinion angle changing under accel, driveshaft just knocked the floor slightly
1 point
-
I stepped in some rocking horse shit , slipped and landed on a unicorn. yup that’s right, I found a stock GTX gearbox that has been rebuilt. it us now on its way to me along with a left driveshaft and another baby unicorn, a working AFM. price paid, much less than I was expecting to have to pay for one. i technically have the parts to put together a complete car from a rolling body. Don’t dare me please, I can’t deal with that kind of pressure.
1 point
-
1 point
-
Not bad for a 17yr old kid. told him to carry on and do the whole car. got a couple of spare bikes to sell to fund it. stoked.
1 point
-
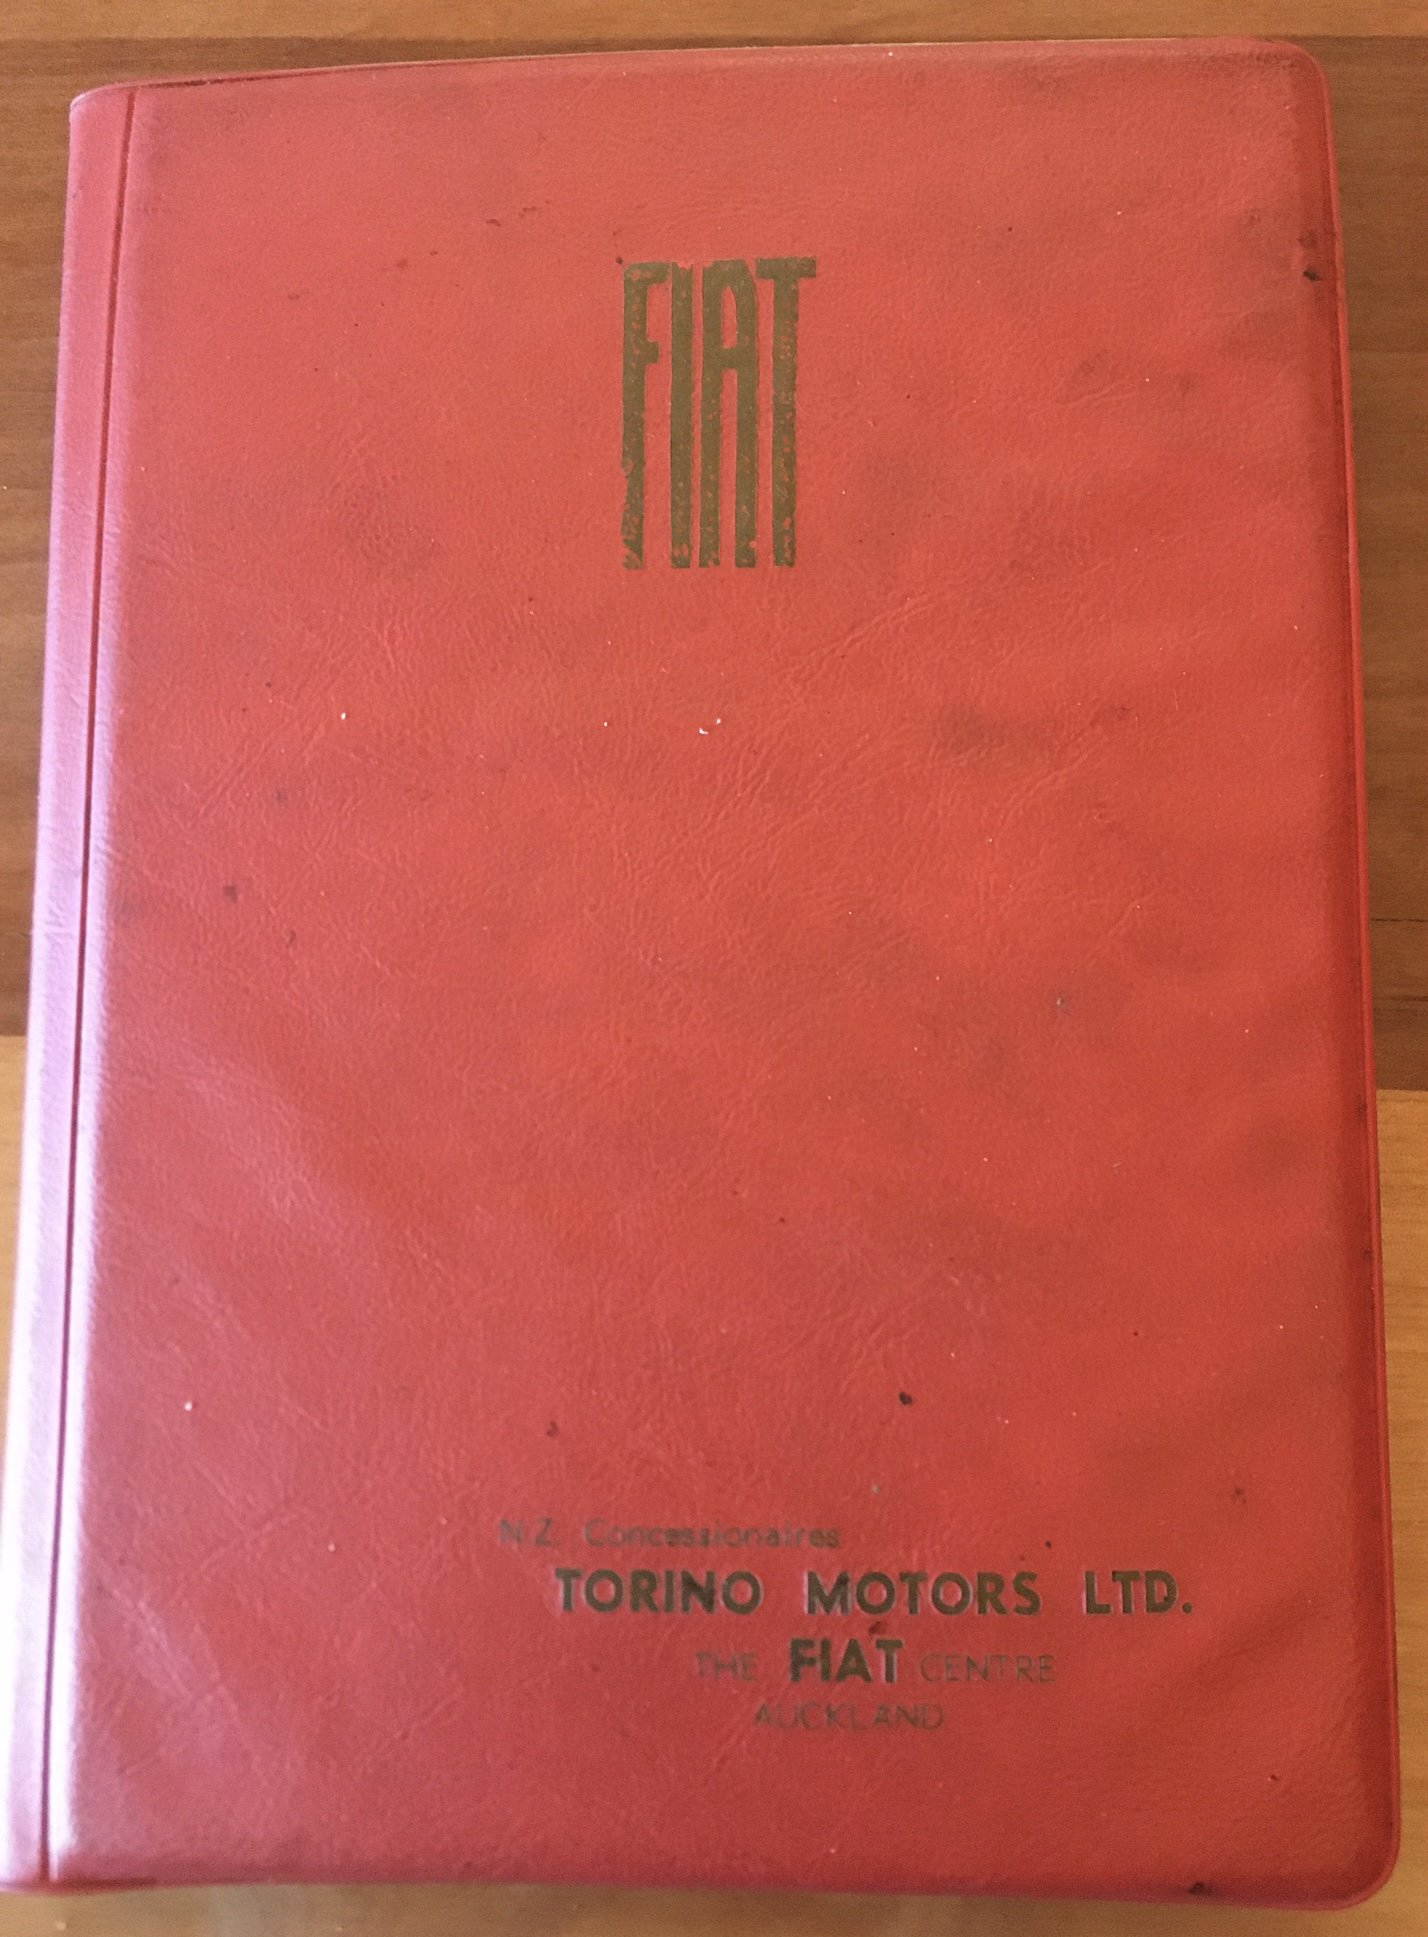
Last year with great haste and excitement I bought a 1966 Fiat 1500. During Covid lockdown. On the wrong Island. 1095km by road and sea from my house. In my defence, a few years ago I also obtained an MG that was 1000km from my place and fetching it was a fun lads’ mission, so confidence in a repeat mission was high. However, lockdown dragged on. Then when it lifted, the ferries had no capacity, the Interislander was down a boat etc…. The seller was good about it, happy to hang on to it but it was being moved outside due to a lack of room. Months down the track I still couldn’t get a ferry to mesh with my days off, and I wasn’t going to pay for a transport company either because the car was a non runner in a tricky location. Eventually the seller decided the best thing was to give me my money back and hence I un-bought a car. A month ago I received an email from the seller. They’re moving and need to clean up to put the house up for sale and btw I never got around to re-homing the Fiat. I would like to gift it to you because you’re the only sucker who showed any interest I think if you took it, it would be going to a good home. I’m a sucker and can’t resist a free car so of course I said yes. Now, I still can’t get a ferry to coincide with my days off, so I flew to New Plymouth, got ol mate to pick me up from the airport and lend me his Hilux and trailer and some barn space and voila! Temporary home With a flatmate that @kws will appreciate.
1 point
-
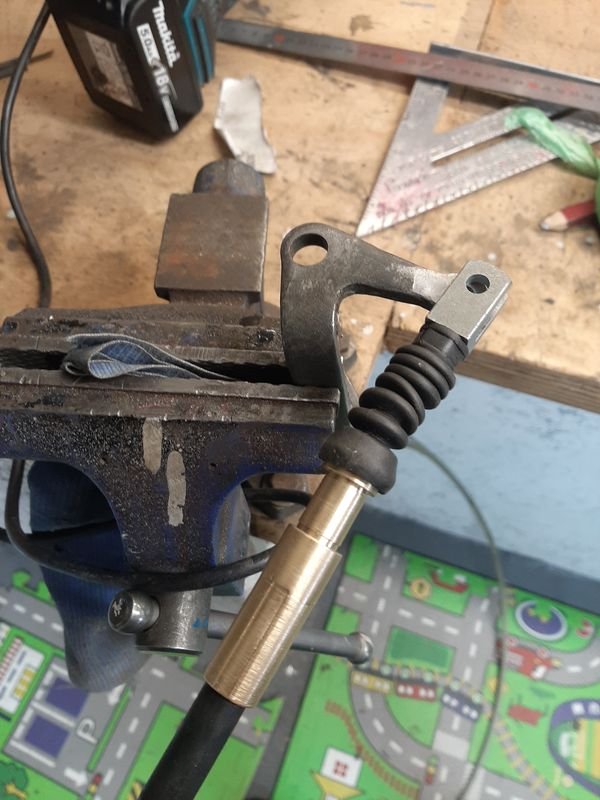
Installing the new gear change cable. In my discussions with Melbar some bits were able to be made to match but some of their standard bits were not exactly the same dimensions as the Fiat original so i asked that they be left oversized and i could smoothing things down as needed, and also accounting for possible wear in the original. This was the tips of both ends Old and bung on the left, new on the right, with the original adjustment nut installed. The tip on this end is the crimp and lives in the hollow end of the gear shift column, i filed that down a wee bit (basically the ridges from crimping) to fit and allow the cable to rotate smoothly with just the right amount of length (rounded the tip a bit more) so that the nut can tighten and the cable can still swivel. That then gets installed in the lock nut and the brass screw and crimp installed in the column change shaft, along with a dampening spring and etc and then that whole lot is attached to the steering column. The Melbar guy said hes never seen such over complicated nonsense. The other (gearbox) end is a bit simpler with a clevis end which they didn't have in a size that suited every dimension required, so went with the one that was right except for didnt fit the 6mm thick stamped pivot arm. I ended up filing the arm down which also lost a fair bit of slop from the slightly rounded top of the arm. I also cut down the boot a bit as it was restricting the throw (as Melbar barry said it would) Thats all back on the van and after a fair bit of adjusting it goes into all the gears again */*/*/*/*/* Next job is to sort out the cooling scenario. Original water pump had fixed fan on its nose, but the Cheap replacement water pump is from a 1500 car that runs an electric fan and a different pulley mounting pattern, so i need to put in an electric fan as well. A 12" pusher is the biggest that i could be sure will fit which isnt that big, but the OEM fan is 10" and doesnt have a shroud so i think it will be OK. Sussing out a layout and attachment Been watching too much Puddin's Fab Shop so had to bust out the 'dimple die' Much better strength and possibly airflow Backside, try to seal off the fan like a reverse shroud so most of teh fans push will go through the rad instead of across it Youmay recognise the alloy sheet from other projects like the sign of the year and the shroud on the 125P ute This is the engine side, with the shroud wrapped around, no screws needed. Had the Radiator shop install a bung for a standard FIAT rad fan temp switch so set up will be the same as the ute (this is the factory set up on it) and as ive retrofitted on the 125 sedan,wagon. Just need to wire it in in yet. Had an overflow knocking around for a while and it will work nicely to replace the factory 'full loss' system (as per pic above) And view from the tunnel - this also has a 'floor' i need to install that basically makes an air ram to the rad and the little carb air box thing as well NOMNOMNOM like a Basking Shark. Will be test driving sooooon and turn it around to make a start on some rust (sliding door to start with) Picked these up from @nzstato (i already have his folder, chur bro!) and ill start making some repair panels like a friken boss while im waiting for paper work etc
1 point
-
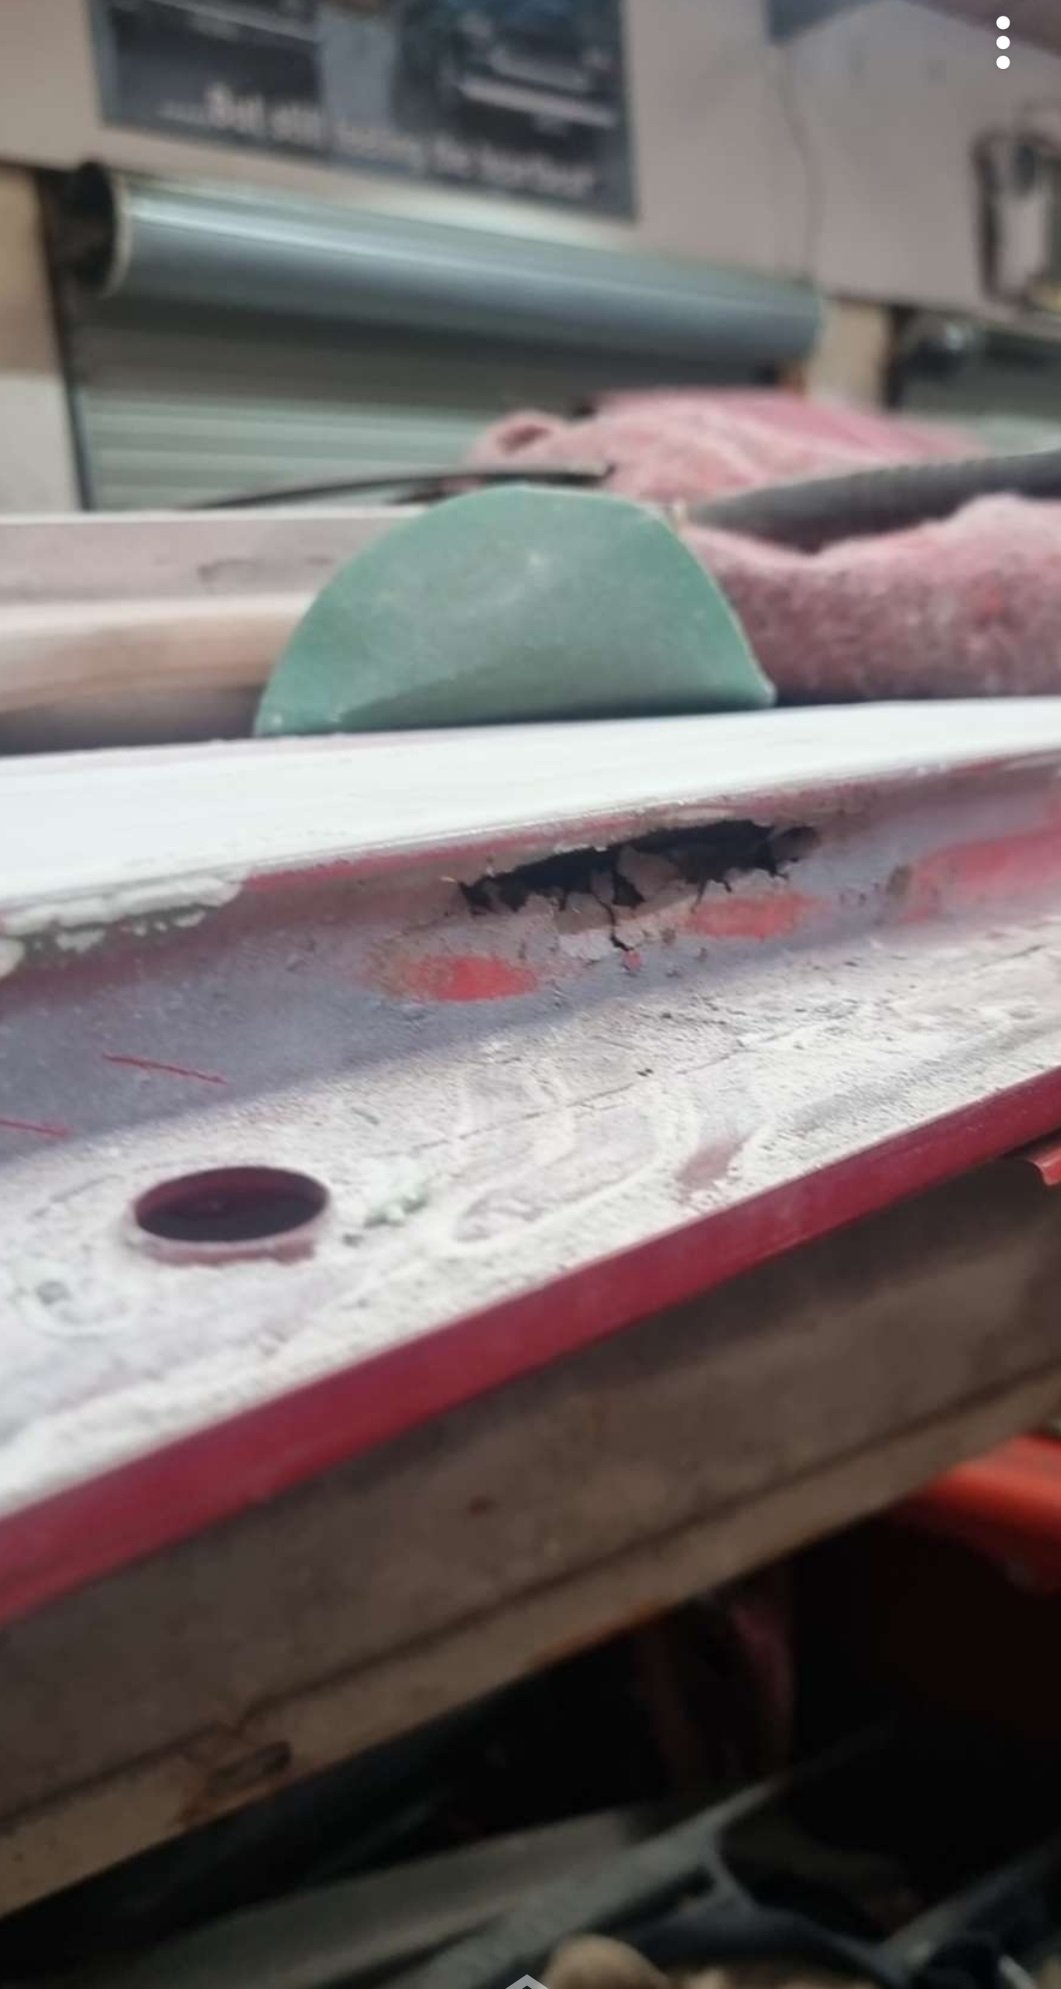
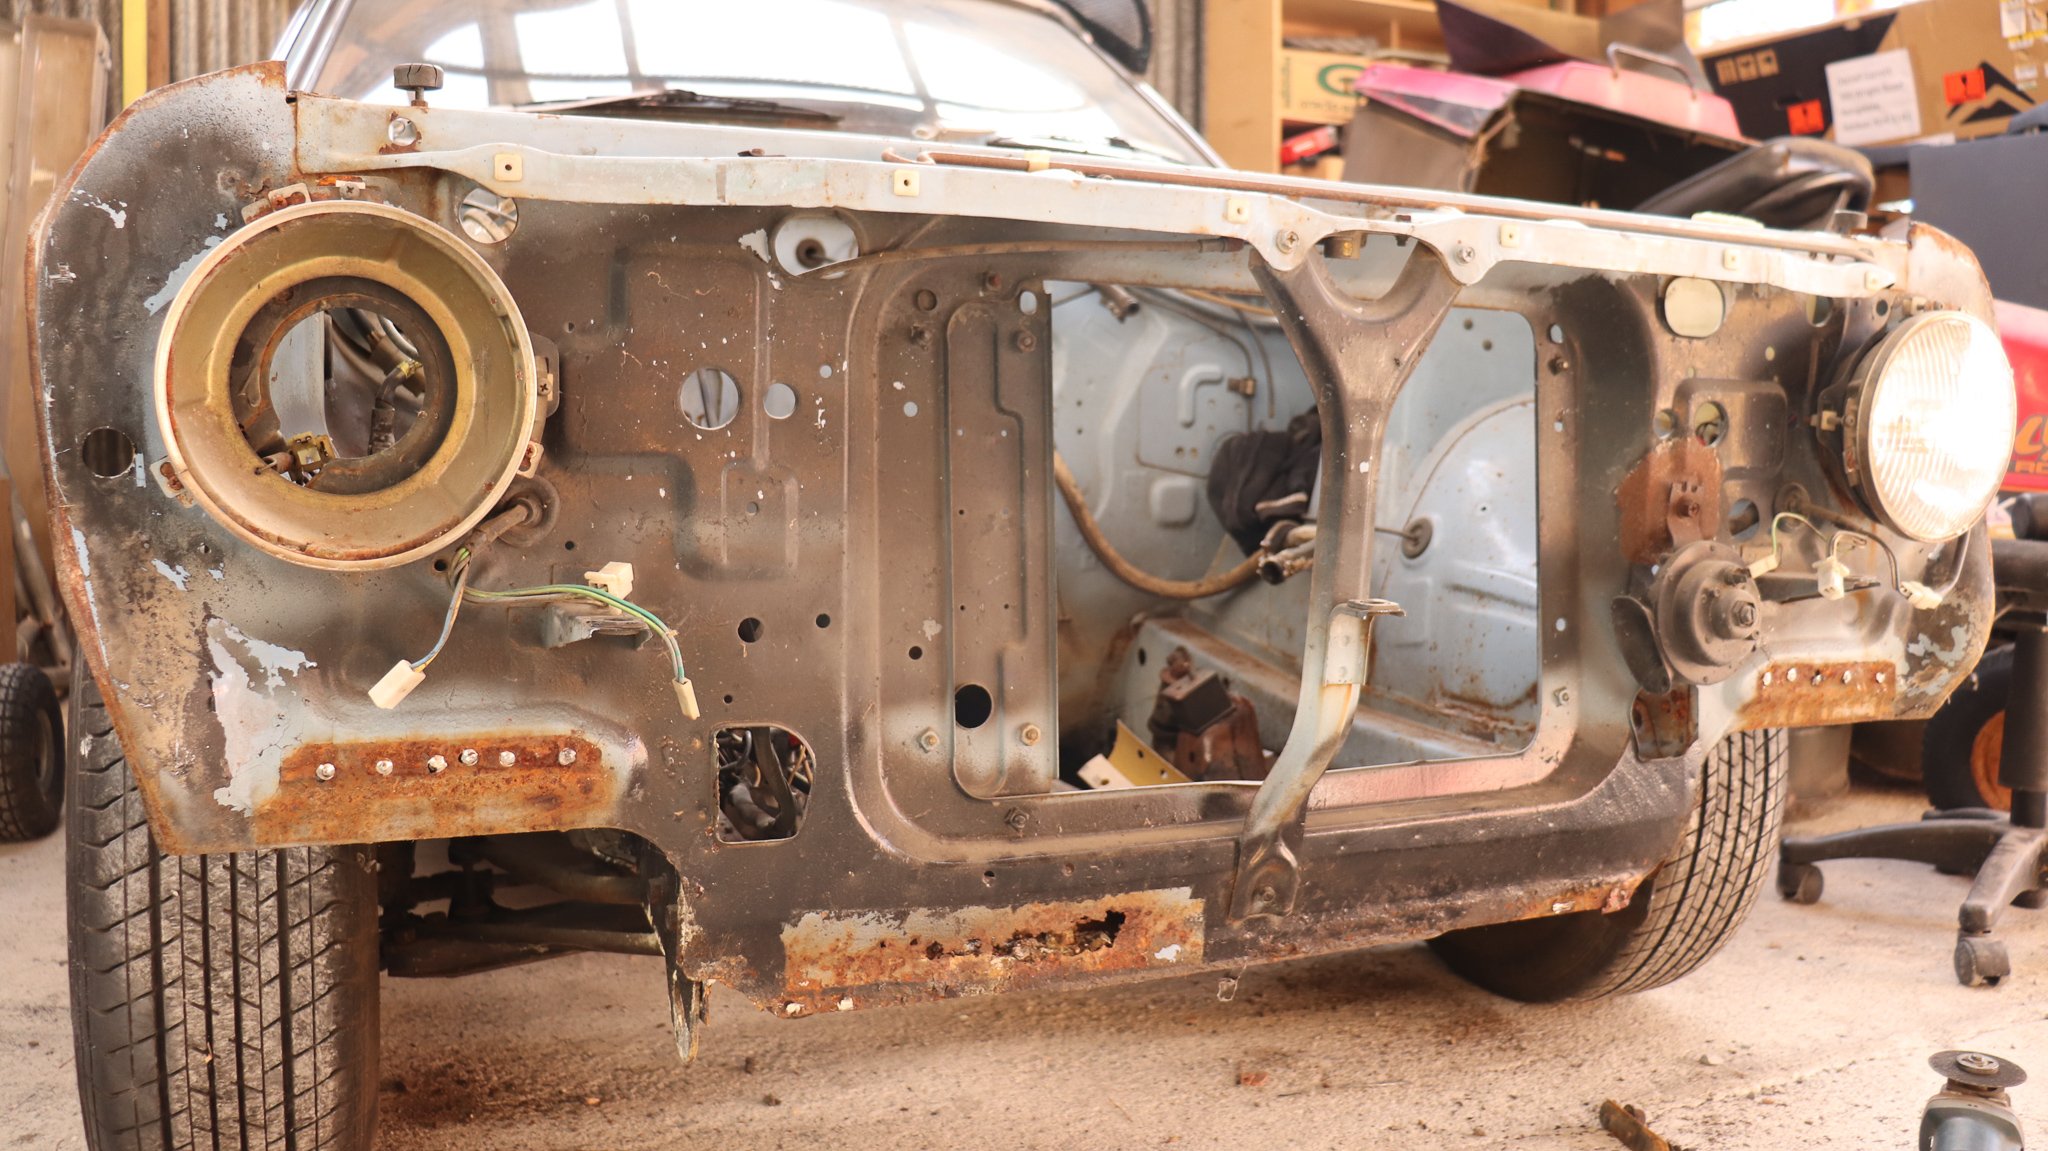
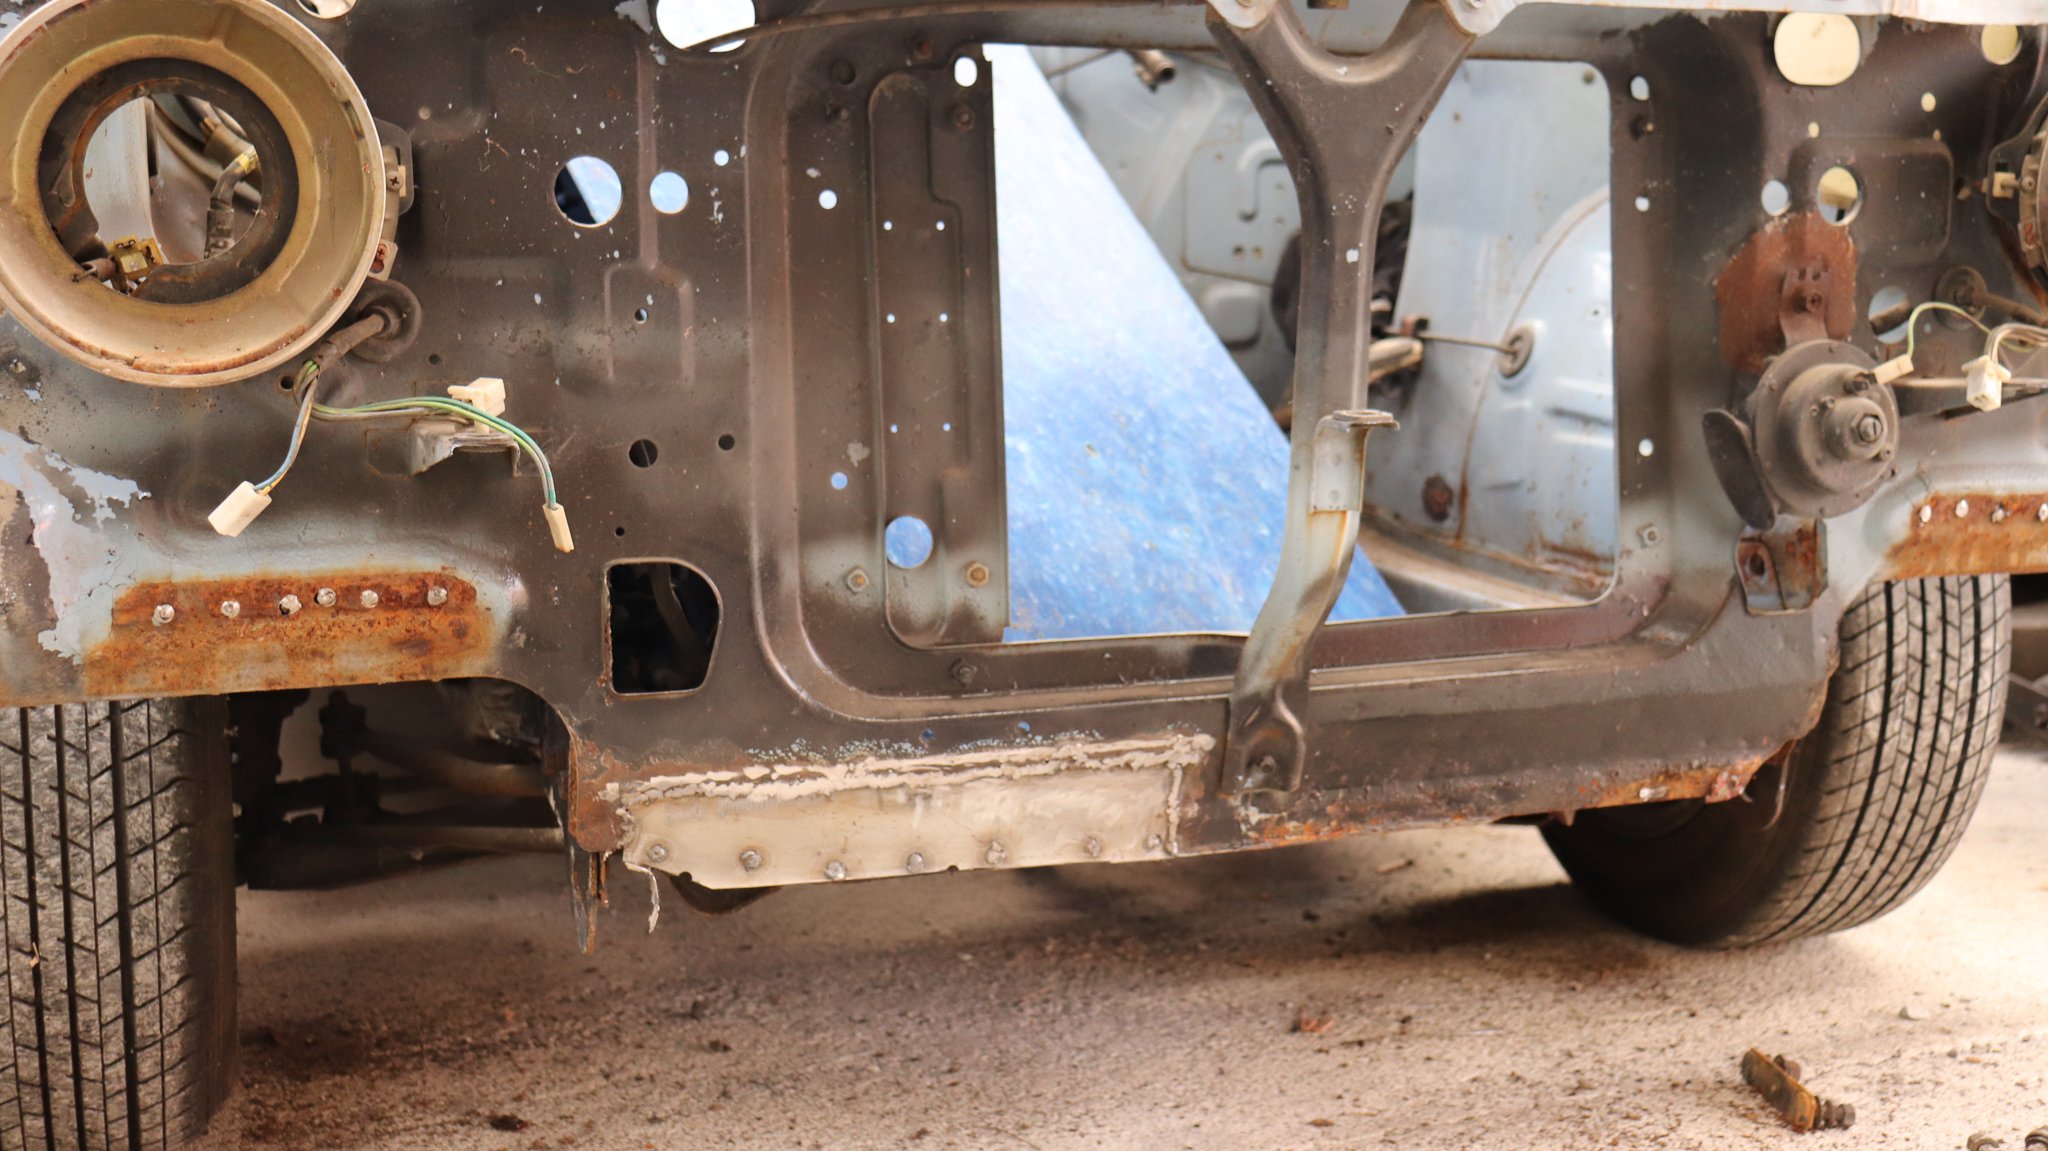
Oh yeah, also found another hole in the NA 4age EP71. Fuck I hate bodywork. Everything else is looking good though so hopefully in the next month or so it will be close to ready to paint.
1 point
-
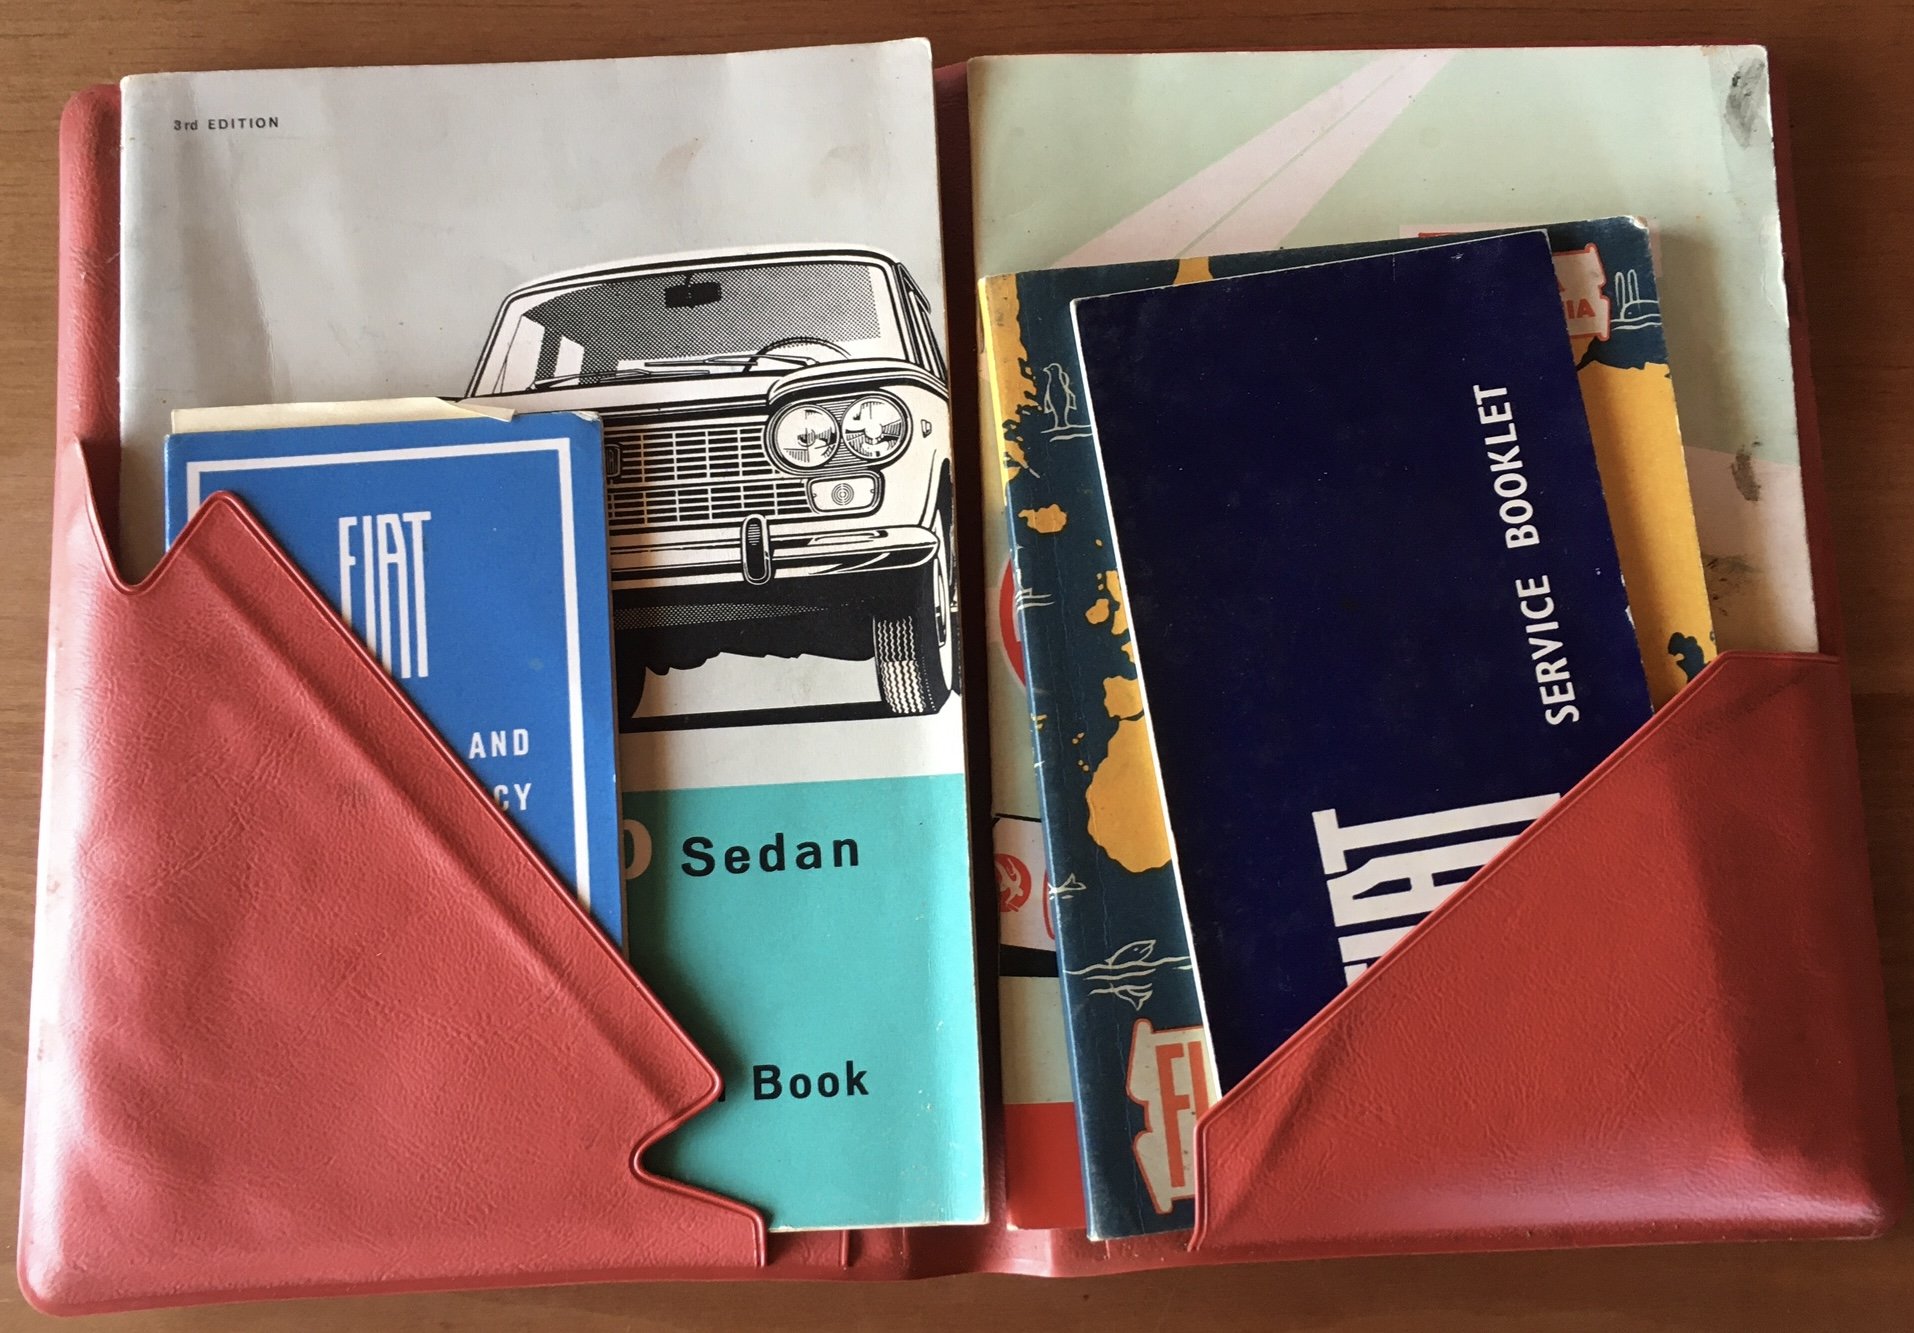
I do enjoy getting wads of paperwork with a car. The last owner before it was de registered was a receipt hoarder. My favourite bit though is this. The most comprehensive original document wallet ever. Containing a mint owners manual, Safe Motoring Hints book, original warranty booklet, worldwide service centre directory, and service coupon booklet (only filled out to 12,000 miles)
1 point
-
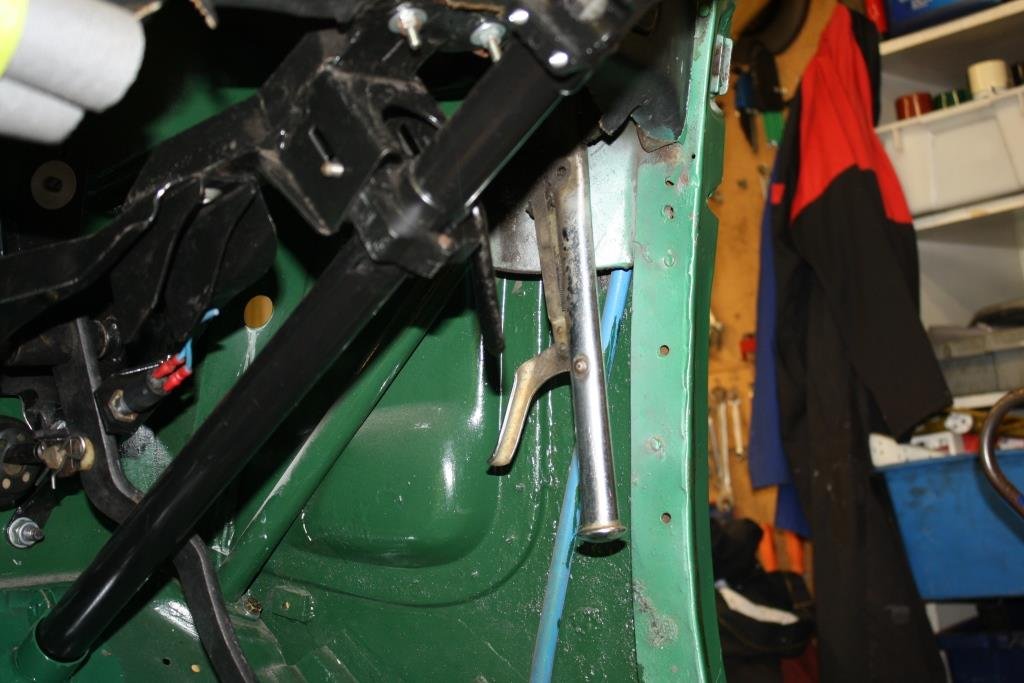
Bought some frame rails! They're attached to a car though so I guess we own that too now.1 point
-
Some of the rust repairs, car was very solid but has some strange areas of rust that aren't usual for the 120y. Tops of front rails usually go, so folded up some new steel and got that in!
1 point
-
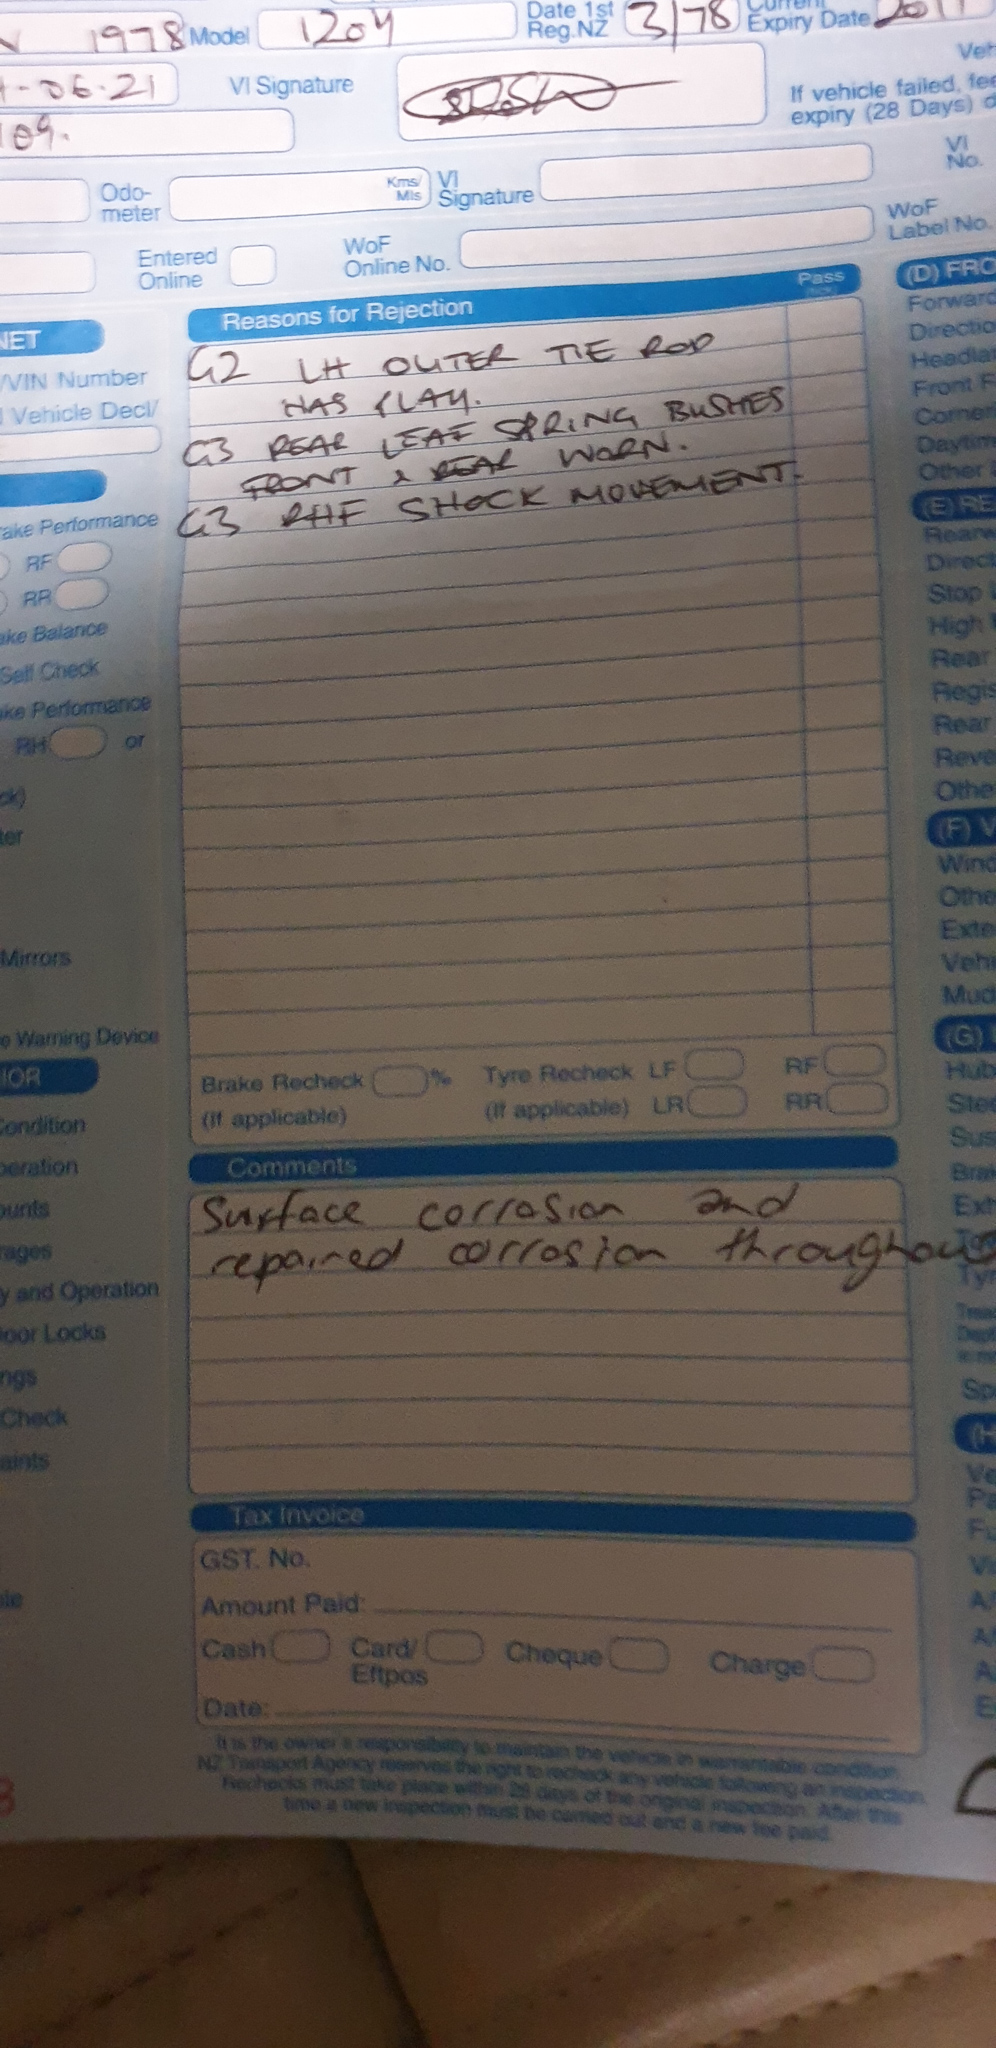
Big day today for the old girl. WoF time, first time in 10 years! List of work completed to her in the last two weeks while I've had time off in between changing jobs: New battery New water pump New valve stem seals, head gasket, tappet cover gasket, carburetor gaskets New ball joints New shocks Indicator wiring gremlin fixed Battery discharging issue fixed (washer motor short) Alternator replaced for one that actually charges and doesn't whine! Full oil service New rear slave cylinders Front struts swapped for B310 big struts with bigger brakes (bolt in), lowering springs installed. Front brakes rebuilt (seals and pistons). New master cylinder New tyres (Nangkang 175/60/14) Spare bonnet for my Green 120y put on (already paneled and primed black) Spare arched guards sprayed with a rough blue match and put on. Tune up 2" Lowering blocks installed Rust cut out and repaired: Engine bay - left and right strut tower Under left and right front guards - support rails Radiator support Front valance Rear right door shut to roof seam So all in all, pretty happy with the WoF items! Spring eye bushes and tie rod on order, will hopefully see them next week. Could have picked these would be pulled up, should have done them in hindsight but have run out of energy! I will get some more photos up of the work completed. She drives really nice and smoothly, no more smoke thanks to the valve stem seals! A full buff and replacement of the pinstripe is certainty required!
1 point


This leaderboard is set to Auckland/GMT+12:00