
Leaderboard


Popular Content
Showing content with the highest reputation on 09/26/21 in Posts
-
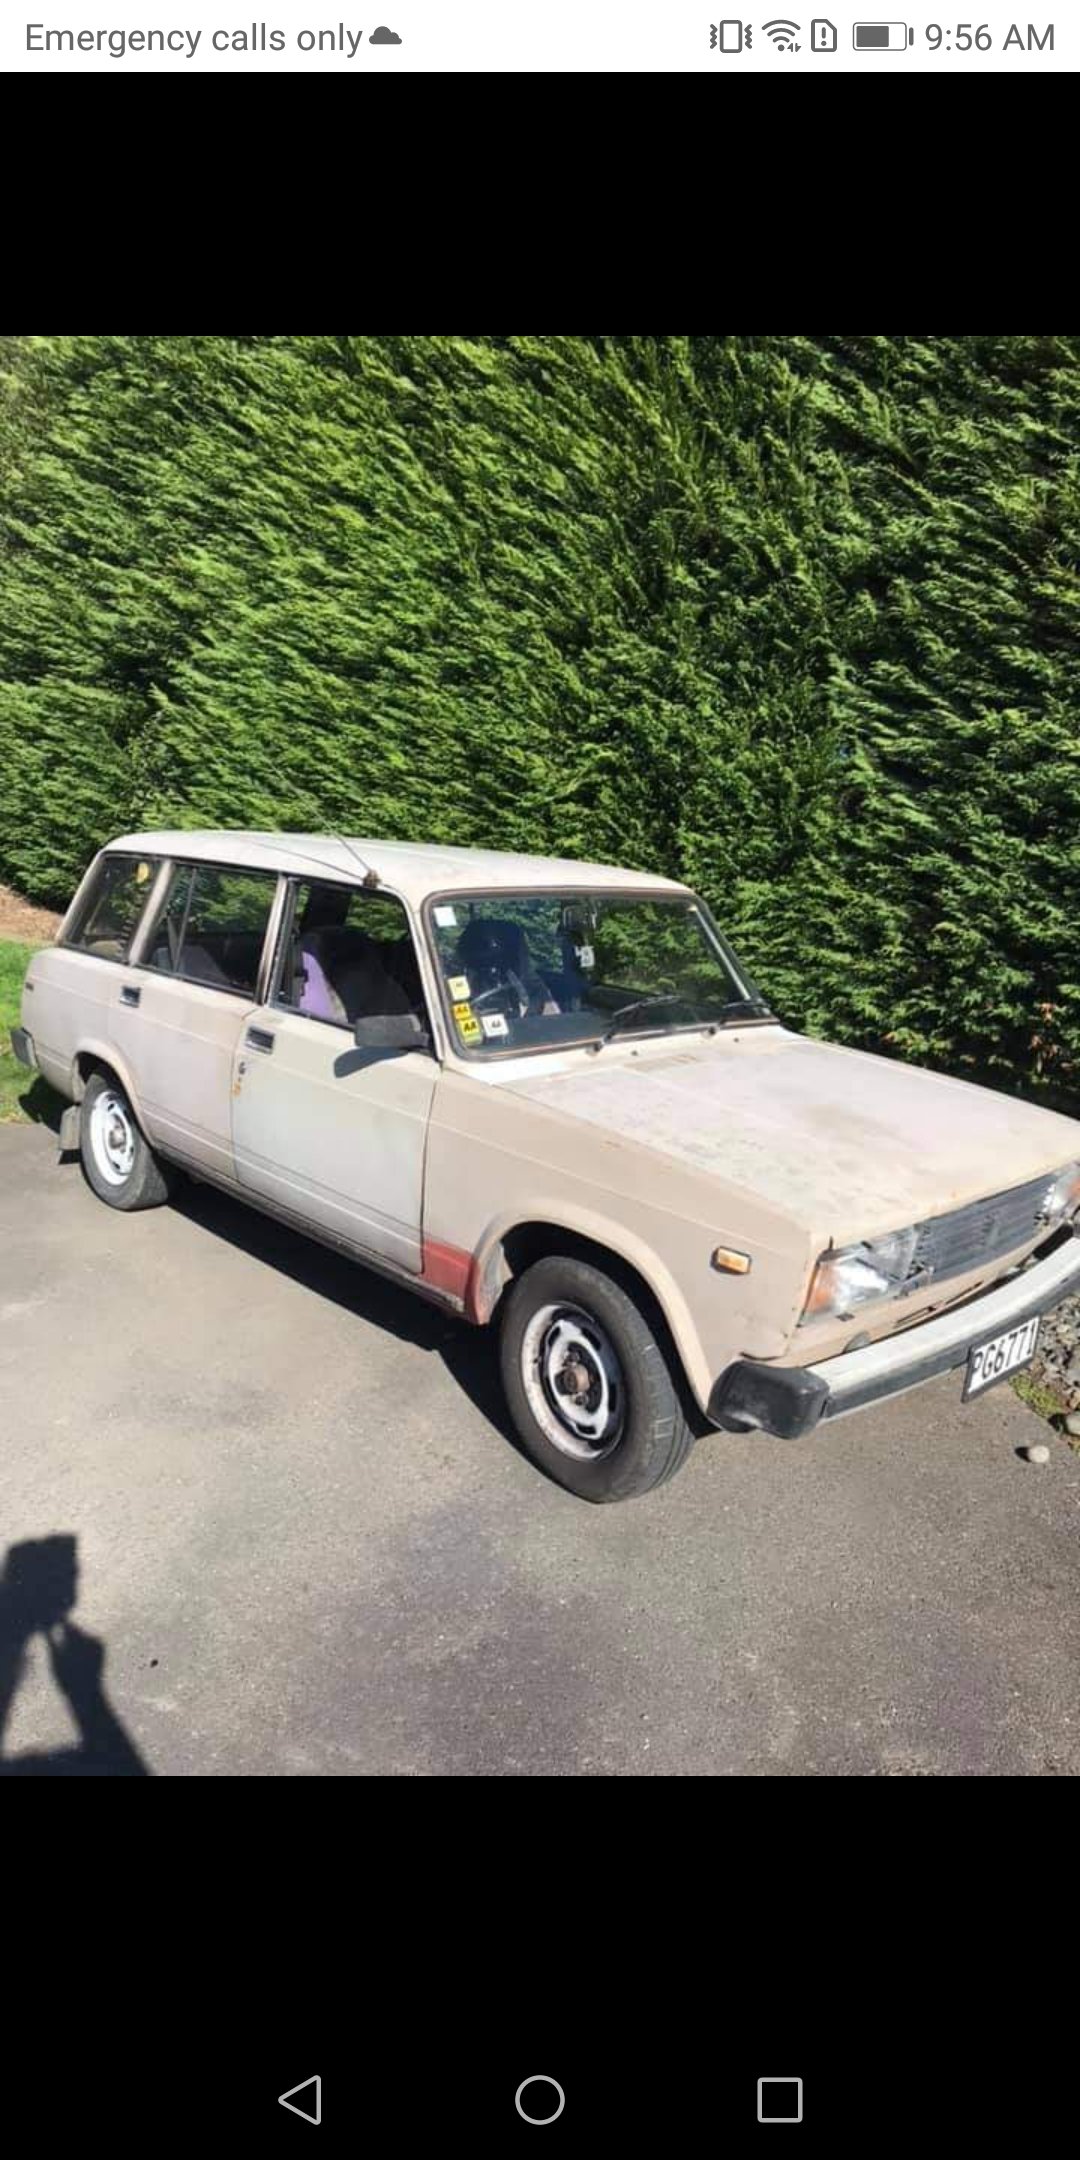
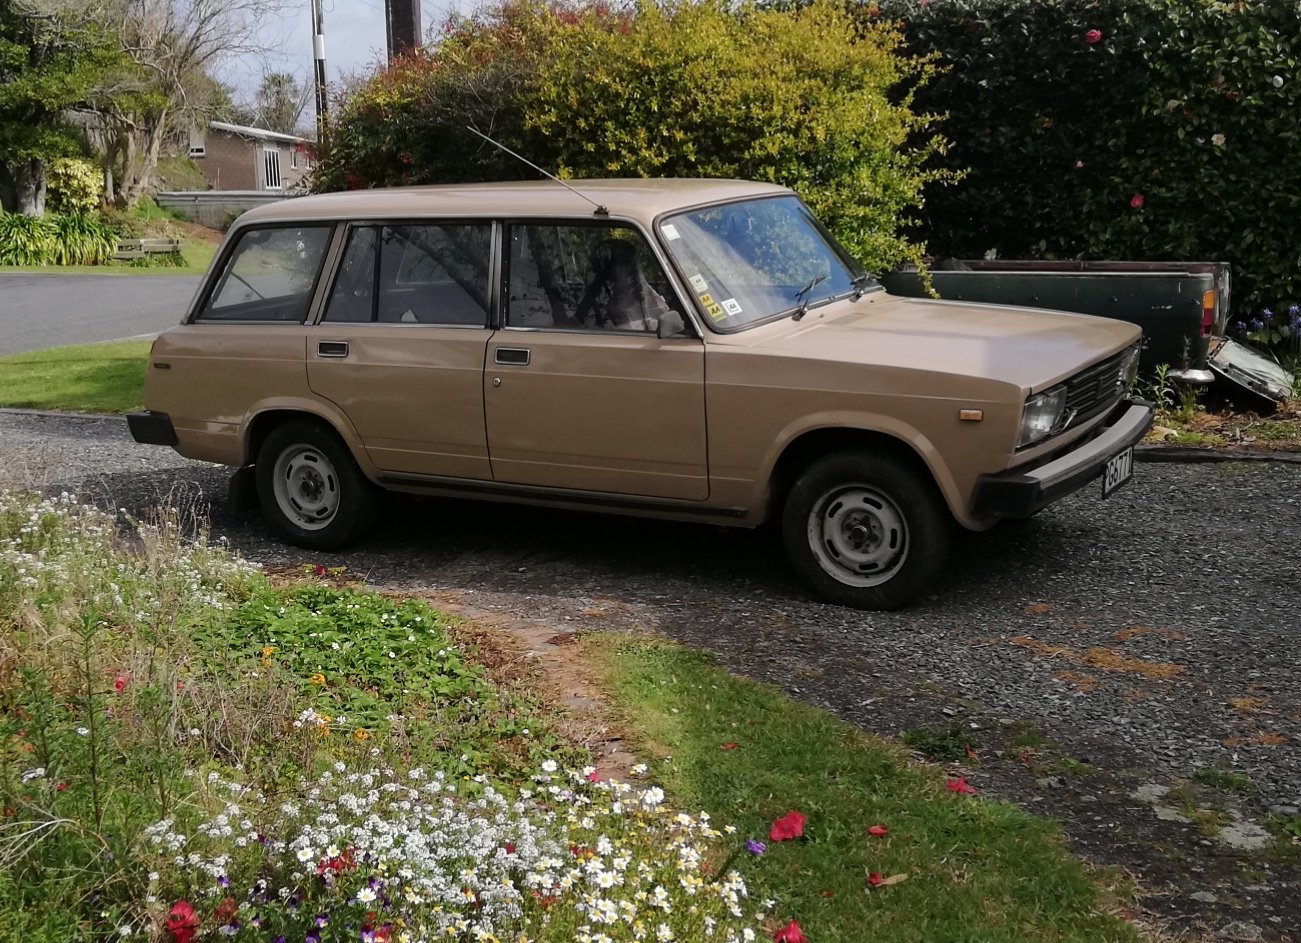
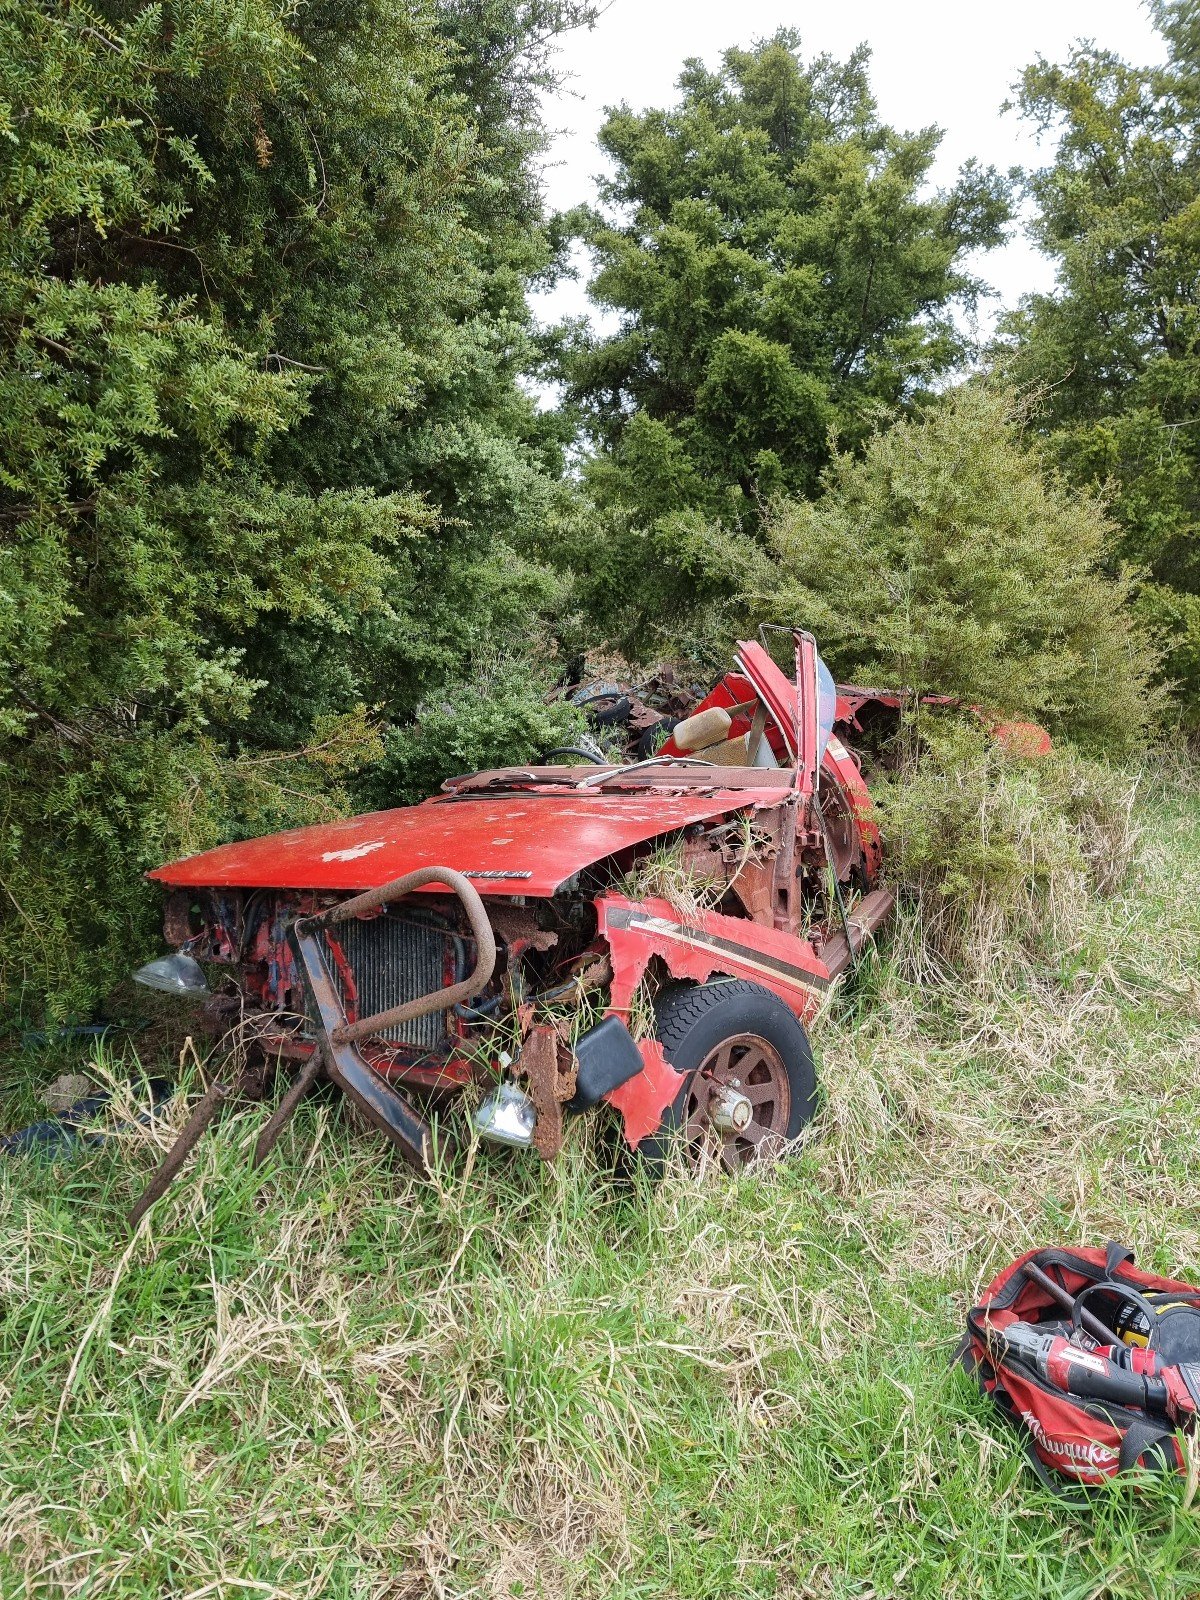
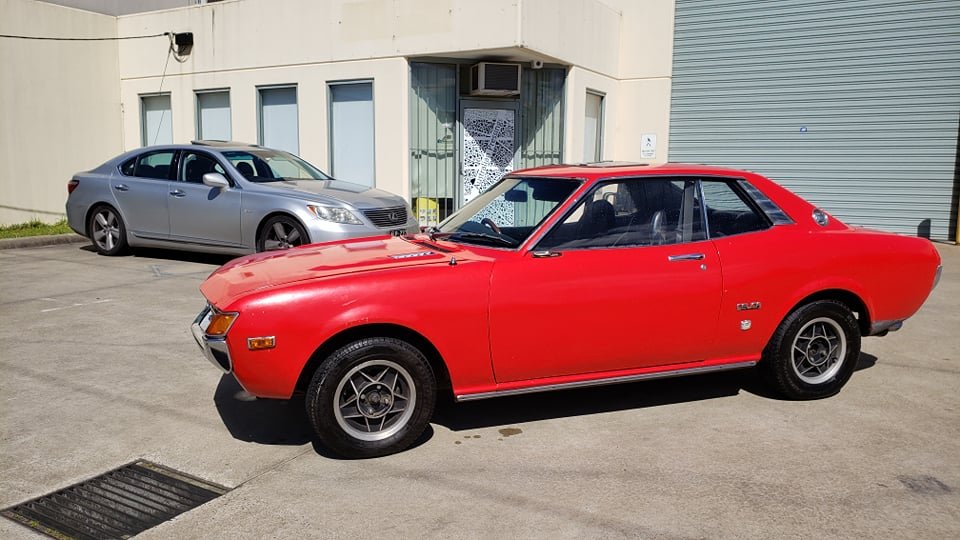
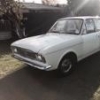
So I got another jalopy, I was searching for a decent triumph sedan when I saw this Lada for sale on marketplace. I thought "Hell, I haven't seen one of those for years!" so promptly went and got it to ensure I wouldn't miss out on the soviet driving experience. My impressions of the car are that it is great - for a car from 1970, by the time this one was made in 89' it was woefully obsolete. I understand they kept making them until 2010 in russia, and 2012 in egypt! The car had been in one family from new, and had been outside most of the time - very little rust and the interior is fine, but the paint was sunbleached to almost white from its original dark beige. I am rather enamored with its factory tool kit, with the tools all stamped cccp. I scoured the oxidation off a bit of the paint and found a good match, repainted it in the driveway, now just need to paint the windowframes black, swap the tyres onto a sweet set of fiat ward rims I found, then have some sweet proletarian adventures.
 26 points
 -
i ordered a new intercooler ages ago but it was coming from auz and they went into lockdown right when i ordered it so it took 3 months instead of 3 weeks. anywho it turned up and i went about making it fit. its wider but not as high as the one that was on the car. a quick note about the intercooler that was on the car. its an R32 GTR intercooler that i put on the car about 2007 and it has been through hell and back and it took it all. it stoved the side of Spencer's soarer in, its taken literally hundreds of hits into curbs and driveways and fucking all manner of shit and its never had a leak or a broken tube or anything. this thing needs a place in the hall of fame. so yea, new intercooler will flow WAY better than the old one and the dyno will tell the story. i made a new bracket thing to hold the cooler and it had two mounting holes on the bottom but because i cant use the top ones i thought id add two more to the bottom just because. i only had a small piece of square aluminium so i made it round and welded them on. 3the new intercooler sits about 30mm higher than the old one too so thats a good. at some point imma make a front air dam for this thing. 2021-09-25_06-12-31 by sheepers, on Flickr 2021-09-25_06-11-50 by sheepers, on Flickr 2021-09-25_06-11-58 by sheepers, on Flickr 2021-09-26_05-10-21 by sheepers, on Flickr 2021-09-26_05-10-43 by sheepers, on Flickr 2021-09-25_06-12-12 by sheepers, on Flickr 2021-09-26_05-10-37 by sheepers, on Flickr24 points
-
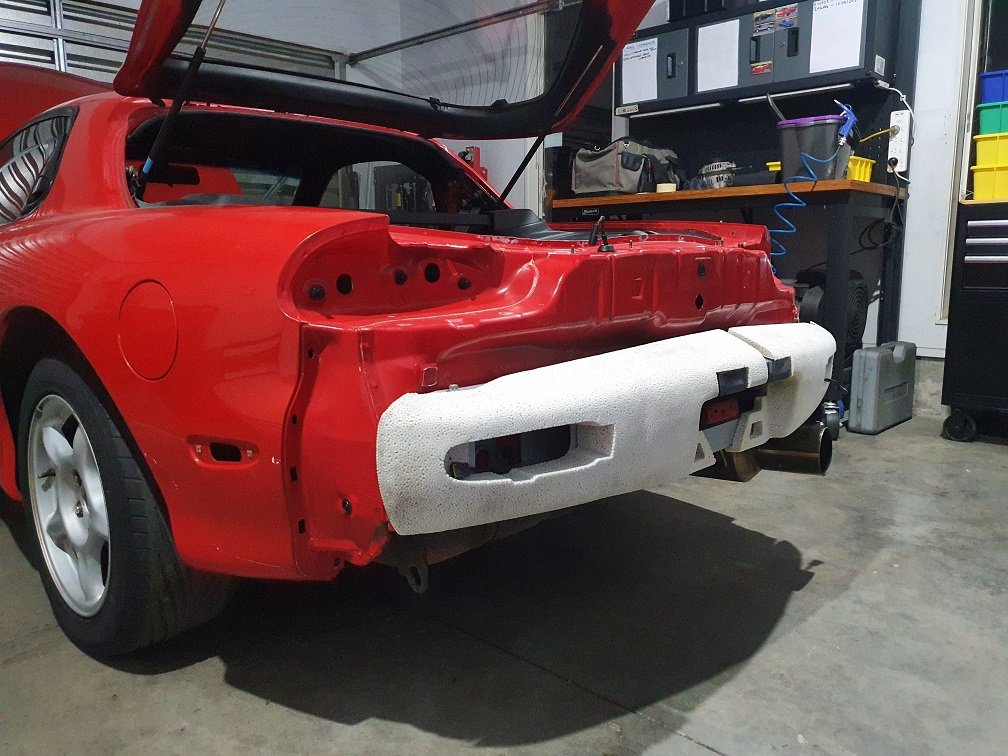
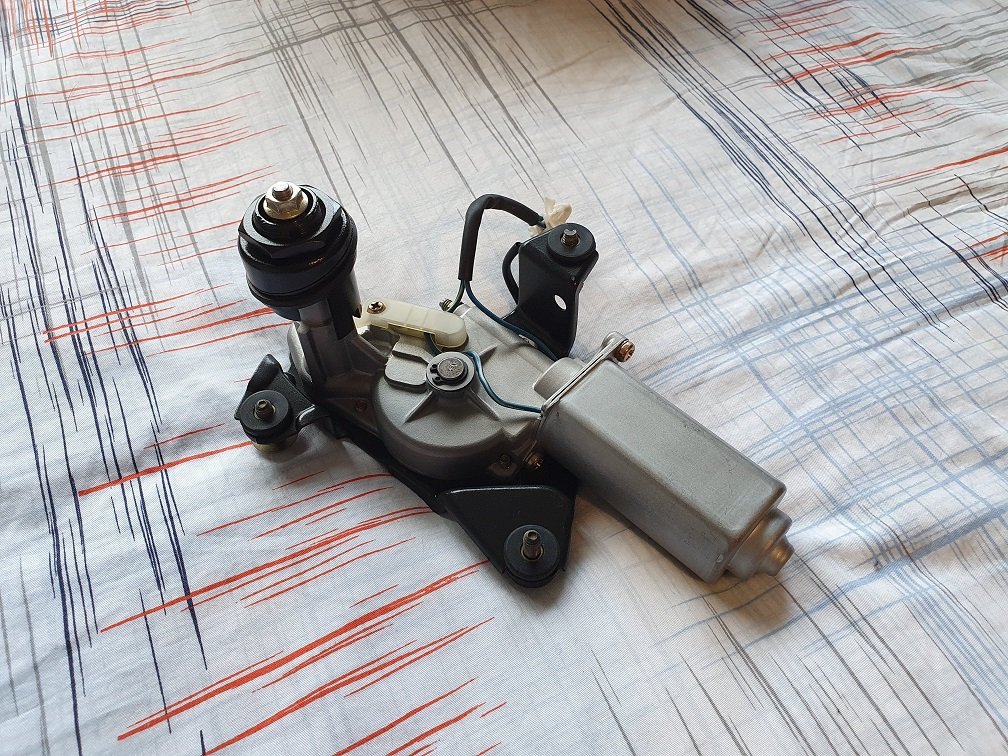
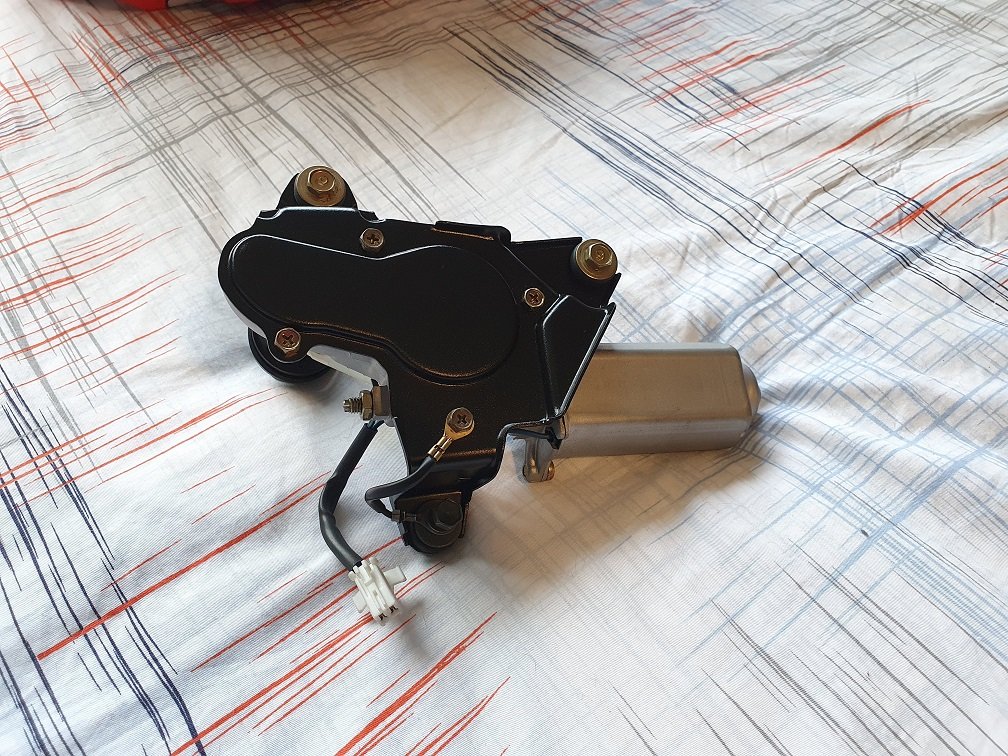
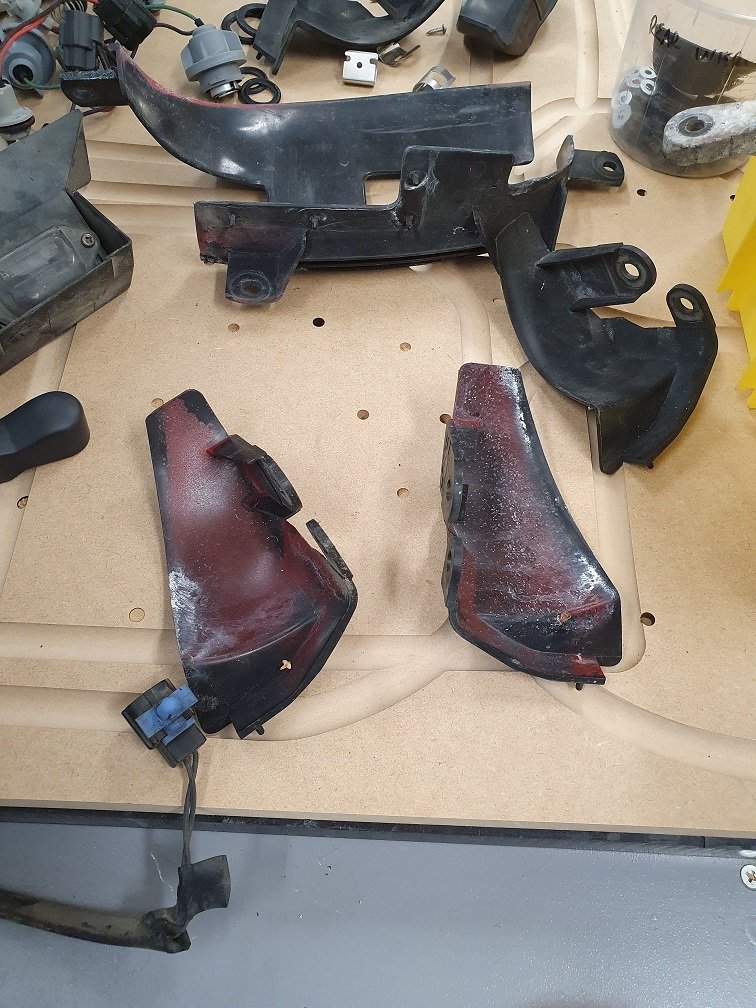
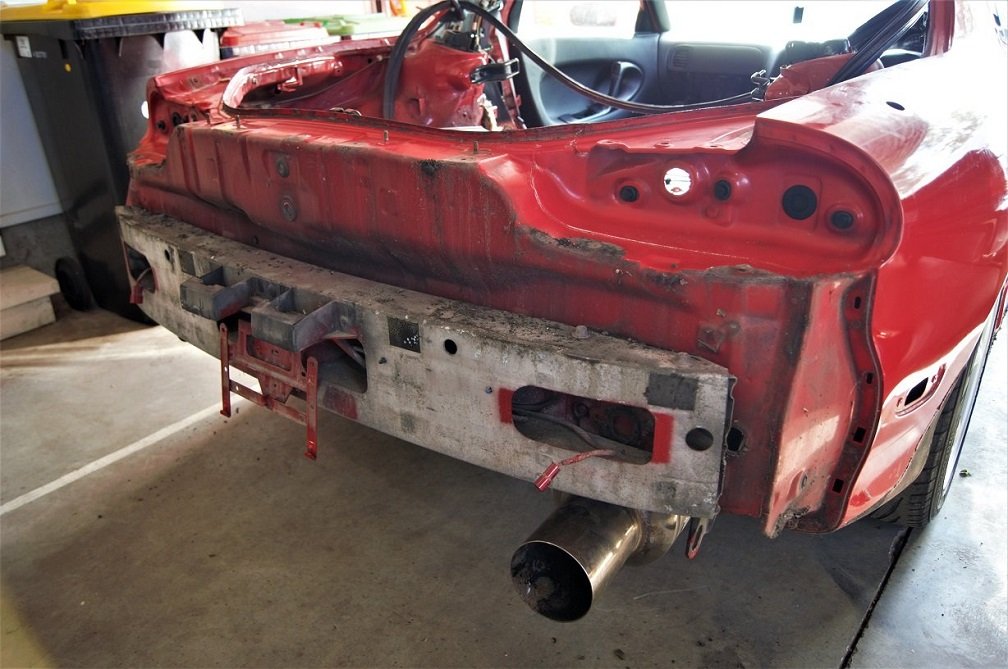
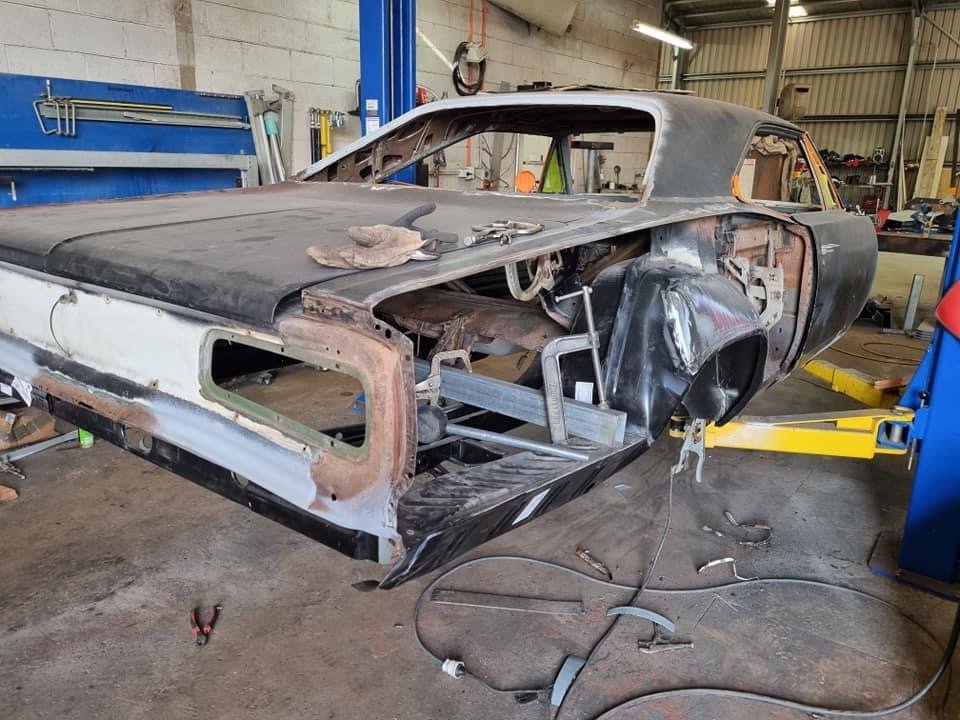
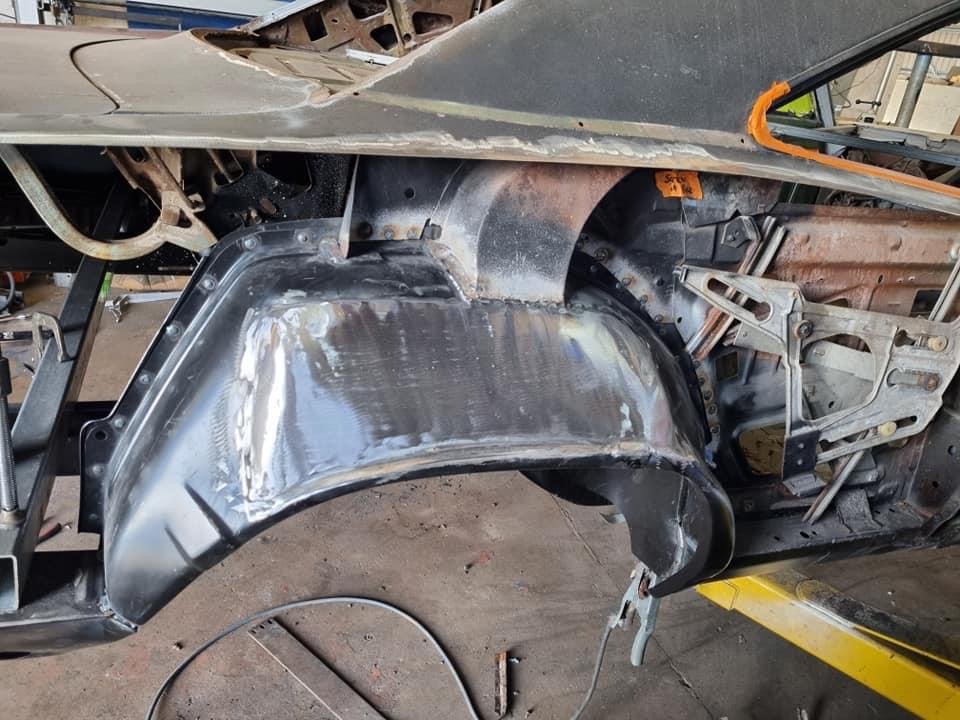
Have had a heap of work on over the last couple of months, so really haven't managed to get much done on the car. That contract winds up soon though, and I might take a break from the side hustle work for a bit and focus on making some progress on this thing. I have managed to find a little time this week to continue on with cleaning up the rear end though. I've also spent time researching and purchasing heaps of parts I know I'm going to need down the line. Had quite a bit of FOMO about stuff going out of stock and becoming NLA, so I've now got pretty much every single exterior rubber trim piece sitting in the closet for when it gets painted in a couple of years time. Wasn't cheap, the local Mazda dealer loves me, hah. I've got everything planned and ordered for the new EM harness, it's the last major piece missing that would make it a runner. I've been waiting 2 months for connector bodies and pins though, and the tracking is stalled in China, so I'm losing a bit of hope there, might have to reorder. I've never had anything not show up from Aliexpress, but a couple of times its taken 6+ months :-(. I'll eventually run an aftermarket ECU in this thing (Have a Link Fury sitting on the shelf gathering dust), but I'll build the harness to mostly factory spec (although much better materials) with a couple of additions for WB02 integration, and anything else I think of. Then I'll just make up adaptor headers if I want to change to another ECU down the track. I've got an original S6 ECU to get it up and running on, and a Power FC there also, so lots of options. Gotta say, I've never seen overspray like this thing has. It's everywhere and bloody ridiculous. The vapor blaster at work has been getting a work out this week! This is what it the rear looked like originally. A lot of the overspray is clearcoat that has dust and shit all through it. Terrible grainy texture and makes everything look permanently dirty. After some attention in the blaster though, looks much more betterer. I dismantled all the wiring too, cleaned, blaster and rewrapped it. Looks factory fresh now. Also the the impact foam, as it was basically black with a reddish tinge. Looking much tidier, you know for something you'll never see. In with my latest order from Mazda were the rear bumper brackets that had rusted into oblivion. One day soon I'll reassemble that and get the bumper skin back on there. I've been in contact with Racing Beat about their twin tip muffler, as it's the only muffler I want on this thing, and they're currently out of stock of the center section (which I also need). They said to check back later in the year. It'll be spendy to get it over here, but ultimately worth it I think as I'll never have to worry about an exhaust again. I sourced a replacement rear spoiler for this, another stock S6 one as I really like them. The one that was on there was cracked, and had been glued on with some terrible bathroom caulking like shit. I had to smash it to remove it, as it was the only way I could think of without risking lots of damage to the boot lid. As it is, the paint on the boot lid suffered, so will get a super dodgy touch up in the meantime. While I had the trunk trim off I chucked some power on the rear wiper motor. It drew lots of current, and was really slow. Popped it out and the was like a ball of rust inside, super gunked up. Blew it totally apart, gave everything in there the big clean, reassembled and now it's like a new one :-). Ready for refitting. While I was in the mood for a couple of little jobs this week, I grabbed some plastic trim pieces from the engine bay. The air guide pieces that go around the headlights were just awful. Red overspray and trapped dirt, with all the rubber pieces attached to them brittle and cracked. Disassembled, cleaned up the plastics and painted them with CRC Black Zinc, as I find it adheres really well to PP plastic as long as you do light coats, and gives a nice OEM looking finish. I scanned the remains of the rubber pieces, cad'd templates and laser cut some new ones out of some rubber sheet of a similar thickness, then put them all back together after tuning up the speed nuts a little so they would grip again. Also ready for refitting. While satisfying, none of these little jobs do anything to get the thing closer to running or driving! Really need that order of connectors to show up! Might have to bite the bullet and reorder from another supplier. If these ones show up later, I can always make another harness and sell it I suppose. Will be back into hiatus on this for the next couple of months while I 100% finish up this contract, then make some more progress over the Christmas break I hope.
15 points
-
Man, making fuel lines sucks heavily! Was ok in the vice for a start, but vice is a metre away from everything in the shed and there’s like 5 metres of line.. cable ties and clamps as I went helped a bit.. At least the brake lines are copper-nickel and much easier to manipulate (he says, having not made them yet..) Also got the hood skin goo’d to the frame and spot welded back together. Used Bostic and it was fucking awesome! I quickly buffed and painted the throttle linkages, hood latch and a fuel tank vapour breather this arvo too, have some clips soaking in vinegar.
11 points
-
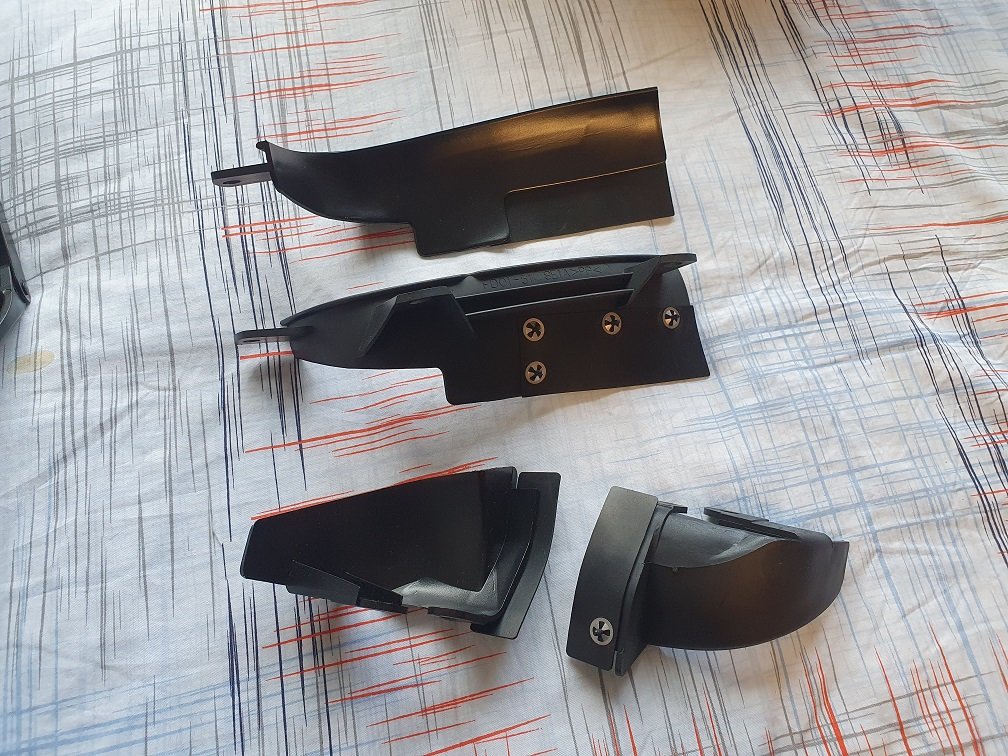
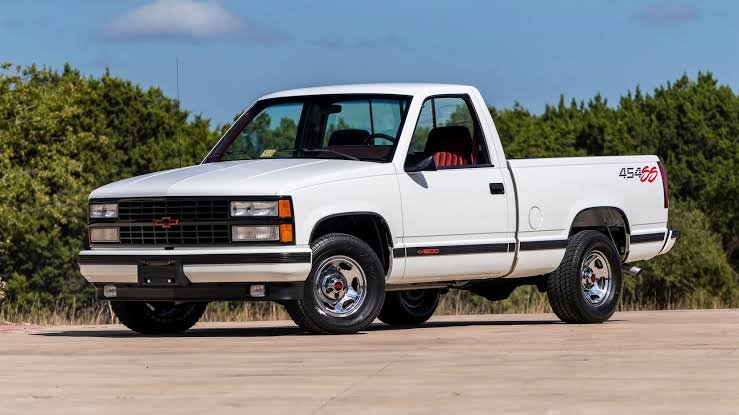
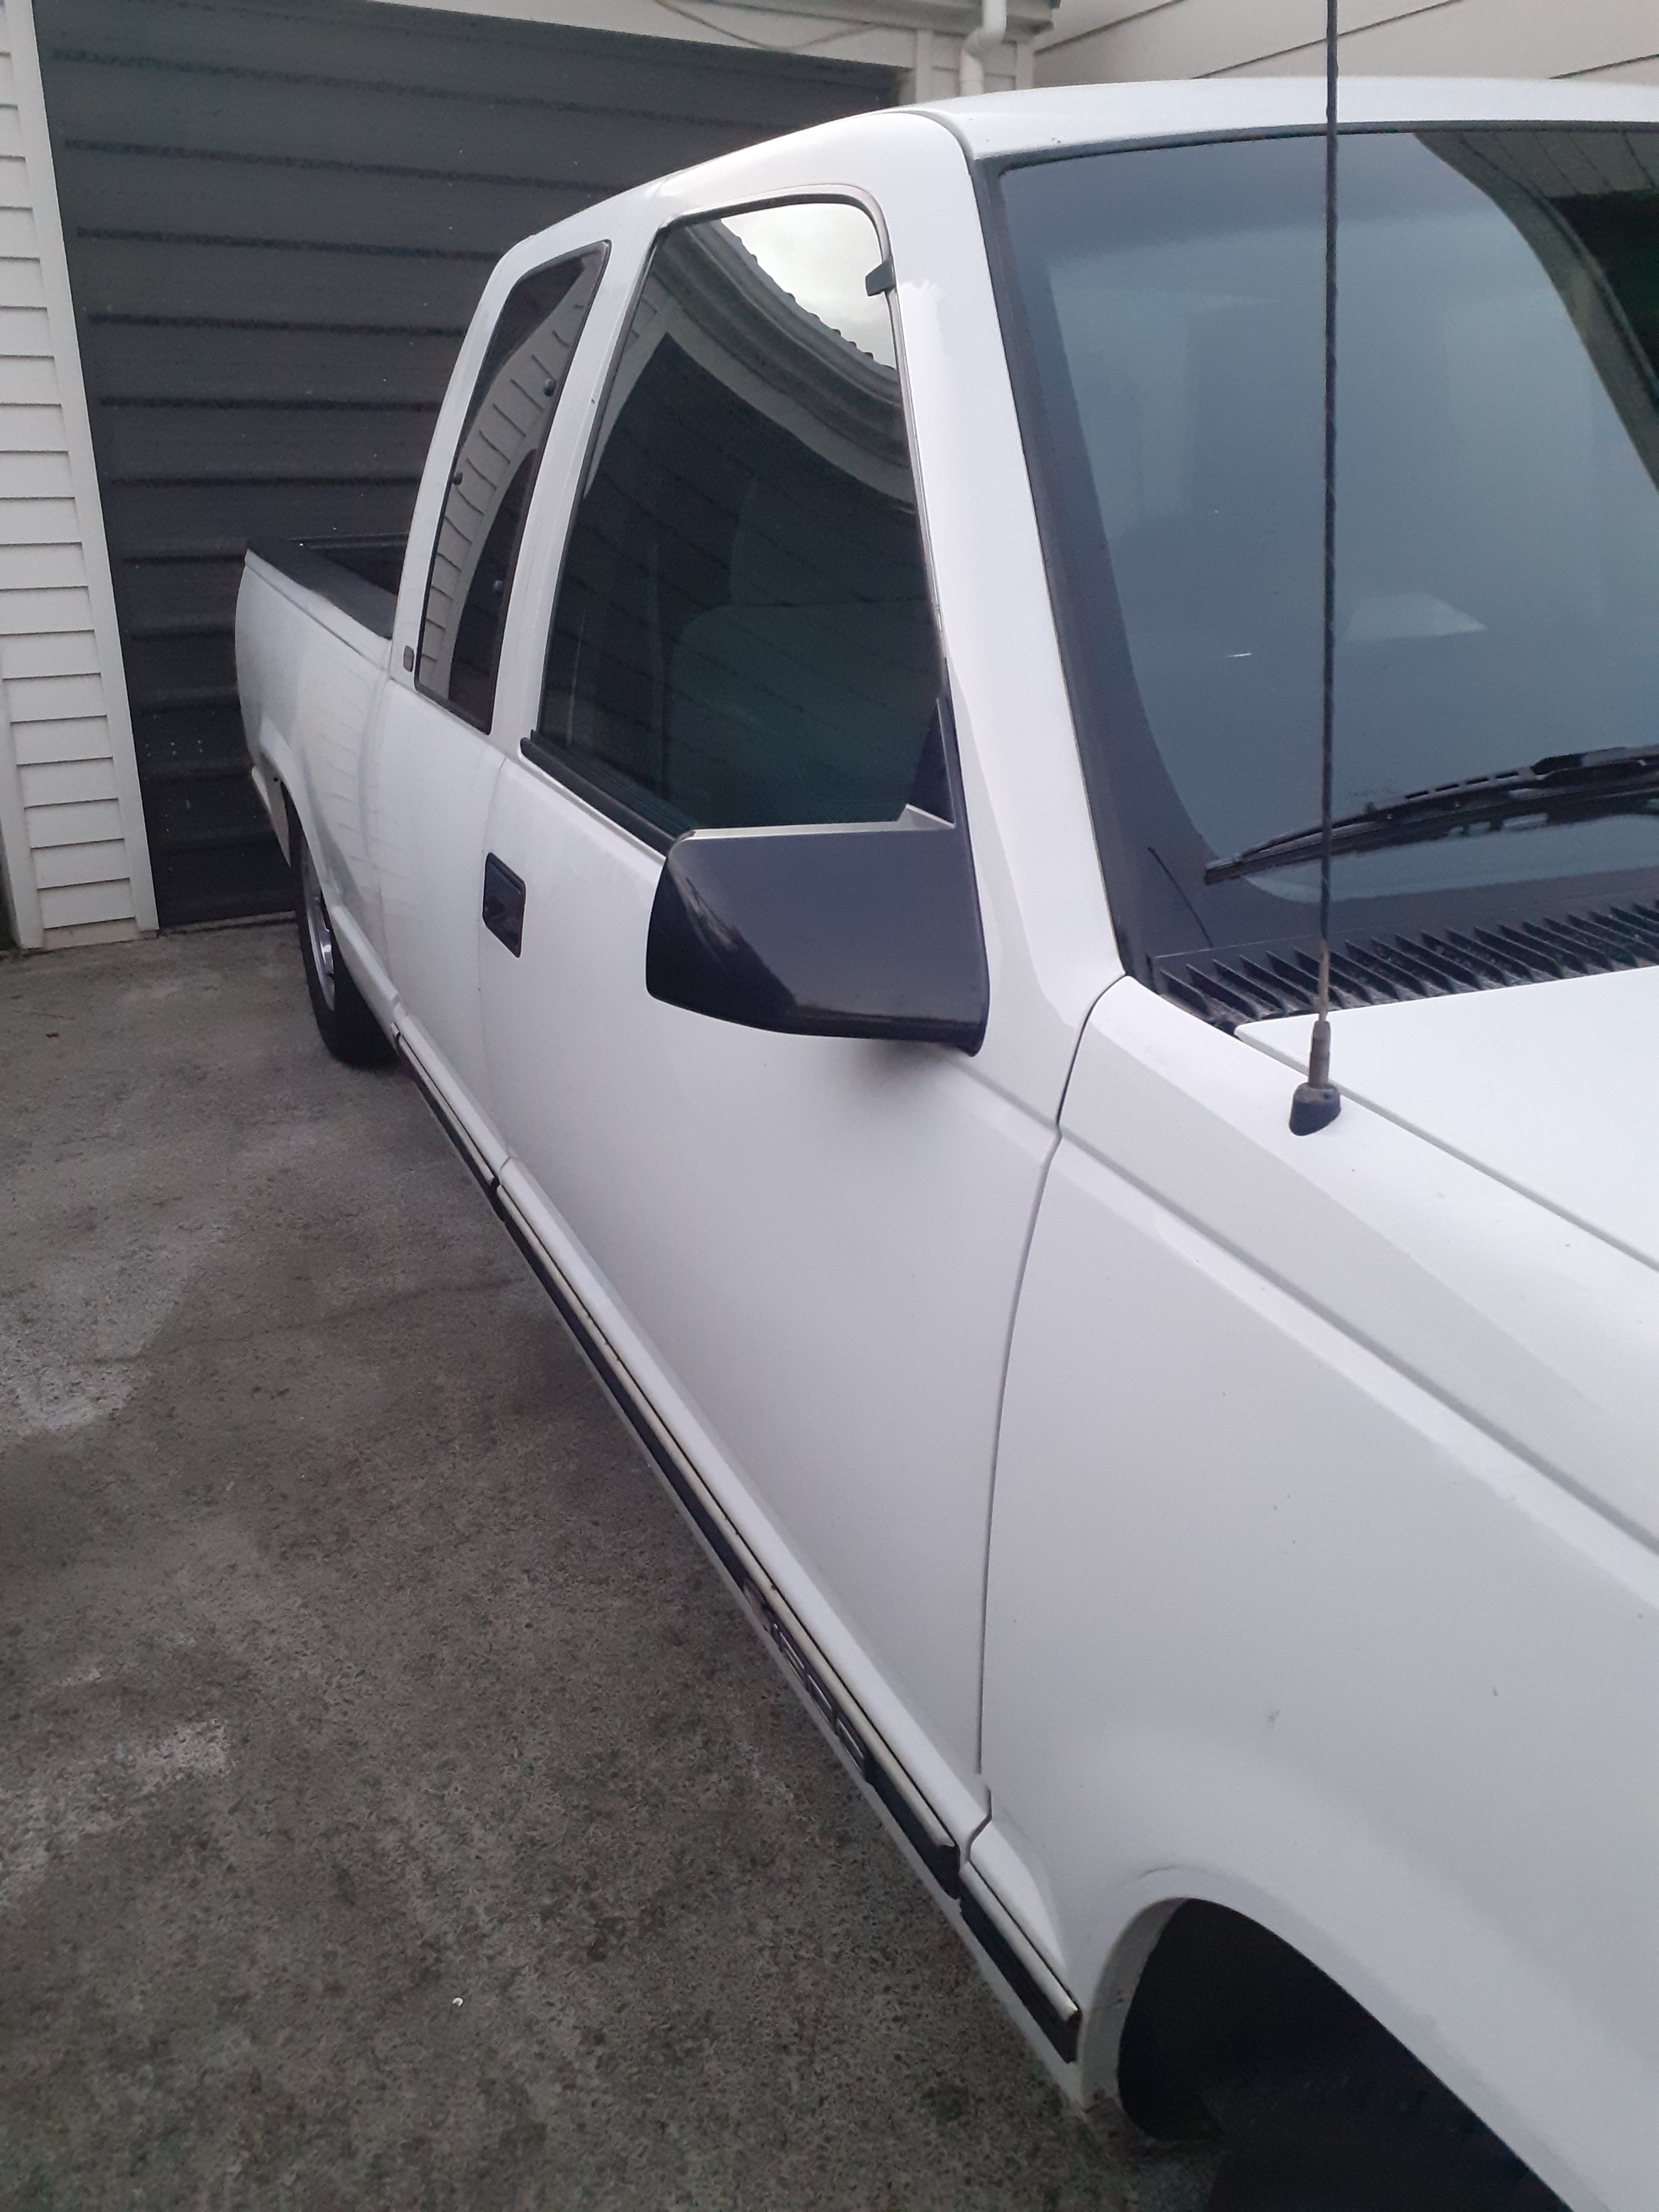
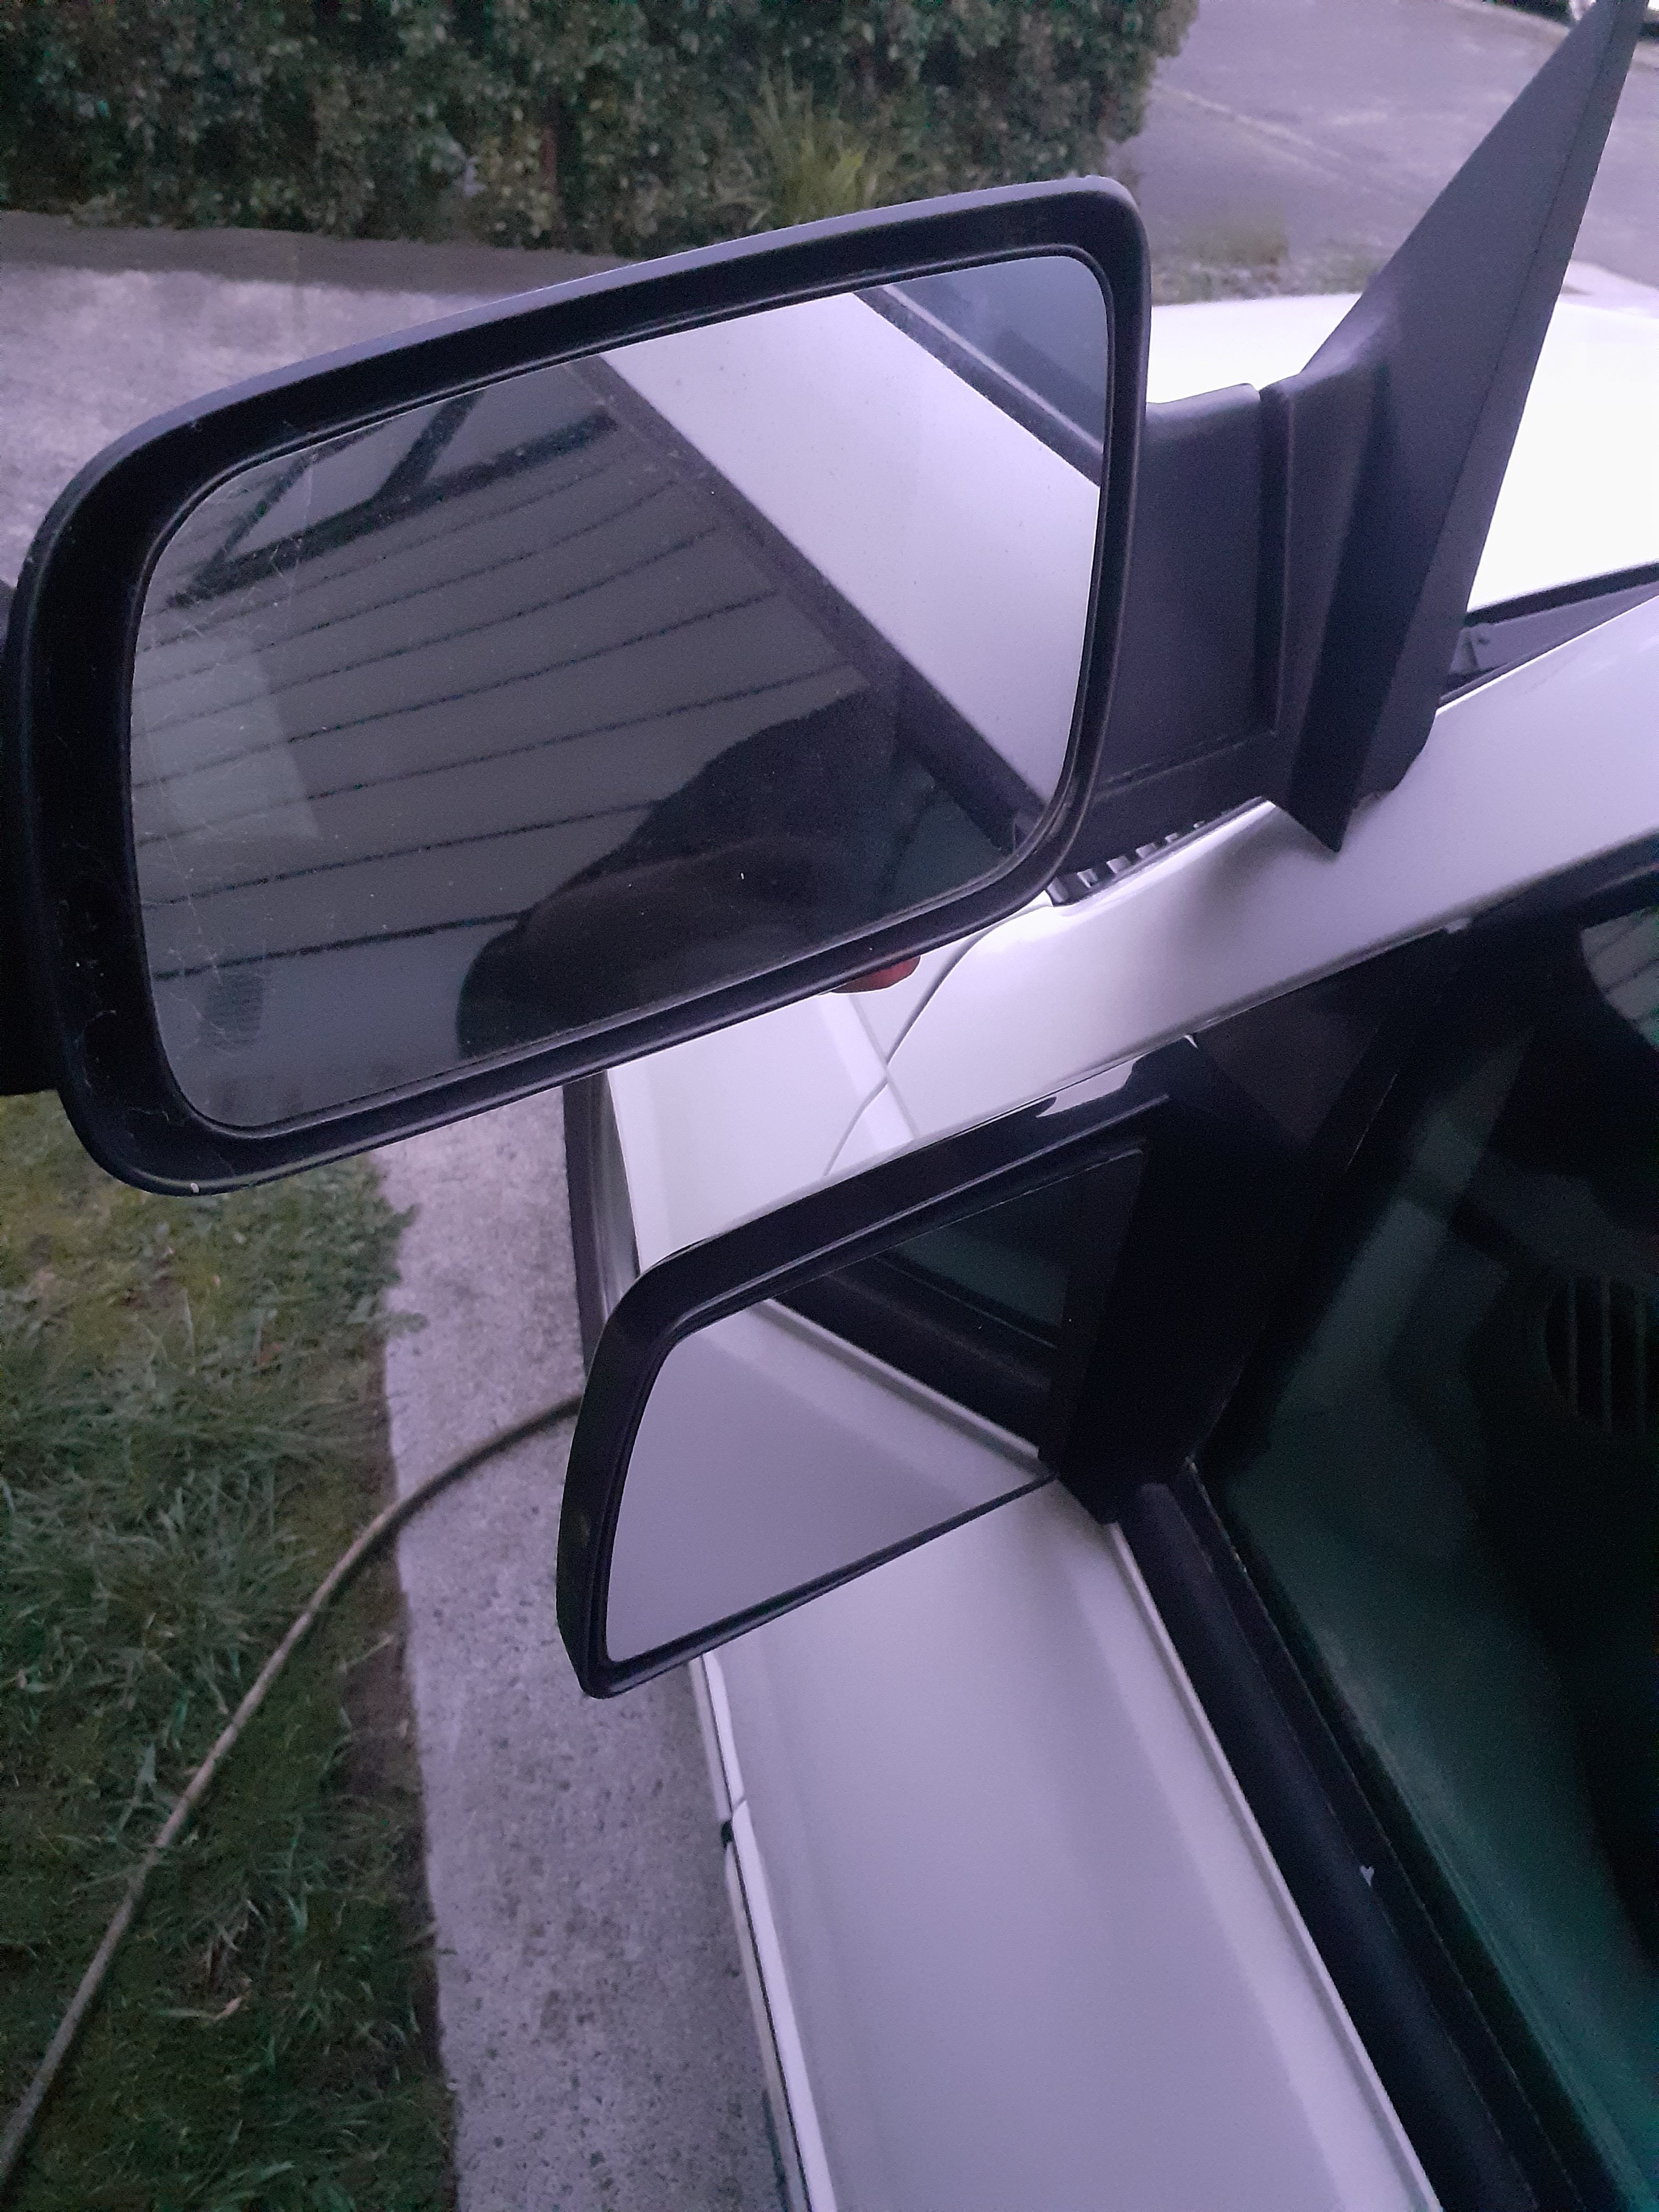
I got some different mirrors. These are "sport" mirrors. They were standard on 454SS trucks , with the powerful bathurst winning two hundred and thirty horsepower 7.4 litre engine coupled to a 3 speed automatic transmission. These were well known as being extremely fuel efficient, Toyota copied the fuel injection system for the first gen prius and were not able to get the same economy on petrol as the SS I have a theory that the SS's incredibly low fuel consumption is because of the small mirrors so I'm expecting to get a result where my 350 actually makes petrol go back into the tank. Also now I can't see behind me as good but I don't care because I'm not living in the past maaaaan
10 points
-
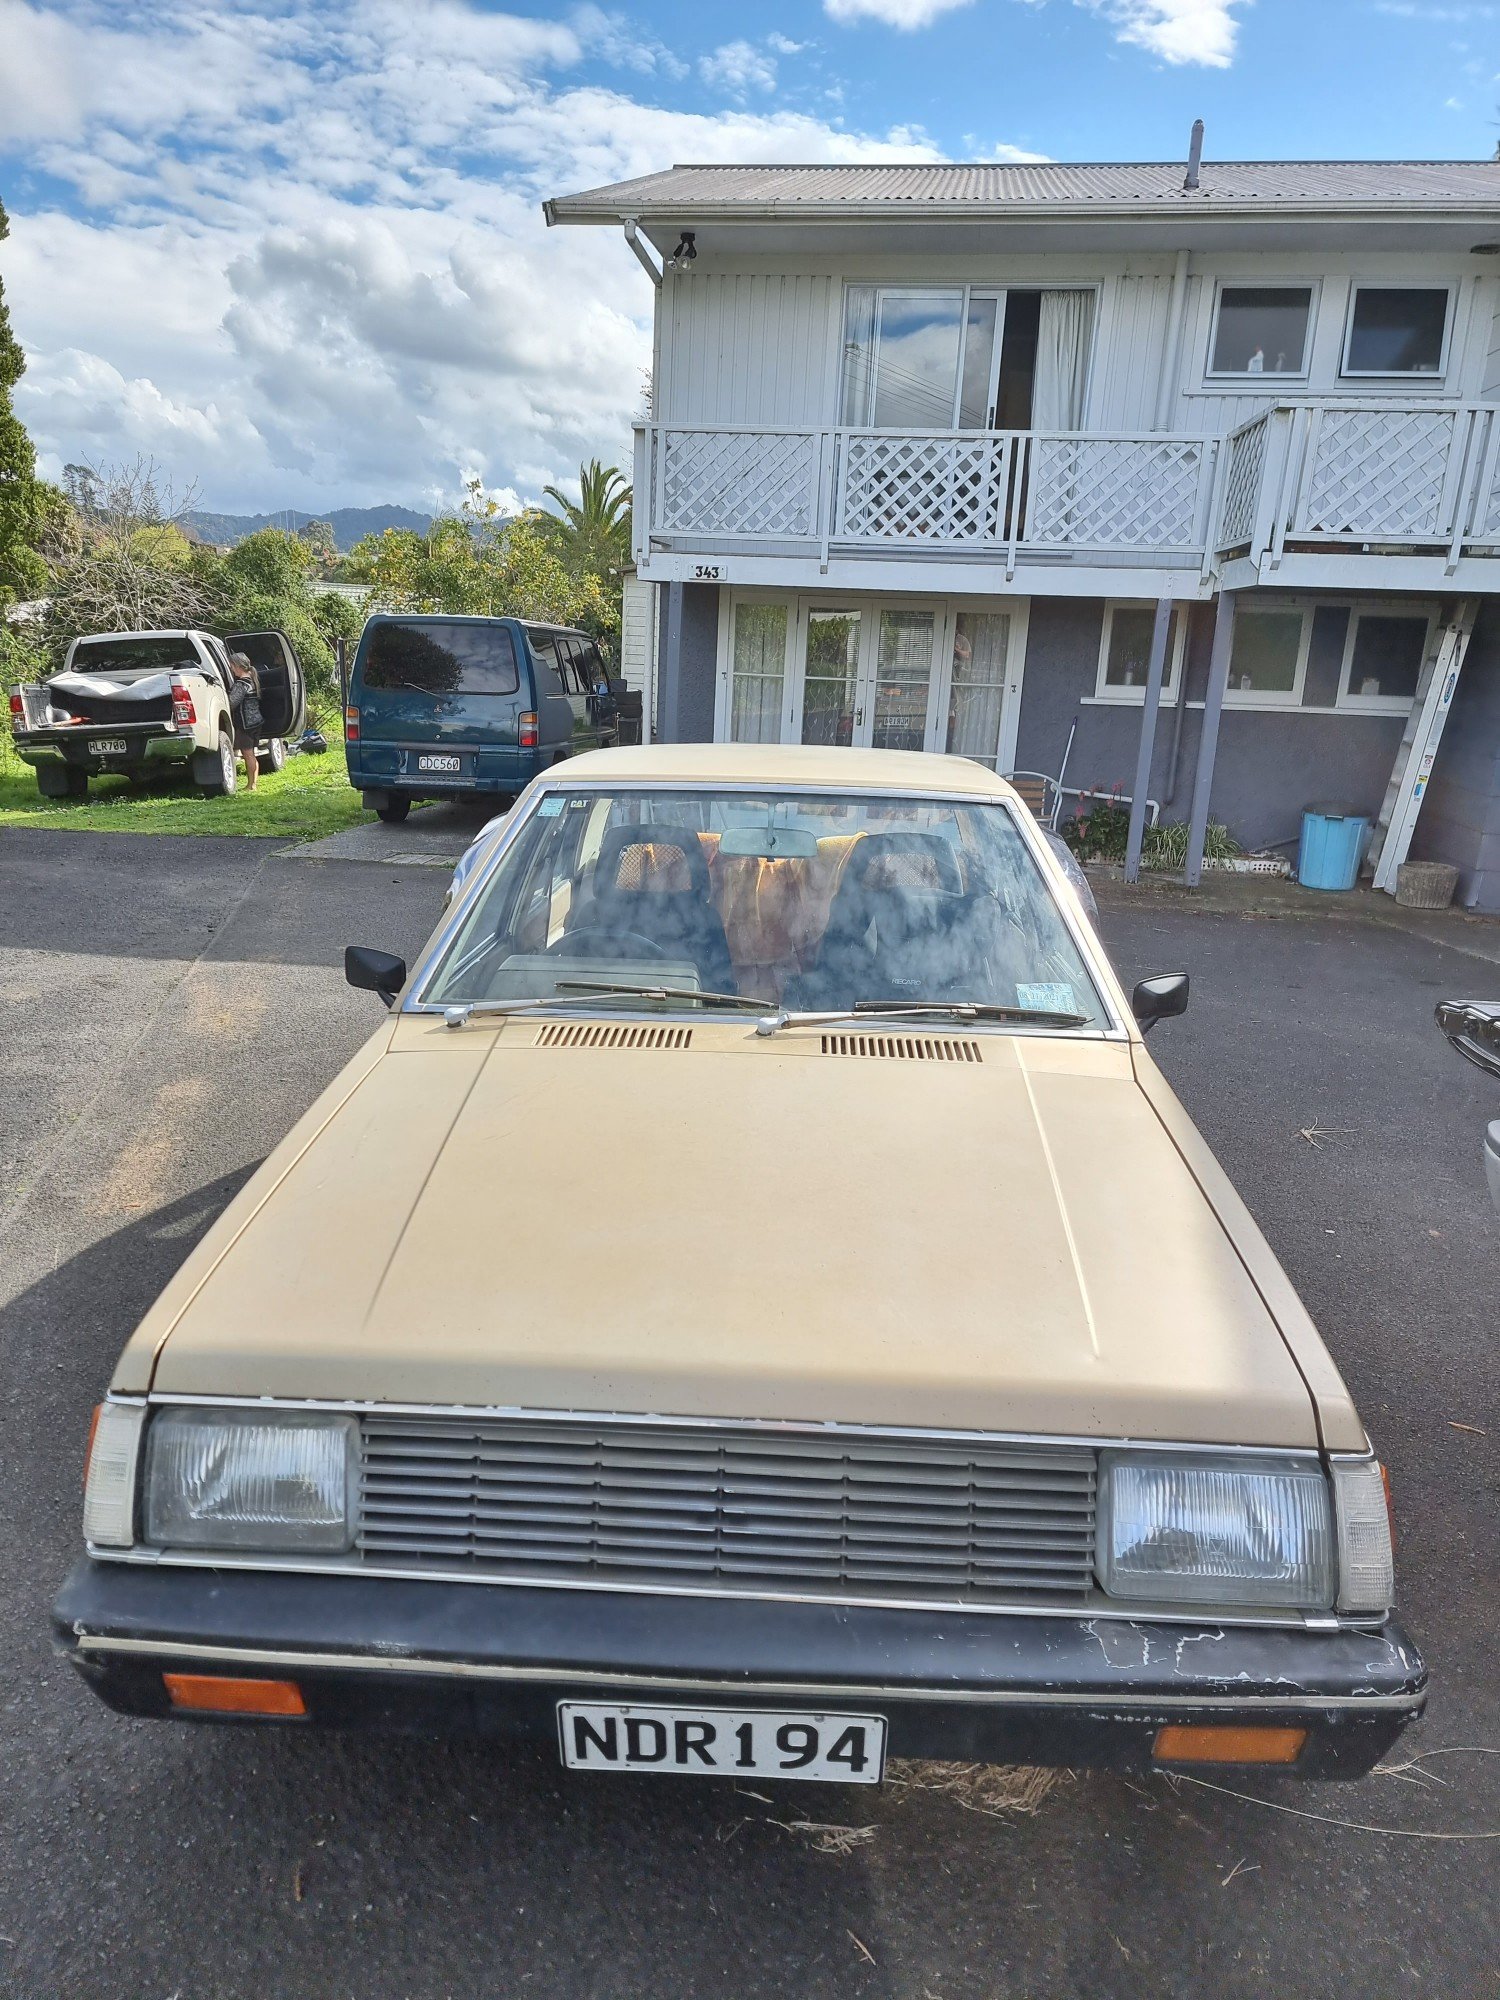
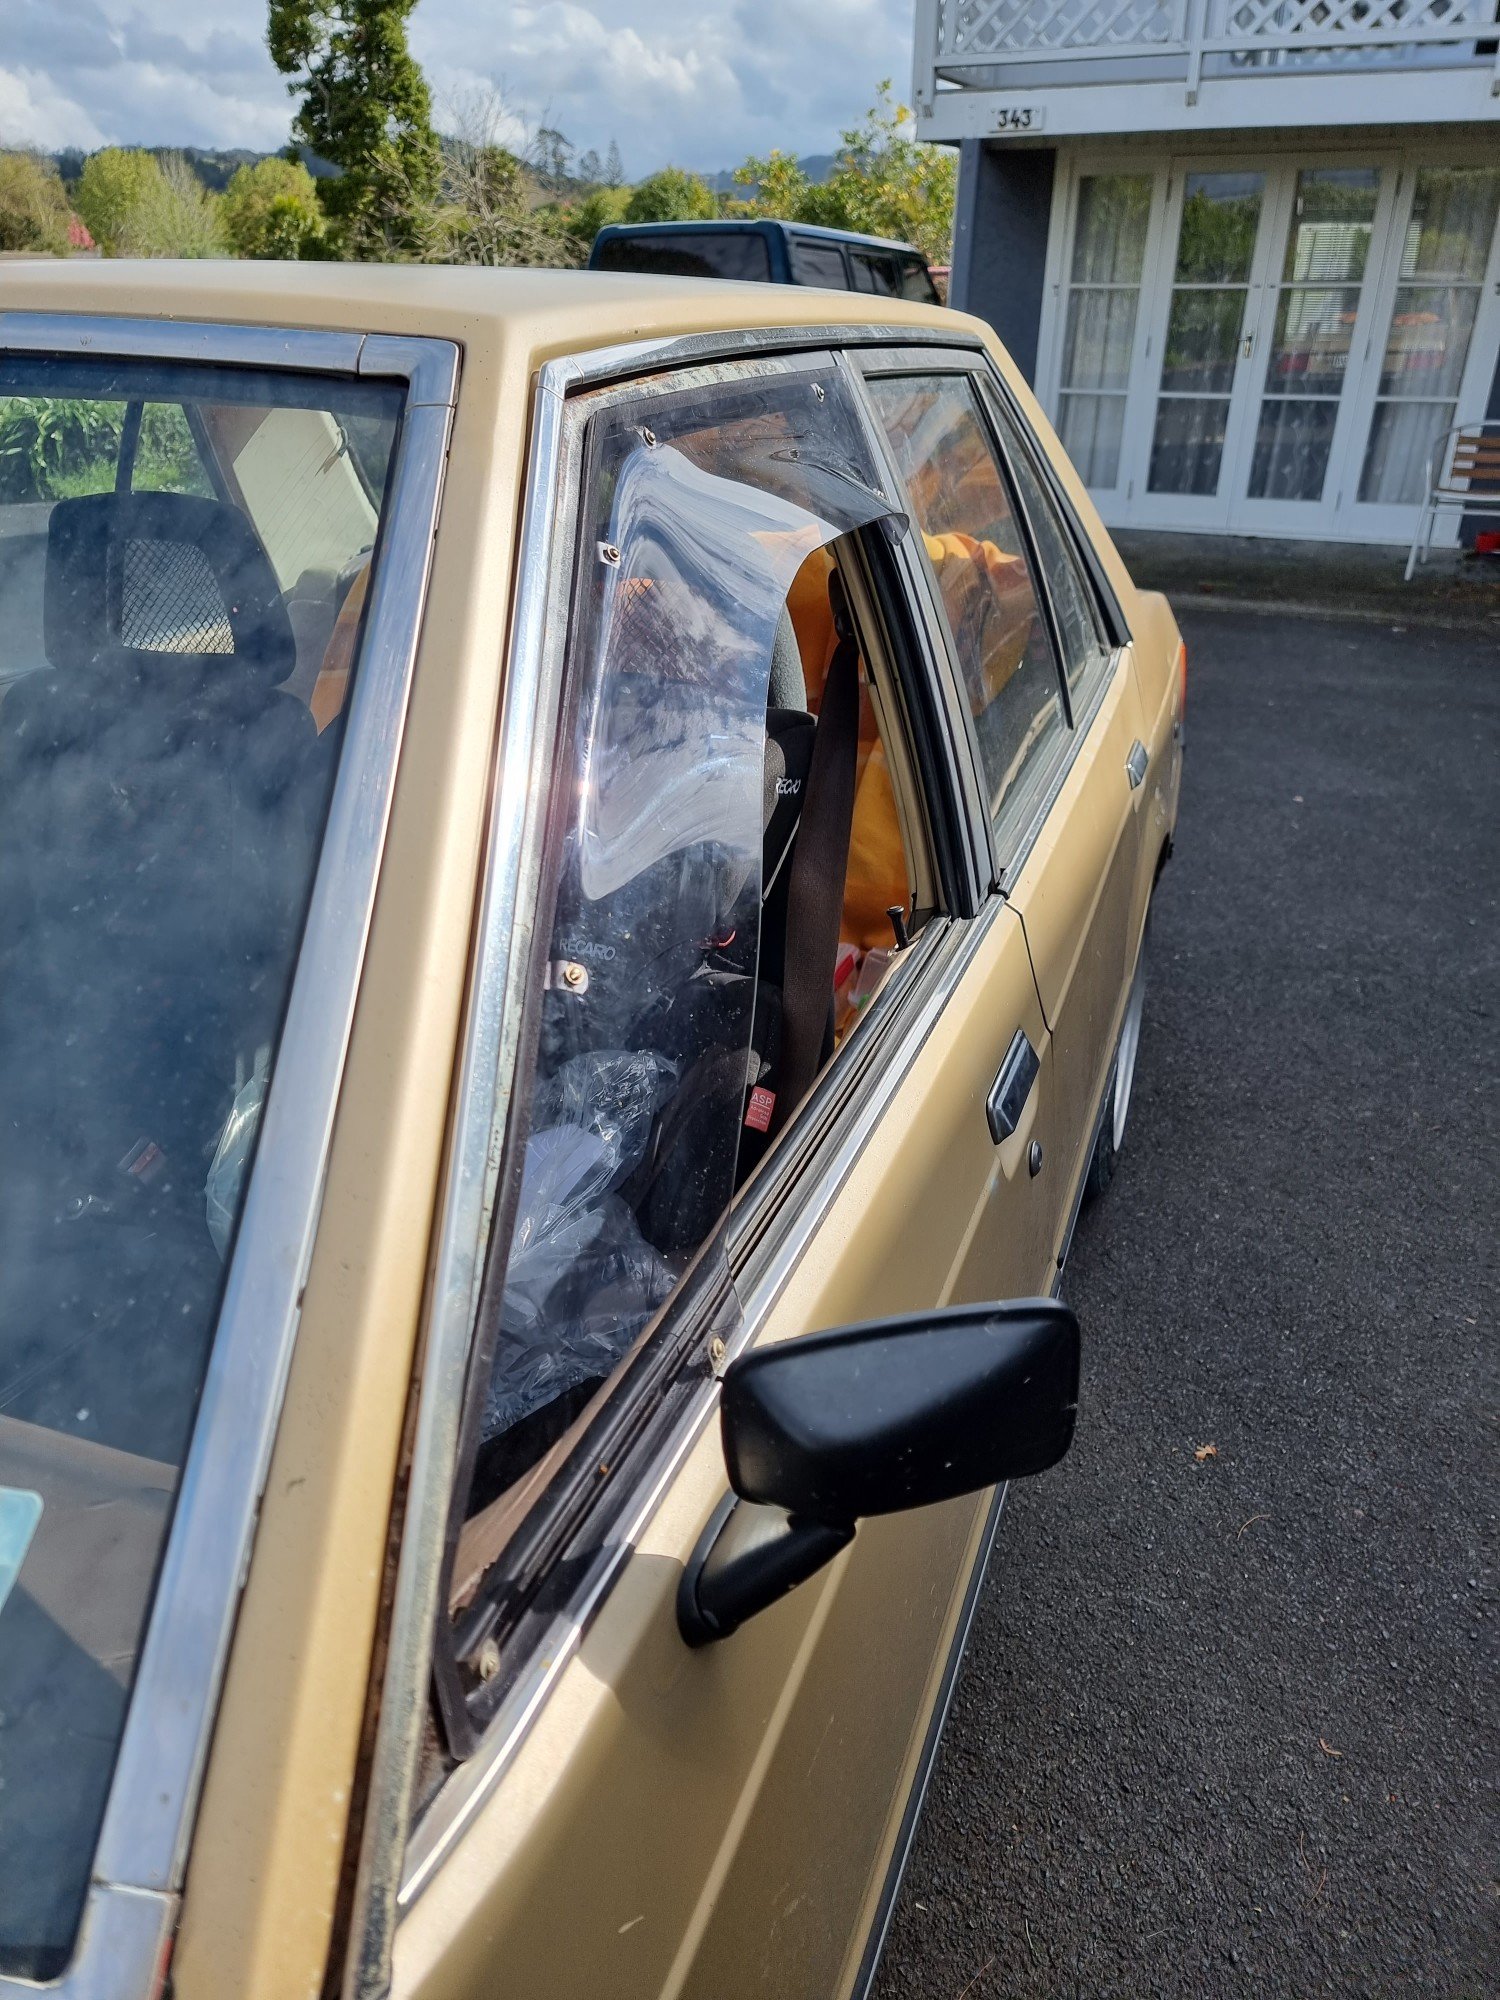
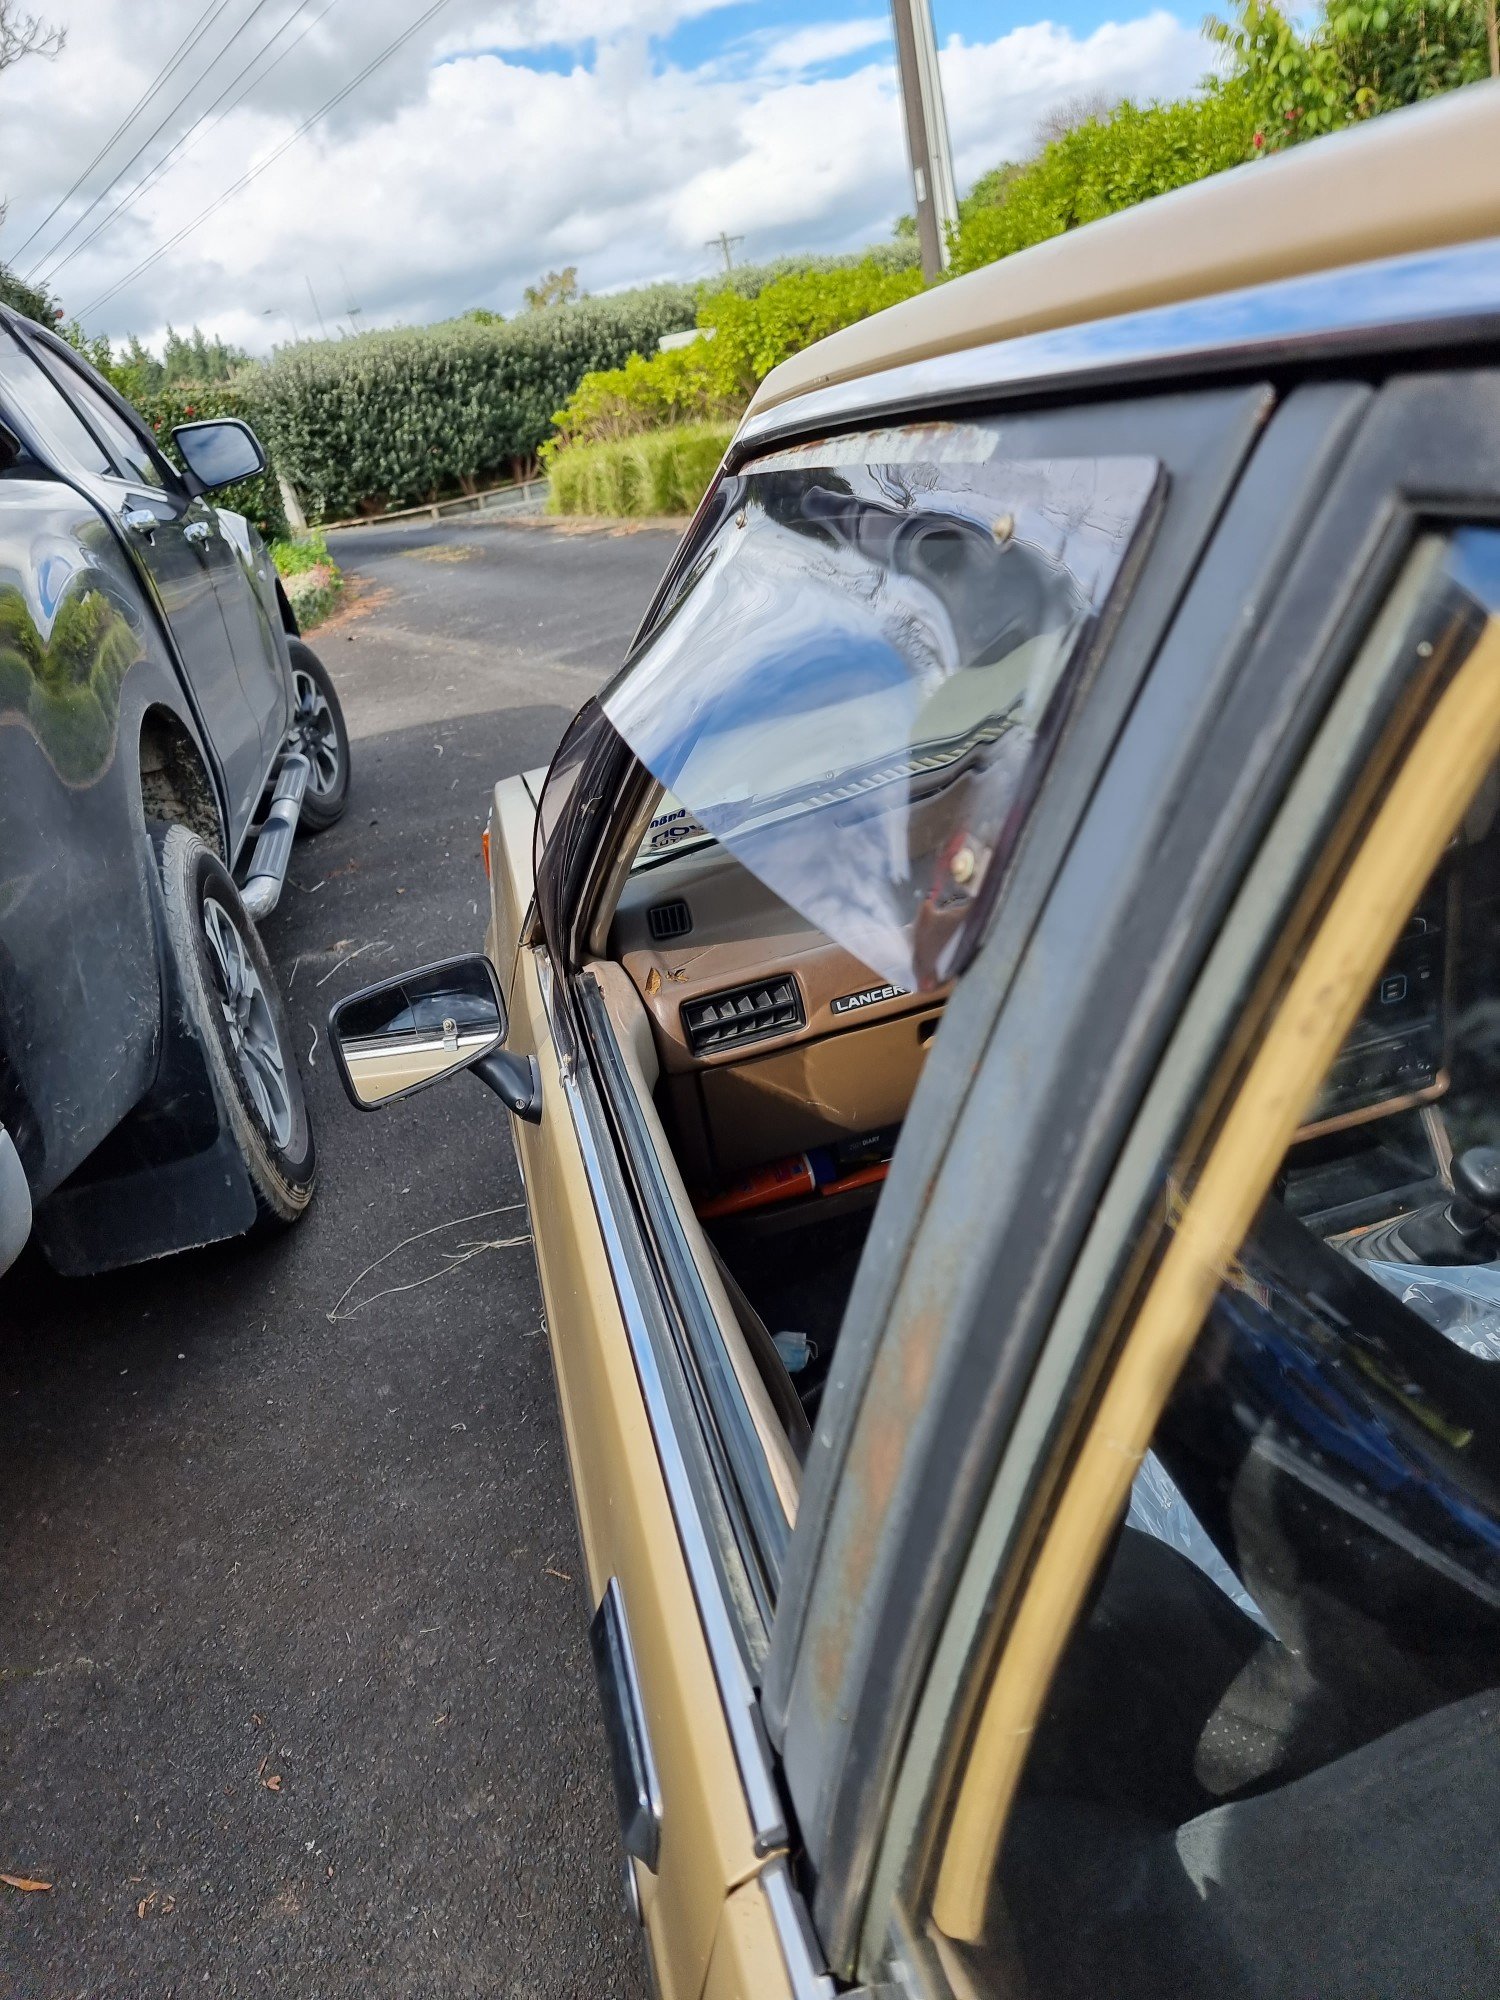
Scored some monsoon clips of this extremely tidy one lady owner l200 my mate has in their padock. So now I could finally fit my passengers side monsoon to the lancer, these are the finer things in life for sure!
8 points
-
There shouldnt be any hate, that shit is cool. I have been pondering EV converting my townace ute for my next major project. Here is one i looked at a wee while ago, boy has done a super nice job.8 points
-
Well, that didn't take long. I knew I was on borrowed time with the gearbox but didn't expect it would come around this quickly. So, I had the new tyres fitted yesterday (Yoko AD08r in the correct Turbo size), fiddled with the old brake light switch (since the replacement is AWOL) to stop the brake lights from being on all the time, and then went out to bed the new brakes in. The car was running great, it ran smoothly and was responsive. The brakes have good feel, with no shudder and the gearbox was shifting great. A few hard stops and a KM or two later I pulled over to check the wheel nut torque (not going to take the risk of not checking them after a brake job again, after the wheels nearly coming off on the Corolla). Of course, the wheels were fine, so I pull back onto the road, gave it a bit of throttle, the turbo spins up, boost comes in and then suddenly It just free revs. It felt like it popped out of gear, so I clutch in, into neutral, into second, let the clutch out, and nothing, just revs. Oh no. I roll to a stop at the side of the road and try a few more gears, nothing, I can let the clutch out with it in gear and nothing happens, doesn't even stall. I can push the car forward when it's in reverse, which is not good. I fire off a quick text to let my Wife know I might be a while and call AA to arrange a tow. "Yes, I am about 1.6KM away from home" I confirm with the rep on the phone... At least it looks good, sitting there, waiting. Whilst I waited I took a quick walk back to where I stopped to check the wheel torque A quick sniff test confirmed that was a nice trail of my fresh, rather expensive, Honda MTF gear oil. There was also a small amount under the car where it sat. After a fairly short wait, a friendly chap with a truck arrived winched the old girl aboard and dropped me home again. The Tomcat repaid his help by leaving a large amount of gear oil on the truck bed, and on the road where the car was loaded and unloaded. So what went wrong then? I jacked the front of the car up, confirmed it had no drive to the wheels and slid under to find out why. That'll do it. The shiny bit the arrow is pointing to should be inside the gearbox and shouldn't be visible. It also explains why the gearbox weed everywhere as the seal was wide open without the shaft to seal it. I did some careful levering with a prybar and popped it back into place. I'd be very surprised if this is a new issue... I suspect I'm not the first one to lever that back into the gearbox. Whilst under there I had a good look around. Noticed a couple of minor coolant leaks I will need to attend to, but also noticed this rear engine mount completely missing its nut. I found a new pre-loved nyloc nut that fit, and wound that on nice and tight. Who knows, maybe that will fix some of the movement in the engine. The driveshaft has quite a lot of radial (up and down) play when inserted back into the gearbox, which confirms my suspicions, both about the condition of the box, and why it popped out; the gearbox bearings are stuffed. These gearboxes do not tolerate being neglected, and being over a litre of oil down when I got it, I suspect it's not had a good time. When Rover had these boxes built, they chose to use hi-tech ball bearings with plastic to retain the balls. This probably seemed like a good idea at the time, and they worked well for years, as long as the plastic didn't get old and the gear oil could keep them cool Above is an example of the bearings used in the PG1 gearbox; uprated steel cage bearing on the left and stock plastic cage on the top right. Unfortunately, the bearings Rover used seem to wear badly no matter what (they tend to get pitting in the races and go a bit grindy), but when coupled with low oil and high temps, the plastic can fail, causing the bearings to no longer be sufficiently retained, as per this extreme example where the plastic has broken and the balls have all converged on the lowest point. This sort of damage is what can also break the flange off the diff center. So I suspect mine has either started to break down the plastic, or the races have worn to the point there is excessive play. The popping out drive shaft is the usual giveaway of bearing failure. With the driveshaft back in place, I have drive to the wheels again, so once I refill the gearbox with the cheapest oil I can get, the car will be mobile enough to get out of the garage and into the drive, where it will sit in shame waiting for me to rebuild the gearbox. I will be stripping the gearbox, replacing all the bearings, and oil seals. Uprated metal caged bearings will be used everywhere they are available. Whilst I'm there I will also be doing the clutch. I'm hoping to keep the Type A torsen diff, but I will need to check it's in good condition once the gearbox is split; if not, I will need to increase the budget and add a Quaife to the list. After that, the gearbox should be damn near bulletproof. I was really hoping to get more than a couple of KM (literally, I've done sub-10KM since I got it) out of the car before it seriously broke, but that's the British car game I play. Every day is a gamble.7 points
-
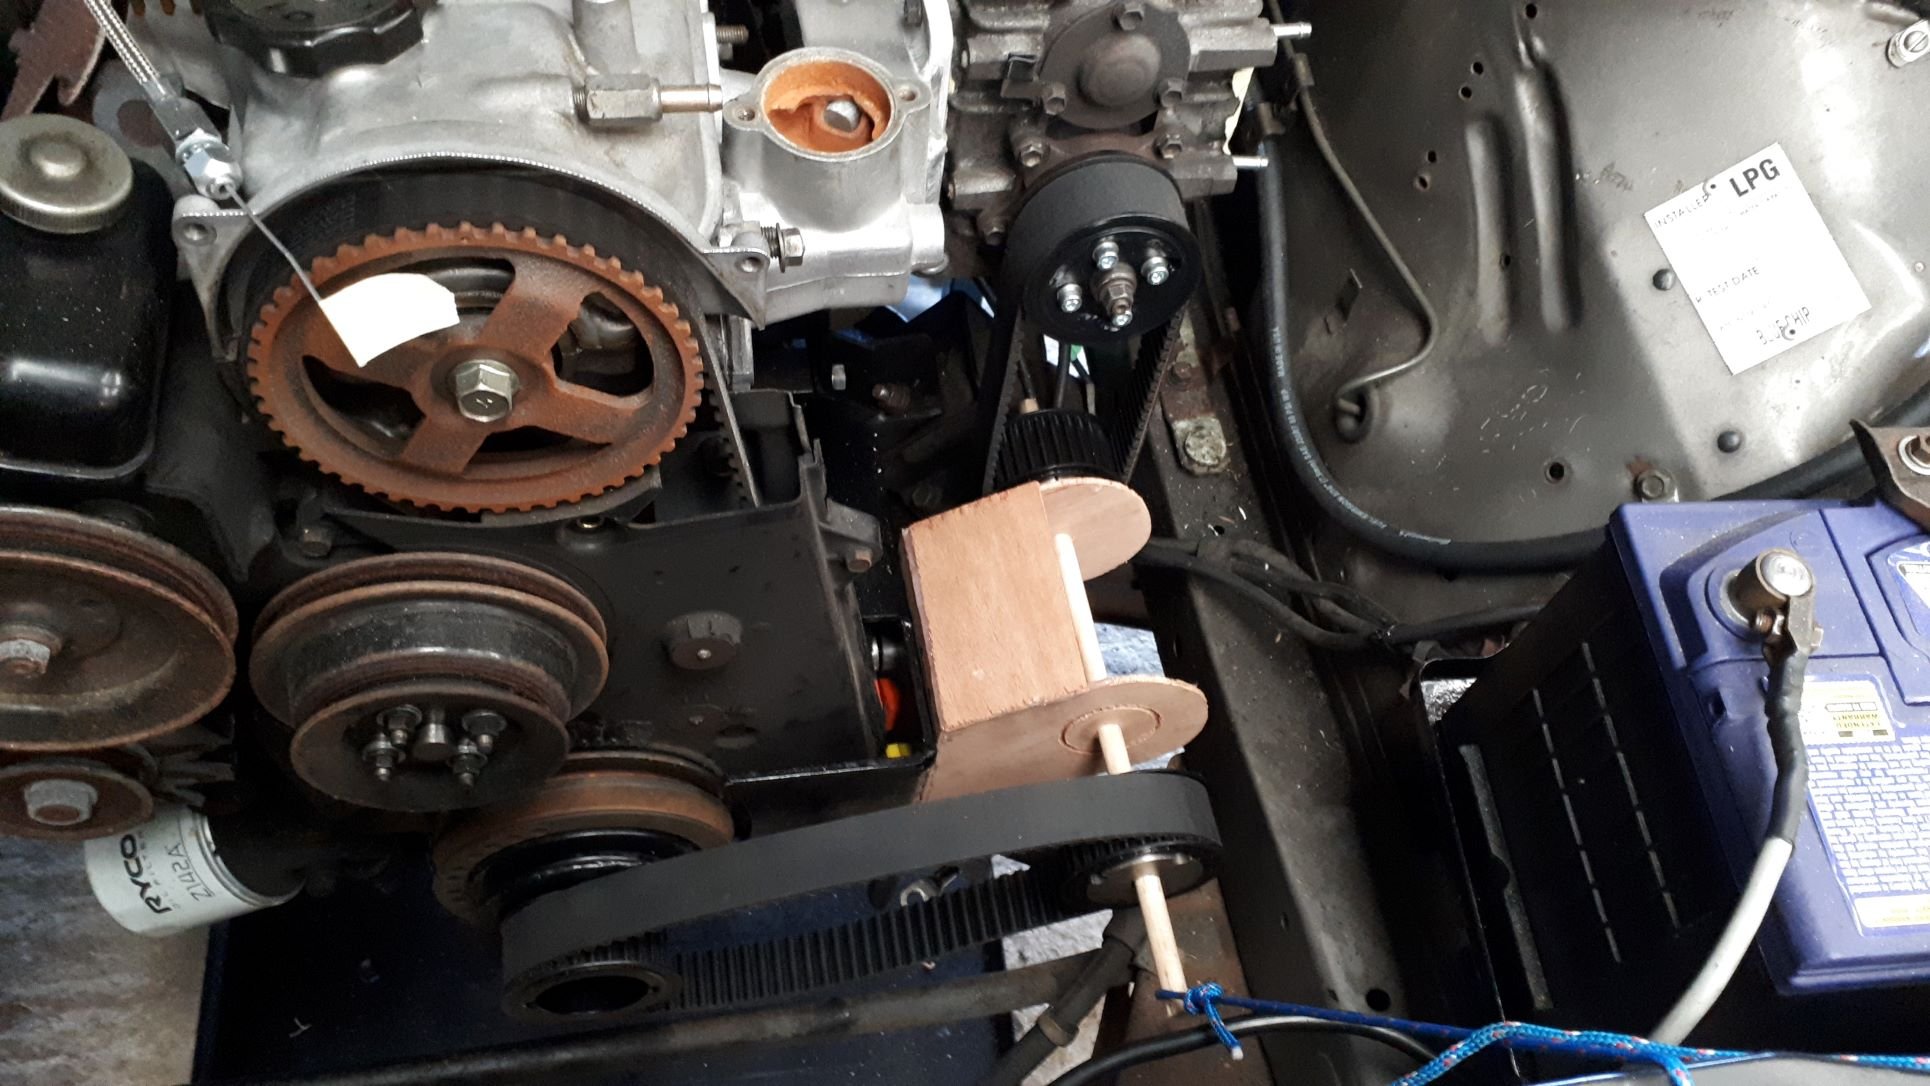
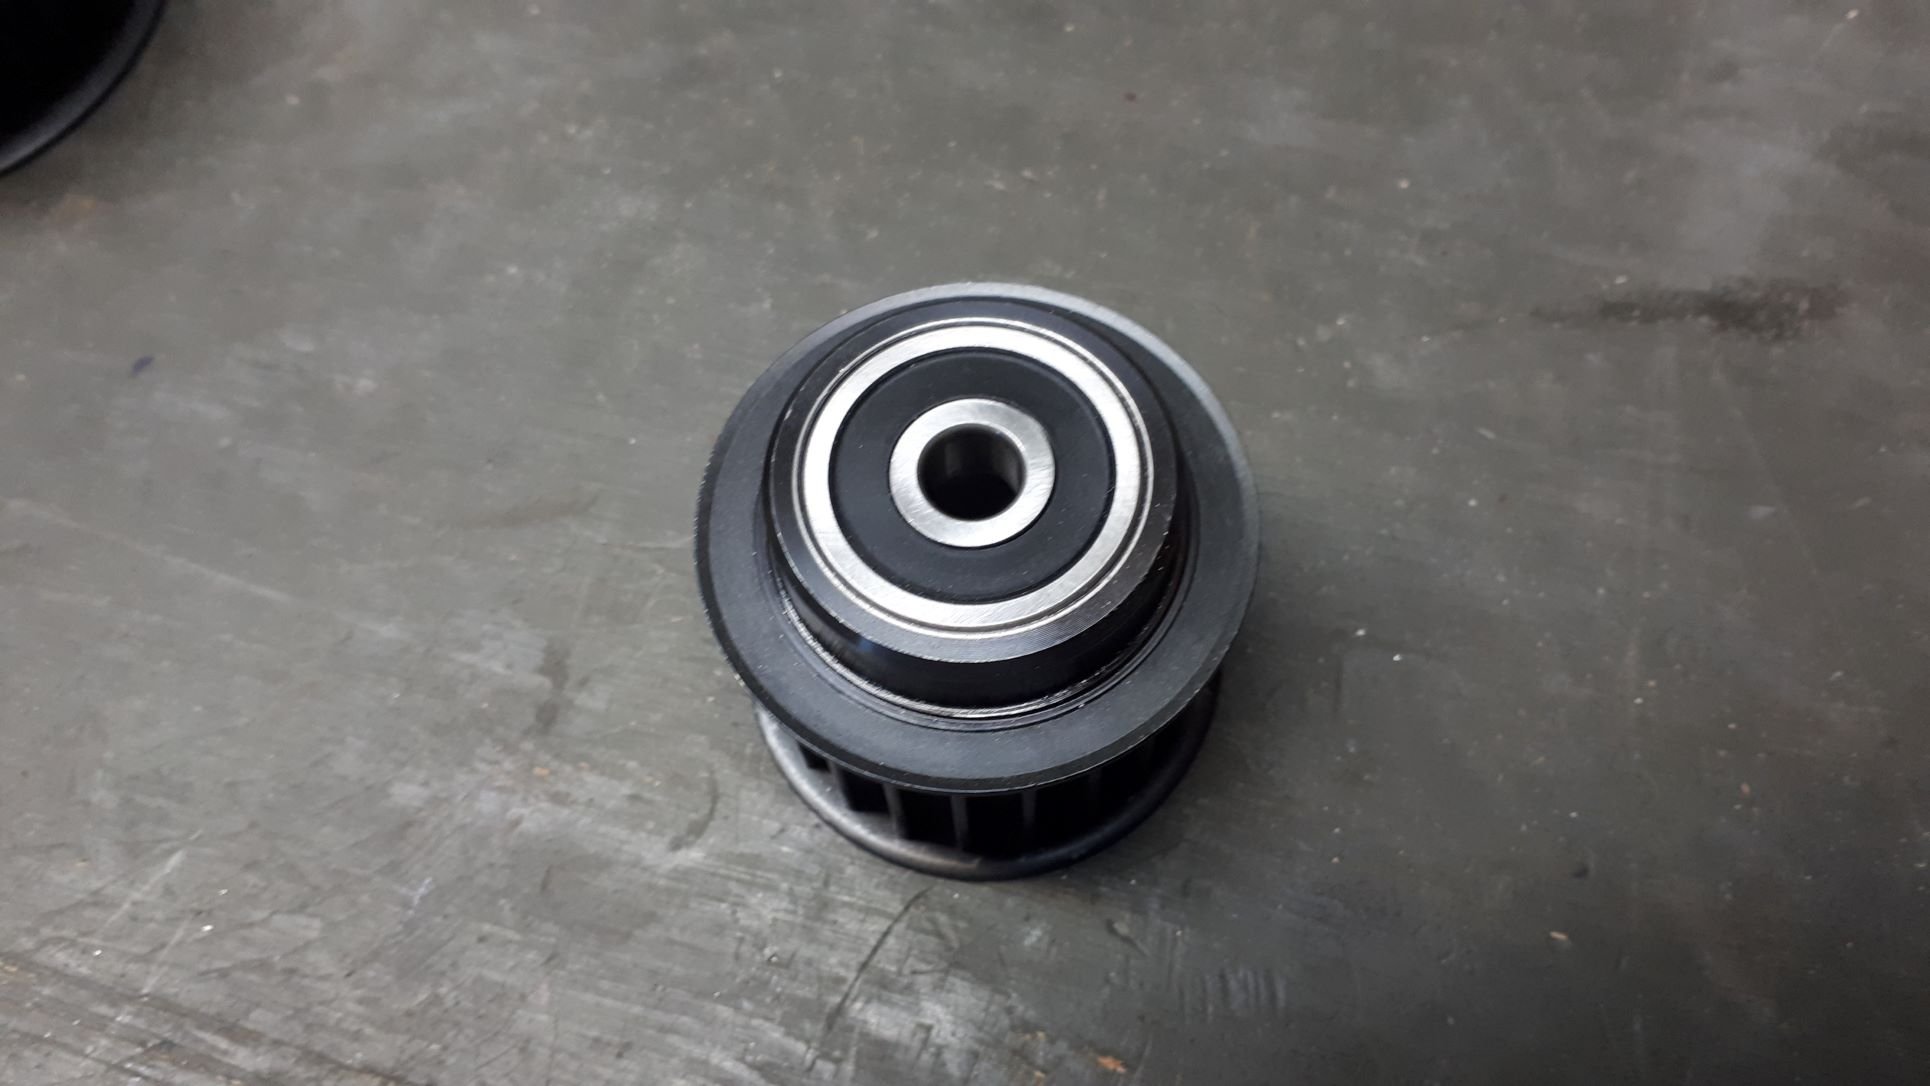
Now to figure out how to get drive from the crank to the supercharger. This was always going to be just a little Heath Robinson involving 2 belts and a lay shaft to bring the drive aft about 180mm. I mocked it up using thin plywood, hot glue and a piece of dowel and after a bit of mucking around I have the basic dimensions sorted. Now I can start fabricating something more substantial in steel. I also machined up a small pulley to accept bearings, this pulley will be the tensioner for the lower belt. The upper belt shouldn't require an additional tensioner as I can tension the belt when I position the lay shaft assembly. I am expecting this drive set up to be very noisy indeed!
7 points
-
I should update the post to explain: The roof in one of my trucks leaks. My delightful staff members put my mulitmeter in a bucket and chucked it right under the leak, so I got a new multimeter sent over It was that new MM which was telling me 6v batteries had ~ 12v charge EVIDENTLY one needs to turn the knob to DC rather that AC (not that it says either DC or AC on the MM face) or else one will see roughly double the battery's voltage on the display I went back, retested the EV and have tentatively diagnosed one dud 6V battery (the one a 12V sprayer was hooked up to)6 points
-
Nice, iforce ate shit. Oh well here's a current photo. Casually waiting for Cindy to open the door so I can come back over, sort the storage in NZ then ship it over.
6 points
-
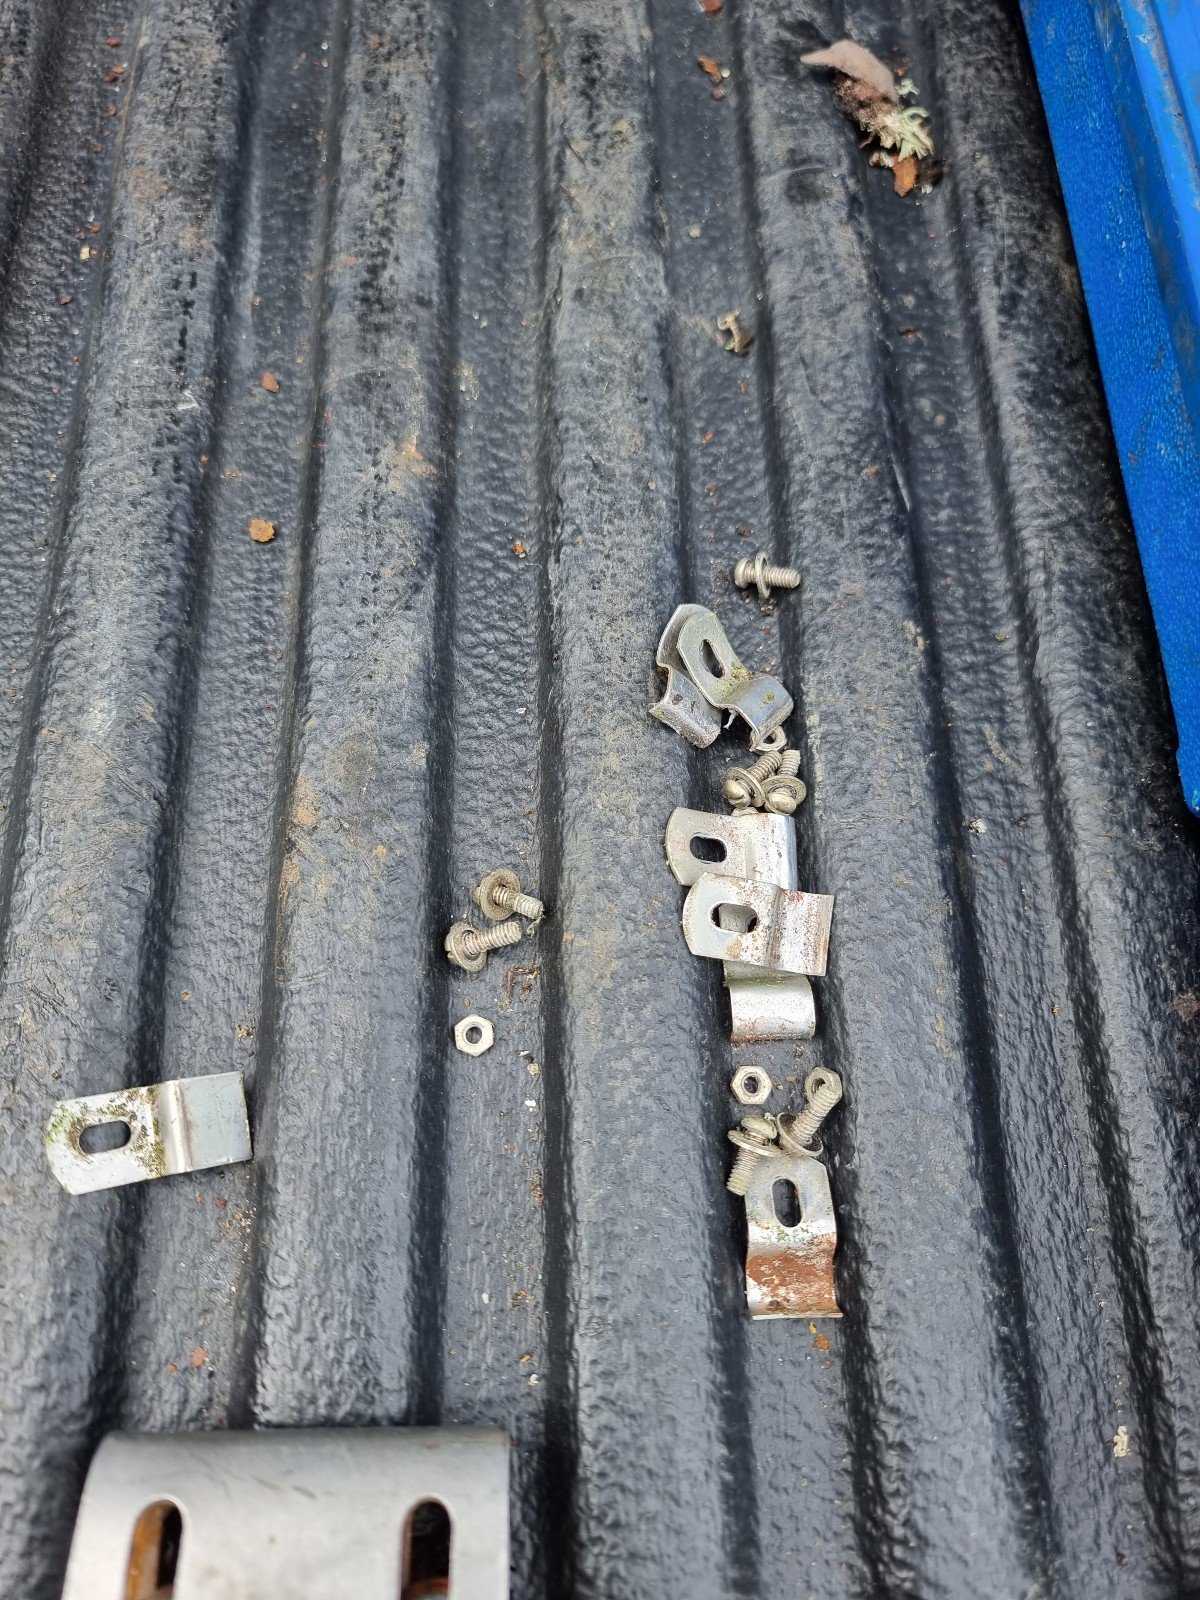
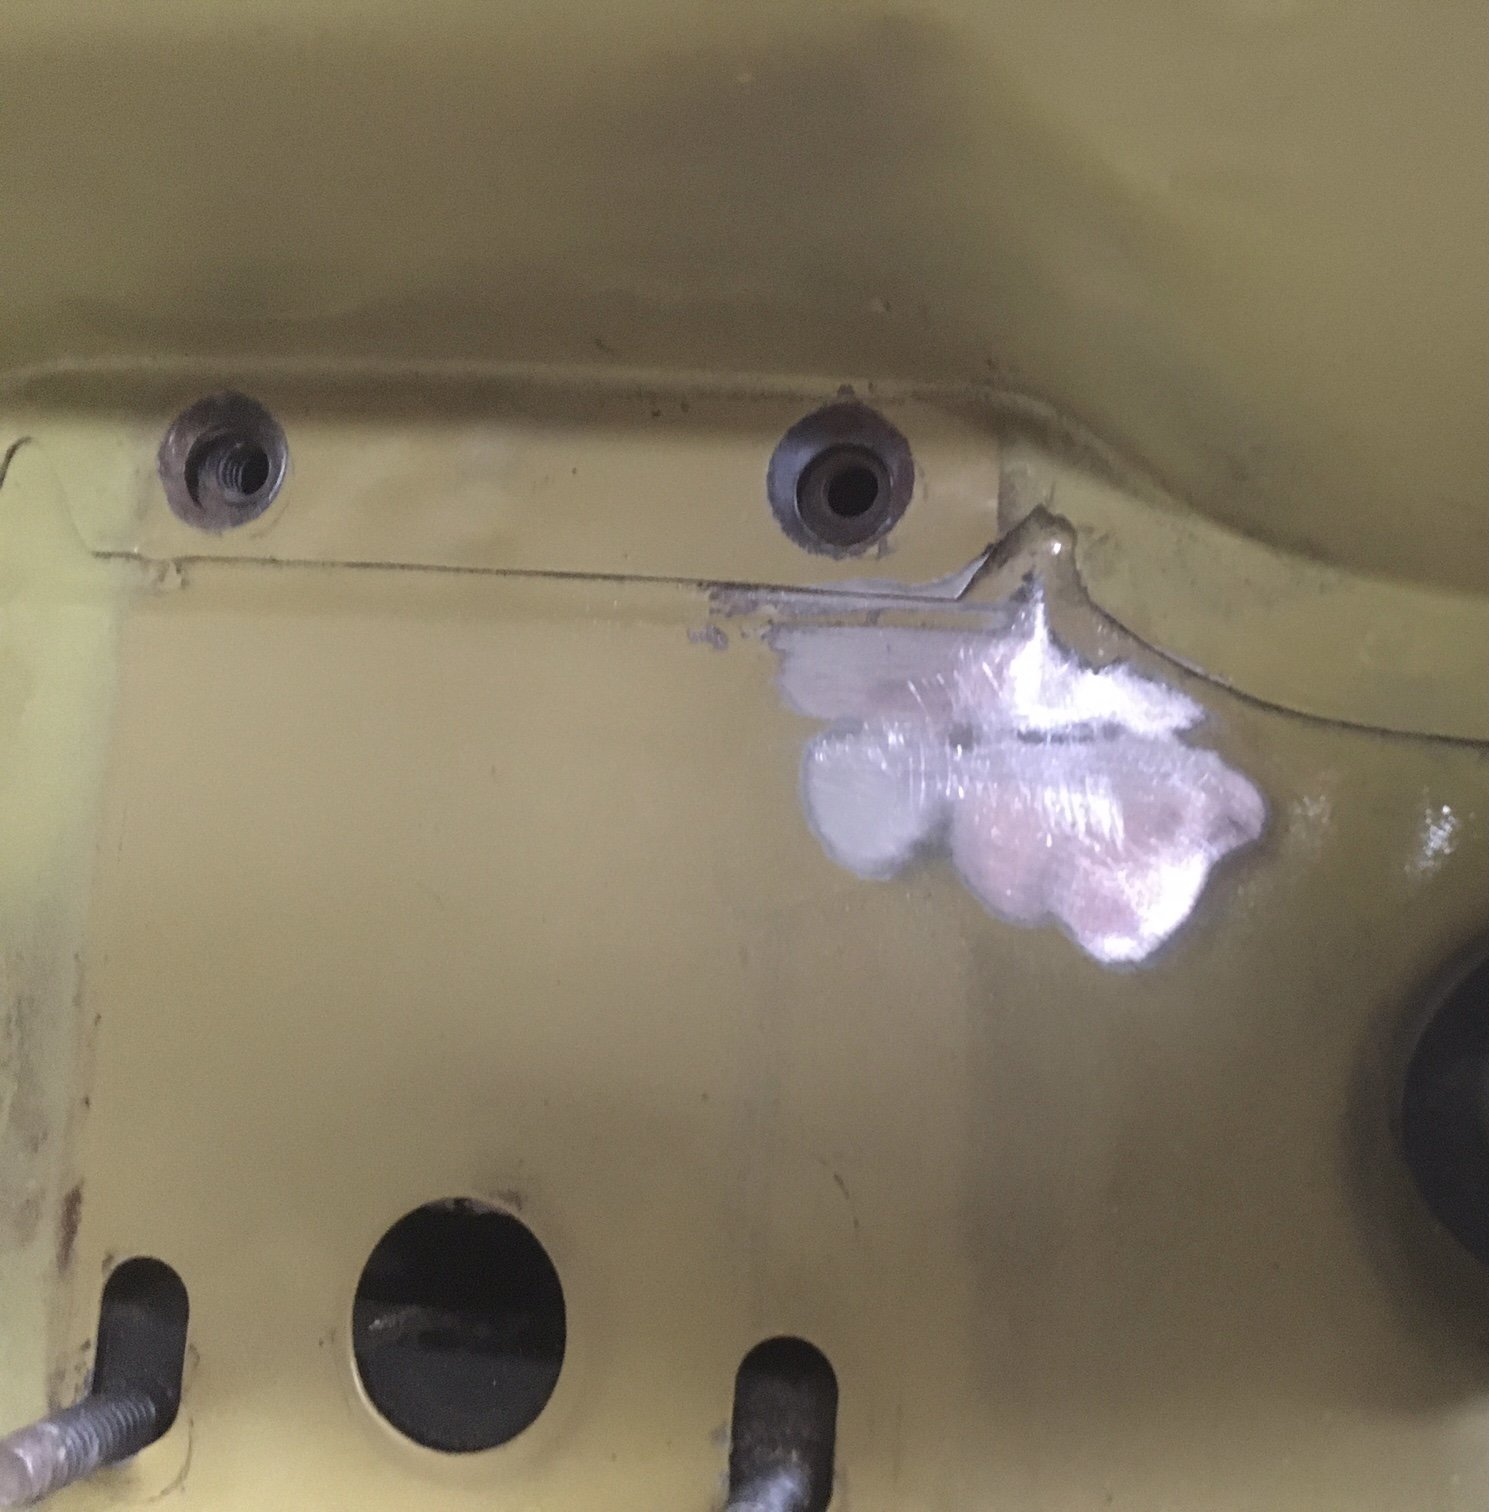
The thrust rods and swaybar are now refitted to the vehicle. The swaybar saddle bracket things are very annoying but we got there in the end. Today it was blowing a gale so I retreated to the shed, which was very loudly groaning and popping in the wind. I popped the clutch cable out. The pedal end is almost inaccessible for my sausage fingers, but I got it unhooked by pushing hard on the firewall side. I decided then that the brake booster bracket looked too crusty so I unbolted that and chucked it in the blast cabinet. Primed painted The removal of said bracket revealed a little rust bubble on the firewall. Luckily it wasn’t deep. I gave the area a scotch brite, and prepsol. then hit it with some primer Then I pulled the shield off the booster and gave that a blast and a prime. Then I gave the booster a good scrub and bolted the new master cylinder on. I have some colour matched 2k paint the panel beater gave me, but no way of spraying it, so I may have to splash out on a touch up gun.
6 points
-
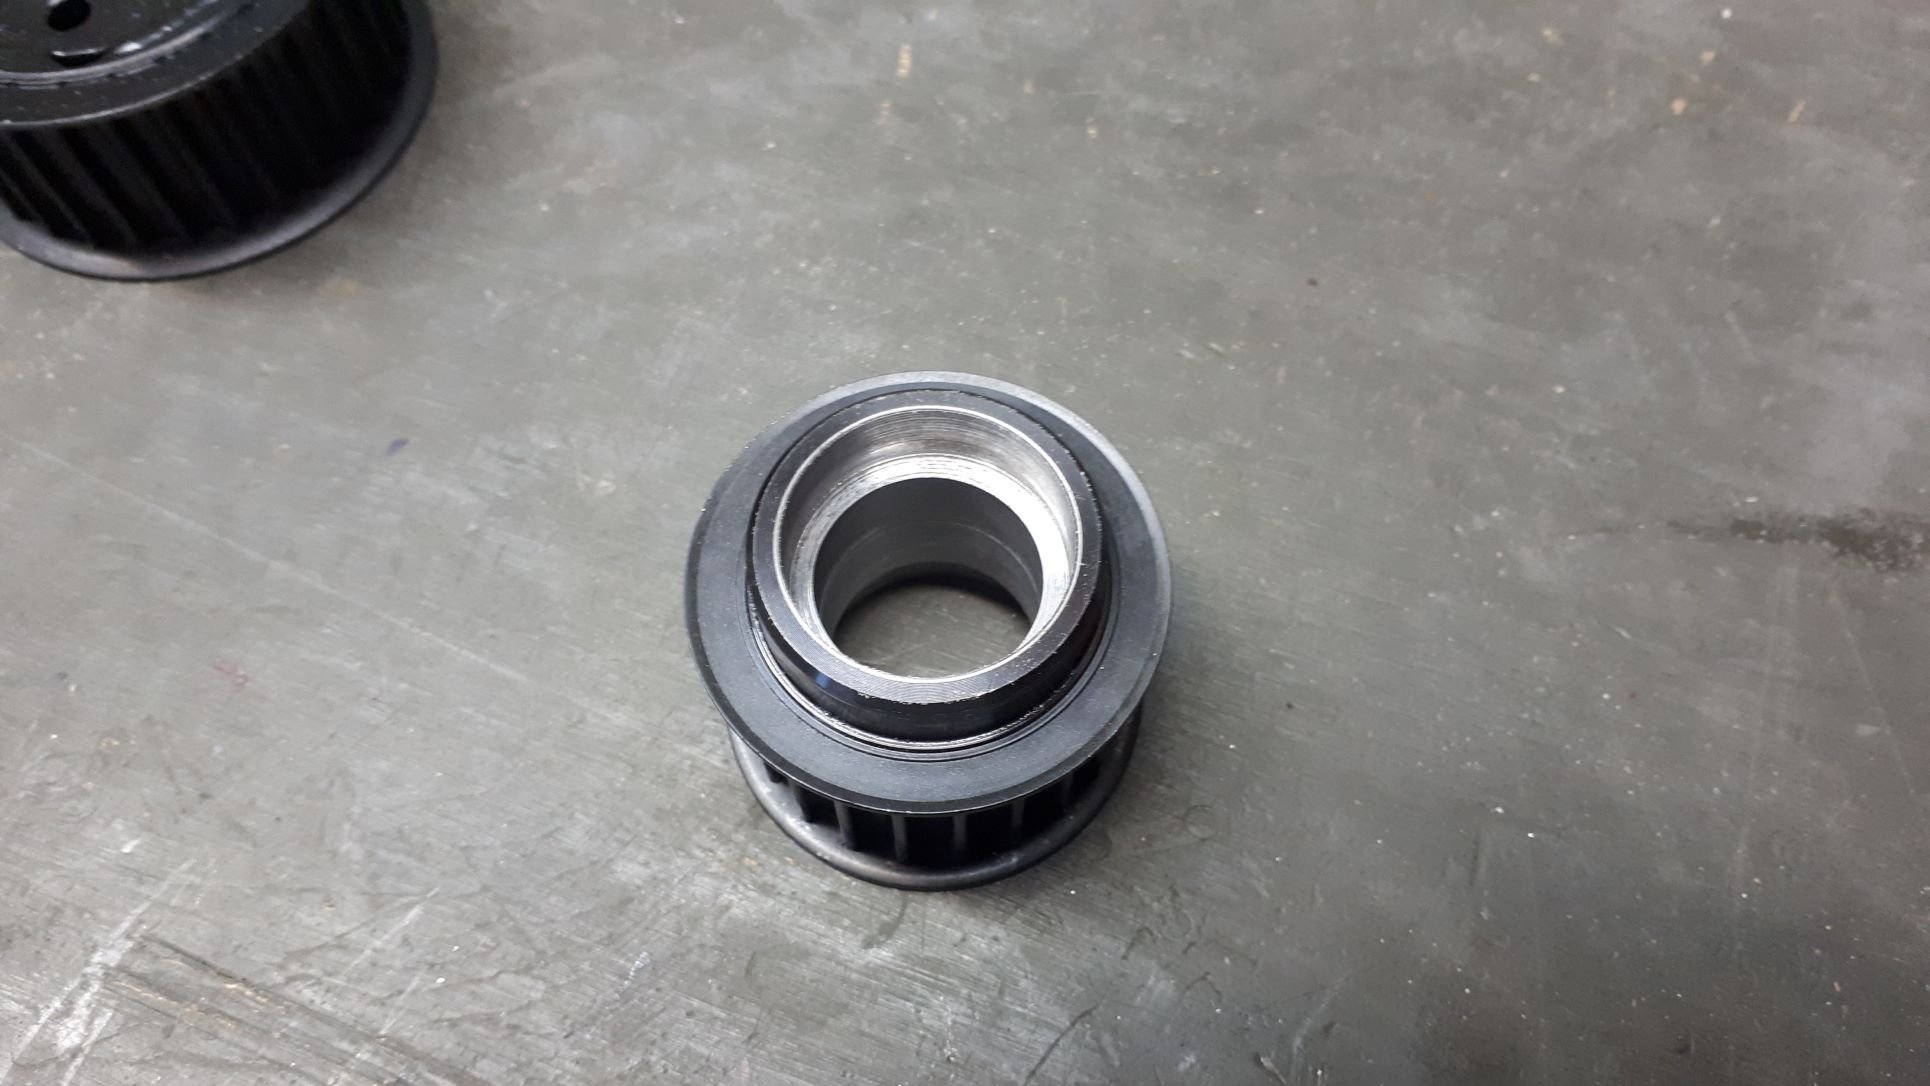
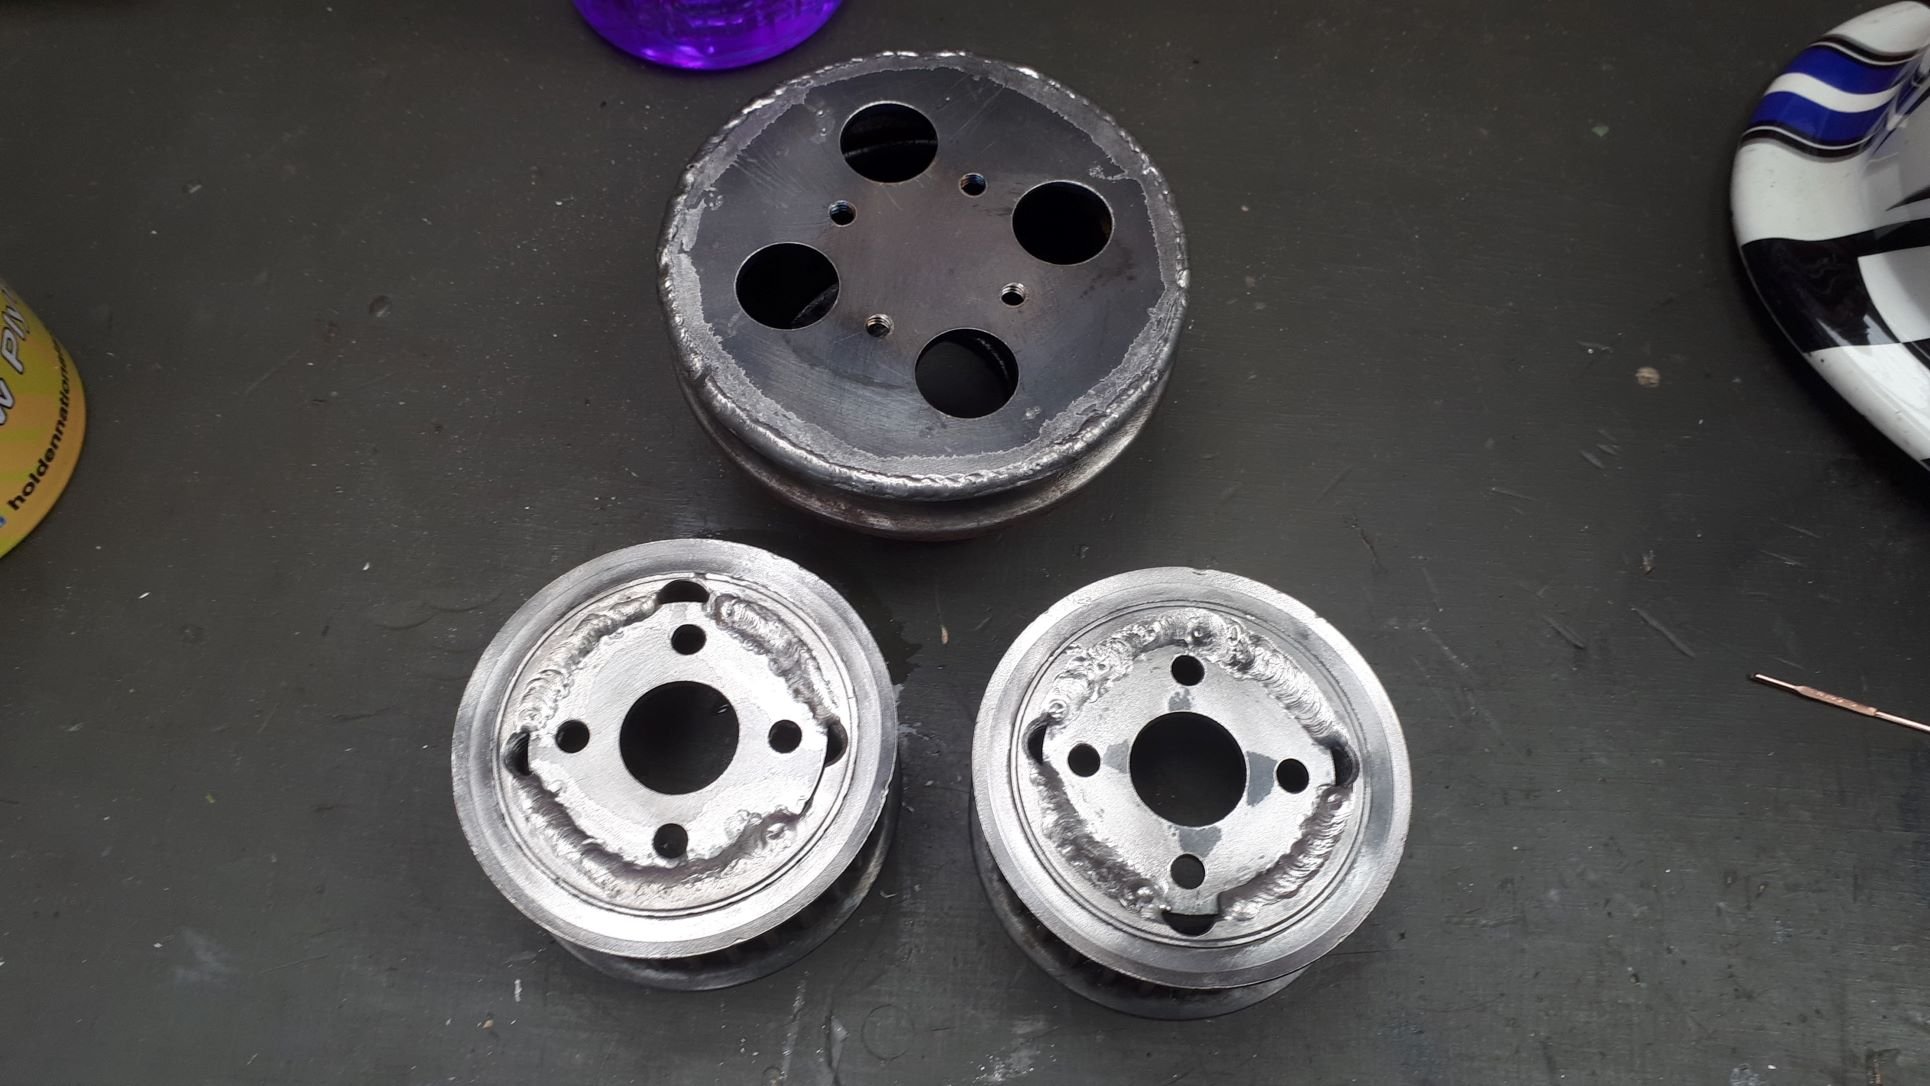
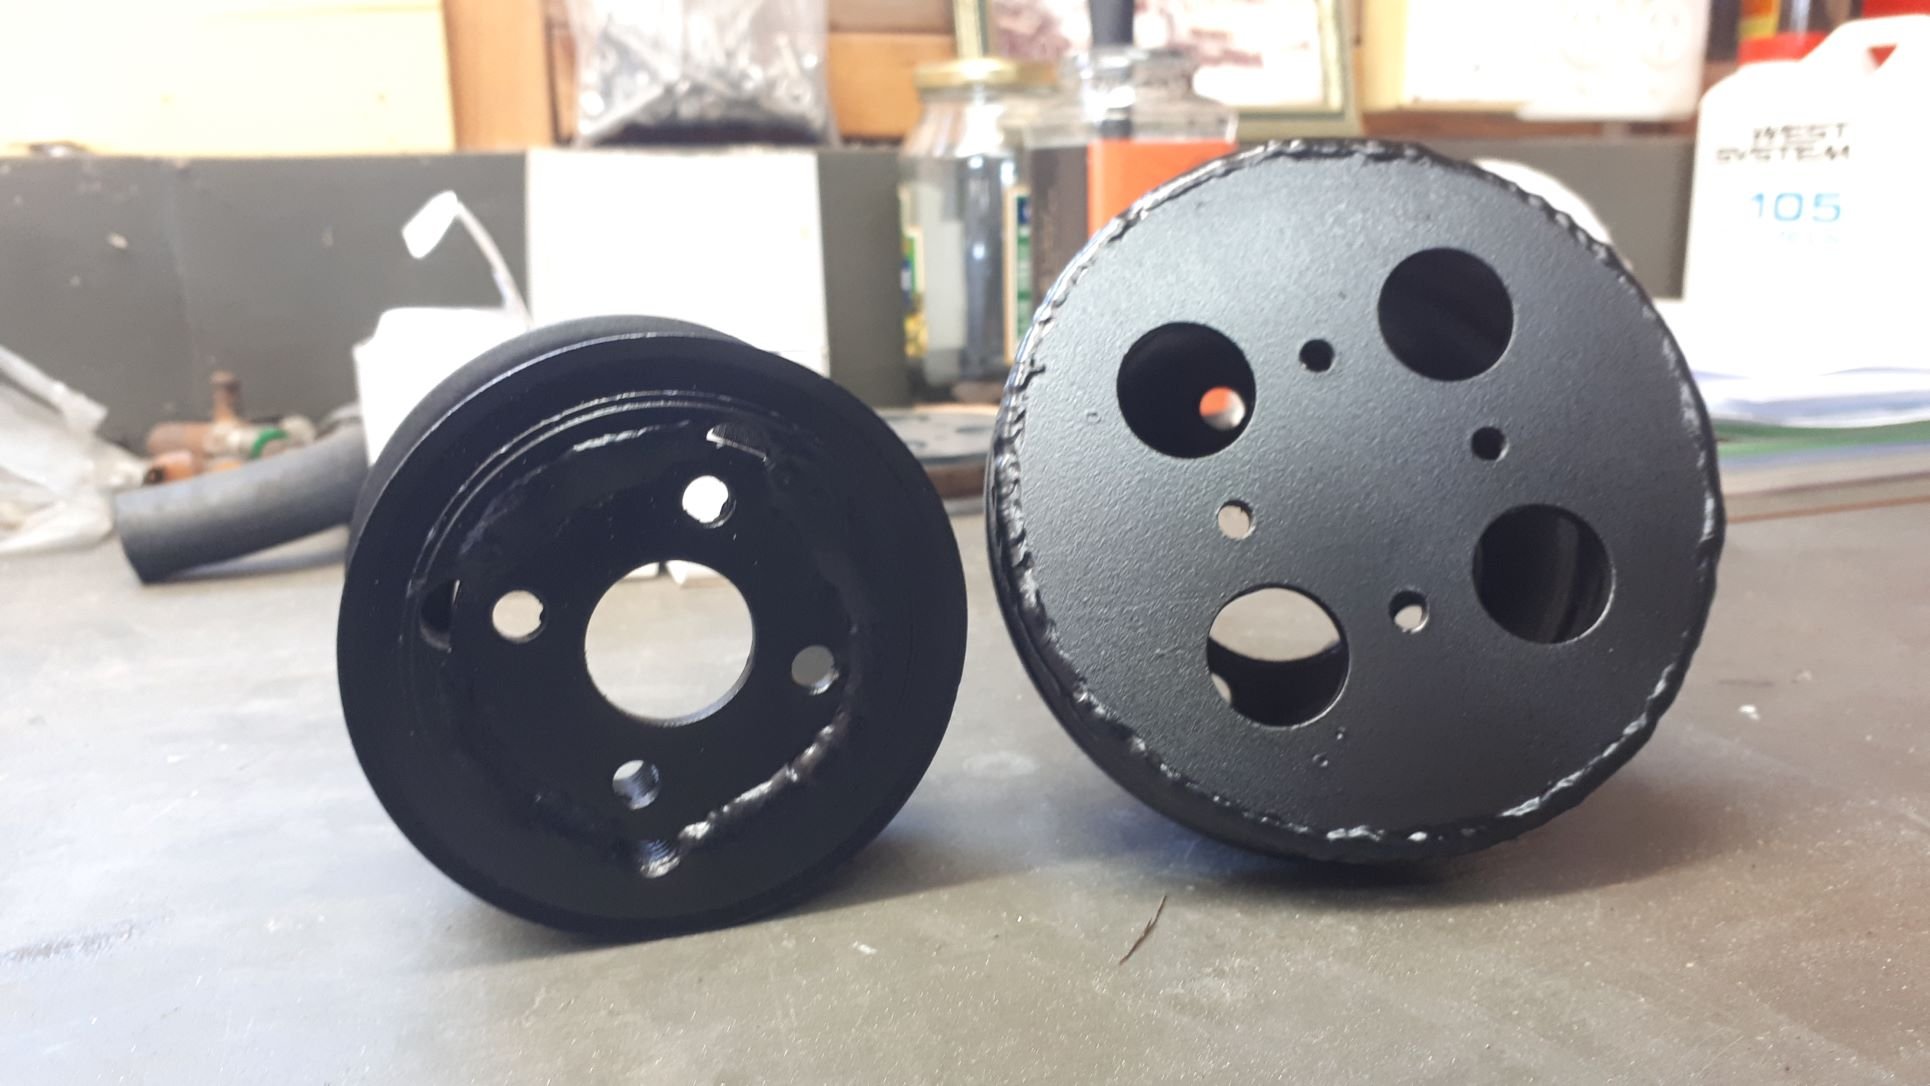
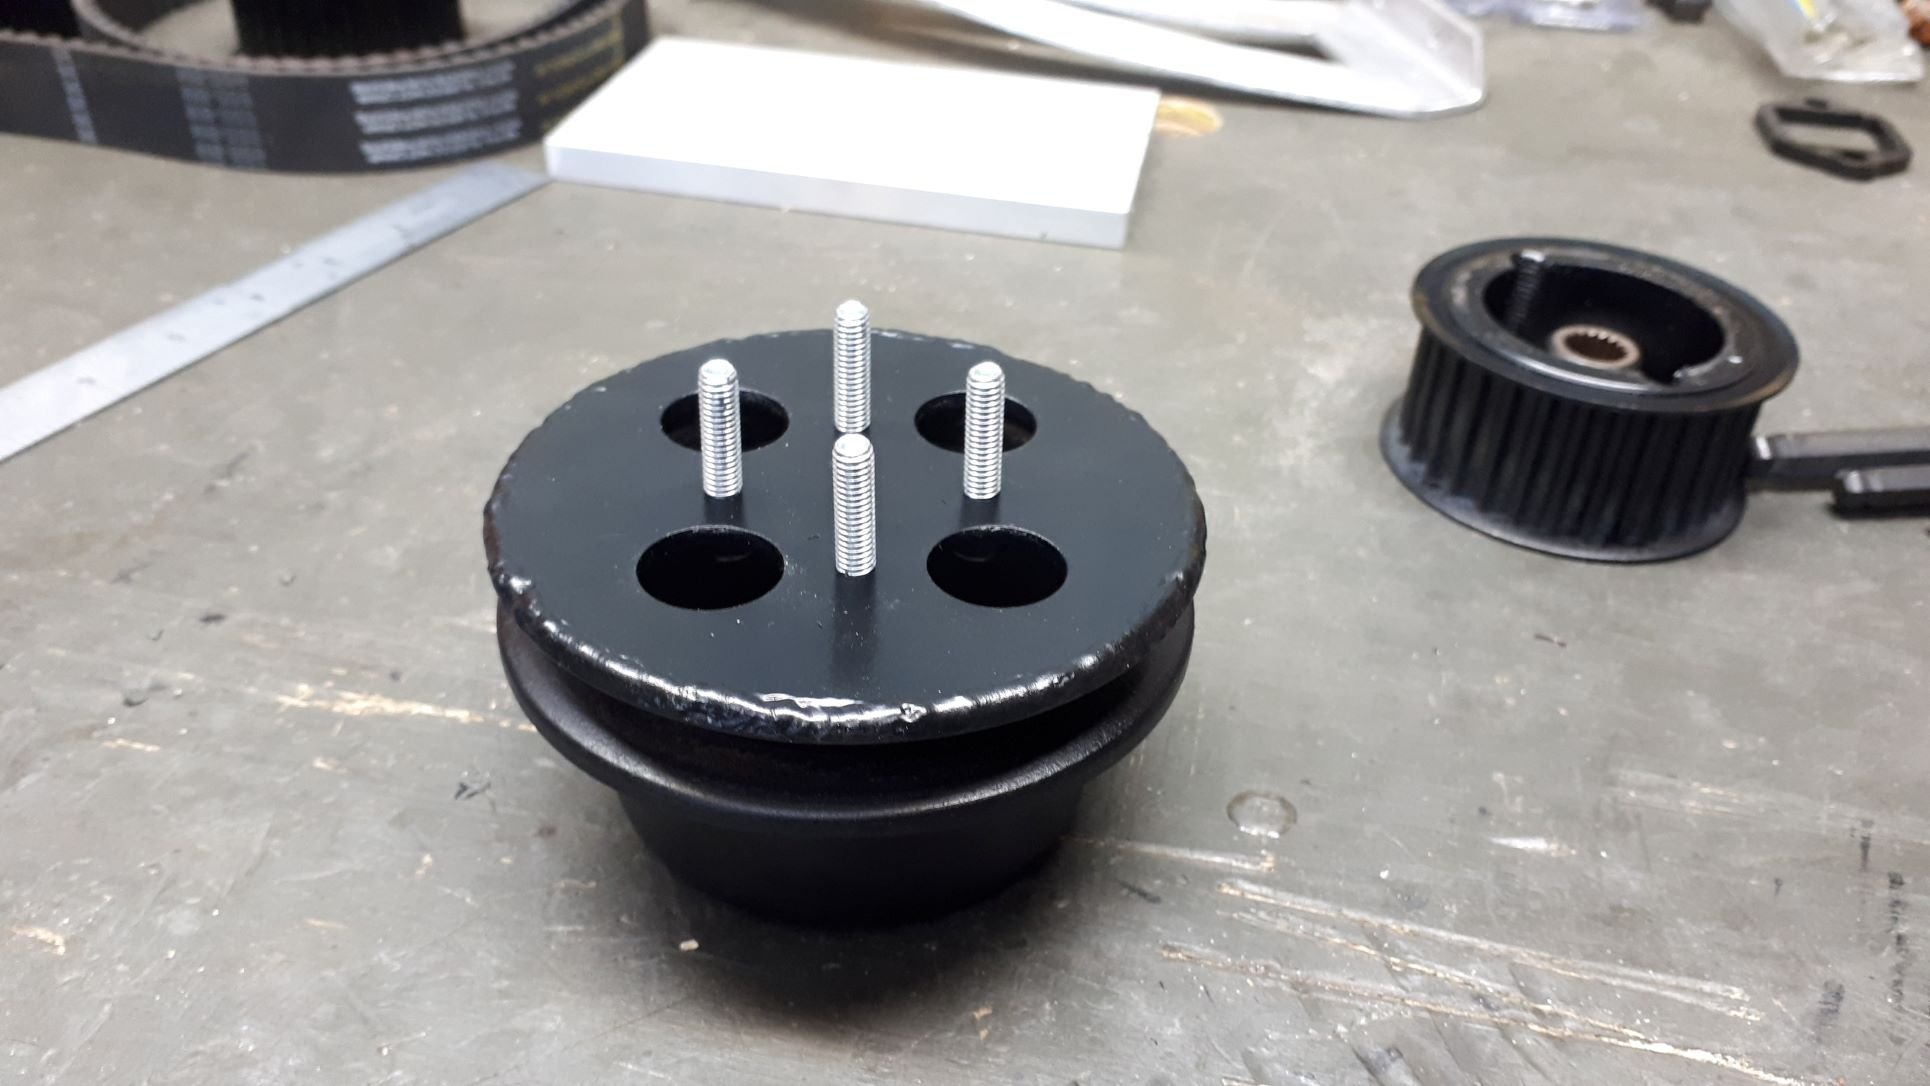
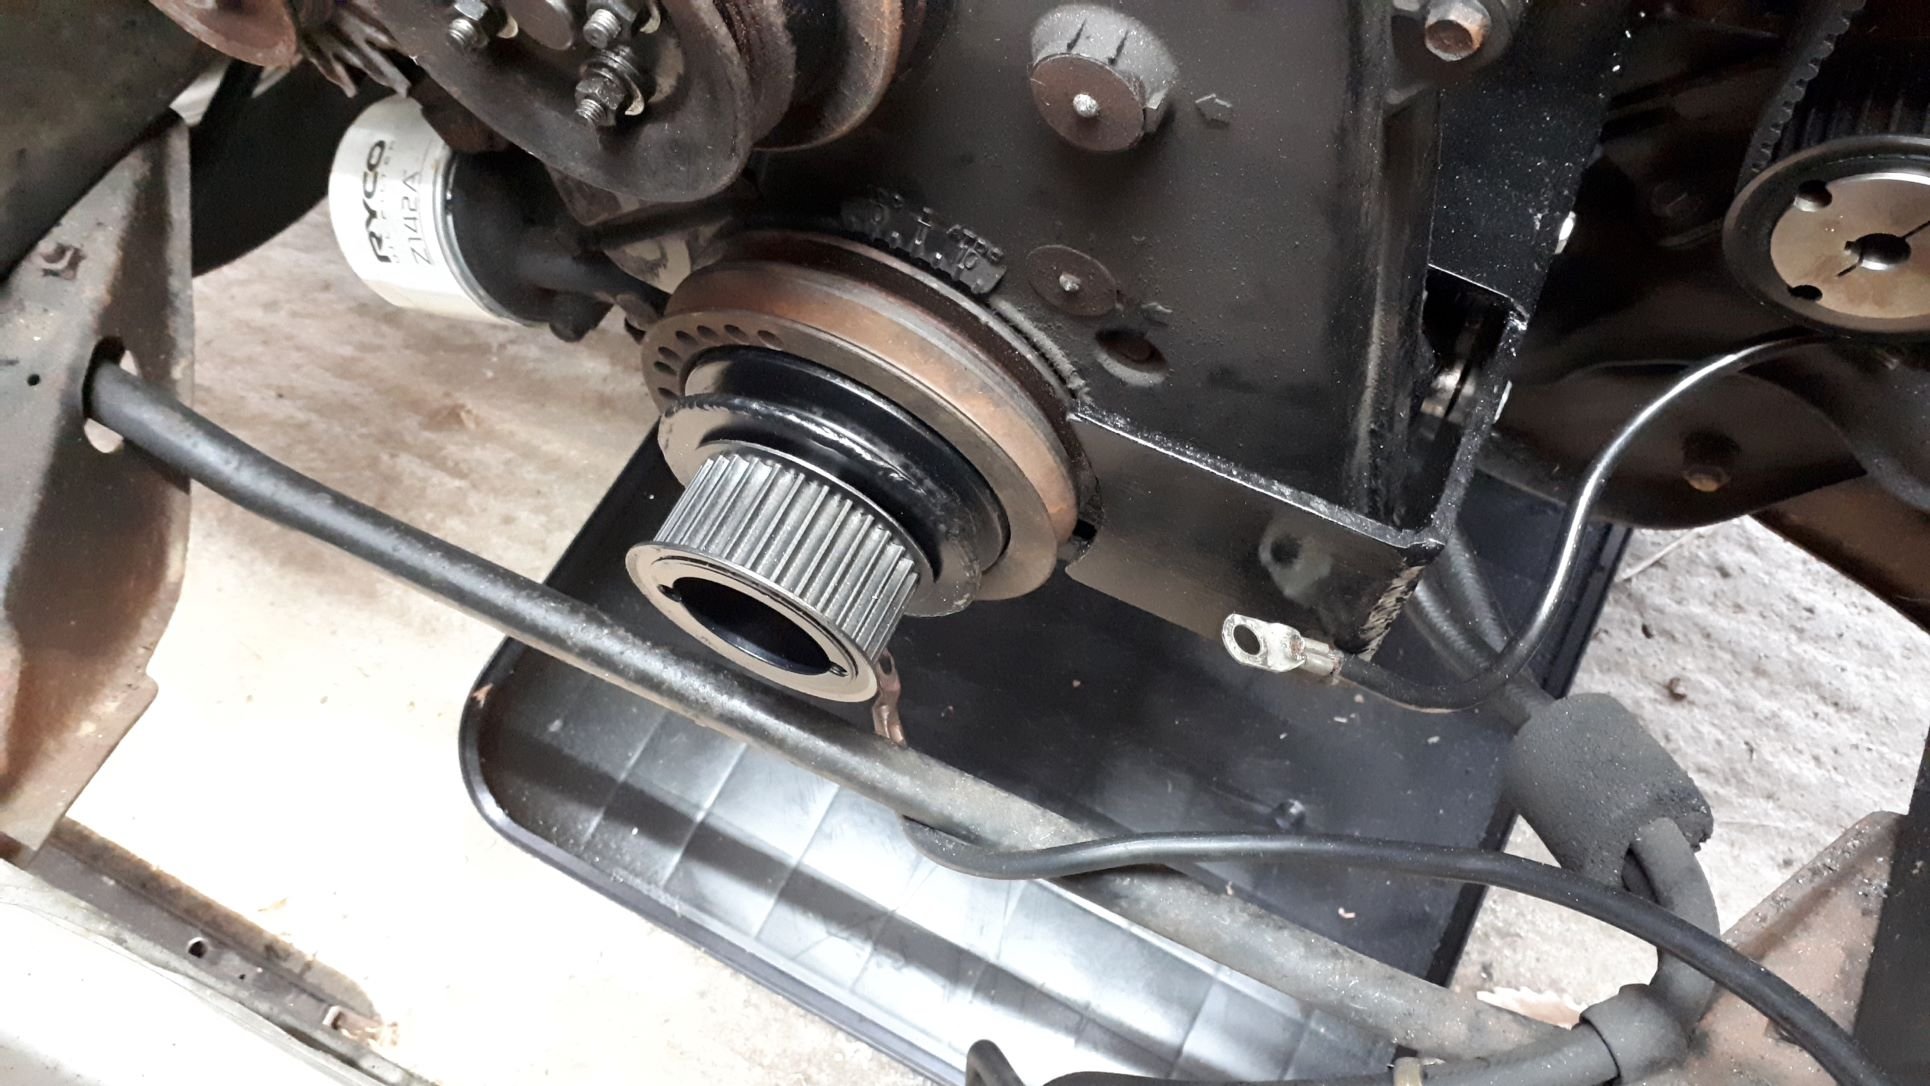
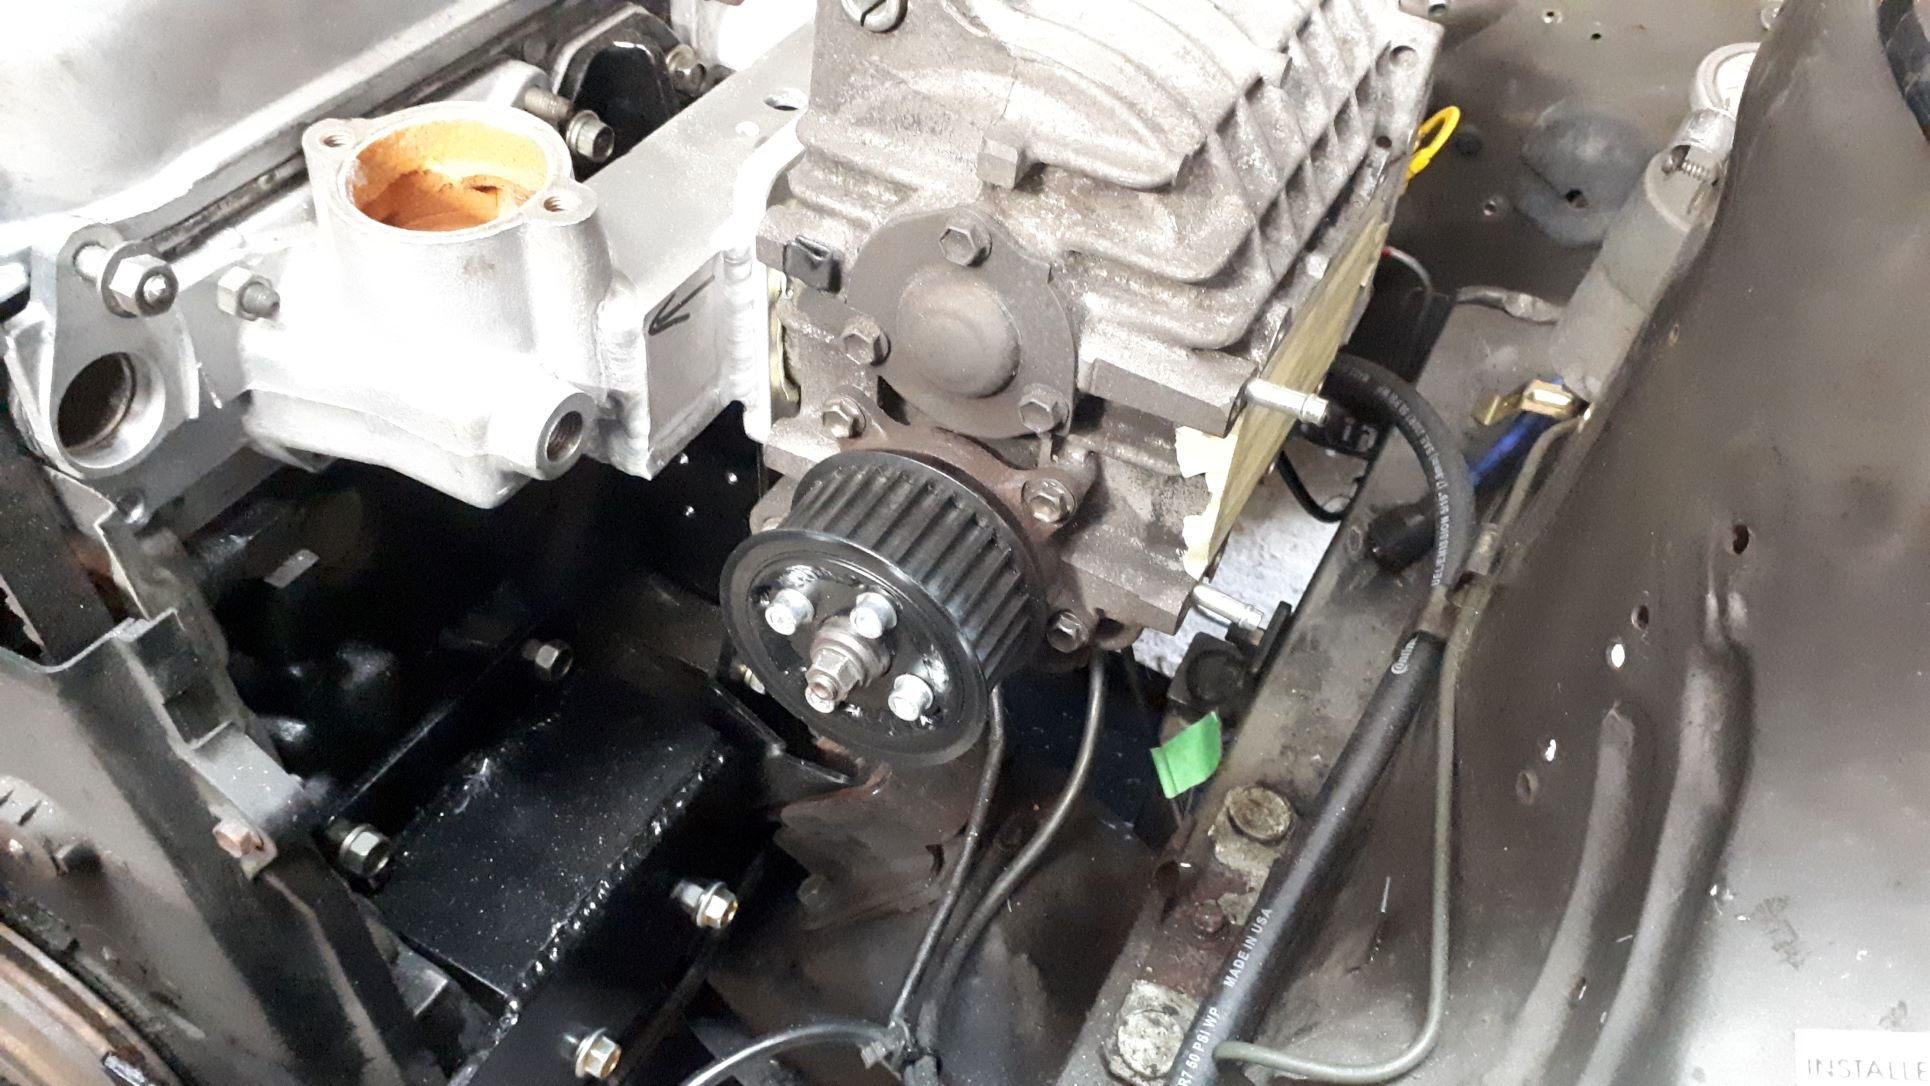
Now it's time to figure out how to get drive to the little supercharger. I had two choices when I started this project, make the drive system simple and compromise on the position of the supercharger making the manifolds awkward and difficult to fabricate, or mount the supercharger where I wanted it and get creative with the drive system. I close the latter and so the fun begins. I have started with the obvious and essential bits, a pulley on the crank and one on the supercharger. I had a nice disc laser cut to weld into the Sigma's factory crank pulley to allow attachment of the supercharger drive pulley. I modified a 8mm pitch timing belt pulley to fit the supercharger and also made one for the crank. It all bolted up alright and now I need to figure out the bits in between.
6 points
-
Don't yell at me but anyone done this or is in the electric car field on here. I saw a mk1 Cortina that had been done last week and shit it was cool.5 points
-
Neat car but I think for conversions like that to become popular, the price of ev parts will have to come down a lot. 100kw, granted it would have heaps more torque, but a stock 4age has the same power? And it cost 30k The fact it costs less to run isn't really that much of a plus unless you do heaps of kms, as the higher initial build cost would take forever to gain back in fuel savings on a weekend only sort of car5 points
-
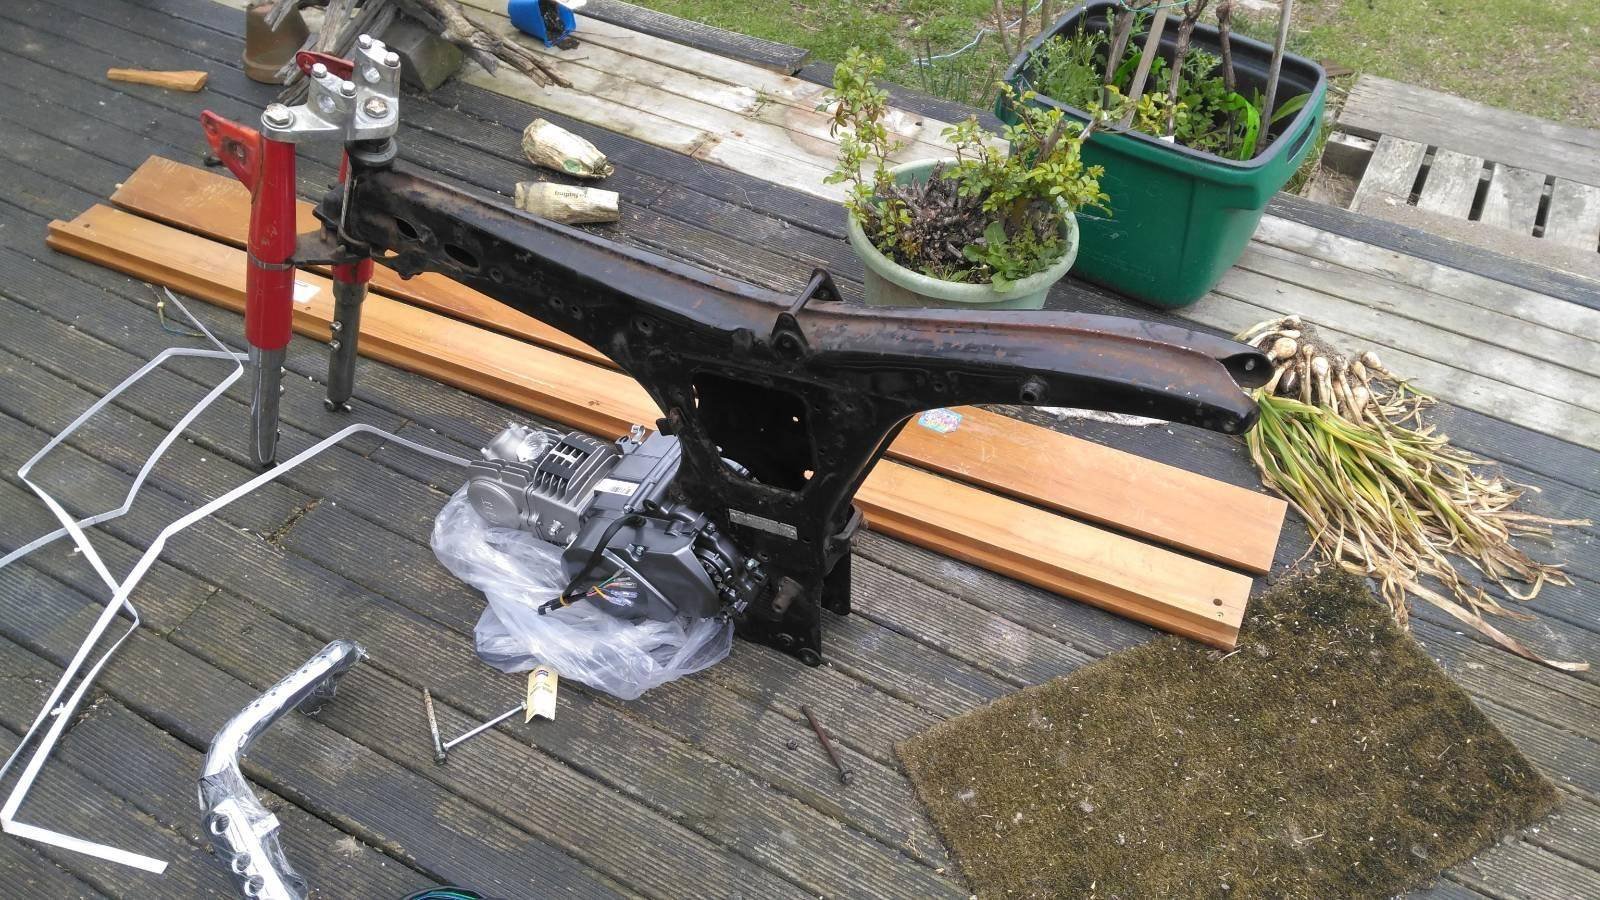
Thanks to Andy @ mBike (who was wearing one of your hats @MopedNZ) we now have a power plant. Also grabbed an exhaust to try for size as well as creaming over his collection of Dax/Chaly/Monkeys. Man, that yellow EFI Dax he has is soooo sweet. Next job will be the fettling required to fit it onto the frame while the trickle of chinese parts make their way into the country. Was slightly surprised to find the top engine mount is about 6.5mm wider than the frame so some thinking is needed there first.
5 points
-
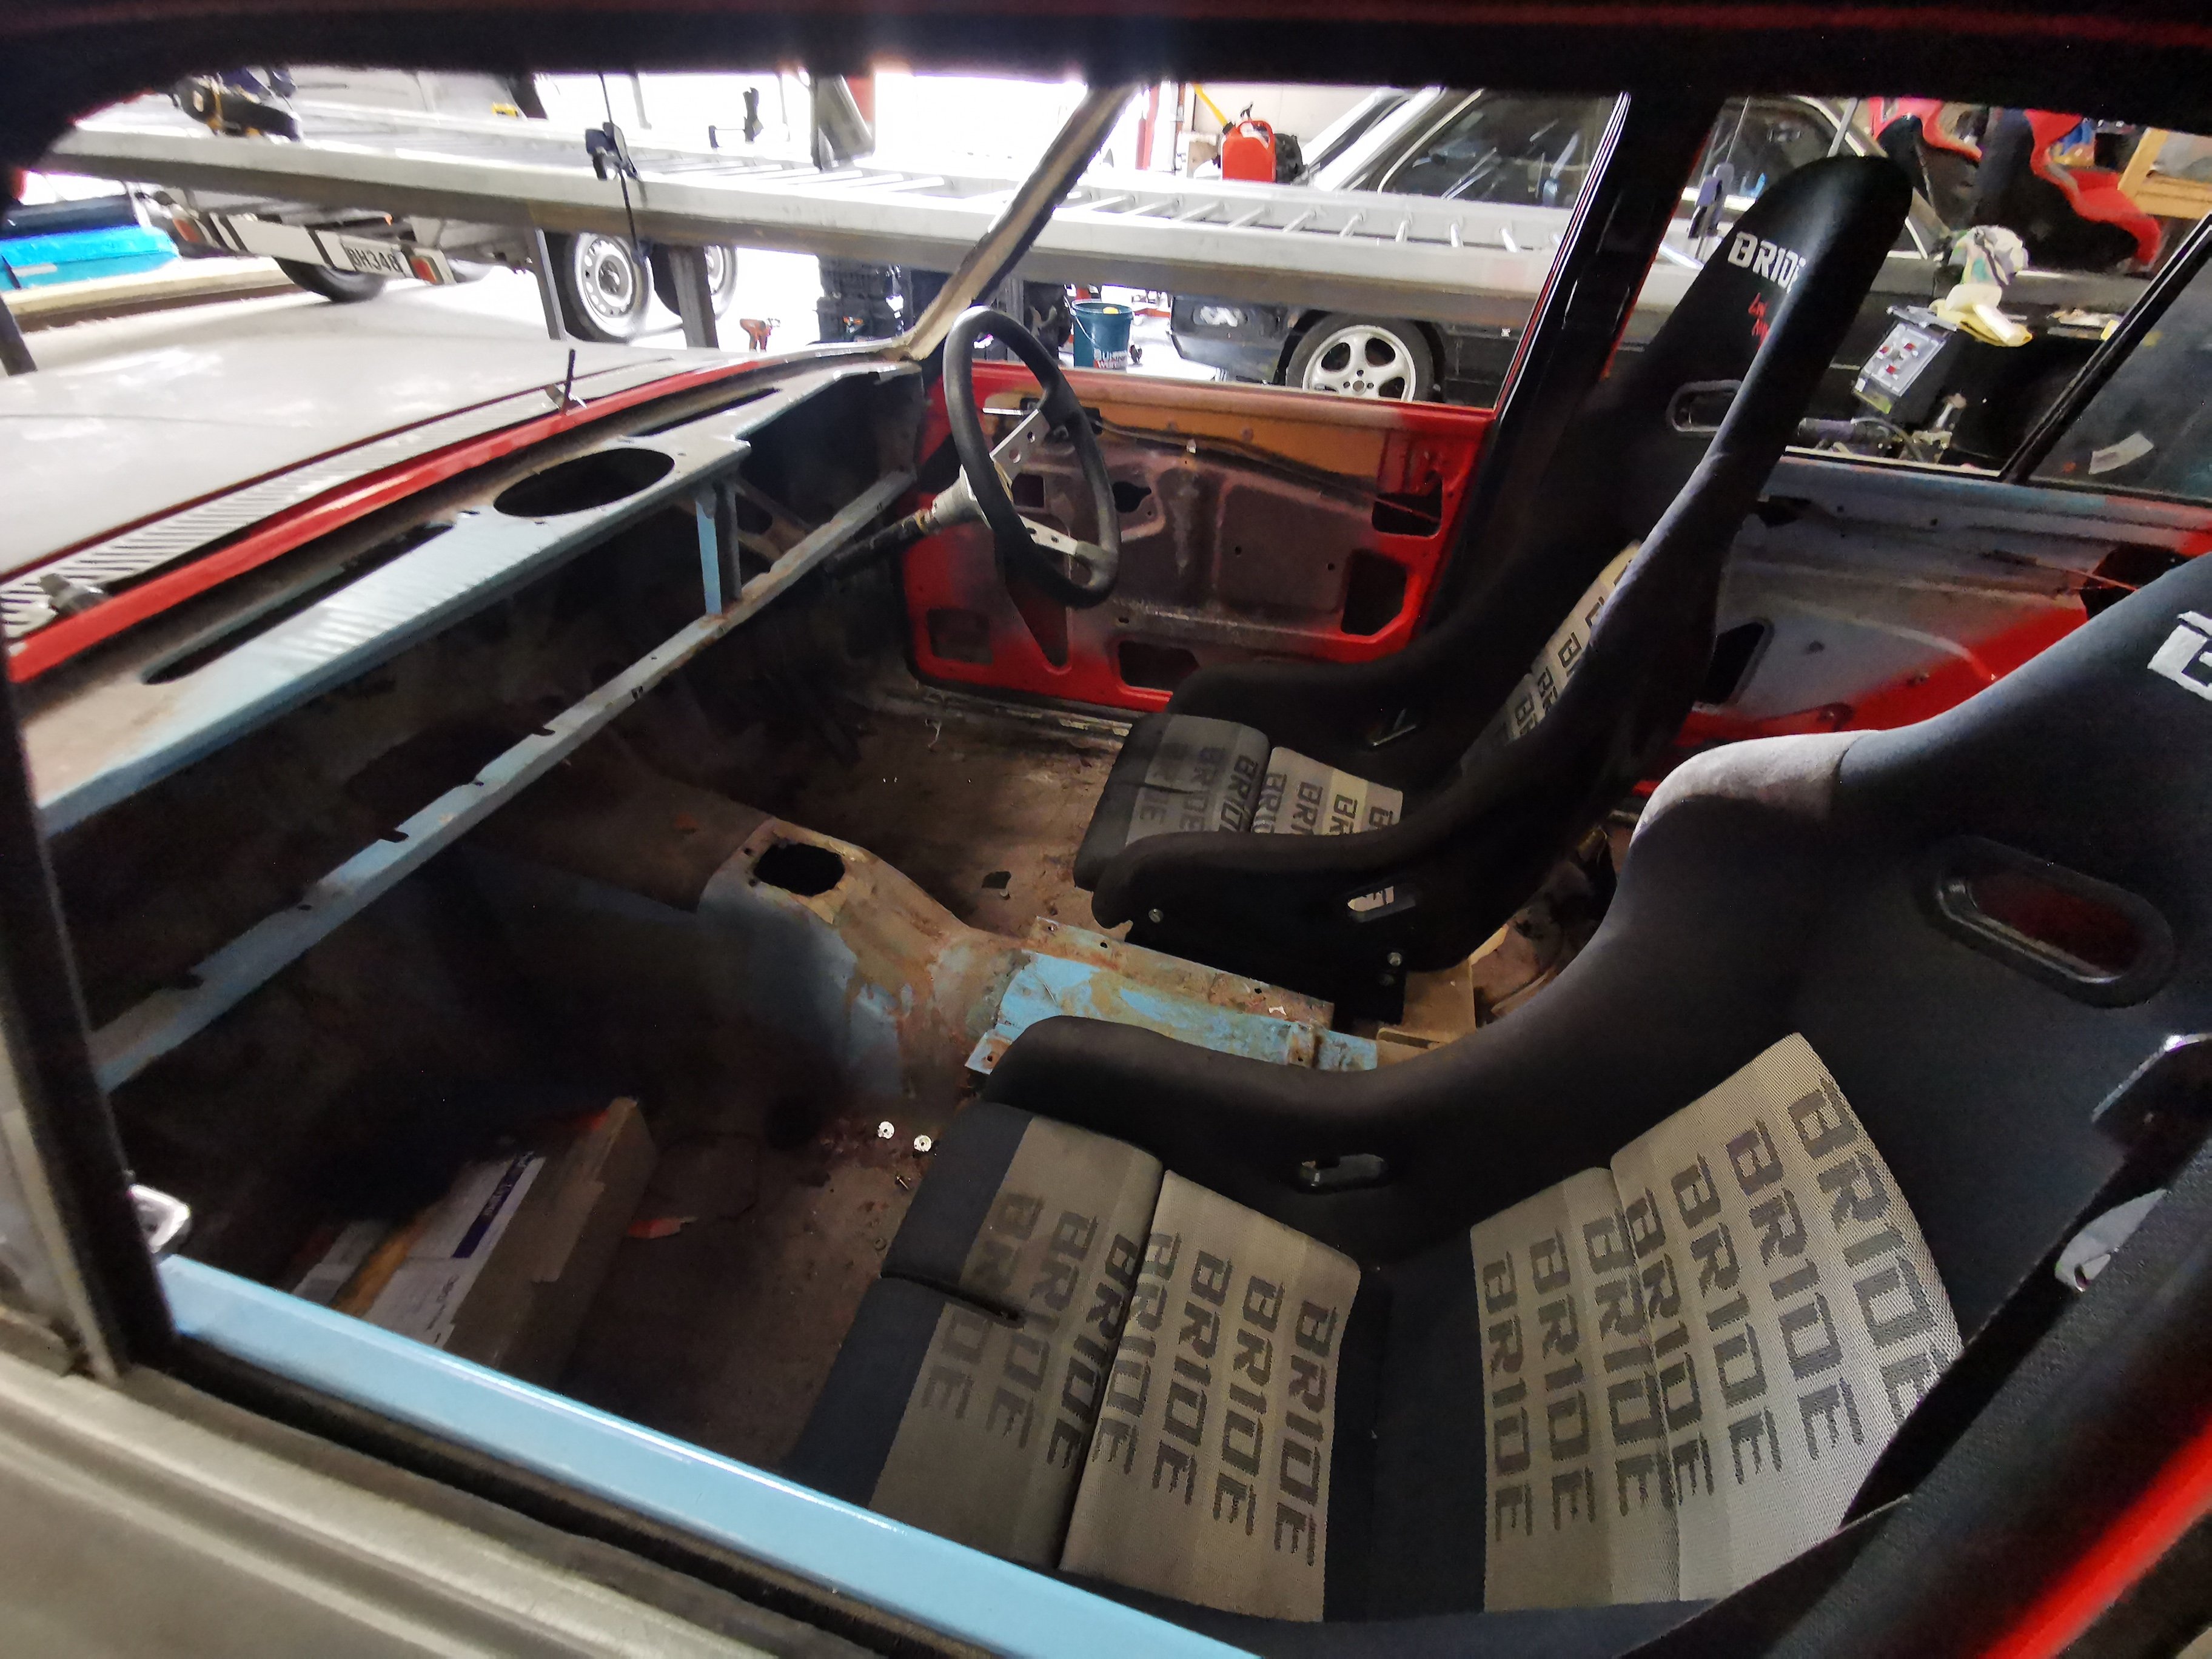
Fully gutted the cockpit.. Zero loomage. Ready for a good clean up. Have now discovered I can't run the triton top mount, so will get a floor mount pedal box.
5 points
-
Not an expert sorry, but I harbour secret thoughts of electrifying my Land Rover one day… I’m not into electric conversions for their own sake, but let’s face it, some cars aren’t about the engine so electricity can make them better. (Don’t hurt me please)4 points
-
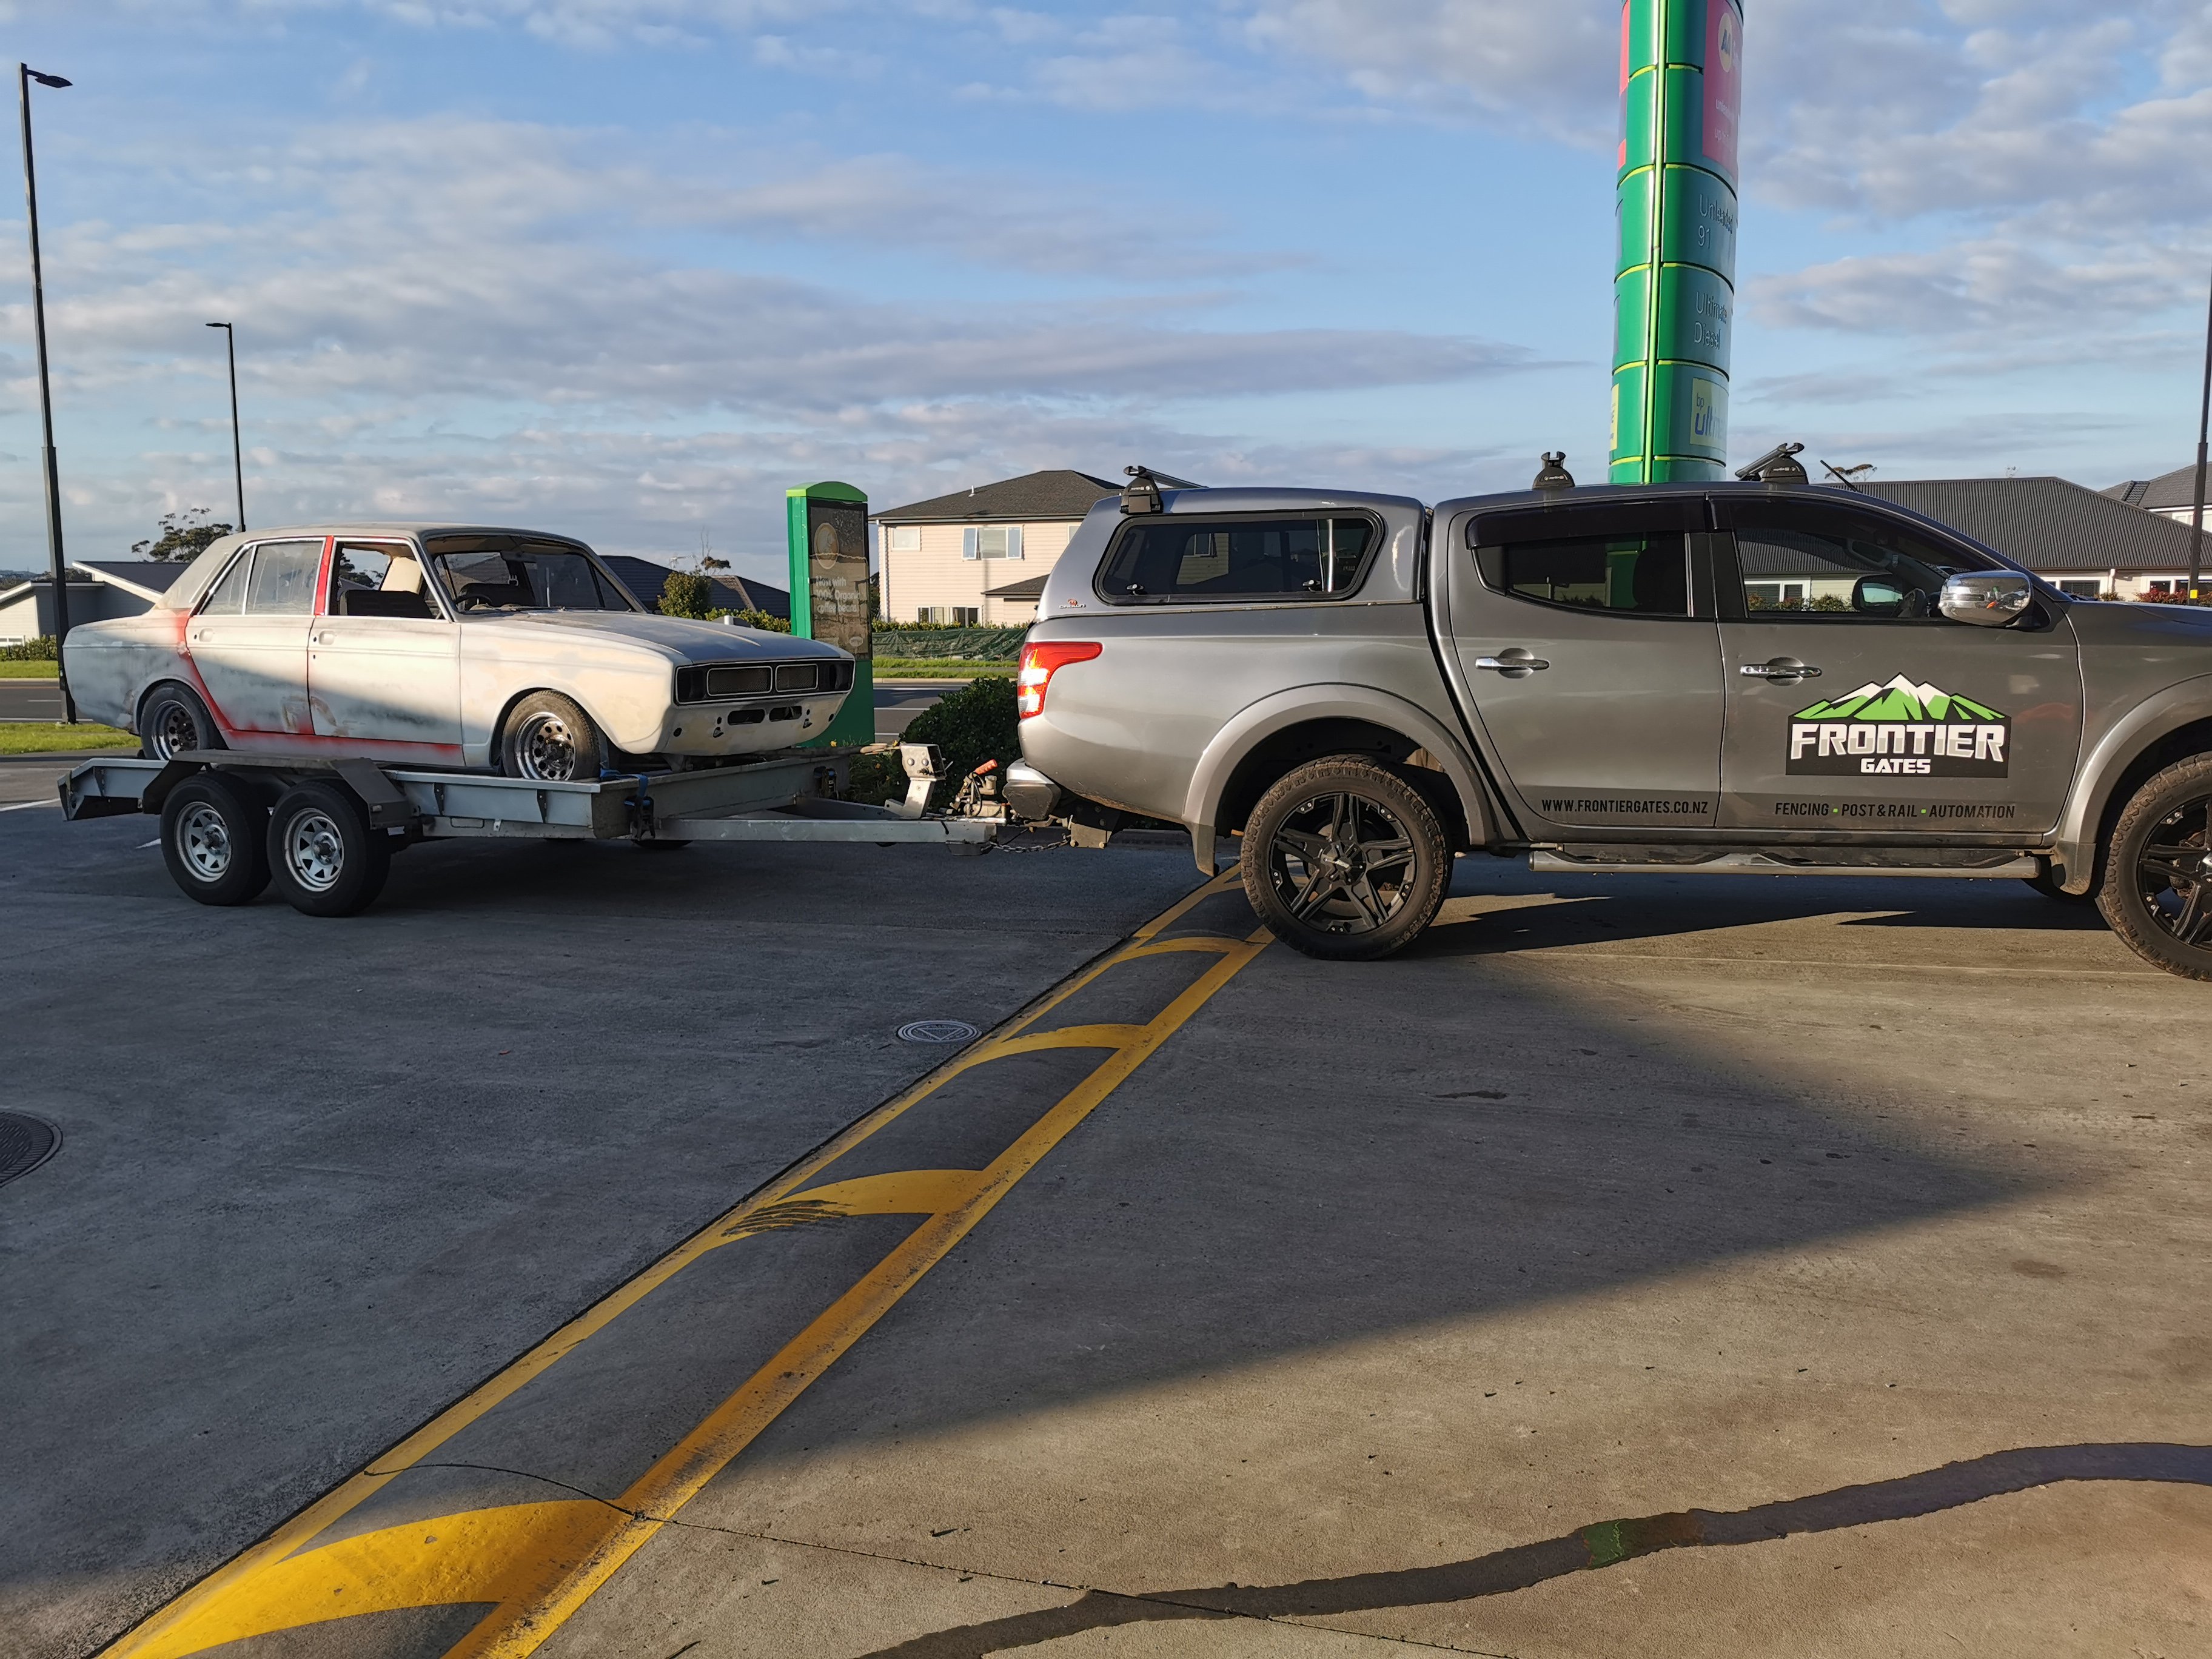
So I picked up a 2nd hunter a while ago, another 73 super. This had a standard motor in it with twin carbs. But could not get it to play nice due to a busted fuel pump. So I decided that was going to put a 12a in this one aswell. But sourcing needed parts was too difficult. So fast forward to now.. Body situation is the previous owner spent hours doing body work on it. Deleted the mouldings which I didn't approve of.. So those weld spots need finishing off. He has sprayed the jams, boot and engine bulkhead red.. Not sure if I'm living it or not. It does have a couple of rust points to sort out. One at the base of the a puller inside, and one at the windscreen corner. And a few pin holes on the drivers foot well. Over lockdown I sold the engine, carbs, and other bits I won't use on this. And picked up my new mystery motor, see next post for these details. This car has lowered coils and blocks in it with good firm shocks.. These will get thrown into the green car, as this will get the coilovers conversion up front and turrets with coilovers in the back. So plans: Engine conversion-has cert plate for this already. Coilovers Turrets out back with coilovers 2dr conversion to extend the door openings. Rollcage and race spec interior. 15x8s and 15x8s on sticky tyres. Fuel cell and surge tank setup. Custom dash as the stock one is poked. Id like to find an escort English diff so I can run a lsd and do a disc conversion with off the shelf items. The front brakes will be escort willwood or ap calipers with capri discs. Have a tilton pedal box for it to have a bias aswell. This will get a wide body mid, I have mk1 arches on it but will try and get some mk2 arches to compare, to see what suits it best. This will be a slow build, until I get the green car finished and off the hoist. Discuss away.
3 points
-
eh, i get a flashing low fuel light in my car, but the engine doesn't change its operation in any way.3 points
-
3 points
-
3 points
-
Debating which bike to take now, depends which one has rego on it I guess lol, possibly twist and go3 points
-
Entrants in first post updated. Good to see @datlow @64valiant & @keltik in there, excellent3 points
-
Also this week I modded the towbar to be a receiver type, the towball was sitting a wee bit too high, the last time I hired a digger we had to fork the trailer up onto the ball. Now it sits lower and can be lower again if I need it, but the bare socket is no lower than before. Im just waiting for some pins to arrive.... Then as I had some 65x6 box spare I added one to the front, along with a shit-ton of bracing. If I ever get a winch I will just mount it to this. You can also see the extra strop hooks I added a while ago.. I have two separate leads on short blocks, if either comes through I will be cranking that rebuild.3 points
-
No photo, just a rant, at myself, decided to start fitting a few parts up inside starting with the wiring that runs front to back, the very first part to actually go into the car permanently.....and ive ficking lost it, searched twice, wtf, if this is a sign of things to come I'm screwed ffs.......2 points
-
I've been researching it for ages, but like Cletus said, until the costs come down it's a bit of a pipedream - because it is pretty much a besoke job for every car it's going to stay costly unless you can find some modularity sort of thing, then costs might come down. For example EV West in the states do a lot of VW/Porsche repowers and released a bolt in SBC engine conversion last year. But still at the spendy end, and every car is going to need a bespoke battery set up. Unless we just creative commons the designs... https://www.autoblog.com/2020/10/02/ev-west-tesla-motor-conversion-chevy-ls-sbc-mount/2 points
-
2 points
-
Tis next weekend.2 points
-
dont bother with rattle cans, theres not enough in them and they spray shit upsidedown i have this gun https://panelstore.co.nz/collections/all-paint/products/novol-underseal-gun i use this underbody coating https://panelstore.co.nz/collections/all-paint/products/body-underseal-anti-gravel and i use this for inside doors, chassis rails https://panelstore.co.nz/products/cavity-wax-gravit-640 sub titles on the gun has a long hose that can go on the nozzle for inside stuff2 points
-
Info dump of manwell stuff while I've found it ) gearbox from CR-V (first gen) GF-RD1 4WD. Serial number of gearbox is SBXM. To find Orthia 4WD manual gearbox impossible. There were too small amount produced. 2) Pedals from Civic 6 gen (ek) 3) Starter from any B-series manual transmission, example DENSO (31200-P3F-J01) 4) Flywheel (22100-P75-005) with bolts (90011-PH3-000) 5) Clutch master cylinder (46920-S10-003) and clutch second cylinder (46930-SR3-013) also reservoir and pipes for fluid 6) shifting arm from CR-V, Orthia, Partner or Accord Euro R 7) clutch disk (22200-P3F-035) with clutch basket (22300-P3F-005) and bolts (90034-689-000) 8 ) engine mounts for mounting gearbox: rear (50827-S10-J00), upper (50825-S10-J01) and down (50843-S10-J00) 9) half-axel (44500-S10-000) 10) and rear t bracket gearbox (50827-S10-J00) can be used from CR-V A quick look suggests crv stuff shares the same part numbers so if I grab axles/mounts/shifter/everything off the crv I should be good2 points
-
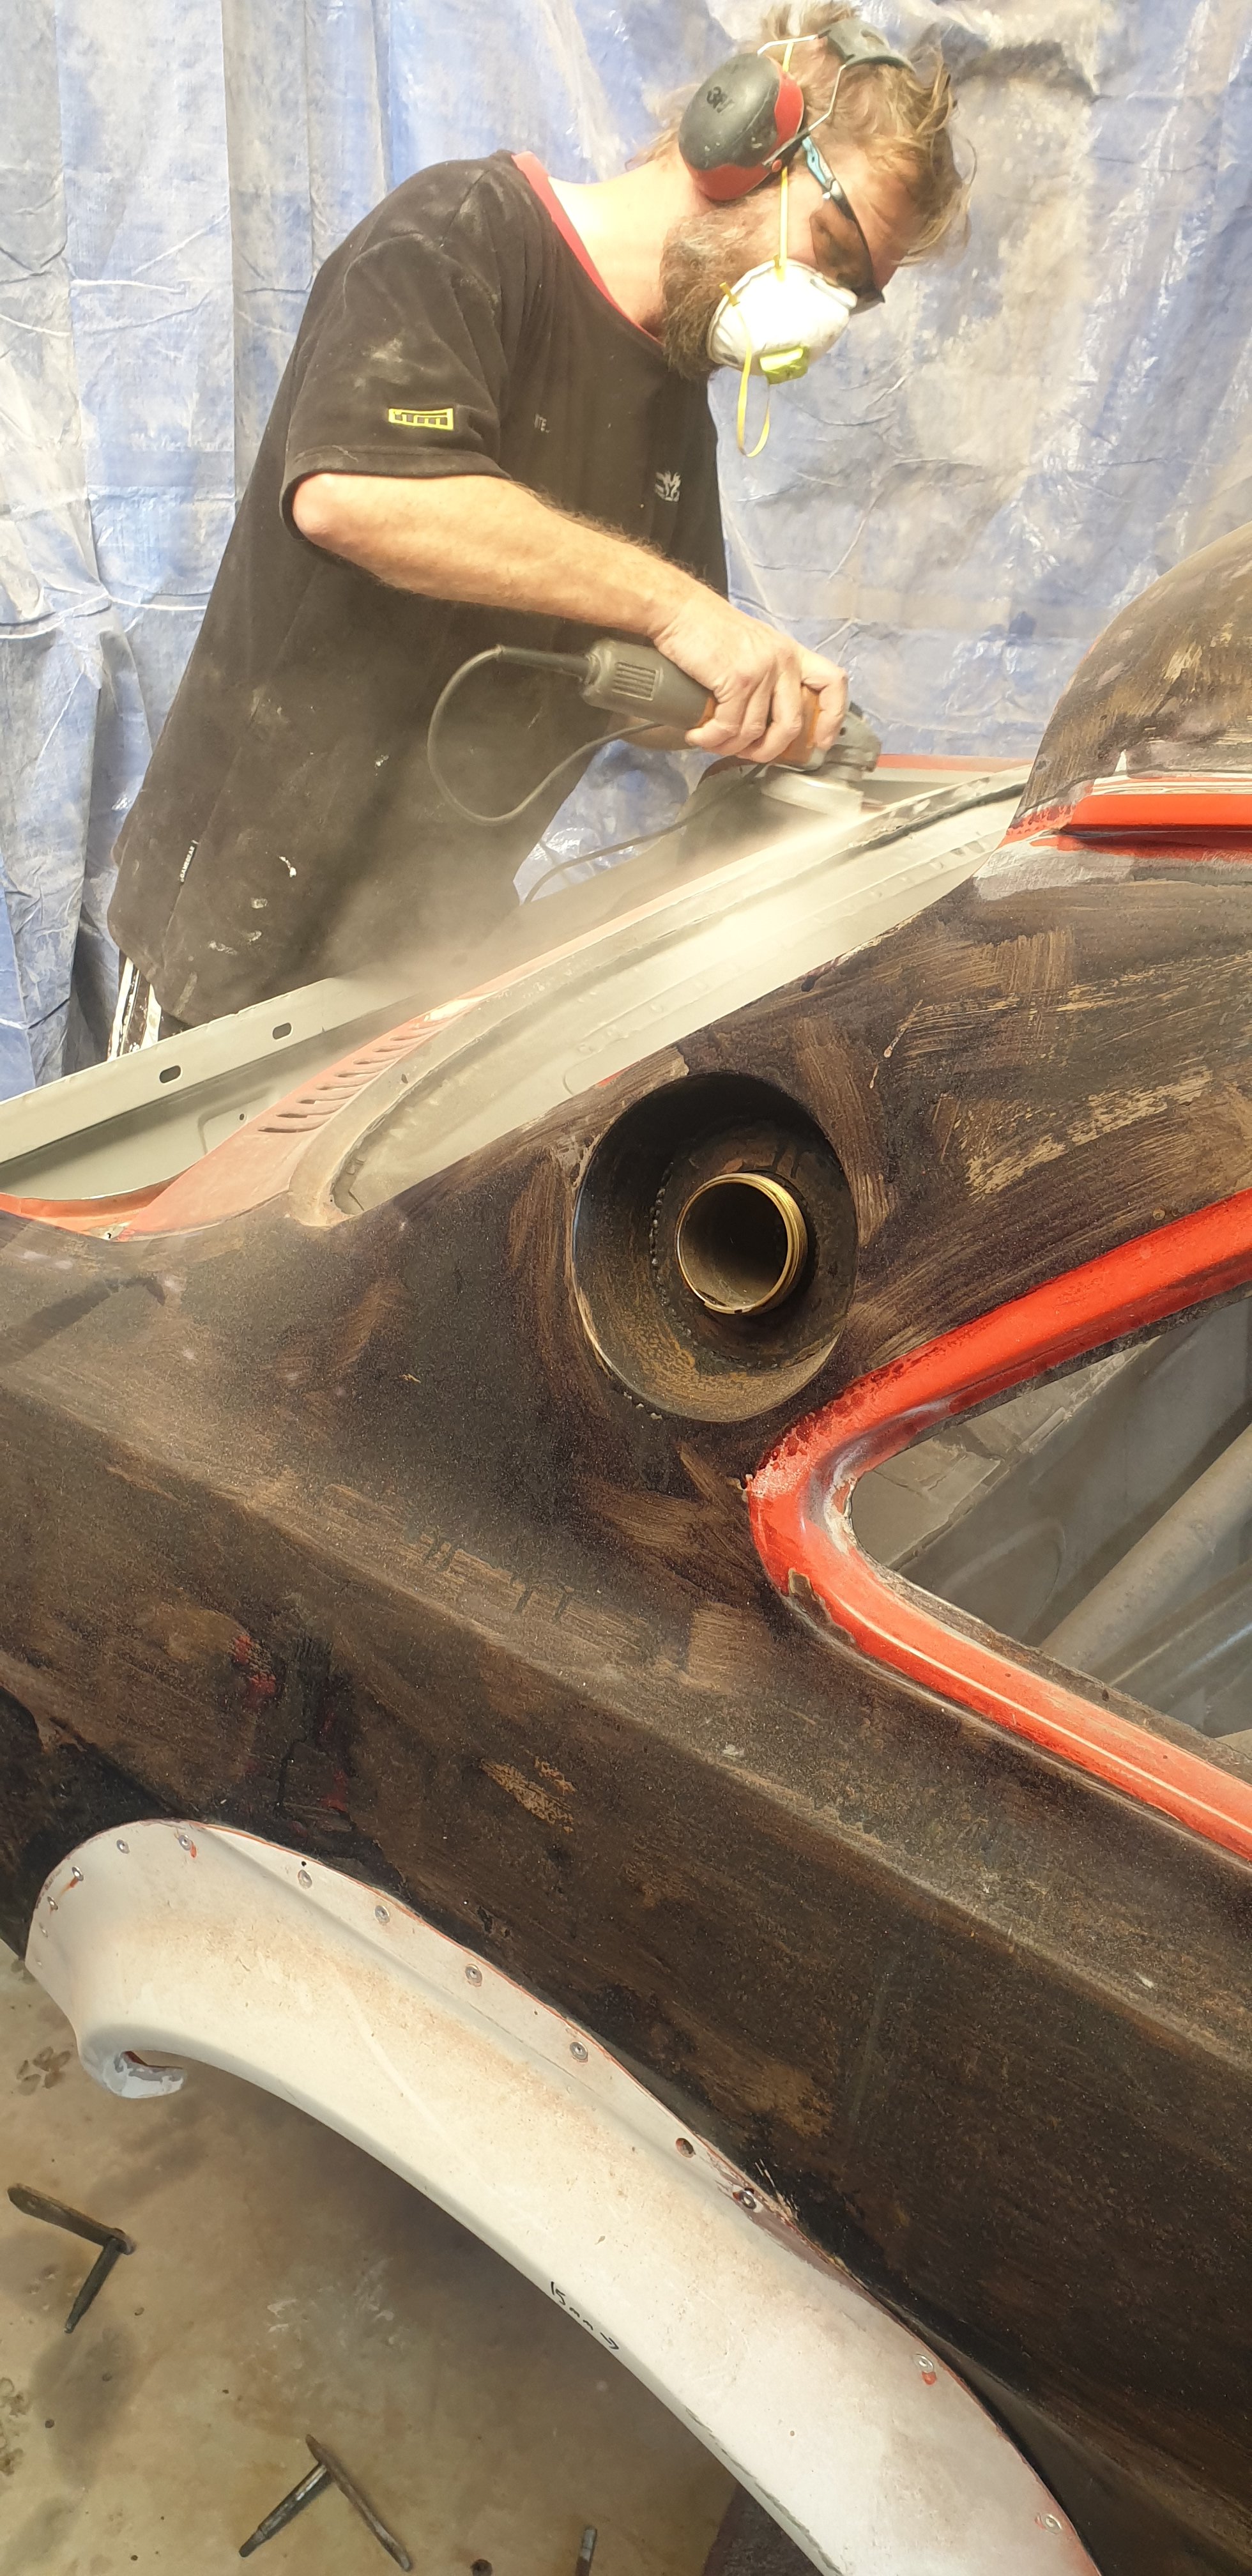
Woo hoo ! Level 3. My panelbeater is now back on the job. Hopefully a few more hours and we can etch primer the exterior.
2 points
-
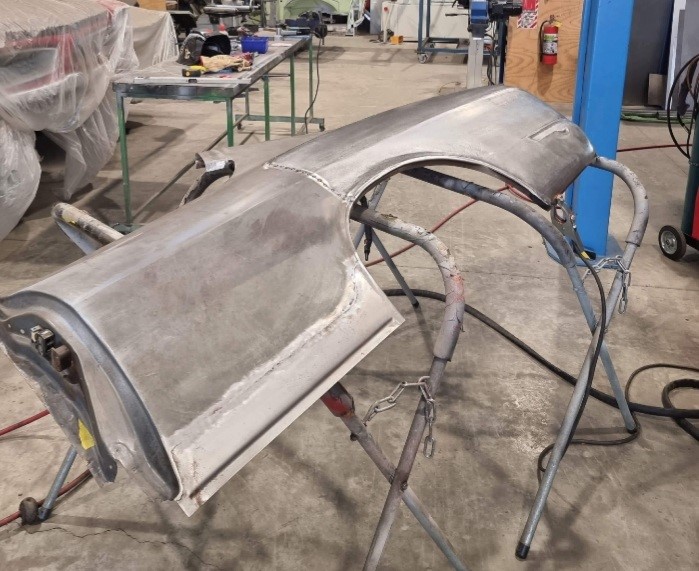
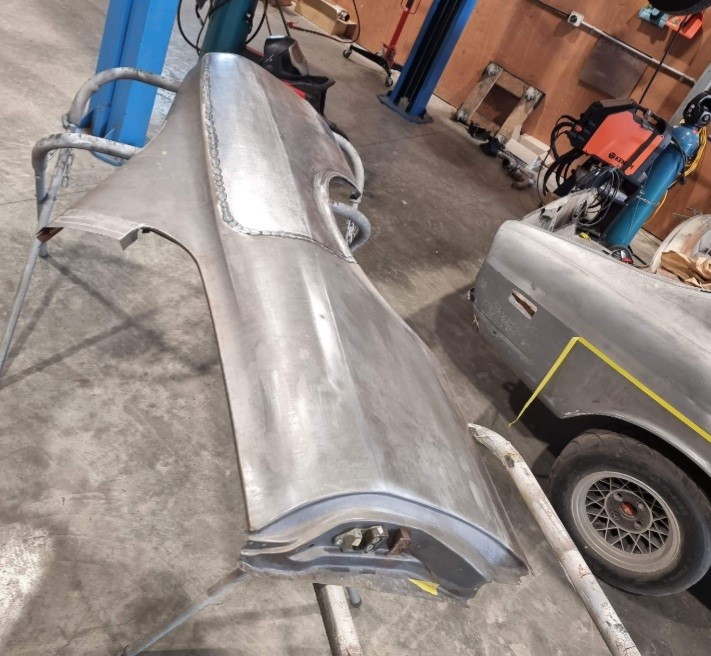
These two from my brothers phone didn’t make it onto the daily updates..just an after pic with quarter panel on
2 points
-
More goodies.. Shoes, pads, LH thread wheel nuts, rocker covers The Mr. Gasket breathers have been display pieces on the shelf for ages so it’s good to finally have a use for them2 points
-
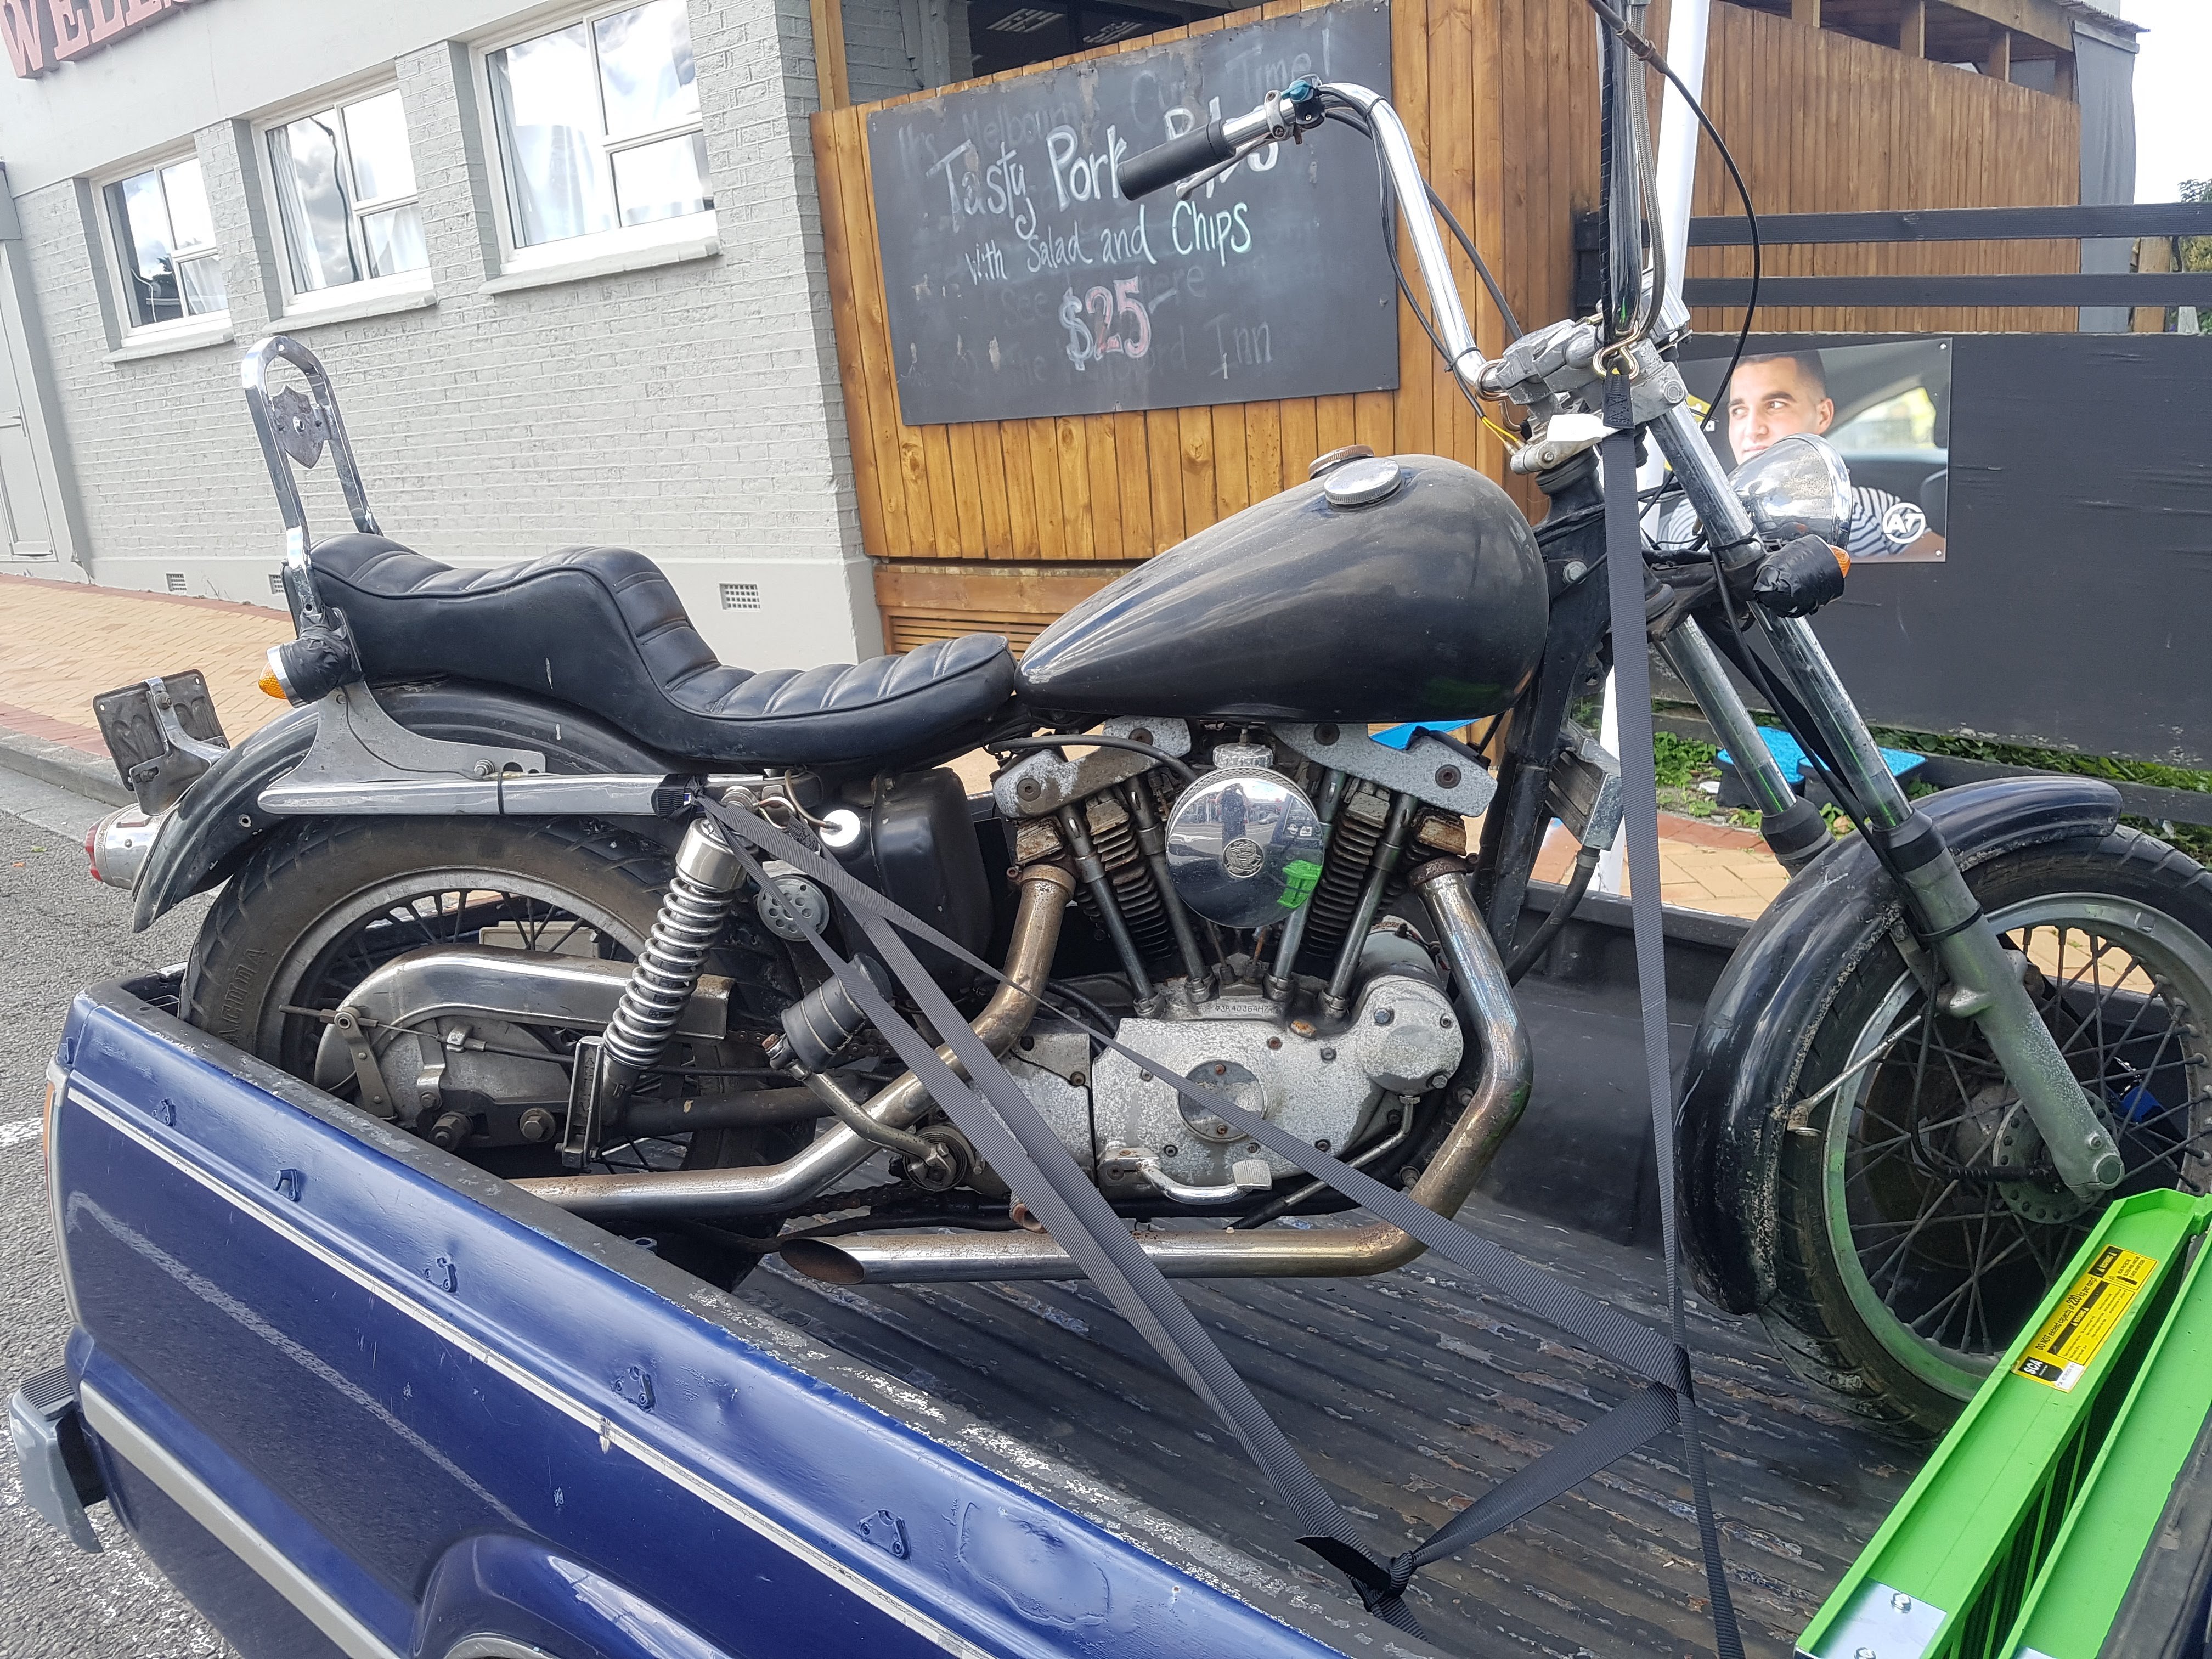
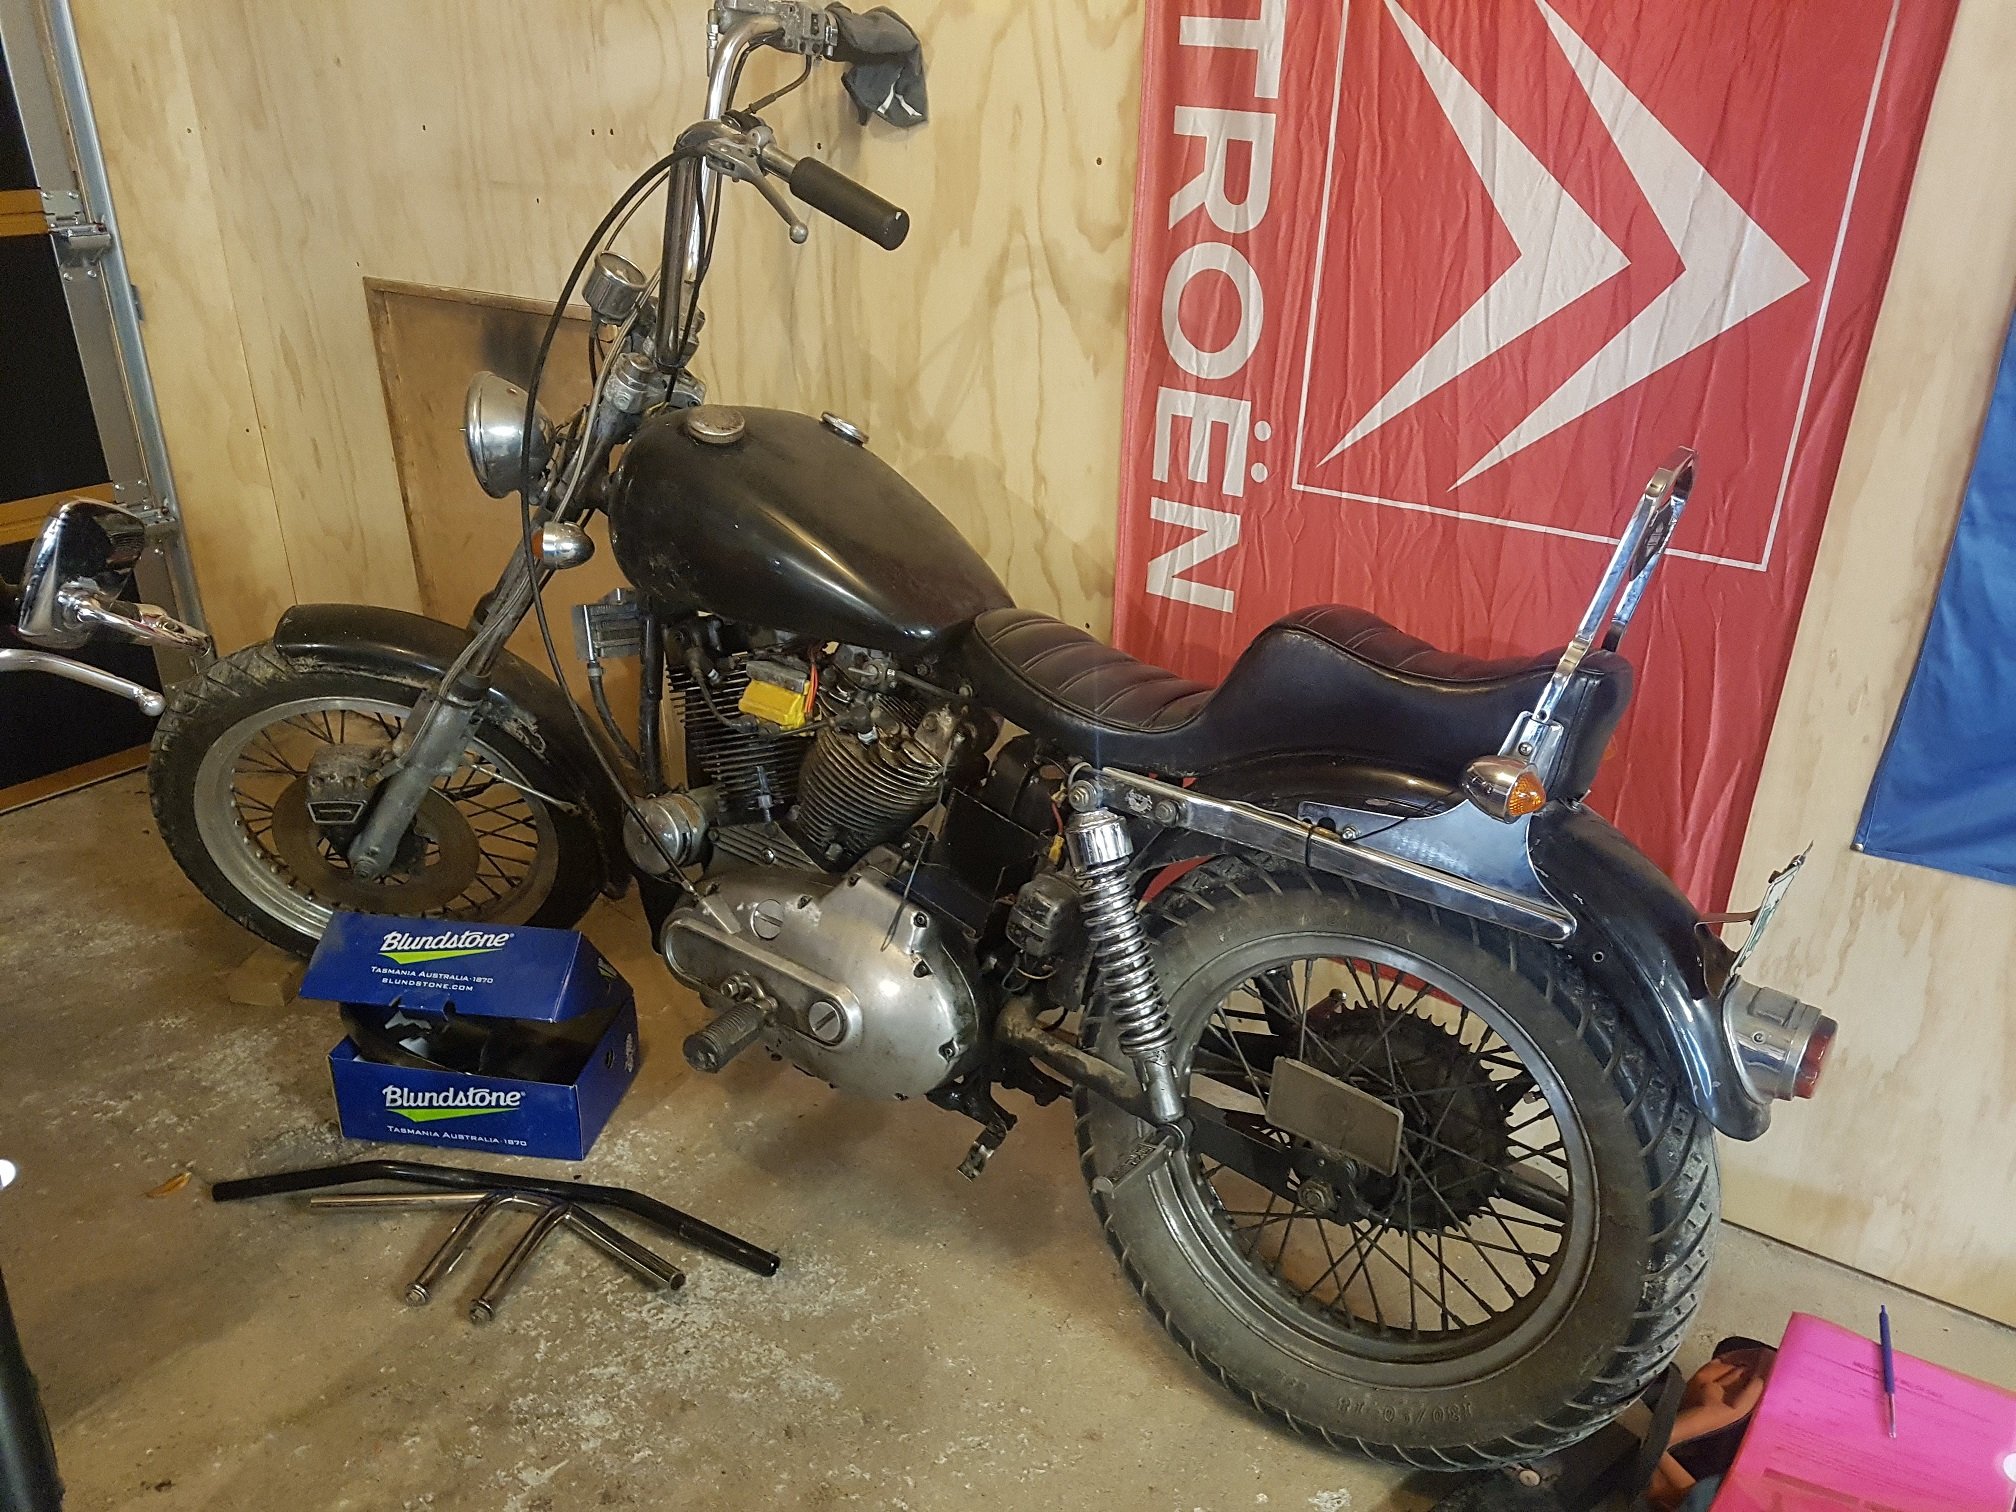
So yeah, many years ago I met this cool dude called Chris. He lives in Christchurch. Apparently he was a born loser, but I liked him anyway. It turned out he was a bit of a badass, and was into the devils bikes. He had an Ironhead Harley. A handsome dude with a handsome bike. I was in love. Every time I'd call in and visit Chris, id have to pop into his shed and sit on his Ironhead chop. It was just the coolest thing. I knew I had to have one. Fast forward a few years, and an auto bid on a friday night. And I had purchased this non running, broken gearbox, POS. Yay, just what I need. More projects. But I enjoy self inflicted misery. So yeah, cool one. nice. Took my shitter of a ute all the way from Wellington to Wellsford to pickup this turd. Had my dad rolling up with me. We share a love of misery, projects and motorcycles. So both were equally excited at the prospect of acquiring another non running project. Both of us never thought we'd see the day when either of us would buy a Harley! Low and behold, April 2021, I became a Harley owner. Who would have thought. Made it all the way home. What a mish. We stayed in cambridge. But boy, a lot of driving in a turd of a ute. A relief to have it back in the garage. I'm sure the Harley would appreciate its new stable, adorned with French vehicle memorabilia, and sharing its space with and Italian stallion Laverda, a Miata, and some of japans finest 2 strokes!
1 point
-
Decent muffler plus resonator, headers were probably fine factory so are fine now. It's usually turd mods to exhaust that case the problem.1 point
-
wellllllll how's life after 13 months with a problematic st170. to be honest.....its not that bad... the engine check light is on all the time and the car has no issues... every now and then it feels like it loses some power...and when I check the code it's usually timing has advanced.... I've been clearing the codes and off we go again...it fucking hates 91 and seems better on 95/98 more than NPD 100. flew through a WOF in August that was the year ownership mark.. not as bad on fuel as all the brits complain about. just gave her a service today..new oil ,filter, air filter, some fuel system cleaner... see how the next tear goes... I fucking hate the dual mass flywheel....may do something about that.. apart from that ..I would love to get back to work on the mk3s....but I have my nephews mk5 here that needed a replacement motor....thats been a bitch and still not running ..need to swap another head on.... and I actually have mates that aren't into cars....( fuck I know....strange ay)..but those men have teenage boys now with cars aswell so I find my self pretty popular with shit cars living in my driveway .....makes me feel like I should apologize to my dad for some reason......and I get more contact from them than I do there dads now lol.... but 1 day I will get back to it........also had to work through this past lockdown.... hmmmmmmm next year maybe
1 point
-
Have been a bit absent with updates here. Havnt done a lot in the shed since a pretty major back malfunction which looks like its going to require surgery to fix, i got a wee but done before it got quite bad so will fire a few updates through. For those of you interested in the XT250 soz but i had to PPSC it, ended up selling for a moonbeamish $5,000 pretty easily so was quite happy with that. I stripped it back to the frame and painted it, zinc plated just about every bolt and slapped all the NOS bits on that it came with, looked a million bucks in the end, probs why it sold for a million bucks. As far as the XR250 goes a had a bunch of parts turn up. this extra ginormous box turned up from the U S of A, it was 3/4 full of packaging and 1/4 full of this Clarke 16L tank. Pretty stocked with the quality. Also had a full decal kit turn up for once shes all back together. Blue '86 design seat cover also turned up from the states. Its since been shipped off to @64valiantfor some foam repairs and fitting to the seat. Shmancy Wiseco big bore forged piston turned up, this is a 77mm bore piston which gives a displacement of 277cc with every so slightly higher CR. it also came with a full top end gasket and seal set which was handy. Since im want to make it look all pretty tidy I decided to get the top end vapour blasted. im going to cerakote the engine side covers and couldnt be arsed spliting the bottom end so the cases can just get the scotchbrite treatment. Top end stripped and ready for blasting: Vapour blasting does such a lush job, its crazy how much it peens and seals up the alloy. After blasting I ran everything through @Flauskis ultrasonic cleaner. Its crazy how many beads still come out of thread holes and stuff when you think you already have it clean as, def a must do for any engine blasting I think. with the blasting all done I sent the head and cylinder off to my machinist and he did a bunch of stuff, started with boring the cylinder to the wiseco specs and doing ring gaps for me etc. then he surfaced the head, did a 3 way valve job on the valves and lapped them all in, the decided to tickle up the ports with the die grinder. Didnt get many photos soz but im tickle pink with the work. I've now put the engine back together, healthy doses of assembly lube, blue loctite and correct torque settings. man i love fresh zinc plated fasteners. Next up is restoring the plastics. this is a painstaking task and there is no easy way to cheat it, especially with white plastics. I tried cheating with the DA sander but it just doesnt do the job like straight line hand wet and dry sanding. Process to fix fucked plastics was razorblade - 320g - 600g- 800g - 1200g - 1600g- 2000g wet and dry. Then hit it with some cut on a medium speed drill wit polishing pad, wipe off cut then hit with a high speed fine polishing pad. just be careful to not hold for too long in one spot and burn though, I had to start from scratch in a few spots. Rear fender came up good enough, not amazing but will do. Sitting on the bike with new tool bag and rear indicators Next job is to do a DIY cerakote of the side covers and get the engine completely back together, then onto the rest of the plastics.1 point
-
Leonie used her connections / google to source some solid carbonic anhydride: Strictly speaking we probably didn't need to remove the sound deadening, but it was already flaking off in some places, possibly had rust under it, and it'd just be weird blasting and repainting a whole car and not be bothered to get the deadening off. It wouldn't feel right. Like a silly billy I didn't get any good vids of us smashing it up. 1. Pour onto sound deadening 2. Listen to the snap crackle and pop of the deadening cracking and releasing from the metal. The cracks are cool to watch appear; sometimes there's enough force to launch bits of dry ice 3. Remove the ice 4. Take to it with fingers/hammer/scraper and it just crumbles off It was very cool to play with this stuff. For the deadening on the tunnel etc we just held some dry ice against it using a towel. Not hard to do, and very fun! Before: After: Happily there's almost no rust under the deadning except in a couple of places. The worst place is where I expected some surface rust to continue under the deadening, on the rear right side seat. But it's not bad. If I could weigh the deadening I would - it's pretty beefy. Somewhere between 15-25kg we think. Now the car is basically ready for blasting... some final zip ties are lurking here and there and I'd like to have a go at removing some seam sealer in places and scrub off the worst of the caked dirt. Here's a shot of the car just before we removed the deadening. We've got a date for blasting: 11 oct1 point
-
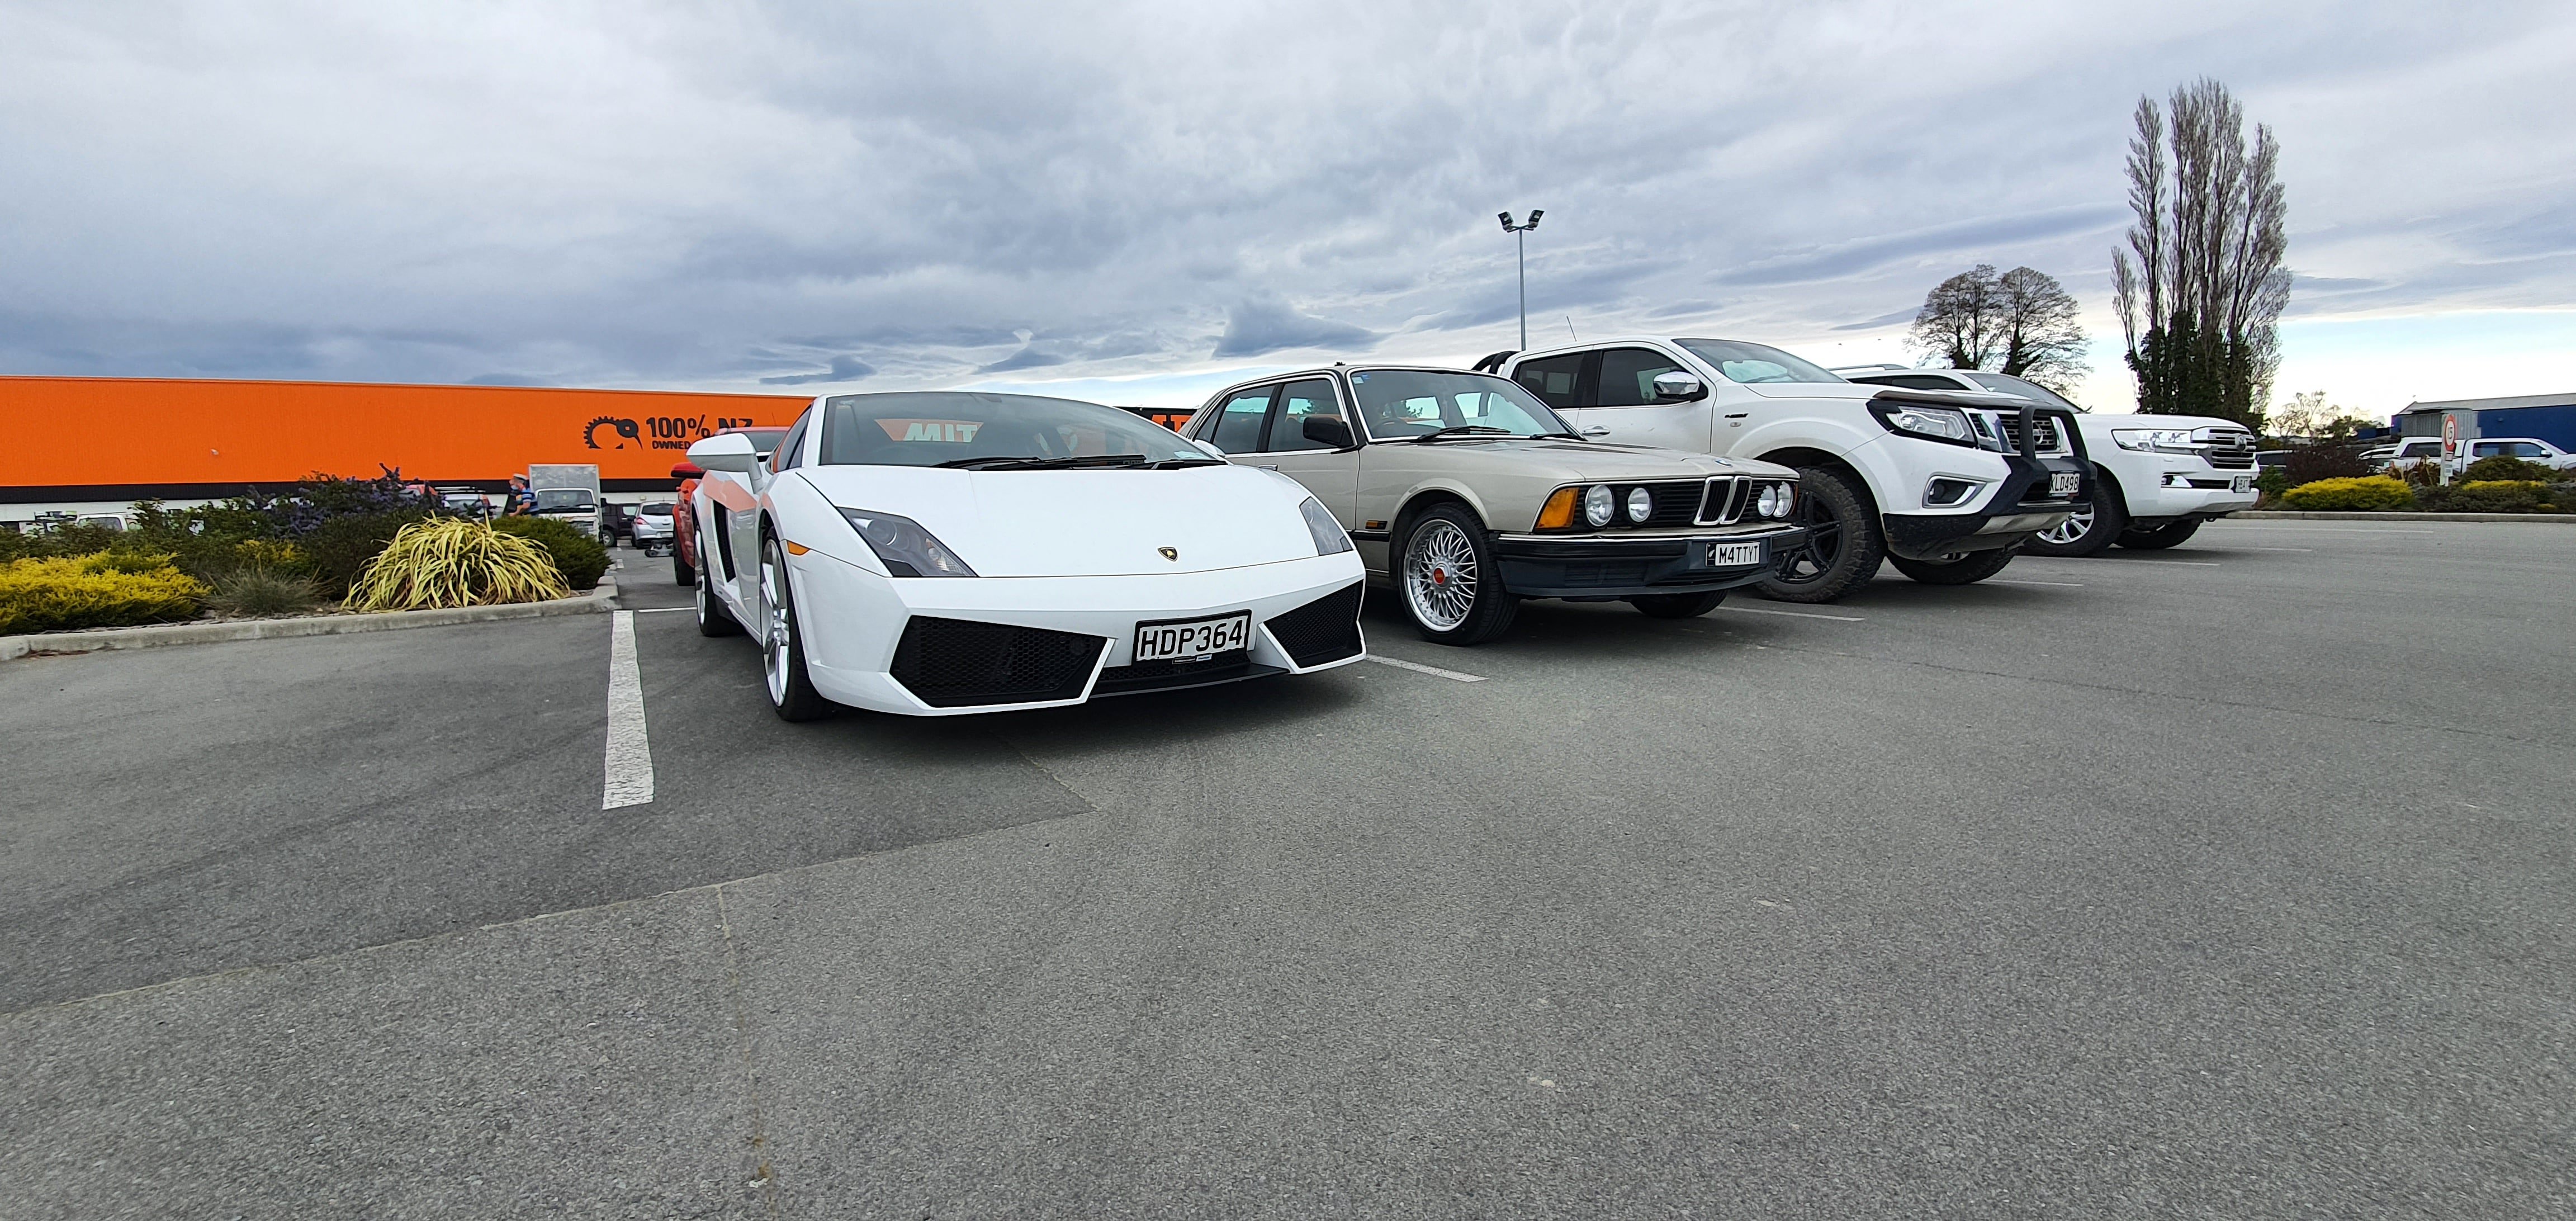
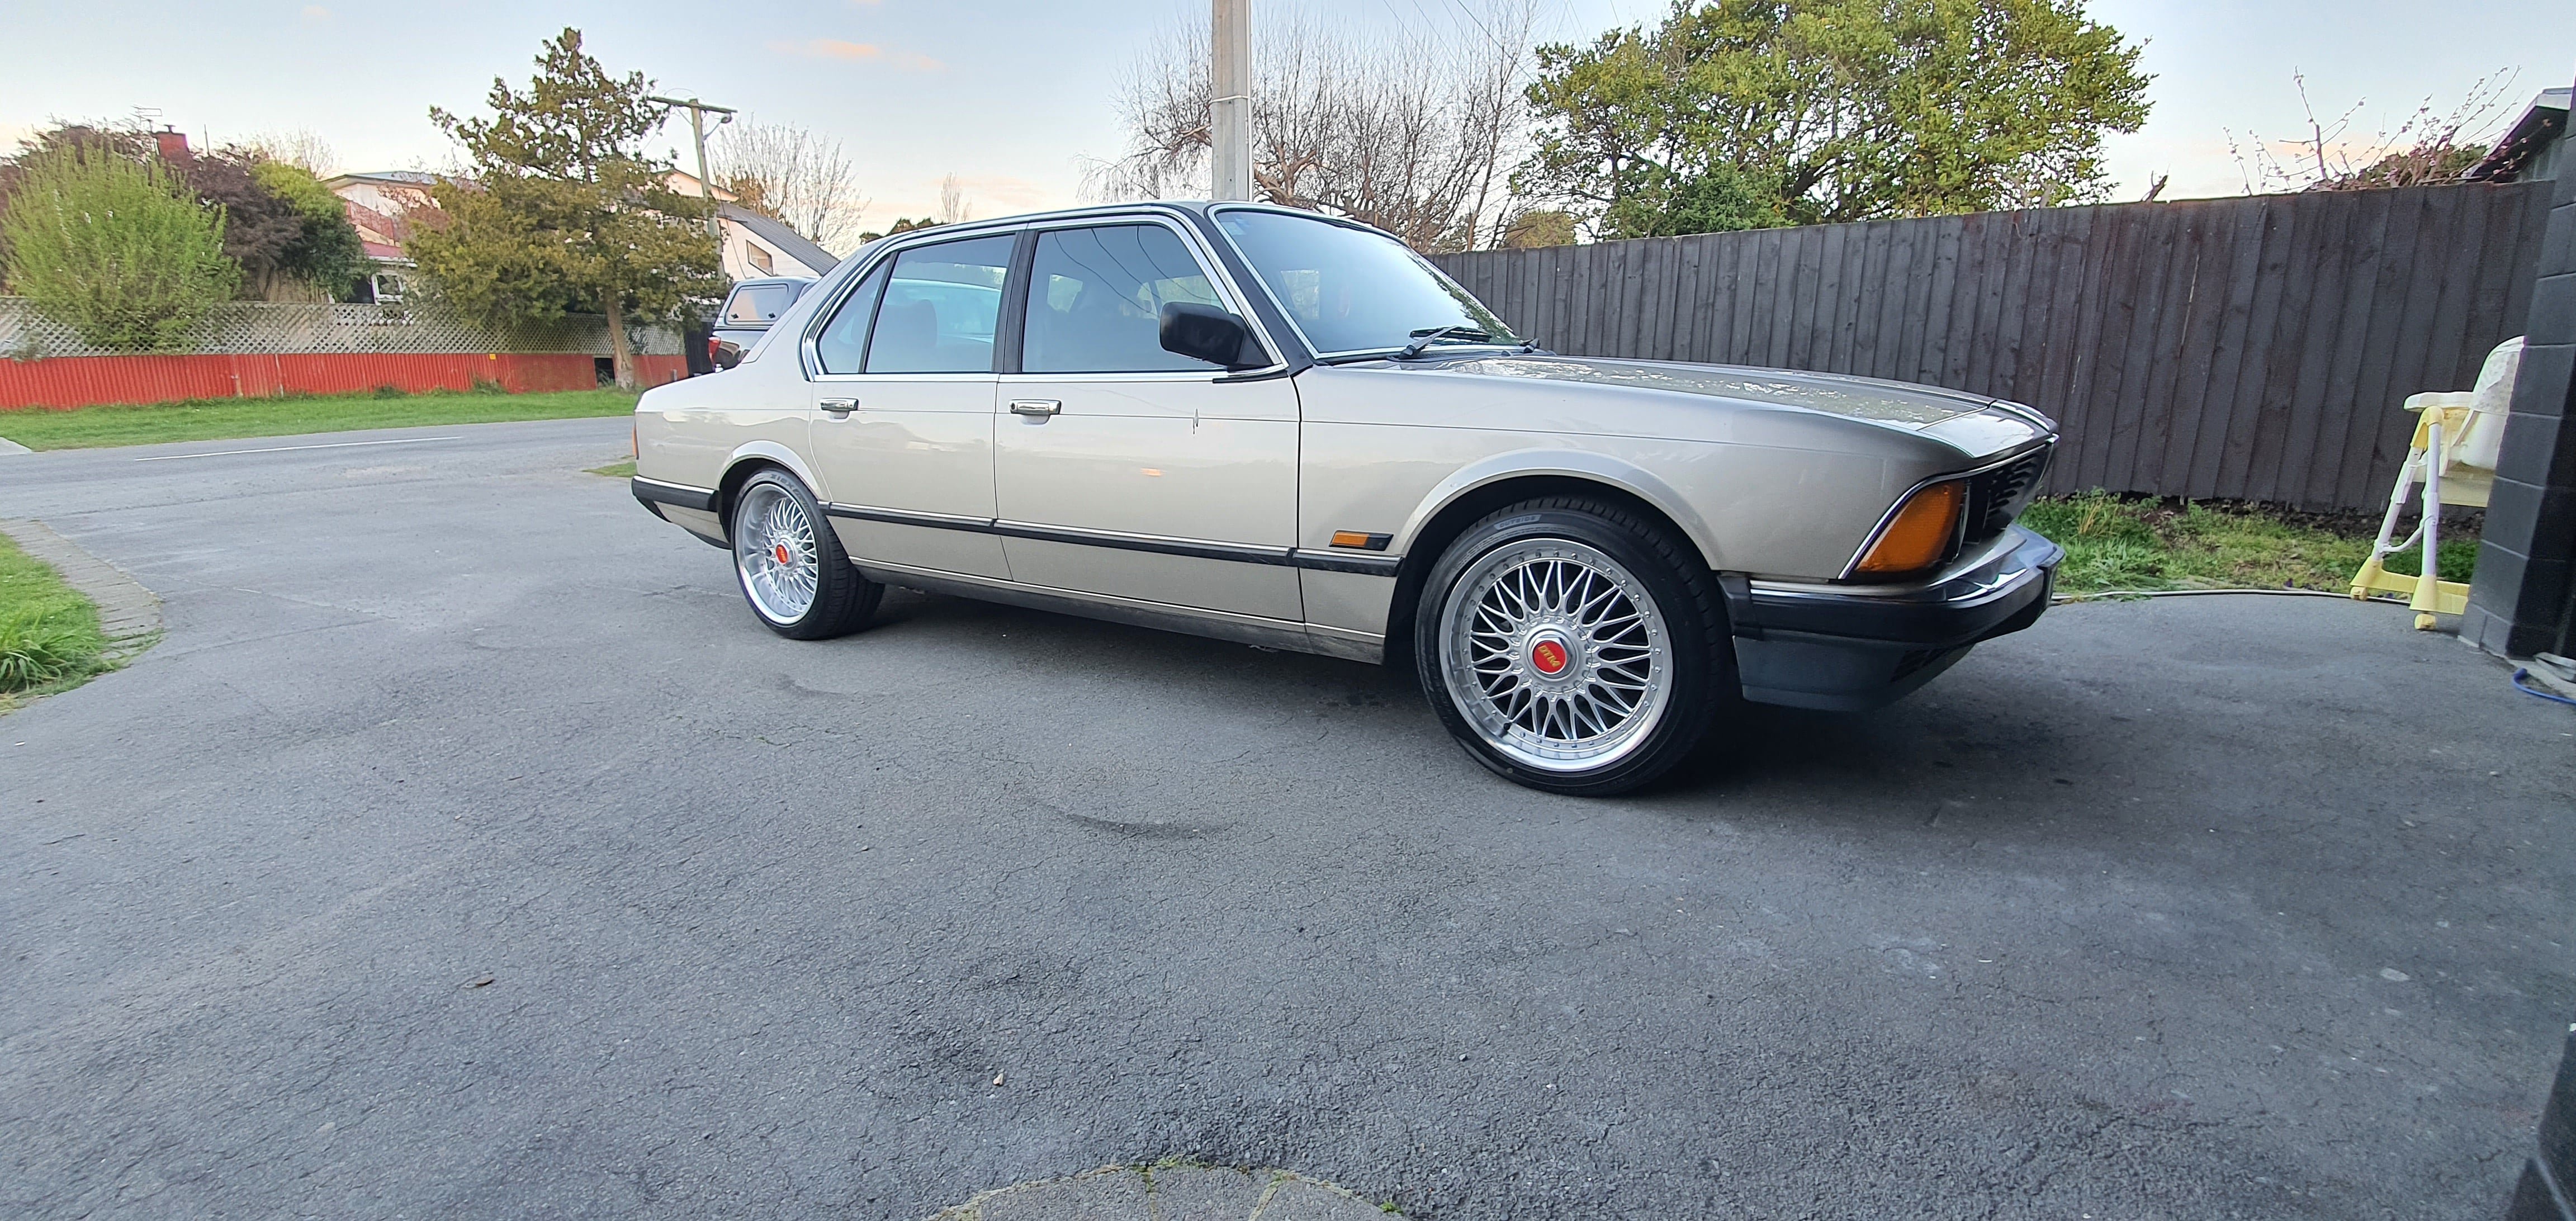
I know a few people will be disgusted by this, but I chucked my personalized plates on it. I have new ones on their way that are the right size and style for it, but I did keep the old Black ones. I haven't really done a lot more to it yet as i'm waiting on a bunch of shit to turn up from Ebay. I have on order: A new rear BMW Badge, new auto gear knob (old ones fucked) new Brake accumulator as the brakes are showing all the telltale signs of low nitrogen, new plates, Momo bosskit for my Momo Indy steering wheel, Dash mat and some stickers. I sorted some 100%, definitely real, totally genuine BBS wheels for it and will sort getting the thing on it's ass ASAP as it'll look a lot better. In the meantime here's some photos of it in all it's Bronzit - Biege glory after a decent groom and some new rims. Side note, was an older couple that owned the lambo - She was driving and it took him at least a couple of minutes to get in it.
1 point
-
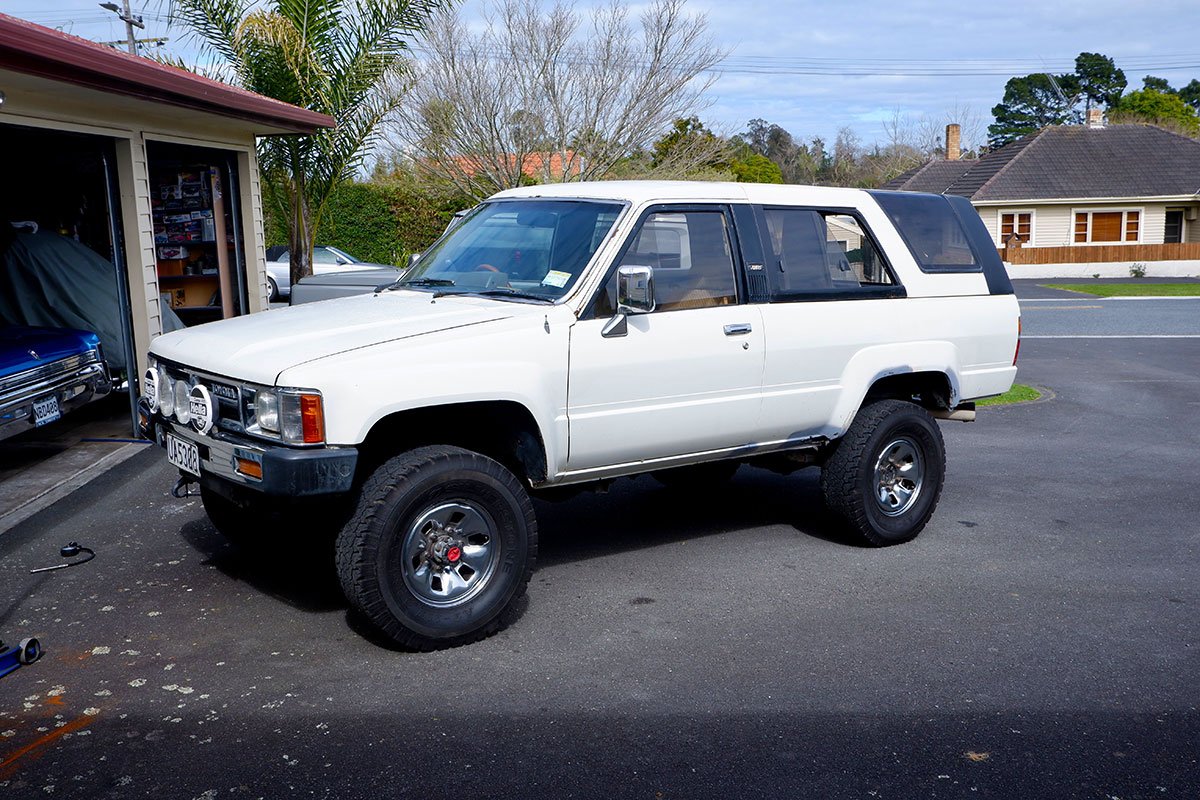
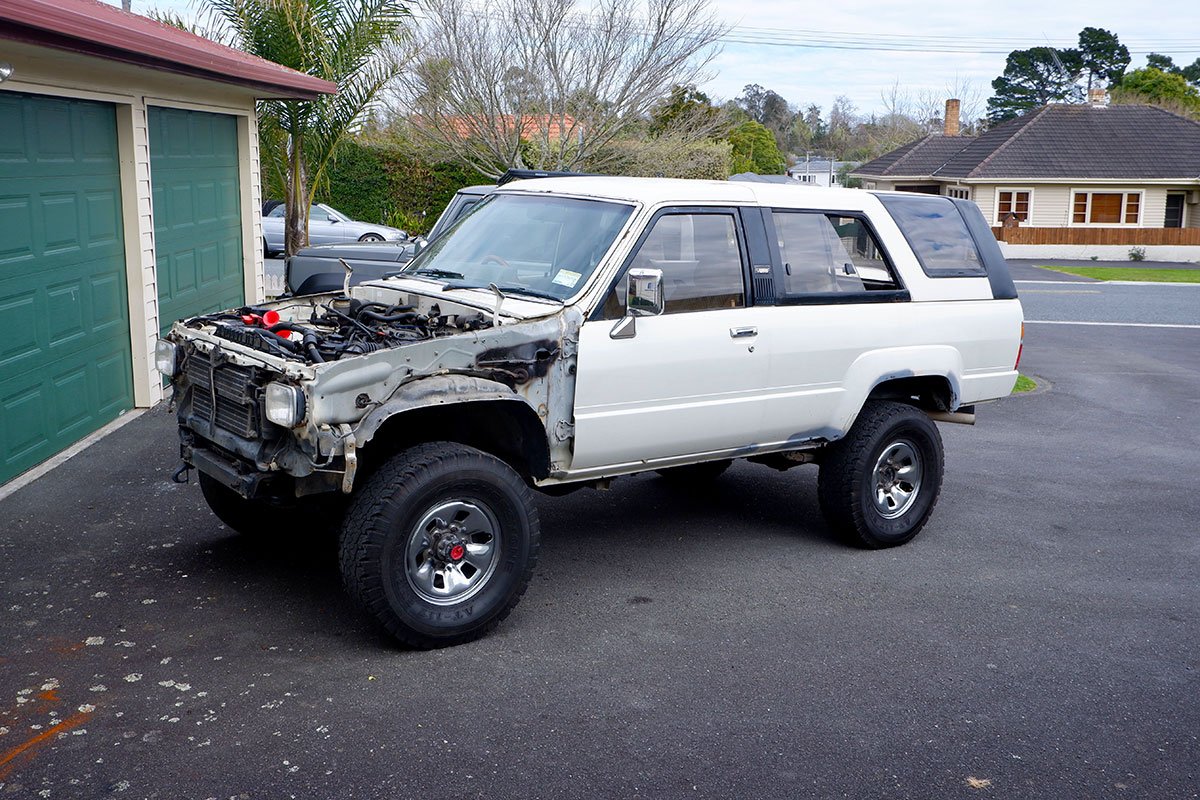
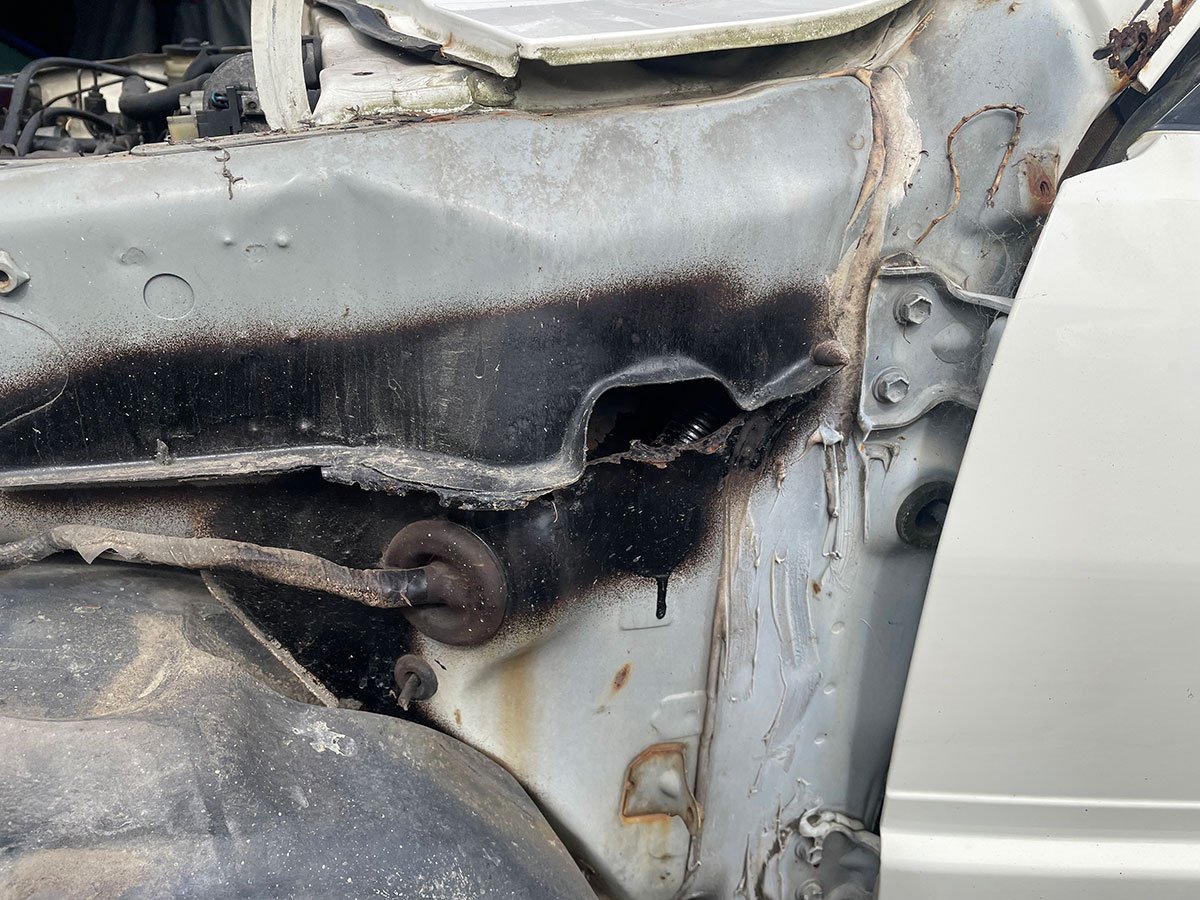
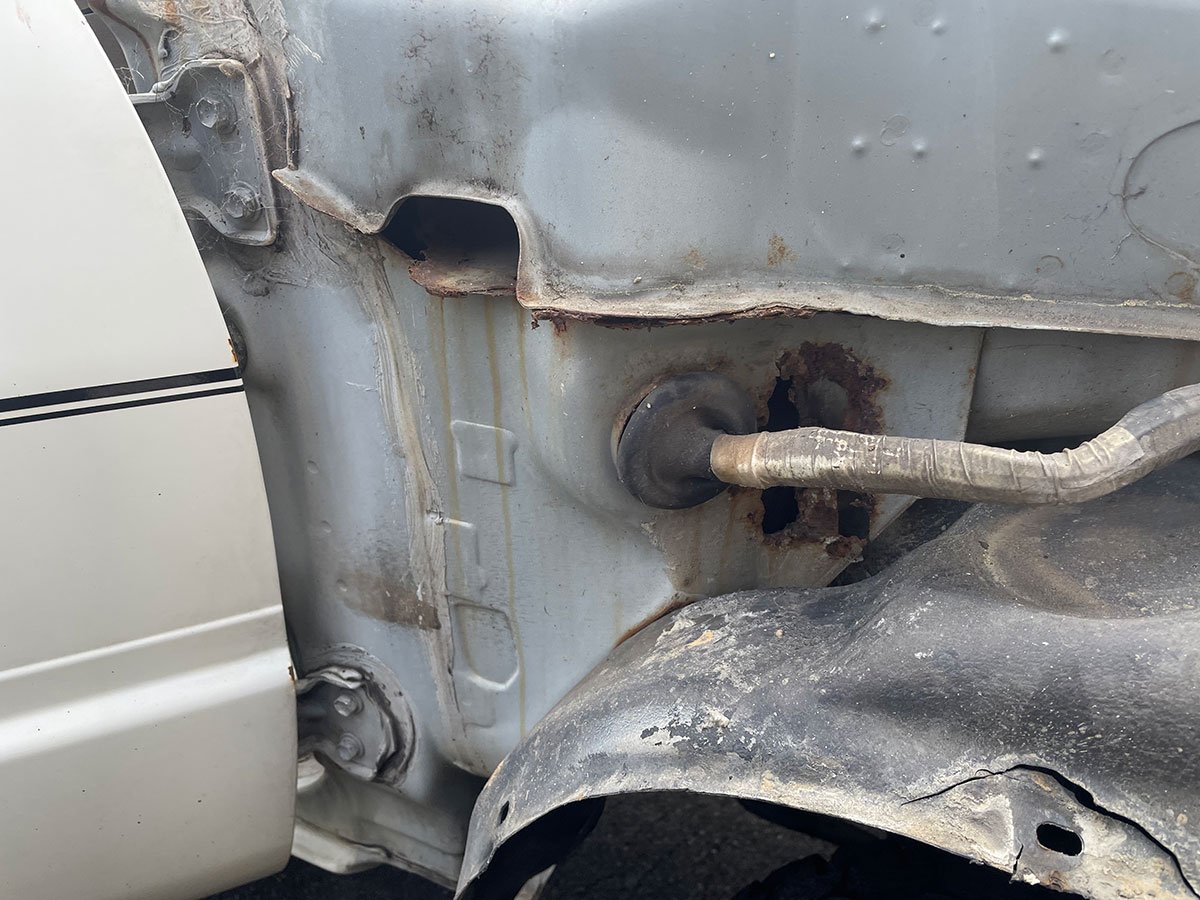
Founds some new to me wheels to throw on when its ready. 15x8 Rays Eng. Tex Rides. Naturally had to test fit them Then started the process of tearing down whitey for loom removal. Removing the front guards revealed more rust in the usual spots where the water drains. Ahh well...
1 point
-
The following day (Those were Saturday's updates above), I set about getting my Hayashis out and giving them a wee spritz with the metal polish to bring back the brightness. Then, fit them up I needed some slip on spacers for these (and some other 13s) to clear the calipers, on wheels with very flat spoke faces and 3-piece bolts it JUST tags the edge of the caliper. No biggy, John van Beek (he with the badassiest Cedric of ever) whipped up some hubcentric spacers for me, I will organise a grub screw and threaded hole in the hub to secure these, just in case I wish to cert later. For now they're perfectly safe, and fit like a glove. 20210919_114316-Edit by Richard Opie, on Flickr On with the Streets! 13x7 -6 offset for those playing at home. So with the spacer on the front, we are effectively a 7J -11 offset, pretty hefty for a standard Starlet guard but with the 175/60 it just covers the tread. 20210919_131430-Edit by Richard Opie, on Flickr Realistically it's probably a little tight, although with a test drive it showed no serious signs of rubbing. But to be sure I found some +7 offset 13x7s on Yahoo for next to nothing (rare to find these days with the way prices have gone) so used buy now through Jesse Streeter to get the ball rolling on those. But here's how it's looking on the Streets. I reckon it just looks so good on 13s, they visually lower and lengthen the proportions of the car. Really enjoy just looking at it, at the mo. 20210919_114754-Edit by Richard Opie, on Flickr 20210919_115151-Edit by Richard Opie, on Flickr 20210919_130445-Edit by Richard Opie, on Flickr Last job on Sunday was securely mounting the rear speakers. The TS-X9 are one of the top-end Pioneer units of the day, these and the TS-X11 both used cast alloy housings are are absolute nuggets. They sound amazing too - I've had these hooked up to my home amp inside, and for their tiny size, the results are unbelievable. These ones I've had stashed away for a while now, so I knocked up some large plates to bolt through the parcel tray to the speaker to prevent them going anywhere, and also spread the load across the old wooden parcel tray material. It's some sort of almost cardboard crap - I should really make something more sturdy. This still flexes and bounces around a little bit when driving so it may need some sort of additional bracing moving forward. Looks hot though/ 20210919_151048-Edit by Richard Opie, on Flickr None of it is wired yet - although that won't be too long. Thanks for looking. Even though we're locked at home I'm very chuffed with the car and it's got me in a good mood.1 point
-
The last lot of work was to service the braking system as it wasn't quite right. In the test drives I have taken the car on the brakes have felt a bit off. The pedal is soft, with lots of travel and not much in the way of stopping. There is also quite a shudder when braking and the hand brake appears to only be working on one side. The plan was to replace the front pads and rotors and the rear pads, figuring the shudder is likely to be from the front, and the pads on the rear were looking old. The front rotors had some grooves in them, but no lip. I suspect the shudder was probably pad deposits from sitting, and may have gotten better with more use. The rotors were quite rusty through. Two 12mm bolts hold the caliper to the slider pins. Removing these allows the caliper to swing up and over. I was really worried about these rotor retaining screws as they all look quite chewed up, but they came out with no issue. I used a screwdriver bit in my impact wrench to undo them. A quick clean of the hub face and on went the new rotor. The old pads did look quite recent and had little wear. It's peace of mind to replace them though. The slider pins were well greased and sliding freely. I cleaned and regreased them anyway. These little plates that the pads ride on weren't in good shape though. Both were gunged up with old grease and brake dust. I've cleaned one half of this one with a wire brush. After cleaning all the plates up, giving them a coating of copper grease and refitting them to the bracket it was time to fit the pads. I would have liked some Mintex pads, but they aren't easy to get here and are really expensive. The piston in the caliper was pressed back with a clamp, and the caliper refitted. The bracket to hub bolts get torqued to 100NM, and the caliper slider bolts are 32NM. Rinse and repeat for the other side. The rears are a little more of a pain due to the handbrake cable. Mmm webs. This isn't even the worst, the other side was grosser. Lots of fly spray and vacuuming made it safe to work. The pads had plenty of meat but were old Lucas pads, maybe original to the car? I removed the handbrake cable pins because they are known for rusting up, and sure enough, mine was very stiff and rusty. I cleaned it with a wire brush and refitted it with plenty of copper grease. The slider pins on each side were stiff and covered in dry old grease. They weren't seized but didn't move freely. These were thoroughly cleaned and greased before refitting. The other side was much of the same. One of the boots on the slider pins hadn't been fitted correctly but thankfully still kept dirt out. The grease was still hard as a rock though. The boot should go right to the head of the pin Everything was cleaned and greased, and the piston in the caliper freed up and wound back in. The rear rotors aren't looking good. They have no lip but seem to be quite pitted. I might revisit these and if a few good hard stops don't clear them up, replace them. The handbrake mech on each caliper moves freely, so they should be working OK. I gave them a good coating on WD40 to help them move nicely. I bled the brakes next. I flushed the system, but I don't think I needed to. The fluid was quite clear and looked like it had been done somewhat recently (despite one of the bleed nipples being blocked and needing removal to clear it, and the two rear ones being rusty and taking a bit of force to shift). Bit of a mystery that. The bleed sequence with the Bosch ABS unit is LH FR, RH FR, LH RR, RH RR. The pedal still has a bit of travel but does feel firmer now. I still can't drive the car because the brake light switch is faulty but once I can I will do the bed-in procedure. I tried to adjust the hand brake after pumping the brakes 20 odd times as recommended, and the adjuster had been wound all the way out. I got it from bout 10 clicks down to 5-6 but I'm still not sure if it's working evenly. I really need to bed the brakes in first, and then adjust it again and see what happens. One other thing I noticed was that the rear muffler was hanging on by one hanger. Some WD40 and a bit of wiggling and I had it back in place. Hopefully this helps the placement of the muffler as it's a bit on the piss and doesn't match the cutout in the rear splitter. The whole exhaust is a bit woeful. I might need to take it in somewhere and have it fixed properly. It's been "modified" and has no mufflers except the back box. Since the car has all the wheels off anyway, now is a good time to replace the tyres. I find tyres can tell a lot about a previous owner. A high powered sports car like this, running on ditch finders on the front and mismatched old and cracking tyres on the rear.... the previous owner was an idiot. Yes, that is date coded 2008. All the tyres are the wrong size, being 185/55R15, not the turbo size of 195/55R15. I got the new rubber the other day, and I just need to book it in and have it fitted. Yokohama AD08R. Pretty serious street rubber. I'm hoping they are as good as the Hankook I had on the Corolla (which aren't available in this size). I'm looking forward to putting them through their paces. I will hopefully have the brake light switch this week, and tyres fitted next weekend. I might even try for a WOF when I get the tyres done and see what happens.1 point
-
This car has some cosmetic challenges. I managed to knock a couple off and make things just a little nicer. Most of the cosmetic issues with this car stem from it being outside under the sun. There are some things that are hard to get (or hard to replace) but thankfully some parts are easy to replace, and since there is an R8 Rover 200 liftback at the local Pick A Part I went on a raid to get some bits. The major one was the dash wood. Mine was in really bad condition and was an eyesore to look at. Although the wood seemed good, the lacquer was falling off in chunks. The wood on the dash of the car at PAP was perfect. Not a mark on it. Removing the trim can be a bit nerve-wracking. There are a series of spring clips along it. To release the clips, start with a pry tool on the far LH side, levering it outwards. Using another tool, work slightly further along. Eventually, with some force, the end clips will give in, and then you can just pull it free with your hands. The other benefit of replacing the trim was that I could look into why the backlight on the clock was dead. The LCD was working as you could just make out the faint digits. It turns out that both the bulb was blown, and the clock needed to be disassembled and the solder joints reflowed. The replacement clock suffered the same issue. The replacement wood just pushes into place, starting at the RH end. And the clock works too. Such a classic orange glow. When I was at Pick A Part I decided to grab a couple of door switches, as I know they are known failure points. Turns out this was fortuitous as both of mine were broken, and the interior light didn't work. The slider lever had broken off both. One screw holds it on, so remove that Disconnect the cable, plug it into the replacement and screw it back in. Done. Rinse and repeat for the other side. Now the light works on the door setting. I changed it to an LED for more brightness and less consumption. The LED doesn't fade quite as nice as a bulb (yes, the light fades out, how flash) but it's not really noticeable unless you're watching the light. Moving right along, the next part I scored was a good condition front grille. Mine was rusty and I was at risk of getting tetanus every time I lifted the bonnet (which is a lot). 5 nuts hold the grille on. I found this mess behind the grille. A quick clean And the replacement grille fitted. I had to swap my badge over because someone had screwdrivered the badge when it was at PAP. This is why I replaced it The replacement had some surface rust on it, but I wire brushed it and then used some rust converter to hopefully stop it getting too crispy. The grille is riveted together, So it wouldn't be a bad idea to split it and properly coat that steel backing inside and out. Still plenty more parts to tidy up on this car, but it looks nice from afar.1 point
-
Does one have to formally apply to the fuhrer for permission to spectate?1 point
-
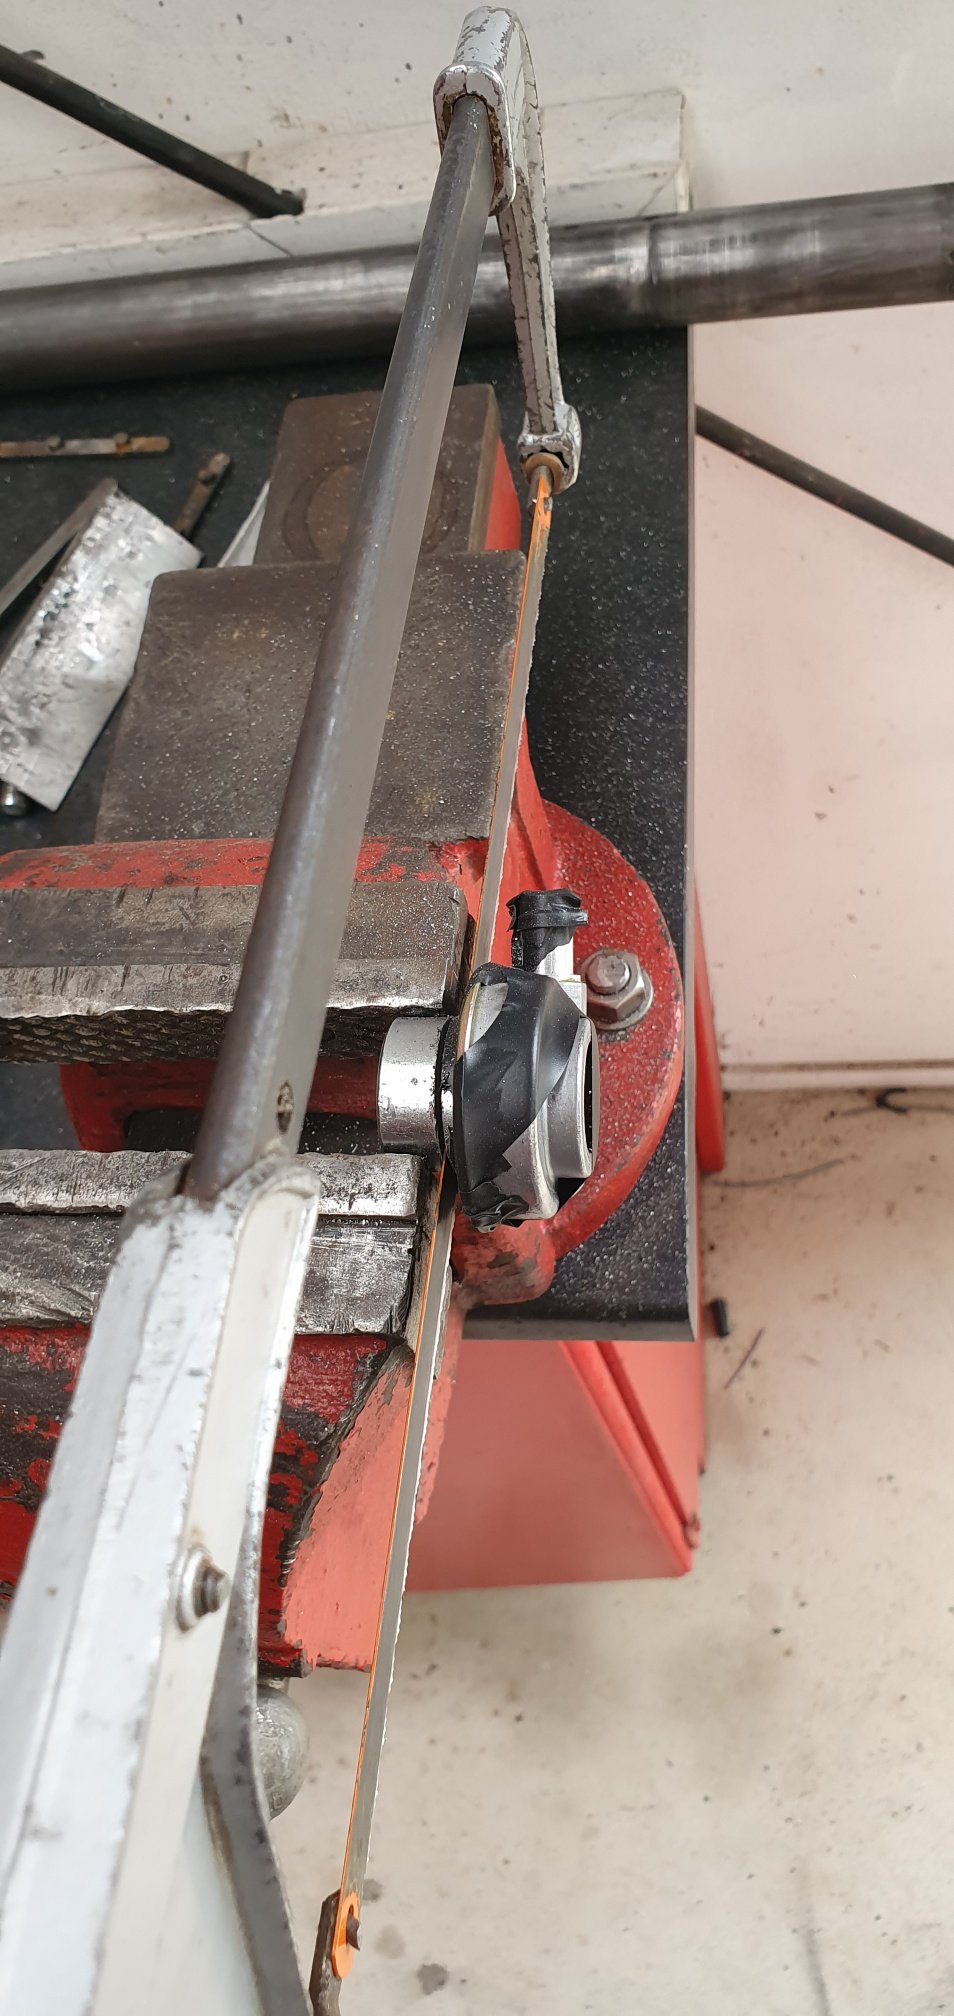
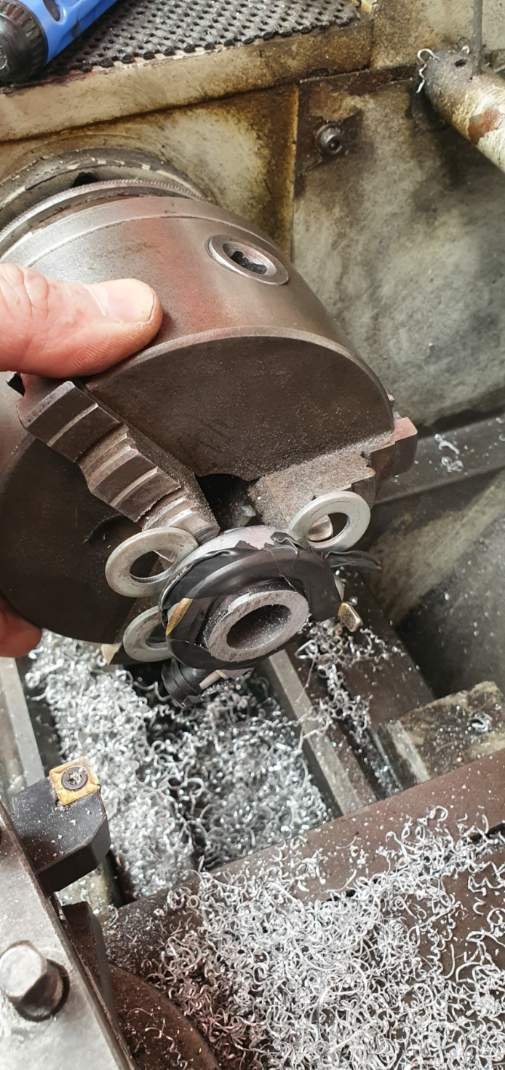
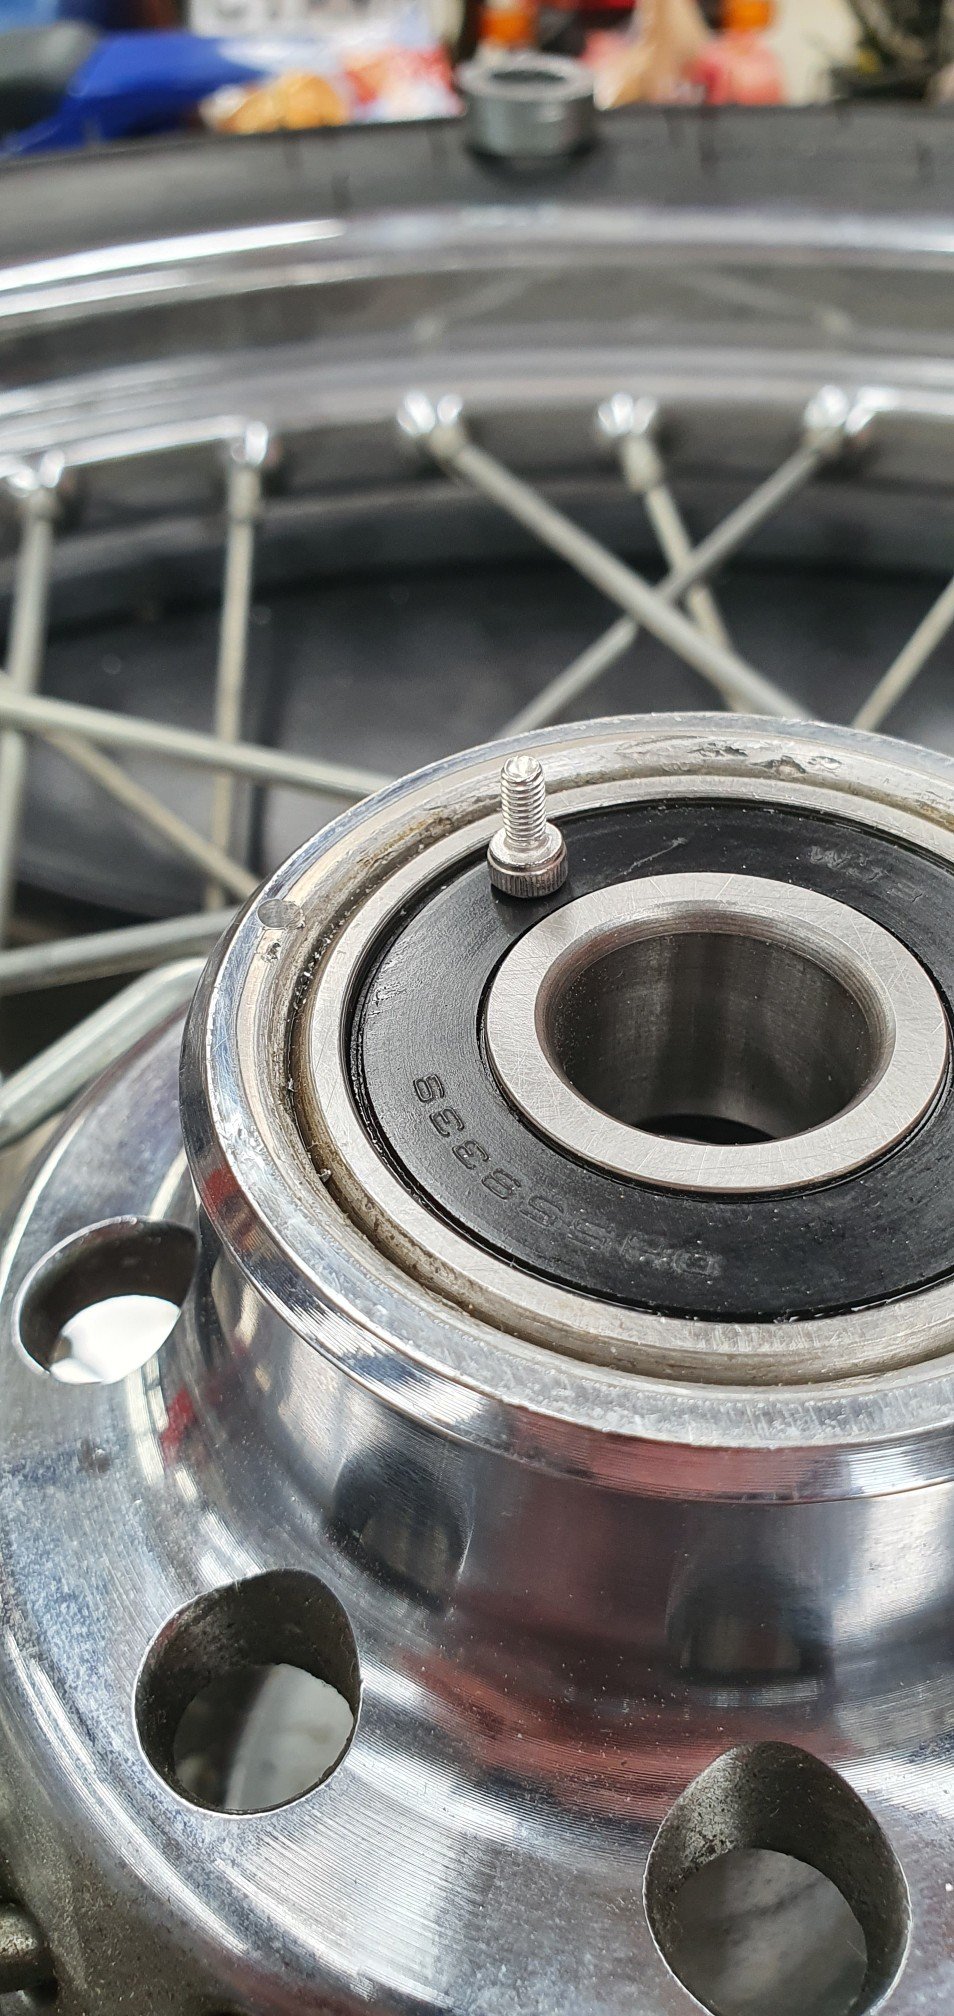
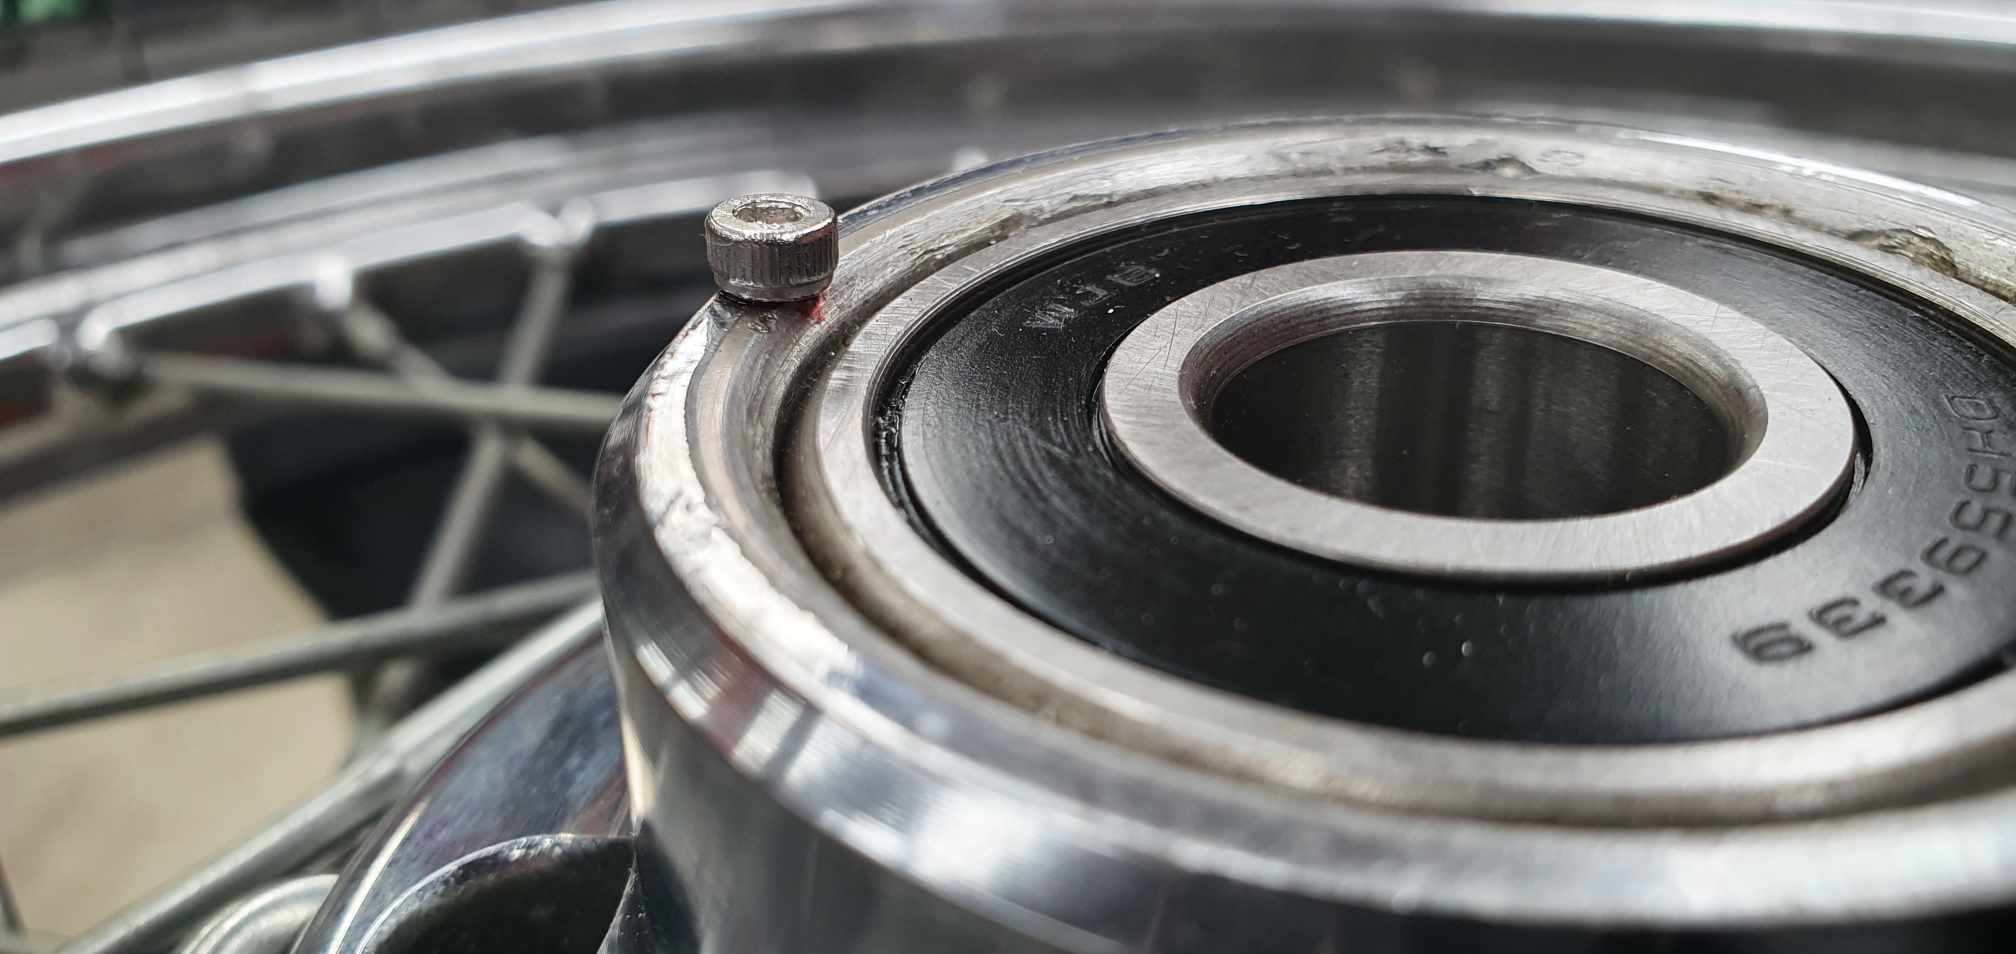
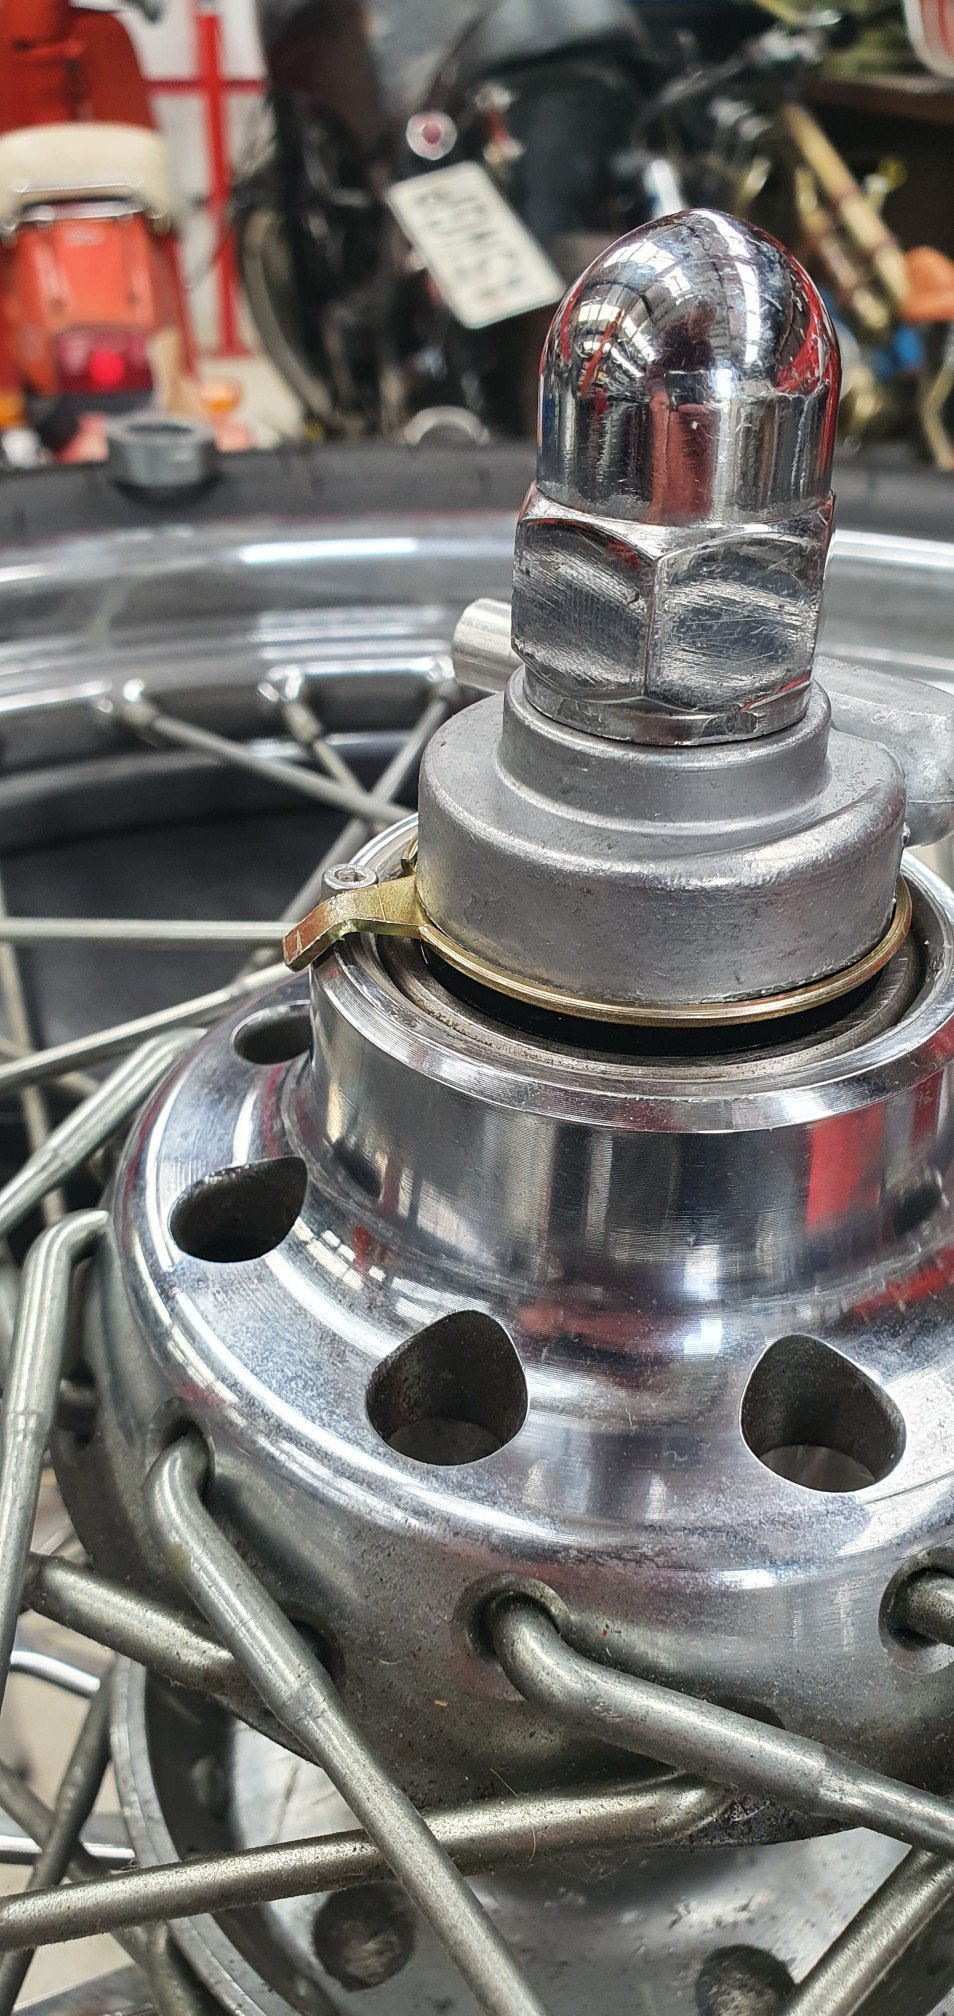
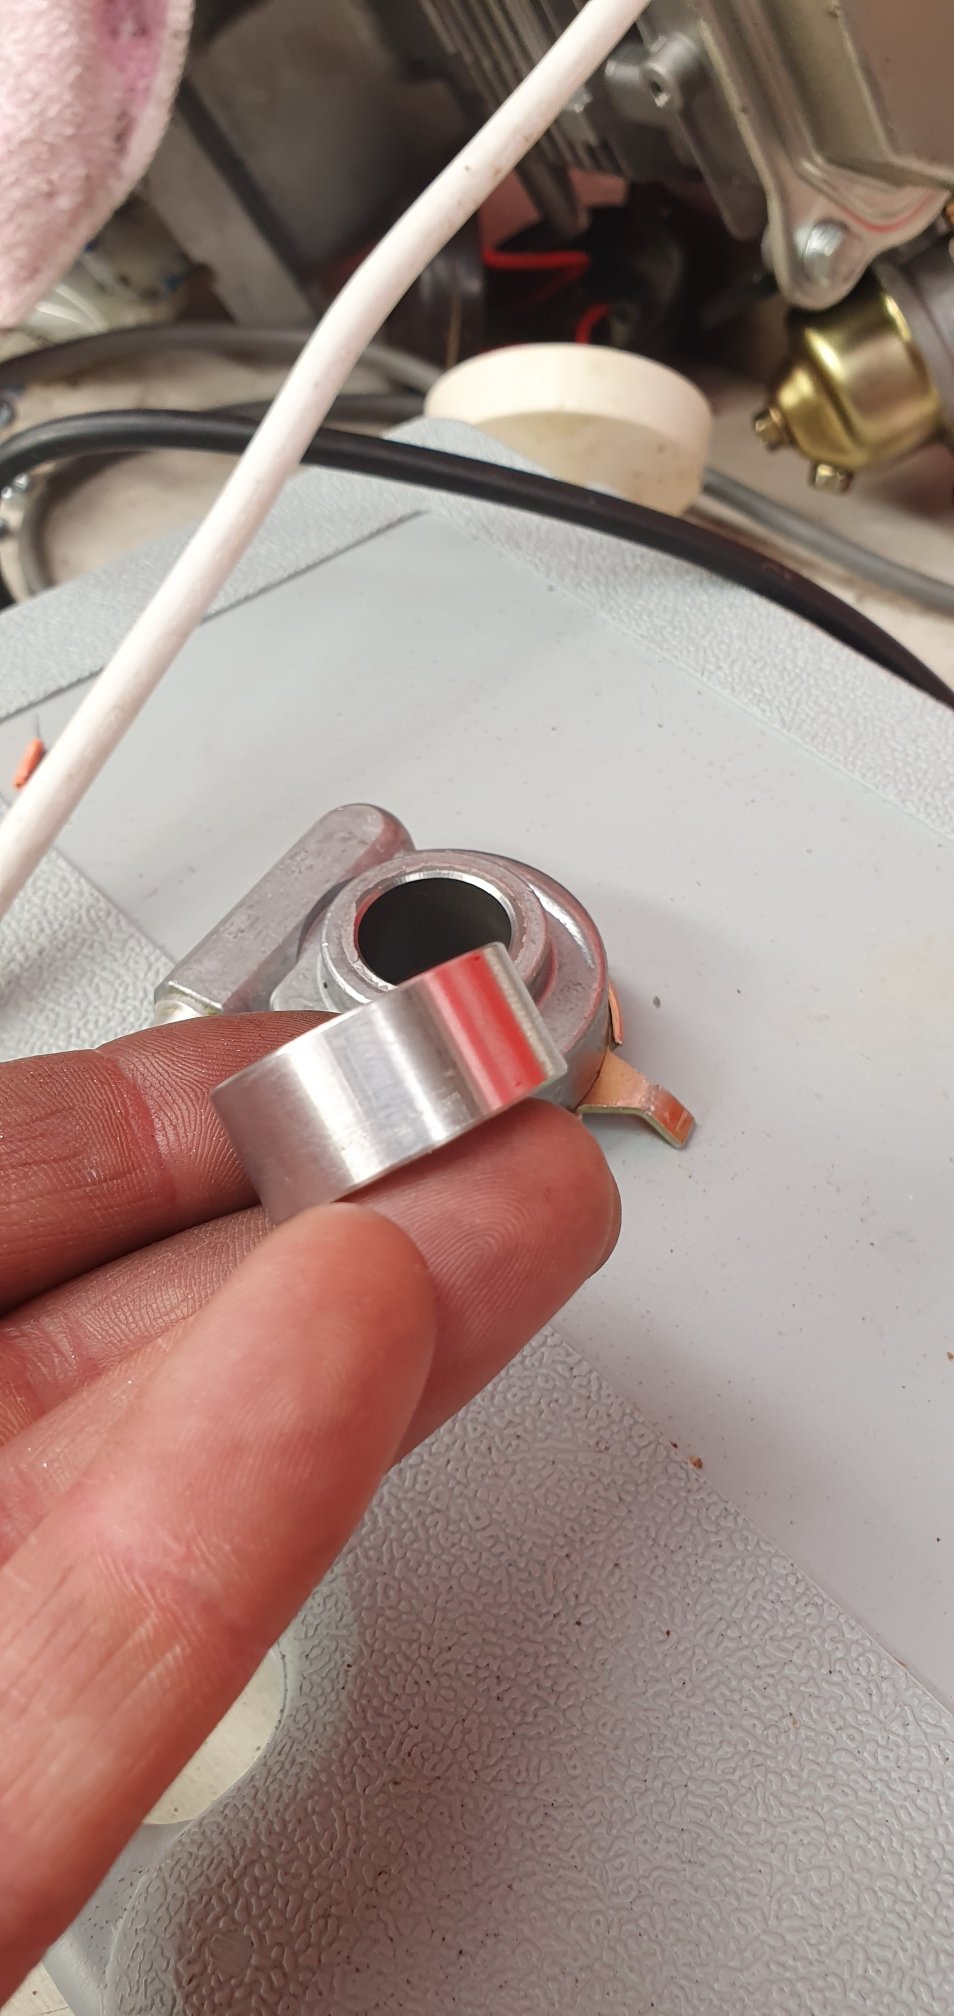
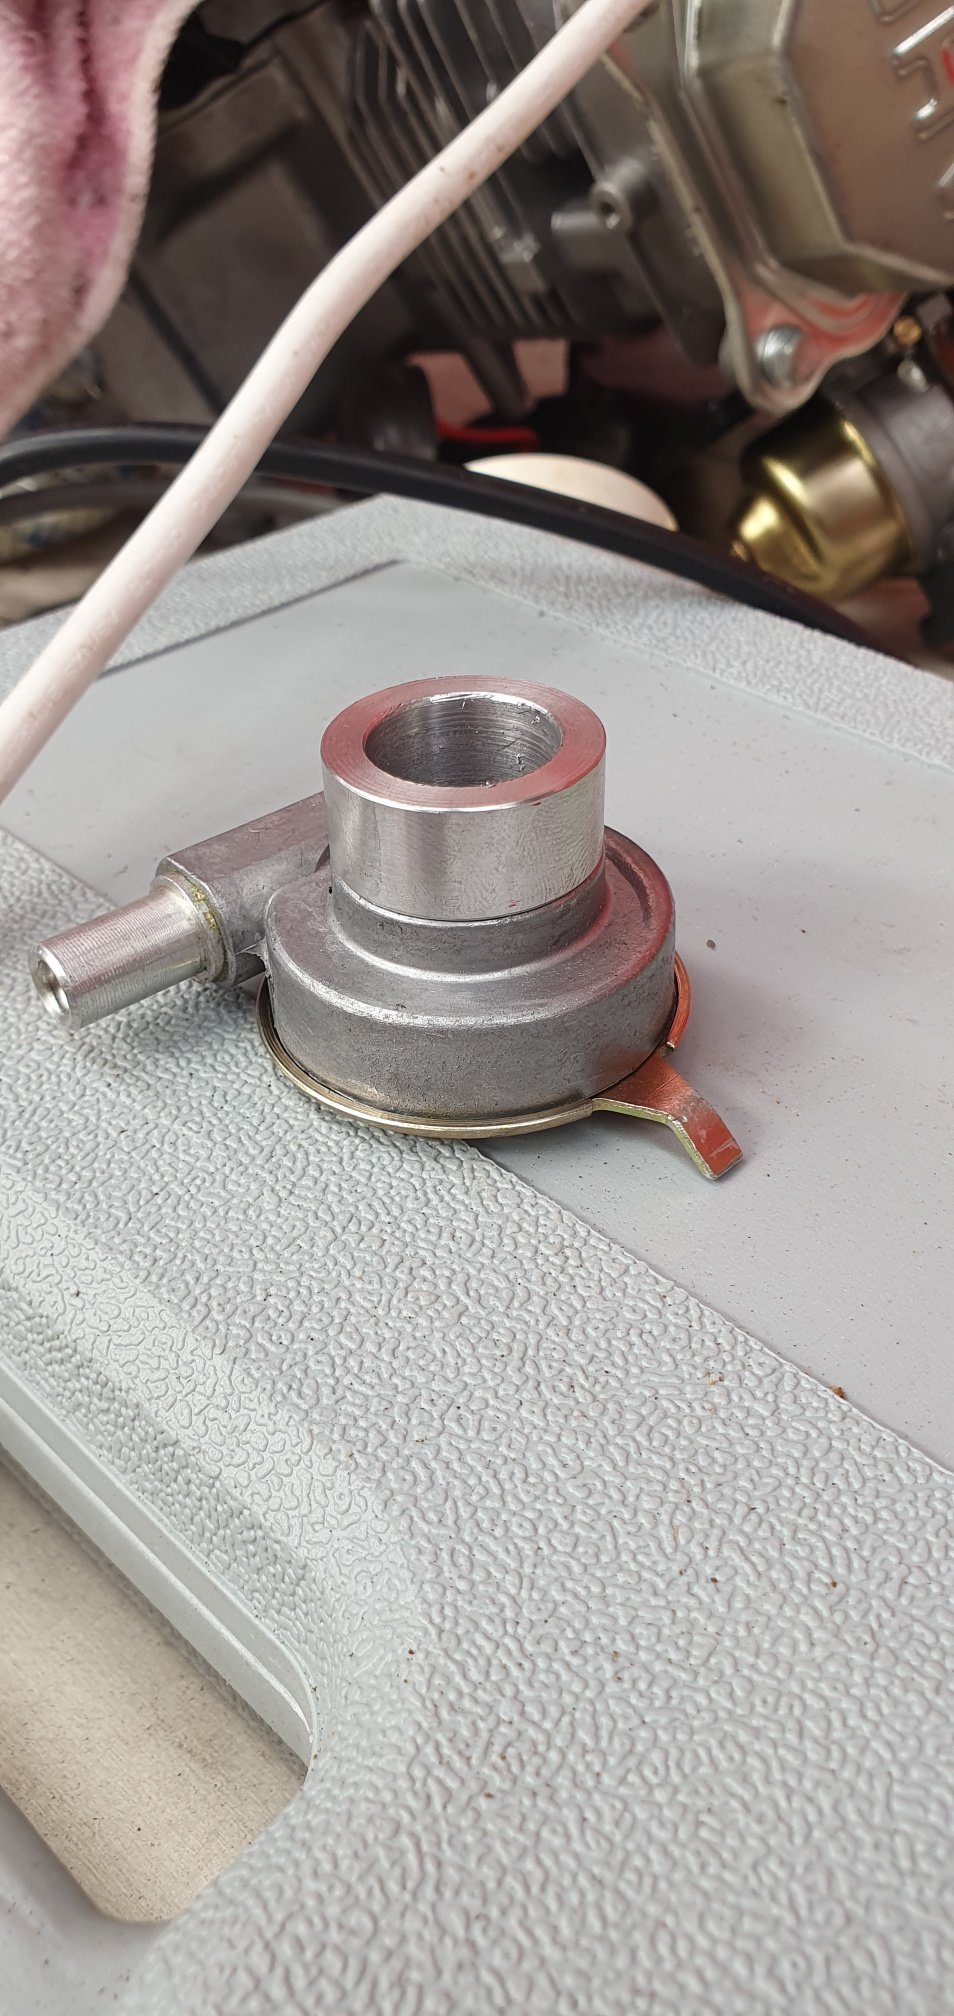
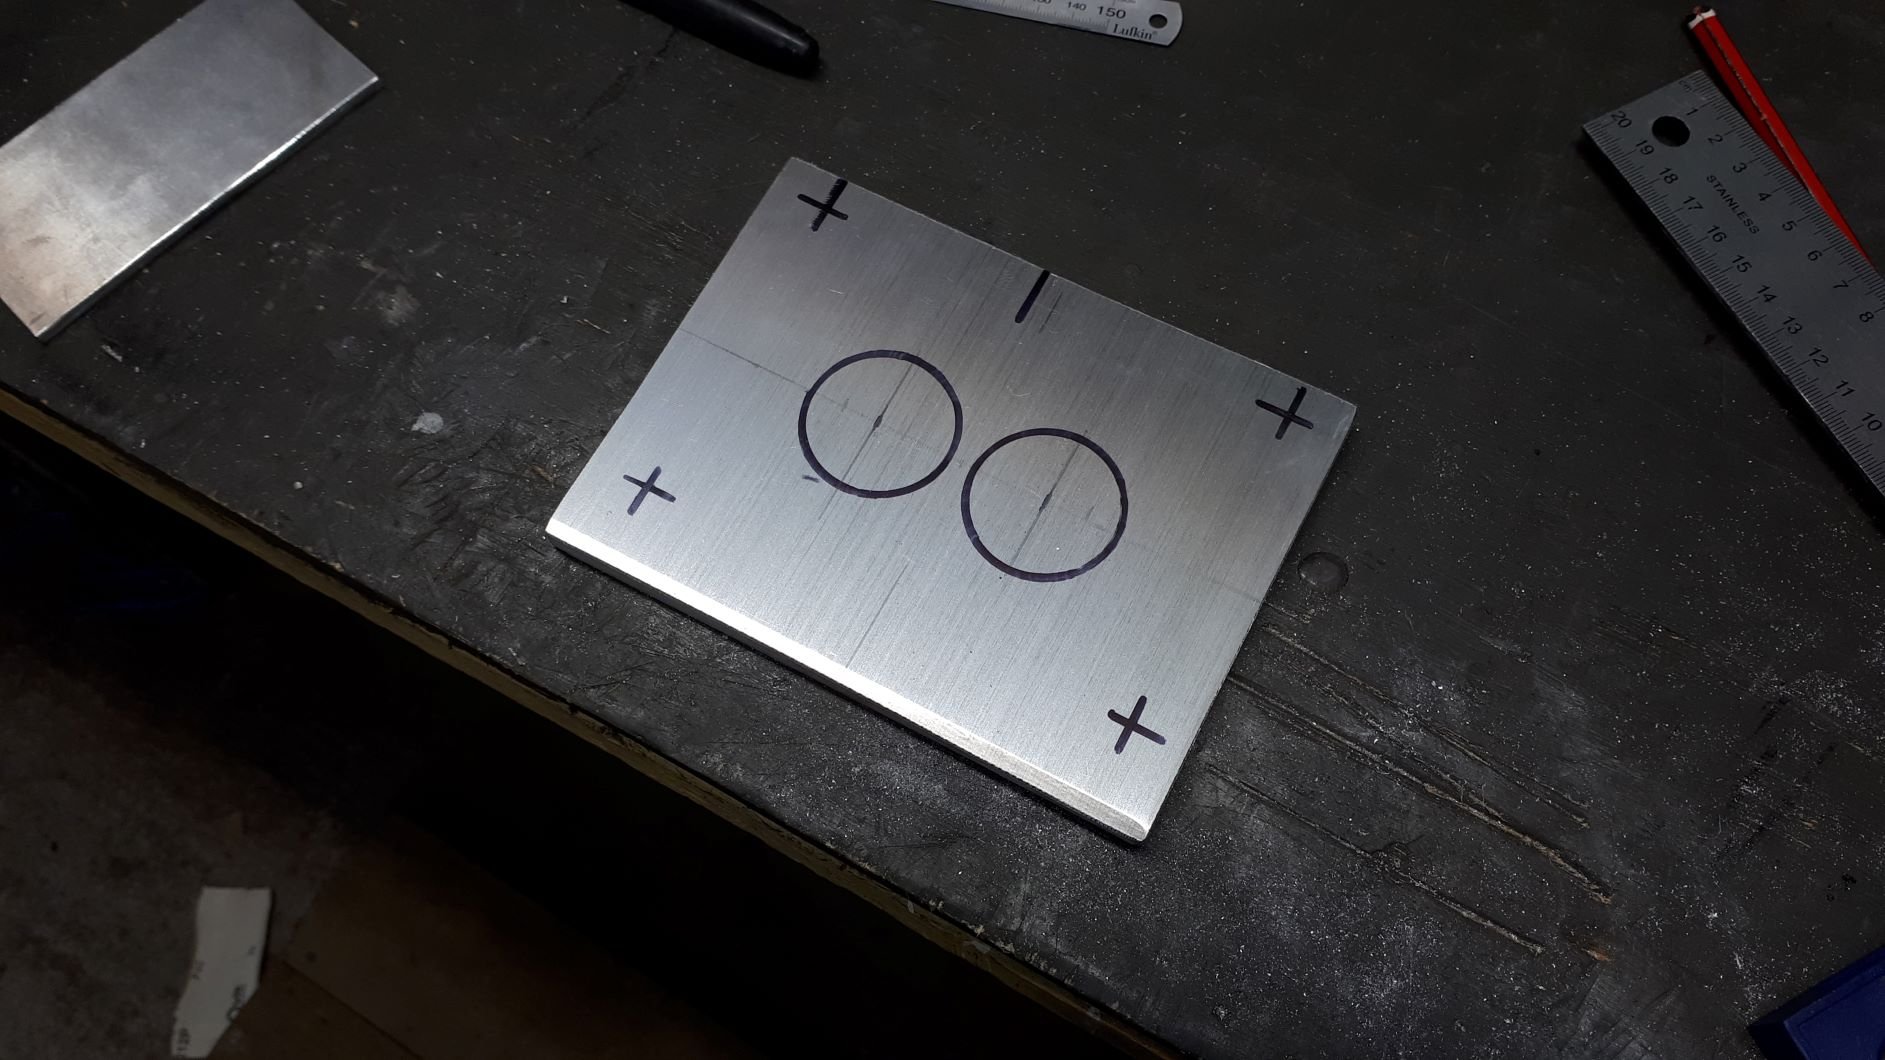
Solutions: Cutting it down, machined in lathe afterwards. M4 cap head to act as a pickup. This M4 drives the tab that turns the worm thread. Spacer made to add back on, what I cut off...but on opposite side. Tadah!! Fuck yeah! All sorted.
1 point
-
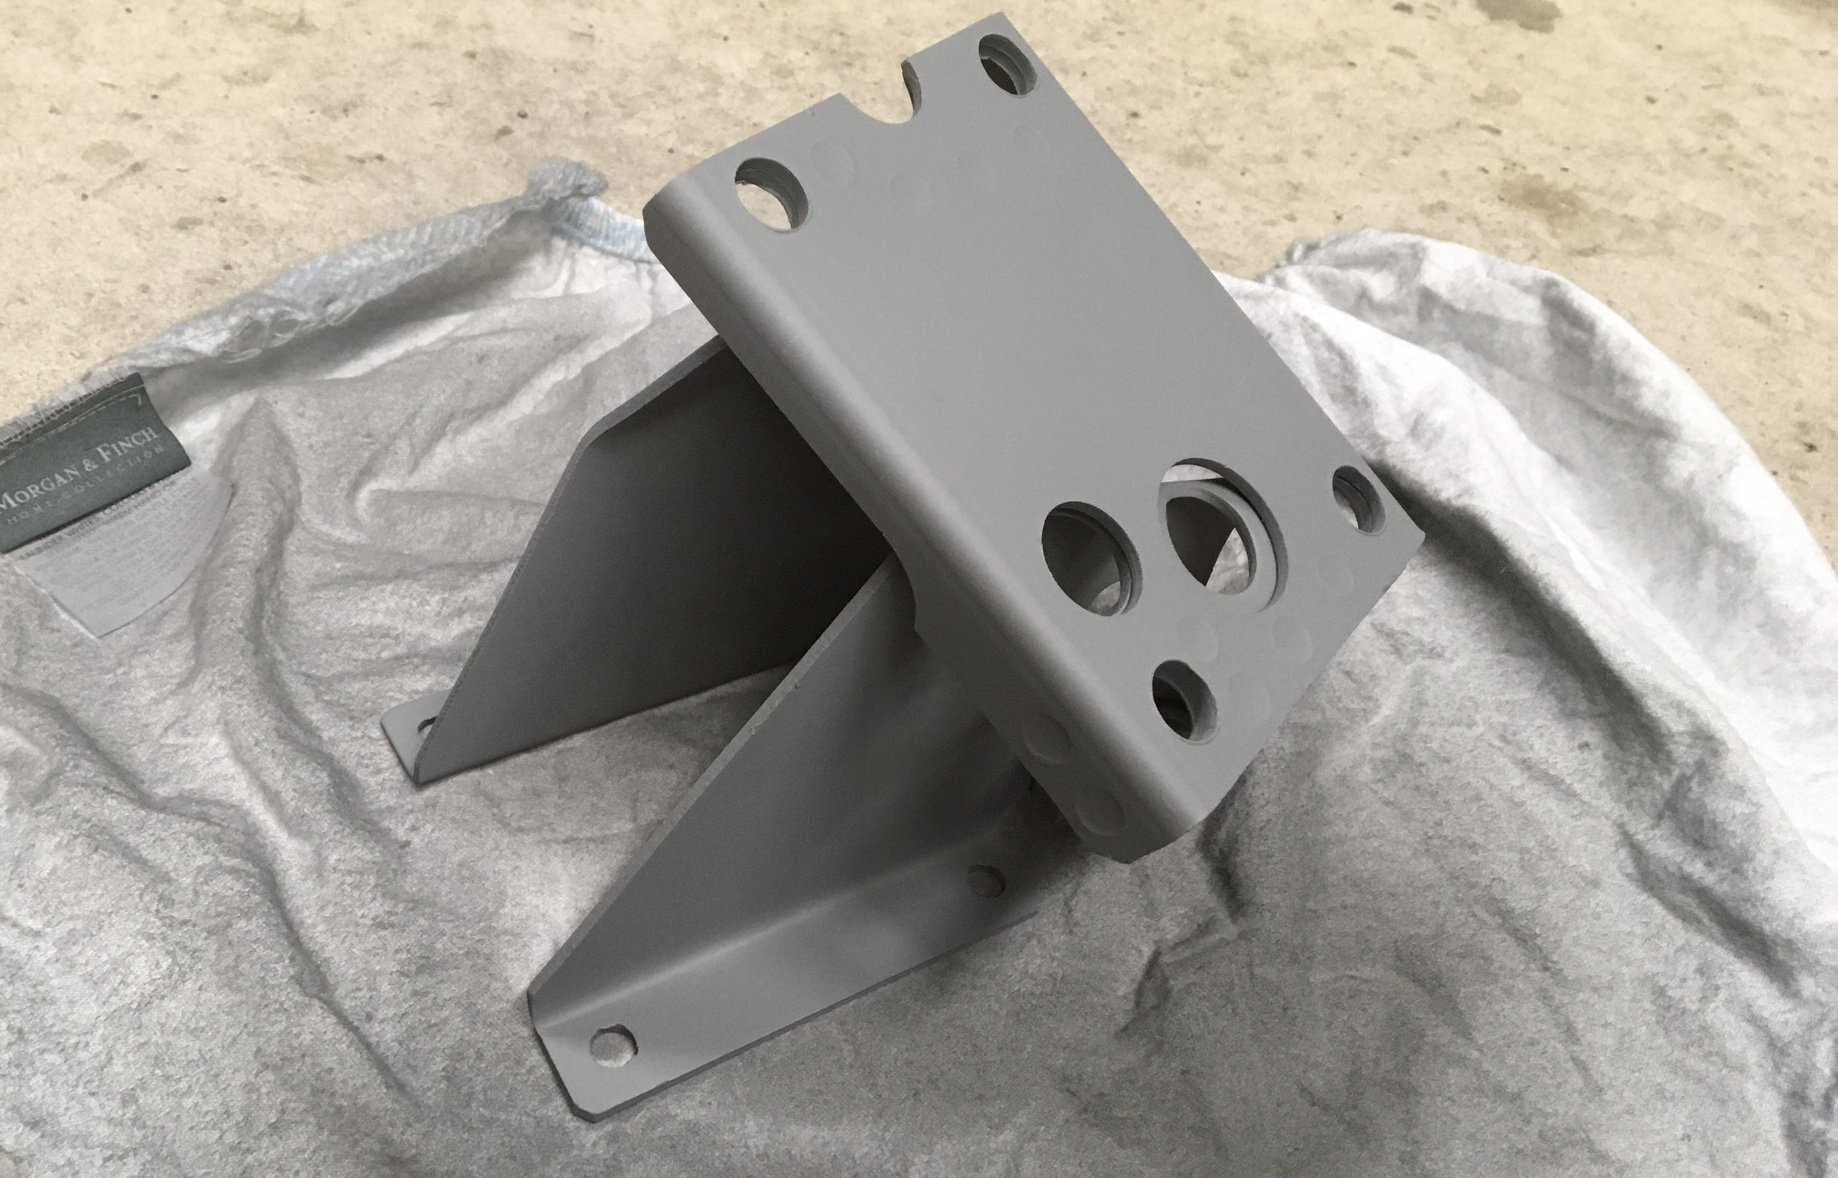
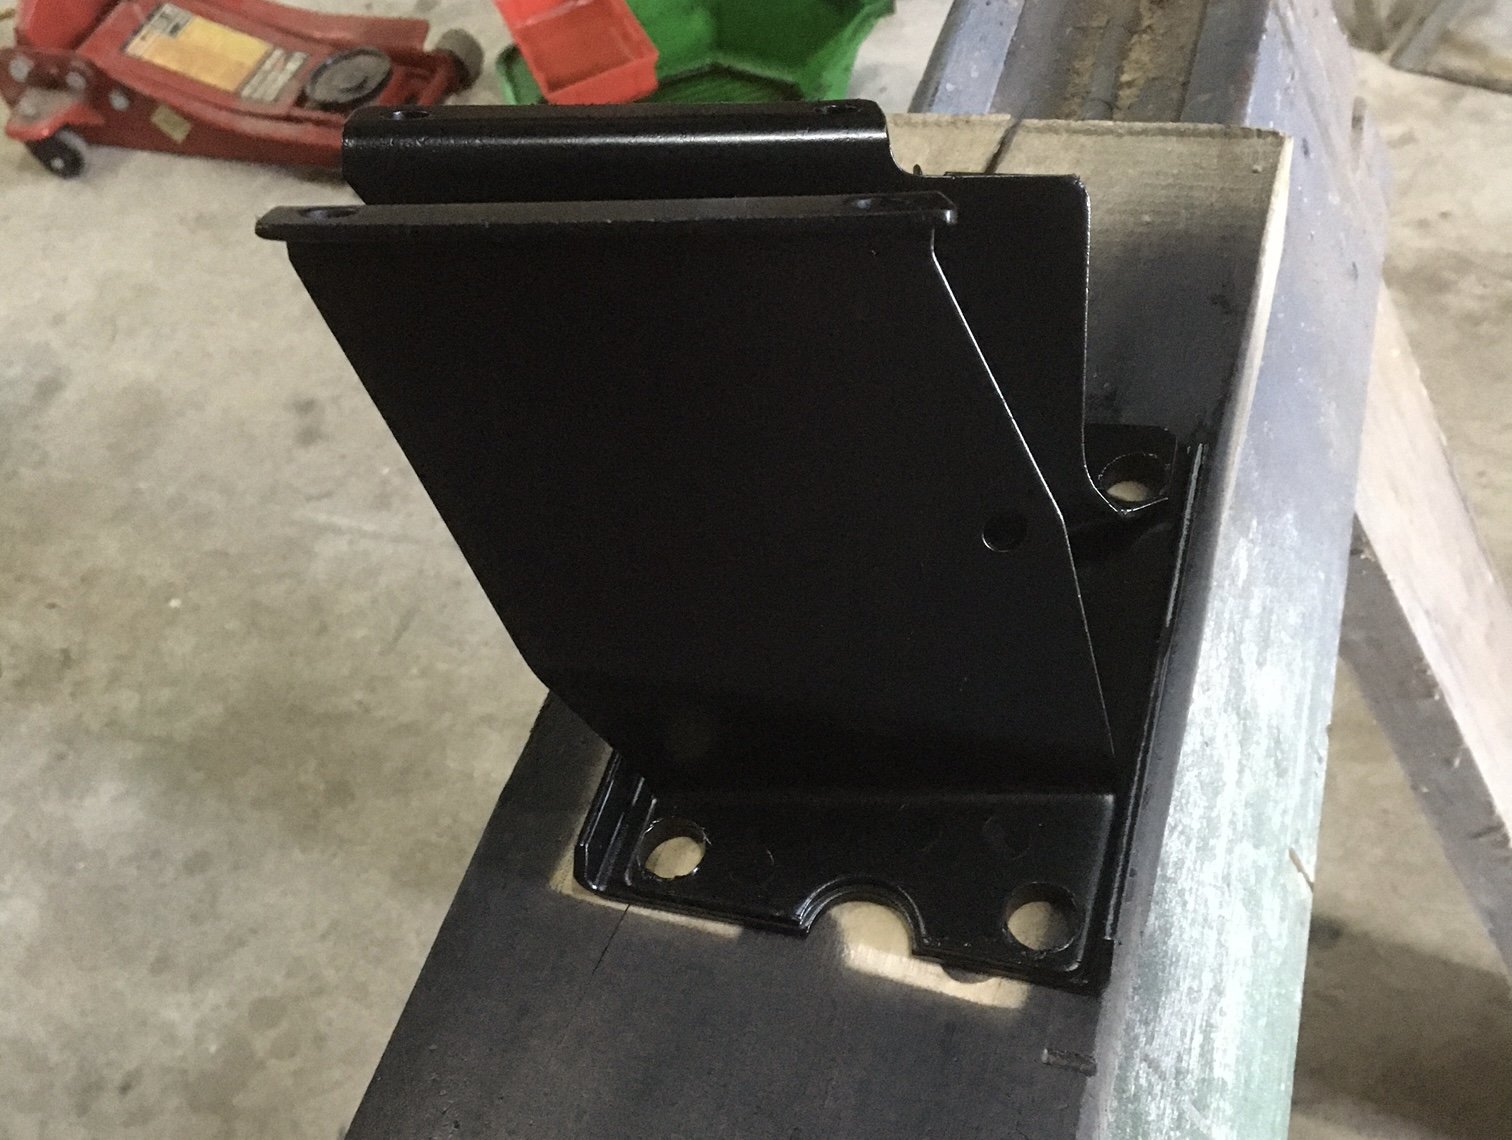
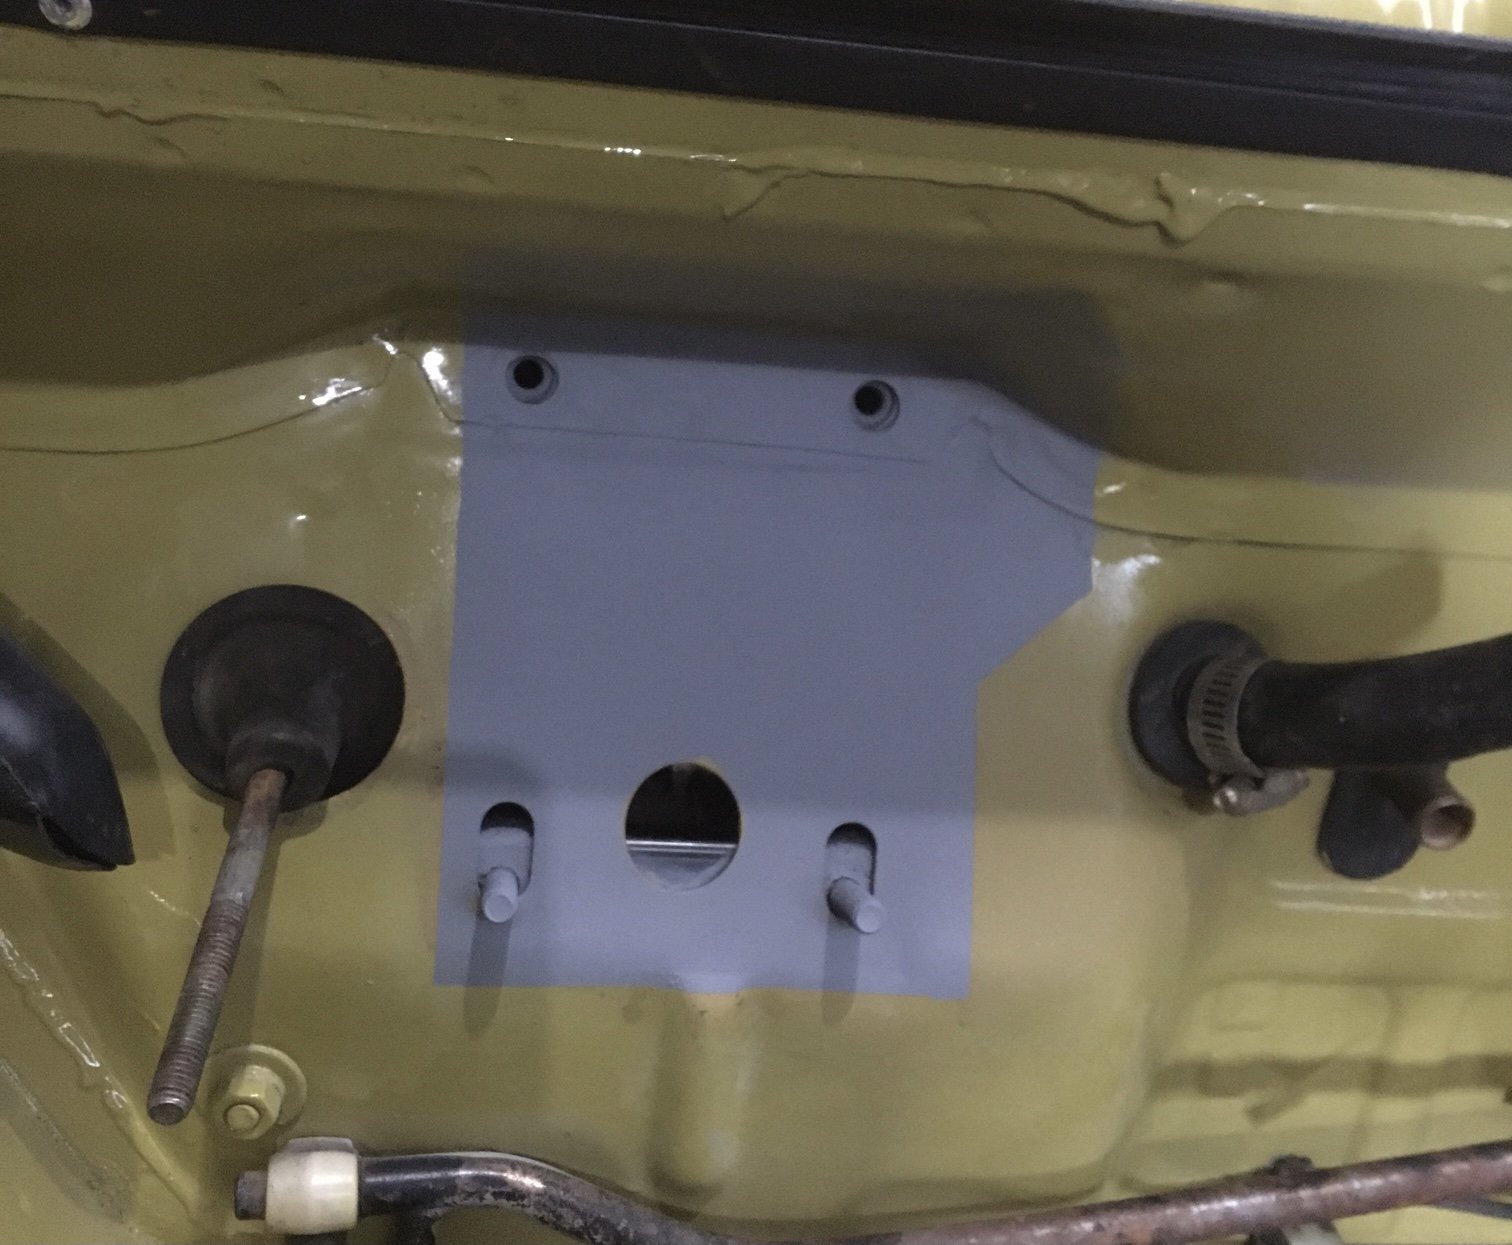
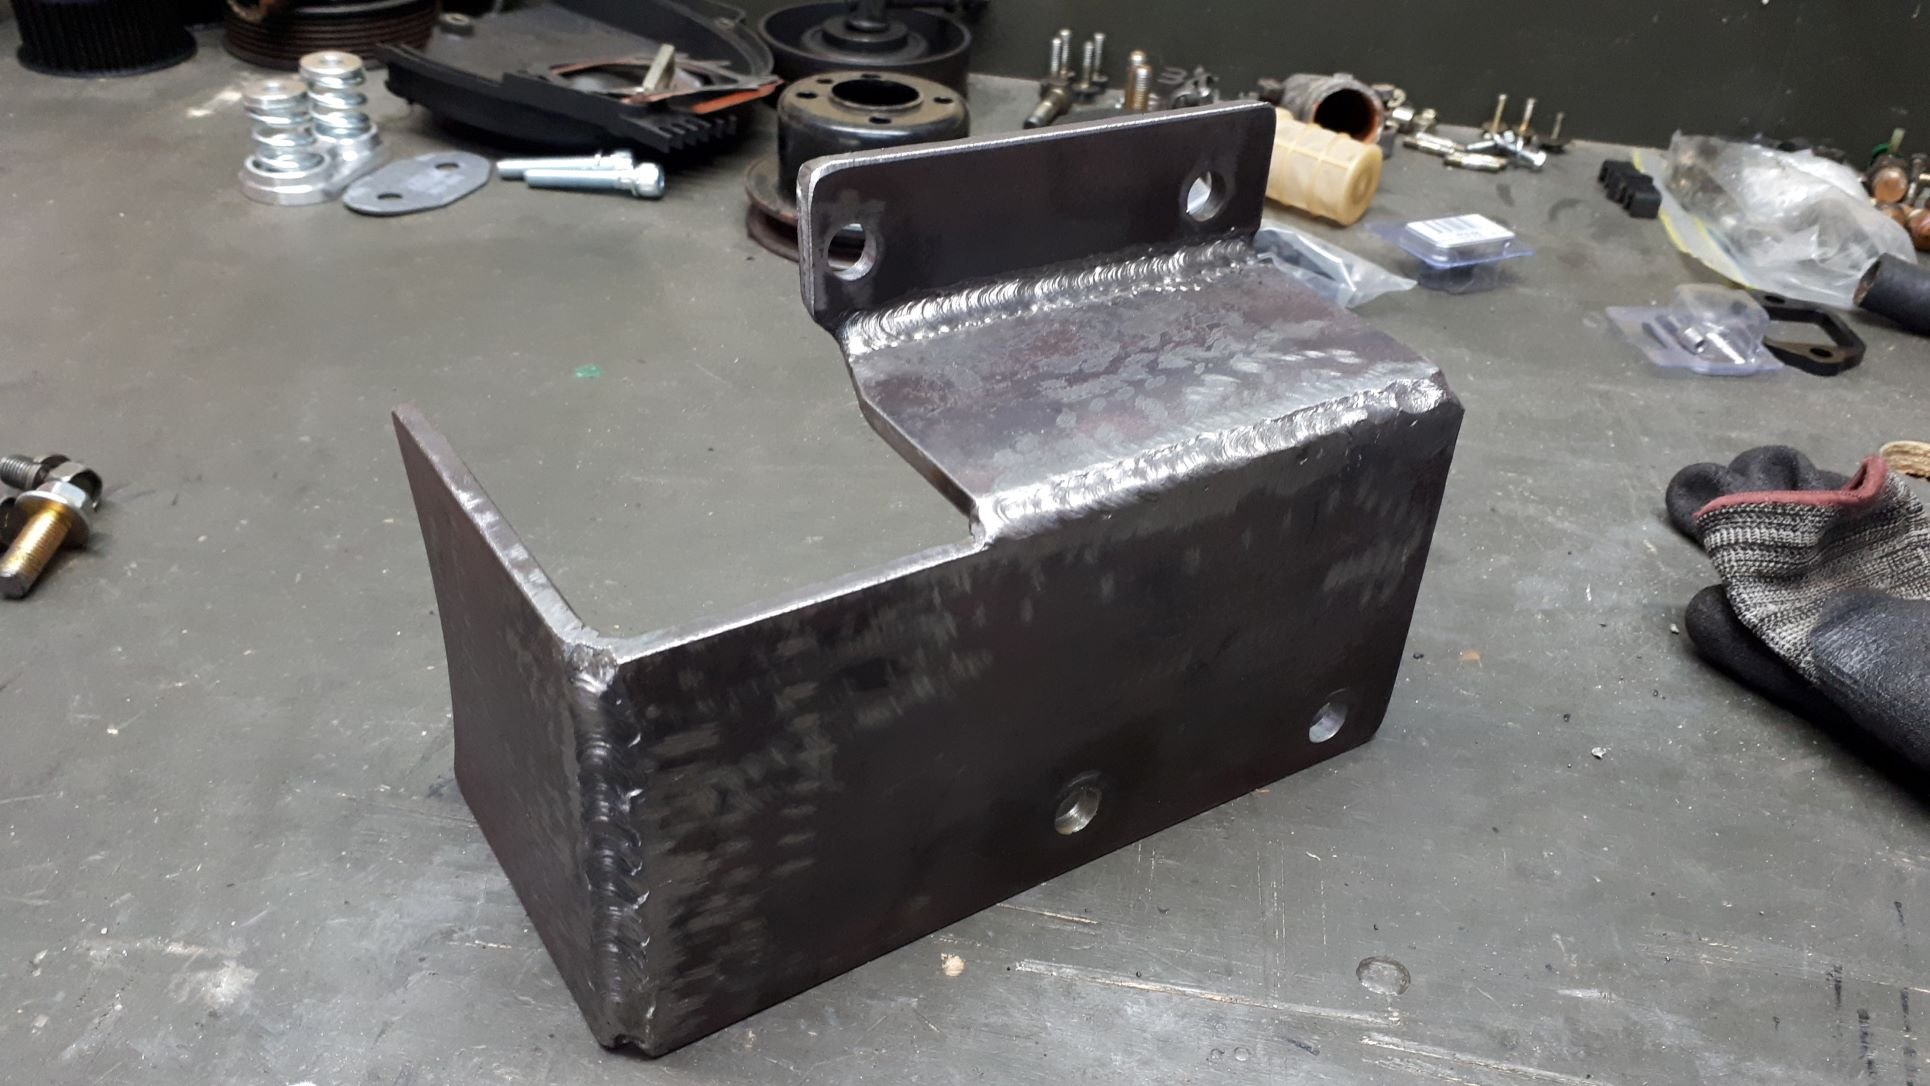
Nothing else to do this weekend but hang out in the garage and make brackets and fittings. Made a beefy bracket to fit in the A/C position, this will provide a mount for the supercharger drive layshaft, the forward belt tensioner and anything else I might choose to attach to it. Apparently Argon is not essential so I wasn’t able to purchase any. In this situation it was out with the trusty little Lincoln Electric arc welder to stick the bits of metal together. Everything went together well and the bolt holes even lined up when I was finished. Made an unnecessarily fancy brace for the manifold that may or may not be necessary and also made a fan shroud for the electric fan.
1 point
-
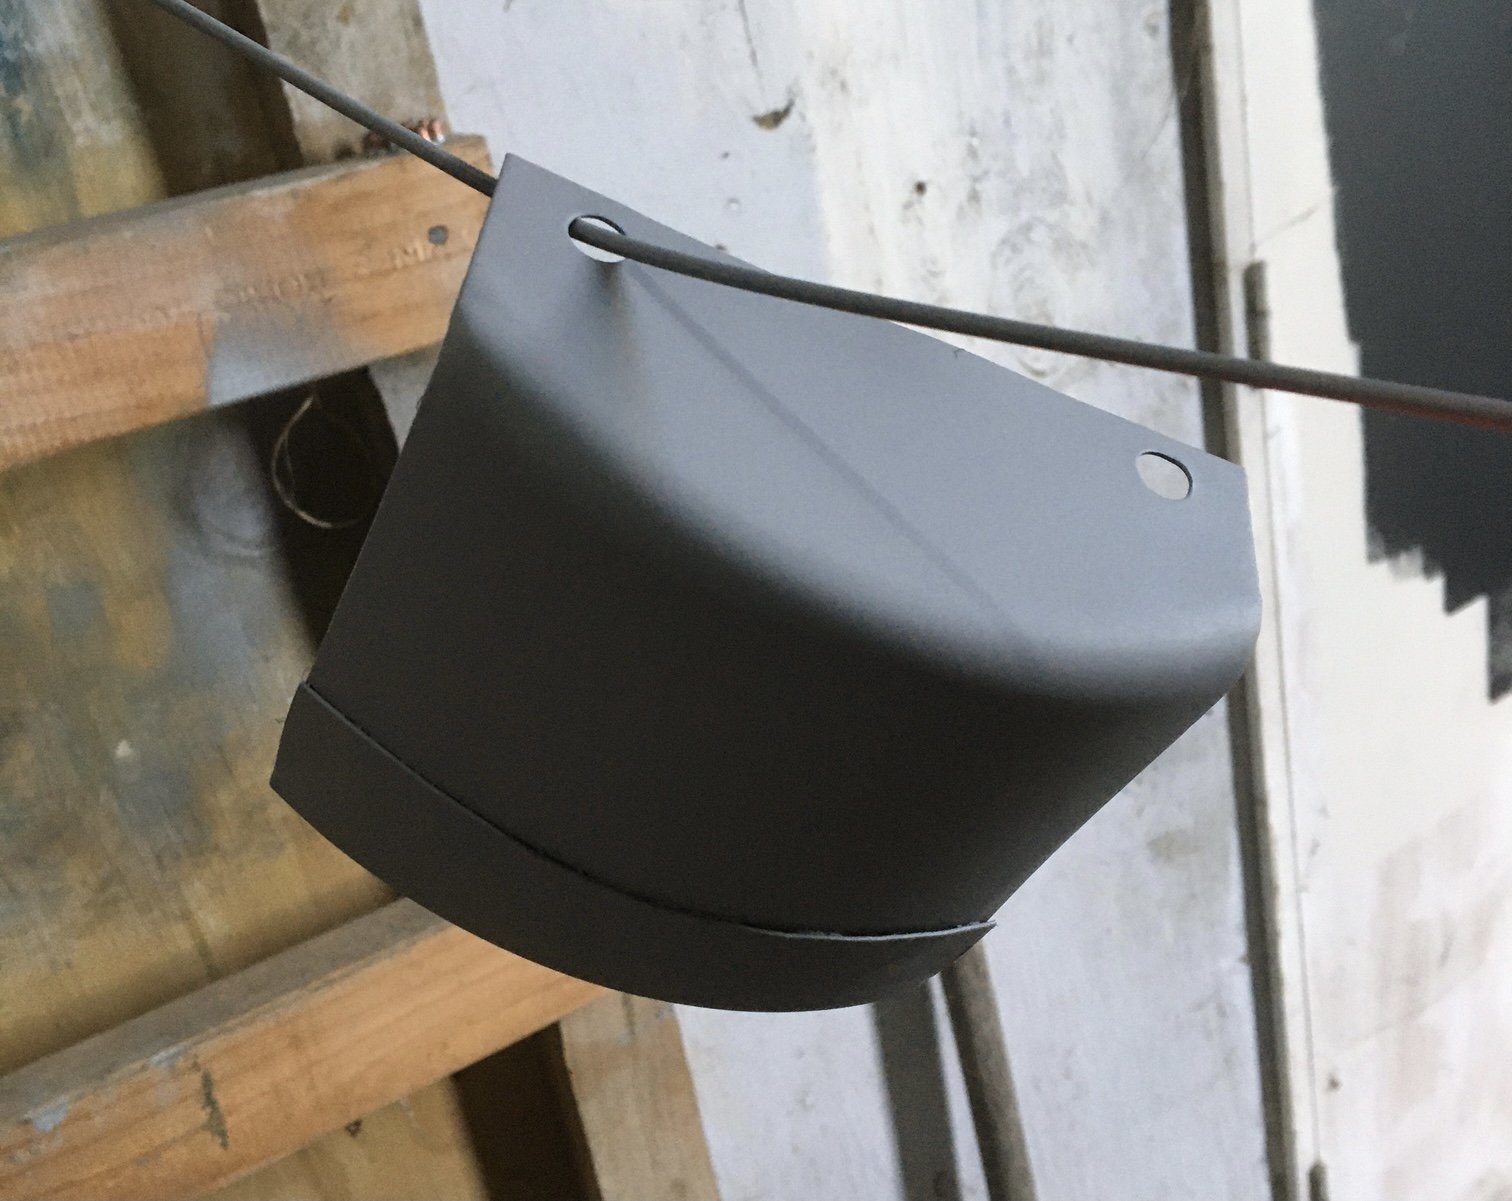
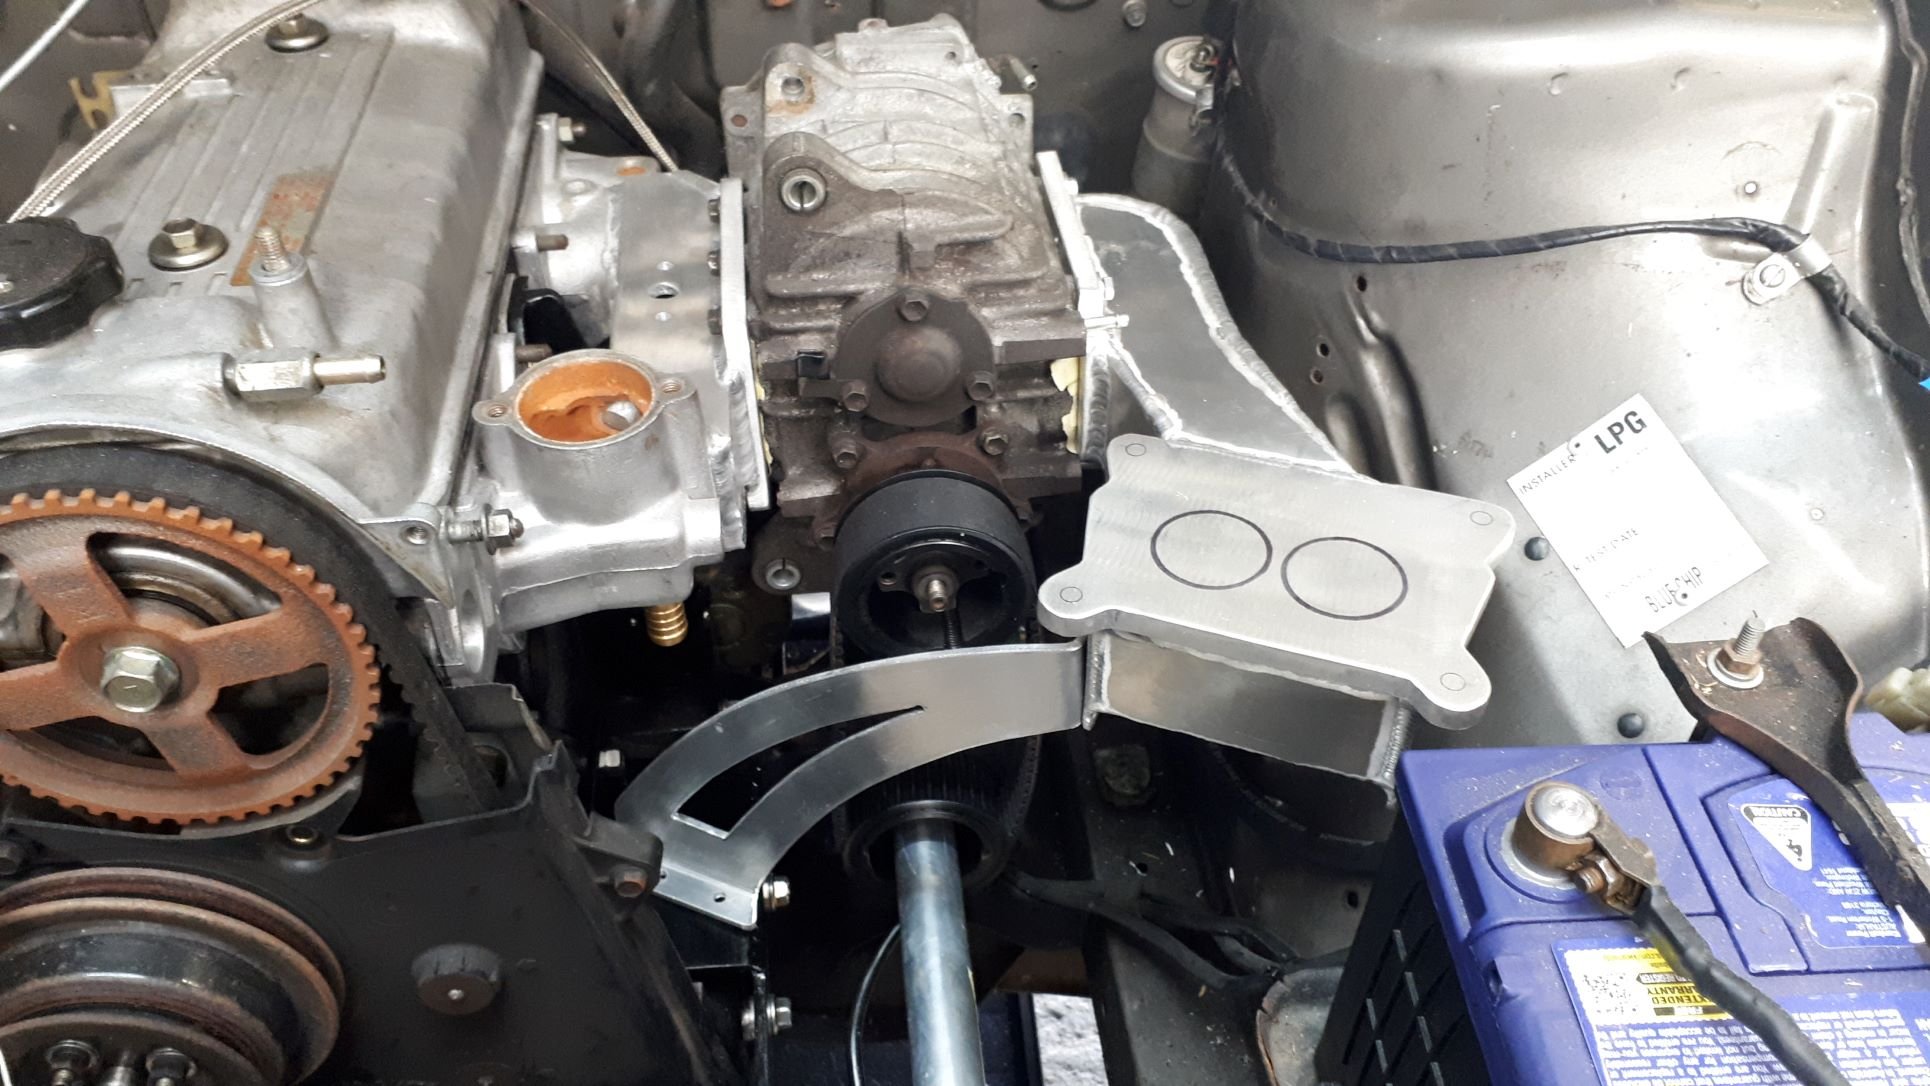
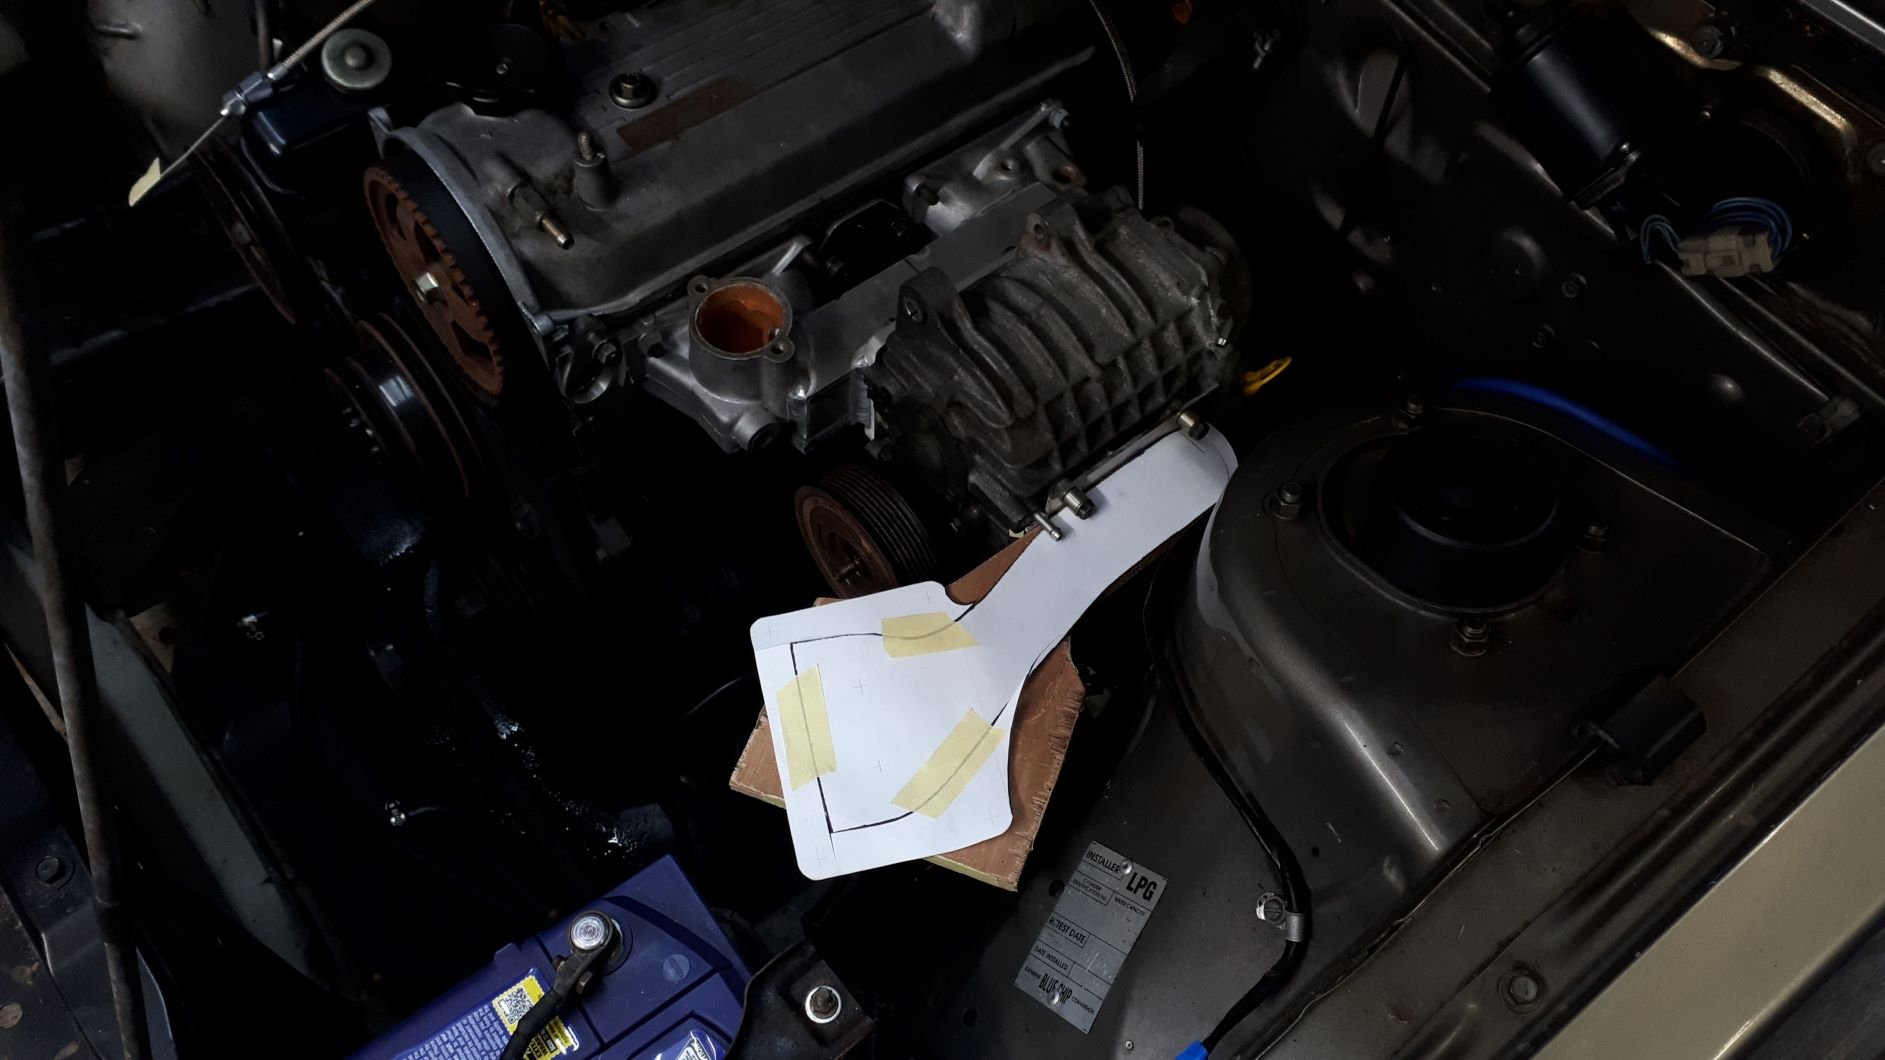
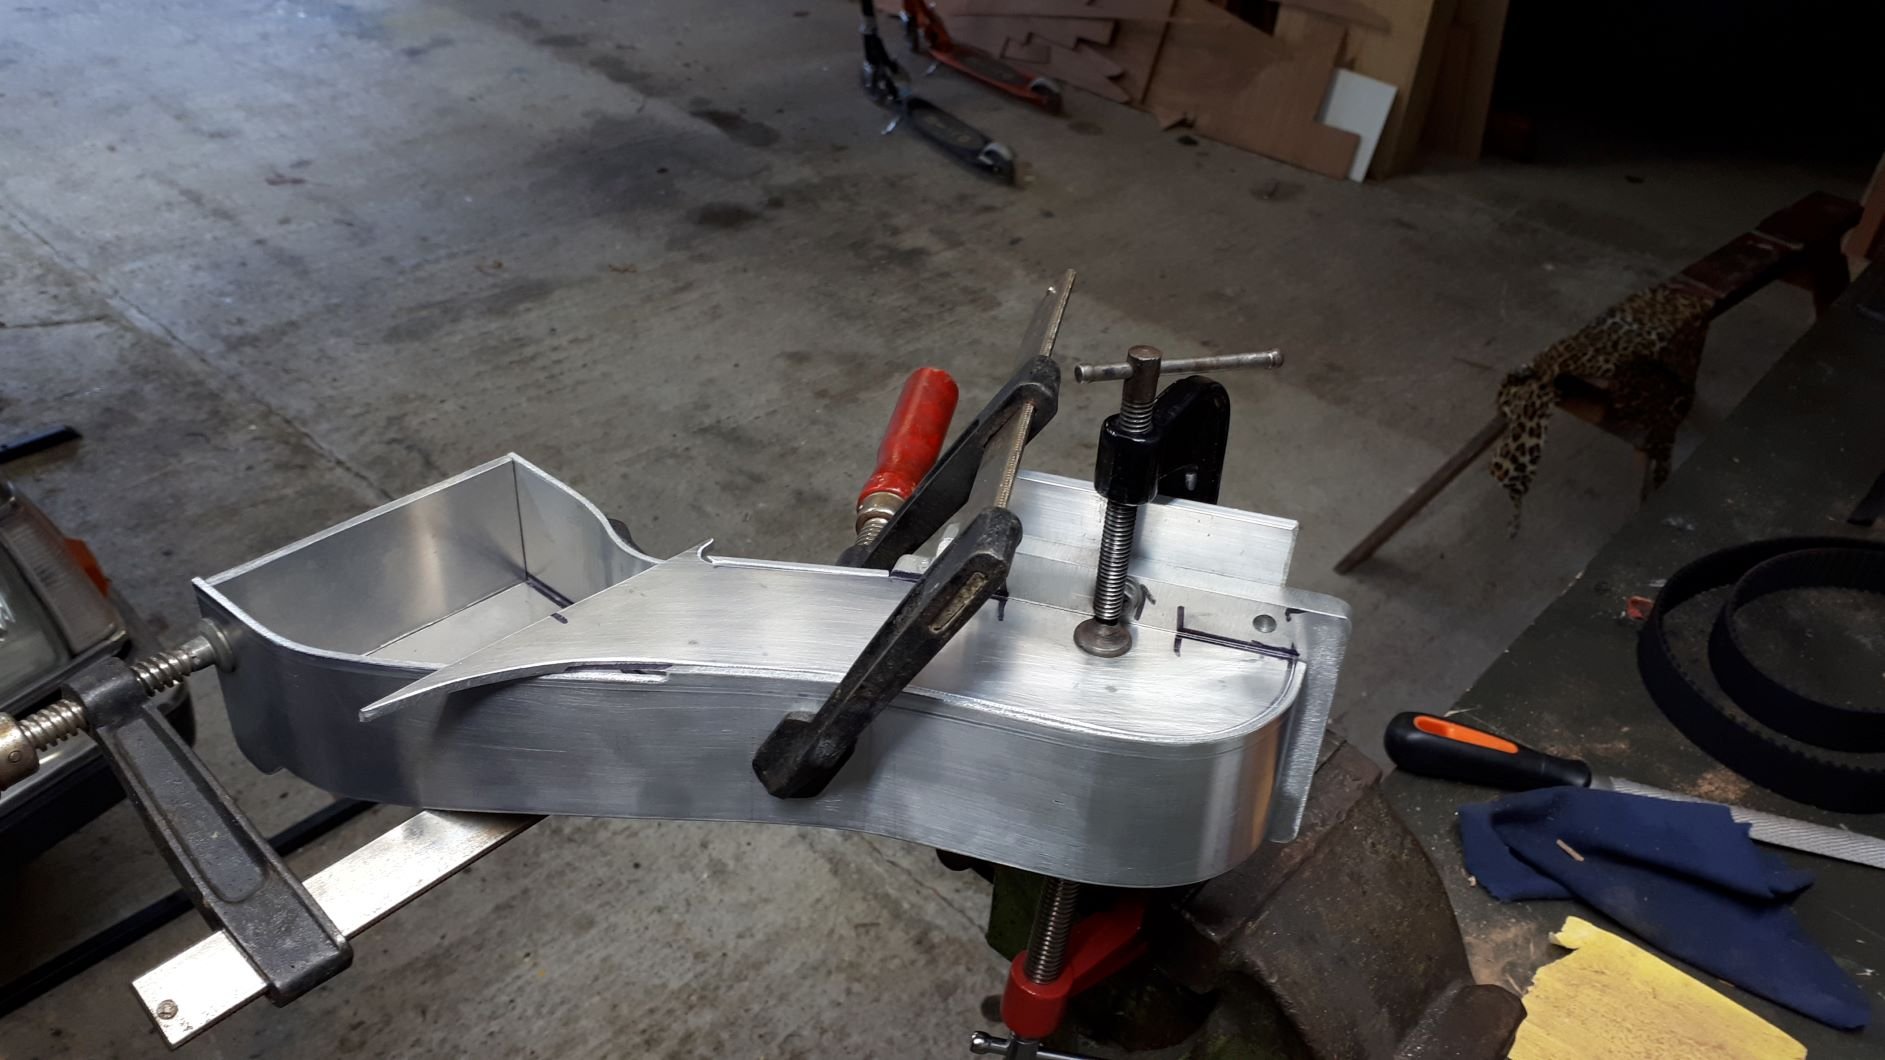
The next challenge is to figure out how to get the fuel/air from the fuel delivery device to the supercharger. Space is kind of tight so I decided to build a manifold that comes forward of the supercharger otherwise I will be cutting a hole in the bonnet. After a lot of head scratching and mocking up with paper, cardboard and plywood I arrived at this solution. Shaping the metal is a real challenge but it is coming together alright. I started to make the flange for mounting the carb but I ran out of weekend before I got very far. It will be kind of large to accept a Holley 2300 flange but I am sure I will be able to trim it down when I have the exact position of the carburettor sorted out.
1 point
-
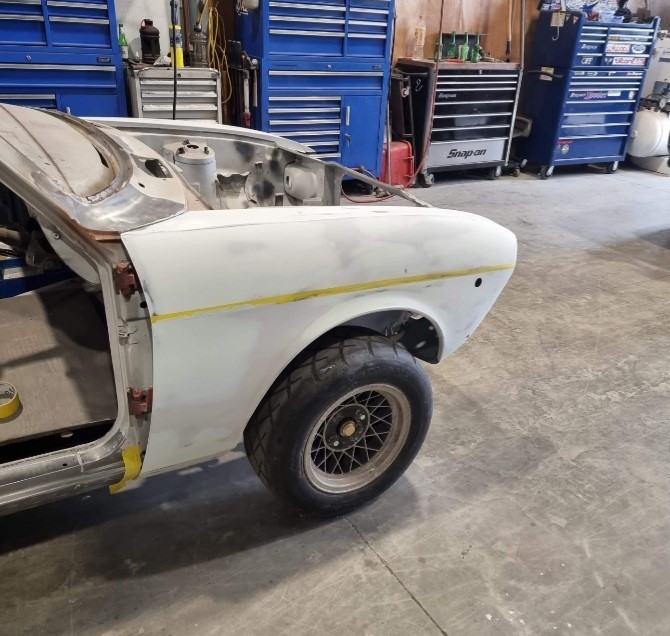
Bit more done on the 1/4 fabrication, getting a lot closer now, also some filling work as well on a door and guard.
1 point
-
Another winter gone without much of an update. Now here I am sitting a week out from Christmas and i've decided its time to get the old girl legal for summer Only real updates since june is I started making Pillar trims for the A and B pillars and all I can say is im glad I bought 1.5m2 of vinyl as ill need to have another crack at the drivers A pillar once i've perfected my technique on the others. yesterday I finally purchased some shock inserts and am I talks with somebody who can hopefully shorten them a bit for me. Fortunately they are alredy 10mm shorter than the ones I pulled out so we don't need to take as much off. Today I went and got everything to give it a service since its hasn't had an oil change in about 18 months so I don't want to start driving around without doing that. Also hoping santa will bring me a good bonus this quarter so I can buy a new carb from weber specialists as I feel the one i'm currently running isn't doing the engine justice
1 point


.thumb.jpeg.910c6632f6e66e8cba89476e83b41634.jpeg)


.thumb.jpeg.384ff72c8d2b0ee0d34a7bdedb55bdcf.jpeg)


This leaderboard is set to Auckland/GMT+12:00