PHLEX
-
Posts
244 -
Joined
-
Last visited


PHLEX's Achievements
Advanced Member (3/5)
205
Reputation
-
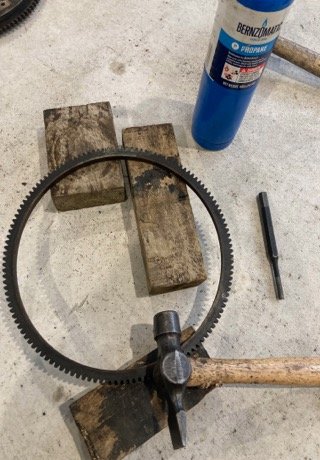
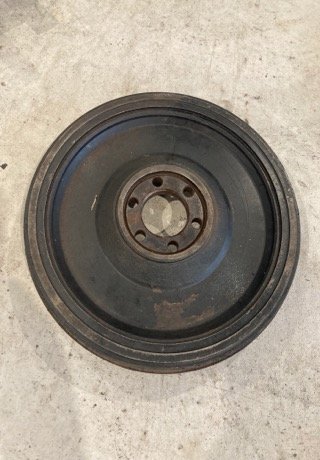
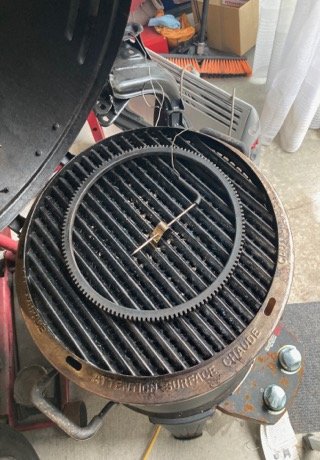
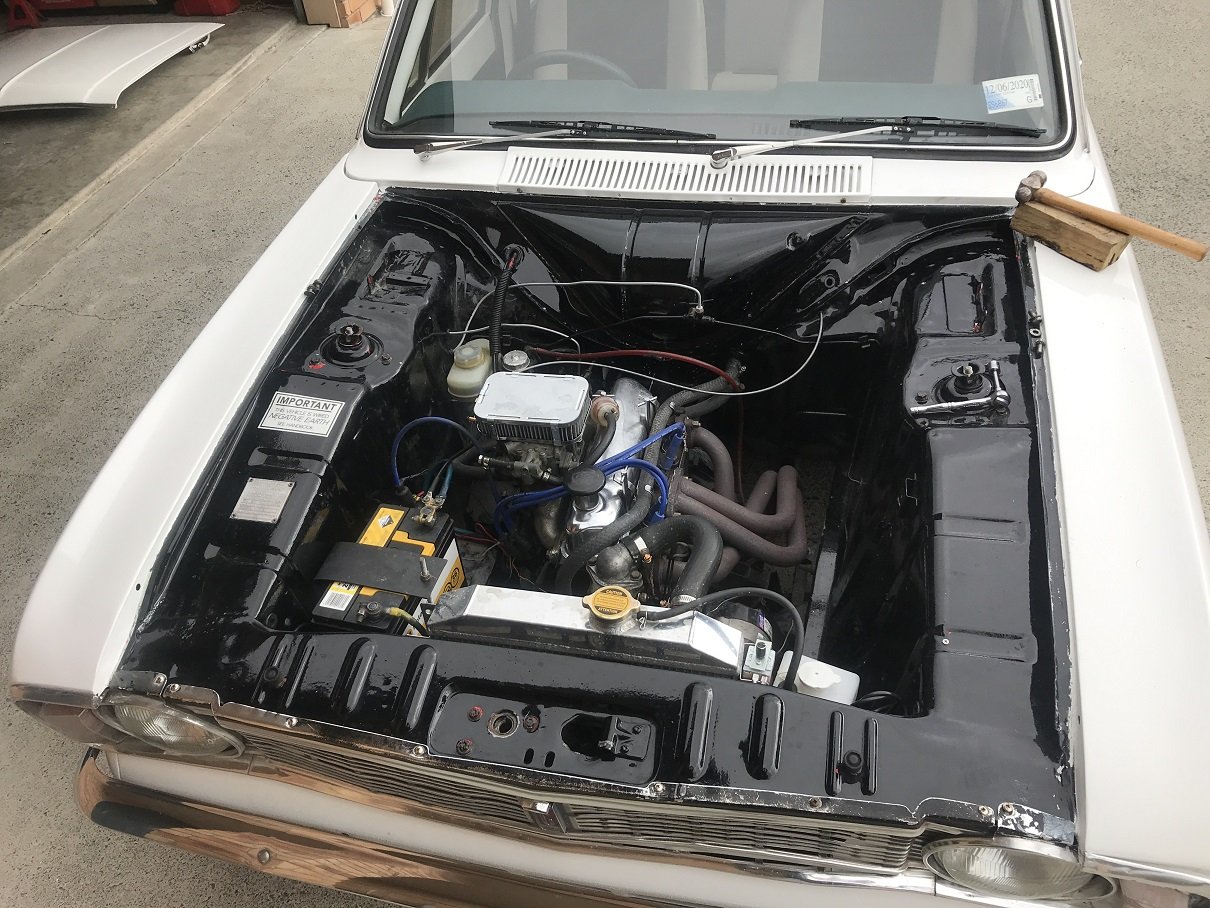
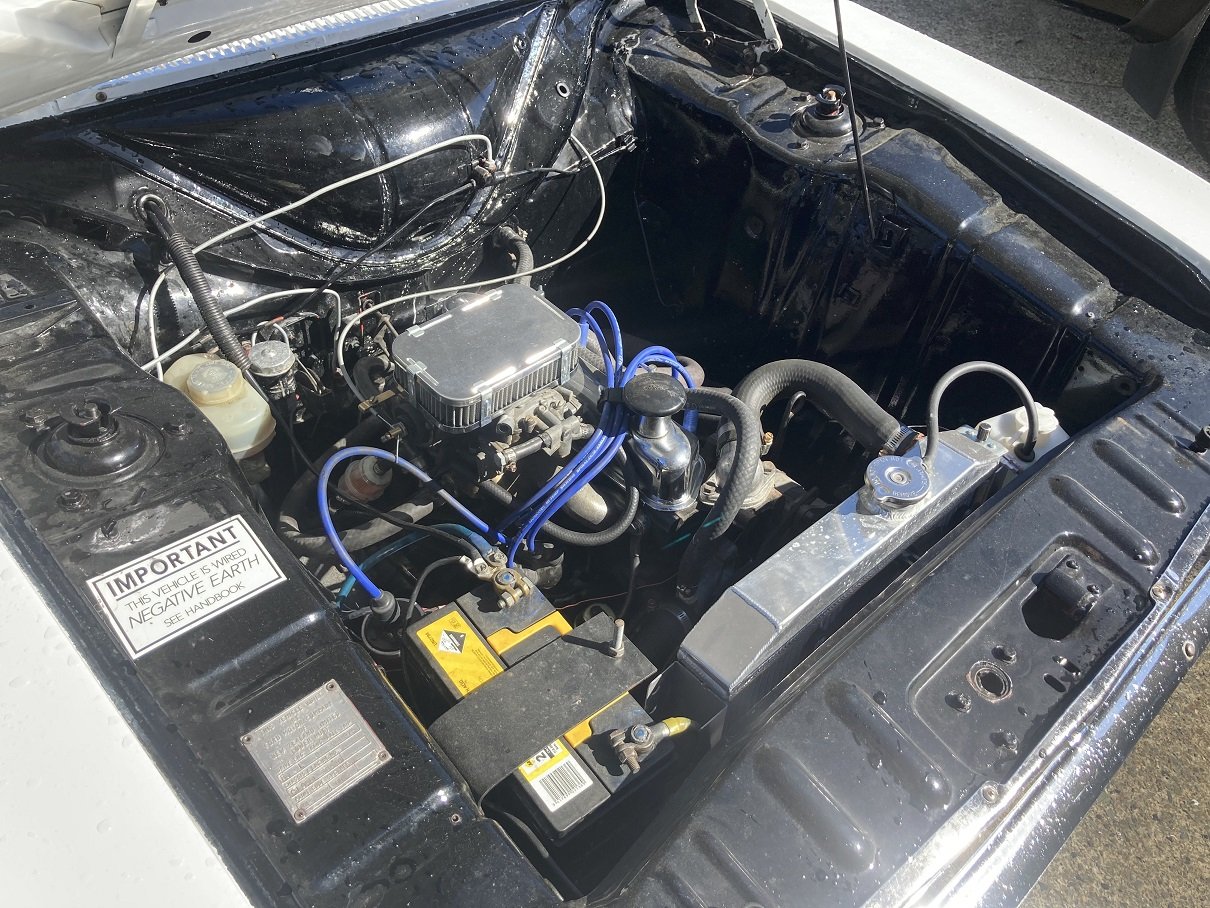
Successful afternoon / evening yesterday. Dropped the gearbox in my lunch break, whipped off the clutch and flywheel. Turns out the flywheel in the car was a 135 tooth so have put that away safely in case its needed again and installed the new ring gear on the 132 tooth flywheel. Relatively simple process, used a propane torch to heat the old ring gear, bout two minutes of round and round and it came off with a couple of light taps with a hammer and punch. Placed the new one in an old hooded barbecue and waited until it was at 250 degrees (manufacturer recommended 280 but couldn't get that hot) and it all but fell into place, couple of whacks with a block of wood and it was seated. Had the box back on last night, fresh oil in and fired it up to test. Decided to call it a night rather than finishing the wiring as I want to hide the external solenoid under the battery tray to keep it tidy. Cant recommend Phil from Wood Engineering Services enough. One call to 0800RINGGEAR and he knew exactly what I was after and had it on my doorstep overnight complete with tips for fitting. Hopefully get back to the shed after work and get stuck into the wiring

- 37 replies
-
- 10
-

-
So I got exactly 1 start out of my thrown together starter motor before my last living solenoid decided it was ready to retire. Pulled it back out and bench tested and its toast. Bummer! I pulled my inertia starter apart and gave everything a good clean and its working fine on the bench. After a bit of online research I found that even tho both starters have a 10 tooth pinion and look identical size the inertia requires a 110 tooth ring gear rather than the 132 tooth I had offered it which is why it didn't engage when I tried it. Ill add here my car is supposed to run the inertia starter, the pre engagement its currently using JUST fits but requires the solenoid to be installed separately which is very fiddly as it is extremely close to an engine mount. Most high torque aftermarket units state they do not fit Mk1 or Mk2 Cortinas for this reason. Not wanting to muck around too much and my quick search for the correct flywheel coming up short I opted to order a new ring gear to fit to a spare flywheel. This means I will have both options moving forward and keeps the door open for an aftermarket unit in the future . Hoping this shows up today and I will take some pics of the process. EDIT: Has shown up right now so there will be pics later.
-
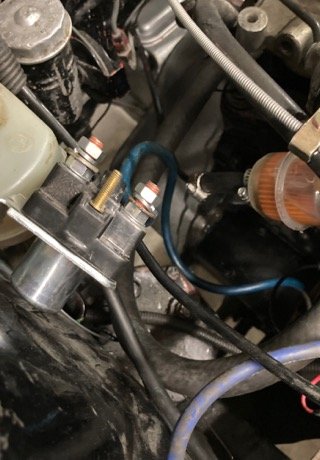
Had my new external starter solenoid show up yesterday so whipped the starter out to switch in the "period correct" unit. Typical old car problems, worked fine on the bench but once in place it is not spinning fast enough to engage the teeth onto the flywheel (yes the tooth count is right, have done that before!) So back out it came and I pulled out my box of spare newer starter parts and set about matching the best solenoid and starter. Worked perfectly on the bench but murphy's law once installed the solenoid doesn't want to kick. Toys thrown and went inside for the night. No pics as you all know what starter motors look like. Next on my agenda is improving the handbrake. I checked the shoes the other evening and theyre still in reasonably good health. I freed up the adjusters and tightened it right up. The cable running the length of the car is on max adjustment and looking tired / I suspect stretched so will try and find a NOS cable or have one made at a best guess length and I have found replacement plastic pulleys available on eBay. At least one is buggered so will inspect the others and get ordering.
-
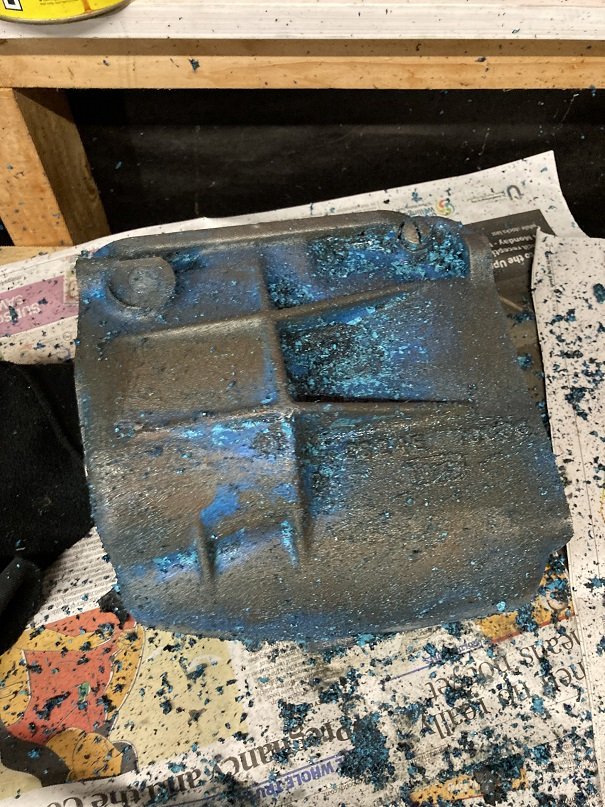
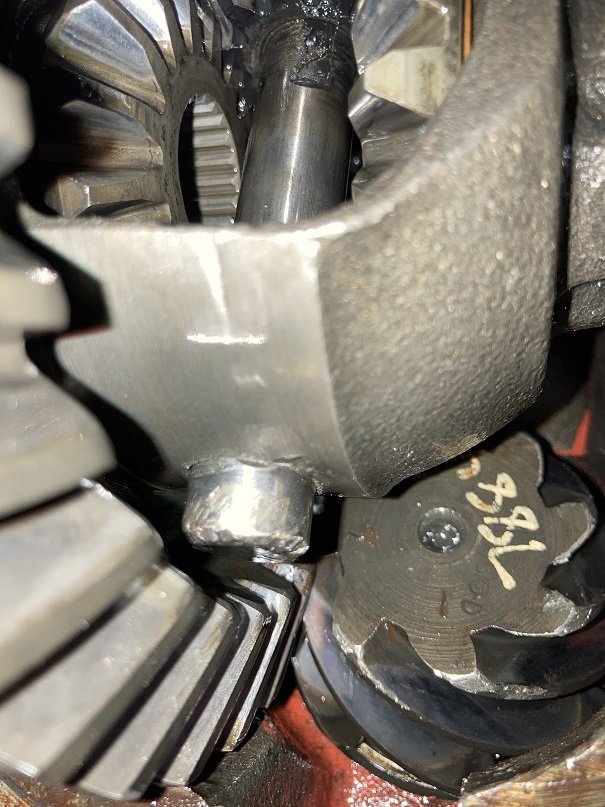
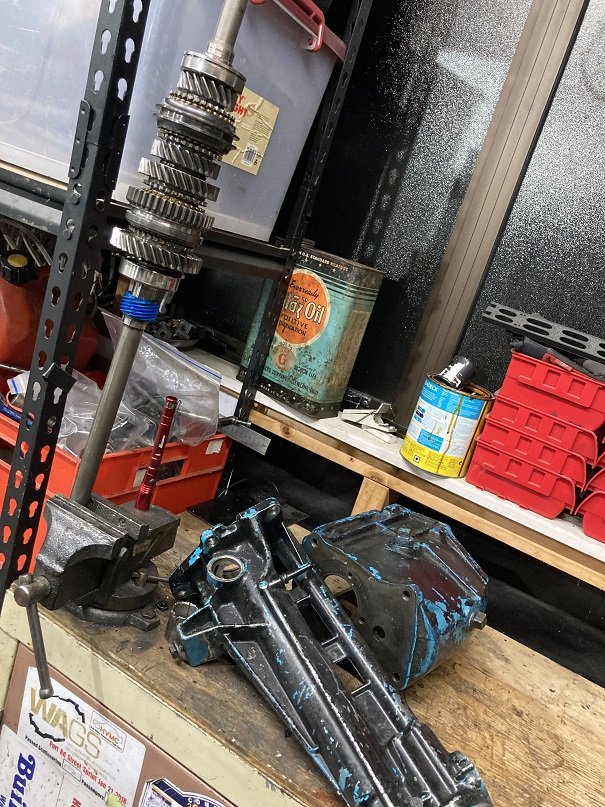
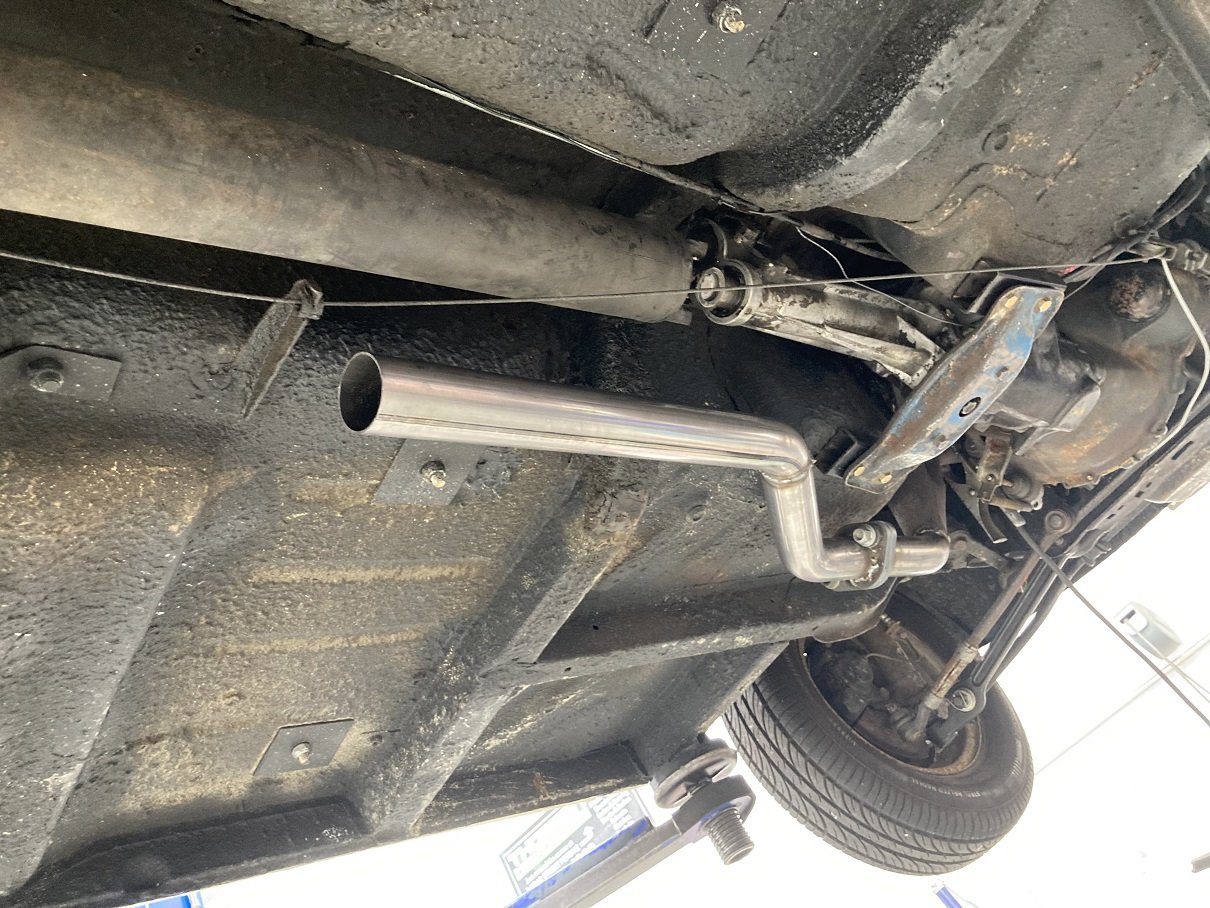
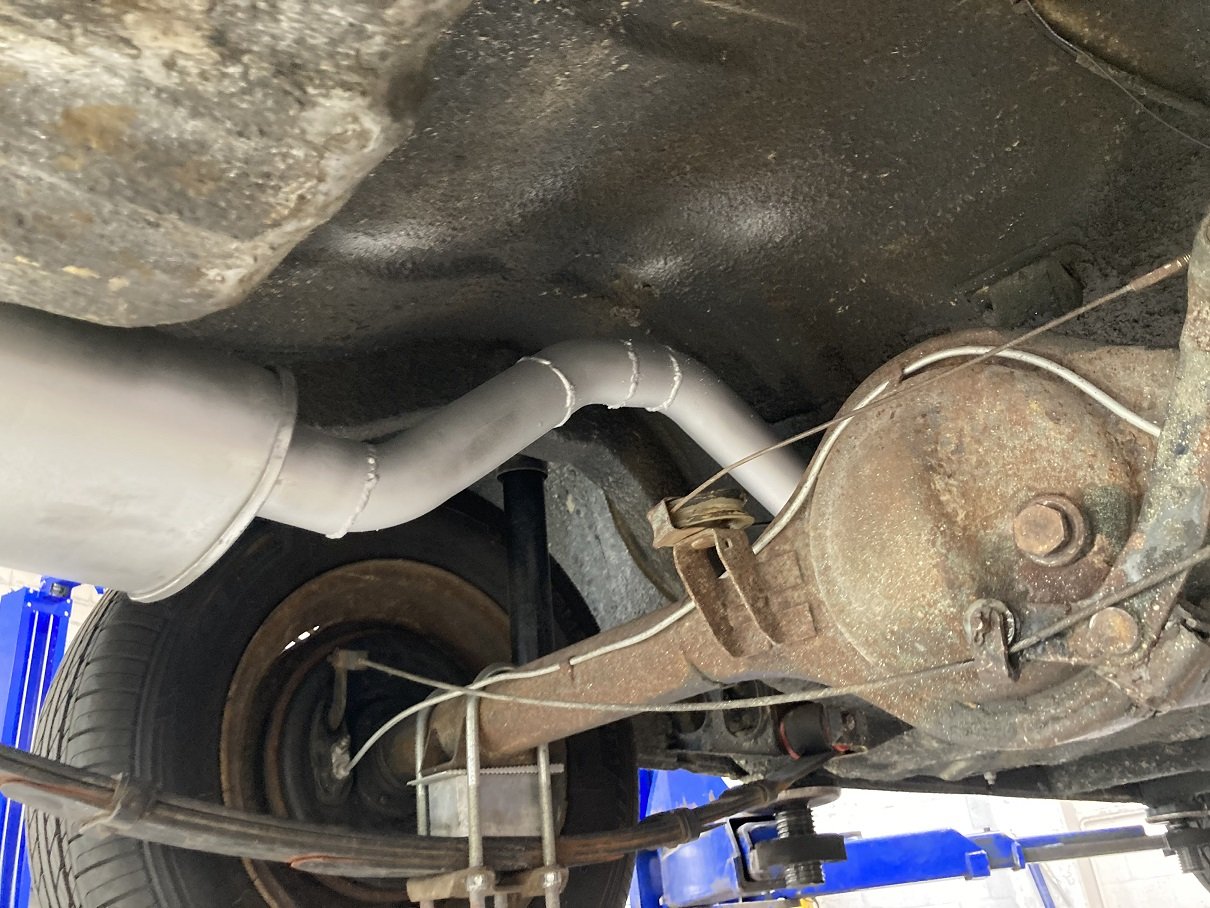
Well those two posts cover 2019-present day fairly well. Car got a new WOF after the exhaust was done and then on the way home the diff center pin worked its way out again, i was about 2 blocks from a mates place so limped it there and came back with the trailer. Unfortunately this time it had contacted the pinion and taken some chunks out. I pulled the center out of the diff hoping that I could replace the crown wheel and pinion with better spares I had but unfortunately one of the thrust washers had come out and been chewed up so I decided to quit there and find a replacement that hadn't been messed with, ideally in a 3.9 ratio which would be less revvy at 100K, Fortunately a local guy noticed I had asked for a shipping price on a diff in Auckland, messaged me and said he had just pulled one out to install an LSD and we did a deal. Whacked a new pinion seal and diff gasket into it for good measure and into the car it went. Much nicer at 100k now and really didn't notice much of a drop in acceleration. In June we moved house, currently renting while we build and the Cortina made the 45 minute drive without a hitch although that damn vibration was coming back with a vengeance. The car now lives on a set of roller dollies and gets pushed over to the side of the garage without a door so getting it out it a little bit of effort but hasn't stopped a bit of progress. During some Level 4 boredom I had another crack at the diff and gearbox angles and made the vibration better but it was still apparent. I did some more research and found out the gearboxes have a bush in the rear housing that is prone to wearing out and causes vibrations of the driveshaft that increase with speed. This prompted me to go searching and I found Burton Power in the UK stocks them. Next thing I know my original noisy gearbox is in pieces, turns out to get the bushing out the entire gearset has to be taken out so I ended up ordering every bearing, seal, gasket and a new bush which arrived about 5 days later, some parts were fiddly but I managed to get the thing back together after paint stripping the casings and giving everything a really good clean. I had to wait for level 2 to be able to buy some paint to pretty it back up. I also found out while looking through the Haynes manual that the box is a GT unit with closer ratios just for a bit of cool factor. Spent most of this weekend swapping the rebuilt gearbox back in, had to modify the exhaust slightly as this box didn't require as bigger spacers to get the angles right (see above in the exhaust pic) and while I was under there I also tended to a little bit of surface rust and gave everything a good check over, Road tested last night and absolutely over the moon with my silent and smooth rebuilt gearbox. Feeling quite motivated to keep up the build now, I came on here this morning and read through my build thread and was cool to see old pics of what I had done so far and thought I would update. Next job I am going to tackle is the starter solenoid is playing up so I have sourced the correct style starter and ordered a new external solenoid to wire in. Hoping to do that over the next week or two ready for its next WOF at the end of the month ready for summer cruising.
- 37 replies
-
- 16
-
-
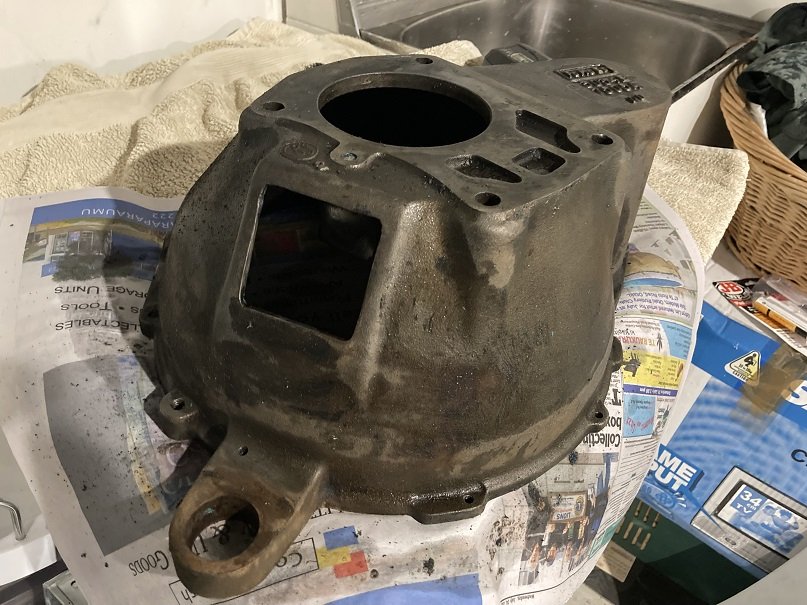
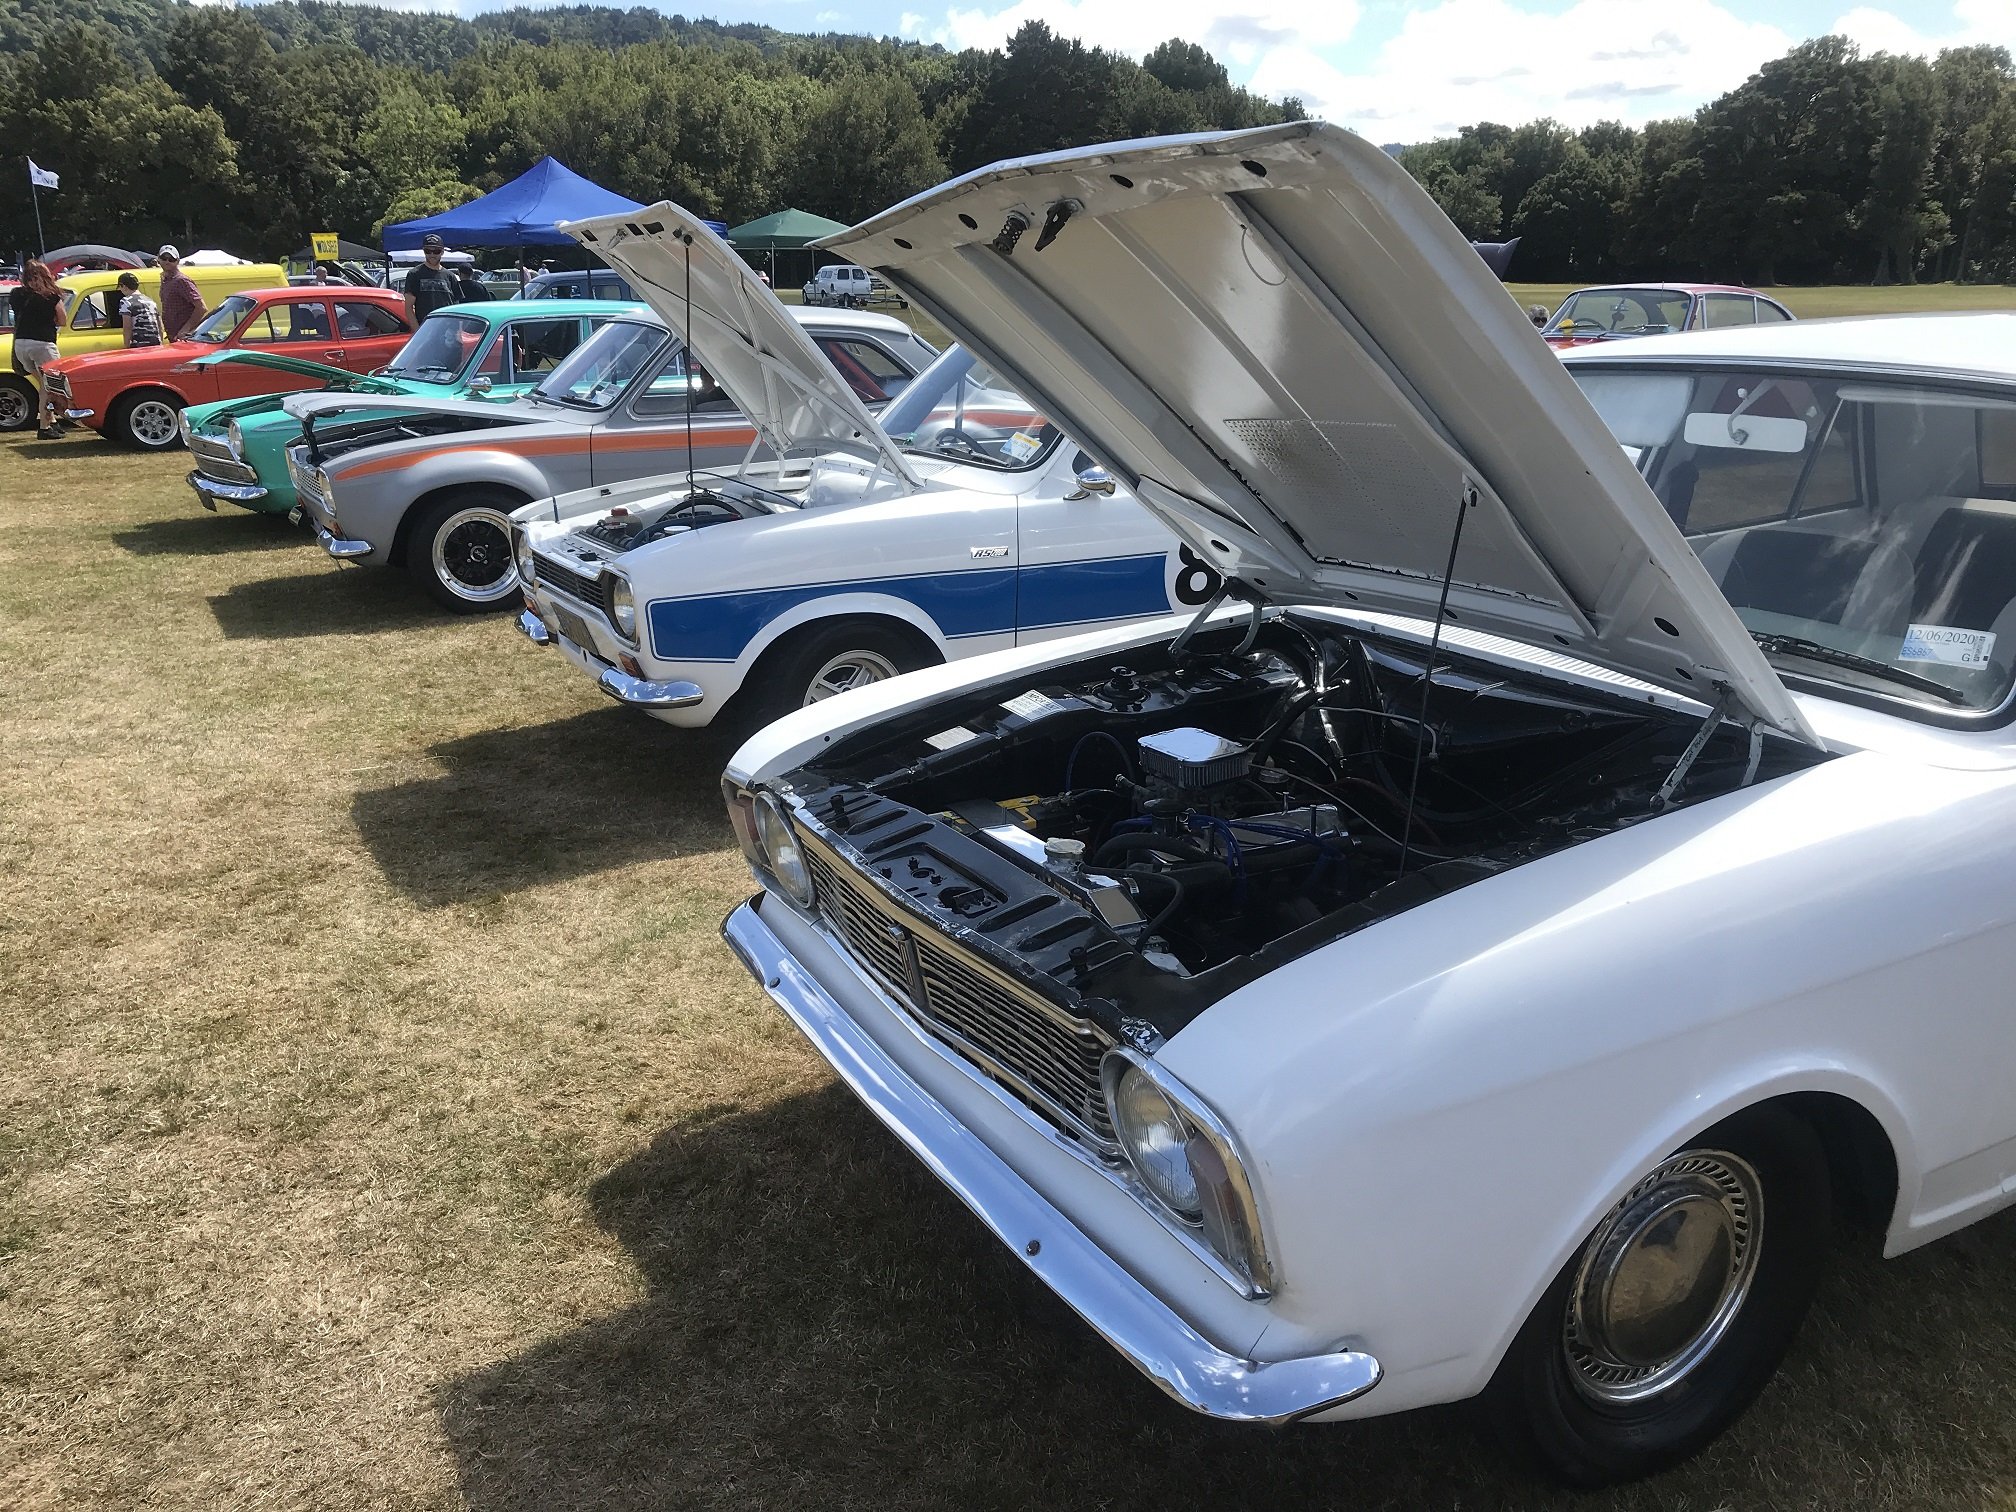
Right so the only notable update between Feb 2020 and Feb 2021 was during covid lockdown a gent in Levin listed up a few old gearboxes for sale he had hoarded for 20 years or so, one was a Type 3 and a suitable replacement so the deal was done and as soon as we went to L2 I drove up and collected it. I got the noisy one out and noticed straight away there were some differences as the replacement was an earlier unit, most likely from a mk1 GT, the most annoying being the slave cylinder was different and the one supplied with the box was buggered. The bellhousings also couldn't be swapped over for some reason which I cant remember. Anyway I managed to source another used slave and rig up a line to make it work. Took it for a drive, nice and quiet and a lot less vibration-y than the previous box so that was a win. One thing that I just couldn't get to work right was the clutch needed a couple of pumps to work which made it a pain to drive, so it sat for almost another year while my skyline got all the attention. Fast forward 9 months to Feb 2021, Trade me is doing free selling for vehicles.... Yes i'm going to be that prick and "test the waters" so I listed the car with a list of what i know it will need for a WOF, put a realistic price on it comparable with others in similar condition. The following day as British Car day again so i "transported" it down there and had several people come up to me telling me not to sell it (had been up for 20 hours by this point) On my way out of British Car Day the diff started clunking so took it home to investigate and the pin had started walking out of the diff. Fortunately I caught it in time and managed to fix it (or so I thought). After hanging out with a few other small fords I got motivated and decided to work my way through the list starting with getting the clutch sorted. After a bit of mucking around I found it was just massively mis-adjusted so was a relatively easy fix. By this time I had received a fair few serious offers for the car but none at my "absolute bottom dollar" and couldn't bring myself to sell it cheap. General consensus was it would sell easier with a WOF so I took it off the market and kept working through my list. Next job was to fix some rust in the boot floor and mount the tow bar I have had sitting around for about a year as it fouled on the exhaust so I never got round to fitting it. Rust was fairly easy to sort, Bit of upside down welding to keep me on my toes. I jerry rigged the rear muffler mount with some cable ties ready to drive down to a friends workshop to replace the very rusty exhaust. I'm getting too old for long periods of time under the car so a hoist was a must for this. I'm fairly new to welding and this was only the second exhaust I had made from scratch so altho the welds are ugly i'm happy with my efforts.
-
Few years between posts but I'm still here! There's been a couple of big gaps between any sort of progress, mostly due to losing motivation not being able to find certain parts. Bit of an update ahead and I will try to backfill some photos where I can. Early 2019 I made a start on preparing the Cortina to be used as our wedding car. This was going to include its first drive further than 20km and with other people driving it so I needed to make sure it was going to be reliable. First issue I had was over about 80kph it felt really floaty and generally unstable. I took it down to get an alignment and was told lowering the front had caused the front wheels to shift too far back in the guards which was causing it to float around. He suggested trying to get some castor adjustment to bring them back forward. Unfortunately easier said than done as this is the swaybar and nobody seems to make adjustable units for the Mk2 that ship to NZ. After speaking with a friend who has had the same issue with his Mk1, he gave me some instructions and we set about modifying the original item to move the wheels forward. Back on the alignment machine and came up significantly better. Can now do a bit over 100kph without issue. Next annoyance was the vibration I had been trying to remedy, Eventually we diagnosed this as the pinion angles of the gearbox and diff which is why putting the saggy old springs in took the issue away. With the help of some diff alignment shims I managed to get this vibration to almost disappear other than a small wobble off throttle at about a 10kph window between 80 and 90kph which was livable. I also took the time to install some semi sealed lights on relays to take the load off the factory wiring. Major improvement over the old sealed units! A friend helped me give it a really good cut and polish to make sure it was looking its best for the photos and it performed the duties well. The morning after the wedding we found a small but noticeable puddle of coolant under the radiator so it sat in my parents garage for a few weeks while a replacement alloy radiator made its way over from the UK so I could drive it the hour home. I coupled the new radiator with an electric fan and thermo controller in case its ever needed in traffic. February 2020 I decided to blow the dust off and get it to British car day. I hadn't done any work on it for a while so decided to re wire everything forward of the firewall and wire tuck as much as possible. This stemmed from the quick job I did wiring in the brighter headlights This went really well, i was super stoked with my work and the modern fuse box has plenty of spare spots for extra wires later down the track. The day before the event it was all legal and ready to go and i decided to pop out for a quick drive and I hadn't latched the bonnet properly which meant as soon as I got to about 30kph going down the street it flew up, fortunately stopping vertical before hitting the windscreen. Whoops!!! Took it off and banged it back straight to get to British Car day. Morning of British car day I met up with a few other small fords and we had a bit of a cruise on the way to the event. It became very apparent the gearbox was in desperate need of some attention as the bearings got noisier and noisier during a run through the hills and the vibration got to the point of unbearable. Fortunately the event was 5 mins from home so after parking up for the day it wasn't too far to limp home.
-
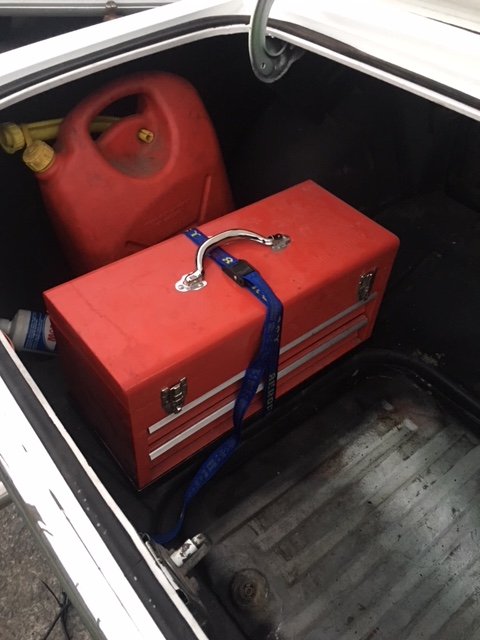
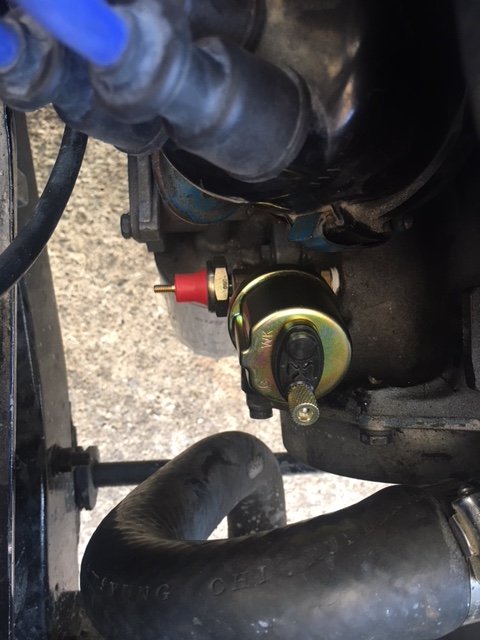
Although the last couple of weeks have seemed like 2 steps forward one back I have achieved a little bit on the Cortina in between other jobs. I have had major fuelling issues for a few weeks now, initially installing an electric pump to try and combat them which worked for a few days and then the same issue came back. Thanks to the help of a few guys in the tech talk section I have now replaced my tank with a spare from a Mk1 so although the fuel gauge is now very inaccurate I have managed to stop all the leaks and now have constant fuel flow so at some stage over the next week or two I will re-remove the mechanical pump as the electric is now doing its job properly. Back when I first got the Cortina I bought a set of imperial tools as I knew I was going to need a lot of different sized spanners and sockets which I don't normally use on my Nissans and Euros so I got a small 2 draw tool box which has usually lived in the boot of the Cortina. I had an idea a while back that we should make a bracket to hold this into the boot so it doesn't roll around (it already had once and dented the side of the car). We had a bit of downtime one evening so whipped up a bracket from 20mm angle iron that fits the base of the toolbox and bolted it to the car using 6x M6 bolts with the middle ones running through a short camlock tiedown to hold it down. Definitely worth the muck around because although the Cortina hasn't needed anything other than a timing adjustment, I have pulled the box out twice to help with somebody else's car where I normally wouldn't have been carrying tools! On Friday I had a bit of free time waiting for a friend to turn up so I finally got round to installing the new oil pressure sensors I bought a while back. The previous owner had completely removed the factory oil light sensor and replaced it with a cheap mechanical gauge which I am sure is very inaccurate so I have now hooked up the factory oil light which works as it should and for good measure (and to retain gauge symmetry) I have made a start on installing an electronic pressure gauge which matches the temp gauge I installed a few weeks back.
-
Slack as I didn't update my post. Test drive went flawless. I ran on just the mechanical pump down to the motorway, gave it death and then came back up my hill in 4th which I have never been able to do. All seems very well. When I got back there were no leaks so blockage in the tank was definitely the cause. Also didn't add above when I was draining the tank into a jerry can with a hose straight off the outlet of the pump it took over 40 mins to fill a 20L container so she was damn blocked. Side note if anybody knows of a good Mk2 tank anywhere please let me know. Mine is rather dented and has holes in the bottom as well as the top so although we could fix it I feel a new tank would be a much safer idea
-
@peteretep a huge thanks goes to you for the cork suggestion. I grabbed a roll of 3.2mm as that’s all I could find and it has worked perfectly to seal the tank back up. I had to make an amendment to my fuel filler design as it was leaking but all seems well for now test drive will have to wait till after dinner
-
Just picked up some 3.2mm cork gasket sheet to see if I can make a gasket from that to stop the leak. if that works ill be very happy and will celebrate by spending the rest of the evening fixing the next car on the list. Hoping its not too thick as that's all I could get today. @Beaver I have had the ethanol blend cause injector leaks in an old RB20E so have been very weary of it since hence the draining of the tank and chucking it into the daily. I will grab some fresh fuel on the way home because the last thing I need is the mobil gas eating the carb seals. The 95 / 98 at mobil doesn't have ethanol as far as i'm aware so that's usually safe
-
Ok so here's where I am at: Pulled the fuel line off the out side of the pump and ran 25L of fuel into a can through 2 inline filters and chucked this in the daily - long story short I accidentally picked up the 91 pump at mobil and chucked $20 in before realising it was ethanol blend and also 91. Saw light blue and assumed 98 (my bad) Once the pump started to make noises indicating it was running low I pulled the tank out and the fuel remaining inside was bright orange. I filtered this through an old tshirt into the lawnmower can and even with one layer of cotton it was draining slowly. The residue left behind was an orange sediment Had a look in the tank through the filler hole with a torch and the filter on the pickup tube is visibly blocked by this orange sediment Bit of research tells me the sediment may have been caused by valvemaster which I stopped using a few months back after being told to use the moreys upper cyl lube instead So I installed the Mk1 tank as a temporary fix and have already been inside that one and removed the filter off the end of the pickup since there's a filter between the tank and the pump now anyway. I chucked a few litres in from a clean jerry can and since the back was up in the air fuel started seeping past the seal for the pickup and float. I have ordered an Oring from aussie since I cant find one locally but have just seen @peteretep's post above and might pop to repco at lunch and see if I can get some cork to make a gasket and ill save the seal for the mk2 tank when I get a new one.
-
I haven't yet but I went through my spares and found a filler tube that has a breather on it so when I install the Mk1 tank I will use that one with a tube running outside the car. Noticed another leak in the Mk2 tank yesterday in the seam this time so I will definitely be either buying a replacement or getting something fabricated
-
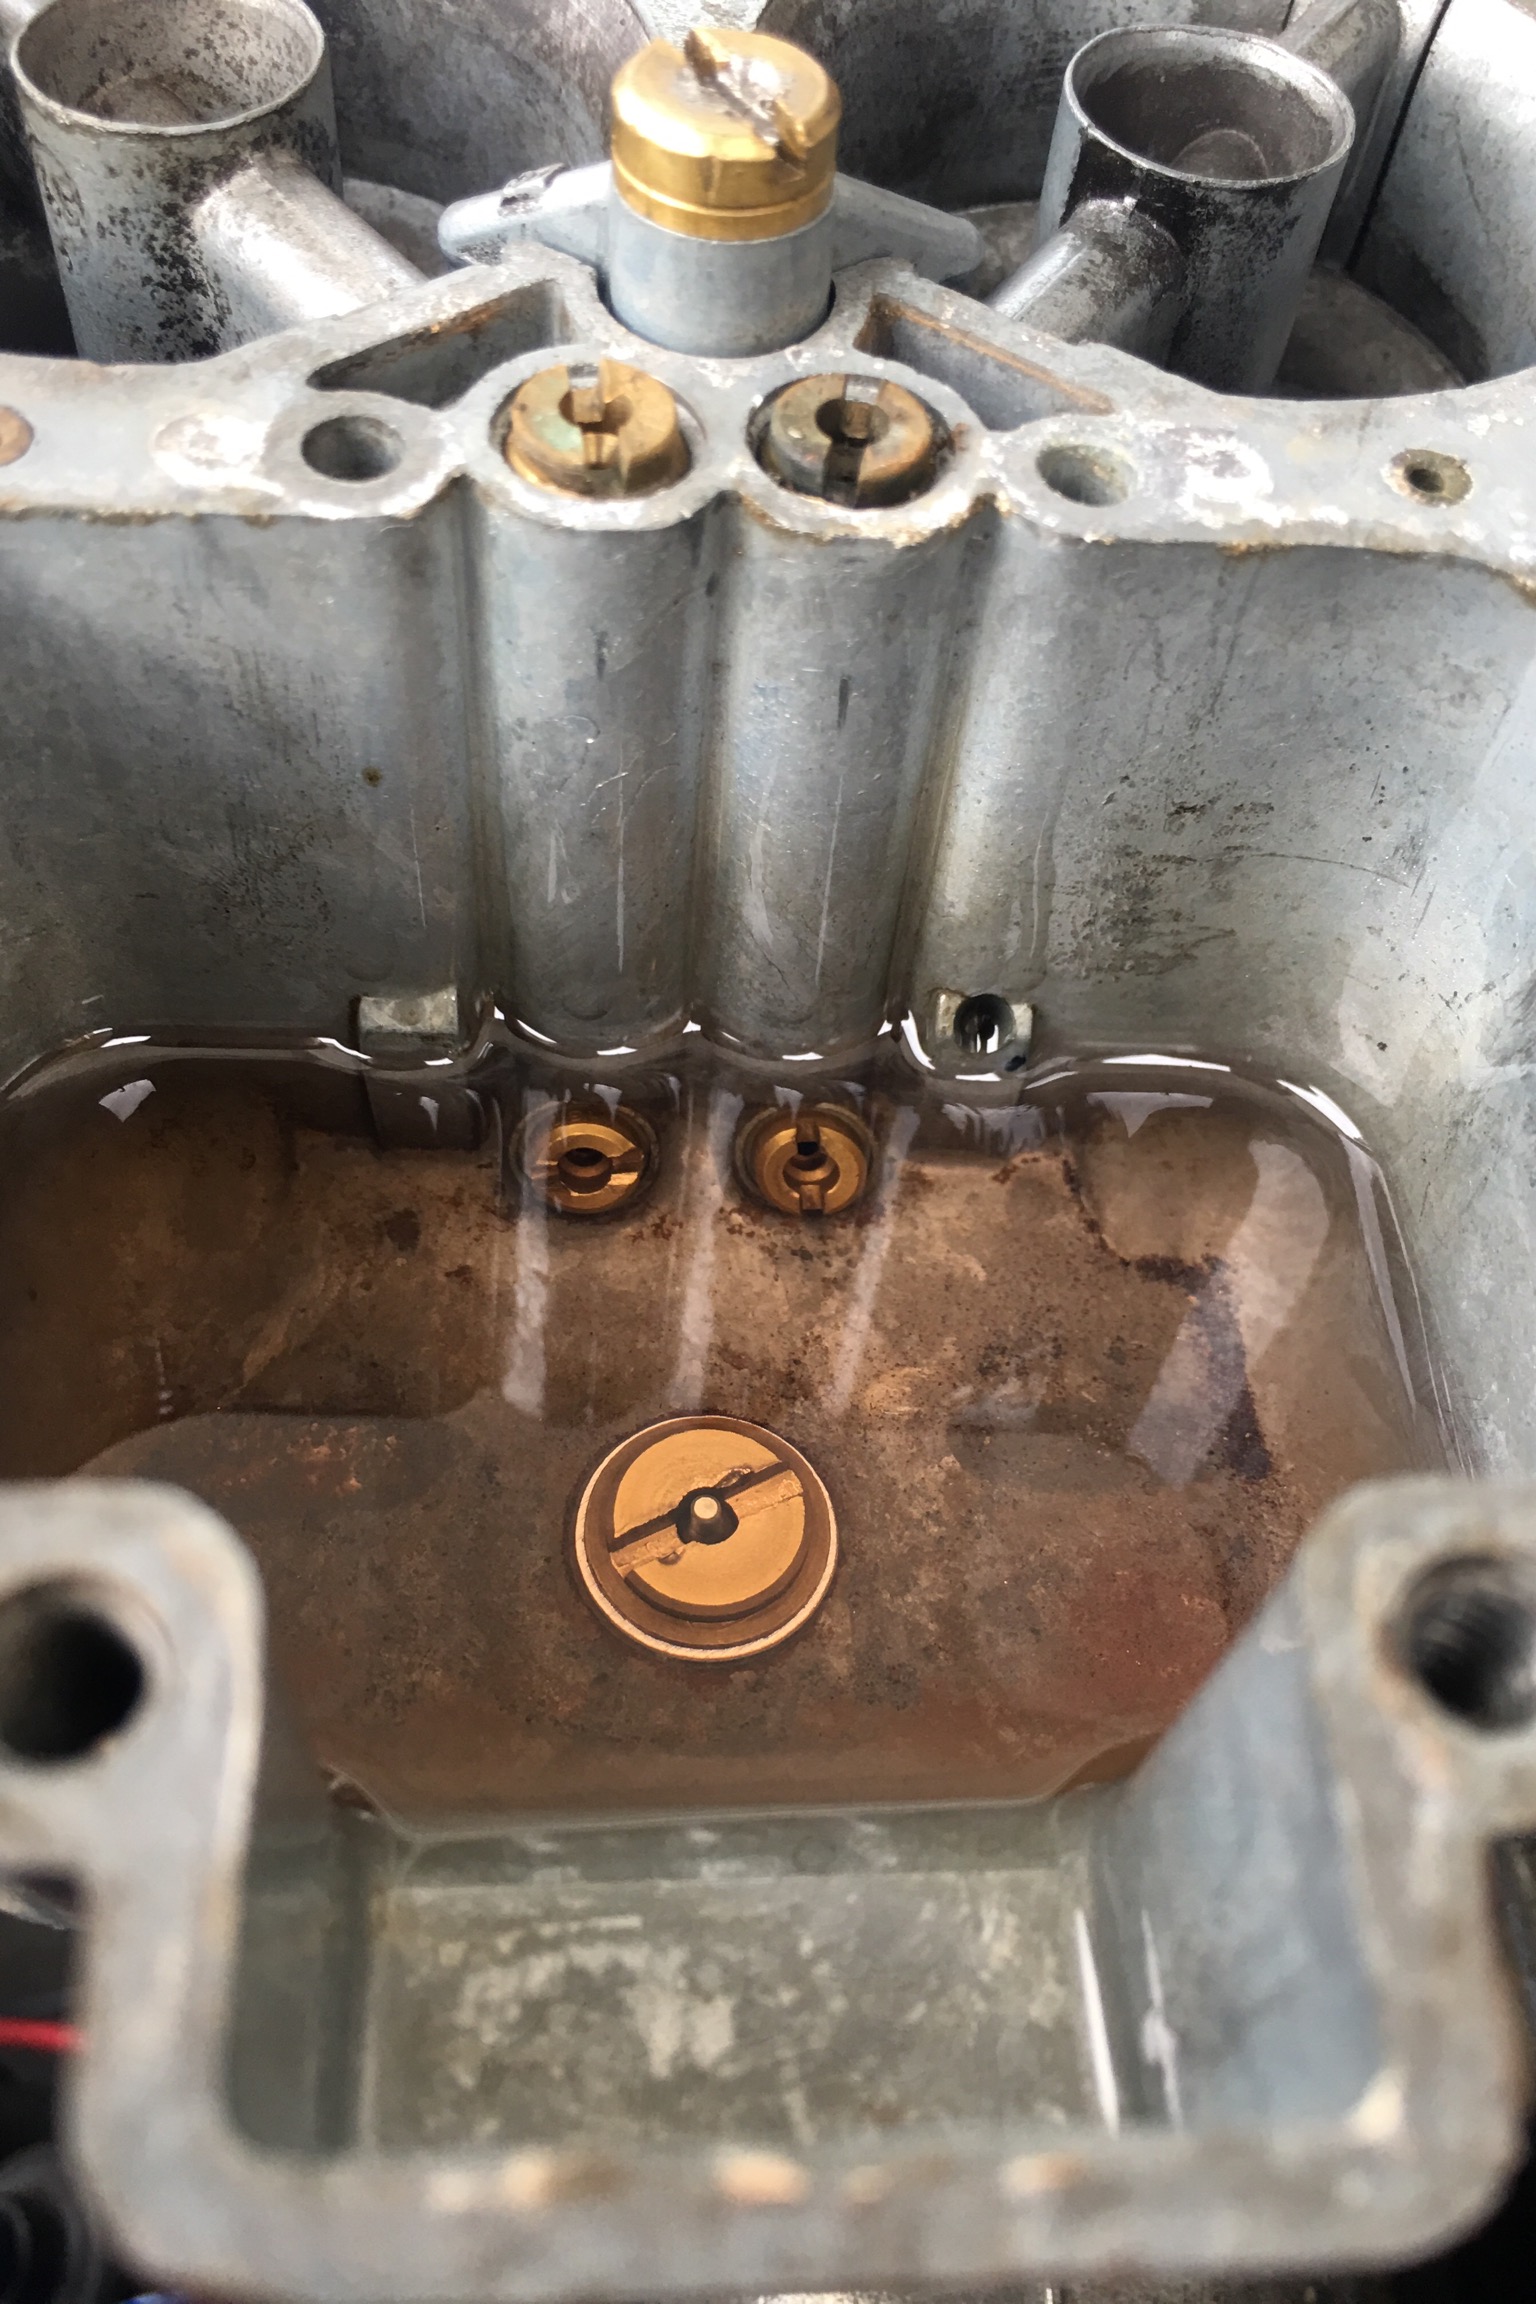
Small update. Went for a drive yesterday to test out the adjusted float bowl and was again flawless until I had gone a couple KM down the motorway and felt like it was running out of fuel again. I have located a spare tank from a Mk1 and made an adaptor to make a MK2 fuel filler work and will swap that in while I wait for a replacement mk2 tank to become available or get mine repaired. My fear is that if I remove the float and pickup assy I will need a new seal for it which seem like theyre all ex UK so I will order one of those before I open it Planning to swap mk1 tank in tonight and will report back with my findings
-
No update yet sorry guys I will drain and drop the tank and see what I can find but have been preoccupied repairing an awkward water leak in my race car for Wallaceville hillclimb in a couple of weeks will post findings when I can get some hopefully later this week
-
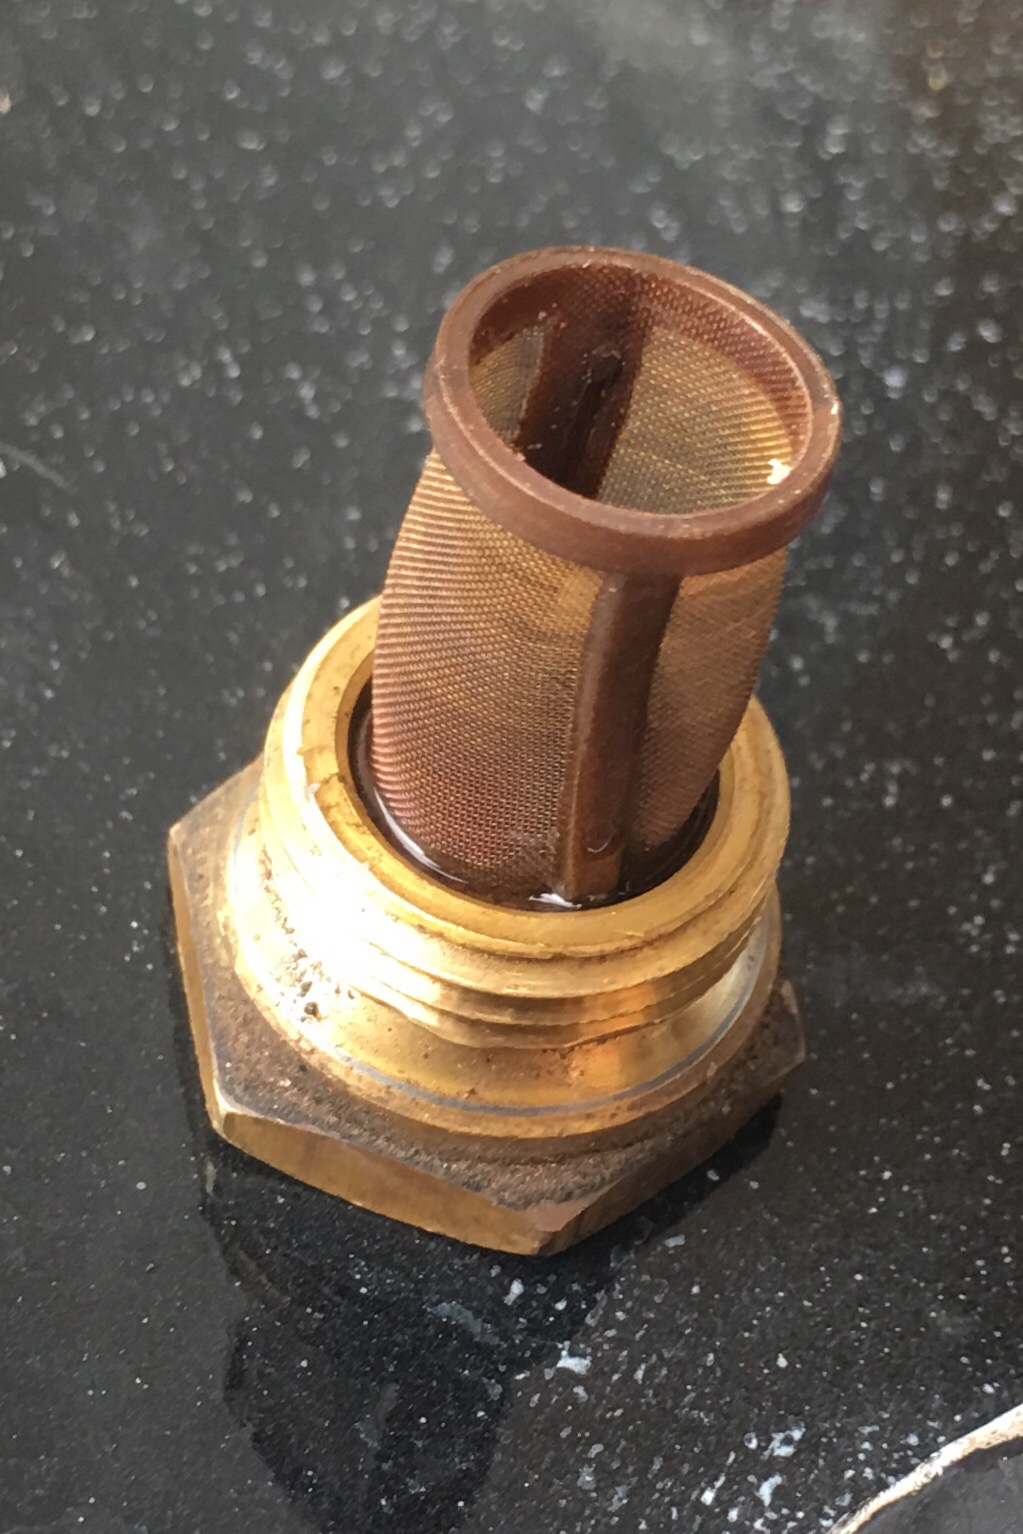
Wow I didn’t even know that filter was there! So far have removed and cleaned that filter and adjusted the float. about to climb under to check for sock on the pickup Fuel level before: And after