
Leaderboard


Popular Content
Showing content with the highest reputation on 09/09/19 in all areas
-
11 points
-
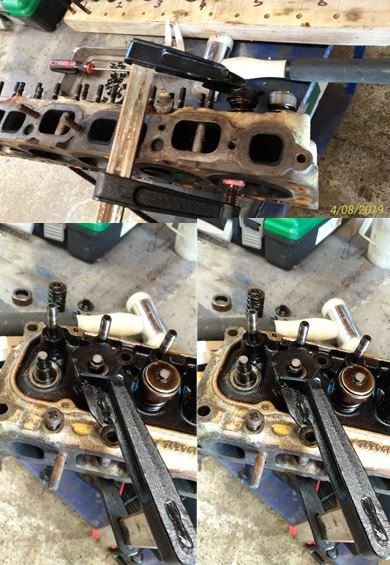
Time to strip the head down. Suddenly I realised I’d lent my valve spring compressor to that guy we all know who never has his own tools (and we always forget his name), who never returns tools……….grrrrrrr! As I’ve said before, combining the lack of an appropriate tool with a good mig welder and the obligatory collection of scrap steel under the work bench is the mother of many a good man-cave invention. Found an old screw Clamp…a bit of cutting and welding. A lick of paint…….. And the custom (i.e. beer, bullshit & bad manners) “Oldschool Holden Valve Spring Compressor” makes its debut.
 9 points
 -
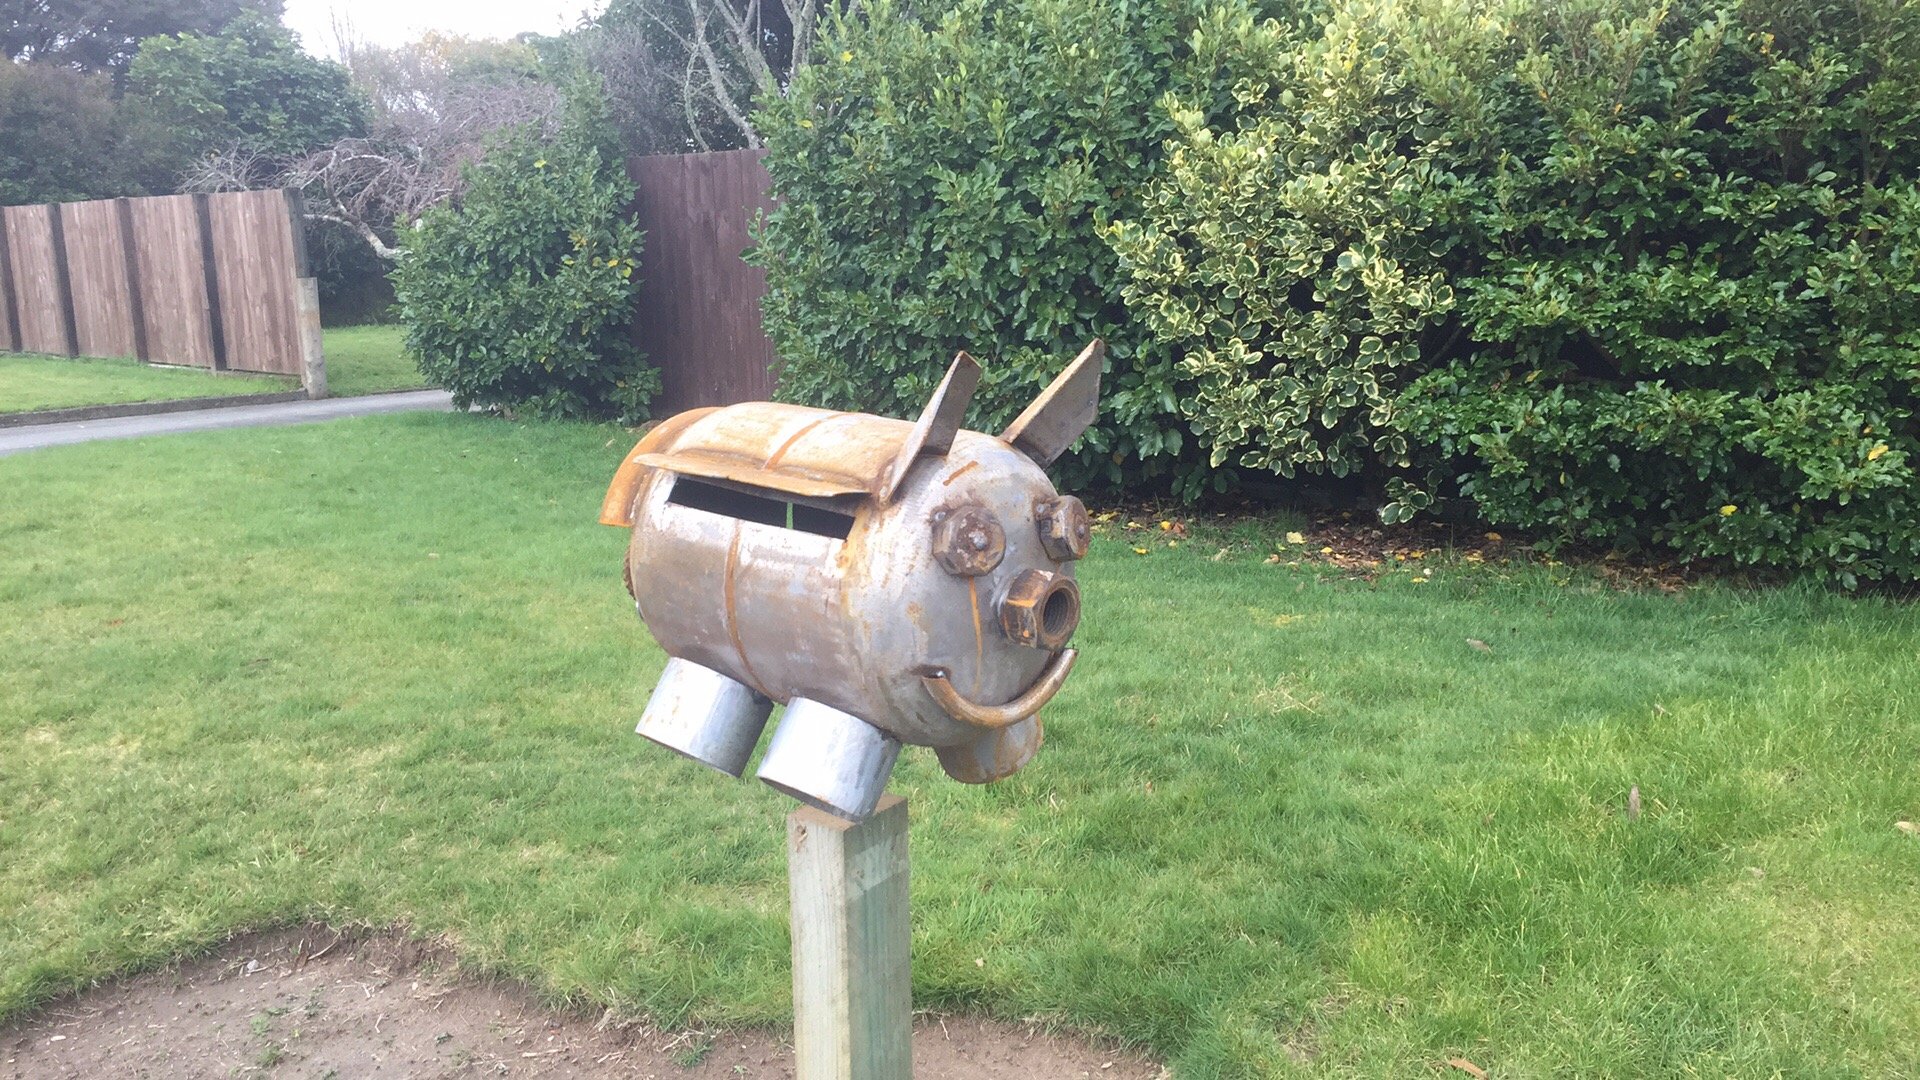
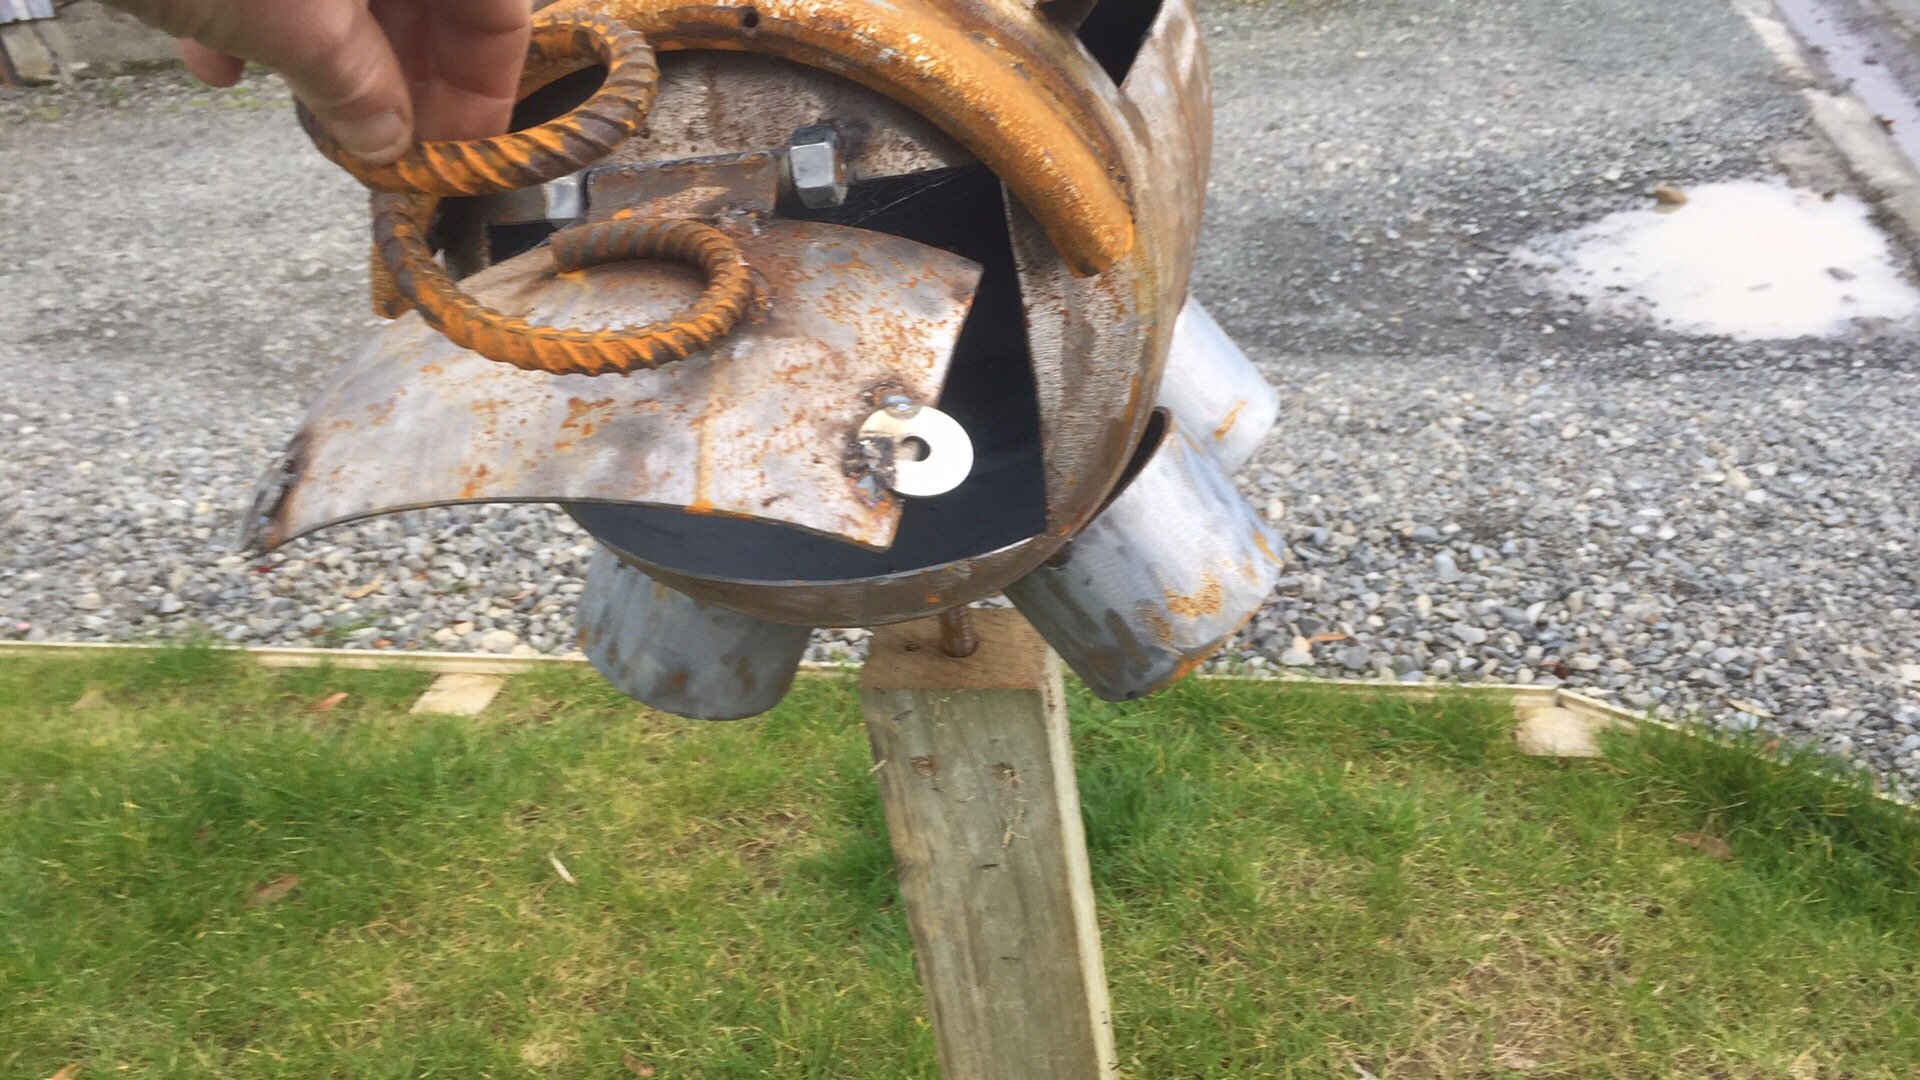
My boy loves checking the mail box every day so I surprised him with this. he thinks the coolest part it taking letters out of the arse. should rust up good.
8 points
-
East coast history sharns Great grandad on grandma's side hand built the road from Motu to Matawai. He and great grandma would set camp. Build the road for a while, then decamp, load it into a wheel barrow, and move on to the next spot. Frig A Sack Also 5hrs at full throttle to get down here. No issues other than getting 70km less to a tank before reserve. Might have to recalculate my fuel fills7 points
-
You would then need a cert for structural modifications/speed holes
6 points
-
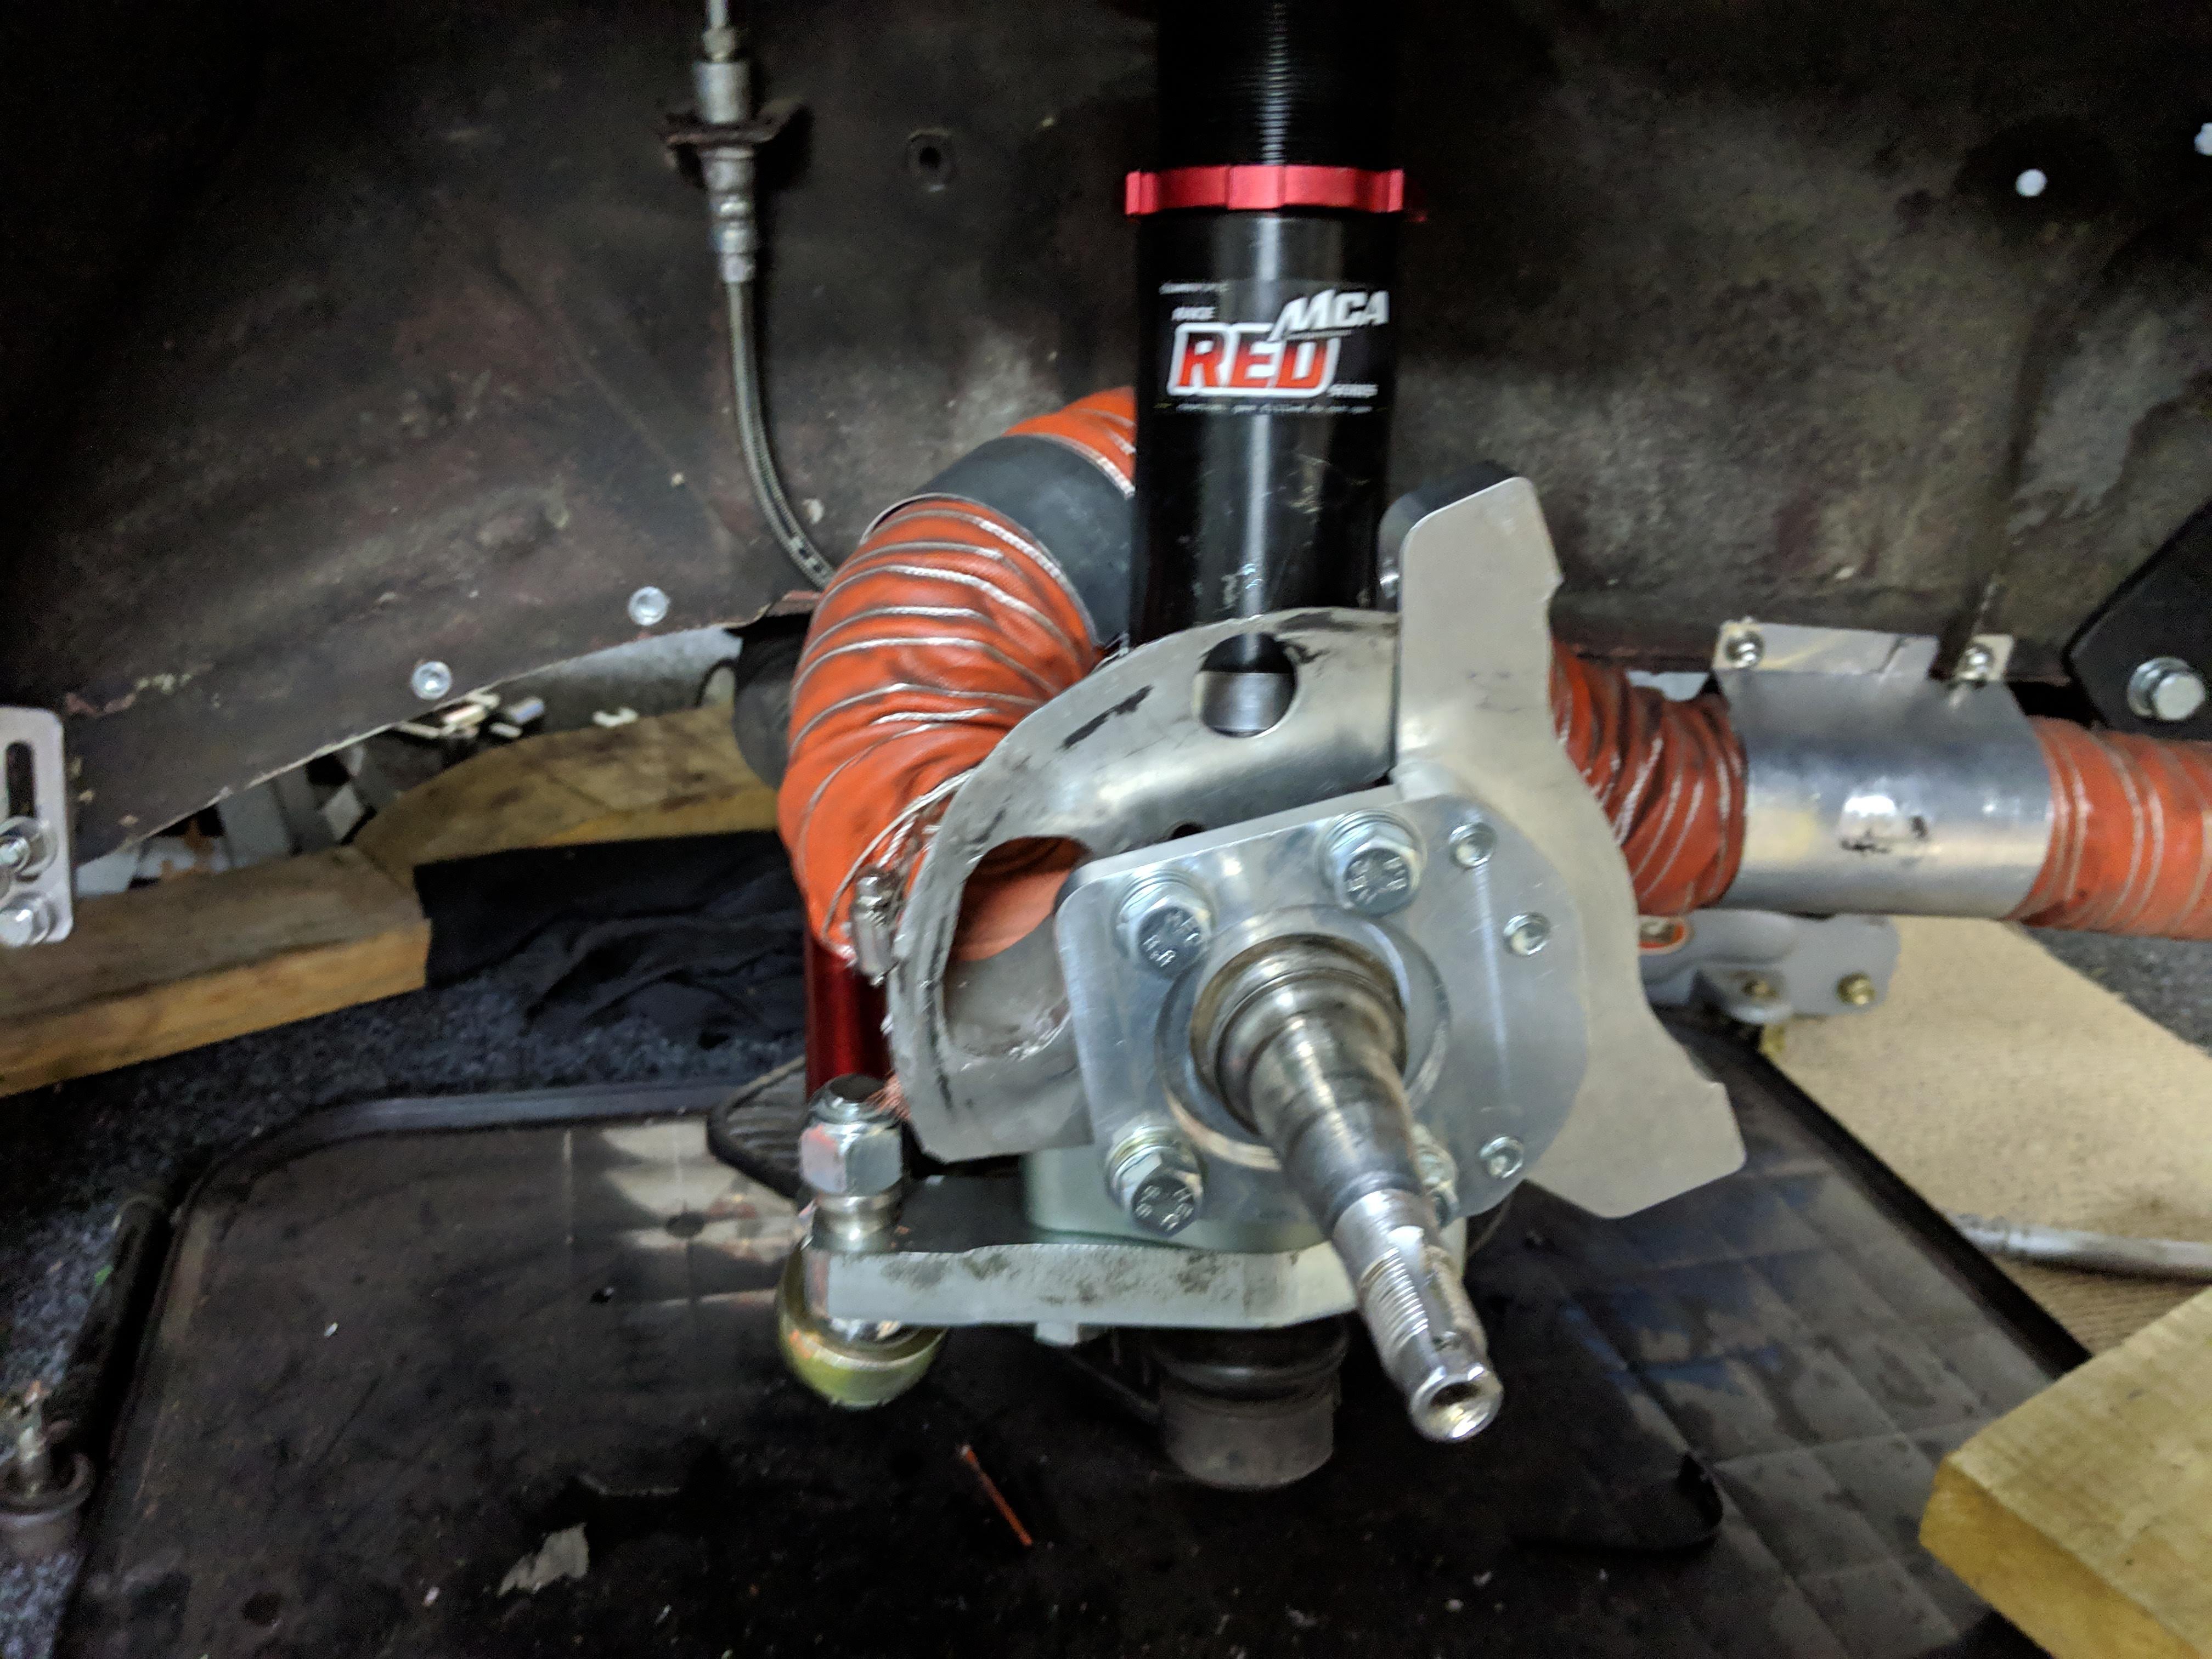
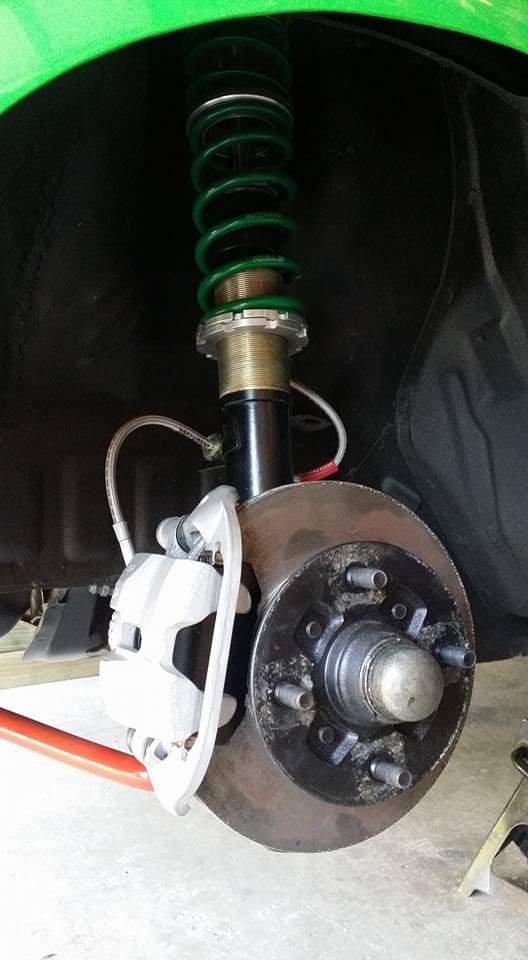
So in the vein of do it once do it properly. I chose a set of custom MCA Reds all round. Here they are fitted up with the brake mounting kit and cooling I adapted to fit. I went with T3 AE86 steering arms and used the T3 Adapter bushings from the standard Starlet Lower Control arms. A set of MRP RCA's finish it all off. The T3 steering arms are shit to be honest, they are far to heavy, far to large, and just over built all round, and I only got them as I couldn't get AE86 PS arms in time. Of course with 13 inch rims there was no way i could fit the steering arms on the outer hole, so I had to chop that hole off and move them in, just means slightly heavier steering, but more responsive which i'm fine with. However with the RCA's the angle of the steering rack ends meant the ball joint (or whatever it's called) hit the steering arm, so we had to do a fair big of clearancing to give a free range of motion. Of course I only got this all sorted just in time for a shakedown on the Friday before the new racing season started on the Sunday, nothing like leaving it to the last minute. Shakedown didn't go well either as I couldn't get the front/rear bias sorted, and flat spotted a set of front tyres. So Saturday I removed my original in line bias valve (supposedly can lock on when high fast pressure applied) I got out to the club day with a new pedal box, suspension and brakes. Took me a wee while to get comfortable with the car... They had discounted the entry fee, so there was a pretty big turn out of cars, which was good. First race I had a fairly good battle with what i believe was a WRX Second race I took advantage of a bit of carnage on the first corner to get a gap to an Integra which was faster then me and managed to hold him off. Handicap race for the last one, a lot of faster cars coming through (mainly porsches), got overtaken while behind traffic, then managed to get it back a few laps later when he got stuck behind traffic. Overall was a weird day with the wind, everyone was a second or two off their normal times, best I did was a 1.37:000 flat. Suspension was a lot more complaint with the bumps, still getting used to the grip, and the brakes were amazing, pedal box with the throttle pedal was a lot better for position.
5 points
-
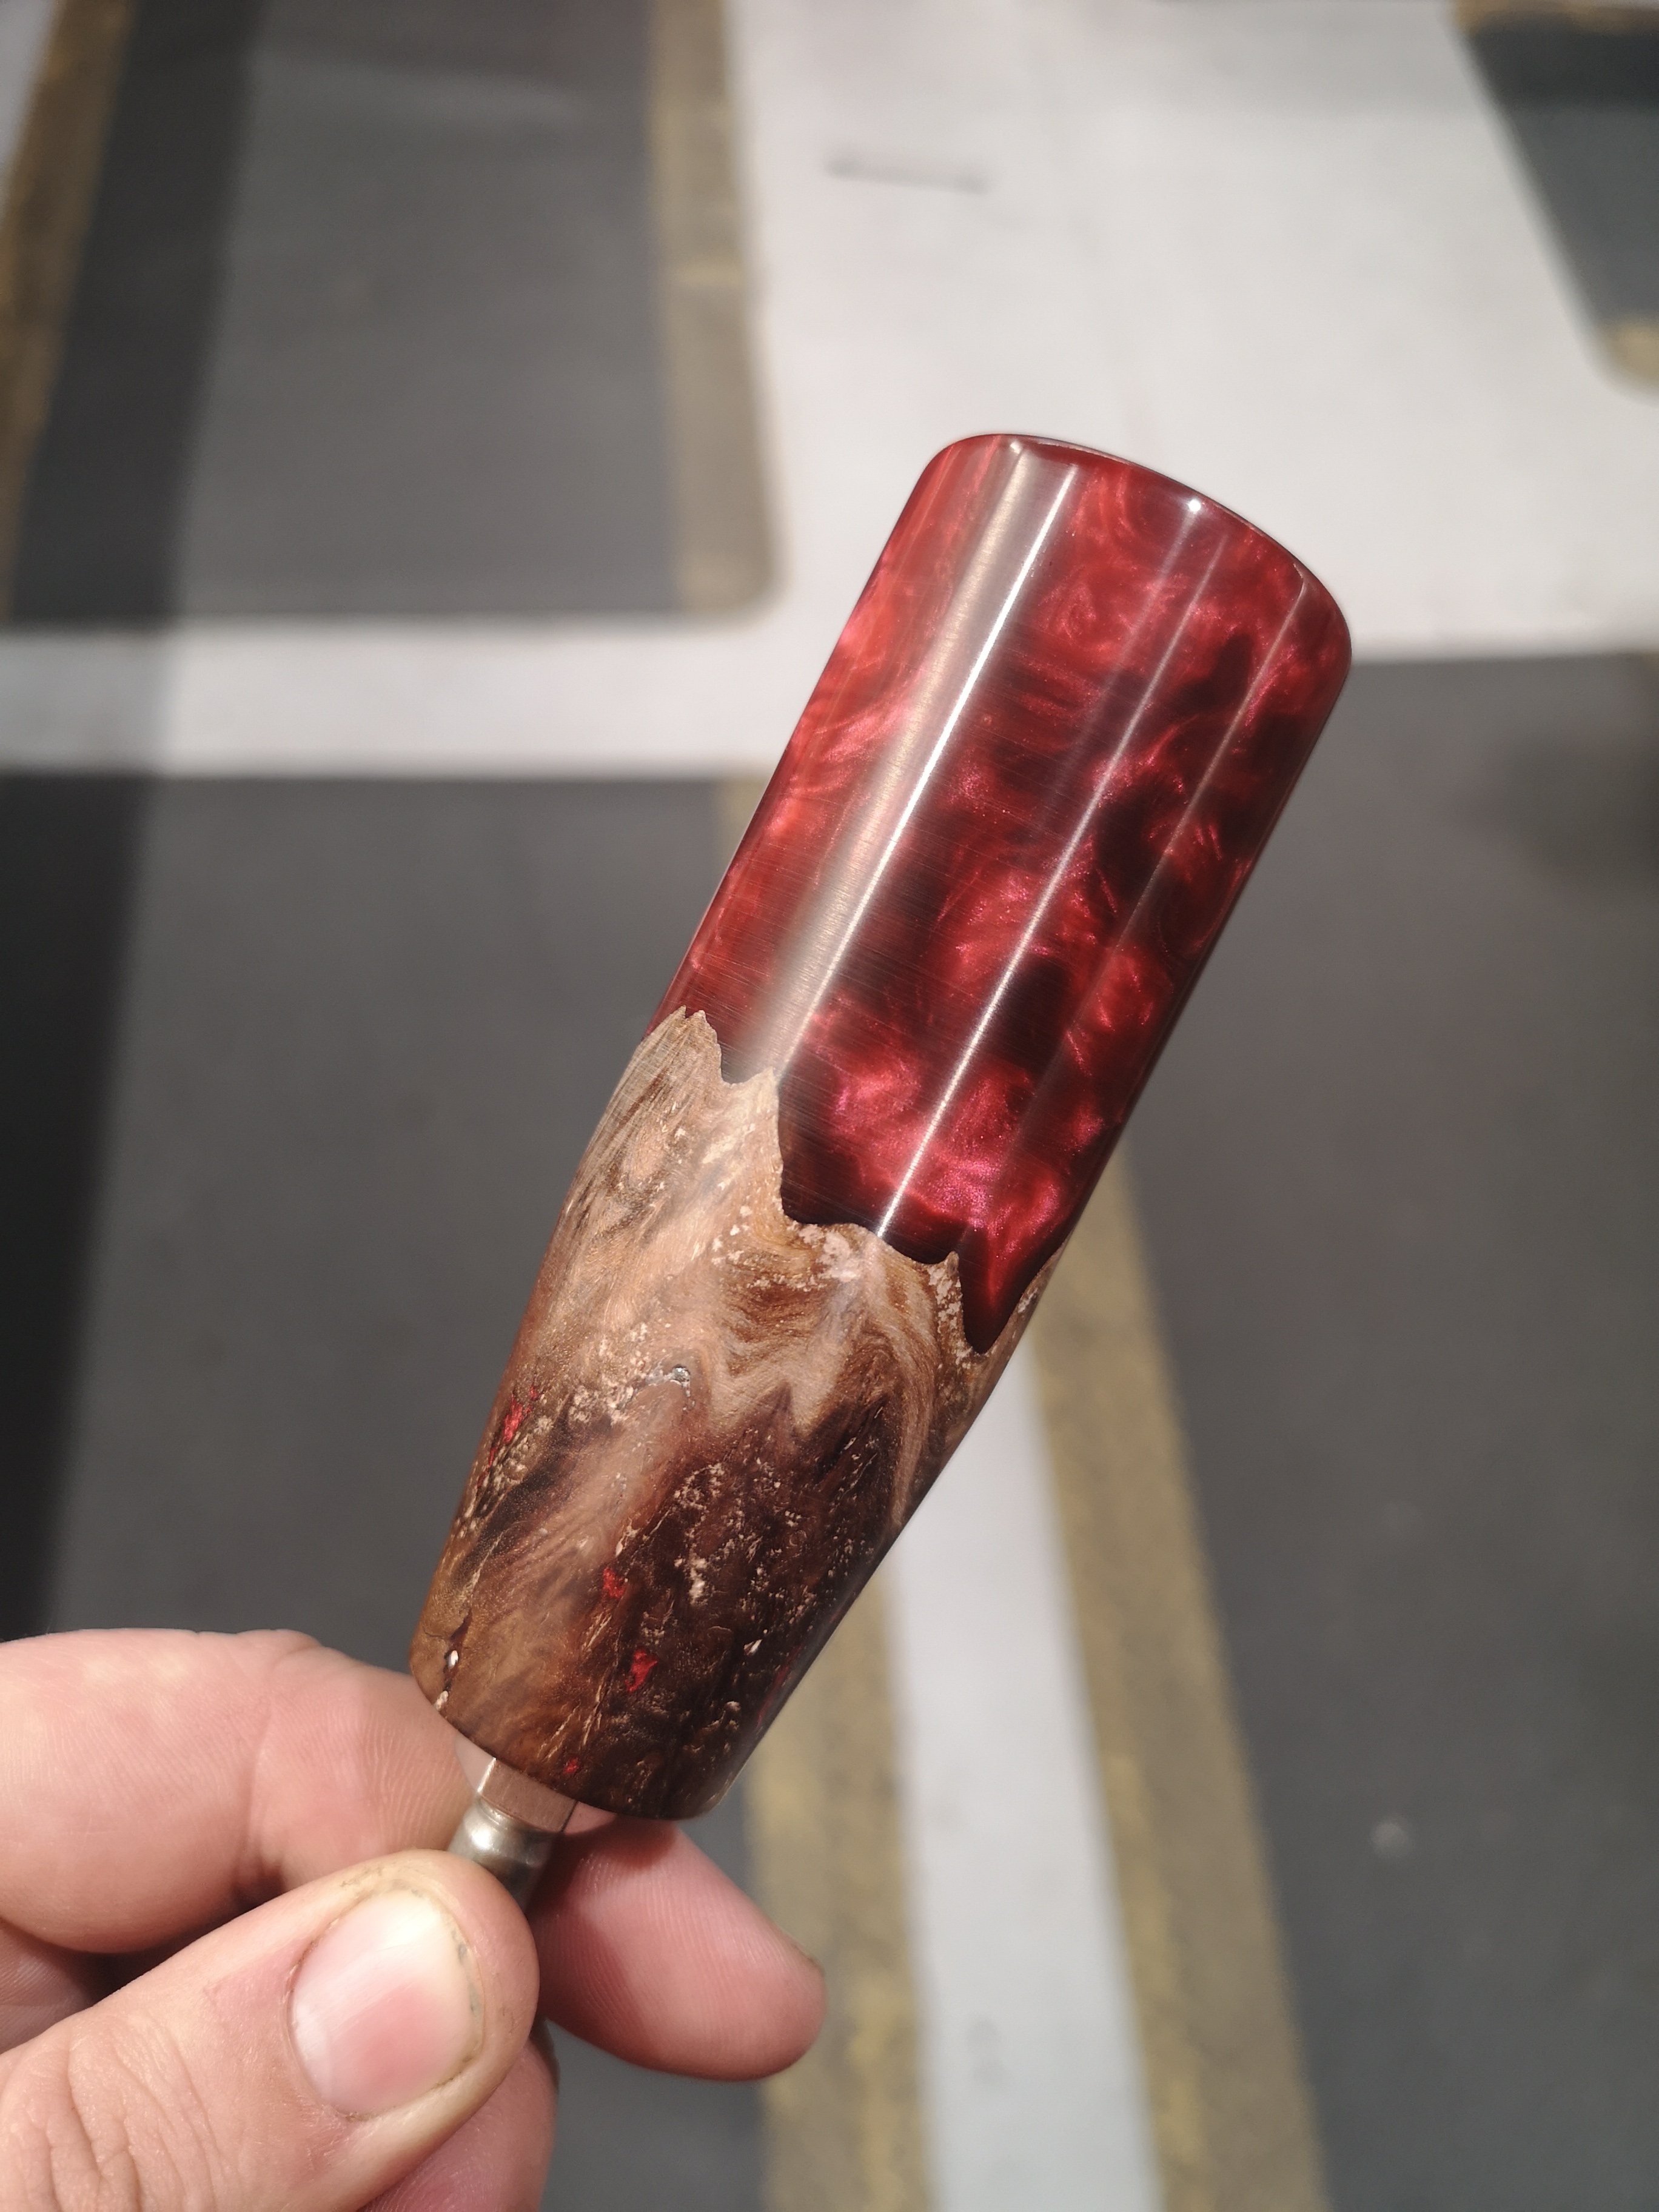
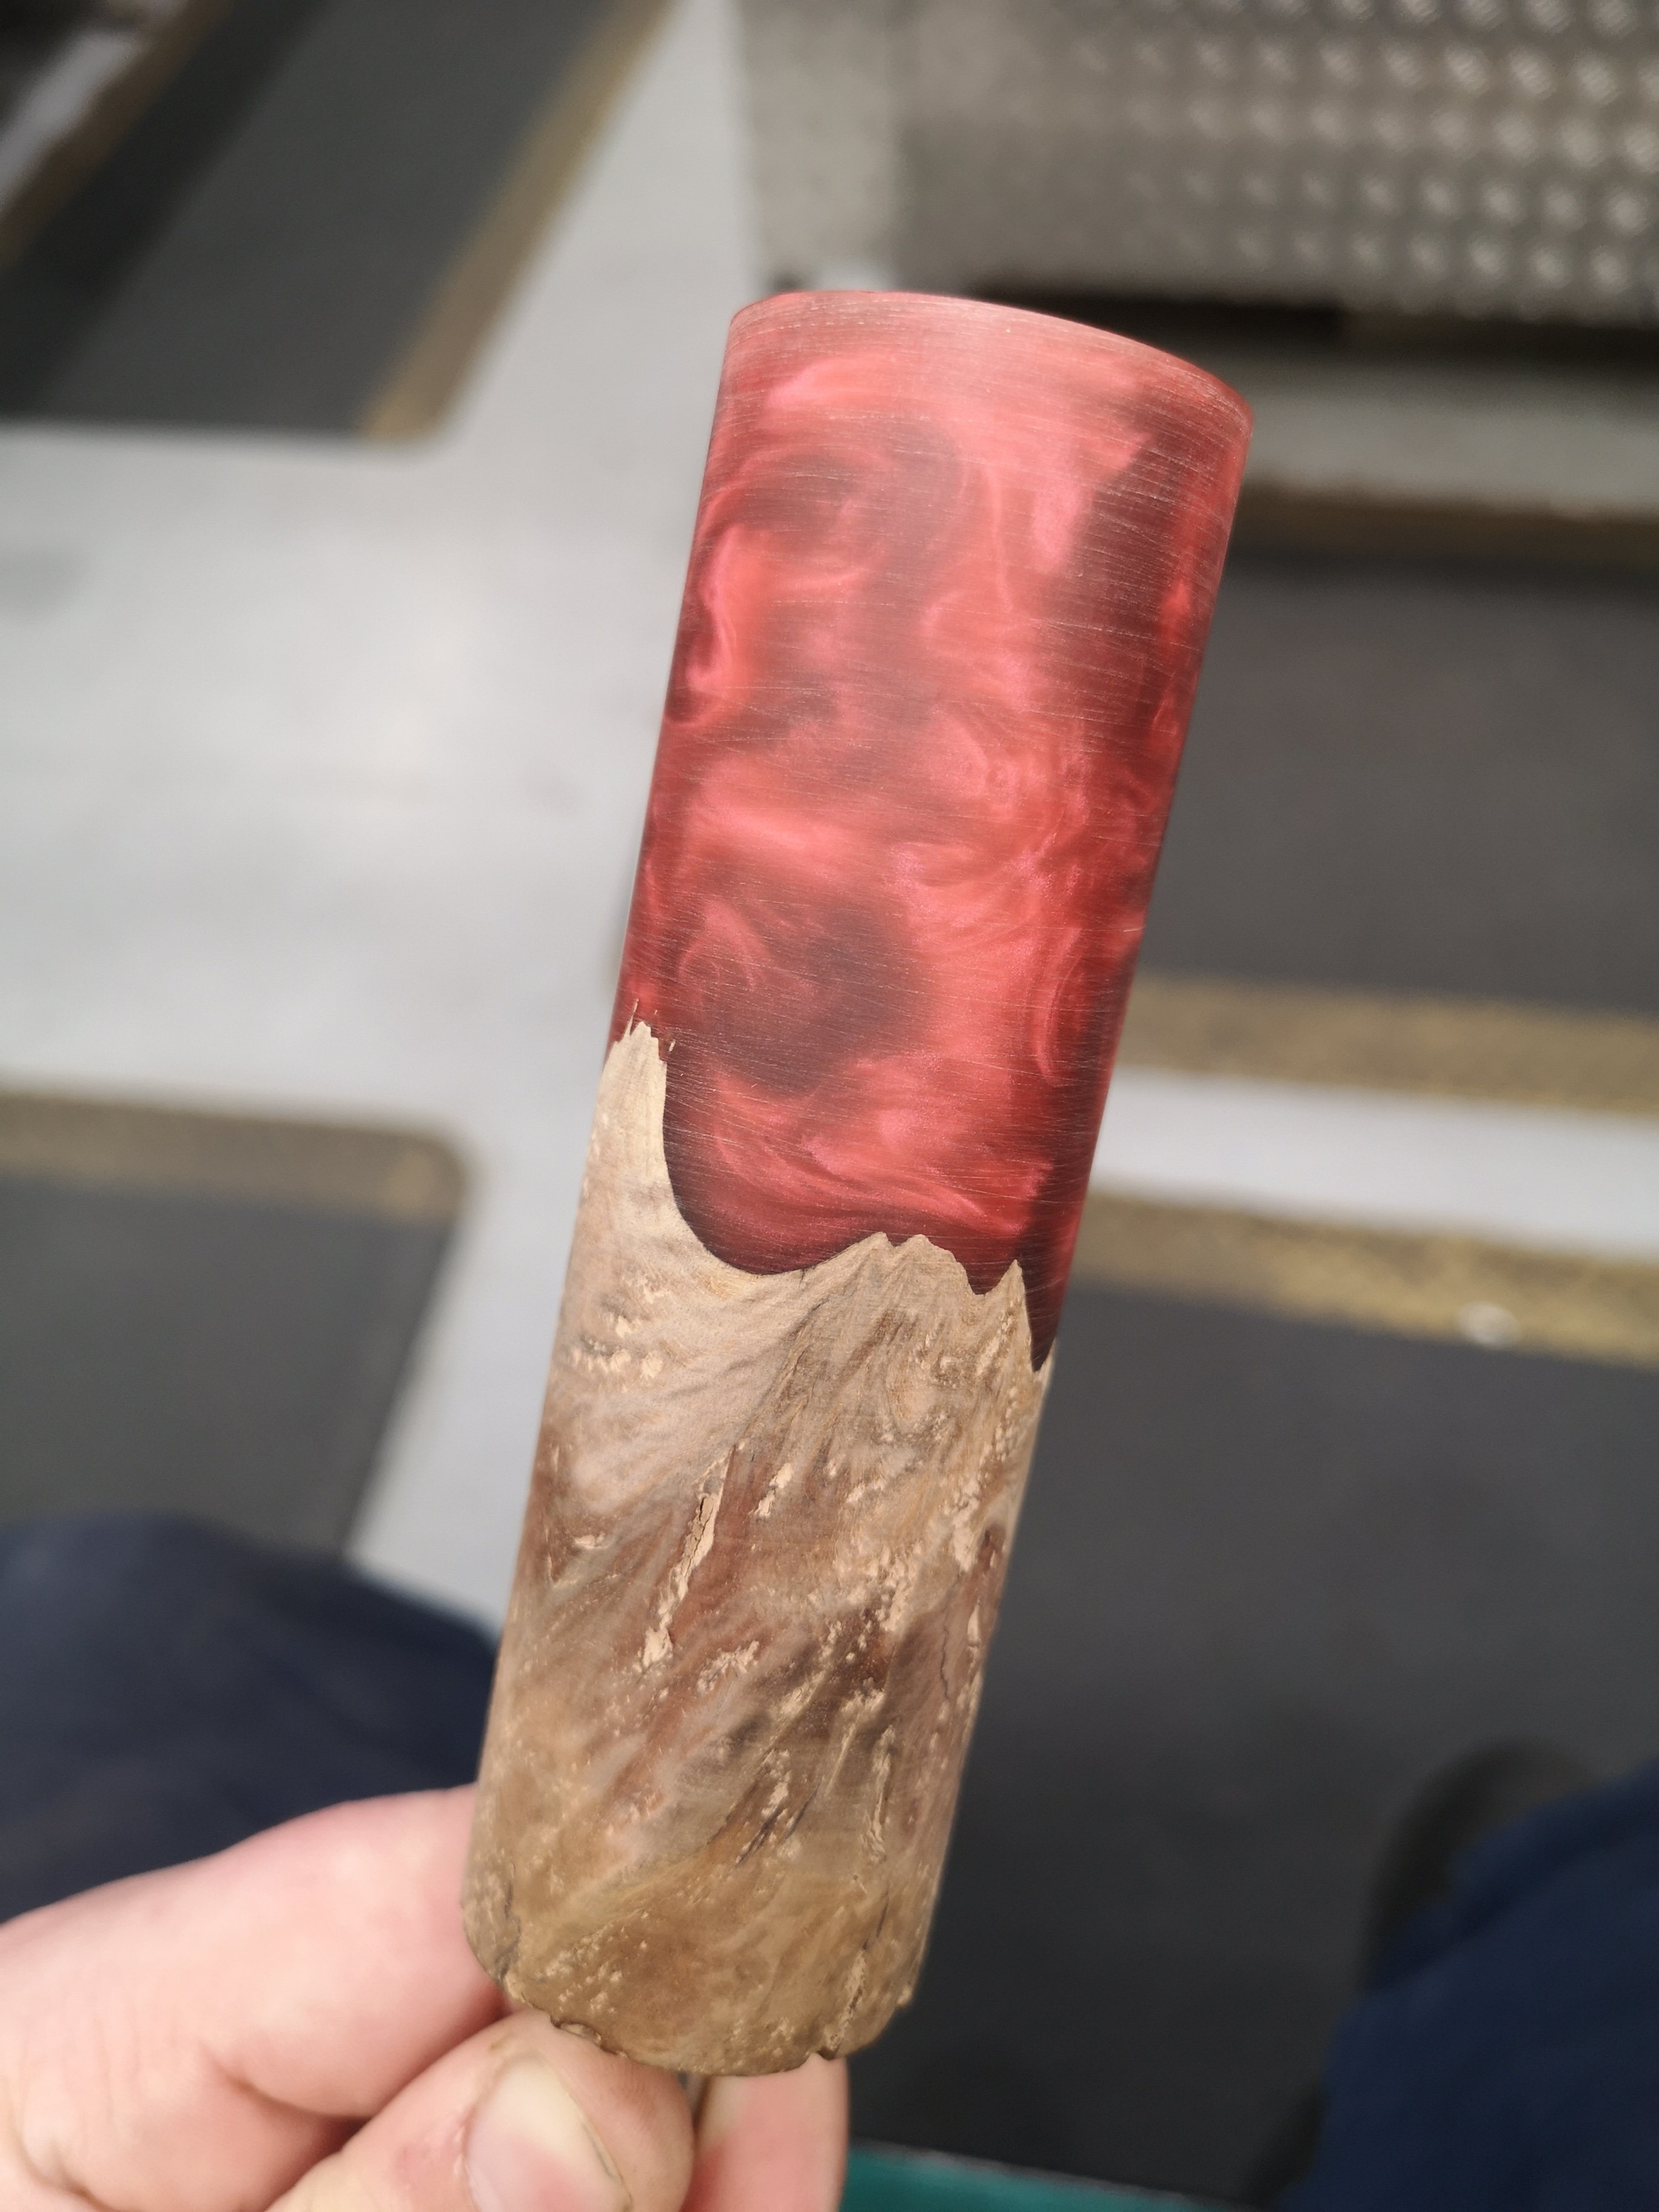
Start of the first one I've done with my own stabilised wood. Needs a shit load more polishing but liking it so far.
4 points
-
This guy is definitely keeping it oldschool. Next level cro magnon projects3 points
-
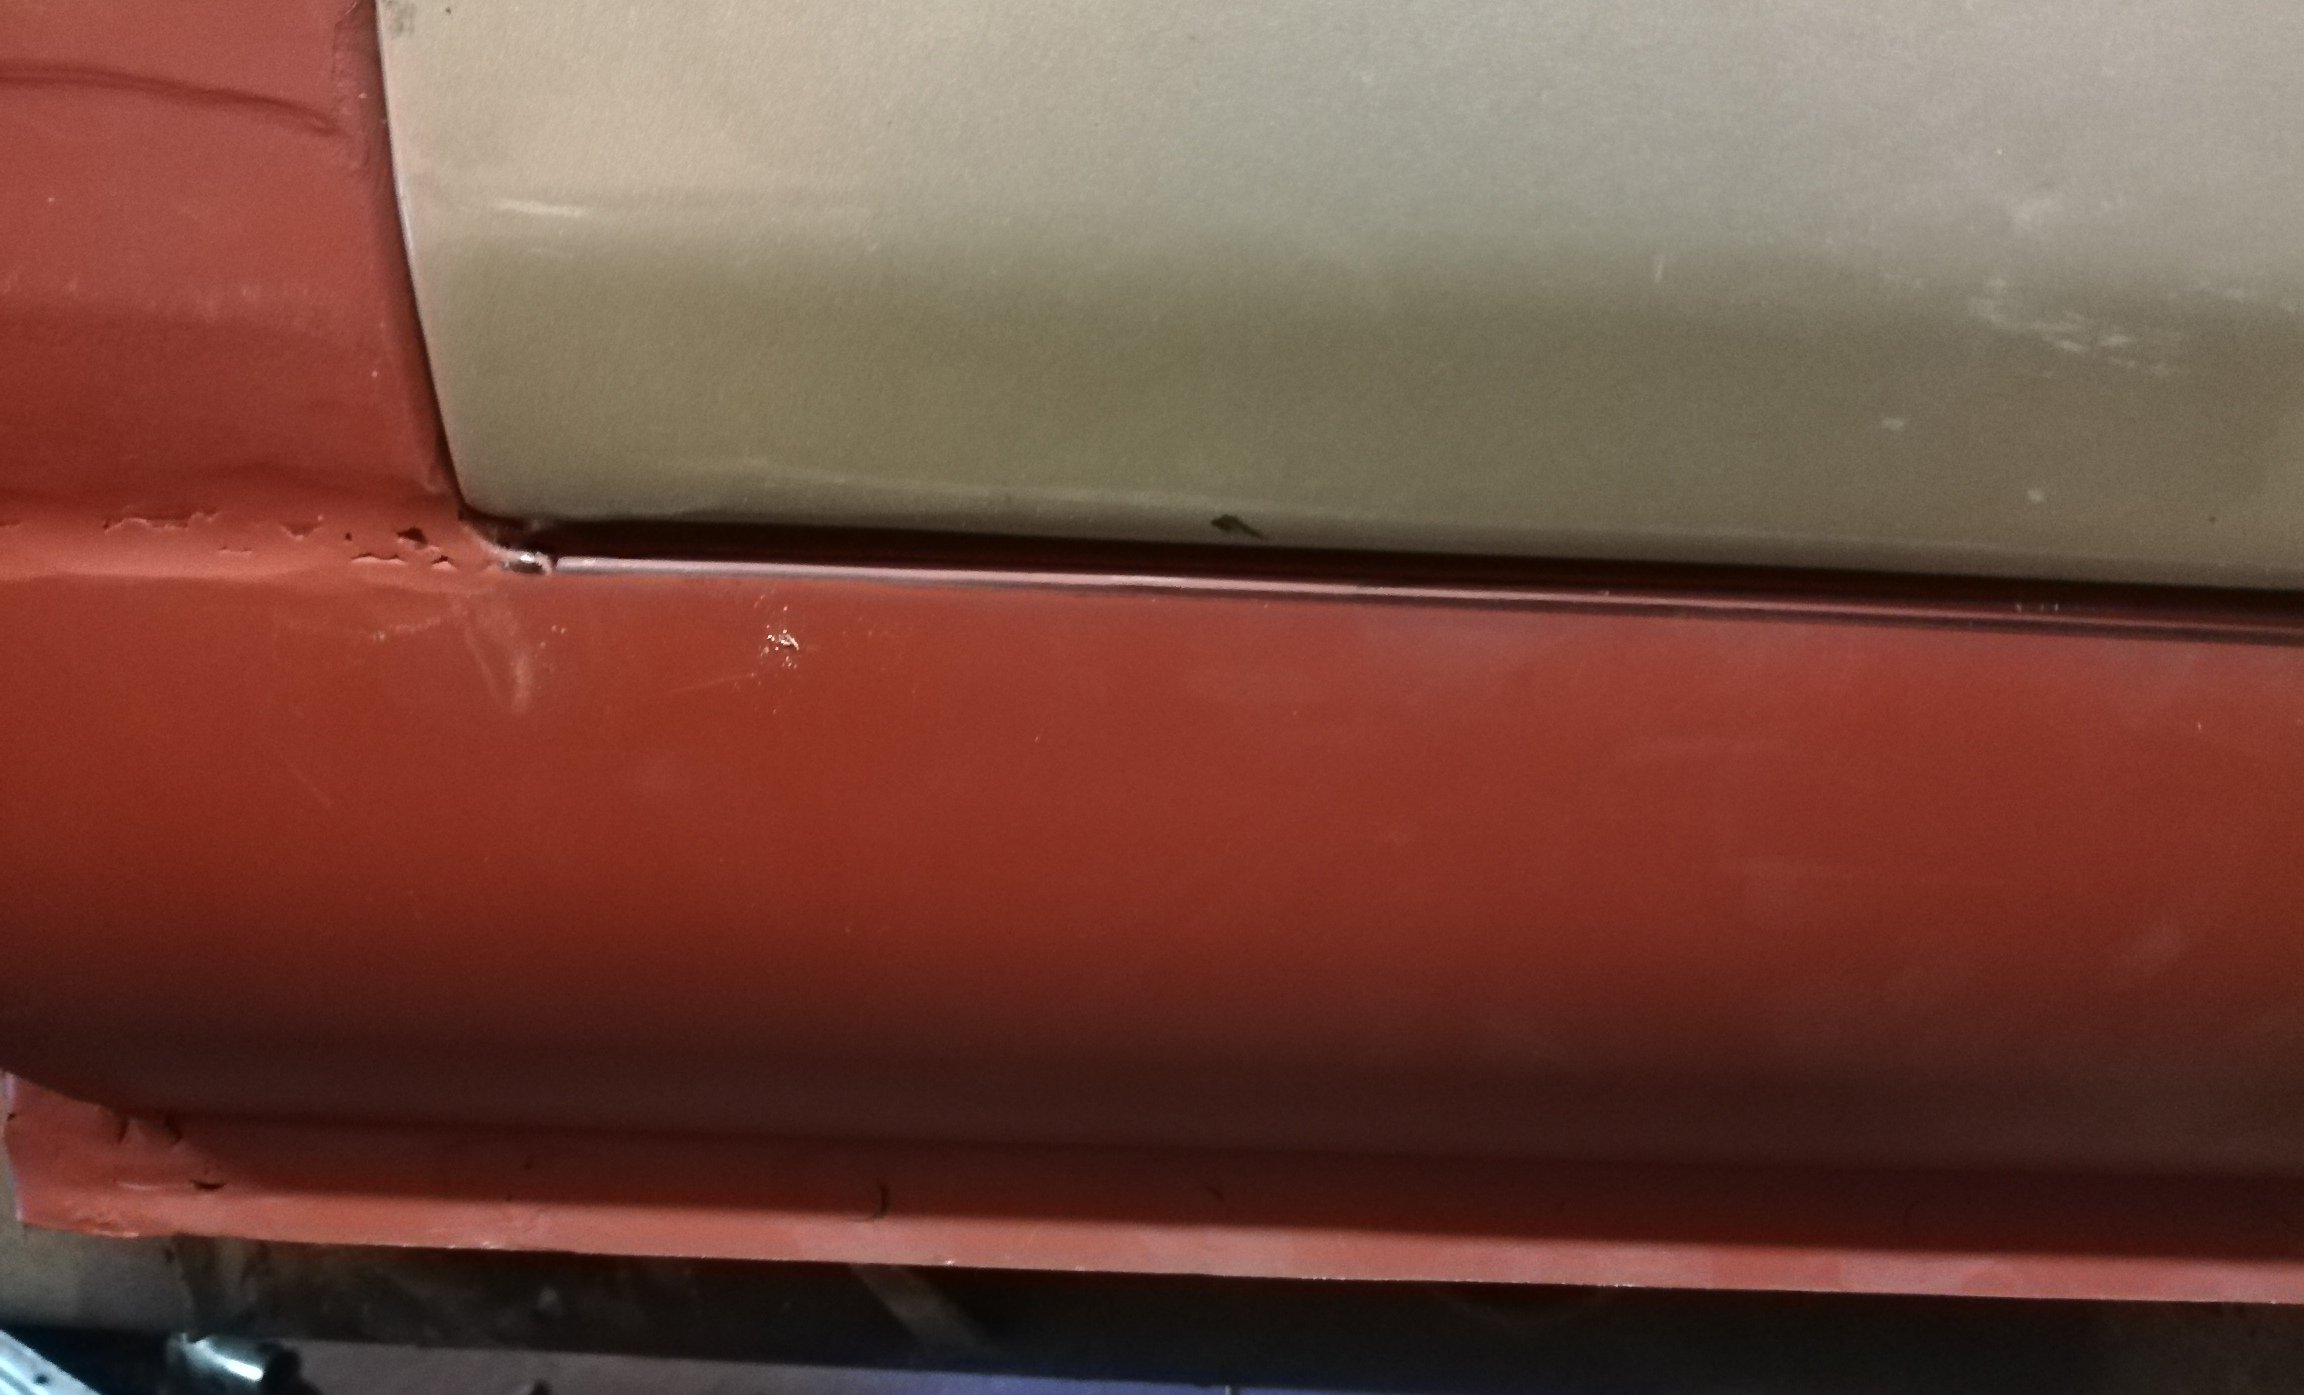
You can’t just cut out the rust and leave a hole. Replace the structure with metal.3 points
-
Can't fail you for having a shit looking car. Trust me3 points
-
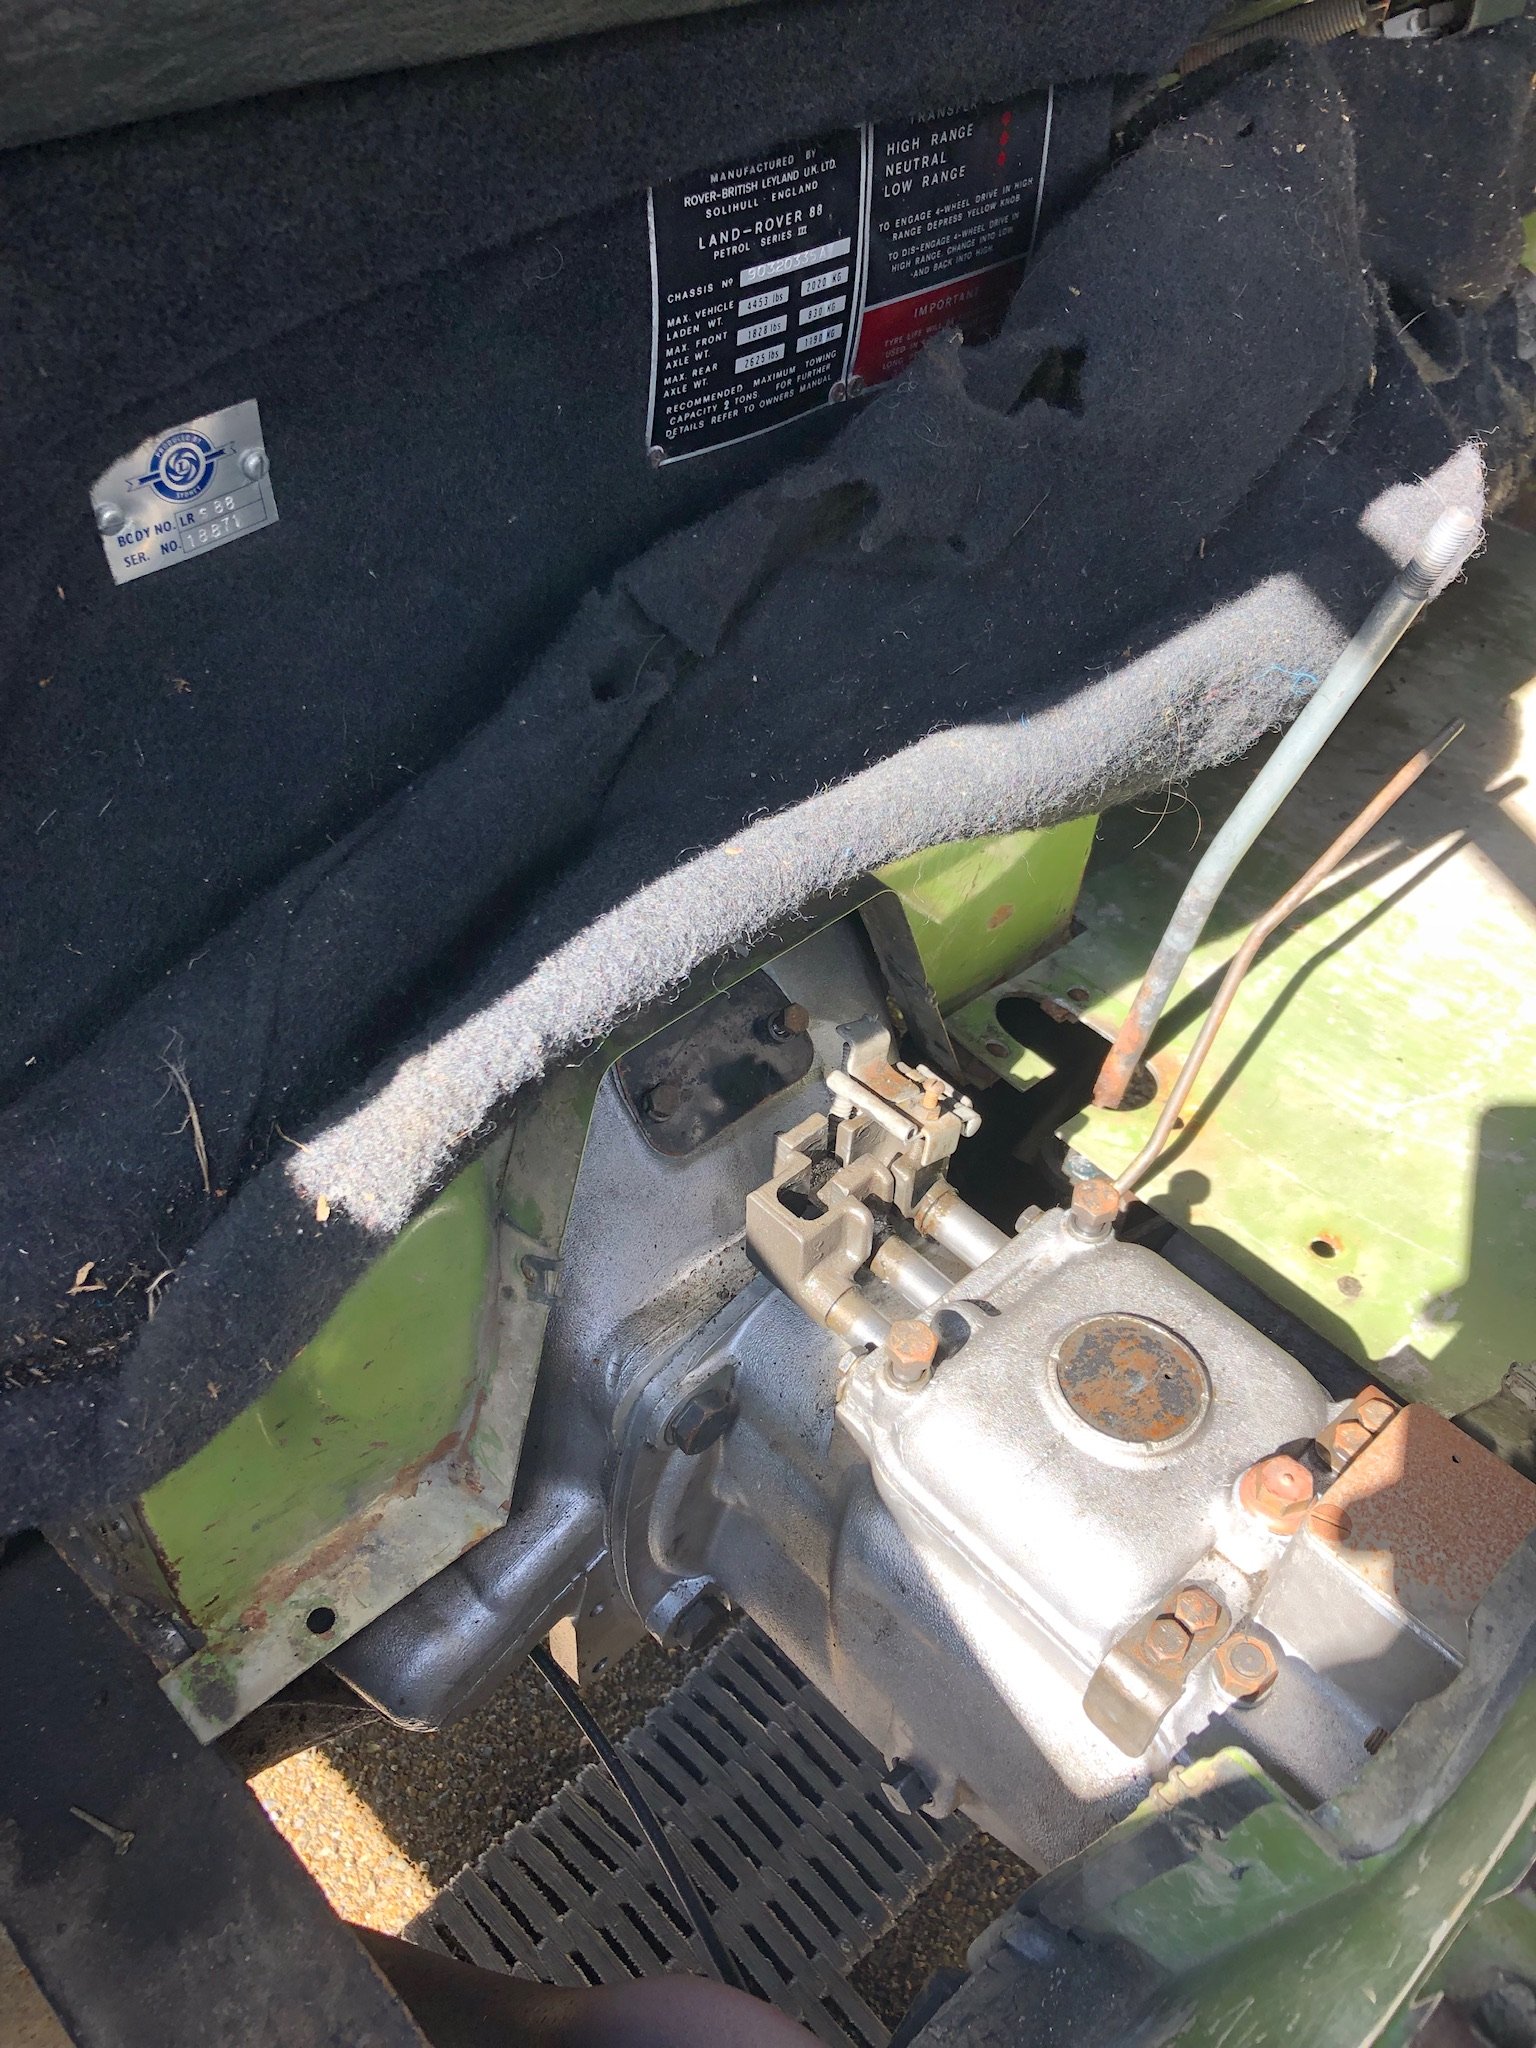
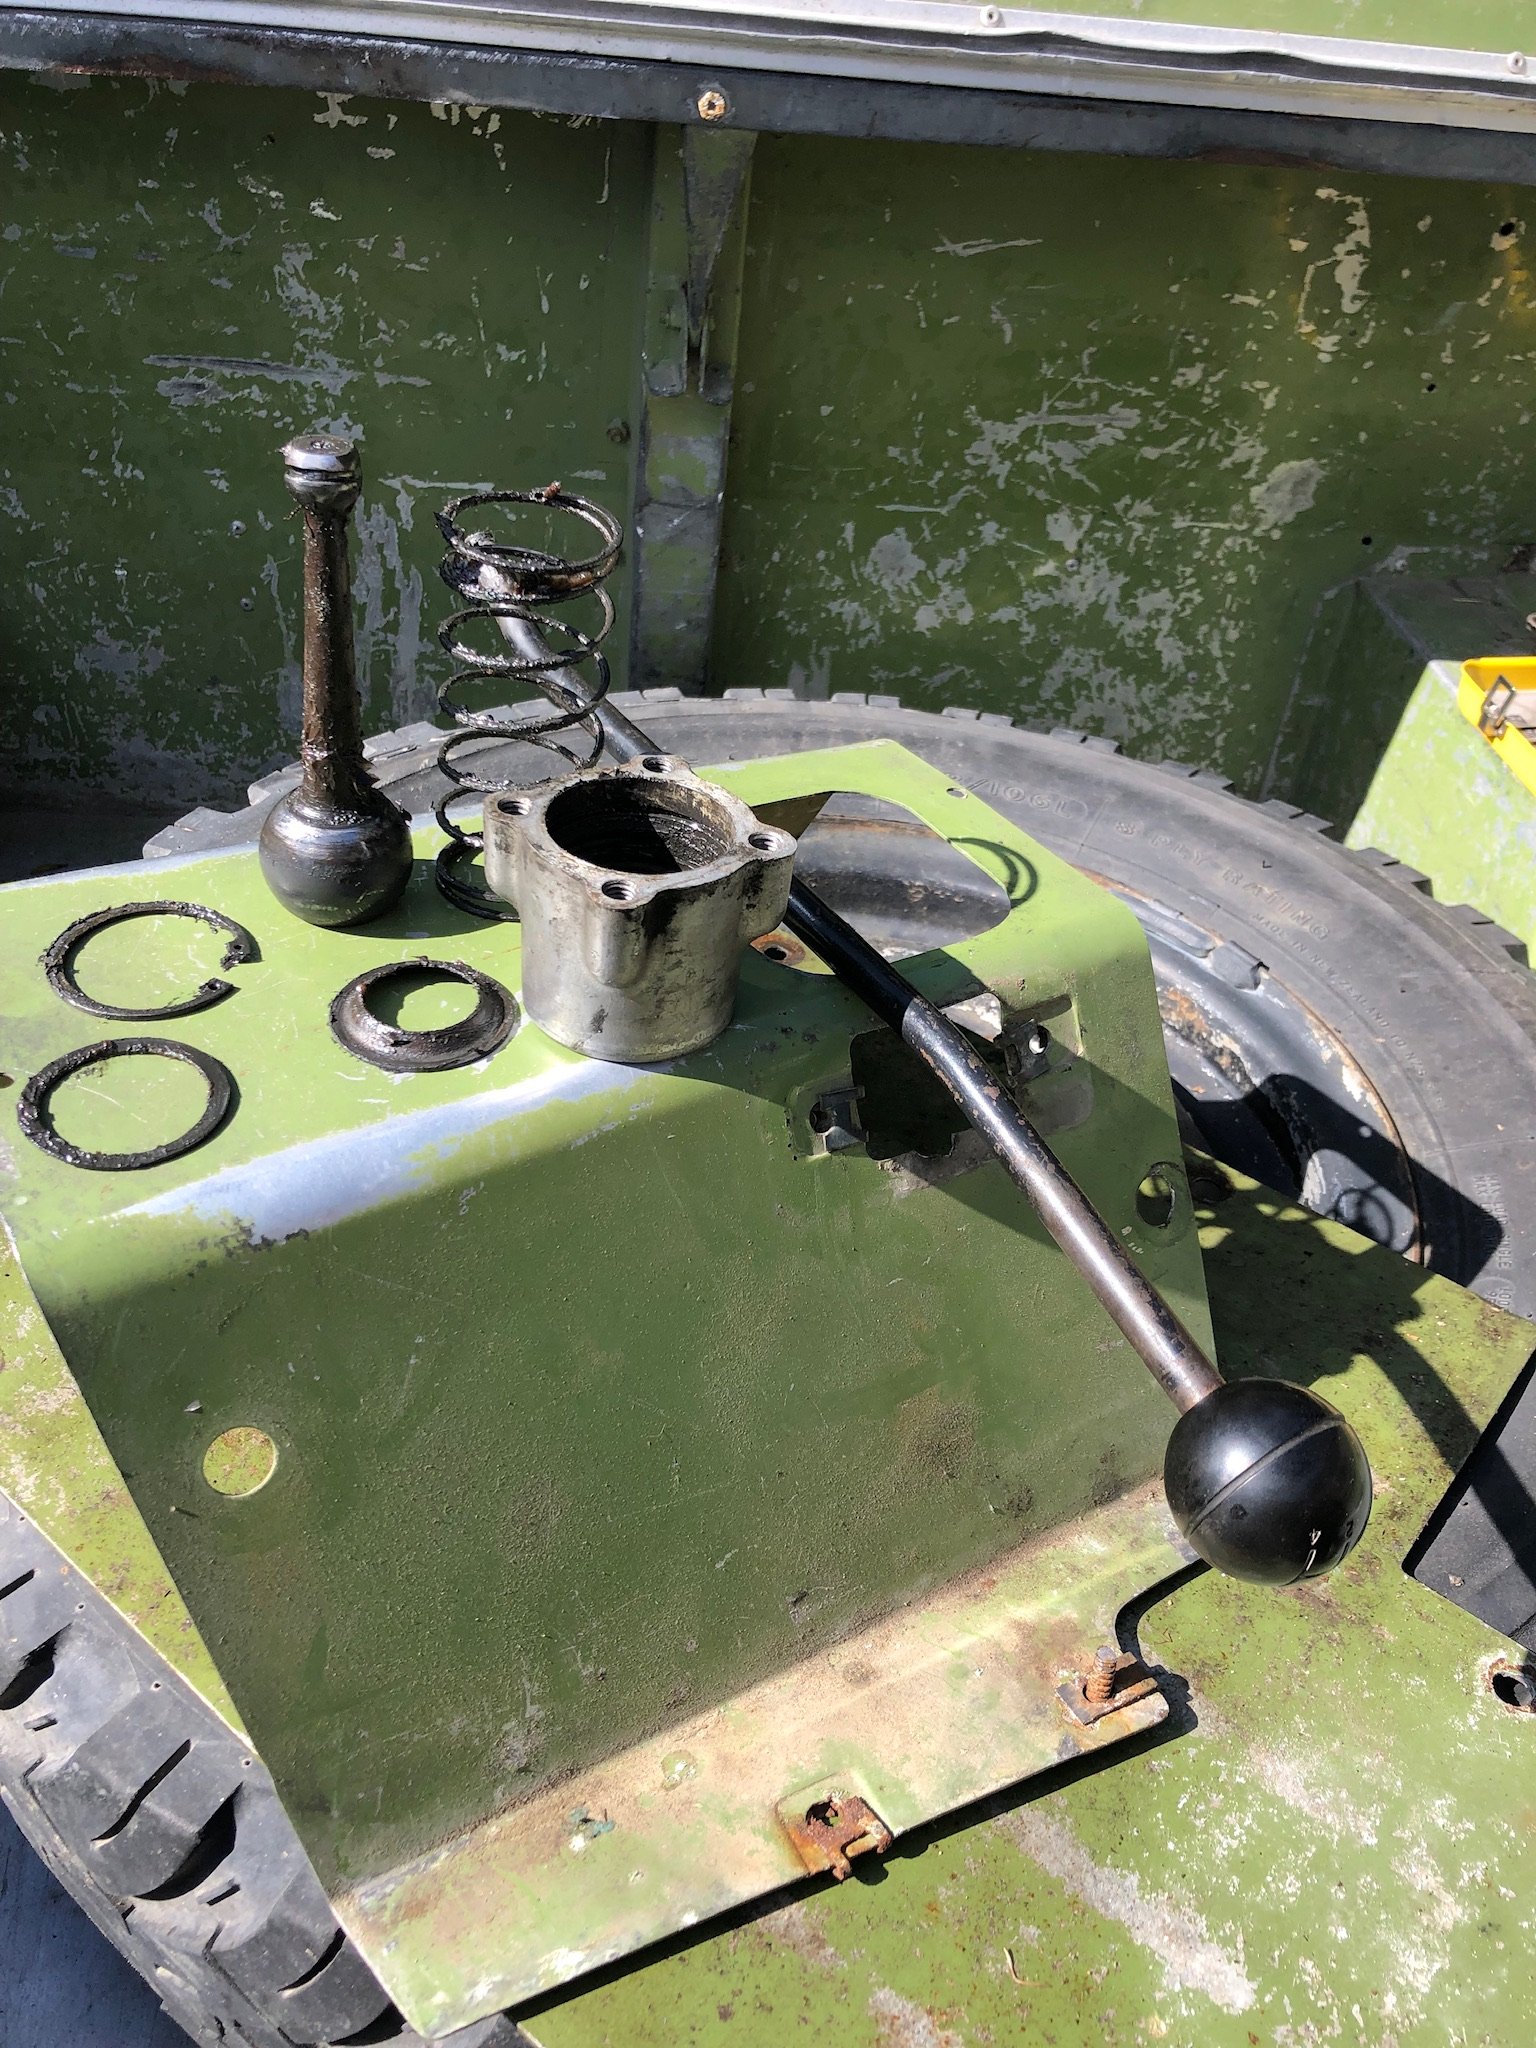
Driving home the other day, and my shifter become incredibly remote. Very odd sensation. Also annoying that it broke off in neutral so I had no drive. Thankfully the underseat storage box contained the ideal assortment of rusty tools, along with a singular used bush, one set of brake shoes, a single u bolt and an owners manual missing multiple pages. Took the high range lever cover off and pushed the selector into second and drove home, chucked it in low range to get up the hill. New one is coming from Australia. Had to take the floor panels out to remove the selector. Currently in flintstone mode. Exploded shifter, the circlip was under a fair bit of tension, didn't expect the spring to be quite that large
3 points
-
Since I'm still waiting on the pressure testing kit to arrive, I got impatient and did some more testing. I wanted to remove the injectors and see if any of them were leaking and what the spray pattern is. The intake plenum needs to come off. before this can be removed though, the coolant block on the front needs to be unbolted. Unbolting this saves disconnecting the coolant hoses. All the other hoses got removed, and the 7th injector was removed from the plenum. The plenum is held down with eight long bolts that go into the inlet manifold. Just a note, these bolts aren't sealed off from the inside of the plenum, so will need sealant on them upon reassembly. With everything disconnected and unbolted, the plenum just lifts off Removing the injectors is fairly simple. The clamp on the pipes (which goes above, below and between the pipes), as visible in the lower Lh corner of the above photo, has to be removed to allow enough slack in the pipes, but otherwise its a case of removing the single bolt per injector, and then pulling it free from the manifold. They are meant to be sealed in, but mine came out suspiciously easily. The rubber collar is weird. I presume/hope there is a normal O-Ring under it, as that is what all the parts manuals say it should have, and there seems to be no part for that rubber collar. I'll have to carefully remove and reuse the collar. All the injectors look pretty rough, but I guess thats what 39 years of sitting in the intake looks like. The ends all look clean enough, with no obvious buildup. I did note that cylinder 6 was very wet upon removal, and a couple of others were damp. The engine has been off and cold for about a week, with no pressure in the lines. Testing them isnt rocket surgery, just pop them all into jars, fire up the pump and see if they produce any fuel (which they all did to some degree), which indicates either the fuel plunger is letting excess fuel through, or the injectors are leaking. Further investigations show its probably a 50:50 on leaking or adjustment causing it. With the pump running, lift the sensor plate in the AFM to its stop and observe the flow and pattern from the injectors. All mine seem to flow roughly the same, but the flow pattern out of all of them appeared to be rubbish, with minimal misting and heading off in all directions. That's good, it confirms that buying a whole set of replacement injectors was the right decision! One other thing that has been bugging me, was the sensor plate in the AFM. This is meant to be a finely calibrated instrument, but I think someone has mucked with mine before. You can see in the above photo that it looks like the sensor plate (the disk in the middle of the cone) is sitting high with a gap under it. Well, it is. From the below diagram, you can see the sensor plate sits at the bottom of a cone. As air comes in from the filter at the bottom, it comes in under the plate and a combination of that air coming in, and engine vacuum in the intake, lifts the plate to allow air into the intake. Lifting the plate also lifts the fuel plunger, increasing fuel flow. The plate should be set to a specific height, which is more or less with the highest point of the plate flush with the lip at the bottom of the cone (before where it tapers outwards again, under the plate). Mine was clearly sitting a lot higher than that. Not to mention the other issue... The plate was off-centre. I even thought the plate was too big to fit through the opening, but it was just because it was off-centre. I carefully backed off the center bolt, and centered the plate (this should be done with feeler gauges, but I did it by eye this time) Now it fits through the opening It was still sitting too high though There is a spring under the plate that sets the height. The manual says to adjust it with pliers, but I'm damned if I can bend the thing. I'll keep at it and see if I can tweak it. The other thing I noticed is that you can hear and feel the plunger moving when you manipulate the sensor plate. I'm not sure how normal it is, but my plunger seems very slow to return to the zero position. It doesn't seem to bind and it moves smoothly, it's just slow to return. I'll be removing and cleaning this in the future anyway. So that's where I'm at. I'm waiting for a set of new injectors to arrive, and I need to remove the fuel distributor and WUR to clean them out. I'm planning on setting everything up from zero since I have no idea what's been done to this by previous bodgers.2 points
-
Yep that would be fine2 points
-
I'm glad you're getting somewhere with that engine, because I got nowhere with that parts one down here2 points
-
Wire brush and some rust converter. Not close enough to the hinges to fail2 points
-
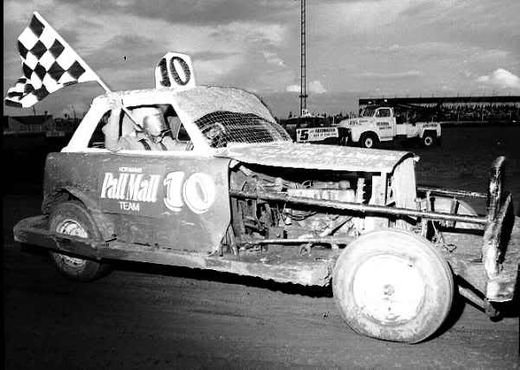
First stockcar. Only pic I have of it. At that stage it was the oldest standard stock racing in the country. This pic was in 2005. It was built in 1967. Powered by E31 Pacer 245 Hemi. Had a habit of heat seizing. when she was "new"
2 points
-
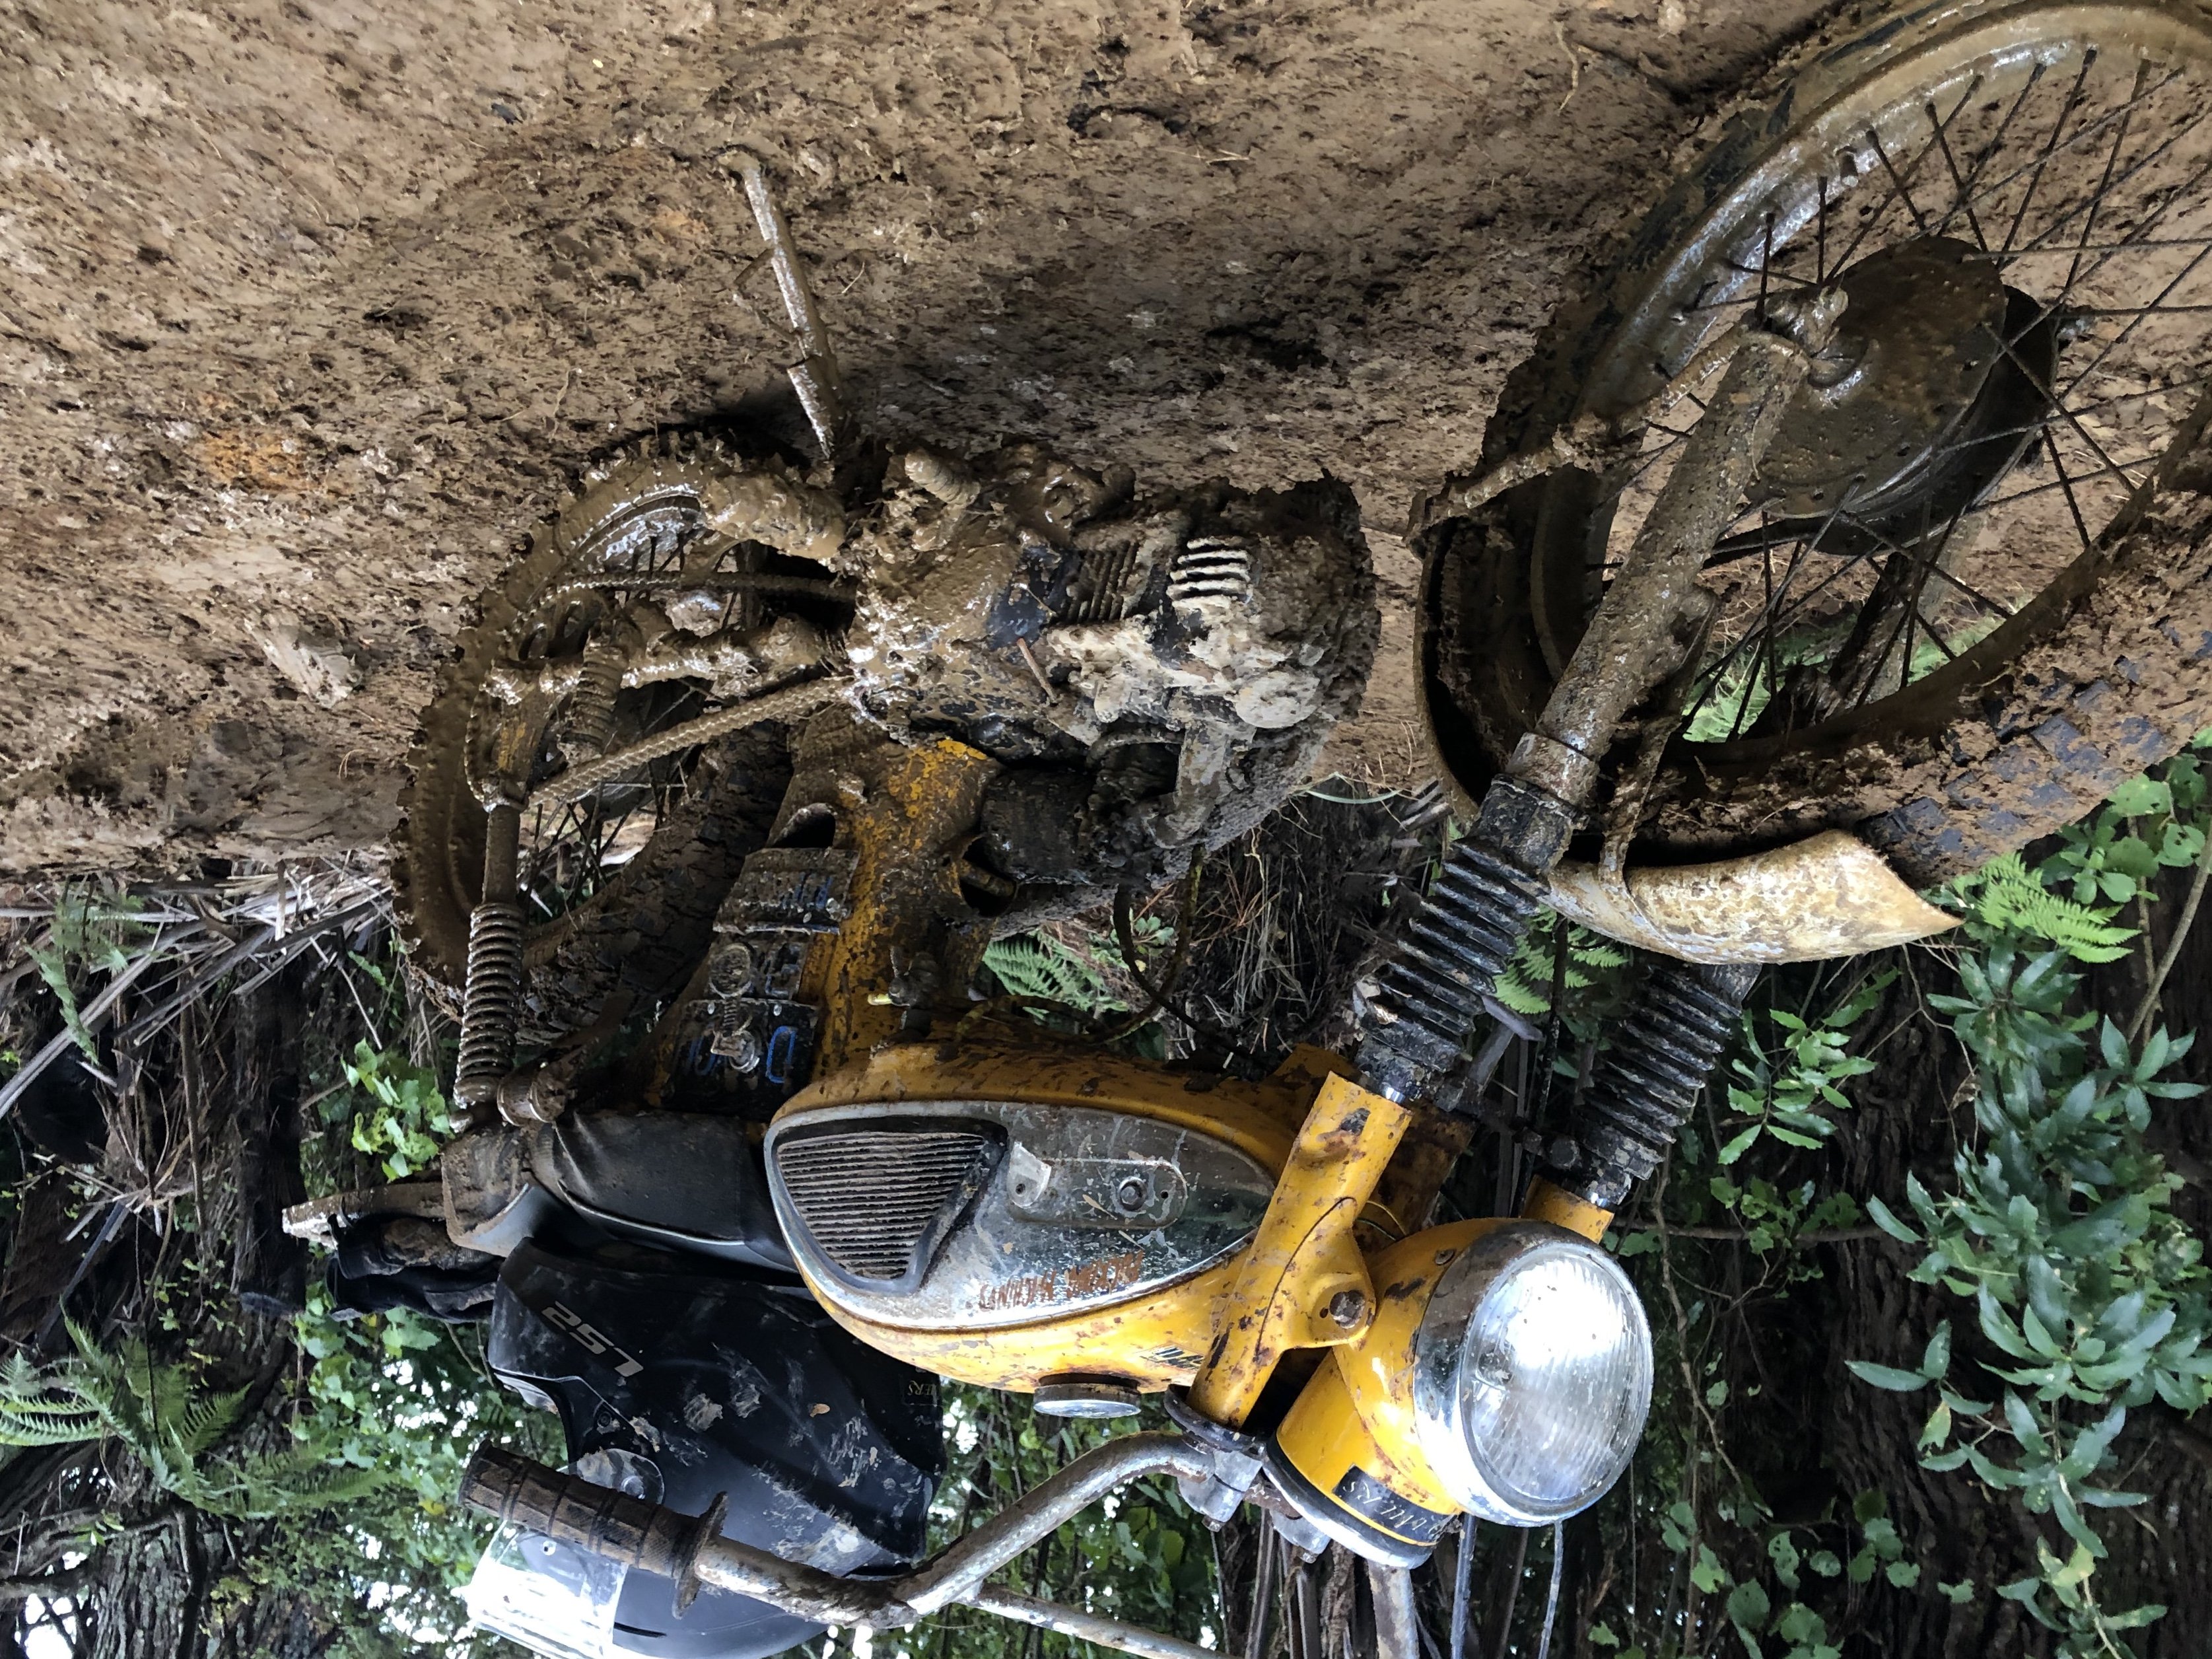
Long time between posts as usual, made another mission back to the Marshland yard before it's all gone. Managed to get four decent 14 inch rims to put the Sabre back to original and so I can fit the NOS hubcaps - will look the part once blasted and painted. Also found a floormat for it amongst the grass, I have the passenger side but had been missing the driver's so I'm a happy lad! Also dragged this monstrosity home because I couldn't bear the thought of it being crushed. I'll clean it up and then decide what to do with it.
2 points
-
Bonus images. Big thanks to these guys Kieran, stan and the other boys for the endless pumping of the brake pedal.
2 points
-
2 points
-
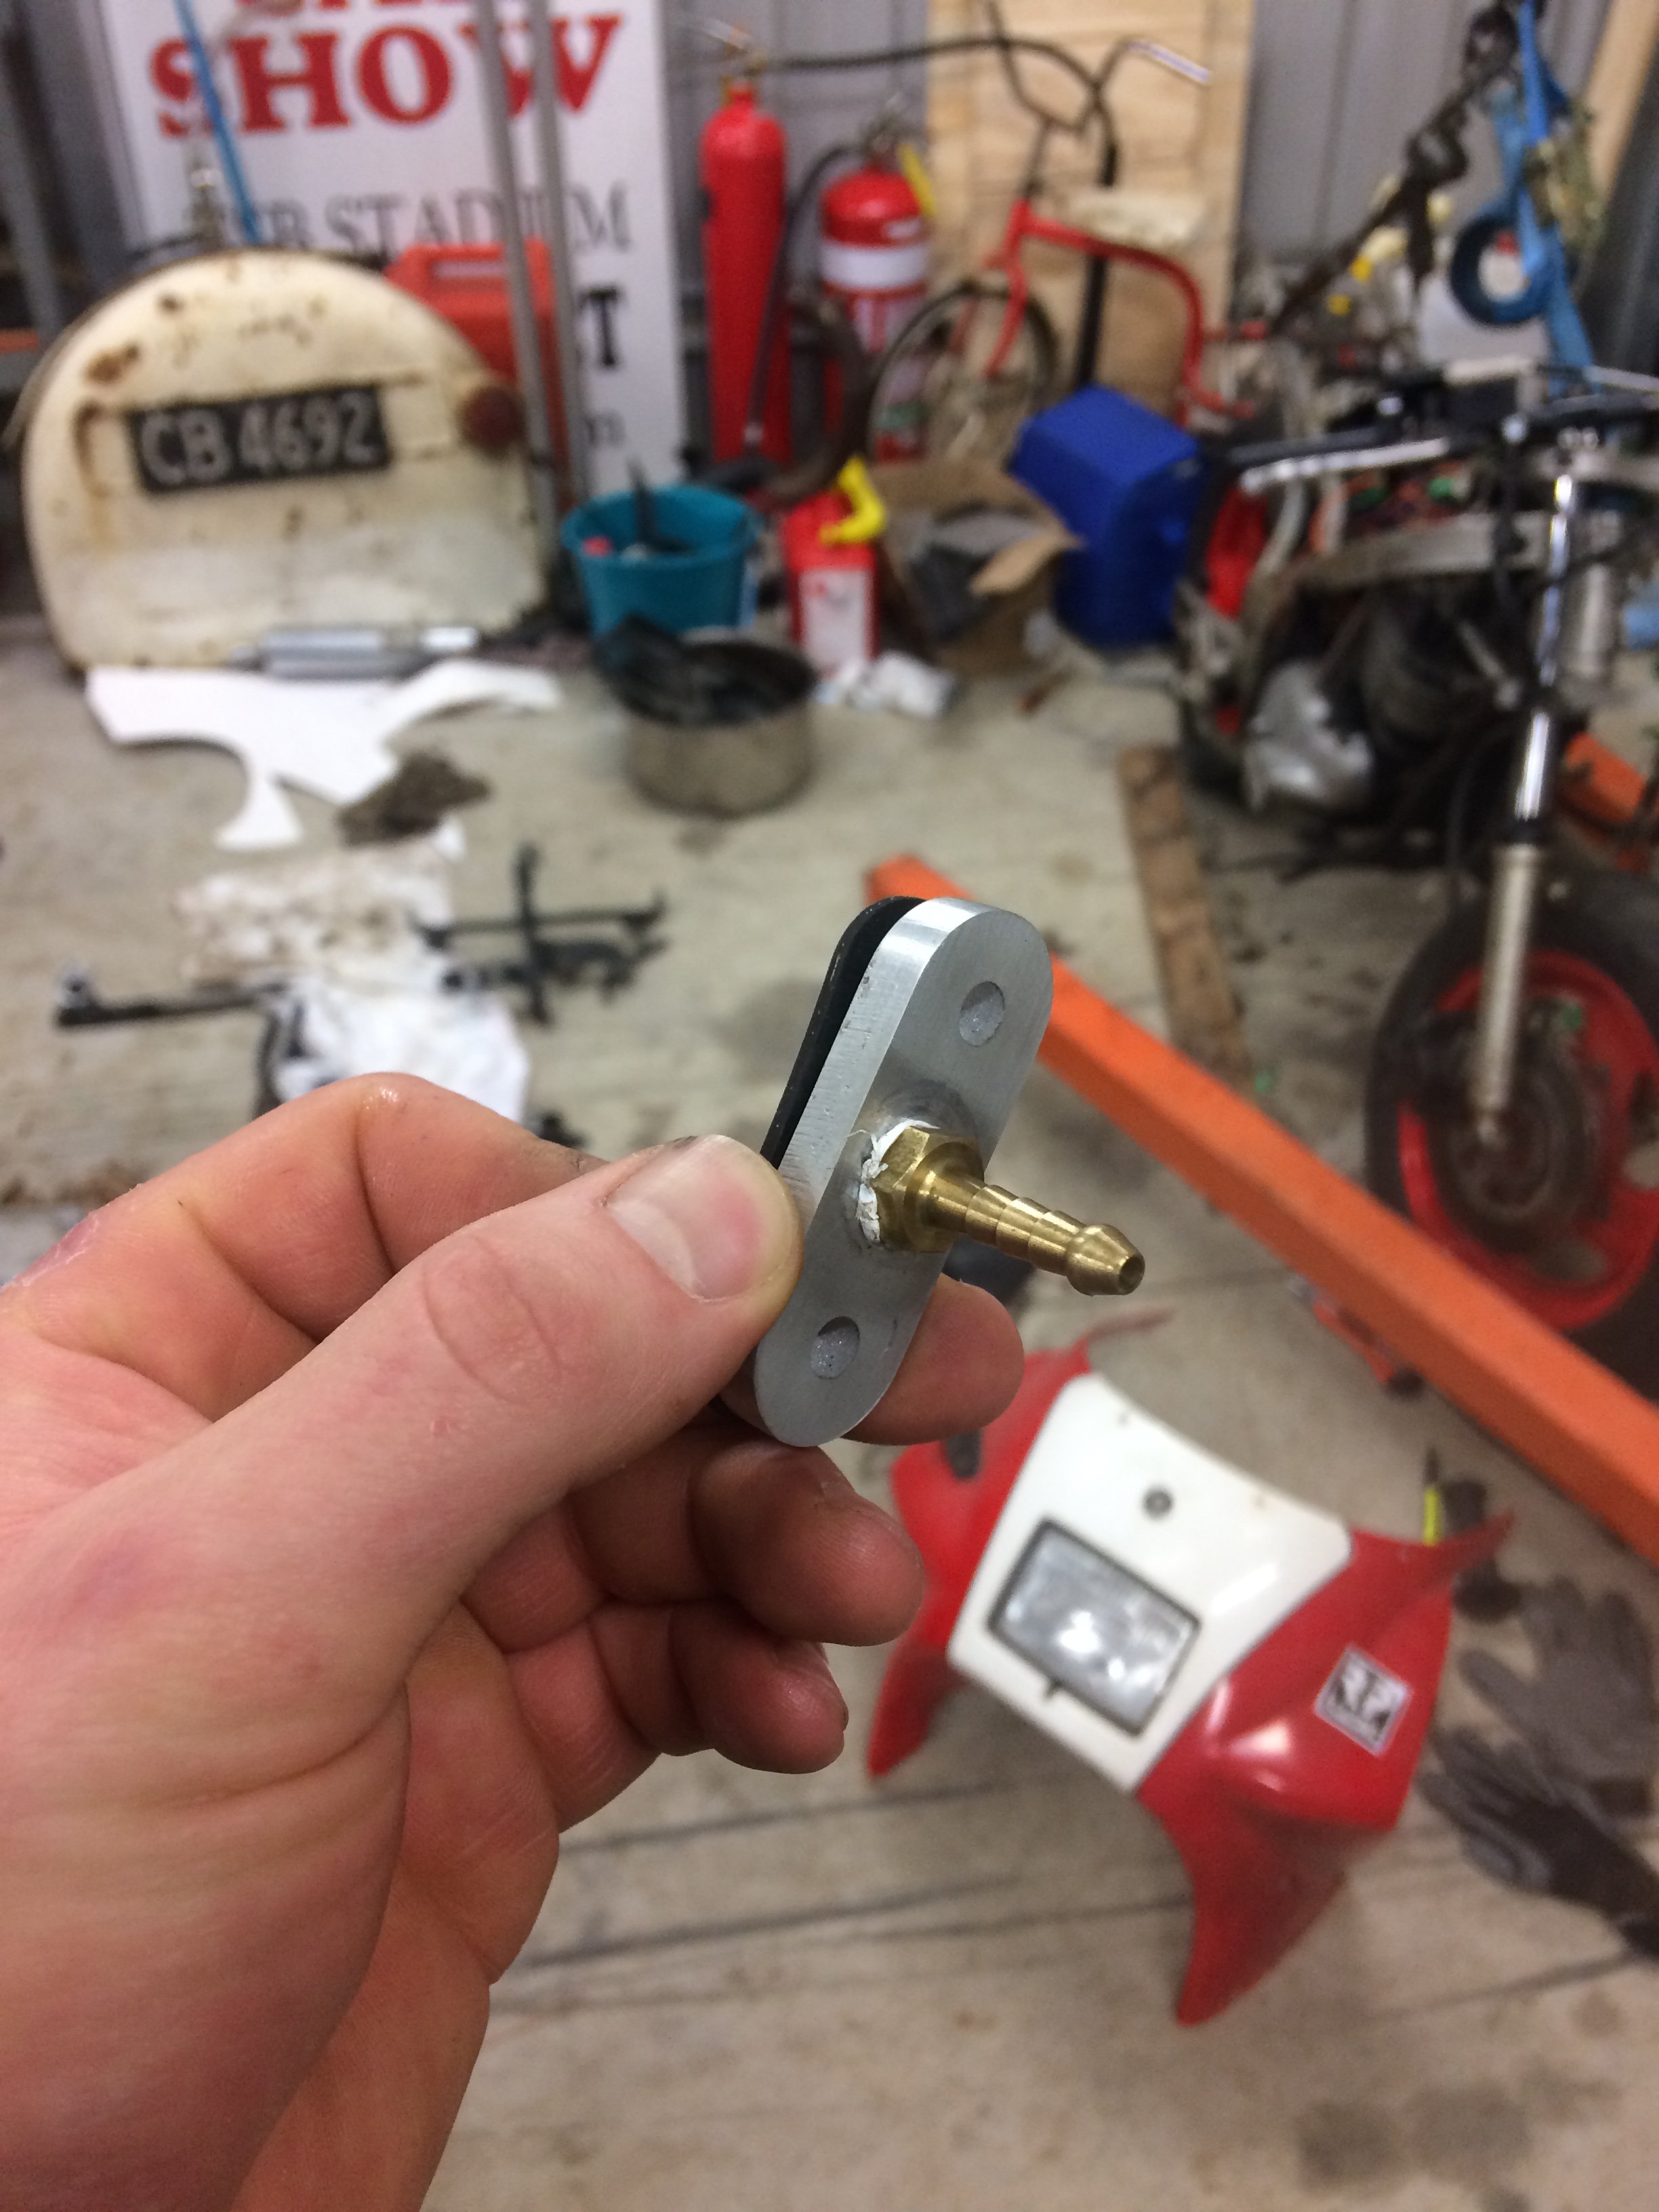
Fuel petcock was ROOTED so I've just ditched it, made a little flange and a nipple which I'll plump to an inline tap and filter
2 points
-
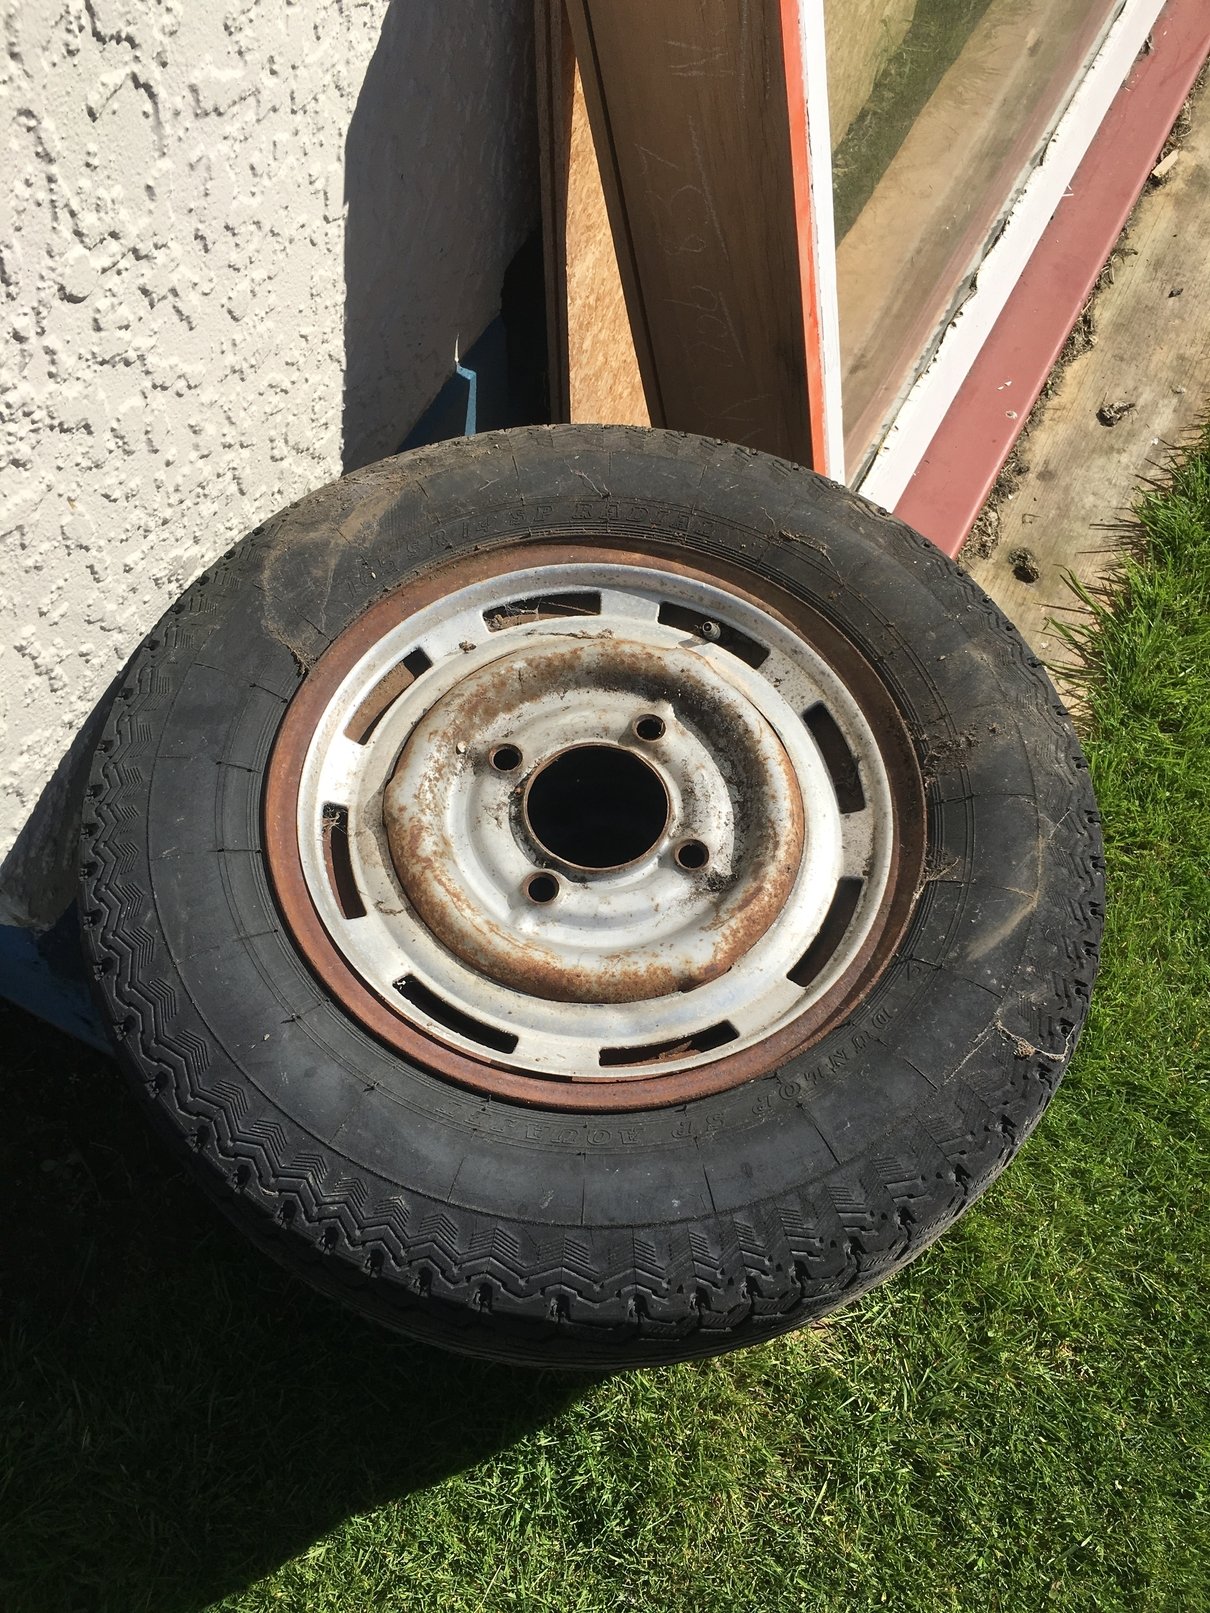
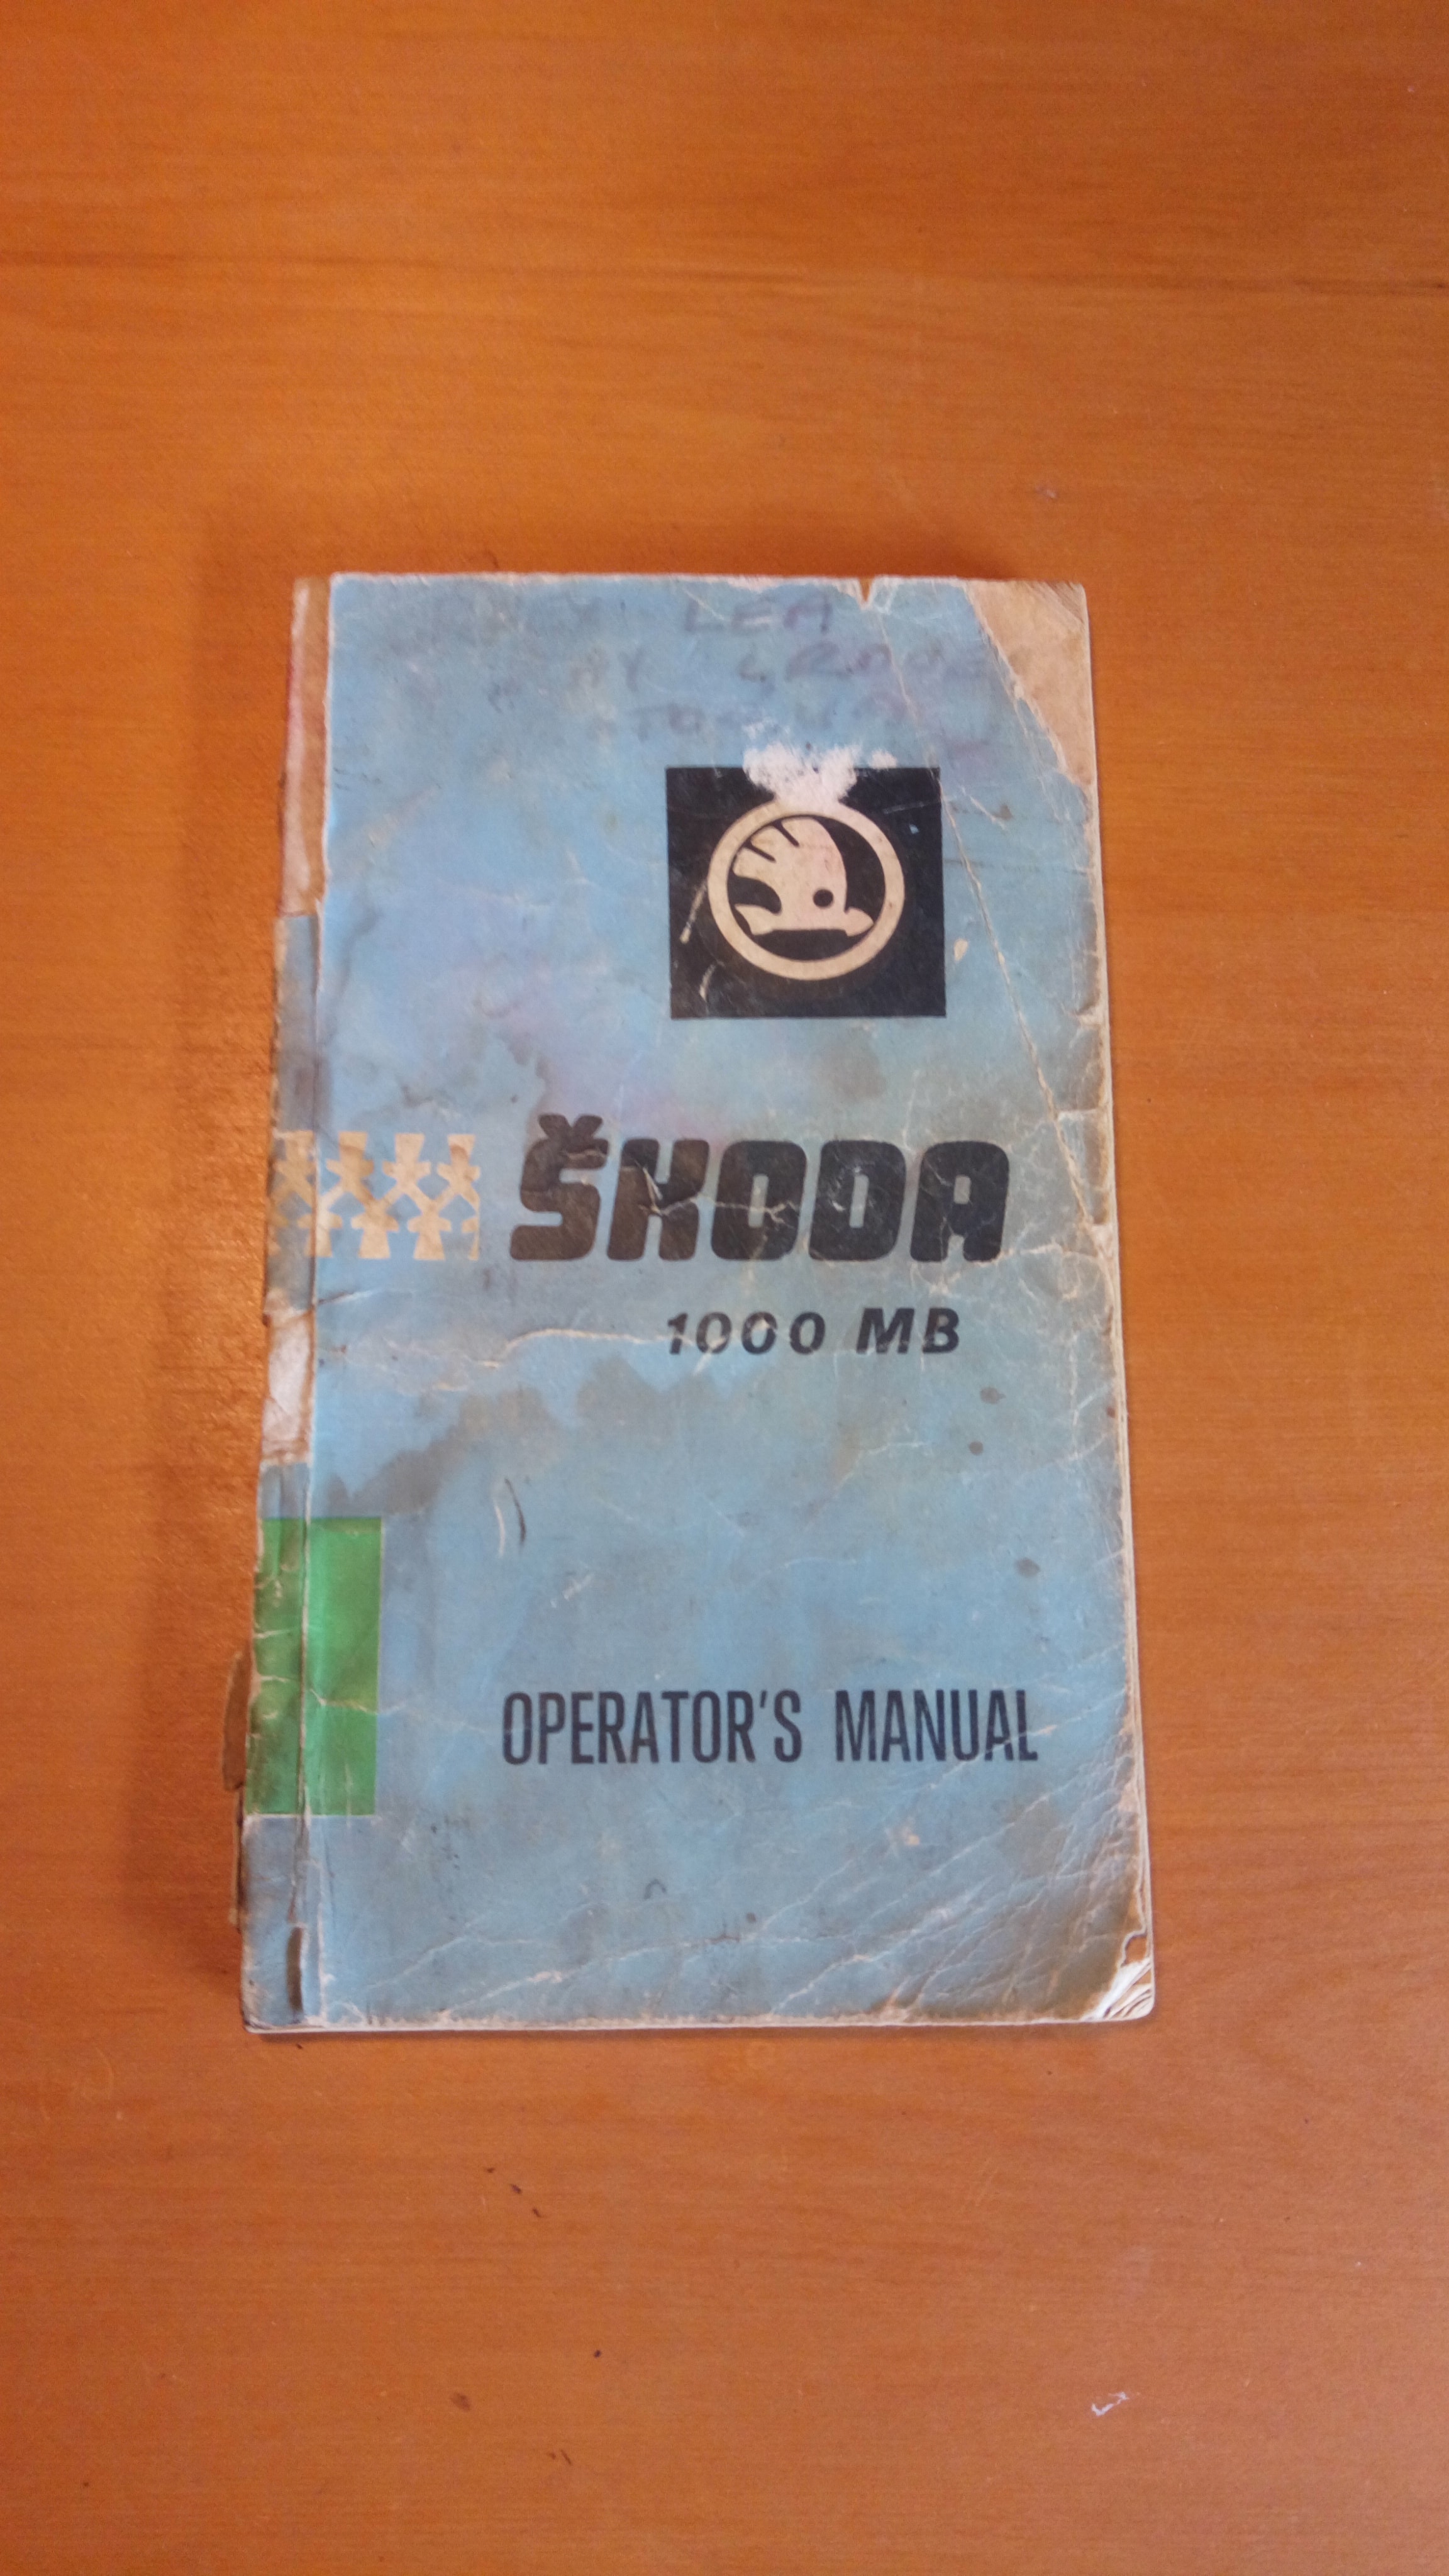
$2.95 on Trademe very well spent. Pretty tatty but complete and from the model's launch in 1964.
2 points
-
Hi, I've got a wilwood pedal box which has the clutch and brake pedals spaced reasonably close together. My factory pedals have dog legs in them (and are considerably less beefy) to get around the steering column. As-is, there's no way that this is going to fit and allow a decent amount of pedal travel. My question is - I understand that modifications to a brake pedal is obviously out of the question. But seeing how a clutch pedal failure is comparatively non critical... Could I space my pedal box over to the brake side, and then fit a modified pedal for the clutch that's got a bend in it? It's hilarious how massive these pedal stalks are compared to OEM ones which are just a bit of bent plate. A more structurally sound version of this:
1 point
-
chur & yeah even though the odds are there will never ever be another situation like this but yep that's why I persisted & posted the 'fix' Drove to Palmy & back over the weekend, car hasn't gone so good! Be interesting to see my Fuelly Sig 'mileage' get better numbers from now on! bar a minor mishap with the muffler1 point
-
Nice, and good job posting the 'solved', helps others!1 point
-
I have a stack of closed cell foam one sided sticky tape, should be thick enough to close off the gaps...1 point
-
Think it is 6mm, its easiest to cut 2/3rds of the way through when you want a bend then weld it afterwards. Pretty easy to tweak it then.1 point
-
It was a hypothetical question lol. More around was there any rules that says that there must not be holes, like there are specific rules around the size of rust1 point
-
The 50mm rule is only for places in the shaded area of figure 3-1-2 https://vehicleinspection.nzta.govt.nz/virms/in-service-wof-and-cof/general/vehicle-structure/structure-incl2.-frontal-impact#figure312 Doors must have no rust within 150mm of the hinges or catches.1 point
-
I picked up the completed radiator, the dude supplied a high quality fan and modified the thermo cover to have a rad cap as that's the highest point in the system now. Unfortunately this has evaporated a pretty significant proportion of my financial reserves, so much so that I cannot afford the chassis coating I did scrape together enough wedge to order what I needed from Trundles after checking the rest of the engine, which appears to have been recently rebuilt and looks pretty good. There is some weird shit going on with what happened to it tho, it was probably turboed already, but this had been removed and the oil feed to what I presume was the turbo had no capping on it. This explains the shitload of oil on the diff and engine on that side, and the lack of sump oil, and the seizure.. But why? Anyway, I have been steam cleaning all the bits and prepping to get it back together; Trundles bits should be here next week sometime. I also cleaned up the diffs, with cleaned up caliper insides and new brake lines; Then I put a whole lot of shit on tardme, might have to sell some bikes and shit I don't really want to...1 point
-
1 point
-
How it should have always been. The pedal set fits great. I'll need to cut the hole in the firewall for the master cylinder but that's the extent of it it. Seeing three pedals makes me very excited for the future of this car.
1 point
-
Next thing was to sort brake lines, front calipers and coilovers. The car came with a home made pedal box with a balance bar it works ok I think it needs a but of strengthening, under hard braking it flexes the fire wall. The other thing with was the master cylinders they used where cheap Chinese trailer cylinders that couldn't stop sucking in air so I changed them out for willwood cylinders. With the brake lines I wanted them hidden as much as possible so most of the plumbing is on the inside of the firewall. It looked good you will just have to trust me as I dont have to many photos. The only place in engine bay is about 100mm section on top of chassis rails. I used right angle bulk head fittings to keep it nice and tidy. Then braided lines to rebuilt AE86 front brake calipers. The struts are ae86 with autolign built coilovers with 4kg tein springs and keepers on top and monroe shocks valved to suit spring rates. Other bits on the coilovers are T3 camber plates up top and at the bottom (not actually part of the coilovers but it this let's you use 86 strut in the kp) T3 starlet to AE86 collar thing that slips over starlet ball joint and T3 RCA. I currently have the T3 knuckle in the car and I'm using the the second hole currently in the hope to achieve more steering lock now I have another set of modified Ae86 knuckles to chuck in the car (but that's going to far into the future). Note: I'm also running a apjs lock spacer.
1 point
-
Door is being a pain in the ass to hang. The problem being that every point of reference has been dicked. Got the lines pretty good, but the bottom of the door over hangs the sill by a good 1cm in places How, I measured and checked everything and used the other door frame for reference. The sill is dead straight. Oh the door is bent Some hammer and dolly work and it's coming into shape. Looking at unmolested utes, there is a prominent angle here. Mine is smooth and bulbus . I assume it was either bent out to match the previous sill, or was bent already and the bogged the sill to match. (Same issue with the roof lines, bogged over and rounded off)
1 point
-
Alright "we" think we got it : for those following1 point
-
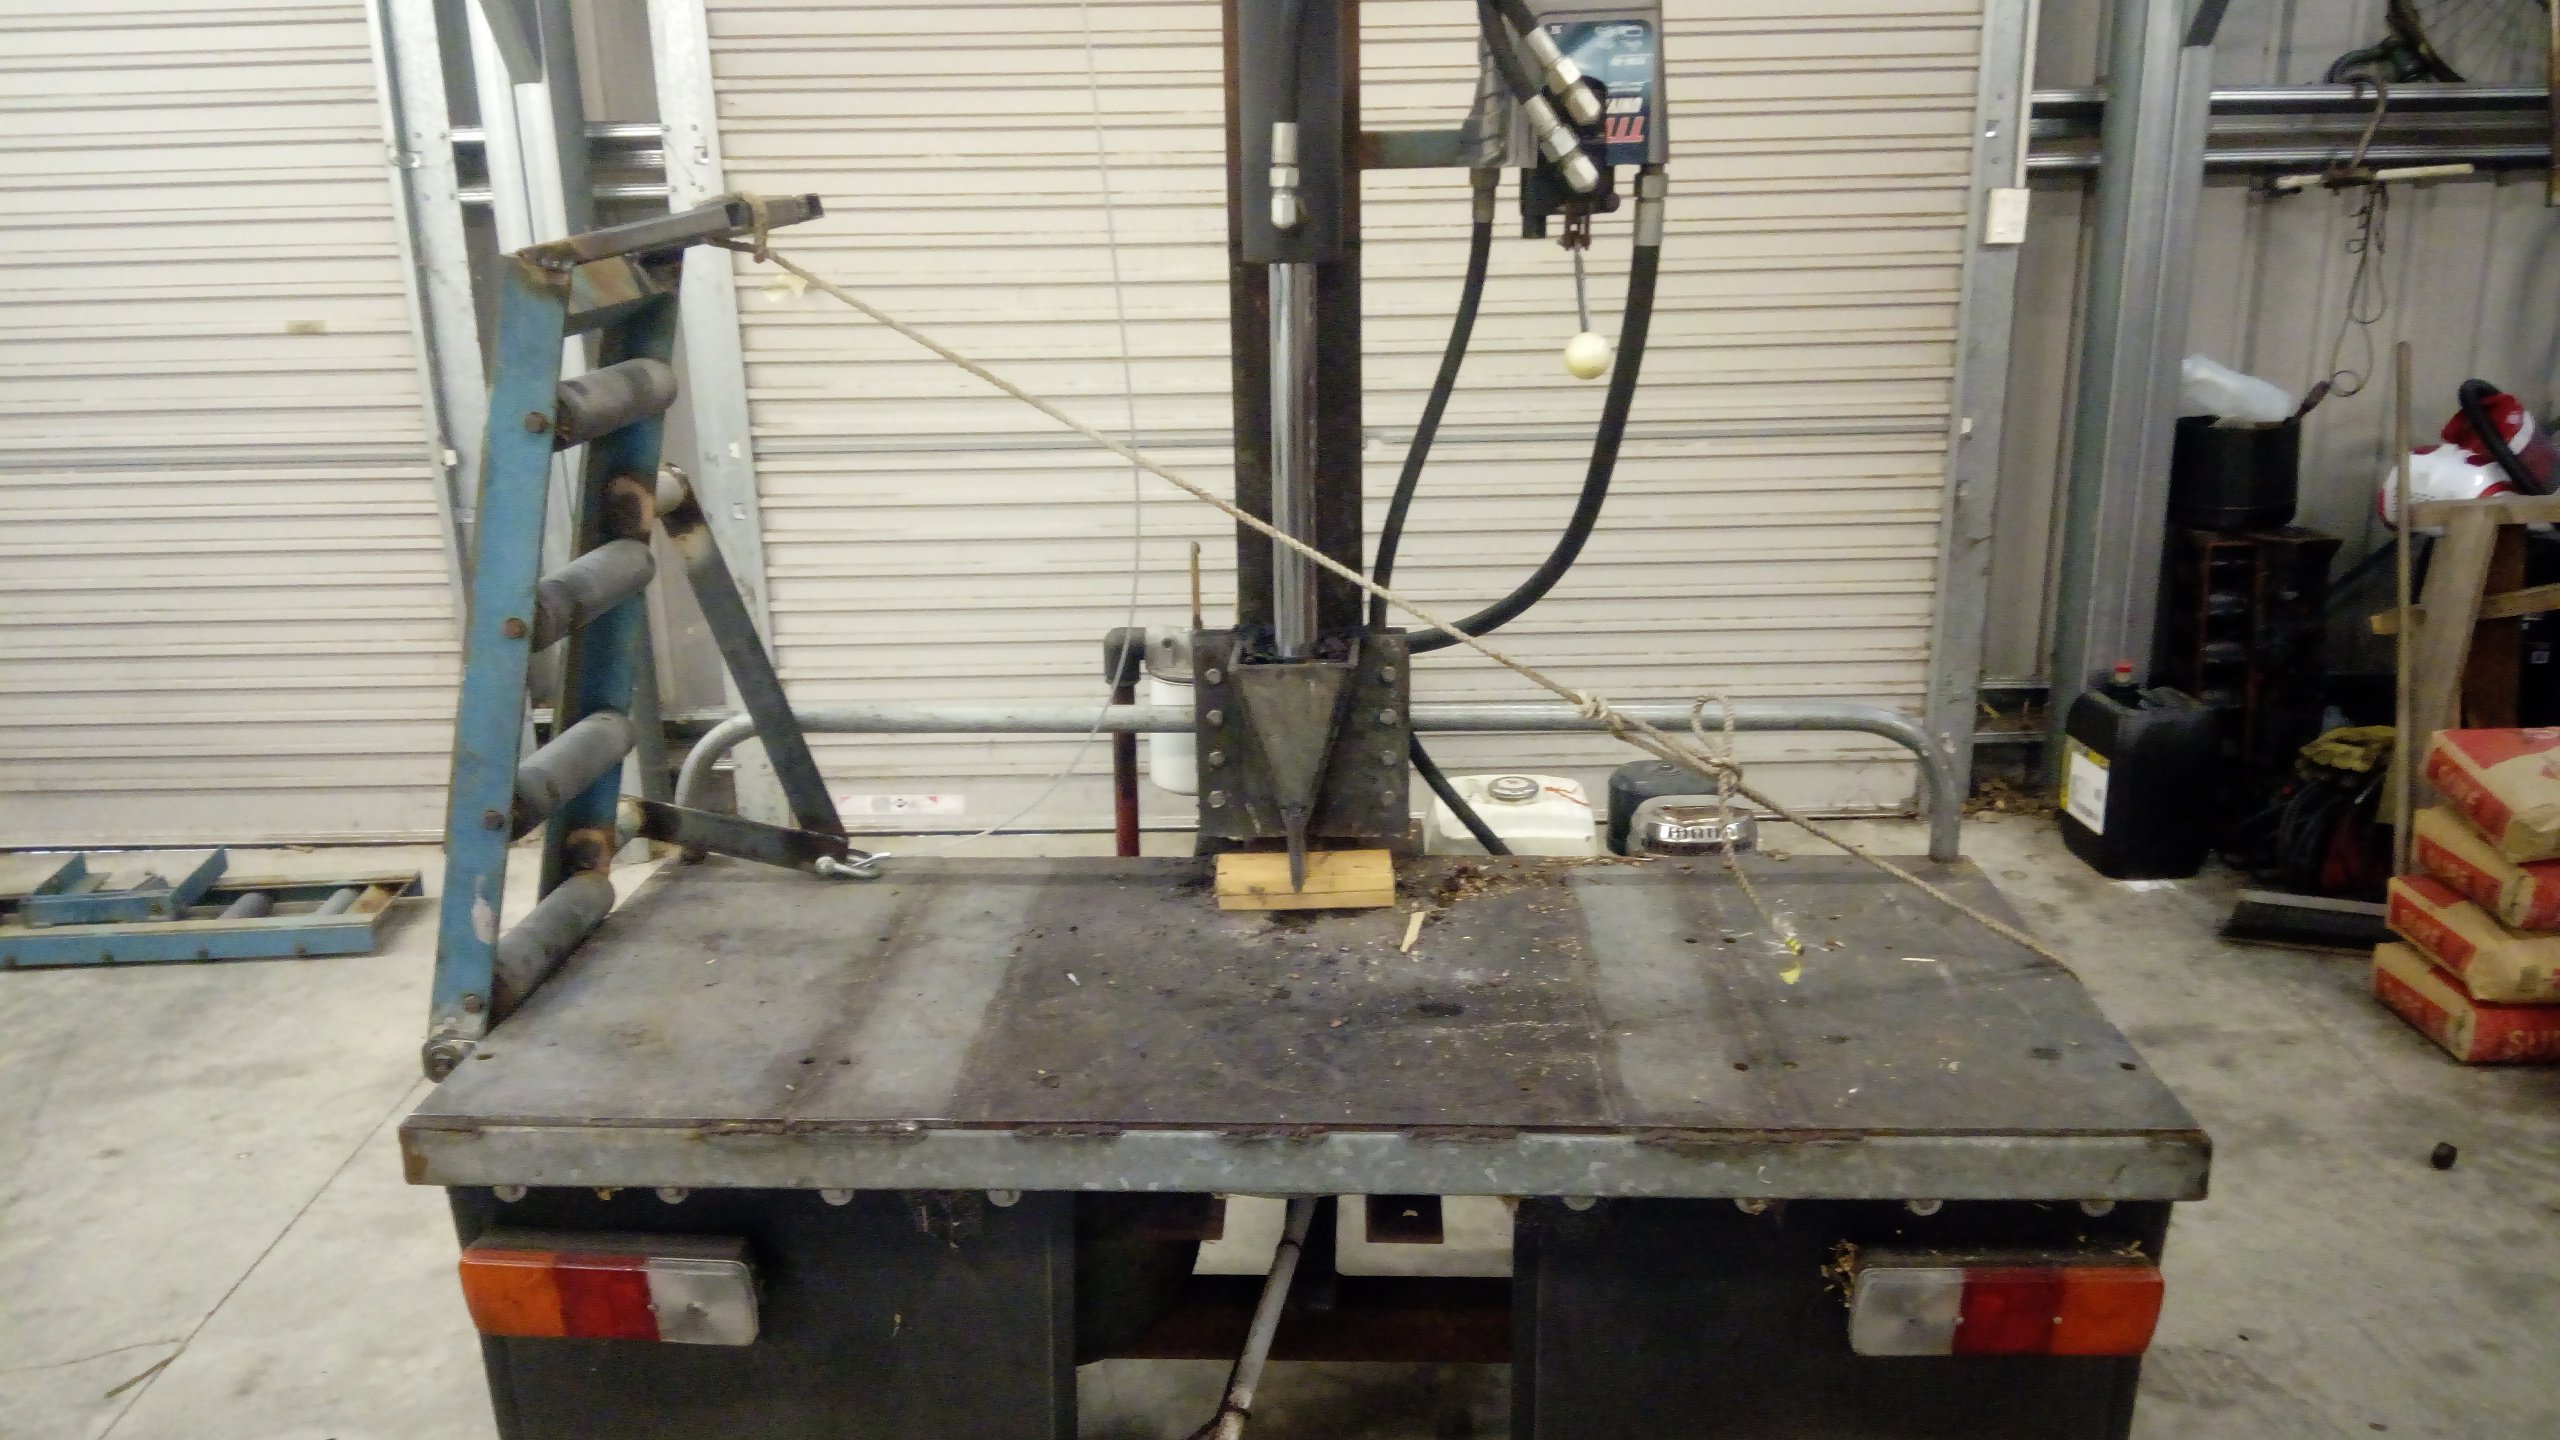
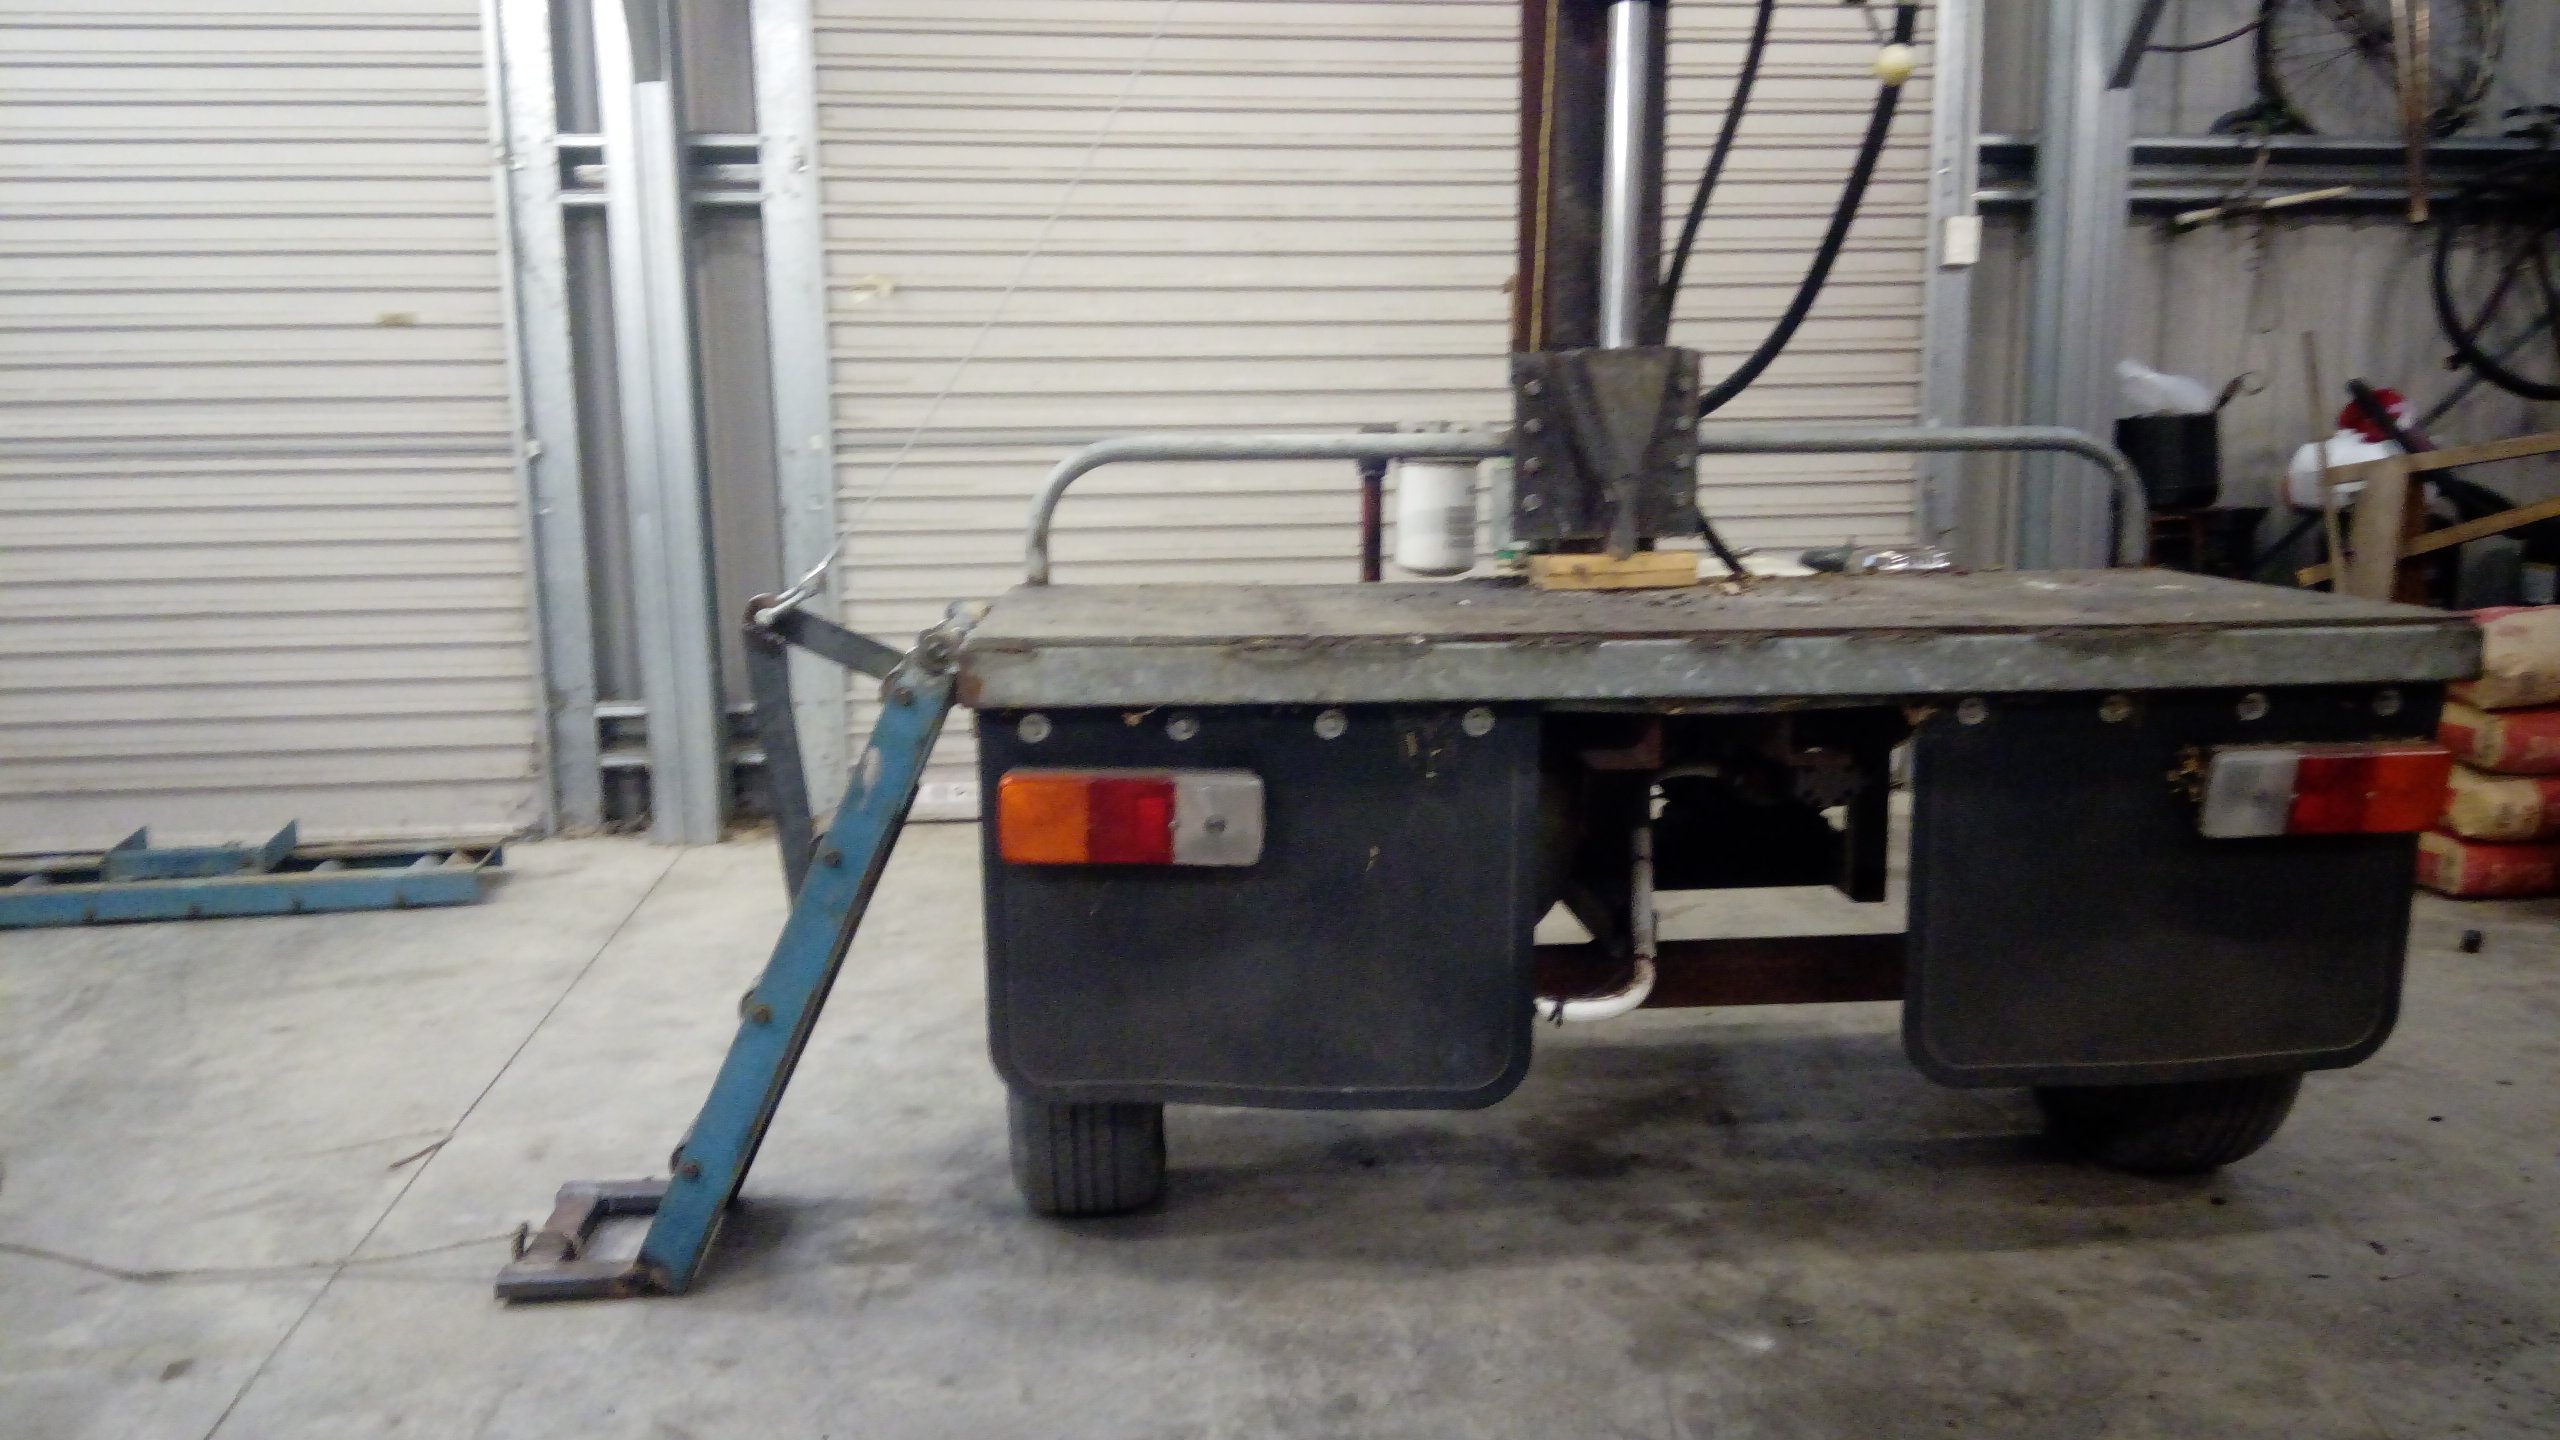
I finished making this slightly cool block lifter for my log splitter this afternoon. As per it's scrap steel and bits out of the bin. Works great. @moparmuppet let's see a picture of your log splitter, I couldn't picture it when you described it in the trade me thread.
1 point
-
HOW DO YOU WEIGH A BLOODY MILLENNIAL? IN INSTAGRAMS.1 point
-
BY.JINGOS THIS ISNT THE BRIDGE CLUB FORUM???!?! ANYWHO I CANT WORK THIS INTERNET TJING OUT MUCH TOO COMPLICATED FOR MY ME SO I GOT MY LOVELY GRANDSON TO WORK THE INTERNET FOR.ME AND HE GOT INTOUCH WITH A NICE CHAP FROM DUNEDIN.AAHHH DUNEDIN EDDINBURGH OF THE SOUTH THE CALL IT LOVELY TOWN.I REMEMBER TAKING MAVIS THERE FOR OUR HONEYMOON.But SADLY MAVIS ISNT WITH US ANY LONGER SO MY LOVELY GRANDSON FOUND ME AN ENGINE IN THE INTERNET ON SOMETHING I BELIEVE HE CALLED tRADEM.I HAD TO GO TO THE BANK AND DO AN ELECTRICAL FUND tRANSFer. WHICH HAD ME MOST BEWILDERED BUT NICE LASS AT THE BANK SAW ME RIGHT AND HECK KEITH YOU SHOULD OF SEEN HOW HIGH ABOVE THE KNEE HER WORK BLOUSE WAS. LOVELY LASS AND QUITE THE LOOKER? MY BIKE IS A SUSUKY MADE BY THEM JAPS WHICH WOULD HAVE JERRY TURNING IN HIS GRAVE BUT IT HAS A VERY RELIABLE ELECTRIC SYSTEM MY LOVELY GRANDSON HAS THE ENGINE BEING SENT TO THE RESTHOME AND IF MY ANGINA ISNT.two DICKY I WILL FETTLE AWAY AT GETTING IT TO FIT MY SUZUKY WITH THE HELP OF MALCOM AND TREVOR AT THE MODEL ENGINEERING CLUB. Have.YOU SEEN THE 5.INCH SCALE MODEL OF FLYING SCOTTSMAN THAT MALCOM IS BUILDING!? I look forward to ENJOYING A CIGARETTE AND COLD CAN OF LEOPARD OVER A GAME OF EUCHRE. Tell.IRIS I SAY HELLO AND THE HIP IS DOING GOOD AFTER MY RECENT SURGERY OH AND.PLEASE FEED.THE CAT WHILE IM AWAY?1 point
-
ILene h0w do you turn this damn camerA thing around!!1 point
-
GOOGLE SEARCH CLEAR HISTORY PORN HUB CLEAR HISTORY HOW TO GET ON GOOGLE
1 point
-
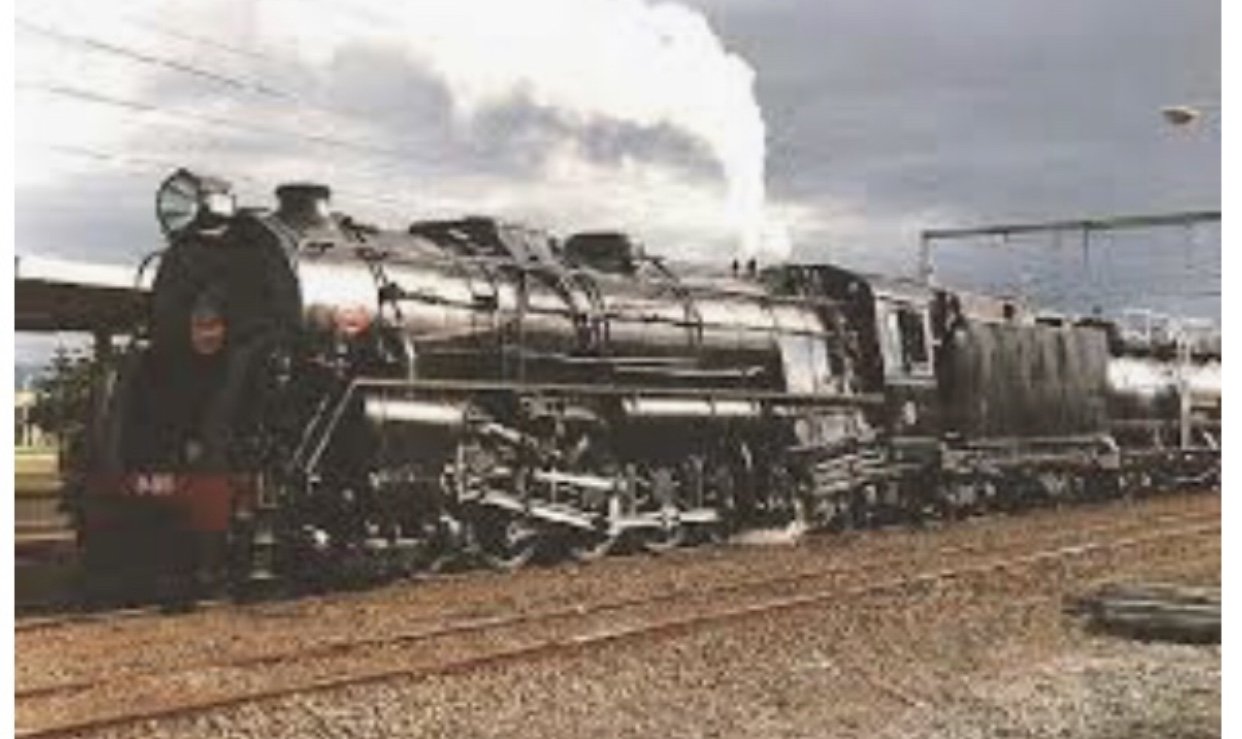
HI TOOMEKE THANKS FOR THE EMAIL I WAS JUST ASKING BERYL ABOUT YOU. SHE SAID SHE SAW YOU DOWN THE RSA ON TUESDAY LOVELY GIRL SHE IS BERYL ANYWHO HERES MY BIKE IM RIDING ITS A 196x YAMAHA YG5 IM THE SECOND OWNER.IVE HAD IT SINCE NEW ALL I HAD TO DO WAS CHANGE THE OIL EVERY FORTNIGHT EACH MONTH AND CHANGED THE ENGINE ONCE TO A MODERN OVH SINGLE CAM 110CI 4 STROKE UNIT. GOES LIKE A CUT CAT ON RAILS I TELL YA. JUST LIKE THE GOLDEN AGE OF RAILWAY IN NEWZEALAND REMEMBER THE NZR KA 4-8-4
1 point
-
Eventually got tired of the high life and found some cheap Hayashi Street CR mags with good tyres. Found springs at zebra that fit result: I think I'd like to bring the front down some more, the back sits just a little lower. I found some unknown mitsi shocks for the rear, and had bushings machined to suit. Such a huge improvement from the boat-like handling characteristics it previously represented. I just installed standard front shock inserts to get the front stiffened up. New Nolathane went in all round, too. On the lookout for a diff, this one has done nearly 300K and it makes some pretty terrible noises, not to mention both wheel bearings need replacing. The plan here is to sort another replacement diff (E312), new brakes and bearings/seals/clean and then install. To keep me busy until I sort the diff, I went ahead and tracked down a 1G-GE, courtesy of a fellow GX enthusiast. Sold in an unknown cond. I didn't really know what to expect. This should be a big improvement from the asthmatic SOHC 1G, having double the valves, bigger ports, and a cross-flow head. Although it won't be as simple as cleaning it up and putting it in, as it turns out it ran bearing number 2 and churned the metal filings from said bearing around the engine. Thankfully, the leaky SOHC 1G I pulled out earlier has put its hand up to donate the crank and rods. They have the same sized mains, too. (later 1G engines had different sized main bearings). That's all for now. Once the SOHC motor is pulled down and the crank and rods are test fit I'll send the block off for a dip and the head to be machined.1 point
-
finished modifying the crossmember and put it back in the car. everything's done now, fluid lines hooked up, kick down connected, shifter connected and spedo cable hooked in. just need my drive shaft back (should be Tuesday) then its test drive time. cant hook up the converter lock until i figure out how the fluid pressure circuit works which ill know when i drive it. 2019-08-10_12-08-21 by sheepers, on Flickr 2019-08-10_12-08-29 by sheepers, on Flickr1 point
-
oh yeah & these, I make these they sometimes come back for repair with Price tags attached over $1100, I've made 18 in the last year alone, & they've been a NWC product since early 2000's... one of our Higher end Products1 point
-
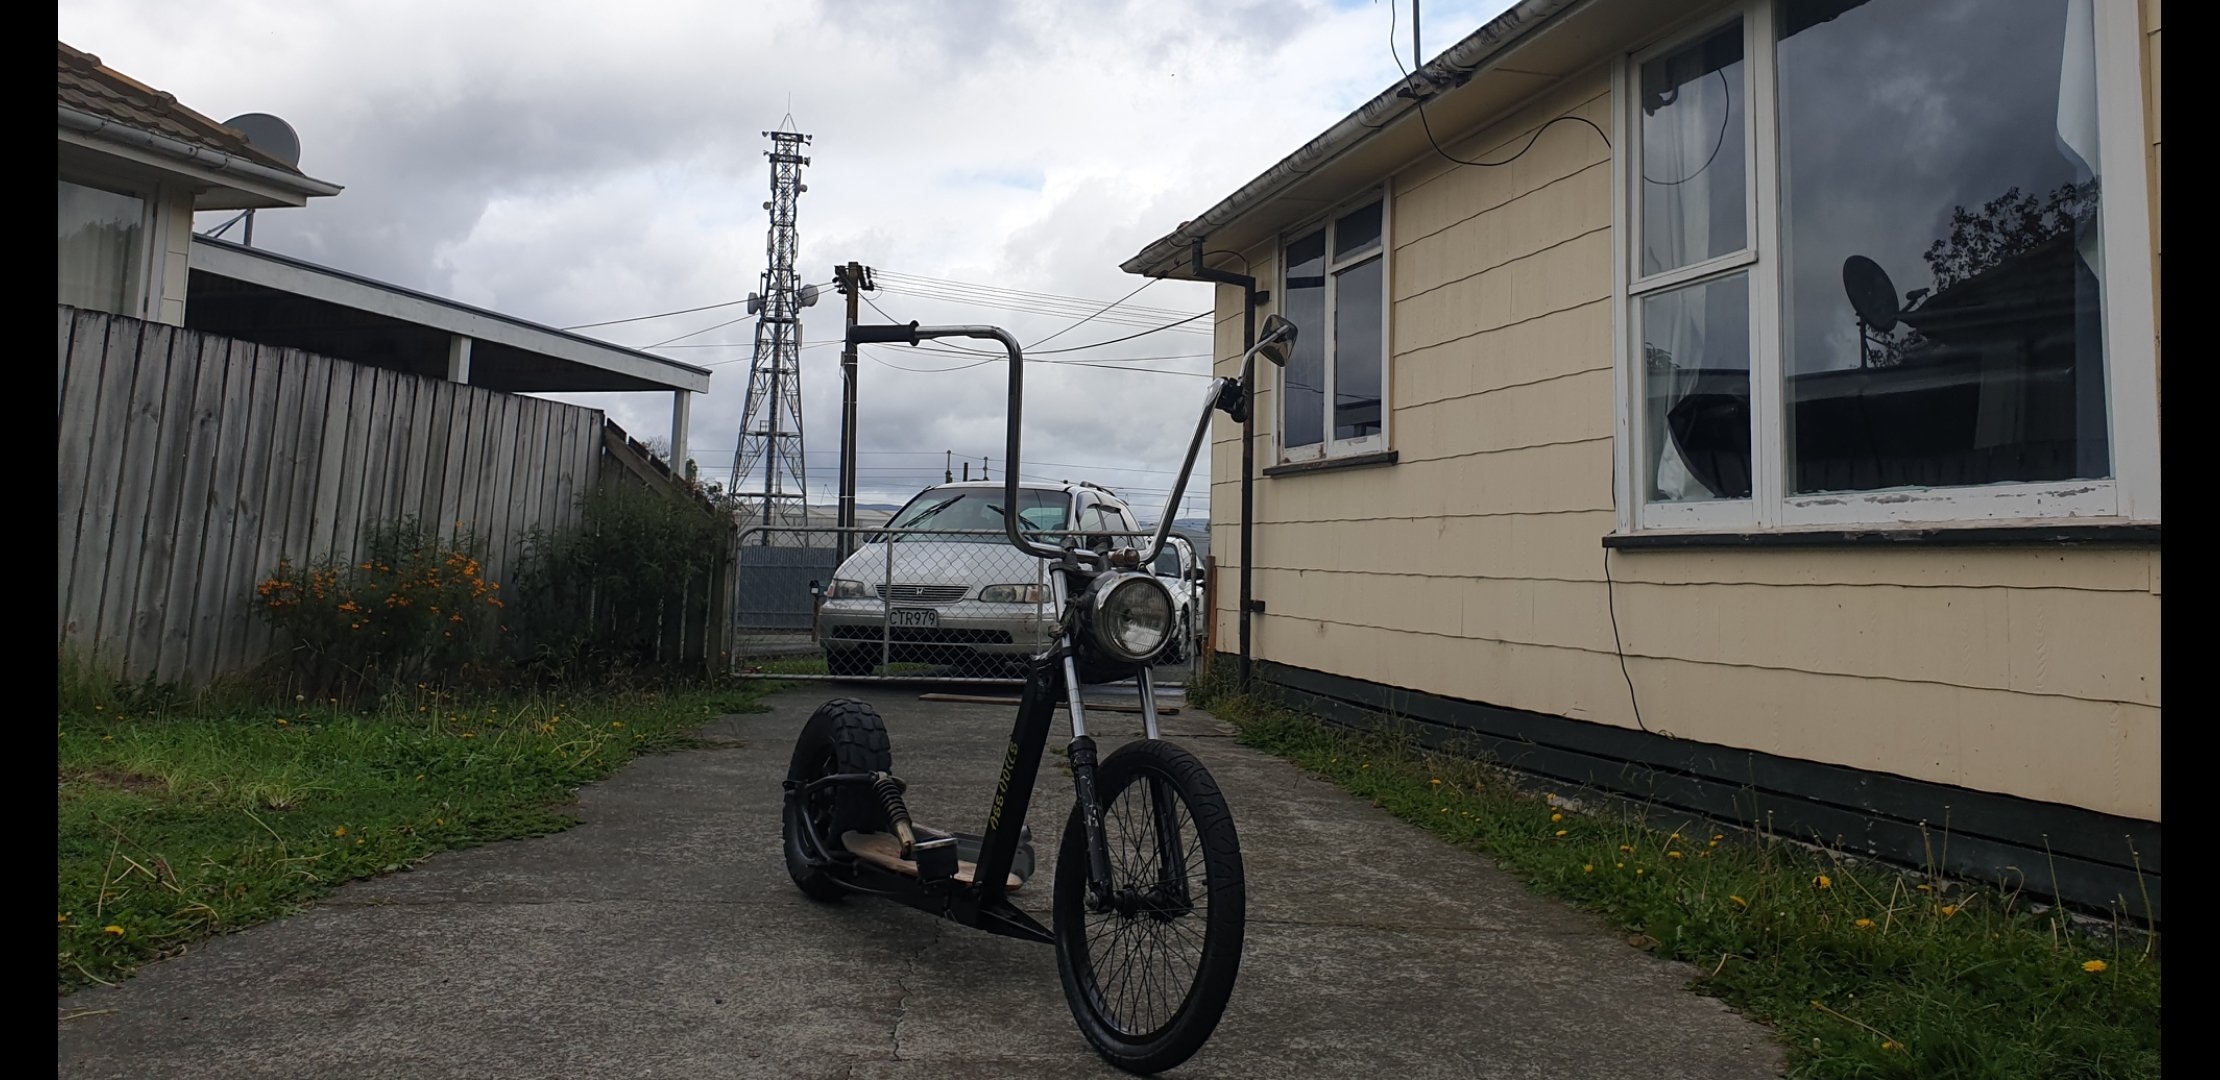
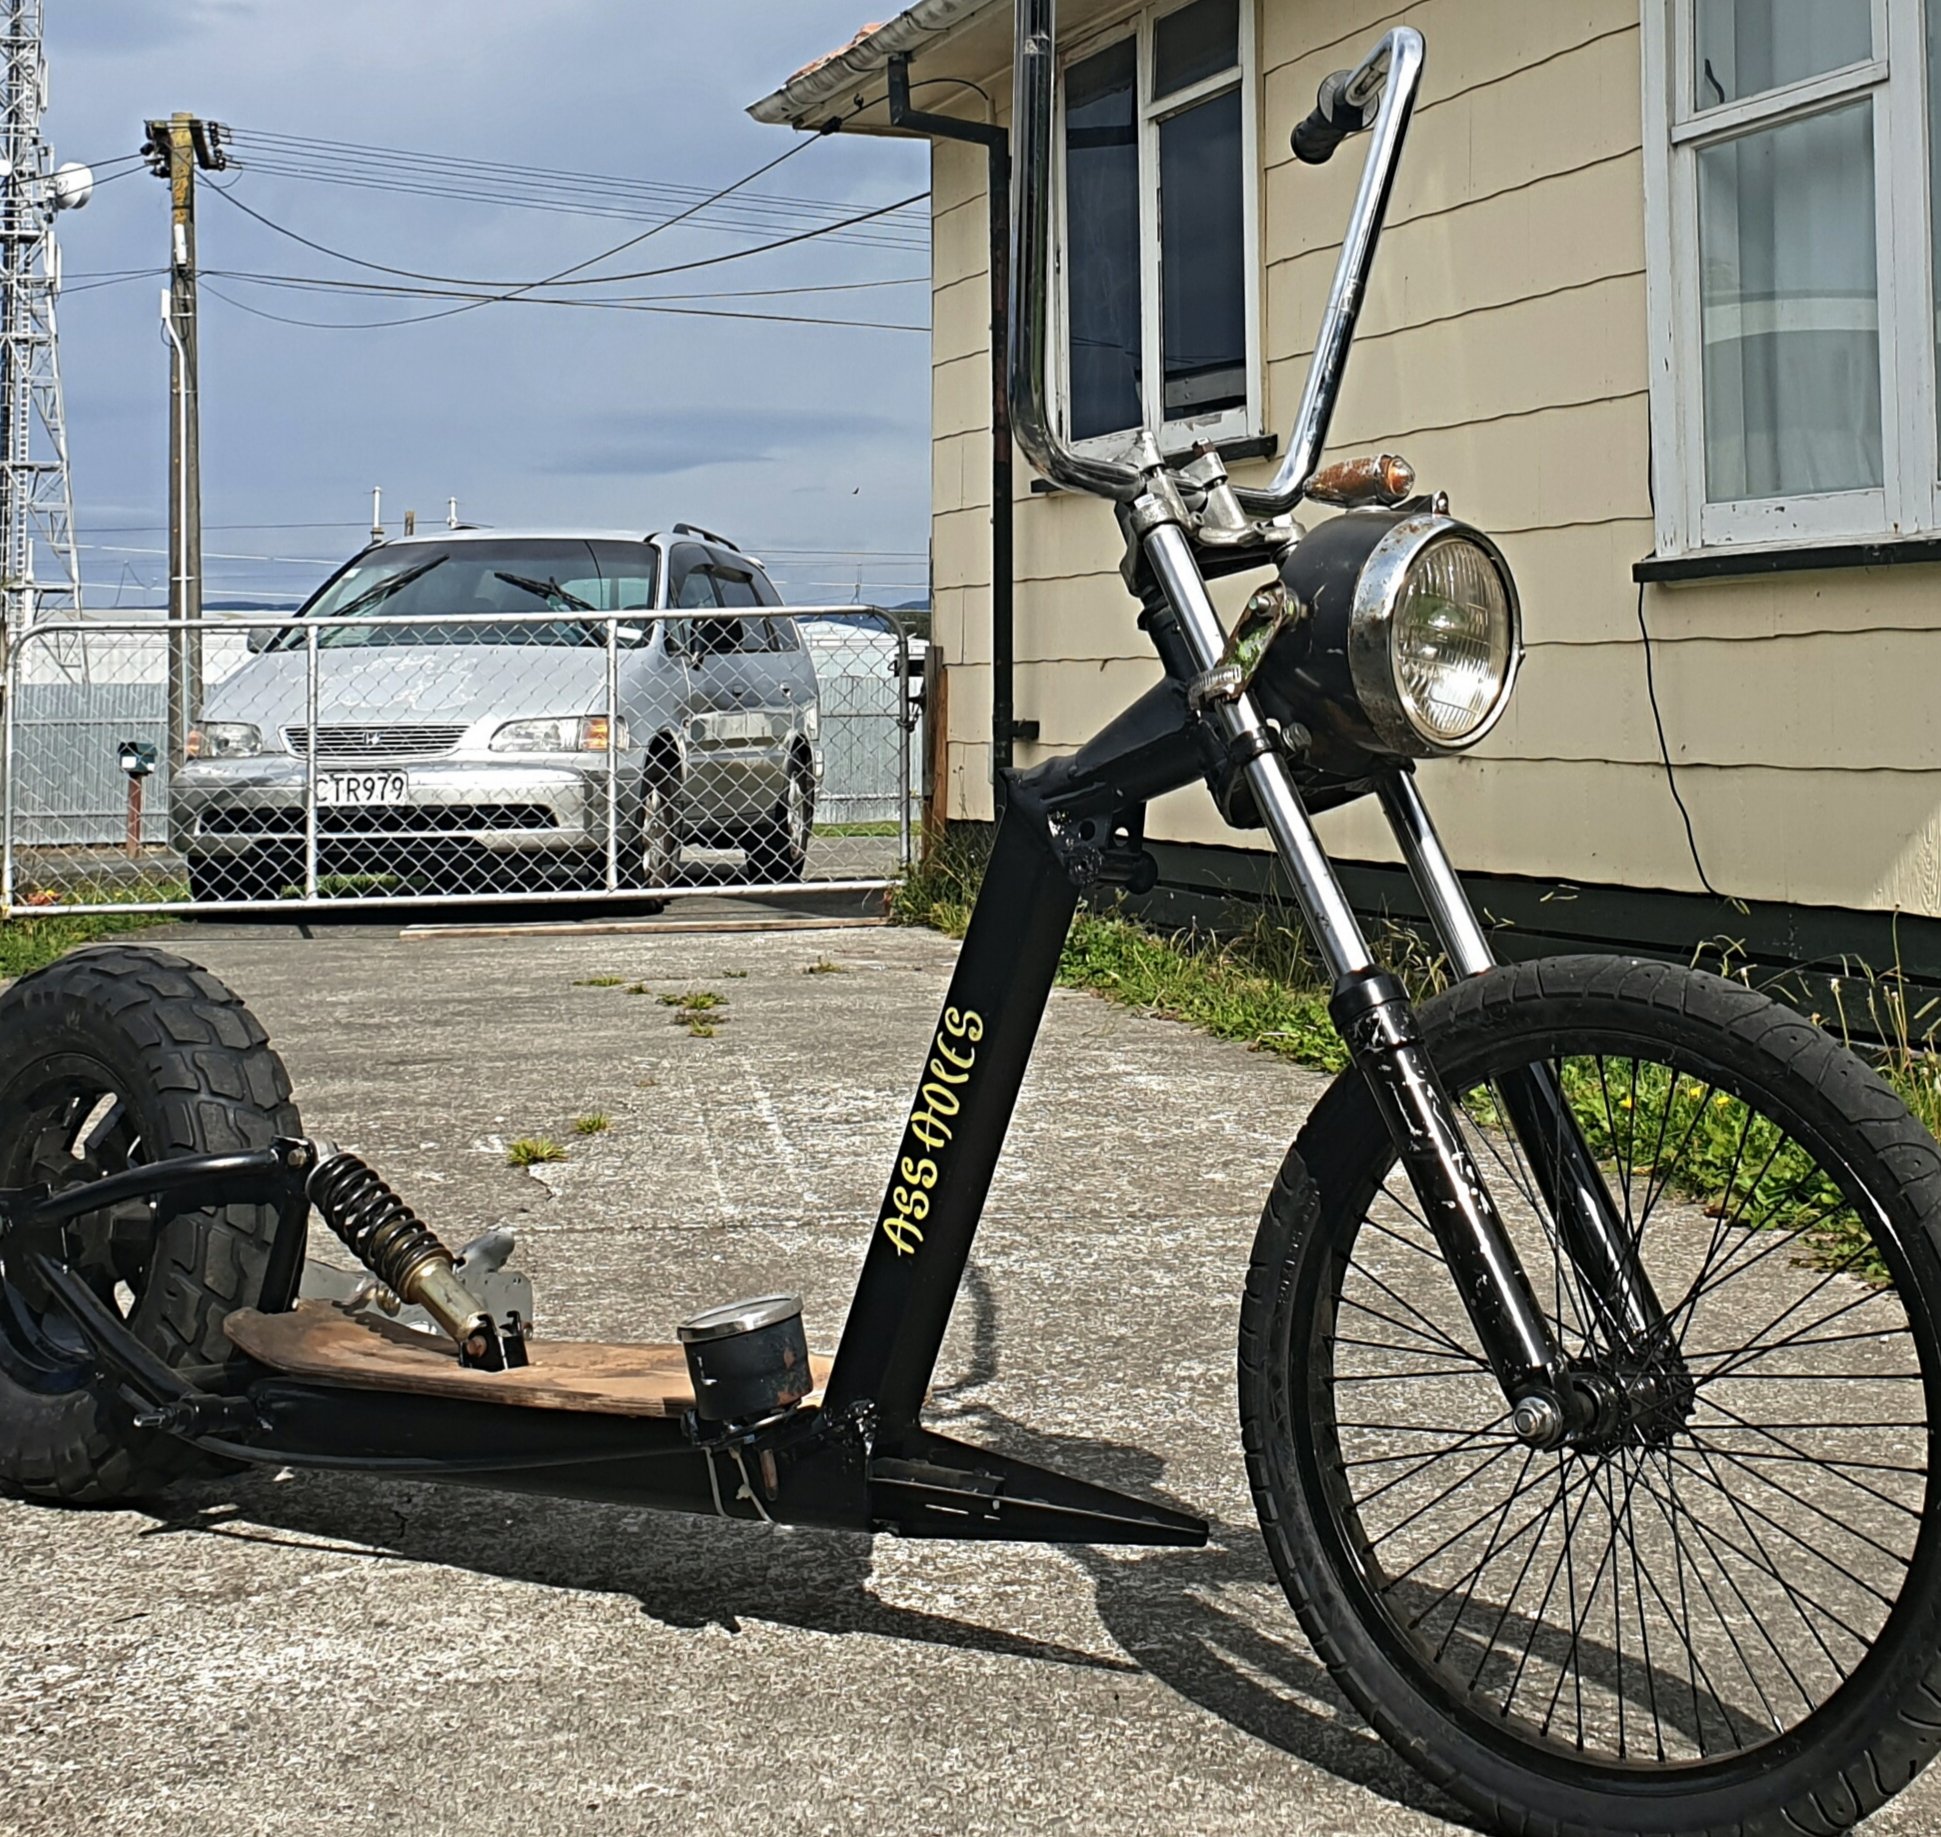
Heres a couple photos of my scotter i built to ride along with my kids along side them on there bikes ect. I built a few years ago. Had a diffrent user on this site then.. few years now. But anyway. Long bord deck. Working spedo. Harley 1inch apes. Dirt bike pit bike front end moped rear with swing arm. Fully working suspension front and rear cheers
1 point
-
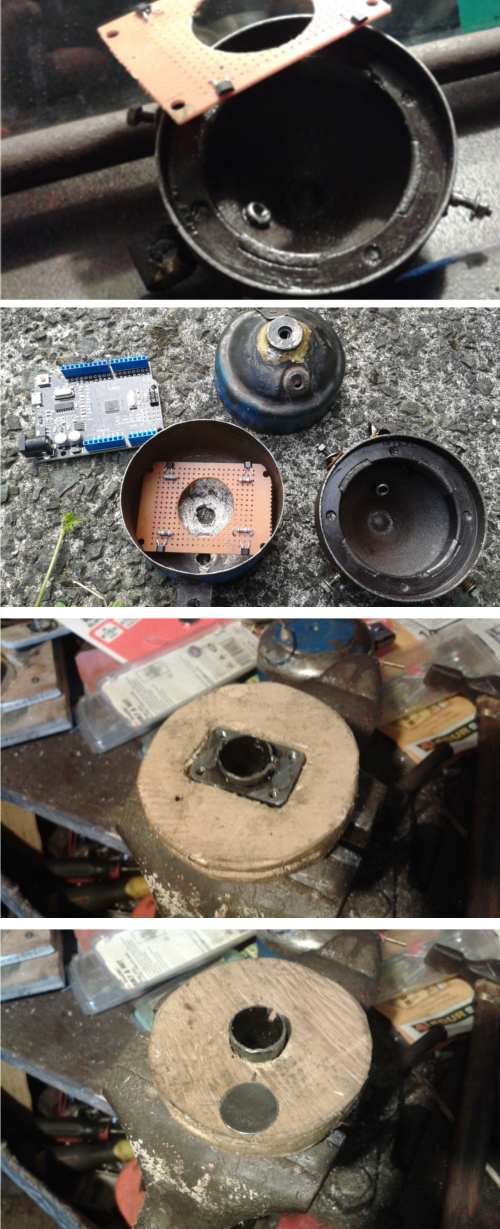
So some of you are really into programmable ignition and electronic sensors. I tried to make my own electronic ignition. After 3 seconds one of the MOSFETS running a coil shorted out. After 7 seconds all of them had. Each mosfet was rated at 20 amps. But considering they were dealing with the primary and ... lets face it. some of the secondary output (These old timers are like that) i don't think they were up to the million volt task. At least 2 hall effect sensors survived. Barely.
1 point
-
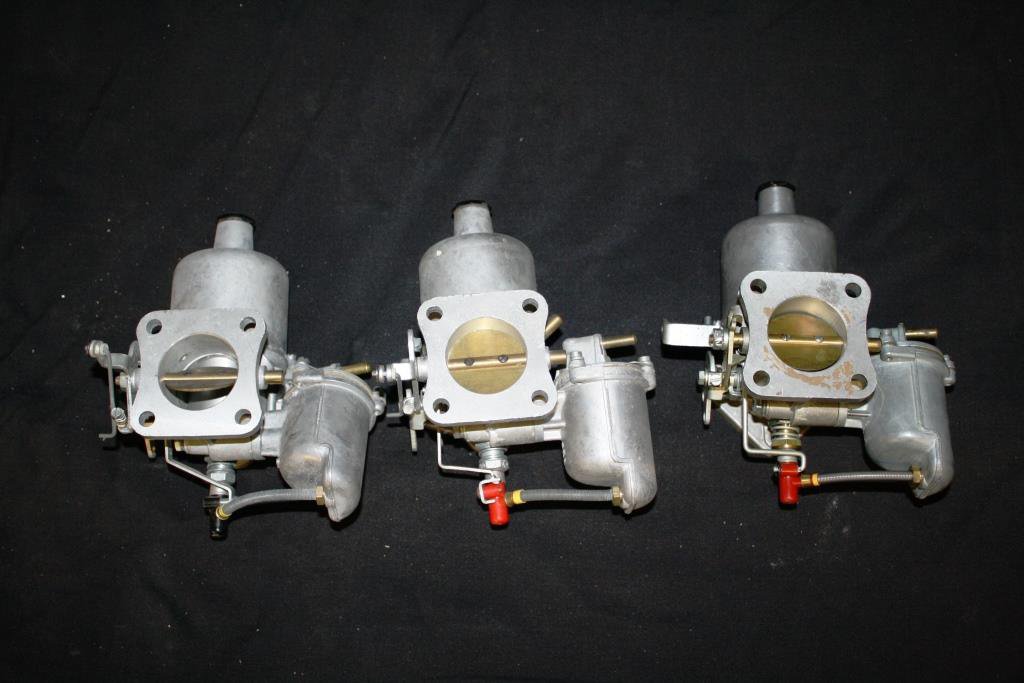
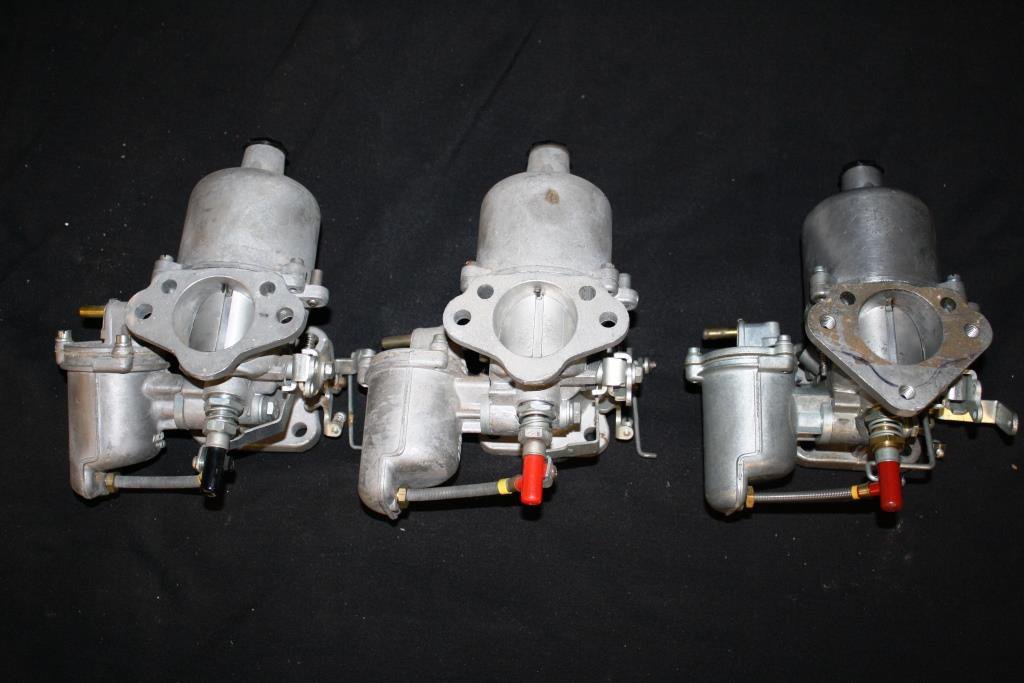
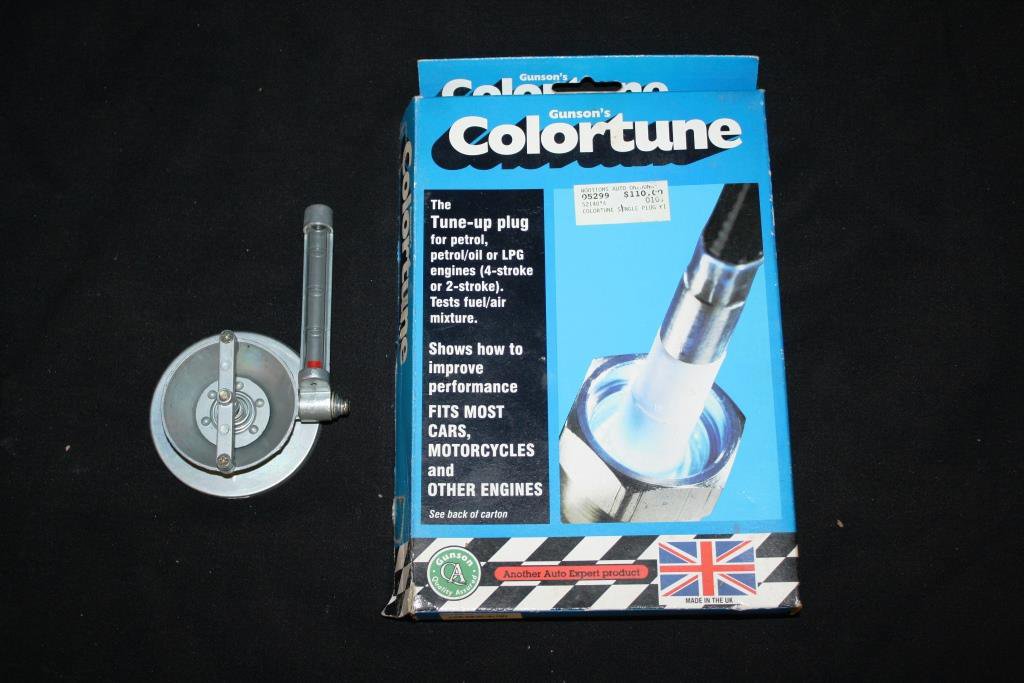
The initial plan was to replace the Spindles and Spindle Bushes and then re-kit the carbs but I managed to track down 3 new/old stock HS6 carbs for a fraction of the price – sometimes you just get lucky! The guy I bought them off even threw in a carb balancer and a Colortune Kit to sweeten the deal, there’s some good sorts out there.
1 point
-
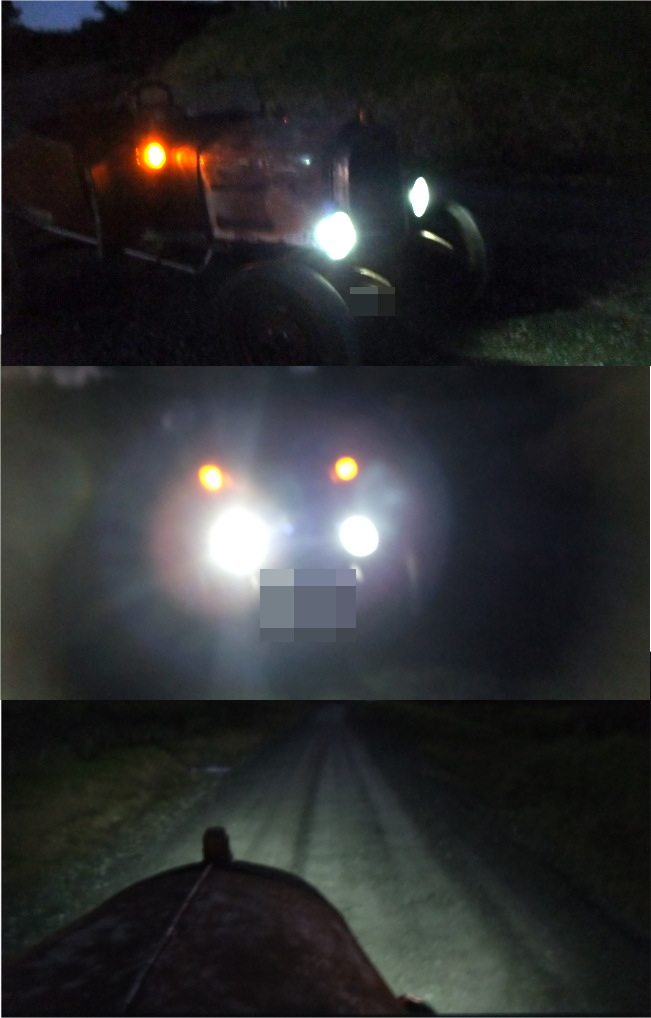
Have i tried to sell you on the merits of LED lights lately? Even on high beam the amps draw is maybe... 1.2 amp? According to a century old gauge anyway... much less than the 10 amps they were previously drawing. And other people can actually see the lights now.
1 point
-
So at this stage I had no dash, my intention had always been to go with something aftermarket, but I couldn't bring myself to pay $2000 for a black and white dash, so the hunt begin for the right solution. First option was to slow (OBD2, Bluetooth and Android tablet) So I moved onto a Windows tablet running PCLink, this worked well but I couldn't charge it at the same time as having it connected to the ECU, but i did end up racing with it and it lasted fine to my surprise. But it wasn't a long term solution so I ended up with this tablet for $200 with dual USB ports It works really well, I have a hard wired shift light/warning light above the tablet, so the tablet is just for temp's and pressures really.1 point
-
Hood tie down strap made from a leather belt. The belt is so long it forms a loop for someone 3 times my size. Could wrap that around my waist 3 times before it met the first belt hole, and it has a functional lock in it. Why would it have a lock? So i don't know if i should start a technical thread on "How to make trembler coils" as mine are toast and one of the borrowed ones died today. Never successfully made an ignition coil before, i think i'll need help of the electrical gurus on here.1 point


This leaderboard is set to Auckland/GMT+12:00