
Leaderboard


Popular Content
Showing content with the highest reputation on 02/24/19 in all areas
-
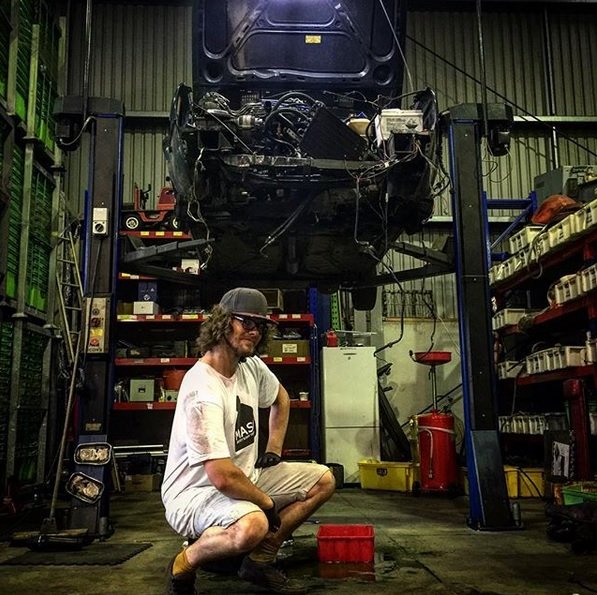
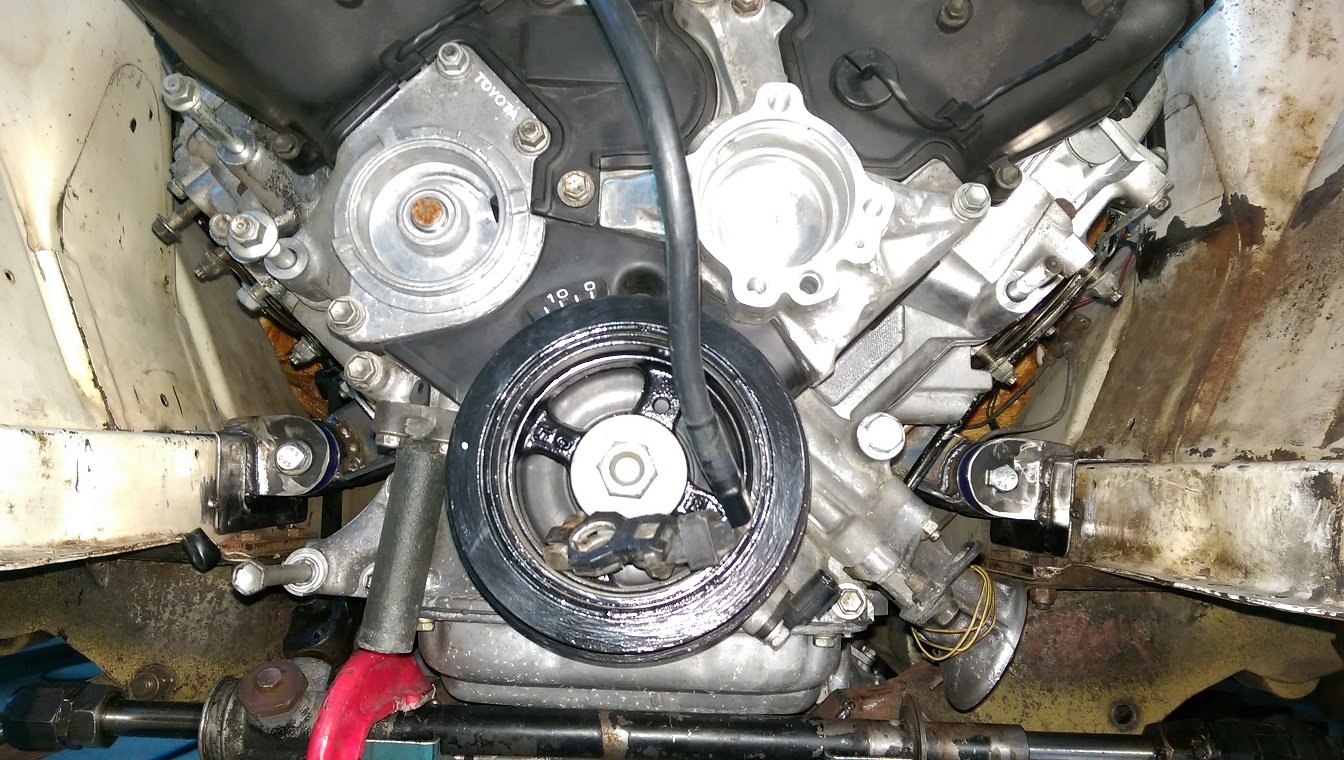
What a mission! I will have a look inside the engine once we can move it to somewhere I can pull it down. Probably next weekend. I dread refitting it though. It was a bastard to get out.
 7 points
 -
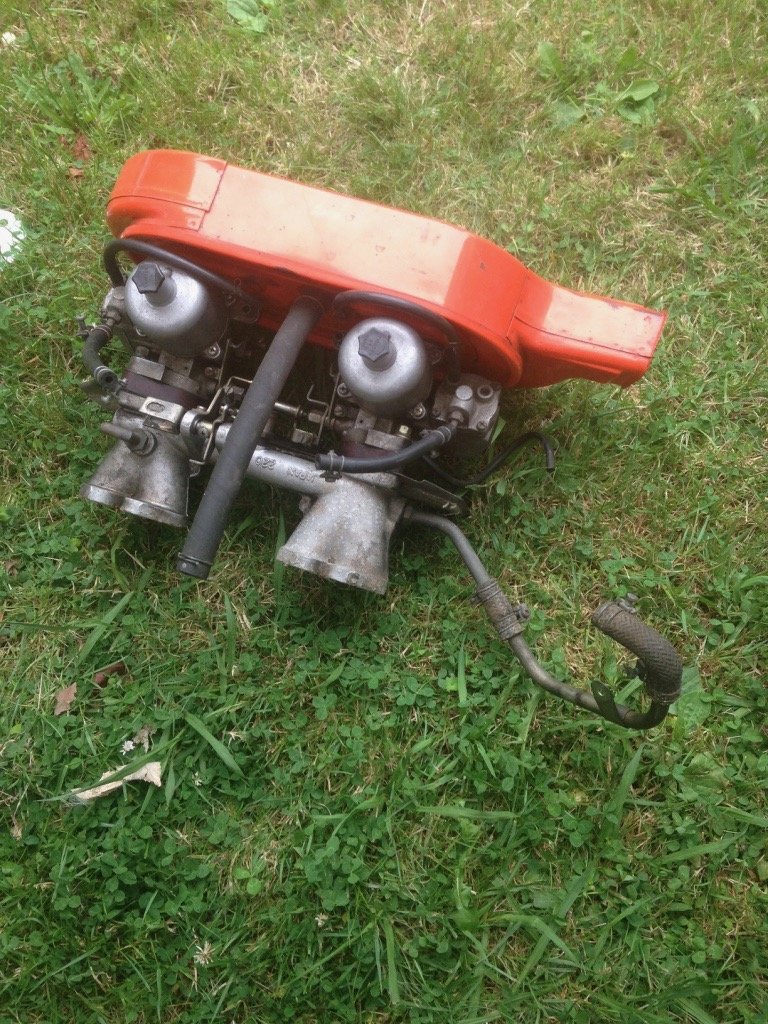
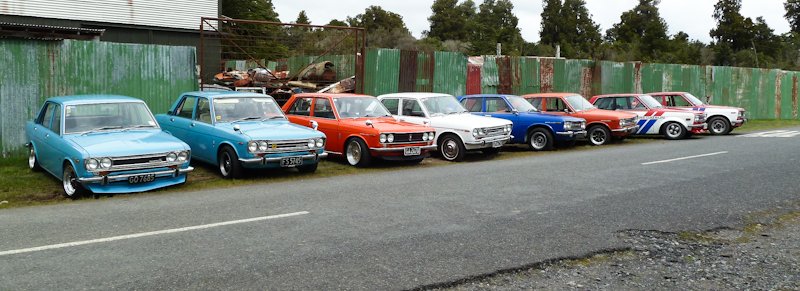
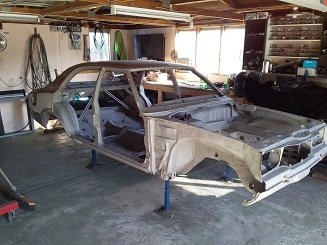
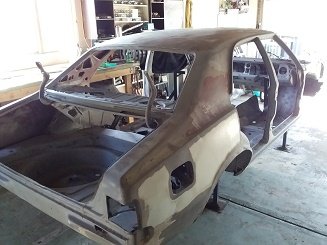
My name is Stu, and I like 4ages. So much so that about 16 years ago I made one fit into a EP71 because I couldn't afford an AE86. Yes its wrong wheel drive, yes its too loud, yes the intercooler is too big, yes there are many other sins, but it eventually ended up being reasonably fast-ish and just quietly it is a little bit of fun to drive. But recently I redeemed myself by acquiring an AE86 Levin, so I thought it was about time to supply you the reader with double the amusement of watching me waste many hours and many dollars on a couple of examples of Toyotas best metal > rust conversion products from the 1980s... I'll do a decent post on each of them eventually but here's a snapshot to get the ball rolling. The EP I'll start with this, bore you with the details, then switch to the more exciting 86... It started out as a white 1985 Toyota Starlet Si - featuring the worlds smokiest 2e-elu. It had a couple of redeeming features in that it was straight, and complete, had 120k on the clock, and came from a very quiet family who loved it and were very sad when i drove away in it. It drove quiet and smooth and apart from the smoke screen everywhere it went, it was a nice car. I wrecked all that by fitting a 4age, adding boost, vibration and lots of noise and smoke. It currently has a fairly basic engine setup comprising of an cobbled together 8.0:1 bottom end with some arp bits, lightly tickled blacktop head, single throttle intake, long merge turbo manifold to a GT2876r and stainless exhaust. Its runs a Link G4+ Storm that I wired and tuned (the later with the help of KPR who I have been annoying for years... oh the shame of tuning a fwd). It has run a slippery best 11.81@121mph on the quarter mile at a peak of 17psi with a 2.3 60ft so there's more potential there. Its currently tuned to 23psi but haven't run that much on a track yet. It only been on a dyno once way back in the day on a aw11 bigport ze and T04e where it made 195kw on 16psi. No idea what its making now as its street tuned, will one day find out. It will surprise most but this thing does go around corners and runs surprising straight without too much torque steer #notlies. Anyway, other than that is fairly simple, some strengthening work in the front, coil overs, turret dropped rear, sway bars, fancy short ratio gearbox with LSD etc etc. Ive done pretty much everything myself bar the paint. Its been a great learning curve and through practice has lead to me wiring and tuning ALOT of other cars for guys I know. Will go into that another time. Here's some photos: The 86 This is newly acquired from a mate who I have been pestering about 86's to for years. I have yet to find time to work on it, but its straight and virtually rust free, and comes with a non-running bluetop with quads, Jasma headers and some HKS bits apparently... = win. This isn't my first AE car, but I'm hoping to build it into as close to my dream 86 as possible (except for the small fault of not being a notch but you can't win them all). Will update on this reasonably regularly this year as I want to get this on the road asap and enjoy it while I piece together a different setup for it. Its not going to be silly like the EP ended up... well, that's the intention. That'll do for now. PS: Hi Dave. Abuse here6 points
-
Got the front and rear axles installed! Starting to look a bit more complete... Rear axle and hubs are all back together with new seals, bearings, gaskets, fasteners and discs. New ball joint for the rear A-Frame load leveller thing. Man this took a bit of pressure on a friends press to get in. Seated perfectly in the end. Next up is rebuilding the front swivel housings. It took me a while to find a good set of original chrome swivels without any pitting. I then blasted and painted the swivel housings then proudly displayed them on the dinning room table... Waiting on some swivel shims and bearings and then I can get started on those. Another load of fasteners for the next round, all nicely sorted by part number6 points
-
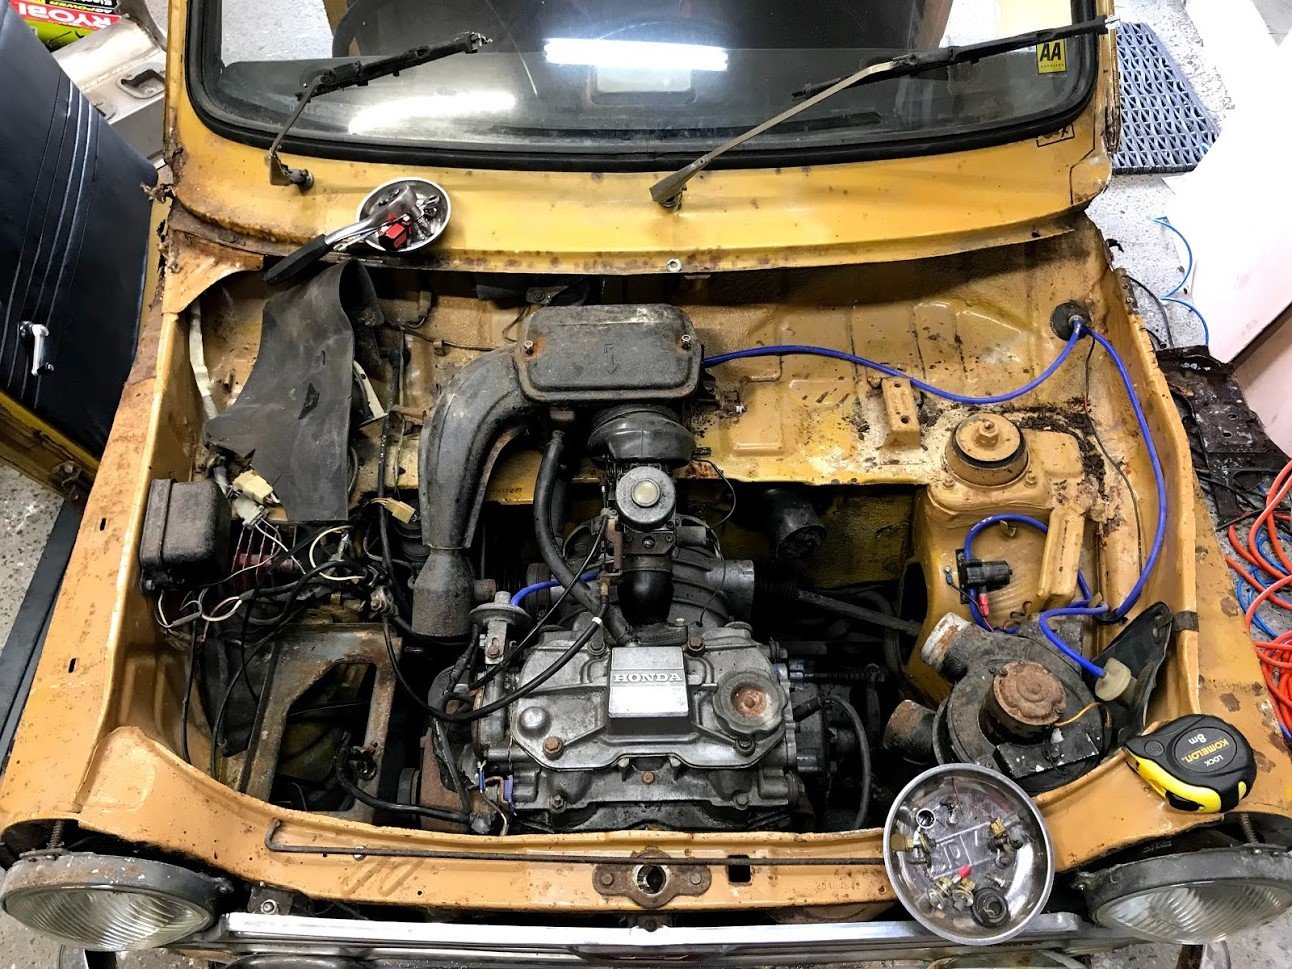
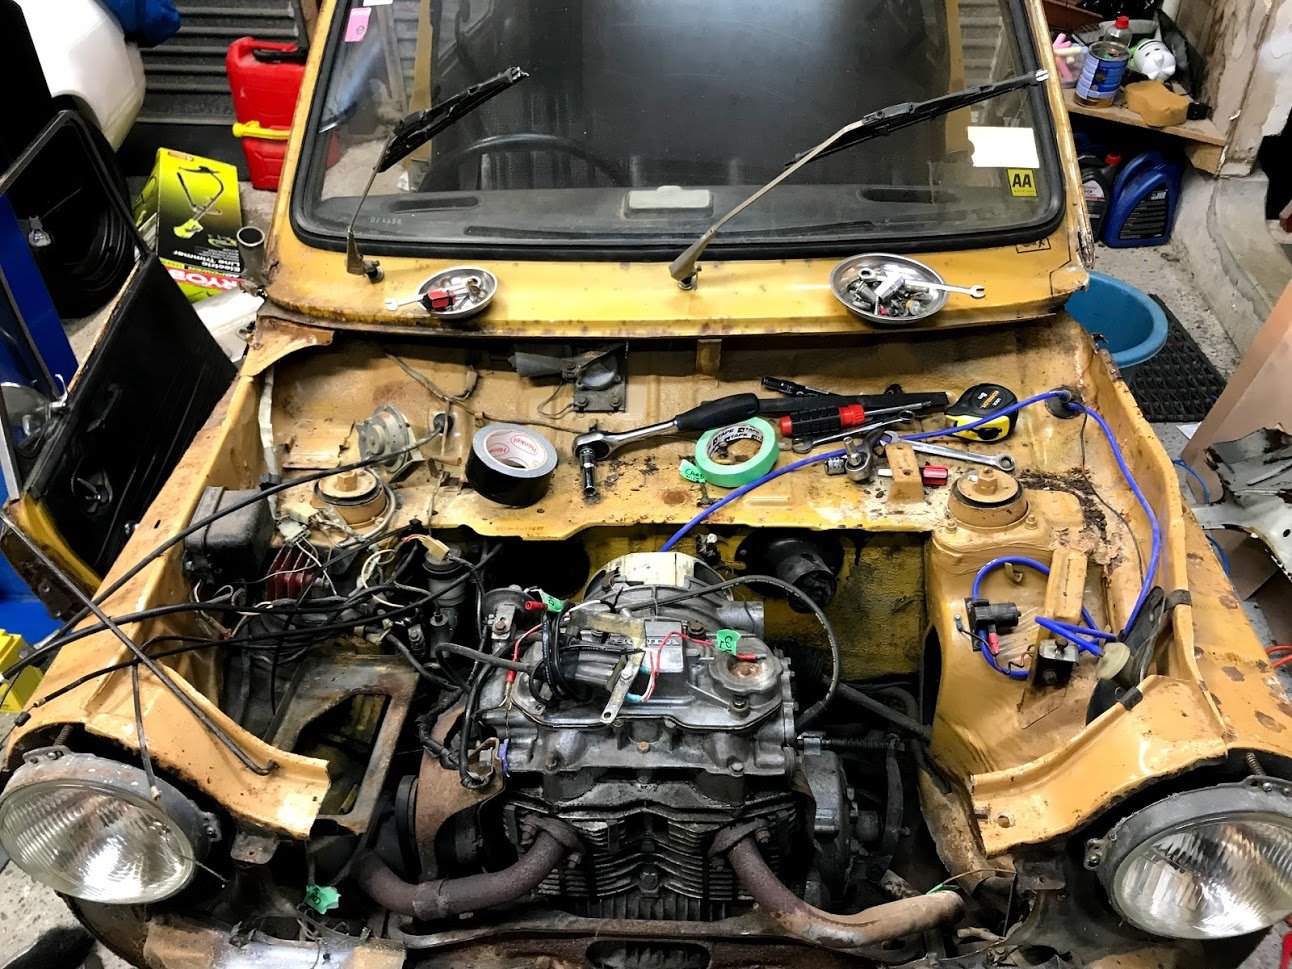
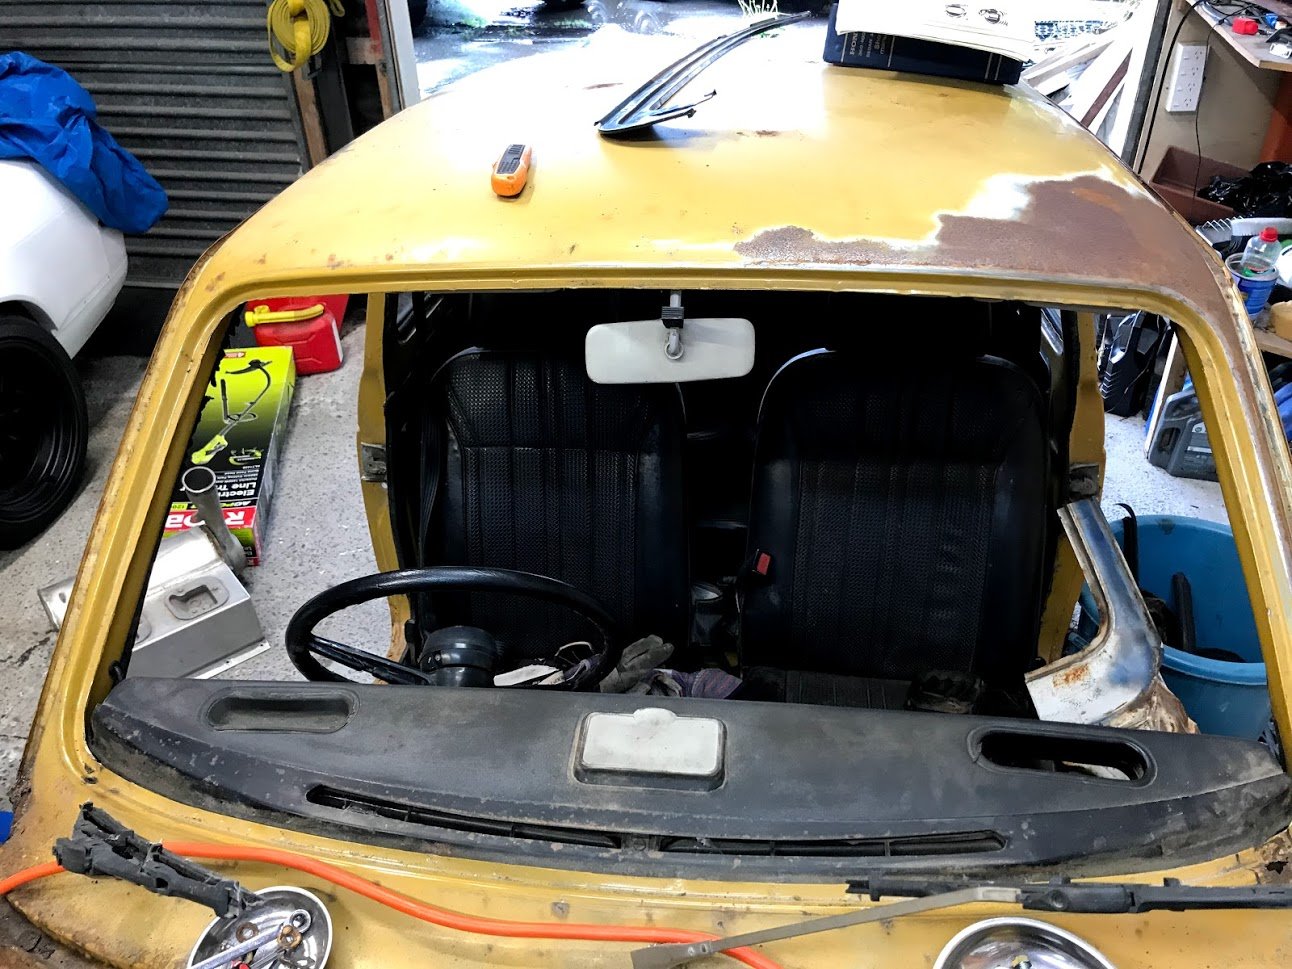
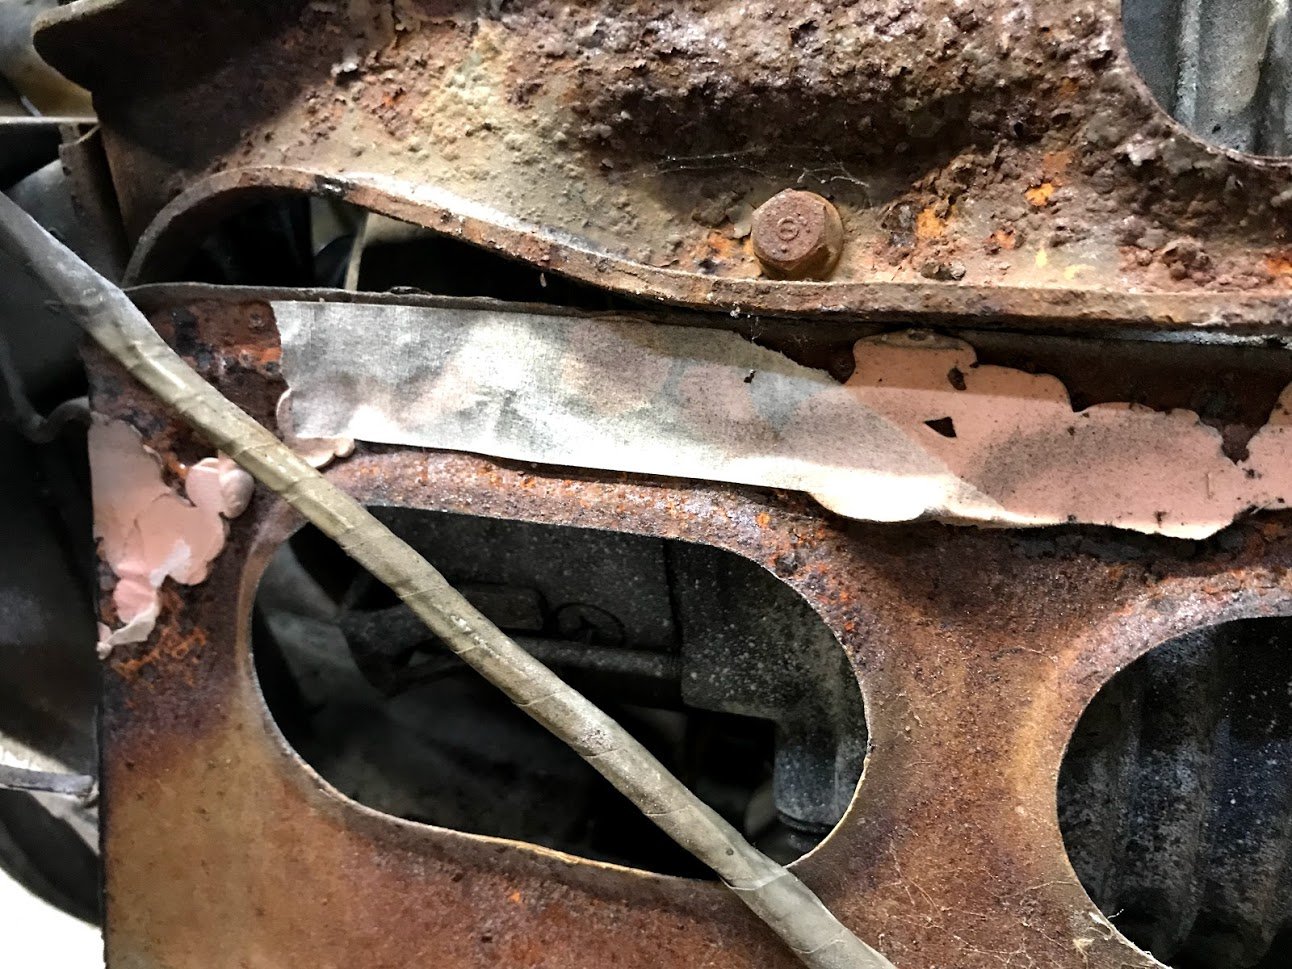
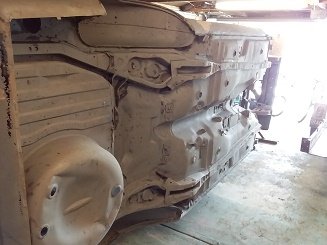
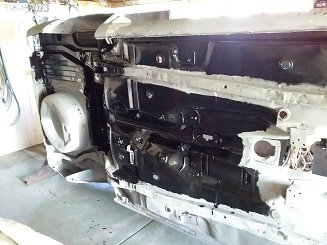
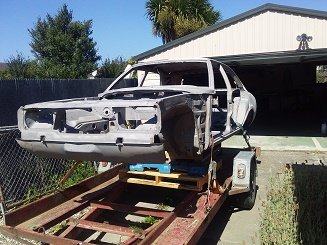
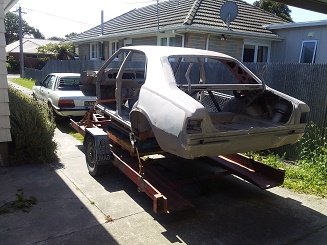
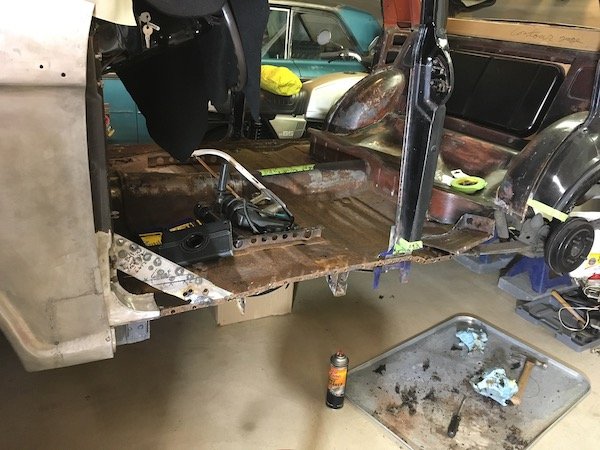
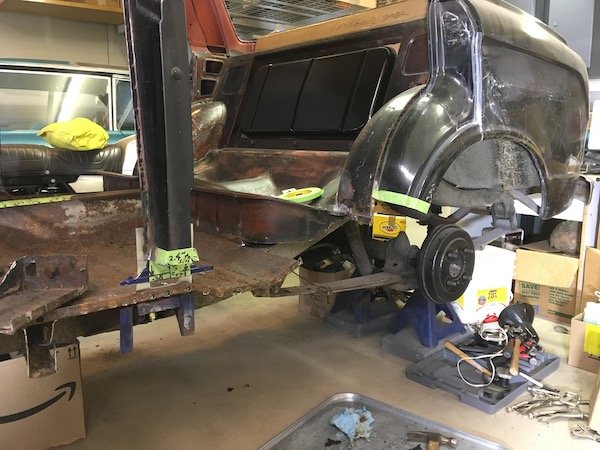
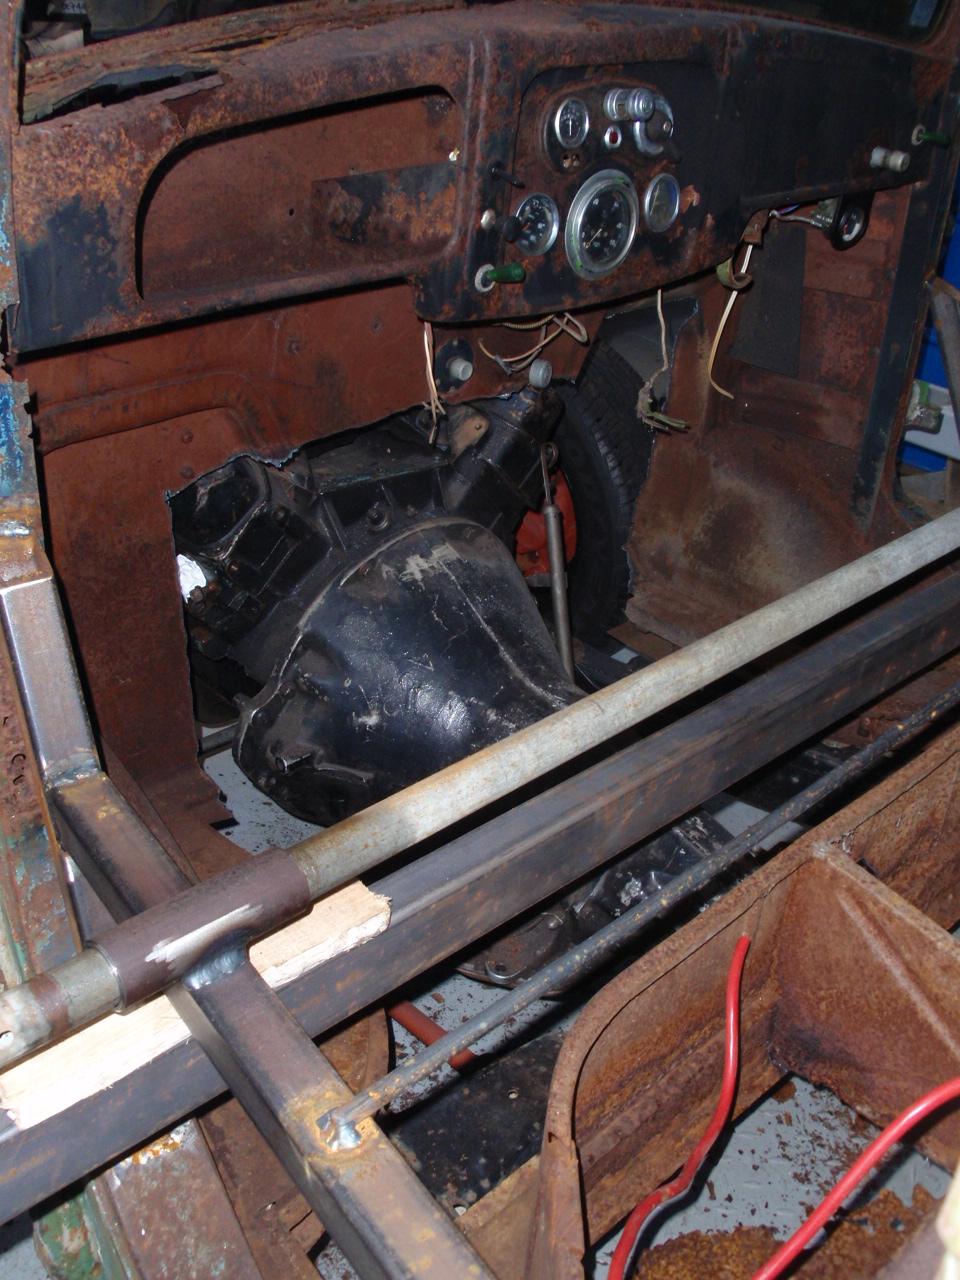
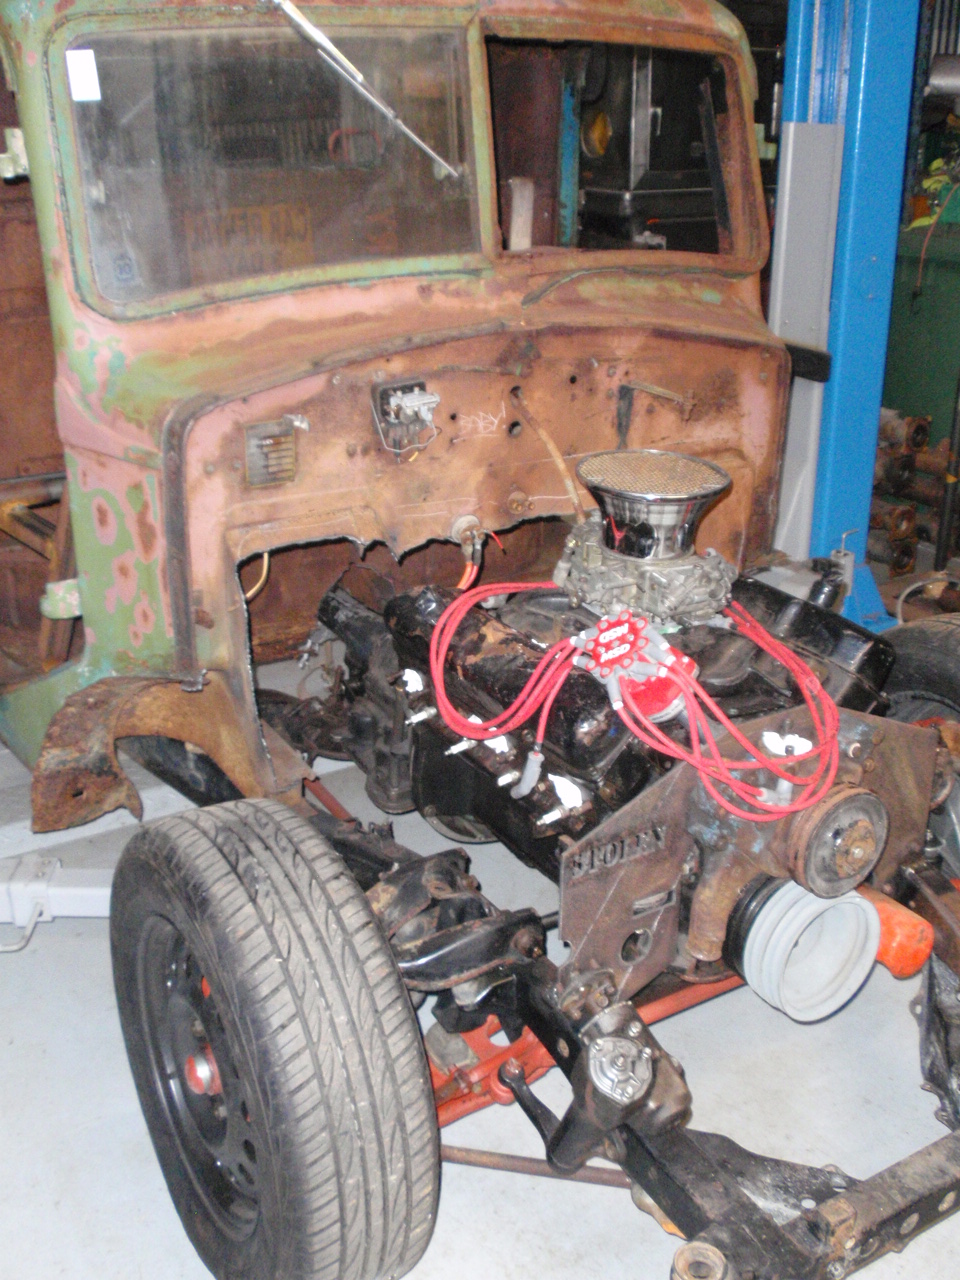
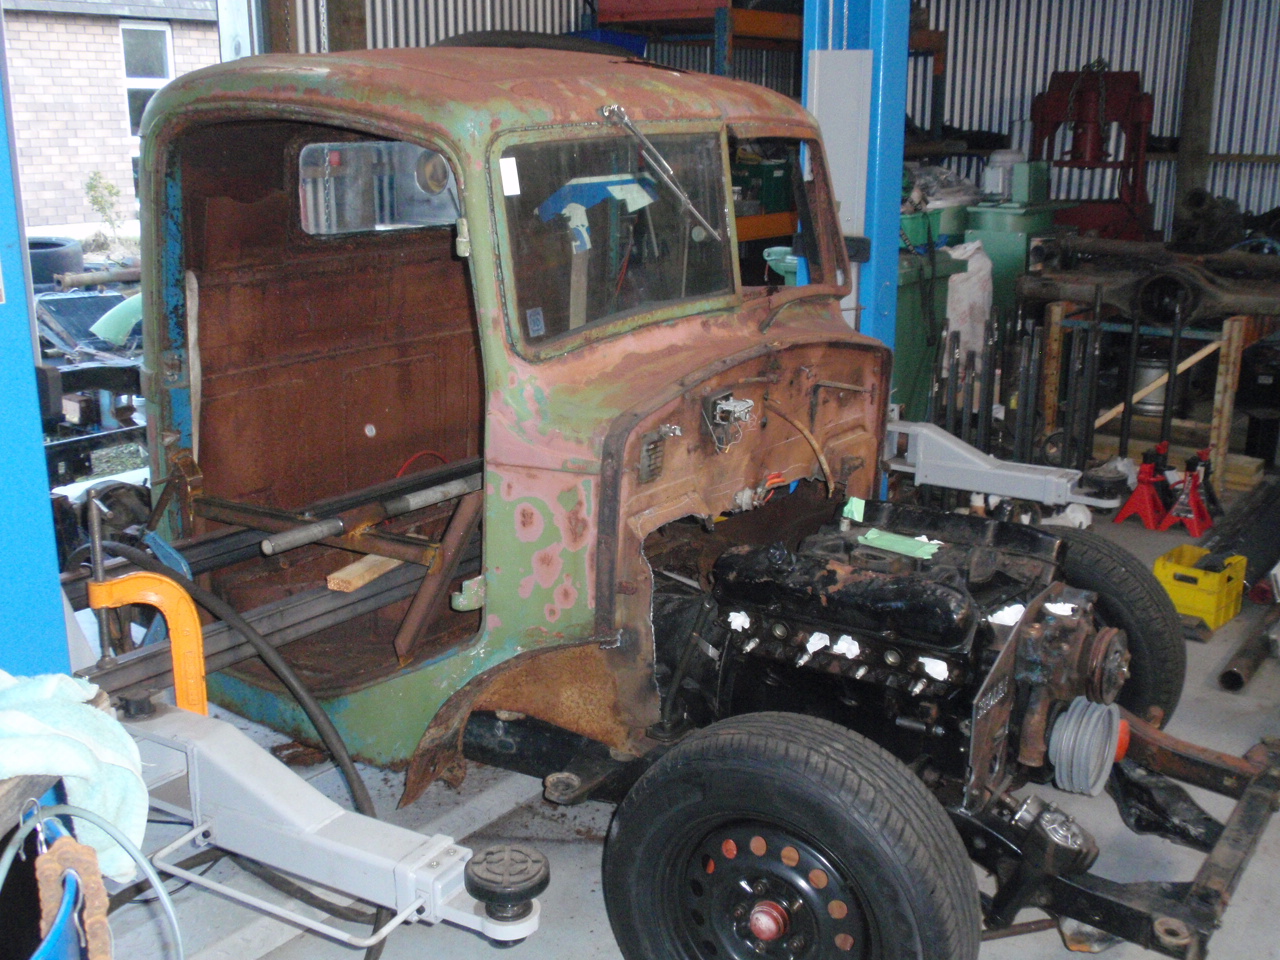
Engine bay: Less engine and less bay: Glass out, the frame is remarkably rust free. Except for the one spot which was where the water drain would have been: Previous owners idea of "rust repairs": Almost ready to pull the engine out, just the rear engine mount and a couple more bolts on one of the driveshafts. The manual says to remove the engine out the bottom attached to the subframe and hubs etc as one unit, but I needed to cut the front panel anyway plus I want to keep it rolling. Will be welding it back in or making some brackets depending on how the bike engine sits in there. The lower panel will definitely need to move for clearance I think.
6 points
-
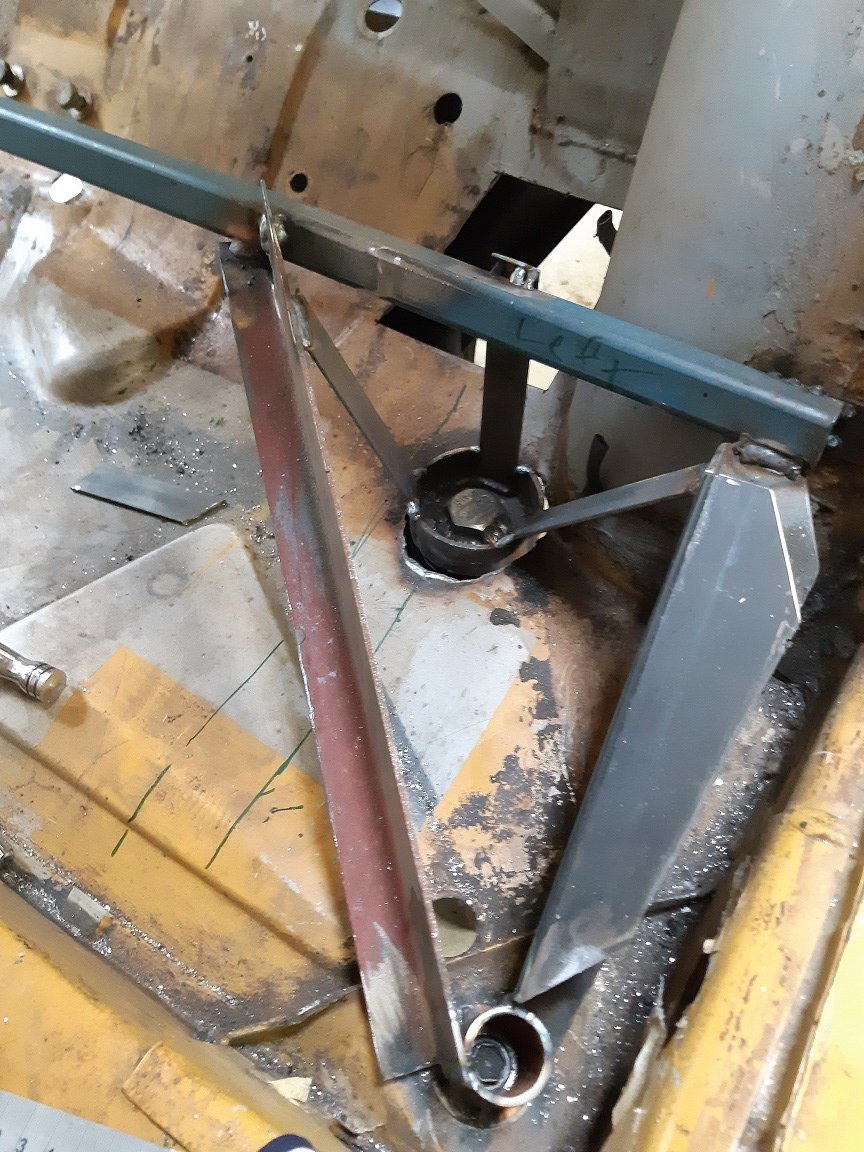
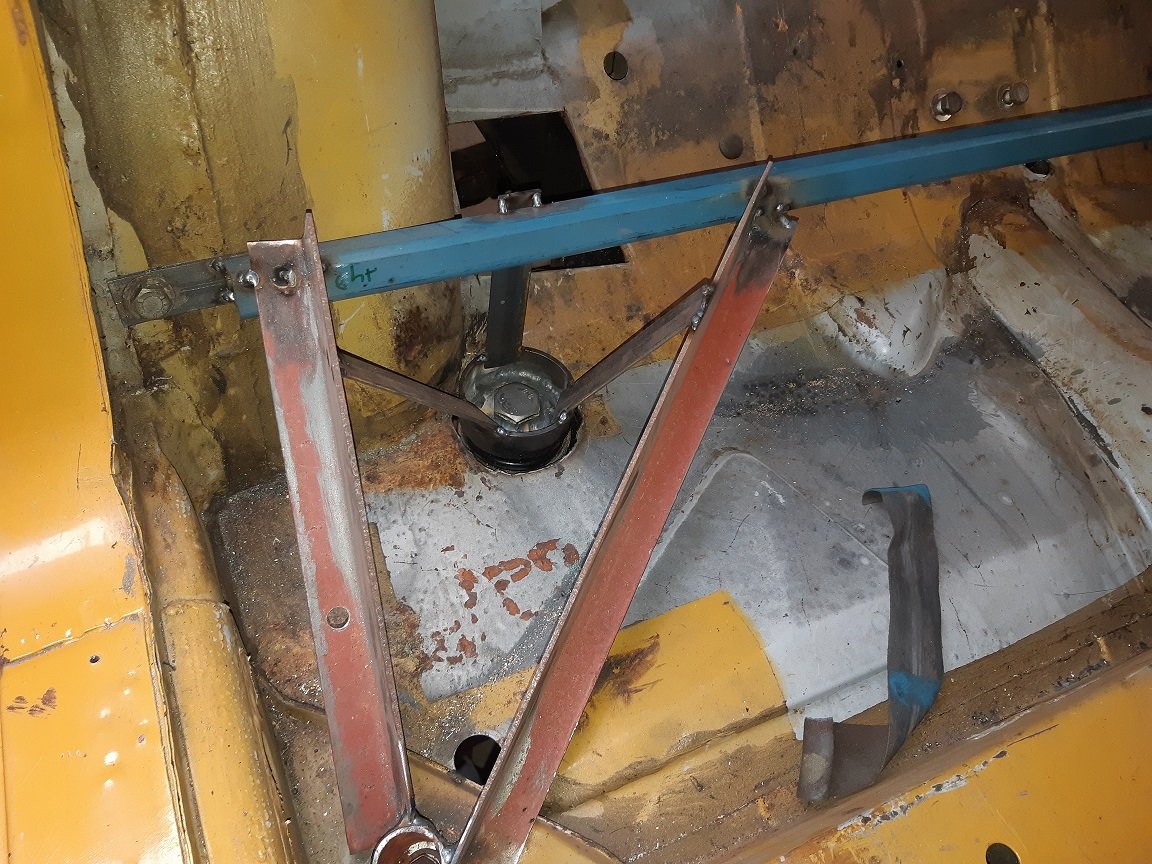
Subframe front mounts and the jig to allow me to transfer it to the other car. My current thinking is to plate the floor and some of the wheel well, around the front mounts, with 2.5mm, on the inside of the car. If it's not solid enough, I'll tie it into the sill.
4 points
-
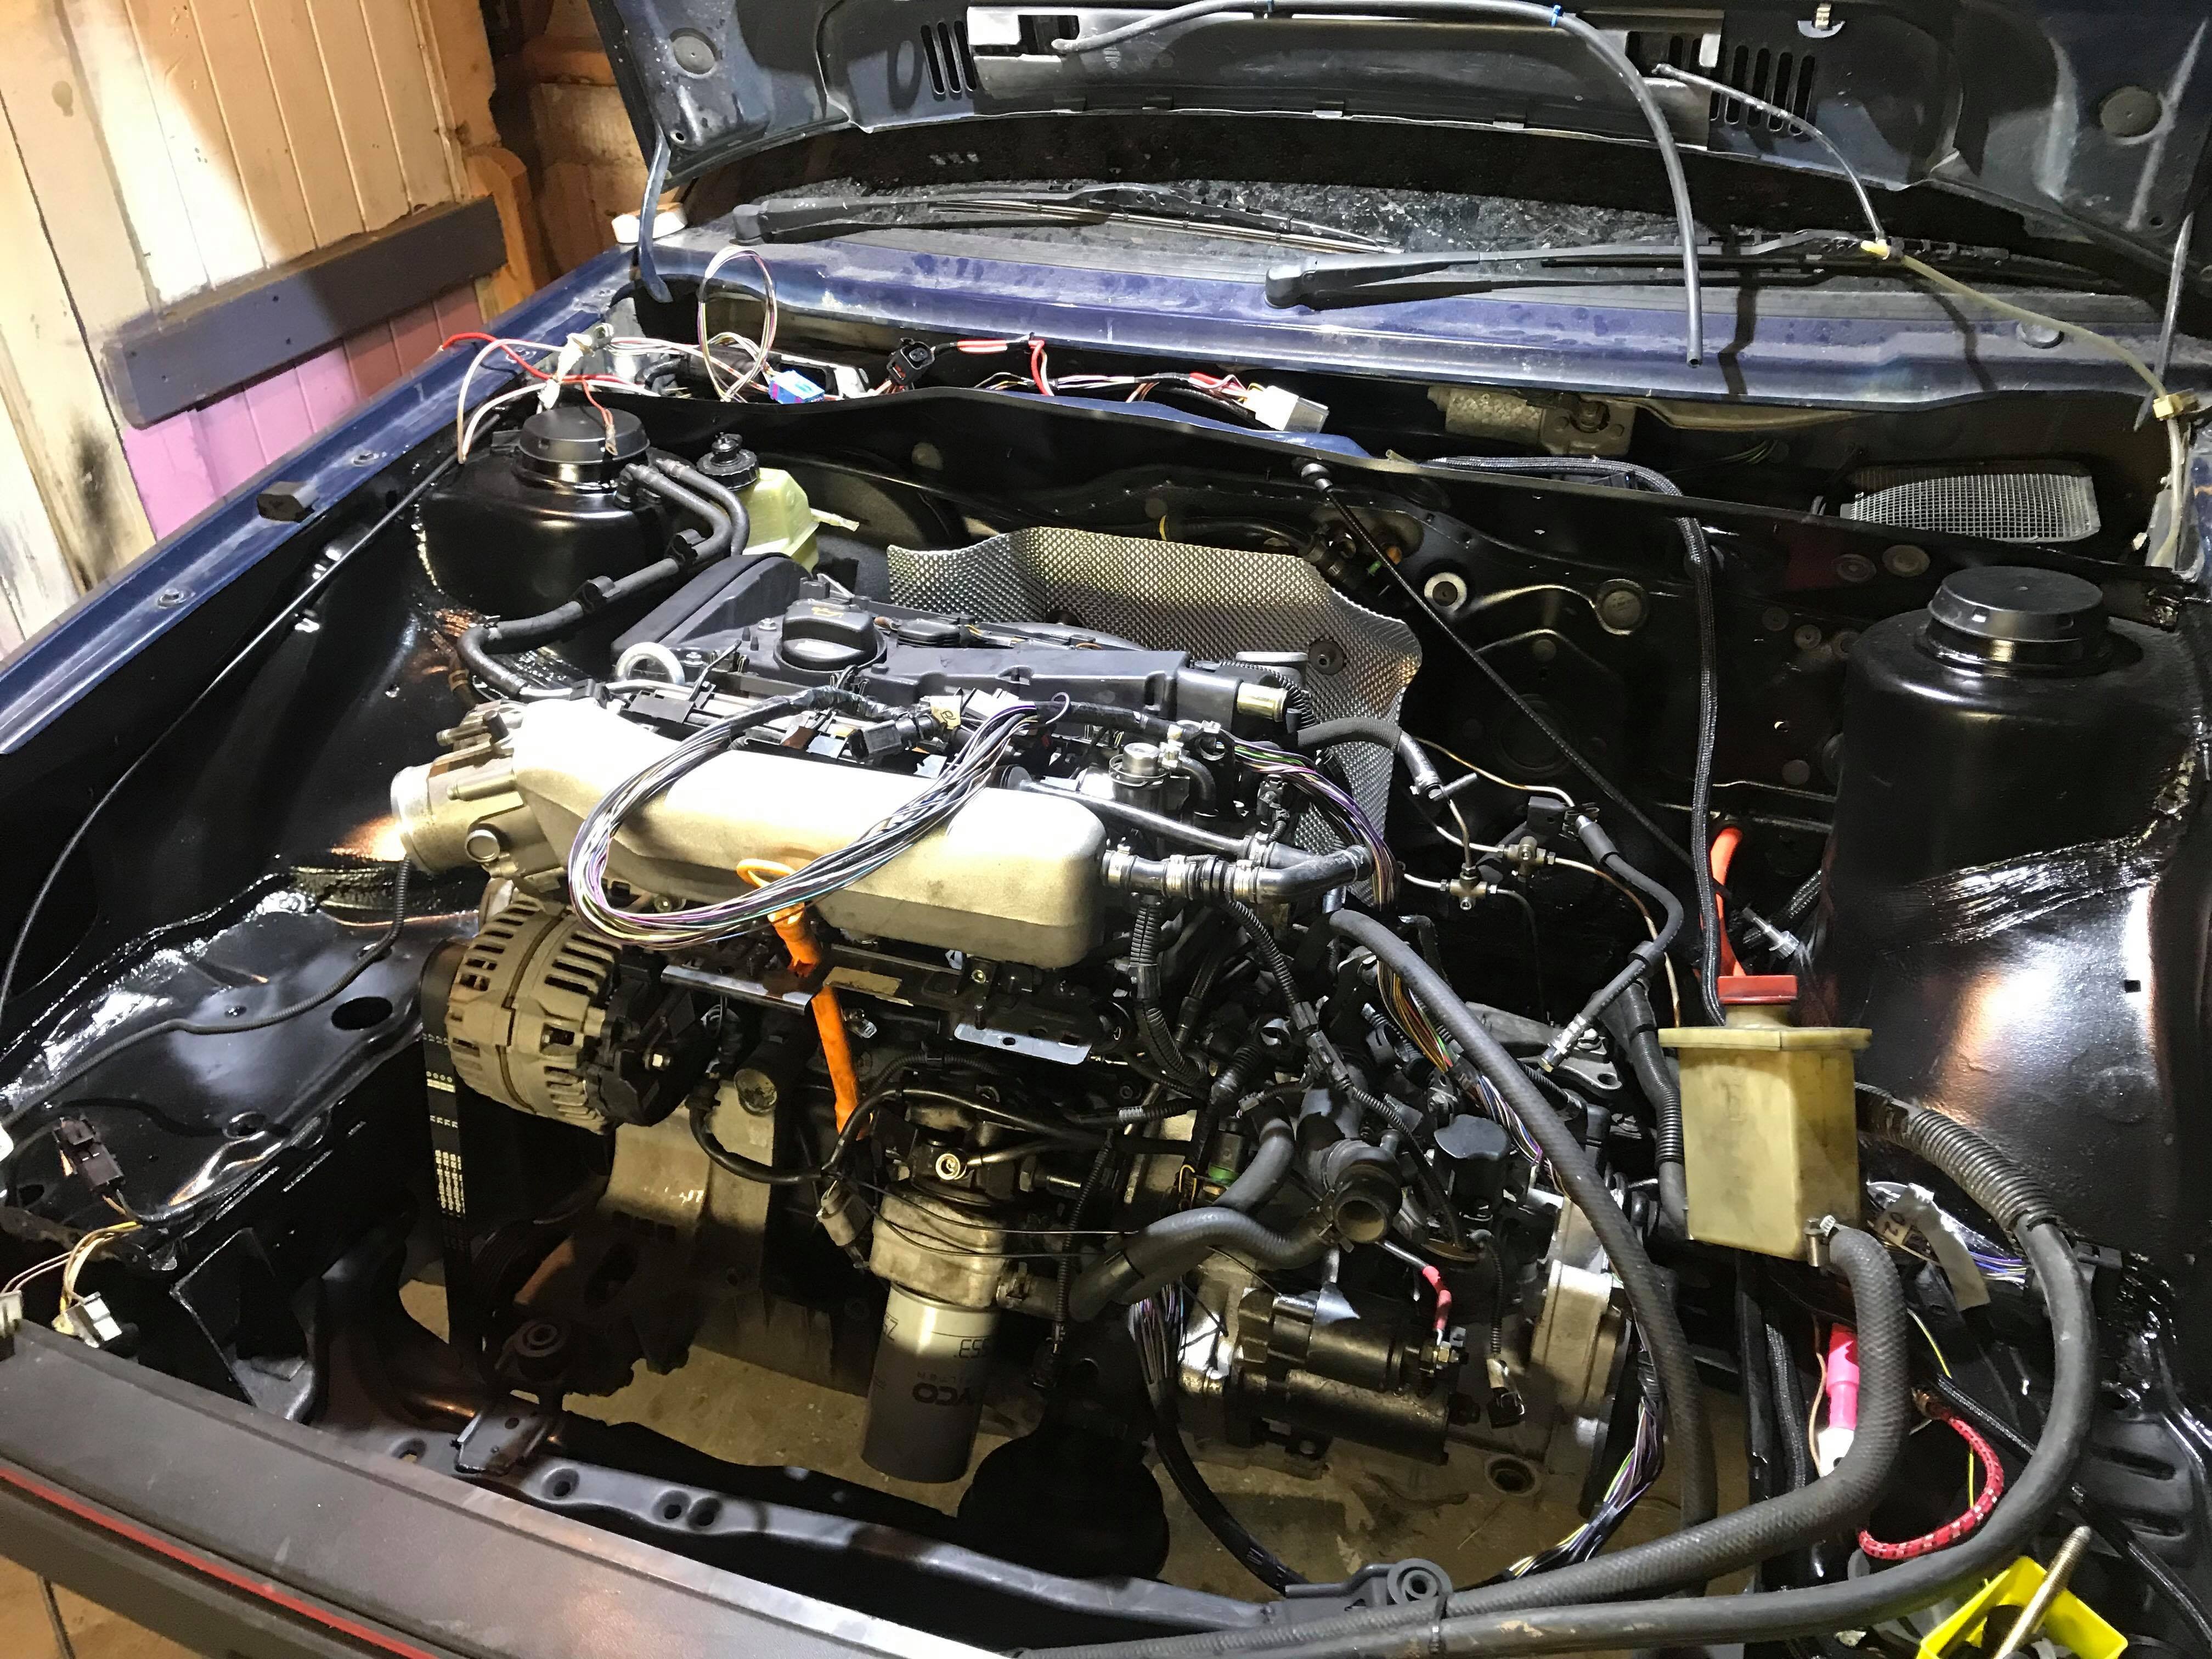
So time for a bit of a test fit. Im using all existing mounts from the mk2 which worked but the brake MC touched the Cam cover and although im sure it wouldn't move to much i really wanted to be sure so i went to the wreckers and got a mk3 subframe (uses one mount that is slightly different) but still a direct bolt up. I don't have any great photos of it maybe because I was too excited but managed to track down a K04 turbo out of an Audi S3 so here we are shooting for a hopefully very drive able 260hp worth of fun.
4 points
-
Well I finally have done enough for another update.. Have the headers completed, painted and fitted to the car. The fun of building the rest of the exhaust has now started the planning stages! The Intake is finished, I decided to block off one of the returns and just plumb up the heater, I didnt think there was a need for a water return at the rear of the engine going back to the water pump unless it is there to aid circulation when thermostat is closed? oh well, if this becomes an issue I can tap a fitting in at a later stage I guess. Have started on the throttle linkage, should have that knocked up this week.3 points
-
TS went bang again which was dumb so decided to see if a mudbug motor would fit, purchased a TF125 and stripped it down with a few parts going to a mate to resurrect his one. Got off to a good start with magneto and sprocket off the TS engine going straight onto the 125 block but then when it came to engine going into the frame things didnt go so good. Motor fits the frame but only just and the offset exhaust port lines up perfectly with the front of the frame so thats not going to work without fucking with the frame which I dont want to do. So purchased another one from Fielding for the lowlowprice of $150. Bit rough and ready but perfect for just nanging round on, few things on it to tidy up and get lights working etc luckily I have the other one to swap bits from. Interestingly it has a VIN on it and shows up in carjam so could be made road legal. Its going off to live down Hicks Bay as a hunting/fishing nang machine so WOF aint really required lols3 points
-
The above has been in hibernation, busy time selling & buying houses / wedding down south So I offered an OC:GC freight run Someone joked 'can you bring a car back with you, then I had someone ask me a favor about a Subaru in Pahiatua, if only they had a way to get it to the South Island.... so a plan was hatched to do a swap.. Along the way a Towbar wanted to get south & a Set of rims north, and another wanted an Interior from Nelson so the Old Barrymobile did a trooper & 900km return trip I lost a hubcap!3 points
-
Milestone! Finally she's in a shed. Hopefully the engine will be on the floor by Sunday
3 points
-
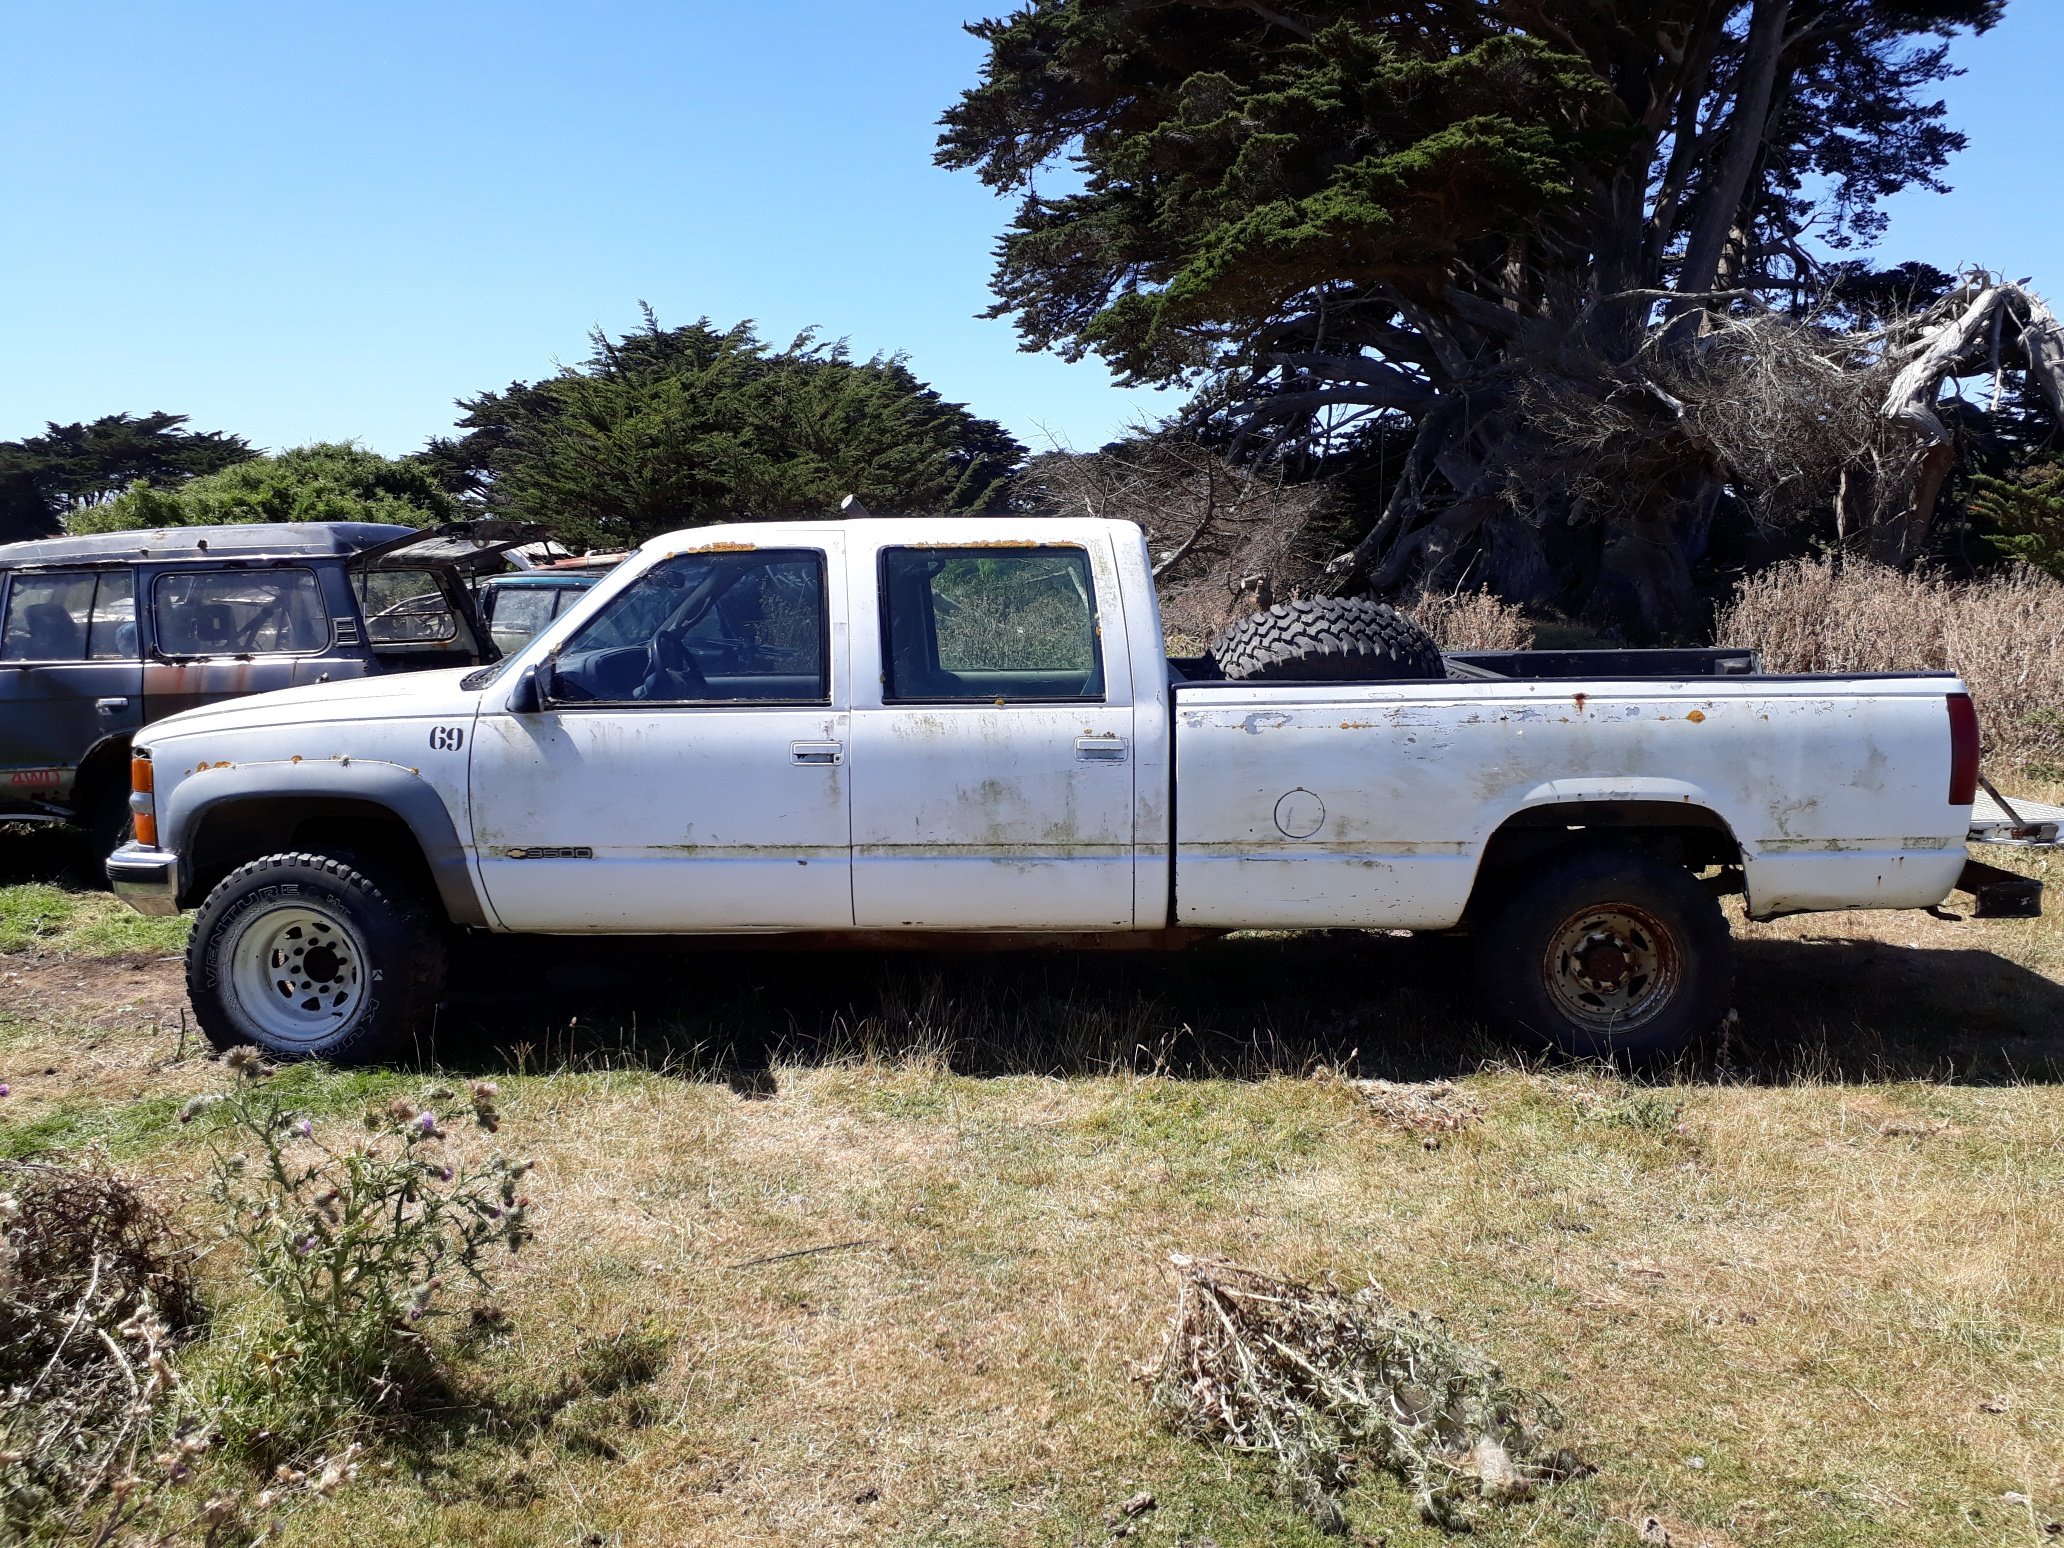
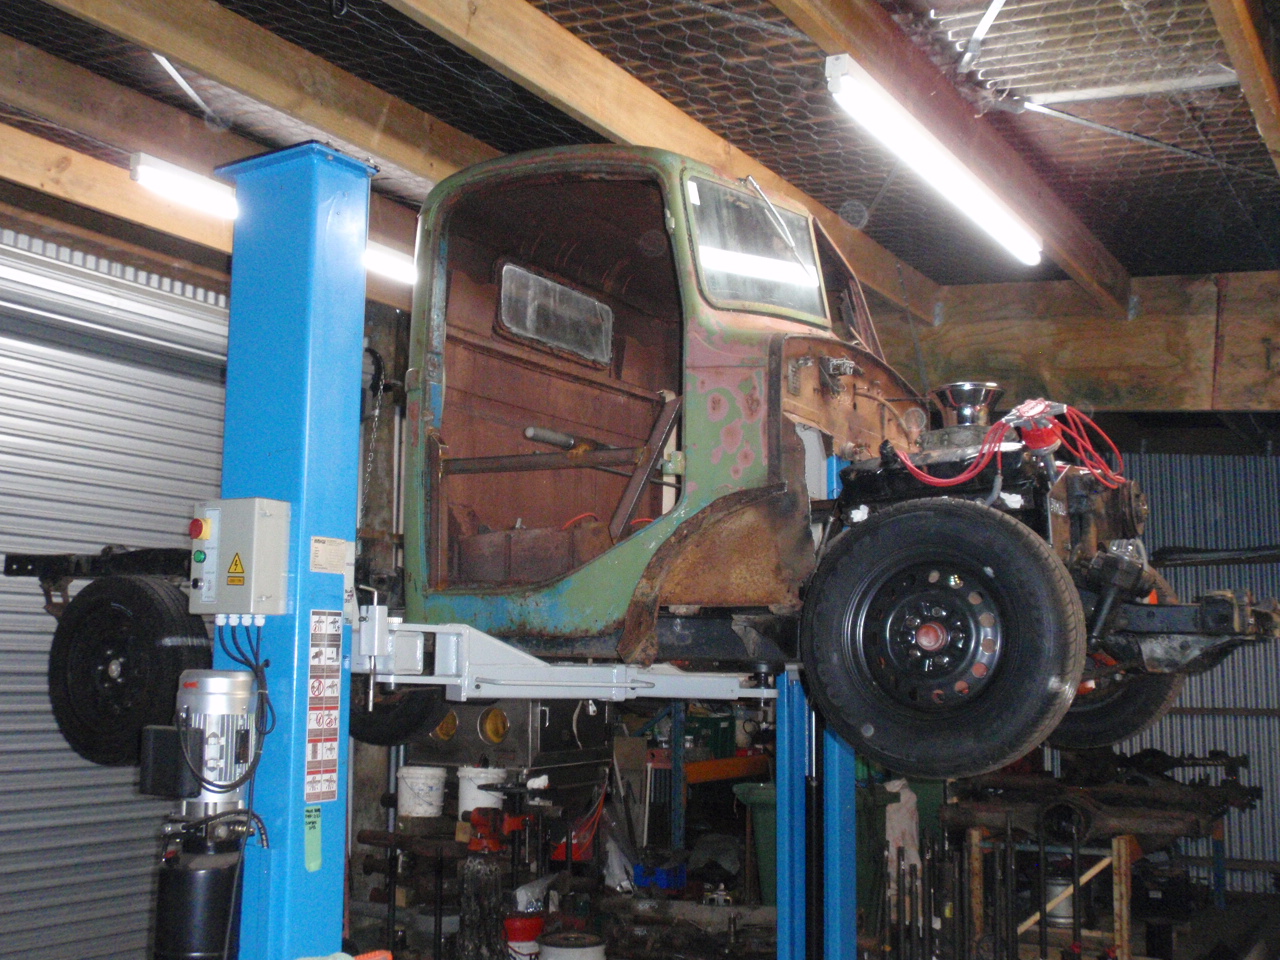
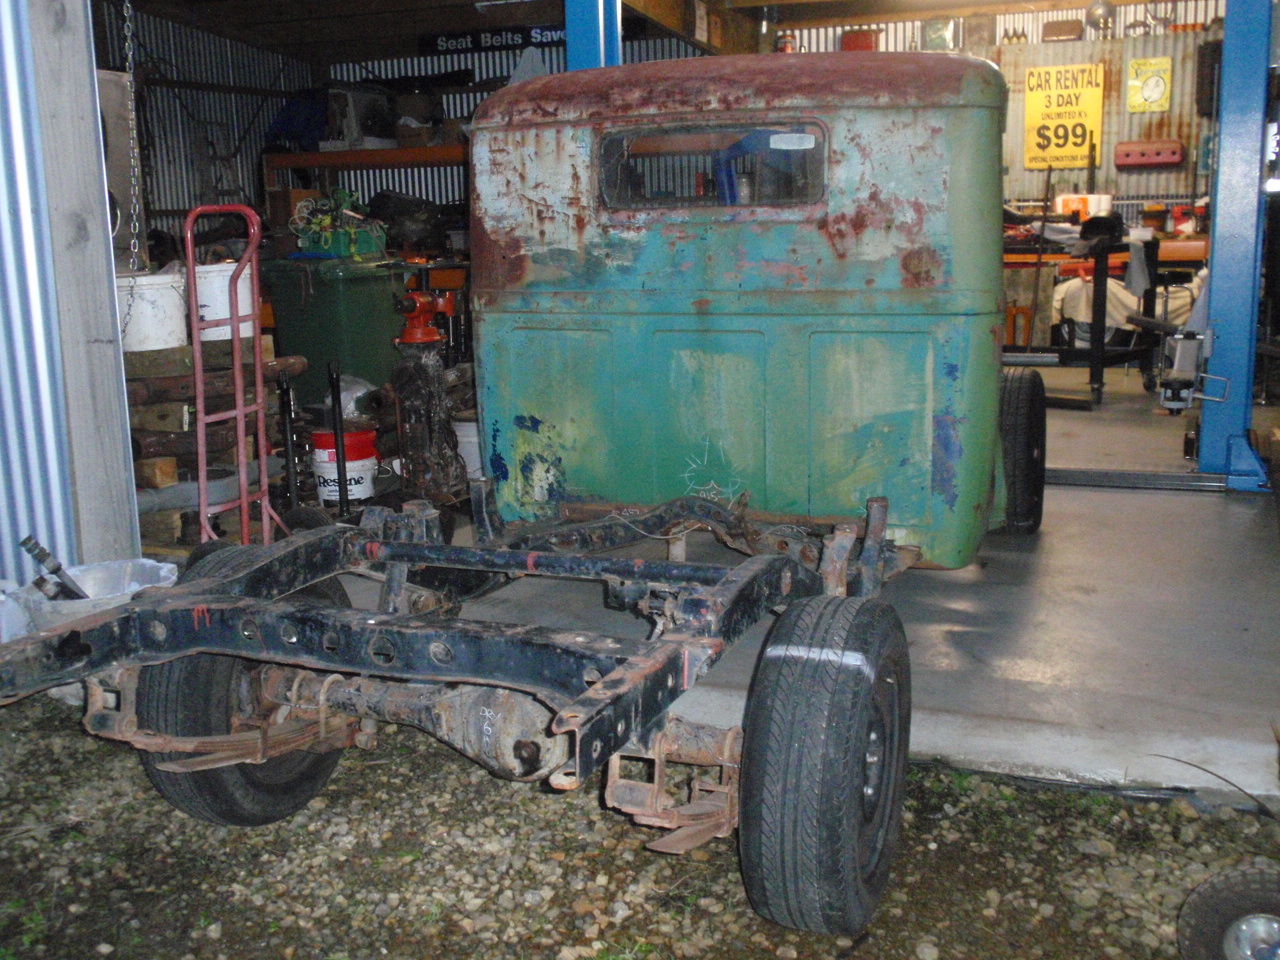
If all goes to plan I'll pay for this heap in a few days. The current owner is a good mate who gave up on the truck some time ago. He's offered it to me at a very fair price so I hacked it out of waist high thistles a couple of days ago, found enough wheels to get it in the air, and got the brakes un-seized enough to get it rolling...in a straight line. Hopefully I'll get an ignition key this week which will mean I can unlock the steering. I'll get some batteries and see if she'll run. I know little about diesel engines so this could be fun. She's a 6.5 turbo V8, and despite looking pretty haggard is quite sound in the body and chassis. One of the worst things is the wheel size - they're 16.5 inch. Those are 33x12.5x16.5 tyres on both the wheels you see. The truck makes otherwise big tyres seem small. I'm on an island where WoFs aren't a thing, but I have no tools except my carpentry gear with me so I will be at the mercy of others. So far people have all said I'm mad (the truck has a reputation as a bit of a lemon around here), but they've all offered me gear too. Nice.
2 points
-
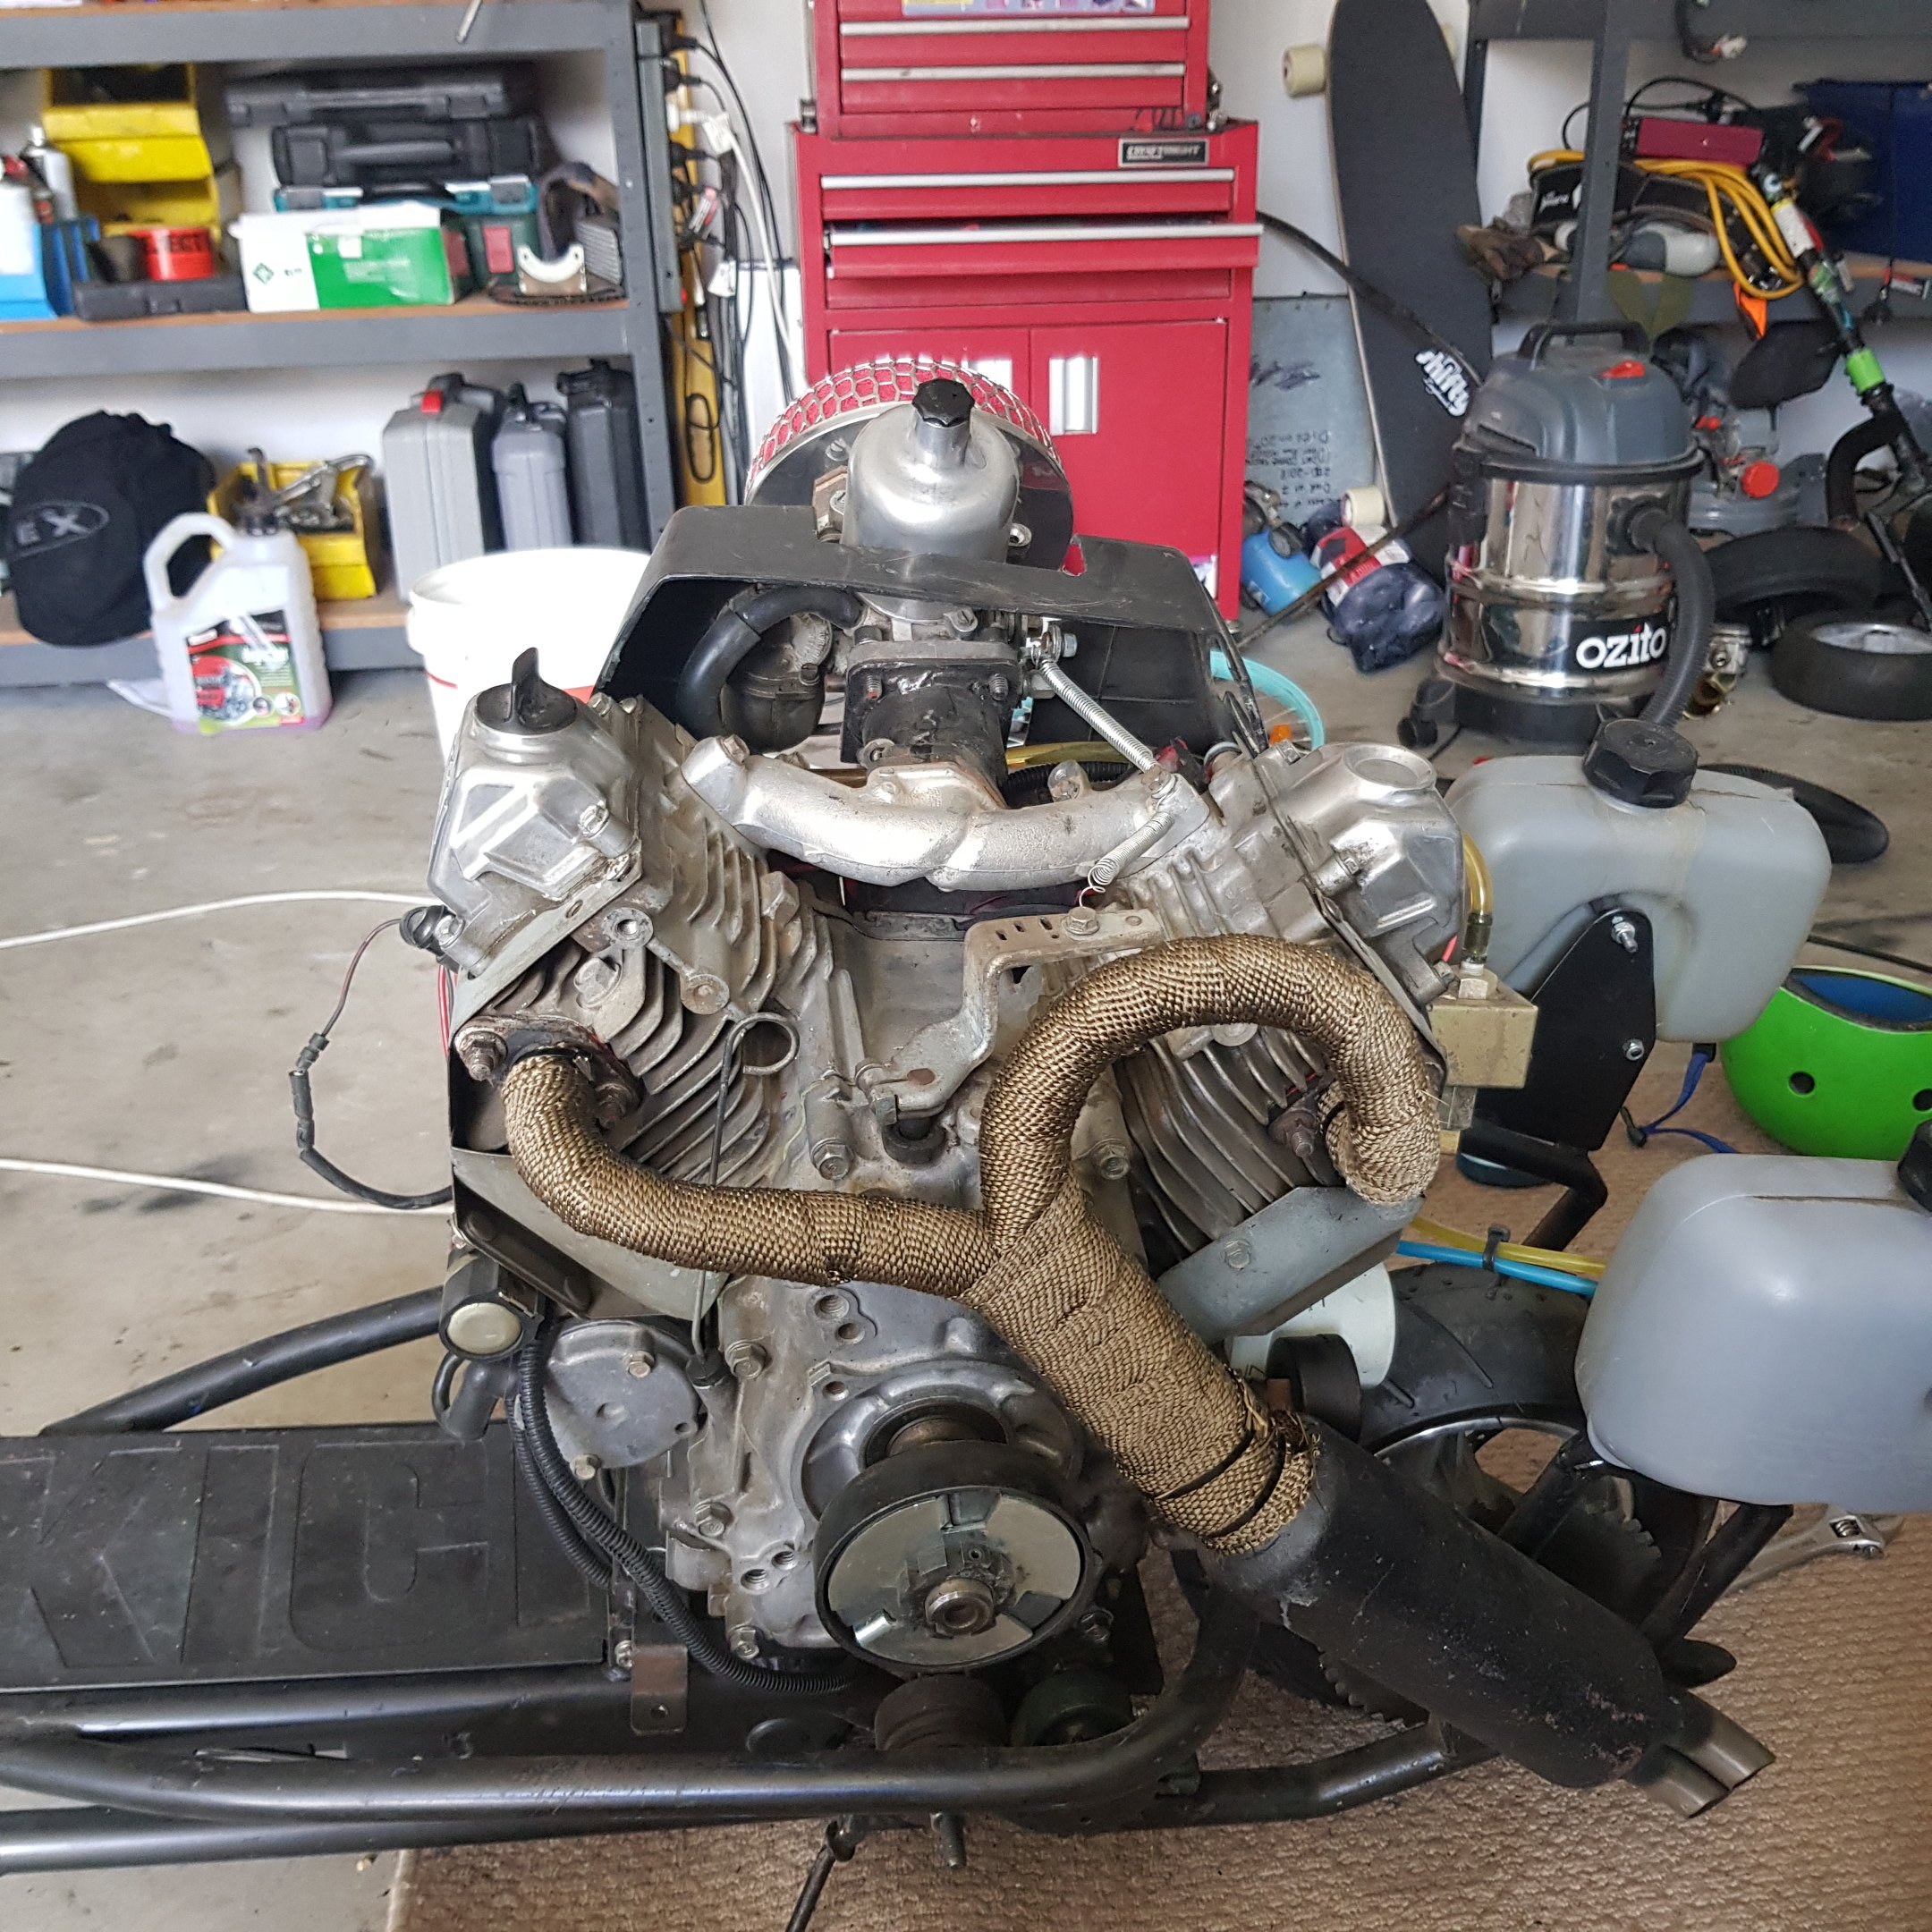
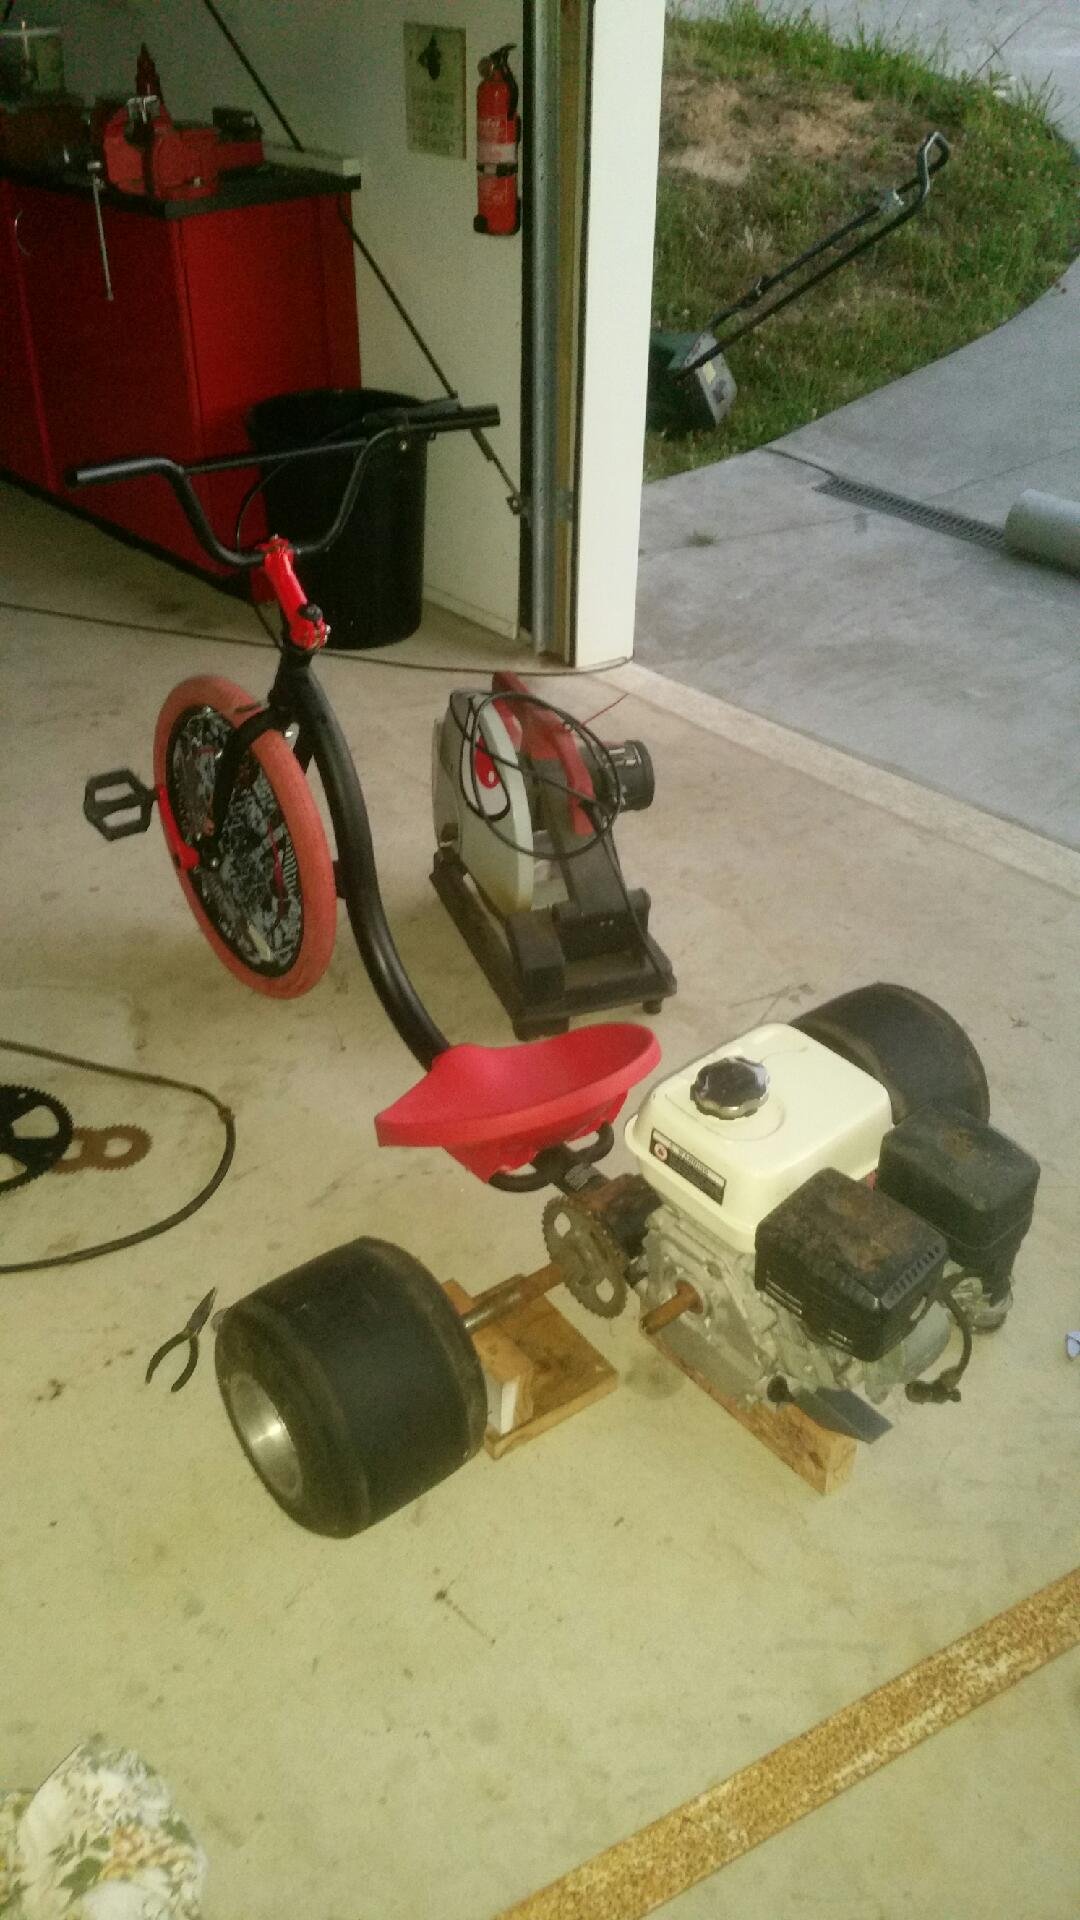
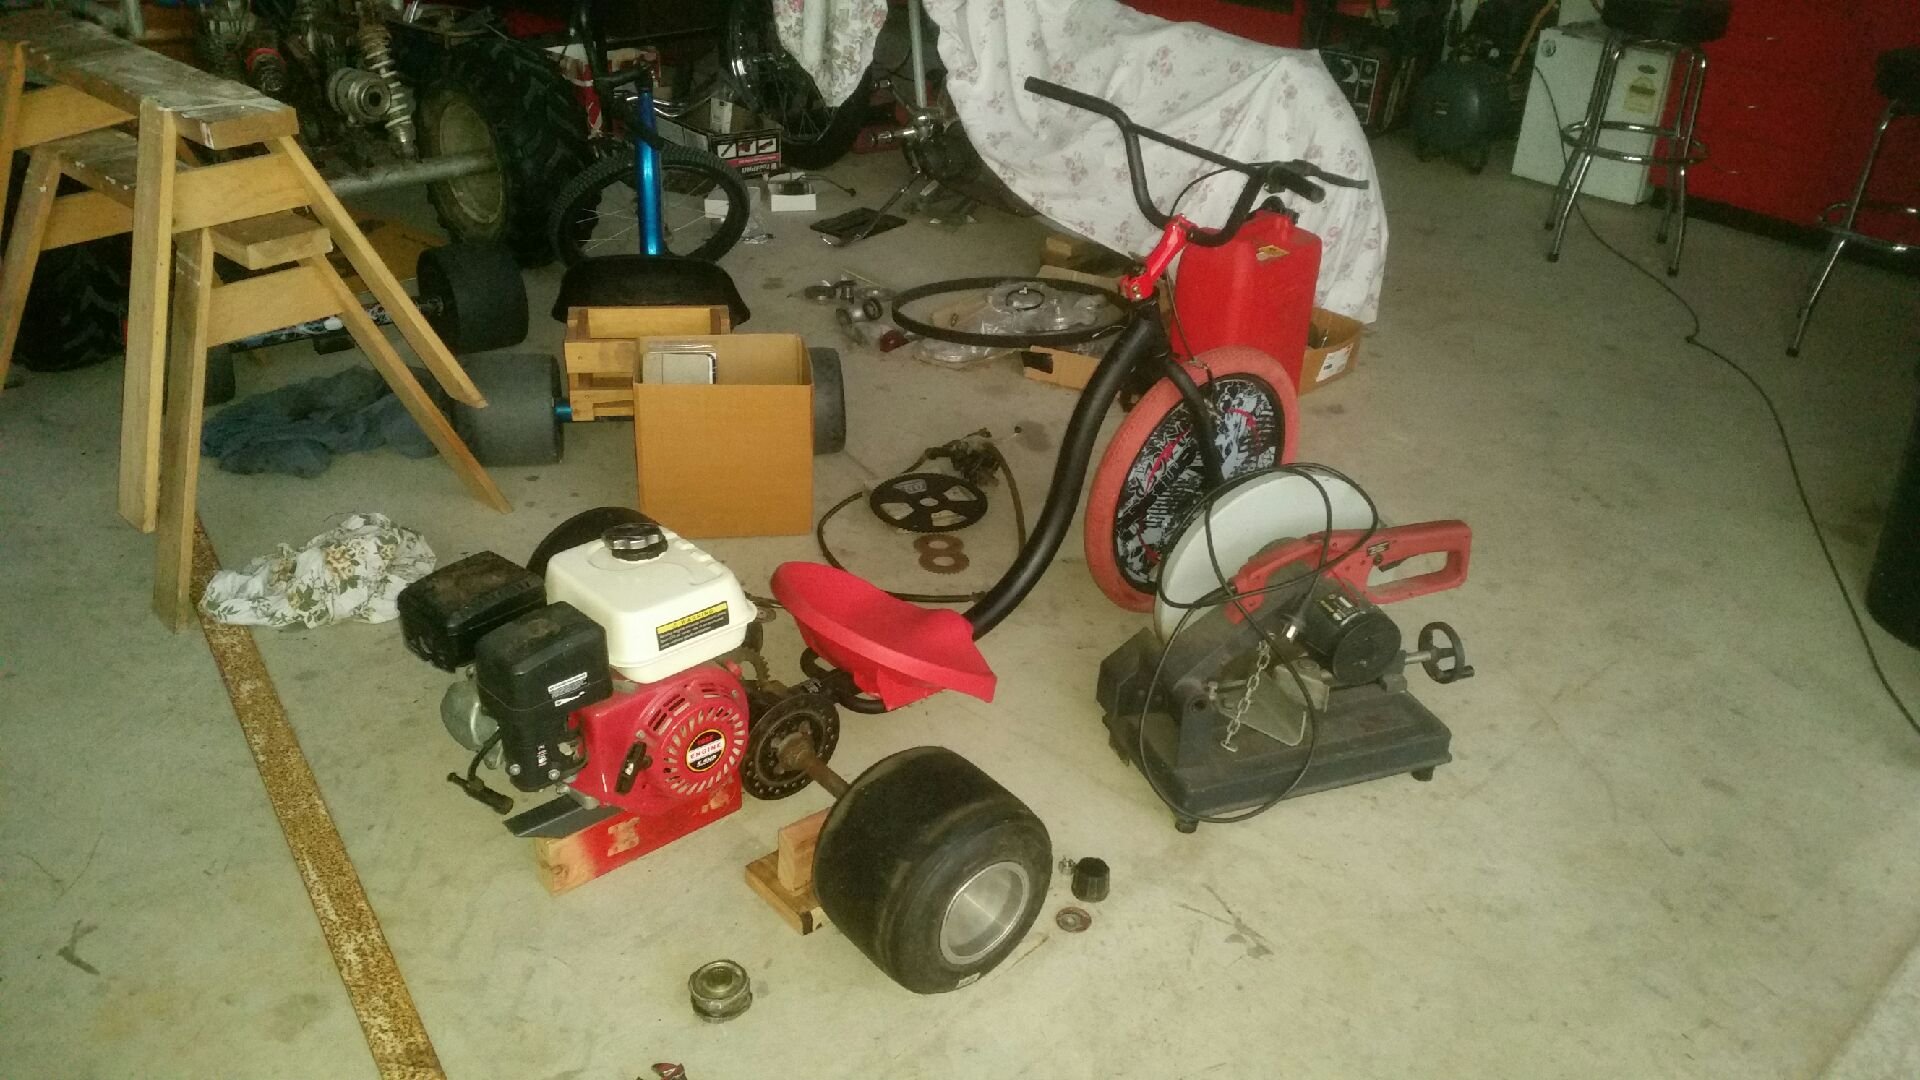
Truth be told i haven't ridden this since the above happened. Some aliexpress bits arrived this week so i thought i might as well fit anyway bit of tianium colored header wrap to prevent major jean destruction. Im toying with swapping the engines over with my sons mobility scooter beast as he loves this frame and has done some welding on it, he lives on a farm so could legitimately use it safely his 5hp Robin motor would work perfectly i reckon. I have acquired all the stainless steel parts now to do the turbo as well....... and sussed a cheap and cheerful way to run my carb blow thru for max ethanol spooly flame carnage
2 points
-
2 points
-
Here's a before
2 points
-
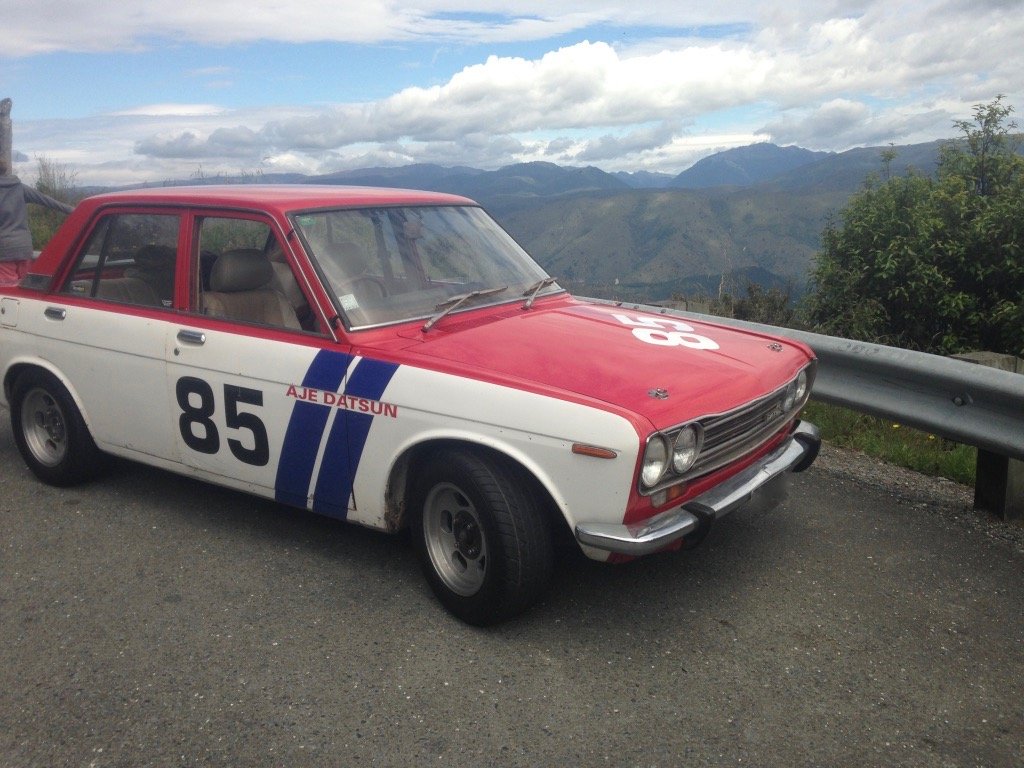
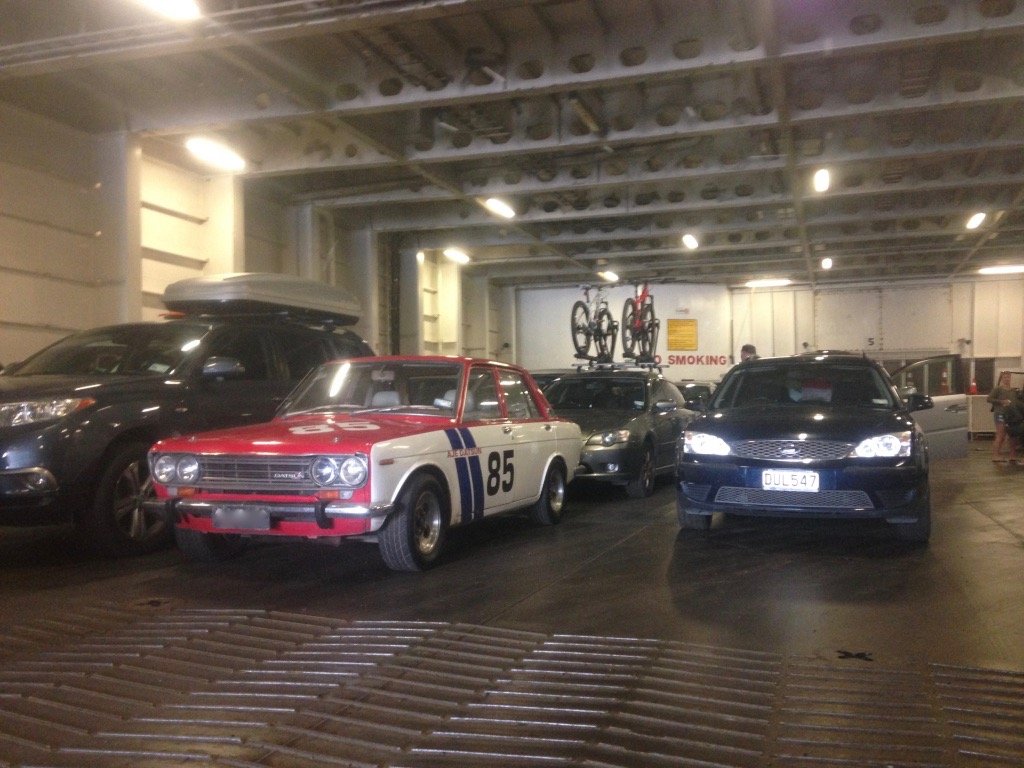
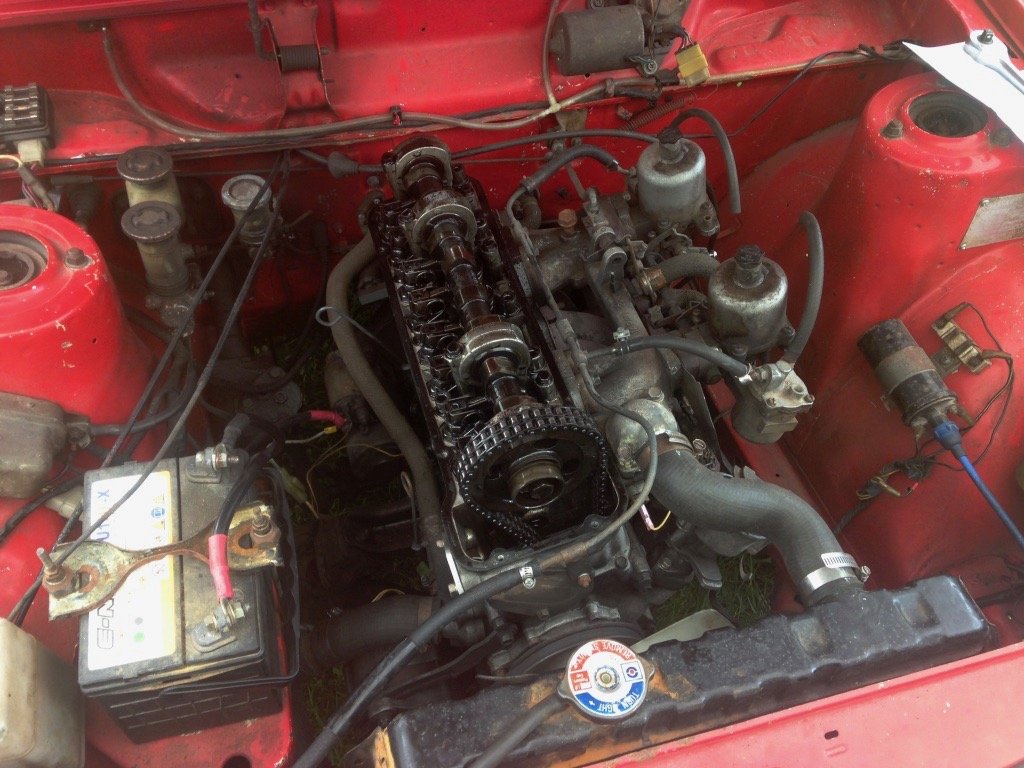
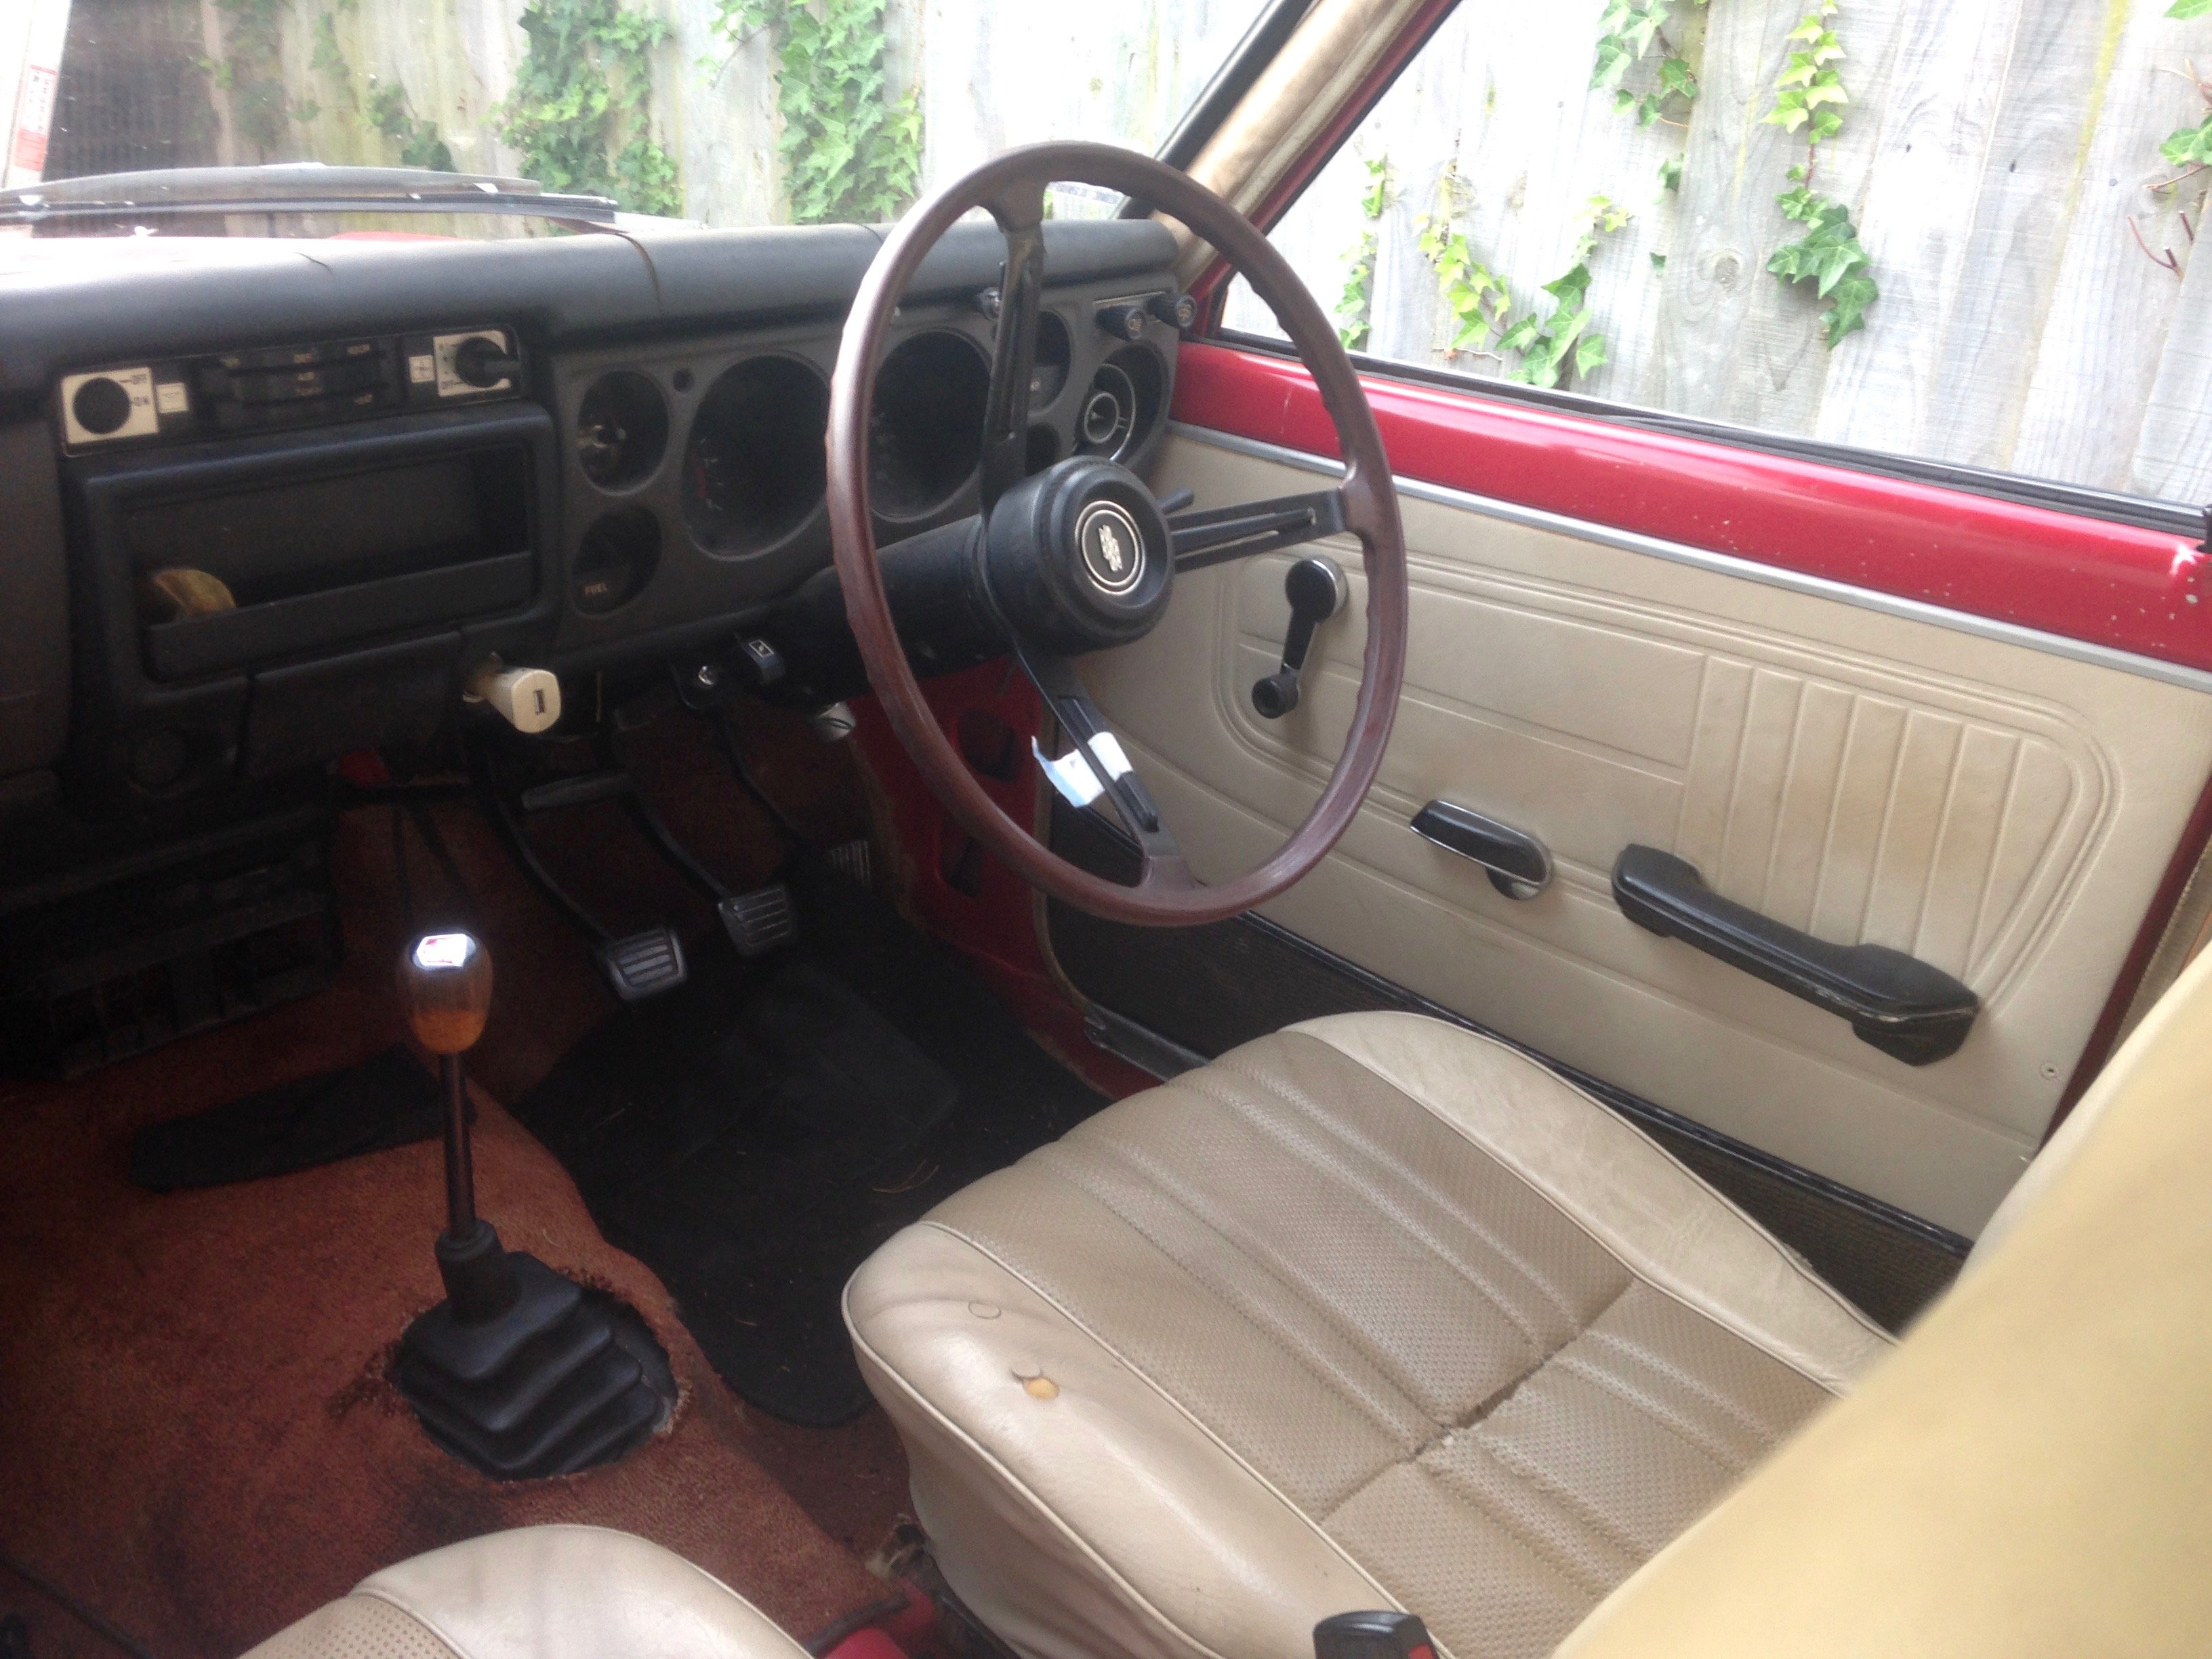
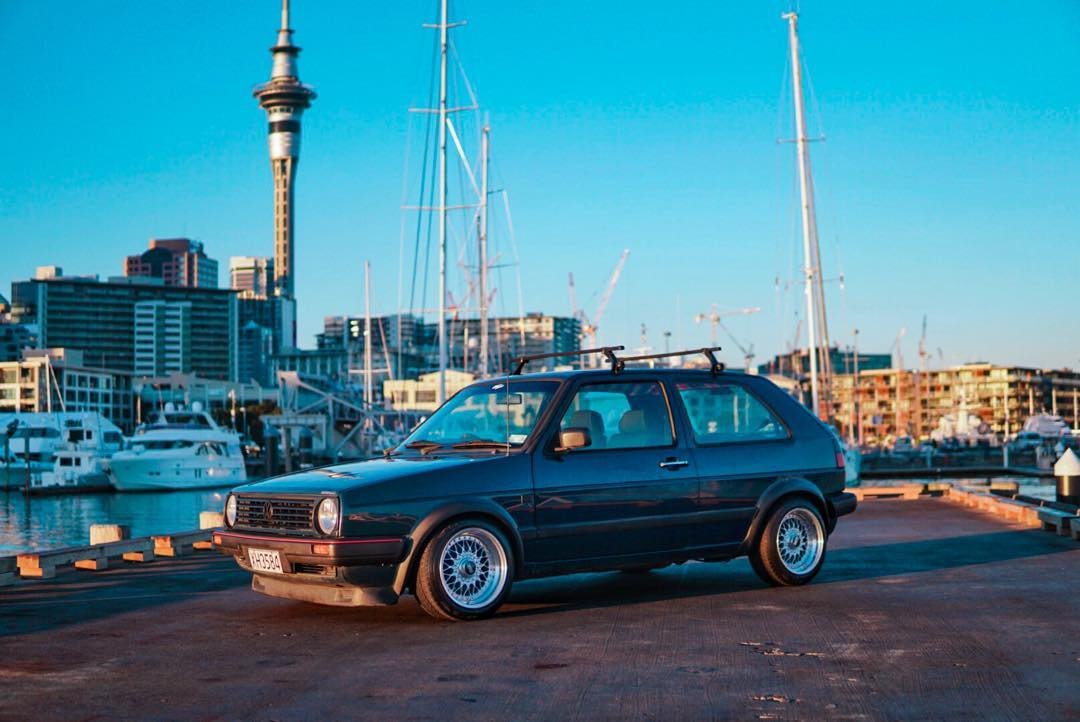
Enough backstory, now for the car. As mentioned, I picked it up over the Christmas break from the family home up north, being that it has been used sporadically I put aside a few days to go over every nut and bolt to be sure the trip back to Christchurch would be uneventful. First up, a few small jobs... Sort the petrol smell: The original rubber joiner had given up years ago meaning the tank couldn't be filled past halfway, a crowd in the west island have reproduced them so out with old, in with the new Then came a tune of the engine, I had been nervous about this as i've never touched SU style carbs, turns out they're easy, plus my learning was made faster by having a full set spare to look at. The engine also has a mysterious click from about #2 or 3, I have adjusted the valves but it still doesn't change, oddly it comes and goes, is mildly engine temp dependant and there is good compression on all four, for sure something that will need more digging..... The eagle eyed 510 spotters will notice the brake master setup is not correct, having be swapped out for a different style for race duties. for now I will run with these until I get the original rebuilt and cleaned up. With mechanicals looking ready for a drive I moved onto the interior, how about the stolen dashboard you say? well as luck would have it, a history of writing off Datsuns racing had left my father with just enough bits to kit the car out as required, he even produced a full set of badges that I now have tucked away awaiting some modern technology for reproduction. The carpet was very much in fine race spec consisting of two or three coats of red paint, in order to prevent my girlfriend from running off halfway back I needed something to muffle the road noise, once again the family parts warehouse presented a front carpet in the most delightful shade of poo brown, matched with carefully positioned black mats to cover the tears a more suitable environment to conversation was produced. Yup, white interior, far better suited to summer! With everything packed and a torn bit of envelope to suppress the steering wheel vibration we headed south, we both held our breath over the Cook strait as the Datsun met salt air and stumbled on start up leaving the ferry, incidentally some muppet had forgotten to fully set the distributor after resetting the timing and had come loose, sorting that we drove on to Marahau for a bbq with Alex and Hannah. On stern advice we reluctantly drove over the Takaka hill, well actually I have been fizzing to do this for a long time and boy was it fun, even with 50km speed restrictions and road works its gotta be one of the best drives in the country polished off with an epic view. And that dumps us back home nice and safe. So plans from here? I was planning on a full restoration beginning this winter, the paintwork is pretty rough from being done for the track but i'm just enjoying driving it too much to take it off the road for any considerable time, there are a few things to start with: The engine tick, it may just be me but I want to dig further just in case I have a side draft manifold and throttle bodies, efi was also on the plans, but SU's just drive so nice and the fuel economy is pretty reasonable. Replace a broken shaft spring on the rear carb - this is causing the idle to not fully drop occasionally, no biggie, but sometimes irritating. Complete the CAD models of the badges and get some replicas made, this way I don't have to cry if they fall off/get broken. Get around to picking up a 5 speed or fit the 3.5 diff in the shed, 3500rpm cruise is a tad loud for my increasing age! Repair the split dash, irritates me a bunch looking at it Paint up a few potential rust spots. Actually decide what colour the carpets should be and source new front and rear Polish up the chrome Clean up the wheels Source new window rubbers so the window trims can be installed. While the list is long of potential performance upgrades, I'm not keen on going too far from factory with it and any modifications that can't be reverted to factory are off limits. Long term it really does need a repaint, but the BRE colours are growing on me and the aged look is reflective of why I brought it, for driving!
2 points
-
Oh I forgot to mention a while back that I managed to get my Mum to do a spot of sanding to when she visited. I doubt she would have lasted log though but I think she did like the fact she had a trapped audience to waffle on to while she did sand... However- that was obviously before paint. Now we are right into the fun jobs of piecing back together the big kitset. The trickiest thing is trying not to get too carried away with cleaning things but it always does seem such a shame to put messy, rusty or dirty items onto a clean shell. I think in the future I'll try to stick to ratty cars like the Viva wagon. Saves time when things can be messy So yeah.. cleaning things. First the bumpers. I straightened both as best I could and Hannah then cleaned the backs and painted the surface rust in Por15... I then trial fitted the front but once bolted up it was slightly wonky. I ended up having to whip up a bending tool to straighten out the slightly bent mounting points... All straightened I mounted the bumper and stood back to admire the first bit of bling... We then hauled in the other two Imps and went over them like a team of car stripping Piranhas and removed all the last morsels of useful bits... With bits removed they then needed cleaning. Hannah quite enjoys these jobs and did a stirling job of making things all shiny again... I filled the roofline and inner wings over the rear arches with cavity wax. Much more enjoyable this time round then the first time I ever used some back in Blighty on my Rx3, in winter on a very cold day. This time round it flowed perfectly... Together we fitted the head lining we removed from Imp 3- the one rescued from Christchurch. Its a bit discoloured around the edges where the contact adhesive that the original factory worker had brushed in place has stained it right through. Not much we could do with that. But its rip free, pulled up nice and tight and looks better then nothing. Its in keeping with a 54 year old car... I then made a engine cover stay. Because the cover is fiberglass and had no mounting points for a stay I had added some before painting along with a suitable point on the car with them further apart then the standard imp placement to take away extra leverage over a flexible f/glass lid. Now to connect the dots. I had a rough Idea of what I was going to make when I added the mounts and just went with it. I had a piece of stainless the right size and used a plastic knob from an old broken cafetiere I had stashed in my bin of 'might be useful one day' bits. I bent the stainless rod in such a way that when the lid is opened it slides up and drops over a stainless bolt then cant go further. To drop the lid you have to lift the knob slightly- this way a gust of wind cant lift it and make it drop. It works sweet as!... Next big job was to get the wee car back on its wheels because I had some work coming in that required the hoist. I refitted all the suspension and luckily had collected 4 decent shock absorbers with good shafts. However the springs were going to be too long. I'd happily pay the $200 for some Montie Carlo springs. For those not aware they are the popular lowering spring set for Imps that most people fit. However the freight costs for a set to NZ is too much for me to cope with and anyway- I have 3 full sets of springs I can play with for free. I like free. So out with the Makita... After doing a heck of a lot of web browsing I deduced that one coil off the front and half off the back would be a good starting point. Totally aware that I'd be raising the effective spring rate I reckoned this would still be OK. The car is going to be a touch heavier all round anyway but too much extra stiffness to the coils without adding extra damping would be no good. I definitely cant afford new posh dampers at this point so I played it safe... I then heated the cut ends up with the Tig in several zones, flattening the coil as I did. This worked well- the heat didn't travel very far. Its not optimum. Optimum was what I used to do back in the day when I spent 3 months of my apprenticeship working for a Blacksmith resetting leaf springs and shortening coils etc. But I dont have big furnace at my disposal nowadays so Makita it is Then cut the ends flat and they came up sweet. It will be really interesting to see how it sits on these and this I wont know until the car is fully built up to full weight. I reassembled the struts and finally I was able to fit the minilight wheels from the racecar on and lower the Imp to the ground. Ooooooohhhhh. I dont know when this car was last rolling but I suspect it was a very long time ago! It felt so good to roll it away from the hoist, stand back and admire it. Plenty of premium positive camber to come out as the weight piles on. I'll soon be ordering some better sized new tyres and getting them onto the rims. While the car is off the hoist Hannah can continue assembling interior bits and I'll be attending to some work on other peoples cars.2 points
-
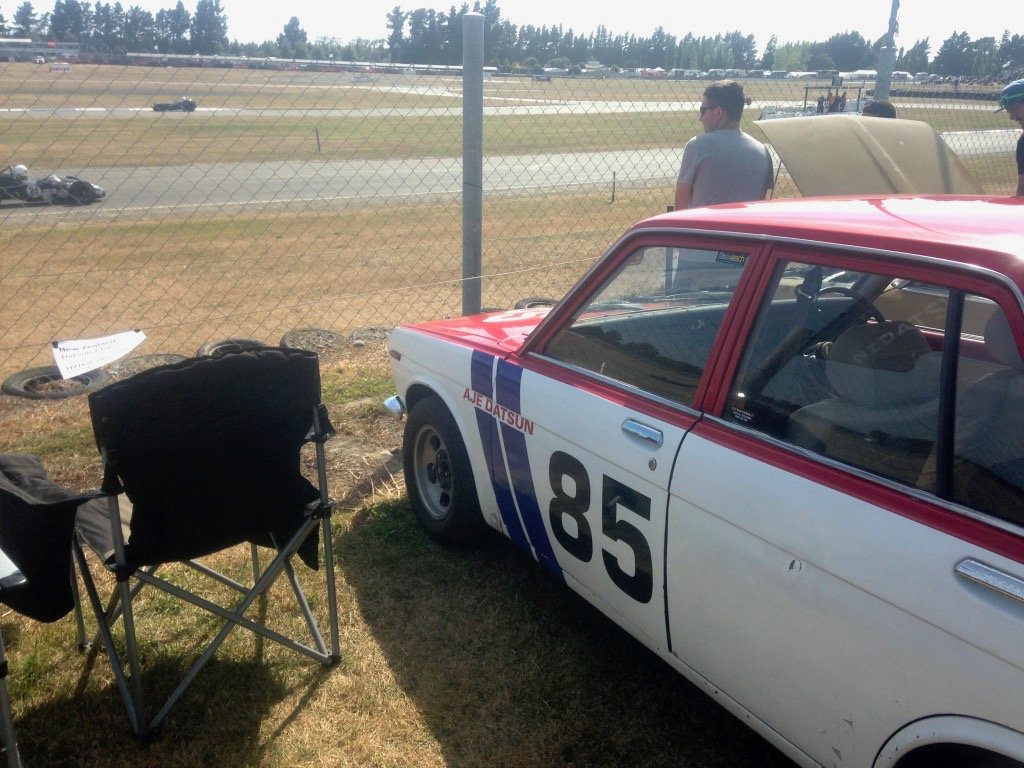
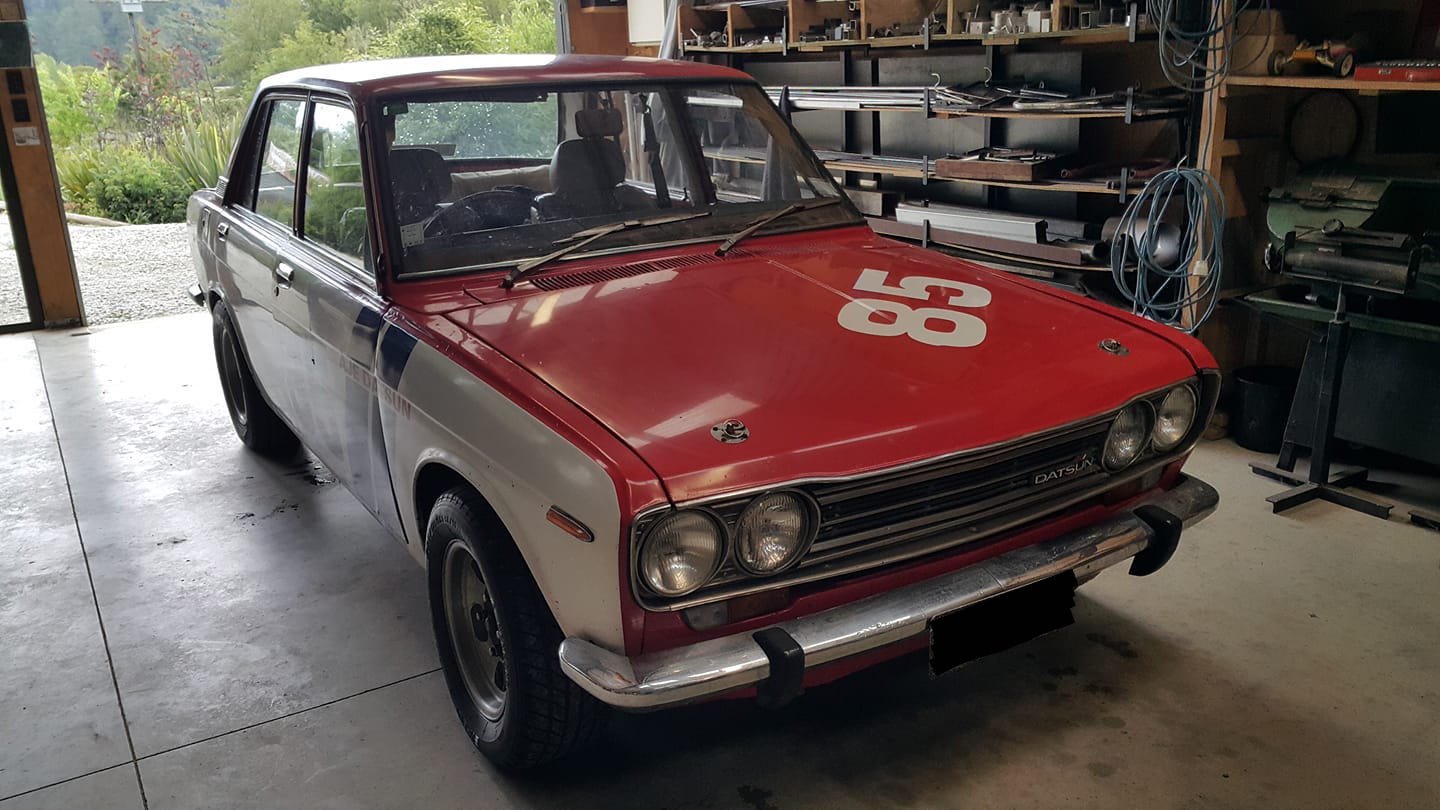
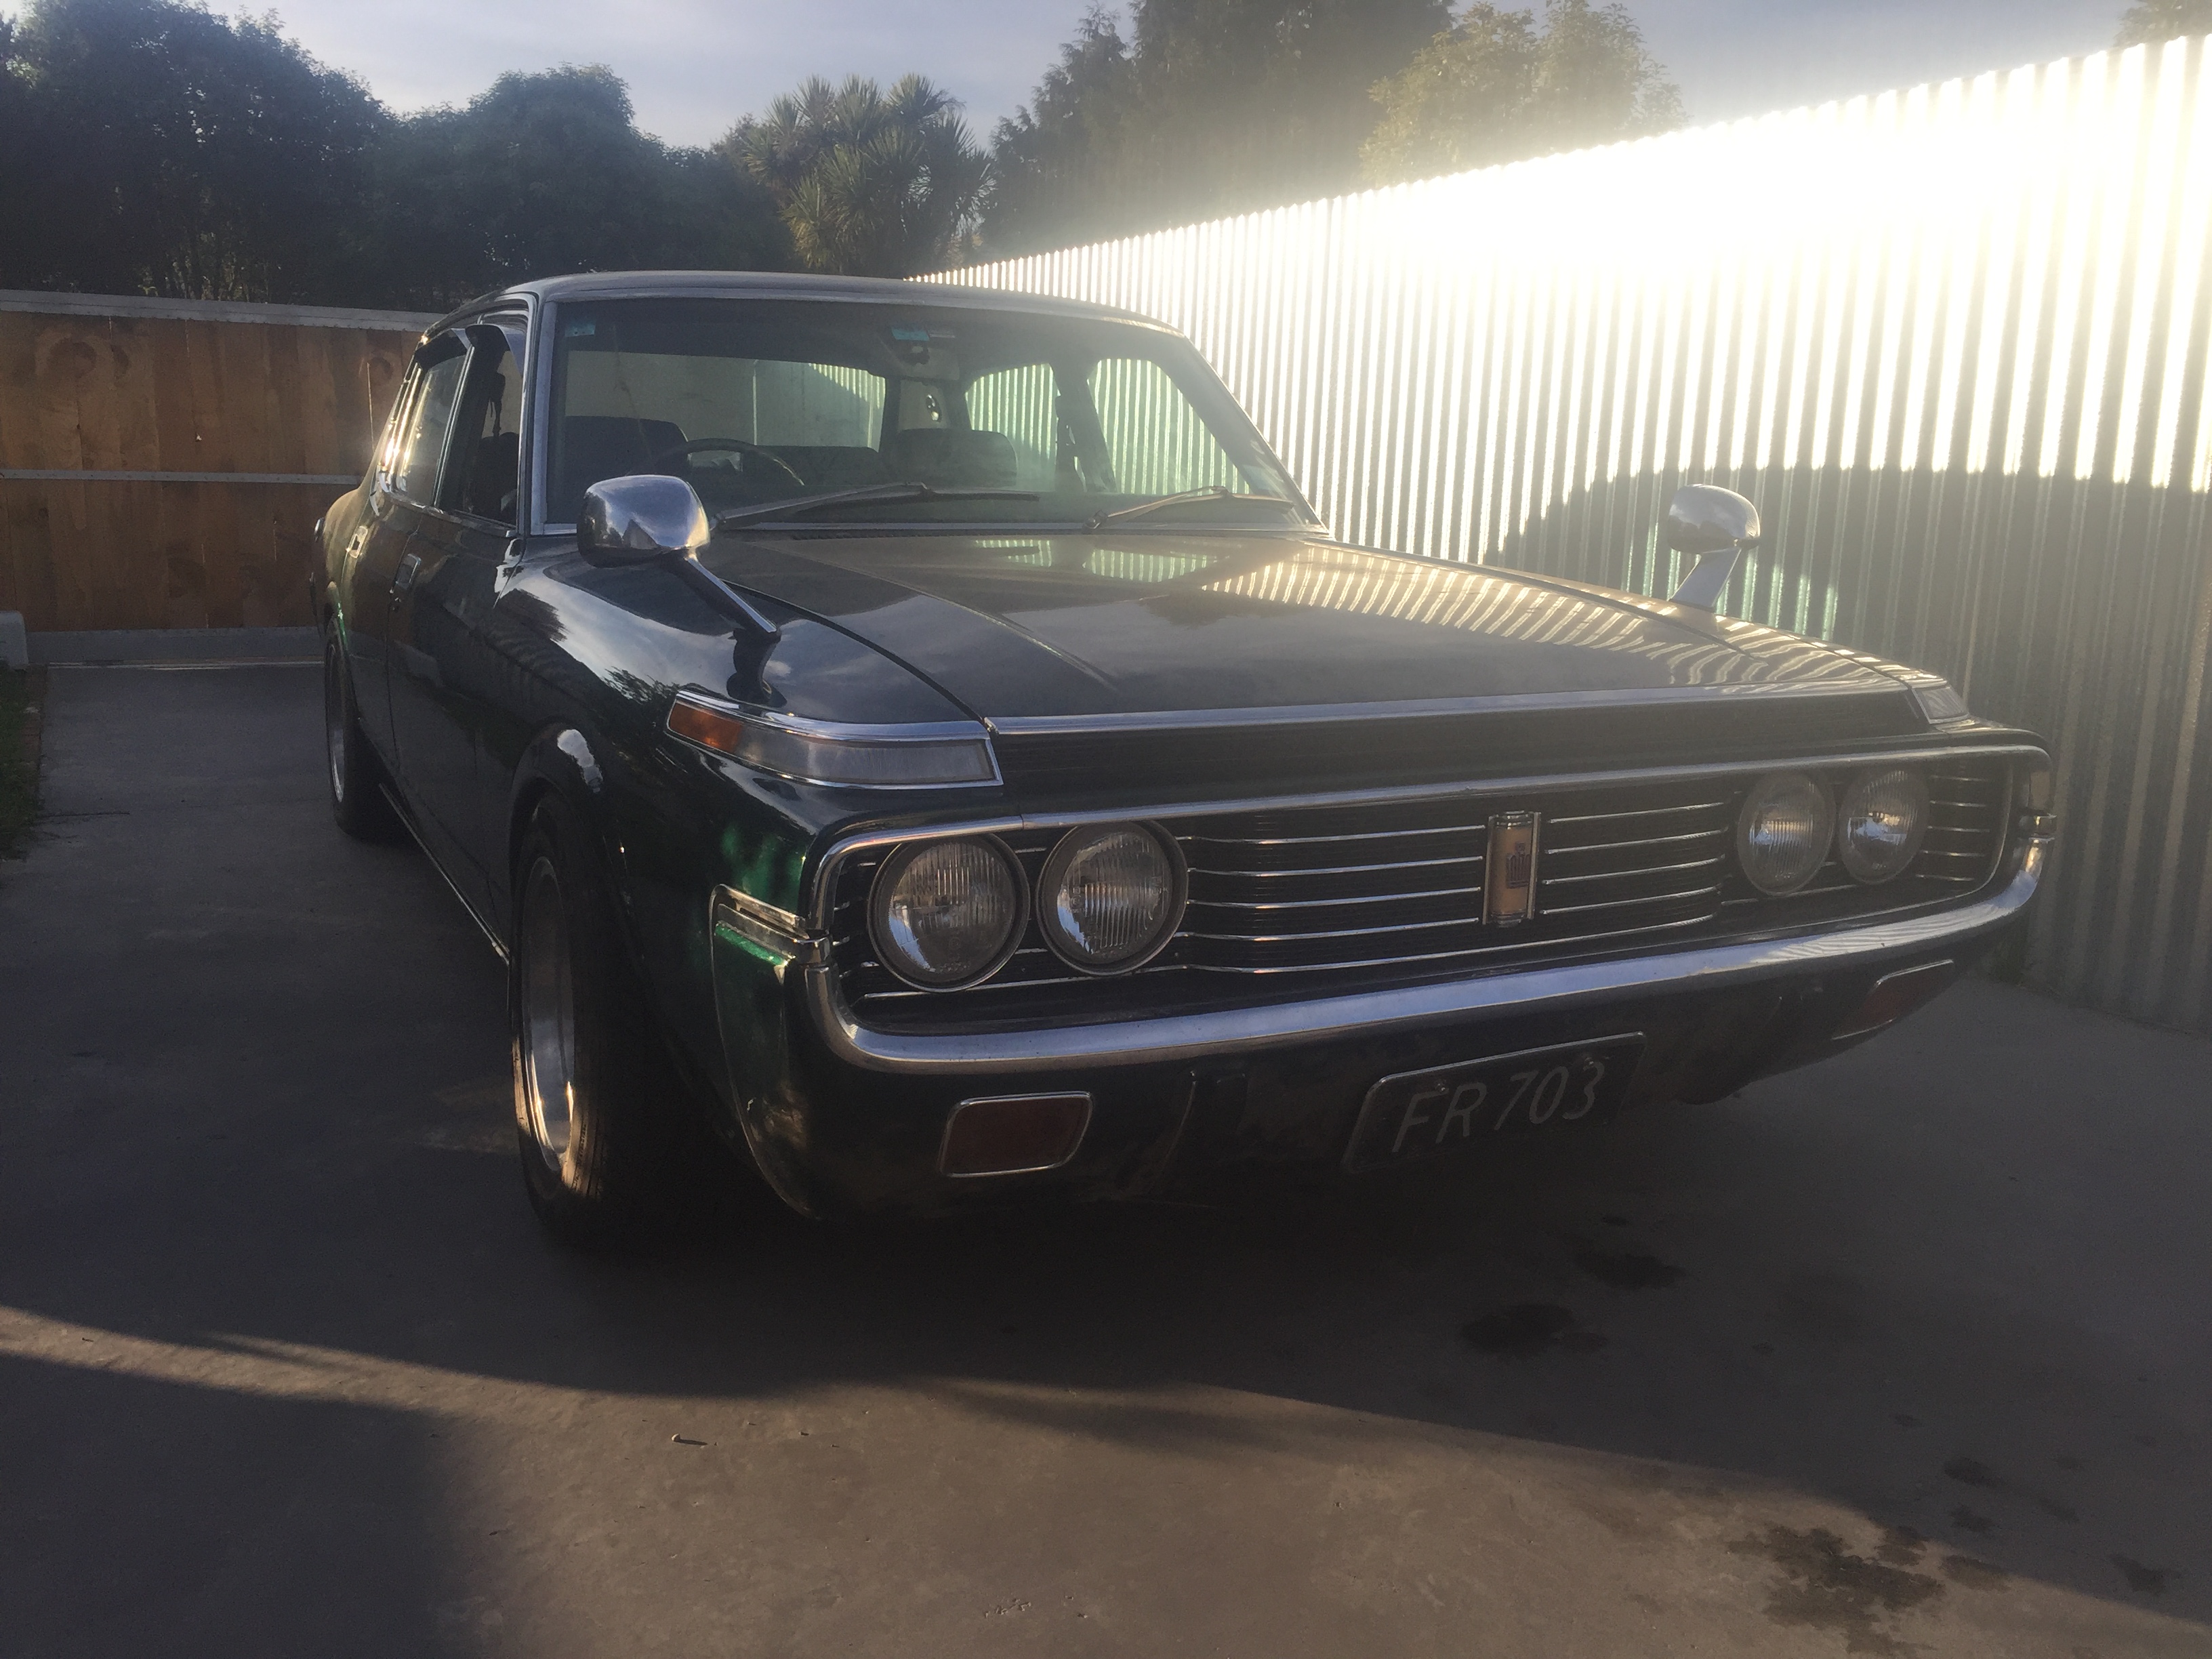
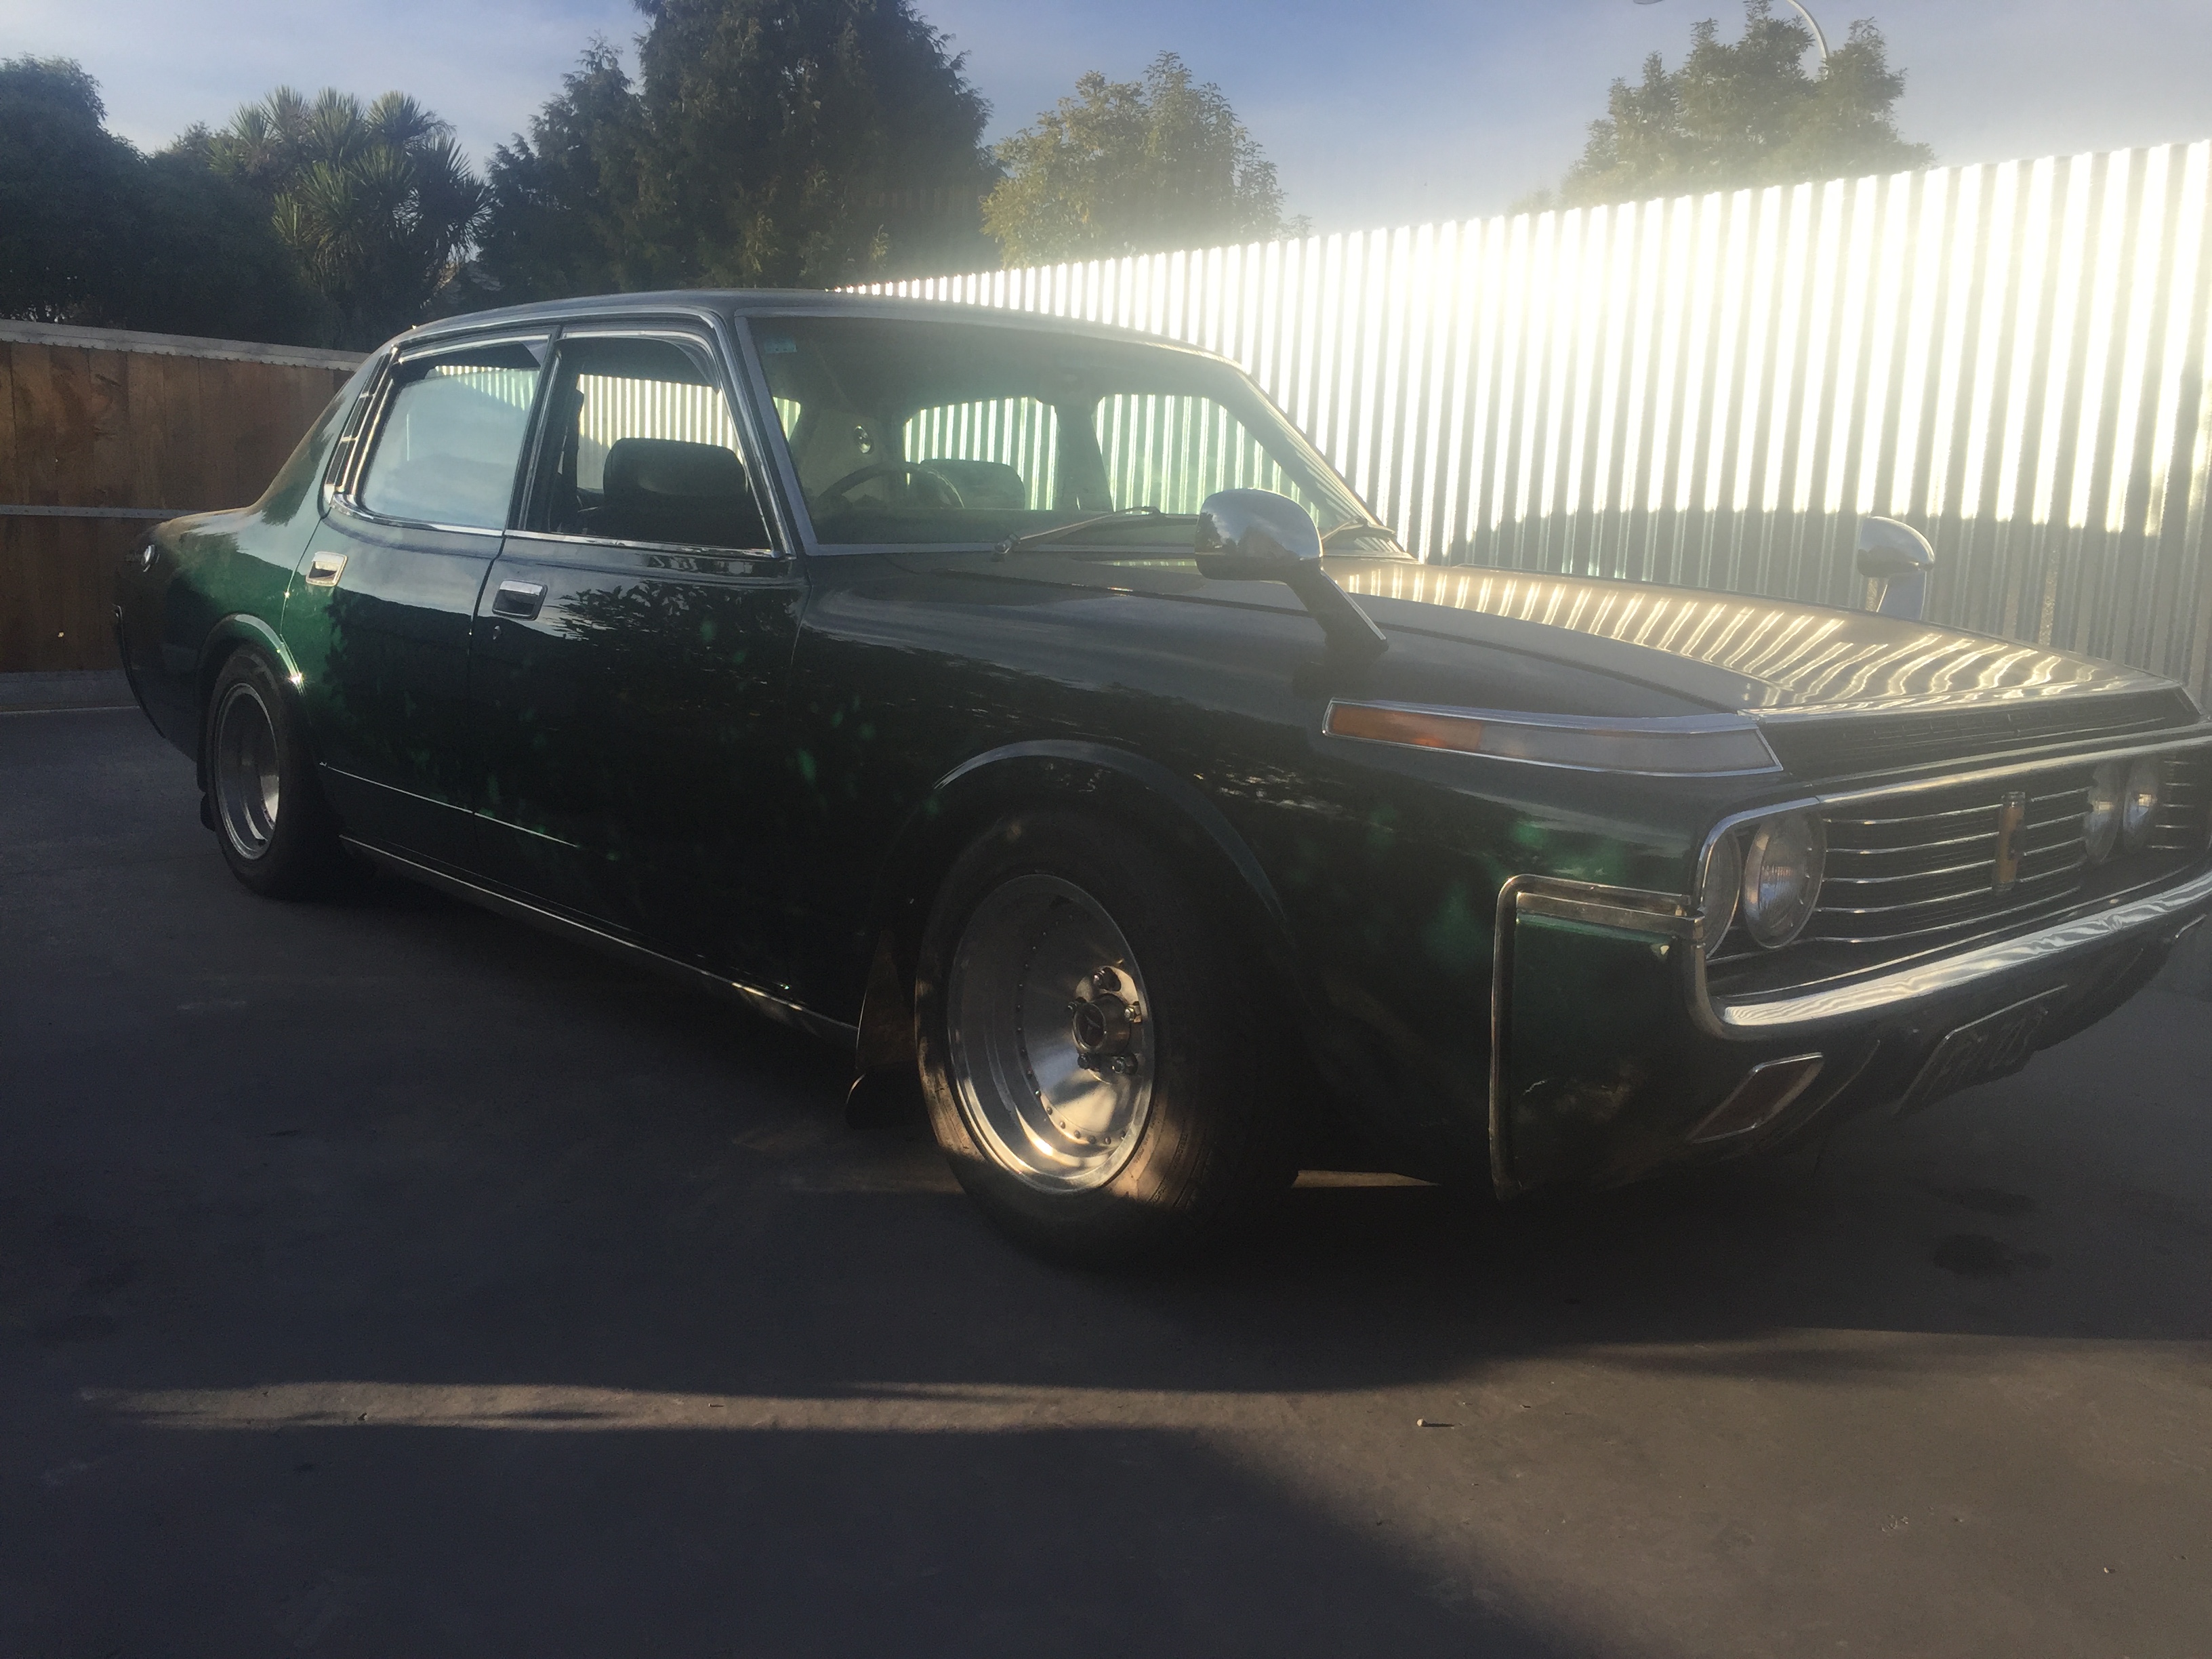
This car has been a long time in the making acquiring, but being the descendant of an original Datsun foamer, it could be said it was my destiny..... The car being a 1972 Datsun 1600sss, the back story? well, take a seat..... 20 years ago the car in question was owned by a young man in Palmerston North, being an easy target it was stolen and taken on a joyride, thankfully once they had had their thrills it was abandoned to be recovered by the boys in blue, but the good luck didn't last, while in impound some scrots jumped the fence and stripped her of all the fancy sss interior, with the badges, steering wheel and dash board gone, there was not much left to identify it as the performance upgrade intended by the factory. Being the Datsun man he is, when my father got word of it being up for grabs he beelined for the impound yard for a nosey, even though the interior had been stripped, the body was in fairly good shape and for a price that we'd all love to pay now, he loaded it onto a trailer and tucked it up under a tarp in the back lawn. At this stage he had a standard 1600 set up as a track car for competing in classic classes at Manfield & car club sprints, but with a teenage family, i'm sure restoration of the sss was still a long way off. Here's a younger me in the 1600 race car in the early 2000s during a carclub motorkhana, most likely the first time I drove a 1600 too! Somewhere in the mid 2000s the race car got close and personal with the tyre wall at the end of the back straight at Manfield, coming out very much second best a donor shell was required, with the sss being in pretty good shape it was quickly fitted out with all the bits and went on to serve race duties for a number of years, thankfully my father realised that sss body shells were getting hard to find and so when a standard shell popped up cheap, he brought that to convert to a more modern safety standard and the sss was reunited with standard parts and retired to weekend road duties. As all this unfolded, I left home, traveled the world, invested heavily in Ladas, eventually to settle in the Datsun capital of NZ, Christchurch. Two years ago the stars aligned on a SAR training exercise and while stocking up on pies in Fairlie, I spotted this wee beaut Sparking a deep down affection I followed it around the corner to where it stopped and of course I started chatting with the owner, turned out its been in their family for quite some time, and the lovely lady informed me that there was a Datsun club and that they had nationals on in Ohakune, even better was that year's theme, 50 years of the 510! Looking at dates they lined up and before I knew it I was hitching a ride north with our very own Datsun barry Runamuck to meet my father and other 510 foamers from around NZ. After a weekend driving around the central plateau I was convinced I needed a 1600 in my life and a plan was struck to purchase a dereg but complete vehicle that was tucked away, sadly after discussion with panelbeaters over the required rust work for re-vin the costs looked a bit daunting for my current plans. A few months later my father slipped up and offered the road legal sss to me, I rapidly agreed before he could back down, only downside was I had no leave left and a work schedule needing much attention, this meant I had to wait until Christmas break to pick up the car! For now it's late, but I shall dig out some more pics and tell more about the car itself and the mini and major plans ahead. Discussion thread here:
1 point
-
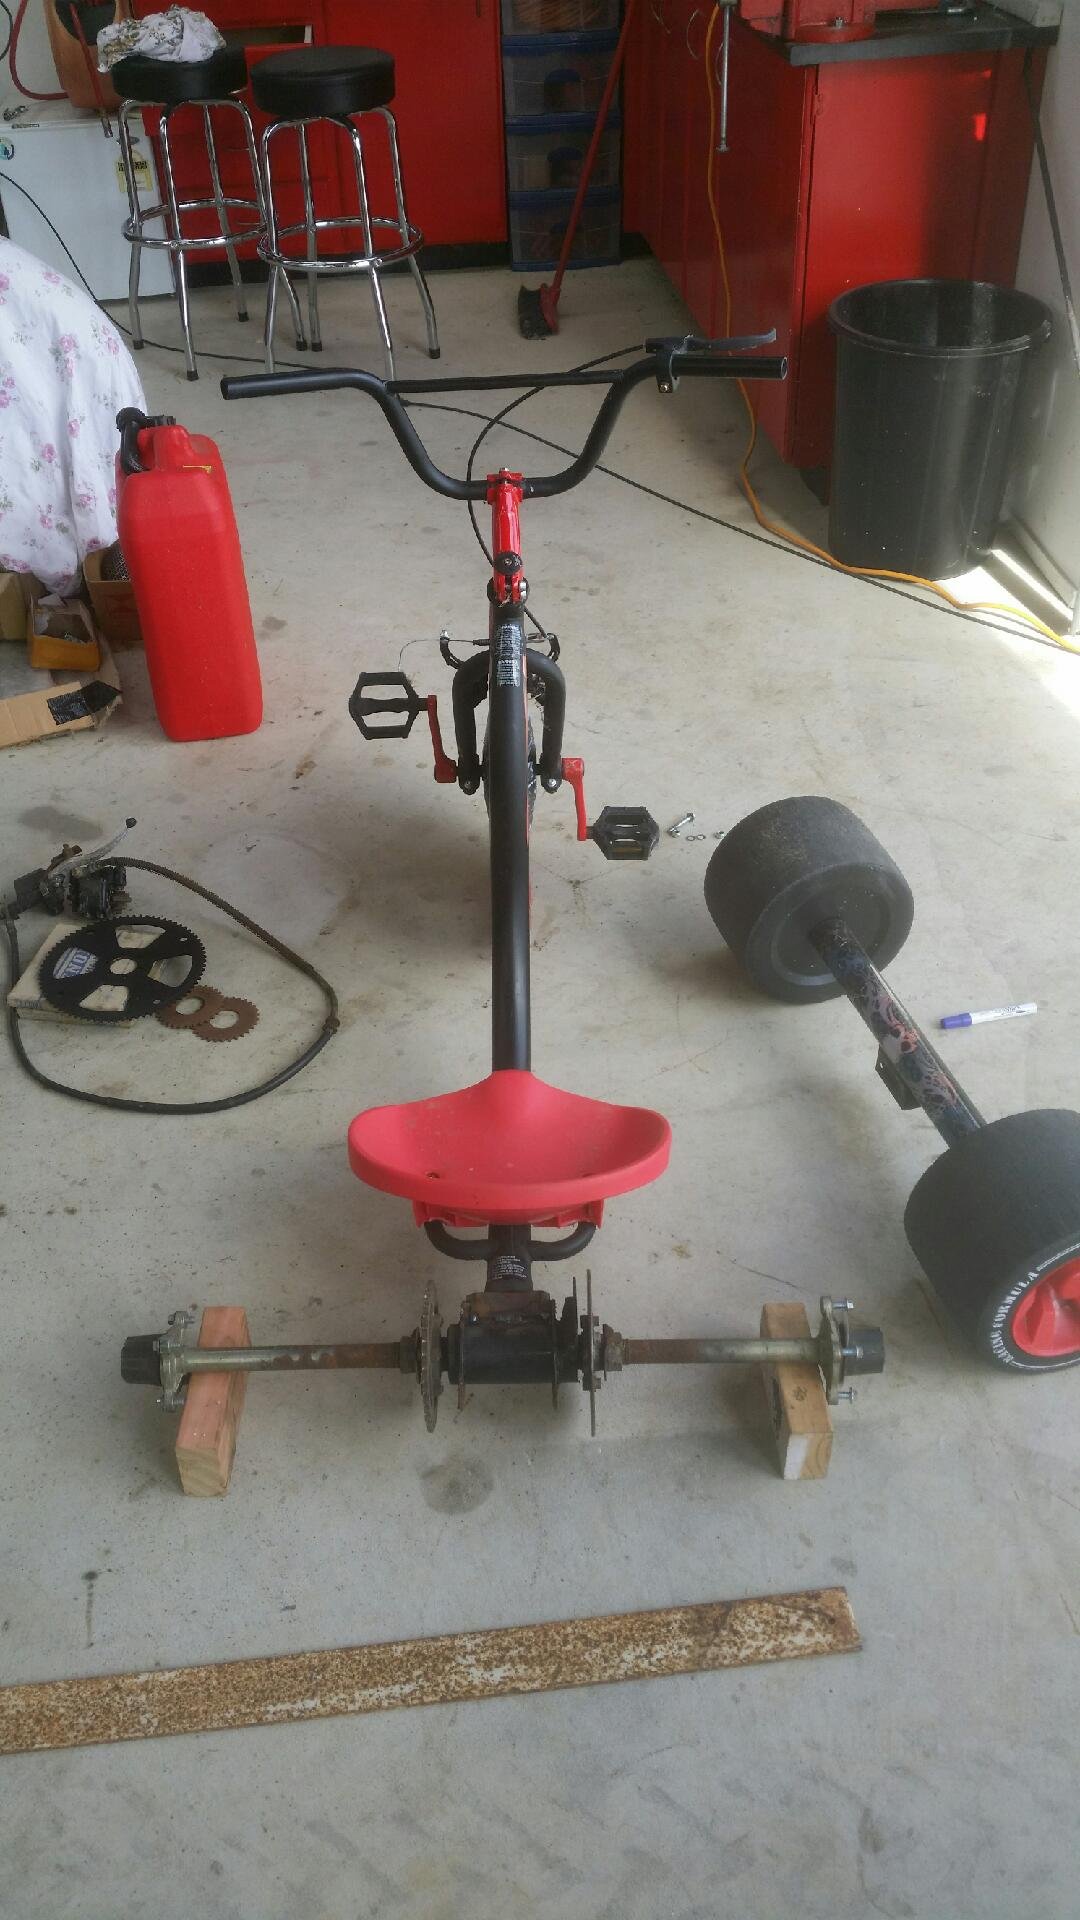
Couldn't help myself, kumeu swap meet provided just about everything I needed to make another one of these...so it'd be rude not to really? Going to roll with the red and black theme. Got this all done after work today...but still a bit to figure out.
1 point
-
You will need that water return to allow water to circulate while it warms up before the thermostat opens. Otherwise you will get hot spots where the water will boil1 point
-
Not yet, waiting for my son to do the drawings (a multi-year process ) It was built by Graham Berry's and patterned on the Locost design with Cortina uprights so I don't expect any major issues (hopefully....) I've thrashed the car around a dirt track on a dairy paddock and nothing broke, but I'll probably add the extra plates anyway as it's easiest to do it now.1 point
-
That's a peach. Oil cooled Bandit motor with GSXR cams and high compression would be a wicked sleeper1 point
-
I spent half the day trying to clean and polish the wheels I'm going to try and order a supplementary plate for this bike and paint it black and silver. This one makes me cringe. Also ordering a few plastic bits like the dash surround and number plate light cover.
1 point
-
Removed 2 rooted engine mounts got new ones from Mace Engineering for 90 ozzy dollars and achieved a Wof today. Boom! Legal for under a grand. Engines sweet had a weepy corroded thermostat housing which leaked into the valley of engine and blocked thermostat All sorted for nothing, it was able to drain itself without leaving a puddle though hence old owner didnt notice it till it got hot I'd guess.
1 point
-
so the plan is to metal prep and POR15 all the good bits till im left with just the repair ares.
1 point
-
well its back from blasting ....and good news .....its not a pile of dust
1 point
-
And fully ilegal but i like driving it so i took it to work on monday
1 point
-
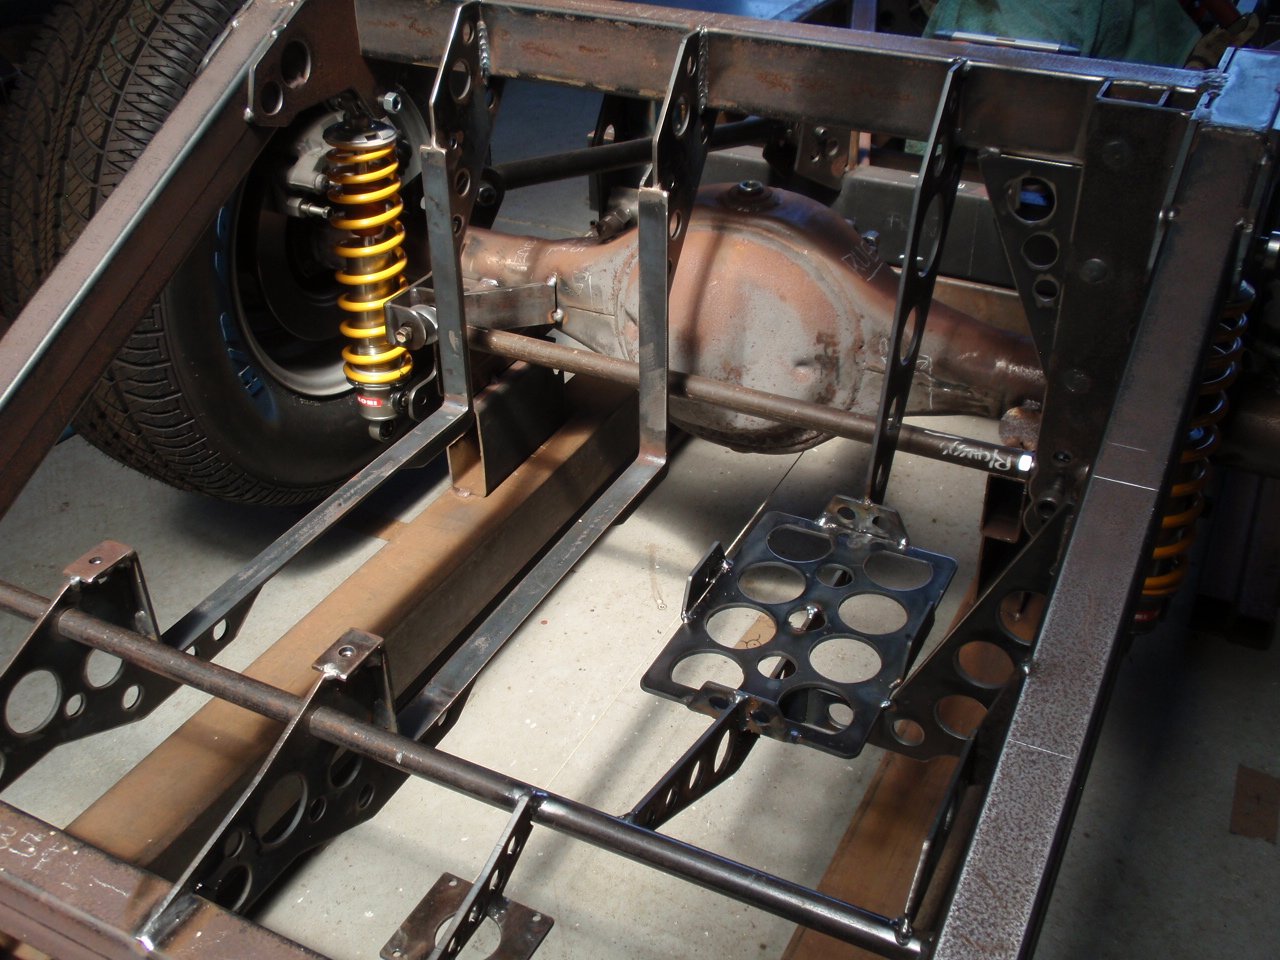
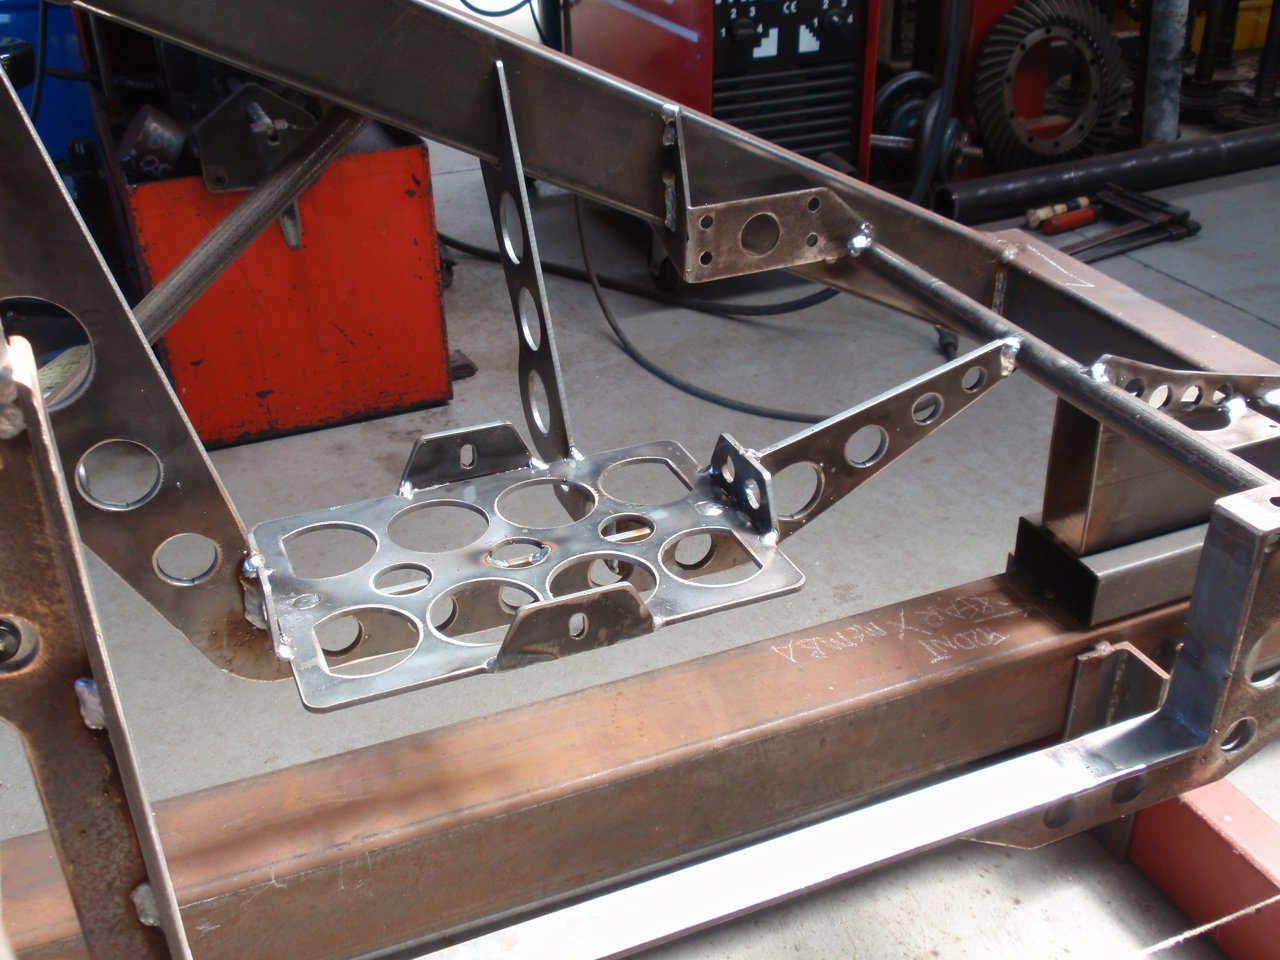
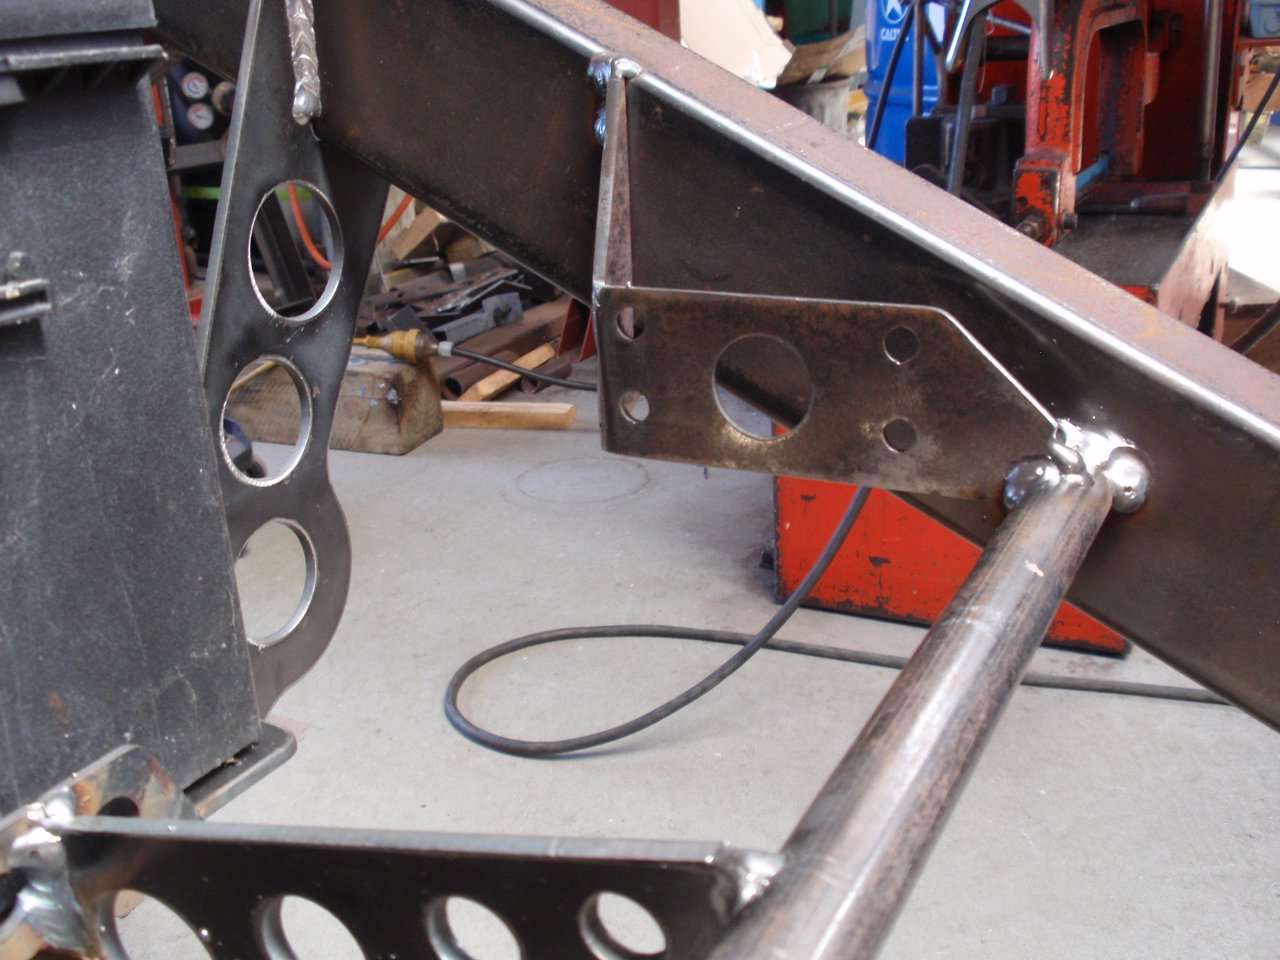
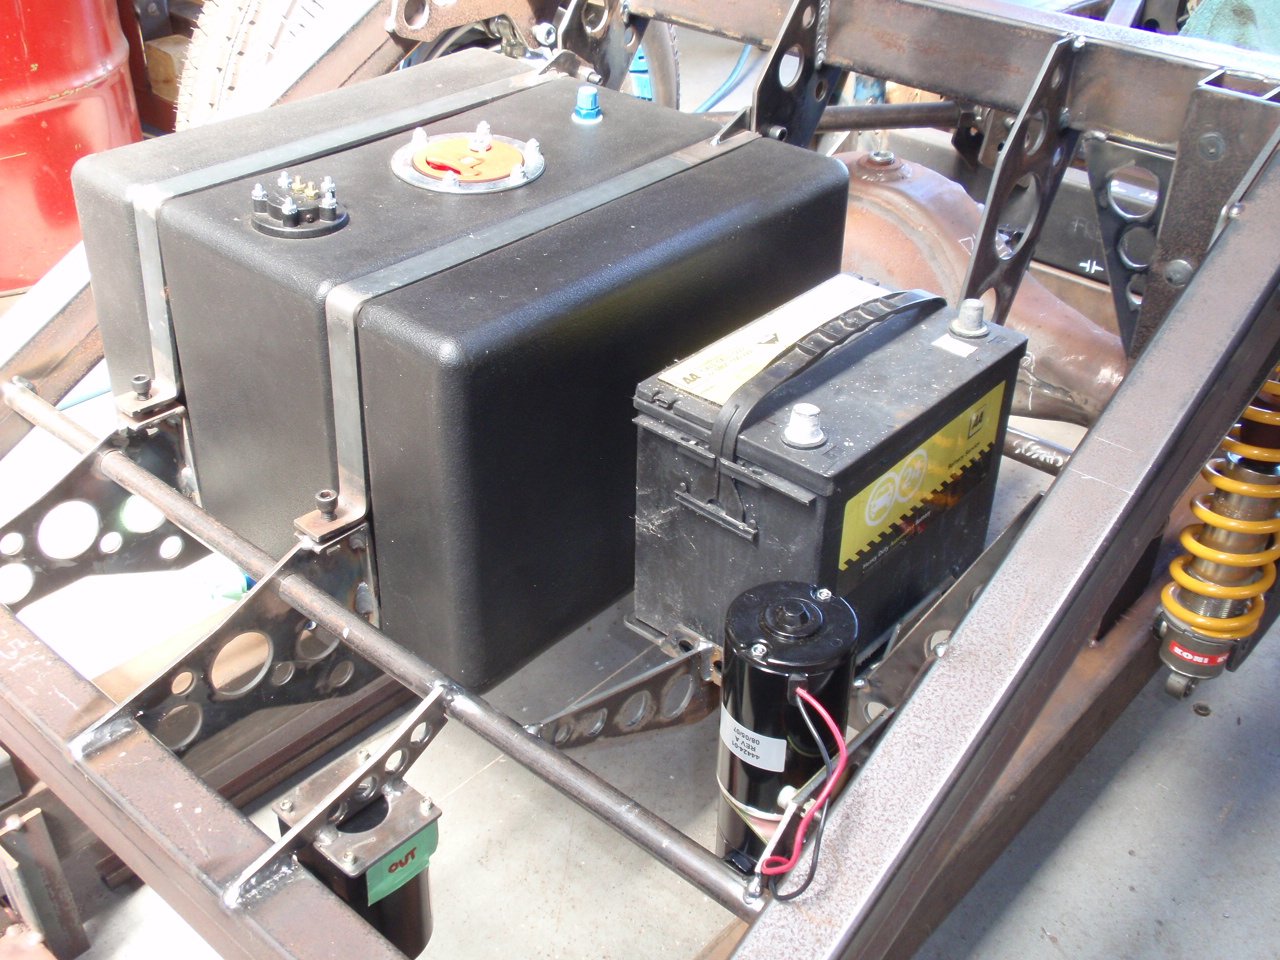
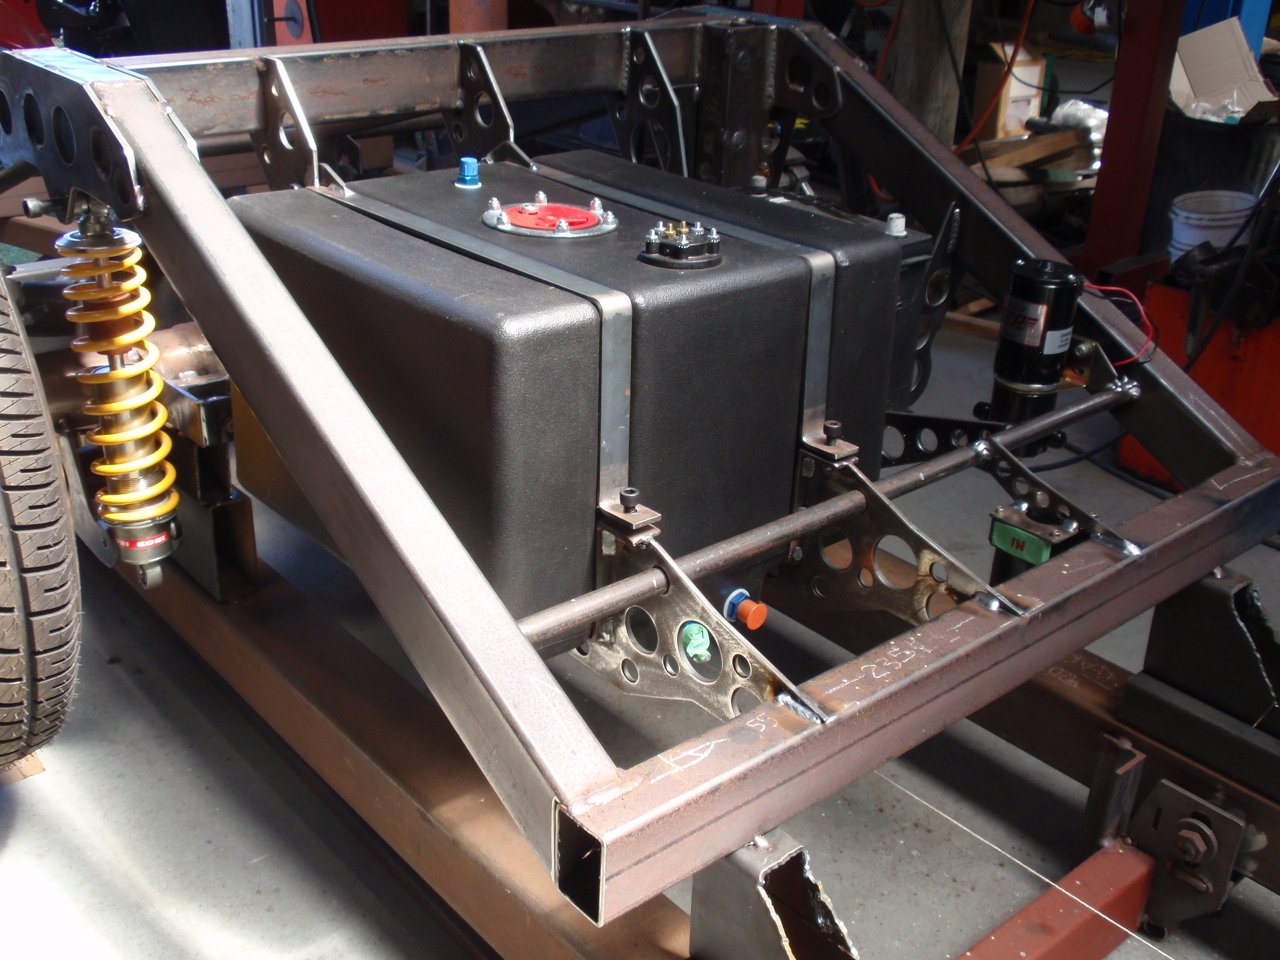
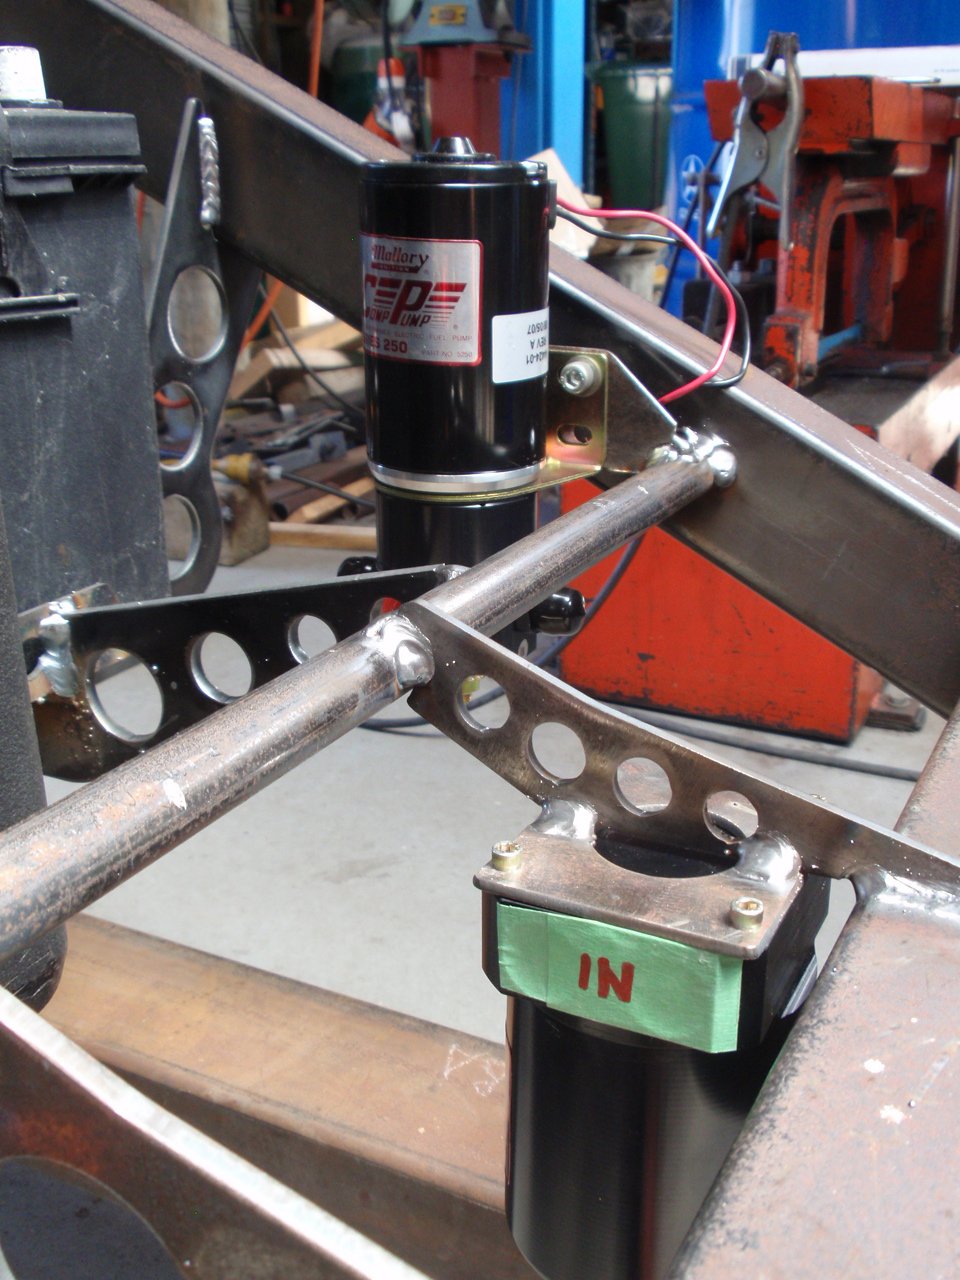
I have done some more on my Hotrod. I fabbed brackets to locate and secure the fuel cell, fuel pump, fuel filter and battery. Can you say Swiss cheese? Lol. Then I populated it. Next task is to mount the rear brake calipers and maybe the rear swaybar.
1 point
-
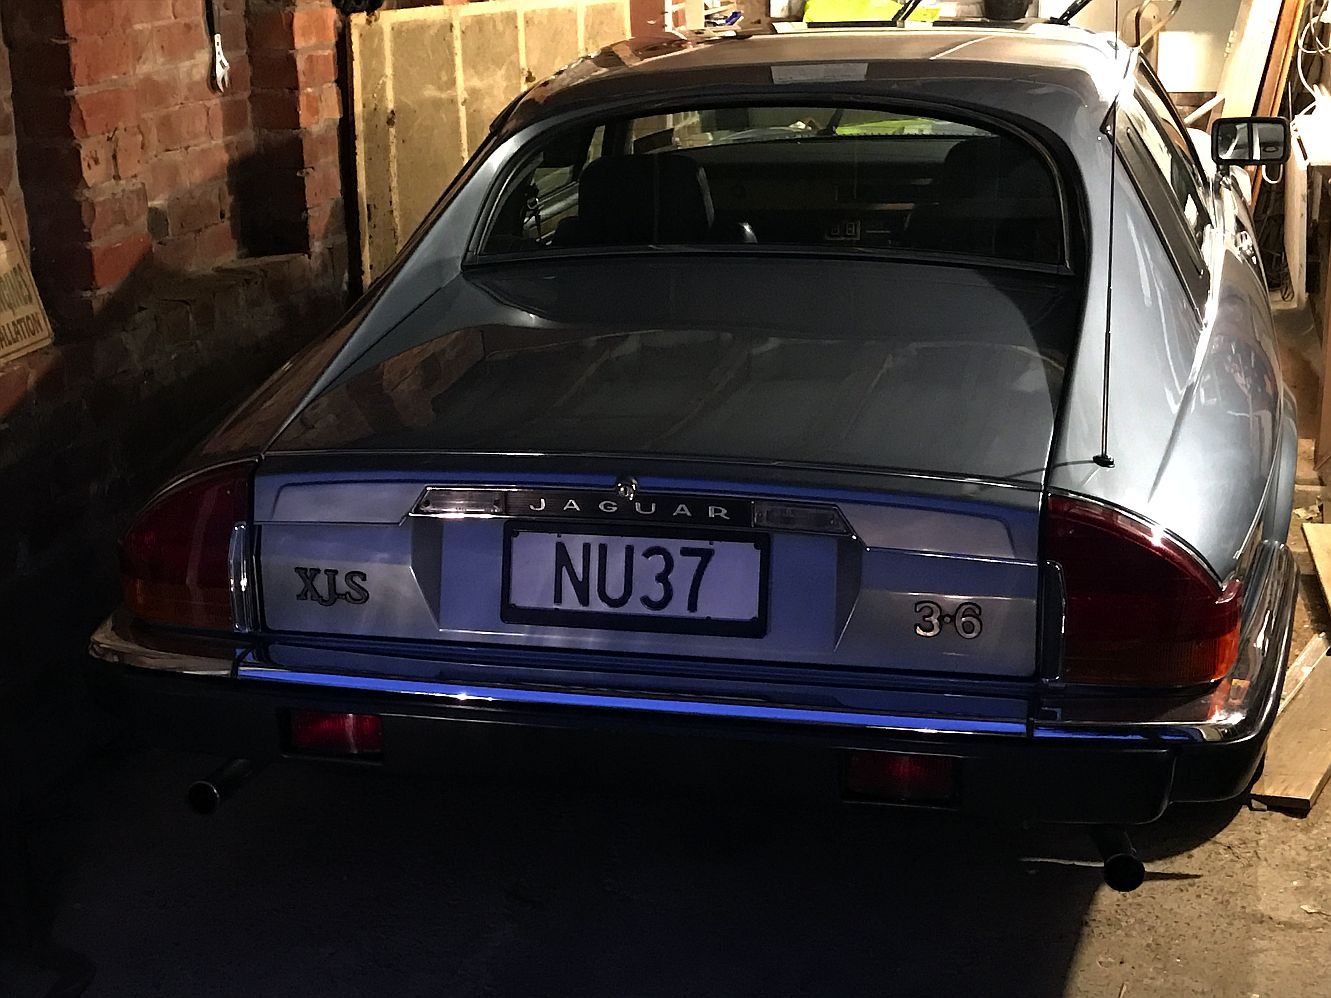
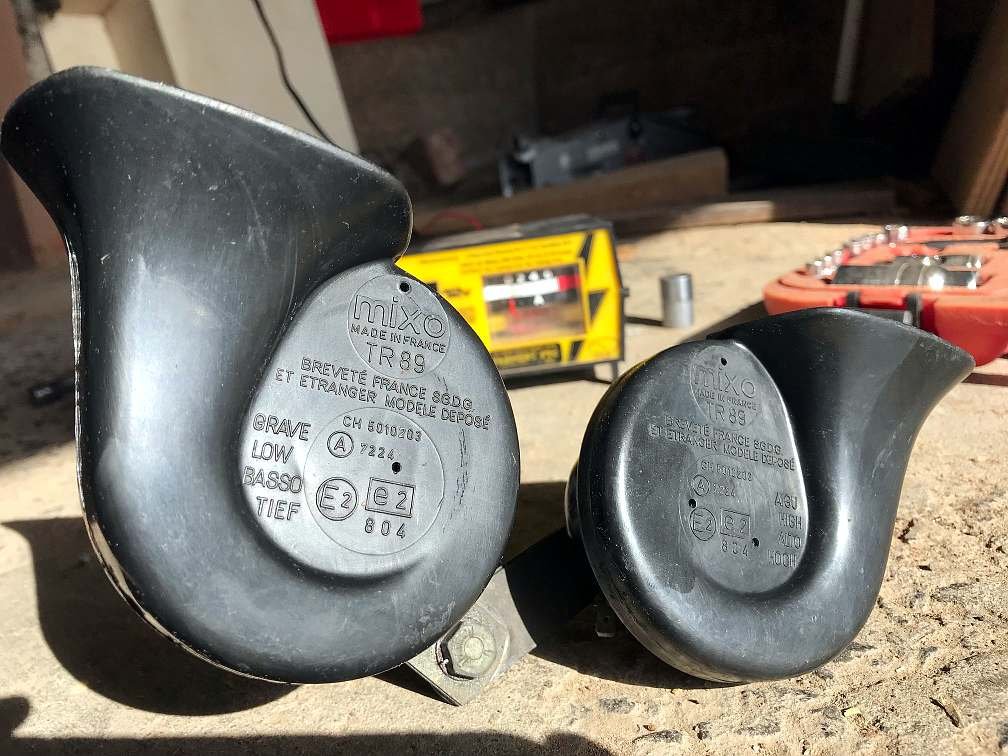
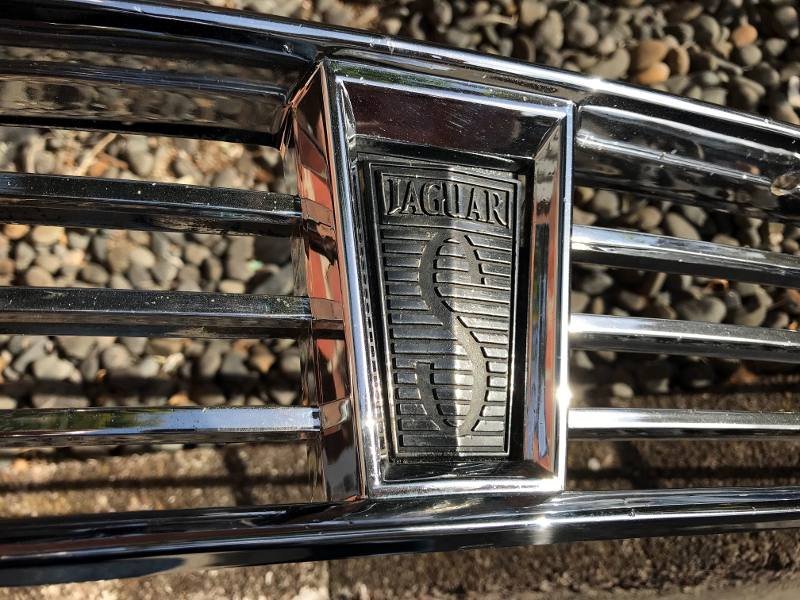
Spot the difference between the rear lights - the one on the right with the black-painted chrome piece must be from a 1970s car. Not sure which I prefer. I decided the alternator drive belt needed changing. I bought one then realised the fan and the A/C drive belt needed to come off first, and that meant wrestling with overtightened stuff that's difficult to access with my limited range of imperial tools. Got it done today minus buying a new A/C drive belt. More satisfying was fixing the horns. I'm supposed to have a French horn duet but only the low tone was working, and that sounded a bit too polite even for a British car ("Ahem.. boop boop"). I took them off the car to see what was up. This is after cleaning: I'd never disassembled a horn before, but it turns out there's no complex electronics - they use a sort of electromagnetic oscillator to vibrate a diaphragm. My high-toned horn had swallowed too much water, so I used a multimeter to find all the corroded/bad connections and clean them. After reassembly I had to set the adjustment screw to get it to oscillate and then to maximise its volume. Now if any other fellow's driving isn't up to snuff, I can give him what for. Because Jaguar couldn't be bothered fitting a welded nut for the horn mounting, I had needed to take the grille out to unbolt the horns. It made sense to give it a clean. See that badge: Normally it would say 'V12', but six cylinder cars have a big 'S' for 'Stingy'.
1 point
-
It's a trailer, no one gives a fuck tbh. Just shove it inside the rails.1 point
-
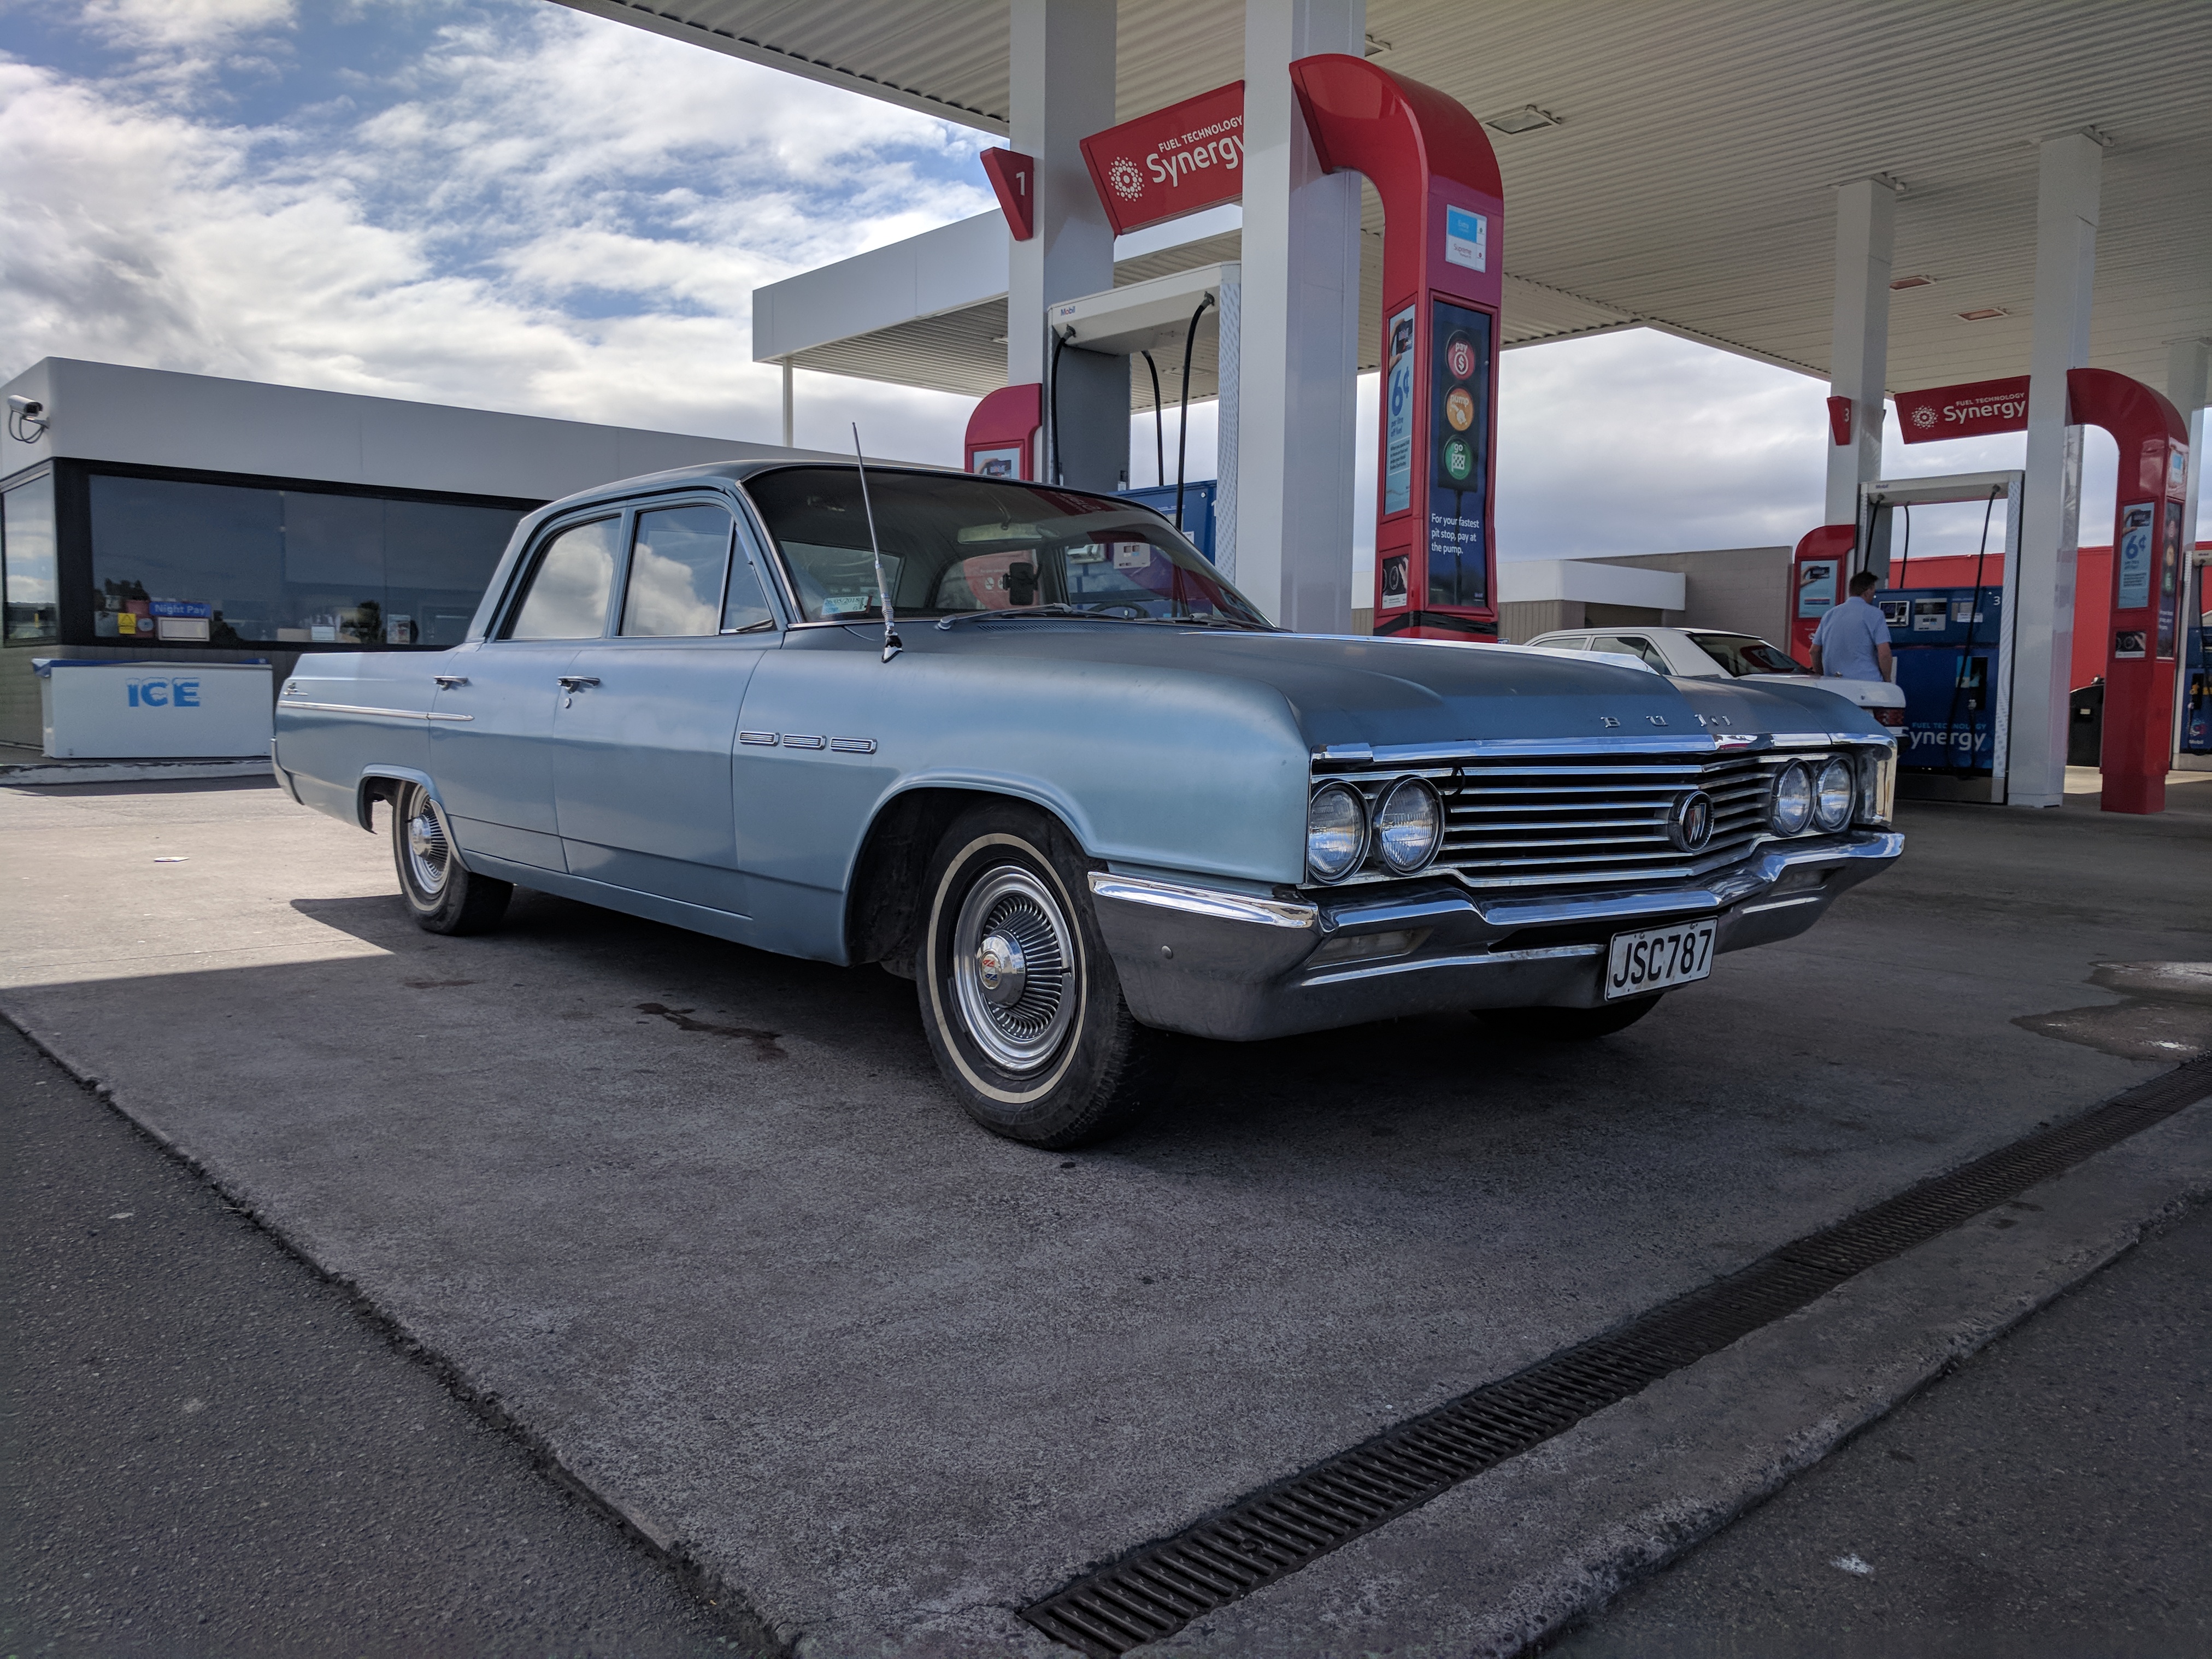
I've just picked up this boat from Blenheim. Currently waiting in Picton for the ferry. Goes good so far, for the 20 minutes I've driven it... 300ci small block buick Plan is to throw an Accuair system in it for Max levels of Aceness.
1 point
-
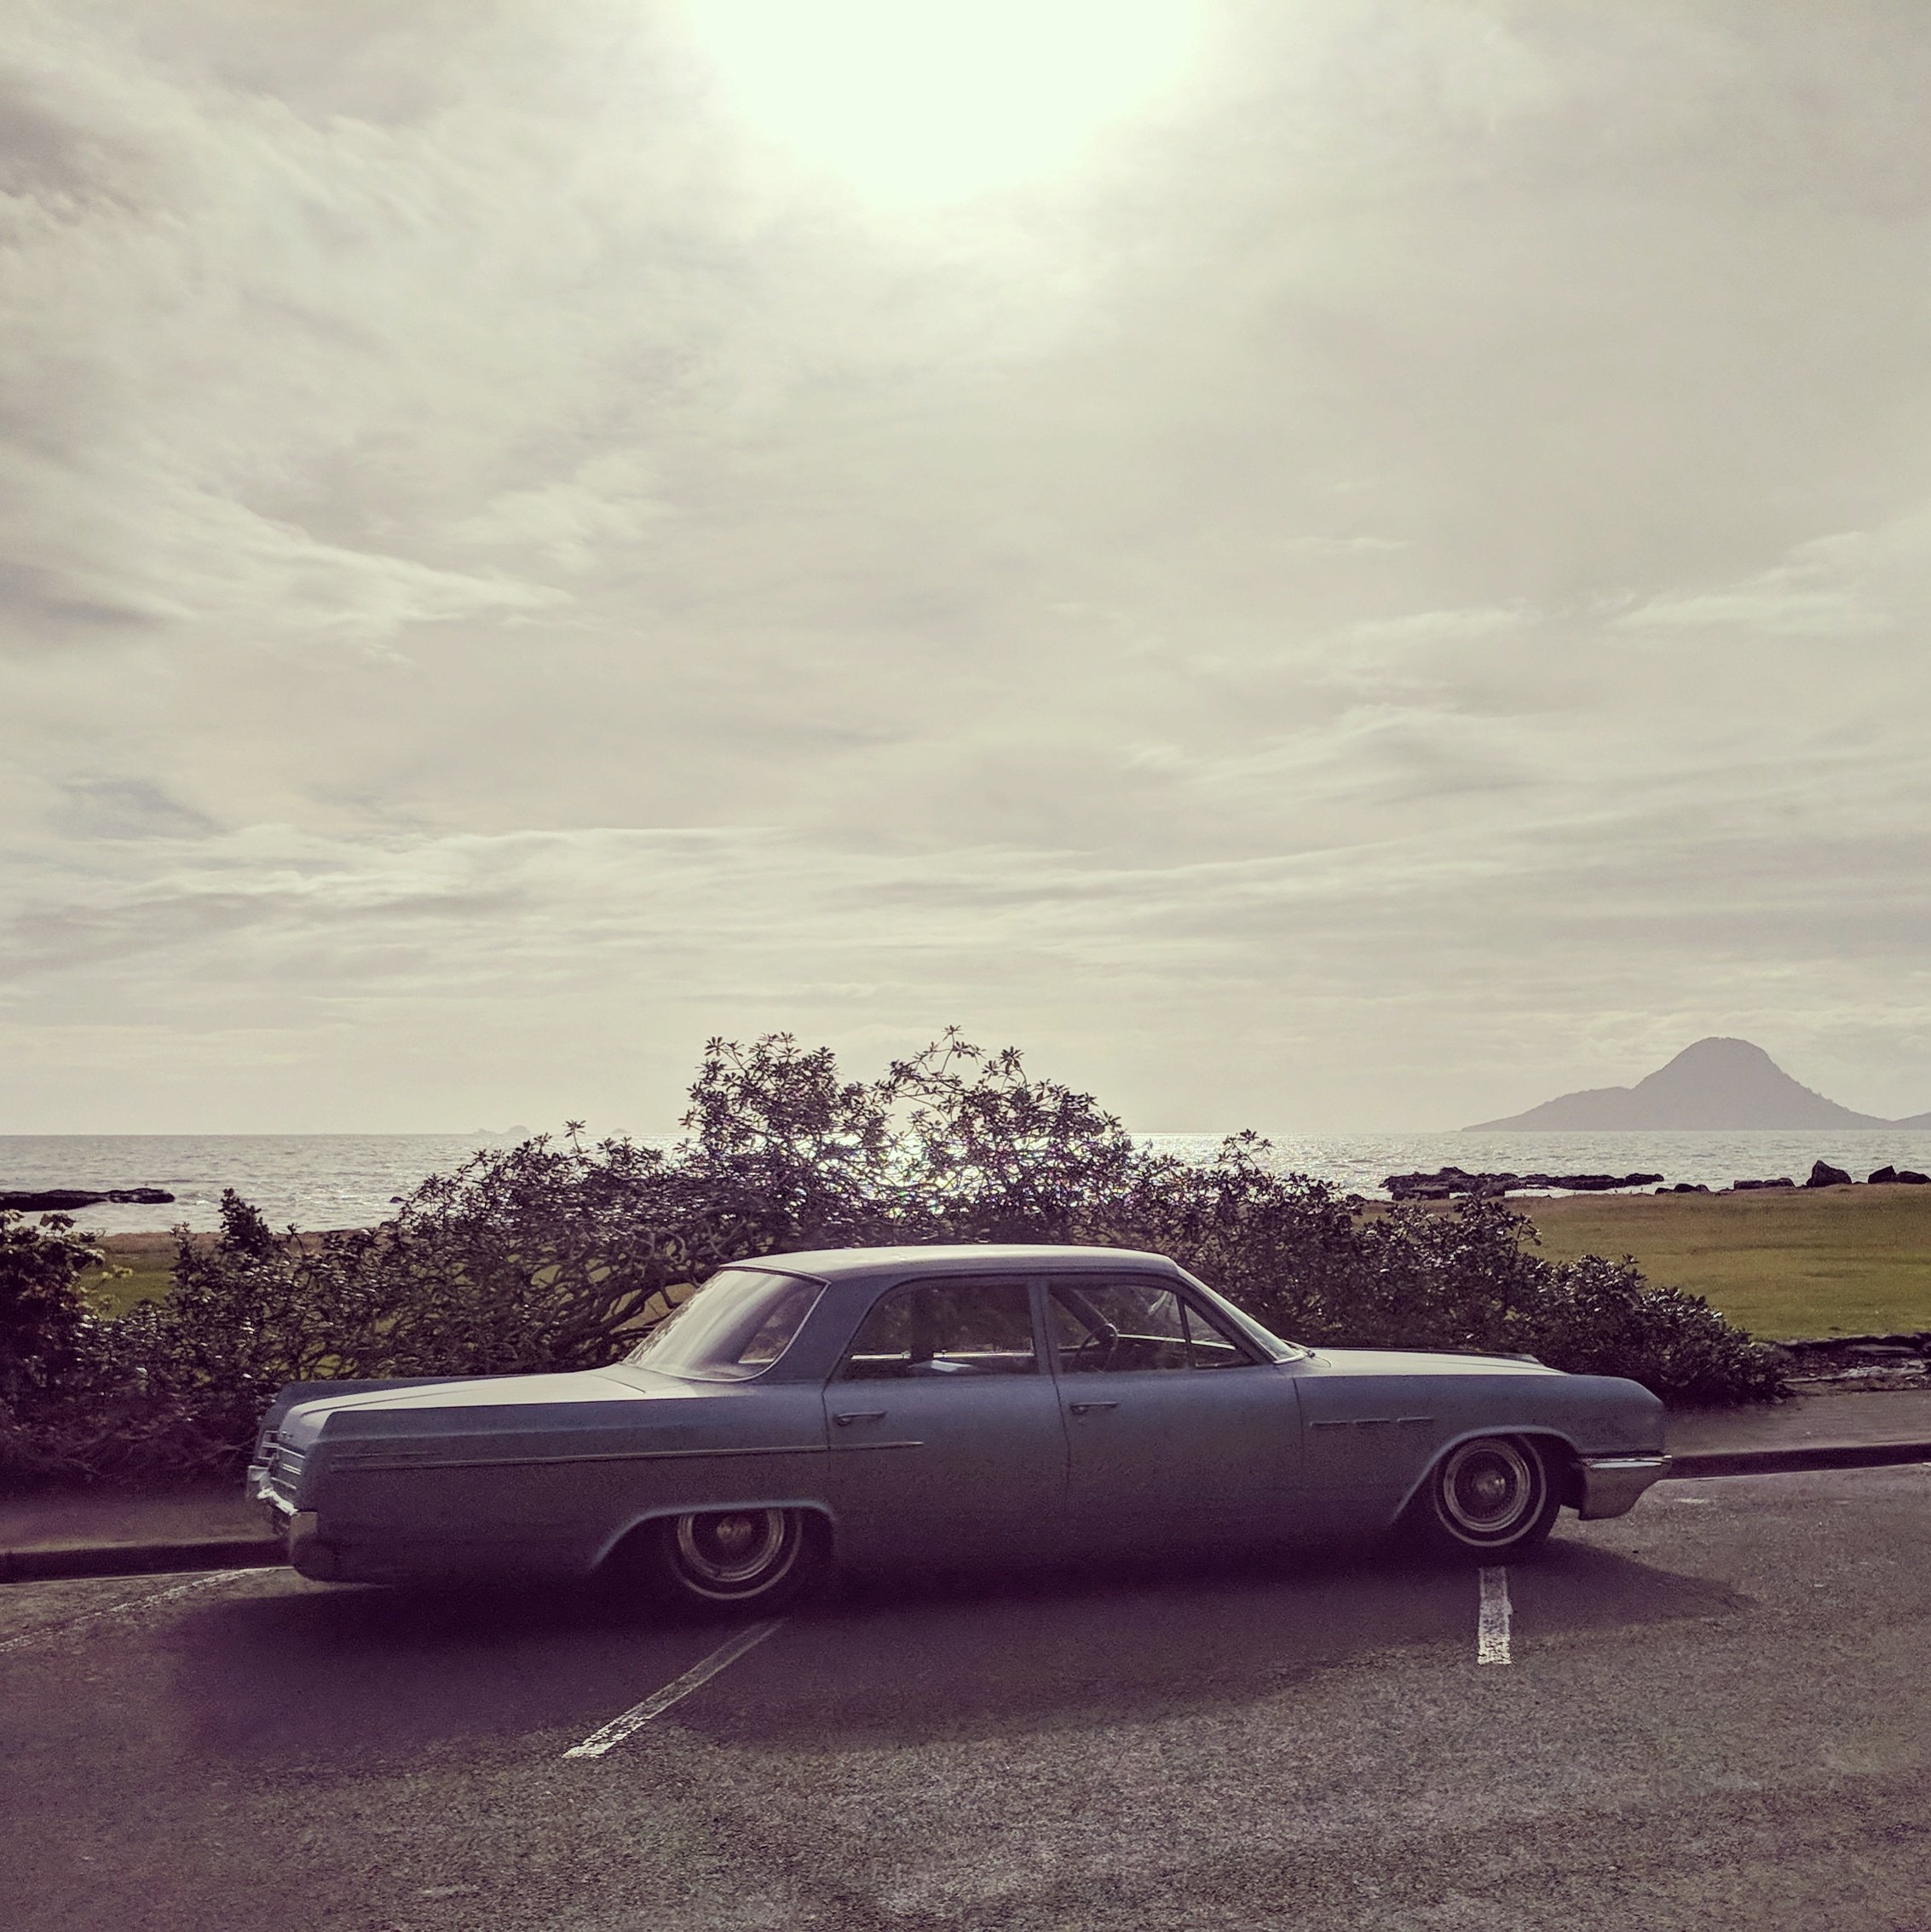
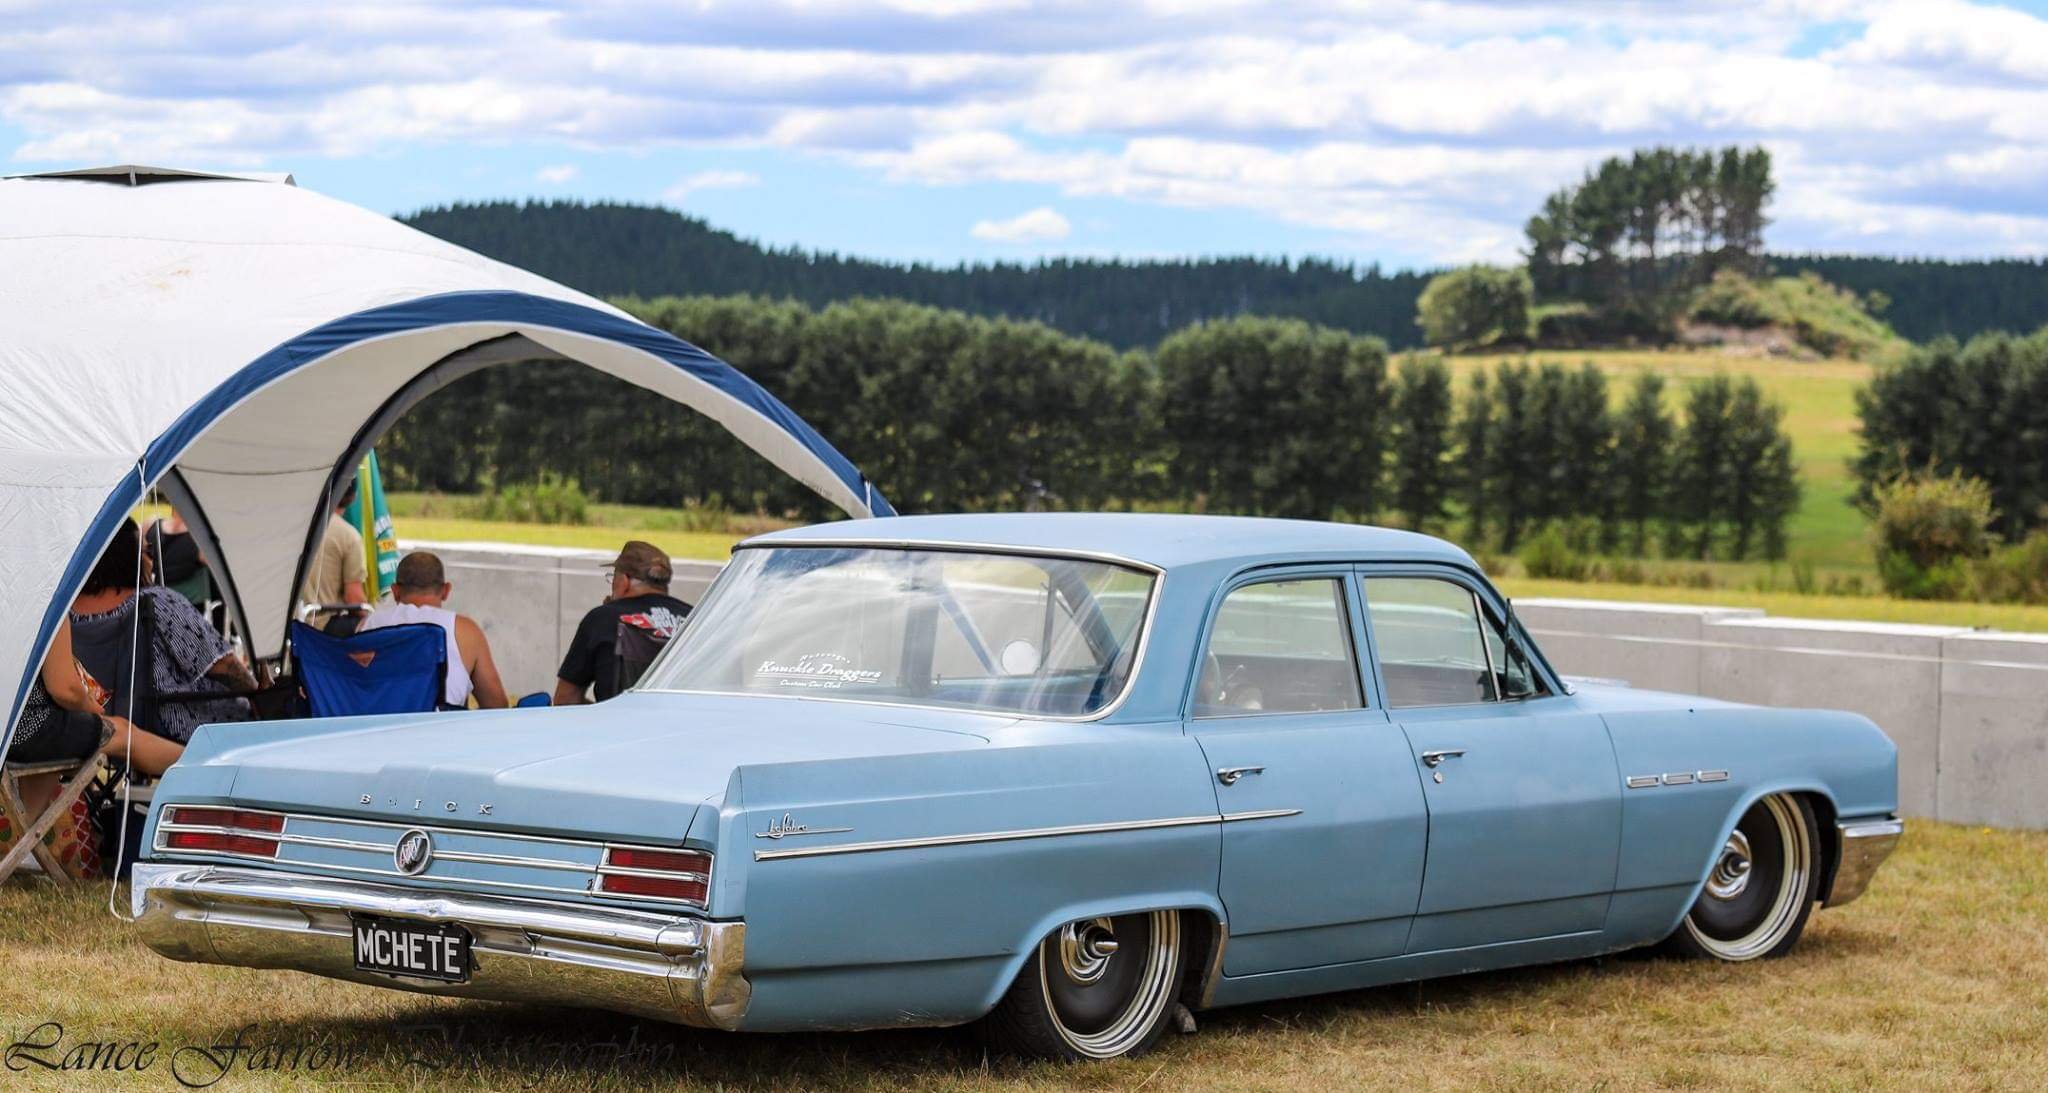
Had a blast in this so far, travelled many miles. Huntly Burnouts, WRCC Spring fling, Rocket open day, Tokoroa drags. Heading to Rebel Roundup this weekend Accuair is the business, Highly recommend. Get into it. I like the stock hubcaps but wanted options. A mate of mine had some Detroit's on an earlier Buick Super, but he didn't like them. So I chucked them on to see if they would suit. I think they look pretty cool, so deal was struck.
1 point
-
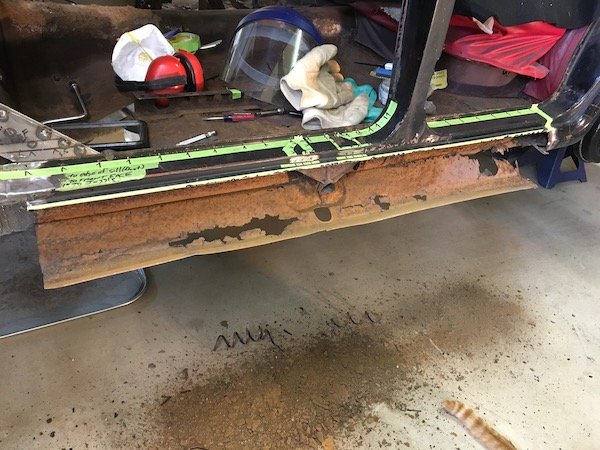
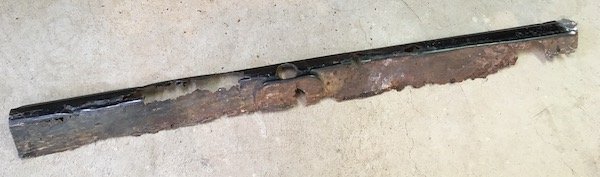
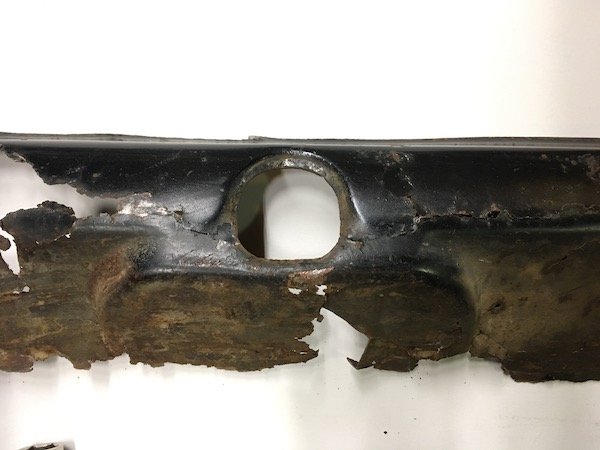
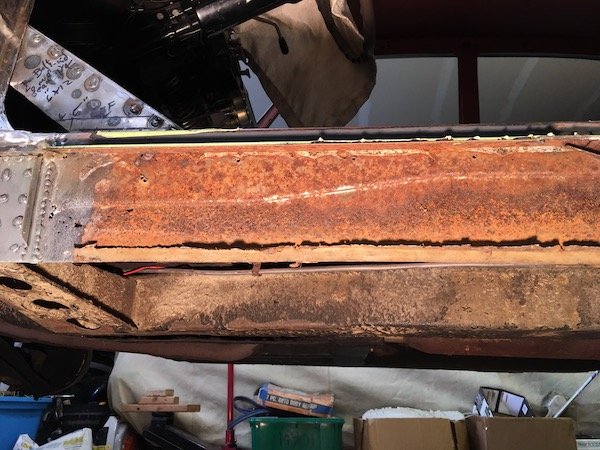
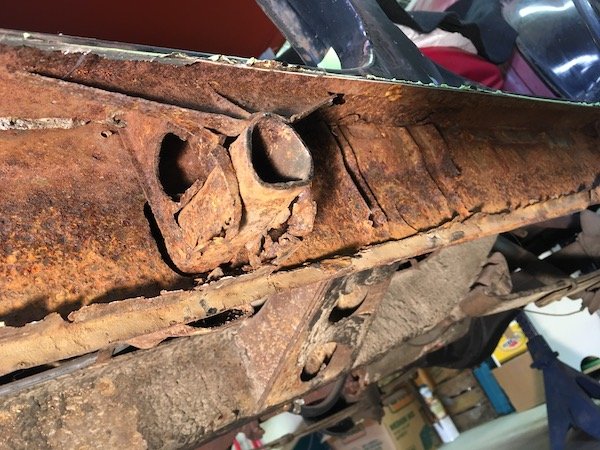
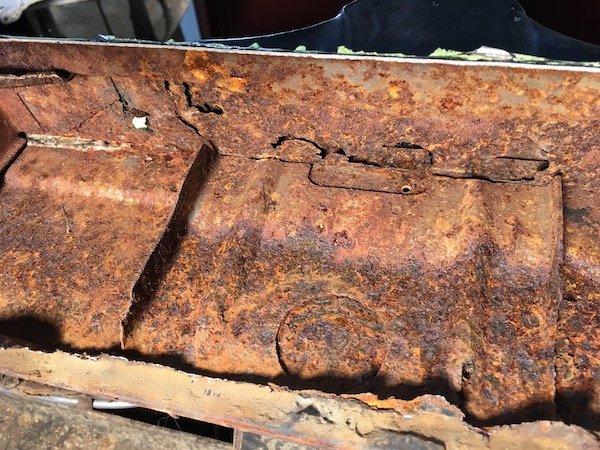
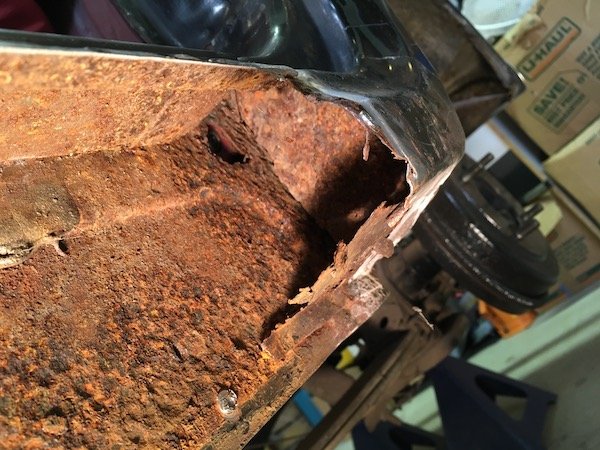
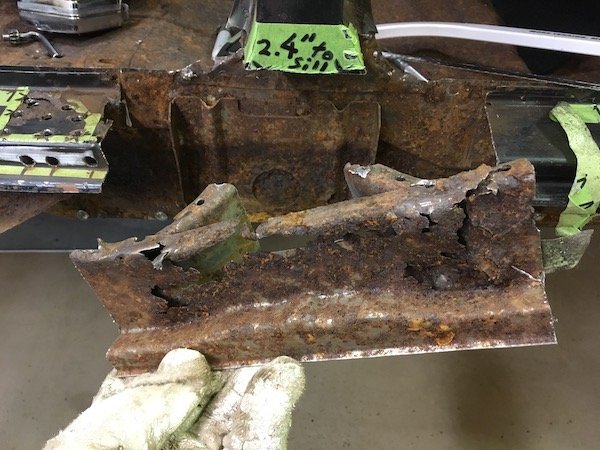
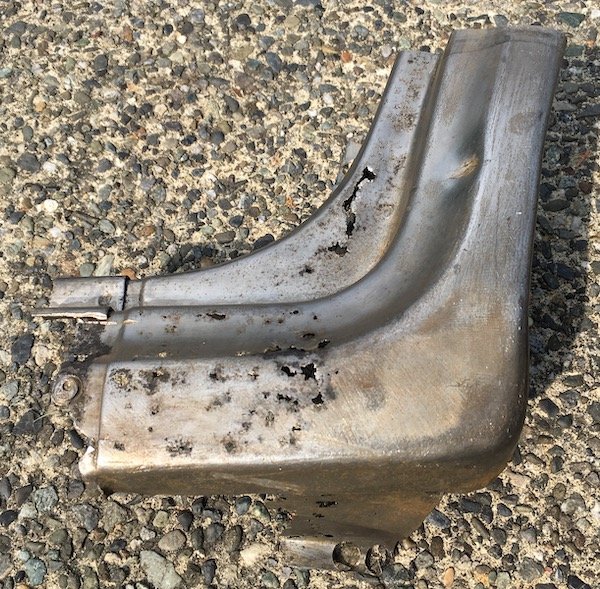
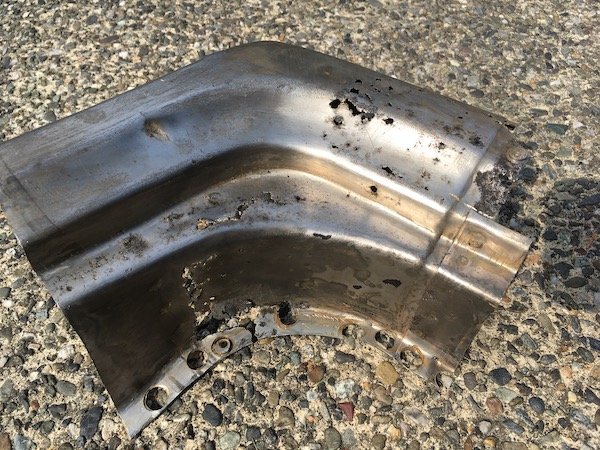
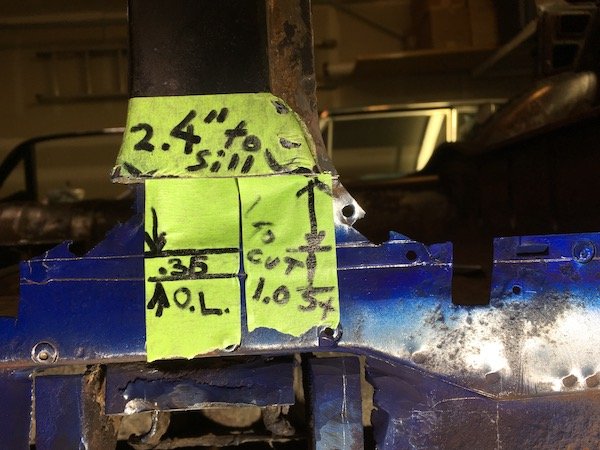
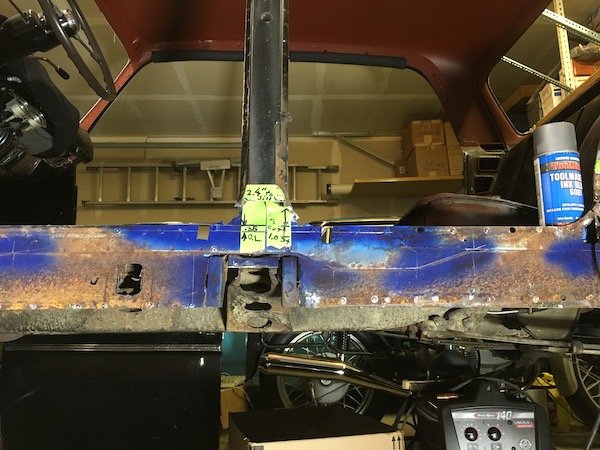
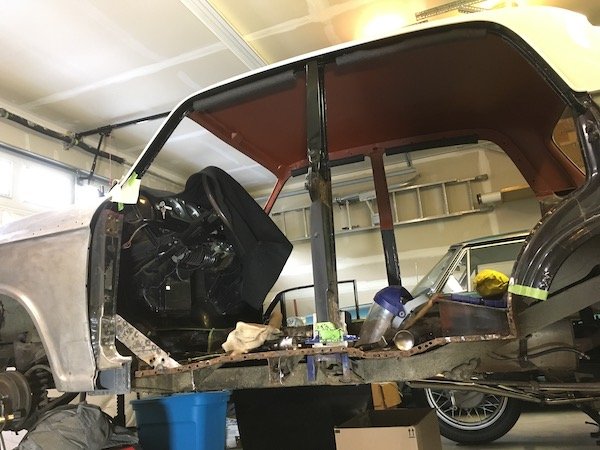
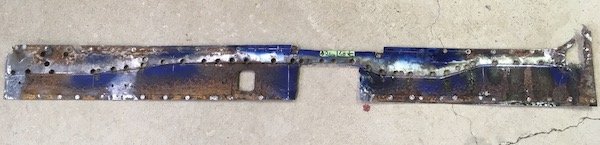
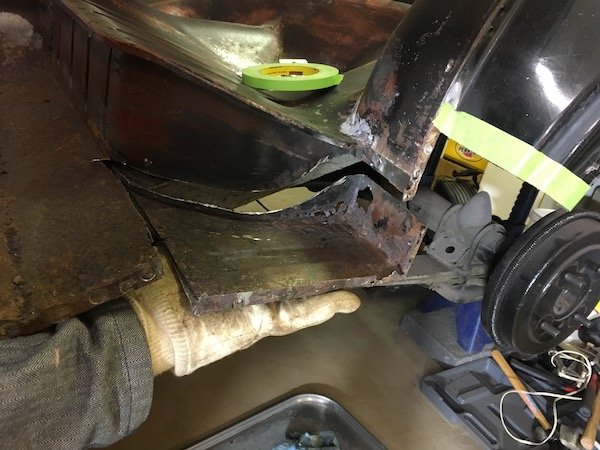
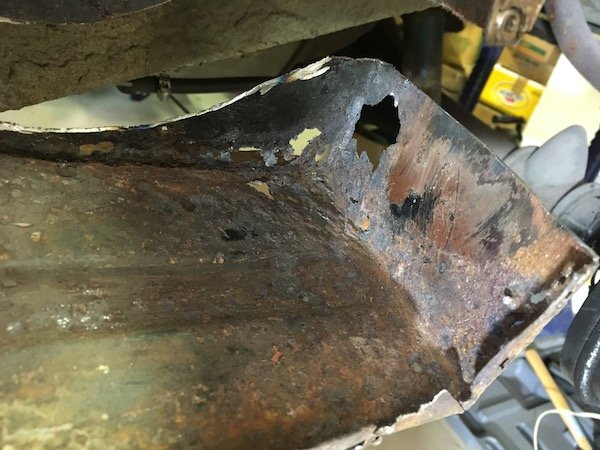
Removal of more rusted metal from the 61 Datsun Bluebird left hand side outer and inner sill, 'B' pillar, 'C' pillar and side of seat pan. A huge hole in the car structure is the end result. This gets very ugly and you may want to look away if at all squeamish. No need to panic! Almost of this is going to be replaced with new steel, but it is a very slow step-by-step process to make these parts from scratch. There is nothing here you can just go to your computer and order or even find in good condition in an auto wrecking yard. It is a heck of a learning process that will be applied to the so far untouched right side of the car. I get started by using electric metal shears, slicing and splaying open the outer sill for internal rust inspection and to understand what details are inside with respect to the side of body lifting point. I had hoped at least the upper sill and inner would be salvageable so I cut a relatively clean line against a tape edge at the body line. The outer sill immediately swung open at the lower pinch weld and then just falls off. Notice the slightly bumped out area below the body lift penetration point. This will be duplicated in the new steel panels later even though I may never use the factory lift jack tool. I do still have the jack but it is worn, unstable and deemed unworthy for safe use. It would either lose grip internally and slide downward suddenly, or the small base plate could kick out at the ground and punch the upper shaft end against the door and make a big dent. Maybe the old lift jack can be repaired and improved or maybe not. Sheet metal form detail of outer sill lift jacking point Eventually, the rusty inner sill is to be separated at the left next to the new 16g steel from the previous 'A' pillar repair and new metal lapped in at the back side of the gusset shown. If you look closely, you see the fuel line and wire to the electric pump. That line is soon removed to avoid a fire hazard. Moving further aft, we see the reinforcing structure around the lift pipe, or what remains of it anyhow. And behind that what I call the joggled gusset. This upper gusset, the near one with the three ribs, is heavy gage steel and salvageable. I thought incorrectly, that to remove the upper part of the sill, that the upper gusset would have to be separated first from the pipe. Actually the top of the pipe is not welded to the upper gusset at the notched contact point. Only the side brackets are welded to the pipe and they are weak enough to just pull apart from the pipe. I could have just lifted the upper sill right off once the regular pinch welds were drilled out. The salvaged lift pipe gusset plate. I ended up with a lot of holes from spot weld drill outs that will be used for plug welding later on. This is the joggled gusset plate that is on the opposite side of the inner sill with respect to the body mount bracket on the other side. This gusset is deemed too badly cratered and rotted and will be reproduced. I cut it out before removing the inner sill by cutting around the perimeter after a futile attempt to search out and drill out all the spot welds. Things aren't looking to good above at the base of the 'B' pillar. Lots of otherwise hidden rust damage. I'm going to cut 'B' pillar base off and repair. The damage and repairs needed to the now cut off 'B' pillar is shown in the light. I subject the 'B' pillar to an electrolysis bath to remove bulk rust and identify the salvageable sections. A lot of it is still good and will be cleaned up and reused. Portions near the pinch weld are bad and the flat horizontal section deep inside is shot. Outward facing sections are perfectly good. Jumping ahead here a little bit since I did not have a good pic of the freshly removed gusset plate. As you can see, it was total destruction to remove it. A real light show with all the flying sparks! Shown above is the newly made replacement. The joggle or step was made under force from a hydraulic press and an opposing stack of offset steel bars. The aft end inside the sill is heavily cratered and holed. Thus I go to the extreme of cutting off the 'C' pillar, aka dog leg, for complete repair as the hidden damage inside is total rust out which will otherwise just continue. Where there would be an end of sill block off plate in the far back is really just rust powder stuck to the asphalt undercoat. At the lower pinch weld, the flange of the outer sill moves upward leaving just the inner sill plate poking down about a half inch. Why? Just looks a bit odd. Probably to match and fit the slight difference in contours at the 'C' pillar. The now cut-off dog leg ('C' pillar base). About 60 percent or more is perforated or too thin to reuse. This part proves difficult to reproduce. It is still not quite right after patching it up section-by-section off the car. I tried, and will tweak it a bit more now that it is welded back on the car. I might do it differently when I go to work on the right side of the car now that I know which areas should be cut out. The now fully exposed inner sill plate. This was a bit of fun. Before drilling the spot welds and removal, I cover all the step contours with blue machinist paint and scribe on the metal the intersection points to permit accurate measurement of the sill. The inner sill steps out about a tenth of an inch where the flange of the floor is butted against it for nested fit. In addition to recording measurements prior to removal of the inner sill, I make a paper overlay as a secondary backup to sometimes flawed note taking. I've also made a full size drawing on mylar as yet a third method to help reproduce the part. Key measurements at the 'B' pillar overlap (O.L) and inner sill. It's starting to look pretty messy and getting worse soon. Inner sill is drilled of the spot weld connections to the floor flanges and removed. The underfloor brackets are cut off at their flanges because these brackets are severely beat up from impact damages. The bracket for the body mount is planned for reuse, if it is good, so the flanges are left intact. Not reusable! As final act, the side of rear seat floor pan is cut out. Is there a name for this thing? This proves to be a relatively easy and fun part to reproduce because of the straight bends and box shape. Just a little challenging to butt weld into the side of the seat pan later on. A rust hole big enough for a mouse to climb through. And they did, sometime stockpiling grass seed and such here and there. And now the huge ugly hole in the car! A preview of making new parts and closing this chasm up. Making left and right hand parts where possible. I'll probably focus on the inner sill next post. More later.
1 point
-
I should add that the rear bag mounts aren't my original idea, they're based off this photo: Which belongs to this car, which lives in Wanaka1 point
-
yeah go mang only not sure about rivnut comment. I cant fully picture exactly how that works but using even a large rivnut to hold in something associated with suspension parts in difficult to access location seems likely to cause you trouble. at the very least the chance of a shitty thread galling causing the rivnut to spin before you tighten it up or similar. a fixed stud or bolt tacked to a sandwich plate or something like that might be more robust and less likely to be a pita. but maybe I don't understand exactly how this is going together and there is no load involved/it's just holding it there until the shocks go in or something.1 point
-
In the next Moonlight Racing container. It's due in a month or so.1 point
-
Turd polished. Now to start preparing for Wagnats. edit - oops - somehow I deleted my previous post.
1 point
-
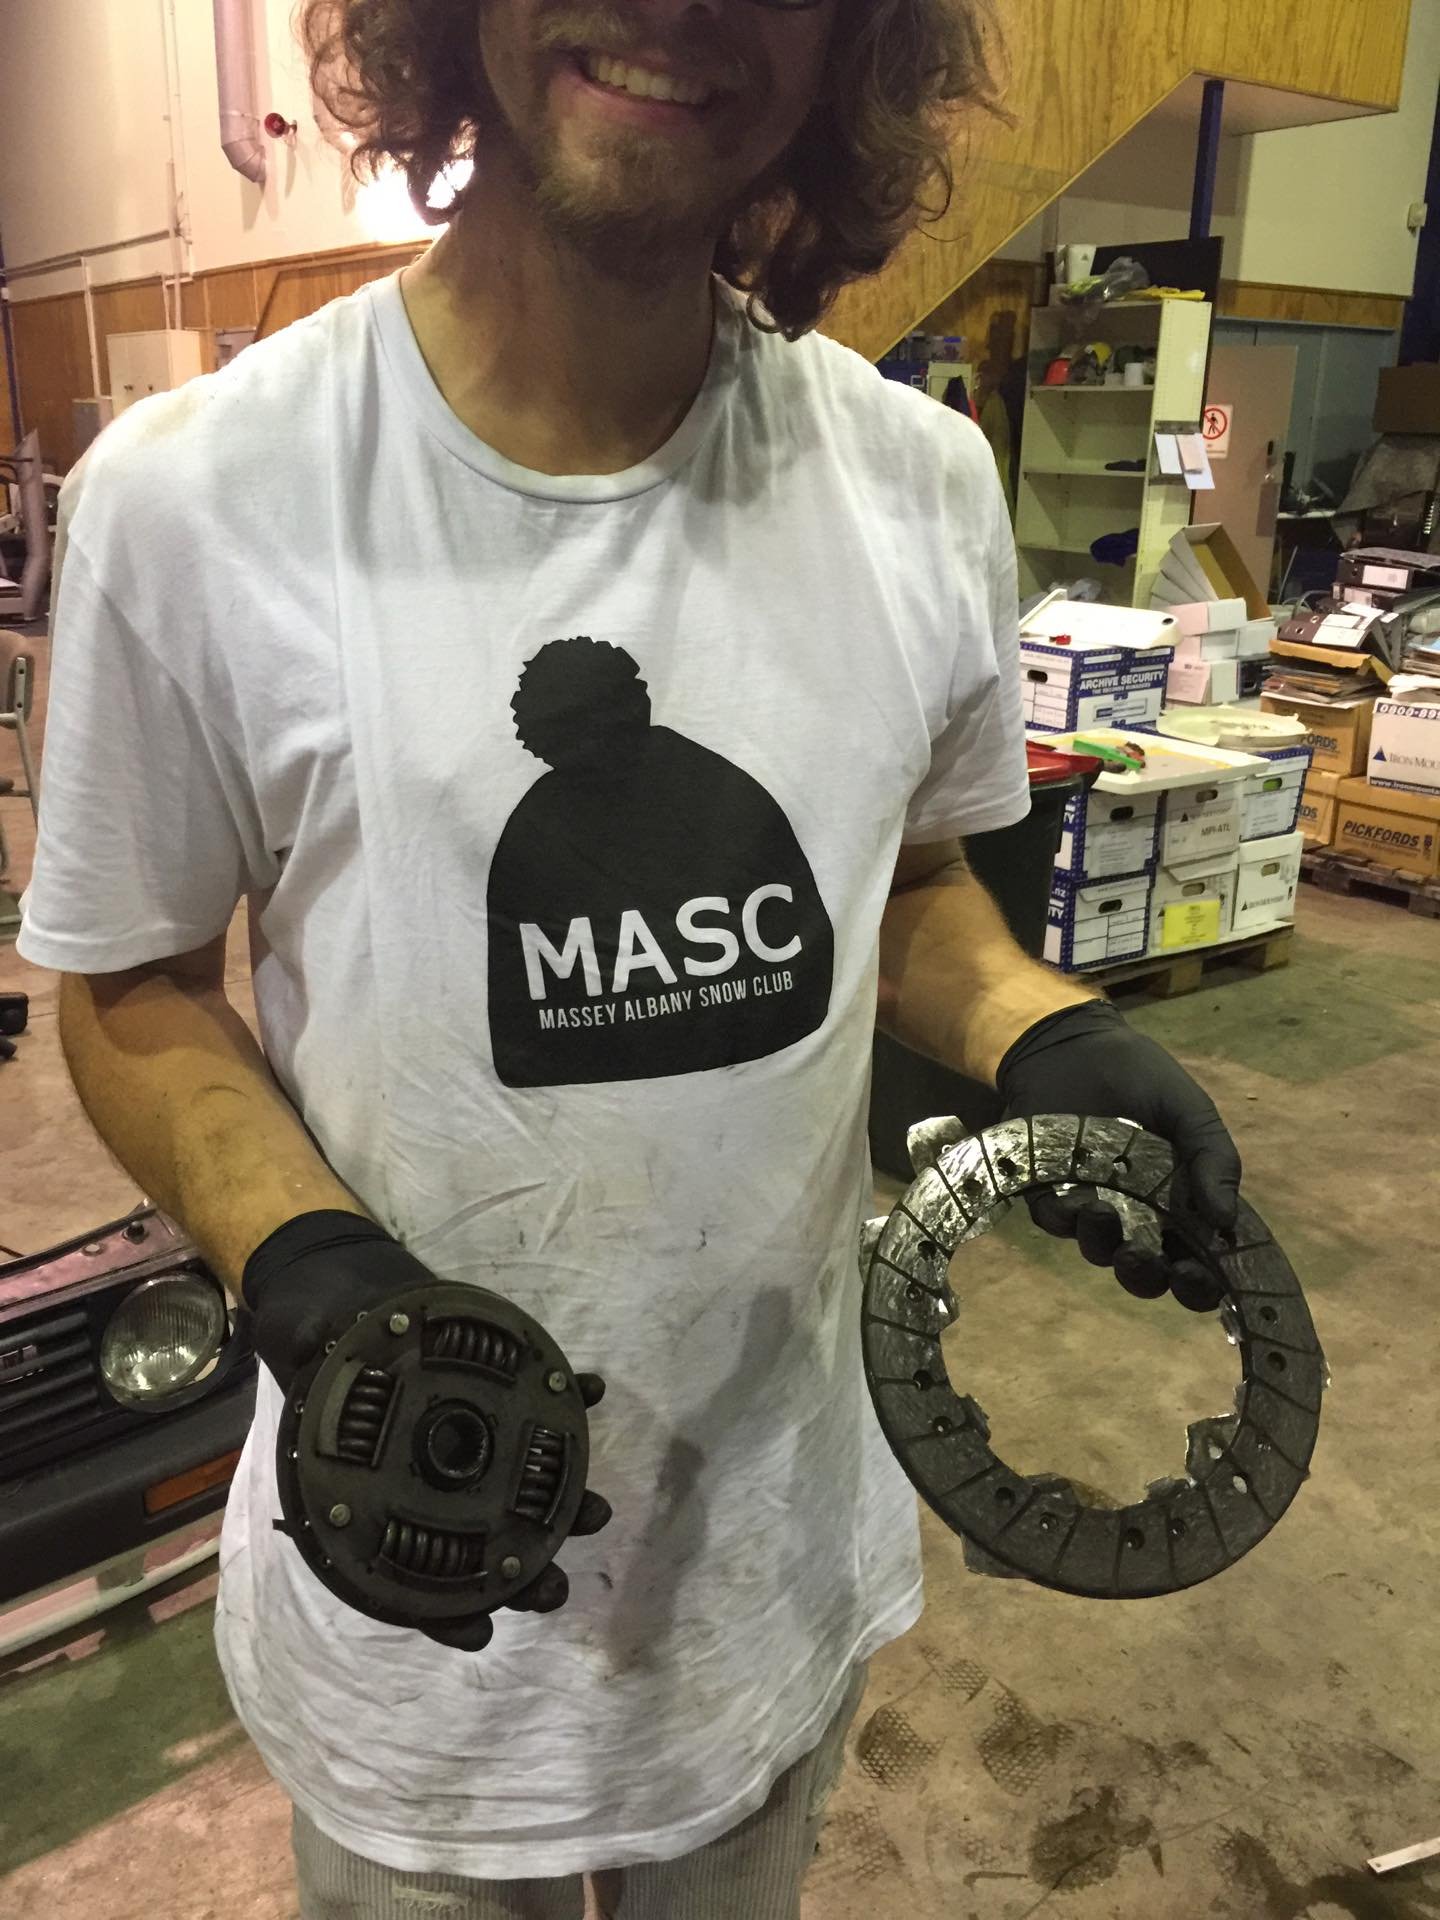
Here was one of the bad things 18 year old me must have done, possibly not bolt the gearbox on correctly... (i drove it for close to a year) so could have come loose but either way I was asking my friend if he could see the clutch cable moving, he cracked up laughing, saying that the cable was moving but the gearbox was pushing itself off the engine!
1 point
-
After all this I ended up never being able to get the megasquirt to be reliable, so a friend had a kjet setup which we put on, it ran awesome and i drove it like that for a couple of years. Did little bits and pieces including suspension and wheels. just drove it everywhere
1 point
-
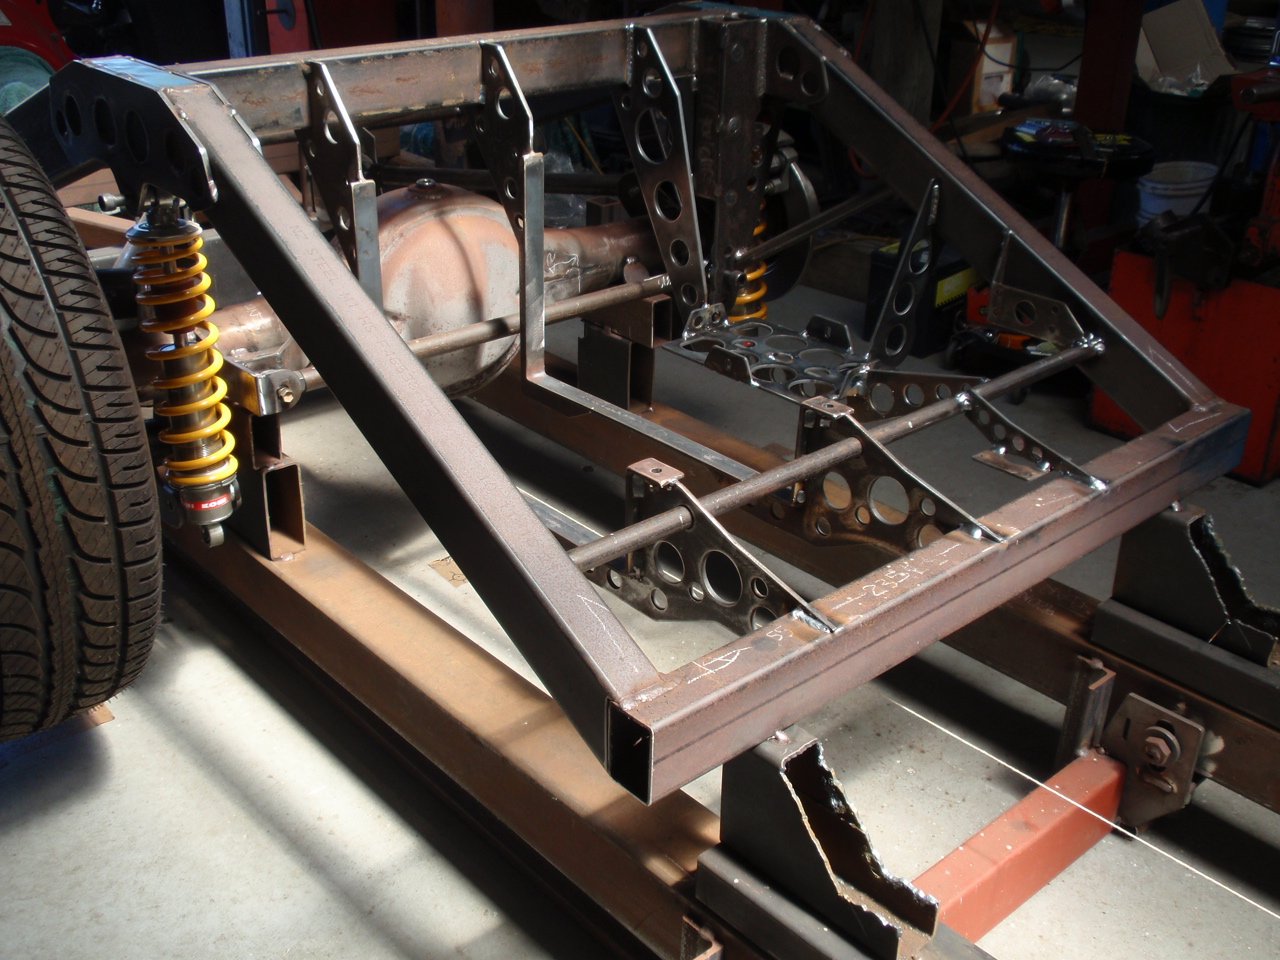
As is the way progress slower than hoped on this money pit, so many damn projects jumping the queue but still inching forward... Built the driveshaft hoops, very happy with the fit and much nicer to look at than the previous hoop setup. Even If I wanted to be lazy and reuse the previous setup, it was not (re)certifiable given that it was made of 45x5mm steel (minimum spec 50x5mm). Pic of the old setup for your viewing pleasure - some proud metal work right there. Also got the last of the crossmembers modified/built. This one ties the frame rails together just behind the engine, but new giganto gearbox would hit even with it tucked up tight in the tunnel. In this case I cut some 20mm plate to same footprint of the member, tacked it to the bottom and then cut out the centre of the original box section. Came out good with no loss of ground clearance, 12mm plate probably wouldve sufficed but scored the material off a mate and whats a bit more weight in 2 ton brick anyway. And finally tidied up manifolds and got them coated. Hopefully keeps the temps down as the primaries are pretty long so a lot of steel to heat things up. Next on the list is new diff...1 point
-
Long time no update! Unfortunately the project is moving pretty slowing, same old story of life stuff getting in the way etc. Any how I am ok with it, I am spending a lot of time trying to get all the details 100%. Since last update I have had the chassis, axles, suspension components and a bunch of other bits blasted and painted. A stack of new fasteners and I am now starting to slowly reassemble! What an awesome feeling it is putting fresh fasteners on newly painted bits! I have also had a bunch of bits re-passivated and managed to find some new old stock indicator lenses Does anyone else lay out refurbished bits on their lounge floor?? Best way to sort new fasteners I have found! Phil at Key West has been heaps of help. New Old stock front lenses I found in Timaru! So stoked on these. New Old Stock rear lenses too The start of the re-passivated bits coming in. Half of them you will never see but I can't help my self!1 point
-
Aaand the engine is now self supporting. It sank a couple mm. I wan't sure if it was resting on the rack, but no, I can slide a thick bit of card between them. I'll be notching the sump, eventually, to get some more clearance off the rack.
1 point
-
Well she finally runs. 6 years in the making. Started first pop and sounds awesome! Still needs to be road tuned as it has a flat spot at 2500rpm and cuts out, but IT RUNS!!! A few small issues to fix and should be all go for cert.
1 point
-
Got into it today. Used a plasma, angle grinder and a vehicle hoist to bring about initial fit up. I am ok with how it is coming together/how it sits on the chassis. I plucked out of my arse the position of the engine when I mounted it. It all looks like it might work. This rusty little fucker is going to be fun.
1 point
-
1 point
-
1 point
-
Took possession of my new donk the other weekend. Acquired this as part of the deal I did on the Hemi engine. It was on TM under Listing #: 1095158136 This will work way better for me than the other motor ... simpler, cheaper and should not break my ching ching gearbox. Bring back the old days I say ... 4BBL's, 4 speeds and 4.11 geared arse ends.1 point
-
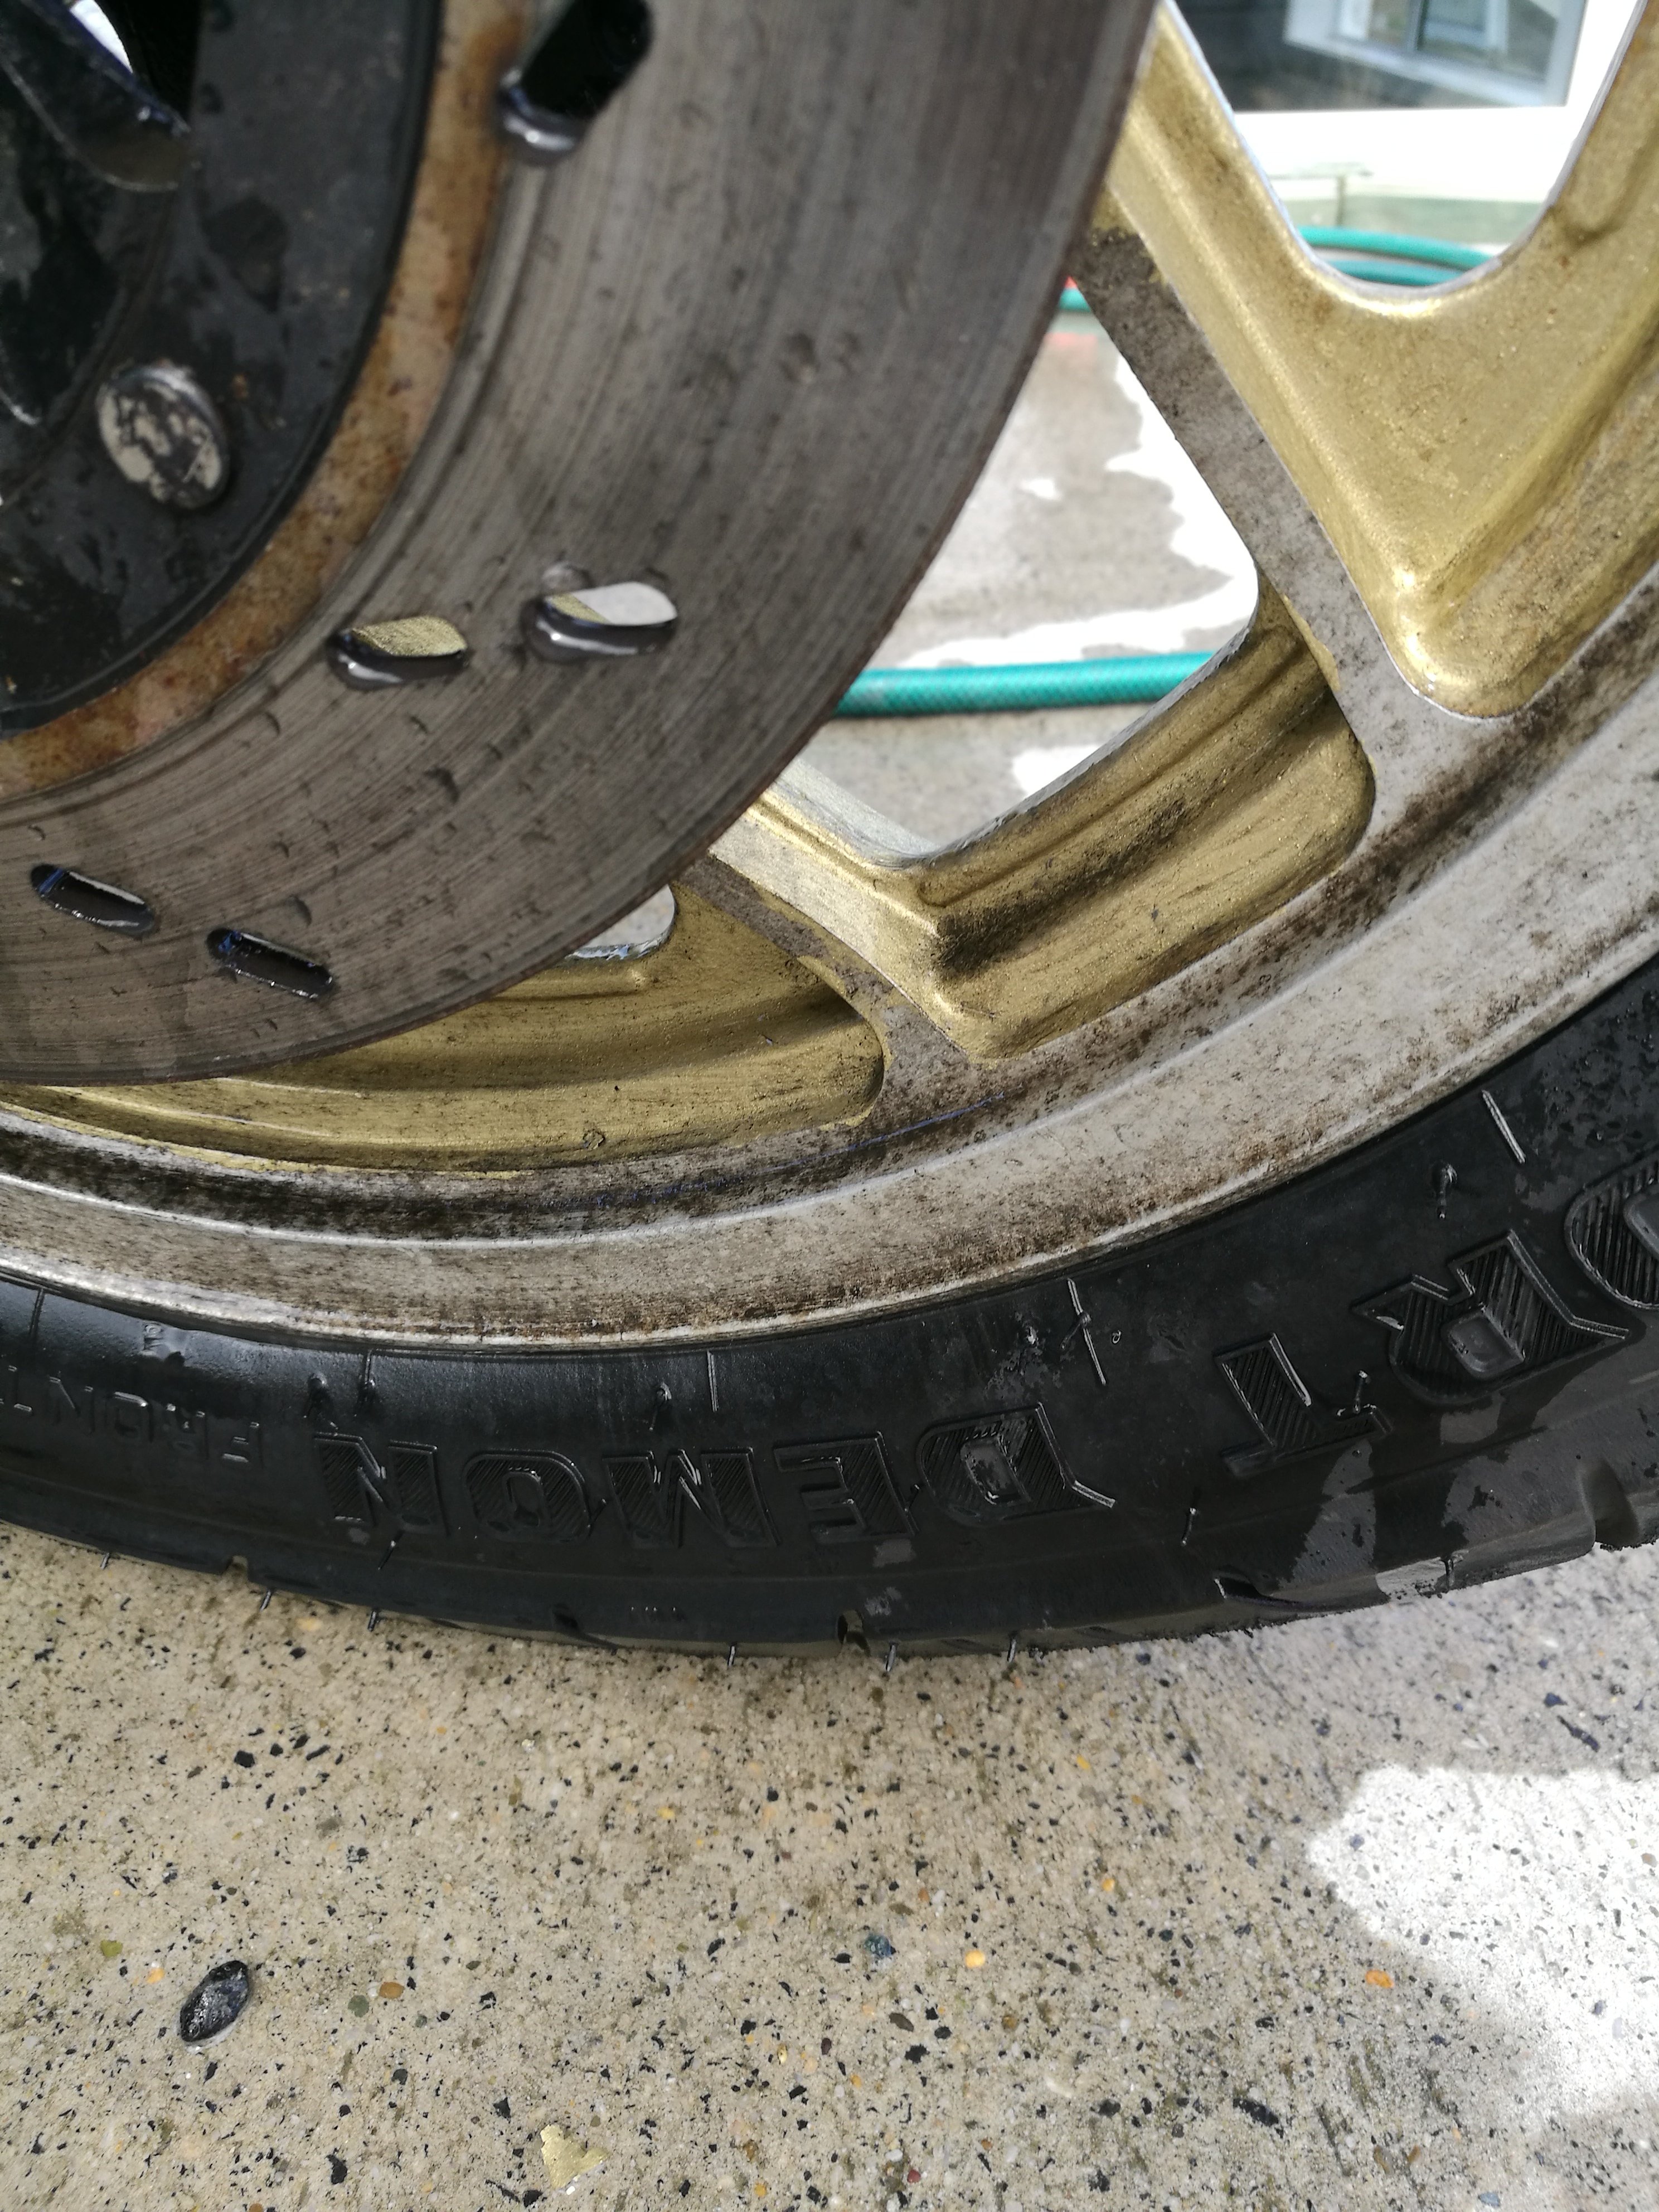
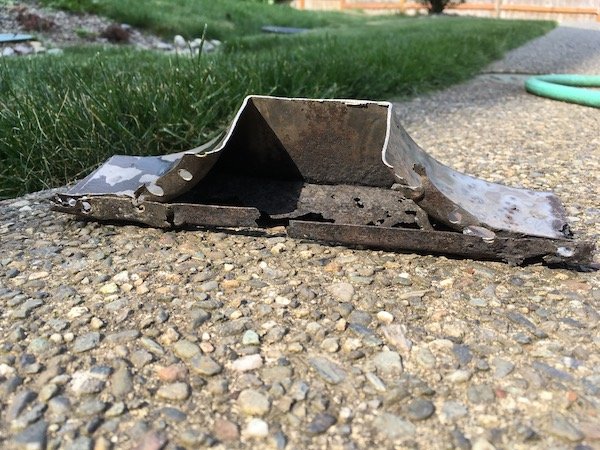
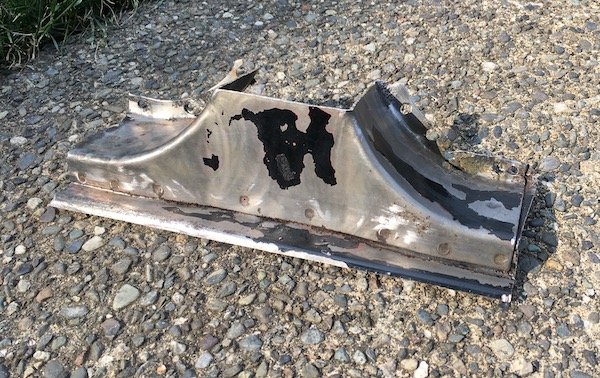
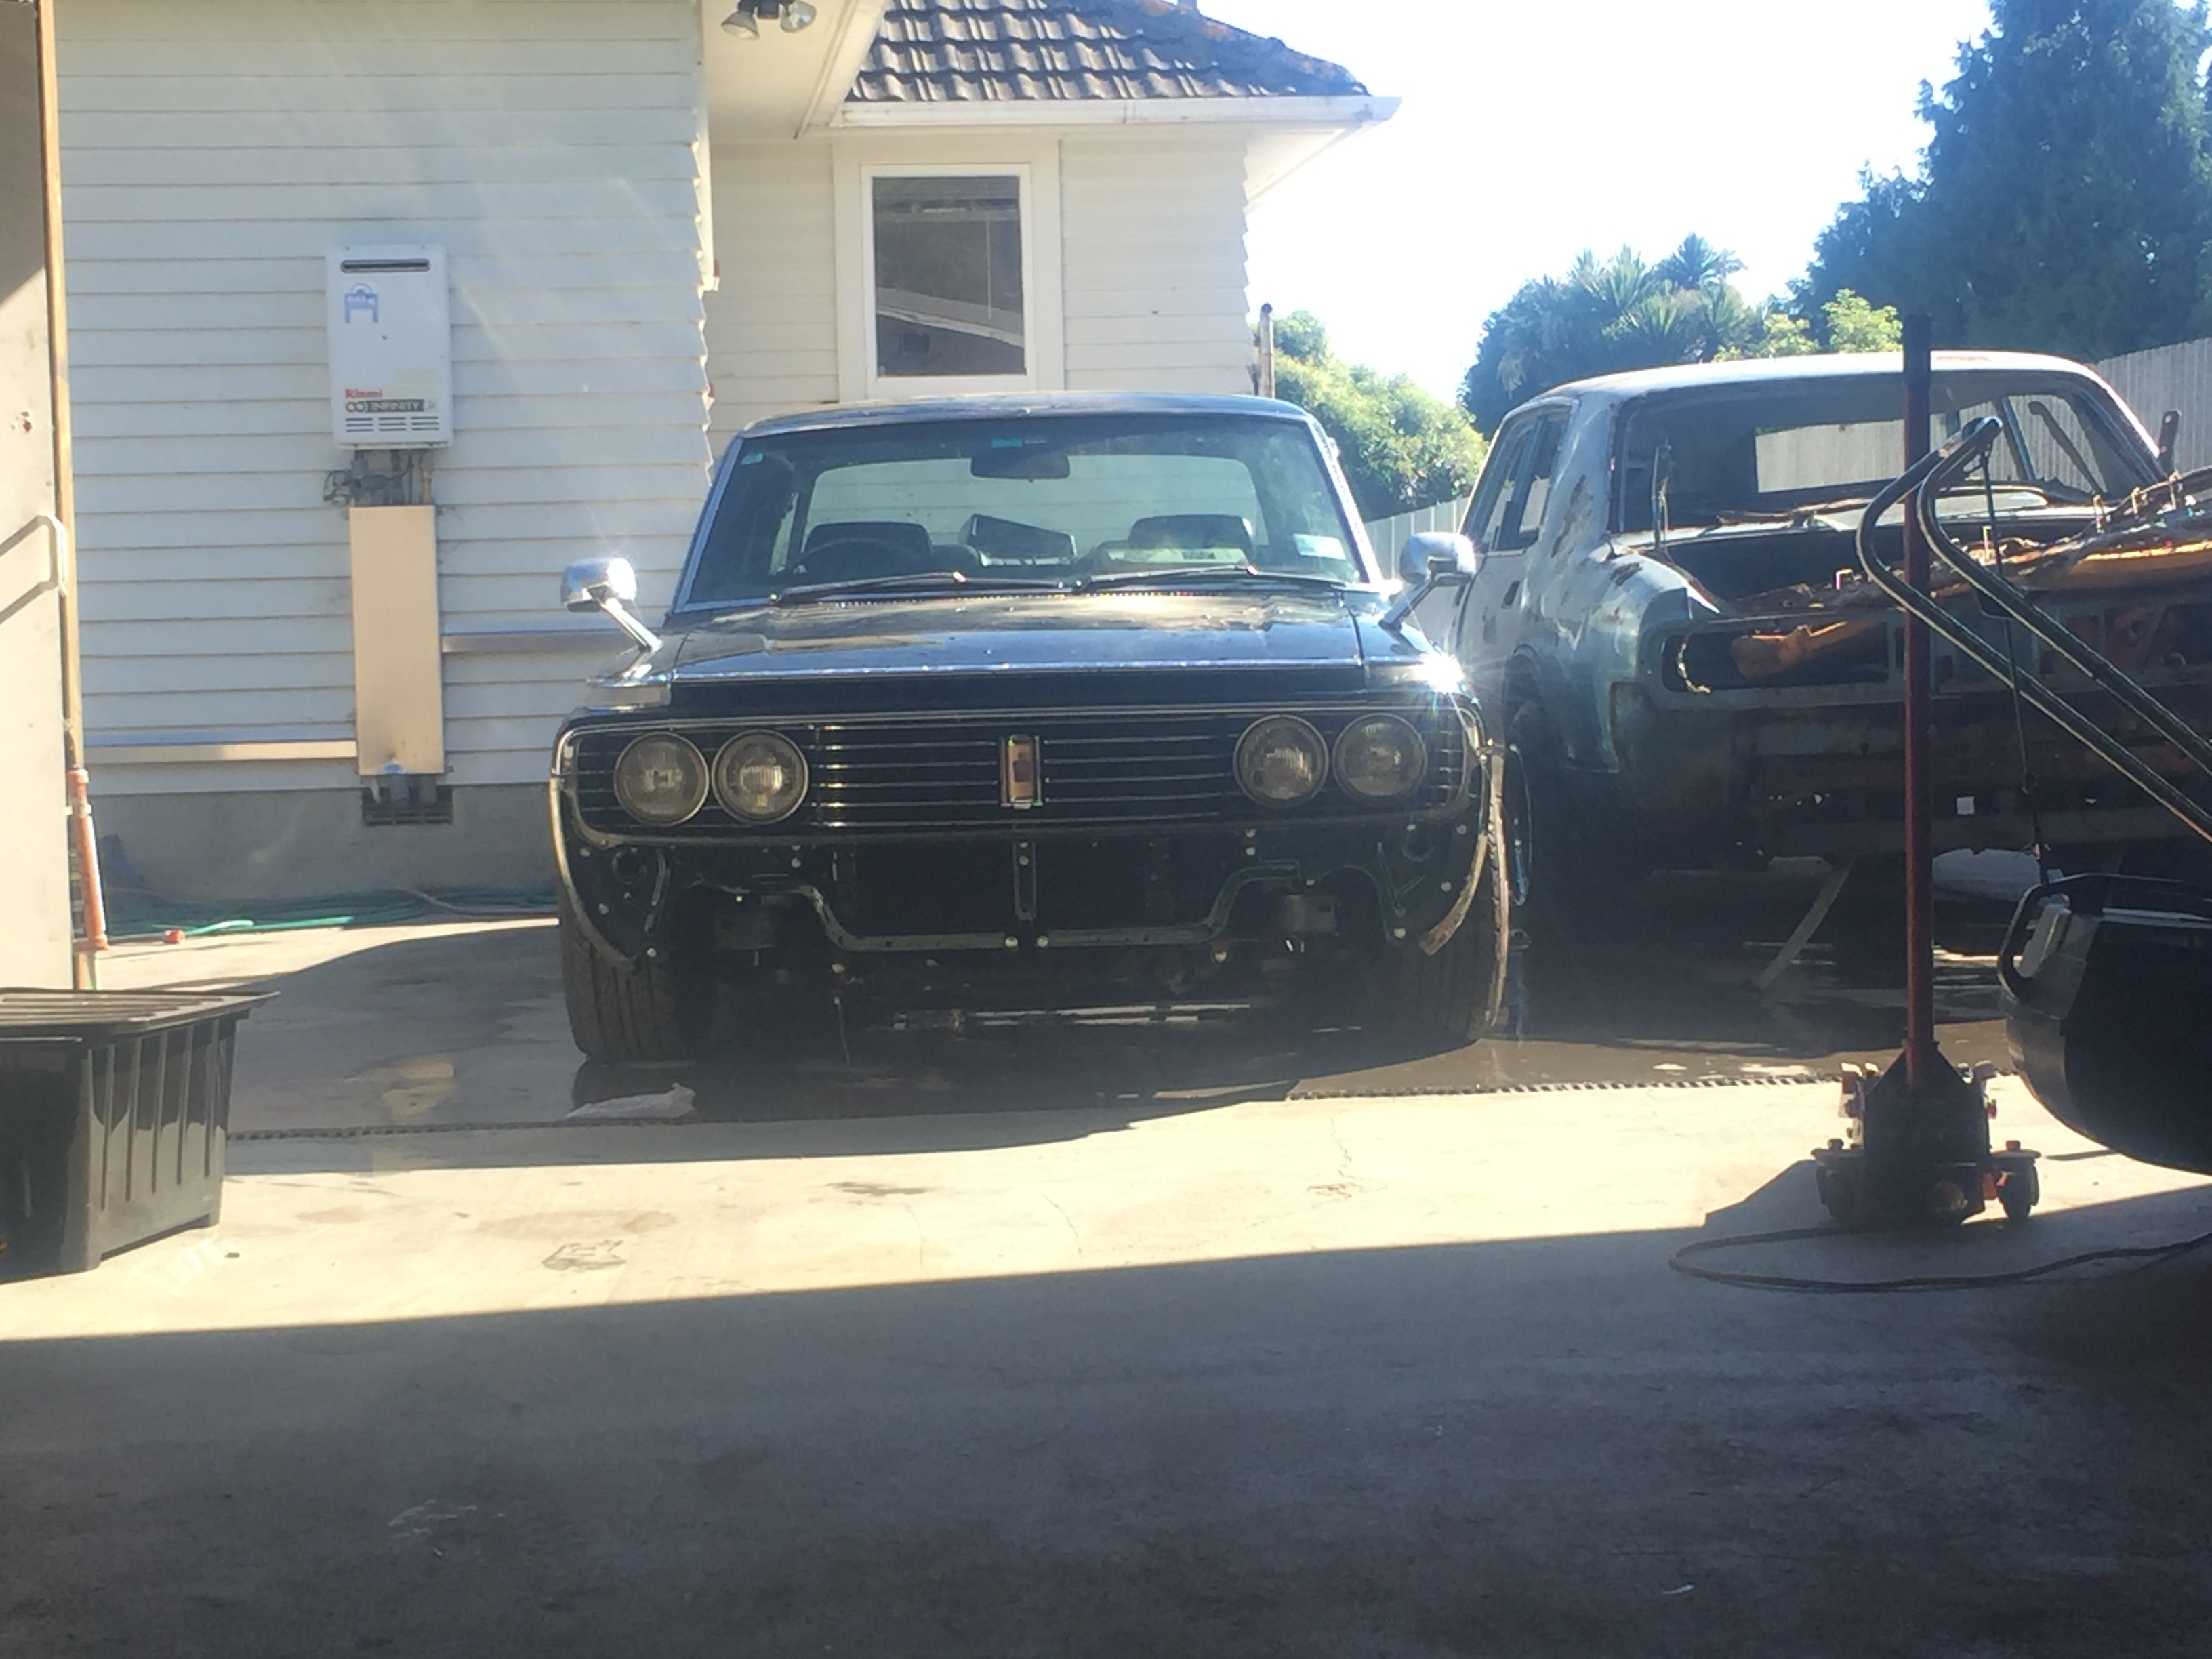
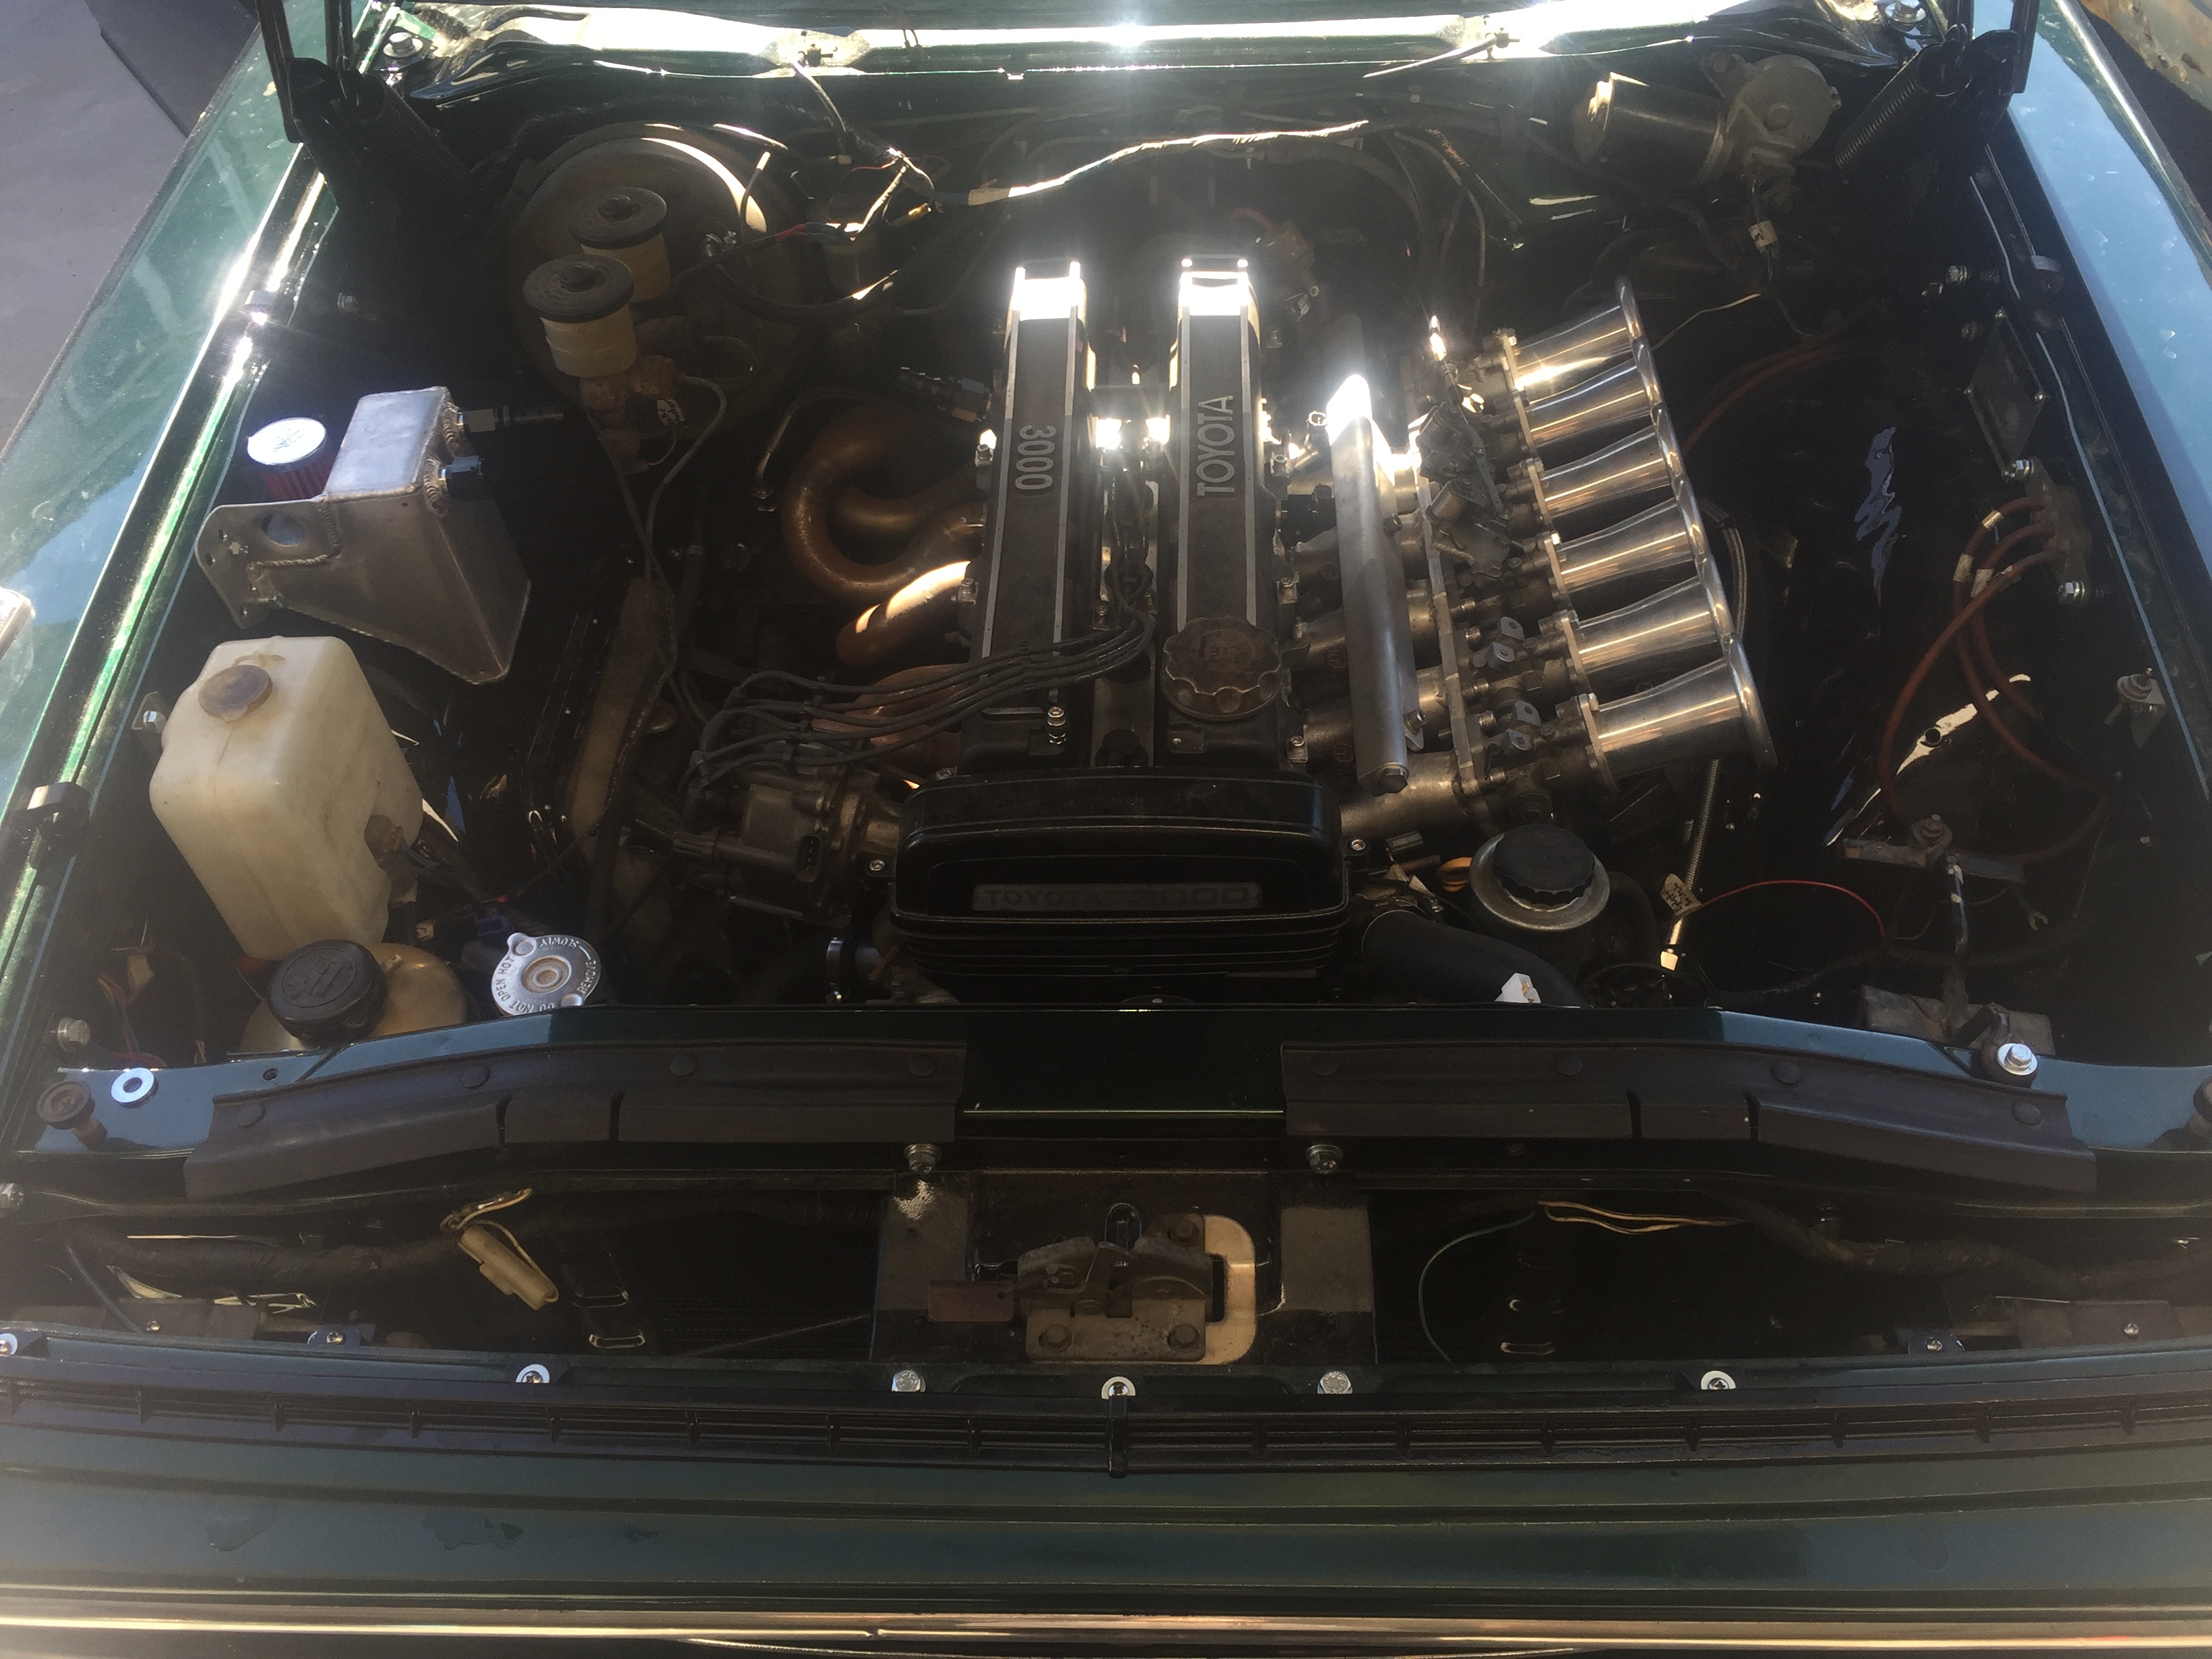
i washed it this time.. more: http://garage4ag.wordpress.com/2011/11/29/lip/1 point
-
So seems a heavy steel engine cradle can be sent to NZ via Youshop for $37, yet a pack of cheap gaskets costs $51...? Can only assume it is in a giant box and the volumetric weight is screwing me. Can't consolidate apparently. Didn't even need the gaskets tbh, only bought them cos they were cheap. Ah well...0 points


.jpg.f987d0351014b1d90f87d960f0793792.jpg)


.thumb.jpg.a2db281d9c23049231ffe92932a2a4af.jpg.82856884f74f9f19661bab062dfdc1be.jpg)


This leaderboard is set to Auckland/GMT+12:00