MARTS-PL310
-
Posts
170 -
Joined
-
Last visited


.thumb.jpeg.e0a4bff61111e0c8c7396950fcc94da1.jpeg)
MARTS-PL310's Achievements
Advanced Member (3/5)
1.4k
Reputation
-

MARTS-PL310 61 Datsun Bluebird Sedan
MARTS-PL310 replied to MARTS-PL310's topic in Projects and Build Ups
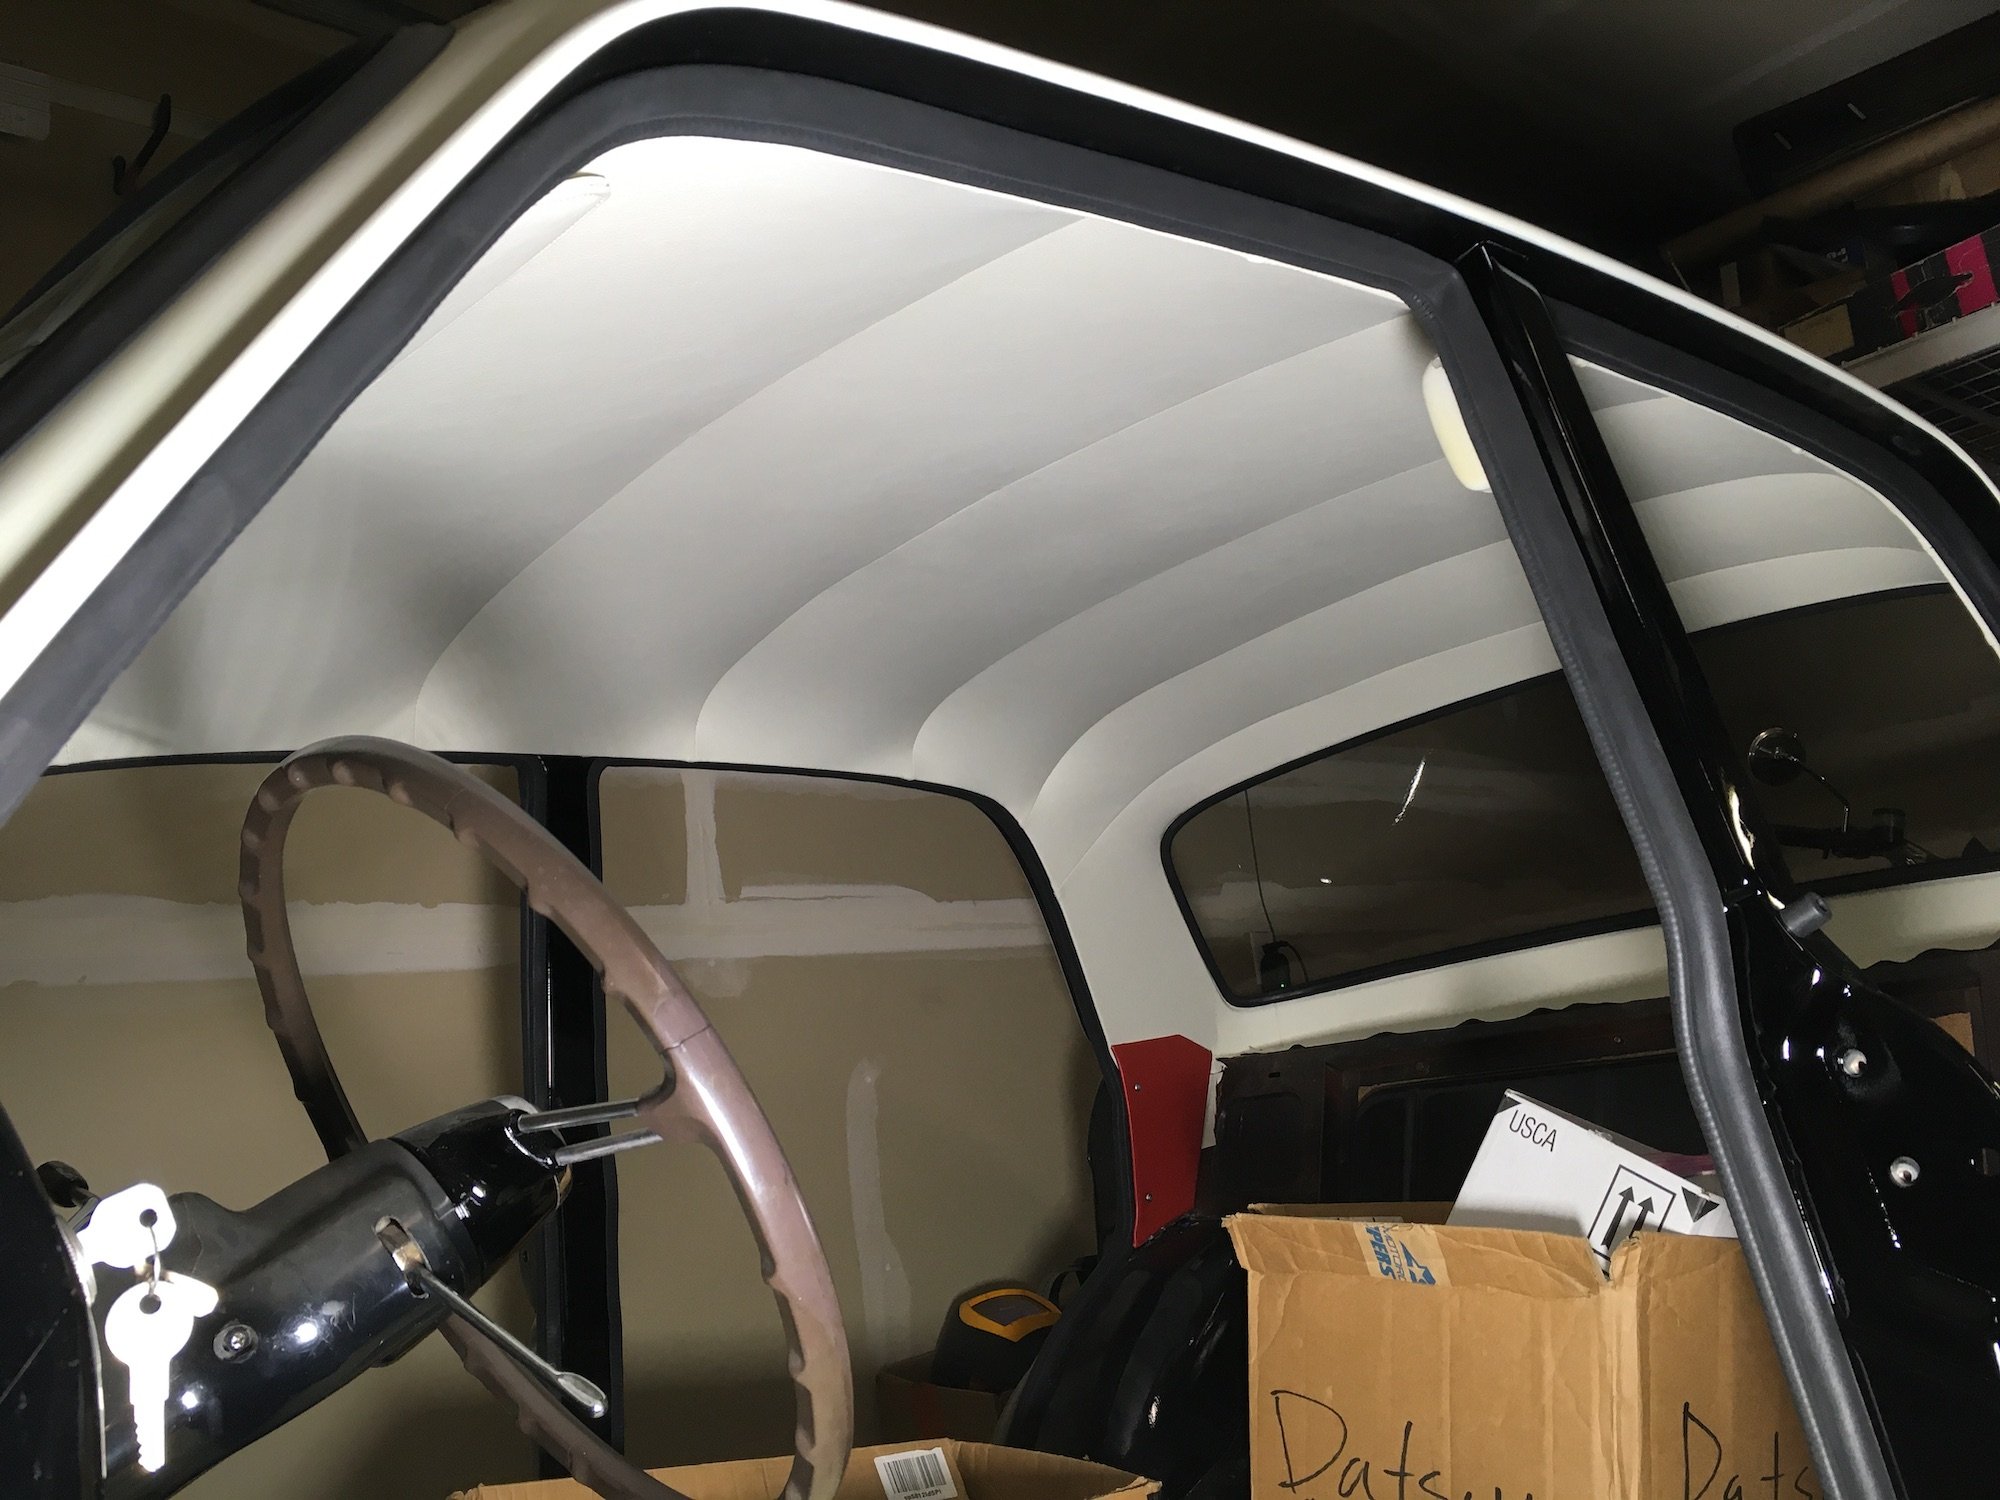
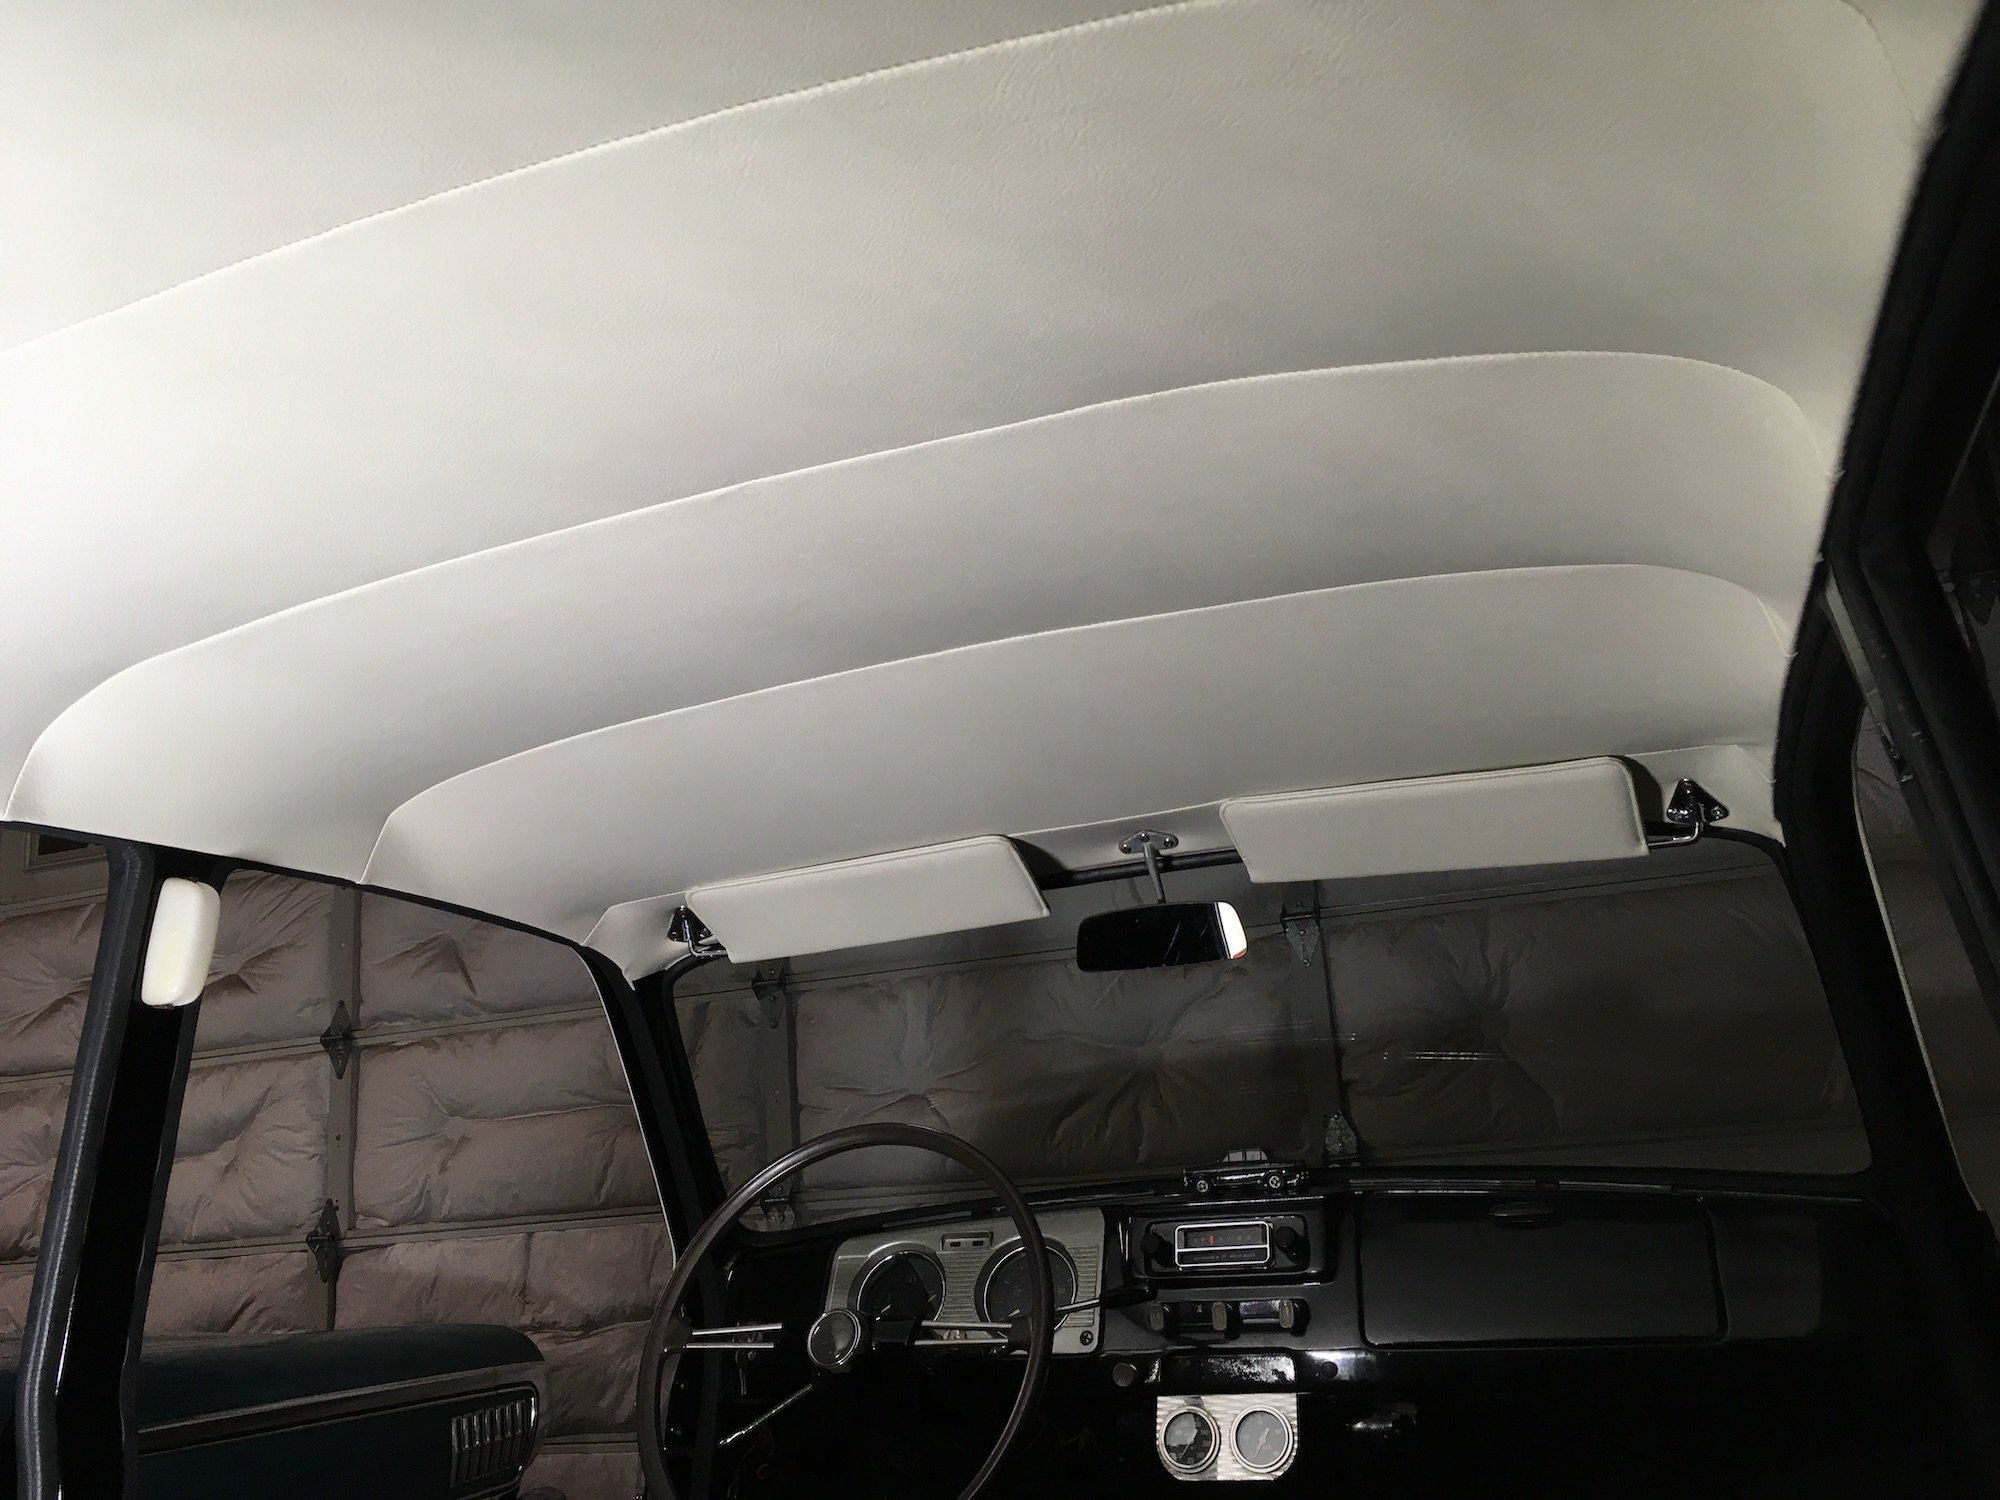
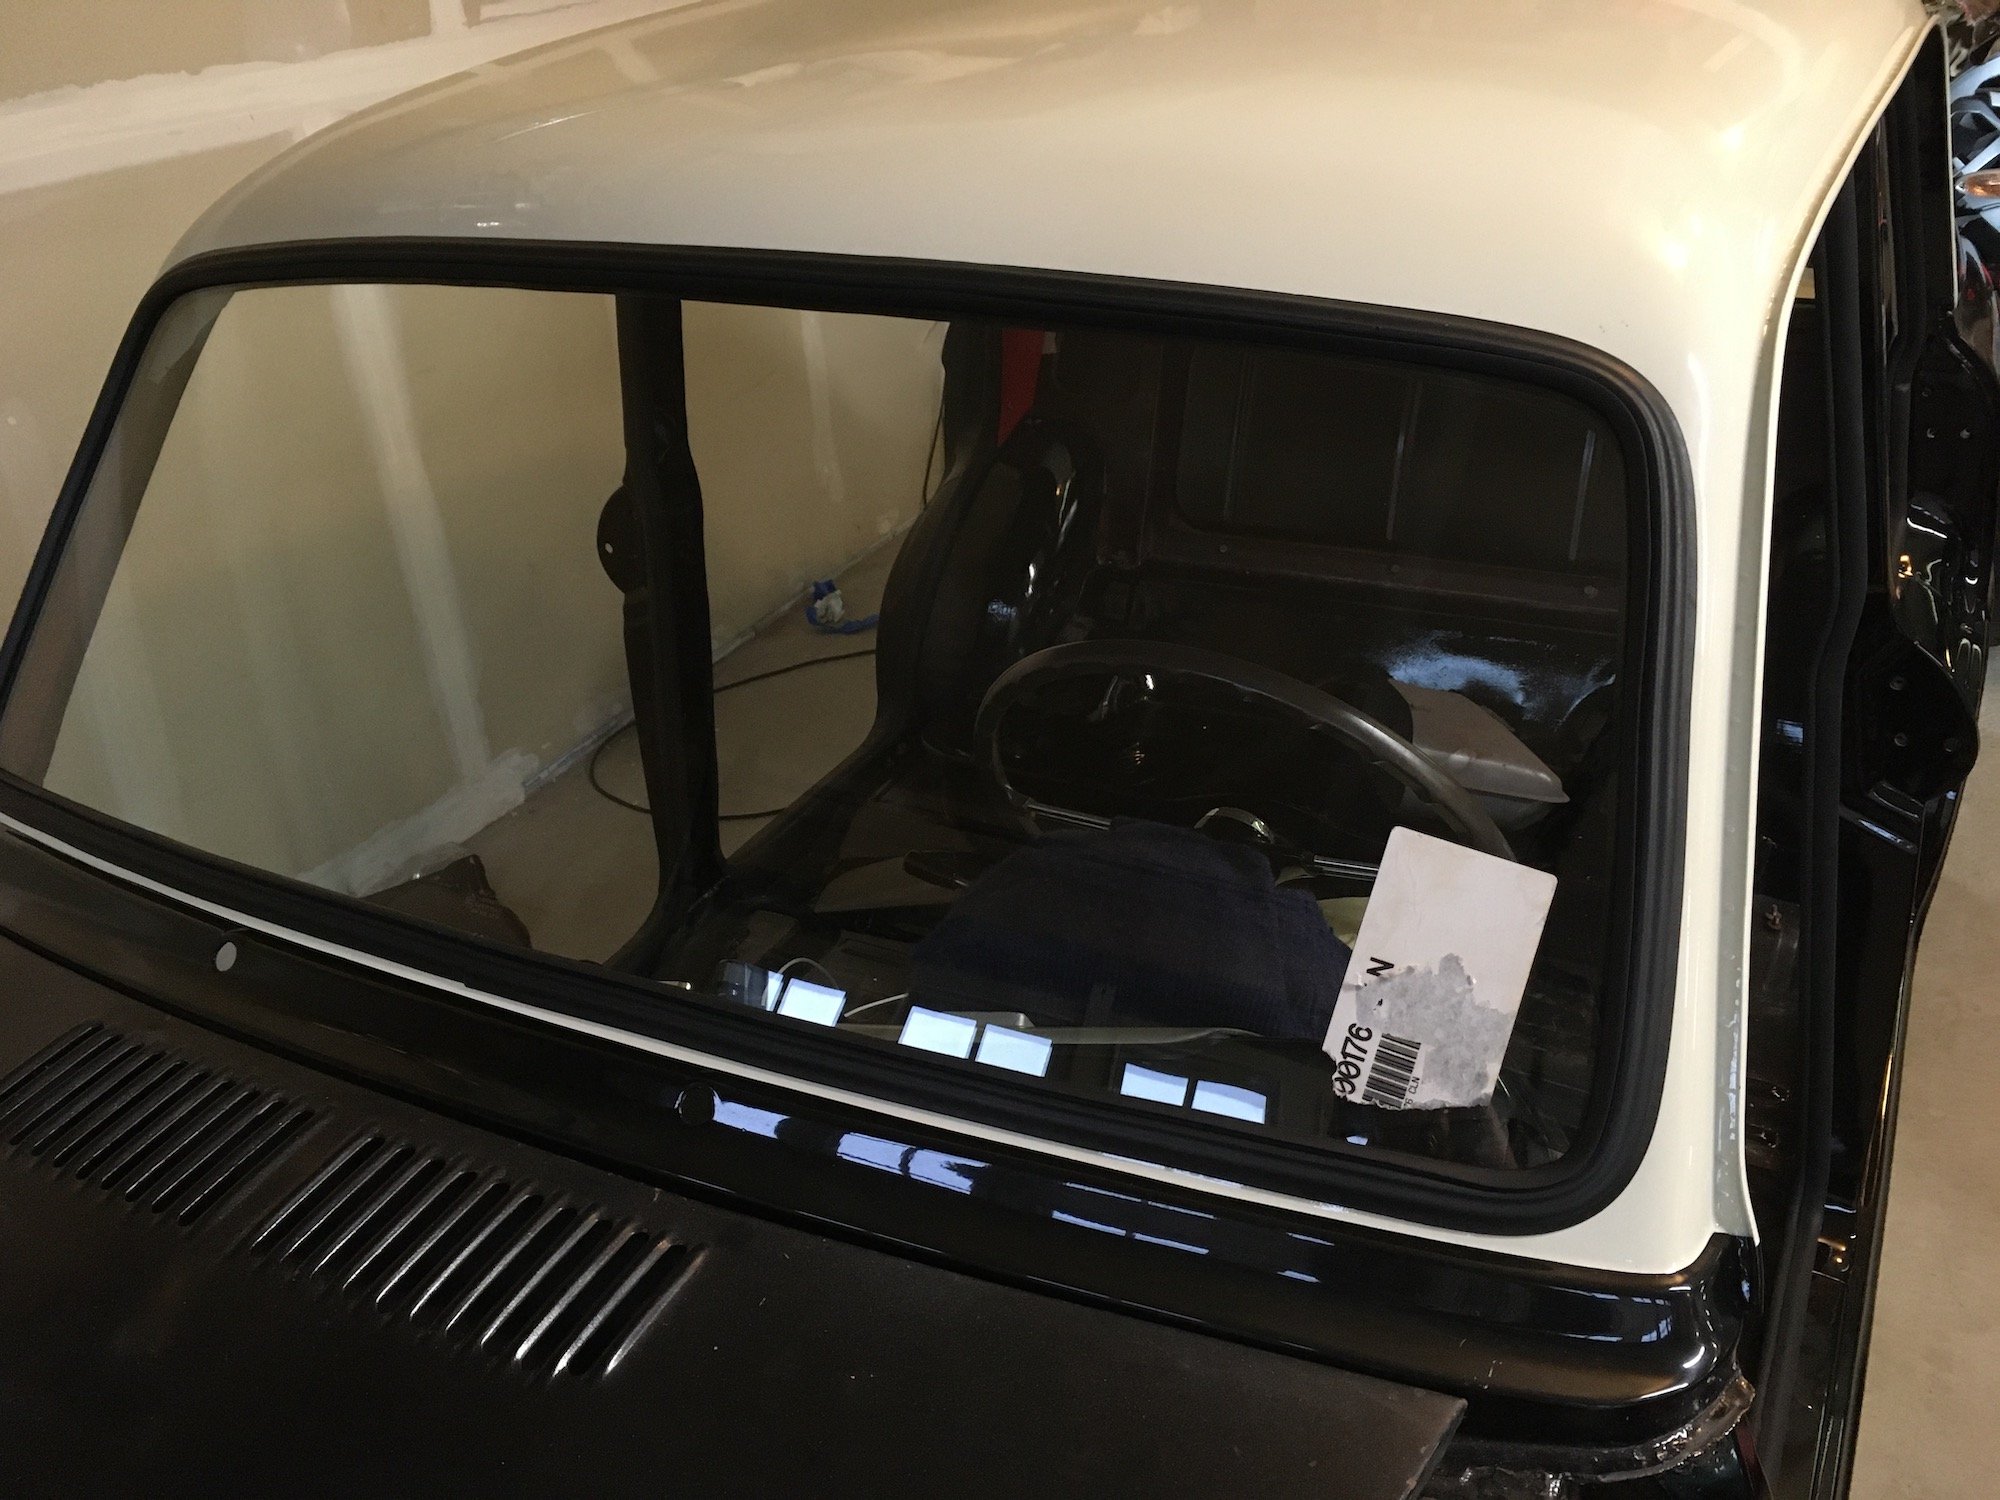
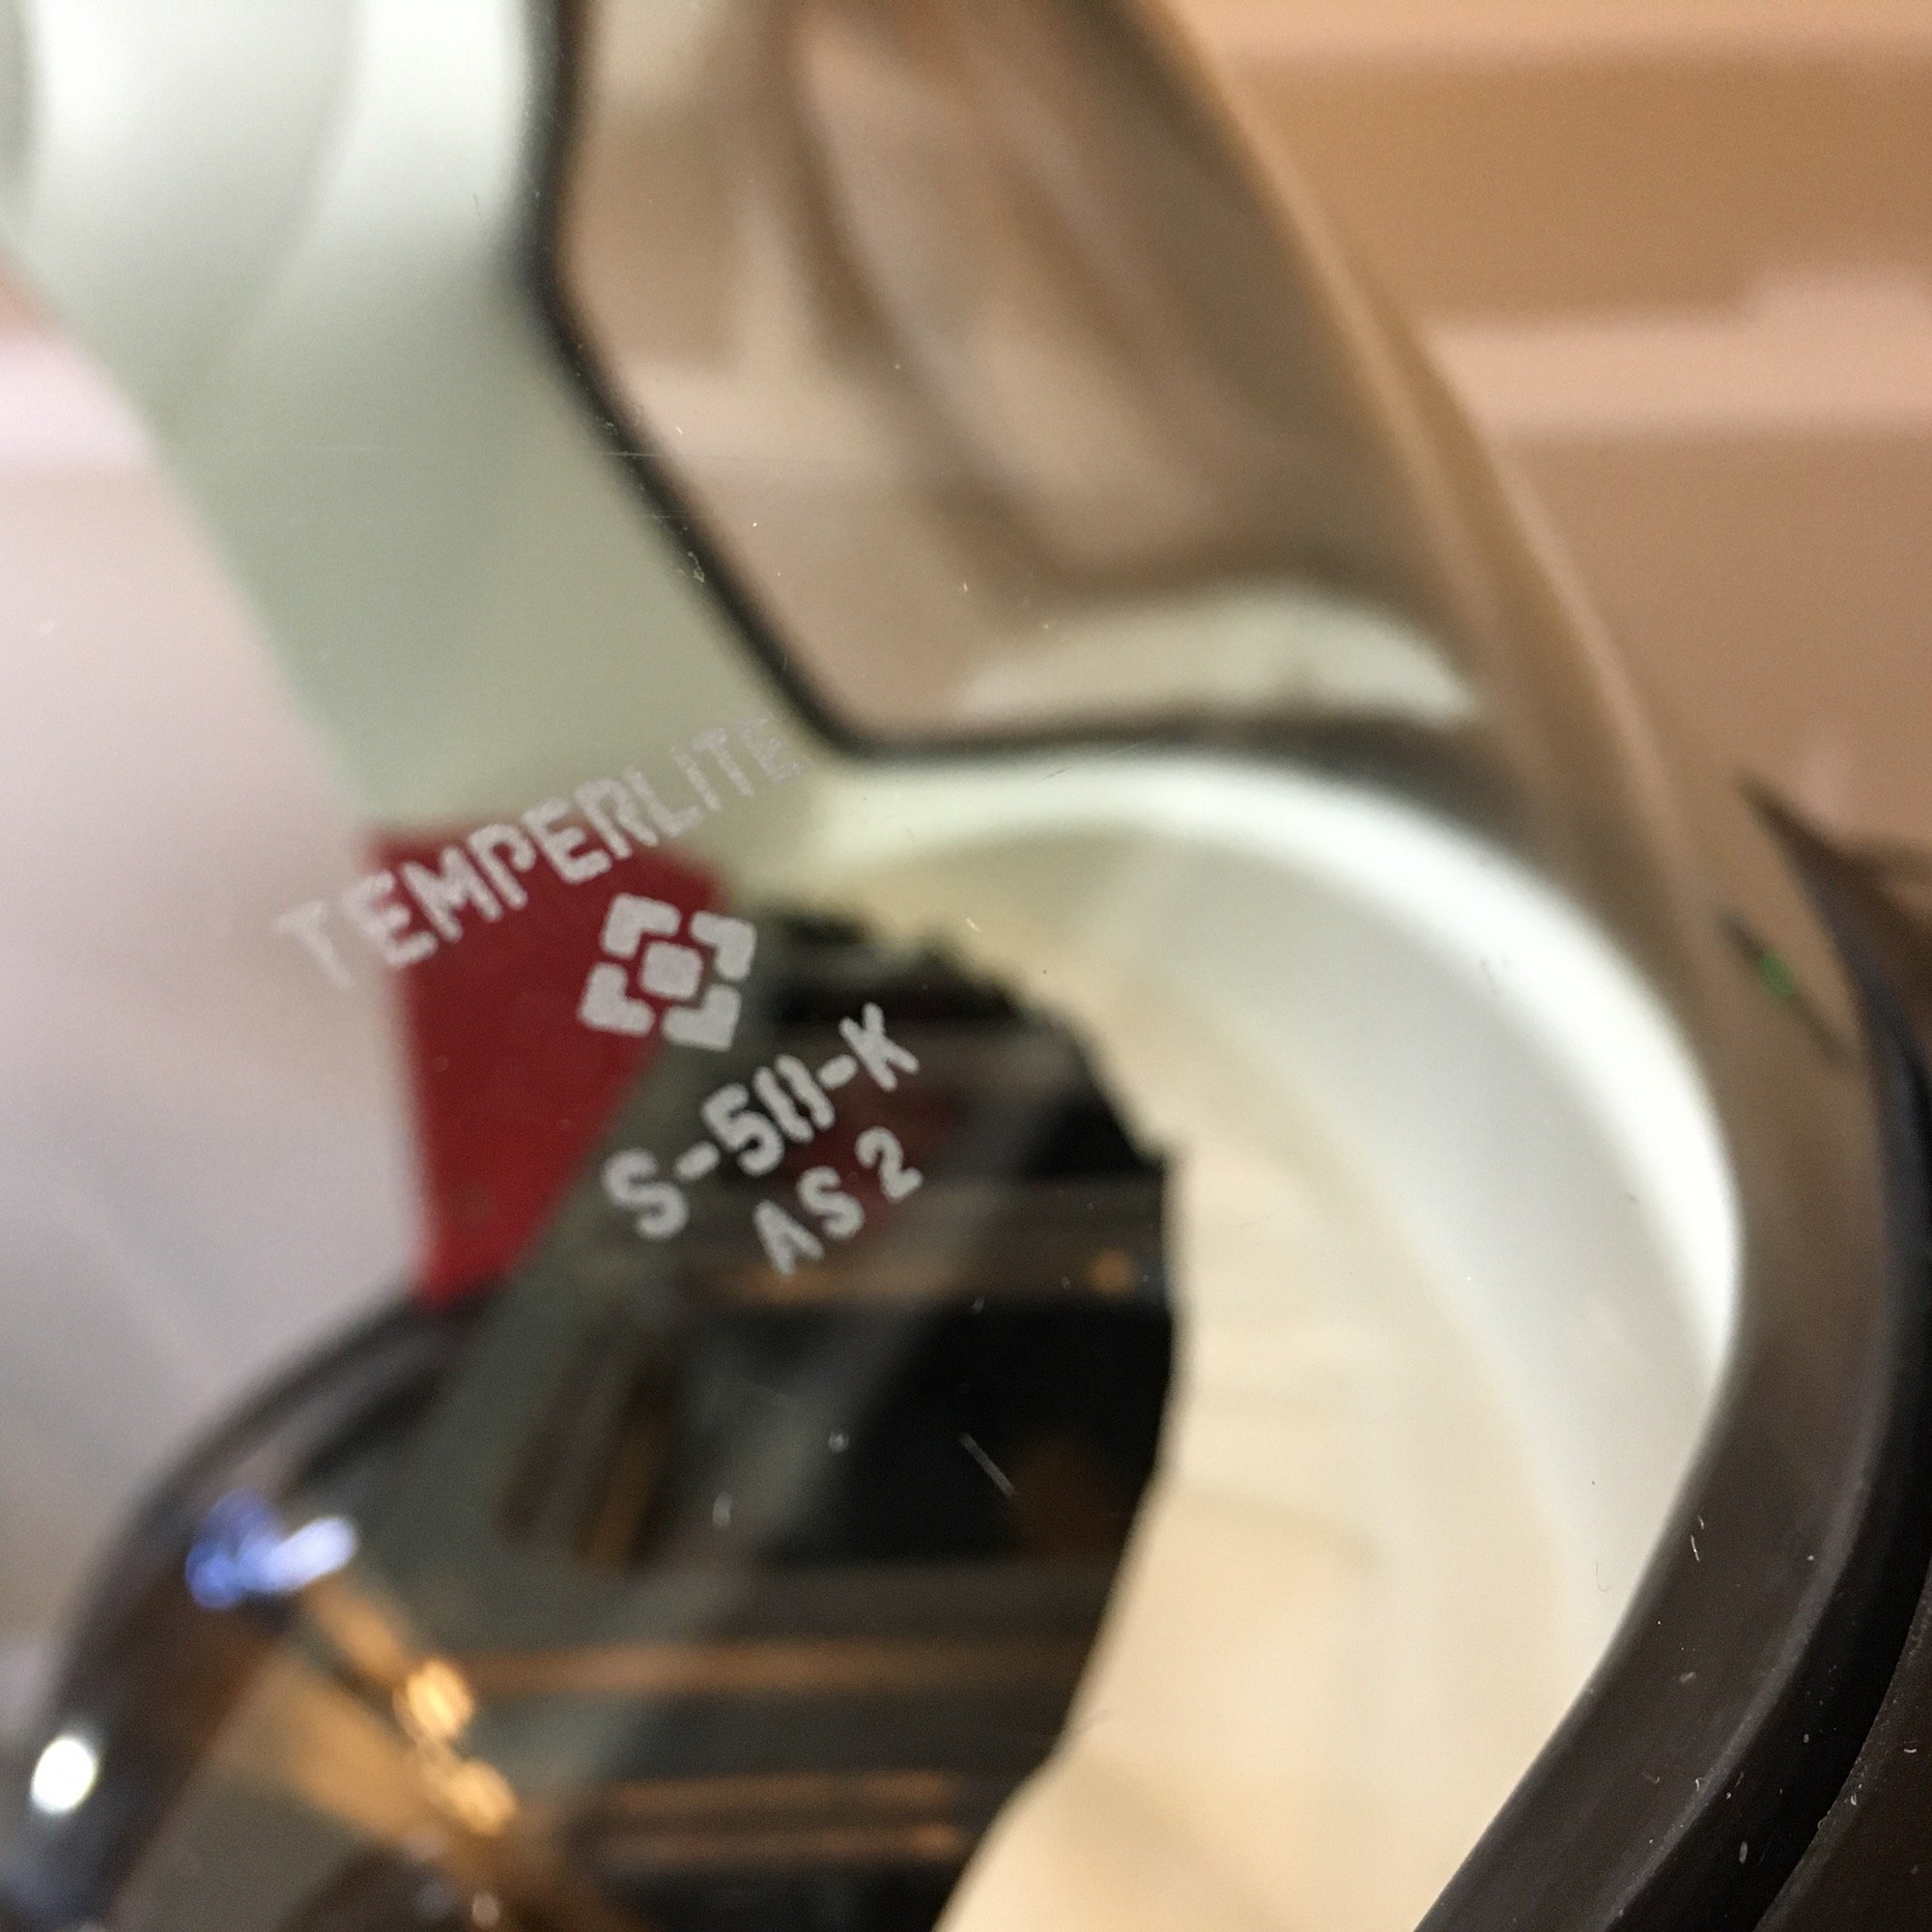
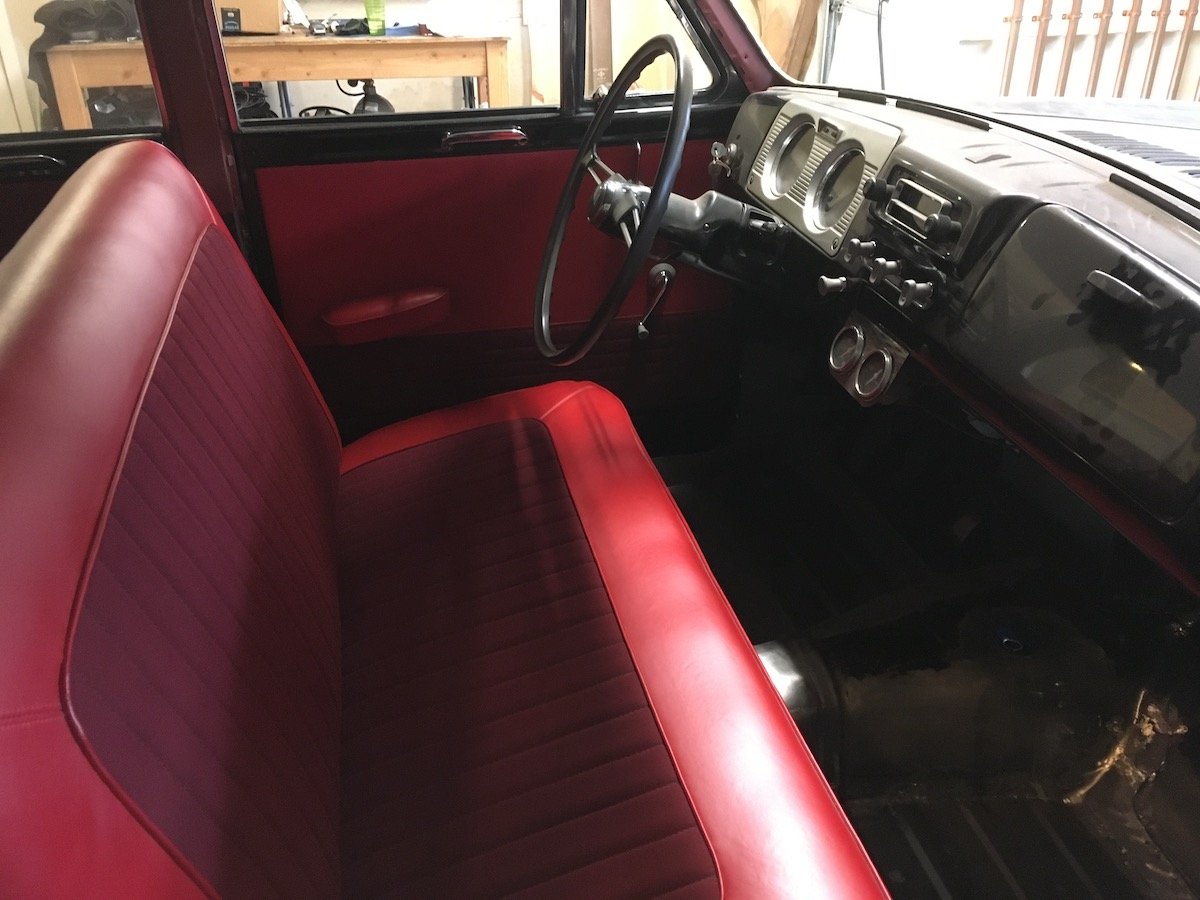
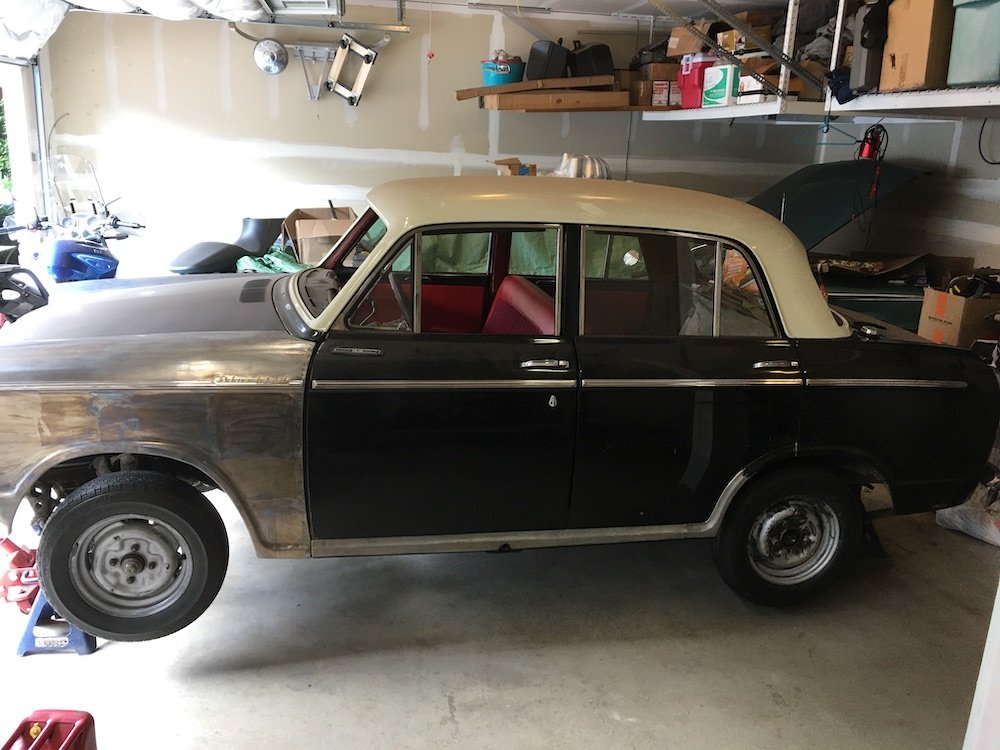
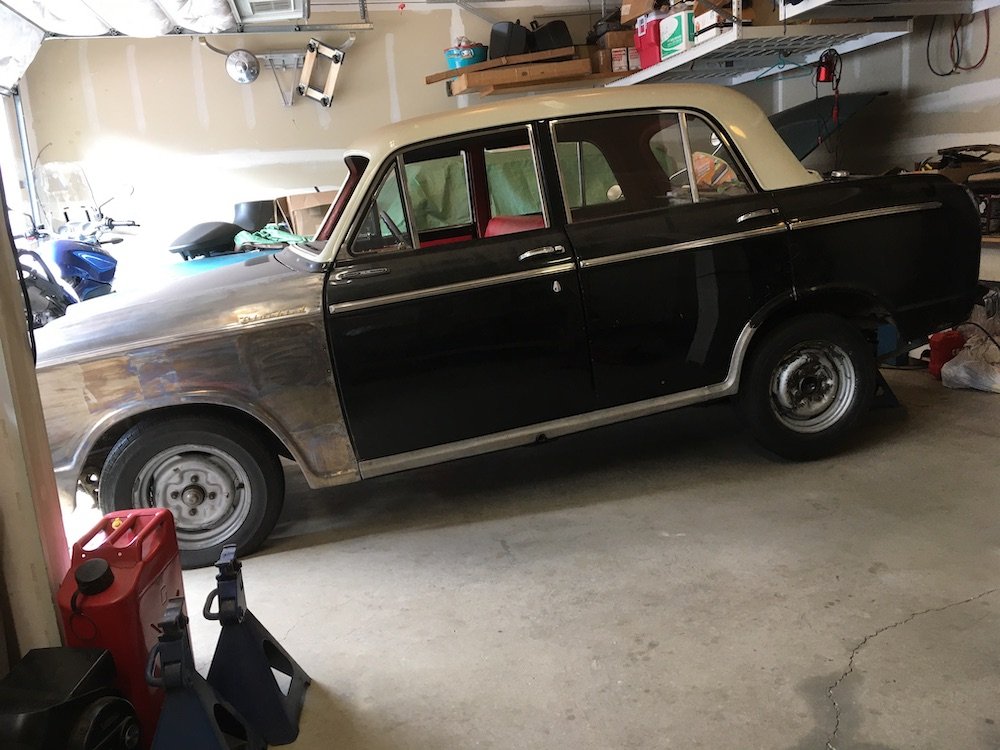
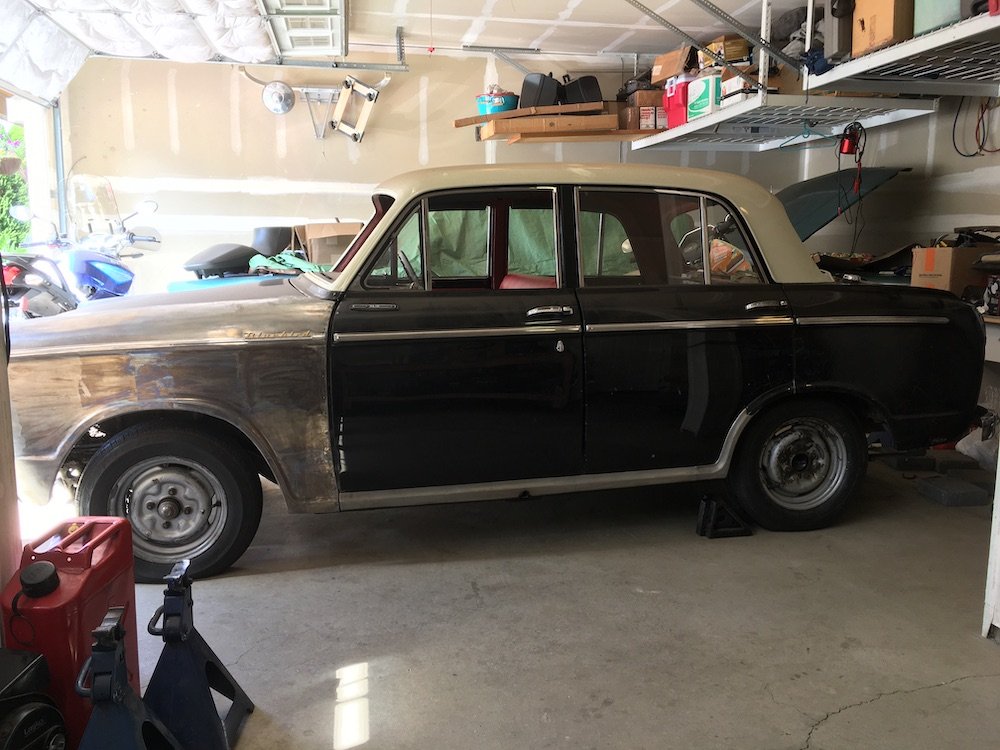
Building the 1961 Datsun 310 Bluebird - Glass and Trim. Bluebird is glazed! I finally installed the front and back glass. Other work happened as well. Here's a little photo preview with details to follow shortly.
- 75 replies
-
- 14
-

-

-
J.e.d.'s 1963 Ford Galaxie Hardtop Discussion
MARTS-PL310 replied to The Bronze's topic in Project Discussion
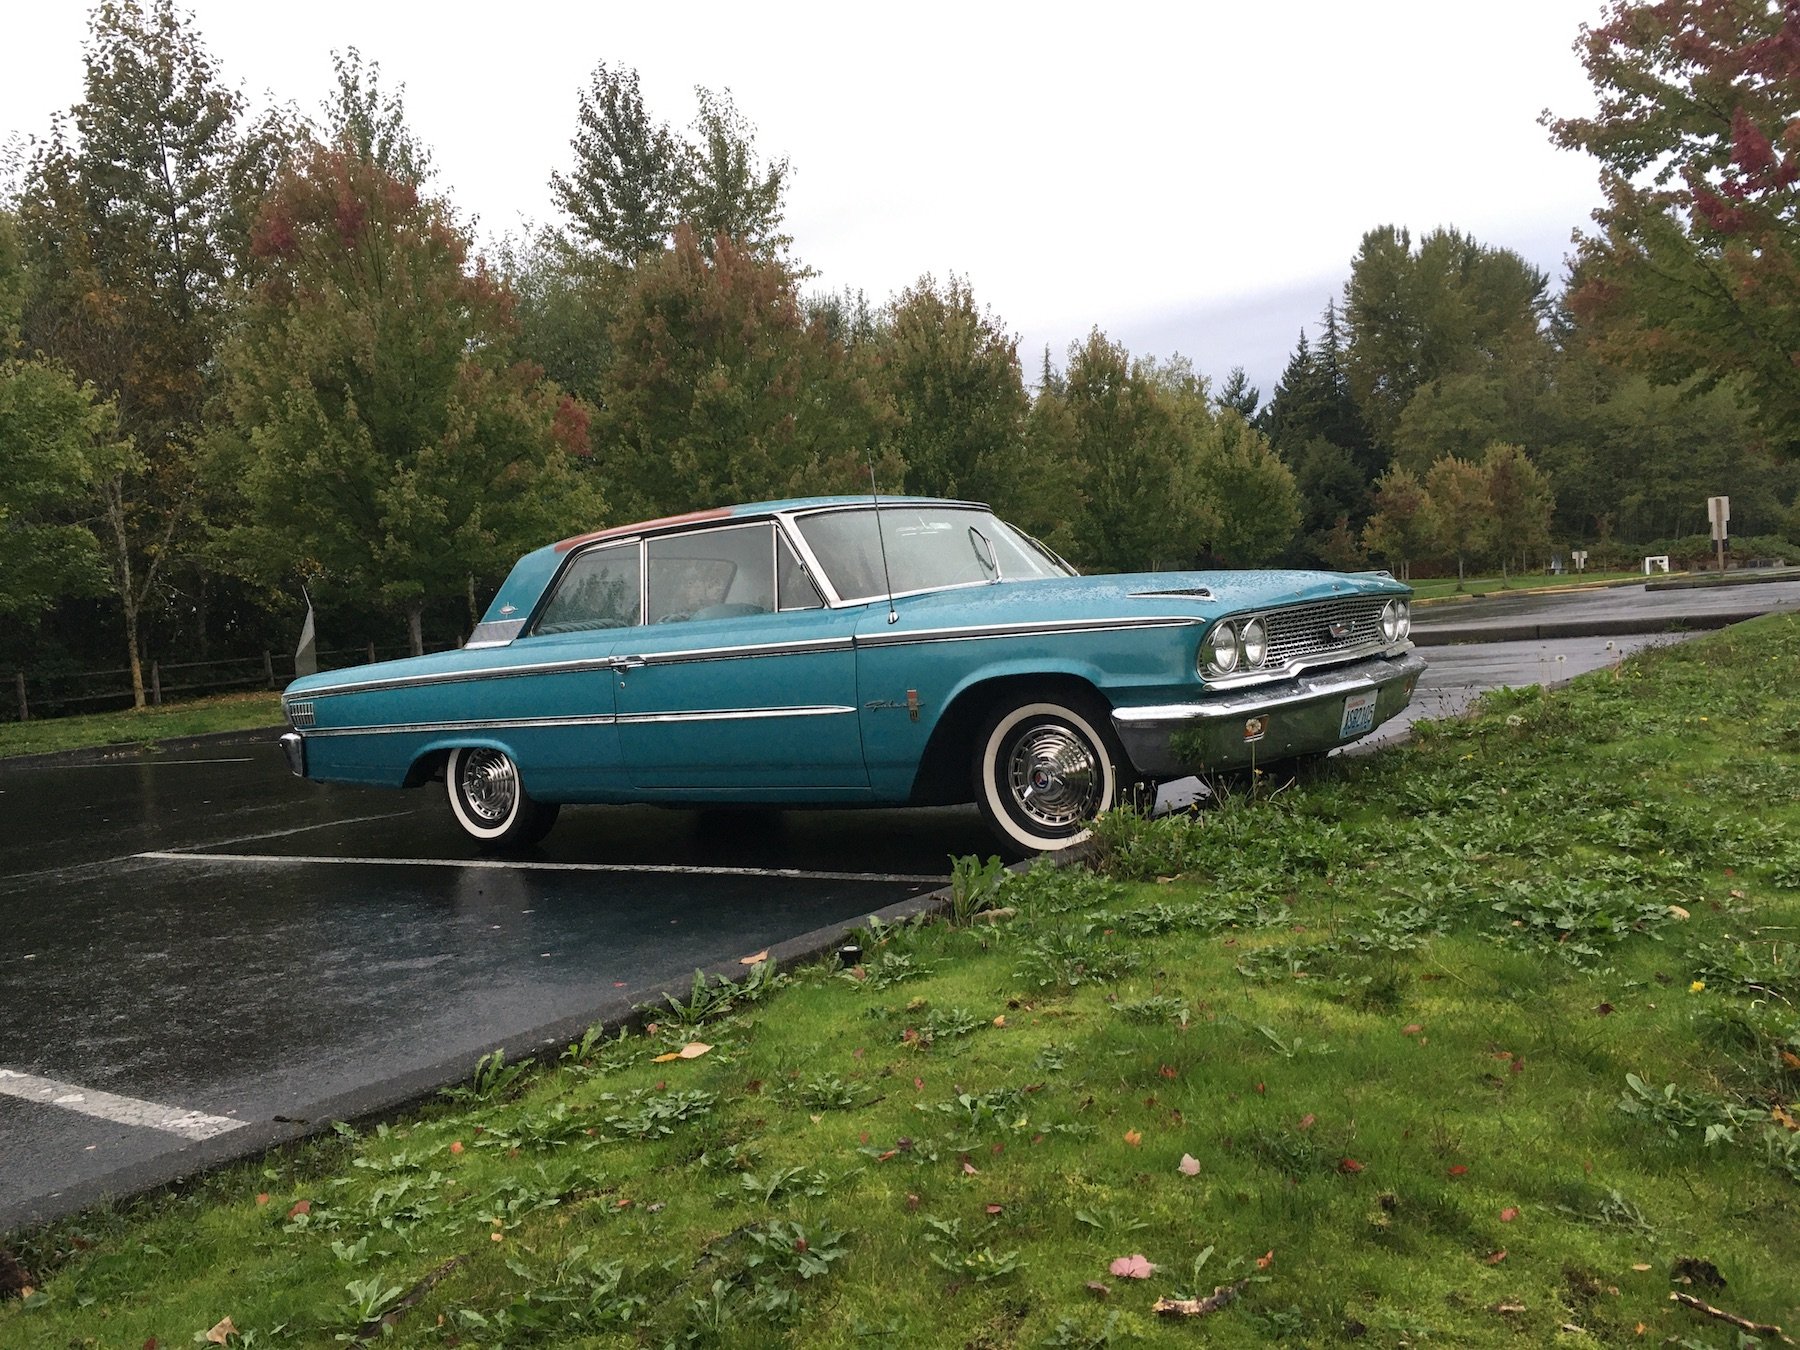
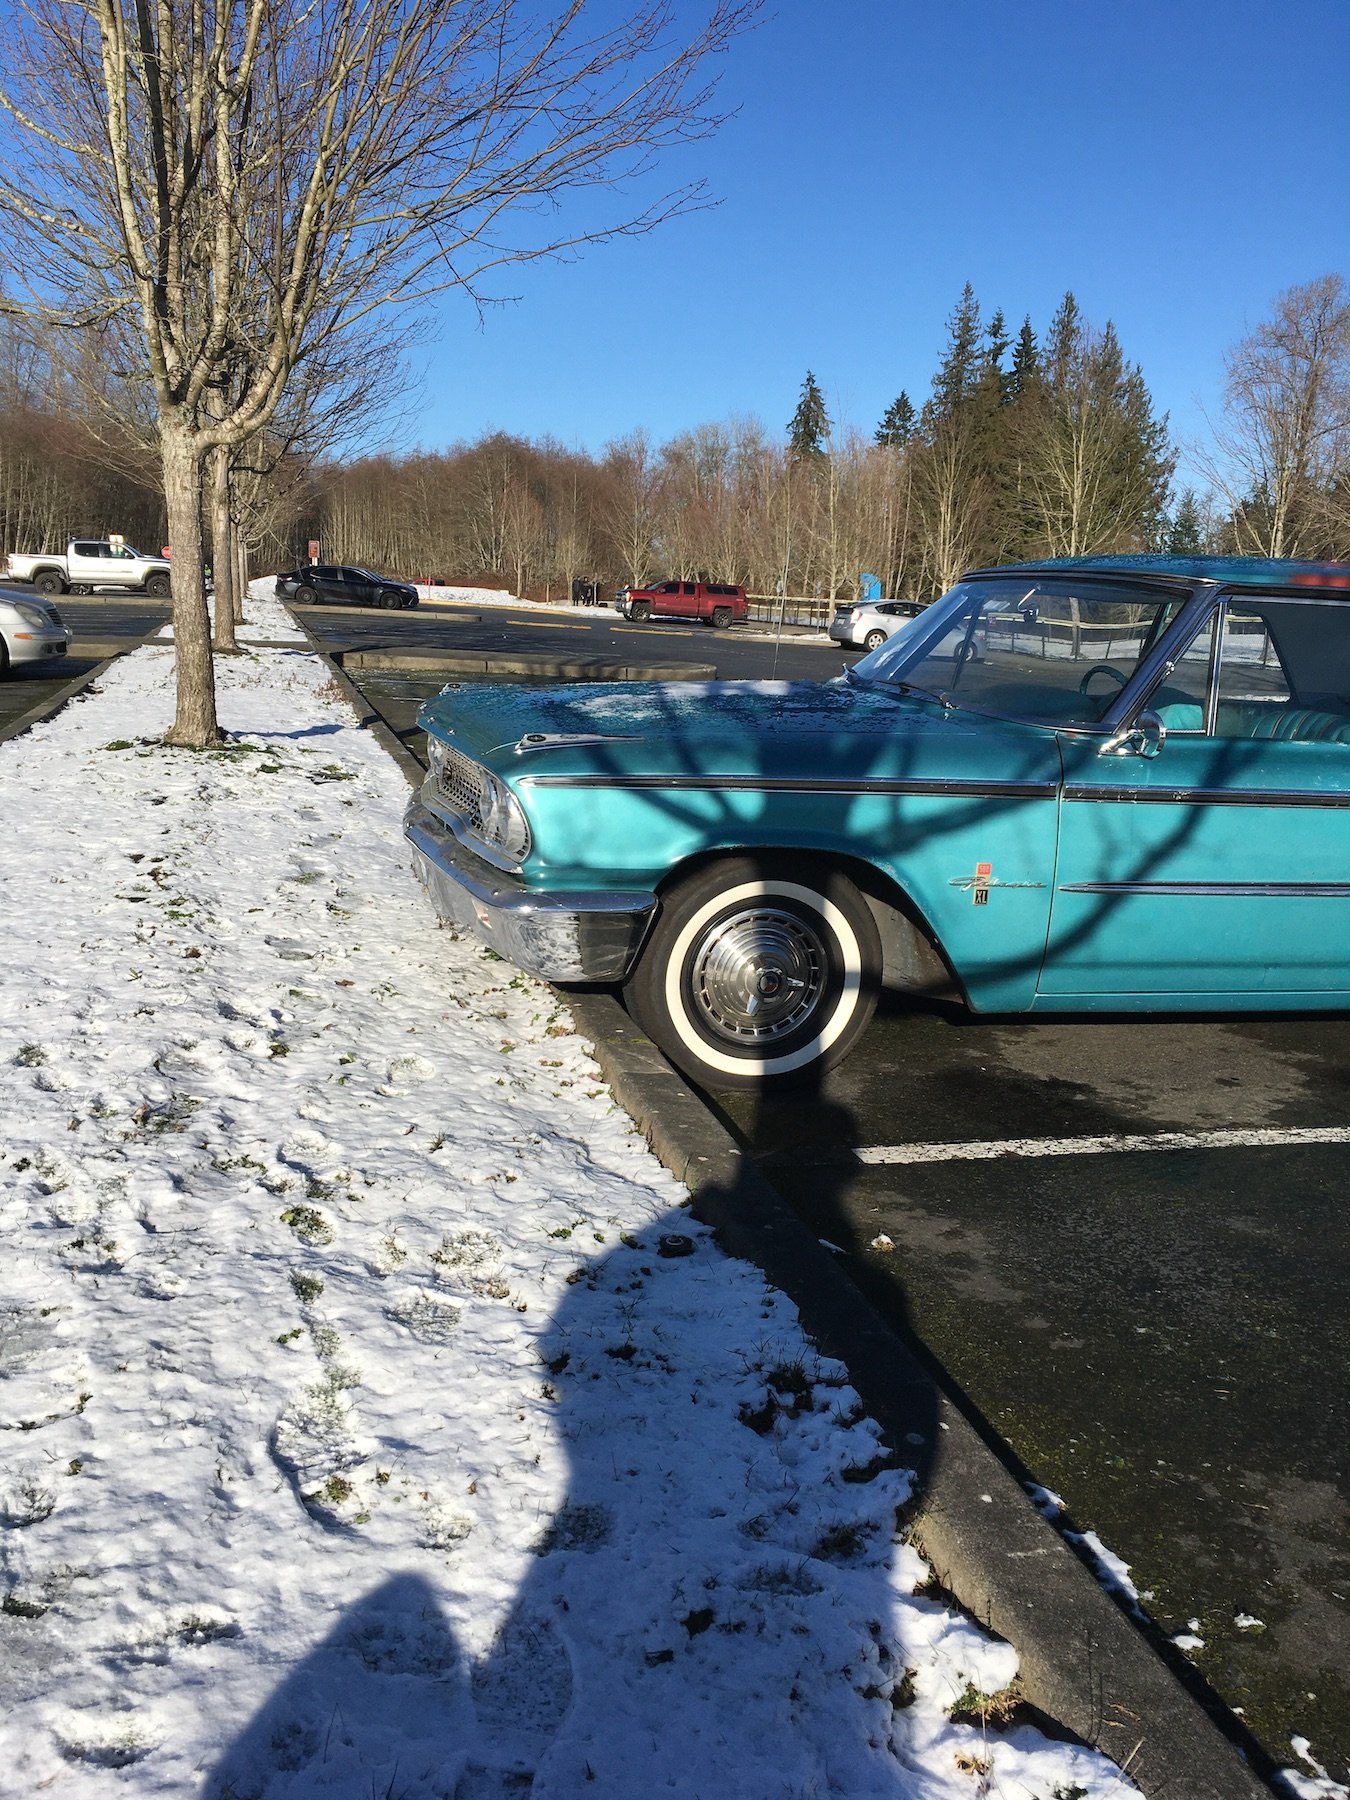
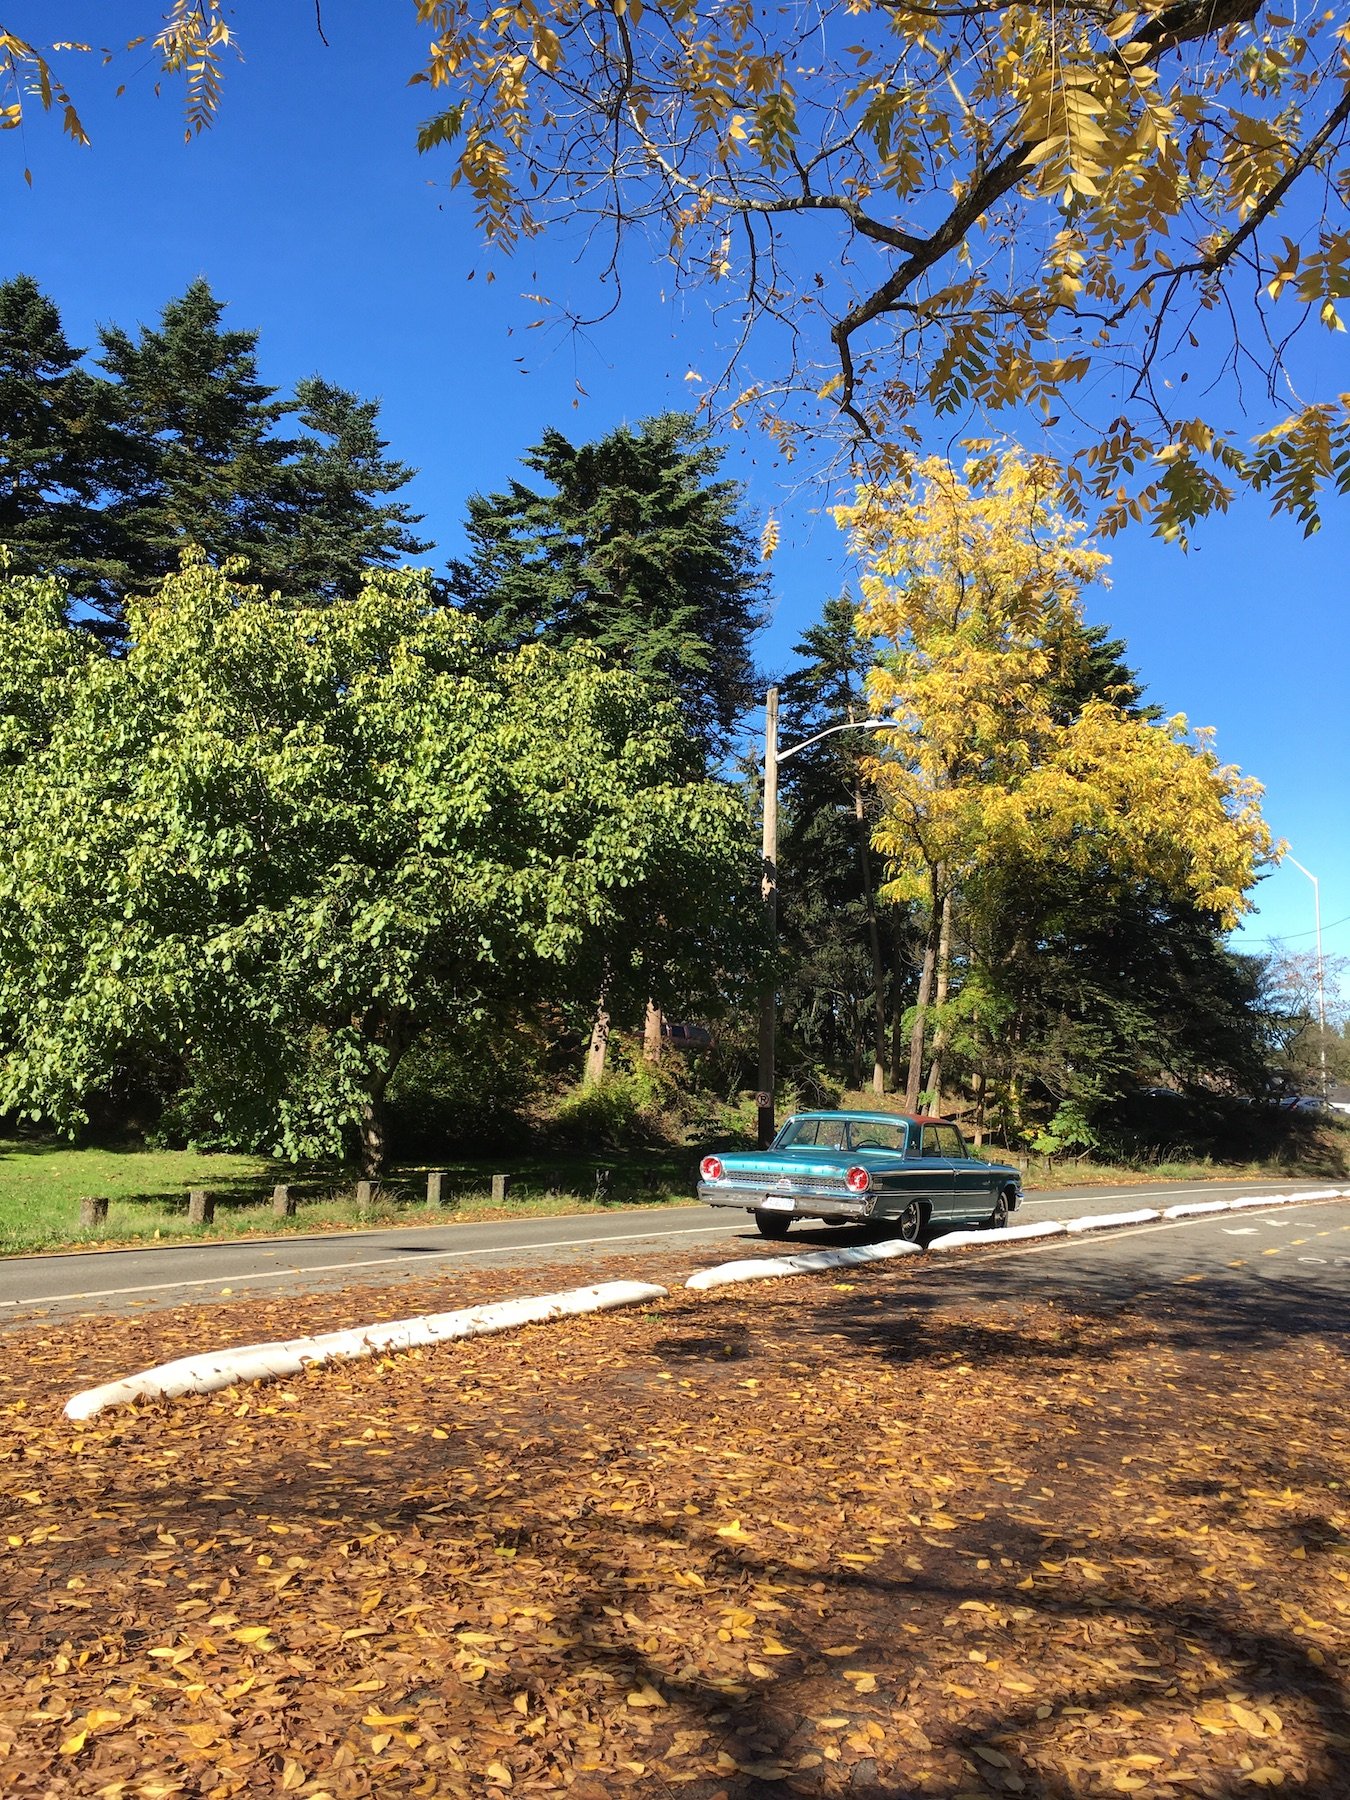
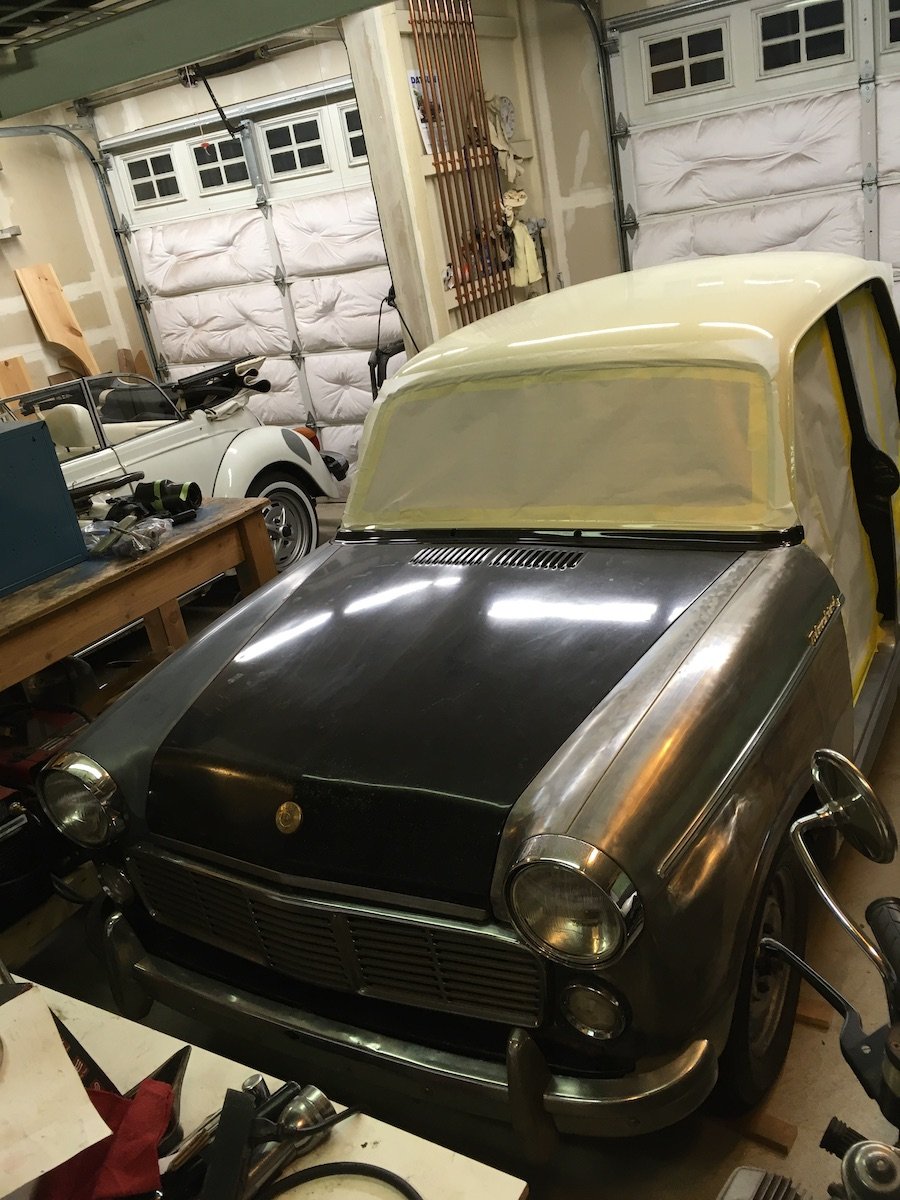
@j.e.d. Here's a few recent exterior pics of my 63 from over the last four months or so in the Seattle, Washington area. My dad bought it in 1967 and passed it on to me in 1999. Stock except for dual exhaust and aftermarket radio. Rain or shine it gets driven. Cruises smoothly at 70mph on the interstate. Guzzles at 14 mpg. Paint is original Ming Green metallic except for spot repairs years ago to lower rear quarters, sills and hood. Interior, not shown, is a bit shoddy and needs new front bucket seat covers (currently t-shirts wrapped around the seat backs, that sort of thing). Most recent work was the replacement of the cam bore plug on the back of the 352 FE engine after it had come out, got tangled up between the block, adapter plate and flywheel and punched out a chunk of the bell housing...
-
J.e.d.'s 1963 Ford Galaxie Hardtop Discussion
MARTS-PL310 replied to The Bronze's topic in Project Discussion
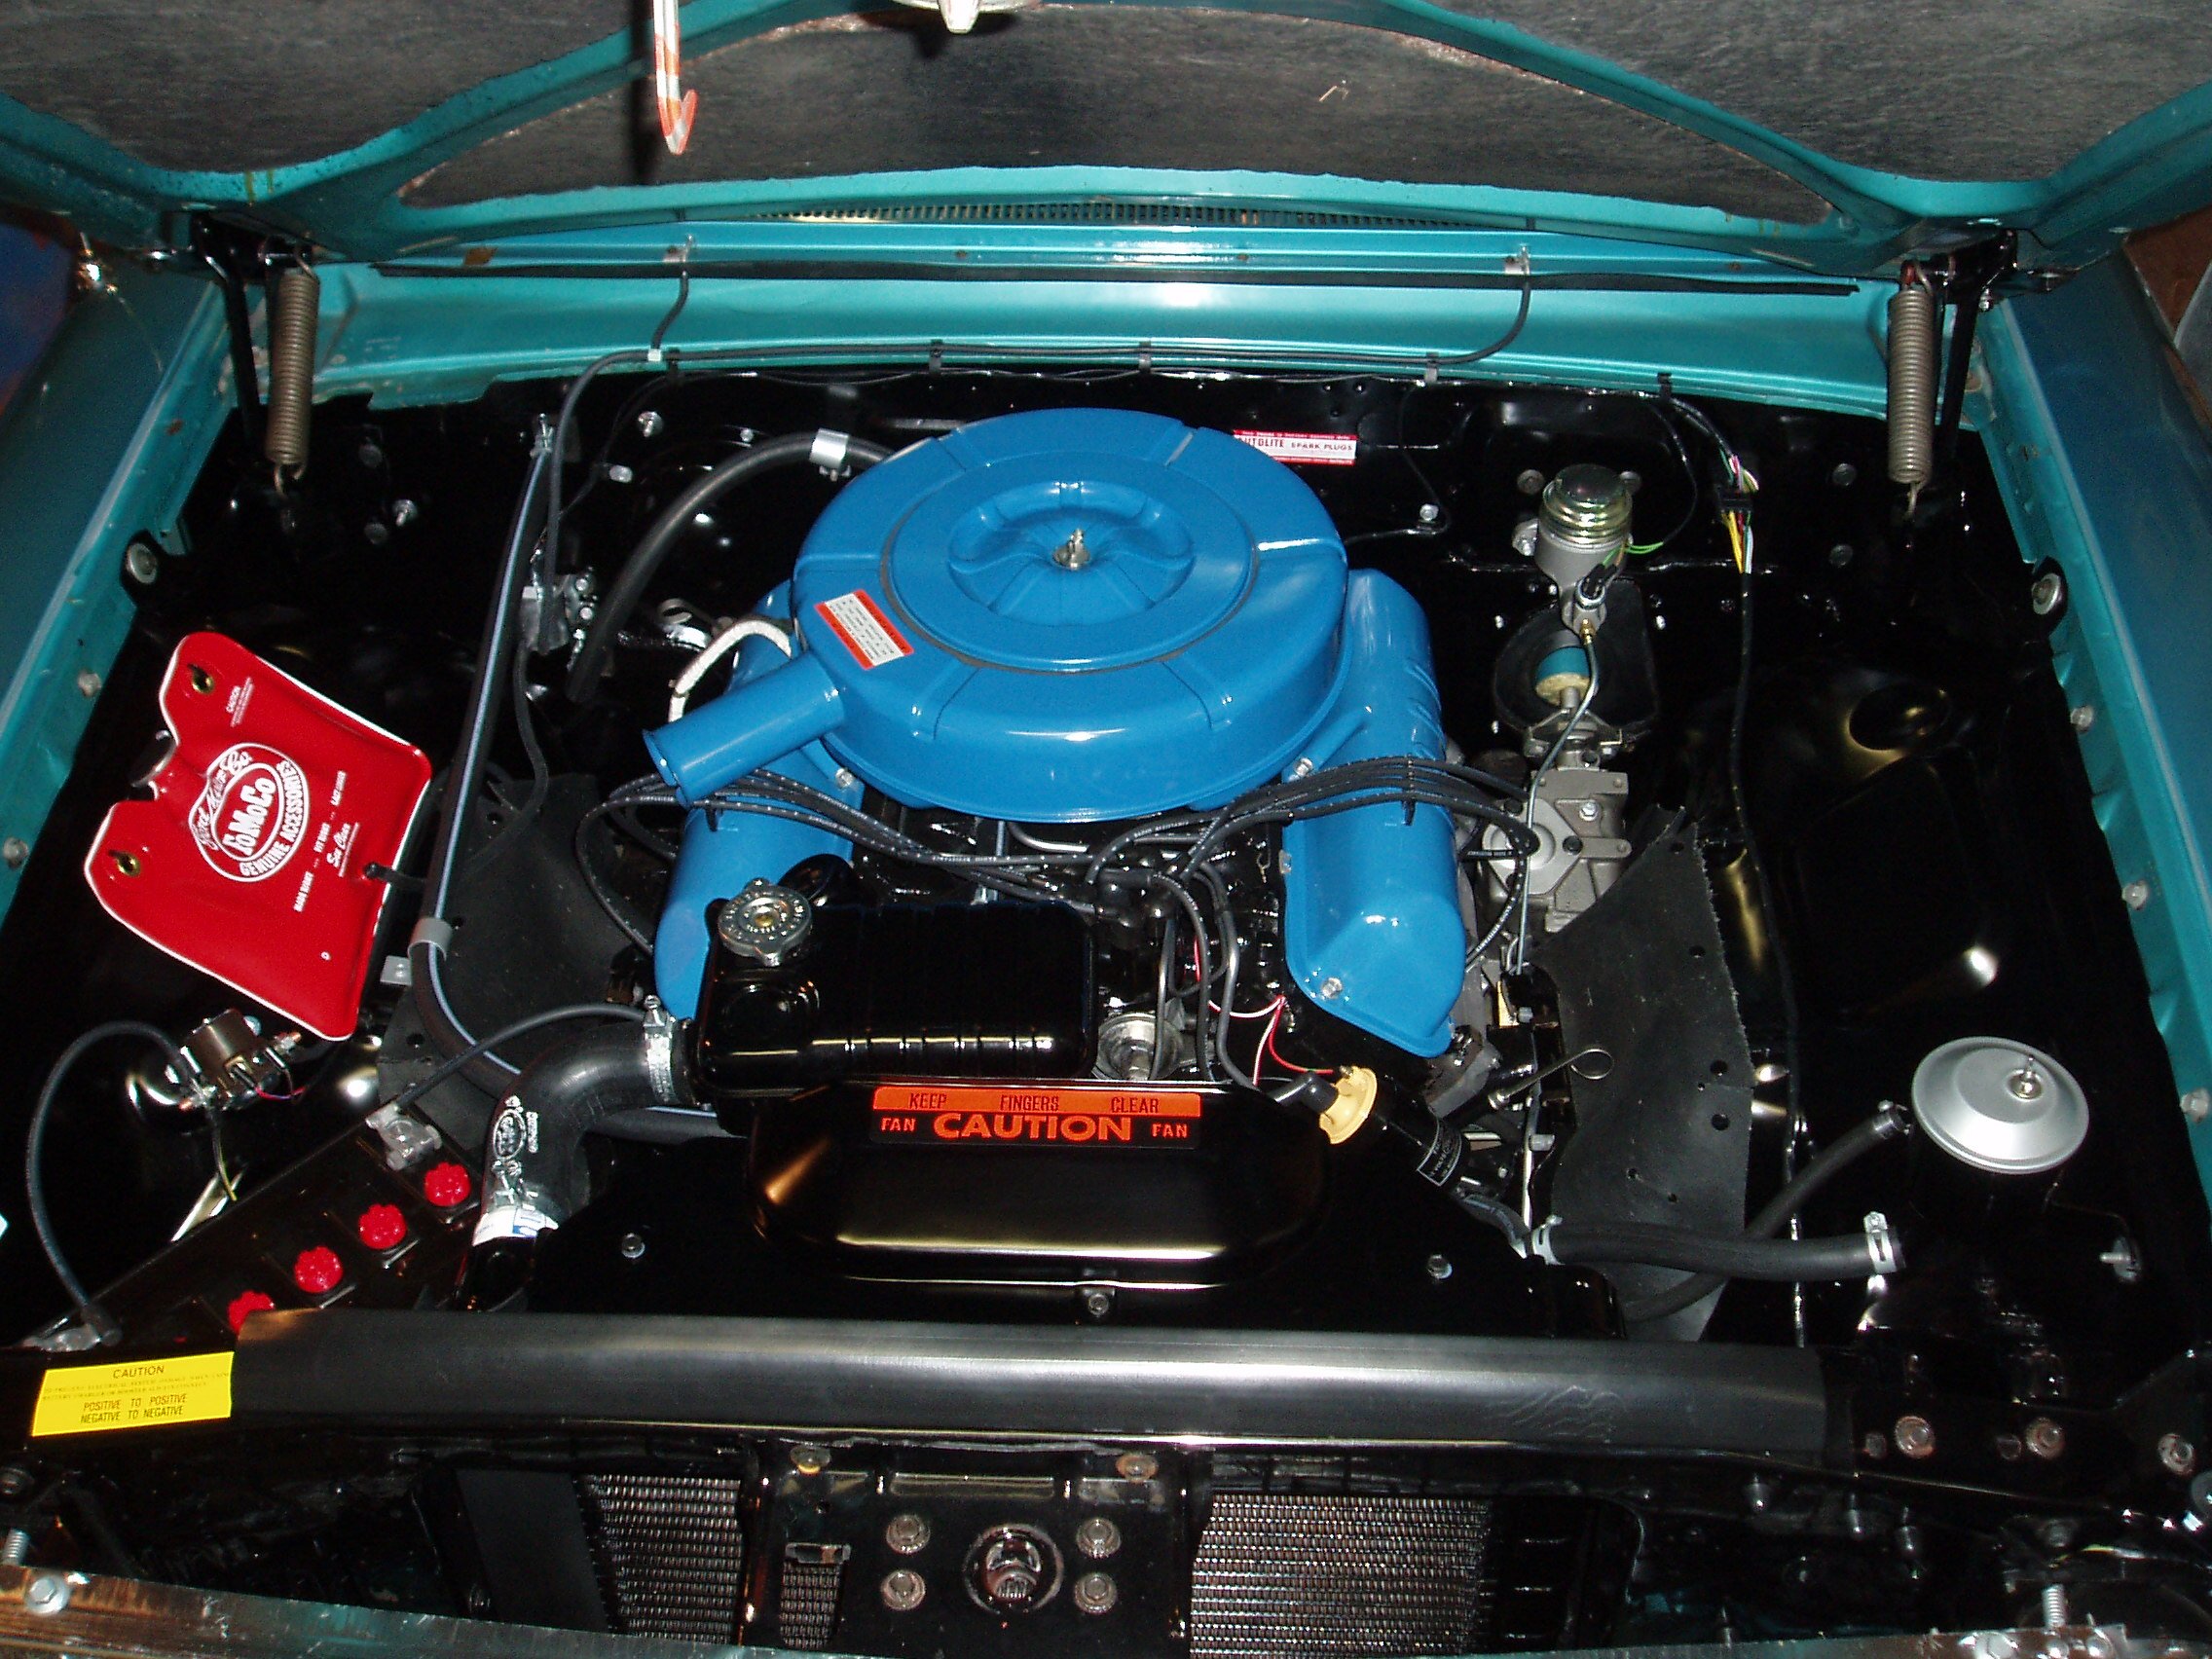
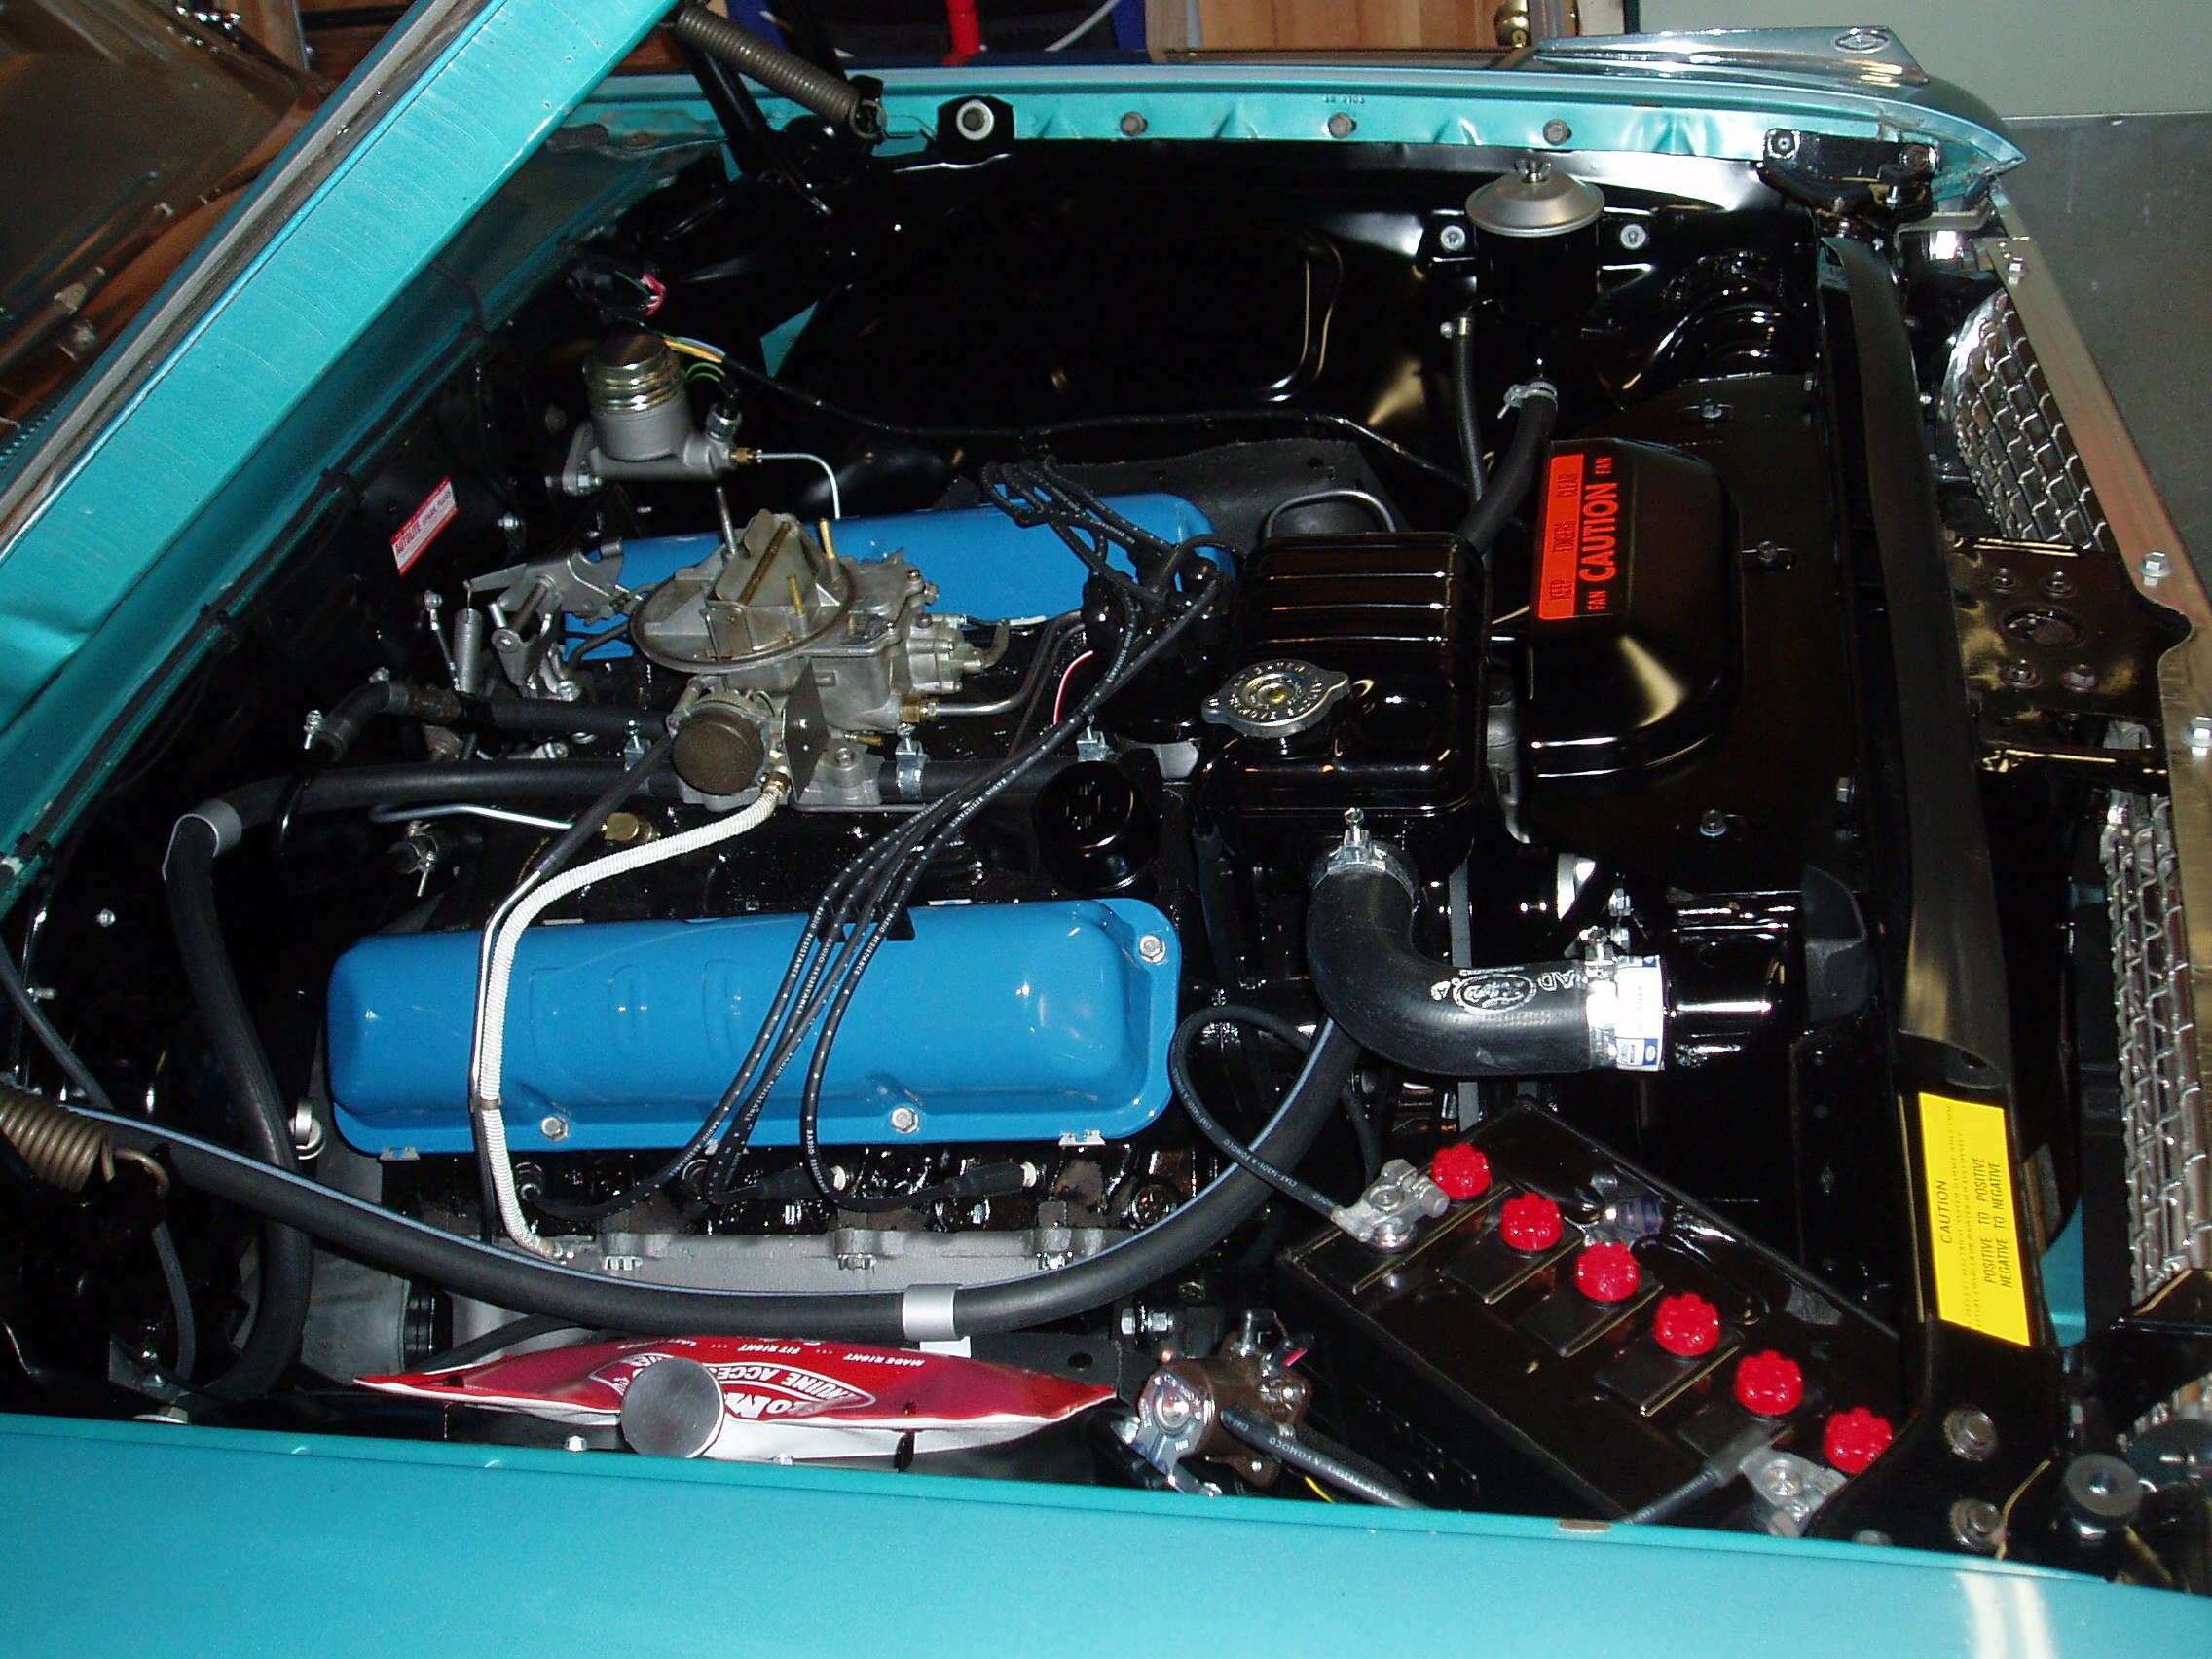
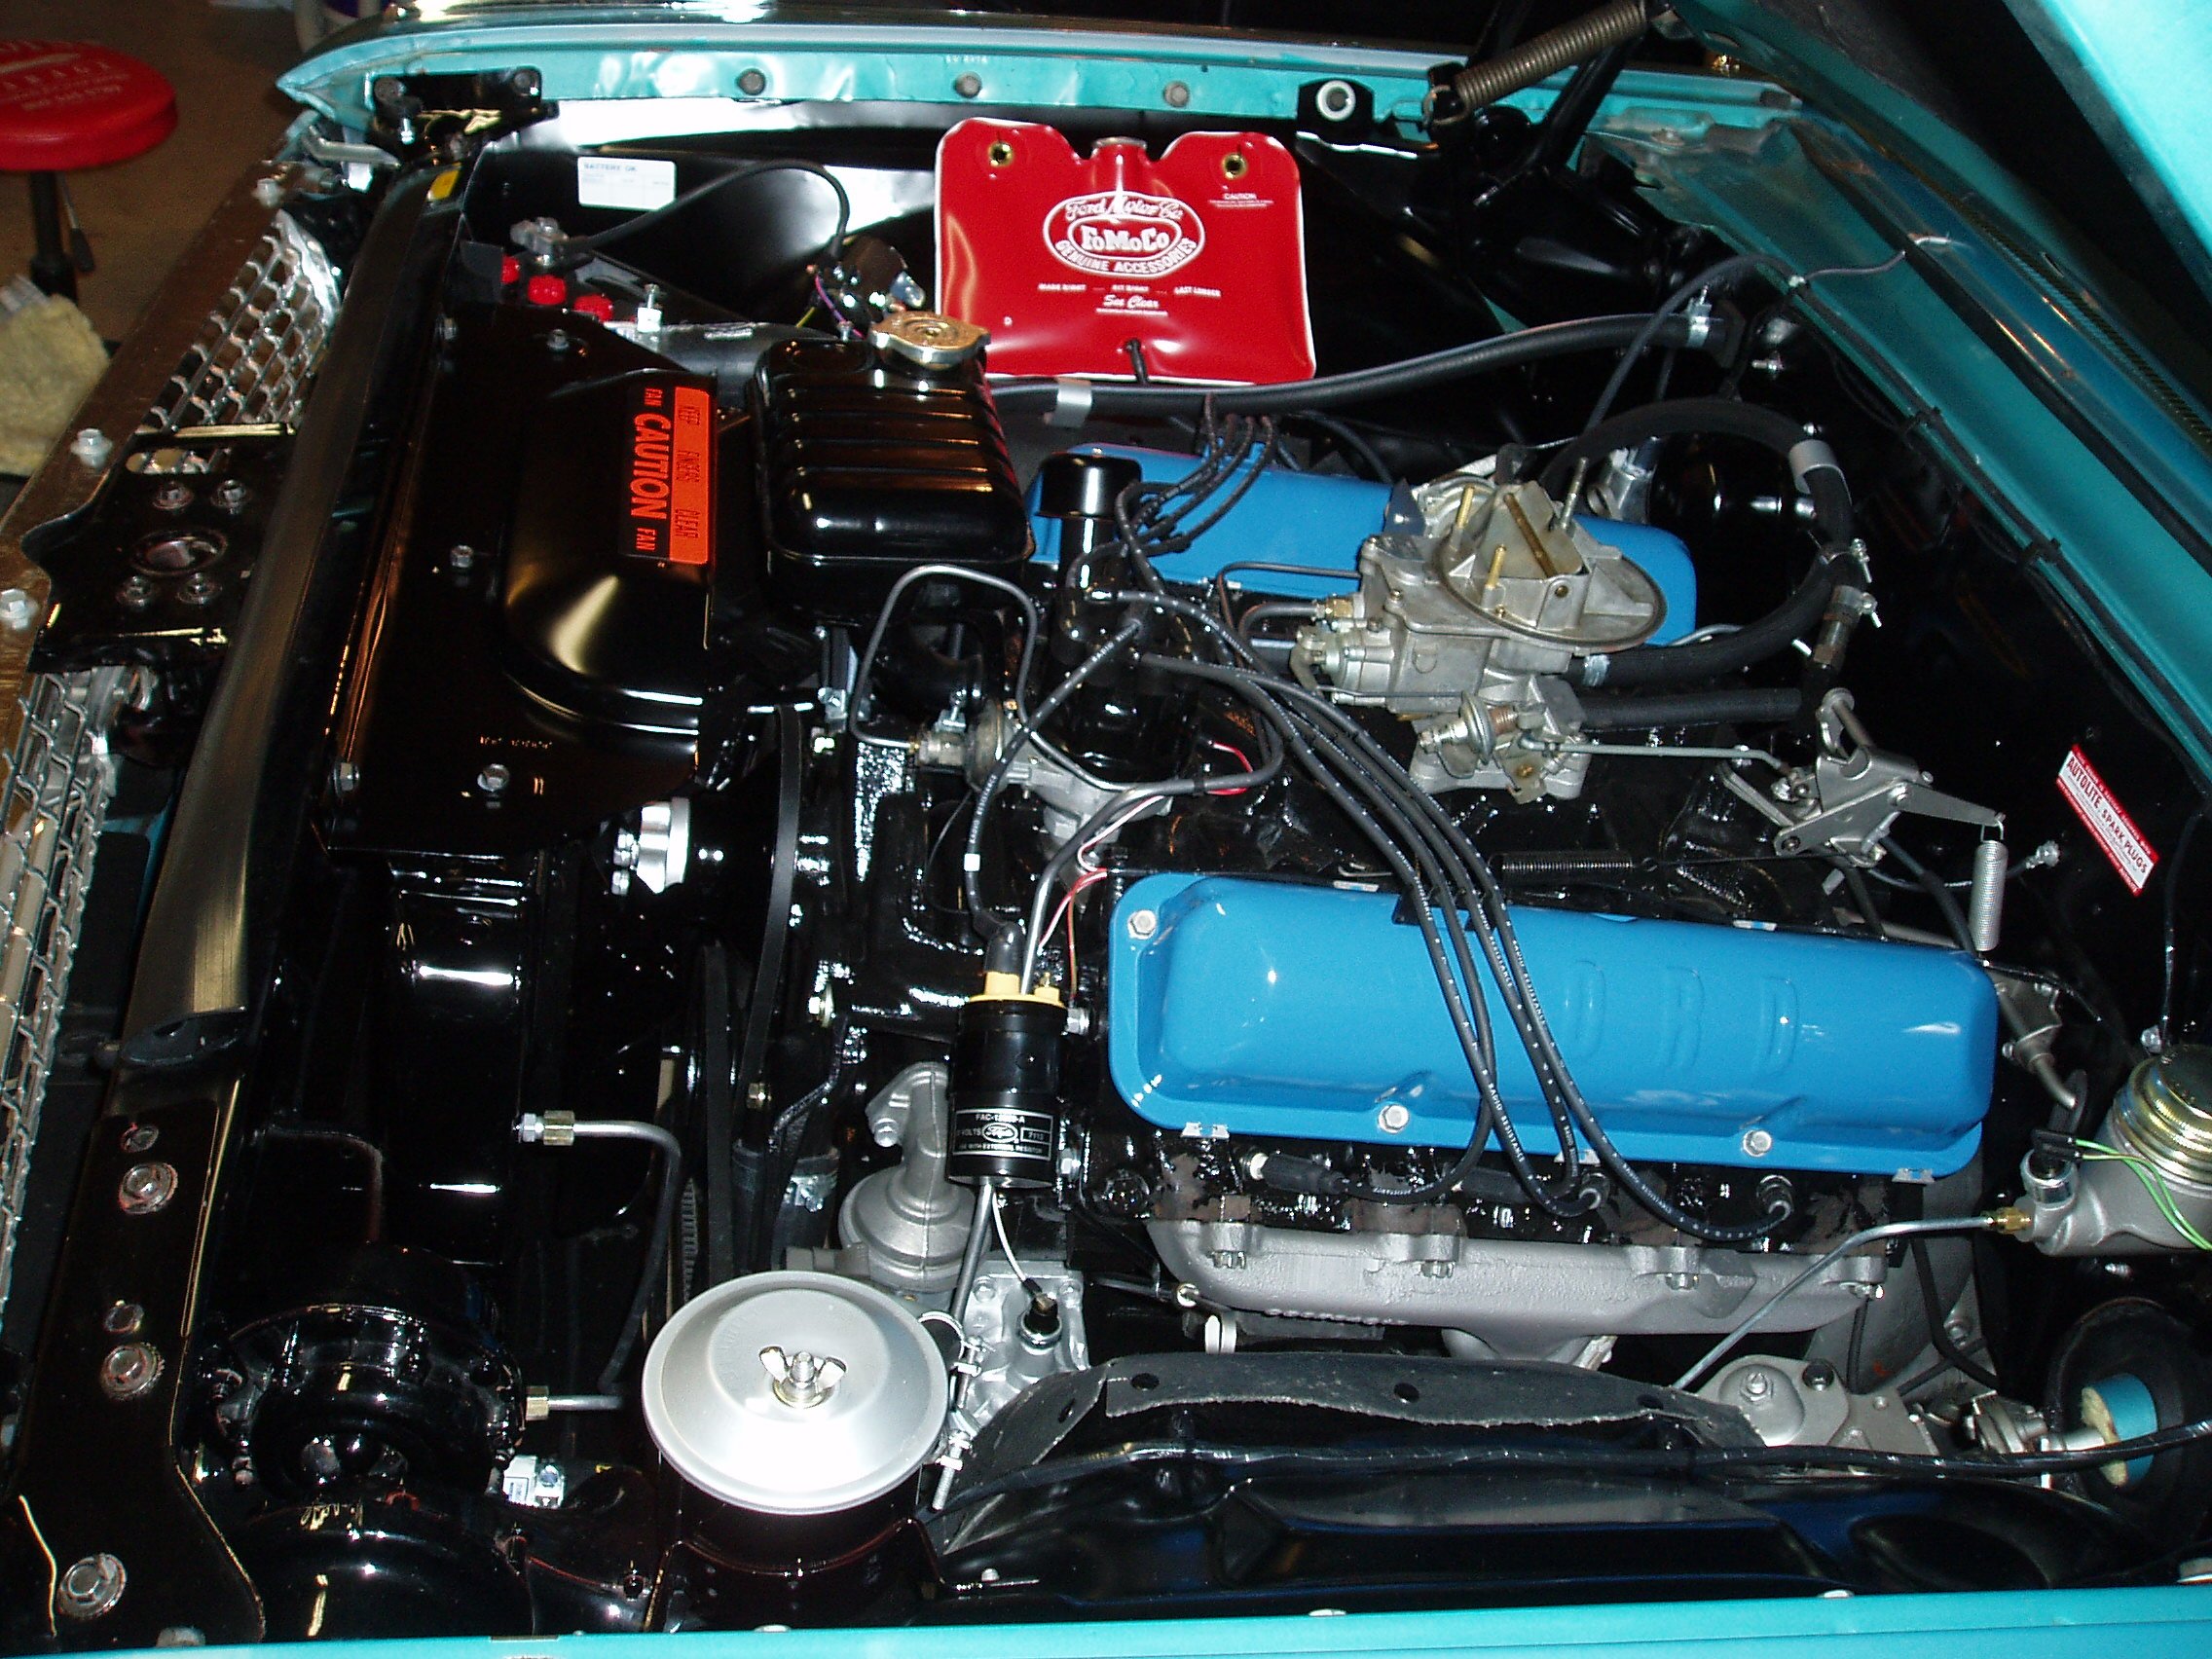
Love those 63 Galaxies! Keep em rolling. I have similar, a 352, 2dr boxtop, 500 XL, family heirloom, 335k miles and still running smooth and strong. Engine pic from last overhaul 18 years ago. Watch out for that darn secondary hood latch. I painted mine striped but it doesn't help much to prevent the occasional ding on the scalp!
-
MARTS-PL310 61 Datsun Bluebird Sedan
MARTS-PL310 replied to MARTS-PL310's topic in Projects and Build Ups
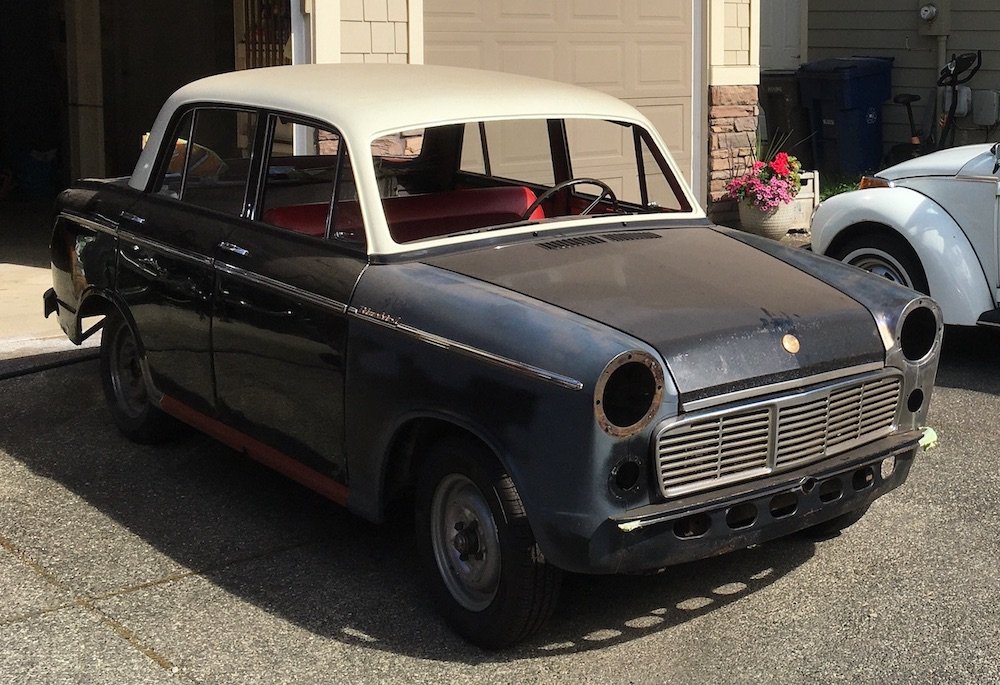
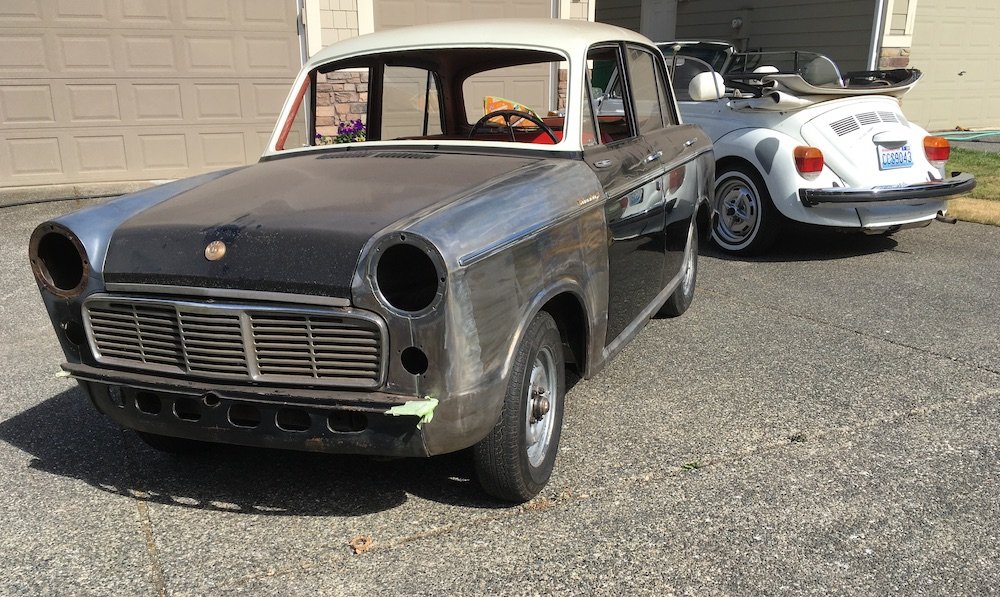
Building the 1961 Datsun 310 Bluebird - Prime and Fill. The Pacific Northwest weather dried out a bit this month thus allowing the spray of a couple of coats of epoxy primer. So now I’m doing light filler work to make invisible the imperfections that would otherwise show through the finished paint. These are mostly weld joints and some small rock dings on the doglegs. Not too exciting stuff but I'm aiming for a nice professional look. Initial body filler applied and sanded back. I'll knock down a few high spots and continue with a couple of more thin applications.
- 75 replies
-
- 18
-
-
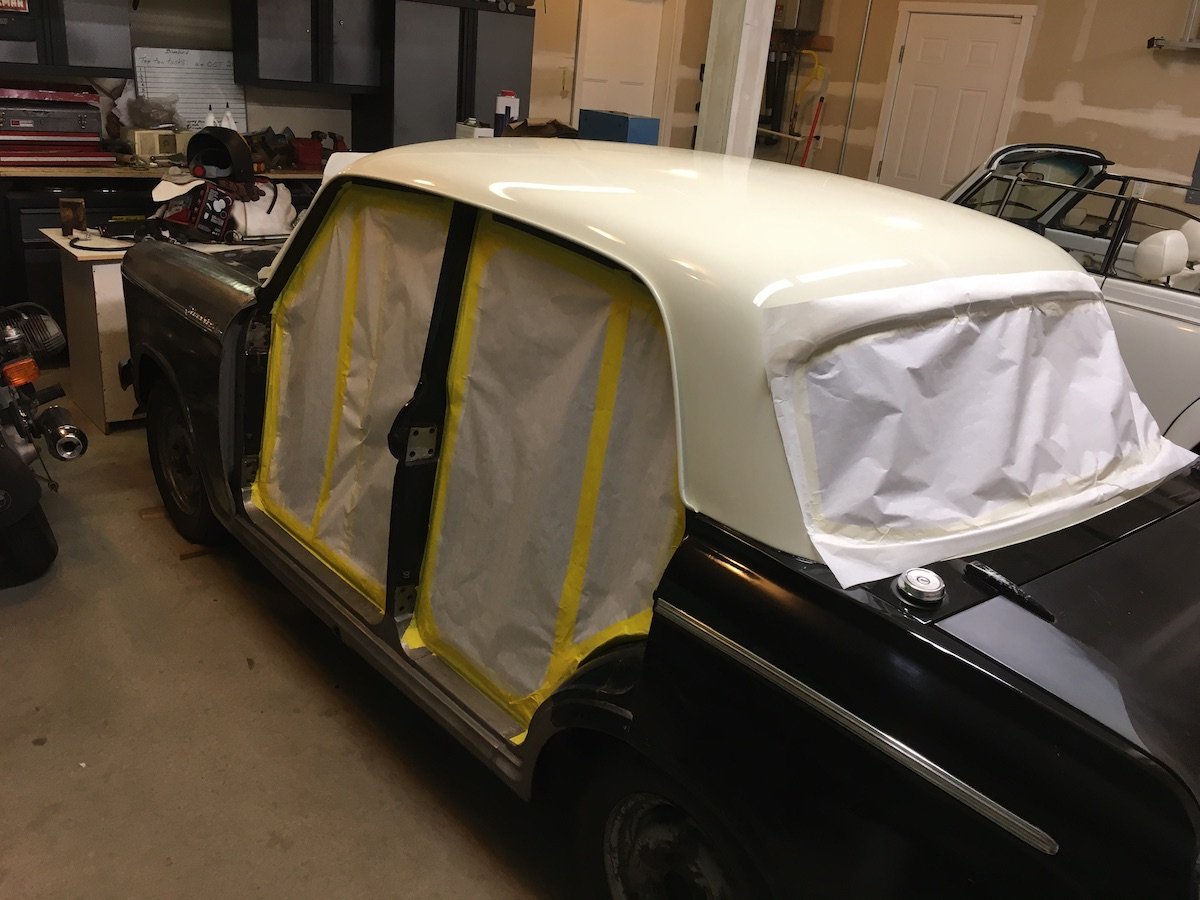
MARTS-PL310 61 Datsun Bluebird Sedan
MARTS-PL310 replied to MARTS-PL310's topic in Projects and Build Ups
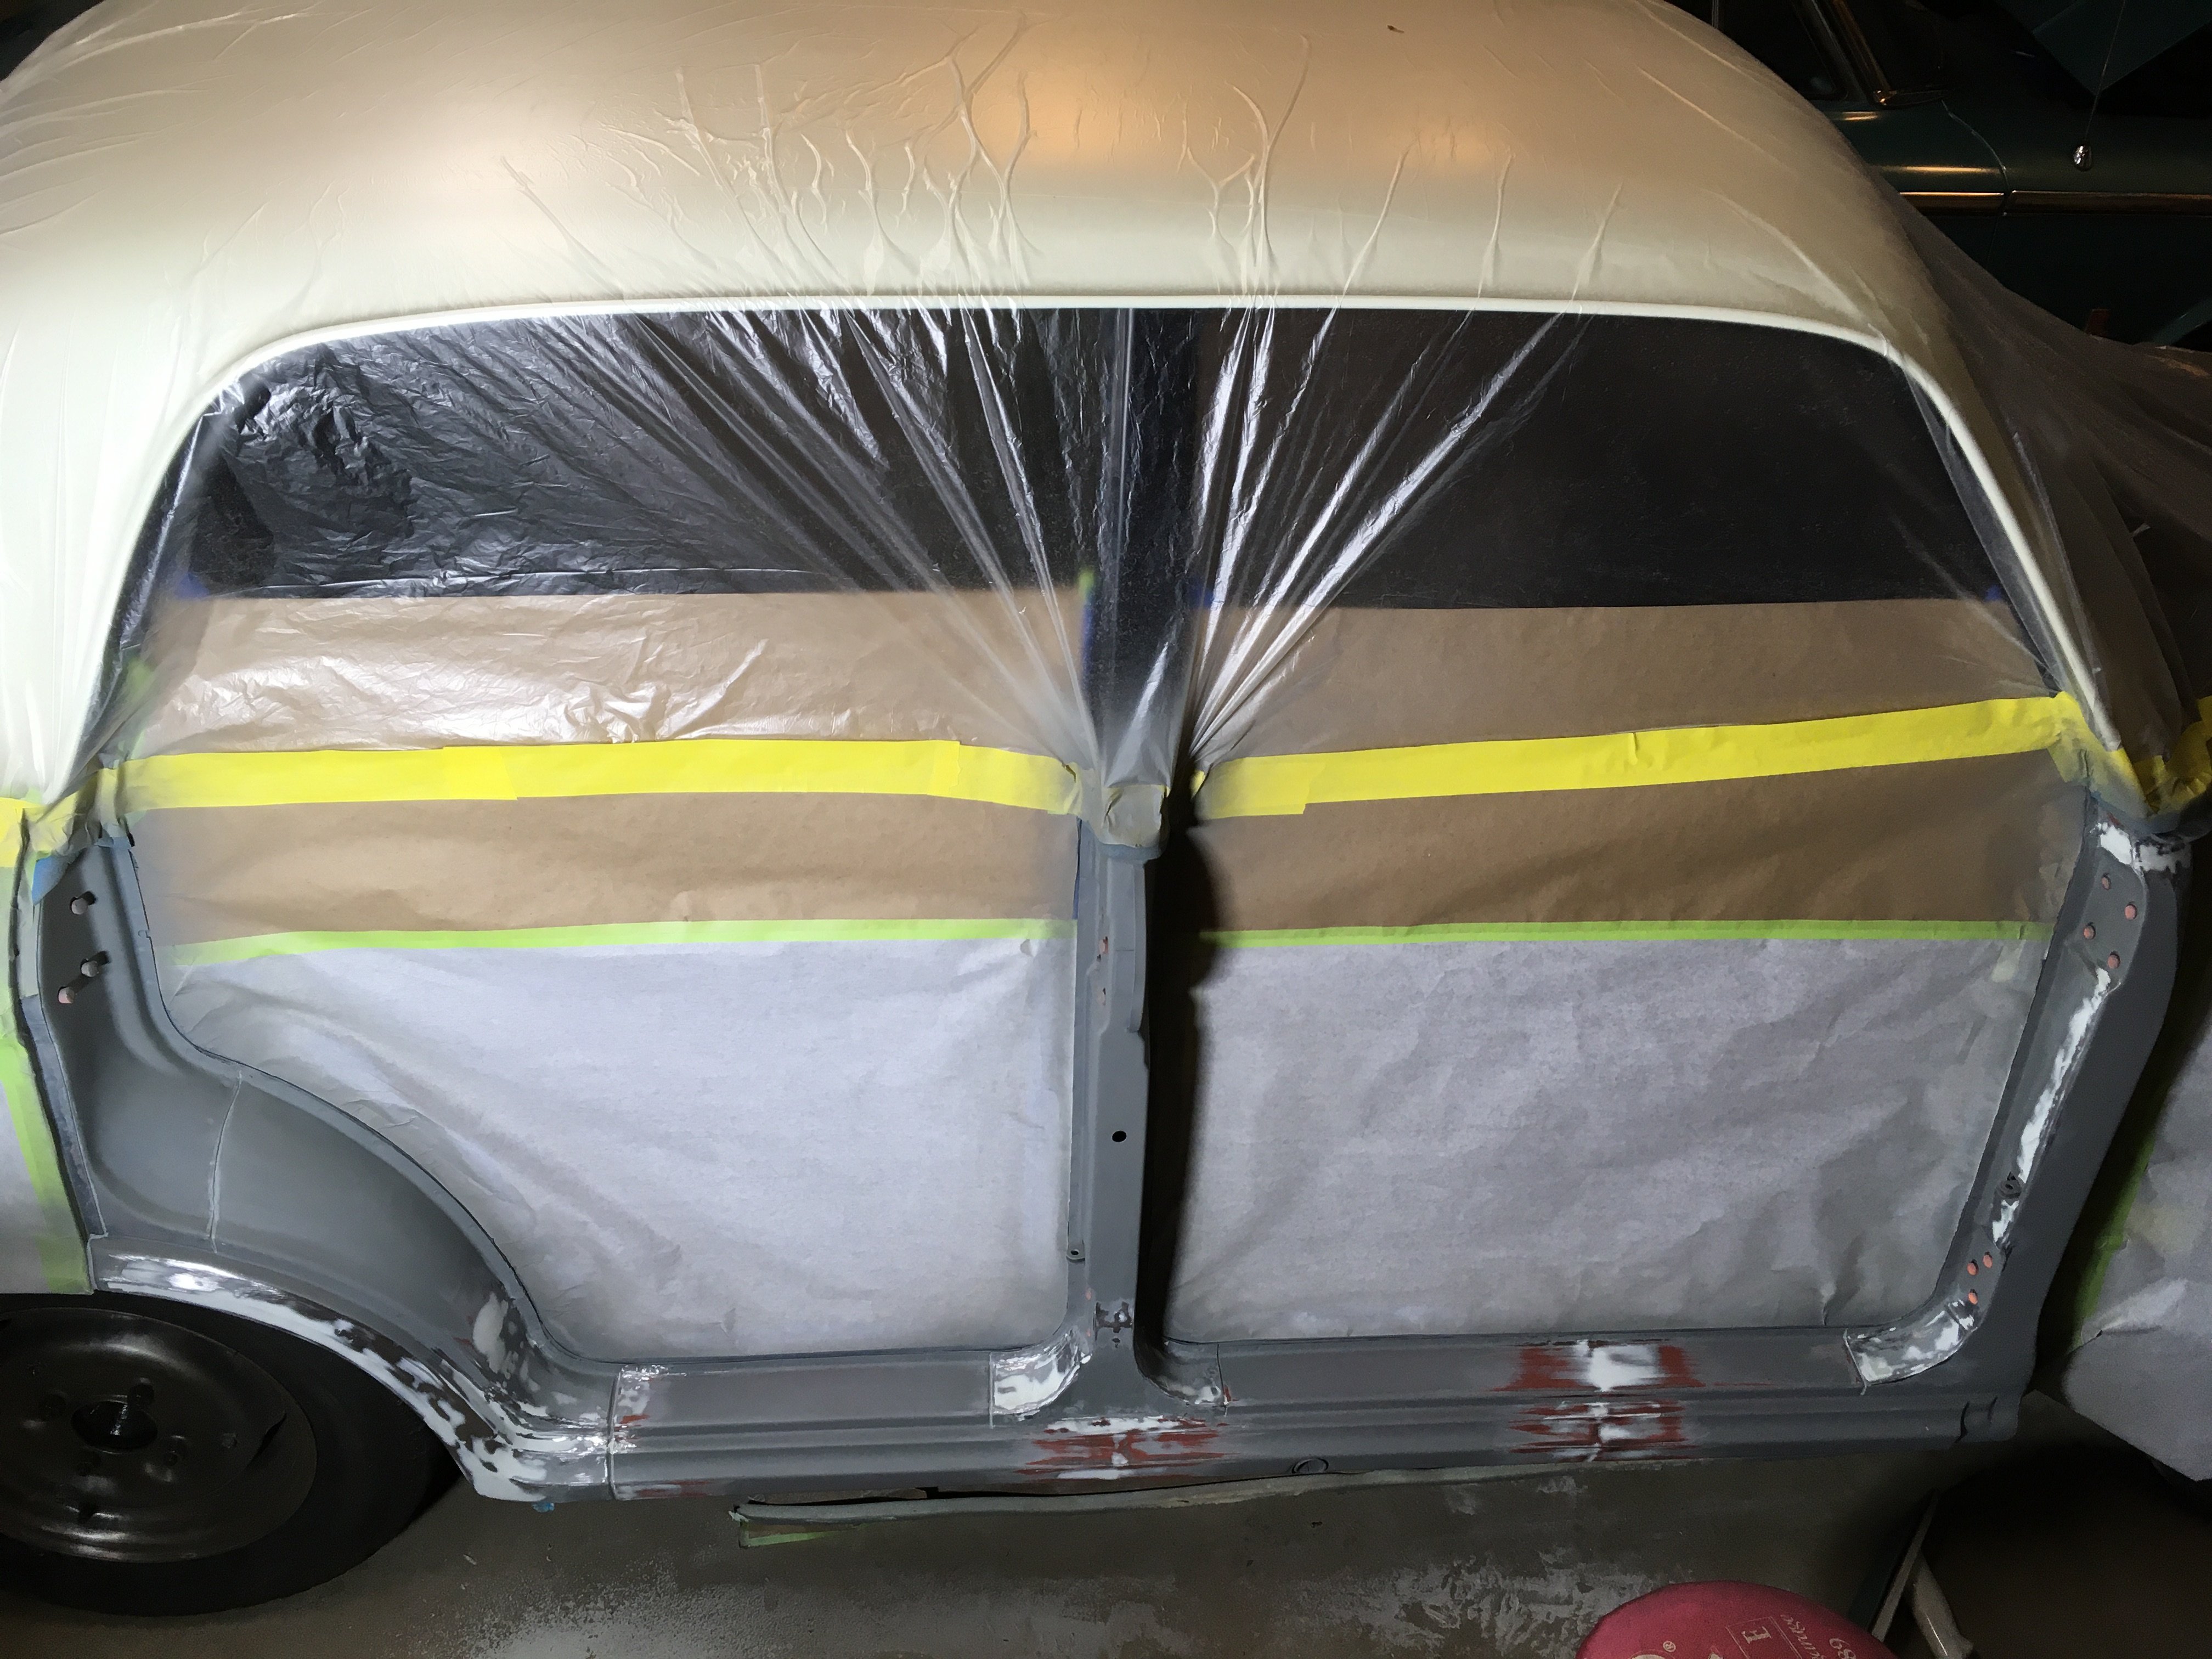
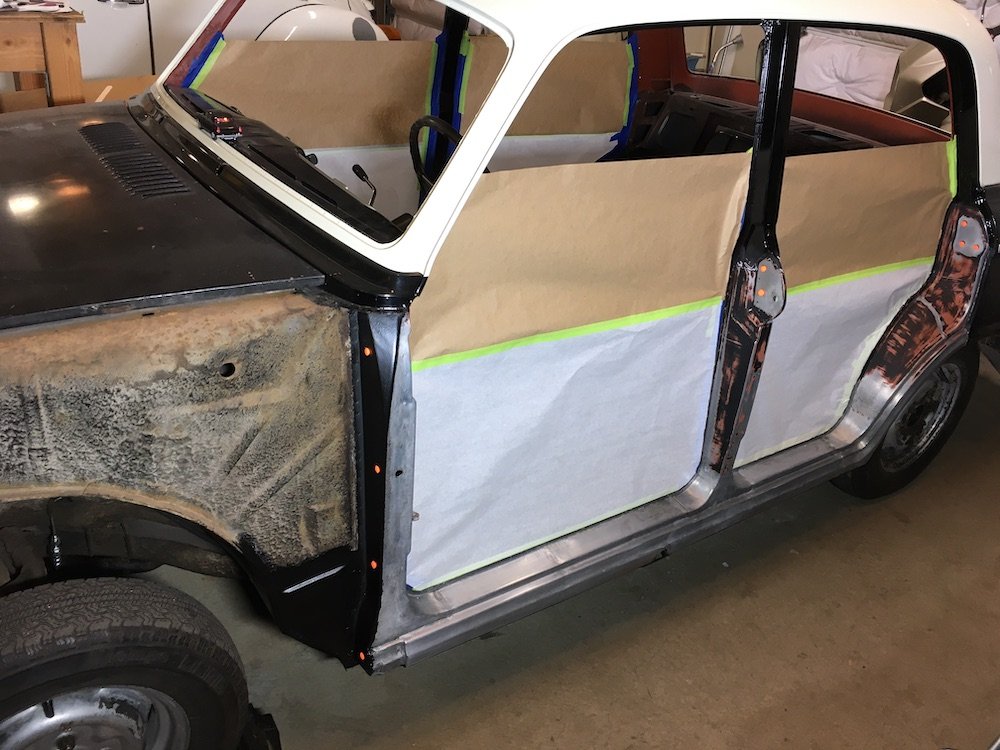
Building the 1961 Datsun 310 Bluebird - Exterior Paint Preparation- Limited. Minor progress today. Bent and beat the previously rolled wheel opening flanges on the doglegs back to original, plus scuffed, cleaned and prepared the outer metal work for painting. As shown, the Bluebird is partially masked up for paint. Plastic wrap will cover the rest from overspray. I'm limiting the scope of the paint work for now from the A-post to the aft end of the doglegs. The rear lower quarters and numerous other exterior body items will be repaired sometime later, perhaps next summer. Each of these other repairs ought to be a lot easier than the monumental project that the floor was. Now I'm waiting for drier weather so I can roll the project outside and start the limited paint process. Just hope I don't have to wait for six months as it gets more rainy here for the next several months. Btw, the orange things are foam ear plugs inserted into all the threaded holes to keep them clear of paint. Applied a bit of POR-15 on the rust scarred forward face of the left A-post. Here I've just bent the rolled flange on the right side dogleg back to original. This leaves a lot of stretched metal ripples that then take a lot of panel beating to smooth it out nice. The remainder of the flange rearward of the dogleg is left in the rolled condition for now. Trouble is, there are two layers of metal (outer skin plus outer wheel tub) rather than the one on the dogleg so it will be more stubborn to restore. Slightly rust scarred on the inside of the flanges but not enough to require cut off and replace. The insides will get POR-15 coated once the contour is made smooth and prepared. It takes only about 15 minutes to unroll one flange using a lever and crescent wrench but then several hours working the dents and ripples reasonably smooth again with these various instruments. Definitely not an ergonomic position for panel beating, very bad for the neck and shoulders.
- 75 replies
-
- 14
-
-
MARTS-PL310 61 Datsun Bluebird Sedan
MARTS-PL310 replied to MARTS-PL310's topic in Projects and Build Ups
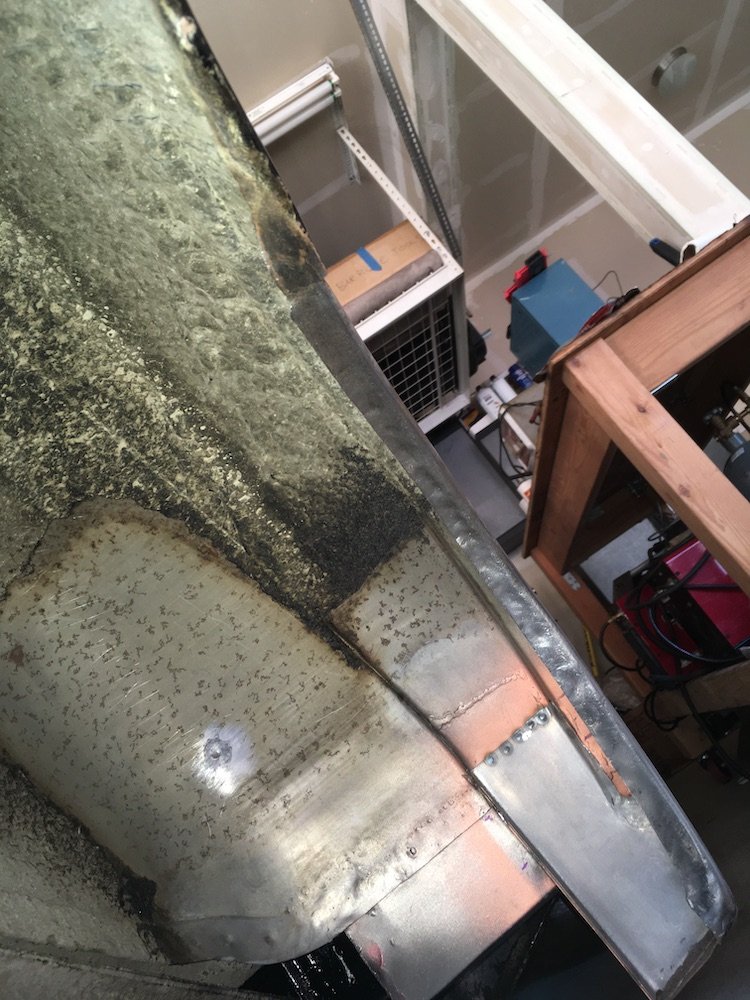
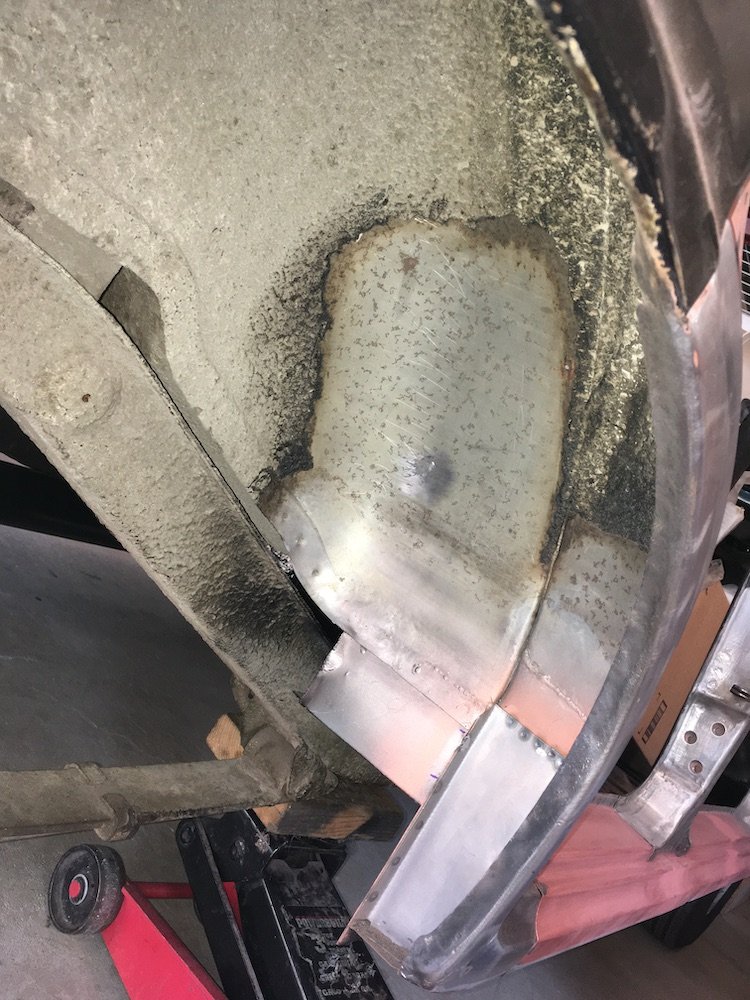
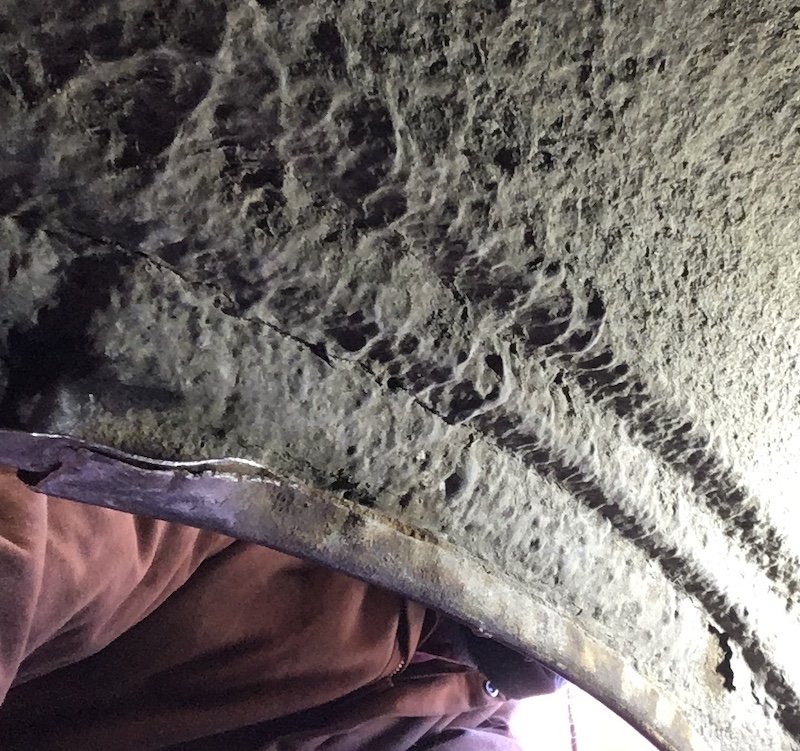
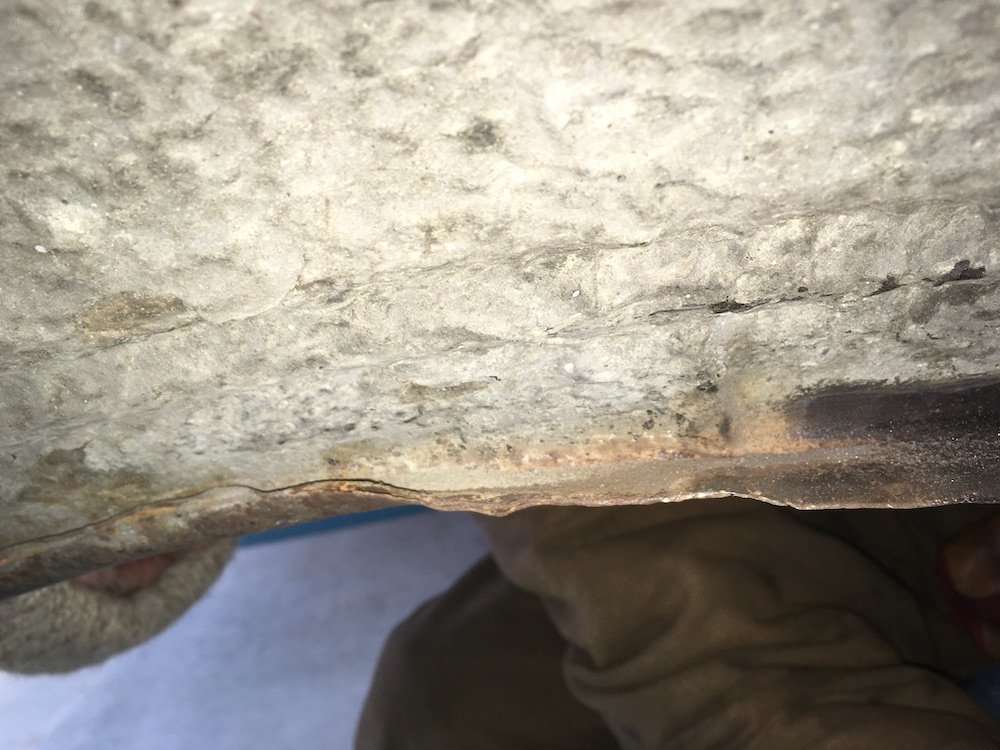
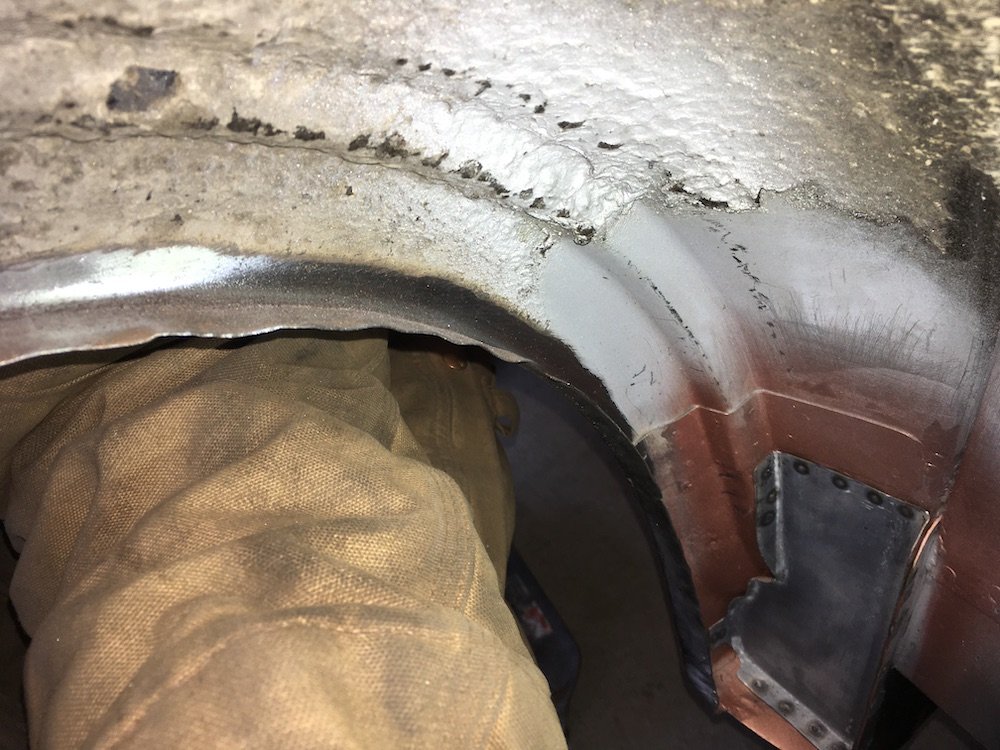
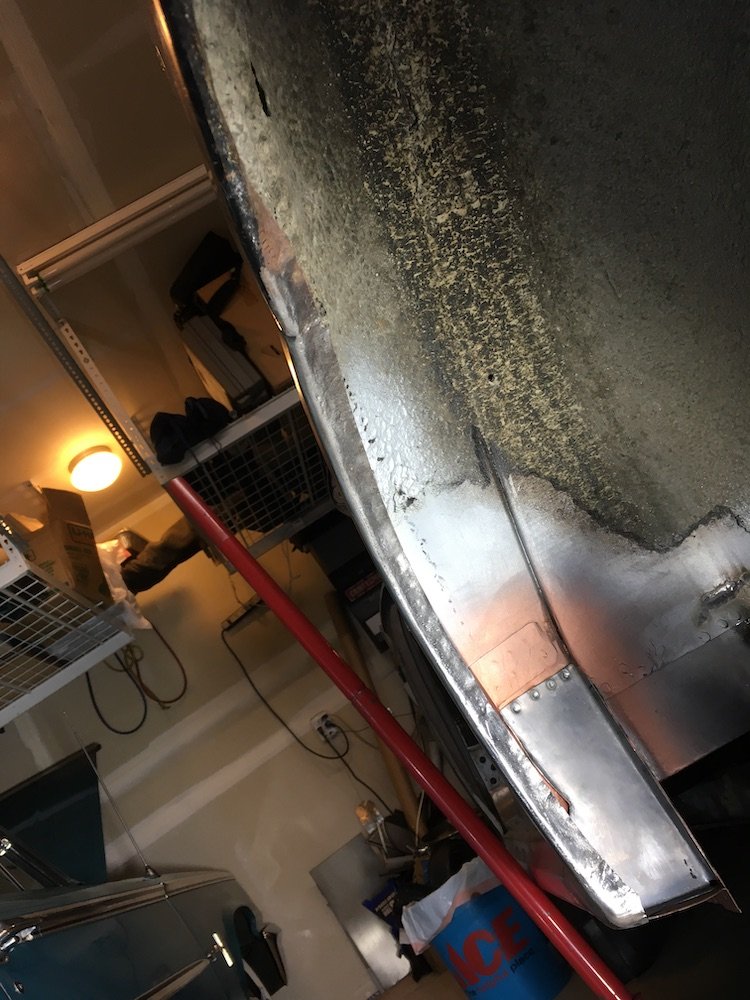
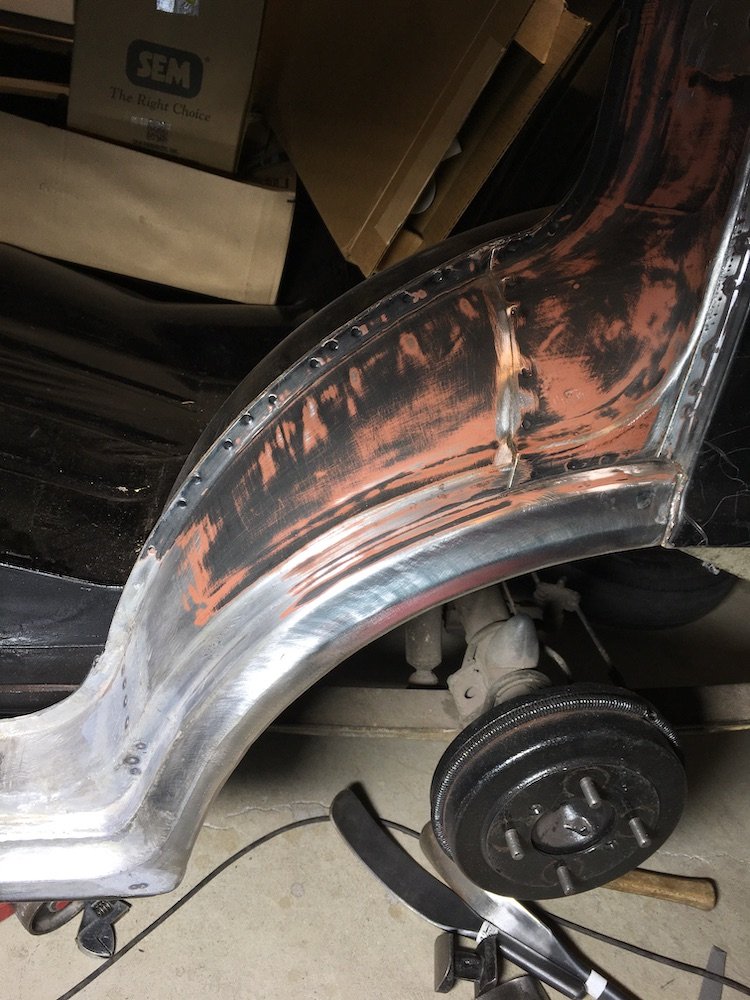
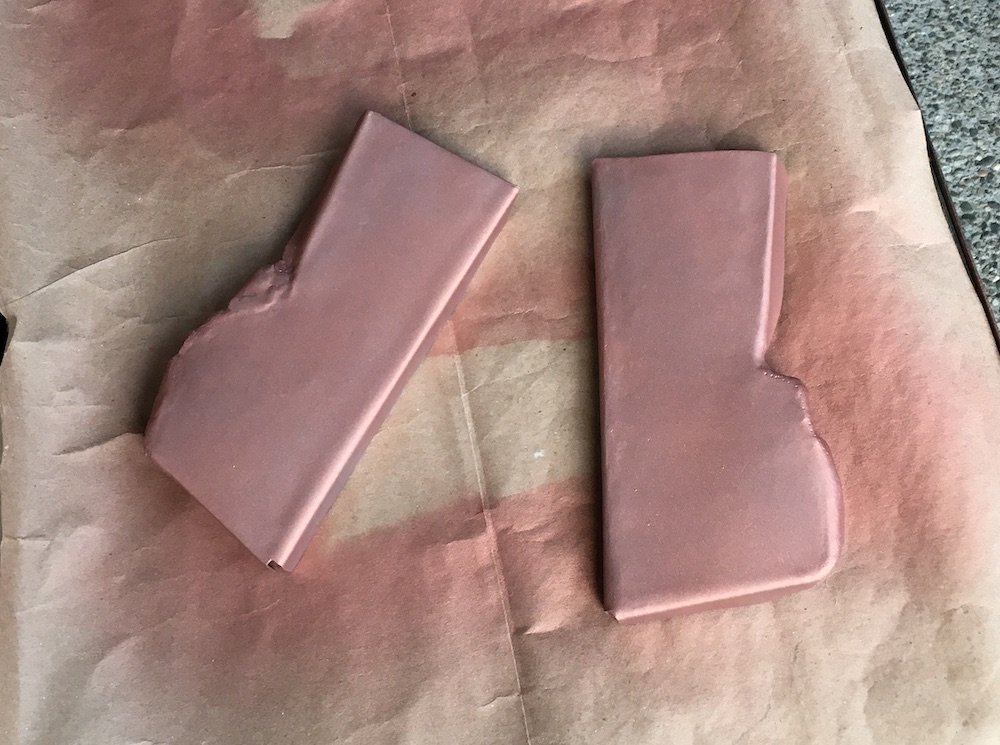
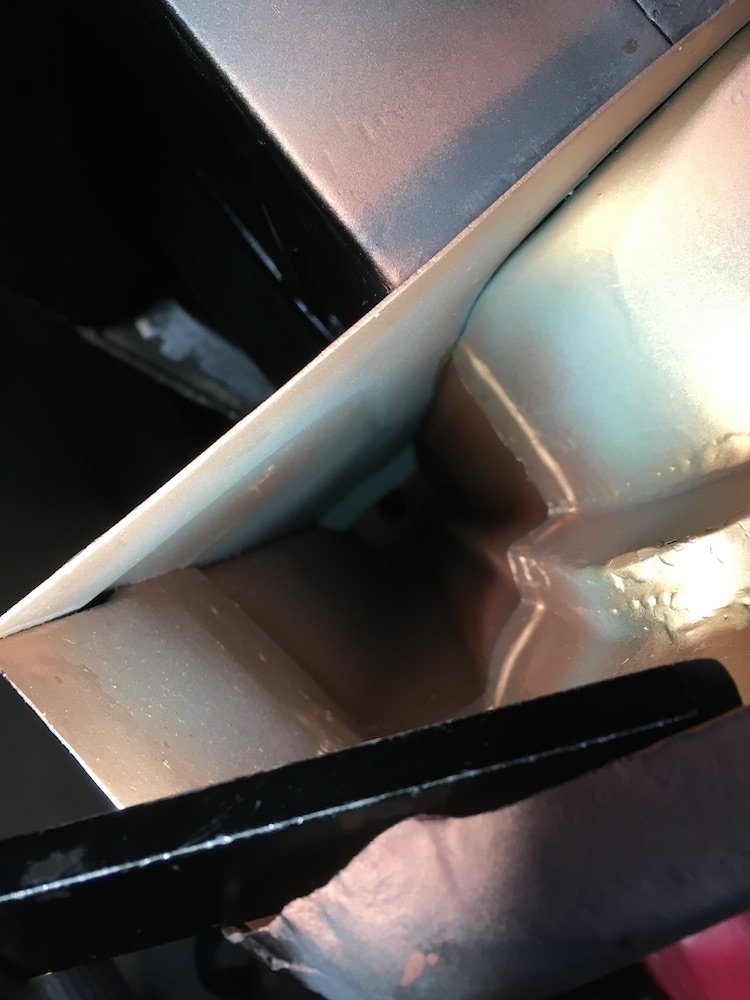
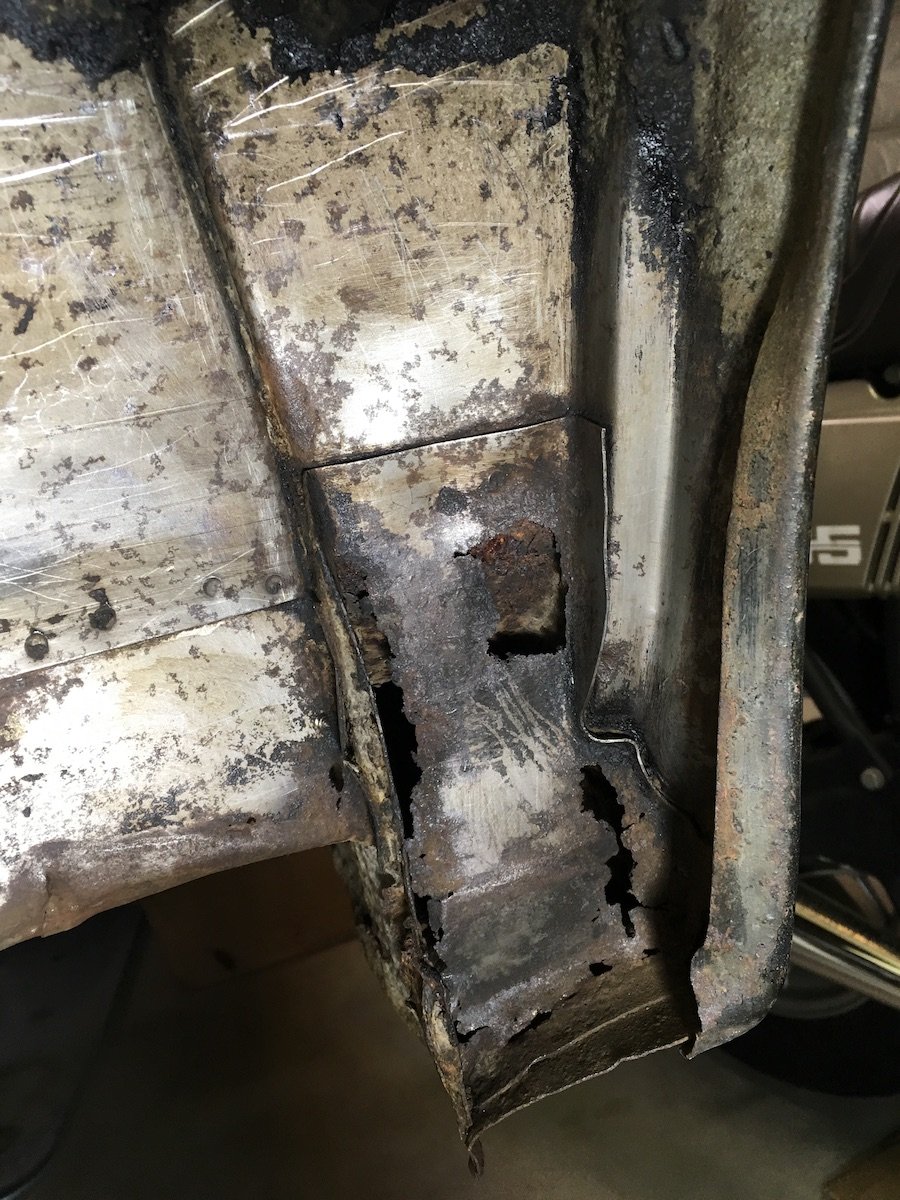
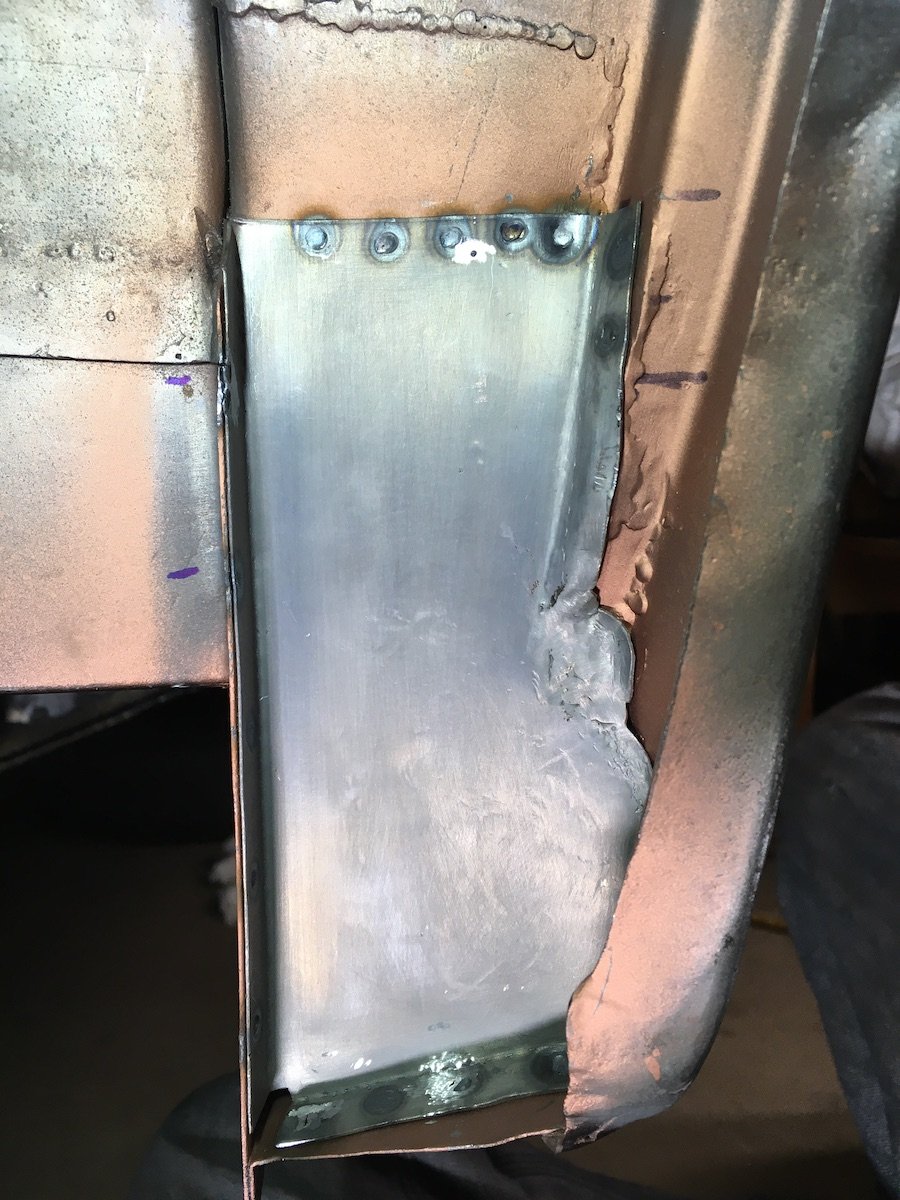
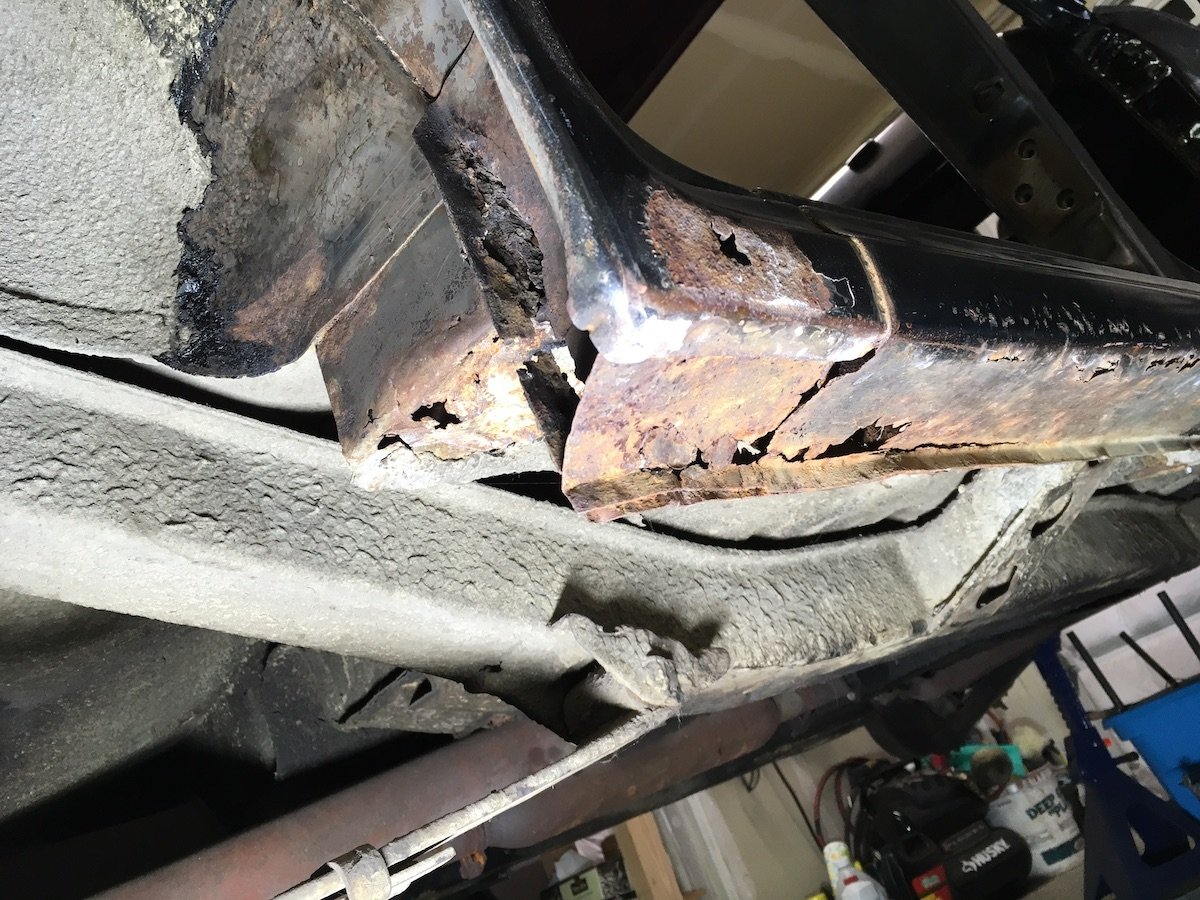
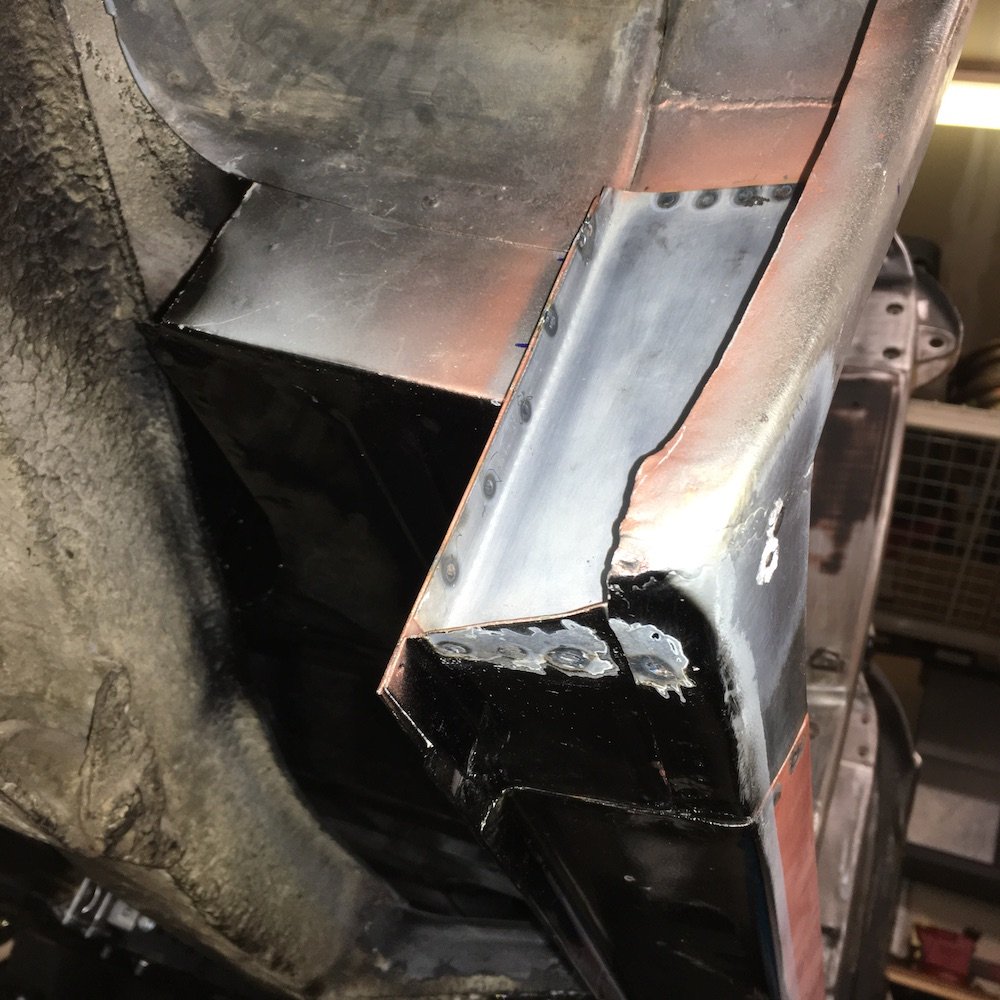
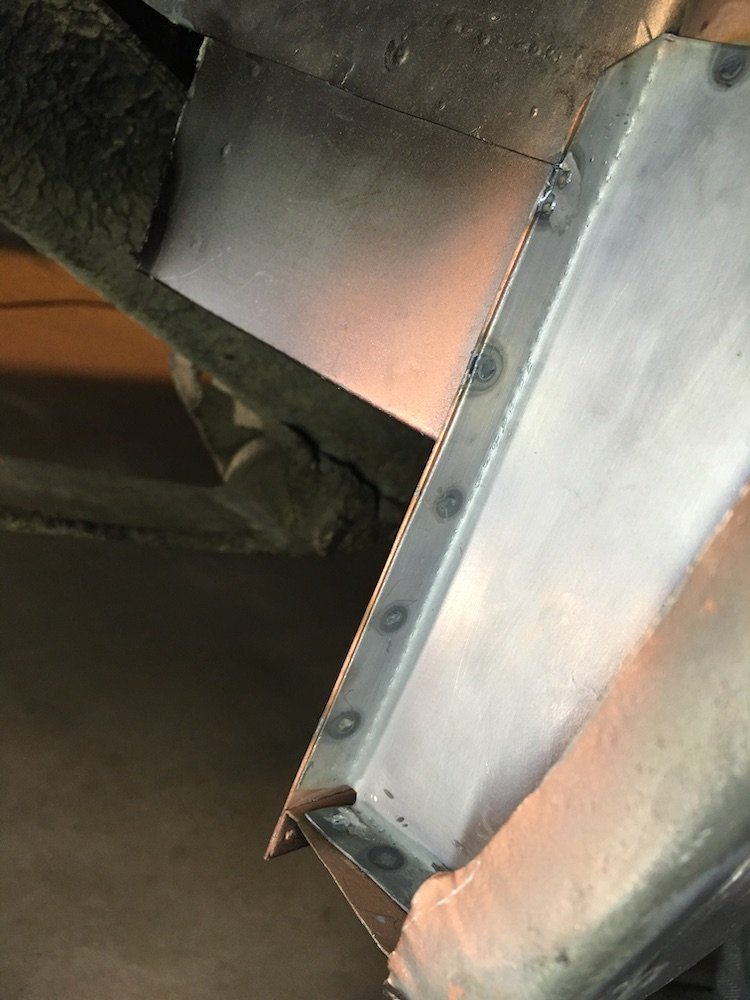
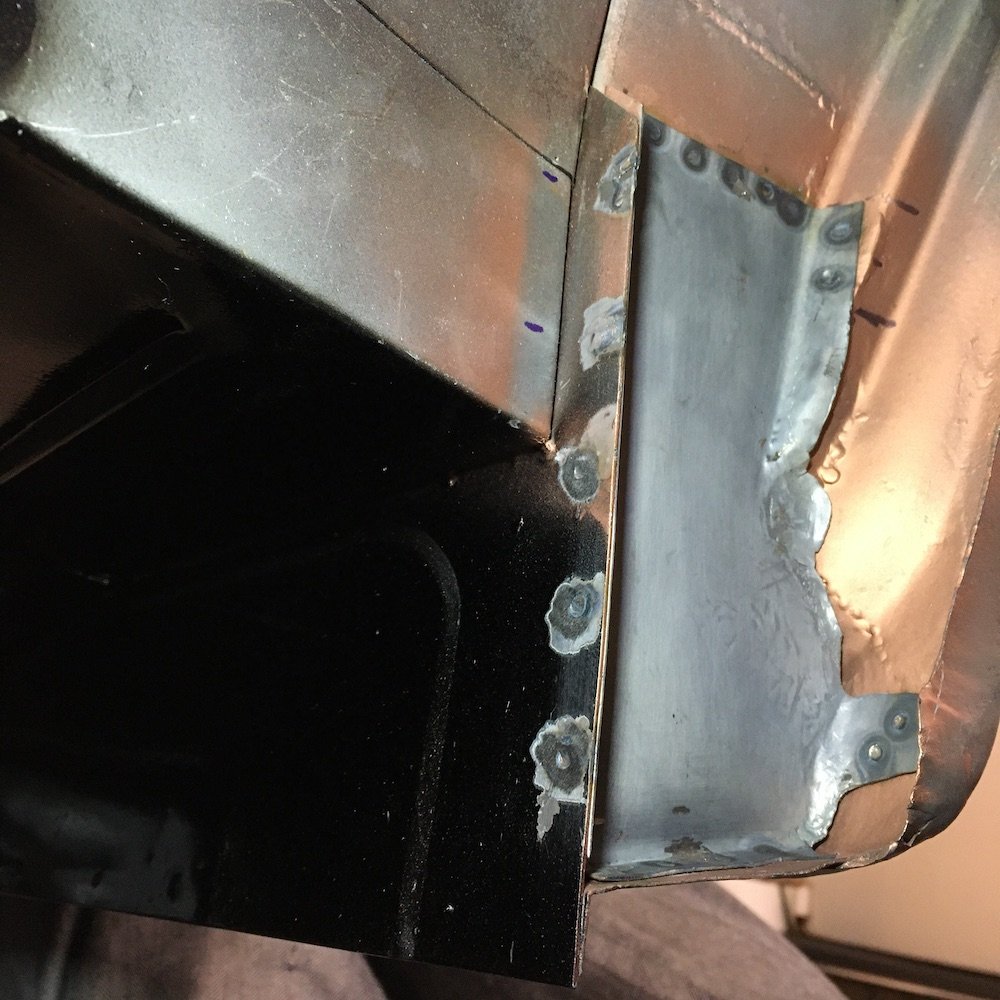
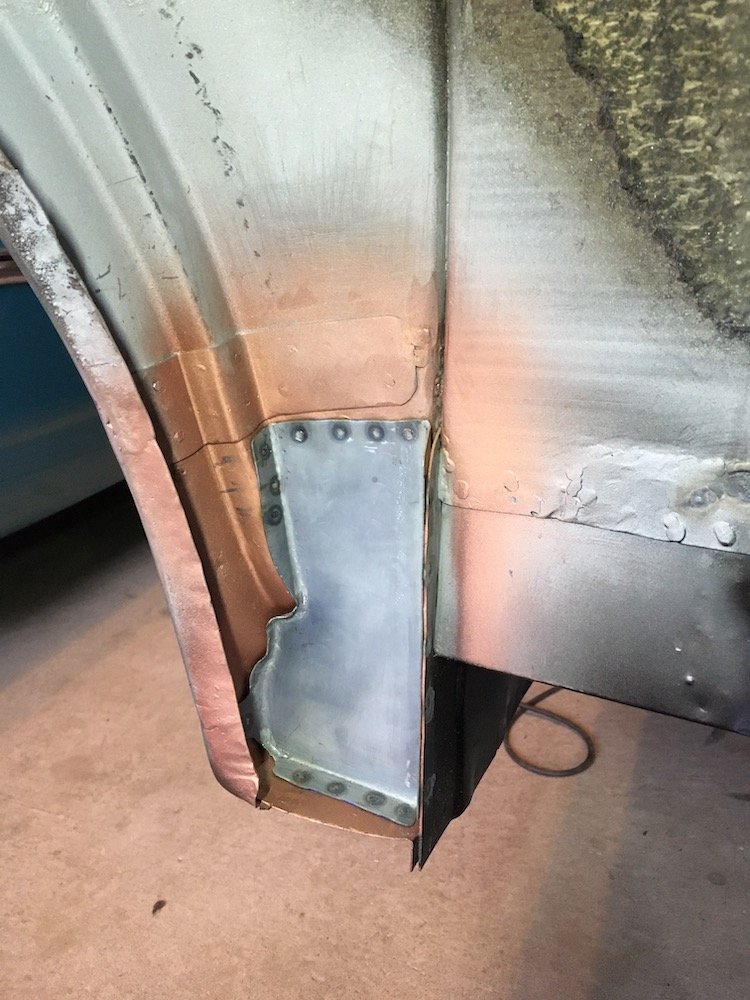
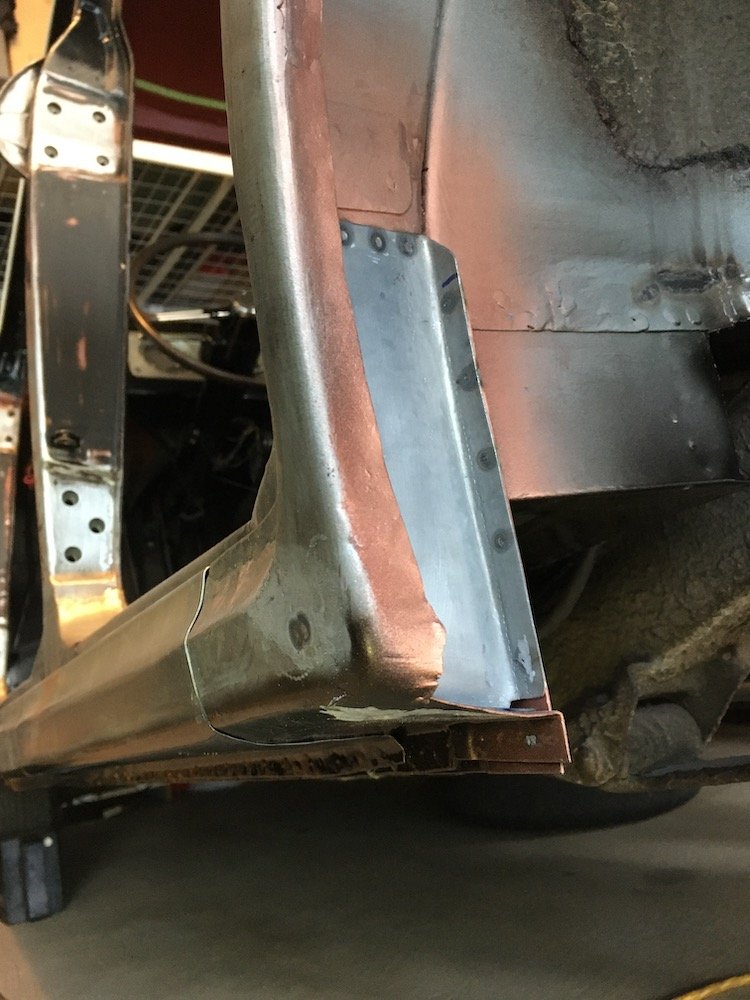
Building the 1961 Datsun 310 Bluebird - Sill Box Close Out Panels - Installation. Welded in the sill box close out panels using an electric spot welder, just like original. Cleaned, etched and weld through primered panels on forward faces. Last views of the prepped sill box insides. Right hand side sill box closure before any repairs were made. Photo taken several years ago. Somewhat rusty. Note PO rolled wheel well flanges on dogleg. Right hand side after lots of new metal welded in. Another old right hand side before for comparison purposes. Quite a rusty mess it was. And after. A couple more from the right side. And a couple of photos from the completed left hand side. Welds are all made by a very heavy and awkward electric spot welder from an ergonomically uncomfortable body position due to the rear axle and brake drum being in the way. I'll probably coat a lot of these inner wheelwell exposed surfaces with some kind of stone guard or lumpy underseal after its all edge sealed, epoxy primered and painted. Way better than original which was asphalt underseal on bare metal only.
- 75 replies
-
- 14
-
-
MARTS-PL310 61 Datsun Bluebird Sedan
MARTS-PL310 replied to MARTS-PL310's topic in Projects and Build Ups
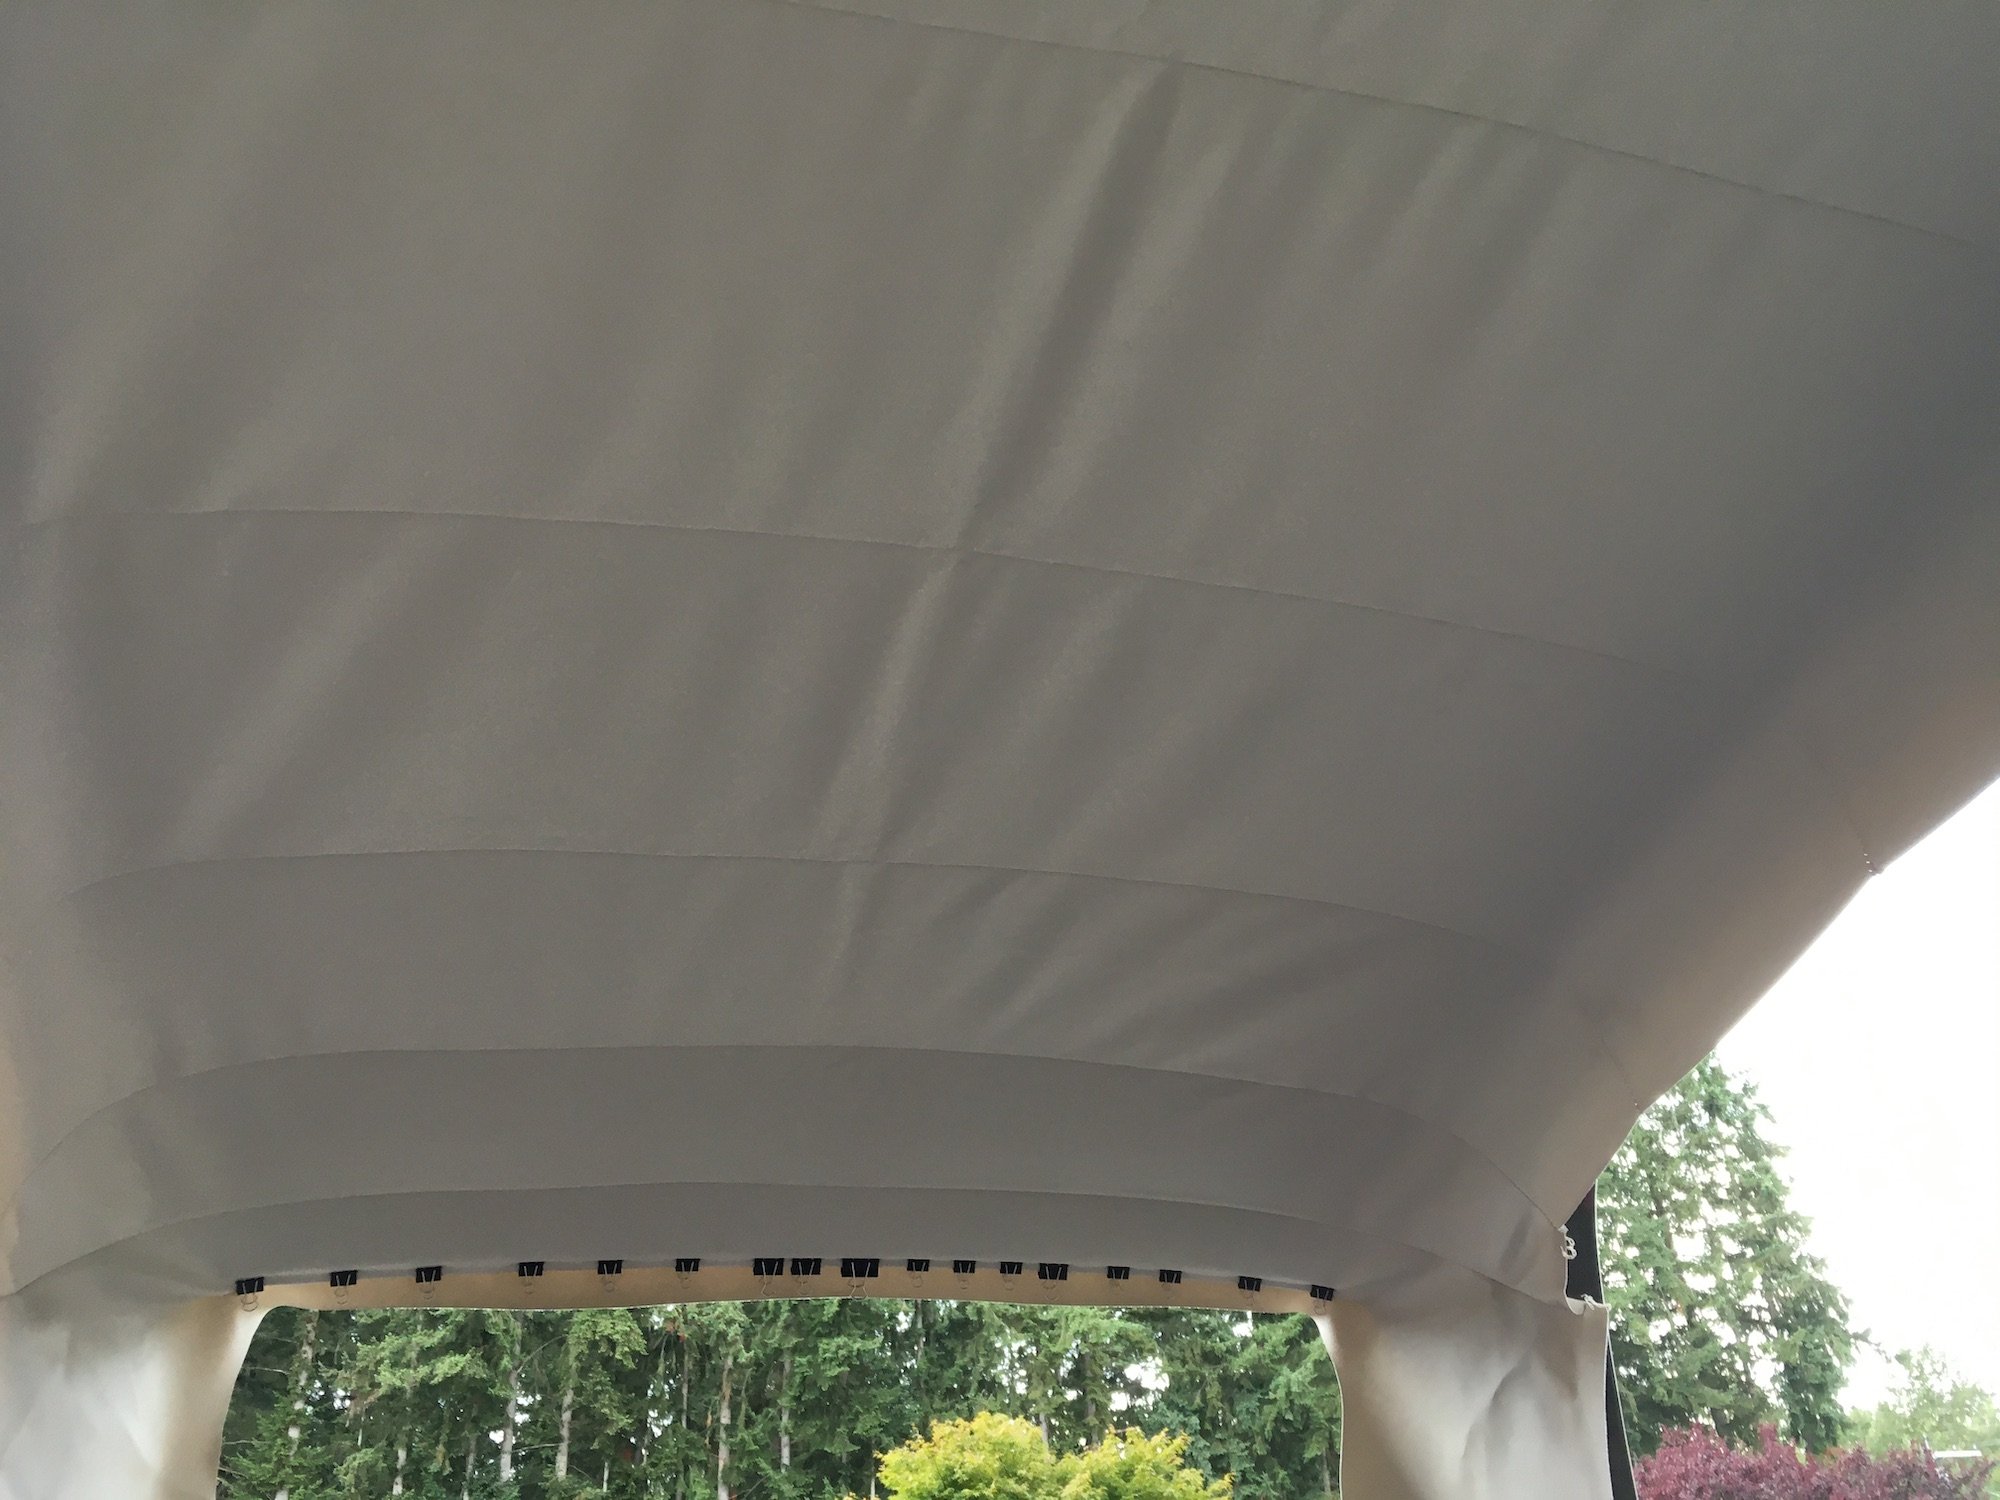
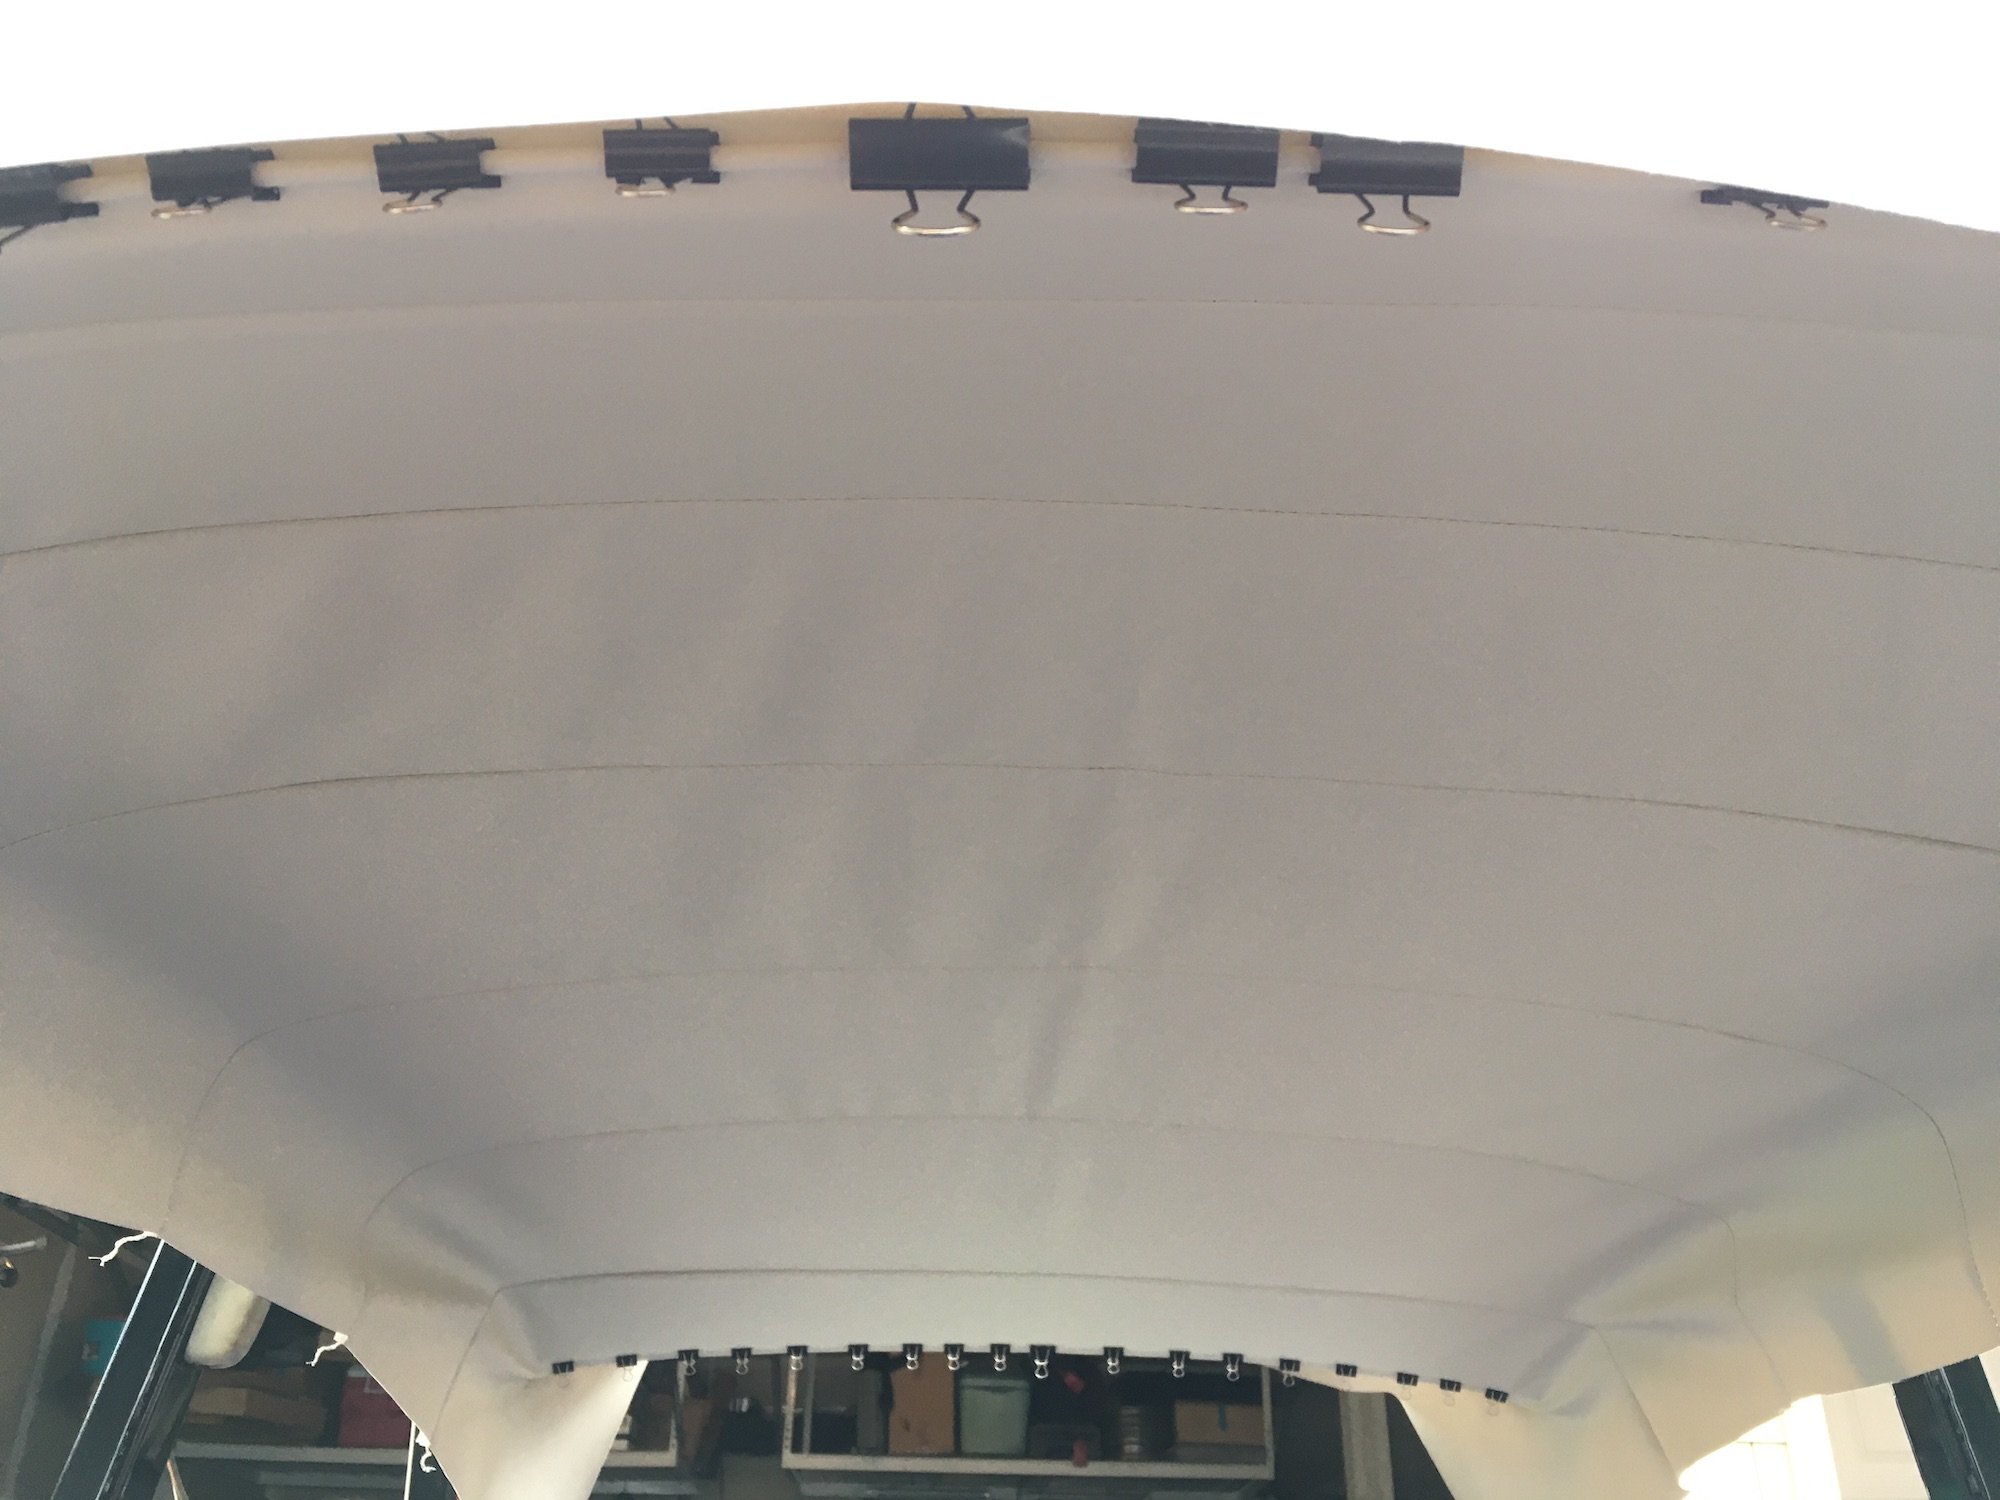
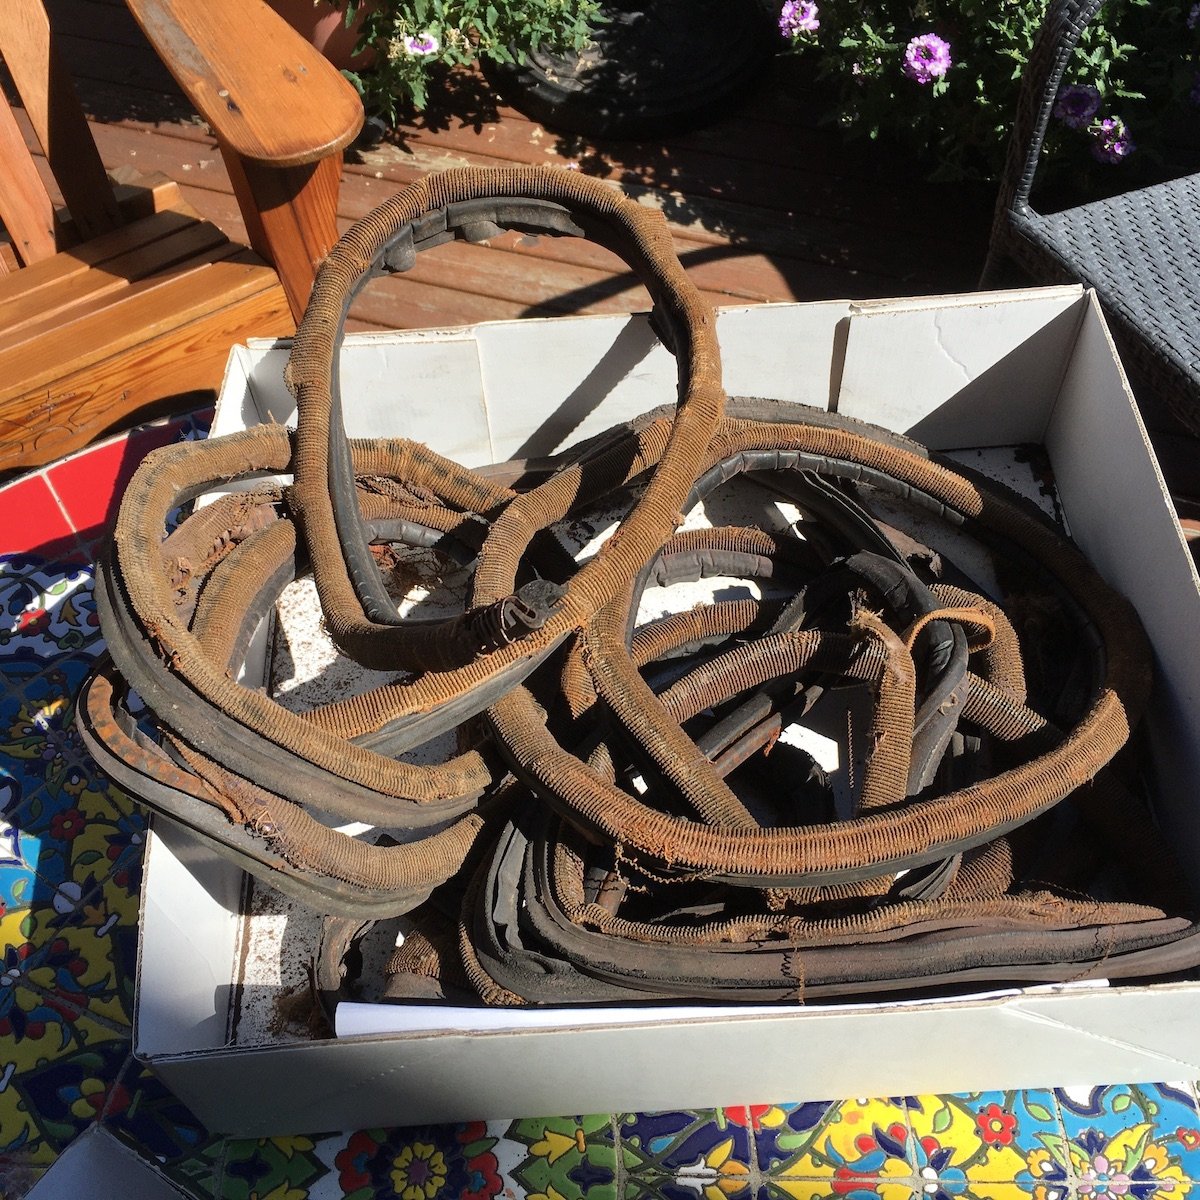
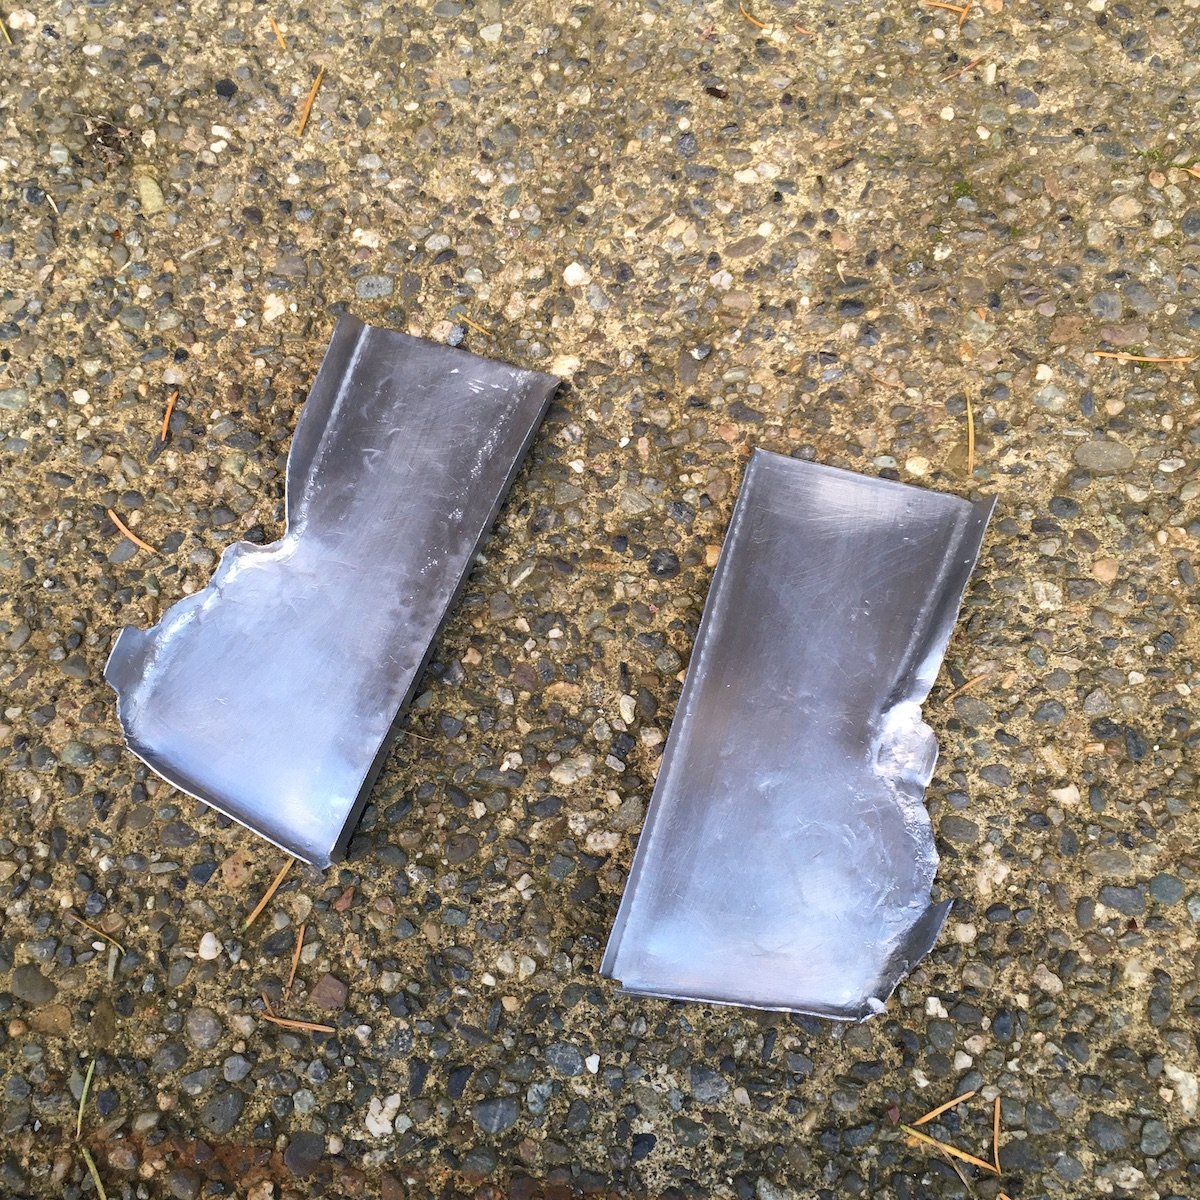
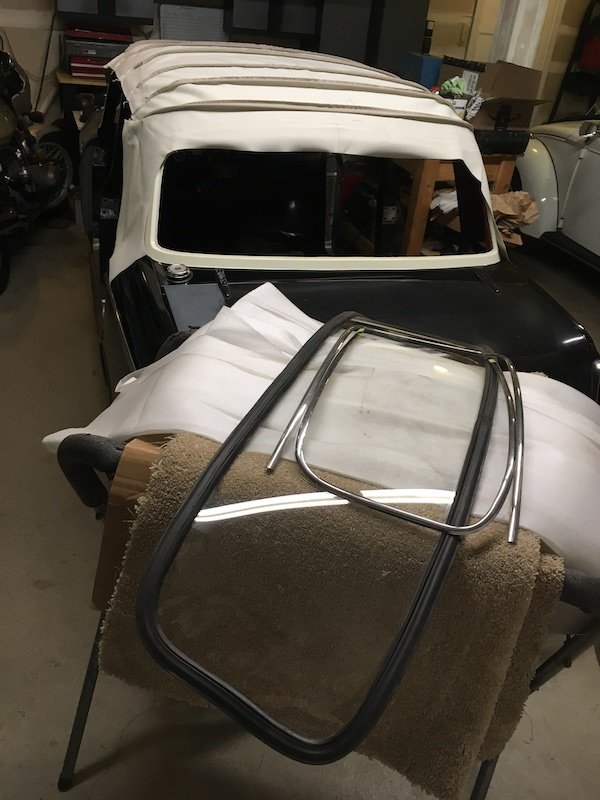
Building the 1961 Datsun 310 Bluebird - Refitting the interior- Headliner. Switching gears a bit as the floor is now more or less complete. This is the plan prior to installing the front and back glass. An installation sequence is required. Hope I'm not missing something. Required events preceding the glass install are: Restore the rolled rear wheel well opening flanges on the doglegs back to stock. DONE. Luckily these were not rusted away so I just had to carefully bend them back and do some hammer on dolly work. I have no idea why a PO rolled the flanges, ultra wide drag slicks maybe? ;- ) Install the sill box aft end close out plates. DONE. Sand and prepare the outer surfaces of the sills, A and B posts, doglegs and door jambs. IN WORK. May also have to use a little plastic filler at visible butt weld joints. Epoxy prime and paint all the surfaces noted above. Install new door opening seals onto the pinch welds. Glue in the under roof insulation pad. Test fit the headliner. DONE. Couldn't wait as I wanted to know well in advance that the reproduction headliner would fit. I bought the vinyl headliner in 2017 and was concerned it might have shrunk or otherwise distorted to an unusable shape. Install the headliner. Install the back and front glass into the custom one off seals I had manufactured years ago (around year 2004). These new custom seals should take the original chrome, maybe. Install the chrome trim into the seals. Finally, install the front and back glass. A quick test fit of the reproduction vinyl headliner shown. No problems noted. It appears to be well made using correct patterns. I'm not able to tuck it in at the sides until all the other work leading up to the door seal install is done since it is to be pinched between the gripper teeth panels and the door seals for a semi-permanent installation. It would probably be damaged if I pinch it in on the sides and take it out again. Satisfied with the headliner test fit. It matches the original very well, I just need to apply light tension at the sides. The old sponge rubber, metal and cloth door seals. These are badly rotted and will not be reused. Modern door seals that are functionally equivalent will be used but these will not match the appearance of the old cloth covered portion (rubber surfaces only on the new seals). The sill box aft end close out panels. Slightly crudely made early on several years ago but will do the job. Installation of the panels is next.
-
MARTS-PL310 61 Datsun Bluebird Sedan
MARTS-PL310 replied to MARTS-PL310's topic in Projects and Build Ups
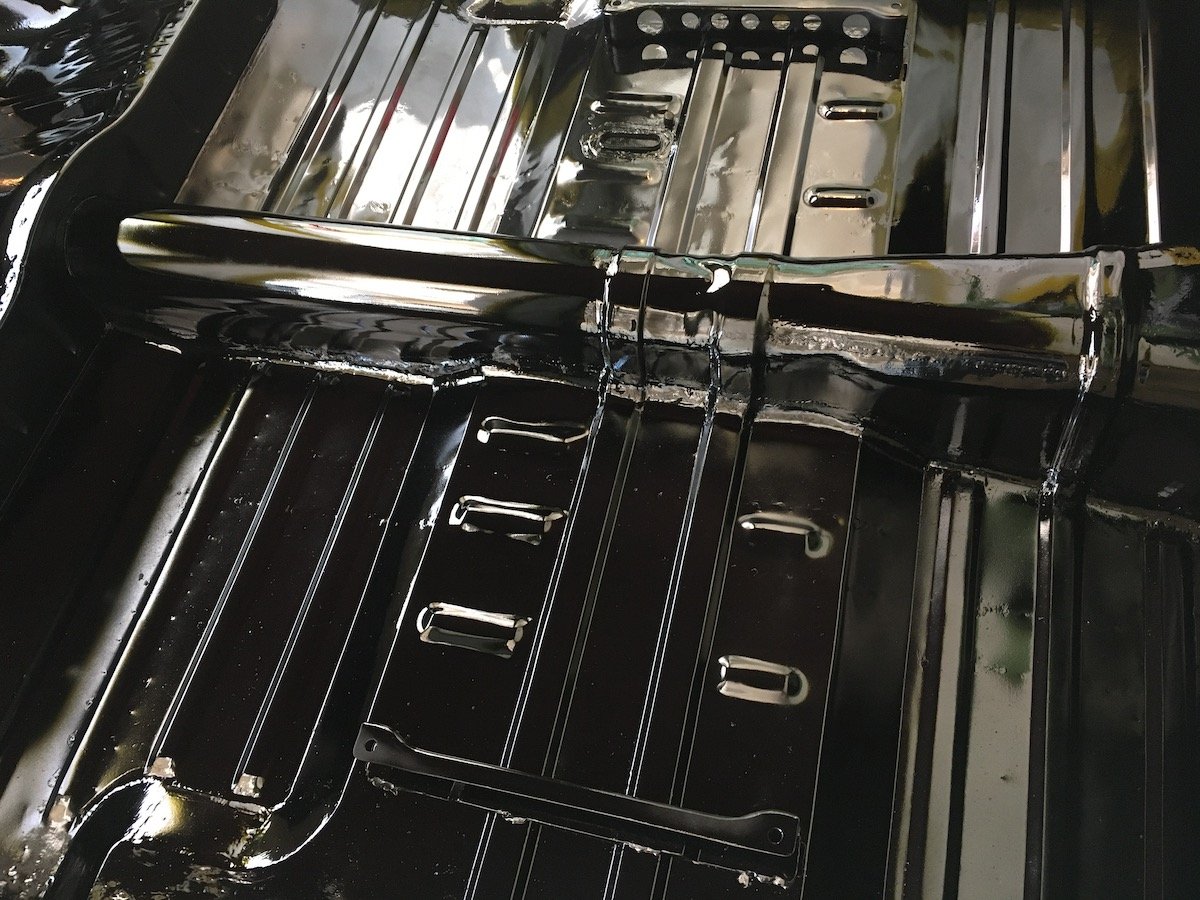
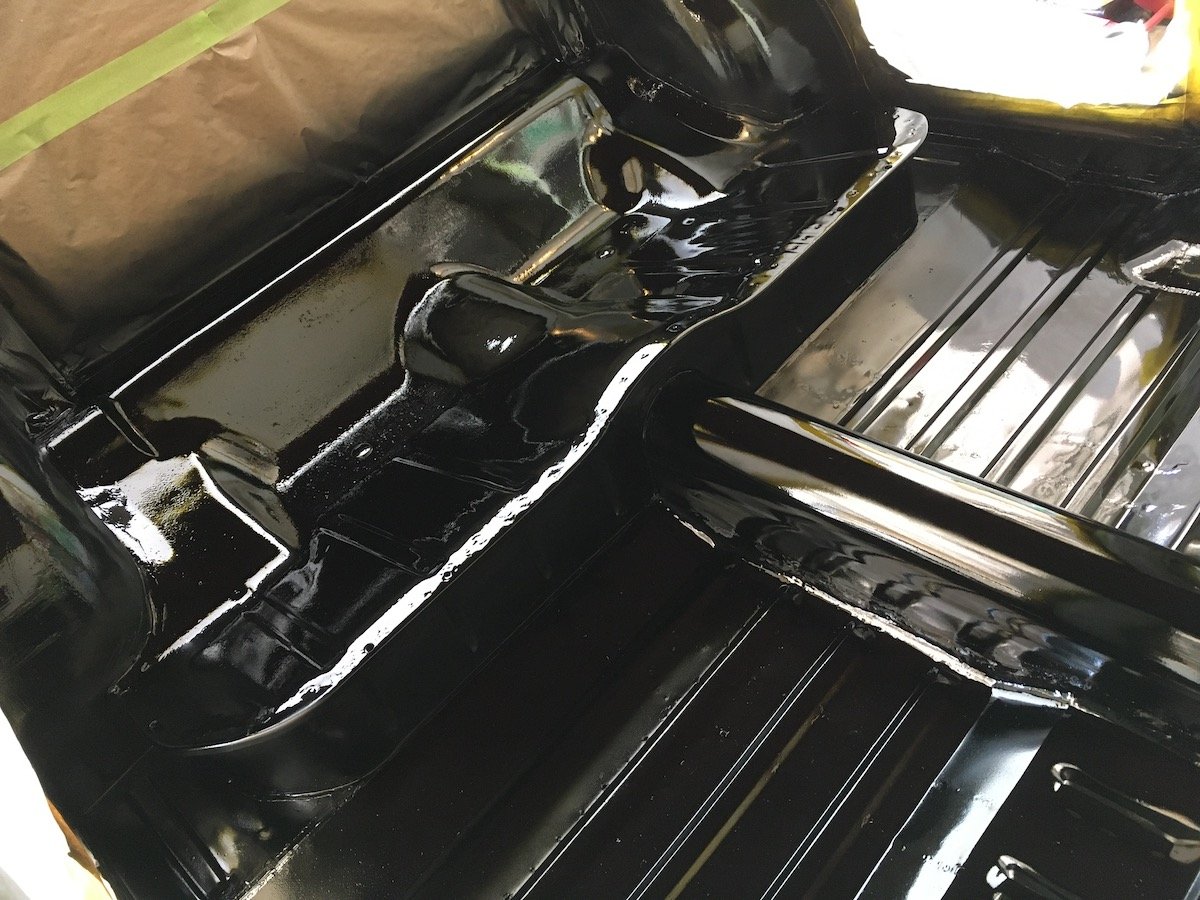
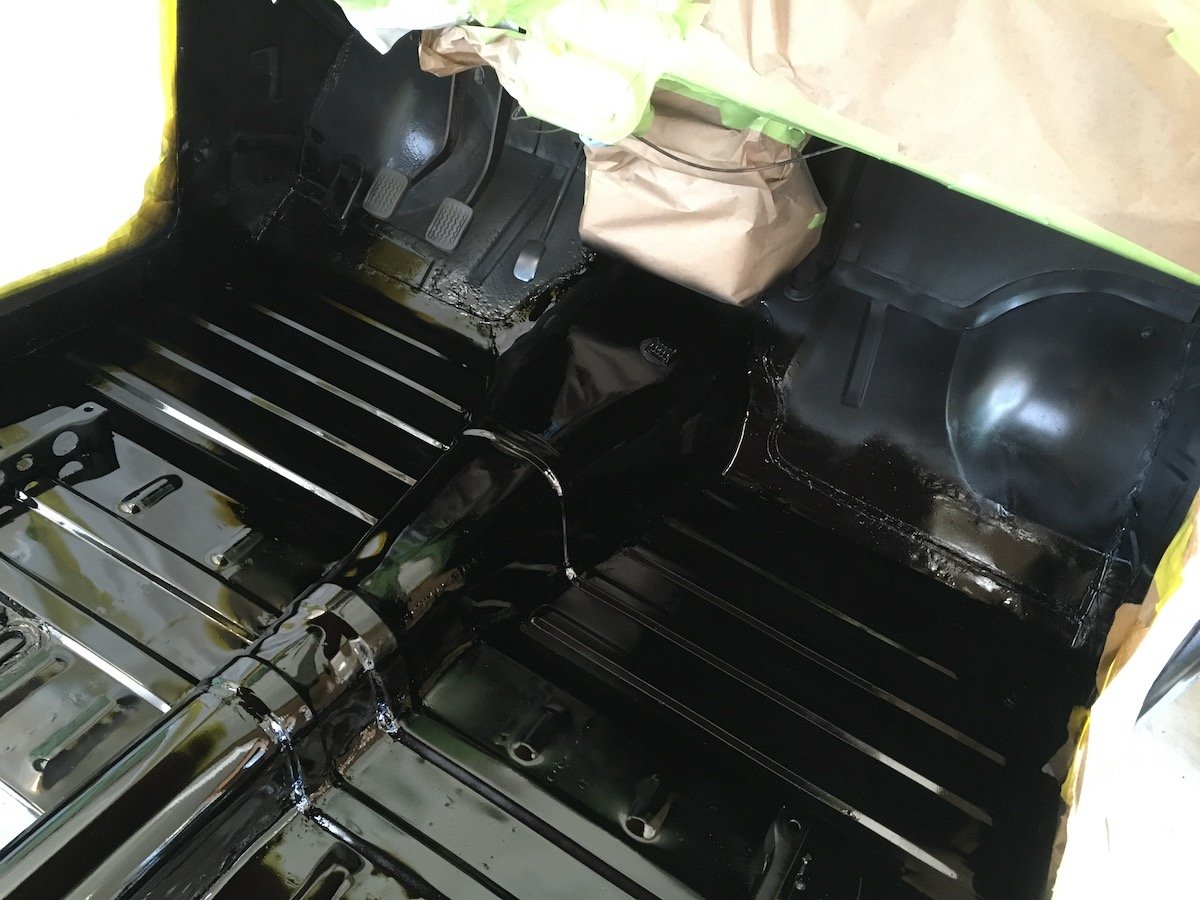
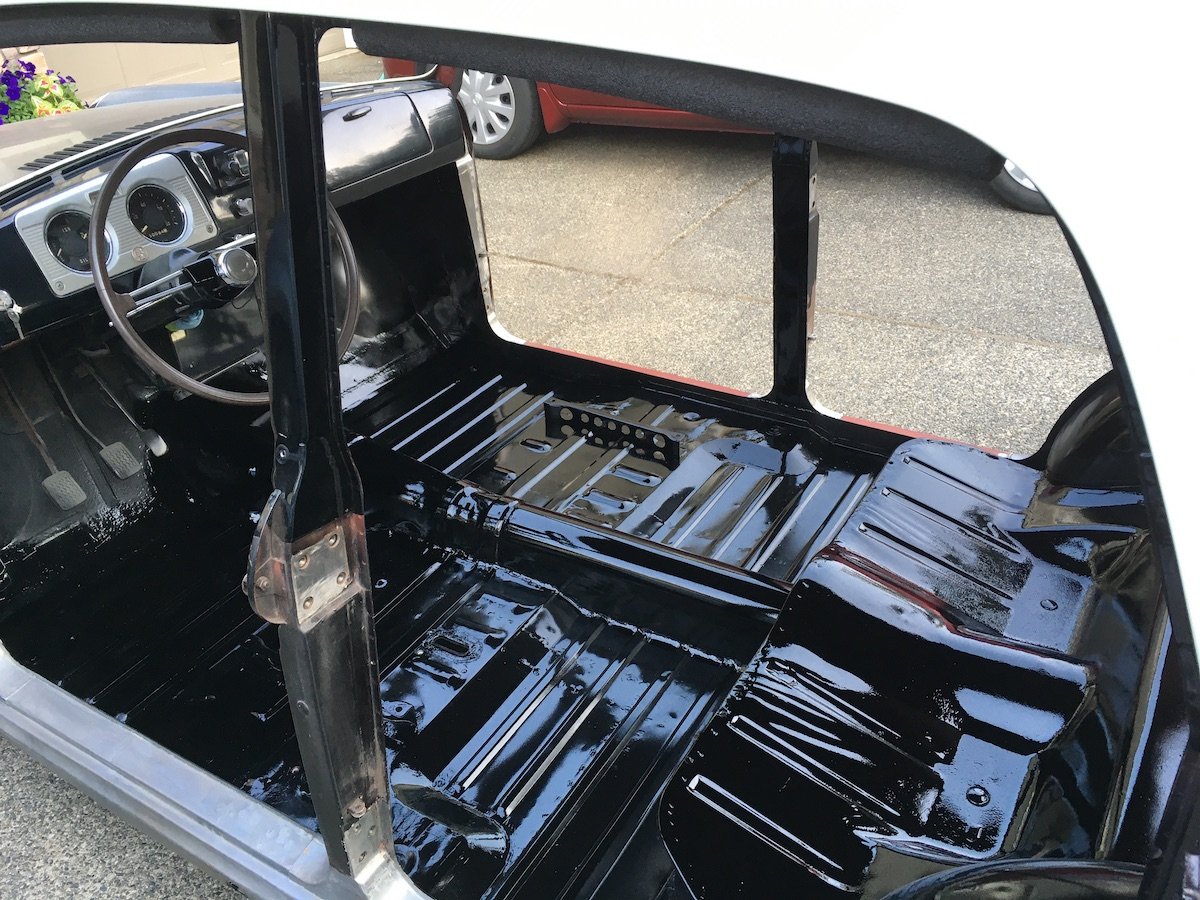
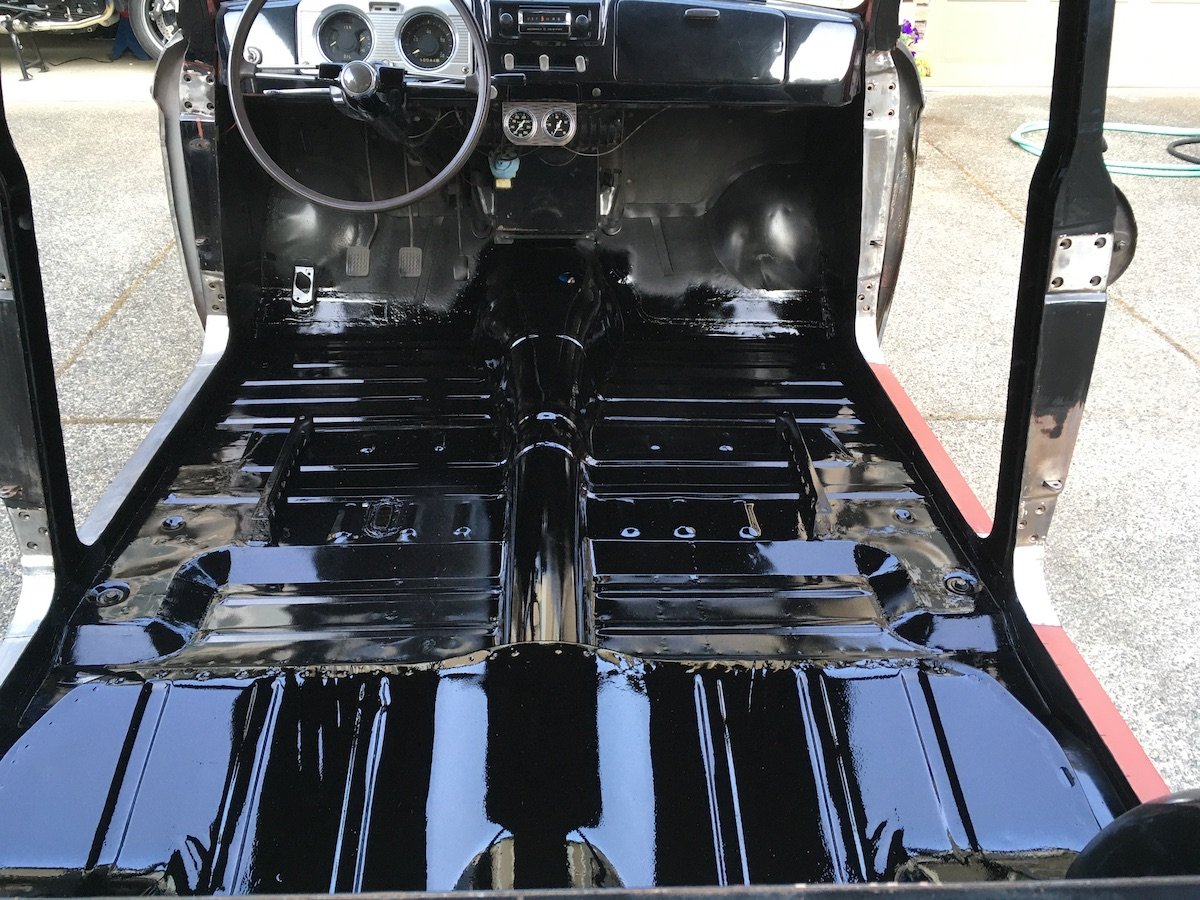
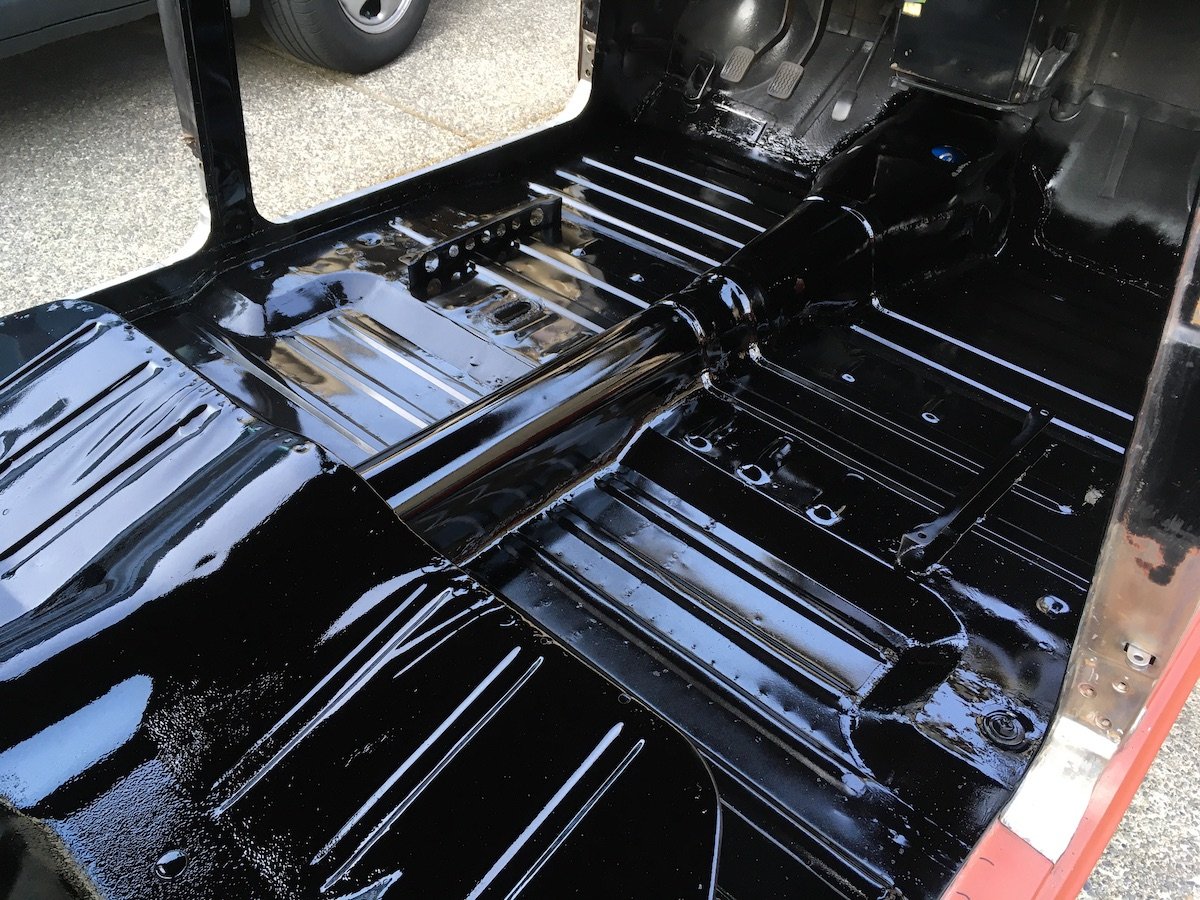
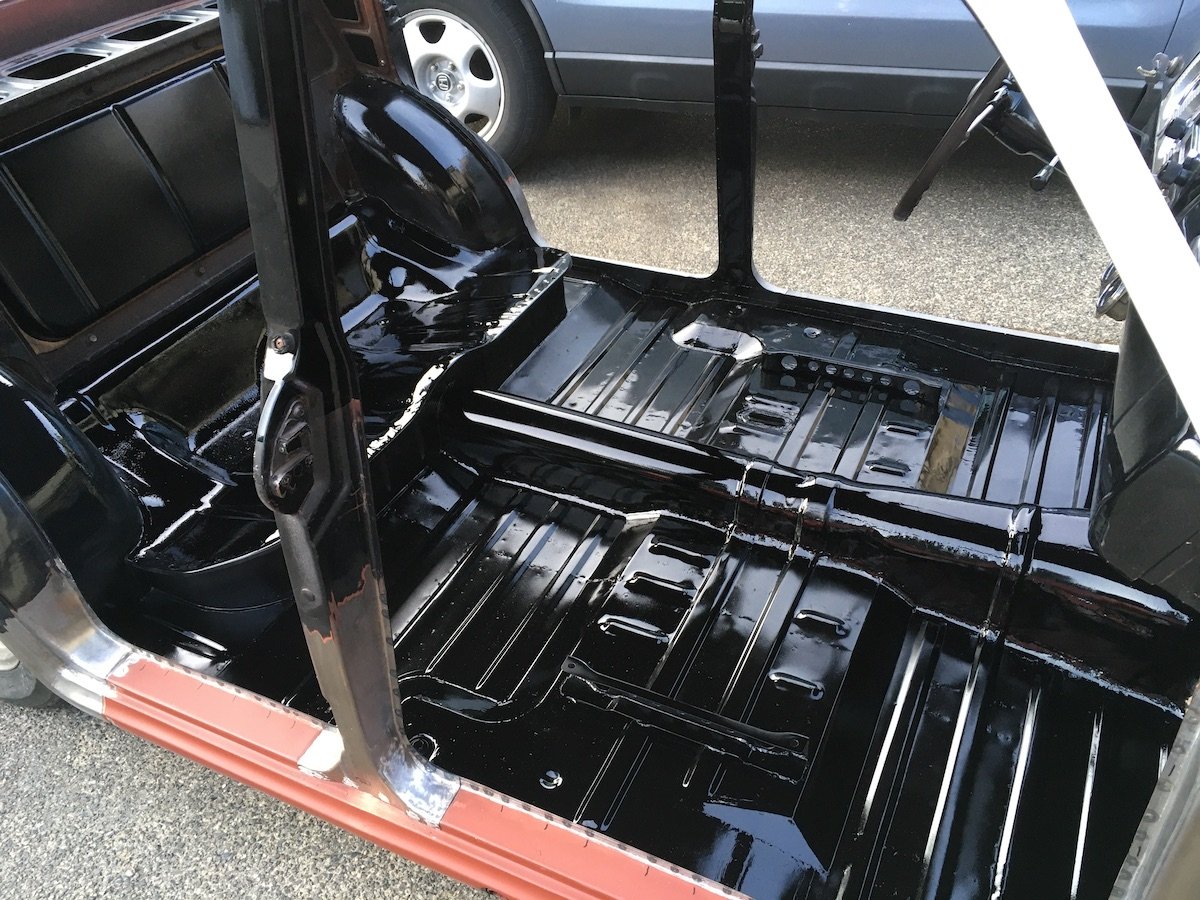
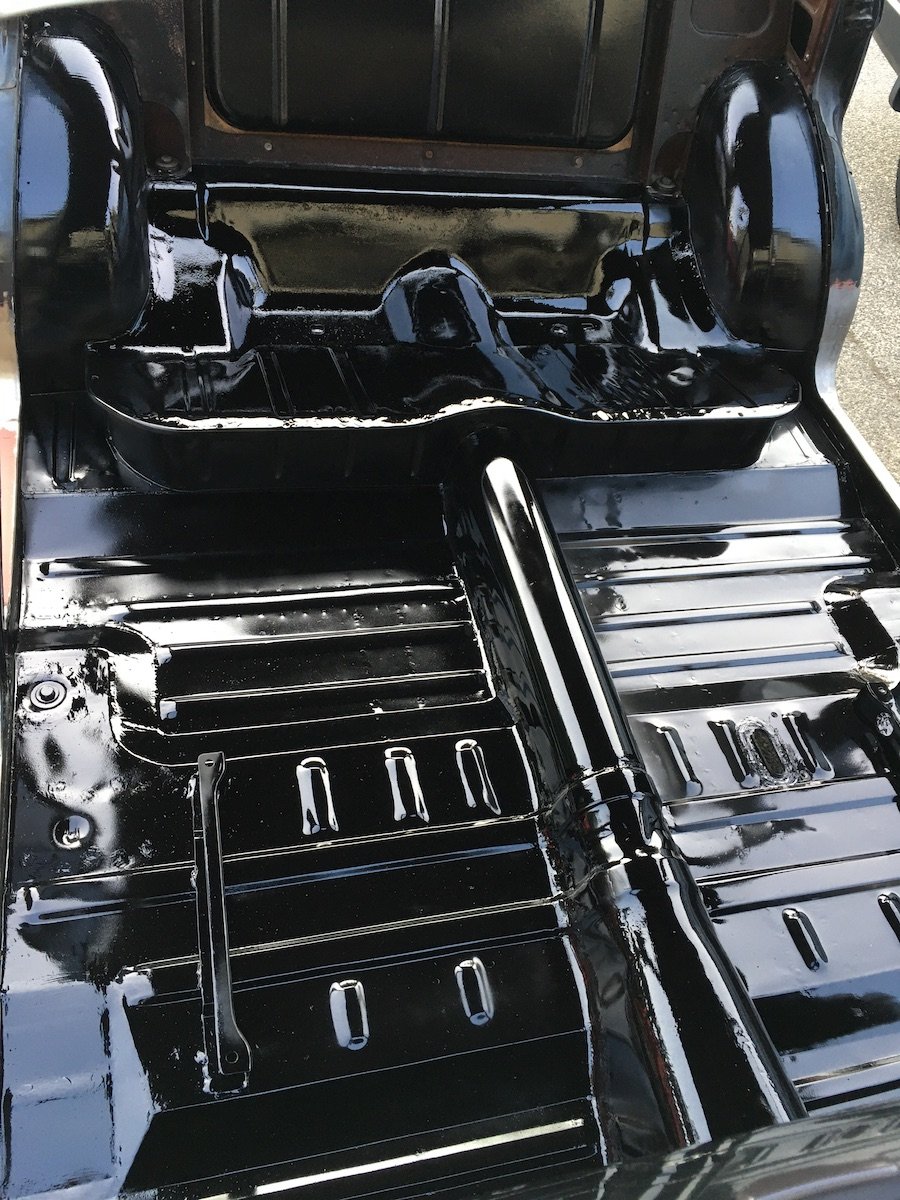
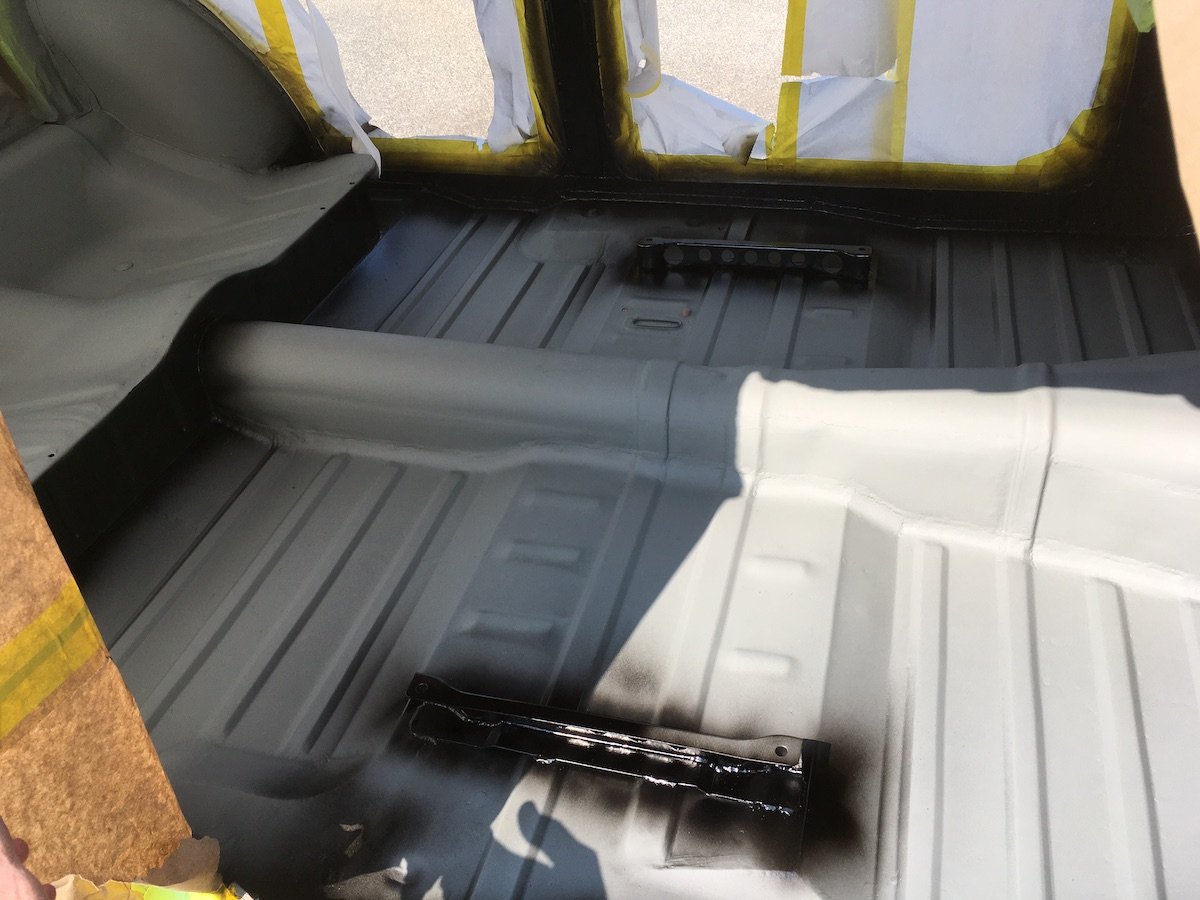
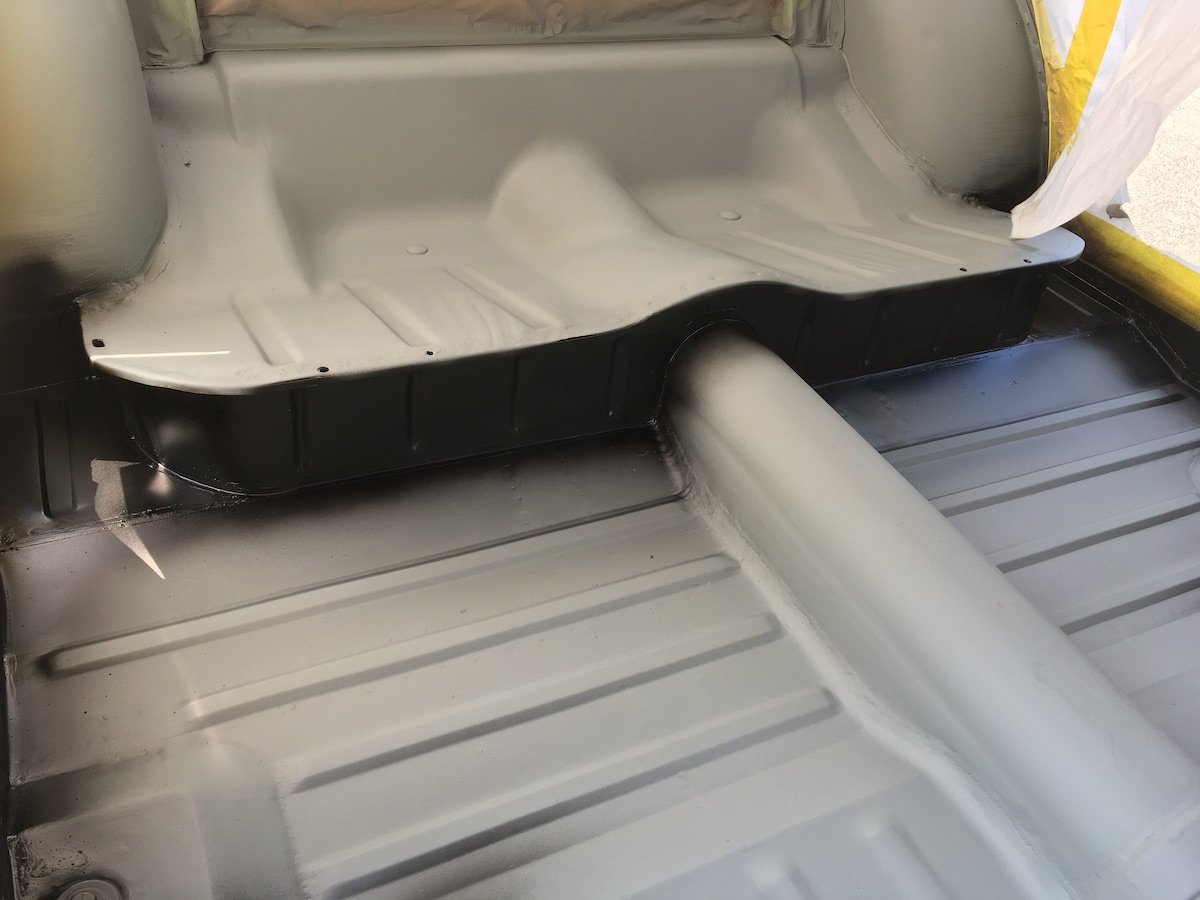
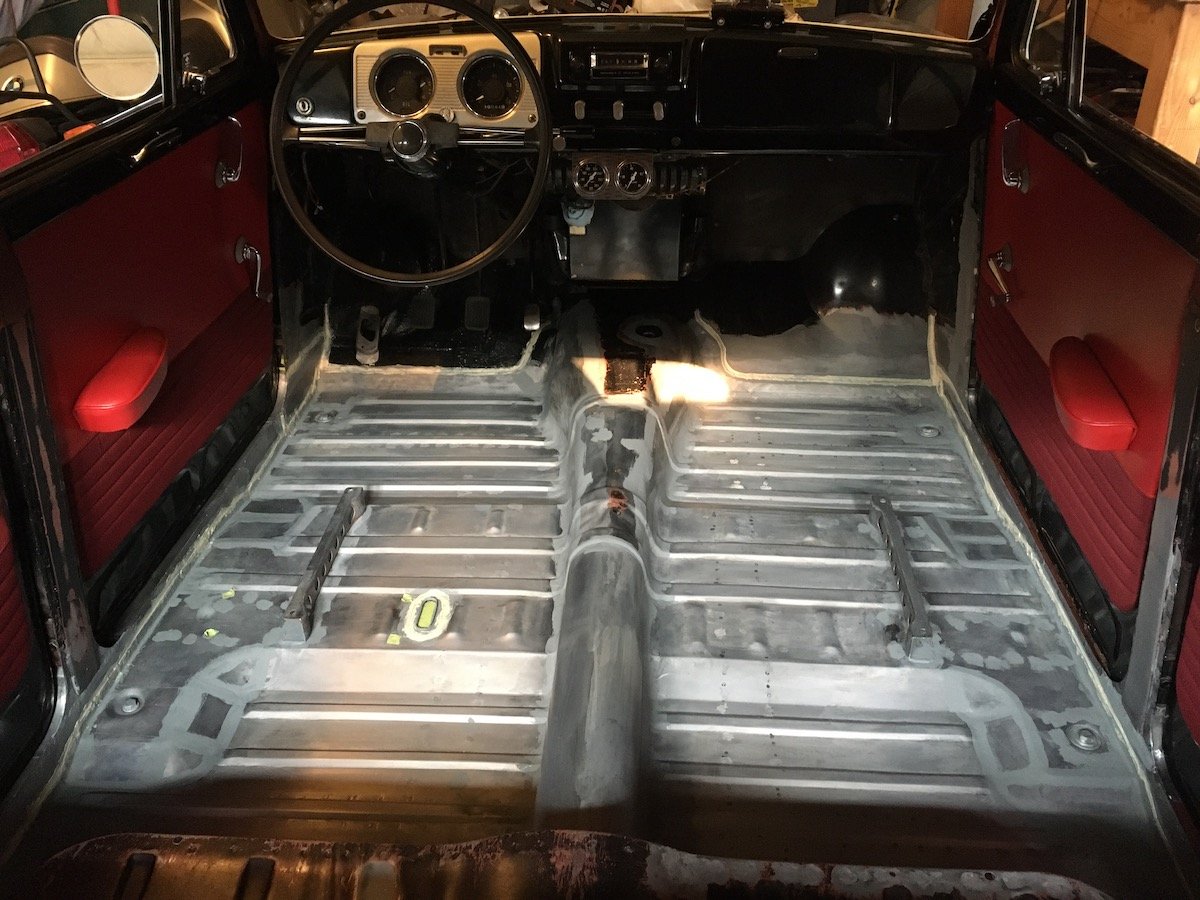
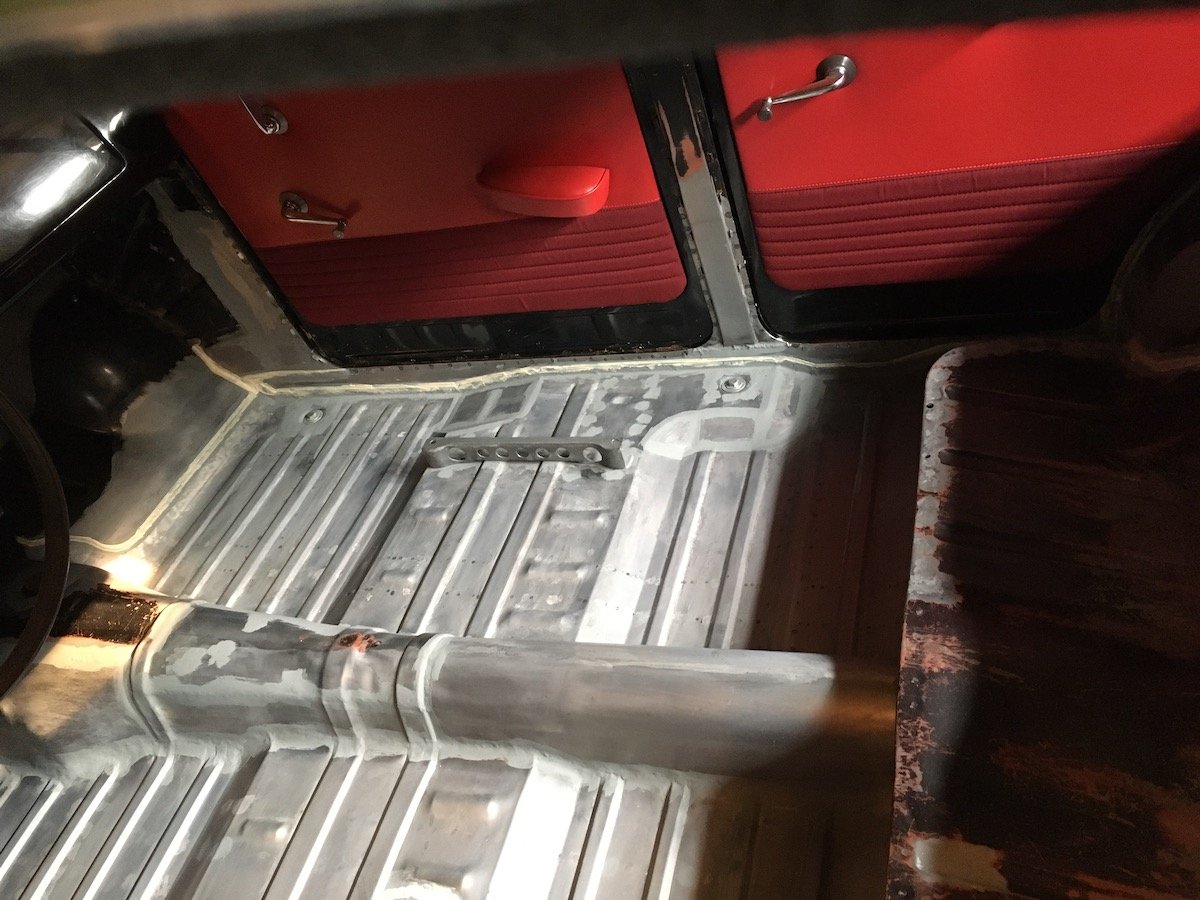
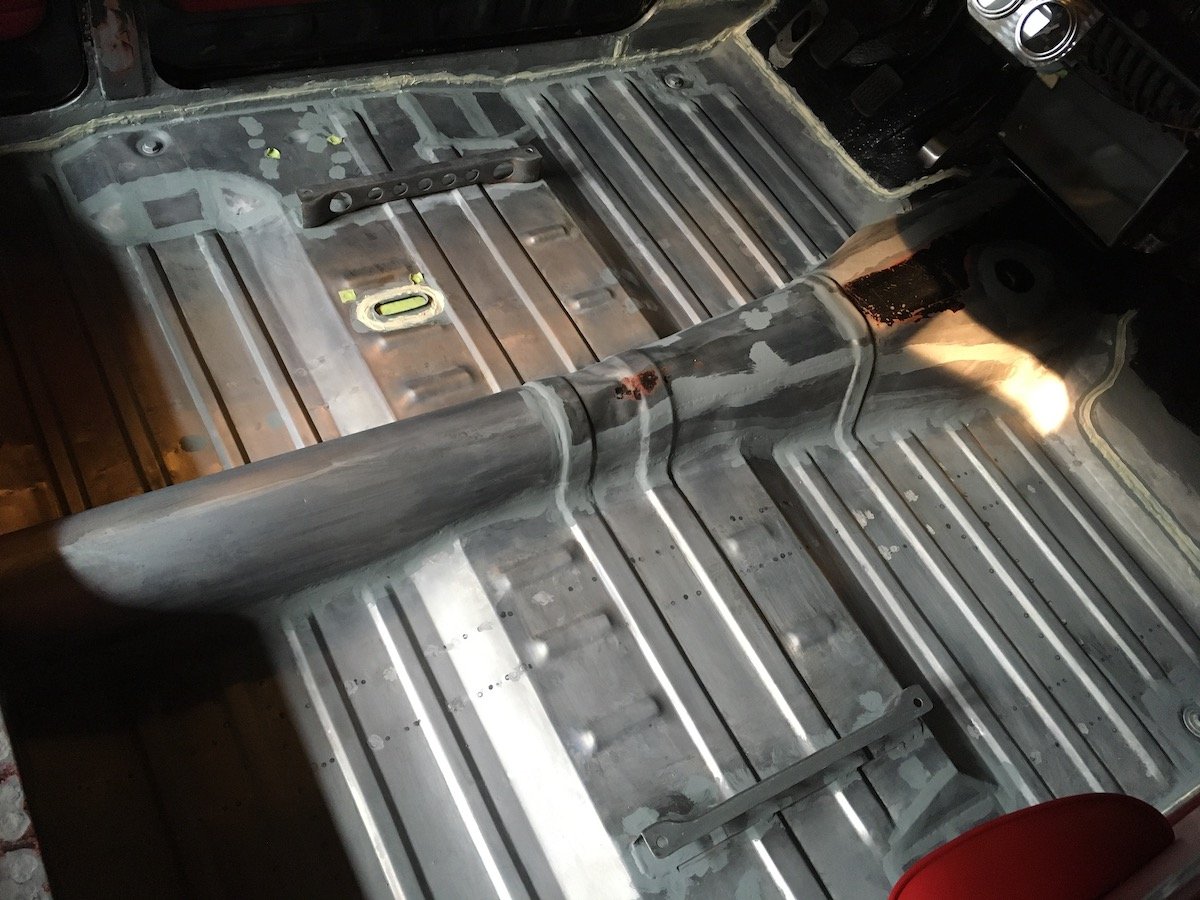
Building the 1961 Datsun 310 Bluebird - Painting Floor Top Coats- Black Basecoat and Clearcoat. Paint application photos. Floor is finished! This brings the latest intense flurry of completed work up to date. I've now got most of the parts and materials required to get started installing the roof insulation, headliner, and glass, but it's going to be another slow learning process each step of the way. I definitely don't want to break the difficult to find glass! Thanks for checking out this latest series of posts on the PL310 1961 Datsun Bluebird!
- 75 replies
-
- 18
-
-
-
MARTS-PL310 61 Datsun Bluebird Sedan
MARTS-PL310 replied to MARTS-PL310's topic in Projects and Build Ups
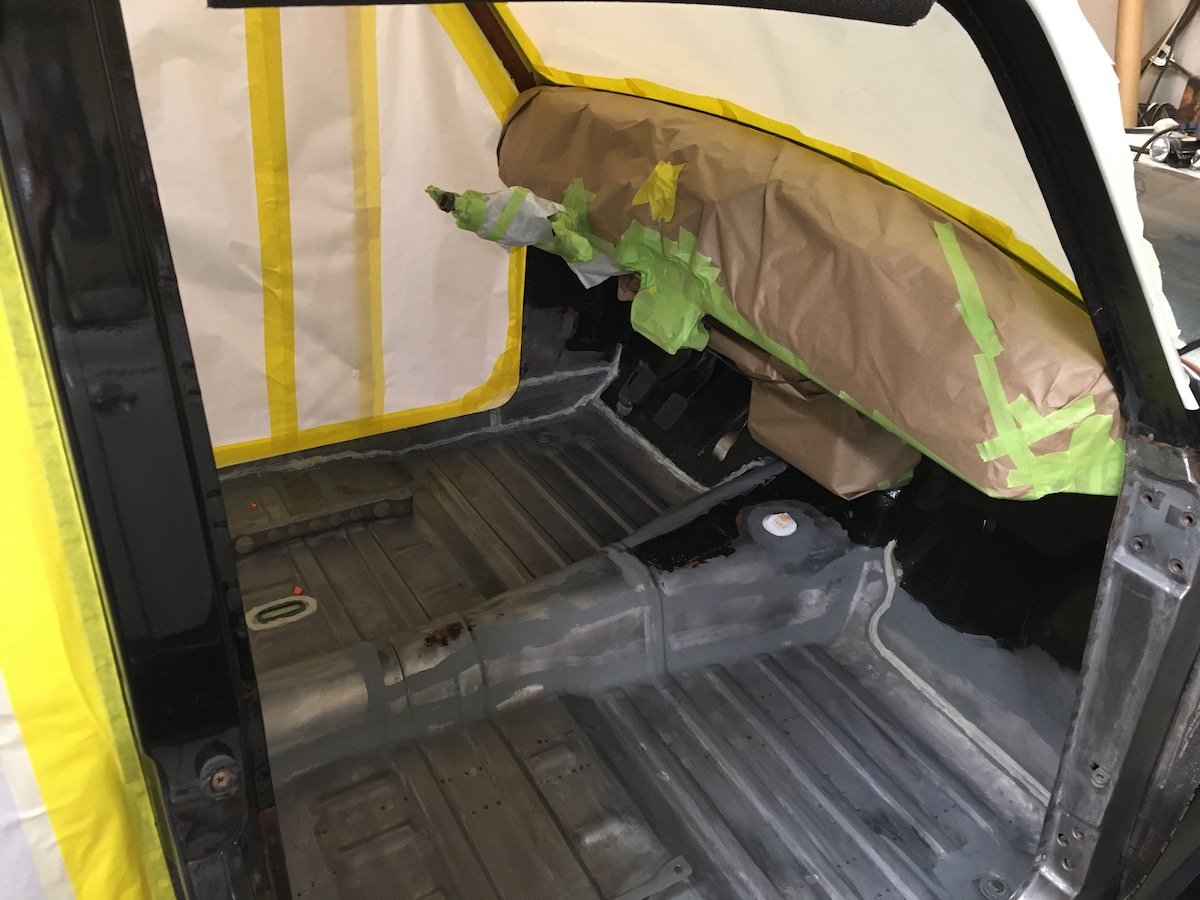
Building the 1961 Datsun 310 Bluebird - Floor Painting- Mask and Prime. Not too much to describe when it comes to masking and priming, except that it takes a lot of time. Taking the doors off did not take much time, so simple they are, a couple minutes each and off it goes. I'll let the photos do the rest of the tale here. Rolled the car outdoors into the fresh air before doing the primer spray work. I also did a little detail work with the small spray gun to get into the difficult to reach areas with primer followed by a bit of black base coat. And I had to cut open some door opening masking to gain better access. Then onwards to the full paint next.
- 75 replies
-
- 11
-
-
MARTS-PL310 61 Datsun Bluebird Sedan
MARTS-PL310 replied to MARTS-PL310's topic in Projects and Build Ups
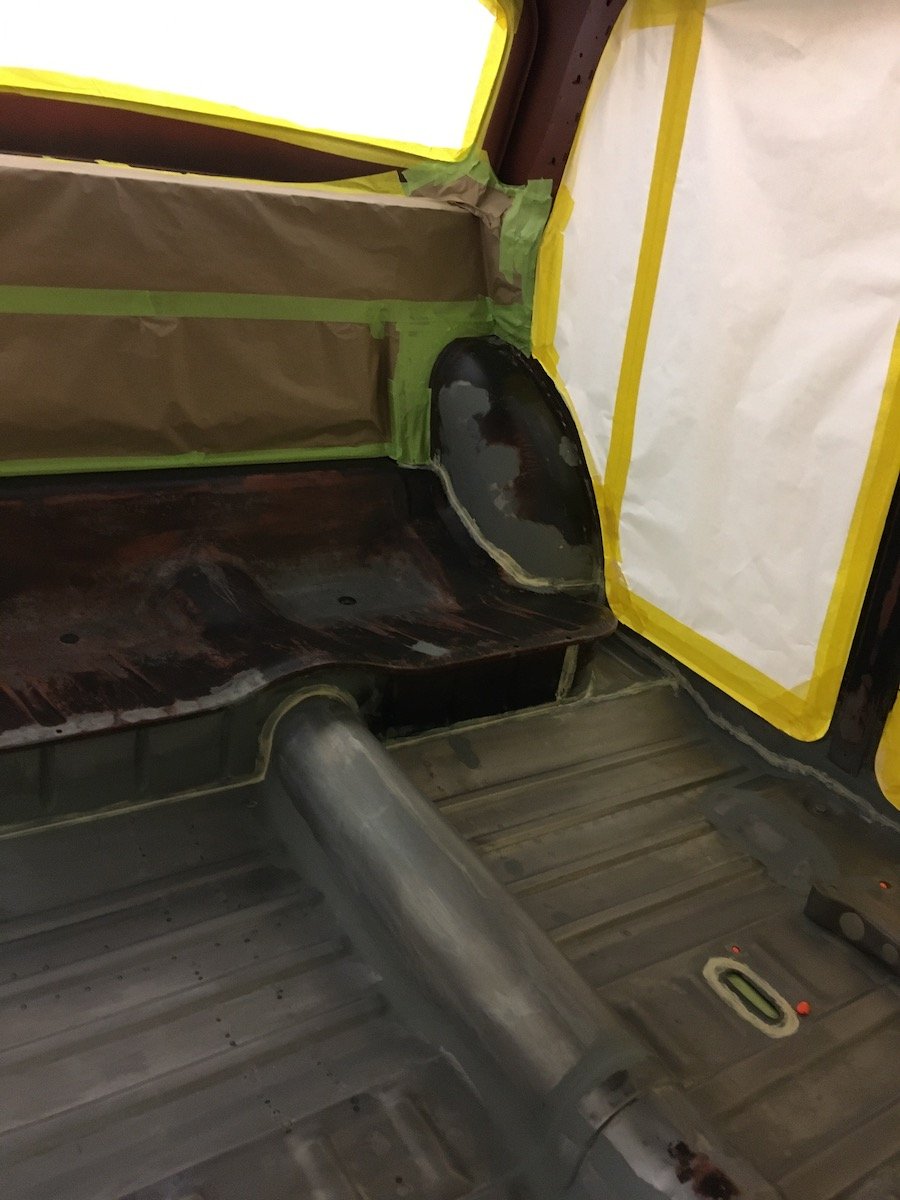
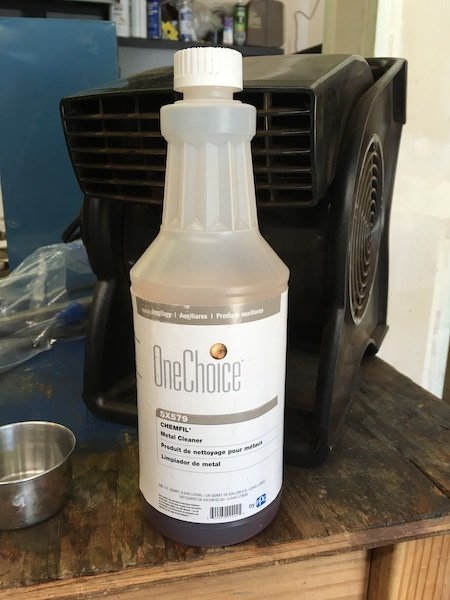
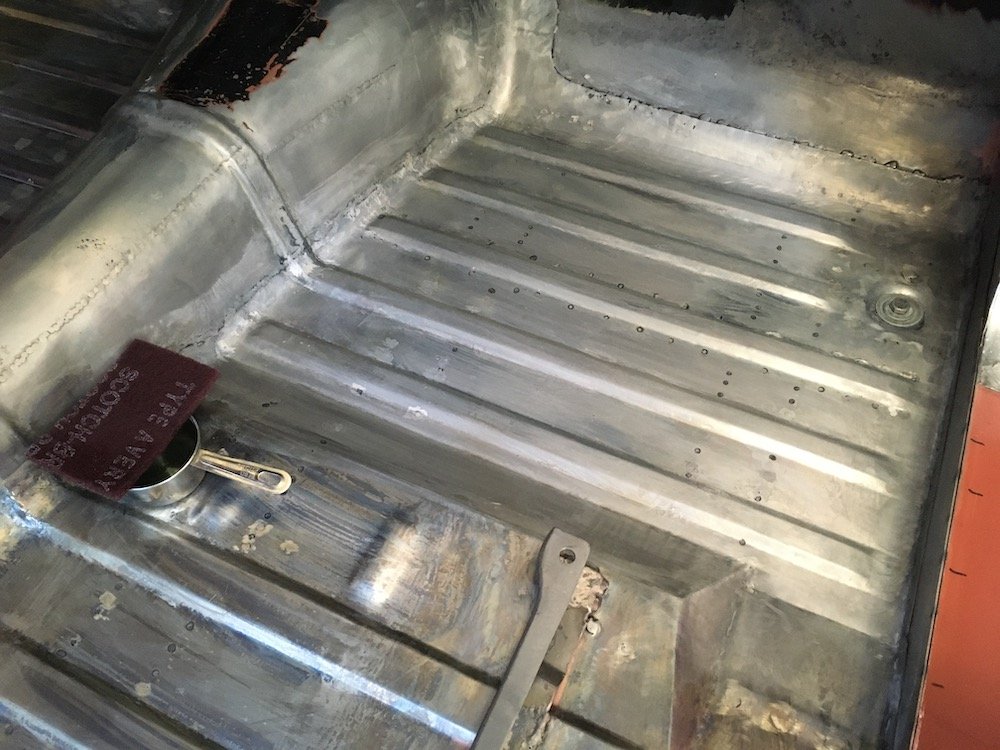
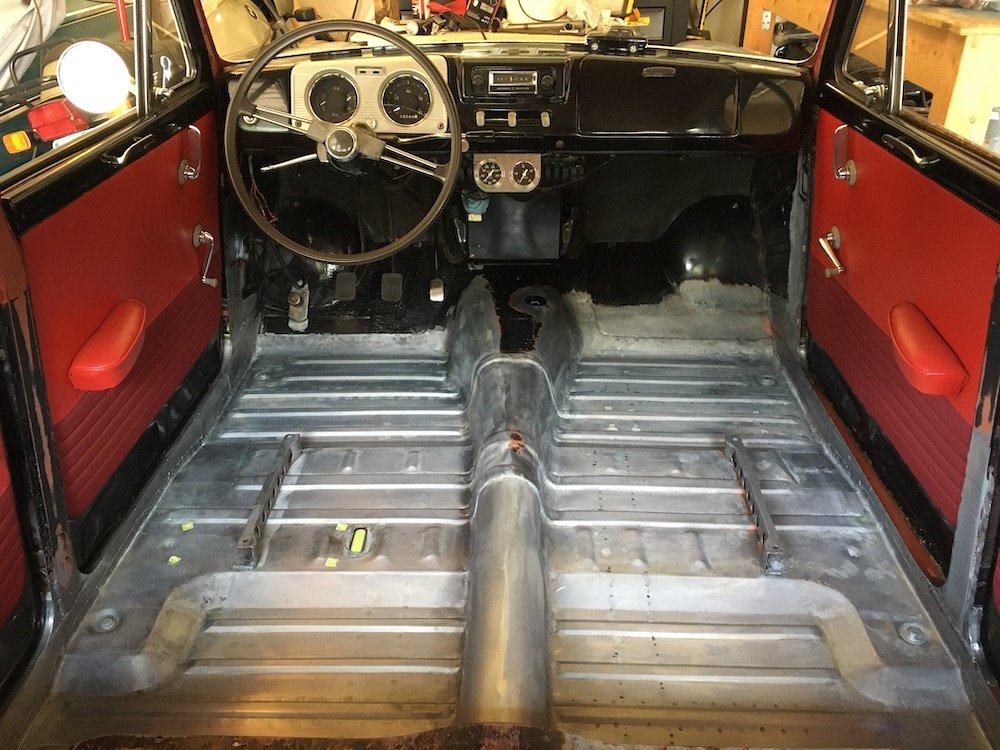
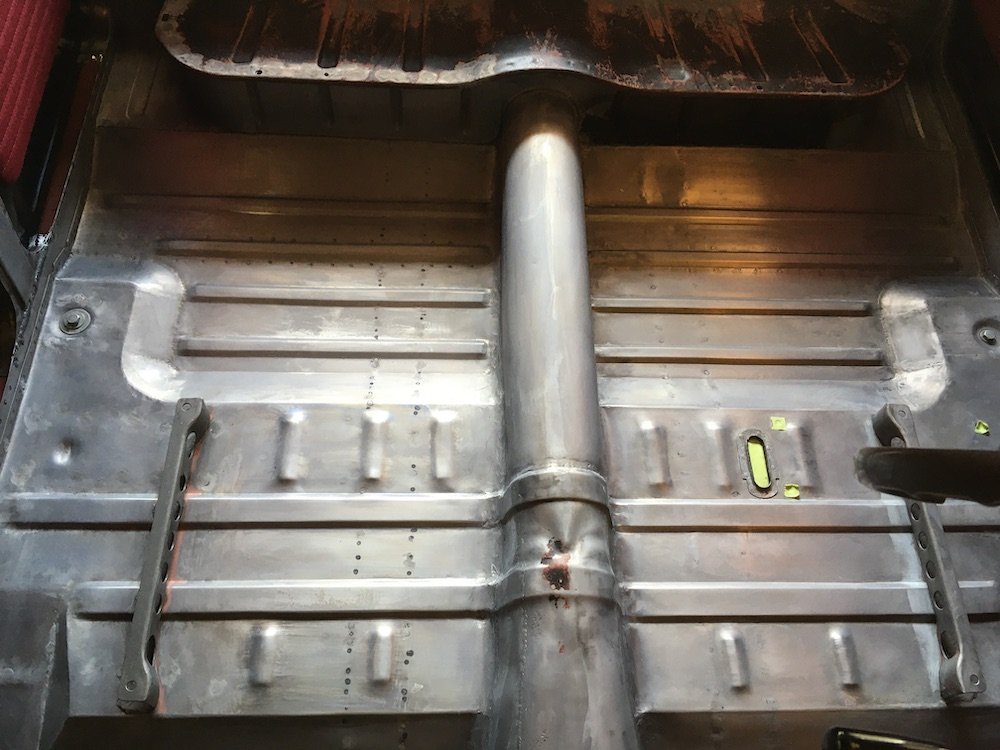
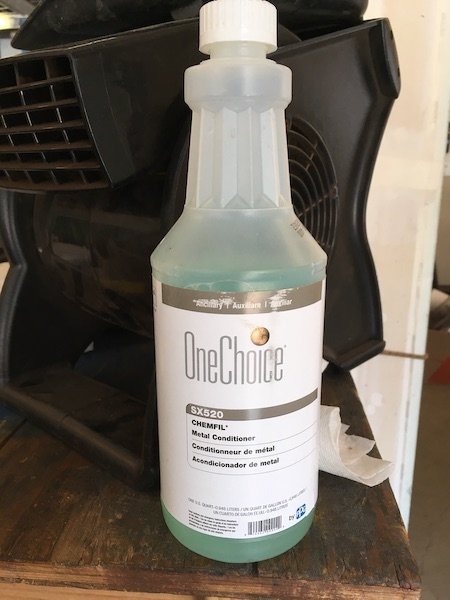
Building the 1961 Datsun 310 Bluebird - Floor Painting- Prep. Preparation for paint. Metal cleaning, etching, brush priming and sealant application. A lot of labor and overkill I admit, but then again the old floor did demonstrate how susceptible it was moisture. This should be good for at least a hundred years or so! My favorite metal chemicals, I've shown these before and here they are again. First a rough cleanup by vacuuming, wet rag wipe down and wax and grease remover solvent. I then apply the PPG metal cleaner with a scuff pad, sponge off with water, and finish with compressed air dry. Repeating the process for the PPG metal conditioner. After the metal cleaner pics. Basically the metal cleaner contains plain phosphoric acid and mild cleaning agents which takes care of flash rust and residual contamination at the welds. After the metal conditioner pic. This etches the metal for a good mechanical bond with the primer and leaves a thin chalky zinc phosphate coating for resisting rust. Continued the prep with brush epoxy prime at all the lap joints and butt weld joints and any rough spots that could use it. Finished with sealant at all the lap joints. Then pull the doors off, mask and prime next.
- 75 replies
-
- 13
-
-
MARTS-PL310 61 Datsun Bluebird Sedan
MARTS-PL310 replied to MARTS-PL310's topic in Projects and Build Ups
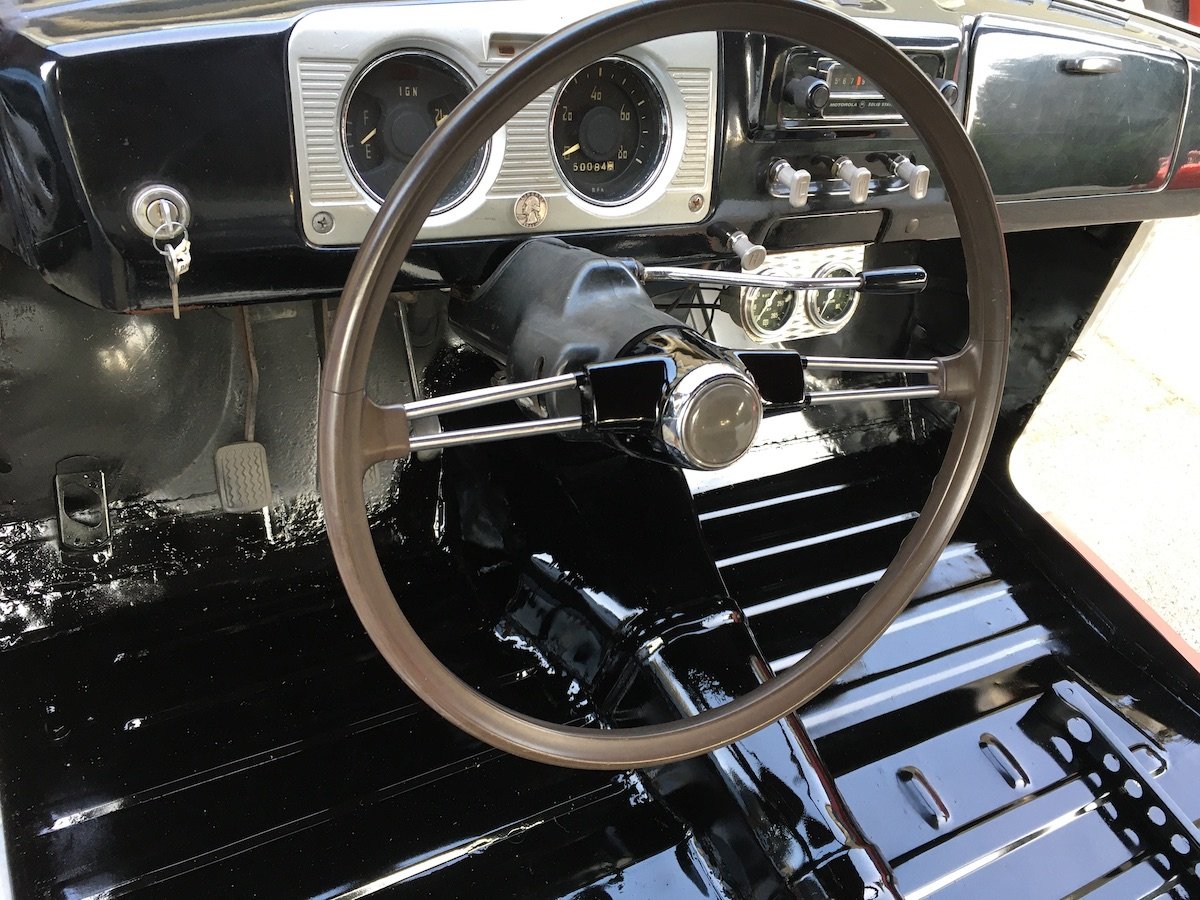
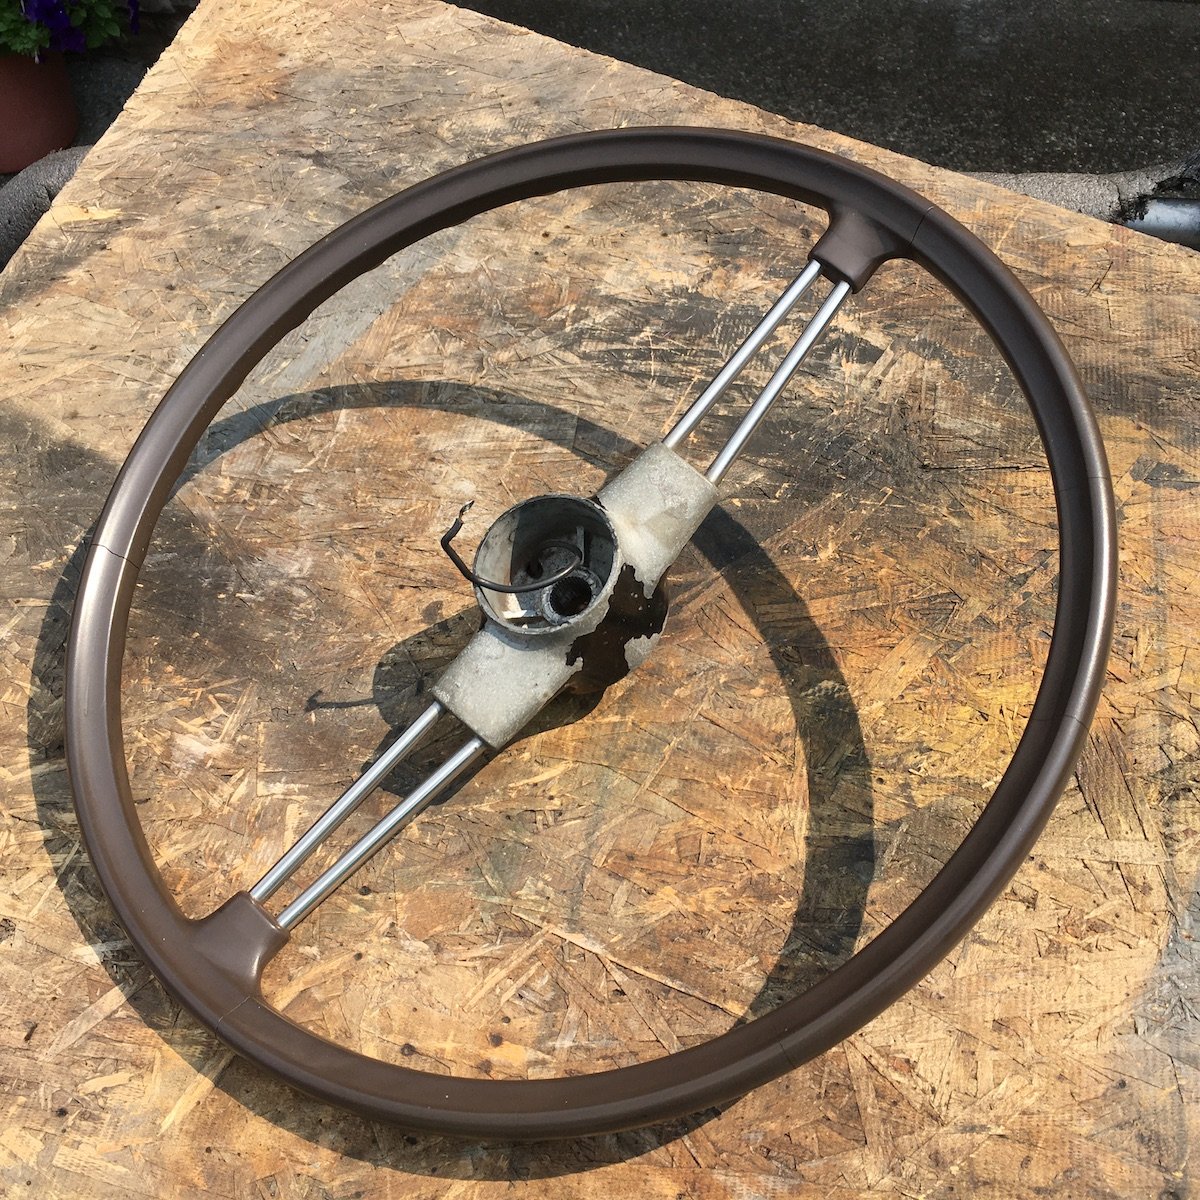
Building the 1961 Datsun 310 Bluebird - Paint - Steering Wheel Hub Restoration. Painted the steering wheel hub since I might as well with plenty of paint to do the floor and it needed it. Before After Hmm, now the faded plastic around the column looks lousy. Glimpse of the finished floor bonus. It's late. Posting more tomorrow on the actual floor paint.
- 75 replies
-
- 11
-
-
MARTS-PL310 61 Datsun Bluebird Sedan
MARTS-PL310 replied to MARTS-PL310's topic in Projects and Build Ups
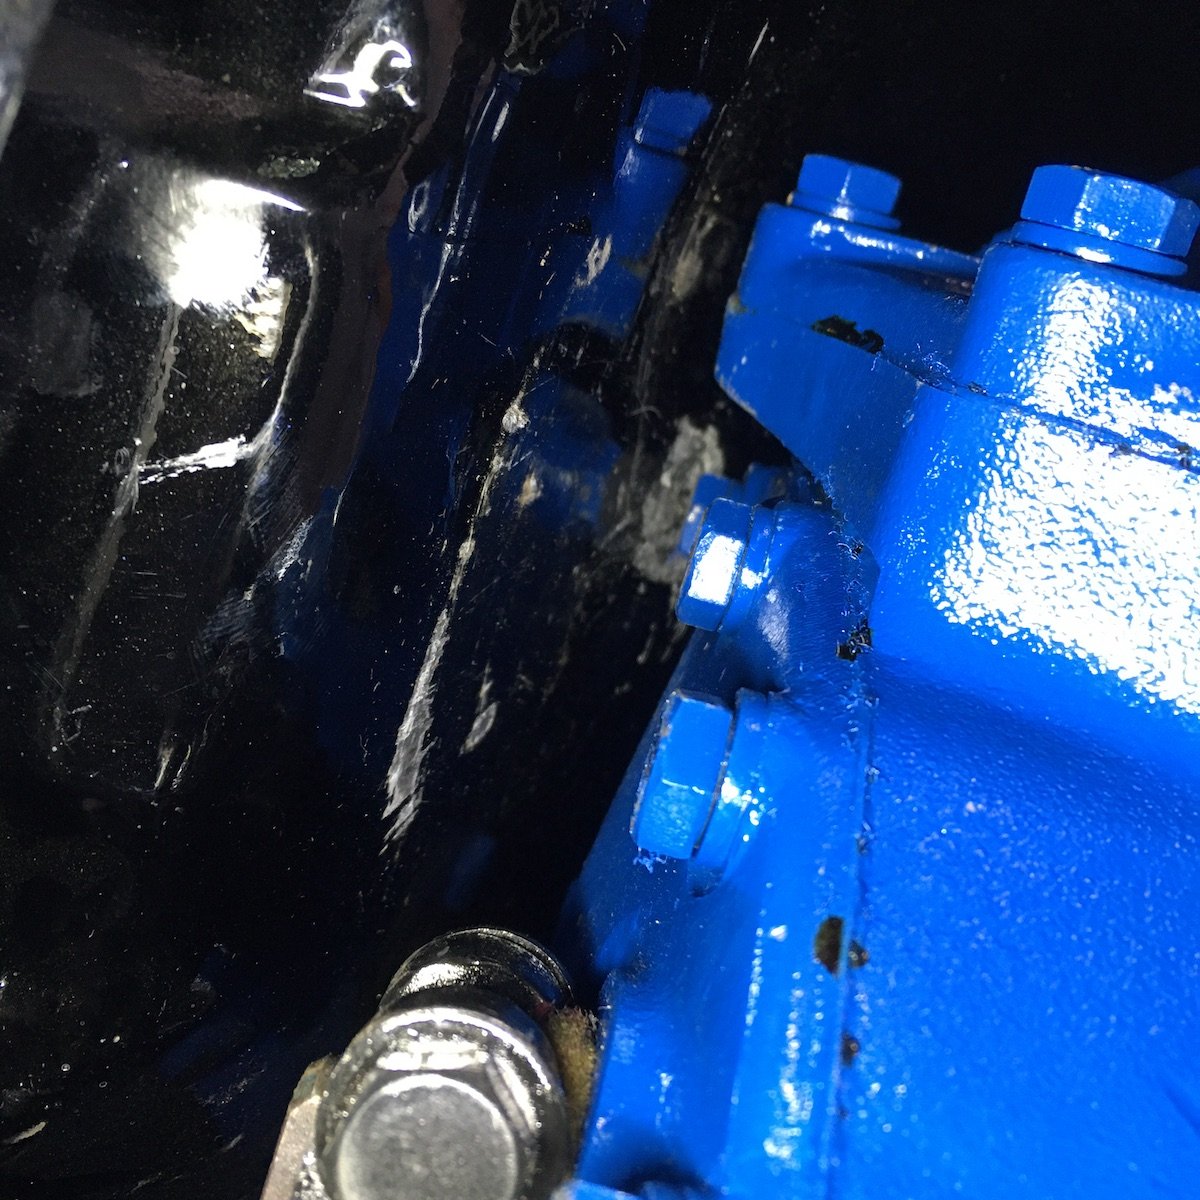
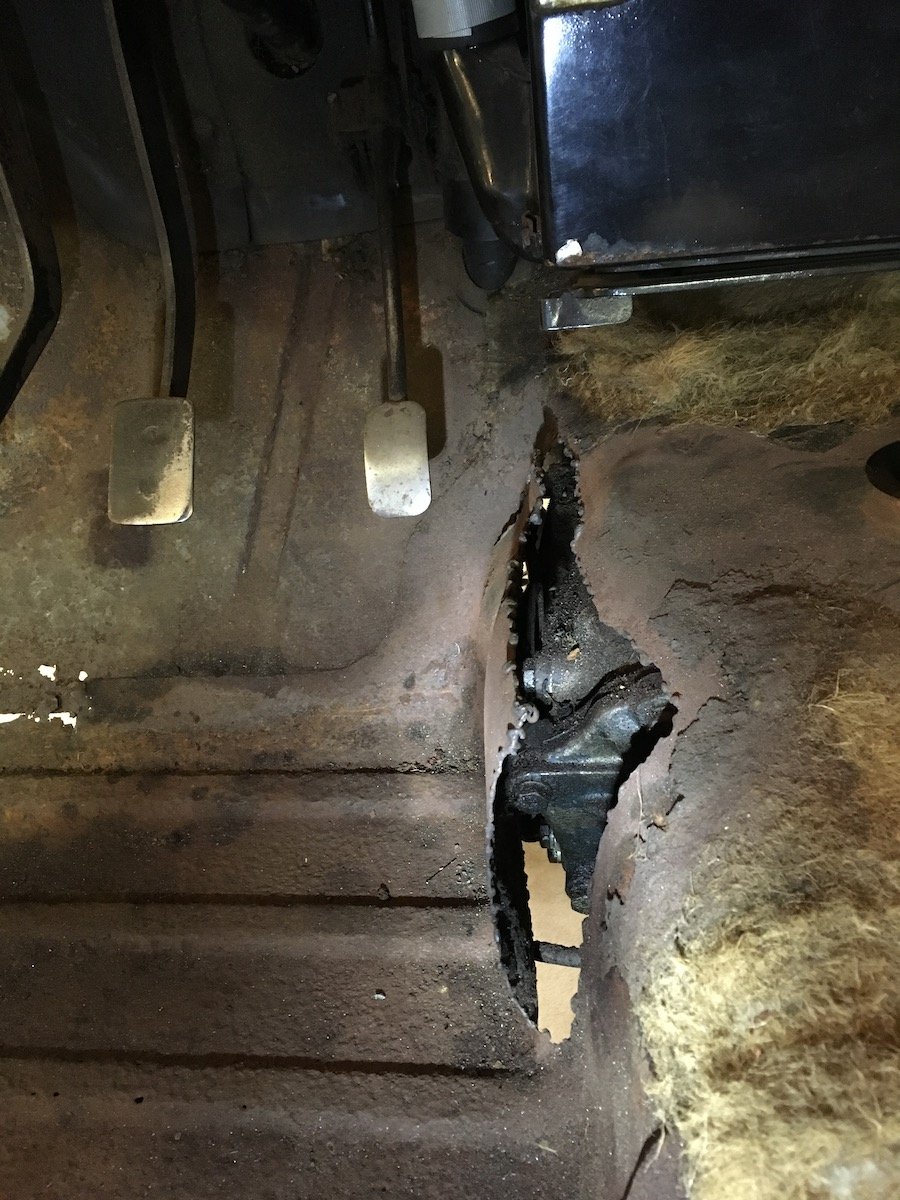
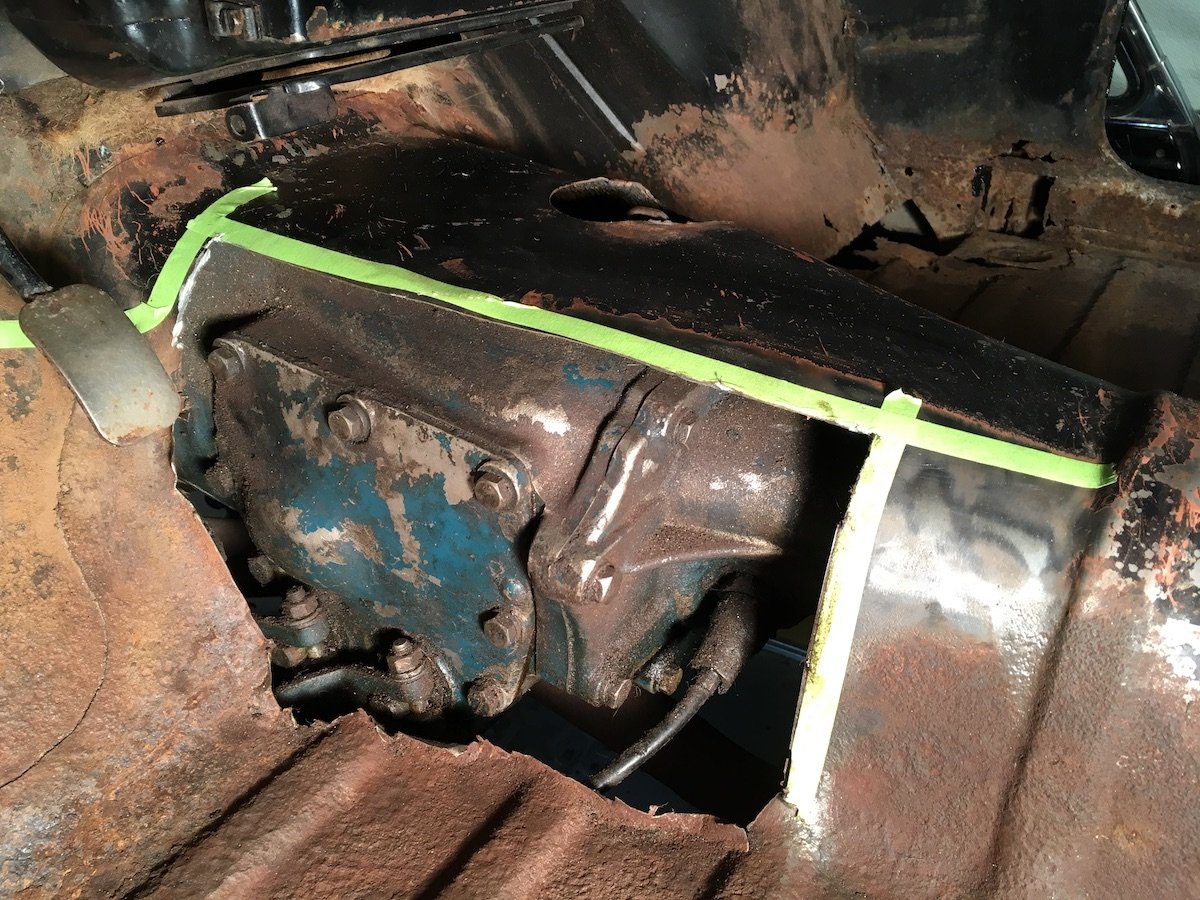
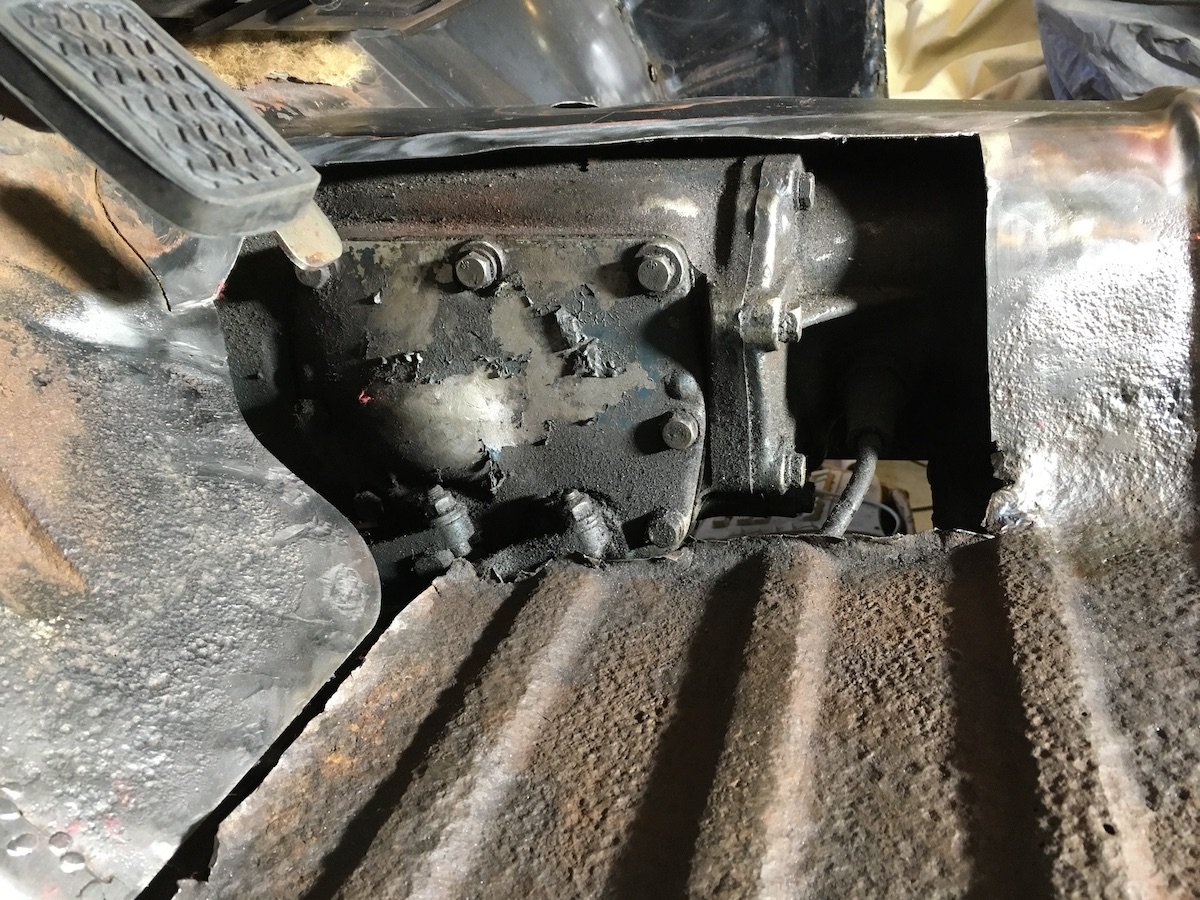
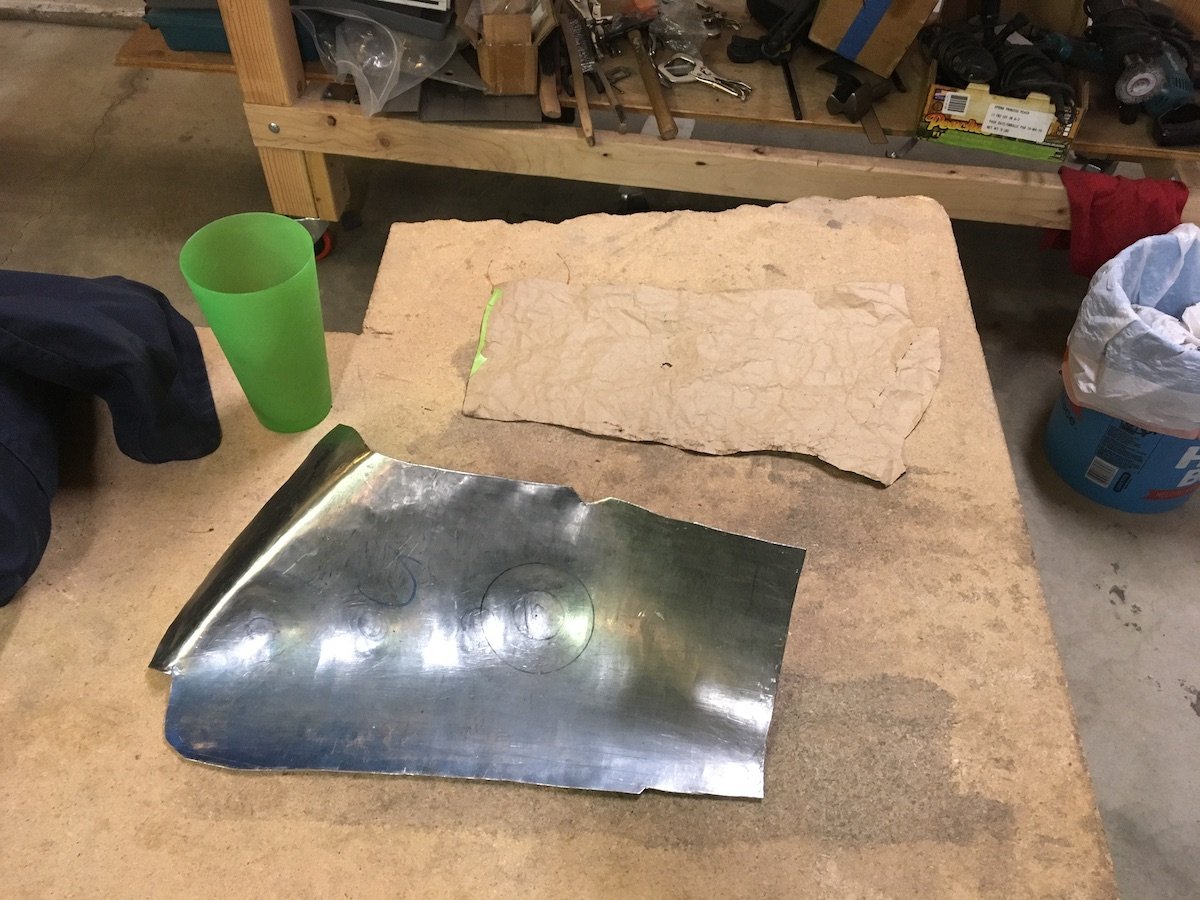
Building the 1961 Datsun 310 Bluebird - Fixing the Trans to Tunnel Interference. Not sure how I messed this up but the upper aft bolt head on the side of trans cover was touching and rattling quite a bit on the first test drive. I did a lot of preparation work when forming the patch piece for the previously modified tunnel to fit the larger "full-synchro" P311 trans. I padded up spots for a bit of clearance where there appeared to be contact when doing prototyping of the patch panel yet must have missed this bolt head. Maybe too much attention was paid to bumping out the nearby spot where the tailshaft housing to trans body ear sticks way out. Don't know. Original very rough mod was done way back in the early 80s when the P310 trans broke a shift input shaft and was swapped out for the big trans. Modification of the tunnel then was by cutting torch, and very expedient, just left huge openings. In this case, the fix was to take a piece of bar stock and carve the end into a convex shape. Then the convex end of the bar was hammered upwards into the bolt head interference spot to form a bit of a pimple sufficient for clearance. Paint was touched up and that was it. Pics: In the beginning. Started with this old rough torch cut left over from rapid repair back in the early 80s. A good illustration as to how much wider the later trans is. The cut metal was covered up by the vinyl floor mat. Out of sight out of mind for years. A couple of other views after the original damaged metal was removed. The future interference is the side cover bolt on upper right, above and to the left of the tailshaft housing ear. The formed patch a few years back. Bumped it out as necessary with plastic mallet on sand bag then smoothed out on english wheel. It was beginning to resemble medieval breastplate armor. Just didn't bump it out enough on that one spot apparently. Fixed. You can't really see much here because it is so tight. Look deep into the photo middle, upper, then above and behind the bolt that is visible, where you might see the paint scratched off by the bumping tool used to beat the sheet metal out a bit from the bolt head. I also tried to pry it out overall in the area by leveraging against the ear, but it didn't help much, the initial forming process work hardened the metal and it just bounced back. Brushed in some touch up paint later on and now I'm done with it. Posting about the floor painting later
-
MARTS-PL310 61 Datsun Bluebird Sedan
MARTS-PL310 replied to MARTS-PL310's topic in Projects and Build Ups
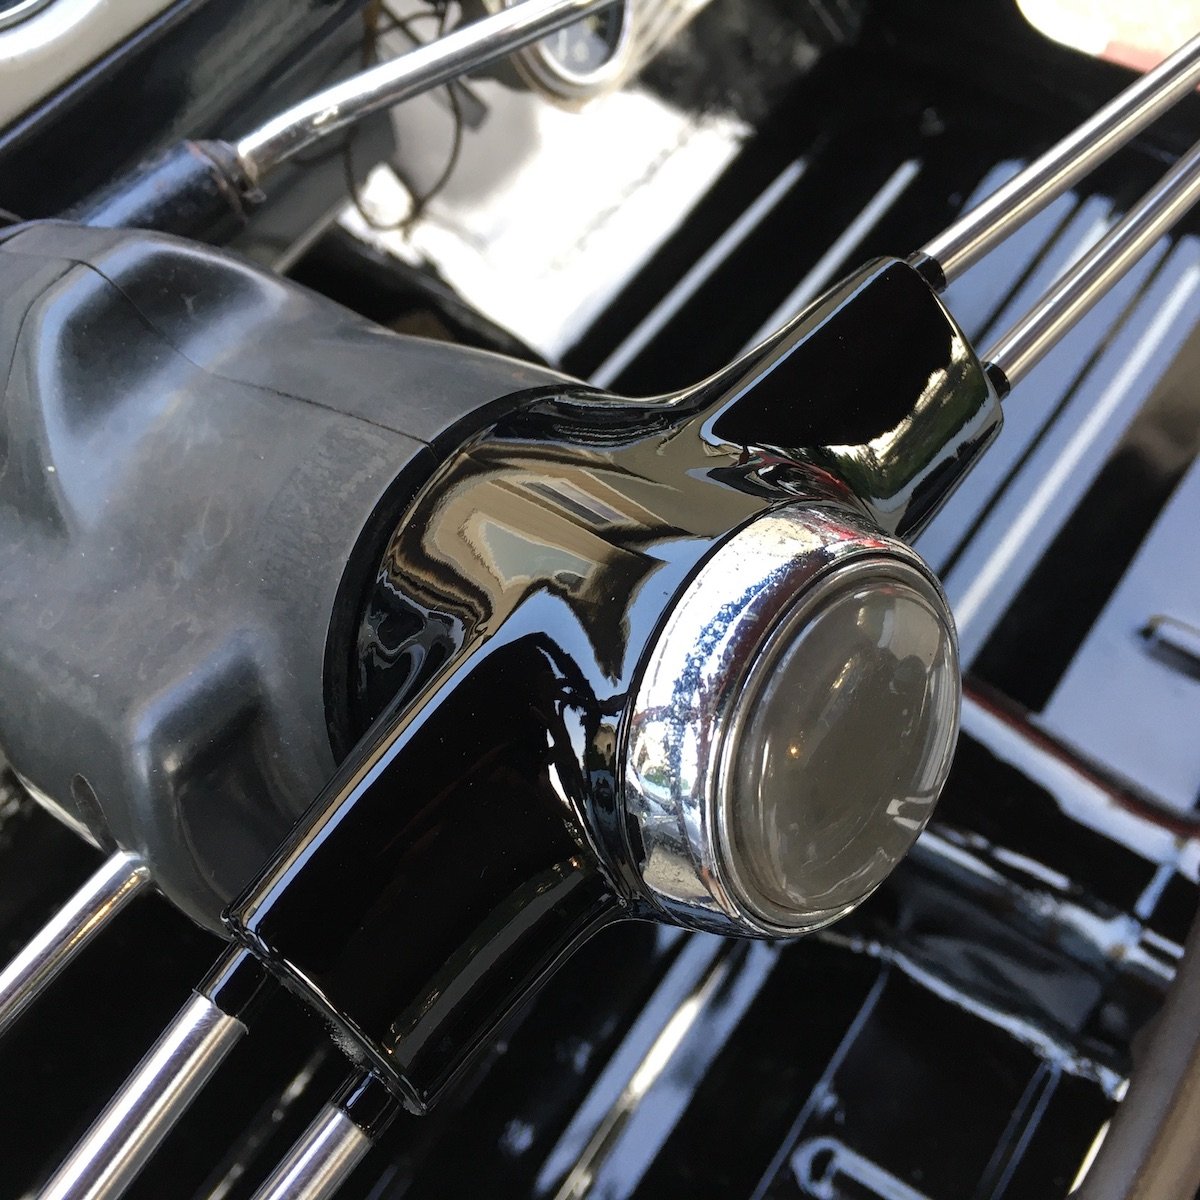
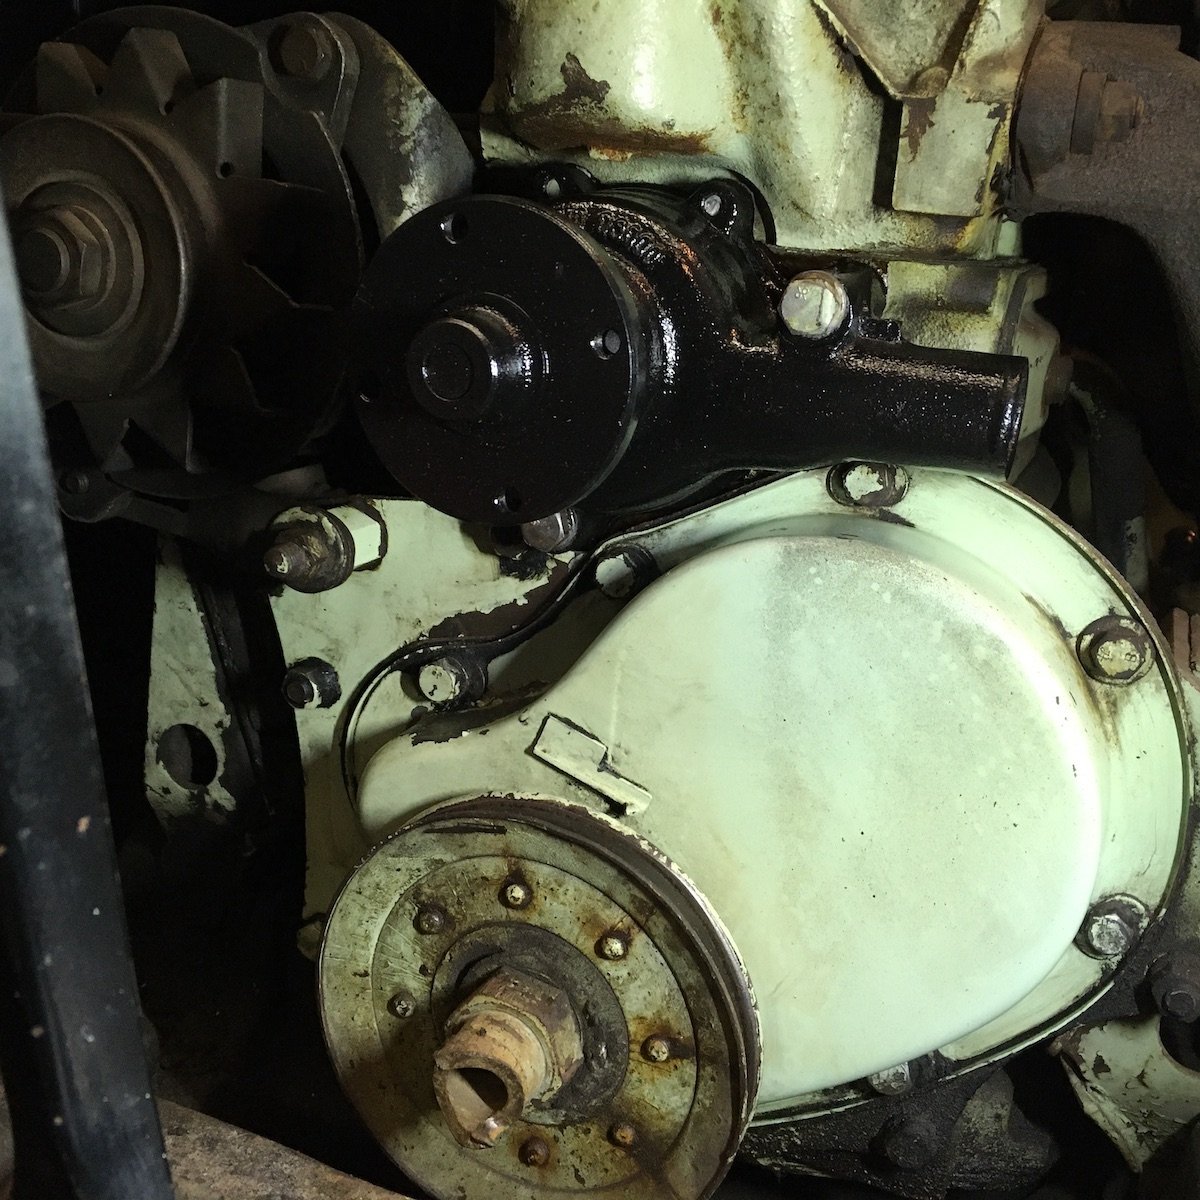
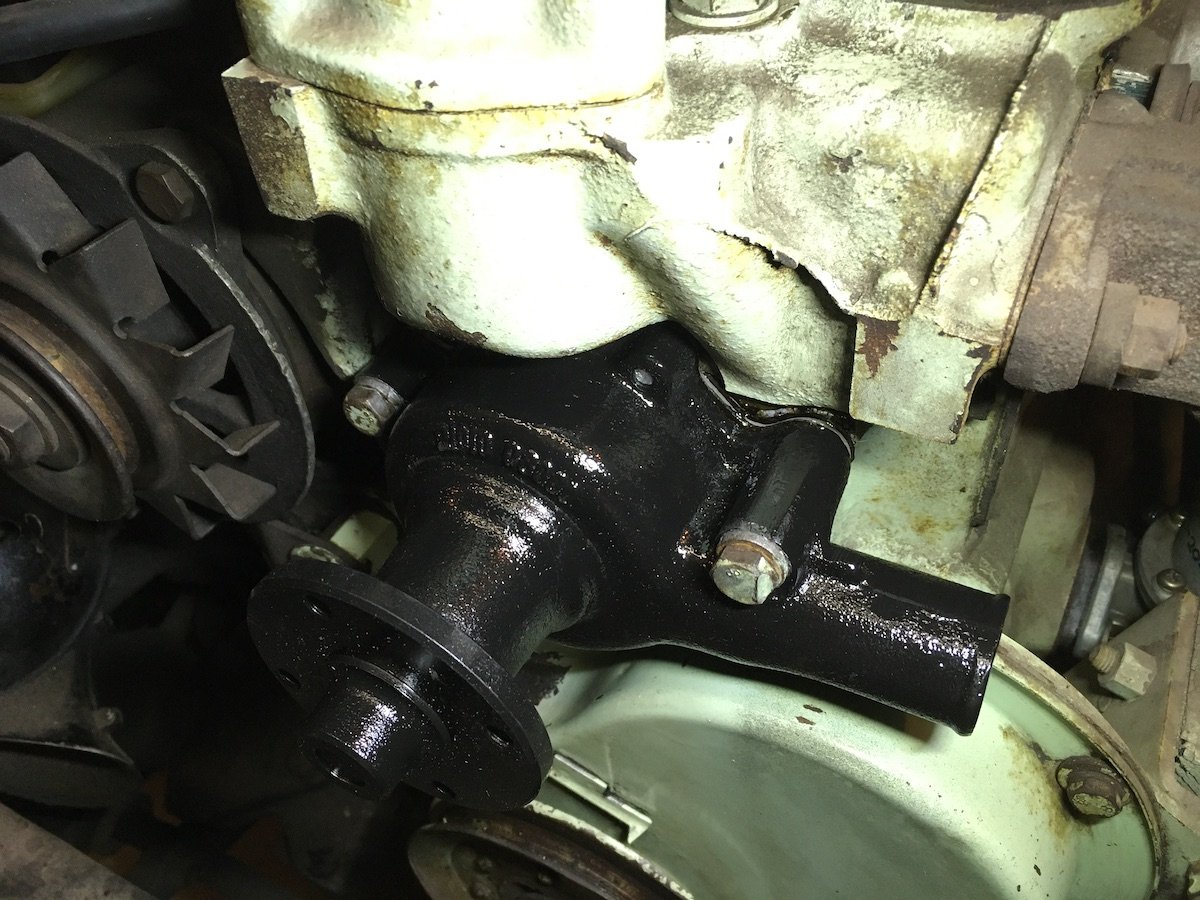
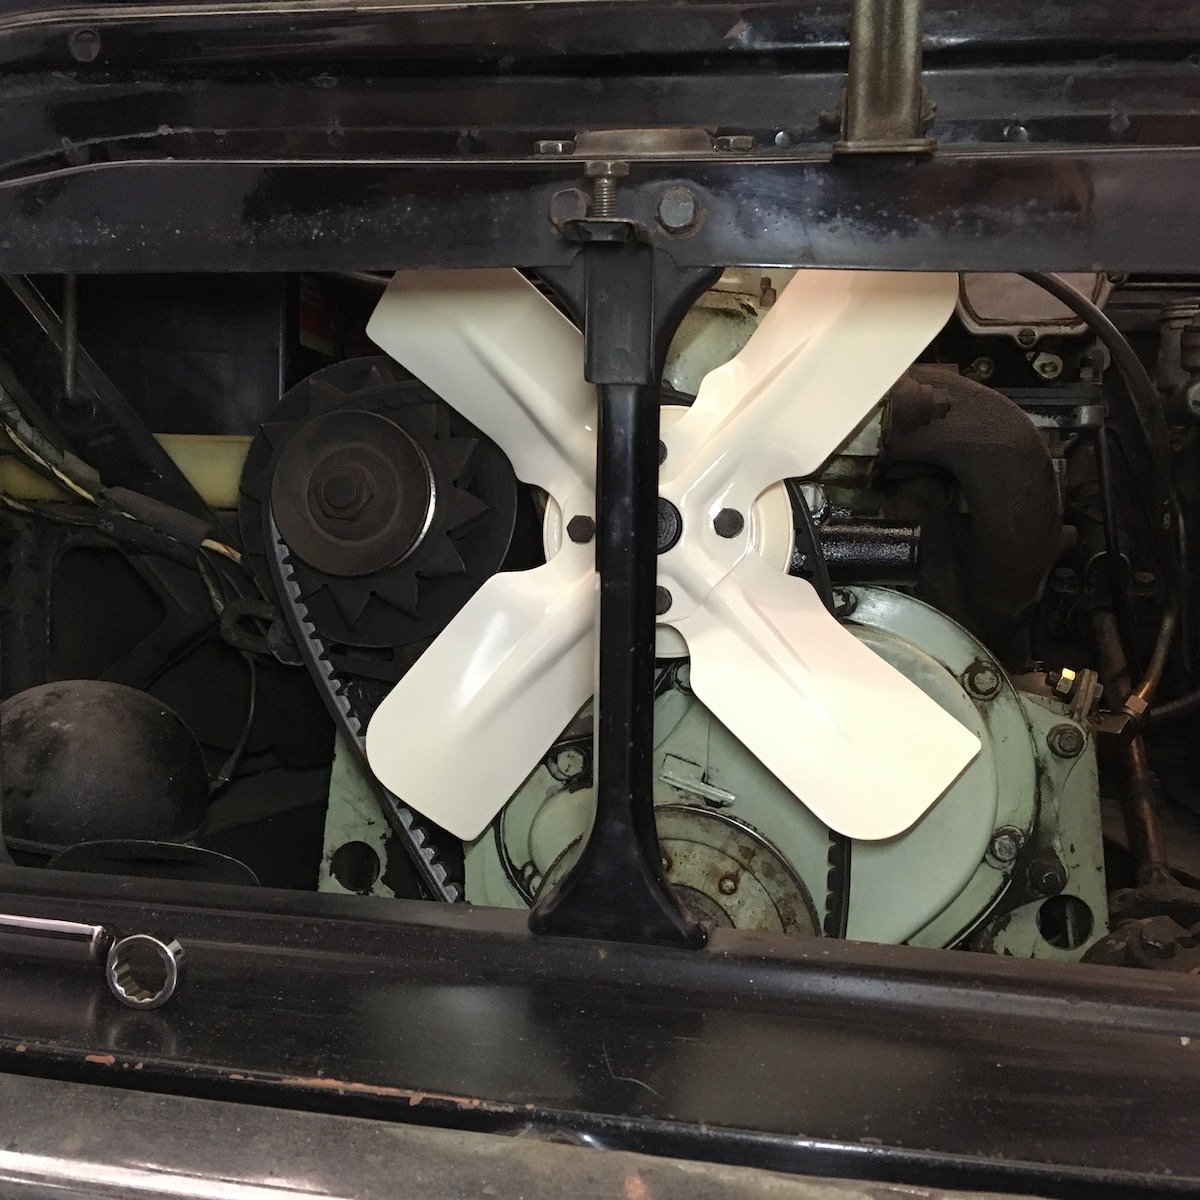
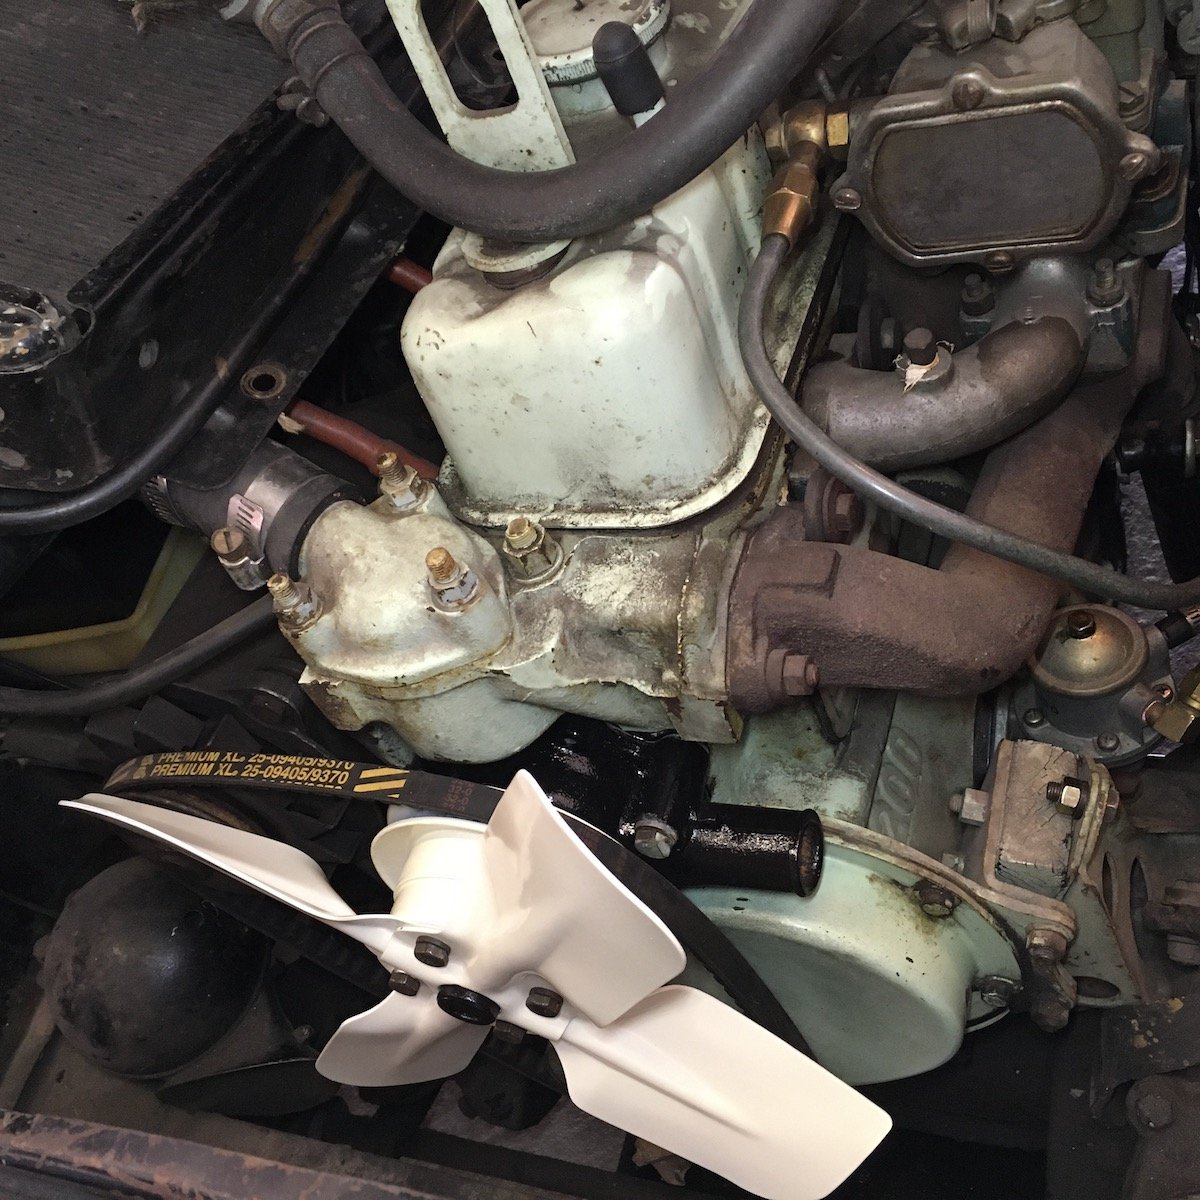
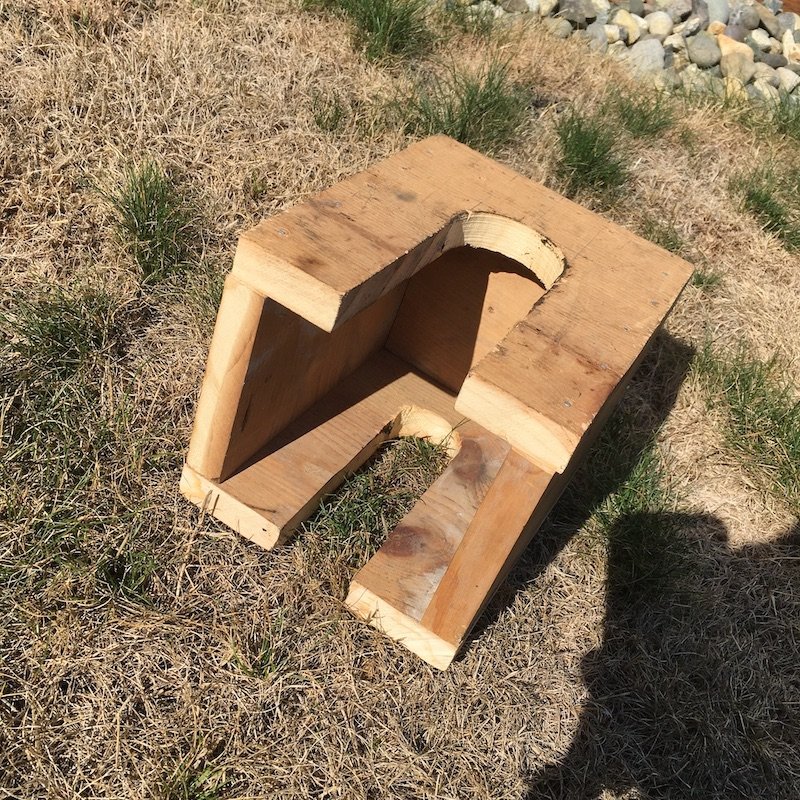
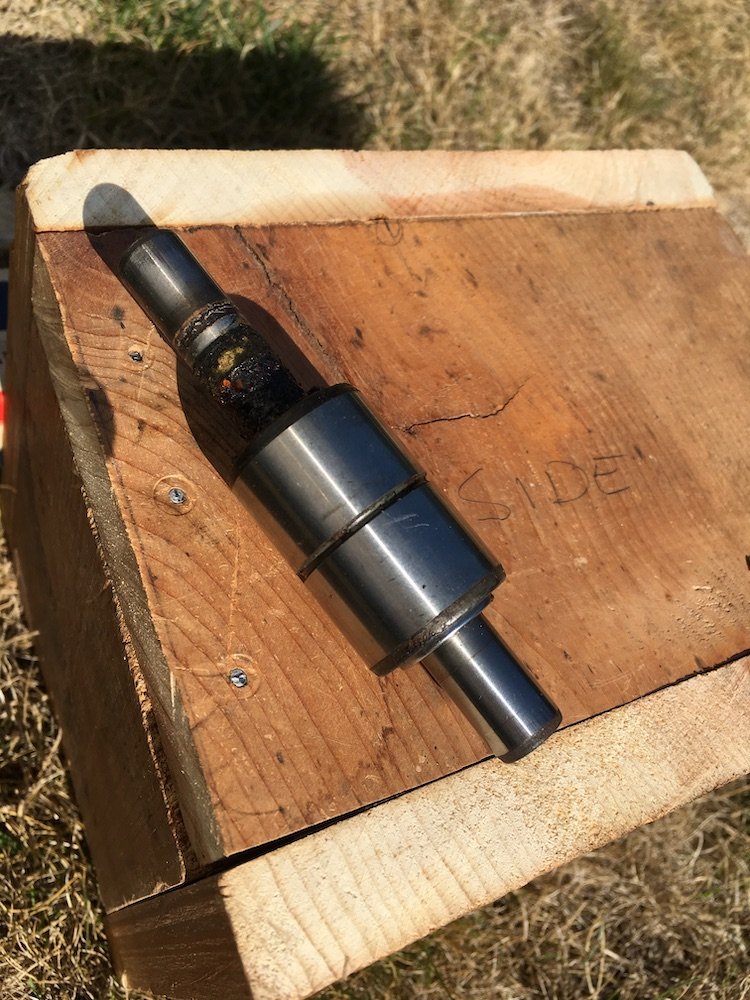
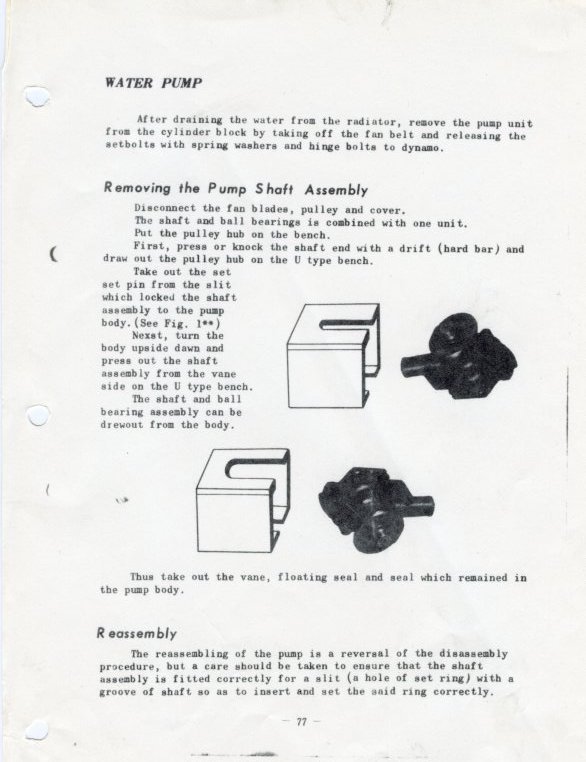
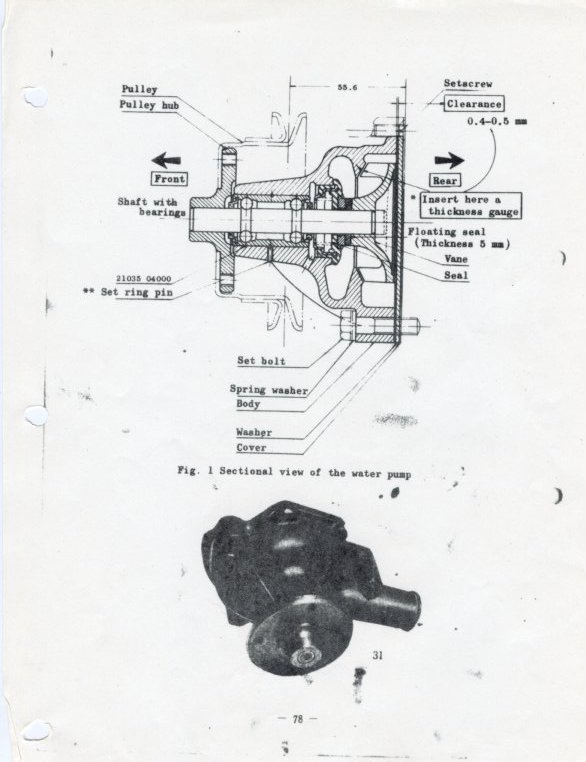
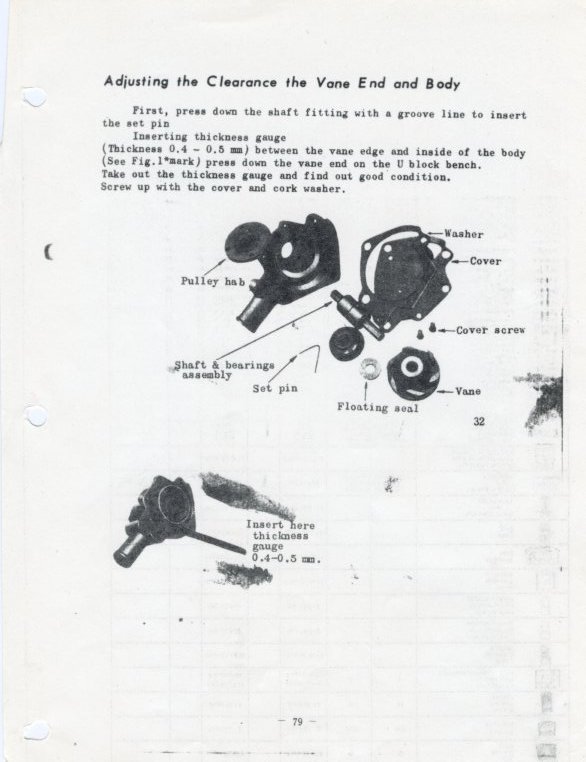
Building the 1961 Datsun 310 Bluebird - Fixing the Noisy Water Pump. So once the engine exhaust was quieted down, it was obvious that the water pump bearings were worn out. Fortunately I had picked up a genuine new Nissan shaft/bearing assembly several years ago from eBay. The water pump as a new assembly is NLA. The water pump was rebuilt with the new bearings and it was successful in quieting the water pump. My first time rebuild of a water pump which, in this case, was fairly simple if you have the parts and are good at making new gaskets. I also had the assistance of the PL310 Nissan FSM, several DIY videos on youtube and a hydraulic press. Unfortunately I took no photos during the rebuild process, only the completed installation and my build of the tool as described by the FSM. One note on the FSM pages, included here for anyone's reference doing similar work, there is no cautionary note on the assembly process saying to avoid applying a press force between the inner and outer bearing race. But I guess that's just common sense practice so as not to damage the bearing. The FSM merely says to reverse the disassembly steps where it doesn't really matter if you damage the old bearing since it is to be trashed. While I was at it, I refurbished a pair of E1 engine fan blades that were previously obtained some time ago from "wayno" on the local Ratsun forum. These stacked together fan blades replaced the single old style E engine fan blade that was on the engine where there should have been two. No idea why someone had deleted the other blade. Noisy design at 4500 rpm freeway cruising speed perhaps. Some self explanatory photos below of the installation, tool, old shaft/bearing assembly, fan blades and FSM. Engine is a little dirty but it runs very well. I probably out to replace that giant '59 Chevy pickup truck generator for a modern lightweight alternator one of these days. Old well used "E" engine fan blade Wooden tool as constructed per FSM graphic Worn out old bearing/shaft assembly Ancient Datsun PL310 Bluebird FSM (plus the PL311 service bulletin supplement). I obtained this Zerox copy of helpful info decades ago from Nissan Corporation in USA when they were located in Gardena, Calif. Free of charge. And can you image getting such service today to support repairs on a 63 year old car? ... More soon
-
MARTS-PL310 61 Datsun Bluebird Sedan
MARTS-PL310 replied to MARTS-PL310's topic in Projects and Build Ups
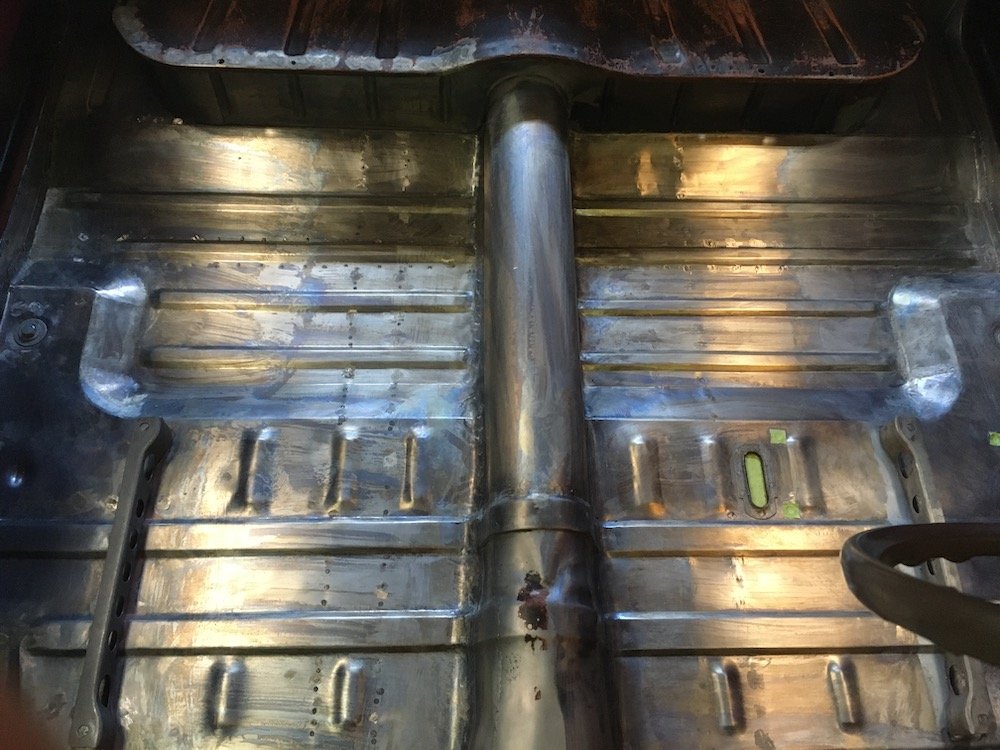
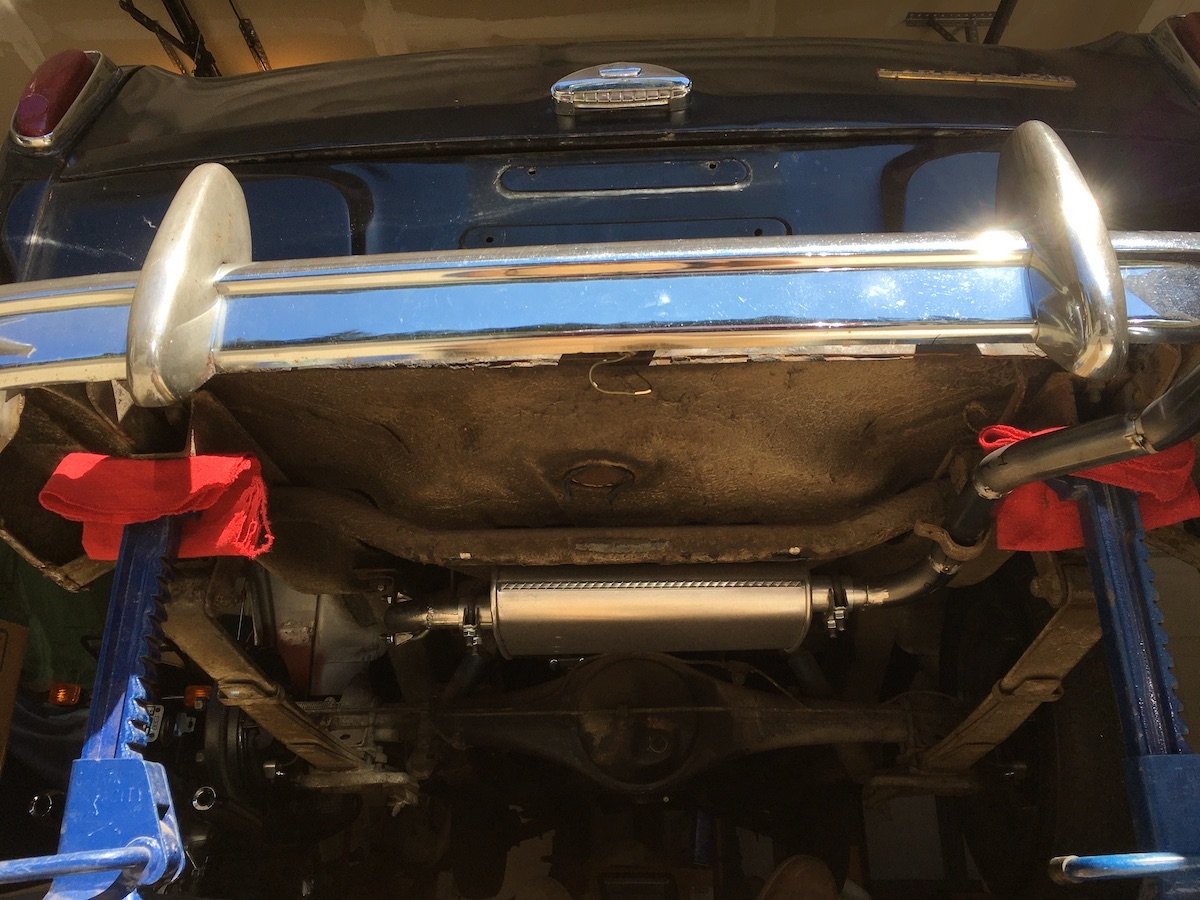
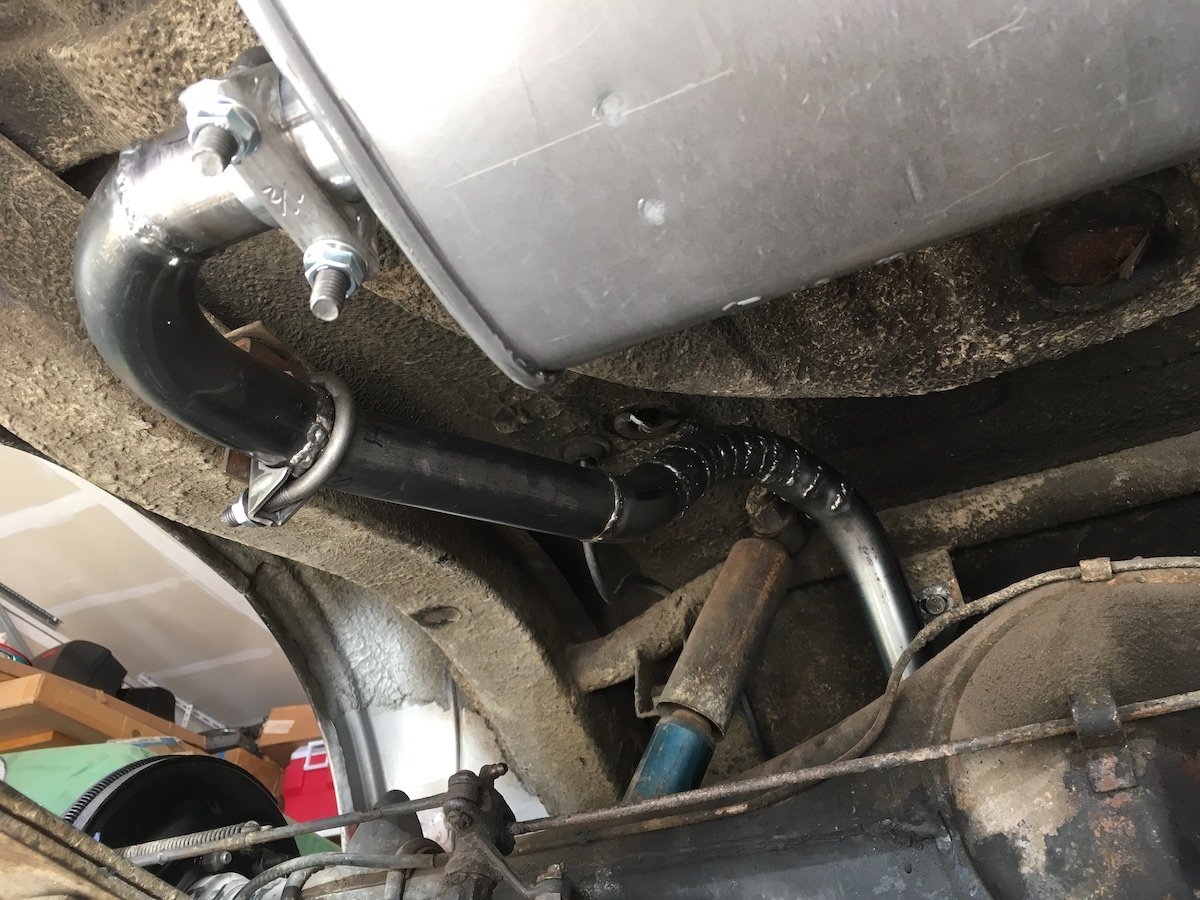
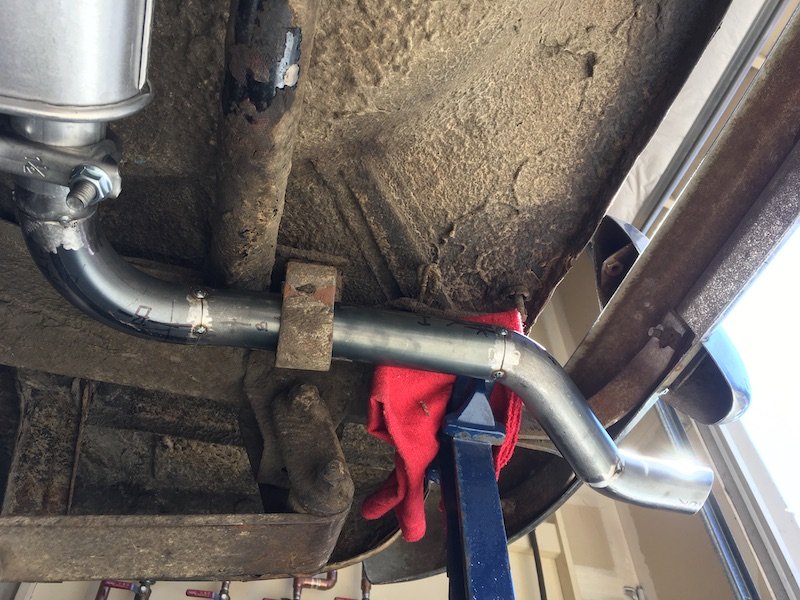
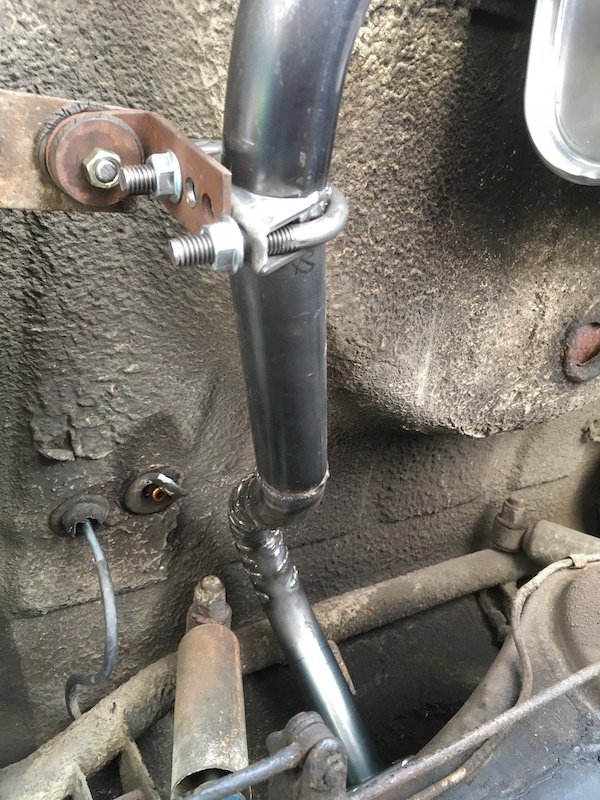
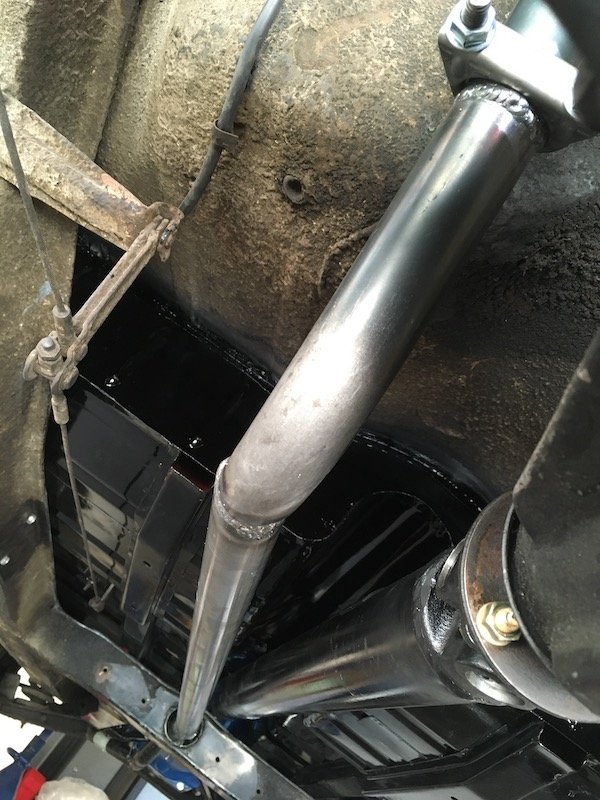
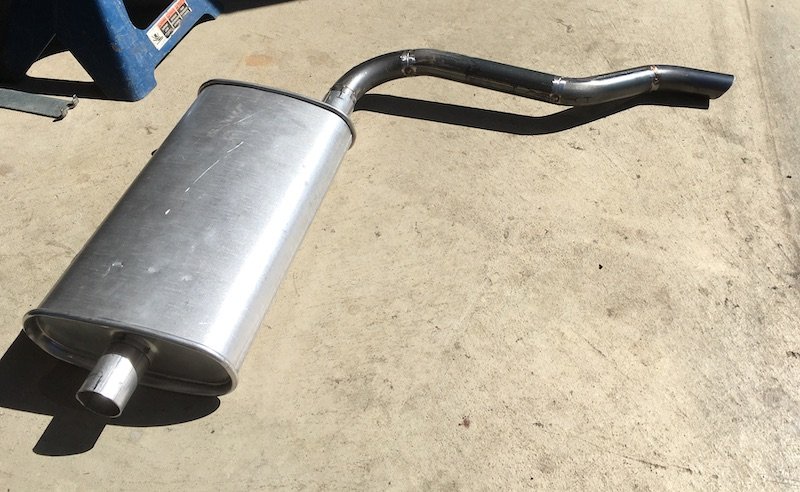
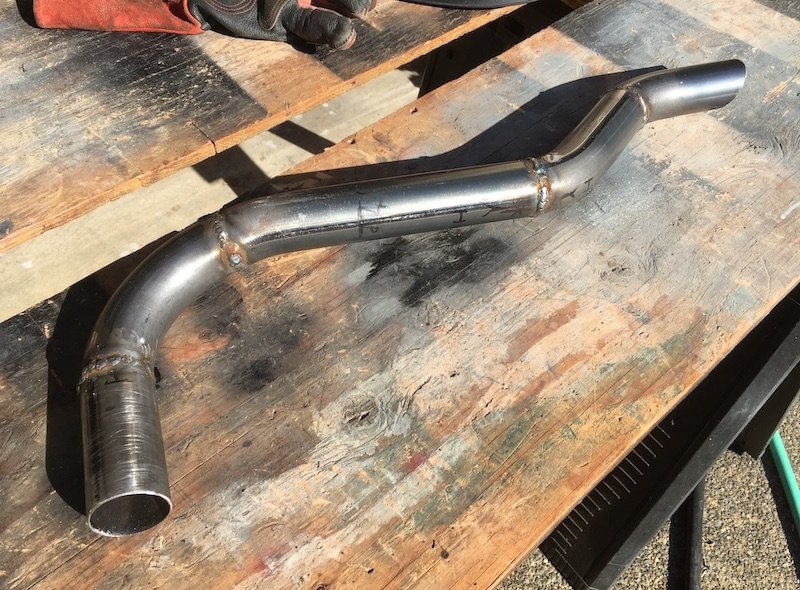
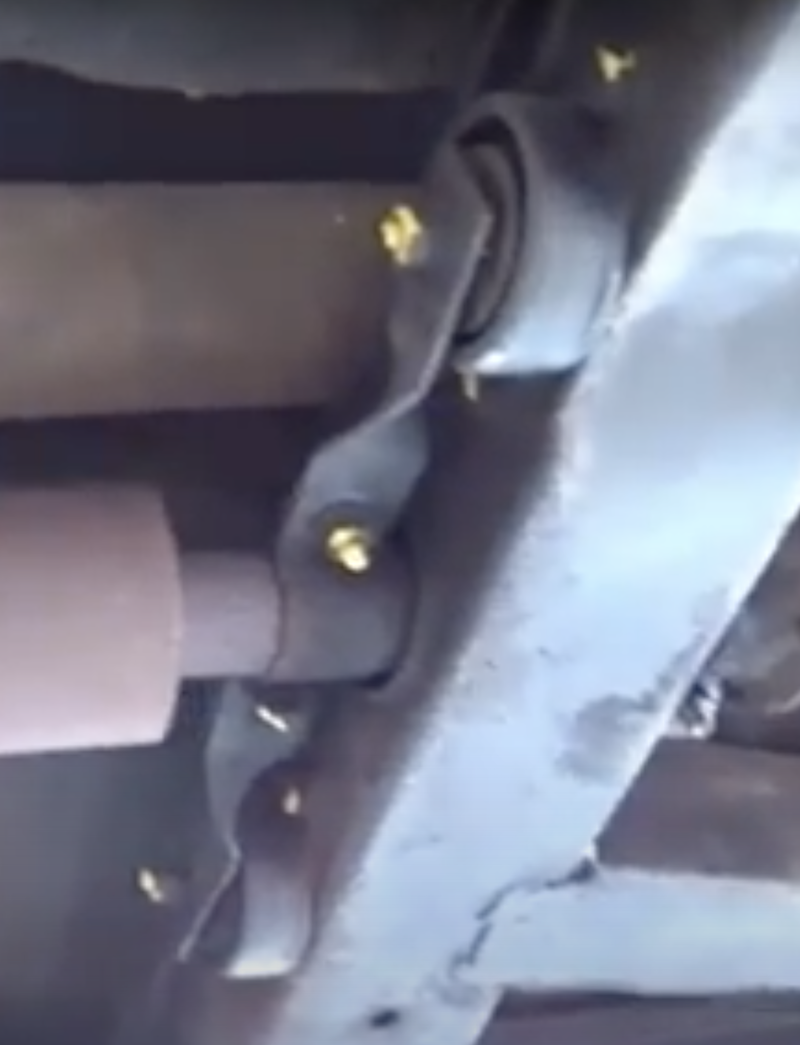
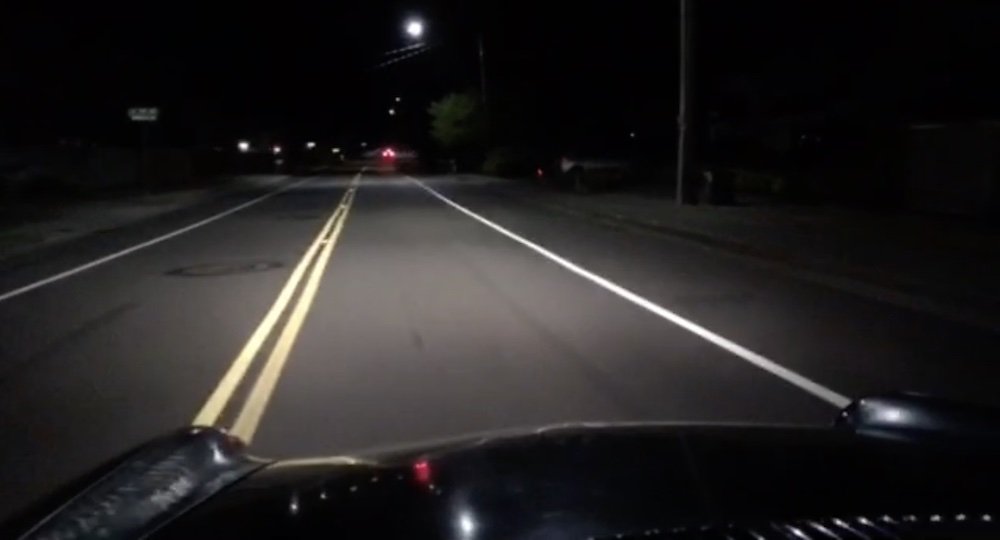
Building the 1961 Datsun 310 Bluebird - Exhaust Pipe and Muffler. Making exhaust pipes and muffler installation. I've never done this fabrication work before but there is no other economical alternative. There does not exist a made to order system that I can just bolt up and hauling costs for transporting the car back and forth to a shop would be close to $350 plus maybe another $500 to $700 labor costs for a true custom quality professional quality job as opposed to a quick in and out one hour job. So I went forward to make my own exhaust system. Nothing fancy in materials, carbon steel, or design, two pipes connected to one $25 muffler from O"Reilly auto parts. The drop or header pipe from the engine is a very old stock aftermarket piece about three feet long that I was lucky to find on eBay many years ago. The small muffler is being test fitted and adjusted at what should be close to the original stock location. Adjoining pipes are only tack welded together at this time. There was a lot of back and forth fitting and adjusting while laying on the floor. Wish I had a fancy lift to save my back. Anyway, it doesn't look too bad in this view but hiding in the shadows is the crude routing above the rear axle housing. Going a bit further forward..., Ugly happens. I regret making way too many pie cuts and welds to get the curvature over the axle housing. Maybe next time I'll use just a few curved pieces with short straight lengths in between. Backing up to the tail pipe, I had become more proficient by this end point and chopped and fitted the elbow and straight bits more to my liking, dodging nearby body, frame and bumper structure, and with a nice angle cut across the outlet. Btw, shown is the only factory original clamping left, all others are left over from long ago quick cheap jobs done by muffler shops. One clamp was definitely not safe. A shop had drilled a hole under the rear seat cushion straight through the body sheet pan and hung a support and clamp without any sealing added to prevent exhaust gasses from getting inside and causing CO poisoning. I have welded that hole shut. Same tail section fabrication off car. And then the long straight section looking forward to the pass through hole. The fit to the curved piece wasn't perfect but it works. There are the diamond traces of the original somewhat complicated support clamp assemblies at the forward frame x-member. It will be another mini project just to try and reproduce those clamps since they are not available anywhere. I just have some photos of what the OG clamps look like. I clamped instead horizontally with a couple of generic tire rubber strap types that I can't even photograph because they look so bad and result in some rattle contact at the through hole. The not shown pipe connection forward of the straight pipe, and on the other side of the x-member, is the old stock header pipe mentioned earlier. No problem with that pipe, it fit very good. A video screenshot copy of the OG clamping design at the x-member. Because of such a close clearance, good support is critical here to keep the pipe centered yet flexible as the engine and header pipe move about slightly on the rubber engine mounts under load and deceleration. The cylindrical section is backed up by a diamond shaped flat piece which bolts to the x-member. I'm guessing there is a rubber isolator inside the cylinder. These clamp assemblies are not available, at least not new, and I'll figure out a way to reproduce a pair eventually. Only guidance I have is this photo and the diamond imprint on my x-member. Workbench view of my finalized pipe creations. Ugly unground welds left as is for integrity and containment of exhaust. Functional. The header kit bits used for the elbows were made of slightly thicker steel compared to the straight pipe and thus much easier to weld without the risk of blowing holes through. So after installing the exhaust, I installed lights, blinkers, front bumper, number plate, then waited until about midnight and went for a stealthy and much quieter drive around the local roads to flesh out additional issues. The speed was kept under 35 mph because there is no front glass installed yet, thus also the stealth approach so as not to attract any unwanted attention. Only a few issues of significance showed up after about five miles of driving. One, the exhaust rattles badly at the x-member pass through. Two, the water pump bearings are worn out and making lots of noise. Three, there is just slight contact between the tunnel and transmission at one of the side cover plate uppermost bolt heads. All issues have since been addressed with appropriate corrections. Midnight test cruising in a Bluebird. More later on the "fixes."
- 75 replies
-
- 12
-
-
MARTS-PL310 61 Datsun Bluebird Sedan
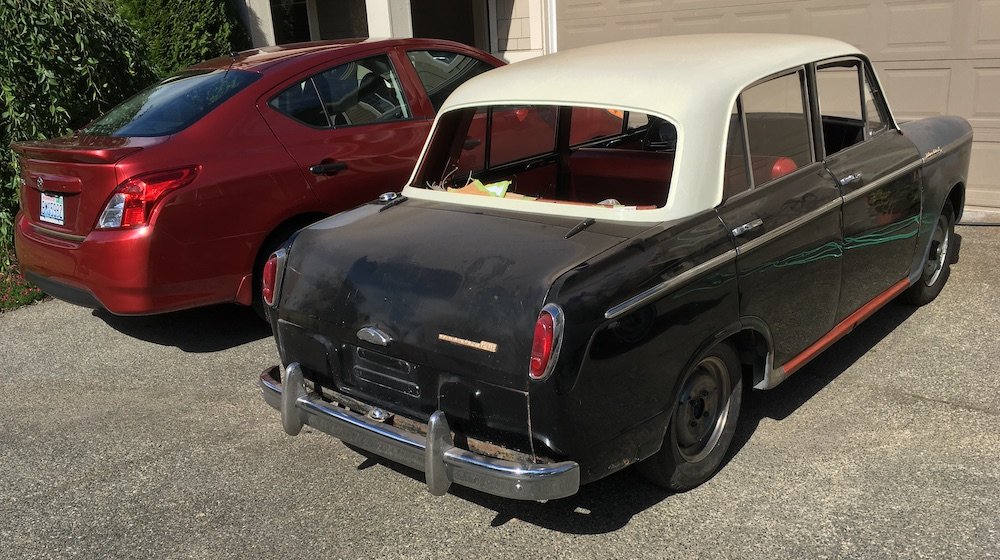
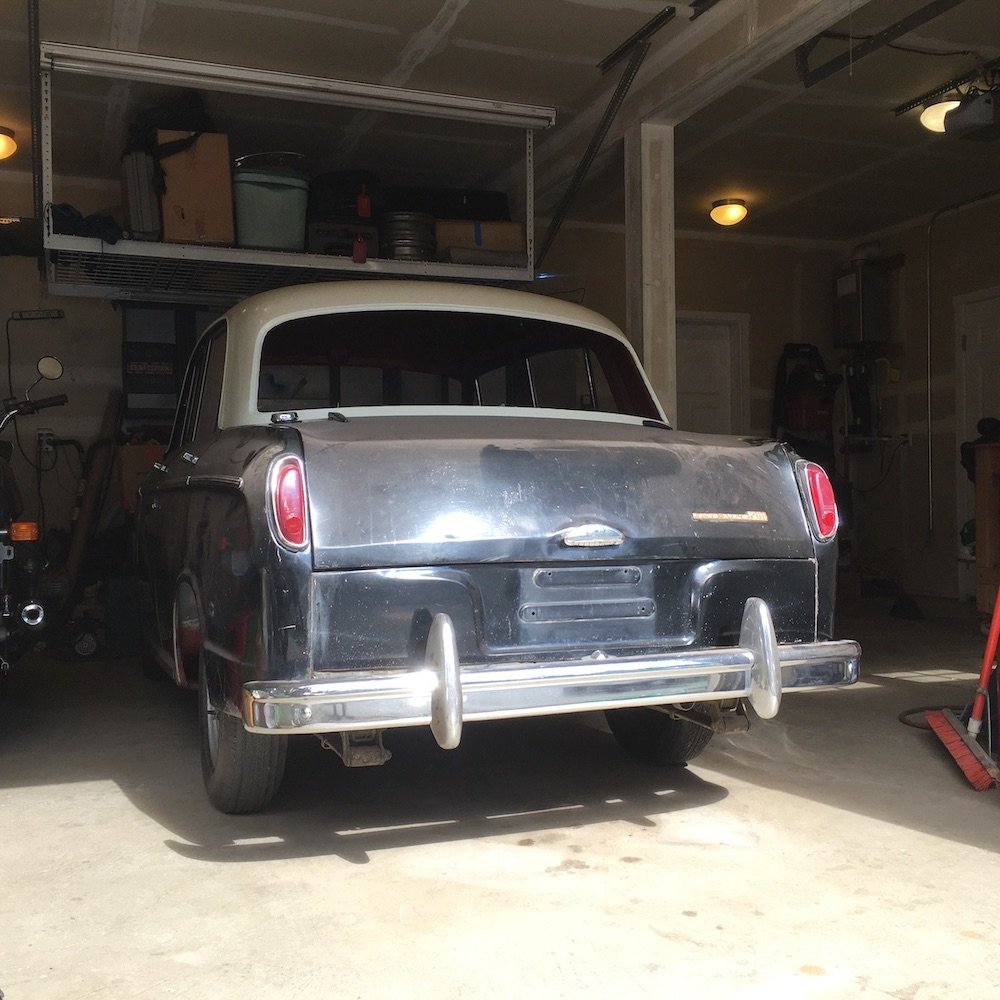
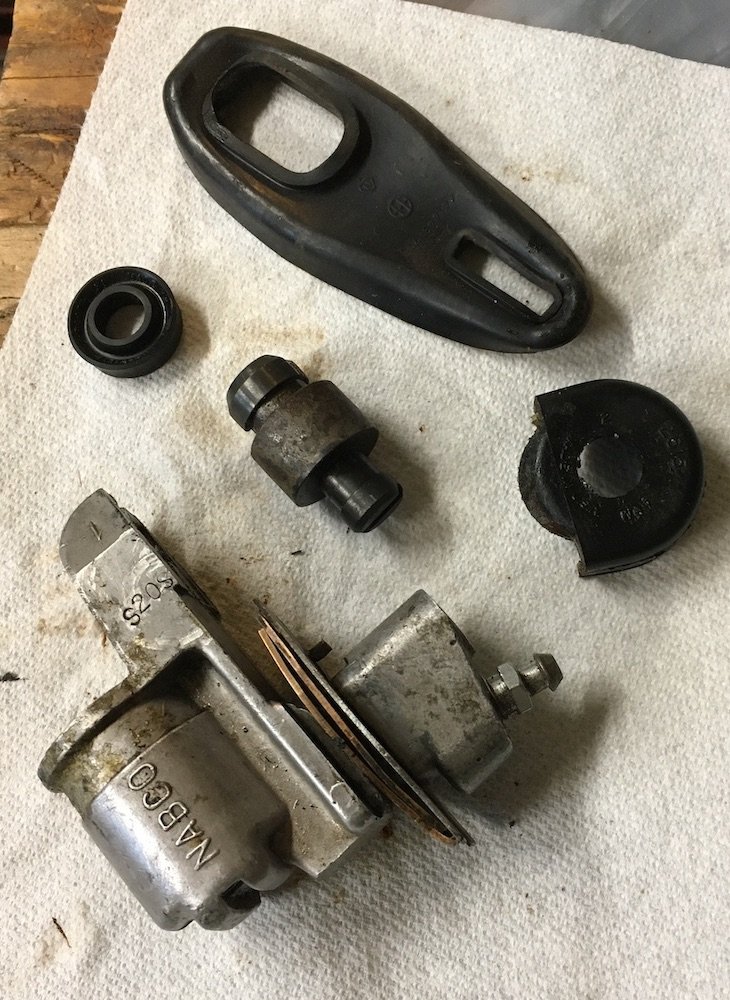
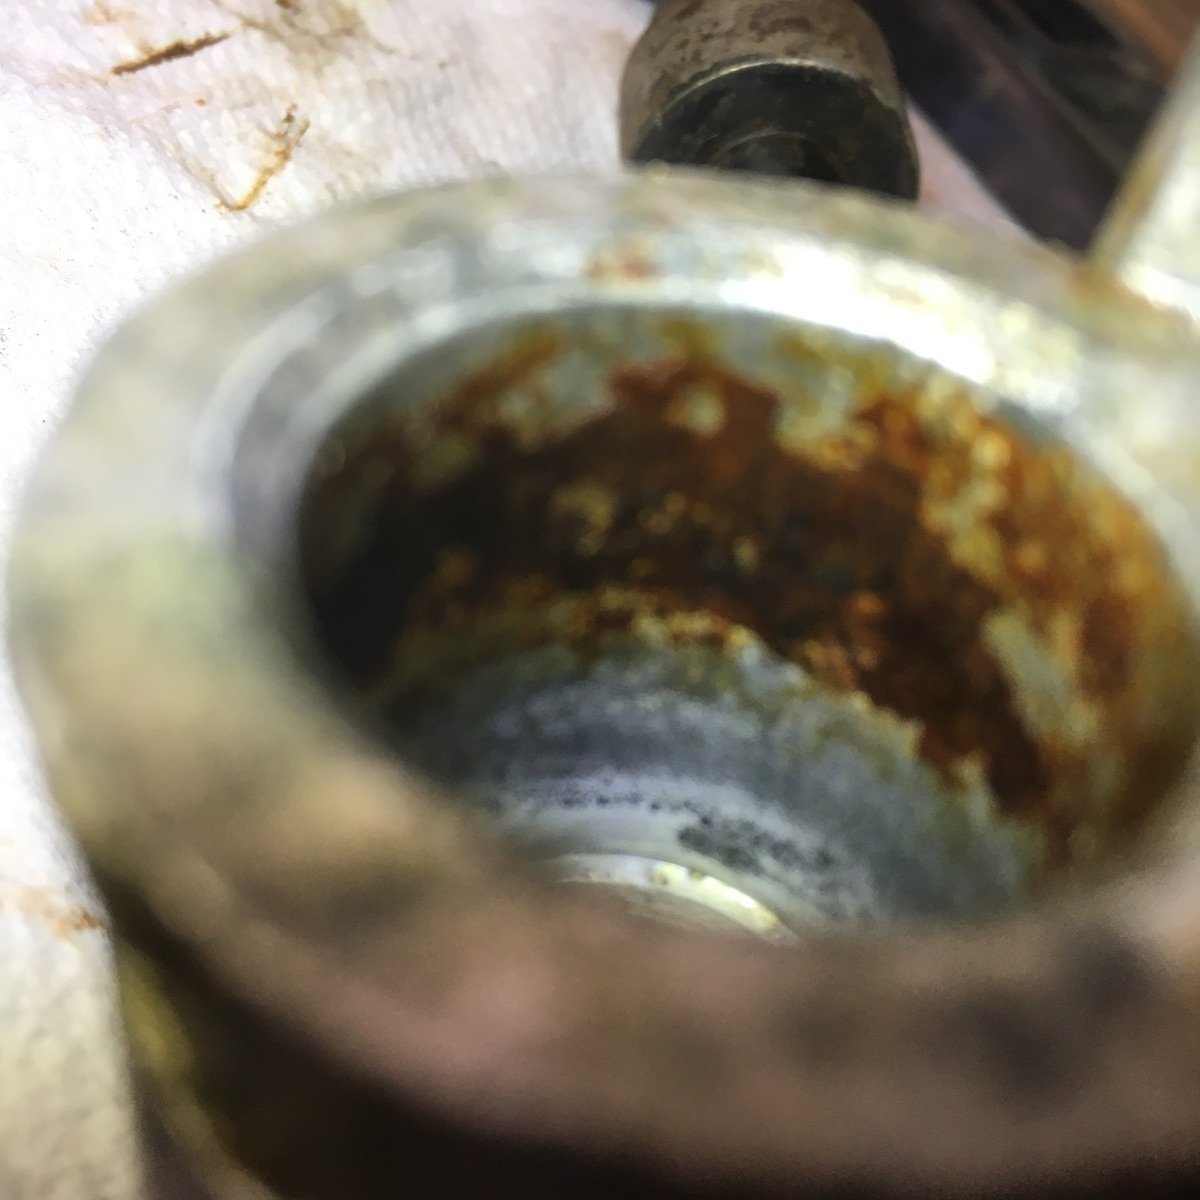
MARTS-PL310 replied to MARTS-PL310's topic in Projects and Build Ups
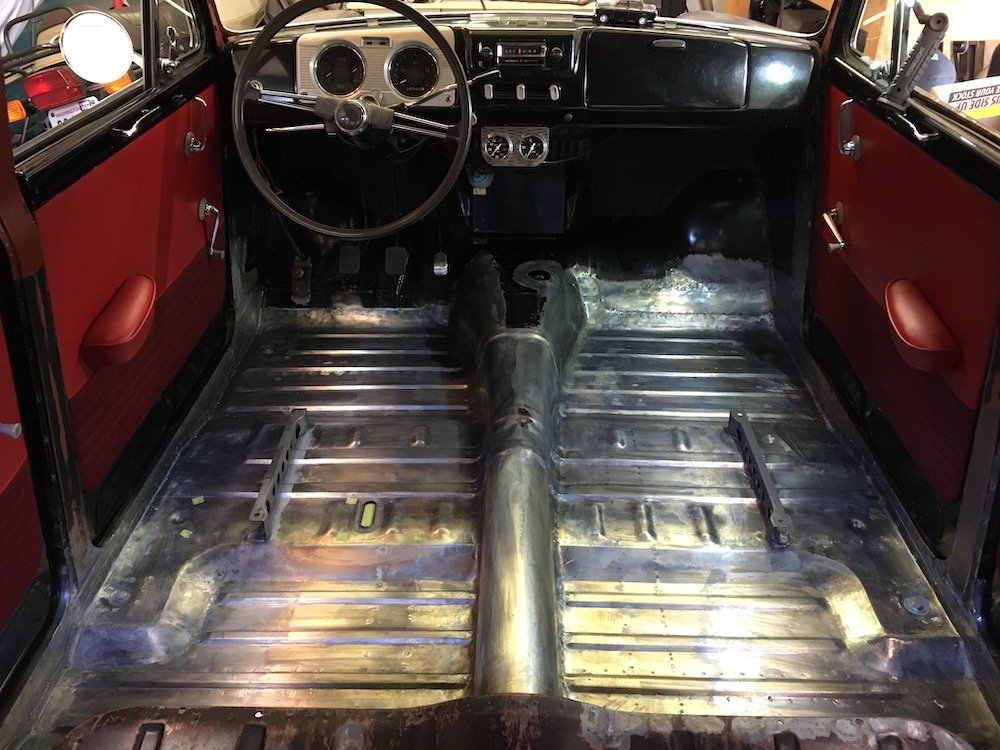
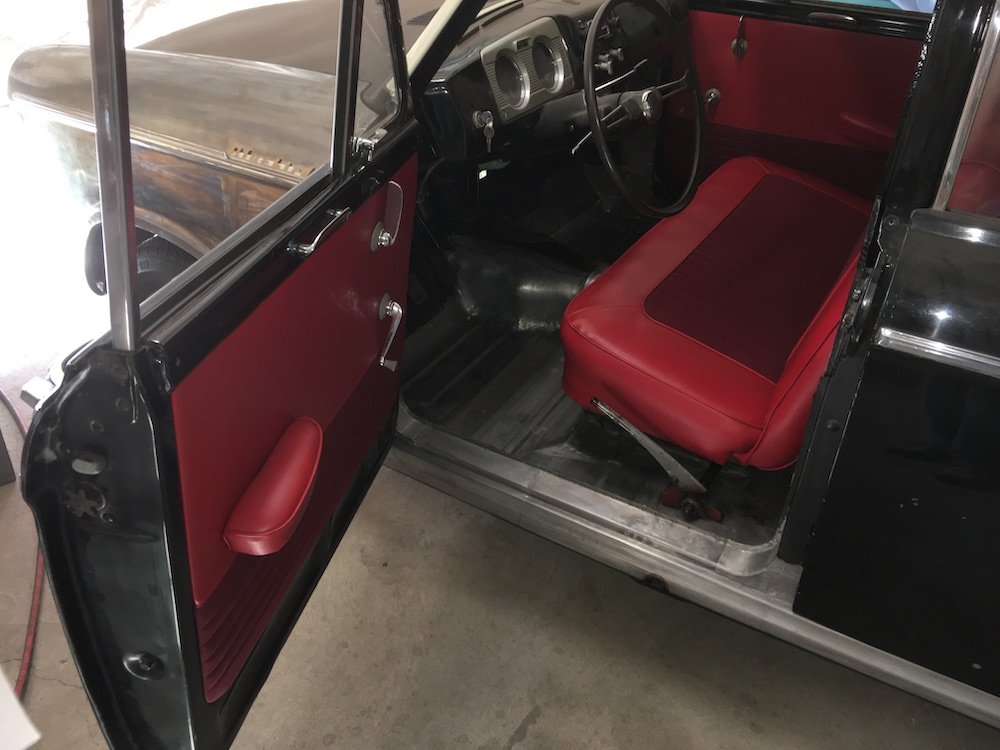
Building the 1961 Datsun 310 Bluebird - Drive Time - It Moves! Lowered the Bluebird and drove it around only in front of the house for a few photos and repositioning back into the garage. First time back on its wheels in six years! Btw, I could use a couple more OG wheels (4J by 13 with stick out mounting clips for the hubcaps) as one is very bent and another is badly rust pitted. Still looking locally but so far no luck finding any in serviceable condition. A couple of issues happened but were expected. One, it was very loud without any exhaust pipes/muffler. My neighbors did take note of the emergence of the Bluebird, especially after giving it a few healthy revs. Two, one of the hydraulic brake cylinders locked up in the full on mode. This was semi expected since it had been a while since I'd serviced the cylinders, My experience has been that wheel cylinders tend to build up rust every few years of inactivity on the dry side of the piston cup seal. And this happens regardless of how clean I keep the brake fluid free of moisture contamination. Getting ready to launch. Temporarily bolted in the front seat. Only took a couple of minutes by threading on four nuts to the mounting studs. Lowering. Rolled out the floor jack and began an iterative front to back lowering of the Bluebird off the fully raised six ton jack stands that had been raised even higher with concrete blocks underneath. The lowering sequence begins... Time to hop in! The mighty loud 1.2L engine starts up just fine and the Bluebird finally drives out of the garage and into the warm summer sunshine And then, after maneuvering the Bluebird back and forth a few times in front of my neighbors houses, the brake lock occurs. This was temporarily remedied just to get it back into the garage by tapping the back of the stuck right rear wheel cylinder a few times with a brass drift. The bird heads back into the roost. One of the rusty brake cylinders. Easily cleaned up the bore and piston with some 600 grit wet or dry paper. Followed with acid clean, etch and zinc phosphate treatment on the steel piston. Repeated process on the other three wheel cylinders. The aluminum cylinders will not be honed since the soft bore ID would become too large and not make a good seal. Brakes now function and seal fine. So the next thing I addressed was the exhaust system. In the next post I'll cover the build of a simple home built design from straight 1 1/2 inch pipe plus a kit of pre-bent header piping bits cut and MIG welded to an economy muffler. First time making an exhaust system from scratch for me and it was another learning experience.
- 75 replies
-
- 11
-
-