
Leaderboard


Popular Content
Showing content with the highest reputation on 08/30/17 in all areas
-
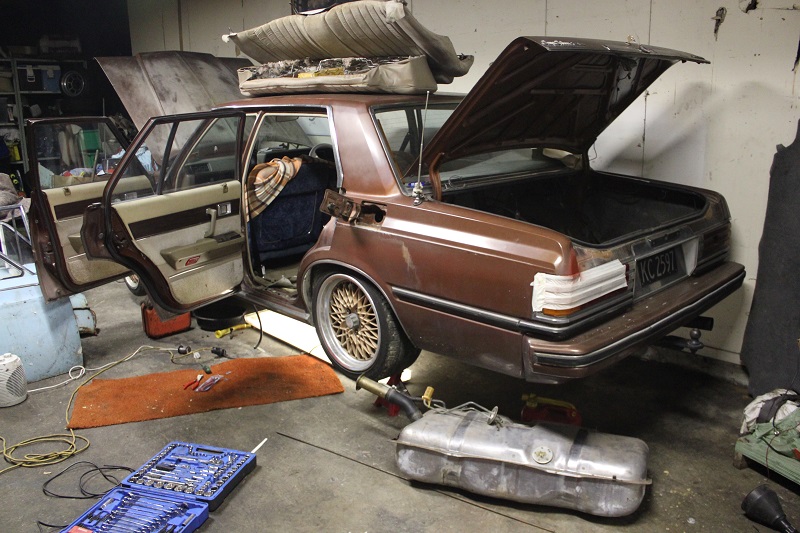
So. What's up with the above pic? Well long story short I got annoyed at how loud the fuel pump was mounted hard to the chassis. So made the decision to go in tank. Was not as easy as I hoped as I didn't want to weld the tank, and due to very short time constraint (I had planned on taking crown wagon to hanmer, but my warrant man pointed out excessive play in the drive shaft yoke, which is a problem I have had before and can become terminal on a road trip) So anyway parts turned up from the states on the Thursday a week before heading off for Hanmer, and with the glorious help of Steelies and his understanding of what issues we had to overcome, got this shit sorted. 1 week later and car is in line at the ferry ready for the trip. 1100km later and mission accomplished. Only drama with the car was me demoing the exhaust on the off road trip on bridges up to fowler hutt. So its back up on axle stands once I get to the lock up again, remove exhaust and fix what ever leaks and issues. Then..... its pretty much done. Just a decent clean, removing the cb radio, and mounting of the monsoons and hopefully within a month it will be for sale. Looking for 8k certed with wheels etc. Spread the word. Will get better pics once its back together and cleaned.
 12 points
 -
Nice one mate lol. As nice as it would be to have 2jz Wagon. I think it will be even nicer having 1kz wag instead.10 points
-
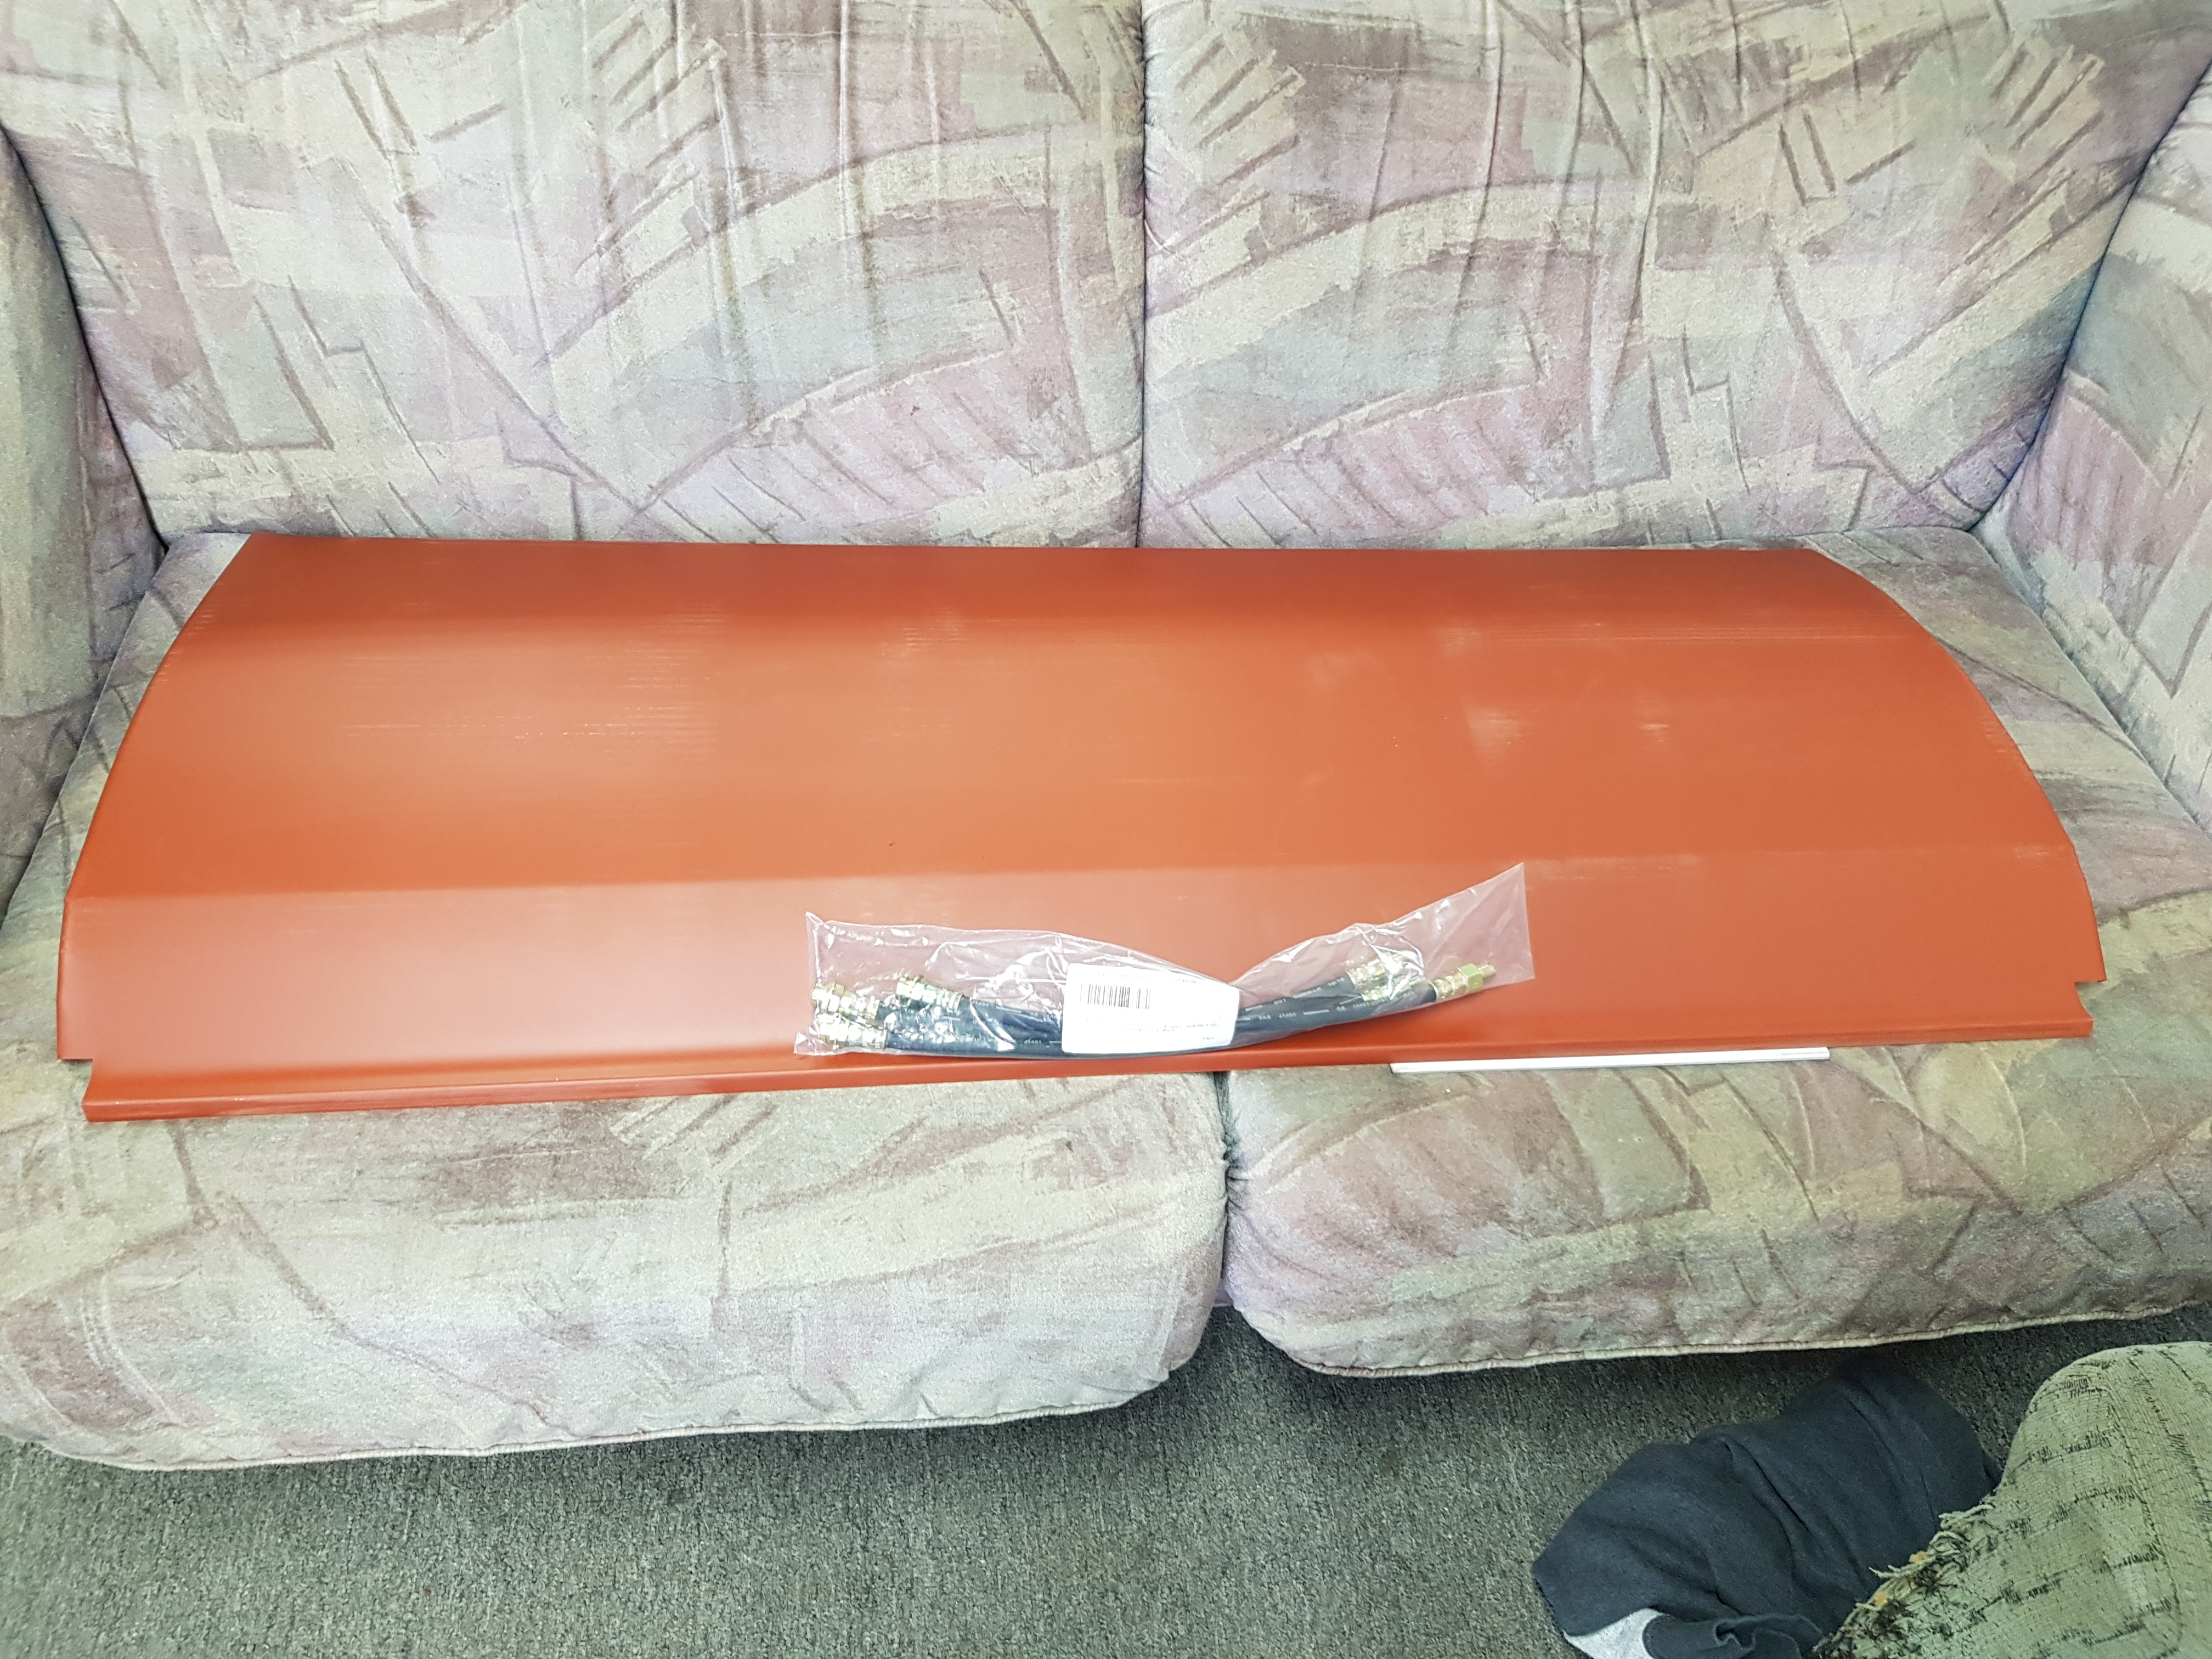
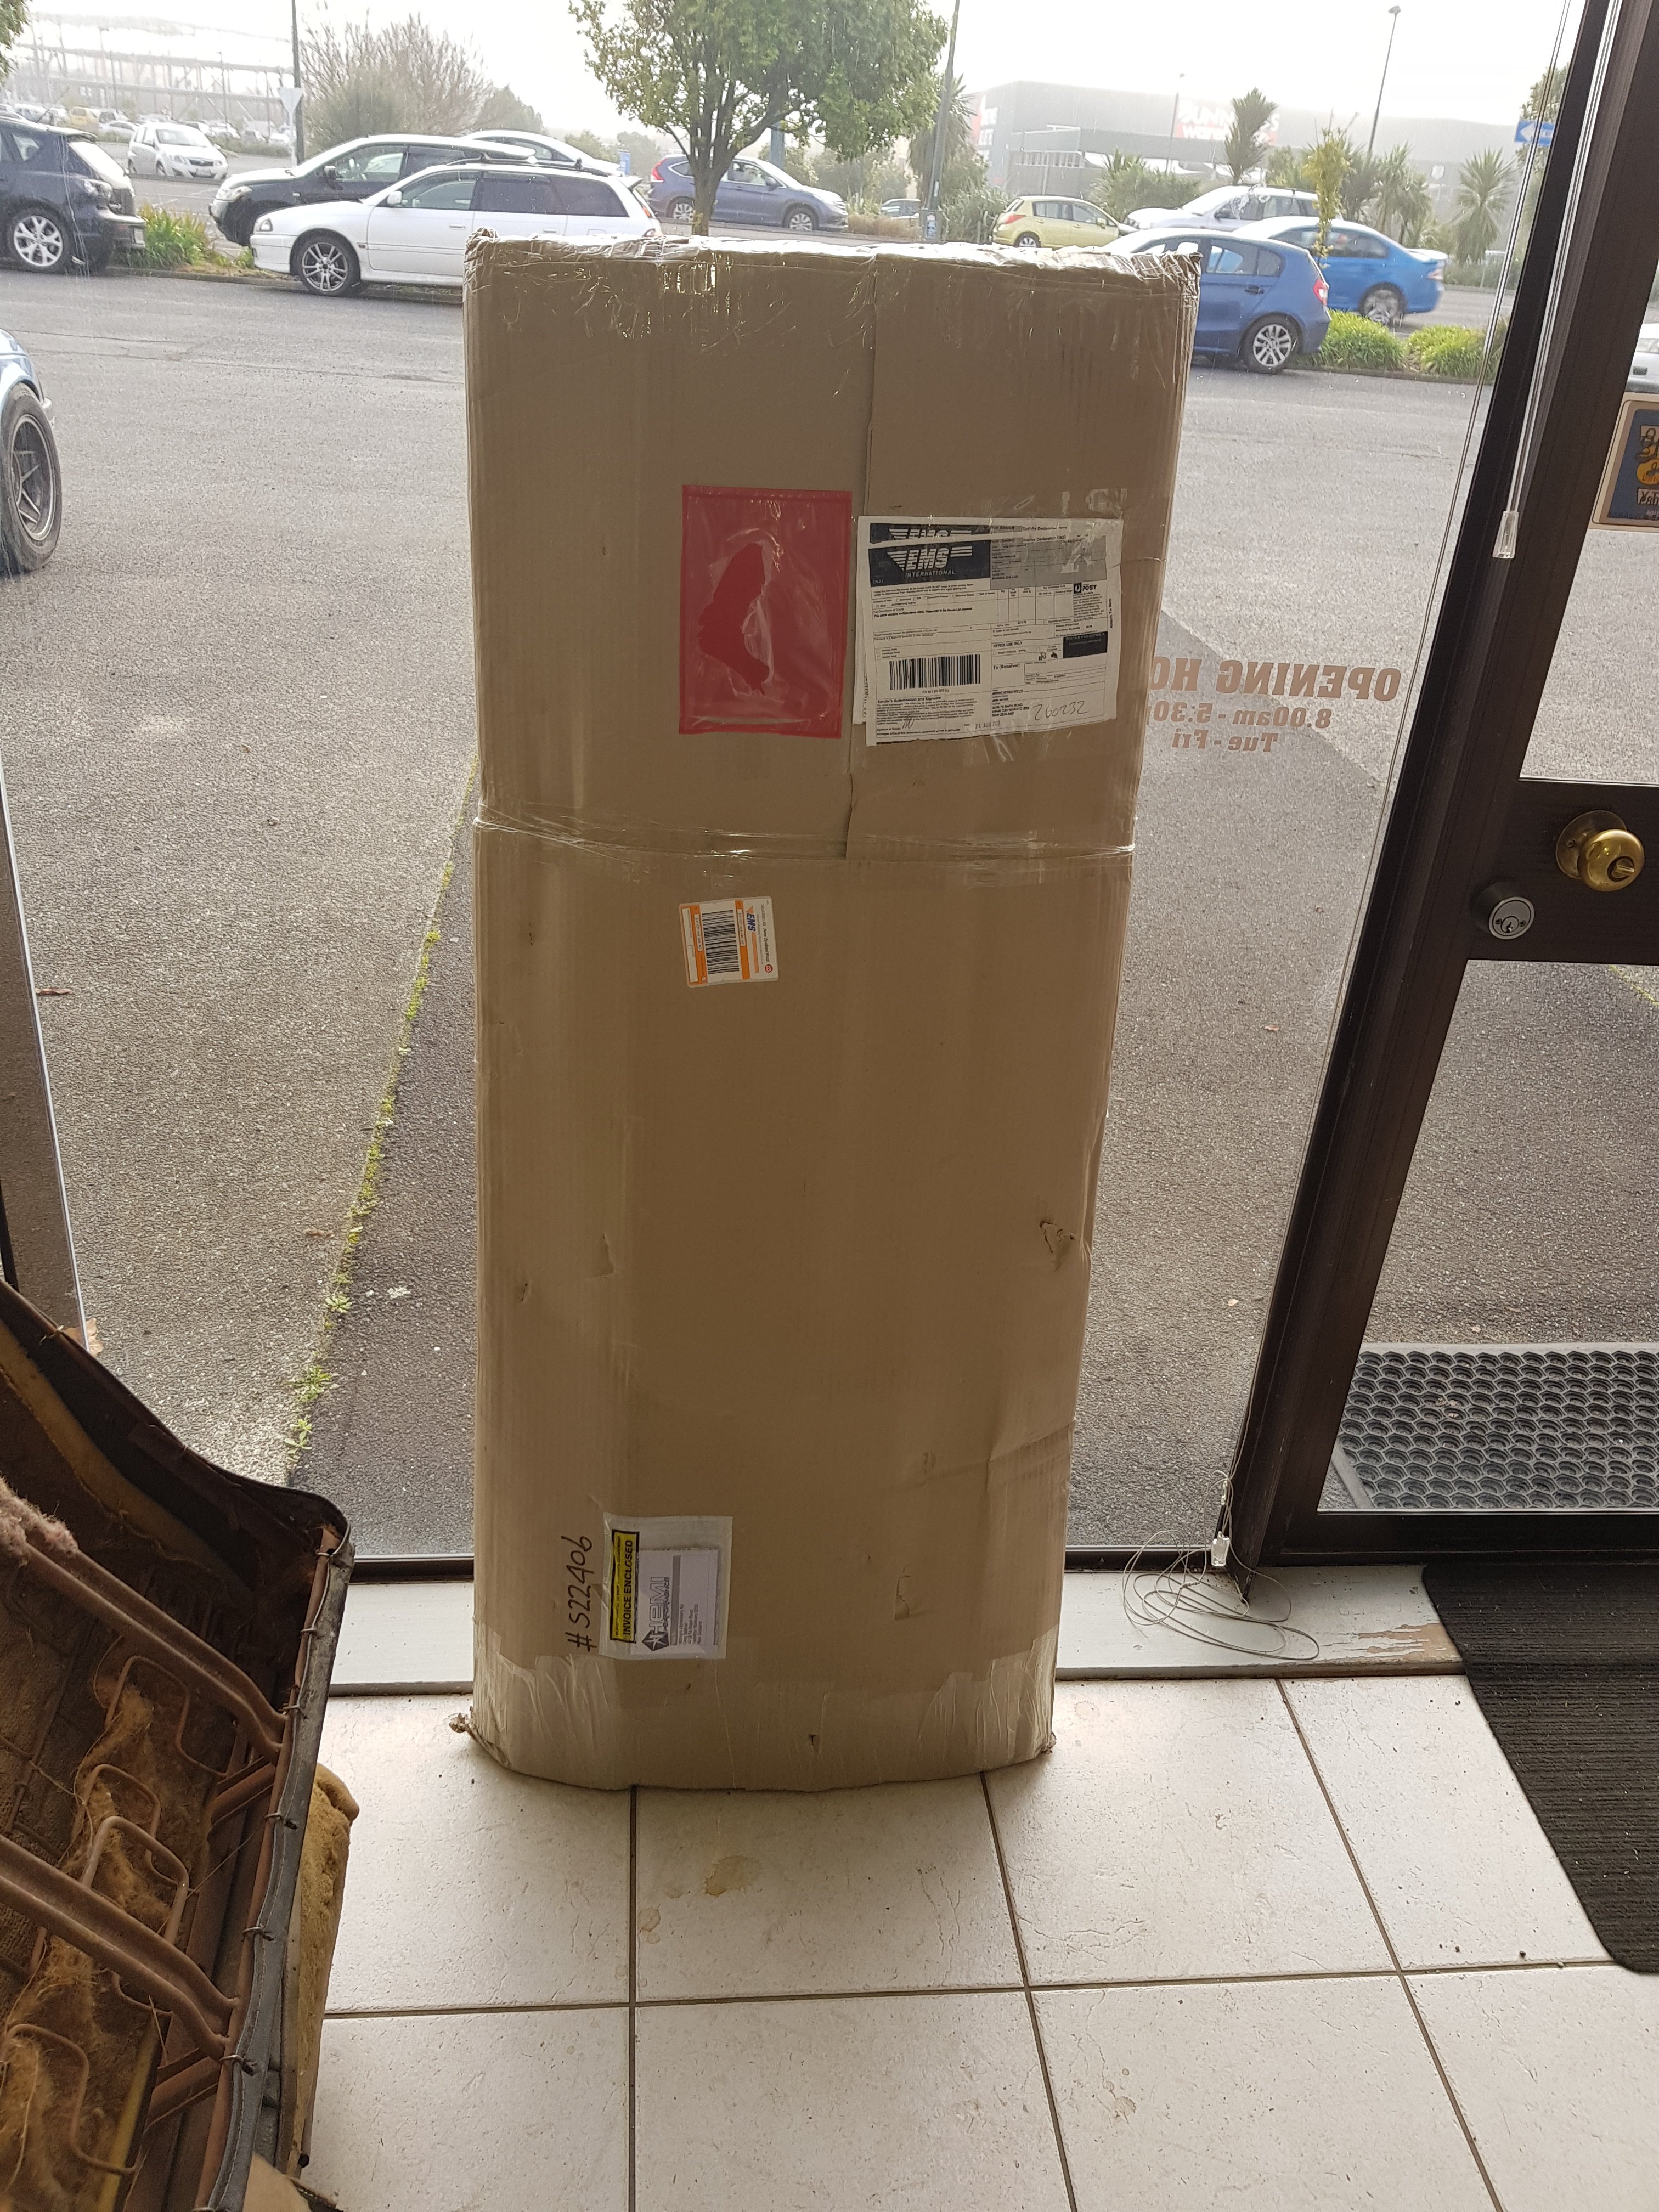
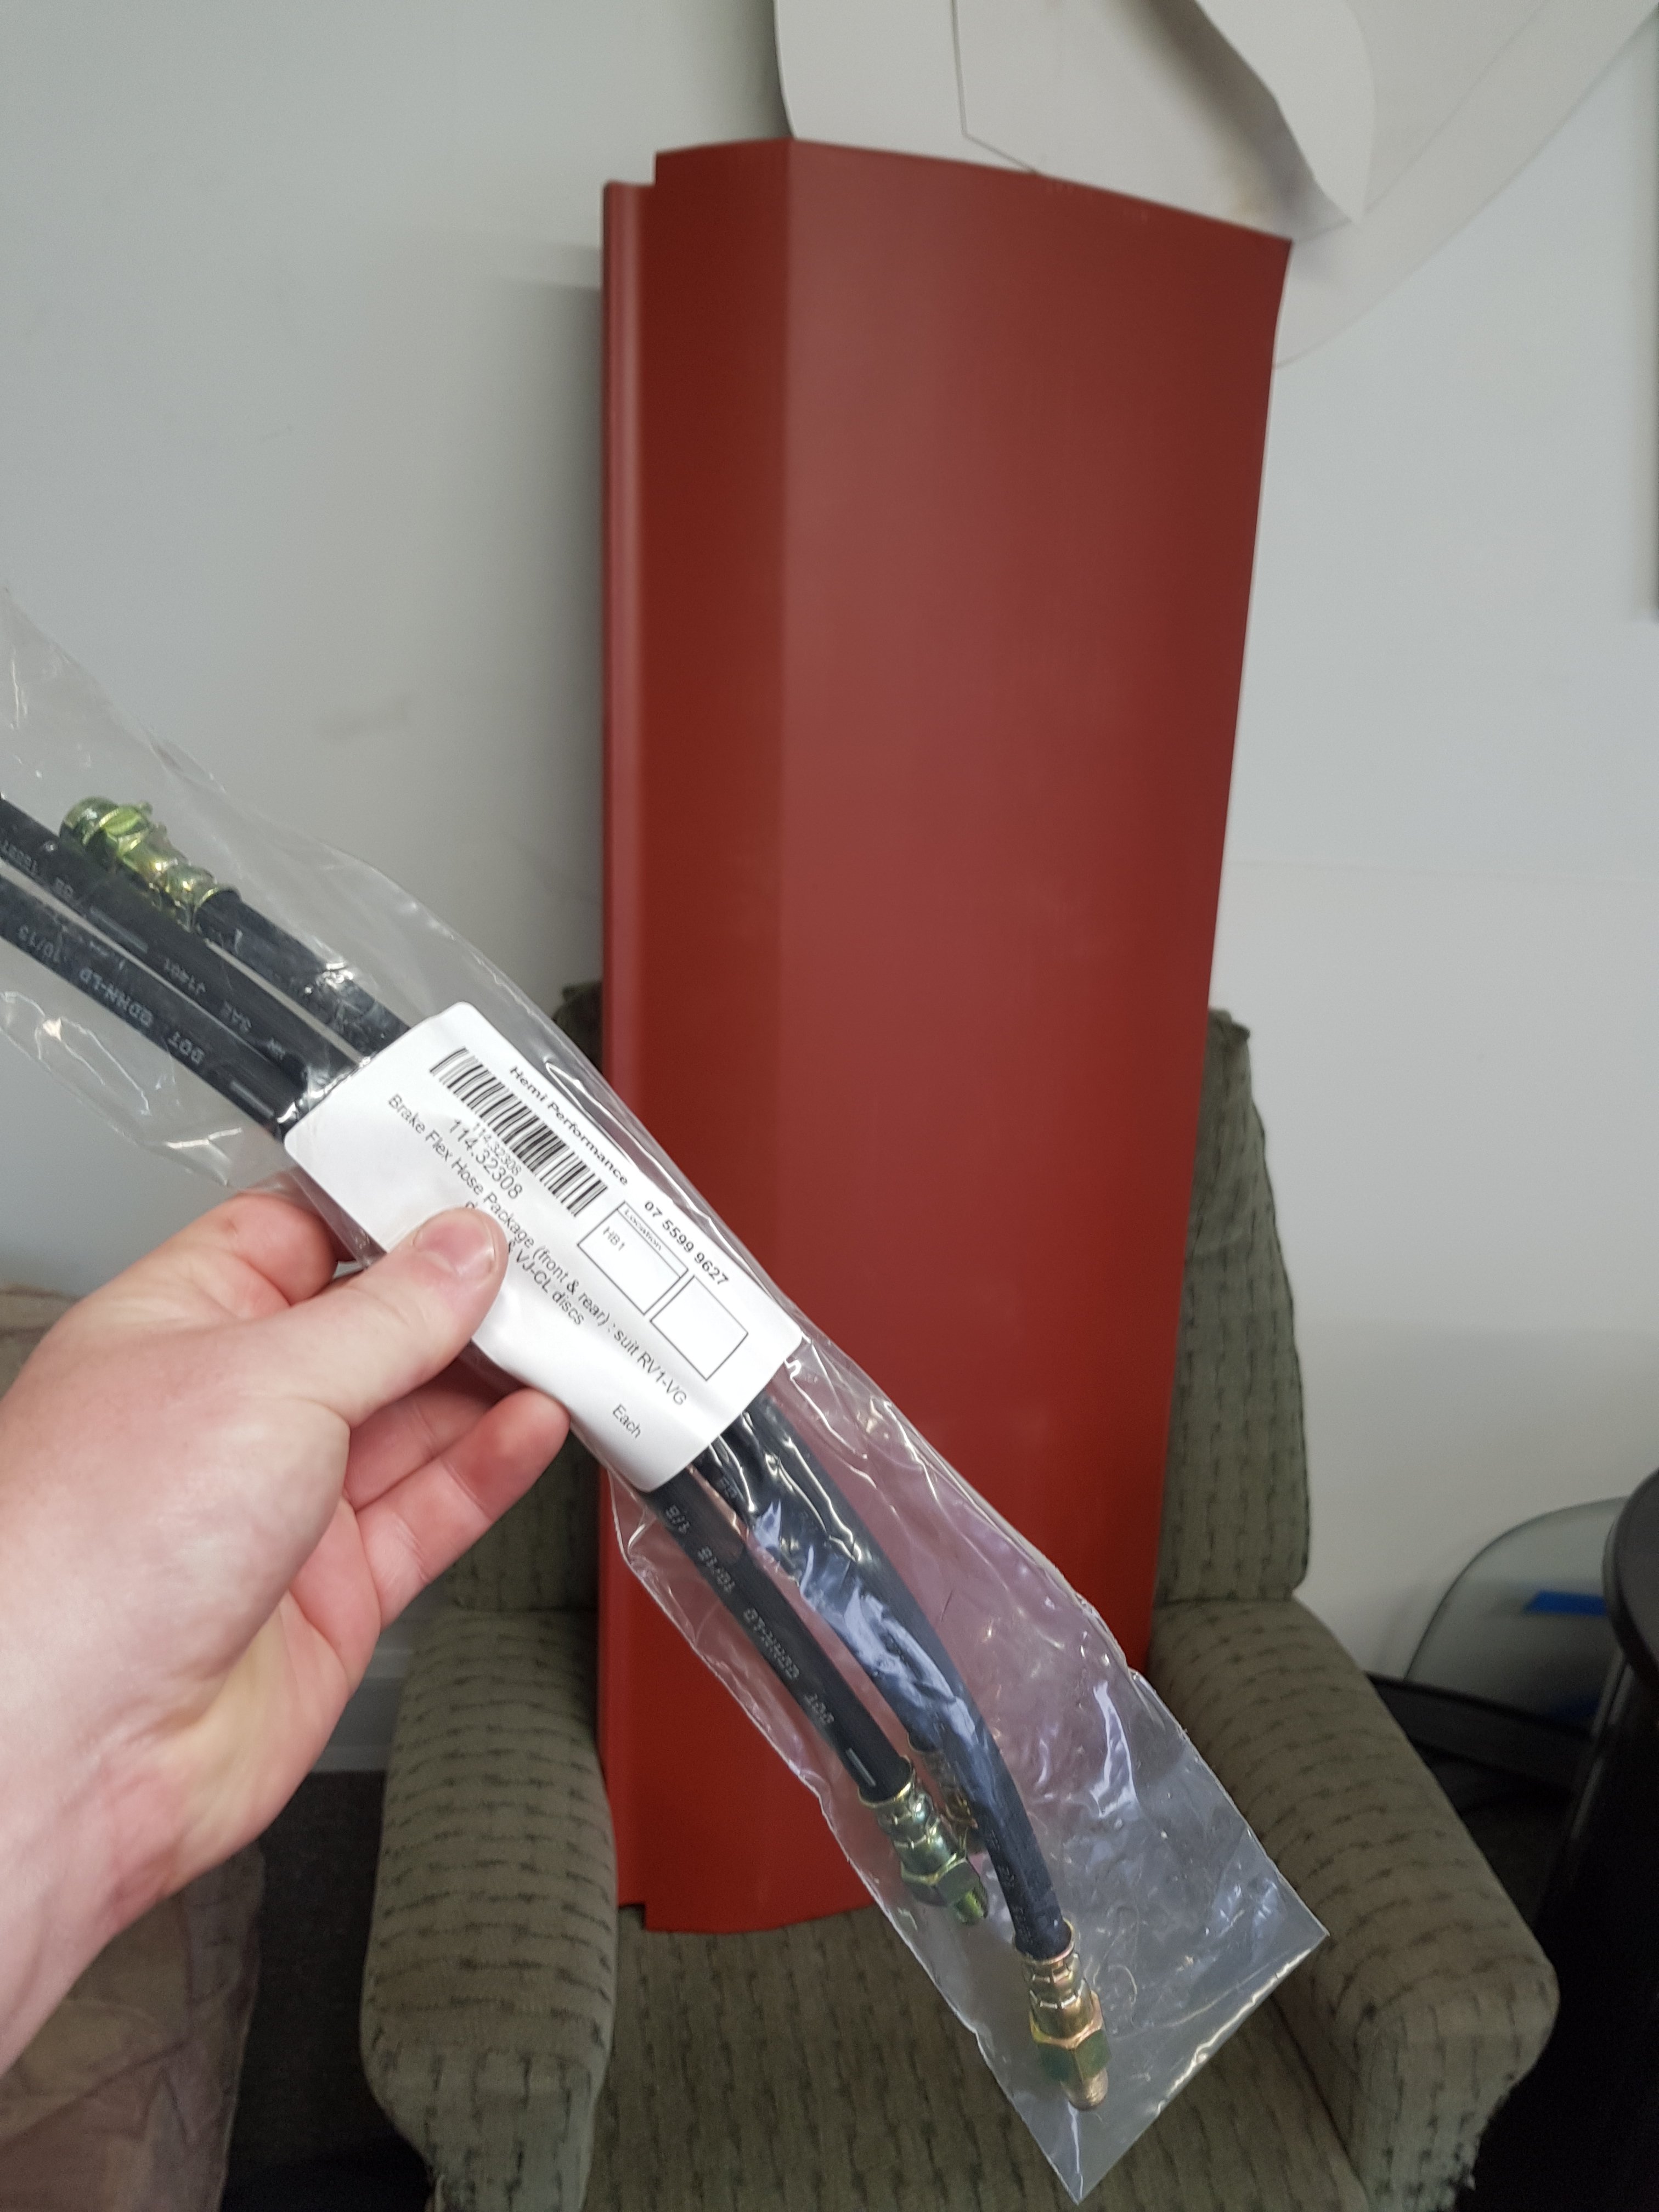
So when we brought the kombi I was told that I had to get the wagon going and gone before I can spend any money on it. So I went shopping just last week for a new tail gate and some brake lines. Look what arrived at the work shop this morning. Didn't even get stung by the tax man at customs. Pretty wrapped about that. New skin and brake hoses acquired. I see @Evan is rebuilding carbs for a hobby now days so I think I'll send mine upto him to rebuild cause he loves them so much. SO MUCH EXCITEMENT!!!!!!
10 points
-
One of my claims to bogan fame is the fact that in the 90s, the local wrecker ran out of stock of escort diffs because of me. 2 in my escort van and 7 in my mk2 cortina. Skid-axle tramp- bang. Learn? No. Repeat6 points
-
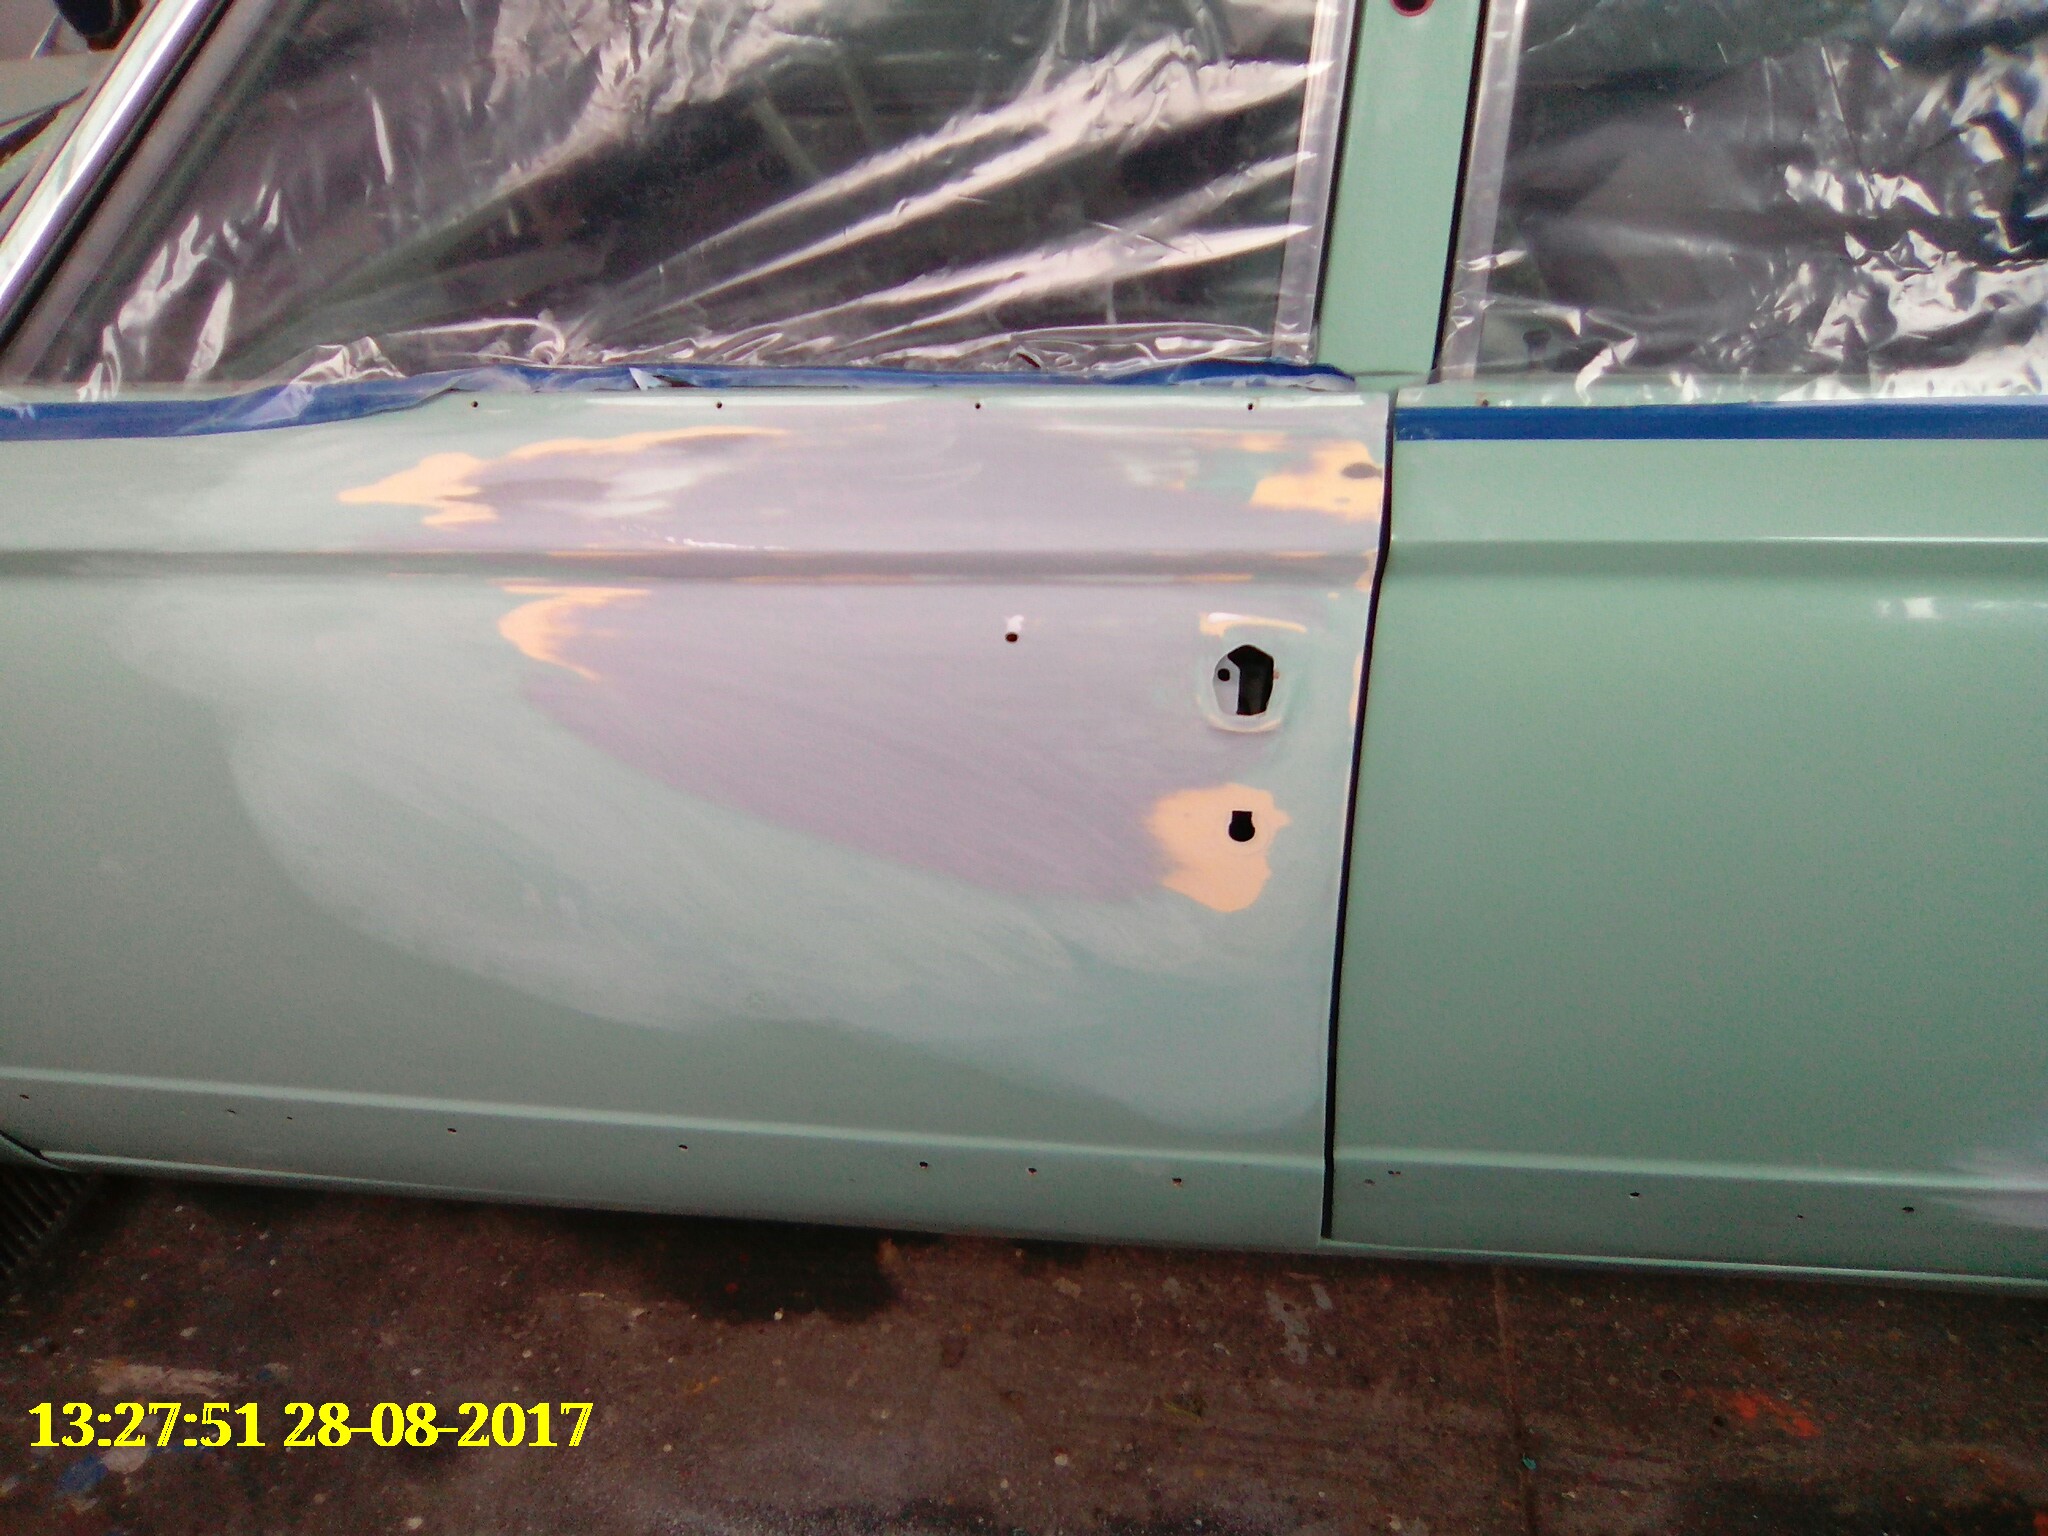
A very quick update this week All the panel repairs are complete and ready for paint Now all we need is some decent weather in Auckland so paint can happen, a big ask this time of year
6 points
-
Also, an estimate of the interested parties currently puts us at 16! I'm impressed, who else you know that might want to join in?4 points
-
Time for today's update then. I didn't get as much done because I had an exam but in the time I had I was quite happy with the progress. I started off by making some holes in the existing chassis rail. I cleaned inside the rail with a die grinder and solvent before I sprayed some weld through primer to try to keep the exposed steel to a minimum. Then I cut and clamped some 2mm plates inside the rail ready for welding. The idea here is for the plate to act as both a reinforcement, and a locating mechanism to hold the channel in place while I butt the two channels together. So I turned the TIG up to 11 and set to joining everything together. The green colour is from the weld through primer being messed up by the heat of the weld. These are the hottest I've ever had my little TIG; I'm trying to make sure I get some good penetration into the 2mm plate. Once all three plates were in I was able to slot the new channel section on and double check all the measurements. I wanted to be doubly sure that everything would line up nicely so I clamped everything to the angle iron again. Then I added another clamp to hold everything laterally and went ahead and welded in the rosets. And wire brushed it off all pretty like. Finally I could get to the actual butt welding. I left the welder cranked way up because I didn't have to worry about blowing through thanks to the backing plates welded in behind the joint. Almost like I planned it... Looks pretty good to me. All cleaned up, And painted with a quick spritz to stop any flash rusting. This was the last bit I got done on the Escort. Tomorrow I'll clean back the inner channel, hit it with some weld-through, and weld the outer skin on. That's the plan anyway. Meanwhile, I did a bit of work on the Mazda to try and sort out the trans issues. Remember, I do want to daily this thing if at all possible until the Escort is ready to take its guts. It's a really nice car after all. I started off talking to the transmission expert friend of mine (wouldn't really work if I called him the "trans guy," would it?). He suggested it may be a stuck valve of some sort preventing hydraulic pressure from getting to the valve body and letting the trans select a gear. He gave me a set of instructions of how to pull this valve and clean it up to see if that would help, then left for a while to go and run some errands. I pulled it out and hit it with some wet and dry as instructed before I reassembled and tried to put it in gear again. Still nothing. Kaput. Still, I was warned this might be the case. If it was, I was told to unplug a certain hose from the trans and run the motor to drain the trans of fluid before I pulled the pan off the trans to look for any shrapnel. So I did. Pulled the hose, ran the engine, got much less fluid than I expected into the waste oil container. Curious... I just assumed there mustn't have been much fluid in the trans. Maybe that was the problem in the first place. In any case, I'd drained it so now I went to pull the pan off. These bloody modern cars man! What a pain in the ass! Eventually I managed to get all the bolts out after wrestling around a cross member for too many minutes. Then I belted the pan a couple of times with a rubber mallet to break the gasket and get it off. Then it came off. Full of trans fluid. Shit. It may look like I decided to work on it in the barn for today but in reality that's all the sawdust I had to throw down to soak up the fluid. Once I had that mess dealt with I got to have a look inside the pan. This is what I saw. Now I like glitter just as much as the next man, but when I have that much of it, and in my trans fluid, I tend to get a bit upset. The two magnets were absolutely covered in chips and shrapnel and the oil itself had a very pretty sparkle to it. I don't think I have to be an expert to say she's toasted. I talked to my mate again and he said it's going to need a very extensive rebuild in the least, a new trans at worst. At the moment I'm thinking that it is going to be a pull the engine and sell the rest as parts job like I originally intended. And I'm ok with that. That said, the guru has offered to look for a new trans for me for much cheaper than I'd be able to get it due to his connections so there's still a slim chance of saving it. I think I'll probably just take the selling it as parts option though. It'll probably save me a lot of headaches. I should know for certain tomorrow anyway.4 points
-
If you still have an escort diff, you will probably also need a good supply of spider gears/axles if you use it as intended3 points
-
Leaves approved all terrain tyres purchased Keen3 points
-
Now for the expensive part! All happening around 2 months before the next scooter rally. Nothing like a deadline to get stuff done... Frame stripped, some extra support welded on known weak points and then off to HPC This was the start of a lot of online shopping and spending money at HPCoatings... Also sleepless nights trying to decided on colour ways for it. I went for a strange old Alfa Romeo GTV colour called Yellow Ochre or AR112. Still a bit unsure as to why I chose this colour after all, oh well it is certainly different. Pretty sure the paint shop also tinted it a bit differently... Panels stripped ready for the paint to go down Expensive bits coming in thick and fast, new big block engine casings, fancy front shocks, digital speedo with fuel sensor, rev counter and cylinder head temp sensor, 30mm Mikuni TMX carb. Time for the engine build. I couldn't have done this with out the help of my mates. A mate Ben spent many late nights helping me out with this build and has an amazing attention to detail when it comes to building anything, especially 2strokes! Great workshop too... I went a bit overboard on this but aim was to make a fast reliable scoot. I went with a kit AFrayspeed TS1 225 kit, mild porting, high comp cylinder head, larger crank, clubman exhaust, AF touring clutch with race springs etc. Side casing going together New 52mm crank installed Parts coming back from the painter in my interesting new colour... To top off my indecisive paint choice I went with this slate blue colour for the rest of the components... Front end going together, disc brake and the new shocks Engine closed up and in the frame Glove box, long range tank, carb and rear guard going on All new cabling and electrics BGM clubman exhaust fitted Rob's bike also getting a TS1 kit and a bunch of go fast bits at the same time. I think all four from the team had their bikes in pieces at this stage First ride! Jetting not 100% but it went awesome! Off to get dyno'd shortly. Scooter rally was only a few days away. What better way to break in a new 2-stroke than 1600km at full throttle? To be continued...3 points
-
Click here to watch Kurt Pearces video of the ride. He's riding a Vespa which he rarely uses the front wheel of. Featuring such moments as: - Attempted road rage by mercedes - Whoolies - Sweet bikes - Auckland2 points
-
Pinto. Then when you reach you fishing spot you throw it over the side to stop you drifting awsy.2 points
-
Vaguely related personal sharn. We fitted 4 gearboxes to the same Escort on four consecutive Sundays. On the fifth Sunday we fitted a Capri gearbox. The next Saturday night the car got barrel rolled. Rotor arms with a spring and weight used to be available that would earth the HT side at a pre set RPM. I was working in a NZ new petrol Patrol today, it had one factory. You could modify one to fit your Escort distributor?2 points
-
Four new door handles and rust work into it.... Plan is to run it through for a WOF next week and I hope I don't fall over at the list. Those Hotwires have made it as far as my garage2 points
-
I am no sedan fan but this whip is so damned sweet, especially with the 2JZ in it. It made me swoon with it's noises and slowed me down with it's slammedness. Good work on completion, hopefully the next owner will keep it slammed and maybe throw a turbo on it.2 points
-
I also got some knobbles2 points
-
Some more prep progress on other stuff. Filled some scratches and imperfections in the duck tail wing, then primed with this Rustoleum stuff the paint shop recommended for fibreglass: Sanded back the drivers door, filled some shallow dents and high fill primed then blocked back again: 2000grit wet sanded the rest of the fibreglass rear quarters, came up pretty decent for fibreglass but I think next time I will spend more time getting the FG smoother. All part of practicing though: That looks dull because its before cut and polish. Stupid SCA primer gun broke on me, there is a swivel joint that but snapped in half. Piece of crap, such cheap metal. But not too fused since it was just a 'free' one which came with a kit along with my old small compressor many years ago. Guess I'll need to buy a better one, my iwata w400 won't work with primer. Deciding if to use the aftermarket rear bumper or not. It a genuine Origin Labo jobby that came on the parts car from Japan. I do have a standard rear bumper but I was planning on using that on the other 200sx.
2 points
-
Glazing shout. sounds like angry donuts...2 points
-
Glass shout sounds like a meth party. Glass BBQ etc2 points
-
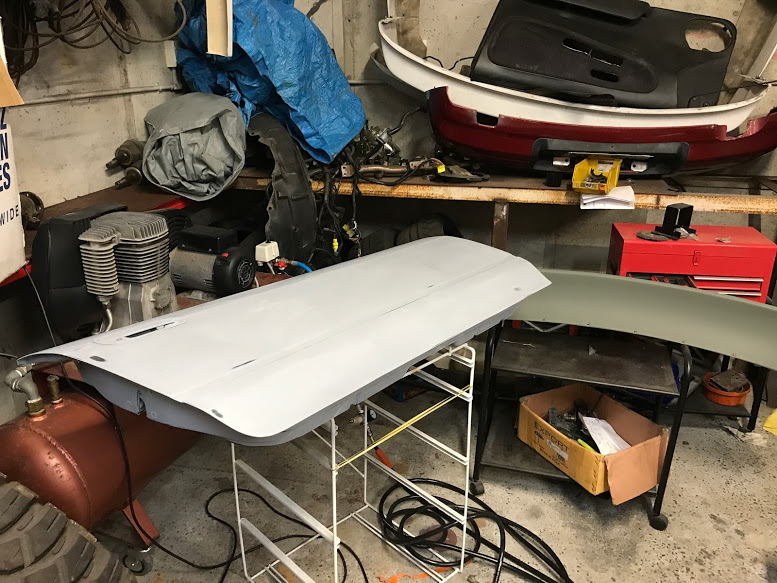
Some paint was applied, then I was away for work for a couple of weeks. Roof needs more clear and some finish sanding. Tailgate has reached the 'good enough' stage now I think.2 points
-
Well then, the having to have at least 1/2 a tank of gas, to stop surge under acceleration lark, finally pissed me off enough, that I pulled the tank out. I thought about all scenarios, and pretty much went with the easiest option I thought would work. I cut out a new flange, from 6mm thick steel, and welded it to the very back of the tank, Then I lengthened and bent the pump cradle, so it sits at the lowest point of the tank, and right at the back. Took a while to get this just right, so that it wasn't touching the bottom of the tank, but nice and close, while not touching the drain plug that's right behind it. Slapped a bit of paint on it, then slapped the cradle in, Then I cut out a blanking plate for the old hole, screwed that down, sealed it, and then slapped a coat of underseal on it for good measure, Put it all back together, slapped piss all gas in it, and whet for a hoon. With less than a 5th of a tank (Probably around sub 10L from bone dry) I could be as fully hektik as possible, and it never surged once, great success!!. Next on the list is to change the AFM, and the throttle housing, then go for a re-tune with more boosts. I also want to change the engine driven fan to electric, but am having trouble deciding on what sort of fan to go for. Regards, VG.2 points
-
This wee project started with my son having a hoon on a mates PS4 racing game and loving it, but he was pretty shit at using the controller. Got the seat for $1 on trademe. $1 reserve win. The Drink Drive 2000. patent pending.2 points
-
This weekend, @Alistair bowled around and helped me with a lush polishing effort on the painted surfaces of the 944. Here's a few shots of the result, taken under some neat skies on Sunday evening. 1991 Porsche 944 S2-179-Edit by Richard Opie, on Flickr 1991 Porsche 944 S2-96-Edit by Richard Opie, on Flickr 1991 Porsche 944 S2-172-Edit by Richard Opie, on Flickr 1991 Porsche 944 S2-141-Edit by Richard Opie, on Flickr 1991 Porsche 944 S2-170-Edit by Richard Opie, on Flickr Some of the S2 differences: 1991 Porsche 944 S2-129 by Richard Opie, on Flickr Turbo nosecone, a big upgrade over the old 924-style front my 8v car had on it. 1991 Porsche 944 S2-92-Edit by Richard Opie, on Flickr "Bridge" spoiler in place of the squishy rubber ducktail thing, and the under spoiler/bum flap thing. 1991 Porsche 944 S2-47 by Richard Opie, on Flickr 1991 Porsche 944 S2-106 by Richard Opie, on Flickr 16x7 and 8" "Design 90" wheels and Brembo 4-pot clappers on 300mm rotors at either end. 1991 Porsche 944 S2-116 by Richard Opie, on Flickr 1991 Porsche 944 S2-119 by Richard Opie, on Flickr 3-litre 16 valve 4-banger engine. A shade under 220hp, lol redline of 6500rpm but sooooo torquey. Actually a very smooth thing to drive, with twin balance shafts and all that jazz. 1991 Porsche 944 S2-189-Edit by Richard Opie, on Flickr Delicious pop-up headlights, I can watch these go up and down all day. 1991 Porsche 944 S2-108 by Richard Opie, on Flickr 1991 Porsche 944 S2-68 by Richard Opie, on Flickr 1991 Porsche 944 S2-80 by Richard Opie, on Flickr 1991 Porsche 944 S2-82 by Richard Opie, on Flickr 1991 Porsche 944 S2-112-Edit by Richard Opie, on Flickr Interior things and stuff. Headunit will be switched out shortly for something not silver, and Bluetooth capable.2 points
-
So, I bought the wee fella a second hand slot car set off trademe. He was pretty excited when it arrived. I remember from back in my day that the worst part about slot car sets was setting them up and then after having a hoon mum yelling at me to tidy it away. So we built a table for it. There is no way I can give up all of that shed space for a slot car set so I thought I would make it hoist up to the ceiling.... Off to Mitre 10 I went to get some pulleys, 12 to be exact.... $38 each they wanted, bugger that, Alliexpress to the rescure. Less than $2 U.S. each including shipping. Iv got to put a boat trailer winch on the wall to raise and lower and shes done.2 points
-
so would seem things are just to hard for parts people Today I ended up burning the bushes out of the idler to see if I could get some ordered from measurements After giving it to my work mate to take to the Suspension and steering specialists, to get something matched up, they gave him a box of free bushes that I could modify and try, as they werent sure. After making a decent attempt at trying to make them work, concluded this was not going to work. took some measurements, jumped on the nolathan website, found some that seemed like they are exactly what I needed, which i then found out are for Hilux of the same period, so will be exactly what I need indeed. then ordered them through Repcos navigator website, however this was at 5.25, so whether they get here from auckland tomorrow or not is a guessing game So turns out, sometimes the best parts guy, is your self. gutted i didnt do it earlier Sigh2 points
-
Please don't ban me for RB, figured I'd start a build thread for my latest daily driver/project vehicle. She's a 1988 VL Royale. Like the VL GTS' the Royale's were a New Zealand only model, essentially a run out of the remaining Calais parts. Unfortuantely they didn't get the pop up headlamps but they got the Calais tail lights and steering wheels plus luxury extras such as cruise control, power windows and electric mirrors. Royale's were either RB20E or RB30E with ML4 automatic transimssions and GM3 or GN9 open diffs with drum brakes. I picked this up off Trademe after missing out on it a few months ago due to lack of funds. It was listed on Monday morning, I called the seller in the afternoon and then took Tuesday off work and drove down to Timaru for a look on Tuesday morning. An hour and a half and one terrifyingly fast test drive later I'd put a deposit on it. I'd been on the hunt for a tidy VL for the past few months and while a tidy example of a model with limited build numbers, with a manual transmission and the extra bonus of two tone paint ticked all my boxes, the real kicker for me was this: an A8 RB30ET factory turbocharged engine. The engine was put in a couple of owners before me and the car has been converted to manual with a 30E gearbox and driveshaft. It's still running the original diff and drum brakes but has had factory turbo front discs, calipers and master cylinder/booster fitted. I'm still working through the car and making a list of what needs to be done and then I'll book it in for a cert inspection. Bit of a daunting process as I've never done it before but mega excited to get this thing street legal!1 point
-
Keep forgetting to update this. Changed a few things over the last 6 months. Finally got around to having a rollbar made up for it by Chubb Racing. Will now be confident to get back out onto the track again. And made it stand out a lot by painting it yellow A friend needed some money so sold me his retro cluster cover made by KG Works Gave the car a proper wash as i was asked by NZPC if they could feature it in the daily driven article. Also bought and installed a 6 speed which has made the ratios super short with the 4.778 ratio diff. 3rd gear taps out at 100kph and sitting at 3900rpm at 100kph in 6th Have been watching too many itb/carb videos lately so might be doing an itb setup with 20v 4age throttles in the near future1 point
-
I put a SPAL fan on my escort after the repco one I had didnt move enough air. It wasnt cheap, but it had way better specs than any other fan for its size. http://www.autoair.co.nz/shop/Shop+by+Product+-+Retail+prices/ELECTRIC+FAN/SPAL.html1 point
-
I can breath in LD28 smoke all day but you feel like your dying when you get a breath of adblue infused exhaust fumes. @- i5oogt - the car looks great - even with the green doors, I now know why you asked about the red ones. Have you kept the blue ones? We could do a swapsys for that multicoloured Jap ratrod 230 look lol1 point
-
Im keen as long as i have nothing else on will confirm tonight but should be free.1 point
-
1 point
-
Hanmer was a great success. Im pining for more OS activities. pretty keen to get along to the Petrolhead breakfast in Wanaka on 1 October. would love to do the Blossom Festival, but i'll be in Mt Hutt that weekend. Shall we get a meet up going in Cromwell Sunday morning 1/10 and roll to Petrolheads? @kiwi808 @Toddy415 @kyteler @gettinroundtuit @Marsh / everyone else! Tender Regards1 point
-
Man, i've been flat out at home and at work this month with general life mayhem. Haven't had much time in the shed at all. Did manage to get some paint on the swingarm though. so last night i thought i'd put the rear end back together - starting to look like a bike again! Hopefully sort the front end out this week sometime, then i can torque everything up and move on to the brakes and electrics.1 point
-
Answer to question #1- yes, postive and negative to coil, wire were red and black, not red and blue. I forgot about the compufire points replacement I've got in the 009.Answer to Question #2 - yes I have the big red wires in the correct places, has thats the only place they could go, just had to crimp a connection on the end of the wire between the starter and the Alternator.Still no idea about the fuse box clip thing!!!meanwhile....it's off the stands, ass starting to squat down.lost that sweet rake it had, just need to drop the front another inch or two!popped the muffler and rear valance on, easy.looking good.Darrell to the rescue again with his tiny little 1/4 inch socket set.sorted those pesky manifolds out! wired up the coil, oil pressure sender, Alternator and spark plugs.Should fire up nowspend a couple nights sorting out the fuel system at the front end, looped the line around to the front, through to the old washer bottle spot, which is now the fuel filter and pump spot, and back to the hard line under the tank.I have had this set up in my head for a while now, I had even drilled the holes for the fuel lines, but no hole to mount the pump, drilling into my nice new paint fun! but at least gives a good earth, the power for the pump is for the moment hooked up to the spare radio fuse circuit, which is always live, which is not ideal.Anywho.rear bumper and mutherfucking number plate bitches! legal beagle.bumper rubbers not fitting all that great, will fit rubber first, then bumper when I next remove the muffler as the bumper mounts are a pig to get to with that big ass muffler in the way. So the correct process is Valance-Bumper-Muffler. reverse of the way I just did it.time to fire it up.1 point
-
it has a 10 year warranty so it souls last 10 years and 1 day then dissolve1 point
-
Nice. Anything wouldn't seem to out of place on one of these?
1 point
-
Since working down south at HPA I thought I'd start from scratch with a new tune file, my old one had lots of odds and ends in it from various experiements / adding and removing sensors etc. Looking at everything with a fresh set of eyes really showed how much a few things were garbage but I just assumed it was right when I didnt know much at the time or whatever. Like looking properly into how the cold start functions work it's now much better, starts without foot on the gas and doesnt zing the revs up when you start it. As well as that I'd never really played around with accell enrichment before, now it feels a lot nicer at high rpm when you give the throttle a stab. And I'll be ditching the staged injection as in my case it doesnt really add enough/anything to justify the added complexity to the fuel system, and the throttle response is worse when you're using it. I think to make it work as nicely as a single injector setup you really need a good wall wetting compensation model and two completely seperate tables for it for each injector. Whereas the Link only has a single table for accel enrichment settings, and an initial enrichment setting when secondary injectors come on. Which makes it impossible to account accurately for situations where you've got say 20% secondaries vs 90%. I think staged injection works well when your entire intake is hot, as it evaporates the fuel a lot quicker. But in my case when you've got a thermal isolator stopping engine heat soaking into the manifold you get a huge % of fuel ends up as wall wetting and you lose control of fueling and accel enrichment. I've now got about 3-4 sets of Altezza injectors though so I'm gonna flow bench them all and find the best matching set out of the lot. Will be interesting to see how much variation there is (or isnt) across that many of the same injector. Also just picking up this afternoon an Altezza engine in bits, so might throw it together and chuck it in the car to have a play around with exhaust side VVTI as well and see if that makes much difference compared to current setup. /Pointless Dave Rant over /It's never really over though1 point
-
Perhaps register one and photocopy the plates and tags onto the rest?1 point
-
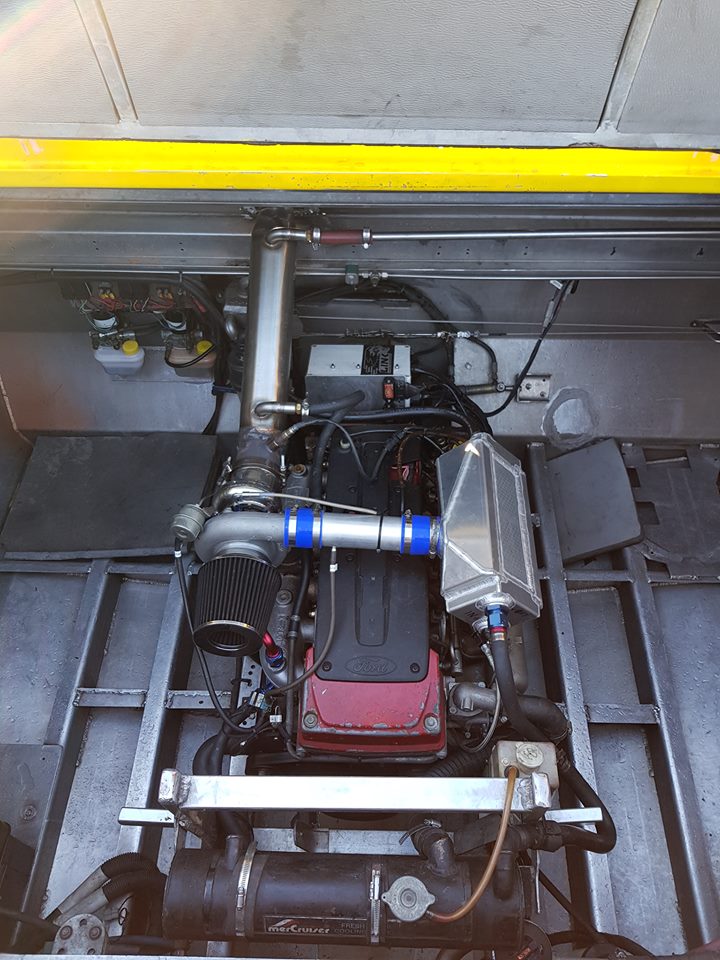
Do this! Used to drive a boat we converted from 496 chev to FG barra and it pissed all over the chev. Gotta be one of the best jet boat engines ive driven with hands down! The barra was pretty much standard apart from alittle more boooooost.
1 point
-
The other job, was to mount the ARB's. I had a pair of 27mm bars custom made, and mounted the front bar to the front axle, using the U clamps and brackets supplied. I made my own top mounts, and welded these directly to the front subframe that the engine hang off. For the rear bar I drilled through the shock mount brackets, welded captive nuts inside, and bolted the clamps to these. I made my own chassis brackets, and welded these on. That should stop the rockin' and rollin'!1 point
-
been busy last week on the van! As you all know, the old Transits did not have fuel injection, and the fuel tank is not set up for this. So I built an aluminium collector pot, which the high pressure pump sits inside. A Facet low pressure pump lifts fuel from the tank, via the original pickup, and feeds into the collector, with a breather/overflow going back to the tank. The high pressure pump feeds fuel to the engine via a high pressure filter, and the return from the engine feeds back into the collector pot.1 point
-
ready For Hanmer
1 point
-
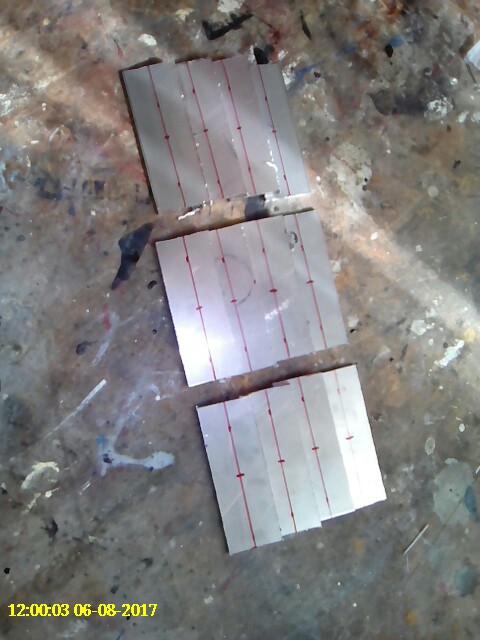
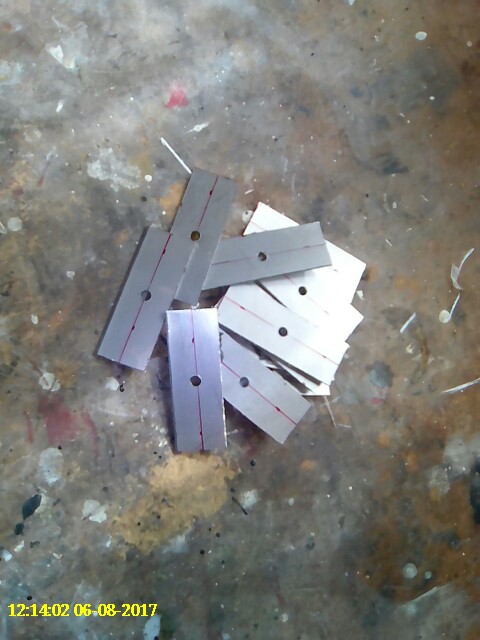
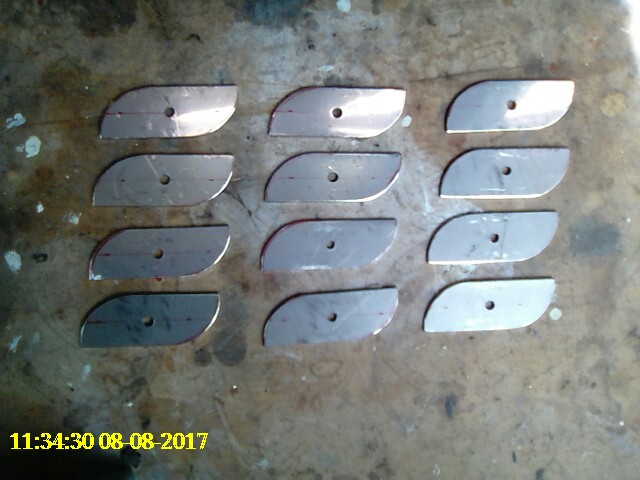
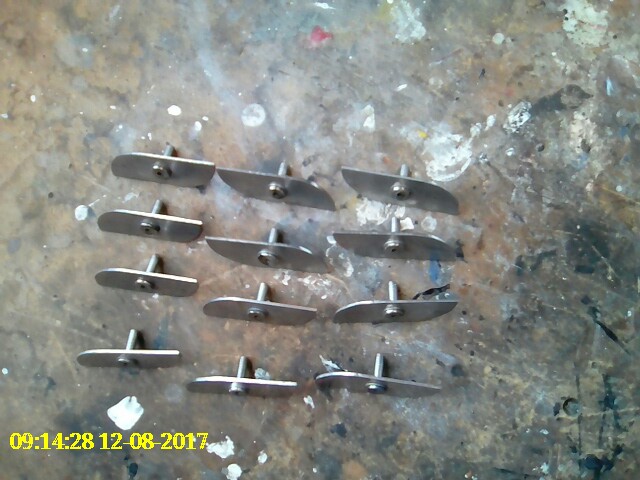
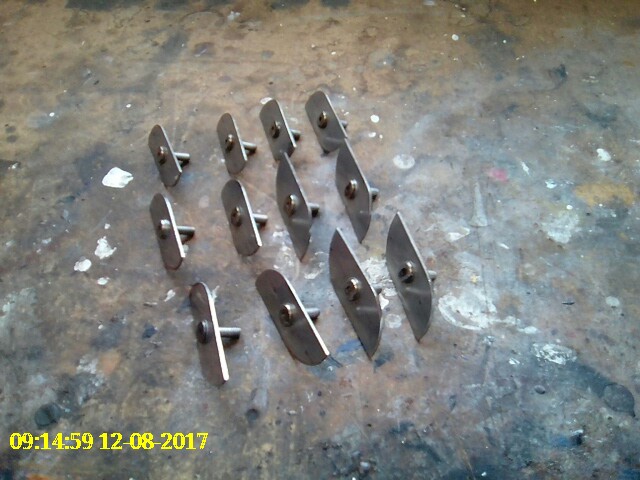
More fiddly stuff while the car is away, I made up a batch of my re-manufactured / homegrown trim clips for the exterior door trims. Cut out a bunch of small pieces from thin stainless plate Drilled holes for the fasteners Shaped them all up Tapped a thread and installed the fastners 12 should be enough to replace the missing clips assuming I don't break any more re-installing the trims on the car.
1 point
-
FC joke took longer than the last time! Ha!1 point
-
Great write up, even greater FC!1 point
-
Cheers team. I haven't had it out of the shed again since I got back to Auckland on Sunday night, it's still rocking a film of filth from front to back... Here's a couple of photos from the journey. The only ones I took. Was having way too much fun driving it! 1991 Porsche 944 S2-20 by Richard Opie, on Flickr 1991 Porsche 944 S2-22 by Richard Opie, on Flickr1 point
-
That blue is nice! any pics with the decals on it? I'm trying to picture what they'd look like1 point
-
no i bought aftermarket ones, i couldn't find any crossflow ones and they would've needed machining to fit anyway. yeah i want to be able to use the cam so though i'd be pulling some silly revs. until the gearbox shits itself. anyway. its a 5 bolt crank . The machine shop came on a recommendation and weren't cheap but they do heaps of racecars and he knows his crossflows from the race circuits so i am confident in his work. i am going to drop the sump as soon as i can bear to look at it again and go from there i think. no load on the motor, it started pretty much off the bat and i held the revs for maybe 20 seconds, no pressure so i turned it off, checked a few things, started it again for another 20 seconds, turned it off and have turned it over with no plugs in a couple of times. i used heaps of assembly lube and oiled all the bores etc well before i attempted to start it. i really cant be arsed to pull the motor again. really! but man. i should've just stuck a ca18 det in it and be done with the fucking thing.1 point
-
Just got the engine crossmember built. I wanted to make a proper crossmember with engine mounts welded to it, rather than the original style setup where the engine mounts just hang off the side of the chassis rails. So I got some 63mm black pipe bent to shape, drew the engine mounts and had them laser cut and folded, and got our fabricator to trim them and weld them up. Really pleased with the result, ties the chassis rails together, and is very strong.
1 point


.thumb.jpeg.384ff72c8d2b0ee0d34a7bdedb55bdcf.jpeg)


.thumb.jpg.b5491dbec1053270a4d99ed376fc2c36.jpg)


.JPG.b1077b1e6f283ce0e6211d768e009648.JPG)
.JPG.1d7f1833524569ad4ac1d969139a4795.JPG)
.JPG.f13fb8b89f86fed761d3ec458b9e4bcc.JPG)
.JPG.33eb853e608809416a226c3a65fbcb3b.JPG)
.JPG.0bfcf6bf51036576a090533c3a444031.JPG)
This leaderboard is set to Auckland/GMT+12:00