
Leaderboard


Popular Content
Showing content with the highest reputation on 20/04/15 in all areas
-
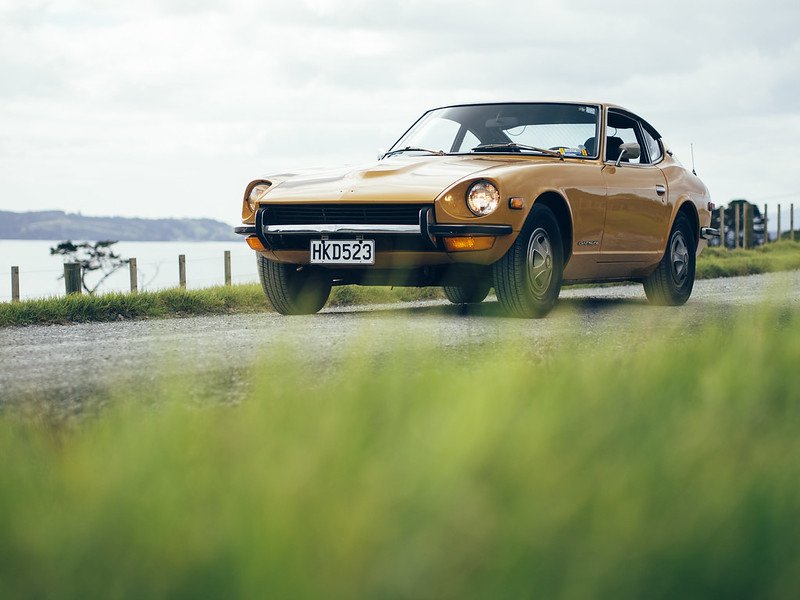
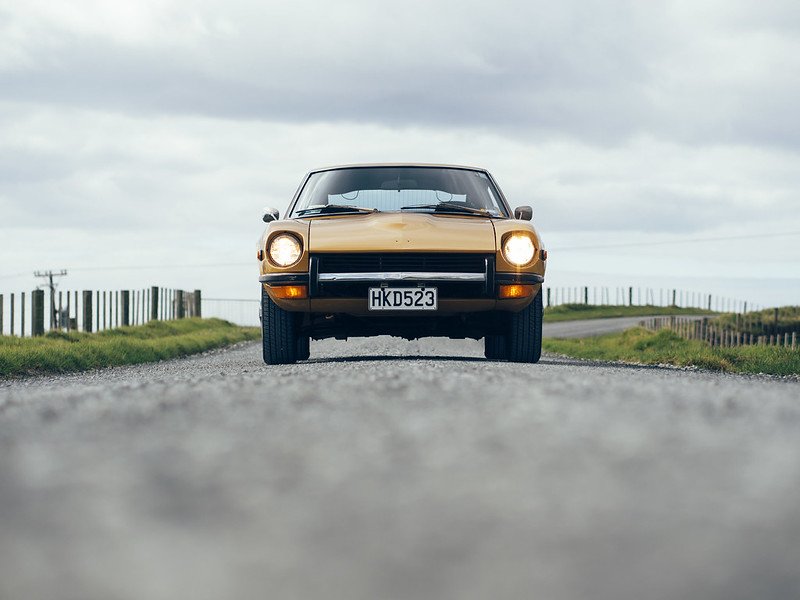
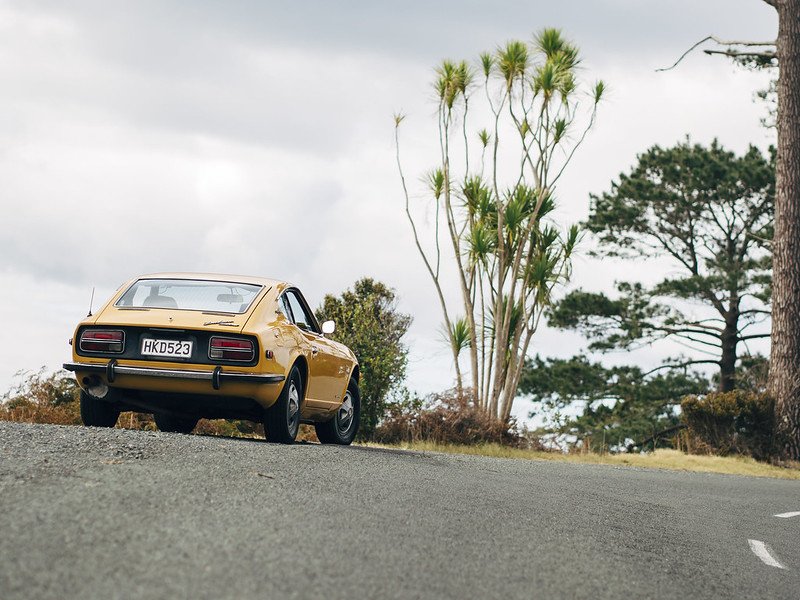
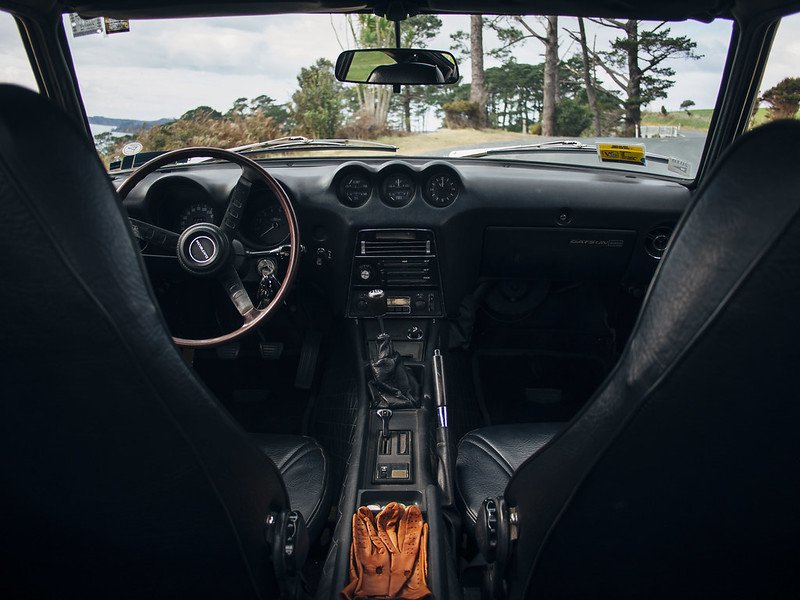
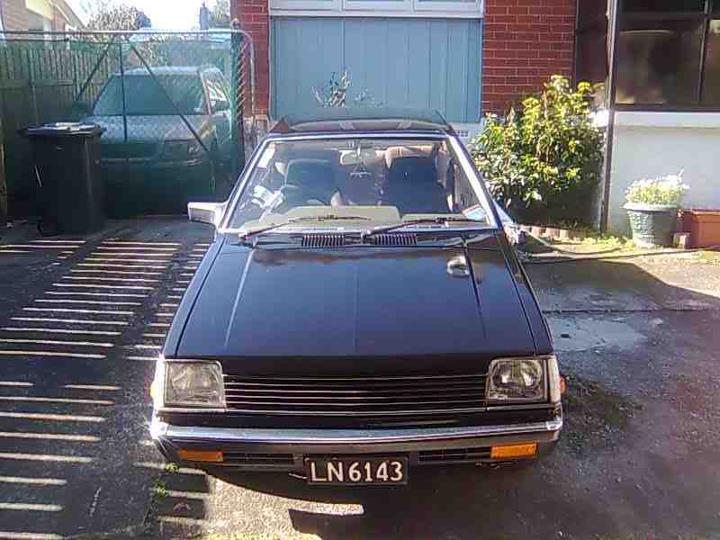
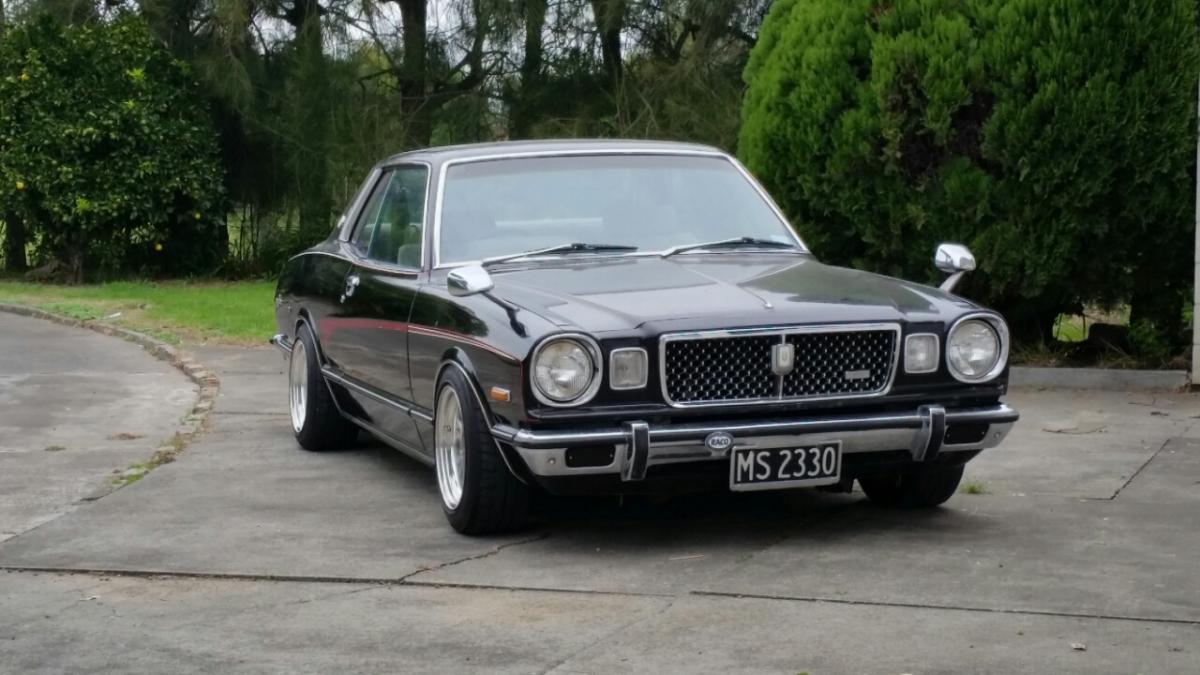
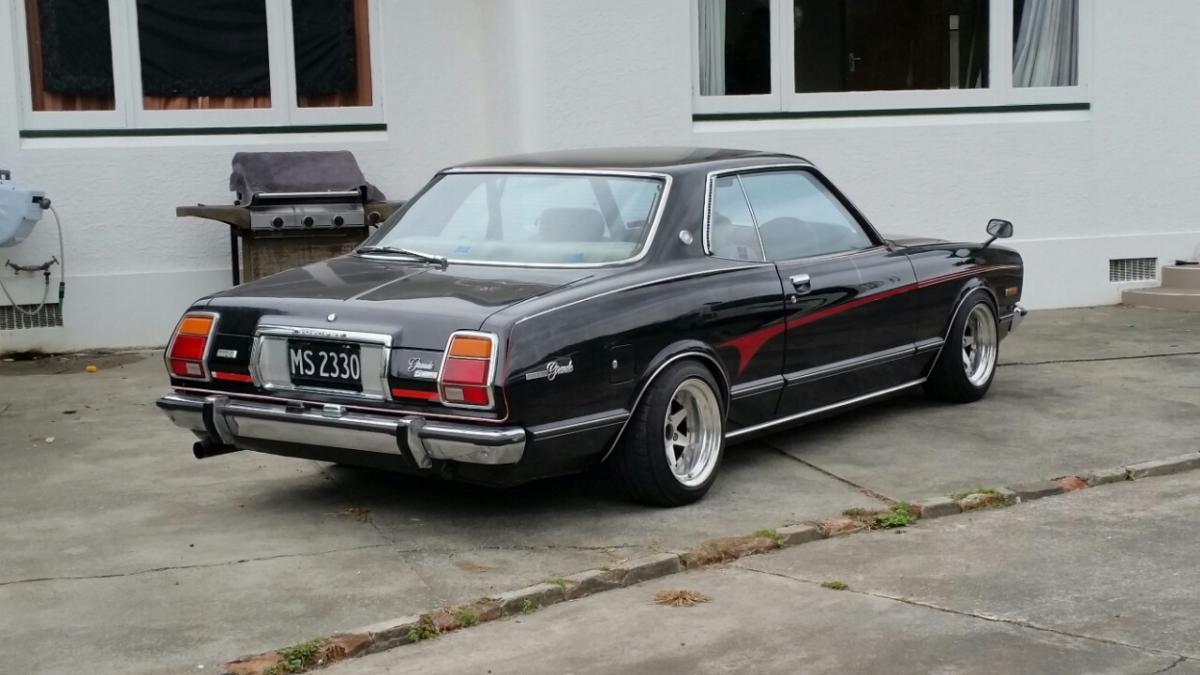
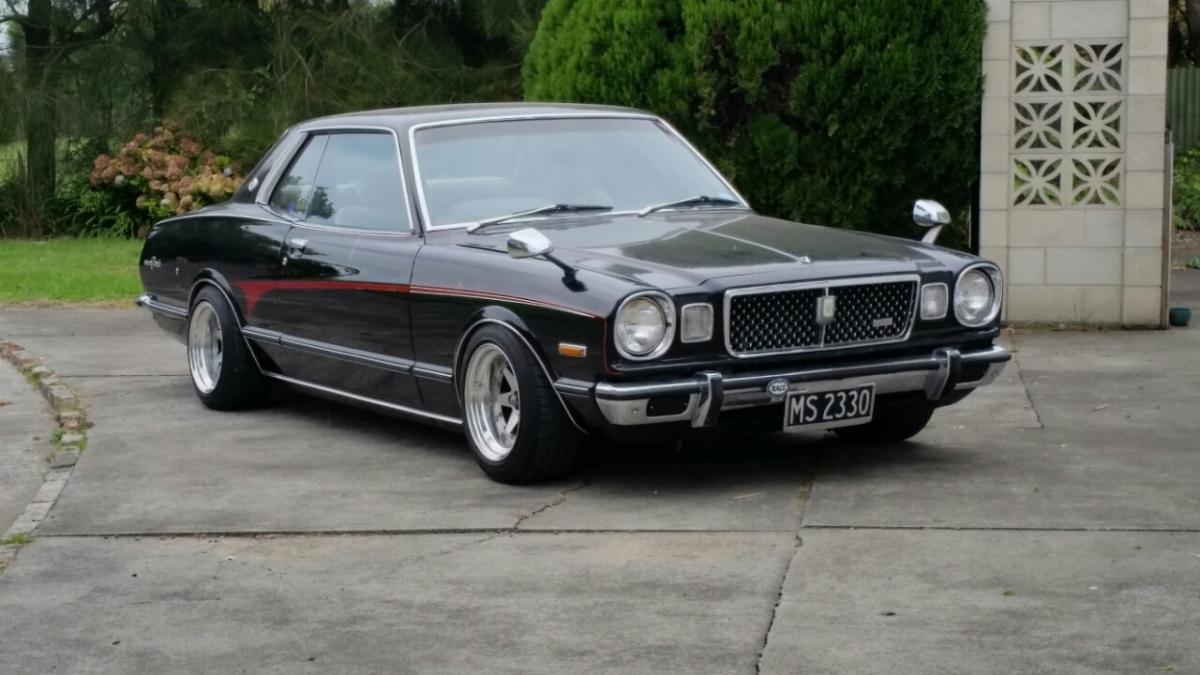
Woodheads auto in Auckland did amazing work replacing the right hand-side chassis rail, as well as a new clutch. At this time I was working a lot and the car was stored at my parents place up north, So it only really got driven every now and then. Took it for a nice gravel road drive after spending 4 hours cleaning it... I replaced the door seals and a bunch other seals around the place, was hoping to help with the fumes, it helped a little but still more work to be done... Cleaned off the stickers on the front bumper, and order a new badge. Found some sweet leather driving gloves in a leather market on a recent trip to Italy. Ive never worn them, but they look sweet sitting in the car!
 18 points
 -
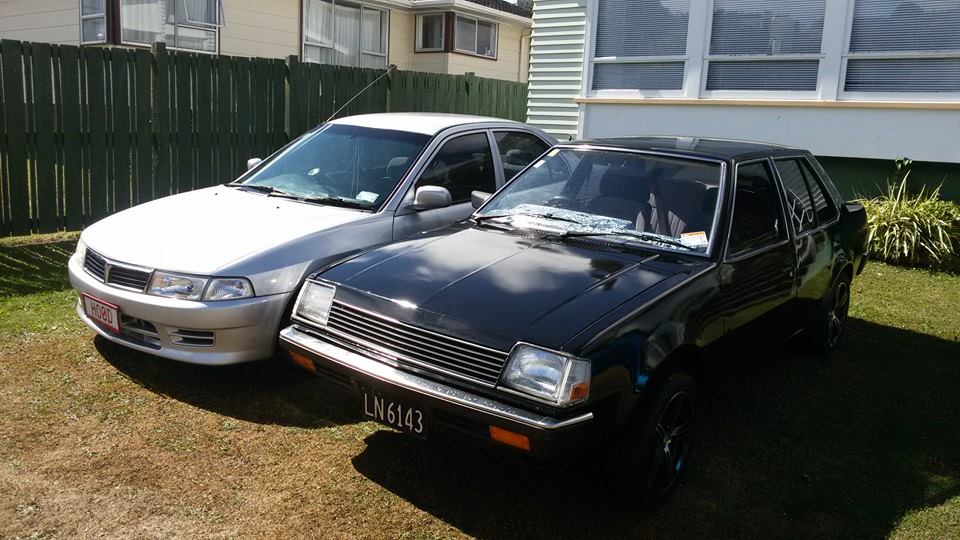
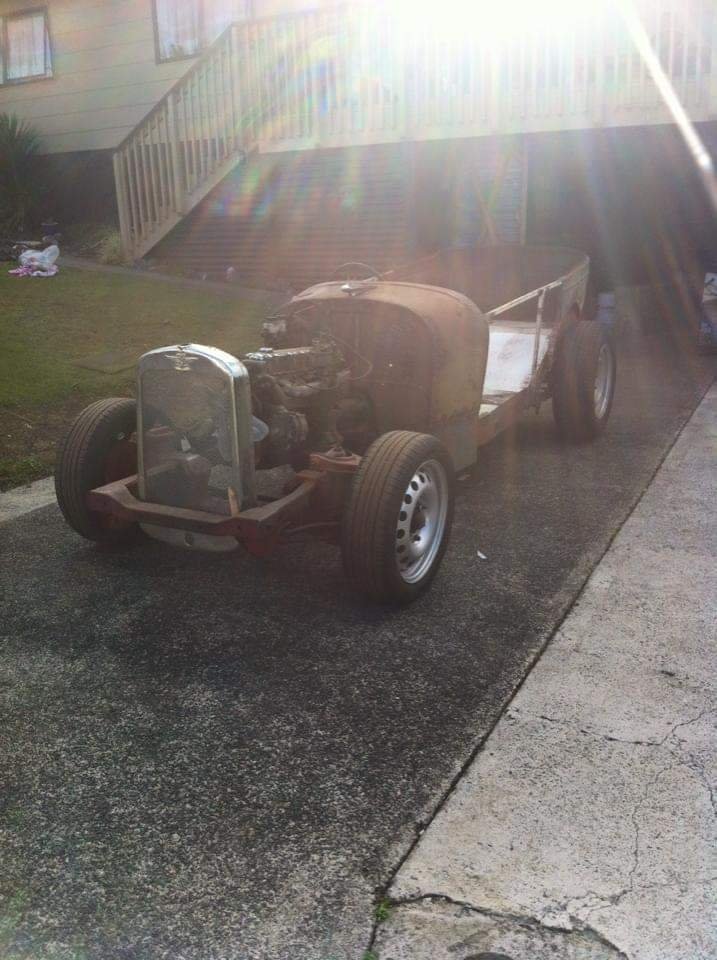
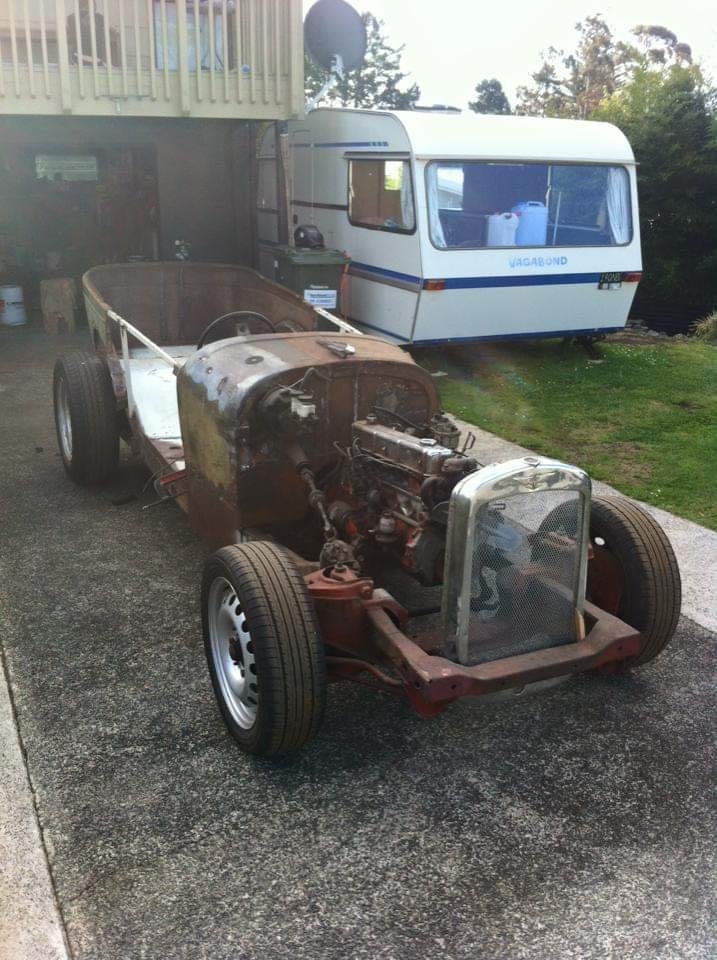
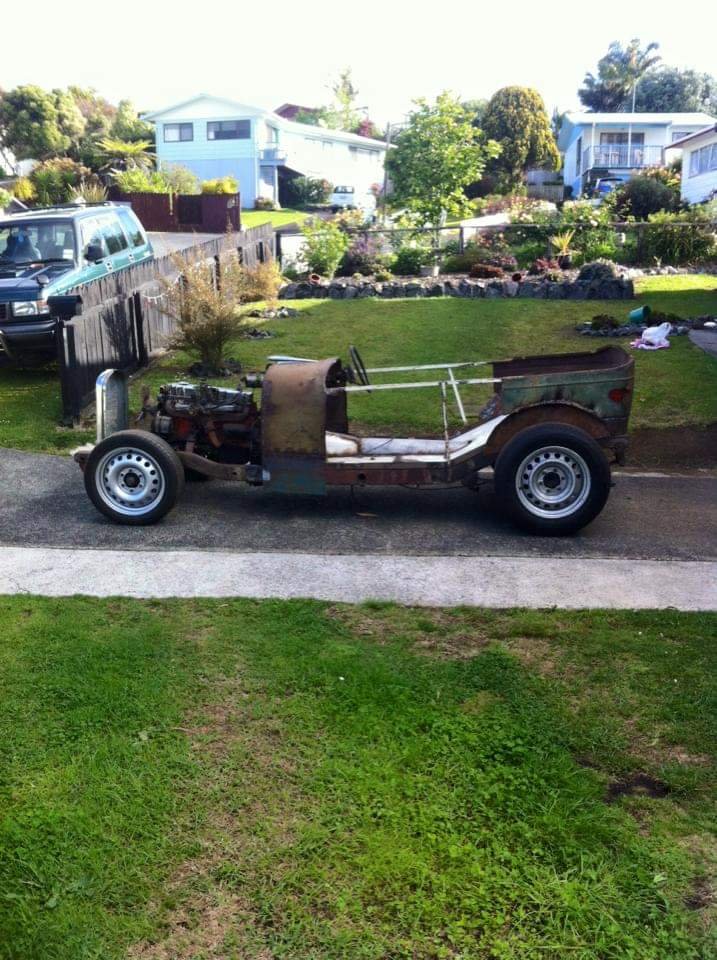
After bitching out on my wagon, I am now the owner of this. Got it with no wheels so chucked my Riversides and Mk1s on. A few plans, mainly more slam, and hoping to attend quite a few track days in this.15 points
-
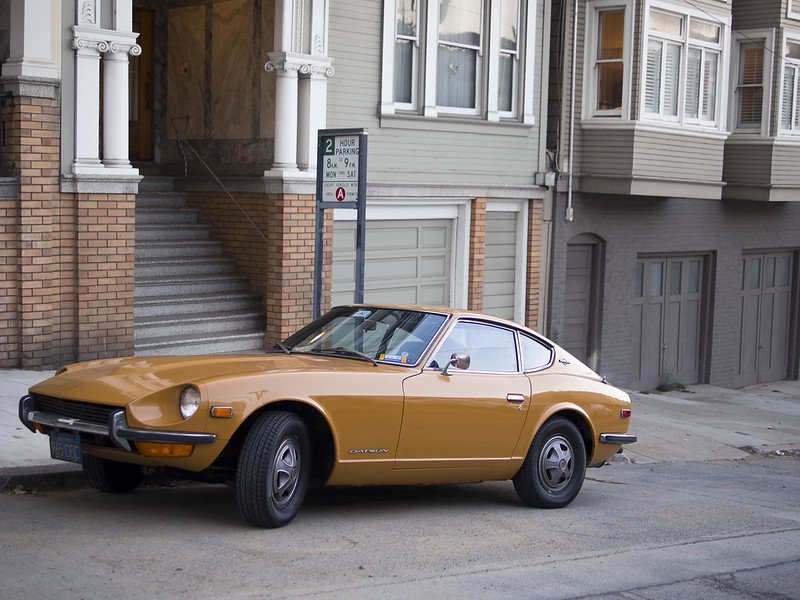
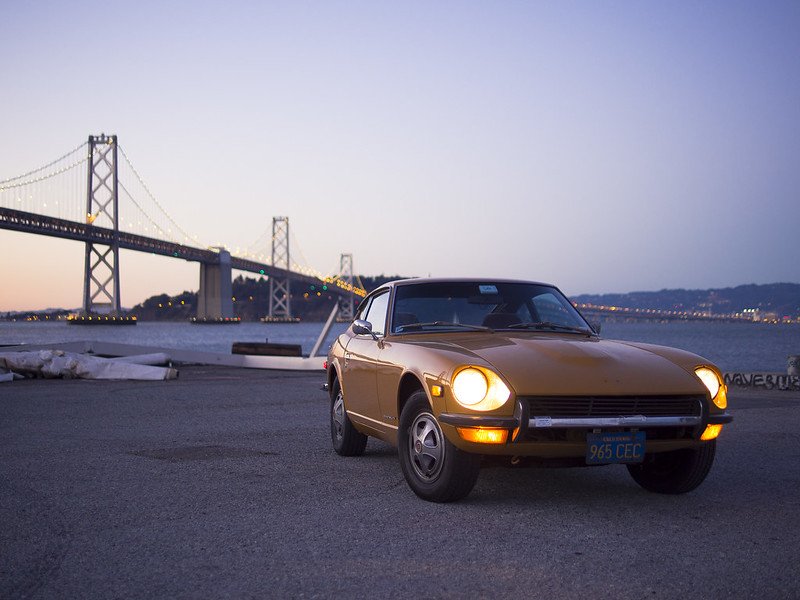
Hi Guys, Here is my 1970 series 1 Datsun 240z. Vin#: HLS30-10681 Build Date: 9/70 I will attempt to do a basic rundown timeline of how I ended up with it... 1970 - My grandfather purchased the car from his local dealer in San Diego 'Economy Car Center' 2005ish - The car got parked up under some carpet in his garage as he was too old and sick to get into it 2011 - My granddad passed away 2012 - My grandmother told me the car was mine as long as I got it out of her garage ASAP - I had the car picked up from their home in San Diego and all fluids replaced and the engine turned over - I flew to San Diego and drove the car 600 miles to SF, left it in a secure warehouse and flew home 2013 - I spent 4 months living in SF working using the on occasion - In December I sent the car to Auckland 2014 - I finally got the car registered in NZ after having to replace a chassis rail from battery acid rust. Here are some images of the Z in the states, before its rough trip home... Discussion click here
12 points
-
bags and piles and mounds, an entire desert of grinding dust. Spent almost of whole weekend on this, got a bit done. started with the subframe connectors on the passenger side, cut into the factory front chassis rail then continued the cut most of the way to bulkhead the rear lower control arms mount to in order to be able to drop a piece of 75x50x3 in there to tie the front and rear of the car together seeing as ford hadn't thought that was particularly worthile. and mounting/footplate welded into the firewall to tie it into then lots of measuring and boggling around the order of business and how the seat mounts and rollcage footings will be tied into all this drew some things and cut some things then set myself on fire for some mild saturday afternoon excitement more measuring and fettling. cut out the piece of cracked floor to make way for more 75x50 for the rear seat mount then the tricky thing of making a plate to fit the sill to mount the 75x50 to, using various pieces of bending and drawing technology turned out great really happy with the fitup so far, still quite a bit of fiddly work with wrapping the mounting plates around the sills and things for the cage footings but I have been cutting out the plates for the other side as I go along and now I have the method worked out the productivity to boggle ratio should improve markedly.11 points
-
Drove home for the weekend and spent some time working on this. Some rust was cut out, some new bit welded in (excuse welding haha) and with a few more weekends doing the same thing it will be ready for paint. I dont have photos of the other side but it was waaaay worse than below, I just need to weld in a small filler piece to seal it up and then paint it up all nice like. Below is basically the last bit to fix, It looks super bad inside the sill from this pic but its not actually that shitty IRL. The previous owner has welded in a 3mm plate in the front edge of the sill that might need to come out depending on how nice I am feeling, it is mostly covered by a piece of stainless trim so I dont really care. Holy Giant shitty pics batman. Also working on this again made me super happy haha, I really want to drive the piss out of it soooon/dreaming. I may also need Mr Upholstery/Gregs help once it is on the road for ultimate lushness.7 points
-
I wouldn't do anything more to the springs until the car is together and you have driven a few kms. The springs will settle.5 points
-
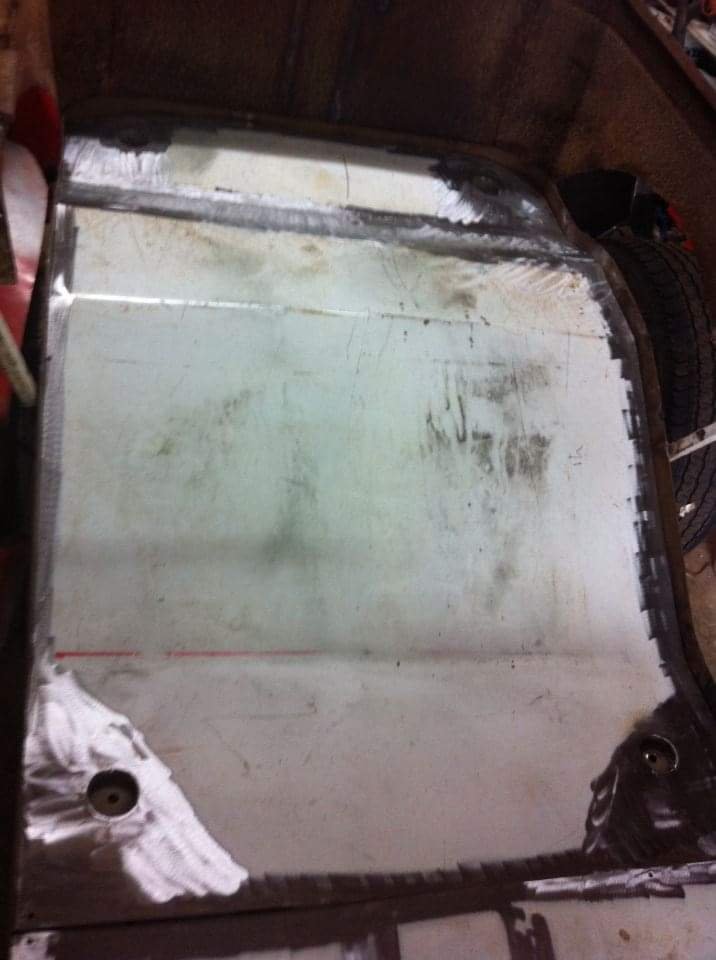
Picture less update. Went to Hamilton the other weekend for a new windscreen as i cracked it on the way to Nats and it got worse on the way home. Got it done by Hamilton Windscreens/Windscreens Direct. Cannot recommend them highly enough. They let me be a fussy prick and get in their way and muck about with the trim and stuff while they were working. Plus they had one in stock! New WOF also, had to get rid of the bob jane australian allrounders im sorry Bart. Plus a wheel alignment. Handles a lot better with 8.5 deg of camel toe removed. Off to CHCH this weekend with the Mrs and 12 week old, what could possibly go wrong....5 points
-
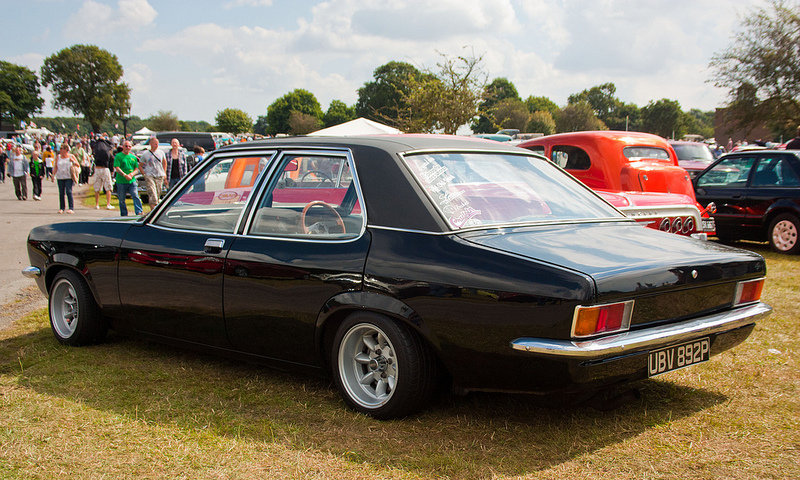
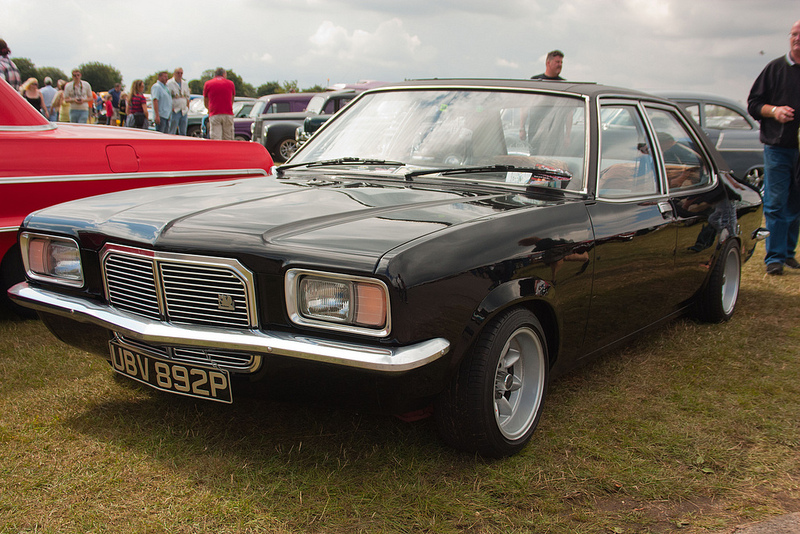
So I finally got round to getting an oldschool car. Needs a lot of work as it is rusty, does not run and does not stop. My plan at this stage is to tear it down very carefully over winter to a shell with running gear, and getting it sandblasted and primed come summertime and the start patching all the gaping rust holes. Also, will add moar low and probably get the steelies widened/find a wider steel wheel that fits. Hood lining is mint, not sure how to remove without ruining it. Seats are in ok condition, carpets are long gone. Has many rusty patches but as cars of this age go it isnt that bad. Discussion: //oldschool.co.nz/index.php?/topic/48006-guypies-1960-vauxhall-victor-f-discussion/ Pictures:5 points
-
Ok ... won't be put back together for a wee while yet ... In other news mrs had a cake made to match my SSR superstars ! Haha GA5 points
-
Don't know if its applicable where you are but careful they don't hit you with a fill cert for >600mm. Also is that a panther?4 points
-
GAME OVER. This is now someone else's problem, much relief. Regards, VG.4 points
-
i would love to see a bike rack suited for one of these steeds3 points
-
More progress! Got the top fully welded on now, chassis cut out and the bottom partially tacked. We are thinking of putting the airbags on the outside of the chassis, since they would be pretty close together if they're on the inside. Like the pic below, except the top bag mount will be about an inch or so lower.3 points
-
Wow, I'm shit at updating this. Got an exhaust sorted, not happy with it but it was a prick of a job because of the limited space to go around the chassis. Gets a bit of a vibration against the chassis once it warms up. Also rolled the rear guards and got the 15x7 0 offset rims that I planned for this originally on. I'm not sure if I like these or the green ones better, bit more ground clearance with these though which is a bonus with our steep driveway. Been doing some basic maintenance as well to have her ready for a show tomorrow but nothing to exciting. Pics: And with the gf's 28 Cheers Matt3 points
-
A few pics . Old and recent
2 points
-
Getting tools on car made thoughts start to turn and I wondered if maybe the mystery package shouty pinto may just start without extensive rebuild... So with the supervision of my nephew we checked it over. New sump is needed. I wonder what sort of story this would tell if it could talk. I think it would likely involve a brown trouser moment. The list is not too long for bench start. Somewhat surprisingly its still on points and they look shagged. Shaneo has donated a sump. My small collection of alternators do not fit so will sort something out. Bolt gearbox to back and maybe swap out monster sidies for known good carb. Even got so keen I bolted together the second pinto to stave off the rust demons and make sure all bits were present.2 points
-
Today's haul.2 points
-
We have one planned! We finished clearing the track properly up to the ridge and have started clearing the area up here- ask Horse about it. Jen and him turned up that morning and checked it out. Plan is to build a cabin the neigbour can tow up from his side with his excavator. But first thing is to get this toilet/shower block up. However that wont get worked on till Sunday because tomorrow its going to be 'installing a hoist day'2 points
-
Done some more work. Got a lot of fill in there and levelled most of it. Got the base of the all important hoist marked out and dug out to be 200mm thick Then i rolled it with my work car until my clutch leg got sore but i couldn't get all the edges. I hired a compactor after work today and pushed it round until my hands went numb. I also left it on autopilot here and there.... G3rF4lNX1o1 point
-
i have used gasket paper. Some mechanic insists on holding the paper over the holes he wants to cut and tap the edge carefully with a ball peen hammer. This effectively marks the paper or even cuts the gasket to fit. You may not want to try that.1 point
-
The first thing I would do is run a earth wire from all the lights to the body1 point
-
Might have Chevette fixed tonight. NOS parts arrived from UK. might have to bring hogs up behind. Duncans picking up his Grandads car from Gizzy too so he will bring that on trailer.1 point
-
Ok so it has been a little while since I last updated this, but there is good reason when I last posted I had to sort the driveshaft accelerator cable and rebuild the carbs. So I did the driveshaft and cable but had a real battle stripping the carbs down and when I finally did I found that the throttle spindle on one of them was twisted. So not a big deal to replace but it kind of killed my enthusiasm a bit so things slowed while I decided what I wanted to do. The plan had always been to put the rotary into this shell and I kept thinking why am I putting so much effort into this motor when it is just going to come out anyway? - I probably should have made this decision before buying all the bits for the crossflow and 5 speed but never mind. Plus it makes the title of this build-up a bit more relevant which is important...... So I decided to bring things forward and just do the motor swap now as well. So I have had a new tunnel folded up and have put in for a weeks leave in a couple of weeks time during which time I will just knuckle down and get the motor in there. I have been doing some other work as well though, one of the bigger jobs was to get the oil cooler mounted so I spent Sunday cutting and welding and made some space for it behind the grill. First up grill off and mark it out Cut a big hole Then add some steel back in to keep things nice and strong, I was in two minds about leaving the little crank handle hump thing but figured that you will never see it so it might as well stay Then a test fit of the oil cooler and with the grill back on So I just have to make up some brackets to bolt it in and it will be all sorted. And the last thing that I have been working on is the steering arms, the ones in it at the moment are mk2 Cortina which are longer then the Anglia ones so the lock isn't great. There is a crowd in the UK who fabricate custom steering arms for this application but I couldn't get a straight answer as to whether or not they would pass cert over here, in the end I decided I would buy some anyway and see how they go and unfortunately after talking to the local cert guy came to the conclusion that they wouldn't be any good, the arm is 12mm thick instead of the 16mm that the hot rod manual states and the way it is put together if one of the welds fails then things could go bad. So instead I am going to have some machined up. Something like this Anyway this is now with the TAC for approval and hopefully within the next couple of weeks it will be signed off and I can get them sorted.1 point
-
I also welded new steel into several places on the front guard but my photo taking skills is absolute shit. Slow progress but unlike my usual stz it is some progress haha1 point
-
Yep should be there. 94 surf not far away.1 point
-
yeah thats exactly what im doing. have a flange just before the subframe where multiple mufflers could be tried. my first try is this cheap 12' drum reso from Red Line. straight through perf baffle for 60 bucs. We'll see how that goes. To be honest it's going to do fuck all and be loud as hell any way. Should make a good video to go with the mag article next month. But yeah I've accepted this isn't a one shot thing, going to take patience if I am after a very specific sound.1 point
-
I would leave the patina paint as is and fix the rust, slam on some steelies and get it running in time for next summer! Would a vauxhall 3.3 six cylinder fit in there?1 point
-
It will be cool no matter what motors in it. What's the current engine?1 point
-
I don't have any pics of the VX 490, but I expect it to look like this!
1 point
-
5km of flying fox? Wow. I'd have stopped. Hoist will be for supporting broken pushbikes by their saddles whilst fixing things/lubing gears. Could possibly lift a rusty car or two.1 point
-
Hmmm hard to say whether you would get exactly the sound you're after first try. Why not build the exhaust and then have a flange just before the muffler... That way you can try a few different combos to see what's sweet. My car runs two straight through mufflers from Chase, they were pretty cheap. I just went there and told the dude what I was after and he had a flick through his book and found me what I was after. I flanged the rear muffler as I thought I'd need to swap it for something quieter/sanity... But it's actually not as bad as I thought it would be. They'd probably have a pretty good idea of what would work for what you're after. It would suck to get something $$$ custom made $$$ and then it's not what you're wanting.1 point
-
Fitted new wheel bearings. Needed them. I heated up the second retainer quite a bit more than the first one went on easy but melted the inner bearing seal a bit Also nicked the axle with the grinder New dif oil seals and O-rings. Also swapped in the new HEL brake lines while i was there, nice product. They were also needed. <OLD LINES PIC> Then fitted up the new rims, these were not needed. They are Cheviot mesh 13x7 +20 and they came with 175/50 tyres and are 4x100. haha. Rear looks pretty cool, BUT inside of rear rim rubs on new brake line OTOH the front dosnt rub on anything, BUT my eyes! oh god my eyes. looks like a low rider up on dros They can go in 'the worry about them later' pile.1 point
-
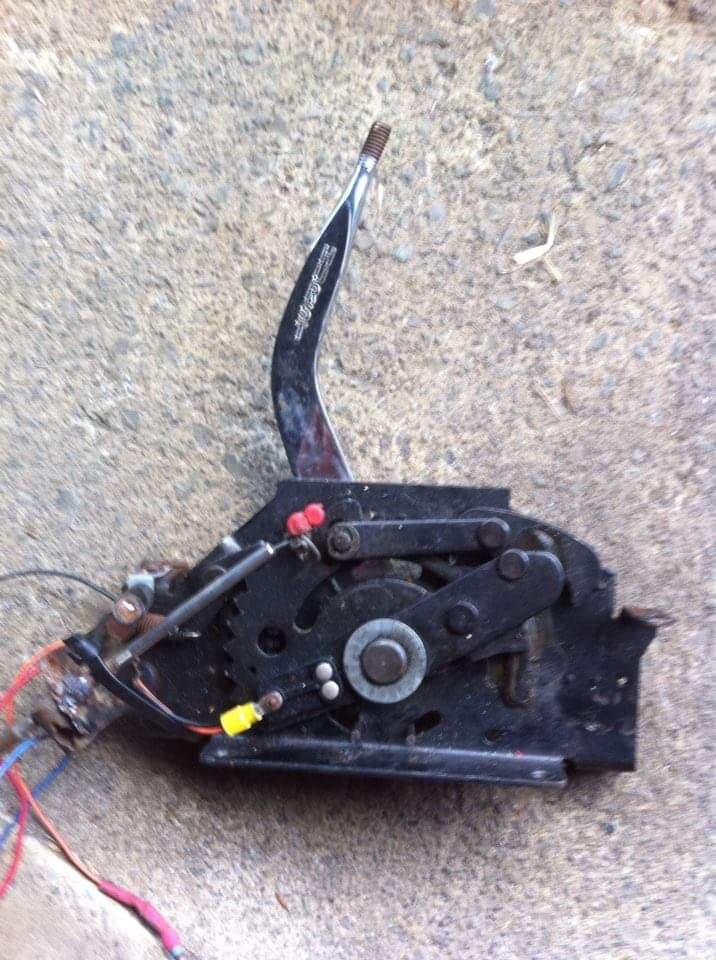
Scored a Hurst z gate shifter, courtesy of bigfoot, LA Lancer driving fiend.
1 point
-
Proof you actually ran out of smoke And its not fair you get twice as much road to use on corners
1 point
-
It was then time to sort out the engine bay, out came the engine and started working on pulling anything else out that I could to tidy up. Subframe and steering rack, both looking pretty tired. LCA’s and castor arm/sway bar mounts, looks like theres more surface rust than paint there… Took them to work to gusset and bead blast them back to new. Now that all the suspension was out of the way I was able to paint the front inner guards with POR15 like the rear. Front castor arm/sway bar brackets done. TIG’d a couple stitch welds to keep it all together. Lower control arms have been gusseted and bead blasted too Subframe and rack got the same treatment Pulled the master cylinder apart, bead blasted it and put it back together. Bought a new clutch master as that was leaking down the firewall, added a braided clutch line to replace the roller coaster inspired hardline/softline. New coilovers to replace the Kei office coilovers W58 and Nite Parts bell housing after a good clean Machined a new shifter bush to replace the mangled one in there. Looked like someone had a go at removing it then gave up. Using a 4AGZE 225mm clutch, had the pressure plate uprated to 1890lbs, nearly double what it was Bought some T3 knuckles and castor arms1 point
-
so at the start of this thread i expressed interest in a metal ducktail spoiler. this is for many reasons, the main two are i cant bring myself to pay $300 for a fiberglass item, and that i dislike fiberglass car parts in the first place. i also didn't want it to look like shit, so quickly came to the conclusion that the best bet would be for me to learn a little sheet metal CAD skills, and try my hand at designing one on there that could be folded and welded (where edges arnt folds) so far im about half an hour into tutorials and stuff and am looking at a screen like this. pretty optimistic about what i may be able to create. feel free to give advice/critisism/ideas
1 point
-
put the rest of the car together?1 point
-
Seeing the sedan might be off the road for a bit getting its V12 I thought the coupe deserved a change. Suspension and wheels swapped over today.
1 point
-
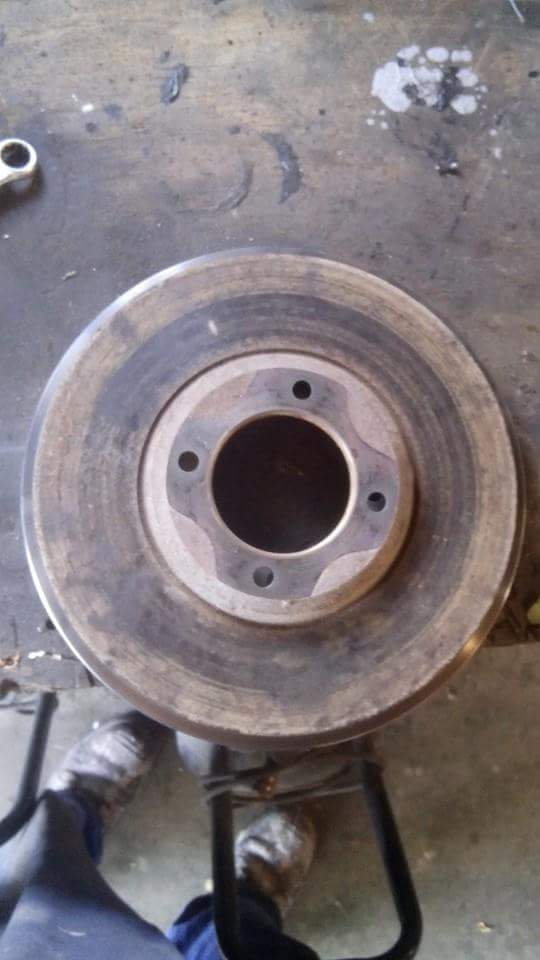
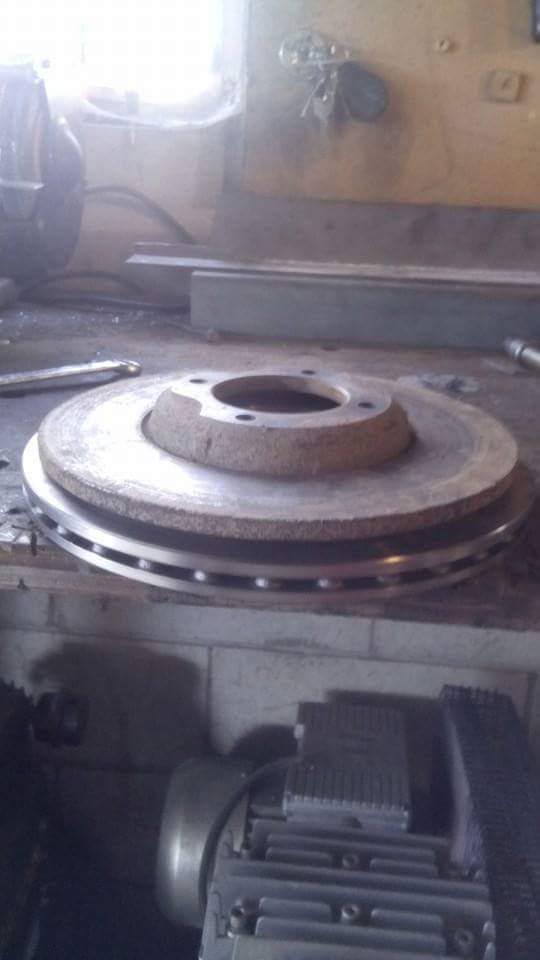
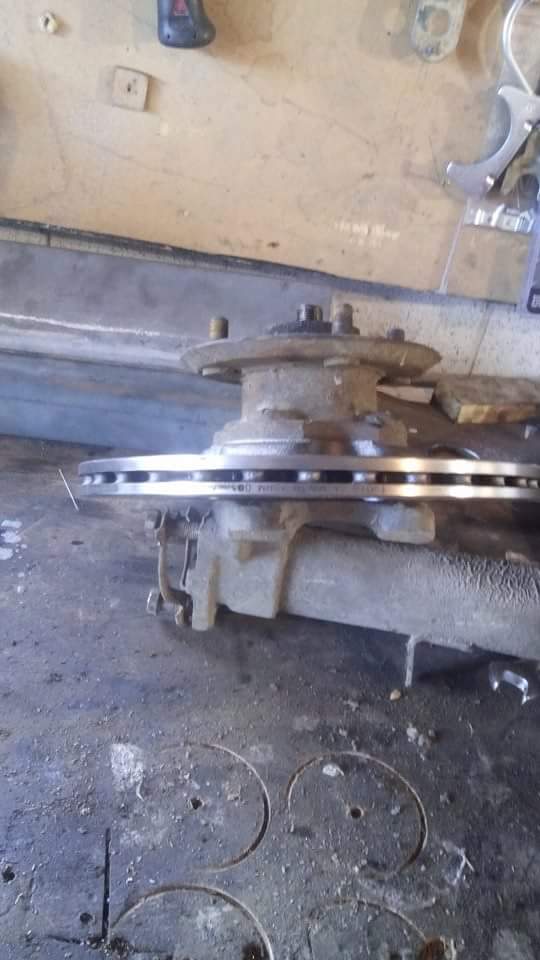
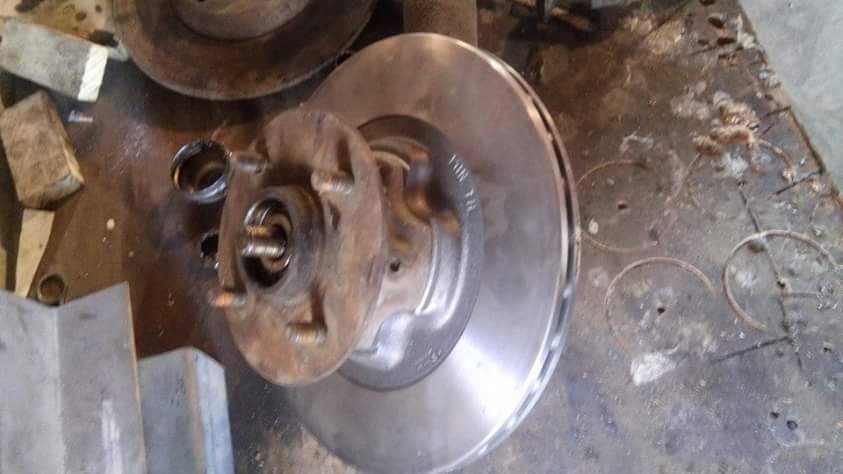
Just a quick 1 Nice wee disc upgrade for the old cortina/escort Brembo 260mm x 19mm vented disc.direct bolt on....but will need to change calipers. Disc is for a ke ford laser 1.6 tx3 turbo As you were
1 point
-
That last photo..... MODGIES!!1 point
-
Getting there slowly, Iv been doing 2-4 strips a day lately. According to my calculations, at my current rate of progress it should be ready for the wee fellas 21st haha. There is no screaming hurry as hes only 2 and a half at the moment. The uneven scrapy parts at the top of this pic will be planned and sanded off, the very back part will be made up of a small solied shaped piece of Rimu The strips that are curved in 2 directions have to be tapered to fit snug so it takes a bit longer than you might think. Edit.. A few more planks on.1 point
-
This But in ute form.1 point
-
Wow- its been a while since I wrote some stuff about dirt, gorse and sheds. So here I am. It has been a busy last few months sorting out many things. I have not been working much in this time, well not paid work that is. I have certainly been on my feet rushing about here and there trying to get stuff done in some sort of order so we can start getting a little business going. What we want to do more than anything is just build or fix things for people from the comfort and convenience of our own workshop charging a fair enough rate that will allow us to continue on with a pretty cruisy relaxed lifestyle out here. I am sure that is what most here on oldschool want though- most I have met so far have not been chasing silly big monies but instead want enough to play with old cars and shit. So that's us. With this in mind I had to continue on getting the shed up and once it was up I have been full on trying to set it up neatly in fashion I've always wanted before taking on any proper 'paid' work. Sam will attest to this...his Celica has been sitting here for ages while I get stuff unpacked and sorted away. I promise you Sam that I will soon remove all them big chunks of air from your/Janes car and replace them with steel. Phew- that was a big chunk of words. Here's a photo.. Yep- that's our workshop all pretty much finished. The very eagle eyed will spot a few flashings missing. I have to finish them plus fit a really awesome cat themed wind vane my parents gave us. But yeah, the shed is up and what a relief that is! Its been a few months of ups and downs mainly to do with the shed supplier being totally useless. But that's all over now and in the past. So moving on its all inside fitting out work now. First thing was to get a heap of plywood delivered and line it out. This instantly transformed the feel! its also going to help heaps as extra bracing although the shed feels solid as without it. After the ply was up I built was a place to sit with our coffee and ponder ideas in the sunshine. Using a variety of Rimu bits kicking about I made this bench.. More recently I have parked a little breville espresso machine on top- one that my parents threw out because it leaks badly. I'll put up with that for nice coffee in the workshop Now I am part German. Only an eighth but I think enough to make me get off just a little on organisation, ergonomics and efficiency. At times, often, this conflicts with my mums she'll be right kiwi hippy cruisy slant. Hannah is also a tidy freak so the workshop has to be as well organised as possible. Especially if we want people to come along to see us and be potential customers. I hate messy workshops! I hate spending ages looking for tools or stock when it should be in its place and easy to find. Especially if a good customer is paying for this time. Not on in my book. So for the last few weeks in between entertaining guests and trying to enjoy some of this summer after missing out on December and much of Jan to building the workshop etc I have been organising all of our stuff. We had to make several trips over to Blenheim to help my parents move house. While there each time we would bring back a load of stuff that was stored there. We also took down the little plywood shed we had built before we started building the housetruck. All this stuff ended up in a big pile on the workshop floor. This pile had me in hives with the general messyness. Plus we had to make the place a little bit tidy for the visit from the smoking tire crew. So I made some big shelves. Many of the boxes my parents had used to move house were a perfect size for these shelves but they were covered in print as they got them from macdonalds. I turned them all inside out and re-glued them. Now I had a load of neat matched brown boxes. Awesome! So I organised shit and stacked shelves.. I also built a big sturdy bench. Then I covered the top with a sheet of 4mm thick steel. Its great. Really happy with it. You can see to the right in the above image a big steel table. That was the frame we found in the scrub next to the drive. Its burly and has industrial grade castor wheels with grease nipples. It was an awesome find. So I cleaned it up and welded the other half of the sheet of steel to it. So a 2.4 m long heavy roll around workbench. You could put a car on it. So cool. I love it. My last thing to build was something ive had in mind for ages- well before building the shed. I always find storing paint cans, spray cans, screws, bolts etc, seldom used special tools- all the little things that clog up shelves and work tops getting in the way. So I wanted to get this stored out of sight and safe from errant grinding or welding sparks. I built this unit. Made use of spare Rimu offcuts for the door.. which opens to this.. Yeah Im pretty happy with that it must be said. Amazing how much stuff it holds and how clear it makes every where else. We have built another bench- a bit smaller and with a Rimu top. Its in what will be the bicycle area. That area will be sectioned off and solely for our many pushbikes and keeping them on the road (or on the dirt..) Last night Hannah started varnishing the bench tops and the doors. They already look so much better after ust one thinned down prime coat.. Once the building has been signed off we'll start doing the electrics. We'll do as much as we can but will have to get an electrician to connect our switch board to the main meter box and then test/sign the lot off. Already have local guy who is helpful as. Later in the year we can start building the mezzanine floor. This I am really looking forward to! Plus looking forward to painting the plywood and finishing off all the doorways/windows etc with some feature wood. Other things have been happening away from the shed. WE moved the long drop away from where it was - which was a bit too close to the truck to be healthy. Up the hill a bit and in the bush surrounded by big ferns. This involved digging a deep hole- as deep as I could reach. My brother came over and helped us carry the booth up the hill. Its now in a much nicer place to take a dump! I added a vent and sealed up all the gaps and now it draws nicely up out of the vent and smells nice. well in a composty long drop sort of way. We have also been having a go at creating a succulent garden/area. Big thanks to Andre for the Yukkas and many succulents. Its looking pretty good so far and hopefully they will thrive in the hot little valley here. We have called this garden 'the garden of tat' because a friend gave us a pretty awful wood look carving of a lady sitting next to a wolf. Once it was placed down we have started discovering other gems and friends/family have given us other terrible tasteless ornaments. Dad gave us the concrete cast boy climbing up a log which I accidently broke in half. But then glued together with no more nails.. So to finish off this rather long post here are of our 'garden of tat'1 point
-
An update,,,,with pictures.... Clambered underneath her to mark out the floor mounts, and found the floor didn't follow the chassis properly, dammit. so chop chop Remember its done with gasless Mig so it looks horrid. Heres the plates that the body will sit on pushed her outside, pics with the new 17" wheels on it
1 point
-
Done a bit of slaving the last few days with a shovel and barrow to level a pad for the water tank. Got the tank from Devan tanks. $3400 delivered for 30,000L Its 450kg so it was stuck there for a while. Then Ray came to visit yesterday and we did some towing Result! Have to plumb it up this week and also tie it down in case the wind picks up before it rains1 point
-
Some progress on the gearbox front i chose the L series gearset as it had the better ratios. I thought i would just change to the column change selectors and be done with it. one problem with this is that nissan went to a larger 1/2 selector shaft in the later gearboxes I couldnt run the larger shaft as the selector that fits it is for the bigger synchros that the earlier gearset does not have. Here is the larger 1/2 selector on the earlier shaft 14mm vs 16mm The column change 1/2 shaft also has a notch in it for clearance of the selector. I decided to make a sleeve to fit the fork to the shaft. cant be that hard. Using some precision engineering skillz i learned from my brother in law Ray, I lined up the 2 detent notches and marked where the new hole for the dowel pin needed to be. I ground a flat and dot punched it then drilled. Some of my workmates told me i would never drill it as it was some kind of hardened tool steel shit. They were wrong. I used this fine quality chinese drill press and only fucked 4 drill bits Then i made this sleeve up to go from 14mm up to 16mm. Pressed it on, machined a notch in it with 20 axis angle grinder Test fit last night. Its the top one WIN1 point
-
couple of interior pics for those that are interested short people in the back hearse spec http://s470.photobucket.com/user/fraz_bandit/media/260c%20wagon/20141002_165818_zpsb83bc960.jpg.html'> hope to get around to the interior one day. Not really a priority as its all there, just tired1 point
-
If anyone want's the opportunity to own this amazing all terrain family station wagon, its up for sale. //oldschool.co.nz/index.php?/topic/45130-fs-1988-toyota-tercel-sr5-whakatane/ Regards, VG.1 point
-
400 odd kms of nearly trouble free motoring. The only thing that went wrong was the battery terminal fell off coming back through pukerua bay, a worried glanced into the engine bay quickly produced some laughs and relieved my panic at loosing all power haha. Im chuffed.1 point


This leaderboard is set to Auckland/GMT+12:00