
Leaderboard


Popular Content
Showing content with the highest reputation on 07/21/14 in all areas
-
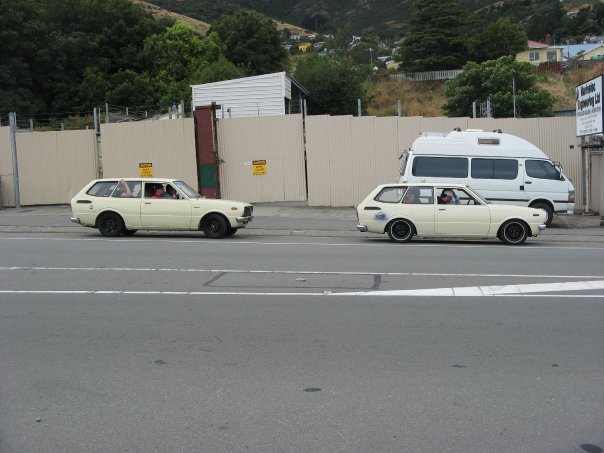
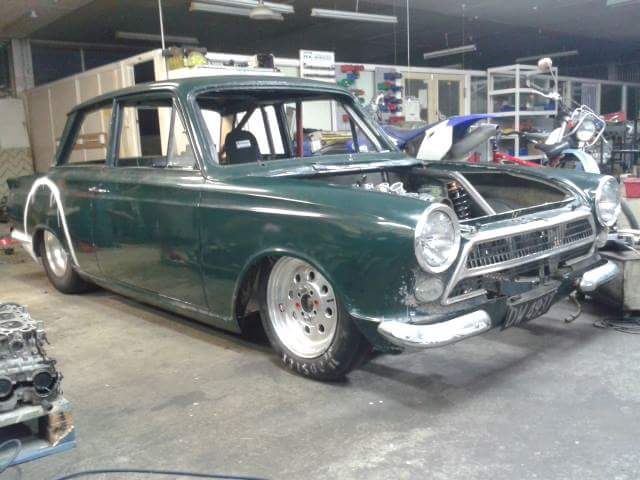
All back together now. Finishing details take forever and cost the most! Has come together very nicely though everything looks awesome and works well. Dash complete, wiring all sorted, windows and doors back on and car runs. Starter motor/alternator wiring was pretty frustrating there just isn't any room! plenty of heat shield and shrink wrap to make sure it lasts the distance and we never have to take it out again. Is running a massive starter off a 5K van or something so that doesn't help. Did a final spanner check and got the basics of the graphics done. Also spent an evening fitting out the safety items and padding the rollcage. Took it out for a shakedown on the backtrack at Manfield last weekend to make sure nothing will fall off. Was more of a motokhana/autocross setup which didn't really suit the rally tyres + suspension but it was still good to throw it sideways. tried to use as much grass as possible to make it more interesting/do some skids a couple old toyotas, worlds apart Lunch is always the most important part of any motor racing event - the way it should be. parked up under the toyota sign for nostalgia's sake. We have entered our first rally for next weekend. It is a clubmans rally in Tauranga for novice drivers which describes us to a tee! 80km of stages should be a good introduction and should be a blast. Still plenty more things to get sorted with the car; Diff has a leak, need catch can sorted, hole in tunnel to cover, mudflaps to make + attach... the list goes on but we will make it. Most importantly I need to sit my rally license and get the authority card back from MSNZ! Will all be worth it when we can throw some stones around - hoping to have some vid of the 4K going strong on the gravel.7 points
-
the lowest one.7 points
-
So as per above, I'd been looking at changing the diff ratio and changing diff type. After doing the maths on the diff ratio, in order to keep the tire sizes I want (195/50/15 and 205/50/15) and get 3000rpm at 100kph I would need to drop right down to a 3.7 ratio from 4.3. Changing to 4.1 would make bugger all difference for the effort, so 4.3 it is! Regarding the diff, after doing some homework I found that the Cusco units are VERY adjustable, and from factory they are on the highest settings for everything. At the moment it has too much preload (how much the clutches are pushed together / locking the diff when nothing is happening) Too much locking under accelleration (Annoying trying to put power down on corner exit, acts like a locked diff) Too much lock under braking/decel (Makes the car understeer on corner entry, and partly responsible for doing 720 spins into turn 1 at Taupo a few trackdays back!) Some people would suggest just adding more front camber to the car, but that just means each end of the car is fighting each other and so you're scrubbing away grip for nothing. I'll be adding a small amount of camber over it's Necessary-to-pass-cert 0 degrees setting to negative 1-1.5ish. After pulling the diff back out it looks to be the Type RS model, which is the less aggressive compared to the MZ version and thankfully it's a lot easier to adjust the preload. The preload is set by a bunch of springs holding two halves of the unit apart internally, that you can see here: The MZ type has cone washers instead, which are even more aggressive and not very adjustable from what I understand. phew! There are slots for having up to 10 springs in, mine had 6. So took two out, respaced them evenly and used the reccomended minimum of four. There are also notches in the sides, which determine whether the diff is set to one way or two way: I've changed this from two way back to one way. So when I'm not on the throttle, the car should drive like it doesnt have an LSD at all, apart from the preload force which should hopefully be a lot lower now. aannnnndd the final thing that I can adjust, is the order of the clutch plates. Basically half of the clutch plates hold on to the shaft which the axles slot into, and the other half grab on to the outside of the housing. So they either have 'tabs' on the outside or inside circumference of the plates. They are normally one then the other, however if you stack two of the same type of plates back to back, in the order prescribed in the manual you can reduce the effective friction down to 60% of what it was to start with. As explained by this excellent diagram: With everything restacked, it just needs the housing plonked back on, and the two halves are only held together with 4 phillips head countersunk screws. The reason being that they are just there to hold the halves together until the crownwheel is on, they dont need to be done up super tight... Then add the crown wheel and torque it all back up to factory settings, and back in the housing. From here it's no different to the process for installing any other type of diff. It looked pretty intimidating seeing the exploded diagram, but they've done well to have the minimal amount of parts and super easy to adjust or service. Here's a Gif of how it stacks together: This is all yet another tick in the box towrads the idea of going to an easier to work on car than previous... I shudder at the thought of having to make the same changes to a diff buried inside a transaxle! There are a few other things to do while the the diff is out. I found that the brake discs were pinching on the outside circumference of the axles - so they werent sitting completely flush against the axle face. This pretty much busted the near new wheel bearings on the axles, so will need to replace those again. Bummer! Easy and not too expensive problem to solve though, I'm relieved it wasnt a bent axle instead causing the problem. When towing the car on the trailer I've had to be careful about throwing strops over the diff as well, as the brake hard lines are in the way. So I'll be redoing these in a more strop friendly location, then painting the diff housing finally, then mash it all back together. This should take a competent and motivated person maybe 3-5 nights after work and a weekend to complete. So, ETA is December Thankfully most of this work I can do on the bench in the garage instead of scrounging around under the car, which isnt particularly appealing at this time of year. Fred: //oldschool.co.nz/index.php?showtopic=21625#p6141357 points
-
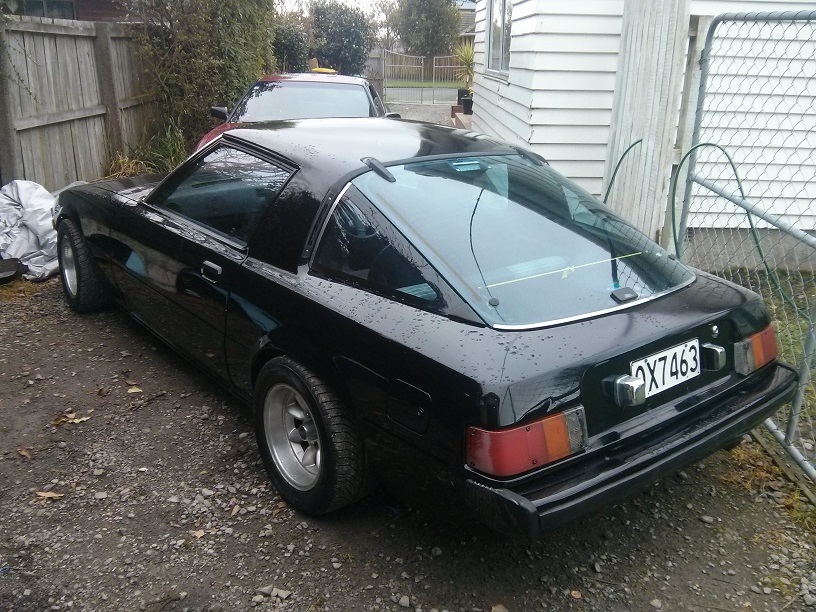
discussion: //oldschool.co.nz/index.php?/topic/44424-hulses-1973-616rx2-discussion/ ended up swapping this for my 13bt starlet. always wanted an rx2 so this is the second best thing a 616 conversion. looks the part and its certed so not worried! old owner had owned it for 5ish years, brought it from wellington when it was lime green on modgies with a 12a. since then it has been sprayed matt black (primer) and had done a 13b turbo conversion on it. then motor blew up on dyno so I ended up with it rolling body.. plans are: 13bpp panel/paint - gloss black black racepros tidy black factory interior 14' mods with 195/45s suspension/brake upgrade diff/gearbox upgrade etc.. heres a couple pics when previous owner had it now comes the start of the build.. got it home, sold the rims, seats and have been slowly getting been getting little pieces together for it. stripped interior etc now started working slowly few pics will update within next few days.. pics give rough idea on whats been done in last 2 weeks6 points
-
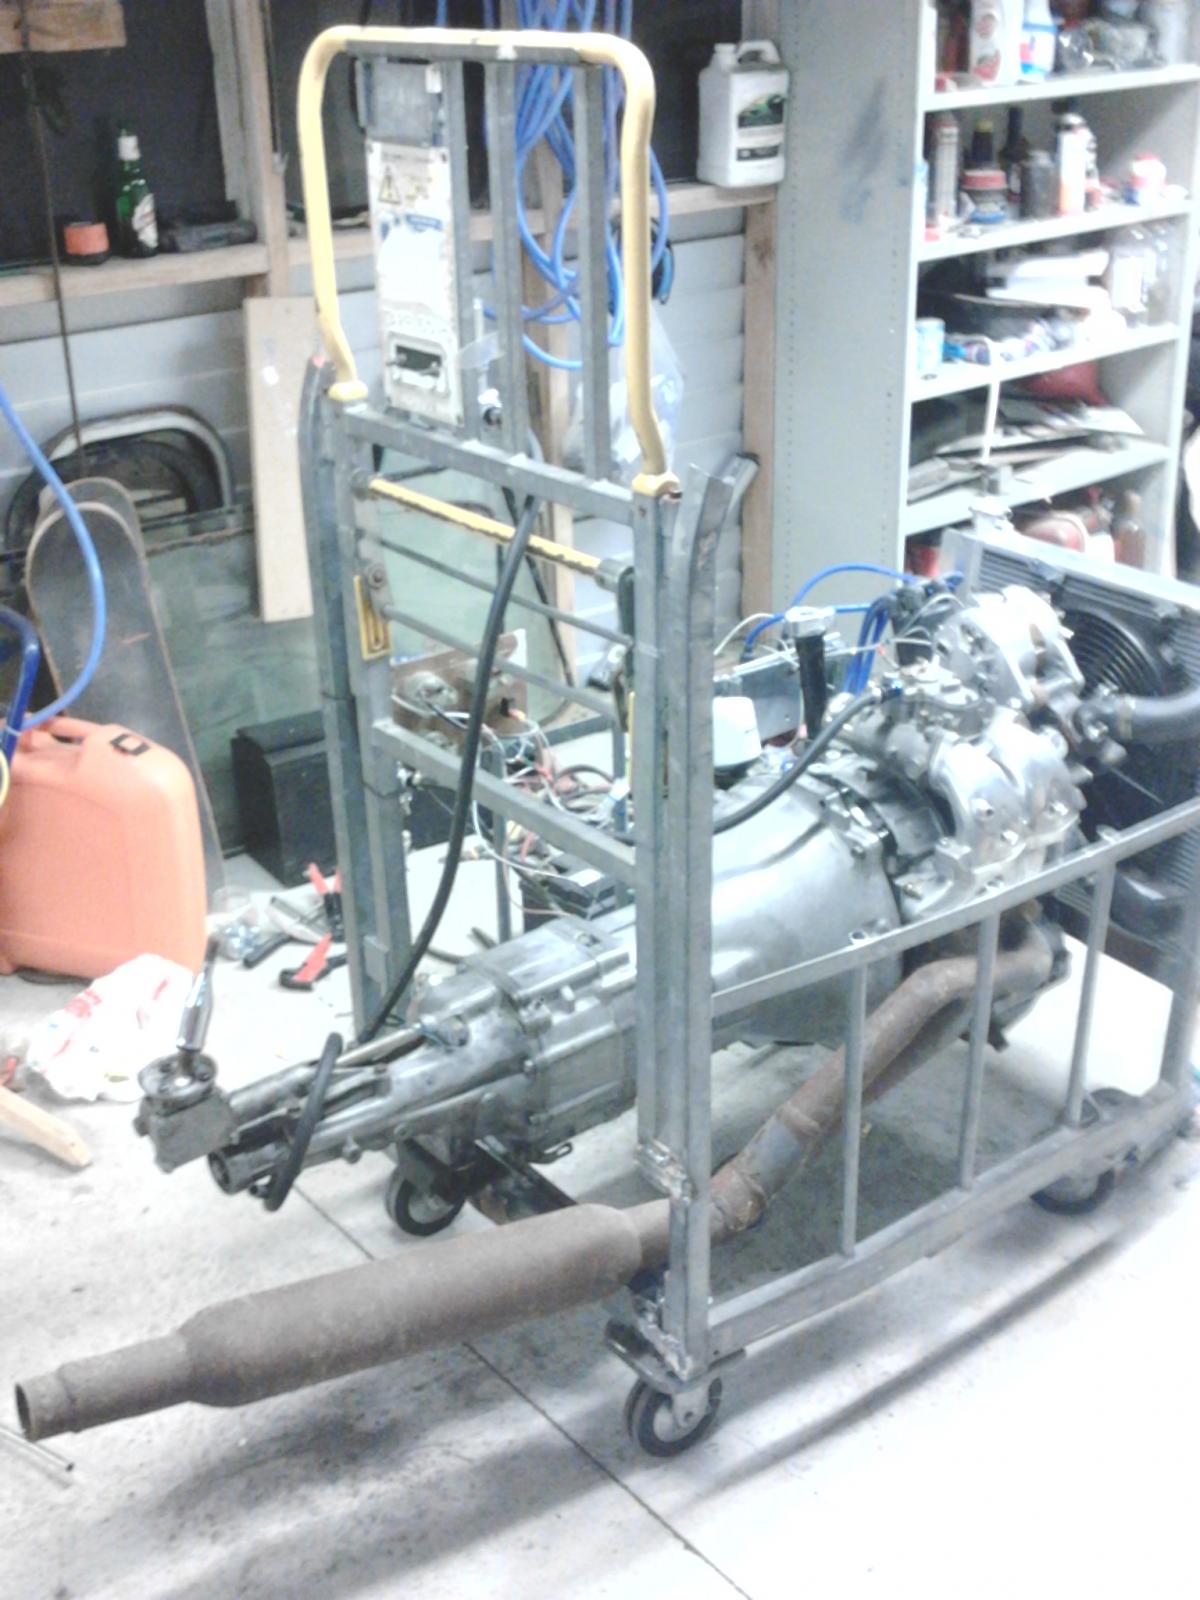
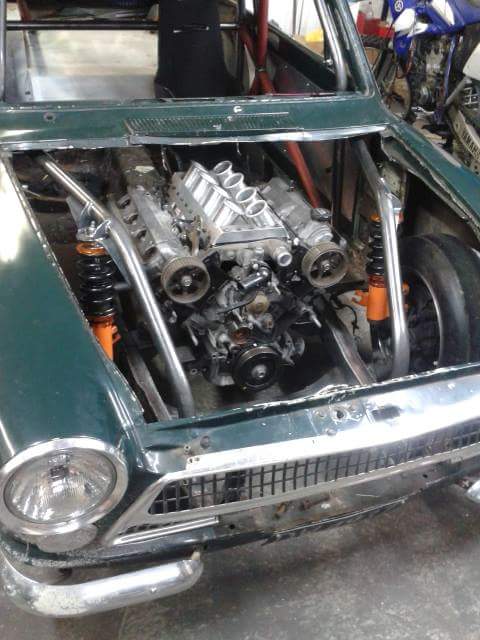
Didn't quite get engine running this weekend but got close. Heaps of stupid shit slowed progress right down like Mazdas silly sized tiny water temp sender in block, sidedraft manifold fouling on emission block off plate, no faster shops open so endless sifting through bolt/nut collection for shit to make work. Also why does Repco have no listings for rad hoses, had to buy some other ones and cut which is no biggie just annoying! Very last two things to do before startup/troubleshooting are: 1. Hook up vacuum from inlet manifold to dizzy (needs an adaptor made as manifold vacuum oulet is hooge) 2. Suss out coil/dizzy wiring setup Any-ways enough excuses,. here is where the week of working on engine stand/engine has ended me: PS. making hoses using AN fittings & braided line is pretty damn easy and fun. My recommended new way of doing lines.
 6 points
 -
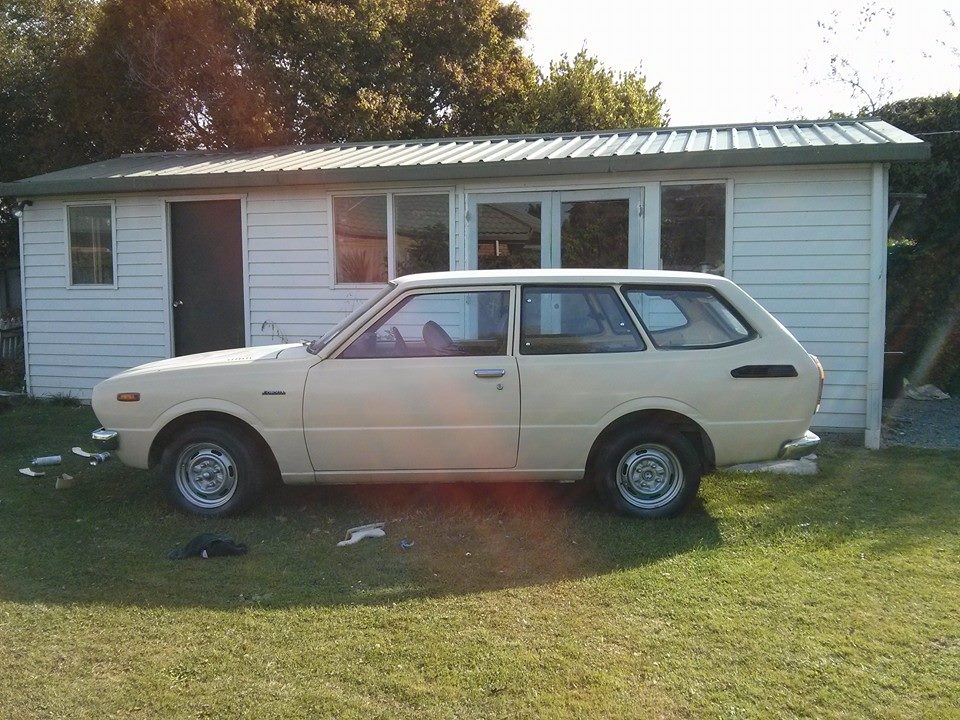
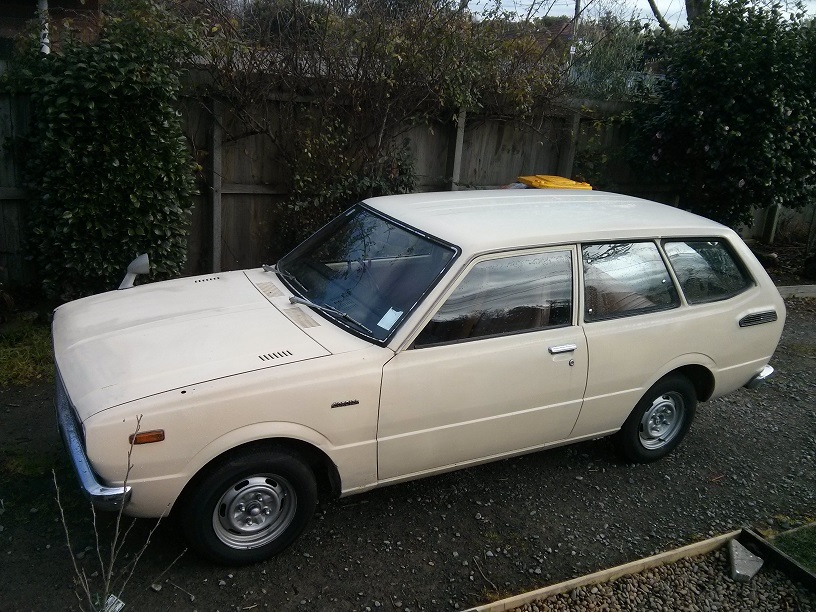
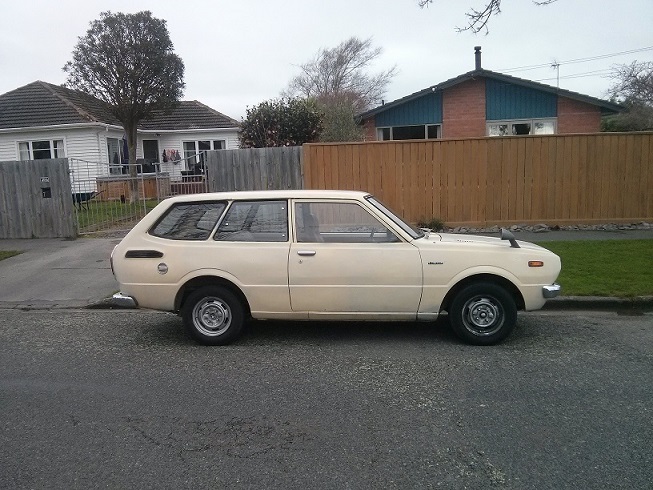
Thought i might as well make a project thread for my daily Trying as hard as i can to not make it a project but theres always things i want to do with it... The car started off very similar to the Rx7..i brought it off a mate who had lost interest in it and got it for a bargain..... Unfortunately i don't have any pictures of when i got it but imagine if you will a wagon covered in primer patches almost creating a type of camo paint job, running a engine that was as close as a K series engine will get to blowing a big end..... the weekend i brought it i panel and painted it.... unfortunately i ran out of paint and the drivers side ended up a bit on the thin side ..... I then set about finding the missing parts i needed including a replacement 3k engine...i found that you can no longer buy a 3k/4k for a box of beers, Toyota tax seemed to have gone up 10 fol.... i ended up scoring a nice little 3k out of a starlet from a member from Club-k whipped that in and it was away (timing chain could do with replacing but still a solid runner) Discuss
5 points
-
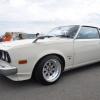
nice, my father in law had one in the same red until 2 months ago. He originally got it to use as a rally car after his last one was written off but it was just too nice, 40 thou original miles. he repainted it and put some sweet turbos on it. Sat in his shed for years until he sold it this year, man i wish i had the money at the time to buy it, so pine.5 points
-
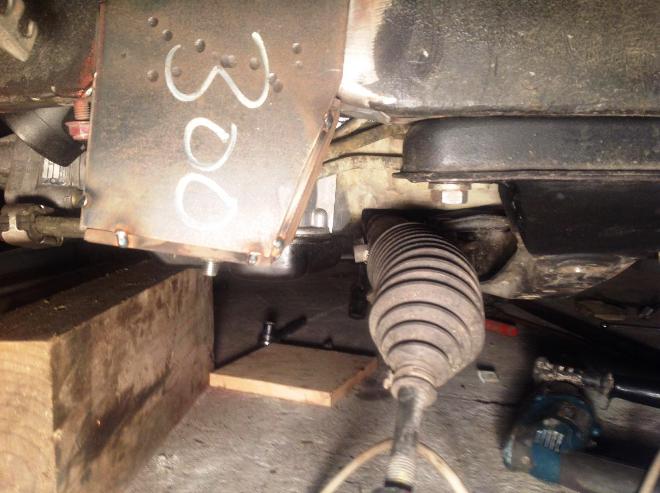
It's quite tight But it's in the hole
4 points
-
Karl, once its warmer how bout a pickapart challenge Like a scavenger hunt most coins nastiest old food a cert plate etc Just for a bit of fun.. Last time we went there it was a good way to have a laugh3 points
-
Only update is that my workshop is so disgustingly messy im scared to go in it encase i get trapped and die from starvation.3 points
-
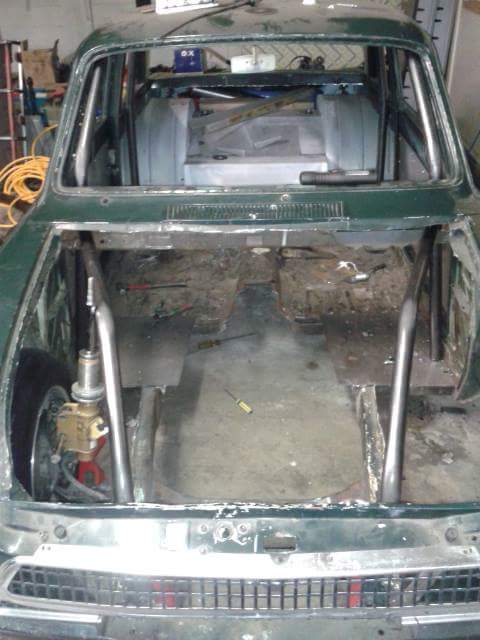
I havn't updated much lately, but i have been chipping away on the mk1. So i thought it was about time i loaded a few pic's up. I should have taken more along the way,Man Imageshack sucks now, can't load decent size pic's Here's a pic of the cage coming together Motor siting in. Got the suspension in. I have used silvia front coilovers, silvia bottom arms, adjustable silvia radius arms. I have just welded a rosejoint into the factory bottom arms to make them adjustable I have used the escort steering rack that i had from previous set that i was going to use. We have decided to go left hand drive so have mounted the rack upside down and it all seem to be sweet.As it sit's a the moment, i am saving for a Powerglide, Looks like the best way to get a decent one is to buy one from the states.
3 points
-
Ok i Know its been way overdue but here we go my Bus has been on the road over a year now and i am very happy with it have not had to many hick ups so alls good NZ VW Taranaki Nationals 2013 Our wedding on the 11th jan 2014 2014 Nz Vw Nationals in Timaru My Next Project once i have some Space to do it 1959 Splity3 points
-
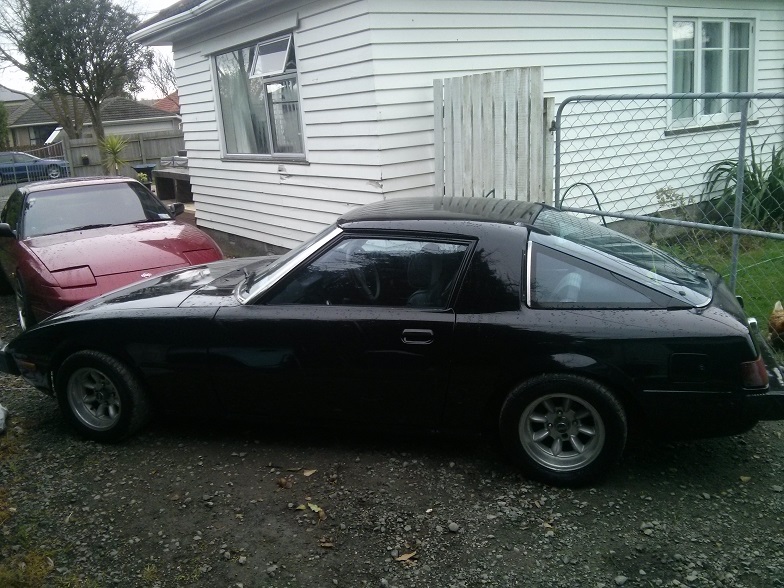
Thought i better start a project thread for my latest toy... Its a 1980 Series 1 RX7 SA22C Brought it off one of my mates who has owned for 6+ years, he had lost interest in the car scene Has barely seen the road in the 6 years that he has owned it..so i plan to changed that Brought the car on Saturday with a non working clutch, luckily we live right next door to each other so just pushed it over.. Washed of the thick layer of dust and gave it a vacuum to see what i was working, over all its in pretty good condition, few little pieces missing but the important parts are there... Found a little bit of rust in the doors and some surface rust in other places but nothing to major... Ended up fixing the clutch on the Sunday, charged the battery and went for a spin last night..reminds me of a hopped up 2 stroke dirt bike (Cars running a 12a J-port) Need to do a few things for a WOF Bleed Brakes Fix some rust Buy some bulbs Hope for the best Discussion //oldschool.co.nz/index.php?/topic/44345-d1rty6s-1980-rx7-rice-rocket/
2 points
-
2 points
-
haha the entire underside of the 120y is covered in the shit (bump stops, cross members, lowering blocks etc). it means its factory you know.2 points
-
course.. pfft just practice its like a gluegun stick everything together2 points
-
Fuel pump fixed, was an old kill switch that bit the bullet, reconnected it at the loom, then fuel line from the tank was blocked, then needle and seat jammed, now runs think the carbs a bit fagged tho, sometimes just stops then struggles to start, might try the other one tho I think a good tune up is in order. Leaks oil from what I would say is a stuffed cork rocker cover gasket so have to find one of those. Initially blew smoke from idle, tho took it for a few runs round the block and it seems to have cleared somewhat. Clutch looses pressure after a few gear changes, will look into a new master cyl seal. clutch throw out makes a small racket, knew I should've changed it.. meh.. Has a clunk from the left rear for some reason, must be the shock, can't think what else.. thank god for rough east side roads, brings my attention to a badly needed wheel alignment (and the clunk).. stupidly bought a secondhand alt without checking my parts, found two in there one in almost new condition (douche).. aaaand.. thats about it for now, put the new(old) front on, looks quite badass with mismatched panels.. will snap a couple of pics tomorrow..2 points
-
And walked on!2 points
-
edit, got some decent photos up after mucking aound so that shitty one can leave. These pics are Before guard rolling and just after i had "fixed" the suspension so it had to settle a bit after this and sits about 15-20mm lower looks alot nicer now. Still have to re-install the chrome and mudflaps. Will get new pics once the weather turns nice again. Mitch Edit Edit. fuck these pics got killed when put into Flickr, sorry boes.2 points
-
I hear you like RX7s?2 points
-
So my wheels arrived. Just need to buy some nuts and bolts and decide on a colour and they can go back together.2 points
-
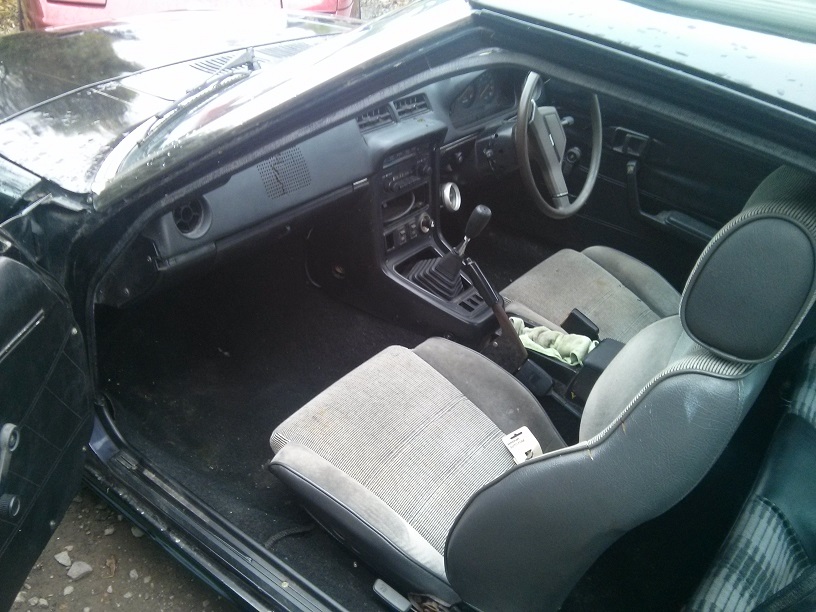
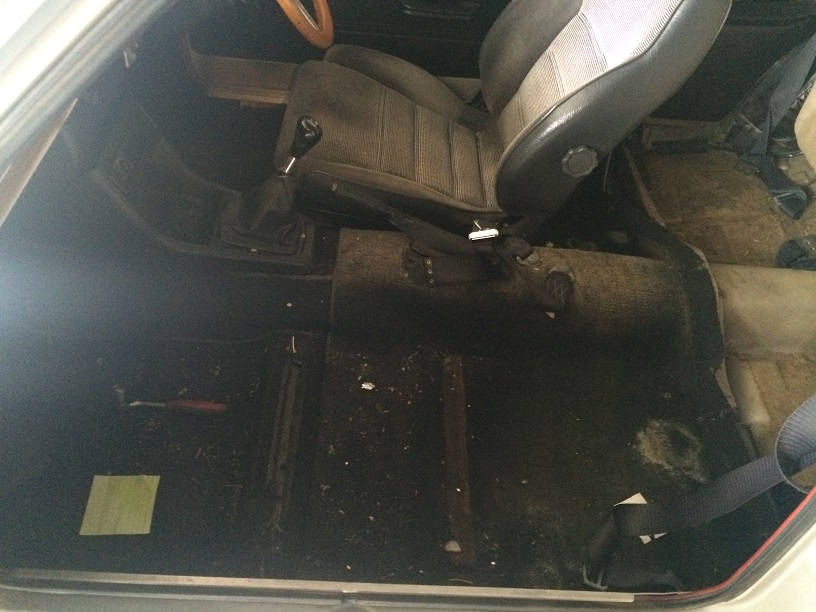
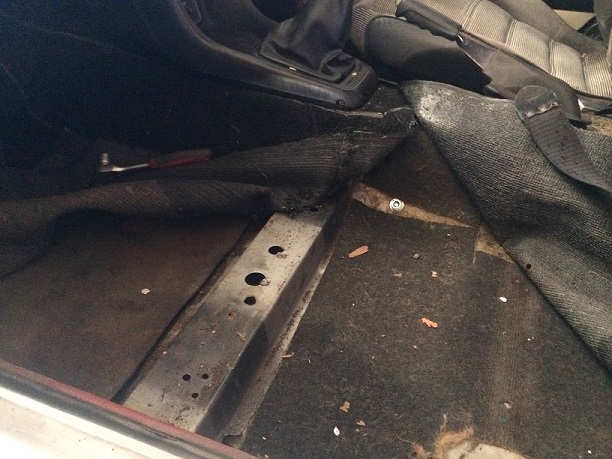
Hey, I've had this thing for 12 years now so thought I would show OS what I'm up to... (sorry in advance for the iphone photos) It was my first car and have held onto it since, when we bought it, it had the same paint job as now but was standard otherwise with a 1600 in it.. Since then the first things we did were mk2 front struts / brakes and a weber twin throat carb.. A few years later we added series 4 rx7 seats, a 1700 xflow with 40mm dellortos, a 1600 sport gearbox and the hotwires.. And most recently which was a few years ago now were princess 4pot calipers and a T50 gearbox that was found at the wreckers with a custom bell housing to suit xflow... Other than that it's been a mixed life of daily driver / parked up getting rusty.. Anyway some more photos in it's current state I'm removing the interior at the moment to tidy the floor up.. Finally have a garage to park it in too after years of it sitting outside so I have some new window and door seals to throw in there as well From what I can see so far the floor doesn't look too bad, I'm expecting some surface rust etc... I was able to get Josh aka Mr mk1 to work his magic on most of the rust last year which has been epic, he did such a good job.. Progress will be kinda slow at the moment as the car is stored at my partners which is 45 min away...But at the moment motivation is high to work on it when I can.. Cheers guys Nick //oldschool.co.nz/index.php?/topic/44173-nicklm-mk1-escort/
1 point
-
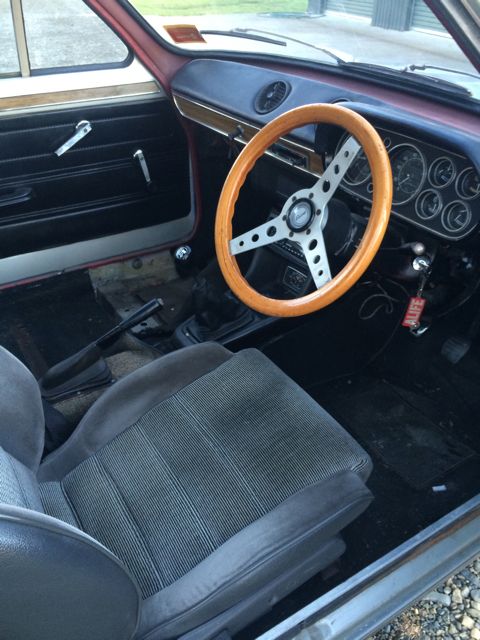
So thought I'd put something up here. Bought this car about 8months ago with a friend with the intention to get into rallying a oldschool RWD car for cheap and having some fun (the way they used to with mo's a beer for lunch) as we both have circuit cars as well and came to the conclusion neither of us could handle ever selling our POS circuit cars to fund a rally car. We are planning to do the Daybreaker Rally in 2014, there is a clause in the rules that still state that the co-driver can drive some of the stages if they want. So we are doing stage-for-stage driving the car. Neither of us have any rally driving experience, only rally experience is servicing stupidly custom hayabusa starlets so doubt that'll be much use to us... so will be an interesting learning curve considering neither of us can read notes so will just do the rally blind at this stage. Got the car cheap from down south where it had been running for a number of years. Mechanically pretty sound few bits and pieces we have had to sort but all in all its pretty good. Car just needed a birthday really. A lot of things were done really hory and the interior was a sight to behold.. A bit of TLC is what it needed. It has a COD (certificate of description) which means we can run legitimately in the classic class and also gives the car a bit more value. As we got the car got rid of the racetech 100's that neither of us could fit our fat arses into and mounted the seats from my circuit car. only just fits in there theres a 10mm gap between the seats and each seat just clears the door on the outside of the car. This is what we are aiming for the car to look like by daybreaker; took it for a skid at the farm to test it all out. Goes bloody well! the 4K in it is grumpy as hell got a massive cam, dellortos and revs out over 8K so were pretty happy with that. Has a AE86 diff (TRD plate diff), gearbox and front struts with Bilstein shocks all round so handled it all really well. Was super tail happy so after this we put it on the alignment machine; turns out it was toeing out by 8mm.. nothing a angle grinder and welder can't solve! So the strip down begun, just to tidy up everything as there were bits of rust, birdshit welding and general horiness in quite a few places. our aim was to tidy up the inside and do everything right. As well as sort out the crunchy synchro's in the gearbox which hindered us while testing Some of the good bits.. grp 4 inserts in the front Some of the shit, starting to strip the whole interior of paint ready for a full respray (check out how dented the floor is - this has been a rally car for quite a while!) Tidying up the struts Jase (ekezetec) made me some new footplates New parcel tray to tidy it up So we had a bit of drama with this. We intended to use my paint I used ont he 101 and it just turned to shit. Apprentice painter painted it for us and did a shit job turned out rough and not glossy at all and was never going to cut it. So got some white CV and did it again with a mate Rob at the gun. Damn he's good at pretty much everything and only wanted a 24 box of export for it which we pretty much drank while he painted... what a GC! Had to spend a lot of extra time re-prepping it again which sucked but at least its done properly. All masked up and ready to go for round 2. Rob at work So much glossier than 1st time round. Main thing was it had to be glossy so dust can be cleaned out properly after every rally. Finished result - really happy with how it turned out! New battery mount welded in and nice straps made. Also ran new cables and put a nice sheath over the outer to keep it all looking tidy Toolbox has been restored taking it right back to bare metal and repainted/remounted using some tidy go-kart washers. Also painted the fuel tank while it was out to tidy it up Nick spent heaps of time cleaning up the rear trims. We used expanding foam up the pillars to try and seal the dust out of the cabin. hopefully this will work well along with our new door seals - got a full set of brand rubbers from thailand so that will make everything seal really well hopefully. Dash has been fully re-coed. Looks 10000x better than it did before. Just looking for a small black retro looking tacho to run now so we can get rid of the monster tacho it currently has.. Dash mostly back together now just need to replace the indicator-lamp-oil-light with a nice little LED unit and mount in the new carbon panel. Also had the top panels of the dash repainted and flocked, looks super tidy and definately worth the money to do it properly! Waiting for the foot plates, seat mounts and isolator switch bracket to return from anodising this week to finish off our nice shiny bits and pieces.. Will post more pics when they arrive. Got new Flywheel bolts for it and machined the flywheel properly so the new TRD close ratio box can go in this weekend hopefully. Also have decided to make a new driveshaft. The output of the TRD box has a ae86 spline which we had to change, Nick had a ae86 driveshaft sitting there so thought we may as well use that! just need to shorten by a few mm and weld back together.1 point
-
<I'm no expert.> But I would guess that the size of the tube and nut should suit the springs. Not the strut. Pretty sure the springs only come in one, or possibly two standard sizes. If you get/find smaller diameter tube to fit your struts, the nut may be too small a diameter and not support the spring. Unless you plan on machining a ring to fit over your nut and support the spring. I'd probably get threaded tube to suit the springs, then machine a stepped sleeve/collar to make the tube a good fit to the strut. </I'm no expert>1 point
-
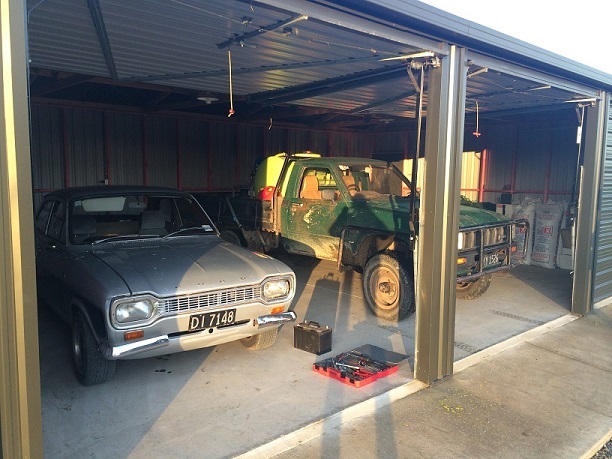
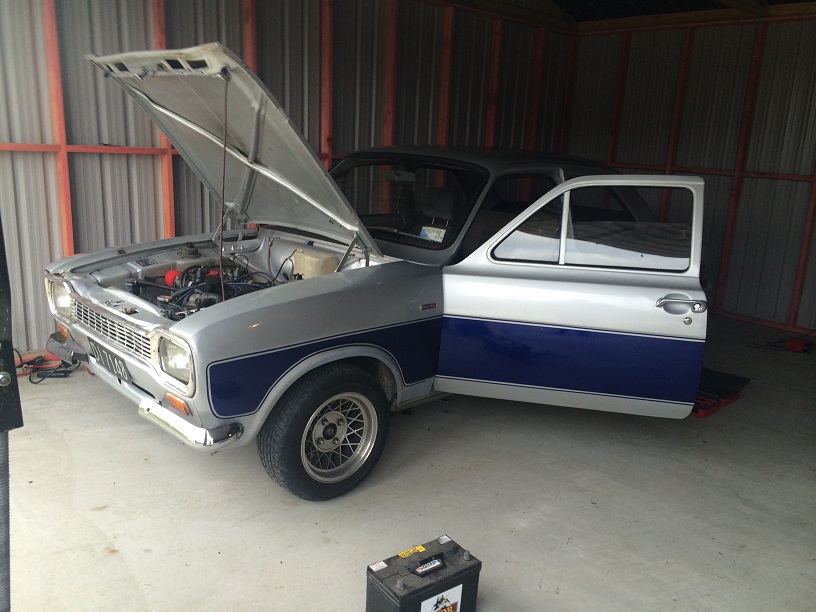
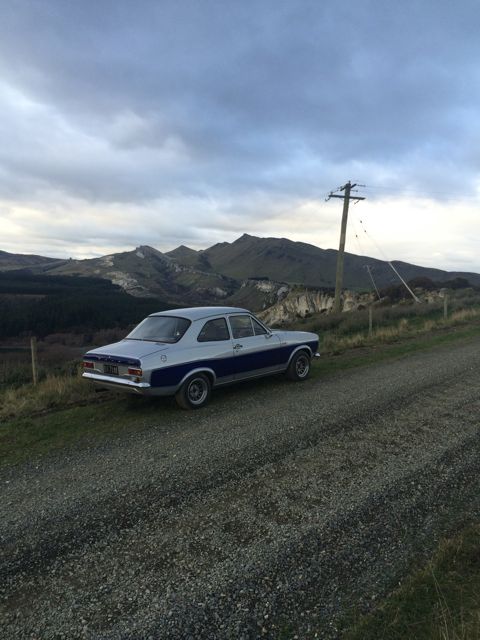
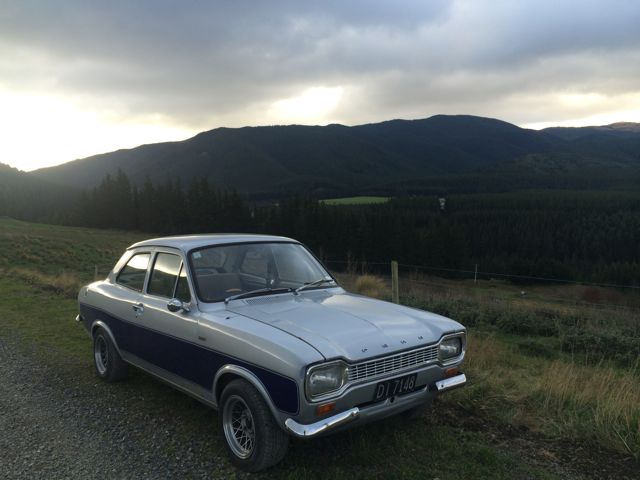
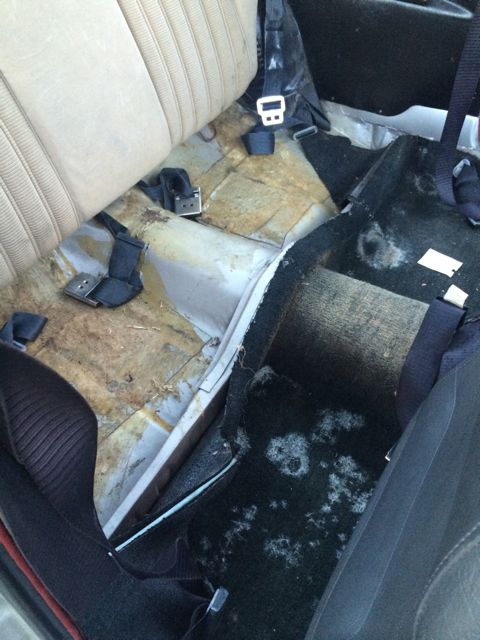
So I should have been working on this thing more lately but haven't spent much time lately where I keep it and when I did make it there this weekend the escort decided to work for a change so I took it for a drive... So that was awesome, I think that since it has a warrant for another month I better make the most of it, who knows when it will be road legal again! This last photo is why I should be pulling the interior out, the carpet is very worn out and moldy but I'll get round to it soon...
1 point
-
Wheels are here So stoked Test fit this weekend to determine what flares I need, procure tires, sell existing flares, procure correct size, fit, win.1 point
-
1 point
-
Ahhh thanks! I also found some pictures of a T series diff set to one way which had the flat face pointing left. Ive set it to the softest possible setting now, and 1 way. so I figure I'll want to pull it back out to either rearrange the plates, or increase preload or whatever depending on how it goes. So not too much of a drama to switch it back to 2 way.1 point
-
Respray, at this stage in gloss black. But will see as time comes closer to panel/paint work gets done. Yeah wasn't a fan, mods are just for a start, will look at something else down the track. Rather have it going for a start. Engine is purchased, follow thread for updates.1 point
-
discuss here //oldschool.co.nz/index.php?/topic/44424-hulses-1973-616rx2-discussion/1 point
-
Picked this up Friday night LD28 5 speed with a 3.5 ratio diff makes it idle at 100kms lol Needs a heap of electrical work and the poor LD Fuel pump is leaking (like lost about 5 litres on the way home - hope no one hit that shit) and needs a general tidy up. Was originals RD28 but someone has mostly finished the conversion to LD as the RD would have fried as always. Heres a few Pics1 point
-
Icecream in summer, hot food in winter? As cool as the Riverhead tavern is, last time was a bloody nightmare, plus half of the other cars from the meet head there so it's busy as hell. Fish n' chips somewhere could be cool.1 point
-
Coincides with my on-call week this month, which is awkward and dumb. But I should be there if I don't get called out. Should make it traditional to head out on a small cruise afterwards to get ice cream, or lunch, or something.1 point
-
Did some dorting yesterday. Slicks... Wow. After qualifying and have the pressures all wrong which resulted in me going 180 at turn one which was a first for me in the skyline and quite an experience haha. After a quick phone call to Rhyscar and got the pressures sorted these things are magic. I was up a whole gear through the infield over my semis and the car didn't feel unsteady, still think I can go quicker but I just need to catch up to the car. So last round did a 1.29.7 this round my fastest so far is 1.26.3 but I'm hoping they timed my last run as I'm pretty sure I would have broken into the 1.25's but they didn't post it yet. Next round I hope to get consistent 1.25s but I should have close ratio gearbox built next round also so 1.24s maybe? See how we go. Max chur to Rhys for slicks and Nick for rims, single biggest improvement so far! Picture, credit to YOWZER!!!1 point
-
Had a chat with Techno Toy Tuning last week. Ended up with these beautiful stainless spacers for the Corolla's 4-link rod ends. The idea was to try and get rid of some of the irritating rattles coming from my current aluminium spacers. Got them installed, back down on the ground and went for a drive. But she now had an epic squeak coming from somewhere underneath. ARRGH Turns out I had done them up to tight. Loosened them of, and it seems to be great now. In other news My Overalls have arrived. Ready for if i make it to a track day one day! Up next; Sound deadening? Lightweight single piece flywheel?? Locker???1 point
-
Magic number plate! So I've just about finished my rotisserie for the vw's shell, it's been a bigger job than I thought it would, but it's going to make working on the sills much easier. I started with these basic plan First job was sorting out the rust in the old stand, it had been sitting outside in the grass for age's, the wheels were rusted tight and one pretty much just fell off. feel free to stick this is the fab fuck up thread! lol. I haven't done alot of welding on thick metal like this, took a while to get the setting right. one down. I then had to add 200mm of 60x60 to the red stand, so they would both be the same height. better? I then welded up the front mount to the shell goe's here and the rear one. another fab fuck up. I left the brace and welded up the rest of the frame, I wasn't sure how high the shell would sit once I found a good centre of gravity. what I did find is with the rear mount being so long it flexed, heaps! it would like bounce. scary shit. so I made these braces to the rear bumper mounts. much better. I cut the brace of the rear stand and repositioned it so the frame clears it and it now rolls right on it's side. I'm going to add a couple more braces to the frames and once I'm happy with how it rolls over I'll weld the frame to the stands plate, just in case.1 point
-
Pistons jeah Cylinders were whack, one measured up as 65mm and the other was 64.5mm widening to 64.75, pistons were stock 64mm size so definitely jumbled together from other bikes. New pistons are 65.5 so an extra 18.9cc's wowee, will drop cylinders off this week to be bored. Ordered a full set of gaskets and seals, just waiting for the last ones to arrive now before opening up the crankcase1 point
-
Couple more pics outside. Can't wait!1 point
-
on ausmini look for the El Gato build thread in engine conversions he has done a fairly detailed subframe build for the 4 efte1 point
-
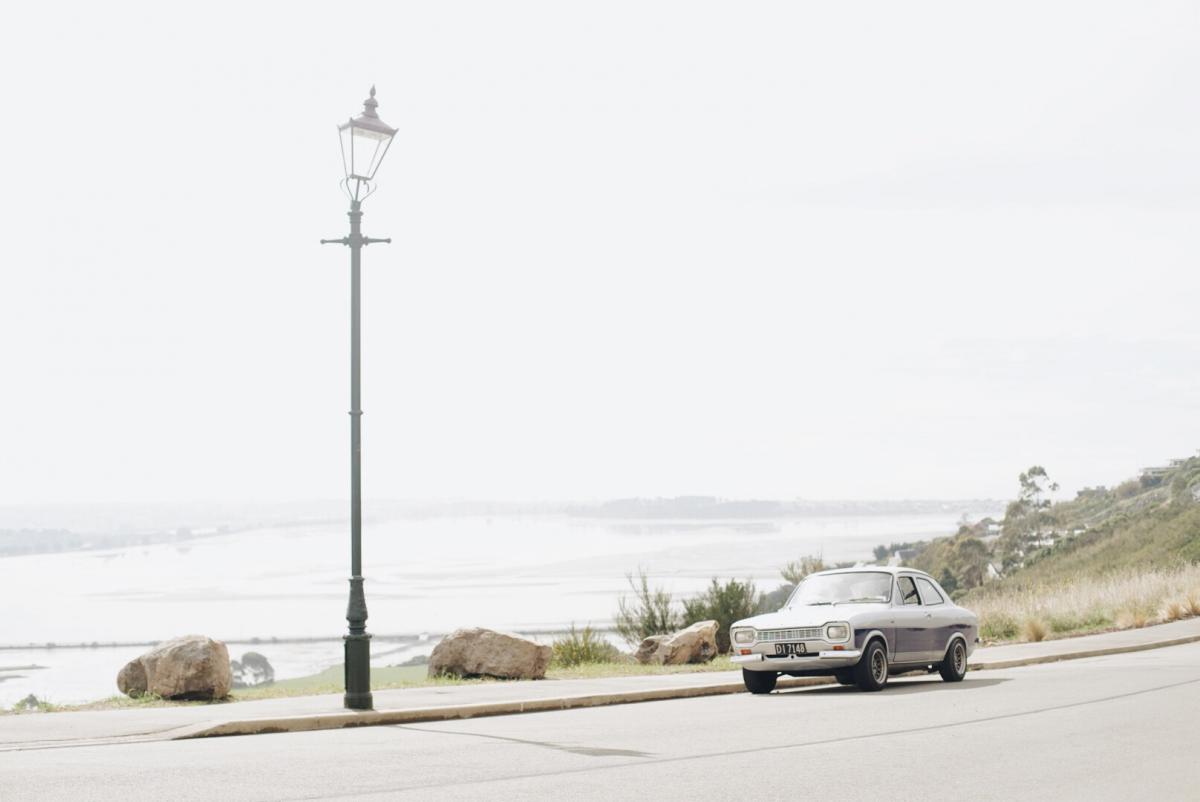
I found this slightly more dreamy photo my buddy Riley took a while back... It needs to come back closer to the ground badly
1 point
-
Yup we can swing into Detroit, Washington is 100% on the list while we go to Atlanta for durpcar. Keen on Smithsonian or whatever museum with SR-71 and space shuttle.1 point
-
There's a decent spot behind the mall in New Lynn called Alien Vinyl, pretty much between the RSA and the Mag and Turbo building https://www.facebook.com/pages/Alien-Records/129799700467007?sk=info1 point
-
Digging this up from the dead. After doing the above stuff almost 2 years ago. It sprung a leak in the sump, I got angry, done a skid up the road and parked it up. Still ain't fixed. Until today, pulled most of it apart , engine ready to come out. Plan is to fix gearbox and sump. then change a whole lot of other stuff that annoys me. Coupe Lyfe1 point
-
Righty Oh. Here's a few photo's and some of my thoughts about the various trucks. But pretty much Class 2 is a cool class, Very controlled rules, read the rule book up on www.oranz.co.nz Anything cheap and tough would be what id go for. Pajeros, Terranos, Hiluxs,Cherokees and recently an Izusu have been the quicker trucks. There have also been landrover Discovery v8's, etc A Subaru Brumby ran down in the South Island for a while. It came last lots. There is also a fast Dodge Ram thats is super fast, but it breaks all the god damn time. He will blitz the field in the first race, then in the 2nd race it will break the front diff or the steering. V6's Terannos are quick but suffer from weak steering.They end up having crazy wheel alignment issues when things start to get a bit flogged out Cherokees are fast, and there was a lot of them running in C2 at one stage, but they seem to have fallen out of favour. The Solid front axle trucks don't seem handle as well as the other trucks with IFS and they tend to bend diffs. Hilux/surfs have strong front ends and chassis but the shit 3L v6's fuck out and like to litter the forests with engine internals.They also cost mega bucks to buy thanks to all the toyota tax. The Pajeros seem to be much the same as the hilux/surfs good suspension, but let down a bit by the engines. the fast ones are really quick but the guys have spent heaps developing the motors. But thats probably much the same as any normal road one, anything not GDi would probably be fine. The Izusu Bighorn RS 3.2v6 is a bit of a weapon, Front suspension seems to be really strong. (This is the same truck thats now yellow on TM) There are a few Suzuki vitaras/escudos raced, seem a bit under-powered and the suspension sucks. A few guys have built quick ones in the South Island though. But really it all comes down to how you drive the things, so many guys get carried away thinking they are driving trophy trucks and smash them to pieces, At Woodhill 100 a few years ago C2 was won by a almost stock SWB 70 series landcruiser because everyone else broke. This one. This was Fairly LOL, went surprising well considering it was 100% stock (just a side exit exhaust and a podfilter) and was beating a lot of other 'Real 4x4's' ended up breaking one of the front struts on the 2nd day of the Taupo 1000. And some others. If i had enough spare coin to build one i recon a chevy blazer 4.3L v6 would be a bit of a weapon, But you could have just as much fun in a $500 Lada Niva with a cage. I can't stress just how awesome offroad racing is, so many entry level ways to get into the sport whether it be trucks or buggys But yeah that's enough typing.1 point
-
nooo cam do sweet shit dont bother with springs. This is my good mates 2A, has a 202 and hilux axles. At this stage it had a 3 link front with 12" fox airshocks, pretty easy to do and it flexed like a boss, those airshocks are cheap too. i loved this thing, had fiddle brakes in the rear, went many places. Has been stripped and sold off now , had patrol axles and a 1UZ sitting in it before it got stripped. I wanna buy a shit V8 disco one day, shorten it and put a series body on it, much awesomeness1 point
-
Soooo top of the page! So back to pictureless ranting about tech related gibberish. There's been a lot of speculation about what the factory Toyota ECUs can or cannot do, in terms of being self learning etc. Since I've had the OBD diagnostic program hooked up, and then using the program called 'Torque' on Android, I've had access to an unparalled WEALTH of nerdy information about the engine. You can set up virtual gauges, or datalog ANY engine parameters you can think of. So something I've just found it useful for just today, is testing an injector size swap. The standard injector size for the Redtop 3SGE engine is 315cc. The standard injector size for the Altezza 3SGE is 340cc. One of my redtop injectors busted itself, and they are difficult to find. So I thought I would swap in a set of Altezza injectors and see what happens. Being a larger injector, you would obviously expect it to cause the engine to run rich. I set up two gauges on my tablet, one which monitors the short term fuel trim (this is like real time adjustments via the oxy sensor) and the long term fuel trim (This is where if something is lean or rich often enough at a particular load/rpm, it will adjust the actual value on the map) I fitted the new injectors, and took the car for a drive. After a while it showed that the engine sensed it was running too rich, so was incrementally reducing the amount of fuel going in. -1%.... -2.4% .....-5% etc and then eventually settled on -7.8% and didnt budge from there. Which is interesting, because.... 340cc * 7.8% = 26.5cc 340cc - 26.5cc = 313.5cc The ECU successfully guessed the size of the new injectors, to within 1.5cc and compensated perfectly for it, within an hour of driving the car. Mind blown!1 point
-
cleanest sprint seats ive ever seen! nice nice1 point
-
Drove down to Hampton for the Icebreaker last weekend and while there we set it up on the scales. No driver and about 1/3 tank of gas. Around 20 ltrs. A bit more than I was expecting tbh. Also surprised at even weight split front to back.1 point
-
This was my last project.. dunno if i put it in here already. it was a Nissan safari, then 37" tires, then hilux cab with tray, then vh45 v8 with fiberglass jeep cj3b tub then sold to help fund our home WISH I'd started that project two years later when I had more $$1 point
-
Got my ball joints sorted and stripped all of the front suspension parts to paint. Was gonna powder coat everything but being that I have only a small amount of funds allocated to this rebuild I decided to paint everything with POR15 and then chassis black. Have read a bit about this stuff and there's about a 50/50 split on whether it is a good product or not, thought I'd give a go and if it is shit I'll bite the bullet and powder coat.. anyway, pics.. New ball joints From this to this To this So far it seems to be quite good, nice and smooth (bar a few runs but hey, its fucken suspension) even looks like powder coating, just need to assemble it and reinstall it, whould like to have painted my springs yellow but it seems generic paints don't like POR15..1 point


This leaderboard is set to Auckland/GMT+12:00