
Leaderboard


Popular Content
Showing content with the highest reputation on 04/24/17 in all areas
-
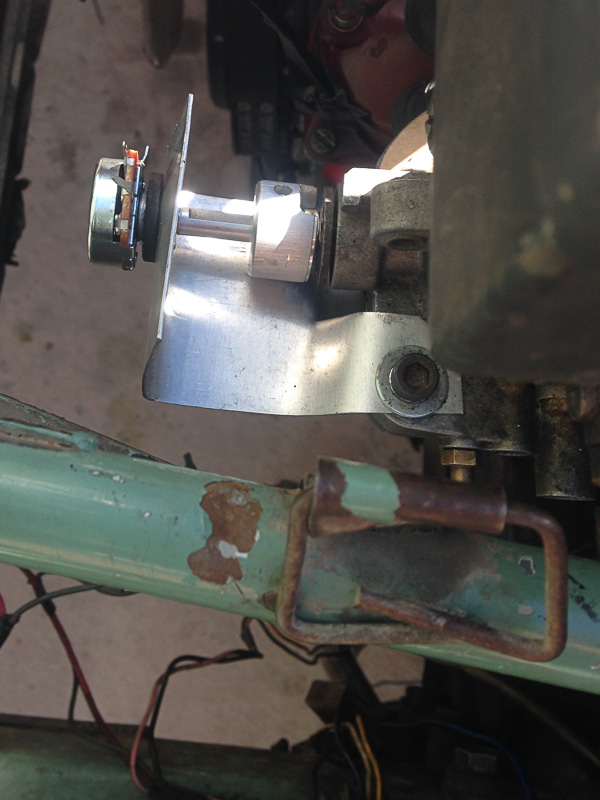
Chassis end panhard mount. Yep the drag link goes through the middle of the bracket Ive given up on the whole offroad thing. going stance spec still got about 3" of droop and 2" up to go. need a forklift. likely have to go softer on the front springs, will see what happens once all the junk on the tray goes back in the engine bay18 points
-
Paint a massive cock and balls on it please before you cover it up7 points
-
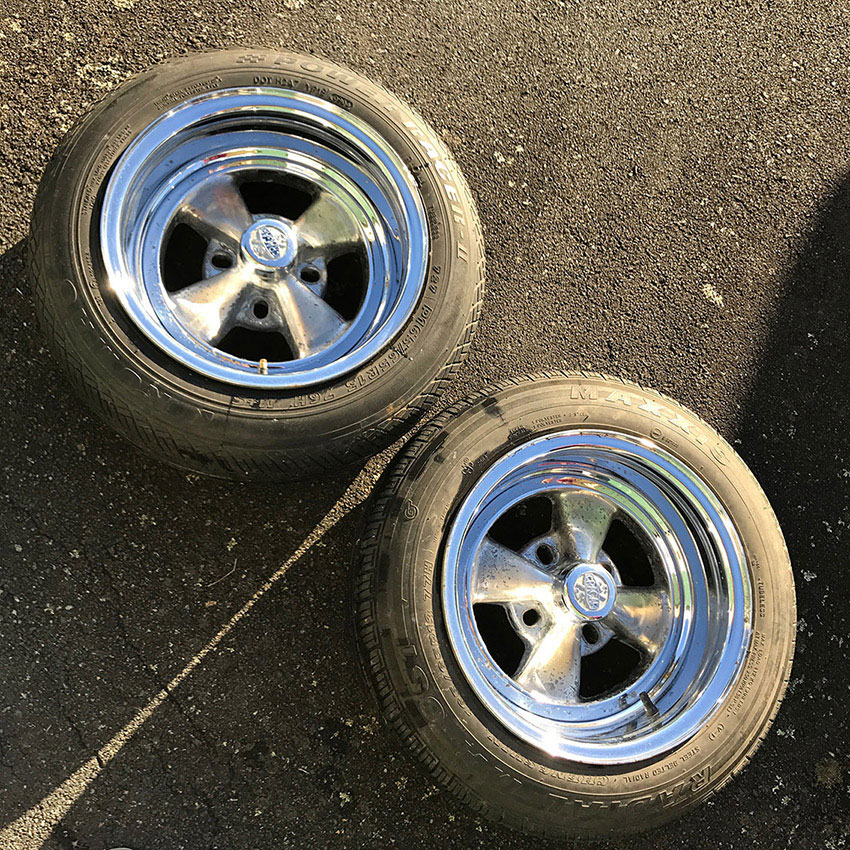
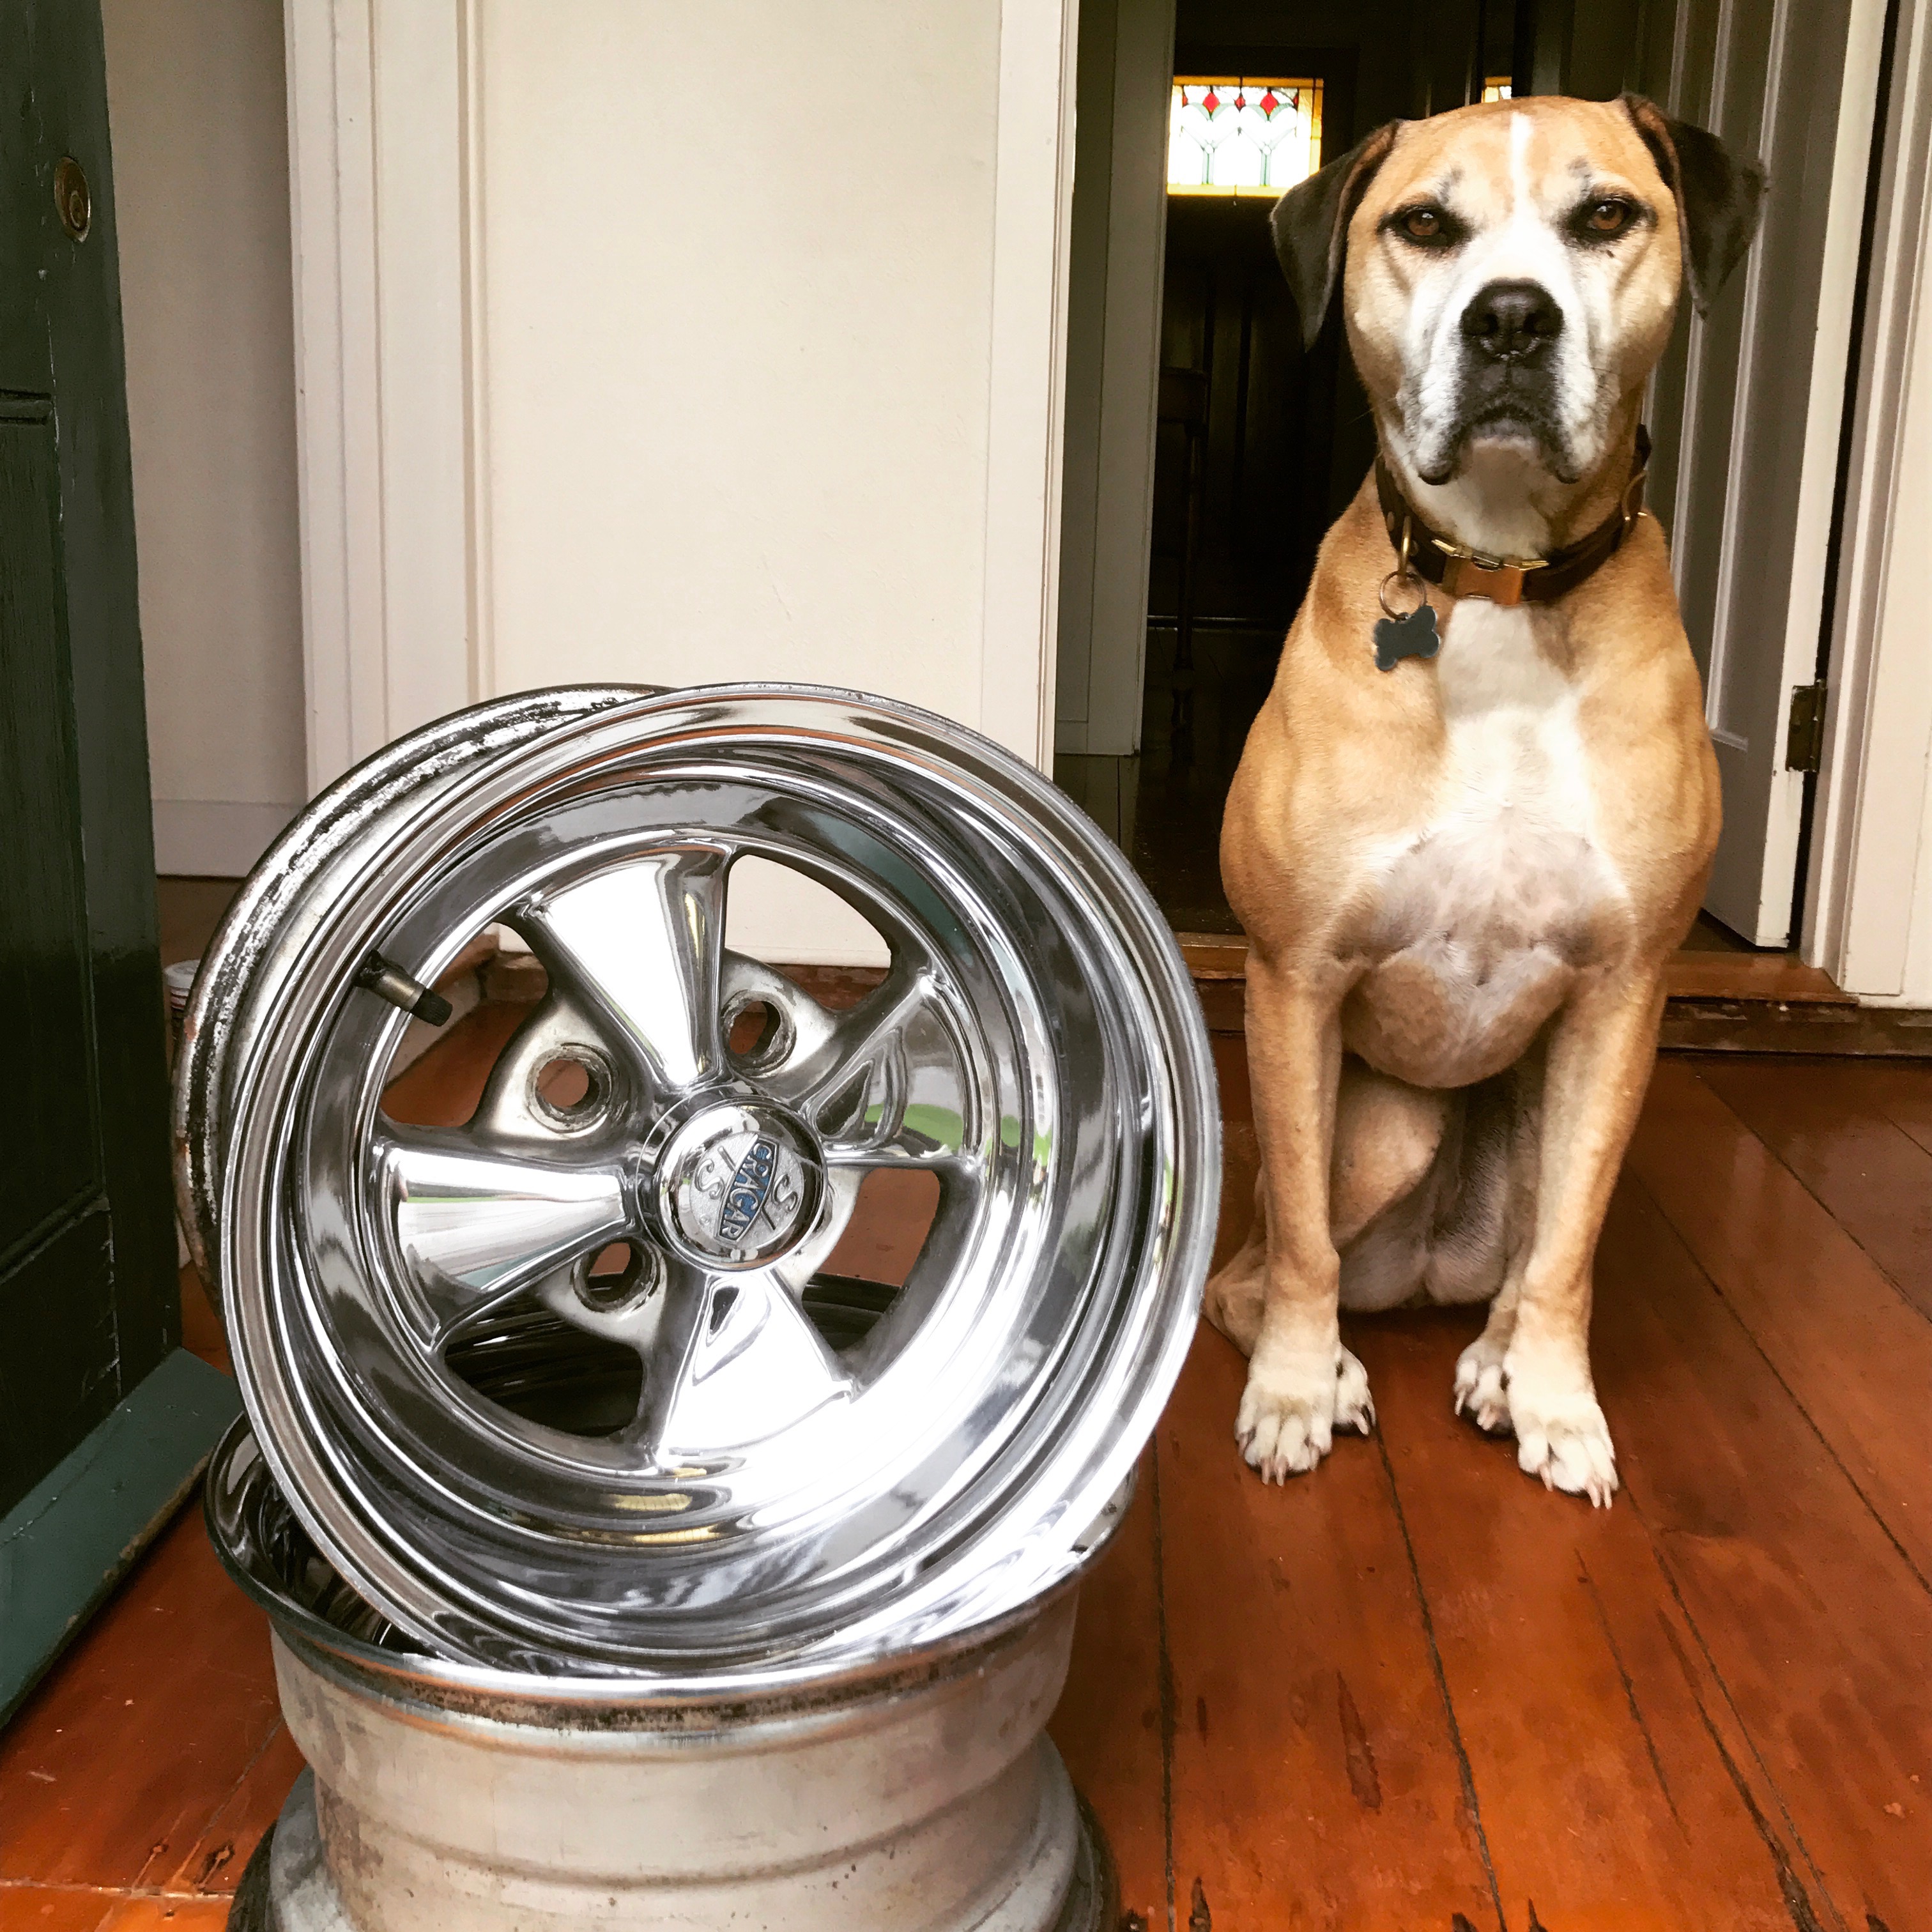
A little progress... Met with @dave a while back and bought 2 more 13x7 Cragar's from him. Thanks man. Gave them a good clean, the rims came up pretty good but the centres are pretty corroded. The centres were painted silver, who ever painted them sanded the chrome so they're pretty dull. Overall condition isn't to bad. Still on the lookout for a cleaner pair... Stoked I have a set now though! Did a quick test fit. I was a little worried they'd be too wide and poke out but turns out they're sweet. Still need to get the proper tyres I want to run but gives you an idea... Discuss here, Cheers!
 3 points
 -
Aliexpress3 points
-
After much contorting, sweating and swearing, the side glass and rubbers are all in on the coupe. I just need to fit the door cards and window felts and jobs a goodin. I tore my hood lining the other day….sooo I’m having to buy another $300-$350. I’m not entirely looking forward to fitting it… The engine front mount bracket has been ditched…..the engine was at 8 degrees which is way too much of an angle. This was due to the fact that I’m running a 13b turbo box (89-91 FC RX7) which is substantially taller in the main body than the series 1-3 box. This means it limits the angle as the top of the box contacts the tunnel roof. I’m now getting a custom front bracket that will lover the block 5cm ish which puts the drive train at an acceptable angle. The sump is sitting on a spacer 20mm off the cross member at the moment - now the clutch slave clears the tunnel. Now I need to get a drive shaft made to suit and then set the entire drive train up so that I’m happy with all the angles. THEN the front bracket can be made…THEN the custom quad throttle body intake manifold can then be made to suit the angle of the block. I got a drive shaft off a mate however it appears to be 20mm too short unfortunately - when you are talking about a high revving engine, you really want the drive shaft to be on point etc. Yes I have a loop to go in. I also tidied up and prepped the diff brake line and fitted a new hose I had hanging about the place 4 steps forward, 6 back….3 points
-
I thought i was looking at my old VG when i first read this thread! I sold it to a guy down in gore before i moved to Melbourne in 2006 but you have had your one a lot longer obviously. Mine had a 360, it went pretty hard. Hopefully all that rust doesn't put you off too much, you should see the 68 impala im currently restoring...
2 points
-
@kyteler, @danger, @gettinroundtuit, @Lord Gruntfuttock, @Marsh, @matt7759, @Mazda Dave, @adamant2 points
-
Micron rated filters for low pressure fuel delivery applications are available and very cheap. Like sub $20. https://www.holley.com/products/fuel_systems/fuel_pumps_regulators_and_filters/filters/carbureted_filters/parts/9746 That's an example, but it's genuine Holley and chrome etc for wank spec. You can find them locally too for about the same price.2 points
-
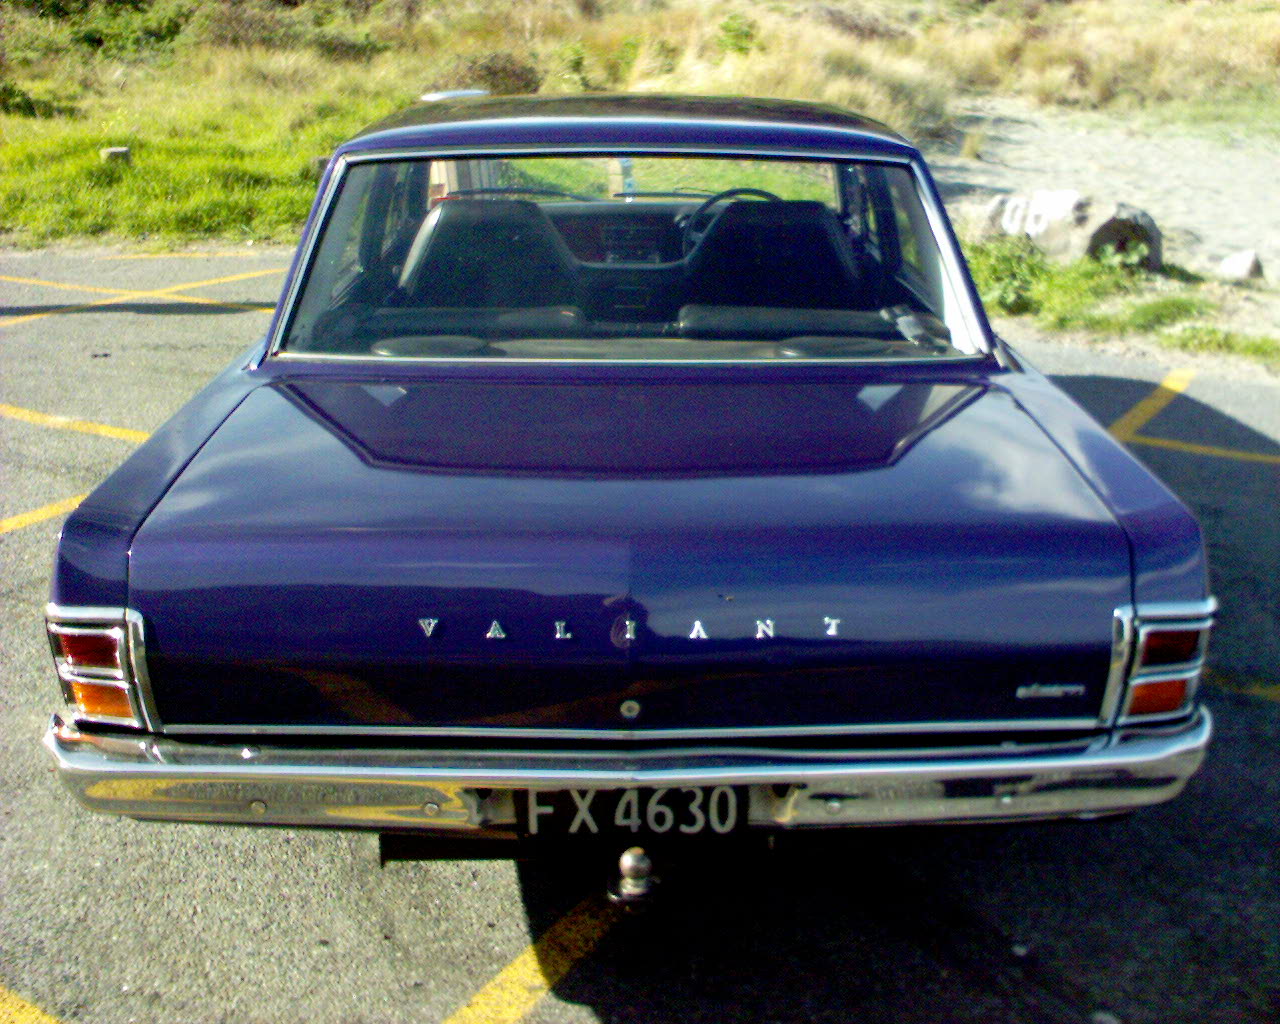
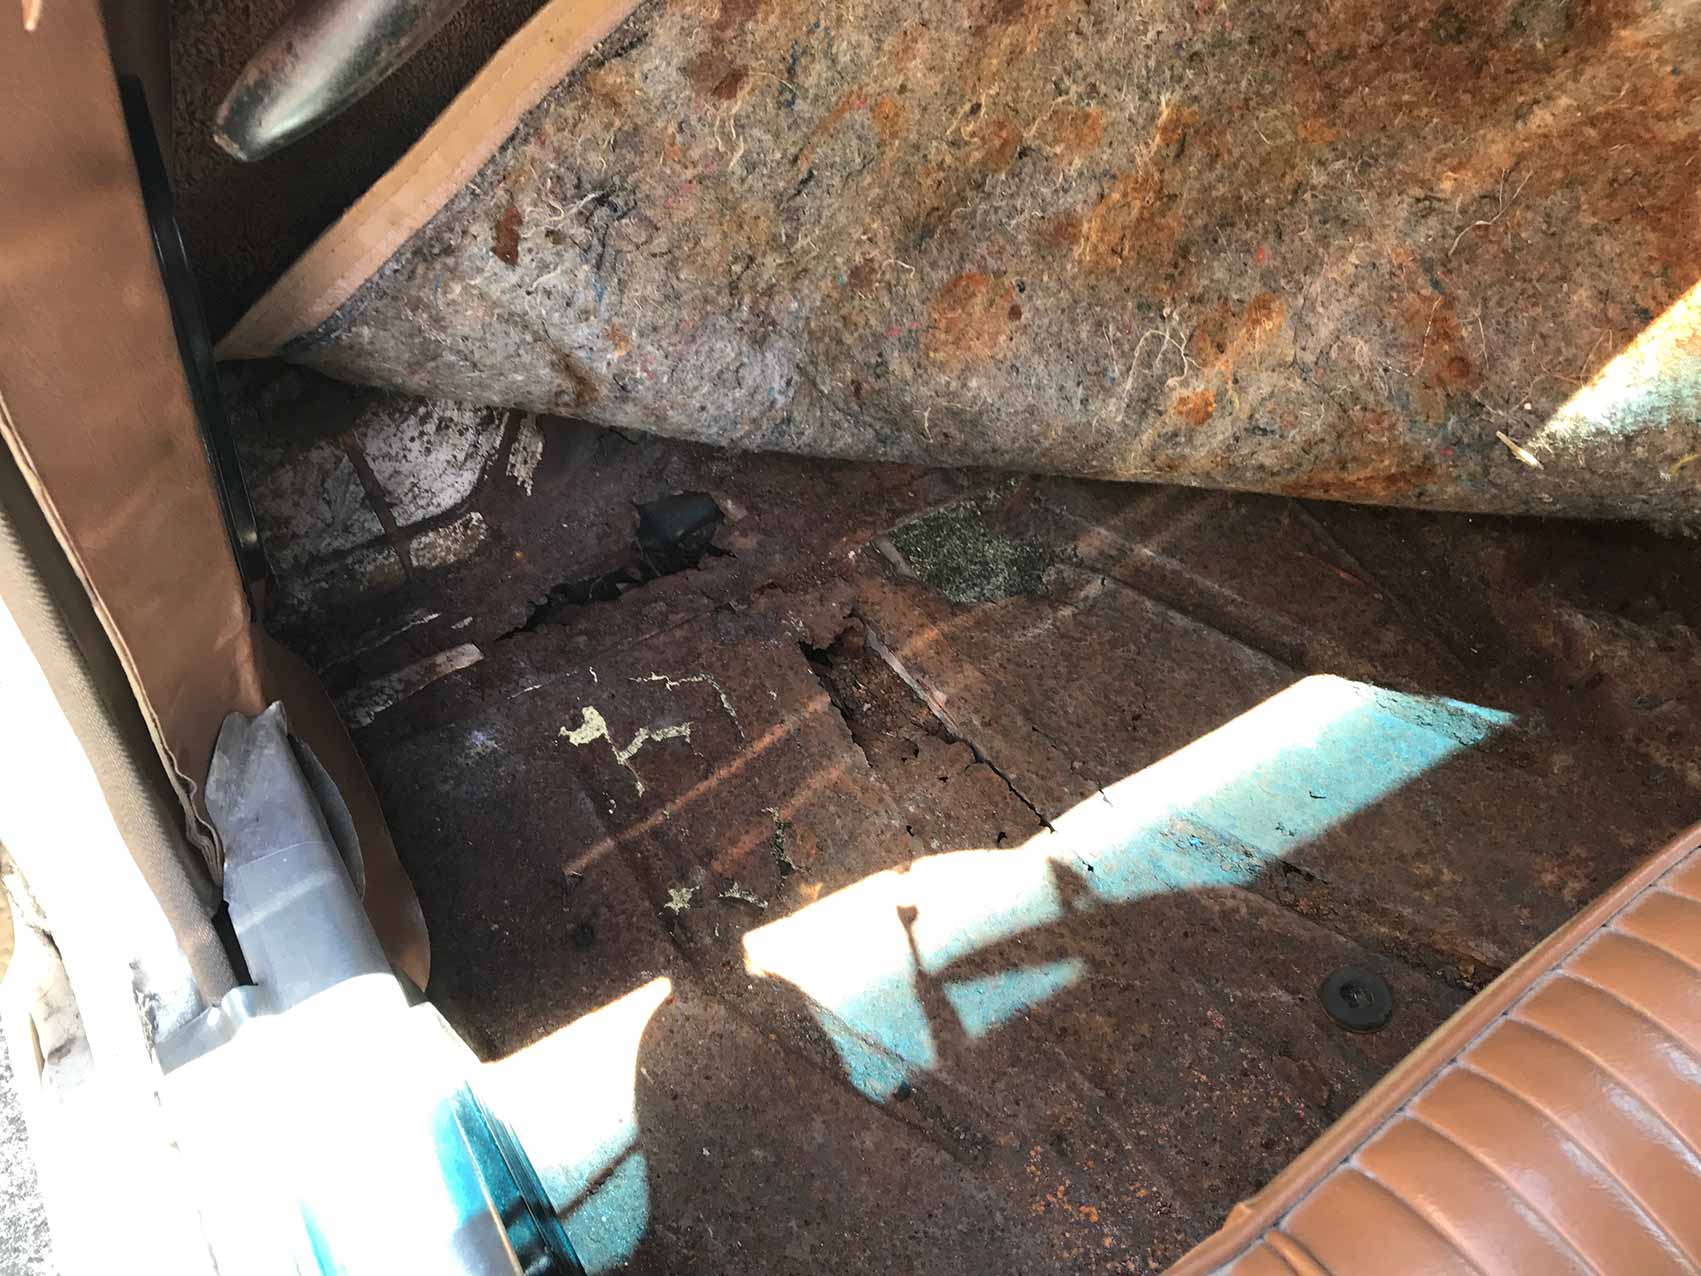
We'll dig as deep as need be. She's a dry carpet model. And despite being rusty now, ten years ago it was completely rust free. The cancer doesn't run that deep. I've met your mate. That business caters to cheque book builders. It's no more rusty than you'd expect for a car of this age that has spent 20 of the last 47 years out in the weather. ......2 points
-
Much to talk about... First of all, #CleansheetVTNZ #Levelimposibleclocked Time to set my mind onto more interesting things, hooked up the wideband to the Niva and had a horrible surprise, all nice at idle and up to 50kmh, but then open up the secondaries and she's rich as, so rich no amount of tweaking and miniature jets could alter, I gave the single carb a full half day of messing about but in the end ditched it for the dellortos, even though these are rich, the results were far more consistent and changes to mixture followed changes I made. With the twins on it was time for some serious thinking, driving around with the wideband on the dash wasn't really the easiest thing to do so I sat down last night with a beer and bashed the keyboard to get python to read throttle position and mixture via arduino, all thats needed then is a tps on the carb, PAP wanted $40 but i'm too cheap for that kind of extravagance, headed down to jaycar and grabbed a $3 10k potentiometer and aluminium knob for $4, mix that with a bit of scrap ali sheet and boom, tps! (well not quite, still had to hack a slot for the shaft to engage in, man I wish I had a mill!) All that set up I dumped the laptop in the passengers seat and had a play Worked out far better than I imagined, managed to tune Idle much quicker than listening, by simply looking at the rev counter and O2 reading, awesome! Pre-drive calibrating of the tps found this wee fella: The 3 equal peaks are me pushing the throttle pedal, the larger peak is holding full throttle on the carbs, few free ponies if I sort the linkages better! With that in mind, I went for a drive and things got tricky... Blue line is O2, red tps, scale is kinda random, but ~500 = good for mixture, tps runs 180->1024 and ignore the green, thats there for when I get engine speed mixed in, but so far its floating along for fun. Oh and graph reads right to left. At cruise and idle mixture is about right, average acceleration (pulling away from lights etc) is lean as, while planting foot runs mega rich(after a brief lean out), my conclusion is the idle jets are a bit small, and needs a size or two up there, and the mains need to be dropped a similar amount with a little more on the pump jets to see about the lean as the pedal hits the floor. Fun times, but man I wish I could just go full EFI without having to cert the darn thing! Discussion about carb tuning tips please:
2 points
-
Moral of the story is don't leave your freshly paneled and painted old car on the lawn for a decade.2 points
-
I would be significantly more likely to keep following your build if it was all posted here rather than having to follow external links all the time. Its a cool car and interesting but meh to external links2 points
-
all gone. 2017-04-22_02-37-50 by sheepers, on Flickr2 points
-
a JZ in it and limmy bashing on a 2-step before the end of the weekend2 points
-
so the drain layers worked until 1am to get the new pipe installed. so i didn't get much sleep Wednesday night. but its done and dusted. there is still a pile of clay to be removed from the front yard and the digger is still here but thats minor stuff. after the drain was finished i did some more smash. tomorrow ill take down the last piece of wall (which will take all of about 10 minutes) and then clean up the mess. 2017-04-20_03-18-29 by sheepers, on Flickr 2017-04-21_05-28-54 by sheepers, on Flickr 2017-04-21_05-29-12 by sheepers, on Flickr 2017-04-21_05-28-34 by sheepers, on Flickr and thats where we are up to. im hoping the builders will start next week.2 points
-
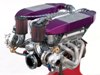
Turbo pipework all welded ready to go.2 points
-
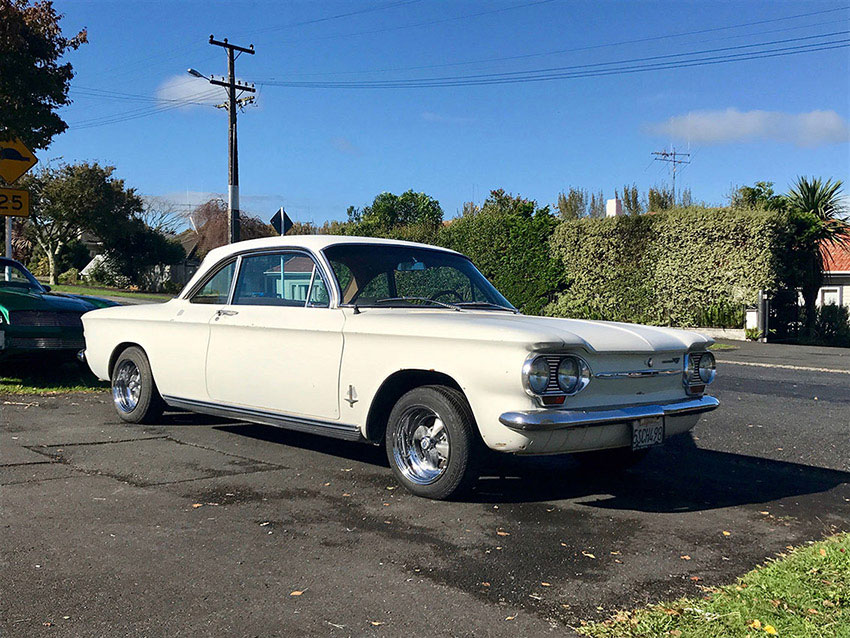
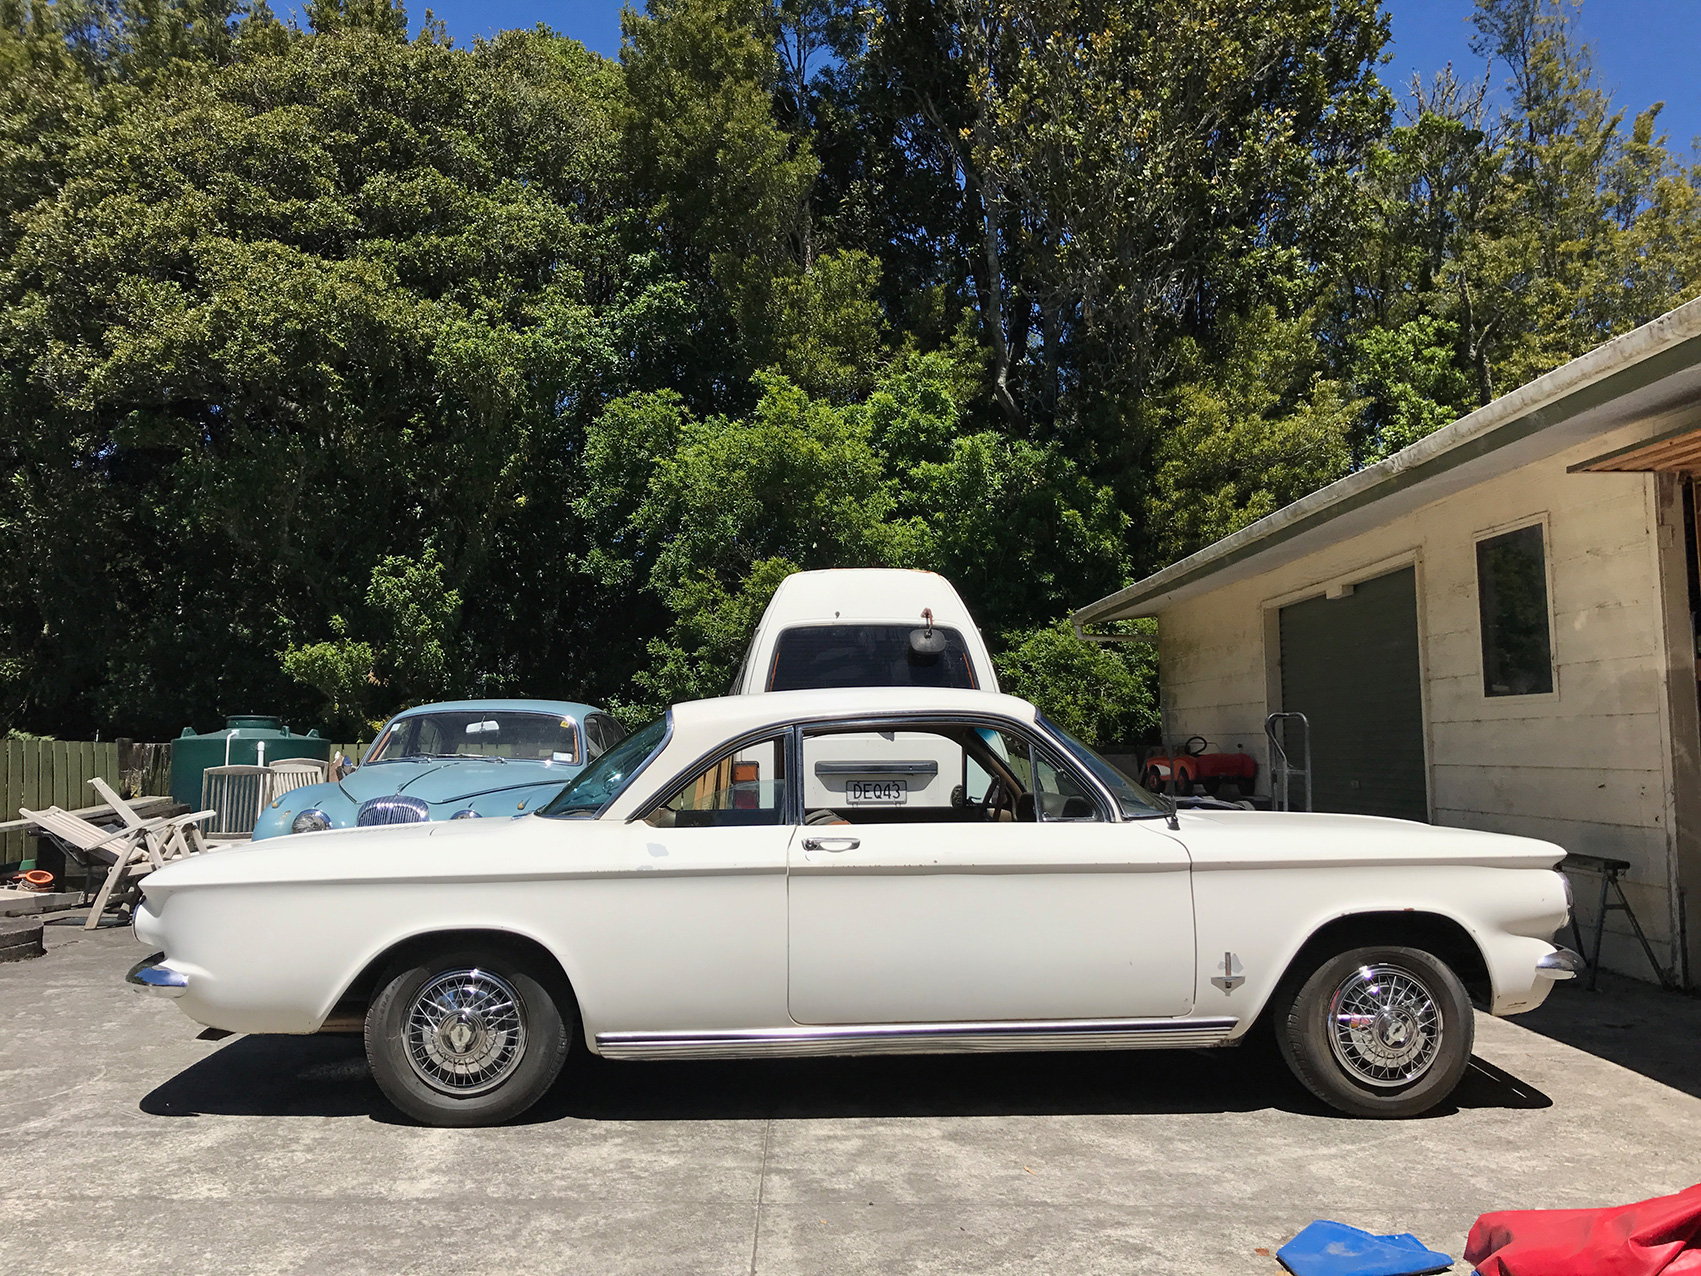
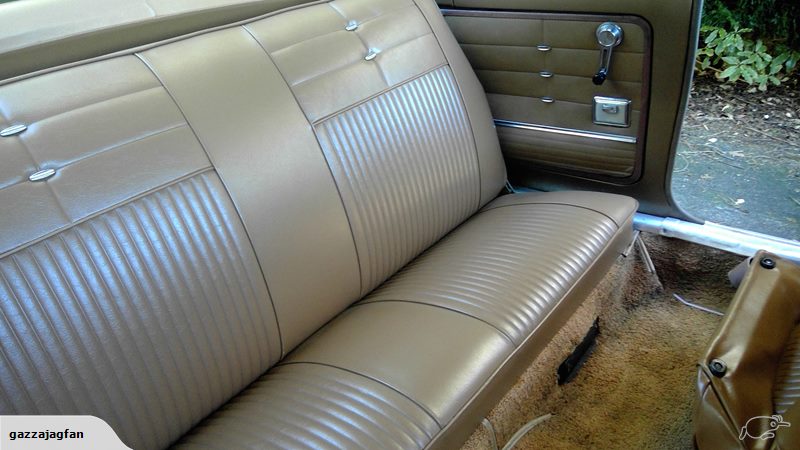
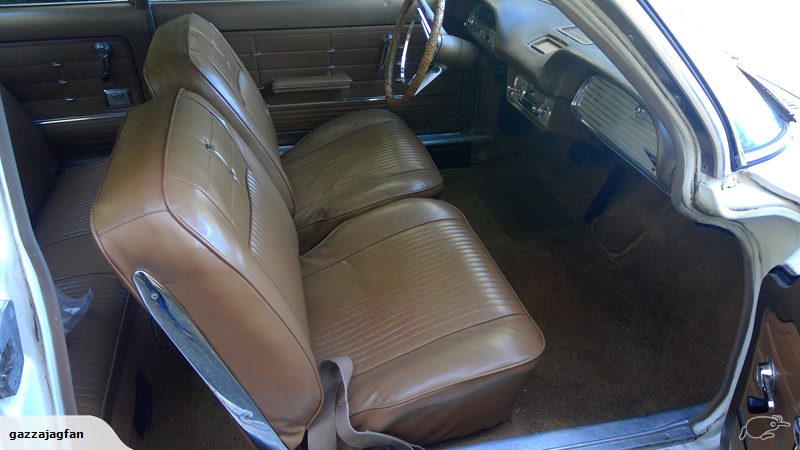
I've been floating around this site for a while, figured now's a good time to start a build thread since I picked up a new project. Its actually for the misses But I've fallin' for it too. We initially bought a Nash Metropolitan, we basically stored it for a few years doing a few minor things getting it running and driving but at the end of the day it was a can of worms I just wasn't motivated to get into. So we picked up a 63 Corvair Monza coupe off trade me and sold the Nash within an hour of each other... Perfect! The Corvair's a reasonably fresh import, its pretty tidy with a bit of rust on the front floors and thats it. It was running a bit rough but came with brand new carbs so chucked them on and gave it a tune. Found an exhaust valve tappet was a little tight, loosened that off and it started running perfectly. Any way here's some pics... Excuse the Trade Me interior pics. I don't have any good ones of my own yet haha Discuss here, Cheers!
1 point
-
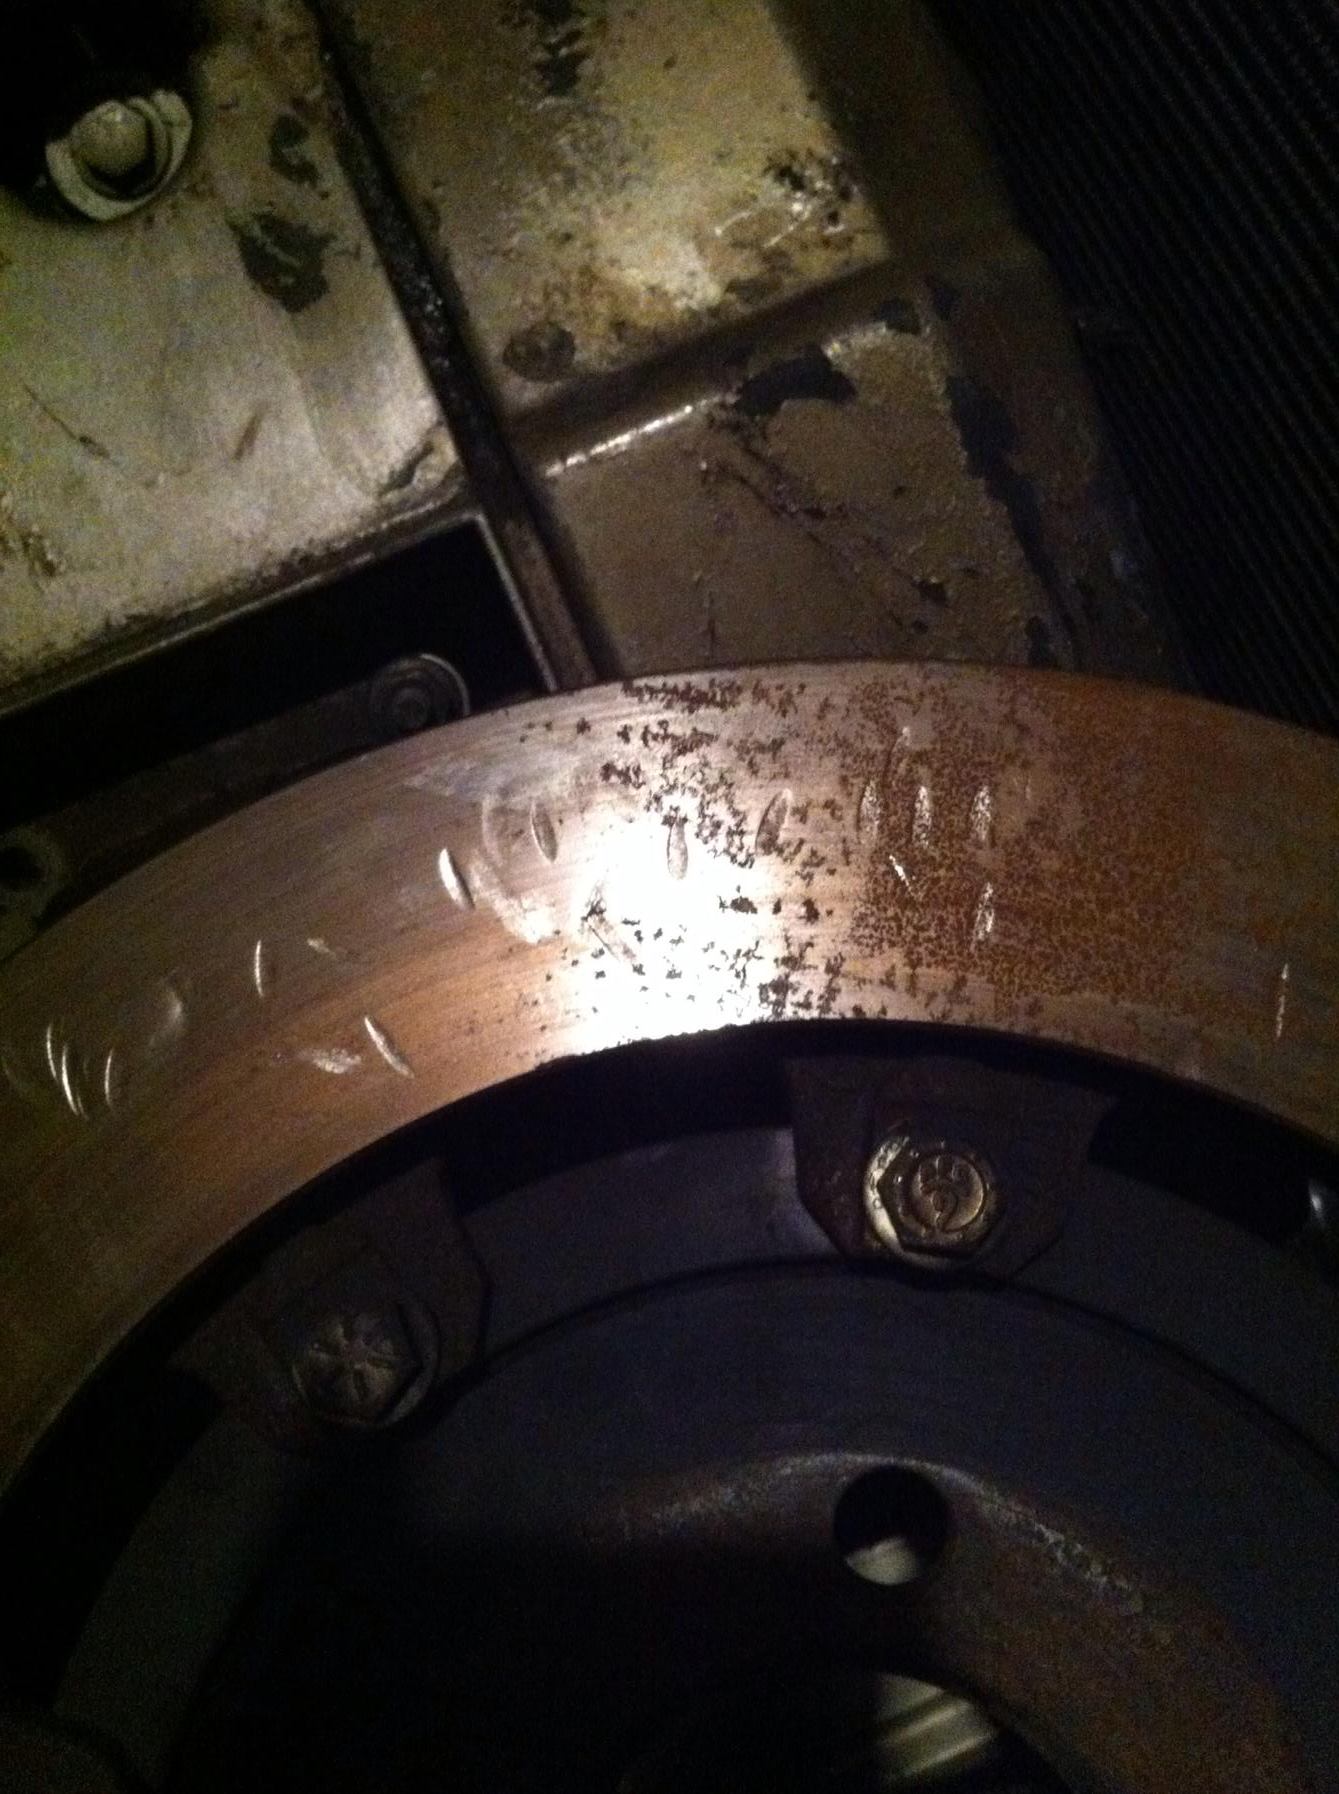
Hi guys I just bought a BBK for my E30 and was pretty stoked that I found it at a good price etc. Until I discovered there are all these dents in one of the rotors! It looks like he smacked it with a hammer to get it off. What do you guys think? Should I go back to the guy and ask for a refund or are they okay to run? I've attached a photo, hopefully, it works Cheers!
1 point
-
i don't think i can make it now either - taking the car for a wof saturday morning , i have a feeling it won't pass1 point
-
All of that stuff is up to fuck all really. Seen waaaaaay worse in cars that are still in operation.Bit of a shit if the dealer said they did the cambelt, but typical of an overseas vendor.1 point
-
As above mate. Feather out the repair and dust on some lacquer primer first, if it doesn't fry up you should be ok to blast it on.1 point
-
Had a bit of spare time on my hands so I decided it was time for a little work on the mighty Golf. First port of call was removing the carb and giving it a damn good clean because the car has been running like shit for the past couple months. I cut out a new gasket for the 2 halves of the carb but was lazy with everything else and used grey RTV. Next was breaking out the Bosch one way lowering kit. having a extra set of springs from the parts car comes in handy about now. After a bit of measuring I thought lopping a coil out of each spring was a good start. I could probably take another coil out of the rear springs but the fronts will no longer be captive if I make them any smaller. I should just stop being cheep and get a set of coilovers if I want to go lower. It hasn't made a huge amount of difference but the rear end has come down getting rid of the "Stink Bug" stance.1 point
-
im out. its the last day of a combined school holidays, easter, anzac extended holiday and getting into Auckland from the south on that day will be purgatory. and TBH im not that enthused about the roads to hamilton. was keen as to retrace the north to Waipu route we took last time so the next time we go up there im in!1 point
-
Aliexpress doesnt inspire confidence tbh, maybe same factory bro applies dunno. US is fine as I can sort free shipping on small items.1 point
-
Got one of the walls up... Would have done both if we hadn't screwed up and carpeted the wrong side of one of the panels.... I'm really happy with how this one came out though. Did some wiring of the roof lights... Lots of heat shrink and braided nylon sleeve... And some weather pack connectors. There are 6 circular lights which are a warm light, two bright strip lights over the bed wired to the house battery and a dome light wired to the Chevy wiring. If anyone buys Dream lights brand LEDs, be aware that white is ground and black is positive. Confusing. Don't mind the plastic on the circular lights, I'll peel that off one they are installed. Rear roof panel: Front panel:1 point
-
Reminds me, head bolts are in the mail. True story!1 point
-
you've been marking lab reports haven't you1 point
-
What is the enamel on? If it's on an old car it should be baked enamel. What you do is lightly dust on a couple of coats to see if it 'reacts'. If it doesn't you're good to go, if it does you're f**ked and it needs to be sealed first.1 point
-
Thanks for that. We need more pasta here.1 point
-
Hells yeah, I thought I killed it, was just a connector coming out inside the box, seems very robust otherwise. Have ordered some nice waterproof connectors off ali to set it up fully moveable between cars1 point
-
tridents are like mustangs and belly buttons. factory snowflake fairmont wheels ftw.1 point
-
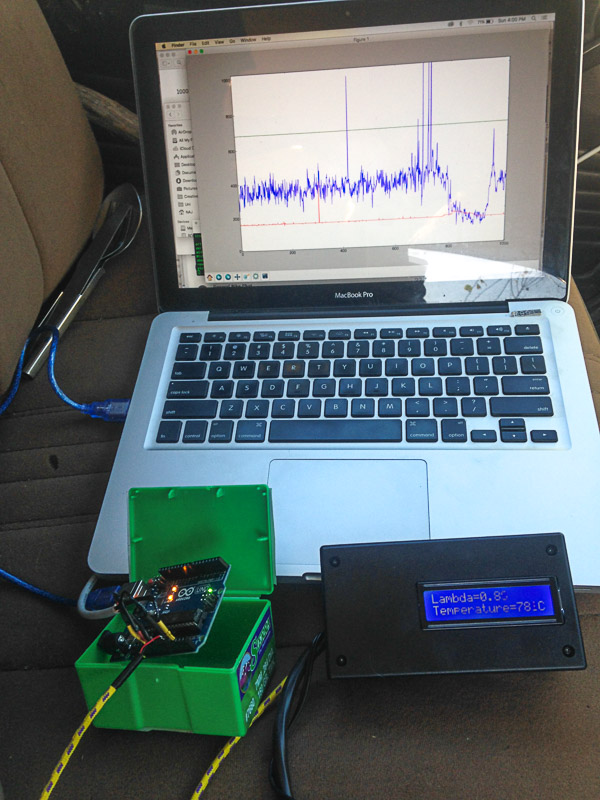
Have the 14.7 wideband kit running well, but the screen lag makes it hard to read while driving, the 0-5V output however made it really easy to feed the output to a much easier to interpret screen. just used 2m of trailer cable for the sensor, which was a good call as it does haul ~3A while running! for less than 100usd you get the kitset and sensor, pretty bloody good really, I then put it in a cheap plastic case and its a very useable setup
1 point
-
Noted. Will try copy pasta into posts. Hopefully the image links dont die.1 point
-
So my yellow box showed up last week As I already had the required wires out and ready from the jaycar unit it only took about 10min to install. Just wires up inline with the 3 wires to the speed sensor. 2 buttons and 2 LEDs let you set it up and check it's working and the ratio used. Has a few useful modes like a test mode so you can use increasing frequencies to test if your speedo is linerally accurate, and has a top speed playback. Worked right away, feels nice in the hand, is totally sealed and I think trying to open it would wreck it, but it has a 10 year warranty and is made to be waterproof (tho I tucked mine in the shifter housing thing, and left the cable long so it's easy to adjust in the future) Also comes with a jumper to disconnect the yellow box and run the speedo as normal (I think for if you regularly swap to off-road tyres/track tyres or swap between mph and kph) Pretty impressed, great customer service so far, nicely made and good instructions, plus made in Aussie but don't let that put you off Price wise I think it's more than worth it for having something that actually works out of the box1 point
-
mounts all on the diff for good. cant paint over the chrome..1 point
-
Lets be honest Done.1 point
-
^ Good ones like this with heat shrink built in/on. Not those shit narva ones. Personally I would solder and shrink, you're not going to get much vibration when they're all wrapped up in a loom1 point
-
Sorry for not posting for a few days, making progress though. Little bracket to hold my sillcock (in the USA the trade term for a hose tap is a sillcock... Many inappropriate jokes were made) Bracket for the water pump. Flipped the awning brackets around and trimmed a bit off them to get it closer to the roof. It now sits even with the drip rail. Mounted some lights under the awning. There are two mounted to the roof rack feet. Had a trial of it. Made a bracket to hold my propane tank to the pillar behind the door. Rebecca also carpeted that pillar and the wheel wells. Looks a ton better. Mounted the switches and outlets to the panel that will sit behind the seats. From left to right: switch for inverter, AC power outlet, DC cig lighter and USB plugs, 8 switch and breaker panel, face plate for voltmeter, and in the far right water tank fill door. The power meter is an $18 Amazon job, it has good reviews but the mounting is a bit annoying, two little tabs designed to mount to sheet metal, so I had to make this plate. The switch is a dpdt to switch between measuring charging and discharging current. Did a job I had been putting off for days... Drilling holes in the roof for the solar cables. There is supposed to be a third for the lights but I lost the nut and washer to the third gland so I need to order another. Painted the edges of the holes after drilling then siliconed them in. The battery cables are ran through the floor with similar glands.1 point
-
Love seeing your car. Its how I want to get my one, one day. I bought the $600 supercharged aw11 with auto trans from that Ohaupo a couple of years ago. I had to do the cambelt and water pump, but stupidly id it without dropping the lot. Was a big job in the end. I've got a full mk1a interior I'm putting in mine. I too like the earlier steering wheel. The earlier interior looks more sporty in my opinion.1 point
-
Today i got the dash out, the XE is well different to the XF which is understandable tbh, but still annoying lol. gonna take some thinking to get it all to work. plenty have done it but theres fuck all in the way of info with regards to wiring diagrams etc that i can find, but i'll make it work. spent most of the day then removing trim and getting the soggy sound deadening out with a heat gun and scraper. left it with some rust converter doing the good stuff. rubber mat, yum! niiiiice! bit of a score this i reckon. early bench seat. the later ones had the headrests integrated so it could be an XA/B/C / Fuckknows. but yeah. its in good nick .1 point
-
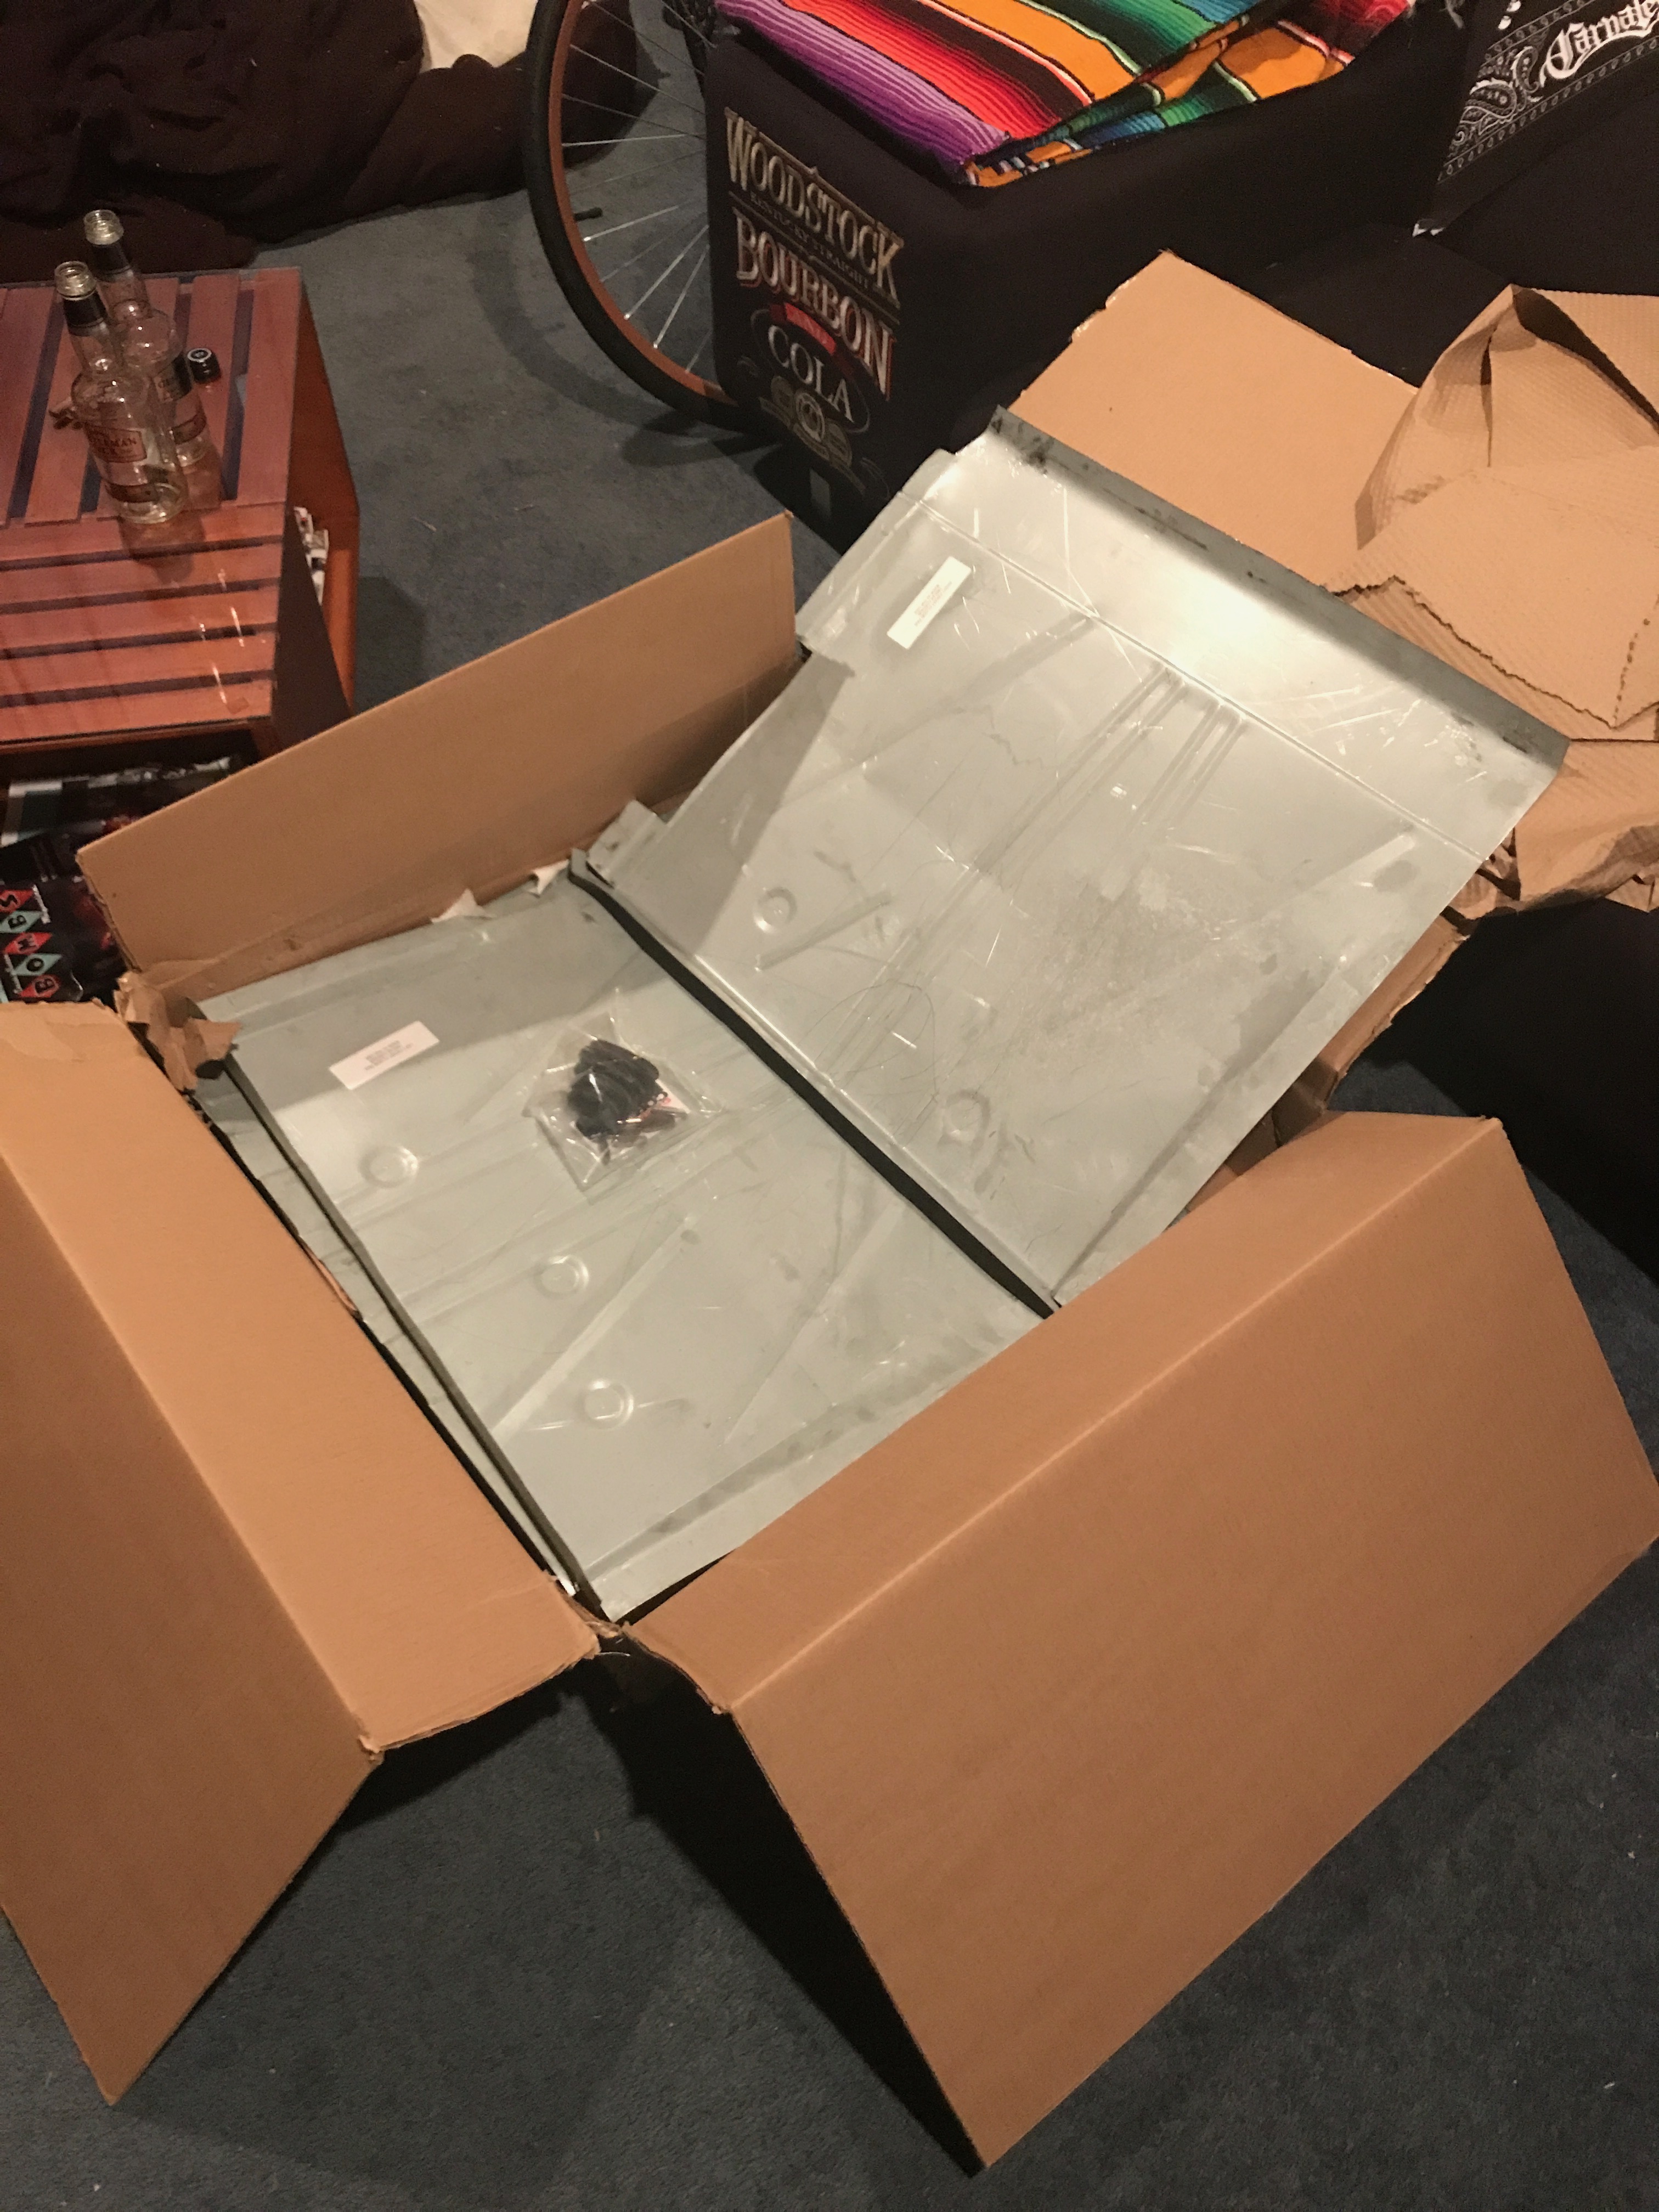
Some parts arrived from America on Thursday. Floor patch panels, a few small bits and also 2 13x7 reverse 4 spoke Cragar's. I wasn't sure how good the rims would be but turns out they're nice! With these rims I can test fit them all round. I'm certain they'll fit on the back with the IRS but the front I'm not sure about. I'll sort that this weekend then know what I'll need to complete the set. Happy as! Discuss here, Cheers!
1 point
-
There is no point checking the resistance of the temp sensor unless you know what to expect at what temp.1 point
-
If you have money for things in spray cans, CRC gasket stripper is good for removing carbon and anything baked on If you spray in on a wite number plate the paint will all lift off1 point
-
How it looks almost ready to rumble / ring-a-ding. That little red bit by the tank is the kill switch. Just need to extend the wires to mount it on the handle bar and fix the earth.
1 point
-
Not the big 6 pots that were intended but at least it's got the 355mm rotors on it now. Took about an hour all up / pretty lazy upgrade. Edit: wow talk about shit photo's.1 point
-
I'm moving to Queenstown in a few weeks! Looking forward to meeting some South Island OS crew.1 point
-
1 month in of driving. The gearbox is making bad noises, the carb is not working properly but running in a reasonable AFR range so its ok, all the door and heater vent seals leak and it fills up water, IT IS SLOOOOOOOOOOOOW. 45kw makes it no rocket ship. Time to change that. Watch This Space...1 point
-
more of the chassis is back together. this is the rear bit that the boot floor bolts to. i didn't narrow this bit because i didn't want to move the body mounts or the rear bumper mounting. it was easier to cut it off and then weld it back on with an offset at the joint. it turned out to be way less of an offset than i thought. the shape of the chassis at this point lends itself to being wider and looking factory. like this, more will occur tomorrow night. sheepers.1 point
-
the resurrection of the chassis has begun. this is the cross tube the the upper control arm mounts to. its plated over the joint. the shape allows for more surface area of weld and also to spread the stress of the joint rather than having a stress concentration at the edge of a square plate. sheepers.1 point


This leaderboard is set to Auckland/GMT+12:00