
Leaderboard


Popular Content
Showing content with the highest reputation on 11/18/21 in Posts
-
Cert achieved! Next step is to make the exhaust a little quieter and then get a wof
 26 points
 -
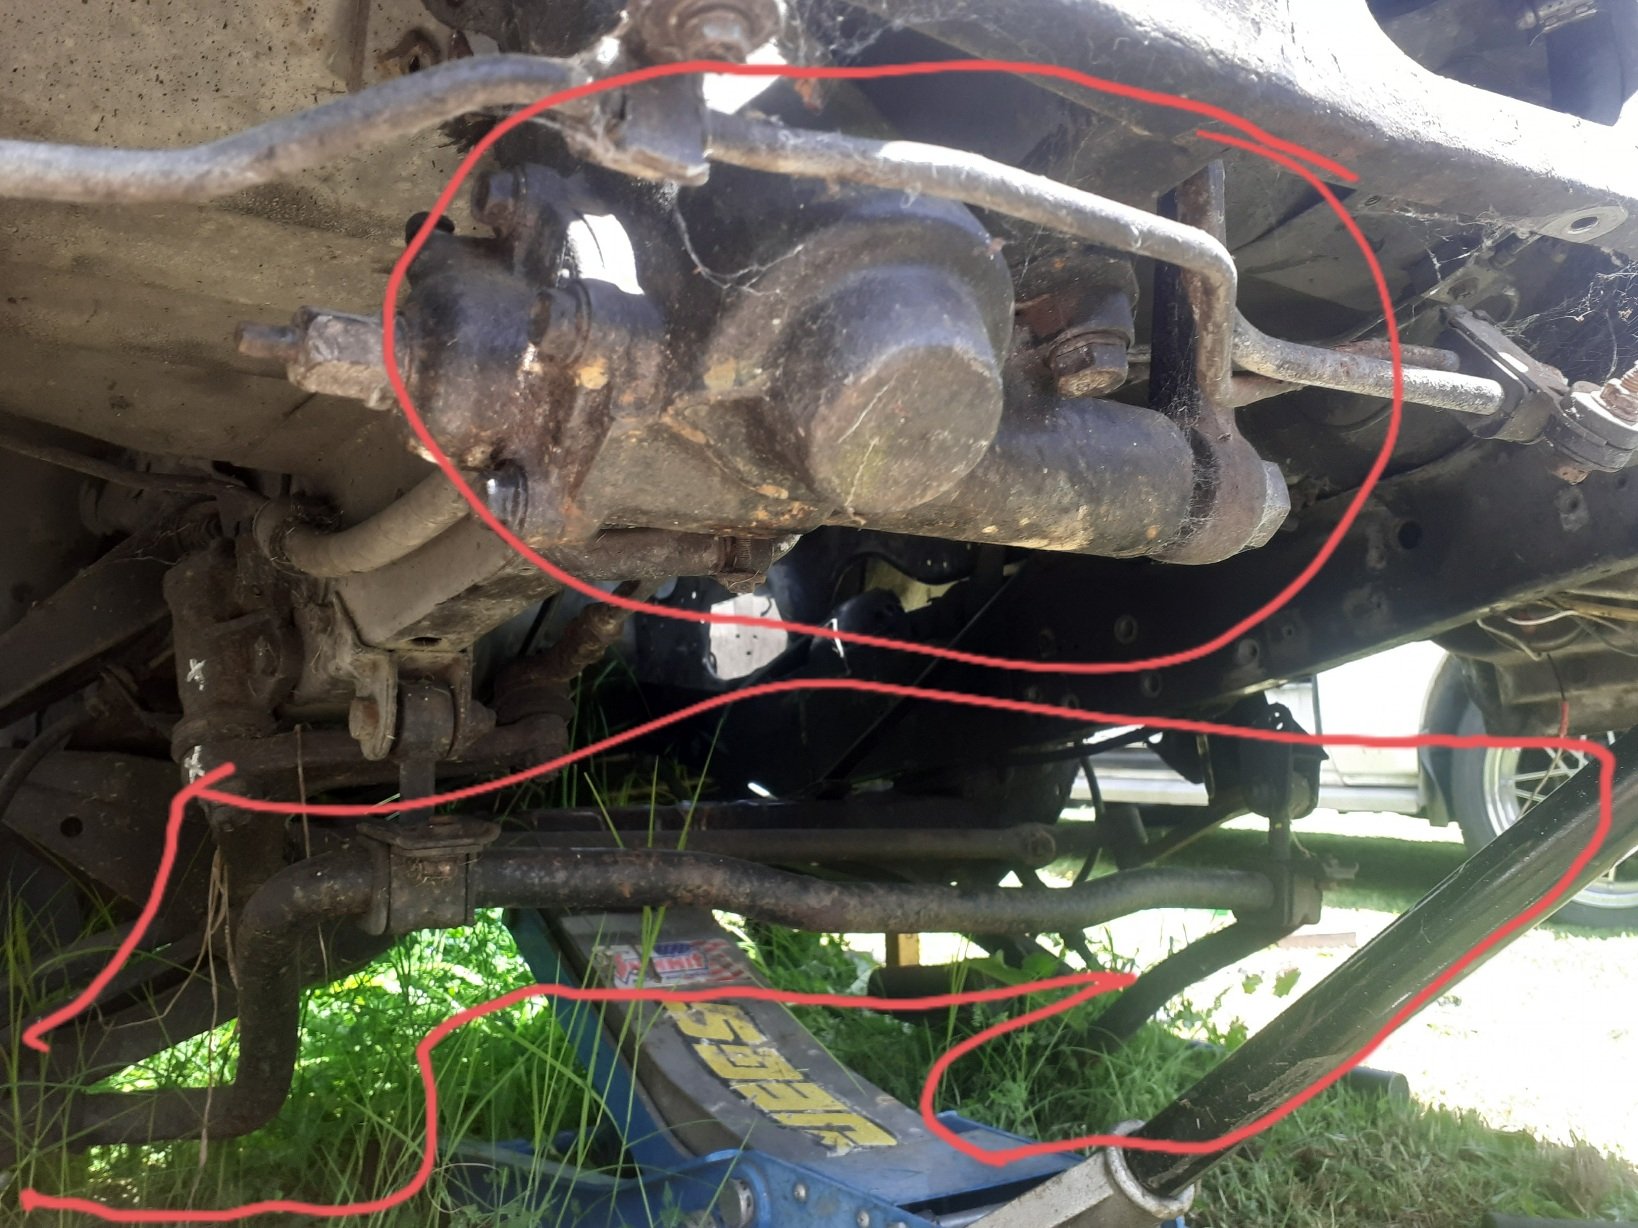
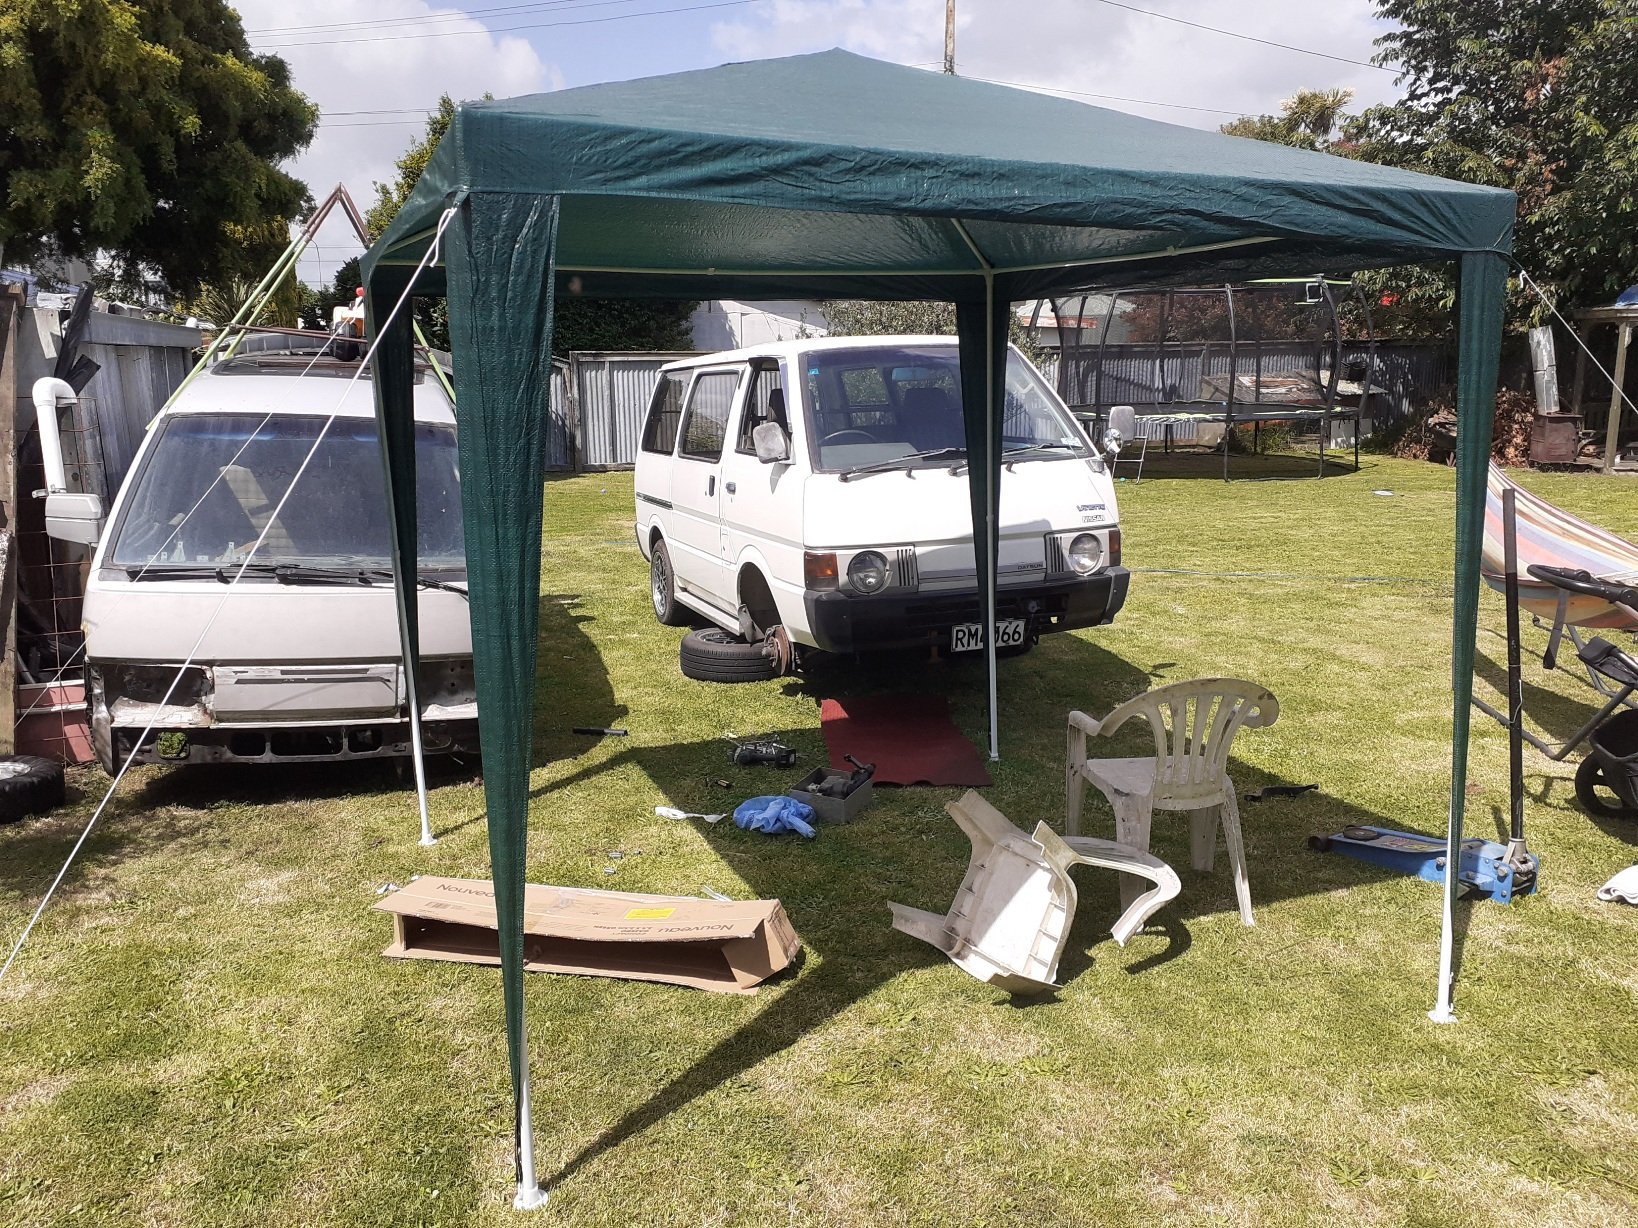
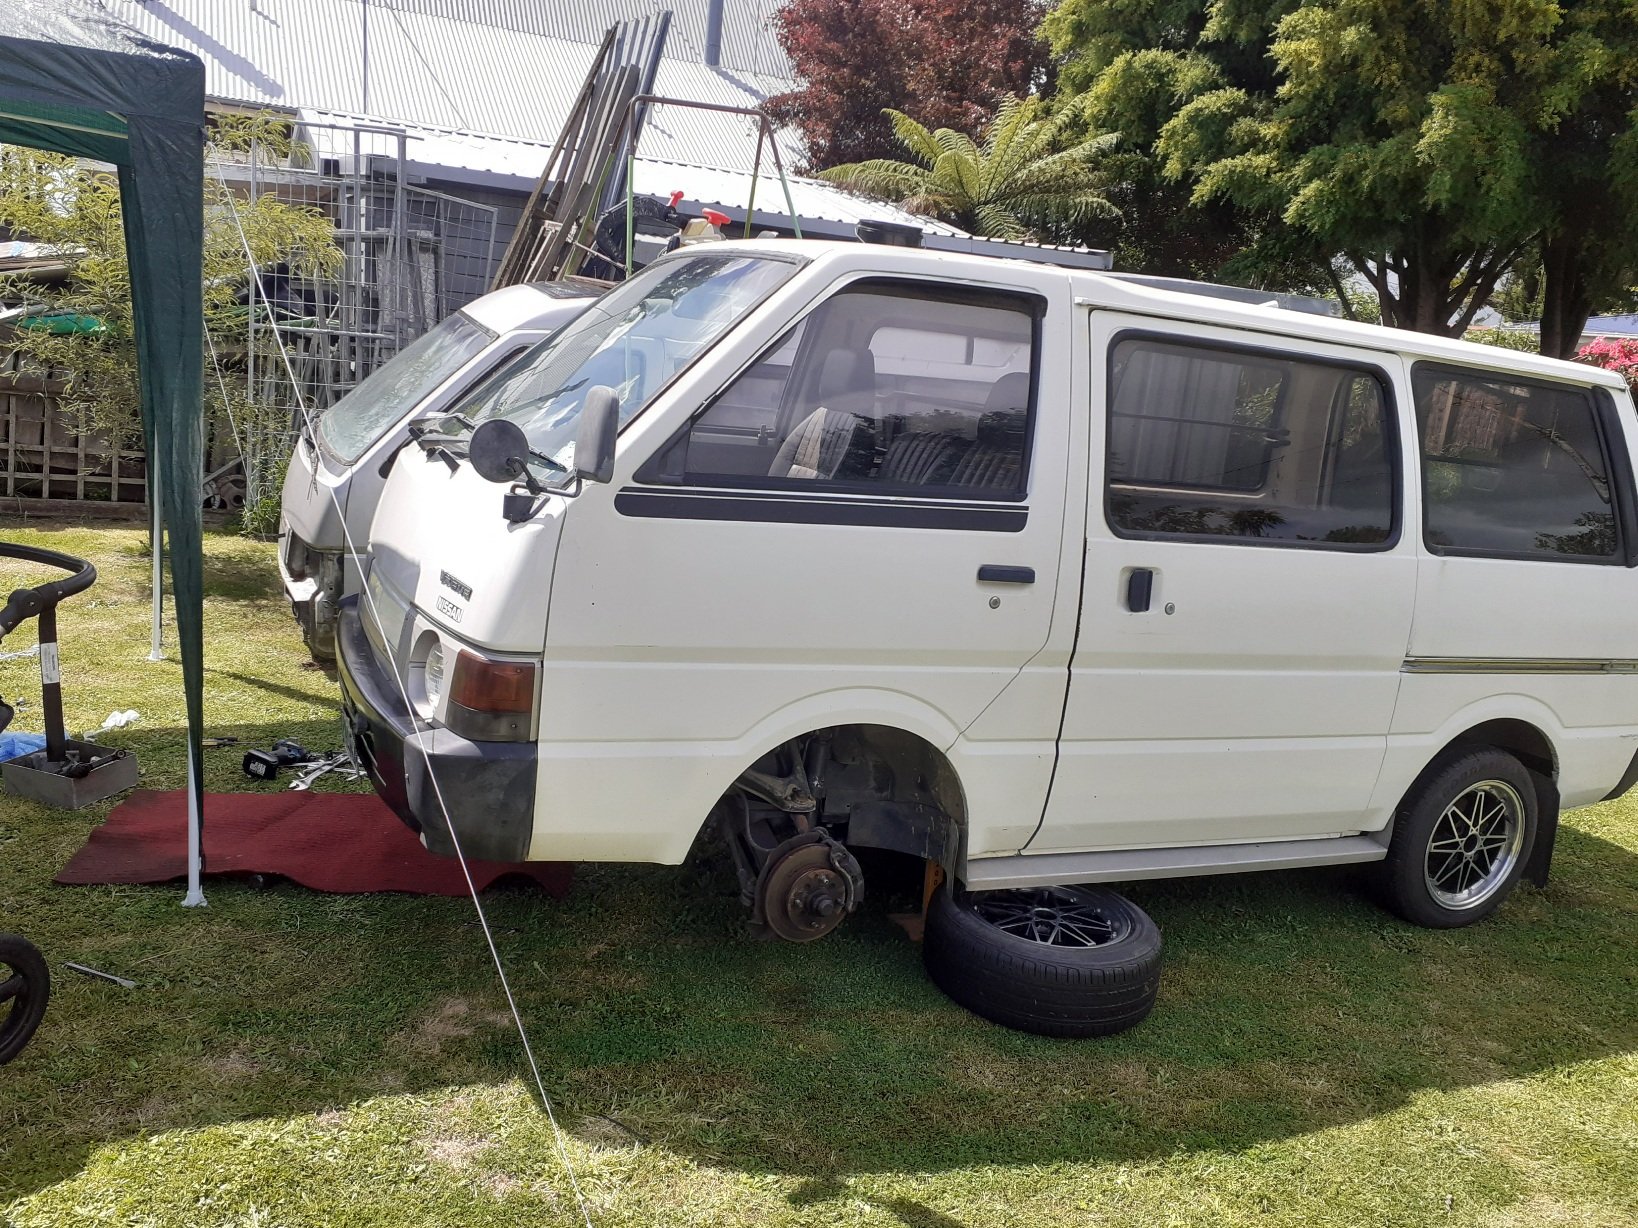
Havent done seat yet, as i drove on a test drive to see if my radiator fan worked and a general test, fan works, but noticed the steering was heavy even when driving at 100k, found it was binding on at least one ball joint .... Sooo instead of buying some ball joints..... I had the great idea to swap alll the powersteering from 'luxury' van, as well as gain a sway bar, ajustable steering wheel angle, to make it handle ..... better. Got set up..
10 points
-
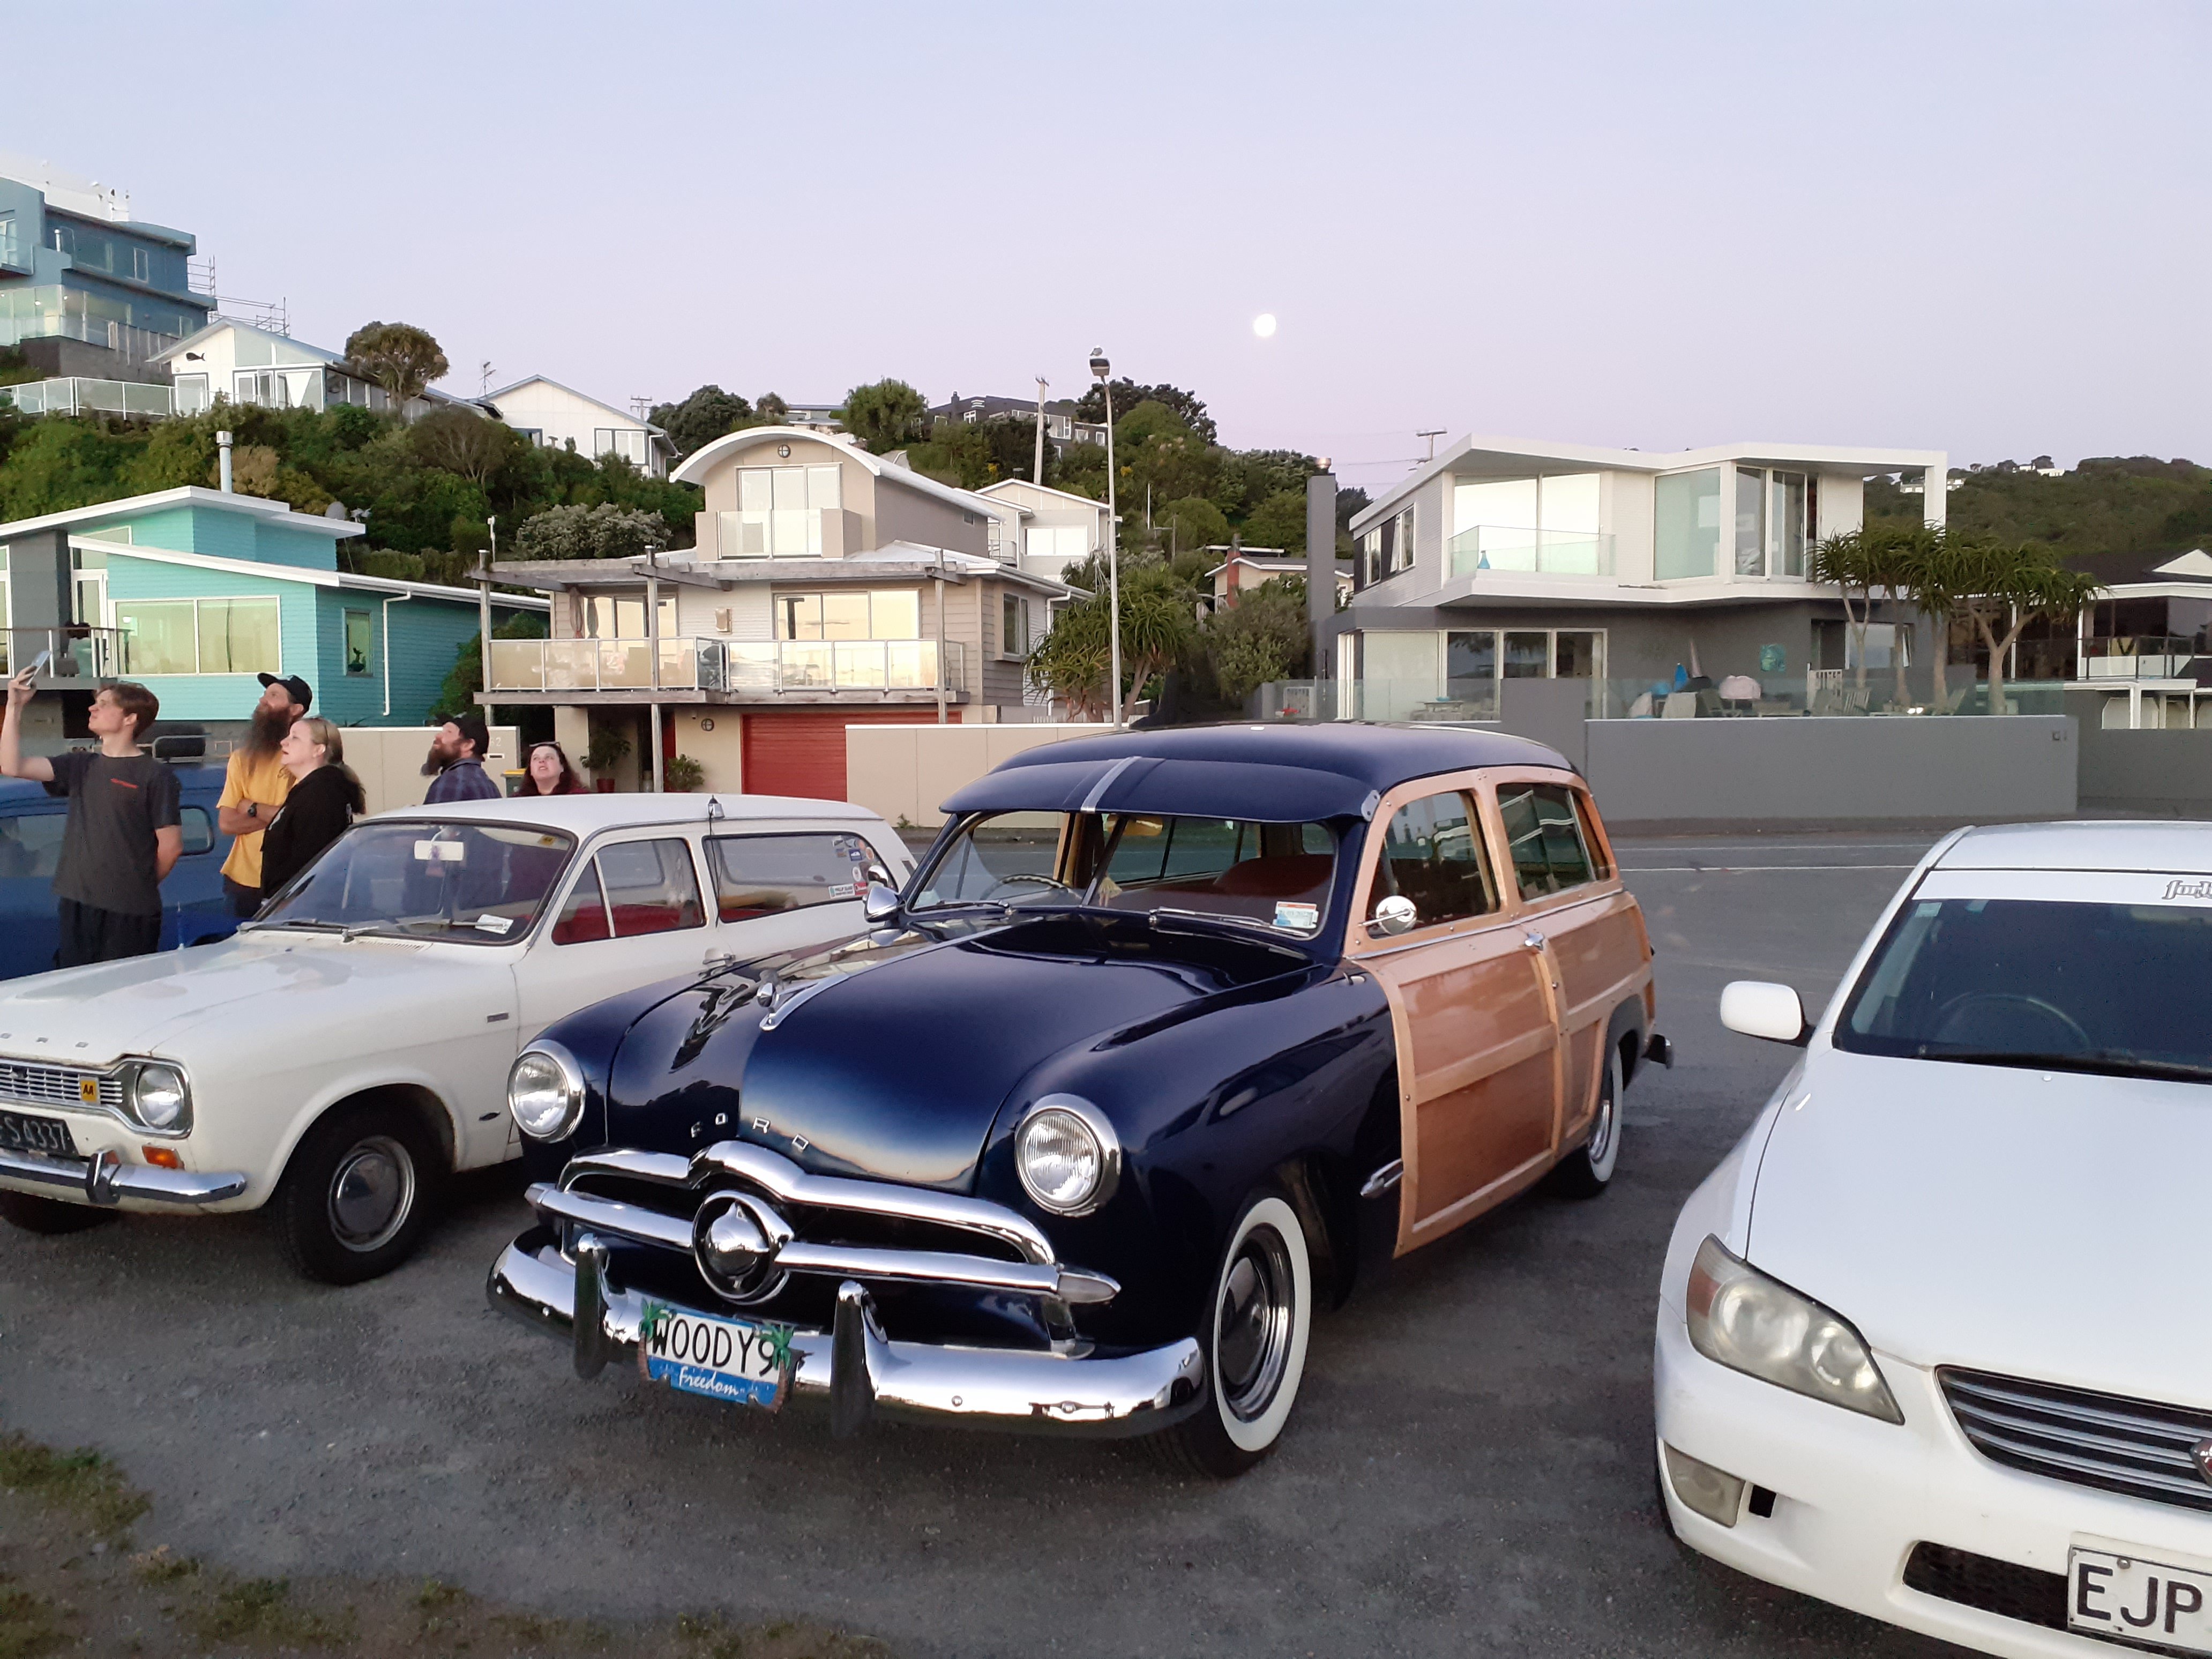
Wow, cherry popped, but I will definitely trade again! Pink pussies were as good as the hype! Big thanks to @johnnyfive and the support crew. Medium bike was a bit too much for me on the trip up through Waikaremoana. Enjoy!9 points
-
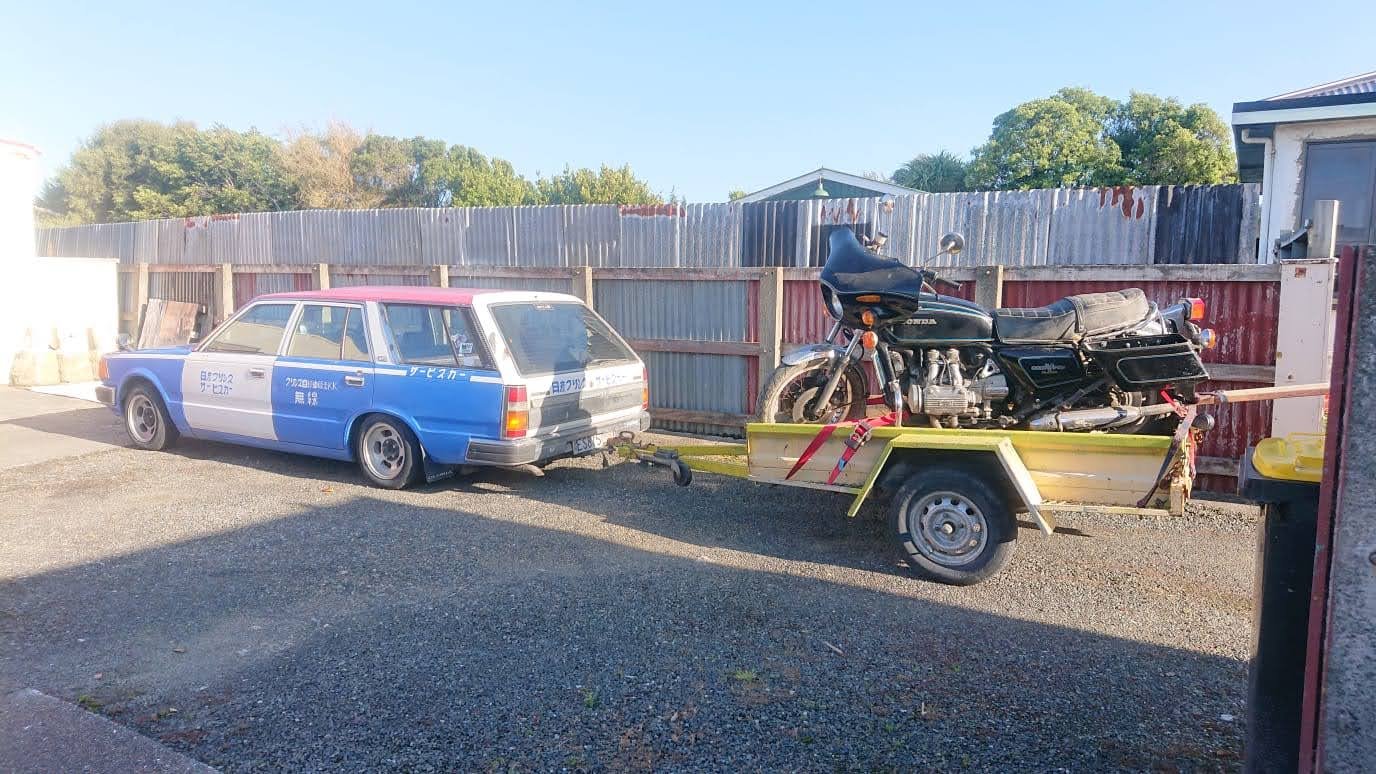
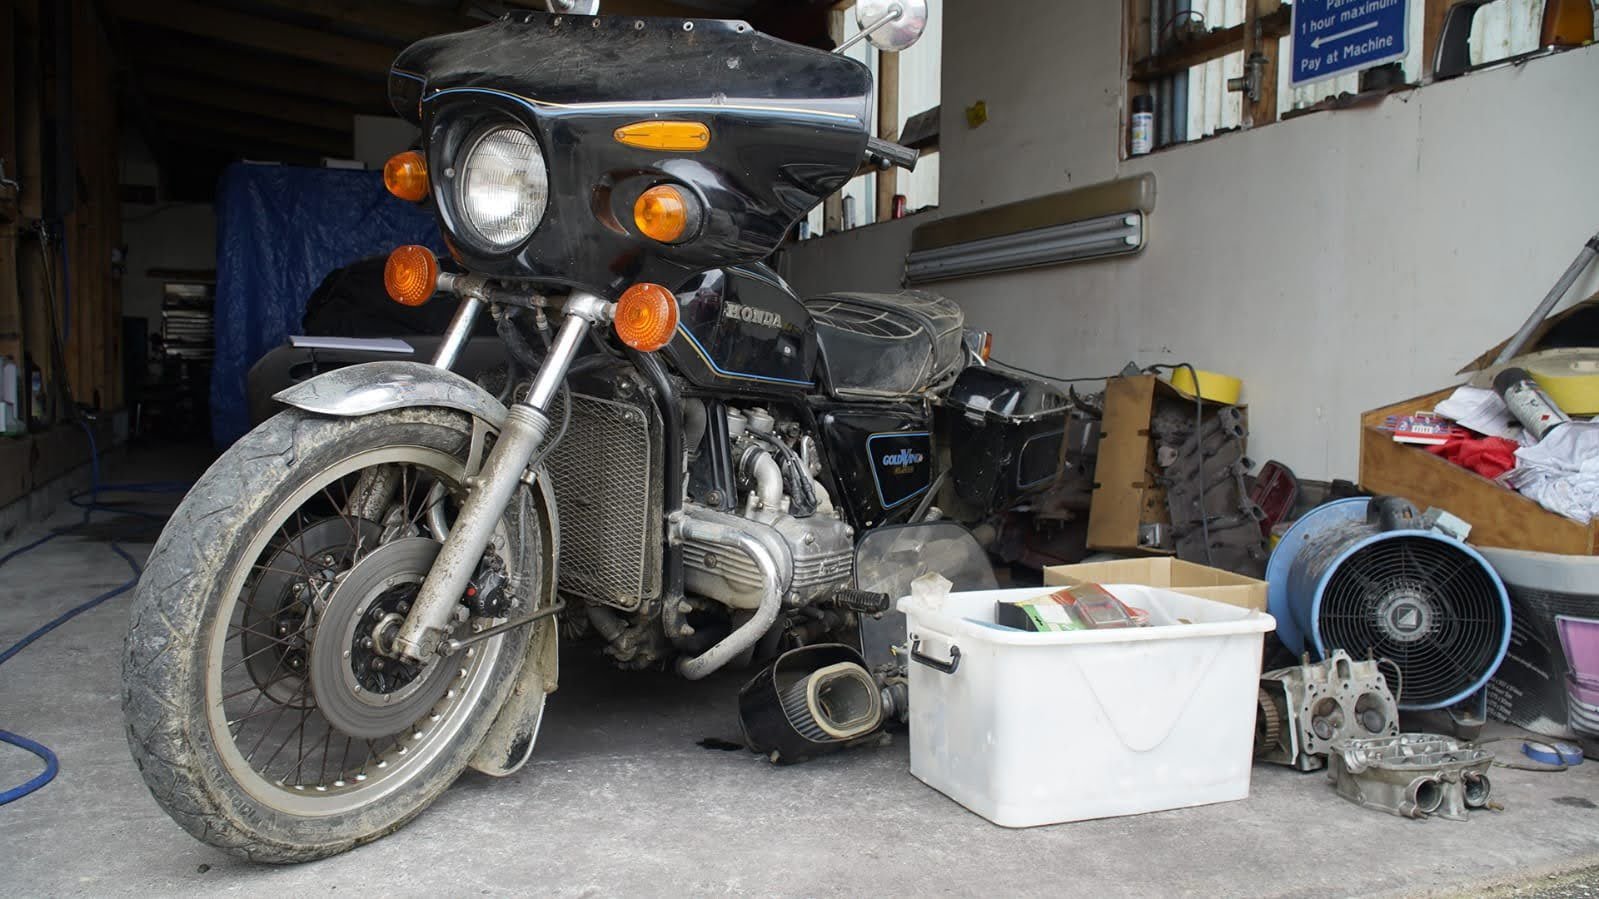
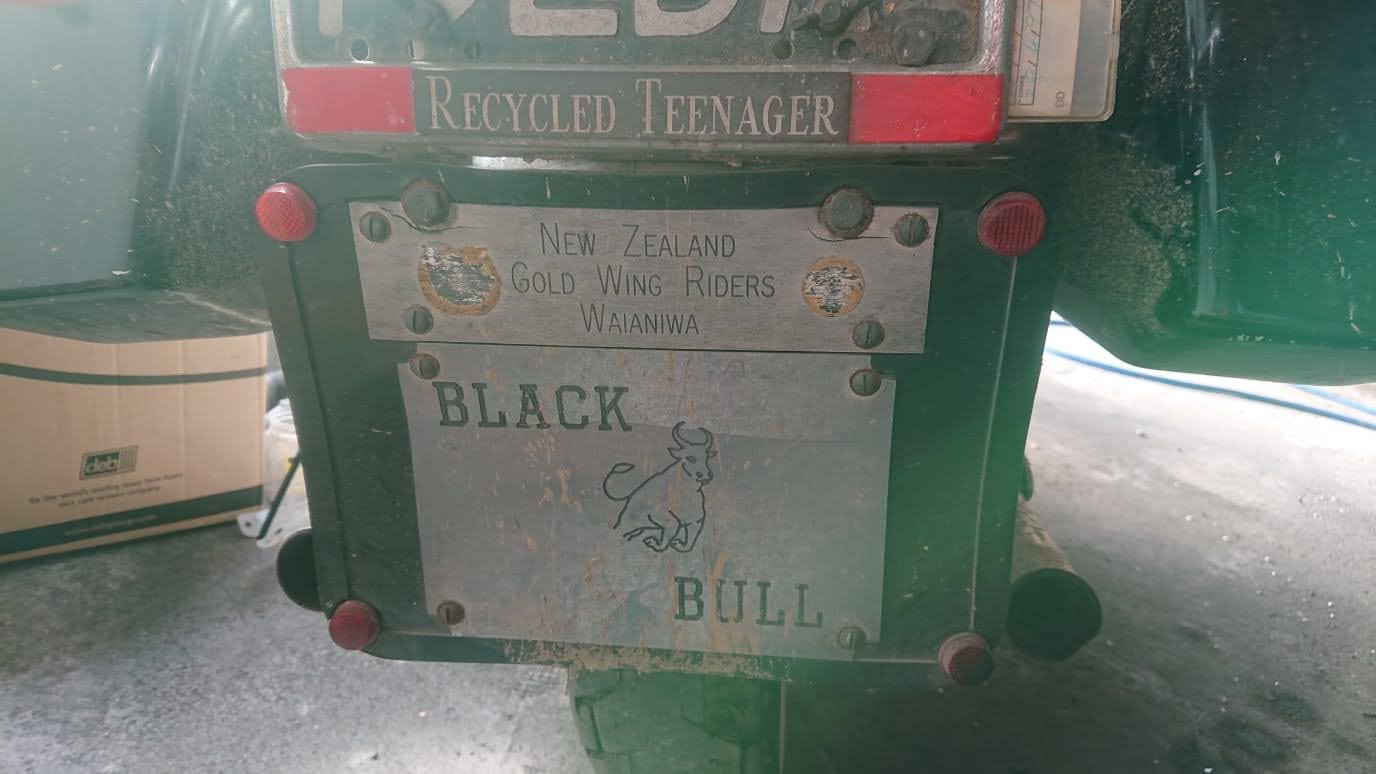
At the start of this year, I got caught in the moment, and purchased, sight unseen, a naked Goldwing that hadn't run in 20 years. Oh, and it was as far away from me as one could get. Great. I've always liked the 1st gen, spoked wheel GL1000s. They're kind of endearing in their ugliness. They're a fucking unit, weighing in at almost 290kg in full trim. Despite that, their quarter mile time is only half a second slower than the kawasaki z900 superbike at the time. Anyway, I just so happen to sometimes hang out with some guy in Invercargill @kyteler, so he jumped at the opportunity to go and acquire more rubbish on my behalf. What a GC. It turned out he recognized the bike, and upon chatting with the owner, it turned out it used to belong to Michaels neighbor when he was growing up. Though the sums don't quite add up, as i'm sure KY was a kid in the late 1800s, well before this bike was sold new. Anyway, Its almost been a year, and the bike is still in Invercargill. I plan to do a mish down and collect in the near future. So have some big plans.
8 points
-
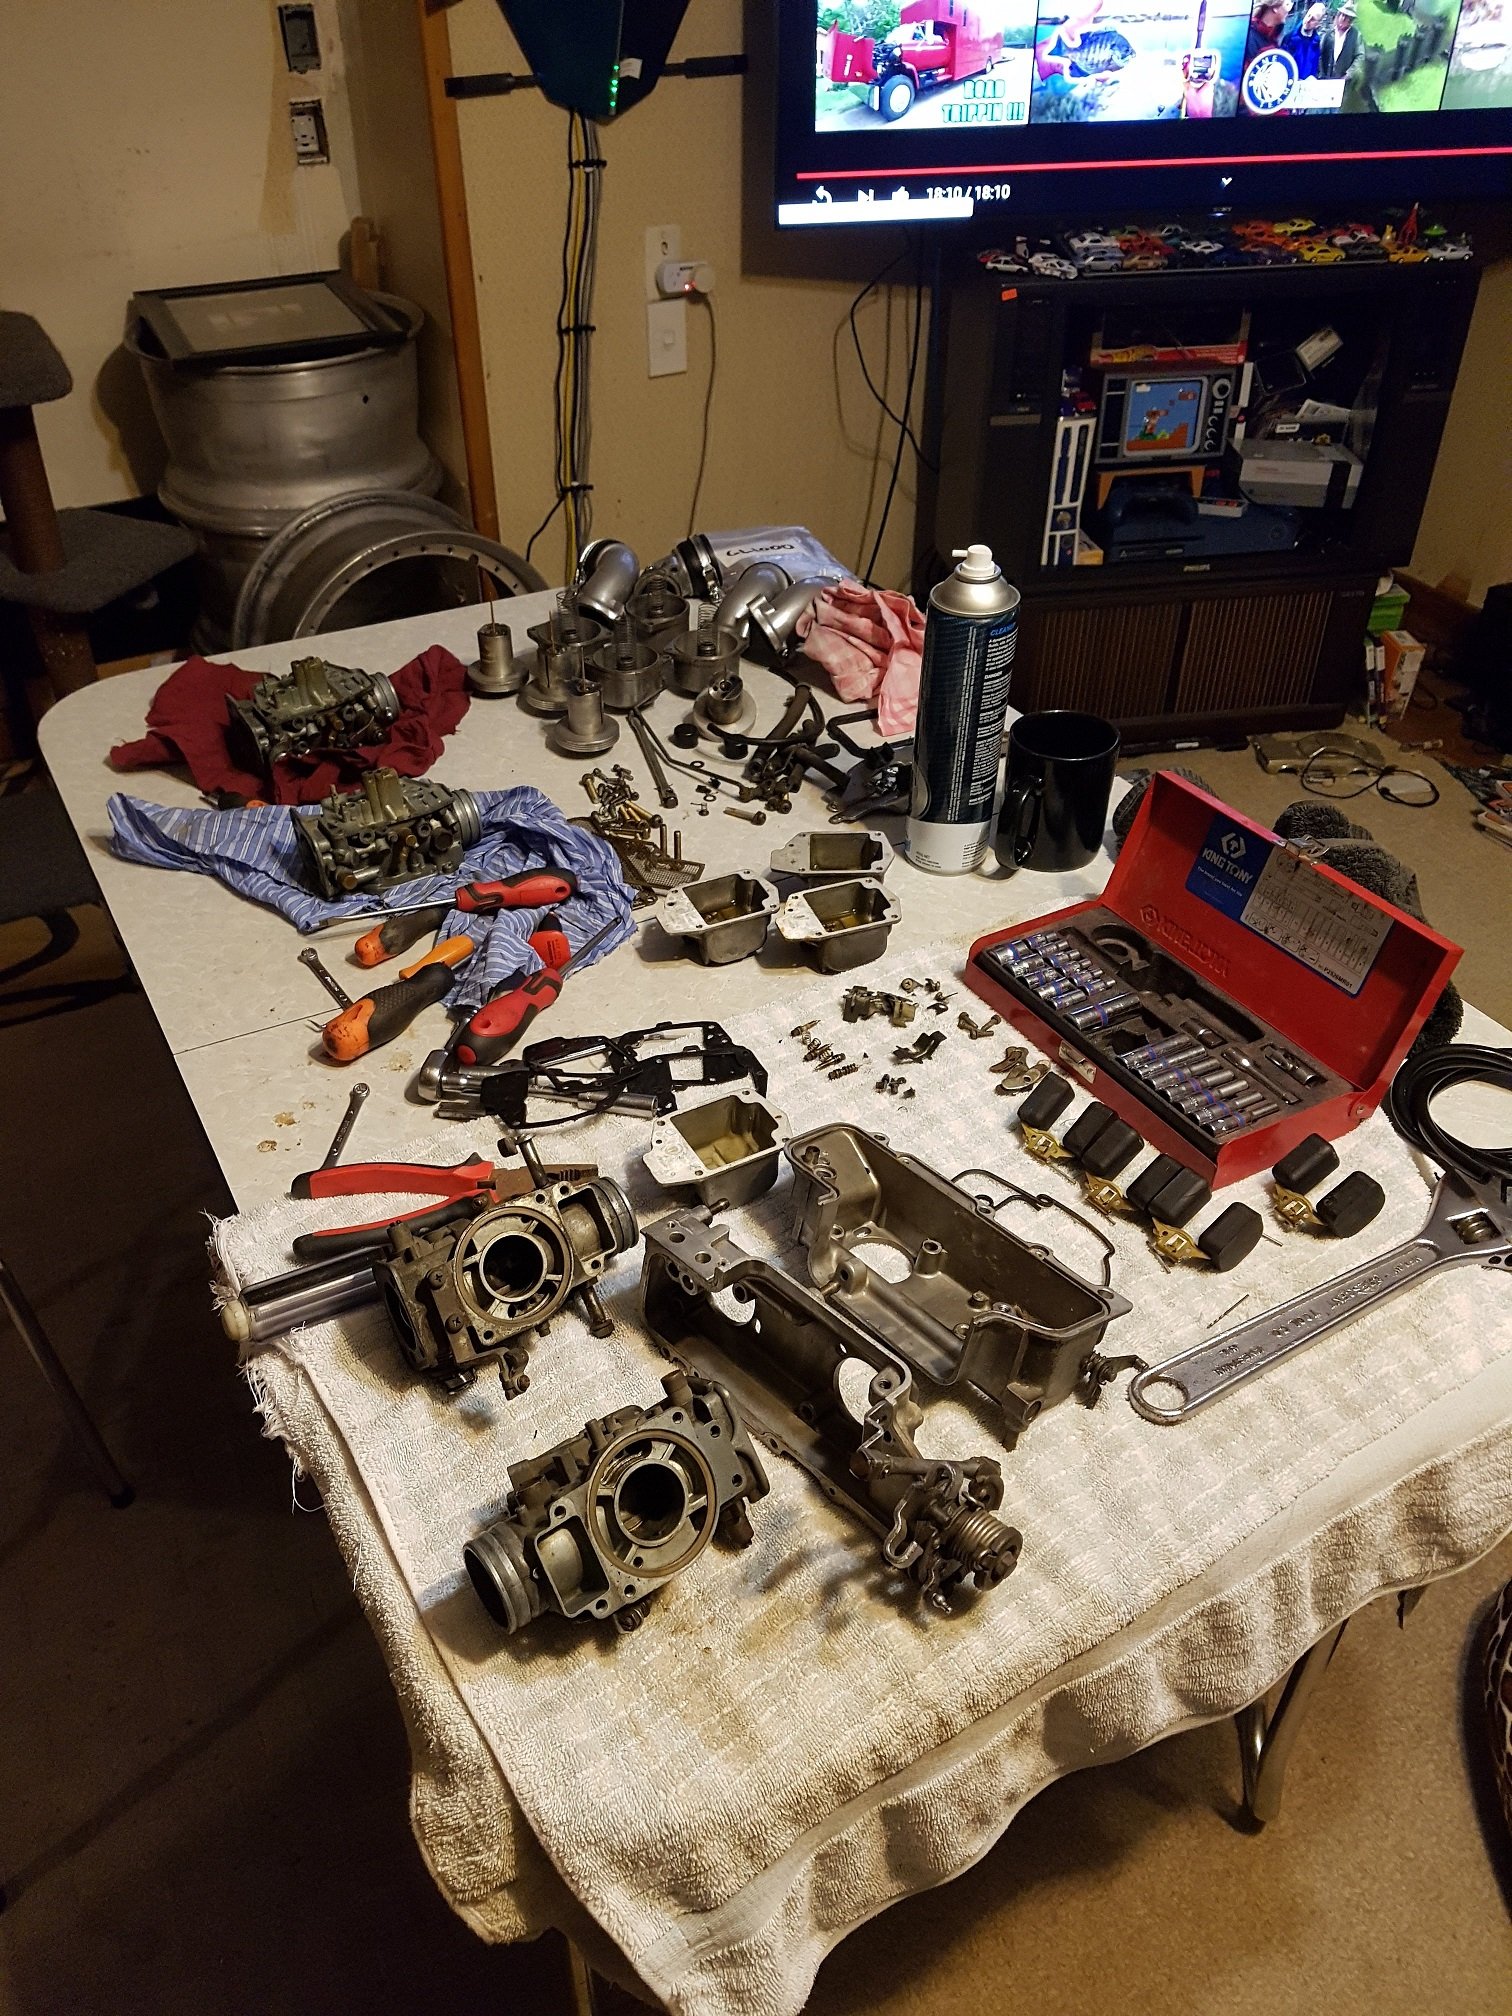
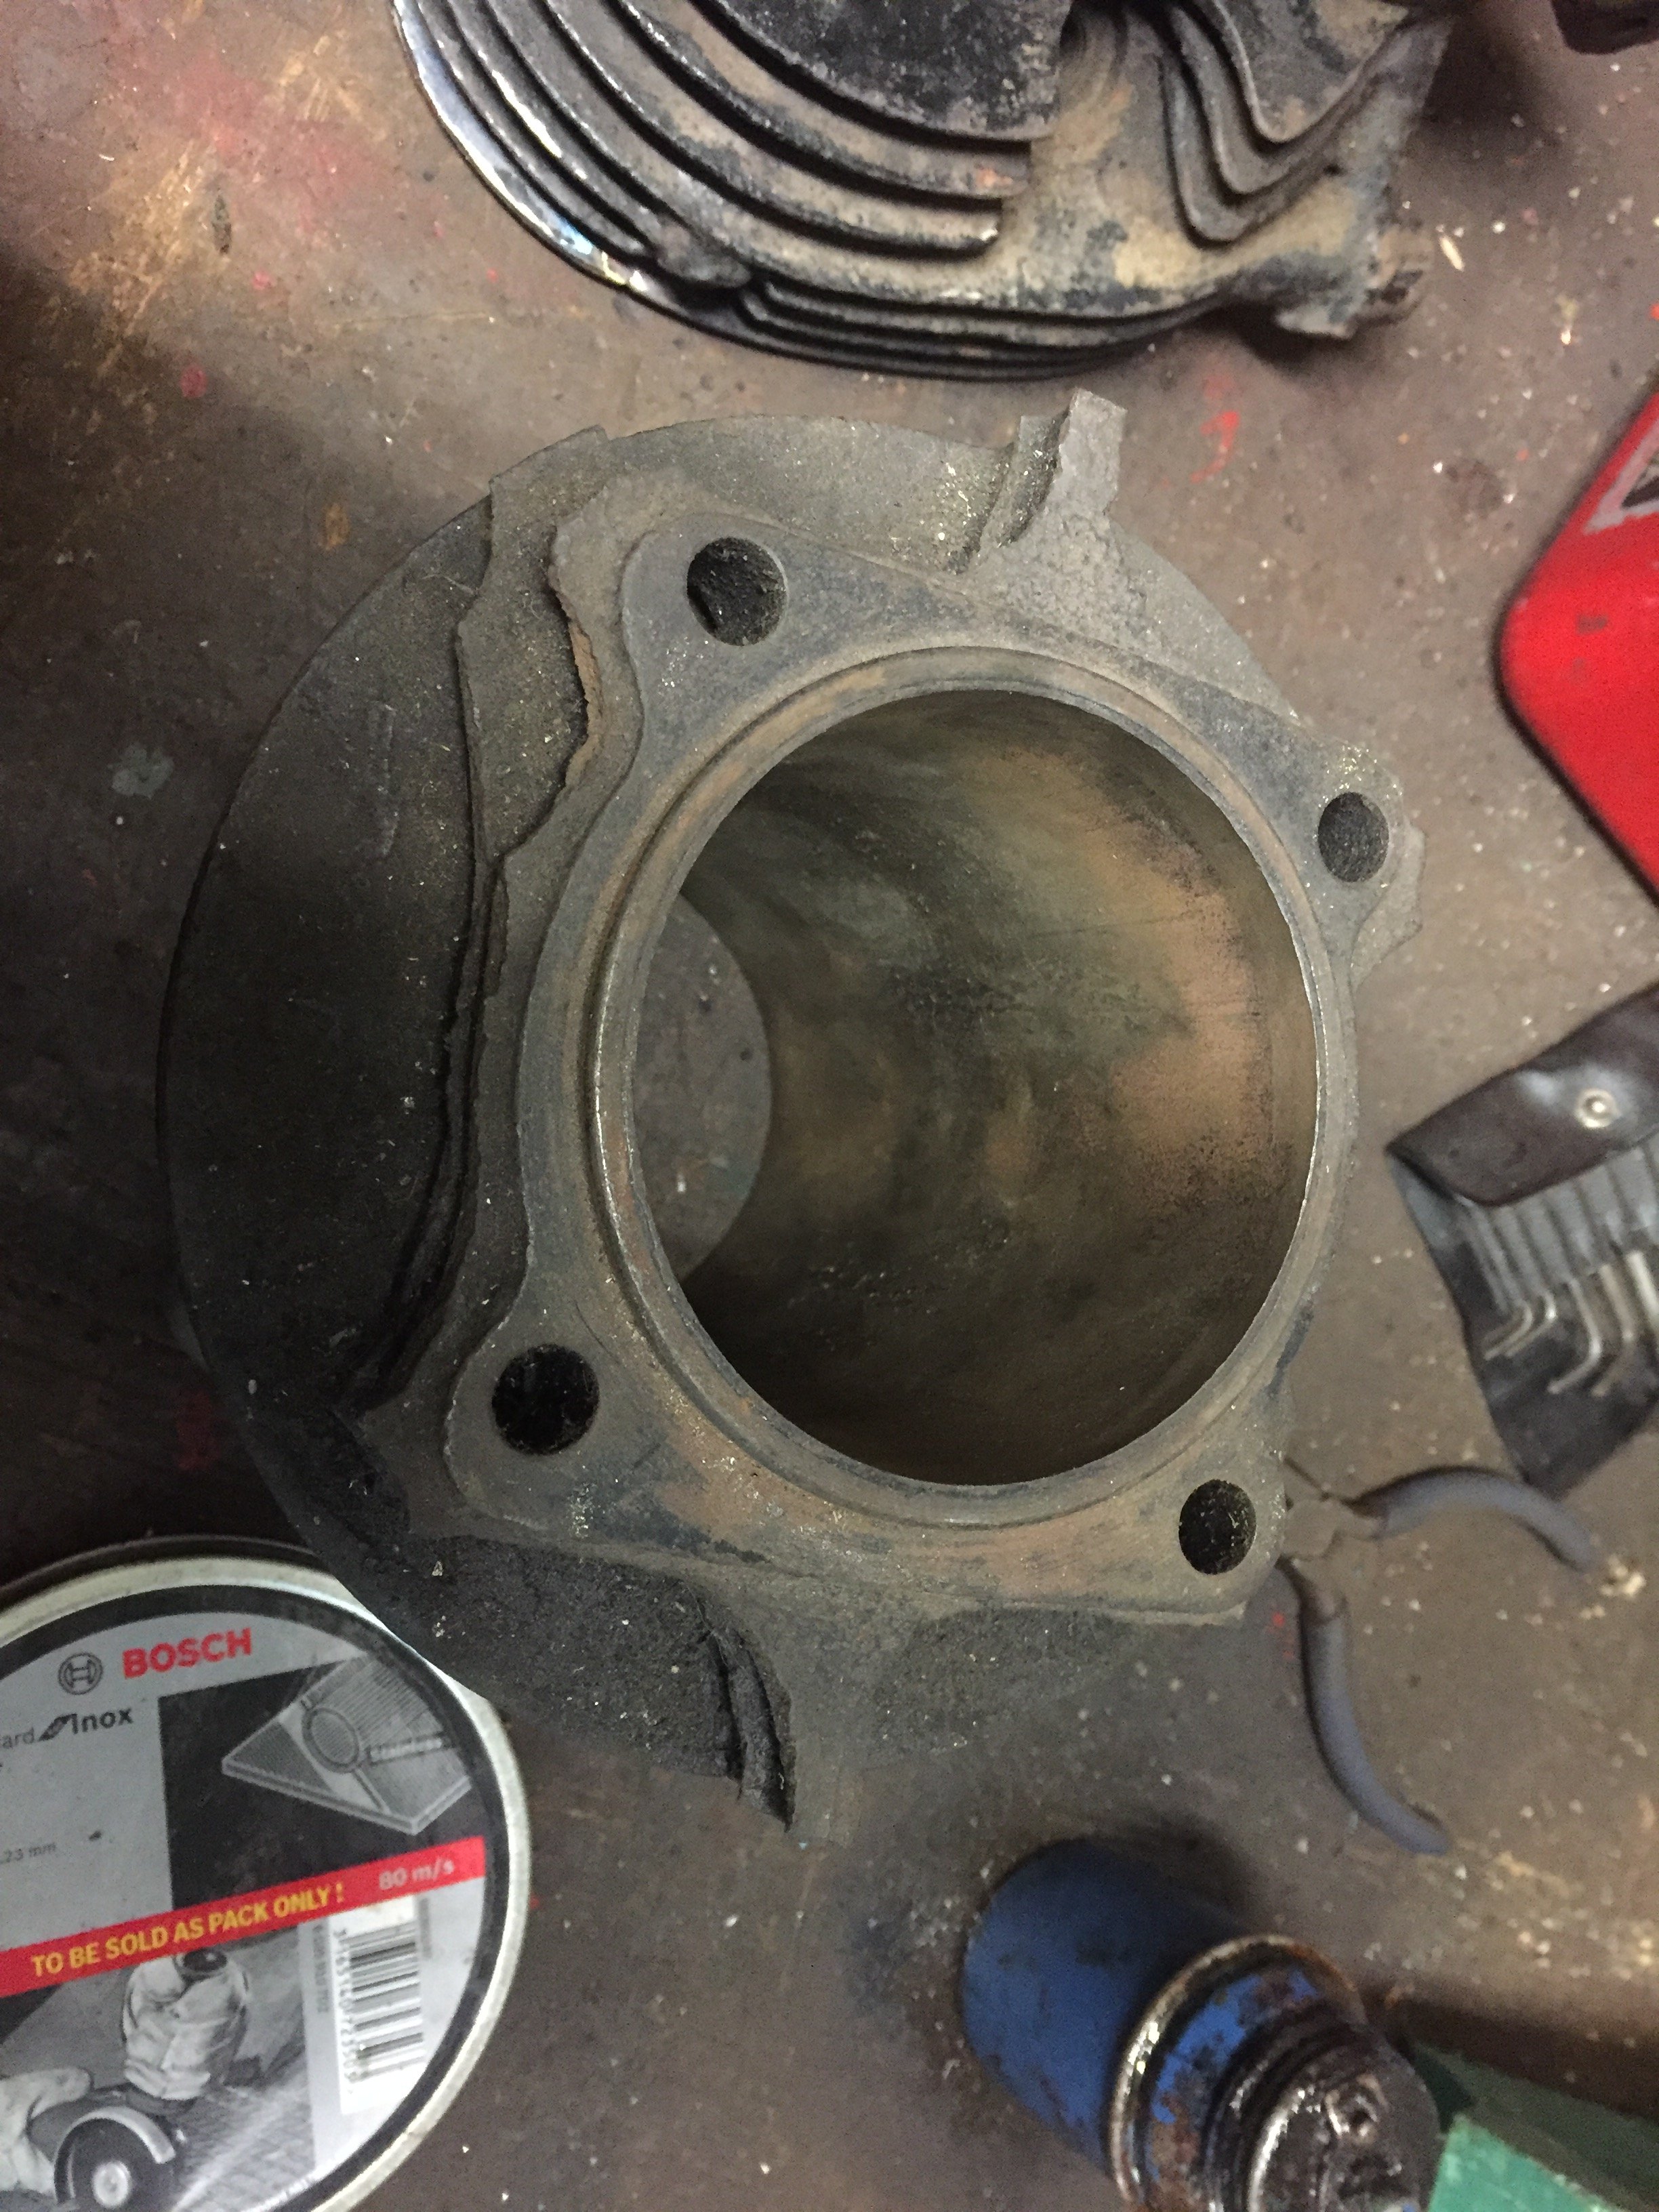
I did fly down mid winter to hang out with Michael and spend a long weekend getting this running and giving it a go over. The plan was to get it to wof condition (its reg on hold, with original plates) then return and ride it back to Wellington. Nothing ever goes to plan. It was way rougher than I thought it was (i should have known!). Gave it a full mechanical service, but rust on the stanchions, munted rear shocks and a chooched starter meant that is dreams of a wof were still a while away. Fully rebuilt the carbs, fuel lines, petcock, front and rear brakes, new braided brake lines, starter rebuild (twice, and still didn't work, apparently common for these), oil, coolant, rear drive oil, new tyres and tubes. Was so close, but yeah, the suspension and starter kinda rained on the parade. I had new fork seals, but forks were too far gone. Only thing that wasn't working was the neutral light. I don't have many pictures of this mission, as we just smashed it out over 3 days. But was good fun hanging with Michael and getting this running. Kick start only was a bit of fun, but getting it barking off, first kick from stone cold on an invercargil morning was pretty magic. Only pics i have is starting to strip it down: And some comfy, warm lounge room carb rebuilds while watching gamer streams on youchoob: Plan is to strip it back to bare minimum, All of the gross fairings, saddle bags are going. And a respray in the factory turquoise. As the black really does nothing for the bike. I've got a whole bunch of new goodies with me in wellington, so once I get it up here, should only need a weekend then it will be wof ready. Quite excited tbh irl.
7 points
-
since last time: Attached the bee to the rear garnish Sprayed the inner ridge of the grilles and touched up the wee slats between the ridge and the edge with black again attached NOS bee to hood Not much else really, still waiting in the queue for repair cert.6 points
-
Welding fins on is easy, I mist have done 100s of them.
5 points
-
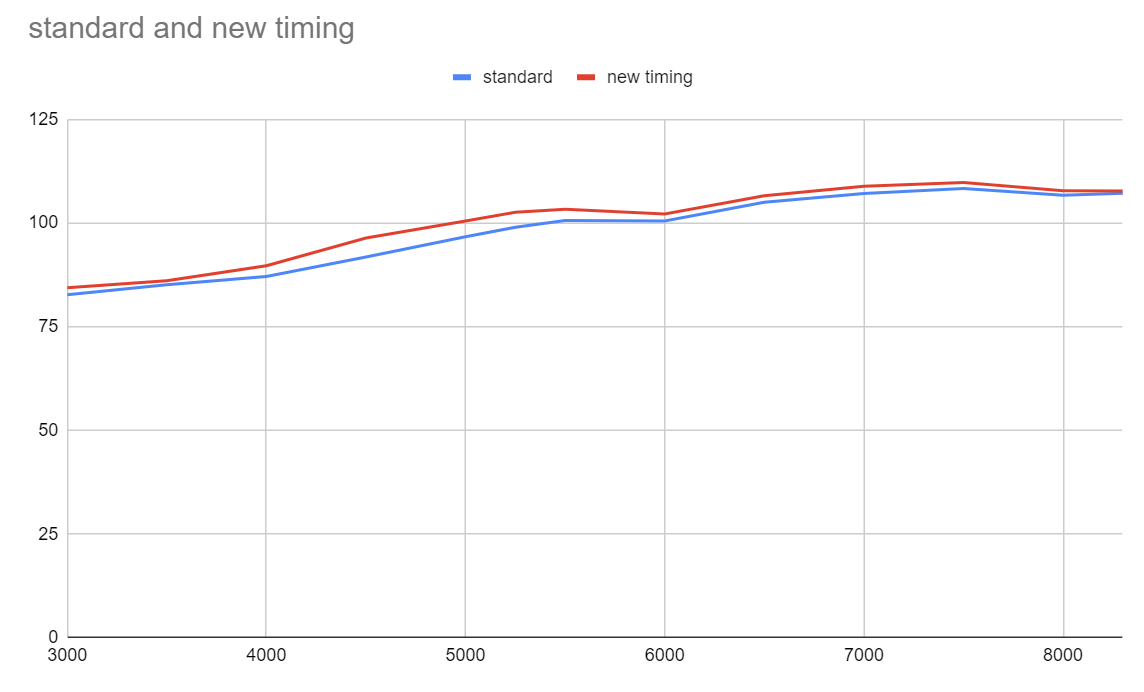
First results! So at zero degrees advance now, it's real smooth to drive and idles real nice but it totally eats shit at full throttle haha. At cruising speed/rpm it's pulling 25% fuel out! Further investigation needed, but I think this is gonna mean I've unlocked some prius spec economy when the cams in that position. (Reduced pumping losses / dethrottling will actually work for once) So at full throttle, usual test of incrementing the cam. No MAF this time, so just looking at lambda results to see if it runs leaner (more air, so needs more fuel) Results are distinct! Approximately the 30 degree line (Yellow line) is the previous home position of the cam. Now with 45 degrees advance (red line) its gained shitloads. So it looks like some amount of gains right up to 8k rpm which is awesome! And I might have filled in that big hole in the fuel map around 4500rpm. Will do some more finer tuning around the 25-45ish range, but pretty stoked!
4 points
-
I just tried to do an OIA for police interest in a vehicle. They came back saying they don't give out that info... Why is every process so inconsistent. Its really frustrating...3 points
-
I just spoke to an unhelpful mole on the end of the toll free number in this link. She was taking like it's going to be closed until April. When it closes anyway.......... I need to do further research into the matter. THEY CANT STOP US ALL!3 points
-
Yeah, its super quirky, not something to re-start the bike at the traffic lights if it stalls.... Feels alot more disconnected from the engine than other kickstarters too, and its like it only rotate the engine 1/4 of a turn. But it works... Edit: For those of you that don't know, the kickstarter is stored in the fuel tank....3 points
-
Basically it wants to be pinged to max advance right until nearly redline, which at first I thought was cool but then makes me realize it just wants even more advance but cant have it. So still no way around needing those other pistons. But still, really happy with this for a "Free" stopgap fix! This is a before and after VE map (fuel table adjustment) from adjusting to best cam position.
3 points
-
Manifold is welded - now to Fab down pipe, then fit external and its plumb back
3 points
-
So I've been pining some wheels for a long time now, I found a set in America that had some on s a pre order. covid delayed shipping etc etc. Shop never replied to any communications (lucky I never gave them any money. I found another set on aliexpress but couldn't justify the freight. Nearly gave up on the pine then they popped up on trademe. Mrs Chrisr said I wouldn't shut the fuck up about them so I should get them. So I did3 points
-
You the real mvp
2 points
-
Rode the xr125 on this.2 points
-
Not much new to show, it's mostly the same right now but a bit quieter with the airbox on. Need some events to go to!2 points
-
looks like you need about 10k rpm2 points
-
Exhaust is very quiet and I'm not a big fan of twin muffs up high , I'll probably change it to a single side muff. It does sound cool though, it's got a bit of a lope at idle which should sound good with the volume up a bit Adult video story was just to add to my yarn, but based on real life events There used to be an adult video shop in east tamaki that was on my way home, a fun game was to drive past and if there was someone going in or out, toot and wave like you knew them2 points
-
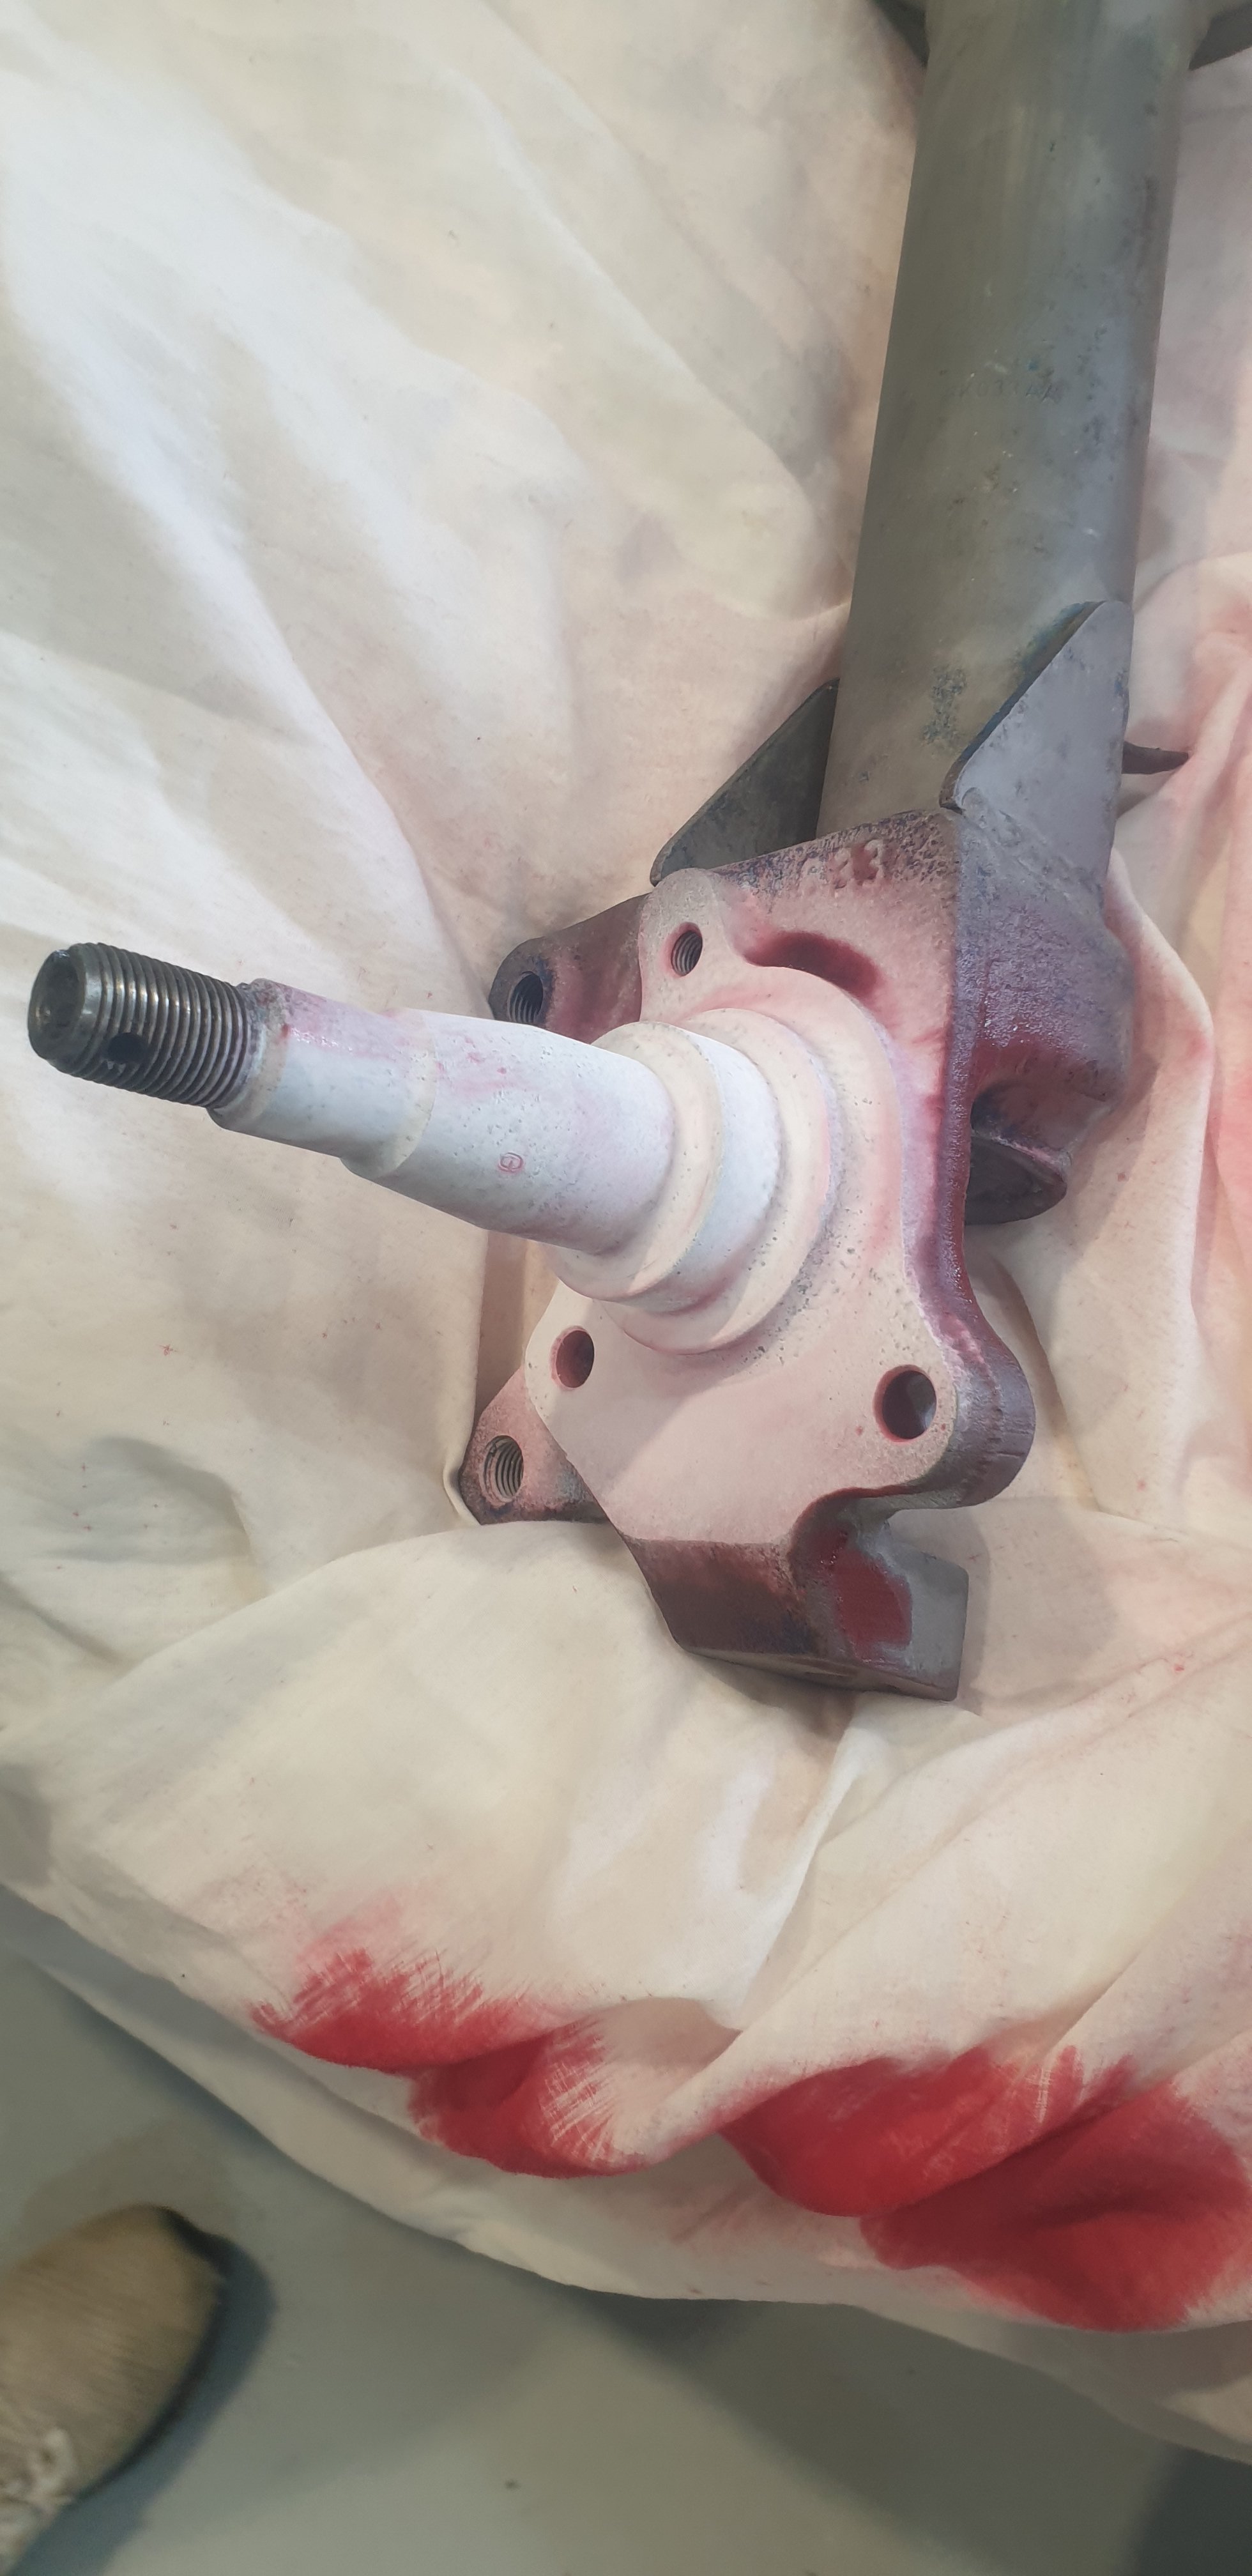
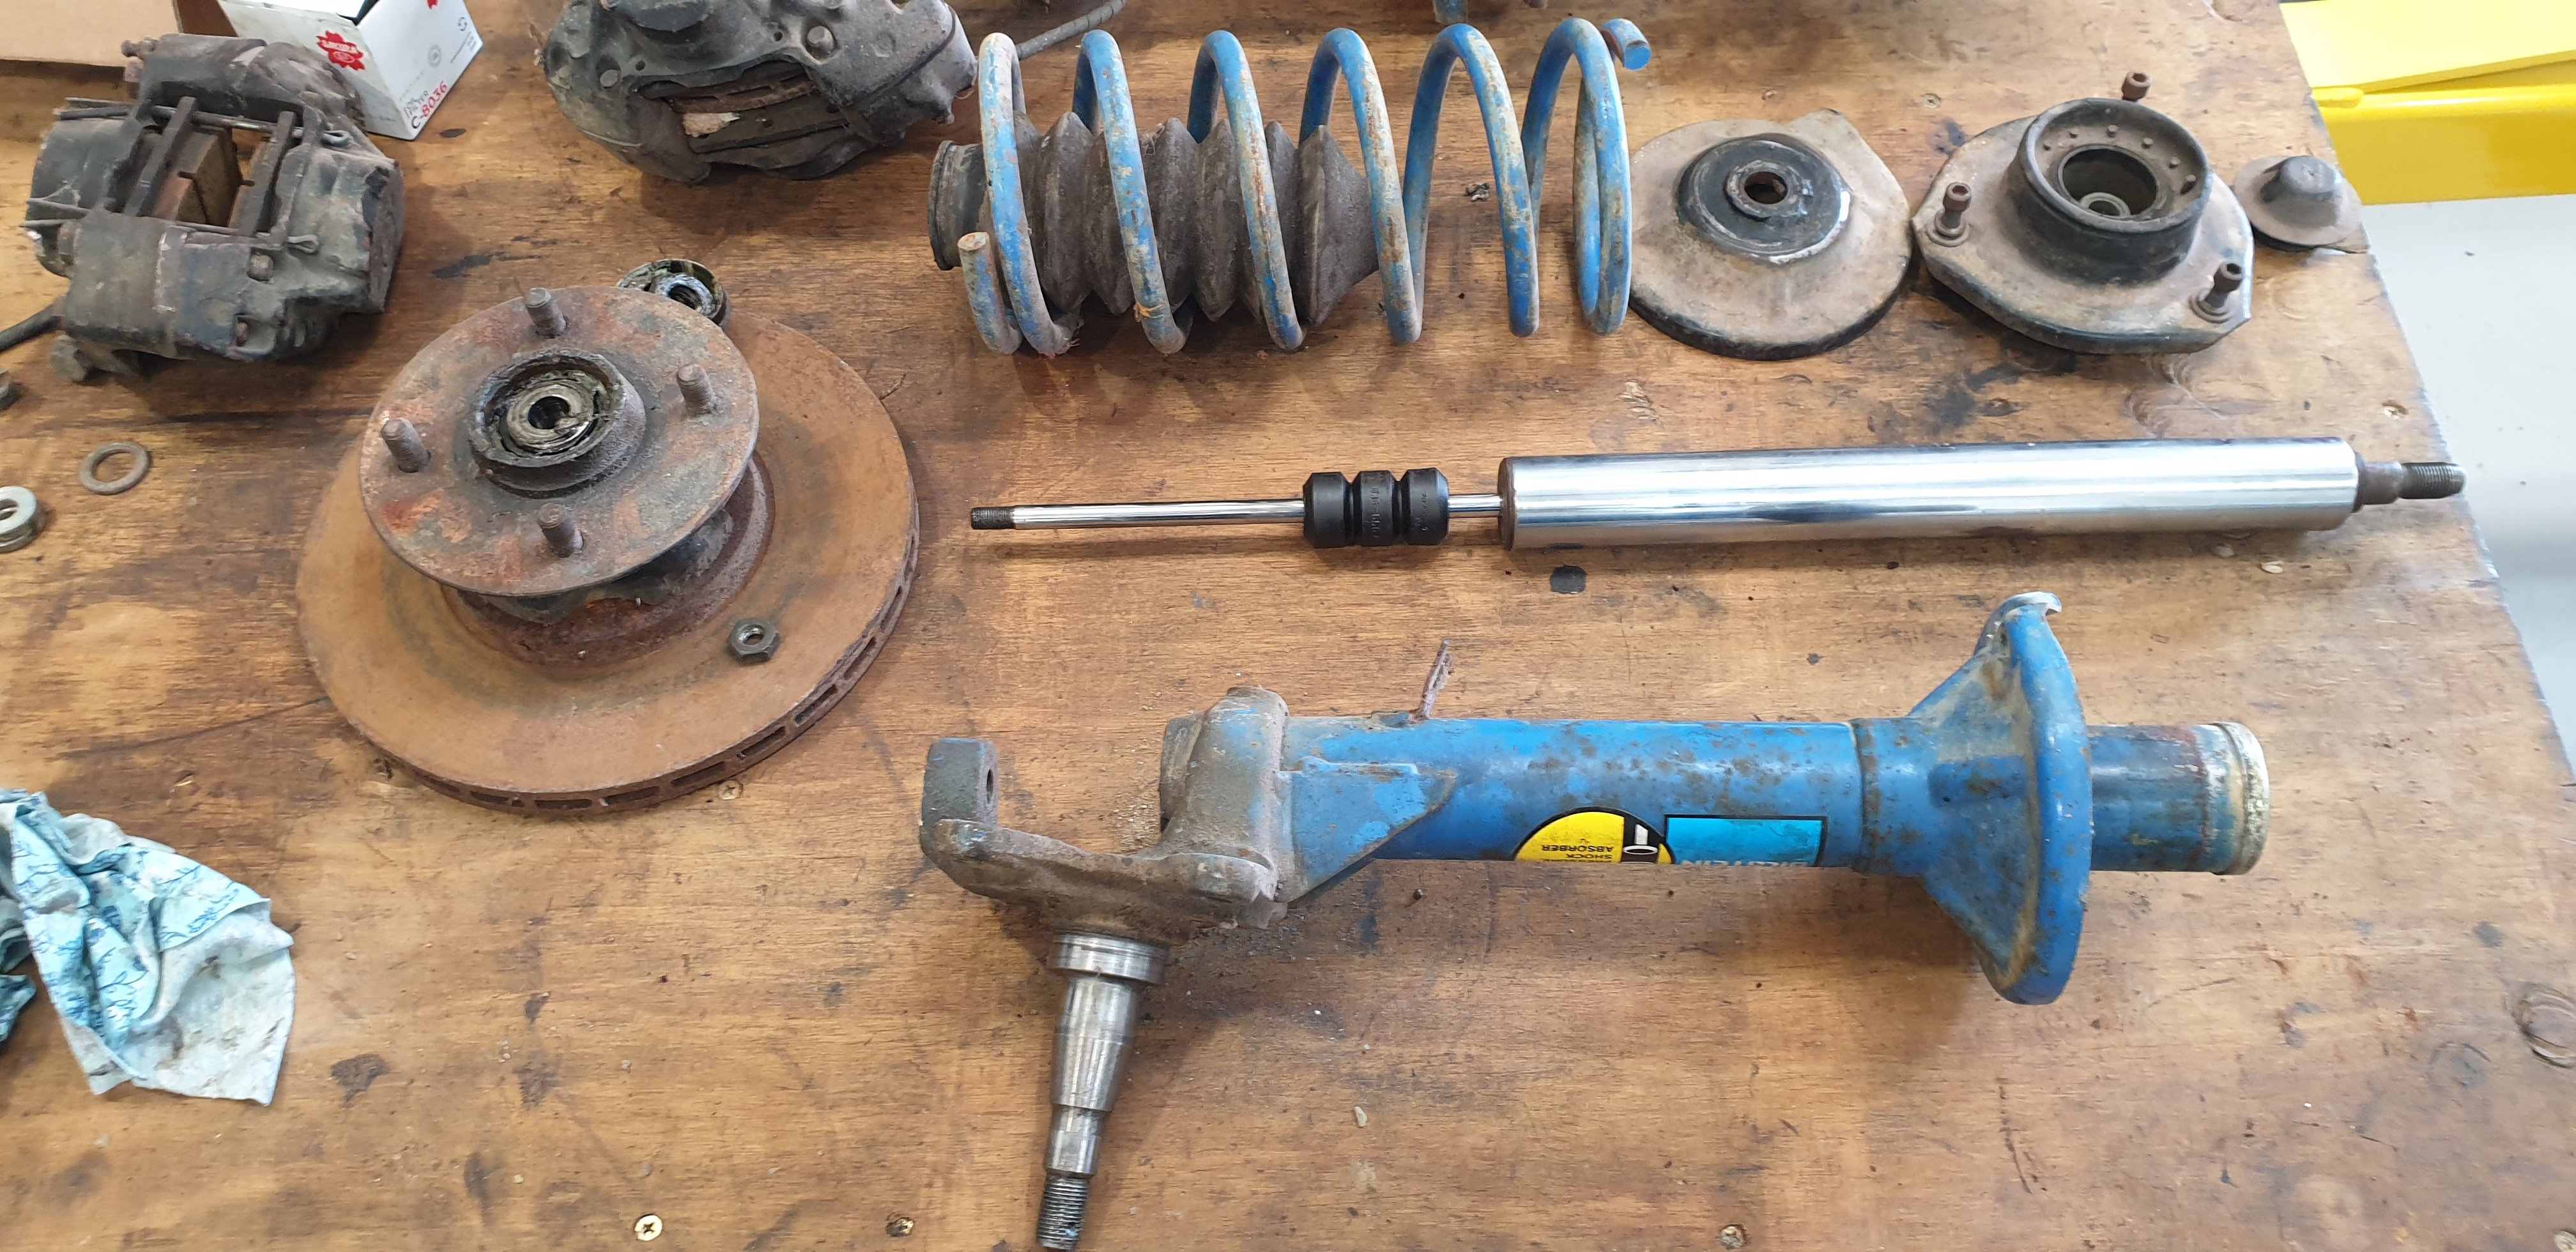
Morning peeps. Have got the front struts out of storage and will start on rebuilding them. They are genuine Bilstein / Ford units that you could buy from Ford Motorsport dealers. Complete with roller top mounts, vented discs and standard M16 calipers with spacer kits.
2 points
-
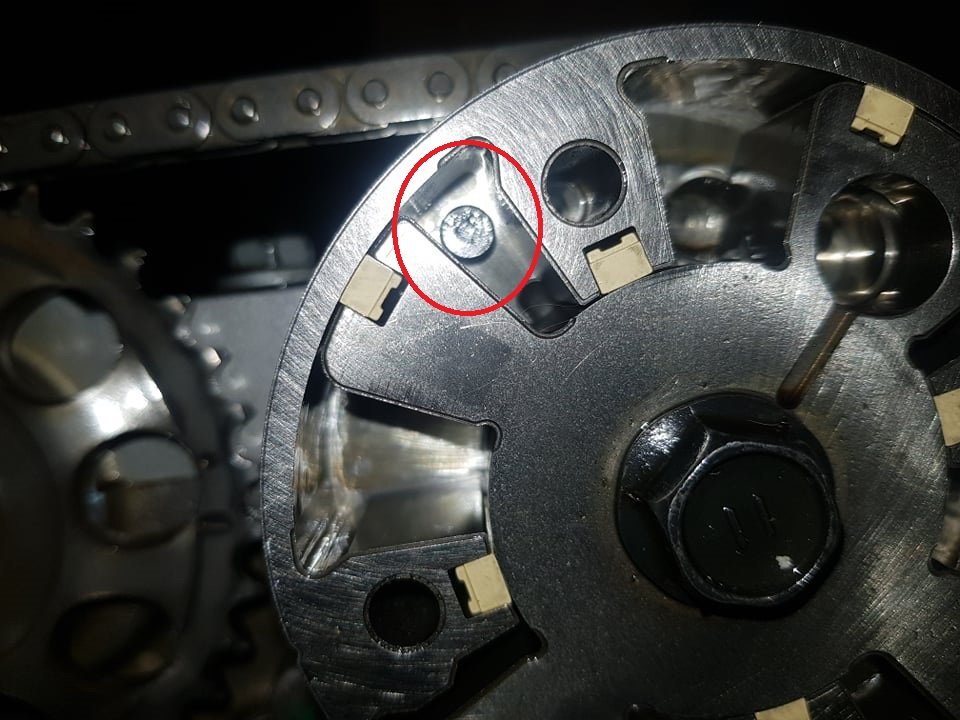
Ahh yeah so this cam has a locking pin that holds the cam at base position until there's oil pressure that can fill the gear. Otherwise the came rocks back and forth as the spring tension acts on the lobe. So I retarded the cam 3 teeth, and much to my frustration it still didnt reach full travel. This didnt make any sense because if I put it back 4 teeth, I'd be back to where it starts at home position. So I pulled the chain back off, and testing it loose - the cam doesnt move the full way anyway! So looking in more detail. It turns out there's a stopper pin that limits its advance. Like so: (This is at maximum advance) So this is great news, it meant I might not need a whole 3 teeth of cam retard. I tried it with only 2 teeth reaches the stopper pin with no piston to valve issues! Awesome. So now just got to finish chucking it all back together and do some testing. Hopefully see something useful from it. Will be interesting to see how it idles and drives with weird home cam position.
2 points
-
Yeah just try a small bit, it will become obvious whether its working or not. Those rods go mean on the tig just scrape the flux off and wire wheel the rod. Use as your filler rod for all the dodgy repairs. Used them recently to weld up some holes between the vanes on a triumph 2000 water pump for old barry mate. Apparantly its still going mint, he refuses to replace it as reckons its a long term repair. Was quite a good repair to do as was the gunkiest place to repair, super grot super shit casting but still welded good.2 points
-
This is pretty much the finished car. I took it to Clint for a cert. It didn't fail on too much, just some additional fuel line clips needed, a smidge of camber to be wound in, heat sleeving on a brake line on the diff, some nyloc nuts for the seat bolts, and a couple of other very minor things. Anyway here's finally, some proper camera photos of it. 1981 Toyota Starlet KP61 4AGE (369)-Edit by Richard Opie, on Flickr 1981 Toyota Starlet KP61 4AGE (383)-Edit by Richard Opie, on Flickr 1981 Toyota Starlet KP61 4AGE (327)-Edit by Richard Opie, on Flickr 1981 Toyota Starlet KP61 4AGE (350) by Richard Opie, on Flickr 1981 Toyota Starlet KP61 4AGE (356)-Edit by Richard Opie, on Flickr 1981 Toyota Starlet KP61 4AGE (311)-Edit by Richard Opie, on Flickr 1981 Toyota Starlet KP61 4AGE (294)-Edit by Richard Opie, on Flickr 1981 Toyota Starlet KP61 4AGE (403)-Edit by Richard Opie, on Flickr 1981 Toyota Starlet KP61 4AGE (58)-Edit by Richard Opie, on Flickr 1981 Toyota Starlet KP61 4AGE (66)-Edit by Richard Opie, on Flickr 1981 Toyota Starlet KP61 4AGE (83)-Edit by Richard Opie, on Flickr 1981 Toyota Starlet KP61 4AGE (48)-Edit by Richard Opie, on Flickr 1981 Toyota Starlet KP61 4AGE (160)-Edit by Richard Opie, on Flickr 1981 Toyota Starlet KP61 4AGE (175)-Edit by Richard Opie, on Flickr 1981 Toyota Starlet KP61 4AGE (238)-Edit by Richard Opie, on Flickr 1981 Toyota Starlet KP61 4AGE (263)-Edit by Richard Opie, on Flickr 1981 Toyota Starlet KP61 4AGE (440)-Edit by Richard Opie, on Flickr 1981 Toyota Starlet KP61 4AGE (408)-Edit by Richard Opie, on Flickr 1981 Toyota Starlet KP61 4AGE (306)-Edit by Richard Opie, on Flickr 1981 Toyota Starlet KP61 4AGE (494)-Edit by Richard Opie, on Flickr Thanks for looking, for the past 15 years or so.2 points
-
those pure nickle rods on an stick welder are amazing and make a first timer look like a pro. you would probably weld everything with them if they weren't so expensive.1 point
-
Didn't know these had a kicker. Weird system, cool though...1 point
-
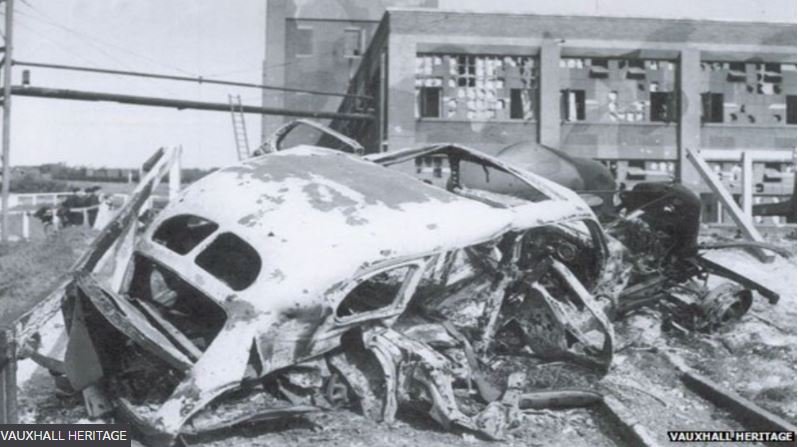
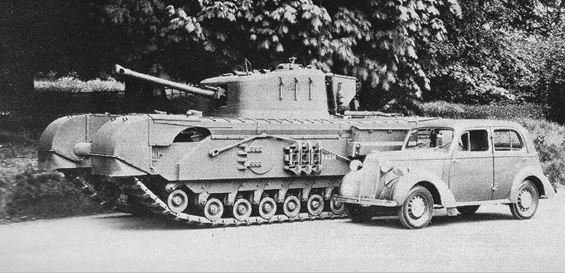
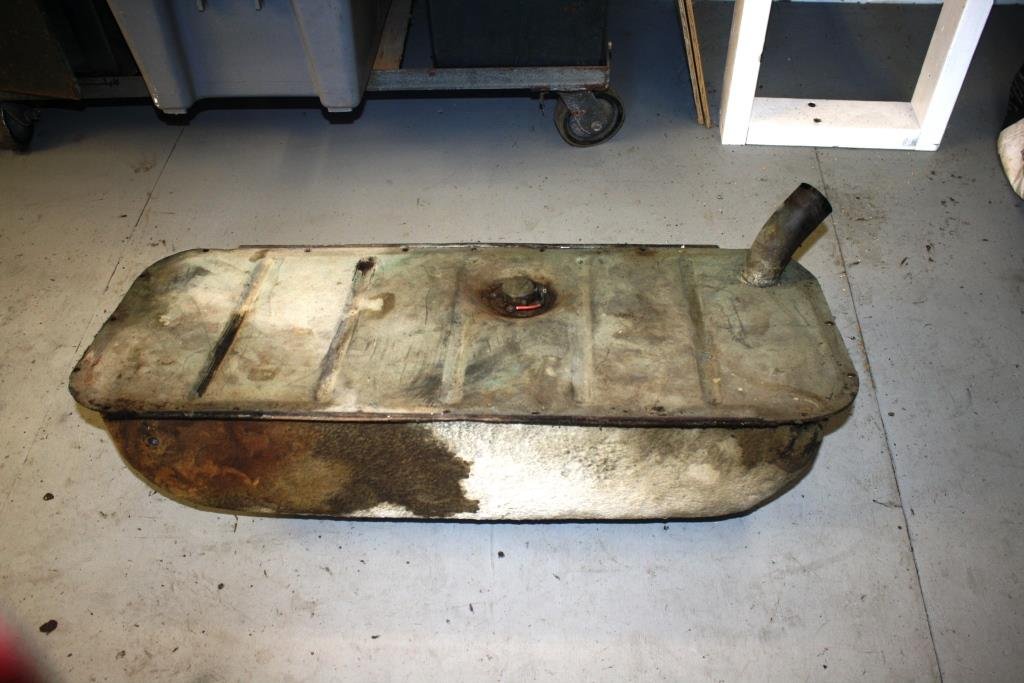
I have to jump in here with a little history; the Vauxhall factory in Luton simply had the living shit bombed out of it by the Luftwaffe on multiple occasions during the war. (From The BBC) On the 75th anniversary of the World War Two bombing of Luton's Vauxhall factory, a Norfolk man has told the BBC about watching the attack as a boy. Fred Morrad, 83, lived in Luton during the war, where his father was an aircraft inspector at the Percival Aircraft Company, based at the airport. On 30 August 1940 at 16:50 BST, 51 bombs fell on the Vauxhall factory in about one minute, killing 39 people.Mr Morrad recalled how a friend's father died in the attack. "My school friend Barry Pitkin lived about 300 yards along the road from me. His father worked at Vauxhall Motors which had been bombed. His father didn't come home," said Mr Morrad. "It was during the school holidays, so when we went back nobody mentioned Barry's father's death. Young children then grew up very quickly." Recalling the night of the attack, he said: "My mother and I, as we looked up, could see a formation of about 12 planes high in the sky. I suppose they were about two miles away, and 10,000ft or so up in the sky. I climbed on the coal bunker to watch. "The aeroplanes kept steadily on although I remember one plane coming down as there were some fighters around them. "When my father came across he told us he had been coming out of one of the hangars as a stick of bombs was dropped across the airfield close to him. He was blown back into the hangar by the blast." Vauxhall archivist Andrew Duerden said: "The victims were aged between 15 and 71, including one woman, and 50 more were injured. "The main area hit was the gasometer, which contained gas used in the heat treatment. Although the factory was back up and running in six days - the gasometer was out of action for weeks. "Although Vauxhall was secondary to the Luftwaffe, if anything it was the other way round - the factory was very important to the war effort, building Bedford trucks, Churchill tanks and also did some fairly high engineering including development work on Sir Frank Whittle's jet engines." Vauxhall Motors World War Two Production Statistics: Churchill A22 Infantry Tank - A portion 5,640 Churchill Tanks with 2,000 spare engines. After the loss of most its equipment at Dunkirk in May-June 1940, the British Army only had 100 tanks remaining. Vauxhall was given the task of designing and producing the A22 within a year. The pilot model was ready by November 1940, and the first fourteen production models came off the assembly line in June 1941. Production of the Churchill A22 was shared with Vauxhall by ten other companies. Vauxhall produced the majority of the parts which were then assembled by Vauxhall and the other companies under Vauxhall's guidance. It is unknown the number of actual A22s produced by Vauxhall or the other companies. Other: 5 million sheet metal sides for jerrycans, four million rocket venturi tubes, 6-pounder armor piercing shells, and 750,000 steel helmets. Vauxhall was instrumental in the building of the first 12 jet engines built in Britain. The Luton factory did 95% of the work on these first 12 engines. Vauxhall also designed inflatable decoy trucks and string and canvas decoy aircraft. It also made tooling for the Hercules aircraft engine, and assisted in the development of the Mosquito, Lancaster, and Halifax aircraft. The GM subsidiary on mines, torpedoes, radiolocation equipment and bombs. Bedford Subsidiary World War Two Production Statistics: (5,995) MW 1-1/2-ton 4x2 trucks, (52,247) QL 3-ton 4x4 lorries, 73,385 OY 3-ton 4x4 lorries, and 24,429 OX 3-ton 4x4 lorries Back to 2021-finally got the gas tank out after lots of prying, wriggling and the indiscriminate use of some rather vulgar language . The smell of the gas left in the tank is akin to the aromas emitted from a rope sandal worn by an Arab swineherd who has been roaming the desert for the last year or two! It doesn’t look too bad but any suggestions on how to clean and treat the inside would be much appreciated. https://oldschool.co.nz/index.php?/topic/49843-sr2%E2%80%99s-1947-vauxhall-%E2%80%9Crigamortice%E2%80%9D-discussion-thread/
1 point
-
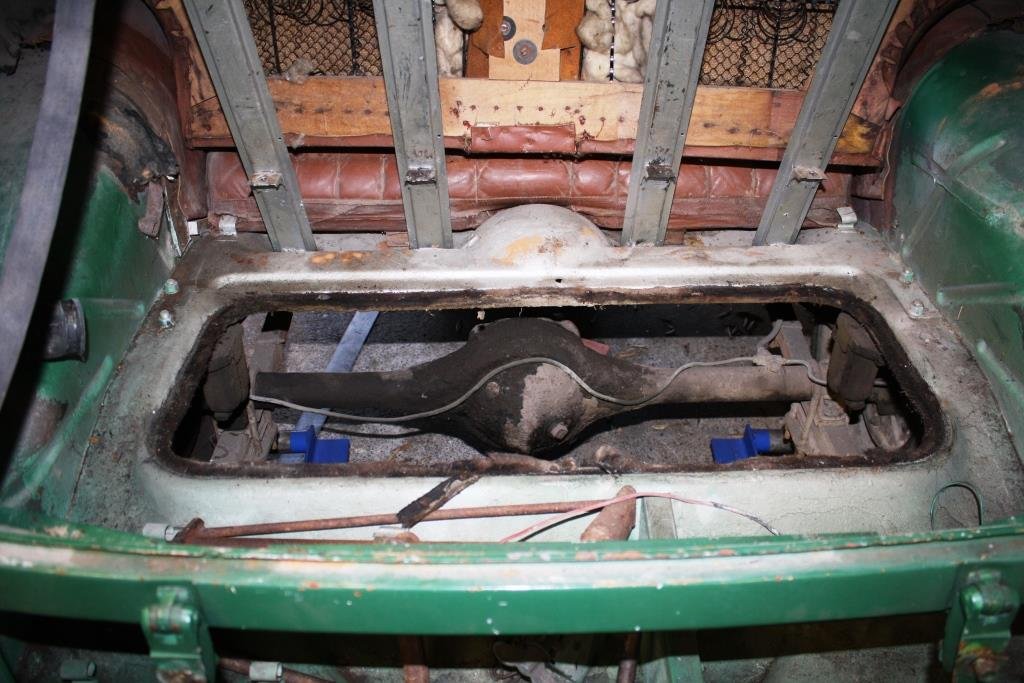
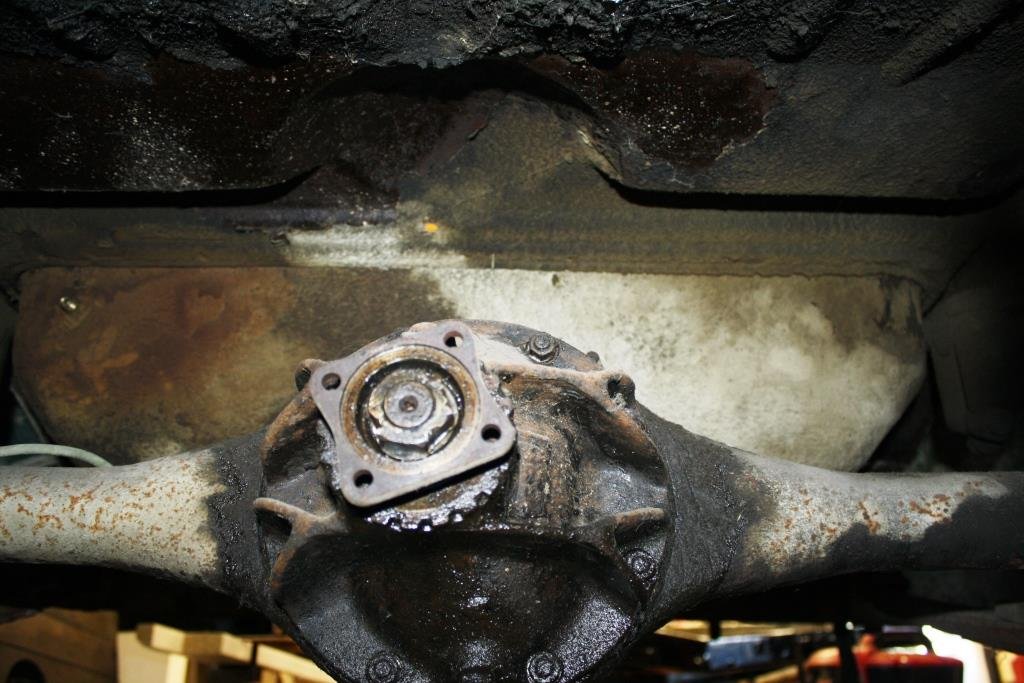
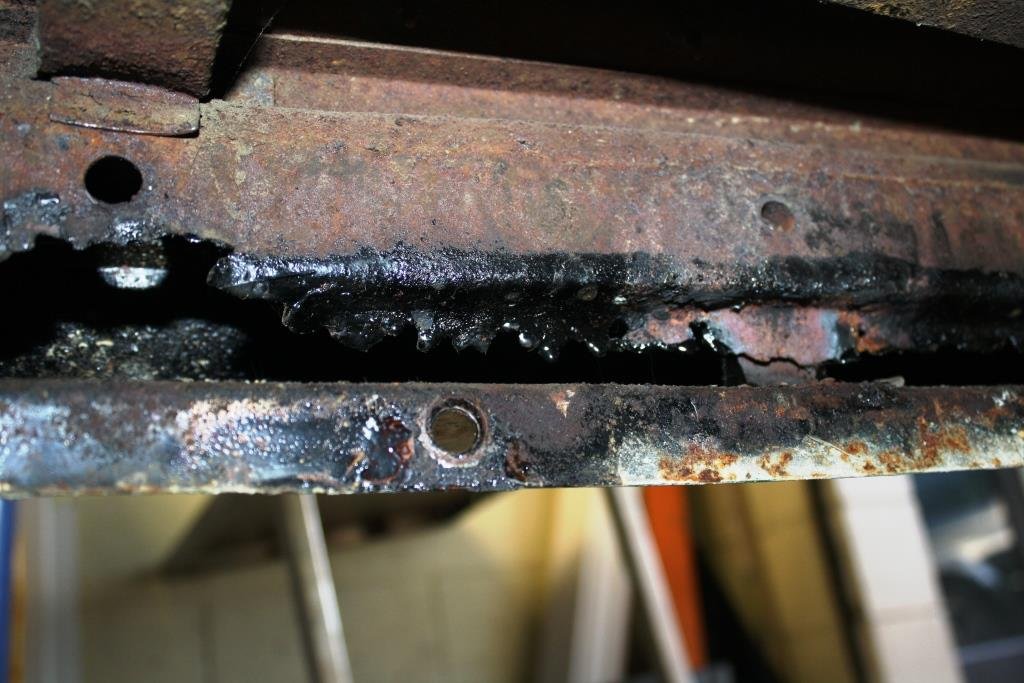
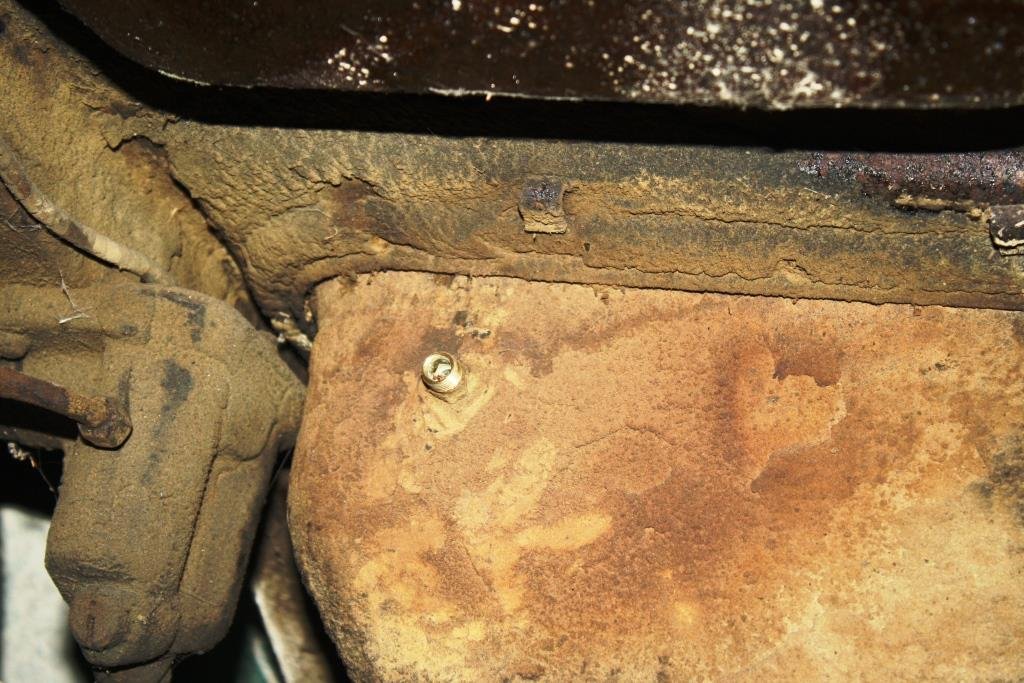
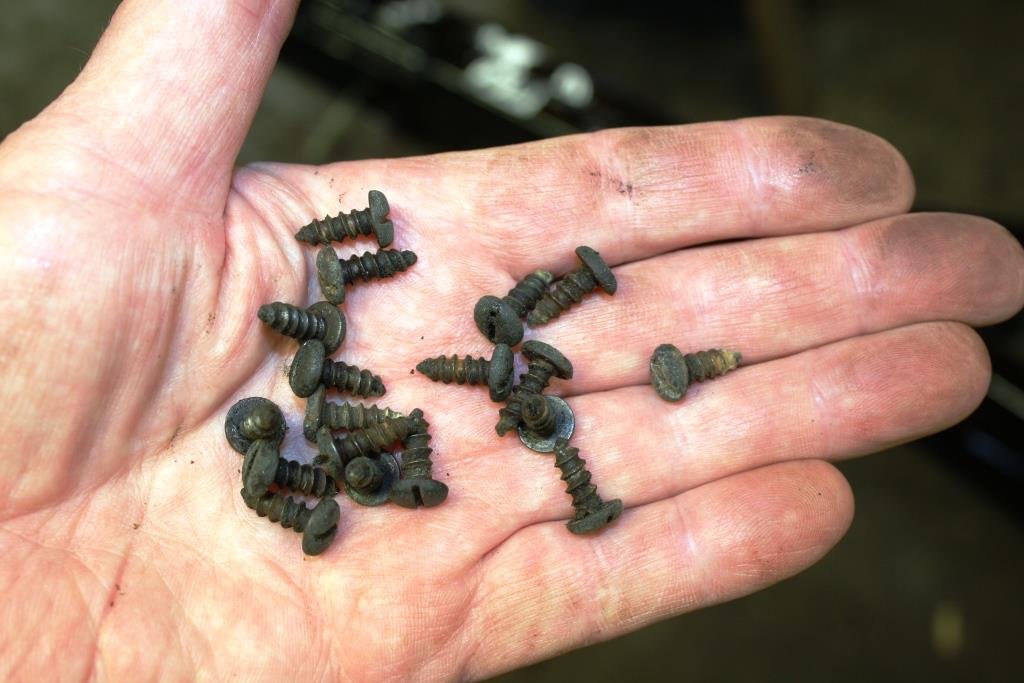
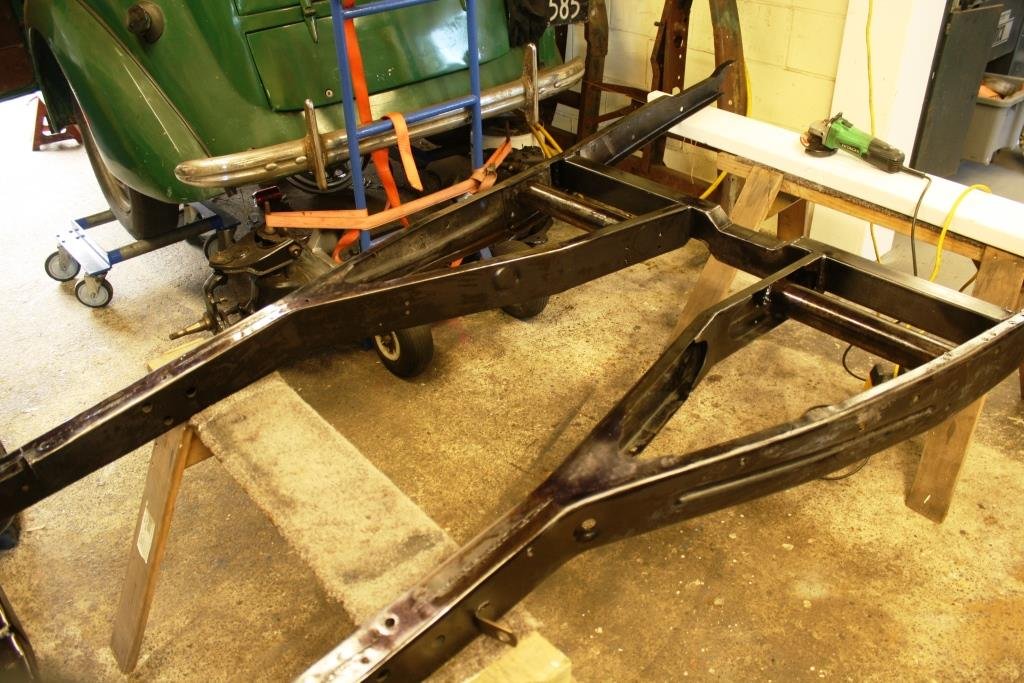
Had a bit of a crawl around under the old girl. No issues with rust in the floor pan above the diff, good old Pommy “self-lubrication”! I did however spot some rust where the body is bolted to the chassis, the black shiny stuff is under seal from some years back. I can’t complain, this is the first time the body’s been off the chassis in 70 plus years. Looks like I’ll have to bite the bullet and flip the body on to its side. First job is to remove the gas tank…..lots of baked on crud. Couldn’t believe the gas tank was only held in with tech screws! I suppose in 1947 after WW2 all fittings and hardware were at a premium.
1 point
-
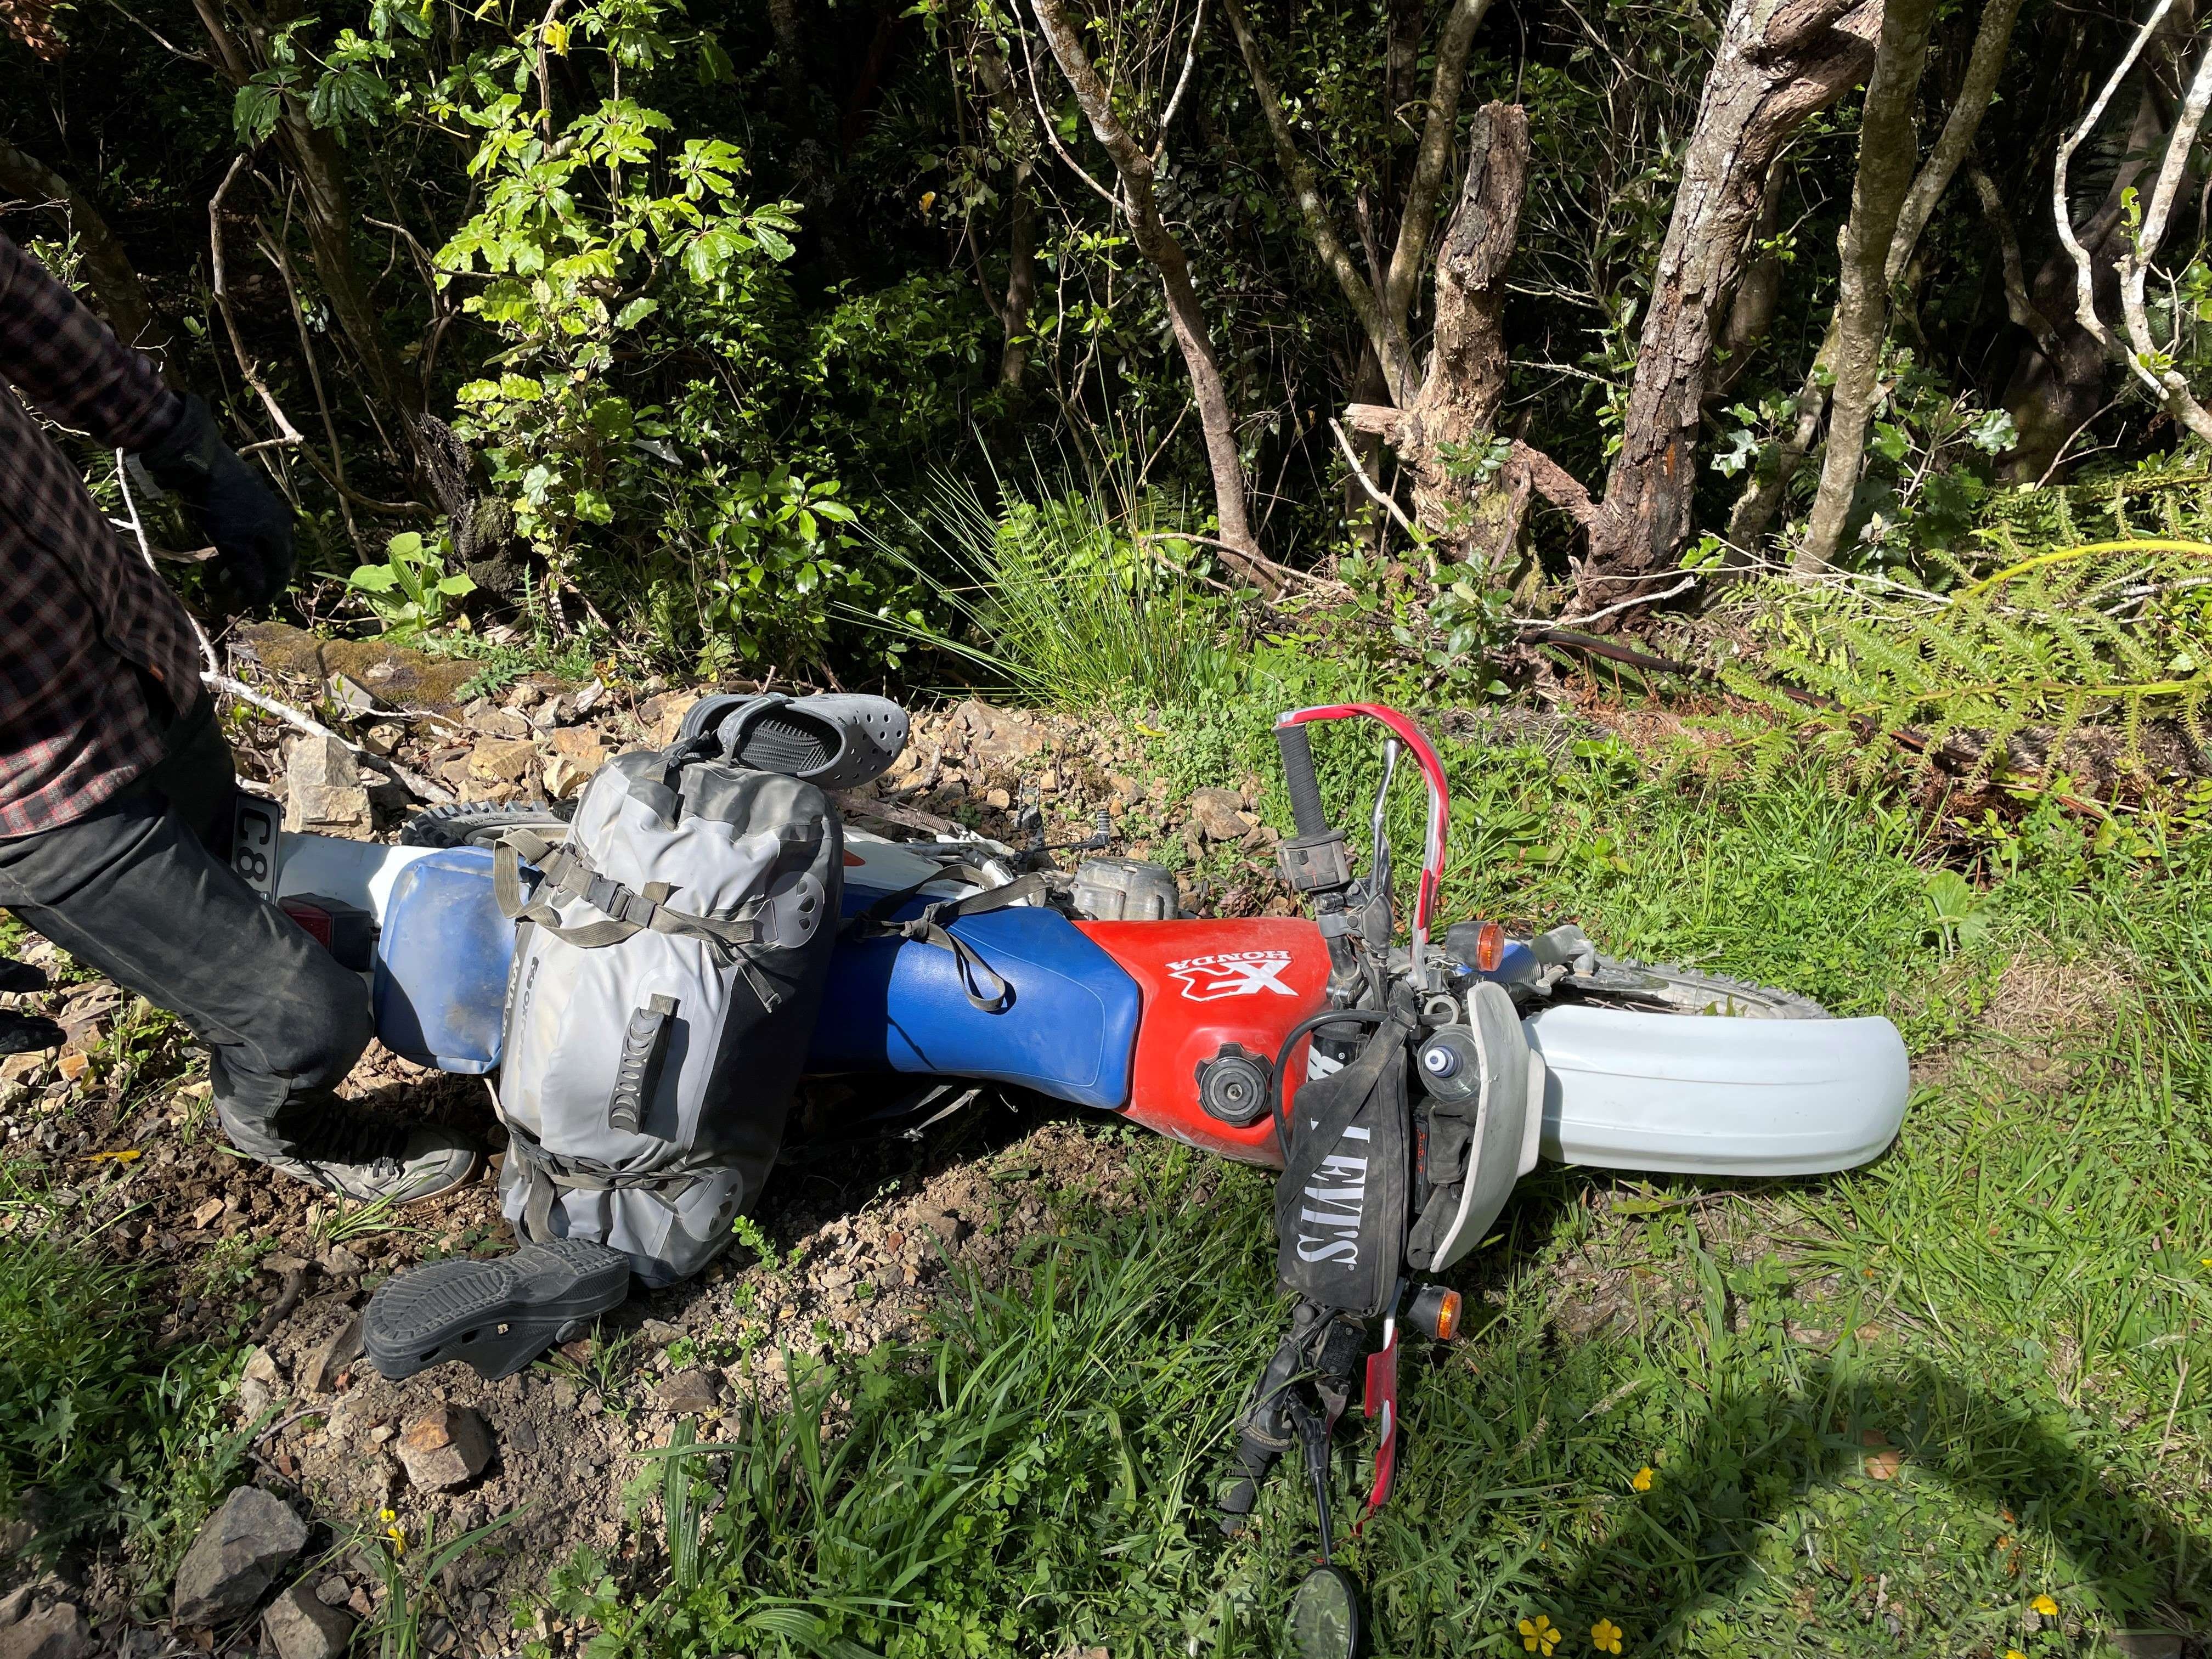
Oh yeah, and @Mitch.W tried to throw his bike down a bank on the Motu
1 point
-
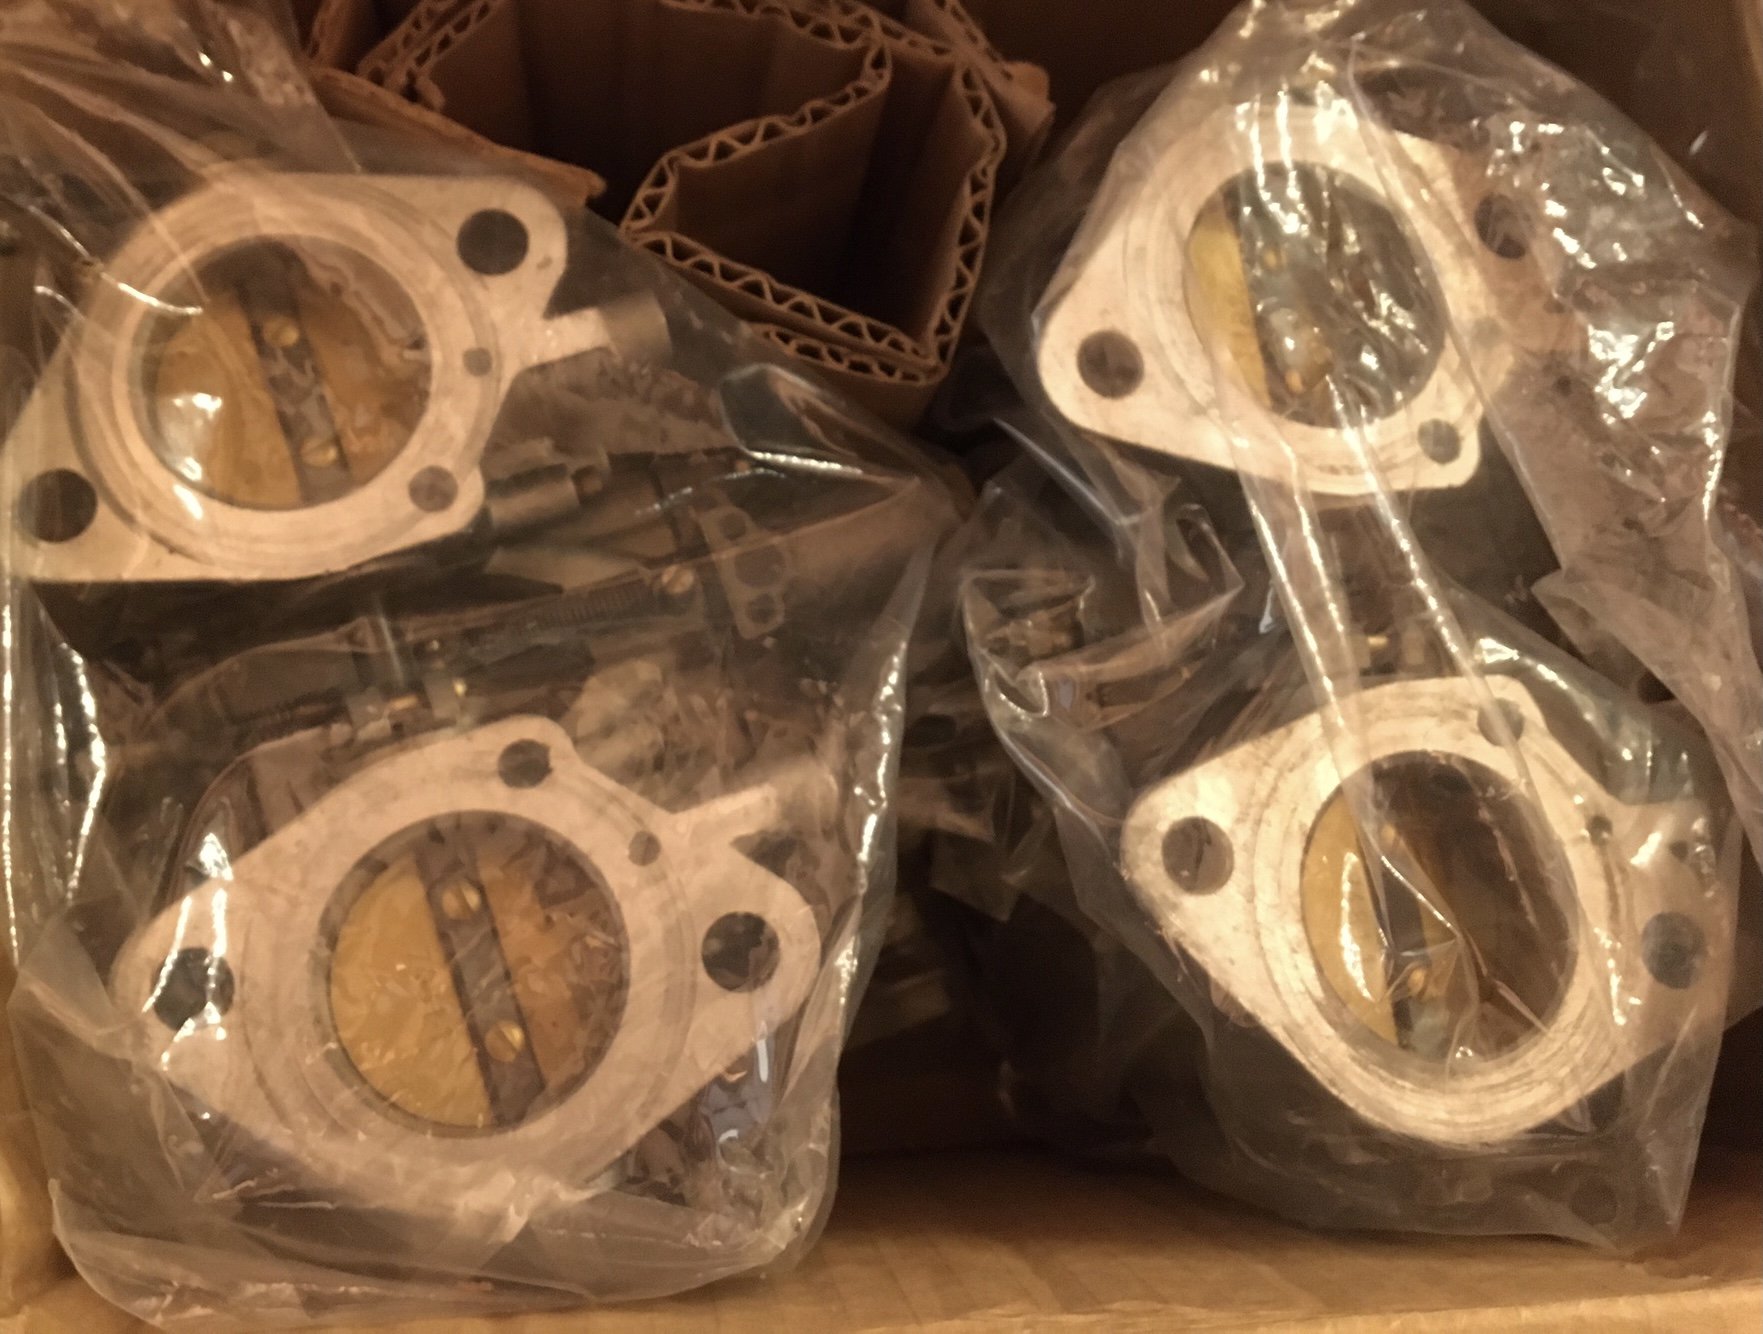
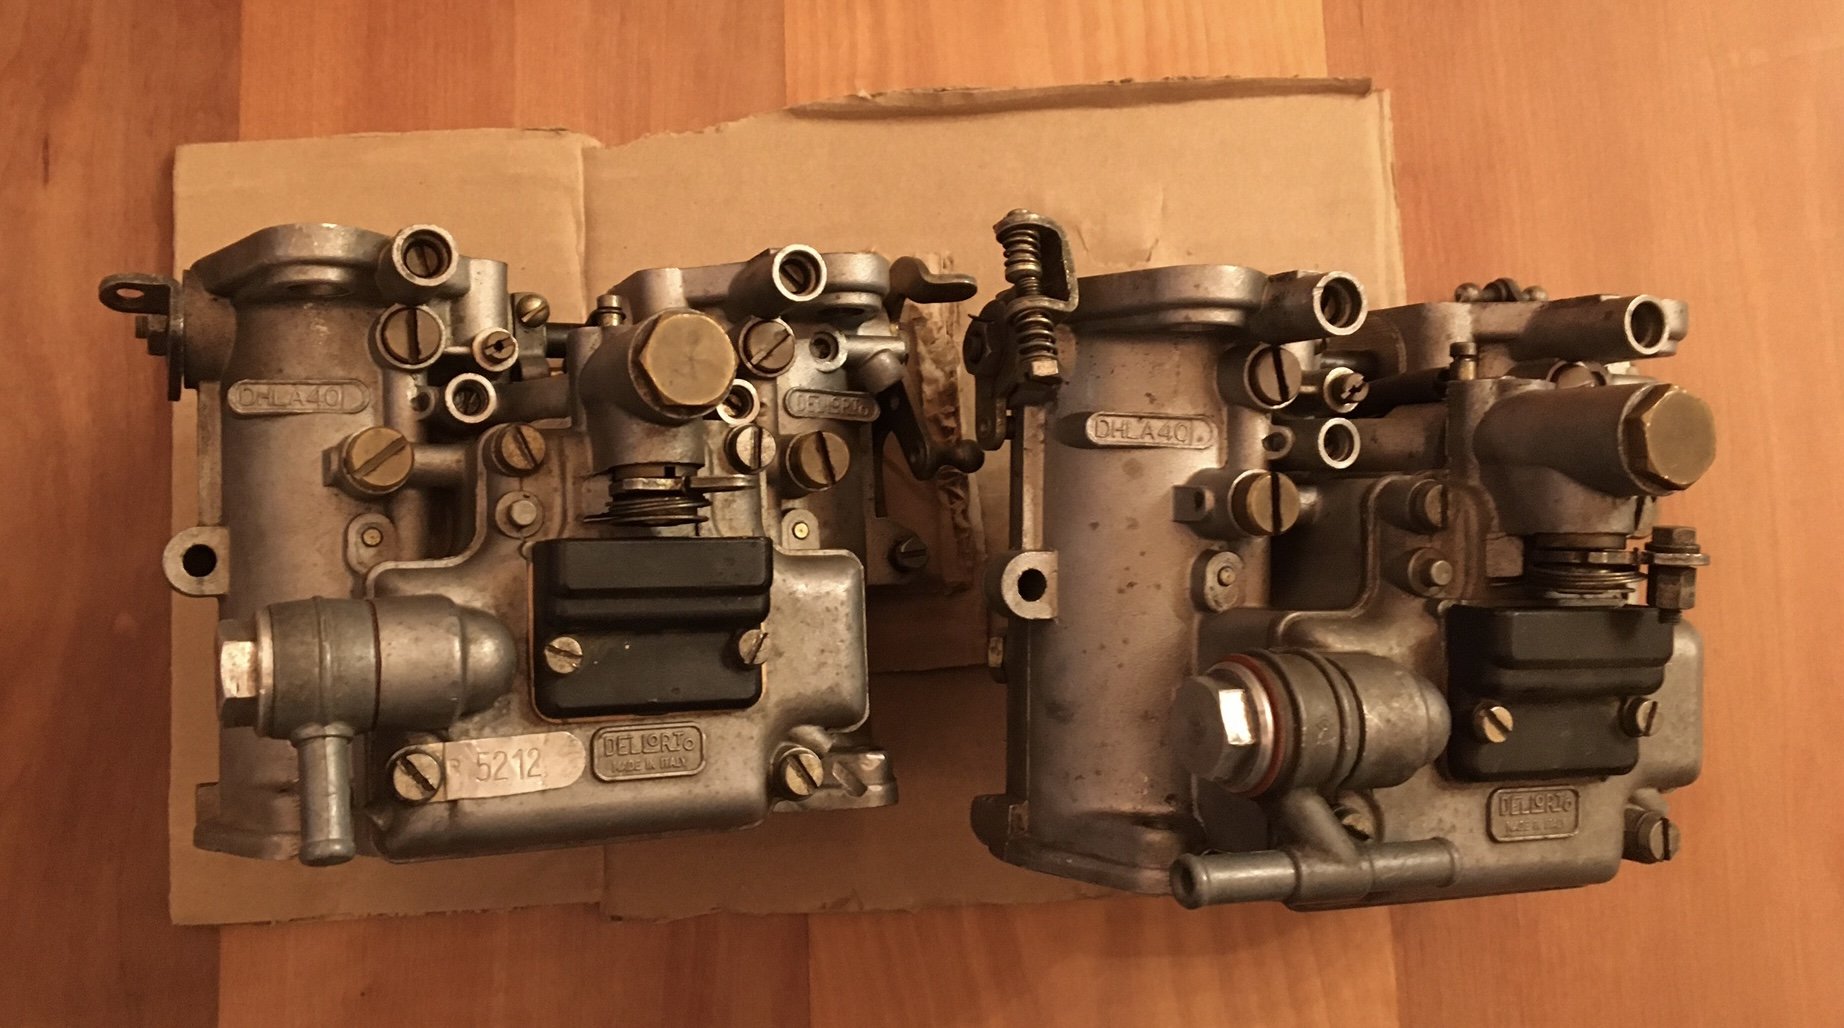
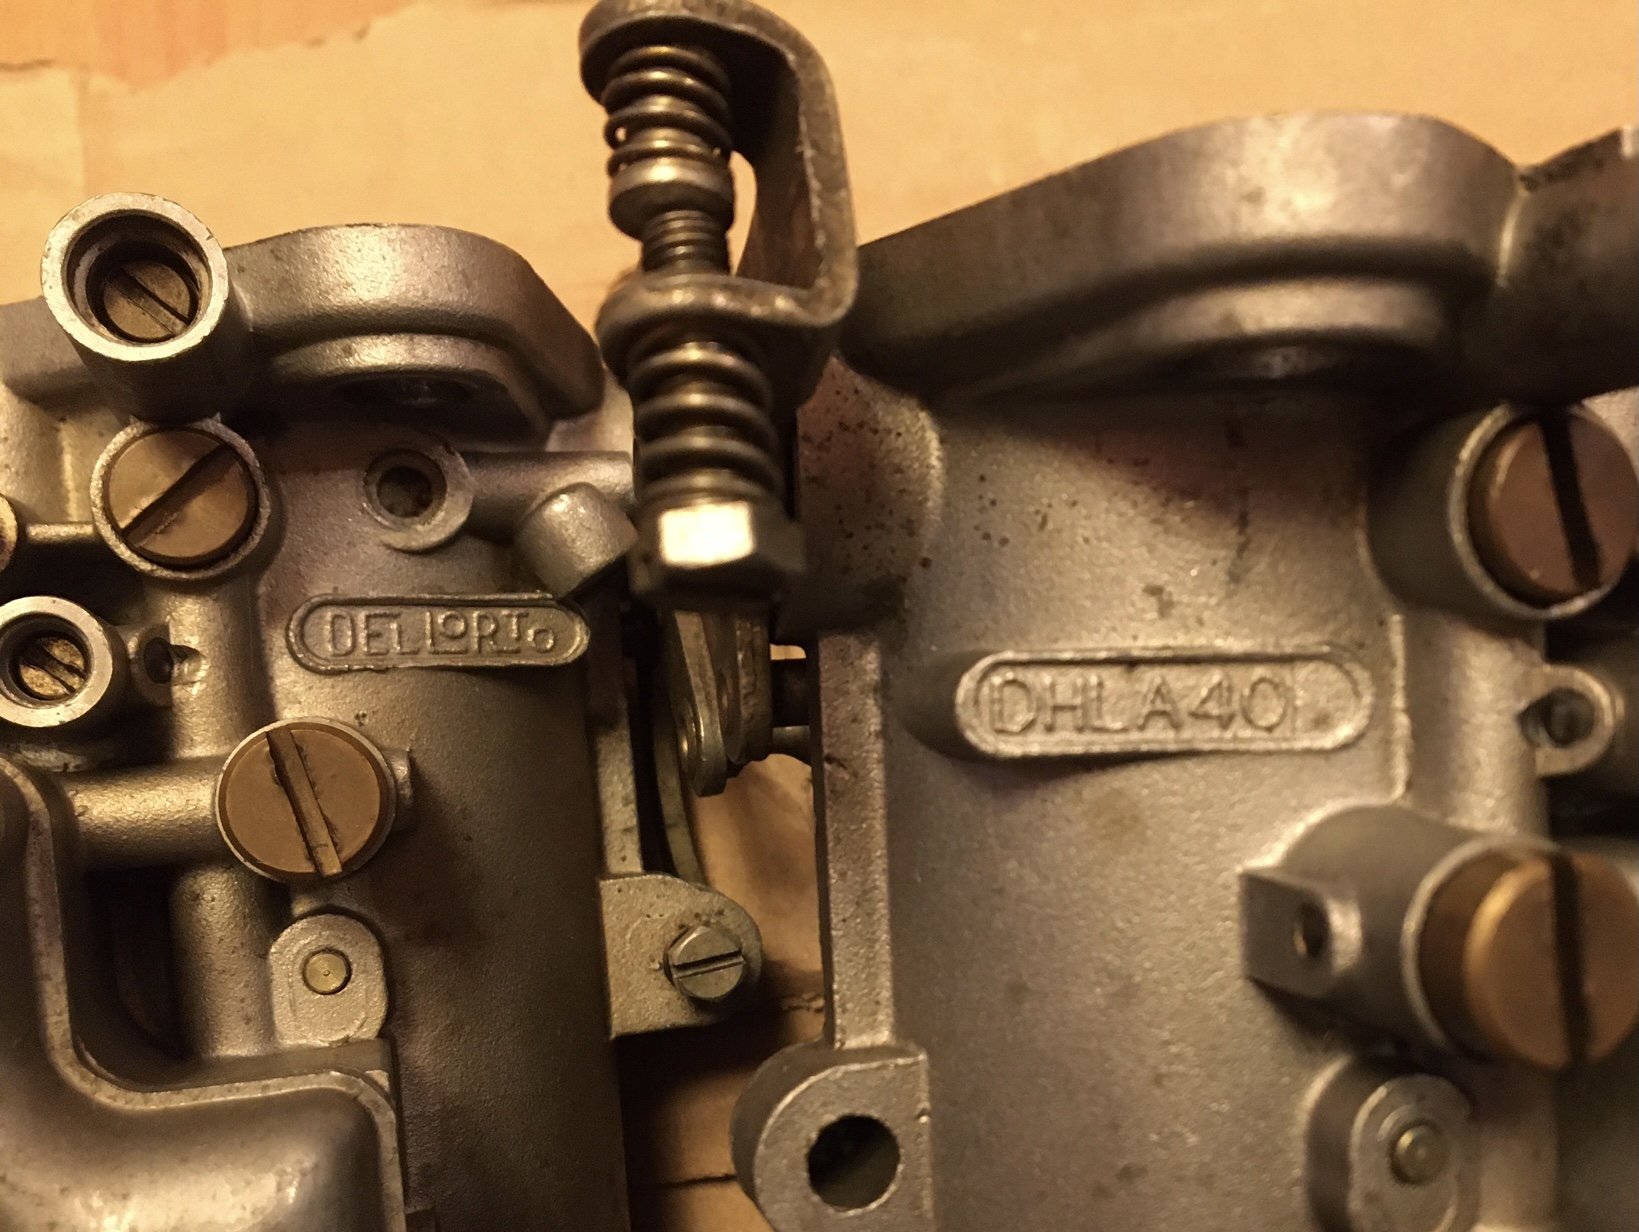
Oooh what have we here? Postie brings stuff. I wonder what’s in it? If I was a maladjusted human I would make an unboxing video for youtube. Er, I am maladjusted but in a different way…anyhoo. VOILA! I think they were on Trademe for a few minutes tops til I stabbed the buy now so hard I almost punched a hole in the ipad. Good price for some very tidy carbs. Such fun!
1 point
-
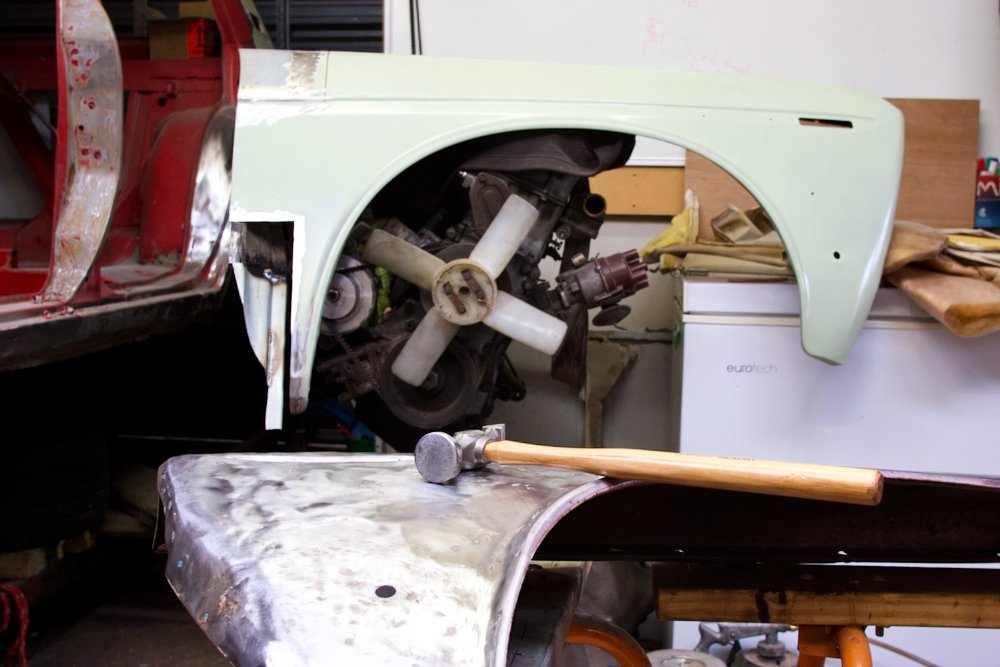
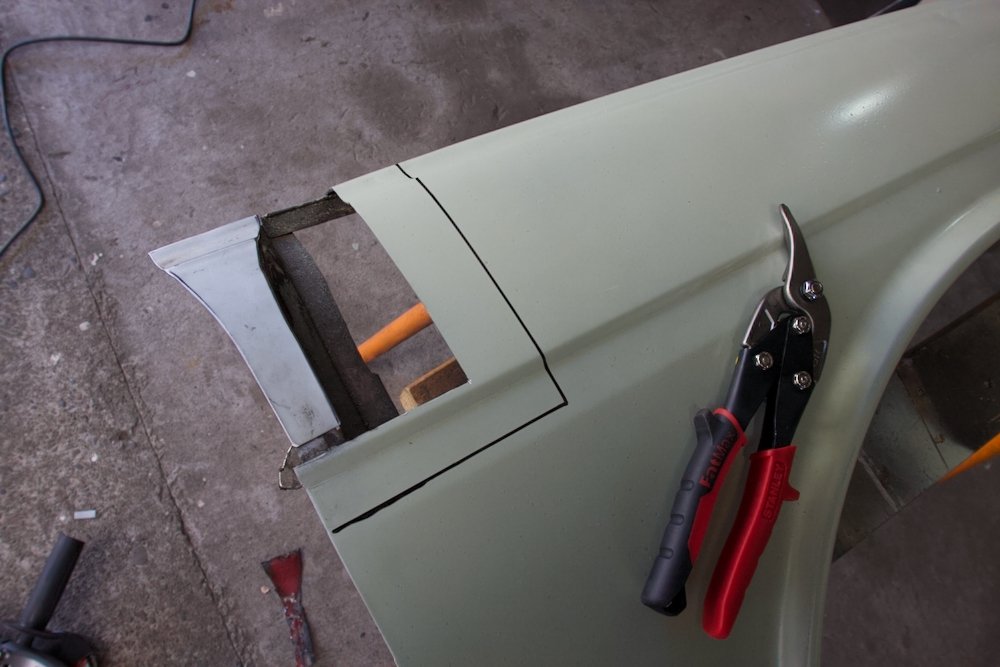
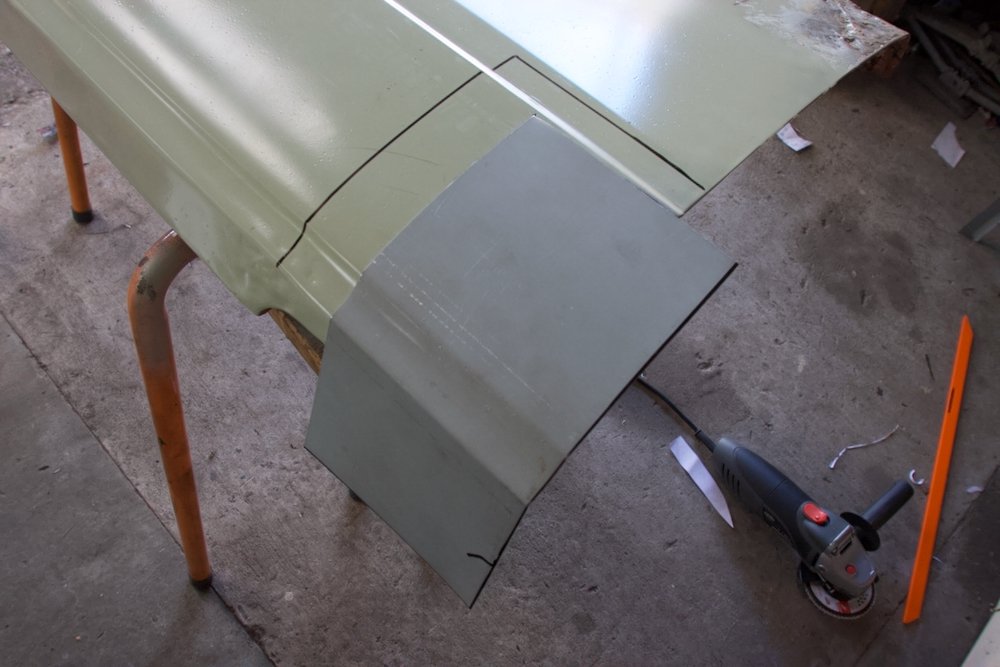
Find rust, cut, make patch, check fit, trim, check, trim, check, trim, check, weld Thats pretty much how the last few sessions have gone, props to @mof for hooking me up with some argon, that got the boot floor into place legend! Gave up searching for 0.8mm offcuts and just went a brought a sheet, that allowed for visible panel repairs to kick off, starting with the drivers front guard The trailing edge had significant rust repairs, what appears to have been the strategy was cut out the rot and where the frame/stiffener is, just weld direct to that and fill with bog. Of course this made my job fun, I had to give up on like for like replacement going with judgement and dry fitting to the car. First of all replaced the rotted section of frame: Then shape the contour into a fresh piece Never got a weld pic, but its now securely attached. Then work on the lower, this got nasty, can just make out the multiple weld lines from donor patches and is pretty rusty/bent to work out where it should be. Reproduced the lower frame and glued that in after many dry fits to the car Also see the back edge of the upper patch fixed in place, managed to replicate the folded edge too, very chuffed. A quick inspection of the passenger guard showed it to be in much better health until I started digging... While it is relatively rust free, it had the best part of 5mm bog over the whole thing, its been very bent at some stage, beaten about right then filled (with much enthusiasm!) Full clean up showed quite a mission ahead Using the better guard as a guide, I sat down with the hammers and various dollys I've got much better shape now with the larger dents out, but will give it more time, it will need bog but hoping I can learn a few tricks to minimise the amount. New repro guards are near $500 give or take with freight extra so i'll be avoiding that bill as much as possible! Thats the notable work to date, many more smaller patches here and there in the sills and boot and two more large areas to tackle, most challenging is the rear guard lip, thinking a shrinker/stretcher combo would be helpful here, anyone have experience with them and able to offer advice? The vice mounted Machinery house ones look pretty good value, any reason to double down and go to larger stand mounted ones?
1 point
-
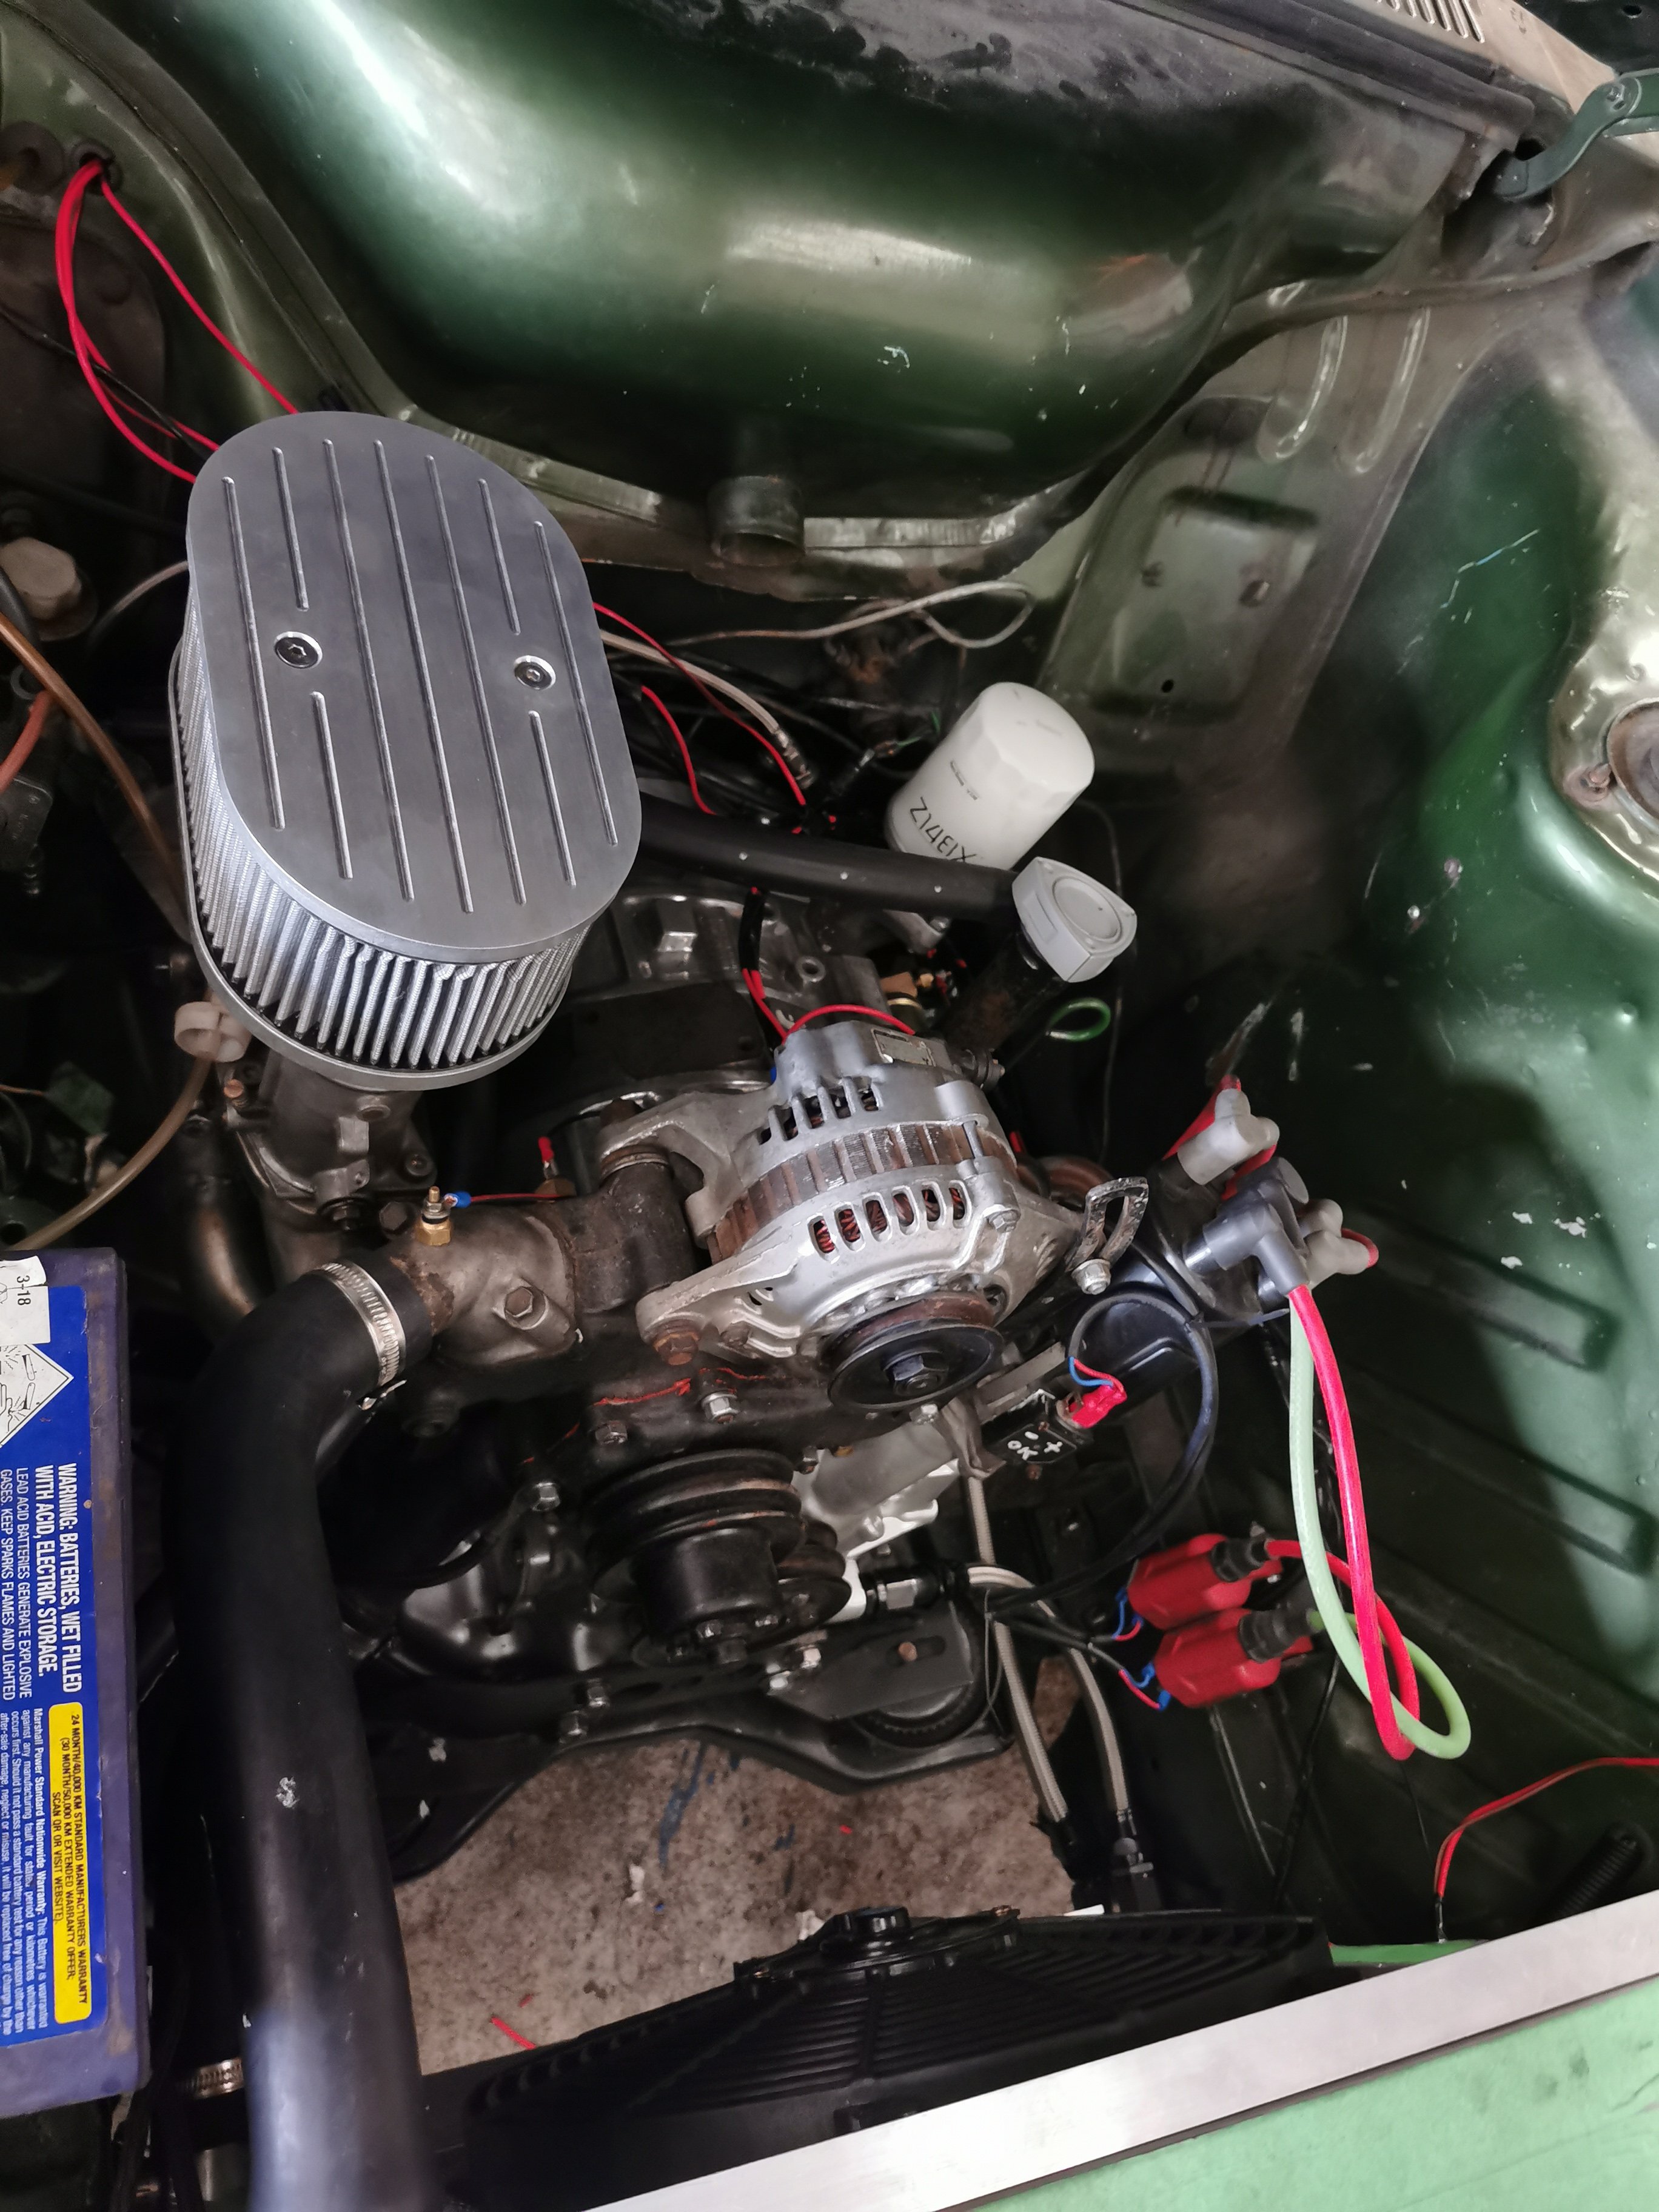
Porn, swanky wanky filter unit... Not cheap, but it does do the job. Just need some k&n spray for it
1 point
-
Went out with @brotherd to test his new motor. I made it half hour before the bad noises started. I took some bits apart and think it might be this? I guess I'll fix that and see if the noise goes away. Happy it didn't fire a flex plate and driveshaft through the bottom of the boat.1 point
-
Those pics were shot for this. It was a compromised shoot, as it was during L4 lockdown and I'm not totally chuffed on the photo results but here we are. I'm a bit embarrassed about it, there's a handful of other cars in the issue that probably should have been cover, instead of a lower cost lower power KP Starlet. But buy it if you feel like you'd be interested in reading the story, I tried my best to get the point across that I didn't really do anything on this car, I just made a bunch of decisions and was lucky enough to have a small group of very talented friends who sacrificed their own time to help me put this thing together. 20211019_154109-01 by Richard Opie, on Flickr So, 6-ish weeks ago I took this in to see @cletusfor it's cert as mentioned above, and have been working towards attaining this. Overall, the initial check went pretty well, and was a good example of why you should probbaly talk to your cert guy prior to undertaking any sort of project of magnitude. In the interests of transparency and maybe helping other people, it failed on the following: Tyre rub on all four corners (fitted the Star Brights for cert and they're just a shade too wide at 6.5J -2 with a 185) - new set of 14x6J -10 SSR Longchamps XR-4 fitted Skid plate required for modified or custom fuel tank as it's less than 200mm from the ground - sheeper helped out and we've knocked up a little skid plate to cover A few extra fuel and brake line clips required - ew yuck I had to drill holes for rivnuts Return spring required on brake pedal - small bracket made up to fit a spring that goes to a small hole drilled in brake pedal webbing 2 of the 6xM6 bolts in the Recaro bases were missing so needed to replace those - bolts installed Seat rails to floor adaptor M8 bolts required nyloc nuts in lieu of threaded plate - nuts installed Heatshielding required for fuel line on diff (close to exhaust at droop) - DEI heatshield sleeve added to the diff, really neat velcro-baced split sleeve that makes life easy Camber to be corrected to maximum of -1.5 degrees - realigned by old mate Kieran to comply Right rear shock just fouling on 4-link bracket - bracket clearanced with ye olde flapdisk and repainted Trim adjustable platform threads on diff to allow bump stop to contact properly - again, ye olde flapdisk came to the party Here she is on her cert feet which are yet to be restored and shinied up, I've also given my stock KP fender mirrors a lick of factory charcoal and reinstated these. 20211107_195603-01 by Richard Opie, on Flickr Recheck is tomorrow so wish me luck.1 point
-
Just try reversing your 1973 mini estate with no reversing lights down an unlit winding driveway after delivering pizza to the address at night time. Is that bit of dark darker than the other dark? Yes, it's a post and you have just run into it. #oddlyspecific1 point
-
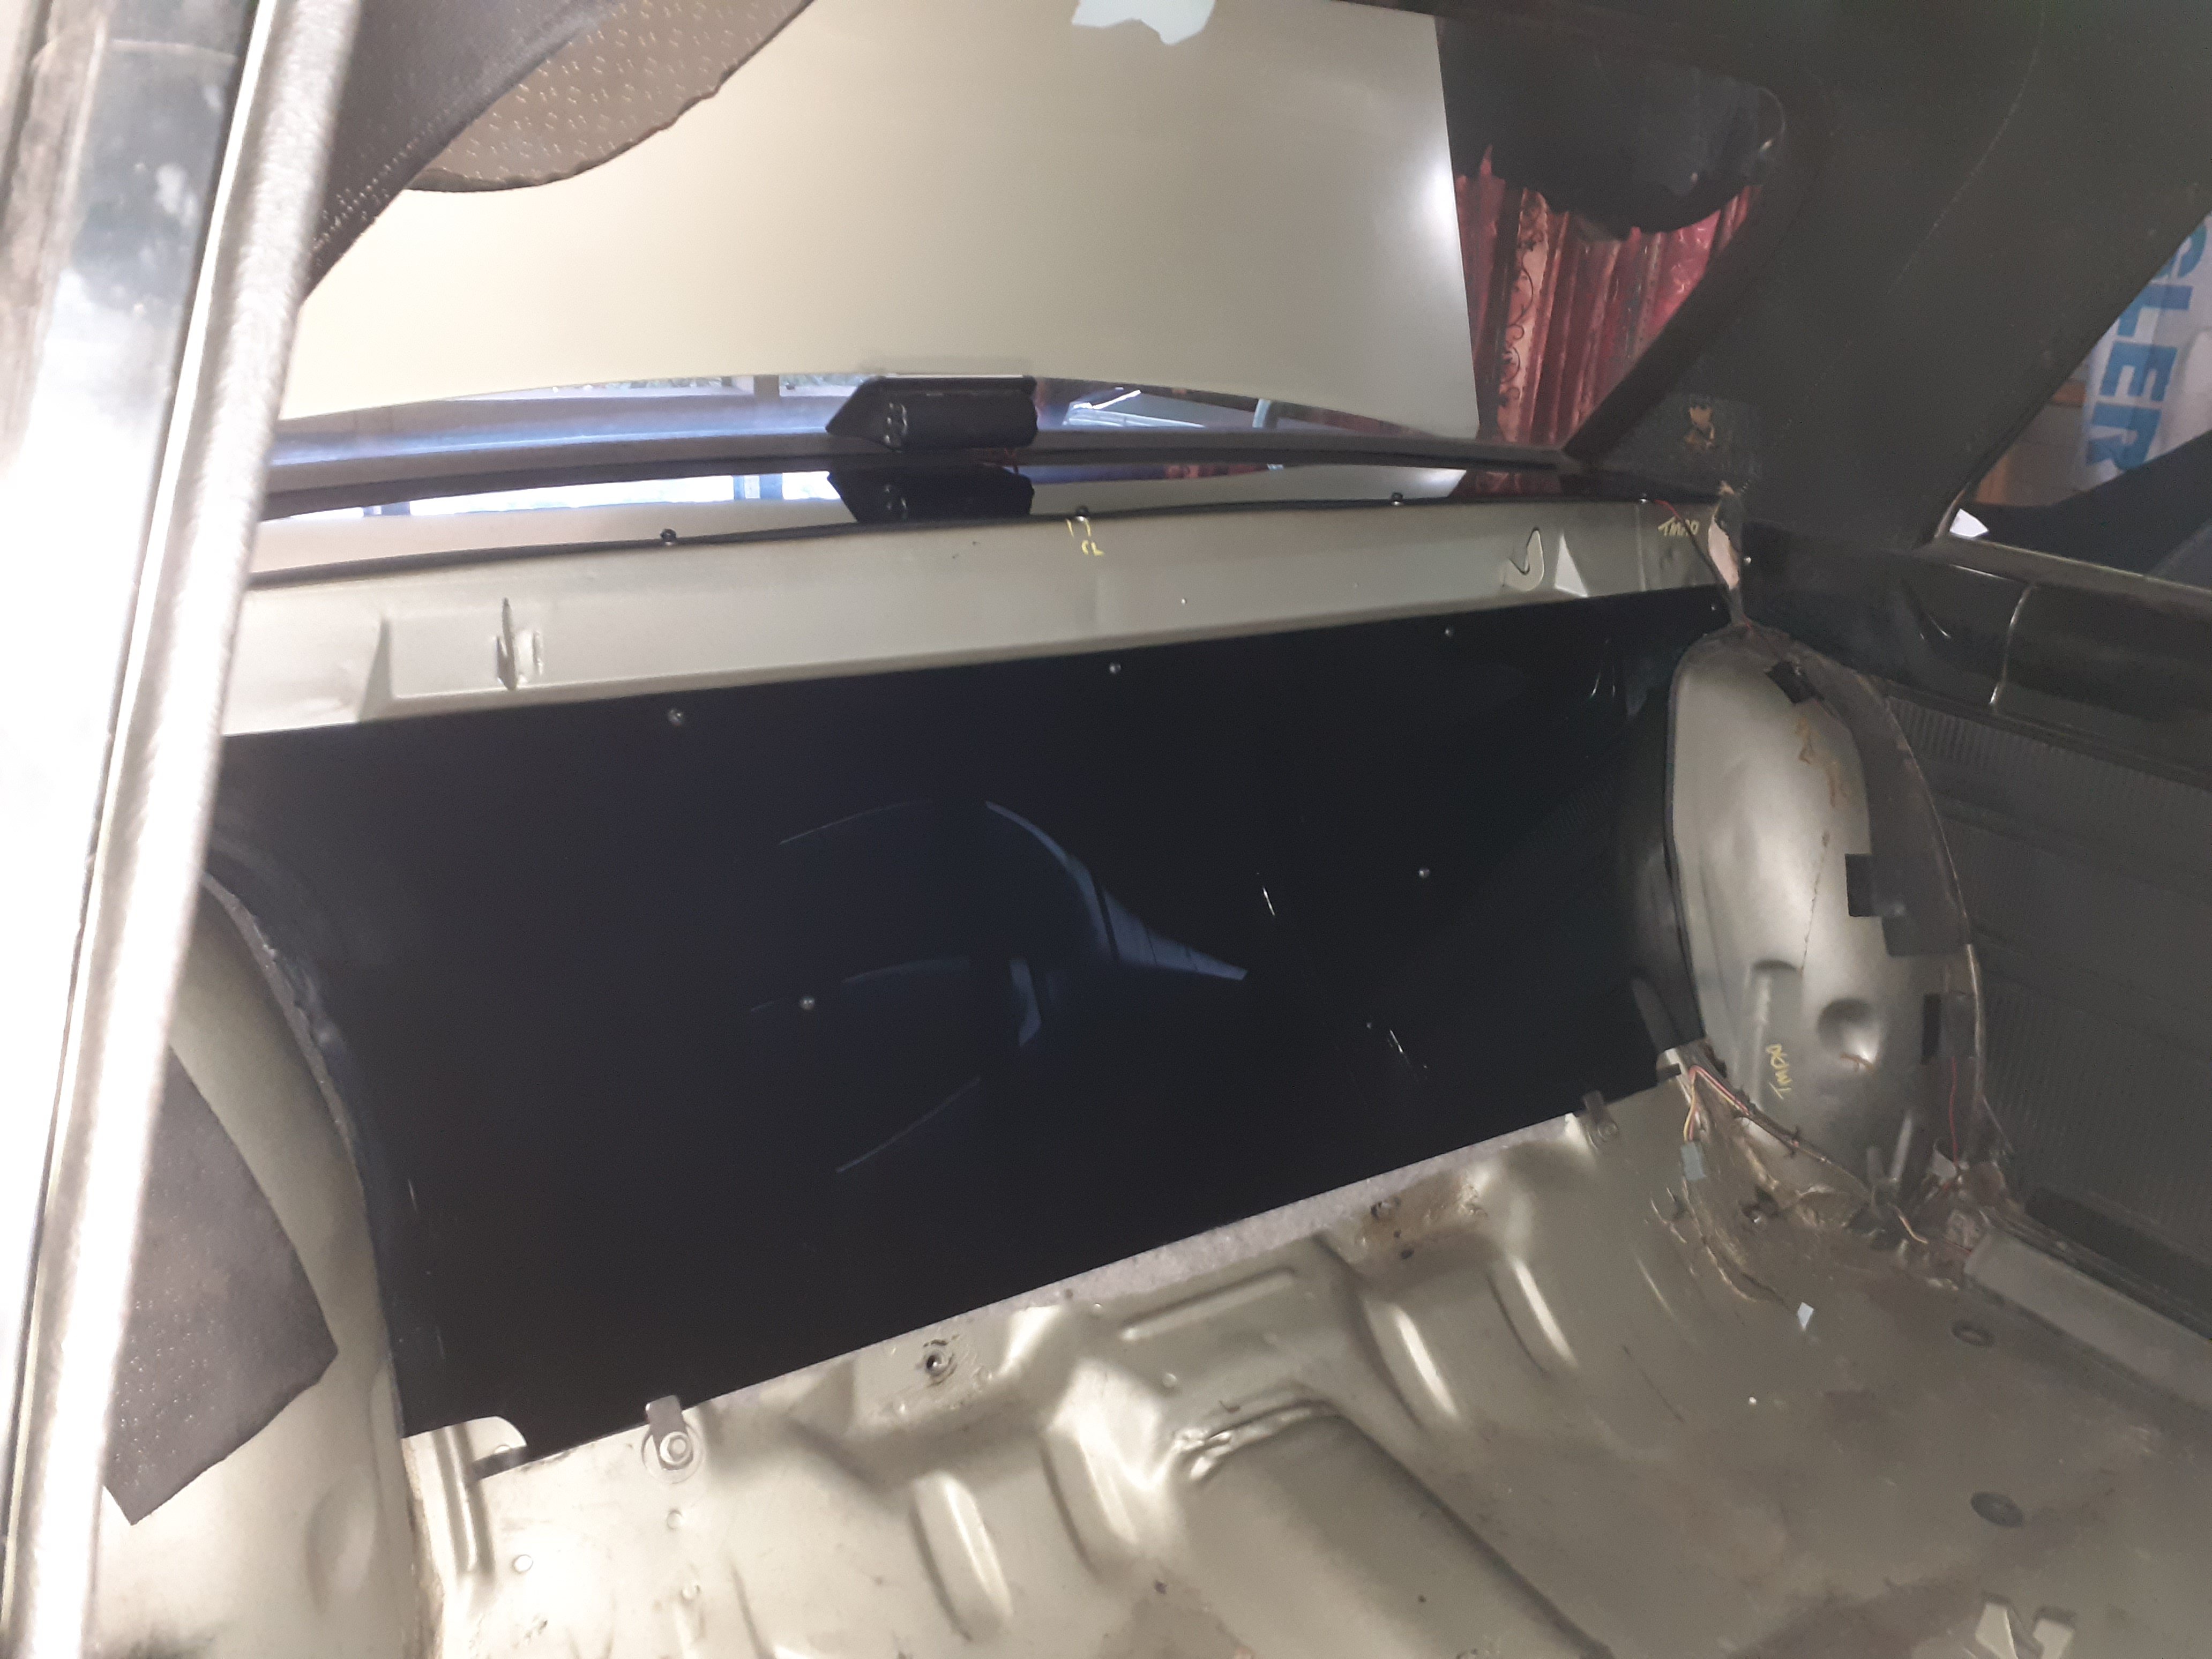
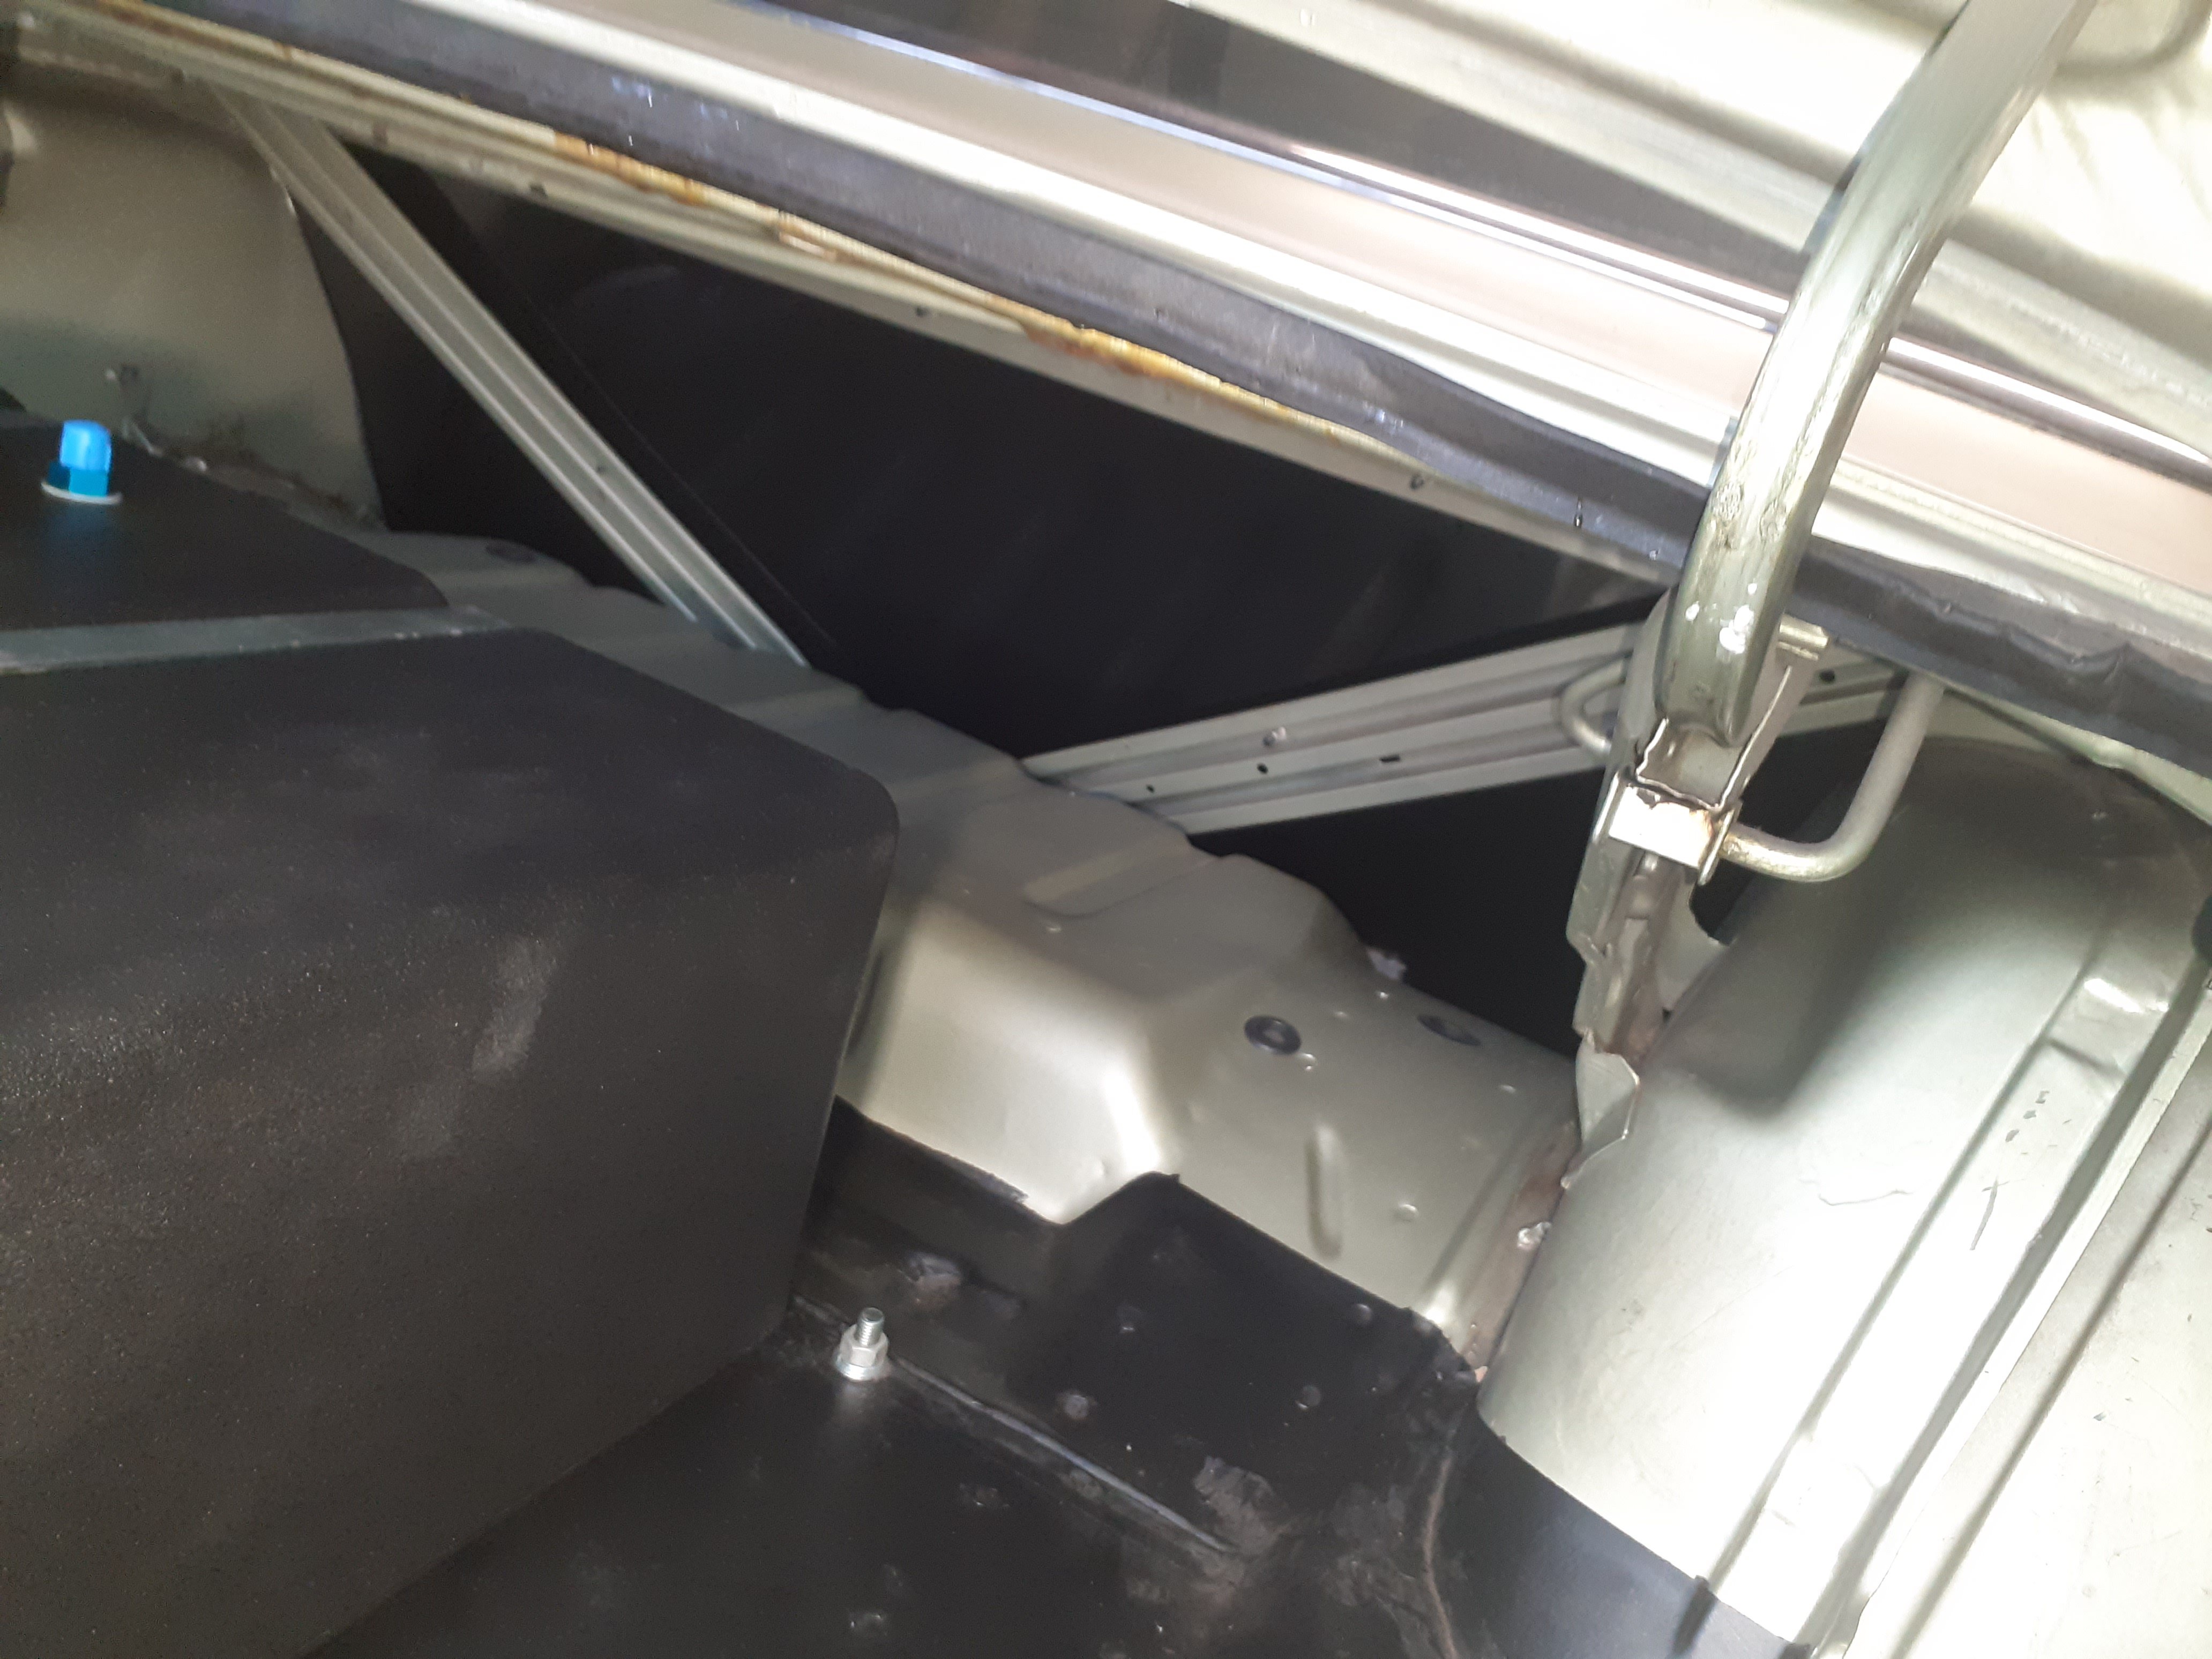
Boot sealed up which was a suckful job but done now Tank and pump in , started on fuel hoses
1 point
-
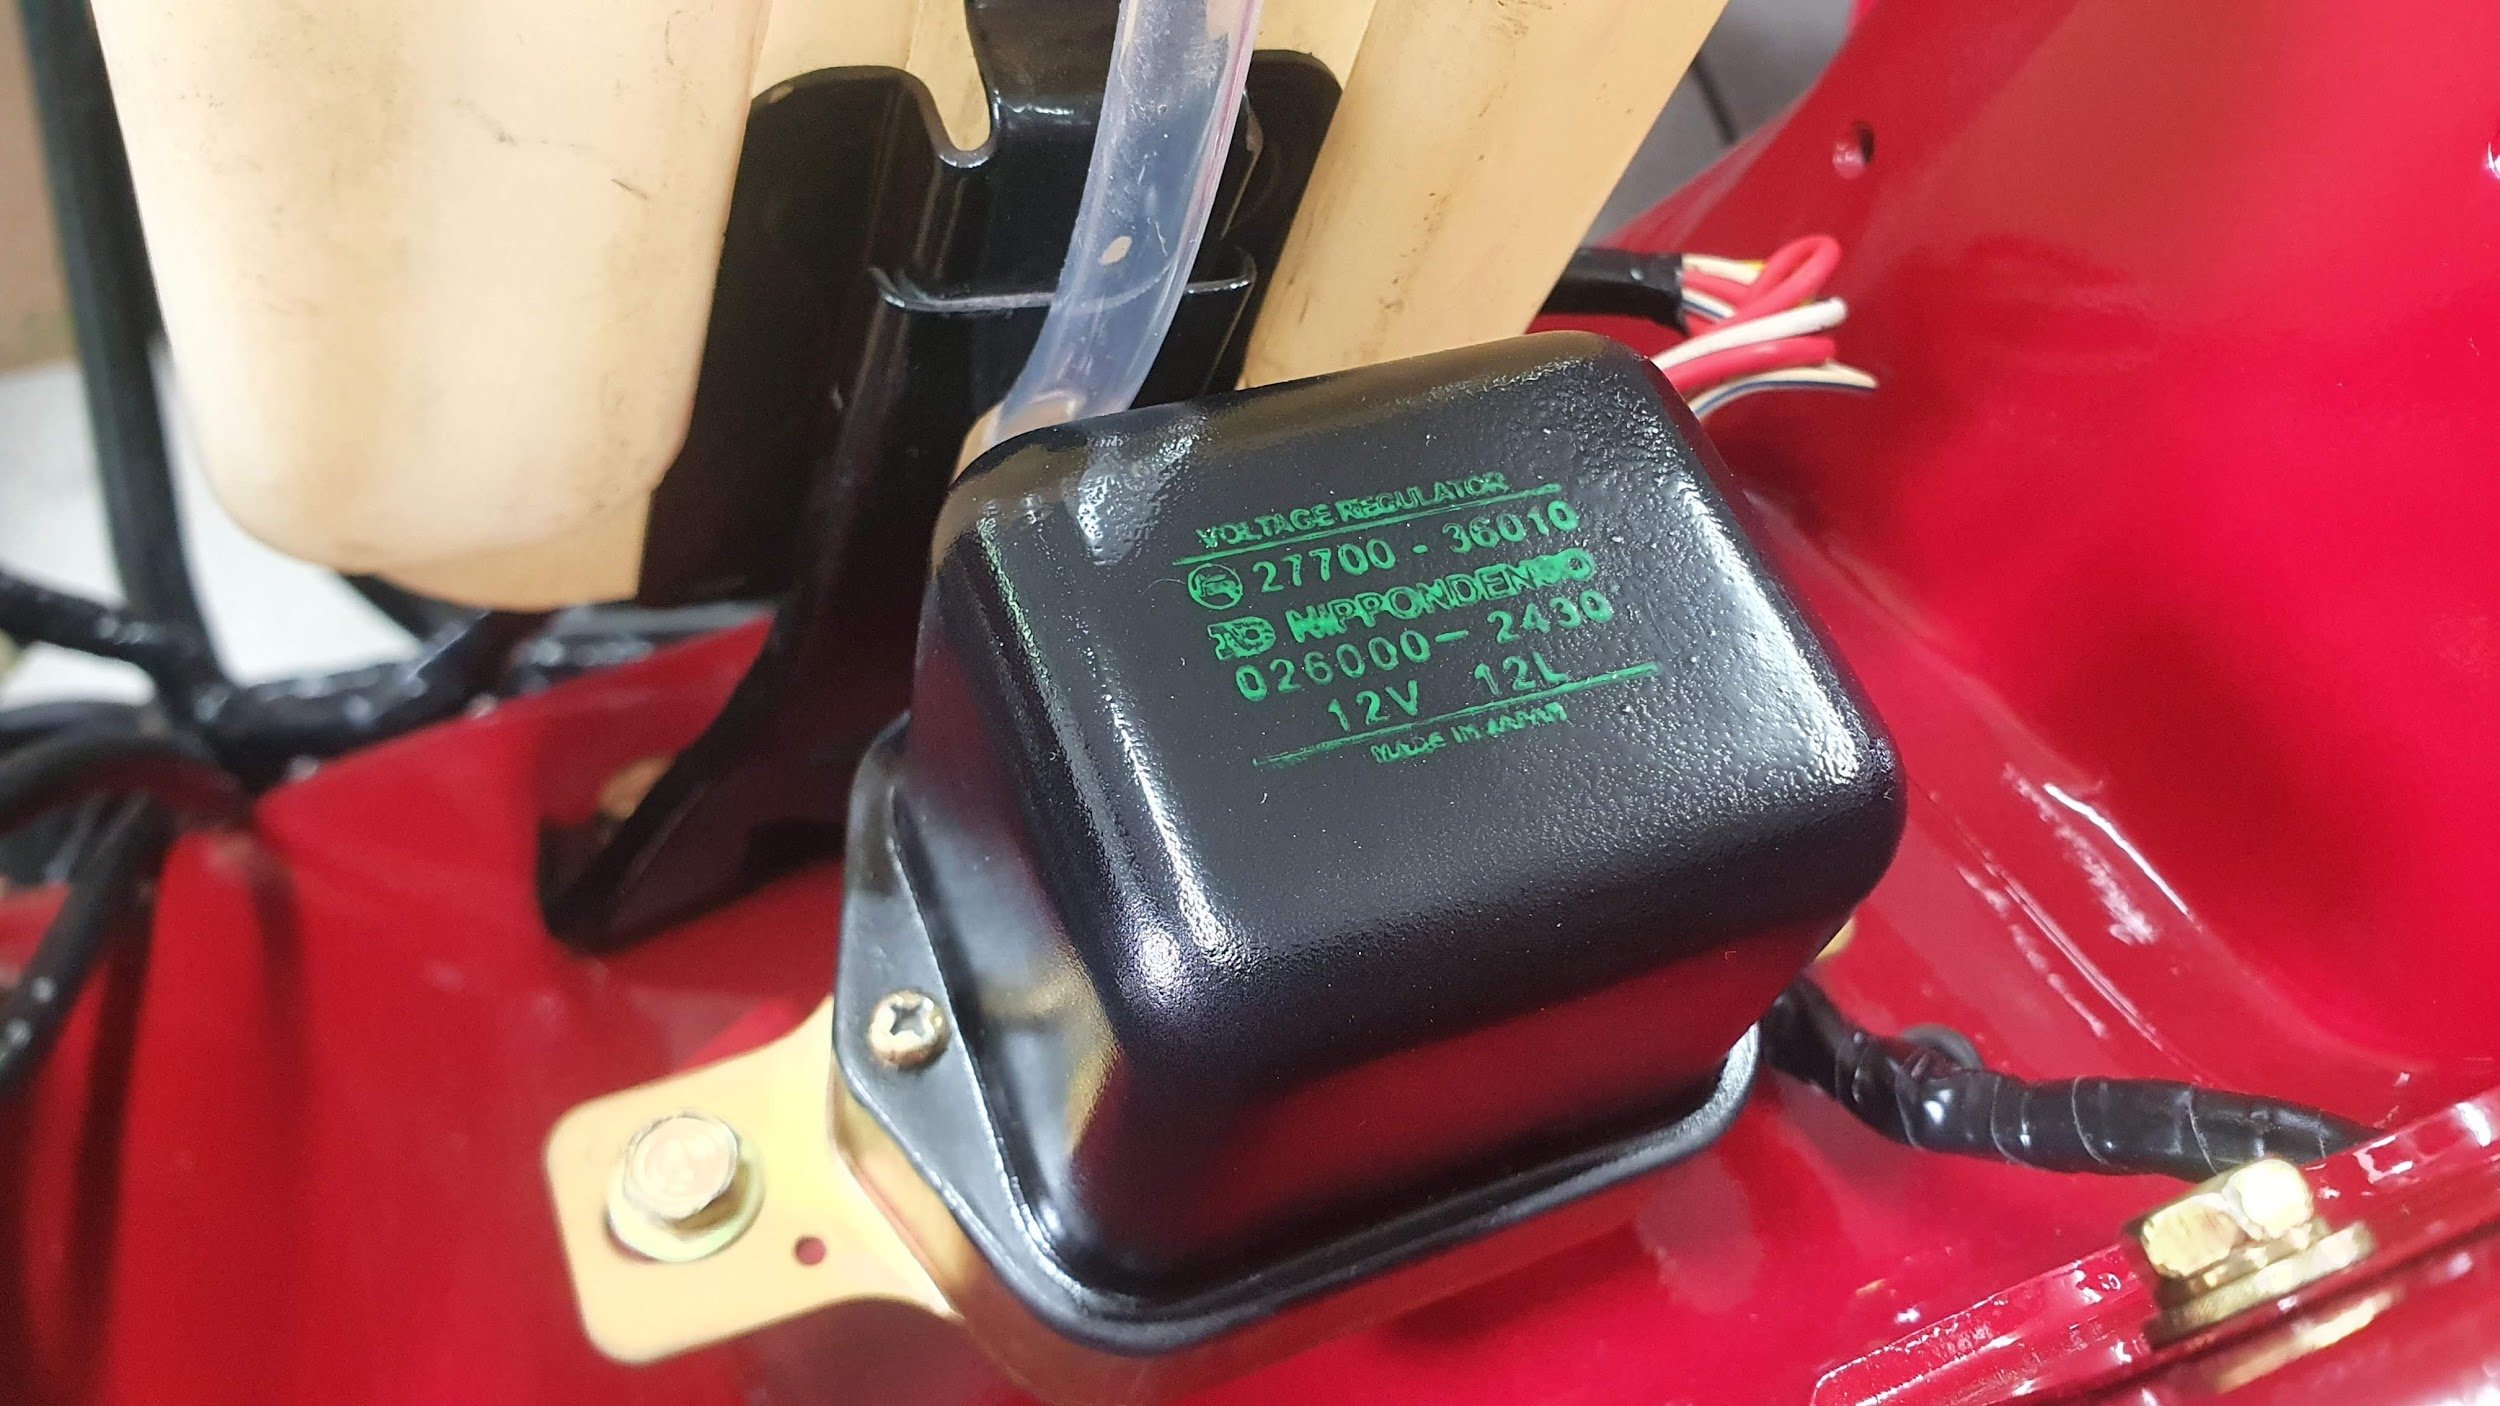
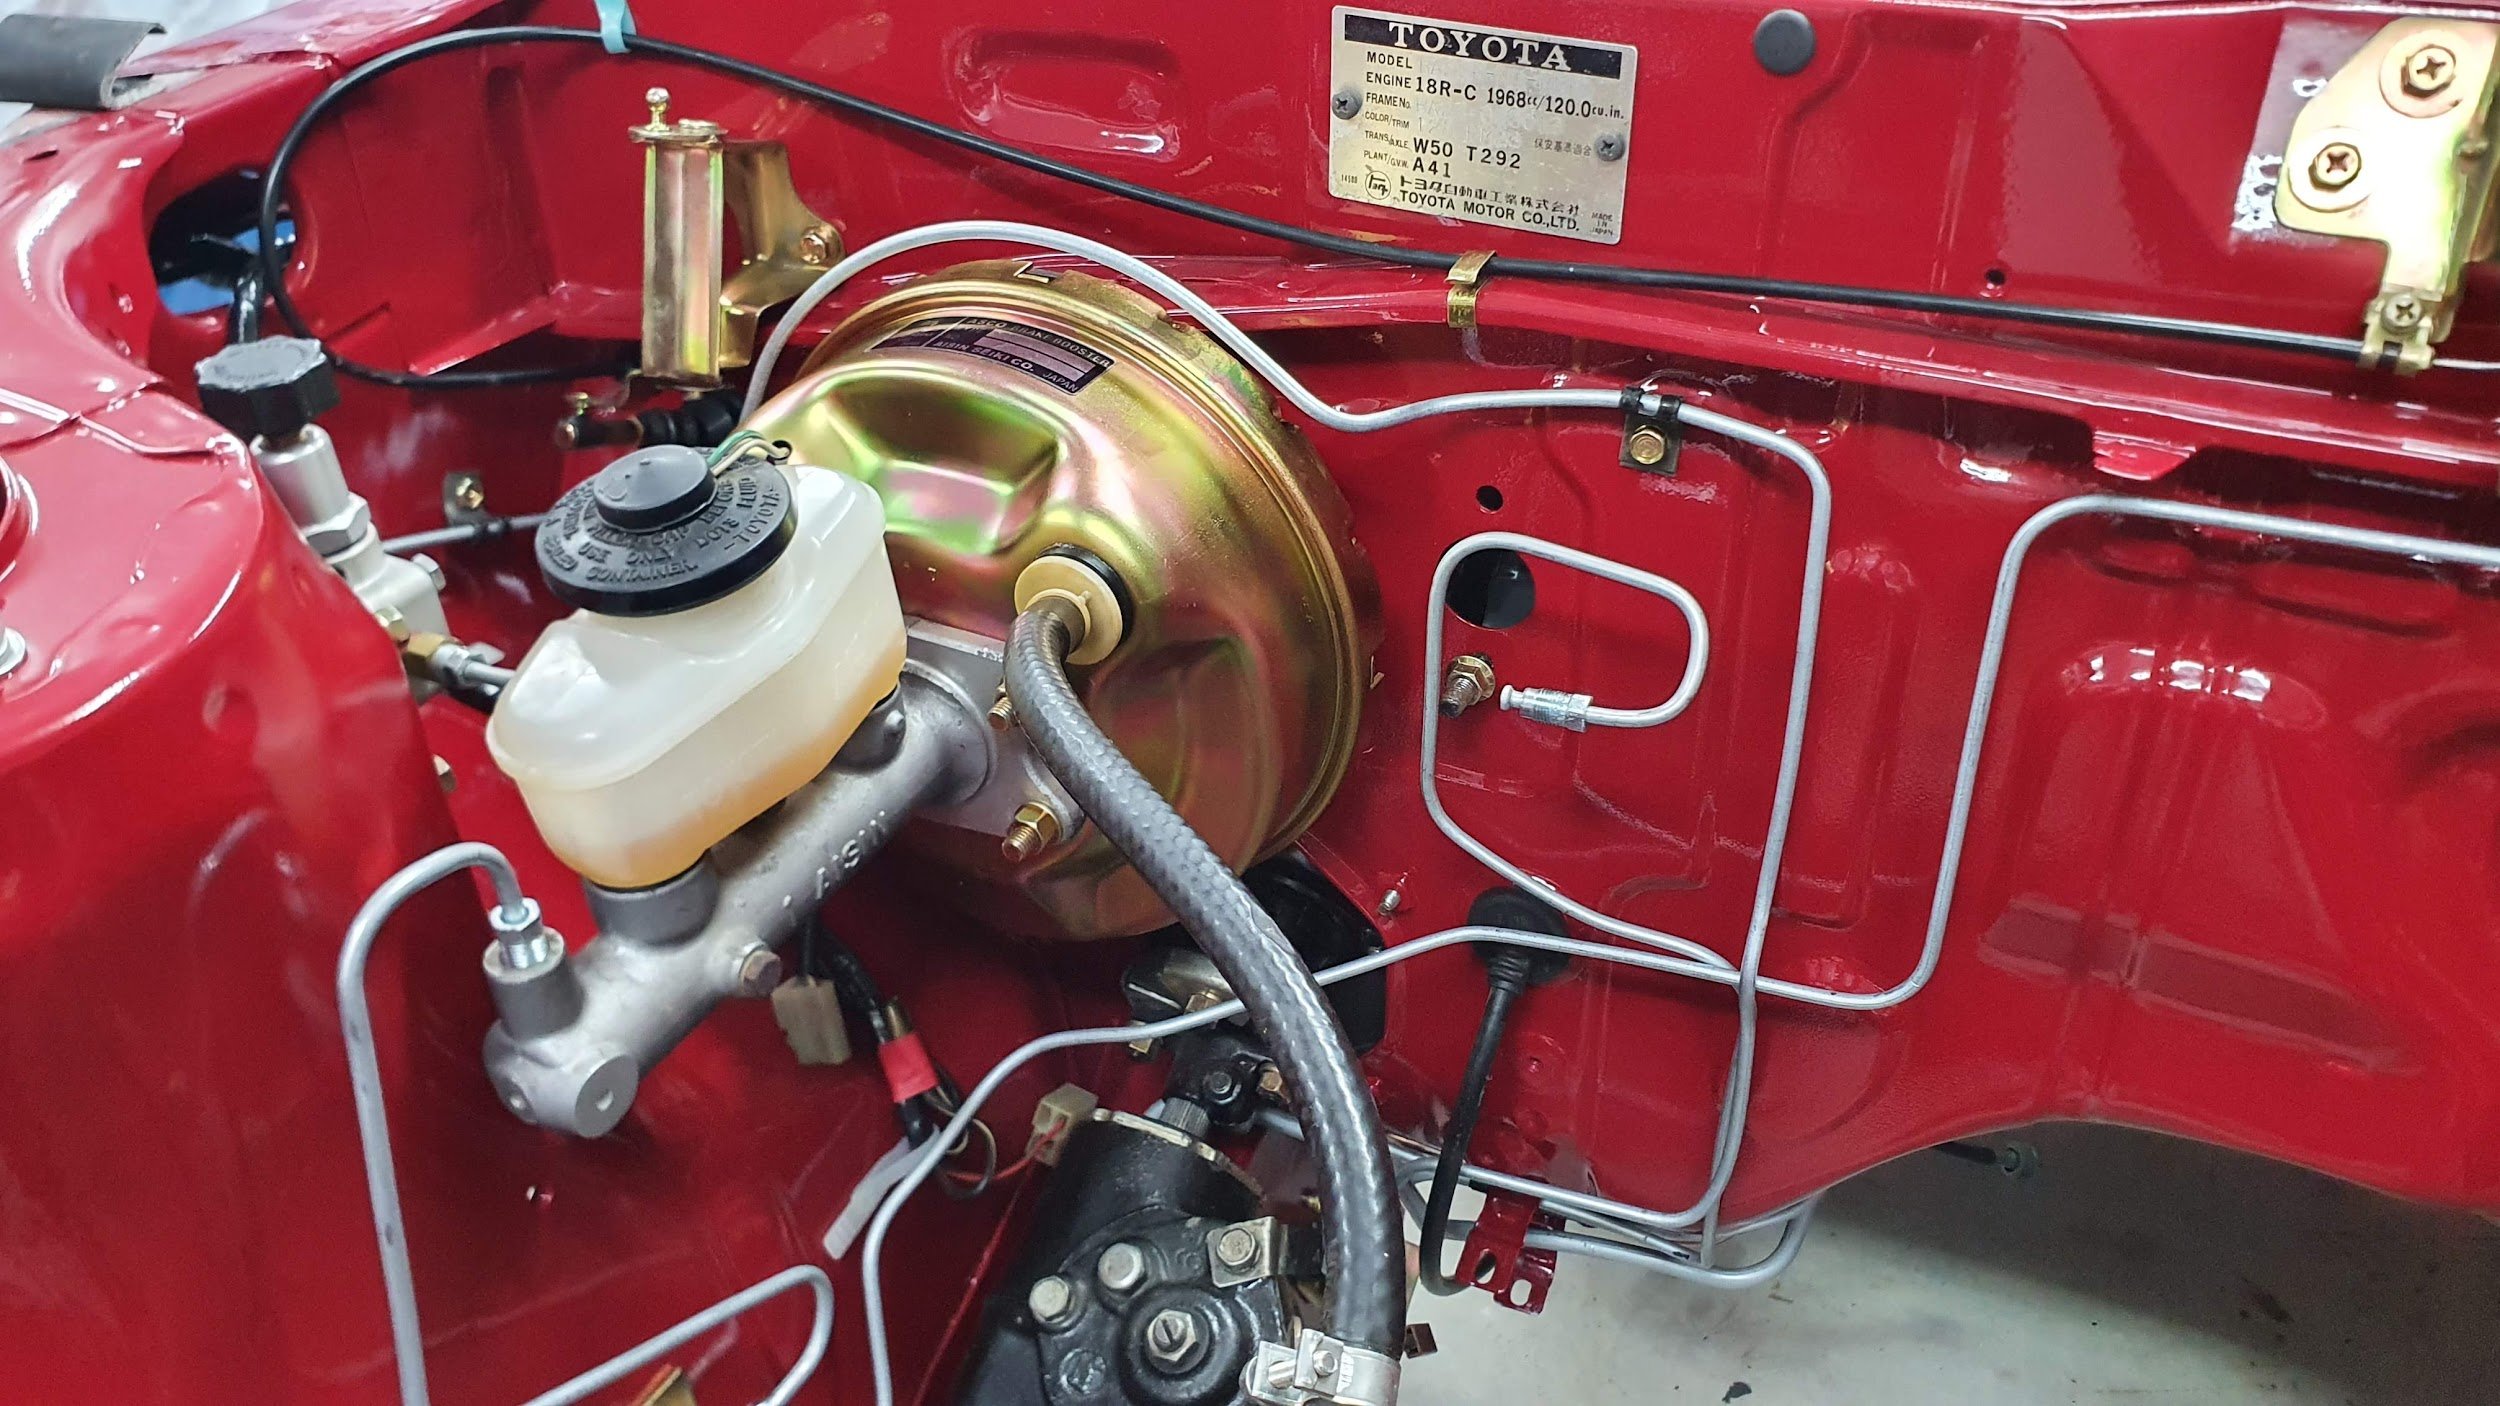
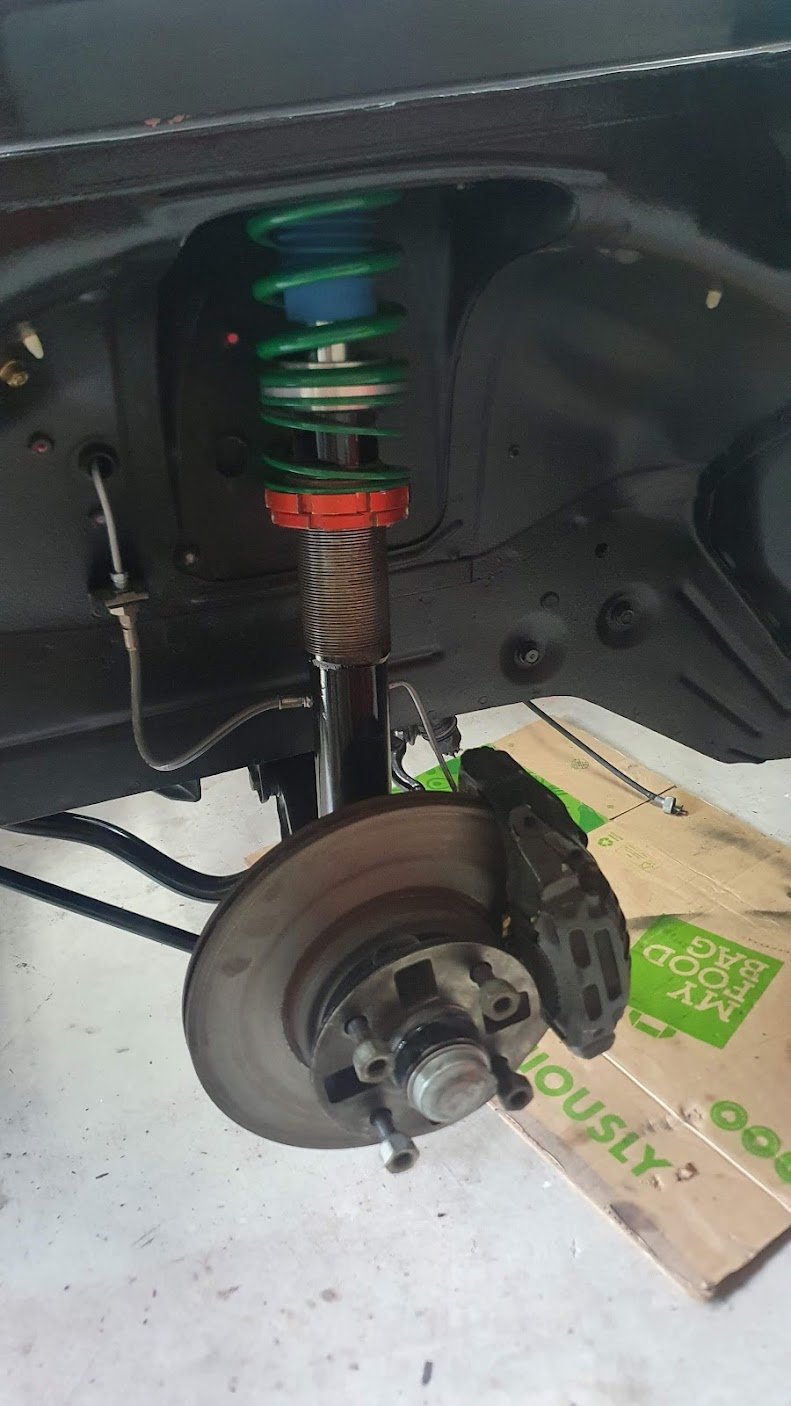
Booster and brake plumbing all done - I previously deleted the bias valve and replaced it with a wilwood adjustable, and upgraded the master to a bigger MA70 one Brakes all round means the front steering and suspension is all in too I previously disliked the wiring and relay/fuse for the electric fan As the alternator is internally regulated now - I figured up-cycle the old regulator housing to sneak the fan gubbins in... Next mission is to test fit the bigger W55 gearbox and apply clearance to any parts, and run a return fuel line that also clears it. Then onto checking the engine and see what needs freshening on it.
1 point
-
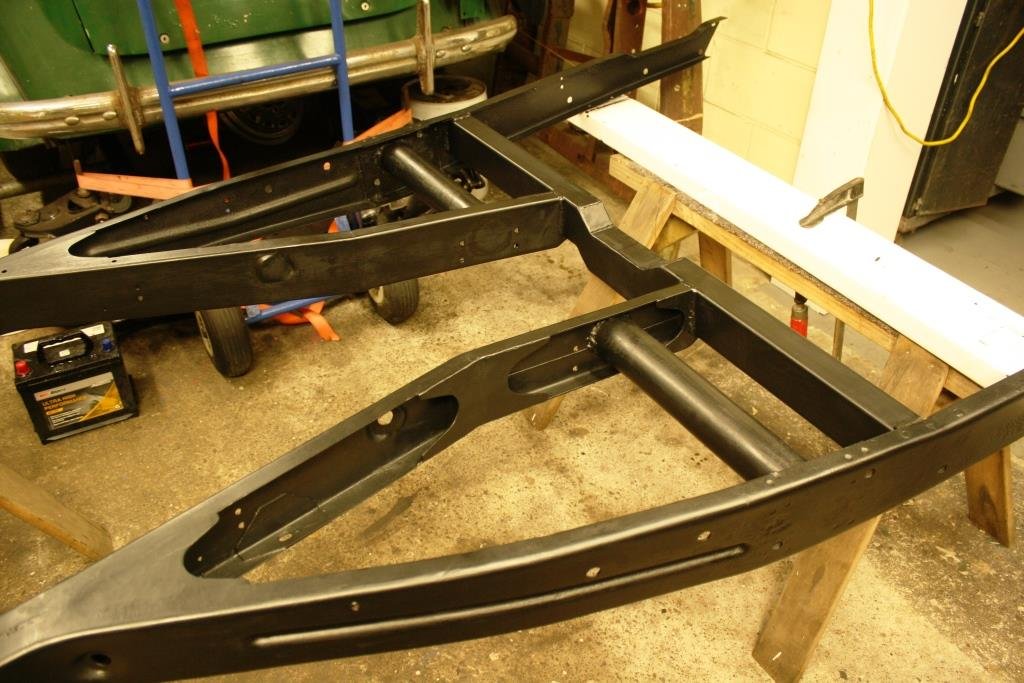
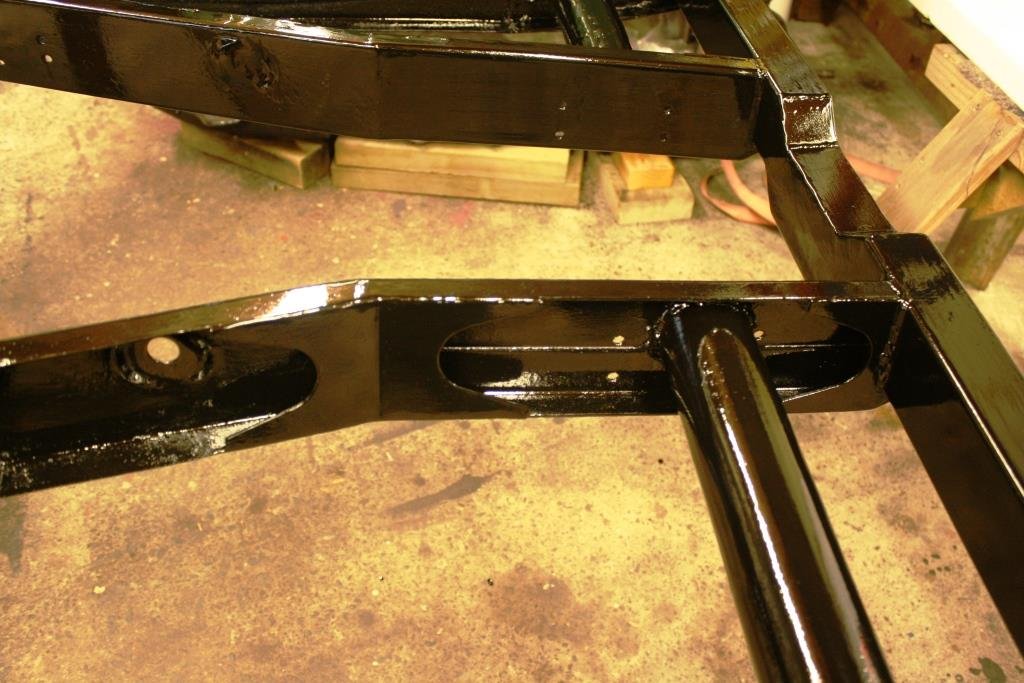
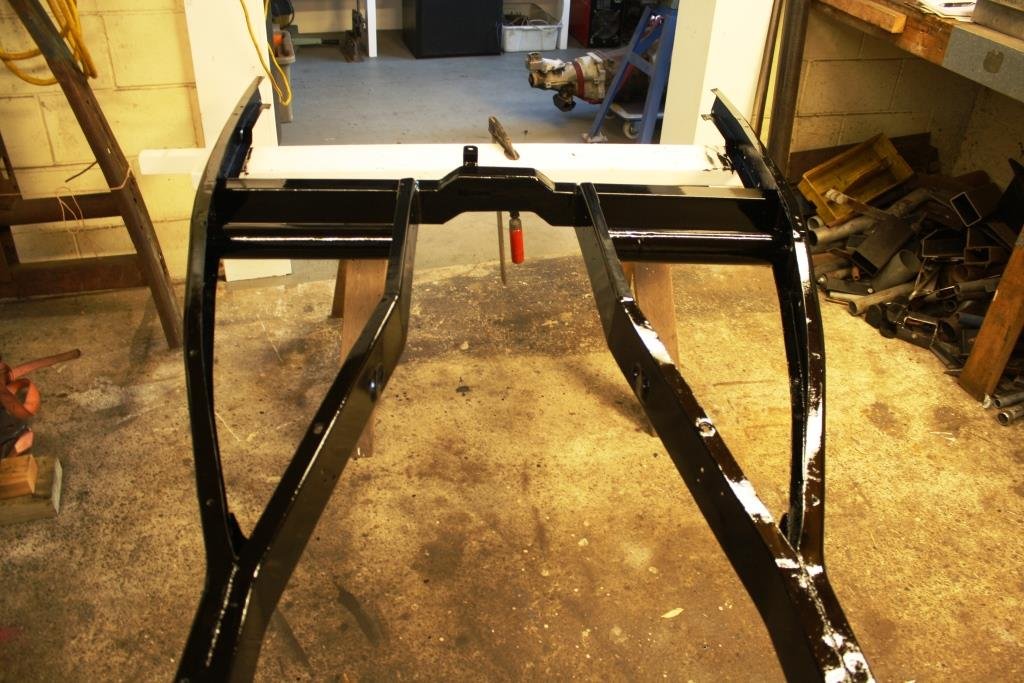
After a noisy afternoon with a wire a wire buff and a flappy wheel Rigamortice’s chassis got a couple of coats of CRC rust converter. Followed by a coat of Wattyl etch primer; jeeze the fumes knock you over… And two coats of Wattyl Killrust epoxy enamel.
1 point
-
shit i forgot to post the pics of the seats and carpets all done. lol, that was ages ago. 2021-08-12_06-31-20 by sheepers, on Flickr 2021-08-12_06-31-12 by sheepers, on Flickr 2021-08-12_06-31-02 by sheepers, on Flickr 2021-08-12_06-30-52 by sheepers, on Flickr1 point
-
i went back to the dyno with the new intercooler and well, sometimes it doesn't go your way. had many small issues throughout the day, in the end the fuel pressure started doing strange things right at the top end so we had to pull the pin. so at the end of the day i had a semi broken car and i was two grand lighter in the pocket which always make a bad day at the dyno even better. took the fuel system apart and couldn't really find anything obvious so i threw LOTS of money at it in the hope that it will be fixed. both pumps are new, two new larger fuel filters, much larger surge tank, new FPR and new injectors. the other thing im going to do is move the oil cooler because it had trouble getting rid of coolant temp. the oil temp and inlet air temps were perfect but the water was getting hot and it took a long time to come back down. 2021-11-12_07-03-34 by sheepers, on Flickr1 point
-
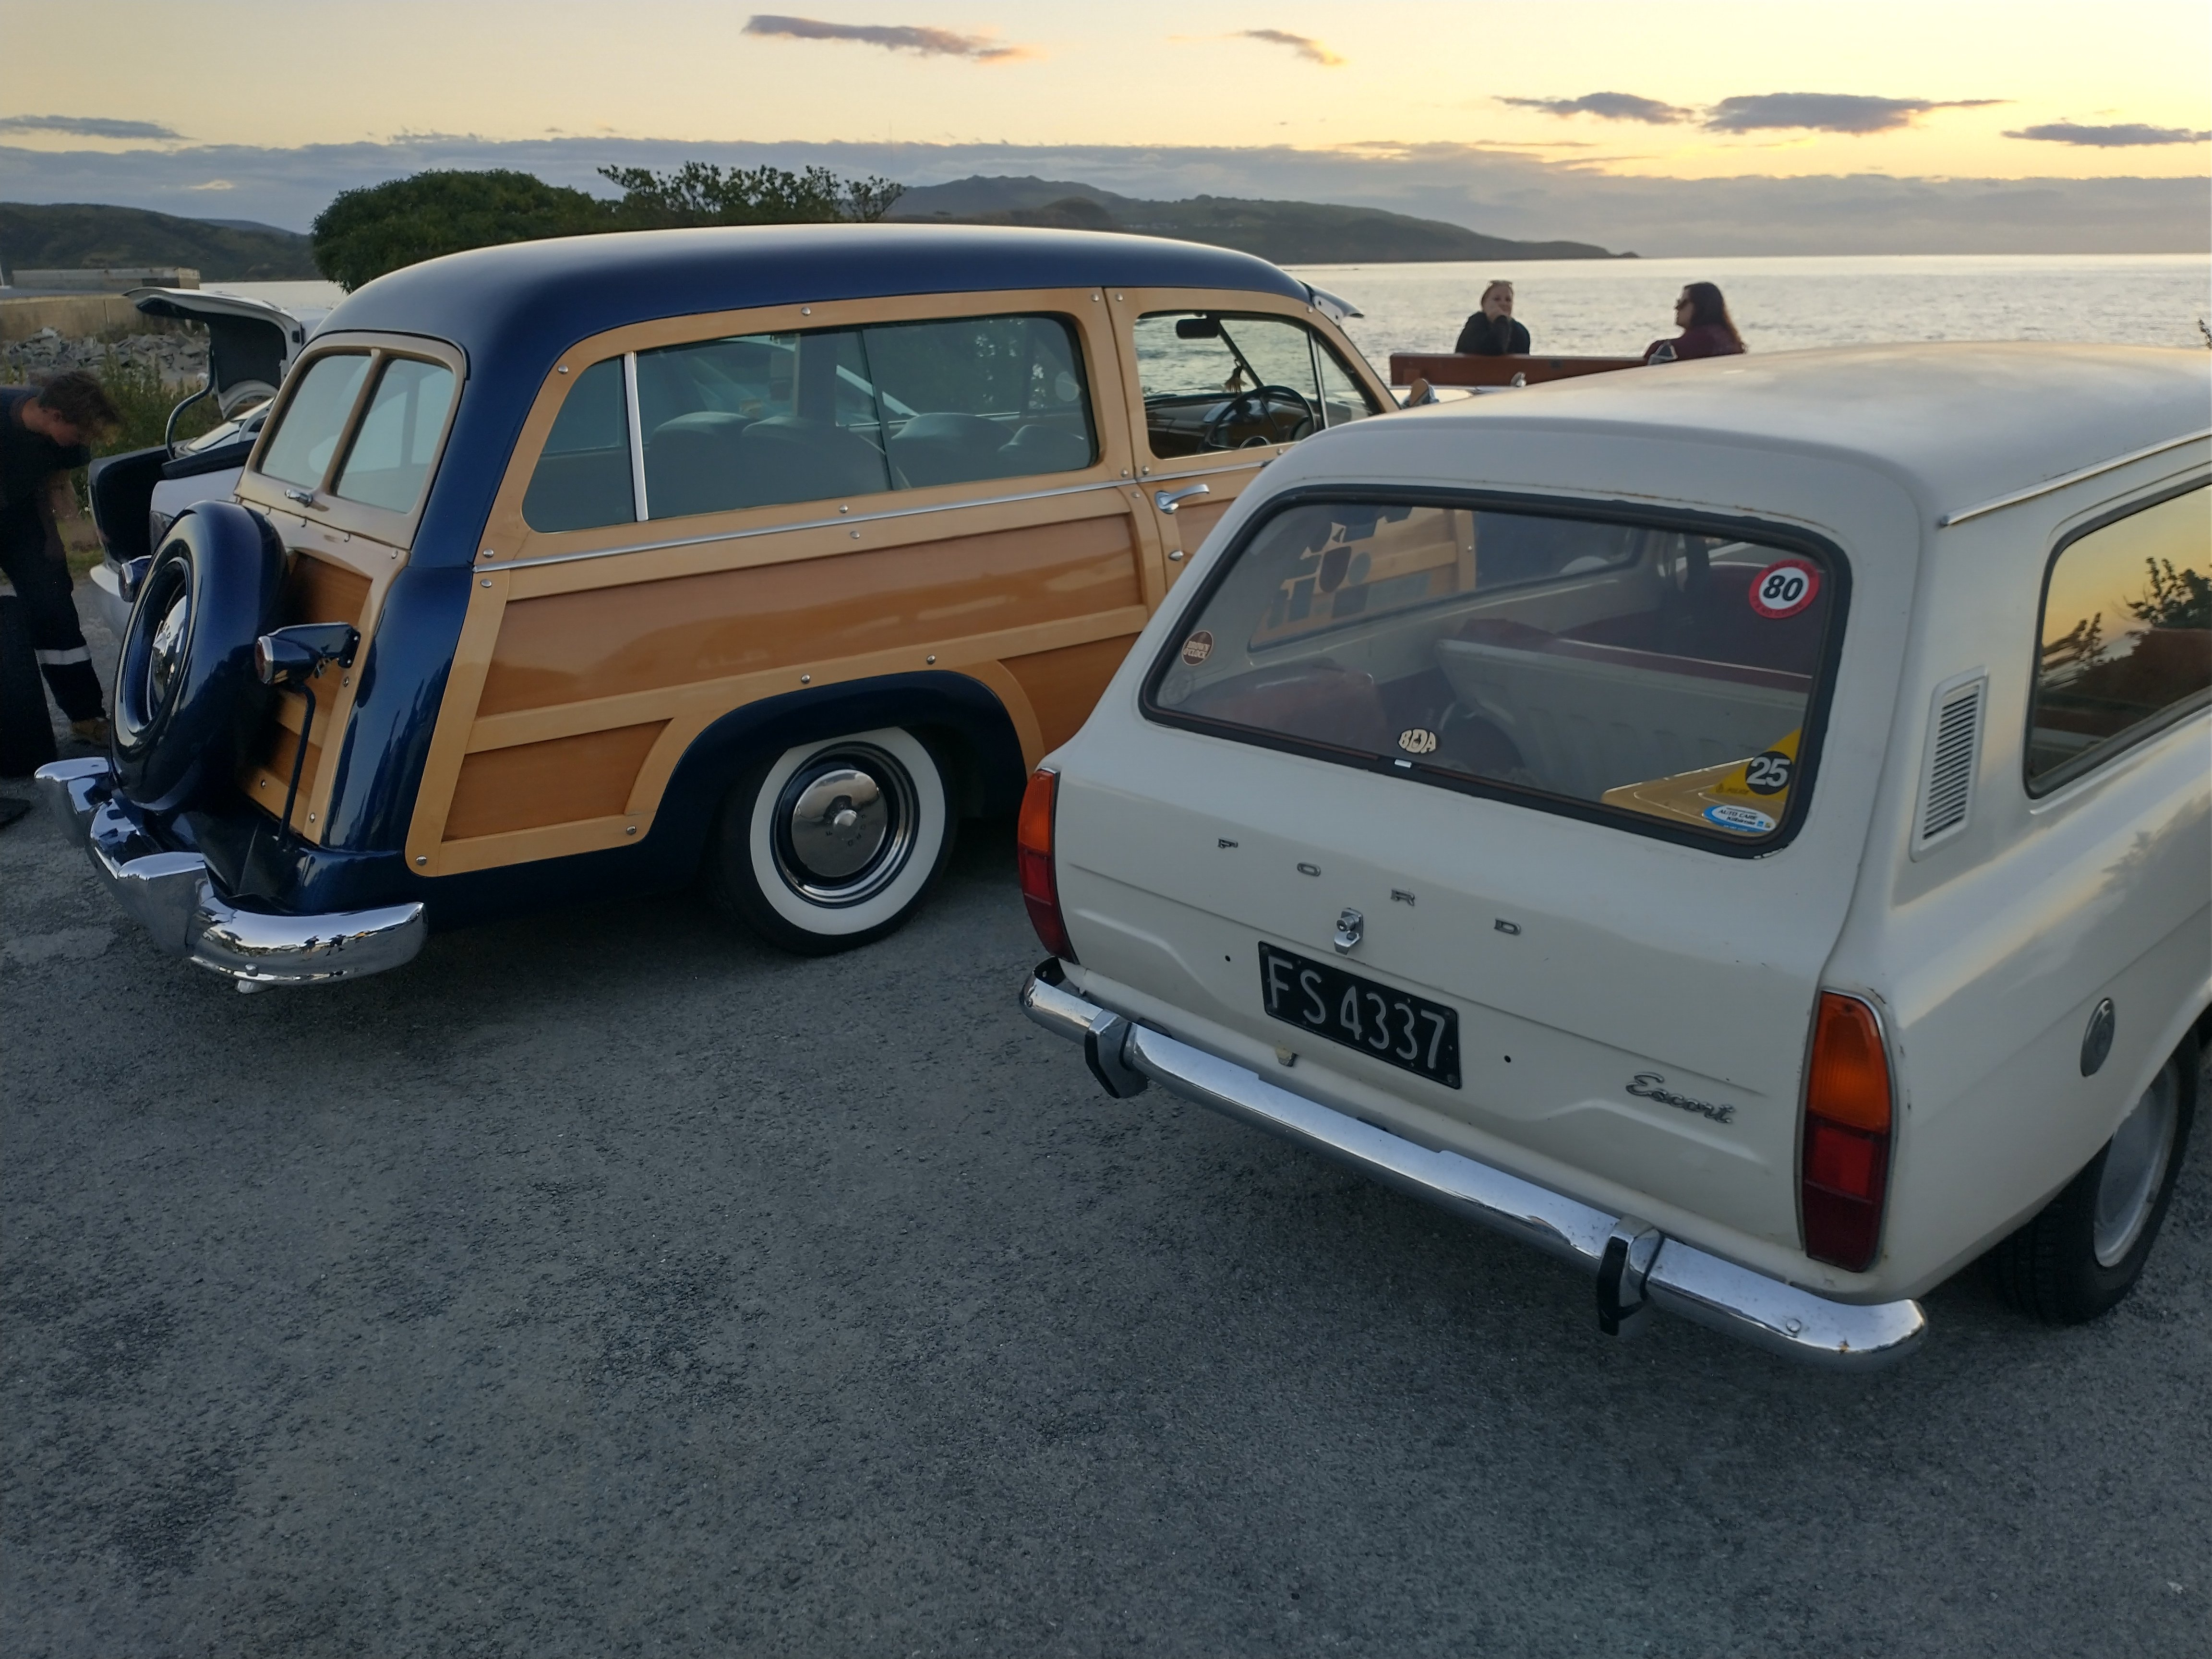
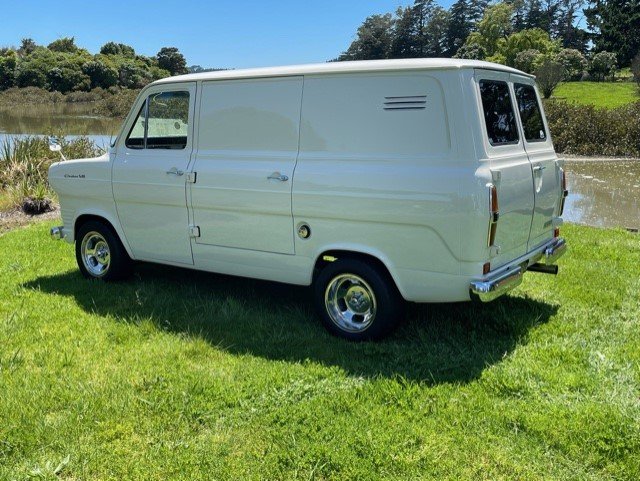
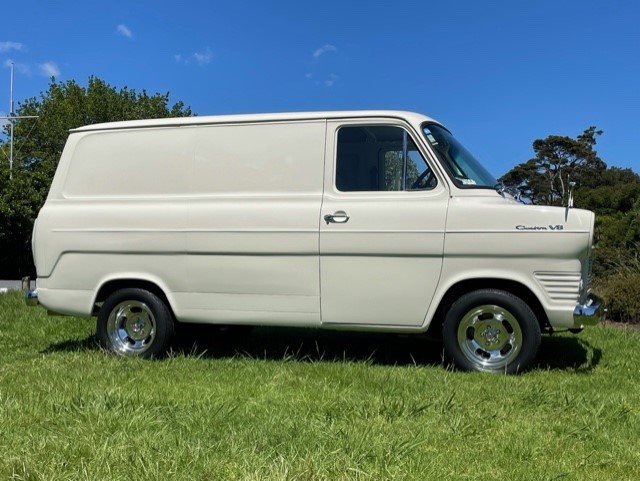
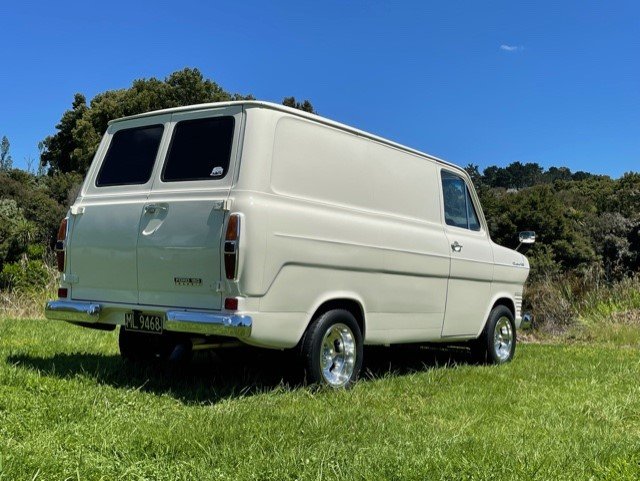
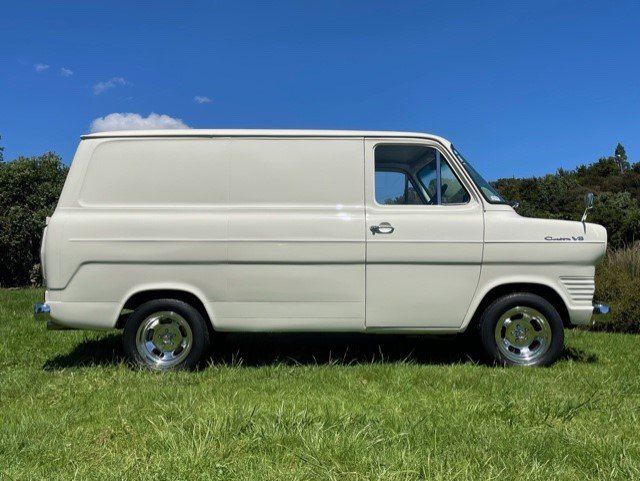
Photoshoot on Tuesday at the Whitford Wharf for NZ Classic Car magazine. These are a couple of my crappy iphone pics, no doubt theirs will be much nicer, but you get the idea https://oldschool.co.nz/index.php?/topic/45289-browndogs-1972-v8-transit/page/4/
1 point
-
i thought it is written off when insurance co doesn't wanna pay for the repair which exceed the value of the car insured. beyond economic repair in beancounter speak but anything is repairable if you have enough money.1 point
-
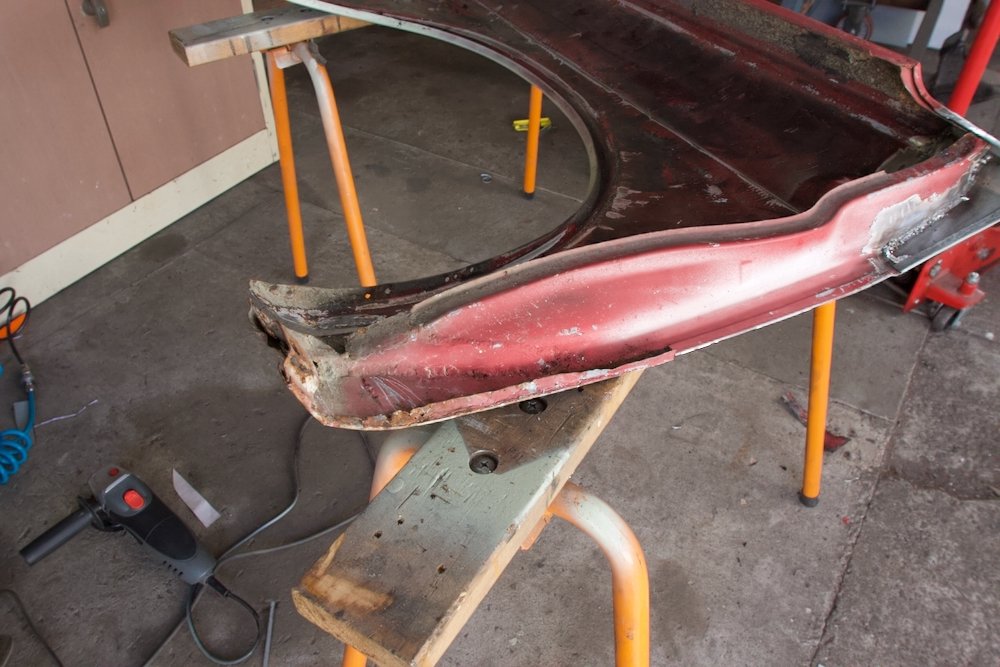
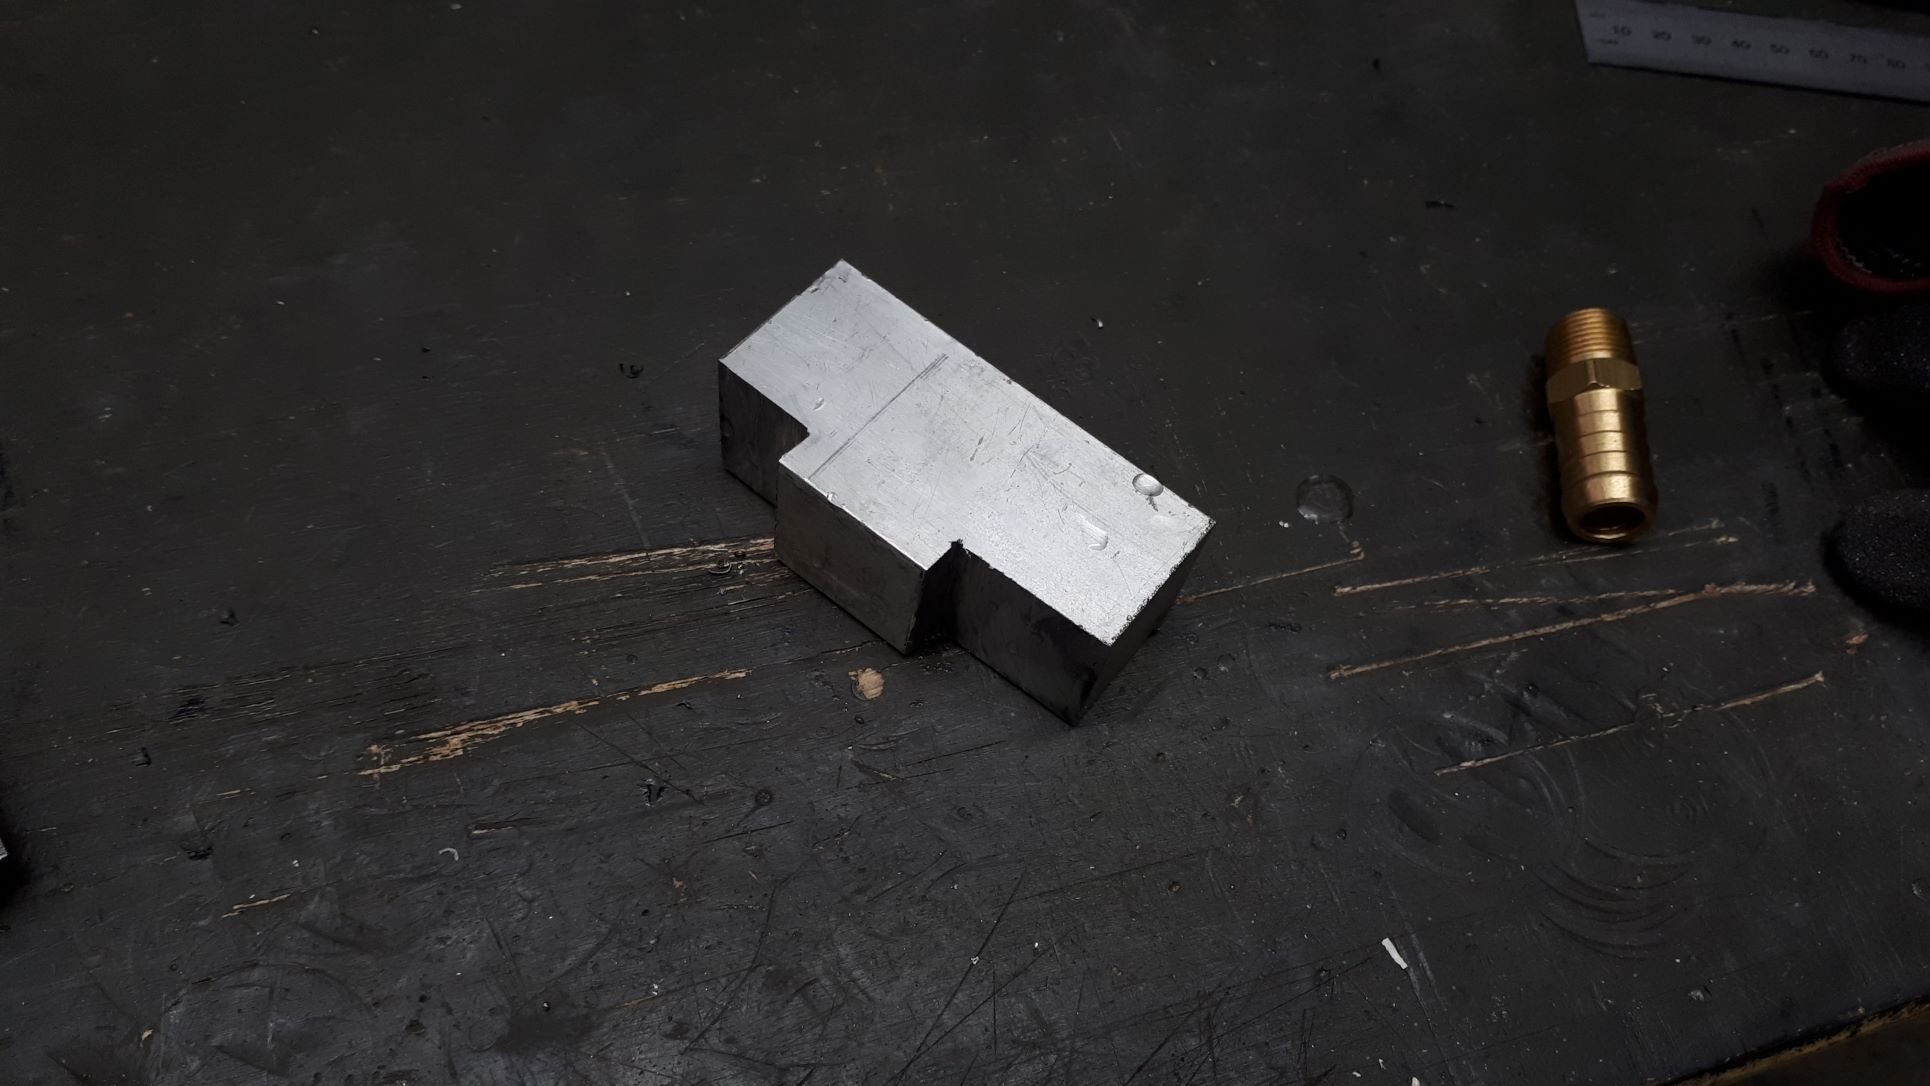
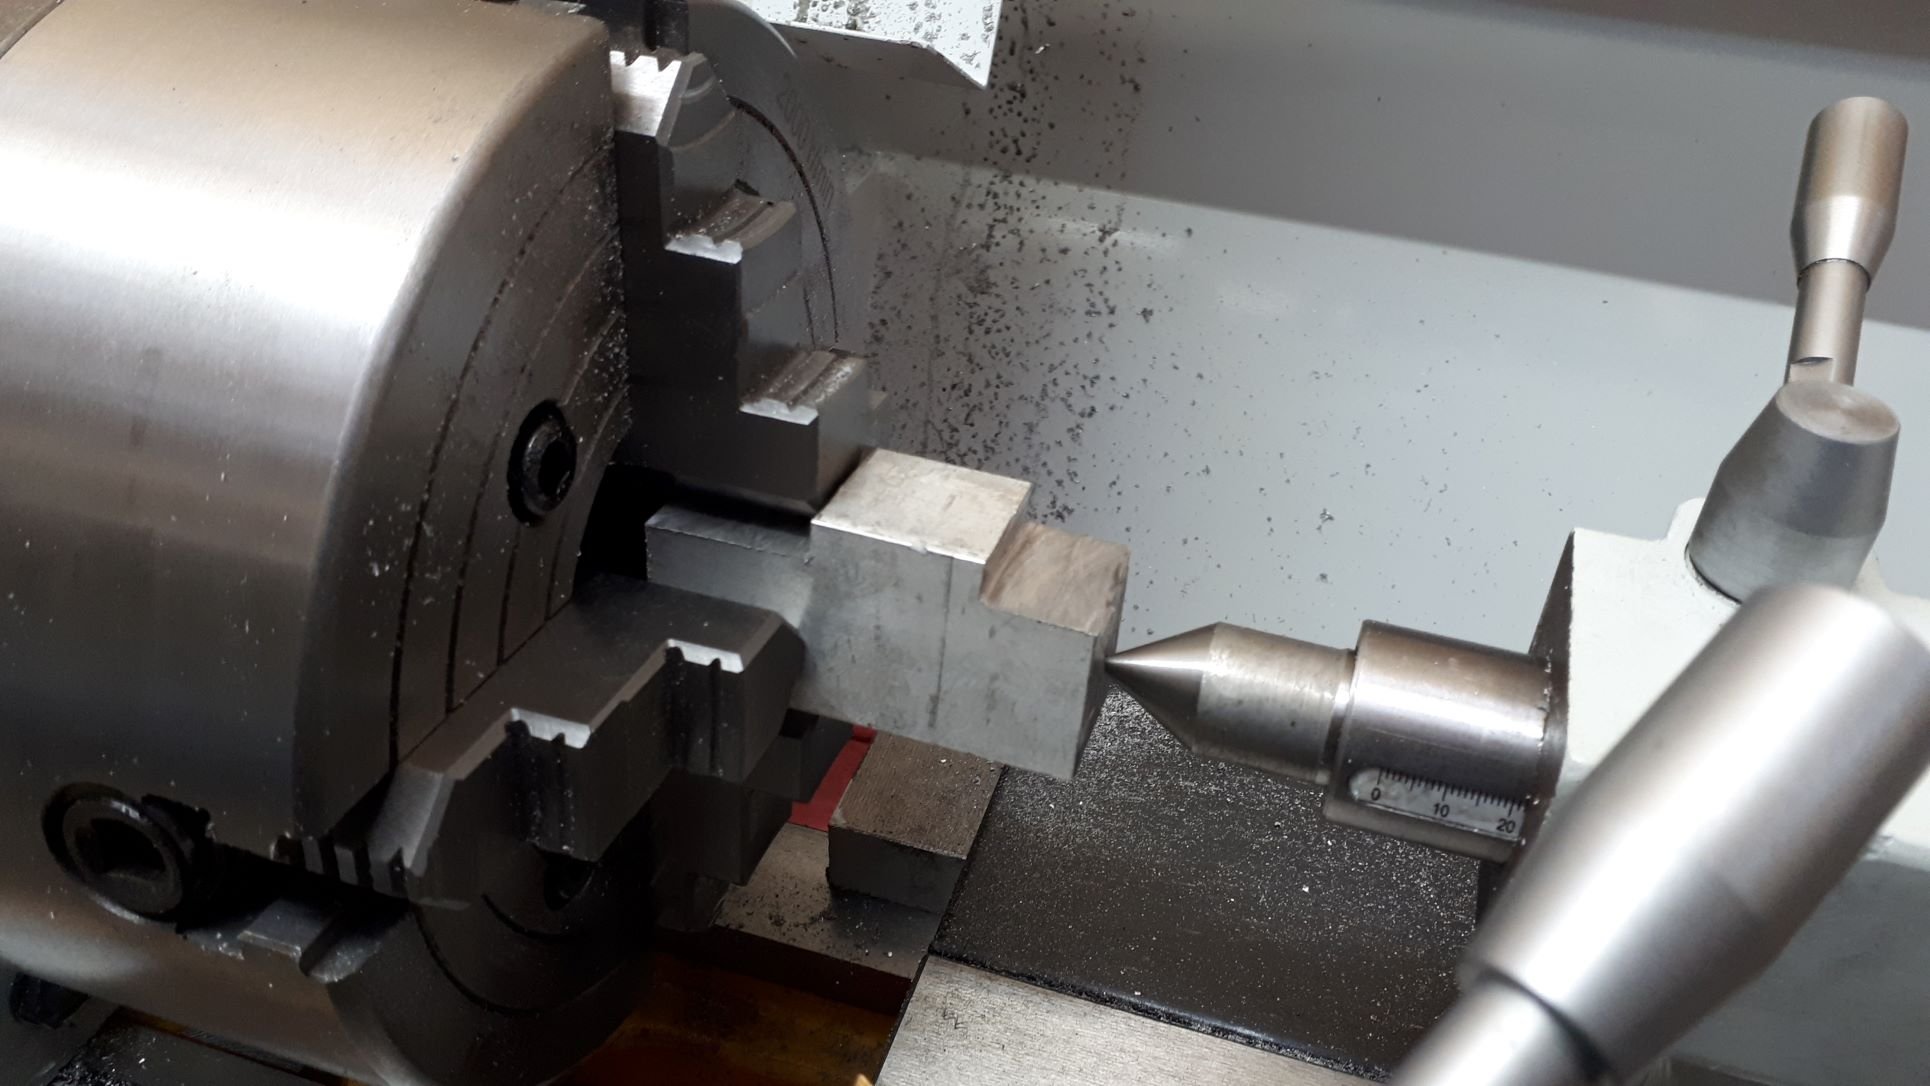
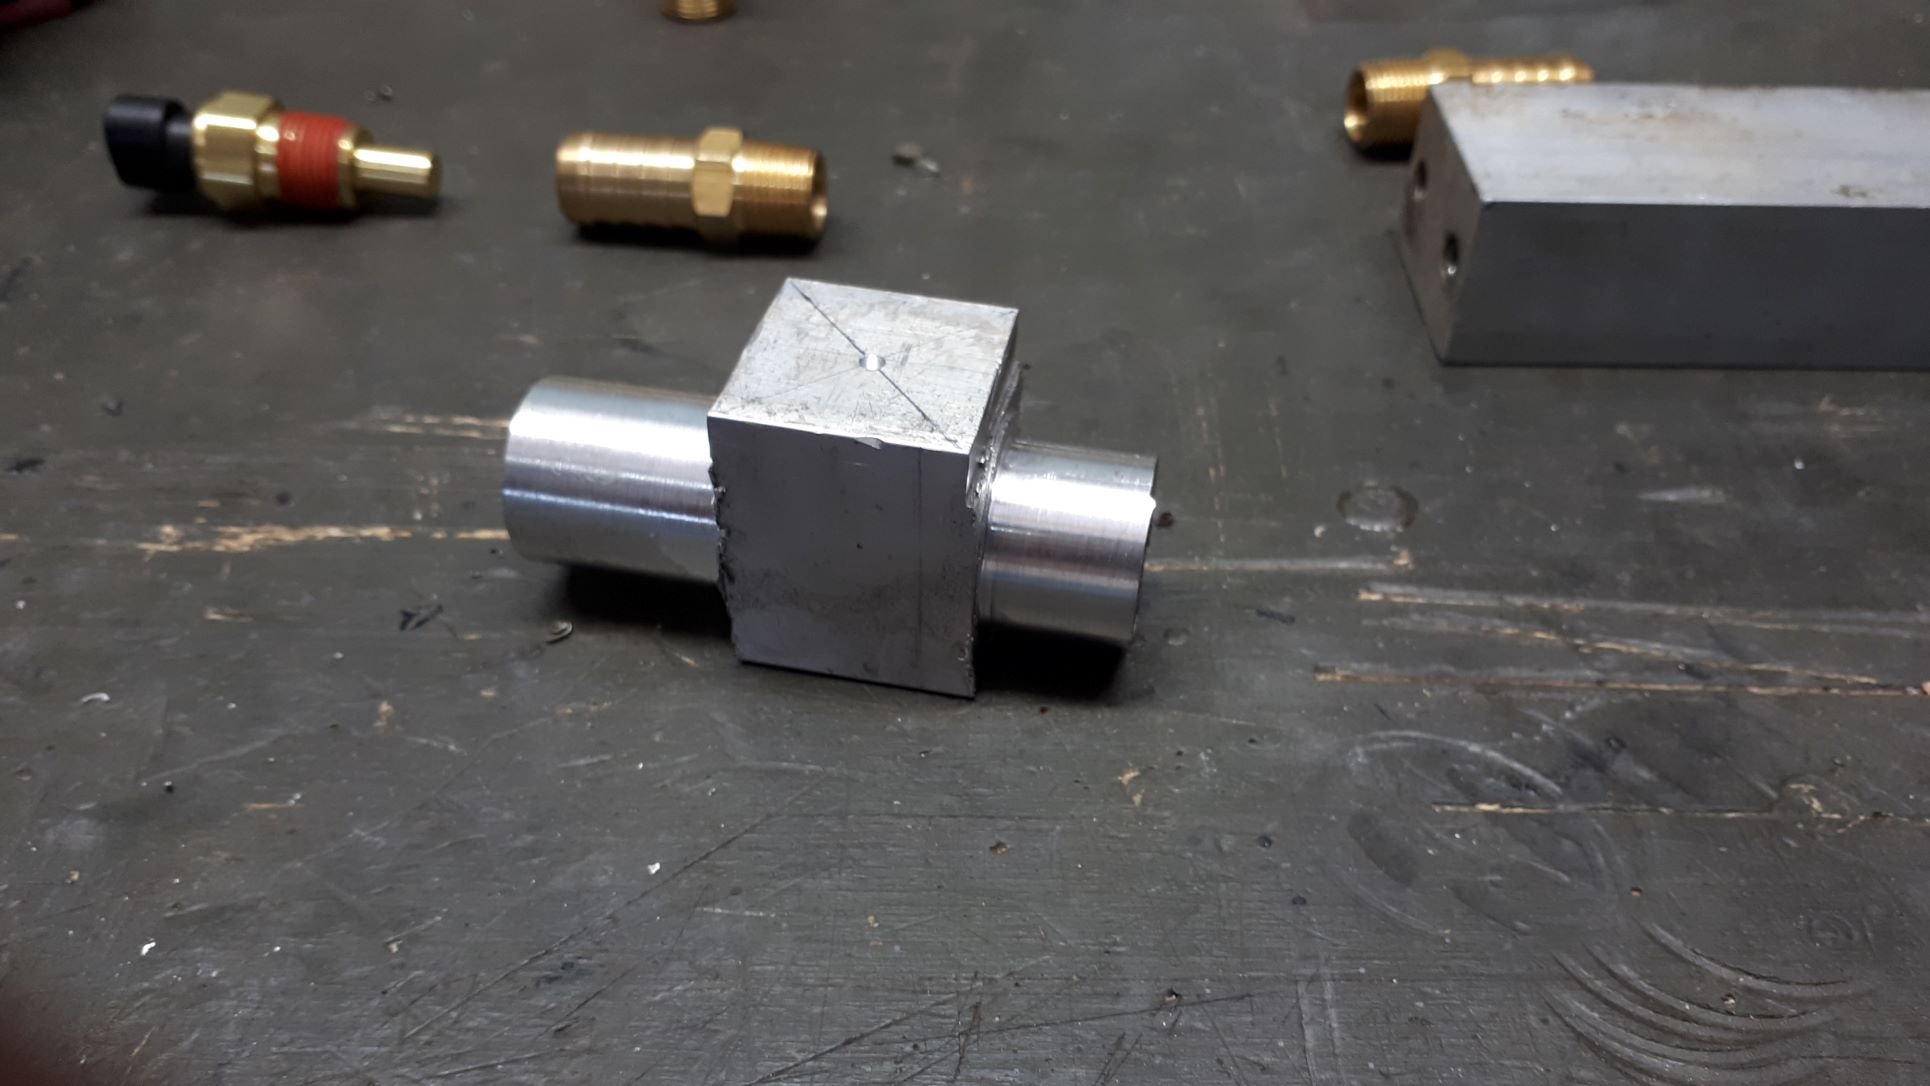
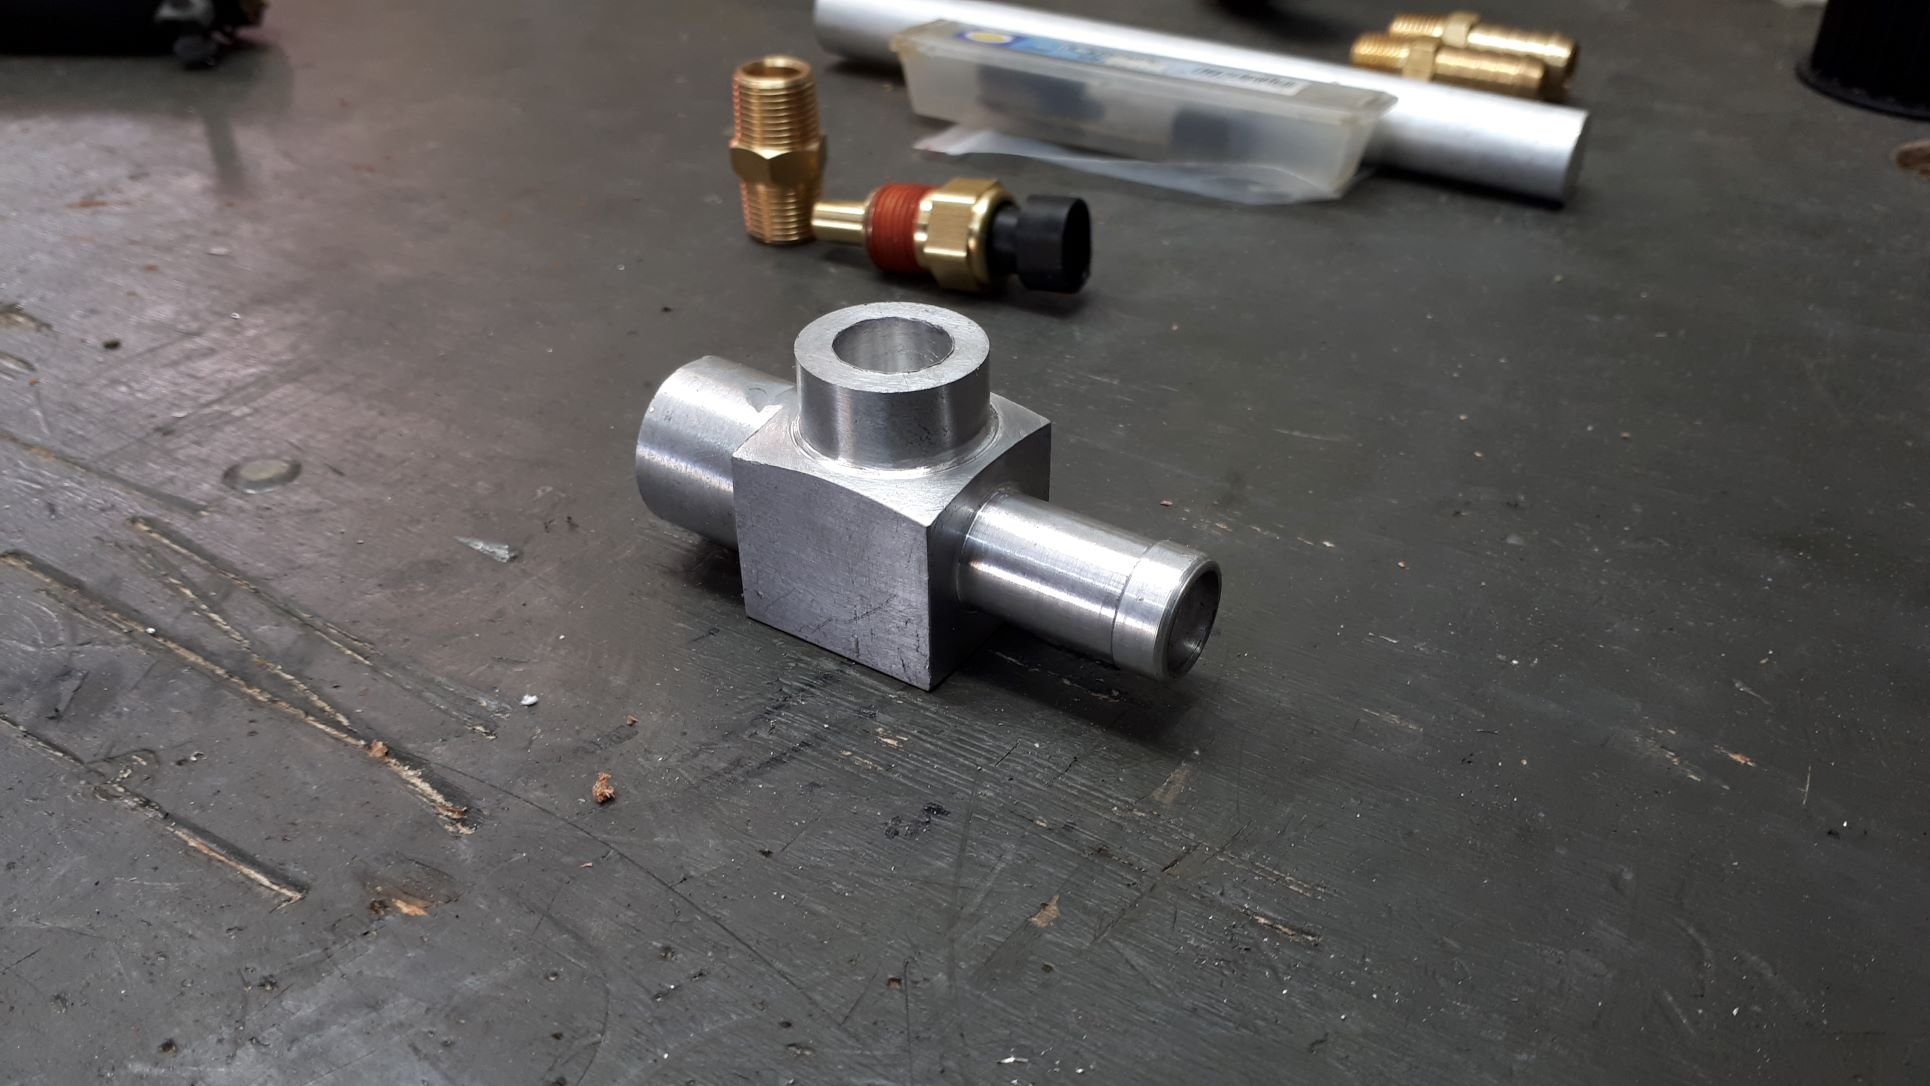
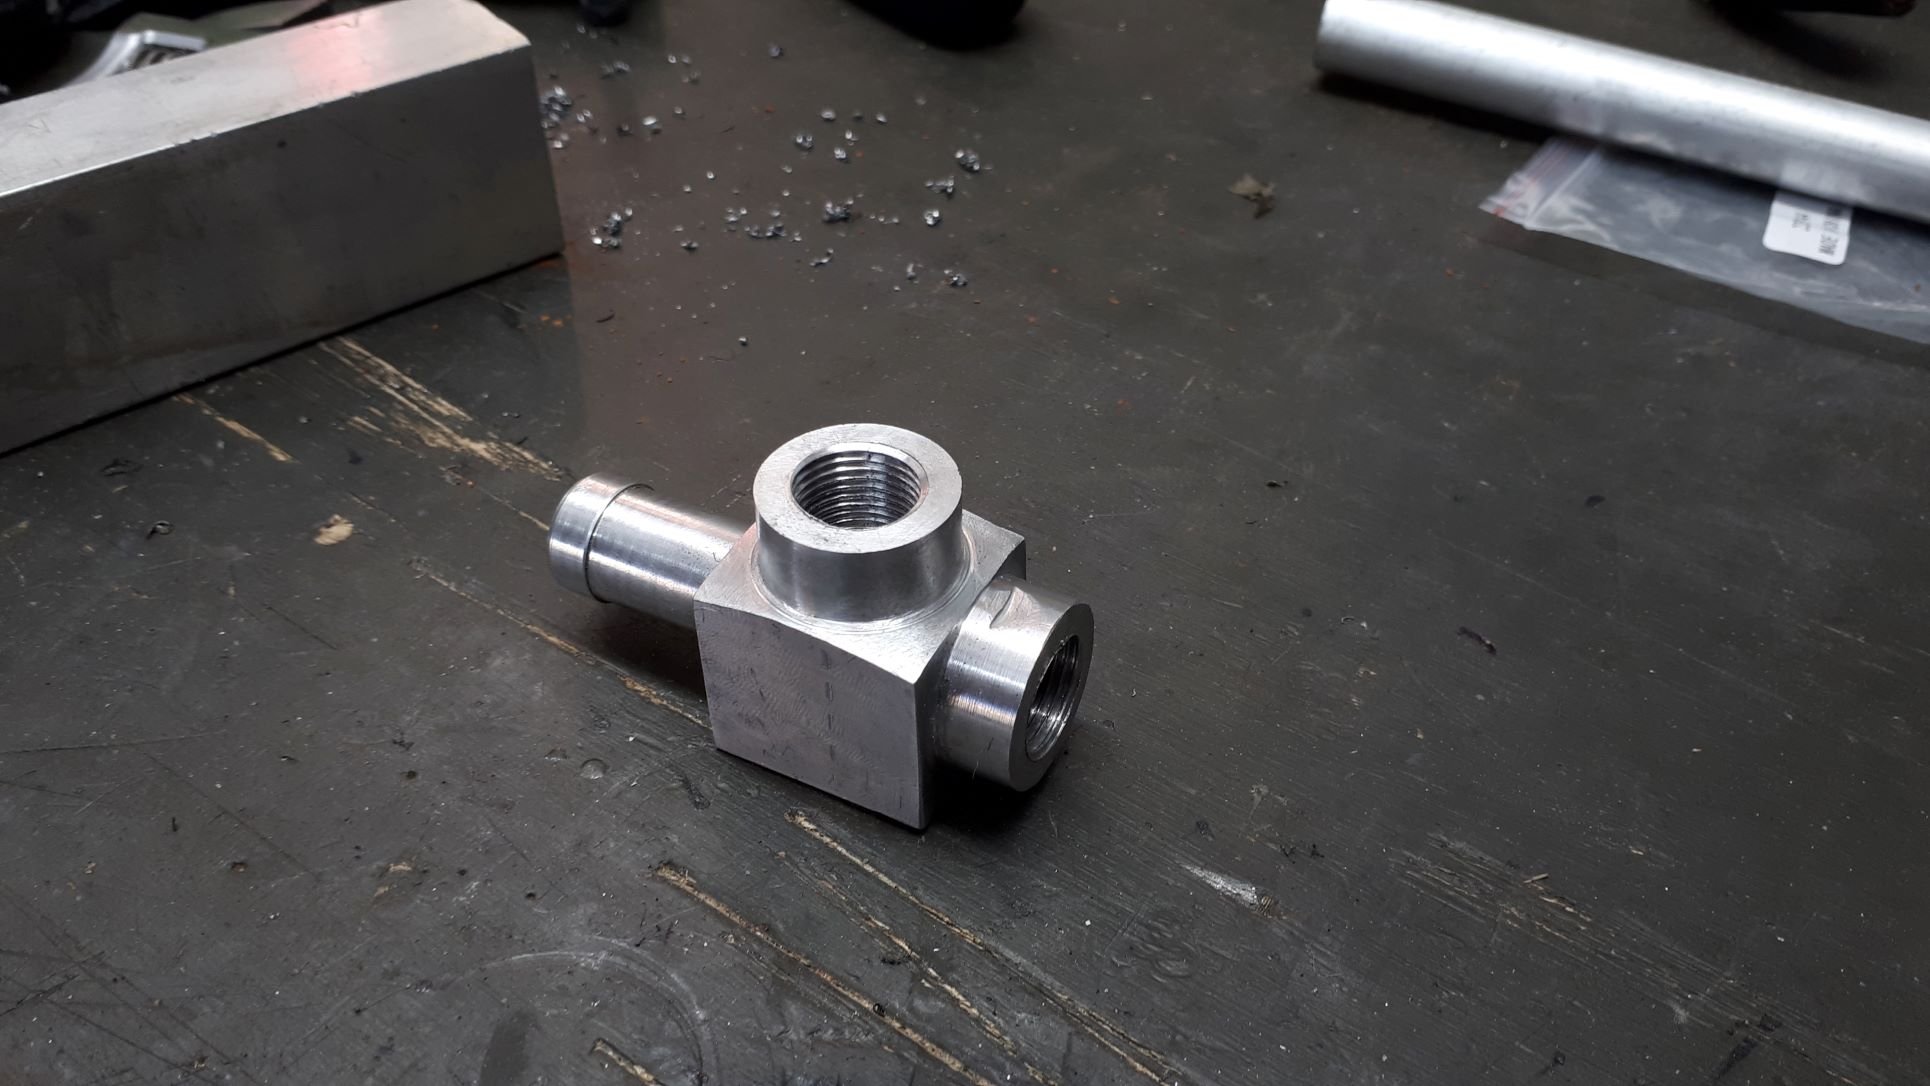
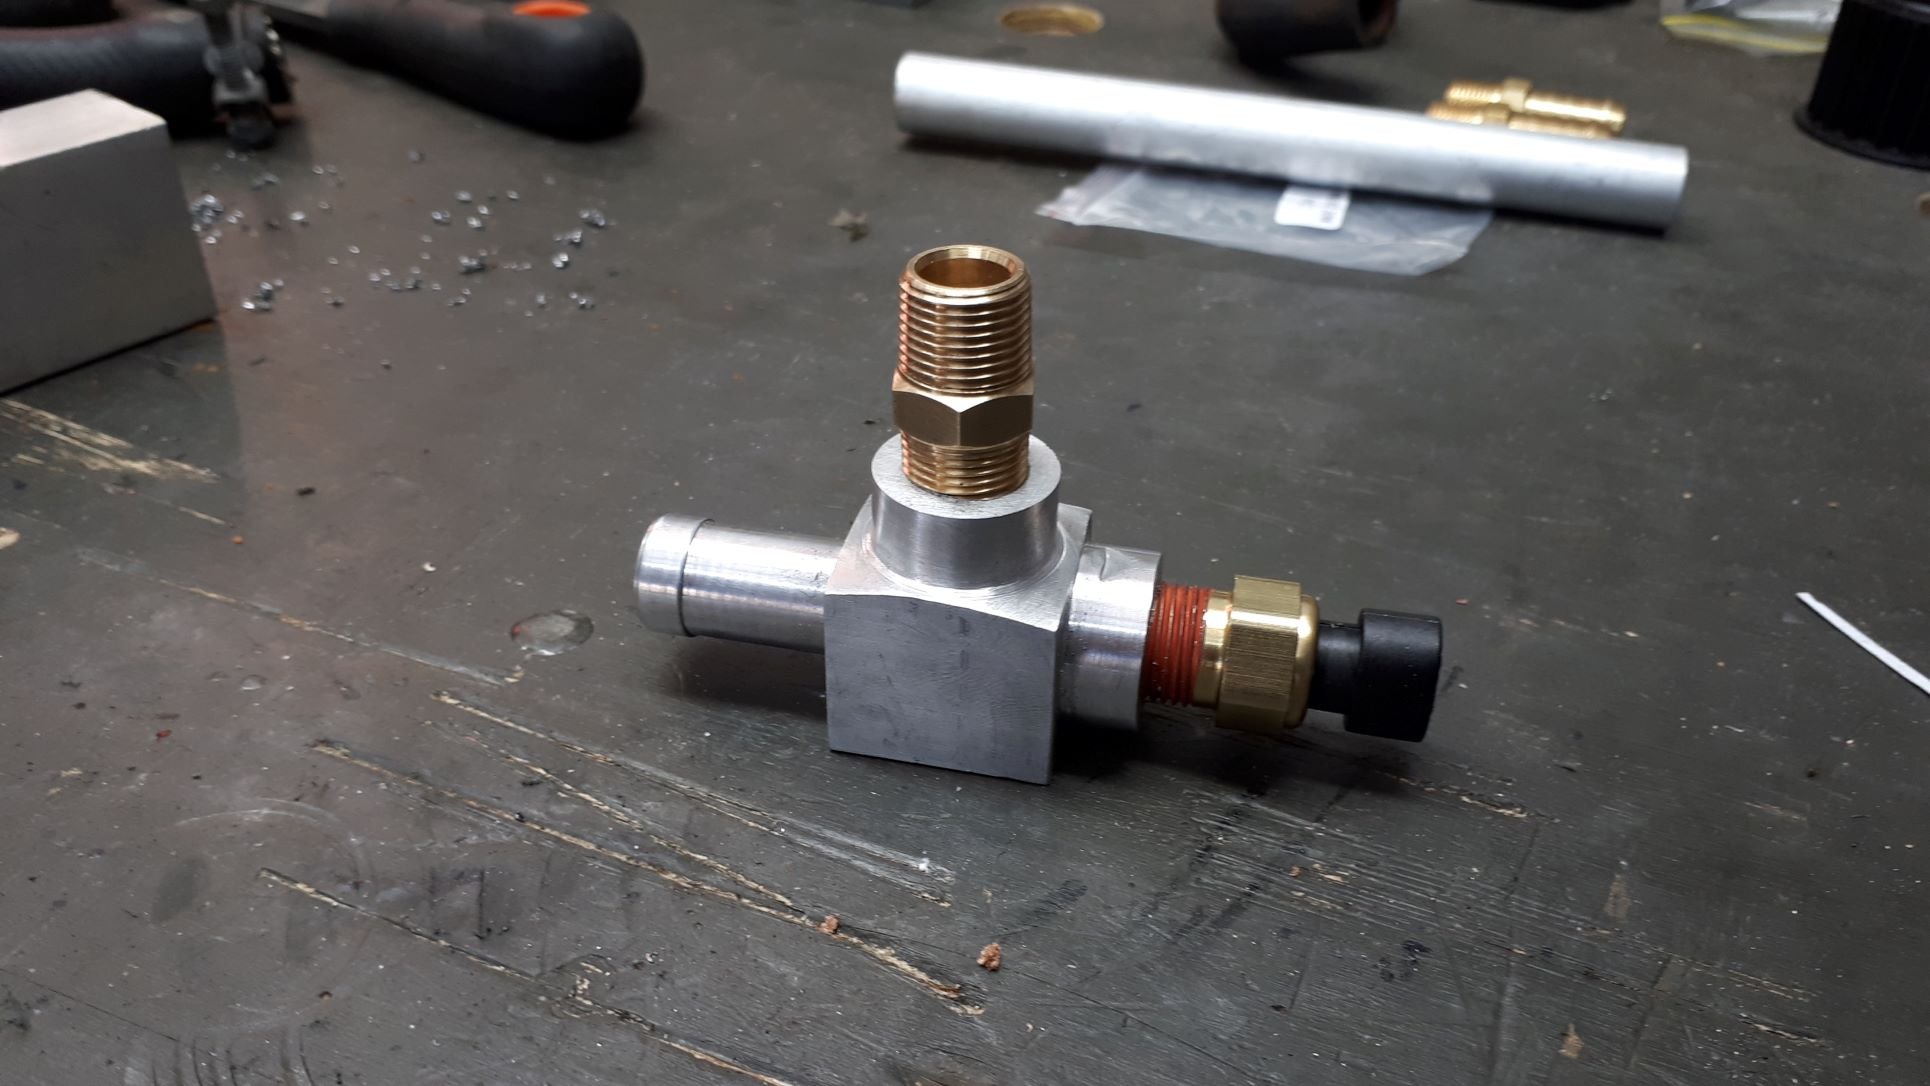
Hacking up the manifold resulted in the removal of some water fittings and I needed to reinstate the removed cooling system components. I had a nice piece of aluminium under the workbench so decided to make a custom fitting. The lathe is a fairly new addition to the workshop, a couple of friends very kindly offered the use of workshop lathes however I decided that I had enough work to do to justify buying my own. Also I haven't used a lathe in many years and I knew that everything would take forever. I have never tried to make anything like this before but I think came out pretty well.
1 point
-
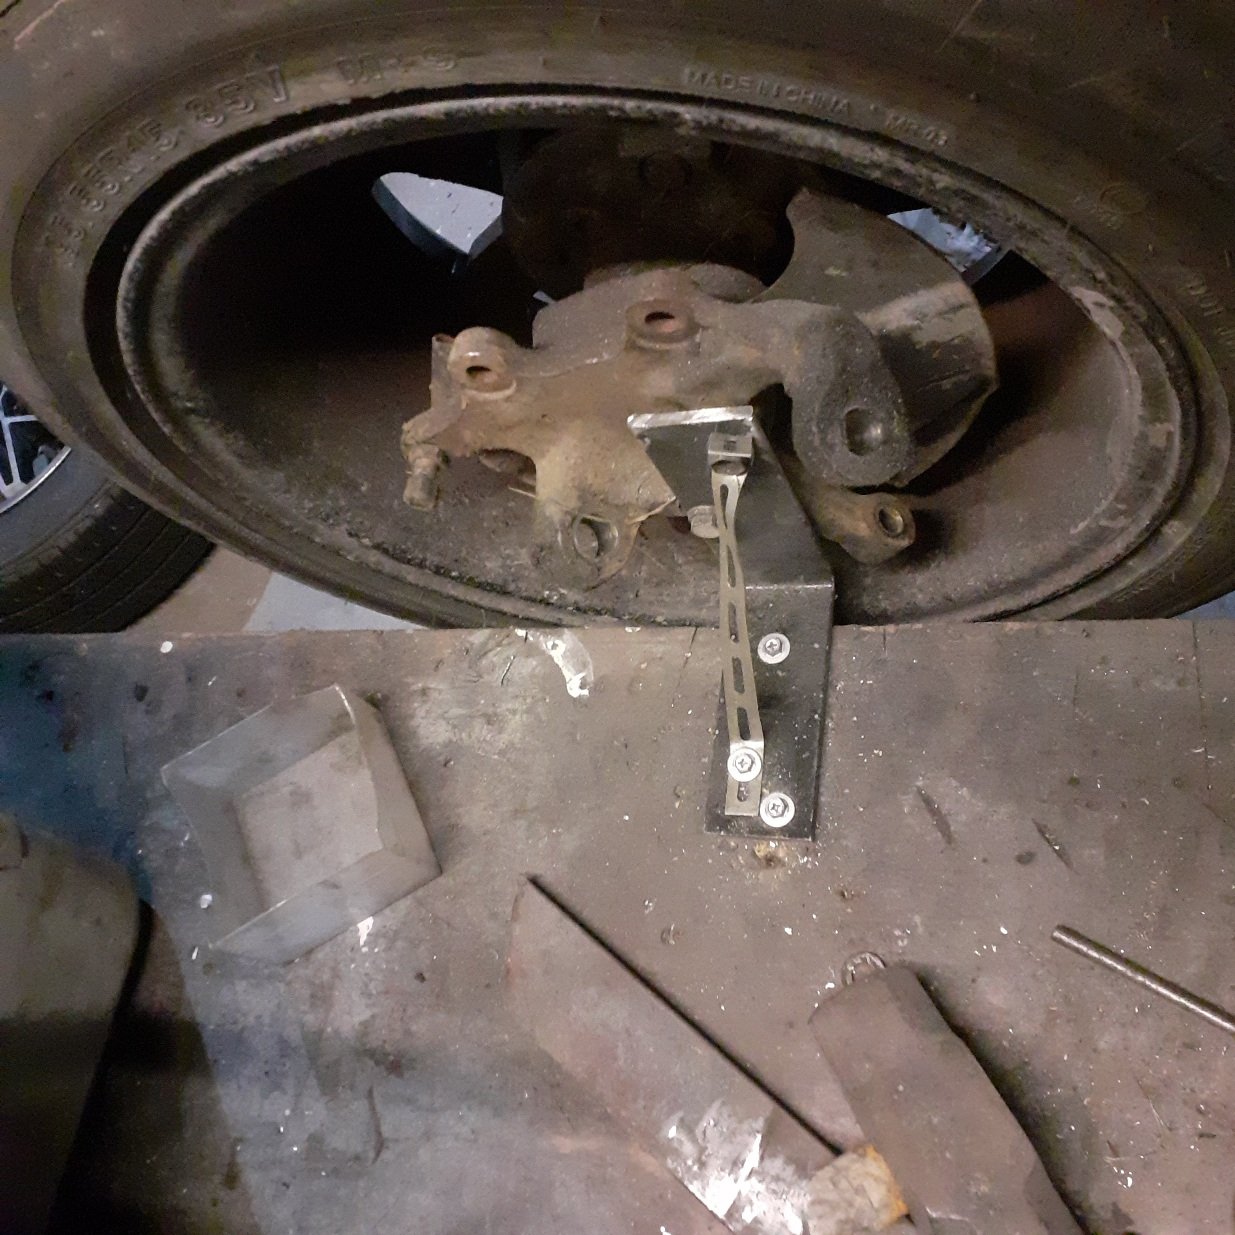
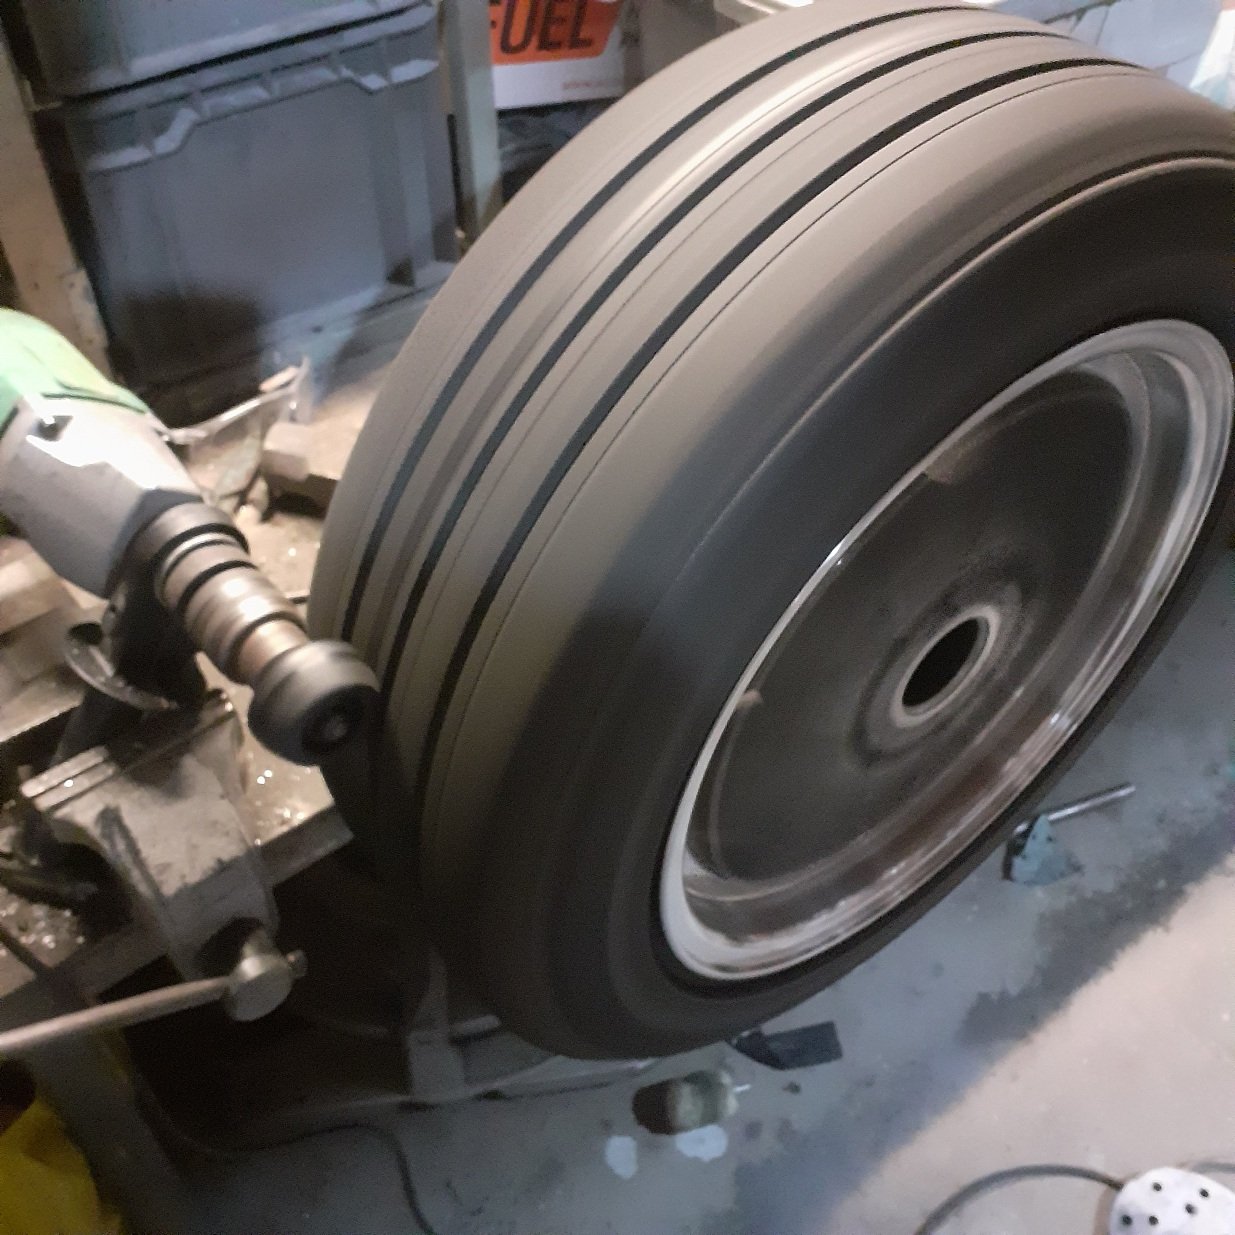
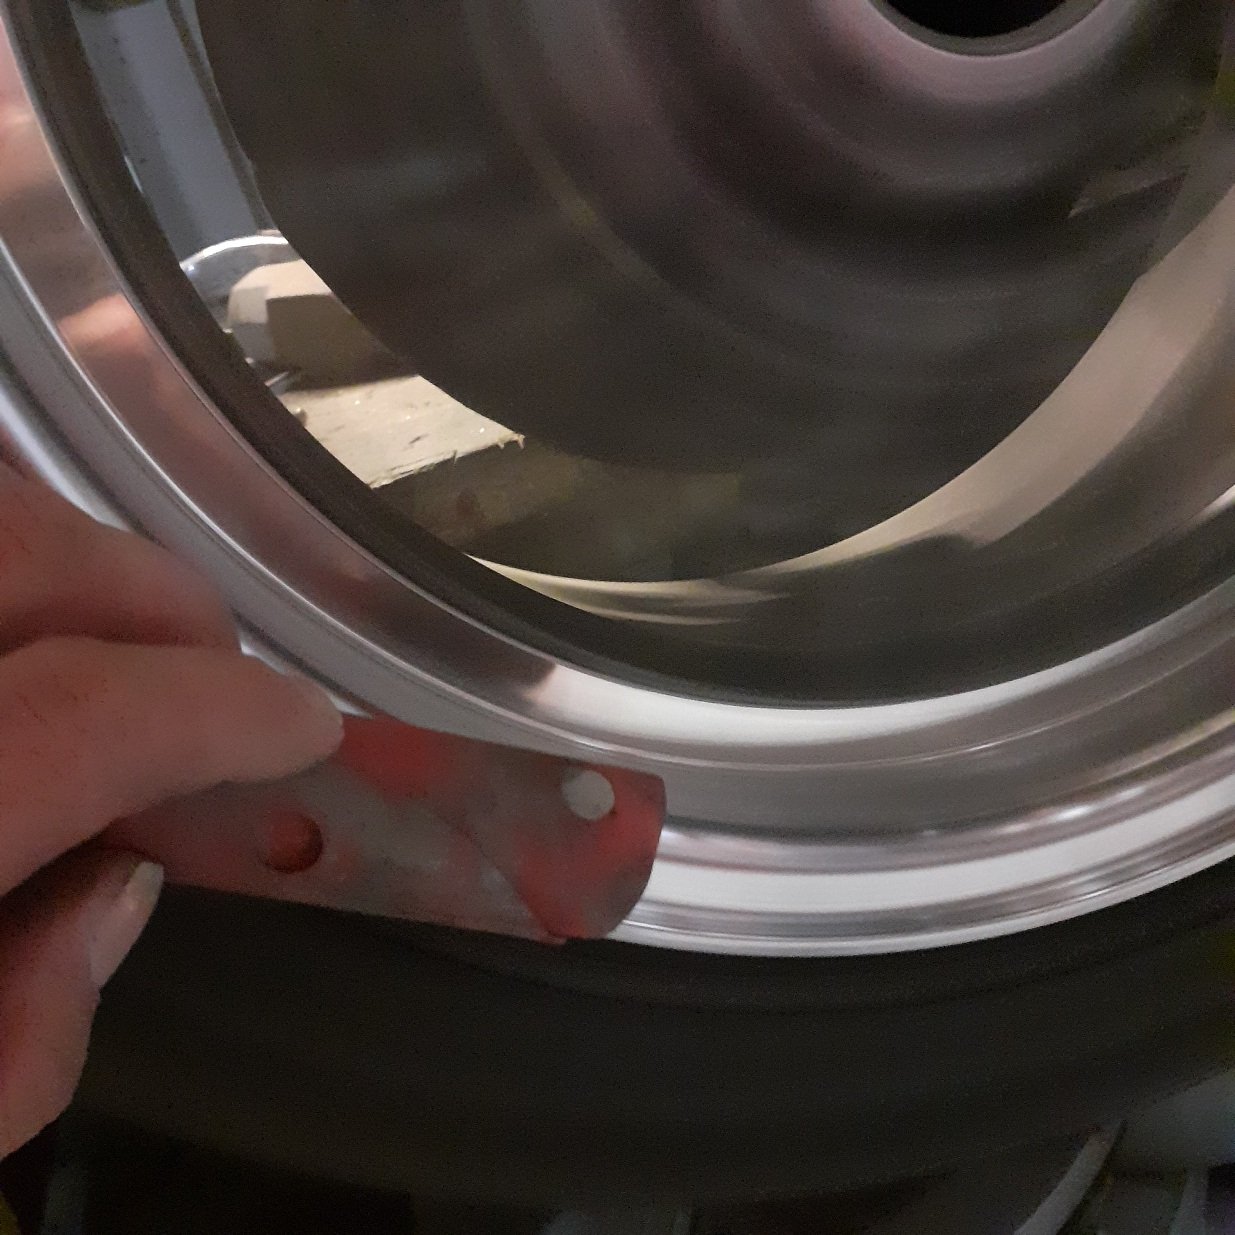
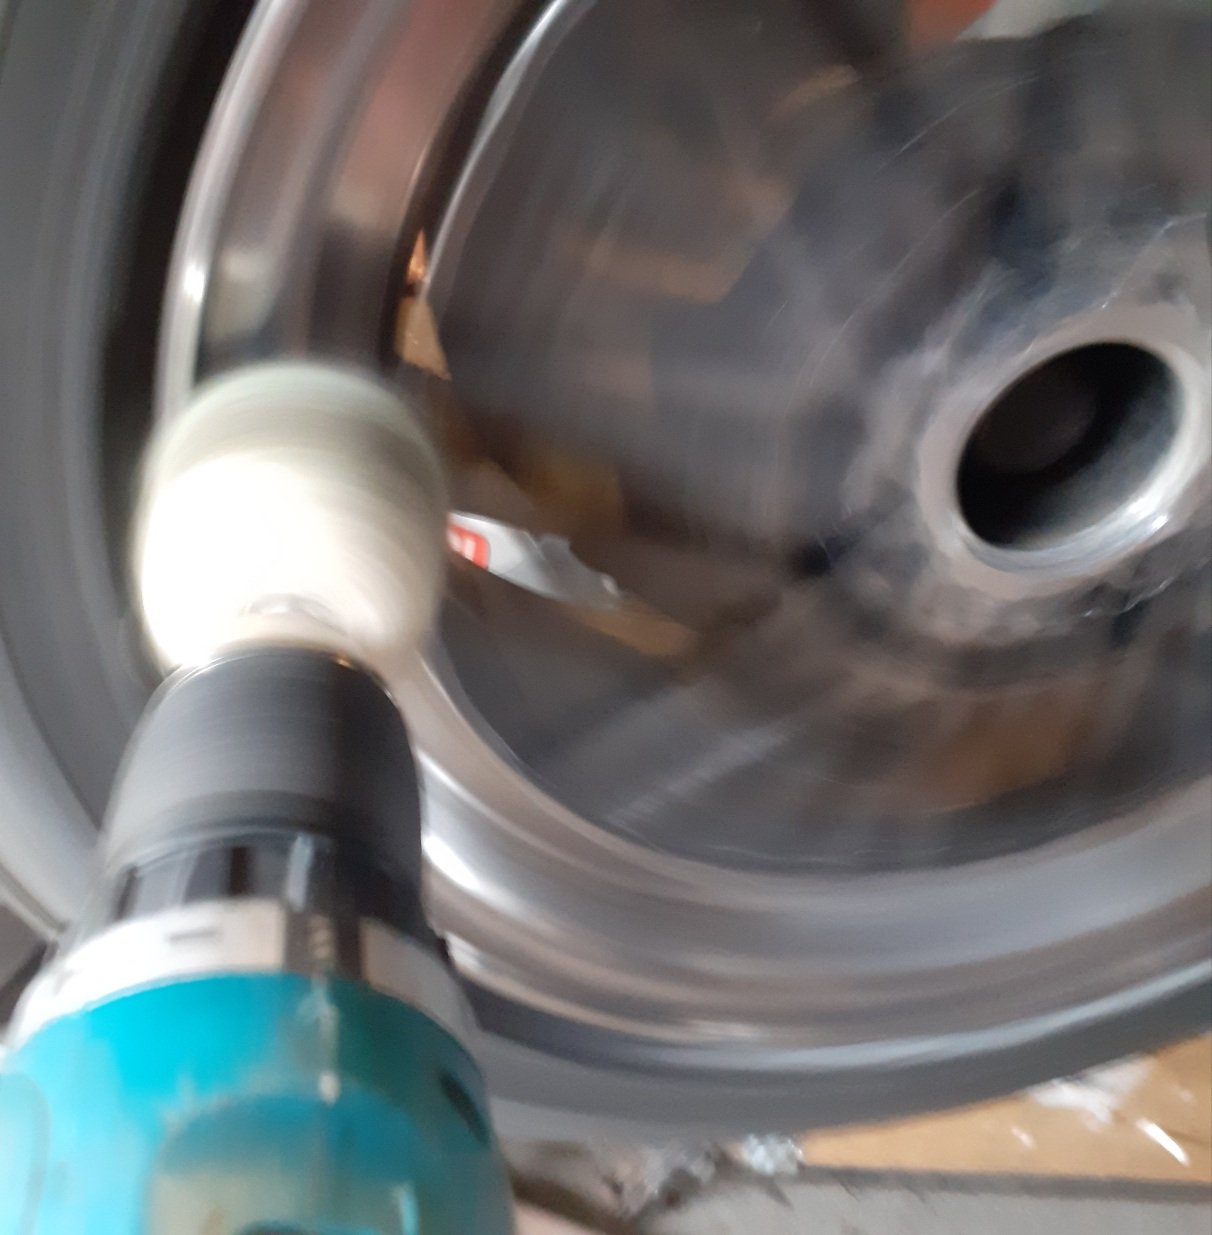
Build a janky wheel polishing/ rim sanding thing while i wait for some suspension and body parts ,made out of donor vans front wheel hub and a bracket with a rubber thing in a drill, works well! Autosol really works best after some high grit wet sandpaper, better than by hand Though tyre off and valve stem out would be ideal but im lazy and cheap, the drill is speed ajustable.. so it dont hurt as much at lower speeds lol
1 point
-
My 2c. Make some good solid clamps for the front of the leaf spring pack. I also made some bars that went from the top of the axle tubes to the chassis, like the top half of a 4 link set up. Just make sure the distance of your new arms is the same as center to center as the front spring eye to the center of your axle. It worked well for my car, I used the watts links off a falcon with the pivot cut in half and welded to the axle tubes. It kept everything up above the ground.1 point
-
Well, we haven't managed to realise the promise of the previous post, but here's the state of play regardless. First up, gearbox. The remainder of my spiffy new internals showed up from the motherland, and I trundled up to the sunny Hibiscus Coast to finish assembly under the watchful eye and guiding hands of Mr. McFarlane the T50 whisperer. This is what we ended up with. 20210515_113825-01 by Richard Opie, on Flickr All shiny and clean and new! The only things NOT new in this, are the gearsets, main shaft and shifter rods. 20210515_113843-01 by Richard Opie, on Flickr Pretty neat learning exactly how this all works in a practical sense. Otherwise the gearsets are all in pretty good order, given the hiding this thing appears to have taken over its life. 20210515_113836-01 by Richard Opie, on Flickr Little bit of a close up of the nice new shift forks and shifter hub/sleeve things Then we tackled the head. Well, Alan at Harris Performance did. For those that don't know, Harris Performance is what was formerly Lynn Rogers and Alan knows his way around a 4AG head a bit. Pics of head below for perusal. 20210511_115253-01 by Richard Opie, on Flickr Chambers tidied up, valves deshrouded. 20210511_115249-01 by Richard Opie, on Flickr 20210511_115244-01 by Richard Opie, on Flickr Inlets all looking a bit spiffy! 20210511_153023-01 by Richard Opie, on Flickr This is the transition from the T3 ITB manifold to the head. Out of the box, it was super shithouse. Now it isn't, plus the manifold/head have been doweled so it's always fitted up in the right place. Not even sausage hands Richy can fuck this one up (too much, anyway). 20210513_124014-01 by Richard Opie, on Flickr 20210513_124023-01 by Richard Opie, on Flickr Cams and supertech valvetrain all installed. We ended up going 1mm oversized valves, as the ones in the head were past their best before and the extra cost wasn't going to be a big deal over replacing them with stock sized ones. It's in the final stages now, prior to head assembly I dropped the long block off, and Alan measured the valve to piston clearances to ensure nothing was going to clash and end in tears. Will have a number on CR shortly (expect it'll be around 12:1 or slightly more) and the head will rejoin the block. Next update, we should have a built long block and I'll be putting all the ancillaries back on it, prepping to put it back in the car hopefully for the last time for the forseeable. Tell me how it's a fuck up and it's going to explode, here;1 point
-
20210129_194419-Edit by Richard Opie, on Flickr Toyota Fest later this morning. Can't sleep. Too amped. Finishing touches to the detailing this evening, then I sat and looked at it for a bit. Man, I am super into this thing.1 point
-
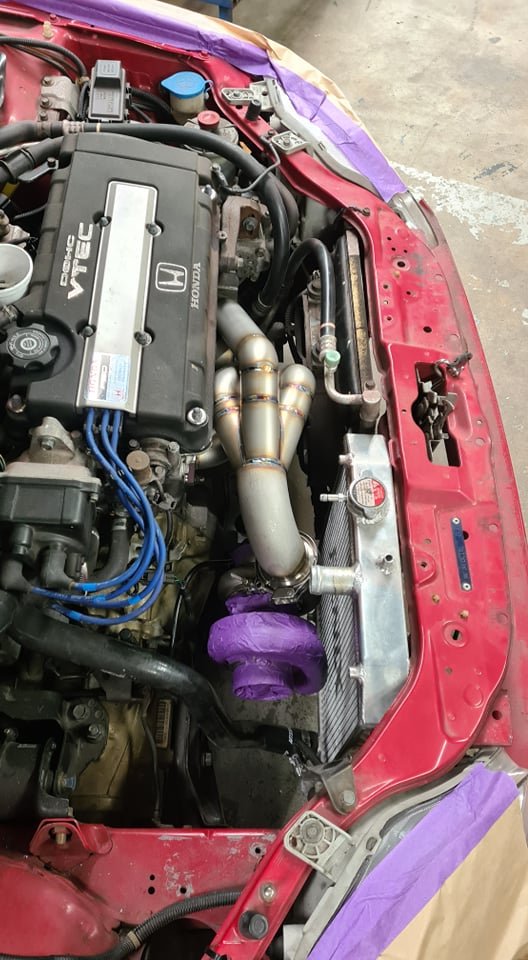
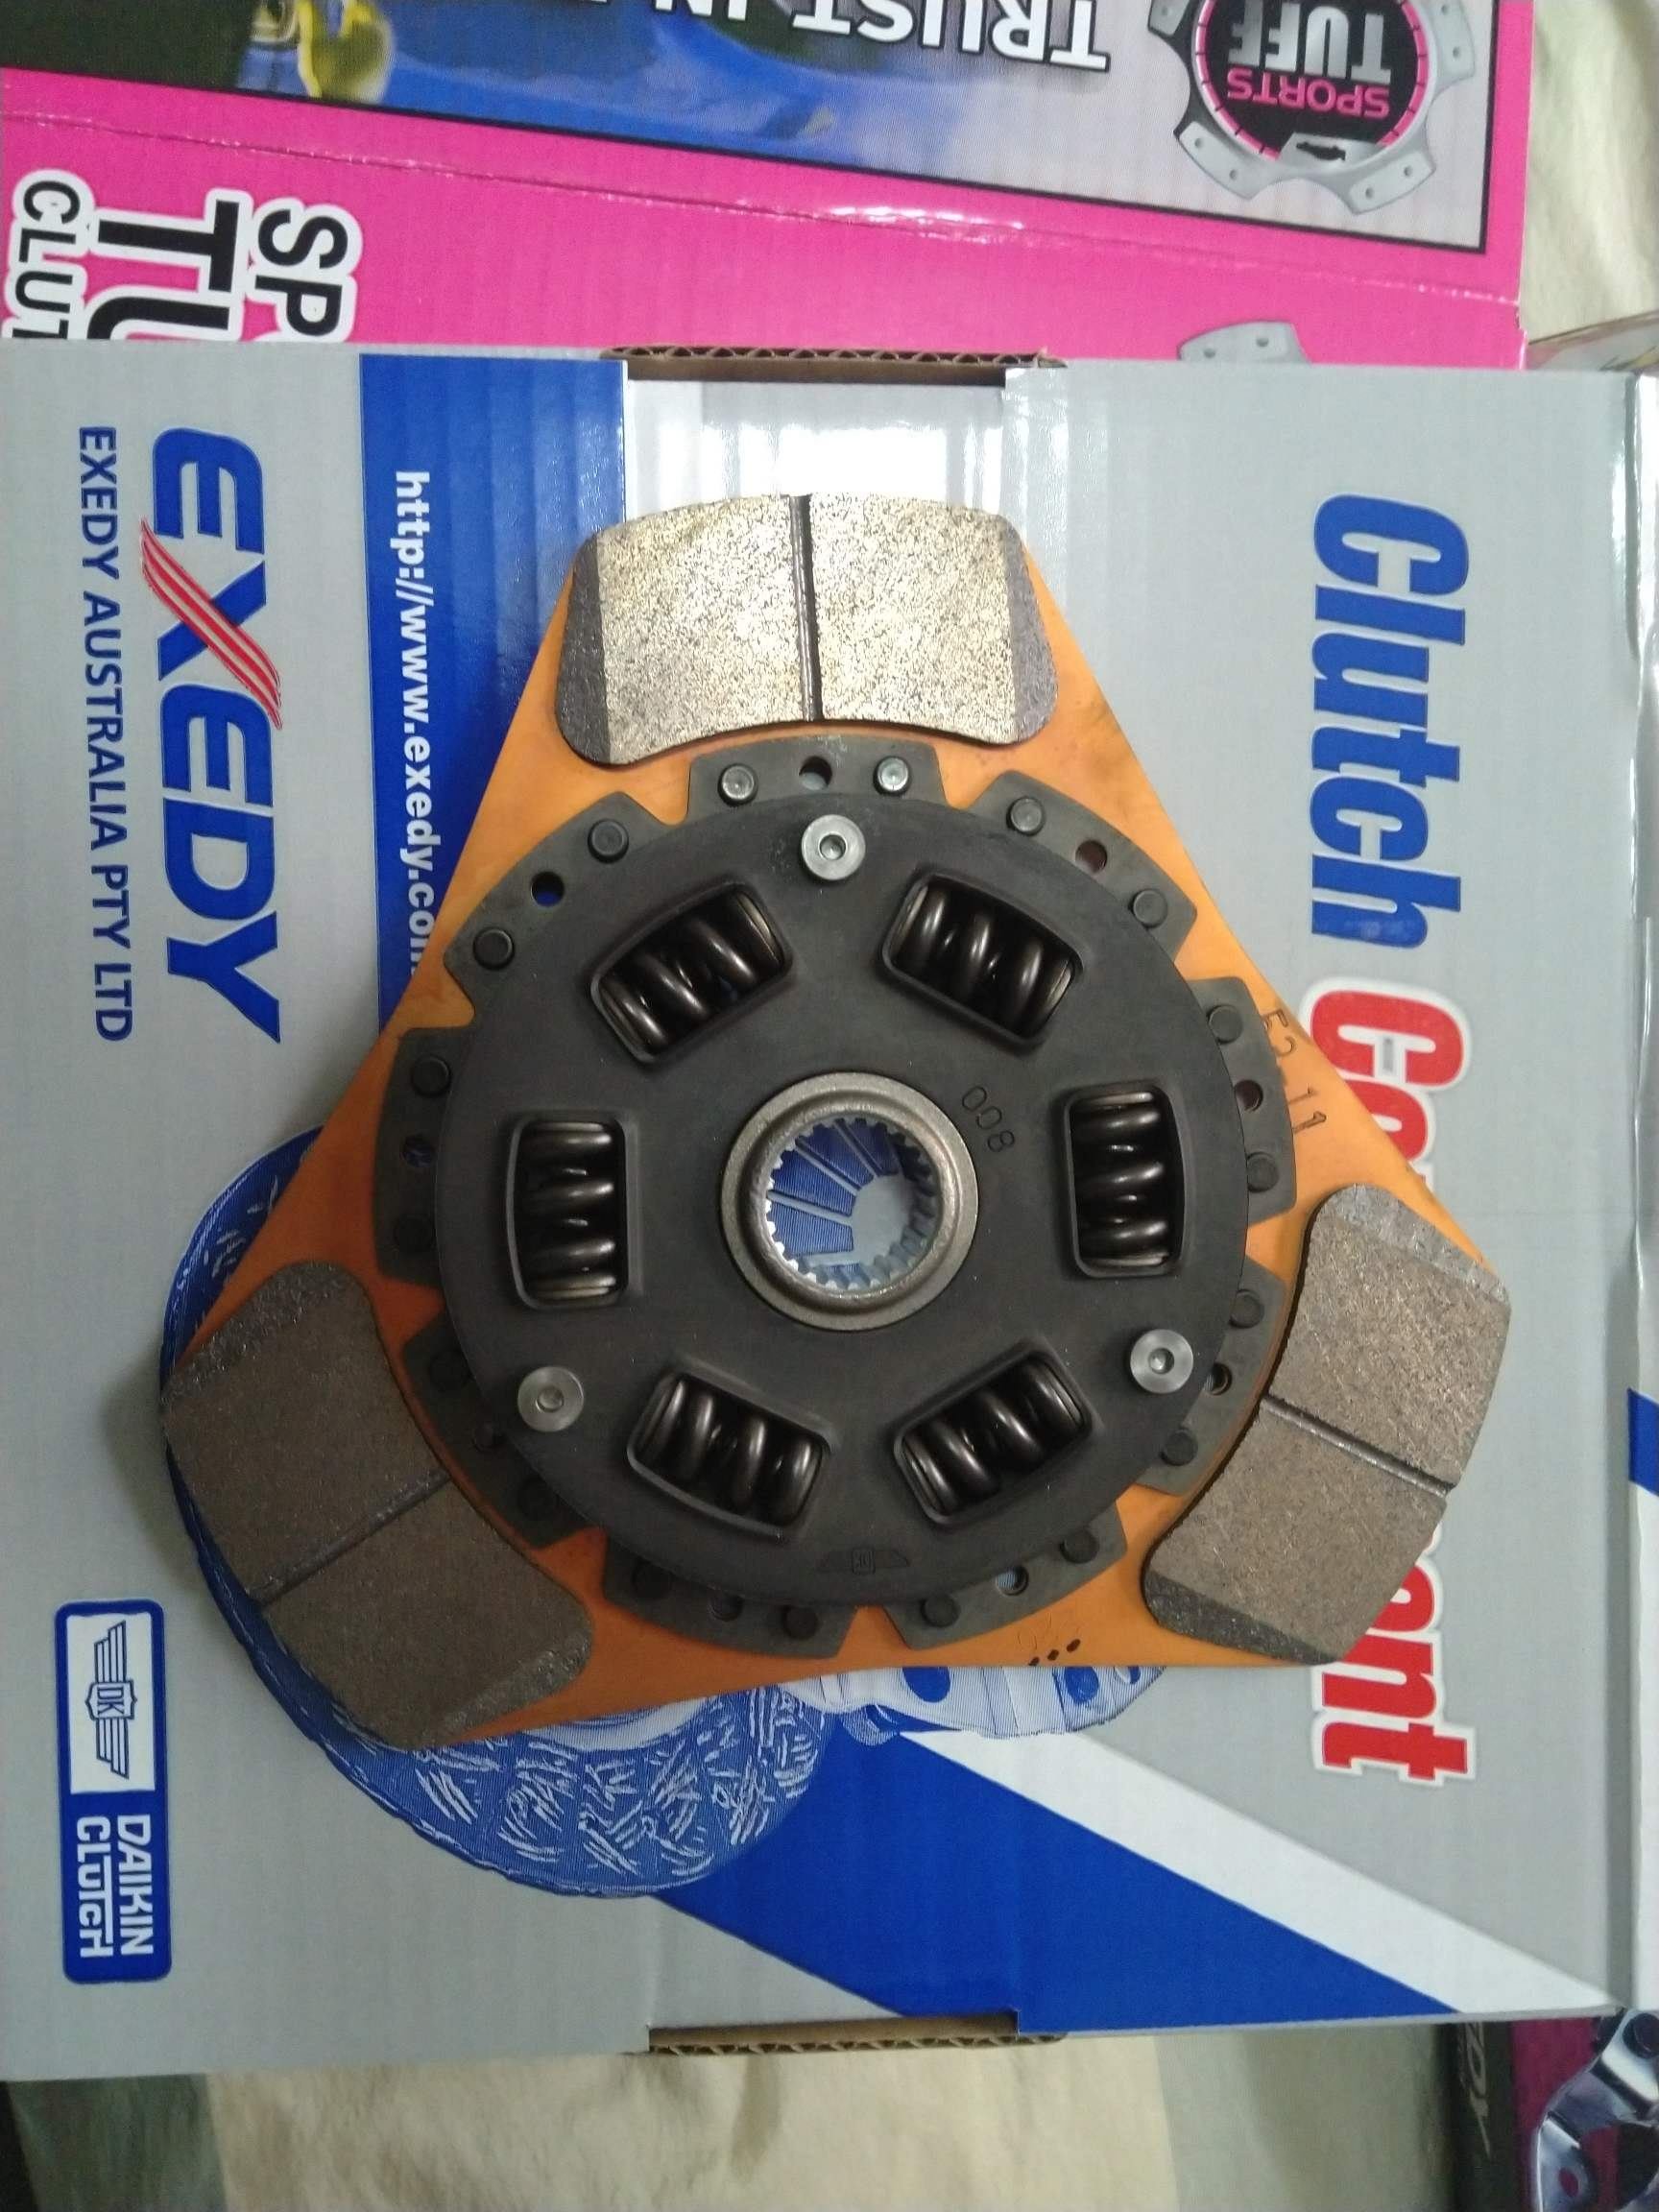
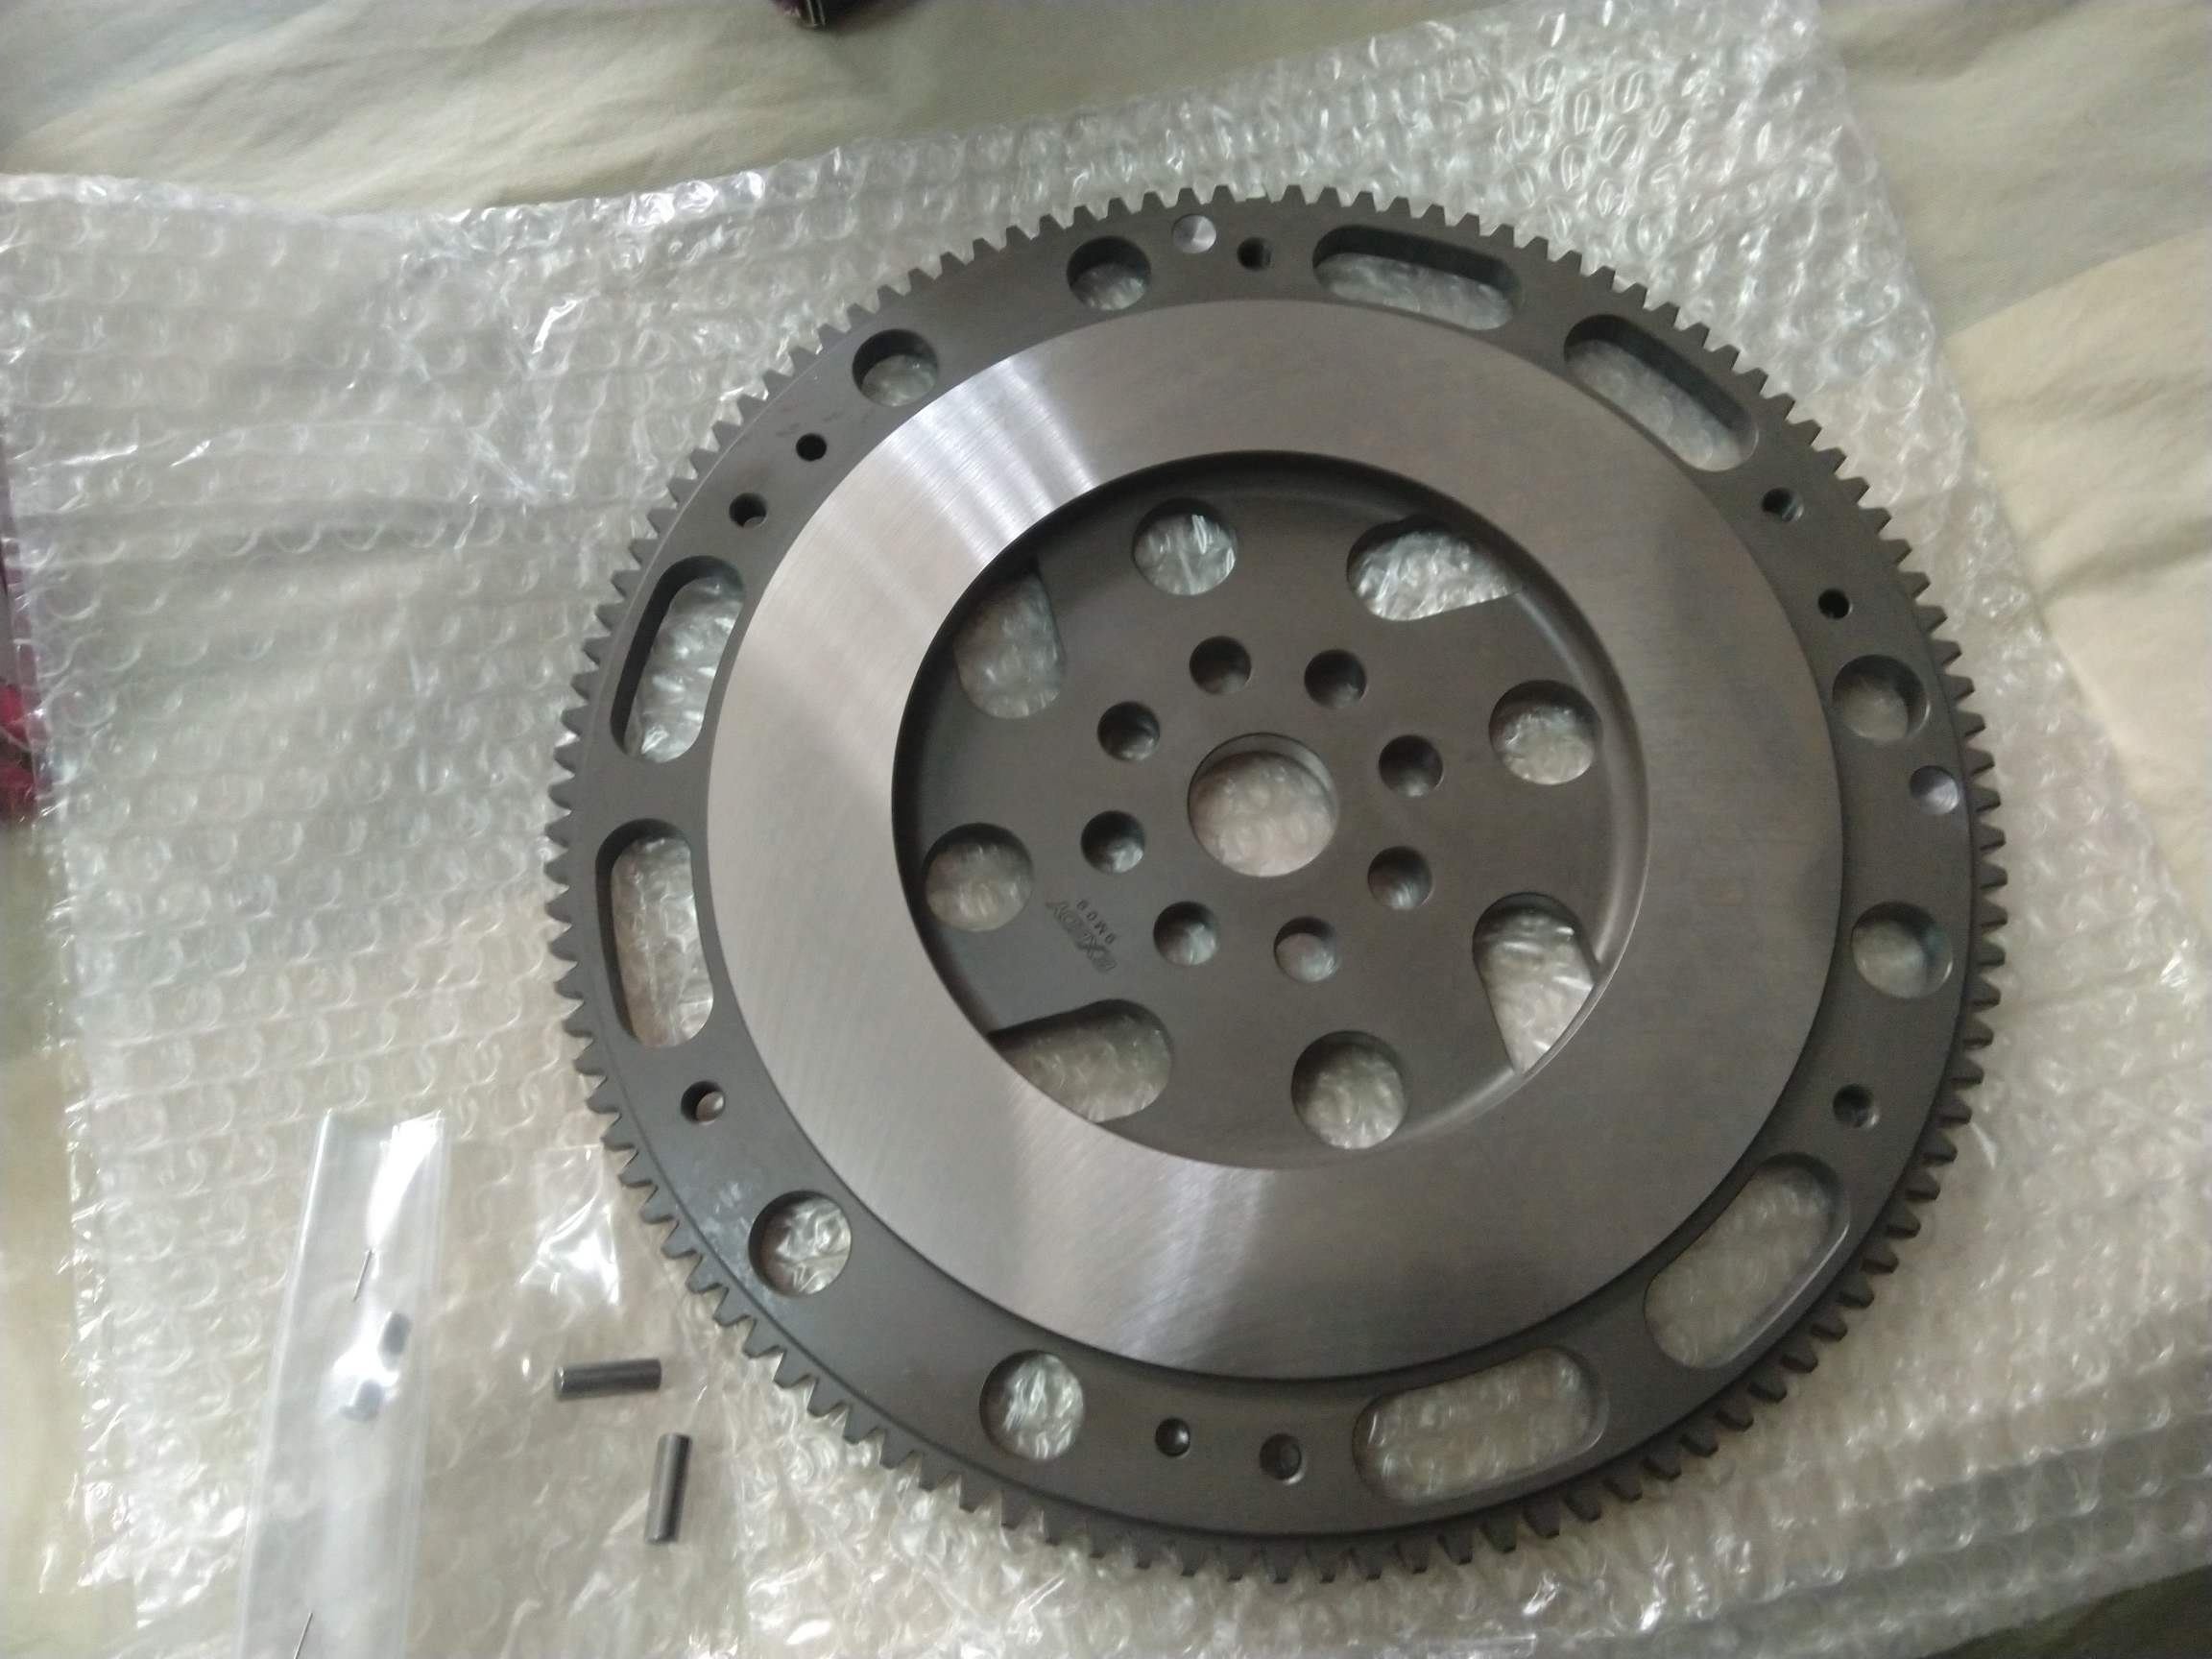
Clutch & Flywheel acquired - will get the gearbox rebuilt and these fitted late Jan / early Feb Also purchased a 66mil throttle body should make thing easier with future pipe work Cars getting repainted over Christmas / New Years back to Milano Red from Milano Pink
1 point


.jpeg.af1e6e0d05eaf3b92c89f594f37a027c.jpeg)
.jpeg.9bbfc2e64566dda9b080611b006d5947.jpeg)
.jpeg.cd63114ccc911a77ddc4d0057135cc19.jpeg)
.jpeg.77d0f7ff858570342d4f8a42ac96b177.jpeg)


This leaderboard is set to Auckland/GMT+12:00