
Leaderboard


Popular Content
Showing content with the highest reputation on 06/09/19 in all areas
-
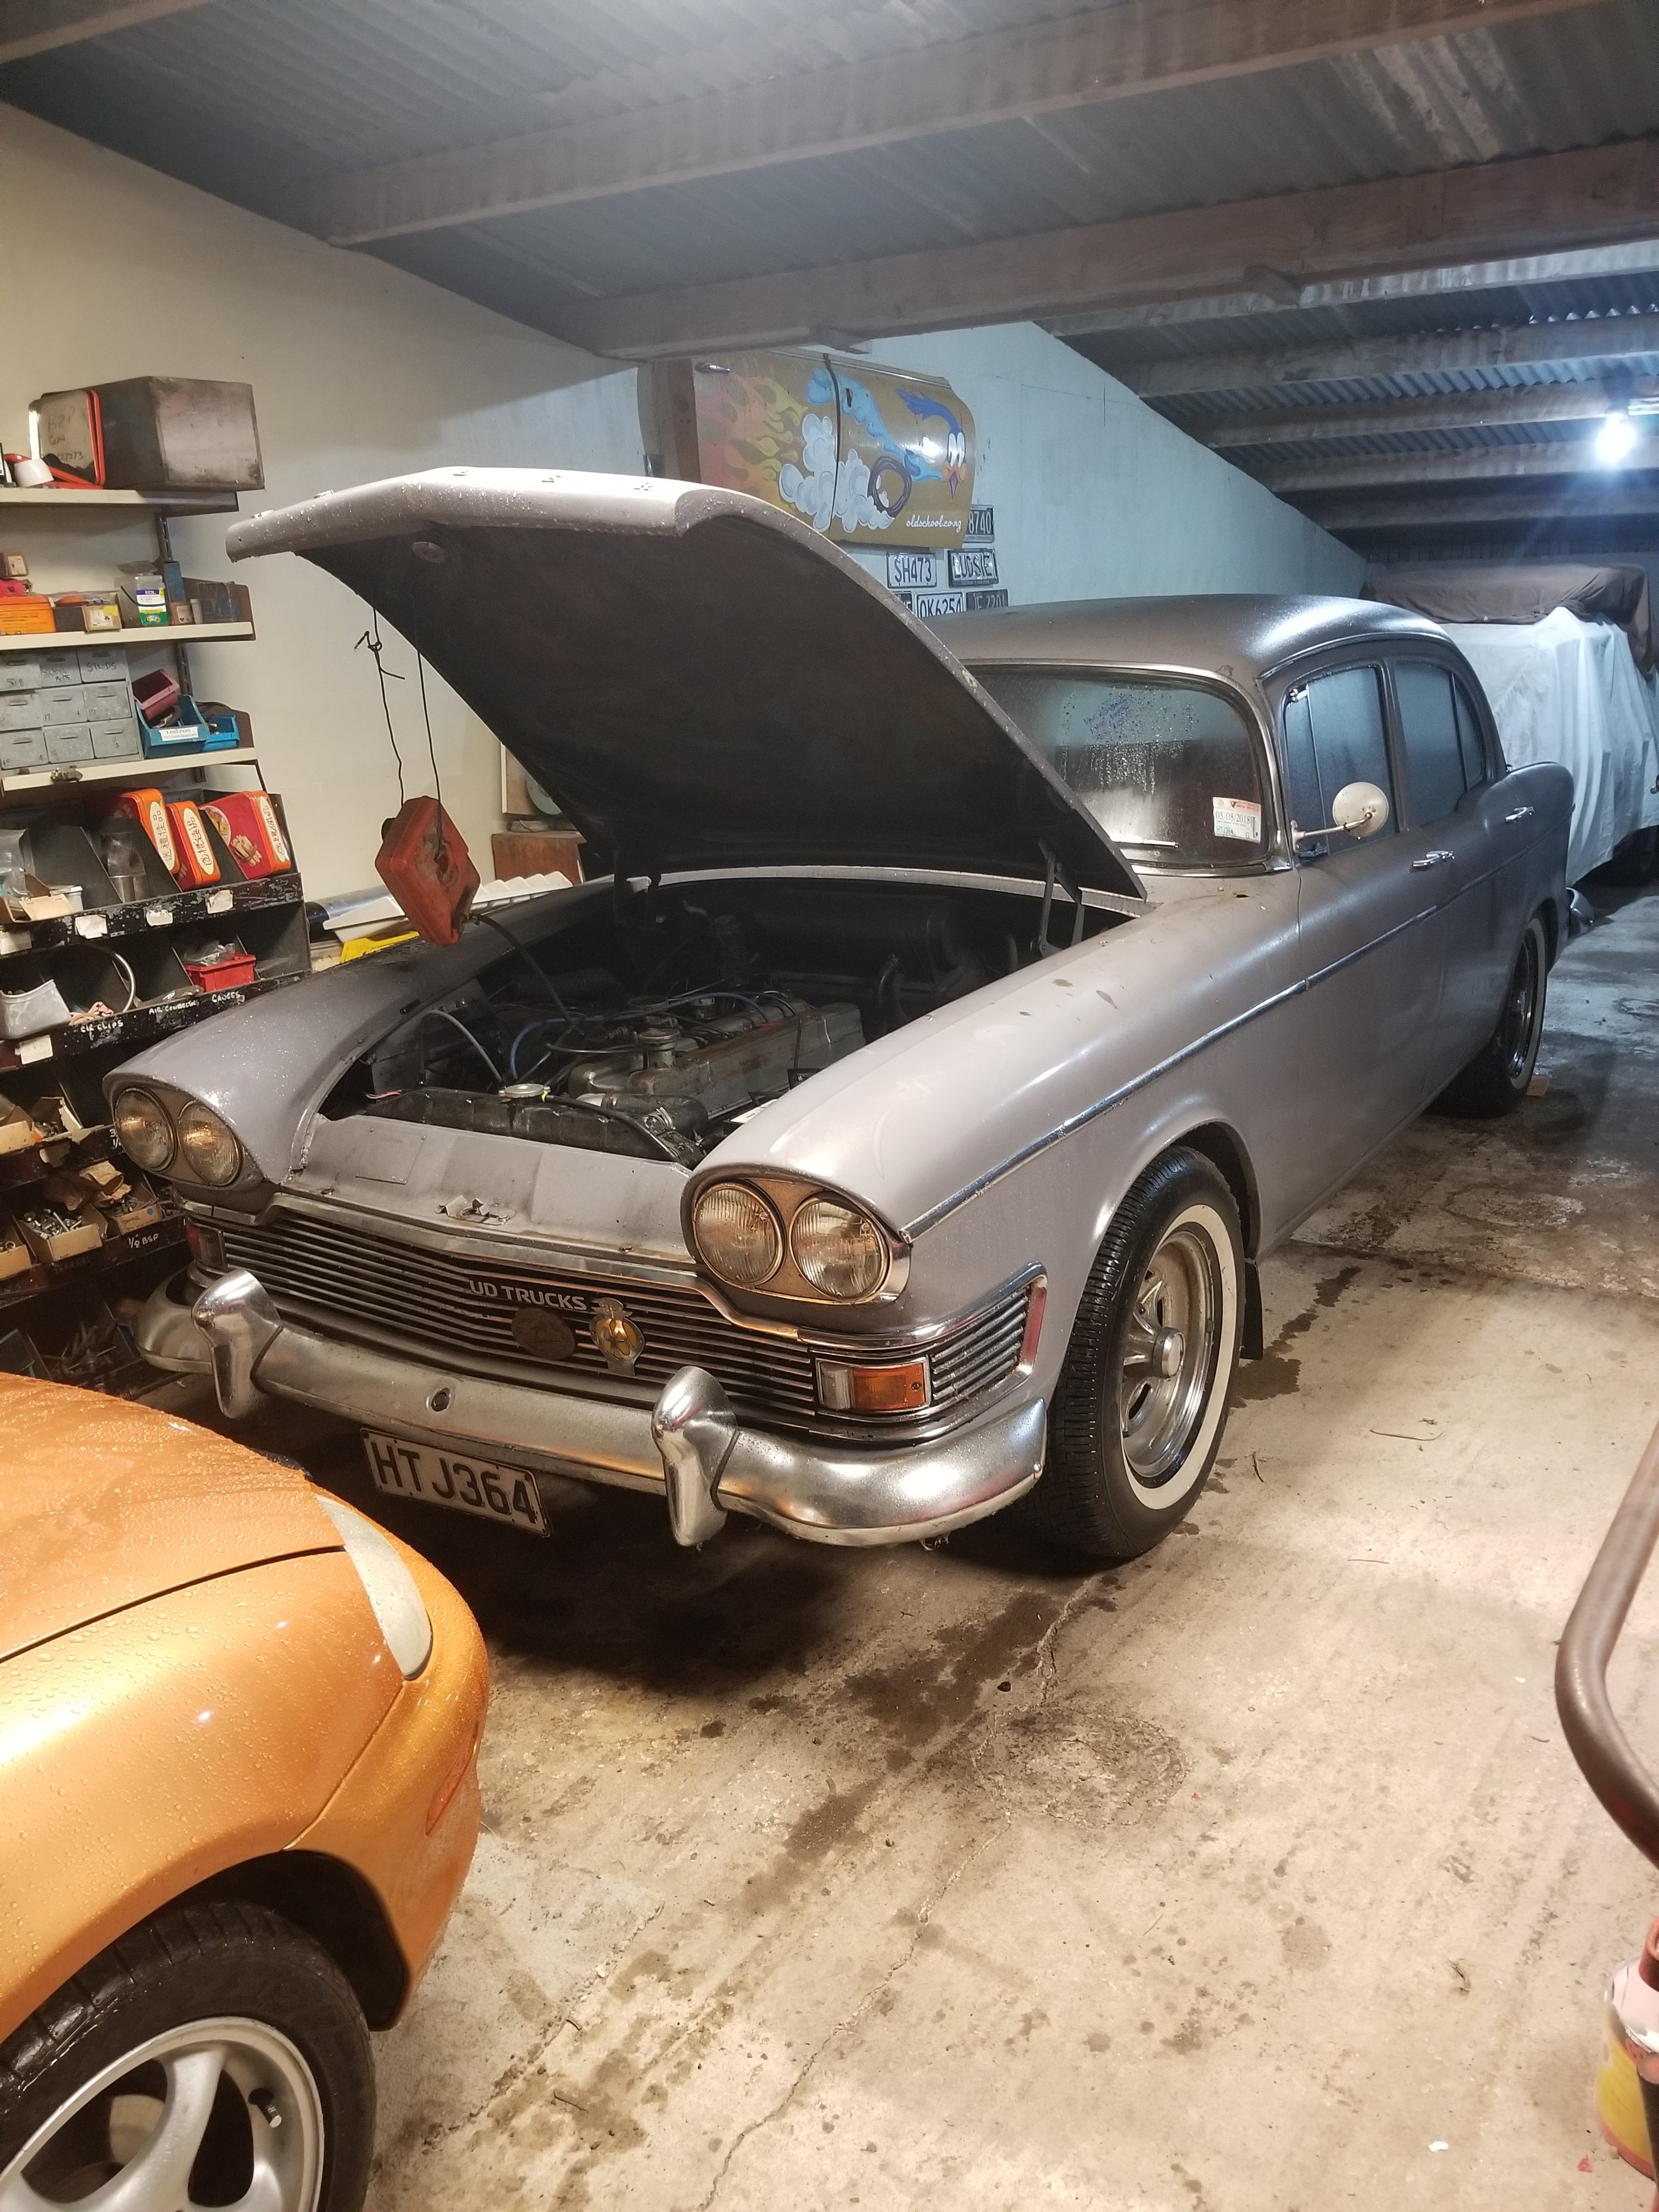
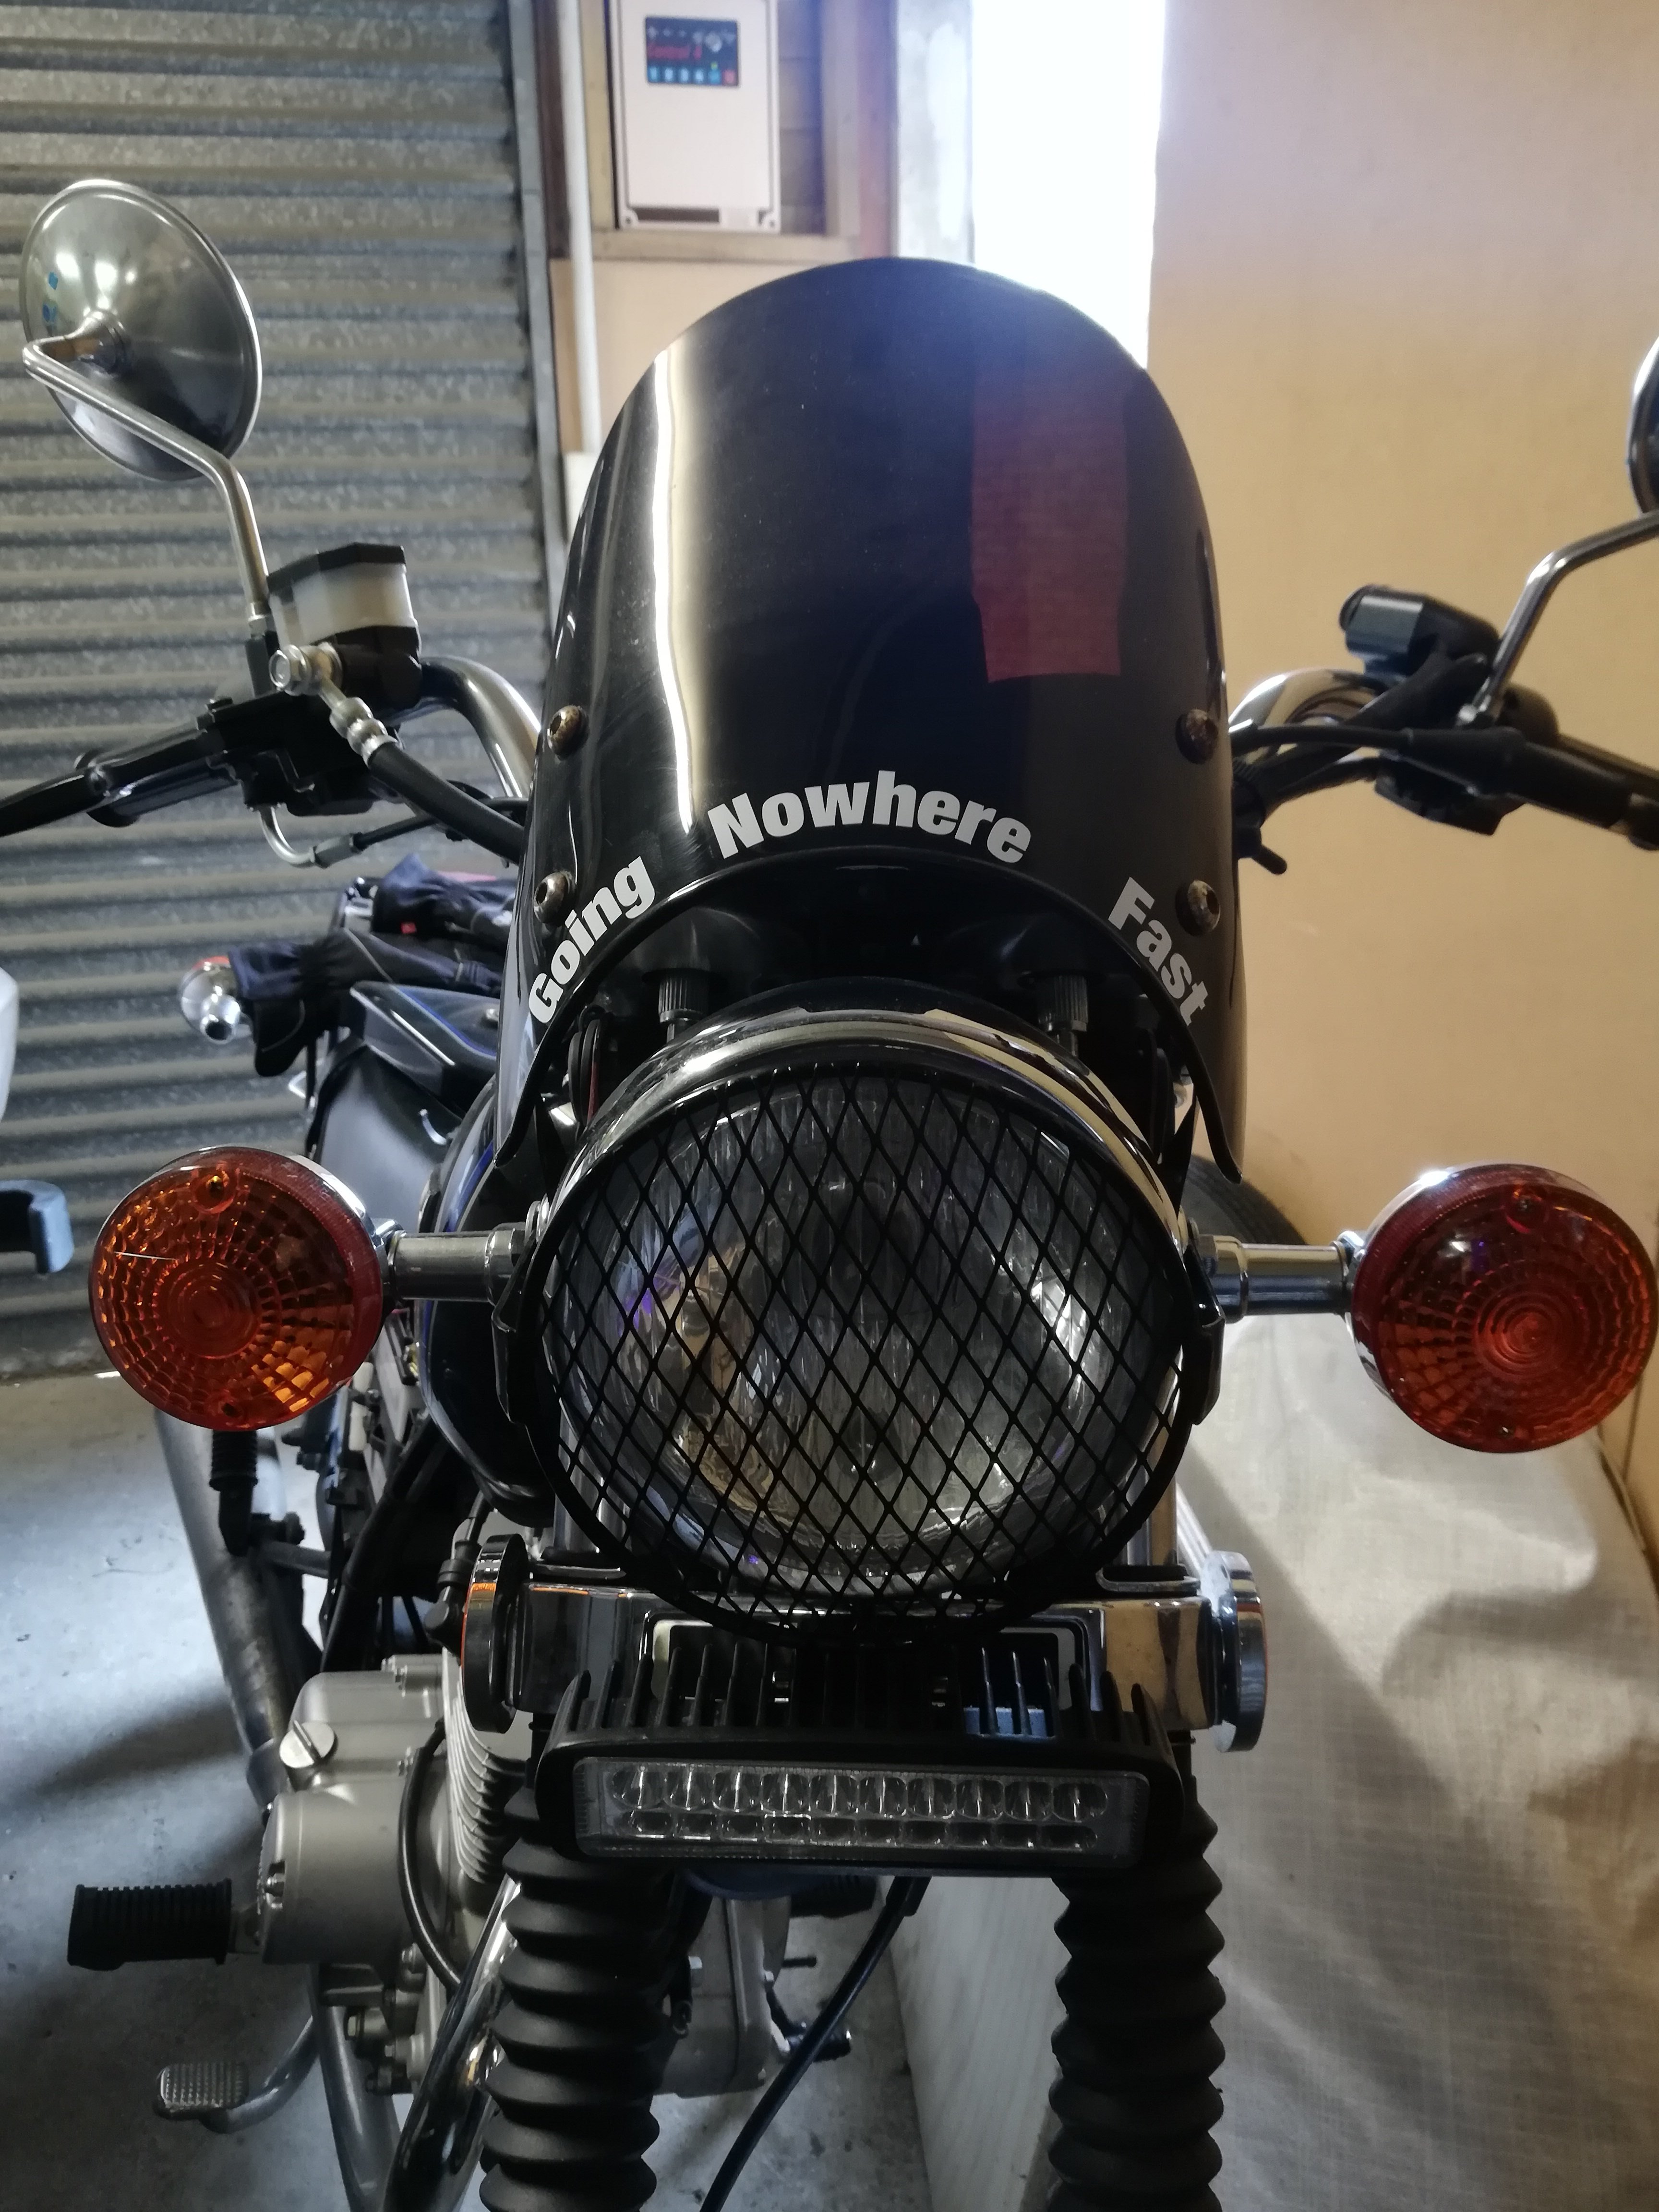
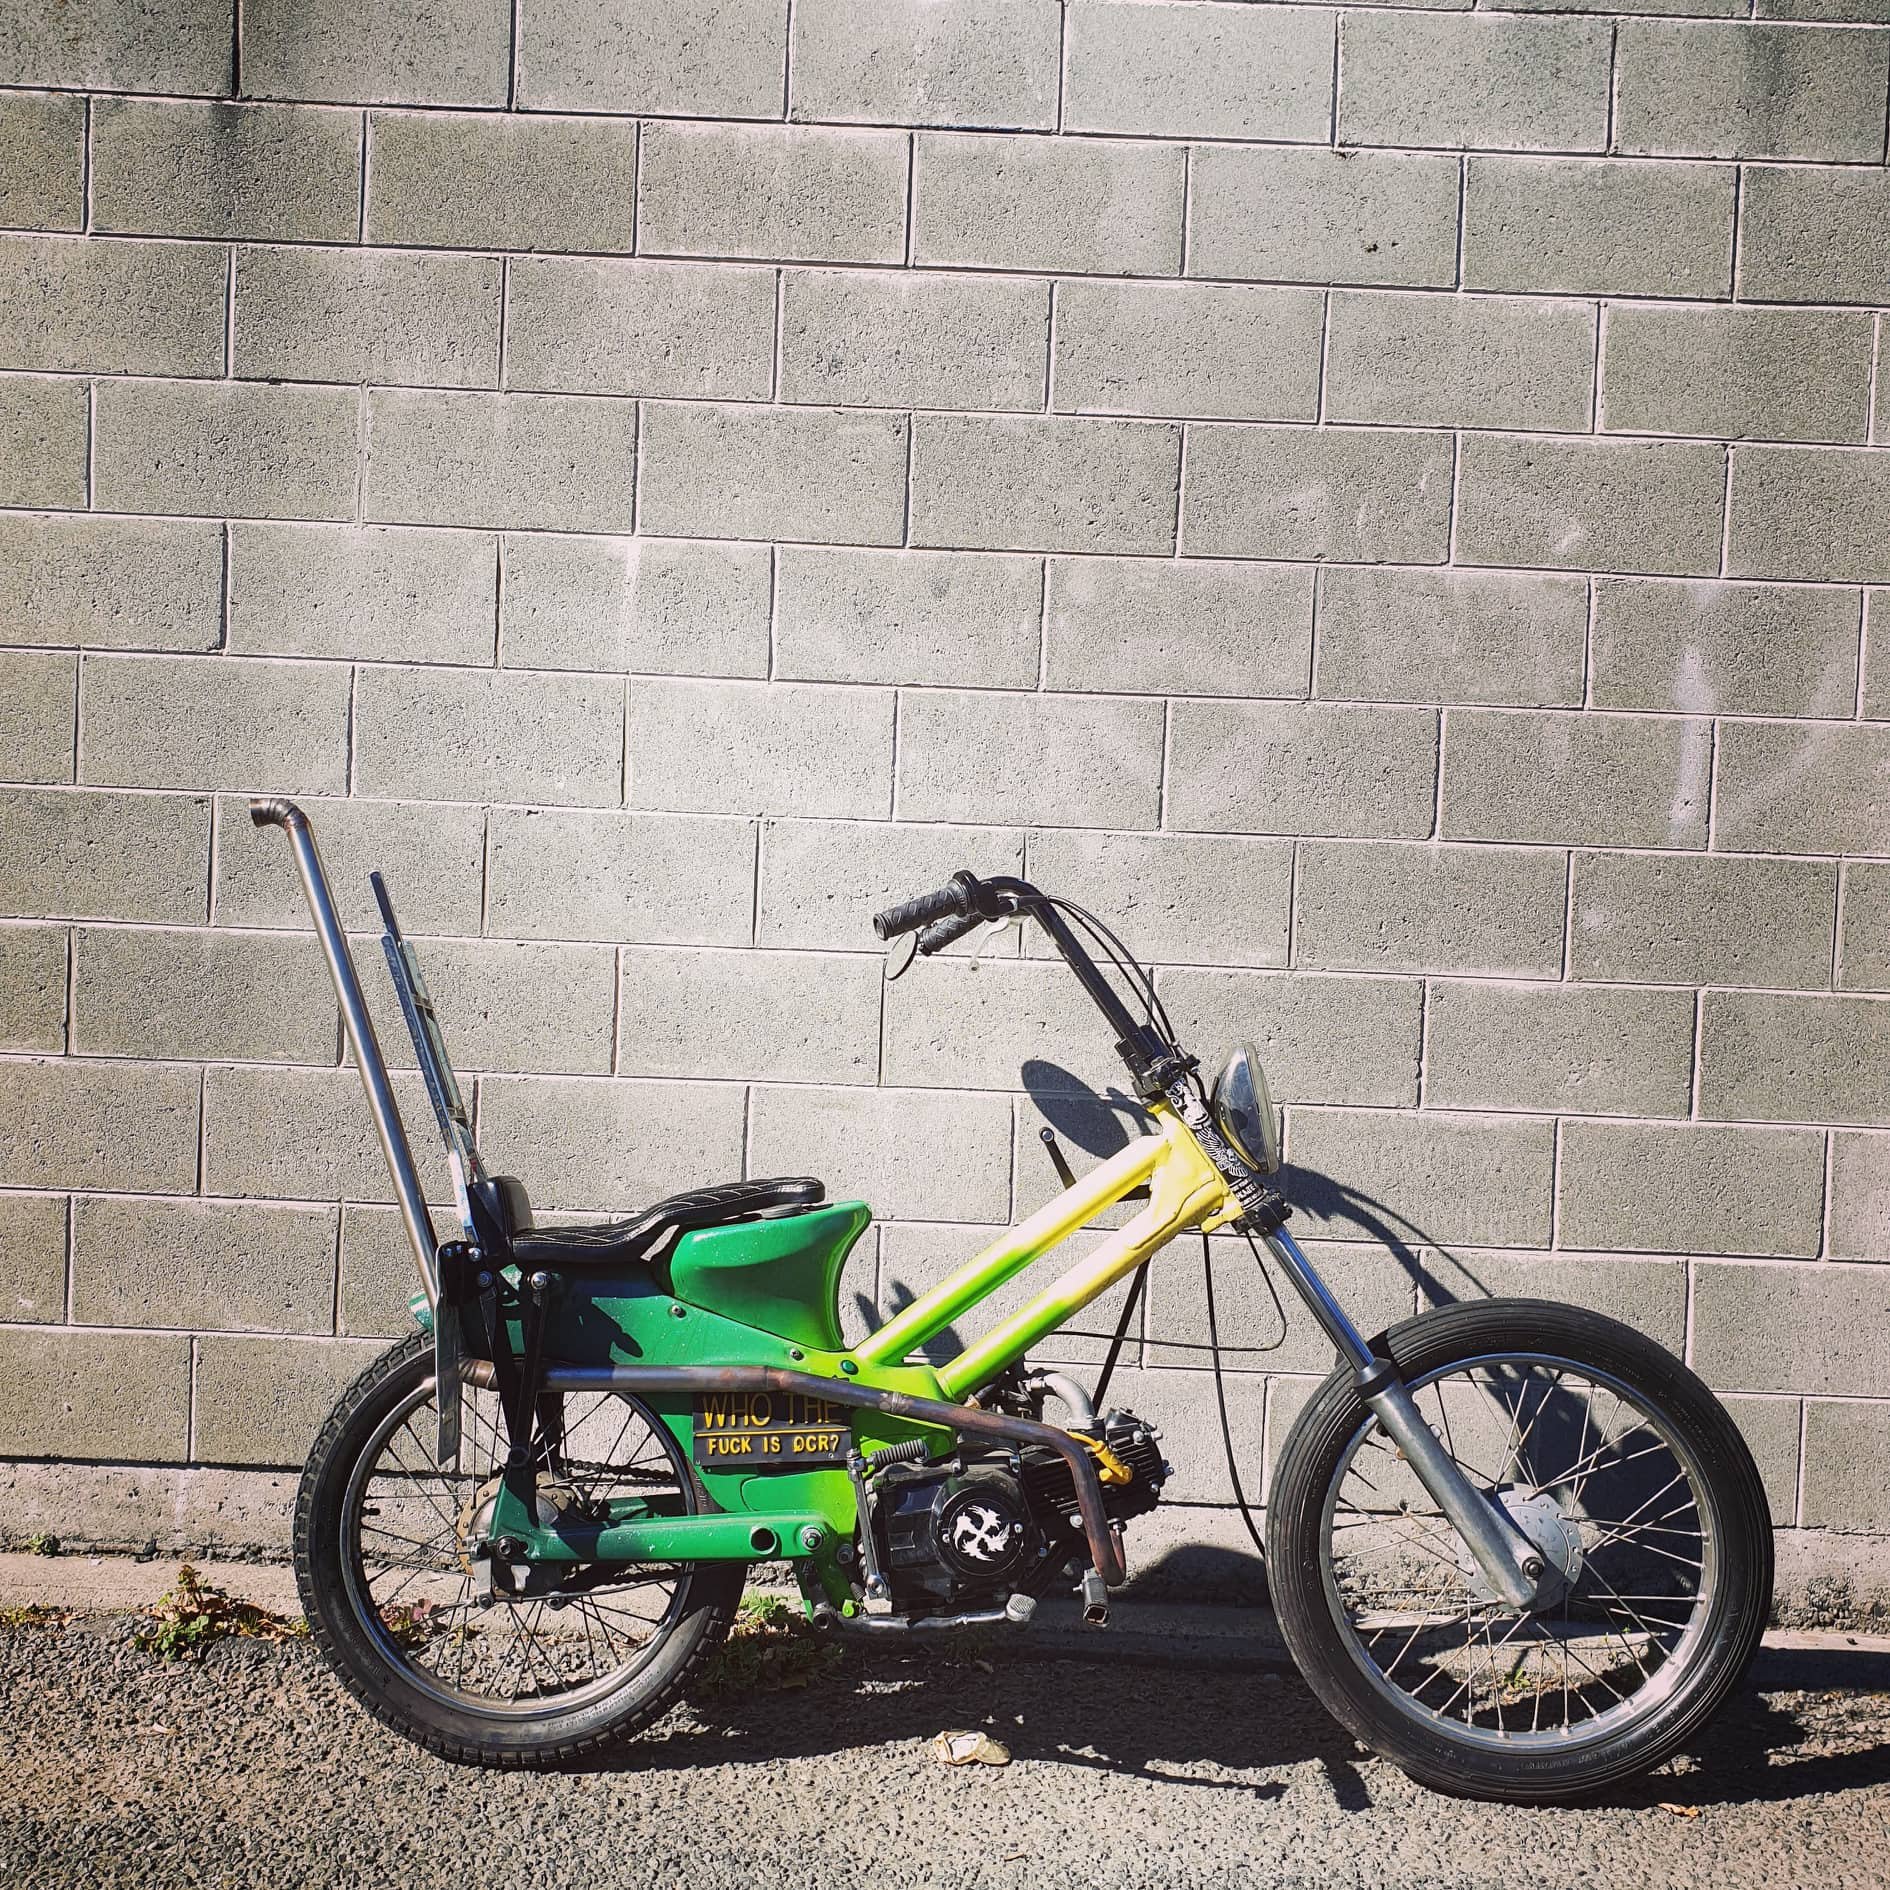
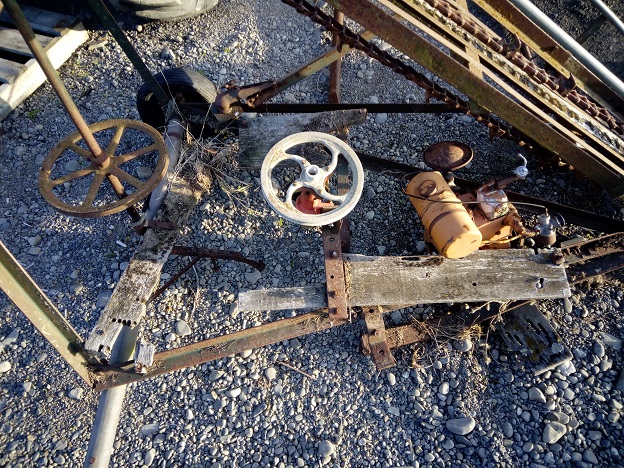
Put this shit in a storage shed two years ago. Dragged it into 'current projects' shed last night. #barnfind
 6 points
 -
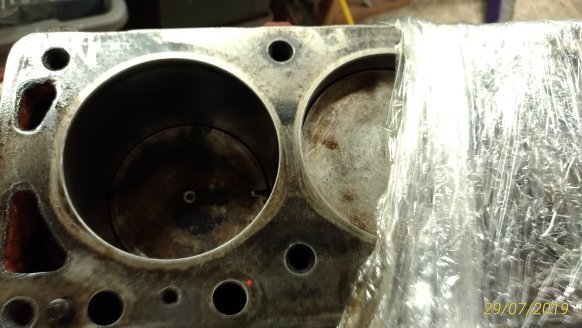
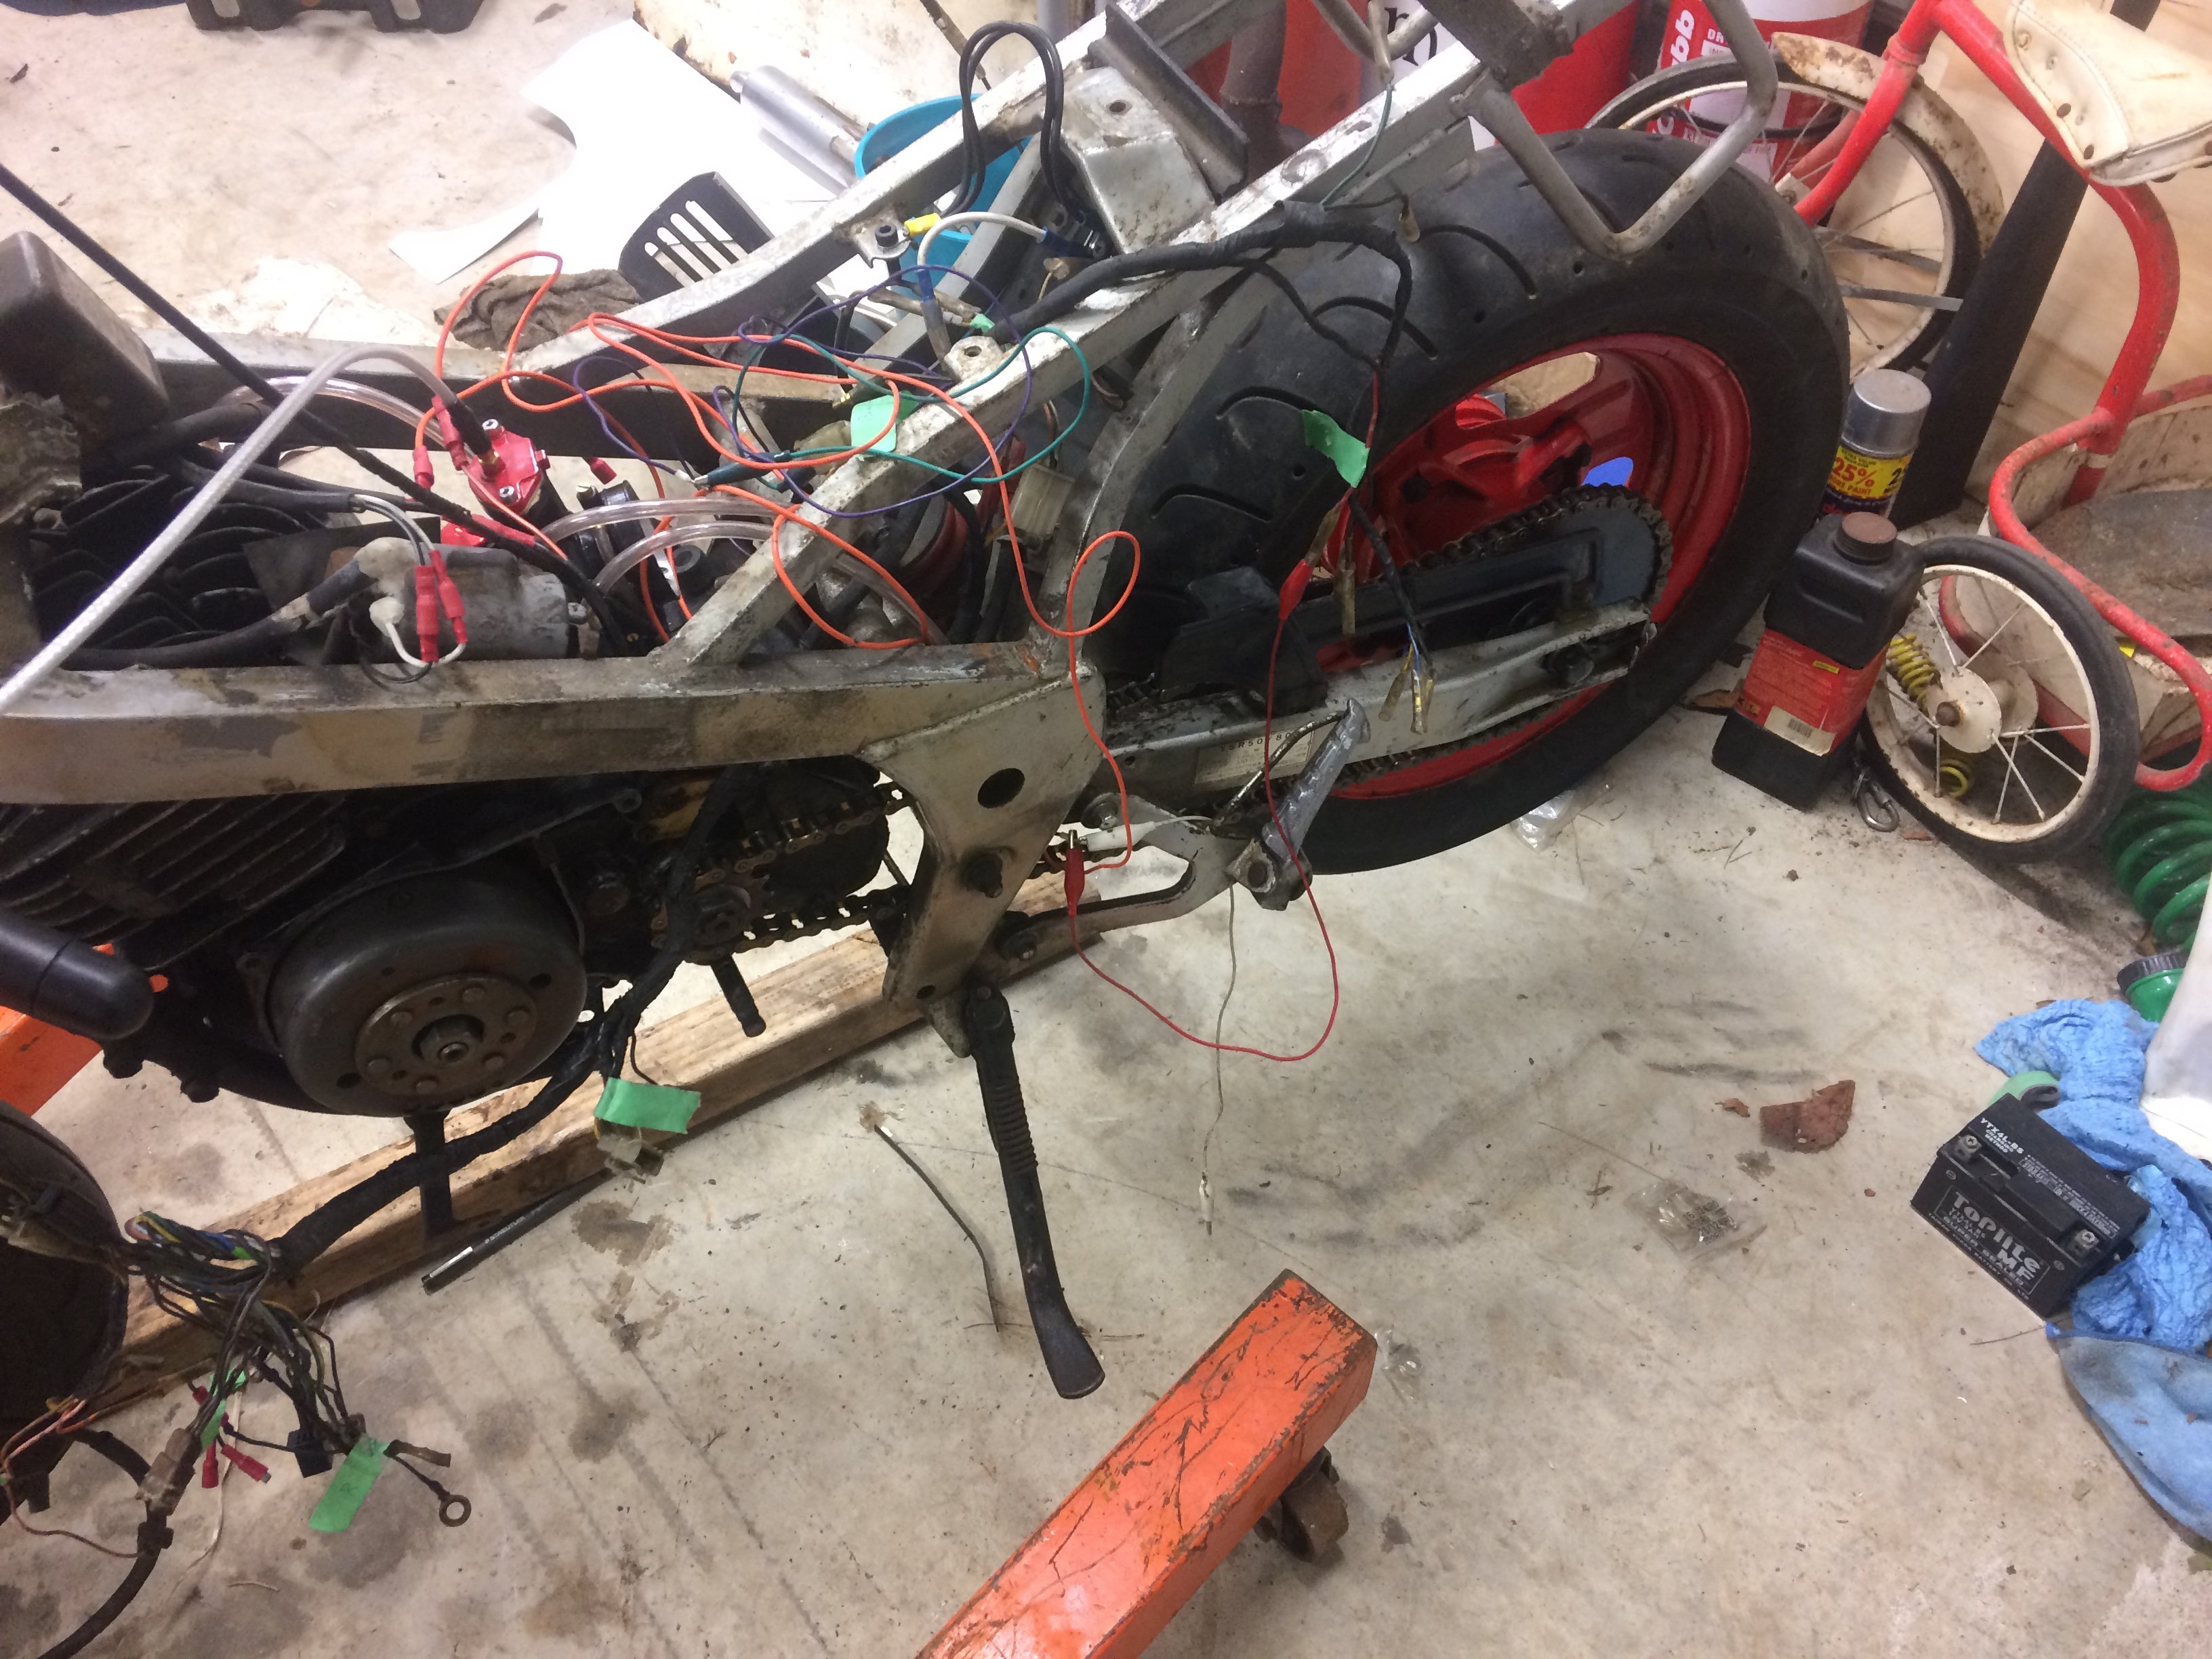
alrighty it was a bit of a Saga & I'm sure OS is sick of hearing about it (waasnt really much anyone could do without physically looking at it & I didn't help much) we checked everthing else, fuel, diaphragms, sparks, wirings... then see that wire #5? I didn't have that (it never has) car goes good now & may explain the dead resistors too5 points
-
The republic of Whangamomona and 42nd traverse ride claimed a fork seal and chain roller on the NBC, so I actually have to do something to it. Unbelievable.4 points
-
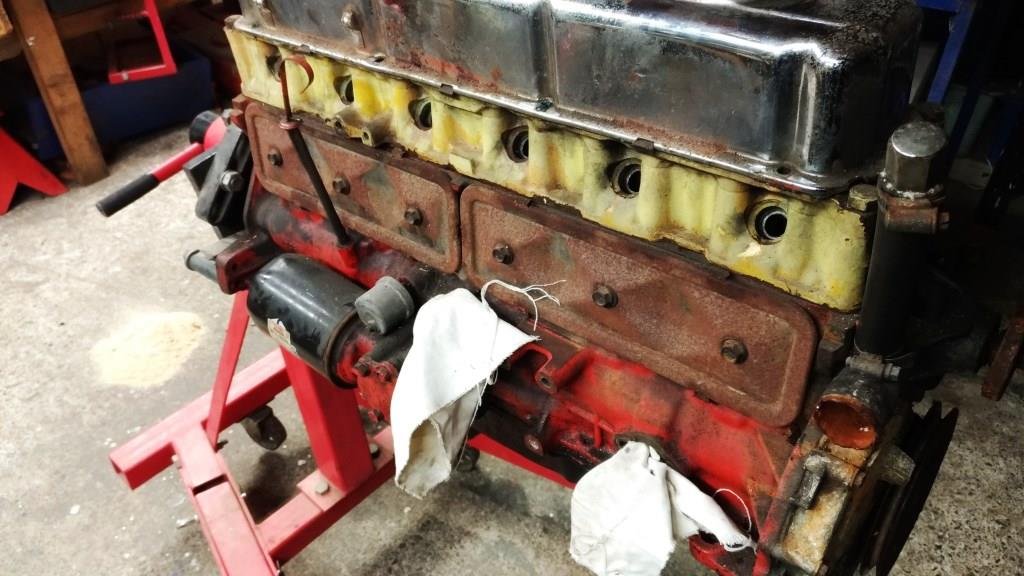
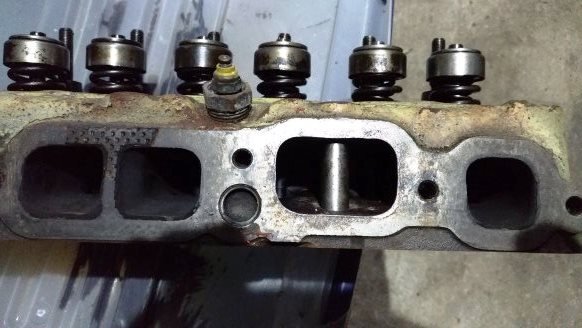
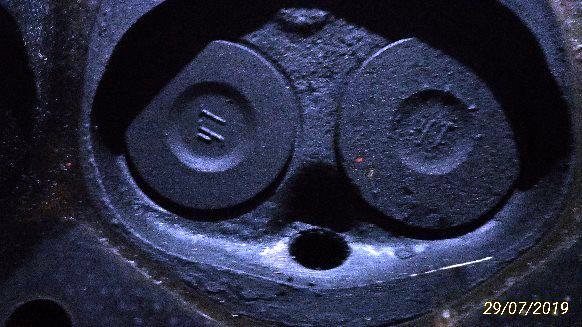
I’d been keeping any eye on a bloke in Whangerai who had been trying to sell a 186 on TM while doing his damndest to scare off any potential buyer by abusing anyone who had the audacity to ask a question on his auction. God I love those grumpy old traders! He was insisting that someone had painted the standard head yellow and refused to post any pictures of the inlet ports. After some months of his relisting I finally put the poor deluded old sod out of his misery by buying it for $300. An early 2-hour drive had me rolling down his driveway at 8 am in the morning, one look at the inlet ports confirmed it had at least a stage 2 Yellow Terra head. When I suggested that as an honest principled rogue, I felt a moral obligation to throw a little more coin in the pot he started accusing me of being a ‘lying young upstart that was talking through a hole in his f***ing head’. As I beat a hasty retreat up the driveway waiting for him to set the dogs on me (with the booty in the back of the van) I had to admit that at 63 years of age, despite the verbal tirade it was great to be called ‘young’ – ya gotta love those grumpy old guys! Couldn’t wait for to to get the head off but work pressure had me waiting for the weekend. As I said in the 1st post of this thread ‘sometimes you just get lucky’ - I stuck it in the engine stand, flipped its lid off and discovered a rather virgin stage 3 Yella Terra covered with the type of carbon that only prolonged over rich running can ever produce. Double valve springs and classic 70’s inlet porting. And just relish in the vintage YT valves! Once cleaned up the flat top 30 thou over pistons felt firm in the bore so Rigamortice and I made the call that we’ll clean up the head, sort out the appropriate sump/pickup combo and see how it runs.
4 points
-
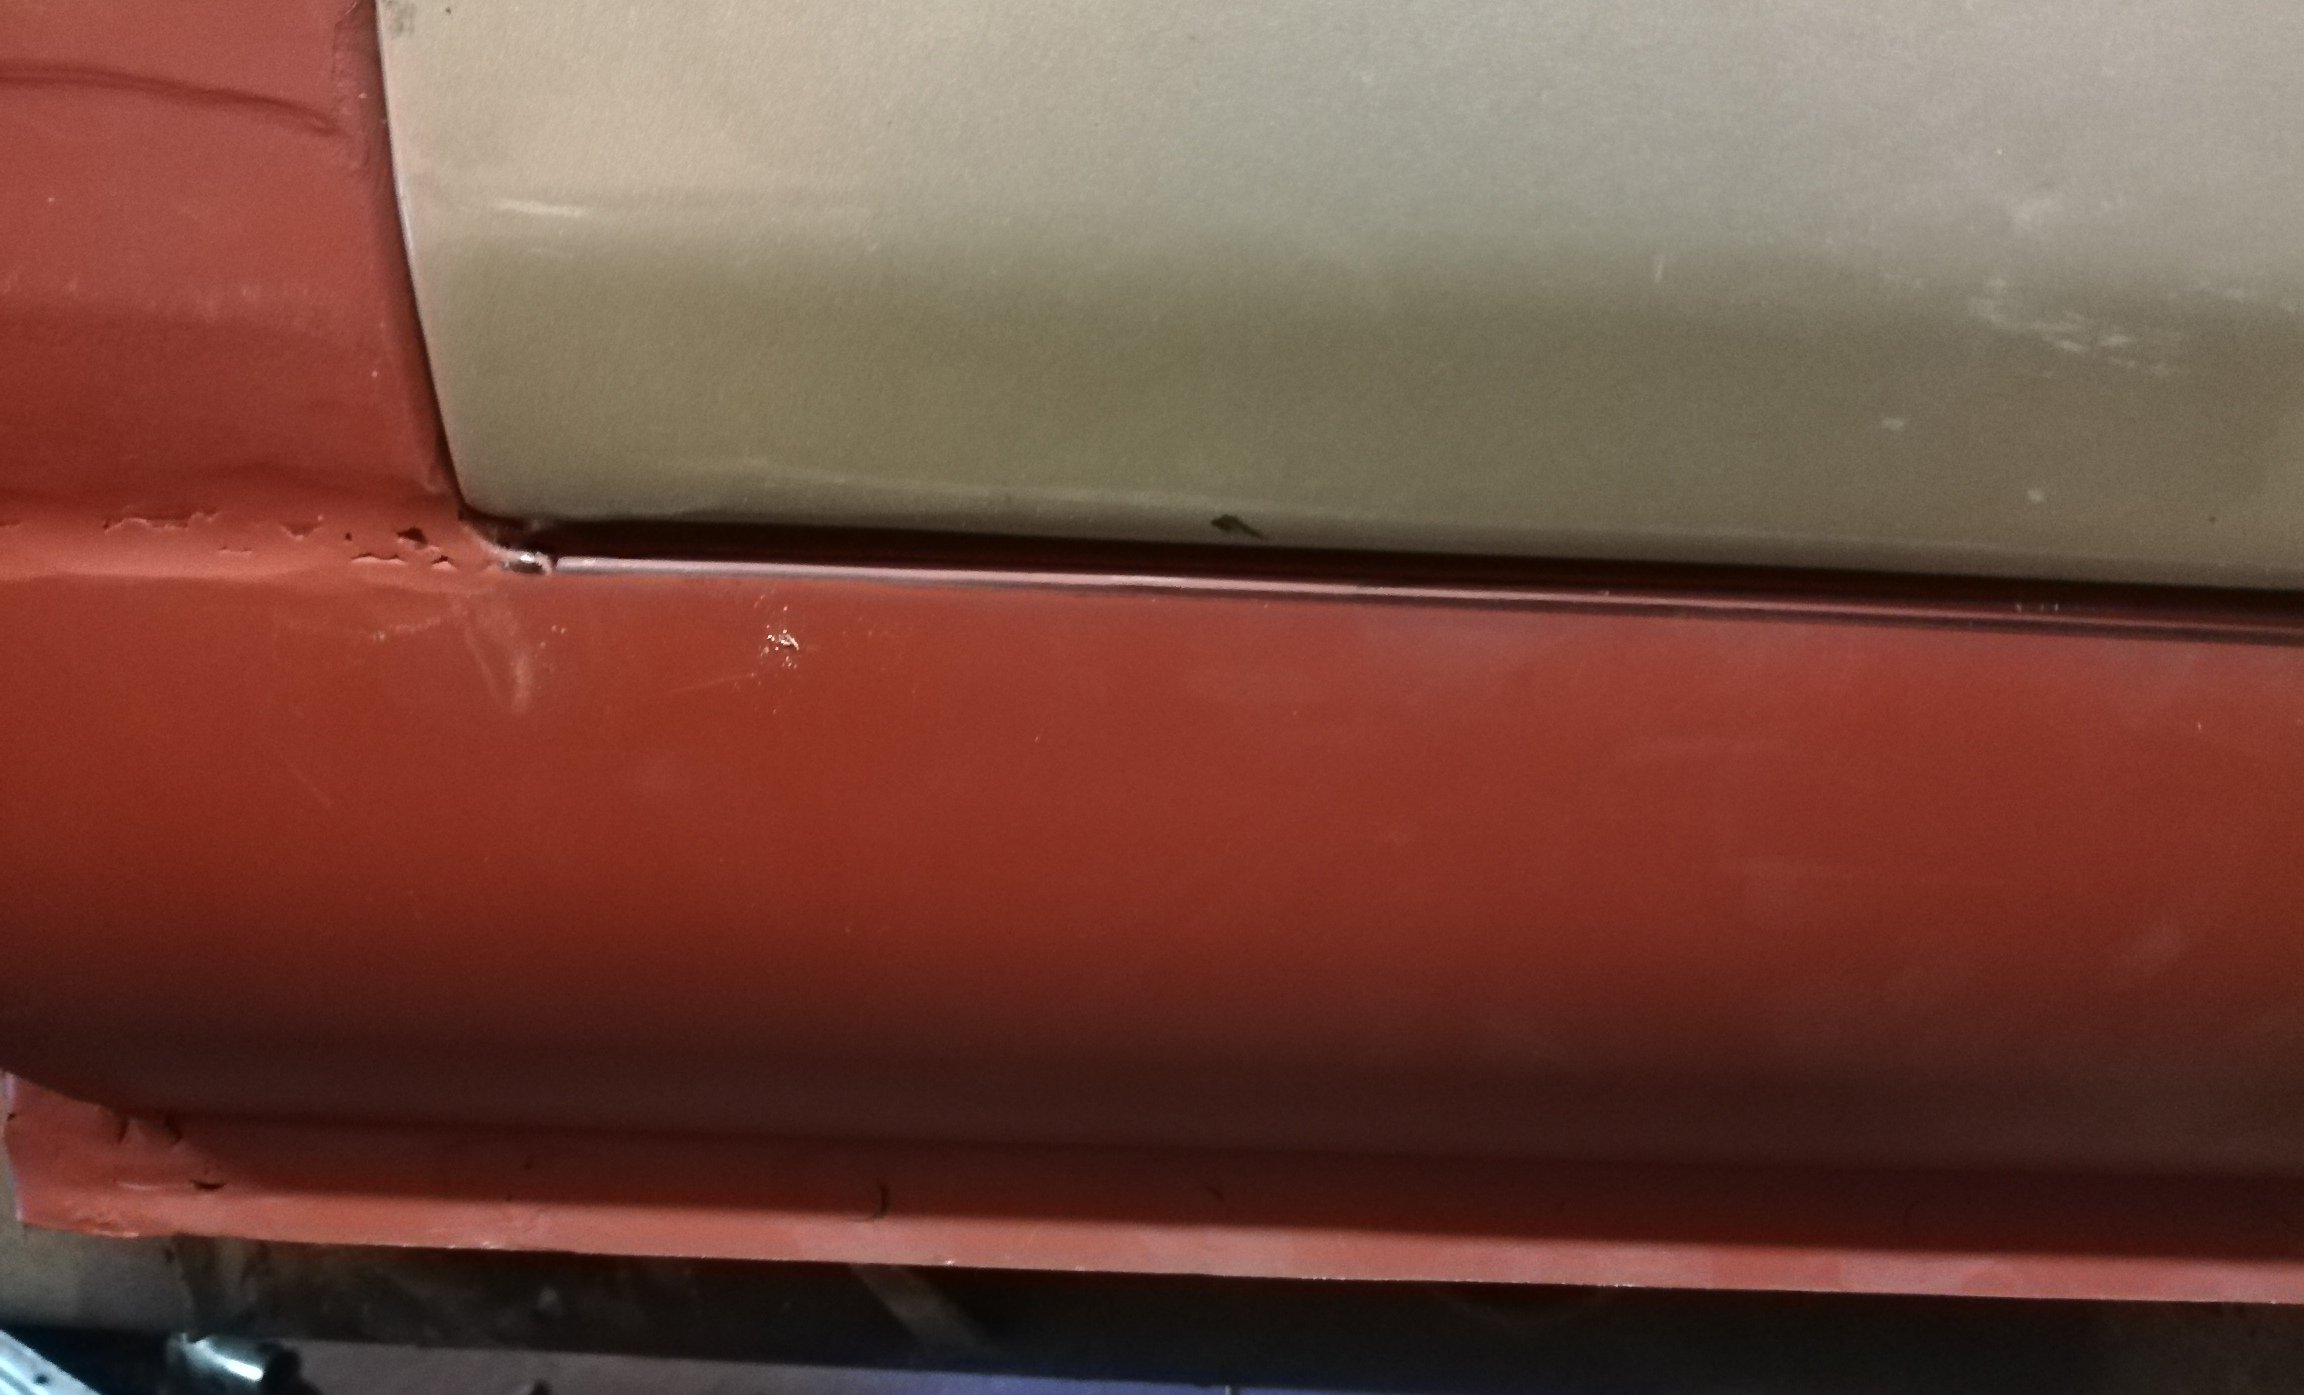
Door is being a pain in the ass to hang. The problem being that every point of reference has been dicked. Got the lines pretty good, but the bottom of the door over hangs the sill by a good 1cm in places How, I measured and checked everything and used the other door frame for reference. The sill is dead straight. Oh the door is bent Some hammer and dolly work and it's coming into shape. Looking at unmolested utes, there is a prominent angle here. Mine is smooth and bulbus . I assume it was either bent out to match the previous sill, or was bent already and the bogged the sill to match. (Same issue with the roof lines, bogged over and rounded off)
3 points
-
3 points
-
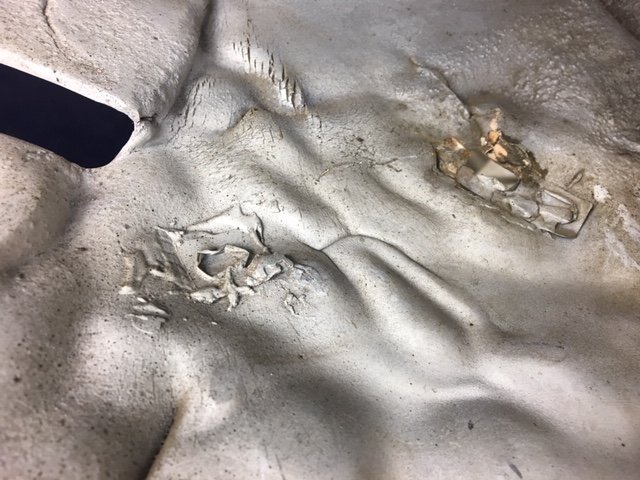
Duke Blackwood asked me to post this photo up as his phone was flat last night. He was having a go at repairing the utterly fucked fairings and found that someone has glued old pill packets across the back of some holes to bog over the front!
3 points
-
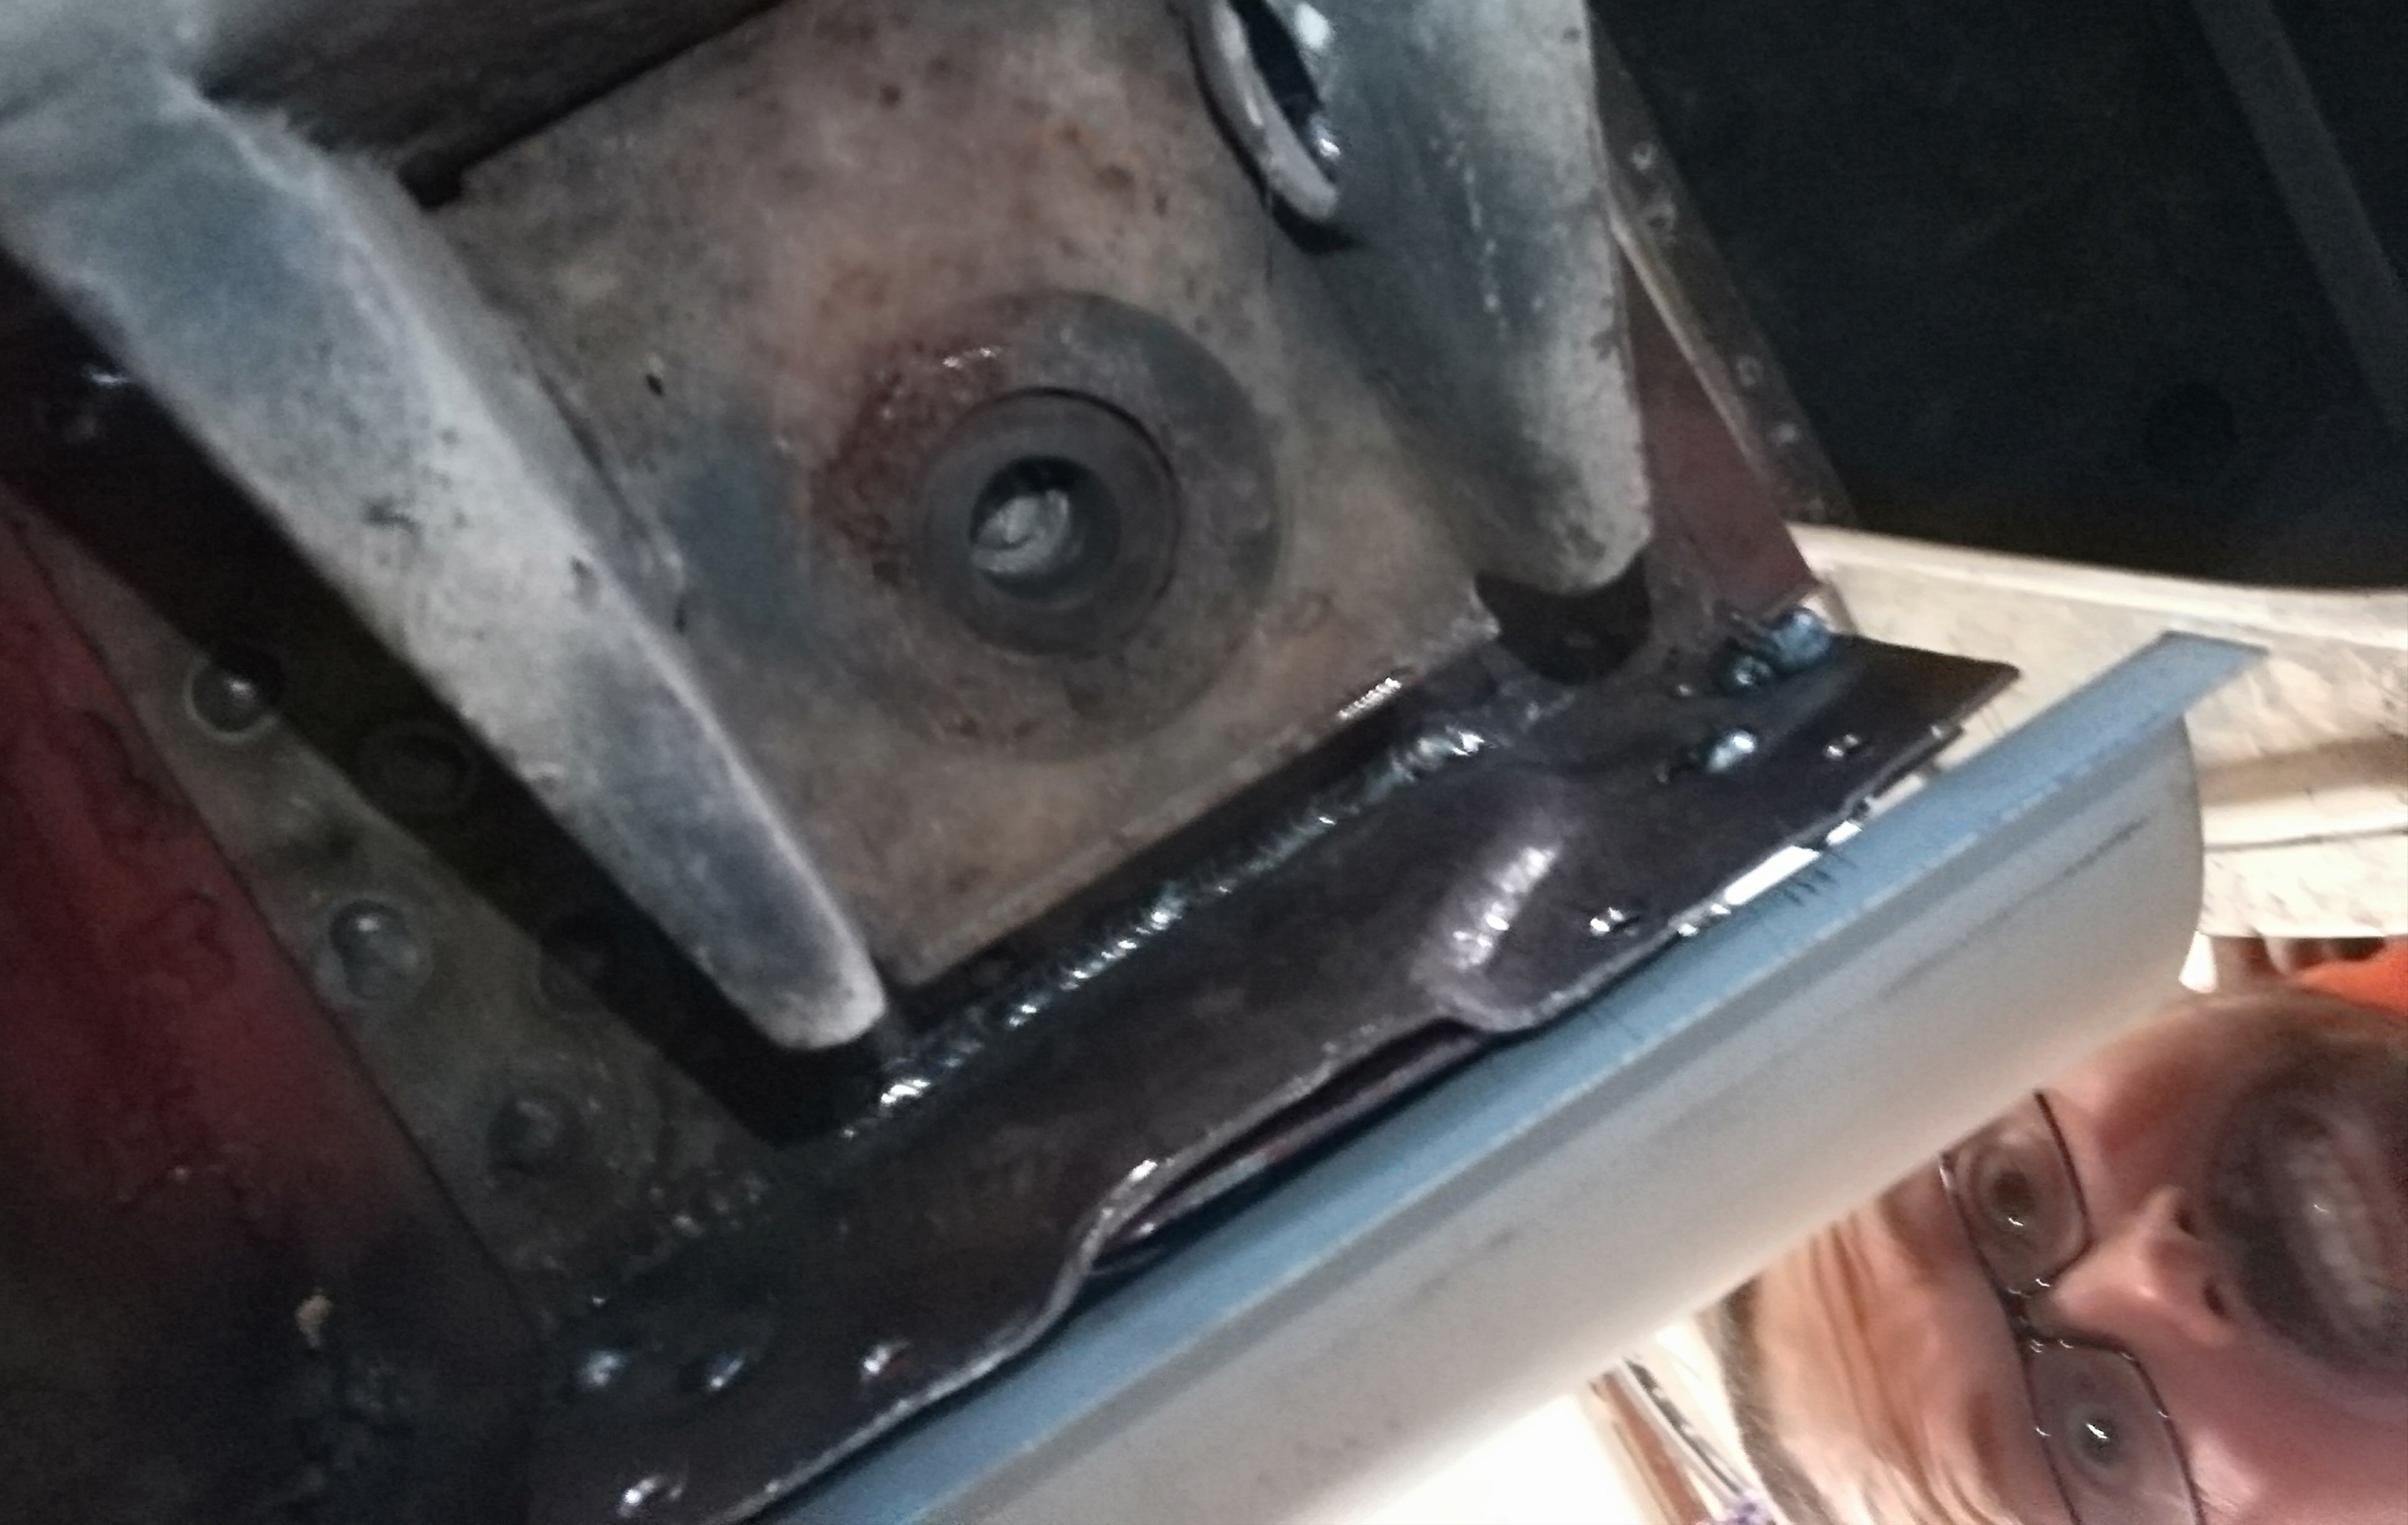
As mentioned previously, I'm having some running issues and I need to try and work out what it is. The issue has been getting worse the more I run and drive the car. It previously only happened under load at about 4000rpm, where the engine would fall on its face and cut out like you had turned the key off. If you kept the throttle steady it would recover with a surge as the revs dropped, but as soon as it got up to about 4k again, it would cut out. When stationary, and not under load, it will happily rev to its 6k redline. It's a very annoying issue. I had a couple of suspicions of what it could be, but I needed to do some testing to narrow it down. My first suspicion was that I must be losing spark, as the engine cuts so abruptly and I felt that if it were fuel it would kinda stutter out. The first thing I noticed was that the replacement coil the previous owner had fitted was a Bosch GT40. This is a 12v coil, and from what I have discovered, widely known to have issues with electronic ignitions. Now, the ignition system on my car is both a ballasted system and electronic. A ballasted system runs a resistor on the power feed to the coil, dropping the voltage, meaning the coil doesn't see 12v. So I was already running the coil under voltage. After testing and confirming the resistor was still in place, I removed this coil and refitted the original Ford coil that came with the car. Changing this resulted to a smoother idle (maybe, but probably a placebo), but the engine still cut out. The next thing was to check the lead positions, cap and rotor. I note that the cap and rotor have been replaced, and the old ones were with the car. The old cap is stuffed, but the old rotor looked OK, so I swapped that in after a quick clean. No change. Next was to confirm if I did lose spark or not. The only way I could think of was by thinking out of the box and using my timing light... So I connected it up, and strapped it to the wiper so I could see it when driving. Sure enough, when the engine cut, the light was still flashing away happily. That indicates I have spark (although, not if I have a good strong spark, but some spark is better than none). So this points me down a different path. I have air, and I have spark. Could it be fuel after all? I posted up on a few forums asking for help, and got some great tips on where to start looking. One of the easiest to do was to check the sensor plate in the AFM was clean. This plate is hinged, and lifts up with airflow as it gets sucked into the engine, which in turn pushes a plunger up and down to control fuel flow. Well, although the top looked reasonably clean, the underside was filthy (probably thanks to the incorrect air filter that was fitted) I gave this a thorough clean and made sure it was spotless. This made no change, but its good to know its clean now. I also, once again, checked the intake tube and boot for splits or cracks, but none found. All vacuum lines (all two or three of them) were checked, all OK. One thing that makes me suspect its possibly fuel, is the state of the new plugs I fitted. Even after a couple of runs around the block, a couple look almost unused. Maybe lean? From 1 to 6 in order. This is leaving a couple of possibilities, ones that I cannot test without further equipment. First is an intake manifold leak or the likes. Today my smoke machine arrived, so I could test this. It's just a cheapie, but makes a good amount of smoke, and has a pump to actually blow it out under pressure. After a quick test, I modified it to work how I needed it to. I salvaged a cap from a CRC rust convertor can, drilled a hole in it, glued some hose into it, and glued the cap onto the front of the smoke machine (as it just has a big nozzle on the front normally, for maximum smoke dispersion in da clubz) This hose then goes into a rubber glove with a finger cut off it. I find using one of these seals the intake pipe nicely with the wrist of the glove, but doesn't crush the rubber hose. I don't know if it's good or bad, but smoke testing the intake shows there are no intake or vacuum leaks. I tested with the throttle open and closed, to check the intake hose for leaks as well as the plenum/manifold, but nothing, not even a weep. So what left? Well, two things really. I need to test the fuel pressures of the system, but because the fuel fittings use banjo bolts and hard lines instead of rubber hoses, I can't use my existing pressure testing kit. I have a new kit on the way, which has all the fittings I need to connect into the KJetronic system. This will tell me if there is an issue with the Warm Up Regulator or the main pressure regulator. The whole system relies on having the correct pressures, so even a few PSI difference can make it all turn to custard. The other thing I need to do, once I have tested the pressures, is to remove the fuel distributor and injectors. I need to see if the plunger in the fuel distributor is clean and moving freely, or if it's sticky. I also need to check the flow and spray pattern from the injectors. It's possible either, or both, of these things are causing an issue. My main theory at the moment is a sticking fuel plunger, which is causing the engine to starve of fuel when it demands more. The worst thing you can do with a KJet system is to leave old fuel in it and not run the car regularly. This car has been off the road for years, and I don't know when it was last started and run, or how old the fuel in the system was. KJet runs at such fine tolerances that even a slight gum or varnish on a component can make it upset. I'm determined to work this issue out and get the KJet working properly as it's a cool system, and one I haven't worked with before. I have everything I need to convert to EFI and Speeduino, but I'm trying hard to resist that urge. Now we wait. Once the pressure test kit arrives, Its game on.3 points
-
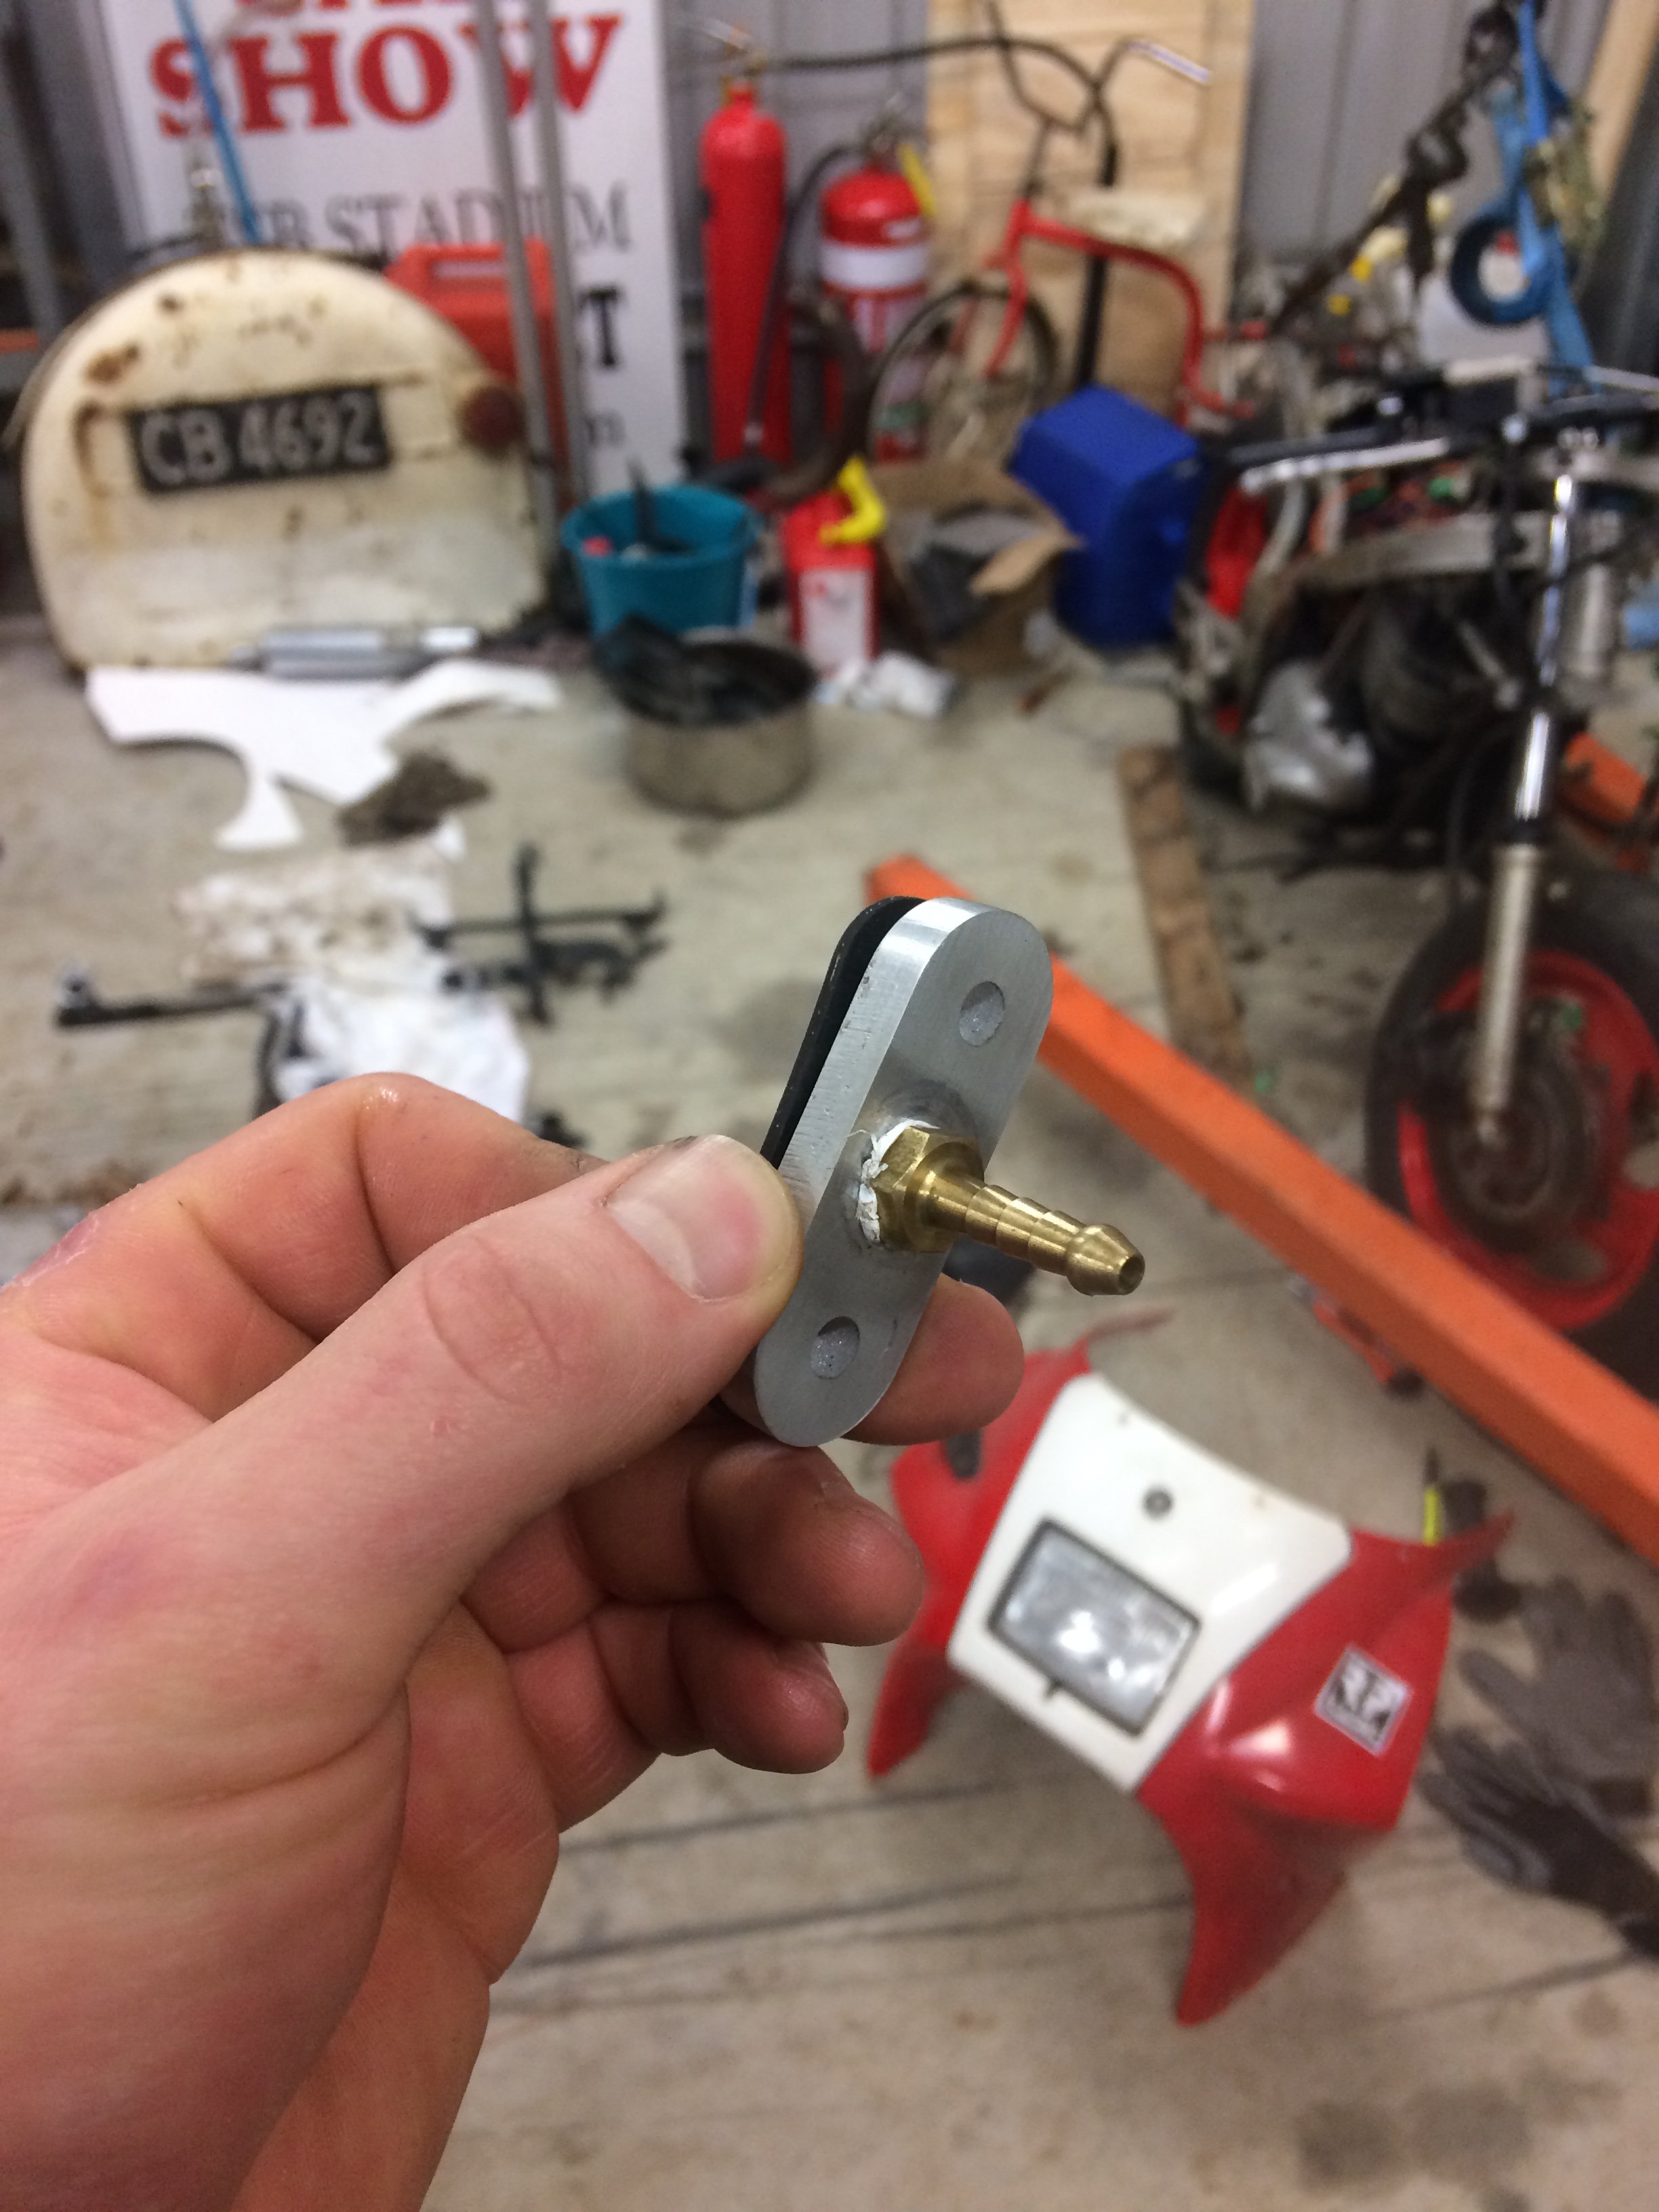
Fuel petcock was ROOTED so I've just ditched it, made a little flange and a nipple which I'll plump to an inline tap and filter
2 points
-
Ride the fast post, then there's no worries about blowing fork seals again if the front wheel never touches the ground!2 points
-
Shit those knobs look the smicko man. What brand resin and pigments do you use. I have a steering wheel to have a go at but I haven't found my brave pills. I want a kinda see-thruough green with flake in it. I have green glitter and clearcast resin and have made a MDF template I was going to pour a 2 piece Plaster of Paris mould around. Not sure about runners/risers etc so procrastinating. What are your moulds made of to get that finish?2 points
-
Alright "we" think we got it : for those following2 points
-
Look at those bolt spacings though, they're way off. WAAAAAAAAY off. You need to calibrate your eyechrometer, Sleek.2 points
-
Close enough Fender is a reproduction, so I made a best guess as to panel gap. A little filler, a little seam seal and she's seamless
2 points
-
This is a test photo to see the quality of pictures. Have been through 3 phones since last time posting and I'm sending them through fb messenger.
2 points
-
I've made some moulds up, it's a 2 part resin and use different coloured pigments to get the desired look. Have just invested in the gear to start stabilising wood so can do hybrid wood/resin ones such as the video you posted which I'm excited to try2 points
-
Bonus images. Big thanks to these guys Kieran, stan and the other boys for the endless pumping of the brake pedal.
1 point
-
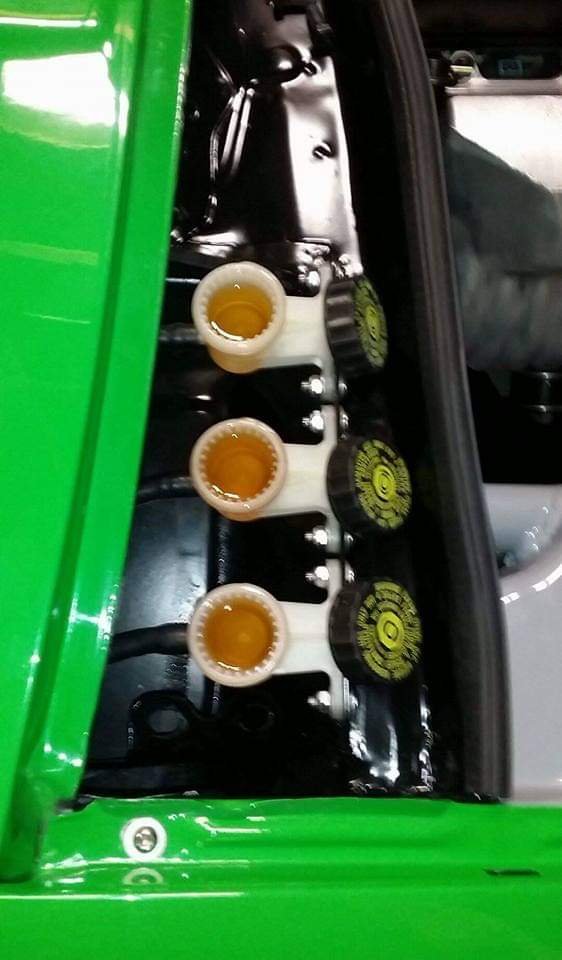
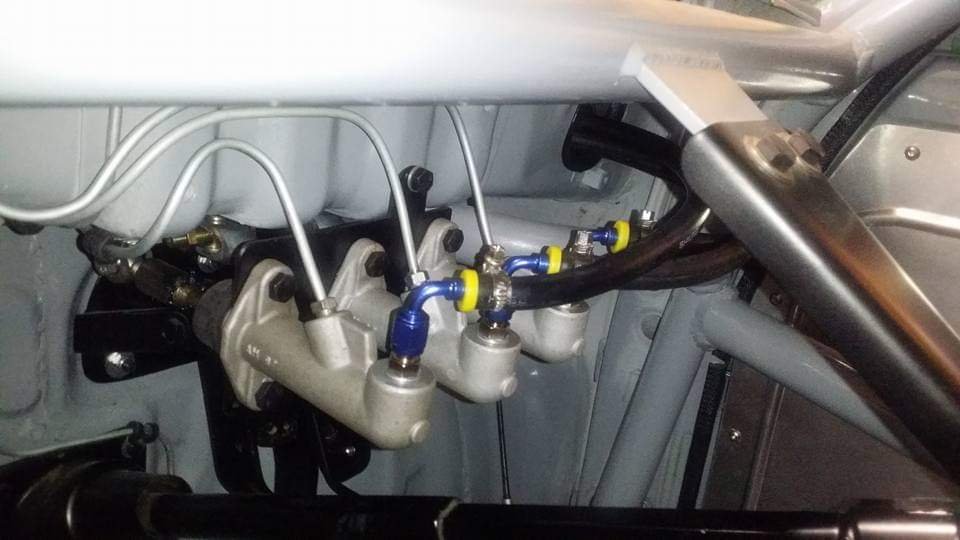
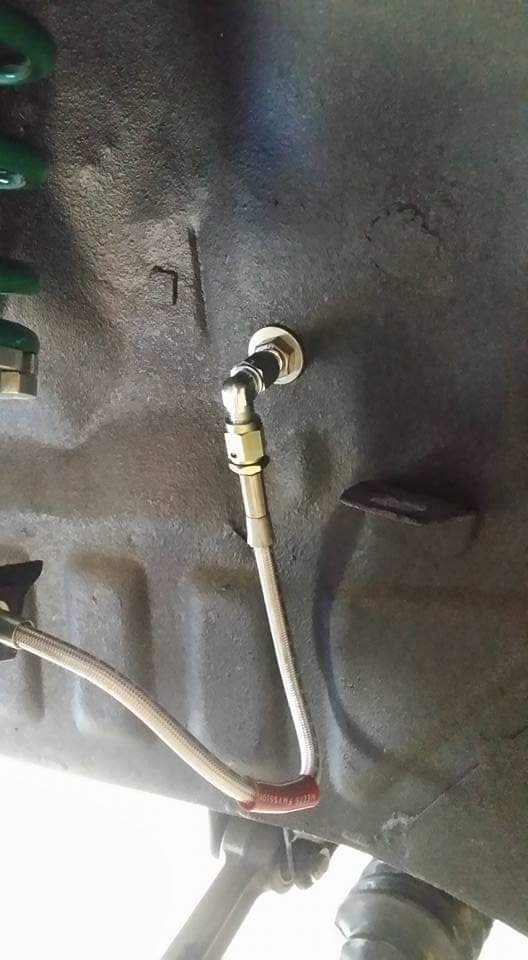
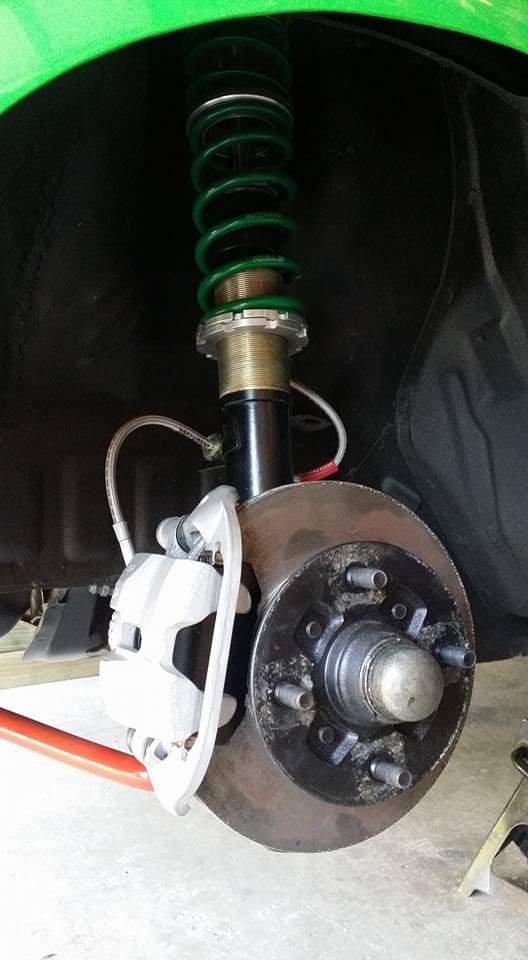
Next thing was to sort brake lines, front calipers and coilovers. The car came with a home made pedal box with a balance bar it works ok I think it needs a but of strengthening, under hard braking it flexes the fire wall. The other thing with was the master cylinders they used where cheap Chinese trailer cylinders that couldn't stop sucking in air so I changed them out for willwood cylinders. With the brake lines I wanted them hidden as much as possible so most of the plumbing is on the inside of the firewall. It looked good you will just have to trust me as I dont have to many photos. The only place in engine bay is about 100mm section on top of chassis rails. I used right angle bulk head fittings to keep it nice and tidy. Then braided lines to rebuilt AE86 front brake calipers. The struts are ae86 with autolign built coilovers with 4kg tein springs and keepers on top and monroe shocks valved to suit spring rates. Other bits on the coilovers are T3 camber plates up top and at the bottom (not actually part of the coilovers but it this let's you use 86 strut in the kp) T3 starlet to AE86 collar thing that slips over starlet ball joint and T3 RCA. I currently have the T3 knuckle in the car and I'm using the the second hole currently in the hope to achieve more steering lock now I have another set of modified Ae86 knuckles to chuck in the car (but that's going to far into the future). Note: I'm also running a apjs lock spacer.
1 point
-
I'm going to do my best to remember what order I did stuff. After I came off the buzz of painting the car and took my eyes of it for 5 mins to make some progress I believe the fuel system was next on the list. I had an idea of how I wanted to make it. So first I used the factory fuel tank with welded in ( I think -8 ) bungs into the lid of the tank. One for the pick up, one for return for surge tank and one for the breather /roll over valve. First fuel pump is a Carter lift pump ( can remember the size) from there to the 1L surge tank. I think the high pressure pump I used was a Bosch 070 (not as powerful as the 044) then I had bent up steel fuel lines run under the car one for in one for out. P clipped every 100mm. Had two filters one before first pump and one before injectors. All this was mostly kept inside the spare tyre well in the boot. Was going to make a lid to cover it in case of fire most likely out of aluminum. I dont want to spoil the ending but I have changed some of these things on the car over the years.
1 point
-
will there be a difference with the donor vehicle ? 2wd ute v 4wd ute van v car/wagon1 point
-
He wants front sump1 point
-
Waterjet cut some new sprockets and sourced the worlds cheapest chain
1 point
-
Thanks for the steer Sleek. It's definitely worth a bit of investigation.1 point
-
@moparmuppet Bit more detail here.1 point
-
Born in the soul of misery1 point
-
Eyechrometer calibration complete... It may be a mirror image but I'd say filling and drilling a few holes is easier than cutting and reversing a whole sump 2T gasket 4Y gasket
1 point
-
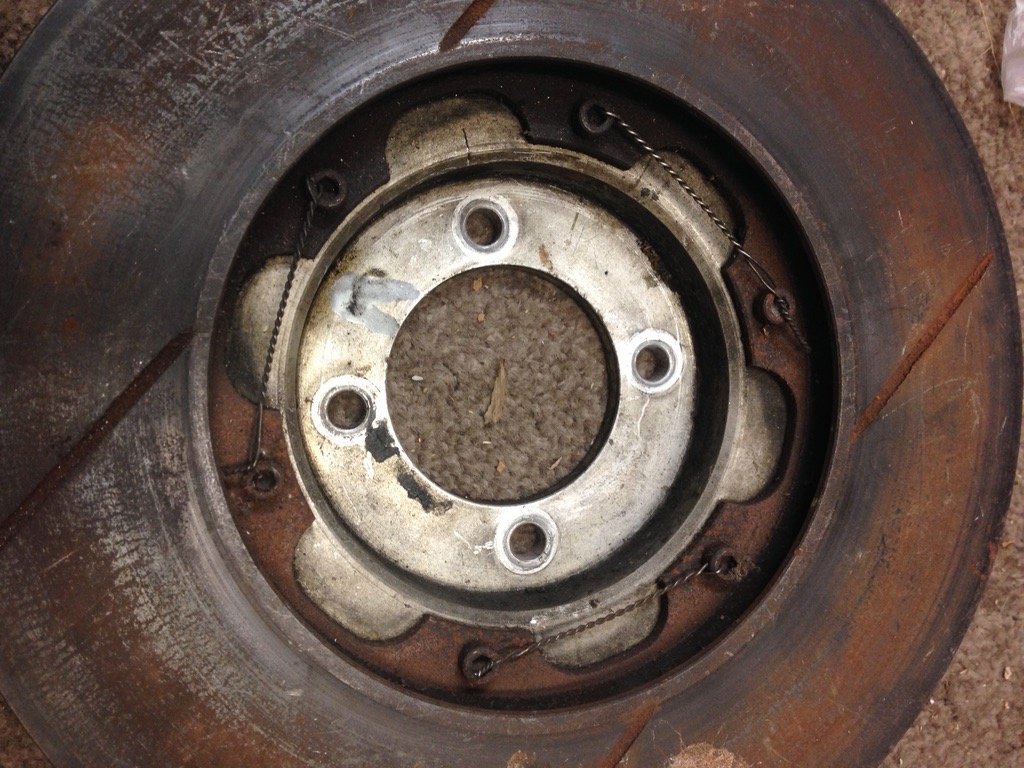
Sorting our brakes for a racecar that is intended to be certified and have been sent the front rotors to machine an adapter to suit the new hubs. Is this set up even legal, 6x M6 seems a little light? Are rotor adapters allowed/are there guidelines for material selection? There is no other mechanical connection other than the bolts, this seems like asking for trouble or is that normal? Please forgive the tie wire too, these were part of a stack of parts purchased but thankfully never raced.
1 point
-
1 point
-
Interesting. And no idea tbh, I'm just a chump helping a chump.1 point
-
I finished making this slightly cool block lifter for my log splitter this afternoon. As per it's scrap steel and bits out of the bin. Works great. @moparmuppet let's see a picture of your log splitter, I couldn't picture it when you described it in the trade me thread.
1 point
-
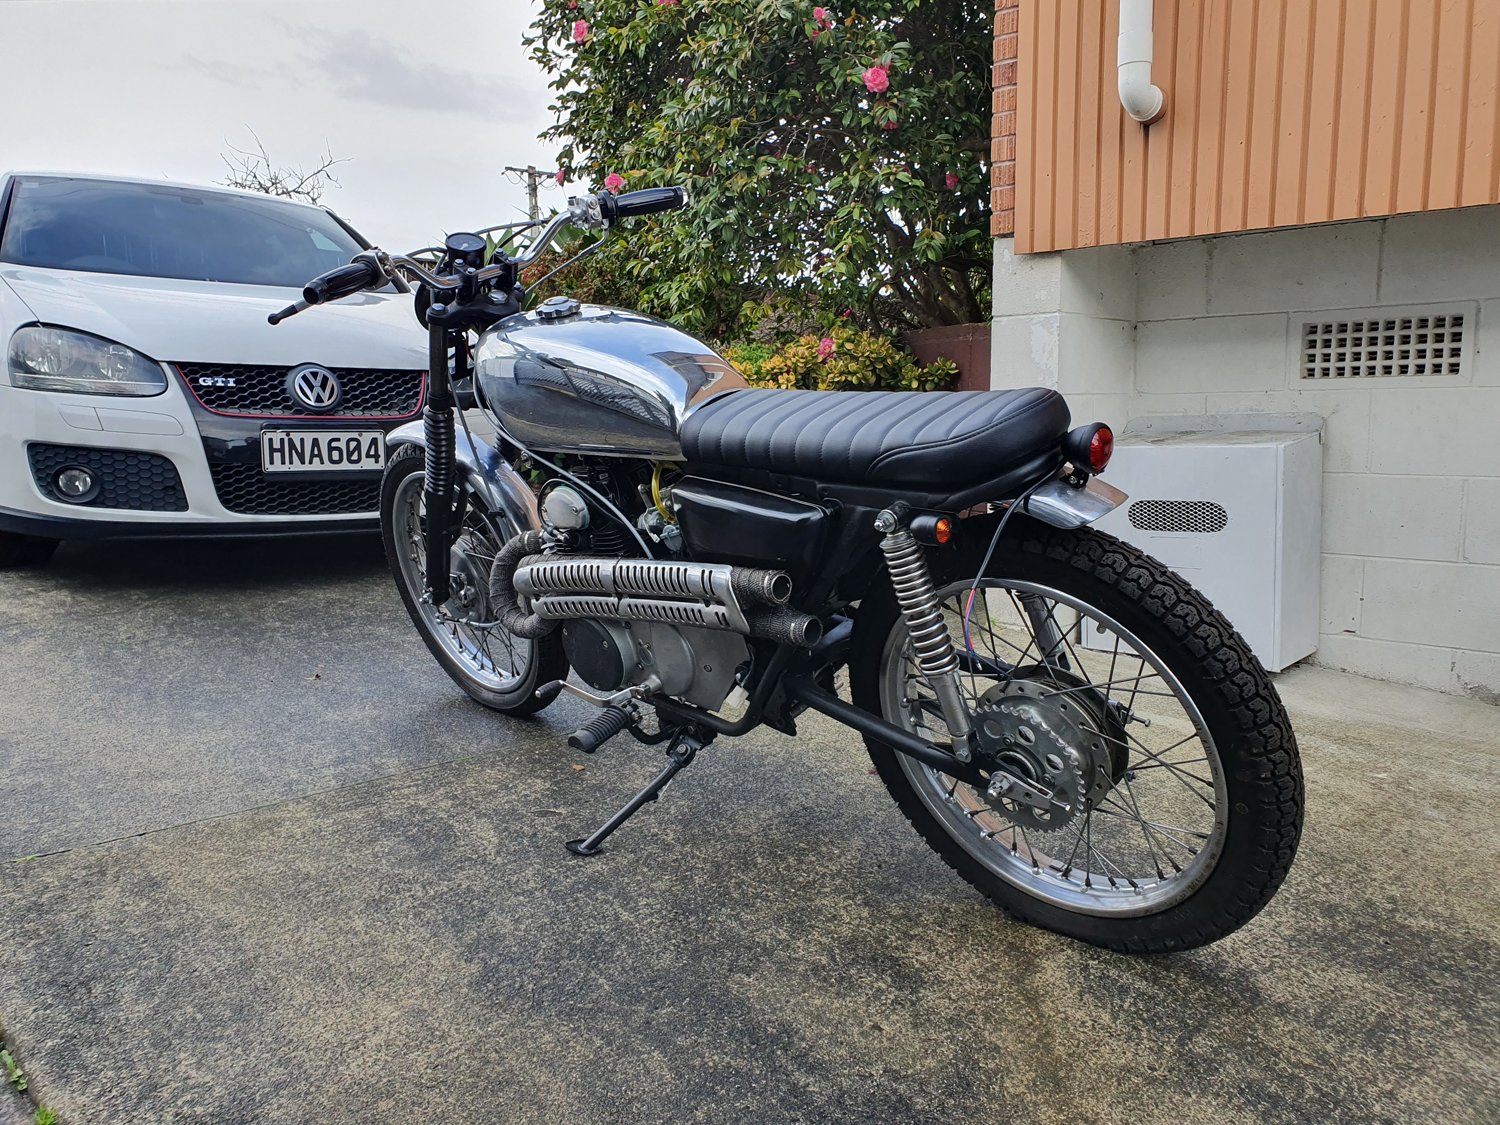
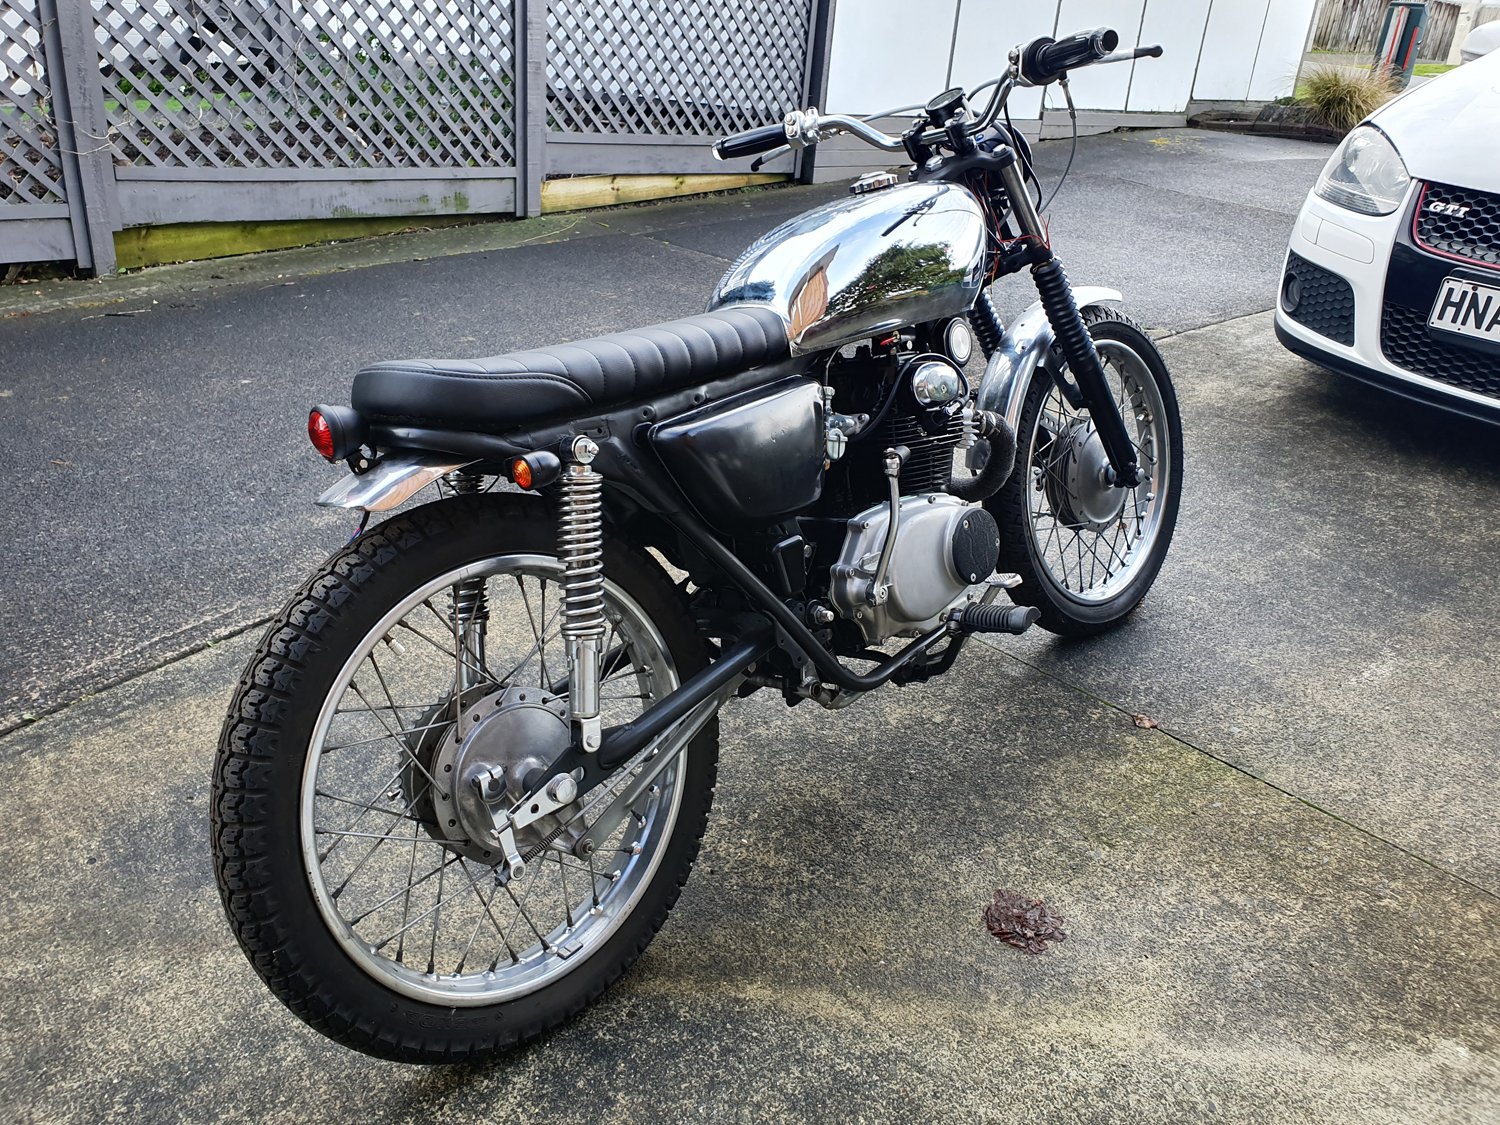
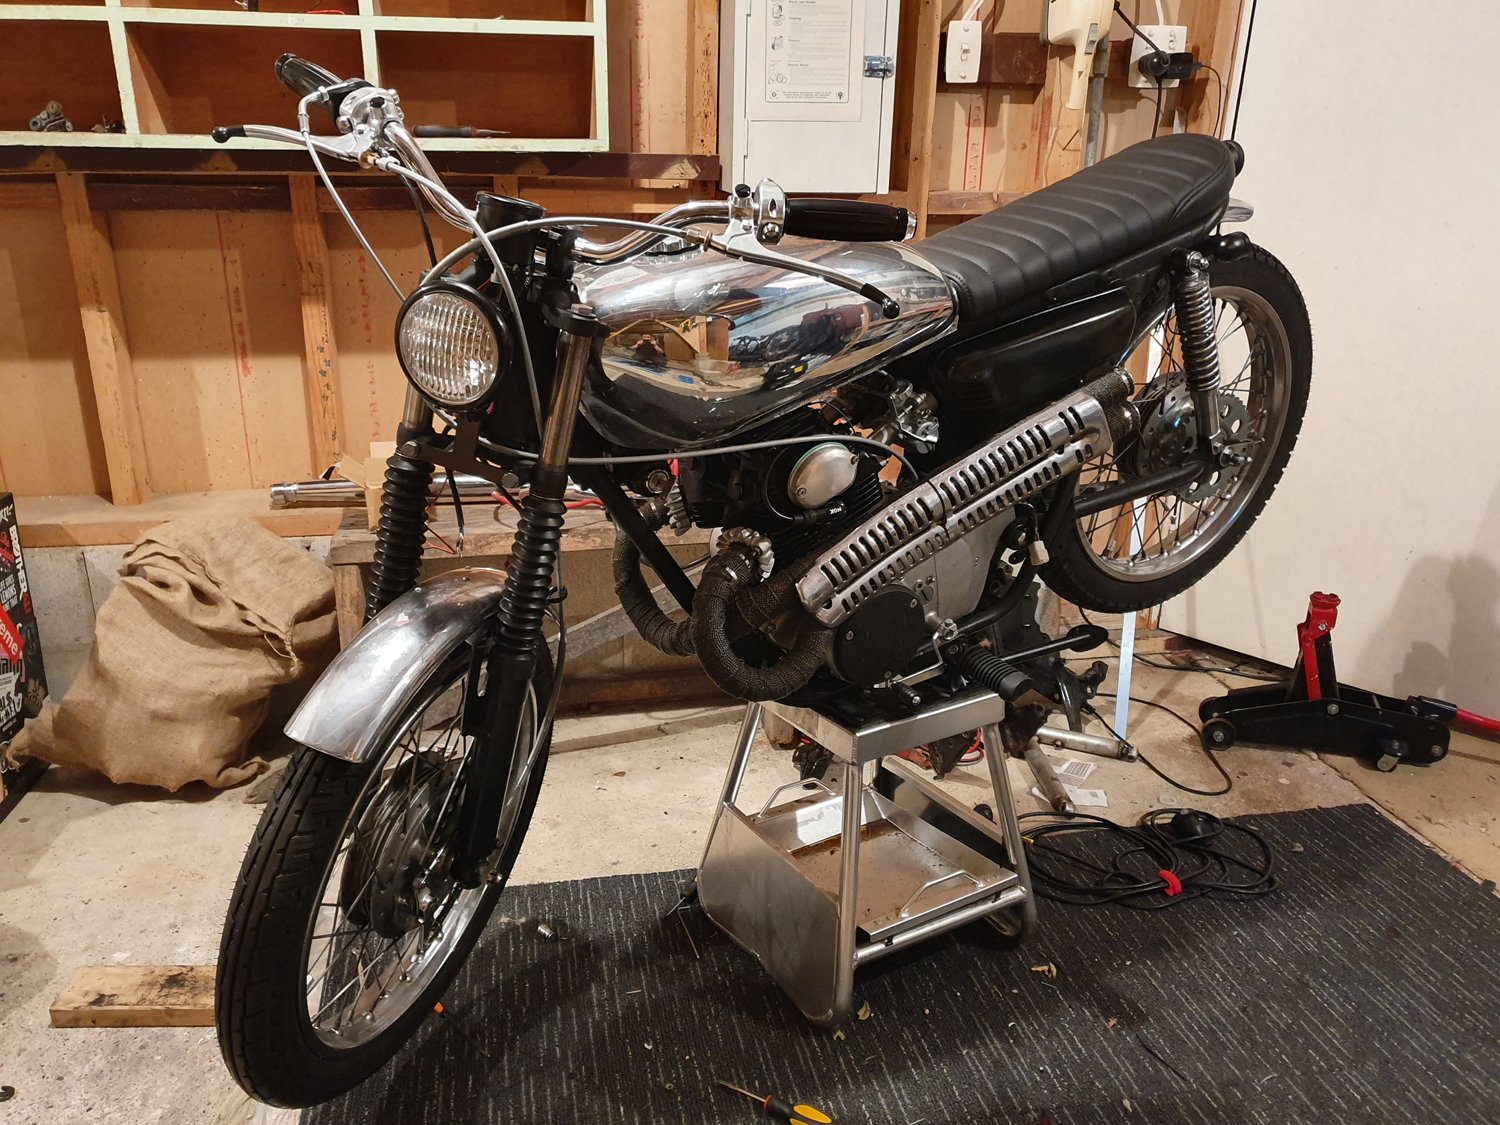
Thanks guys! It’s been a lot of work to get it to this stage. I’ve added an LED flasher unit so I think it’s something to do with the wiring not being quite right. I’ll revisit the wiring once the controls arrive from AE and try to knock it out all in one go. Super Trapp reps should also be arriving too this week as there is an issue with the exhaust and rearset brake hitting. Probably going to make new headers to get the clearances. Anyways she’s come a long way since the Trademe purchase that’s for sure!
1 point
-
Now its done Featuring a new tall pipe from Rumbler Jesse and a suicide shifter I whipped up out of parts. Stoked as fuck with how it looks now too
1 point
-
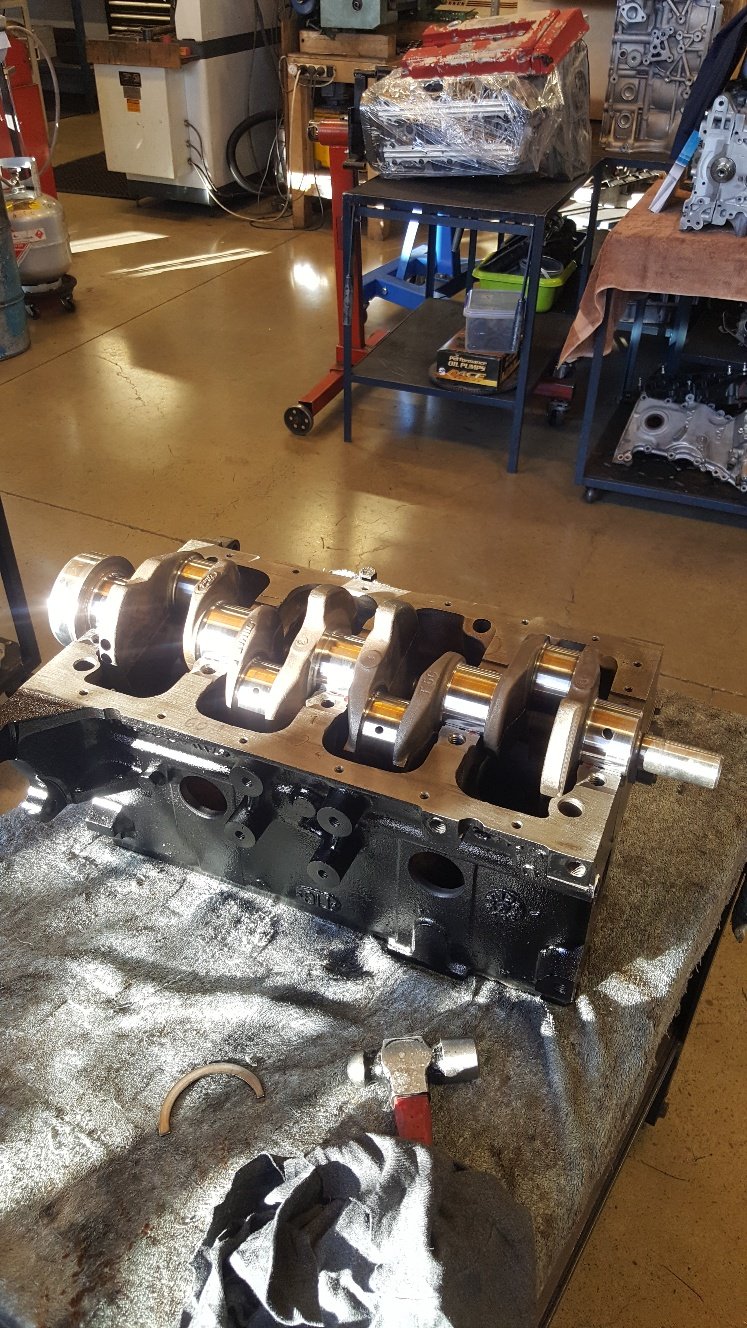
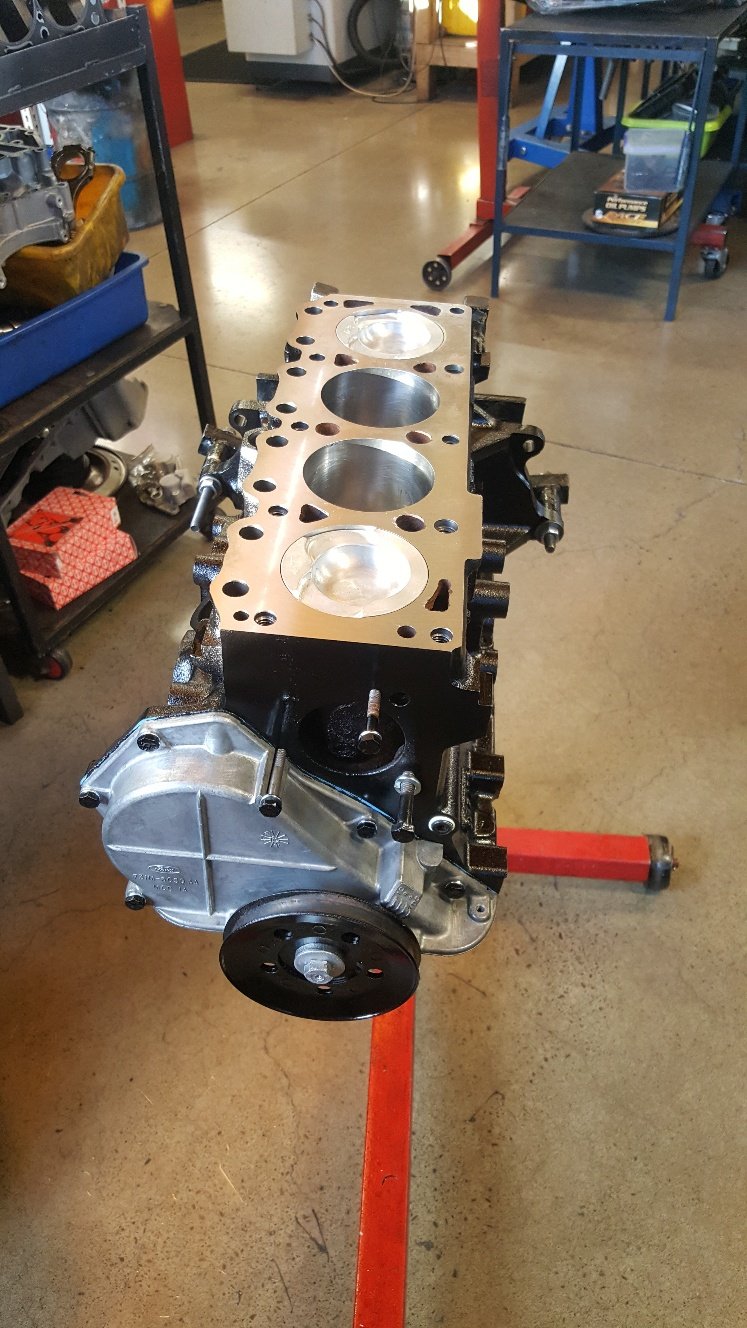
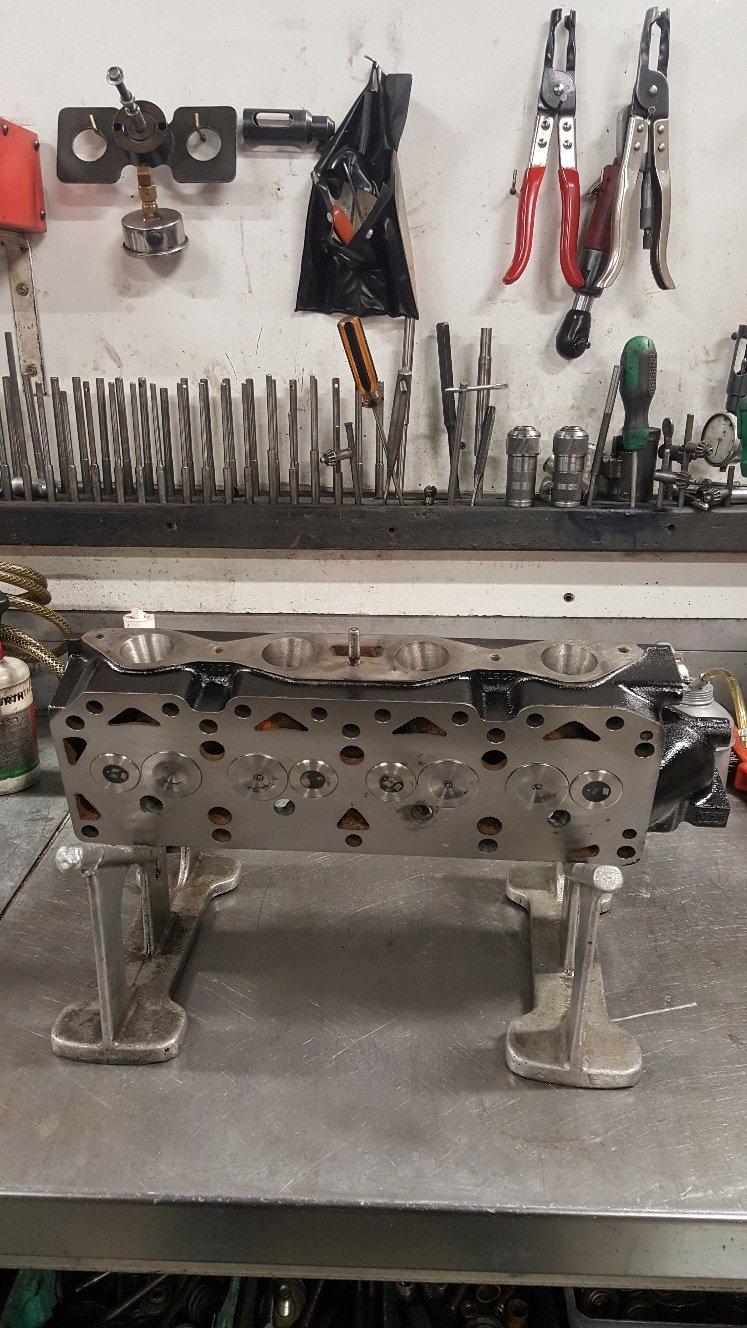
Time for final assembly. I bought a new set of cam followers as the old ones look a bit thin in the head. And I have had one break in another engine. Put the crank in. Short blocked. Checked the front pulley for tdc. It's the best time to check it. Not a common problem with solid front pulleys. But definitely common for old harmonic balancers to move and cause a headache when timing your engine. Assembled the head.
1 point
-
Tested plenum on kp, looses power with side panel on. after cutting stuff up, seems taper tubes or slot aren't a restriction, as does the same with them removed. have come to conclusion kp engine doesn't like a plenum, or at least one this size. possibly the bellmouths need more space to the roof of plenum. either way cant do much about it. so going to weld it up and see what it does on hilux got bit more done on throttles, bosses welded on vac rail. Throttle plates etc modified and back in. linkage rail re-drilled. pretty much everything needs modifying / butchering to get the throttles close enough together. Found a plug on aliepress that vaguely sounded like the right one for the tps. after a few dollars and the usual wait it actually fits Dug out this smaller 55amp alternator, fits on current lower bracket, will fit up close to block once have added more adjustment to top bracket. Was pretty toasted, so chucked some new parts at it. Never really attempted to rebuild an alternator before, was pretty easy Even found a sightly bigger pulley in my pile of junk alternators,1 point
-
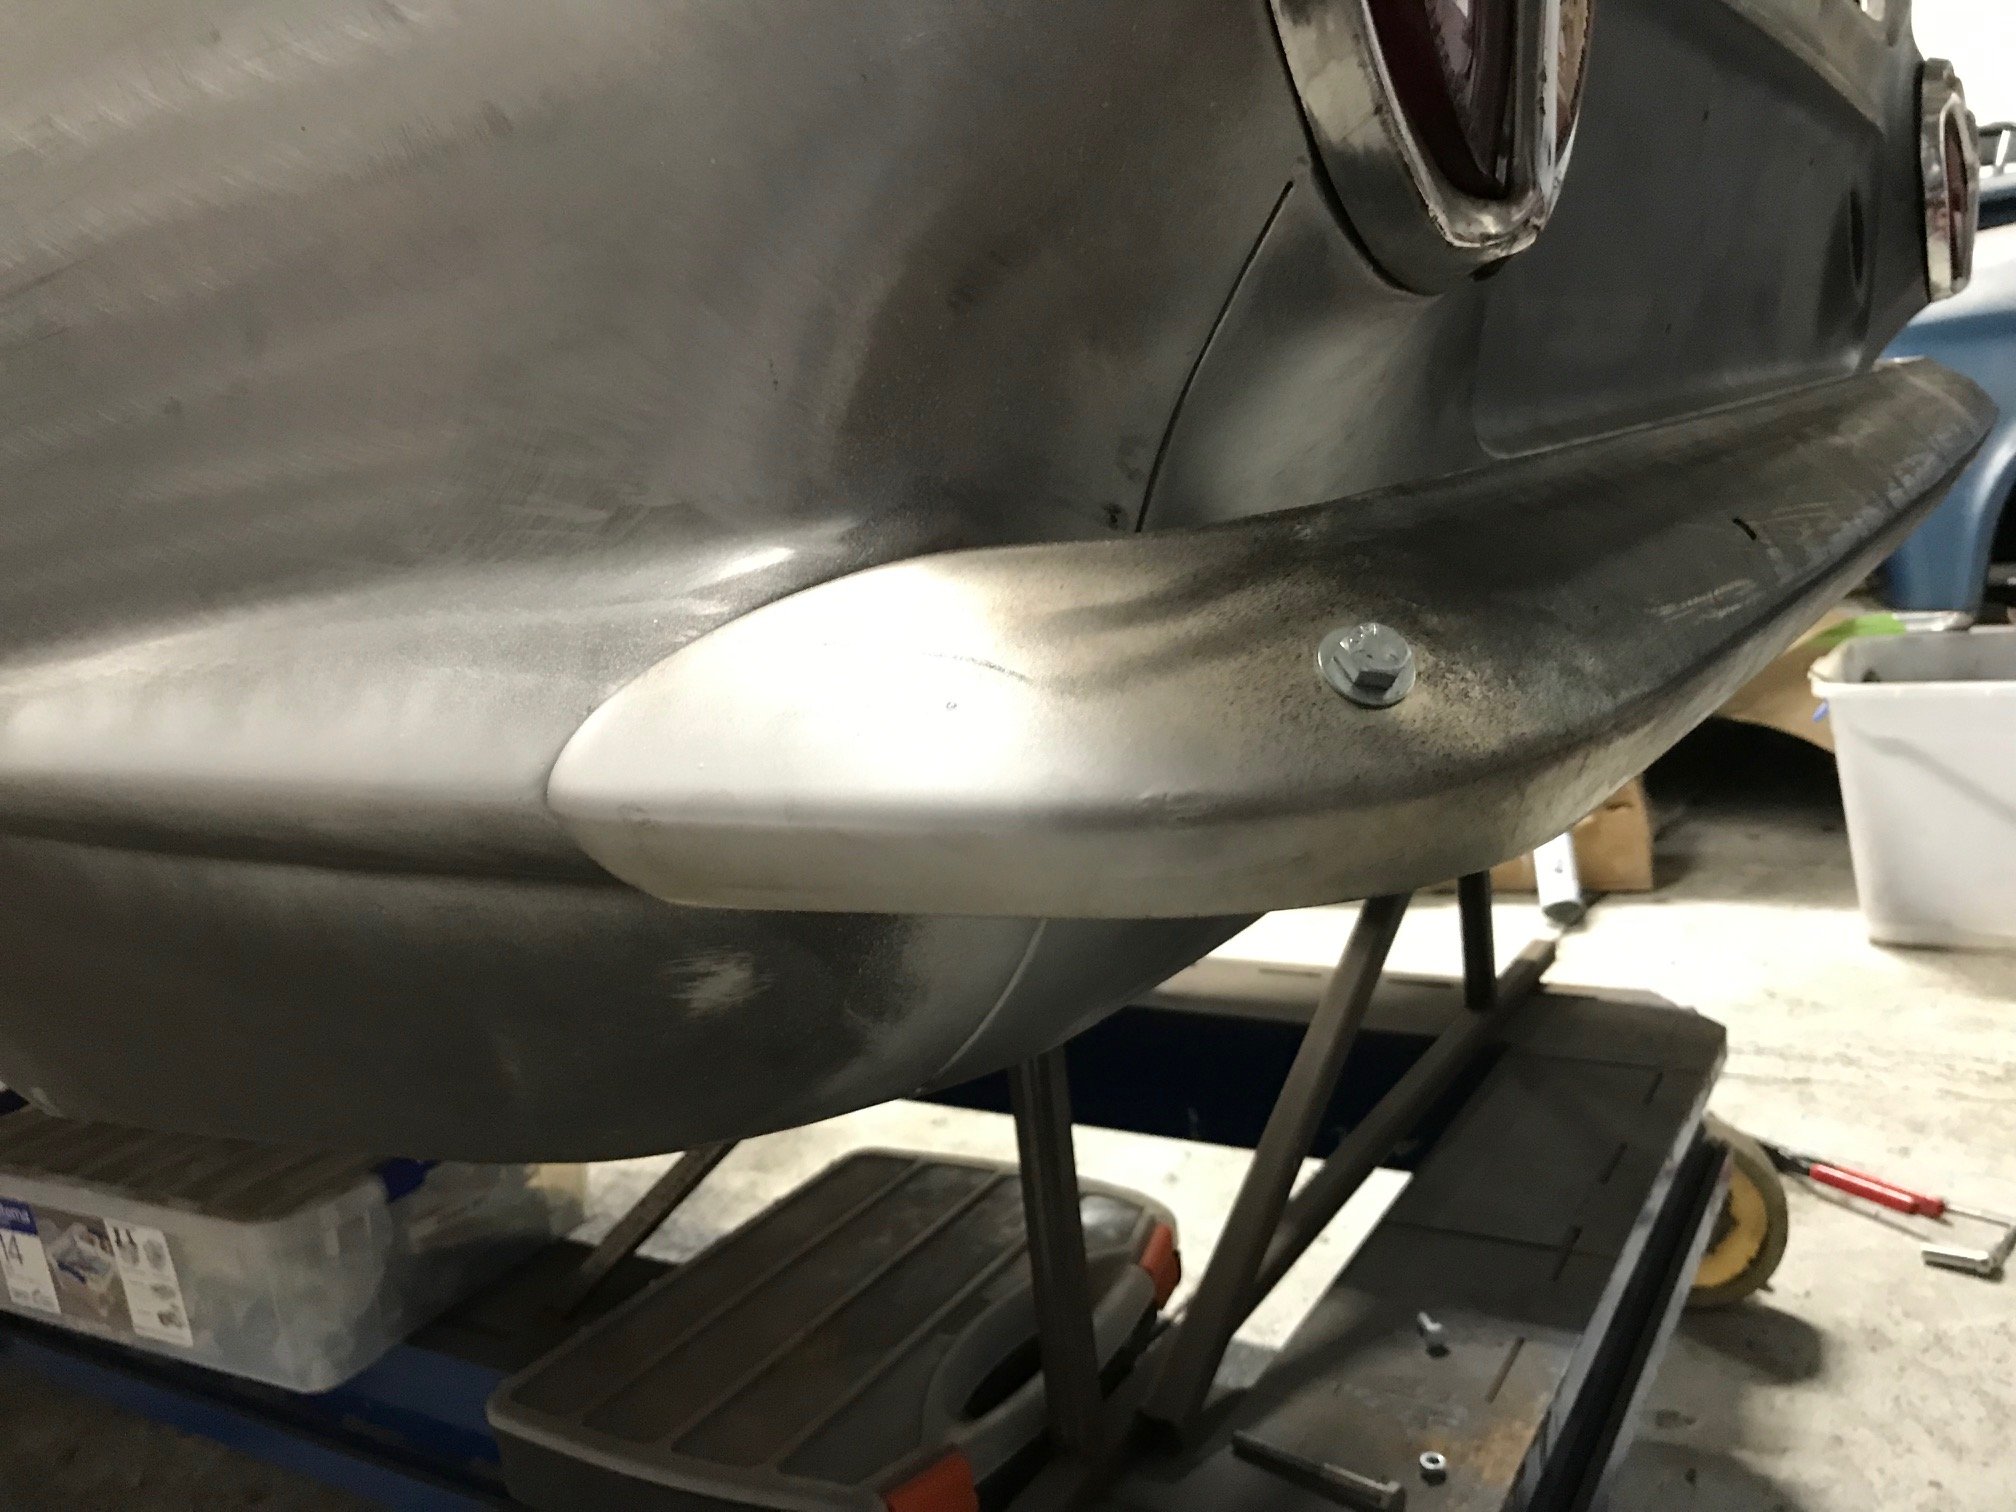
Rear bumper has been straightened up and trial fitted. Looking mint. Just needs a file up and off to the chrome players again. Down to the last few small jobs and off for the final blast.
1 point
-
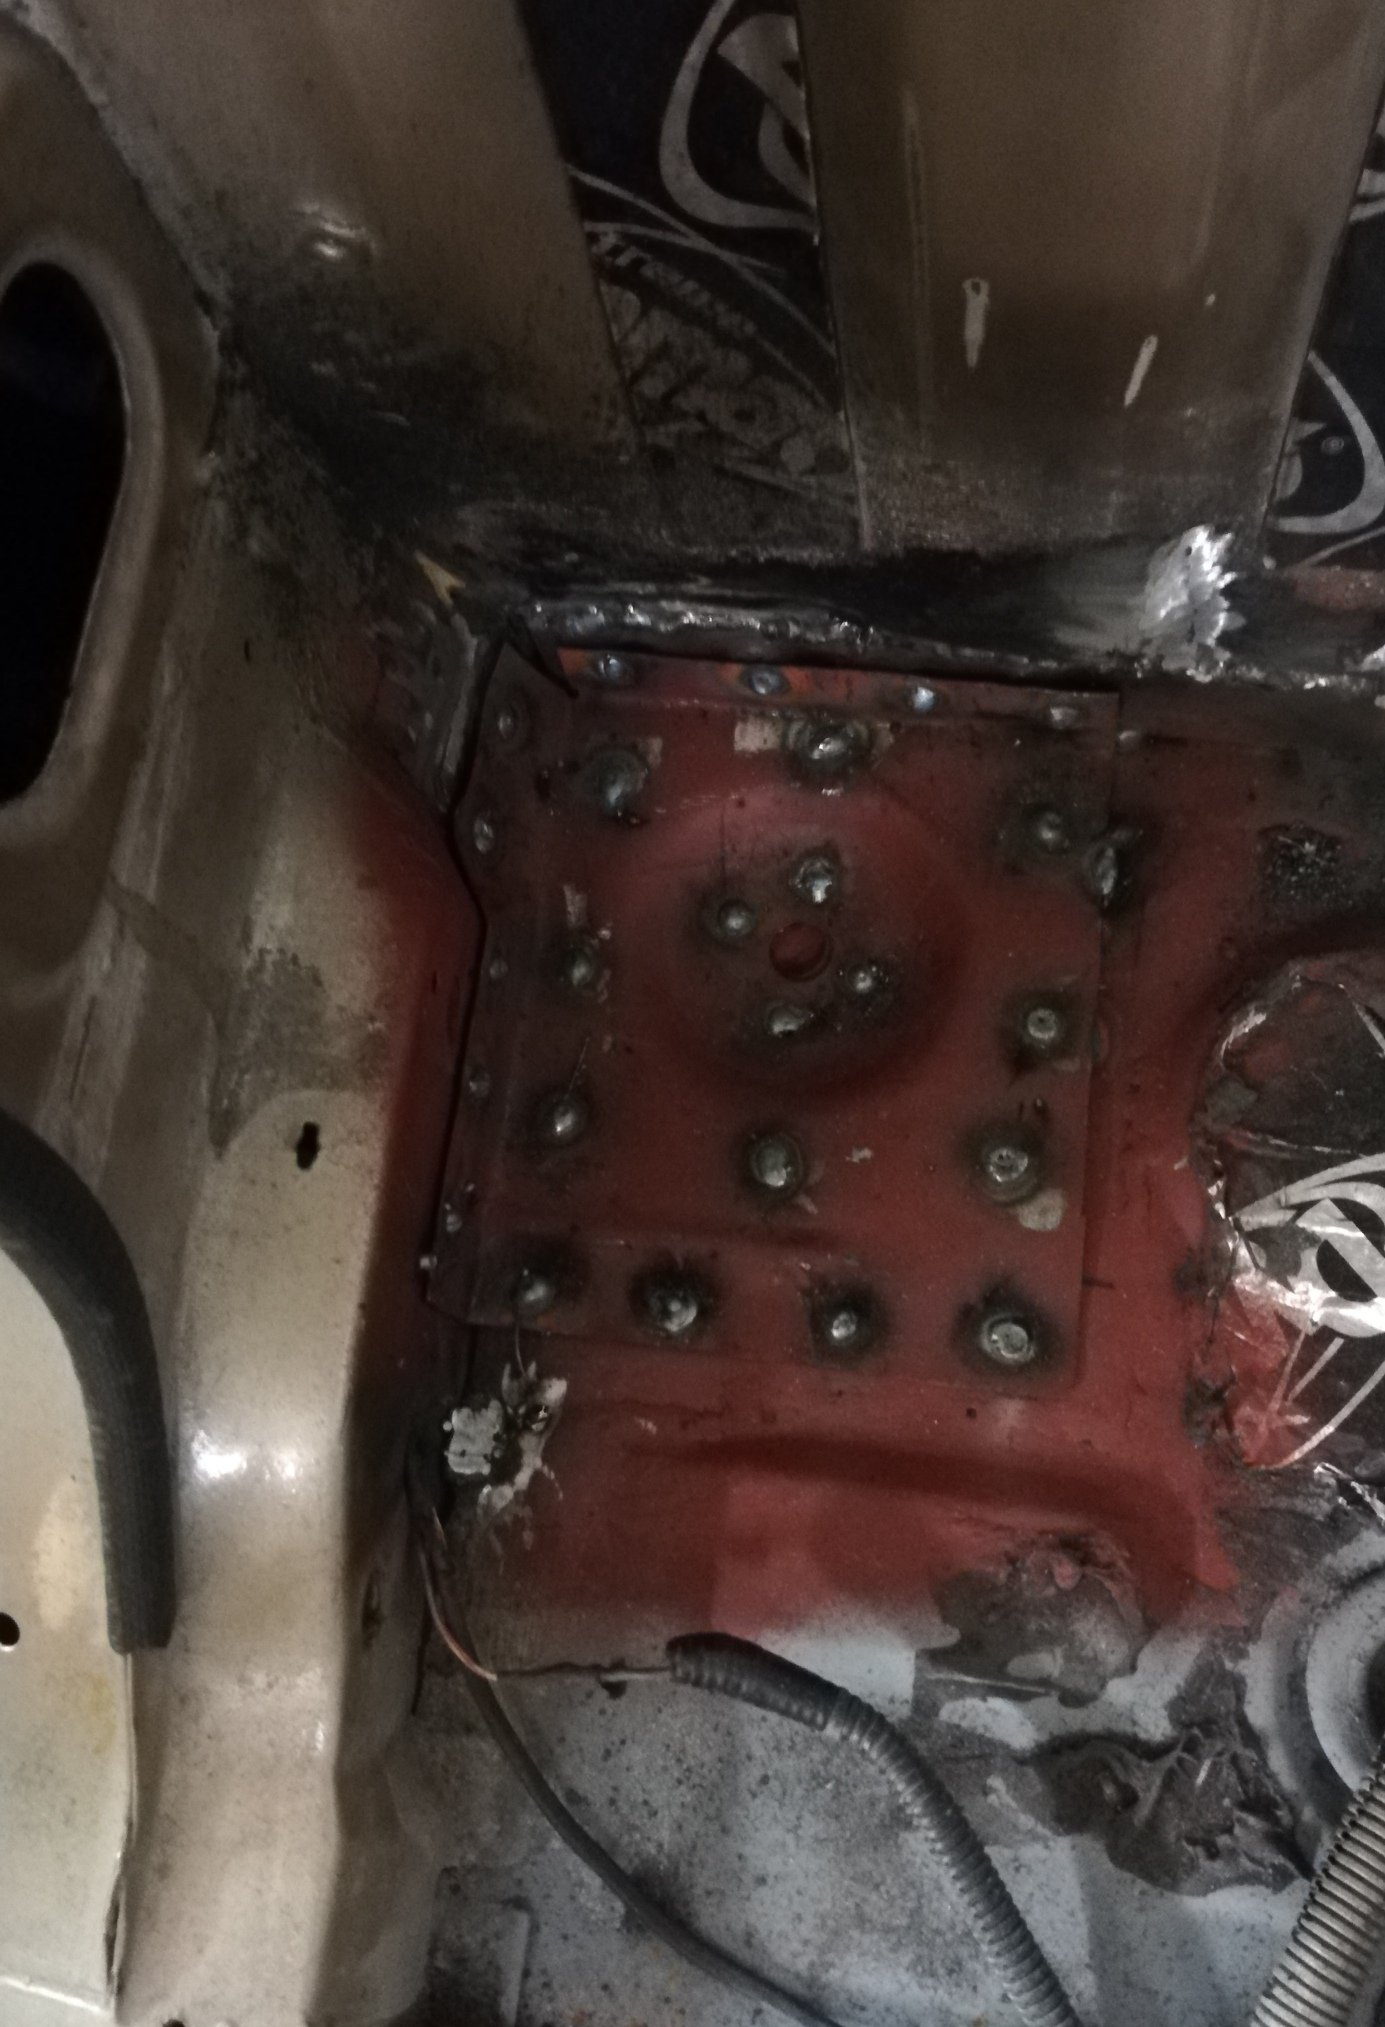
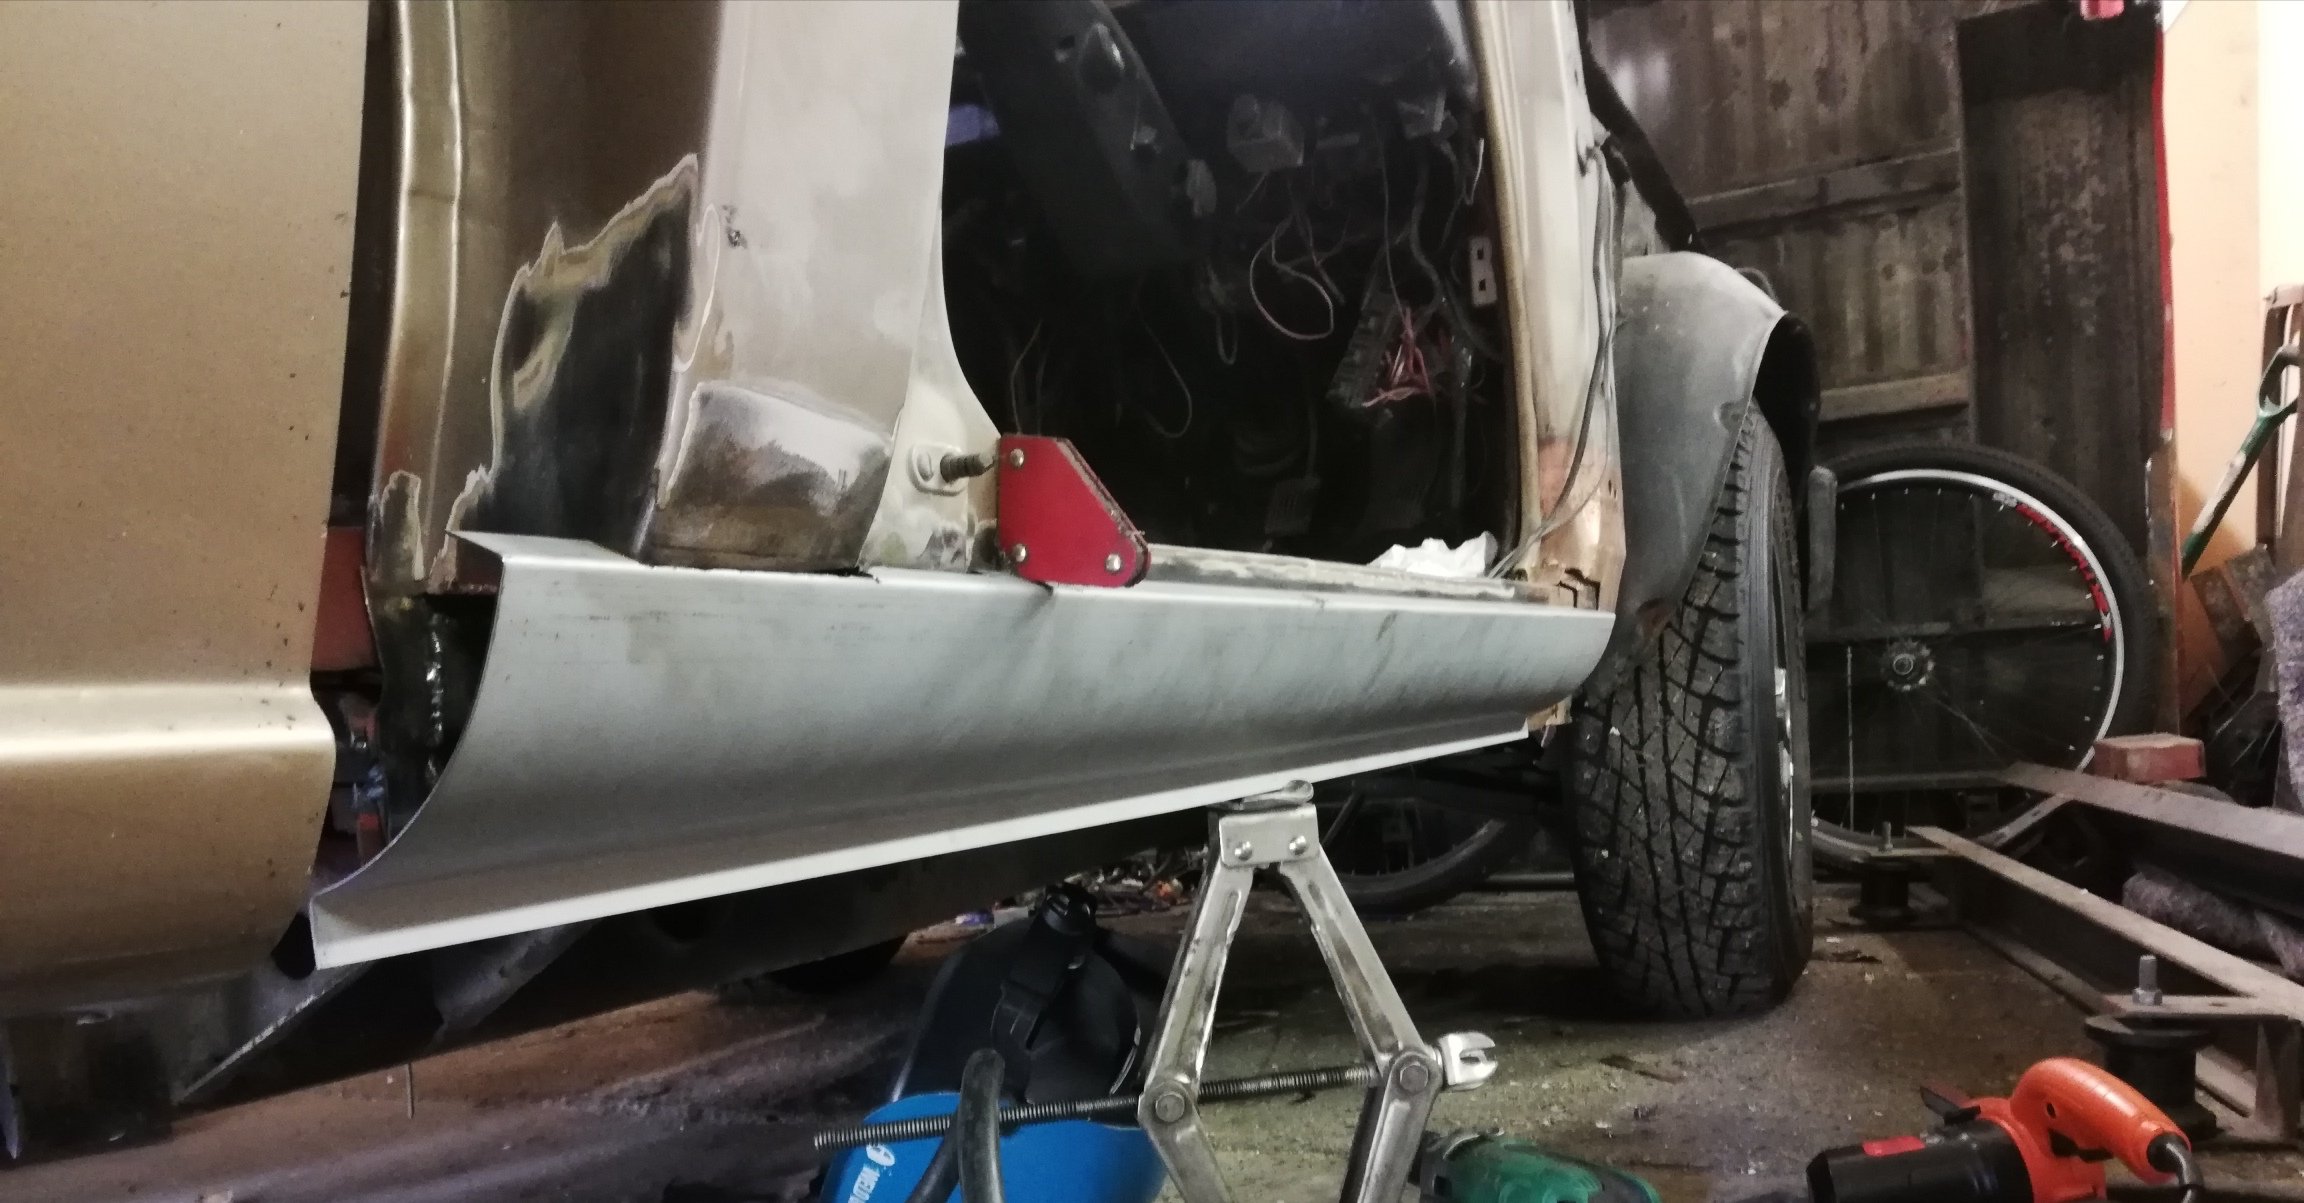
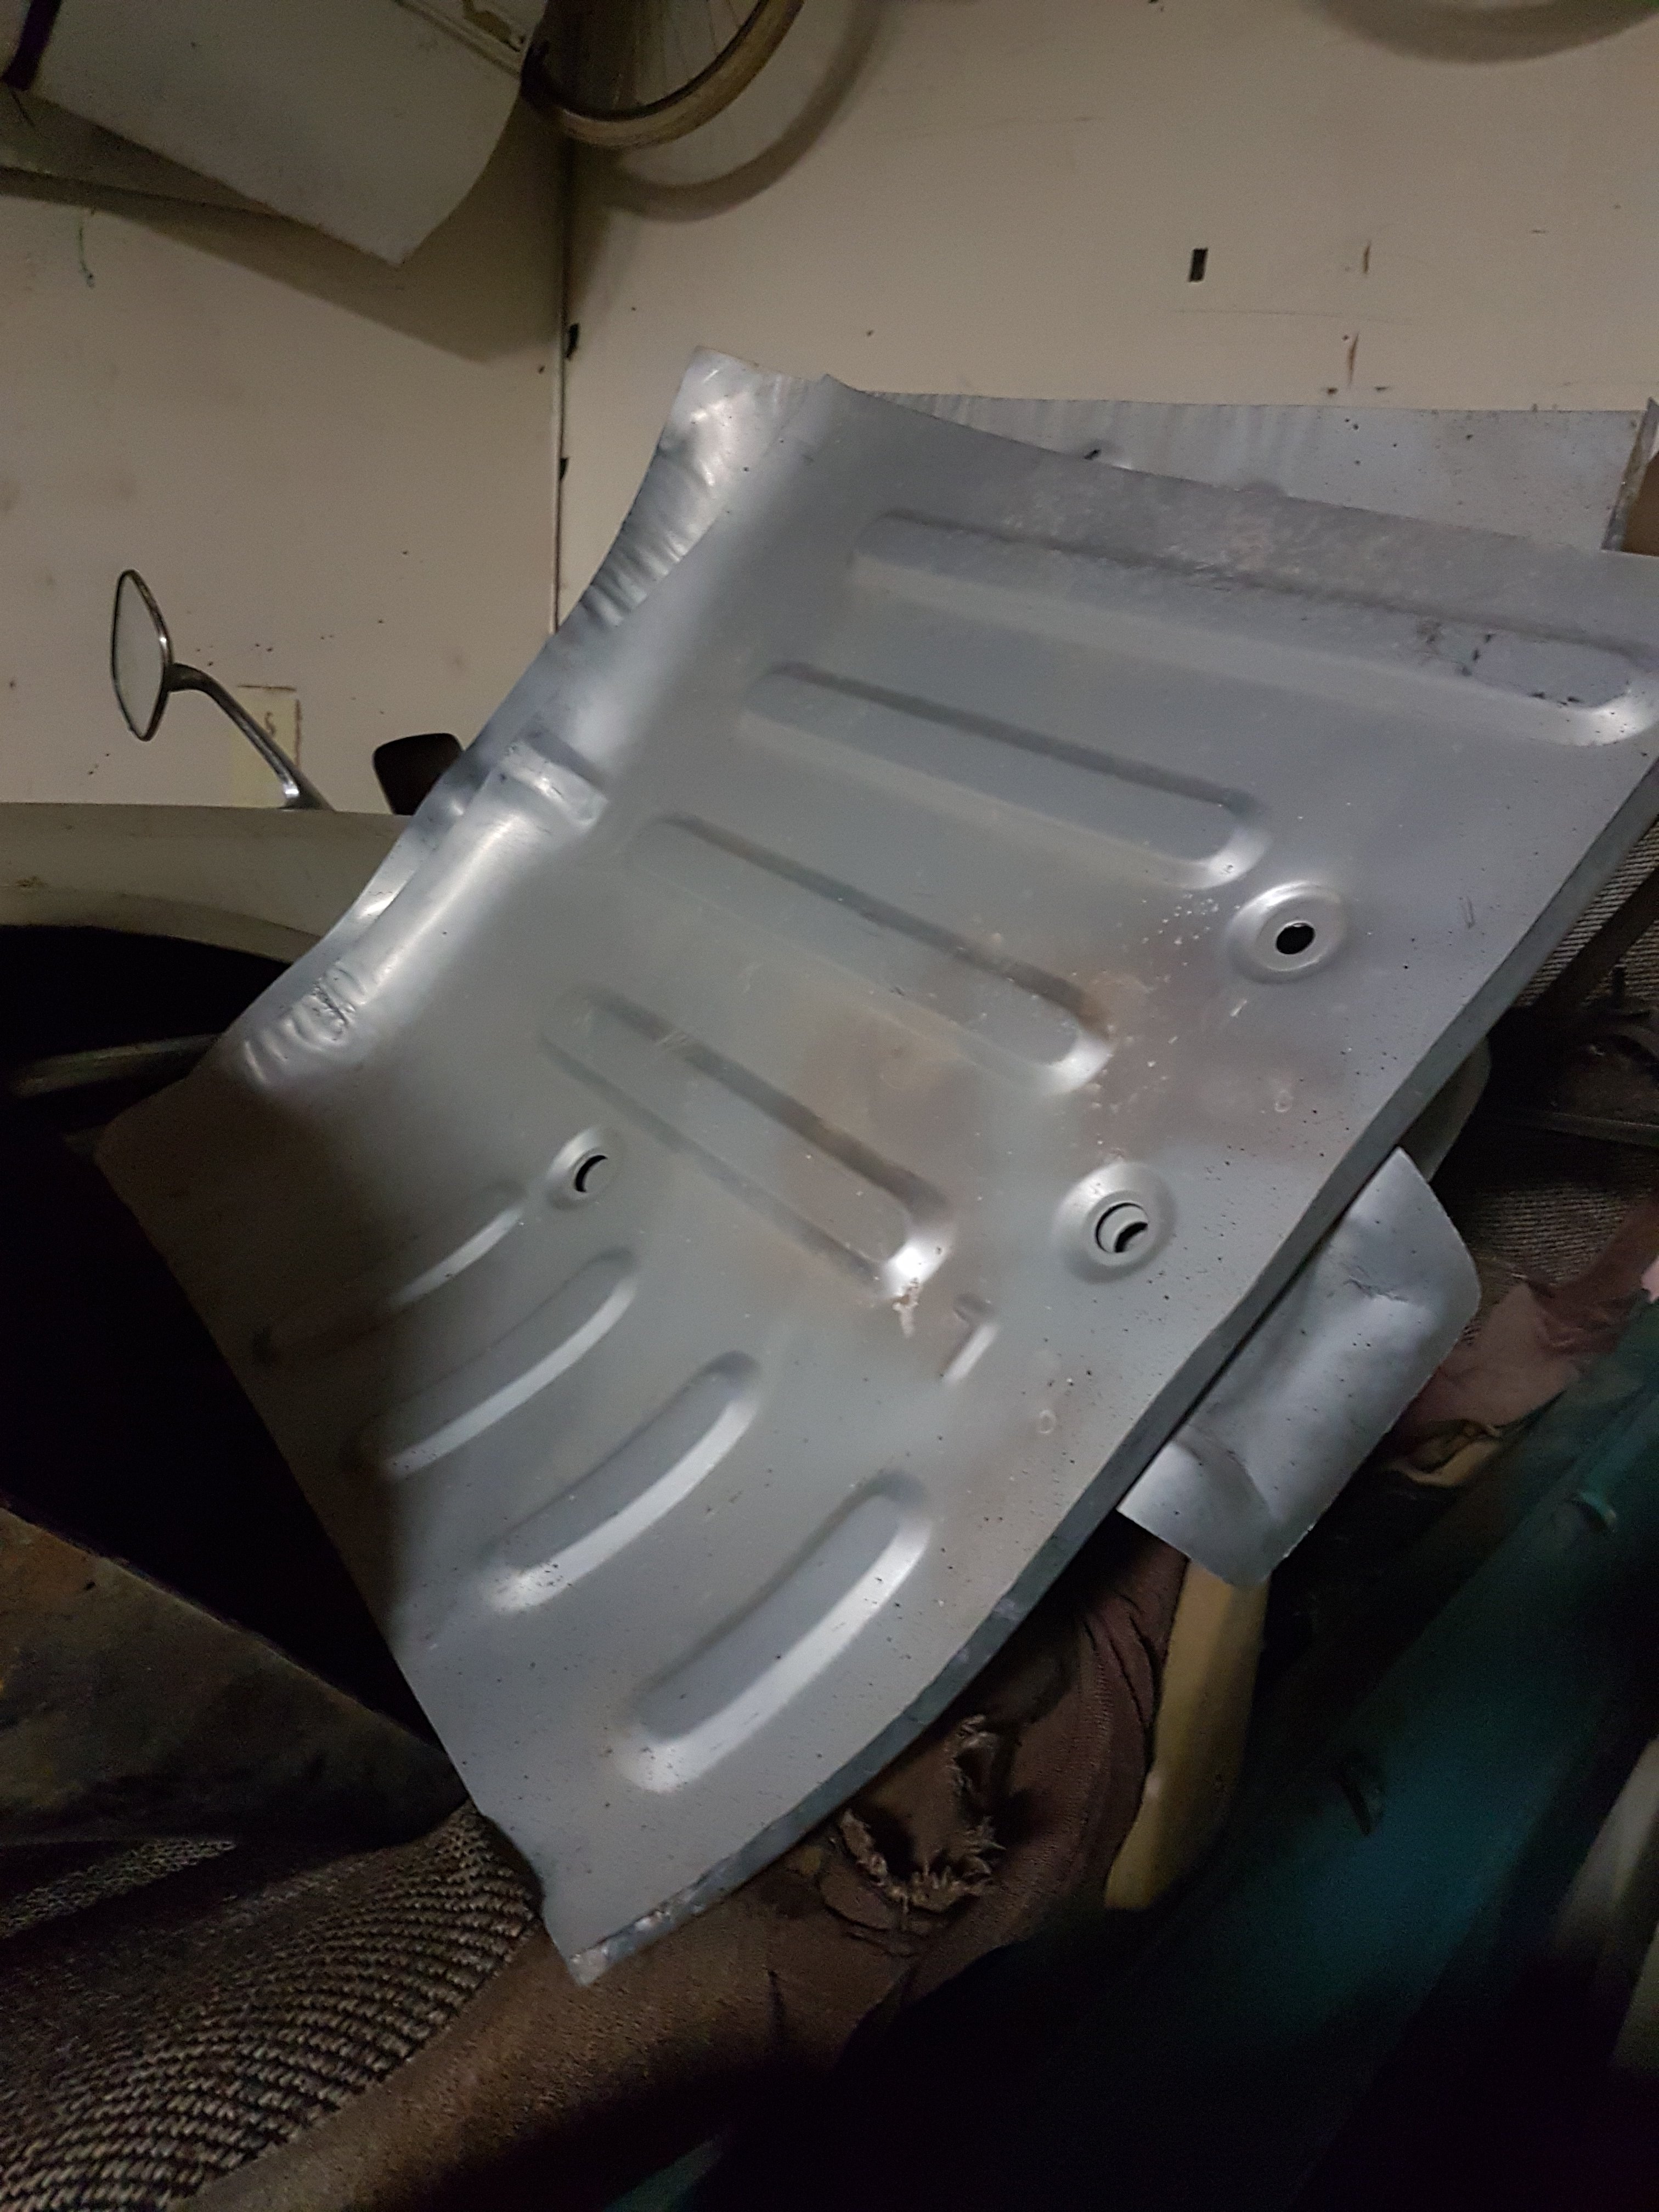
Ok ok What a balls of a job Floor is in Inner sill is in Cab back patch is in Inner cab mount plate is in Outer cab mount is in New sill getting trimmed to fit Not sure if I need an inside sill bracket like what was shown gas axed above, doesn't exist in my parts book.
1 point
-
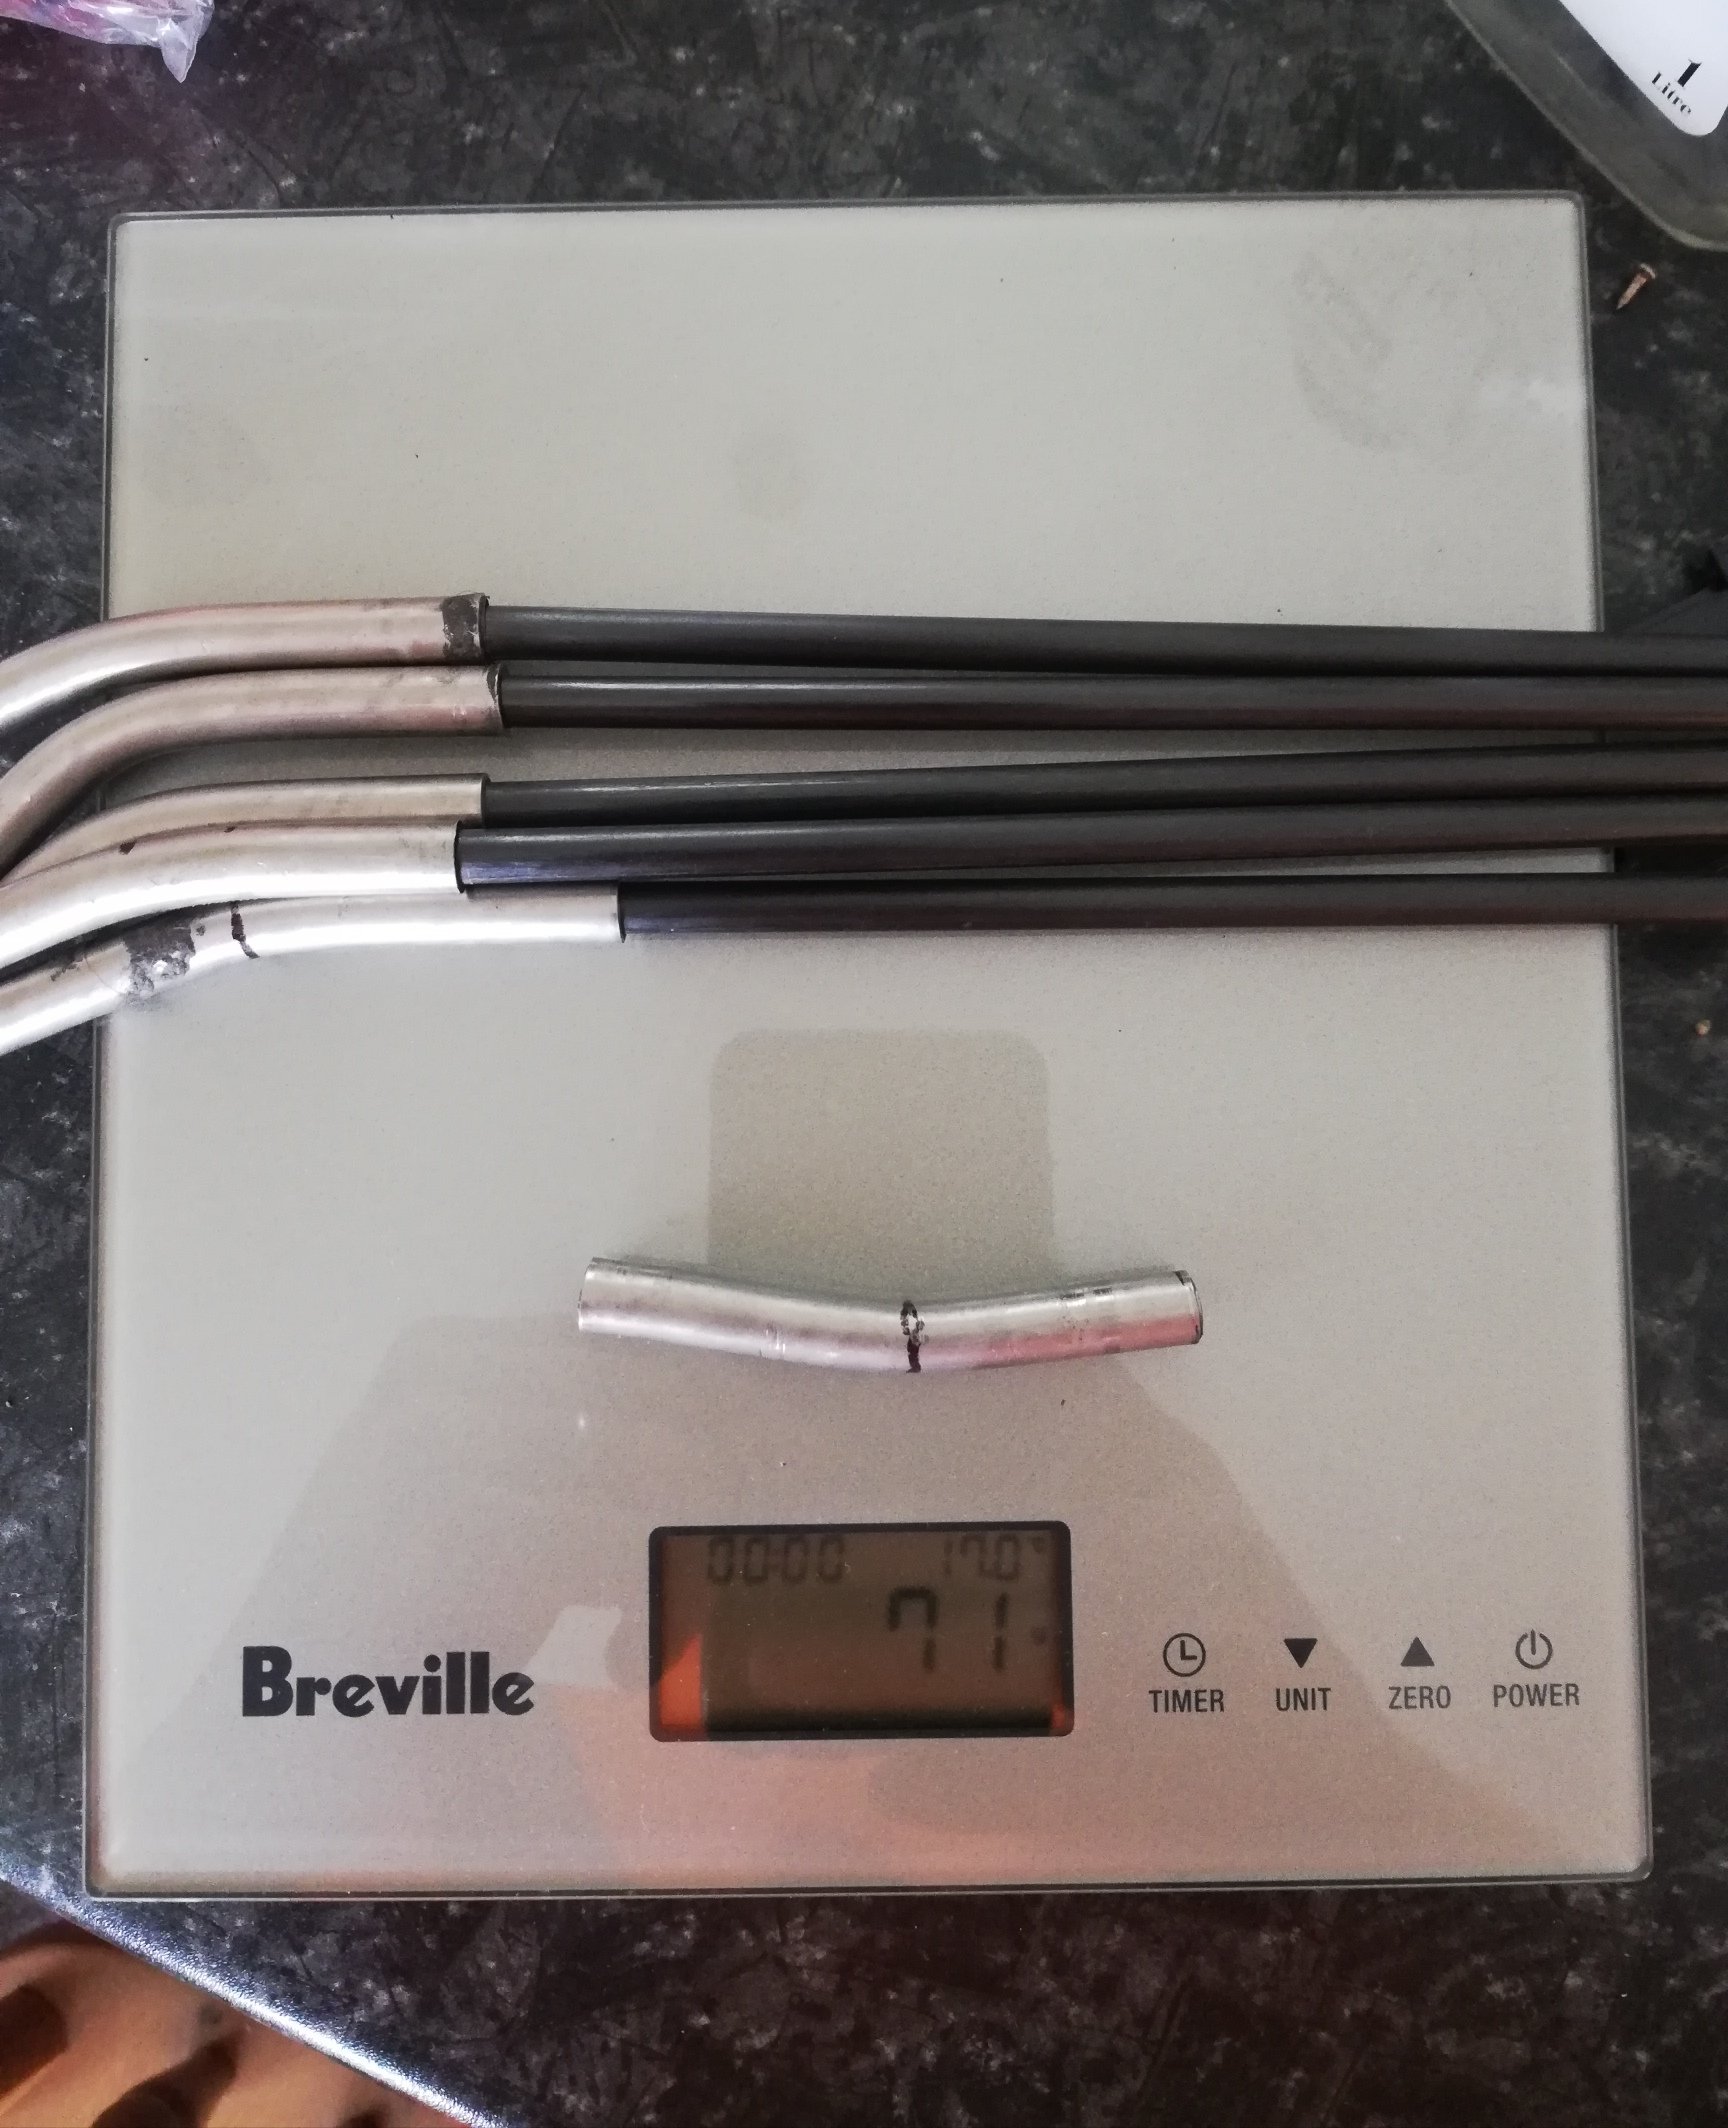
Carbon fibre tube and titanium tube tent pole for my bivy Dunno what the original looked like or weighed. It's roughly 10g less than a comparative length of DAC alloy tent pole. I can probably shorten the titanium a bit and make that 15.... Was cheaper to make them this way then buy the alloy pole anyways
1 point
-
I guess because people would buy "replica" Chinesium seats, made out of wobble and bend, bolted up badly, to shoddily welded together seat mounts, with the seatbelt anchorage held on with seagull droppings. So while it is unlikely to make the car crash, it will have a negative outcome on safety if the car drove into something* *worst case scenario presented because it's more entertaining, while also containing elements of facts.1 point
-
So yeah it's pretty much finished, except... Bathroom: First idea was to flatten out some copper cylinders we had to line the wall, so after scraping back all the insulation and probably getting a mystery disease in the process, then cutting them to tiles, we decided it didn't look great. So instead used one of the best looking pieces as a feature in the bathroom cupboard storage area. And subsequently lost the cupboard storage area as it looked too cool to cover up. Bought a concrete pot plant thing to use as a vanity, painted the inside black, but didn't like that either. Bought railway sleepers, but cutting them up seemed like you would lose the point of them being sleepers. So we have a sink, pot, and sleepers just hanging out here now. However, we did definitely want exposed pipework, so got the external copper pipe bent around which looks fantastic against the black wall, and my flattened copper. It finishes now where it will eventually be behind a "floating" mirror, and down into the valves and taps. The old stool is the makeshift bathroom shelf, it's helped paint and waterproof the place, oh and I have successfully managed to kill that plant now. Stephen even bent the original pipework from the bathroom into a towel rack which looks sweet And finally used some leftover pipe to create this vision I had of a hanging rack for my favourite rally jackets. Stephen's dad referred to the place now resembling a second-hand shop. Which is perfect by me. I want to end up wrapping the rack around the wall and including shelves for the huge collection of Mazda shit I own, but we are waiting for the concrete dudes to come back and coat the walls prior to making it a better fit. Other than copper pipework and my rally memorabilia, the interior has been gradually added to downstairs, but gets changed around a lot as things move on or come in. The plinth was made for the Sachs rotary bike, but has now ended up as the desk upstairs which is far easier. And that brings me to the rotary storage... it was meant to be for the RX2 Coupe as a priority. But I ended up storing my 808 here for a while, which was bloody cool to wake up to. However, we have managed to break Stephens 808 after a mission to the snow on Friday that ended with a tow truck from Smash Palace to Auckland, arriving at midnight on Saturday. So it's temporarily a piston workshop but it might need an engine upgrade so might sneak a rotary in while it's here as payback for dropping petrol on the concrete and stripping a circle of coating off. (have managed to get rid of most of that stuff on the left now so it's getting tidy) Also birds on tin roofs are hilarious. This little guy smashed his apple core on the clear-light but it bounced back and spooked him so he's left it for the rest of the bird bro community. Hopefully next time we will have a bathroom sink...1 point
-
The crazys in the workshop have been at it again....
1 point
-
First time it's seen daylight in about 3 years. Have just discovered a leaky rear shock so I guess I have to throw some more $$ at it haha.
1 point
-
Rebuilt and repowered technically. My crowning glory was that car. Now, has been racer
1 point
-
Oh yeah, so this thing is pretty much done. Wiring is in place. Just need to splash out on the M-Unit to finish. I'll probably try tidy up the control cables somehow and also fit some nice exhaust tips to my cut pipes.
1 point
-
Beat life1 point
-
Actually, i did buy some floor pans! Kinda progress..
1 point
-
Got a new look for the Beat1 point
-
So I haven't had a spare wheel for ages, and decided I should get one before I get caught out. I ended up buying a whole set of wheels off @jono007 who was nice enough to drop them off at @Truenotch pad, and he was nice enough to store them for a while. Thank you gentlemen! I decided to fit a set of tyres to them and use them over winter, as my semis are bald and are quite scary in the wet, and I still haven't had my promesh repaired. I've never been so confused by a set of wheels in my life, they are kinda so gross they are Kool, or are they? Regards, V "confused half mongrel" G.1 point
-
But you cannot buy the food and the space it takes up is huge, it seems to be a privet event they just jammed in1 point
-
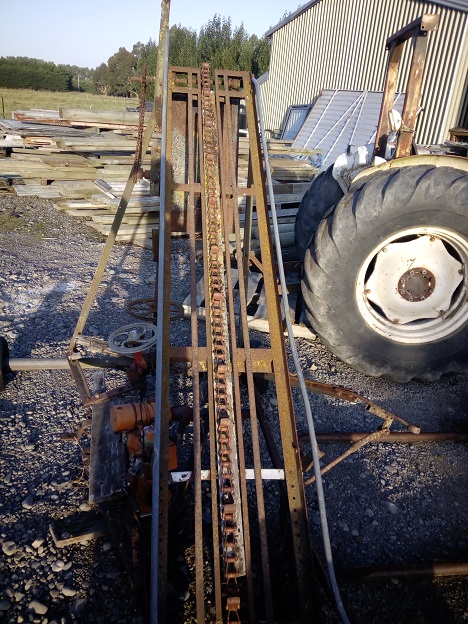
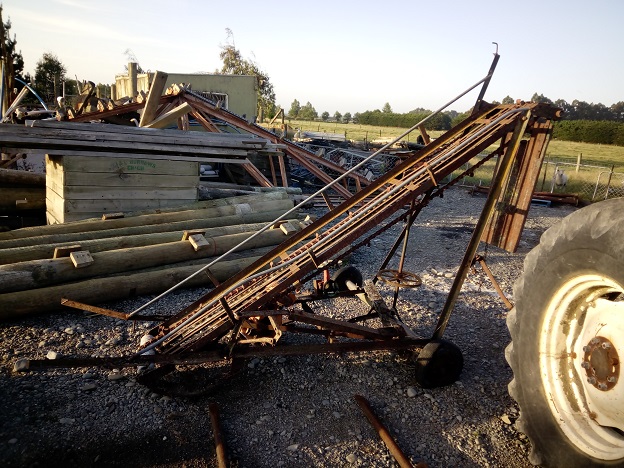
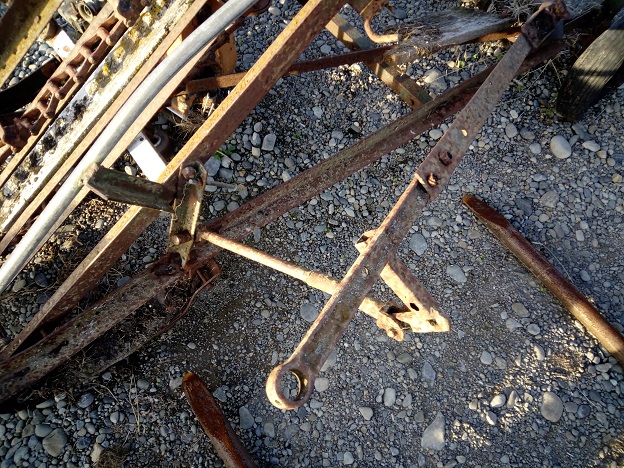
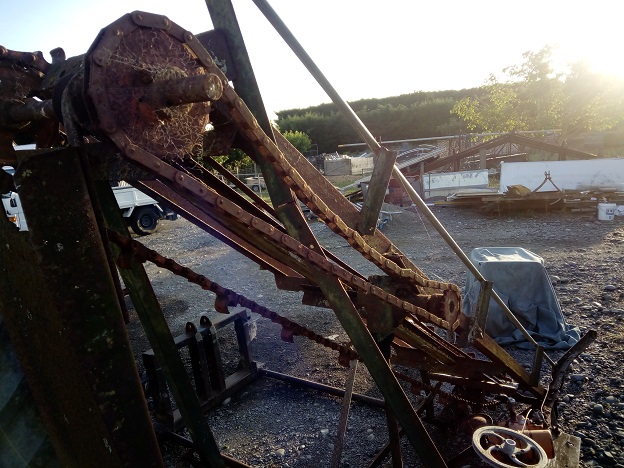
Thread dredge, this thing still goes hard for what it is. I've wanted an elevator/conveyor to work in with this to reduce all the throwing of wood. People often use modified hay elevators but they're pretty hard to find and cost a bit. Until I found this little gem when I was out looking for old bottles. Best part, it was free. It's quite the engineering masterpiece. Plans are. *Make it work. *Make it tow able with a car or ute. So how can you help? I need the back axle out of a small Japanese car to use as a ready made axle for this. It needs wheels and it needs to be cheep. I also need to find a decent vertical shaft motor, what have you got? Thanks OS pests.
1 point
-
Pointless update: On the way to Nat's I noticed a pretty bad brake judder at highway speeds and thought I should 'prolly do something about it. Diagnosis by default was warped disc etc, however, to eliminate this I pulled the handbrake (Gentle, Mavis...) at highway speed and got vibration. So, we have rear brake issues. Upon a bit of inspection, it appears the design of the Buick mag had a slightly different dish than the original steels, so it was clamping down on the drum outer rather than standard lug grabbing points. Two options to remedy - pull of drums and machine down high points - which would be nice If i had a mill - and due to the high points being the outer balance points (and balanced by drilling) I didn't want to hit them with an angle grinder in case it made the balancing worse. The easy way out was to get a 3mm alloy spacer. RAGE (Rough as Guts Engineering services) at your service Ma'am. Of course, easy is relative - the one's on the tard didn't fit the prescribed 5x127mm (5x5") so I modified some others I had lying around. Joined the Humber club a while ago although hadn't done any events with them until a couple of Sunday's ago an opportunity came up to do a drive to Manawhai via SH16. This fitted in quite well after Caffeine & Classics and I was already over the bridge so thought why not. By default I was certainly the whipper snapper of the group by a couple of decades minimum - however great sharns all round. The trip north was best described as tortoiselike, maxing out at a heady 80km on the downhills with a constant cloud of blue smoke on the over-run from all parties. Lush. Had lunch and a cup of tea at the museum then visited a beach and did skids. (One of the previous things didn't happen) My favourite new Barry was Mavis (Ann Dimoline) who owns 9. Have a read about her here. The current compendium, each nicknamed by Ann, reads: 1965 Humber Sceptre Mark I (Opo); 1966 Humber Sceptre Mark II (Pearl); 1961 Hillman Minx 111b station wagon (Chanel); 1962 Humber 80 111b station wagon (Toto); 1963 Hillman Super Minx saloon Mark II (BT); 1966 Singer Gazelle Series 6 Auto (Tommy); 1954 Humber 10 MK 7A (Babe); and 1974 Commer pop-top camper (George). What an absolute battler. Anne to the left with her Humber 80 Wags named Toto I bless the rains down in Africa - Gonna take some time to do the things we never had and collection of swarming Barrys. A fave to be sure - what a great wag - and a daily too - loaded with tools for Robertybob Handyman services. Otherwise no updates right now, however I have a couple of subtle upgrades in the pipeline, however a few other projects on the boil means they may be in warmer weather. Otherwise long may she continue being a workhorse and doing what car's are meant to be doing - driving and stuff. Yesterday delivering latest 'investments' to storage for even more future work. Peace y'all.1 point


This leaderboard is set to Auckland/GMT+12:00