
Leaderboard


Popular Content
Showing content with the highest reputation on 07/10/19 in all areas
-
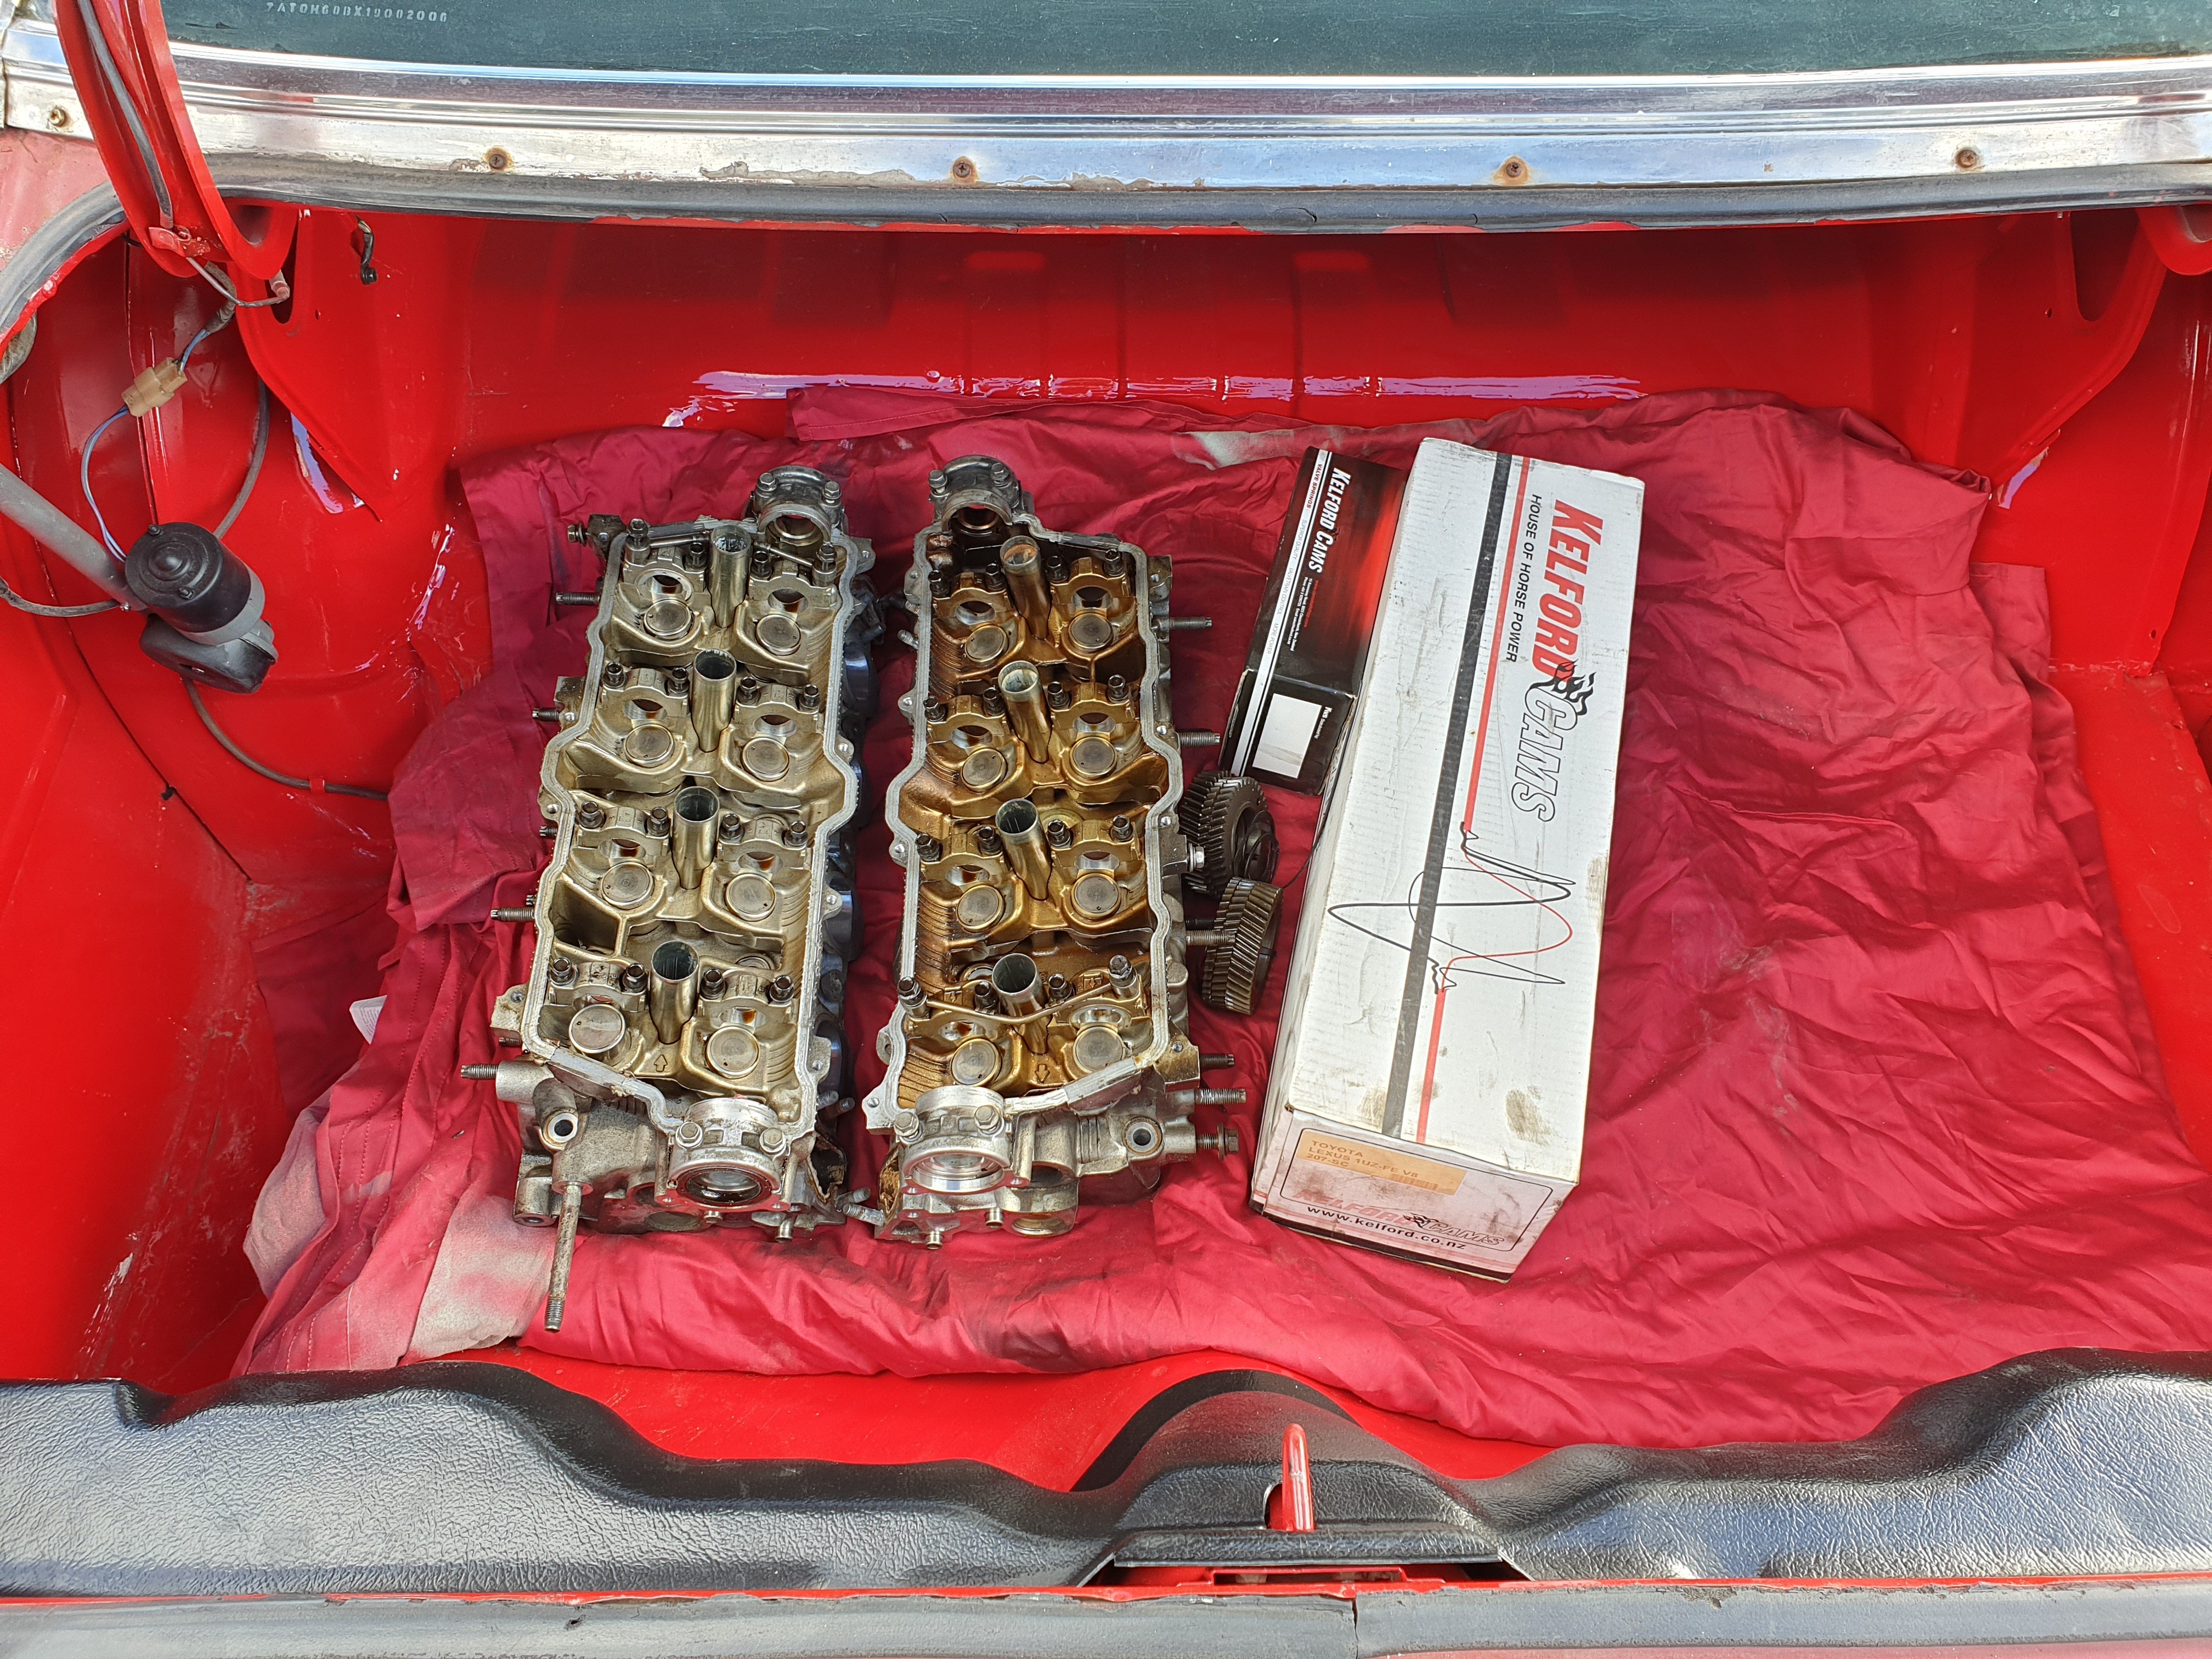
Parts haulin....
 6 points
 -
Looking good, recommend learning how to use a router and giving laminated ply a go. very on trend lol. about $120 for a sheet, not bad IMO. Flip with a router you can make so many things! I just made this from scratch (Stripped the room bare), learning how to router on the job. Don't recommend Bunnings ply! GIB plastering isn't all that difficult either. (handles still to be fitting to all draws)5 points
-
Ah im in Hornby So dead reg and Unknown motor with some other issues. Id offer ya $3004 points
-
I might bring my FA50 as a backup bike. It'll do 80kph on the flat, but is geared pretty high so could be punishing up hills. It's got a 2 litre fuel tank, terrible lights and the brakes almost work.4 points
-
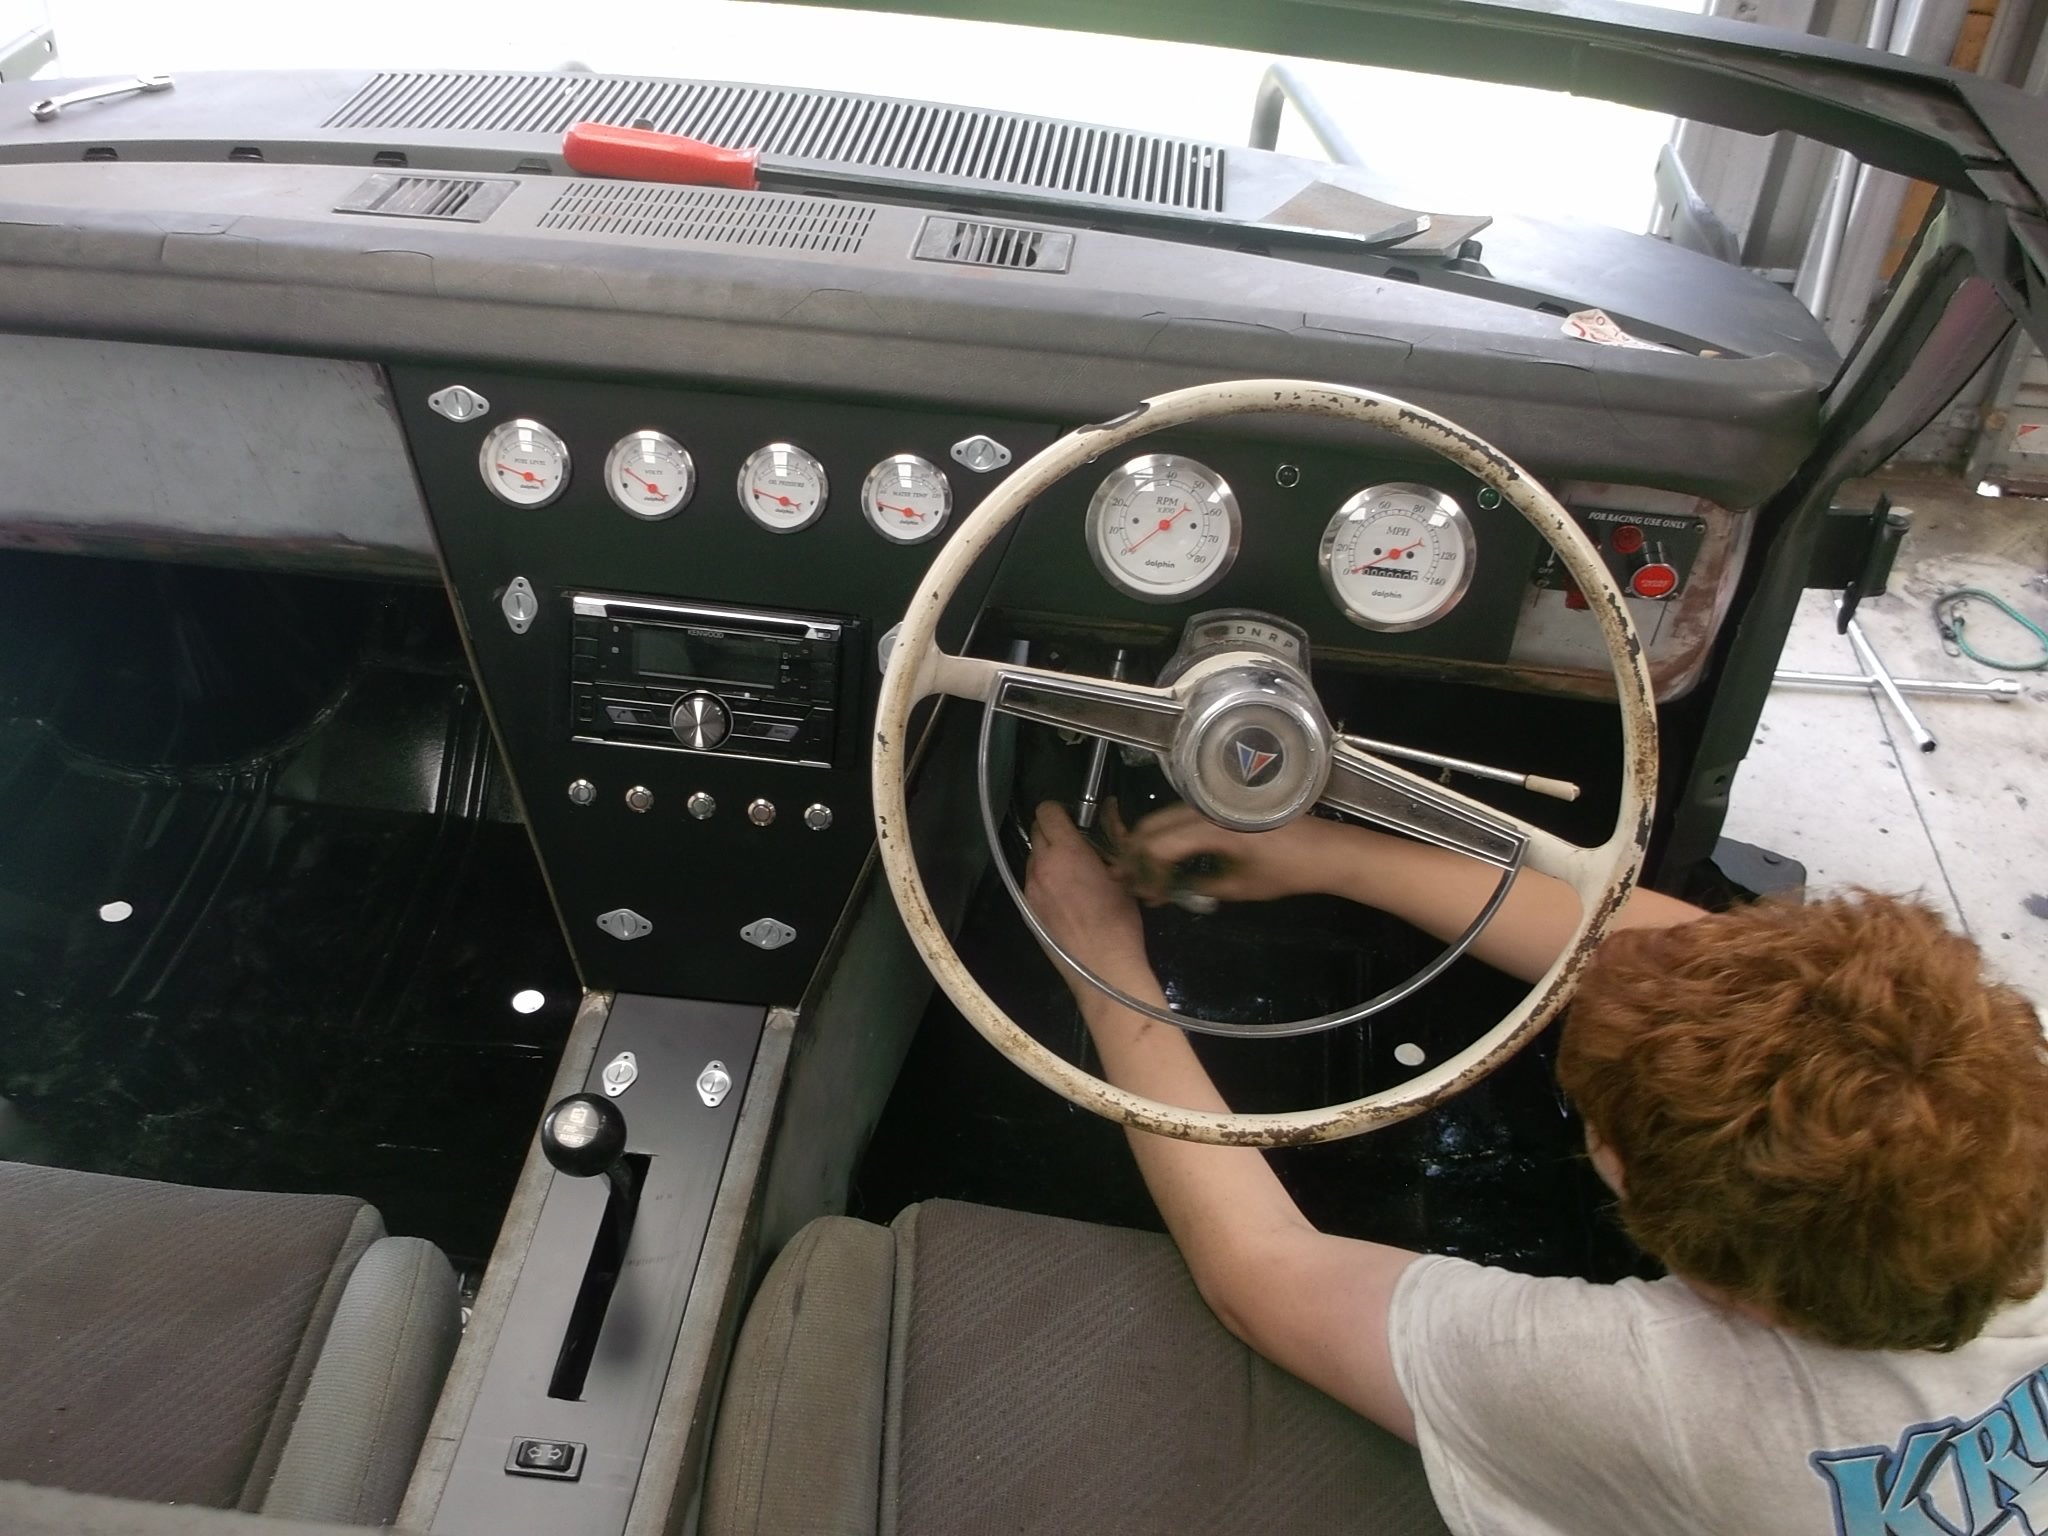
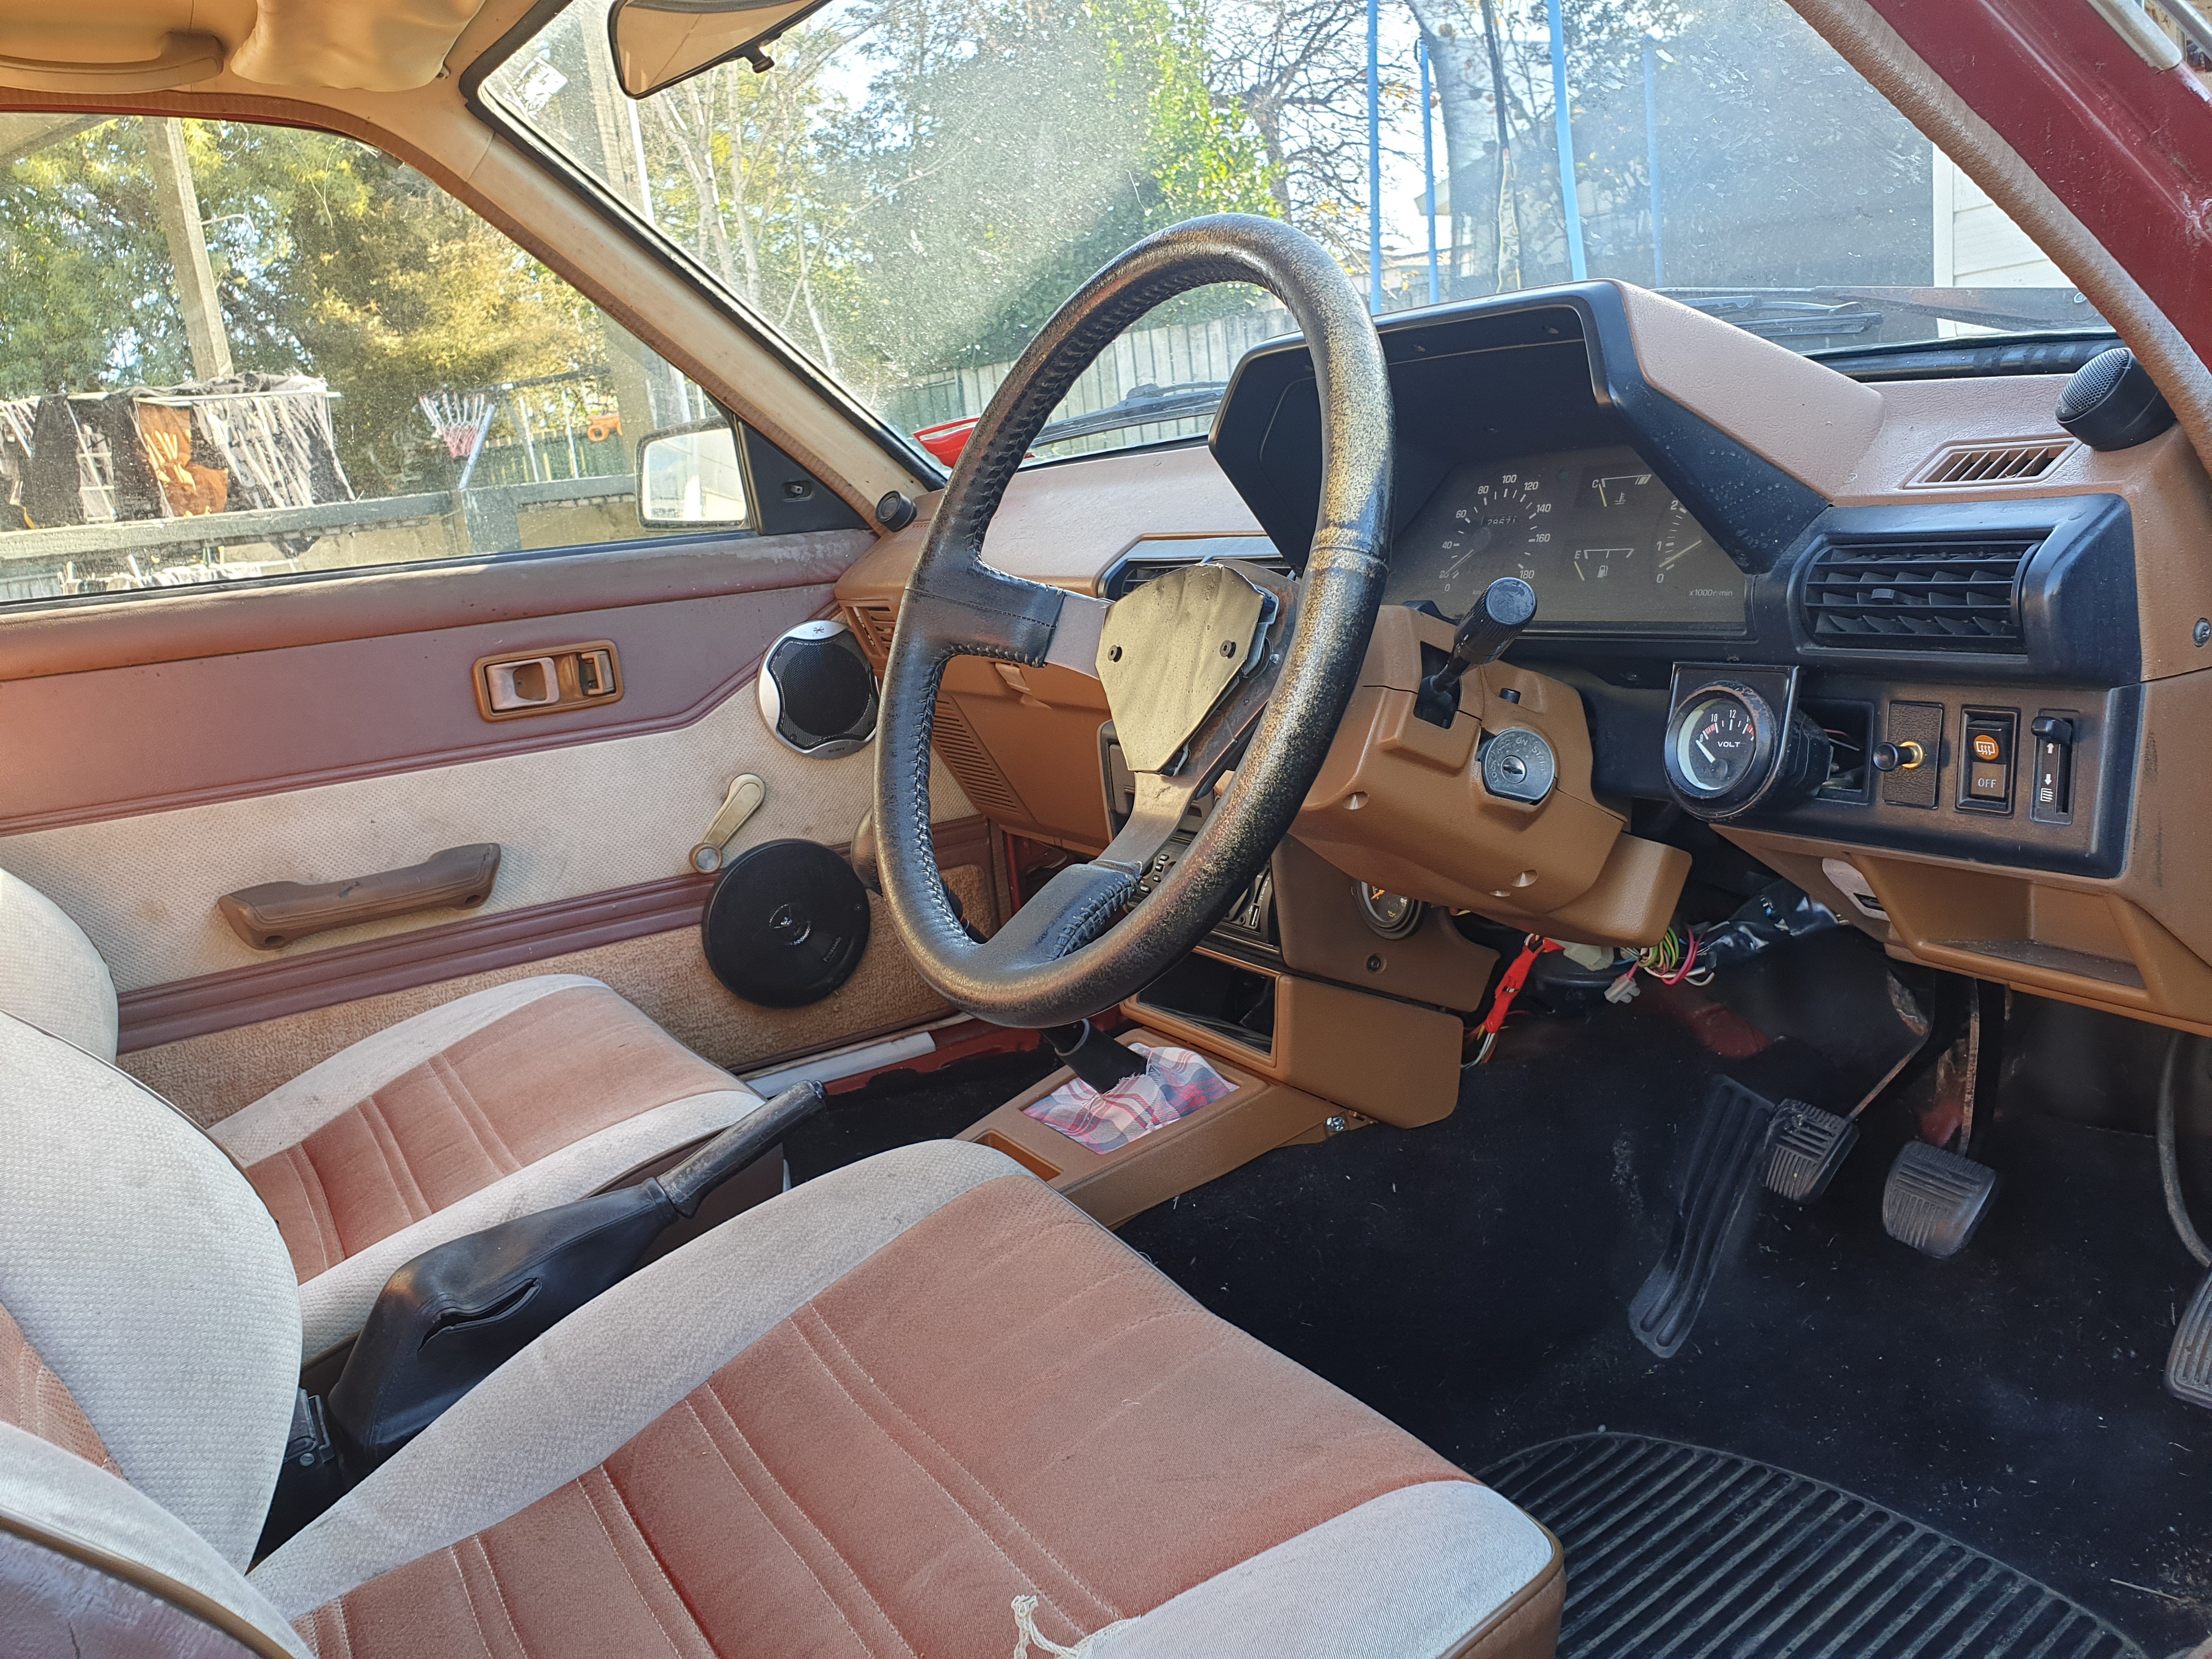
Been on hols, got back today and had a couple of hours in the shed tonight so I mounted the Safari cluster in the Dyna dash. I had mostly fitted the dash before we went away. Shit will fit ok I reckon, I had to trim the cluster hole quite a bit bigger. Factory looking eh. It's all 1992 So no stylistic clashes happening.3 points
-
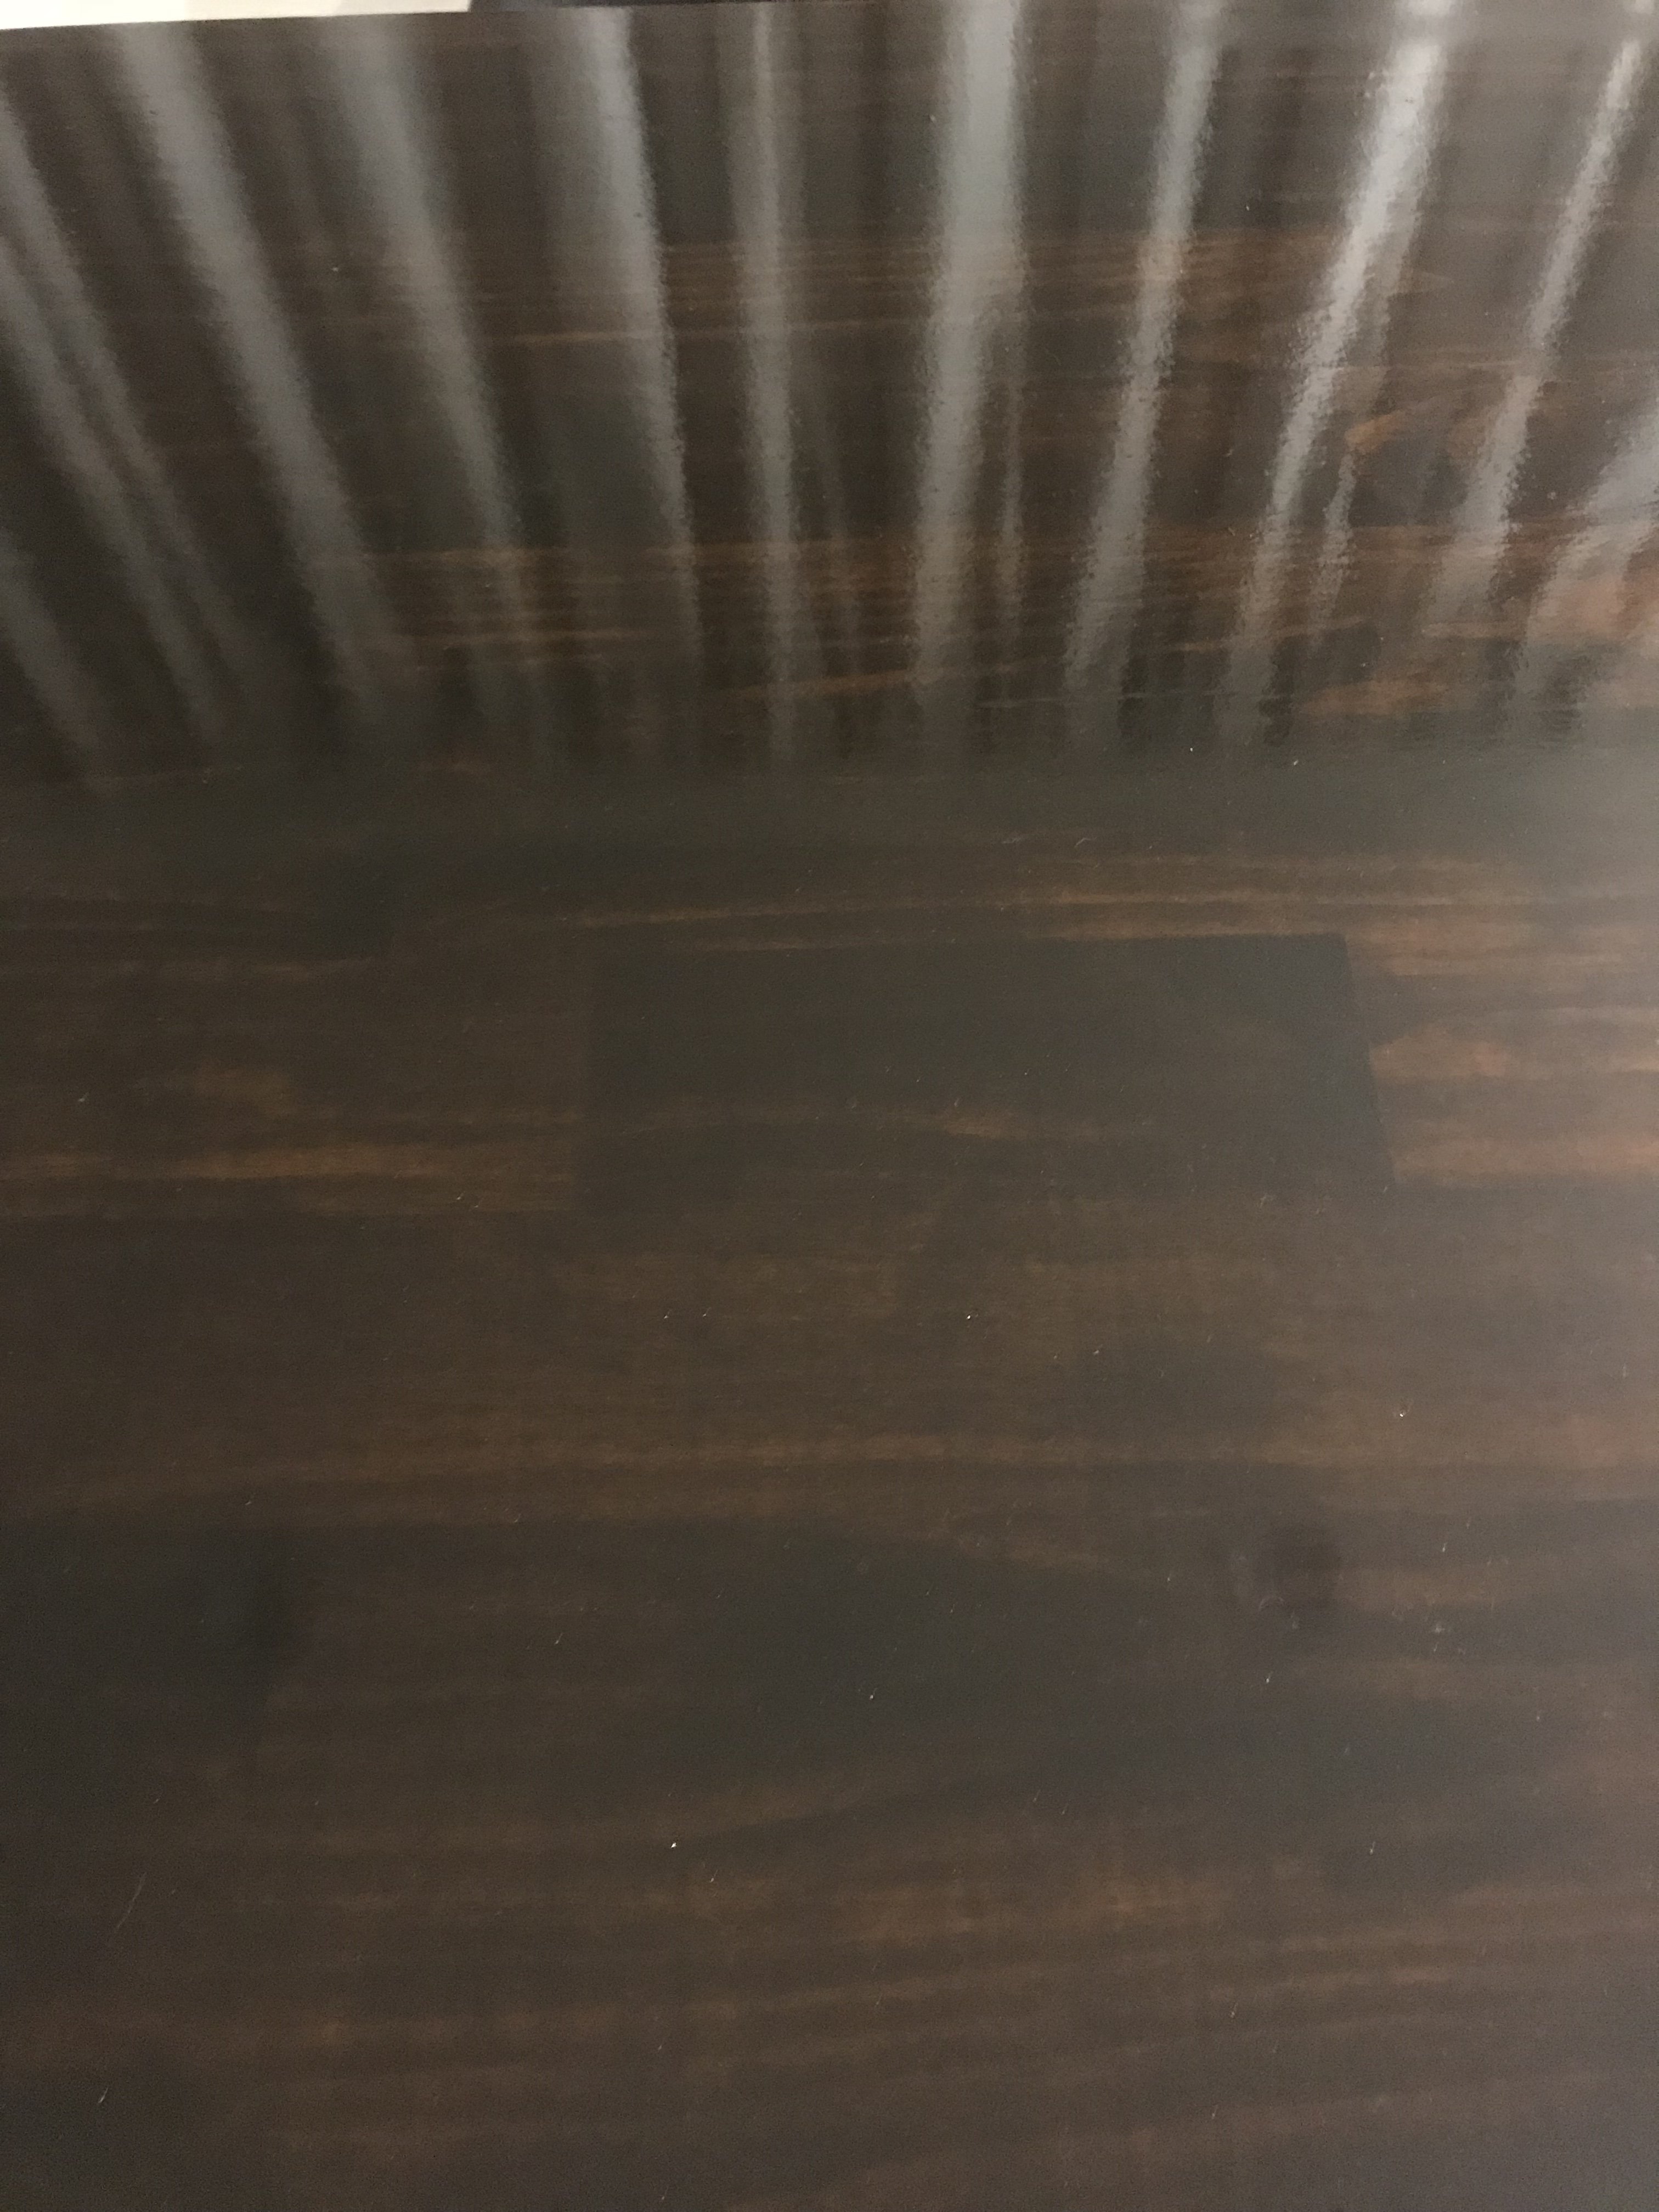
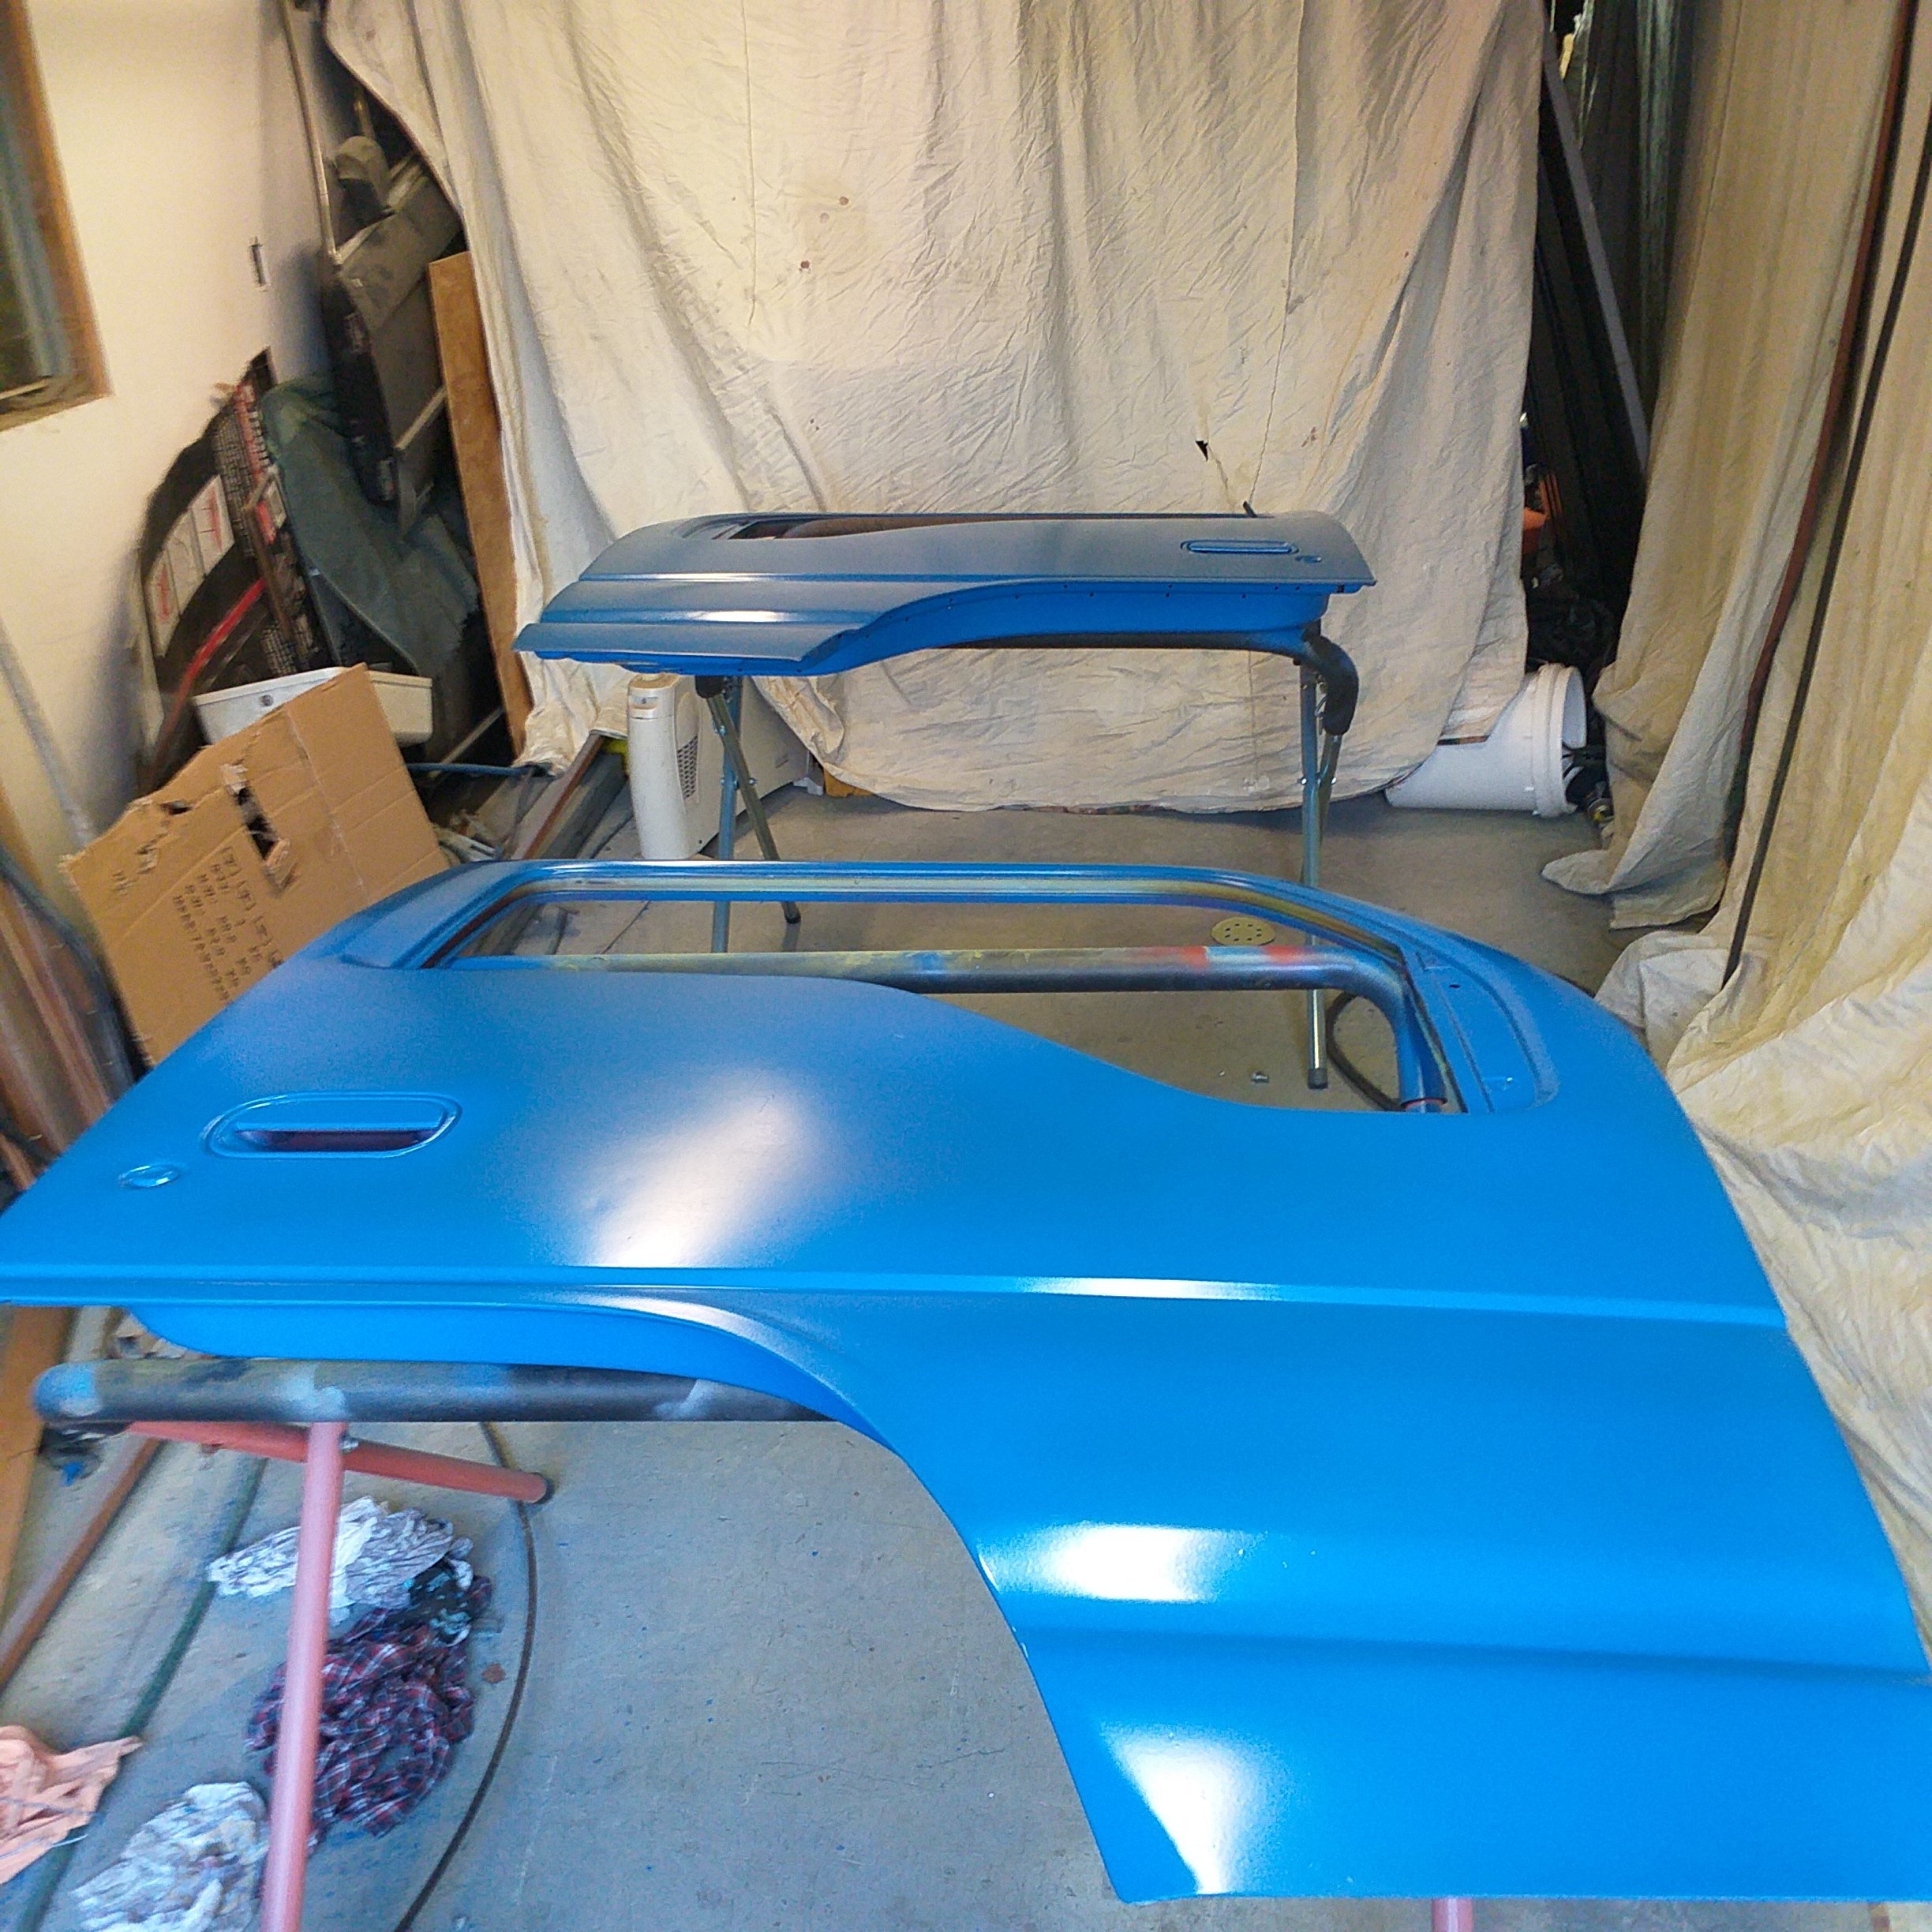
Here’s some better photos of the finish. probably used more clear on it then the black. sanded it with 600gr between the final coats and thinned it right down
3 points
-
better shot of the dash. rear parcel self remade to fit around cage .383 painted
3 points
-
It's not as bad as cfc's, one gram of r134 is equivalent to 1410 grams of CO2 as far as warming is concerned, cfc's were equal to 8500 grams of CO2!2 points
-
Ronnie Dio the AF18 for me. Prep will be replace broken plastics from when I dropped it a few weeks ago. And either burn the pipe clean, or fit china spannie. No bedding or tent means I'll need to carry a lot less. Won't even need the pack rack I made last time. Underseat storage is legit a.f. any other wounders gong to be rep ping twist and go? @sentra?2 points
-
righteo. the speedo is out, either it is out or my kombi is reving a hell of a lot due to a small tyre. its current front & rear tyre are 195-70-14 gps speedo doing 50kph = 56.33kph on the dash. tyre rolling from one spot to the next spot is 197.0972 the internet tells me by working out pie and all the other shit. my xero tells me its roughly 11% out at this point I've given up with where i was heading and called @flyingbrick we have come to terms i need a 205/80 r14 to make it some what read close to the correct speed. this will make the Circumference 214.6525cm instead of the current 197.0972cm. my peace of paper in front of me has so many god dam numbers written all over it and I am ready for a Jack Daniels.
2 points
-
Day two. No asplode
2 points
-
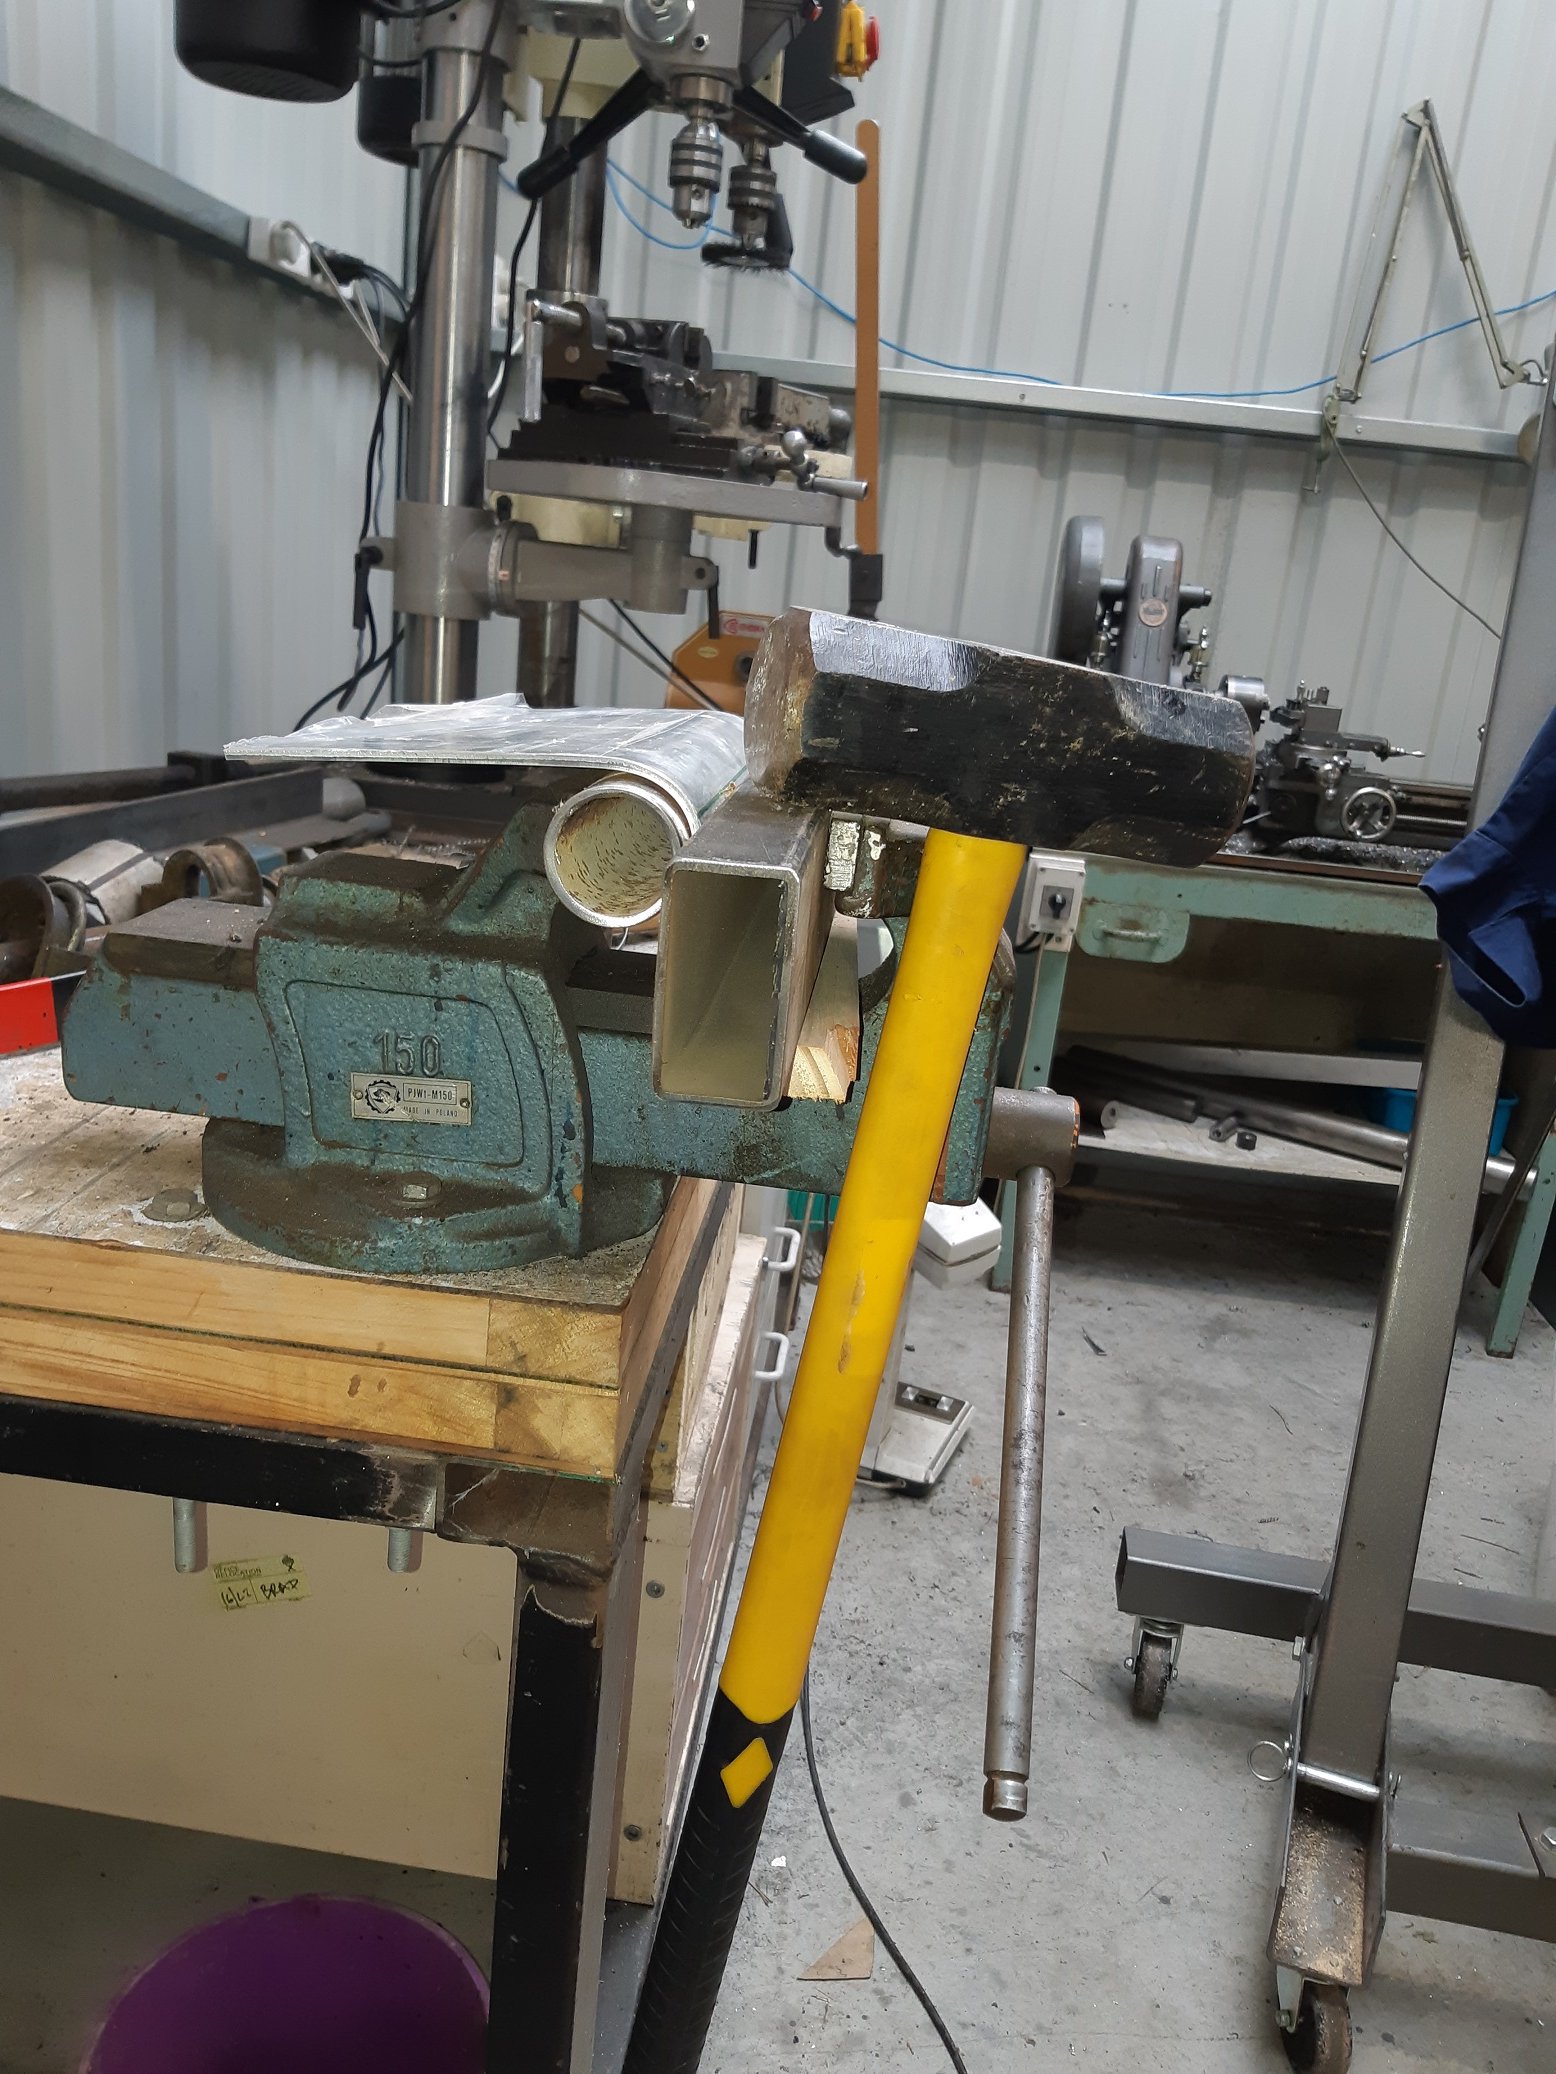
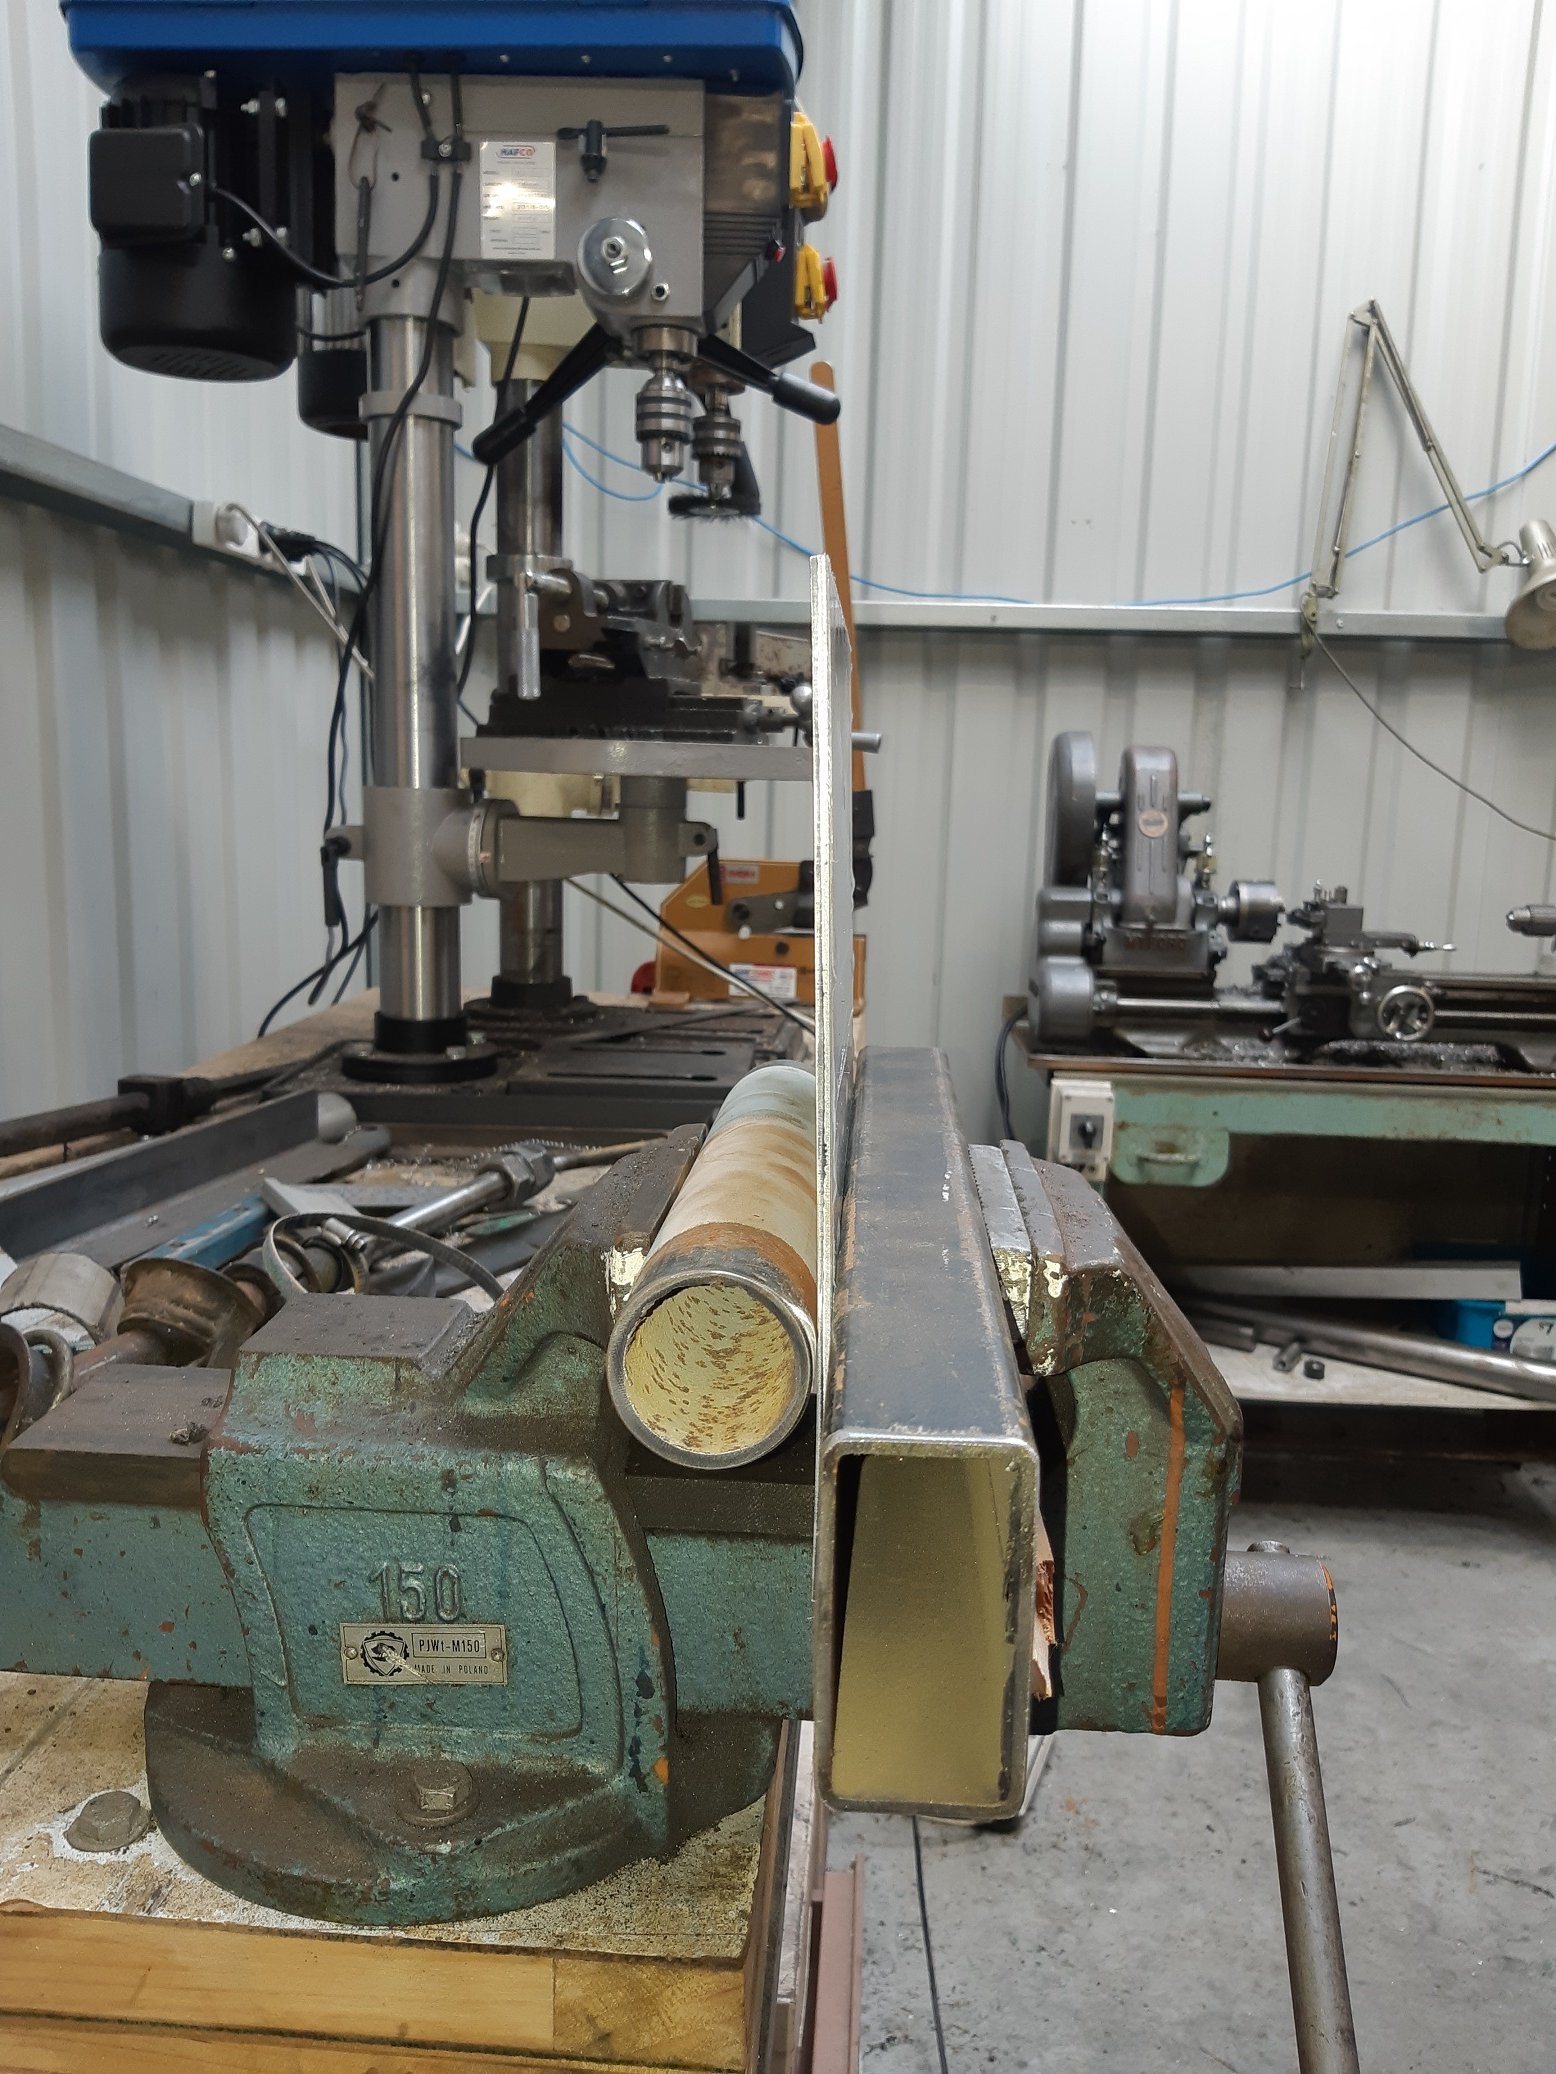
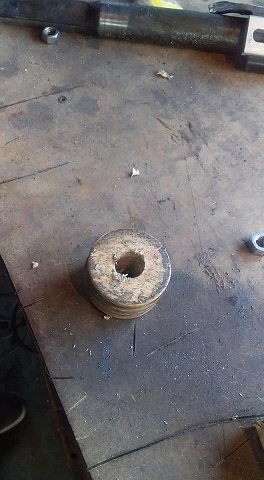
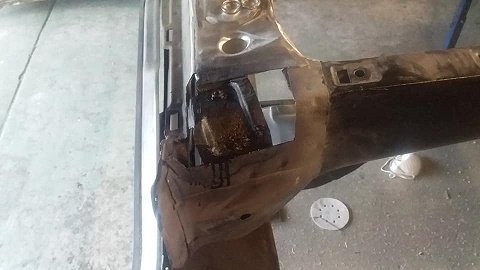
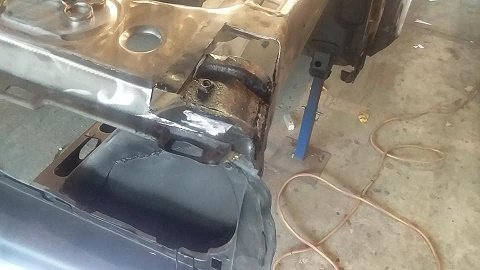
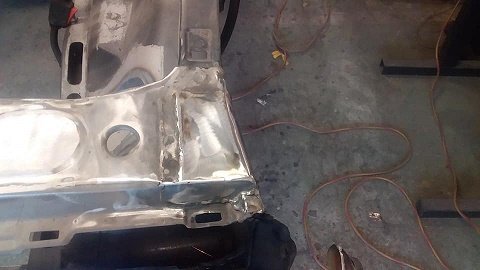
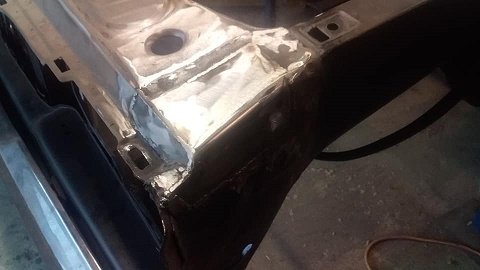
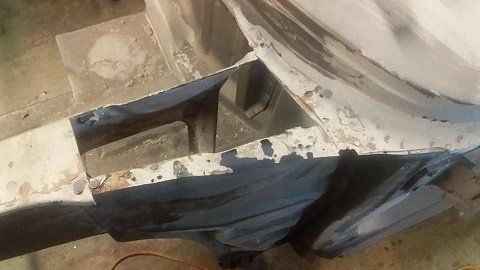
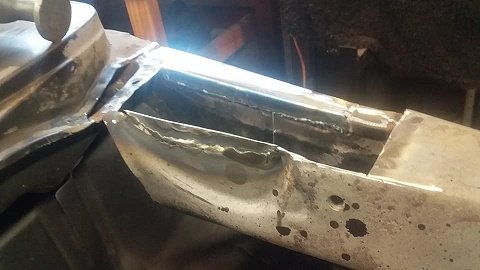
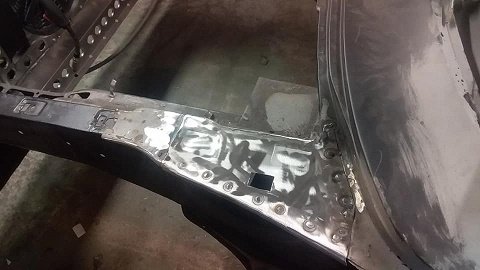
How to put a curve in a 4mm thick aluminium sheet to fill the hole you cut in the sump. Get a random bit of thick wall rusty pipe about the right diameter. Wrap it in card so you don't mash rust into the aluminium. Then, using another bit of square section, clamp it in the vice along the bend line. Put a big bit of wood against it and hit it with a mallet. Pick the wood up off the floor and put it back. Hit it again. Pick the wood up off the floor and put it back. Hit it as hard as you can. Pick the wood up off the floor and put it back. Wail on it like a crazy person. Each time, picking the wood up off the floor and put it back. Observe how much it HASN'T FUCKING MOVED AT ALL. Switch to sledge hammer, hit it literally five times. Done.
2 points
-
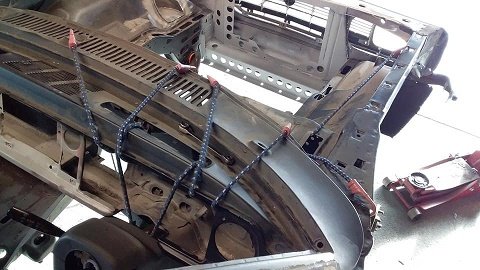
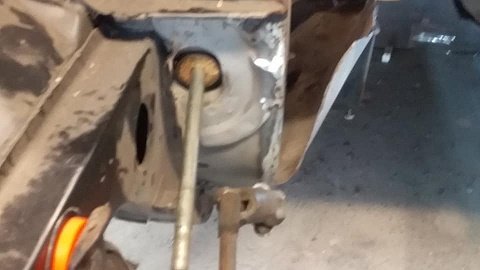
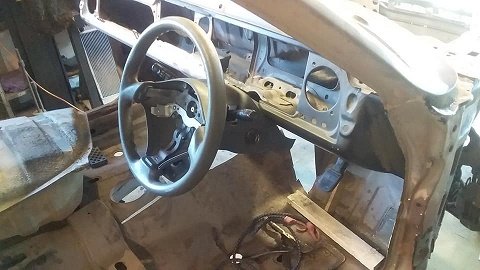
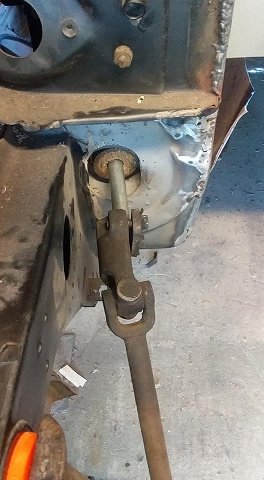
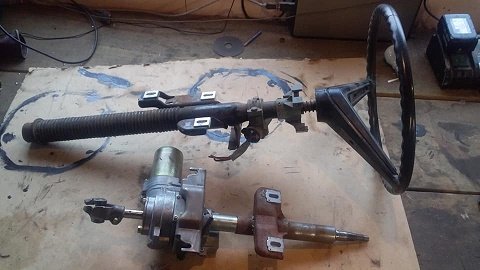
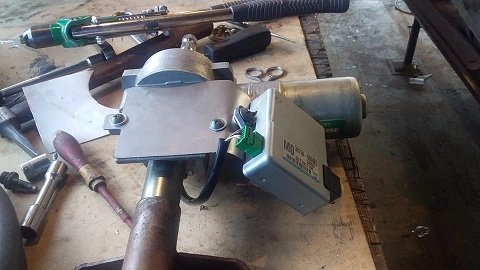
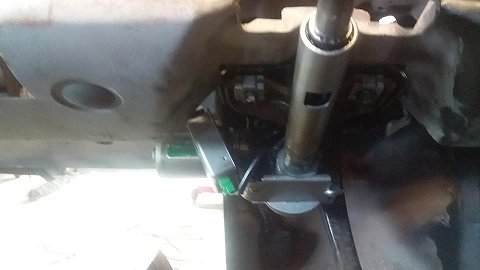
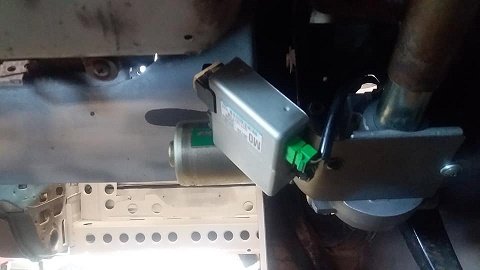
been pretty slack lately......blame it on the change of seasons and getting dark early....but thought i would carry on with the EPS setup. so i used all the bungee cords known to man to hold it in place as well as a shaft and wooden ring to help center it in the hole. once i had it where i wanted i cut up the mk3 mount and welded it all in place so the the suzuki coloum bolts up to the 3 points the factory shaft did. then painted it and put it back together then i bolted it all back in to see how it fits....really happy with it even like the way the factory suzuki cowl fits up... bolted the make do shaft up. i also contacted a guy i used when i put one in my escort years ago...hes in Ireland ..hes store is closed down now but we talked and i sent him pics and details and some money and he made me a wire in potentiometer to control it. so i just need a boss kit and find a steering wheel i like....get a section of steering shaft made with correct ends and its good to go..
2 points
-
Why are the starlet itb's in this thread? Because the the inlet manifold on the hilux sucks. Not power wise, it seems to work good. but it vibrates, cracks and the big plenum doesn't work with what im trying to do. stalls out easy and any kind of cam setup other than factory, even cam timing changes on stock cams makes it a whole lot worse. wont idle on all cylinders and stalls real easy. not ideal for 4wding itb's will solve the big plenum issue, also will be able to isolate the plenum from the engine with some short silicone joiners. to solve any vibration issues. So had those bellmouths in above picture from another project, recycling; extended them by welding some thick wall tube onto the bottom machined a taper into them to suit the 52mm throttles and slightly adjusted the bellmouth so has bit more of an elliptical shape. machined some of the excess off them. could have taken whole lot more off but was over it by this stage. will probably test them on the starlet before welding them into plenum2 points
-
SHUT UP AND TAKE MY MONEY some nice little dress rings to cover the holes to make them look smooth. so keen!2 points
-
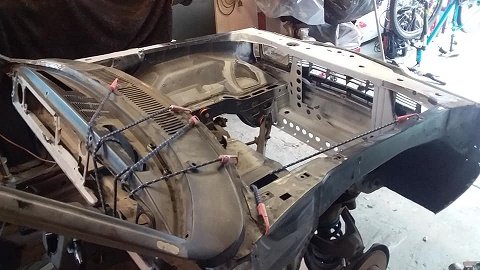
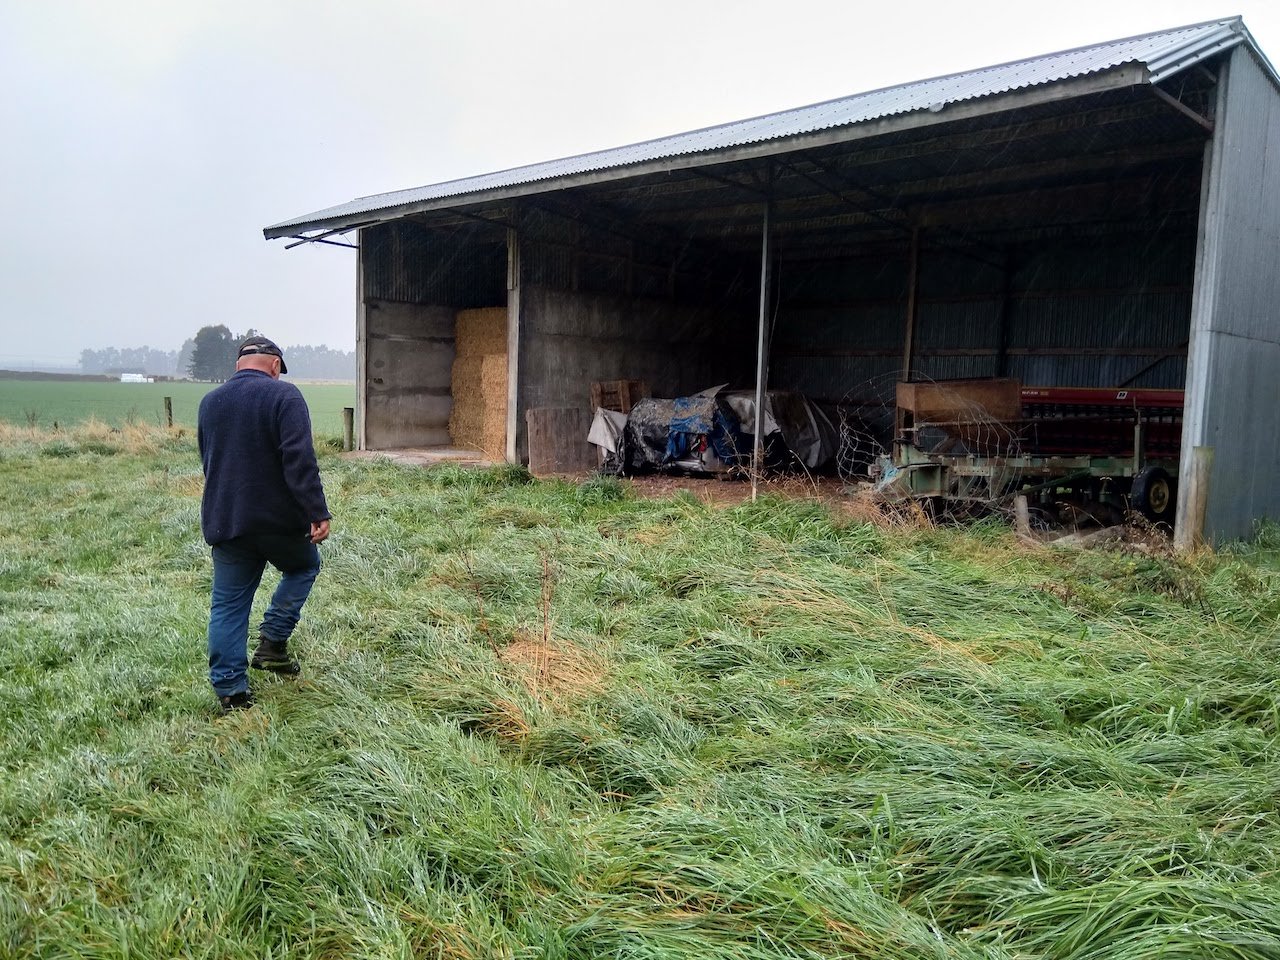
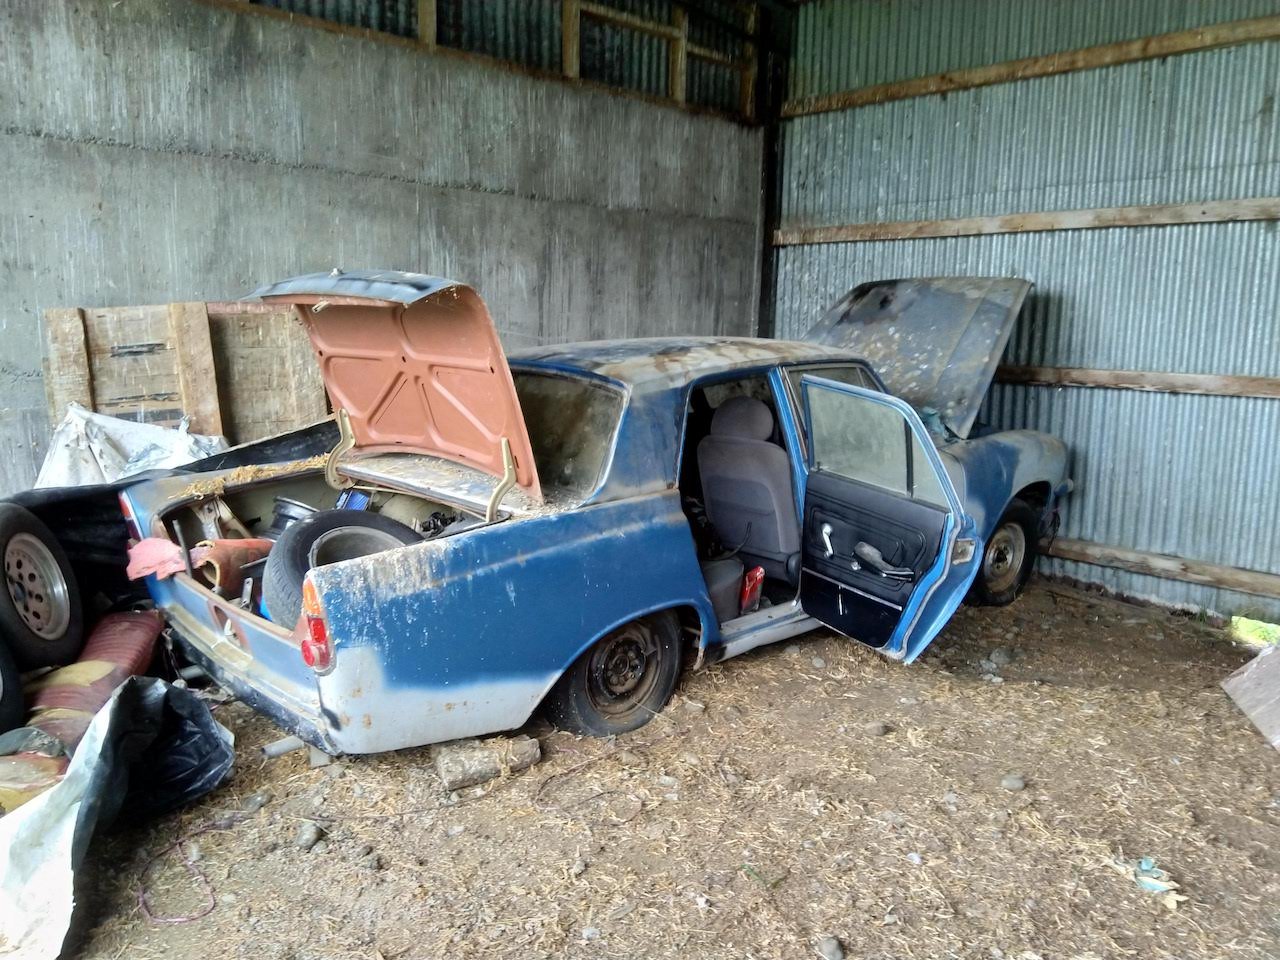
Found myself a new project. Car was last on the road in 1993, then the registration went dead but the rego is still in the system. Previous owner bought the car around '98 with plans of putting a 302 into it. A few years later he took the car to a panelbeater to get some rust fixed and bodywork done. The bill came back a lot more then expected so the car got mothballed to a hay shed. A mk4 zodiac came up a few years later that had already had a certified V8 conversion so he snapped that up and the mk3 stayed in the shed. The car only had minor rust (guards, doors, boot etc) to begin with, there was no damage to the chassis or sills. A bit of minor rust has come back since then, but a sweet barn find. The car was in Methven and had a heap of spares with it. It was pretty heavy towing back. It came with the engine pulled apart and a heap of heads, manifolds and bits. The guy that sold it to me knows someone with a mk2 motor that ran when pulled out, so I will snap that up. Long term plans for it once revinned will be some slam, wide steels and eventually an engine swap to a V8 or a barra. Am I best to get a repair certifier to come and look at it so I can get the rust signed off before I strip it back and paint? I'm thinking that might be easier while everything is pulled apart rather than taking through revin in primer, then pulling everything back apart to paint. Any ideas on how hard this would be and cost? Discuss here:
1 point
-
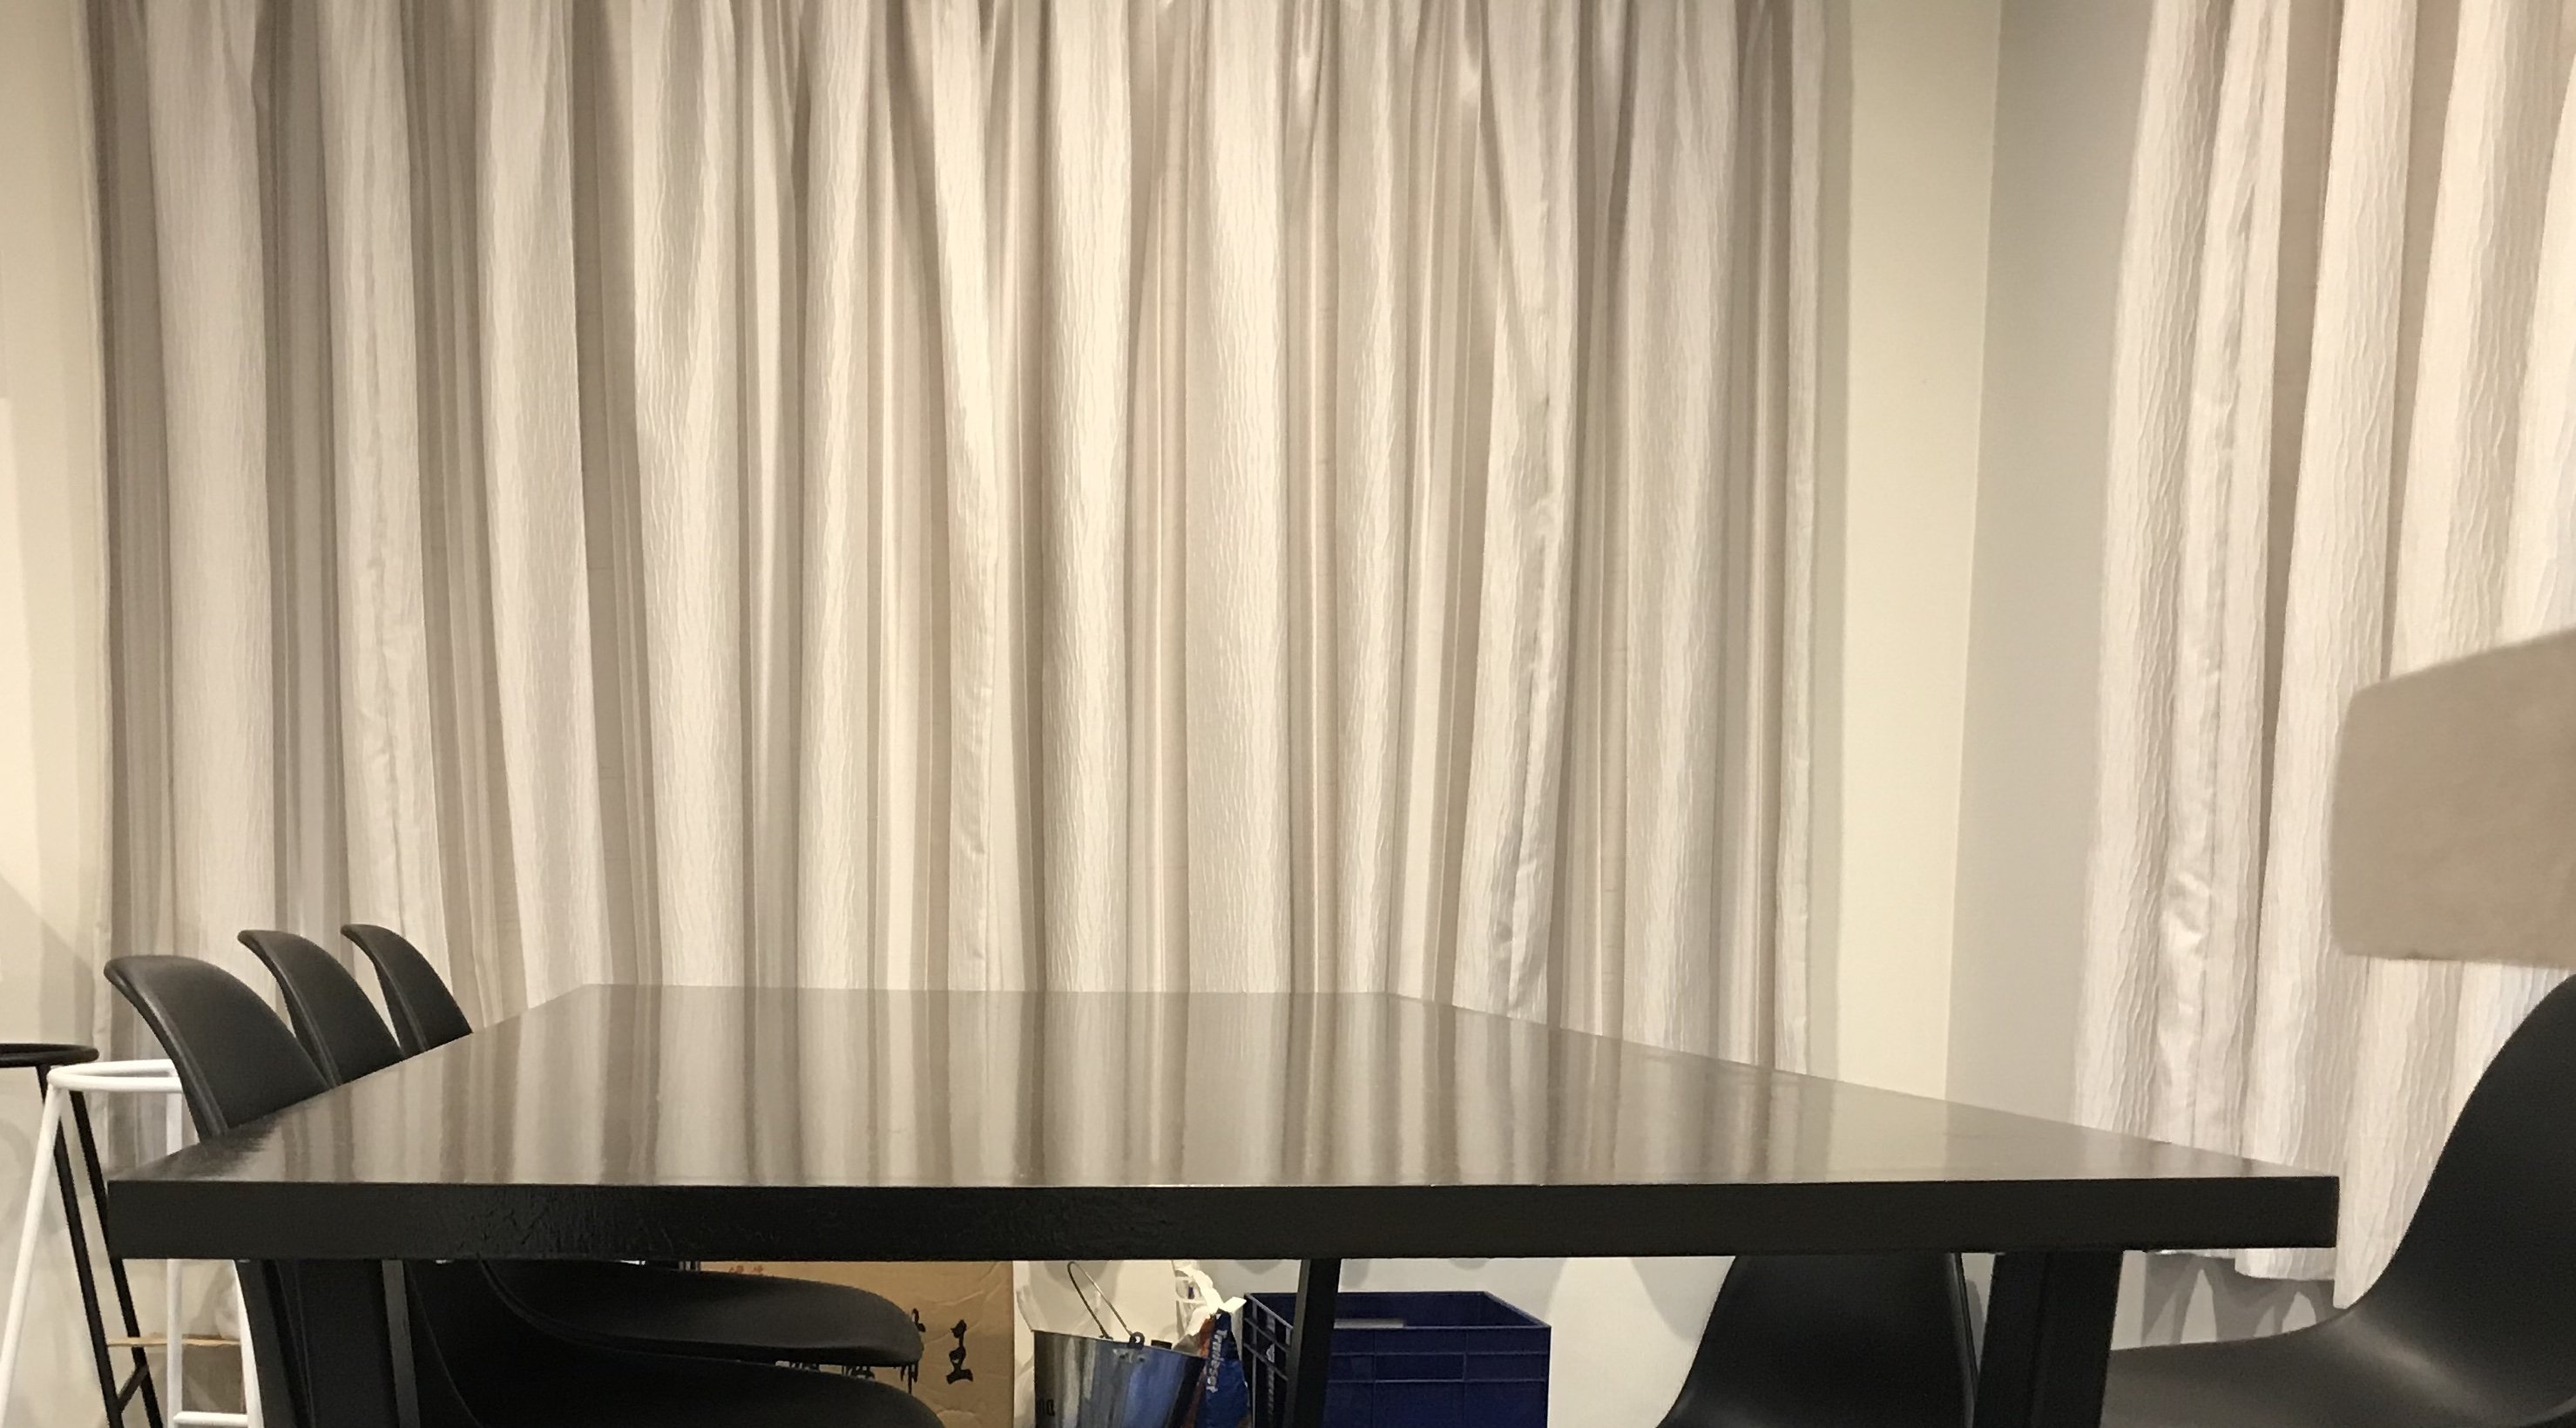
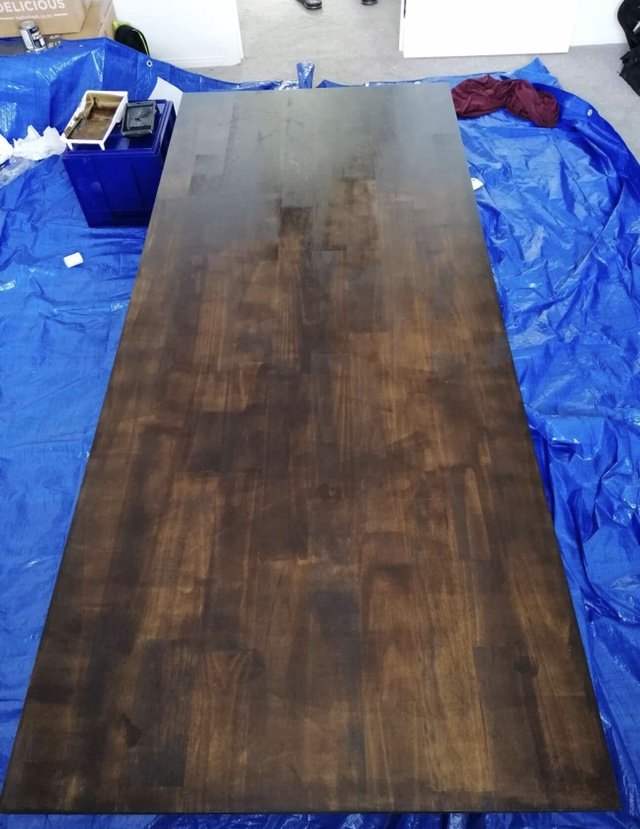
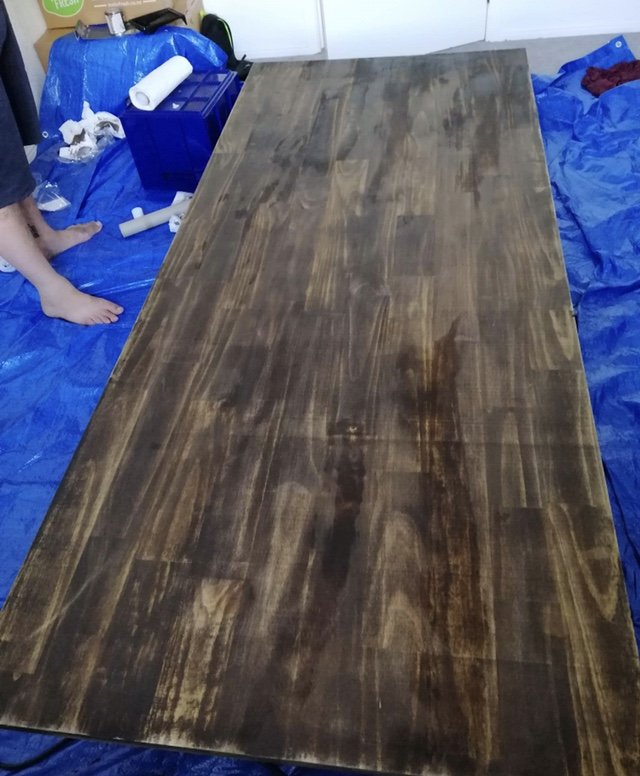
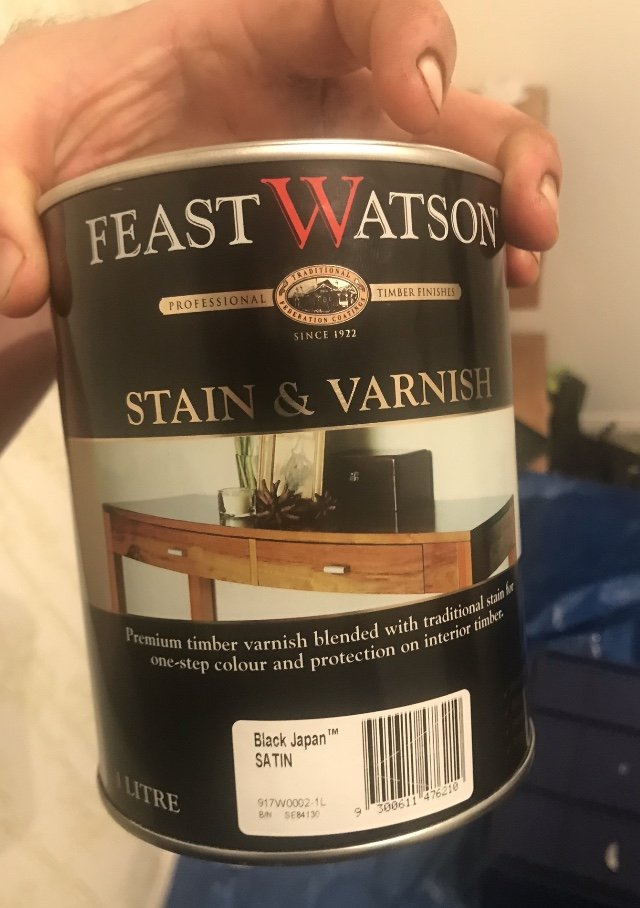
Bought a house last year so I’m a lot more budget minded now, that and what I don’t spend on the house gets spent on cars so every cent counts being a Jew on everything but cars I’ve decided to try my hand at some super tidy furniture for the house on a budget. started with a dining table. luckily I did some elect work for one of our fabricators at work so I’m getting all the legs steel, fabbed and painted for free picked up a pine laminate slab from Bunnings. $115 for 2100x900 and about 30mm thick using the stain in the picture plus a clear with Saturn finish. They were around $70 a tub. Probably only use about 1/3 of them for this so about $45 worth of stain for this. so about $160 so far for the table didnt sand the slab at all, wanted to leave the high spots and rough bits. did the first coat super thick with just the jap black, and actually looked a lot darker in person then the photo, darker then the last photo sanded it all back with worn out 120 grit, this took all the high spots back and brought through the grain and edges. next mixed the clear and jap black 1-5 in favour of the clear and that’s how it sits now. ill probably give it another coat with 1-4 and see how it looks. plan is to get another two slabs. Cut one into two 450x450 side tables and 1650x900 cut to width for coffee table. the last into 2100x450 for two tier TV table. legs will all be retangular box tube, painted in Saturn black and the timber to all be the same stain and thickness
1 point
-
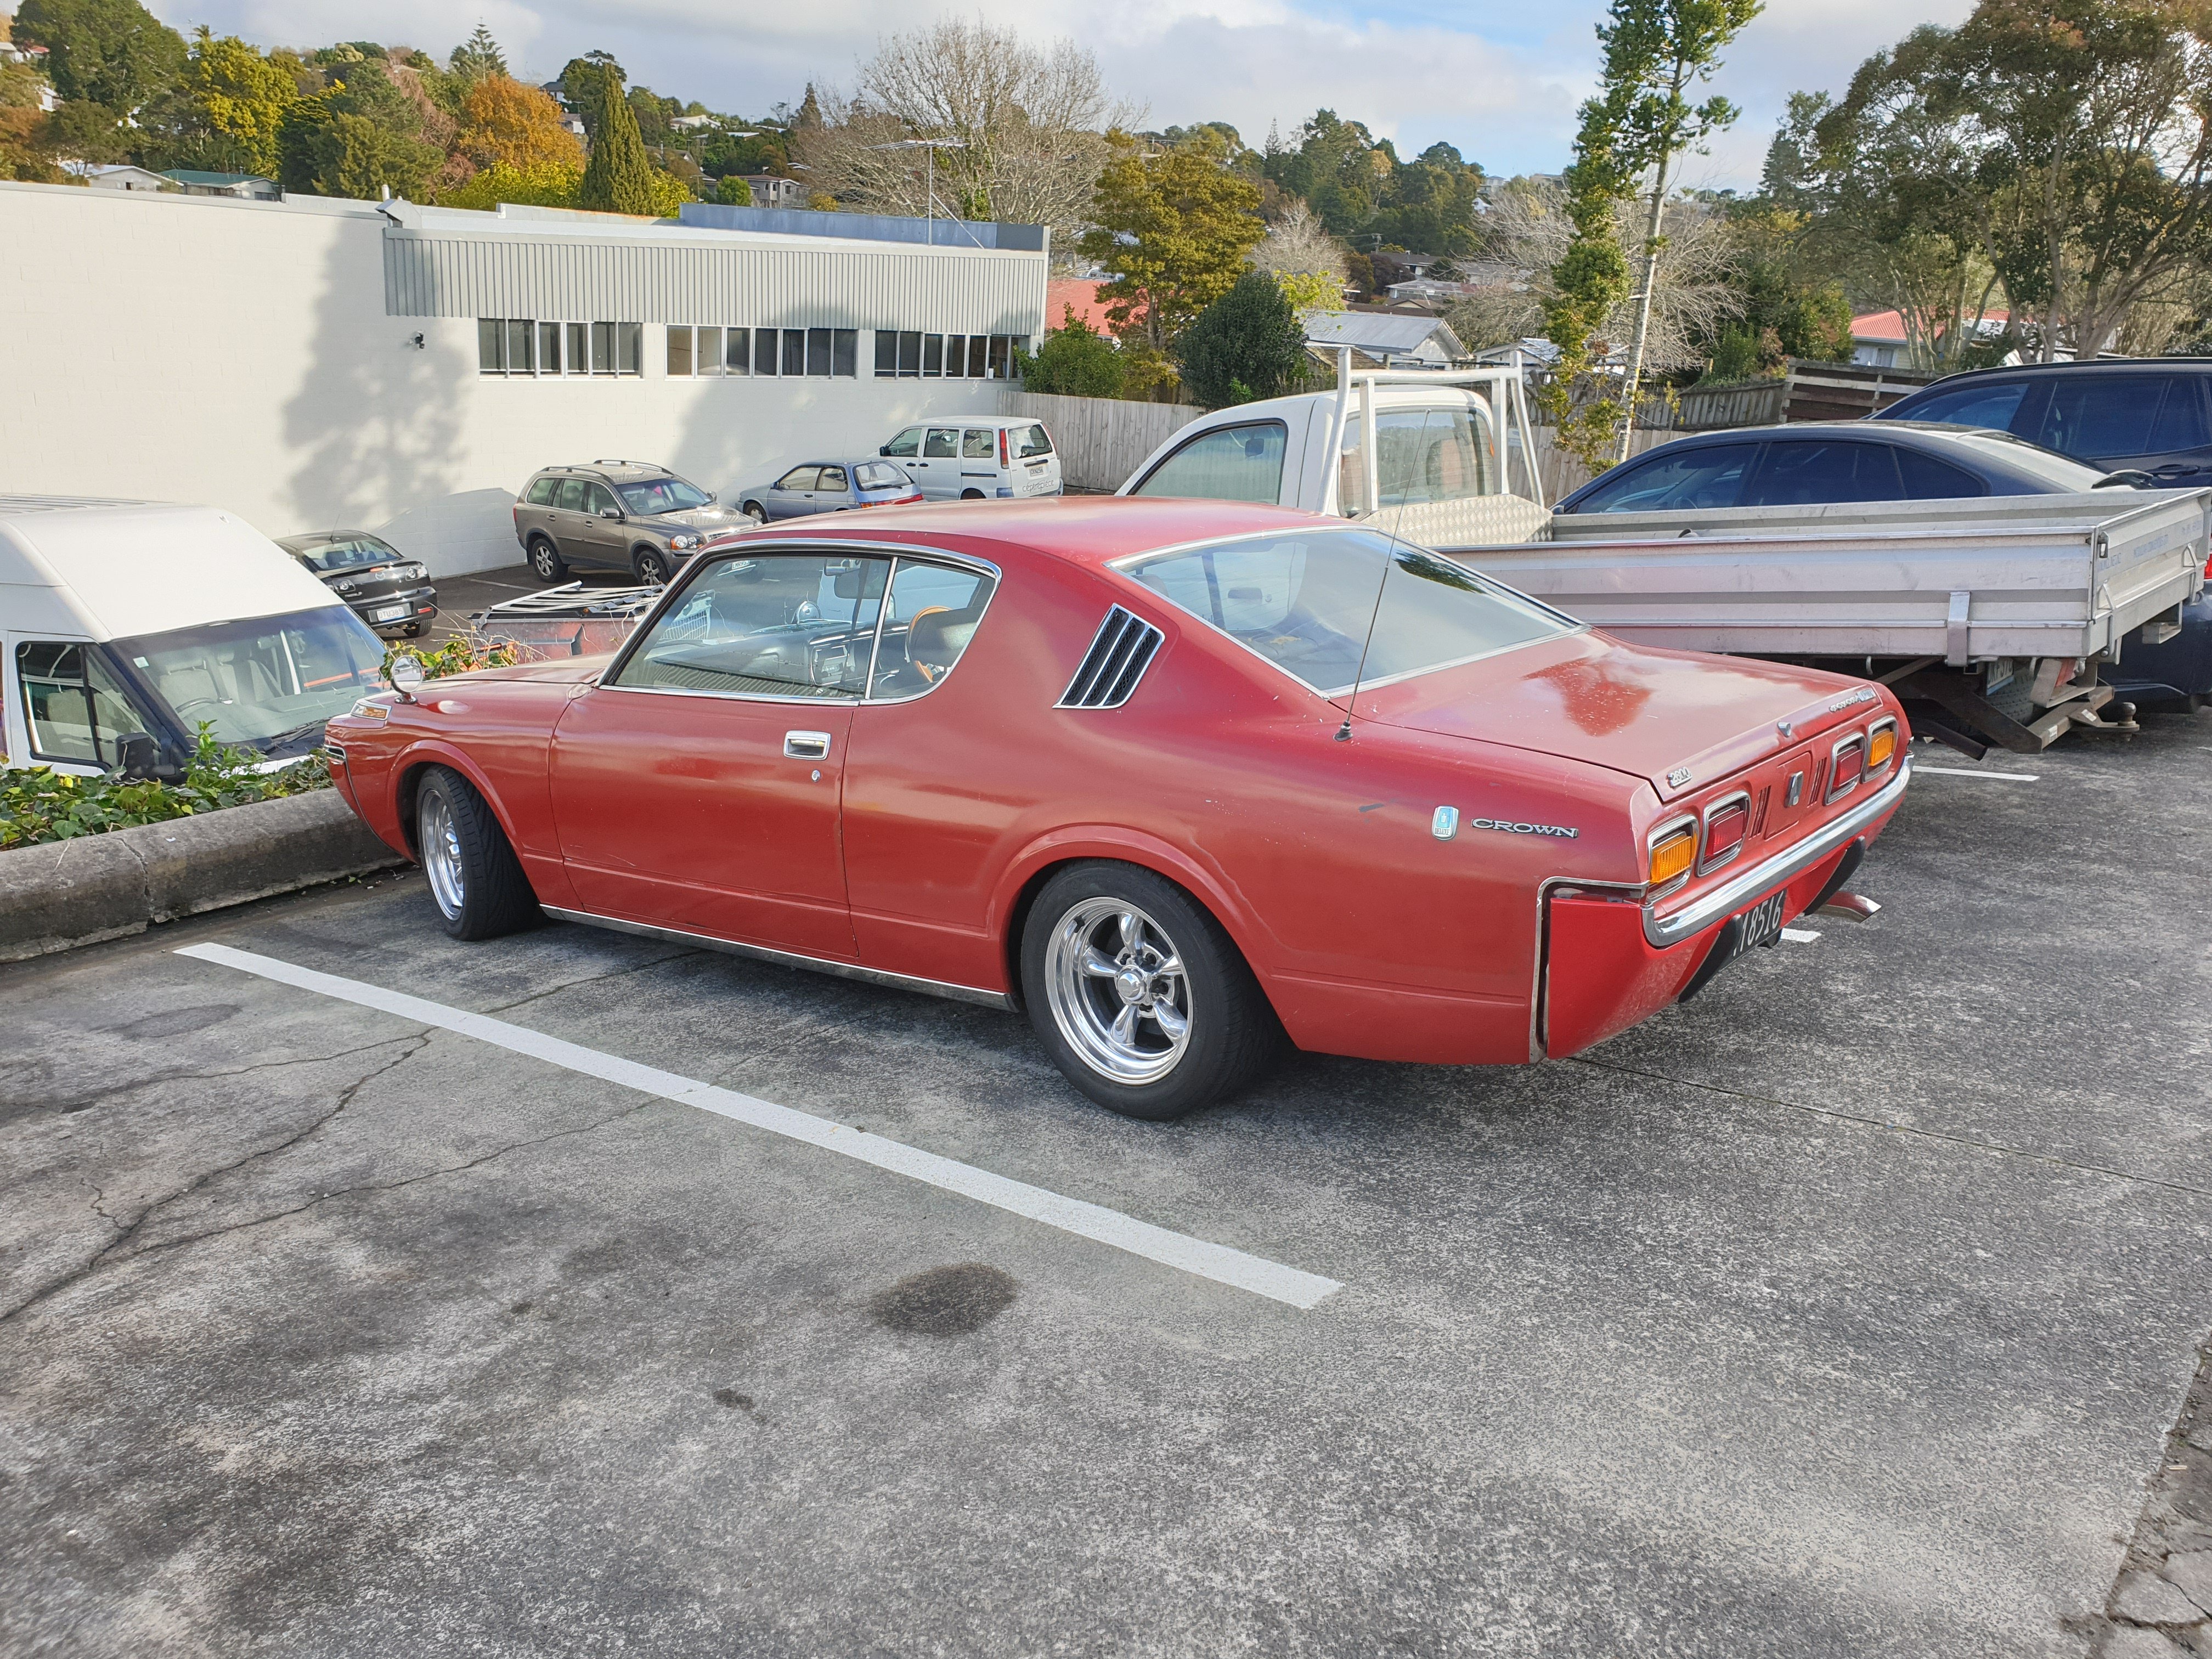
Whaddup OS! Foremost, it's been a while.. Since my last old(ish) car, I've been pretty absent from OSNZ due to new car life. Turns out that new car life is actually not what I had hoped and JZXs aren't really my thing. I'll skip the sentimental shit so tl;dr, I wanted an old car again for the last year or so. Two years of JZX ownership was cool, but I was fiending for a 1G-G again.. Well around a month ago, I began looking for a GX61 as thats what I've always wanted. It's a shame that I'm a picky bastard as limiting myself to factory twincam24 models (yikes) meant that I was unlikely to find what I wanted easily. I had a few leads to follow and quickly learnt that what I wanted in the GX61 scene was going to cost me quite a bit. Acknowledging that, a couple of weeks ago I opened up to this idea: What if, instead of getting something familiar and "dream car tier", I wing it and get something completely new. So putting this into practice, I decided to view a Y30 Gloria hardtop located in Dunedin. Some of you may know the car. It came up a week before the hand-in date for my thesis, so I chucked a deposit on it (oops) and booked flights for the day after uni finished for me. From pics and description, I thought I knew what to expect. Well Saturday morning came around and Zeb picked us up from Dunedin airport. The mini-tour of Dunedin was great and it was a pretty good way to fill in the morning before Y30 viewing. We drove past where the Y30 was located before viewing for a quick sneak peak.. Well it was apparent right then that it wasn't what I was expecting. For the money I was looking at paying, it was too much work to get it to a good 'base' type spot. It was this point when I realised that I'd be doing my South Island trip via bus or rental instead of in my own old car. Pretty sad, but I remembered I had a back up. An MS112 Crown hardtop in 033 white located in Nelson. To keep it short, it belonged to OS user: Slacker_Sam and from the pictures, it appeared just what I was after: Clean & Tidy; 80s; sedan body. To summarise, I managed to coordinate the trip to Nelson where I'd view and then buy if it was right. Turns out it was what I was after as I was heading to Picton in it later that evening. The trip back home wasn't completely without fault. A suspected dicky alternator killed the battery 45 mins before ferry boarding. Bluebridge moved us to the next ferry for free and a replacement battery had the Crown roaring again. In the North Island, Google Maps directed us through the Tararua Forrest Park via Akatarawa Road.. Holy shit, what a road.. The poor 5M felt it and developed that 'hot' smell that M series seem to produce. These fucking things have the thermal stability of an RBMK-1000 in heat... A coolant drip in two places which I was aware of in the South Island was likely the culprit, however I was loaded up with some extra water and i banged on a couple of extra clamps to put my mind at ease. I kept my eyes on the temp gauge like a hawk despite its potential inaccuracy. Thankfully the road didn't induce a 5-MRBMK meltdown and we made it back to nice open roads where the M could bask in cool fast moving air. Other notable moments include: The AC belt lunched itself on Desert Road, however, I brought tools with me including a socket set which allowed me to remove the belt in a minute and keep on our way; The trans began slipping from Taupo onward. I felt it earlier but its here where it became pretty clear. As of now, I'd say the trans needs attention. I'll flush it and see what that yields, but my sparse knowledge of torque converter automatics leads me to believe its likely lunched. Not an issue though as I'll later explain.. For now, here are some pics: Some things pertinent to the car which I really enjoy: It's untouched. No shitty headunit, no "mods", NOTHING. It has a towbar and some Bridgestone Texas alloys which I consider a cool bonus; Blue interior. 033 white and blue interior go together perfectly; OEM floor mats, need I say more; Dealer sticker and plate frame, a WOF sticker from 1997 and some ancient JAF sticker on the door; Blue glass all around. There is more, but I really don't want to ramble more than I am. I'll make a new post outlining my first impressions and initial "going over" of some bits. Discuss here: https://oldschool.co.nz/index.php?/topic/60957-michaels-ms112-crown-hardtop-discussion/1 point
-
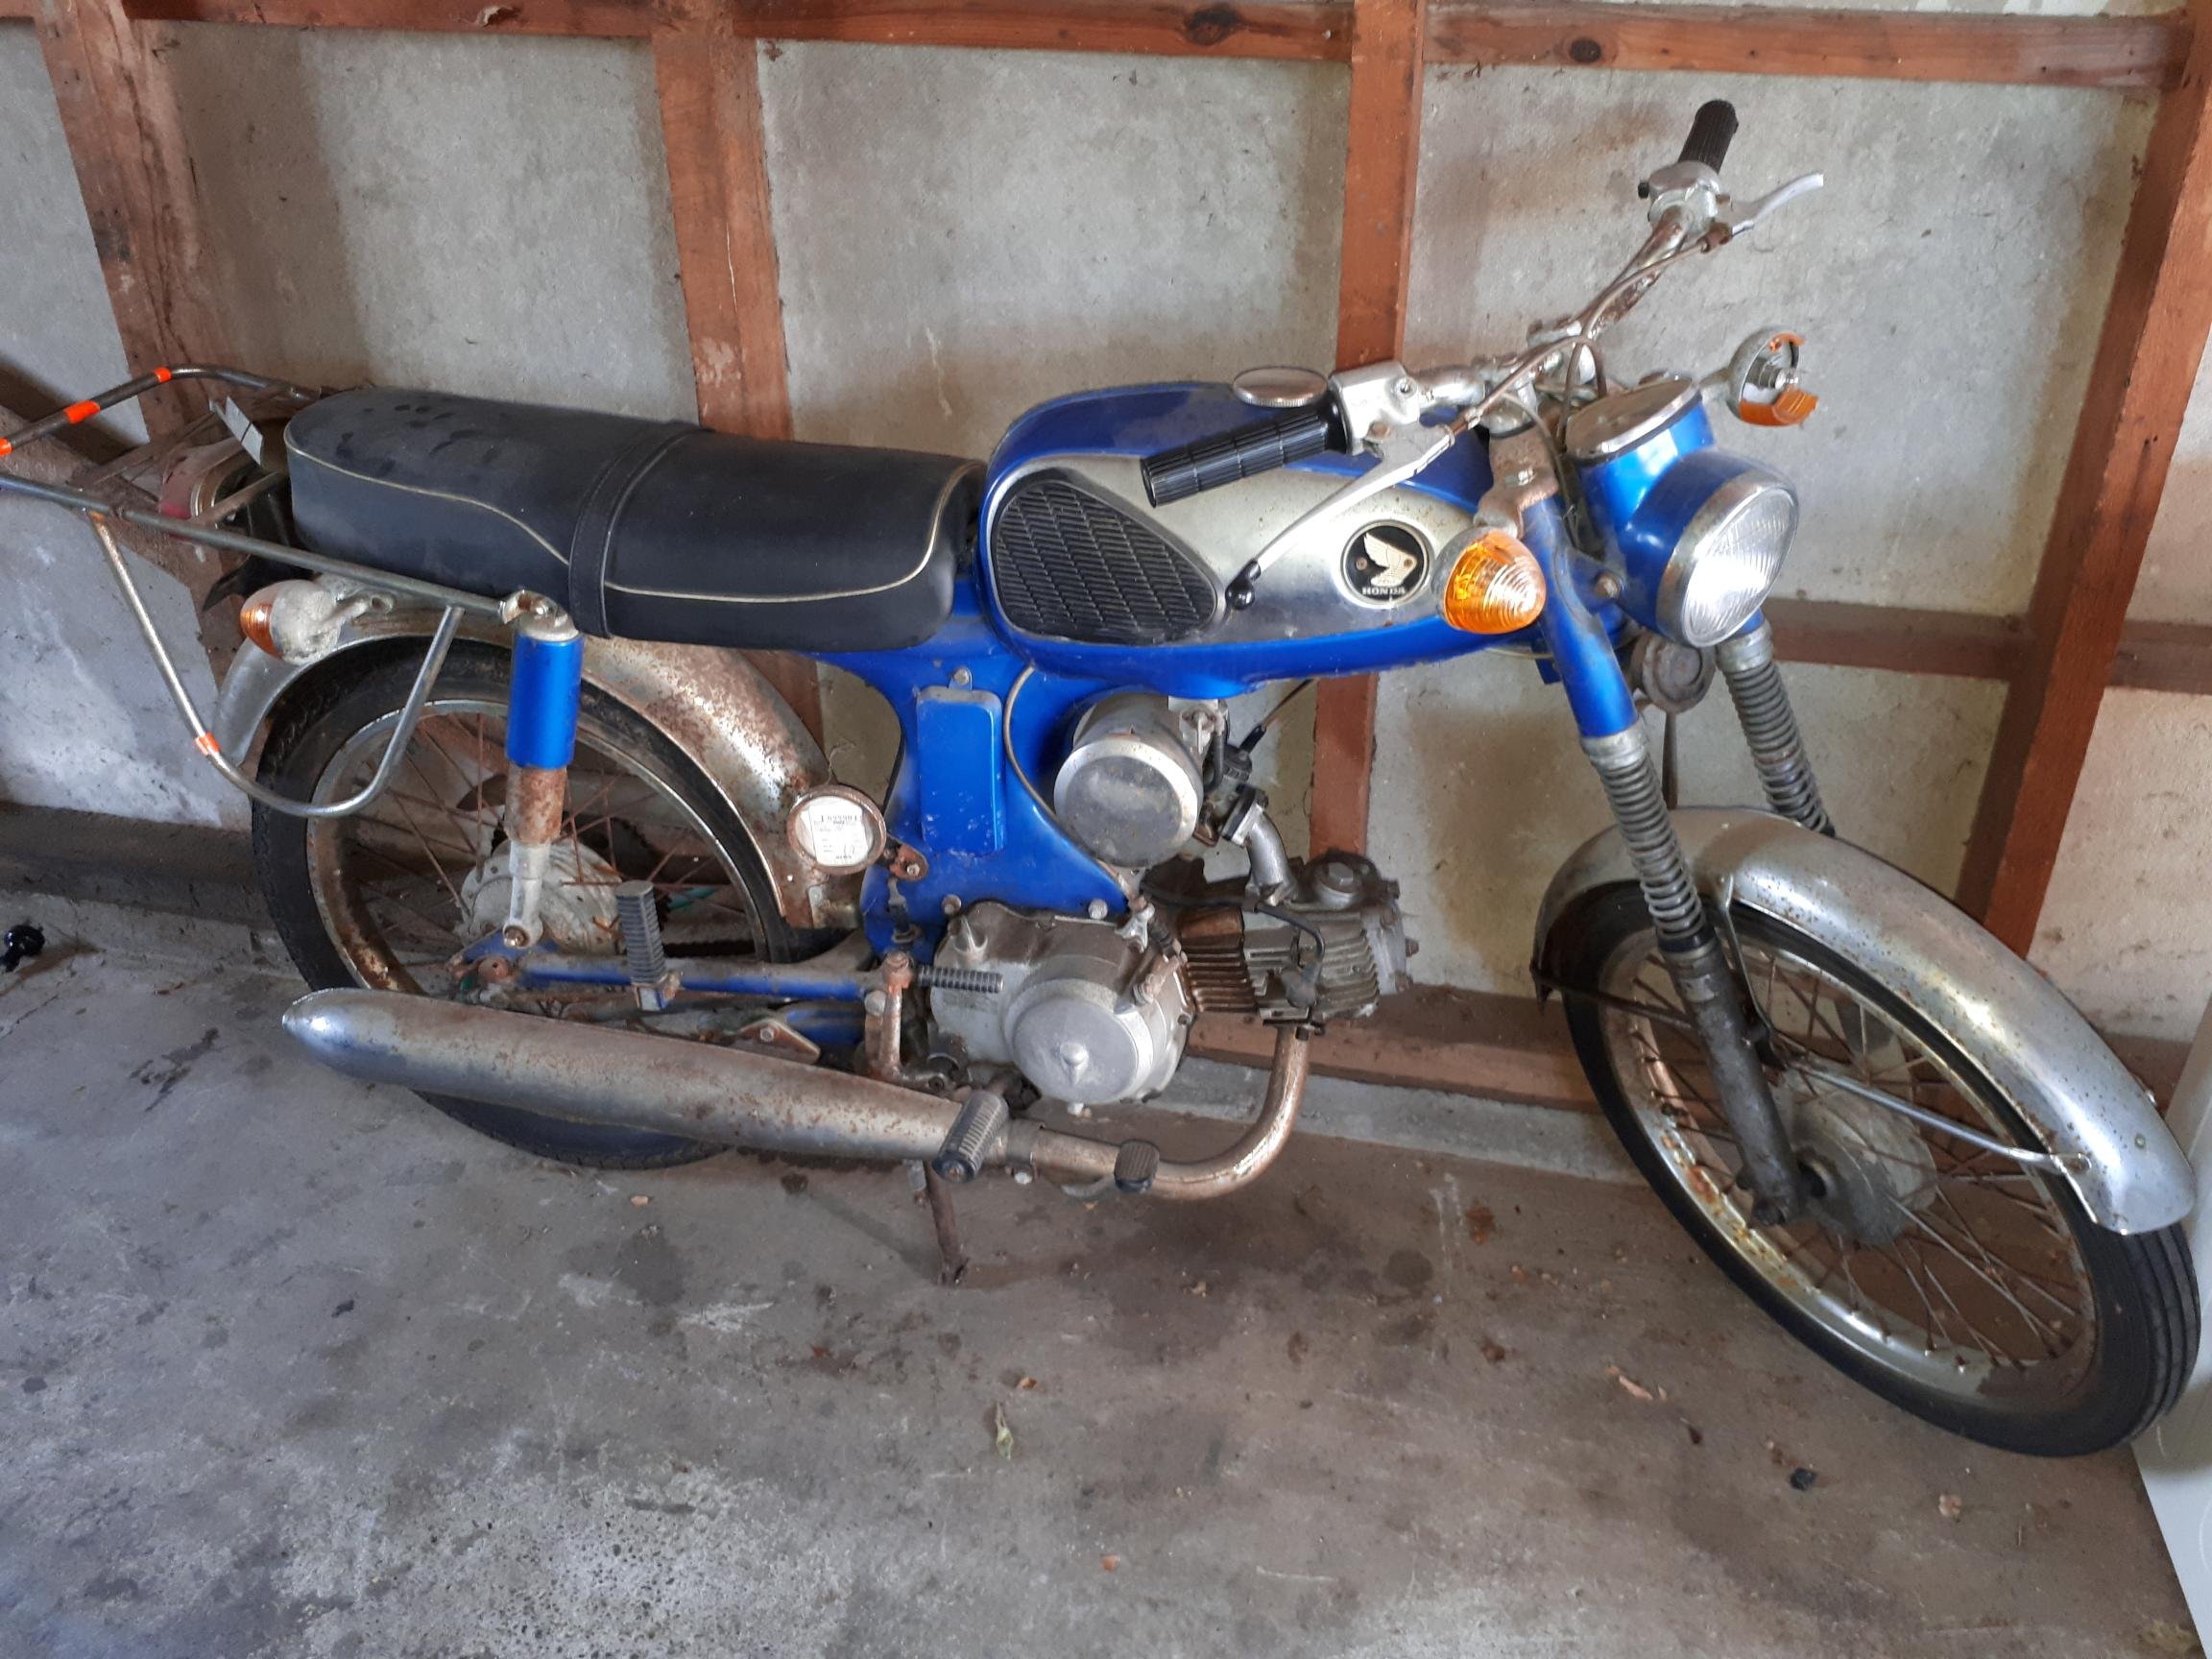
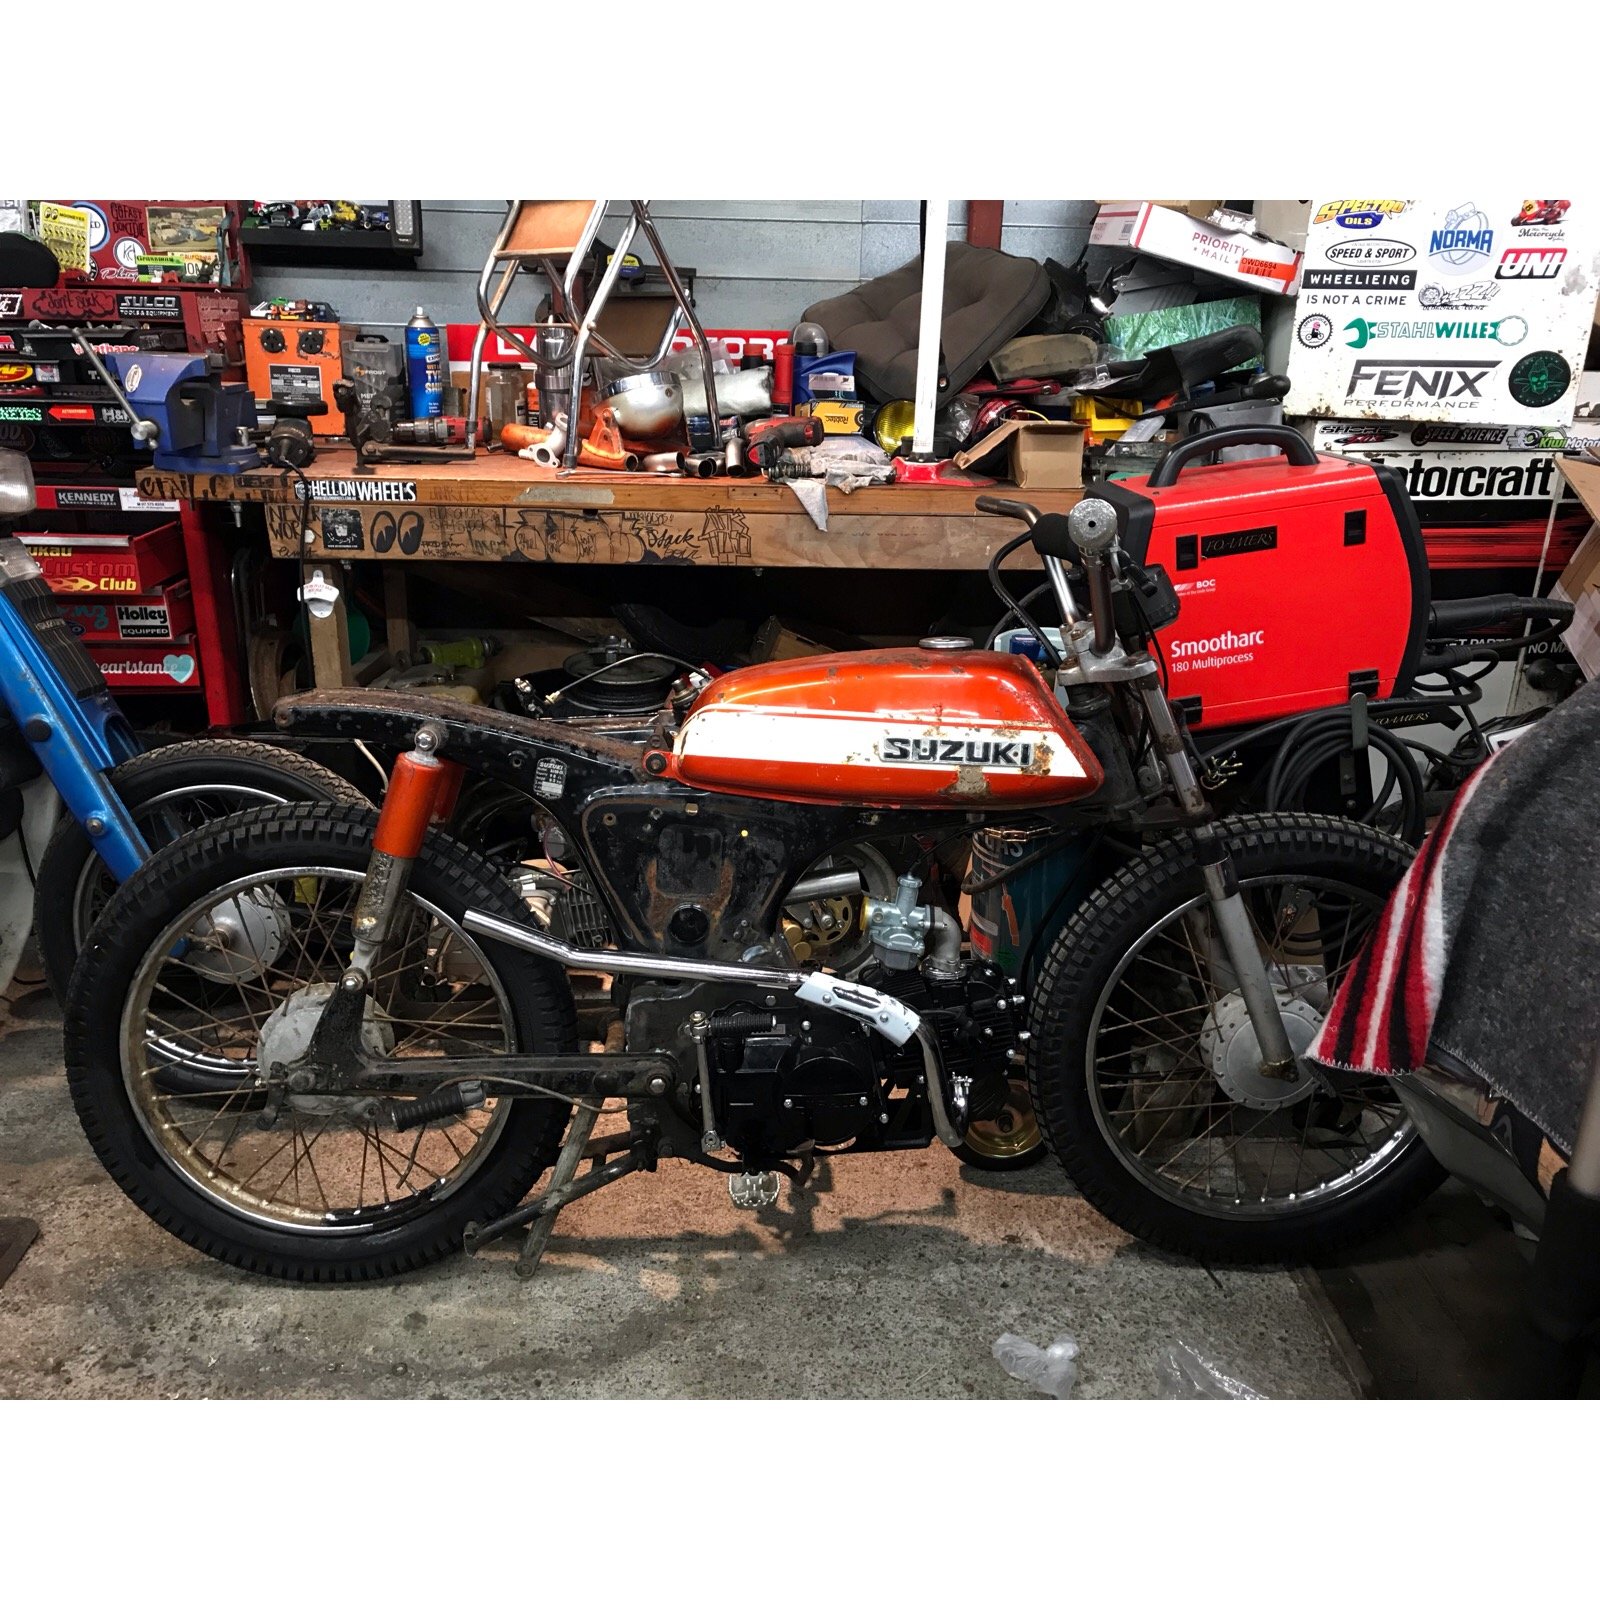
I have had this bike in the shed for years and never got around to working on it. Is anyone looking for a project?
1 point
-
Would you be better off purging the tube with an inert gas before pinching off?1 point
-
1 point
-
Awesome stuff man!! Looks really good! It’s amazing what you can do with ply. old boy builder I’ve been doing some jobs with just built a walk in pantry out of it. Used 3 sheets at $67 a sheet. just a skill saw, glue, screws and drill. Their getting cupboard doors done by a cabinetry place when they get the kitchen done, but super impressed with what he could do with so little1 point
-
So, a month later and not much has happened. Took the heads to the reconditioners. Will sort out a new clutch then I can take the short block in for a reco as well.
1 point
-
will likely be bringing my street magic again1 point
-
Possibly, what does that involve? Just putting them in vacuum pot for a while then back into atmo? I live in Morrinsville now but if you post them down or drop them to my Dads place in Glendene I can give it a go.1 point
-
I use a set of 4 to move the rx7 around. They work well on a nice flat garage floor. They did not work so well in my mates garage when we were moving his Holden on a roughish garage floor. Flat floor = winning Rough floor = meh Got mine from super crap but they are all made in China.1 point
-
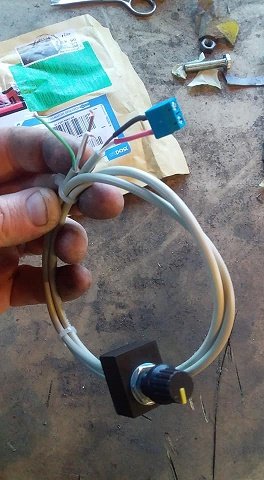
mmkay pops in -as ya do says hi to sr2 [Simon you have email re inverter] **Waves at unca Jake** Okily Dokily on the old Mark 3 Go Tina...the ballast wire was about a foot or so long with the standard old round bullet connectors and was a thick GREY wire. Recall has it possibly under the bonnet catch radiator support upper panel area... pic of wire (with ends reterminated here) https://thumbsnap.com/1q1cINlX End of the day running a ballast resistor with a bypass is actually a tad better for starting. However if you decide to go that way a standard issue common garden 3k/4k toyota earlier mitsis etc as here https://www.repco.co.nz/en/brands/oex/oex-oex-ballast-resistor-acx1955/p/A1195390 Can simply be mounted and wired direct from the ignition feed to the ballast coil-as to the ballast bypass giving more available power on cranking/starting well as simple as a diode fitted in to a wire connected to the starter solenoid feed and connected direct to the coil... Hope This Helps Edits to add **newbie**.....Yeah Right.............(Passes round Tuis......-As Ya Do...) Reason for edit Older Experienced Time Served Qualified Mechanic **Newbie**1 point
-
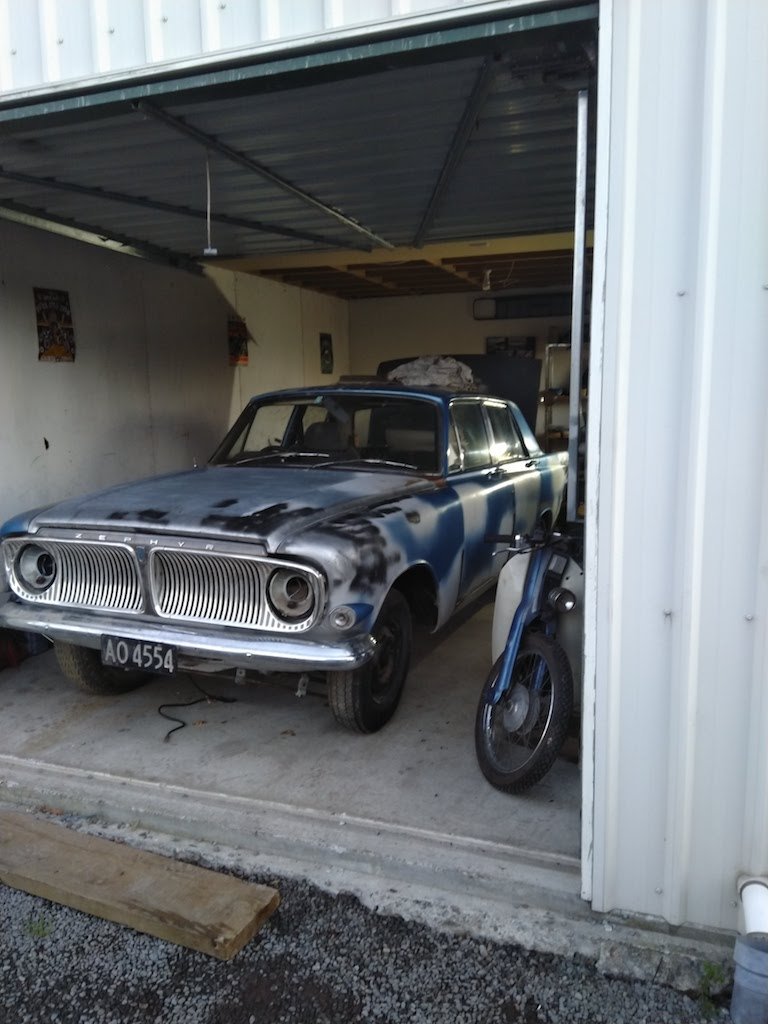
The turbo in it is only running 9 lbs boost, wouldn't have bought it without one. She steps out abit now on the tired donk, fresh motor & intercooler + wind up the boost........ Should be fun then!! Already know how painfully slow they can be, Dad had a non turbo with a smaller motor If weather behaves over the weekend I should be cutting & start assembling the bottom section.1 point
-
I've heard sandbagging works well but havent tried it. Re: Vac pump I just recently bought this and this: https://www.aliexpress.com/item/32596684494.html?spm=a2g0s.9042311.0.0.27424c4dxRsPKo https://www.aliexpress.com/item/32580819002.html?spm=a2g0s.9042311.0.0.27424c4dxRsPKo So far so good, pulls vacuum right down to zero on the gauge when you've got a good bag seal. If I leave the pot shut off it'll hold a vacuum overnight at same place on the gauge. I bought the pot as well, because I use it as a catch can for any epoxy that might zing up the pipe to stop it from stuffing the pump. Just have a second pipe on it instead of that filter. But also good for degassing epoxy or rubber or whatever else for other projects. And having the large volume means if you've got a tiny leak you dont lose overall pressure as quickly. The only catch was that it doesnt come with vacuum pump oil, and you need special oil that doesnt evaporate when the pressure gets really low. I think it's flammable or something like that so they cant ship it internationally. Can get it from Repco though so no dramas. I've still got a love/hate with vac bagging though. Can be very fiddly.1 point
-
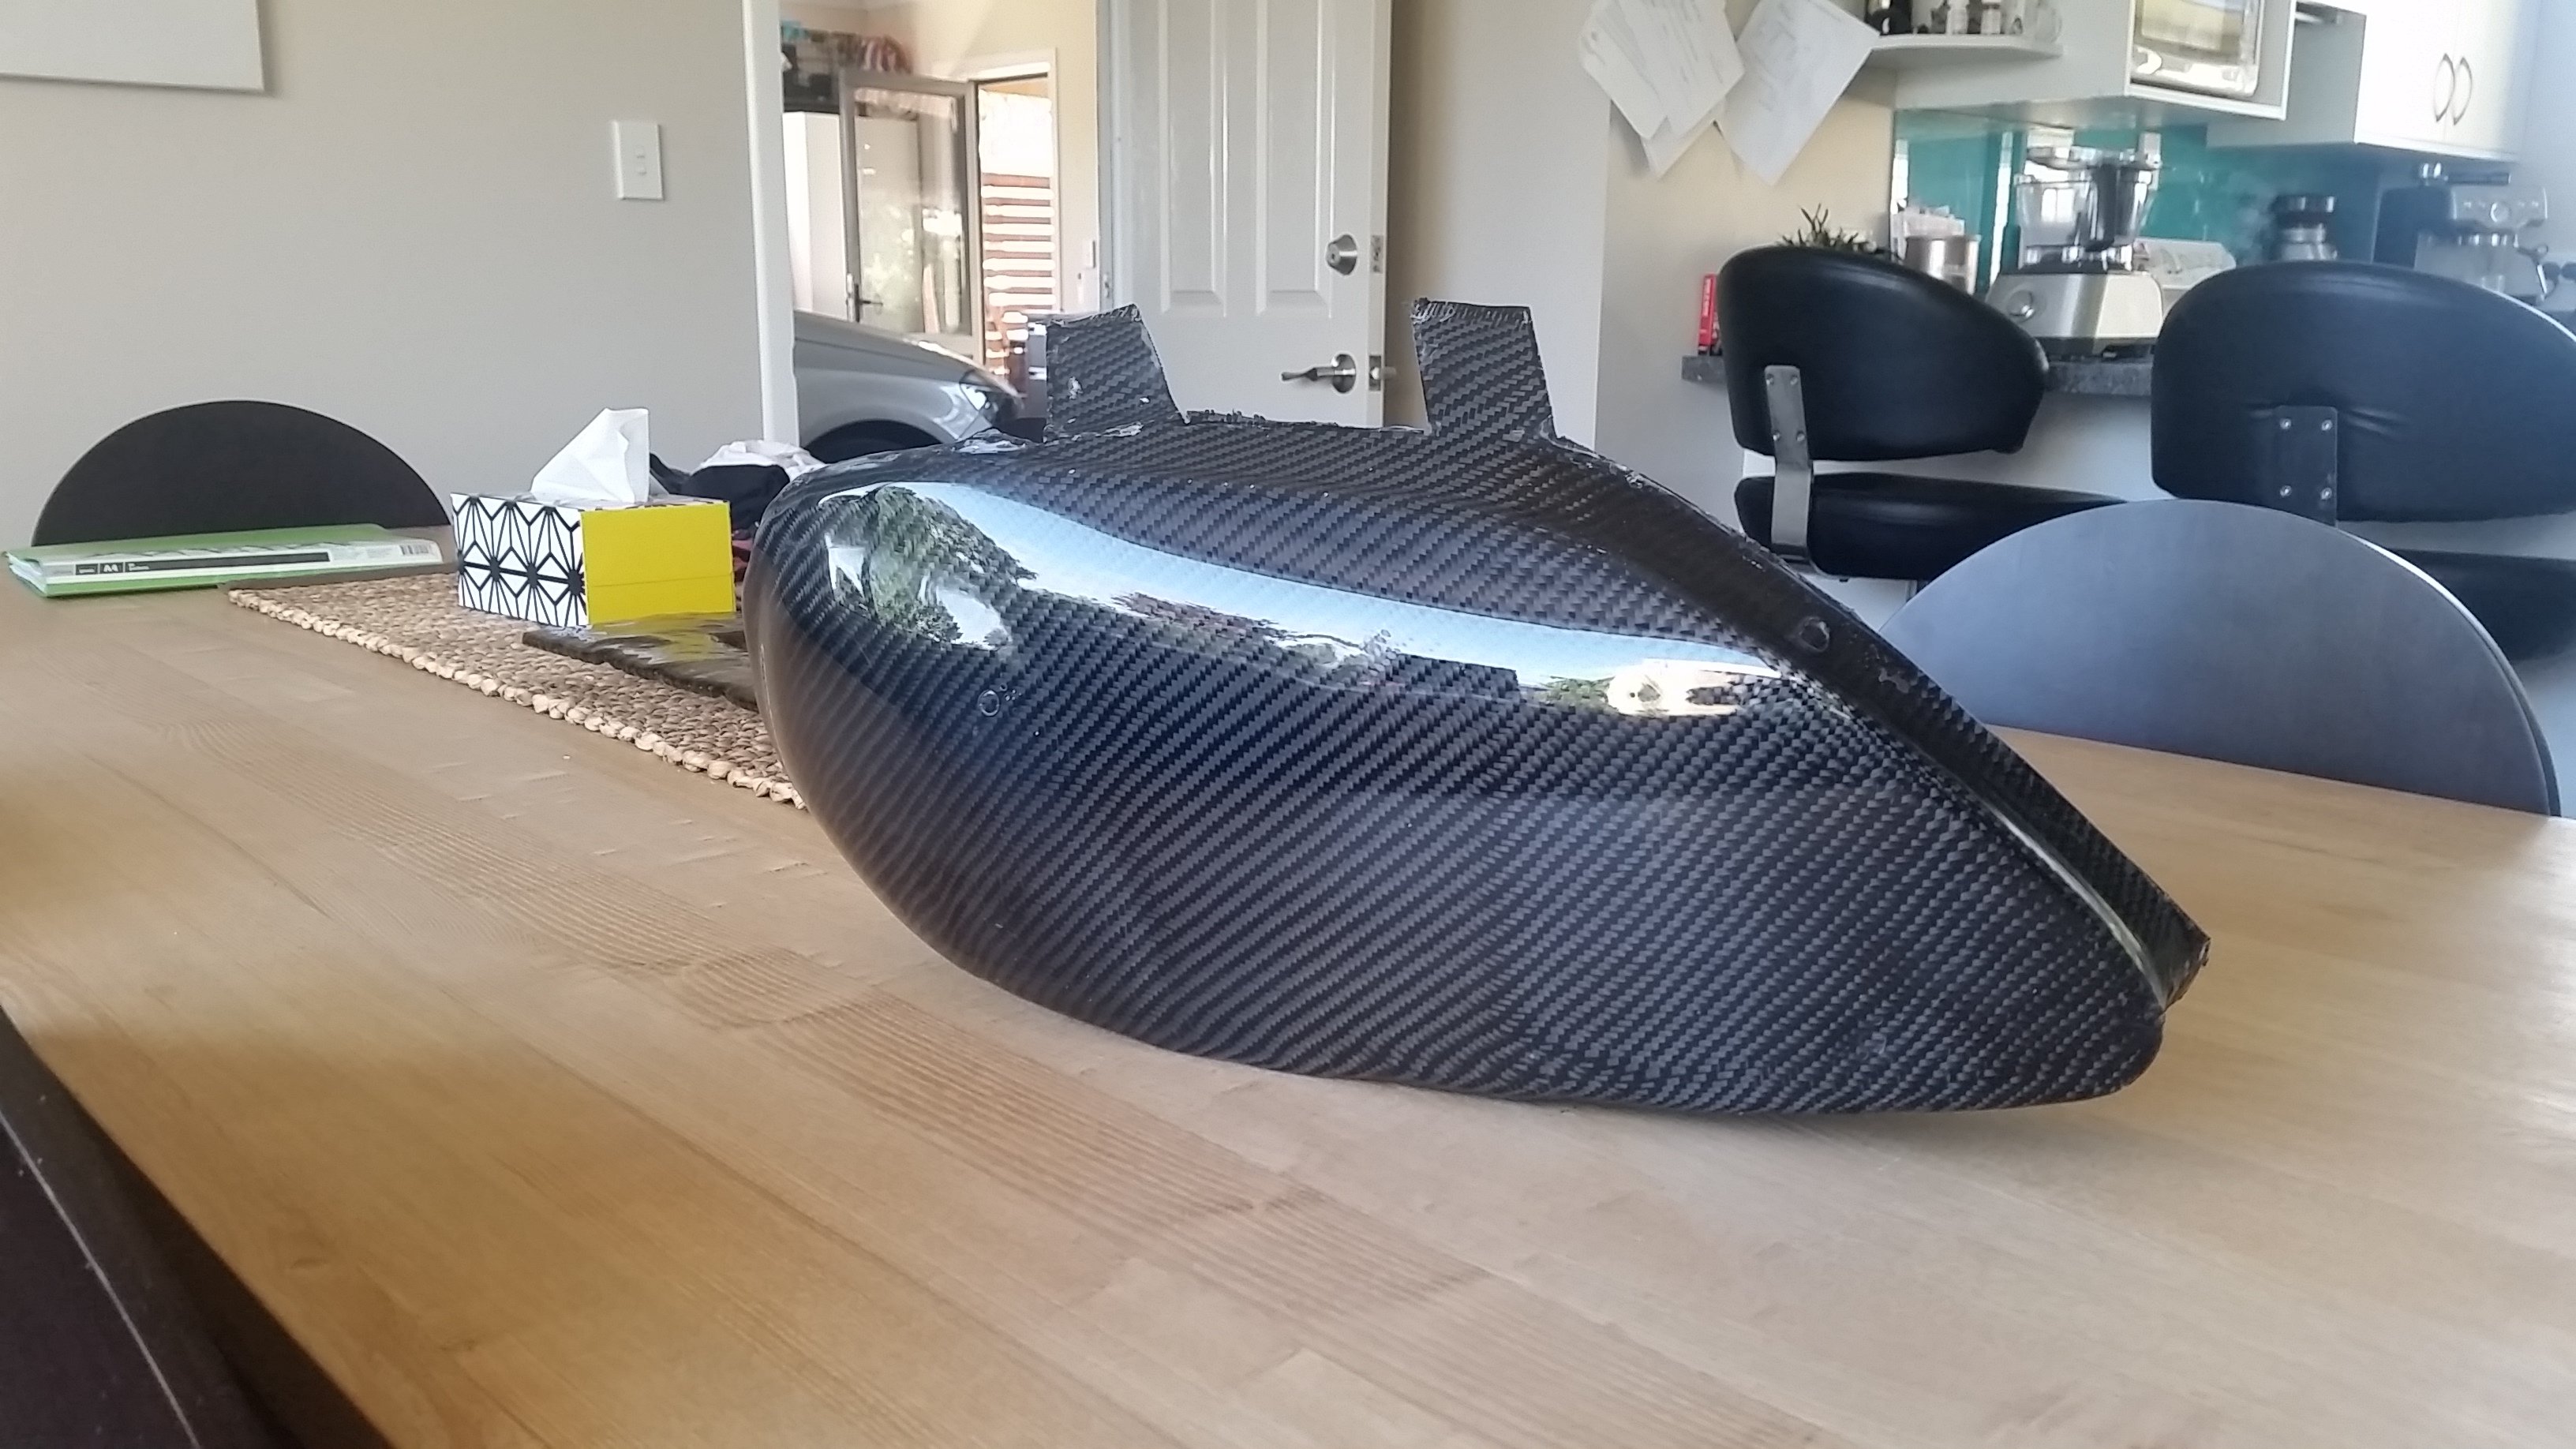
Interestingly the original panel was a whopping 200 grams and the cf panel is 65g so percentage wise there is some benefit.. No-one wants to see my pos Honda, its not really a project, more of just use it for events and make stuff for it when I am bored. Back to cf... Where do I buy a decent (cheap) vacuum pump? I'd like to do a dash next and then maybe front guards. Has anyone tried a sandbag or similar to back up a single sided mould to prevent lift away?1 point
-
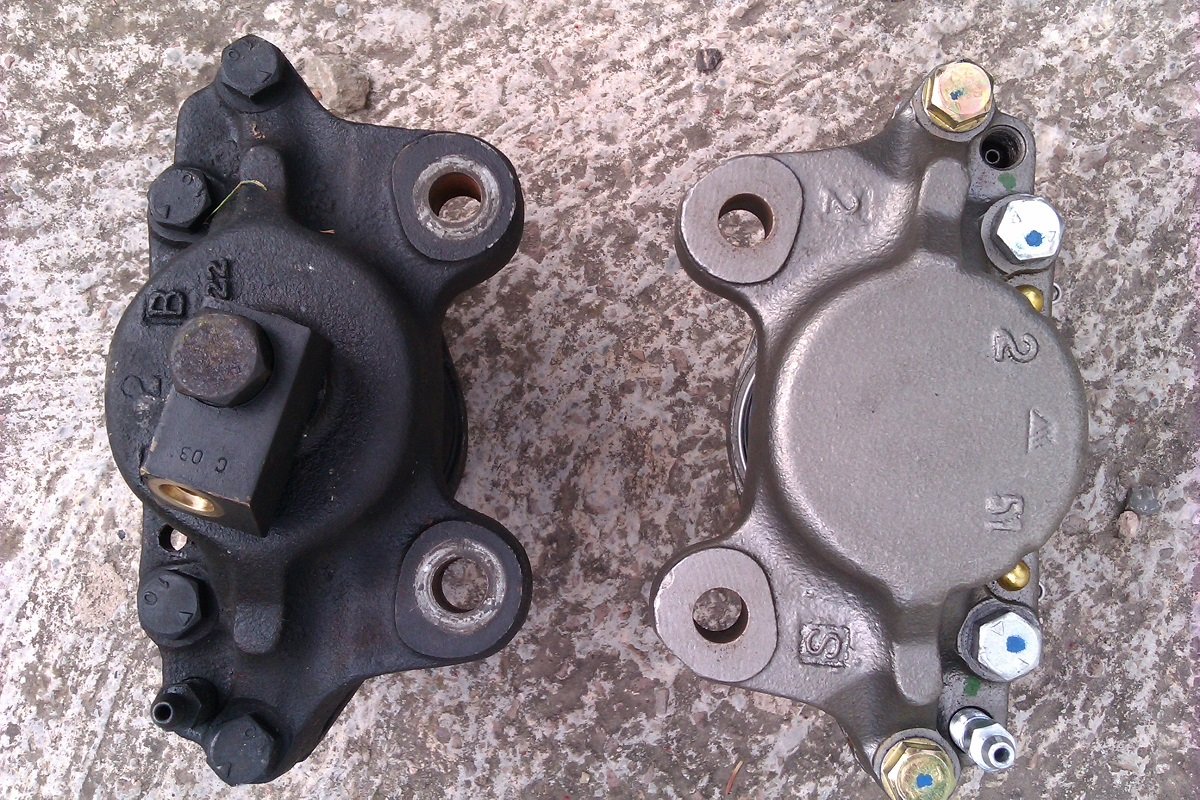
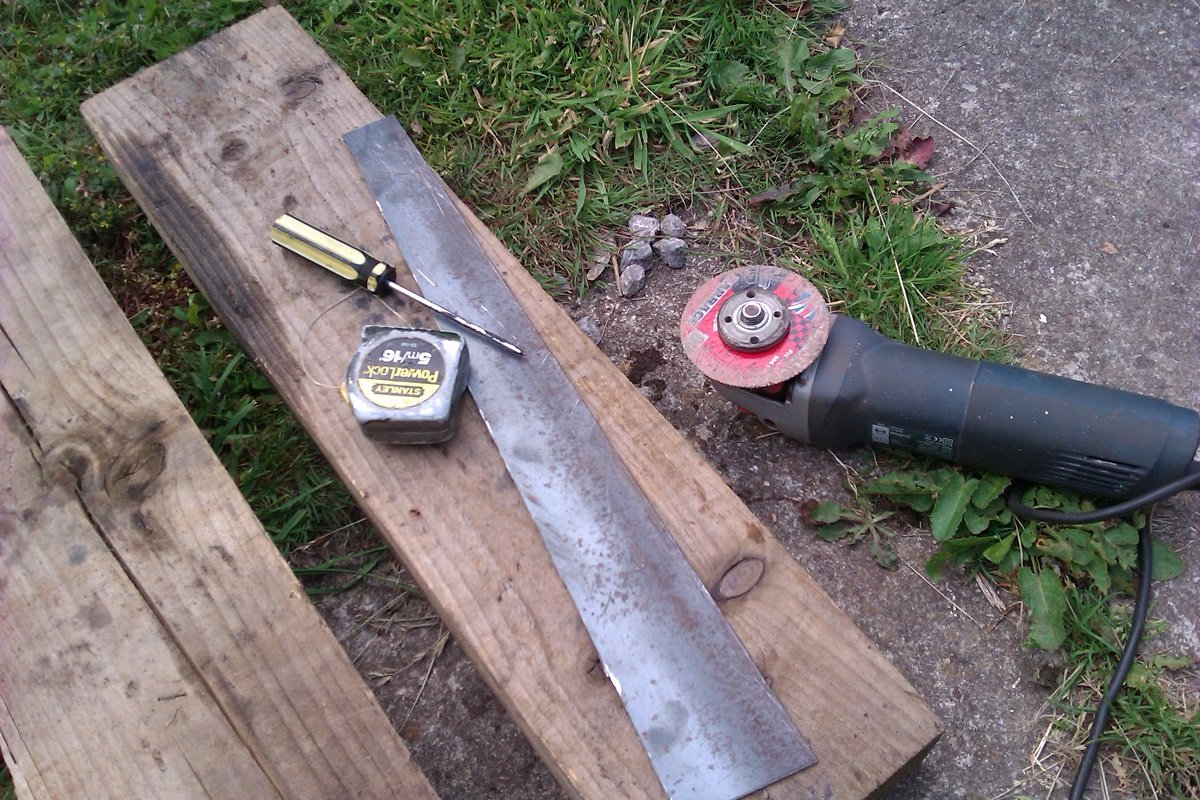
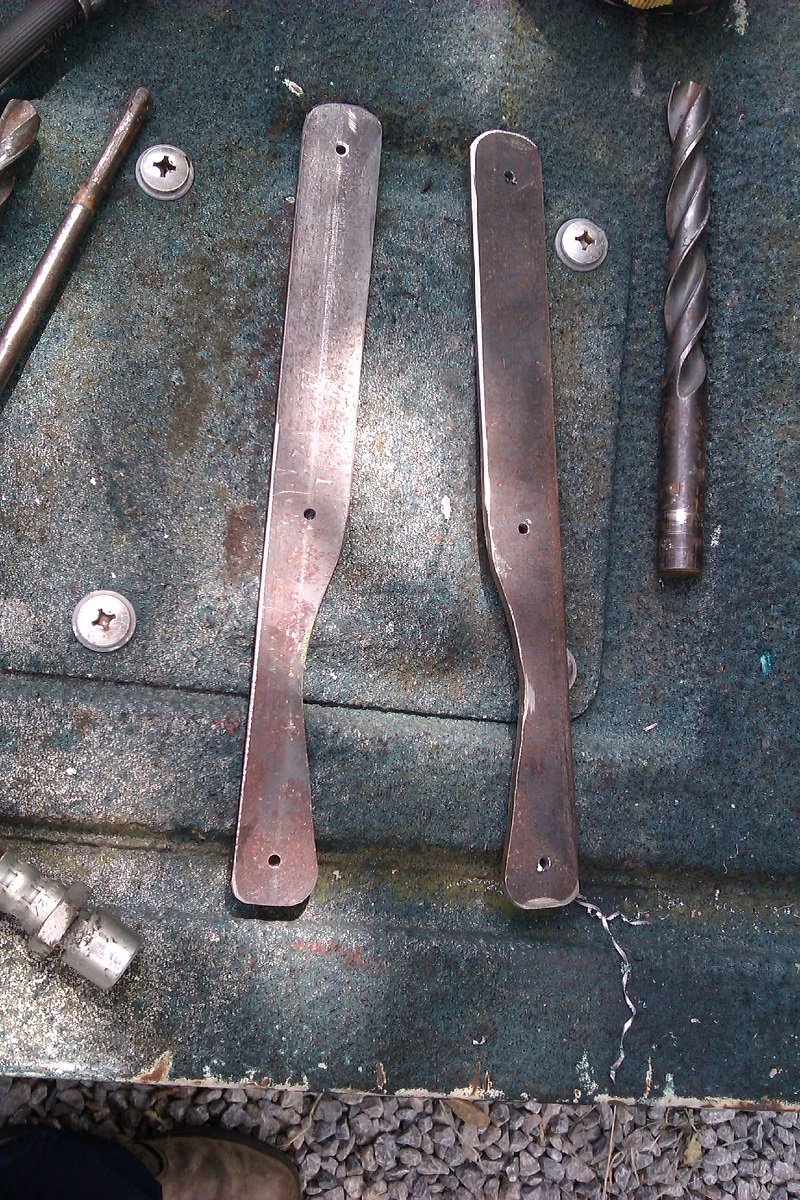
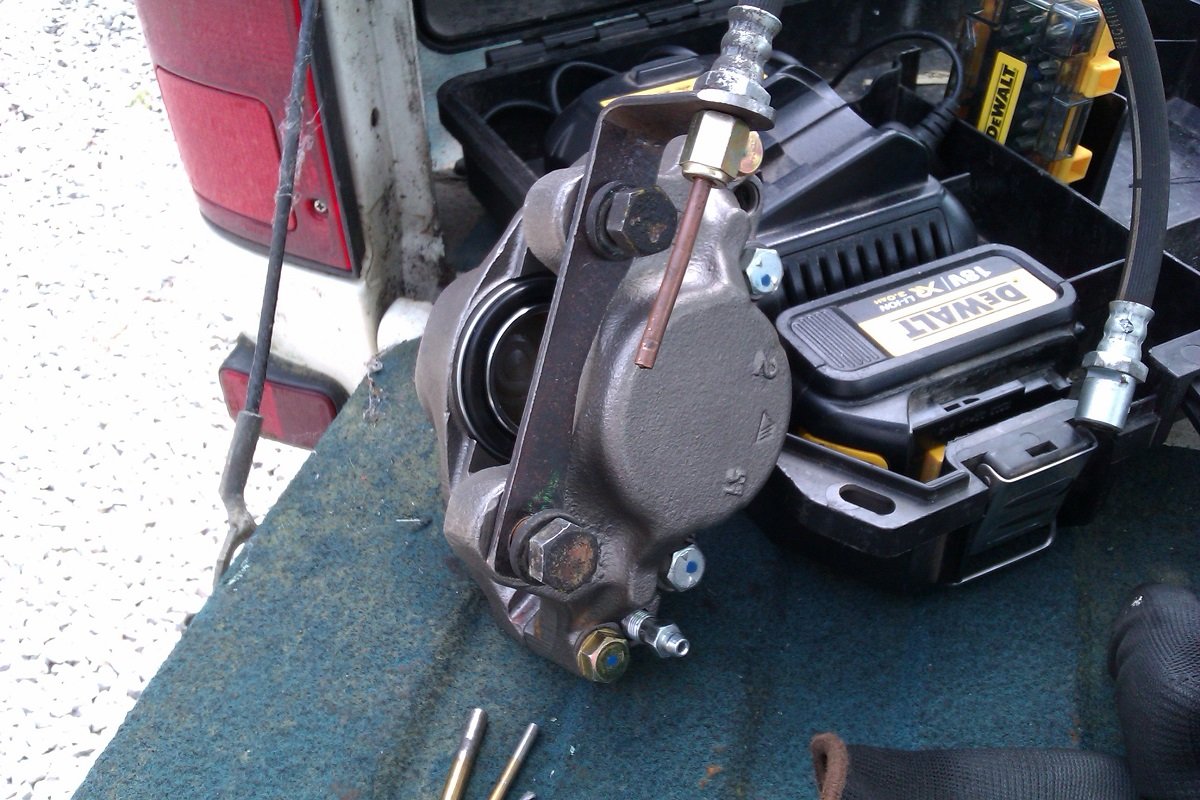
Monday afternoon shenanigans As mentioned the new calipers differ where the pipe goes in. Aftrer a bit of thinking I decided to stick with the standard flexi hoses but extend then using hard lines. This means I have to put a small taper into the end of the flexi hose and make upsome brackets to support the join. Given my usual level of bodgery, I'm quite glad how it looks so far. Pics... Same/not the same A bit of 3mm off-cut I had kicking around. Cut and cleaned up. Trimmed to clear the calipers. This was plan "A" on the length, I cut them back to clear the bumpstop mount. Measuring up for the hard lines. Finished off with a coat of "Sump disaster" red, hopefully the curse won't follow it... Making up the pipes later so hopefully all back together by the end of tomorrow. Woo-Hoo
1 point
-
A couple of years back I bought a YSR50 with a TS185 engine transplant, half complete, from an estate garage sale; it may be the best value purchase of my life. I haven't touched it, never got it running. After reading about the upcoming Urewera Undertaking, I knew it was time. The factory YSR frame is only rated for 65kgs and I weigh more than that... I'm also looking at a horsepower increase of something like 240%... and I should probably make some kind of concession for the gravel. So there's a bit to be done. Step one, amalgamate the looms and achieve stable idle voltage. Step B, celebratory burnout. Watch this space.
1 point
-
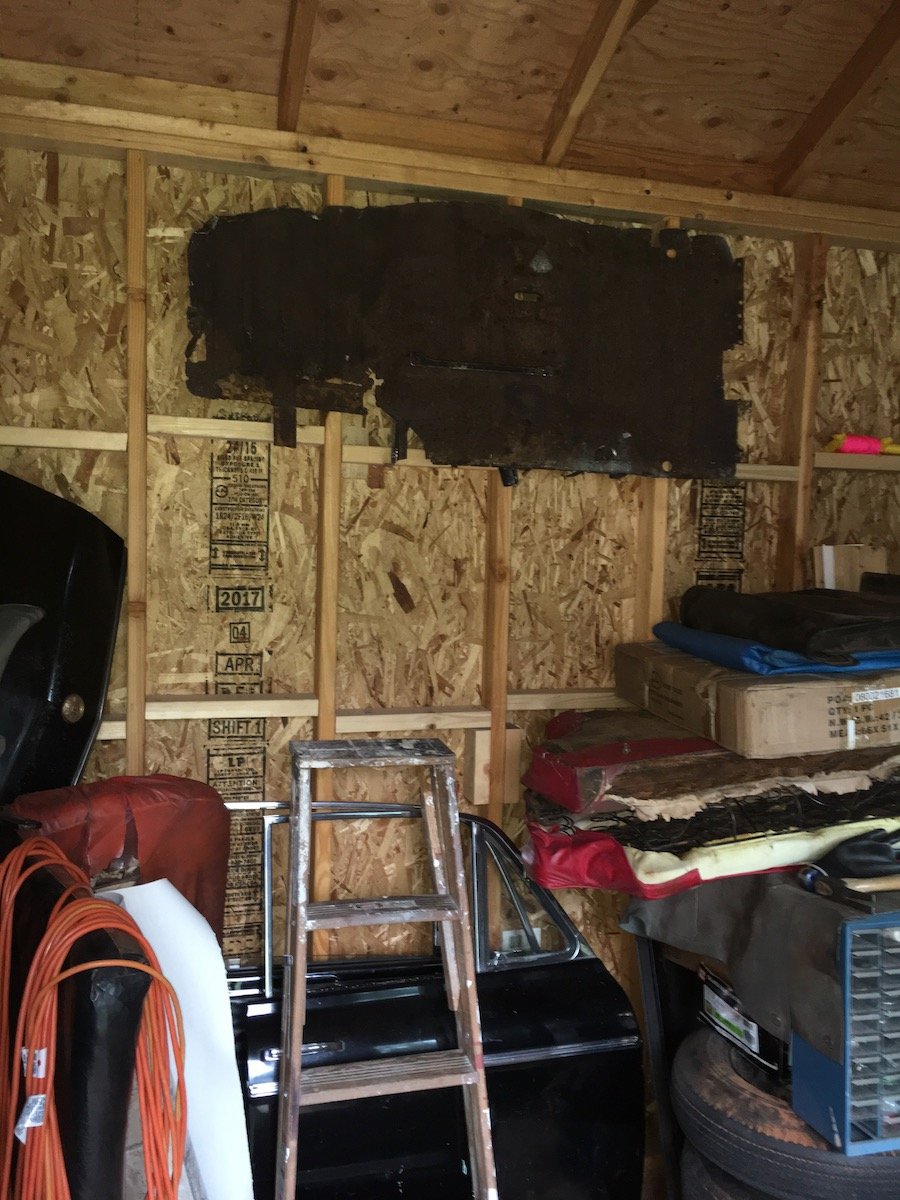
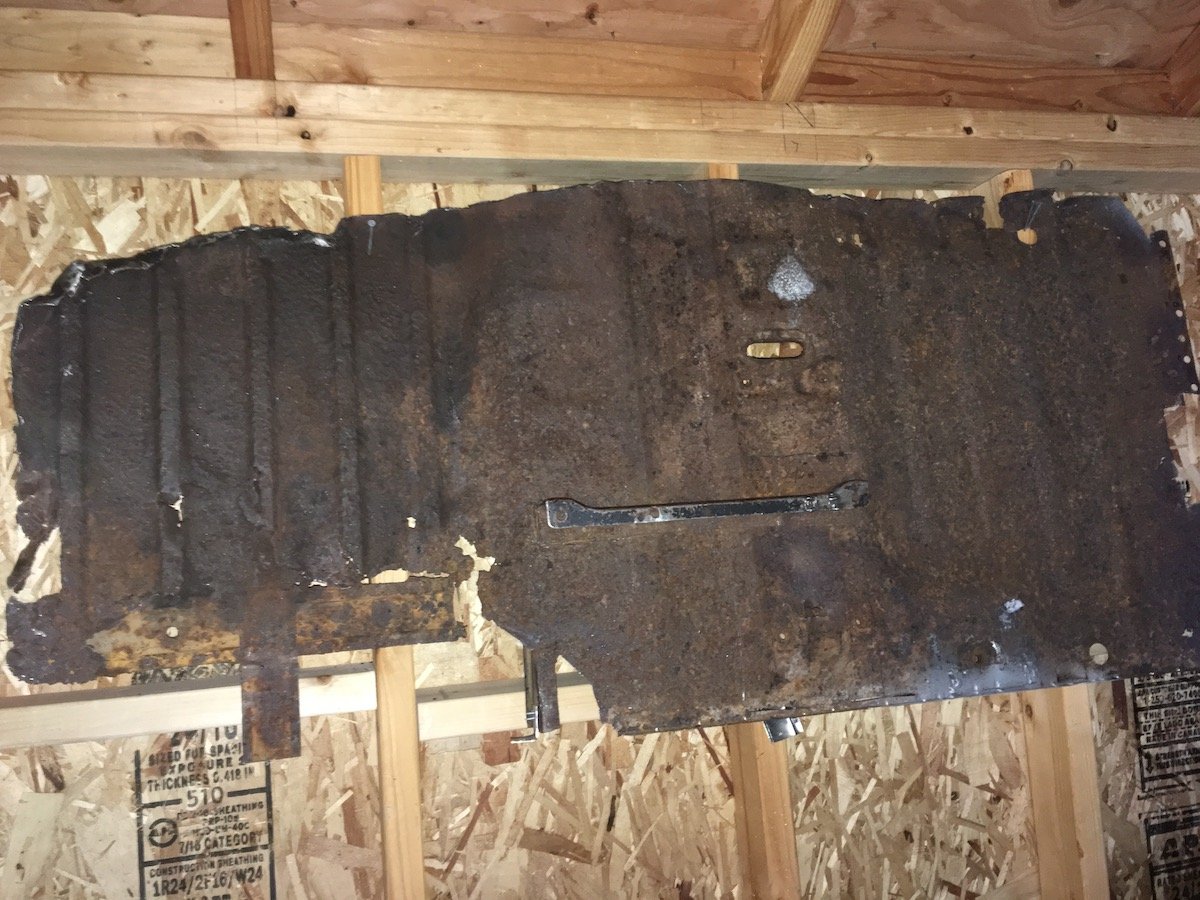
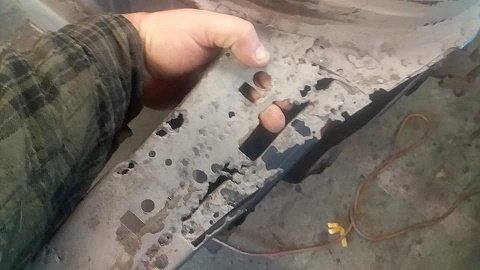
Hung some new wall art in my storage shed today. It's the remains of a '61 Bluebird left floorpan. There is a practical reason for temporary wall hanging it. I was just going set it on edge in storage so I could salvage a few items off it later but it began folding over from its own weight. Plus, it was generating all kinds of crud such as; dirt clods, large rust flakes, under sealant, and greasy blobs anytime it got touched. Just had to get it out of my garage and isolate it. My "wall art" came from here. I'm hoping to make a few more posts soon to cover the last couple of months other work activities that led up to this "epic" event. Making the trans/driveshaft tunnel solid, investigating door hinges, finessing various fitments and preparing the fender and other bare steel sheet metal for epoxy primer. Discussion: https://oldschool.co.nz/index.php?/topic/60267-marts-pl310-61-datsun-bluebird-sedan/
1 point
-
Been slack on the starlet side of the shed. Abit of love today however.. So ba falcon carpet + knife + kp starlet =this haha I mean its not perfect but aloooot better. Also took for a quick drive think alternator is on its way out. One thing off the list another on hahah
1 point
-
I’ve got this underway. Suzuki A50 feat Lifan 125
1 point
-
So plan is - twin 45mm (or 1 3/4") for most of the length, which matches the existing twin pipe from the manifold to the Y that is a muffler shop replacement that i will keep a very small part of, - into a single 57mm (or 2 1/4") pipe to match the existing rear muffler, that i cribbed from bits from the Croma Turbo i wrecked This was way more expensive than i thought, especially as a bought a nice new welder to do it with. Even my man-math was struggling. After watching some youtube and doing some actual math i started with making the new Y section from which everything else will be built from. and went forwards from there. The Y is right at the back of the floor pan and actually has a kick up towards the diff. Shiny stuff to the ex croma over the diff section And painted with some BBQ paint Pretty flash for a driveway job! Ended up using only the first 50cm or so of the old secondaries but turned out nice in the end. Shit is tight getting in and out. This is the new front section against the old part, the new Y joint ends adjacent to the white bit on old pipe so ive extended the primaries by like 2 meters. Unfortunately didnt take any photos of the whole thing as the rear half was installed so i could ensure the front half lined up Buttoned it all up just before dark and its surprisingly quiet, probably because i was used to the old blowing exhaust, but has a proper FIat rasp at around 2000 rpm or stabbing the throttle and seems to free rev a wee bit better. Tightening it all up properly means it now has no leaks, but it rattles on the cross member, i want to put a support off the gear box and I remembered that i forgot to weld in a O2 sensor bug so another couple evenings tweaking and upside down welding before a road test and butt dyno.1 point
-
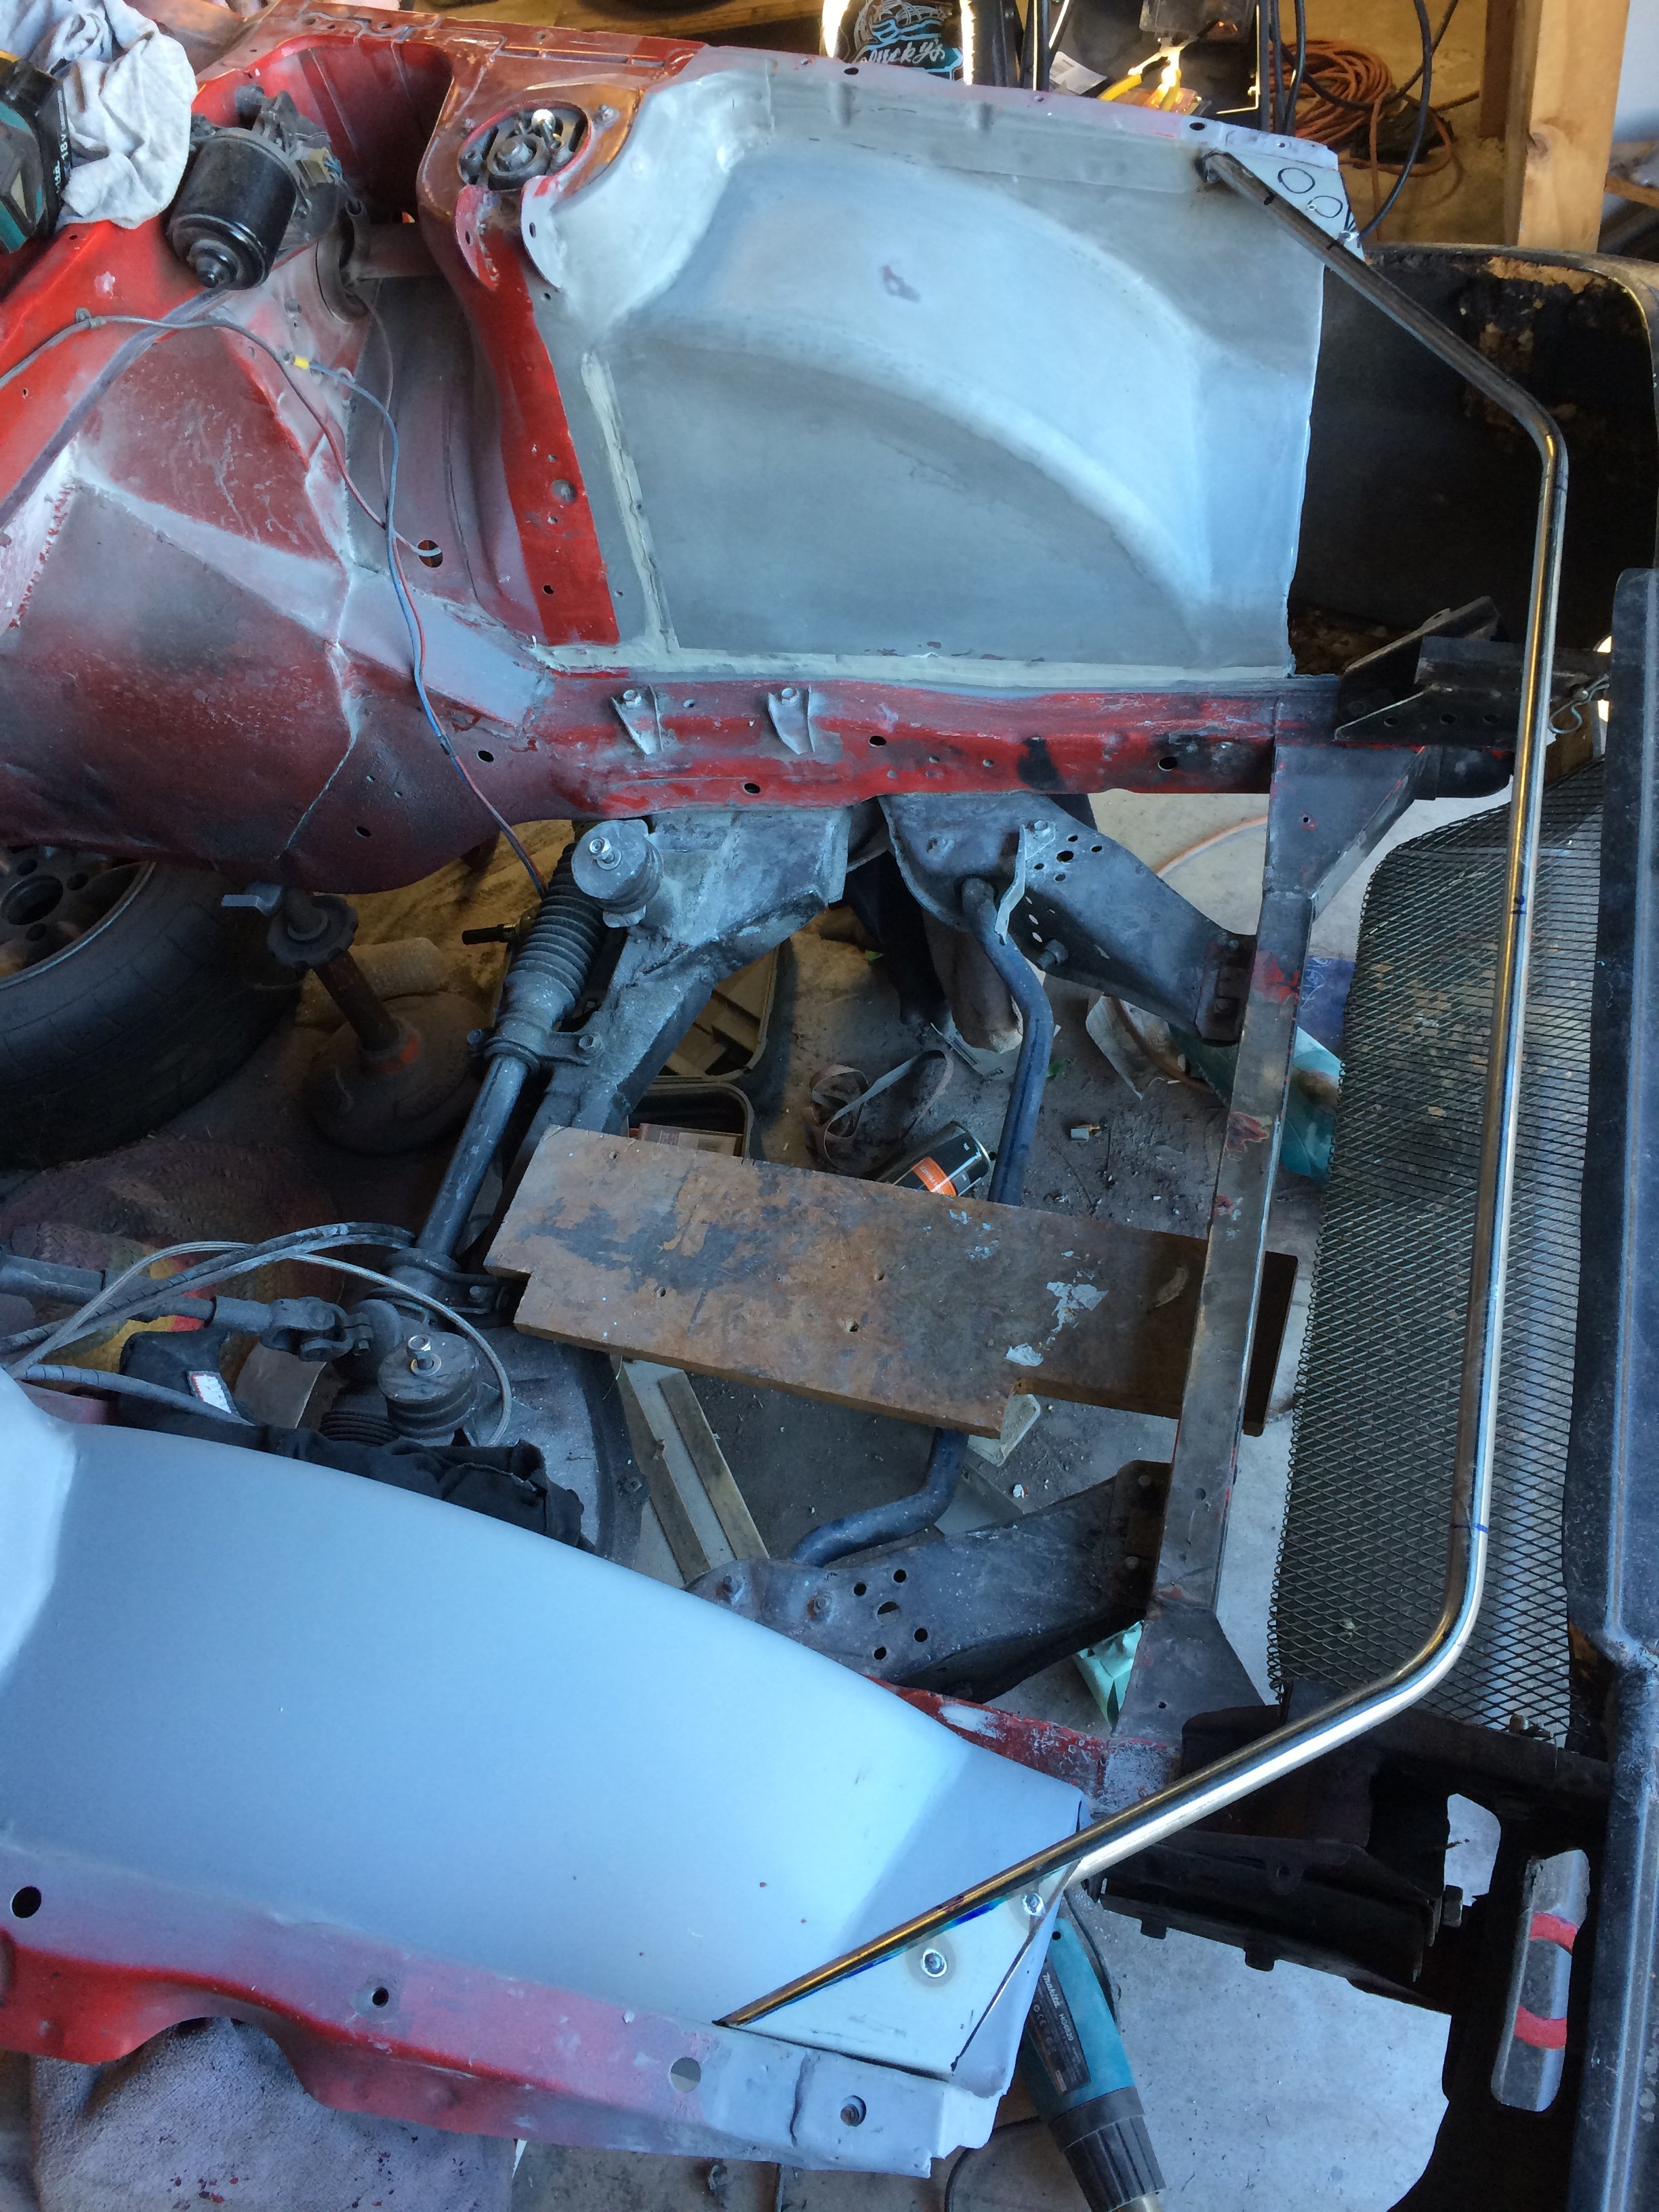
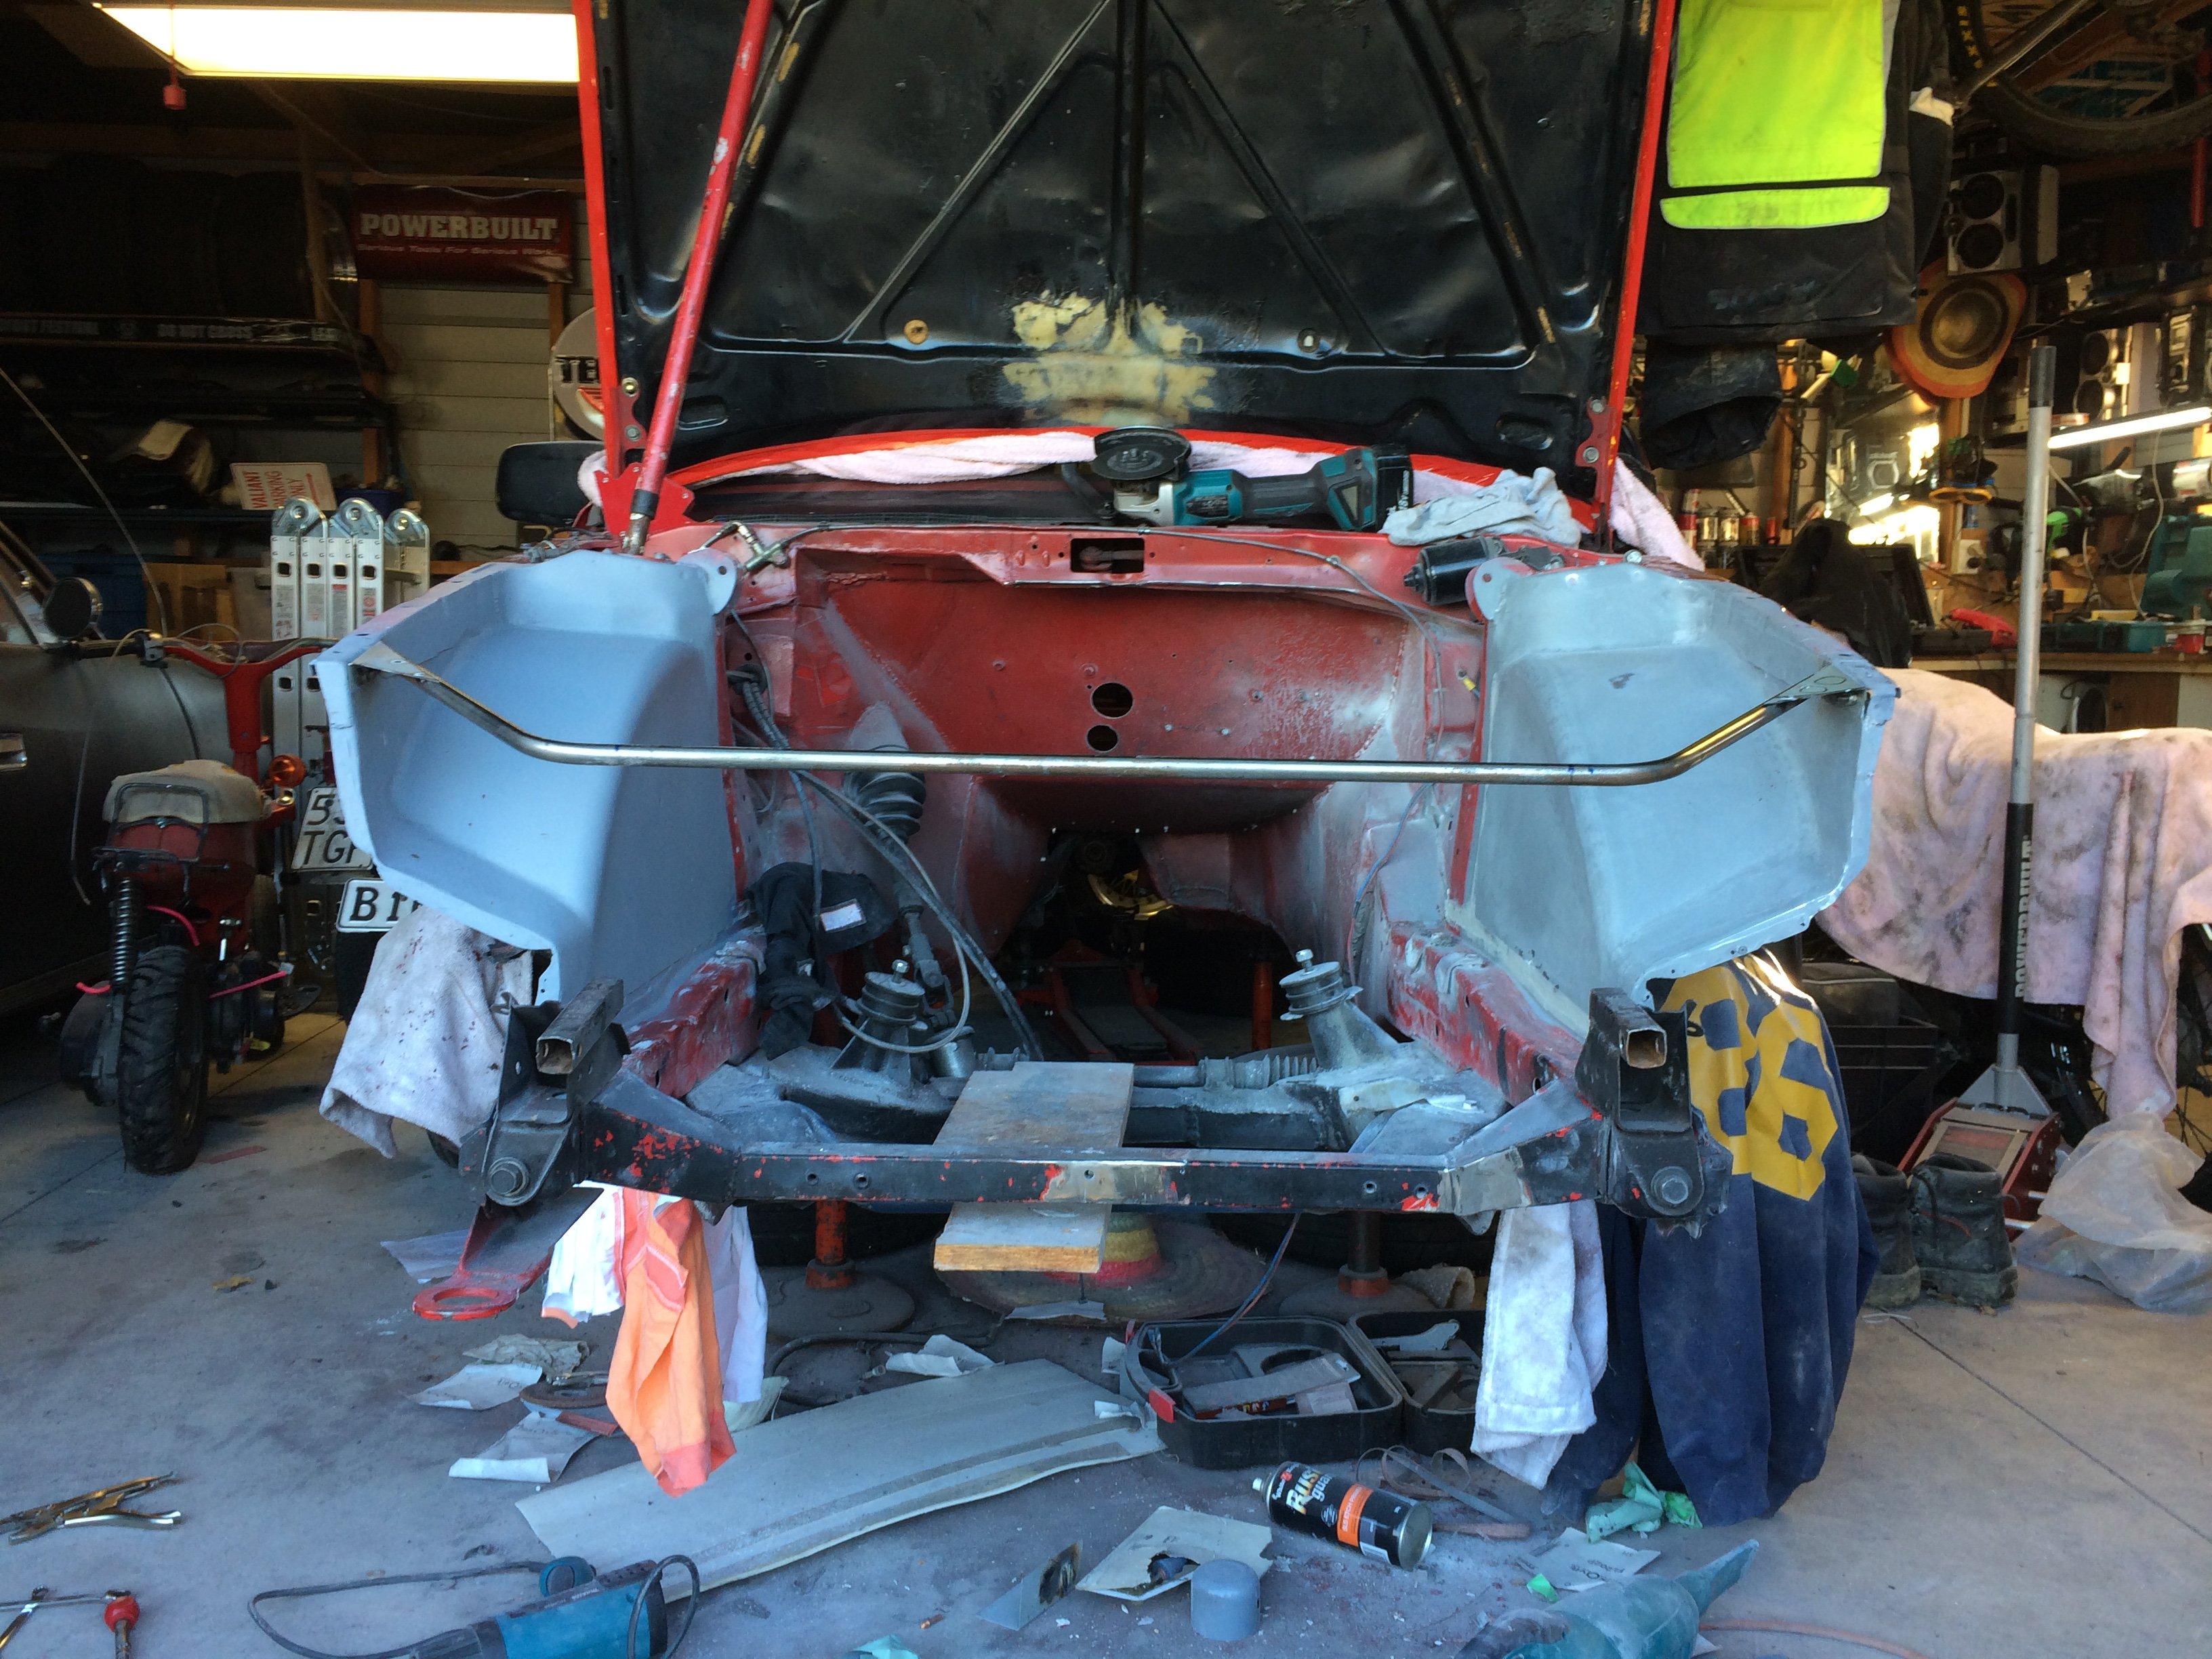
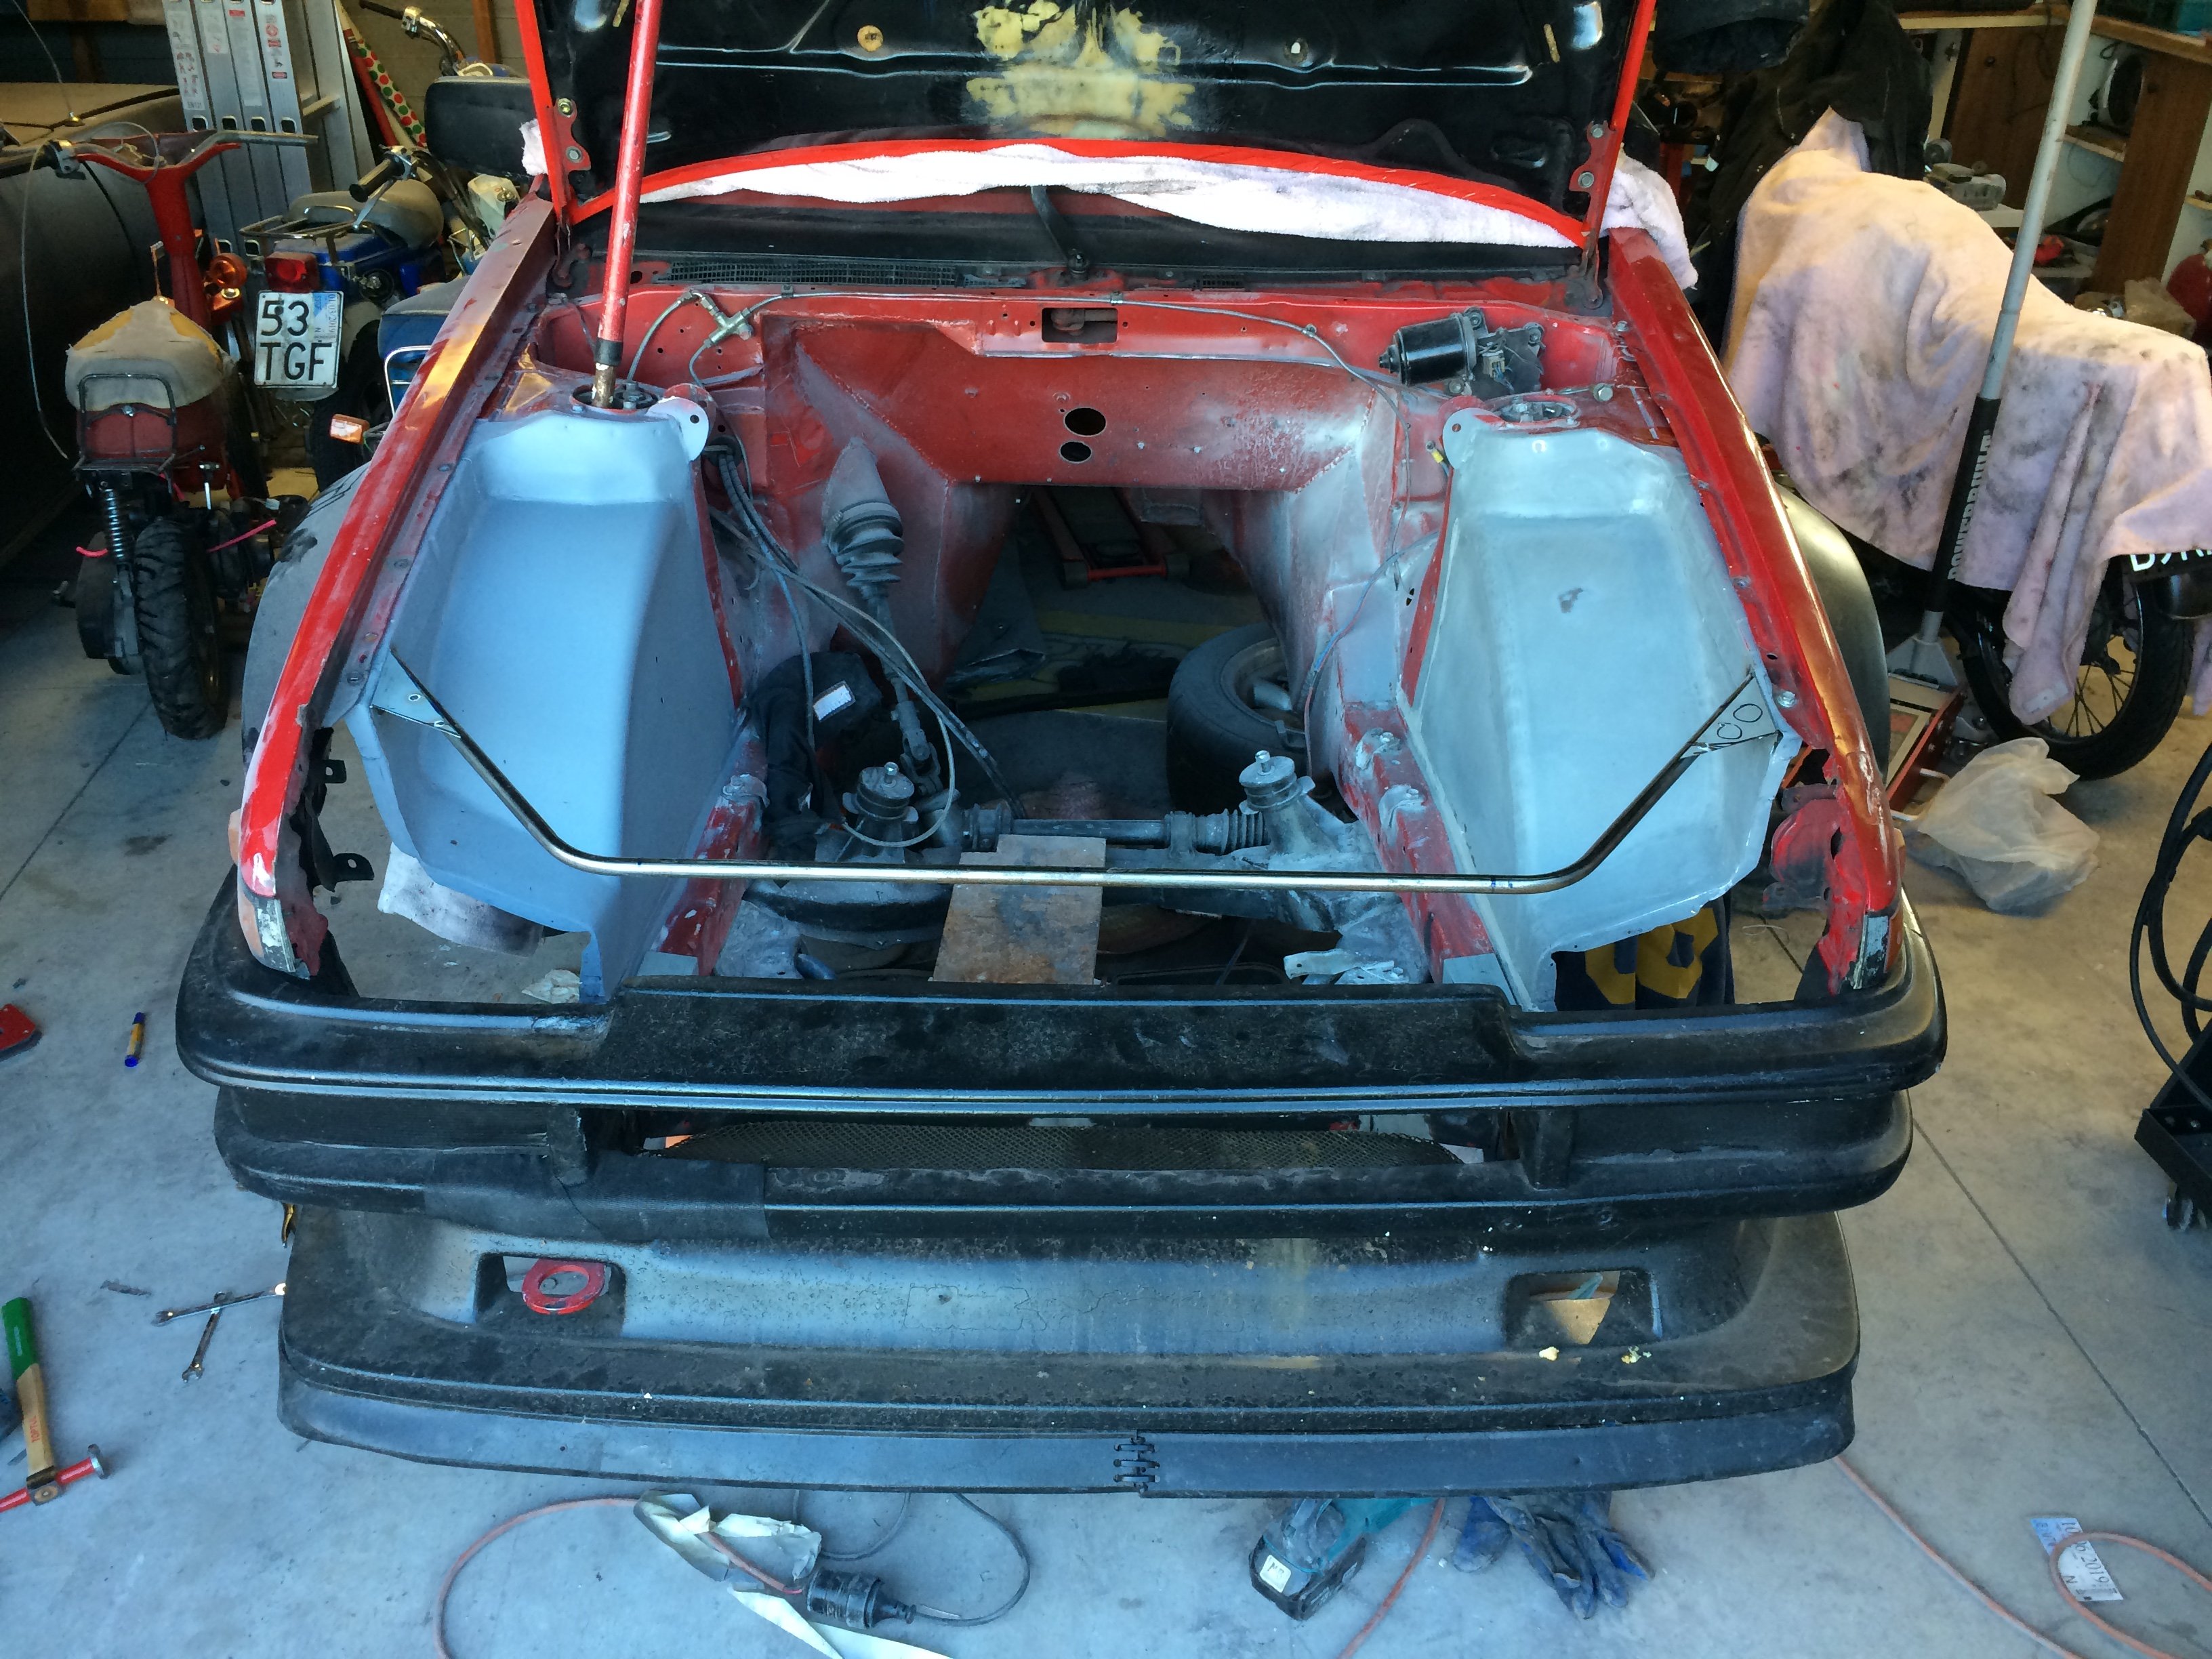
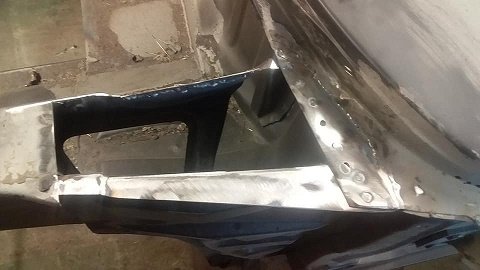
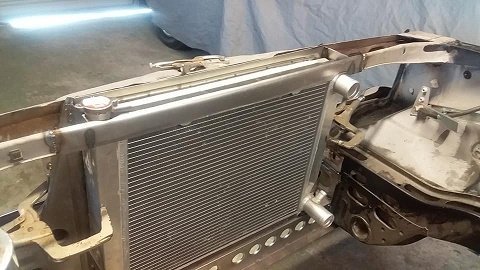
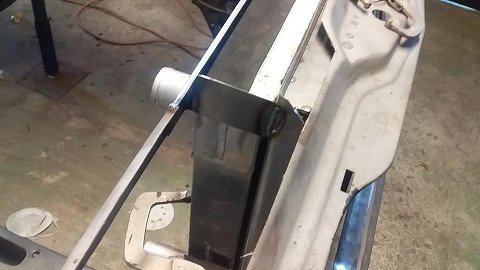
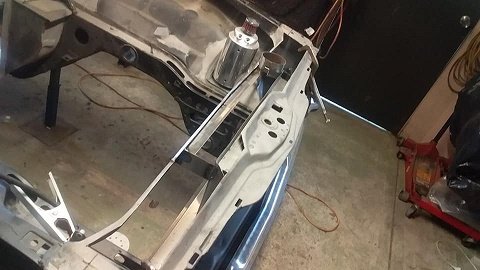
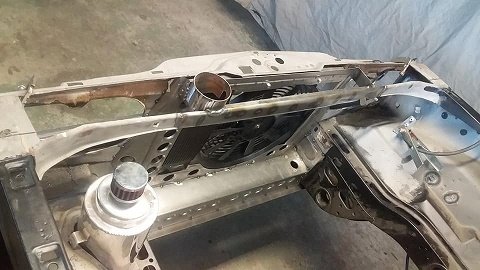
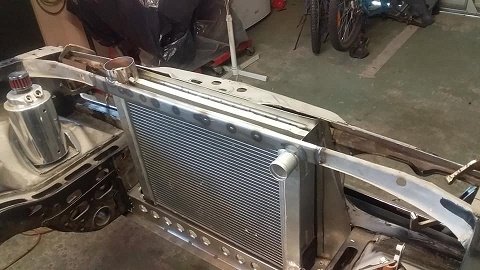
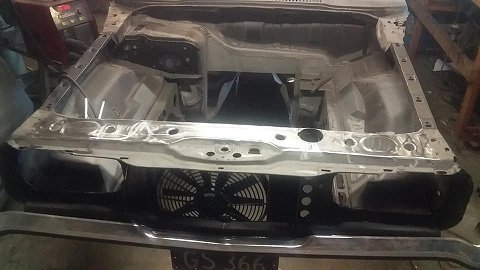
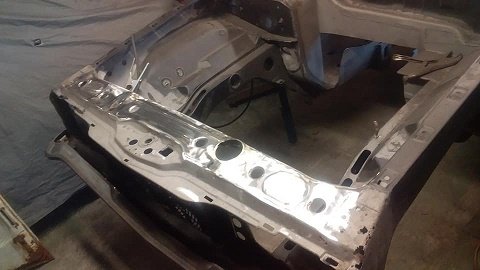
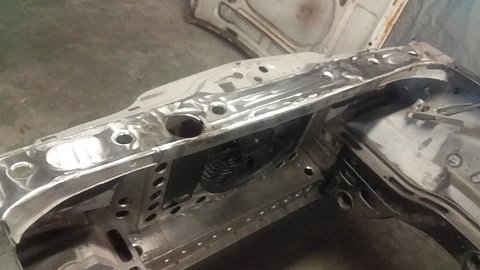
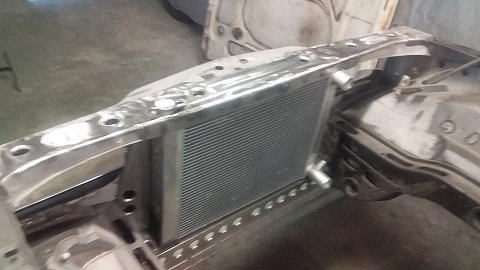
I’ve made good progress on the right hand tub now. Got most of the finishing and a coat of primer onto it. Then @Rhyscar came around with his tube bender and we started on the new radiator support: This bolts in place on the sides and will have a couple of vertical stays for the radiator and ducting mounts. Popped the guards and bumper back on for a visual inspection: And the new radiator will mount like this: With ducting to take the flow out the bonnet. Woohoo! Now back to body work in the engine bay.
1 point
-
Time for a smol update on the fiat. Have been chipping away with making patches and buying parts/paint stripping etc. Gave the mrs a wind up about getting motivated to finish it and she pushed me in to actually buying parts. Parts are in the country but the a holes at customs forgot to process the gst invoice so I'm back to bodywork.
1 point
-
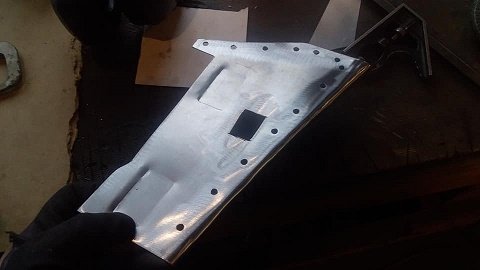
Fuel tank access panel. Not perfect but will do the job. Think of the grams saved!
1 point
-
He could always swap in LGBT transistors. They are super easy to trigger. #dadjoke1 point
-
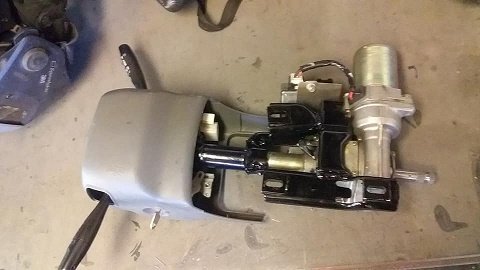
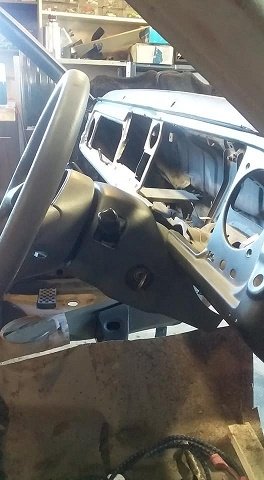
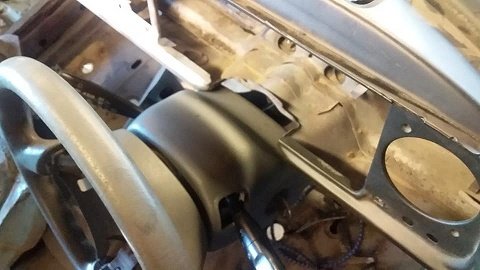
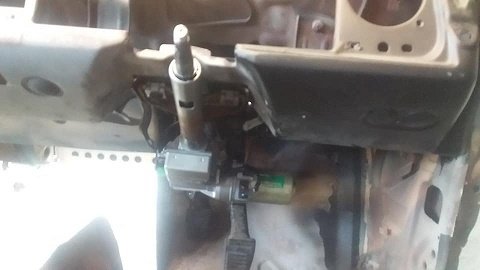
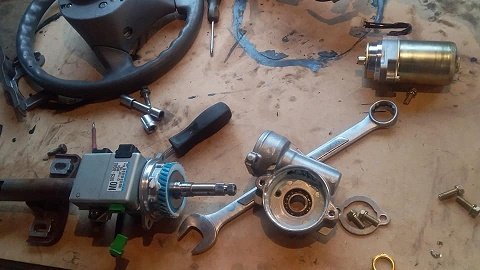
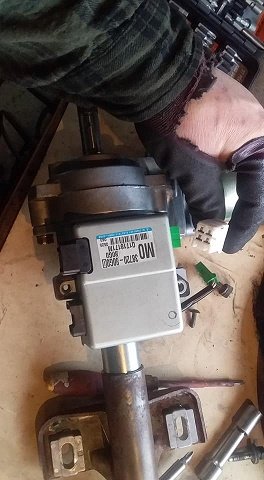
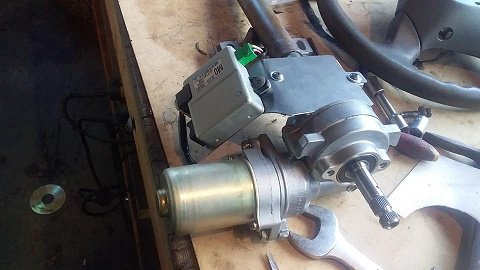
i started having a play with the EPS..i stripped it down to the basic unit. here it is just mounted up with pedal box in and just 2 bolts ysing the suzuki steering mount.( pretty good really for a Japanese part and 2003 tech in 76 car) the motor and gears hung down pretty low so i pulled ut a part to see if i can tuen5 the motor and gear drive 180 being just 2 bolts made ut easy to flip 180 so ghe motor is now on top of the unit....but the wire from the motor would reach the ecu for the EPS so i made a small bracket to move it off to one side then bolted it back up to see and all in all very happy...it now buts the motor up under the dash.....so thats the 1st part of the mounted sorted.
1 point
-
So the first task after the bathroom extension was to have a kitchen area along the back wall. Kitchens are expensive, even for the kitset things. So after a bit of Facebook market searching (never expected to find good stuff on there) I came across a yuck cabinet thing that can only be described as the wooden entrance piece to school camp where 1J5's were stored in the top, and school bags below, and maybe one of those weird clear grey/brown mugs on the top too that a relief teacher sipped from occasionally. Well this thing was also bloody heavy but only $50 so we hoisted it up into the van and to the shop, and I spent 3 days regretting my purchase. Had various ideas for it, tested different woods to see how food-grade polyurethane held up, then eventually stumbled upon a sale of ply at Bunnings and was sold. We sanded up the cupboards and drawers and took the top piece off. Spent another few days testing between paints and stains, with the matte black paint turning out chalky and holding fingerprints, so I settled for an outdoor satin black deck stain. Don't tell the Bunnings paint lady though or she has a meltdown. Ended up sacrificing the left had drawer and cupboard for a Bunnings showroom special oven and hob, and the shelf found it's final place but not by choice, because the chemicals in the floor coating has stuck the feet to that position. So it stays. And the legs are off a commercial cooker that were the cheap price of free. After that we went to work on the dirty/laundry area, but didn't want the machine visible because it's not cool and industrial, and wanted an area to clean car parts etc. Went with the cupboard theme of black with ply top and genuinely impressed with how it all came together, especially with Leonard. And other than those jobs, we had to get some of the bathroom done after months of procrastinating over different ideas. I got Ryan to leave some of the concrete bare, because I wanted to still have some of the tiltslab in the room, so I put what I thought was polyurethane on it, just turns out it was some wood varnish (definitely don't tell Bunnz lady) and it worked a treat, stopped the concrete dust and allows the water to run off. I waterproofed the shower over 2 days, the second day took 3hours straight of coating but old mate Missy and Ice Cube got me through. Then I found a tiler and it all went well until we were one tile short to finish. A few days later it was all tickety boo. Note to self though: if you've never had a dual shower head scenario going on before, do ensure the dump head is turned on first and not the shooty one. Stephen wanted me to have a photo of the shower on and a beer in the soap box, so turned it on full steam with old shooty head pointed at me and the camera. So the camera is thoroughly clean now. Next we are finishing off the final wall, and deciding an idea to make a bathroom vanity. Any ideas are hugely welcome - we got some galv feet off AliExpress which are lush so that's idea one.1 point
-
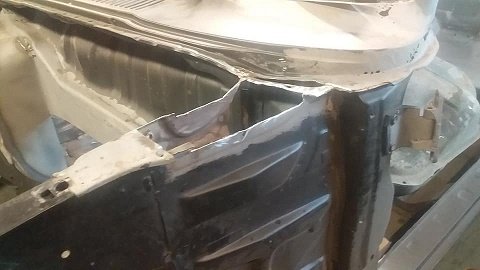
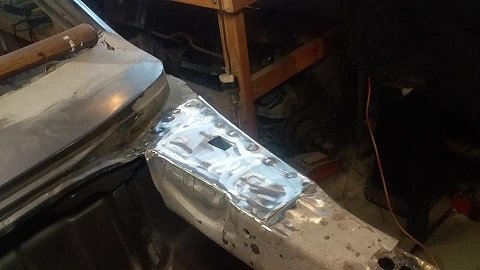
got into some more rust on the passenger side front...got the front edge done and the area around the bonnet hinge mount. (the drivers side was mint so i made a template of that)
1 point
-
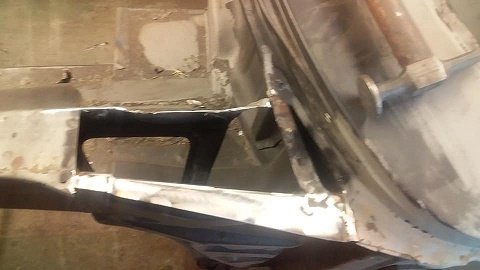
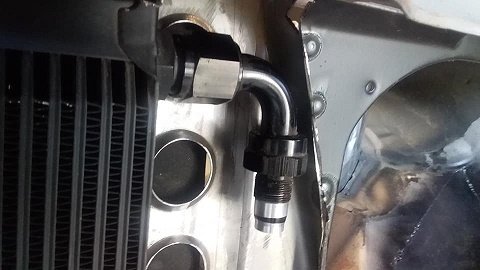
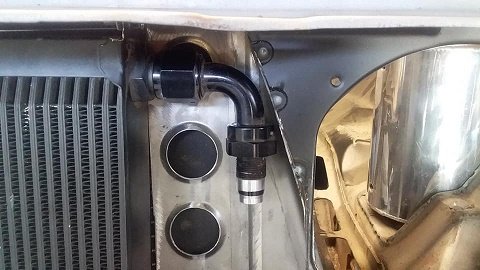
luckily i left enough room for the oil cooler 90. finished up the last of the radiator supports ..(still just silps up under the lip and had 2 brackets on the bottom.) then made the new slam panel...(i had to bolt the bonnet on and drill the pilot hols for the bonnet pins just to see where they would land...before i start)
1 point
-
Not a problem. It's been super cool to learn from some one with so much knowledge. I asked him if he had any idea on how many engines he has built. His response was, "some weeks I would build two a day back in the old days, spend all weekend cleaning the casings and parts and then just build engines all week." Guy sure as hell knows what's up. Hopefully get some more stuff done tomorrow night once the fly wheel is back.1 point
-
Hilux LSD is useless.. have it done up it's shagged 2 weeks later. But there are full spools out there that fit up to hilux a old boss had a hilux diff in a 8.90 drag car. Never missed a beat. Light rotary application.1 point
-
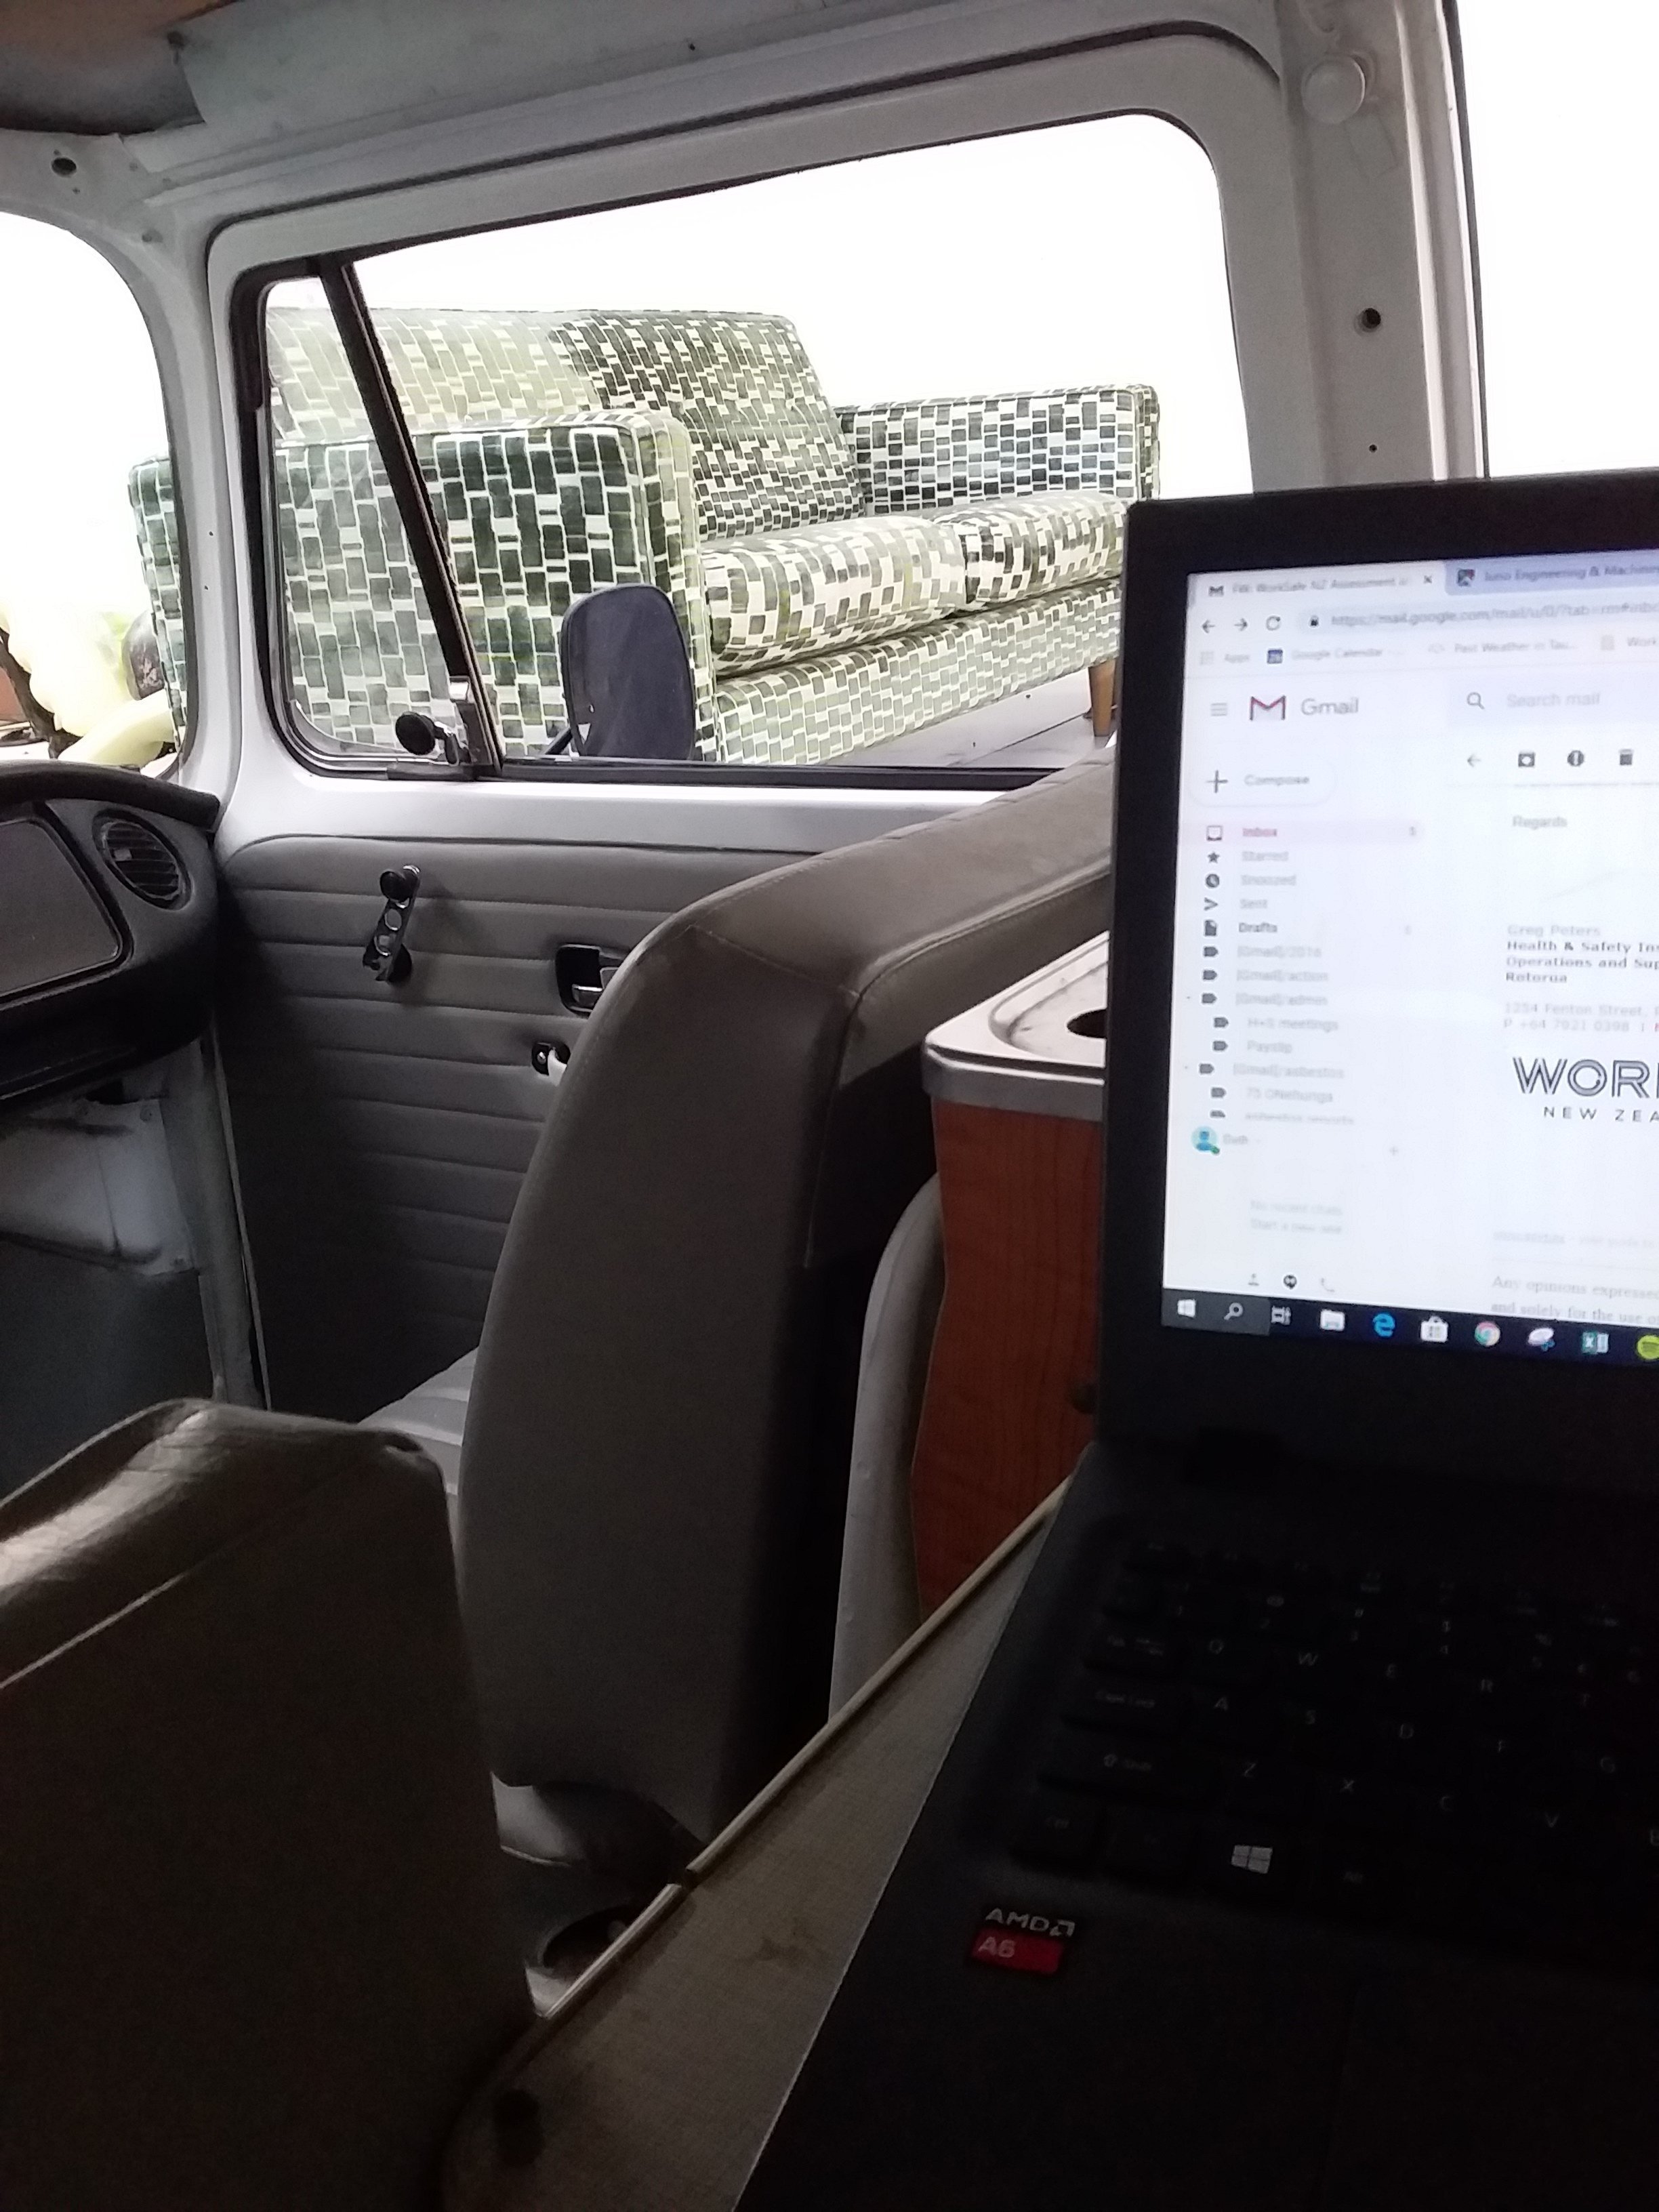
Doing my office work whilst sitting in our Kombi. So excited for this project
1 point
-
Not sure if I should get some epoxy or try to rangi up a vacuum system or just carry on as I am.. Did some reading about prepreg but seems like the cost skyrockets / is not really novice spec.
1 point
-
1 point
-
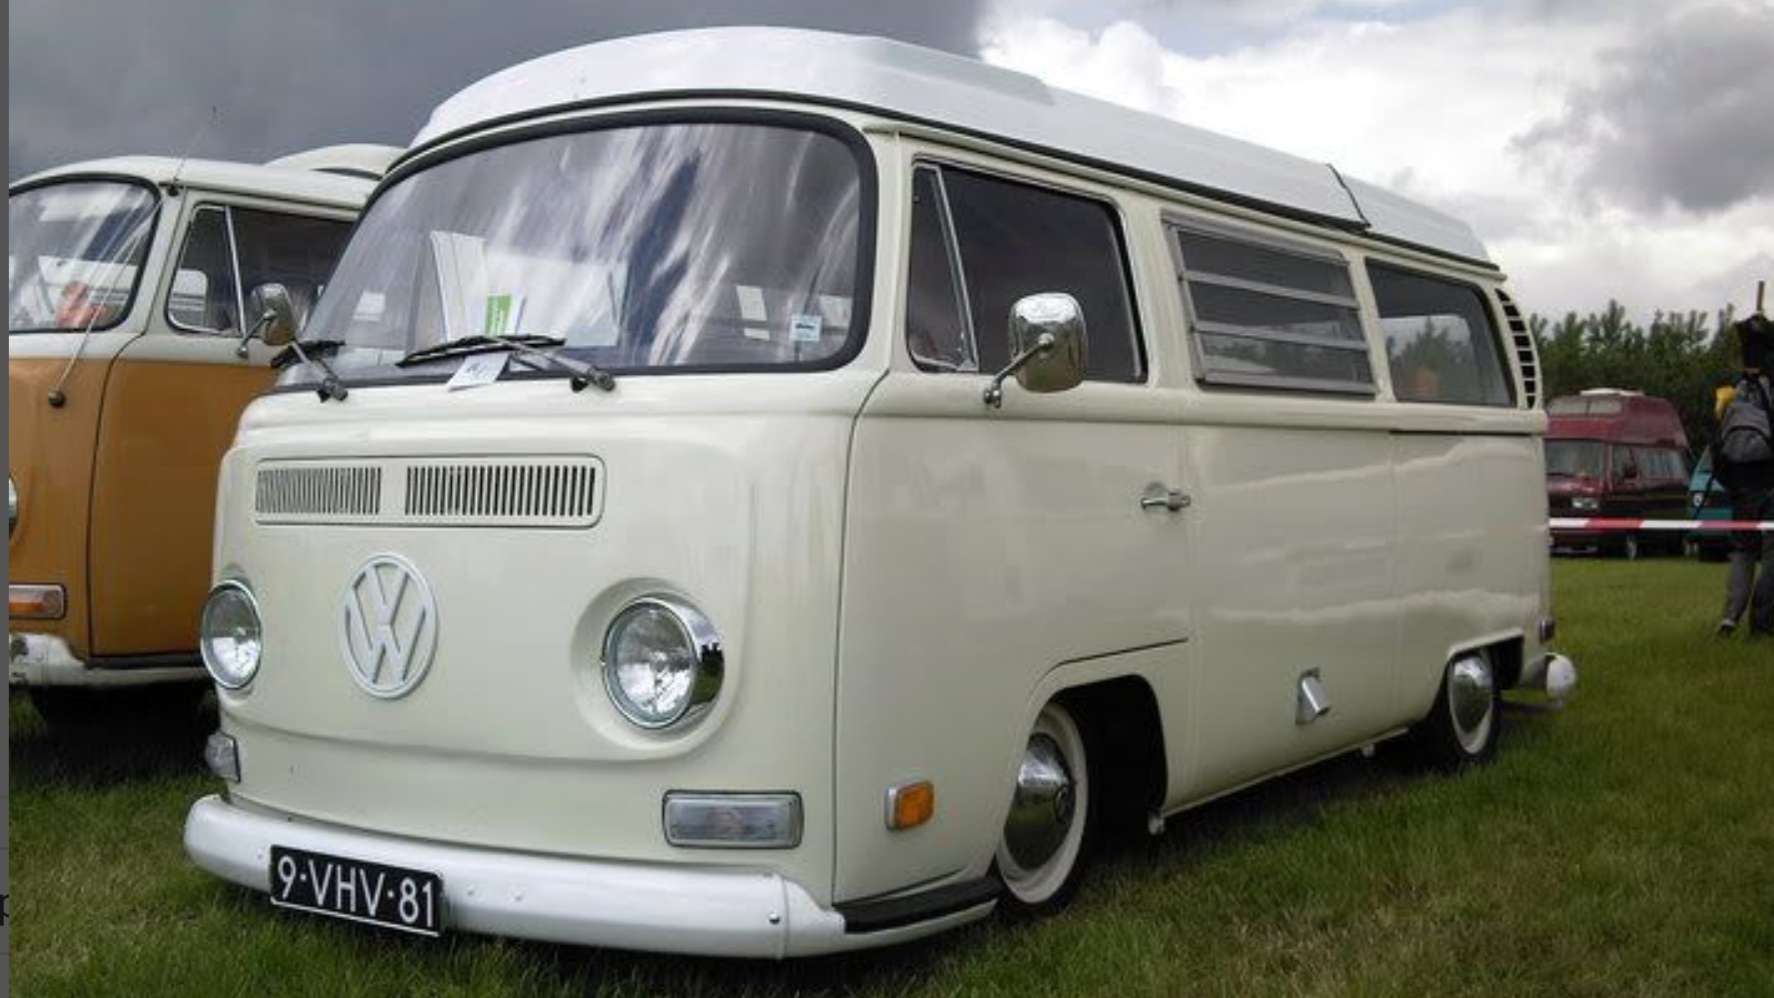
Found a white. It's colour code is L87 pearl. Off white doesn't look that bad with a white roof and bumpers either. Now to find it.
1 point


This leaderboard is set to Auckland/GMT+12:00