
Leaderboard


Popular Content
Showing content with the highest reputation on 09/27/17 in all areas
-
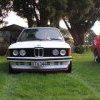
so, were was I? ah yes friday. I phoned around a few places and found Autostop are the only people that carry Bosch car parts these days, asked about a GT40T (for transformer) coil, no worried the helpful young man said, I 'll ring ya back once the van drops it off, sorted. at about noon the guy rings me back, the coils here in the local shop, but for some reason I double checked, it is the small square one right? no its the round cylinder one, doh! no worries he assures me, I'll get it on the next van, I get another call at about 3, square coil is here, sweet! so I bunk off work early as I have the wifes car for the day to go and pick it up, get home on the double time just as Darrell does and we install the new one and she fires straight up!Once I got the old coil out it was obvious it had see better days, but in my defence most of that great crack was hidden from view under the mounts, and I was more worried about the clutch and piston rings still working etc..all this pissing about with the coil had at least given me time to sort a few other small but important things.these are my jets.as I said in the earlier winge post everything has been checked and double checked, which does at least give me more confidence in the old girl.gave the last few parts of the sunroof mech a lick of paint and duct taped the old cover on for now.water tight bugwhich bring us back to friday night and a for the first time a running car. First job, wash all the dust and cat paw prints off it.jeah.stood back enjoyed a beverage until it was nearly dark.once the kids were in bed and I'd realized the only things stopping a wof was a front number plate, wipers and them brakes, or lack there of. I then remembered I hadn't yet had another go at adjusting the rear drums and noticed when I pulled the handbrake on, I had a good pedel, hmmmm.Sure enough they were miles out, whats next? wipers and a plate? might as well keep going!I have some how amassed quite a collection of wiper arms and blades over the years and so had a nice working matching pair, something else new of this car, polished up the old black plate, so many battle scars, but I love it.By now its 11.30, fuck it, I'm going for a drive!now it get this thing legal. I have however driven it on private roads and those twin carbys are transformed this car into a bit of a beast.that little 1600 revs feels like it wants to rev to the moon! still needs a bit of work on the timing and jetting, but dear god it pulled 50mph in second gear today! a little bit scary with drum brakes! so friggin loud though, no headlining at all, my brother said after I took him for a wee blast, it like sitting in the engine bay! it kind of hard to drive normal as it so much fun to wind out.17 points
-
Its been unfortunately off to pretty slow start just been doing some bigger hours at work to pay for parts, good news is I ended up buy a manual. Its a small world ended up putting a post on Facebook and a guy in Hamilton had a 5 speed Toyota W50 box with a Castlemaine adapter that he had had forever. Turns out once talking to him he recognized the rotisserie frame from the photo and we figured out it was his old truck that he started building in August 2000. The Toyota box was what he had originally used to set up the chassis but he held on to the motor/ box when he sold it which has worked out well for me. The turbo 350 never lined up at all with the gearbox mounts so it was a pleasant surprise that the Toyota box fitted perfectly. He also found the driveshaft that he got built and balanced when he was building it, am super stoked. Im a little bit concerned that the box might be a bit small once I go to a hotter 350 in the long term but it should be sweet behind the 305 for now, apparently the stronger W series boxes are all about the same size and have the same bolt pattern so can always go bigger later. Here are some pictures the original owner gave to me of when he was working on it. And classic early 2000 Barry shot I love it And some pictures of the gearbox fitted up to the chassis At the moment the cab is at a mates I have been peeling the cowl off but this is how the chassis is sitting at the moment at home. Sorry my potato is not the greatest at night time photos.13 points
-
Cut the drivers side floor out last weekend. Not for the faint hearted. Started mocking up the new floor, going to butt weld it in so it looks decent. Big piece of realestate this mofo. I got to lunch time on saturday, thought fuck it, im off to the pub for a beer. The weather is too nice for any more of this shit today. Haha Anyway, progress continues. Want to try get it back together for end of summer. Probably dreaming but its not impossible if i try do a few serious full days coming up on my annual leave next month12 points
-
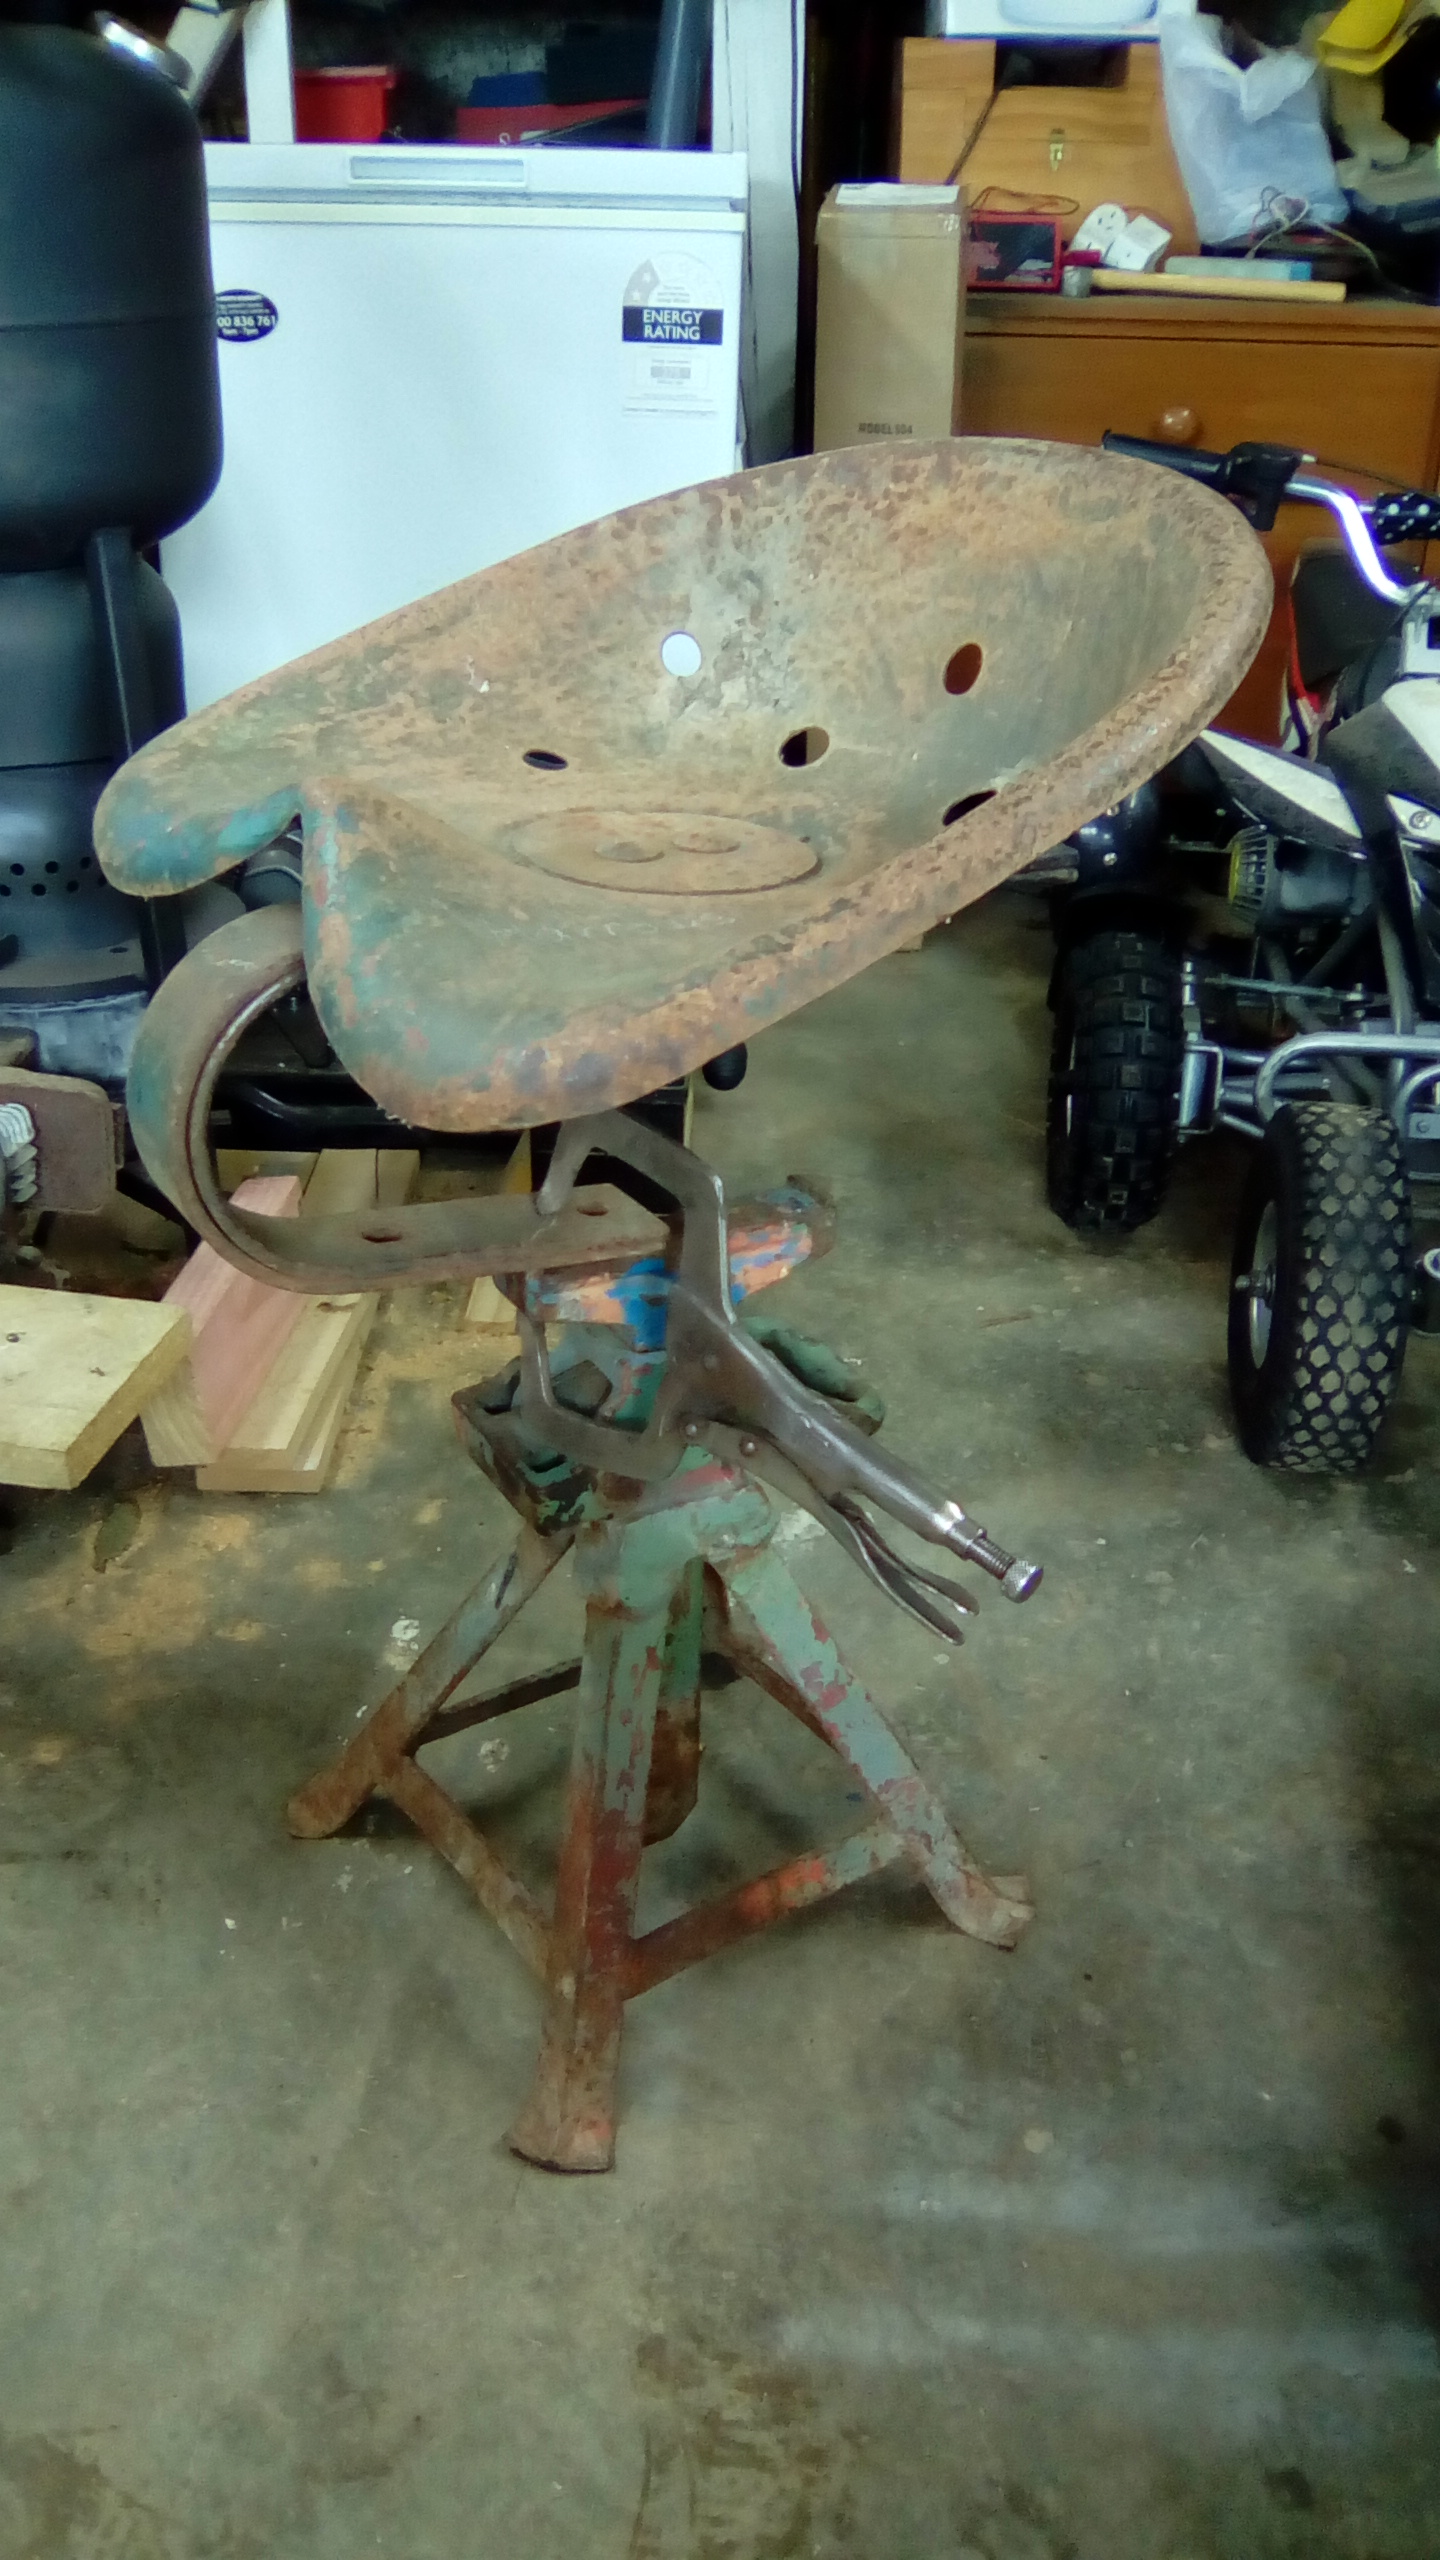
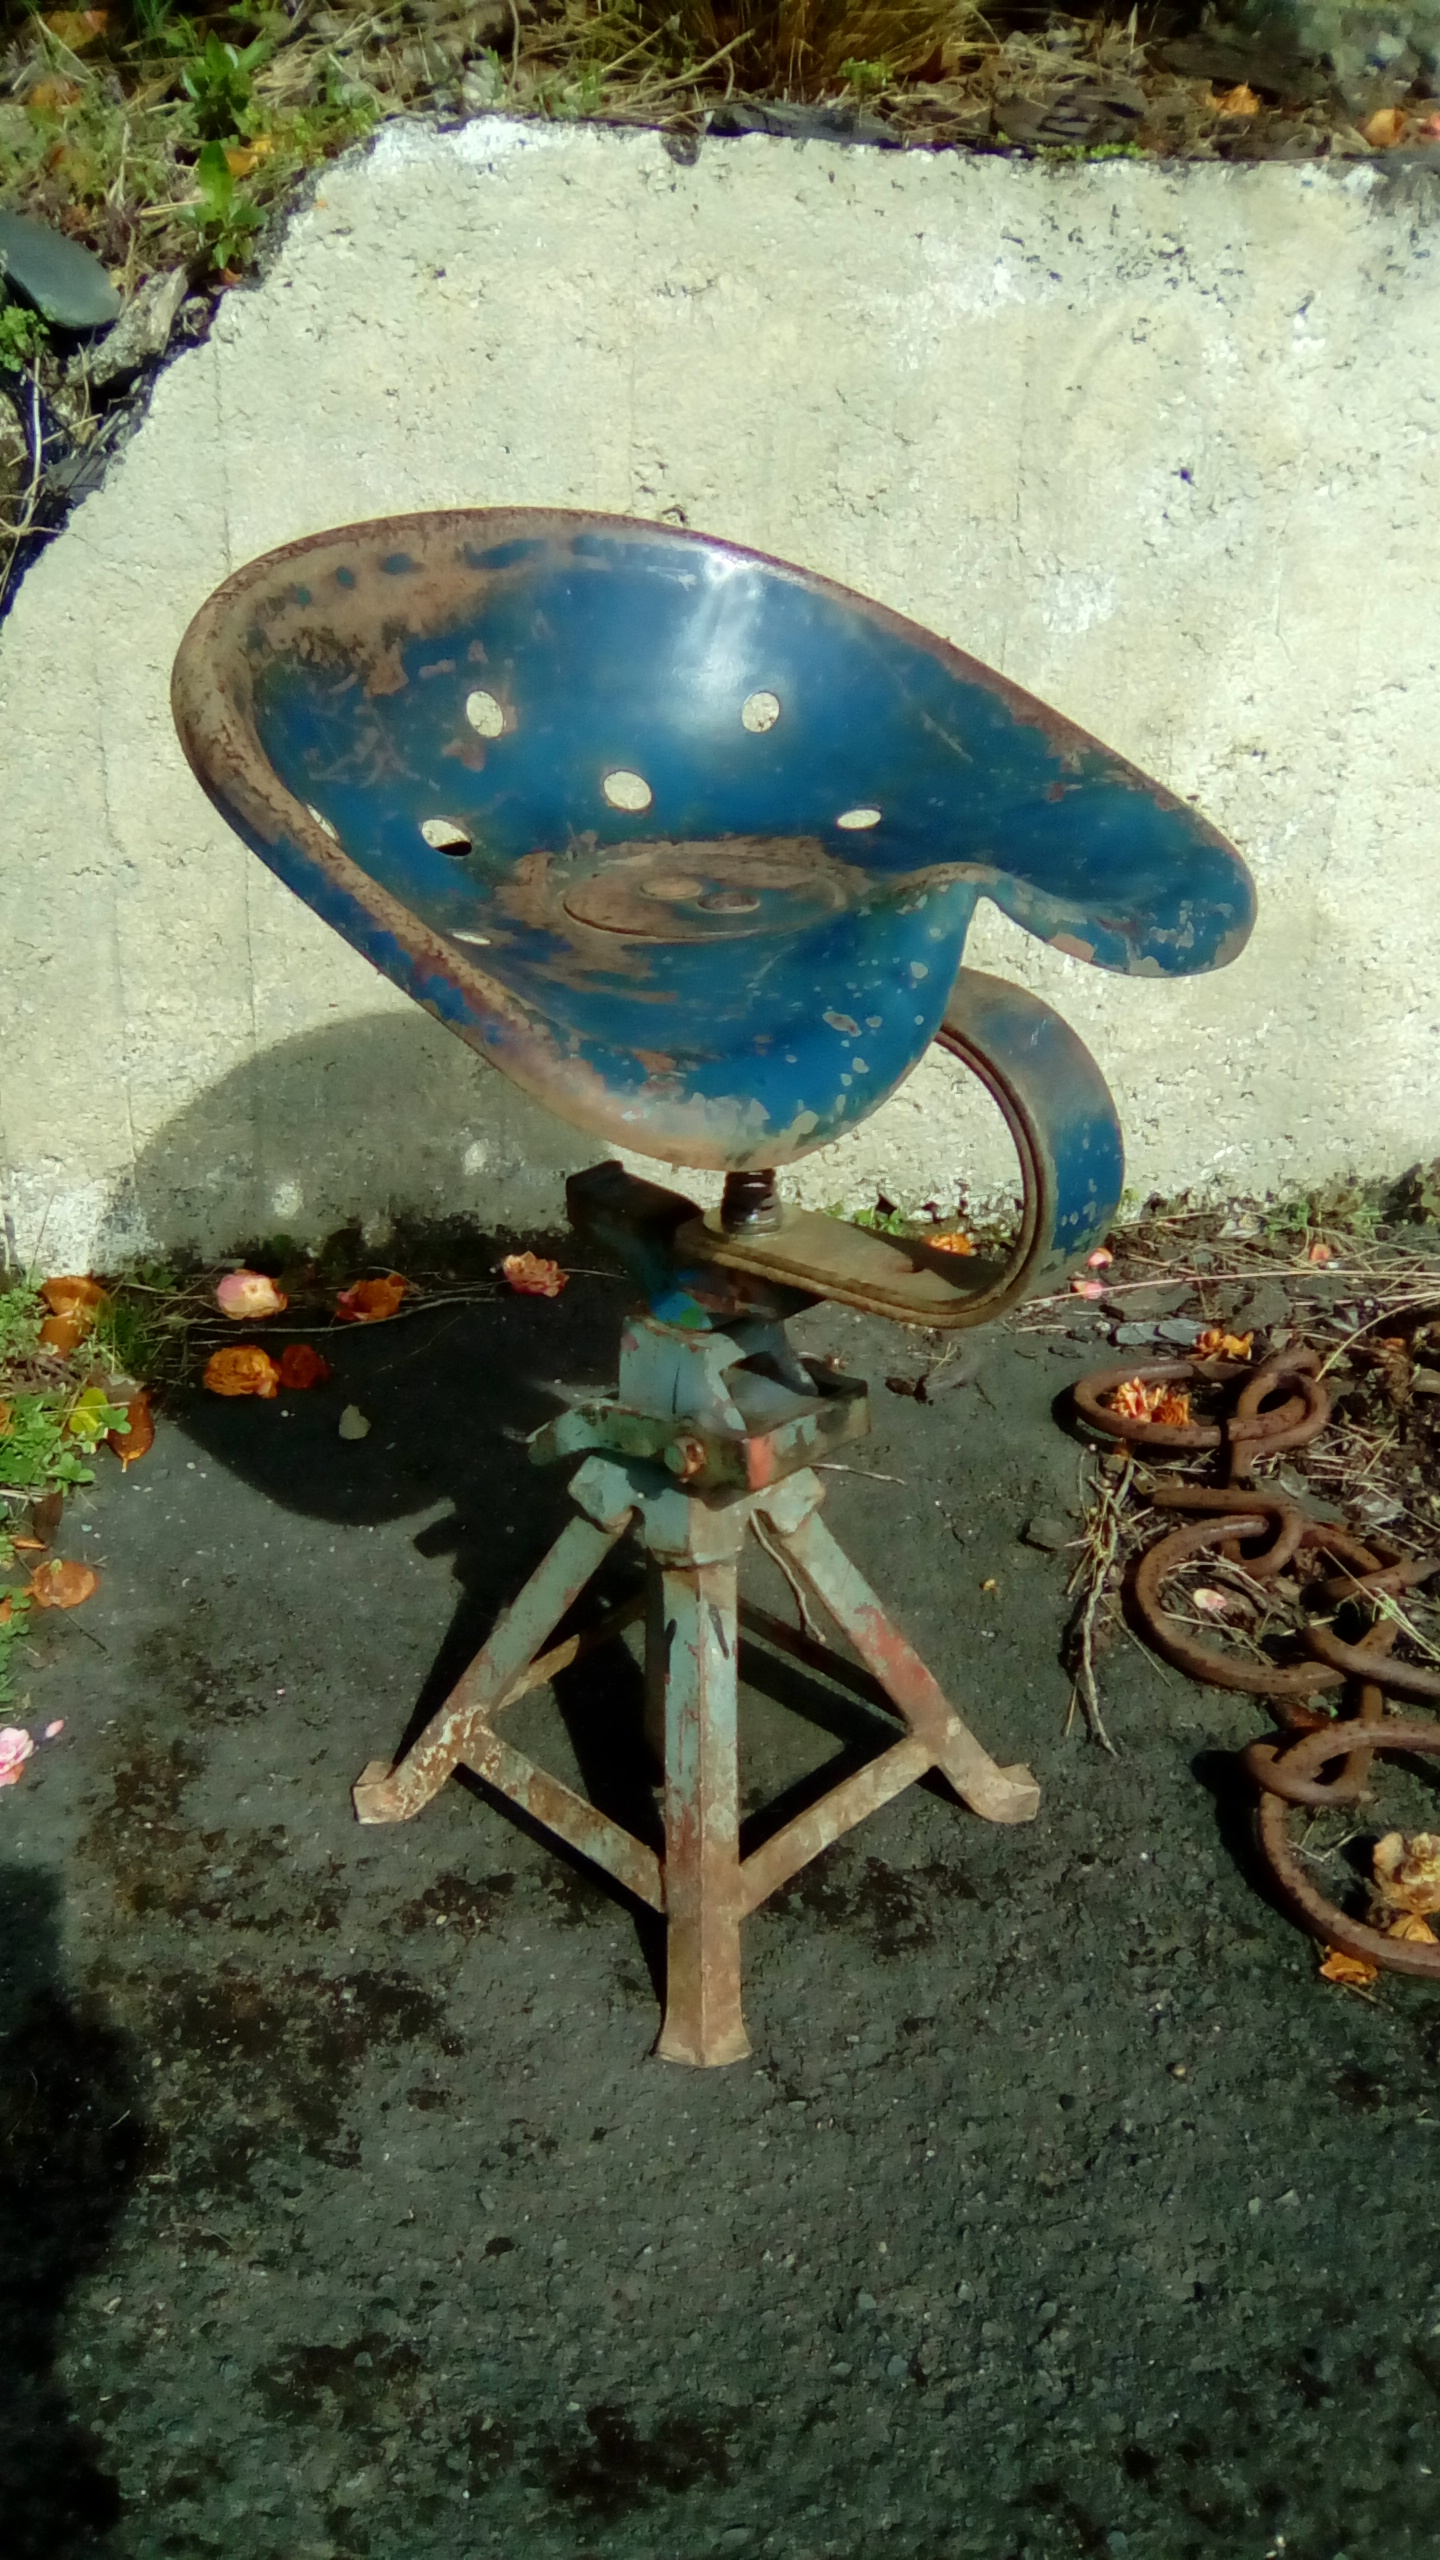
I've got a customer that collects interesting pieces of old farm machinery etc then gives them to me to make something out of. The simple things are sometimes the best. A mock up of a tractor seat and stand And bolted in place and a light wet sand to bring out what's left of the ford blue paint.
 8 points
 -
Have finished the majority of the rust in the doors, just one little hole on the side of one to go. I have welded on a new folded over flangey bit and painted all in there on the photo below. Has come out pretty good. The other door was pretty much the same deal. Another thing I did was make the cowl vent bracket fit this dash. Since it's changed to the RHD dash and I'm still using the LHD vent bracket it ended up mounting in the same place the glove box hinge was, so cut it up and drilled some new holes. That's the vent fully opened, can also be set to be slightly opened. Needs a different seal as the current one is too stiff and doesn't allow the vent to pull down flush, otherwise it operates pretty well. Filled up the two holes that were left at the top of the firewall as well, probably should do the same to those other two. Hooked up the accelerator cable. Then did some average panel beating and bogging to fix where the panel warped when I welded the bracket to the back of the firewall. Might need a bit more work one day. The part that clips in to the firewall for the accelerator cable was a bit loose and needed some sort of spacer, so laser cut out some circlip sort of things. Cable ties are sweet to hook the cable to the pedal right?! It does work well though, has good travel, feel etc. Received the seatbelt mounts back from getting passivated. Today I made up this after work. It is to mount the steering column to the firewall. Making a cone that small out of 2mm stainless without using rollers isn't very fun! Pretty happy with how it turned out though. Don't think I could make the steering column any shinier if I tried! Haha Borrowed a wheel off the Mercury to see what whitewalls look like. They're a bit wider and higher profile than what I'll be using, looks so sweet though!8 points
-
Shout out to GC @Vintage Grumble, sorted me a couple belts, chur my bro3 points
-
.3 points
-
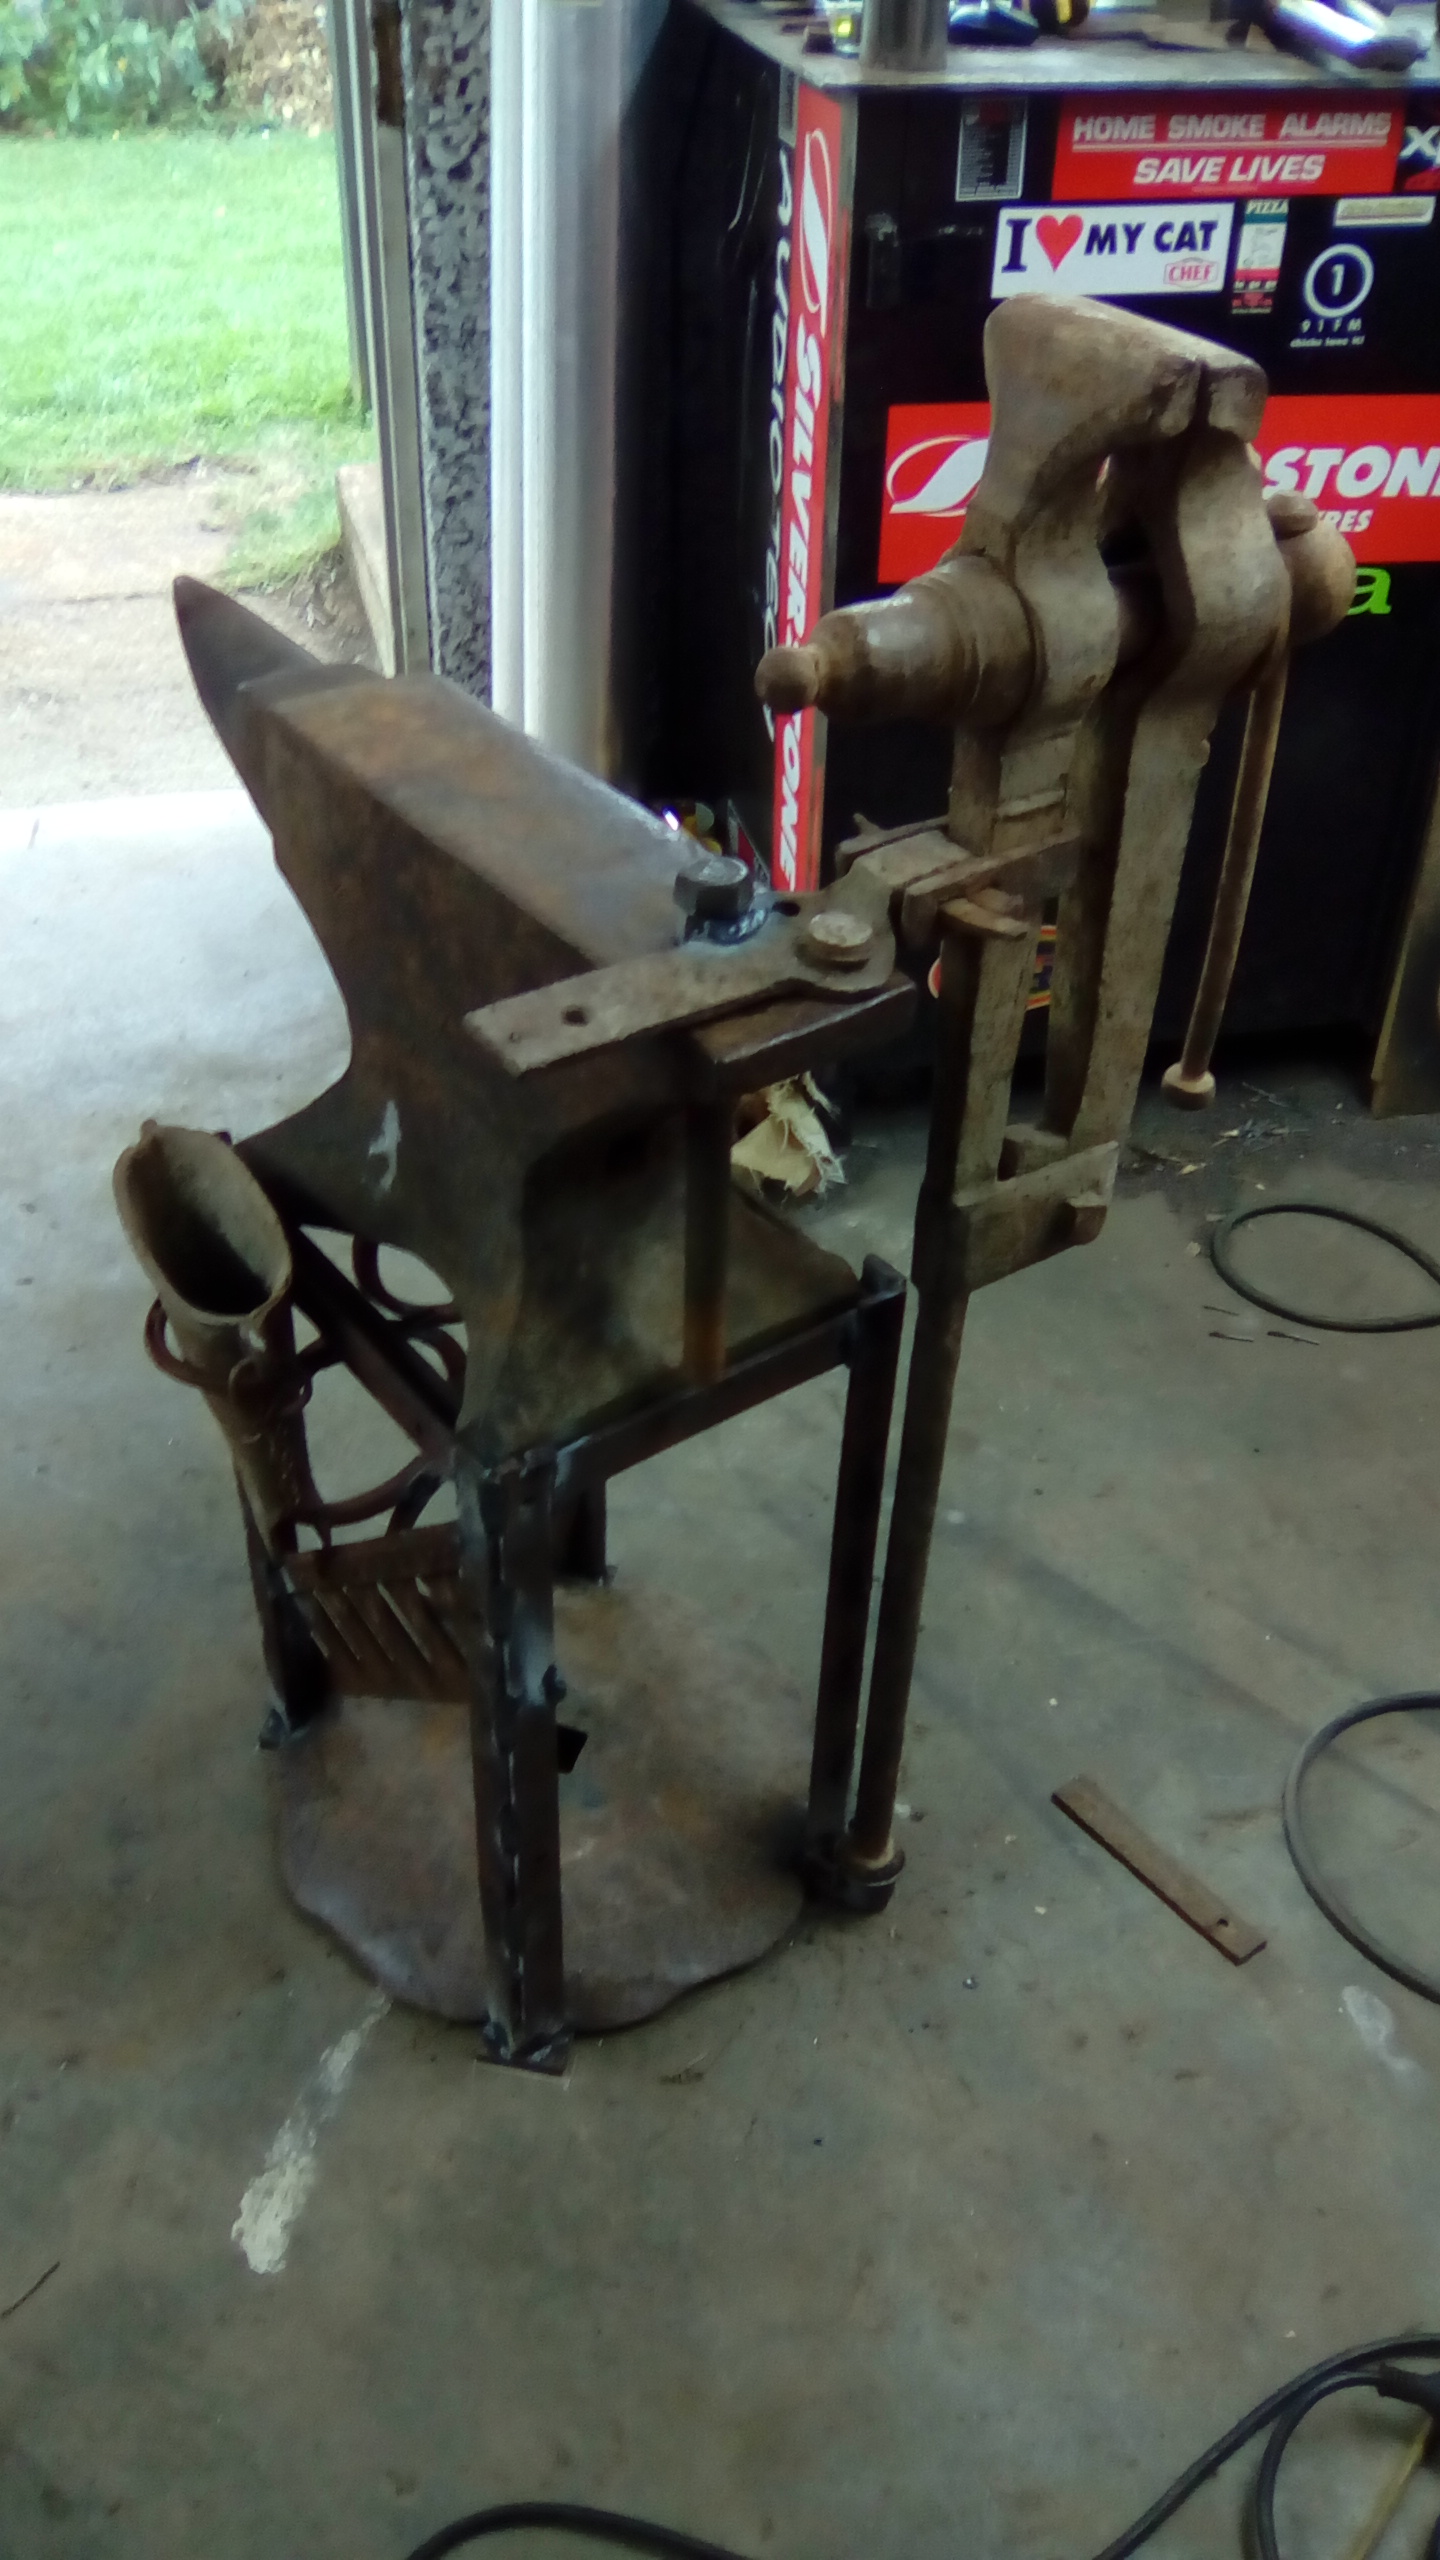
Also this anvil stand, the black smiths leg vice locks into the anvil holes but is easily removable. Stand's mainly made from fencing standards, disc's blade, bits of harrows and an old mower blade. Sorry I do have better pictures but not on my phone. Just realized this isn't a finished picture, a bit more bracing went in as the anvil was about 90-100kg. Got good muscles building this
3 points
-
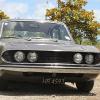
This is actually my wife Bex's car but its too cool not too share with you guys. So we bought this old chevy recently. It came in from San Fran, California. Rego ran out in may 2016. Bit of a project but its a complete running driving hardtop. Bonus is its a factory 396 big block TH400 optioned caprice and factory black paint as well, making it quite a rare car. Its original as well, never been messed with except for a pertronix ignition setup. Plans are to fix the rust in the front floors (standard on these haha) tidy the mechanicals up and give the interior bit of a freshen up. Not painting it though, the original rough original factory black paint rules! Pics of it in the usa before it came over recently Discuss here //oldschool.co.nz/index.php?/topic/53695-68-chevy-impala-caprice-396/?p=17429052 points
-
Thought i better show you lot i havent been a slacker and basically share the misery of what I've been doing on this nugget since the last post Rear window channel was found to be fully fucking rusted when i removed the screen. I cut another section from a pontiac wreck and grafted it back in, along with repairing the trunk lid seal lip that was totally missing. Chop chop, weld, grind etc.2 points
-
New stuff! Webike order with headlight/speedo combo for the dax (ali light housing not plastic like the Chaly one and a 140kph speedo.....), also some 110/80-10 Bridgestone Molas ML50 tyres for the 3.5" rims going on the Chaly Tyres looked quite skinny compared with the rims, its seated on one side of the rim. (Yes im assembling them on the dining room table, wife is out) Compared with the 3.00 -10 pirelli tyres it came on Looks sweet though, had to remove front guard is tyre is too wide. Also will need to trim the chain guard as that sits solidly on the tyre. If I went to a 4" wide rim Id have to shave the bracket that holds the rear drum in place and make a new bracket Now I just need to get it running reliably (thinking the coil may be a bit sad), get a new front guard that mounts differently for clearance and wire up the lights. May also lower it, it sits about right with me on it, just looks high when on the stand2 points
-
Howdy, Have been doing a bit on this old girl while being on holiday lately, even managed to get a WOF! Anyway, whats been done; -Changed to a Link G3 (super easy to use compared to the megasquirt), have tuned it reasonable well so the mixtures are all safe. The ol' 4ag goes surprisingly well! -Fixed up and resprayed an old dash in the nice porno beige. -Mounted one seat.. -Cut off the terrible exhaust tip and made a cool stainless rod gearstick! -Random little things for a WOF. This thing is super fun to rip around in, tis constantly picking a wheel with the little 165's and open spinner! Is crazy loud inside with all the sound deadening removed and no seats ect, ear plugs are almost necessary. Am kinda unsure if I should pop in a J160 and a decent diff, or sell it. Hmmm. Here's some pics!2 points
-
By the way..2 points
-
Redone the gusset on the front end because I wasn't happy with how it looked, should be much stronger now. Made a start on the handbrake linkage thing. Used some $2.50 block bearings from aliexpress, as I was not keen on paying over $100 for two in NZ that weren't even the right size (needed 12mm ID ones and apparently 12mm is a very uncommon bearing size) so would of had to sleeve 20mm ones to fit. The china ones seem decent enough for what they're being used for. My dad had an aluminium air bag tank that he was planning on using for another car, but it fits this perfectly apart from the mounts being on the back instead of the bottom. So might buy it off him, cut off the mounts and re-weld them in the correct place. Made up some more plates for seat belt mounts, this time for the floor. The retractor bolts onto the back and then the lap belt bolts on to the part sticking out. Also has a doubler plate underneath the floor with some captive nuts. Stripped everything off the doors to see if they needed any repairs. Yes they did. This is the worst of the two. Was hidden under a rubber seal and the strip that holds it in place. Left side door isn't as bad but still needs some patches as there was a few rust holes. Found some on the outside skin which is a bit annoying, but the patch shouldn't be too visible anyway. My parents are heading off to America soon so I made up a list of all the parts I need. Everything is so cheap but it adds up quickly. Hopefully it will all fit in their suitcases.2 points
-
2017 Event - A few of us are planning to ride on smaller bikes from Whakatane(ish) around the East Cape and back over 3 days, at the end of November when its nice and warm but not too busy. No requirement on bikes, something unsuitable and small is preferable though. I'll be on a CT110, VG his NBC110, couple friends on scooters(~50cc). Looking at about 600km, about 200km/day. Thinking a riding speed around 50km/h should give plenty of time for looking around and activities and sightseeing during the day, but not too fast for the smaller bikes. Where possible the route is off busier state highways so there will be some longish sections of windy gravel, but little traffic and no rush means you'll be fine. Accommodation around Whakatane, Hicks Bay, and Gisborne should be easy to arrange, be it campgrounds, cabins etc. There will be a ute and/or trailer that can carry fuel/luggage/spare bikes as well if anyone wants/needs to sit out any parts. Coast trip Total by John Bell, on Flickr Things to see and do on the route may include but not be limited to Serenity Lighthouses Wharves Churches Time travel. Horses, all of the horses Gangs Waterfalls Slip'n'slides And some of this You got 3 months Holla at cha boy, what do you reckon?1 point
-
I went to a 17 for cheaper/free tires in good sizing (215/45r17) as i couldnt find tires in the compounds i needed in an 18 no matter how hard i tried. Ill likely go 17x9 in the rear in a more aggresive offset soon and run them as dailies, and these as drift.1 point
-
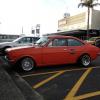
My parents spotted this in their travels in the USA, so sweet!1 point
-
A logic level MOSFET is your friend. If you're switching inductive loads, make sure to put a diode in parallel with the load.1 point
-
14th or 15th of October? That date could work well1 point
-
Transistors?1 point
-
and I'm basing it on this build from the www.Avenger.co.nz Forums have also just been informed about uprating the rear Cylinders to match otherwise risk them being over worked anyone have any better info or specs to match? Application will likely be Track based activities for the Racecar & less Gravel / rally1 point
-
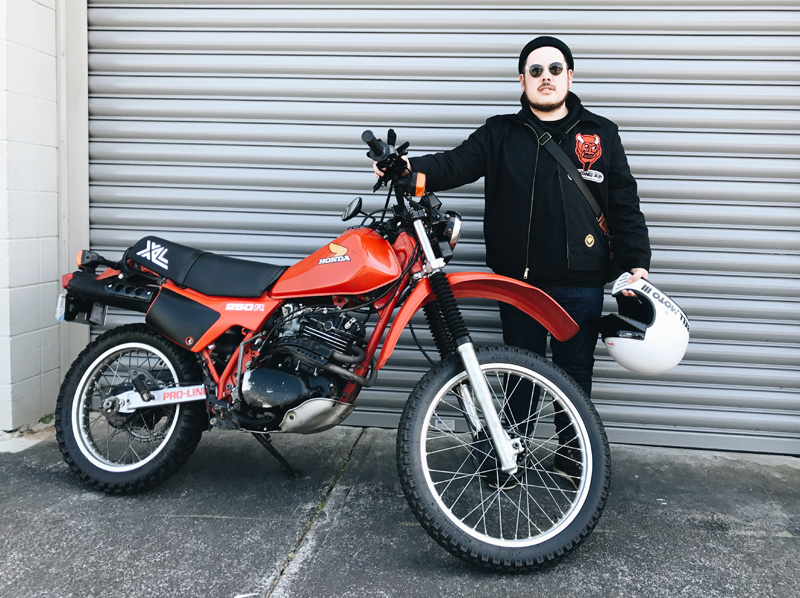
Yeah man, bought it from Motomail for $499. Not too much more expensive than online - plus I wanted to try one on first.1 point
-
Showed a borrowed S13 rear subframe the the undergarments of my triumph. It looks feasible... I used the diff output flanges as my reference point. The rear mounts on the car just need to be moved back 30mm, shortened and moved further apart, don't even need to cut into the box section the existing mounts are attached to. And make a couple of 'scallops' into the boot floor to clear the rear mounts on the subframe. The front mounts are actually about 50mm lower than the floor, so the floor/sill/inner guard would need some reinforcing and mounts built down to the subframe. Here's a shit picture. The subframe would be 110mm higher than this photo. There is a bracket there preventing me from moving it higher, and I ran out of blocks of wood to stack on the jack. I've drawn in the mount, it would actually be partly in the boot to get it back far enough. Those dashed lines are where I would make a scallop thing into the boot space. Aaaaaand I need to narrow the subframe 200mm, and make custom driveshafts, like @sheepers did. But, first. keep fixing the rust. sigh.
1 point
-
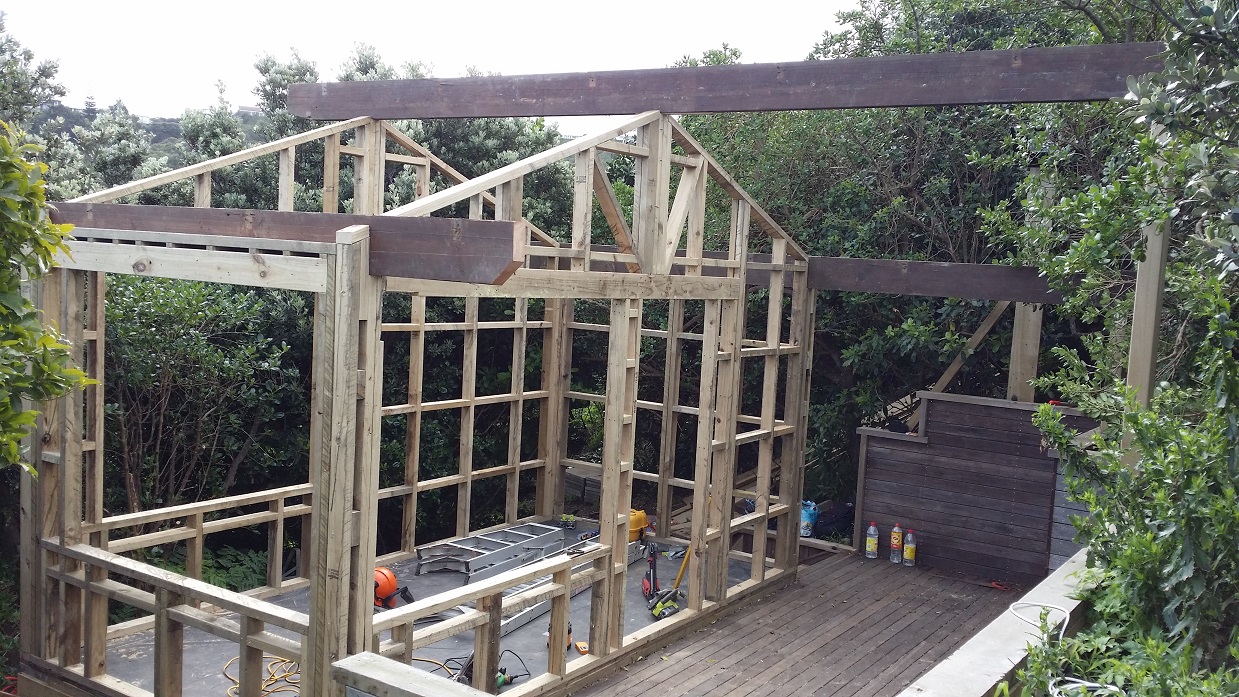
Hey mate @yetchh Me and the old man just bought a old shitta in Patons Rock. (G bay) 800 squars.... but it's just a concrete water tank and a 2 room tin shack old batch. ah well I know what i'm doing this summer.1 point
-
I'm 100% in, though I haven't sorted accommodation yet.1 point
-
I'm also glad you ended up buying this car. it saved me from buying it1 point
-
Thats a sweet helmet! did you get yours from Nz?1 point
-
I called in to the painters to see how busy he is. They have 59 caddie, mid 60s VW, and a why would you bother rusty 57 Chev on top of a heap of Jucy rental vans. I'm booked in for 2 weeks away to bring the car in. Because mine is easy and I have money I get the jump on the others. Now I have a dead line to work to things will get done.1 point
-
Have been uber slack for the last few months, things gt too hard. Finally got around to buying some engine mounts (arrived today), after the replacement ones sourced from Japan didn't actually exist. SO have some out of a 260c which are very similar and will/should bolt to the car, but possible some fiddling of the engine brackets to get it sitting right as they are a bit taller. So this weekend will look at getting the flywheel and clutch etc all bolted back up, and have a crack at putting the engine back in the hole. Progress. Hopefully.1 point
-
I've done absolutely nothing more on this bike, BUT the XL is now road legal so that's progress I guess.
1 point
-
Diode probably not really necessary, there to protect against any back EMF from the automotive circuits. Battery should basically act as a massive sink and absorb any spikes from large motors such as the starter but I already have a few 1N4007 diodes lying around which should do the trick. I'm generally not stressing about protection etc, if the rev limiter fucks out then I won't be any worse off then I am currently. I'm not planning on revving to hit limiter every time I drive it or anything.1 point
-
UPDATE! "FIVE UJs later", at least a hundred calls and txt, a mince and cheese pie, a bag of service station lollies with jet planes, and (this will make you laugh) a 1/2" drive UJ with 29mm socket later, we FINALLY got the Tunland back together and ready for some more drifting! Again, a MASSIVE thank you to @98cc and his family for their amazing hospitality! We were extremely lucky and fortunate to have made our way to their casa. It was very difficult to leave! Not only did they give us access to a full workshop, they housed us for the night, fed us, offered us a very "rare" opportunity to see some amazing things we would otherwise possibly never see in this lifetime, and shared some good old yarns from all things Villiers to pregnancy and tomato sauce! The highlight (definition - an outstanding part of an event or period of time) was when @98cc and I popped into a parts store and asked the chap if he had any listings for a UJ with a 29mm cup size. He massaged the keyboard and vanished into the showroom, only to return with a 1/2" drive UJ with 29mm socket! it was quickly evident the UJ we presented to have replaced was not an indicator as to what we needed So after educating him as to what a UJ is, helping ourselves to the catalogs behind the counter, and showing him how to search items on their system, we left in haste. It was however great to have a chuckle amongst the chaos. What a fantastic weekend. Cant wait to do it again! Which could possible be within the next 50,000km if not sooner! Thanks @98cc you are a LEGEND!1 point
-
Today my flatmate (mott) and I drove in to the Kaingaroa forest around the Rangitaiki area of SH5, then along foresty/public access roads to Murupara. Few side adventures to drive up/down things and along a river for awhile. Good day, got a new personal best fuel economy on the drive back, 15L/100K. Lowest I've ever seen it. We saw this abandoned building in Murupara, it had a real bad vibe about it.1 point
-
Fully glued in. Much easier to weld without the primer in the way. Started the fun time task of grinding down the welds. Got pissed off with the power file cause the 40 grit belts kept catching on the join and coming apart. I went through 5 of them in about 20 minutes. Mental note not to buy the flexovit ones again. I think the problem is that they butt join it with some backing tape. It would be much stronger if there was an overlap, so there is no join to catch. The bosch ones I had were good, but I can only find the 80 grit ones which take ages to grind down the weld. Has anyone used these? Any better than the flexovit ones? https://www.trademe.co.nz/building-renovation/tools/power-tools/sanders/auction-1420958943.htm
1 point
-
Nothing wrong with that rate of flow in my (super amateur spec) experience1 point
-
"RS-DIESEL" stickers on the rear doors would be a laugh.1 point
-
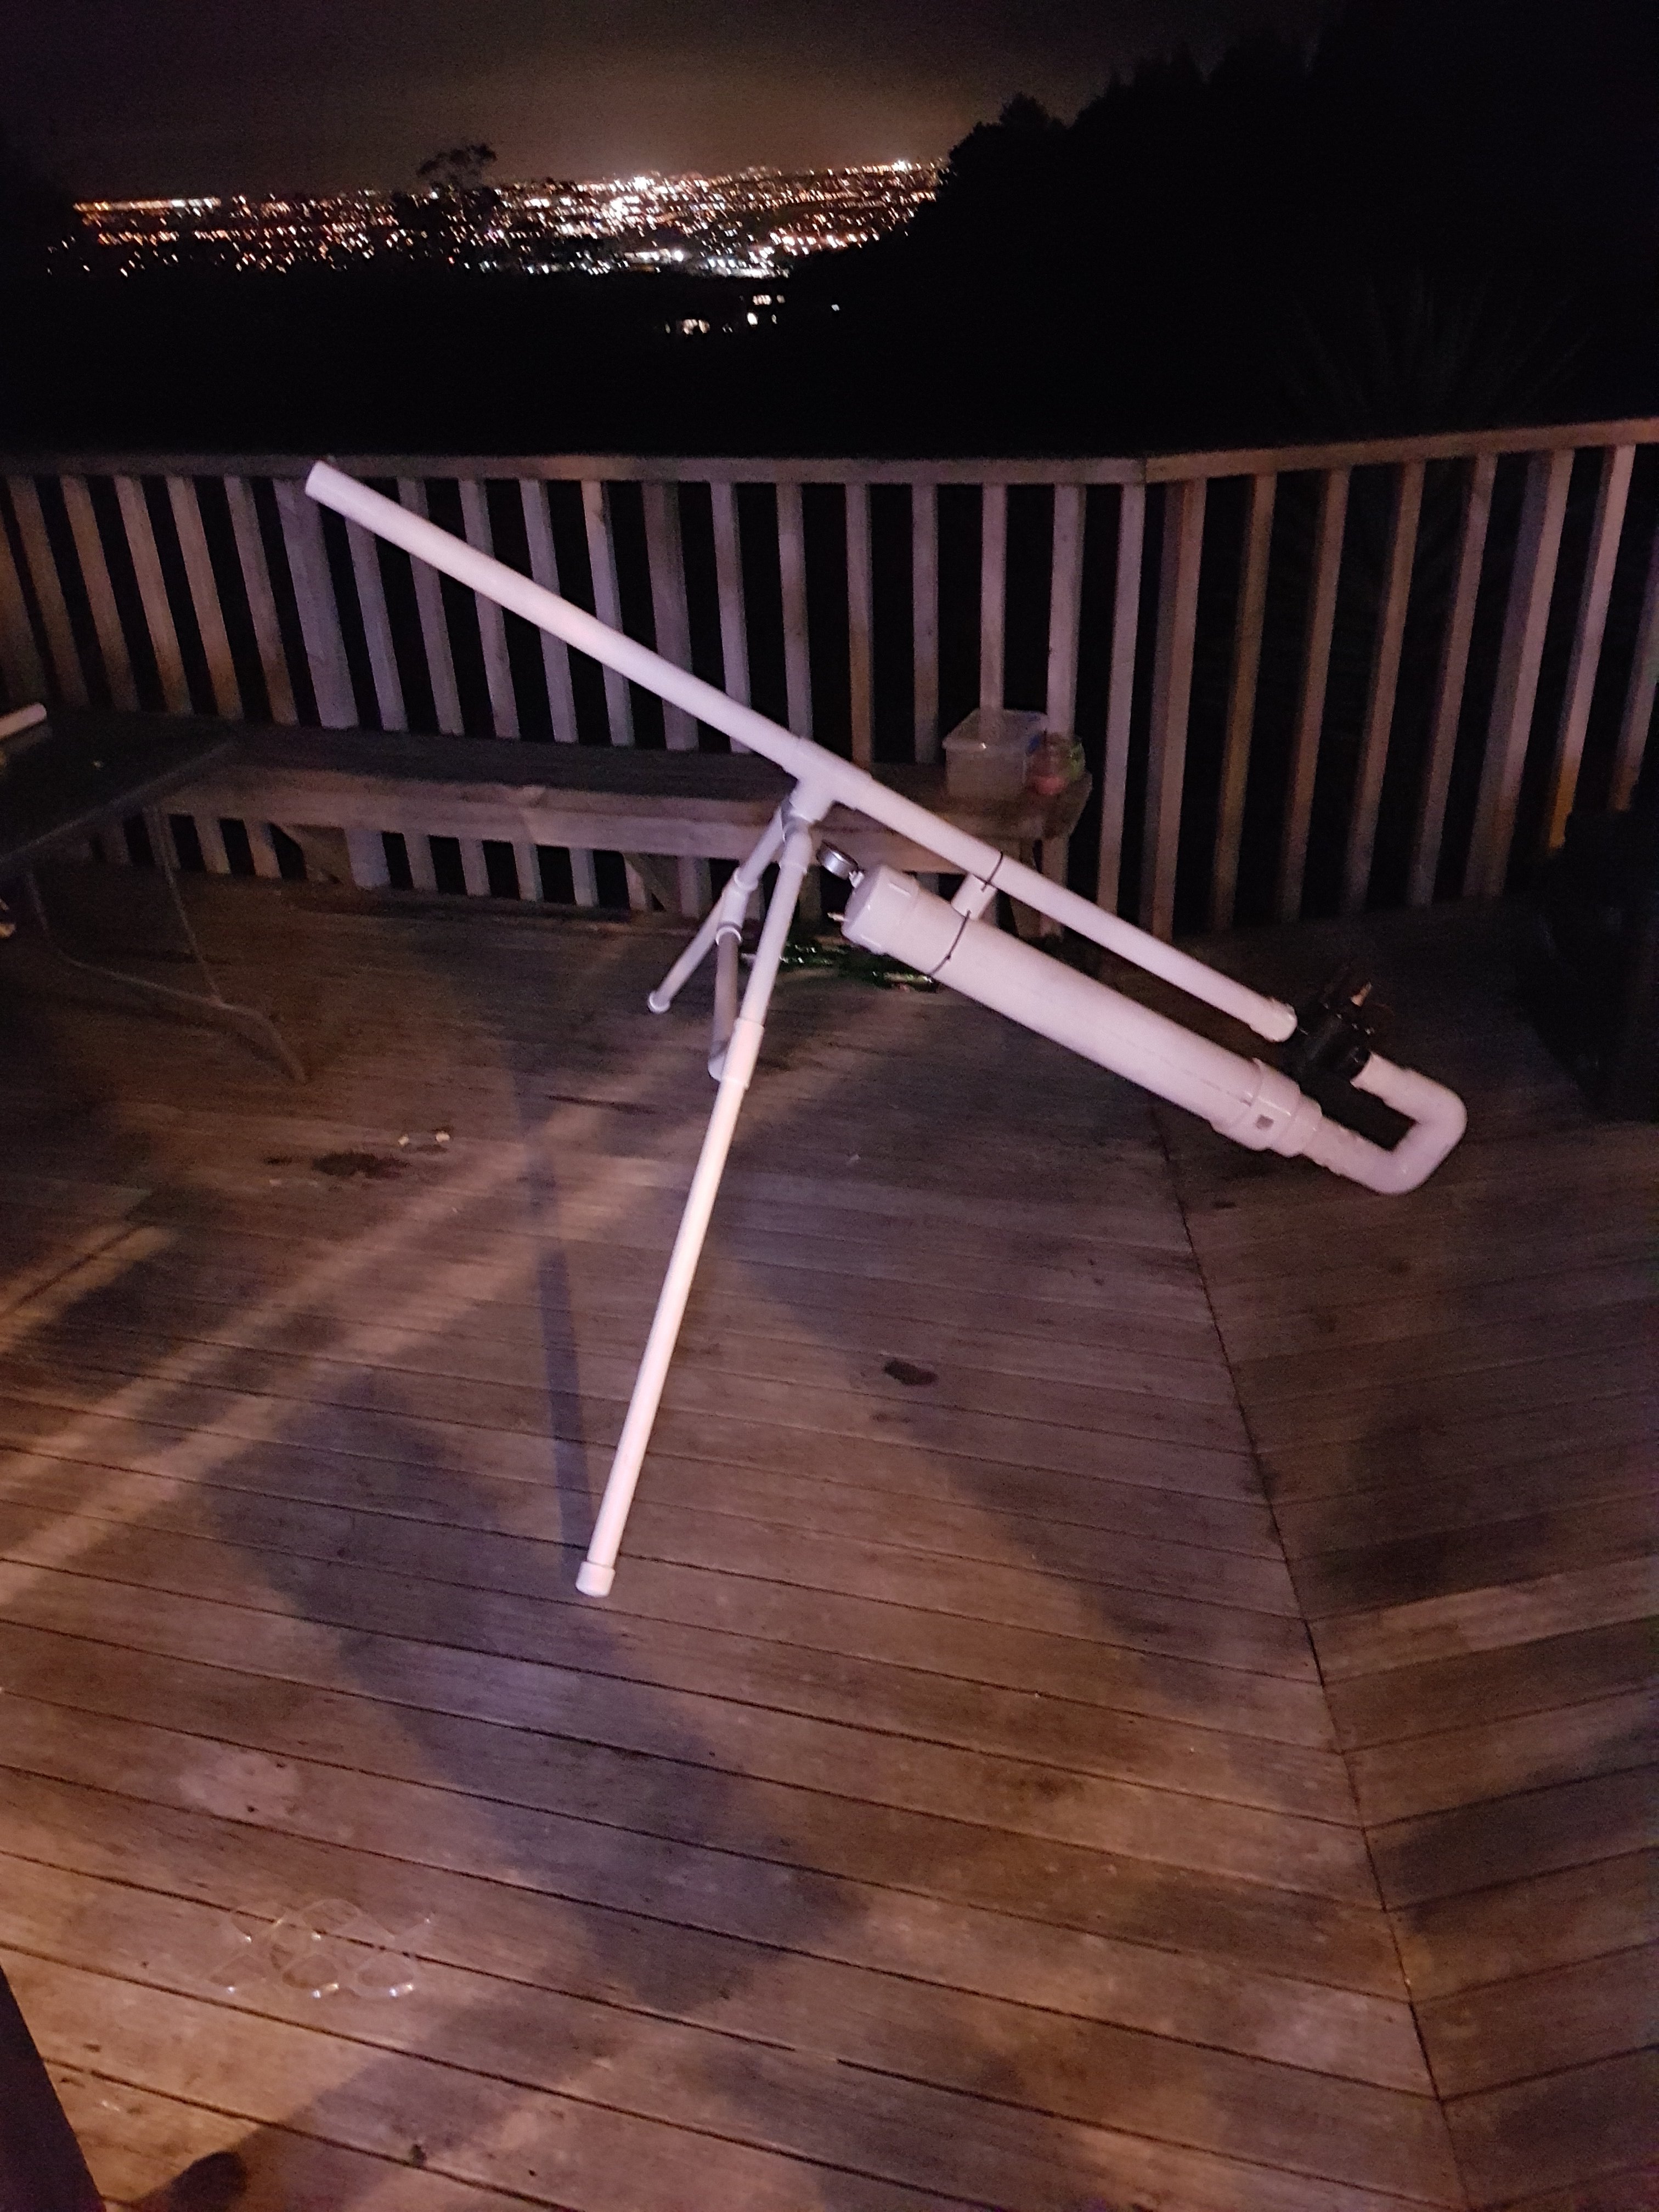
Had a pile of pvc pipe lying around, so decided to put it to good use. Made a bait cannon for surf casting. Made from high pressure pvc and a irrigation valve. Makes a huge noise when it fires. Powered by a bike pump. Had it up to 80psi. Couldn't see where the spud went.
1 point
-
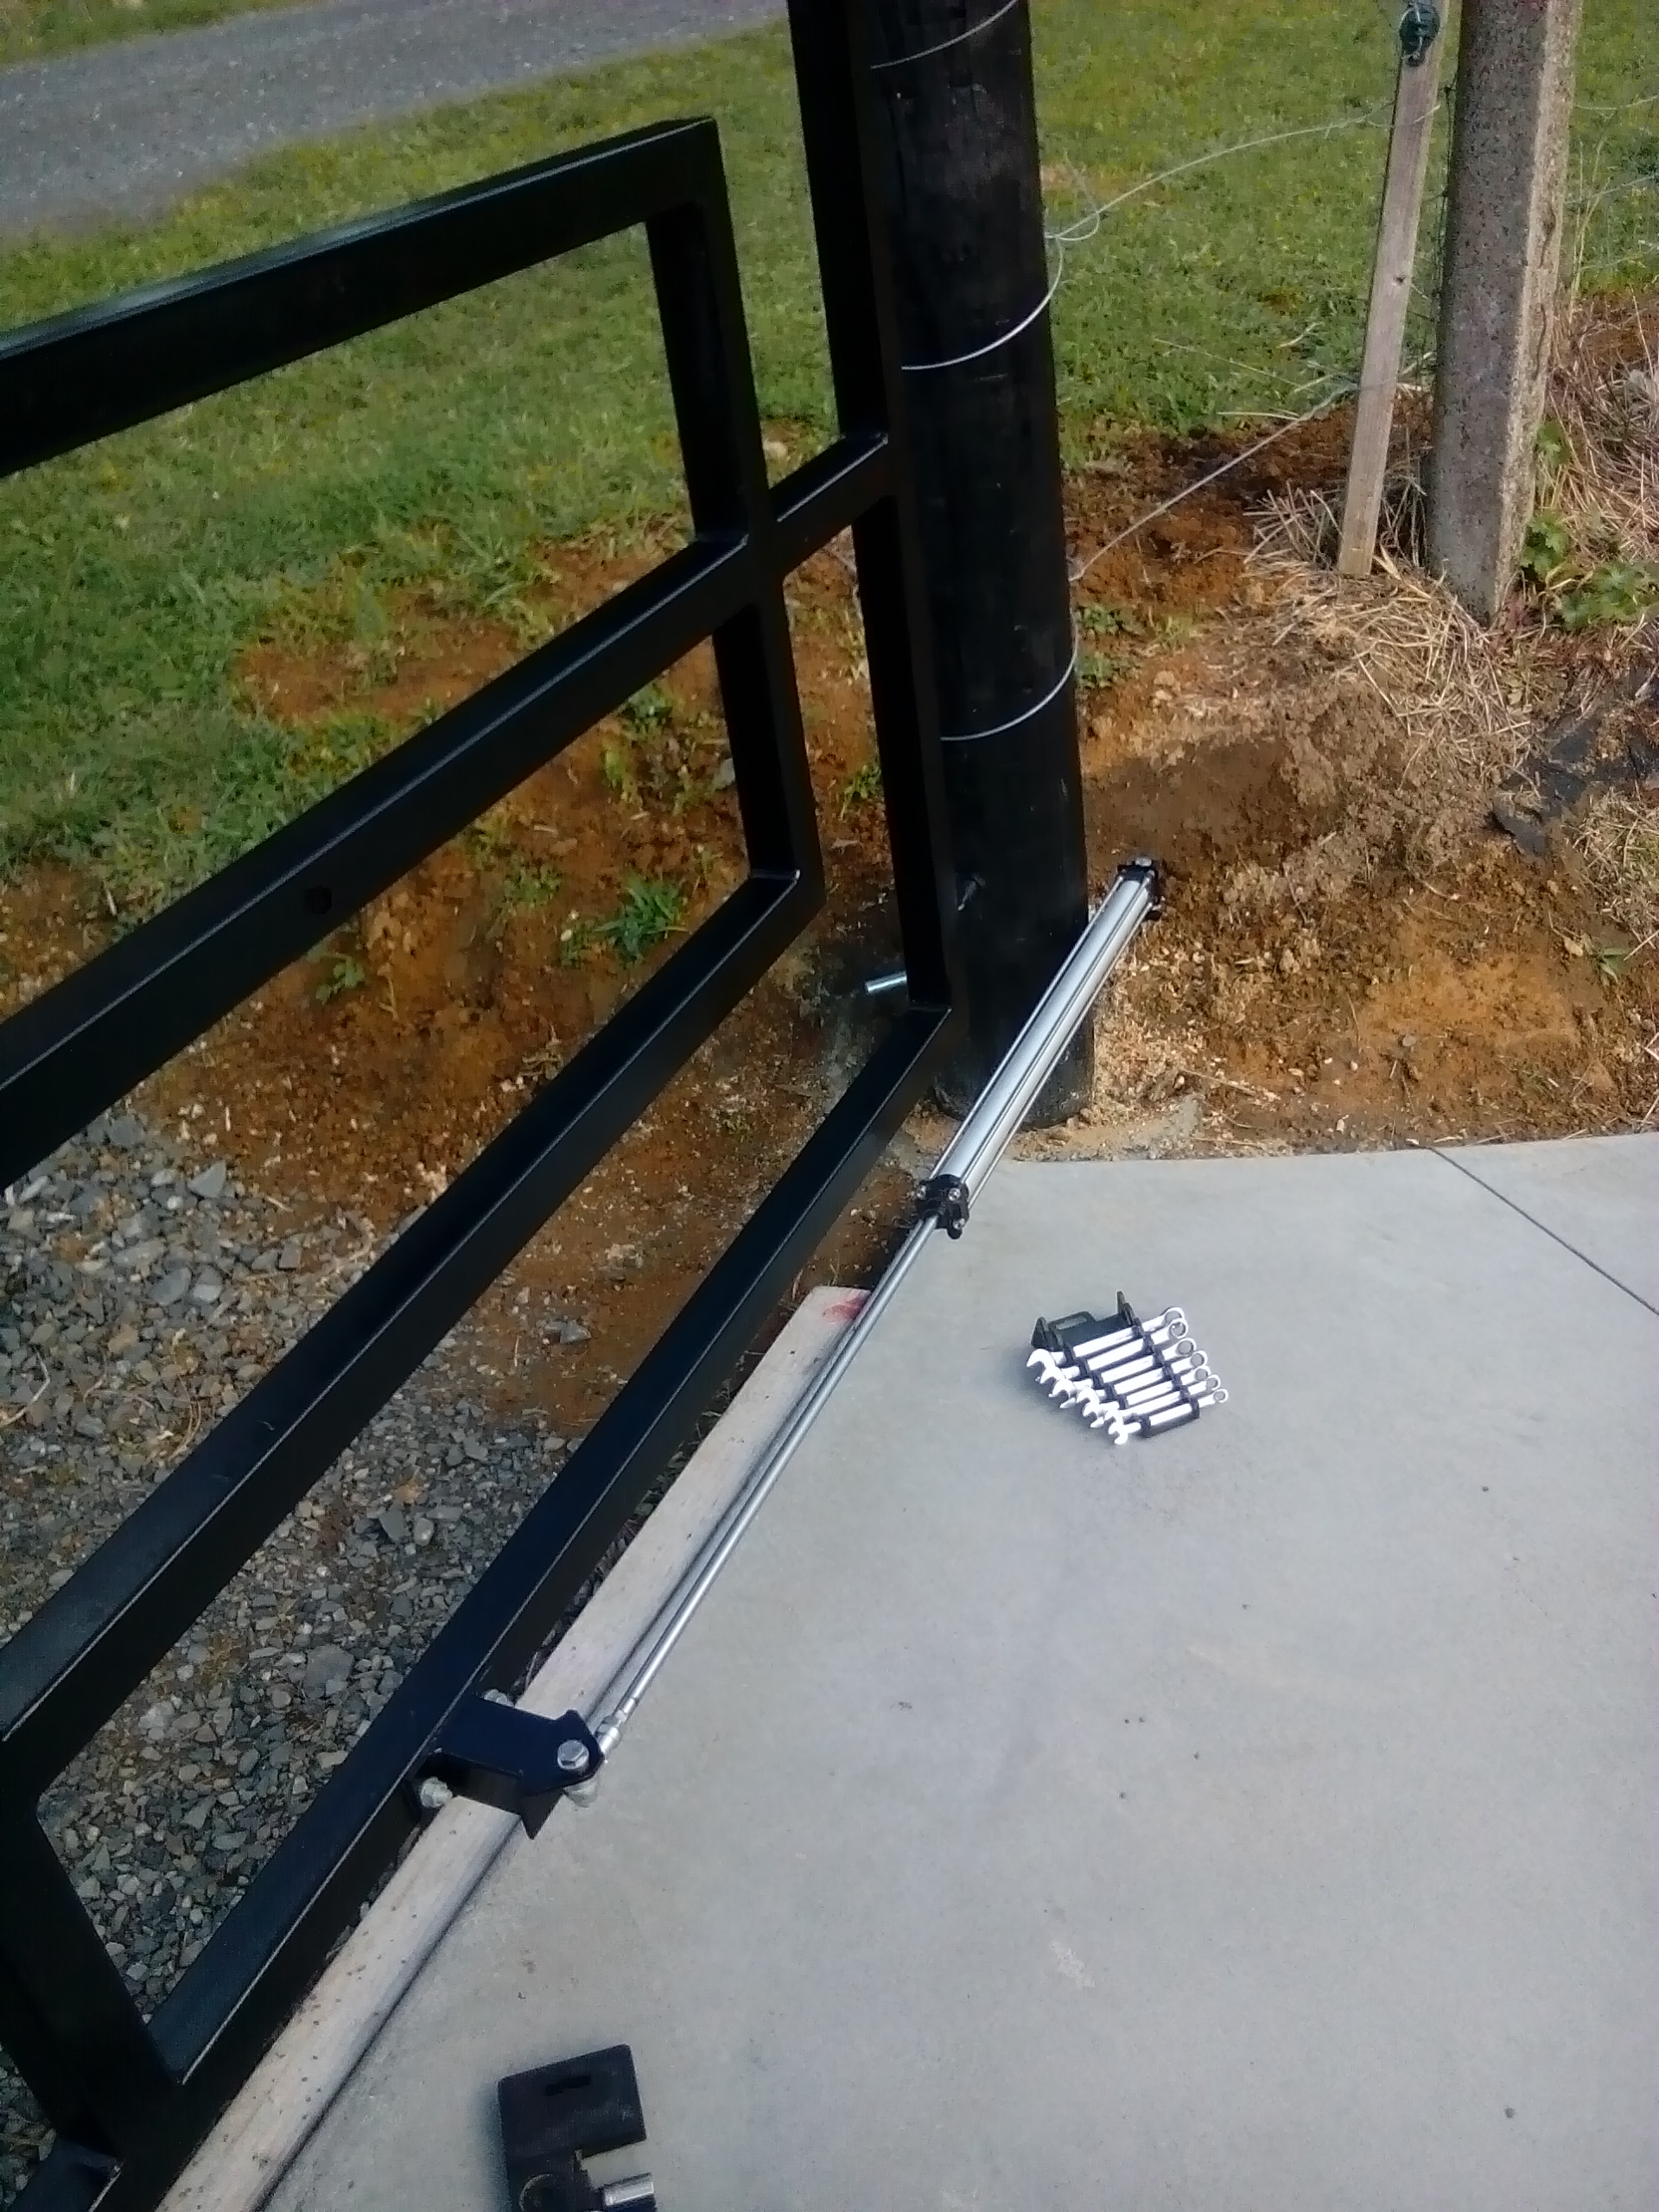
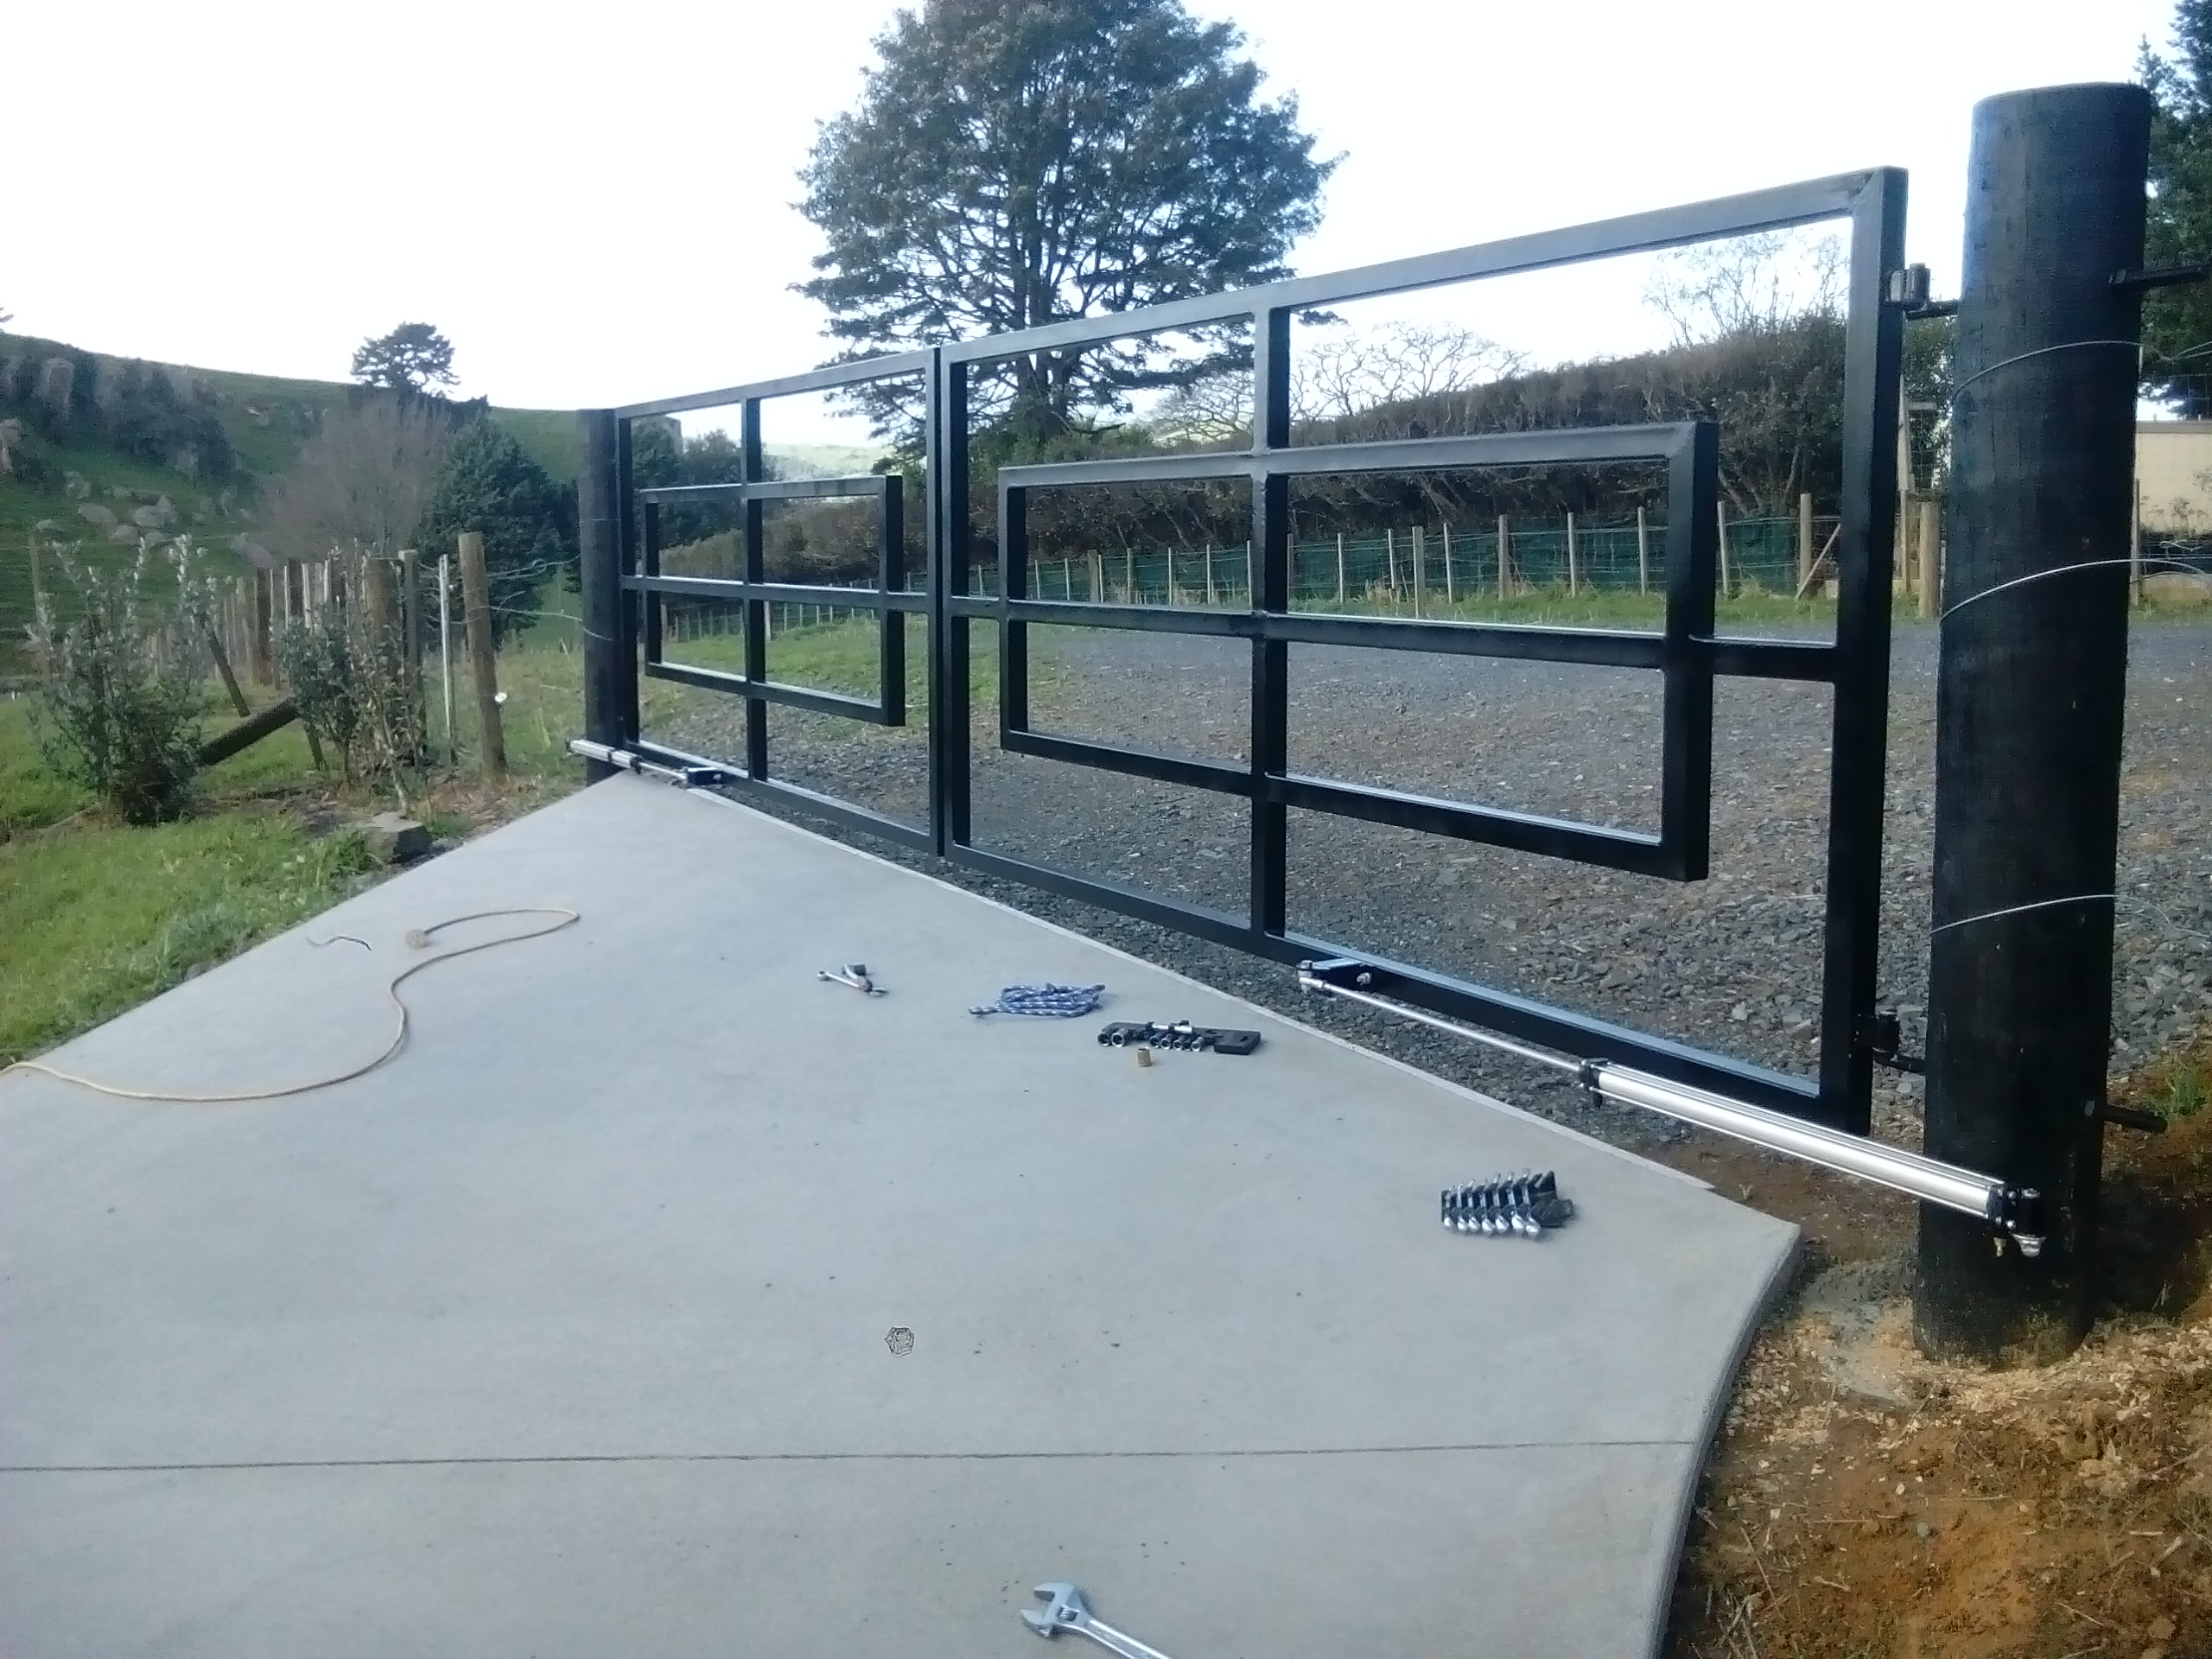
Pneumatic cylinders fitted up. The one on the left has a dummy barrel added to try balance the symmetry better, as it only had a 190mm stroke. They swing and stop perfectly, which was fantastic as all that maths paid off big time. Just got to get a few pneumatic fittings and some air line and it will be all go.
1 point
-
So dishwasher packed a sad. Dreading expense I googled the fault code, which indicated a faulty heating plate, which would probably be uneconomic to fix unless I faffed around finding second hand parts. I went through the diagnostics, and sure enough plate not heating (you can trigger it on/off via sequence of operating buttons). Testing for resistance the element tested out ok, so possibly worth fixing. It's an F&P dish drawer (early one, been in the house since we moved in) and I was really surprised how user-friendly it was to pull apart. A couple of pins and everything dropped out/unplugged for inspection. Pulling the main board and removing cover plate revealed obvious burn marks indicating a fault at a 24V/230V relay... And cleaning it with Contact Cleaner revealed the disconnect... As the pin had burnt off I looked at sourcing a replacement relay. Of course it was an obsolete item, but Mr Ebay provided one for $10 US delivered. Bit of a time delay to get it but not a major as other drawer operates ok while the guts are pulled out of the faulty one... I got to use my Aliexpress octopus thing, bit of solder action and wahayy, I am an appliance god. Houswives everewhere will offer me sexual favours in awe of my skills... [Disclaimer] apparently somebody wanted a shiny new one instead of faffing about for a couple of months. Sexual reward withheld despite silly bloke feeling rampant/chuffed with himself...1 point
-
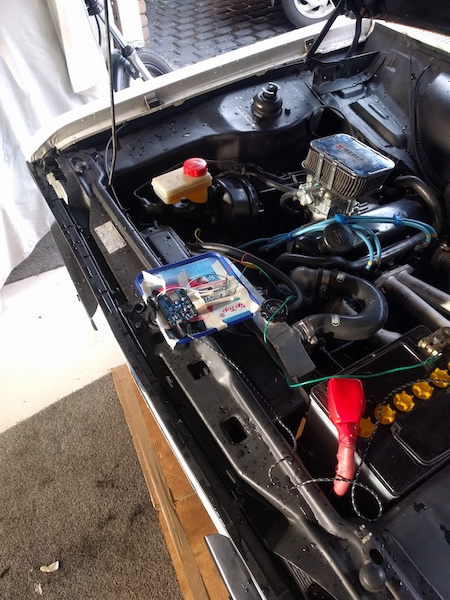
Did some work on this, pretty happy with progress so far. I've smashed together a basic circuit with some diodes and resistors and am able to fairly accurately and reliably read the engine RPM (+/- 100 rpm) using an Arduino. The circuit is connected to the points output/coil negative terminal. I've got an arduino nano ordered off Aliexpress which should do the trick nicely. I've ordered a couple of these https://www.aliexpress.com/item/5V-Low-Level-Trigger-One-1-Channel-Relay-Module-DC-AC-220V-Interface-Relay-Board-Shield/32801667044.html and am planning on putting the relay between the points output and the coil. The relay common will connect to the coil -ve. The normally closed contact will connect to the points, the other contact to GND. So with the arduino I'll be able to pull the coil -ve to GND, essentially cutting spark. When the arduino is not energised everything is wired as normal, so if there are any issues I can just pull the power to it. I will cut spark for a time somehow proportional to the RPM. Will have to do some testing to find out exactly how long this needs to be, unless anyone has any suggestions? Any idea what normal rev limiters use?
1 point
-
Vaguely related personal sharn. We fitted 4 gearboxes to the same Escort on four consecutive Sundays. On the fifth Sunday we fitted a Capri gearbox. The next Saturday night the car got barrel rolled. Rotor arms with a spring and weight used to be available that would earth the HT side at a pre set RPM. I was working in a NZ new petrol Patrol today, it had one factory. You could modify one to fit your Escort distributor?1 point
-
Exhaust is finally all finished fab wise. Got around to doing the rear most mounts. It's pretty rigid now and hopefully shouldn't hit anywhere as there's some quite close clearances. Pulled the cab off again to do some stuff. Started by scraping off the remainder of underseal, that took quite a few hours. Then finally got around to finishing the trans tunnel. Made the holes in the corners bigger so some patches could be welded in and then just gave all the welds a sand to tidy them up. No idea why the firewall rusts so quickly where the etch primer has been sanded off. Nothing else seems to rust much. Crappy primer maybe? Will sand it all back to metal one day anyway and use some better stuff. Fixed the rust holes in the rear cab corners. It's in pretty good condition compared to most! Seemed to be missing some photos of those rust repairs but it's all done now. Whilst the cab was off it was a good opportunity to pull off the shackles that mount the back of the cab to the chassis and give them a tidy up with new bushes. Pretty surprised at how well they've survived, the shafts that the rubber bushes go over were still shiny steel! Gave everything a sandblast and then sanded off all the edges so they're a bit nicer. They made some cool looking sparks! They're all painted now, photos to come soon.1 point
-
Ok. Update. Had a mini break but back into the Capiche Started with the trunk floor : Oh, Hai there!1 point
-
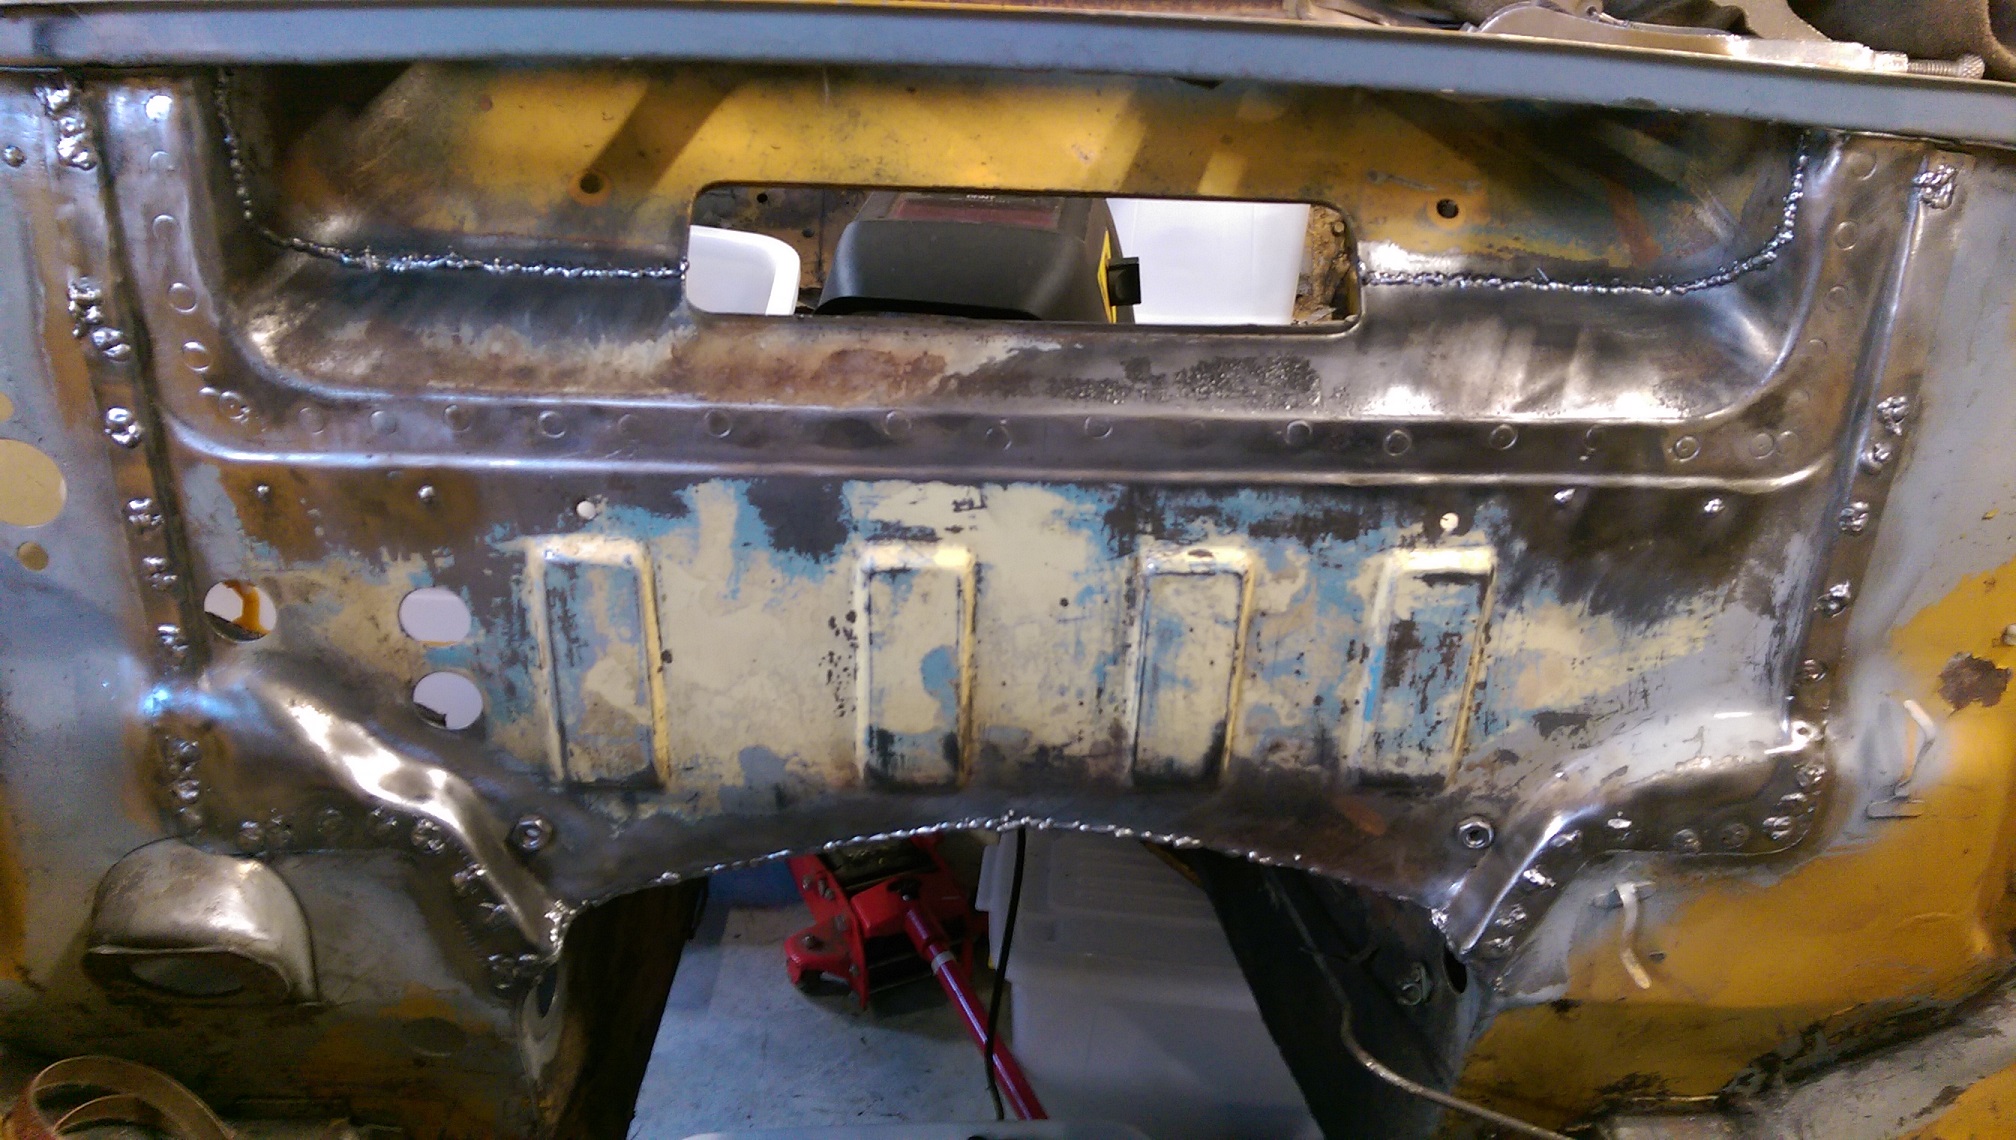
Nothing too exciting has happened, just lots of little things, hence why there hasn't been many updates, but I thought I'd better do one before I get too many more photos. Rust killed and painted the back of the dash today. I'm tempted to weld it in to the cab but I know that I will regret it when I need to fit the wiper motor, heater etc behind it. Pressed the holes in on the airbag tray, looks heaps better! Needed to weld some box section behind it as it warped quite abit. I'm thinking I might paint it with some black crinkle paint. Had the certifier come and have a look at how to mount the seat belts, since the upper back of the cab is a thin double skin. Came to the conclusion that we needed to slide in and weld some plates in behind the skin and door frame. Hard to see in the photos but the inner skin has quite a weird shape to it; curves out and then back in and around to the rear window. It also slants down at an angle, so that's where these brackets come in. Took awhile to figure out how to make them as I started off trying to shape them to fit the curved profile but that was a fail, then realised that they could just be flat plate at the two angles. Drilled some holes, hoped they were in the right place. The plates fit through a gap up by the headlining. I could only just fit my hand in there, caused a lot of pain trying to get them fitting right. They were perfectly in the right place so plug welded them in. Also another two plugs above and below the nut. Scored a handbrake for a few dollars from the vintage car club Cleaned it up and cut some holes in the floor Because the dash has been swapped from LHD to RHD there wasn't any holes in the firewall for the support brackets. Instead of drilling holes and having some horrible looking threads and nuts sticking through, I made up a mount and shorted the bracket to suit. Need to do the same on the other side now. Welded in the cowl vent pivot/gutter thing as well. Gave it all some decent coats of paint so hopefully it doesn't rust again. Put the rubber seal in but it's too thick and hard so the vent sits a little high, will have to sort a new seal one day.1 point
-
Got most of the decking done on Sat.. and shifted the step/guard rail location Rain fucked me a bit on Sunday but once it cleared, I finished picture framing the deck.. realised I need to lift the steps up 33mm higher as the top step is 213mm instead of 180 (forgot about the decking) If the weather plays ball this weekend I'll get it done and hopefully move onto the facings/sills..1 point
-
Haven't done much more to the dash apart from fit it into the cab, as I am undecided how to approach the rusty holes under the gauges yet, a bit too many complex shapes! My Dad had a 55 Chevy steering column laying around, so we started to mock it up. The shaft out of that column had been welded in multiple places so we found another column that had a mint shaft and it was also longer so didn't need an extra universal joint added. The outer tube of the column was pretty average, had lots of extra holes, cutouts and had been shortened, so drew a new one up in Solidworks and got it put through the Tube laser at work. It's now made from 2 inch stainless tube.1 point
-
Made some brackets to mount the valves. For some reason the holes ended up too far out so had to slot them a little. They're held in with countersunk screws so it's all still flush underneath (not that anyone will be able to see underneath anyway haha). Played around a bit with the location for a while and decided this was the best. Wasn't really enough room for the compressor to fit in between. Will mount a compressor on each side of the bed, just above the exhaust area. Back to fitting and fixing the rust in the dash now. Cut out the good/un-butchered section of the dash that some idiot tried fitting a commodore cluster in. Glad to finally throw this shit out! Pic for motivation1 point
-
Boom. The power of time lapse internet! Complete whole floor pans but cut in half. ie down the length of the trans tunnel. Works out cheaper. Thinking about lifting the body off the frame now to fit the new floors and clean up the underside and chassis.1 point
-
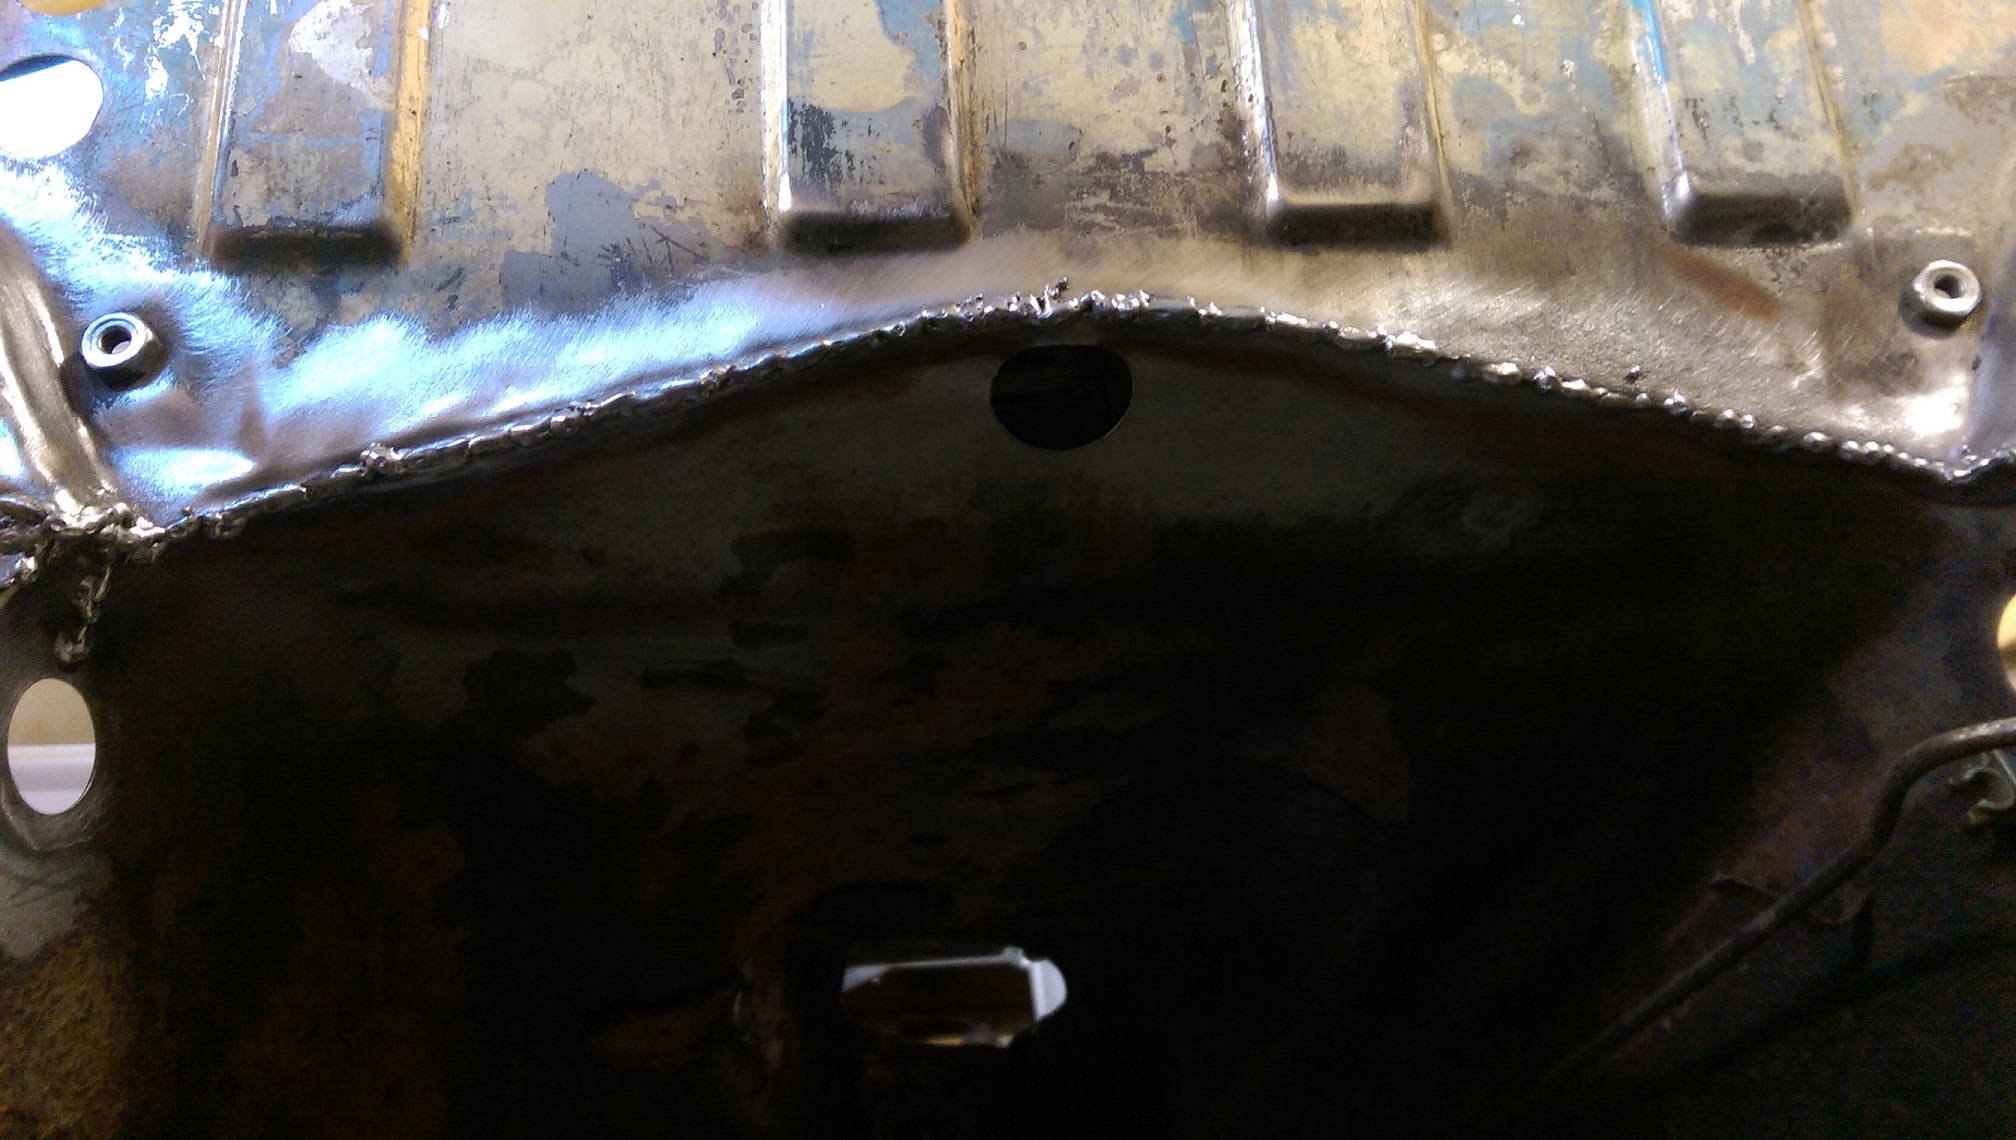
Look at that lump. The essence of Detroit. Engine finally out. I had to buy a new crane as the work one wasnt long enough to reach! Im just going to throw gaskets at the old lump, check the bottom end and if all is well put it back into service. It seems to run fine, no knocks or smoke and the compressions were all good. Anyway, can make a start on the floors now1 point


This leaderboard is set to Auckland/GMT+12:00