
Leaderboard


Popular Content
Showing content with the highest reputation on 08/23/17 in Posts
-
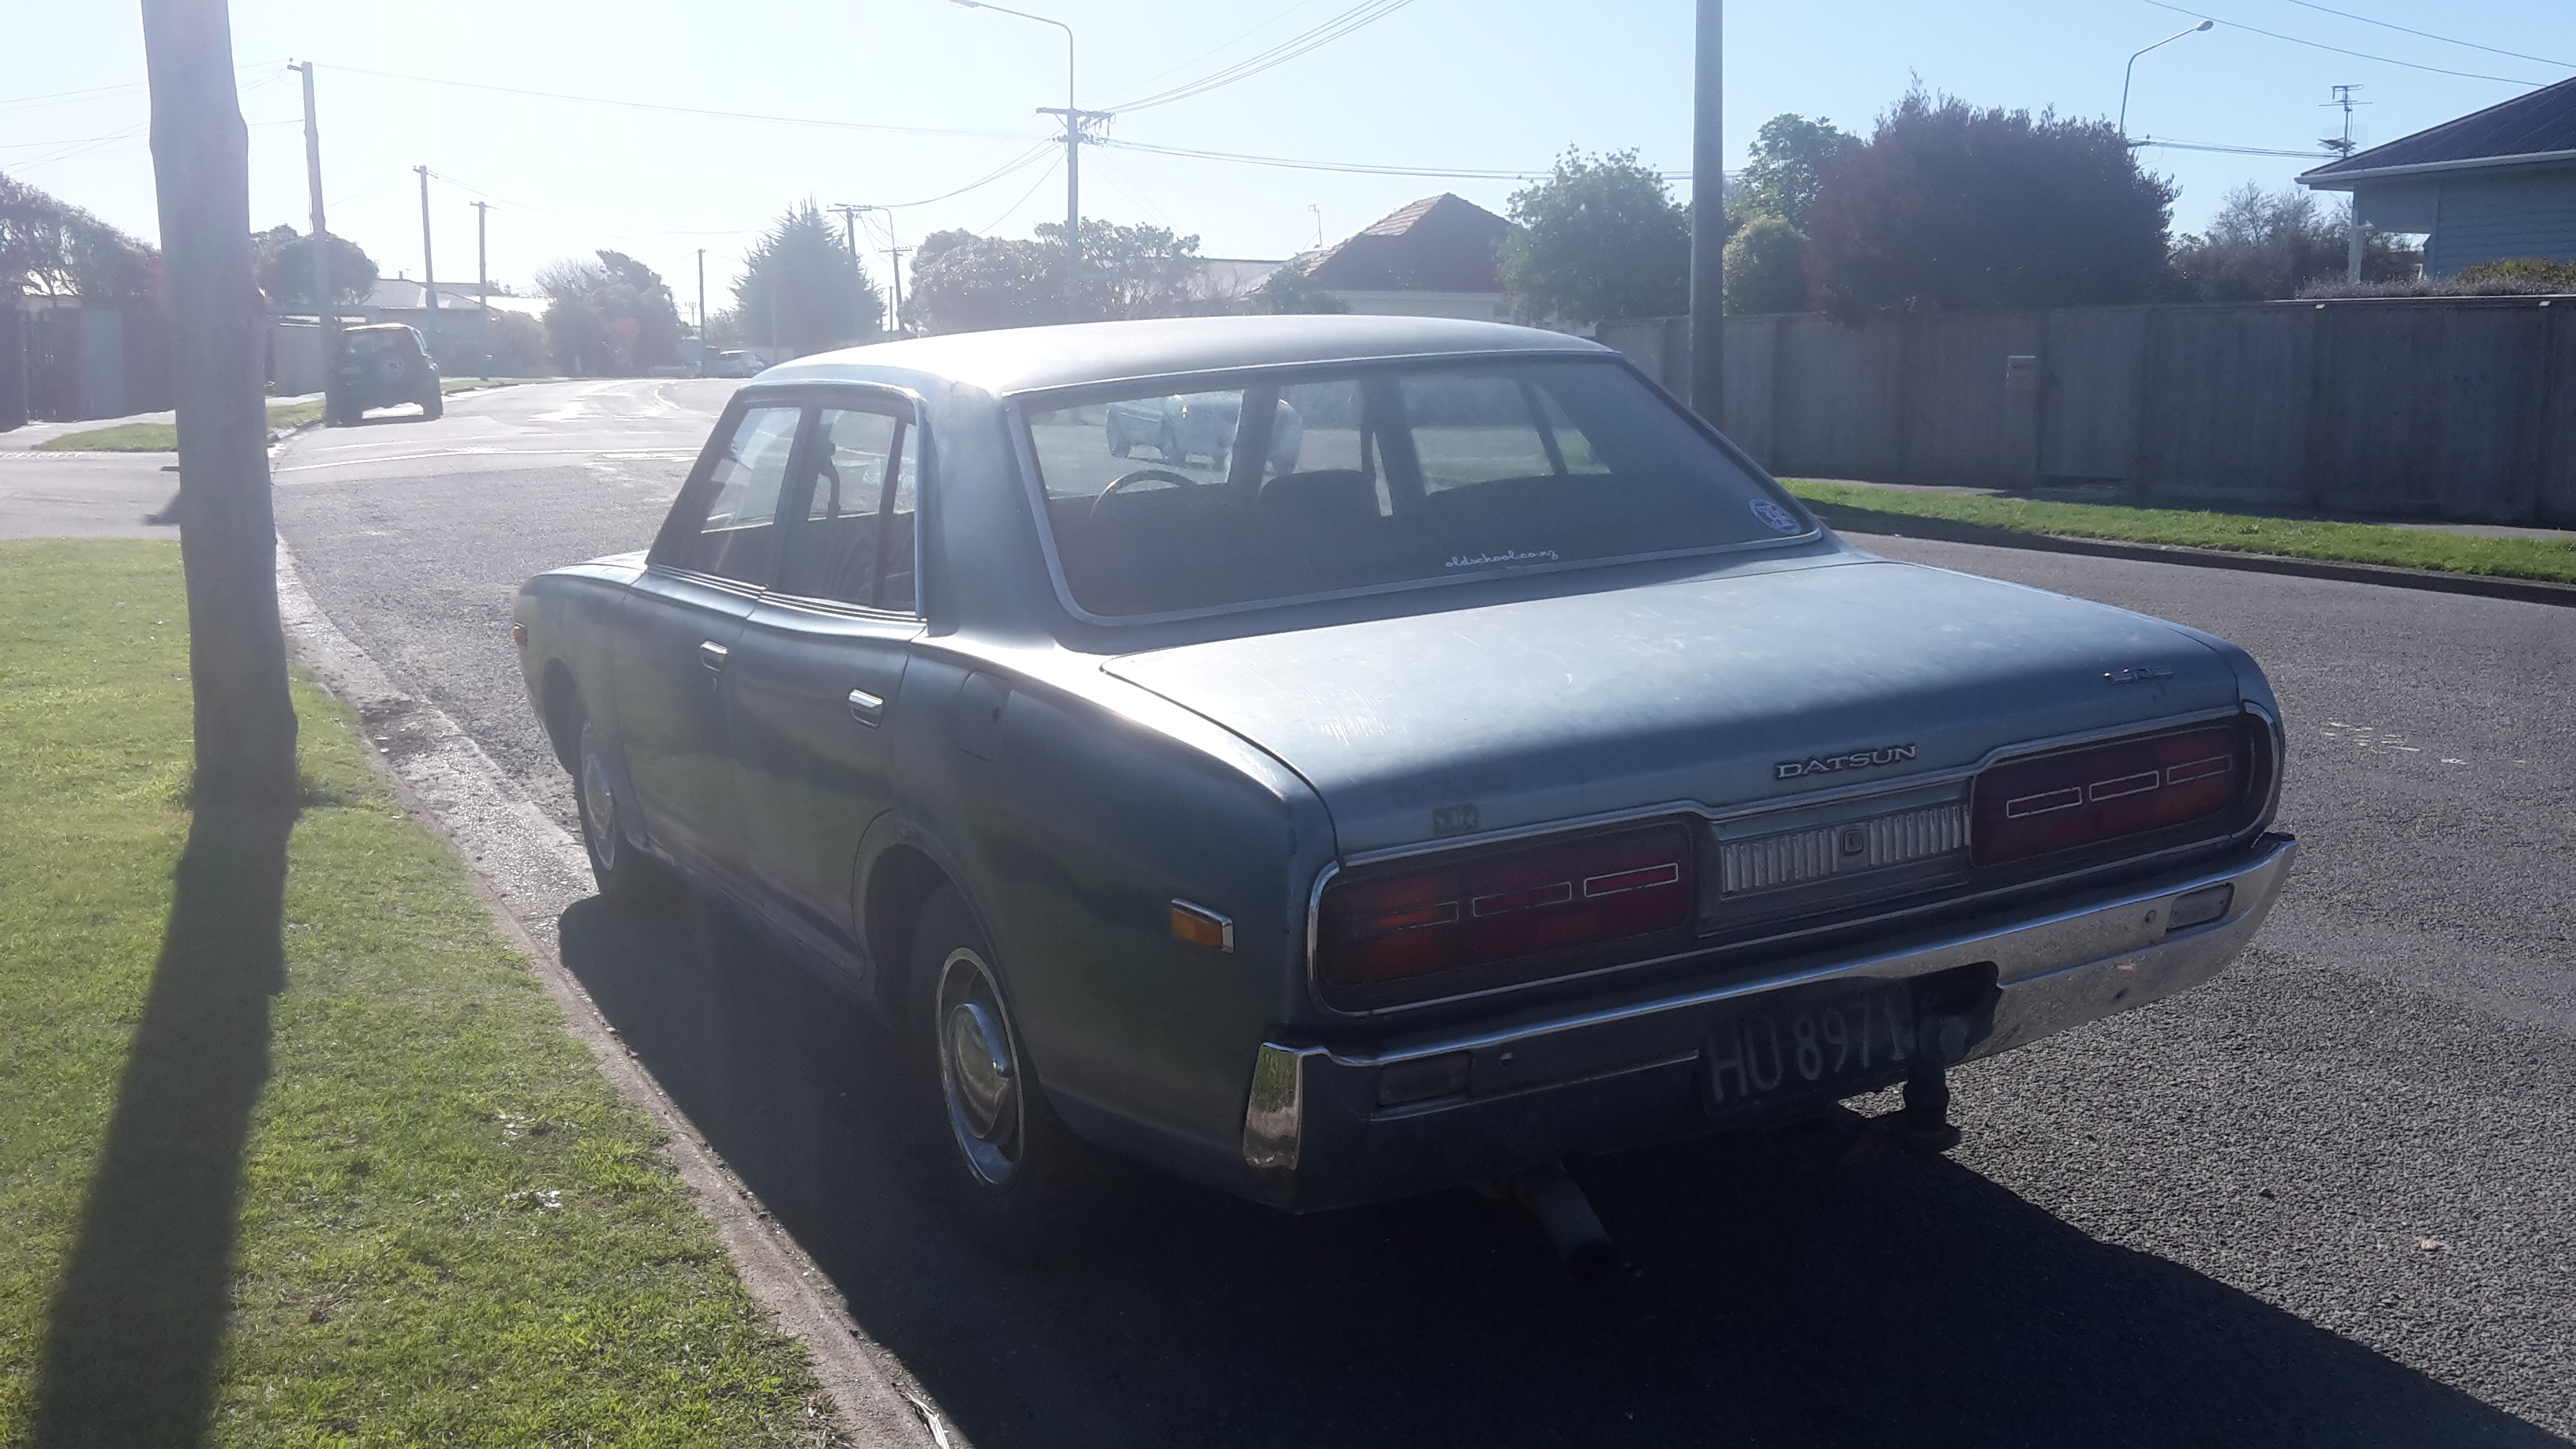
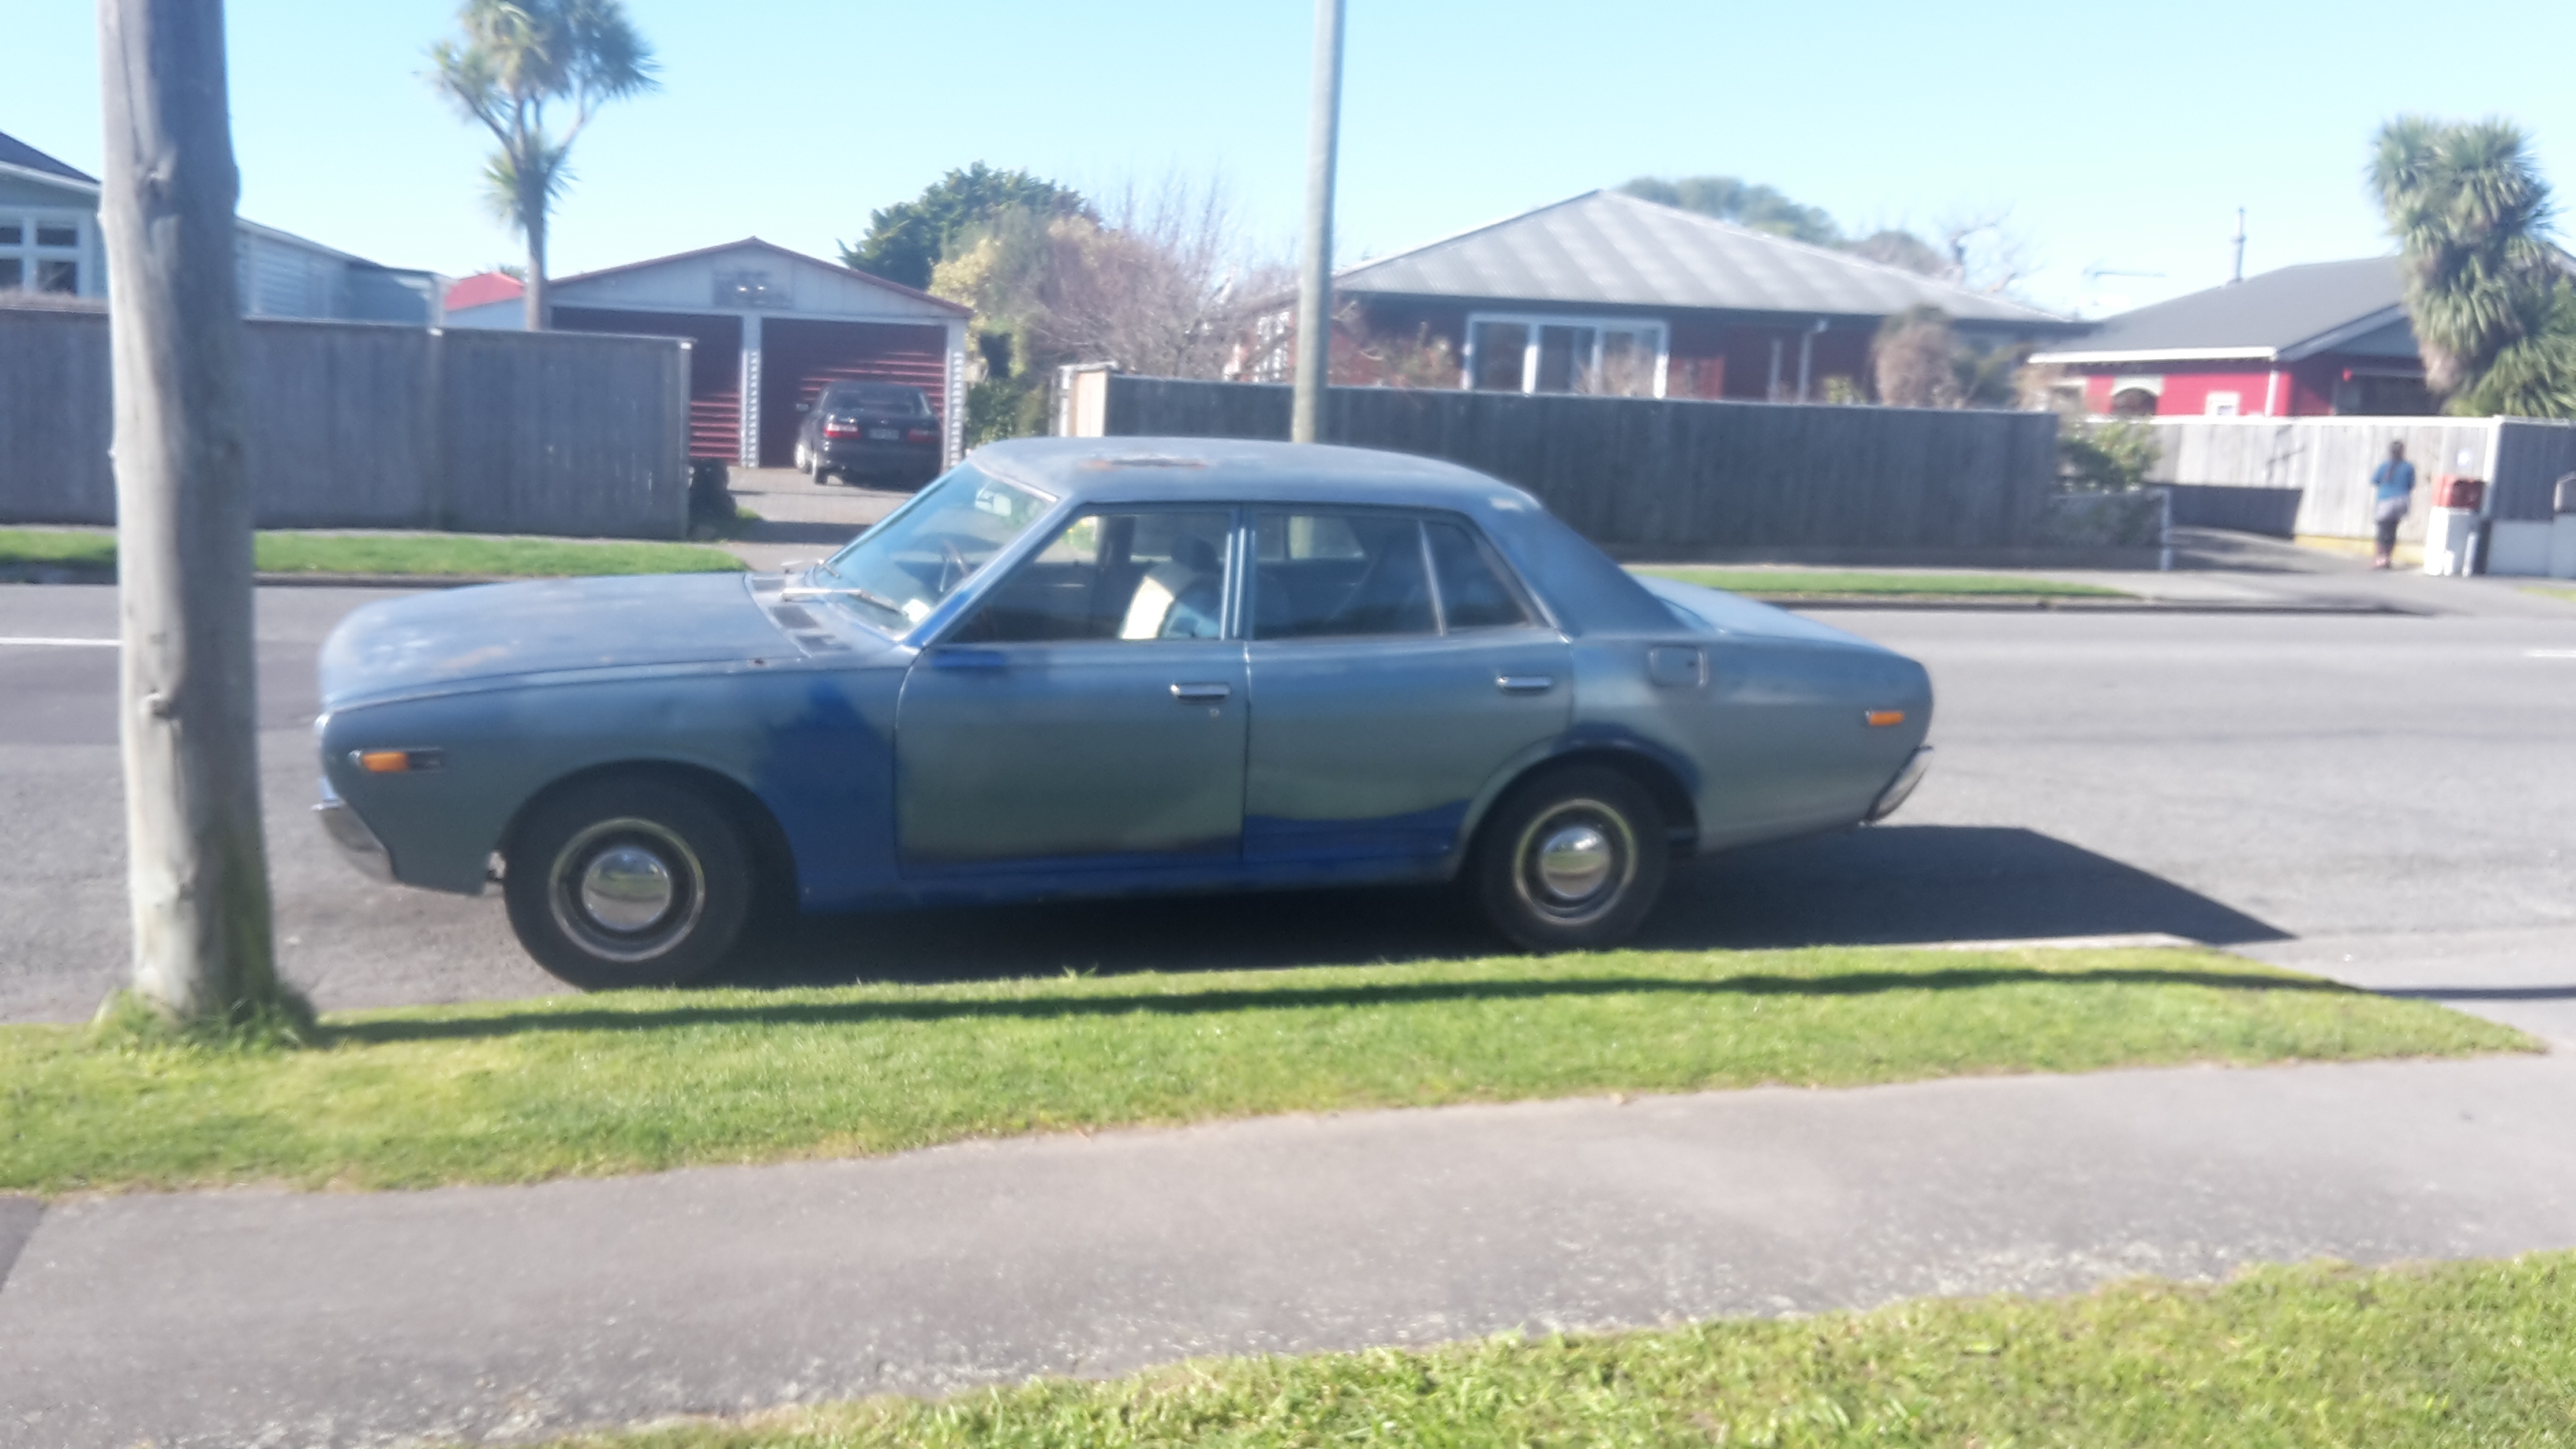
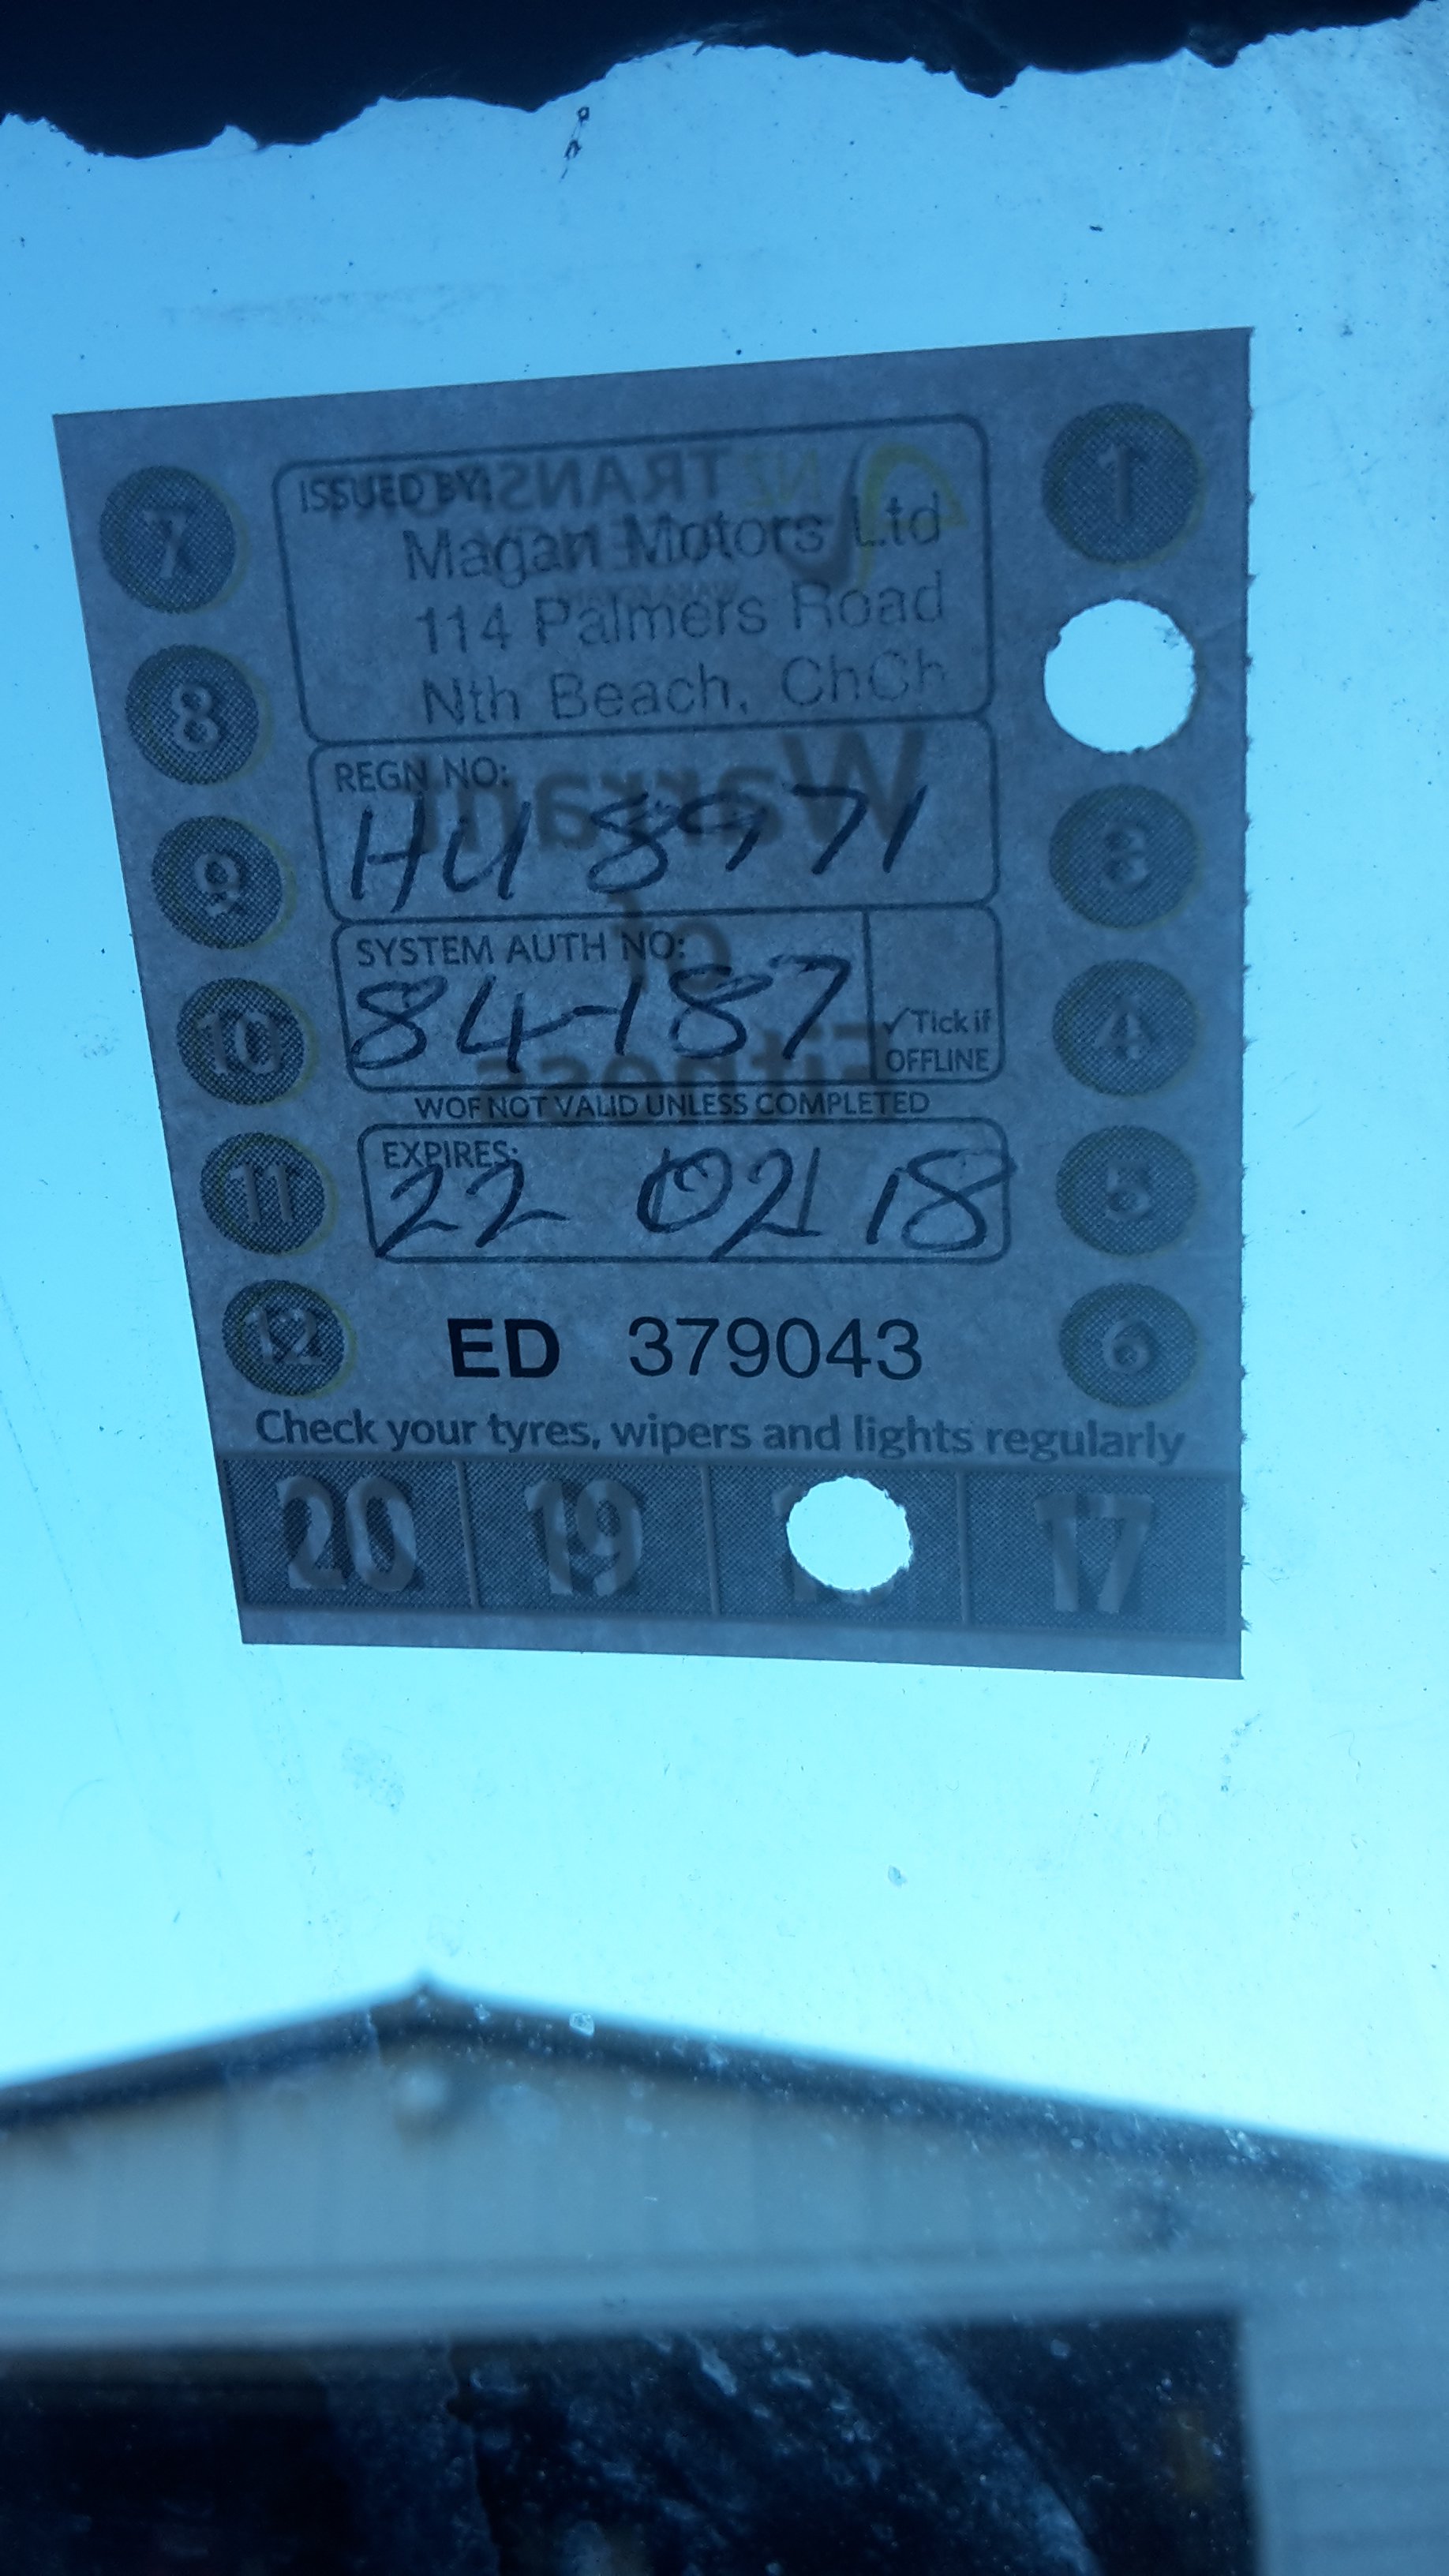
update time. out in the daylight and re assembled. with a new sticker
 10 points
 -
Will bring the Land Cruiser and also @mo999. Be interesting to see how busy the carpark is tonight. Could always use my PTO winch to drag the offending cars out of the way.8 points
-
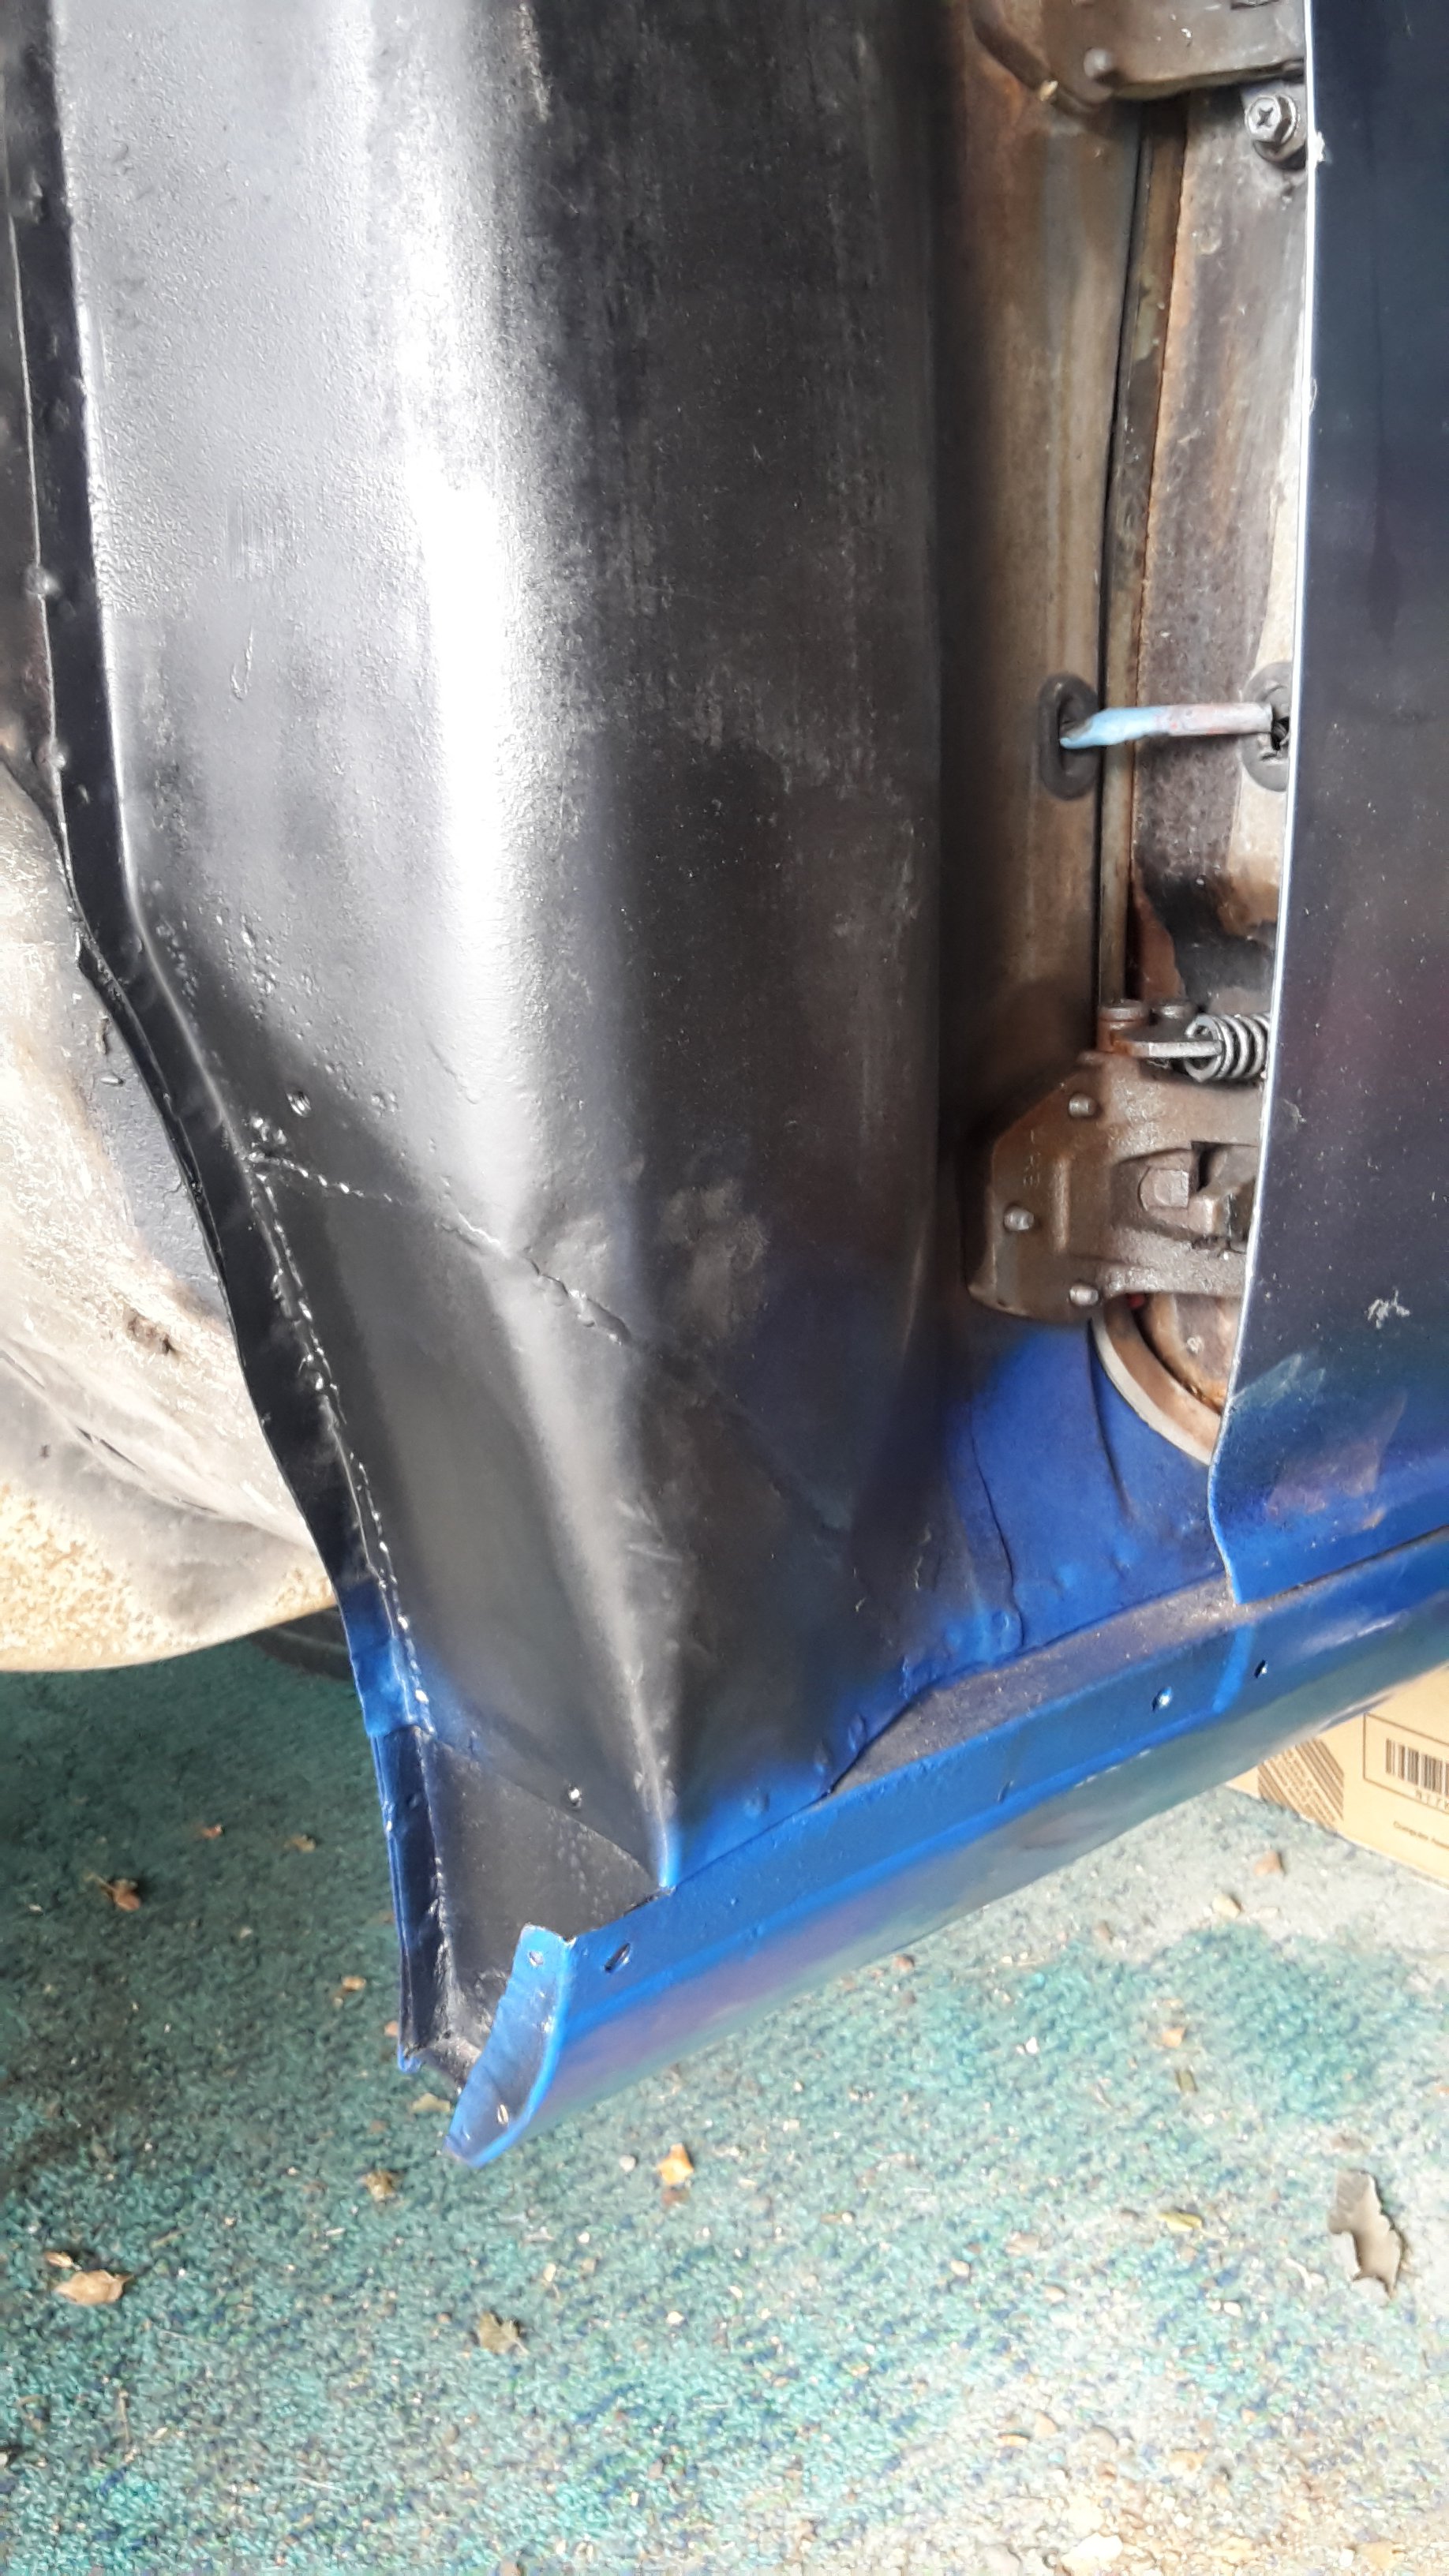
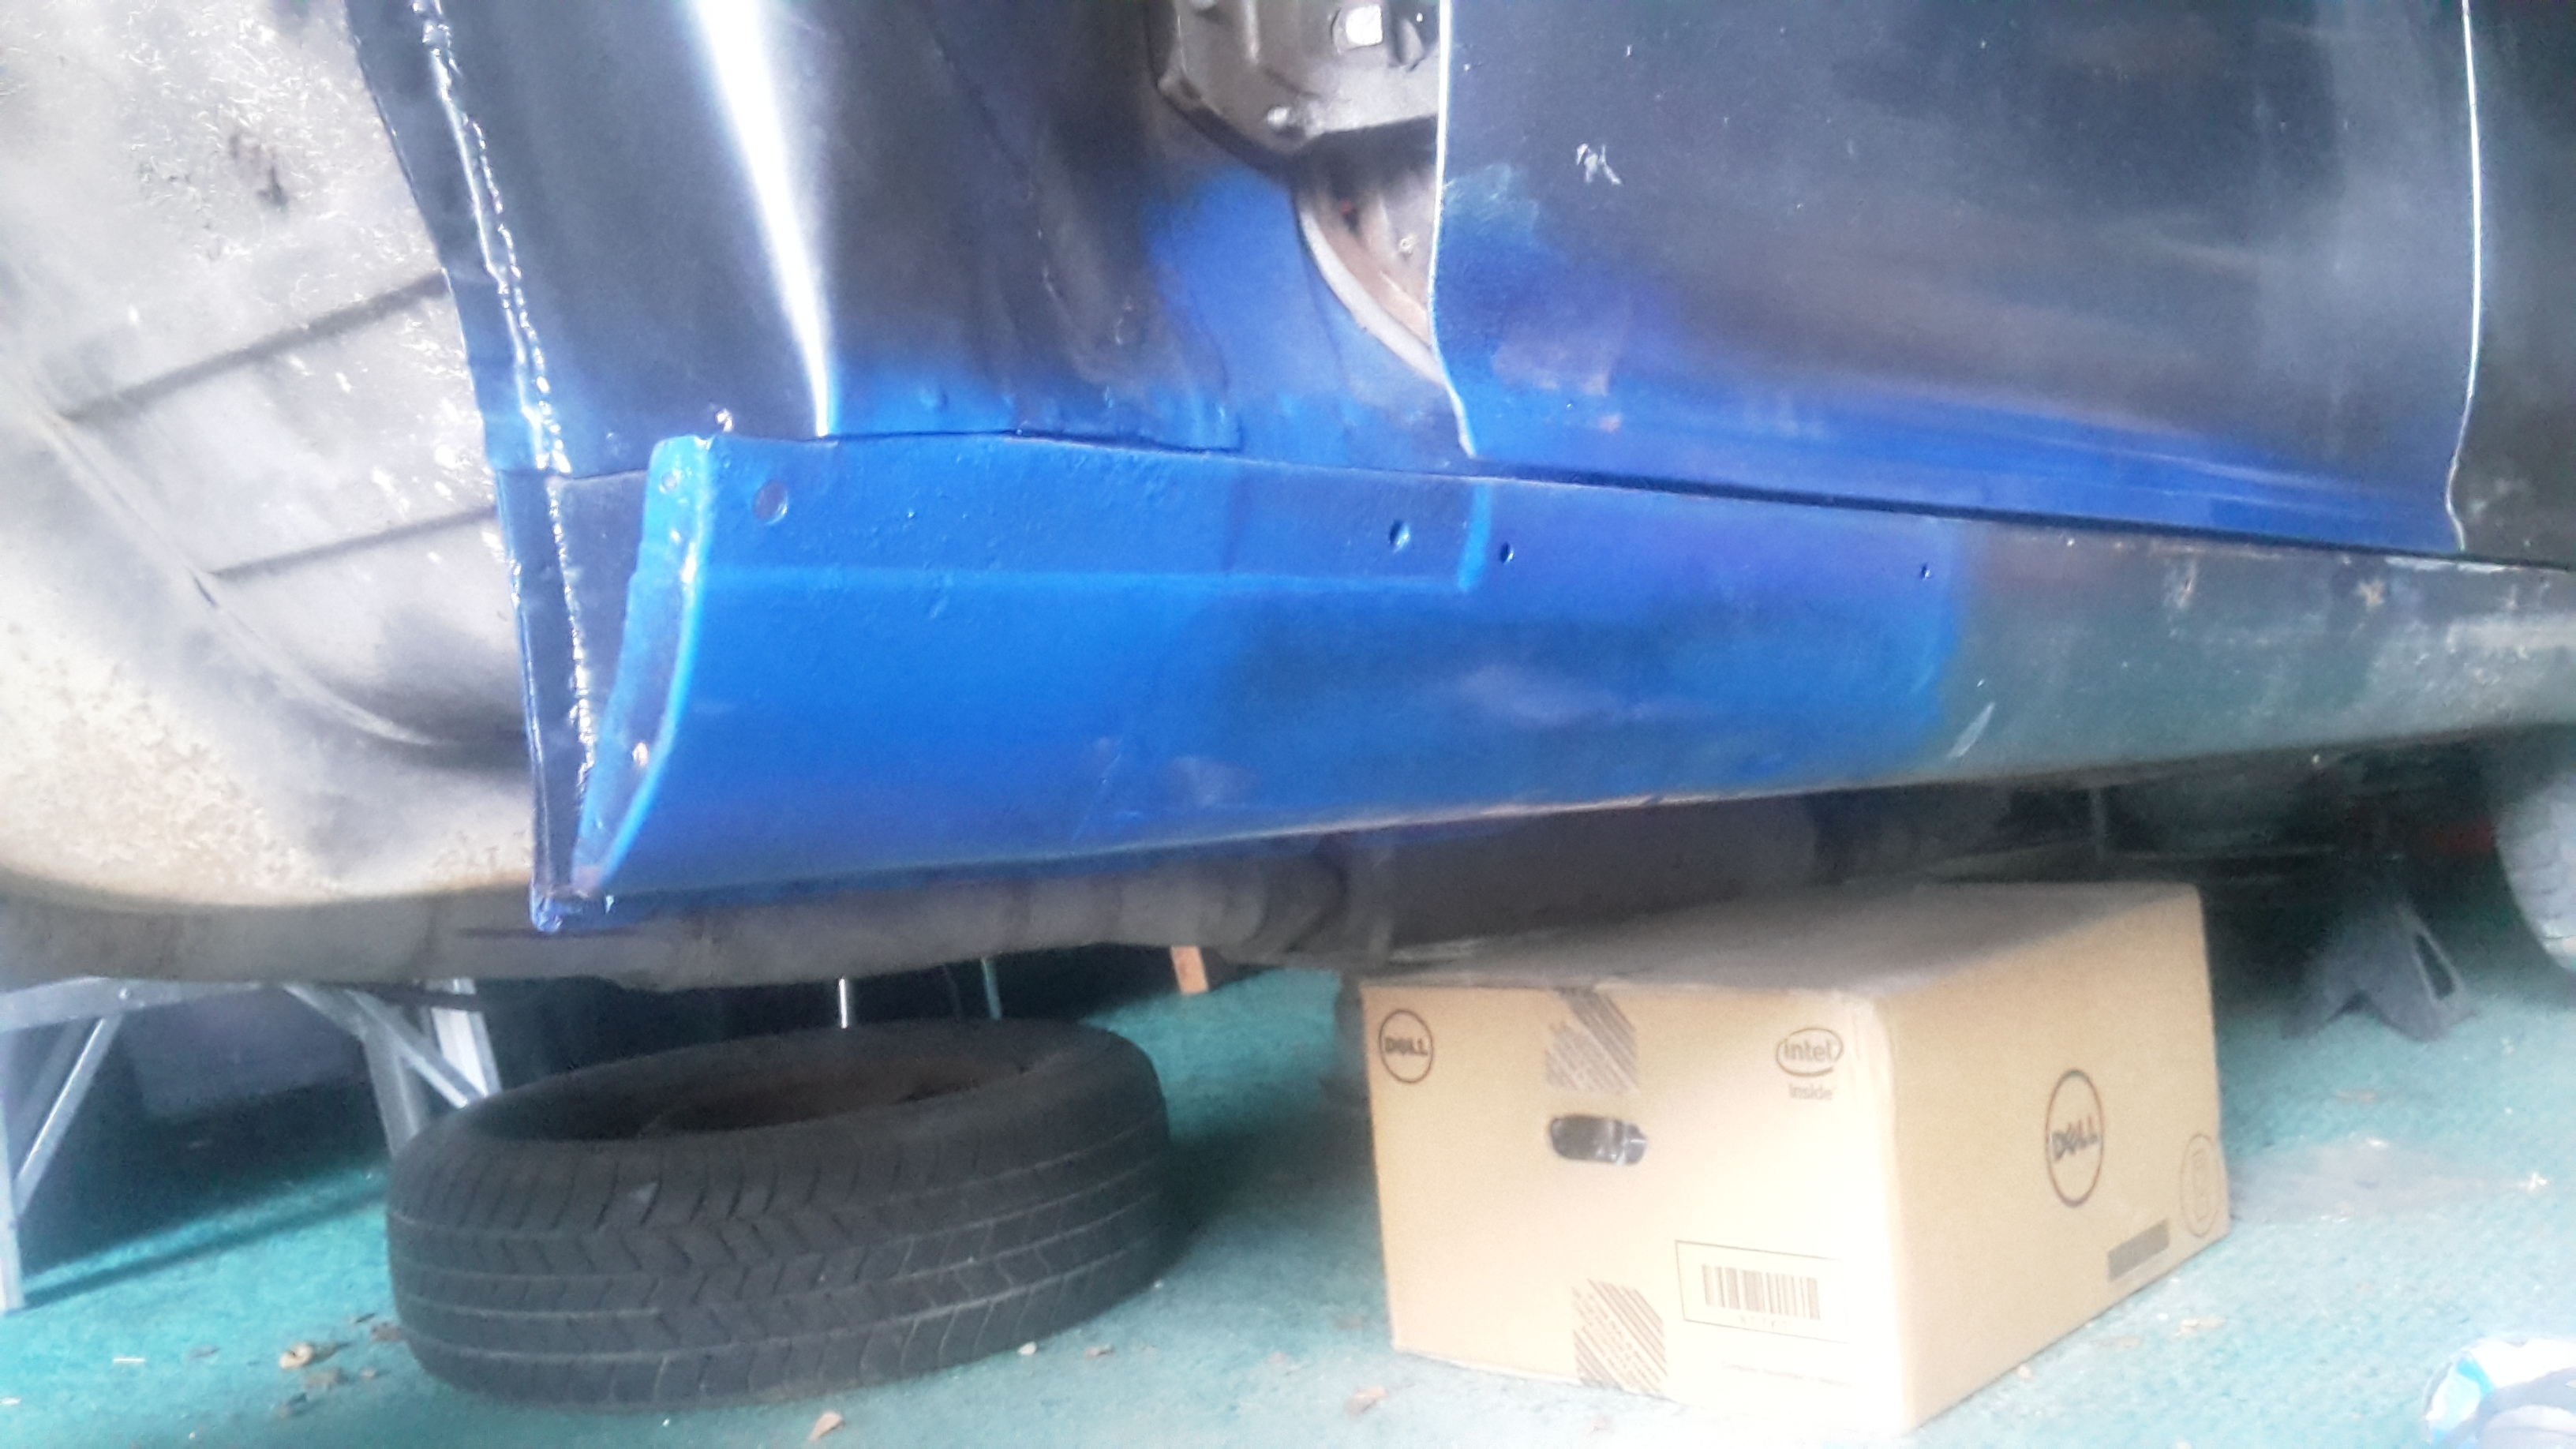
Update time. Vivadom daily driving has been pretty damn good. Especially when 2 months ago I finally got around to changing the voltage settings for the wideband O2 sensor on the ECU so that the ECU would get the same reading as what the Innovate gauge shows. It’s a common setting fault and took all of 5 mins to get them to read almost the same. What does this mean though? Well for ages the ECU and hence the tuning program, Tunerstudio, have been receiving a ‘leaner’ voltage than what the engine was really at. This meant that in tuning the final outcome was always a bit too rich. When the ECU was in closed loop ego control it would take my preferred AFR table settings and adjust to what it thought was correct.. which was not. With the ECU now getting the proper signal we re-tuned the car on the way back from Blenheim to Motueka. It was too rich everywhere and after not long was leaned right back. Driveability remained the same, but tail pipe smells improved J I have not gone super lean, sticking to around 15~15.5 on cruise. We filled the tank back up in Motueka and the cars economy had improved returning 32 mpg (8.8l/100km). There is still room to improve but happy with that. So this was all good and everything was fine and dandy for the last month or two. Then the other day while leaving town I started to hear a teeny whistle sound. I just put it down to the throttle body making the sound because sometimes it does just this. The other thing I thought it might be was the idle control valve. I didn’t look into it any further. However, over the next few drives I noticed it was hunting a little at really light throttle openings, like slowly accelerating away from standstill. Hmmmm?... Then that whistle again, this time when I got home one evening. I popped the bonnet and listened around. I couldn’t pinpoint it but when I ran my fingers around the back underside of the plenum box where one of the runners joins I heard the note change. An air leak. Bugger. I looked with a torch and could just make out a little crack on one of the welds I had machined down…hmmmm. Bugger. Oh well.. I was planning on doing a modification to the throttle body pulley so why not sort it out now. I drove the car into the Viva hospital and started surgery. It didn’t take long to pop the bonnet off, unplug all the bits needed and start removing the inlet manifold. The trickiest bit was the return fuel line which was stuck to the pipe and hard to get too. One hour after having parked the car in the surgery and picking up the scalpels I had the manifold on the bench. I worked out pretty quickly why the manifold had cracked where it had. To explain how we need to pop into the police box and go back in time…. Maybe not that far though. Lets try again… Nup.. still too far. This time… Errrgggg. Again… Oh dear lordy..one more time… Ahh… that’s better! Righto..now remember this original plenum chamber? Made from some bent up 2.5mm alloy sheet. It had buckled diagonally when welded and I had then set up the runner heights to suit when I tacked them in place. I had to try and straighten it so it sealed correctly (using our house as a press).. It all worked out OK at the time because it flexed enough to seal when bolted down to the runner flanges. However a few years later I had that backfire and blew the lid off. I then fabricated a new plenum from 5mm alloy sheet and its was nice and straight.. It did not flex. This is how I think the crack happened. I decided I was not going to try to weld up this little crack because I knew the heat would warp the runner flange and nothing will seal. So I bought some posh looking South African epoxy putty, a bit like minute mend or quicksteel. It requires a lot more mixing than the others but sticks really well and smoothed off nicely. Kevin kept guard while it set. While the inlet was off I did some measuring and worked out the dimensions for a new offset/eccentric throttle body pulley. Then I machined down a lump of alloy bar and ended up with a new pulley. I got to use our new mill with a 2mm slot drill ( I could have used a hacksaw and file but this was more fun..) The new pulley effectively gears down the cable pull at the start of the throttle pedal travel and speeds up at the end making for a much easier off idle transition. You can see the difference between old and new here.. No more kangarooing down the road for people not used to this engine with its lightweight flywheel etc. I refitted the inlet manifold, plugged everything in and tried it out. WAY BETTER!!! Went for a drive and its so much easier to ease the throttle on out of corners or from standstill. Much more user friendly and I now wish I’d done this mod ages ago!7 points
-
I tried out its towing capabilities today...
7 points
-
Got some quick stuff done tonight. I got a hold of some 2mm sheet steel to make up the inner frame rails so I marked that out and cut it up ready for folding in the brake at school tomorrow. I started by making up some test profiles to find out the measurements I was going to need in order to get the two skins fitting snugly over each other. The first one was too small, But the second one was just right. I then used the measurements off the second one to mark and cut out the blanks for the channels. This 2mm stuff is a pain to cut with anything but the big bench guillotine. The tin snips will just do it but it sucks when you've got girly grip strength. I also quickly knocked up a couple of dies to press in the "crumple zone" corrugation in the inner frame rail. It's pretty quick and dirty but it will do the job and it's going to be hidden so I'm not too worried if it doesn't yield a completely pristine result. Confirmed with the truck company the Mazda should be here Thursday because their truck has been in for maintenance. Looking forward to it.7 points
-
I successfully un seized an engine today using brake fluid, it was stuck like chuck, its happily running now,4 points
-
Jim's ringadinging4 points
-
Oops, missed a bit. Past couple of weeks I've cleaned up and put the interior back in. Cat helped - these had been out for about 10 seconds... Did I show you guys this? It's from Speedhut , they have a super cool gauge-face designer, can upload images and text and everything. Have a play, it's fun. Fitted in the hole pretty well (this was just a mock-up, fitted better after some more trimming inside and some sikaflex to fill the gap around the outside. It's tidier than it sounds, promise). Lights up all purdy-like too4 points
-
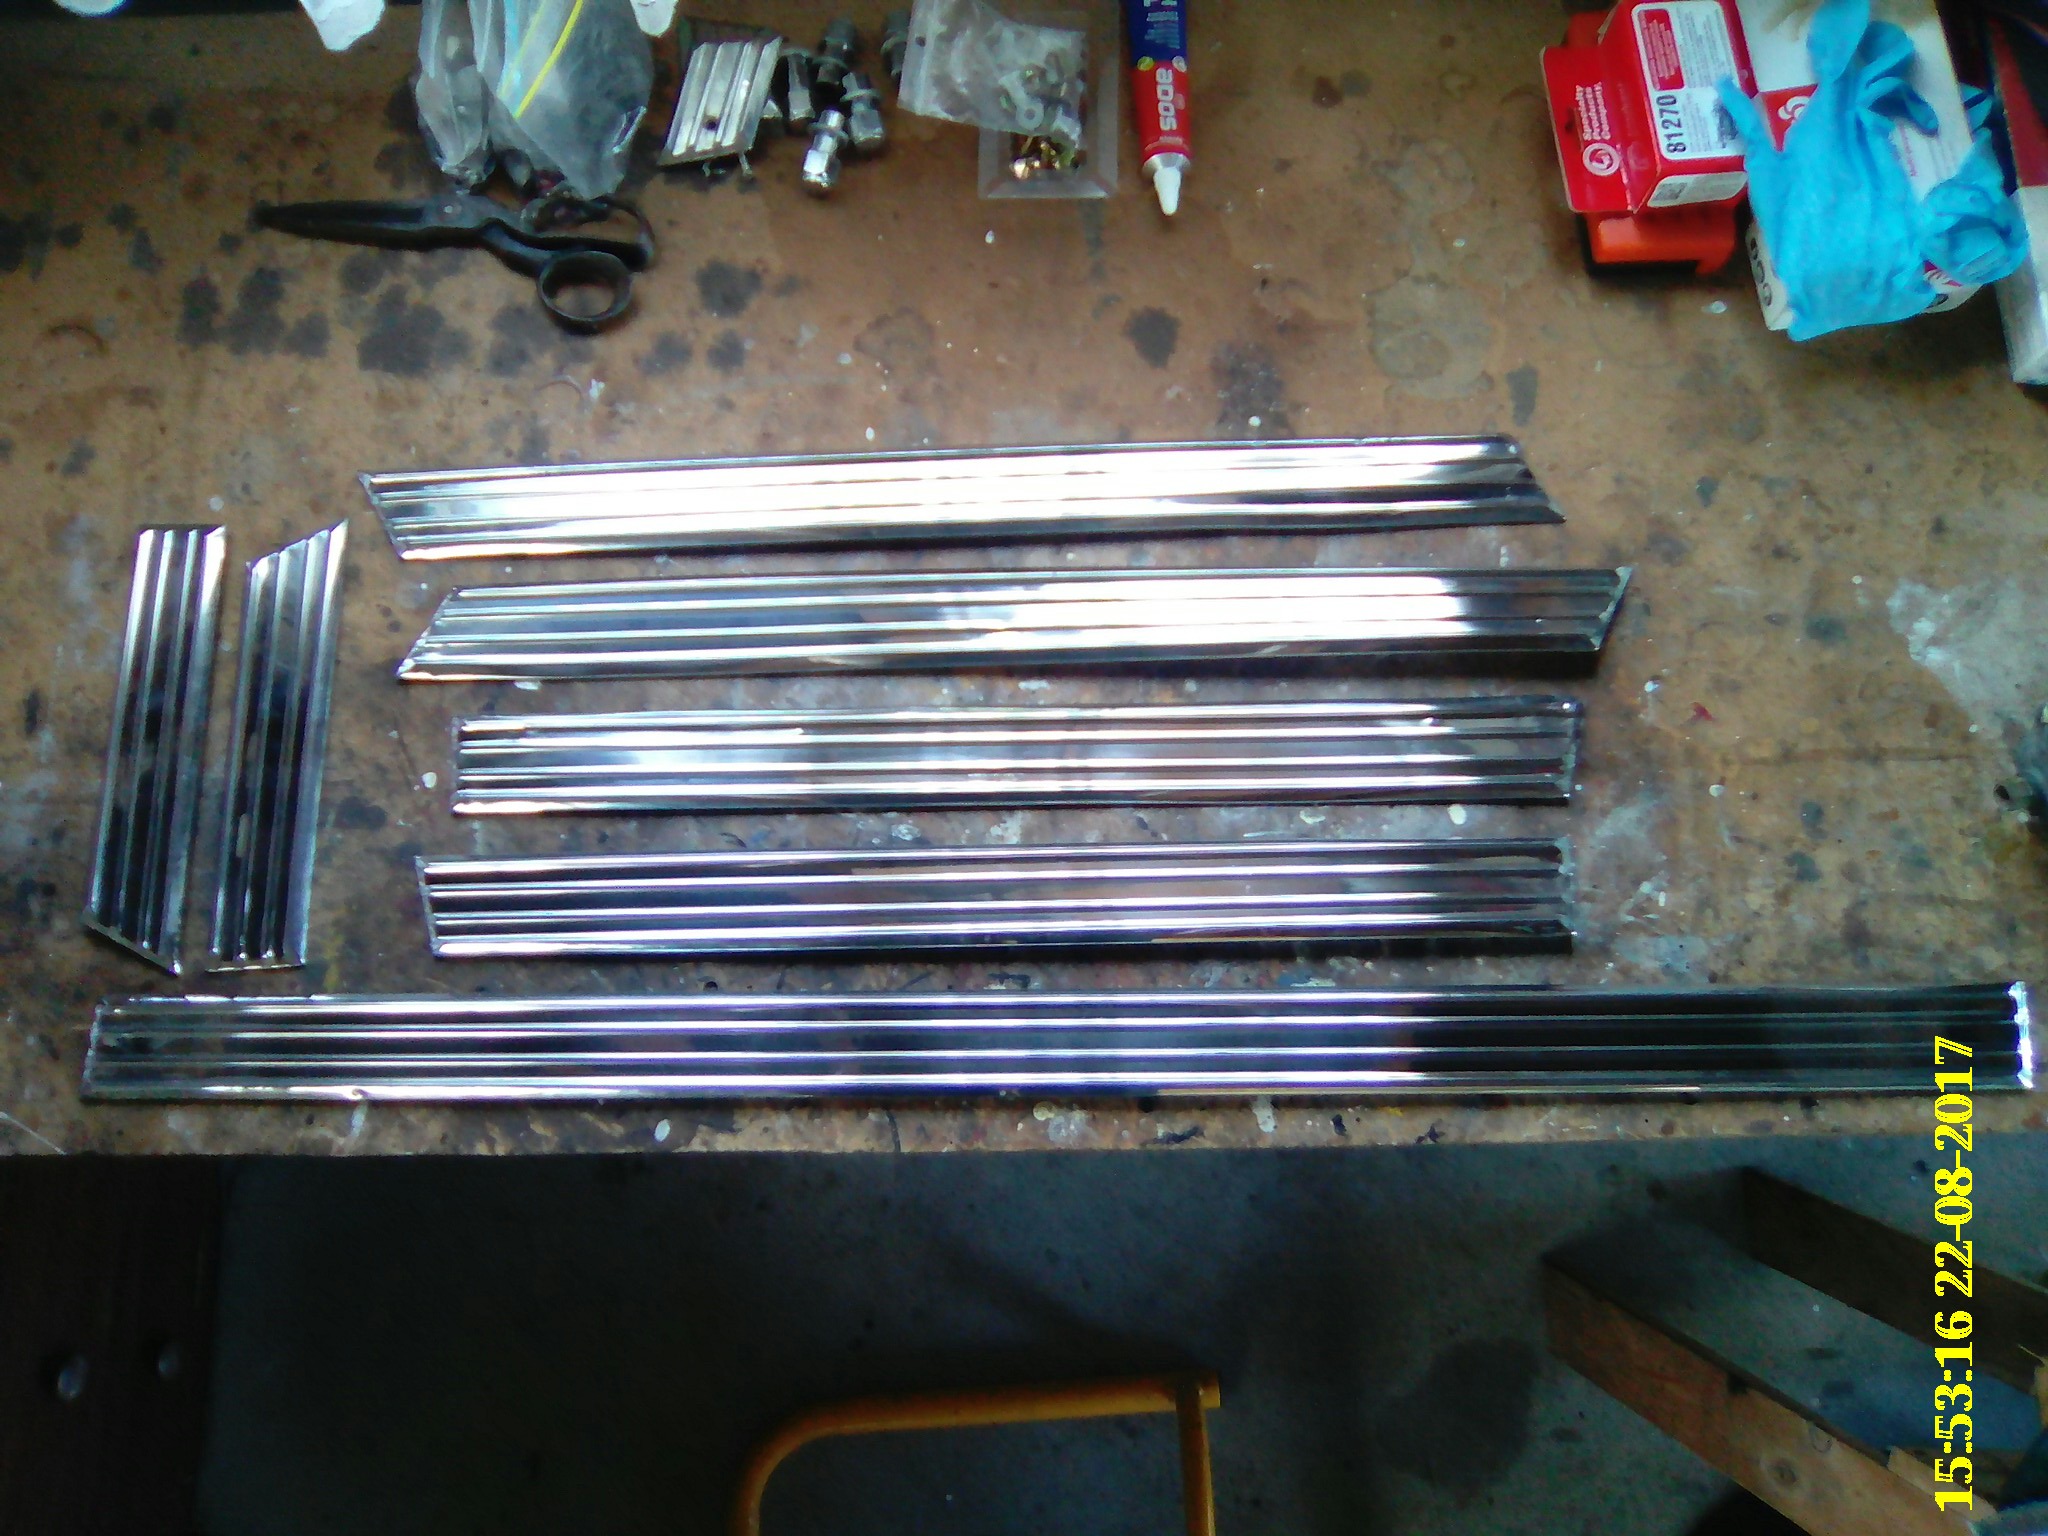
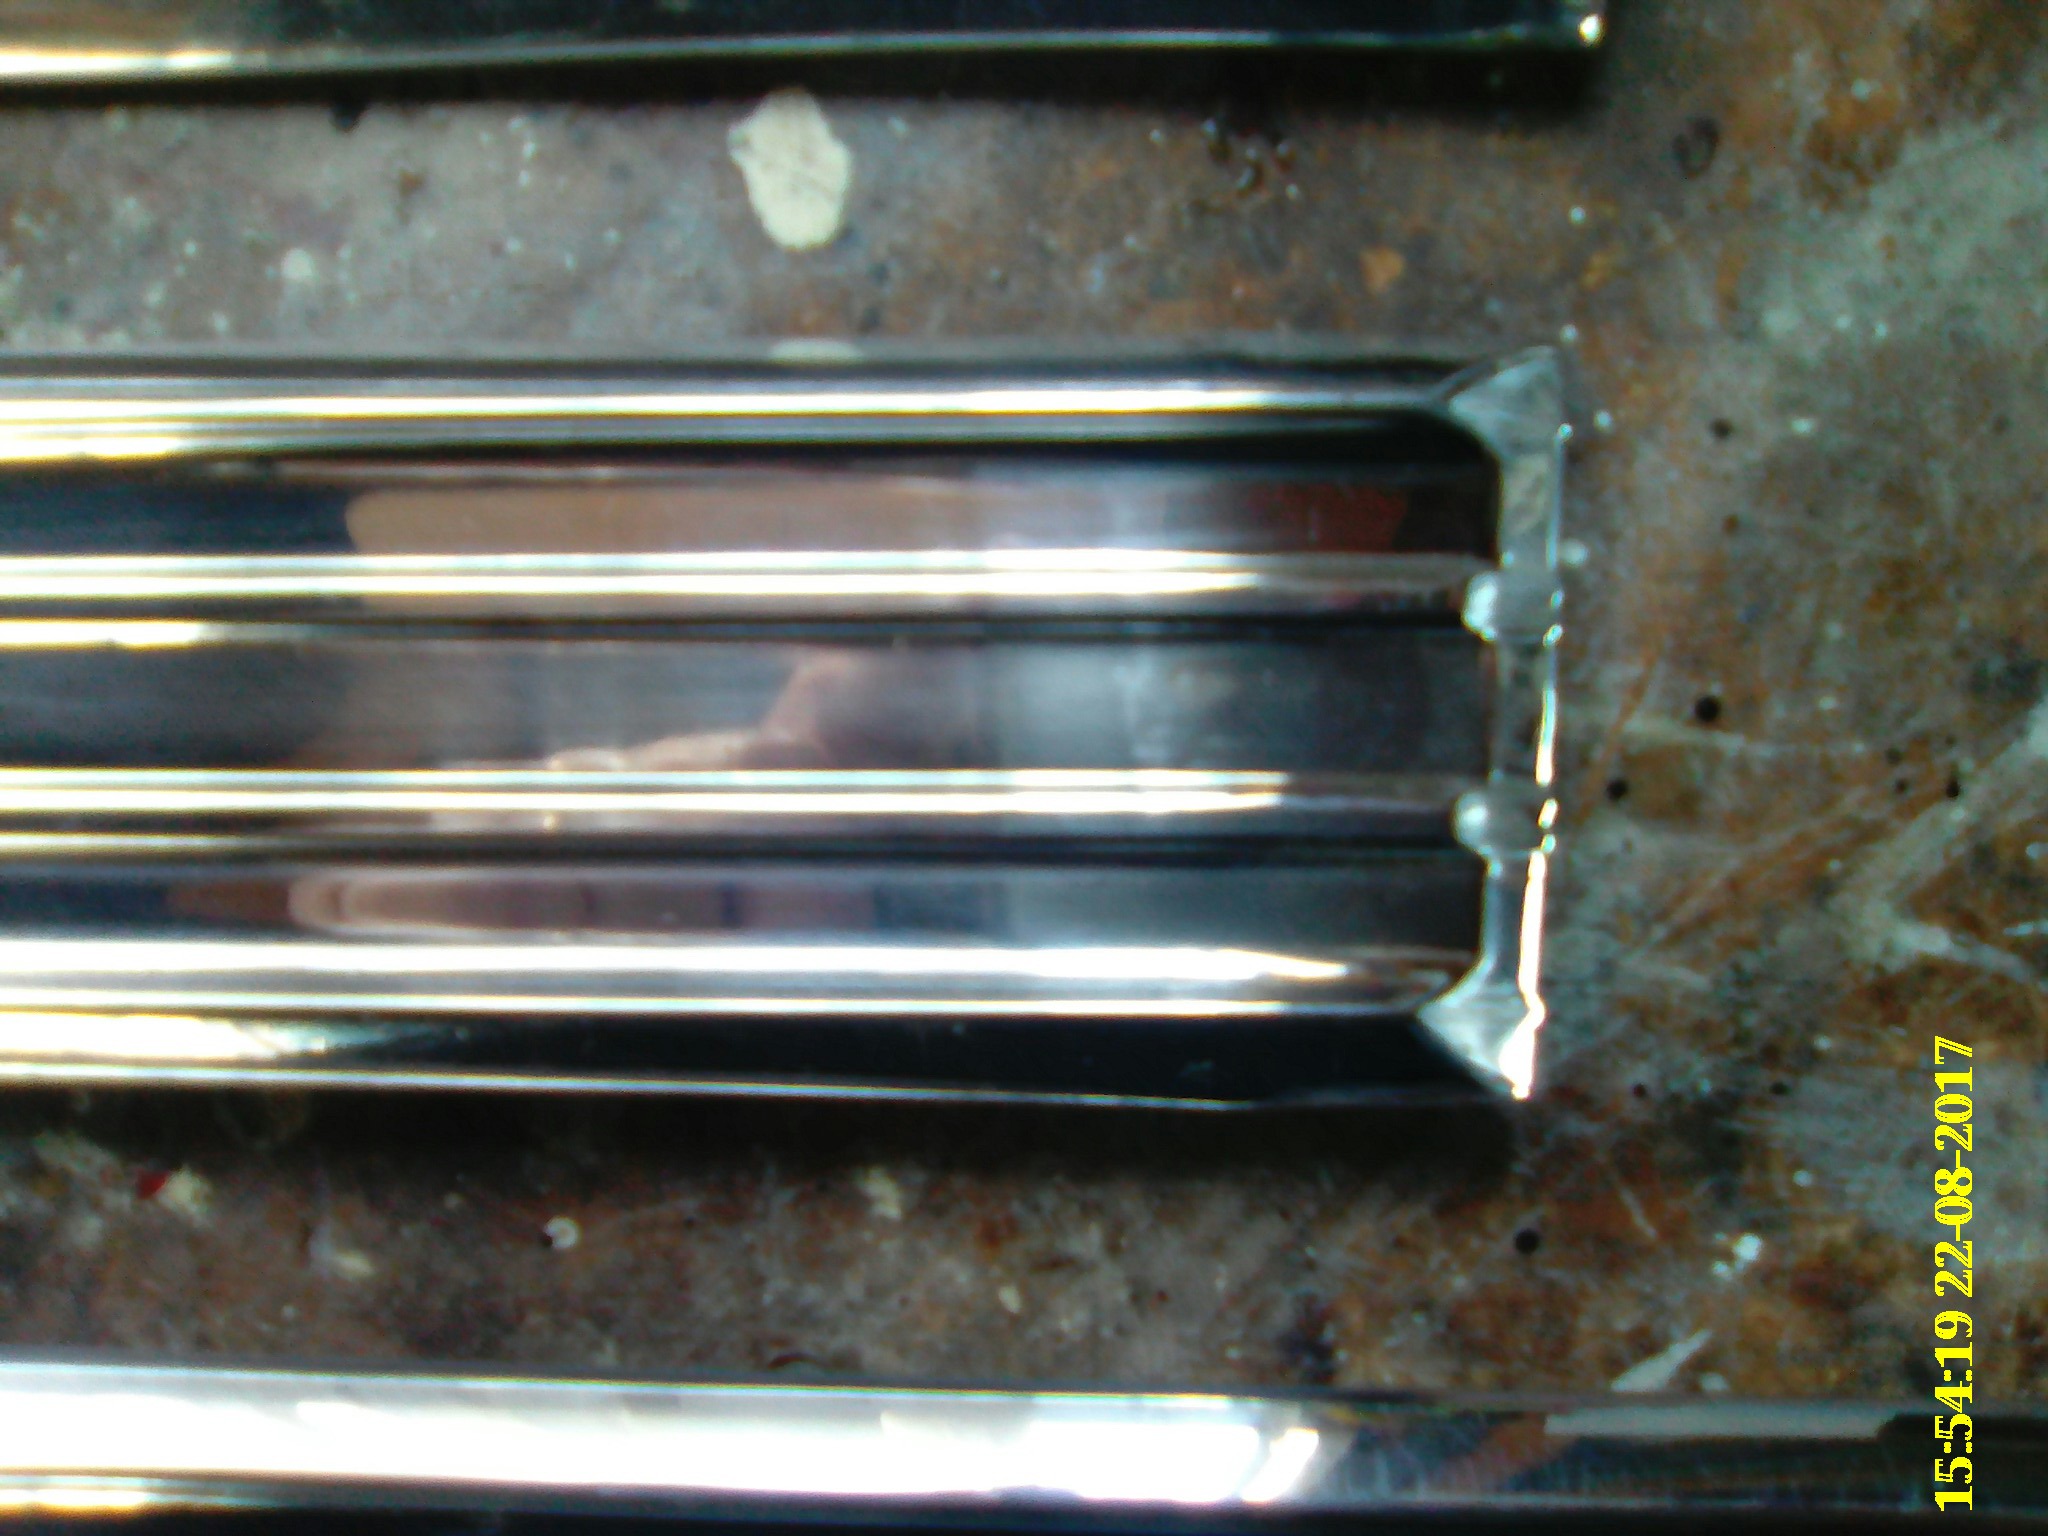
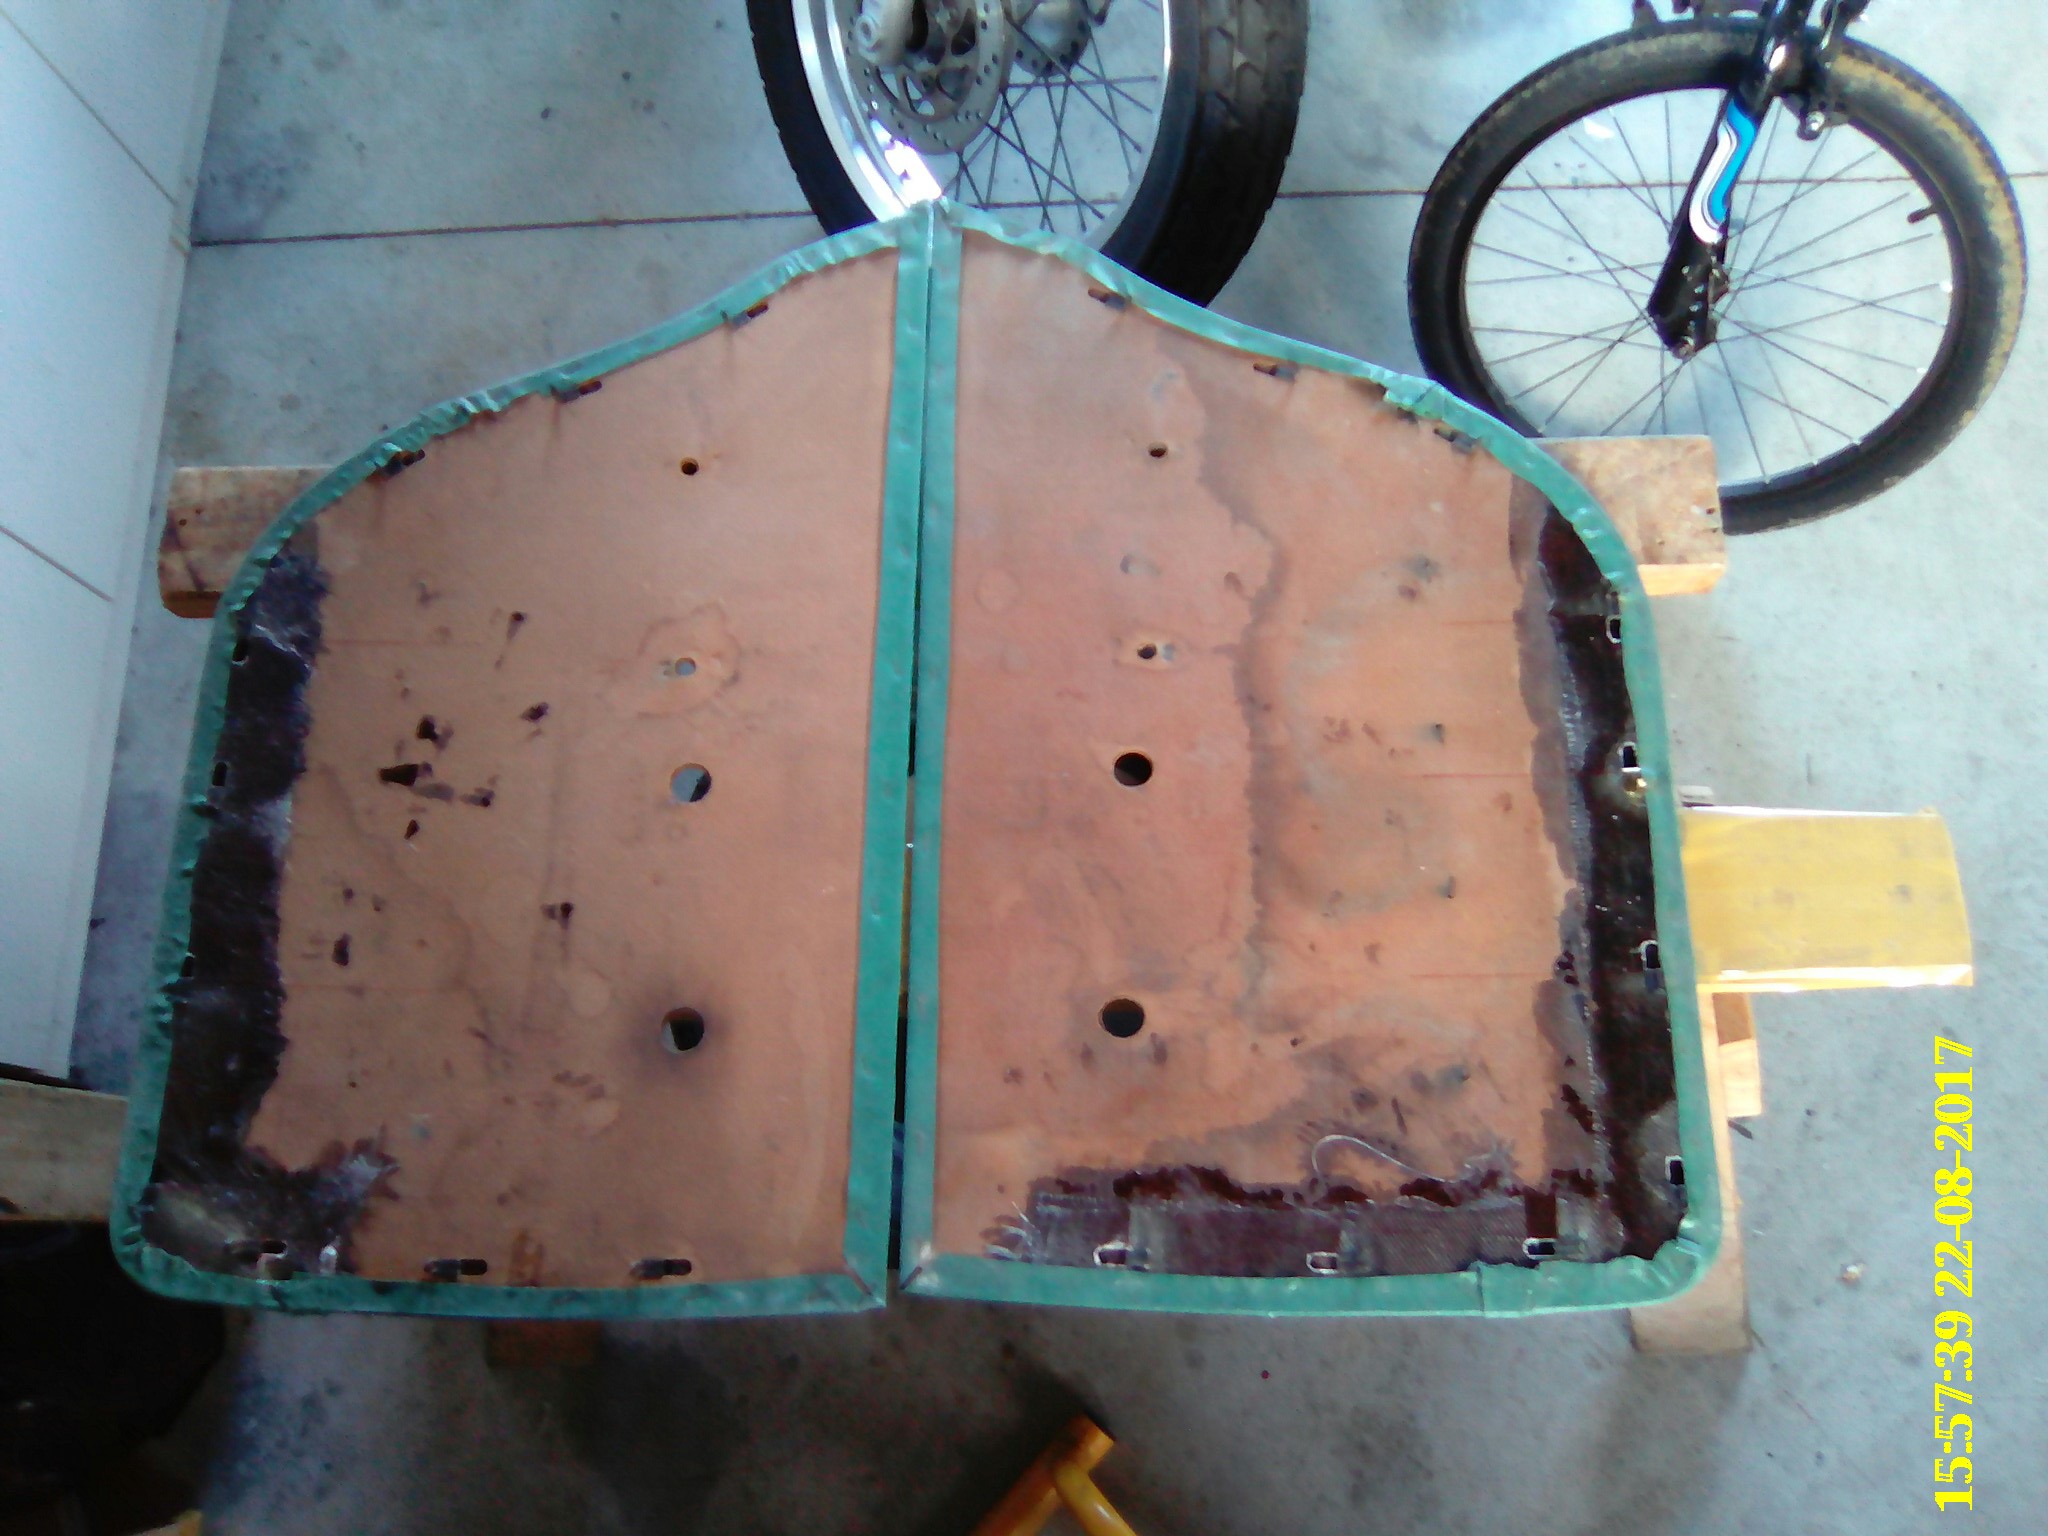
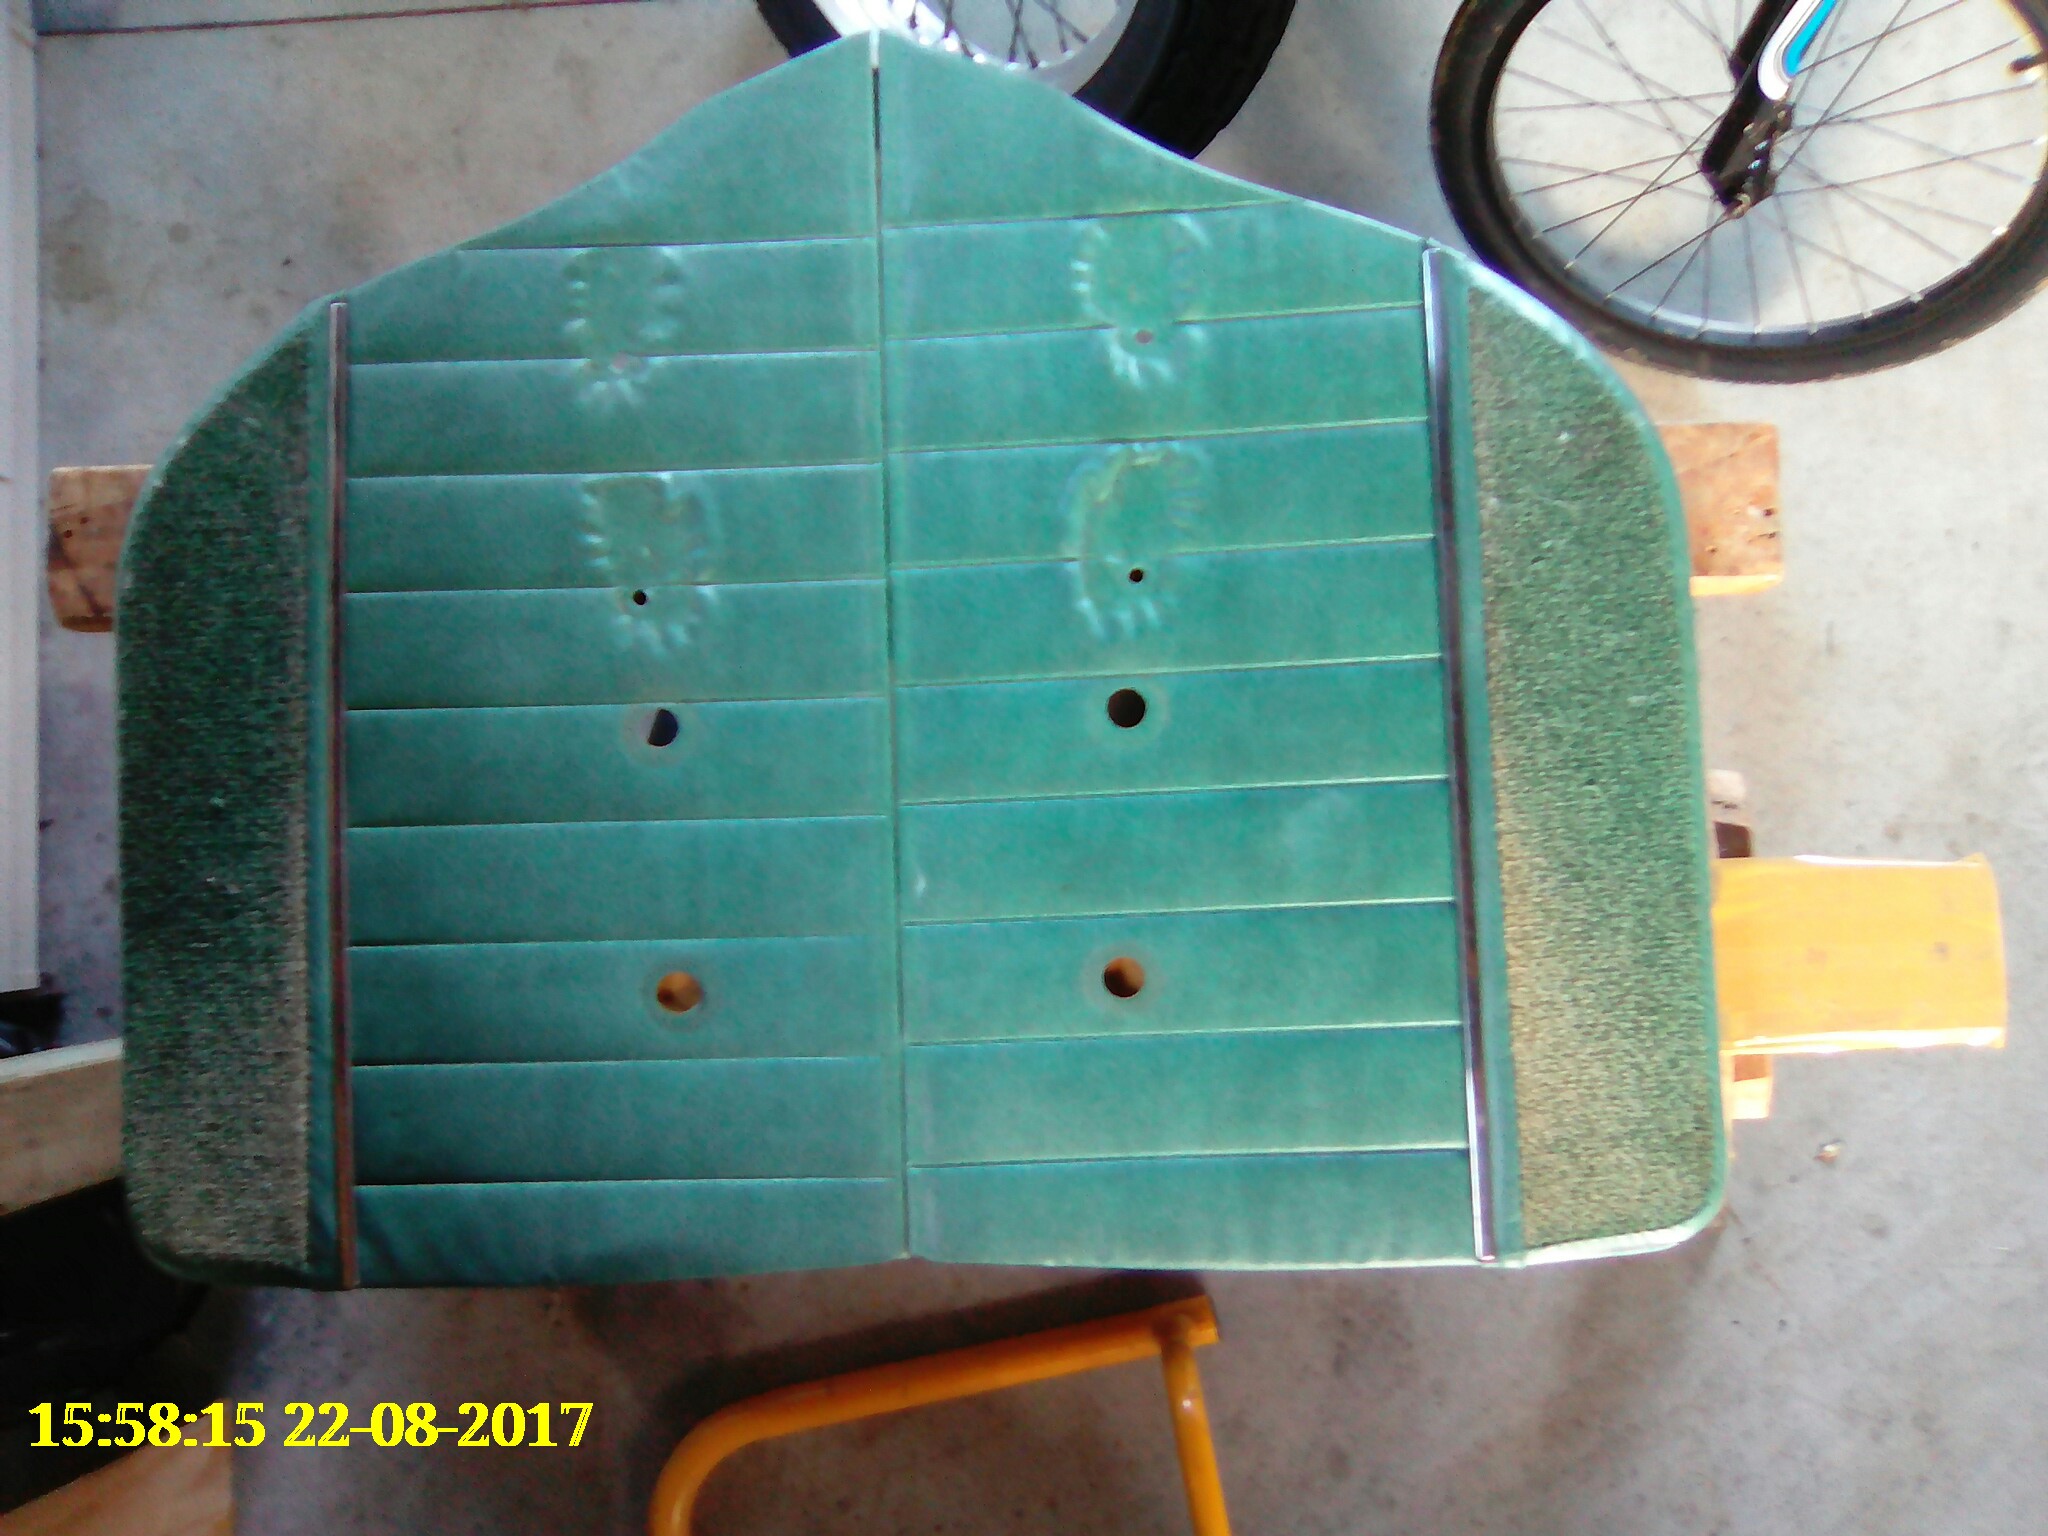
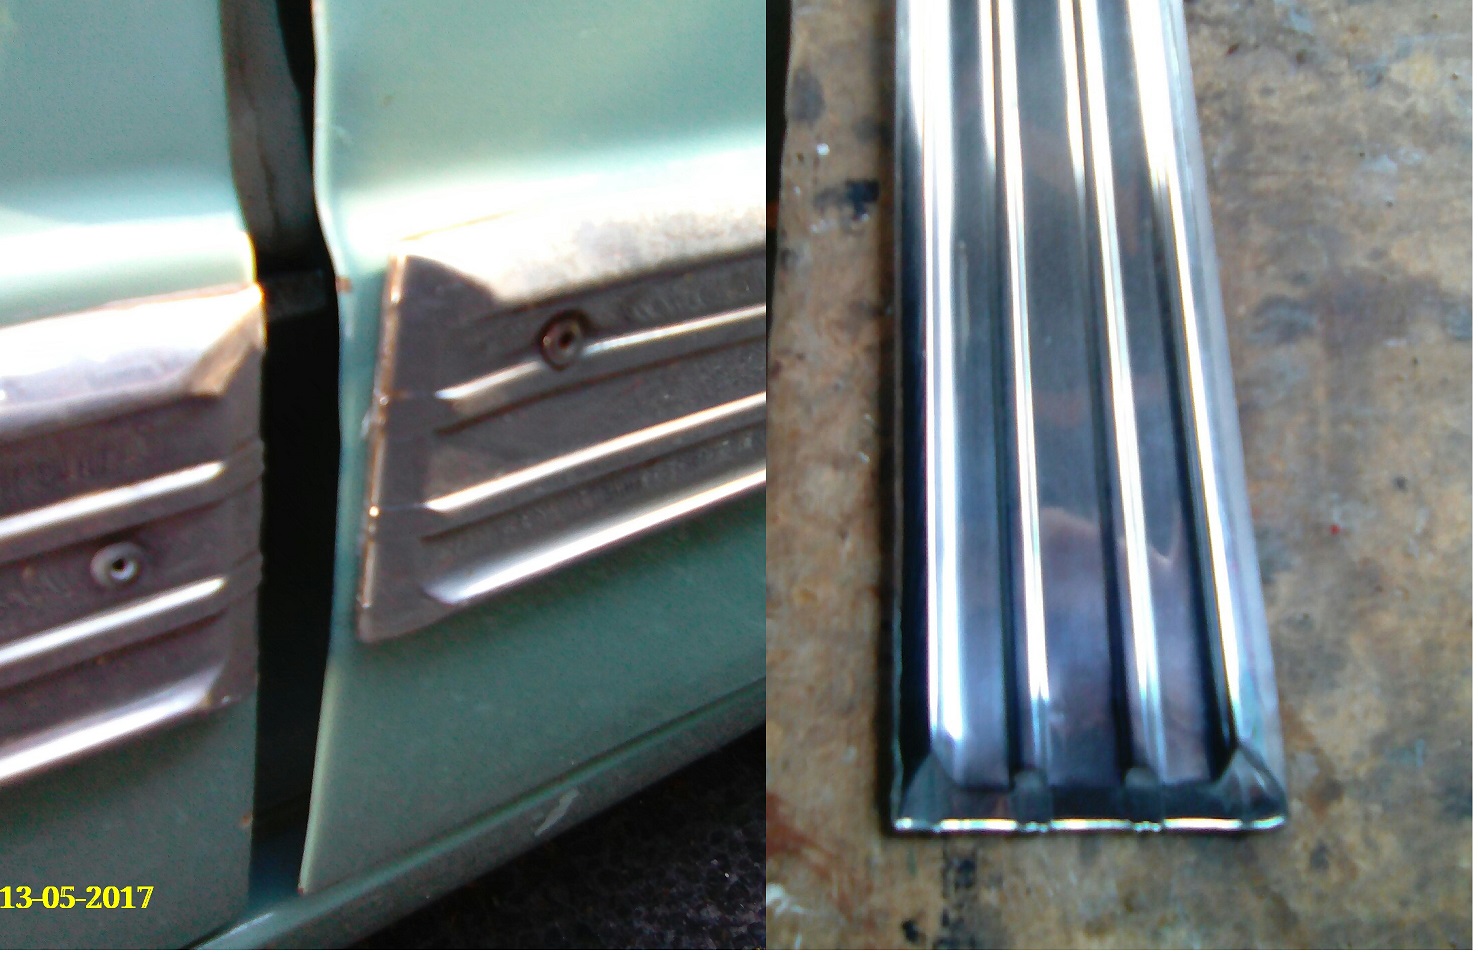
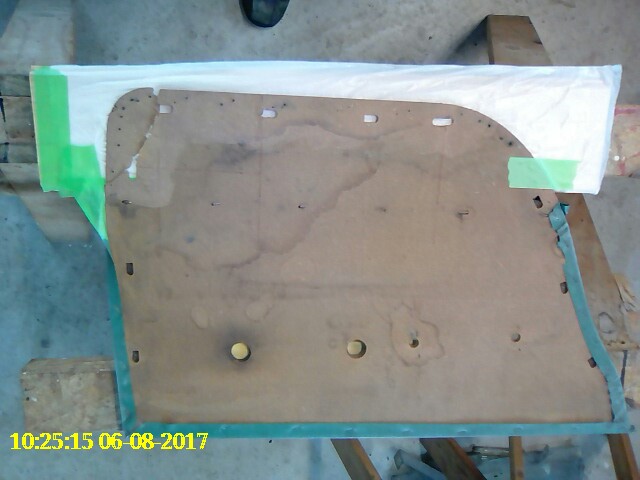
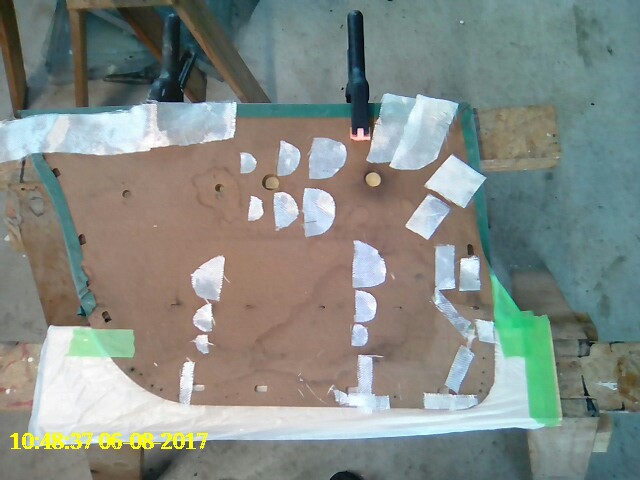
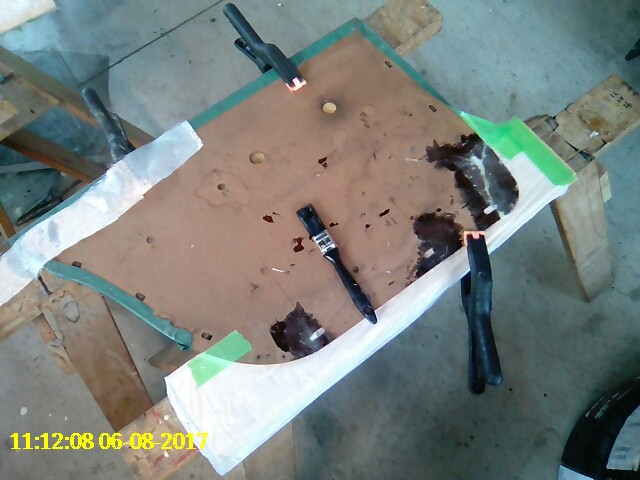
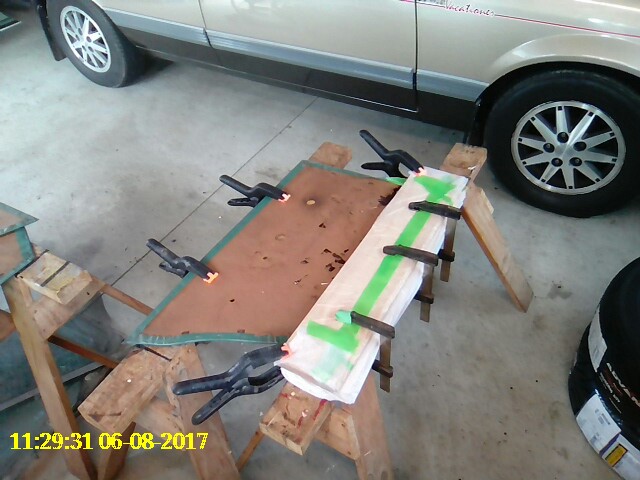
Cool stuff happened this week A local stainless steel fabricator has been busy restoring the exterior door trims for me, I got them back today and he has done a great job. As I mentioned in an earlier post the trims were full of holes where the trim had been pop riveted to the doors, all the holes have been repaired and they look great. Here is a comparison picture. I have also finished repairing the rear door cards. Very happy with how they turned out
4 points
-
It goez Nungarattlenunga nunga rattle rettle Whiiizzzzzzzzzzzzzzz Burrrrrr. (With a huge cloud of thick black smoke, as some hot chick in a suzuki swift with her window down at the lights found out lol) Actually goes hard for what it is.3 points
-
Who knew all your previous Google searches would be relevant in another context? I think the big issue here is why no bug catcher?3 points
-
If all goes right I'll be there in the rover.. first meeting.3 points
-
Sorted the main issues. Speedo is now very intermittent, sometimes it decides Im doing 20kp/h regardless of if Im moving or not, sometimes its pinned off the end of the gauge. Ive tested the hub and the gauge and both are fine so I suspect the cable is broken somewhere. Also the fuel gauge doesn't work, not the end of the world. But its out of the shed: And Ive riden it to work everyday so far this week Much faster than taking the car as I can cut through a pedestrian gate to get to the workshop and shave about 1km off the trip. Takes 2min from my driveway on the way, and 3min on the way home.3 points
-
lemon party golden shower squirt munro, geyser wilhelm, donald pump, gush gush, gone fistin', dirty hose, pump in the trunk3 points
-
October 6-8 in whangamata Anyone with their British steel think they'll be going along?2 points
-
Folding up the channels had some mixed results. I got the first folded up with a bit of fiddling around but it turned out good. The second must have been not quite on the line or something but it came out slightly to big to fit properly. This is both channels fitted into the outer skins. This photo sort of shows how the second one doesn't fit nearly as good as it needs to. My plan is to try to heat up the fold and flatten it back out so I can refold it in the right place. Failing that, I have more steel so I can always just make another one. I'd rather not waste it though. Sorry for the small update. The Mazda should turn up tomorrow. Should be fun.2 points
-
just put your competitors one on there with one of those 'hows my driving' stickers2 points
-
You need to build a lawnmower trailer for towing behind gyro. Or a weedsprayer. make it a business vehicle2 points
-
Birthday parcel from Japan! Good mix of new and decent second hand parts New genuine Honda carry tray thing, HVFactory ignition trim, AF35 speedo cable, Daytona CVT stuff that I got just cause it was only ¥400 with free Amazon prime shipping lol. And also a few decent condition second hand parts, late model handle bars, front carrier rack, trim panel and genuine Zoomer lights. Once I'm not too scared to even plug my Tig in I've got a few ideas on what to do with the bars etc... Also these just arrived for the exhaust Sightly oversized at 27.5mm I'd, but should flow well at least lol2 points
-
Stumbled across this site, has some interesting custom gyros http://mikip.net/gyro/custom/custom.html2 points
-
A Beat down south if anyone is interested, $650 ono http://www.trademe.co.nz/motors/motorbikes/motorbikes/scooters/auction-1398620819.htm2 points
-
All the NOS M series headgaskets you can find?2 points
-
Can you turn up to cert someones car on this please Clint. Then can you post an account of their reactions for my amusement?2 points
-
Been busy over the last few months A12 out and A14 in! Ended up building a fresh A14 9.8:1 Compression (pistons flycut) Cam with 2500rpm-6500rpm range 9.4kg Flywheel (2kg lighter than standard) Firmer Kelford valve springs Ported and polished head & manifold to my ability Twin 40mm dellortos & extractors New alloy radiator on its way, also have to install the e15 electronic dizzy at some point down the track. Here is a quick video of a small test start with single carb when I first installed the engine... Pics following Pistons flycut for clearance H89 head, water jackets tapped and grub screw inserted. Also drilled a small hole to locate a roll pin from the dellorto manifold to keep it alinged Discussion2 points
-
Fitted all the radiator gubbins back in and filled it up with coolant. Thought I ought to let the old girl put her face on. She's a pretty lady! Dropped her down on the ground to check wheel clearance. Sits thusly: Not insurmountable and almost exactly what I expected, but the bigger issue is that the now-spaced wheels rub the back of the arch on lock, didn't think about that. Hum. Might have to get some less dishy wheels on the front. Anyone got any 13x6 equips? Oh, filled it up with coolant and brought it up to temp to start getting air out. First time I've been able to get some warmth in this engine, seems to run pretty well! Then I ran out of fuel, welp.2 points
-
Recycled PC, fresh install o' windows, won't connect to the innernets. On fucking ethernet. 20 fucking reboots later... Christ I hate windows most days. Restoring windows 1% 1% 1% 1% 1% ...1 point
-
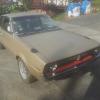
So I want to try get the STARVIA into a position where I can get it out of the garage. Maybe I can take it for a WOF so I can drive it!! Unfortunately, the STARVIA is the first thing I put in the garage then I put all the rest of the crap in. The garage is full as because all my house stuff is in here and I am living in it while the house is built. There is no driveway, there is just a ~30cm drop outside the roller door. I want to avoid moving things outside for this exercise, it's wet and muddy and currently dark. I'm standing on a bench to take these photos. I think there is JUST enough room to fit the STARVIA behind the Triumph with its arse pointing out at the door. I somehow need to get all the stuff behind the STARVIA to in front of the STARVIA. Then use the trolley jack to pull the front of the STARVIA around behind the triumph.... Problems: That big box behind it is a fireplace on a pallet... it's fucking heavy. It's too wide to fit down either side of the triumph. There is also a flue kit there, it's not heavy, but it's big. The thing in the bag behind the bike is a lazyboy, it's not heavy, but it's a big and awkward. The bench by the roller door is too heavy to move. The triumph can't move, it's on axle stands with no suspension. I need to lift the drill press onto the bench I was standing on without breaking my back. Feels like one of those sliding puzzles with the one clear space and you have to move the different size shapes around.
1 point
-
Yeah he was going to put the trailer on the back also to take up more space1 point
-
from memory the burgerfuel dudes wete going to park their ute long way across parks for us so that'll free up a couple. I reckon if we all brung a cone (no not the sweetest geebah puhuhu) road cones n corner it all off1 point
-
I also have a bike with a variator and a belt that needs a new belt/weights which are currently AWOL from Germany. also I'm out of the country between now and Saturday night. No worries though1 point
-
and at the top of those stairs i made a floor for filling up with shit. 2017-08-22_03-43-01 by sheepers, on Flickr1 point
-
See previous two posts above for updates!1 point
-
1 point
-
This weekend, @Alistair bowled around and helped me with a lush polishing effort on the painted surfaces of the 944. Here's a few shots of the result, taken under some neat skies on Sunday evening. 1991 Porsche 944 S2-179-Edit by Richard Opie, on Flickr 1991 Porsche 944 S2-96-Edit by Richard Opie, on Flickr 1991 Porsche 944 S2-172-Edit by Richard Opie, on Flickr 1991 Porsche 944 S2-141-Edit by Richard Opie, on Flickr 1991 Porsche 944 S2-170-Edit by Richard Opie, on Flickr Some of the S2 differences: 1991 Porsche 944 S2-129 by Richard Opie, on Flickr Turbo nosecone, a big upgrade over the old 924-style front my 8v car had on it. 1991 Porsche 944 S2-92-Edit by Richard Opie, on Flickr "Bridge" spoiler in place of the squishy rubber ducktail thing, and the under spoiler/bum flap thing. 1991 Porsche 944 S2-47 by Richard Opie, on Flickr 1991 Porsche 944 S2-106 by Richard Opie, on Flickr 16x7 and 8" "Design 90" wheels and Brembo 4-pot clappers on 300mm rotors at either end. 1991 Porsche 944 S2-116 by Richard Opie, on Flickr 1991 Porsche 944 S2-119 by Richard Opie, on Flickr 3-litre 16 valve 4-banger engine. A shade under 220hp, lol redline of 6500rpm but sooooo torquey. Actually a very smooth thing to drive, with twin balance shafts and all that jazz. 1991 Porsche 944 S2-189-Edit by Richard Opie, on Flickr Delicious pop-up headlights, I can watch these go up and down all day. 1991 Porsche 944 S2-108 by Richard Opie, on Flickr 1991 Porsche 944 S2-68 by Richard Opie, on Flickr 1991 Porsche 944 S2-80 by Richard Opie, on Flickr 1991 Porsche 944 S2-82 by Richard Opie, on Flickr 1991 Porsche 944 S2-112-Edit by Richard Opie, on Flickr Interior things and stuff. Headunit will be switched out shortly for something not silver, and Bluetooth capable.1 point
-
Couple of Pics I took today Yeah I messed the numbers up didn't see them till I got home : must go back & get the '76 Until I get some trim this IS it's good side Gorge'eous ?
1 point
-
we had a roof shout and it was fucking great. approx 11 thousand people turned up and had great times. this is the last people standing. 2017-08-20_12-29-17 by sheepers, on Flickr1 point
-
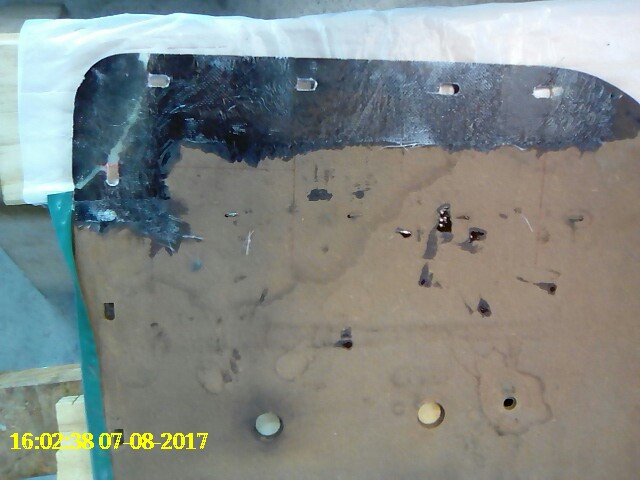
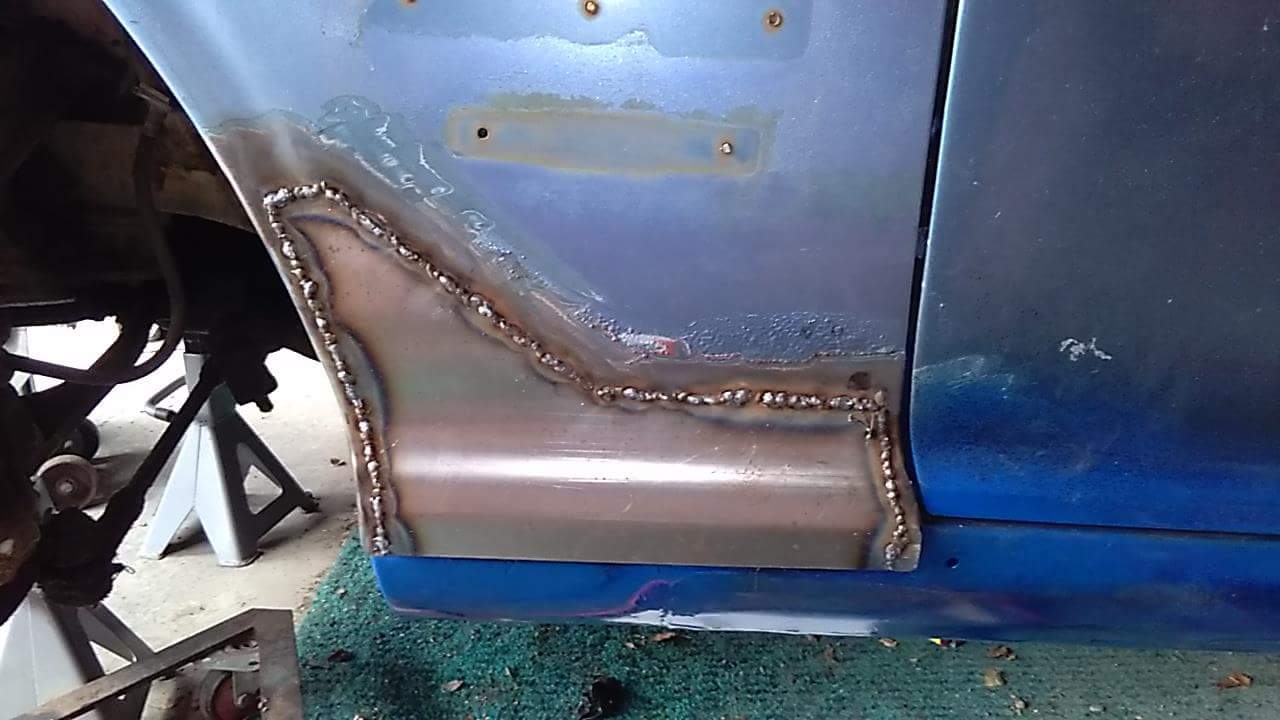
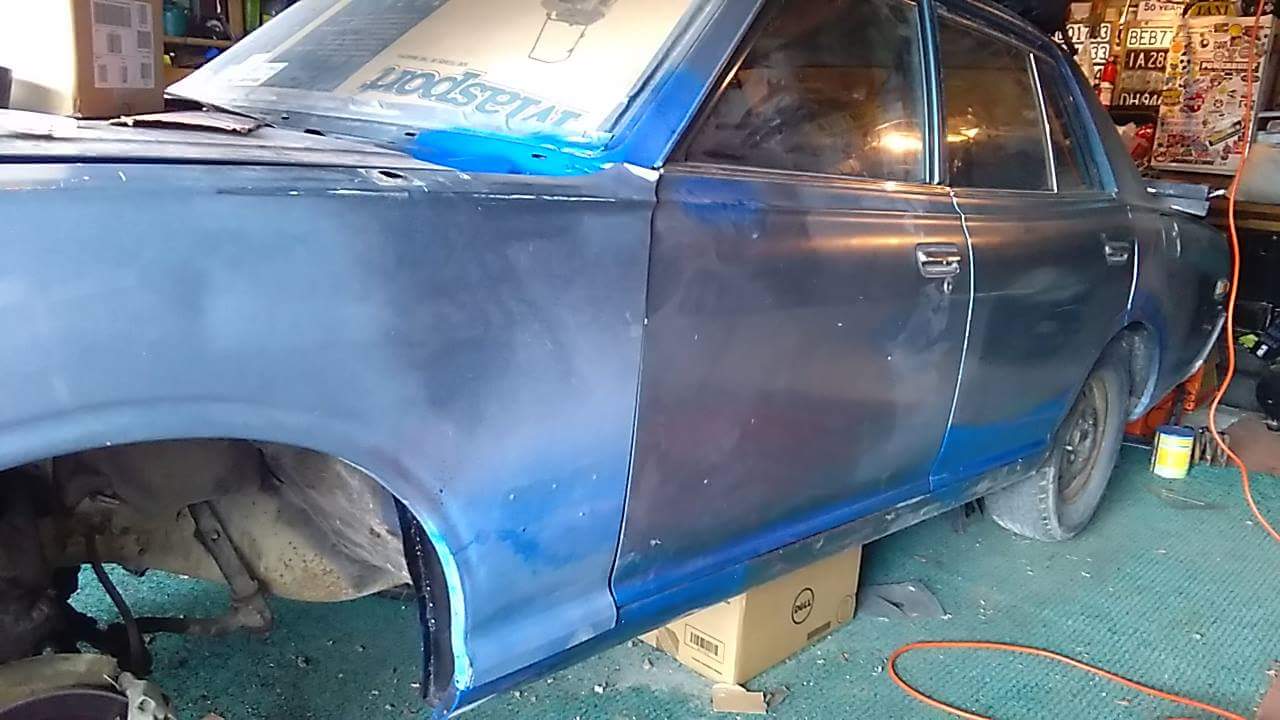
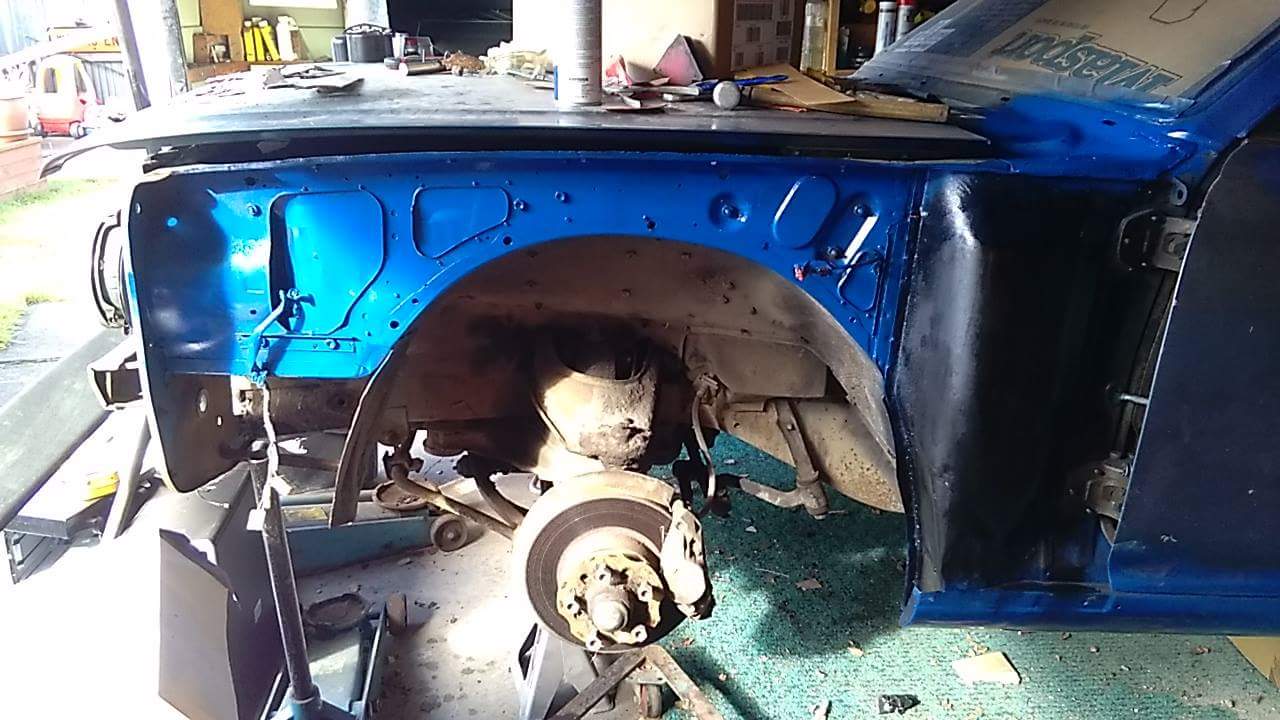
Well it's been a while but I'm finally getting back into it now the weekend's come back. I made a start by cutting out the part of the inner guard that needs replacing. It took a bit of cutting and spot weld drilling but it came away easily enough. Before: And after: You can see a really dodgy "repair" that's been welded over the outside of the rail, probably something to do with the collision that caused all the buckling in the inner wing sometime in the past. I doubt it would have stood up to any sort of cert and it looks hideous so I'm going to cut it from just behind it and get rid of the whole lot. The replacement panel is all made up months ago before I realised how much of a mission the whole job was going to be. Everything you see here is going to be replaced. Before I can do that though, I have to cut out the bad stuff. I started by cutting the whole lot off just where I said. Now to stop all the stresses building up in the same place I'm not going to join both the inner and outer skins at the same point. So I'm going to carefully peel the outer skin back without damaging the inner skin and join the two in two different steps. So, here's the peeled rail. Came away pretty simply. This is the new outer rail mocked up to see how it will fit. Snaps on nicely so I must have made it pretty damn close to the right size. It's way too long currently but it'll be trimmed down to size later on. I learned a couple of things from cutting off the end of the rail. It's a little more complicated than a straight rail on the internal skin. There's a pressed kink, obviously some sort of rudimentary crumple zone. It sort of looks like a shadow in this photo but it goes between the two cut away parts. Now as much as the thought of a pristine front end and a steering column through my face in the event of a crash is appealing, I'd rather not screw up my pretty teeth. Therefore, I'm going to reproduce these features in my rails. I'll have to figure out a set of dies to press them in. On the Mazda motor front, I've got the car turning up on a truck either Tuesday or Wednesday so the next exciting chapter in that saga will begin soon. Until then, more cutting and head scratching today.1 point
-
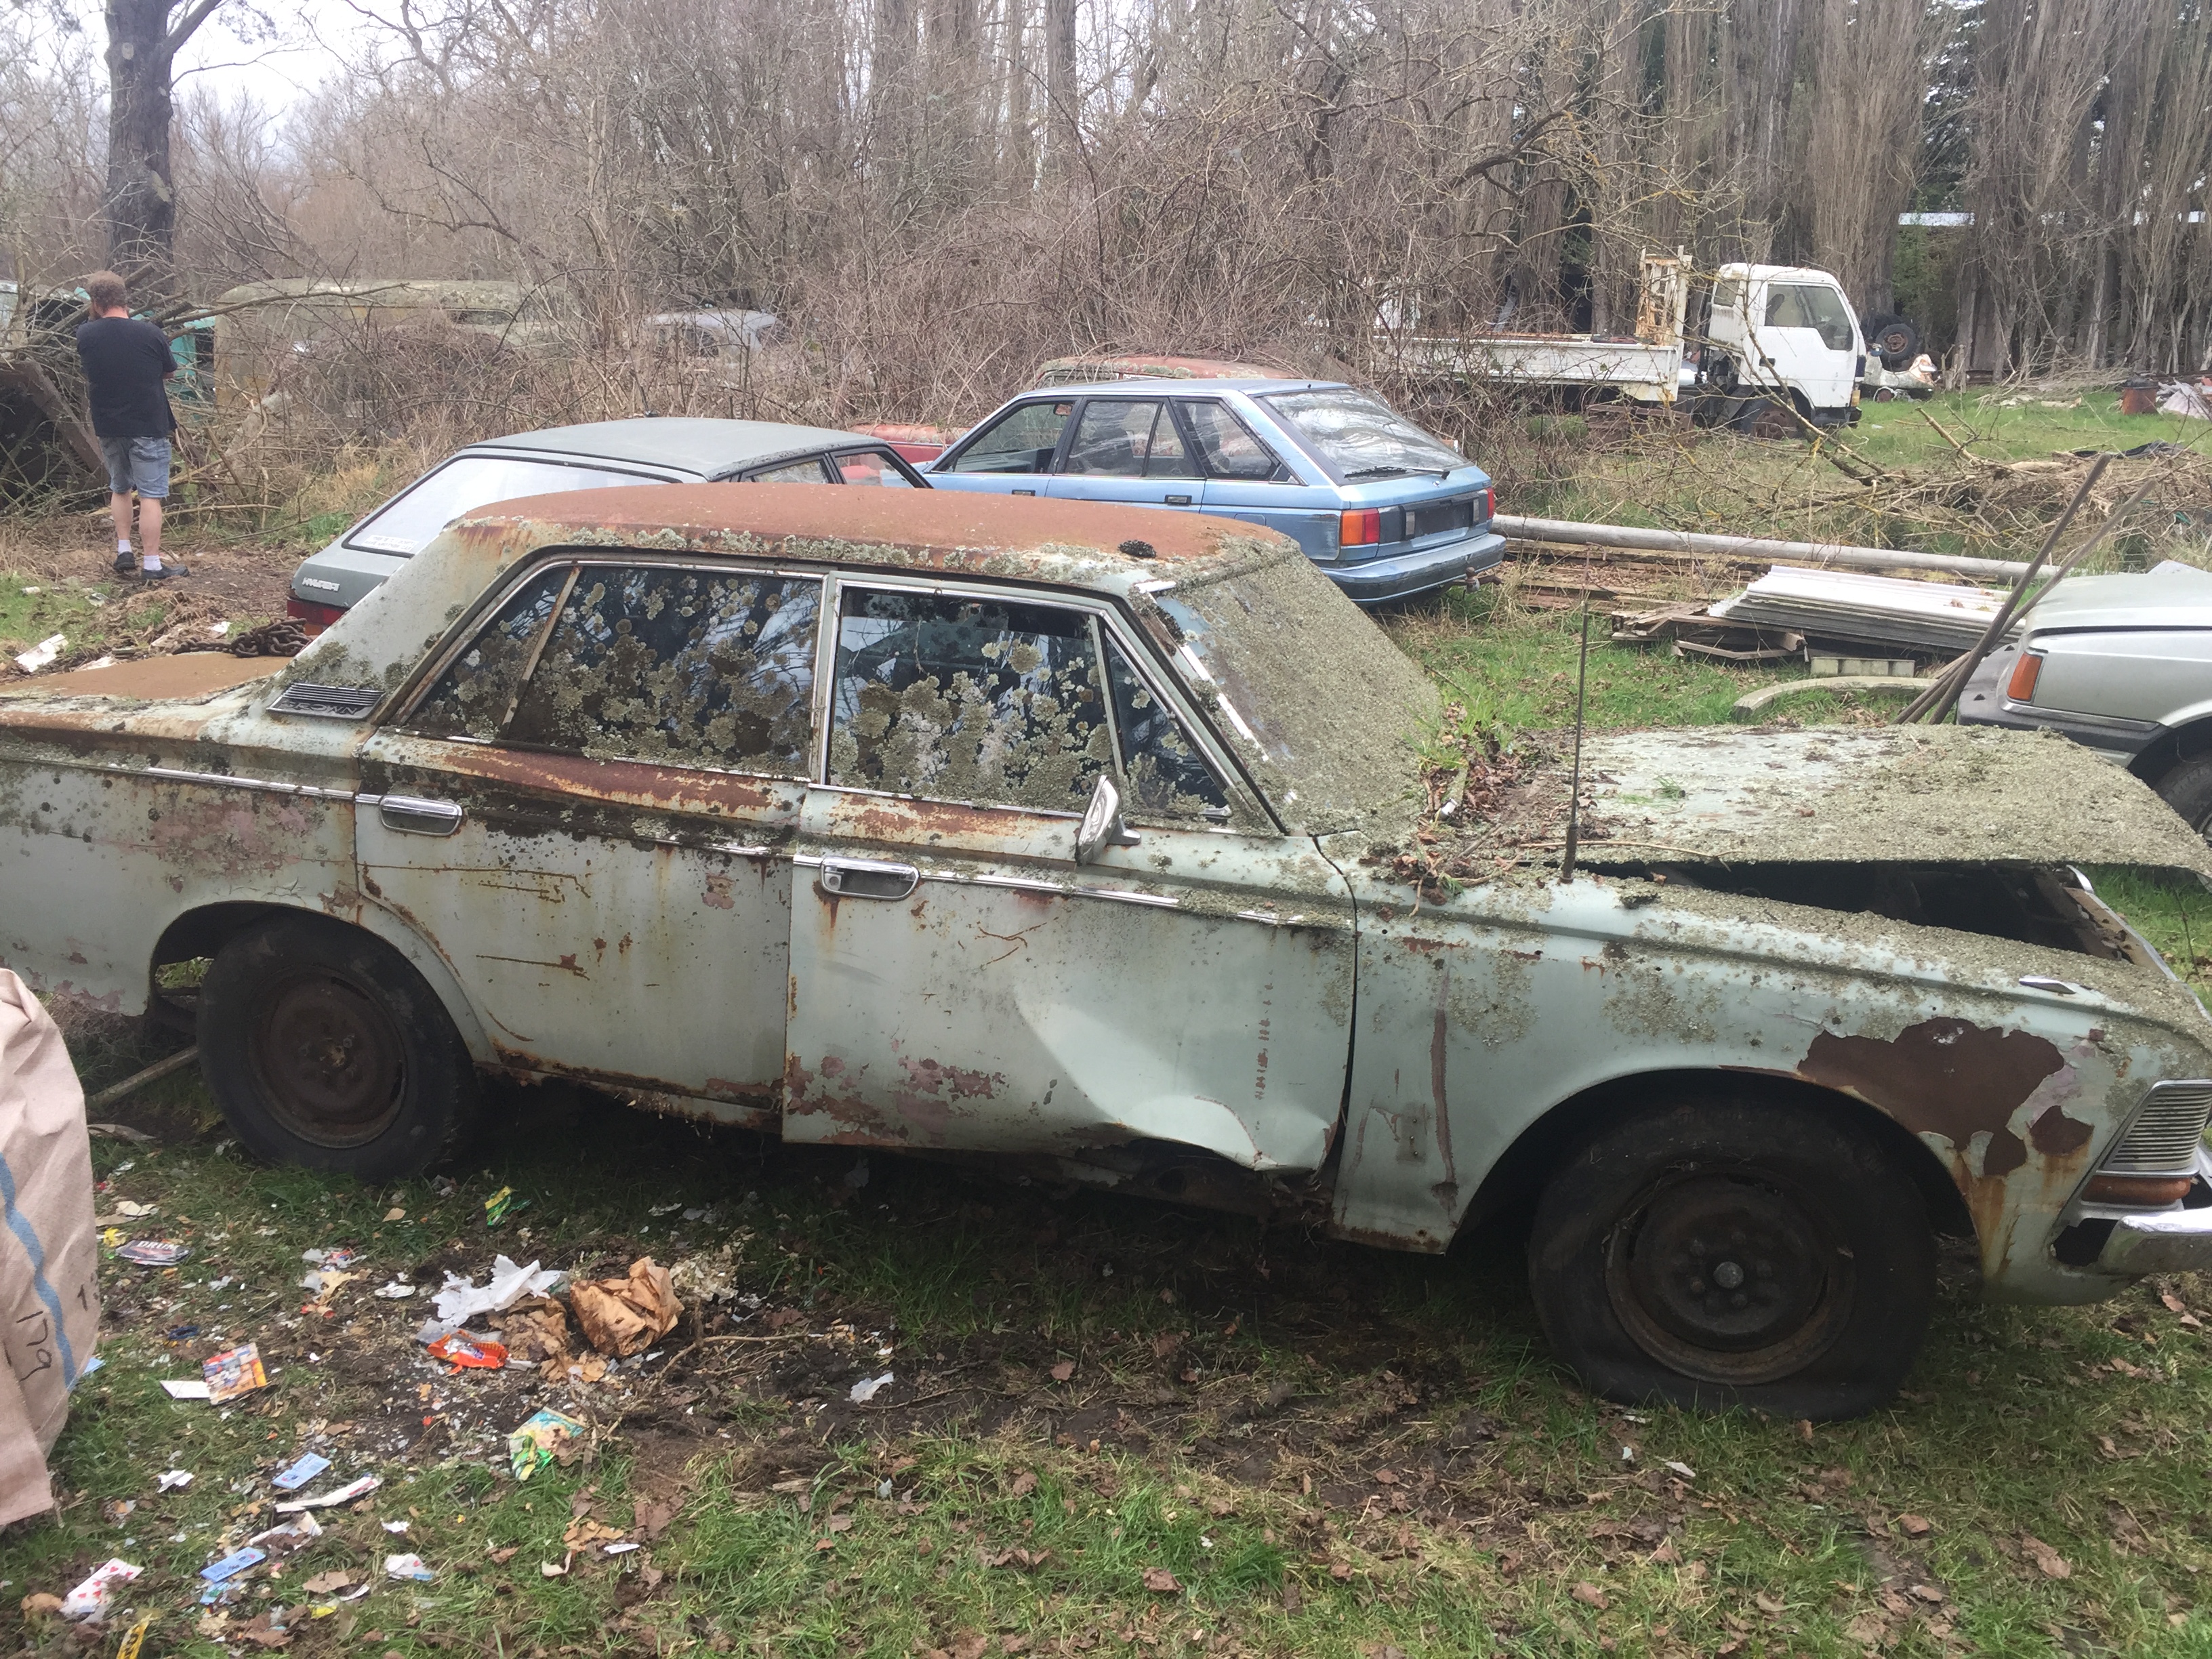
Scored a parts car for the wagon,a series 1 1968 ms55.the interior is in far better condition than the wagon so dash,front buckets and door cards will be going in the wagon,might keep some glass and the diff.sad sight ,always destined for the crusher but atleast i can save some bits
1 point
-
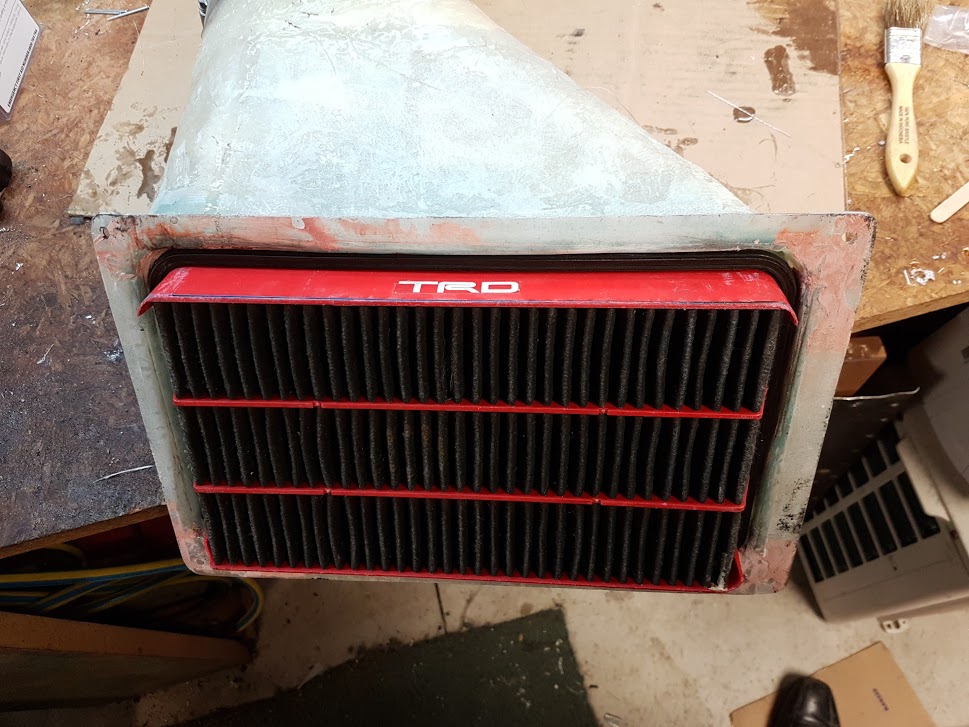
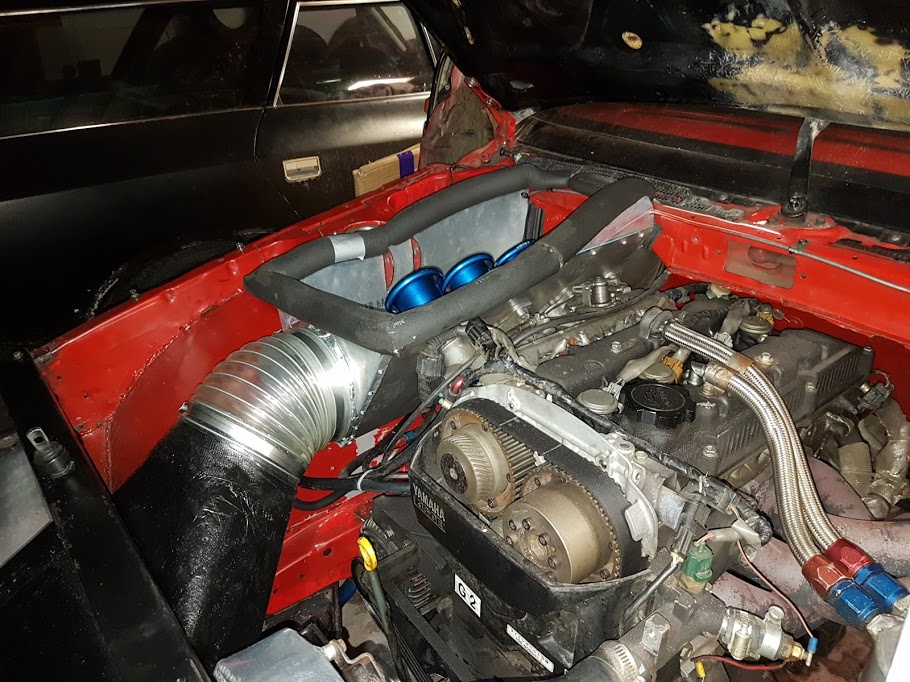
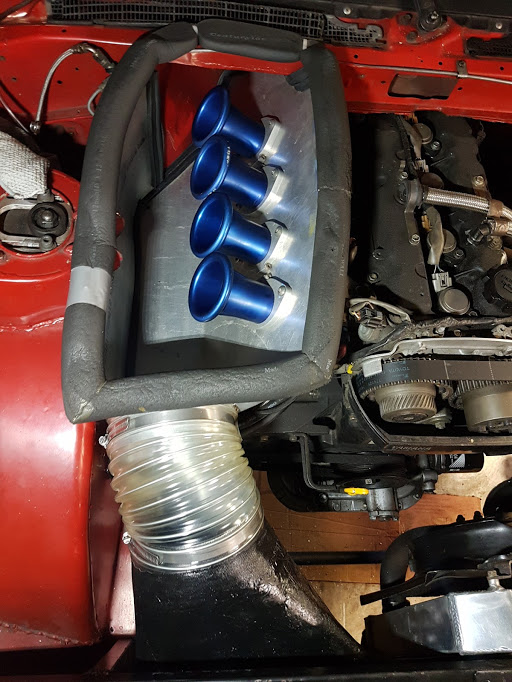
Jason managed to turn my "buck" (read: bucket and piece of wood) into a part that will hold the filter and funnel air towards the air box. the filter fits like a glove! Test fitted with some big hose: Gave it a wash and a paint. I didn't want to sand it too much because I hate fibreglass dust and don't have any masks at home, so it can stay rough . The setup has turned out good enough for now. I'll re-visit everything next time the engine comes out.
1 point
-
Stripped the China carb for a nosey earlier, can't find anything bad about it besides the enricher feels a little bit loose when fitting it to the carb, but it still seems to seal fine so it should be mint as. Thought some of you at least might be interested in having a look inside an NZ$20 carby And the $15 torque driver I don't know about any of you, but I'm actually rather impressed with both! Oh and I've still got a few surprises up my sleeve...1 point
-
That exhaust stud repair is great. I like d21s I've had a few of them.. Sr20 is a bolt in if I remember correctly with some combination of nissan Lego mounts and maybe some fuckery with the sump. I put a 1uz in one of mine, and a 3.8 VN motor in another. Bit of work though. Ka24de would be a good bolt in conversion especially with a turbo on it. US silvias were called a 240sx so there's aftermarket stuff available for them Or a td27 turbo for a cheap to run daily Td42 turbo for max towing /deez skids1 point
-
While the car is away having the panel work sorted out I decided to get started fixing up the interior door panels. I started with the left rear, this one actually as a corner broken off completely along with a couple of trim clip locations that can no longer retain the trim clips. I have built a few small boats in the past (you can see them in the background of a few pictures in this thread) and have plenty of fiberglass off cuts in a box in the shed. I decided this would be the perfect material for fixing the door cards so began by cleaning up the areas to be repaired with a sanding disc. Then I cut out a whole lot of little patches from fiberglass cloth so I can build up the damaged areas. Next I set about rebuilding the damaged areas with fiberglass cloth and resin. Finally I put two layers of glass cloth right along the bottom but by this stage my gloves were well coated in resin and I didn't dare try to pick up my phone to take a photo. You can see the strips of glass cloth that I used in the photo above (top left of the pic). I then sandwiched the whole lot together and allowed it all to cure overnight. And the next day it is all cured. Only 3 more to do.
1 point
-
a few more progress pics.
1 point
-
passenger side is pretty much done / just the guard to go also thinking about welding up the sill trim holes to keep the water out long term
1 point
-
Ok so this weekend i set out to get car ready for caffeine n classics which unfortunately didnt happen. I knew i had to grease up the ball joints so i started on doing that but found that most of the steering ball joint boots were either split or missing completely. 3 were rebuilt a few years ago but had no been on road to drive up mileage. I suspect more may need doing. So i started by removing it all to replace the stuffed boots. Put it all back together and greased up every nipple. Steering felt a little stiff when going for a drive will re grease it all again and double check everything again. Otherwise felt good. Treated her to some whitewalls ! I checked out daves sweet photo album of 100s of cars he has white walled while he got stuck in! He had never done one of these nor did he see one when he went to Japan recently lol. Gave it a wash at wash world on the way home. Everything was going ok. Sunday morning got up early put car in driveway n let her heat. The brakes were feeling wierd. I popped the bonnet to check the brake master and it was completely empty! I popped my head under car and the right rear drum and tire was covered in fluid! Buggar! Trusty tools of the trade! I know the front left has been rebuilt not so long ago too so im thinking i should wip the remaining 2 out and have them done because no doubt they will be in same condition. The prince only has 1 brake line for all 4 wheels so if this was to fail while driving id loose all brakes! Sketchy! So she sits up on all 4 axle stands again haha.1 point
-
Picked up my BRM 4 spokes today fully refurbed. Thanks to Nigel & Dan from Manukau Auto & Tyres for the top notch workmanship as always. You want your classic wheels restored these guys are the best.
1 point
-
One complete box ready for action. Body work will start again in a couple of weeks so looking forward to finally getting progress
1 point
-
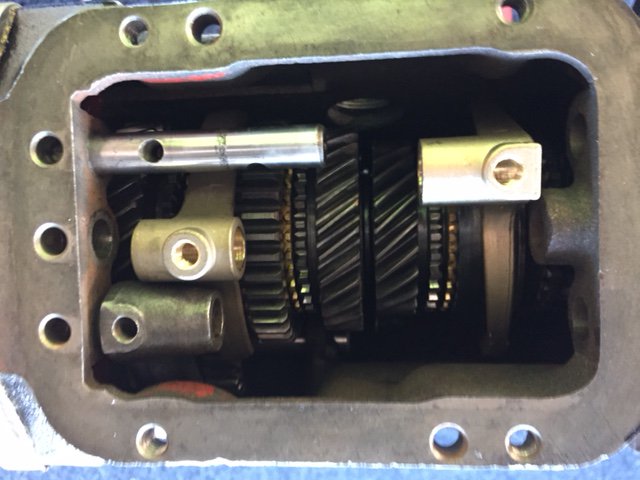
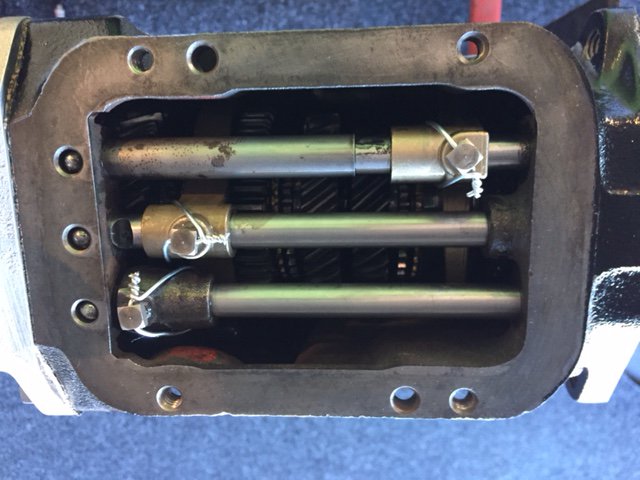
Used new gear selector forks as the old ones had nice big wear grooves which causes the box to jump out of gear. Put in the selector rods and then wired the rod securing bolts.
1 point
-
The wagon has received some love lately.I managed to find a series 1 wagon getting wreaked in OZ .He had everything i was missing so the wagon is now complete.I will probably look into getting the badges scanned and 3d printed as they're pretty brittle.He also had a spoiler which looks to be period aftermarket,whats your guys thoughts on it? nothing/roof racks/spoiler? ( spoiler sits a little further out the back) .Also got a NOS grille from Thailand and a bunch of ms112 parts from Seedy AL that will improve the wagons braking. took it for a spin round the block goes well considering stale fuel,no brakes and 20 year old engine oil front to back is filling up with parts1 point
-
I pulled the springs and shocks out the back with the car on axle stands and the diff head supported by the jack with some rags on it to reduce noise from there. After bouncing it around a bit and using the mechanics stethoscope/screwdriver I decided that the noise was from the lower left rod end. I already cleaned and greased the rod end and bolt on the top left. I did the lower one too and it didn't fix it. I think the cause might have been the lower arm was adjusted a few mm too long so when it moved it got way more force on it. I slacked off the adjusters on that arm and adjusted it until it was in the middle of the loose area. I also thought about putting some of the friction modifier I had into the LSD to try shut up the chatter, but it was already at overflowing and the oil looked milky so I want to change the diff oil soon as. I'm not sure how the diff oil gets water in it.... it's been sitting in the garage for 2 years. It very rarely gets wet... Where does the water come from????? Well, I took it for a test drive up to Kaitoke and the noise appears to be gone... for now.1 point


This leaderboard is set to Auckland/GMT+12:00