
Leaderboard


Popular Content
Showing content with the highest reputation on 09/21/15 in all areas
-
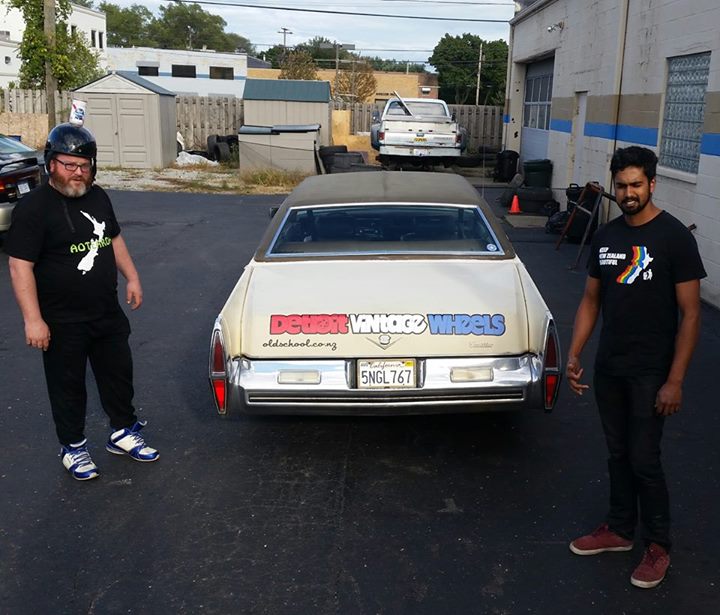
So i got some new wheels for the 120y, so the plan was to chuck the street fins on the van. Buy some tyres off the tard, get 3 sets of wheels stripped and fited up etc (had to swap tyres from fins onto new wheels for 120y, then swap tyres from trademe wheels onto fins for van) Motivation high, chuck wheels on back of van. sliding door wont open past the wheel. Rage quit. Joe, you can have your wheels back, and some free tyres. Pic for thread, jdm parts hauler yo5 points
-
more welding then used cunning rat technology the worlds nutterest right angle non variable high speed drill combined with much bastardry to hopefuly get the instant center higher up and further forward given the ride height desired but I think now the tide may have turned, with just about all the horrible upside down welding to shitty sheetmetal done and more straightforward and obvious fabrication left anti roll bar tacked in place and prepping to install the coil over mountiing bar. have to box out the rails and make some towers for that to mount it high enough for the desired ride height with the 7" stroke shocks I have5 points
-
Wow- after a bit of digging about through her old photos my mum finally found some of our old 120y wagon from back in the late 70s/early 80s. What I was after was confirmation that the car for sale on the oldschool classifieds area.... http://oldschool.co.nz/2011/forum/index.php?/topic/49659-fs-datsun-120y-wagon-nelson/ Mum phoned me this morning with good news. Yes!!! it is indeed our old car. Damn this is cool news!!! I have spoken to Dave's (avenger tiger) boss and its still up for grabs so I have said I'll take it away Mum and Dad are very excited about the prospect of getting their old car back. Mum has been talking about getting a Morris Minor Traveller like they had before the Datsun but they are too expensive. Getting their Datsun on the road for them would be awesome. Luckily it sounds like I might be able to get the old original engine back as well. Its currently in a Suzuki 4wd but the owner wants something else to power it. So this will be good if I can secure its original heart. Anyway- I'm so excited. I should be in the workshop right now welding my Viva wagon but I couldn't help but start a thread even though I don't yet have the car. I am under no illusions that it will be an easy resto. It will be rusty like Ive not seen before. But I don't mind that. Hopefully if I need any parts there should be enough bits floating about in NZ on the vibrant datsun nz forum. Another choice thing is that because mum has photos of it with the plates visible hopefully I can apply to reuse the old plates when it come to the re-vinning process. So here are some cool photos. All taken in the late 70s or early 80s. This is up the Westbank road when we used to go visit this mad old farmer/recluse fella. He would hang weird things about in trees if I remember correctly and thats what we are looking at. This is me and my brothers and sister in the boot along with Bella the smelly old Lab and Pipi the cat (who lived to be 19 years old!). I'm the little fella sitting on the back seat on the right in the white collared top. Here's the two family wagons. My Dad was very proud of his Mk4 Zodiac wag that he brought over with him from the UK. It was always giving troubles whilst the Datsun just purred through life. Dad never bought another english car again and we ended up with two more Datsuns after the 120Y. Mum and Dad did buy my first Triumph off me when I left for me 10 year OE and they loved that old car. But that's because Triumphs are bloody awesome too. Finally here is a photo of a Family reunion at Woodend. It was my Mums family and this was the mens beauty contest. The little Hillman Superminx wagon next to the 120y was my cousins and that was a cool car too. I think my cousin Helen ended up crashing it Here it sits in its current condition.. Discuss Here4 points
-
so much easier to work not lying on the ground in contorted positions4 points
-
in this update, more rust... Got sick of sanding bog on the fender and sill, so put the front/side down rolled her forwards a bit and jacked up the back. RH side rear wheel has a pool of diff oil on it, so i guess the axle seals are pooped. Oh well more parts for the list. anyway, onto the oxide. I fixed one tiny wee hole behind the gravel plate at the rear of the sill/front of the rear arch, but the rest of the sill was really good. So onto the Left boot well. a BIG cut to start with i cut the lot off as the inner skin is pooped as well, but mainly so i could also access the 'roof' of the inner skin. before i cut any more out i remade the outer skin while i had prlenty of datums this is why it rusts: damp and crud in the boot get trapped between the skins - this side also has three openings all behind the wheel so of course it was full up to the top with 50 years worth of road gunk. - one for the bumper mount (the skins were not spotted together here - helpful as i ca reuse the indent) - one for the petrol flap drain pipe and - one moreanother for the rear lights loom keep on digging corner of the rear bumper/valance was a bit frilly too and start putting bits back in, pretty happy how that square bump lined up, shame about the welds I have also now removed the remains of the old well floor/roof of the inner skin and remade it so the outer iwill have a single skin by extending the floor straight accross to the inside of the outer skin (instead of leaving a small gap to collect shite) so there is one less rust trap. Will also save quite a bit of material and save me from remaking such a complex piece that cant be seen but it needs some grindering first so will fit that up later in the week. hard part will be tacking the skin on without it warping to heck. lucky the bumper will cover most of it Ive saved all the CAD templates for when i get to the other side - its not as bad but may as well get the same treatement when i make it around there.4 points
-
Built another ae101 as a daily in the past couple of weeks. Back to cheap reliable 4age power for daily driving yay! Keeping this one extremely simple compared to the racecar...3 points
-
Already done. From the sounds of it, I've snapped up the last two bumper supports available.3 points
-
This is what happens when you open Pandora's Box. CH-WOP-WOPPPPP. The front bumper support, she is toast. To be honest, I was expecting to see something like this, so it wasn't that big a surprise... front bumper supports on AW11s are hideous water traps, no two ways about it, and I would have been an even bigger idiot if I'd pulled the front apart to fix the crossmember but neglected to check behind the bumper. Again, compare with the one from the previous AW11 - which, as mentioned previously, wasn't all that rusty elsewhere. But at least that satisfies my curiosity, and it shouldn't come back to bite me in the arse further down the track. Guess I'll be getting hold of Mark from Toyota on Monday. Elsewise, the rest of the front is now off, so work can start on the crossmember. Discuss: http://oldschool.co....1-sc-chit-chat/3 points
-
Well, not quite ready for nats, but good things take time right? On Thursday evening it fired into life for the first time. After lots of fiddling, and a round of fish and chips, we shuffled the E21 onto the dyno at approx 9.15pm. Big thanks to Roskilda autos! Rodney and Ari are great guys who know who to get stuff sorted, and went hard to get me doorting for the weekend! After the first run was worked out properly on a calculator on my phone translating to "old barry horsepower" figures, my face turned to a big notbad.jpg Things only improved from there. I rang the engine builder the next day to tell him the numbers. Pretty sure it's one of the only times I've heard him curse. We were both pretty happy! 152wrhp/190hp at the engine3 points
-
Who's up for this? Have put my name down and will be taking the zed along. Let's get an OS crew together and make them swooon. Details here: http://www.gentlemansride.com/rides/new+zealand/auckland2 points
-
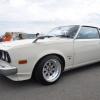
couple of interior pics. original as. aftermarket 70's tacho kind of ruins the mint dash, but sweet 8 track player makes and selection of terrible 80's tapes makes up for it! engine bay looks like every other cedric it was sunny last weekend so went for a cruise needs the front right brakes adjusted and thats about it2 points
-
With the VW finally out of my shed, I've got a bit more room to work. Note the angle of the pipe, that's not right at all! Realizing the Mineralli (I presume) mount is never going to work on my Morini I started making a mock up, angle has sure improved and the massive gap between the bottom of the case and the pipe closed up a lot. It's put the header in a nicer spot too, should be just a case of cutting the head pipe off at the first weld, cutting the flange off, rotating both and welding them up Also thinking I may cut the stinger off the chamber and rotate it a bit to bring the silencer in a bit as it's a fair way out at the moment and I don't exactly have any plastics for it to avoid! Had a go on Sunday at making the new exhaust mount, looking through the steel I've got sitting around the shed I could only find 1mm and thinner sheet or 10mm and 15mm plate. Obviously none of it was going to work, came close to giving it up for the day as there's nowhere open in Gisborne on a Sunday to buy steel, until I spotted a few old saw blades up in the rafters! 3.5mm super duper hard tool steel, fucking cunt to cut or drill! That's where I'd got to yesterday, ran out of drill bits and patience. Today I dropped my tank in to get sealed up, should be done Wednesday at the latest. Finished shaping up the mount bracket, just need to weld on a spacer then paint it. Sits the pipe in a good spot Was very hard to make myself pick up the grinder!But I did Port could use a clean/polish Won't take much to put back together When I'm not trying to hold my phone as well as the pipe I can close that gap right up. Also the Aliexpress goodies are starting to arrive2 points
-
lets run with the meet then, I'm happy to still do it2 points
-
Or your kids could hack in via Bluetooth when they think you're driving too slowly.2 points
-
ONe of us, one of us, one of us, one of us, one of us, one of us........... If there's anything you're needing Alex, sing out. If you upgrade to 13" alloys, there is a very easy brake upgrade which will make it stop like a champ. (Assuming it has disc brake struts?) I have an A15 (if you want?) that you can have for what it owes me. The water soluble nature of datsuns will be no match for your gifts at de-rusting cars. We'll have to find you a factory B120 tacho for it too. Oh yes, we're going to have lots of fun.....................2 points
-
Please do post photos on this thread of your setup. Yeah I like those above safety designs in a E throttle you mentioned. Plus you could fit a bluetooth dongle thingee to a MS equiped car running a E throttle and using MS droid rev the engine whilst standing away from the car !2 points
-
I also enjoyed the convo about road boners and school bus drivers with over sized novelty spoons to take care of such business2 points
-
2 points
-
The more I looked at this the less I liked it. I cut it back off and welded the old pieces back in. Then trimmed the top off. Made a couple of brackets up. Lined up the radiator with the hole in the bonnet, and away we went. I've remounted the alternator to the lower left, I think it's where a P/S or A/C pump might go on a car? Anyway it will give more room to mount a hydraulic pump up where the alternator was. The bottom hose has been altered to point into the front of the chassis, the radiator has had it's inlet and outlet changed to match the Datsun motor and I made a tensioner and dummied up a radiator hose. The alternator sits out a little but no problems. I've found a problem. The hydraulic pump I have, it's designed to rotate anticlockwise and I wanted to turn it in a clockwise direction. Aliexpress have pumps that look like they should do the trick, I'll order one this week.2 points
-
2 points
-
Im back! Well I was always around but on one night a couple of weeks ago A cold sneaked up behind me, threw a sack over my head and dragged me off to a place where I did not want to do anything but sniff and feel yucky. This was just after having been busy fixing other peoples cars for that money thing. Basically put.. my roll had stopped rolling and this wagon stayed up on blocks. But yesterday I got my rust mojo back and got stuck back in. The wagon has been sharing the workshop for the last few weeks with a cool old Volvo 145, a very bright Saab 95, Bimmer 320 plus Hannahs Trump Mk1 wag. I do like lifting the door to see intersting cars in there Not too much to show because it was all slow repairs around the chassis rails and jacking points which I want to really make sure is nice and solid. I have now just earlier finished the worst of this area with not much to go. I used a combination of 1.6mm steel and a very handy piece of box section that happens to be the correct width and thickness. This has been saving my folder from trying to fold 1.6 too often- it being really only designed to fold up to 1.2mm. Luckily the rust has been along the bottom of the rails where the damp has sat thus leaving the uppers attached to the floor nice and strong. I remade the gearbox mounting brackets and made them semi fixed with an extra bolt rather then the little tabs that Vauxhall had fitted, now rusted away. As I have been working my way along the rails I have sprayed the insides of the new steel with zinc rich paint. Later on it will get a heavy dosing of wax. So the last very interesting photo for this mega update is of the underside sort of almost rot free. I promise I will try to do better next time although I most likely will just take more photos of rust. I am very much looking forward to the mechanical/bodging/fiddling/tweeking updates when I get the car moving and stopping. I have been having many day dreams whilst chilling in the sun under the influence of man flu about what I could do with the engine/what I could swap it with. I still love the absurdity of a grand plan I dream about where I squeeze a BMW V12 with a manual box in place However I usually come back down from cloud nine and mull over more realistic propositions such as a sneaky carb fed turbo, perhaps a Datsun engine or maybe fit fuel injection from another 1200cc car (that last one more for the technical fun in doing so rather than any real benefits it most likely wouldn't really bring) For now though it has to be rust removal.2 points
-
OH MEAN. So yeah did't get compeltely finished with a few things. I wasn't completely happy with the brakes, exhaust is still buggered. headlamp adjustment was done by me on the shed wall and I thought it was stil way out of whack, and yeah she's got a couple of rotten looking tyres, but the compliance man was happy as a dog with two dicks with the thing and only kicked me out for the exhaust. Took it straight to exhaust shop once the testing station lad rang me, and will hopefully collect it from there mid morning tomorrow and go get a recheck and win at legality. CHOICE2 points
-
Karl and I have talking about doing a vintage gaming day, I'd be keen to set it up at mine as a meet in the next couple months1 point
-
it was, now its been raining for 3 months its all fucking mud Got some wood to line the wall from the plyguy. was pretty cheap. mostly cosmetic seconds. done about 75% of this end. Just need another stud to attach it to, and wire up the switchboard. and find my motorvation. i left it out in the rain somewhere? also partially built some shelves. it was easy cos the wall was half my shelves already built. couple lengths of 4x2 and some other random offcuts, plus some more seconds ply to line them. They are 700mm apart so im thinking of making some levels in between the current ones starting to fill up...1 point
-
Been a lot of work on the boot floor. Seems like the end of my time at this property, so trying to get enough done so i can spray epoxy on underside before i have to be out of here.1 point
-
I cant be fucked reading all the discussion Whats going on in here?1 point
-
Figure out the lock issue? hitting Headlight buckets?1 point
-
aagain I feel your pain1 point
-
http://www.aliexpress.com/item/4-hole-mounting-type-max-250bar-working-pressure-hydraulic-gear-pump-HGP-1A-F8R-with1800rpm-rated/1691104933.html1 point
-
Yeah a good cause get behind and good reason to ride ! Will also be attending the Christchurch event1 point
-
Awesome!1 point
-
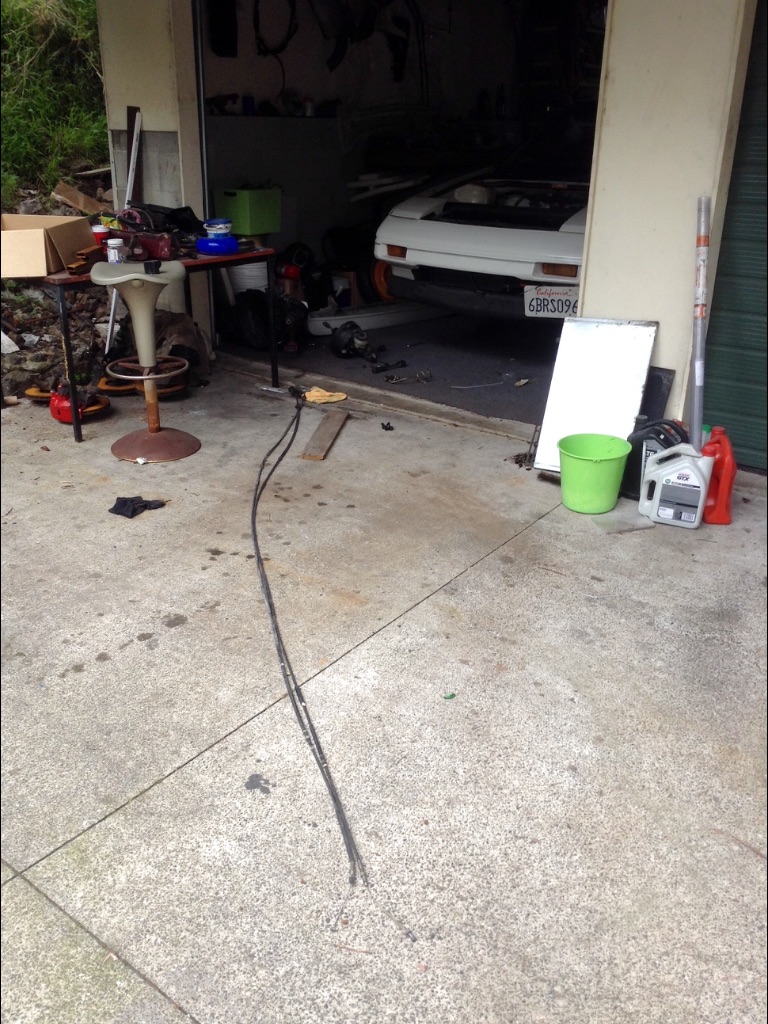
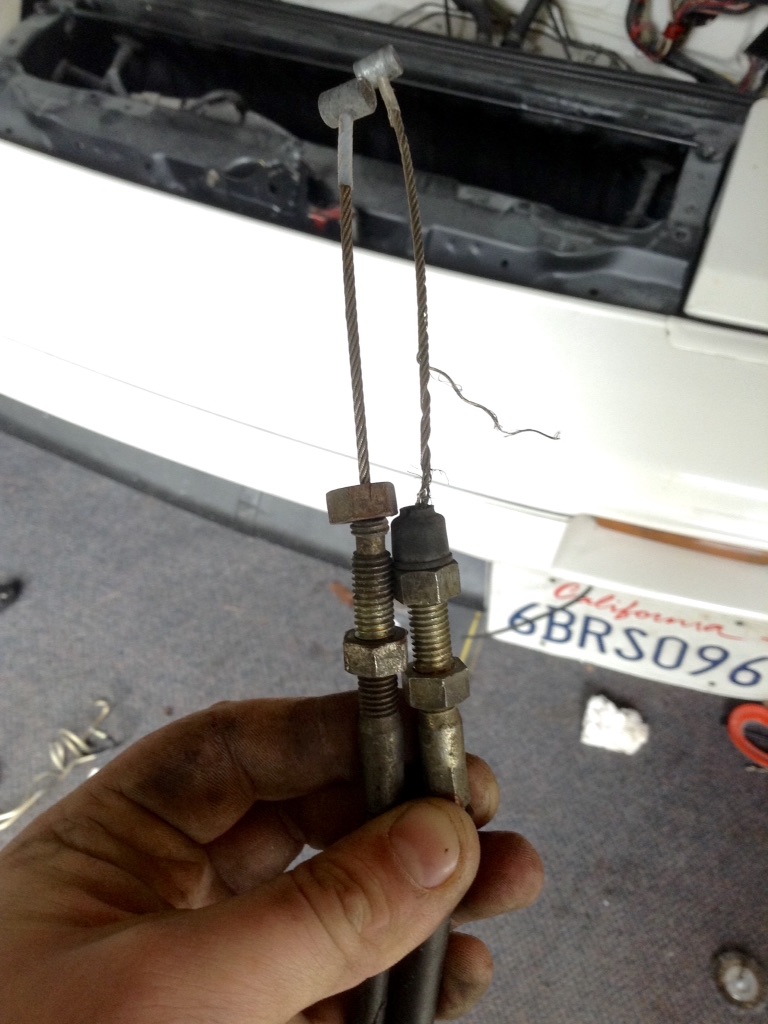
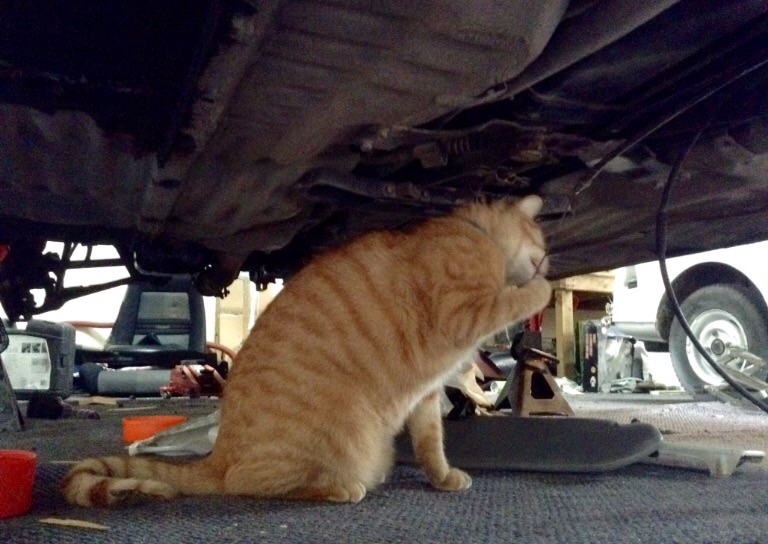
Working threw little gremlins atm while I wait on some suspension and hub parts to roll in Swopping booster and hilux cylinder over too. Old one had leaked, pealing the paint underneath it. Seems to be a common thing in these Sanded it back and painted it, it's a couple shades off so hopefully no WOF guys get funny about it Long ass acsel cable Hanging on by a thread Finley found it fun too Started on the drivers chair too, will make sure to do a good write up on that
 1 point
 -
Below is a picture of a navara rear end i have in my shop at the moment. Definitely looks as though your missing a leaf. At least.1 point
-
The vermin prints in the dust were the most loltastic part Keen for Horopito mish if you and Chrison8 head down, I feel like a mental health day off work to come help pull apart old rusty cars would be beneficial!1 point
-
I was waiting for someone to read that bit on the for sale thread and then quote me. Caught out! Yep... when I saw the first photo that mum sent me of the wagon with us kids in and I notced that it was a two door I started to get a little 'mushy' inside at the thought the one in nelson might be ours. When she sent the photo of car with visible plate I got very teary eyed and clucky for the little Datsun and suddenly.. yes I do want it, I want it now, I want to save our little Datto.. Yeah... that old nostalgia thing eh...1 point
-
Yep I hear you, I've tossed it up a bit, pros and cons etc. It only takes a split second of the throttle running on, and then you're flying off the side of Takaka hill or Scenic Drive which is less than ideal! It's fairly robust with its safety features though... The TPS outputs two seperate signals, and so does the FPS (foot position sensor) So if one of them goes faulty, it sees that it doesnt match the 2nd signal anymore and shuts the system down. It also has a relay controlling power to it, and an electronic clutch to disengage it both as safety features if the TPS readings arent as expected etc. I guess another way to think about it is, a cable pull throttle can still jam open as well. And some people have had that happen too. The Atlezza TB has a cable pull system, that if the electronic junk shuts down you can still open the TB half way by cable. So can limp home if need be. There are zillions of Altezzas out there which all seem to be running fine with their factory fitted E-throttles... Lots of people moan about E-throttle being mushy and unresponsive, but I reckon it's all about how the factory ECU is controlling it, not a physical throttle lag. Looking at the datalogs the physical delay in throttle angle is near negligable, An interesting use of E-throttle that I heard of, is a guy who's in a race series where there's a "Breakout" laptime that you're not allowed to beat. He sets his E throttle to limit throttle opening so that when he's going full throttle, he goes just over that laptime every time. But then when he gets stuck in traffic, he flips a switch and it reverts to full throttle angle and he roars past everyone. Flips the switch again and goes back to "laptime" mode. Or the cars with big horsepower, having a "rain map" that makes the bulk of their pedal angle more usable in the wet. Most of these things dont apply when I've got a peaky motor with only 200hp, but will be fun to play around with anyway1 point
-
nope. Condition and performance1. The risk of a component (Note 5) hooking a vehicle, or hooking or grazing a person, has not been minimised, eg a bonnet or bumper has been removed, exposing sharp, moving or hot components.1 point
-
measured from the bonnet as that was easiest1 point
-
Man, you're a cute kid.. what happened? Would be cool for your olds, specially since you restored it.. would like to that for my old man but all the cars he had when we were kids are fairly expensive now, even for pos examples1 point
-
Engine has been purchased and is currently in a running bike. Will put up a proper post up with photos tomorrow1 point
-
Thats pretty rad to find a vehicle your olds once owned! we have a similar story in my family, the old man saw a chev corvair on TM that brought back memories of the one my grandfather had when they first moved out, he somehow tracked it down and even better managed to buy it! here it is tucked away waiting on hefty rust repairs but the effort for that history will make it worthwhile. I must show him this thread for motivation!1 point
-
Painting going on and sissy sticks coated.1 point
-
yeah i think it might me a little wheelie happy. managed to gain a few sprocket teeth on each reduction which is gona add a couple gears below the villiers' 1st. sitting above the rear wheel may also add a certain handling characteristic1 point
-
Looking great, just wondering where you got the front splitter from?1 point
-
UJ sounds more ape than monkey tbh1 point
-
So just acrylic laquer rattle cans? More details man. As for heat I'm not sure, I think 2k urethane are they way to go on engines these days, but obviously not easy to do at home. Just a guess but I'm thinking you didn't let it flash off enough between coats and that fucked it maybe? You should be able to put down a million coats of laquer if it flashes off (it's what you are meant to do)1 point
-
Just to back up what Spence said, 2k is no problems at all, I sprayed all the glass on my 7 In it, and some of it was onto raw glass not even gel coat.1 point
-
Not a good enough excuse. Sell the child. Even a sick child has to be worth at least a pod filter and a couple of Eagers.1 point
-
Hi. It's another year on and UJ didn't do dick. My bad. Lubs yew all. If I die Mathers and Cam can fight over the Mercedes carcass, but someone send Ned the stereo plz as it's pretty choice TBH. Danger and Uterus already know to fight over my rifles...... but no one can have Shaz <31 point
-
At risk of sounding like a giant cock: no polish, wax, or cutting compound has been on that paint ^ since 2006. The only thing that's happened is that it was washed it and dried it off with a towel. The photo was taken with a cell-phone last night. I learned how to weld on this actual car and did the body and paint myself. It was my first attempt at welding related panel work, but K-Trips, the Pinga, and another chap named Mathers deserve a big dollop of credit for helping too. Those guys did bloody heaps. xxxOOOxxx If you are prepared to take your time, put in lots of effort, and can afford to purchase good materials and the right tools - then anyone can do this. Anyone. Probably even KY or Dodgysam.1 point


.thumb.png.b2aee08688778d18bdc7b3e3c1852d9c.png)


This leaderboard is set to Auckland/GMT+12:00