
Leaderboard


Popular Content
Showing content with the highest reputation on 10/24/19 in all areas
-
After a 20year apprenticeship she got the job. My bird got her ring finally and I scored some major points. Cracker weekend at Banks Peninsula that sports one of my favorite winding roads ever. ha. 20 years. "Good things take time" - well thats what the cheese advert says. Keeping that in mind... Who else can be out in the shed for a whole day and at the end of it look at what you did and see so little progress? Say a job you thought 30 minutes maybe or an hour tops turns out to take seemingly forever. We seem to be stuck in this pattern with all these little jobs that just eat up the time. As a quick summery viewers plumbing and wiring has been the culprits for the most part. All the hoses have been ran and plumbed up. Much of the hydraulic power-steering/hydro-boost brakes is done in black nylon covered steel braided hose with some stupid high PSI rating. Came with the brake kit and looks ace but I can see it will get dirty with use. Right angle impact driver was a must for fastening some of these as no way in hell a standard cordless could get in the confined spaces like between engine or exhaust and rails. Heater lines are the same as the radiator. That flexi corrugated metal pipe that holds its shape. Have put heavy duty clamps on it all. Tucked away as much as possible to keep it out of sight. Then all rest of the fuel and brake lines are PTFE / Teflon braided stainless. Only the trans cooler has normal rubber hose but it will be tucked away unseen - although I have braided heat shrink in long lengths I guess I could use. The two cables on the valve cover are for the trans kick down and the accelerator. Also tucked in the Lokar trans dipstick behind the engine to the right. Moved on from there to the wiring. To simplify things I got an American Autowire Highway 22 kit. Well impressed with it. Good gaug wire with nice thick insulation and thick strands in extra long lengths. The coloured wires are all labeled every 20 cms - such as "Headlight Lowbeam", "rear park", "Dash lights" etc etc. Well labeled fuse panel. comes with dimmer switch, ignition/keys, light switch and more. I decided to make things even easier I would make up my own wiring diagram. Man that took longer than expected! Think a few days. Glad I did it as its made the process easy. Its changed a little since I have started and those changes are not shown on that diagram but once im finished I will add the alterations and tidy it all up to show the looms better. Note some of the security is not shown there along with a few other things I forgot to add at the time. But ya- totally recommend people make up a diagram it just helps so much and designing it really brings the whole system into your head. Got a thick plastic board (10mm) that I cut to shape for the area it will be mounted. Will be up on risers to keep wires behind it out of sight. Mounted up much of the electrics-shaved door kit, fan controller, gauges controller and fuse panel. Will still be some relays and other bits in other spots around the car. Had to cut up the old stainless on the dash a bit to add things like the above keys(Drill, dermal and file job to get that shape). The other hole is for the trans lockup whats just a on/off switch(modified old Hudson ignition switch). Lights fitted in with out much work using an old hole but the new wipers are two speed plus intermittent and the switch is huge out the back so had to be massaged a tad. Using the old Hudson knobs on the new bits to keep the look. Drilled new holes for the vintage air heater unit that has three knobs - still need to get some old hudson knobs for them. Still all the effort paid off and they look stock. Started the wiring doing under the hood first as its is the easiest area. Battery is mounted in the boot/trunk and comes up to the front then to a 175Amp fuse that branches off to everything. Epoxy pertronix coil in a finned cover to keep the look im after. Mentioned the braided shrink fit before. For those who have not came across it - its great. Shrinks on down like regular shrink fit. is supposedly flame, oil and gods know what resistant. But just adds an older look to the wires whilst keeping them nice and safe. Then it was lay out the wires. What with all the wires being colour coded and labeled this wasn't to bad. Have a few extra wires in each bundle that are not attached to anything just for a bit of future proofing - never know down the track what you may suddenly wish to hookup. Feed the wires through the right holes leaving a decent amount out the back then screwed them on down nice and secure. Put in an earthing/ground bar since I have so many grounds up under the dash and around the fuse panel. It grounds right onto to the chassis next to it but also I ran a thicker black earth all the way to the back and it will attach to the battery as well. Im not in the mood for electrical issues caused from crappy grounds so with luck this will help that. Since the firewall got modified its meant we needed a new heater. Bit of a shit as I rather liked the old 49 Hudson WeatherMaster - it was in working condition, fan went, radiator didnt leak and knobs all did what they meant to do. Anywho to replace it I got a Vintage Air heater with demisters for windscreen. Man they are small but should put out the heat if the reviews are anything to go by. Mounted up with plenty of room under the dash. Hudsons had the gauges mounted in the center of the dash and then a second glovebox behind the steering wheel. Im using the door to that glovebox to mount my new gauges. Will show all the important info at a glance whilst keeping the analogue look. Hooks up to gauge control box via a single ethernet cable. Nice n easy and better yet - its in metric. These Dakota Digital control boxes have multiple speed out's. So im thinking I may try to hook up the old analogue Hudson gauge as well. Its in imperial/miles as back then NZ used the old system and not metric like now... still be kinda cool. Anyone got any recommendations or experience hooking up digital to old mechanical analogue speedo? I see DakotaD and other brands have some box thing with a motor in it that can convert but they are pricey. Thought maybe get a digital gauge with the same sweep and swap the guts about? ideas? Other than that its been springtime roadtrips. Till next time ... latter.13 points
-
So a day later, current count of entries is 29. I have two unready bikes, with known issues, and another unproven bike in a thousand pieces, with likely unknown issues. Pray for me. I'm looking at doing a quick dash around the route this weekend in the car to make sure what exists on Google Maps is possible IRL. And to familiarise myself with some bits I don't know and possibly get a GPS trail. If everyone has better prepared bikes than I, we should still be OK with one support vehicle & trailer at this stage. As far as I know @Thphantum is still OK to provide this for us? Anyone else is welcome to ride/drive along, (its a public road, and we're not a group remember), but for my sanity, please try and have some self sufficiency/self awareness as it gets confusing quickly when multiple people are relying on multiple vehicles for different things. Everyone gets fragmented and/or lost. Anyone thats registered and is pulling out? Or anyone coming that hasn't registered yet?5 points
-
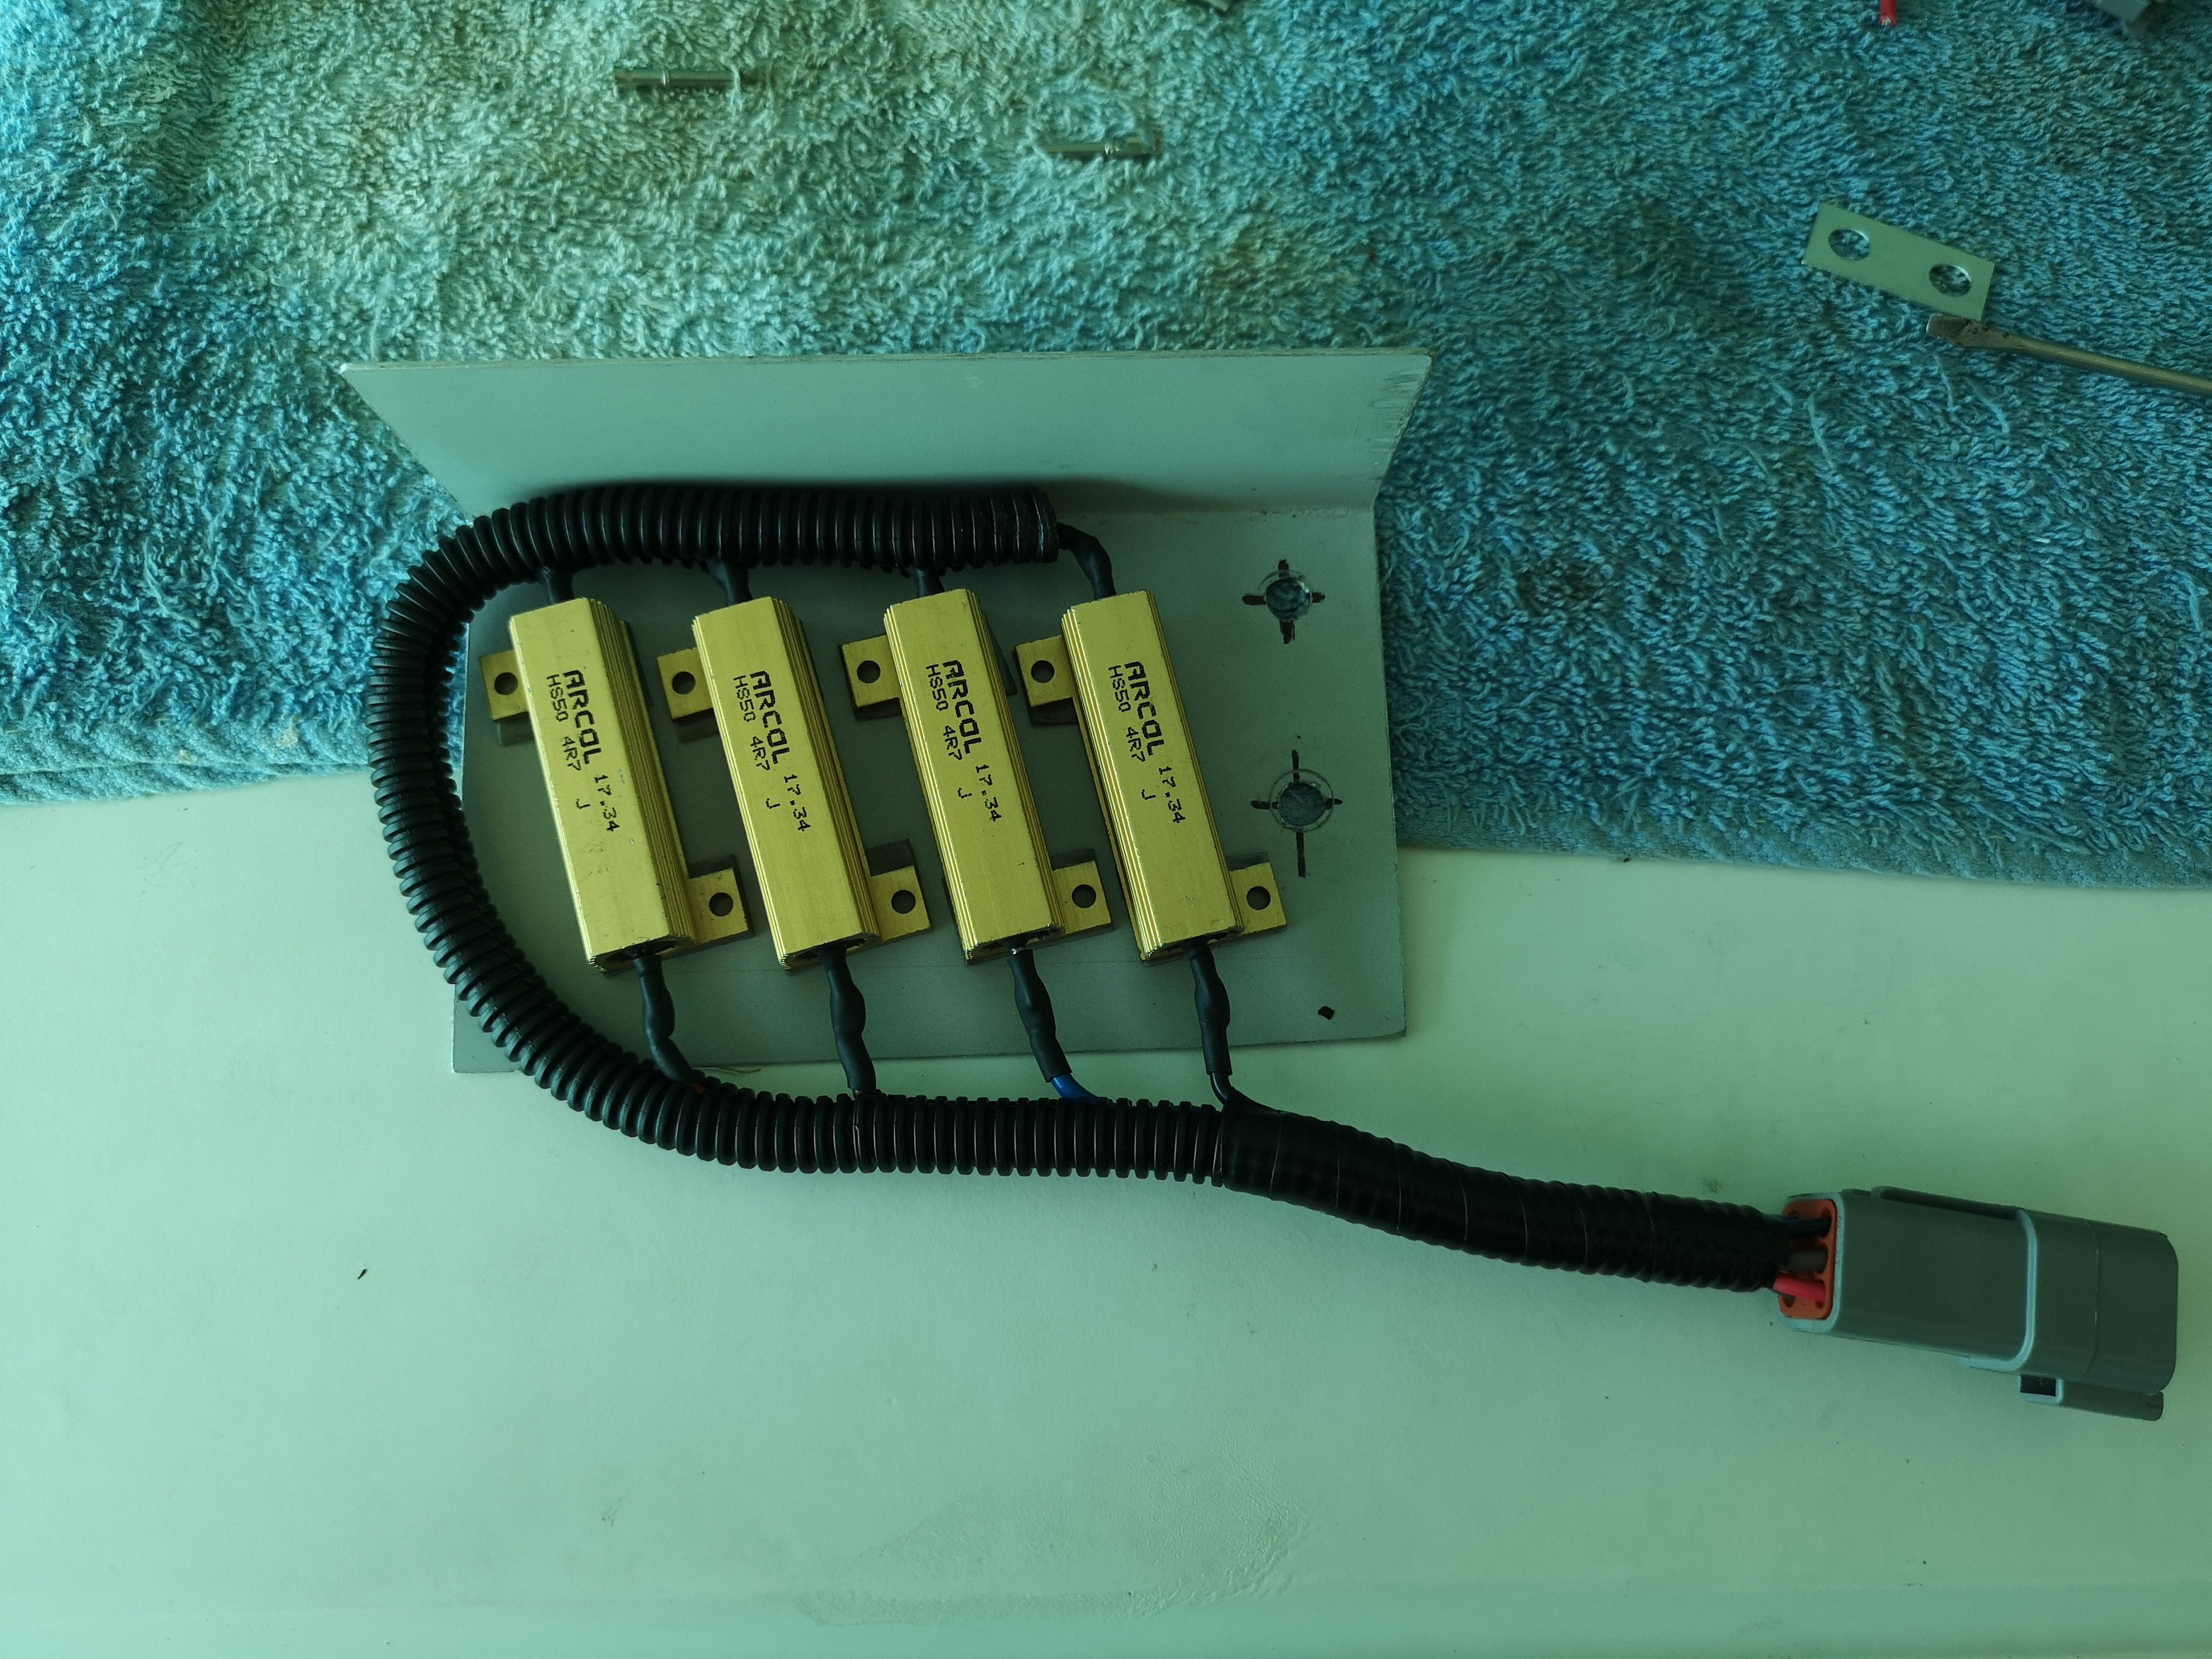
Had a chance to do some more on this since it's been raining.. Just got to wire up the fuses, relays, fuel pump then start it.. Hopefully. In hindsight I prob should have gone for high impendence injectors, for ease sake.. But set the resistors up..
 5 points
 -
Shiii, this is only about a month away. **buys another bike**5 points
-
i has a new car and no new scoot (as expected, as i was never looking to buy a new scoot TBH) but will def come along to this for the funsies, and will have vengaboys playing in the car for anyone that breaks down and needs a lift (looking at you here @sentra and @UTERUS ). I have a tow bar too, and can tow someones trailer along with me fo sho! I have accom etc sorted, so will be there!5 points
-
More like a factory car coming with super loud exhaust that is switchable by the driver at the push of a button. Can't fit it aftermarket, why should it be allowed when factory fitted? Just because something is factory fitted, doesn't mean it should be exempt from the rules that everything else has to live by.4 points
-
Made up the clutch and brake cables today Made a coil mounting bracket and gave the intake a tickle with the grinder More wiring progress, Finally played with my rivnut gun and mounted reg/rectifier. Also connected the headlight relay wires into the relay base4 points
-
I had to read this a few times to confirm it was as silly as I first thought, it was.3 points
-
Wof yes. #Watscert? #therulesdontapplytome3 points
-
informative as always, thank you for directing me to an appropriate local government publication good sir. oh yeah, this is a month away!! my panties are already becoming saturated at the thought of thirty small motorcycles manging through Tame Iti country3 points
-
The iwi was looking into some bio-seal scheme using recycled something to seal the road. I'd suggest given the normal rate of progress in the area, we'll be sweet for a few more years yet. also link https://www.wairoadc.govt.nz/our-council/news/article/324/waikaremoana-community-reaffirms-road-sealing3 points
-
Ill bring you a box body trailer3 points
-
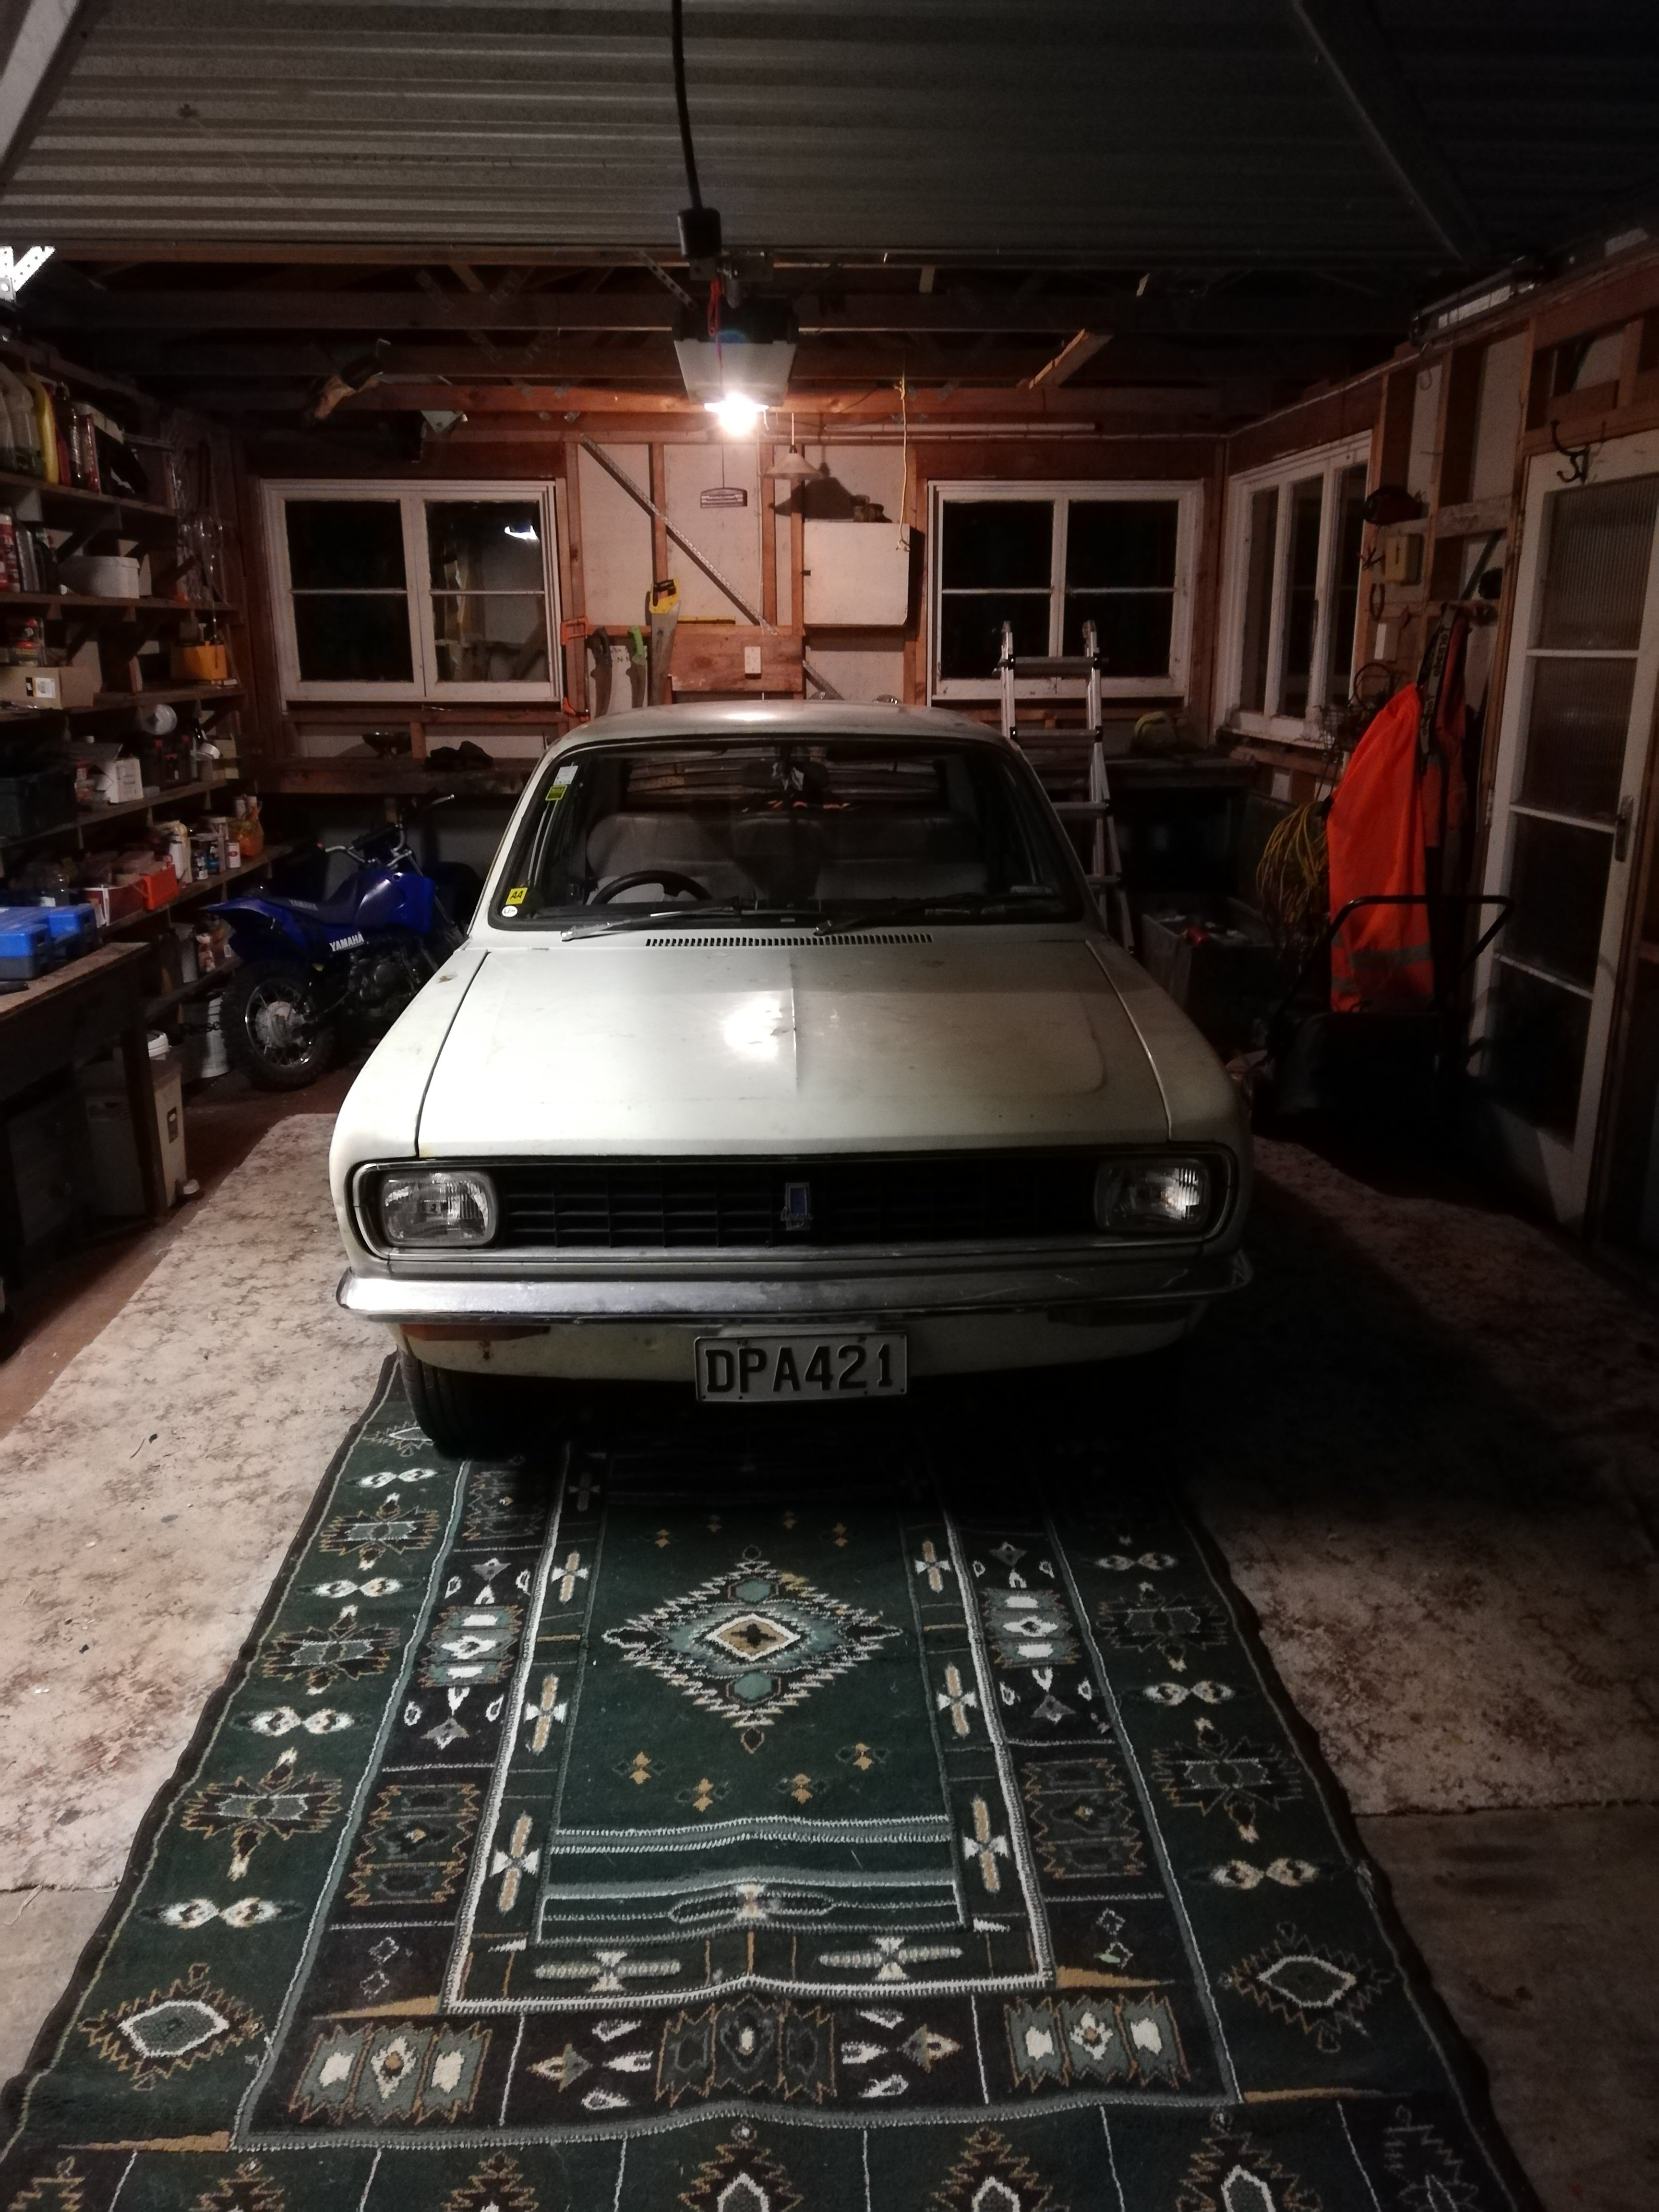
Can confirm this thing is white now - no photos yet.2 points
-
Triumph PI standard in the boot. More chance of exploding than anything else. #BLSHARNS2 points
-
Aahhhh so there's a new version of the Nextion screens out called the Intelligent Series. https://nextion.tech/intelligent-series-introduction/ Can now use blending, transparencies, antialiased fonts, and a few other tricks. So this means no more bitmaps for all of my text! haha. So code will become a whole bunch less bloated and designing screens a lot easier too. Looks like the refresh rate to the screen is a bit quicker too. So this probably is enough to dump the idea of going to STM32 for now.2 points
-
Crx is back from paint. Looks a bit better with one colour. Someone is coming to have a look at it tomorrow so fingers crossed he makes a offer2 points
-
Printed2 points
-
Yawn... Might slap some white on this bitch next week. Also might not.2 points
-
Thought I may as well start a thread on this raging beast, a friend of mine (may have been on here once) moved from hamilton to dunedin and abandoned it on my doorstep. He had had it sitting for quite a few years. Is a 1600 with twin strombergs & extractors - the motor has had some unspecified work done, apparently from a rally car. Body is in pretty decent condition, original paint is extremely worn and has surface rust for dayz, only welding required is in rear arches due to 3/4 inch coating of oil everywhere else. interior is 5/10, seats & dash have seen better days. lots of new suspension bushes in it which is nice. bodges required: weld rear arches where needed, sand & seal surface rust fill old badge, aerial holes etc muck around with ignition, it is totally pre-bodged and doesnt turn off with key until an electrical load is introduced i.e brake lights, horn (which to be fair is pretty funny) ideally obtain electronic ignition from chrysler. minimise ridiculous oil leaks put seats and dash cover on to cover wrecked originals wof treat with disdain as not proper leyland product. feel free to question my sanity on this thread, updates will be fairly slow as im only home a few days a fortnight!
1 point
-
I'm actually planning on putting my Motec m400 in and perhaps moving to e throttle for simple iac. But I'm far more keen to have the blower switched on just off cruise. And run a vaccum valve for bypass. Simple is better and usually looks better too.1 point
-
That actually really does clear up your argument, good point.1 point
-
1 point
-
KEEN!1 point
-
I kinda feel like brand new cars/vehicles should meet the same rules as cars/vehicles already on the road... If a car on the road needs a cert for something that is factory fitted to another car, that factory car should need a cert on entry before rego. If I doesn't meet cert rules, it shouldn't be allowed on the road unless modified to meet the rules. Should get some horrible sounding, loud harleys off the road. #oldman1 point
-
Ive said it before and I'll say it again, I fucking live this car. Great to see you able to get some time to work on it.1 point
-
Factory supercharger, right?1 point
-
last Owner reckoned he had it running, possibly on engine start but not on the carburettor, it did clean up ok tho, I have it soaking in petrol, that pink shit dose come off with water and soap but not petrol.
1 point
-
Blardy honkies. Its the tino rangatiratanga flag. I don't own a copy of it though.1 point
-
Ah, but did it have a WOF or CERT?1 point
-
Egr already done Had a tune and center muffler removed Its making just under stock power atw instead of flywheel Real happy with perfomance at moment,will probably get new exhaust but probably go single not dual just want slight v8 burble,have to live with it as a daily and guy i talked to said no real advantages with twin 3 inch unless chasing high torque numbers. Better mod for me will be tc lockup to keep trans temps down1 point
-
similar reason why I decided to be bloody minded and use a hilux. considered 8.8 but for a fox body with the factory triangulated 4 link the upper mounts need to be on the sides of the centre housing. only the factory mustang 8.8 has those cast in and welding some onto the explorer section didnt seem like taht greatest idea v.s. welding onto a hilux housing. getting a mustang housing in nz is costly. /hindsight should have sacked up and bought a 9" auto and 2.92 ratio ftw - bigger stronger pinion, and less torque load on axles / torque sponge to absorb shock loadings1 point
-
Seems like it will be close, and you can always add a few more mm with some flat bar if needed. If this is mainly about bump travel on full lock, I would expect that doesn't happen when travelling at speed. Hitting the bump stops on a dip on the desert rd at 100kmh (for example) will load them up a lot more and they will likely deform further.1 point
-
Got failed on that at VTNZ the other day....amongst other things.1 point
-
I've heard a few have dropped off / various reasons. Probs worth a second head-count at some point prior. I'm still fizzing tho1 point
-
Iirc its hovering around the 30 mark. Can have a look tonight and get a more accurate figure1 point
-
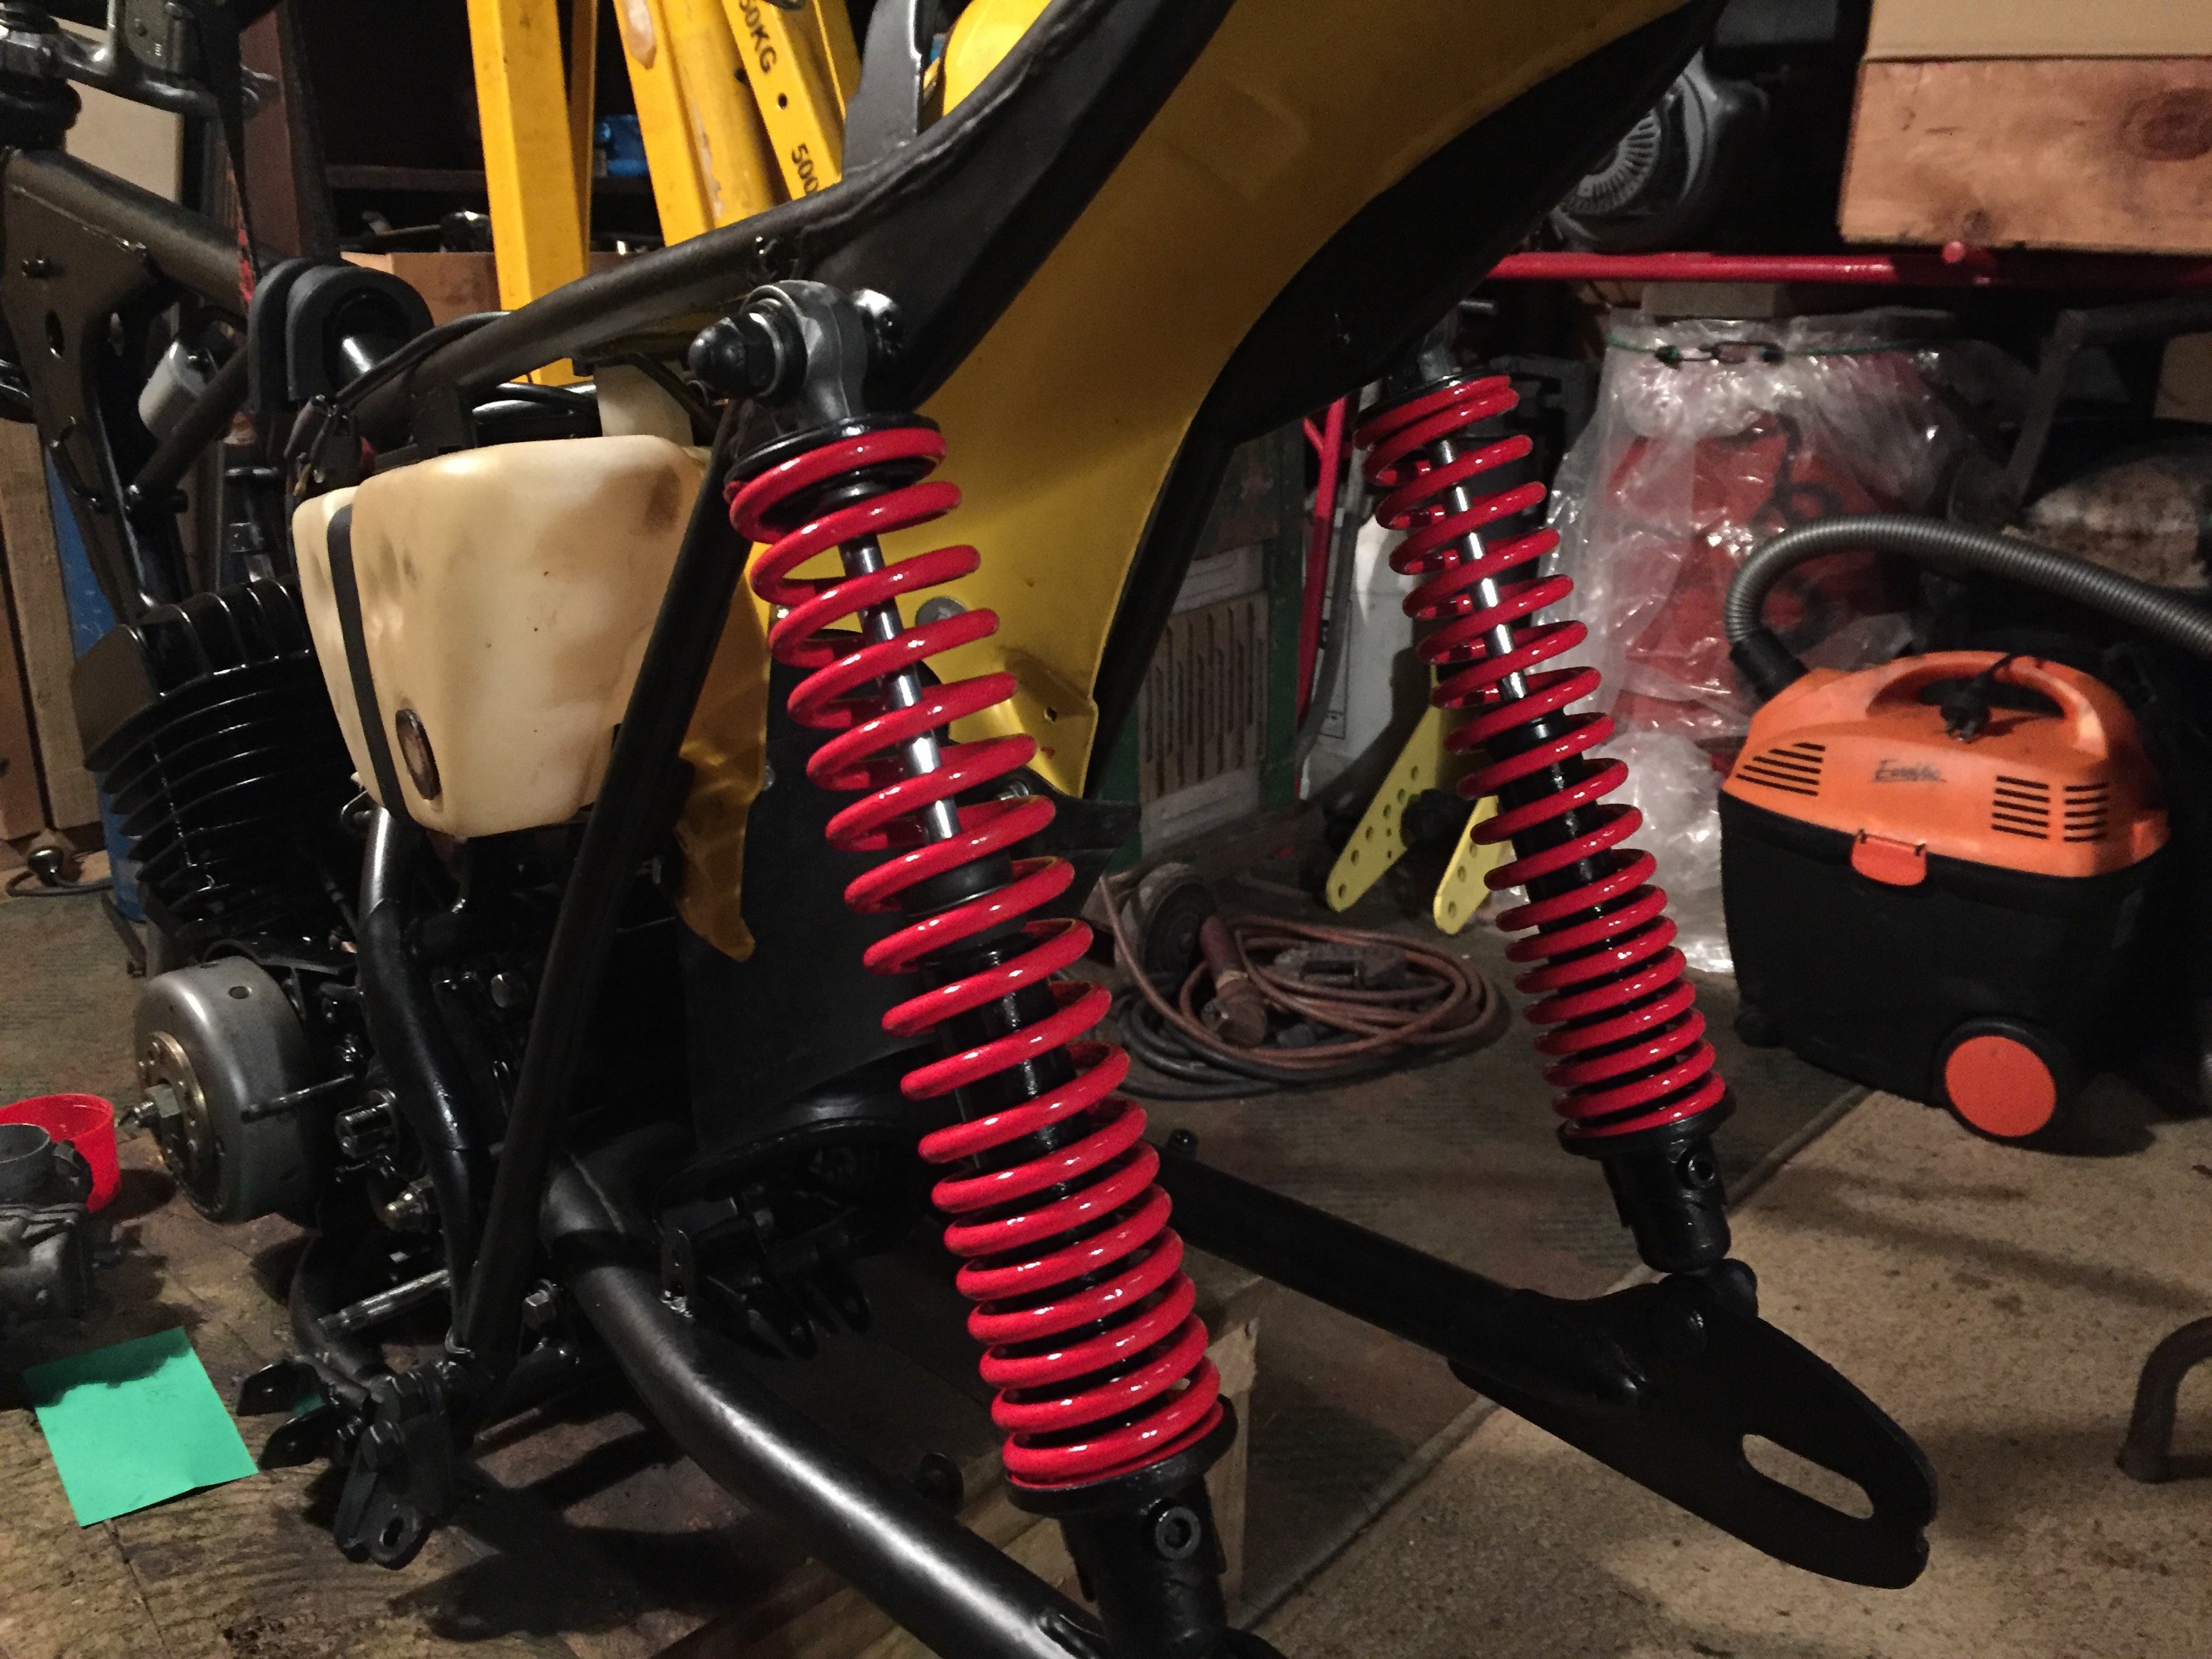
Cleaned up the old rear shocks and straightened the bent one, it’s weeping a bit witch is a shame, wile the springs were off I hacksawed the inner plastic covers off so now you can see the shafts.
1 point
-
Bit of an update, taken the motor and gearbox out, and majority of the stuff in the engine bay is out, fuel tank is out now as well, so she’s a pretty bare shell now. That was all done about a week and half ago At this point I haven’t had much time been busy with extra work at home fiberglassing some GTR parts. But did get into a bit of work tonight found a couple of nasties but not as bad as I was expecting Will be adding photos when I reach the computer as I can’t upload photos from my phone1 point
-
Overlays. Sorry. I'll see myself out.1 point
-
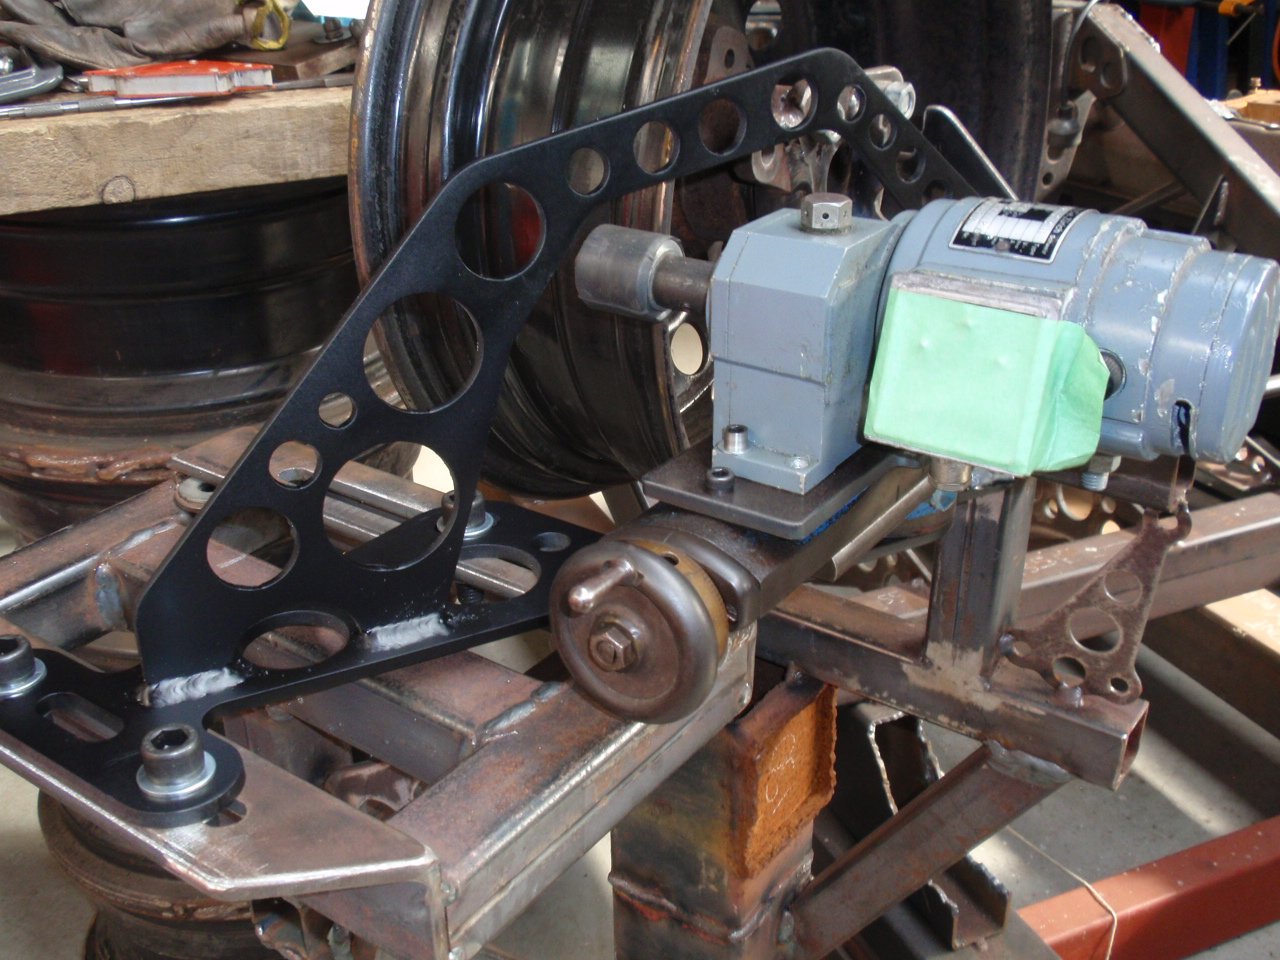
Bracket fabbed to hold electric motor that will be used to rotate the rim at a speed that allows continuous welding. Painted and tested for fit. Good enuff.
1 point
-
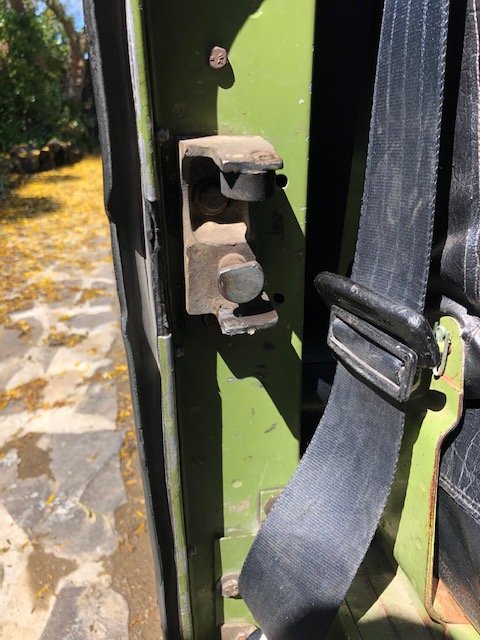
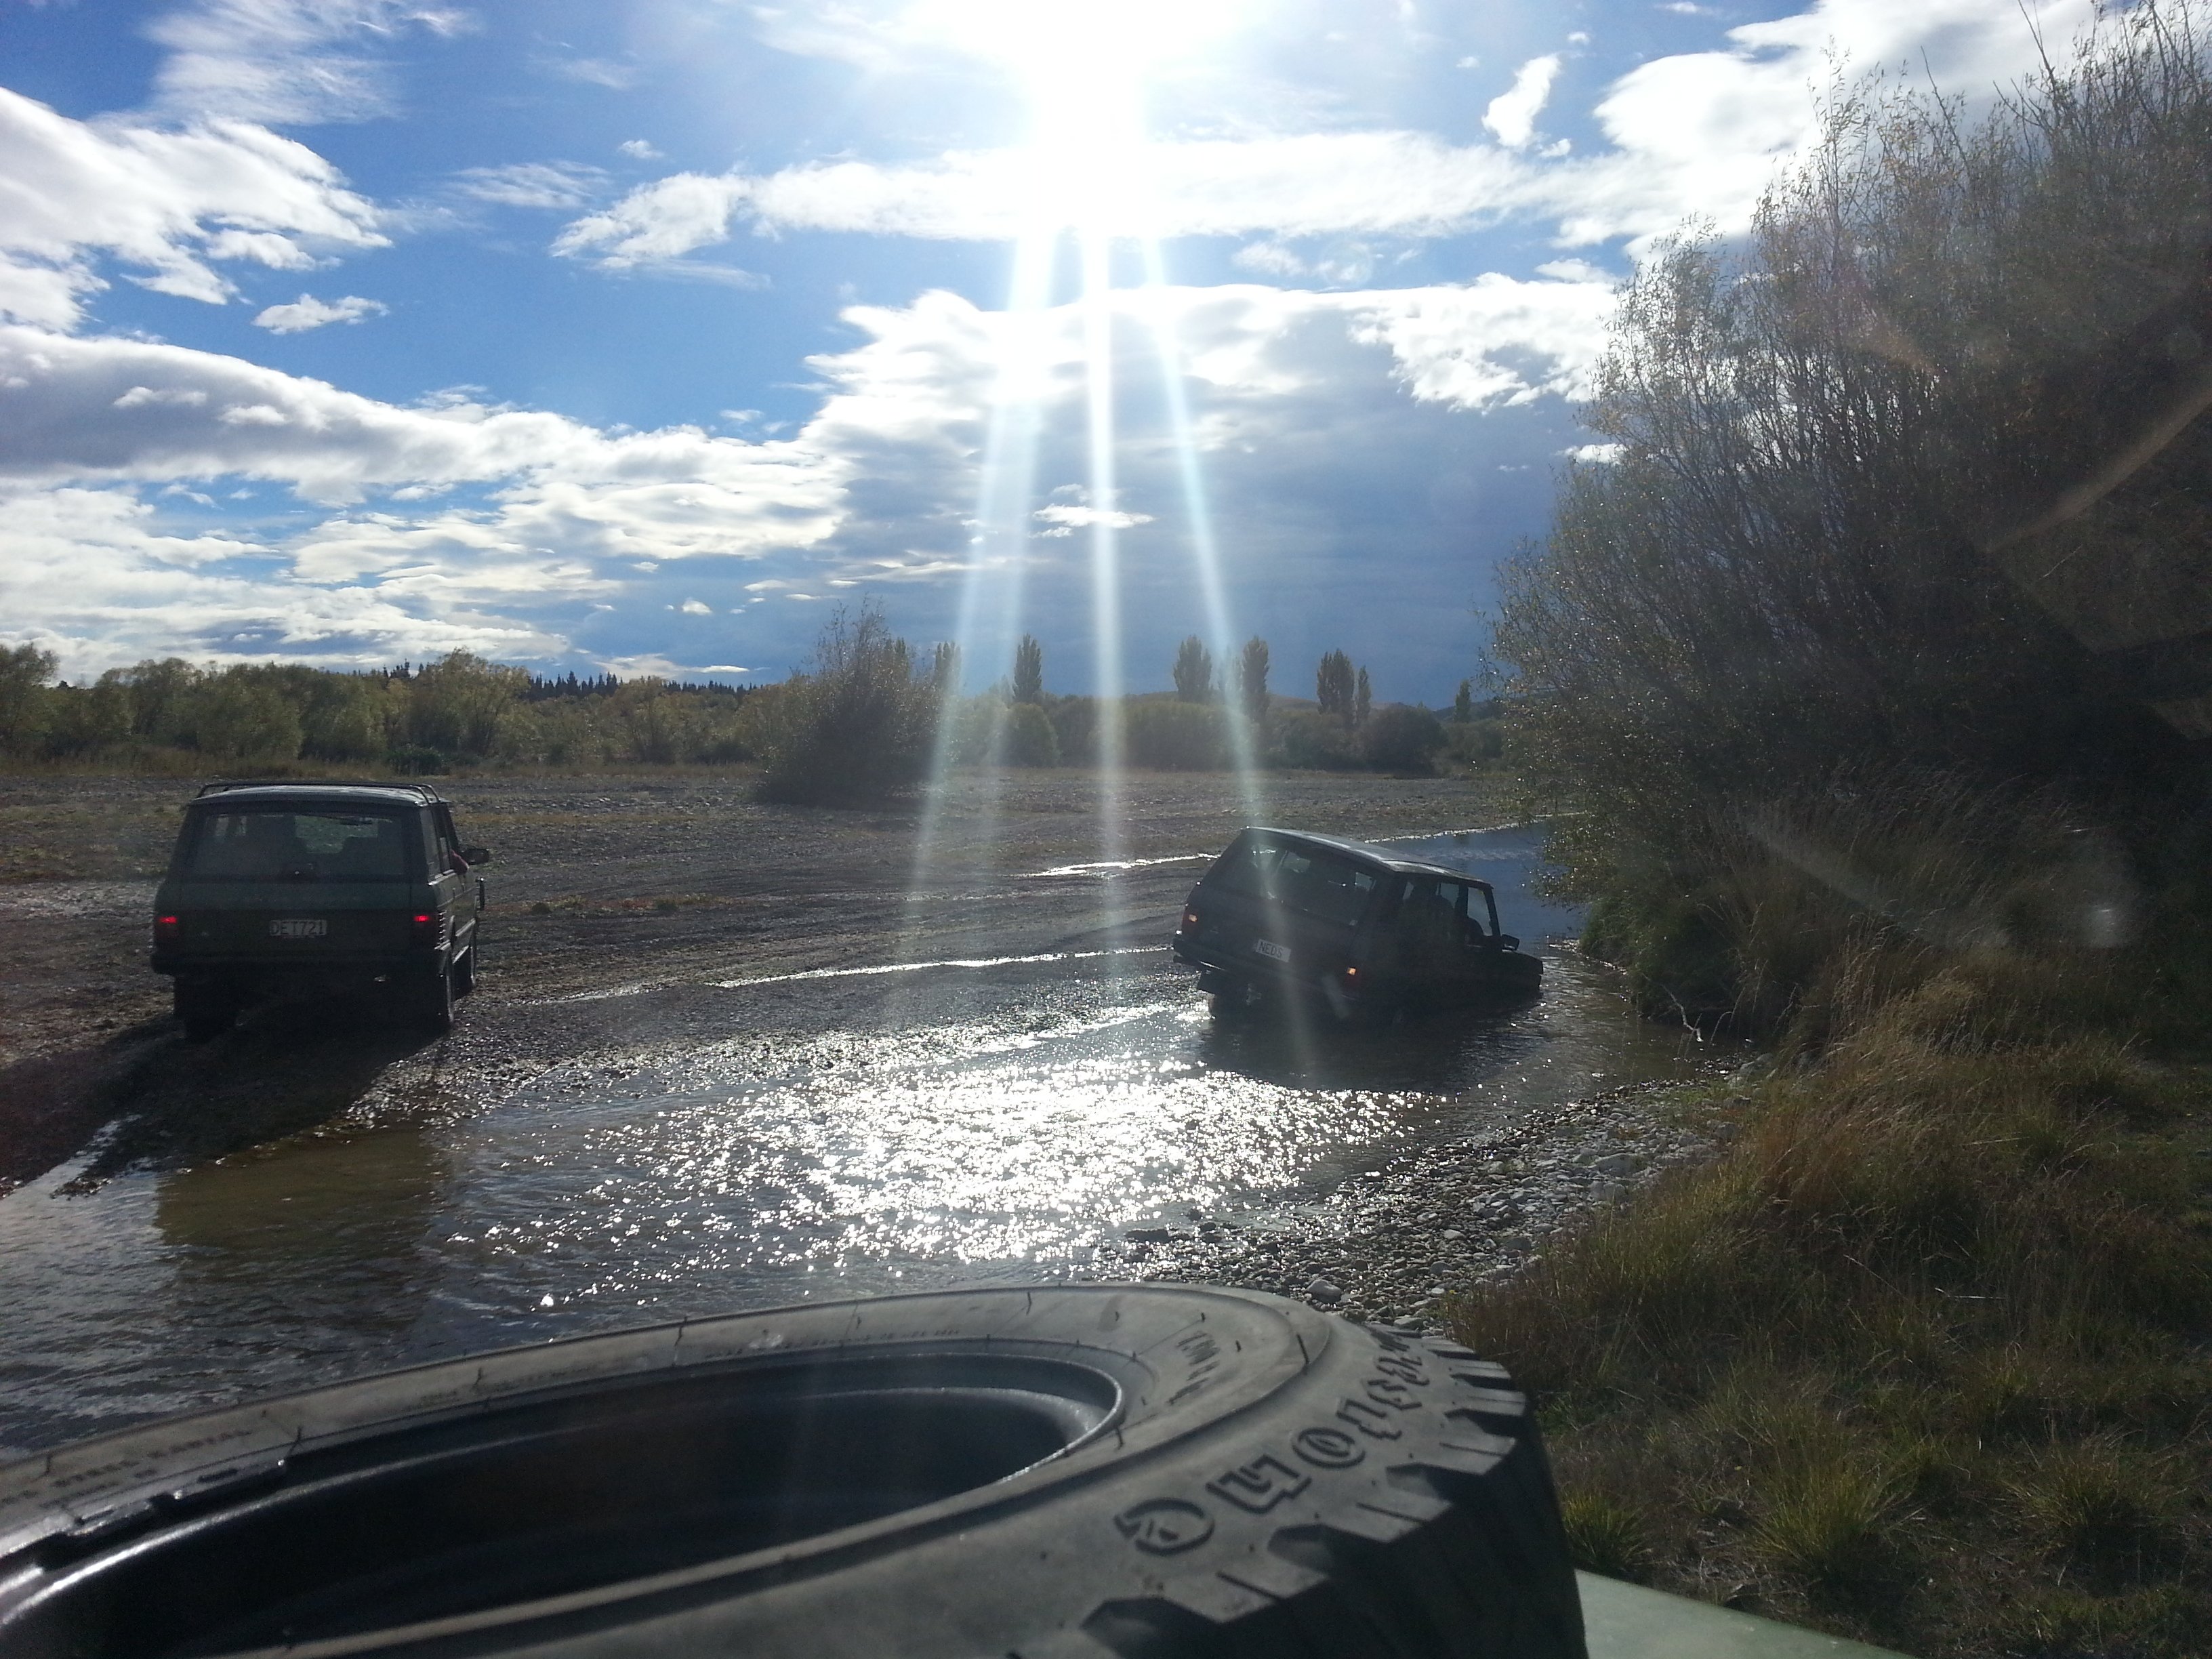
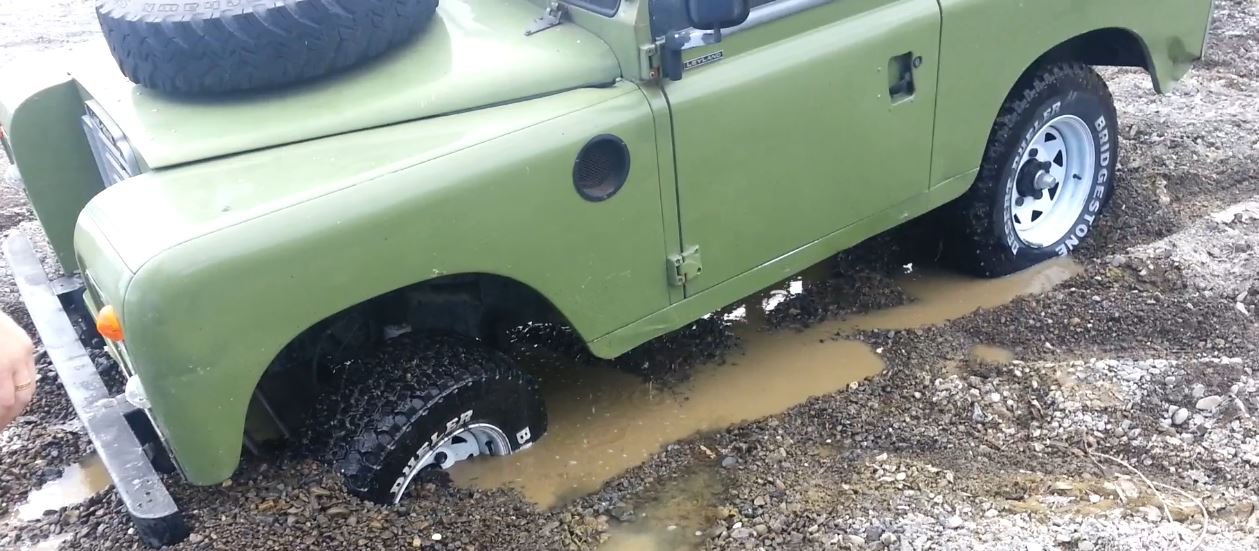
Got things back together. The gear stick is slightly closer to the driver now which is both helpful but I have also now lost all my reference points Left a car park entrance with a fair bit of speed on, and the drivers door flew open. Not the first time this has occurred so also adjusted the latches, they are pretty well worn however. Slam locks always draw attention as members of the public probably think I'm furious about something. In reality I just want to go home without falling out. Tried to go and find some puddles or things to drive over at the Waimak but access is pretty well blocked off. Found some old photos anyway Moments before this occurred, I believe the driver said, "Watch this!" Which resulted in trying tow the range rover out, which went well... My car did back out of that, but a man with a snatch rope had to come and rescue the range rover. There are computers under the drivers seat for things like the airbag suspension etc. Which were under water... This was a few years ago and I believe it's all fixed now. Keen to try and find some spots around Christchurch for more of the above, Waimak and also Mcleans Island seem like a no go anymore though...
1 point
-
Will be the problem. they sound just like that when have a lean cylinder. will missfire and pop out the intake. Need to do 2 adjustments on 20v throttles. balance each throttle on its throttle stop . then there is a 2nd adjustment so all the throttles start to open at the same time. if they were balanced on the throttle stops and 2nd adjustment wasn't done, soon as apply throttle via throttle linkage they will go unbalanced. Also if they have been removed from manifold at any time will likely need rebalancing. Have had best results ditching as much of the vac stuff as you can. Hook up brake booster leave rest disconnected. Map sensor - not really any point having it on alpha n tune. (ive been out of the ms game for years. does it have a separate sensor for baro correction or can use map sensor?) Fuel reg - leave the vac disconnected, running a flat fuel pressure is far easier to deal with; your tune has no idea of map, so your pressure reg shouldn't either Make sure all 6 ports on the throttles are blocked Basically any air that doesn't go through the throttle plates and into the engine is going to give you a bad day. Running baro correction on the alpha n tune?1 point
-
I've been pleasantly surprised at how well the bw diff in my vg has survived All I've ever had to do was replace an axle with a twisted spline and it's done a million burnouts and a lot of drag racing. I pulled it apart once to check it and it was fine 25 spline axles, 2.92 ratio, 4 spider lsd with some extra preload1 point
-
Before I bought the 8.8 I did price up a new 9" build, and it was cost reasons for going the way I did. I got a quote for a new housing and axles which was going to be about $2300, I cant remember how much a center was going to be exactly but I recall a new one with a good lsd was another 2-2.5k or thereabouts, and that was without a brake setup. So around 5k? The 8.8 wasn't as cheap as I thought it was going to be but it was less. These are approximate prices but pretty close to what I've spent $500 for the whole diff including brakes from a wrecker $900 for rebuild parts, ring and pinion etc $900 for housing mods and rebuild $200 new discs and brake pads $150 for another short axle and some better spider gears $150 Fancy diff cover $100 spring pads, paint, brake pipes etc So around $3k ready to go This is the first time I've added it up so I guess time will tell if it is an economic win or not1 point
-
Your tps woes... I've never needed to open one up but if it's a standard 3 wire jobby then I'm having a guess that they are just a potentiameter inside? If so then could it possibly just be a case of swapping the left and right wire so it works in reverse? But for all I know they might contain far more magic inside then that and us mere mortals should not be messing with them...1 point
-
Wow- its been bloody ages since I visited this thread. I may well take some photos, before and after spec, if folk are interested. Trees and landscaping growth has been mental. I'm loving it. The place has such a different feel now. Anyway- I went for a stroll up one of the gullies where I new there had been some damage from that Cyclone Gita. I had never gone up for a look siince the event due to the amount of thick mud and caranage to climb over. However the cyclone was two years ago and stuff has settled. I wasnt expecting to find such a massive slip. Its mighty impressive. I could not actually walk up the top half as it was too steep. I had to clamber through the bush up the sides. Perched at the top looking down- Wow! There are some huge trees up there. This we knew but now the bush has been taken away from the bases and you can see them.. phowarr! We have started poisoning all the large pines. I wish we had done this 5 years ago as suggested by so many more onto it folk. The trees are way too big to even consider dropping as they'll take out massive swathes of very very old tree ferns. The trees we have so far poisoned have already dropped their needles and are breaking down from the top. Its so satisfying. The extra light is amazing, no more needles on the ground to smoother and poison the floor. The growth of natives below is already very noticeable. Poisoning them is easy as, cost bugger all. We are so stoked at the amount of time for other better things in life (like riding bikes and hooning in cars) we have gained by not having to deal with these fuckers now I am sort of tempted to drop a couple of big ones (and get an arborist mate who we both work for at times to help- he has better gear). If landed in the right places there is some real good potential for some North shore spec trails to be had in the gully. Speaking of mtb trails- we have made some more and will continue to do so as time allows. Its a fun thing to do but not super urgent when we have an amazing mtb park full of great trails just up the road. The trails we have made certainly dont suit fatty lazy spec riders or heavy clunky bikes- very steep up and down. Which is what I like. Singletrack. I want to make more flowing fast ones across the property and our neighbours have given me the green light to make some runs down through their pines too. We have new neighbours moved in over the road. Hes into mtbing and is my age within two months , born in the same hospital! Really cool folk and we are stoked to have them join our valley. We want to make secret trails down from the park into our valley I'll get some new photos soon, once I've done the lawns (which look great but fuck me @ amount of lawnmowing in spring.... )1 point
-
The better half and my self have been honing our skills of late. Thats right boss. Hours of hard yards have been put in out in the garage. You all know it and have no doubt also spent many hours doing it. .... Standing there with a beverage staring at an old jalopy, talkn shit and do'in sweet fek all. But seriously what have we been up to other than throwing back jars and chin wagging you say whilst dressed in trendy garage attire. Well ladies and gentlemen wait no longer for here is yet another riveting update to cover the little bit of work we actually did. Radiator all plumbed up. the finned metal hoses bend and hold shape well. like how its kinda central in the engine bay. Replaced the hose clamps that came with it with stronger jobbies as I couldn't be feked with hoses blowing off and coolant going everywhere. Moved on to hooking up the column shift to the trans. Using an IDIDIT GM/700R4 universal shift kit. Thinking being since im using an IDIDIT column it would all just be bolt on. Well that was the theory anyway. Basically it would work fine if I was LHD. the instructions are nice and simple and kit straight forward and well made. Would just bolt in. Being RHD its all opposite though and naturally the American brand dosnt included any instructions and when I contacted support I got no help and basically told me to fek off. LHD shifting would pull the cable out as it moves from park through the gears. RHD we push it in as we move through the gears from Park - 1st. Rejigging at the column is an easy fix. just throw the car in park pull out the cable and hook it up (As pictured). Basically doing opposite as instructed. The bracket that fits to the trans had to be bent so the tab that holds the cable pointed upwards not downwards. Then an extension made up for it. Reason being that the shift arm on the trans is made to point downwards and pull through the gears. Since im pushing through the gears it had to be mounted up top. So the bracket that holds the cable in place had to also point up. Simple enough I know but thought since IDIDIT support and engineers where about as useless as tits on a bull I would flick it up encase any other Kiwis or RHD owners needed a bit of help. Shifts easy though the gears. Clicks from Park to 1st. Ordered a heap of fittings for the fuel system. But before I start hooking all that guff up it was deemed time to finally finish up the gas tank thats mentioned in a previous post. Its made to nestle up nice and happy in this rather large hole that was cut in the boot/trunks floor. Its hard to tell but the hole has been braced up fro the underside so when its all together the floor will be sandwiched and nice and sturdy. Since the lid was still off it seemed a good time to put together the in tank fuel pump. Overkill to be sure since its only driving a few carbs and not fuel injection. But it has good reviews and is supposed to be pretty quiet so I was like mehhh seems easy enough and should be "hook it up and forget about it". Its an Aeromotive Phantom in-tank carb setup. Basically meaning it has a regulator (pictured there front center) that drops the 320psi pump down to 15psi. Also has its return blocked with a removable cap. Comes with pre-filter pictured along with that sponge tube that you cut a tad higher than your tank and acts as a filter and a baffle. Also put together the Dakota Digital universal sender. As with all there stuff its a nice bit of kit with simple instructions. Has the ability to fit in a huge range of depth tanks and works with many gauges. Anyway lid all TIGed up. Thanks lads at Kirk Irrigation for that by the way. Also got them to attach the filler neck and drain. Holes added before assembly to make life easier. Then the sender and pump just all dropped on in to place. Under the car it sits up nice. tucked just above the lowest part of the chassis. Should be no scrub line issues. Also still has a nice amount of clearance from exhaust - its why its an odd T shape. Up top it is about level with the lip of the opening. Will have a floor mounted above it latter down the track. The rest of the other bits of the fuel filler neck still to attach pictured above. Also pictured is the cradle to hold the battery box that we wiped up to hold it all nice and secure on the right side. Just using a standard marine battery box. Fits up nice in the back fender as shown. Can vent it through the floor. Will have a panel to hide it from view down the track. The battery only just fits in whats good i guess - no slipping about. The big bugger should power everything I need and flick over the engine no worries. Looking at either welding cable or 1guage wire to carry the current up the front. earths all over the place of course. So picture the above with panels. sides to hide the battery and tool kit along with fuel neck that will live on the other side. floor to protect the tank then front panel to hide the airtank and amp whilst also adding sound deadening to the shut up those two pumps. Now getting back to my original comments in this post. That being the standing staring at the car. Maybe moving something a fraction taking a drink and repeating the process. Side pipes seemed like a good excuse to practice this. We had to go through the process of draining a few cans to use to hold the pipes in place first of course. Sacrifices we make aye. Note the said cans are crimpled in the middle otherwise they are much to high to suit the air out stance with the pipes. Front grill also seemed like a good excuse. Pondering a 1950 Buick grill. Middle section should fit in well once pushed back but its overall width is wider than the car. Dont really want to cut the chrome as it is so nice so I guess if we use it we may need to flair the guards a bit. Already planned to do this a bit to get better wheel travel for steering when air out but hmm I think this is something a few more brews and staring might require. All this is much down the track of course. Tiki - such a great helper. You got a wire he will attack it. Drop a nut and he will soon have it flying across the garage floor ending up down the side of some thing out of reach or under some other heavy obstacle. Told him I would stuff him is such a pose if he keeps annoying me. Guess he is happy with that idea as the little shit hasn't stopped.1 point
-
Today is going fantastic. Squash is now registered which is great. Inspector just had a look at it/found chassis number and we had van sharns. I threw together the wiring on the melody and chucked the biggest jets in the carb and it fired up. Took it for a squirt up the drive and it goes well mega rich but that's easy to fix. Time for a nap and some lunch and I can smash everything else out.1 point
-
Spent wayy too long on the exhaust today. The primary pipe ended up a bit longer so I'll see how badly it has effected the power Cut some tubes some bad welding later All my welding sins ground away Muffler even fits1 point


.thumb.jpeg.384ff72c8d2b0ee0d34a7bdedb55bdcf.jpeg)


This leaderboard is set to Auckland/GMT+12:00