
Leaderboard


Popular Content
Showing content with the highest reputation on 07/16/19 in Posts
-
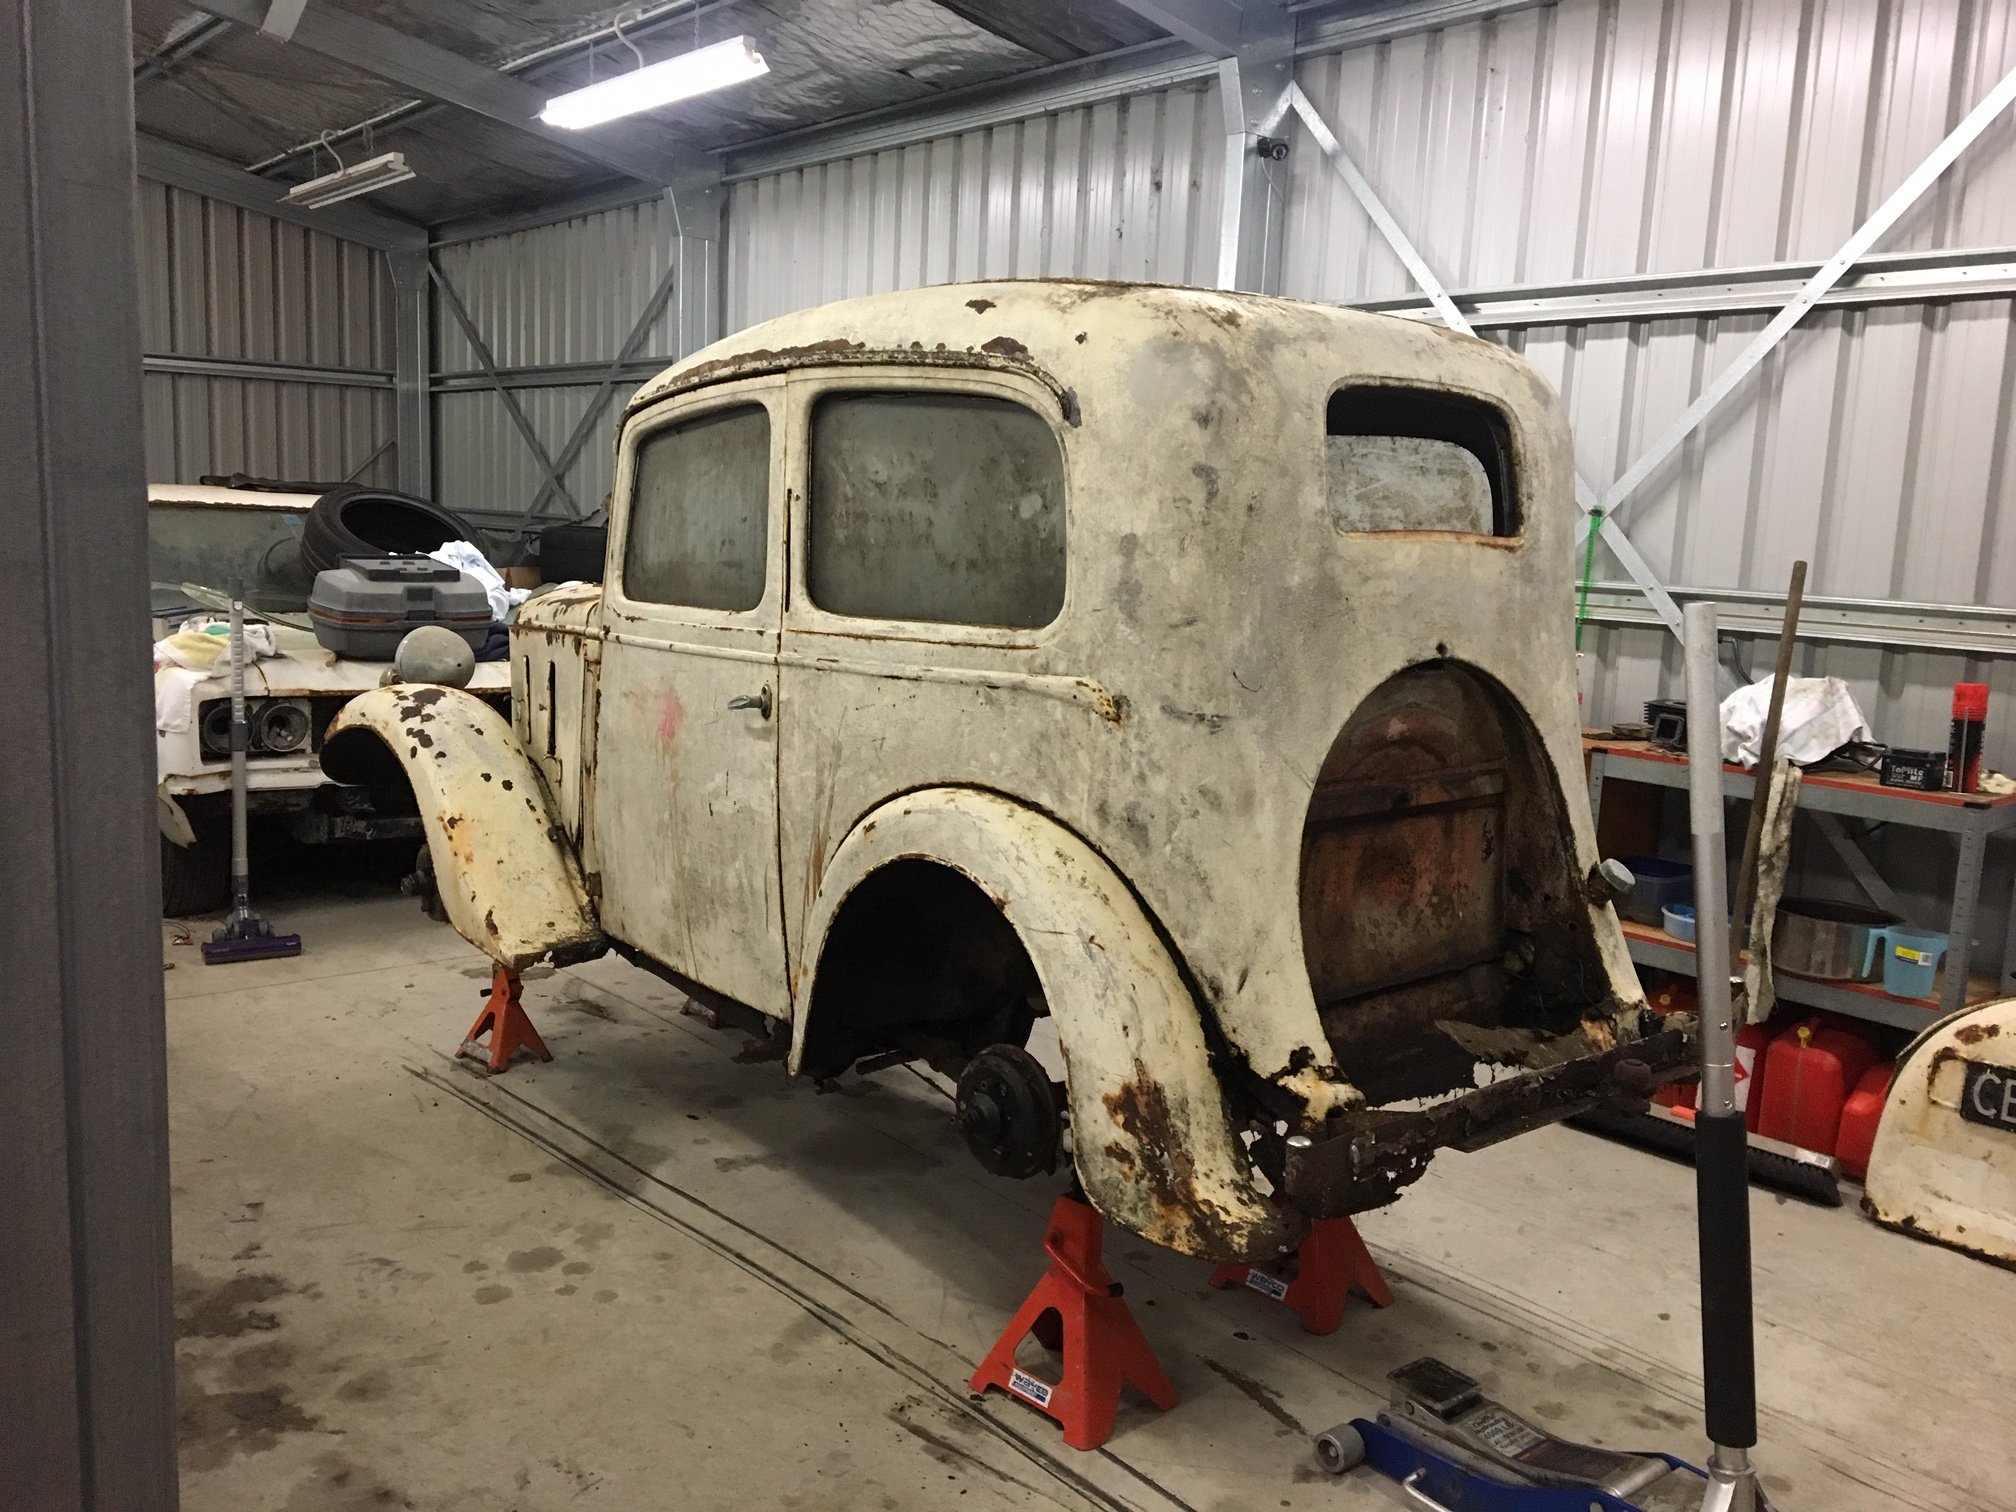
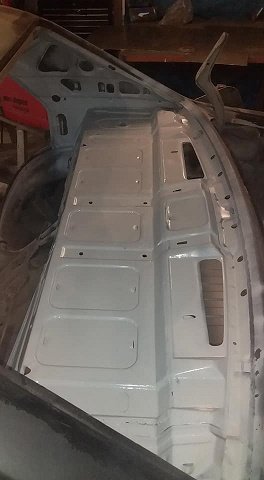
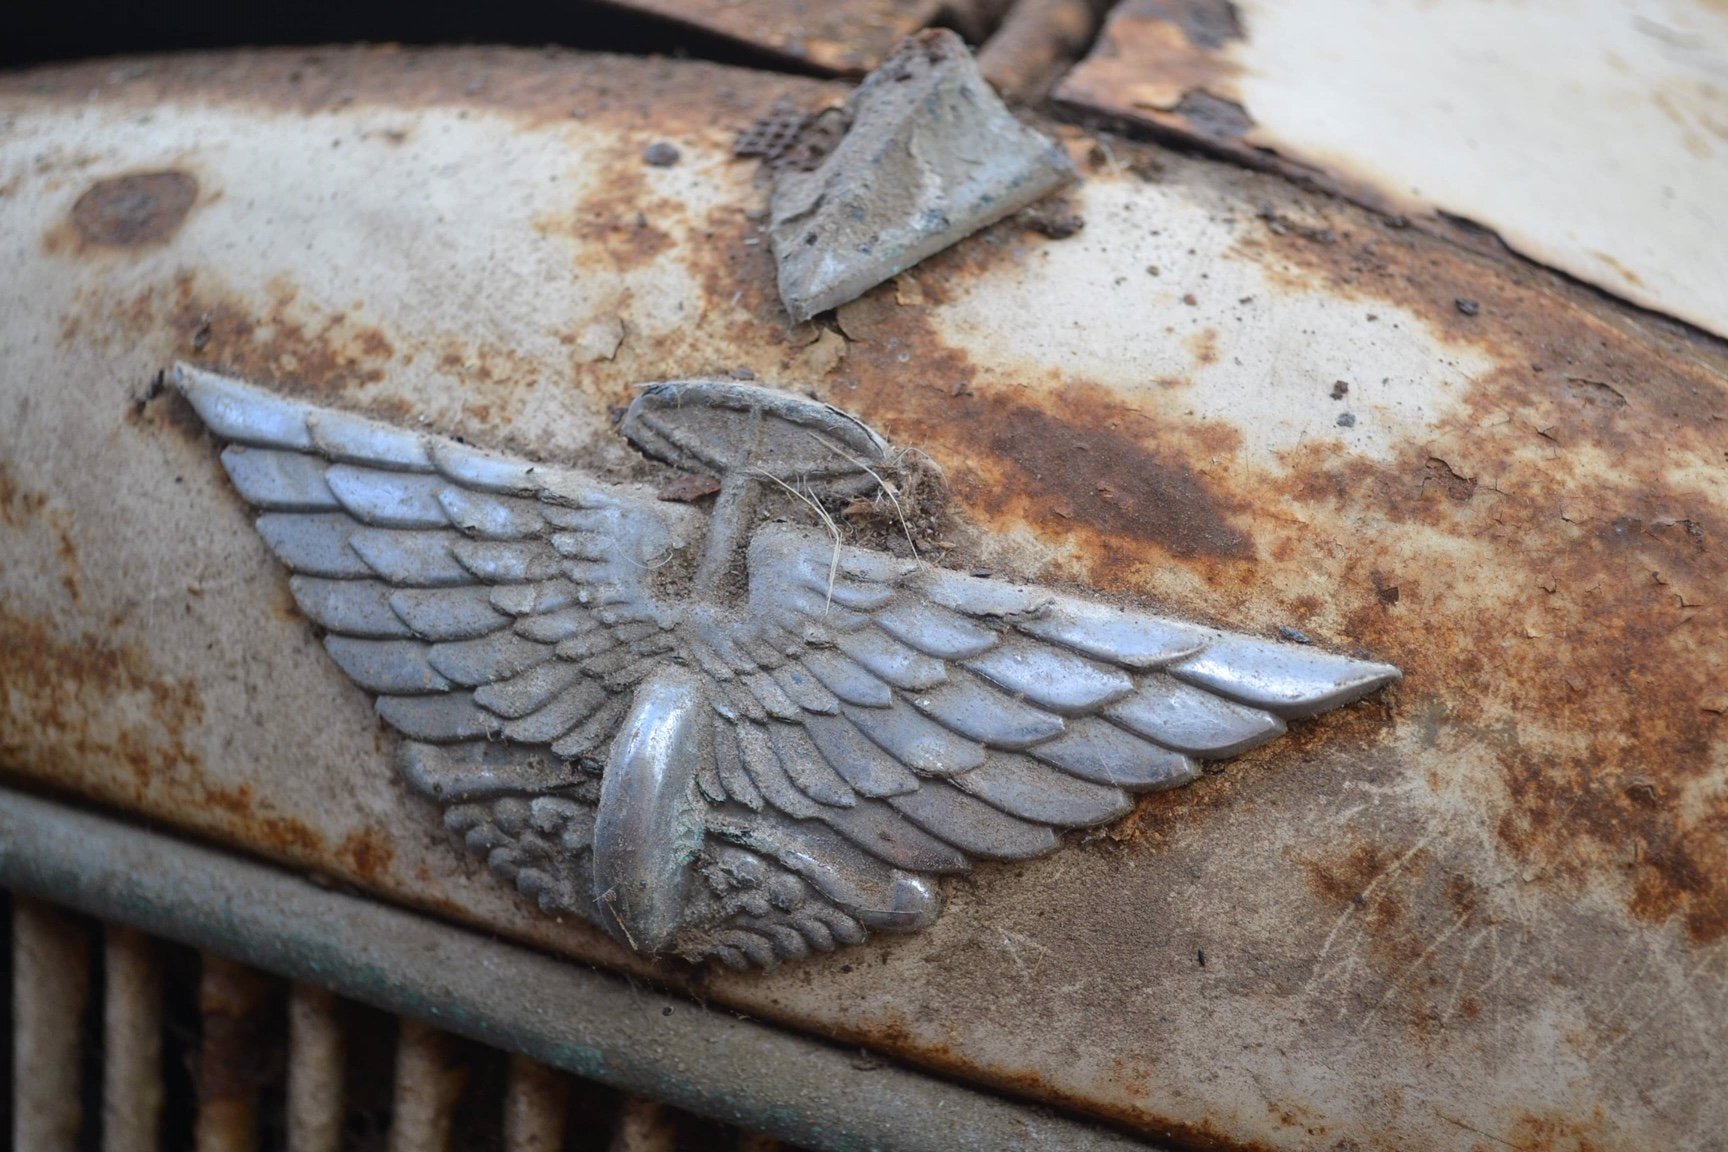
We took the car to my dads workshop as he has a bit more gear than me for getting things free'd up, the initial goal being to get it to a state where it could be pushed around and easily moved about the limited space of my own workshop. We got it into the shed, jacked it up, squirted some CRC at the wheel studs and left it overnight. I came back the next day to start the mammoth task I was expecting to get the wheels off. Armed with a range of metric and imperial sockets, I found the nearest I had to the BSW (*shudder*) wheel nuts and gave an exploratory lean on the breaker bar for the first nut. It turned easily and then came off by hand... NO FUCKING WAY... I repeated this for all 12 nuts, yes it has 3 stud wheels! What I had set aside an afternoon for, took me less than 5 minutes. I later went to take the bonnet off it, it wasn't attached properly and only had one bolt in it. No tools required here, I undid this 82 year old bolt with my bare fingers... As I said earlier, this thing has given me a few surprises about how easy it is coming apart. This is probably a good point for an explanation... When grandad parked up a car for what he thought might be quite a lengthy period of storage, he had a habit of pouring a few gallons of waste oil over them. Makes a hell of a mess and collects every spec of dust and dirt, but it does an impressive job of keeping everything working. The 68 Rambler Rebel in the background was in the shed next to this, and everything on it moves and functions and it has minimal rust due to the oil protection. The floor pans in the austin look as though they have had a tube of grease smeared over them, but zero rust there. The only real rust on the Austin is around the spare wheel, and in the sills, where the oil didn't really get. I've been having a tinker to try and get the engine free'd up. So far I have managed to remove the head, exhaust manifold etc, all without any broken studs. Thanks grandad! In fact the only thing I have found seized up on the entire car so far is the lever for the folding front windscreen (and the engine...)
 14 points
 -
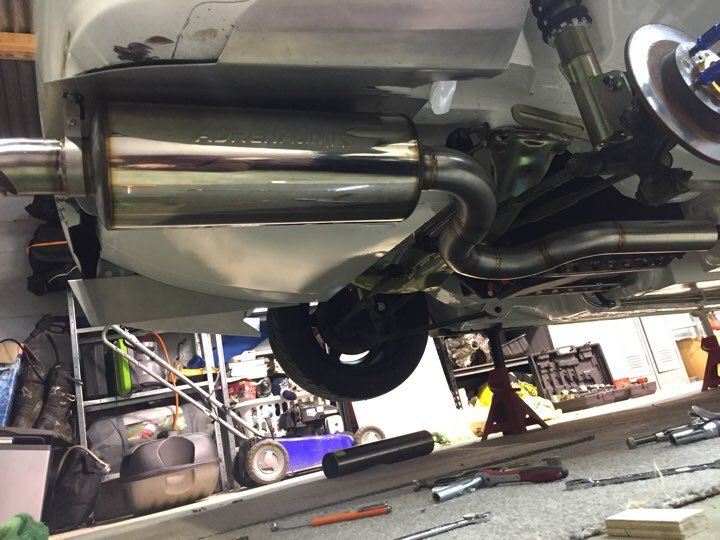
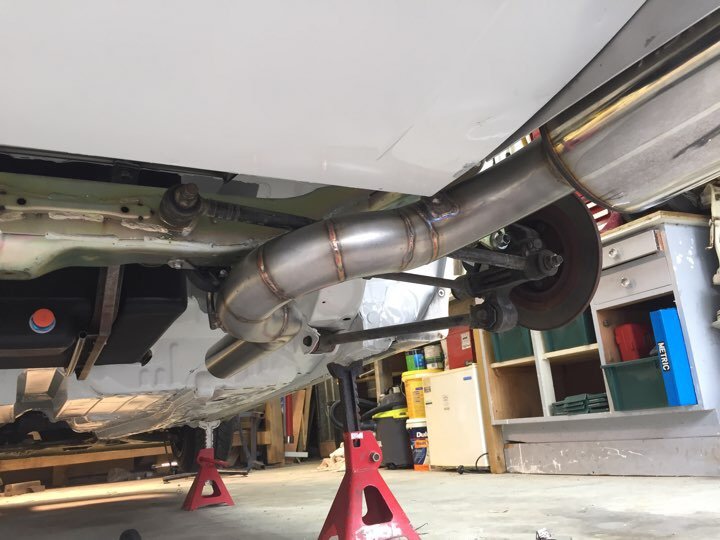
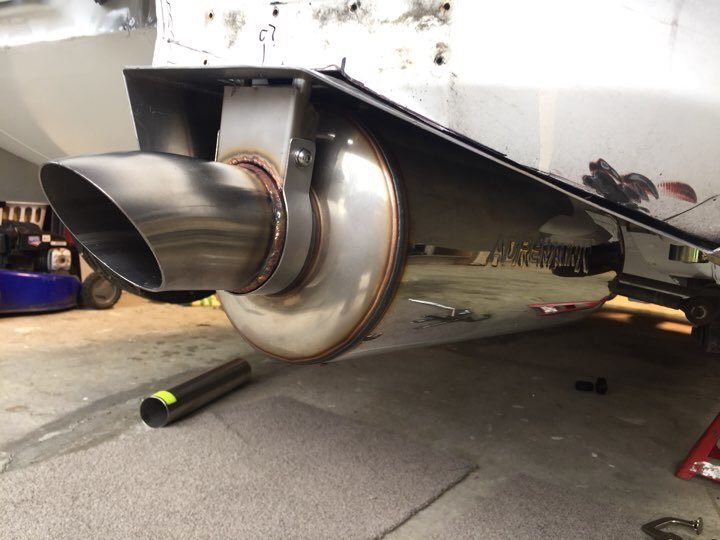
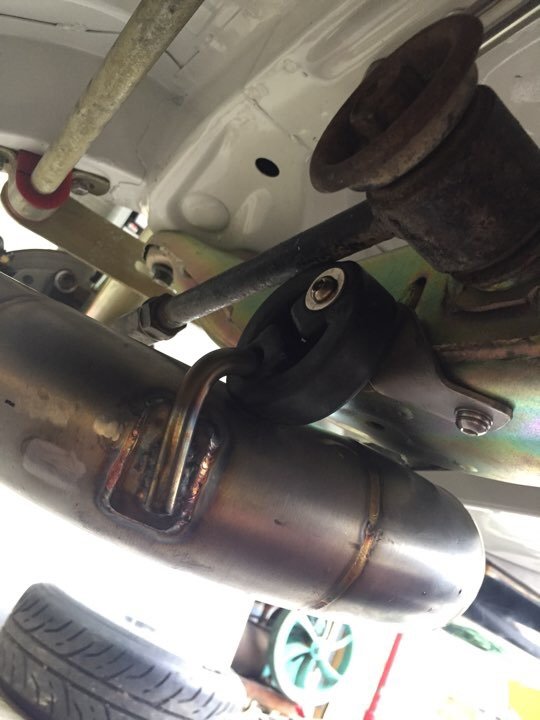
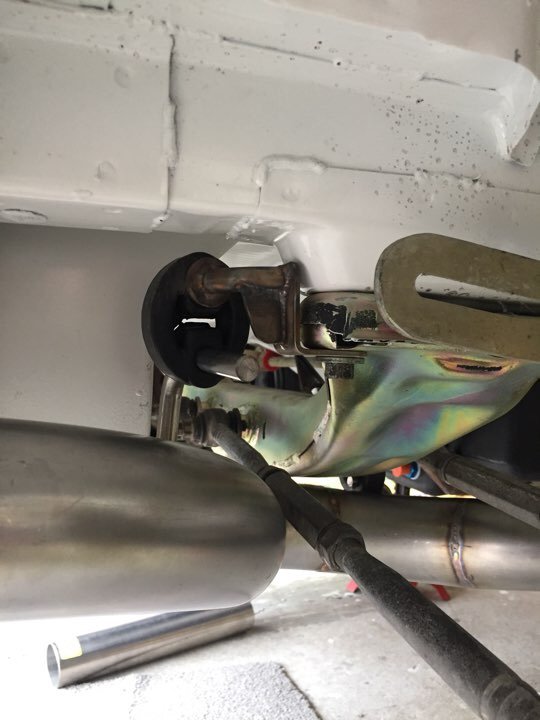
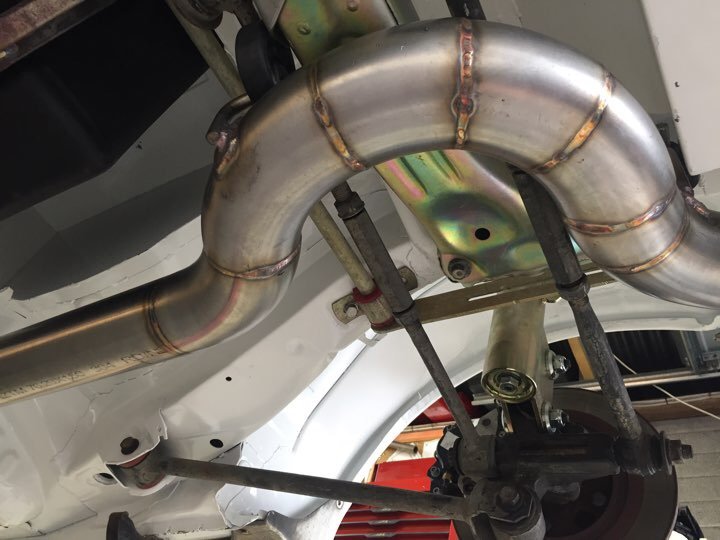
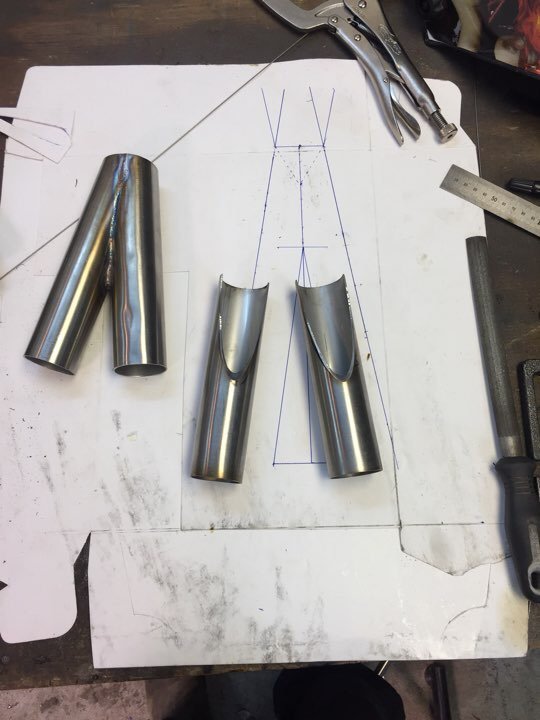
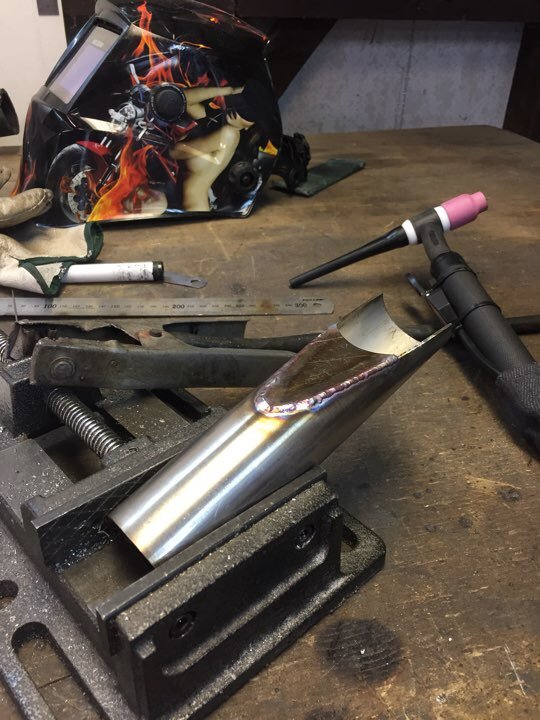
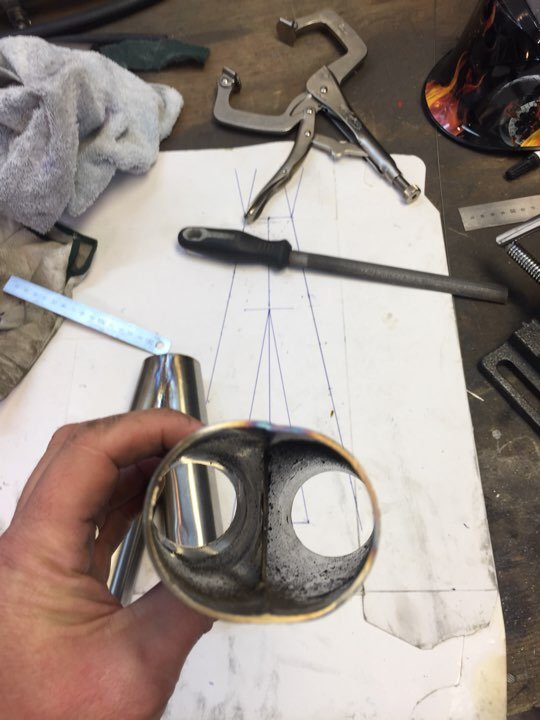
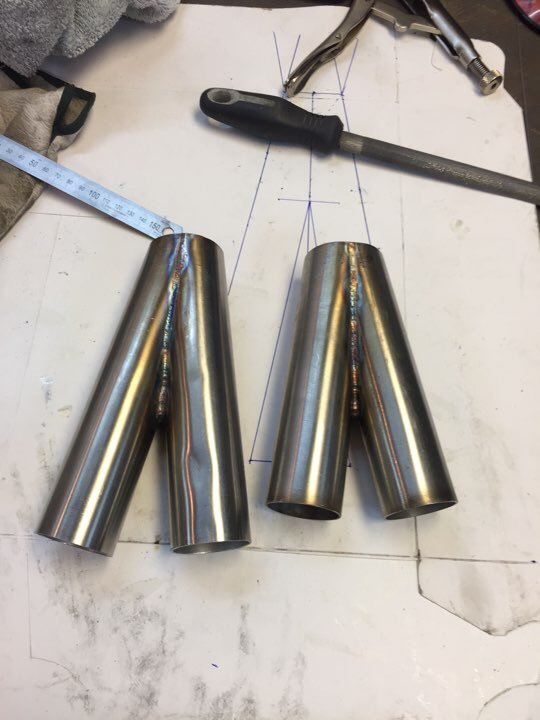
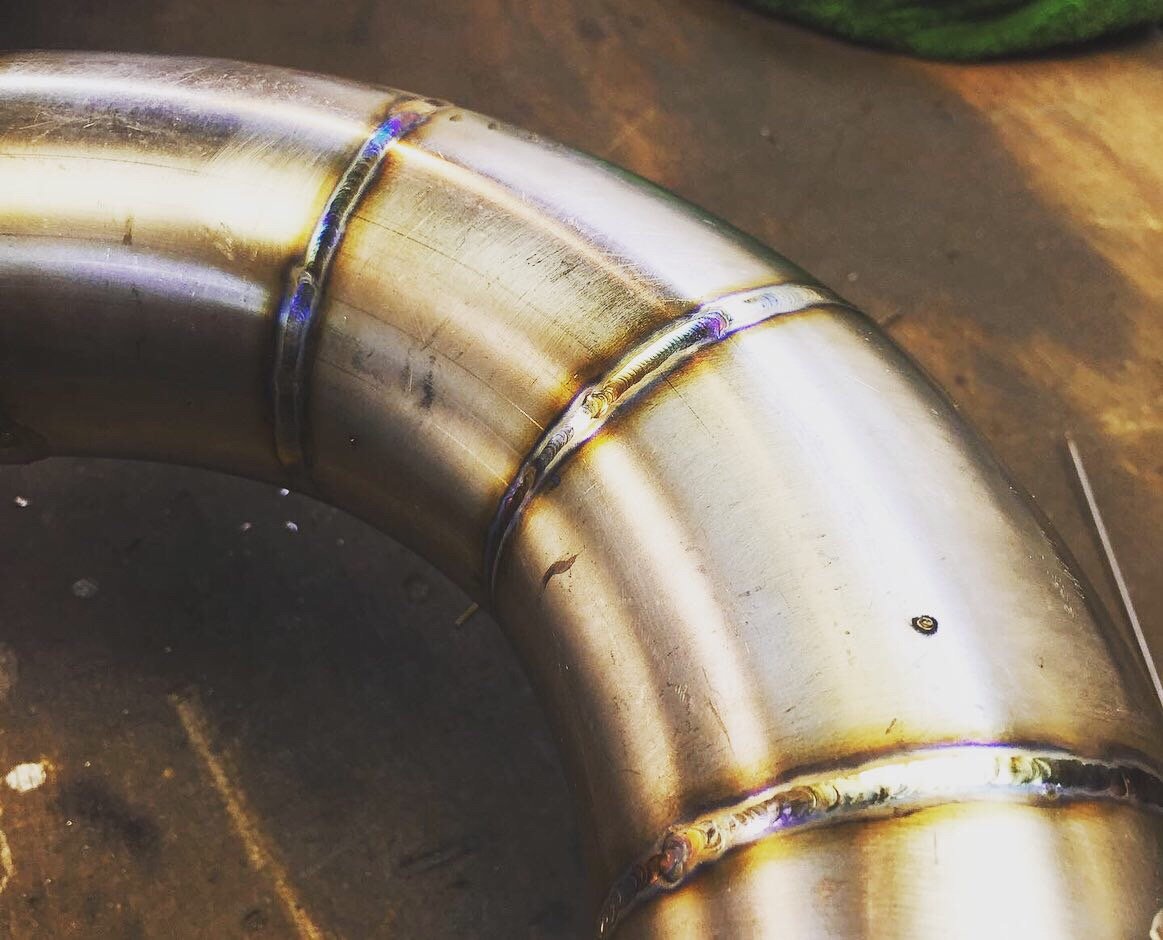
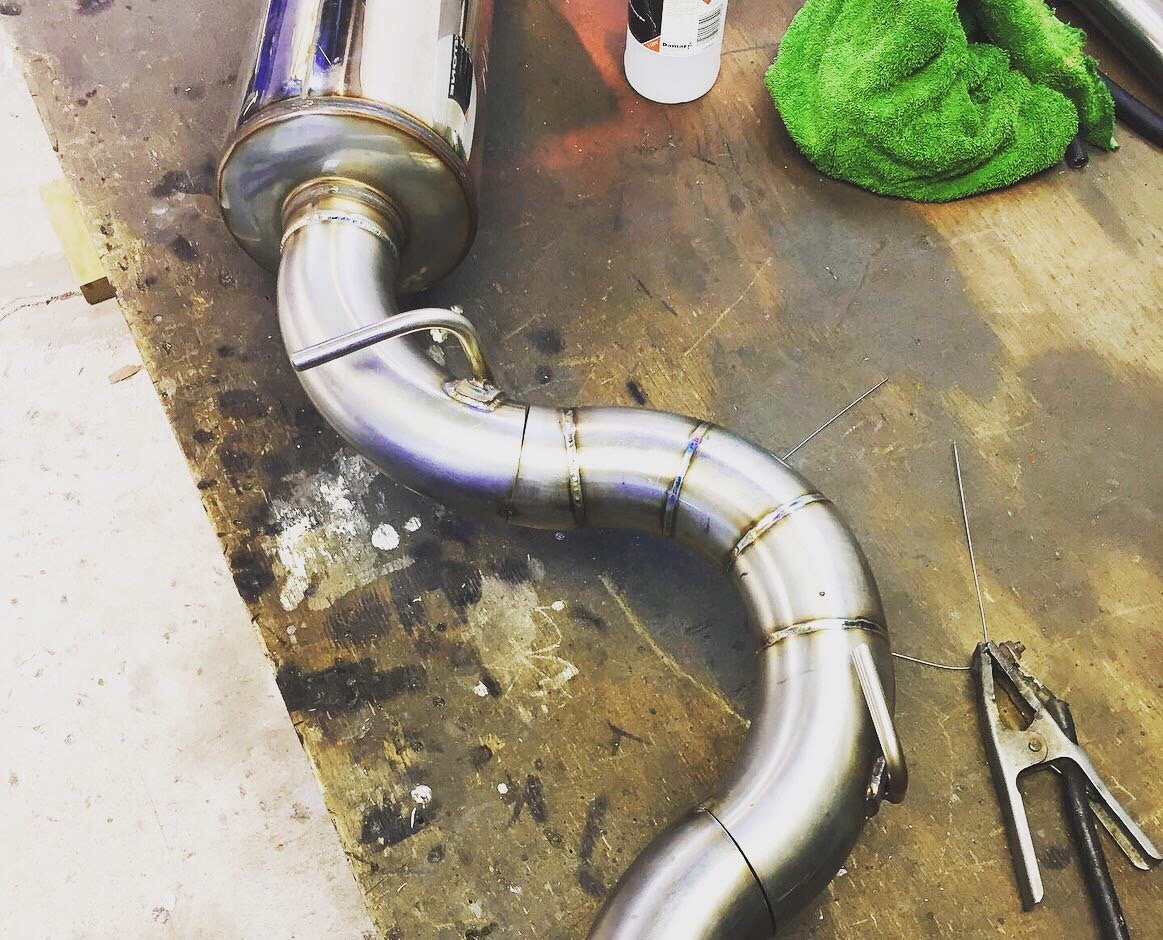
Been chipping away at the exhaust. Been working some big hours recently so took a few days off to reset my mental health and catch-up on some shed work. Finally finished the rear rear section of exhaust thanks to @Truenotch for helping out with another set of hands. Turned out to be a bit of a mission to fit a 3” zorst in a very tight space which required some unique solutions. So so here’s the end product which I’m very happy with. Can’t wait for it to make doorty noises! Bends weren’t quite tight enough so had to cut them up to make them tighter. Luckily the band saw and linisher made this task a dream leaving a nice flat surface to get some mint welds on; In order to get it fitting tight with no movement I over engineered the shit out of the mounting rear mount had double rubber mounts inside the chassis rail for max stealth Rear of muffler had this swanky mount to the subframe and under the subframe i added this rubber to keep it from hitting the subframe mainly as it’s only got 5mm clearance. Been working on building collectors for headers today also. Bit of a head fuck trying to work out how to construct these from the measurements I had but got there in the end. So I’ve decided to go with a Venturi style merge collector and a 4-2-1 header design mainly for packaging reasons. The idea is the gas speed increases momentarily accelerating it through the merge and it also amplifies the any acoustic resonance that we may or may not be able to create with the expansion chamber (standby for @Roman science in near future)... End product just looks like two bits of stainless welded together... Used a bit of card to make a template to get the angles right for the two halves They actually have a small plate/baffle welded in to restrict the area where the two flows merge. Normally (depends on merge angle) the area almost doubles which slows the gas flow and worst case can cause reversion at certain rpms. Welds came out pretty good with no purging only a few small spots of penetration that I’ve mostly been able to get rid of. Smashed through almost a whole d-bottle doing this and the exhaust though! heres the rough plan with my headers; My primaries are 41id stepping up to 44id then this Venturi is 47id before stepping up 56id secondaries and another 51id Venturi and tapering up to the expansion chamber. But that’s about as far as I’ve got sorted at this stage more to come on that next time...
7 points
-
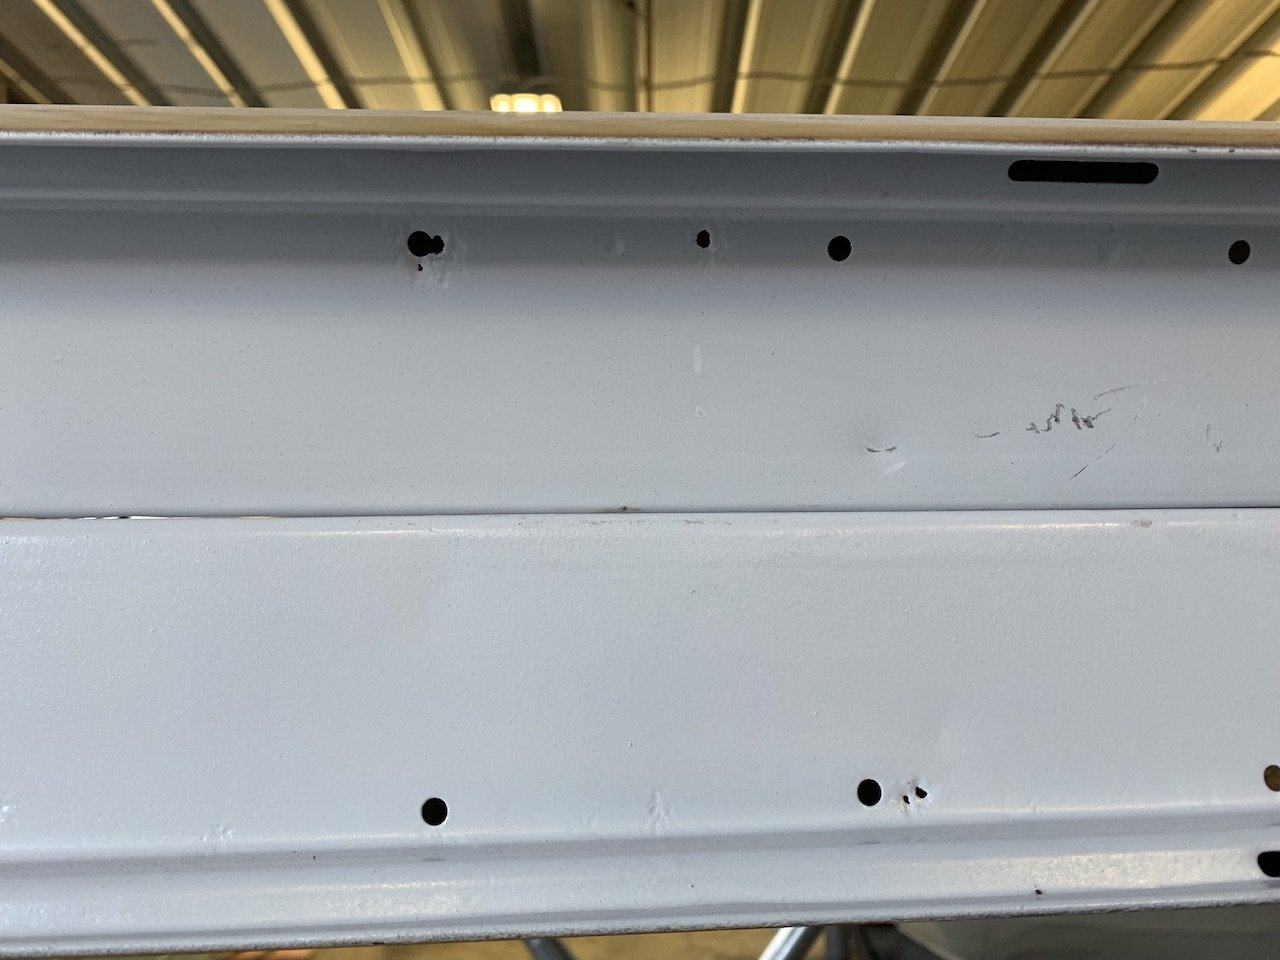
Made an anti-banana jig. You may wonder "why so many holes in top bit?". Well, I was rushing, and you know that episode of Mr Bean where he goes to the dentist?
7 points
-
5 points
-
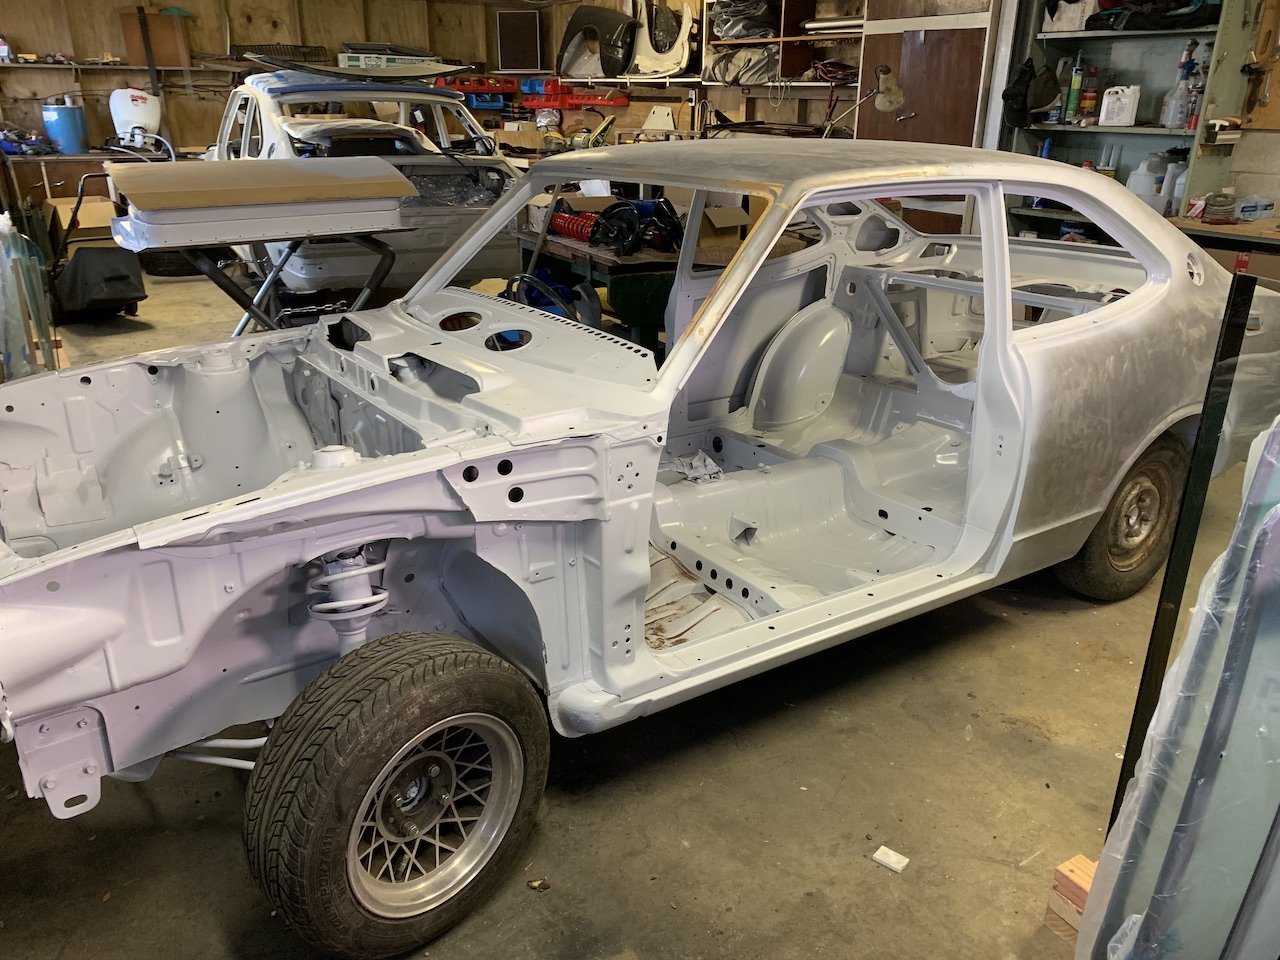
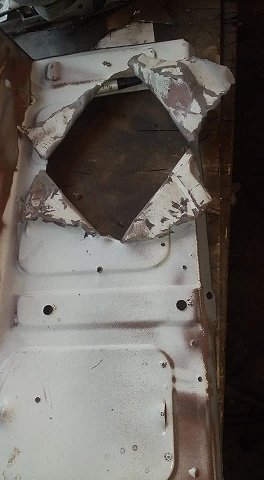
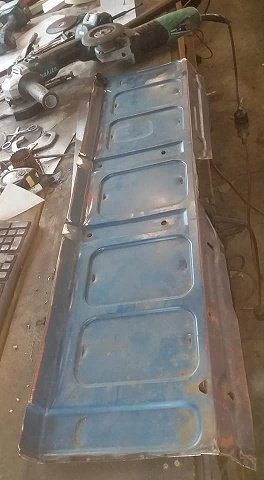
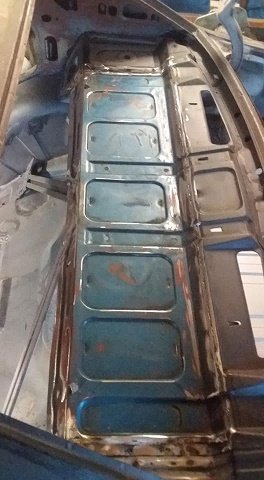
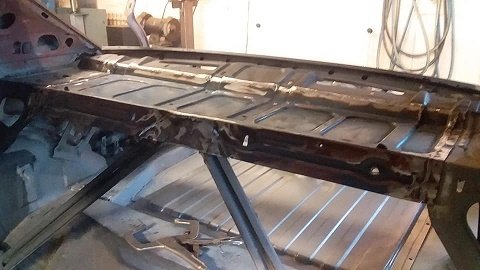
One good days weather in two weeks - so finally got the chance to pick up the car from the blasters. It had a little water in it and they forgot a few areas but not too bad. It's got a few areas of pin holes in the floor but no new major discoveries/disasters! These little holes were the ONLY spots of rust in the doors! (lying on top of each other) Now to clean out the sand and touch up a few spots and keyphos it again while I wait for an opening at the panel beaters!
5 points
-
The cert plate in riveted to the car. Now to finish the compliance and then enjoy4 points
-
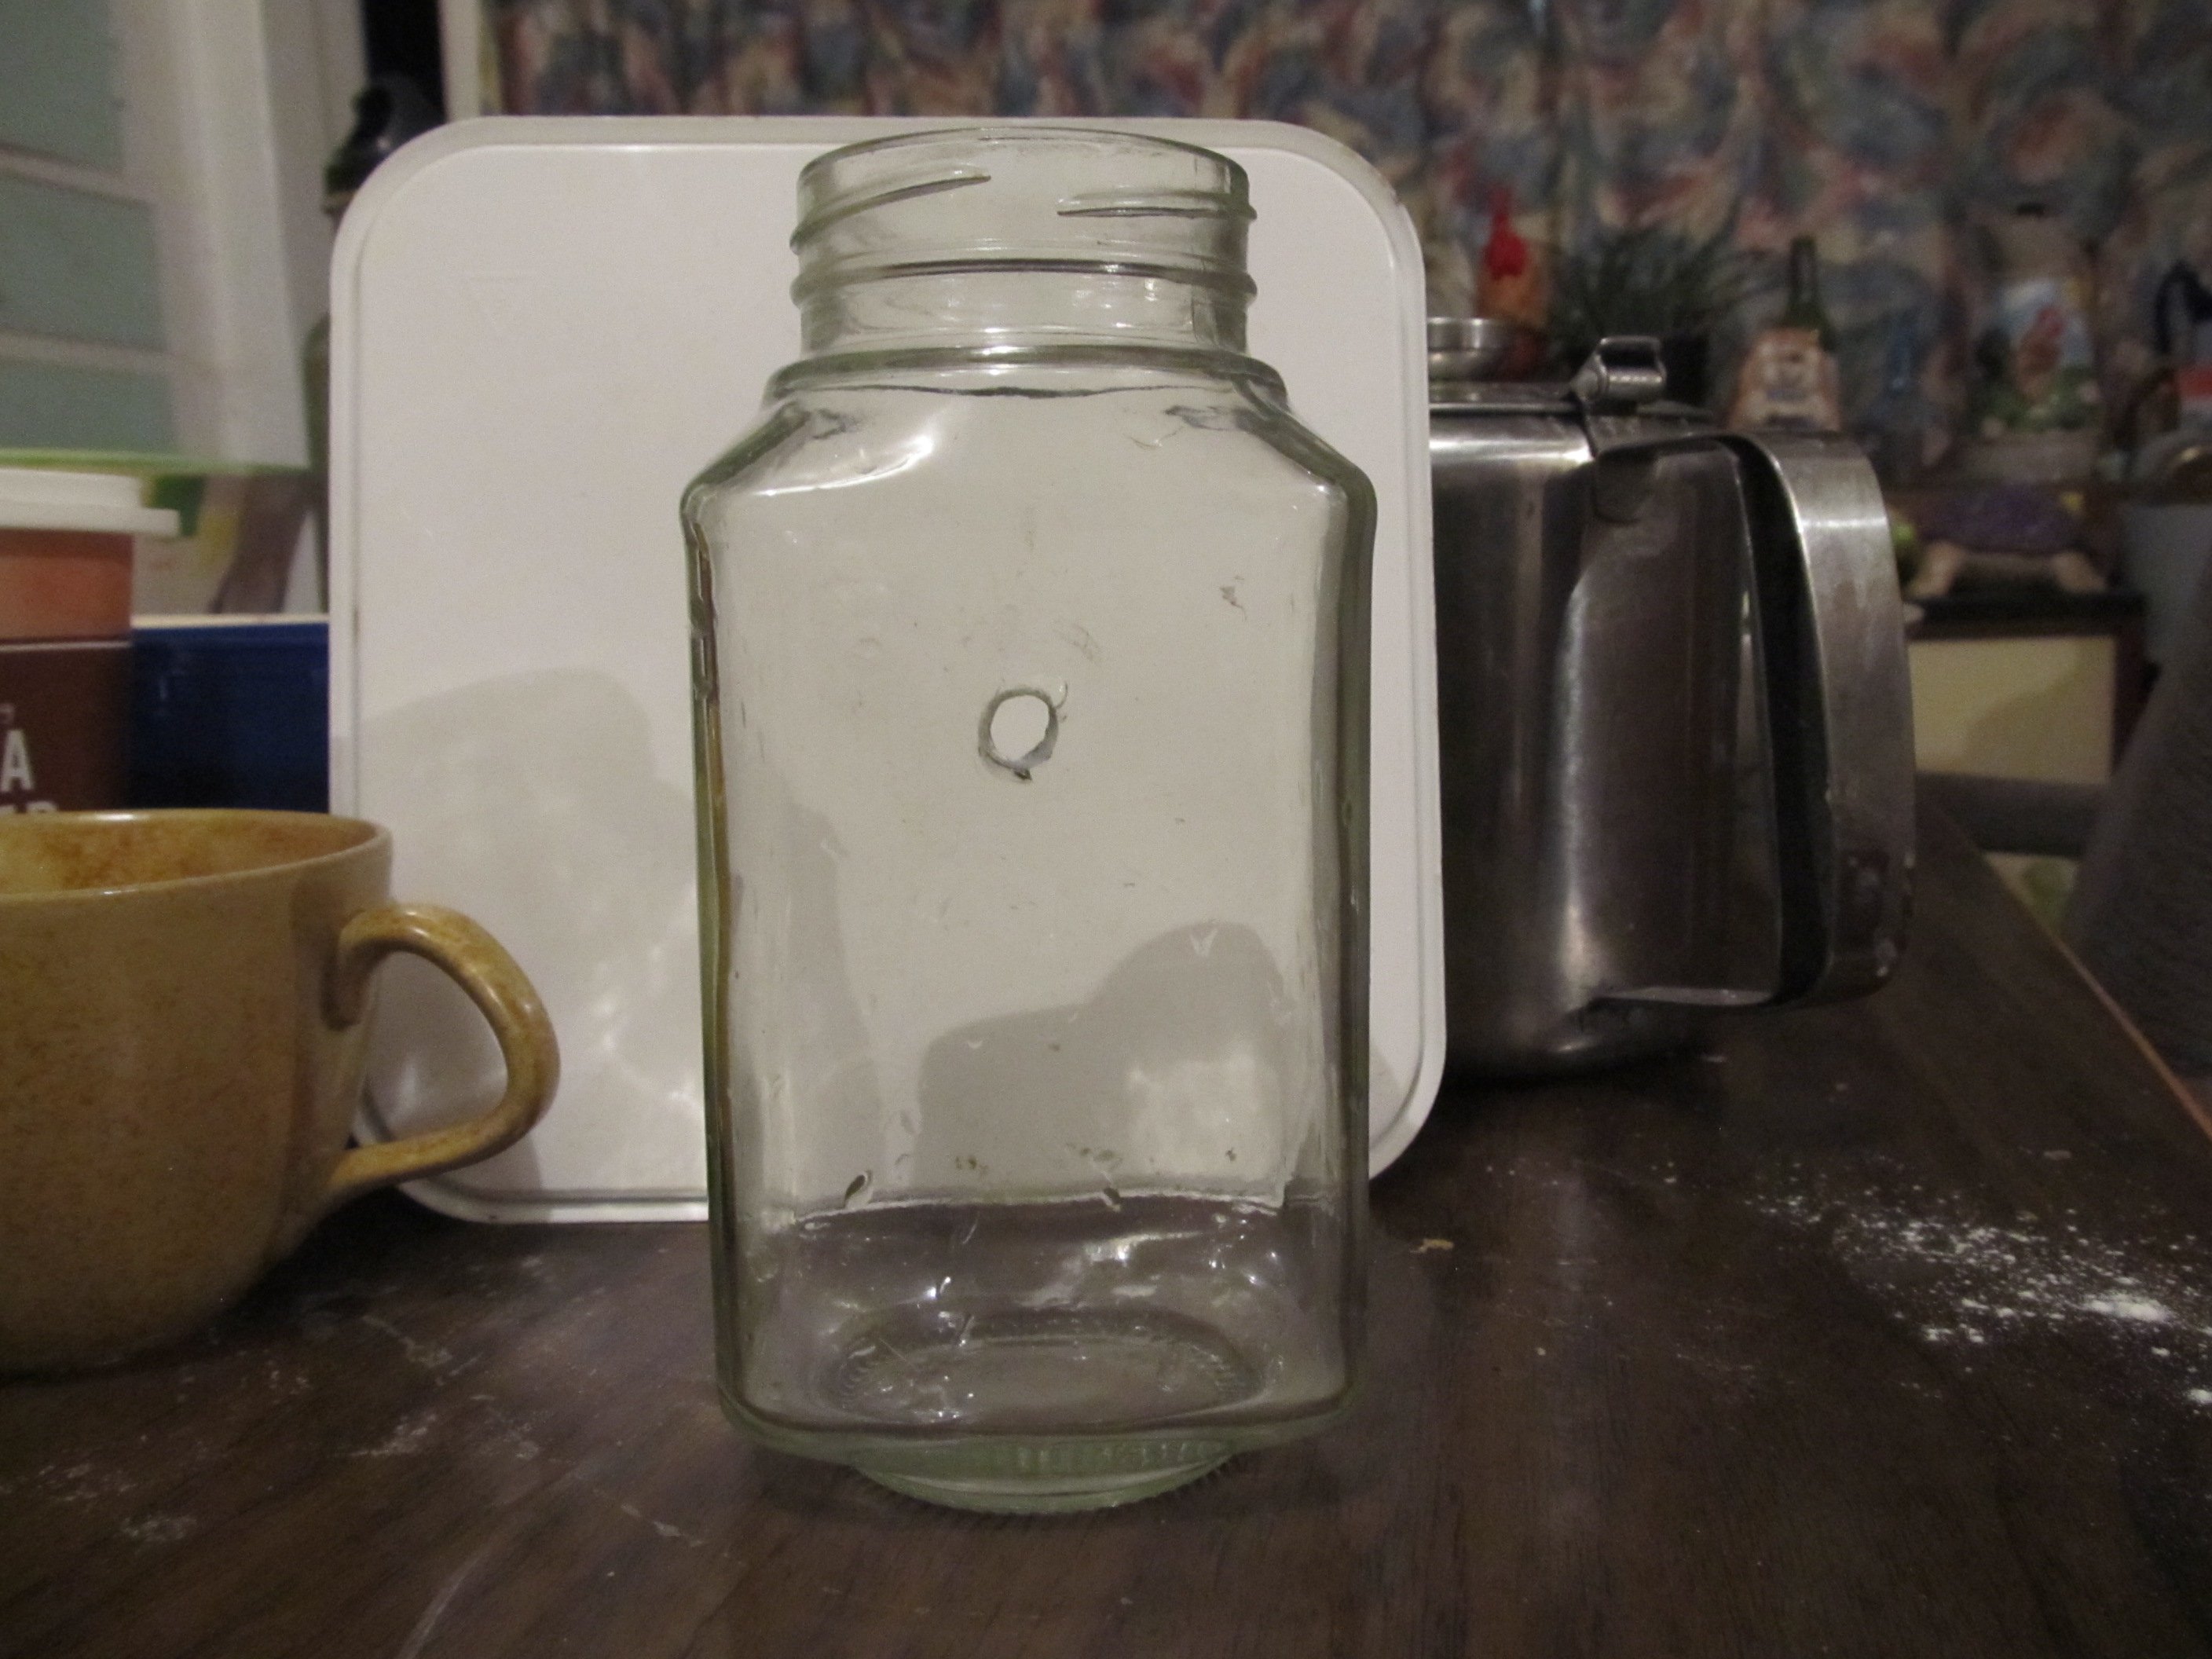
The boy is making a lamp. Today he somehow managed to drill a hole in a glass jar with an egg-beater drill.
4 points
-
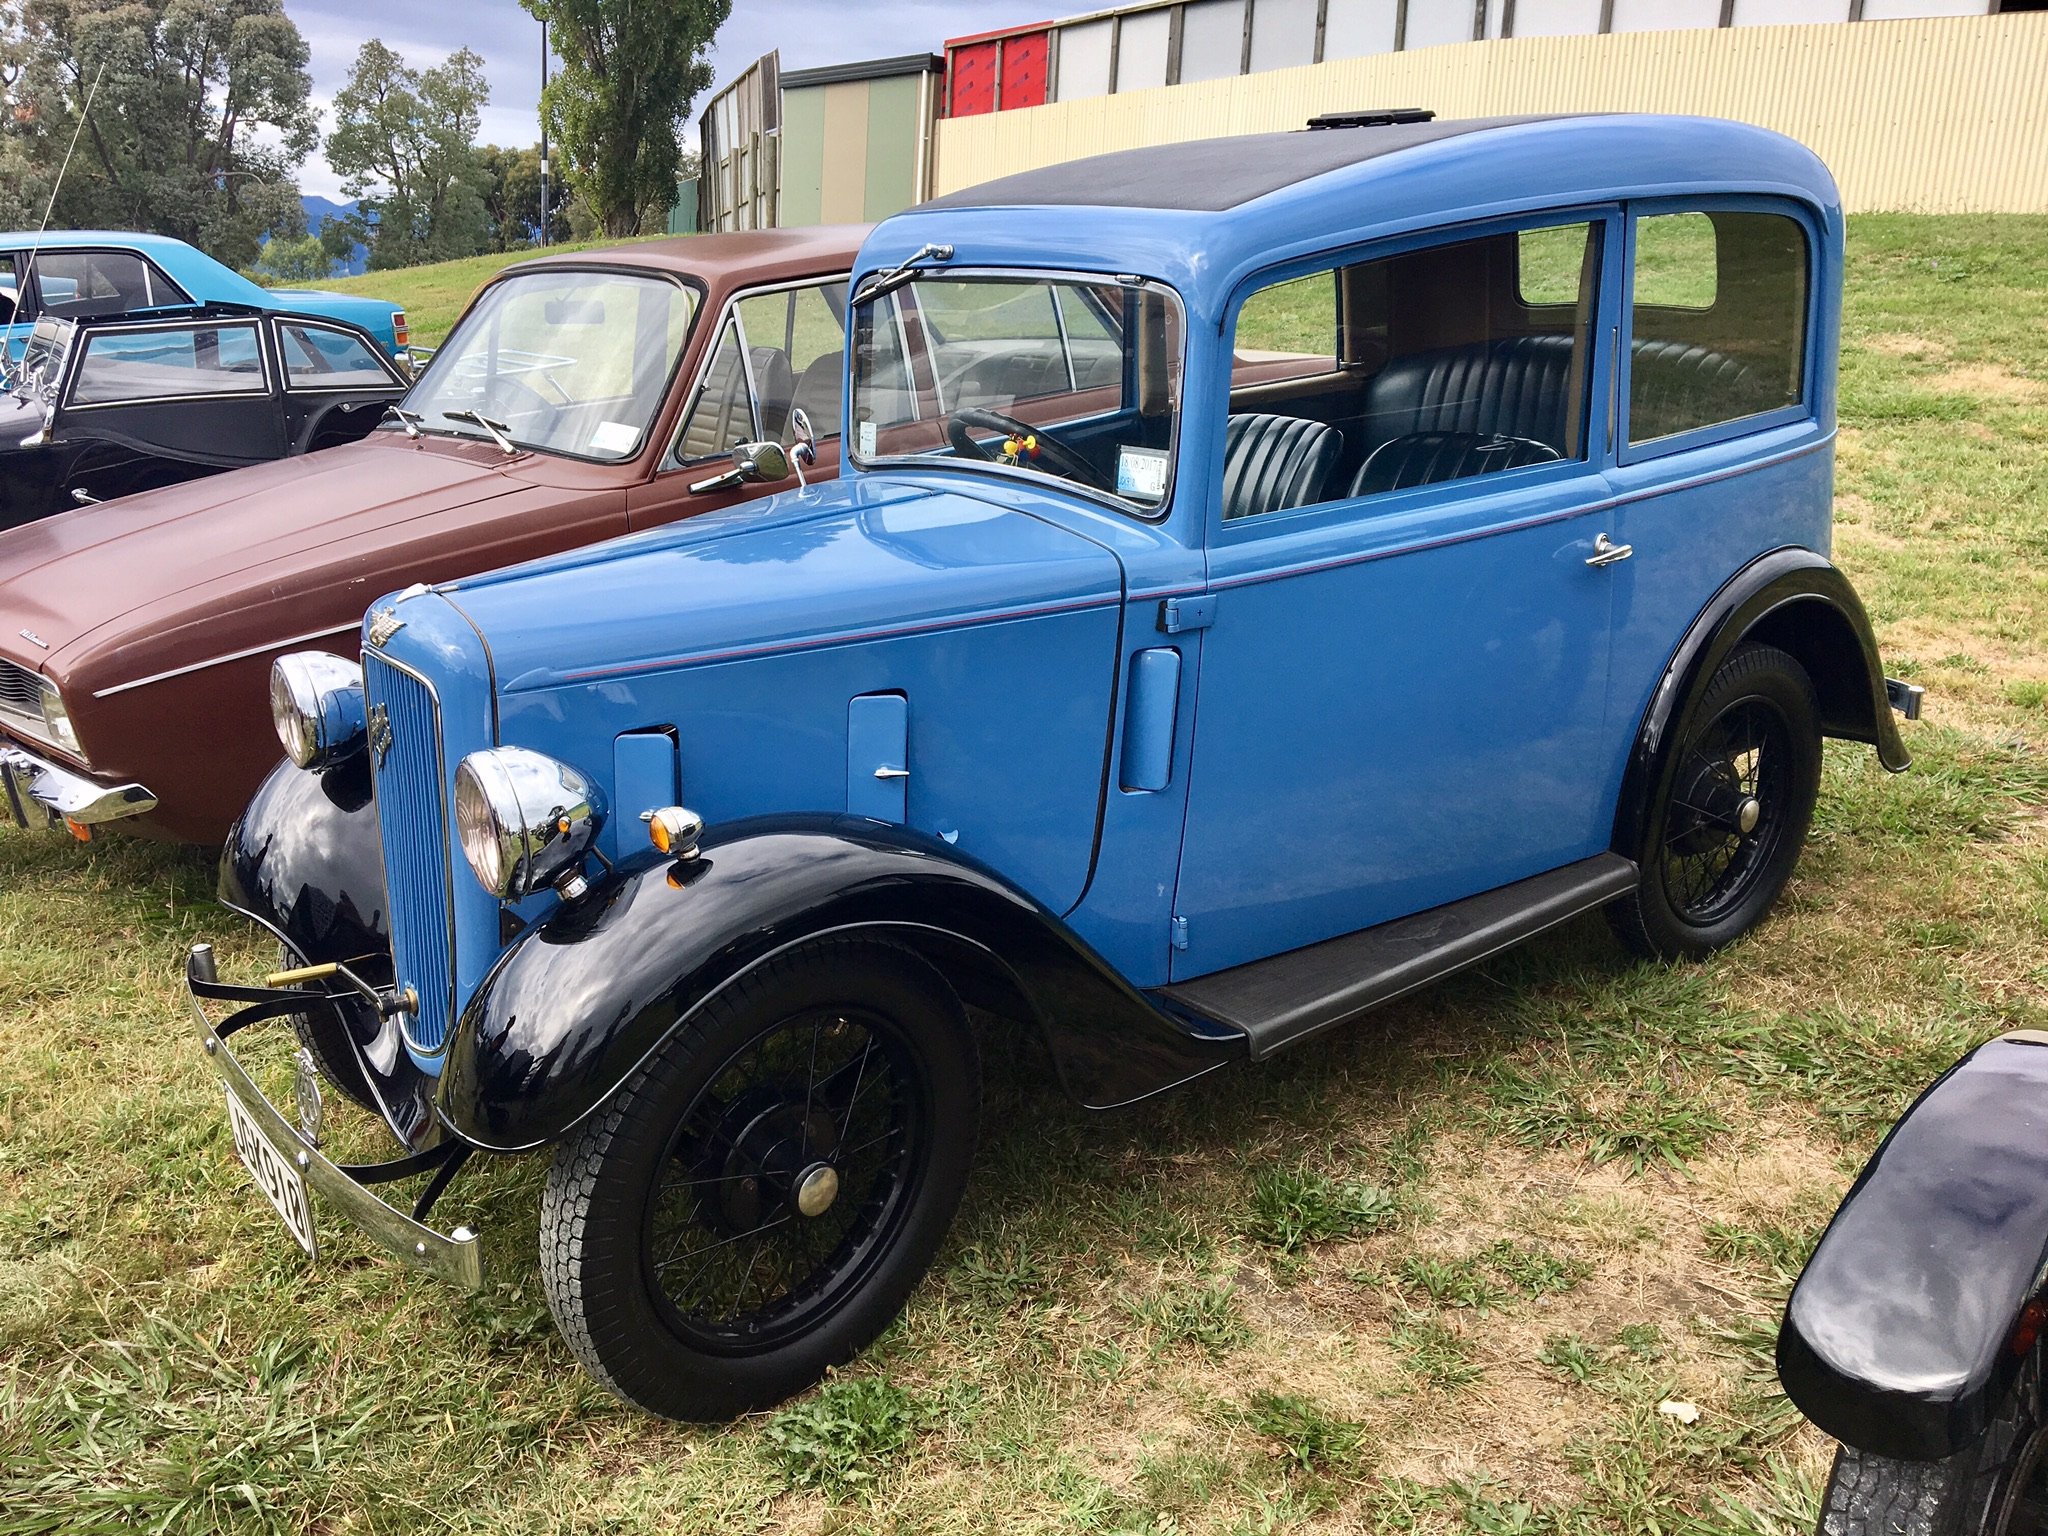
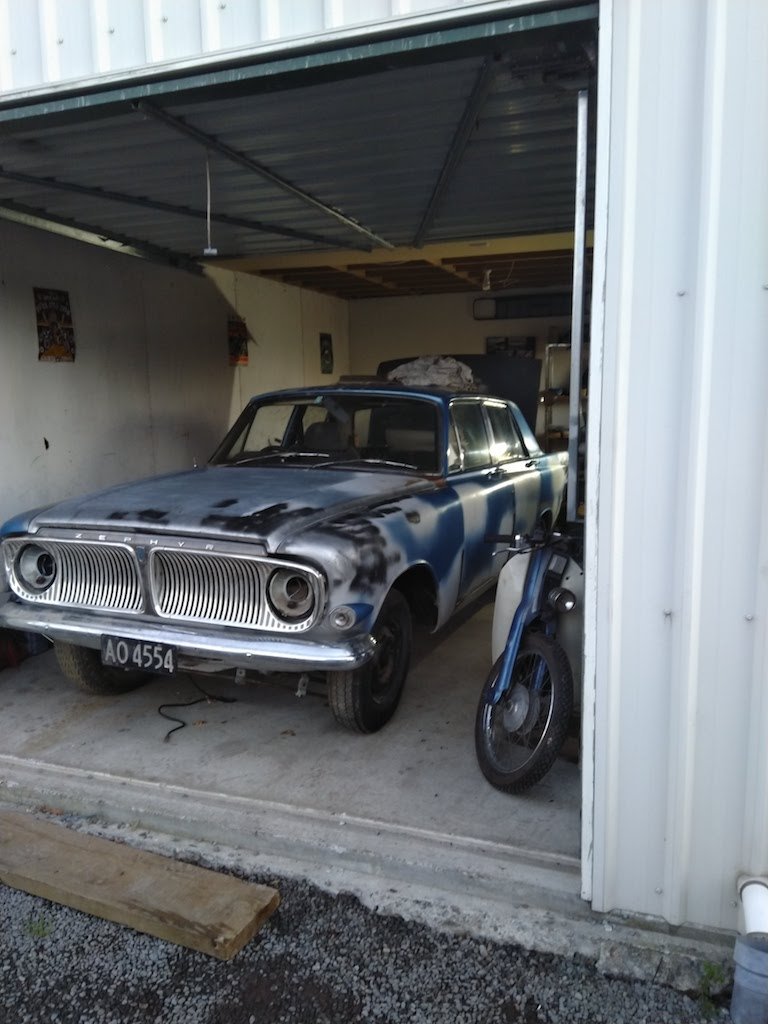
Oh I’ll get it open lol having the opening front windscreen is mandatory. yup it will get painted. I’m thinking 2-tone blue or blue/black. Inspired by one I sat in in Nelson a while back. I’d quite like to do light blue body and dark blue guards with light blue interior, dark blue accents/piping etc
3 points
-
someone should build a tiny scooter teardrop3 points
-
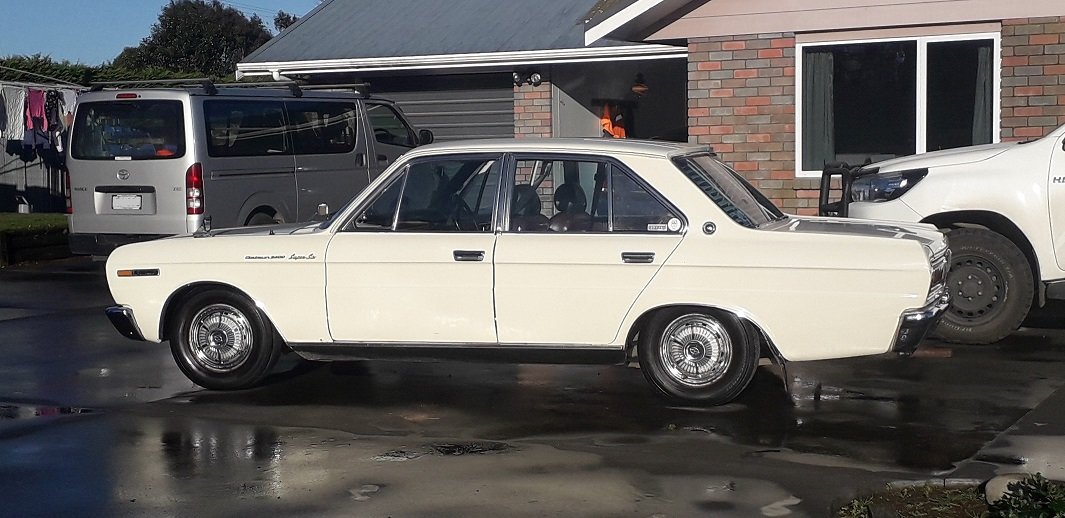
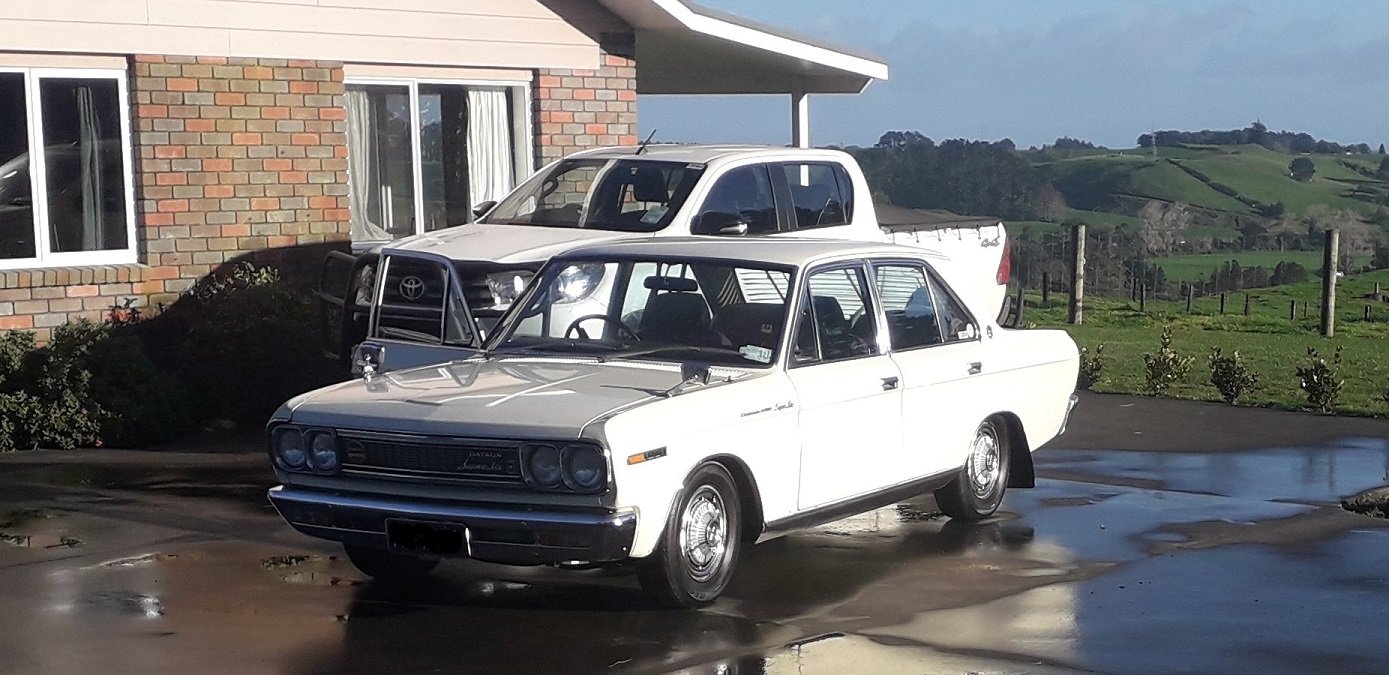
Cheers to absolute legend @crustywhip for sorting me a whole box of interior trim, door rubbers, windows, regulators, and most importantly two mint front guards, one of which has already found it's way on the car. Cheers to @The Bronze for hauling the bits up the country for me. Now that the front is together, only minor things left for a warrant. Need to stop annoying exhaust rattle, put my new front calipers on, and get the headlights working again. Front guard will be painted at some stage but for now it's not too much bother. goes so hard. I get many "when is it getting a turbo" comments, but for what it is it definitely doesn't need one. till next time3 points
-
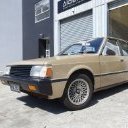
I also got a new friend for the wagon! just need a coupe now right? Its the best starting L series i have ever seen, low kays, been in a shed 15 years, immaculate interior. Undecided if i will keep it. might start a build thread3 points
-
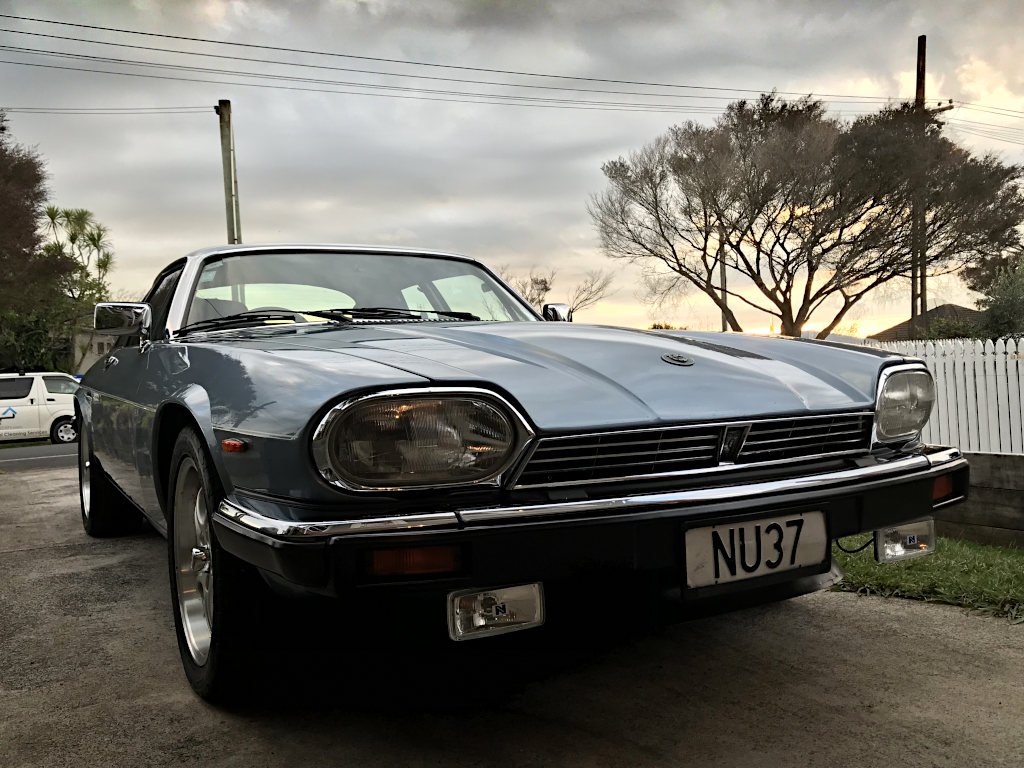
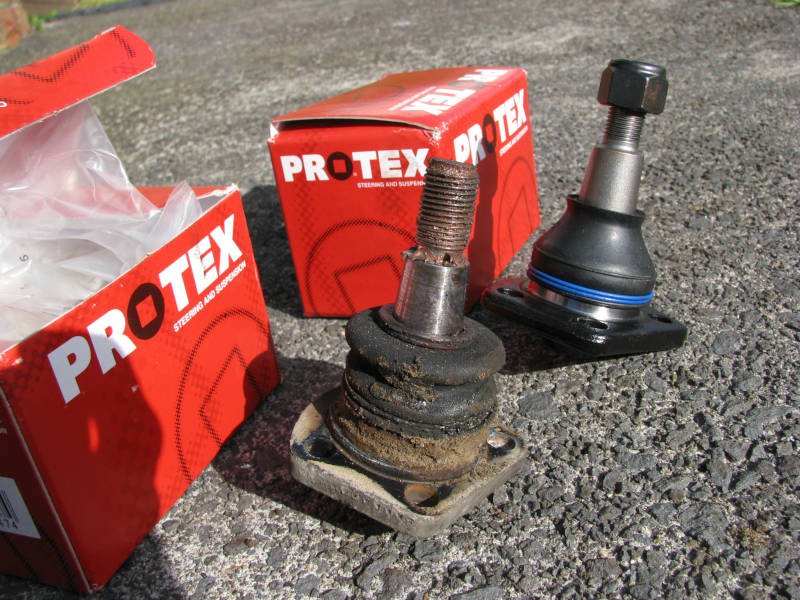
These new wheels have a tyre diameter 3% smaller than stock, so my speedo is even further out than before. It now seems to under-read by around 10%, officer. I went looking for more reasons for the vibration at 80kph, and found the diff seems to leak oil from the input seal. Probably explains its woooo noises on deceleration. So many things to fix! This car will keep me entertained for many years. I found a bit of play in the front wheels when rocking them at 12 and 6 o'clock, but not at 9 and 3 o'clock. I ordered some lower ball joints (an unscientific guess) and installed them this weekend... While doing this, I found the shock absorber top mounts were loose, one by a reasonable amount. After replacing the ball joints there was still some play in the wheels, so I think I guessed wrong. The vibration situation seemed to have improved for some reason though. Maybe I need to do the upper ball joints too / I don't know what I'm doing.
3 points
-
A few photos were taken and then onto the trailer and off to the workshop. Yes it fits on a fairly standard size trailer!
3 points
-
The more I work on this thing, the less insane I feel for having taken it on as a project. Can't wait for the day when I can drive this to the dairy to get milk.2 points
-
Thanks to those that turned up! Was a Chevy (+1 mitsi) meet this time. I think it needs to have a Facebook event, will try a private invite only one next time and see how that goes.2 points
-
so bummed i missed the meet again... 2 times in a row now hopefully my corolla is running by the next one2 points
-
I've had a few people say keep the flat deck. It really is a whole lot more practical in every way. Needs a new timber bed and sides. The frame is solid as a rock. Let's say I won't part with it any time soon. and we'll chuck it on the "Long term list" Finally said good bye to the last of my cortina stuff today. That was a little difficult. But reality is that it was too much for me to take on not being a welder, or a panel beater. Took advantage of Supercheap's Club Plus discount and saved almost 50% on a new trolly jack and axle stands. The Mrs has been having a fit at me working on cars using left over deck piles for the last wee while. So at the very least she will yell at me about 10% less than she used to. Ordered the 1/2" rattle gun too. Should be here before the weekend.2 points
-
King cab. But was suuuuuuuper rusty. Didn't look too bad until I pulled out all the secret silicone that the previous owner had used to 'fix' it. And then I have left it outside for the last few years. It wasn't any good to anyone really then, and it definitely isn't now.2 points
-
Semi keen to take the bosses Van Van 125 because of 6 gears, bigger tank and the rear tyre is wider than my face. Don't think he's sold on the idea though. "2 points
-
You are a man of class and exclusive taste sir.2 points
-
Owning this thing has been very fun! On my first day of ownership i thought i'd go for a ride with some tractor and saddlebag enthusiasts down Central Hawkes Bay to the Patangata Tavern for a shandy and sharn. After fueling up, the battery died on me which i thought was odd. at least i had plenty of big hefty harley riders to give the only japanese bike in the group a push start. I quickly learned that these bikes do not like running with a dead flat battery. After a while it wouldnt even push start, which left me stranded somewhere on highway 50. thank god for AA plus! The previous owner had told me the bikes battery would go flat after a while if not riding it often, these old bikes tend to have pretty tired charging systems so didnt think much of it. Didn't realise it would shit the bed within a day of owning it... Started with the regulator/rectifier. a quick diode test showed it was chooched. A second hand article was had from a wrecker in chch. The bike now held charge, but every time it started up it would blow the main fuse. I found some helpful info on the GS resource forum, which helped me diagnose a faulty stator. A common issue with these bikes, as they are tiny, dont get a lot of cooling from oil in the cases and are just generally shit. tracked down a local replacement. Its a Ricks Motorsport Electrics aftermarket jobby. the thing is super beefy and has like double the copper windings on it than the factory article. Now just waiting for a gasket for the stator cover and can finally start getting some more miles on it! yay for old shit2 points
-
Cheers lads. Still have a lot of little bits to finish off. Starting it has pointed out a few things that need attention (nothing major) leaks and such. As much as I hate to do it, it might have to come up a little bit, cross member is 105mm off the ground, that I am happy with, but the very expensive ceramic coated exhaust is only about 60mm, and may or may not have already made friends with the road. I'm not sure if it's normal, but the mazdaspeed lsd sounds like a bag full of hammers clanging and banging away. I knew it was going to be tight, but shit. But all that means fuck all. I am just happy I finally pulled my finger out and got shit done on it.2 points
-
parcel shelf time yay. as you can see it looks like some has put the mighty dof dof 6x9s in with what can only be presumed an axe and fucking big hammer. lucky for me there was a car being wreaked last year and i cut the shelf out of that. and one out one in
2 points
-
2 points
-
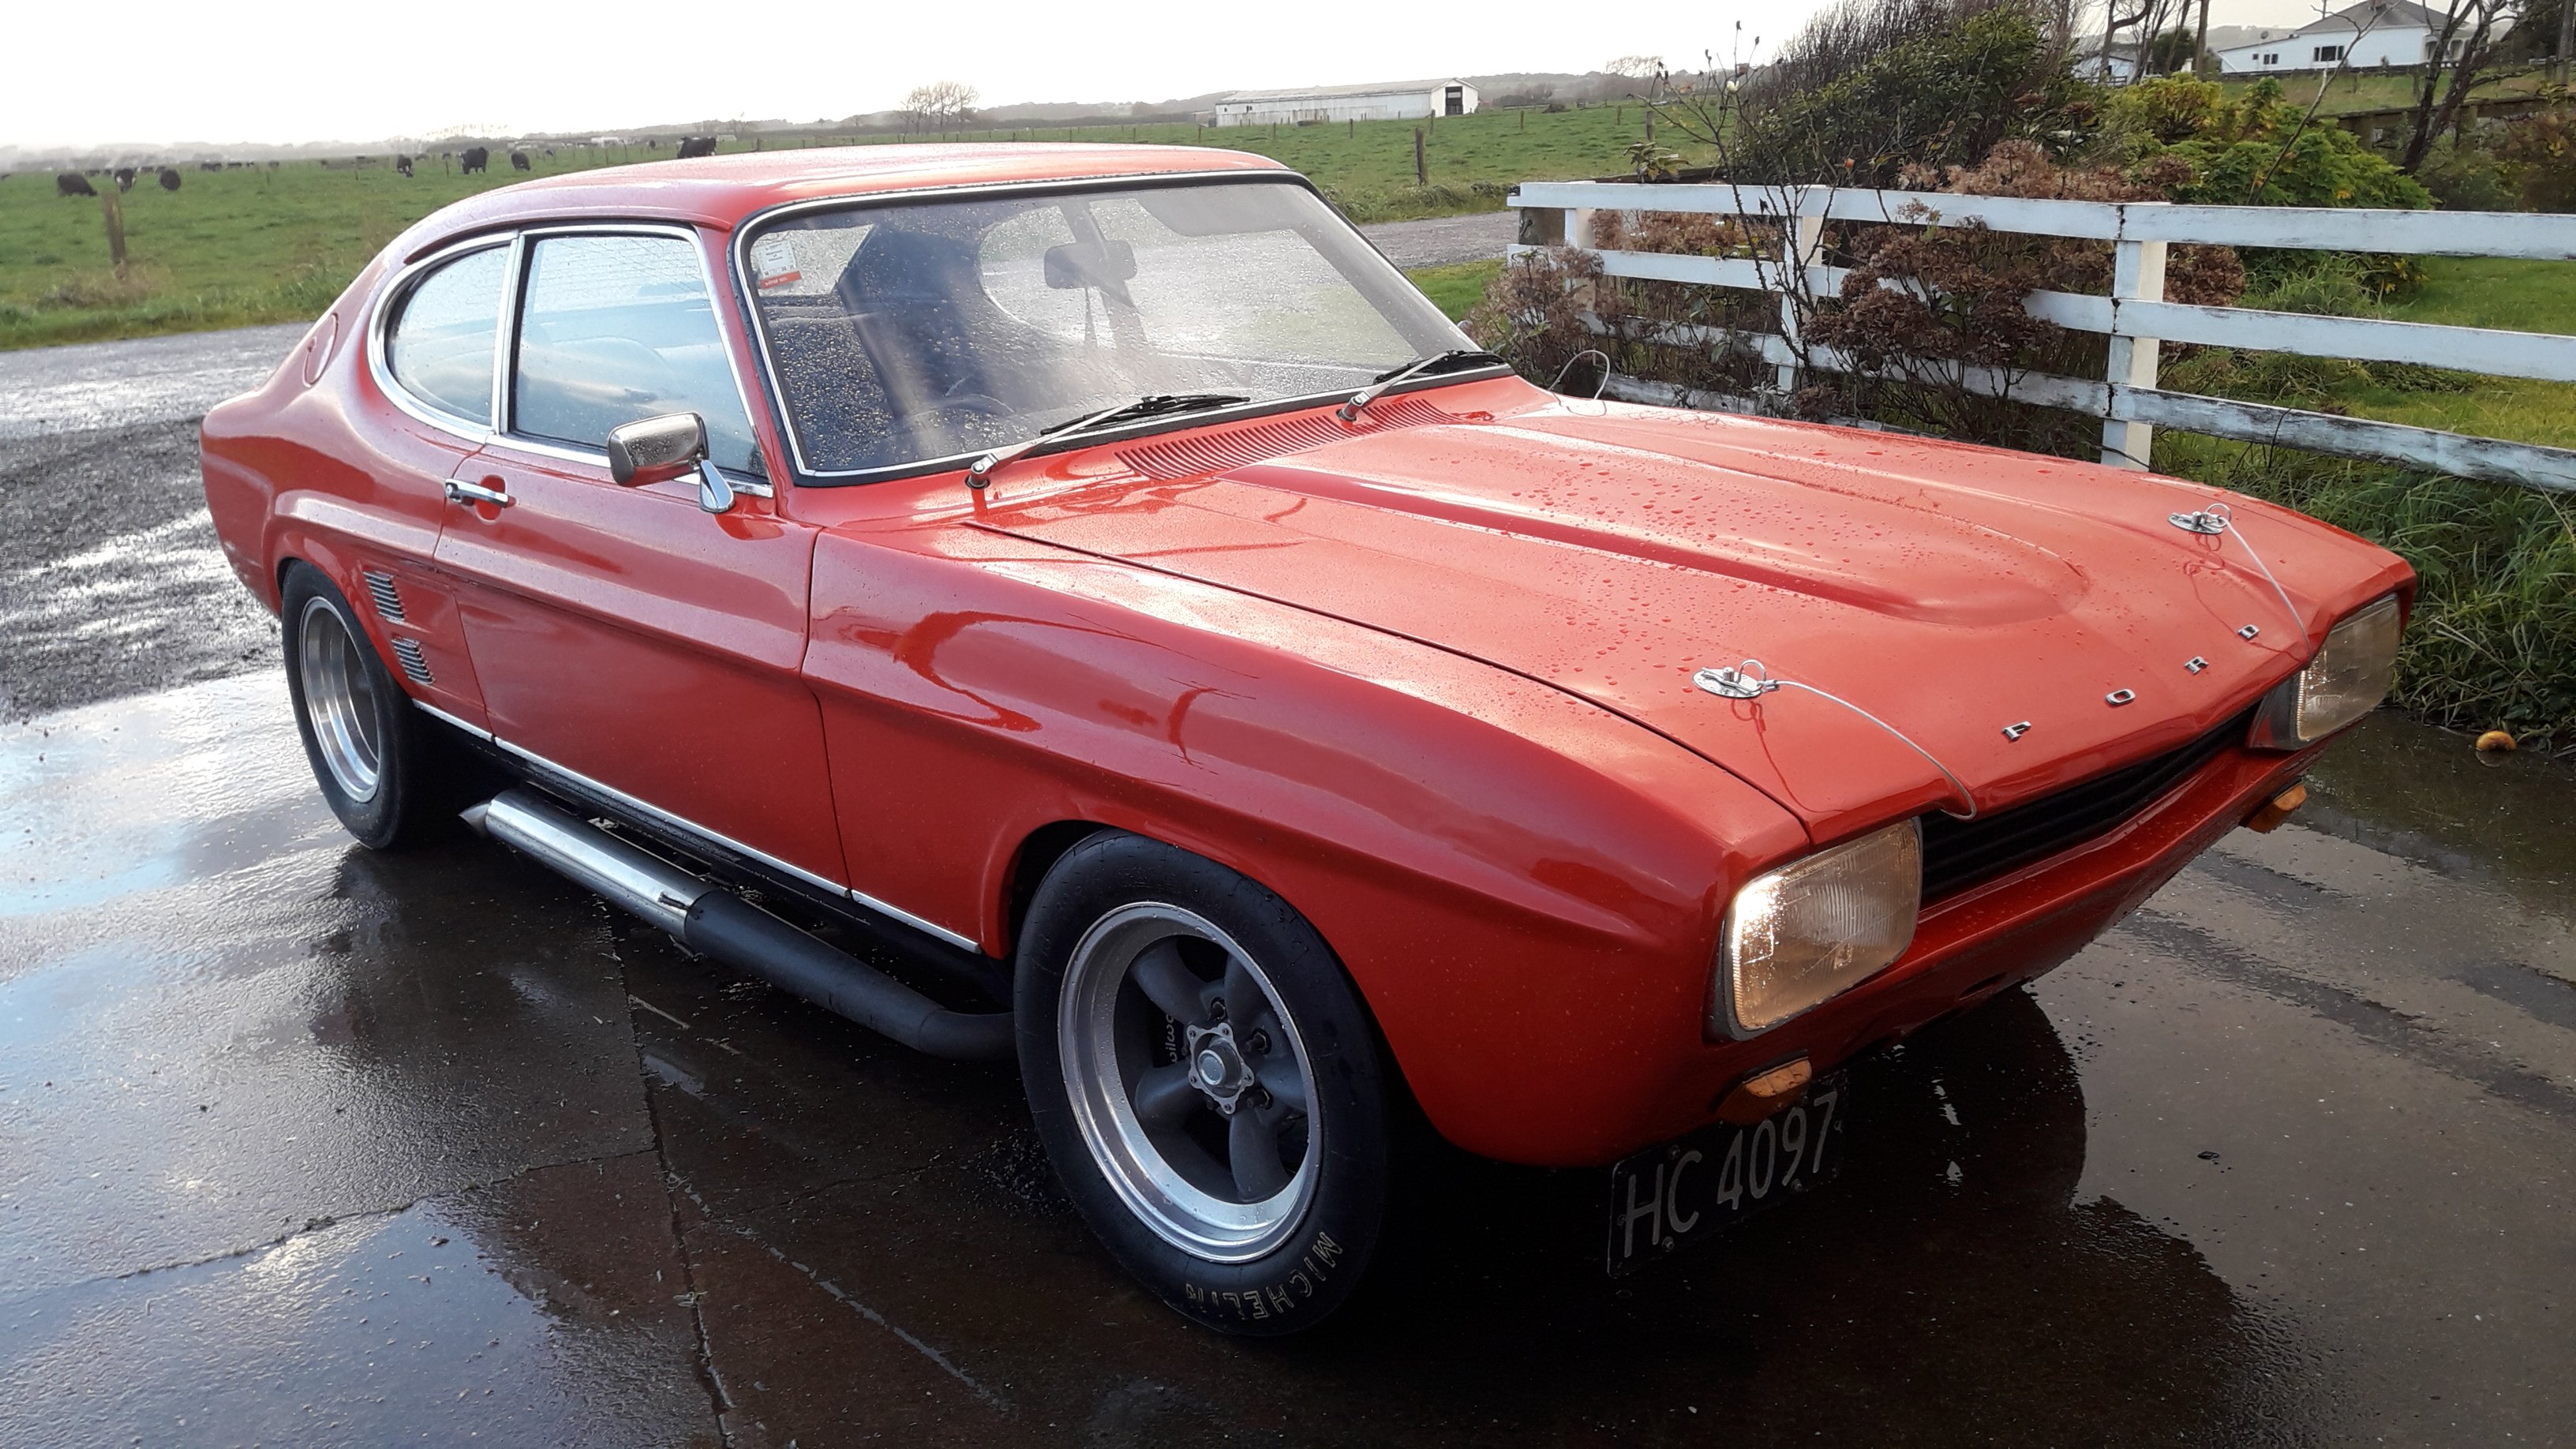
She's all up and running with the new paint job and brand new engine now. All certified and legal. The engine that was in it had a cracked deck and was bored 60 thou over so was replaced with a brand new Ford racing 345 hp 302.
2 points
-
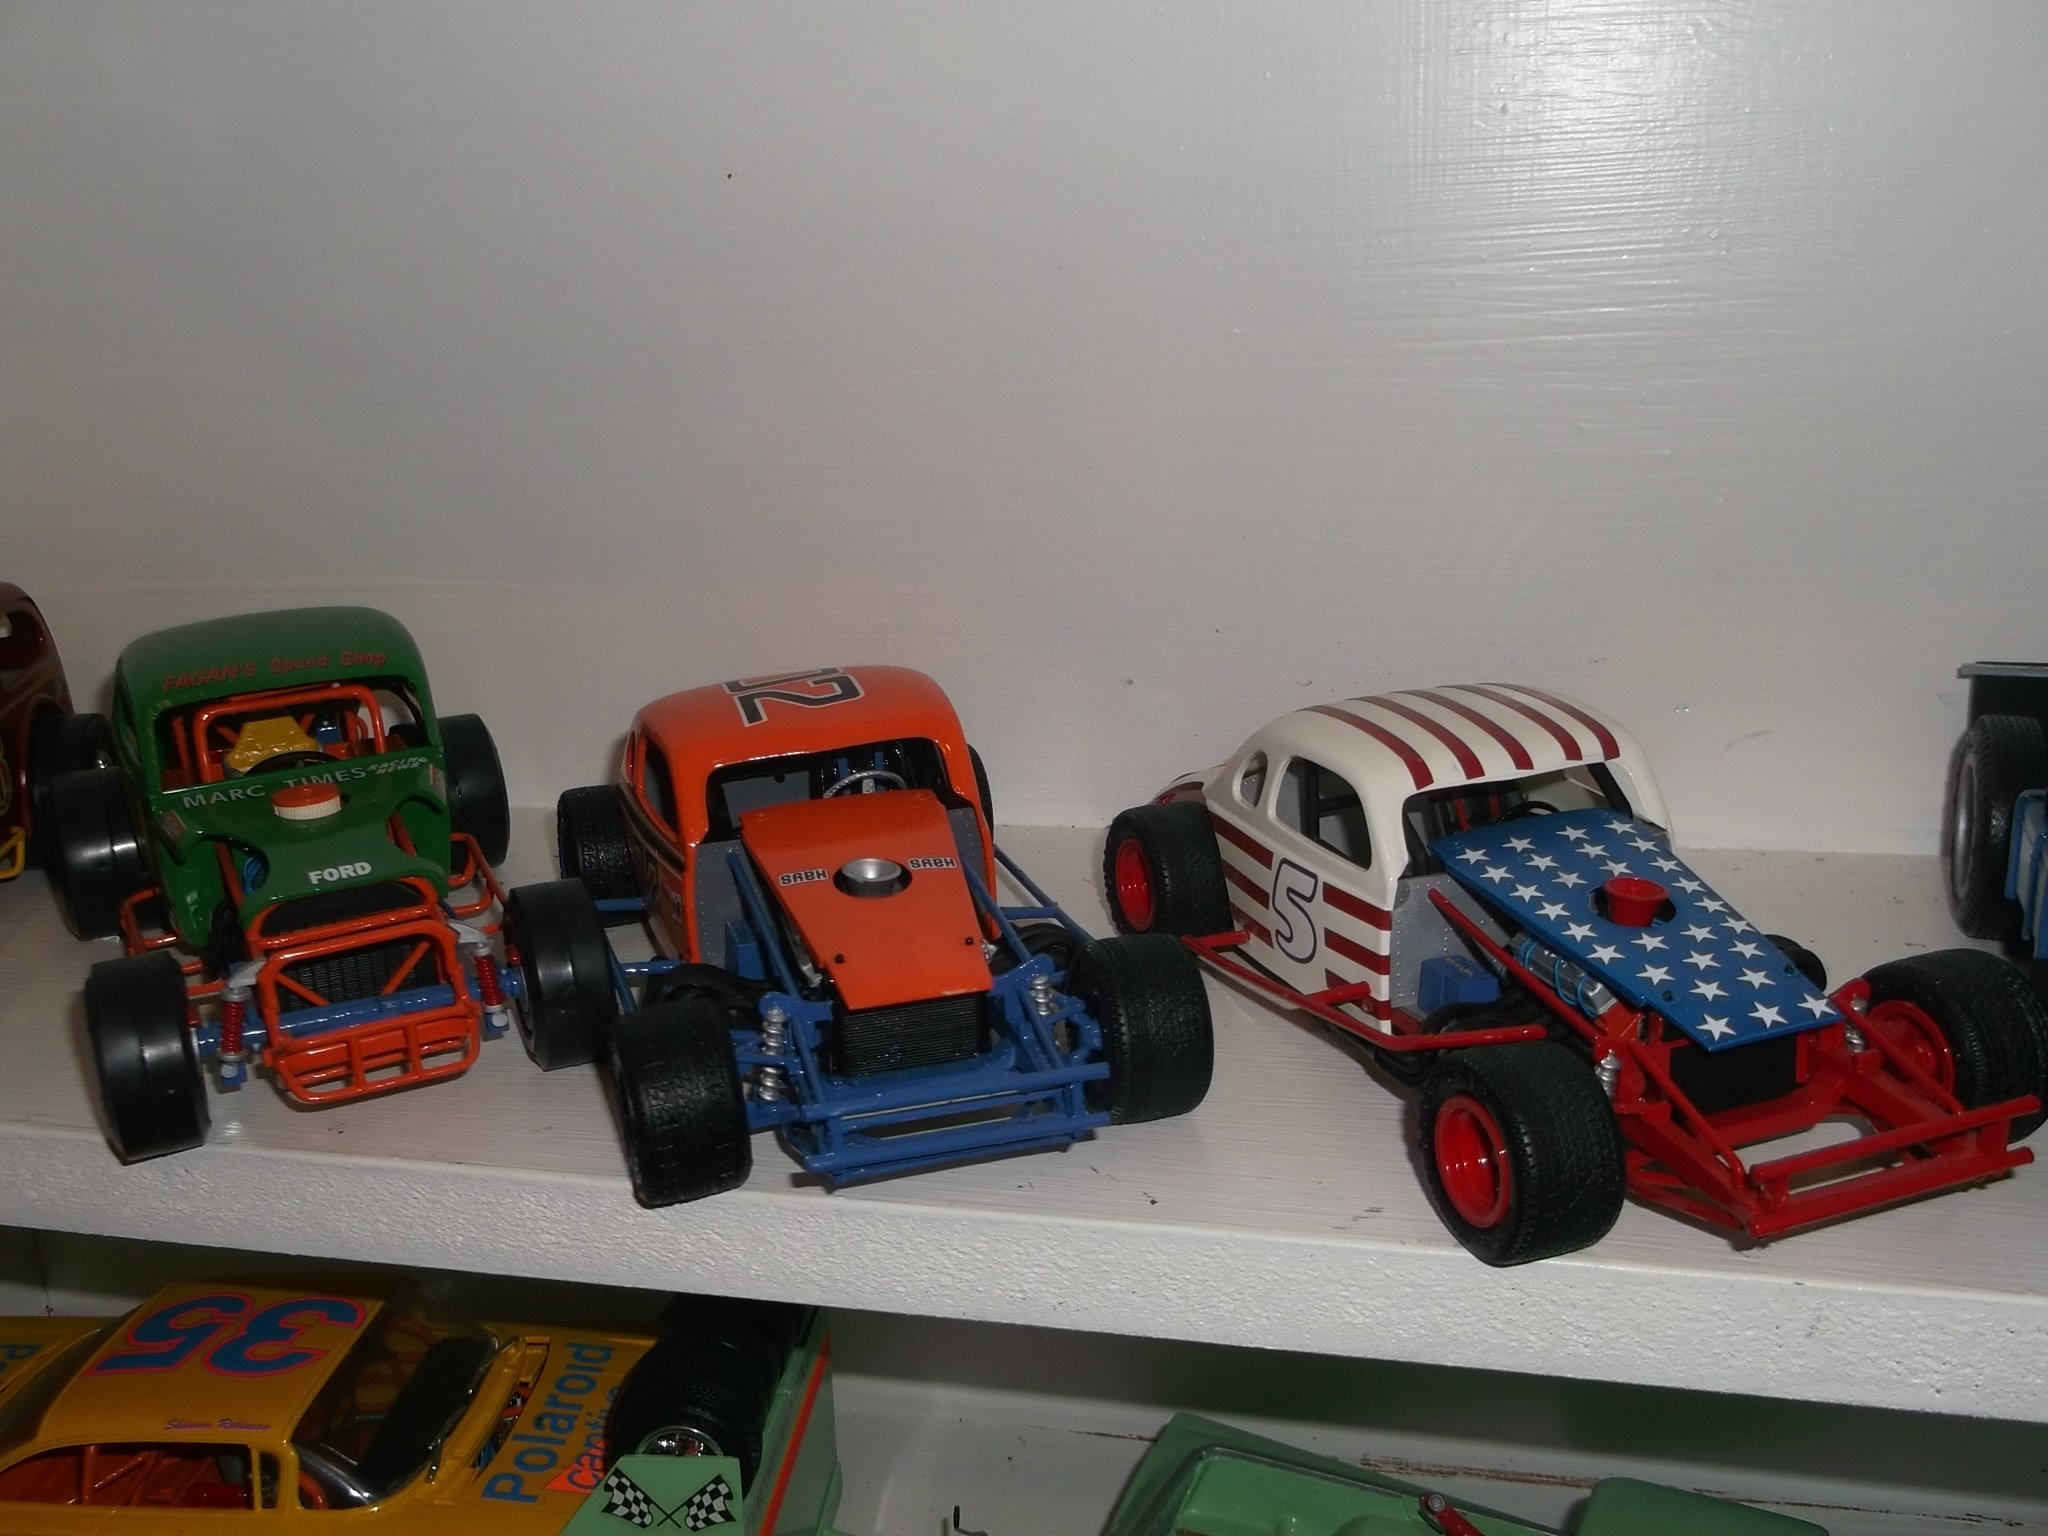
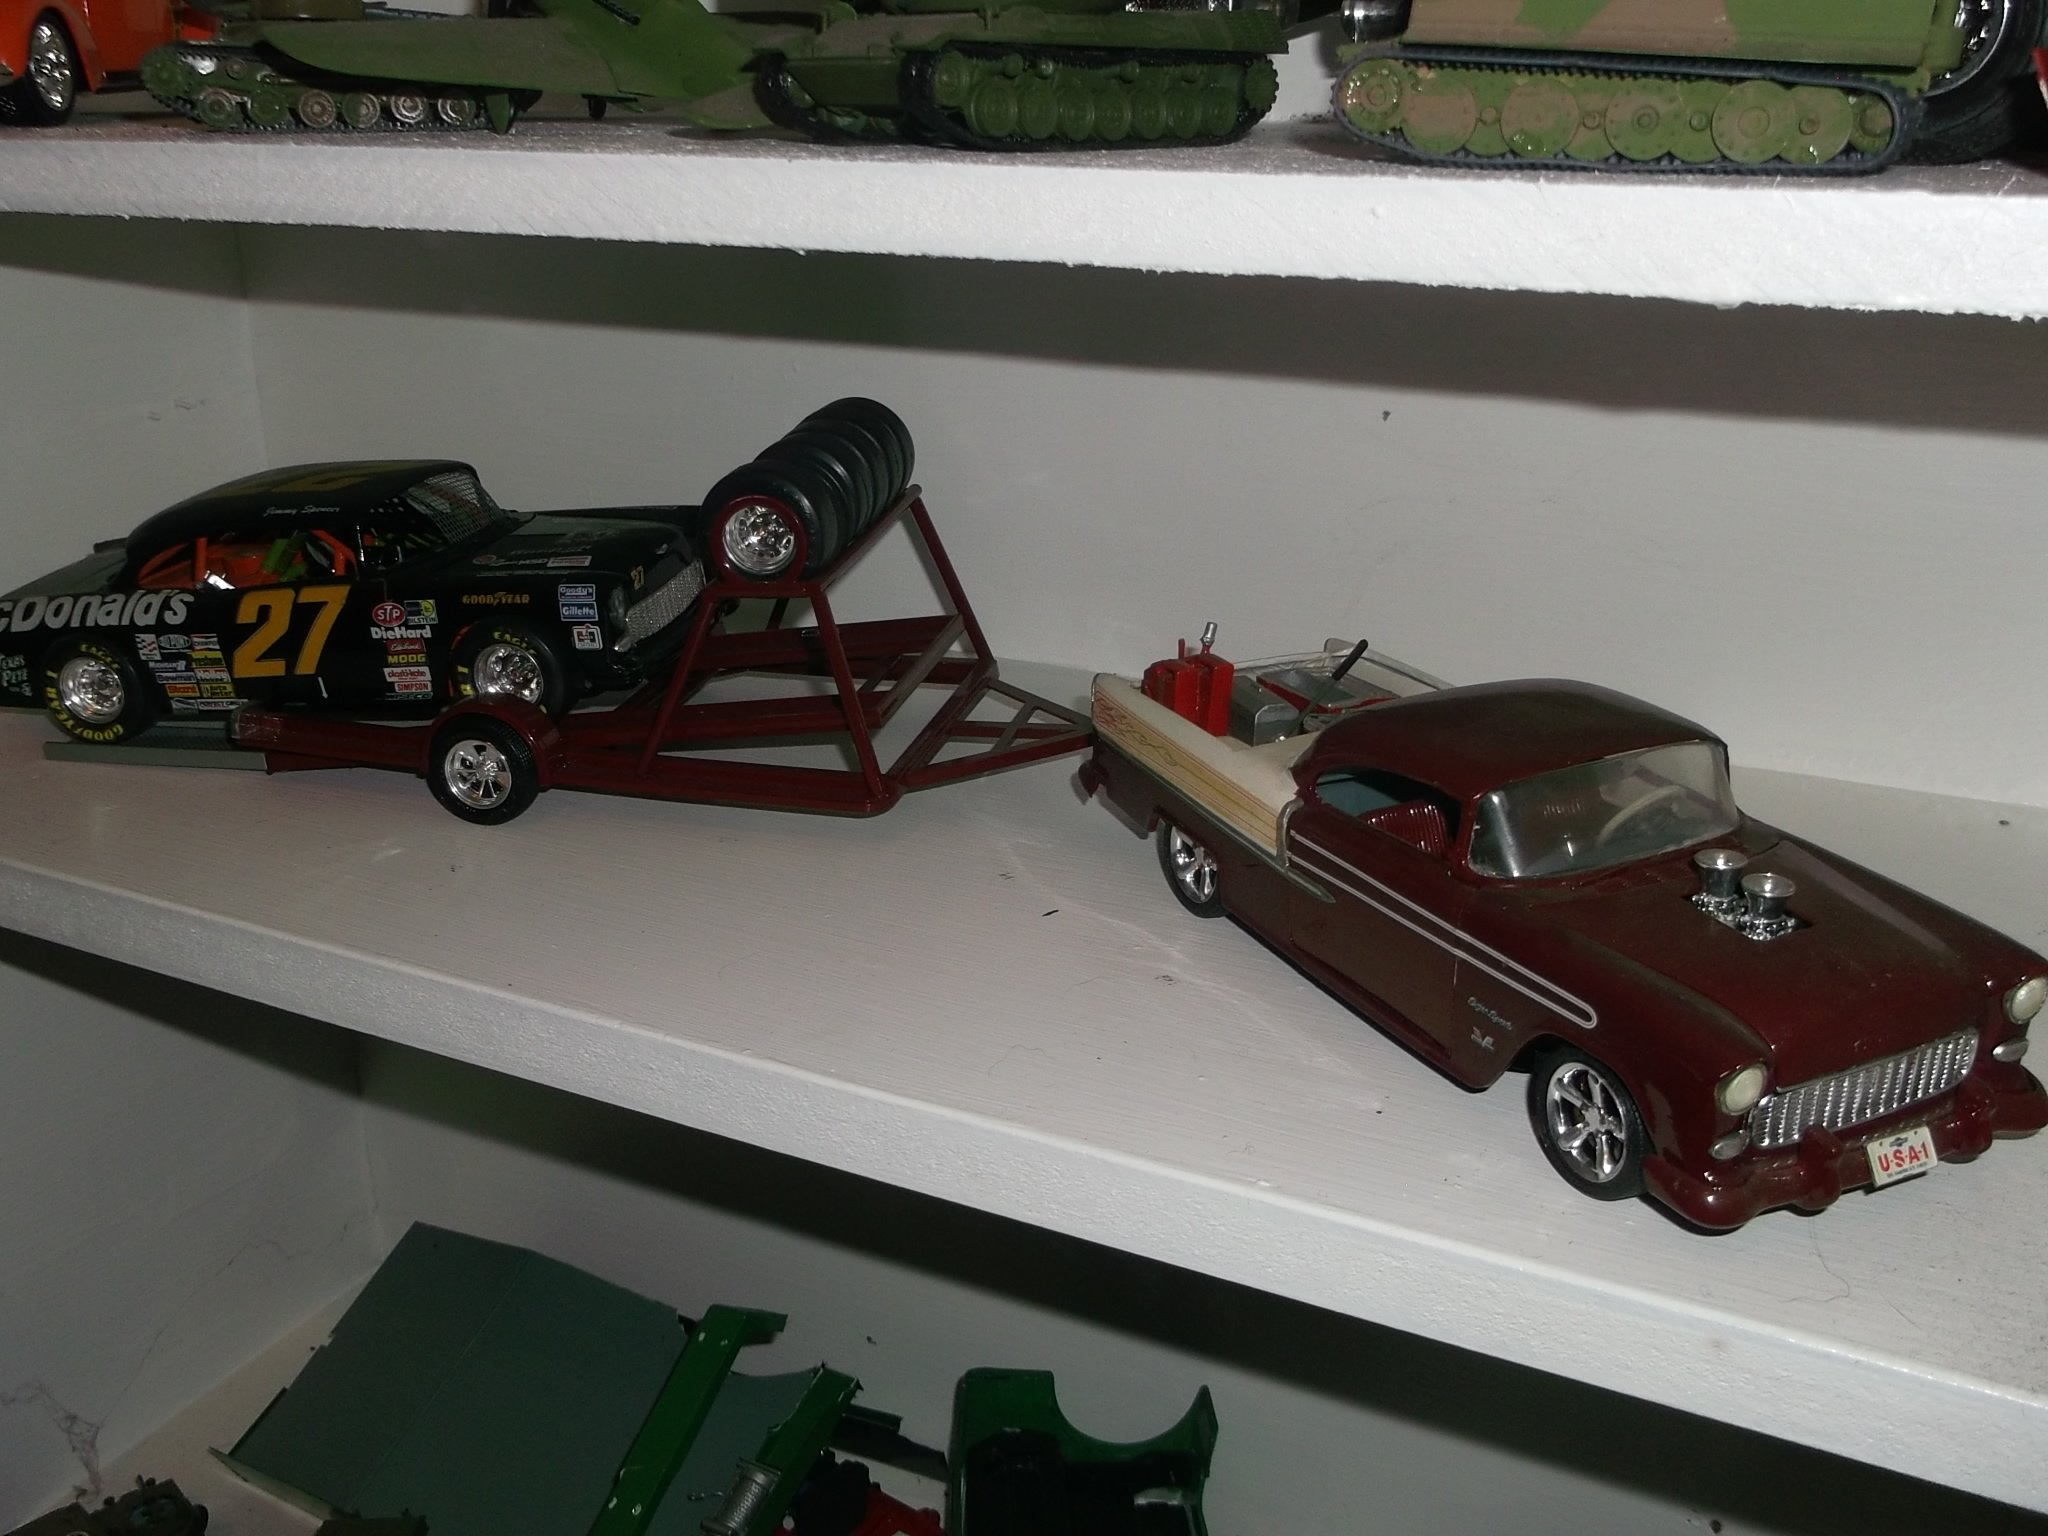
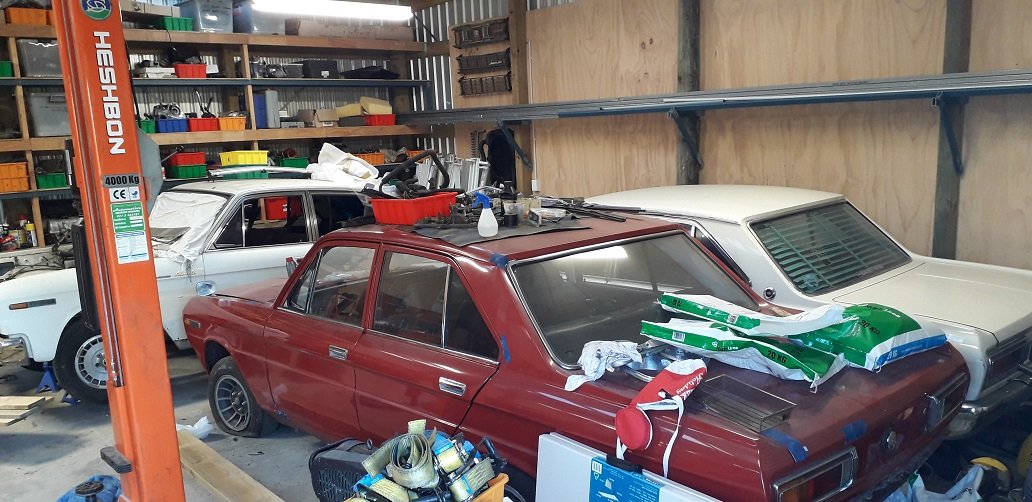
I need a bigger garage.2 points
-
2 points
-
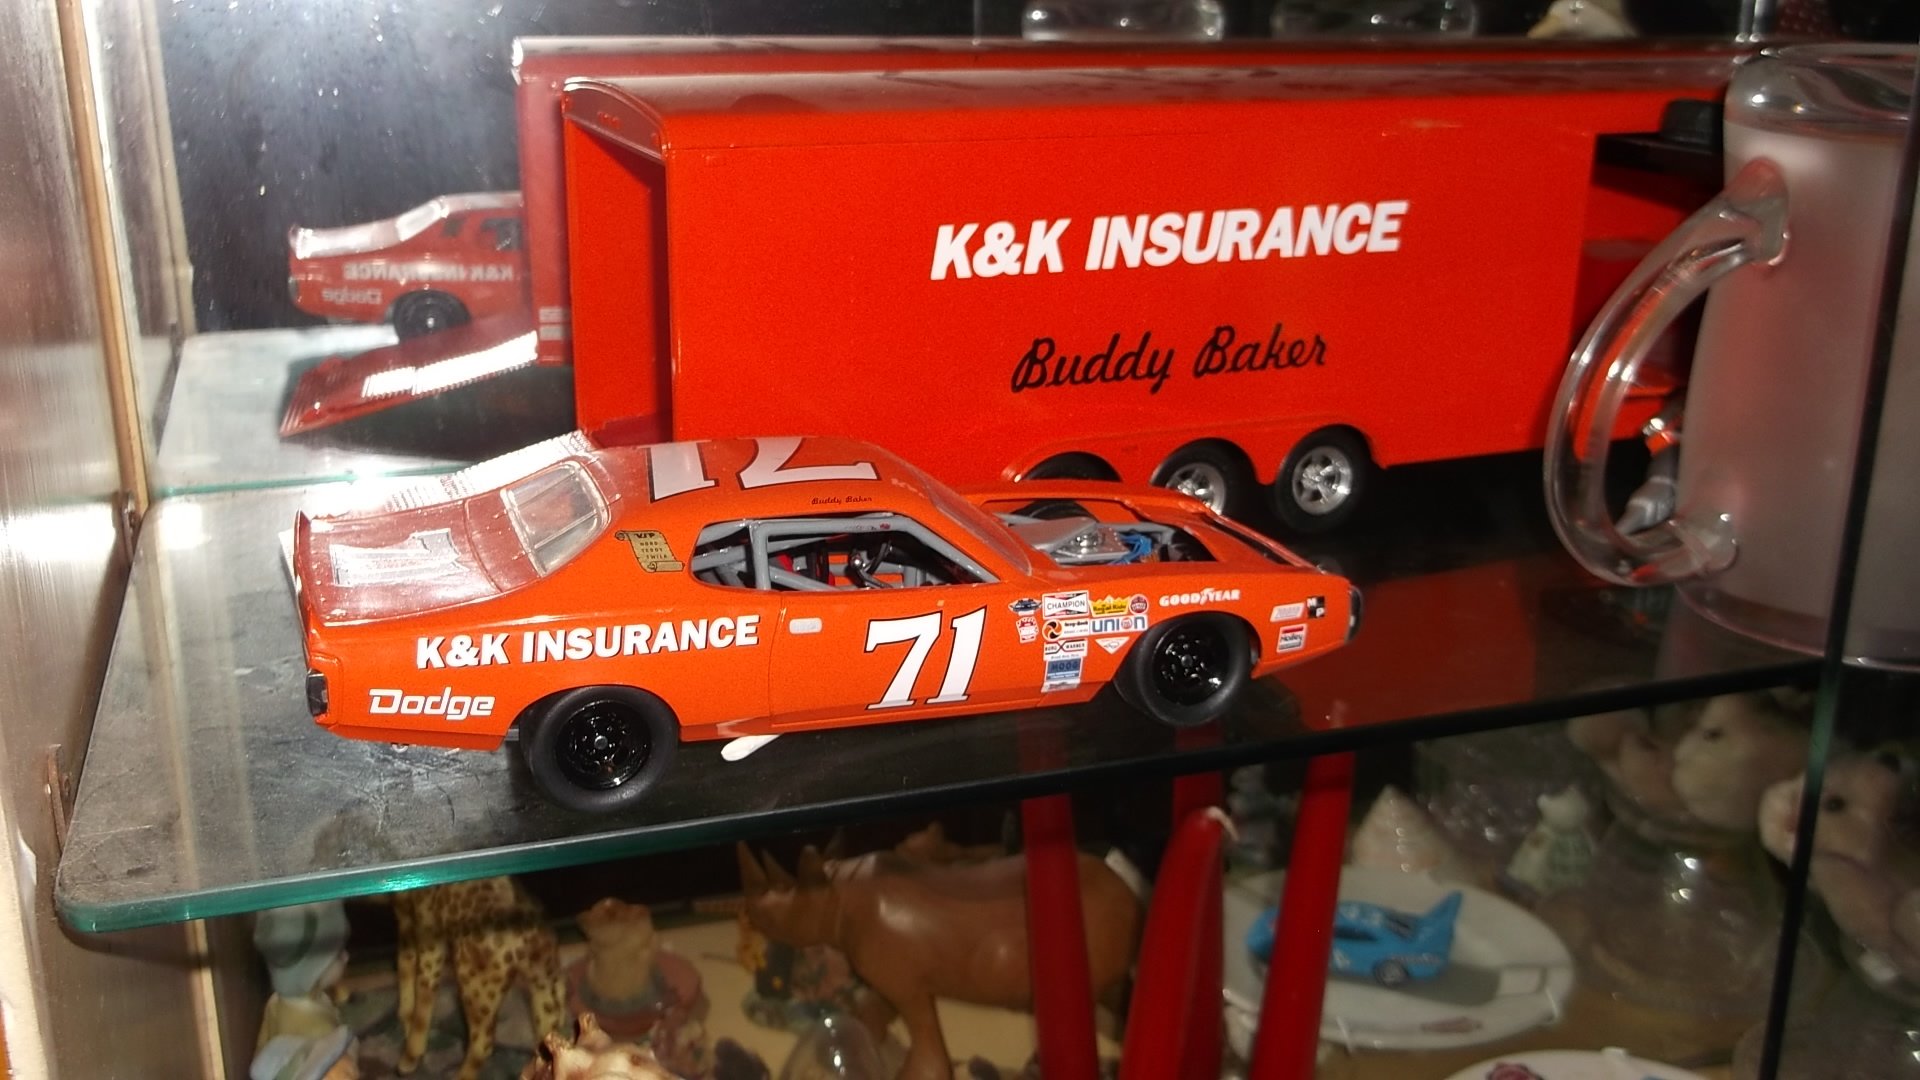
my son and i build a few
2 points
-
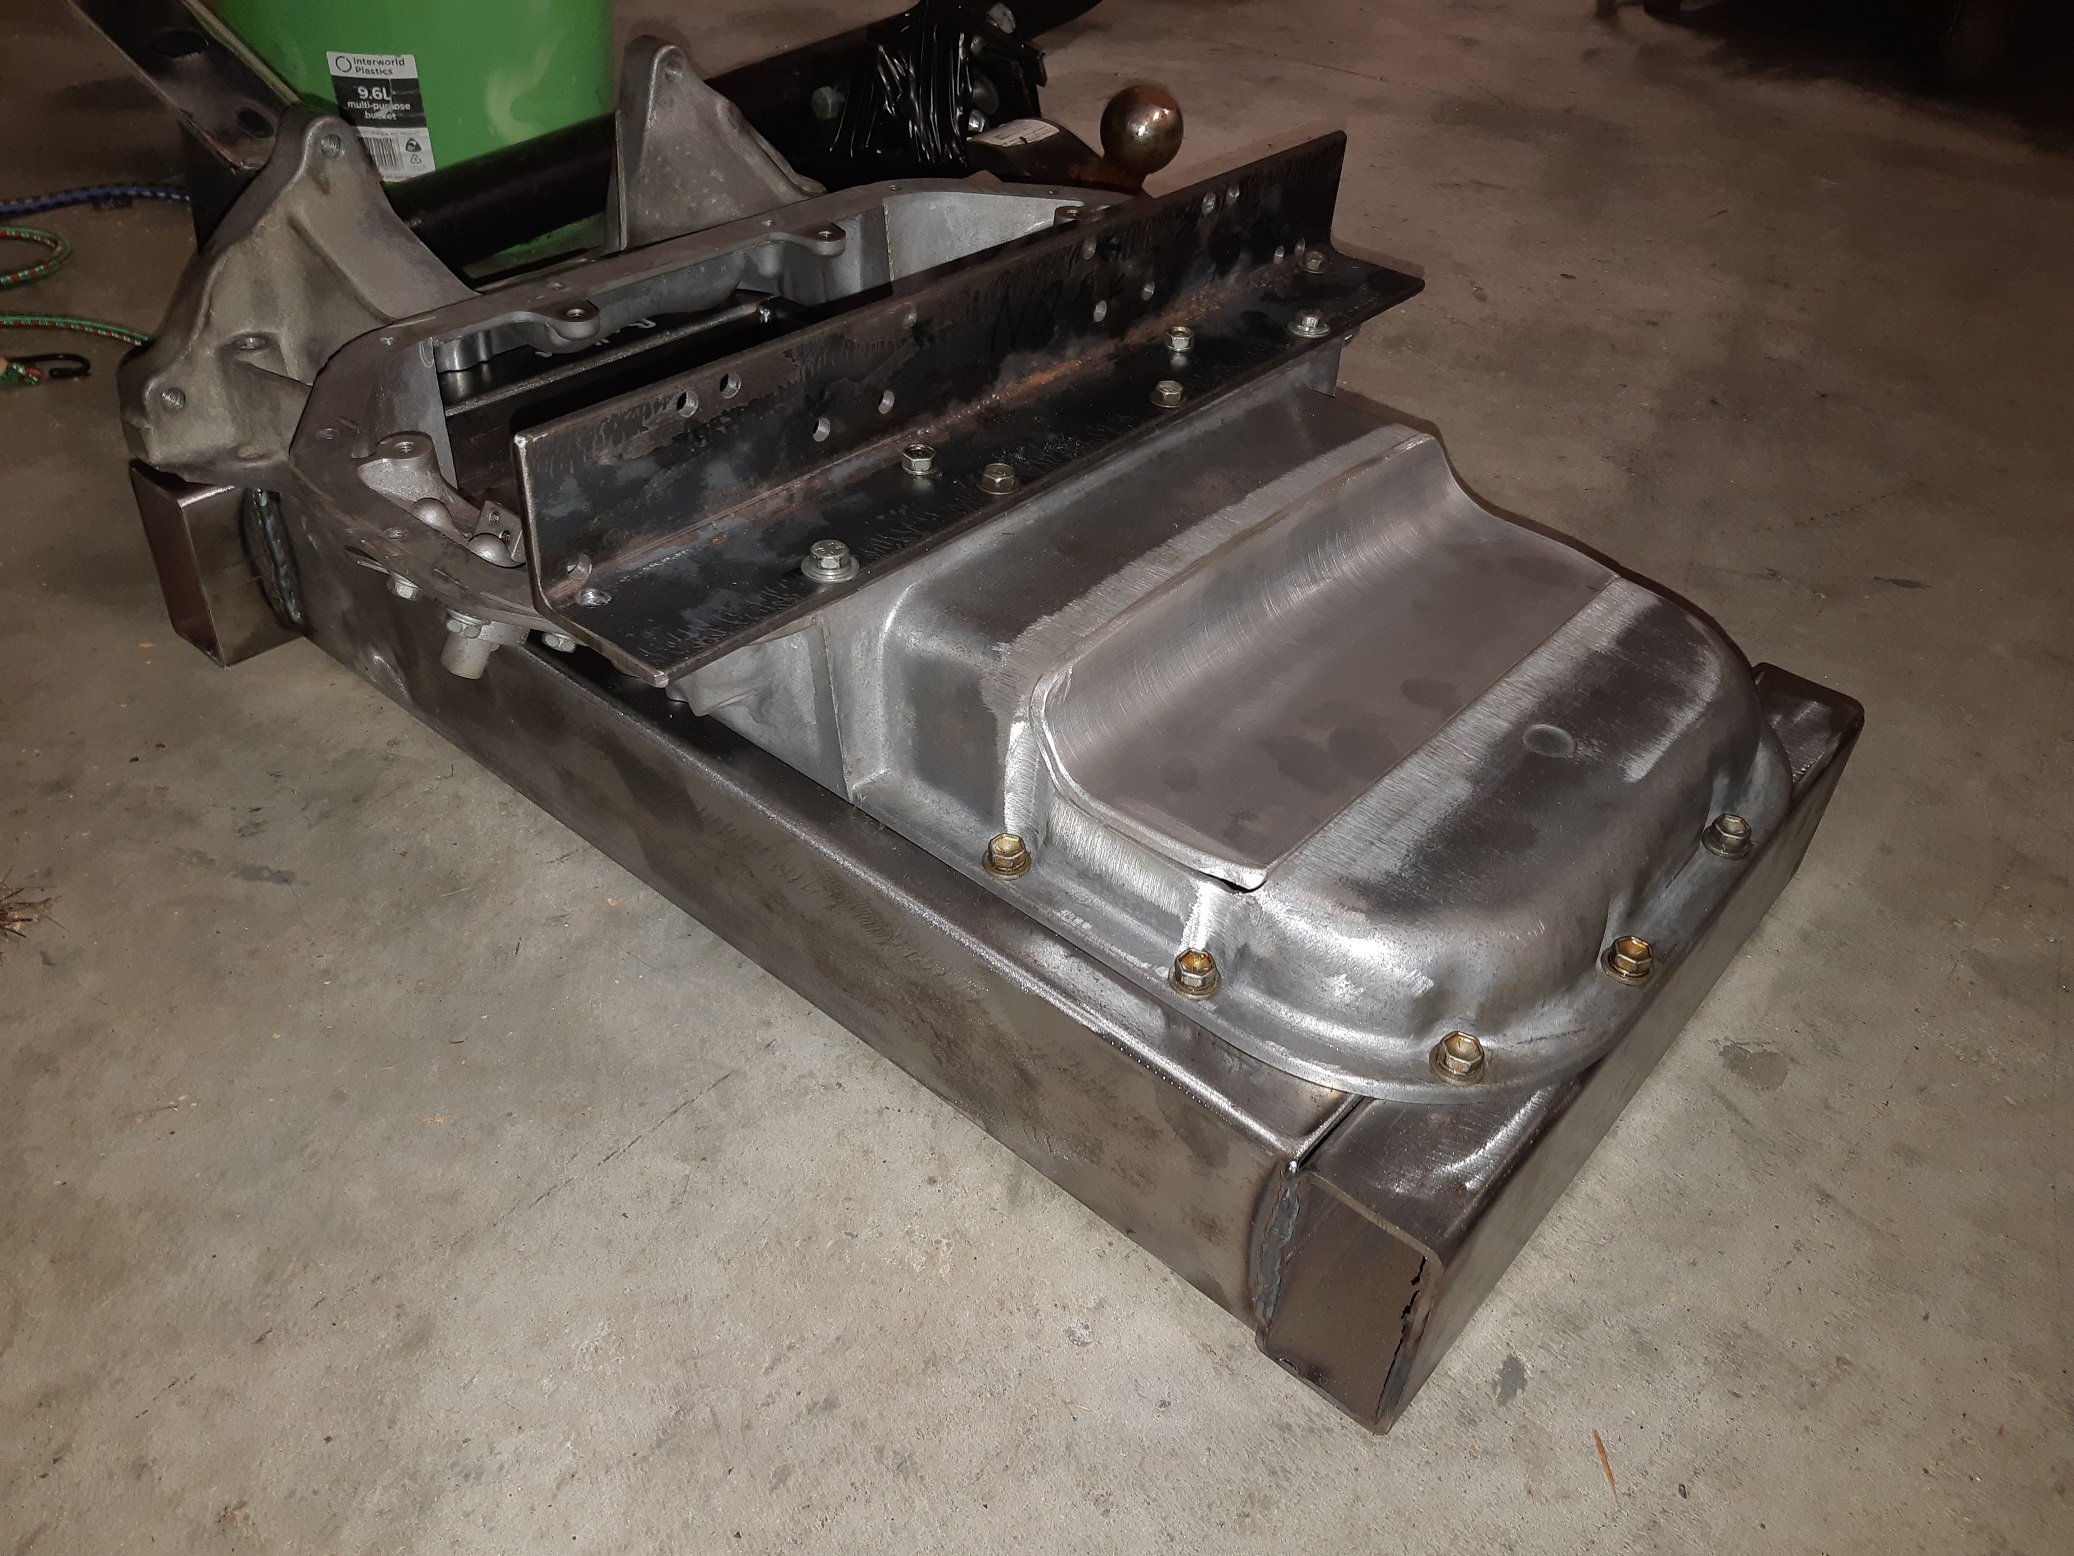
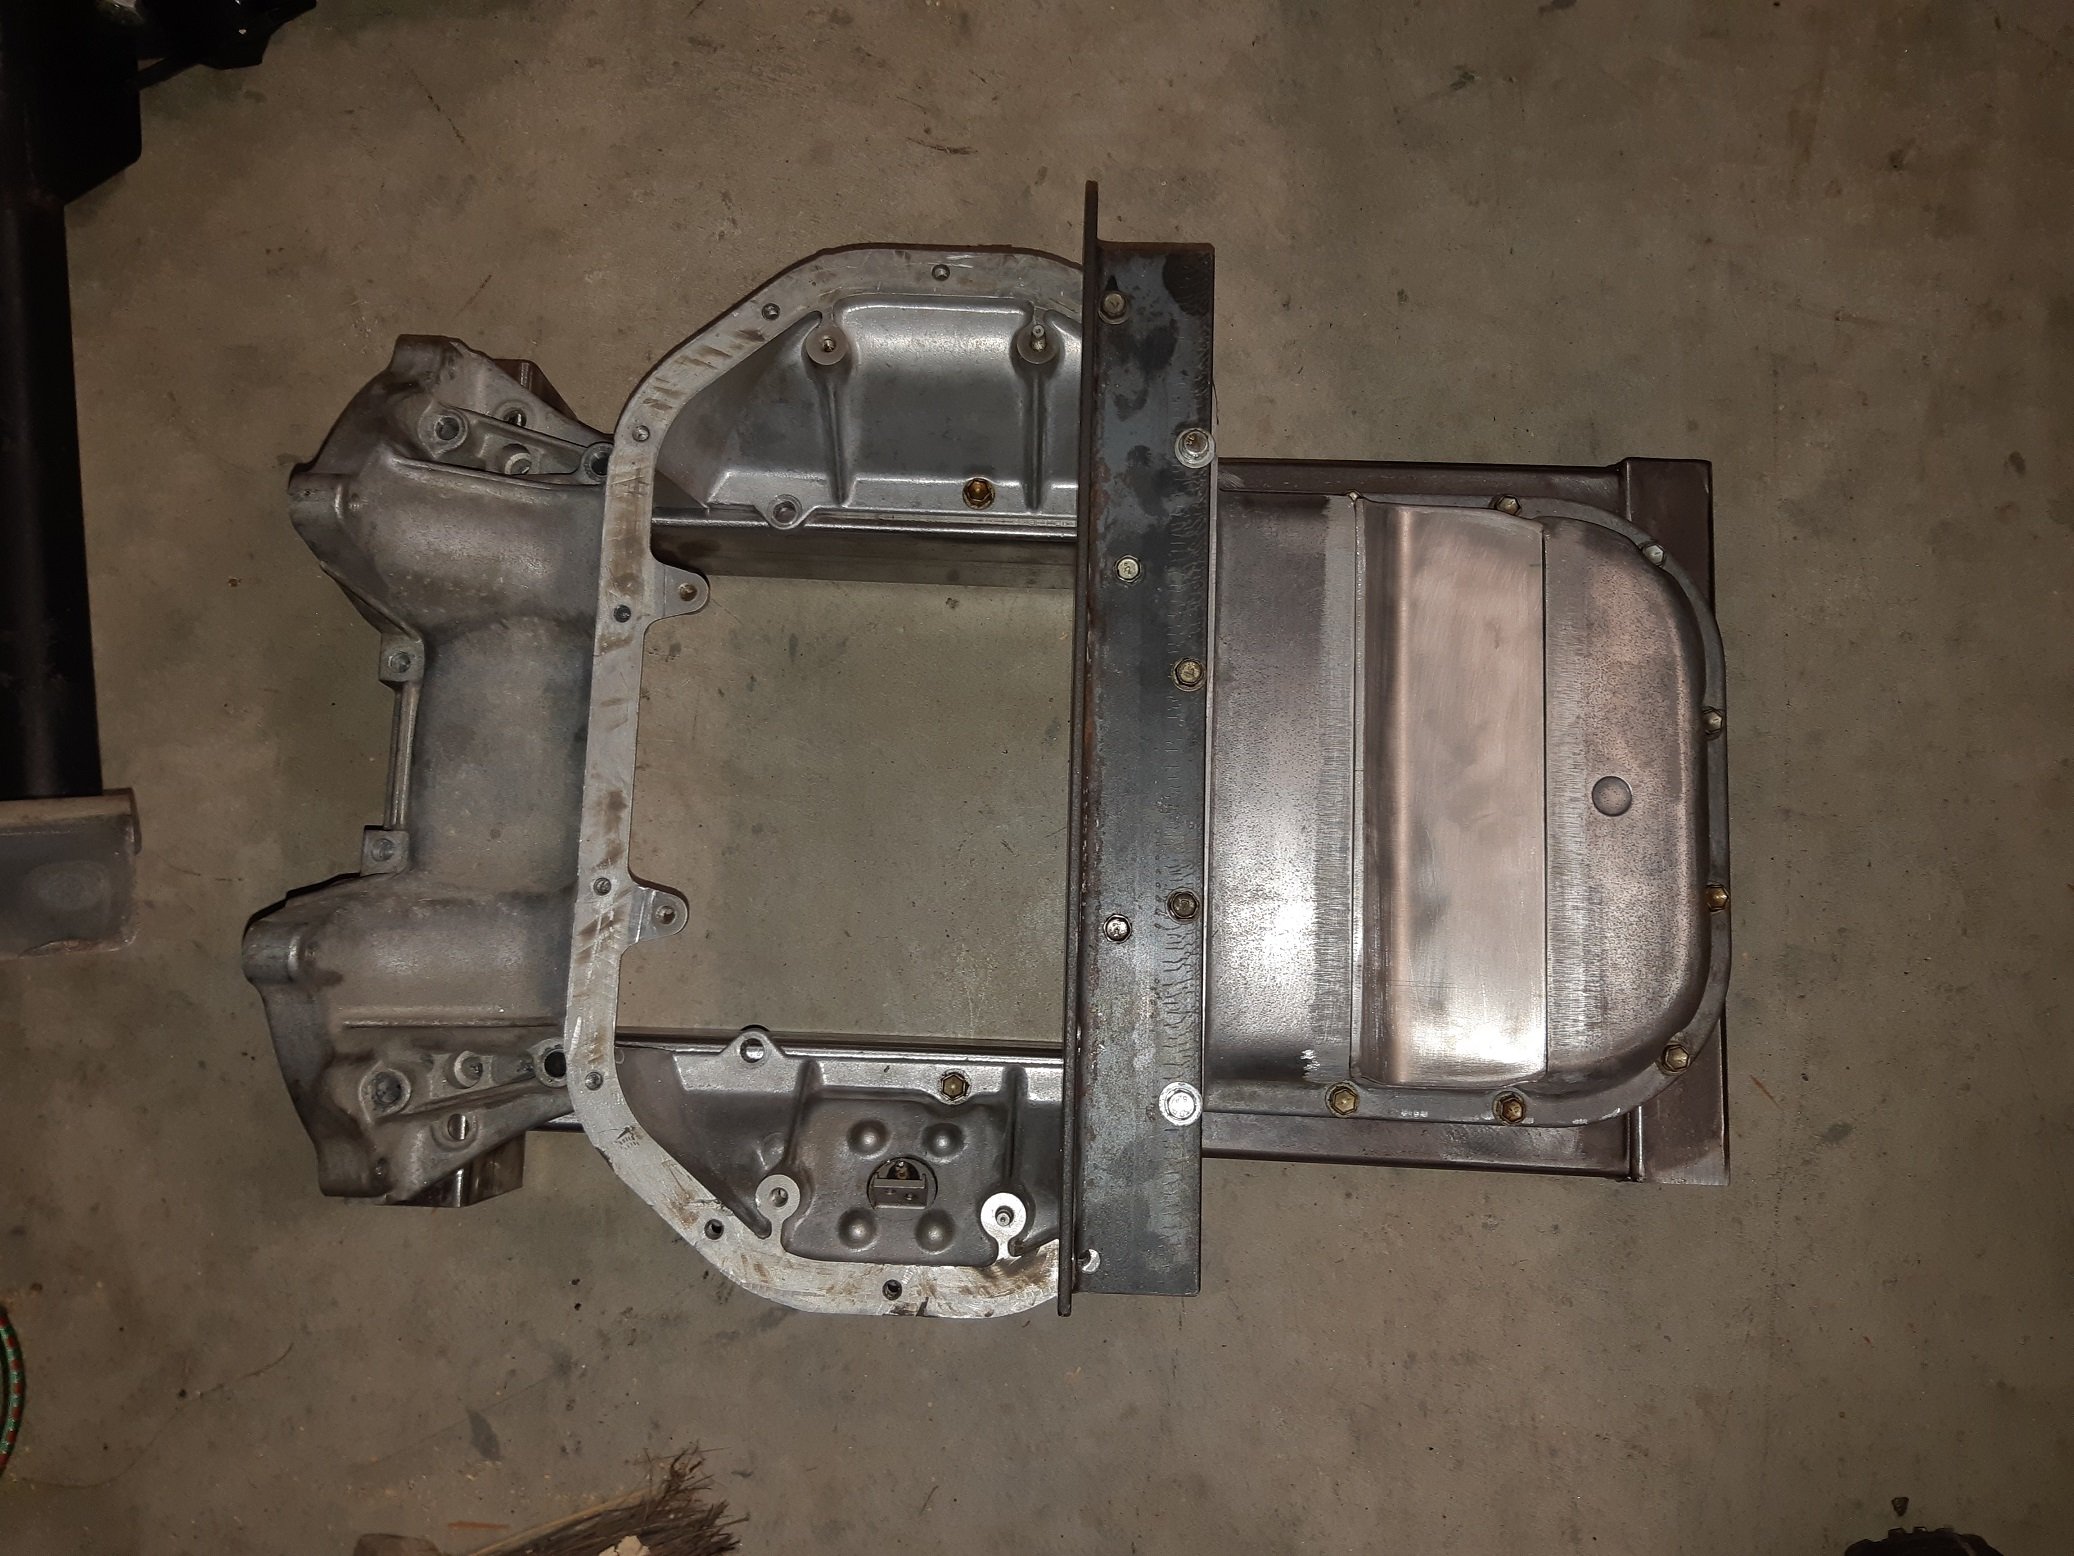
Seems im overdue for another update. Best remedy that I guess and spew forth more pics.To keep all the electricals ticking im using a Powermaster 150amp 1 or 3 wire alternator. As i stated above I wanted all the brackets as low as possible. unfortunitly cooling hoses got in the way in the middle positions and the powerstearing rack when it was really low. So its had to go up higher but is still low as we could get it. Still its not to bad I guess.Also mounted up the radiators overflow seen above.On the other side of the rad we mounted up the PS/hydroboost reservoir. Three port jobbie.Under the car a fly wheel cover was fabbed up. Stock would not work due to the trans adapter. Bit of split pipe was used for the notches to clear the torque converters covers ridges.Car is off the jack stands and front panels are bolted on. not all the bots etc are in but enough to keep it together until I get new bolts for it all and get it done right. Old Nailhead sits in there nicely.Steering wheel thrown on just so we can roll it about easier. GT Performance 9 bolt hub, 15.5" wheel and horn. Really wanted a wheel with a horn ring cus I love those things but ones that suit smaller wheels are bleeping expensive so it can wait.Car is sitting pretty darn low. Like the lowest part is the brace that joins/strengthens the front sub side to side much like the original Hudson setup. I haven't measured it but I guess we have 30-40mm clearance to the road. As you can see with the good old beer bottle next to the car... it low.keep in mind we still have to add side pipes - its that big ol hole you may of spotted in the above pic. You will see also that we will have a heap of room for them under the rockers. They also have a bit of a curve whats a bonus as it will (with luck) keep them out of ankle range whilst keeping them nicely tucked up so we dont rip em off.and moving right along... side shot just cus I like it. yes I know the car is dirty but so is my mind and I like it that way.Now talking about burning ankles on side pipes a subject by gal has mentioned most times I bring up lake pipes. My answer generally goes along the lines of "wear heels" below pic proves it. Ankle out of burn range.. toes on the other hand she has never mentioned.But seriously - like the back tire viewed air out side on.Enough farting around talking about air out this and that. Throw a battery in and test that shiz. Yip yours truly testing it out. We left it air up for a few days and I was pleasantly surprised to find it stayed there with only a few psi drop from what I left it at uniformly across each wheel. I will mark that to atmosphere and not any slow leak due to it being across all four wheels not just one.yeah i know the front could be bolted on a bit better but ahh stuff it it will be off again anyway.And just cus im feeling all gangsta...i know it aint hydraulics but it will do me. When air up we must be around 150mm at that one low point in the middle just behind the wheels. Ass end that has larger bags naturally goes much higher.2 points
-
Welcome back viewers to yet another ever so thrilling update on the old Huddyson. Sitting here and looking back over the last few years I must scratch my head and ask where has all that time gone. I really did believe it would of been driveable by now - road legal or not legal. Life has its way of derailing such grand time frames as im sure you all are aware and the fact that even though the parts im using may not be the most expensive out there they sure dont come cheap. To paraphrase Oedipus, Hamlet, Lear, and all those guys, "I wish I had known this some time ago." Everything was such a damned nice idea when it was an idea yet as with everything How you look at it is pretty much how you'll see it I guess. And looking at it I can see the old gal ride low n slow down the street fast n loud on the highways everytime im out working on the old beast. God i got a tad philosophical there for a moment... what are they adding to the water around these parts. /twitch Enough of that nonsense. let start the normal barrage of images and brief explanations. Back floor all patched up over four link brackets. Holes added for access & removal of the top bars bolts. Sparks and smoke flying up front as the Trans cover was all made up like a big jigsaw. To help pull the drivers side floor up the brake boosters cover has been incorporated onto the trans cover to add rigidity. Since the brakes are all tucked away under the floor and me being a bit of a lazy sod im using a remote reservoir. The brake pedal was a bit of a sod that took up a heap of time. Due to the floors sloping angle and other factors we couldn't do a normal pivoting bar as the inside push rod where you stand would be pointing towards the floor. So a duel/tandem lever was made up. its somewhere between 4:1 and 5:1 ratio. Still got to get the adjustable top links. but tested with a bit of bar and have heaps of travel for the booster. Grease nipples all over the place. Machined up brass bushes and ya its solid as. Have to get the actual pedal and the other lever bar it connects to tested still. Moving on to smaller jobs now. Power steering. As i have mentioned I think some time ago im using a PSC setup made for rock-crawlers. So if its powerful enough to drive and survive the crazy setups they have it should be fine for my setup. Now I didnt want to take away from the finned engine dress-up stuff when you open the hood. So a low mount bracket was fabbed up. The little pump has a heap of adjustment, lines up nicely with the other pulleys and is tucked nice and low that will not only keep it out of eye sight but since the pump is gravity feed from the reservoir that will be mounted up by the radiator it will have ample full as well. Mounted up the trans cooler up front of the radiator after I drilled a few holes and added grommets for the hoses. Should be hidden away enough not to be noticed. Got the cad skills out again to design up the gas tank. Its about 19Gallons/72litres. The tail pipes are rather close together so the plan is cut a hole in the trunks floor and have half the tank through this and then the other half taking up much of the trunks floor space. Baffles will also add bracing for those times I may throw heavy loads like tires ontop of it. The bottom should be flush or just tucked up with the bottom of the chassis whilst the top will come nearly up to the trunks lip/bottom of the door. So it shouldn't be a hindrance or noticeable. One end is slightly deeper for the pump and sender. Josh and the guys at Apex in Oamaru cut n folded it up. Top guys with some great kit that I highly recommend. They also made up that Hudson logo for a bit of fun what was nice of them and chucked it in. Until I figure out what to do with it I plan to use it as a stencil to tag a few things around the garage. \,,/(-.-)\m/ On a bit of a separate note the missus has taken up slinging a bit of one shot paint of late. Hell yeah I say. Im more than happy to buy the brushes, paints and what ever if it means I can get some lines laid down on pretty much what ever I want. I think she is busting it out but naturally I may be a tad one eyed, biased and not the best judge in the matter. Take a look any way. Some panels up near the top of below pic in my garage. Cooler to go with her Morrie Door she made up for Flockie on an old 40s Ford pickup door. And of course hand bags... she has a thing for handbags.2 points
-
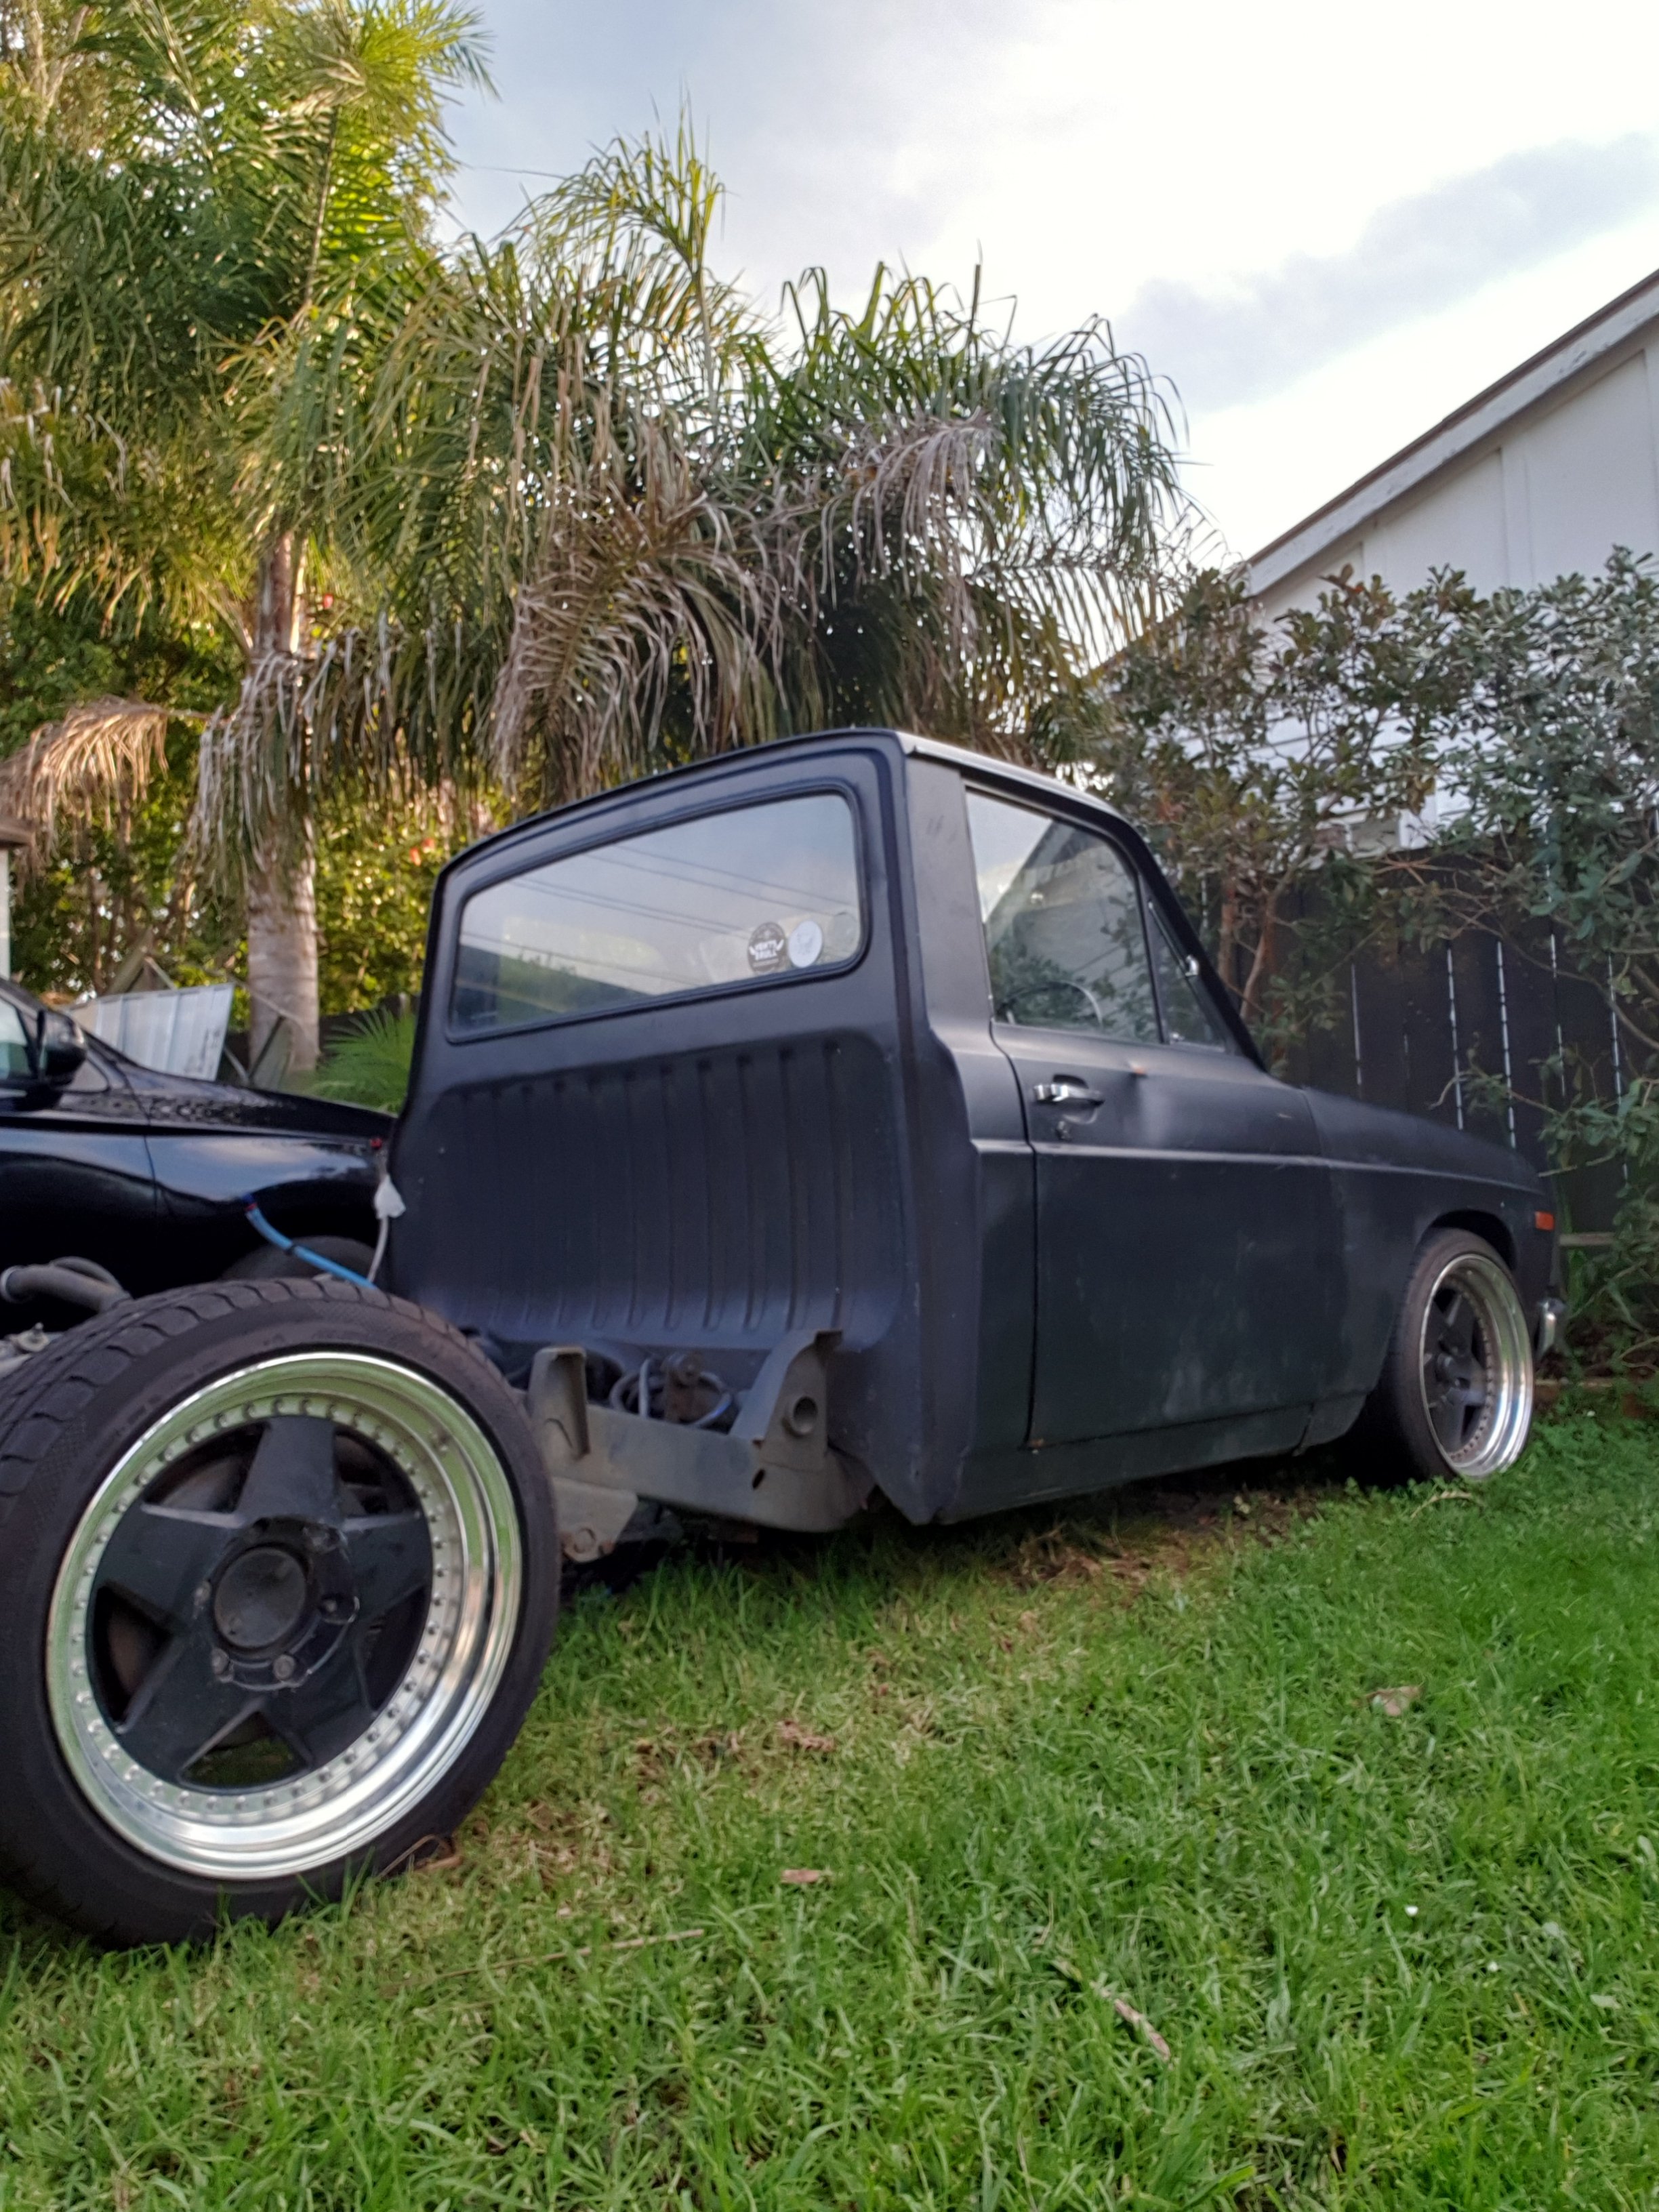
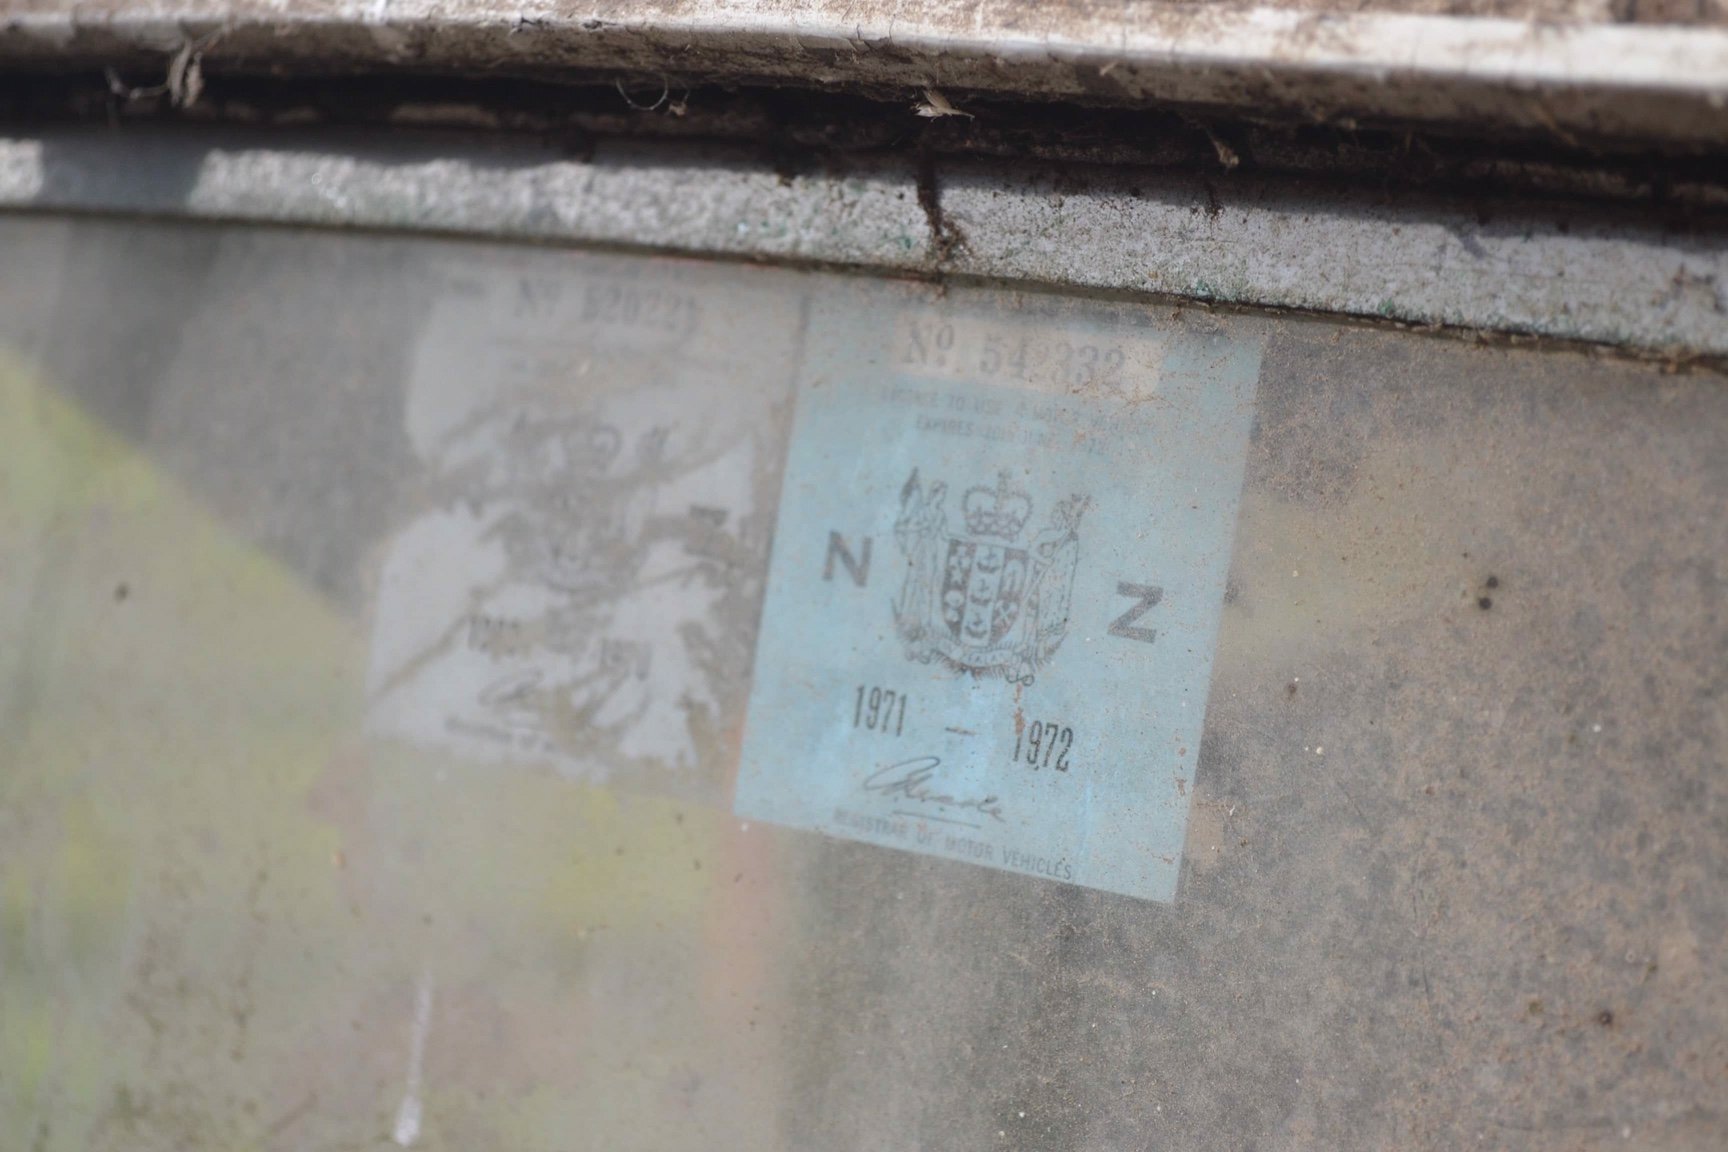
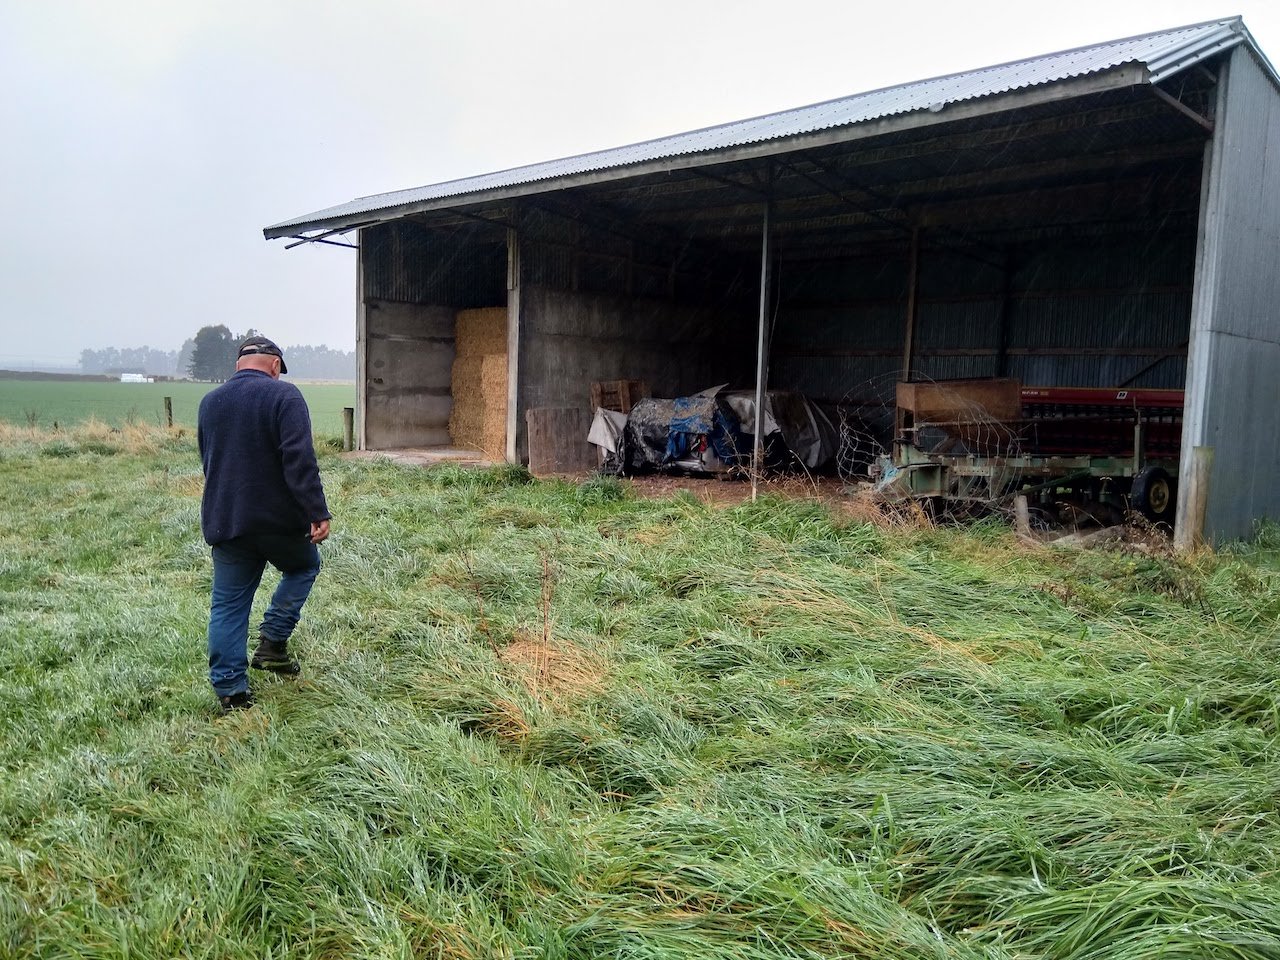
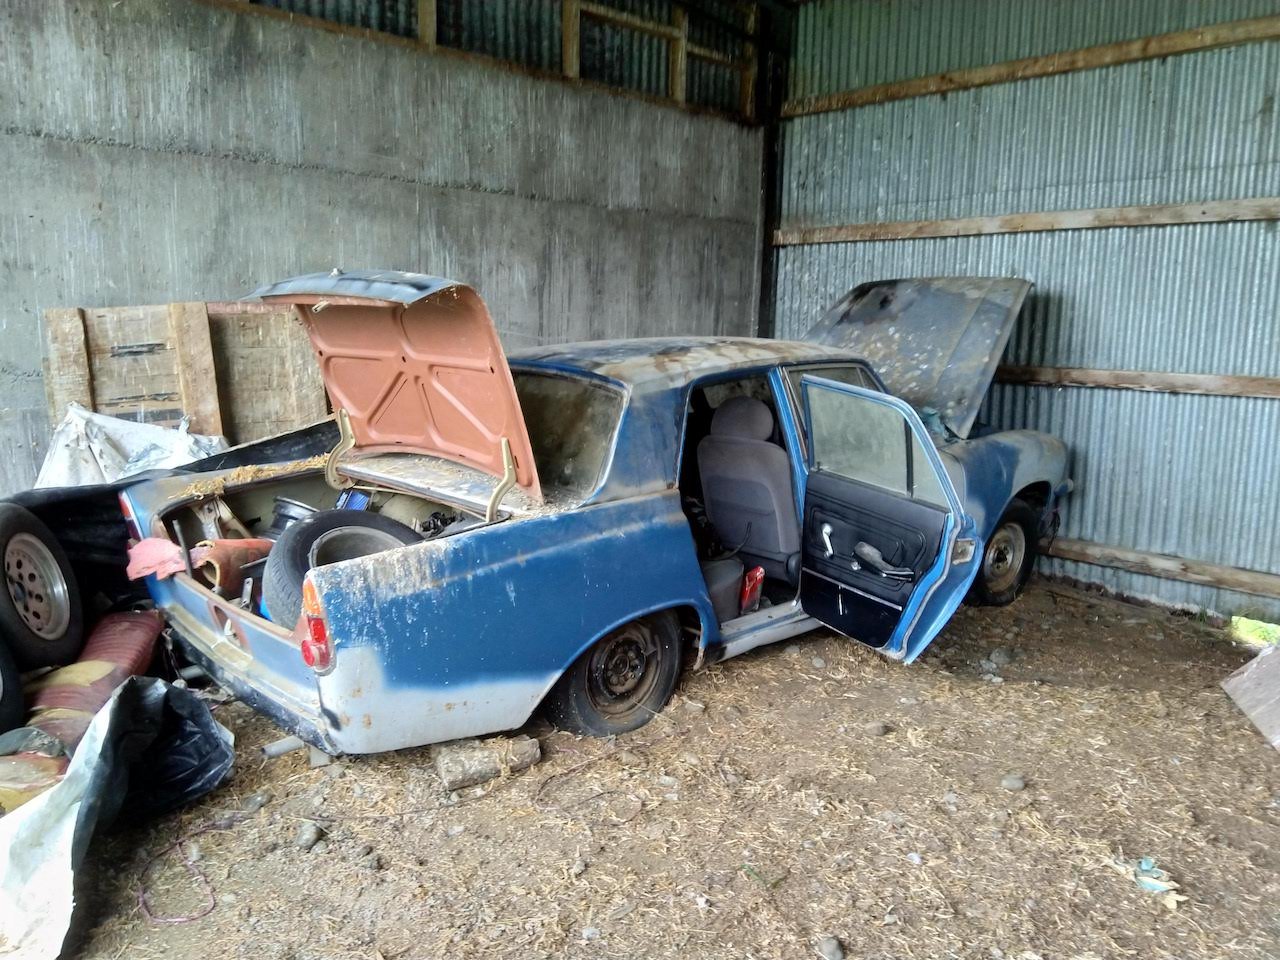
Found myself a new project. Car was last on the road in 1993, then the registration went dead but the rego is still in the system. Previous owner bought the car around '98 with plans of putting a 302 into it. A few years later he took the car to a panelbeater to get some rust fixed and bodywork done. The bill came back a lot more then expected so the car got mothballed to a hay shed. A mk4 zodiac came up a few years later that had already had a certified V8 conversion so he snapped that up and the mk3 stayed in the shed. The car only had minor rust (guards, doors, boot etc) to begin with, there was no damage to the chassis or sills. A bit of minor rust has come back since then, but a sweet barn find. The car was in Methven and had a heap of spares with it. It was pretty heavy towing back. It came with the engine pulled apart and a heap of heads, manifolds and bits. The guy that sold it to me knows someone with a mk2 motor that ran when pulled out, so I will snap that up. Long term plans for it once revinned will be some slam, wide steels and eventually an engine swap to a V8 or a barra. Am I best to get a repair certifier to come and look at it so I can get the rust signed off before I strip it back and paint? I'm thinking that might be easier while everything is pulled apart rather than taking through revin in primer, then pulling everything back apart to paint. Any ideas on how hard this would be and cost? Discuss here:
1 point
-
Parts world or equivalent should be able to track one down.1 point
-
tax some from ya neighbours for us please1 point
-
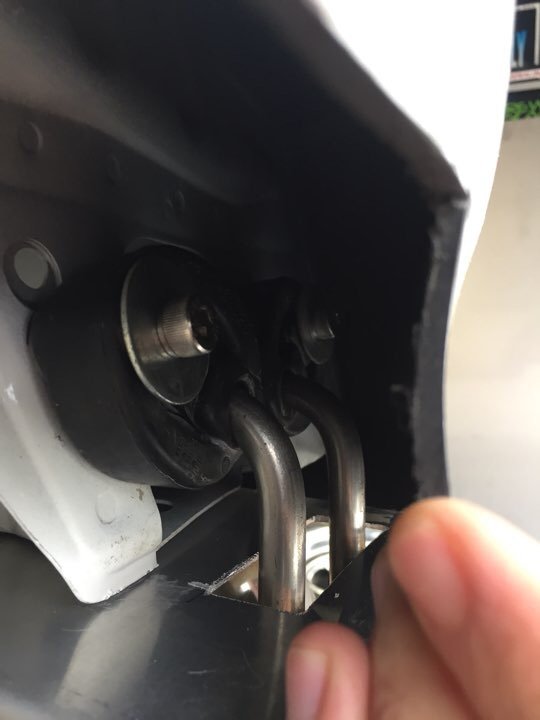
a $60 warehouse tent over the top?1 point
-
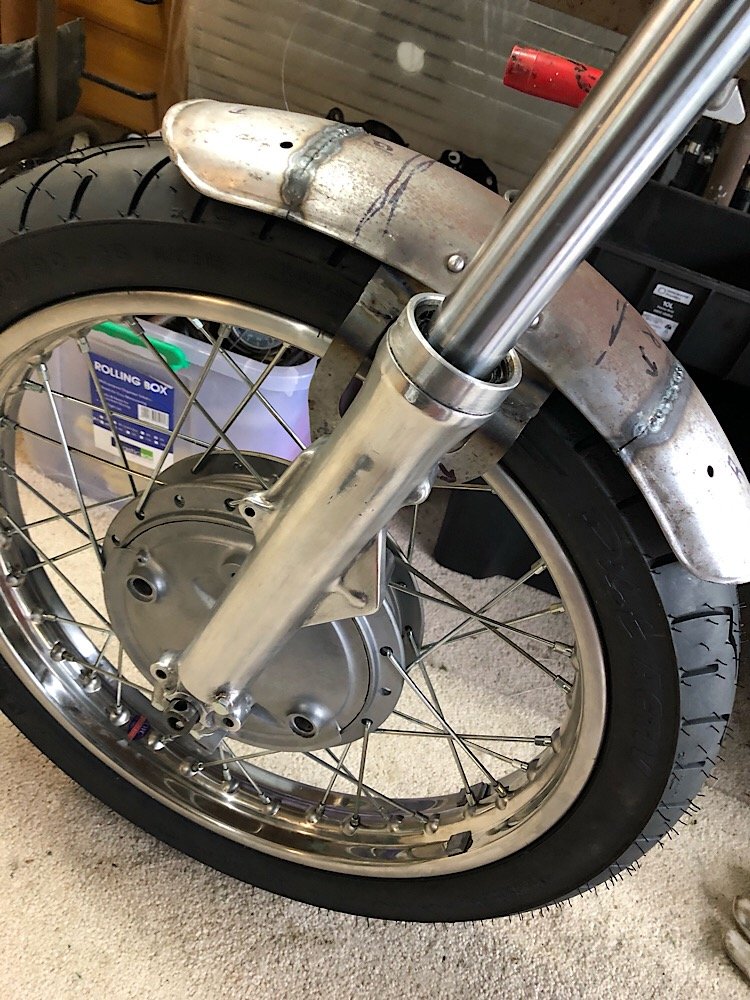
Spent the arvo shaping the mudguard after cutting it. Spot welded the ends back on and filled in the holes from the guard supports. Then cut 15mm out of the mounts to get the guard sitting closer to the tyre. Had to pre heat the metal before welding to get the MIGs weld to fully penetrate into the steel. Happy with how it’s all sitting now
1 point
-
I may be one of the weirdos, but this is fucking sexy.1 point
-
Gave it a wash and drove up to auckland a few weeks back. Came up pretty shiny. Fitted some new shocks to go with the reduced suspension travel and its lush again. Had a few funny issues at first and stopped and gave all the spade terminals on the coil/ballast resistor and away she went. Sat on 70mph the whole way, even passed a car up the mahoenui hill at more than 70 Also, gotta catch em all!
1 point
-
Proof that I am now an auto sparky and fuck anyone who says otherwise; Should have cleaned the smeg off my lens for that last one. Then on to the engine cover, but first I had to build a bit of the intake to make sure I could get it all to clear. There is a sweet spot just behind the cab that will fit a 600x 300 intercooler, I am hoping I can get to that area without modifying my gear linkage too much. Made a rim for the cut sheet metal so the floor was stiffer and the cover had something to bolt to. The intake had to be low otherwise the folding rear seats would hit it. Welded and cleaned up. Looks kinda cool. Then some time honoured 'frame it up in solid round then smash sheet metal onto it' fabrication. It's tight. There was a wee bracket thing that hit the cover when the seat was down so I whipped it off with the grinder only to immediately realise it was the hook to keep the seats up. So now I need to replicate it. Like a cunt. I initially used some real thin galv sheet I had but it was clear I was never going to be able to fully weld it without chasing holes all over the place, plus it already sounded clangy and tinny, so I found some 1.5mm mild steel in the rack and used the thin shit as a template. This meant I could get a nice fold where I needed it using the finger bender. Still yet to do the other side and fill in those gaps, but good progress. Front driveshaft assembly is in getting shortened and balanced at considerable expense. Still yet to hear from engine man. I might have to spend that money on coating the chassis etc and hope I can find some more later on. Or find some more shit to sell. As you were.1 point
-
Video of first start. Is a credit to Al Marsh. 8 year old build, he never had a worry, I was stressing, but oil, water, fuel, and spark, and he was just like "go for it" he never doubted his build. https://www.youtube.com/watch?v=Kxpfsu5Z9ns1 point
-
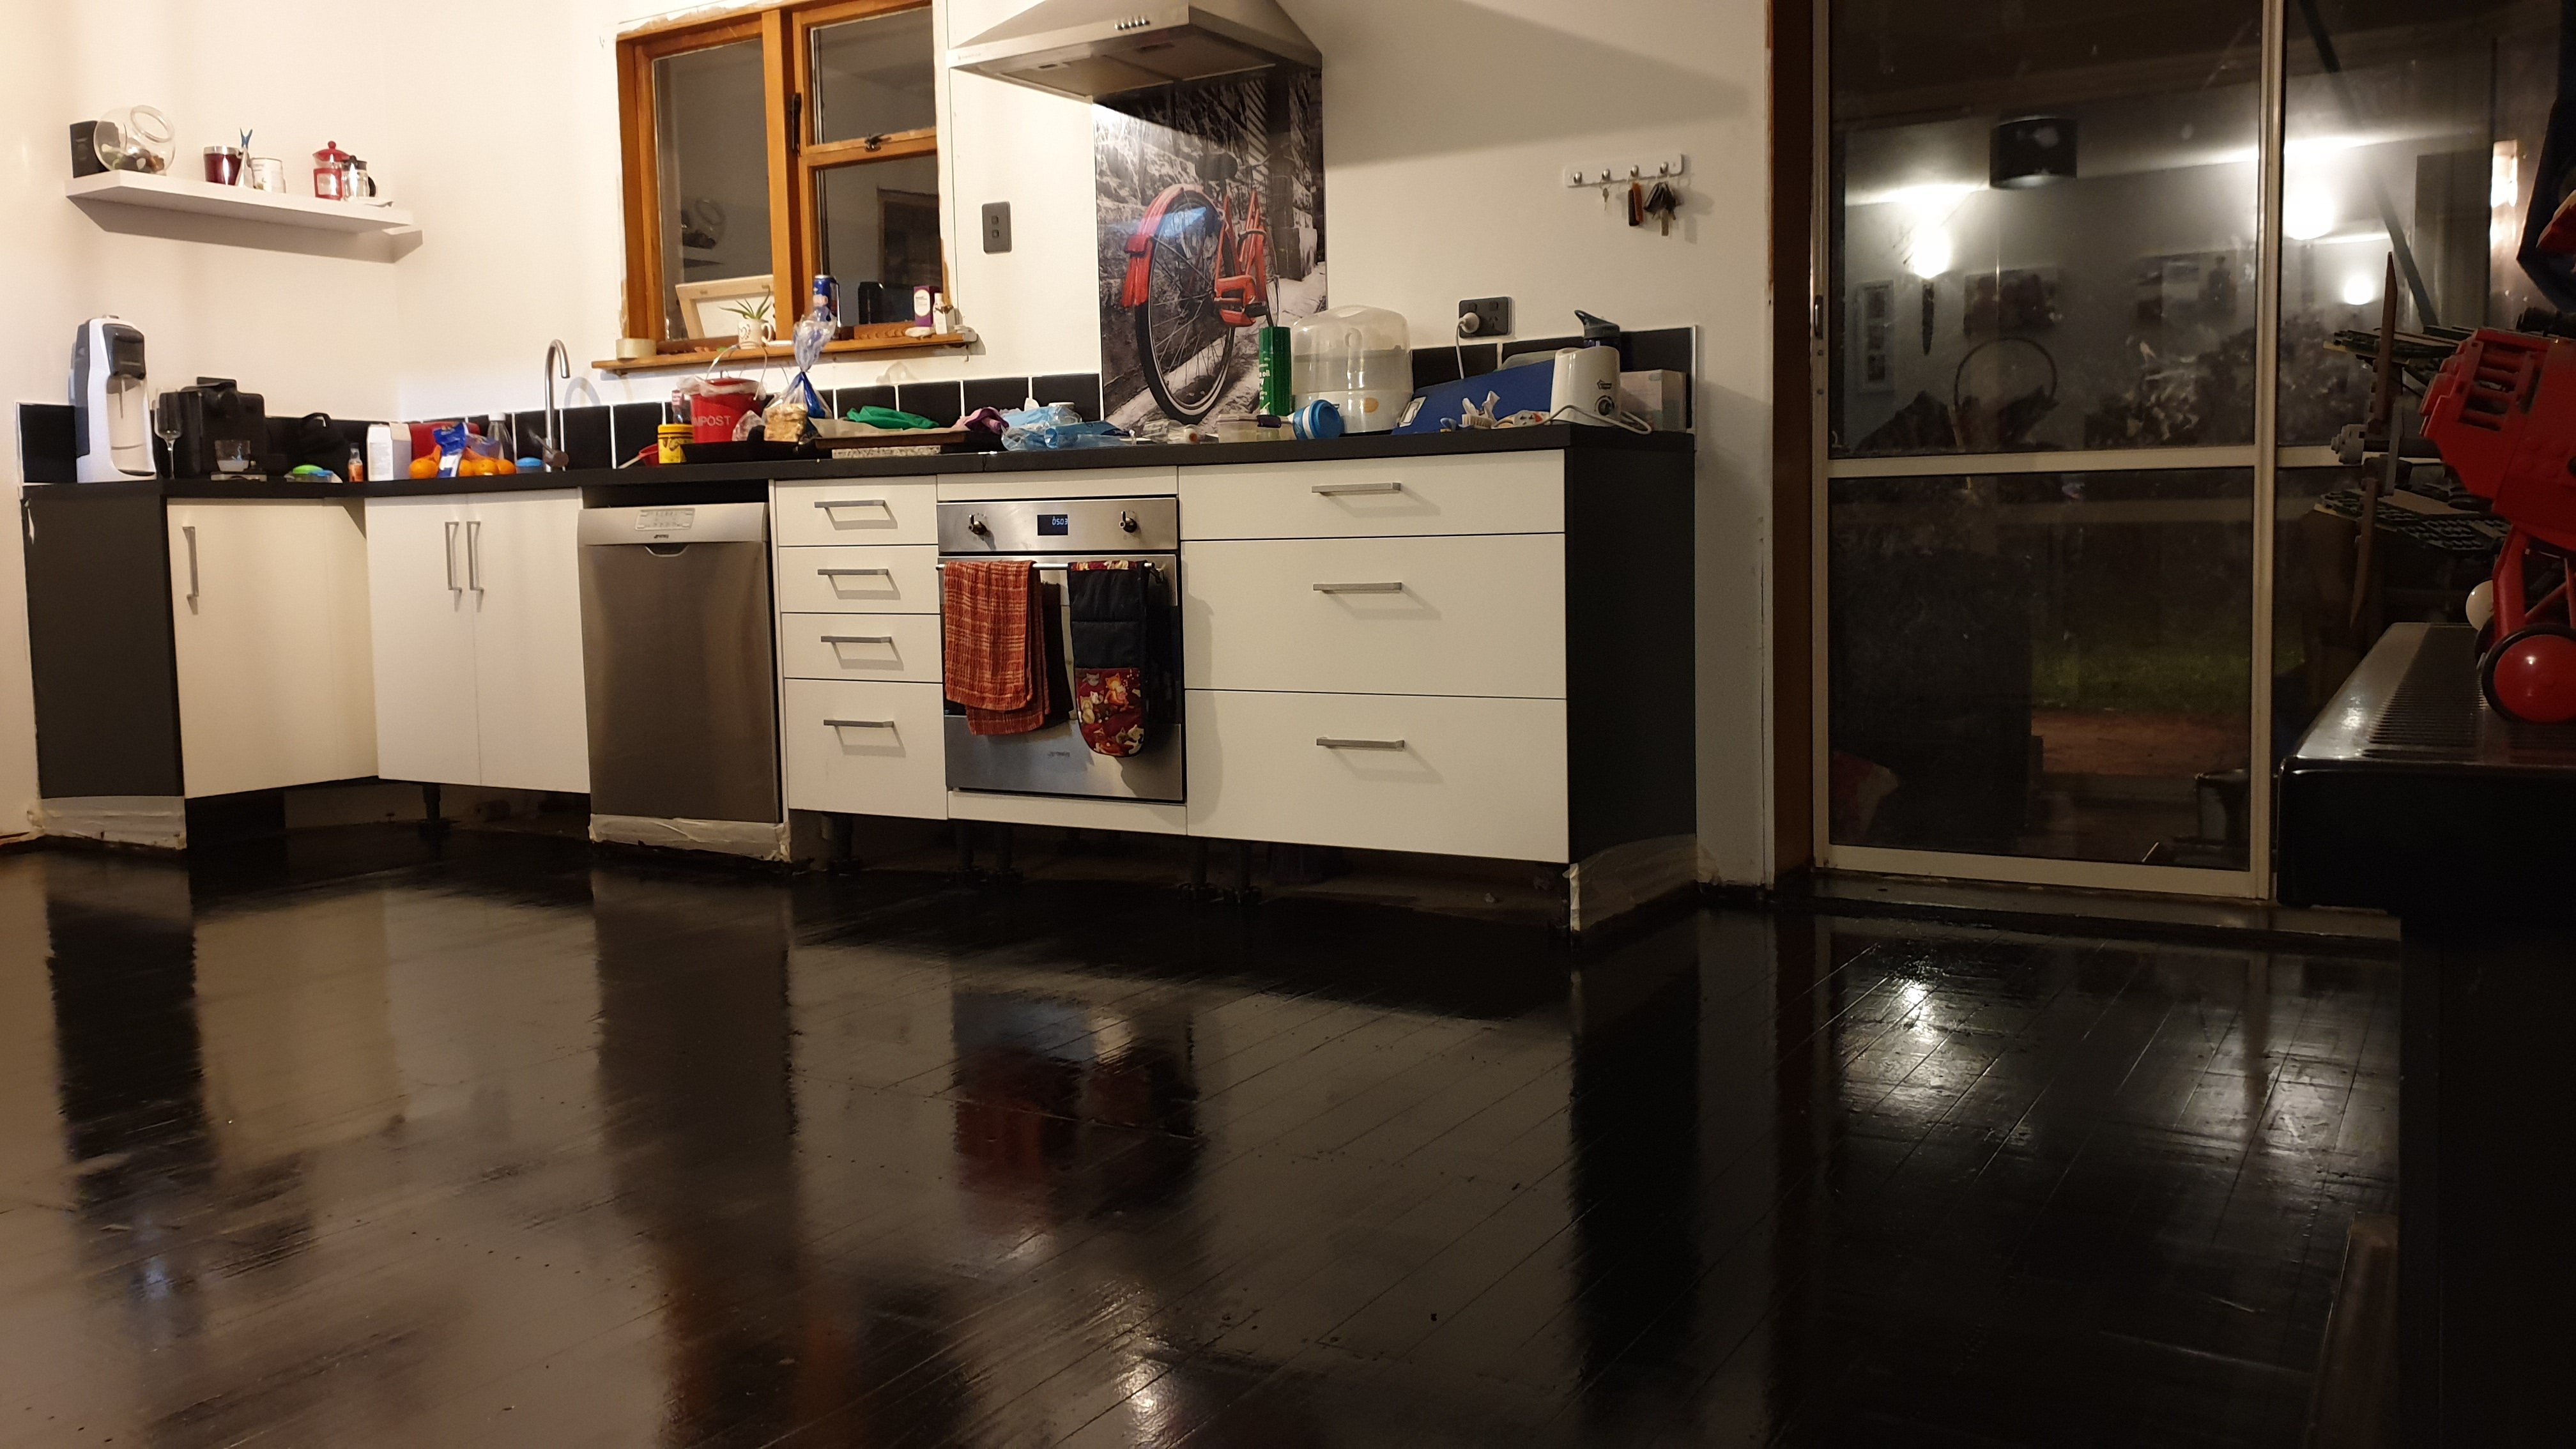
Thinning it out made all the difference, rolled on with a foam roller like a dream. Now to paint that window frame black and fit the kick boards!
1 point
-
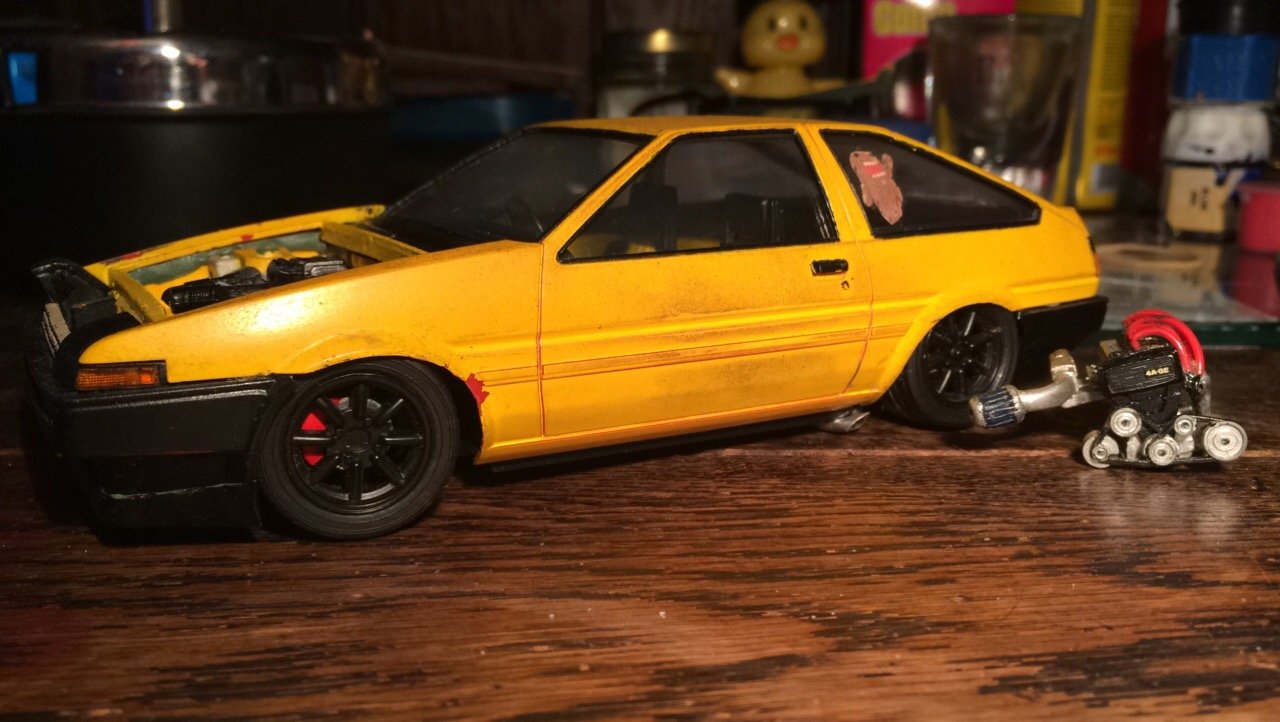
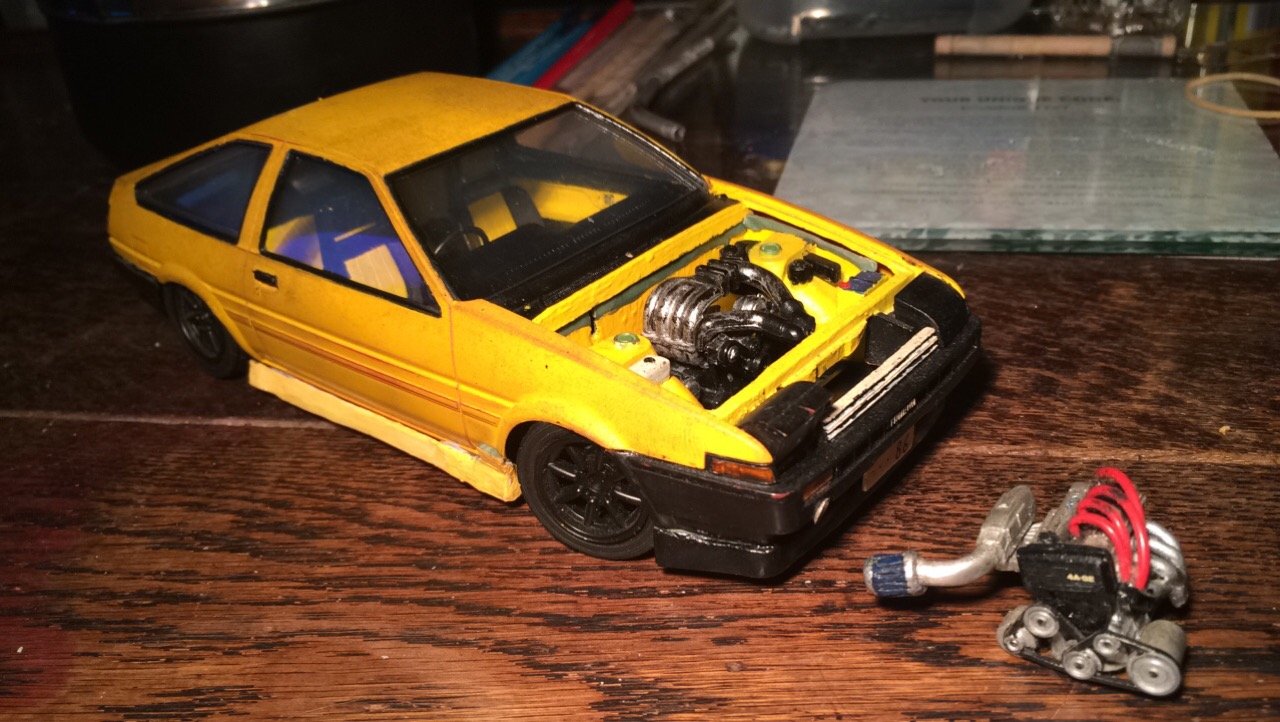
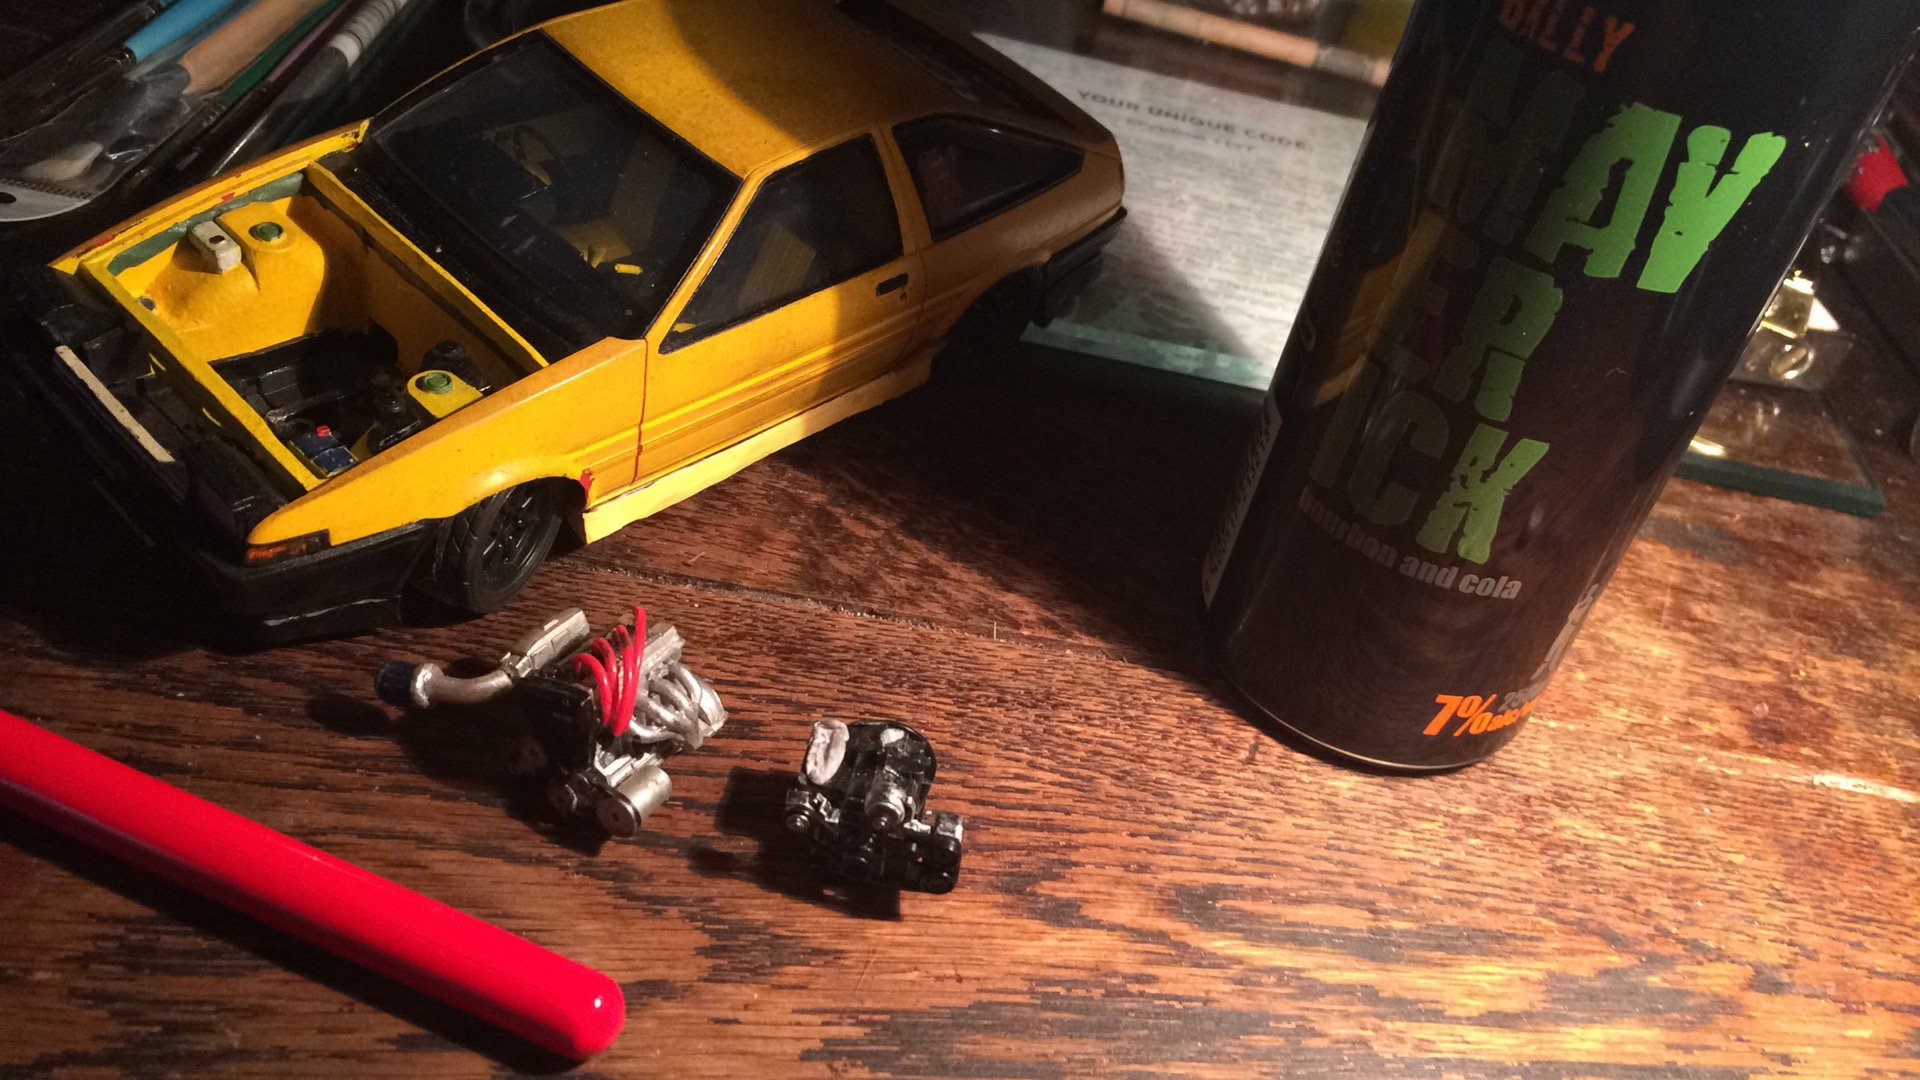
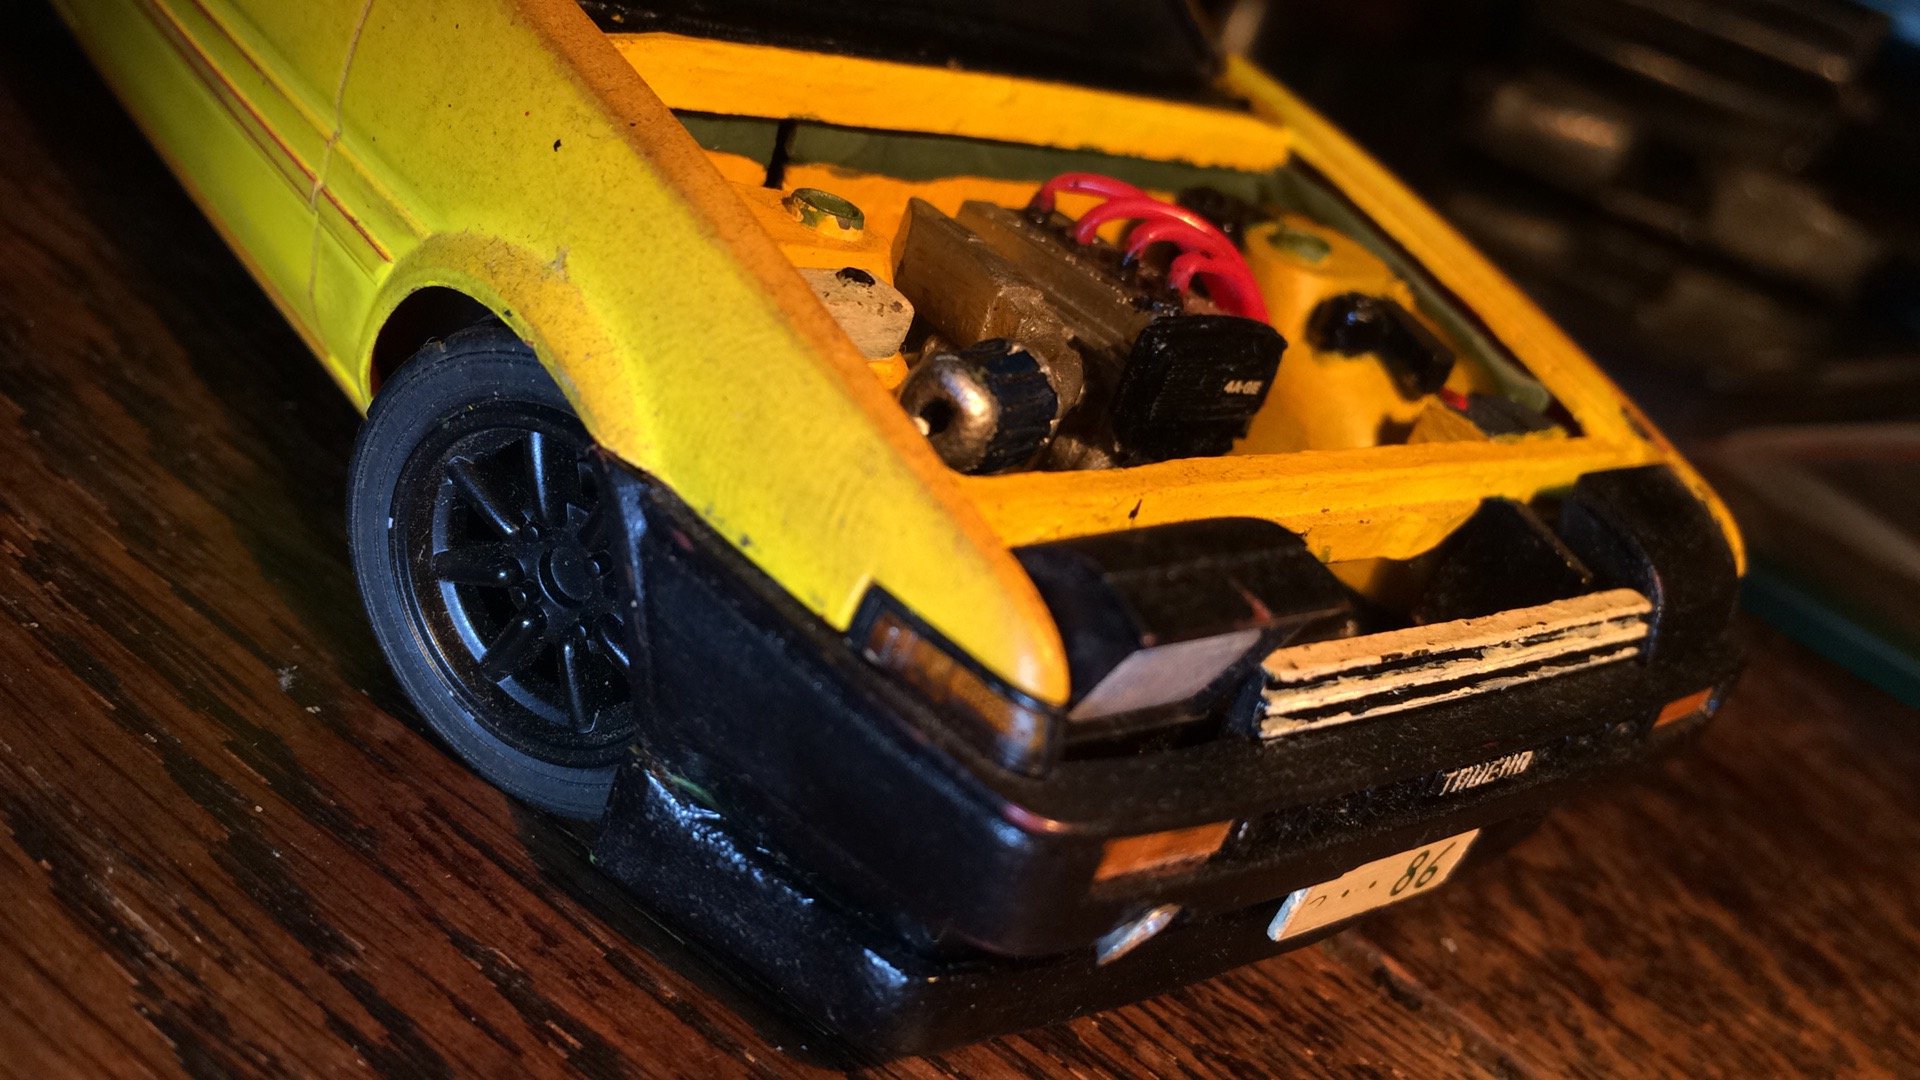
i wish I had better pics of the R32 to be honest.. I put a lot more work into that one, especially the doors, they swung open and you could move the windows to fully down or click it back up into the raised position. modified the factory engine detail to make the turbos bigger. made individual intakes and filters instead of the plastic airbox arrangement, intercooler and piping, full exhaust etc. the paint was like 3 different layers to and weathered to give it the appearance of a drift missile thats been resprayed in the past but skimmed a few walls at the track. you can actually see the different colours showing through in some spots. I just remembered it originally came with a clear bonnet, probably should have left it clear but it just looked too fake so it got a paintjob too.. the AE86 never got finished, I just ran out of enthusiasm. Just had a quick look at it before and it looks soo bad now, the paint is all filthy and coated in dust poor thing...1 point
-
Found a couple more pics on my phone... pretty terrible pics sorry.. but yeah Aoshima 1/24 Trueno it came with engine detail and also had a spring suspension setup (basically just normal plastic struts but with teeny tiny real springs like from inside a pen) took springs out Lowered the body shell itself on to the bottom plate as well as chopped the back out a bit to allow the diff to really slam right down had to cut down the firewall and sides of engine bay to allow body to go down further but massively misjudged and so had to build it back up again with modeling clay custom exhaust with side exit made from alloy tubing had a stab at making front lip and sideskirts from modelling clay cold air induction pipe from front bumper found some tiny rubber tubing somewhere to make into sparkplug leads custom intake pipe and filter made from alloy and clay its been bashed up a bit from moving house and neglect, ill try get some photos of the underside as thats where most of the work was done trying to get it sitting right while still roll freely (thats a thing for me, its gotta still be able to roll even if its not perfectly smooth, not a fan of just gluing wheels in place etc) had an RX7 kit i never really finished that I robbed the 13b out of as well and can exchange that for the 4age if wanted
1 point
-
Since my last update I have re-kitted the P/S pump I’ve also shimmed the relief valve to lower the assistance given as the steering was too light at higher road speeds, I’ve replaced all the inner and out tie rod ends and the drag link, I dropped the block, crank and heads off to my machinist, block had been acid tanked, honed and had the cam bearings replaced. The heads have been checked over, machined, machined to take the valve springs, couple of worn valve guides replaced. The valve springs turned into a bit of a headache, the double springs supplied with my cam kit ended up having 140lbs of swat pressure which is was too high for a hydraulic flat tappet cam, We ended up ditching the inner spring and shimming the outer to end up with 100lbs seat pressure. A bit annoying but at least it didn’t turn into a major. Dont have any photos yet as it’s all plastic wrapped as it will be a couple of weeks before I start assembling slowly coming together, made another couple of orders from rock auto got a cam thrust plate with a tensioner (from a Dodge V6) as the factory 318 doesn’t have one, got some rubber lower arm inner bushes as apparently the complete polyurethane bush kit I got for the car doesn’t come with them (and no one lists a poly bush for it) ordered new rad hoses, bypass hose, rear spring shackles (as mine were too rusty) also ordered a starter motor from a 1992 dodge Dakota as with the headers I can’t use my factory starter due to the size. You can buy A/M mini starters but they are around $400, or as most of the guys in the states do you can get a Dakota starter and it’s basically a factory mini starter and at $71usd plus shipping it’s still way cheaper than an A/M unit. For now I need to let the bank account recover so ill be working on tidying up the rear suspension mounts and springs.1 point
-
Outer mould patterns finished and ready for printing. 3D printing is good but it also means to have to design the under side! Twice as much work!1 point
-
BORT REPELLENT??1 point
-
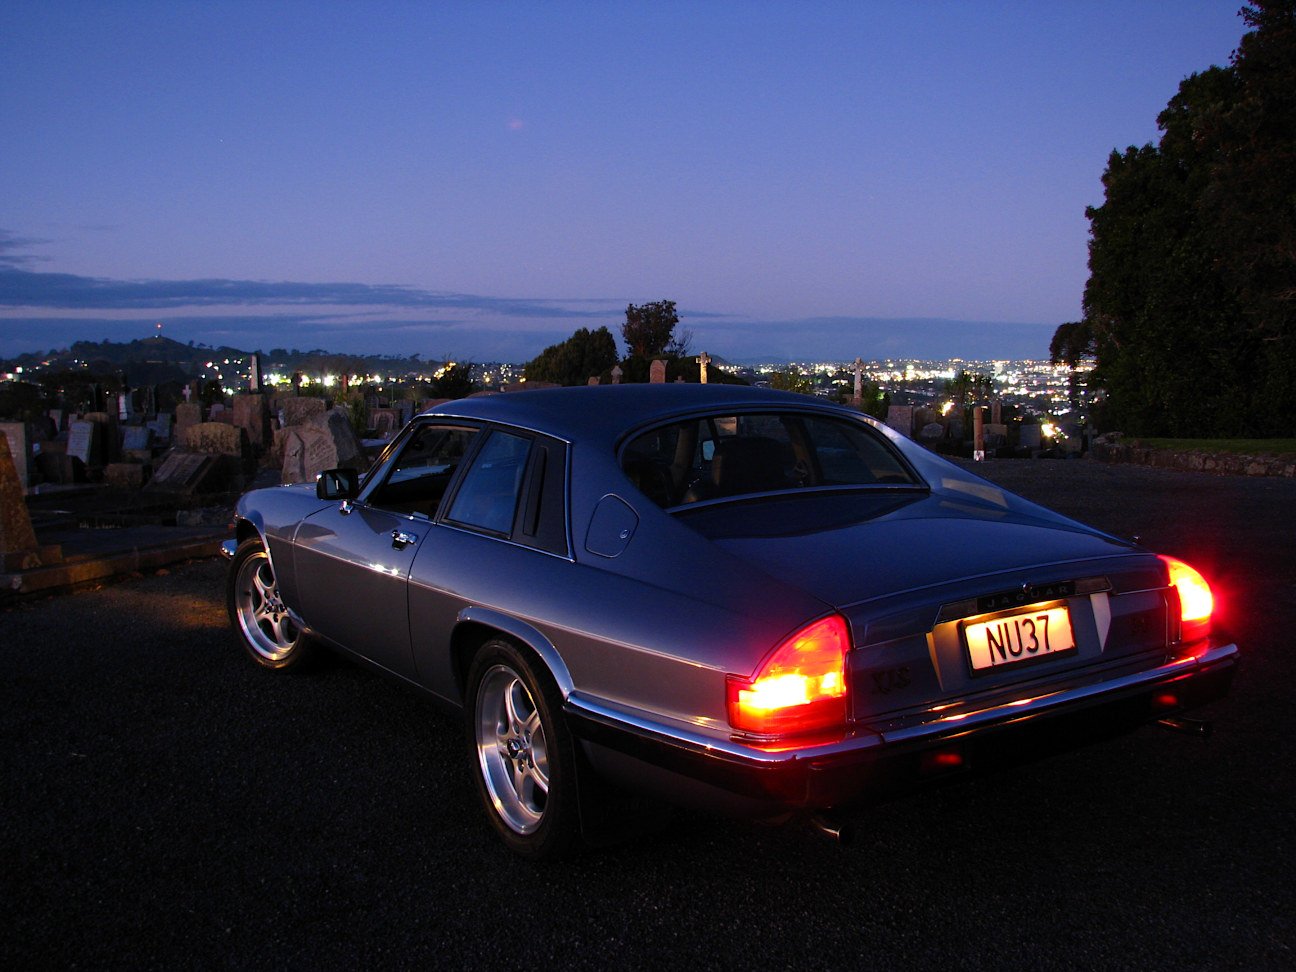
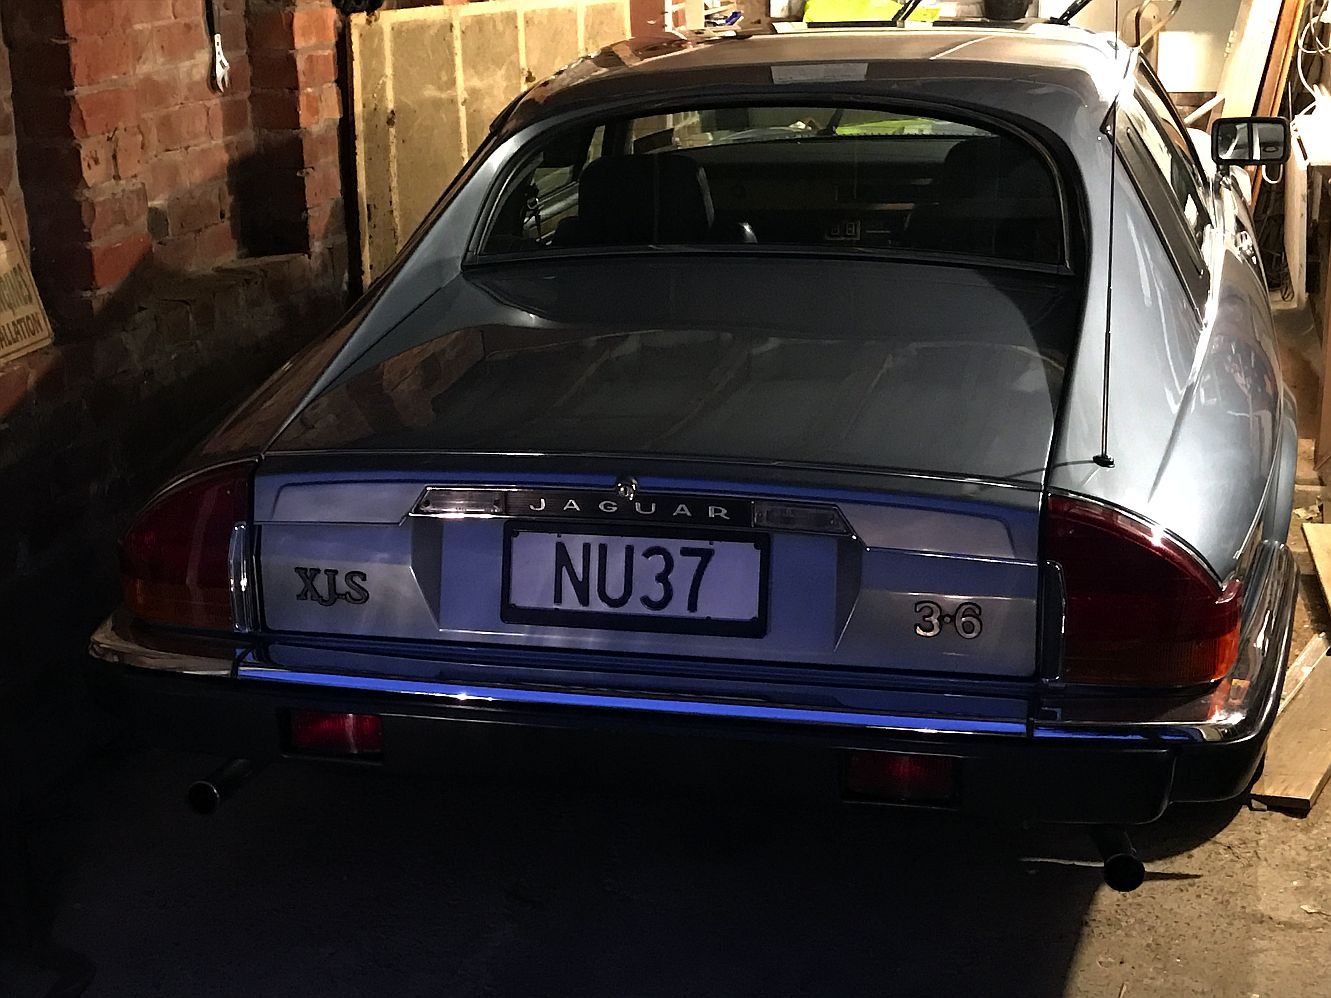
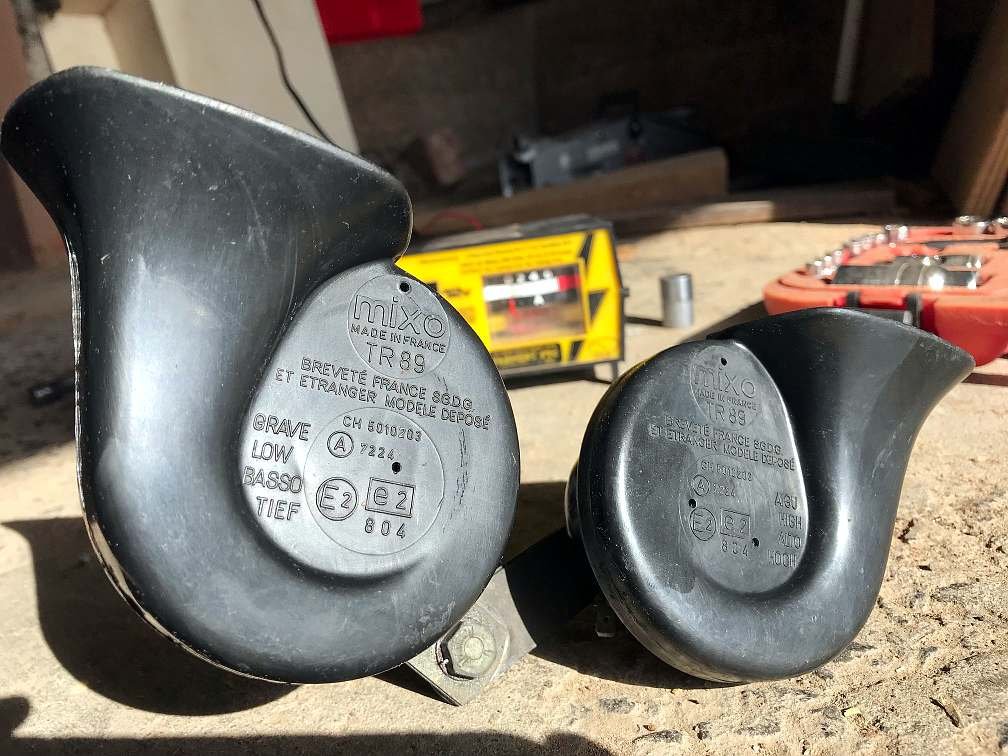
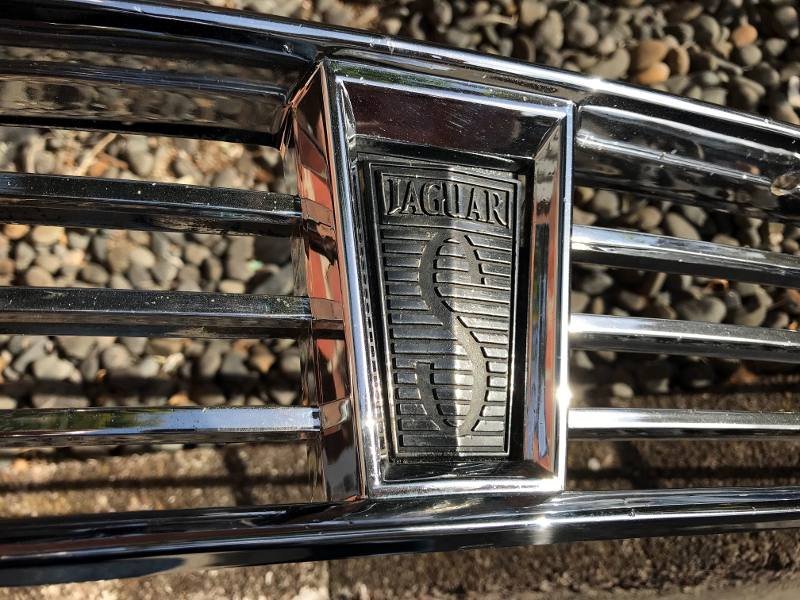
Spot the difference between the rear lights - the one on the right with the black-painted chrome piece must be from a 1970s car. Not sure which I prefer. I decided the alternator drive belt needed changing. I bought one then realised the fan and the A/C drive belt needed to come off first, and that meant wrestling with overtightened stuff that's difficult to access with my limited range of imperial tools. Got it done today minus buying a new A/C drive belt. More satisfying was fixing the horns. I'm supposed to have a French horn duet but only the low tone was working, and that sounded a bit too polite even for a British car ("Ahem.. boop boop"). I took them off the car to see what was up. This is after cleaning: I'd never disassembled a horn before, but it turns out there's no complex electronics - they use a sort of electromagnetic oscillator to vibrate a diaphragm. My high-toned horn had swallowed too much water, so I used a multimeter to find all the corroded/bad connections and clean them. After reassembly I had to set the adjustment screw to get it to oscillate and then to maximise its volume. Now if any other fellow's driving isn't up to snuff, I can give him what for. Because Jaguar couldn't be bothered fitting a welded nut for the horn mounting, I had needed to take the grille out to unbolt the horns. It made sense to give it a clean. See that badge: Normally it would say 'V12', but six cylinder cars have a big 'S' for 'Stingy'.
1 point
-
Oh hey. Some stuff happened today...
1 point
-
Haven’t been up to much of late. this is more like a car diary update for my self than any progress update I guess. Exhaust is all TIGed up. looks good and rather jealous of Flockies nice even pattern he is able to achieve compared to the mess my efforts tend to yield. Whilst the sun was shining the better half got out the spray gun and painted up the exhaust then touched up the lizard skin here and there under the car. Flockie got busy on the lathe and machined up some bushings for the front airbags then made some other non-collapsible bits to help mount up the brake booster. Tell you having all the kit to just go machine up stuff as you need it is brilliant and a great time saver. Booster is all sitting up nice n pretty. Tucked up under the floor panel with a remote reservoir cap on it to make life easier in the future. Will change out the long low pressure out fitting you see just ending at the bottom of the frame to a banjo style so every thing is kept well up and safe. Thought this image might be of interest to other stepdown Hudson owners who have thought about updating the stock MC and wanted to know if a more modern duel style would fit. Chucked on a few tires. Getting tires on/off the back has always been a bit of a concern. Happy to report the back 235 on 7 inch wide rims went on just fine. Clearance on the inner side is a bit tight. say 1/2″ from the rubber to frame. so will get a 10mm slip on spacer just to give a bit more breathing room. Have about two inch from top of tire to wheel well at air out. Before any one says - yes will clamp down that handbrake cable. Also need a spacer up front as the outer step part of the wheel centers just barley hit the top of the big bleeping 6 pot calipers. Bit of a shit when you get custom rims made up then need to use spacers. Still its nothing major I guess. Its going to sit nice n low how we wanted it. Wont see any of the red rims once its on the ground with its skirts on at air out. Heck with a tank of gas and all the other weight might no see any white as well. We are swapping out the shockwave air bags at the back to a larger ones. With adjusting the mounts on the diff we will be able to obtain the same low air out height as it currently sits whilst being only slightly higher on ride height and much higher on air up / fully inflated. If that’s to low then we can go up another one or two inch but will not be able to go lower with out fab work.1 point
-
Time for an update as more nutting out, shelling out, figuring out and cutting out has been happening. Starting off with the driveshaft. I wanted a two piece. Front will be locked static from trans to center bearing. then I wanted a slider second section due to airbags changing the length by over an inch of the second section. Had looked at a heap off options and discarded them all. Jag, Holden, Land Rover, HiAce, 4WD and list goes on. Sure I could get a dirty old thing & get it cut up and balanced. Recondition it. but in the end it was decided that everything else is new under the car & I like the piece of mind knowing a custom made one to my engine and requirements should last with any abuse thrown at it. Besides the car will be to low to want to go feking about with driveshafts ever again. Aint cheap to get all new components and shaft made up but its made for a nailheads low rev high torque and not a high rev/hp BBC/Ford. Now this was not some over night decision. Spent weeks solidly thinking about options and going to wreckers & talking to those in the know around the country. Heck the drive shaft had been sitting in my mind from the start & Flockie had been thinking it over from the time he got his hands on it. You will note in some old pics various driveshafts laying about. learnt a heap and Fraser the chap who made it up at Circle Track Engineering in Christchurch NZ was a top bloke to deal with. Showing us abut the shop & explaining everything. Next step was to get the darn thing in the car. Original plan was to bolt up the center bearing in the Hudsons cross brace where the old shaft ran. Whats that saying about best laid plans of mice and men… Basically the bearing was a lil to tall to get in the hole with no cutting and of course a tad to wide to also allow the exhaust. No biggie when you come armed with a cut off wheel right. Tunnel Mark1. Keep the Hudson one piece design and C- notch the top for the exhaust. As you can see. Not the best looking solution (yes I know who will ever see under there anyway right). Also not that strong really even though it was done in 6mm plate. So scrapped that idea. Tunnel Mark2. Goal: make it stronger whilst tucking everything up more & allowing more room for the exhaust. Cut out the whole first idea. Measured & welded up some box section that is way stronger than what originally was in place. Drilled and tapped the center to mount the bearing straight up to the body thus getting it up further. As you can see much more room and a much tidier looking structure. Trim off the ends and added top plats to mount a 6mm plate that will add further strength to the overall area whilst adding an area to mount the exhaust from. With the driveshaft mounted it was time to start thinking exhaust. Will carry that on in the following post. Pretty stoked how its all fitted up and Flockie did a great job fabricating it all up. Stronger and more room than stock Hudson.1 point


.thumb.jpeg.384ff72c8d2b0ee0d34a7bdedb55bdcf.jpeg)

This leaderboard is set to Auckland/GMT+12:00