
Leaderboard


Popular Content
Showing content with the highest reputation on 09/25/17 in all areas
-
everyday turn more steel into dust unsure exactly where I want the exhaust to end so cut it a little long and will see how it looks when its on its wheels. put the turbo kit back in temporarily to check fitment and of course needed to slit most of the joins to take the pipe strain out so everything will play nicely. will put the guard back on and make the hole in that while its all there21 points
-
Finally have a bit of an update on this build... My tyres showed up from America so they went on and did some test fitting. Reverse Cragar's all day long. The standard offset set looked weak. It's pretty much ready for vinning, I brought in some suspension parts (tie rods, bushes etc...) but they supplied the top arm bushes instead of the lower arm bushes I needed. So vinning has been put on hold for another few weeks.
 14 points
 -
applied maths and string theory zing they see me chooching9 points
-
UPDATE! "FIVE UJs later", at least a hundred calls and txt, a mince and cheese pie, a bag of service station lollies with jet planes, and (this will make you laugh) a 1/2" drive UJ with 29mm socket later, we FINALLY got the Tunland back together and ready for some more drifting! Again, a MASSIVE thank you to @98cc and his family for their amazing hospitality! We were extremely lucky and fortunate to have made our way to their casa. It was very difficult to leave! Not only did they give us access to a full workshop, they housed us for the night, fed us, offered us a very "rare" opportunity to see some amazing things we would otherwise possibly never see in this lifetime, and shared some good old yarns from all things Villiers to pregnancy and tomato sauce! The highlight (definition - an outstanding part of an event or period of time) was when @98cc and I popped into a parts store and asked the chap if he had any listings for a UJ with a 29mm cup size. He massaged the keyboard and vanished into the showroom, only to return with a 1/2" drive UJ with 29mm socket! it was quickly evident the UJ we presented to have replaced was not an indicator as to what we needed So after educating him as to what a UJ is, helping ourselves to the catalogs behind the counter, and showing him how to search items on their system, we left in haste. It was however great to have a chuckle amongst the chaos. What a fantastic weekend. Cant wait to do it again! Which could possible be within the next 50,000km if not sooner! Thanks @98cc you are a LEGEND!9 points
-
heres a bad picture of the back of the house. the weather boards are finished now and I've painted the back of the house and that's finished too. also the cap flashing between the neighbours house and ours is almost finished as well. 2017-08-28_05-14-09 by sheepers, on Flickr9 points
-
Rough as guts mate
6 points
-
Nothing Major this weekend, went in all guns blazing and lost interest after getting a pile of dirt in my eyes (which I assume came from Hanmeet) New Diff bearings and front shocks Hoists make handy for additional garage space Diff out, dirt face I might make the effort to actually do the rebuild this week..... maybe....
6 points
-
Howdy, Have been doing a bit on this old girl while being on holiday lately, even managed to get a WOF! Anyway, whats been done; -Changed to a Link G3 (super easy to use compared to the megasquirt), have tuned it reasonable well so the mixtures are all safe. The ol' 4ag goes surprisingly well! -Fixed up and resprayed an old dash in the nice porno beige. -Mounted one seat.. -Cut off the terrible exhaust tip and made a cool stainless rod gearstick! -Random little things for a WOF. This thing is super fun to rip around in, tis constantly picking a wheel with the little 165's and open spinner! Is crazy loud inside with all the sound deadening removed and no seats ect, ear plugs are almost necessary. Am kinda unsure if I should pop in a J160 and a decent diff, or sell it. Hmmm. Here's some pics!5 points
-
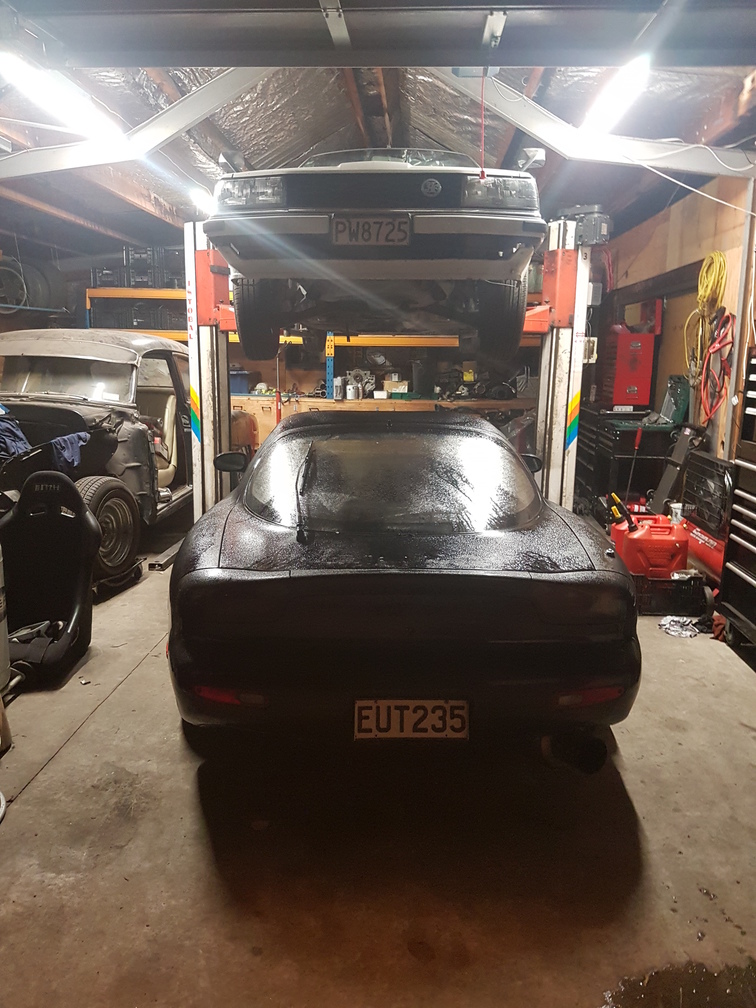
Had a really good day today on the Skyline. Decided I was going to get it out of the shop and go for a drive. Picked up a new battery and went out, the left side was still pulling badly and I knew it was something to do with the brakes so I pulled off the caliper and pads and had a look. Turns out it was a really simple answer. These are two piston with two pads which are the same shape, one was worn down more than other and when I put them back in after doing the discs I put them in the wrong way so had the less worn one where the more worn one was. I think the calipers need rebuilding anyway as the pistons dont fully retract in so I couldn't put new pads in but for now the braking is back to it's normal uselessness and not pulling violently to the side. I was also testing out the replaced caster arm and it's worked really well. The car doesn't track entirely straight but I feel once another alignment is done it will be really nice. Feels good to have it out and about again, oh and wired up the front fender indicators too.5 points
-
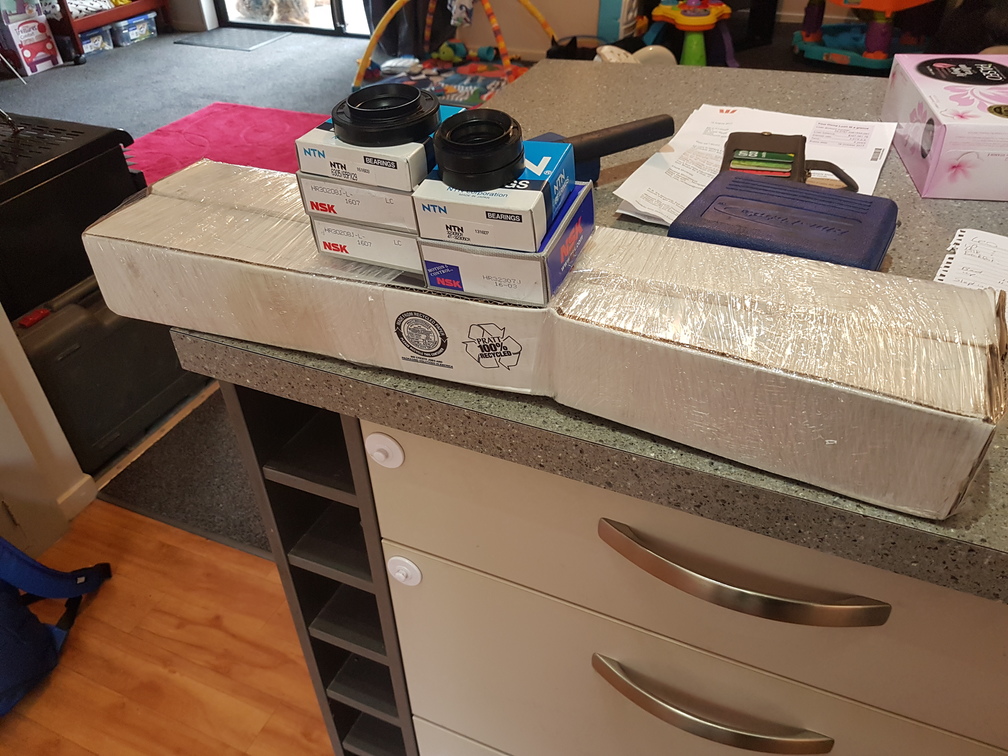
On their way from rock auto g4 points
-
Filled one hole Also zapped some small holes in the horizontal part. Just need to fix a bit of the pinch weld on this side and it will be done. Took the glass out of the other side. I can see why it was a bit leaky there.4 points
-
other things. deck framing, complete with scotch. 2017-09-21_06-22-51 by sheepers, on Flickr some gib board that in theory should be attached to the house tomorrow 2017-09-24_04-47-44 by sheepers, on Flickr 2017-09-24_04-48-01 by sheepers, on Flickr and paint. these bits are finished. 2017-09-24_04-48-11 by sheepers, on Flickr 2017-09-24_04-48-21 by sheepers, on Flickr4 points
-
For some reason I can't attach a link, but go on www.lvvta.org.nz and look at 'modification threshold ' To be honest I can't tell you 100% either way based on what it says, it doesn't specify efi conversions as being ok without cert- just efi system modifications-, then it says all fuel system mods need cert, apart from, then gives a box which describes what you can do, but according to that, you could make a fuel tank out of codys cans and not need cert as long as it fills from the original point....3 points
-
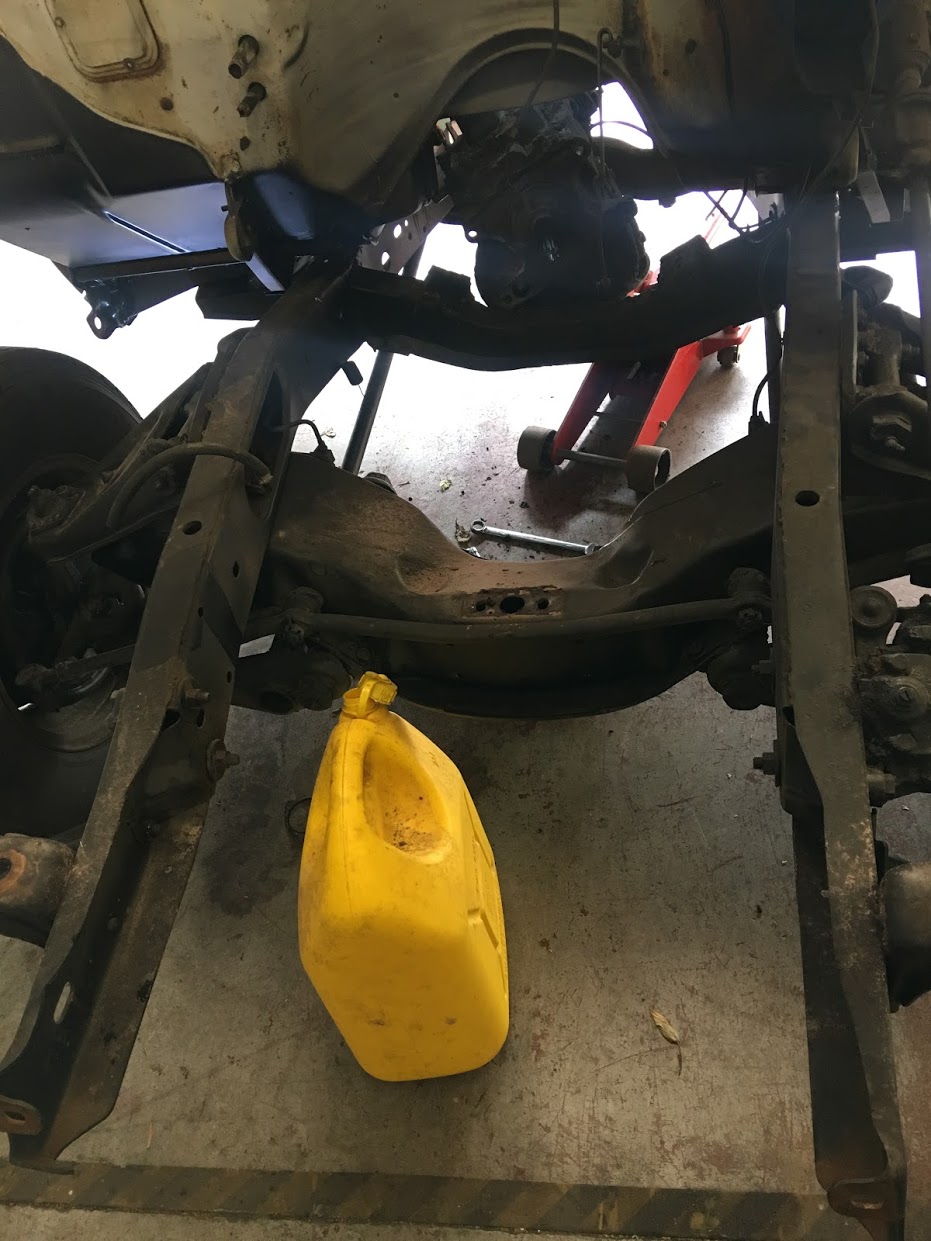
Made some progress. Engine/tranny will fit without changing the front end, so Im not changing it. Cut a notch in the crossmember to get the box in the hole. This truck was a manual so has the high hump trans tunnel, so no cab modifications required. Rear output from the trans is about 4" further back than the original. Did a bit more research, and I will chop out the entire crossmember as it isnt needed, and I think I need to get the trans output down from where it is. Its all just a mock up, hence the 1" sq thinwall spacer under the perch, but it looks like this will work, unless there is a reason why I shouldnt. The perch is out of a 77, and they are roughly 30mm deeper in the chassis rail, so spacer. The chances of finding a 62 perch is virtually nil, not many of these trucks were ordered with autos, and all the manuals use a horseshoe mount at the front of the engine and another mount at the rear of the bellhousing, no perches. The tranny mount in the photo is the original holden one, should be straight forward to adapt that to the frame with a bit of angle and some gussets. If anyone has anything to offer in the way of driveline geometry advice that would be cool. Ive been playing with transaxle based shit for toooo long, and Im an old dog to boot, cant train etc. Driveshaft is a two piece, so its set from the centre bearing to the rear axle, and I really shouldve got a measurement on the output of the old box before removal... duh...
3 points
-
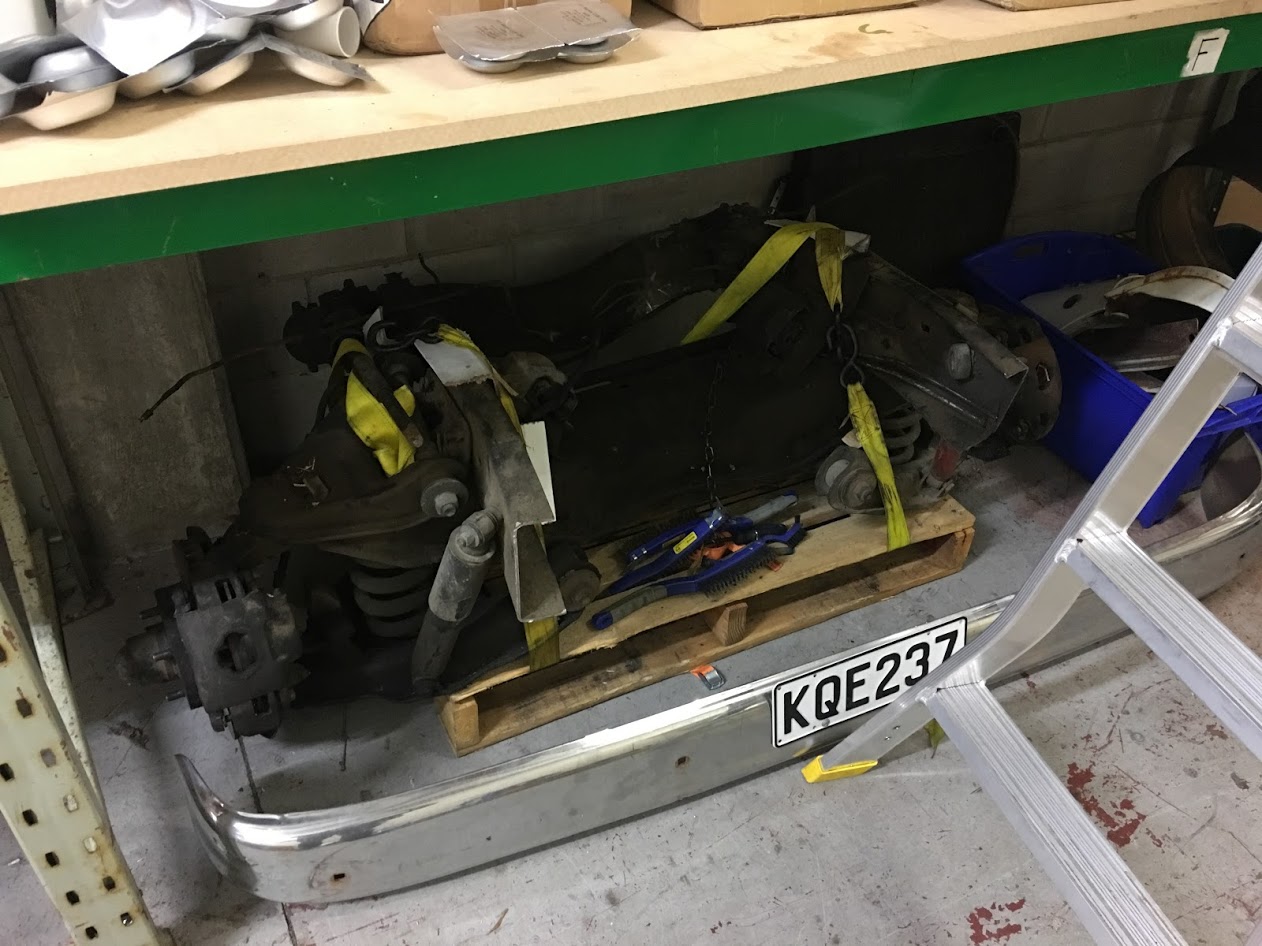
Diff housing, with spring pads and other assorted unwanted giblets removed
3 points
-
For insurance sake it definitely would be. If the car were to catch fire and they found it had a modified fuel system they could hold that against you. Even if they did initially say "yeah nah that's fine"2 points
-
The cert for EFI conversion, even if it's direct bolt in stuff, is to ensure the safety of the high pressure side of things. I've seen more than a couple of times people pumping EFI pressure through the 30something year old carb rated fuel lines, and wonder why they leak. It's just another blanket rule to guard against idiocy.2 points
-
Doesn't the letter of the law state it needs cert. Probably why Don says it does. Unless the insurance company will write it in a letter then I wouldn't believe them for a second.2 points
-
Maybe look into AAPlus for next time2 points
-
I was thinking I'd just use a LM7805 with a diode and a couple of capacitors, but something like that would probably be a better solution. Although so far my spend has been about $10 bucks for the arduino nano, some resistors, zener diode, relay module and an IP56 enclosure to suit. A $5 regulator to protect my $2.50 arduino nano and $1 relay seems a but overkill haha. Once I get it working properly I'll chuck up a schematic, a parts list and my code.2 points
-
Also the answer to how many sheets of 12mm ply can you fit in the back of a sedan is 5! Or cut into 3x = 15 pieces
2 points
-
Exhaust shop booked now turbo flange arrived.2 points
-
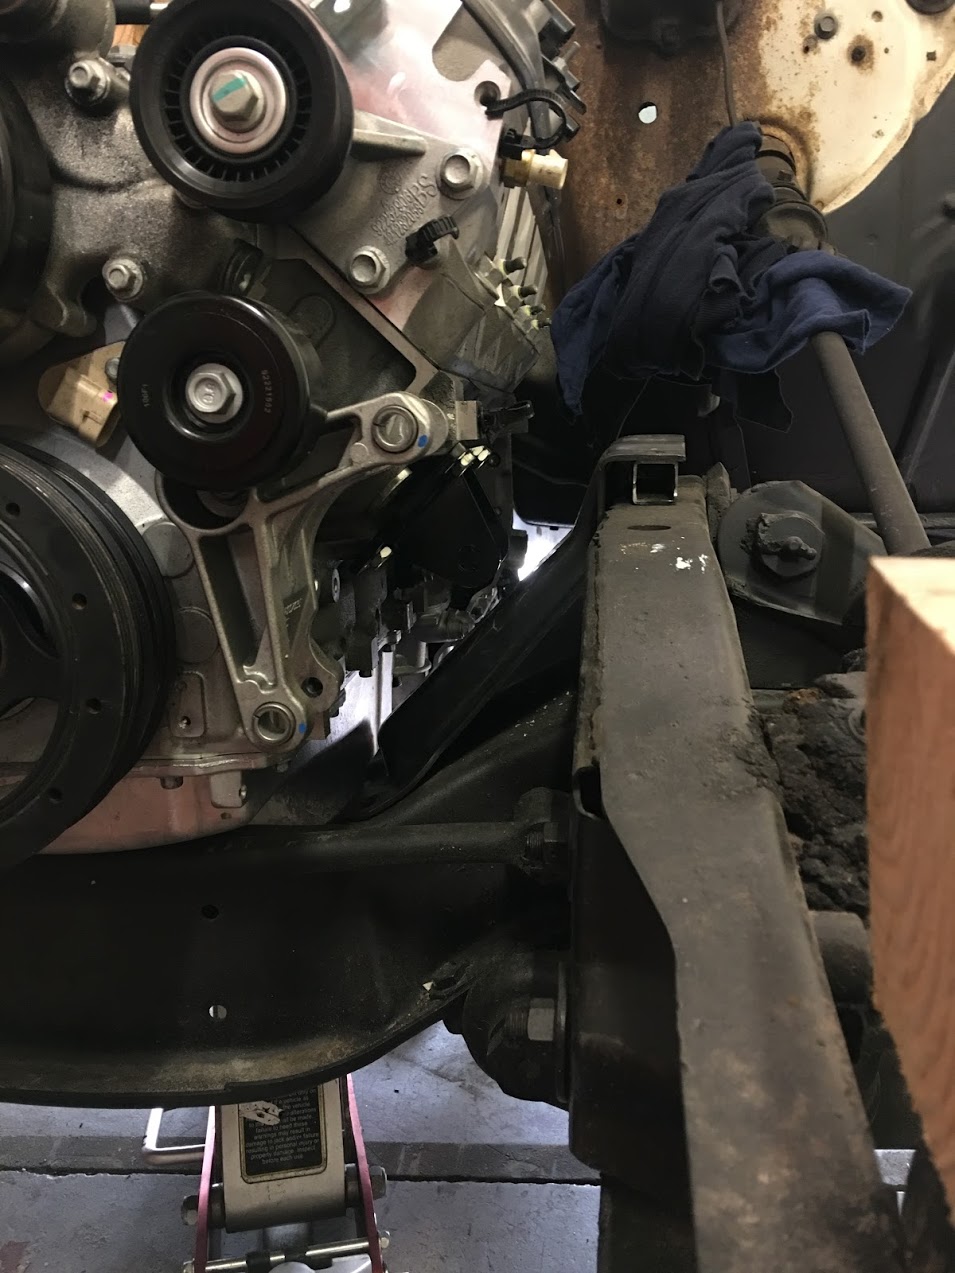
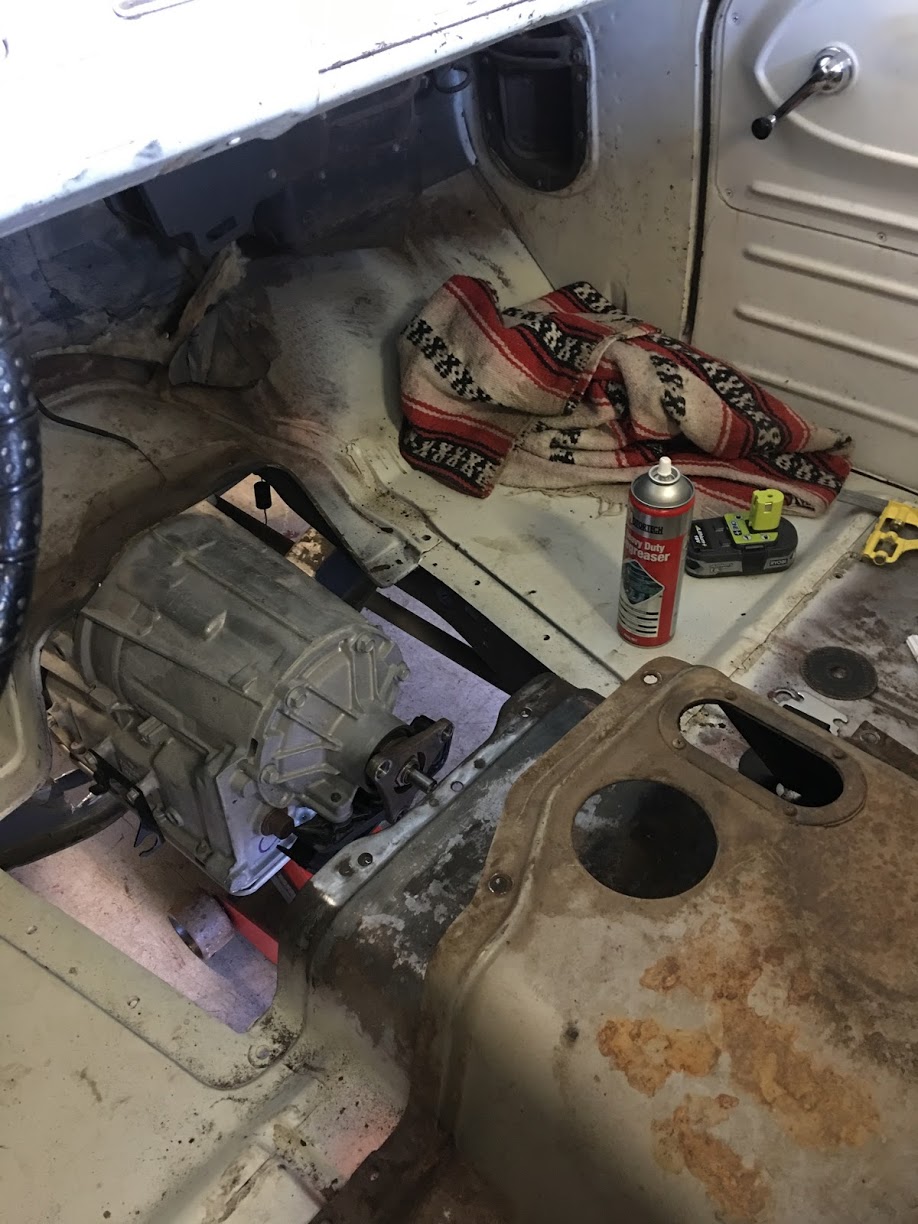
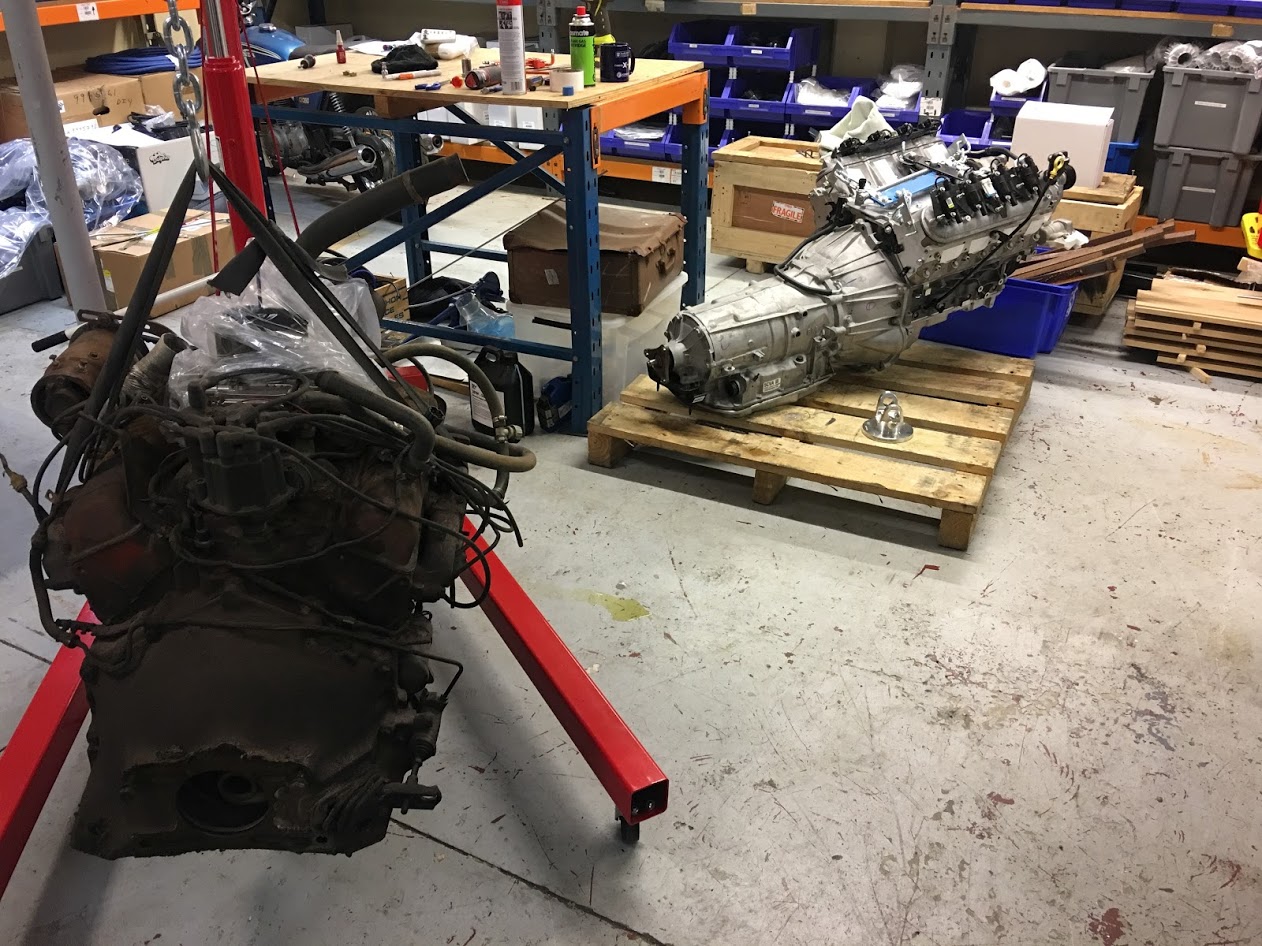
So pulled the front end off and engine and box out over the weekend. Gearbox/driveshaft fought me for a couple of hours before admitting defeat at the hands of a bigger hammer. Have taken all the extraneous crap off the LS and changed the sump so it will clear the crossmember, will need to hang the AC compressor and the alternator off the heads, rather than off the base of the block they are in the Holdons. Pretty much every conversion I have managed to find, the torsion bar front end has been pulled in favour of a later model, basically the crossmember the torsion bars attach to is in the way. Im going to test fit before the front end swap happens, Id really like to keep it how it is... Also have obtained a 12 bolt rear end, this is off to be rebuilt and an eaton posi chucked in it because 11's. I will be doing the bulk of the conversion myself, the front end swap (if I have too) is basically a bolt in barring one mounting hole. The front end I have is out of a 77, and fortunately it is a front cut so lots of measuring to get the steering geometry right. What I do need is someone to do the welding on trans crossmember, once I get to that point. Any suggestions would be great, also at what point should I get a certifier involved, Im not cutting it up, rear diff is a bolt in, may go to a one piece drive shaft... etc... If anyone wants the old exhaust, come and get it, no holes, not rusty, but I chopped it in half to get it out
2 points
-
Roof has reached the 'good enough for me for now' stage, so removed the masking. Put the fuel pump in and moved it out of the garage today. I need to sand and buff the clear coat on the tailgatess before they go back on. Also the steel floor panel needs some attention as it has a bit of surface rust on the lower mounting surfaces, and I don't want to mess up the new paint in the back. Metalflake I'd rate as 'OK for a first attempt' I need to 'phone a friend' to help with the windscreen reinstall.2 points
-
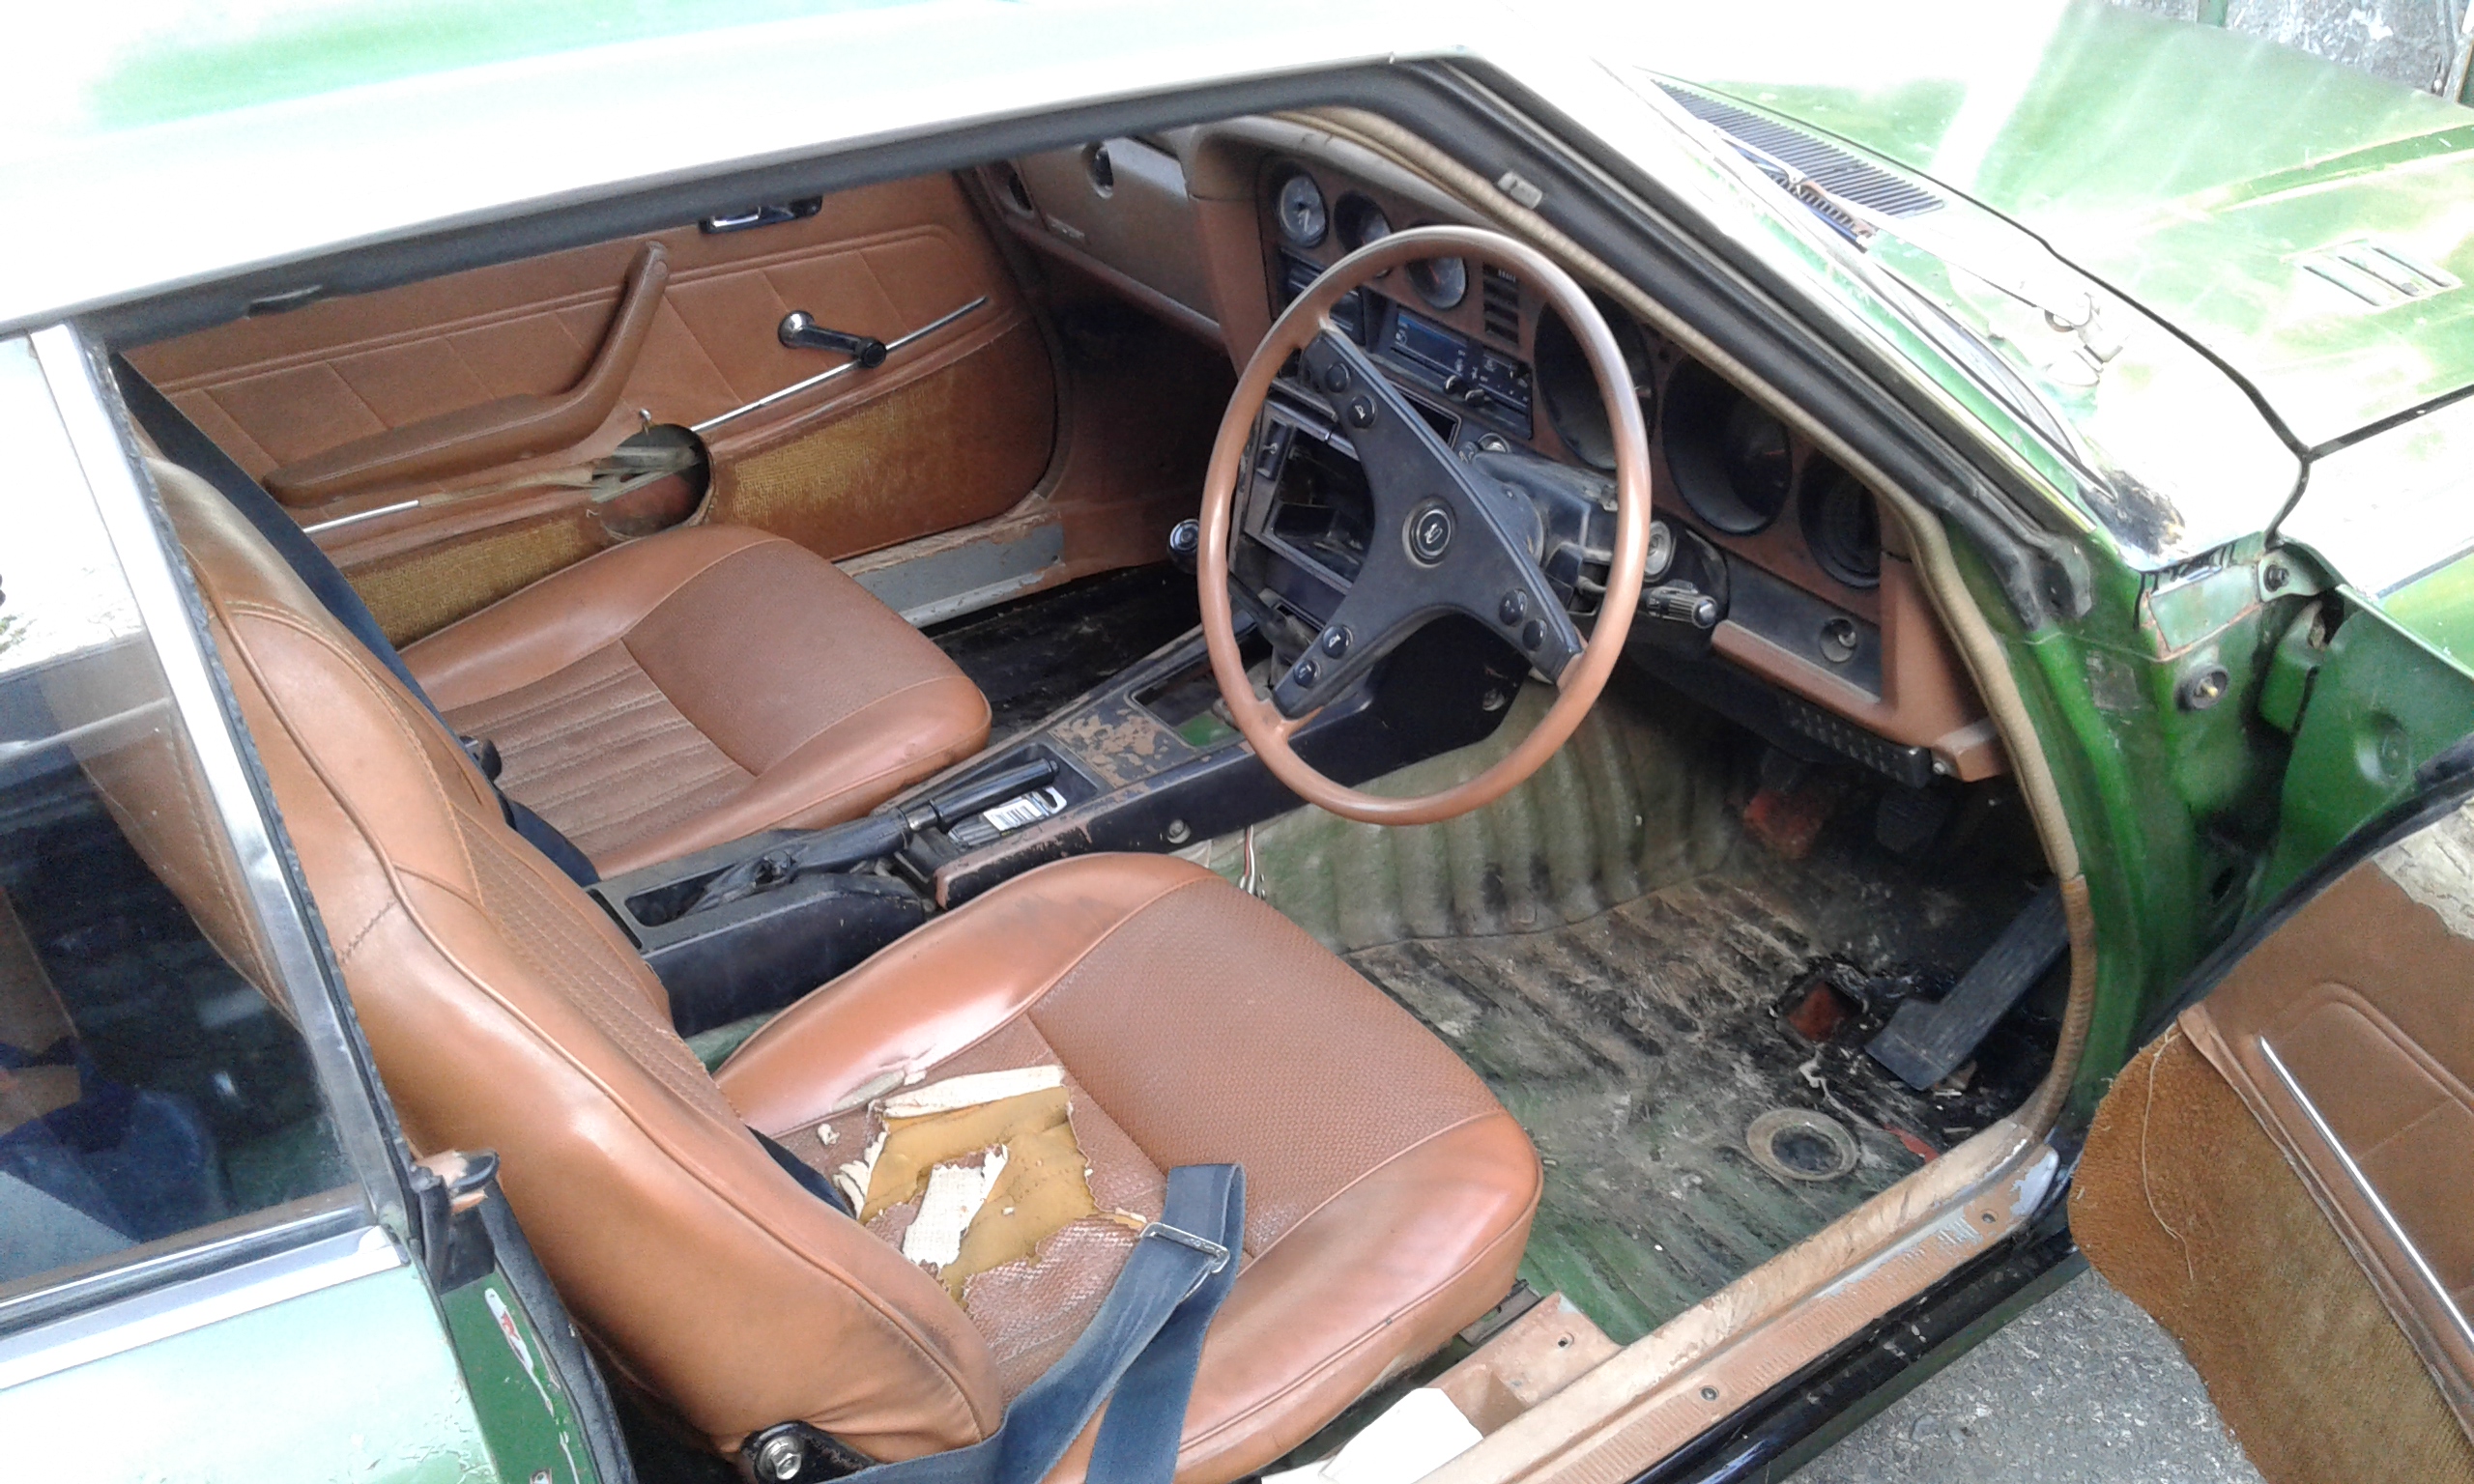
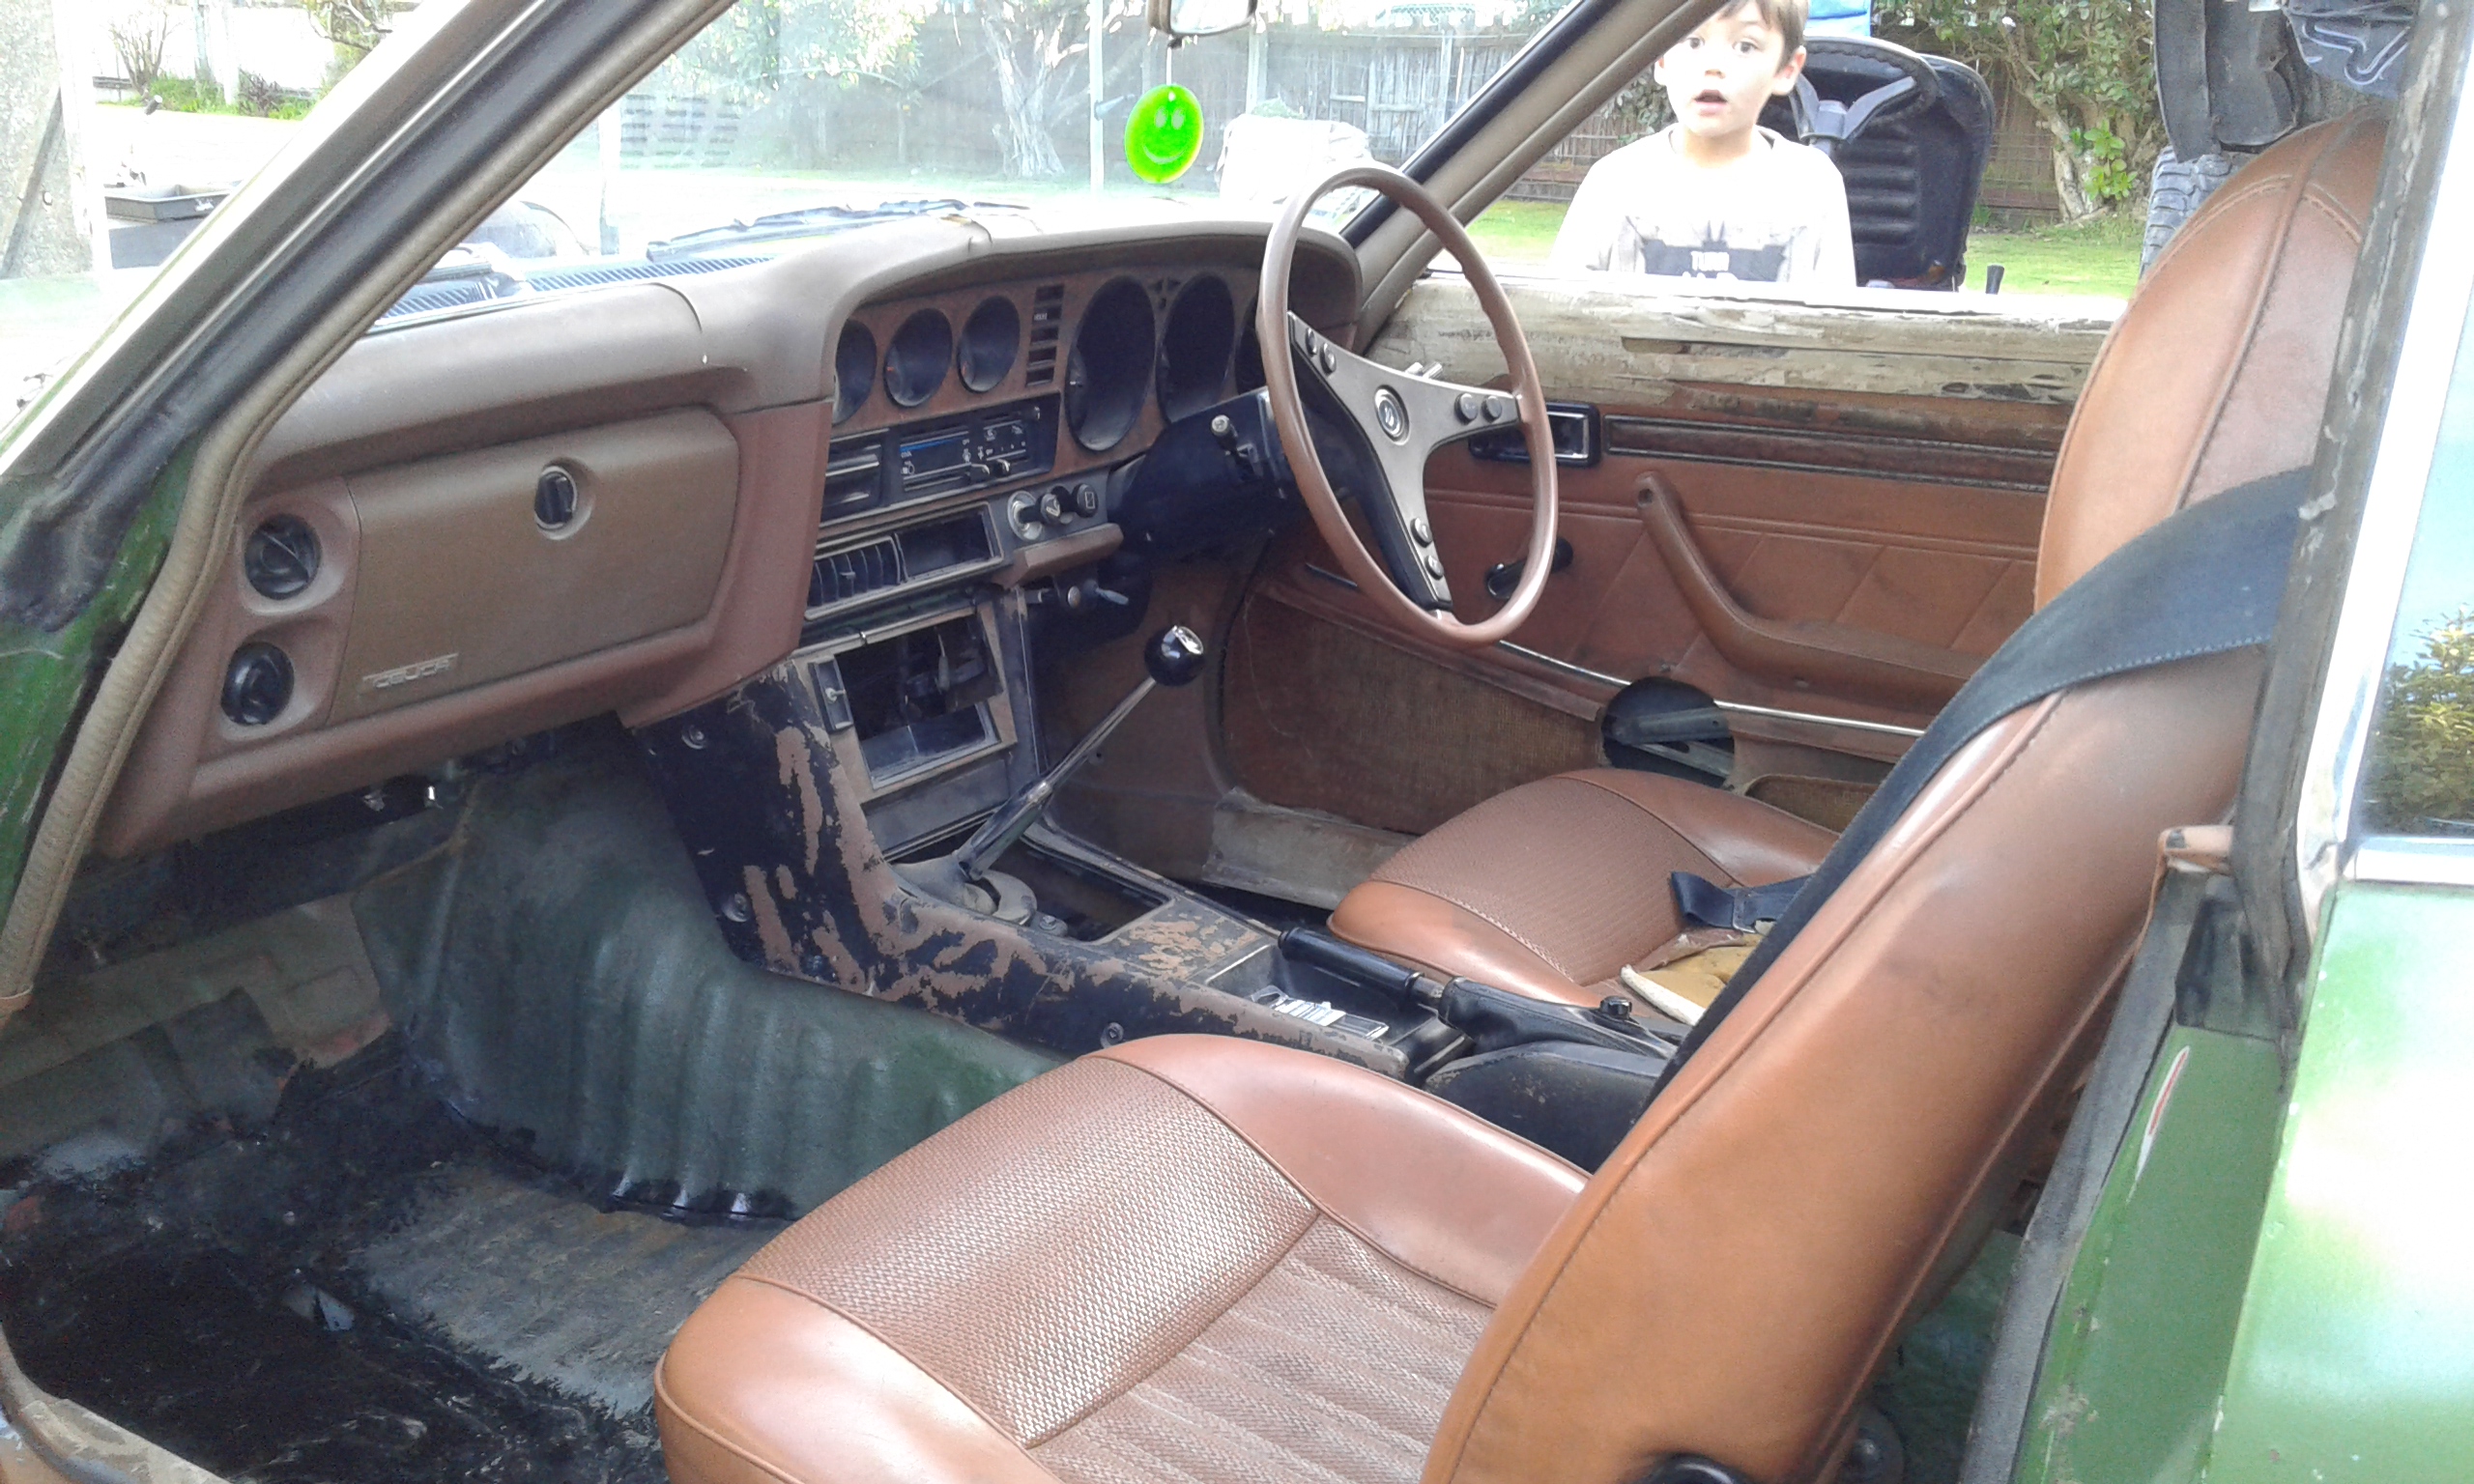
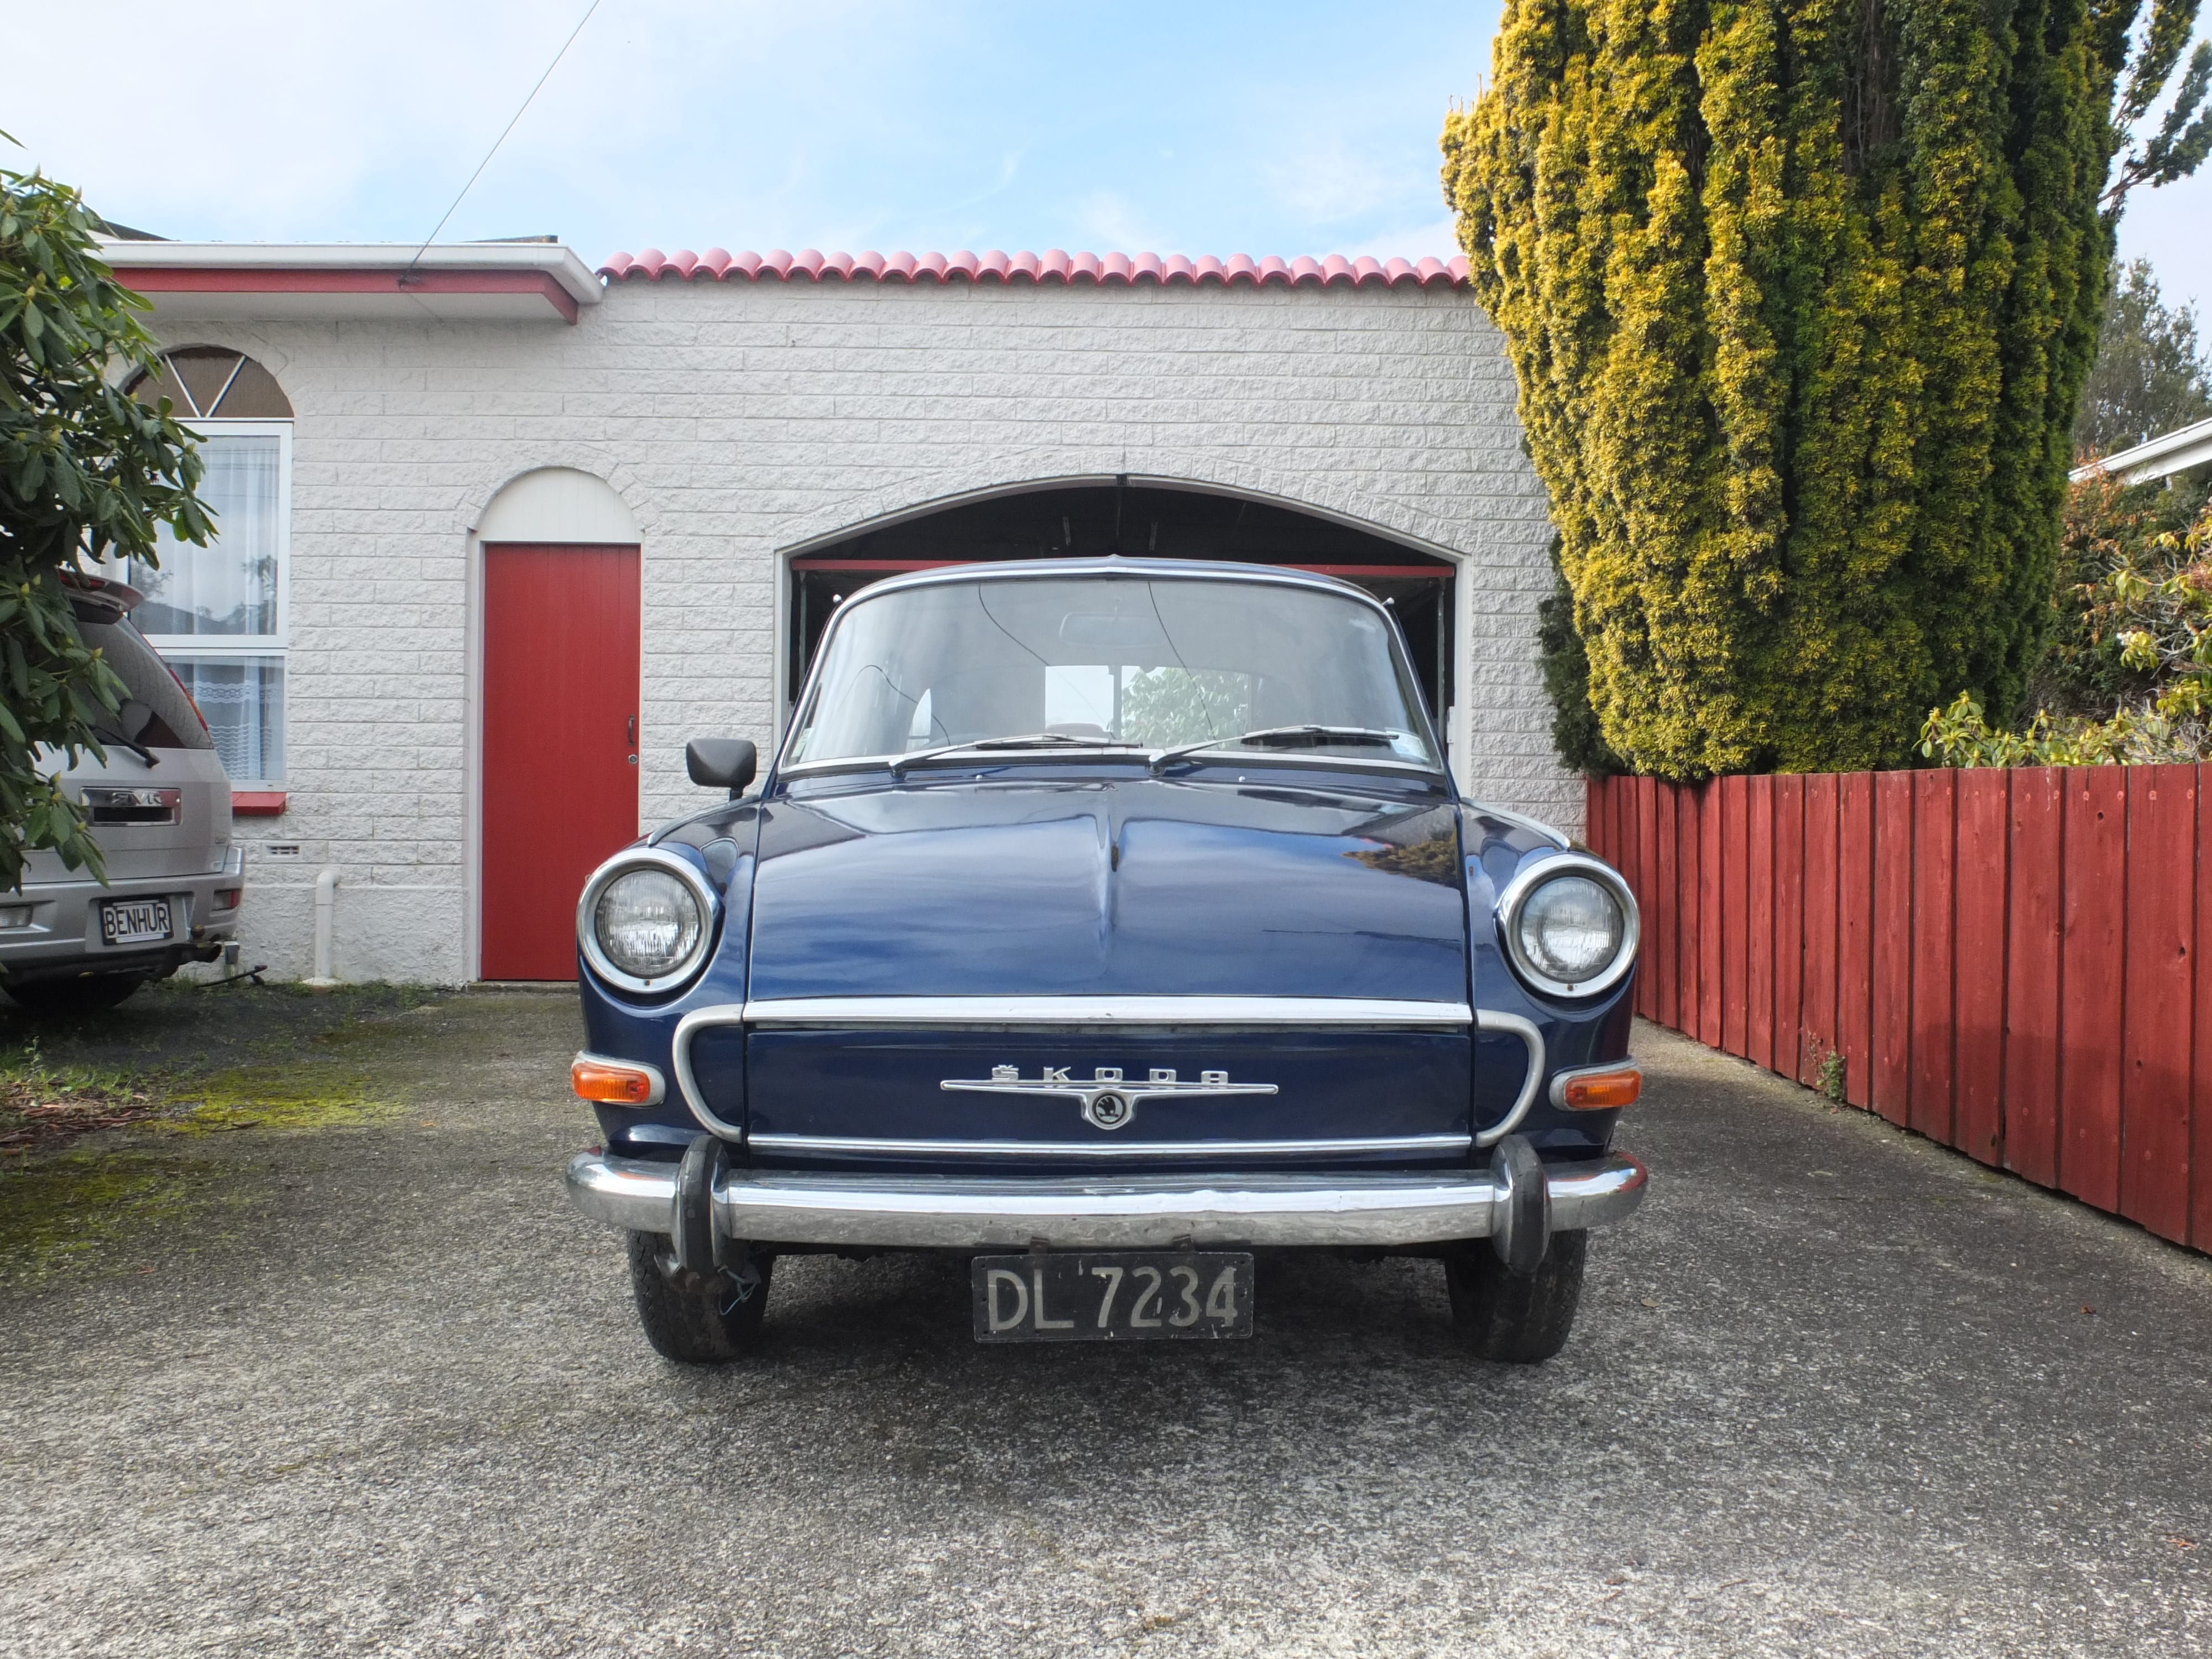
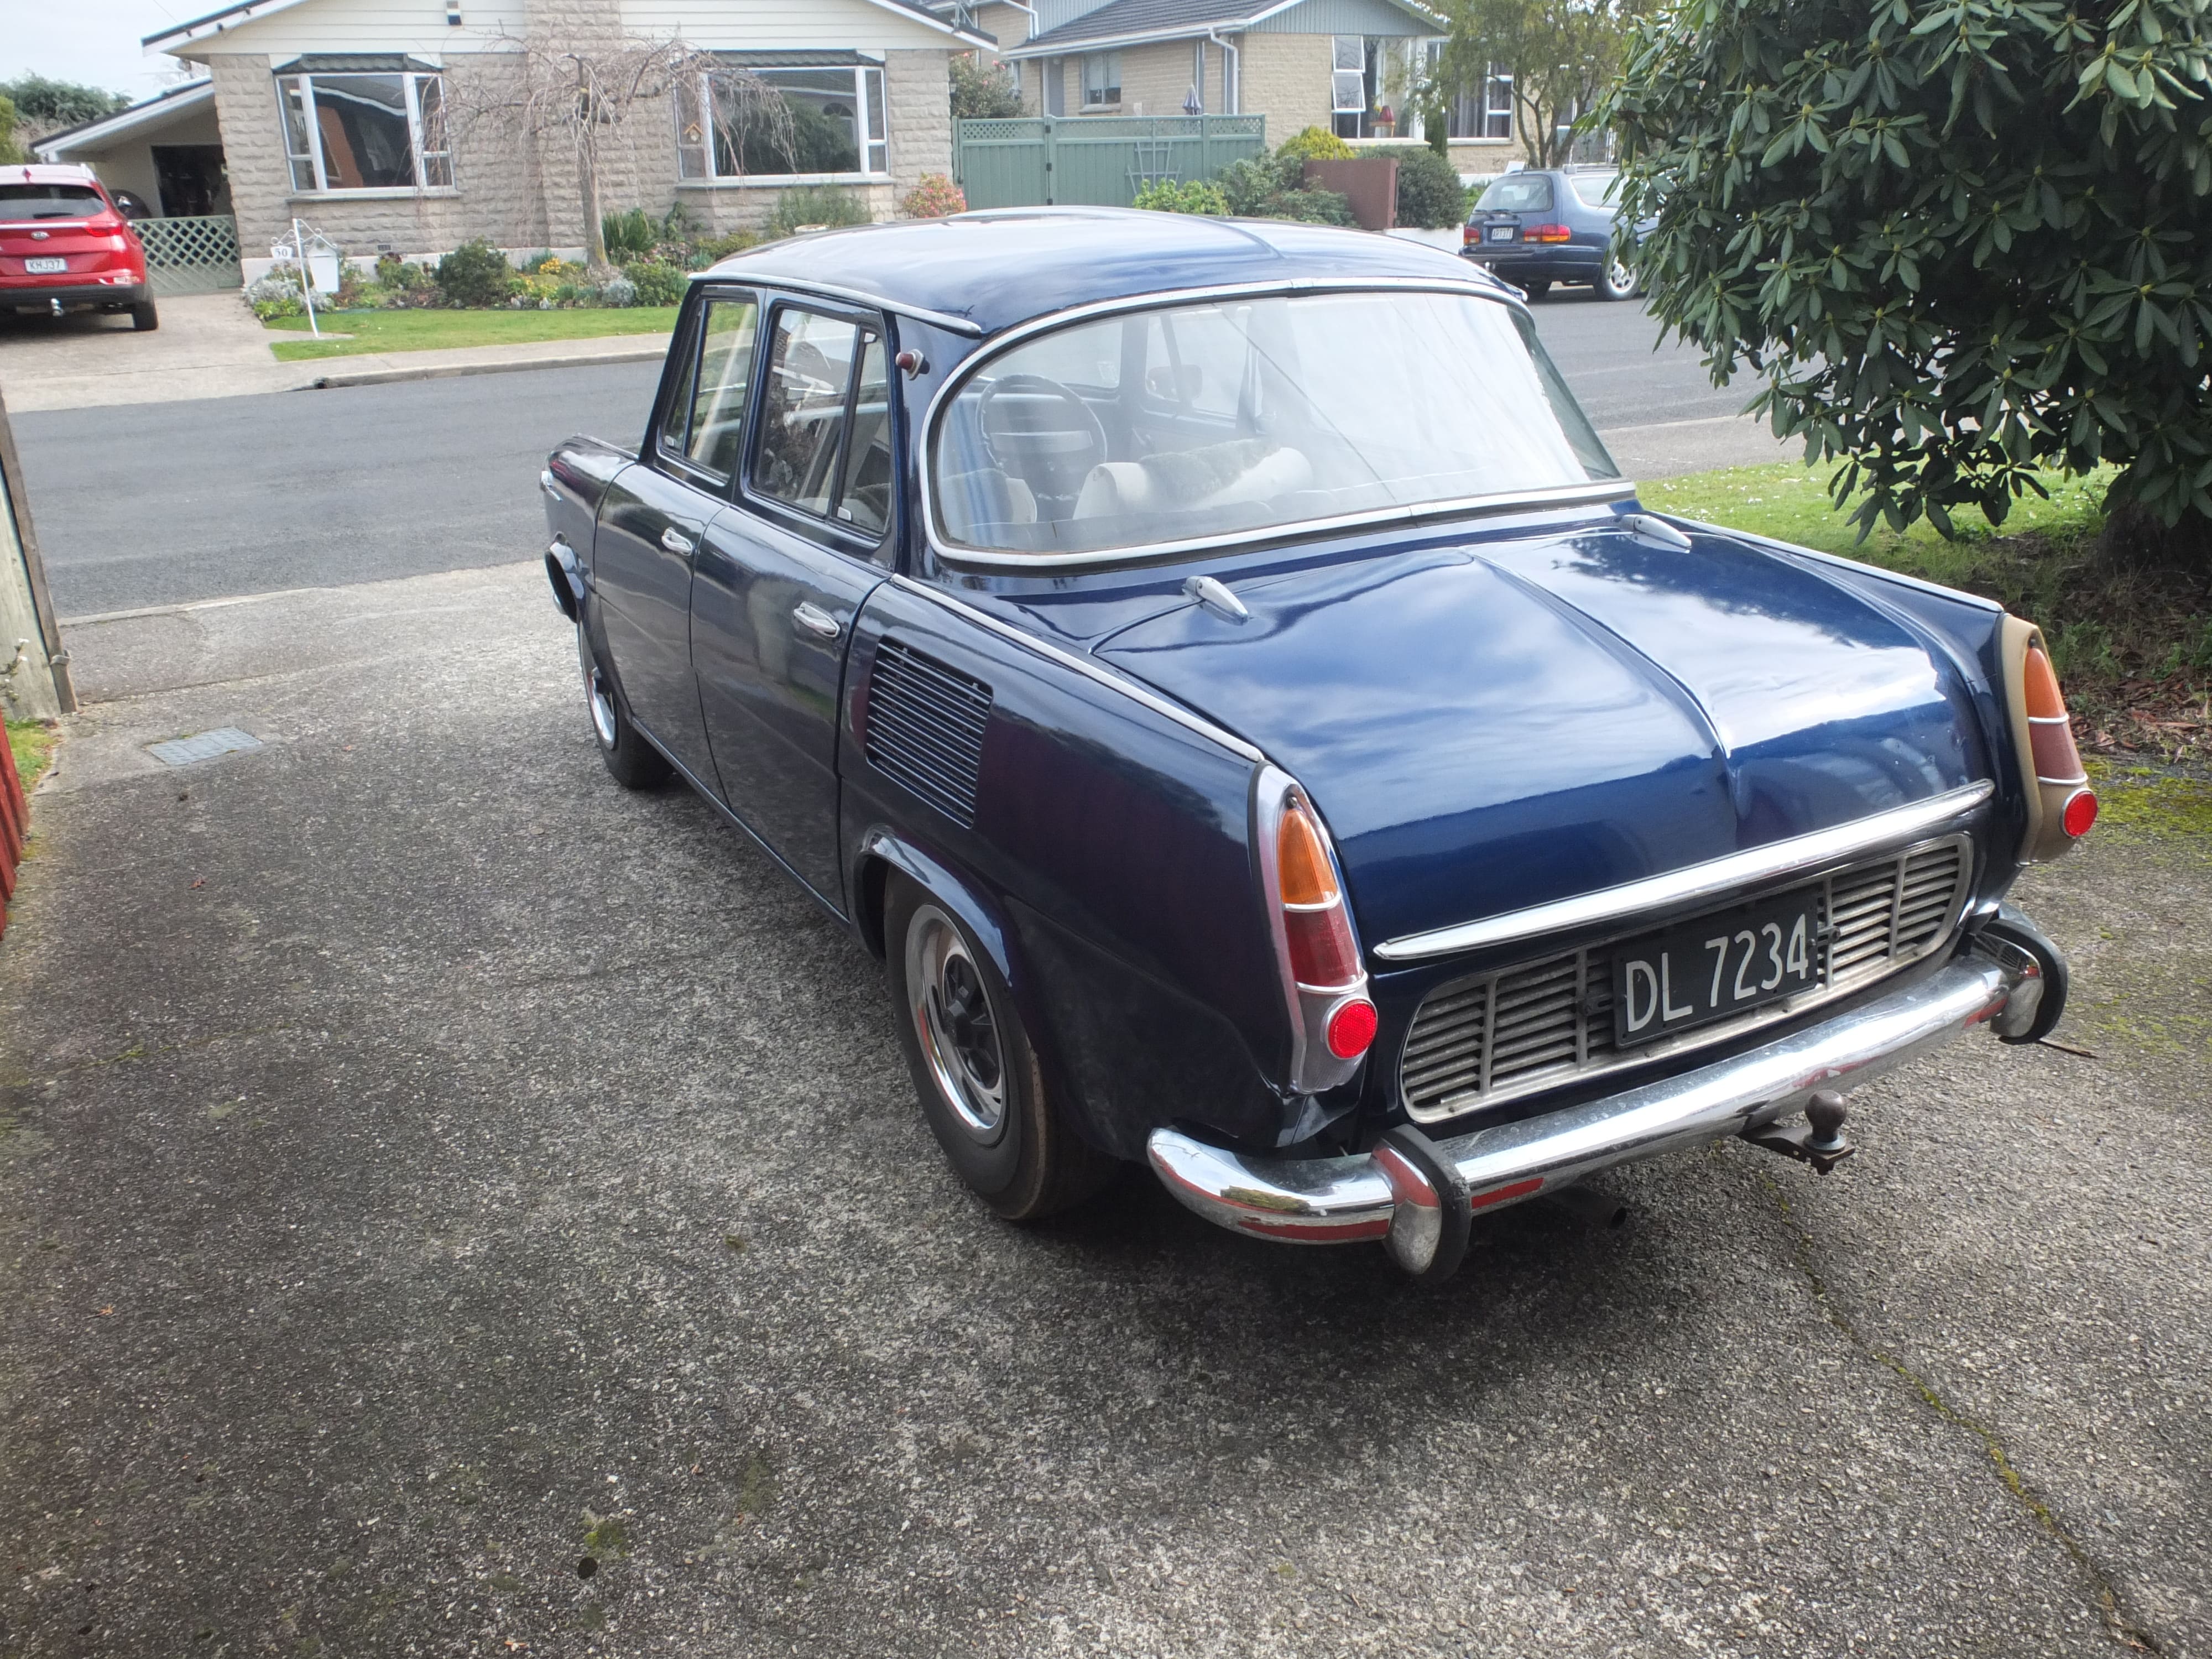
LINK TO DISCUSSION: Okay so I've been on the site for a while but contributed very little to date so here it is. This is my 1969 Skoda Sabre (1000MB outside of NZ), was my Grandfathers and comes with lots of parts. Rego is currently on hold, failed its wof a few weeks ago on tyres and a leaking brake cylinder and it should be back on the road in a few months. Plans are to convert to 5-speed (have a gearbox waiting) and potentially get a 1300cc motor from a Favorit too. All long-ish term plans subject to time, space, money etc so they might change. First though will be to swap out the existing front axle for a later 110L model to get front disc brakes and to do some interior work like headlining, carpets etc. Anyway here are some recent photos.
1 point
-
Long story short I went for a ride in Karl's turbo diesel 260c and wanted one. We stopped past a paddock of rusty cars on the way home from Hanmer where he said there was a diesel 260c just waiting for a turbo. The car cemetery was just down the road from my mum's place so over the next few weekends we dragged out several Cedrics and R30 skylines and moved them to there. Picture time Discuss Here1 point
-
Tricky one, I don't know many GL4 oils, I have only used VMX 80 and Valvoline Duragear 75/80 edit: and Redline MT901 point
-
Have reserved 2 tables out the back in the sun...1 point
-
Hello there. If only it were that easy. When it comes to our woes, we seem to go all out above and beyond the standard poo scenarios to epidemic OMFGs. What an absolute mission! Outcome pending ... Hello there. It is a work in progress! Despite giving the UJ measurements to the genuinely nice lads at Repco in Howick, the UJ given was not the right one (luckily confirmed with a gut instinct), so we vibrated our way to the Repco Distribution Centre in Mount Wellington to buy what was then supposedly the right one ... ish. Long story short, the Tunland is at @98cc casa, drive shaft on the workshop floor, waiting for another UJ that will actually fit which we will HOPEFULLY source tomorrow! We cannot thank @98cc enough for his AMAZING help, and his family also for their overwhelming generosity welcoming us into their home and offering us a bed for the night and yummy hot toasted sandwiches! Absolutely shattered, was a 4am start on only 2hrs sleep, so time to shut the eyes and dream of UJs that fit, Austin Sevens, Villiers engines, and albion gearboxes1 point
-
I got the van back together yesterday, and drove it around today dropping off some parts for work. A few minor issues to sort, but it runs really well! Anything more than half throttle from a standstill will turn 2 of the 4 rear tyres into tyre smoke! The power steering is fantastic, although a bit "pointy" now, I will fit another castor wedge in there to try and help with this. The new big bore stainless exhaust sounds so sweet, not too noisy when you are cruising, but has a nice deep bark when you put the slipper in! Still need to fit the evaporator into the heater box and connect up the air conditioning, but other than that it is basically finished. Super happy with it! A few pics of the finished product: The pulleys run really close to the radiator fans! I also fitted a smaller pulley to the blower to up the boost to 10 psi Roll on OS drags Mk5! Big thanks to Muncie for the loan of the blower pulley tool Mk3 power steering box, with hybrid Mk2/Mk5 steering column: I needed to make an extra auxiliary wiring loom for the engine, and fitted relays to the headlights, and horn while I was at it. That is 7 micro relays, 4 mini relays and 16 fuses! I tried to make it look as "factory" as possible, so moved the battery tray to the RH side, and fitted the original airbox (which I had to modify a little bit) to the LH side.1 point
-
right this minute the dog has a whole bunch of paint on her. I foresee it getting worse.1 point
-
New blower pulley arrived today - smaller pulley = more boost! I removed all of the wiring, pipework, radiator etc and gave the engine bay a paint in Ford Diamond white1 point
-
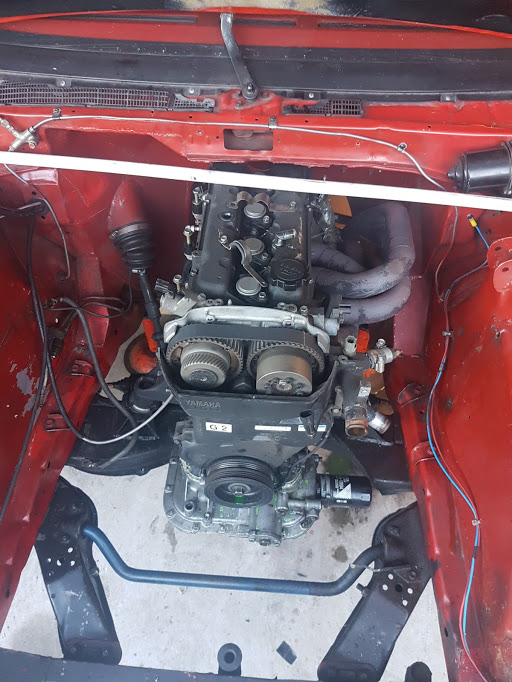
Well then... the idea of fitting this engine has ground to a halt for now It was raining yuck outside this afternoon so Hannah stripped the head off and removed the valves. While removing the head a couple of valve springs were noted as being quite loose. Loose enough to spin freely by hand. Hmmmm. Bugger. Number two valve removed, an exhaust valve, had a broken spring. Two of the exhaust seats have deep recession and the other two are on their way. You can see how pitted the seat is on the one with the broken spring. Note the amount of recession (probably also had much lapping of valves through out its life by some old Barry owner) Note how bad the surface is on the valve head too. The inlet valves are quite thin having been lapped in a fair bit by the previous owner who rebuilt this engine.. obviously a fair few miles back going by the amount of slop in the guides. With the valve heads pulled out to max lift most of the valves have upwards of 2-3mm of sideways play at the head. Also noted is a repaired crack. This doesn't worry me as usually once fixed they wont do it again. But its not the smoothest repair. Plus there are some bloody hefty scrape marks from some heavy handed gasket removal evident. The block has been bored out .030" with new pistons but has worn enough to have a decent lip. Not so bad its not usable but noted anyway. So suffice to say I am very happy we decided to strip the head off for a look and found these faults now, rather than having fitted the engine only to discover after doing so that its a dud. Saved quite a bit of grief. I have stashed away all the bits and will now re-think the game plan. Considering the engine currently fitted is purring along nicely with its only gripe being a bit slow on the steep hills (I suspect about standard level of slow to be expected though) and that it likes to leave a little mark from its leaky rear main seal, I think I will just happily putt along with that engine for now. The other Viva is advertised and one day it may well sell. Then I can look at re-powers. Between now and then I'll keep my eyes open for another cylinder head in better condition than this one. I'm not sure if the 1256 heads fit straight on? Any ideas/info welcome.1 point
-
So long time no update. Have been chipping away at the minor things over the last year to get this thing closer to being road legal. Not too many things to go to get legal but have been working on getting it track ready for this Octobers Jerkfest track day. Finally got the Bride Brix mounted up and sitting at an acceptable height. Also picked up a TOM'S ECU - makes a fair amount of difference to mid range torque compared to factory ECU. Also removes speed cut and up rev limit to 8400rpm. Found some new/old stock Pioneer parcel shelf speakers. Got around to undersealing the whole bottom of the car and also made up some driveshaft loops. Also painted the gearbox crossmember and shortened the studs on the runner mount. Also managed to do a few more bits like fitted rear the swaybar, bought some Direzza ZII Semis, fitted AE86 accelerator pedal. Did Cambelt,Water pump etc also. As it sits currently: So the list to get it legal currently stands at: - NSDT cert for the front struts - Fit new speedo pickup - Fix rust spots in doors - Replace seat belts - Fix hole in rear muffler - Align Headlights - Do skids (oh wait, too late) Im aiming to drive it to Leadfoot this year so I better get cracking!1 point
-
Ok that was a fail ^ and a few more followed. Did some more runs and wasn't happy how unstable boost was. Put a bigger 40mm gate on it. inc bigger pipe off manifold Was just as bad, if not worse. Probably should have brought a 45mm and may have worked. Decided to try mount the gate on the turbo housing, before buying yet another wastegate Grill weld Grill cut a patch out of an old collector fixed Finally holds boost perfect now.1 point
-
Final spec on the motor was Standard bore 2.0L pinto block YB cosworth rods & pistons Ported, big valve 1600 Pinto head (9.1:1CR) MLS head gasket & ARP bolts throughout Custom turbo grind camshaft, HD valve springs, Newman long pad followers YB under piston oil squirters, high volume oil pump & Peterson oil pressure relief valve Custom Go Pipes steam pipe manifold & 3" dump, ceramic coated 3" mandrel bent exhaust GT2860RS turbo Turbosmart 38mm external wastegate, FPR800 and Kompact bypass/BOV Romac harmonic balancer & custom trigger wheel Modified (1 tooth) YB distributor with phase sensor Sierra EFI manifold with 630cc Siemens injectors LS1 coil packs Haltech PS1000 ECU Haltech wideband controller1 point
-
Still no photos, must work out how to get them off the new flash phone. Replaced the rotten section of the trans tunnel over the weekend, a big chunk more of the rust done. I bought a length of 9/16 High tensile steel bar to replace the wooden intermediate steering shaft. I needed a 320mm length and the standard length was 3.7 meters. It did only cost $40. After 2 goes I got the the flats for the cotter pins in the universals in the right place. Steering shaft has been trial fitted and everything clears...........just. If anyone needs 9/16 round bar I have 3 meters looking for a home. I pulled the engine out last night to get some space to finish off the trans tunnel final rust by the gearbox and sort out the gear shift. New morse type cable and fitting are turning up at the end of the week. Also turned up is a Aliexpress cone type air filter. Getting dangerously close to sending the car off for some paint.1 point
-
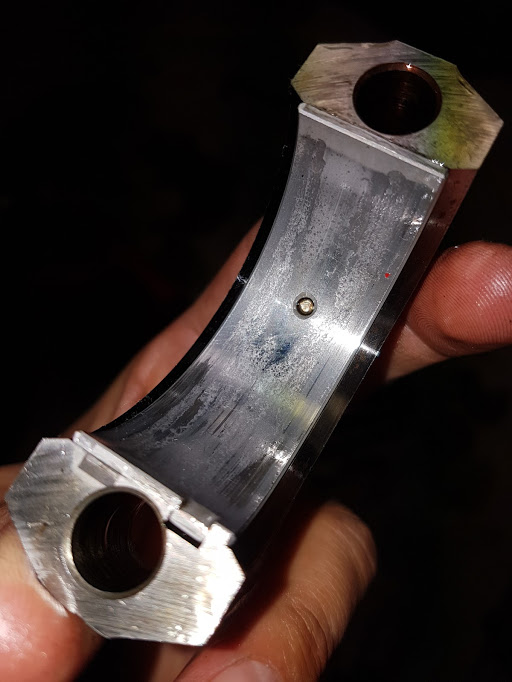
If I could go back and talk to 23 year old Markku I'd give myself a good clip around the ears. There's untold amounts of messy work that I did whilst in a rush, half cut and on a university budget... Credit where credit's due - I managed to go racing with almost no income (thanks Studylink!), but I'm about to pay the price for it now. More on that later... Last Friday after work @Rhyscar, @mark105, @japawagons and I bombed down to Palmy for the weekend to go racing and celebrate a friend's 30th. It's been a while since I last raced this car at Manfeild, so I was pumped for a good weekend. I'm happy with the look of the red bonnet too - in the right light you don't notice that it's a different shade of red... It'll look really good when we re-wrap it with the right colour! Got the car out onto the track on Saturday and it was going REALLY well. It felt peppy and was turning well. The rebuilt front shocks have made a difference! The rear felt OK, but Rhys noticed it was hitting the bump stops on the way out of some corners which was unsettling the rear - big skids ensued! I played with the rear compression settings and it got much better - good bump compliance, good turn and fast corner speeds. It felt faster than ever through the Turn 2 sweeper and was easy to point around the last corner which is a great sign. I still had a few issues with it being a bit twitchy, so now it's time to play with rebound settings and get it dialled in nicely. I left on Saturday pretty happy with the car and was looking forward to Sunday. We headed off to do some drinking with the birthday boy: Started the car on Sunday morning to warm it up and there was a ticking sound. After a bit of revving and diagnosis it became apparent that the noise was big end knock. Bugger! We drained the oil and saw evidence of glitter - Sunday was done before it even started. Turns out I could have had more to drink on Saturday night after all! Pulled the engine out yesterday and dropped the sump to inspect. First thing I noticed was this: And there was some crap in the strainer. Inspected further - all 4 big ends look like this: And all 4 mains look like this: Crank: Took the crank to ST Automotive in Cambridge today to get the crank measured and inspected. Shane said I'd got away with murder! The crank measured up perfectly and there's no grooves. Win! He looked at the big end bearings and told me that the wear didn't look like oil starvation. Most likely cause? Not enough clearance on the bearings. He's suggested that I take the block out to him and he'll get everything right and reassemble it with ACL race bearings. Now that the engine's out I've got a front row seat to see all the terrible panel work I did 5 years ago.... So back to that conversation about 23 year old Markku's bad decisions....
1 point
-
Small update on this slug. Been daily driving it since I got it up until last week when I started pulling it apart. Did about 1500 trouble free kilometres during that time including a few drives out west. Man it's slow in the hills haha. The radiator has a small pinhole leak on the top tank, soldered it up and all was good. Until it started leaking again so going to heat it up and re-flow the solder once more. Started pulling the dash out recently to tidy the wiring and replace the JVC minidisc player. Today I put some new speakers behind the door cards. JVC 5 1/4" units, fit well! Just needed new holes drilled. Have put the Diatone covers back on top for a more period look. Going to need to give the gearbox some attention soon. There are late and early versions of the H55F with the crossover year being 1985... I'm not sure if mine is early or late. Does anyone know how to find out without taking the 'box apart? This forum says to look for this cover but I can't find it. https://forum.ih8mud.com/threads/1984-bj42-h55f-input-shaft-question.788943/page-2#post-8984906 I'm looking at getting this kit which suits late models, I can't find an early one. https://www.trademe.co.nz/Browse/Listing.aspx?id=1410645352 https://www.onlineautoparts.com.au/products/Gearbox-Kit-Manual-(Undercar)-OEM-Replacement/ZPN-00874 Any ideas wise people of OS?1 point
-
Dug out some bog from the guy who did a rust repair on this for me a few years back. What a shit job. Good news is only a small rust patch needing doing here.And then this bit on the side of the rear screen. Then this thing will be cured of this bit of tinworm. Until some more emerges.1 point
-
So with the help of a friend we managed to get a reasonable tune on it before the laptop battery died. It's currently running way too rich at low loads at around 3000 rpm so I'll need to deal with that next time I drive it, other than that the fuel map is pretty good now. The car runs smoother now throughout most of the map than it ever did on the carb and seems to have a little more power. The fuel pump is quite noisy though, I'll have to coat it with a silicone sock or something at some point to make it quiet. I'll need to tackle warmup enrichment over the coming week. So the remaining jobs are: - Put a permanent MAP sensor onto it, I have one now. - Make a brace to hold air cleaner in place - Tune and hoon It's amazing how much of a difference it instantly makes when someone adjusts the fuel numbers in the table, at first the car would run out of puff at about 5000 RPM and be way too rich, now it pulls happily right up to the 6000 RPM rev limiter in the gears I have tried it in. Going up a hill is great when the numbers get adjusted and it starts making power. I'll get around to a more technical post once I have had lunch/dinner/done more hooning1 point
-
I actually tried to fire it up last Friday night, but the second hand fuel pump out of Darrell's HZ Statesman, which I've had in a box for a few years, had died from natural causes.I wasn't keen on changing all the lines and installing the factory pump, so I googled up the brand of the old pump and found they are a NZ company manufacturing these pumps in a Waihi, 95bucks delivered to my work yesterday, 5 o'clock couldn't come soon enough! I rusted home and mounted it up.This is a 2psi low pressure pump for carbs, they do a 4psi 6si a 6volt version and 24 volts version.I like it as it's small, in line, no regulator needed, and very quite.So after battling to find a good earth I ended up using the screw that holds the left service cover thing on.By now it was nearly ten at night but I've waited to long to let that stop me!I took it for it's first wee drive up and down the street last night, woke up all the neighbours and stuck it back in the shed as no lights is a bit scary!Darrel came up and we quickly realized the "to do" list is getting bloody small!-lights-seat belts-4 wheel nuts-brakes still spongy-wipersplus non wof things like air filters, sunroof etc...so while we were on a roll we connected up the lights.still no front indicators, but I'm sorting that out today.moved the power for the fuel pump over to one of the only on when car is on fuses, indicators I think?and holy shit! everything works! the wipers! both speeds! the horn, everything!can't believe it!!even though it is technically running like a bag of shit, carbs need tuning/jetting/sync, brakes where scary bad and the steering felt heavy as(might have just gottin use to power/no tiny wheel) it was awesome!I even gave it a bit of welly in second up the road and man, it wants to go!1 point
-
A month since the last update, where the hell did that go???? Front brakes are almost done, HZ Calipers fit over the machined down HQ discs. I had to play musical brake parts, HZ calipers stolen off the Firebird. I had some HQ calipers that I had rebuilt a while ago. A small amount of grinding was required and some new bolts and the Firebird has new calipers. I did a list yesterday of the jobs that need to be done. There are a lot of things that will take 10 minutes to finish off, mainly welding jobs. I will take some photos and get them up.1 point
-
Main part of roof primed over the weekend, so pulled out the windscreen tonight - came up easily after cutting the rubber on the inside. Only one little hole needing welding. Cowl vent looks OK from the top side.1 point
-
Shut your whore mouth!1 point
-
So I've still got the escort I haven't posted anything for a while and work has been slow but I finally decided to take it off the road and get it painted it's been a while lol also looking for a new bonnet if anyone has one around
1 point
-
I was having headaches removing the side shaft bearings (rear shafts that go into the rear differential) - maybe because they were pressed bearings, and or old age - anyway made me a "chinese hammer" to knock the bearings out in reverse - 1. take a hollow iron "tube" approx 2.5mm wall thickness with an ID(inside diameter )that fits neatly over the side shaft axle right down to the shrouded bearing inner race - exposed face 2. make a "slide hammer" aka chinese hammer here 3. put a "hammer stop" at the top end of the overlaying shaft FIRST - FIT THE hammer SLIDE onto the hollow overlaying SHAFT - ie. assemble it first for operation - then fit the hollow overlaying shaft down onto the side shaft axle and let drop it all down till it touches the bearing inner race (find a way to hold your "hammer slide" part up near the "top stop" part - so you can weld in peace - i used a piece of wire) then weld the bottom part of the hollow overlaying shaft that's in contact to the bearing inner race I used stainless wire +tig -stainless sticks better then baby shite to some metals while the weld is still hot and expanding the bearing race - slide (knock) the hammer in reverse (thats why its called a chinese one) - literally 30 seconds plus - poof - out they come - 4-5-6 hard knocks GRIND off the first bearing inner race (from the overlaying shaft end tip) - and reload -ie. reweld the overlaying tube end onto the second bearing you will see how I battled at first to get the first bearing out - I tried to grind it with mini grinder, no joy,.... knocked it, no joy...., tried to lever it, no joy.....and did not want to press it out - besides it would not fit into my press - AND the bearing shroud would have to take the pressure from the press - most difficult as you cannot get a cutter/blade into the surrounding bearing shroud to split the bearing inner race to release it's grip on the side shaft then "enter the dragon" - "chinese hammer" -presto !!!! - you also cannot hit/knock/press out the wheel bearing (with another method or device) as you may crack the cast iron bearing holding shroud if the bearing is a real tight fit - also the shroud design doesn't let you get in anywhere to remove the bearing as the back end of the side shaft is blocked off - this "chinese method" removes all the stress +knock+pull +pressing is going directly into the bearing race that must be removed - and the harder it's knock pulled the quicker it comes off. hope this makes sense from the pics - [/url]1 point
-
1 point


This leaderboard is set to Auckland/GMT+12:00