
Leaderboard


Popular Content
Showing content with the highest reputation on 05/01/17 in all areas
-
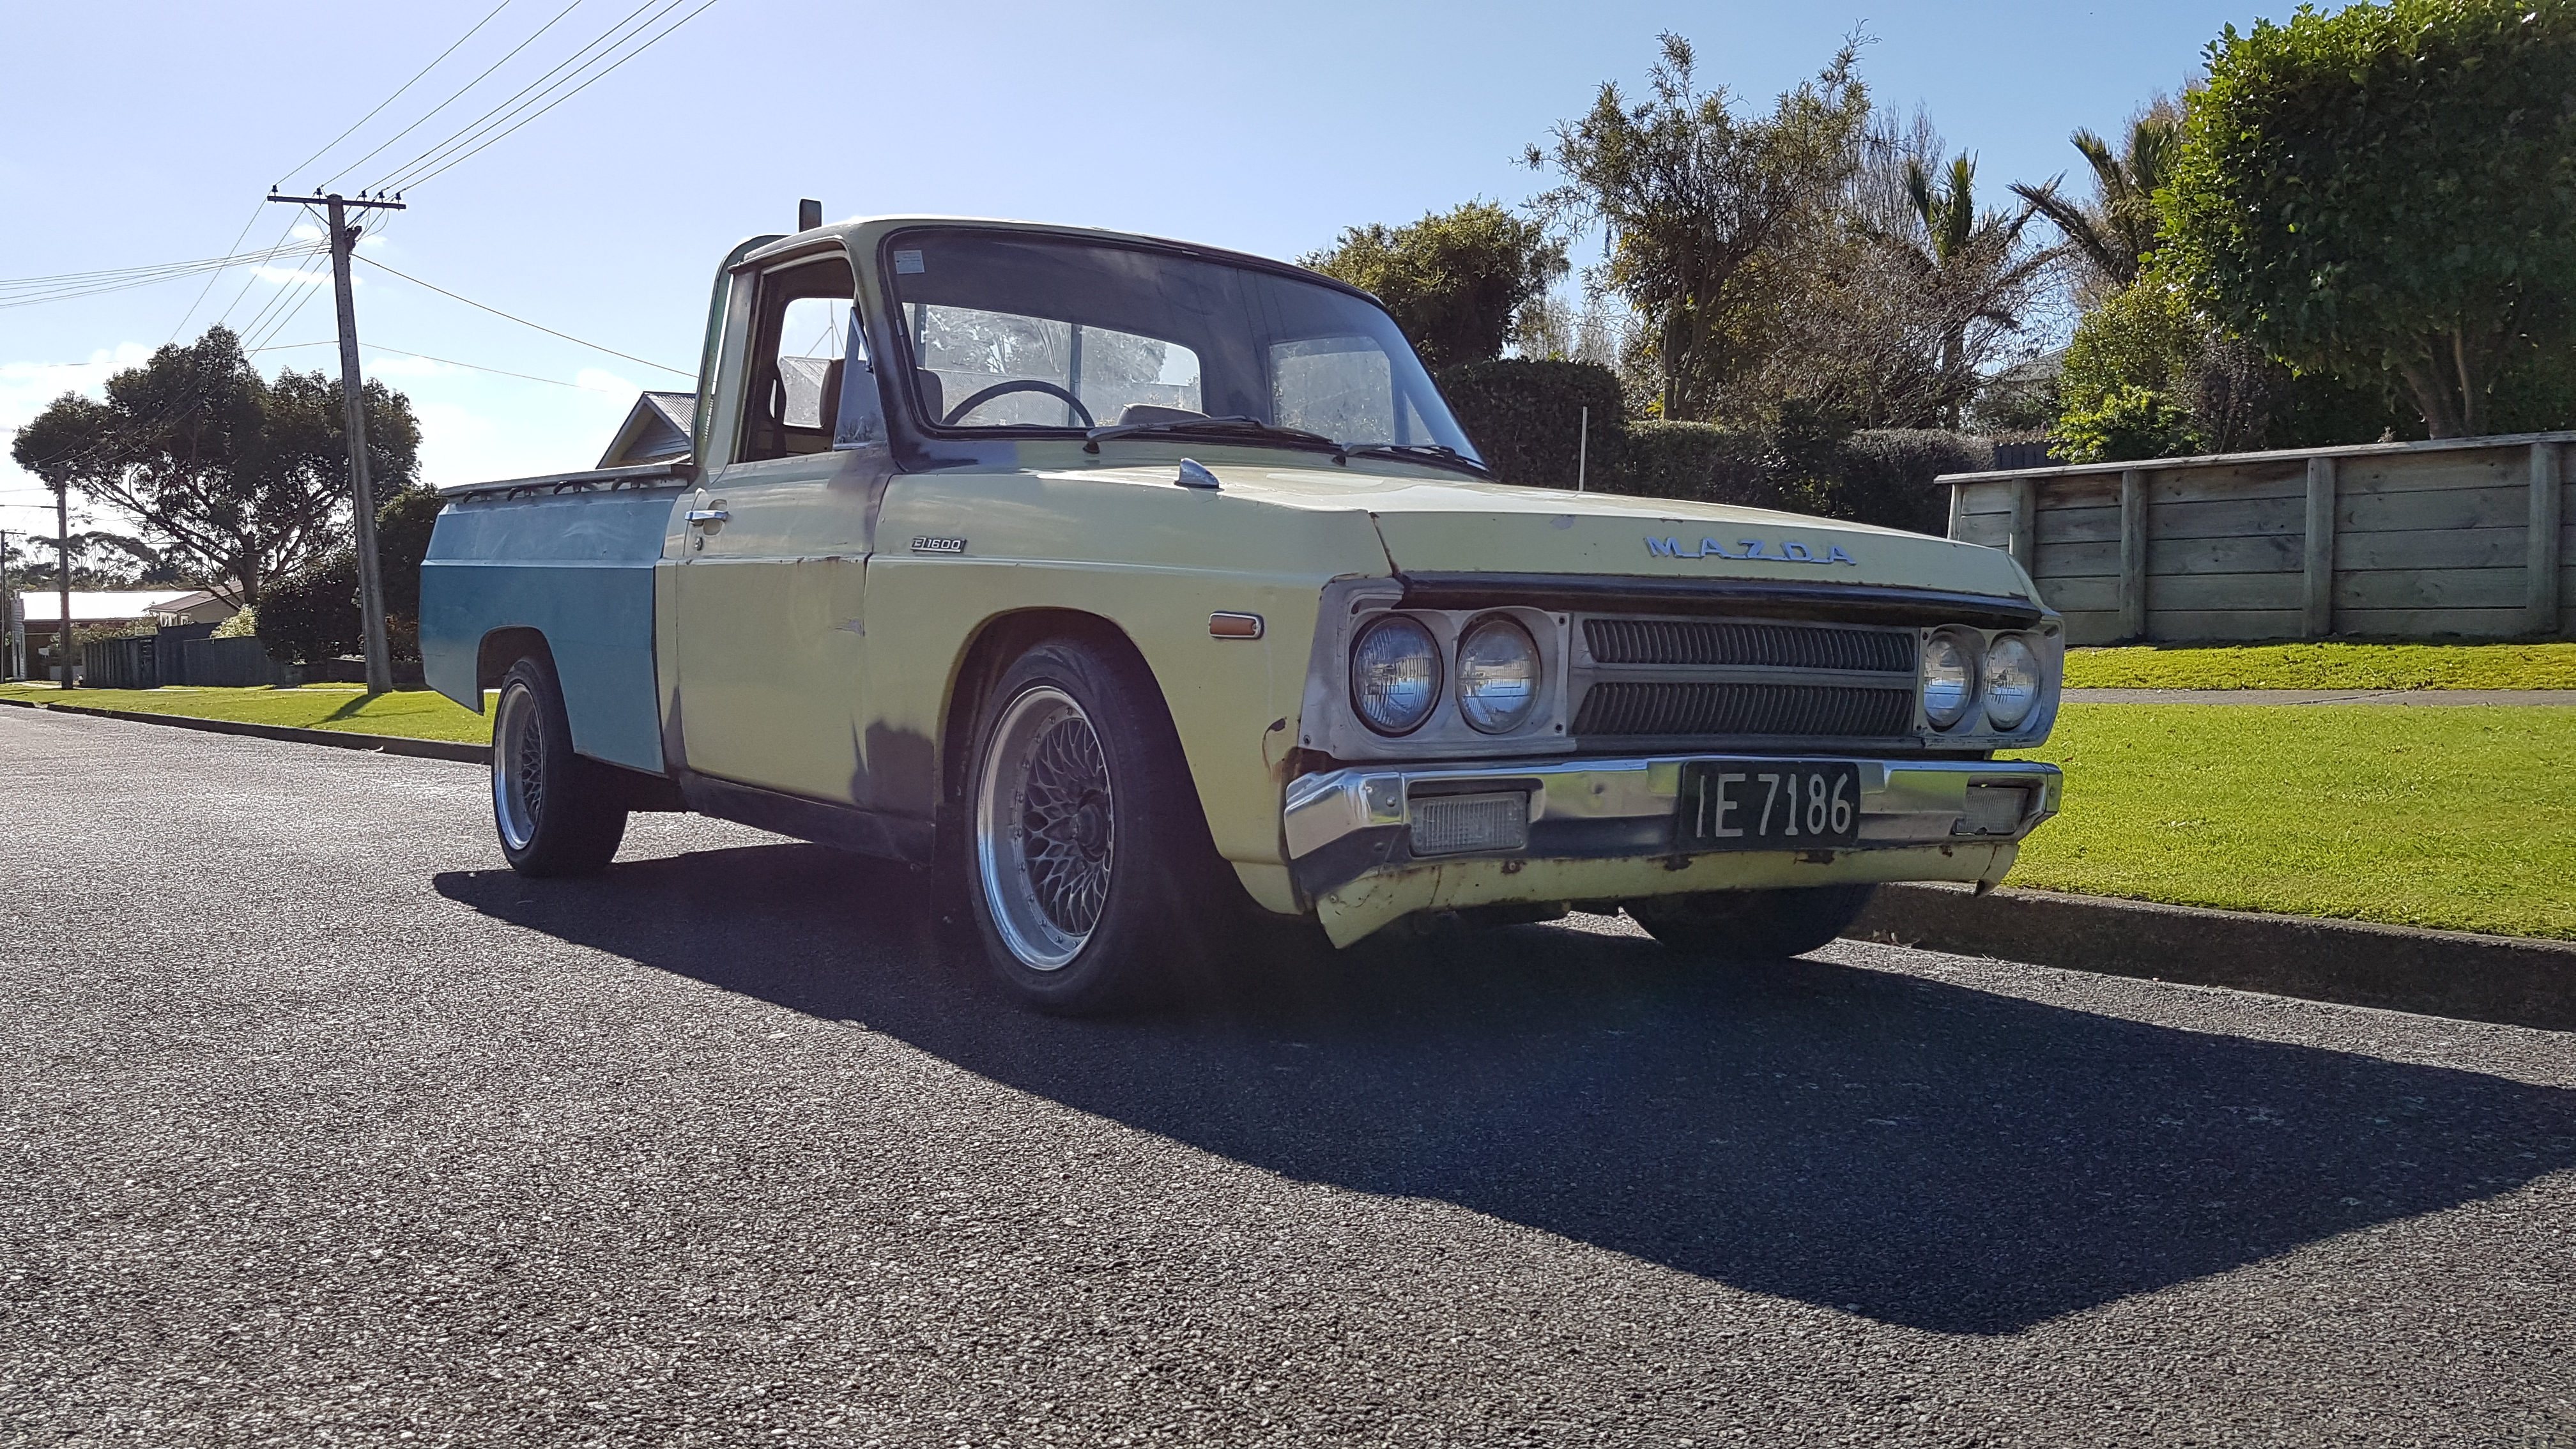
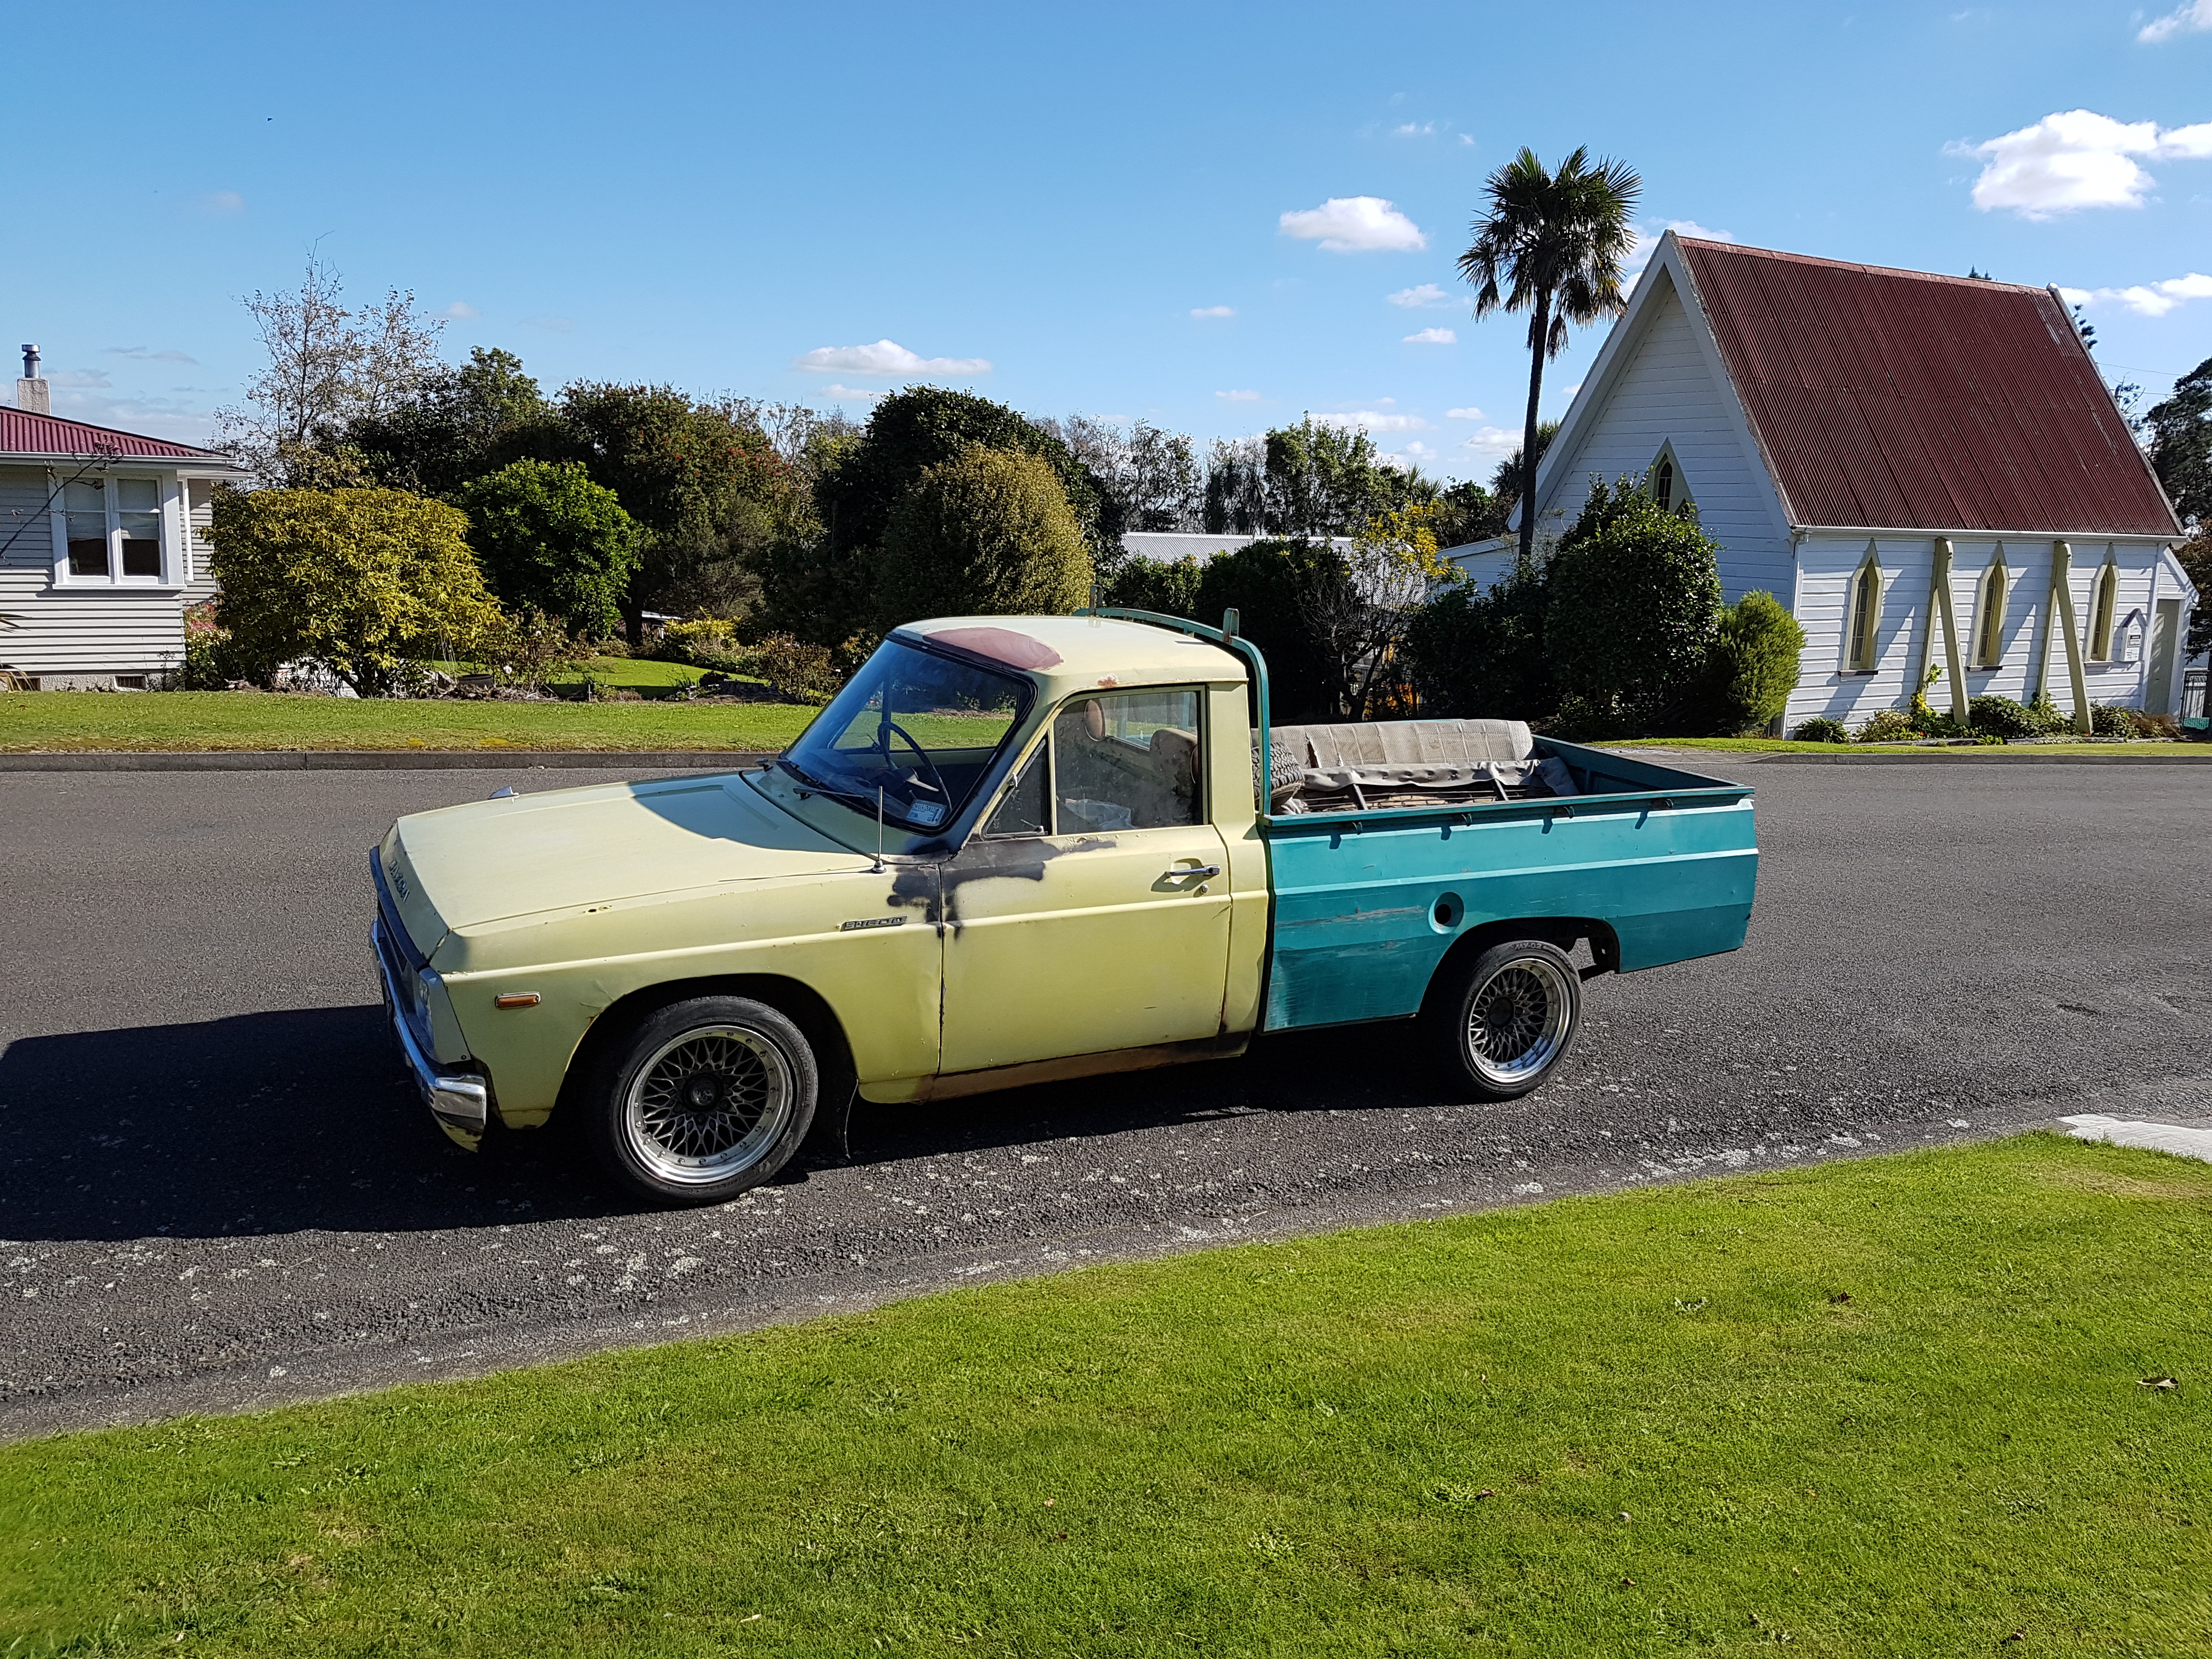
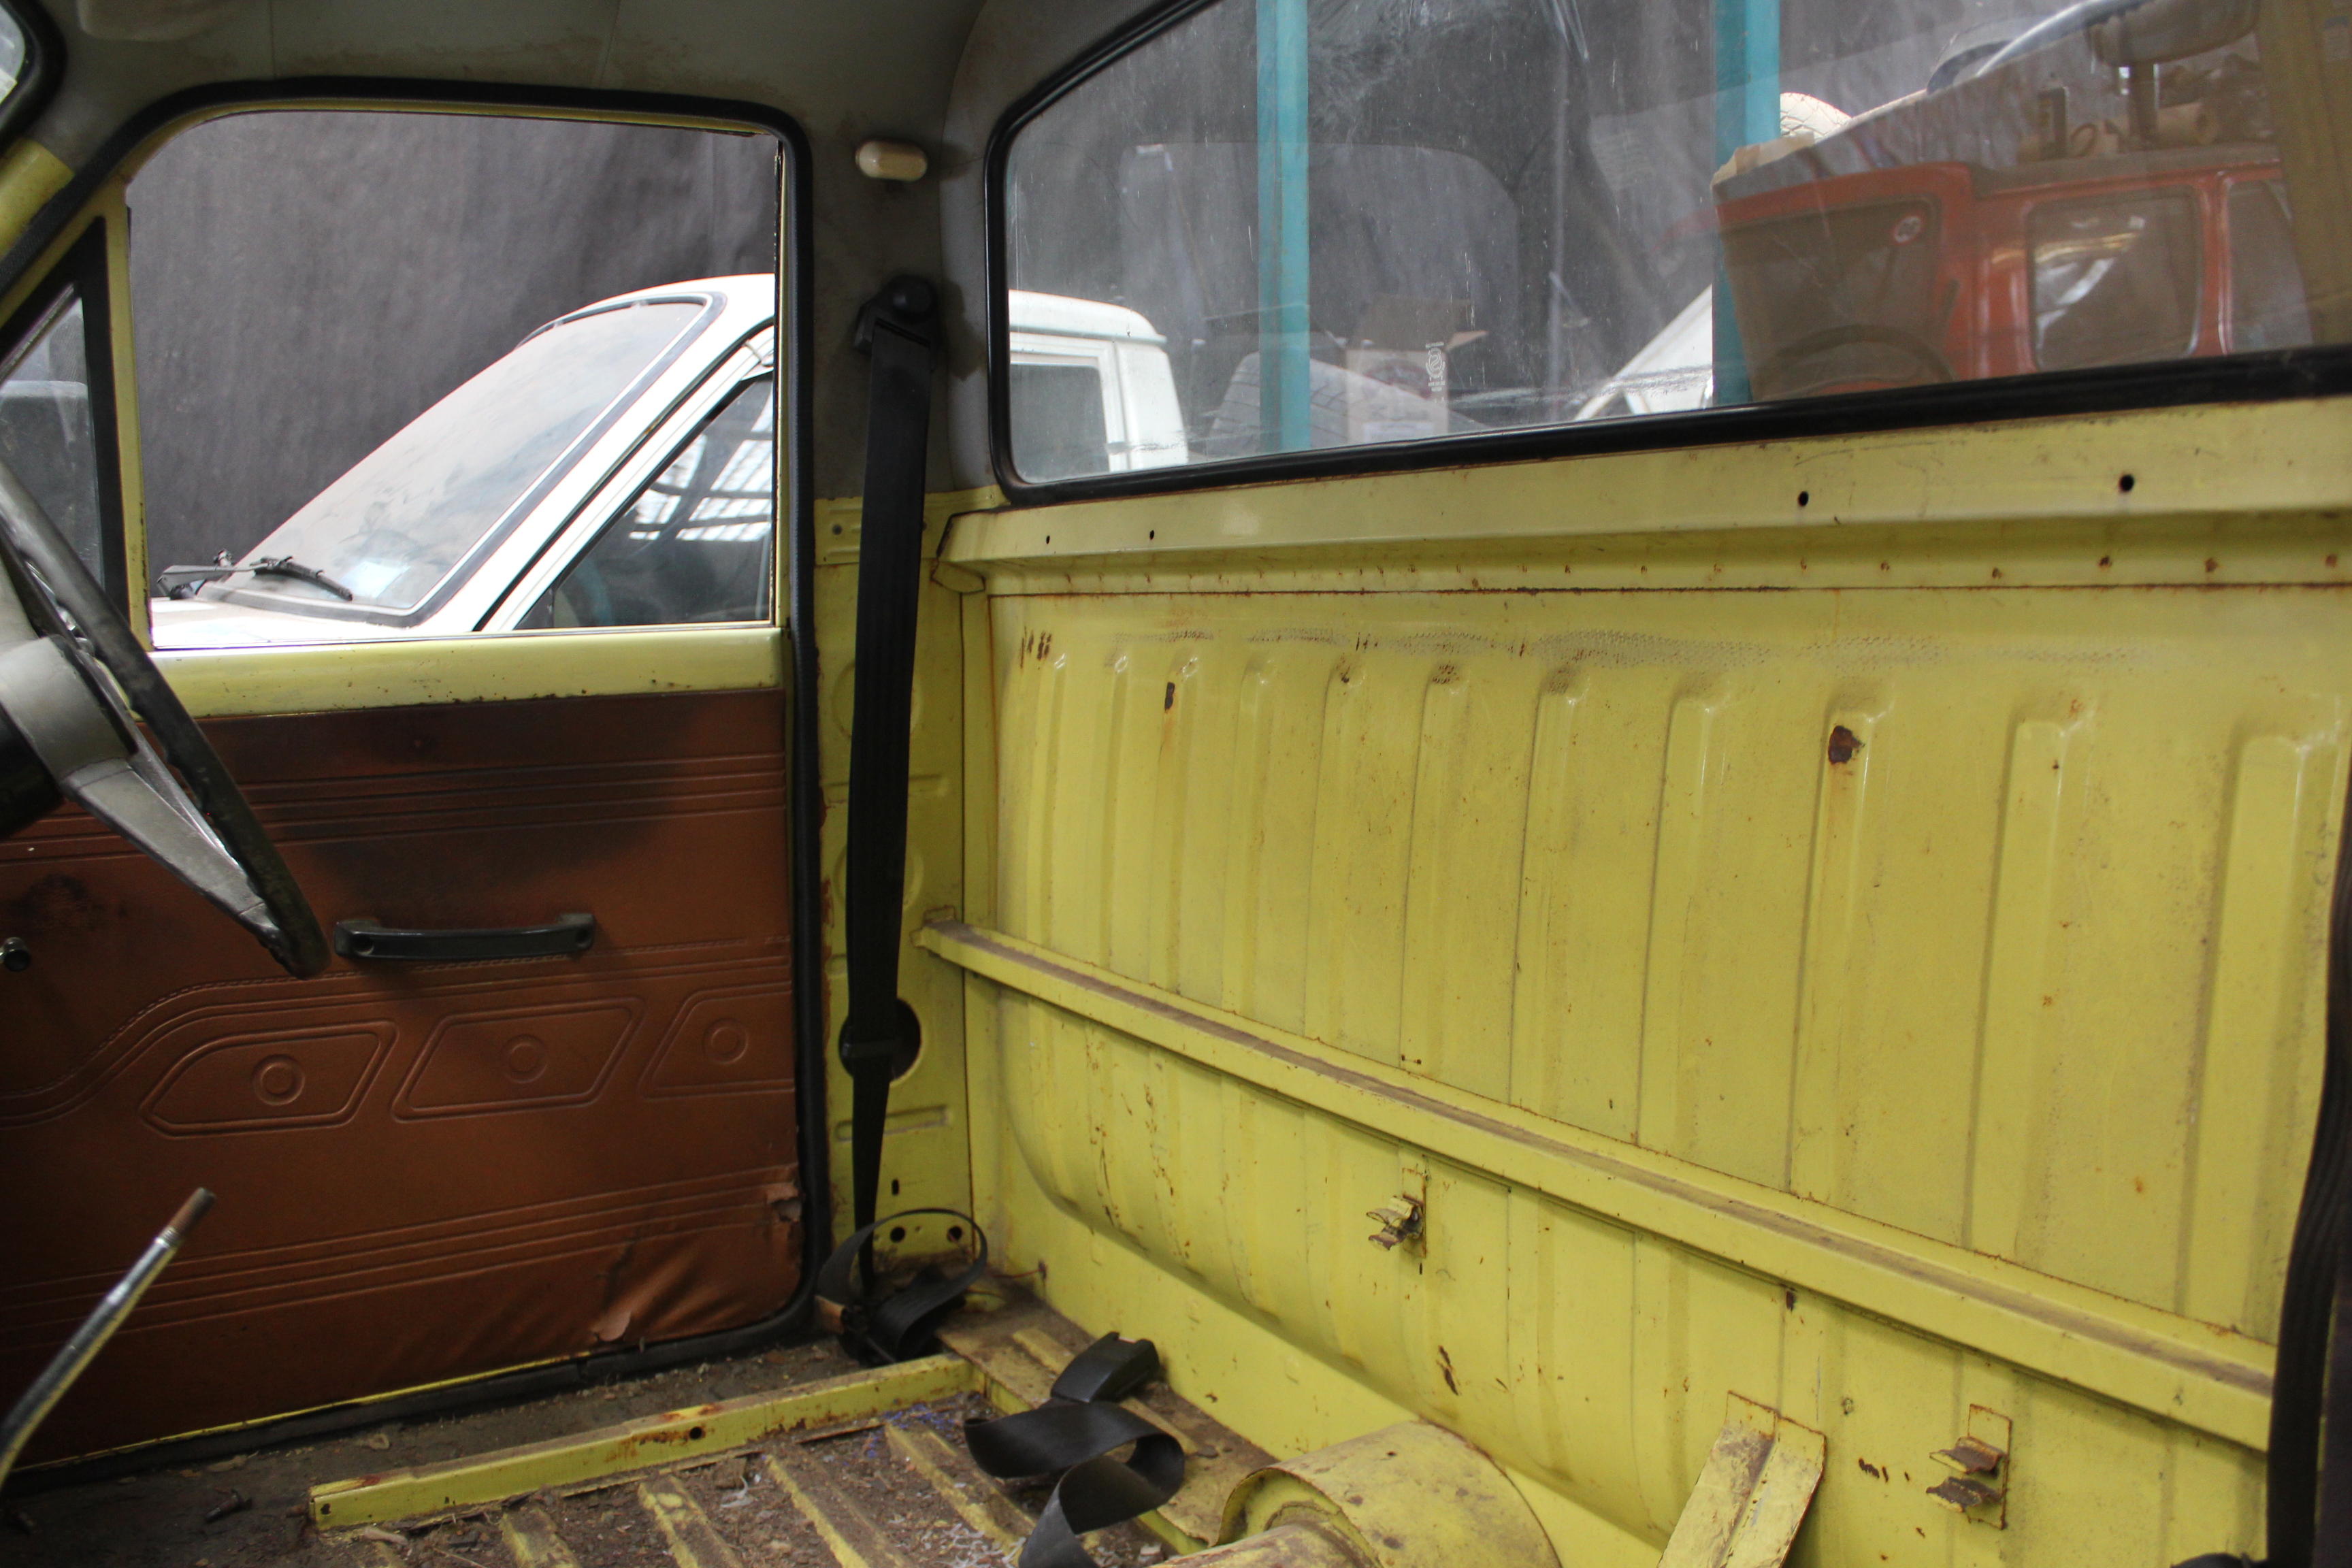
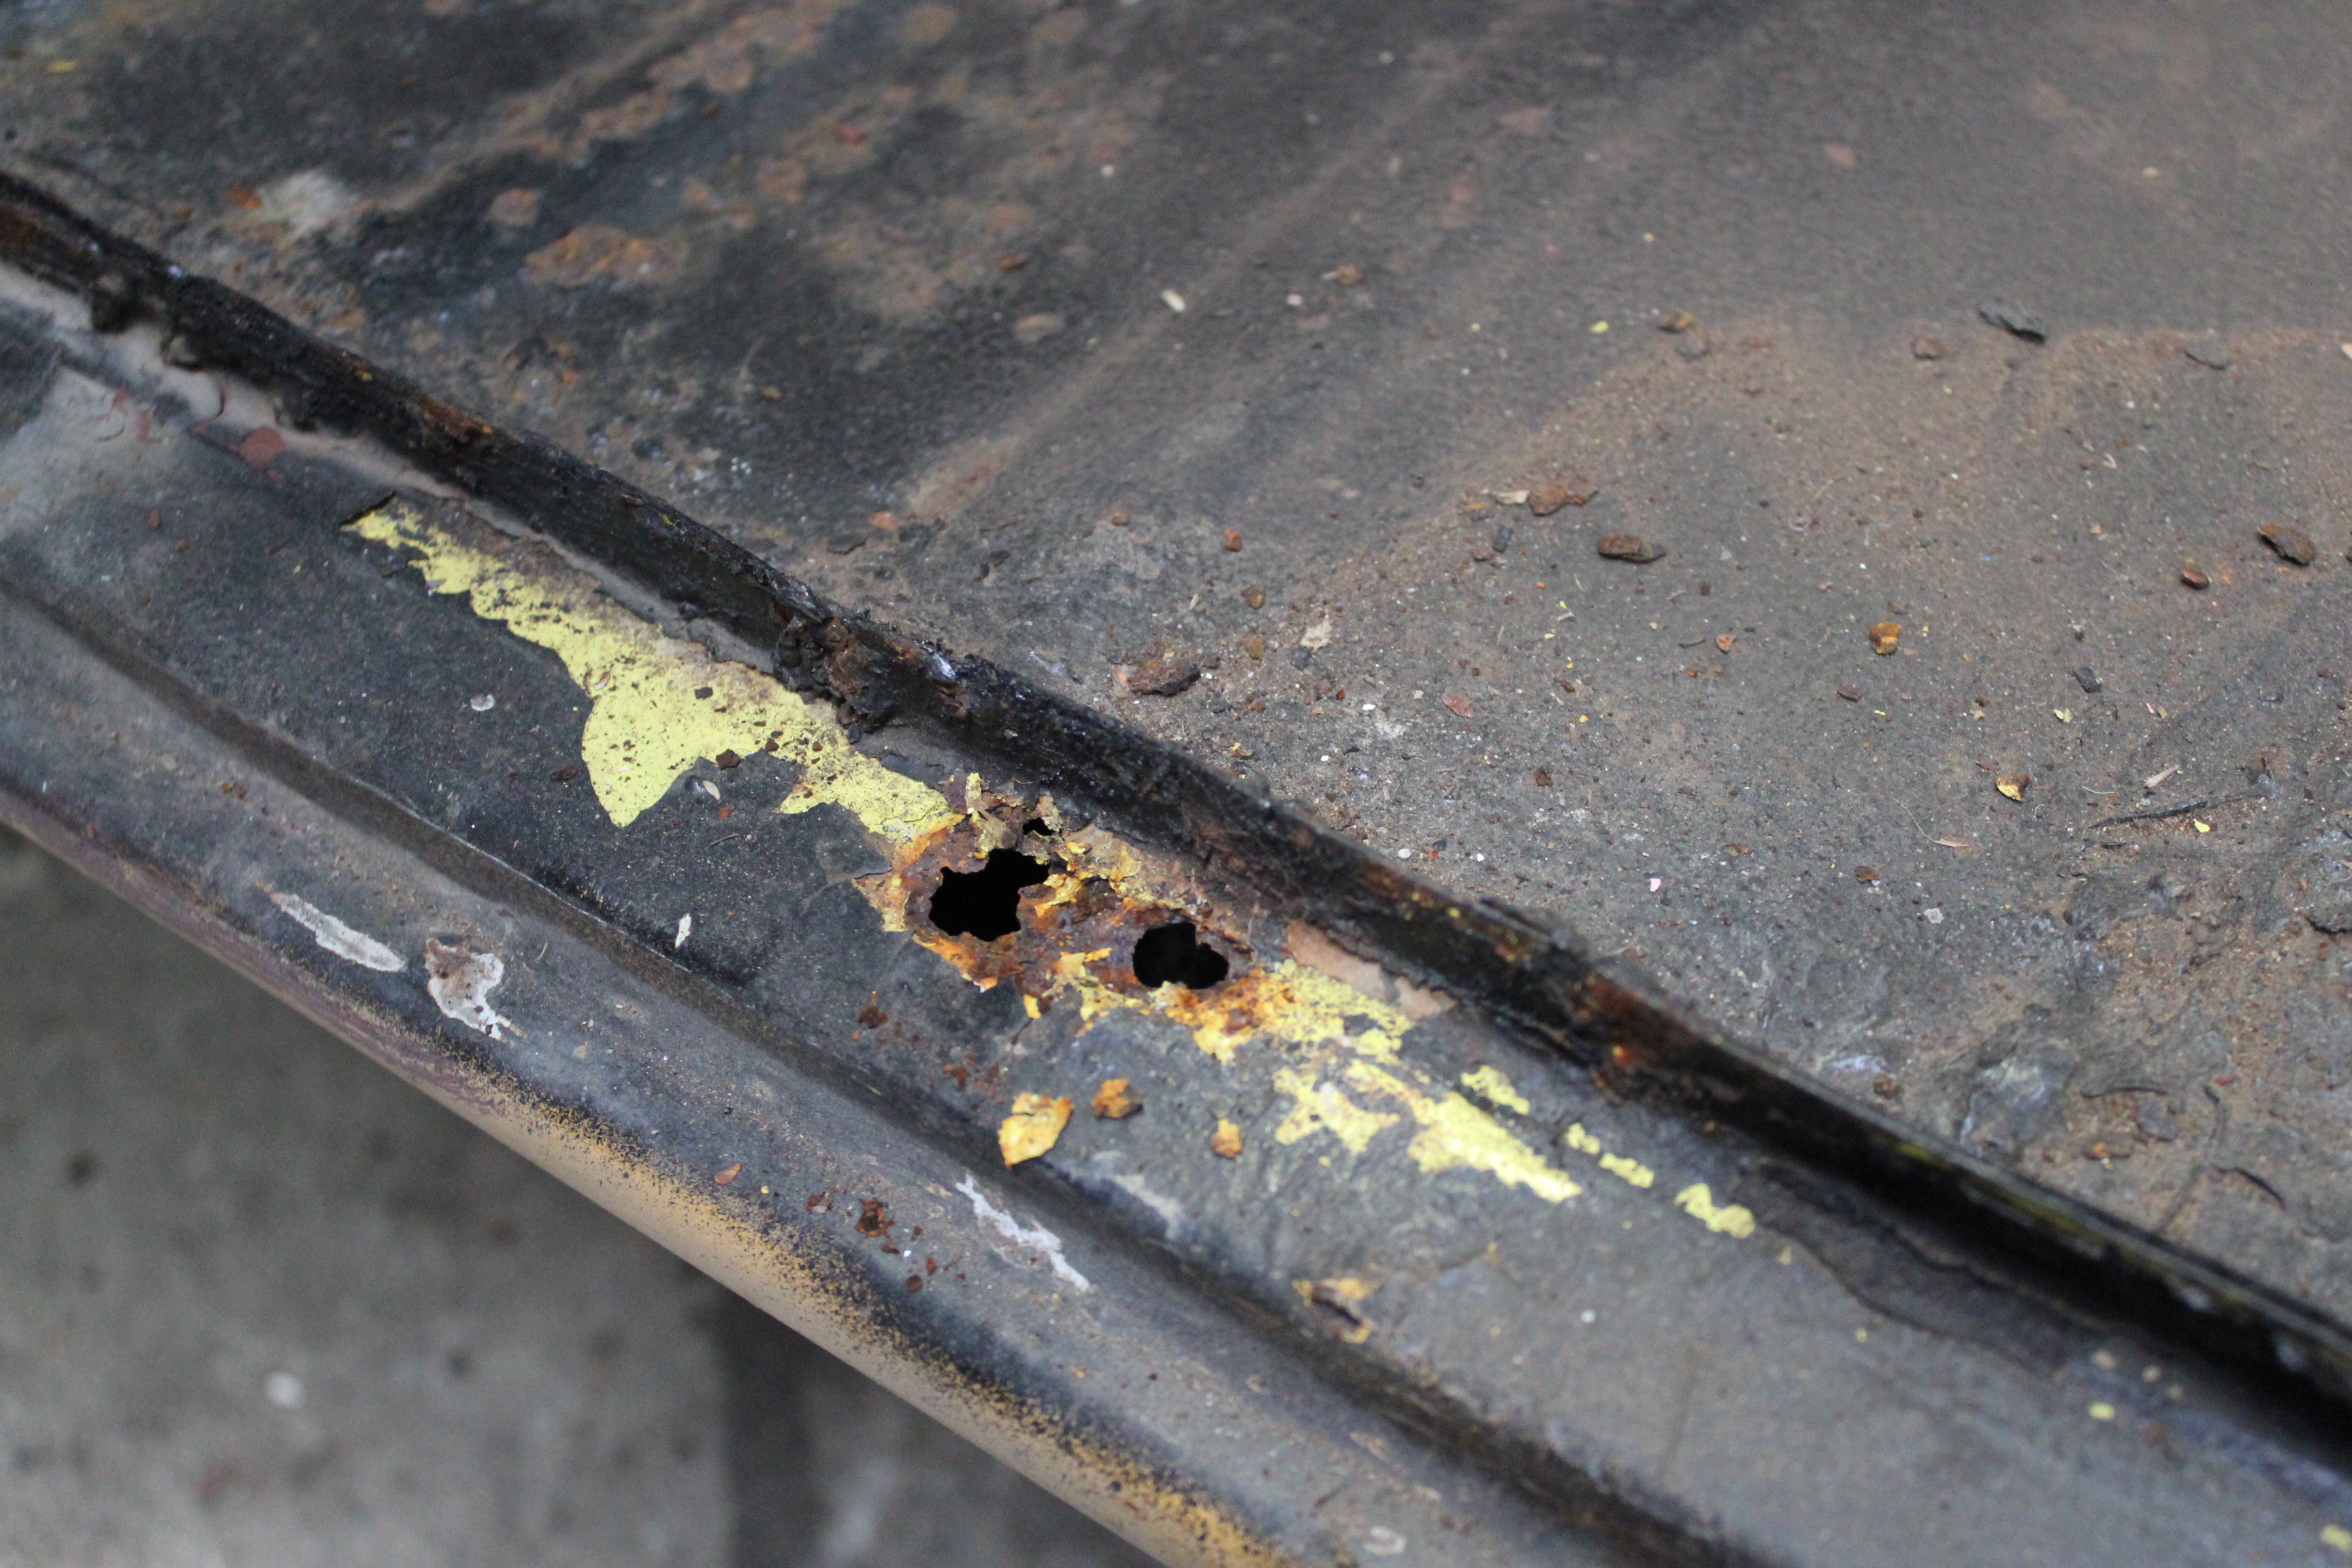
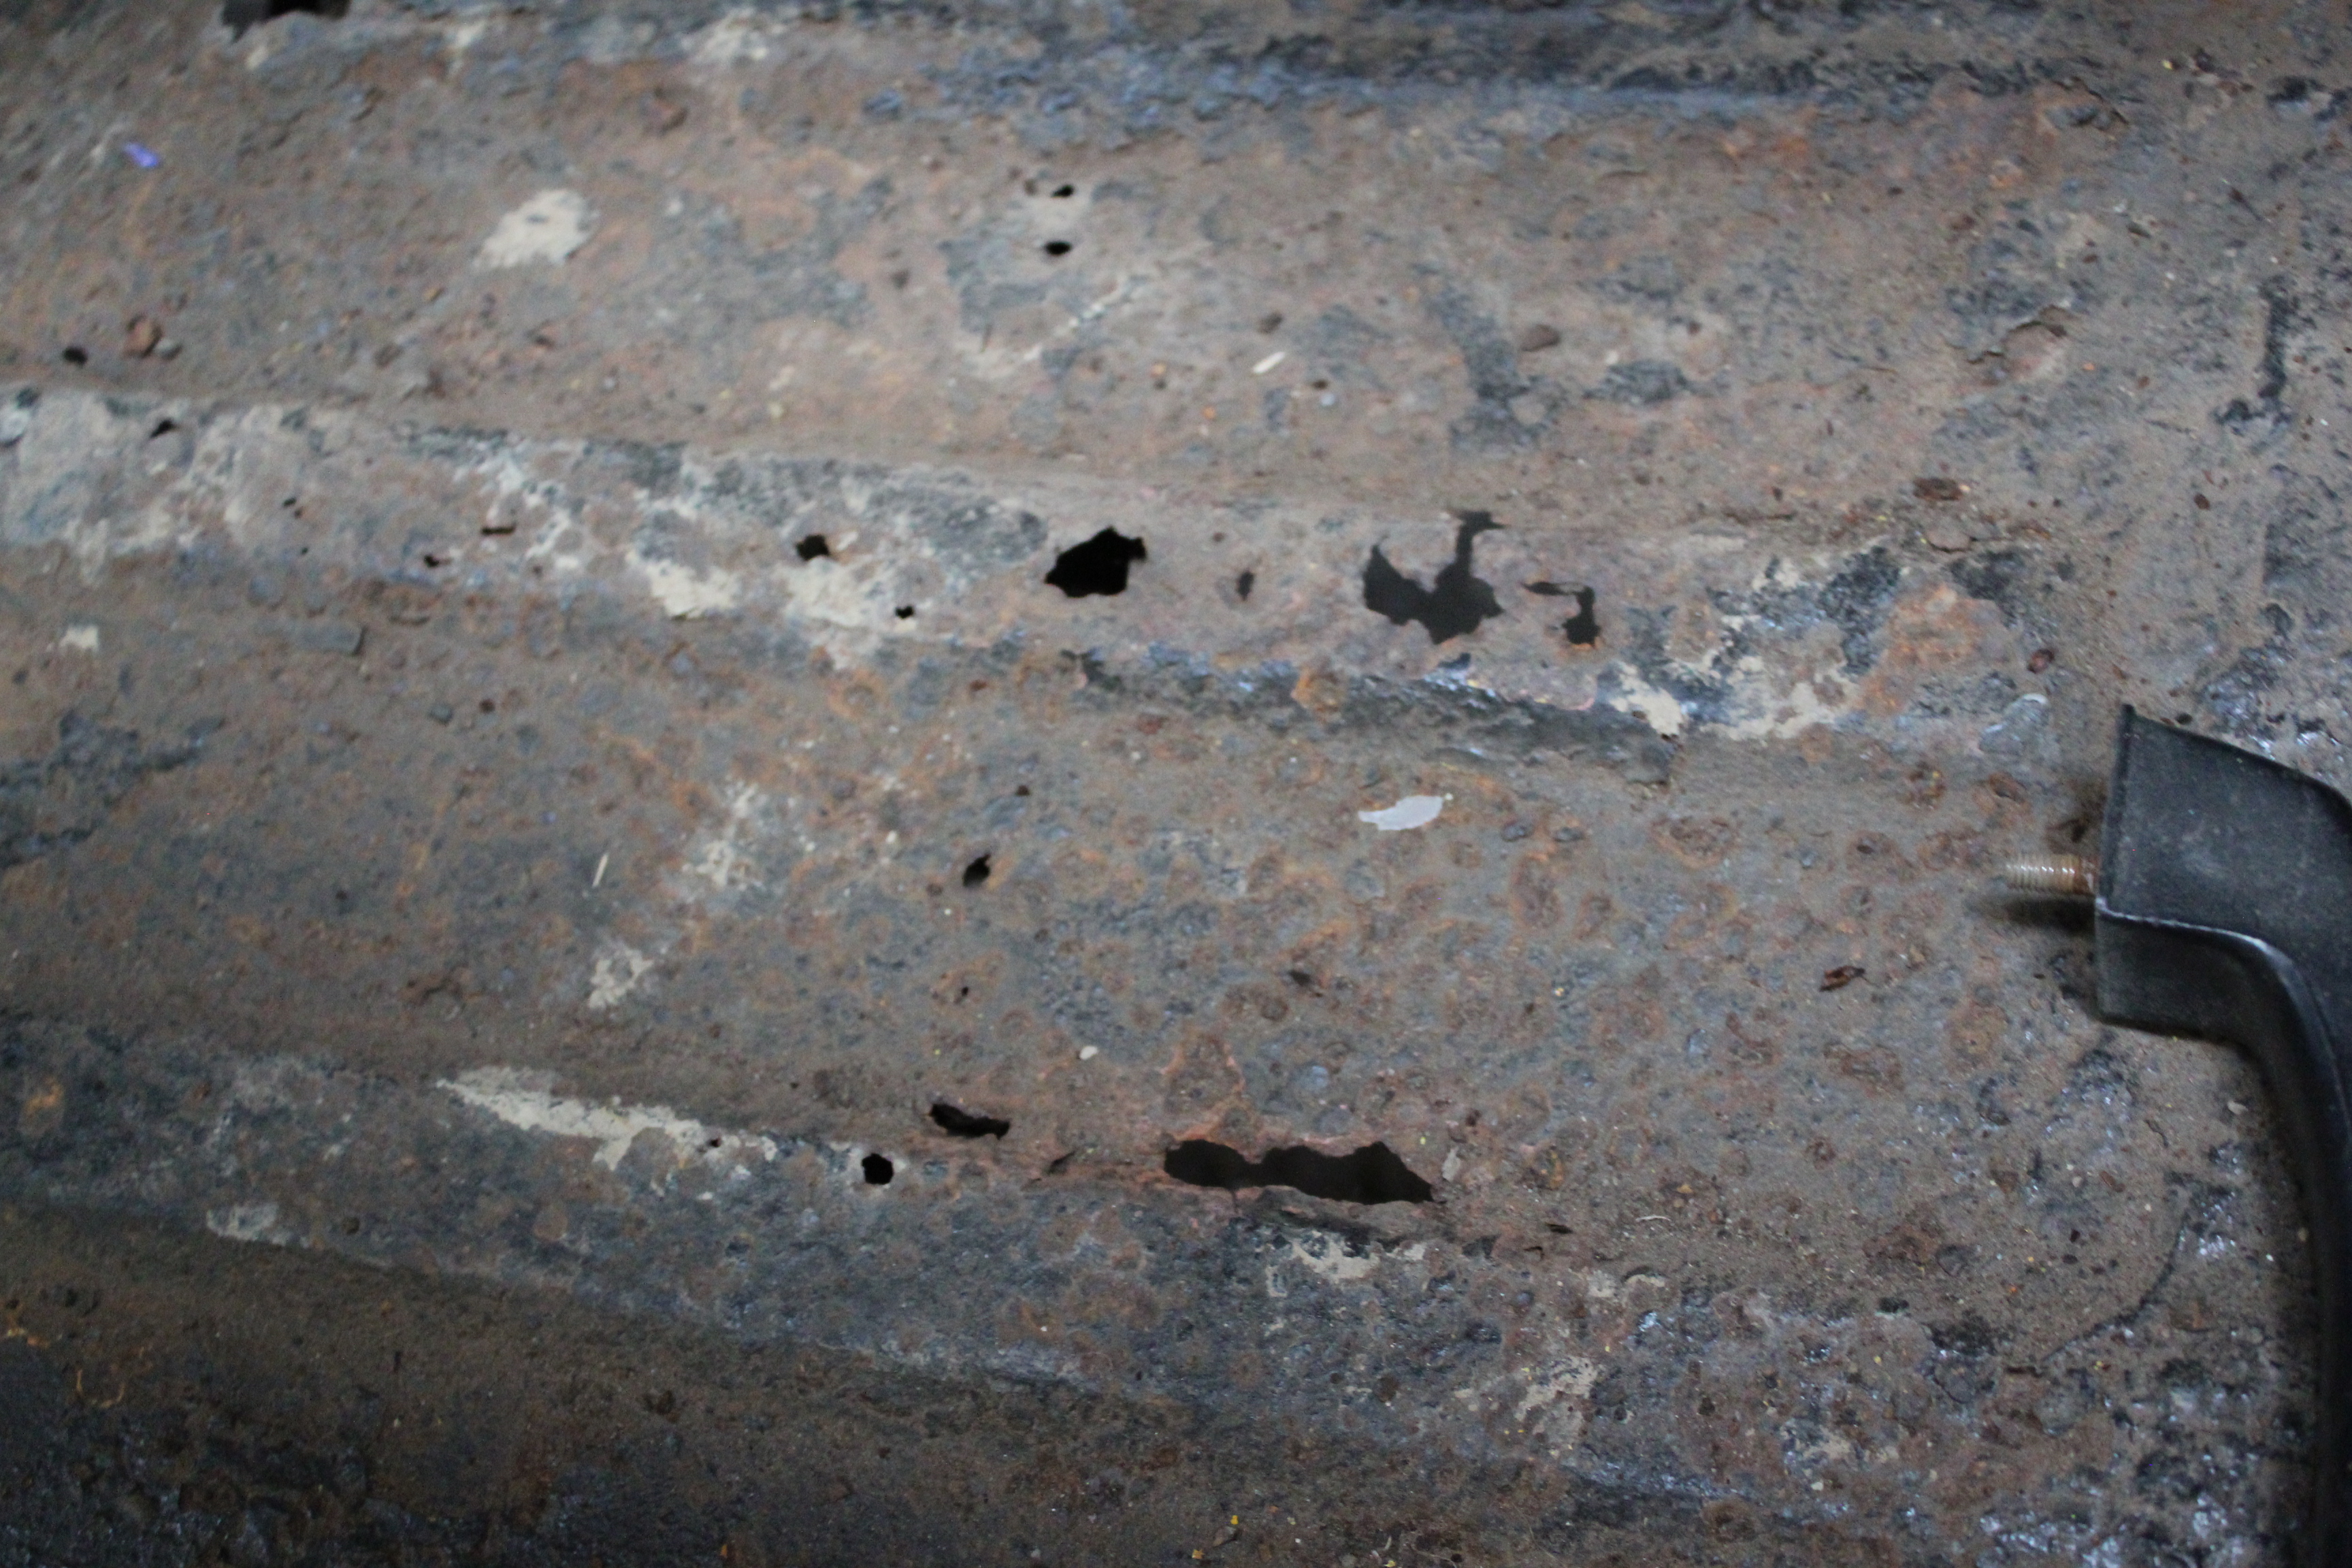
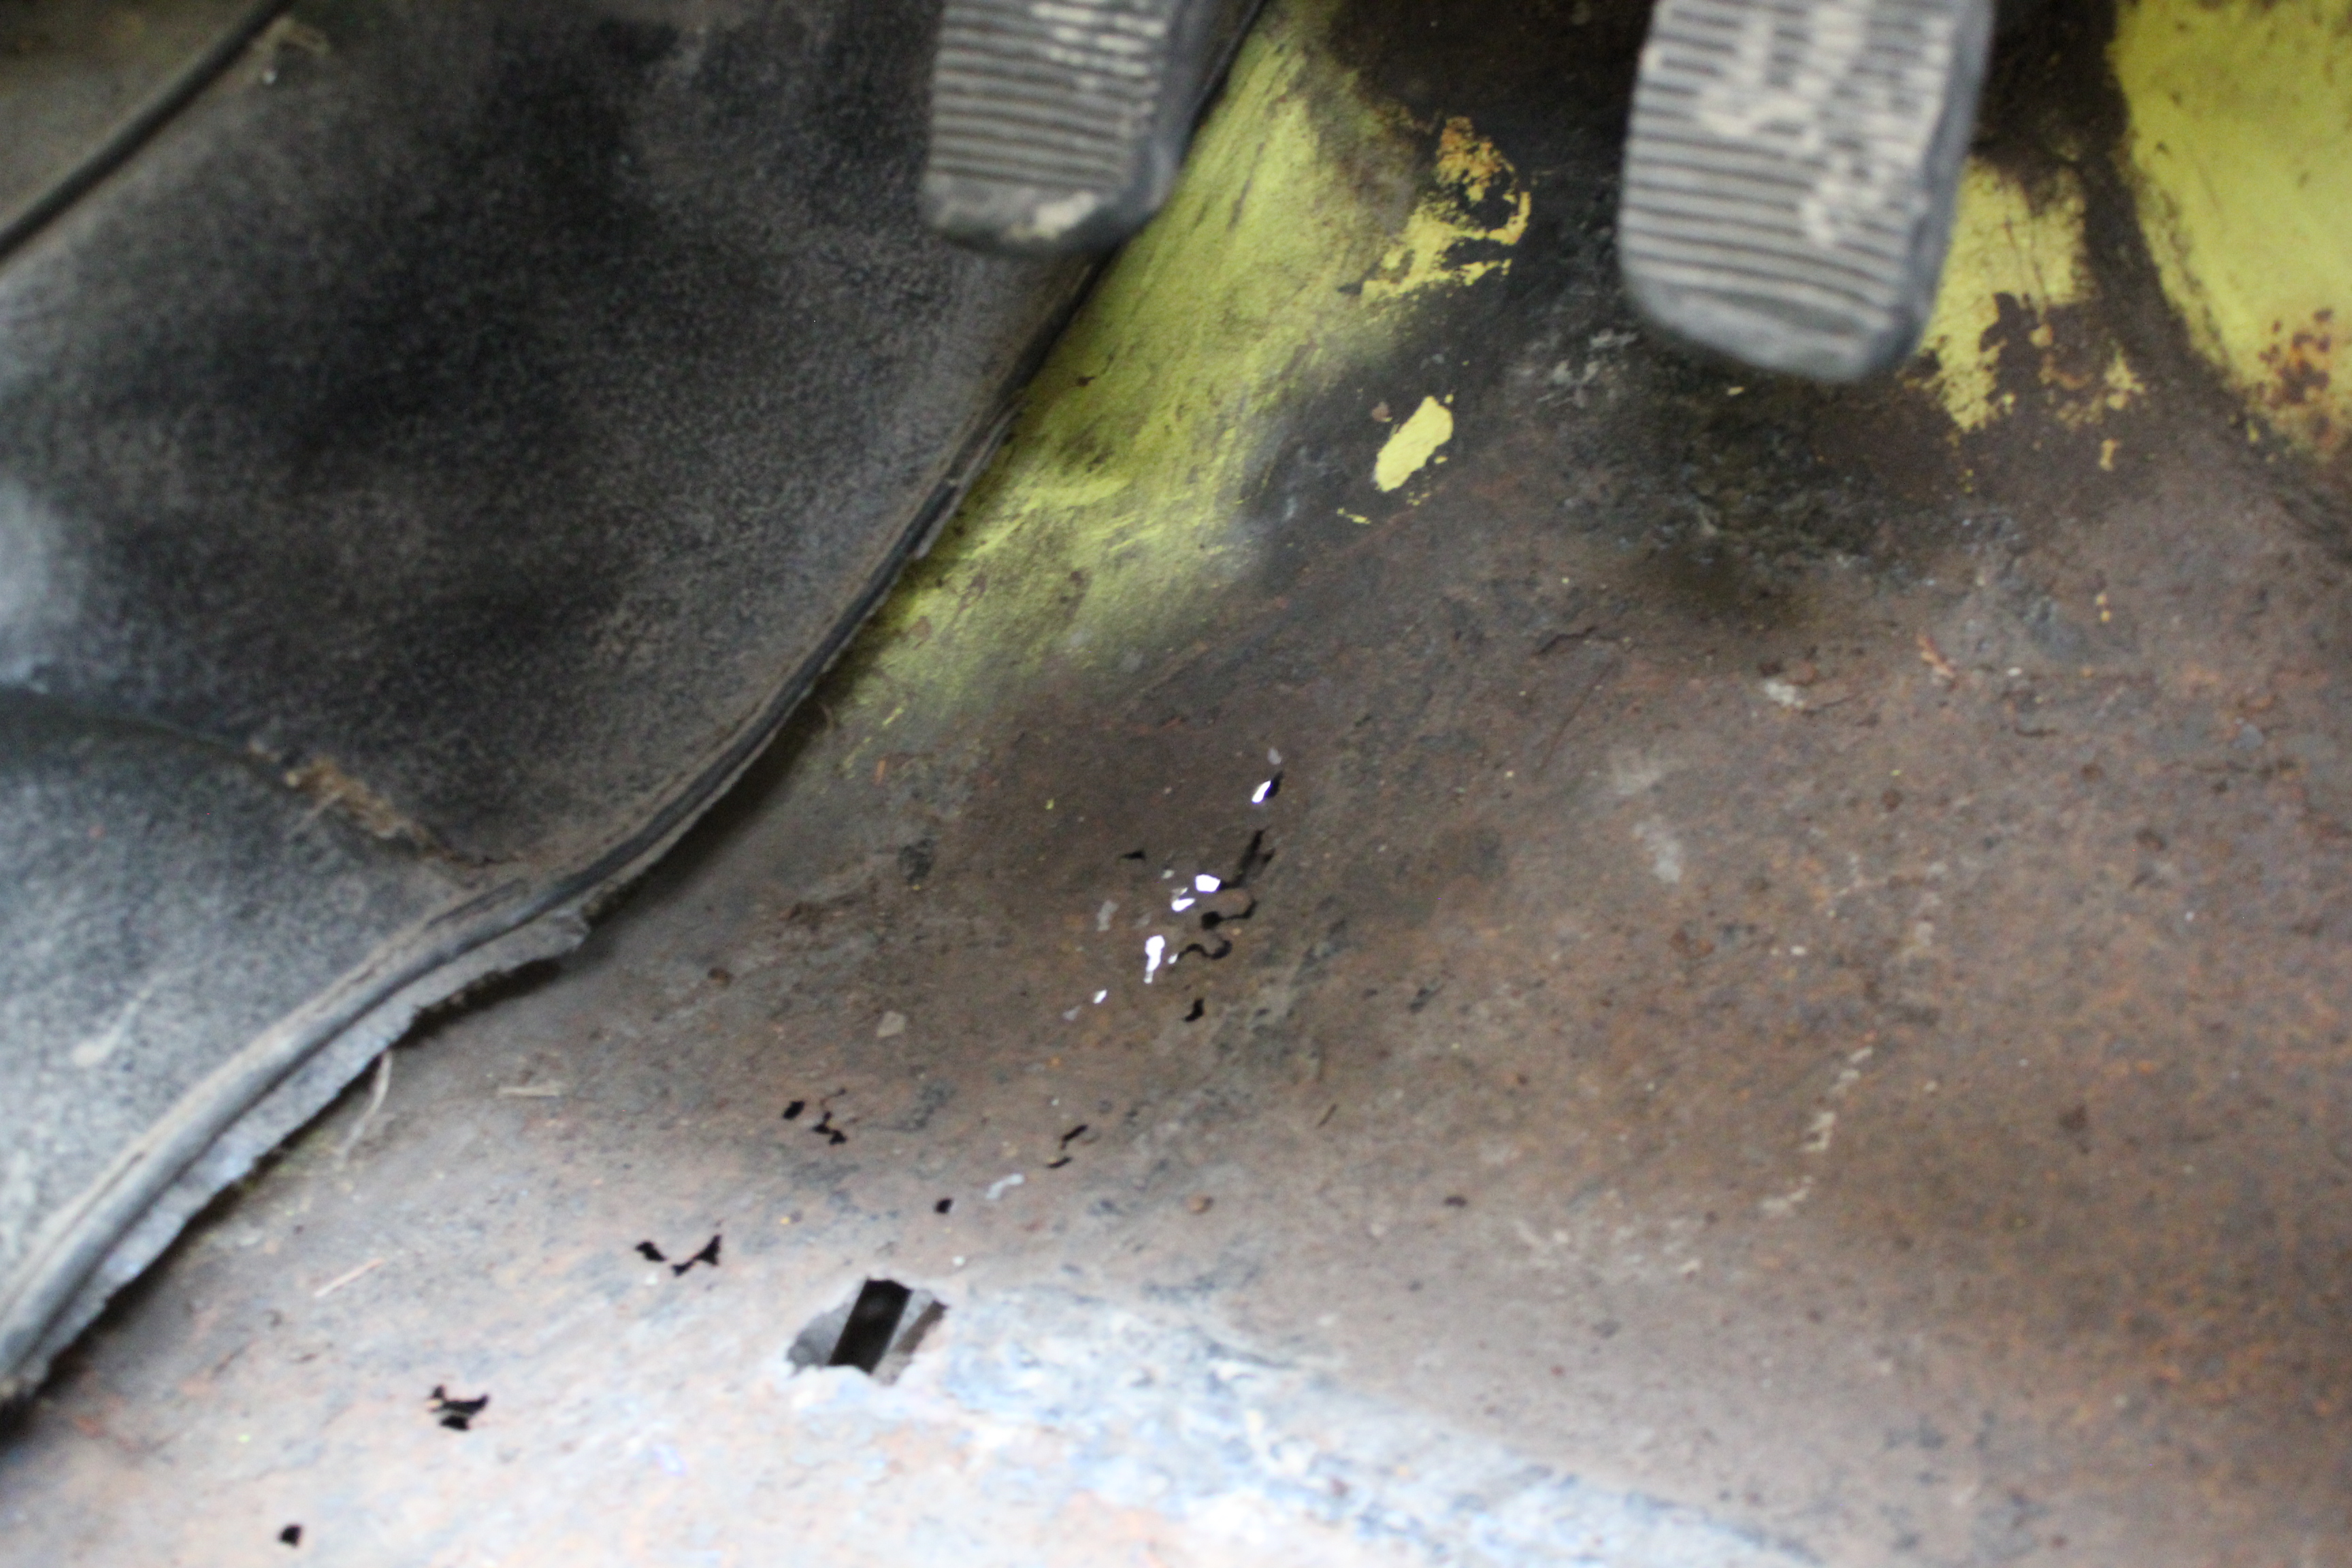
This beauty popped up on Facebook. I say I want it. Allan says (without even knowing what it is) buy it. Next thing you know Allan, Joe and I are sitting in traffic on our way up to Tokomaru to have a look at this magnificent beasty. Wellside is in pretty good condition, no concerns with that. The cab however is a different story... Swiss cheese floor pans and the passenger sill is a similar story. But no worries they said! So buy it I did. The bench seat that was in it looks to be out of an older model, but he had the original one, so plan to whack that back in. Also came with some more leaf springs to get the back sitting even with the front. First thing to do, learn how to weld! Discussion
 8 points
 -
Had a good time at the Beach Hop, took a relaxing approach and only did one of the major runs (to Whitianga). Car went well, except for a little driver error where I took a slight short cut across the lawn of the place next door to the one we were renting (huge grass frontage with no fences in this area) after dropping a couple of people off on Saturday afternoon. Suspension was on low driving position, fine for road use but not so fine when there are low-level tree stumps hidden in the grass. I collect two of them, one right in the sump, and the other along the drivers side sill (which I didn't even notice for a few weeks). Made a hell of bang! Anyway, there we no leaks or knocks and the oil pressure was good so we drove home with no problems over the next couple of days. Car needs a WOF so I wanted to take a look underneath and also fix the sump so I moved it onto the lift yesterday. I couldn't see any other damage though so moved on to lifting the engine up again to remove the sump. I was a bit smarter this time and didn't drain the radiator and remove the hoses. Instead I unbolted the mounts so the radiator could lift up with the engine. Much less messy, and cheaper too as I just but $50 of antifreeze in it a few weeks ago. The sump gasket stayed stuck to the engine block so that was good. Also the oil pump driveshaft stayed in place so it was much easier overall. Oopsies So I beat that mostly flat again (still a small kink in the corner but I didn't want to cause a split/leak) The pickup is pressed into the flange and I think it had twisted up a bit. I tweaked it back down and put a couple of tacks on it so it won't fall off. To protect the sump - I don't want to take it off again anytime soon) I've made a skid plate from some 6mm steel plate that was lying around. I don't think it will bend much. It bolts on so I can change the oil. There didn't seem a good way to make space for the oil drain, but I can always do that in the future. Normally this area is well above the ground even with the suspension right down (can just drive like that if the road is smooth) but anything that is sticking up would be a problem. Now it should slide right over, although I'm slightly bothered that the steering linkage is just behind that round crossmember. I might weld an angle-iron 'breaker' across the plate to protect that. Just need to fill it with oil and charge the battery and it should be WOF-able.6 points
-
So I ordered a carb rebuild kit and new plug wires with the objective of seeing if I could make her run. Carb was a bit sketchy, the instructions showed a washer that I never saw on tear down. But cleaned out a ton of varnish an junk an slapped er back together. It's a one barrel Carter carb feeding 196 ci FLATHEAD STRAIGHT 6. Yep 90 ponys! so the plug wires were a bust. Way wrong. Oh well, took em back an got a universal diy kit. Till then we made due . Fed it with a portable boat fuel tank and shorted the starter with a screwdriver, as one does. She fired up straight off and idled nicely. Blew a bit of smoke an all but quite happy. The fuel pump discharged all the old gas into an EPA approved bucket and after running for a couple minutes I changed the oil and filter. Had one spare tire so slapped it on front and aired up the back one, it holds air for about 10 min or so. With a quart of atf it backed off the trailer/work station, I made a half assed attempt to bleed the brakes before hand ( with a 8 yr old for a helper) but just used the hand brake. by this time the cars fuel tank was empty so hooked it back up and added a few gallons. And drove down the driveway and back. Yep gravel driveway handbrake skids more as it happens dont hold yur breath an more pics next time hopefully6 points
-
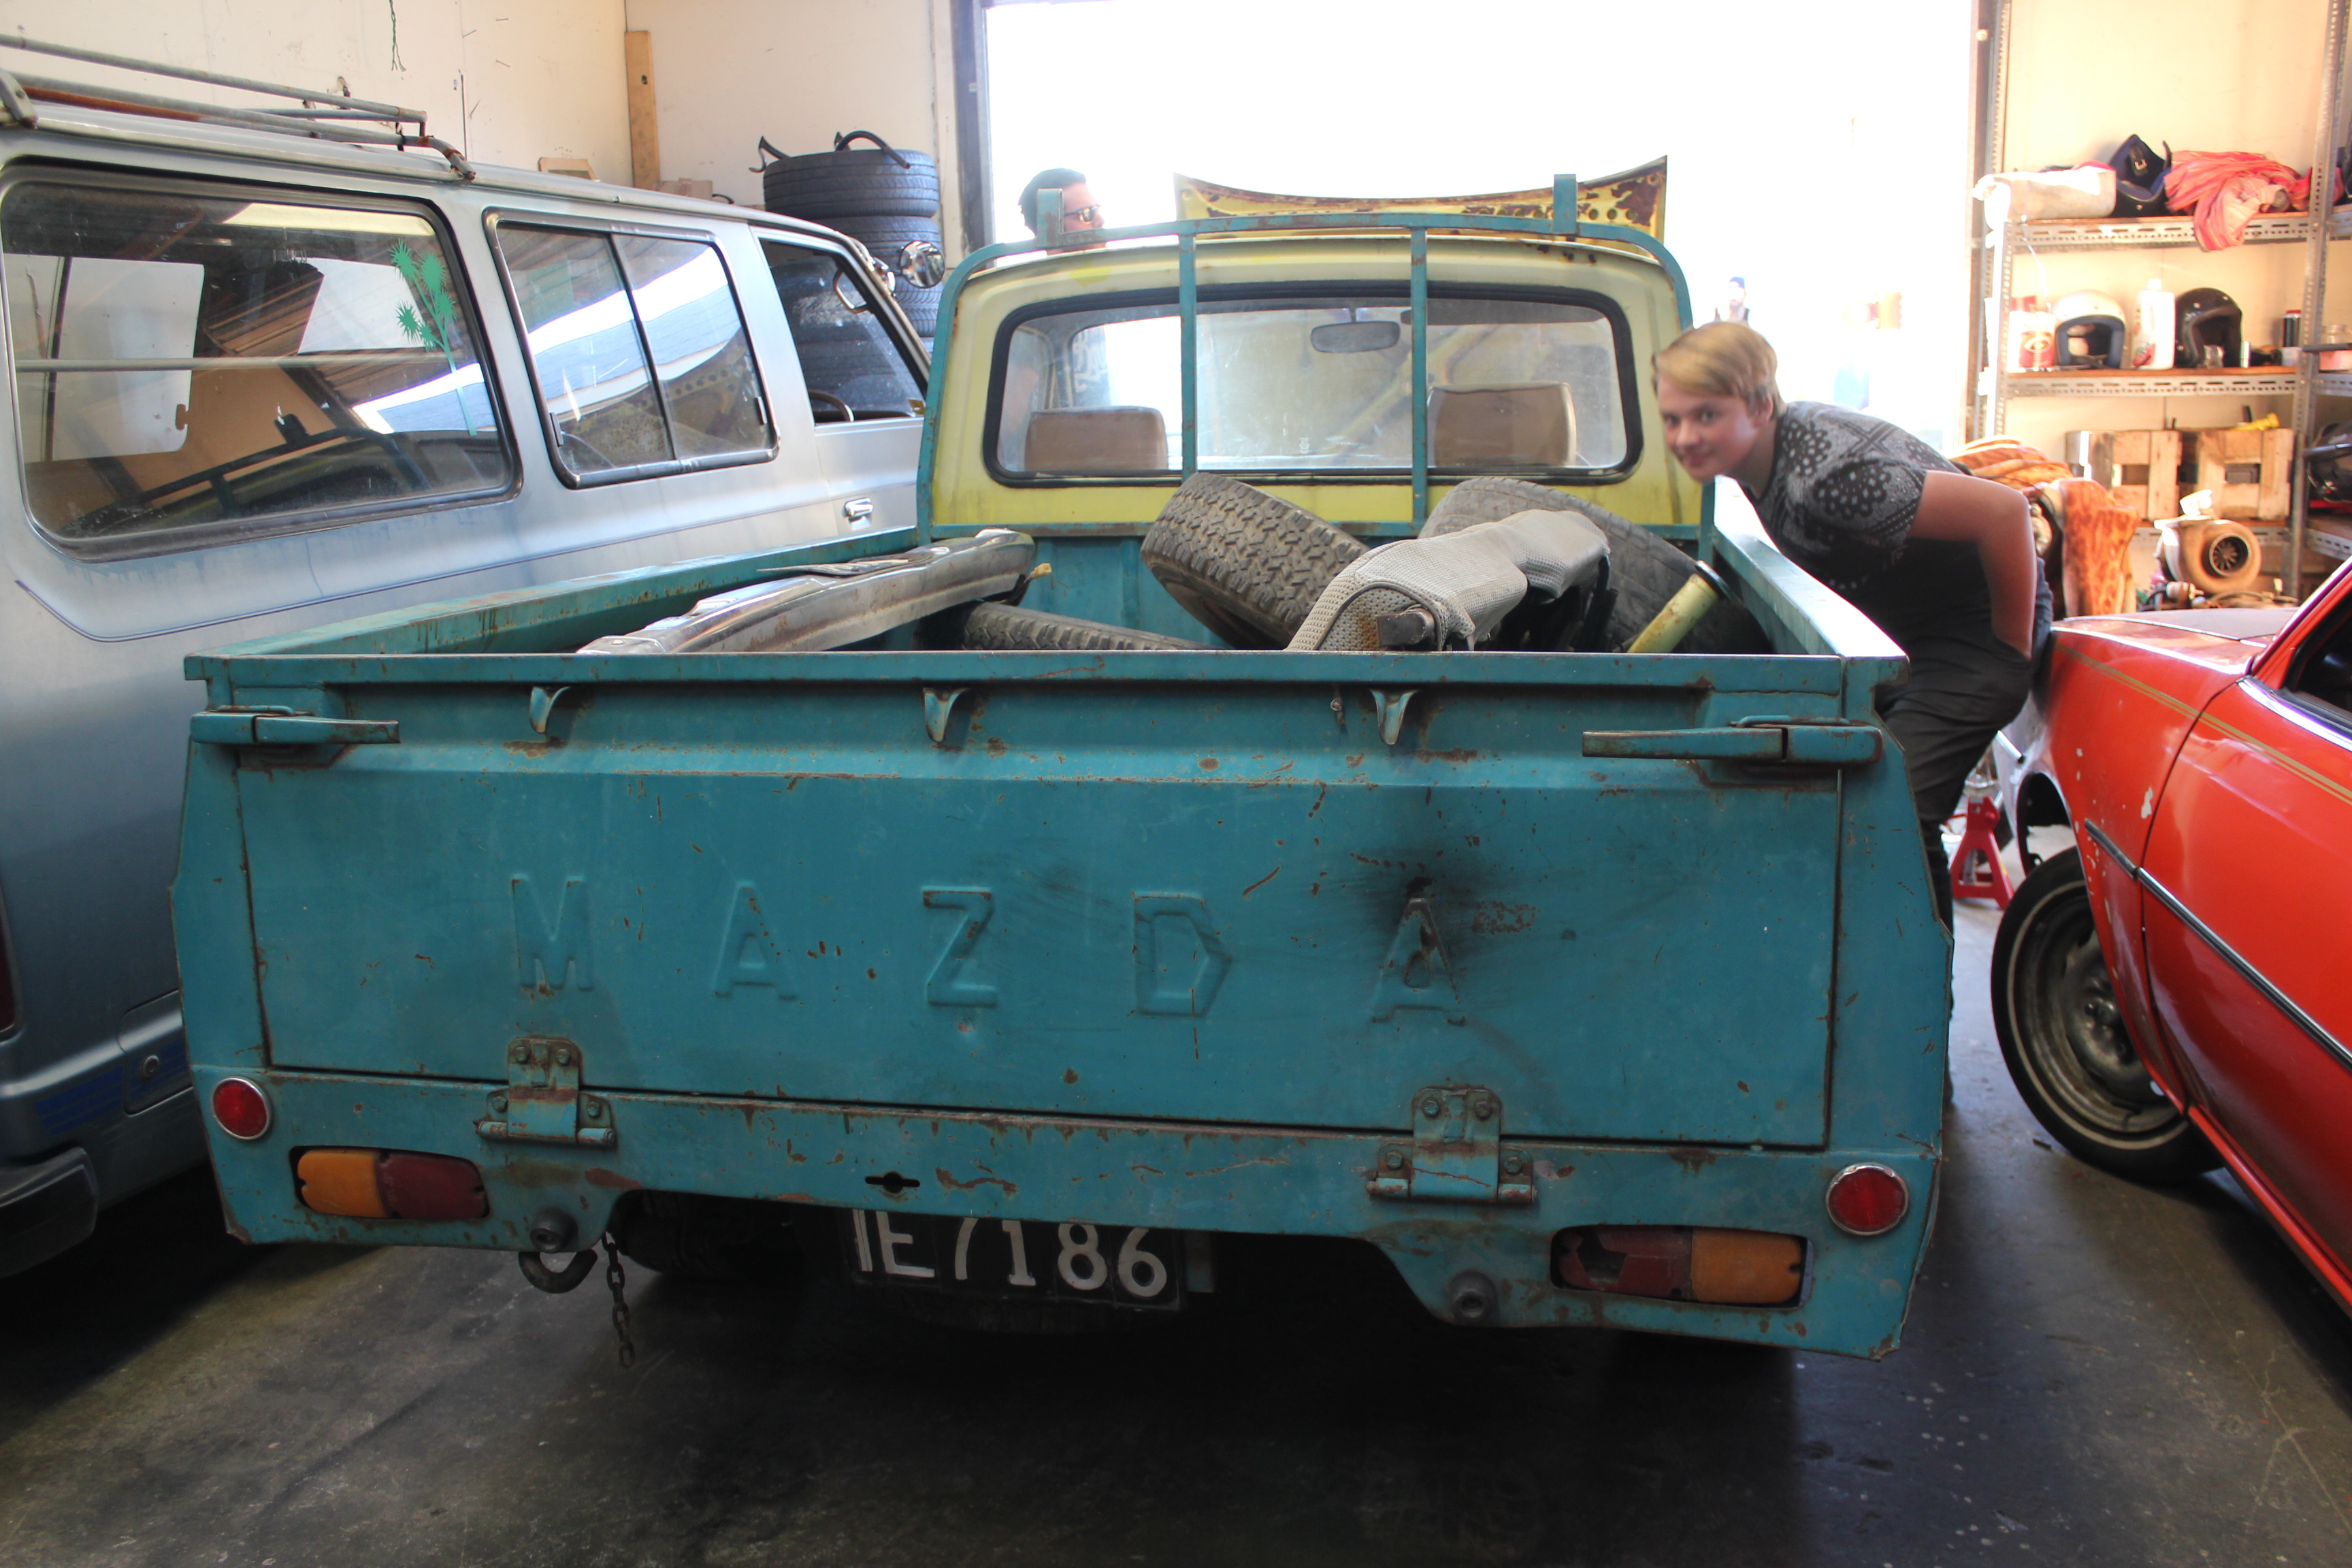
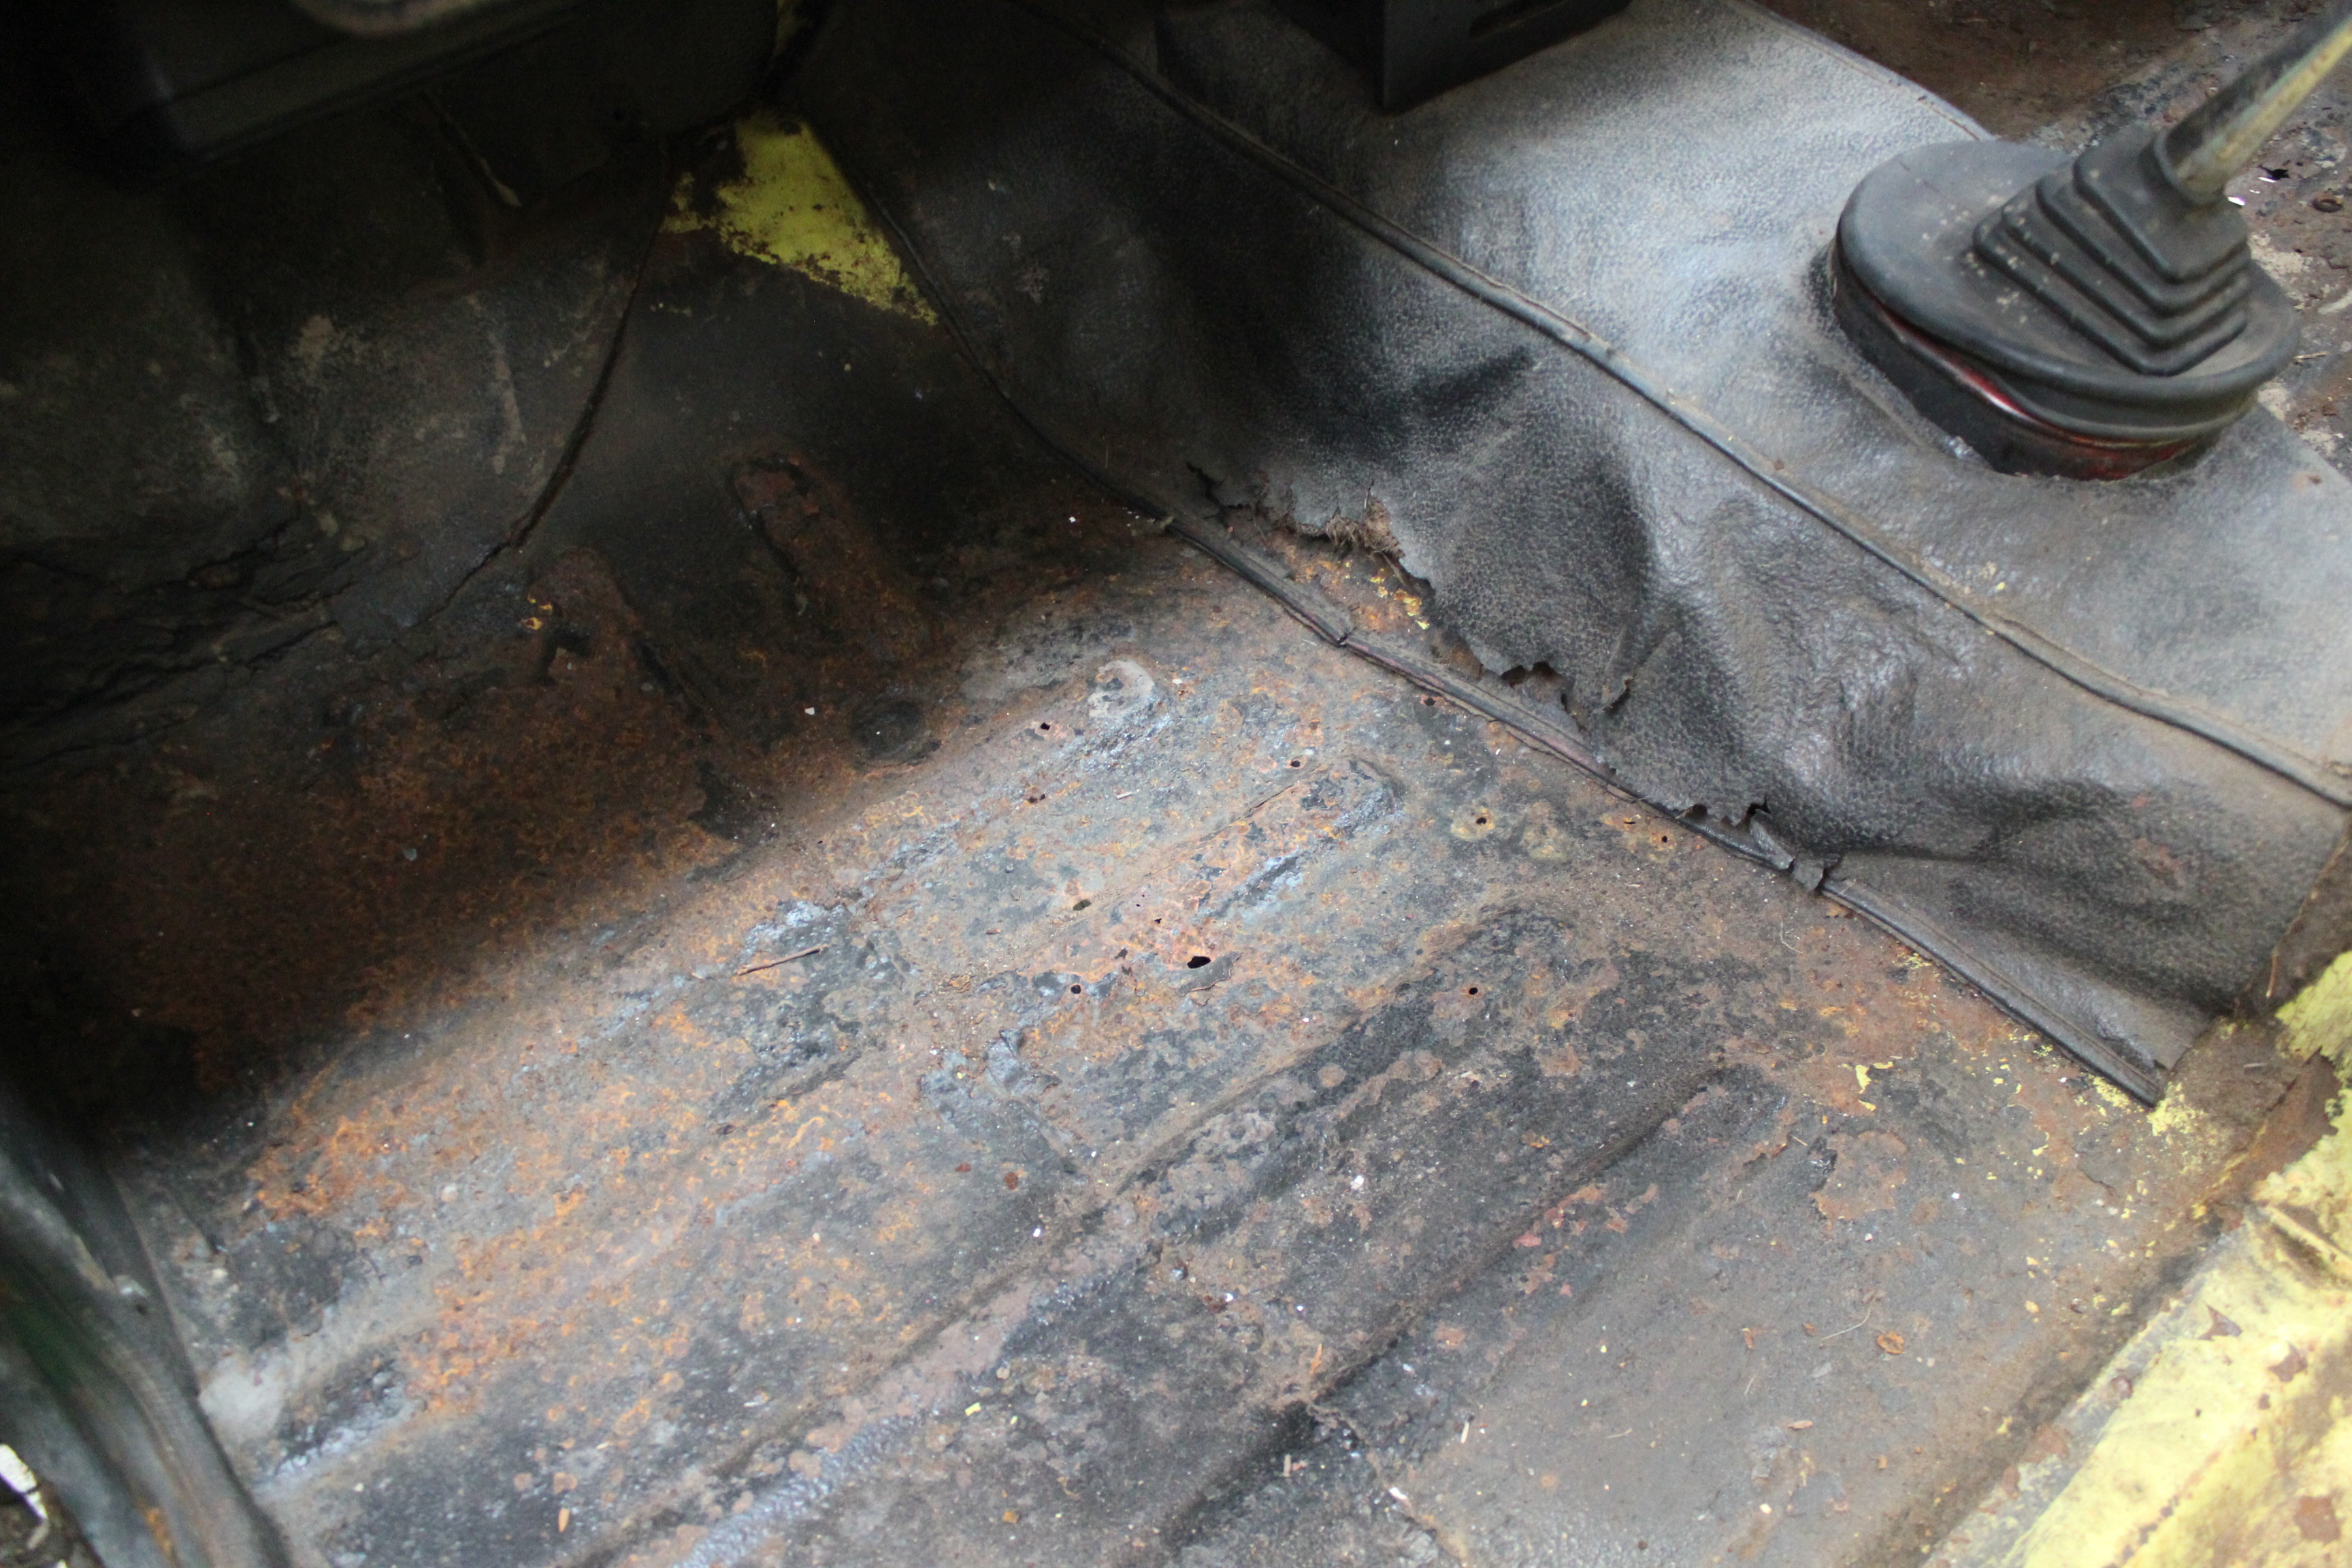
First update, coz lazy it's the same day as finally starting this thread. Today Ty helped me pull out the bench seat and clean up all the crap and assorted rust flakes from in the cab so we could get a proper look at the swiss cheese. Can definitely see alot of daylight through there. We also (with some assistance from the lovely Allan) pulled off the door cards to take a look at how bad they are. Not too bad it turns out. Most of the rust is from mid cab forward. The rear is pretty good. With just one hole on the outside where I may or may not have been poking around with a screwdriver....
5 points
-
Well even without oldschool company it was a good cruise down to Hamilton. Thanks to the good guys n girls at Midnight Upholstery for feeding my family and also thanks to everyone who put their cars on display at the open day. Decided to come home the long way and kept off State Highway 1 nearly all the way back, there are actually some great roads between Auckland and Hamilton and we should make an effort to have another go at this in the future. Hopefully we can get a few more cars on the road next time.5 points
-
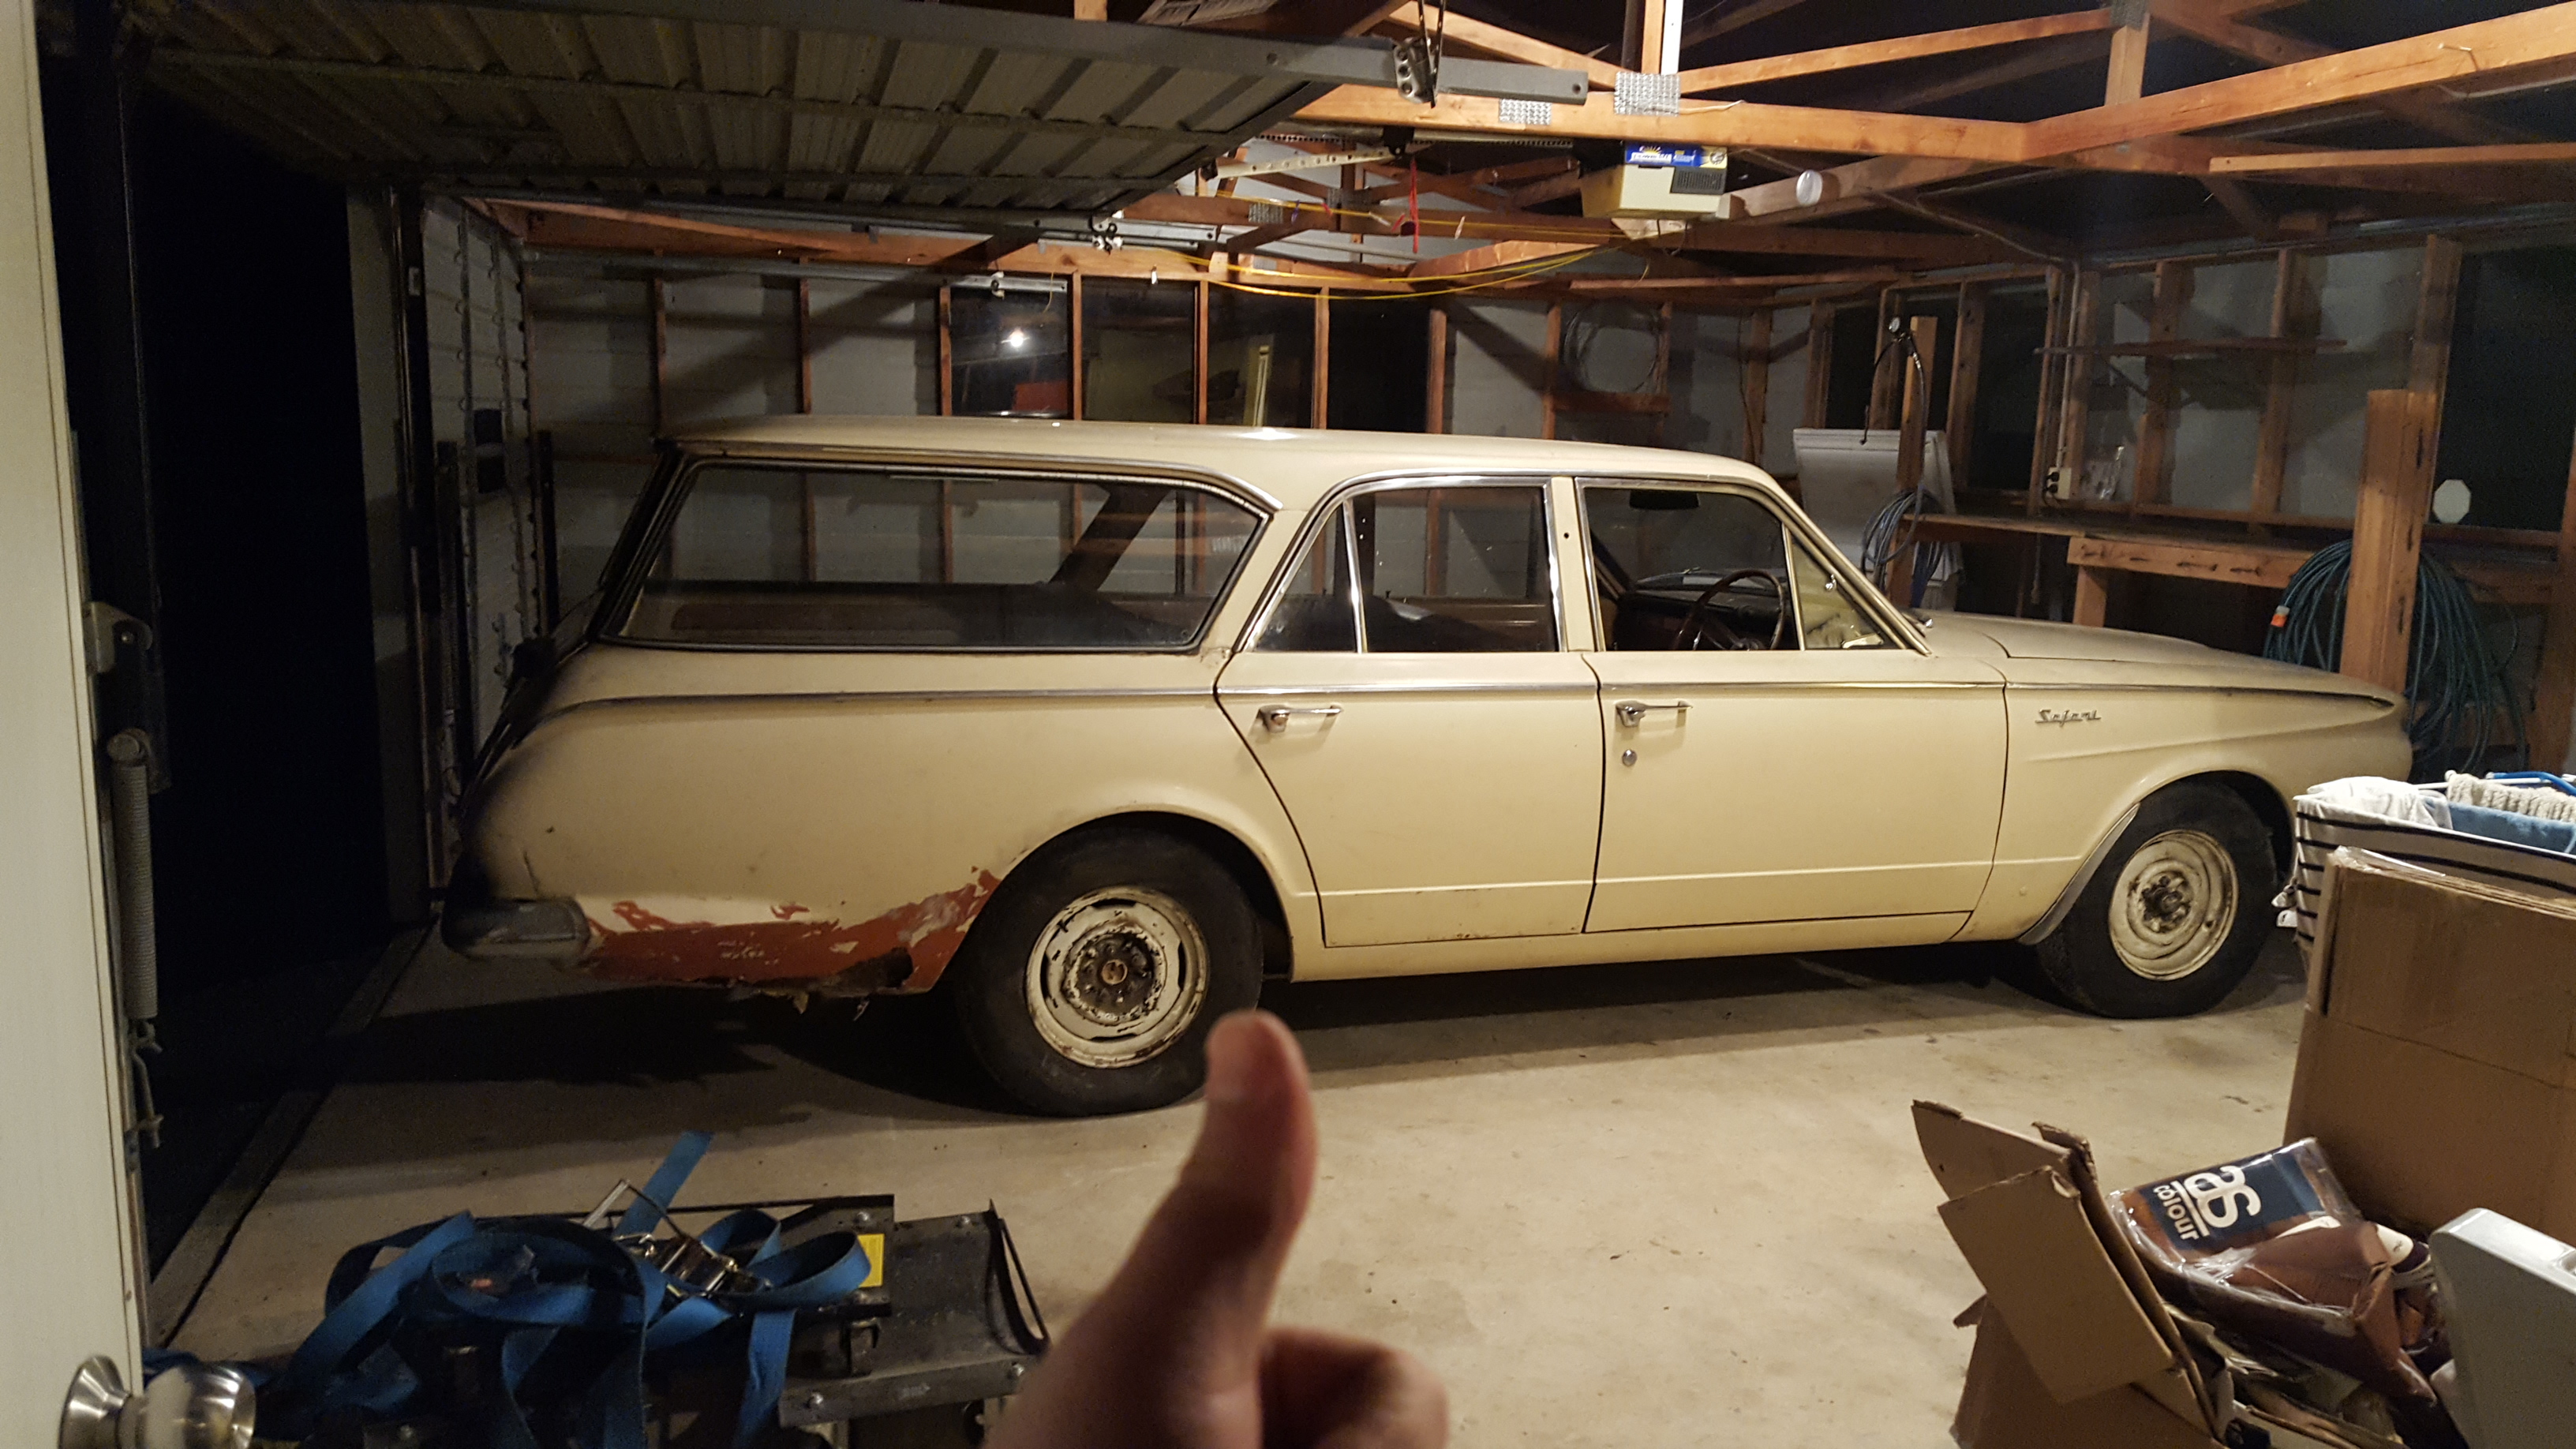
So @Archetype lent me his trailer this arvo and I managed to drive the valiant under its own power onto its trailer. Was good. But the new house location is up on a hill....... got the trailer and two wagons stuck half way up kinda got to close to one side and bottomed out, couldn't move. Unloaded wagon there got trailer up the hill. Backed back down and towed the valiant up with out a trailer. Mate got brakes working and it running quite sweet just not great which is sweet as. And now it's sitting in my shed waiting for me to buy some steel and a couple of cutting disk and hire a gas bottle Watch this space. Got to have it going for the wedding in feb next year and now I have my own shed I can escape from Beth heaps now.
4 points
-
Fixed4 points
-
Hi Guys, yes I found my way here eventually....thanks for the reference Alfashark. Early jap nuter - I can help you out no problem. Congratulations on your purchase! I have a few DKW/Auto Unions, and parts are easily available. They are fun cars to own and drive, and easy to work on. They have a following of their own. I would be able to look at the motor and tell you what's needed. Send me a PM. Please post a picture of the car!4 points
-
Got the fwd alternator bracket to work with the rwd water pump. this lifts the alternator up out of the way of top suspension link. and bit further away from mud and crap. just had to modify the top mount to bolt to top water outlet and waterpump. also make a new inlet for water pump fwd bracket already had some racing holes in it from when it was on the starlet? Started making some towers to go around the towers. getting the sheet to do what i wanted wasn't much fun,, but turned out alright after being thrown on the floor a few times not much clearance to turbo is main issue4 points
-
Hey oldschool, first let me say yuall are a terrible influence on a simple American. Been pining for something old to tinker with. Have a few dream projects/rigs I want someday but mostly for now was looking for something cheap and different. Saw this Rambler American 220 on Craigslist, shot 'em a text an actually got a reply. It was 1.5 hrs away which is purty close for us but was busy so never pursued it further. Week or two later they text back an went down 50 bucks. Now it was a bargain so I jumped on it. Supposedly was running when parked, 20 years ago. We hand winched her up on my trailer with two flat tire, Benjamin's for title it was home again. quite straight really and a lovely color. All the glass is good tho sadly none of the seals are. Lights, blinkers, bees nest, yep all the boxes ticked. Lotsa trash inside hope the misery is kept to a minimum found a 1963 penny under the flooring, slipped in at the factory maybe?3 points
-
Since the Wellington train system can’t help but try to fall into the ocean each time there is some weather, I had some spare time today to do some more work on the bike. Since attempting to drain the fuel tank the other day I was left with a small amount in the bottom of the tank that I just couldn’t get out of the filler neck (due to its design). The only way to get it out was to remove the fuel tap, and drain through that hole. Removing the tap was easy enough. Two really tight, rusty screws and out it came. Another screw on the filter and the lot comes off. That’s a tasty looking filter. And this is what the fuel tap looked like. The tube is nice brass and cleaned up well, and the filters are intact and also cleaned up well. This is what was sitting in the bottom of the tank After draining it out, I took the tank out into the garden and hosed the utter shite out of it. Lots and lots of orange water poured out, so I kept flushing until the water ran clean. This is what came out of the tank. Chunky. The great news is the inside of the tank looks awesome now. Minimal surface rust left, and there are no flakes left. Not much work to finish it off now. It’s a damn sight better than it was. The next part that got my attention was the fuel tap. I cleaned off the outside of it, and then removed the two front screws and pulled the front off And this is what greeted me inside the tap Clearly the fuel level was at the reserve height for a while, as it was almost completely blocked with rust and scum. This is what came out of just that side of the tap All the seals and O-Rings were flat and hardened, so out they came. New ones have been ordered from Litetek along with a carb seal kit. When my ultrasonic cleaner arrives the tap will go in there for a proper clean, in the meantime I cleaned it up with WD40 and brake clean. I wanted to have a quick look at the fuel pump. When I first got the bike the pump sounded like a tin of gravel being shaken and then it stopped working at all. I disconnected the pump and left it. Today I removed it for bench testing. It seems it has an internal short. Whenever power is applied, it results in sparks and nothing else. I disassembled it to see if I could work out where the short is. Unfortunately I hit a dead-end, where I cannot access the windings for the main solenoid, so it’s a dead duck. Will try to source a good used one. Traces of water inside the electrical cap With that out of the way, I had to look at fixing the gauges. The tacho was almost falling off, and the chrome caps on both arent attached. It looks like the tacho had a bump at some point, as one mount is broken off and the bracket is twisted. I pulled the gauges off and checked out the damage. And the reason the caps aren’t attached. The mounts for the screws have been broken off both. Some creative superglue work sees all the broken off parts re-attached. Will need to be careful with them in the future, but the superglue is pretty strong stuff. Looks a bit naked without them And the last fun task today, was to see if I could get a charge in the battery. Previously my charger wouldn’t even detect that a battery was connected, the voltage was so low. Today I cheated, and “jump started” the bike battery from the old Rover battery. I connected them with correct polarity (like jump starting a car). Left it for a minute or two, and then connected the charger. Zing, the charger detects it and is charging it. I checked before and with the charger disconnected im now seeing 12v at the battery. If i can get the battery to hold a charge it’ll save me some money whilst i build the bike up. It will be replaced later on, but this will buy some time.3 points
-
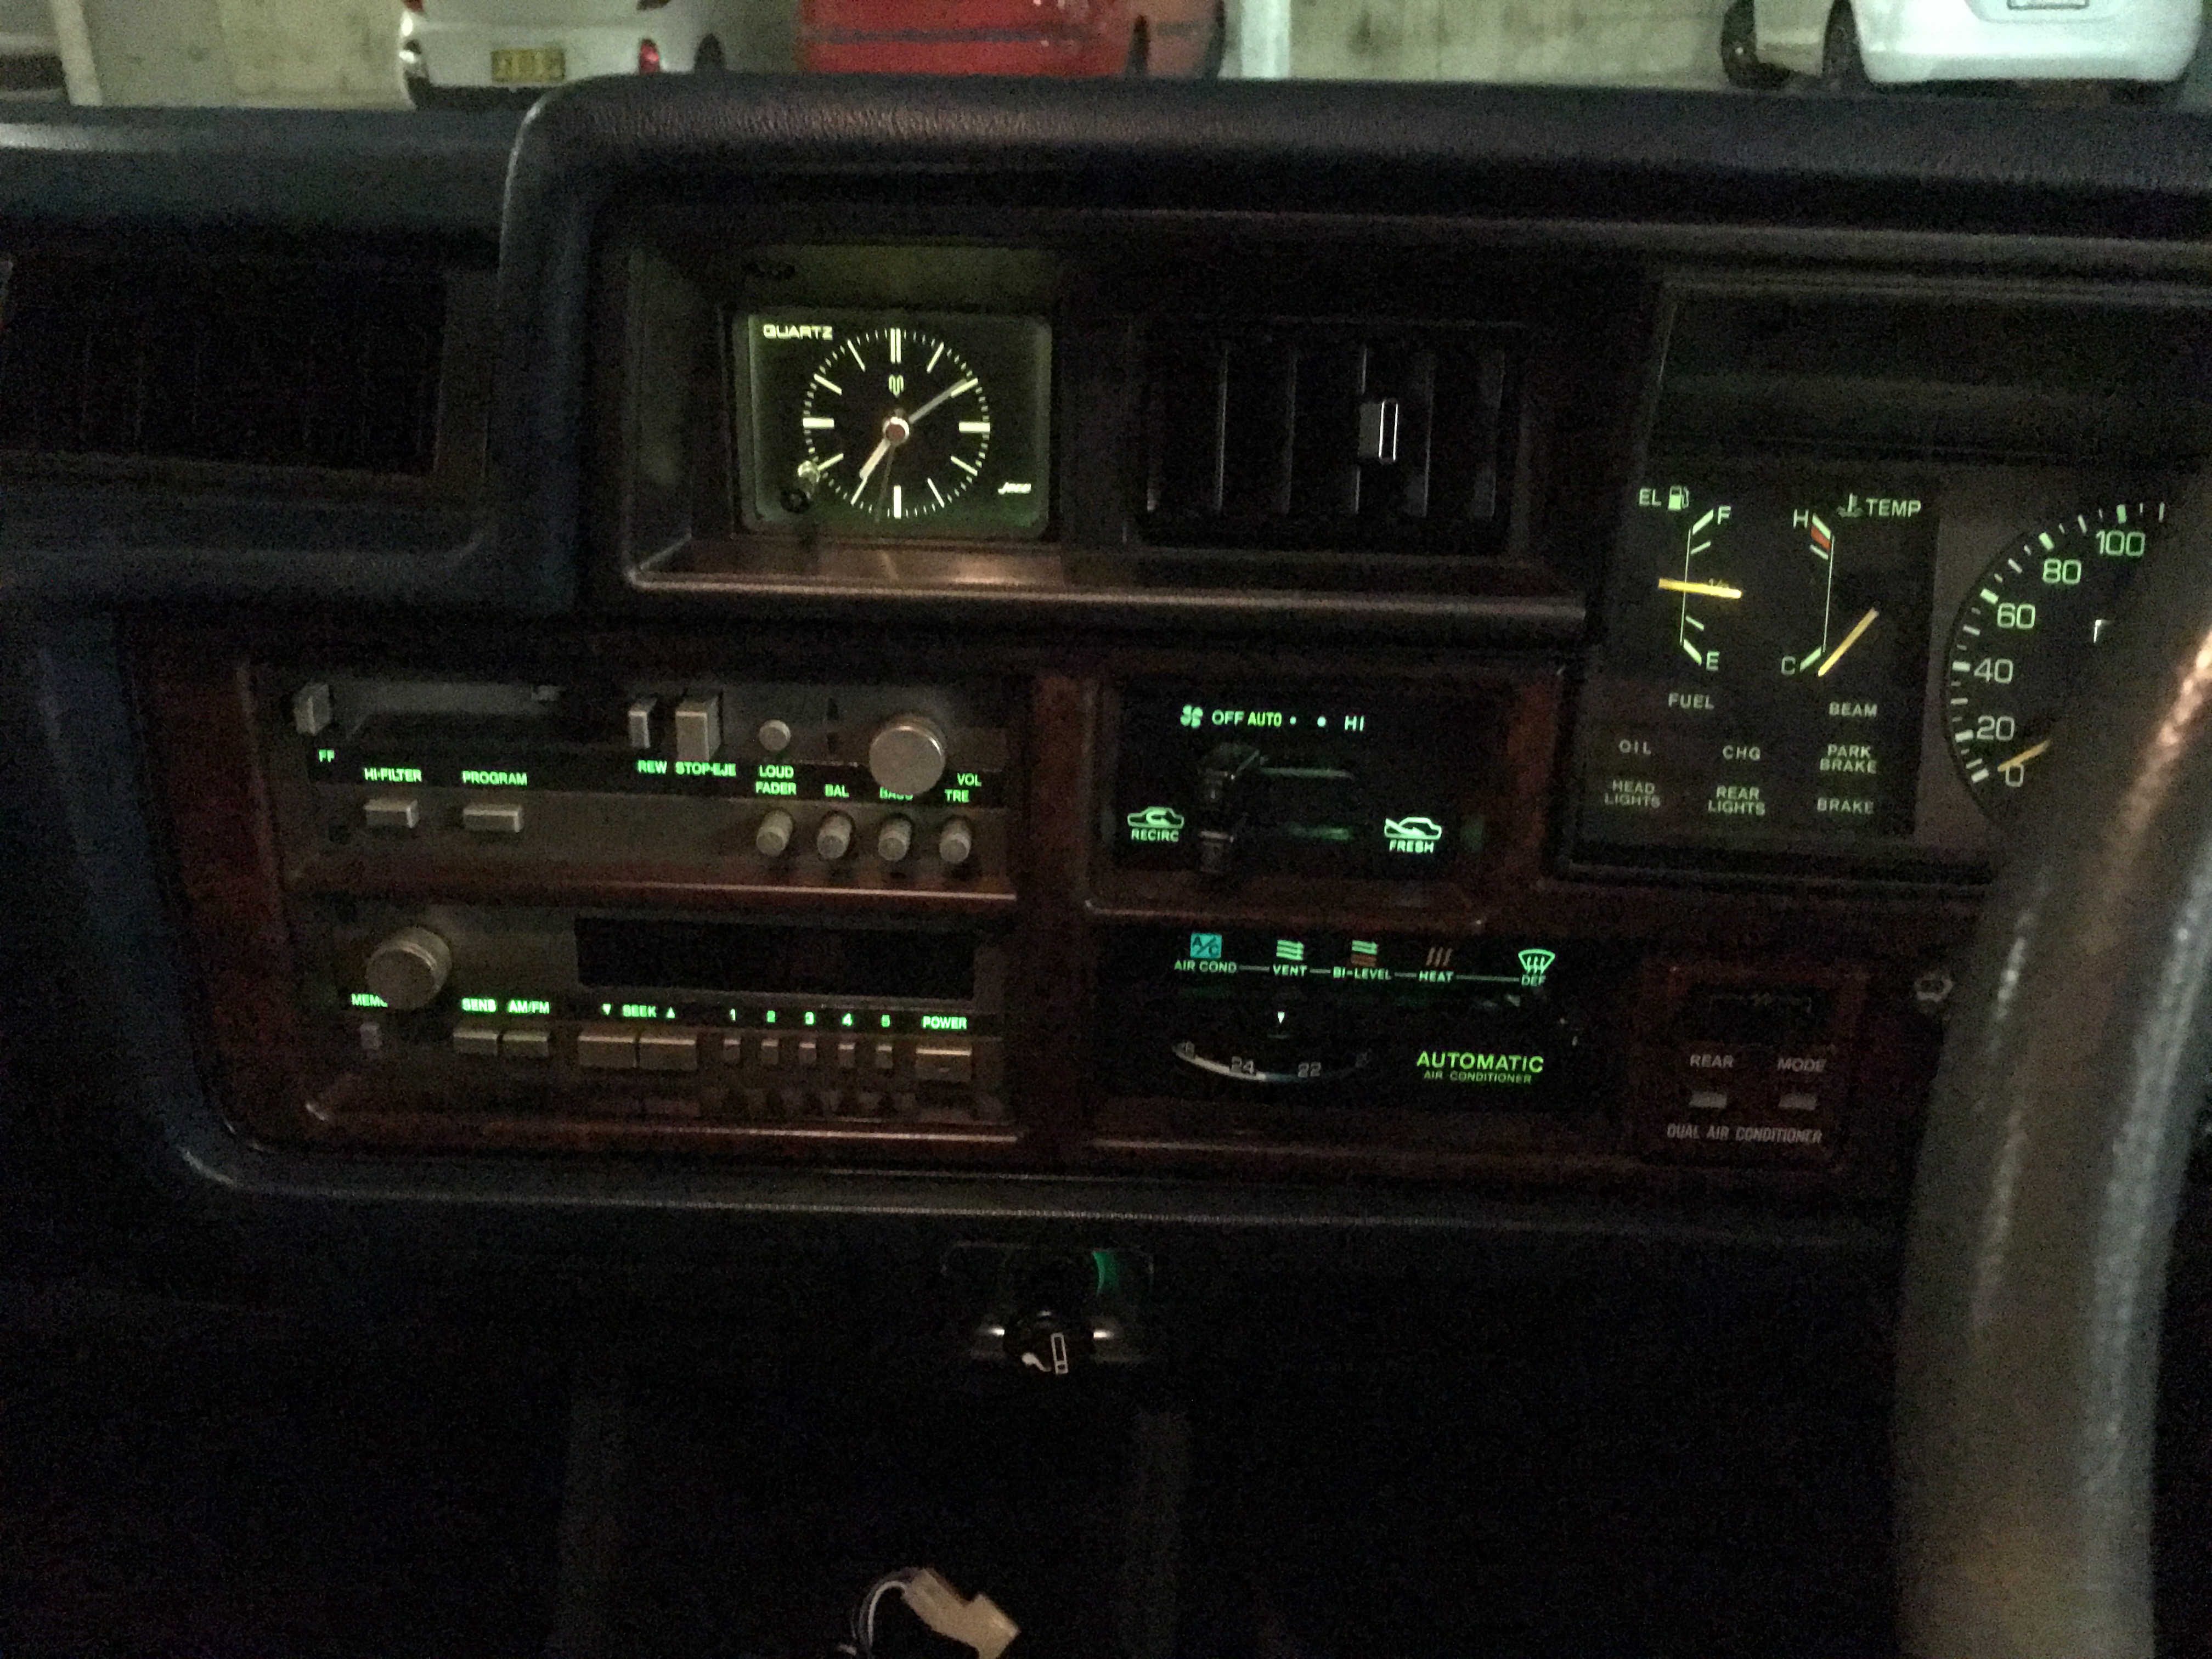
Haven't done much... But have done this! Analogue clock...nice
3 points
-
Got some pics of the wiring. Tested everything, found I had somehow wired my solar panels backwards even though I traced them back before plugging them in (they come with two black wires...) Swapped them around and was away laughing Volt meter doing its thing Took the back panel off the box to fill the water tank the first time and check for leaks so I got some pictures of that. We also ran some chlorine through the system, about 2ppm, to clean it out. Also discovered while laying down there that you could actually sleep below the bed quite comfortable with a camp pad and sleeping bag (which we have with us anyway). Good to know if someone comes to visit and needs a space/weather is too poor to use our tent. Using some loc line flexible coolant hose for my faucet. It is long enough to reach out the door and folds up out of the way. Also for anyone copying this idea, there is a $8 half inch kit on Amazon that has everything but the hose to npt adapter. Buy the genuine USA made LocLine one, it's only a dollar more than the Chinese ones. Made some window shades awhile ago out of the insulation just never took a picture. Using magnets to keep them up. Hung some curtains. They are some cheap Walmart curtains that Rebecca and Mom doubled up and shortened to fit3 points
-
looking like this coming Saturday is going to be not shit weatherwise.. pretty keen to get the wag out and have a wee drive/abeer/ maybe bring a bbq ... EOI ?3 points
-
Pretty sure I'm going to be in napier For Meeanee Swap meat.3 points
-
four words, an apology "i am very sorry" to all of you who wanted a spirited Sunday drive between the Valley Inn and Governers Bay pub, i am very sorry for the opportunity lost, due to the rolling roadblock ahead, i am also very sorry for the fact i didn't use my front bumper and push that fucken Hiace off the road, as a means to travel at velocities of more than 15km/h. so apart from that, and the rain, i do hope it didn't puit a dampener on the day love and peace, Joe3 points
-
I bought it some new wheels because I've always disliked the ones on it. 18x9.5, +24 offset fits perfect, I re used the tyres that were on it already, 245-40-18 I also spent a few hours touching up all the paint chips and scratches. Looks tidier.
3 points
-
So 2 weeks before moving to the US this happens! Guy in OZ is rebuilding a T57 and needed a new block. So got to and cast one up! Didnt go 100% but still really well. On a plane to LA in 3days!3 points
-
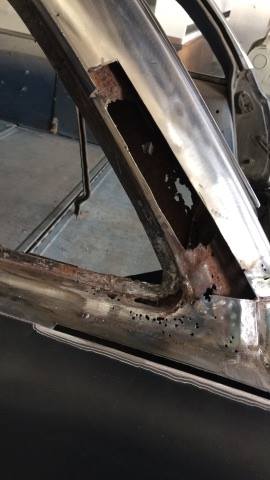
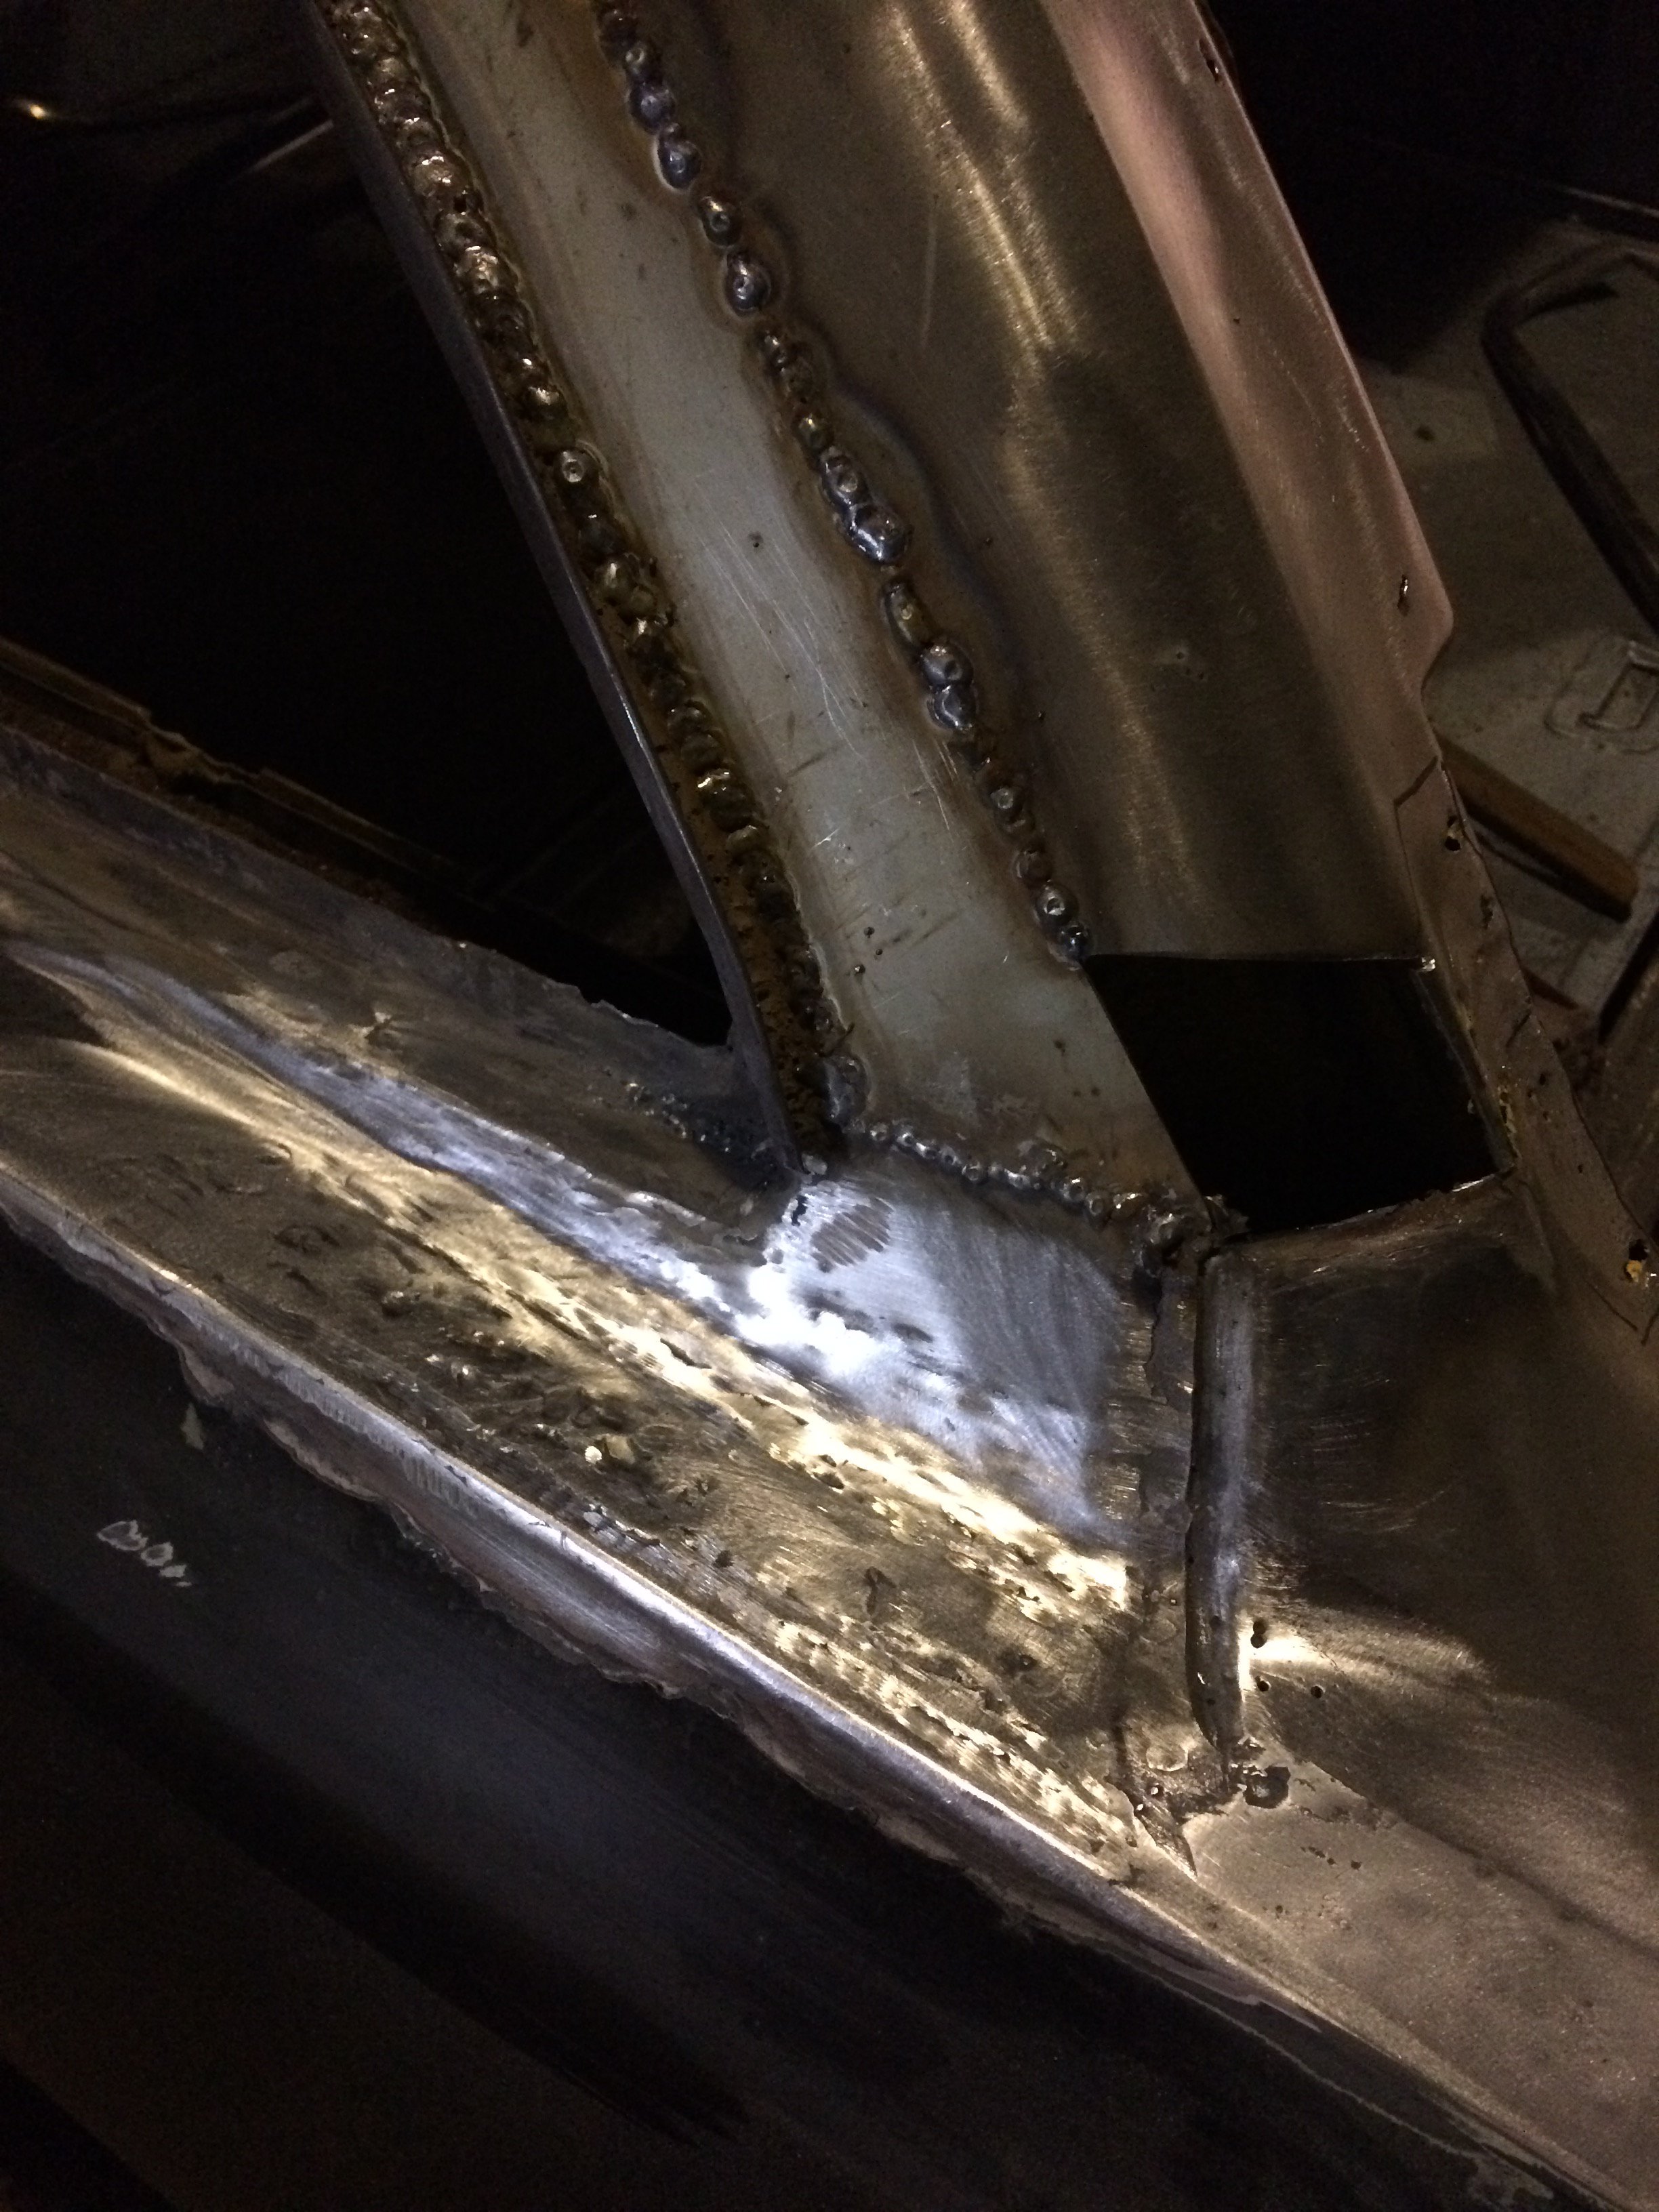
Who likes jigsaw puzzles? Almost forgot how to weld. Lucky I remembered how to grind.
2 points
-
You can buy new floors from Oz for these. It's way cheaper than patching the floors. http://www.ebay.com.au/itm/MAZDA-B1600-B1800-UTE-UTILITY-PICK-UP-PICKUP-FLOOR-PANEL-RIGHT-HAND-RH-/261268421141?hash=item3cd4cfba15:m:m6wUdKxI_R-wmuRTtmhSC7w sweet ute. B1600's are awesome.2 points
-
This coming weekend. Over.2 points
-
Twin 40 sidedraughts is what you need. I had them on my twin cam Lada and it did the doooorts. This was only after I managed to find a manifold that cleared the dizzy tho, they are out there.2 points
-
I quite enjoy meat2 points
-
That's the story of my life at the moment..2 points
-
Trimmed each side of frame. Left hand side slightly more than right. screen capturecertificity.com And probably the most important note, make sure the motors drive shaft is aligned with the centere of the swing arm for the chain to clear either side. This pic show the motor 30mm to low. Also make sure the motor is mounted parallel to frame otherwise the output shaft will drive on an angle can cause the seal to leak picture hostingcertificity.com Cut some tabs upload images freecertificity.com temp image uploadcertificity.com Add some kneed-it or LPG mig them in place (Rusty chain is temp to confirm all aligned ok) uploadimagecertificity.com Cross fingers they don't fall off. Looking at pic's probably should have made the tabs have a slightly larger lap onto the frame, feels solid enough for now.2 points
-
Bed ridden with the floozy?2 points
-
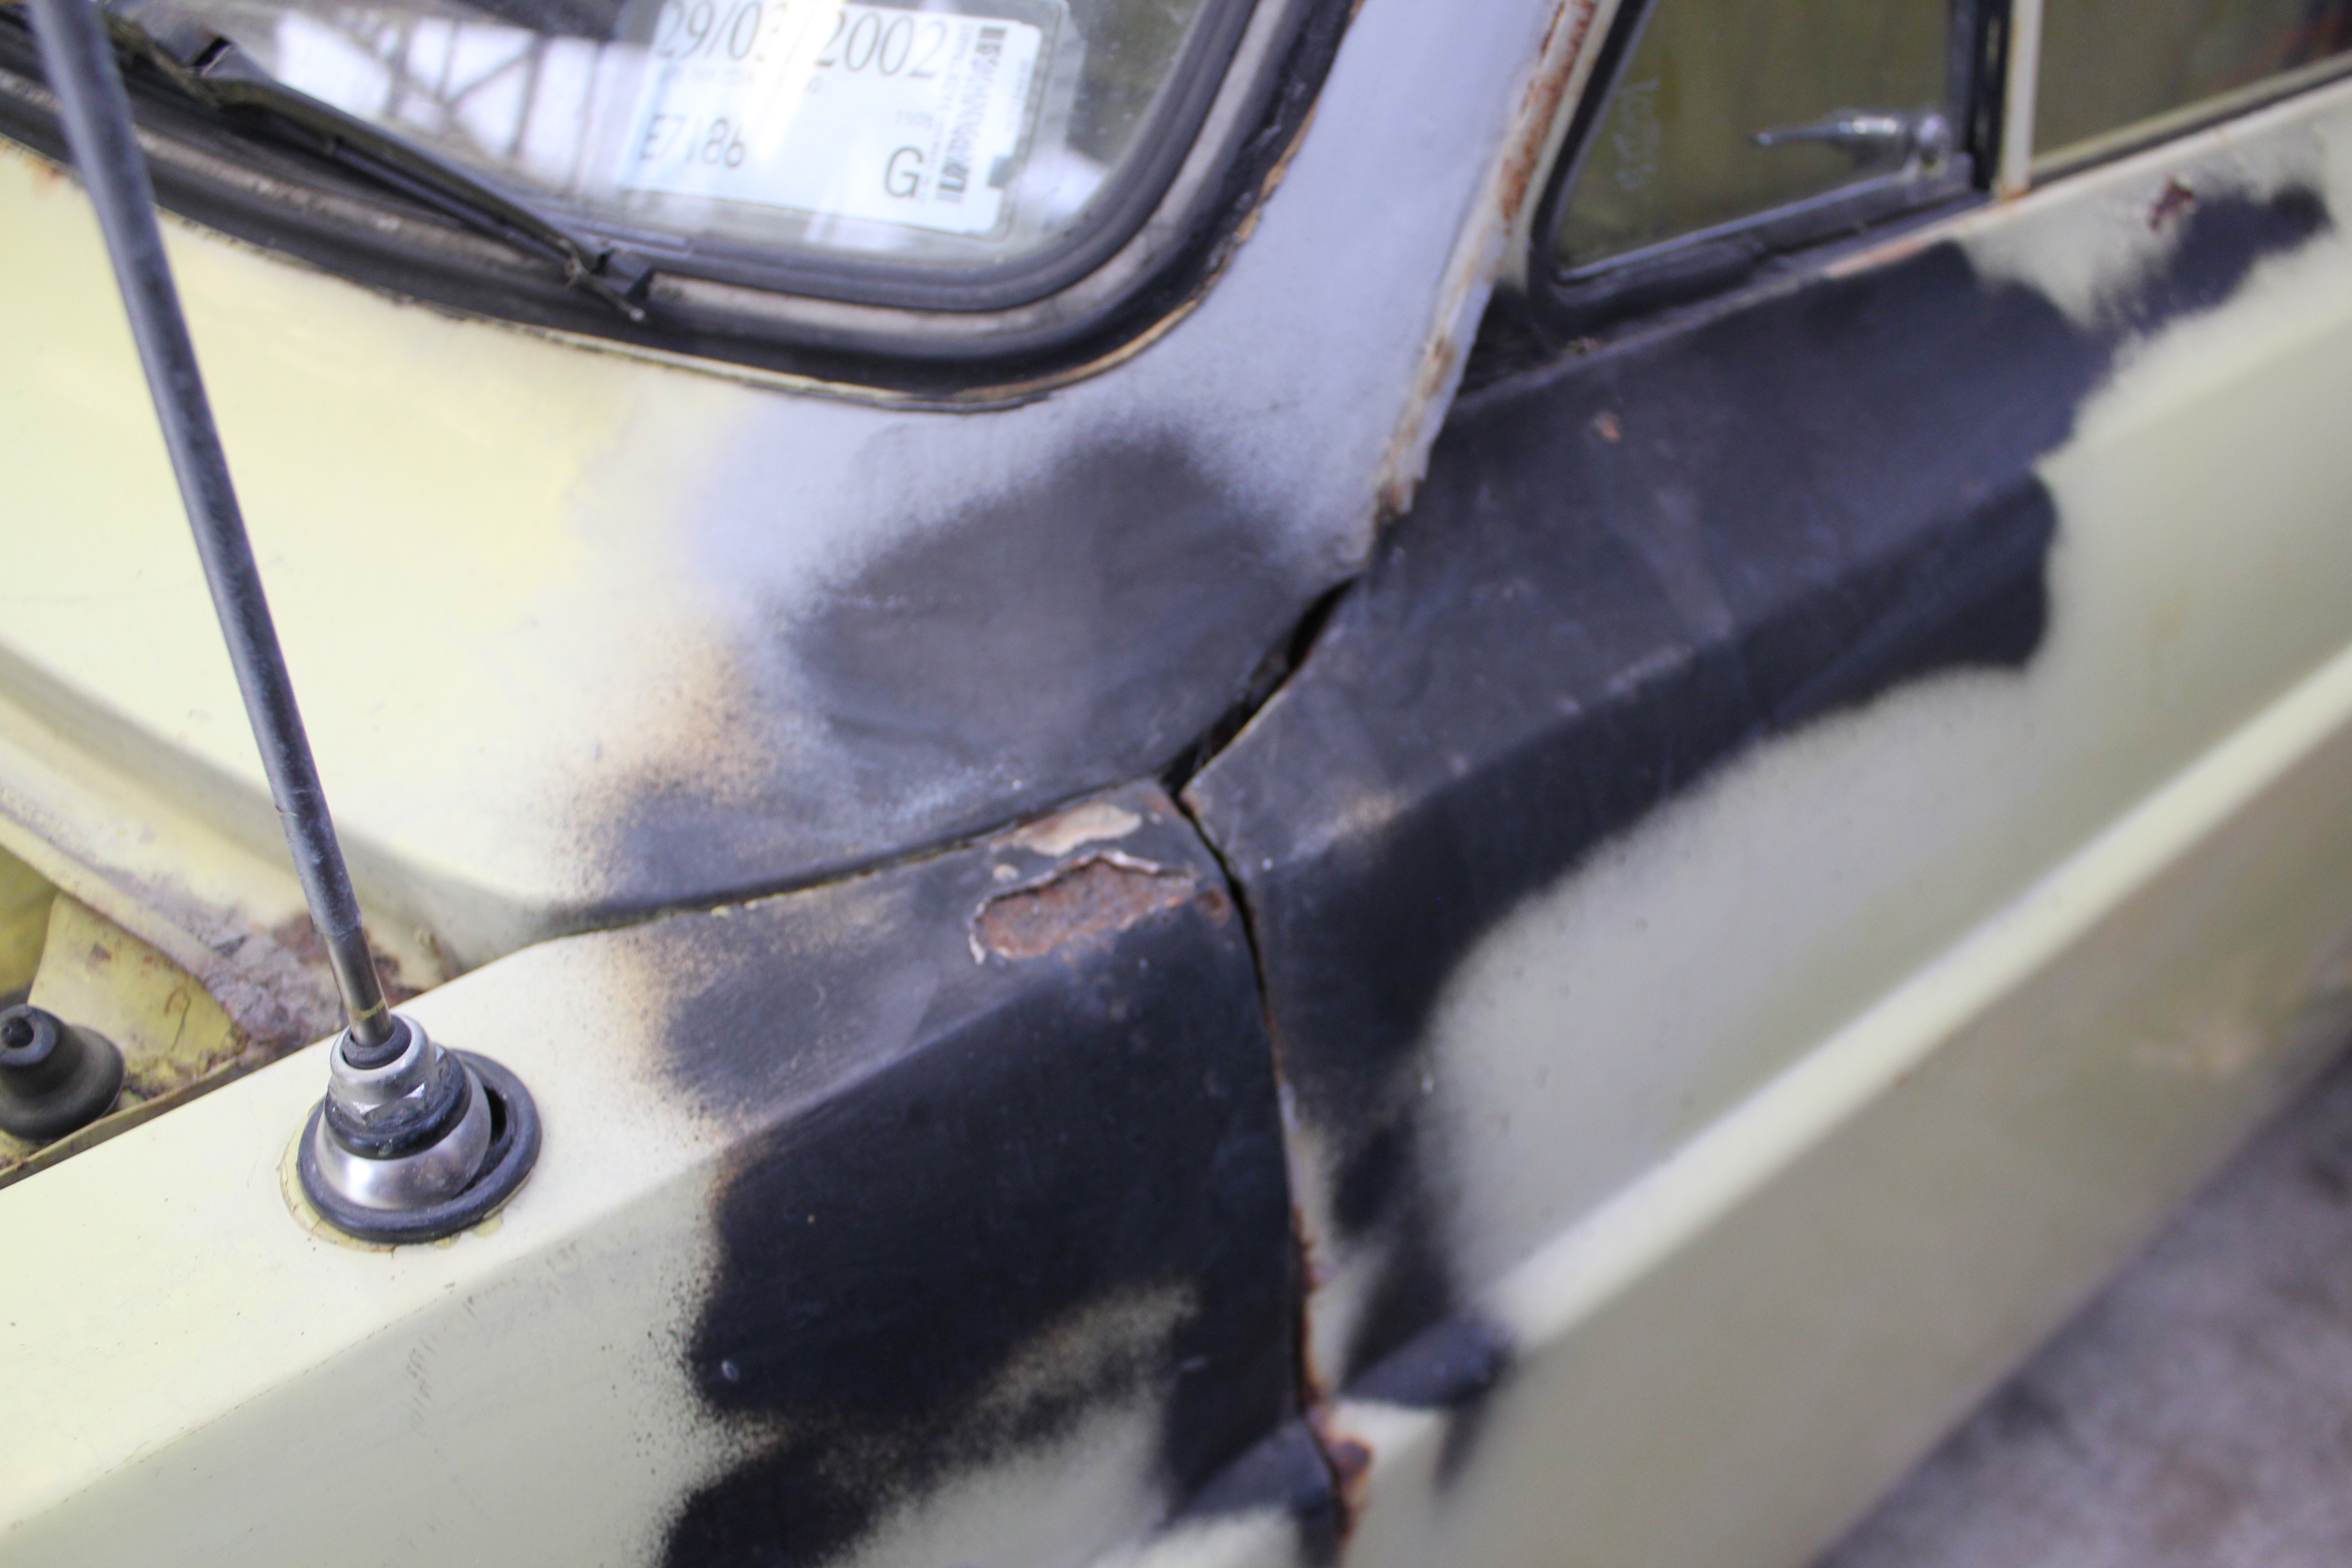
Cert plate acquired. Beach Hop attended. I do need to make some changes to the rear shocks or something as it is rather bouncy in the rear when driving. I've been advised that '4WD' shocks would be better. Will do some research after the school holidays.2 points
-
Suzuki Owners Group, Take One Tried to order everything I could think of at once, hopefully more than half of it works / fits. List for future reference / if anyone wants to do similar and for myself to order replacement parts. Por15 tank sealer NOS leg shield inddicator assemblies BIG BLOCK! GPX 140cc Motor MIKUNI - PZ30 30mm Carb CDI - 8 Pin Race Wiring Loom - 8 Pin x2 Vesrah brake shoes VB312 Clutch, Brake and Throttle cable Dual Layer Pod 44 x 102 15deg Angled Uni Filter Domino Tommaselli Throttle Petrol tubing neoprene 3/16"i.d. black (m) Fuel Filter x2 Brake & Clutch leavers 2008/09 Hayden Paddon poster "signed . . . oh what! x2 275-17 HF307 Trail tyres x2 Tubes & Rim Tapes for rusty rim jobs New side stand Carb Manifold Intake Rotator Adapter image hosting websitescertificity.com Frame water blasted and ready for re assembly ish. how to take a screenshot on a pccertificity.com The plan is to try and retain some patina with new running gear in places required. So far the frame is a fair bit more different than from the Honda CUB family so this might not be the simple bolt in job I expected, hence the grinder on standby. Getting the carb to fit will the least fun! Que Rotator Adapter If anyone speaks to the wife . . . all the above only cost a box of beer! LETS DO THIS1 point
-
Late last year I saw a certain rx7 advertised, wanted it, talked to friends and they said get it. I made a decision, slept on it, slept on it again. Had a week away to see reason and paid for it. It is joe/goats fc3s rx7. Here is his excellently written ad & some pictures I think I'm a sucker for punishment and I'm blaming the brain injury for making another project when everything else I own needs something doing on it a good idea. And I think I like cars that people hate? No space, no money (now) a trademe rtv rebuild rotary that hasn't run properly in years. What could possibly go wrong? After a few delays I made it down to Wellington, because brain injury I can't organise a piss up on a brewery. I arrived at Wellington airport and forgot my aunty & uncles address and while working out where to go and how to get there almost forgot about my bags. Caught a train and I'll be meeting Joe soon and we'll get some more parts and see what we can do. I have ordered new plugs and leads, made a diagnostic connector and got a new coolant temp sensor in the (misguided overly optimistic) hope it may help the flooding issues. No new pictures yet but I'll try remember to take some.1 point
-
undo the last bolt !!!! get some ti-tensile threaded rod and make 2 spreaders to push the axle flange, once under tension, try cracking with a hammer. don't put huge load on it, as you could distort the axle flange1 point
-
The IRS in these is actually pretty good. And good idea with the 1UZ, that would be a great combination. The rear ends are already alloy trailing arm and quite well designed but the diff is the weak link when upgrading the power output of the engine or replacing it with something better (and more powerful). The diffs also use universal joints to transmit the power to the axles, CV joints are much better in every way. A sensible upgrade would be to fit a Nissan R180 or R200 longnose diff into it. It has been done many times before, especially here and in Australia. I doubt you'll get a ratio as tall as you want in one of these (but Nissan/Datsun foamers will know more about them than I do) but a Nissan diff head and axles will give you strength, CV joints and less weight. Plus there are many LSD options that can be fitted to them and a broken diff for mocking up purposes can be had for pretty much nothing.1 point
-
Might be keen. Weather and time of day dependant.1 point
-
I got this off trademe, it has possibly the worst welding I've ever seen...but with minimal effort myself and mate of mine got it going last night. My mate reckons it looks like something out of a war torn African province, just gotta add a few machine guns and a flag! Hence the nickname. Now anything that goes is a rarity in my life...so this bad boy is fast becoming a favorite. Kj1 point
-
Looks common to me, I've pulled quite a few looms apart recently so I'll check threw my plugs. id search threw the injector though, Bosch style will have a common type plugs for multiple injector sizes theres a load on Ali express super cheap that are the same ones most suppliers sell as new ones edit: http://s.aliexpress.com/Br6ZFfeE Good excuse to put a 10 banger in it1 point
-
So... built a deck, Added some more fillets round the front and back doors, Photobucket is being a cunt so I'll do the rest later....1 point
-
You're welcome to message me if you need to tackle something you can't find online1 point
-
i used a whole bunch of those spring loaded ones (second photo) on my Rover when i made the loom for Speeduino. Got them cheap in bulk off Aliexpress. Bosch EV1 style connector, or JPT (junior power timer)1 point
-
I've got some in stock but it would be far easier to raid the wreckers1 point
-
Definitely not $50 each - super common at wreckers and you can buy off ebay/ali if needed. Yeah they come with the big clip or not. Also some Toyota water temp sensor plugs are the same and green too1 point
-
Not relevant to the topic, but please don't do that stupid F shit. This isn't facebook, commenting F does not notify you when there are replies. Do this if you really want notifications for this topic, don't spam up the thread.
1 point
-
Shit yeah. You will sure learn a lot from Andre.1 point
-
Good life choices Mr Roman1 point
-
I can't stop looking at that fucken wall..1 point
-
Fuggin' chequebook builders.1 point
-
Finished! Bit of machining porn for you!1 point
-
Almost finished! Bores have cleaned up without any defects. Ports look a fraction off on some of the bores though so hopefully I can cut some valve seats that work! Not going to lie, its quite exciting!1 point
-
Lucky gas Is cheap over there! With the low roof/big stove I reckon kitchen at the back then so you can stand at the stove, instead of kneel. You could still have bed at the back (I like being able to jump into the side door and get changed and hang out and stuff in the lounge in car parks, its abit less obvious and requires less room) just make the kitchen 'slide' out from under the bed, and/or make a section at the end fold up as a splash back/stop crap going in the bedding - you wont be frying and driving or cooking and sleeping atht same time! You may be able to rig something to hand the bikes above the bed? Just don't sit up in the middle of the night! You might need to get the sketchup going. Also do this:1 point
-
I decided against the stairs, mainly because CBF. Next there's some paving to do, and after that I better actually build the cabin I guess.1 point
-
So I bundled the kids The fishing rods, the .22, the flounder spear, snorkelling gear etc into the outlander and we were off: Weather was good We caught some fish, played on the beach, set a net, gathered some tuatuas, mussels, cockles and crabs Here are the pics Feel free to ask questions get me out of the car!! setting up camp bring home some tuatuas, cockles and mussels cooking em up Are they ready Alexander's shellfish he gathered himself Eating the crabs returning the Kahawai frame to the ocean your's truly box of Do-bros dead.. bed time1 point
-
so yea..... my mum has gone to the uk for 5 weeks and said while she was away not to buy any cars, boats or bikes while she is away.... so yea like been a little child and not listening to mum as per usual and doing the total opposite i kind of brought myself another valiant..... so me and miniman76 with a couple of mates went for a drive to auckland to pick up a min shell miniman76 had brought and the valiant i had brought. my 1st intentions where to grab the good parts for the wagon and cut the rest up for they day some decides to crash into my sedan and what not but on inspection it looks a bit to good for this. it came in a million and one peaces, meaning 3 cars worth of parts spreed out under this guys house and one de regd sell on a rotisserie. some of the doors will be cut up and used on my wagon doors or just swapped over just wait and see what the go is. here are some pictures of the car and what not notice the doors stacked in the engine bay, all seats in the front, two boots in the back seat and more doors and guards in the boot..... we made all this fit in the van as well as the ute. (note there are already 3 gear boxes under the mini in the tray of the ute) and this is how the van looked i have to go back up later this month so i will pick the two front and two rear windows up then. if you know of any one looking for ap5/6/vc parts i might have a few spear laying around i may be willing to sell cover my silly purchase. thats it for now i think. ohhh so yea my mum doesnt know about it still as im hiding it in my work shop for the next 5months or so, so she doesnt kill me. haha1 point


.thumb.jpg.b5491dbec1053270a4d99ed376fc2c36.jpg)


This leaderboard is set to Auckland/GMT+12:00