
Leaderboard


Popular Content
Showing content with the highest reputation on 11/15/16 in Posts
-
drove it around the motorways of auckland city and have clocked up about 120 ks in it so far. all seems well at this point…….10 points
-
Finally got my steering column mounted after waiting for a chance to collect the correct fasteners with a busy few weeks at work. Pretty happy with the result it gives me plenty of adjustment still and is substantially lighter than the factory mechanism. Got a steering boss kit on the way so I can mock up steering wheel position and make sure I'm happy with it before I fully weld. Also got a new TIG torch on the way so if that helps my crappy TIG out I might weld the dash bar into the cage.. It adjusts on the matrix of tapped holes and rotates around the centre of the UJ in 1-2deg increments as such. Plan is to get all this Gold zinc passivated like my subframes so should look pretty swish So dad just ordered a set of Enkei RPF1's for the AE82 so I thought I better test fit them on the AE101. Think I need to buy myself a set cause they are stupidly reasonably priced through Barry Manon/MRP and fit my car perfectly! 15x8 +28 for those that are interested. Because slammage... Love these wheels Apart from some photo's I've been planning and organising the build properly for a change. I find myself going out to the shed, staring at the car and not knowing where to start so I decided to write myself a list on this massive whiteboard-like panel I had lying there. It's helping me plan and know what bits I can get underway and what parts I need to order at each stage. This project is 100x more of an undertaking than I ever thought it would be and my progress thus far has been pretty pitiful IMO so time to get organised and get it finished! This list only scratches the surface in terms of what needs doing but should get the car to a good point and give me something to work towards Also in a burst of shed-organisation motivation I finally wired up the 4x 3-tube fluorescent lights I had lying around. First time trying electrical thingys and I haven't burnt the place down yet. Garage is well lit now for night time motivation10 points
-
Sill repair panel is done. To get the curve I used a couple of strips of inner tube on the upper wheel of my english wheel (home made a few years ago). This lets the metal curve over the lower anvil without stretching it so you get an arc in the panel rather than a compound curve. It's not perfect because my lower anvils have a flat piece in the centre (which you need for normal wheeling) but the linear marks are pretty light / should sand out I think. I welded some tabs to the remaining parts of the sill so I could clamp the new bit in with clecos. Also made the inner sill closing panel up, but its a bit ugly so no pics. It won't be seen once it's all together. Have picked up the front panel from Metal Immersions but it hasn't made it out of the Nissan's boot yet. Next is to make a new piece for the bottom of the guard. I could probably weld the old bits back in, but I had to make two cuts (didn't cut far enough up the first time) so it's probably better to renew it all. Have a paint issue I'll ask about elsewhere.7 points
-
One job that I've had to do since ages ago is replace the rubber bushes in the rear suspension arms. The car has always had a bit tyre shake or axle tramp when briskly accelerating from a standing start. The rubber bushes in rear arms of the car were in good shape, just soft. So in preperation for the //oldschool.co.nz/index.php?/topic/53865-oldschool-christmas-tree-drag-day-mark-4-december-10th-meremere/ I enlisted the help of Dave/Sentra and the improved hoist. There's a couple of pictures that I took before the battery on my phone went flat. Not so wobbly hoist: Floppy rubber: Red stuff: Dave!!! Notice the hub bushes around the wrong way??? Whoops. They also needed to be linished to get the hub to fit back in. In: And just because its a pain to get it into 3rd on the dragstrip (rest of the time the gearbox is mint): We also changed the engine oil to a thicker grade......Not much of a change, it still smokes. The tyres shake less under heavy acceleration, but still present. I'll look at getting the car aligned and setup at some point.6 points
-
back in business. few teething issues getting it started but its going well so far (have covered two Ks in it up to this point so not a huge test). ill put some more Ks on it and see what happens. 2016-11-14_07-55-07 by sheepers, on Flickr 2016-11-14_07-54-56 by sheepers, on Flickr6 points
-
5 points
-
Looking forward to seeing this beast at Drag Day.3 points
-
Pulled the lump out and took off the bits I need. Untitled by GuyWithAviators, on Flickr Threw them at the new block along with the new parts. Untitled by GuyWithAviators, on Flickr Went to install the rings, assumed they were STD size pistons but to my surprise after cleaning them up found they're max oversize. Cue quick trip to ACL to get bigger ones as Dad (mo999) was only up for the weekend to help me. Untitled by GuyWithAviators, on Flickr Untitled by GuyWithAviators, on Flickr Put that in and went for a test drive around the block. Had the bonnet off so saw the smoke escaping the loom before we smelt it. Coil had moved over in it's bracket and shorted against the block. Melted the power wire throughout the loom so unstitched that and put it back together with this stuff. Neat. Test drive was good other than that. 5DMK7195 by GuyWithAviators, on Flickr Untitled by GuyWithAviators, on Flickr Also loving the new mesh grilles from Neal and the Channel-Master gutter mount ariel from a Morris 1300 at PaP Takanini.3 points
-
Did you know that Stirling Moss raced a Super Snipe in a rally across 15 countries in 5 days in December 1952? I accidentally went for a long drive on the weekend, from Auckland down to Kaiawa through the back roads, then turned left back up the coast road. This road has a few twists & turns including a hairpin or three, some hill climbs and sweepers. Rally country. I wasn't in a hurry. I never am. But then, from nowhere, I noticed some of BMC's finest front wheel drive wizardry looming large in my mirror. I thought I'd slow a bit further and let him pass, after all, 'said Barry was right up my bumper with lights on. Barry won't pass. Hmmm. Nailed it. First, Whooooorp! Second, Whoooorp! Third, Cough Whooorp! Speedo bouncing around 30ish. Whoosh! Strangely (probably gasping from the blue exhaust smoke?) I left him behind. However, the first set of twisties were coming.... Slowed down hard. Bow thrusters full to port. Tyres protesting. HARD into a left hander. Mid corner bump in the road..... SHIT..... That's right - the rear shocks are stuffed..... Entertaining I'll tell you. Said hydrolastic car passed while I changed my pants, however, not to be outdone I thought I'd give chase. Surprisingly, I kept up - no substitute for cubes in the hill-climb section I suppose. Anyway, I knew the rear shocks were poked after some hairy corners on the way back from Hawkes Boes so promptly did some research and found that a Toymota Cressida (circa 1978-80) should do the trick. I ordered a set of Gabriels (because they are red) from Rock Auto. Yes, they cost $14 each + $20 shipping. Ordered them on the 9th. Arrived today. Makes me wonder how Repco stays in business. Old vs new. GABRIEL 81340 [shock Absorber] Guardian Shock for those playing at home Old shocks came out easily. There doesn't seem to be any oil in them at all. Compressed with a finger and no chance of bouncing back. New shocks near perfect fit. Bushes are a little smaller, however some dish-washing liquid and a rubber mallet sorted fitment. Red for Racing. Look out Alec Issigonis. We shall meet again...... All in all a trouble-free hour long Monday night job. Quick jaunt around the block yielded much nicer dampening. Might have to look at a sway-bar next.....3 points
-
This better seedy?3 points
-
Got the new trumpets on. pretty much the same results as when had wood test spacers in there, good gains. Now back to the exhaust side to fix the reversion at 5k. have started making a new collector3 points
-
Had an update from the metal worker: So happy with the work!2 points
-
Have a couple of leads going for truck driving, hopefully have something to do by the end of the week. Fingers crossed anyway2 points
-
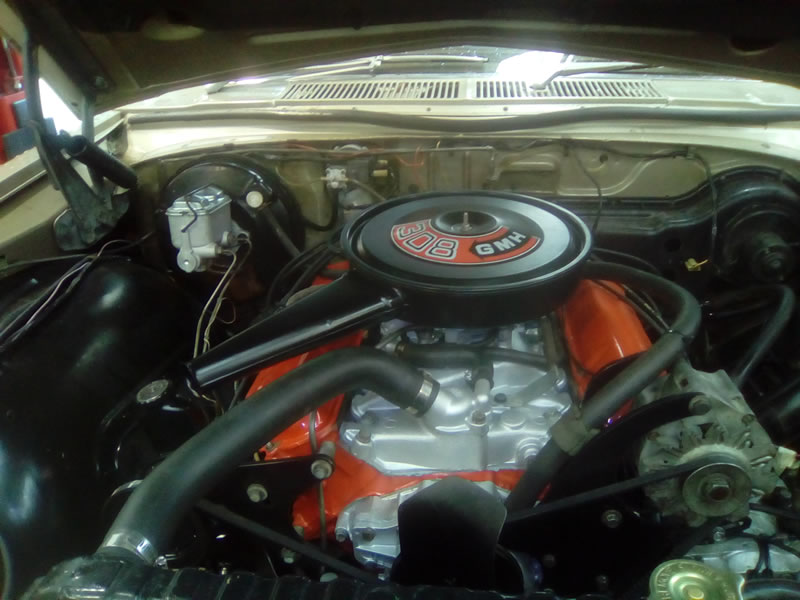
Finally, its ready for pickup Friday. needs few minor rechecks like things re-tightened. dud new oil pump or gasket, leaks a lil oil.. so replacement tomorrow and it is cruising time.. touch wood. Starts easy as. Runs like a well oiled sewing machine with a very subtle but noticeable lumpy idle at the rear.. woop re sanded/ polished & finally painted the tridents. wasnt happy with the subtle scratch marks left from the first time round, so used about 10 different grades of wet n dry.. never again by hand! much happier, but doesnt hide the subtle casting flaws close enough to near mirror finish. looks good from about 20cms away. im told the 352s produce some good smoke, 8mm tread currently just need to replace the front A arm and sway bar bushes, lowered springs. might get the paint professional touched up and cut/polished, undecided on window tint and im done!...
 2 points
 -
My trusty twin carbs were being a right PITA to tune - even OS-GC Threeonthetree couldn't properly tame them. Untitled by GuyWithAviators, on Flickr So thank you to some other GCs, Tim and Sam I have a single carb to run while I get my twins looked at/rebuilt. Had to get overnight parts from Christchurch to run it though, my OG manifold is already suited for extractors. I've noticed a couple of frost plugs are weeping so I will have to pull them out and put new ones in with some sealant according to the internet. No dramas though as the thermostat gasket needs the same treatment. 5DMK7194 by GuyWithAviators, on Flickr Also did a temp repair to the major rust spots, looks okay. Just need to wipe an oily rag over the new paint right? 5DMK7193 by GuyWithAviators, on Flickr And more excitingly/speaking of rust. I pulled the dash out and changed over the middle section to my black vinyl GT dash with tacho (not yet connected). While I had it out poked around the air vent channel and dug out some rubbish and uncovered some rust holes. Put rust kill acid on them for now and will get those repaired eventually. Dash looks swish though / not the yellowed wiper switch / anyone have a decent spare? 5DMK7189 by GuyWithAviators, on Flickr2 points
-
M8, this lived a few houses down from my place. I was pining over it hard and wanted my mate to buy it but he's a pussy /cool story2 points
-
Been a long time with this one too! Greg smashed out the seat a couple weeks ago in time for me to take it to the Smash Palace bike show! Fucking love the seat so much but since its done ive discovered my bars pull back too much and its made it quite awkward which I knew it was kinda gonna be but wanted to push on. Last night I crashed at a mates place for the night and talked Harleys as we both have Ironheads and while talking about my new seating positions and he mentioned some bars I brought a few years back by mistake I sold him So I brought them back from him and tried them on this arva. Will run standard switches on the bars to simplify things and getting brake lines sorted in a couple weeks so ill be able to ride this thing before the end of the years out. Enjoy these photos in the mean time2 points
-
Shit its been awhile since ivbe updated this. Missing a few photos of the adventures this bike has been on. This year from memory Ive ridden to the west coast 250k in one hit on the 50 motor and it loved it. Heaps of local rides too. prob close to 5000k in the last few years on it. For this years Dirtmasters I fitted Suzuki B120 forks and Rear shocks and Dirt tires and it carved up the track and handled the jump all good. Then in October Hogan hooked me up a deal on a YB100 so a new piston and rings and gasket set and this thing was strumming so the following weekend I stole the motor and it bolted into my F5 frame and everything swapped over easy and have done a couple hill rides on it and its so much fun. way more power way more fun I fucking love this bike so much. so much fun for 10 bucks gas and so many trouble free miles.2 points
-
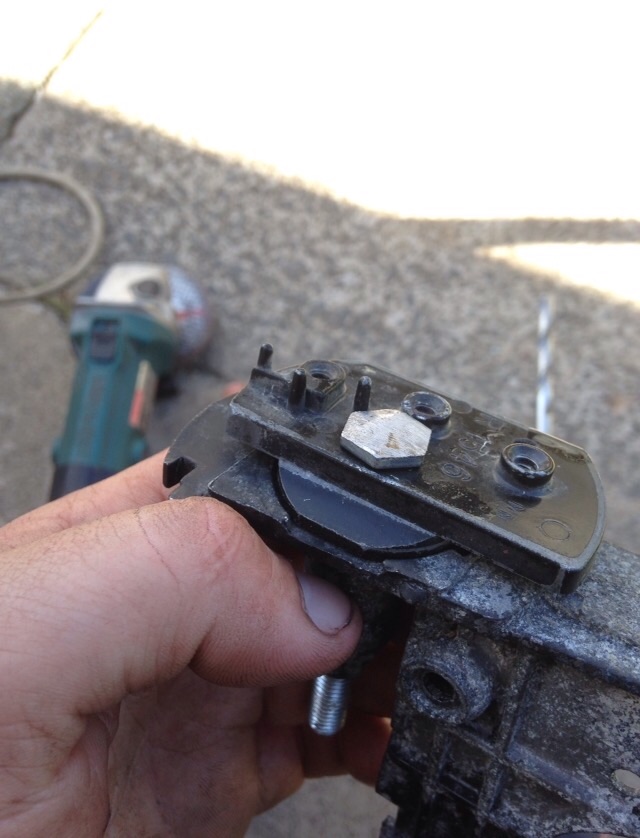
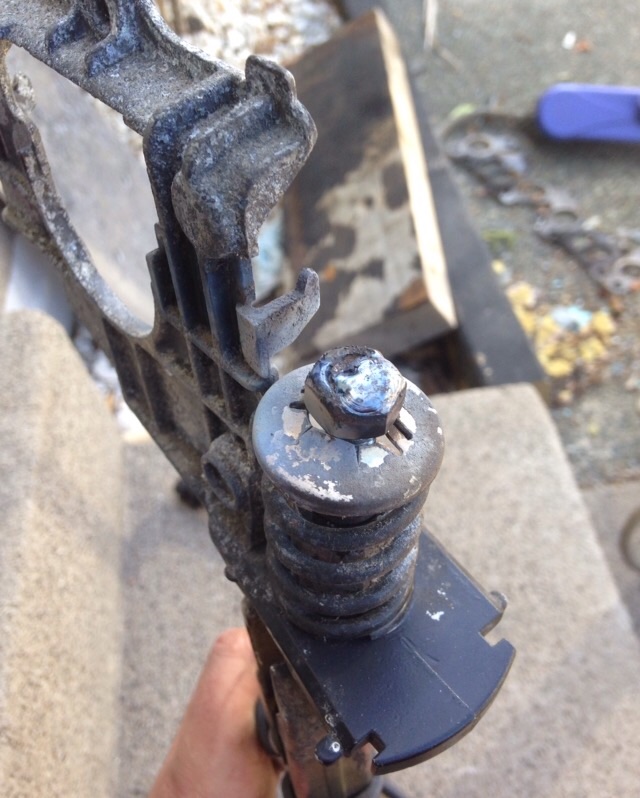
Its been a while since ive posted anything and its been a while since ive done anything to the bike. I recently bought a bedford van and have been chipping away at the bedford every weekend to get it ready for the Burt Munroe Challenge. Over the past week and after getting motivated from the Smash Palace Bike Show. I bought a new pedal rubber at the Mcleans Island swapmeet, but the shaft was too small in diameter so i cut it off and welded a piece of 16mm round bar. To mount the mudguard i turned up some steel bungs and drilled and tapped them to M8, then cut and drilled a bracket out of some 50x50 angle. The angle was tacked to the frame. I wasnt too happy with the match of the radius of the mudguard and the tyre so i remedied it by using a method i saw on the lowbrow website using 2 bits of 2x4 to widen the distance inbetween the guard and in turn tightening the radius.. The black marks are refernce markd every 50mm To mount the middle of the mudguard i drilled and tapped some 16mm roundbard and cut some 22mm tube for the round bar to slip in to. I tig'd the 2 together and faced it up on the lathe. Another bung was made to go in the mudguard in the centre of the rib so the 2 bolt up flat together. Knocked up a kickstand at work from some 16mm round bar and some 25x25 shs Tacked on the brake stay tab on the chainstays and held it in place with a strong hand tools magtab. I'd recommend thes to anyone Front brake stay2 points
-
2 points
-
And the engine looking right at home... The clutch and flywheel assembly is fitted now. So next we continue with the assembly, alternator sidemount needs to get fabricated to clear the chassis rail, attach the other ancillaries, remount the fuel system components etc. Looks like i'll be getting some custom MCA coilovers made up for the front as well. This way we can achieve more low as it is currently sitting on its bumpstops and there is no suspension travel so would bottom out everywhere as is. We will probably put off the interior retrim until i'm back in NZ now. Cheers, Tai1 point
-
I just finished my final year of uni, had a job lined up and at the 11th hour they pulled the plug, so until I work out were i'm off to next i'm looking for some work to keep things ticking over, i'm keen, capable and have quite a varied CV but preferably looking for machinery/truck driving if possible, i'm licenced to class 4 + wtr with experience in civil (water cart/digger/roller/shovel stand) and agricultural (baling/stacking/wrapping/rolling ect). Anyone need an over qualified operator to fill in some gaps?1 point
-
This is true but it's an absolute cunnyhole when you decide to change your wiring later on haha. Although most people dont like it, I like the split wrap loom stuff for a good compromise between not looking like a taped up mess but also being easily accessible later on to tinker with. Depends on how complex the loom gets I guess.1 point
-
Someone should buy this one I think it's kinda cool http://www.trademe.co.nz/motors/caravans-motorhomes/caravans/up-to-12-ft/auction-1195984511.htm1 point
-
I had a similar problem, it was a bad earth on the altnator to the body,1 point
-
Good effort mate!1 point
-
Saw your beast parked up on Galatos Street today. *Swooon*1 point
-
I think HEB has the Marlborough kiaks road maint contract. but she's a pretty big job Jim. I imagine it will wind up being done by a collection of companies.1 point
-
I would love to see pics! I saw a set of 13s in usa the other day longchamps.1 point
-
Haven't done too much over the last few months, just been driving the car to & from work also bought some reground cams. And some pics without all the gumboot rally sponsor stickers1 point
-
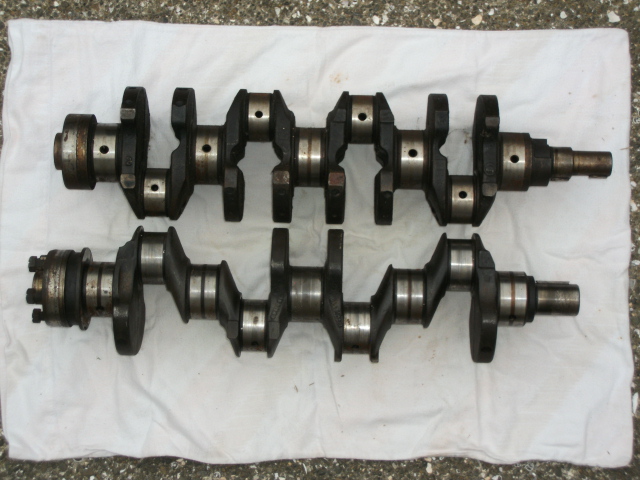
Xmas has come early- thanks to some intensive interweb digging & Smoking Joe, I now have an alternative to the 2y crank, a 3T. Top 1 is 3t looks much the same as a y series. Me is very happy.
1 point
-
nice! yep they'll look good on it for sure, there used to be a red series 1 coupe from Christchurch i think that used to get about with hotwires on it. Yep 14's would be ideal, mine are 13's, but beggars can't be choosers with 4x110 as ya know.1 point
-
Mate can you fit one of your wee motorcycles on the tray at the back ? Park up and set the camper up and use the little bike to get around1 point
-
Sooooo these were purchased in the weekend….original 13x7 Hotwires that have just had a professional refurb at Arrow Wheels. The caps are coming shortly too. Oh, and I got 2 more Toyo 215 50 13s too…. The engine bay is all but ready to prime this week and the dash is basically buttoned up also.1 point
-
That tray tho.....talk about mashing two eras of styling together haha1 point
-
And a teaser for the final product... I'm dropping in to check it out hopefully on Tuesday so i'll get some better pictures then. Haters gonna hate here //oldschool.co.nz/index.php?/topic/44085-tai-scamps-mazda-1300/ Chur, Tai
1 point
-
Shit yeah lets do this! Grab ya wagon, van, sedan or tent and have a good time with bad friends Just leave your rowdy cams at home. Don't wanna get stuck yet again!1 point
-
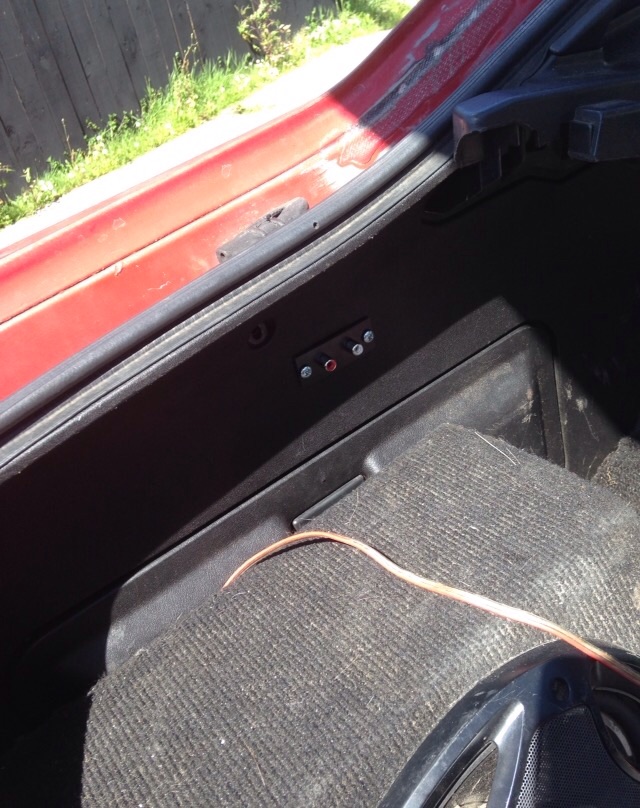
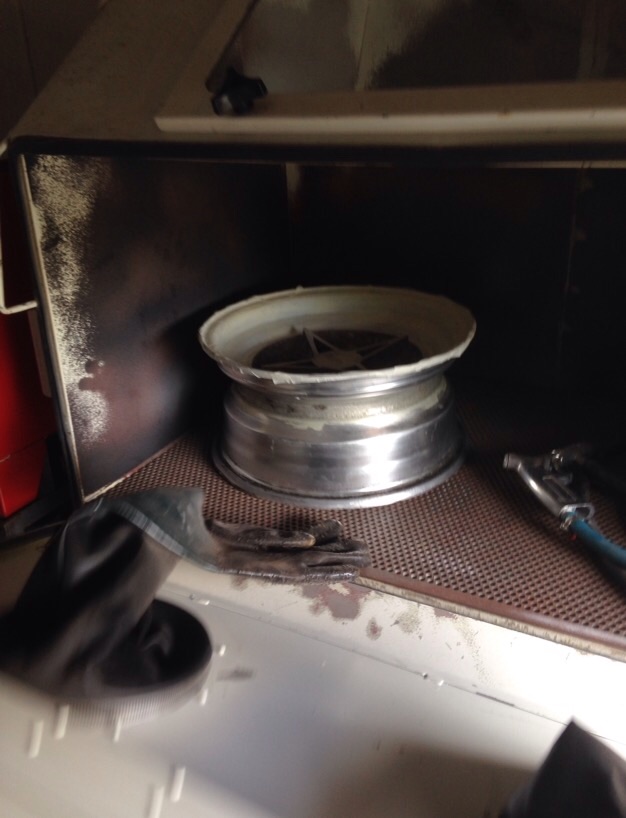
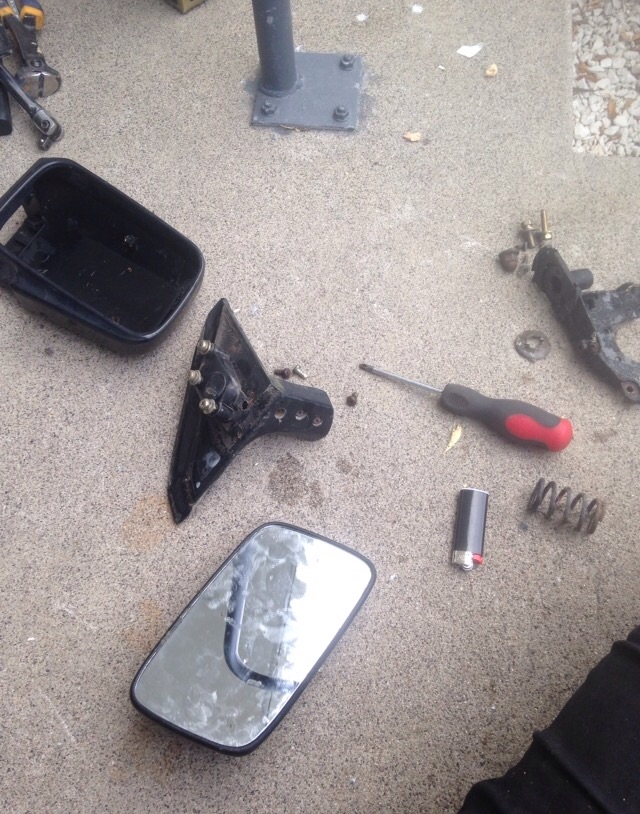
Since the car is pretty much a daily driven ute I thought I'd make life a little easier. 6x9's make for a good sound system on long trips but moving wheels/engines and other crap is a pain in the ass. Thought I'd keep it OG with the White and red plugs. Sorced from jaycar they didn't break the bank and make every day useage miles easier. Other thing that's been bugging me is the hideous repco wing mirrors someone put on. Prefacelift mirrors are ok I guess, big improvement over repco jobies. Just running drivers side. Big ups to the bloke who drilled holes in my doors for no reason Spring thinger retainer clip thingy had come off on both mirrors of donor car, nor did they want to go back on. Stopped by steel masters and picked up a bolt long enough with an 8mm shank. Had to cut the head down to clear mounting bracket. And I welded the nut on for good measure. Was pretty fiddly pulling apart and getting back together so want to avoid doing that again
1 point
-
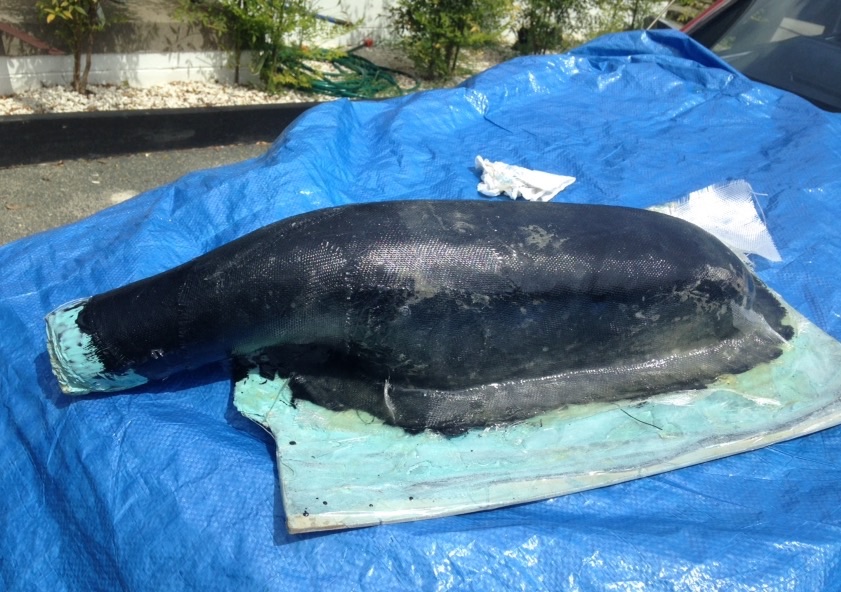
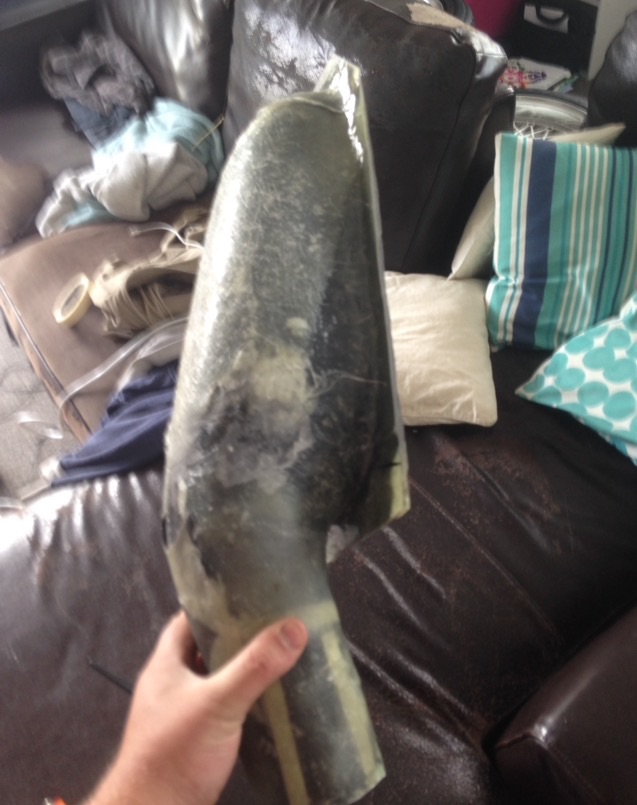
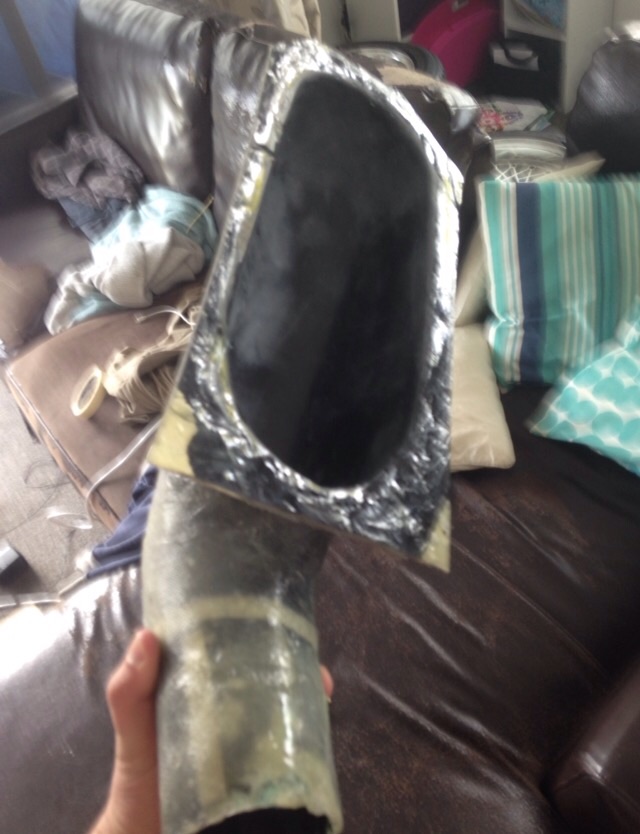
Moulds getting there, little more to do still. Haft to touch up the gel coat where I got s bubble between the gel and glass. I little support to do and maybe a base so it sits flat. Went to a mates and started sand blasting some OG wheels I picked up. Finally picked up a drivers side window mount mirror so can pull thoughts hidious rep I things off!! Cars got fender mirror door on passenger side so I can probably just run drivers side and if get hit up I'll just say it's factory like that
1 point
-
Hey guys Have entered the Corona into drag day for the 1st time. really looking forward to it. Car needed a few things touched up for wof and def a new clutch ! Brought an electric dizzy n ignitor from aussie which should arrive next week. Also brought some factory fender mirrors what a score !! They look great Anyway after fluffing around with them decided it was time to get to the clutch so out with the engine Clutch was well buggered lol belongs in a museum Had a test fit while out Got a bit carried away and ended up cleaning the head, painting the block n gearbox, radiator fan surround and under sealing the whole Corona!! While taking the front wheels off I noticed a split in the flexible brake lines. It only went for wof check the same day n didn't get picked up on.. lucky I noticed it. So while I was at it I decided to both both sides just to be safe. Looks a million bucks !! Will install electric ignition during week need to get another tacho as my smith's one won't work with electric only points ignition Looking forward to a new clutch too that'll be lush Cheers1 point
-
I have been slowly working away on this van, and dropped the engine in yesterday. What a bloody mission! The extra height of the supercharger made it REALLY tight to get in there. I had to notch the front crossmember to allow the sump to drop down and clear it, and it is really tight for space in all directions. But it does fit! And no cutting or beating of the floorpan or bulkhead required! There are a few tweaks needed for clearance, but nothing major. Here is a pic of it sitting in place. I have also installed a MK3 Transit power steering box. The steering box was straightforward enough, remove the Mk2 mounting plate and fit the Mk3 version. For the steering column I used the Mk2 outer part, and cut it off where it protrudes through the bulkhead. I fitted the Mk5 shaft to this. And used a coupling from a Mk5 with the 2x UJ's so that I could get rid of the rubber coupling that the Mk3 has, and also keep the steering column on its original axis. There was a little bit more to it than this, but you get the idea. //oldschool.co.nz/index.php?/topic/50625-browndogs-supervan-2-yet-another-one/
1 point
-
this has been pretty shit on the whole and my two options were cry like a baby and throw all the toys out of the sandpit or just shrug and get the fuck on with rebuilding it. 2016-11-03_07-23-14 by sheepers, on Flickr 2016-11-05_02-42-21 by sheepers, on Flickr 2016-11-05_04-12-08 by sheepers, on Flickr so yea, new head is being worked on by the great people at Glendene engine reconditioners and i should have it back mid week. gonna change a few little things around to make life easier and this time it won't shit itself.1 point
-
2016-10-30_12-33-05 by sheepers, on Flickr 2016-10-30_12-32-55 by sheepers, on Flickr1 point
-
Found this stuck under the back seat. Smoking pass! (Although the Ben Dude reckons its from his tow car)1 point
-
I only drove it a few more times after my last post. Decided after the second time it died on Queen Street with low oil pressure that it wasn't going to be practical driving it everyday. Picked up a sweet Nissan Sentra Sportwagon from Zebra to serve daily duties and give me time to fix the Austin properly. That put the Austin the garage (first time since I bought it in 2012 that it's had dry storage (the paintwork shows this )) Also you may recall in a post from last year I mentioned it was used for filming... Well it was aired not long ago. Season two of Westside! Complete with lopsided hydrolastic. vlcsnap-2016-08-09-16h53m54s756 by GuyWithAviators, on Flickr vlcsnap-2016-08-09-16h55m30s144 by GuyWithAviators, on Flickr1 point
-
Just to prove it wasn't a fluke, here are all of the narrowed rear suspension components:1 point
-
Every day is a school day when Phil is around.1 point
-
well my thread on my series 2 LHD bought this out the back of nowhere in n.ireland, haggled over price etc as was looking bit much for a rusty car lol heres a picture of what it was like when i bought it her factory series 2 rotor wheels discussion thread - //oldschool.co.nz/index.php?/topic/44328-rotor-dude-mazda-cars-discussion/1 point
-
There are always the questions being asked on this forum. "What is considered Oldschool?" or "Is my car Oldschool?" These are always very difficult to answer and to save the conflict you will more often than not be told to piss off. There are no real hard and fast rules for a cutoff date or style and the parameters can change over time but we have decided to try and define this as best as we can here. Some points you will agree with and some you will disagree but this is the best medium we can come up with - accept it - please. Oldschool cars are not defined by make or model or country of origin - so make and country of manufacture is irrelevant - end of story. What we can agree on is that anything made before November 1986 is definitely what we would call oldschool in NZ - this was the date when the government changed from black plates to white plates. We can mostly agree that if the model was made prior to 11/86 and continued into the next few years without a significant facelift would be well regarded as oldschool too - a good example is the Toyota KE70 which was made until mid 1987 and still sold new for the 18 months or so following that. Where it gets muddy is the next 5 years from '87 through '91. Some cars fit and some cars don't. Just as 1949 is a marker with traditional Hot Rods and fenders being moulded into the body then we will say 1989 is a marker for Old School cars and bumpers being moulded into the body. In both cases there are valid arguments for cars on either side of the line that are not considered correct by some. No - there will never be a standard answer for this and there is no need to force your opinion onto others no matter how strong that is. Getting your heckles up and starting an argument over it will result in your thread or post being deleted. Because we don't want the conflict. If you find your project thread has been moved to other projects and you truly believe it should be in the OS projects then PM a mod or admin and put your case forward. Thanks Admin Team1 point


.JPG.48b13980a6c90d9b0813be9f3a2cd547.JPG)

This leaderboard is set to Auckland/GMT+12:00