
Leaderboard


Popular Content
Showing content with the highest reputation on 05/23/16 in all areas
-
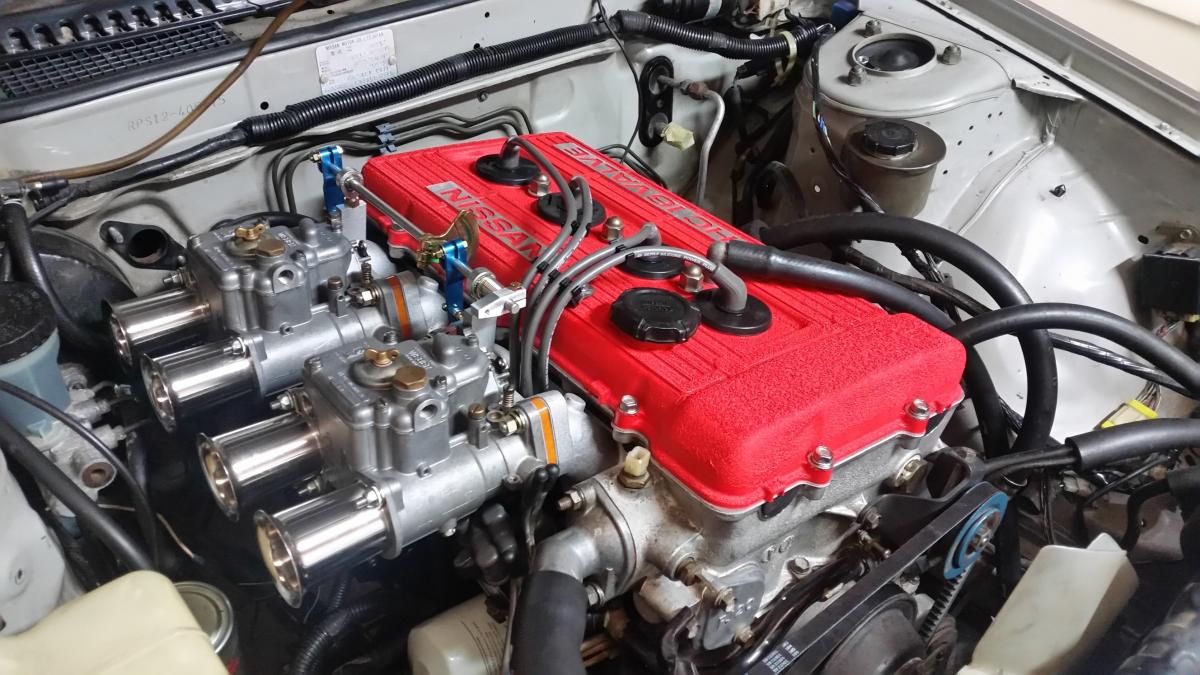
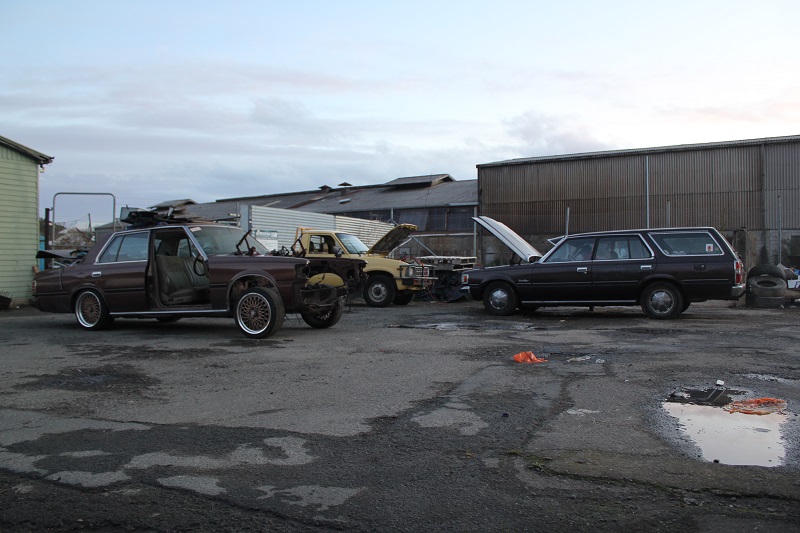
WARNING SHARN AHEAD Rather than posting it in spam I might as well start a thread as it's going to be somewhat of a project, just not the normal slammed out OS project lol So I've started a lawn mowing/property maintenance/handy man type shit business And as sticking the weed eater out the rear window of my Altezza doesn't convey the most professional look I decided I needed a van/ute/wagon to haul my gear around. Test drove a couple Previa turds, yuck. Couldn't scrape up enough $$ for the HiAce I was offered, almost brought a Nissan C22 Vanette, but the seller sold it even though I told him I'd take it pending J5 or VG having a look. Probably a good thing though as the mighty A15 probably wouldn't have liked being loaded up with gear and towing a trailer full of greenwaste for long! Also came damn close to picking up a fairly tidy 2002 VX Commodore wagon for $1500 from a dealer, would have been good to put a couple hundred $ into then flicked off for a tidy profit, but I thought about it too long (over night) and it was snapped up by someone else. Anyway a garage around the corner from home often sells cheap vehicles on the side of the road (kinda almost cooked an Estima there trying to sell on one of my test drives) and a couple weeks back this Delica popped up out the front of the garage and it was almost in my budget range of $0-fuck all. Took it for a test drive, straight away I used the fucked clutch and oil leak to my advantage and got a good chunk of $$ off the price and it became my van with a nice new "clean sheet" WOF from the same garage on the screen... Pulled the very rear seat out and lined the floor, I can fit 2 mowers and all my gear in the back and still have a 5 seater wagon. A few minutes after this photo was taken I learned that it has an open diff and that the torsion bars have sagged/been wound down. Went to go straight out the driveway and the front bullbars bottomed out hard on the road and left me stranded with one rear wheel spinning on the grassy gravel drive As said the clutch was well rooted, slipping like anything, but since a full kit is under $150 trade at BNT with a free flywheel grind I wasn't too phased! Blasted the engine/box with 4 big cans of degreaser and went to town on it. Typical early 90's Mitsi, the clear coat is fucked! Easiest clutch change I've ever done, under 45 minutes from driving into my workshop to having the box on the floor, wasn't too much longer to get it back in. Found it's got a new/recon starter, it was the pretty much the only thing that wasn't buried in congealed oil, nice shiny new looking fuel pump too! Was a decent rivet groove in the flywheel too, but didn't think to get a pic of that before dropping it off at BNT. Shiny box haha, my boy spent ages with a scraper then diesel and a dish brush on it. "Regularly serviced" "Clean sheet WOF" That's fail crayon from the main WOF centre in town... Found the dizzy when turned to max advance was timed to TDC, it was also 180° + 1 tooth out! Reinstalled the dizzy correctly and set it to 7.5°, it now revs over 4000rpm haha. "new rocker cover gaskets last week" translates to a touch of orange poo smeared on rock solid stock gasket and half round block, changed to new ones and it doesn't seem to be leaking any more/still a possible front crank seal dribble though. Was backfiring a LOT between gears and has been using an absolute shit load of gas, I'm putting that down to the rather messed with Mikuni Solex "electro jet" carb. I've changed most of the vac lines as several were leaking, set the choke and idle up RPM, changed the thermostat so it actually gets warm enough for the choke to turn off and cleaned out everything I can get to, found a tiny adjuster behind the carb that sets the idle adjustment range too (think it's the fast idle control), when I got it I couldn't get it to idle under 1100rpm, now it holds 750 smoothly. Today I discovered that the accelerator pump was set to the max, 2 pumps of gas was enough to flood the engine and the pump arm was over-travelling so far that it was squirting a little blast of fuel in when I lifted off the gas, could explain the back firing and the super rich smoke clouds when the choke was on?! lol Backed the pump linkage off a lot and in the 15 minutes I've driven it since there's been no backfiring, so fingers crossed it will also stop drinking so much gas, 1/4 tank for 18k is just nuts! Don't think the vac secondary are opening either, but that's a mission for another day. When I've got some more money I'll likely be changing to an Aisan carb from an L300 or something and doing away with all the vacuum and emissions shit!! So yeah I know it seems like a total POS, but at this point I've got less than $2k in it and other than the fuel usage and the torsions needing to wound way back up it drives really well. Engine is smooth, not smoky once warm and makes no bad noises, found a warranty void melt tab on the frost plug behind the flywheel which leads me to think it has had an engine rebuild at some point in it's history too. Can't find ANY rust beyond a hole in one of the sliding window frames, only 210k on the clock and since the speedo is rather optimistic* it may be lower still. *Wondered why I kept getting tail gated so checked the speedo against GPS, 60k on the dash is really 50, 85 is 70, 100 is 80, 135 is 100! Future plans inc properly decking out the back for my gear and I'd like some Valiant steel wheels. TL;DR? I brought a shit van that I'm trying to make less shit and make a living from.10 points
-
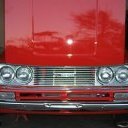
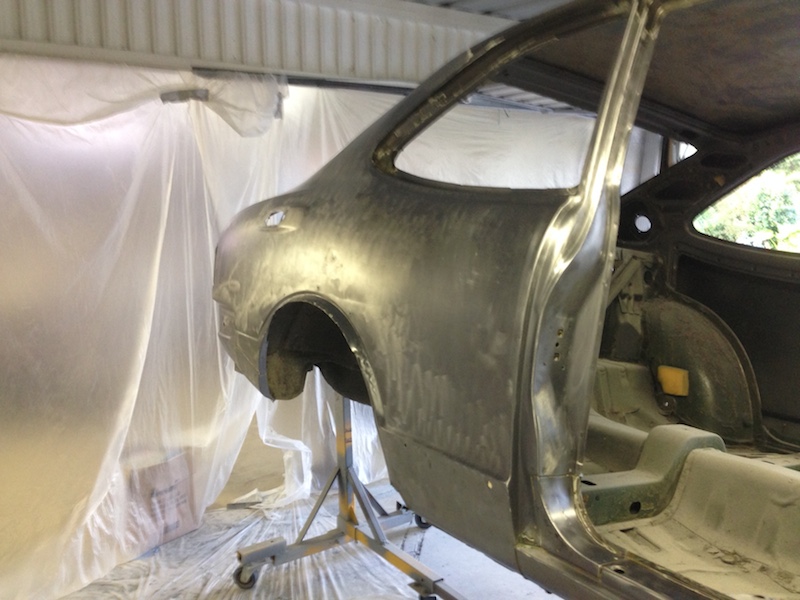
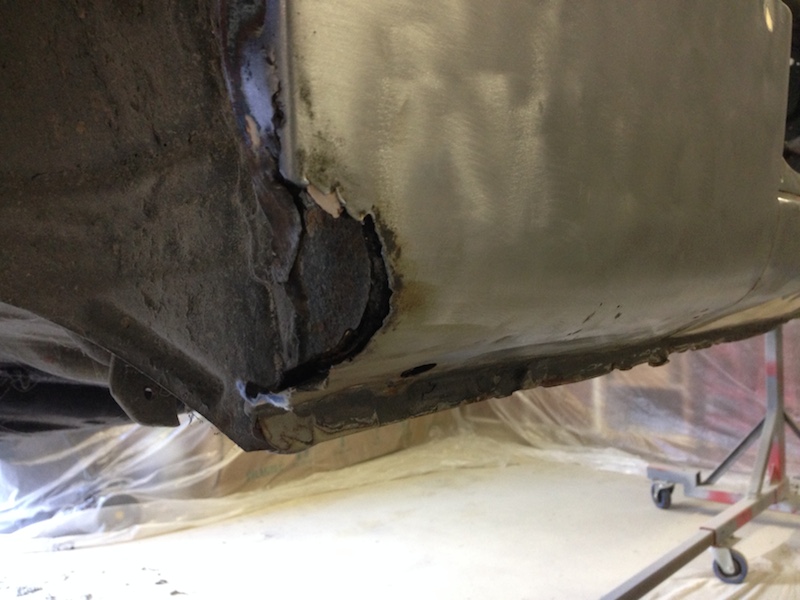
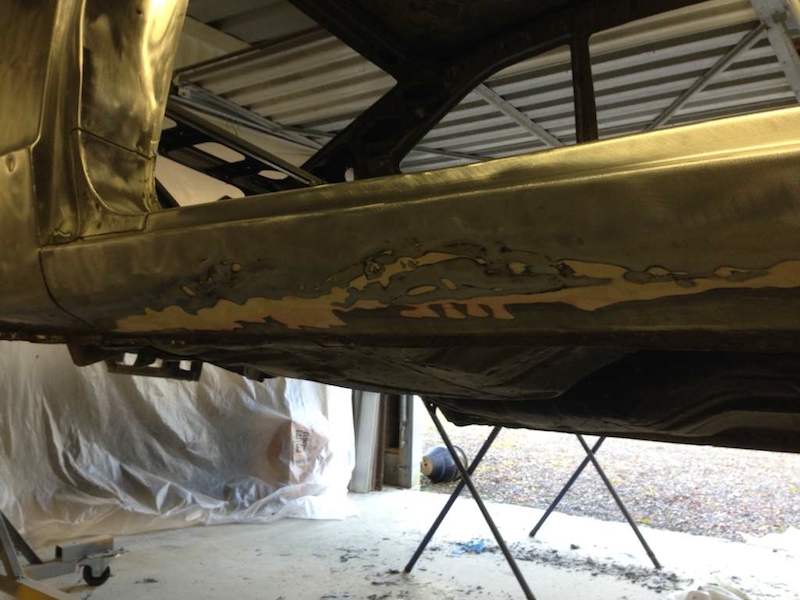
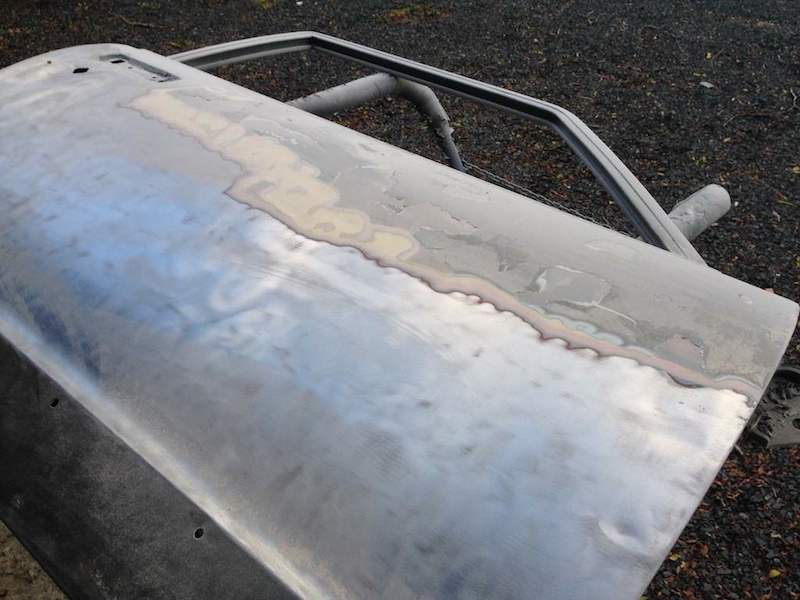
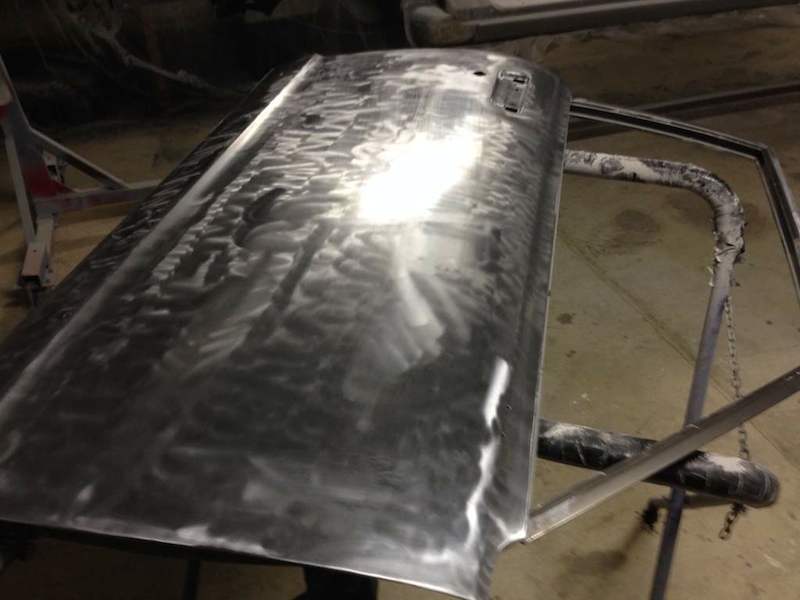
Pulled out all the doors I have and decided to flag the originals and go with the other set of rx4 doors I have, as straight as the originals are they have a few hours of rust work in the the bottom so time dictates it's far simpler to go with the 4's Originals, So I went ahead and stripped the blues and did some minor panel work on the bottom corners which had been dinged/bent slightly, they've got a shit ton of paint on them, like three separate primer/top coats with the last being enamel I guess as it turns to a runny mess when I hit it with the blue wheel.. Patch in the middle is me trying stripper on it, other patch is the only ding, Some very minor surface rust along the bottom seam, was also under the seam sealer so hopefully it's not in the seam. A good penatrent should fix it I guess.. Same as the other door along the bottom Also started stripping the drivers rear 1/4, Shit paint.. Shit primer, from memory is only 1 or 2 coats.. Glad my mate pursueded me to strip it, there's lots of little worms underneath the primer..8 points
-
Top notch sharn Fuel A+3 points
-
Trailer has been stealing most of my car time, but also been waiting on a couple of things. When i went to bleed the rear brakes after taking the shots above, one of the lines that joins the caliper halves together had a leak, i though it was some grit in the threads or the flare being over tightened, but no. Anyway, all back together now with new lines (shoulda got them made up first time around) Also pickup up a Civic Radiator from Zebra when i picked up the trailer to try, and it JUST fits. Dont look at my janky extened pulley! The nose of the waterpump shaft is only 45mm from the radiator and is pretty much bang in the middle of it This is all so i could remove the noisy, hp sapping and unreliable electromagnetic fan. It also has a shroud so might even suck some air though the radiator instead of just mixing the air in the engine bay with an assortment of fingers. I may swap it out for a bigger pusher fan on the other side eventually. Just need a top (and probably a bottom) hose so i can run it for longer than a few minutes, which i need to do when i use this to pull the spare car from its pit on the lawn. Next job is to clean up and refit the towbar to do just that.3 points
-
Got a WoF on this the other day, expires at the end of April 2019! Also started boxing in the draw bar for more storage, which it definitly needs now that I sold my van today ( ) so all the camping stuff from it ended up in this. Errrm, yeah. we might need to travel a bit lighter now I already cut down the sink (mrs wears contacts so its a prereq) just need to fit the 20l water container up and under some how some way (keep coming up with funky ass shit. like every single day). I think it will work ok if i strap it up like a fuel tank filled via the filler with a drain tap on it. So drawbar storage - this is made partly from the bed from the just sold van, which was made from the false floor of the van we had before that and partly from left over 18mm ply from the Blimp trailer me and Euron8 made. See it WILL come in handy one day! Will probably stick some lino on the inside of this just cause. Heavy stuff (like a 12v battery for a stereo, lights and phone charger), jack and such will need to go in the false floor of the van itself, to minimise load on teh tongue, so this really only for light stuff like wetties and whatever. I will fashion a special stick of the appropriate lenght to allow it to sit level as a bench top as well. Closed up the awkward gaps at the sides with the old mud flaps from the van, should also assist with aero as the front is pretty much dead flat otherwise, and ive at least boxed out the massive 'air intake'. The flaps mean its also not fully air tight to help vent the battery a wee bit, but it will only be charged at home on the charger so that shouldnt be to much of an issue I will try to get the spare up underneath once ive figured out the water situation, and put a bike rack where the spare mount is currently on the front i reckon. Just need to go somewhere in it now!3 points
-
One more. Symphony in motion. The eagle eyed will notice i painted my rocker cover with wrinkle red - not quite the correct shade but looks better than before. Also got some new ignition leads from Japan and a new starter motor from rock auto of all places! My S12 clutch master has no clearance so i need to fit a R33 clutch master (they are shorter) Currently making the datsun 1600 FJ conversion exhaust headers fit my car.
 3 points
 -
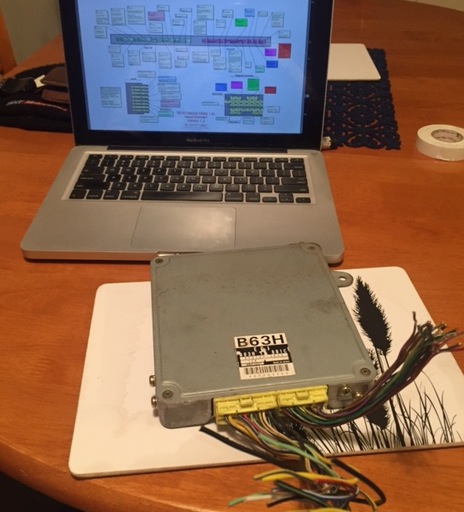
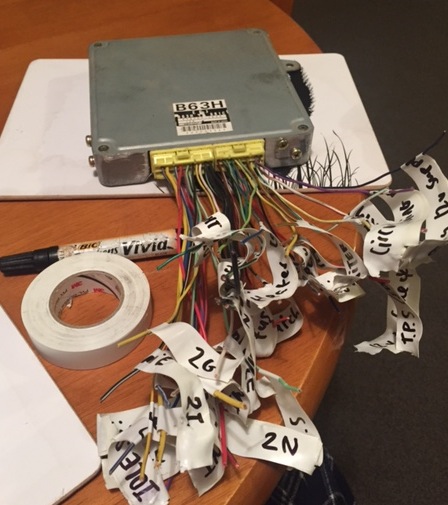
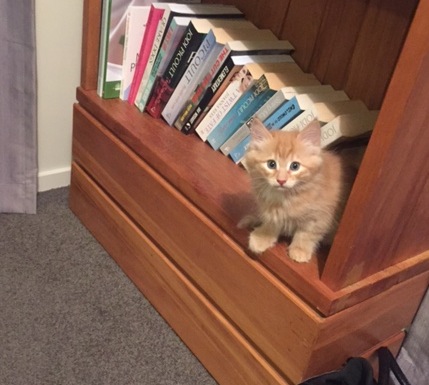
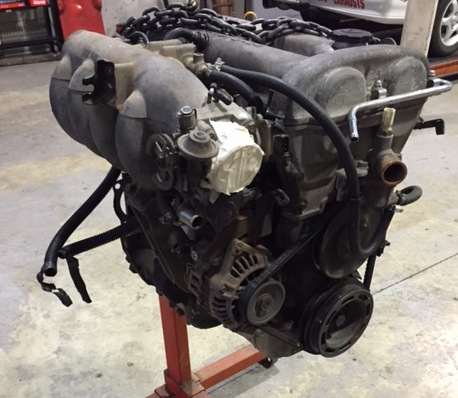
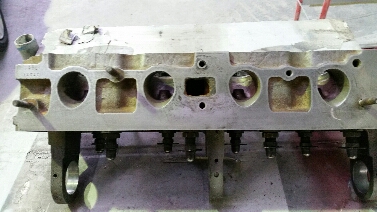
found a sweet pin out diagram for the mx5 ecu so thought it might make life easier if i label all the wires. going to make a mounting bracket to fit the ecu up in the passenger kick panel and maybe put a fuse box and some relays next to it. this is Teddy degreased the motor today, ready to strip it down for cam belt ect
2 points
-
Oh look you can get ergonomic seats and fuel tanks all on one2 points
-
It's basically a tank with a turtle neck sweater used as inspiration.2 points
-
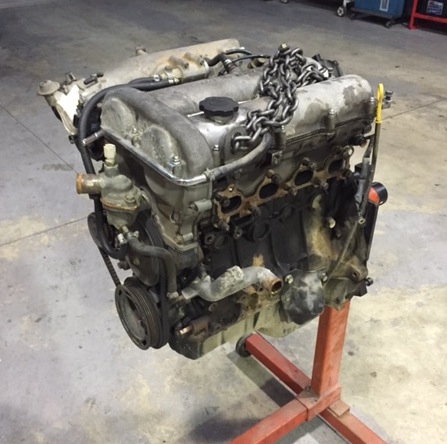
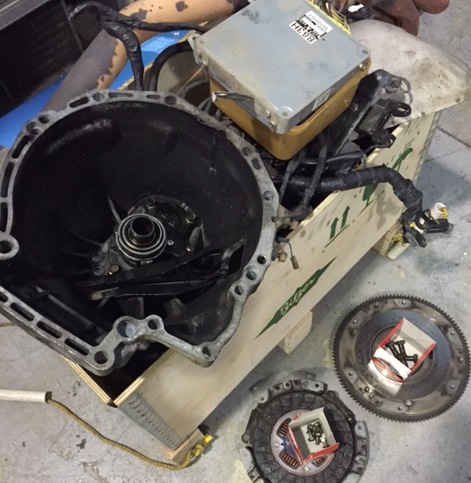
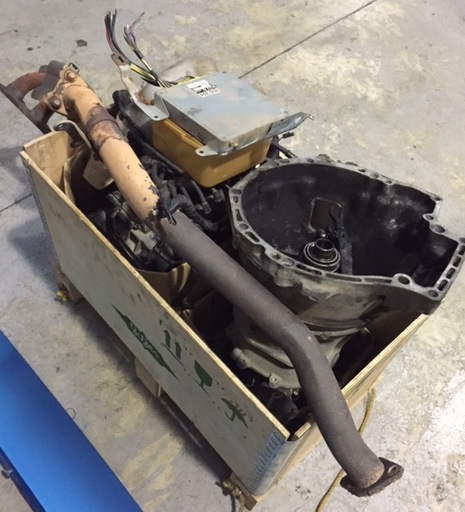
engine turned up today, got it onto a stand ready for a good degrease and some paint ect the fella i got it from was such a good dude and cut all the sections from the loom i needed and given me the front half of the mx5 box to put onto my 626 box. plan is to clean it up and give it a paint, do the water pump and cam belt, then try get it in and make some mounts. while I have been waiting for the motor to turn up have done a few little jobs, have cleaned up the spare wheel and given it a paint ready to put a tyre on and winch it up in place, have also dug out the front discs and worked out they are UN courier vented discs, have moded some top arms to take the newer style top ball joint by moving one hole and slightly elongating two other holes, need to see if i can find the spare lower arms to see what is needed to fit lower balljoint or if the old one is the same taper ect, also about to clean up the tow bar ready to paint up and bolt on
2 points
-
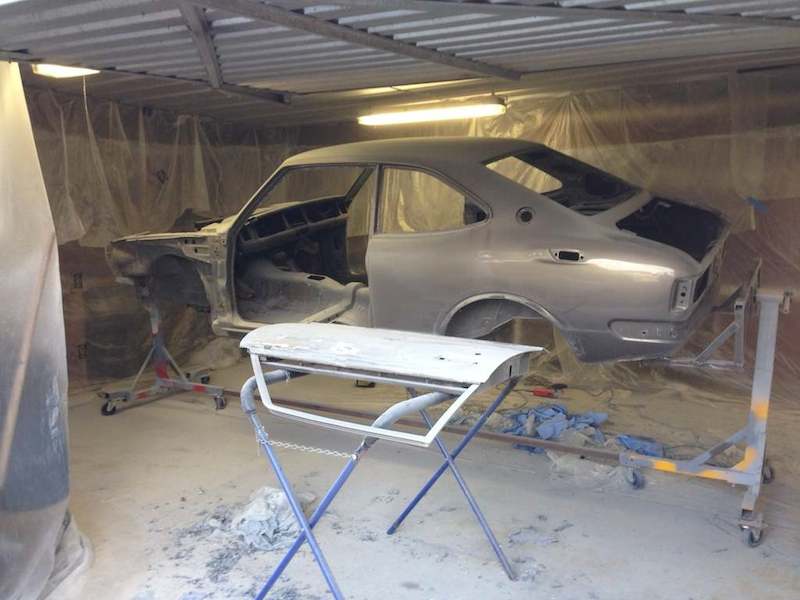
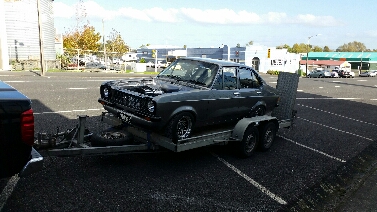
Another day in on the car today. Joe and I finished prepping it for the paint shop on Thursday and I dropped it off this afternoon. List of jobs to do are: - Clean up White Paint Front Screen Surround Rear Screen Surround Sunroof Hole Parcel Shelf Boot Spotlight brackets Wiper Holes - Paint all trim bits Satin Black Front Panel Around Side Windows Tops of Doors Dash and inside A Pillar Bumpers & Handles Fuel Tank & Cap It should all be done by next weekend so fingers crossed... Once that was done, we spent a couple of hours this afternoon cleaning up all the glass so it's ready to go with the new headlining and complete rubber kit. Method was: 1.) Scraper to remove Silicone / Black Paint over-spray / General Crap 2.) Meths to remove sticky crap left from tints and more general crap 3.) Glass cleaner and news paper All screens came up looking mint, very happy.2 points
-
Final update - unless I find the VHS tape of these beasts running. After I had it complete we had a weekend of fun on the farm with two others just like this one. It went very well handled good - got great bite on the dirt - when launching from a standing start it would pop the left front wheel off the ground! Two mishaps though - my girlfriend (now wife) took it for a spin (literally) and removed 20M of the boundary fence and nose down in a water race - it was pretty exciting on wet grass! We pulled it out of there bent the bumper back off the wheel and fixed the fence all good only a bit of hurt pride and sore knee where the ignition key on the dash got it. Funnily enough I was talking the the old neighbour a while ago and he still remembers this happening - it was in the 90's! The other thing of note was that I learnt that Bedford diff's are not strong - but not in the way you might think - it broke the axle off outside the bearing and of course the wheel fell off causing the passenger riding in the back to somersault off, apparently he landed on his feet. After that I replaced that diff with a Transit one - the heavy duty type with floating axles - and had no further problems. Drove the thing lots and lots after that, places you cannot go now - rivers, beaches etc. One memorable trip down the Waipara river from the SH1 to the sea and back. Never let me down - I learn't that towing it into a Nor'wester up hill to Kirwee with my L series Turbo Subaru was not a good idea - BHG on the Subaru! So I picked up a cheap and very rust HQ Ute with a 253 in it - not a real V8 one though which made a much better tow vehicle. I will just leave this here - not long before I sold it due to family and lack of place to store it - I still miss it! Thats me and GuyWithAviators when he was just two years old! buggy0022 points
-
There is a distinct lack of burnouts leaving caffeine and classics....2 points
-
Quick update and might be bit of a surprise! Now wearing a pair of genuine Weber 45 DCOE carbs
2 points
-
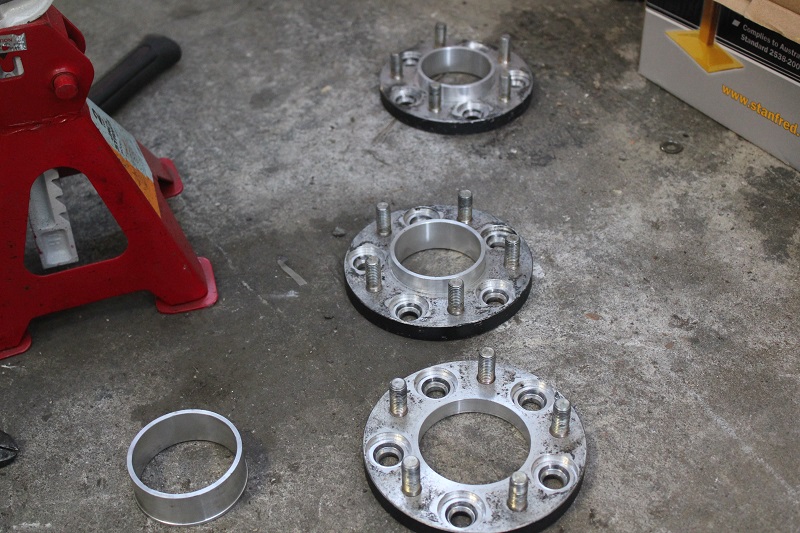
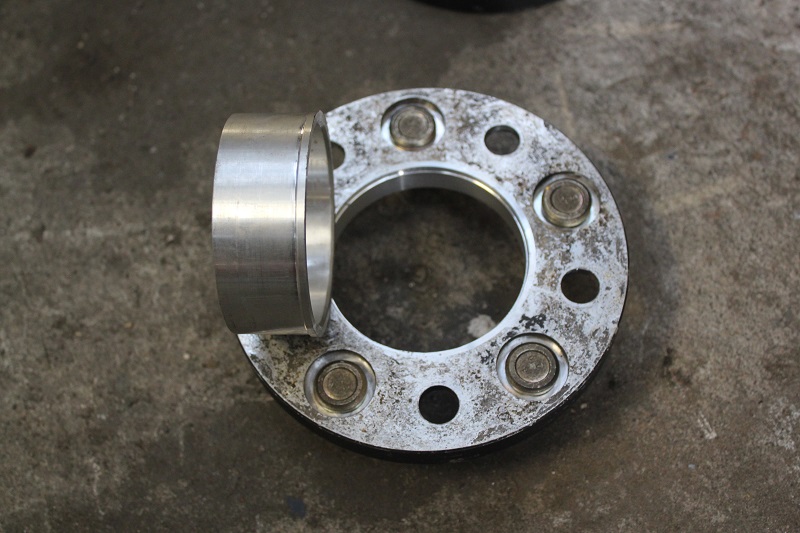
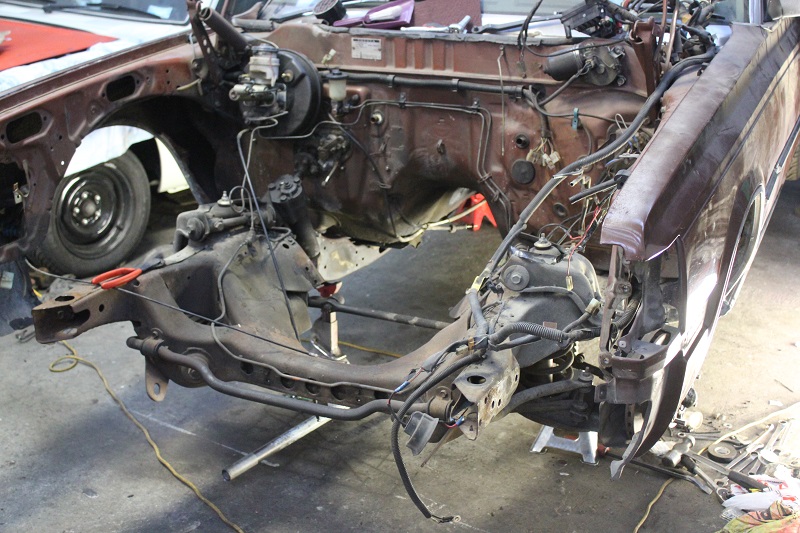
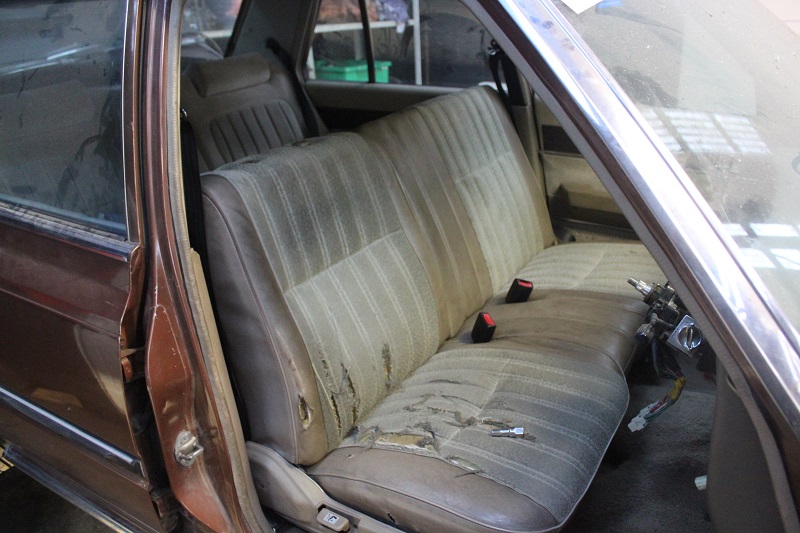
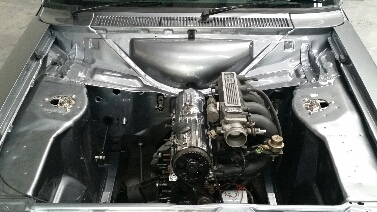
wow, had a super fucking massive day on this. longest day I have spent on this car in a very long time Super rapped mega thanks to beaver too, who came over in the afternoon to try rid him self of a hang over, managed to get a lot further than I had hoped for thanks to him So today, got the carpet in, bench seat in, seat belts in. had to put the diff head back in, lacking an LSD for now, as having issues finding one. Also put the lowered springs and shortend shocks in the back, worried about bump to clearance so will have to see how that goes I guess. Steelies engineering modified my bolt on spacers, as they had no locating rings on them. As always manu did a fucking amazing job, and now I know I don't have to worry about such things for the cert. Also, have decided to paint the chassis and inner guards in the engine bay, just to tidy things up. Wasn't really looking forward to taking the guards etc off as re=running wiring looked like it would be a cunt. Turns out, beaver found out the inner guards come out without having to remove the gaurds them selves. so I'm happy about that. Anyway, some sort of pictures. So yeah, next step. water blast engine bay bits, chassis etc so I can paint chassis, then motor can go in. YAY!
2 points
-
^ it just gets better. Or bring cat, rub its fur vigorously until staticky, let cat play in polystyrene mess. Then take cat home and hoover it.2 points
-
This afternoon, after ferrying the sheepers down to Hamilton I set about modifying the dash cluster to accomodate my new instruments - yes that's right, I did a thing on this myself. IMG_4941 by Richard Opie, on Flickr Starting point was this factory flat front KP61 tacho dash cluster - I wanted to cut up one of these rare, hard to find examples because it meant I could install the tacho I wanted and still retain the OEM fuel gauge and temp (temp not so much of an issue but anyway) which you'll note are included in a combination gauge on the non-tacho cluster that my car came with. IMG_4961 by Richard Opie, on Flickr On the speed side, I wanted to install this Stack ST3801 speedo - it reads an optimistic 260km/h so I'm sure further developments will be needed to ensure I can take this car off the clock. IMG_4963 by Richard Opie, on Flickr For keeping an eye on revs, I have always wanted to pop a Stack tacho into a car - these remind me of watching the start-up montages of Bathurst years past, you know the one... the grand marshal instructs 'drivers start your engines,' then you get a montage of Larry, Brocky, Tricky Dicky et al. pressing the go buttons and more than one Stack tacho leaping into life as the engine fired. Anyway, I wanted that. You'll note the instruments don't match. Weird yes, I dunno. But I have a stack (lol) of other auxiliary gauges I am using which match the speedo in terms of bezel design, but the tach is the odd one out in the Stack range. Anyway I digress.... IMG_4988 by Richard Opie, on Flickr When you try to fit the gauges into the cluster, this happens. The speedo is slightly too large in both bezel and body diameter, and both of them foul on mouldings behind them. IMG_4959 by Richard Opie, on Flickr This is why. There's all sorts of annoying bits of plastic and shit going on behind the instruments. Suffice to say, it needed to GTFO so I went and invested in a variable speed Dremel and some tool bits for it. IMG_4997 by Richard Opie, on Flickr And then I started mangling. IMG_5006 by Richard Opie, on Flickr Until eventually, I had carefully hacked the back of each side out and they were roughly (literally!) ready to accept their new instrument overlords. IMG_5026 by Richard Opie, on Flickr The tacho fit into the fascia perfectly as it was - you'll note in this shot, there is a flat on the bottom of the aperture for the speedo. That needed to be ground out circular to accept the main body of the gauge, but the bezel itself was still too large to fit in the supplied space. IMG_5055 by Richard Opie, on Flickr So I did what any sane person would do, and employed my newly acquired Dremel skills of precision destruction to chop the bottom off the speedo. Which ended up being more than just the bezel. But it worked a treat - this is just after the initial cut, and some sanding with a fine sanding drum at a low speed finished it off nicely, but I think it might be prudent to fill it with urethane or something similar just to stop any dust getting in. IMG_5050 by Richard Opie, on Flickr Went over the edges of the gaping chasms I'd created with a burr to tidy them all up, radius the corners and remove any sharp edges. IMG_5066 by Richard Opie, on Flickr Then secured each of the instruments into it's new home! I won't be able to reinstate the clear plastic cover over over these two - they sit proud of the mating surface for that cover, but also the fact the instruments have lenses of their own means it results in some weird/annoying reflections. I only need to cover the temp and fuel gauges, so will sort out some kind of clear plastic to glue over the top of them and it should nestle nicely in the factory location. Thanks for looking! Discussion in signature if you want to yarn about it.2 points
-
still no word from the insurance company as to whats going on but i should hear next week. the flares turned up and they are premo. really well made and they will fit really well. and for some reason i bought some new tyres 2016-05-21_02-14-10 by sheepers, on Flickr2 points
-
Fuck you're a cheap cunt. Hiflys are cheap nasty Shit. I would know, I have one on my daily too2 points
-
Have since put all the dash back together and installed the tape deck with detachable face that came in the rx60. Then I spent around 30 hours hiding what wiring i could in the engine bay and painting intake and cam/timing covers. Before during after Then it was time to head to NZDM's day at Meremere. Woops The more i use this car the more i love it! I noticed while loading car on the trailer the evening before that the idler arm ball joint had about 10mm back and forth play.Al_Feinted to the rescue with a last minute spare which i chucked on at Meremere! I managed to brake one of the rear drive CVs at the end of the day but i have a feeling this was due to my laziness as its the one that i noticed had a split boot. There's something exciting and very rewarding in drifting in one of these old sleds especially when it all goes to plan!2 points
-
I bought another radio, this one is for the kitchen. It's a cool little grey bakelite one, not sure of age or manufacturer, must be 50's ish. Will do the same as the other one with amp, speakers and bluetoof Not sure if it works in its current state, someone has cut the plug off so I assume not. Good old Aliexpress The BT unit in the Philco was a bit basic so I swapped it with a Logitech one, it remembers a number of devices even when switched off which the original one couldn't do. I'll chuck one of these in the bakelite too.2 points
-
Think I'll trundle along to this1 point
-
someone has probably swapped in a shorter ratio diff into it.1 point
-
Interestingly I met the guy who owns these Volvos, back when he was selling the S60 on the left. The S40 was gone and replaced by a V50 wagon but he still had the 240. This was right when I had my 244 too - but as I was attempting to market the S60 for sale on his behalf it was best to turn up in a late model Commodore than a ratty old Volvo. This pic was taken on his front yard opposite the garage. And here you can see the rest of the house1 point
-
can check by wiggling the driveshaft IF it moves up and down, then the pinion bearing is on its way out. if it rotates more than a 1/2" then the back lash is out1 point
-
Failed the WOF Ayyoo! Loose inner steering ball joints were an easy fix, friend with the gold wagon recently came along a stash of spares from 3 different 1501 sedans.Still have to fix a hole in the tailgate that has been there since I bought the car and the lights for the rear licence plate. I also went to the international Simca Meeting while I was in Holland visiting family a few weeks ago. Managed to pick up some parts, mostly badges and light stuff, would've bought more if I knew that we would still have 30kg left when we were at the airport... Met a guy from Germany with a lovely restored grey 1500 wagon who might be willing to sell me his roofrack, seeing as he has a larger one on his wagon to put his kids bikes on. There was also a Belgian with a whole lot of stock who might have some synchromesh rings for my gearbox as when I shift to 2nd there is a loud crack. Earlier I made a comment about getting my wheels widened like the guy with the red 1501 wagon. Spoke to him there too, turns out the aren't stock. They are actually stock Fiat 124 coupe wheels. The wheels fit on a 1501, 98x4 or 100x4 or something, but so do the 1501 hubcaps. Pics for those who are interested, not mine, but a Dutch guy's: https://www.flickr.com/photos/140983117@N08/shares/hz85YD1 point
-
first or reverse. see if you can look underneath while someone rocks it back and forward- id be looking for worn upper/lower susp link bushes- look for the diff rotating as the car stops moving diff problem- if the car moves a bit but the driveshaft doesnt turn, might be in the diff, (i had a car that the spider gear pin wore a slot in the carrier and did exactly what you describe) driveshaft- look for worn u- joints open the bonnet and see if the engine moves around a lot ie if it has a broken engine mount if the car moves a fair bit, and the driveshaft turns, it might be a gearbox problem1 point
-
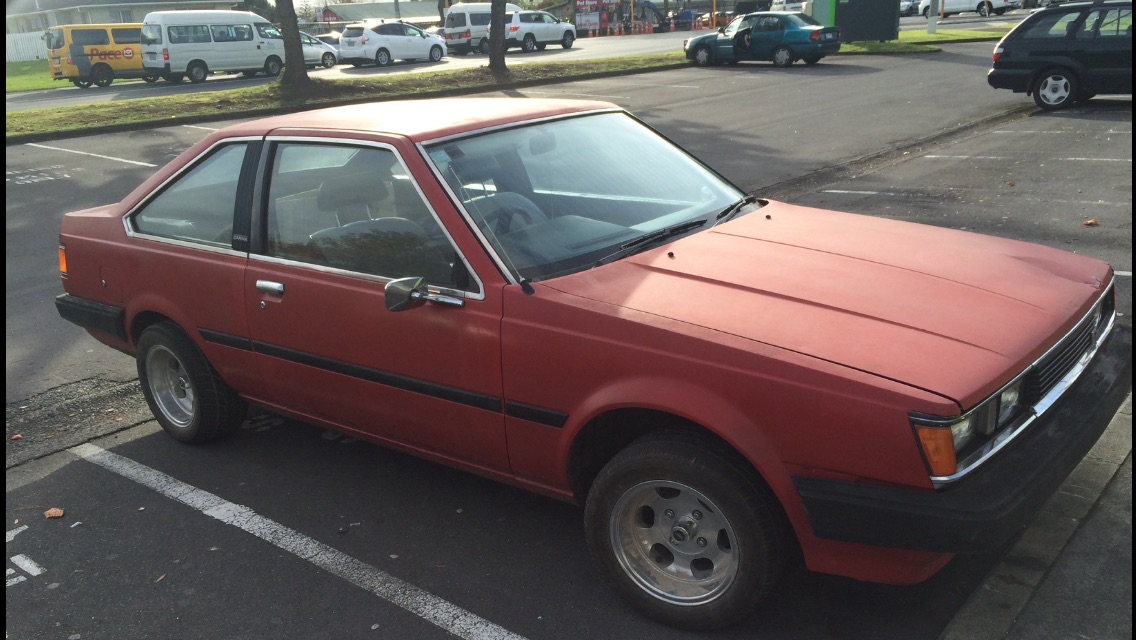
Been extremely reliable over the past month. Gone for 4 extreme hoons down windy roads and sticks like shit to a blanket. Wicked handling on this, like a damn go cart. Definitely the funnest car I have been in. Don't know if I will make it go choo choo anytime soon. I think I might leave it as is and now invest into my KE25. AE86's are a great investment for anyone that's interested. Went up to pork chop hill and got a completely unexpected snap.1 point
-
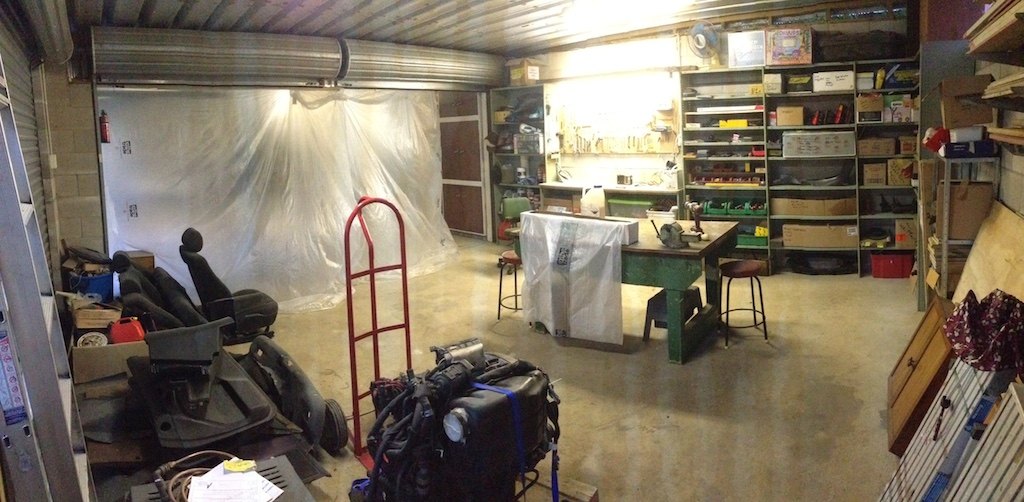
moved to a new town, set up new business, had a baby, set up shed........finally got some progress I set up the second half of the shed for the car by closing it in with some plastic. Best decision EVER! SOOOOO much BOG! discovered already = So much dust!! Got the rear quarter and drivers door stripped and coated in keyphos. The lower section was about 6mm thick with bog, covering up a few dents and a massive hole, and surprisingly the sill wasn't rusty, just totally dented in and filled with bog. Went through 2/3 coats of paint stripper then ended up having to use strip discs as 50% of the panel and the drivers door were totally layered in bog. Two strip discs and a dead grinder later i'm wondering if I just cut straight to sandblasting..... any OS'ers in the waikato keen to come and cut out my rust and fit some new steel?? http://oldschool.co....4-ke25-corolla/
1 point
-
Shouldn't that be a Mustang?1 point
-
That;s a BINGO, cheers Kicker. Pining for that tank but bidding is getting animal.1 point
-
Suzuki TS?1 point
-
Well engine went back in with ease. But soon discovered that the turbo actuator has about 1mm of clearance from the steering rack and rear engine mount hahaha Any who stoked that its mostly correct... and can easy remedy it but lifting the turbo higher by 15mm. It also looks like i need to get the compressor housing outlet port cut and re welded on a different angle... just so the intake tract can be simplified. Other then that minty fresh!! Ran all new brake lines front to rear and and installed a larger 23mm master cylinder. Looks like my old 22mm cylinder was funked...1 point
-
After a long wait to get some more shielding gas from BOC, and dealing with life, I finally have the gas tank back together. It took a few 'touch ups' with the welder to get it fully sealed on all the seams - I tested with some meths rather petrol (too likely to boom) or water (rust!) this time. Plating only burned off in the HAZ so hopefully this will work out better in the long run than bare steel. I won't refit it for now. Also cleaned up the inner guard from the front guard. Needs some work, but not too bad.1 point
-
So a bit of a change of plans. I figure if the supercharged motors going in then to keep it all legit I'll haft to cert it. So I might as well put adjustable suspension in on all corners so down the line it makes it easy, rather then certing with just fronts and having to re cert if I wanted to change later on. So I'm on the hunt for some used AE86 rear adjustables On the boost front I really really do like the supercharger, 4agze drives awesome with the torque. But with replacement or upgrading one down the line. Sc12's are still some what cheap but most have loads of KM's and tired rotor coatings. And upgrading to something like this.. http://www.lysholm.us/_1600ax.php It's not really cost worthy for the gain. I looked at one of these to put on the 7AGE in the AW but with a price tag of over 2800 if remember rightly and struggling to get 350hp staying turbo seem'd a better option. So I saying all this the 4agze going into the Rina will now be a 4agte mate sorted me out with a near new garrett GT25 AR80 for a box of beer so I'm pretty happy with that. Came in on his ps13 and was replaced by the previous owner in jap not long before it was exported to NZ and has only a smidge of play side to side Small turbo, but I want it to be there straight away, and running OEM ECU I can only run up to 14psi before the injectors lean out so a big turbos pointless unless I went to a standalone witch I won't for a long time. For the manifold I'll use one of these cheap things to get it running and cert'd. http://drivenperformance.co.nz/products-page/exhaust/toyota-4age-4agte-turbo-manifold-16v-rwd-cast/ And maybe make my own manifold later down the track and use a t25-t28 flange so I can go to a gt28 later on if I wish On anouther note. I didn't realise that the original head lights are seal'd beams, of witch they crapped them selfs pretty quick and I was left with no head lights. Good bloke by the name of clint sent up some with fitting to change to conventional lamps. Wahoo! I have head lights again! Sitting on spittys at the moment
1 point
-
bills in the mail1 point
-
Myself and Sentra Dave spent some time getting some data on ID1000s tonight. This was interesting because it's the first time I've measured some injectors which actually do come with some reliable deadtime info. For better or worse my results were very similar to the provided figures, we were running a slightly different pressure compared to listed data though. Unfortunately we found that the Link G4 does not appear to have a minimum pulsewdith setting, or a short pulsewidth adder table, so some of the extra lengths we went to by running lots of tests could have perhaps been streamlined a bit. (Sorry to chew up your afternoon Dave...) It was still interesting though and good to rule out the injector behaviour as contributing to idle issues etc. Also the injector behaviour was pretty good anyway. They were clocking in at 938cc @ 39psi / 13.6 volts. Nice and linear down to about 2-2.2ms but below that you really need the PW adder table as there's quite an agressive "knee" and then it drops off pretty quickly. This gives me some confidence that my method is pretty good, and it will work well in other cases when injectors are being used where accurate deadtime information just simply isnt available.1 point
-
Hmmmmmmm . . . . guess I need a new coil or to add a ballest.1 point
-
I've been using this thing a bit and really enjoying it It had a black patch on the passenger side where the previous owner had a repair done, but it was never painted properly and the filler was lifting so I've been working on that lately. Been hampered a bit with shit weather though...1 point
-
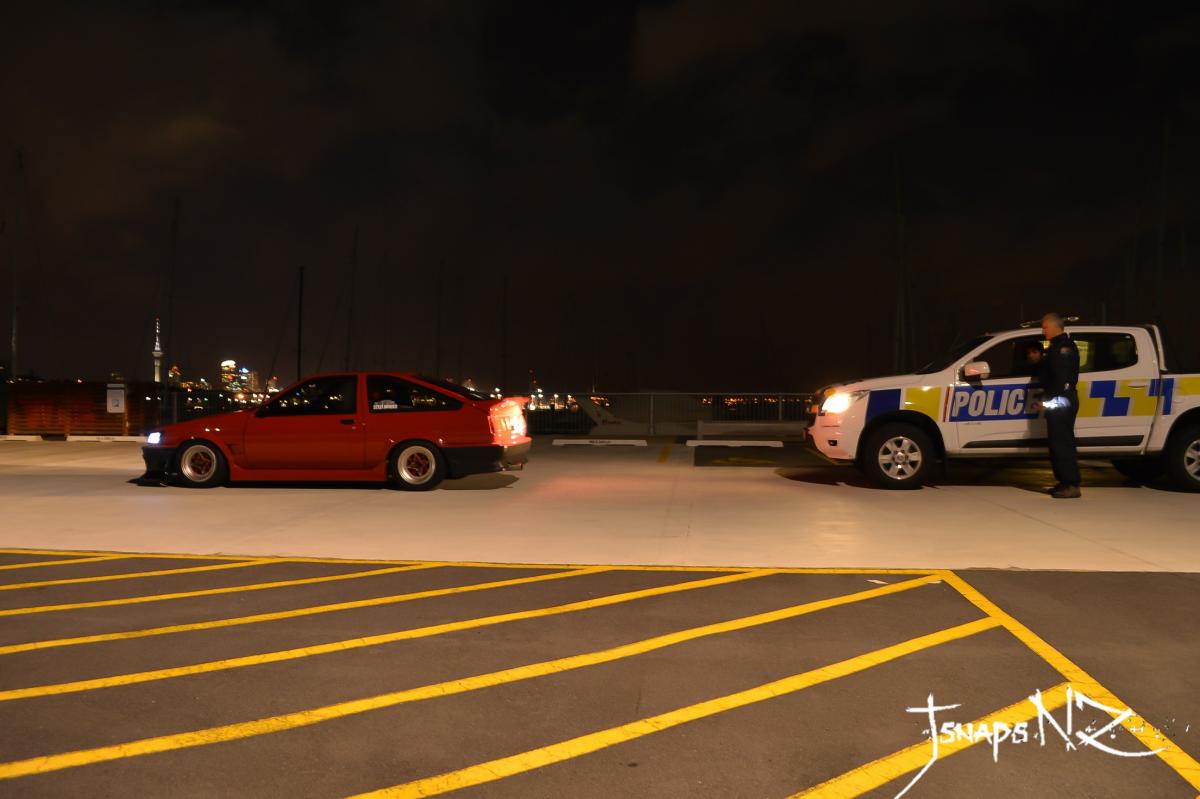
Went out for a cruise tonight with a view of taking some nice photos, attracted some undesirable attention: Rego expires tomorrow (oooh actually today now!) so SAFE! Thanks for the additional lighting for my shoot officer
1 point
-
I'm not sure if its been covered or not, but has anyone tried them fuel saving tyres?1 point
-
I was being a smart arse for it being quite a simple circuit for what it achieves, with the code available to load onto the arduino the most difficult part looks to be tracing an injector wire back for the input.1 point
-
28th of may, il start driving now1 point
-
So as it's the night before I leave for Auckland I decided I better put this thing together. I've spend the night cleaning parts, polishing glass and tags, gluing tags, badges and glass and reassembling this thing back together. So this is it! Happy Birthday mum sorry I couldn't get it up to you for your actual birthday but here have a build thread about it.1 point
-
lots of little things are being tidied up at the mo. i decided it needed new balljoints so i put them in. Richard was keen to replace all the bushes and steering components so i ordered a full set of parts from Ian at autolign and he was able to supply everything i needed in a couple of days. so new parts are, rear trailing arm bushes upper and lower panhard bushes castor arm bushes lower control inner arm bushes pitman arm drop arm inner and outer tie rod ends bal joints sway bar bushes which about covers every suspension bush and wear part on the car. and in other news its going down to midnight upholstery on saturday morning for the carpets and the seats to be done. heres a pic of most of the bits and the mess after doing the rear trailing arms. 2016-05-19_04-28-10 by sheepers, on Flickr 2016-05-19_08-04-18 by sheepers, on Flickr1 point
-
I bet everyone from this thread checking out investments plate's site will put a spike in their visitor count and we'll see a press release next week 'demand for investment plates soars!'1 point
-
I saw you on the weekend. Buying a new angle grinder were you? CUT SPRING CRIMINAL Looking jazzy1 point
-
Overnight parts from japan (well not really), 20/30 mm lowering springs Chucked them in tonight, looks to sits about the same as before but should settle a bit so will recheck in a few weeks and trim to suit. they have an extra flat wind/are somewhat progressive so will be a much nicer fit even when trimmed.1 point
-
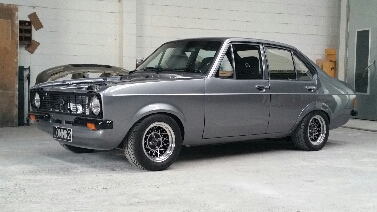
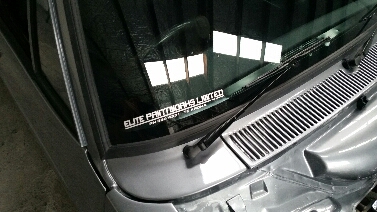
So a wee bit more has happened. Firstly I modded the head for the injectors to fit and then sent it back to be reassembled Bonnet all repaired and inside painted ready for the outside to be coated And finally put the car on the trailer and went for a ride to drop the engine in. Fitted the new heavy duty exedy sports clutch, bolted up the gearbox and boom in she goes.. And a look at the ride height...not bad, will leave like this for now and see where it settles Got the all important sign writing on too
1 point
-
New Year-Time to go on a diet. I had always planned on keeping full interior but have come to the realization its pointless and just punishing myself when i could send certain pieces off to people who actually require them and in the process give myself a bit more power since i dont plan on adding a turbo. In the past week ive removed and weighed a few things for curiosity more than anything front seats 18.6kg each rear seat 21kg spare wheel 13.7kg sound deadening removed so far 14.2kg carpet unknown lets say 5kg =91.1kg To remove the sound deadening i used science - dry ice mixed with isopropynol This worked a treat and i highly recommend it, all you do is smash the dry ice with a hammer in a plastic bucket untill its a fine powder(carefull not to break bucket), then you poor in the isopropynol and give it a good mix, i just used a concreting trowel. It makes a kind of gel which you poor into the area with the sound deadening and let the magic happen. This video was pretty helpful Ive also acquired a pair of out of date sabelt 6 point harnesses today which will be going in with the new race seat this weekend in time for the ZCD summer matsuri amatuer day next friday in taupo!1 point


This leaderboard is set to Auckland/GMT+12:00