
Leaderboard


Popular Content
Showing content with the highest reputation on 05/03/16 in all areas
-
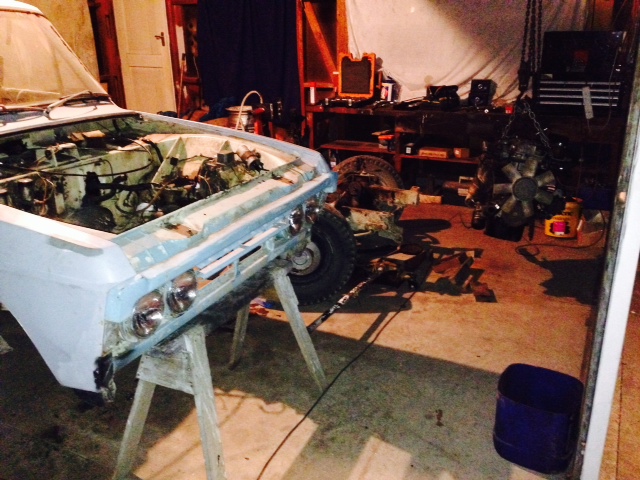
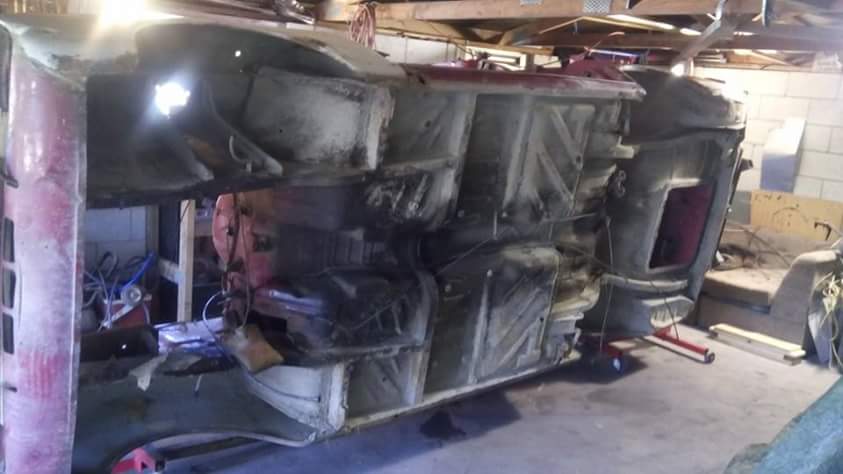
My long awaited thread is finally here! Discussion: //oldschool.co.nz/index.php?/topic/52756-slacker-sams-72-trump-estate/ About 3 Months ago a friend tagged me in a for sale post on the Facebook for a 2.5 estate. Naturally I was foaming at the bit. After calling the owner I organized to buy it. He inherited it from his late Father among other cars, Most of which ended up at the scrappys. The Triumph narrowly avoided the same fate. He told me about a couple of young guys in "lowered triumphs with no bumpers and silly looking wheels" that came to view it. All they wanted was the engine and gearbox, The rest they wanted to scrap.....I would've had an aneurysm had that gone ahead! Anyway its an English assembled factory PI Estate. It features such lushness as REAL leather seats, power steering, factory tacho, front swaybar, 2.5L motor - Sadly the injection has been removed in favor of 1"3/4 SU's, and Manual overdrive. on with the pics: Lush gauges The donk Potato pic The rust shituation That's all for now11 points
-
7 points
-
romandave took some lovely pics too, thanks dave5 points
-
Making a roof rack while the mini is off the road!4 points
-
So thought I would do a write up on a project I did for my brother over summer/for his 21st birthday present. So he has a mini that he absolutely loves and he saw some roof racks online and wanted to do something along these lines... Did some research and couldn't buy anything suitable talked to me and did some CAD modelling to do something way cooler than that. Wanted to add some curves to it as the mini isn't a very square car so squares would look weird on it. Curving the roof rack in both directions looked good and wanted to create a 'floating deck' with no stays in the corners so it looked lush/kinda like it wasn't attached. Wanted to do it all out of stainless so it is shiney AF. Used 3/4" dairy tube as its easy to work with and aesthetically was the right proportions for the mini. Send cad files to autobend and they rolled and bent the tubes to suit. had to cut + weld to length (ignore my rubbish welding pls) Got it all welded up and test fitted good My brother did some woodwork with Kiwa?Kila? wood and came up real nice! Pic showing clamp/mounting arrangement Turned out pretty good and looks sweet. Best thing is its super practical also. Just did a west coast trip in it with his girlfriend and they could stow their luggage on it. Here's a few sweet parting shots of sweet south island west coast.3 points
-
Lil shit3 points
-
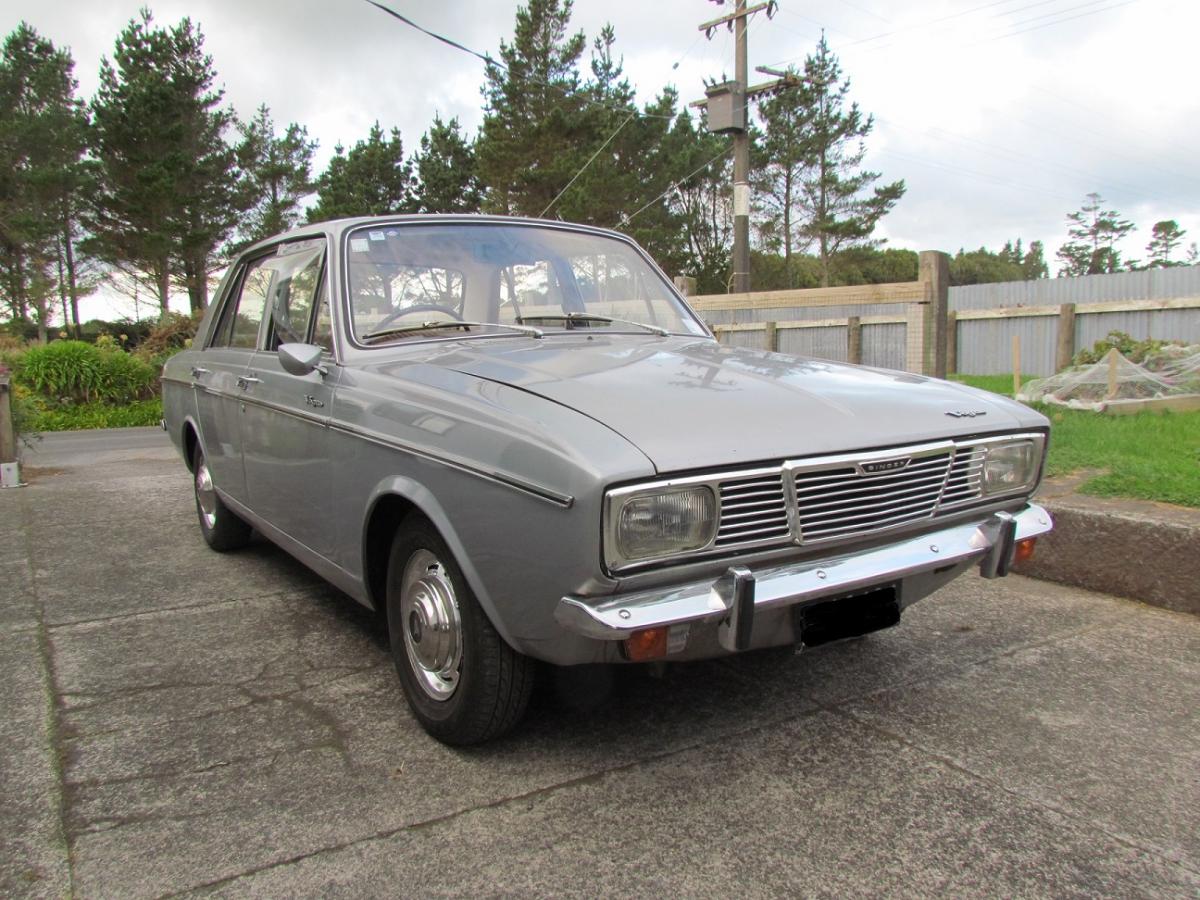
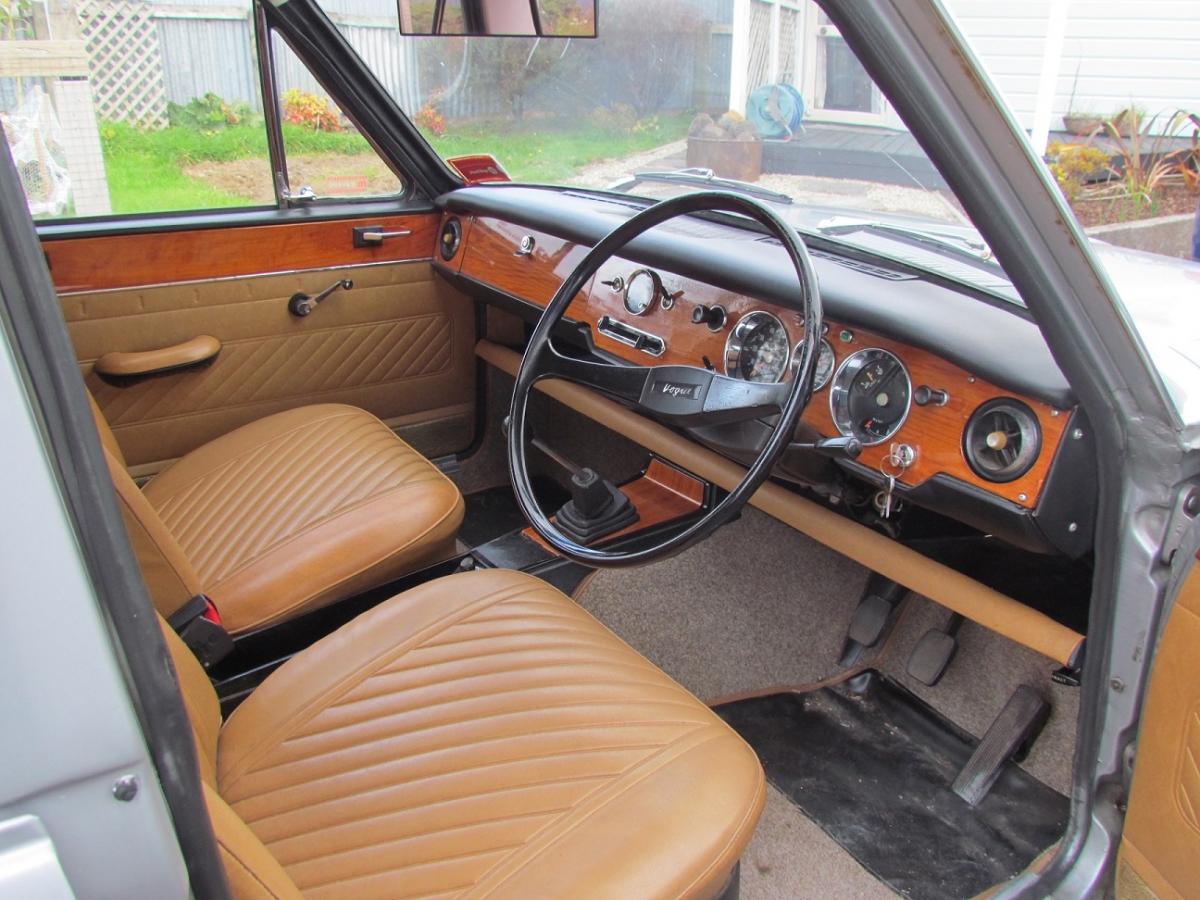
Hi All. I've been hanging around here for a while and I have a couple of poorly projects, but now I have one that works and is all legal I thought I might share. As per title I accidentally bought a Singer Vogue on the weekend. It was advertised on the down low and the old bloke who owned it let it go for a decent price. It seemed stupid to not buy it so here I am...I do in fact have another Rootes Arrow in my shed by way of a Sunbeam Sceptre, so it's not too weird I guess. Discuss //oldschool.co.nz/index.php?/topic/52739-sunbeams-1970-singer-vogue-discussion/
 2 points
 -
Drove mine today. Went to supermarket, scraped on the speed bumps when I went a little too quickly. eg, didn't crawl. Still looks jacked. "Low" Nissan life.2 points
-
Thanks for the replys guys. I wont be missing out on the event,I was planning on doing it in my lancer anyway. I just had a last minute thought (as always) about putting this diff in the gx and using that. And if it's worth the bother to spend some evenings on it before the weekend. If it doesn't work out then I'll just use my lancer. I'll give it a go I think2 points
-
shit you have a lot of fuel tanks2 points
-
Might have a seat, you can give me directions because i will probably get lost.2 points
-
my first attempt at being a spray painter went better than expected!2 points
-
I was fucking about in the shed and was looking at the bars and decided to swap them out for a set i had in box and had been humming and harring over for a while. I payed $5 i think at the mcleans island swapmeet. Pretty happy with them and theyre staying on. Next up is to mount the mudguard and mount an oil tank.2 points
-
It bolted in ok, sentradave very kindly fiddled my shaft and swapped yokes. He also did the rear brake lines. Re mounted fuel pump with some rubber and ran a new fuel line as the old shit was fucked as. Clever use of rivnuts to mount the handbrake cables. It bolted in great btw, untill i tried to adjust the links to get the correct pinion angle and now nothing fits. I got a supertrapp though, so i've got that going for me. I'd like to thank the following; sentradave for engineering and moral support pooman for taming dave evan for doing the things i didn't feel like doing romandave for showing us the magical brake bleeding technique dell'orto for the sick hookups I've got a few tricks left up my sleeve to solve the diff angle problem, so I need to visit zebra and see what they have to offer.2 points
-
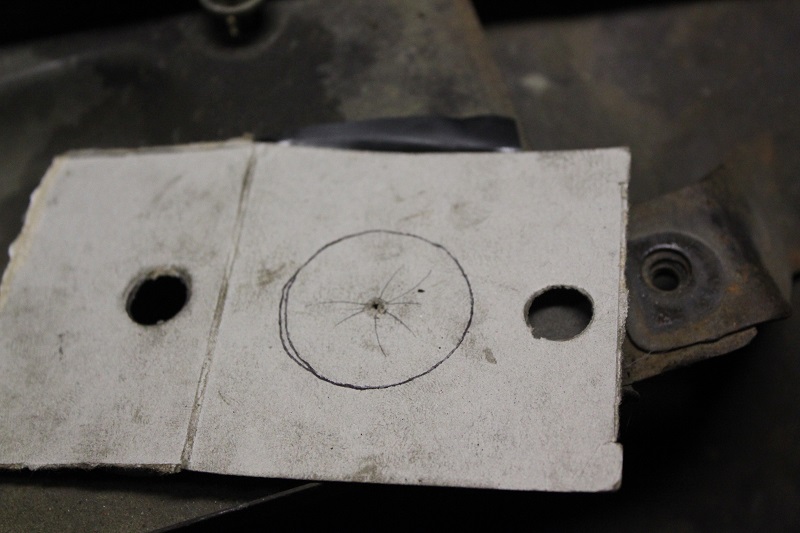
So the pictures above relate to fitting the clutch master cylinder. I pulled the setup out of my wagon, so this actually gave me a good way of making a template. I basicly took a piece of cardboard and took a "rubbing" of the bolt holes and hole for the cylinder it self This crown already had the bolt holes, but not the master hole. So after taking a rubbing, I traced it out with a pen, then used a compass to find the center. If no one did this sort of stuff at school I will explain, basicly, take the diameter of the circle, then divide by half. Set your compass to this measurement, and then scribe an arch from the outside of the circle in, do this in two places, and where the arches cross, is the center of the circle. I did more than two for good measure (pun) then, punch the bolt holes in the cardboard, taped it to the fire wall using the bolt holes as a reference. then center punched the middle of the circle, drilled pilot hole and hole sawed my 32mm hole. Un fortunanlty cant fit cylinder yet, as I went to go fit it, and noticed a bit of weepage. opened it up and it needs a rebuild, surprised it worked at all to be honest! so have a kit coming Monday. Also got my new fuel pump, fittings and bracket together, have found a place to mount it in the chassis, but need to make a plate for it to mount on. Also started the replacing the fuel lines for EFI ones (showing the EFI proof writing for easy reading under vehicle) And yeah, that, is where I am currently Really need to get the floor sections welded up so I can progress, was hoping for this weekend, but work is oit of gas and from what I hear Boc have no argo shield atm Plus have some other shit going on this weekend But it really needs to be done during the day, as its a bit dark down the back of the shed...... this might put me back a week damn it.
2 points
-
chicken mesh then bog for big holes. or nutech, its as good as steel and magnets don't pick it up.2 points
-
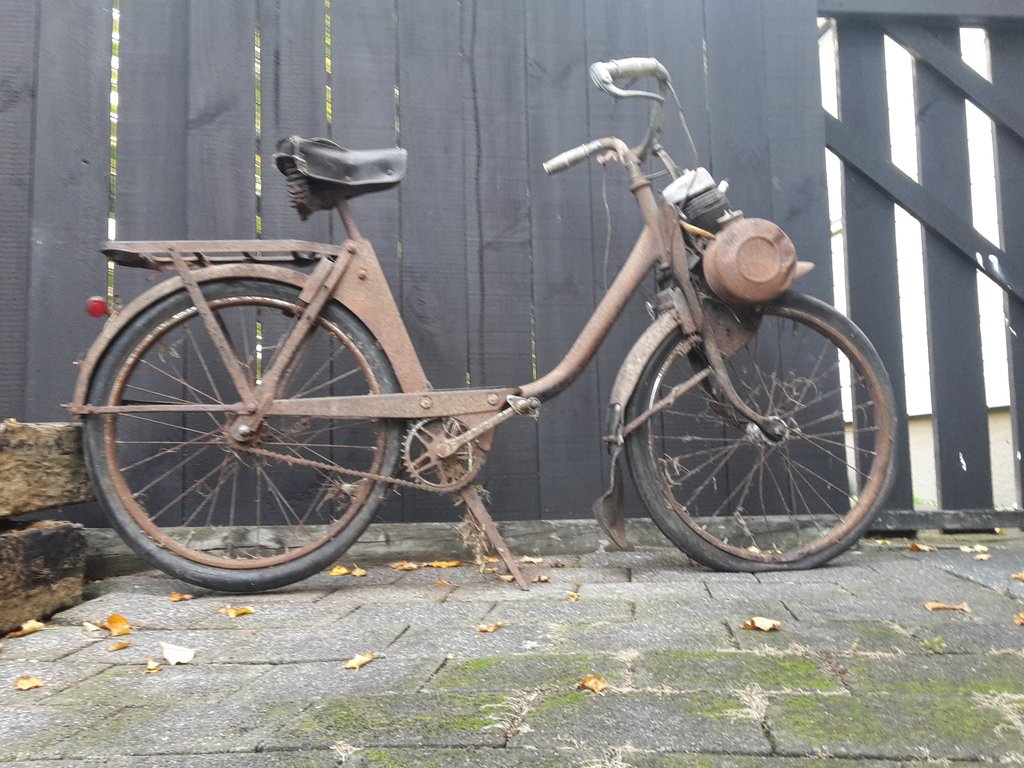
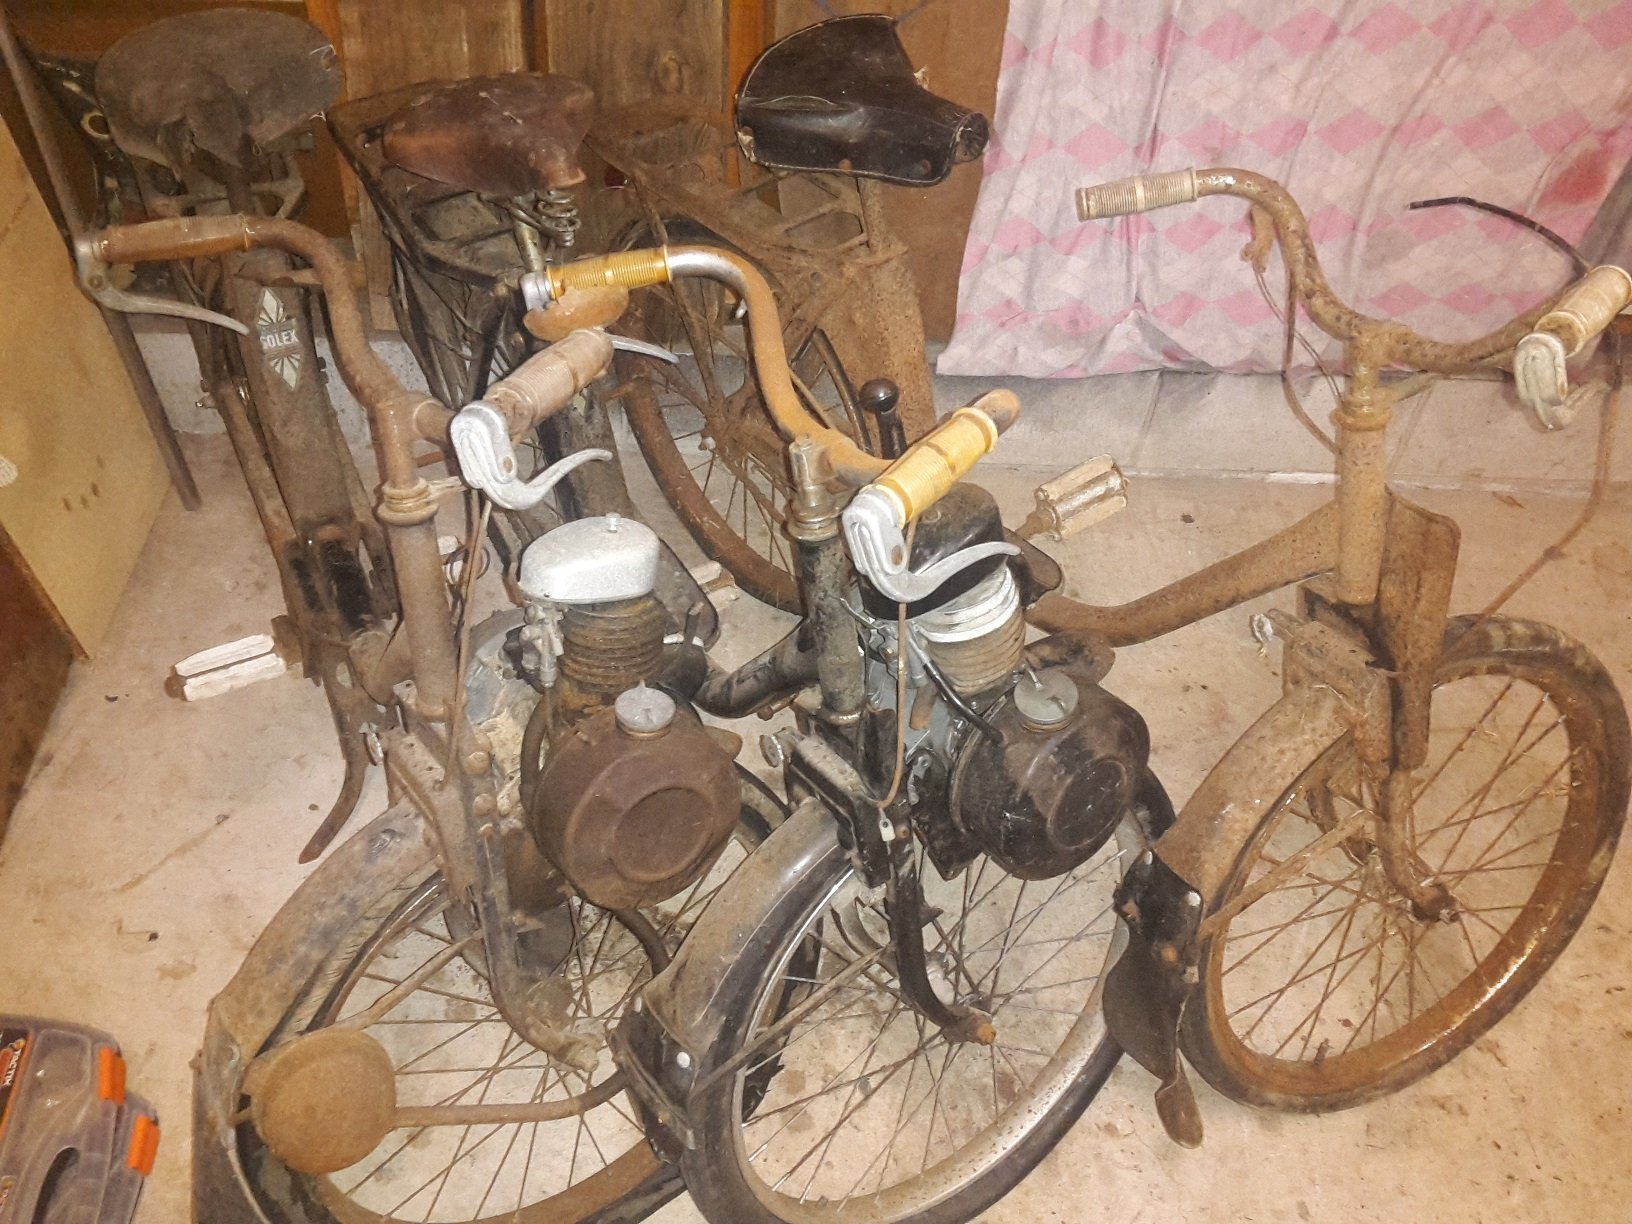
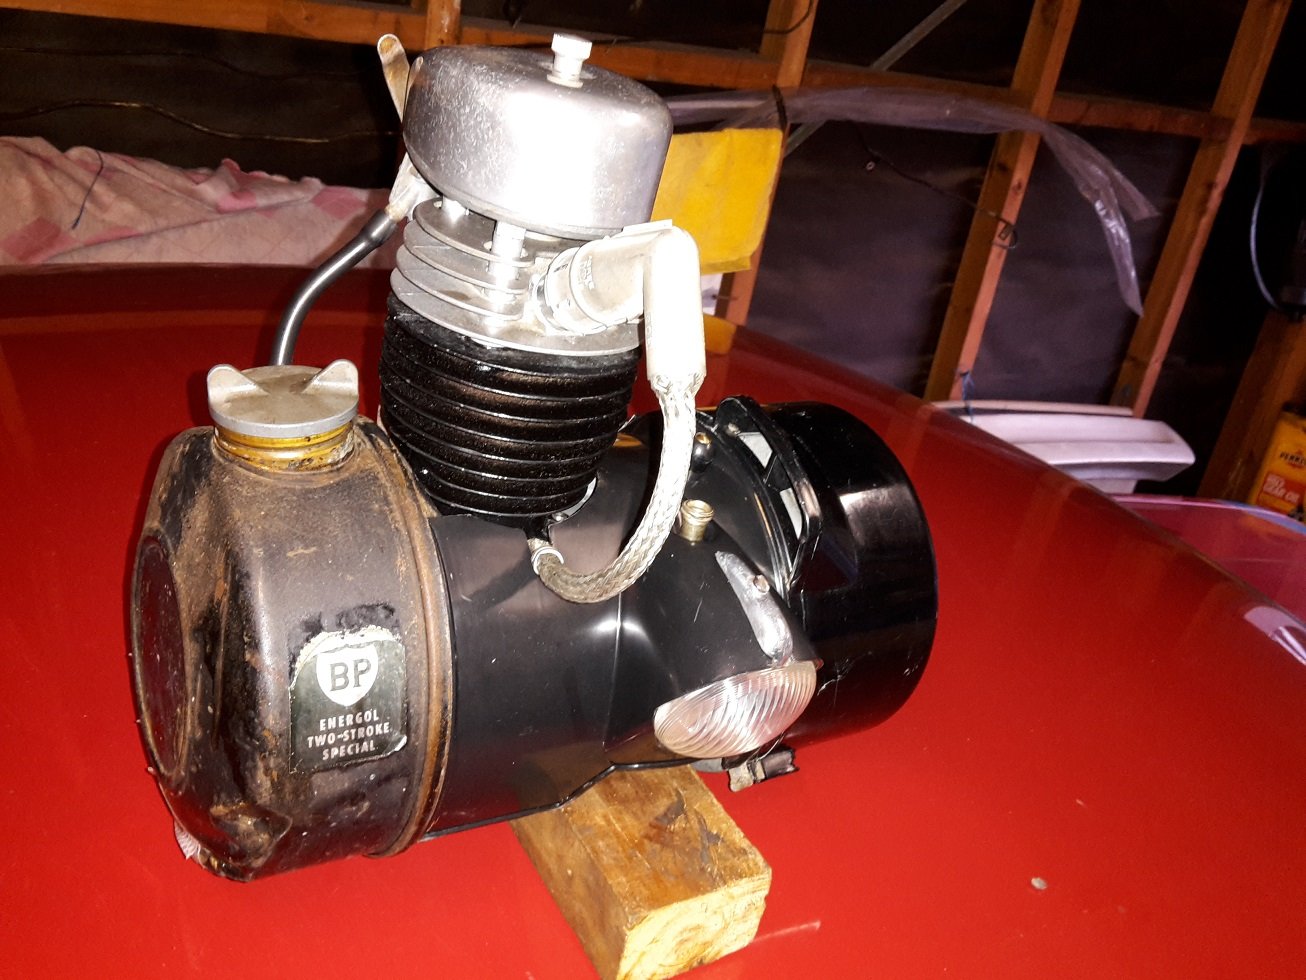
So... a day off sick(sick in the head maybe). I was bored, and looking at trademe and I stumbled upon a moped that took my fancy. So i brought it It turned out to be a 1959 VéloSoleX 1700 49cc - in completely rust-spec mint condition(rooted) ...christened P.A.M (pedal assisted motorbike) by my wife . . . If that wasnt bad enough, i found two more locally so naturally hit buy now on those too (now im really fu#$ked in the head) original purchase on the right - another 1959 1700 on the left and a very original 1961 2200 model in the middle I set about quickly dismantling a motor and learning the intricacies(breaking) of small 2-stroker motors. After a week of cleaning, honing, part hunting and reassembly - IT WAS ALIVE!! One day i shall have at least one looking awesome and be hooning down to the local patisserie - ordering le baguette and crumbing it all the way home.
1 point
-
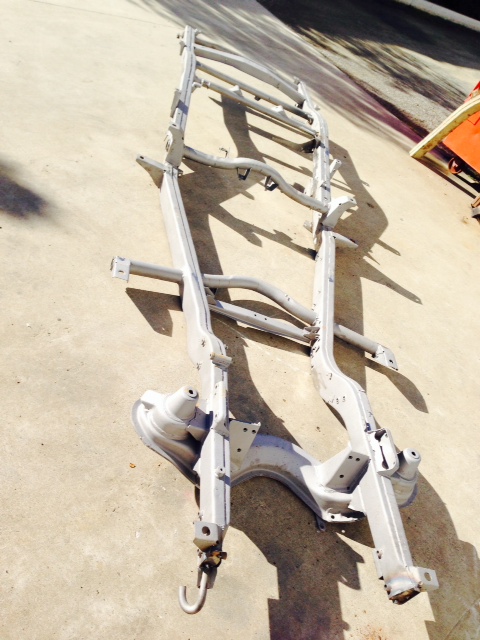
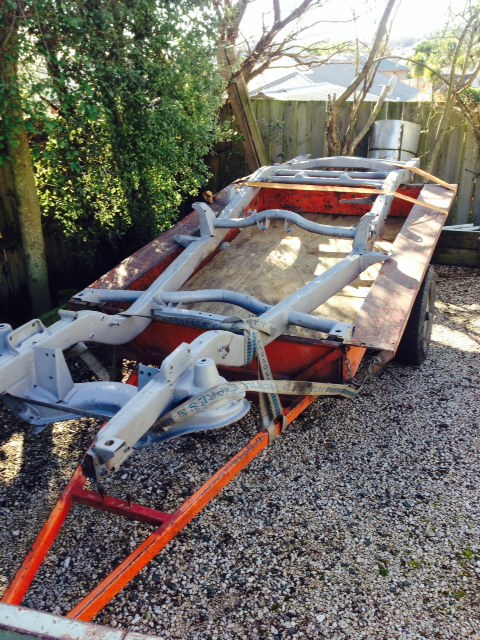
Starting of fresh with the b1500 as I've ditched the rotary idea and b1600 for the older b1500. Plan is to pretty much just restore it and lower it with a couple of subtle mods. keeping the factory motor and use it as a daily driver. Here it is how i picked it up from a car yard over in motueka I've stripped it all down and removed cab from chassis Sent chassis off to be blasted repaired a couple of thin sections where the blaster went through and now its ready to go back to be powder coated looking forward to getting it back painted and start piecing it back together with all new gear, also going to oil the chassis to try and prevent any rust in the future anyone had experience with that Discussion thread //oldschool.co.nz/index.php?/topic/44409-maxteds-1969-mazda-b1500/
1 point
-
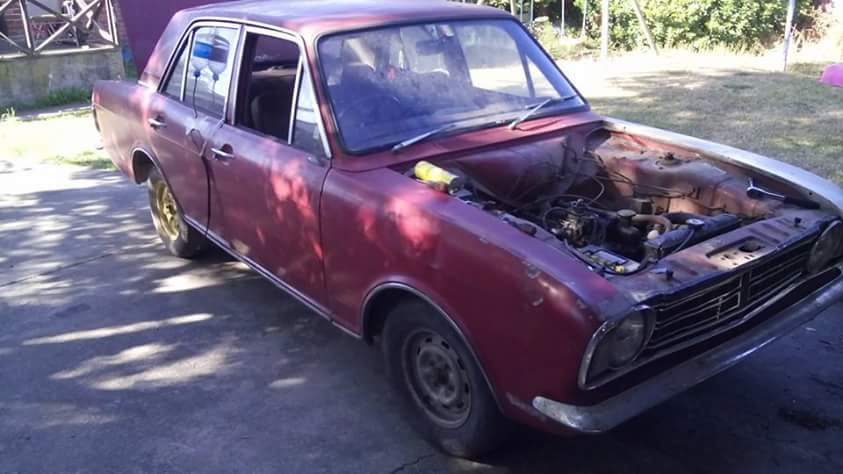
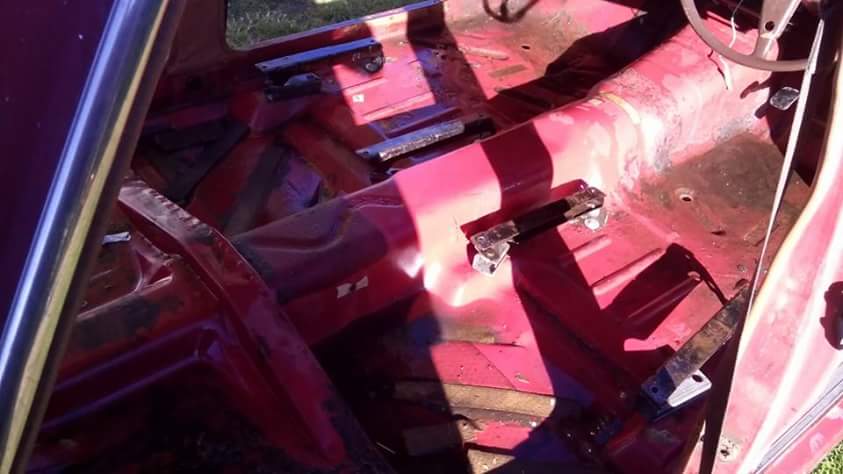
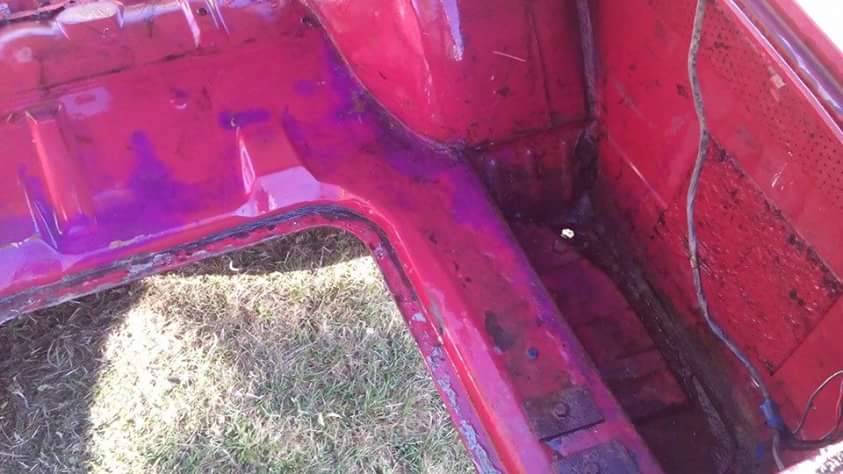
Howdy all So as some of you know I sold all projects last year( apart from a bike I'm building) and to be honest I wasn't really looking for a he project. Anyway a mate rang me to ask if I know of anyone wanting a mk2 Tina.......I asked around and no takers........so fucking bang it turned up on Wednesday..... Even drove it of the truck So its 1970 ( I think) mk2 cortina 1600 super. Pretty much the least amount of rust in a ford shell I've bought in the past 8 years....even the ciggy lighter worked. Sat in a shed since 1988 So I stripped it down and cleaned the years off it Got up Saturday stripped the rest of the running gear and made a spit . mounted it to start on the underside And that's as it sits at the moment
1 point
-
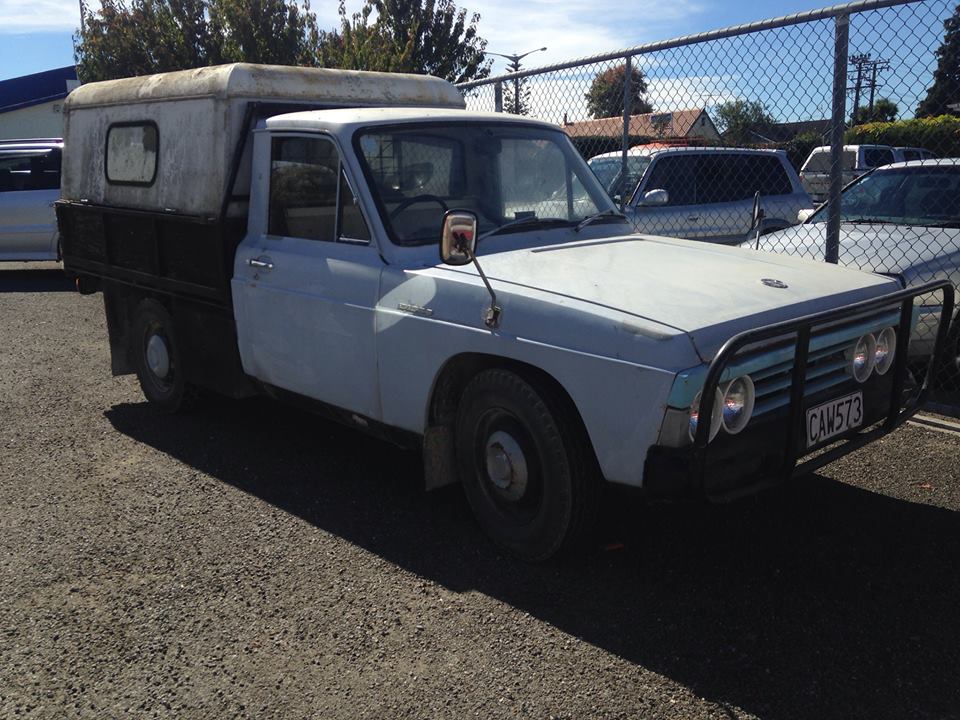
I bought a new toy. I've been looking for an RN30/40 for ages but I've been pretty fussy, with one of the harder conditions being that it needs a wellside. There are fuck all. Then this came up, I was like meh, extra cab, but bonus 4x4 tub and guards Plus it's got this!!! Plus it's engineered, and only cost me 3.5K. So fucking cheap. So I went to look, drove it, sounds amazing, bargained the price down a bit, then went home and organised the $ and picked it up last night. It's got a few things to sort, typical hilux rust, high beams are out, shit wiring job on the stereo etc, but it'll make a way better daily than the boring corona I'm retiring. Cheers Matt Discussion Thread1 point
-
Going to wire them to 14awg with a relay just to be sure, as I can't find any info on coil amp draw =\ Cheers Ned1 point
-
Finally got a result from the insurance. Will get paid out and keep the car. Looks like I'll be playing panel basher now1 point
-
Do you have a superbrapp now?1 point
-
It makes a pretty sexy journey directly under the gearbag drain plug.1 point
-
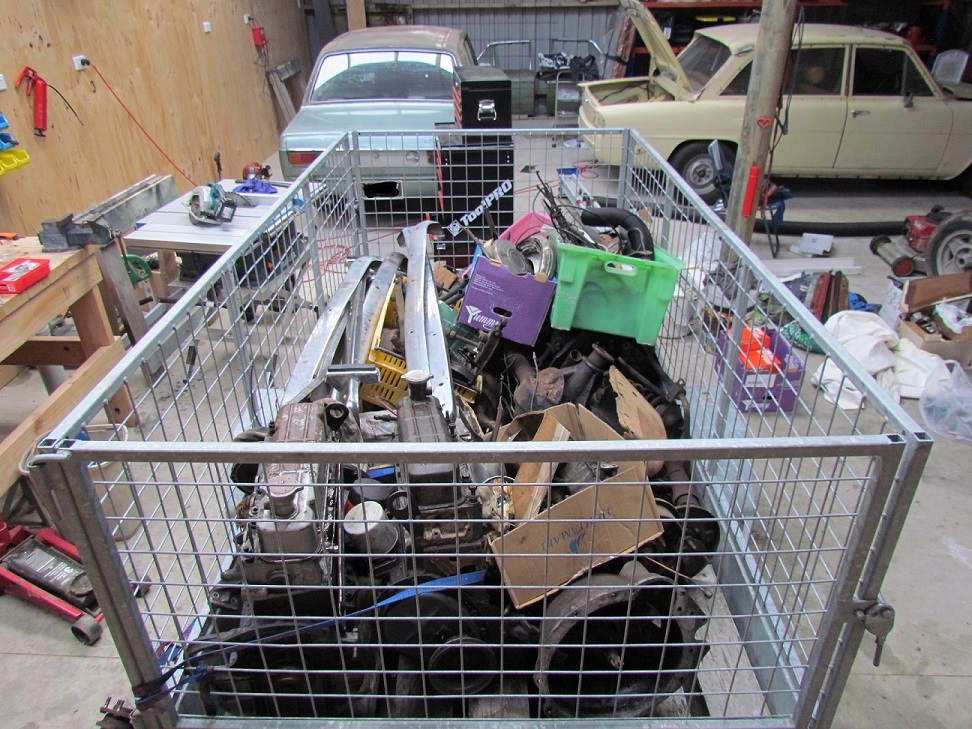
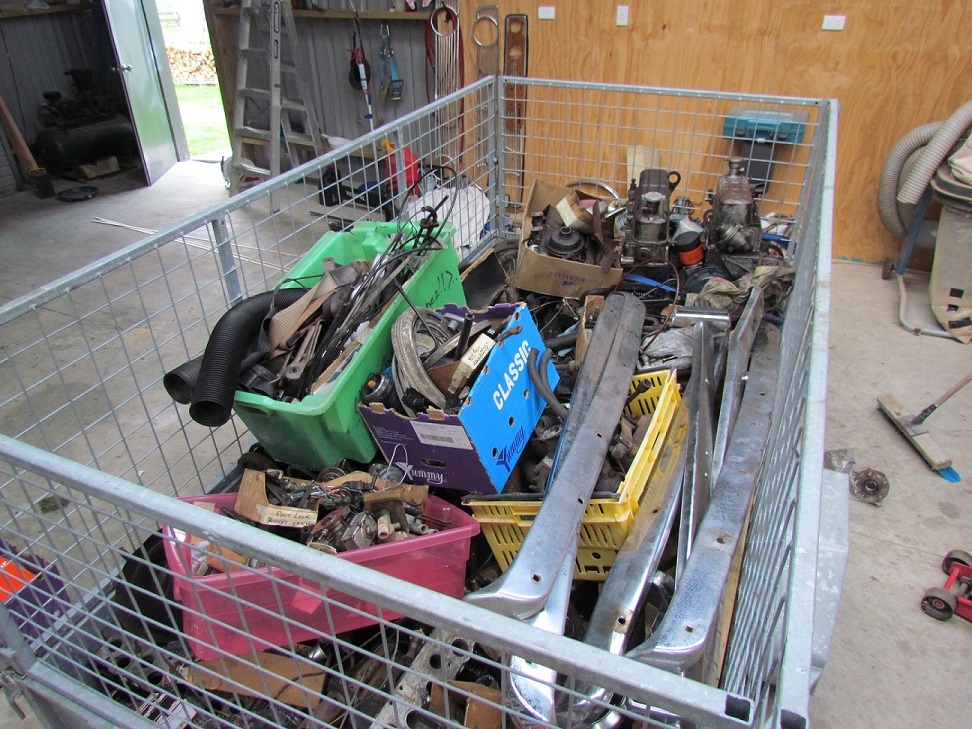
Comes with an unbelievable hoard of parts too. This is just the first load...
1 point
-
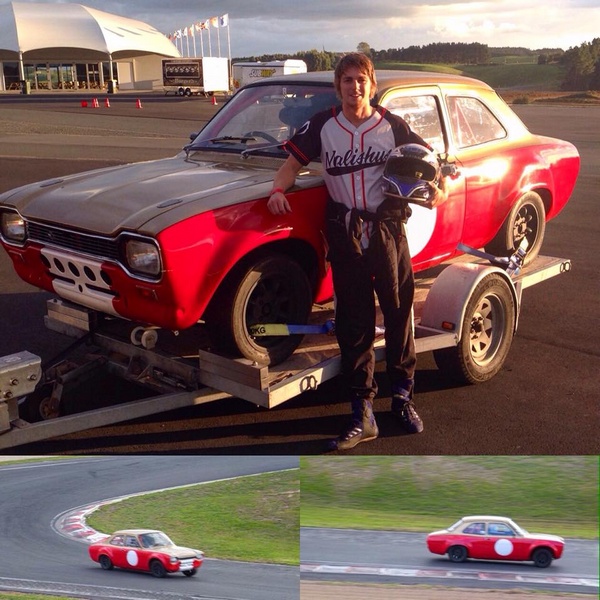
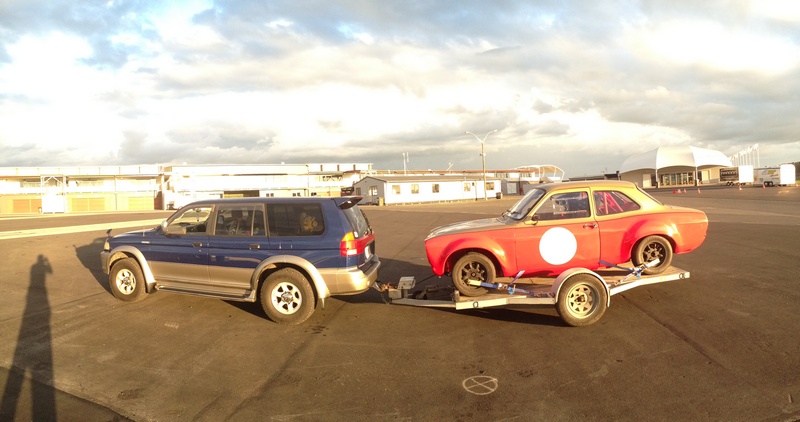
Good Test Day at Hampton Downs 80 track Kilometers done and the car didn't miss a beat and best of all , its coming home in one piece and still shiny.... phew ! unfortunately the GoPro footage got corrupted so only got some iphone footage https://www.youtube.com/watch?v=oluSeq0jKHc
1 point
-
yeah its a cool conversion a friend has already done it before and it worked really well, i still have photos of his mounts ect looked rather simple. they go well for what they are, wheres the thread on your ute mate I've been waiting awhile?1 point
-
I cut out the back of the cab (it had some rust and old patches too so this killed two birds with one stone) and curved the panel some more then locked into place with clicoes.1 point
-
Couple weekends ago I got sick of looking at the ugly light brown door cards, and after looking up different fabrics dyes I came across Duplicolor Vinyl& Fabric Spray. People seemed to be getting good results with it. The back cards already had punctures in them, and considering I could get a new set of door cards easy enough (and maybe more importantly, the stuff is $13 at supercheap a can), why not? Waited for a hot day, got them all extremely clean to get some adhesion going, and the old man gave me a hand to spray these up. Came out good in the heat Still looks great as of now, but ill have to report back in a year. Looks much better than I expected for $13 dollars Goes really well with all the small chrome pieces. Theres no way anyone would even be able to tell these were originally another colour, aside from how they no longer go with the light coloured interior. So what's next? -Paint/Dye a few other interior things. -I need new front seats for sure. The originals have no head rest and for a guy over 6' tall they just don't cut the mustard all. Hit me up if you're in the Canterbury area and selling a decent pair of recaros or some other reclinable bucket seat for a reasonable price. Late evo recaros would be sweet but with the prices I see them going for ... I'm not at all fussy. -I've been looking everywhere for a gauge cluster with a factory tachometer/ or just the tachometer itself, again if you know someone with one, please let me know; I'll buy it. -Looking at swaps, a narrow block dohc 4g63t engine & transmission (vr4/evo 1-3) seems the way to go. Even the latest series of 4g engines show their roots with the originals; My 4 speed gearbox can be connected to a 4g63t, and my existing rwd mounts happily fit a 4g63t - not that either of these things will be reused, haha. -Not a priority, but carpet would be nice at some stage. Speakers would be good too. BONUS PIC: How neat is this, the fuse box has a test light built in; sliding the dial over each fuse tells you whether it's good or not. Never seen a car with this. EDIT:Just tried to view this on a dsl connection. Sorry guys, I completely forgot what life was like before fibre. Ill make an effort to shrink everything from now on.1 point
-
got the struts crack tested yesterday and this morning i took all the bits to work and bead blasted them all. then Richard (the guy who's buying the car) came over and gave me a hand to paint the bits. we als installed the rear springs and shocks. I'm waiting on the top hats from T3 and i can put it back together and put them back in the car. 2016-04-30_02-45-49 by sheepers, on Flickr 2016-04-30_04-20-51 by sheepers, on Flickr1 point
-
I got the bargain of the century of a bolt in hilux diff, shortened, discs and lsd.1 point
-
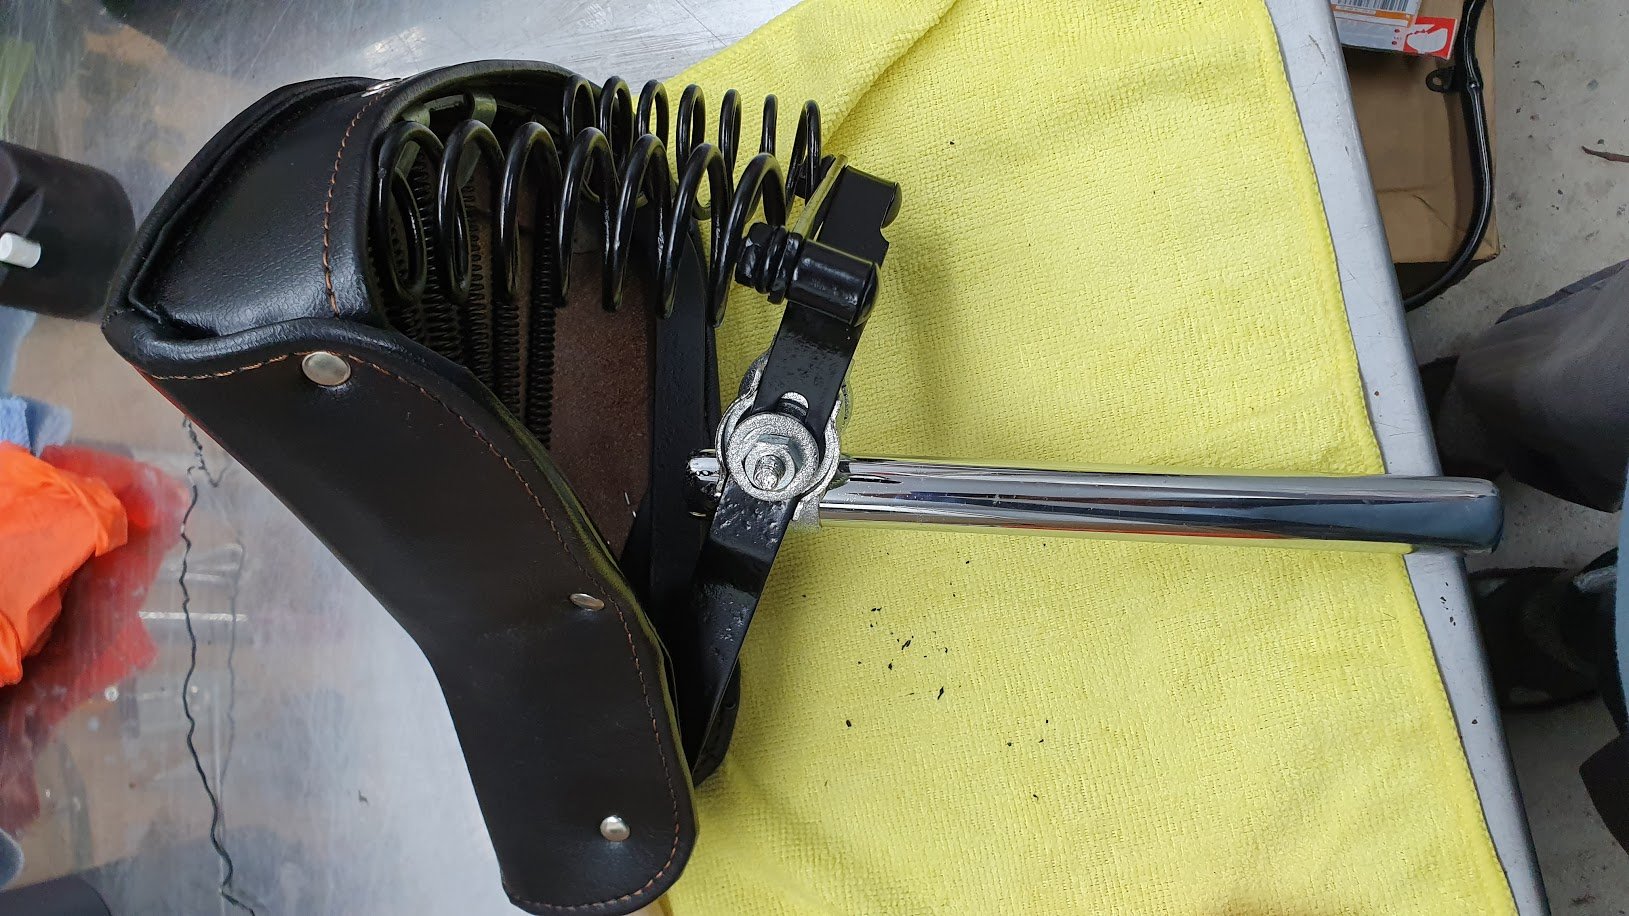
Chroming came back ok - some bits are a bit pitted but shit happens. I reassembled all the pedal and handle bar bits. old seat new rebuilt/reupholstered seat
1 point
-
Holy pictureless update batman. 50mm lowering blocks aquired, fettled and fitted (thanks Al). looks bazillion times better. Pair of lowering springs for the front have been located and permission to purchase given to some internet man from yahoo japan. Will trim to suit. Thats all folks.1 point
-
Another productive night last night. Got the starter mounted up and turning the engine over (Cheers Joe). I was expecting this to cause a bit more grief as it's a honda starter with an adapter plate and has also had the ring gear on the flywheel replaced to suit and notched to help the starter engage. All seems to engage very nicely and turned over the engine for the first time since it was assembled. https://youtu.be/p9ecmp-AupM And also mounted the carbs1 point
-
It's a few days past yesterday but work got in the way of playtime. Couldn't be bothered sealing the gaps so in it went anyway, I ran it in the drive with everything all assembled and thermostat in there and it is rock solid at 80 degrees so that's nice. I started unwinding tape, gauges, switches and misc wires and removed this stuff that doesn't do anything except make me angry. Next? uhhhhhh probably more wiring. Maybe even have a go at sealing some gaps in the floor/firewall so it isn't 420 every time I drive it.1 point
-
I made a thing in this pic yea the woody thing with the Paua inlay "W" logo, also the back 'seats' : full article http://www.themotorhood.com/themotorhood/2016/4/12/weekly-motor-fix-gas-attack1 point
-
On a South Auckland highway, cool wind in my hair Warm smell of my engine, rising up through the air Cop stop in the distance, I saw the shimmering lights Threw out my bevvy and my lights turn dim I had to keep out of sight Temp went colder than Norway; I think compression fell And I was thinking to myself, "This tang could be heaven or it could be Hell" Then I gave it the Jandal, my tires went away I had my foot right to the floor, I hope my seals Stay... Welcome to the 12A California1 point
-
music video of simon at a burnout comp His palms are sweaty, knees weak, the clutch is heavy There's coolant on the ground, 155/13s fitted already He's nervous, but on the surface he looks calm and ready to drop Os, But he keeps on looking at camo skirt wearing hoes, The whole crowd goes so loud He turns the key, but the braps won't come out He's pulling out the choke now, everybody's joking now The clock's run out, time's up, over, blaow! Snap back to reality. Oh, here comes hi viz guy there goes sparky, wave him off the pad, bye He's so mad, but he won't give up that easy its goin to get some mad slap seconds believe me1 point
-
+1 Dayfe the master One last shitting up the thread A long, long time ago I can still remember how that rota used to make me smile And I knew if I had my chance That I could make those apex seals dance And maybe they'd be happy for a while But February made me shiver With every nanging I'd deliver Bad news on the temp gauge It couldn't take any more jandal I can't remember if I cried When I heard them pingin gillies go quiet But something touched me deep inside The day the rota died1 point
-
It's next week ish. I was thirsty for an answer. shhhhhh This is what a shitty picture of an open thermostat looks like, one step closer to being water seals. Step 17 is to buy largest fan you can find and gently place it onto the radiator. Magic! I'll see what adhesive foam I have and try seal the edges as best I can. Tomorrow I may even see how much it doesn't fit.1 point
-
New chrome fender mirrors and angel eye led headlights!1 point
-
rustisize knows what's up. The right solution - available in your average kitchen -and you can have rust like this in about an hour. This took me much longer because I didn't understand what was happening.1 point
-
1 point
-
Ughh wishing these weren't rare af and that you could actually get some decent wheels for 10"s! If you know of any let me know! (HAYASHI RACING'S YAYOI WHEELS & IMPUL PRO MESH WHEELS)1 point
-
Latest pics:1 point
-
OK well now that I have some time between paying jobs (which have almost all been other old rusty cars and general rot removal) I have sneaked the Viva up on the hoist and got cracking with its rear end. But first here's a pic of the rust I have removed so far. We did a run to the metal scrap place so I had a clean out. This lot had to go. There will be more.... Now this rear valance panel looks a bit thin on it.. Which it certainly was. Not quite as bad all the way across as my other Viva when I repaired that one. Again just like the other Viva its weird that only the rear panel rots but the inside shaped vertical panel stays solid?. Not that Im complaining. Anyway. I cut it open and then cleaned out all the rust flakes, wire brushed it and then neutralised it all. I discovered that the new can of Brunox I had bought happens to accept the extension lance that comes with my cavity wax cans. Sweet- I was able to spray it right into the Lh corner. Then I painted the interior to help the car last another 40 years. Then a local mate wanted to use my hoist so the Viva came down and I cleaned up the front panel. Its been repaired before and had been done neatly enough but then covered in bog. The corners near the rails were gone again so that will be attended to once back up in the air and Ive finished the rear. Back to the bum. I carefully cut and shaped new steel to fit in with only butt welds. Vivas have quite a tricky multiple compound curved rear end but I was able to work it out using two pieces of steel and lots of hand shaping after getting the main curve set with the folder. I tidied up the bits that were under the reverse lights, which wont be going back on, then one more vacuum out. For the final fit of butt welded close fit panels it helps to use a butter knife to line the edges up.. I grind off the lowest weld which could hold road muck but otherwise I will leave all the welds untouched. Grinding welds down sucks. The exposed welds are sort of part of the overall patchwork car I'm after for now... Then I moved round the side and this bit looks a bit dodgy. This has had a previous decent enough looking repair but sadly was covered in filler straight onto bare metal- as was the way in the good old days eh. So the bog absorbed moisture and rotted steel. Bugger. I cut it out and treated the inside with luckily only a few bits that need to be cut out. Then while the Brunox epoxy spray was setting I moved over onto the opposite side. This time its the very bottom corner of the arch that looks a touch rotten... So I cut it out. It was pretty frilly after all.. The arch corner in pieces. Note my ever evolving welding table. I recently added the uprights to hang my angle grinder, Dremel machine and other bits that were always getting in the way, falling off or never at hand. Its then once opened up to day light that I discovered a little seam sealer Jabba the Hut!!! Wow. * I then had to carefully shape a new corner and arch bottom out of several bits of steel. It was all so rotten I wasn't quite sure what the shape was meant to be like. It didn't really have to be factory original looking, just neat. So I have sort of just made it up as I went along.. Once this arch repair is done I'll go back to the other side and finish that. Then I will drop the car down and turn it around so I can having it facing the sunny end of the shed. Then I can work through the engine bay rust with nicer light with better access to the coffee machine/biscuits/sunshine/music. * that is actually a lump of factory seam sealer. I might have added the eyes..1 point
-
Mmkay, so I've had time to tinker and found two cylinders were intermittent. Changed out the old sparkies for new NGK's and replaced the oil which looked pretty yuck. Here are some more photos for y'all: Interior is super clean bar a couple of rips in the seats. I dig the red and black. very 70's.1 point
-
alright so ive been asked "how do you stretch a guard?". the answer is its not easy and i want to make this very clear, i have only done this twice. i am not an expert by a very long way. i was told how to do this by my mate Peter the panel beater and that's the grand total of my experience. peter was very clear in his instruction and he told me that if it starts going wrong DO NOT try and fix it. he would come and sort it out for me. i have fluked it so far and have not needed his help to fix anything. so, with that said here is a run down of what i do as best as i can communicate in text. please ask questions and ill try as best as i can to explain. ill take some pictures tonight that will help. 1. Mark out where you want to put the new fold where the guard lip will start from (the new arch line) do this on both sides before you do anything else. 2. Drill the spots and separate the inner and outer skin. 3. Fold the outer lip down. 4. My “spoon” is a broken trailer leaf spring. It’s perfect for this job because it has a skinny end with a bend in it that allows you to get right up inside the panel and onto the back of the flat parts of the quarter when you need to pull the panel out a bit. And the other end is thicker and had a curve to it so it makes putting a convex shape into the arch easier. 5. Using a spoon (whatever that turns out to be) very gently work around the lip putting a crease in the panel for the new arch line, pull the spoon towards you and hit into the car. I use the pick end of my hammer to make a nice tight crease line. The skinny end of my spoon is great for this bit. 6. Once you have a crease hit the spoon from the back to stretch the lip, once again work slowly back and forth, don’t try to move it a great deal with each blow, take your time and it will come. At first I use the skinny end because there isn’t enough gap between the outer guard and the inner guard to get the thick end of the spoon between the panels. At this stage I’m hitting the back of the spoon with the largest hammer I have. You can hit the spoon fairly hard and you should be able to judge how hard to hit it. If it looks like you’re moving it with each blow you’re hitting it too hard. If you can’t really see anything happening with each blow but it’s moving slowly then you’re about right. 7. Go back and forth between checking/maintaining the crease and stretching the lip out. Once in a while use the spoon and the light panel hammer to get any obvious dents or bulges out of the arch and to work the stretched material into the shape you want the arch to be. 8. As you go you’ll find that the top of the crease line will move in towards the centre line of the car. Get the spoon up behind the flat part of the panel and gently bring it out. 9. DISCLAIMER!!!! As I said I was told how to do this buy my mate Peter the panel beater and he said very specifically “if the quarter panel around the arch starts to buckle STOP and I’ll come and fix it”. I’ve been lucky enough in the two times I’ve done this that that haven’t happened to me, I have no idea how to fix it if it does, but if Peter said that the only way to fix it was for him to do it then it must be very tricky indeed. 10. Try to get some shape in the lip (either concave or convex, don’t matter it just gives the lip strength when it’s finished). Once again, my spoon has a great shape to the end of it to help with doing this. 11. The bottom corners are tricky because you have to transition from where the panel was originally to the stretched part through the top. It gets more difficult when it comes time to reattach the inner and outer skins. You’ll just have to suck it and see because it kind of “happens” as you go. 12. When the outer is where you want it start on the inner. 13. Fold the inner lip down. 14. Beat the inner with a ball peen hammer to stretch the inner skin (don’t hit it hard enough to dent the outer) don’t worry too much about the shape, all you’re doing is stretching the steel so you have material to work with. 15. Use the spoon and hammer to move the inner out. Make you crease line around the top in the same place as the outer and work the inner the same as the outer, slowly. I find that if you hold the spoon on the outside of the inner skin pulling it towards the centre of the car and hit the steel right next to the spoon outwards it stretches nicely. You can work your way forwards and back doing this. 16. You might need to give the inner a few goes with the ball peen to stretch the material enough. 17. When the skins are touching again and your happy with the shape (check the flat panel above the guard and the fore and aft parts of the panel for flatness/correctness - usually it goes in and you’ll need to get in there with the spoon and tap it back out) it’s time to weld it back together. 18. Because the two skins are now different lengths you will need to scribe the fold line onto the inner and cut the inner back so the outer folds around it. This is going to be very difficult to explain in text so I think I’ll try and draw what I mean. Untitled by sheepers-ra28, on Flickr Untitled by sheepers-ra28, on Flickr Untitled by sheepers-ra28, on Flickr Untitled by sheepers-ra28, on Flickr 19. Use heaps of clamps right around the lip to clamp the two skins together in place. Check the surrounding quarter panel for correct shape. There is no going back once you start welding. 20. Tack the centre first and work outwards front and back from the middle welding the edge of the inner to the outer where the fold will eventually be. Use the smallest tacks you can because these will eventually be “inside” the lip and if they are big it will make the bottom of the lip all lumpy. 21. Then fold the outer back under. Fold it with pliers until you can hold the dolly on the outside and hit the lip up from the inside. Don’t hit the lip inwards at any point, it will distort the lip and the panel above. 22. When it’s up tight against the inner clamp it and weld it in place. Start in the middle and tack it moving outwards. Hey presto! Finished!! Easy.1 point
-
1 point
-
so a couple of months ago i had set myself the totally unreasonable goal of having this car finished by new years as im leaving for the airforce on the 19th of jan (less the 3 weeks away now) At that point i has rust, two tone paint and an engine that was running like a bag of shit on poorly setup bike carbs now being the 1st day of the year im very please to be able to say, thanks to the help of alot of Oldschoolers, that my car now has the rust repairs, brand new paint, redesigned intake manifold and better tuned carbs, and the interior tidyed up ALOT. I also have a 90% built hotted up engine that is awaiting the conrods to be repaired and then ill be bolting the head back on and its right into the car. the list for this car is now incredibly small and i am extremely happy! 1. Buff new paint 2. Install fresh engine 3. Fine tune bike cars to new engine 4. Finally enjoy the car and the fact that it looks exactly how i have been trying to acheive for the last 3 years. paint doesn't look very good in this pic as its overcast and a pretty crapy day, but even unbuffed looks awesome when the sun hits it, so hopefully when its buffed it will clear up a bit more. tryied my hand at a metal flake paintjob on the rocker cover, black paint with blue glitter chucked over it and clearcoat, the clear went a bit weird so i may redo it, but i like the overall look! just trying to decide if i paint the head blue or black. PS. in these photos you can see the sort of working space i have. 1 small as fuck garage that doesnt fit a car and barely fits and engine stand, so ive done everything on this car outside, sometimes while raining, often while dark into the small hours with spot lights set up because thats the only spare time i get! so quietly stoked at the car I, and those that have helped, have produced!1 point


This leaderboard is set to Auckland/GMT+12:00