
Leaderboard


Popular Content
Showing content with the highest reputation on 03/29/16 in all areas
-
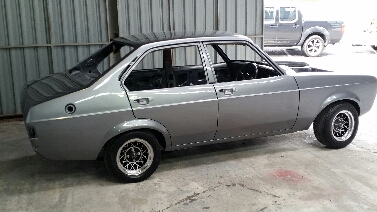
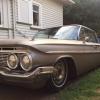
Got the red resprayed by Josh (Mr.MK1) who did a awesome job. Cant thank you enough by the way! So happy now its just one shade of red!18 points
-
broke my phone so this is the only pic16 points
-
After all the excitement of Toyota fest i came home with an all new enthusiasm for making this car better. So with a four day weekend wherein i have 2 days free i decided i should make this 1GGZE thing happen. So i did this... If you have ever attempted to install an engine on your own using a forklift you will know this was a real cunt of an asshole of a job. Removing the engine was easy but putting the other one in and trying to tweak it ever so slightly to get the gearbox to line up with the clutch etc was a god dam nightmare and there were many swear words. But hey! how rewarding right? Amazingly everything bolted straight up and all lined up beautifully! Swapped the clutch and flywheel over, the fuel lines with the fuel filter bolted up with some minor tweaking. The only things I've really had to modify are the heater hoses and radiator hoses which were pretty easy. They are located in basically the same place as on the other engine so I've just had to make them a little longer or a little shorter. I'm not real happy with the radiator hoses but they will do for now. (not bad for shit i had laying around) Now just the wiring to take care of! ....... lame!10 points
-
Hey Team, Been doing a couple of little things on the bug since I'm down from Auck. Got the motor and box in a while ago but couldn't get it going. I triple checked all the wiring and found nothing wrong so I sent the computer away to be checked. Have got it back with a few changes so hopefully it goes! Have chucked a few panels on. Will hopefully get it pretty much back together and driving this week. Rad9 points
-
It may not be every boy's dream, but I've always fancied a cabin in the woods. As luck (plus planning, decades of hard work, and some determination) would have it I now own 'some wood's. First I selected a site, and then cut down all the gorse. No trees were cut down, but some were trimmed. There may be one smallish karo tree that needs to be cut down later, but I'm trying to avoid it. UJ are kind to nature you see. What you probably can't see is how steep it is. It's steepish at least7 points
-
i love that the kid got greedy trying to sell it and you hussled the fuck out of him and got it way cheaper via trademe than your original offer off trademe. good work son7 points
-
In completion of my AE86 project (which has been promoted to my 'Sunday Fun-day car, this is a very high rank) I have bought myself a pre-facelift KE25... for some reason. Have scored myself so far, KE20 1200 HI-Delux front guards, bonnet (not pictured) and grill setup from Japan TE27 Trueno rear tail lights from Japan 4k and K40 locally Going back to a K series engine but will probably upgrade to a K50. Barely any rust overall which is sound. Bit behind the rear tail lights but for a novice like me should be pretty easy as it's all flat in that area. Pretty keen to get this panel and primed myself (learn along the way), take it to somewhere in a booth to get exterior done properly. I predict that this will be a 2+ year long project, but looking forward to it none the less! Big thanks to Olds Cool Autos for supplying 90% of everything, including the shell.\ Discussion thread here: //oldschool.co.nz/index.php?/topic/52401-pbaines-1971-toyota-corolla-ke25/6 points
-
And that's all for March. More to come in April, but this baby will take me until November or December to finish as I only have about half a day a week free, so it'll be a wee while between meaningful updates. I'd love to have the subfloor finished by May. Always May EDIT: Oh, I should probably share the view that'll be from the cabin's second deck. There will be two decks, one covered and hard up against the cabin (that'll have an outdoor kitchen), but there shall also be a second deck a few meters away with an outdoor dining table. This is what that dining table will look at. I quite like it (sorry about the horizon).6 points
-
Next came digging. Lots and lots of digging. The top 150mm of soil is nice organic type stz, but beneath that is compressed greywacke dust (or something like that) which is about as soft as Danger. It can't be dug with a spade, and a mattock was far too slow and akward, so I hauled a generator up there and used an electric rock breaker. Nek munute it was time to lump up pre-mix concrete and get some piles in.5 points
-
The GC who has been running an automotive workshop down the road from me has moved to a larger and more modern premises. His business is general mechanical repairs, tyres and warrants etc. He is looking for a young person who would like to start an apprenticeship, he is offering to take someone under their wing and help with the training etc. The workshop is in central Manukau, easy access from both the Southern and South Western Motorways. Hours of work are 8:30am-6pm Monday to Friday. If you know of somebody who is interested and isn't a slack cunt then let me know and I'll pass their details on. Might be suitable for a younger brother/sister of OSers or maybe that friend/relative that is looking to leave school etc.5 points
-
5 points
-
But then I visited Steelies in the Steelies house, and realised that my '< 10sqm' cabin was going to be just too small, so I had to dig some more holes, add some piles, carry more concrete... but in the excitement I seem to have started the creation of a twin level internal access basement. Ain't no one got time for a single level external access basement. They're for chumps. Split level with internal access is where it's at. The foreground (bottom right) in this picture is where the chainsaw is in the first picture. There's heaps and heaps more digging to go4 points
-
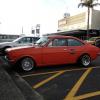
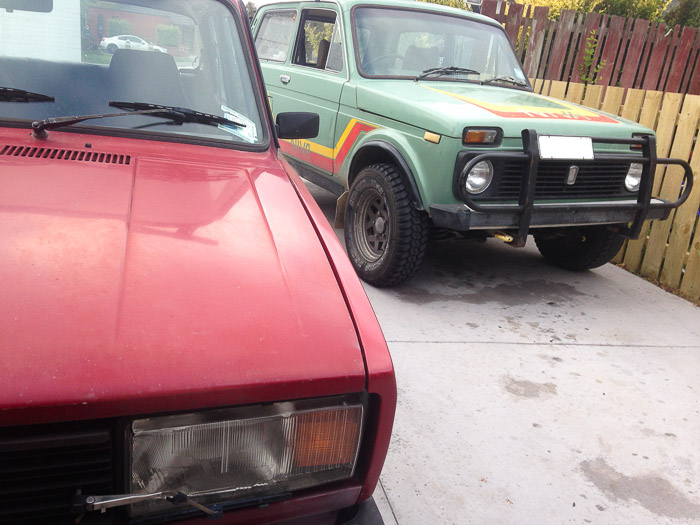
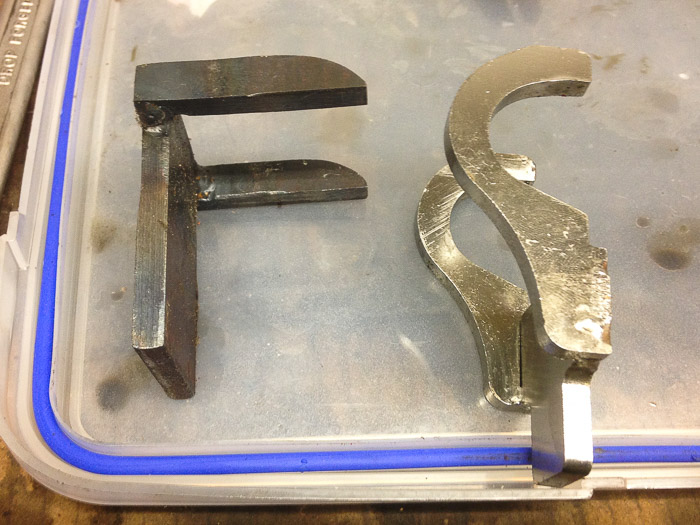
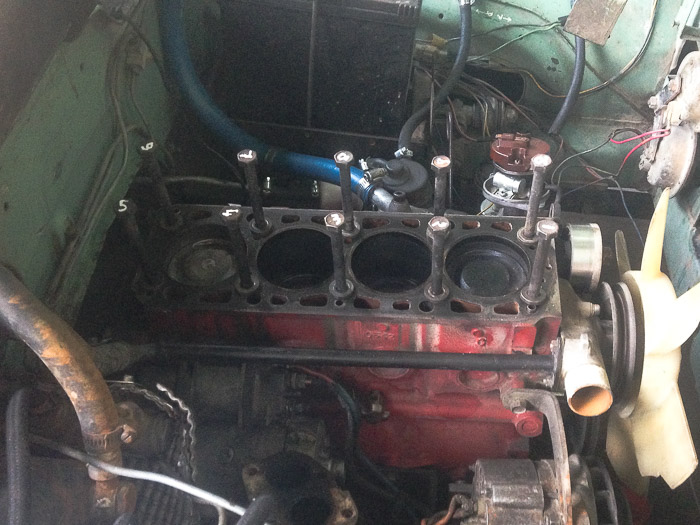
Long weekend and made it into the shed each night after dinner to tackle the engine Borrowed a bottom tap to clean up the threads and took my time checking and rechecking there was enough room to torque down the head, only just there, but just is enough! With the engine back together and running next stop was to check the valve clearance, while up in Matakana a month back I called in to see Azzurro who lent me some shims and the right tool for the job For laughs, here's my attempt at the valve bucket tool, next to the real deal After all the messing about I really only changed one shim, but it was pleasant having the right tools! Conclusion: Two running, road legal Ladas, or is that Ladii?
 4 points
 -
Last piece of the puzzle finally arrived. Now I have all the parts I need to hiff the coupe back together and on the road again. Still hunting those elusive ASCD sensors, but they aren't mission-critical. Also, I had an interesting discussion with some car restoration foamers recently about DR30 prices and their collectibilty - thanks to frenzied blog exposure in the last 6-12 months the market outside of Japan is finally waking up to the fact these Skylines are now worth buying, and apparently a generous offer to purchase my coupe may be coming my way in the near future if they can't find any suitable examples elsewhere. Huh. We shall see. I really doubt I could be persuaded to sell, unless the figure is in fact ludicrous. Was to be expected from how Skyline Japan (C210/211) prices skyrocketed overnight a few years back, I suppose. Trust me to be 11 years ahead of the cool crowd though! Discuss: http://oldschool.co....ns-dr30-wedges/3 points
-
Yuck Also barry builder has fixed the side rubber trims by replacing them with black wooden slats and fixed it with blobs of no more nails3 points
-
^ when i did the engine thats in my white val now, the block was decked 30 thou, so the intake gaskets didnt fit any more- the fix is to machine the intake manifold. instead of doing that, i found the manifold fitted fine without a gasket, so i used that grey threebond goo around the coolant and exhaust crossover ports, and blue hylomar around the inlet ports (hylomar is petrol resistant) over a year now, no problems3 points
-
Been pineing for vanlyfe again because such practicality for all aspects of everything so been keeping an eye out for something suitable when this POS popped up. Cheers to BLIZZO for giving it a quick once over and a seal of approval before I placed a couple of bids and won it. Took the train down from Hamilton on Saturday to Palmy and drove it back that evening. Its a 1989 Hi-Ace Custom so its got some good supercustom bits like a coil sprung rear end and a column shift G55 gearbox but a gross 3Y-U with a billion vacuum lines on the carb that other than using all of the fuels it runs lush as fuck for 318thou kms. Spent all last Sunday arvo in the rain at PAP pulling this pile of yuck off a 3Y-EU Townace, at some point I will try fit it to the Hi-Ace. Will it make an improvement to anything? Maybe a bit better economy power but who knows. Got it home and tried to fit the supercustom big brakes I had lying round but thats a fail so while it was on the axle stands I swapped on the wheels of the Hilux Its got a heap of bog hiding in it and its filthy as builder spec inside(nails and screws in the bottom roller door channel). Needs a good clean up and my panel beater Barry to give it a once over. Plans are to take seats out of the rear and build a plywood base for camping/utilitarian duties. Maybe flip the ball joints and adjust the rear springs to get it tucking then see if I get a green sticker2 points
-
yeah but you are both assume that british machining is up to a standard that isn't british........2 points
-
Adjusted the upper shock mounts a bit to allow a bit more shock travel (duh). Was looking under the car with CDL and noticed that one of the front bags was rubbing on the chassis pocket when down. Not necessarily a concern but I wanted to check it further, I found that there were a couple of (factory) weld dingles rubbing on the airbag so had to dismantle some of the suspension so I could grind them smooth. Came apart OK, and no other issues after 1 year/3000 miles on the bags. It's nice not to have to deal with spring compressors and such when splitting things apart. Have also topped up PS, bled brakes, drained and refilled air compressor (twice) so hopefully is all OK of BH16. Geez this thing looks untidy underneath!2 points
-
i made a thing so i can fit an air cleaner. ill probably cut the end a bit shorter but i don't have a filter yet so ill wait until i get one to figure out the length. 2016-03-28_03-02-45 by sheepers, on Flickr 2016-03-28_03-02-33 by sheepers, on Flickr 2016-03-28_03-31-06 by sheepers, on Flickr2 points
-
Fail ^ afr graph; pink line is the 44.5mm extractors, they match the old 38mm's from 6000rpm onwards. but are junk below 5000rpm, at part throttle and wide open. im not sure what is happening down low, lack of velocity or maybe getting a bit of reversion? but rules out that the 38mm tube is any kind of restriction. The fuel ratio is a bit junk in general. long story, but had to do a quick temp fix on cambelt, with an old belt. as some stones managed to get in there and destroy my poser toda belt. Im pretty sure the cam timing is off. as its gone lean through the midrange. but with that fuck up looks like it may have gained some more midrange power. as requries about 5% more fuel between 4500 & 6500 to get it back to where it was. when i throw the new belt on will see whats going on, and maybe finish dialing in the cam timing, that i was spose to do 2 years ago... looks like i got to 10degrees advance on the inlet and 10degrees retard on exhaust, over kelfords recommended.2 points
-
Won this auction the other day. Have a soft spot for Crowns but wagons especially.A few people on here would have been watching this auction, Will be delivered up to New Plymouth later this week sometime, Failed on a few things, so will need to sort out; the list is: *HP lights to be replaced * Diff Cross brace rubber to be replaced *Left hand side Idler Arm * Front + Rear top shock rubbers to be replaced *Indicators to work *Steering drop arm ball joint to be replaced *Machine rear drums *glove box to shut *cracked rubber Body to chassis mounts to be replaced to start with I just want to get it rego'ed, which will mean having to track down above parts, made harder by the fact I live overseas mostly, however a lot of internet searches and phone calls should have it sorted. Once it's legal then will look into 1JZ-GTE, the biggest issue (maybe) will be the fact that these still run a steering box, and not sure if it will be a straightforward drop in or involve some mods. Wheels - alot of options, that look good on these|: I'm also madly searching Yahoo.co.jp for a set of these lights, found on the base model vans, and deluxes; if anyone has or knows where I could find a set in NZ give me a yell The headlight conversion makes the car look 1000x better to my eyes, so I need them.. Also if anyone has a set of MS137 / UZS131 88-91 alloys for sale let me know, the old man wants them for his Hiace, same as the set below: If anyone can help with any of the parts i'm after will be eternally grateful.1 point
-
Trademe owns Carjam, that's what happened.1 point
-
Love dem rustangs! Will look out for 78's especially for U1 point
-
We will be there will be in a yellow ex lancer1 point
-
Yeah, I got the headsup about this from our shipping broker. I don't really have anything old enough to take. Might take the wagon in case I find something to buy.1 point
-
RX-Ace1 point
-
Lo-bros all round1 point
-
Nice. I can't wait to have the next burger meat in the back of it.1 point
-
have a look at the end grian of the lengths. ensure they don't run the same way when you glue them up. how long are the lengths ?1 point
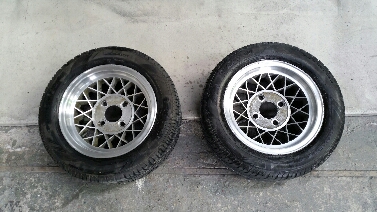
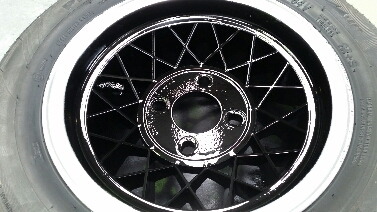
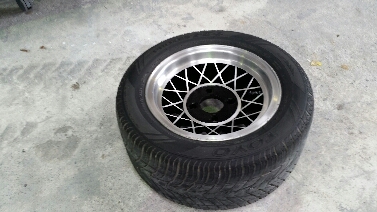
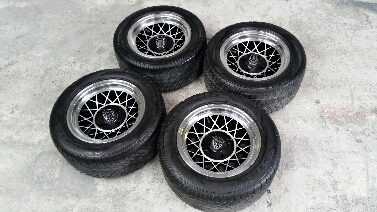
-
Cheers Dan. Yeah much happier with the wheels now after todays effort. Still a little unsure but I'm sure some more low will fix that!1 point
-
Here you go1 point
-
Intake and valve cover ready. Also finished sanding the spoiler but didn't get any photos. Will get some later when I do paint. Swap should be starting in 2 weeks, as soon as my last few bits arrive.1 point
-
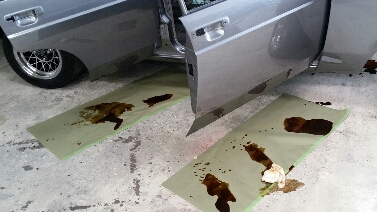
Pulled the wheels off today to give them a spruce up. They were looking a bit ratty and wasn't sure if they were the right choice Gave them a good sand up with 320 then 800,1000 and 1500 A few coats of satin black and a rag with some thinner on to wipe off the excess. And finally a heap of rags,metal polish and elbow grease... Came up good,much happier now. Still needs about 2" of drop but will have to wait till the rest of the weights in.still thinking modgies but might leave that for now as I've realistically got other things to blow money on for a while. Also filled it up with cavity wax
1 point
-
Hi temp RTV has never failed me........1 point
-
I was able to spend a bit of time on this over this long weekend and close up the rear quarter. First removed the remains of the inner skin and replace it with a single skin. Like the other side, instead of recreating the factory rust trap, i replicated the existing 'shelf' but made it an extra 5mm or so wider to attach directly to the outer skin. inner plate ready to bend to outer 1/4 profile inner bent up to outer profile. + a wee rebate for the bumper mount outer 1/4 from under neath (bumper rebate patch from the original just tacked on) hole which was cut from the original outer skin. It would probably have been easier to just tap it into the nice new steel given the state of it, and the amount of faffing blowing holes in it but its done now Next, make the lower panel to fit. A shrinker/stretcher would be awesome, but this tuned out ok. 1/4 fit looks ok test fit #4358754785 showing off my pie cuts and blow outs that make this shape 1/4 fit looks good, time to weld. I like to have the patch just 'fall' into place with no more than about 1.5mm gap at the most- if you have to force it it wont sit right once its welded and might warp - too big a gap and its a pain to weld and it will warp due to the amount of heat needed to bridge a big gap 1/4 tacked in, this is about 3 passes, just closing up the gaps each time letting it cool be fore stating the next pass. These big panels will warp very easily. 1/4 welds smoothed and ready for some primer Also fixed the rust patch in the sill, good to have a few patches on the go when welding as you can swap between them and avoid over doing it and warping the panel. insider the sill end, not bad for 50 years. Dunno why it rusted out above? sill patches tacked in And all ground back plus smoothed with the 40 grit sander and ready for some primer So that leaves only the front drivers floor and fender to do now rust wise, but I cant make a start on that untill the diff is back in and on its wheels. Axle seals turned up, so swapped them out, changed the pinion seal (the nut was suspiciously easy to get off so will get a new one before i put it back in) with some RTV behind the washer (to stop the leak into the flange). My handbrake pads and diff hard lines need picking up, and i need to get the leaves reset over the next week or so, and meanwhile have some crusty diff/suspension parts to clean.1 point
-
Anyone wanting to do the same thing- the tie rod ends i used are early commodore manual steer ones- Camelot part number TE526R available from Autolign the joiner part has a female 9/16 UNF left hand thread in one end to fit an original valiant inner tie rod end, and a 14x2? male thread to suit the commodore tie rod end at the other. the whole thing is 210mm long which should suit any valiant VE- on. the threads are cut to a length of 65mm. Also you will need 4 jam nuts, 2 to suit the valiant tie rod ends and 2 to suit the commodore ones, the left hand thread nuts were slightly tricky to find, but Atom Fasteners in east tamaki had some. The joiners themselves were made from 4130, not because thats what i asked for but thats what the guy who made them, had in stock.1 point
-
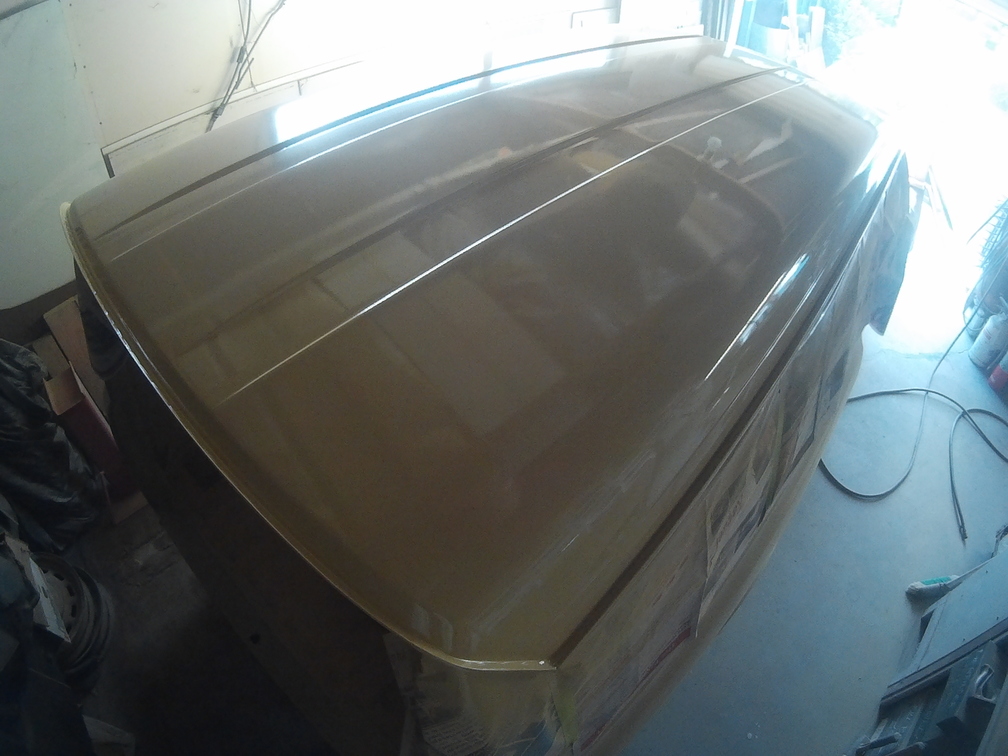
The roof was long boarded down and any imperfections were sorted out. Also seam sealed the two edges where the roof panel meets the sides. This is the rear corner looking over the roof. Sprayed on the final primer, dried very quickly but was able to keep it wet and glossy. Looking very straight now.
1 point
-
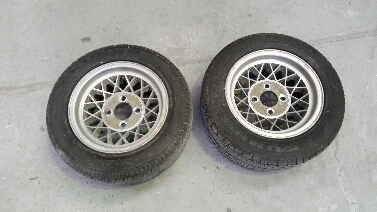
Ssr formula mesh
1 point
-
Sooooo, unicorn shit has been aquired. Genuine TRD new old stock (thants right brand new) k50 close ratio gear kit. And not only one kit, but two, although the second is missing 5th gear, got lost someone in its last 30 years of storage. So pine right now1 point
-
MY GUARDS ARE FIXED!!!! Suffice to say I'm pretty happy about it. Guards where repaired with just 1 day to spare before a group of us riverside gang members were due to leave for Toyota fest down in Cromwell. So in one day and two late nights i managed to get the car legal enough to get a warrant and then low enough again to be cool. I would have liked to get the front down a bit more but virgin guards and stupid tyre profile would not allow it. Also ran out of time and patience. P.S rear guards arent finished yet either, still need a bit of careful shaping to get perfect and a proper paint as they are currently just in a white primer. After about a 800km round trip the car was still in one piece, despite all the tyre rubbing and chassis encounters with the road surface. Here is a bunch of pictures.1 point
-
Not as bad as Rotary puns, which just keep on going around.1 point
-
Oh and here are some pics I was given of it 20 odd years ago1 point
-
unlike. just bring beetle cause yolo. il let you know how air ride goes so you can install it cause FTP and john key and all. flick a message il be down there by myself if ya want to come for a roll/i need hands to push when i brake down1 point
-
this is why i have air shocks on there way. sadly its a huge event and a good place to do some advertising for the business so its kinda silly for me not to attend. time will tell. (i risk that sticker where ever i go)1 point
-
Finally have 4 pipes heading in the right direction. Has been tricky getting all runners the same length, while making them aesthetically pleasing and within the same constraints, so can bolt on swap back to the old extractors if need be.1 point
-
I bought a used radio flyer on trade me for $50 and decided to make it look a bit better and give it to my boy for his birthday. One thing lead to another and now its a candy red low riding radio flyer1 point
-
2016-03-08_07-44-31 by sheepers, on Flickr1 point
-
i just chucked them on to see what they look like. the photos look a bit weird because the light is reflecting weirdly, or some shit like that. 2016-03-08_04-40-17 by sheepers, on Flickr 2016-03-08_04-40-26 by sheepers, on Flickr1 point
-
Way too long without an update. A mixture of being too busy to get much done on the car and even less time to update. Seats have been retrimmed but retain the original pressed corolla logo panel that have been vinyl sprayed to match. All seats installed etc. Originally these cars come with 3x6 inch speakers, but try finding some locally. Even reasonably priced 4x6s are getting much harder to come by, so I got some 'value for money' fusion 4 inch items with adapter plates. Installed. The idea with the audio is to make some nice and reasonably period speaker boxes for the parcel tray. To run then show i'm looking at getting a JVC bluetooth unit that can be controlled remotely via a smartphone so I can hide the headunit under the seat or in the dash. Fuel cap and trim installed. Cleaned the dirty old seatbelts. They have a bit of sun fading so they may have to be replaced. Rear seats and belts in. Handbrake in. Dash all done. Accelerator pedal and assembly in. Windscreen in. Bled the brakes today, worked sweet when I fixed all the leaks, but it seems like the front brakes are binding, much have to rekit them.1 point


.thumb.jpeg.384ff72c8d2b0ee0d34a7bdedb55bdcf.jpeg)


This leaderboard is set to Auckland/GMT+12:00