
Leaderboard


Popular Content
Showing content with the highest reputation on 09/28/15 in all areas
-
Today, was a good day. To summarise. No barking from the dog. IMG_2329 by Richard Opie, on Flickr No smog. IMG_2343 by Richard Opie, on Flickr Bex cooked a breakfast featuring zero bacon. IMG_2378 by Richard Opie, on Flickr Went to $hort Dog's house, they was watching Yo MTV Raps. IMG_2392 by Richard Opie, on Flickr Rolled a seven, seven-eleven, seven-eleven and picked up the subsequent cash flow. IMG_2429 by Richard Opie, on Flickr Took another sip of the potion and hit the four-trumpet motion. IMG_2487 by Richard Opie, on Flickr No helicopter looking for murder, purchased fat burger at around 2am. IMG_2482 by Richard Opie, on Flickr Today I didn't even have to use my AK - instead we installed a four-age. IMG_2463 by Richard Opie, on Flickr17 points
-
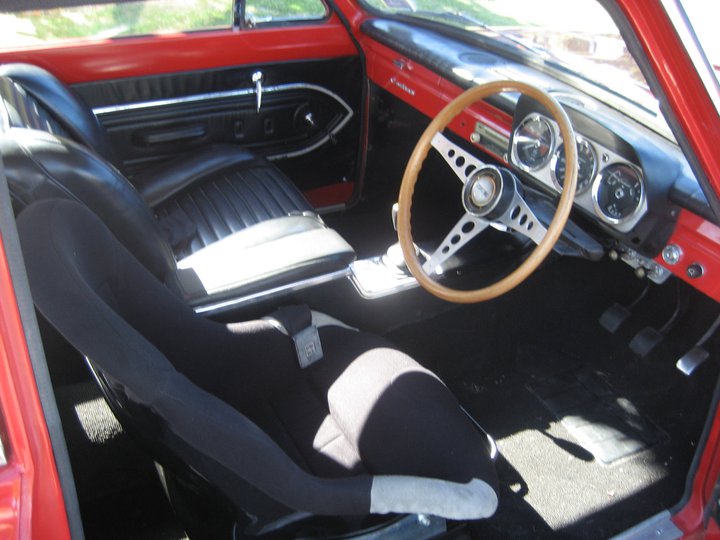
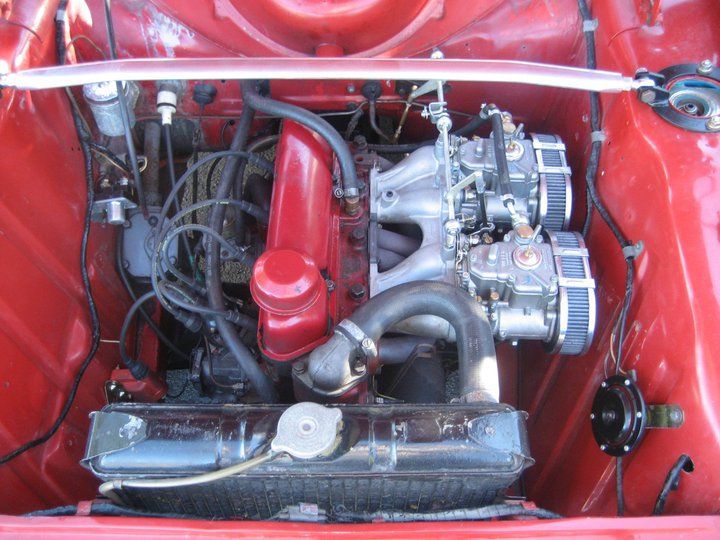
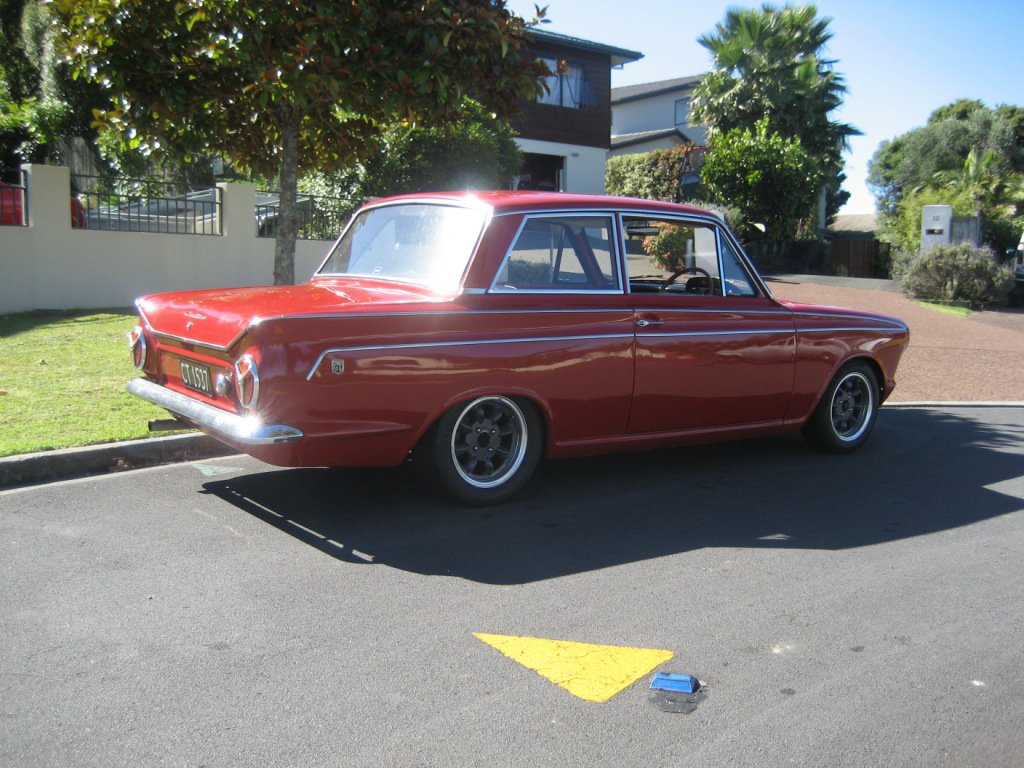
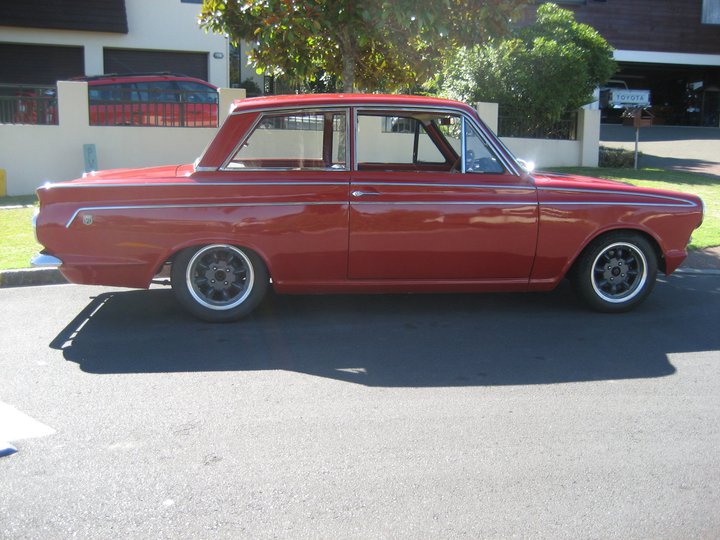
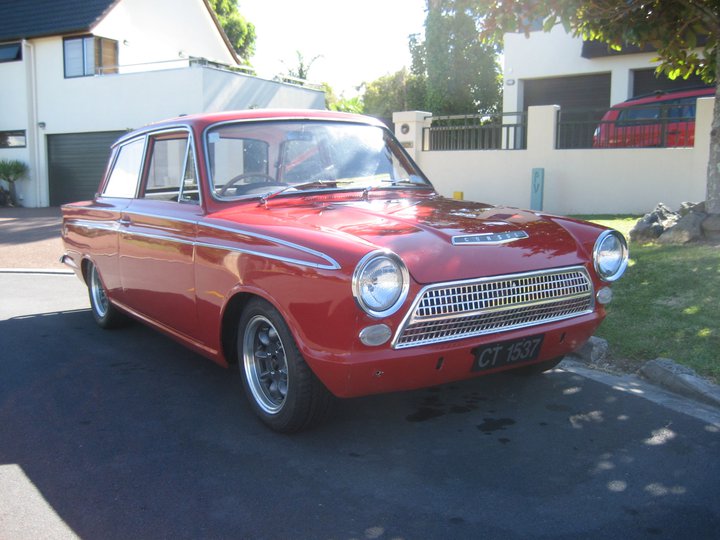
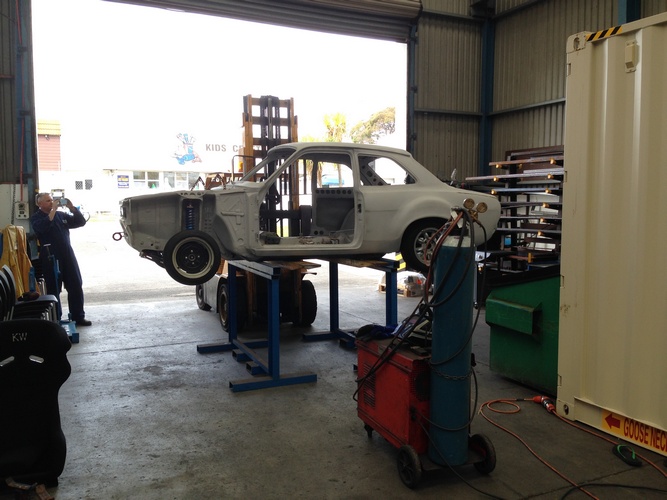
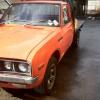
Hi All, Have been a member of the forums for a while but haven't contributed a lot. Went along to the monthly meet in Ellerslie last week for the first time and met the Escort brigade in the pub. Someone suggested I should post to introduce myself and my car so here goes. I bought a 1064 Mk1 Cortina GT in 2011 which looked like this at the time. Turned out the engine needed a bit of work so I decided to go for a YB engine. It has taken a lot longer than I had hoped but the car is now not far from being complete. Fingers crossed it may be on the road by the October monthly meet. Will post some more pics when I work out how to resize them... Cheers Nick Discussion- //oldschool.co.nz/index.php?/topic/50272-sods-64-cortina-cosworth/
 14 points
 -
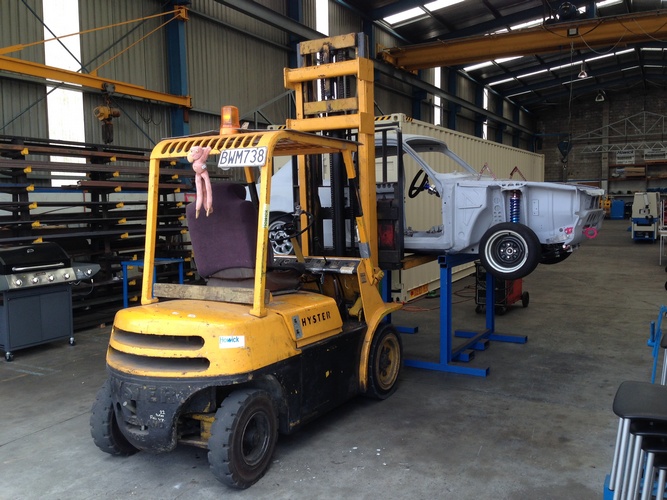
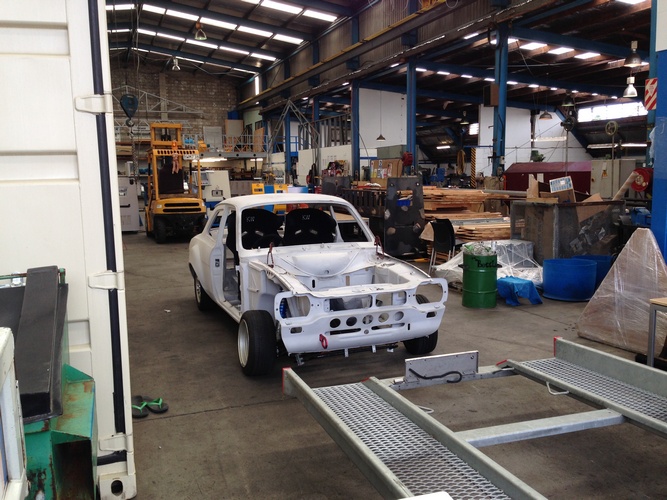
So it seems kurts attempt at coupe lyfe has failed as this thing has fallen into my hands and I'm going attempt to finish Kurts attempt. He sold it to me with pretty much all the hard stuff done which is verrry nice! It arrived to my house on thursday night looking like this straight off the truck, highly recommend Brent at Classic towing, he is a dream to deal with and at a very good price too! much better than any other company i have had to deal with before. on friday evening i ripped into things, put the last coilovers in the car, and ofcousre slammed it. need shorter springs for the rear coils as it sits wayyy too high and i still have a bit of body adjustmet to play with. also had to put the skirts on to see what it would look like..... it looked good. pulled all the seats out as they were all dirty and grabbed some turtle wax upholstery cleaner. Worked way better than expected got all the greese and rust stains out of the seats, still need to finish cleaning up around the headrests. Before: After: Next on the list -put the side skirts on properly -check all the bolts underneath are tight -install driveshaft -instal/mod gearbox x member -mount enginebay stz -rebuild brakes -acquire and install raditior -wire up engine -exhaust -and a shitload of other small jobs.. should easily be done come summertime hopefully...10 points
-
alright iv been really busy/lazy lately, so havnt made much progress started welding the roof back together thats about it. Anyway heres the bike, A vtwin 250 Honda. I think it should be enough to cruise around in and at nearly 14,000rpm to find limtier it should sound pretty cool. a Also Had a party and thought it should get a load test, It passed.8 points
-
Finally got this down to a track day. Wasn't many cars so had heaps of track time, car felt pretty good but definitely needs some improvements. Next on the list is knuckles to try sort out the odd steering, and a bucket seat so I dont have to fight to stay in the seat.5 points
-
DGR yesterday. Gave it a paint last week, looks shit. First time riding it this year. I remember it being safer.3 points
-
Can you paint this canary yellow on silver steels, and make it go zutututu, kthxbai.3 points
-
I disagree with the above. needs twin cam head, ITBs, spaghetti headers and the lumpiest cams you can find for max dort3 points
-
Low vs High.3 points
-
Alright I scored this little fiat and im putting it up here to try motivate myself to actually start on it. Is been sitting under a tree for a long time engine is well stuffed I assume but havnt got to involved yet and the floor is rusty as from what I can see thru all that parts stacked up in it. The Plan: we have a car show in Christchurch every year call Muscle car madness and if you stay out it gets pretty wild at night, So im building this to mainly cruise around there. I want it as low as it can possibly go with camber and wide steel wheels (itll never be road legal so I dont care what has to be cut and added to get it super low) Possibly running a motorbike engine it the back seat with pipes out the rear window. Basically its going to be a super cheap build so itll evolve into what ever it does with the parts I can find. Discuss anything here: //oldschool.co.nz/index.php?/topic/49640-427carguys-bambina/2 points
-
Well the bikes are nearly finished now which is good because im flying down to chch next Monday to start the ride! The top coat color has also been sprayed on all the parts. One of the last jobs that had to be done was to make the handlebars. I originally thought i was going to have to find someone with a tube bender and mandrels suitable for the job but i managed to find some 2.5mm wall hydraulic tube and this bent very easily without wanting to collapse at all. The handle bars are bent with a hump in them to clear your legs at the top of the peddle stroke. There is a piece of threaded rod welded into one end for the bars to screw into the head assembly Starting the bend With a little bit of heat on the outside of the bend the tube just pulled around And bending the other side to match (the hard part!) I got the bars and all the fasteners nickel plated, i did all the polishing myself to save time and cost at the platers. I can highly recommend Electroless Coating Systems Glenfield for any nickle plating you want done, top service and they do a very good job. I also did the grips, for those i raided my dads file draw, i was lucky i found 2 with exactly the same wooden handles After trimming a bit of each end a putting a 5/8 hole up the middle and giving them a good sand they looked like this And stuck onto the bars, they are still wet with the first coat of sealer, there are a couple coats of varnish to go on yet. All going to plan final assembly of both bikes should be tomorrow night2 points
-
Repping the 90's yo2 points
-
Put the BW auto in the skip. They are automotive aids.2 points
-
Maaaate, next time you need something from Hawkswood gimme a PM, I'll give you the OS discount code (I manage the business)2 points
-
2 points
-
Since the car's been apart for friggen ages, and had a few big expenses that delayed buying a clutch for quite a while. I decided that it would be an awesome idea to rip the wiring loom out and tidy it up, as well as add a few extra bits. So first things first, holy moley after seperating out all of the circuits and straightening all of the wires (instead of bunched up in the way that suits a FWD celica, which my loom is from) the diameter of my loom has reduced dramatically! Decided to split the loom coming into the engine bay into two, so it's a lot easier to take off. So one half for all of the stuff on top of the motor and everything else down the intake side. So the new loom includes provisions for some extra bits: Clutch switch (For launch control) Brake switch (For cruise control) Cruise control switch A panel of switches for the dash to turn things off and on A second map sensor for datalogging/nerdy purposes E-throttle (this is friggen greedy on inputs and outputs! Got it setup running awesomely though) Knock sensor setup properly (woohoo!) Having the Link output a PWM for the speedo (more accurate than current setup) And some other junk I might have forgotten about, but sweet jesus with all of the extra stuff it's a behemoth of a thing! Takes up my whole lounge floor haha. I finally got a clutch, ended up with a full faced disc Exedy Heavy Duty setup. Hopefully lives up to it's namesake. Been doing the hard yards yesterday and today to get the motor back in with the clutch and gearbox fitted, wiring loom back on... Fired up first pop which was awesome! Still lots to do, (like fit a radiator and the whole front half of the car) but its a great milestone to reach. Just about blasted my eardrums out starting this thing up while the oxy sensor was unplugged! Need to calibrate it before plugging it in, but after 2 days of hard slog to get this far I'm happy to have a break for the rest of the night and get stuck in again tomorrow. Can noooooootttttt wait to drive this thing again! OS drags and summer trackdays just cant get here quick enough2 points
-
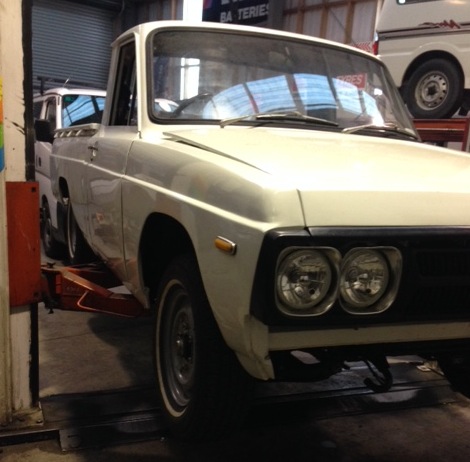
headlights turned up last night, fitted one side to see how they look, had to modify the inner buckets to get them to sit in properly but i think they look all good looking forward to getting these put on next week!
2 points
-
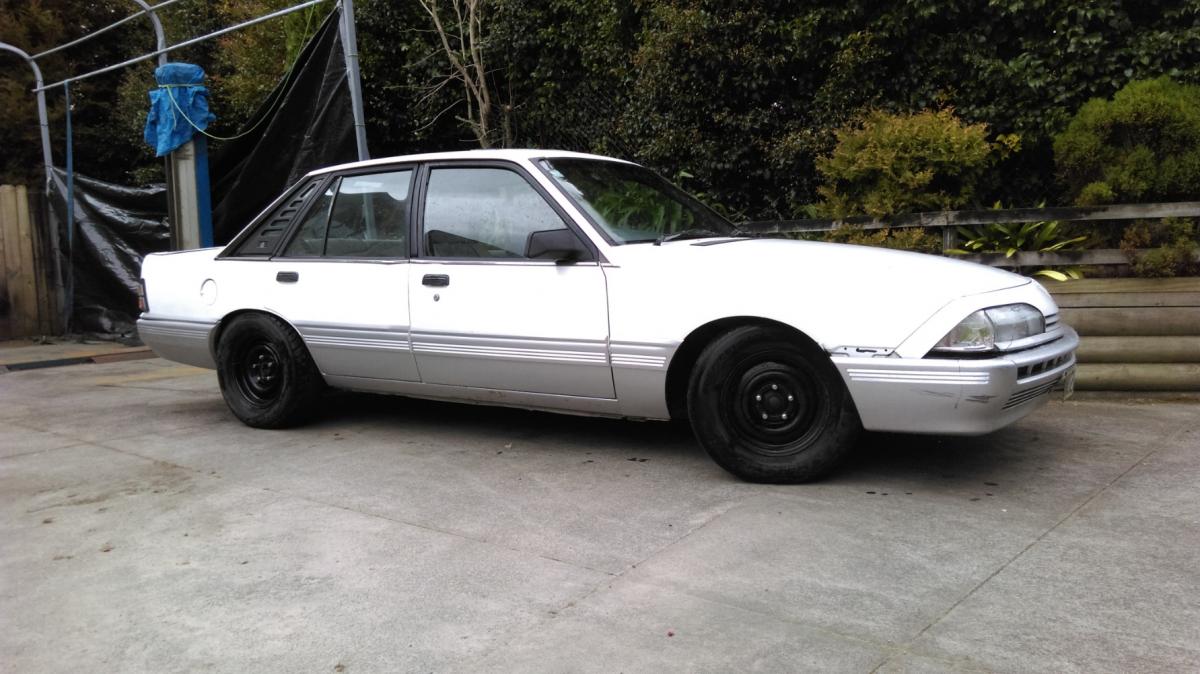
Righyo long time no post. Ended up swapping the vk wagon for this 1988 vl. Had it for about 3 weeks now and loving it even more than the last commy. It's the RB30e manual but it's running a little ruff as it's coughing at low revs then picks up and runs normal after around 1.5k revs. Its had a respray at some point but it's pretty ruff in places. Plans just to clean it up abit and make it run mint before slapping a turbo on it. I've brought some 15" steerlies that I gotta get tyres for and then obviously sack it lower
1 point
-
Hi all. So I'm sort of posting on behalf so please excuse the fact I don't really know what I'm talking about. My cousin (and good friend) has got a mercury comet (wish he would post up a build thread because it's a beaut story). The comet came with a fucked 3.3l 6cyl and I believe either a c3 trans (3speed column shift auto, linkage on left of trans) He's bought himself a 4.1 6cyl which is featured in the other thread with the crazy block numbers. The new engine comes with (I believe) a Borg Warner 3 speed auto box with linkage on the right. Ideally he would keep this c3 box with new engine BUT the bellhousings bolt pattern is different. Do any of you stockcar/Ford nuts have any parts laying round that may help? Car has huge sentimental value for him and its a MASSIVE project because of rust etc1 point
-
just a quick update for everyone so they can feel good about the progress of there cars1 point
-
I used a boat Morse cable when I put the 302 + C4 into my XF falcon to keep the collom shift. The C4 trans has the dipstick tube going into the side of the pan where the Bogwanner goes through the op of the casting is a good way to check at a glance.1 point
-
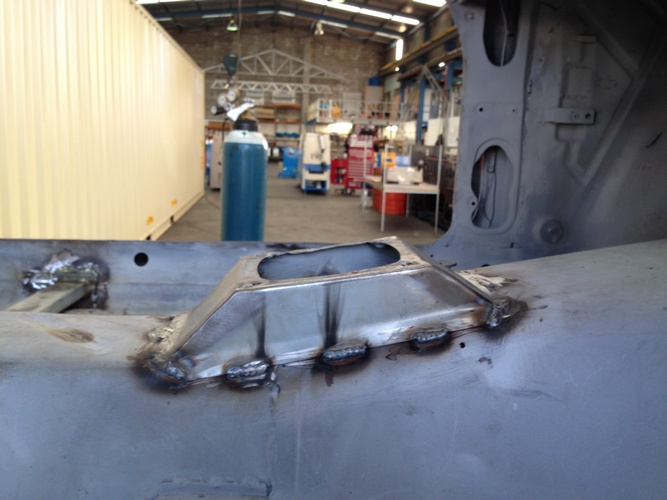
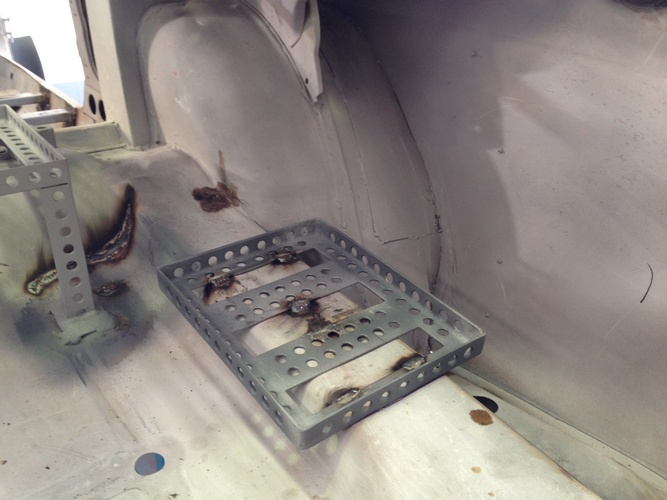
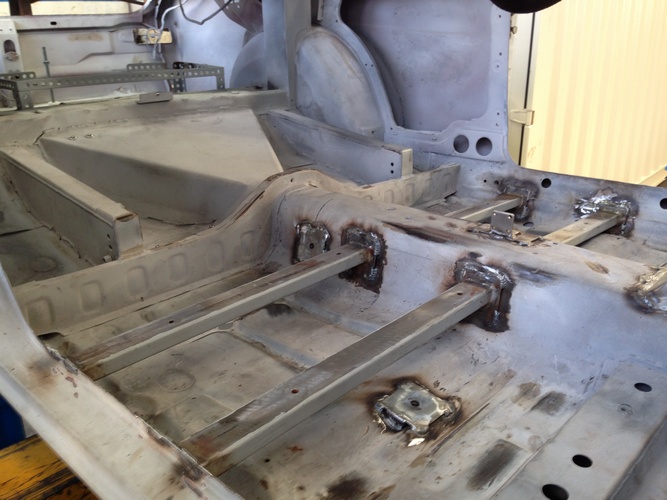
handbrake mount in line lock mount in made a surround for the gearlever battery tray fabricated and welded in seats in , back on the trailer to go home
1 point
-
The XA, XB and XC V8 with C4 powered Falcon with the column shift use a linkage that runs across the front of the trans pan to sort this problem. Getting hard to find now but they are out there. Before someone tells me such a thing doesn't exist, they do, I've owned a V8 Falcon with a bench seat and column shift.1 point
-
haha love your take on ice cube.1 point
-
If you haven't already found it, the ado16 forum is pretty good for info etc.1 point
-
it will be, however go to Repco, its likely to be cheaper than that or even here http://www.classiccarparts.co.nz/mini-pre-verto-clutch-slave-cylinder-non-genuine-gsy110-mg-1100-sprite-n-midget?search=clutch%20slave&description=true1 point
-
yes... do this Haha BT1 clone that would be a first!1 point
-
Clutch slave cylinder - sorry I don't have a spare but they should be easy to get - same as mini.1 point
-
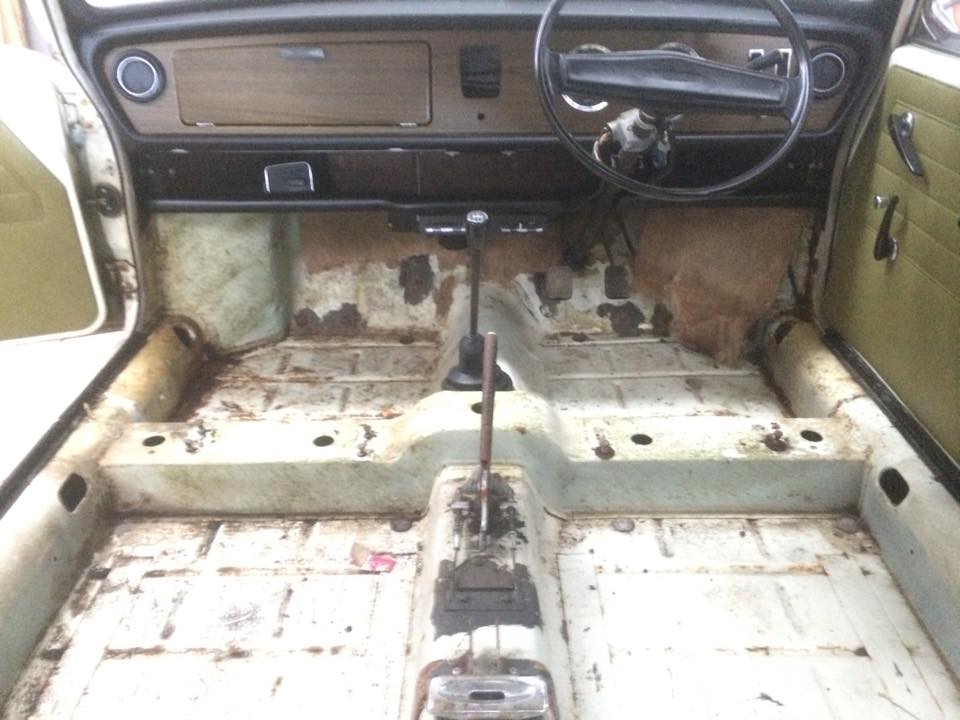
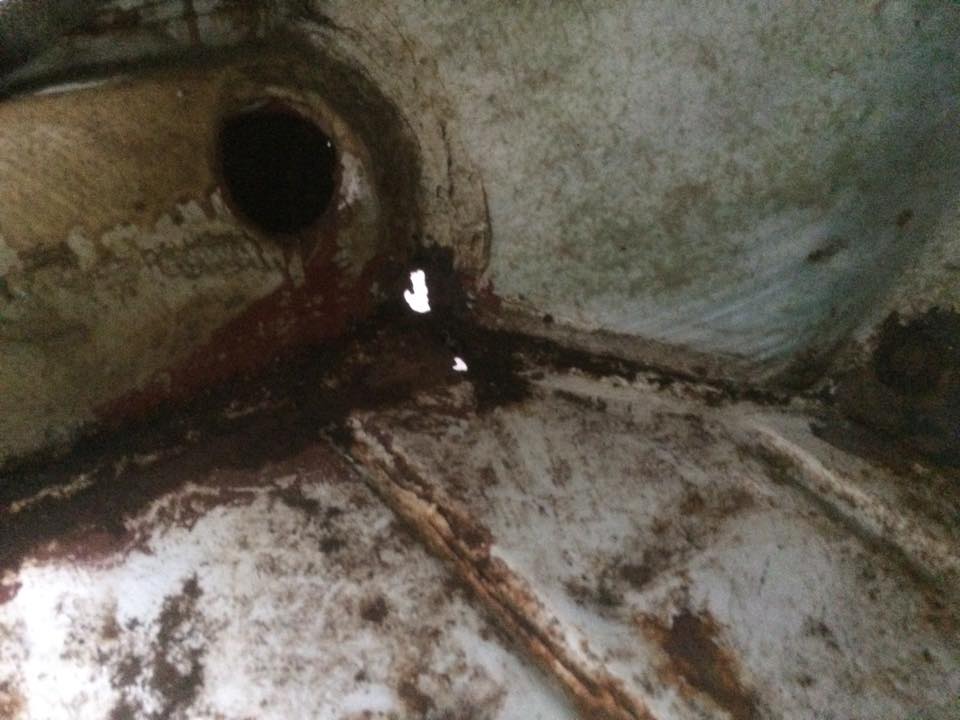
inside all stripped except dash, gona leave that in for now this is the worst rust in the floor pan
1 point
-
Just started a page on Facebook to see what interest there is for a Jappa classic car day in Welly, along the lines of the Yank and Brits shows that we see every year. Looking at Moonshine Park in Upper Hutt Sunday 29 Jan 2016. Just thinking that this could be an informal park up, show and shine... to gauge interest. What do you think - going to fly or bomb?? Search for; Wellington classic Japanese car day on facebook and "like" if you like.1 point
-
Sorry guys - yes Sunday was the intention... Facebook doing screwy things via my phone. Set it up from 11:00 to 1:00pm... but is showing from 10:00?? Anyway, the day is fixed. This catch up is informal just to check interest - if we get plenty of cars coming along then maybe something more structured can be put together next time.1 point
-
http://www.steeringboxscrapers.net/low/index.php?topic=7812.01 point
-
Its because of the spin of the earth and magnets etc. ABOVE the equator these rust out the right front door first.1 point
-
So, this has been sitting in the shed since os trackday. Speaking of which, other than all the good cunts. wasn't up there with the best trackdays ive done, hampton seems to hate me. firstly with some irregular bodily functions that had me gapping to the nearest facilities more than once. Then the old 4age doing the same chucking the oil out the breather due to to many rpm's. tyre choice was some ok t1r's up front and old hard worn out t1r's on the rear, with the previously mentioned oil from the front making it all the way back there too! (sorry motorbike guys) which made for some hectic oversteer and accidental drift runs. i also did a hopeless job of bleeding the rear brakes so they didnt really do anything. fronts were fried. did mange to get some good hooning in there though. ah well maybe next time! Other than that i sold out and got a mate (thanks!) to cnc machine me some longer trumpets, which i've been testing today white ones are the ones i made ages ago. which have been chopped up a bit. as they were for silvertop throttles. about 70mm long new ones are about 110mm They shifted the power around a bit and filled in a few holes. have the before and after map if any techo people are interested. up to 10% difference in fueling in places. Sadly the 4 cylinder harmonics have spoiled the fun again. at high rpm the whole manifold vibrates enough to pop the throttle linkage off.. unsure if its fixable yet, may have to go back to the old setup. unsure if its the extra weight and/or the material thats causing it . plastic ones had no drama.1 point
-
So close I can almost taste the victory. First order of business: take a photo of the new front bumper support to prove it's on the car (and for future reference if compliance comes knocking). The weird flecks are a combination of rustkill and Brunox. Then reassemble the entire front end in the reverse order of disassembly. Carefully. Wash off a heap of accumulated dust and grime, then make the most of the afternoon sun. Much better! Discuss: http://oldschool.co....1-sc-chit-chat/1 point
-
Small update. Managed to break both the front engine mount and the left one under the clutch. Sourced the front one from Basis Untitled by GuyWithAviators, on Flickr Untitled by GuyWithAviators, on Flickr And the other one from Hawskwood Classics. Was thinner than the original but I just doubled up the broken plate from the old mount and it was fine. Untitled by GuyWithAviators, on Flickr Soon after the accelerator kept jamming on... That would be why. Untitled by GuyWithAviators, on Flickr Quick trip to Zebra and pulled one from a Triumph 2000. Much better. Untitled by GuyWithAviators, on Flickr Also did a temporary repair to the front seat. Hopefully the ones from my Wolseley will be better. Untitled by GuyWithAviators, on Flickr Untitled by GuyWithAviators, on Flickr The clutch also wouldn't disengage but just had to swap the clutch arm with a bent one to make it push further. A day in the life of BMC ownership. And finally a photo from a drive out to Beachlands IMG_0170-HDR by GuyWithAviators, on Flickr1 point
-
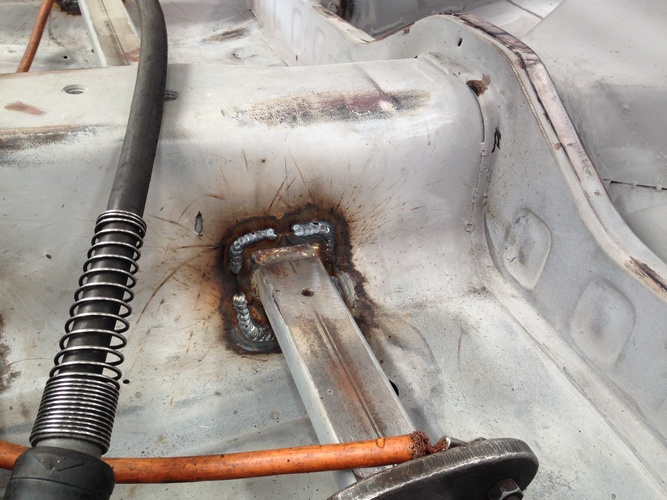
Taken the car to work to do some welding seat mounts in eye bolt mounts for harnesses in
1 point
-
There is 13 weeks till boxing day, Which is 91 days, Which is 2186 hours. Half an hour per day, 7 days a week till Xmas equals 45.5 hours. That's not much... Tick tick tick tick.1 point
-
Tanks done. Made a stencil of the side panel, then Chris computer wizard straighten/smoothed it all up GN400 2511 by Hayden Rowe, on Flickr cut them up on the plotter, and free hand the pinstripe on GN400 2507 by Hayden Rowe, on Flickr was stoked with that GN400 2508 by Hayden Rowe, on Flickr GN400 2509 by Hayden Rowe, on Flickr We stared at it for abit, Chris made a temporary badge and we played around with location on the tank...... GN400 2510 by Hayden Rowe, on Flickr GN400 2506 by Hayden Rowe, on Flickr GN400 2505 by Hayden Rowe, on Flickr GN400 2504 by Hayden Rowe, on Flickr .....then i thought, what if we cut the suzuki logo out, leaving the green to come through GN400 2502 by Hayden Rowe, on Flickr GN400 2503 by Hayden Rowe, on Flickr GN400 2501 by Hayden Rowe, on Flickr way more simplistic, and since i went to the effort of de-badging/bogging up the sides, seemed crazy putting a badge back on GN400 2516 by Hayden Rowe, on Flickr GN400 2515 by Hayden Rowe, on Flickr GN400 2517 by Hayden Rowe, on Flickr really happy with the end result, Glad its over, huge thanks to Chris, way more skills at sticking then me bahaha next up, Finish forks, and then seat upholstery cheers1 point
-
We talked about this again last night - it's time to get it locked down! So far we have these sheds confirmed: Truenotch Mrjstar Mark105 Matangi (shared garage) Miniman (need to double check) Midnight Upholstery Is anyone else keen to offer up their shed? J.e.d made mention of being keen, which could work if we start the tour at Te Kauwhata and work our way through to hamilton/Matangi/ohaupo and back to midnight for a BBQ at the end.1 point
-
Awesome, the guards are the right shape and its the correct length to the wheel arches and the rear. Wellside here we come!!!1 point
-
Had a lol at the quick release wheel (the g clamp) Does ya fuel filler catch thing drain to outside the car? I like it1 point
-
If you look back to the top post you'll see what the guards used to look like. Here is what the drivers side looked like this morning: So obviously there is a bit more cutting to go before new parts can go in. But given how much bog was in the lower guard it could have been a lot worse. I expect the other side will be similar. Booked in for a WOF on 6 October so hopefully it'll be driveable after that.1 point
-
1 point
-
I have basically finished off every thing that needed making on my bike now, all that's left is handlebars and paint which i will hopefully start this week. As i said before i was hoping to make my forks more like the originals, they are all done now and i am extremely pleased with how they have turned out. Pics.... I started with this head casting. I got it from the guy in Oamaru, it's a steel casting that was taken off an original bike. I cut of the handle bar spigot as it was to small for the 5/8" handle bar tube that i wanted to use. I got it in the 4 jaw running as true as i could get it and then machined the 2 degree taper down the length of it. I then drilled and reamed the hole for the adjusting bolt to 1/2" for the next step. I found a 1/2" center drill with a broken of end so i could modify it with out feeling bad, i welded it to a 1/2" rod and then ended up with a long center drill. With the long drill running really nicely in the reamed hole i cut the bottom bearing surface, the long center drill worked well and didn't wander at all when i started drilling. After that was done i bored it out some more and tapped it to 5/8" UNF. That finished off the head and i started on the fork tubes. For those i used the squashed round tube i got from Oamaru. The problem was that i didn't like the look of the long straight tubes when all the other parts on the bike were tapered so all i did was cut a big long triangle section out of them and welded them back up. Tacked back together And all welded up. These long welds were good practice for my tig welding, im slowly getting better at it. I get to do a tig course next year through my apprenticeship so im really looking forward to some proper instruction. For the fork end detail i just cut out some blocks and welded them on. Cut to shape and roughly filed up. And after final shaping and sanding with the bearing carriers fitted. Once all that was done i welded the 2 fork tubes to the machined head. I did a few plug welds aswell to make sure its as strong as it can be. Once that was done i gave it a good file up to fair it all in. The other problem with these fork tubes is that when the round was squashed flat i don't think they had a proper former in it so it was hollow in the middle. This didn't look to good either. Ever since seeing Manu's pics of leading his Ariel tank i wanted to give that a go, these fork tubes were the perfect thing to do so. I asked a good panel beater friend of mine if he would give me a hand and show how it was done so i got some pics of the process. First thing was getting the surface perfectly clean and getting some flux on it. Then tin the whole surface with the body solder Next was getting the lead on. It was a fairly big stick and you heat the end up with the torch until a lump falls of onto the bit of steel you just preheated. You work your way along until there are lumps of lead stuck to the length of the part. The key to the whole thing seemed to get all the lead on in one go so you don't have to put more on later over the top of it. He told me that it is much easier to file of excess lead than put more on. After that was done you go round and using a wooden shaper heat up each lump of lead at push it around until it is roughly the shape you want. After all the lead was on i gave it a real good scrub in water to get rid of all the flux and this is what the forks looked like Now for the fun? part, I dug out my dads body file and got into it. After the basic shaping it looked like this. It happened pretty quick because the lead is very easy to file as you can imagine. And what they looked like after finial filling and sanding. I have also machined up a new handle bar spigot and welded it on, its also tapped 5/8 UNF for the bars to screw into I also finished of and painted the rear saddle mount and spring. The leather saddle is riveted on with big copper rivets. The front seat mounts ready to be cut out All fitted up with the front mounts bent to shape. I also set up the adjusting screw in the rotary table and milled a 1/2" hex on it for your spanner to go on. And how the bike looks at the moment. I am wrapped with how the forks have turned out and they now look like they were in 1870. If i had handlebars i could ride the thing, i am going to strip it down and hopefully get primer on both the bikes this week. The ride that im doing on it is less then a month away now so hopefully the painting process will go smoothly and then i might even be able to get a bit of practice in!1 point
-
Yeah, I can grab a drum. 44 gallon or is that too hard core? Maybe a 50L fuel can might suffice. This picture taken from 2013 sums up the mornings after there1 point
-
Yeah you can go in the bed-wetters class aka 3S-GE division.1 point
-
I thought these were fetching good moneys now.. since there isn't much to it, would it not be worth restoring it?1 point
-
that is fuckin legendary. side note, old man had a phone magneto hooked up to silvered toilet seat in one of his flats, handle in wall labelled 'dont turn'1 point
-
Took the engine out of this tonight, thanks Neal for the loan of the engine crane. IMG_1607 by GuyWithAviators, on Flickr No more wooden engine mounts IMG_1611 by GuyWithAviators, on Flickr IMG_1617 by GuyWithAviators, on Flickr Tomorrow will split the engine and gearbox and swap the new bits over then hopefully get it going again! And give it a long overdue wash. Most people would have given up on just an Austin 1300 after all these engine/gearbox problems but I quite like this wee car. /it's not worth anything to sell.1 point


.thumb.png.46e518f714cdc319554c389f990e75a4.png)


This leaderboard is set to Auckland/GMT+12:00