
Leaderboard


Popular Content
Showing content with the highest reputation on 09/17/15 in all areas
-
Proof:12 points
-
Couldnt figure out how to load pic from phone, so computer it is. Lowered the forks. GN400 Build 09/16 14 by Hayden Rowe, on Flickr spacers on the seat removed and a 120/140mm space went in at the bottom end of the fork GN400 Build 09/16 13 by Hayden Rowe, on Flickr End result, super super soft, but didnt cut/firm up the springs, Im gonna add an air value to the tops of the forks to stiffen them up, will add photos of that happening later on GN400 Build 09/16 12 by Hayden Rowe, on Flickr Nice to have the bars back on though. been awhile! GN400 Build 09/16 11 by Hayden Rowe, on Flickr much less dorky ride height GN400 Build 09/16 10 by Hayden Rowe, on Flickr New muffler showed up GN400 Build 09/16 08 by Hayden Rowe, on Flickr stainless steel Lossa Engineering GN400 Build 09/16 07 by Hayden Rowe, on Flickr GN400 Build 09/16 06 by Hayden Rowe, on Flickr super nice build quality, saw these in a custom hog shop while i was over in ozzie for family xmas GN400 Build 09/16 05 by Hayden Rowe, on Flickr angle up?...... GN400 Build 09/16 04 by Hayden Rowe, on Flickr or flat? GN400 Build 09/16 03 by Hayden Rowe, on Flickr went with up and heat wrap. Welded on a mounting tap aswel, happy with how that worked out, really clean and easy to get on and off, in saying that its only a single. GN400 Build 09/16 01 by Hayden Rowe, on Flickr Really happy with the end result GN400 Build 09/16 02 by Hayden Rowe, on Flickr now onto bog life GN400 Build 09/16 09 by Hayden Rowe, on Flickr lce cake with hummus sand sand sand prime ice cake with hummus sand sand sand prime ice cake with hummus sand sand sand prime repeat. that is all8 points
-
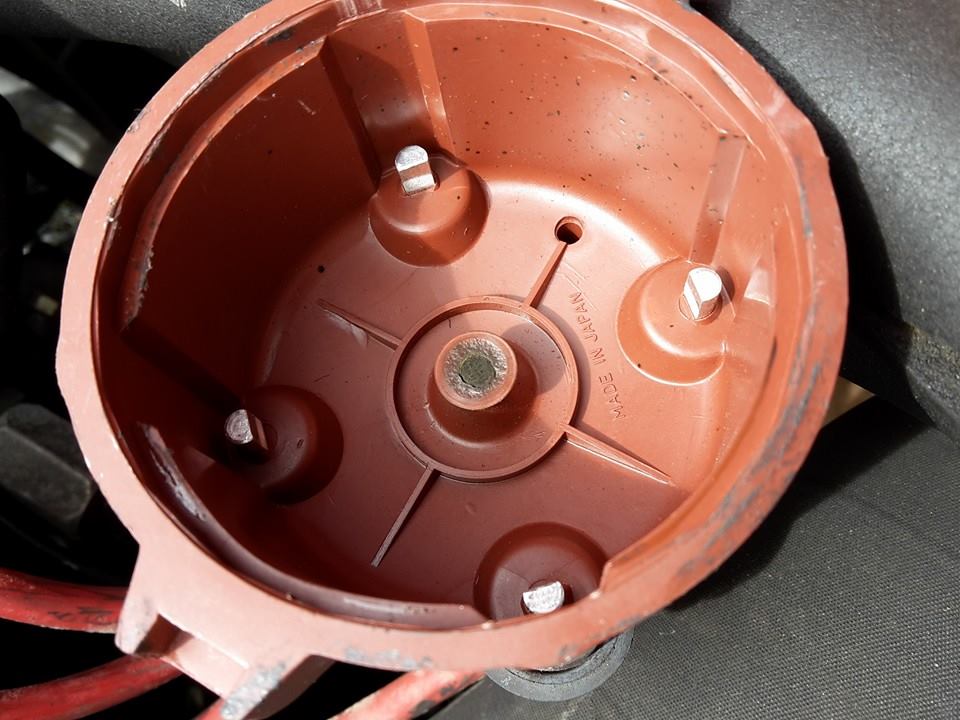
been doing a wee bit of fettling. Brakes came up pooze at the rear on the brake rollers at work. LH side shoes were damp with old diff oil. rear diff breather has recently been off and cleaned out. there's the culprit! Wheel cylinders seem pretty new all round so just slammed some new rear shoes at it, gave brakes a bleed (have a weird brake holding delay issue now which may be master cylinder related) and chucked a new set of front seatbelts at it and looked at how much water the radiator is leaking. Few more jobs to do (two tyres are perished, and needs exhaust love and a couple of other bits and pieces) but I'm presenting it for revin tomorrow! Will definitely have a list of things to fix before it's legal but at least I'll have an idea of what I need to crack on with, and best for me: I'll have that 28 day deadline to get it sorted coz we all know I'm a procrastinator unless I've a looming deadline! che also, got a needless, weird, irrelevant plate off the tard to smack on it. If I can't have black plates it might as well have something ridiculous!7 points
-
Thought I should have a ramble on this topic. Have held various tickets including an Ali one so might just clarify a few things: 1. Aluminium MUST be cleaned prior to welding but the predominant reason for this is not to remove dust and dirt but to remove the oxide layer which forms on it naturally which is the reason it doesn't corrode. Cleaning can either be done with IPA or mechanically with a stainless wire brush. The wire brush should be kept in a zip lock bag or plastic container when it's not being used so it doesn't get contaminated. If the brush accidentally gets used on carbon steel then don't use it on Ali again. The reason Ali is almost always CNC router cut such as in Alloy boat production and not lasercut is because the CNC router leaves a nice clean freshly cut edge whereas the laser heavily oxidises the edge which would all need to be cleaned back again to weld. 2. AC balance - You can quite safely probably leave at 50% for what you're doing. This setting is all about how much penetration you get. Some info on why you need an AC Tig for Aluminium: A standard DC Tig for Stainless or mild runs DCEN which means your earth is positive and your electrode (The tungsten in the torch) is negative. When welding Aluminium the oxide layer requires a 'cleaning action' whilst welding which is only achieved if you switch the polarity to DCEP (Negative Earth, positive electrode) The problem with this is that running a positive electrode will melt your electrode away almost instantly hence the reason you have to cycle between polarities which is what AC does. It cycles between DCEN and DCEP so the DCEP part of the cycle achieves the desired cleaning action of the oxide layer while the DCEN part of the cycle prevents your tungsten getting hot enough to melt away. Some more info on AC Balance control: http://www.millerwelds.com/resources/articles/Understanding-AC-TIG-GTAW-Balance-Control/ 3. Tungsten grinding - Never grind from side on if you can avoid it, it tends to cause arc wander. Your grind marks should follow the same direction as the length of the Tungsten. For DC TIG (Stainless and Mild) grind to a sharp point. The length of the point should be twice the width of the tungsten you're using and the sharp tip knocked off ever so slightly. If you leave it super sharp at the point it can result in a small piece of tungsten melting off and falling into your weld which causes a tungsten inclusion and would fail an Xray test. If you don't knock the point of it's not a big deal, many people don't do this. For AC Tig (Alloy) grind the tip at a 45 degree angle but leave a flat spot on the end the same length as the angle section. There are numerous ways to 'ball' the tungsten but this is not at all critical, just grind as above and start welding. Having a clean tungsten is critical. If you contaminate it with the filler rod or in the weld pool you MUST regrind it. Gas Flow- TOO MUCH GAS WILL INTRODUCE POROSITY INTO YOUR WELD. More is not better. Should be roughly 8-10Lmin. A few other things: Use the correct cutting and grinding discs for Ali which won't contaminate the material and introduce contaminants into the weld. When finishing the weld don't back off the pedal too suddenly. Taper it back gently. Important for Ali or you get crater cracks which can spread down the length of your weld. Torch angle is important! NEVER EVER use brake cleaner or anything with chlorine to clean any metal prior to welding!!!!! It creates phosgene gas and can kill you very very quickly. If it doesn't kill you it'll FUCK you up and leave you with permanent health problems.5 points
-
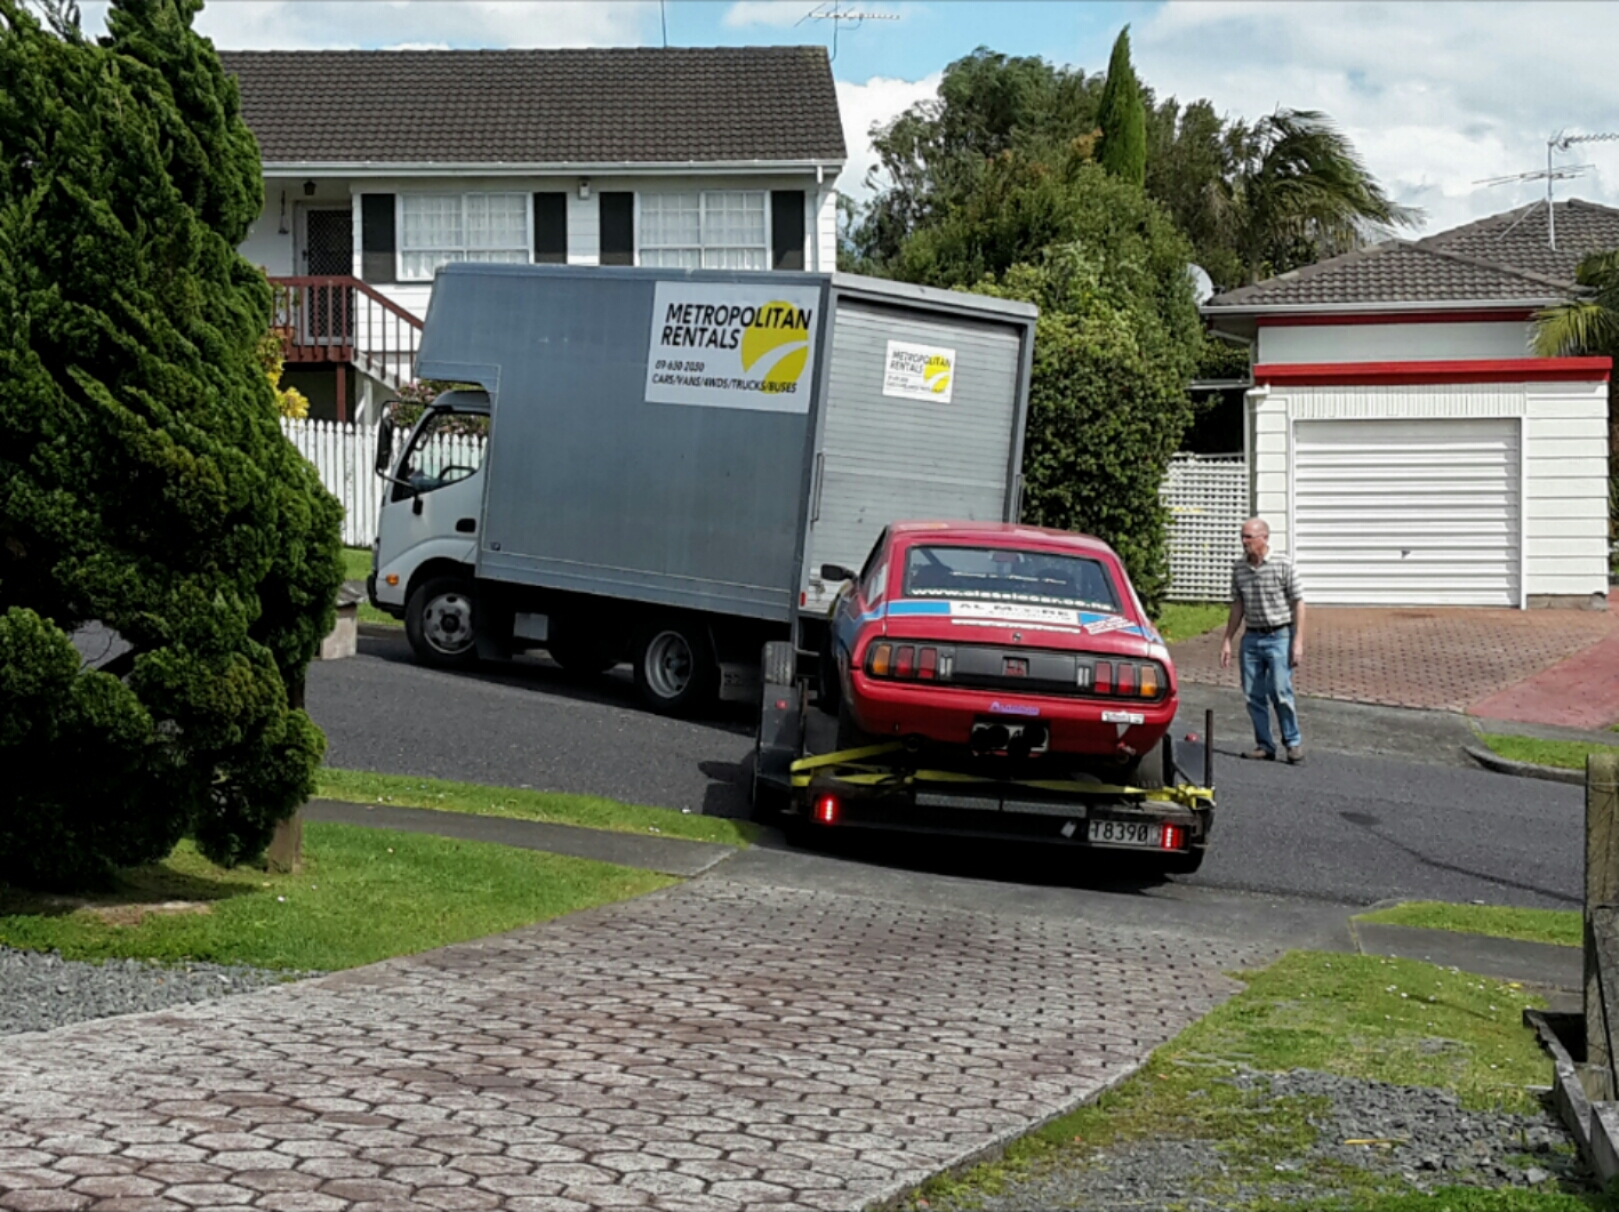
OK sorry for more spam but Shane just sent over some more close up images with various repair stuff which is good and thorough. Engine had a strange miss which turned out to be a bung plug, replaced that with some random one and it worked. Compression appears to be a little low on one cylinder but the car still seems to run relatively well so when I get it I'll do plugs/leads/dizzy cap etc anyway as a precaution. Shane also has some MDI spark booster thing (you know those boxes you always see on old Jap cars to boost the spark) so he'll throw that in too. A few more pics.. Powerhouse! I'm actually happy that the numbers match on this and the body.. otherwise that could be a bit of a problem come time for VIN etc. Angry face! Interior is overall very clean, will need new centre console as that one looks banged up and not correct for the car (more holes for buttons and switches than my povo one has). Plus side, less things to go wrong in mine right? But this really got me excited.. https://vid.me/fhmd Annd they reckon we should have a booking for shipping next week so that's pretty exciting.4 points
-
mock up with your cock up goofy frame welded. ingredients here are bits of 3 bikes, perked/leftover tube, flymo bits, curtain rail and falcon leaf spring.4 points
-
ahhh something your kid will remember forever , the day dad and i started the cycle car for the first time!!! good dadding bro!4 points
-
Looking great mate . Nice amount of slam !2 points
-
Damn! it's getting steamy and dreamy in here. See youse this evening. (can always turn the bar stools upside down to allow more seating).2 points
-
2 points
-
Microwave or heat in oven and reuse again and again thats what we do at work on a hydrogen gas sample line to an analyser2 points
-
Shit long time no update. I still mess about with old bikes a quite a bit. here's a couple of photos of a bike that came to me under sad circumstances recently. It's a BSA Fittings, Speedy cycle. These were made in Christchurch by Speedy Cycles and are quite recognisable. I really like this bike, it's still in it's original finish even after 90 years. All Speedy cycles were Nickel plated and as far as I can tell heavily painted in red and green paint with what looks like white and black details. I have a feeling this style was sold like a GT bicycle rather than a racer. It's a bit battered, it has a bent frame, is very dirty, is missing it's correct rear wheel and hub, and the BSA chain adjusting cams are missing. I have everything to replace the missing parts and have started to strip the bike down to fix the frame and give it a good clean. Here's a couple of photos of a friends Track Speedy. BSA "Track" bridge. And the Speedy cycles chaps.2 points
-
You could register this under the Exempt Class A and it would be road legal.2 points
-
New carby installed - had to modify a couple of small things but it ran right out of the box and ran pretty good too. Genuinely so much more responsive and very consistent at idle compared to the Q-Jet. Things to do - tune it properly with the carb tune kit that came with it and adjust timing as it is a bit pingy now. - fit a right angle fuel inlet to clear the air filter base. - figure some way to mount the air filter as curiously there does not seem to be any thread down inside the regular hole in the middle of the carb. - adjust the throttle response as it is super snappy right now - probably just needs a lighter return spring. I drove it home tonight and off for WOF tomorrow. It sounds so much more rawkus than the video portrays but I know I'll be flayed without pics.2 points
-
2 points
-
Cool shot Shane got of the car with the seaside2 points
-
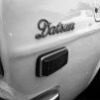
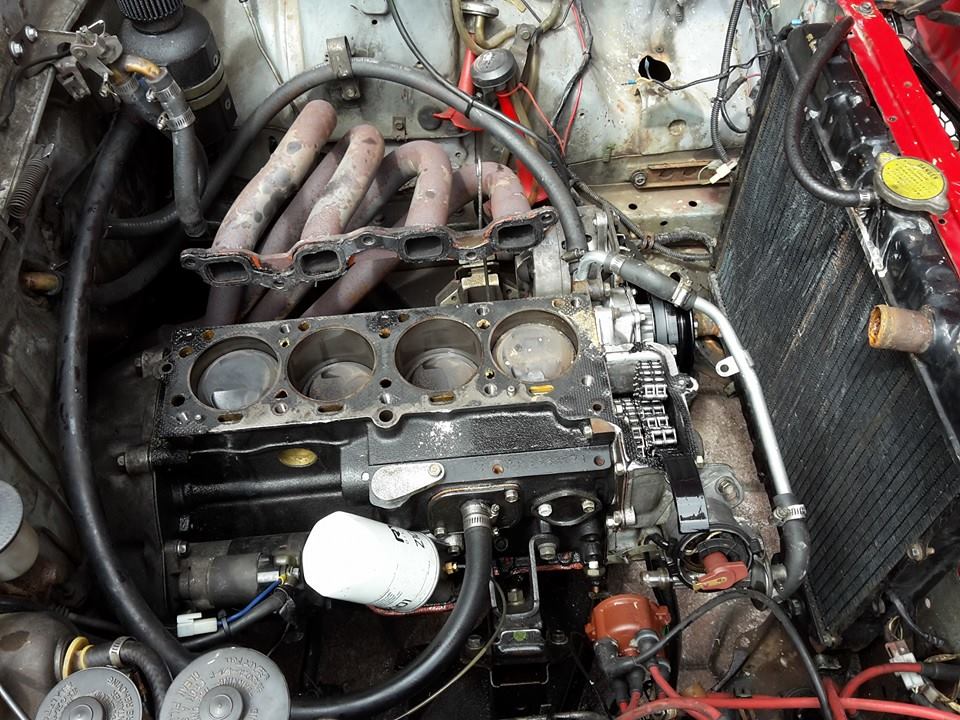
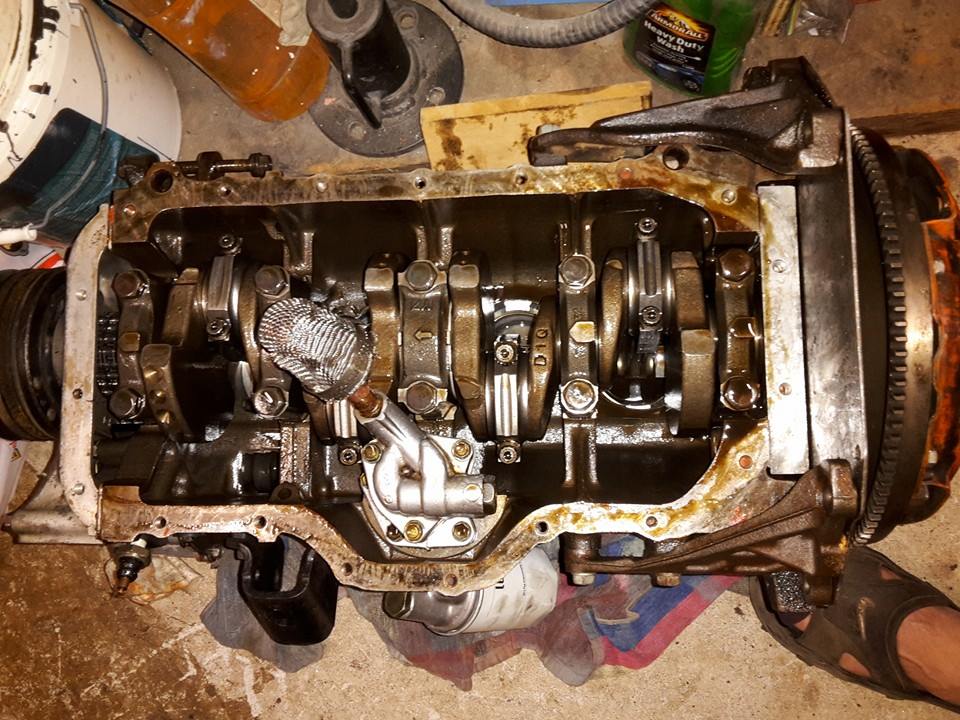
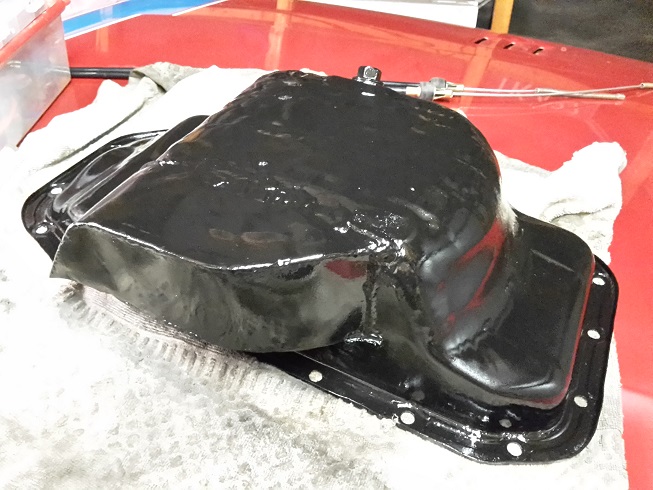
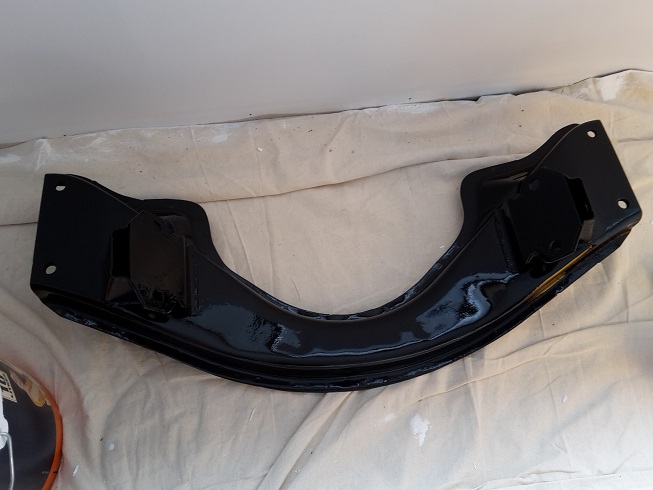
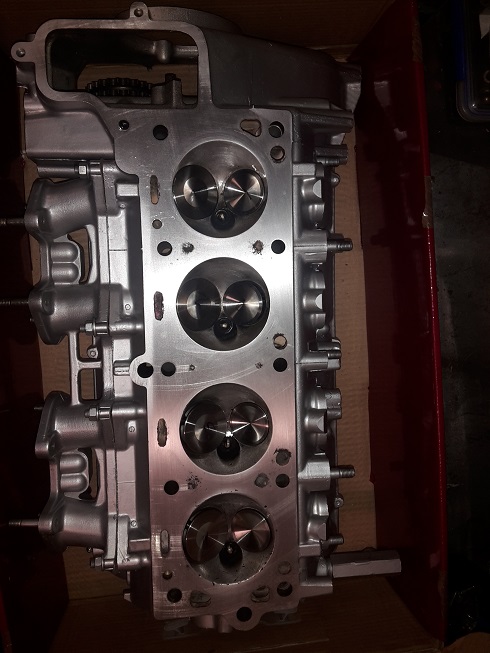
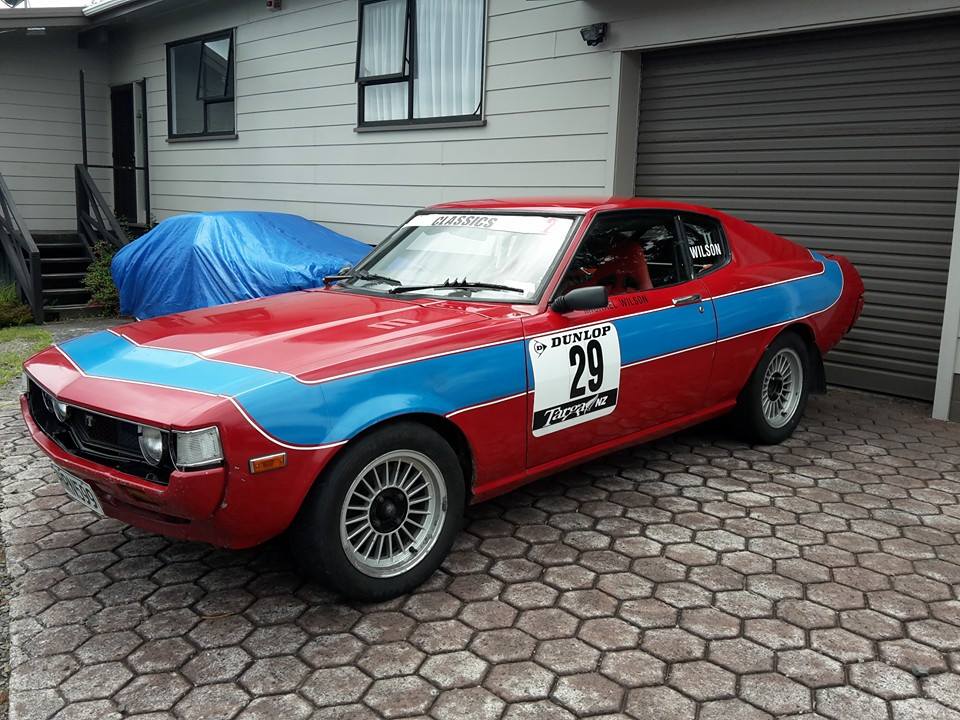
Many moons ago in a place far far away.... I service crewed and co-drove with a fellow celica owner in the Targa Rally NZ - 1999 to 2005 This celica was raced in classic events following that till 2008 when it was put to rest in a garage.. Fast forward 6.5 years I had kept sporadic communication with the owner (used to own my black one too) He offered me the car + parts ... me being me (celicaholic) i couldn't refuse... It being in Wellington, me in Auckland posed a problem as it came with a couple of parts (over 1.5 ton - possibly 2 ton) Logistics of moving the car + all the bits fell to one option only - Big mission to Wellington!! Hired a truck and borrowed a trailer and 3 days later it was in my drive... After sleeping the rest of that week i decided to try and get it going... 1. no spark 2. Very rattly timing chain 3. Flat battery >>replaced with a new one and drove it around the block - engine wasnt happy though So instead i started tidying it up straightened up the front bumper and moved headlights for air intakes. Removed old sponsorship stickers. Changed crazed broken tail lights and added GT. Roll forward a few weeks to labour weekend and i checked the engine thoroughly for what the issue could be. Compression test revealed 30psi in #2&3 and 180 in #1&4 - oil test indicated valves not pistons/rings so ... OFF WITH HER HEAD!!! With bottom end looking really good.. The head was stripped down and the inlet valves were found to be paper thin on the edges and sunk into the head. So new valves were needed. Turns out i have TRD oversize valves a whopping 1.85 inch diameter. Small block chev oversize valves matched so with new guides it was rebuilt and cleaned. The engine had a terrible oil leak too so tracing this was found to be the highly modified sump. Thanks sheepers for welding up the hole in the sump that previously had brazing, JB weld, bog, chewing gum and any other filler to try and stop it leaking. Painted and looking mint here. Turns out this is a very modified engine - H-beam rods, 4mm oversize pistons, high volume oil pump etc etc. Also the engine crossmember was modded so this was changed for an original one (also painted) Finally 1st week of december i got the head back all done so the engine was assembled and thrown back in the hole (after a massive clean and tidy in there) Couple of weeks waiting for other go fast bits and it was all together and ITS ALIIVE!!! I celebrated by rapidly annoying the locals at 8500RPM around the block!! and then washing it for the 1st time since 2008 - what a magic Christmas present for me .. now to get a WOF/REG/Motorsport card etc etc. See you all at the NATS trackday
 1 point
 -
Im so bloody lazy Plan confirmed... Remove engine from black v50. Install into blue v50 with new barrell, piston and head, take old engine and semi assemble it and install into black v50, go to vtnz and register the blue v50 and "attempt" to register the black one but all I have is a frame number and no previous owner details. All going well il have two v50's all legit. PS the expansion pipe is soooo fucking loud its awesome hahah1 point
-
Segidens(sta parts) was sweet and beat everybody by a good amount when I bought rings, bearings, and gaskets for the Kent.1 point
-
Damn that pipes sexy!1 point
-
Looking awesome mate! keen to go for a burn when I come over in December! Pretty sure we need to do a road trip out to the Boxing Day races1 point
-
Sounds fucking mint for a swingers convention tbh. Paid.1 point
-
Hot dipped, reckons he's had people have tanks dipped without telling him there leaky, then complained to him they still leak. Local radiator place said it should be a piece of piss for him to seal up so going that way now.1 point
-
Fo' sure! My dog's been enjoying sleeping in them for the last three weeks. He says it makes a nice change from his normal bed. He say's Allan's one is a bit salty though. I've got your heater too.1 point
-
Jeah! oh also, I'm keen1 point
-
Dayem. Such a clean looking build!!1 point
-
1 point
-
What about Highlands though?? PUHUHUHH1 point
-
Yay! No cooking tonight! I am devastated that Bizzo and the lovely Loz will not be there though. Mostly Loz.1 point
-
There is a distinguished gentlemans ride coming up on the 27th . Pm me for detail as qcr are meeting up earlier for a ride1 point
-
It started great tho..1 point
-
About $90 for a kit made for a 20l tank, about $20 to have my 4.5l tank hot dipped.That $70 would buy a lot of useful junk from Aliexpress!1 point
-
looking fucking rad man!!1 point
-
A reminder of details for tonight. Menu Meet at Brew'd Bar Island Bay at 7pm. I have reserved a table for Old School. Map1 point
-
Oldclassiccar.co.uk has all the brass fittings for making fuel lines, they also.have cloth covered cables incase you need some in.the future1 point
-
351 with an 850 - theres ya problem there. Unless you were pulling 8000 rpm.1 point
-
Maybe. Like clockwork I have just heard back from Pinewood, turns out they have space after all: So that's $152 per person if 6 people buy in. Who's keen?1 point
-
this is brilliant man , the forks look perfect! great job~1 point
-
Well . . . I've got the car back again. Short version? It just looks incredible, blown away with how good it looks. It needs to be put back together again and given a good wash - that'll have to wait until I'm back from the Coast unfortunately. But in the meantime, here's a little sneak peek:1 point
-
Some more progress from the weekend, I needed to do some tests on the plastic steering arms to make sure they are right before I get them machined. First up I bolted the arms in place Then I made these I bought some cheap laser pointers and mounted them to a bit of SHS, it is hard to see in the photo but one of the clamp plates holding the laser is bolted so I can adjust it and get the laser pointing parallel to the mounting face. I only made 2 of them so I have to do each side of the car separately, so one gets bolted to the rear hub and the other to the front, then I put a board out the front of the car to shine the lasers onto then I can just measure the distance between them, well that's the theory anyway. So first I set the alignment by making sure the distance between the dots was the same at the front hub and on the board which was about 3m in front of the car. Next I pulled the springs out of the front suspension and measured the distance between the dots at ride height, max compression, and max droop. Then with a bit of trigonometry I can work out what the angle change is, seems to work ok, in that last photo you can see the marks I made at the 3 measured suspension heights. the arms are pretty good but I am getting toe out as the suspension changes and I think it would be better if it was going to be going the other way (toe in) so I have some fine tuning to do. I ran out of time yesterday to get it finished so will hit it again after work today. I also had this turn up last week After leaving my $20 cage in the car for the last month or so I decided that I would put one in but seeing as it is a bit of work to do figured that I should start with one that was up to spec. Anyway it is a fair way down the priority list at the moment but I will get to it eventually.1 point
-
I have basically finished off every thing that needed making on my bike now, all that's left is handlebars and paint which i will hopefully start this week. As i said before i was hoping to make my forks more like the originals, they are all done now and i am extremely pleased with how they have turned out. Pics.... I started with this head casting. I got it from the guy in Oamaru, it's a steel casting that was taken off an original bike. I cut of the handle bar spigot as it was to small for the 5/8" handle bar tube that i wanted to use. I got it in the 4 jaw running as true as i could get it and then machined the 2 degree taper down the length of it. I then drilled and reamed the hole for the adjusting bolt to 1/2" for the next step. I found a 1/2" center drill with a broken of end so i could modify it with out feeling bad, i welded it to a 1/2" rod and then ended up with a long center drill. With the long drill running really nicely in the reamed hole i cut the bottom bearing surface, the long center drill worked well and didn't wander at all when i started drilling. After that was done i bored it out some more and tapped it to 5/8" UNF. That finished off the head and i started on the fork tubes. For those i used the squashed round tube i got from Oamaru. The problem was that i didn't like the look of the long straight tubes when all the other parts on the bike were tapered so all i did was cut a big long triangle section out of them and welded them back up. Tacked back together And all welded up. These long welds were good practice for my tig welding, im slowly getting better at it. I get to do a tig course next year through my apprenticeship so im really looking forward to some proper instruction. For the fork end detail i just cut out some blocks and welded them on. Cut to shape and roughly filed up. And after final shaping and sanding with the bearing carriers fitted. Once all that was done i welded the 2 fork tubes to the machined head. I did a few plug welds aswell to make sure its as strong as it can be. Once that was done i gave it a good file up to fair it all in. The other problem with these fork tubes is that when the round was squashed flat i don't think they had a proper former in it so it was hollow in the middle. This didn't look to good either. Ever since seeing Manu's pics of leading his Ariel tank i wanted to give that a go, these fork tubes were the perfect thing to do so. I asked a good panel beater friend of mine if he would give me a hand and show how it was done so i got some pics of the process. First thing was getting the surface perfectly clean and getting some flux on it. Then tin the whole surface with the body solder Next was getting the lead on. It was a fairly big stick and you heat the end up with the torch until a lump falls of onto the bit of steel you just preheated. You work your way along until there are lumps of lead stuck to the length of the part. The key to the whole thing seemed to get all the lead on in one go so you don't have to put more on later over the top of it. He told me that it is much easier to file of excess lead than put more on. After that was done you go round and using a wooden shaper heat up each lump of lead at push it around until it is roughly the shape you want. After all the lead was on i gave it a real good scrub in water to get rid of all the flux and this is what the forks looked like Now for the fun? part, I dug out my dads body file and got into it. After the basic shaping it looked like this. It happened pretty quick because the lead is very easy to file as you can imagine. And what they looked like after finial filling and sanding. I have also machined up a new handle bar spigot and welded it on, its also tapped 5/8 UNF for the bars to screw into I also finished of and painted the rear saddle mount and spring. The leather saddle is riveted on with big copper rivets. The front seat mounts ready to be cut out All fitted up with the front mounts bent to shape. I also set up the adjusting screw in the rotary table and milled a 1/2" hex on it for your spanner to go on. And how the bike looks at the moment. I am wrapped with how the forks have turned out and they now look like they were in 1870. If i had handlebars i could ride the thing, i am going to strip it down and hopefully get primer on both the bikes this week. The ride that im doing on it is less then a month away now so hopefully the painting process will go smoothly and then i might even be able to get a bit of practice in!1 point
-
1 point
-
And some more pics Body gets primed tommorrow so will update with that soon1 point
-
So, ever since I lowered the wagon ive never been happy with how the front sits. Theres an awful amount of guard gap but I cant go any lower with the standard struts without it resting on the bump stops. I needed to make "JUDDIES" or "JUSTIES" or how ever you young-ens say adjustable suspension. So, with a lot of research and referring to Seedy Als guide I decided to hack up a pair of Sigma struts. I purchased adjustable platforms and top hats from George Stocks. I also purchased a pair of SW20 (i think) rear inserts that were about 50mm shorter which meant I needed to cut the strut tube. Strut tube cut and ready to be welded back together A test fit to see how everything sits. With the different shaft size of the insert I couldnt use the factory top hat. I purchased some adjustable camber plates to suit. A little spacer was made to sit between the top spring perch and the top hat. The top spring perches didnt have a locating indent in them. I got a quote to have this machined fro $200! So I get my maori ingenuity on DONE Ordered some springs with keepers. And all fitted up I trial fitted one strut and found that the spring rate was way too aggressive. At the lowest setting the car was higher than before and was solid. I bought some more springs that have a friendlier spring rate So here are a bunch of pics showing the height before installing the new struts, new struts at max height and new struts at max low (actually could go down another 15mm) New struts - Max height New struts - Max low Measurements taken from top of arch to centre of stub axle Obligatory chassis rail comparison As it sits at max low, im sad to say, its too low. But, I can easily raise it to the perfect height. I had to use my roller blade wheels as the wheels I was using wont fit the new struts. Pics Thanks1 point
-
Bury it deep man. You don't want those cunts at the GCSB finding out when your dinner is ready.........1 point
-
You're a brave, stupid, lucky man.1 point
-
Nah nah nah nah nah nah, 4age's love revs. Even with a factory ratio and everything standard they still do near on 4K at 100, that's just how they be. You will grow to love and embrace the RPM's.1 point
-
threaded rod will be fiiiiiinnnne unless you crash it into a wall or something, in our racing karts we use aluminium ones and use they as a bending point in a crash to save damaging more expensive parts. just buy my kz2 and win at life/be the king of grass skids/1 point
-
So I figured instead of making a new thread I'd carry this one on. After selling the Crown and Pajero I've been looking out for a roadgoing landy. I had a pretty broad description as to what I was after but so many just weren't ticking the right boxes on the tard until this gem popped up last week in New Plymouth. Fate would have it that we were headed up those ways for a pissup so I organised a viewing and bought her on the spot! Today me and Ben shot up to New Plymouth today and hauled him home. This one's a grubby '69 S2A 109" Stationwagon running a lovely Holden 186 of bum plundering doom!! From what I can tell it was a factory 2600cc 6cyl model so the conversion is a lot tidier to carry out than in a 4cyl model. The guy I got it from bought it form the Tauranga District council as an abandoned vehicle at the start of this year. She's dereg but in pretty good nick so I'm a happy lad. He's spent quite a few bob on roof and door seals, new door tops, changed out all the oils and shit, and tidied the interior up quite a bit. He's chucked a new gearknob set at it and new gear lever boots and all the shit that people never get around to doing so I'm already ahead of the eight ball. Goes pretty good but is fiercly out of tune (lovely full throttle Holden red engine detonation due to staleish fuel and a poorly timed up dizzy I reckon) and the brakes are pulling all over the place so they need a good adjust up and bleed. Plans are to re-reg, sort out a few bits and bobs and just bomb the hell out of it all summer (hopefully). I'm actually not that well placed to have bought this at the moment with different things taking up all my spare time at the moment but I'll get straight onto it at the start of October! More pics next time I see it in daylight! Discuss! //oldschool.co.nz/index.php?/topic/38706-campylobacters-campylandrover/1 point
-
Thank you for the encouragement everyone. Here's tonight's glueing and screwing efforts. There's lots of sanding still to come as I've made a few mistakes, but it's still better than watching TV1 point


.thumb.jpeg.384ff72c8d2b0ee0d34a7bdedb55bdcf.jpeg)


This leaderboard is set to Auckland/GMT+12:00