
Leaderboard


Popular Content
Showing content with the highest reputation on 07/16/15 in all areas
-
So I have finally decided to document my twin rotor Wankel engine project. Years ago I saw the video below of the twin O.S. Wankel engined R/C tractor pull car and thought that was the coolest thing since sliced bread. Fast forward a few years and I saw a twin rotor O.S. Wankel based engine in the YouTube thread, which has been the crux of this project. The engine build by ‘20B’ combined two O.S. Wankel PI’s together with a custom machined centre and rear housing, in addition to an oil hardened 4140 eccentric shaft. Unfortunately the only video of it running is the one below and the project thread stagnated years ago due to a crushed bearing. It wasn’t the only twin rotor project, as avid model engine collector Miguel de Rancougne had another O.S. Wankel PI based engine in his possession as seen below in a Christies auction handbook. http://www.christies.com/lotfinder/lot/a-twin-rotor-wankel-engine-4223480-details.aspx?intObjectID=4223480 Both 20B’s and Miguel de Rancougne’s twin rotor miniature Wankel engines provided enough reason for me to attempt to make one myself. So in March 2014 I purchased a brand new O.S. Wankel PII with the aim to build a two rotor with my friend Ben who happened to purchase a used PII from rotary mad Puerto Rico. The idea was that we would test run both engines then pull apart his engine and CAD model it. The parts required would be additively manufactured on the universities recently acquired selective laser melting machine prior to sanding smooth. To test this theory a single rotor and eccentric shaft were manufactured from a CAD model off GrabCad in AlSi10Mg aluminium alloy. With the surface finish of the parts worse than predicted and lack of a ferrous metal powder for the machine I decided to focus on building the test table for the engines.11 points
-
I was going to steam some strips of pine to bend around the cockpit cut out for reinforcment but on a test piece the MDF turned to soup when the wet wood went near it. (Im hoping the fiberglass will weather proof it enough.) So I just cut it up into a bazilion bits to follow the contour, It added a suprising amount of rigidity. I cut the bonnet out and added a bit more stiffness to this too. I started making the pedal box today, it goes beside the engine.10 points
-
Everytime I see an update for this it makes me happy.8 points
-
Knuckle Draggers pic by Richard Opie, on Flickr Thomas (aka The Knuckle Draggers) did this for me. I giggle every time I look at it. It's arriving in it's original, A3 format soon.7 points
-
just go take your misses and new child somewhere to test drive a car with a tow bar. They will be like, oh family man, good job. then do your tip run, then take it back and tell them you want something that can tow a trailer better.6 points
-
The new 1.9TDI Unit Injector engine. Got my discs back from being Slotted also. Today after work the front came off & the engine, subframe and suspension all came out. That was that for the night. - Next job get the new suspension up and mounted and the body rolling again. - Strip out dash and shitty factory wiring and begin the splicing and re-looming of the car.6 points
-
Soooooo with my airbox intake thingy. All is well and good, but when the motor gets to 6000rpm, datalogs show that there is a 3kpa pressure drop at the inlet manifold all the way to 8000rpm. How much is 3kpa? About 0.4psi which doesnt sound huge, but when you're working with 14.7psi atmospheric pressure that's about 3% of air (and power?) being lost before it can even get a chance to get to the throttle body. 3% of 200hp is 6hp so wouldnt complain about a 'free' gain of half that much if I could halve the pressure drop. So my first thought was, why not go from the current 3" pipe to maybe 4". But then I thought, since I no longer have a MAF, why have any pipe size at all? I could have a bellmouth straight on the throttle body for max flow. Then have a big enclosure to feed it filtered air with minimal pressure drop. This would take up a lot more space than a normal intake though, So the first things first is see if it seems feasible for space. I took a photo of the motor as straight on as I could (If wanting to do this, stand back far and zoom in, to minimise perspective distortion) and drew a rough sketch in Cad to see if theres' about enough space for a bellmouth, some space around it and a panel filter. Seemed okay so I plonked the motor back in and started on some CAD (Cardboard Aided Design) to see how much space I've got: Then roughed something together in cardboard, this is the Rapid Brototyping stage: Then copied the dimensions to CAD: Then made version 2.0: Back to CAD, made it more roundy looking: Then started working on the second half of the airbox. So now I've got a pretty good idea of the maximum available area I can work with to make it any size smaller than this. (It's pretty big and gumby at the moment) At this point, I've got two options - I can keep the intake getting air from the big hole through the wheel well area and down to the front as per previous. Orrrr, there's a 91mm dia hole behind the headlight, I could get air from here and/or here: So time to head to Solidworks and try some stuff in the flow bench thingy. TWO INTAKE ENTER. ONE INTAKE LEAVE. I've set the airbox opening to be a source of atmospheric pressure air. And the throttle body area drawing in 170 grams/sec of air (As per datalogging from a few pages ago...) When I keep the airbox diameter really large, even with shitty bends. It keeps the pressure at 101kpa right to the bellmouth. (This graph shows velocity instead of pressure, but you will just have to take my word for it.) When I try a different (simpler/smaller) design that sucks are through the 91mm entrance hole in the front panel of the car... I lose 0.2kpa straight away. Which isnt much, but it just points towards the idea that bigger is better for everything pre throttle body. (Red is good, yellow is not so good, green is less good, and so on. Read the scale damnit) For experiment's sake I thought I'd see what happens when I run the "Big" airbox entrance on an airbox that's 10 meters long. Despite what you'd think it still stays 101kpa across the whole thing, right to the bellmouth. So it seems to indicate that the length of intake means bugger all compared to diameter. Even throwing some harsh 90 degree bends in there, the cross sectional area is so huge compared to the throttle body that there's effectively zero pressure drop. Aaannnnnnnnnddddd that's as far as I've gotten. But the plan from here is to make a cardboard model of the exact shape that I'd expect to build it. Then put it into CAD, then I've got the options of getting bits lasercut or whatever, to minimise the odds of cutting a finger off trying to build something properly. This whole thing might be a big waste of time and acheive nothing at all, but it's helping keep me sane through winter so that's always a good thing. But, I'm pretty confident in my ability to quantify a change for better or worse now. So even if it's a failure it's a win, because Coupe Life4 points
-
woah negative nelly3 points
-
mount your buckles on the original buckle anchorages, that will be easier. otherwise, depending on the height of the seat, it becomes classed as a stressed seat, and the mounting requirements are different2 points
-
Am loving the curves, keep up the good work!2 points
-
Pictures would help a lot here. If you need to soften up some old rubber couplings to help them slip on easier I usually just sit them in hot water or spit on the pipe to lube it up if im feeling lazy.2 points
-
LOOOOK all done!!! we had to use a press to get one out :/ take it that was the tight one..... we gave the pins a polish and reamed the bushes and yeah a lot better. getting excited now!2 points
-
New shoes. Disc : //oldschool.co.nz/index.php?/topic/49000-stylez-gx61-mkii-hardtop-couch-spec-disc/?p=15449792 points
-
Hey dudes I need a trailer towed to the tip and my car with a towbar is out of action at the moment. It's loaded and ready to go, trailer has wof and reg, will have a cover, all legal beagle. I'll unload it so you can sit in the car listening to Steve Winwood if you like. My place isn't far from the tip, only about 6k's or so It's all part of a game of musical garages as my lockup is being sold so will be appreciated and some suds are on offer. Cheers!1 point
-
More work on aligning panels. Ended up making a new inner wing piece on the drivers guard that hugs the pillar. Have finally got it to a point i'm happy with where its parallel to the pillar and lines up very well with the door. No too many photos but lots of tweaking going on.
 1 point
 -
Just a few little things after work today. Started to weed thru the Sticky cluster fuck of Modern car loom, thankfully only about 1/10th of that will remain after I am done with it Also degreased the replacement subframes and sprayed over with some engine enamel for a quick tidy up. Stripped the brakes off and dropped them in a tub of Phosphoric acid so that they can be painted tomorrow. - Also ordered my Adjustable Coil-overs today - 22mm Master Cylinder. - New headlights. - New handbrake cables.1 point
-
This is amazing1 point
-
Saw this in Vegas today you really have to see it in real life to appreciate it. Nice work 120 why1 point
-
Party at Kickers; toast marshmallows on the rubbish fire.1 point
-
party at kcikers, take a piece of rubbish each? safety in numbers etc1 point
-
If you haven't got the hose connected properly, the air will take the path of least resistance which means the hole where you've not got the hose mounted correctly. This means unfiltered air, detritus, water and other crap could enter your engine.1 point
-
PIcs or it didnt happen I have no idea what you are talking about What car? What airbox? What hose? etc?1 point
-
Get Bizzo to buy it then him and sparks can have cute matching 2door sedans.1 point
-
repu gaurds? prob be way to pricey/ hard to get, unless someone makes fiberglass ones1 point
-
I can't bring myself to bodge it up! OCD spec haha I would remove both inner and outer skins by the spot welds and weld new panels in, only way to do it right and remove any chance of the menace creeping up again! Returning to stock may be an option (with the 2.3 motor), no longer have stock springs etc anymore though. Got a bit carried away and the engine bay is essentially empty now anyway (all bagged and tagged at least!). I'll have a hunt and let you know about the door handles1 point
-
primed the front guards for what i hope is the last time. shape is really good. will see better when they are on the car and aligned with the other panels but at this stage they look good. before priming, Untitled by sheepers, on Flickr Untitled by sheepers, on Flickr Untitled by sheepers, on Flickr after priming. Untitled by sheepers, on Flickr next is boot lid and then passengers door. boot lid is almost ready for its second coat of primer. maybe this weekend.1 point
-
Small post. Painted few things at work Also I think tom likes my car1 point
-
Check earth to the dash/cluster1 point
-
Rightio, a long time between drinks on this project build. So since last time.. Sometime last year I started some work on the reproduction tray. The nats paint job was a temp job. Essentially it was shitty supercheap rattle can paint over equally shittiy Thai primer, so it was time to take it off and give it a few thick coats of etch primer for the mean time. I also cut off the engine mounts at some point. Later on in 2014 I tucked this and the engine away in a lock up with Seedy Al. Sadly it remained untouched…until a couple of Sundays ago!! I gave Al a hand towing one of his new steeds and then later in the arvo we went to work on the hilux. Thanks Al! With a bit of maneuvering, we had the 3RZ in the hole and the gearbox mounted up. As in the last post, Allan modded the gearbox mount, dropping the bolt up point for the gearbox about an inch or so. Al must have had the magic touch that day because it was perfect!! We got the engine sitting pretty straight and bang on level. She’s a bit tight at the firewall but not super tight – move a couple hoses and some other bits and she’ll be right as rain. I already knew the driveshaft yoke was a match to the gearbox output so I wanged in the driveshaft just to see the angle of the dangle and how much it needed to be shortened/lengthened. Turns out it is the perfect length! Gotta love those Toyotas. Didn’t get too many photos as the phone was running out of battery It hasn’t come without a couple problems however. The swaybar – had to undo this bugger and drop it down to get the 12R out/3RZ in. Now it is awfully tight around where the sump bowl will be, so this will need to be spaced down about an inch. The sump – a modified sump was always in the cards. With the engine sitting where I want it, the sump will need a notch where the sway bar will go. Because of this, the pick up will likely require a tickle up too. The sump will also need a tweak over the front crossmember, and the center link/drag link. The drag link – looks like these things are also known as a centre link or centre drag link. This bastard is right in my way!! Ideally this would need a drop in it, as the below pic. It looks like most of the 2wd Hiluxs have the same amount of straightness, up until the late 90s/early 2000s when the RZ etc came out (go figure) but the design is a fair bit different, not too mention probably a lot wider. Does anyone know the logistics/legalities of modifying these?? Or know of one off another vehicle that might fit? I saw this website but ahhhh unsure ?? http://grannys.tripod.com/centerlink.html Discuss: //oldschool.co.nz/index.php?/topic/25299-bizzos-rn35-toyota-hilux/page-6 many thanks1 point
-
i found some left over parts from putting the engine back together but i also got busy on the front end tonight getting it removed and ready for the new front got covered in petrol removing this bloody thing!!!! big empty holes and missing peaces started stripping it all down and then realized it was mainly covered in grease so il leave that till new beam arrives to install. got word it should be here next Tuesday. so maybe next week some time. he also said he may have some longer drop arms for the rear laying around some where he said he will try dig up and find for me. now that the fronts all apart il do the king pins again. cause i love doing everything twice.......1 point
-
Update time. Got the new loom mainly in - found the ignition/light switch is missing half of it switching gear - so all the light functions wont work Added the correct blackout lights Added the oil bath air filter Opened up the wiring clamp holes in the guards that had been brazed up. New ignition switch is on its way from the States. Just need a battery and the old gal might be ready to try firing up.1 point
-
I did a wee bit of work over the weekend. I spent a bunch of time making a nice wiring loom for the fans and fog lights, I've nearly finished that, just need to do the final termination. I also made some new brackets for mounting the fog lights into the grille. Hopefully will get a chance to finish putting that together one evening this week then I can change the bumper this weekend. I've had to make a bit of a mindset adjustment so that I remember to always use genuine 'merican UNC fasteners too.1 point
-
great day out guys, great to have a look around some projects and awesome sheds!!! and have a yarn with some likeminded people, cheers for the BBQ to finish a great day off. A big thanks to threeonthetree for the invite and all the shed owners for letting us look round. PS ive dragged the heater out of storage for the EH today it might be time haha Cheers Rusty1 point
-
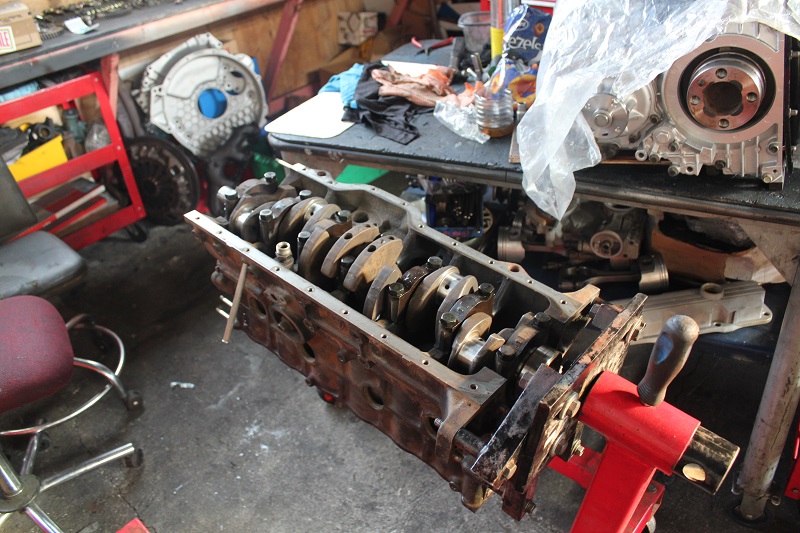
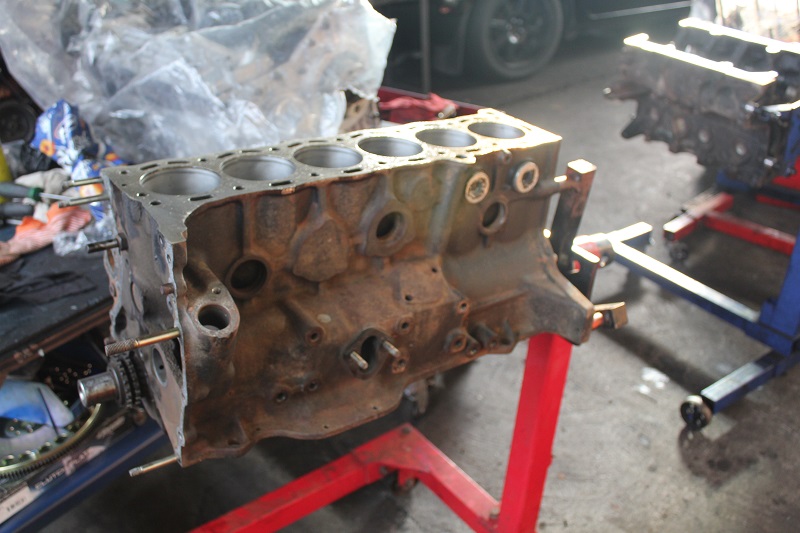
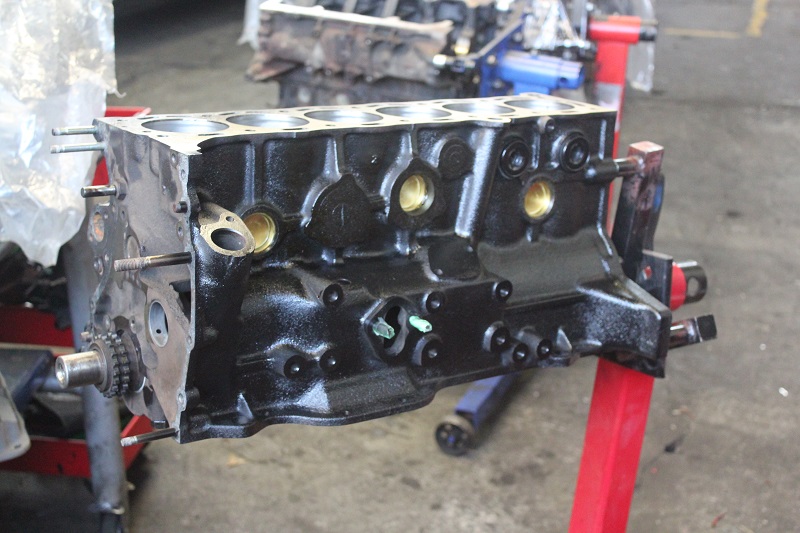
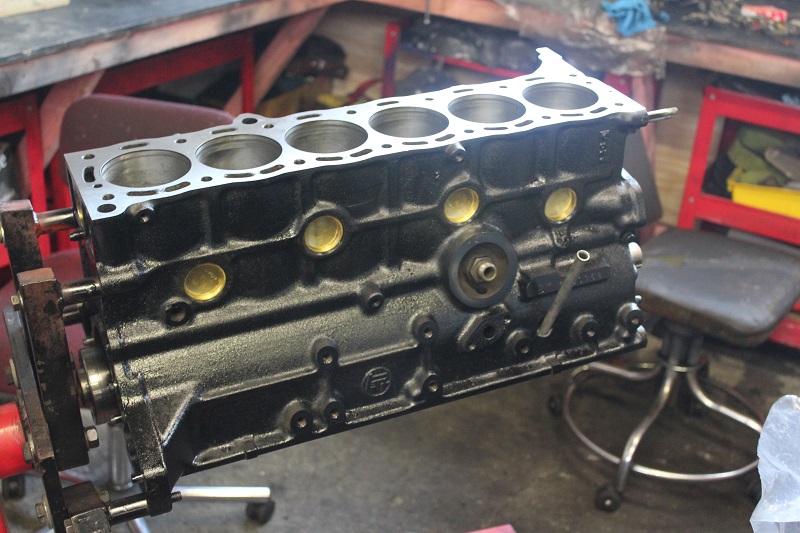
Casual update. Spent a bit more time on this yesterday and today. Block went in the hot was to get all the machining dust and other shit out and off the engine. Then cleaned up pictons and ring groves. Then, went to go fit big end bearins to conrods to measure, nope, turns out they are wrong. quick bit of research, engine changed in 1984, so I have been sent later model big ends, so will get that sorted Thankfully not a same case with the mains, so managed to atleast get the crank in. Measured good and turns nicely. Then today, I painted the block and smashed in the new frost plugs, then spent some time cleaning up other bits, pulled the rocker gear apart as that was full of old oil crust, cleaned the auxillery shaft and put that in. But yeah, biggest problem I for see in the future is a damn sump gasket. I hadn't paid any attention when I pulled it all apart and had hoped I could just get away with using 3 bond, but no, and old gasket is shot. So maybe with some luck I will be able to find a conversion / bottem end set for not heaps of money.... got a good deal on the top set, but that was repco clearance price. Also checked head, 3 valve seats need work, not to bad, will try convince engine builder at work to do them for me. lovely
1 point
-
Walked into the blissful smell of freshly roasted coffee and jet fuel in the shed this morning...aahhhh1 point
-
Shedtour was tops, Kempys shed was mind blowing! All the electrical gadgetry was Awsome! Huge thanks to Neal and all for organising. Was a great turnout of people! And stoked that my sheds tidier than what it was now! Also just aqquired more things to add to hoard at Swapmeet Damnit1 point
-
I had an awesome time I can't take any credit for organisation tho, that's all Neal Three on the trees doing (I've got to thank Chris R for all his electrical and shed sorting help too), I was just a glorified shed opener I think the highlights for me was meeting everyone, Kempy's Dr who style shed, complete with Jet engine. Toms Awesome FA50 (don't ask me why I like them so much I just do) and his killer 80's Hilux. Oh and Neals awesome BBQ skills Great to meet you all, and I hope we all get to do this again soon1 point
-
Fun day having the OS crew over, meeting everyone and spinning spinning yarns, playing with toys, lurking in dark corners of sheds checking out relics of the past, beer and meat on the BBQ, pouting over car parts, sweet rides around Auckland between sheds, jet fuel and burning rubber inhalation.. ..,and man making almost drum melting fire. Thanks again to Threeonthetree and ZebraDude for organising the tour ......and an awesome bonus of having a clean, organised shed I can actually use and find stuff.1 point
-
well, not much done to the old girl, it went through another mot (wof) with out even a single advisory, i cleaned up the bottom of the doors, patched a little hole on the wheel arch and changed out the rear shocks 1 of which looked to be the factory sachs shock and the other had been changed to a monroe, the monroe was still servicable, but the sachs shock was as good as useless, a mate went over to ireland for a week in it and it behaved like it should, and we are off up to the isle of skye in scotland for a wedding for a few days, so should be good.1 point
-
Ive been looking for some sweet 6 stud wheels for this for a while, and haven't really found anything all that appealing. The decision was then made to widen the factory steel rims. While discussing widths and tyre sizes with my foreman, he mentioned a spare set of 245 and 265/50r14 Eagers...... Now for as long as Ive been working with him, I have constantly given him a hard time about his bogan taste of cars (has owned several SA22s, one with a SBC, now has a HQ), But alas, he has broken me. The deal was done and all that was left was the task of selecting rim width.... A quick measure up and a few phone calls to friends later...... 8s on the front, 10s for the rear. Still need a quick coat of black paint, but pretty excited about running the factory hub caps. Now before any of you monkeys want to call me out on ridiculous offset, my skinny arms snapping due to the lack of powersteering, or the fact that such wide, quality tyres may be detrimental to my health when driving in the wet, Just remember how much of a bad motherfucker I am! (if youve met me before then maybe just use your imagination) chit chat http://oldschool.co....gos-b1600-yarn/1 point
-
what a cracker of a night we had on friday. started with sorting out the clutch cable and peddles and that jaz painted all the covers in some black. made them look all pretty again. pulled some more of the engine apart cause we got excited and put other parts on 1st..... partner said she hated how far forward the gear lever was so i gave that a bend. then assembled everything and took a few more photos and BOOOM!!!!!!!!!!!!!!! so i was missing the fan belt so shot out to see my mates at the vw shoppe and got a belt and while i was there i spotted a short shift kit. this thing is amazing. like mind = blown, thing shifts with the flick of the wrist. partner should be able to1 point
-
Geez you guys don't muck about!, living the life though, very cool indeed.1 point
-
Flashback to better times..1 point
-
Few more images... got its re vin in march, happy times. other pics from hardpark 2015 and v 4 and rotary jamboree at manfield1 point
-
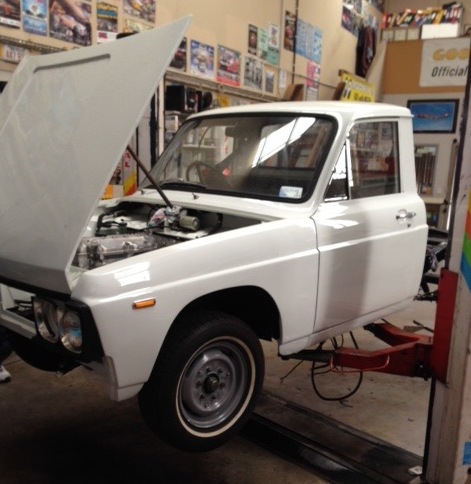
well got the cab all swapped over today and put new rubber mounts and bolts in, need to run the wiring to tail lights, buy a fuel pump (and wire it in) and hook up the rear brakes before swap the wellside over, after having a good look over it pretty happy with it. lots of jobs to do now -sort wiring out -swap in lsd diff nugget with better ratio -dynamat and carpet -get door cards re-covered to match bench seat -paint exhaust manifold -clean up intake manifold and carb/airbox lots to keep me busy
1 point
-
i dun this. Untitled by sheepers-ra28, on Flickr Untitled by sheepers-ra28, on Flickr Untitled by sheepers-ra28, on Flickr1 point
-
you need to know how much free power in case it's too much and you suffer from sustained loss of traction1 point
-
Found this on club k from a guy who found it eles where ahahha also added some info, im 99% sure its relating to the mx73. Some guy spent a lot of time doing this write up! This should help alot of people out, feel free to move this topic if need be. --------------------------------------------------------------------- ENGINES 6MGE bolts up, wires up, no effort required worthy if you can get one cheap. Difficulty 1/10 Worth it? extra 20hp, 20 Nm torque, once again, price dependent (This is over the 5MGE, not the 5ME) 7MGE bolts up, needs 7MGE loom, ecu and be 'spliced' into MX73 may be able to use 5MGE harness and sensors, but wouldn’t get full effect. may need small exhaust change to suit MX73 system Difficulty 3/10 Worth it? extra 30hp, 30 Nm torque, price dependent (over the 5MGE) 7MGTE bolts up, NEEDS 7MGTE loom, ecu, and be spliced into MX73 needs bigger exhaust and intercooler to get best benefit. Difficulty 4/10 Worth it? yes, if you can get one for a good price 1GGTE Bolts up with GX71/GA61 1G-EU or 1G-GEU mounts. needs 1G gbox (or at least the bellhousing) needs 1GGTE loom and ecu, and be spliced. needs bigger exhaust and intercooler to get best benefit. Difficulty 5/10 Worth it? yes, if you can get one for a good price, and you have the mounting sorted. 1JZGTE Can use custom mounts with the stock crossmember (available in Australia, was $250AUD plus postage, not sure now) or you can use an MX83 crossmember, and factory JZX81 mounts,(late 90-92 for Australia, any MX83 for US), or you can use the factory JZX81 crossmember and mounts (ie, if you get a JZX81 front cut) needs 1JZ gbox (or at least the bellhousing) needs 1JZGTE loom and ecu, and be spliced. needs bigger exhaust and intercooler to get best benefit. Difficulty 7/10 Worth it? yes. The Nonturbo 1JZ-GE isn't really a worthy swap for the dollars it costs, unless you can get one uber cheap. 2JZGTE as above for 1JZGTE (same mounting), but will have clearance issues with turbo's (may not apply to LHD) Difficulty 9/10 Worth it? yes. The nonturbo 2JZ-GE is also definately worth a look. It will match a stock 7M-GTE any day of the week, and is capable of nice figures with some dollars thrown at it. 1UZFE needs custom mounts (available from Peewee on the Cressida forums, $120AUD plus postage) needs custom exhaust, and most likely manifold modifications around steering needs 1UZFE loom and ecu, and be spliced Difficulty 8/10 Worth it? yes. ALL motors will need a front sump version. ALL sumps can be interchanged within the same family (ie, if you buy a 1jz with a mid sump, you can put a 2jz front sump on it, but you need the sump (both halves), baffle plate, pickup, and dipstick/tube) All loom problems can be sorted with going aftermarket ECU Any motor with coilpacks (ie, not a standard coil) will need a tacho converter Cost of installation of all motors is the same. What varies is exhaust costs, intercooler costs, wiring costs. Turbo motors may require a radiator upgrade. WHAT CARS HAVE WHAT ENGINES 6MGE Found in the MS126? Crown 3000 as a mid sump Found in the MZ12 Soarer as a front sump. 7MGE Found in MX83 Cressida as a front sump Found in MS130 series Crowns as a mid sump Found in MA70 Supras as a midrear sump Found in MZ20 Soarers as a midrear sump 7MGTE Found in MA70/71 Supras as a midrear sump Found in MZ21 Soarers as a midrear sump 1GGTE Found in GZ20 Soarers as a midrear sump Found in GA70 Supras as a midrear sump Found in GX81 Chasers as a front sump 1JZGTE Found in JZA70 Supras as a midrear sump Found in JZX81/90/100 Chasers as a front sump Found in JZZ30 Soarers as a midrear sump 2JZGE Found in JZA80 Supras as a midrear sump Found in JZZ31 Soarers/SC300 as a midrear sump Found in JZS14x Aristos/GS300s as a front sump Found in the IS300 2JZGTE Found in JZA80 Supras as a midrear sump Found in JZS14x Aristos/GS300s as a front sump 1UZFE Found in UZS131 Crowns as a mid sump Found in UZS14x/151 Crowns/GS400 as a front sump Found in UCF10/11/20 LS400s/Celsiors as a front sump Found in UZZ30/31/32 Soarers/SC400 as a midrear sump MOUNTS Last known address Bonneville Automotive Pty Ltd. 17 Phillips Road Kogarah. New South Wales 2217 Australia Phone: +61 2 9553 4708 GEARBOXS W55, W57, W58, R154, A340E, A341E, A350E Will bolt up to all of these engines. W5x series gearbox to M series motor, will require a 5MGE or 7MGE manual bellhousing R15x series gearbox to M series motor, will require a 7MGTE manual bellhousing W5x series gearbox to G series motor, will require a 1GGE or 1GGTE manual bellhousing R15x series gearbox will not bolt to G series motor (but you can get the J160 6 speed from the IS200 that bolts up) W5x series gearbox to JZ series motor, will require a 1JZGE or 2JZGE manual bellhousing R15x series gearbox to JZ series motor, will require a 1JZGTE manual bellhousing W5x or R15x series gearbox to UZ series motor will require a custom bellhousing from CASTLEMAINE RODSHOP, or DELLOW AUTOS Converting to manual will require lengthening the driveshaft, or finding a manual one from a wreck. Using R154 or any of the auto's will require a larger spline on the driveshaft than the factory one. W5x series gearbox will require 2nd most rear shifter position (as per MA70) R15x series gearbox will require MA70 or JZA70 shifter position. MX73 runs the same output shaft as the W series boxes. The A340E (MX83 on), A341E, A350E, and R154 run a slightly larger output shaft, and will need a custom tailshaft (custom as in needs to be professionally modded). Some of the late model autos have a weird yoke on the output of the box, but these can be changed for a normal one. All bellhousings in the A340E, A341E, A350E range should be interchangeable with each other (you may have to swap over torque convertor too, which may require swapping over oil pump). A340E from MX73 runs the same output shaft as the W5x and the A43DE, so you will need to swap the yoke to use it with the later A34xE range. When mounting a gearbox in an MX73, there should be very little hassles. Under the car, the MX73 has a row of holes where you can choose where to put crossmember. And since the crossmember isn’t straight, you can turn it around. DIFFERENTIALS You can get any ratio from about 3.5 to 4.7 Look around local wreckers, look at RA65 Celica's, Crowns, Hiace's, Hilux's, and Supra's We can use the MA61 Supra LSD centre. Infact, the whole diff can just be swapped for a Supra one (bolts in) If you go a turbo, or the V8, I recommend getting a Truetrac LSD centre, from RABIDCHIMP Here is the list 3.583 - RA65 Celica(F372) 3.583 - RT142 Corona (F372) 3.727 - RA65 Celica (F302) 3.727 - GA61 Celica XX, (F302 3.727 - MA61 Supra import(F303) 3.909 - RA25 Celica Manual (F313) 3.909 - MX13 Mk2 Corona(manual/auto?) (F312), 3.909 - MX23 Mk2 Corona auto(F312), 3.909 - MA46 Supra (manual/auto?) (F312) 3.909 - MA61 Supra manual (F313)LSD 4.10 - MS110 Crown auto (plated as F362, but was F293 in vehicle), 4.10 - MS112 Crown auto (F292), 4.10 - MX13 Mk2 Corona (F292), 4.10 - MX73 Cressida auto(F292), 4.10 - MA61 Supra auto(ADM) (F293), 4.10 - GZ10 Soarer auto(F292), 4.10 - MZ10 Soarer auto(F292), 4.30 - GA61 Celica manual(F285)LSD 4.30 - MS123 Crown auto(F282) 4.556 - MA63 Supra auto(EDM?) (F252) 4.75 - MS57 Crown auto(F??2 - no build plate fitted) 4.778 - MS110 crown auto(F362) SUSPENSION There are a few places that do springs. Even if they don't list them, they will probably still make custom ones for you (price isn't much greater) KING SPRINGS KONI, Cressida not mentioned, but they will do custom. LOVELLS, Cressida low isn't mentioned, but I'm sure they do them. DOBINSONS As for shocks, get Tokico's. You can see which ones on the RABIDCHIMP website. MX73 uses the same shocks as the MA61 Supra I recommend getting PolyUrethane Bushes at the same time, make the ride a little bit stiffer. Who makes PolyUrethane Bushes? NOLTEC NOLATHANE LOVELLS SUPERPRO I dunno whether any of these are available in the USofA, but I'm sure at least one would be. RABIDCHIMP stock SUPERPRO bushes for the MA61. Crossreference the part numbers to find out which ones may be the same as the MX73 OIL Manual gearbox, run Redline Lightweight ShockProof. Diff, not sure, but planning to run Redline of some sort. REDLINE RIMS The stock size is 15x6", with a 20mm offset. Apparently 17x7" rims, with a 25mm offset fit well. You then have to be careful what size tyres you put on so that it doesnt scrape. The largest I have seen on an MX73 was 18x8" on the front (with 245's) and 18x9" on the rear (with 265's), and he had to roll the guards to stop scrubbing. I would recommend 17x8" on the rear (with 245/40's) and 17x7" on the front (with 215/45's)." http://www.club-k.co.nz/Forums/viewthread.php?tid=19995 ------------------------------------------------------------------ Interchangable parts: 7m and 1jz: Clutch kits (but not flywheel) Cat back Exhausts 89+ motor mounts (rubber part) Anything trans related Anything gauge related Rad (if you're not using the 1J hydro fan setup) Driveshaft/Diff 2jz to 1jz: Power steering pump Alternator Spark plugs (ngk 3330 and 6097) US spec 550cc injectors (resistor pack needed) JDM Spec 440cc injectors (drop in upgrade) Water Pump (requires removal of the 1J hydro fan and a 2J pully) Head gaskets (although most other gaskets do not swap, get a 1J set to do it right) Clutch fan (if you use a MKIV water pump and pulley) Fuel Pump Serpentine belt (but NOT timing belt) Oil filter and relocation kits Intercooler kits Plug coils Cam gears (incl aftermarket adjustable) Map sensor (I think... someone verify please) Ignitor seems to be the same too Rod and main bearings. The head bolts, crank and rod bolts from stock or ARP either bolts or studs w/nuts. The pistons including the wrist pins, wrings and locks. Stock side feed or after market side feed high ohm injectors. Low ohm injectors require wiring in the 7M or preferably 2JZ injector resistor pack. Water pump and housing when replacing the hydro fan to electric or clutch fan. Cams are normally not interchangeable with out some grinding on the 2JZ cam and having it spun balanced, HKS, Jun and Blitz all make 256, 264, and 272 cams for the 1JZ. Cam shims, springs, retainers, Valves and springs, along with buckets are interchangeable. For an aftermarket flywheel, order a 7M fly but have the 2J bolt pattern drilled into it. The 1988+ Isuzu Trooper 4 cylinder 2.6 liter engine (4ZEL) uses the same belt as the Toyota 1JZ engine. So instead of getting a belt from Japan (~$100) you can pick up an Isuzu Trooper belt locally at an auto parts store for about $30 US. Make Sure You Get The 4 Cylinder 2.6 Litre Engine Belt! http://www.mkiiisupra.net/bbs/archive/i ... 34936.html1 point
-
Cheers sparkz fitted mine tonight Tapped a 10mm thread and wound her in easy as1 point


This leaderboard is set to Auckland/GMT+12:00