
Leaderboard


Popular Content
Showing content with the highest reputation on 03/18/15 in all areas
-
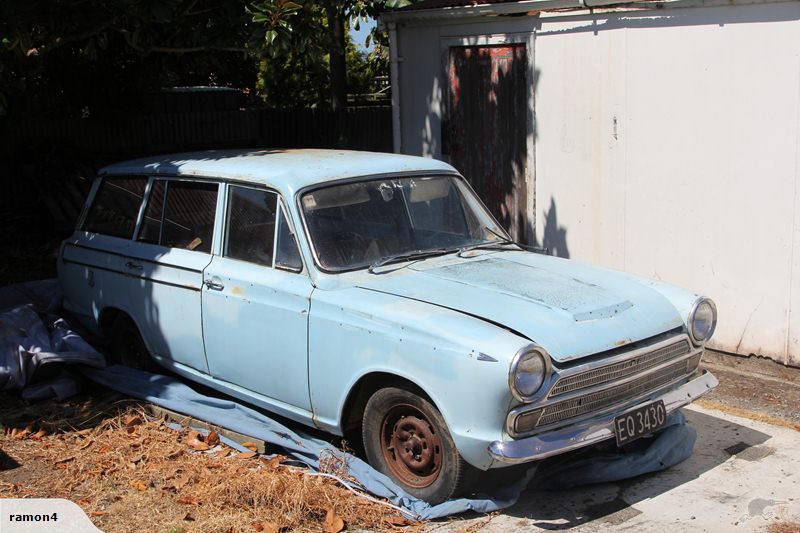
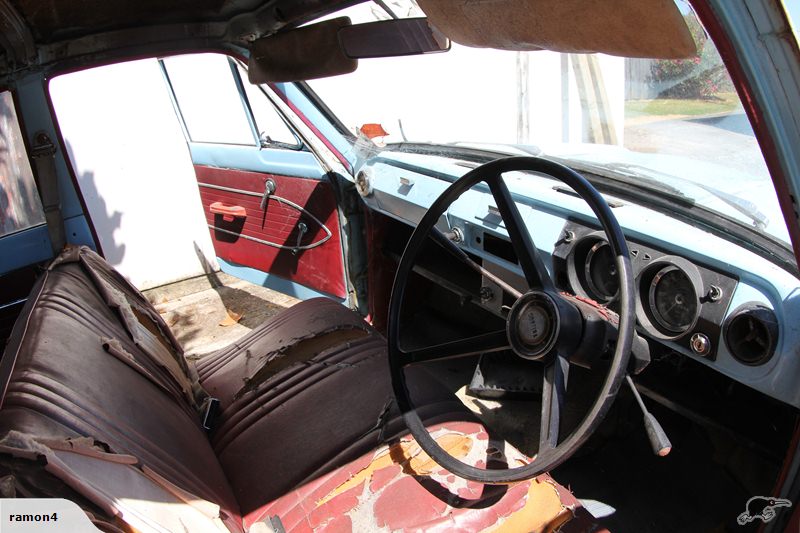
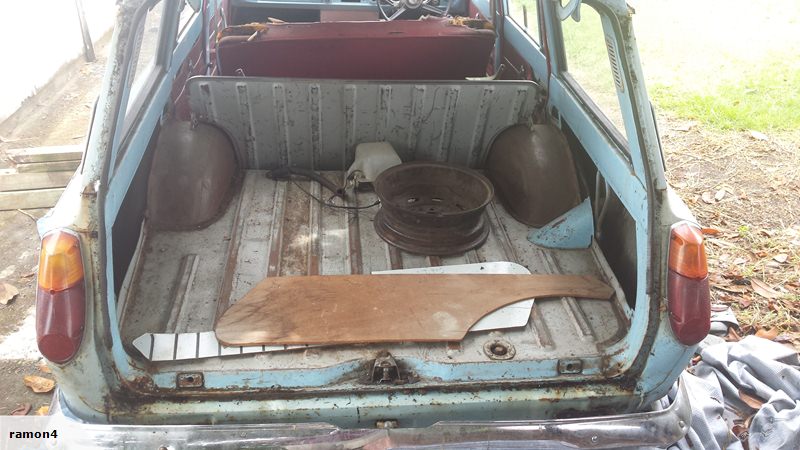
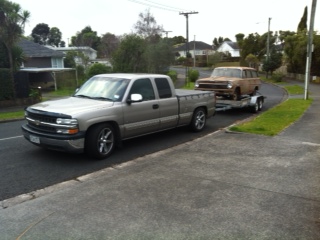
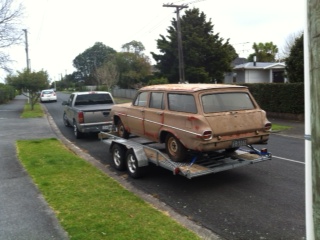
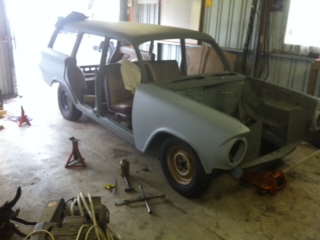
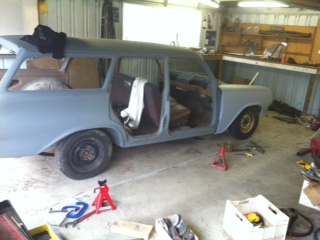
Brought another car cause I wanna be like Seedy. Wanted one since I was 18 but they never seem to pop up for sale.. this one did so I buyed it. She is a lil bit rusty, mainly the passenger front outrigger and sill. Shes a lil bit ratty, which aint going to change Shes a lil bit been sitting for 10 years, but drivable now I picked it up from Tga a month ago and it sat at the old mans until last weekend when I got a mate to bring it down. The paints a bit rough and a few dents by one guard but its actually relativly straight for its age. I've replaced the master cyl and bleed brakes up and also clutch.. having trouble finding the old 8" lockheed rear cylinders and pads for the drums so might change to escort 8" backing plates which mean the parts are easy to source. Managed to get the 1500 engine going with a bit of a carb clean, blow out old petrol, and replace engine earths, Shes still a bit rough but drivable. Actually drives pretty good considering its sat 10years! Plans are basically to get legal, slam and put some widened steels on. Not wanting a huge project at this stage as I have the rx2 to get back into at some stage, just wanting something OS to enjoy for now. Ive brought the steels just gotta figure out how much to widen to and if I needa change offset or not. I already had a set of 185 55 14s so that made the choice to goto 14s easy. Anyways, pics.
 6 points
 -
5 points
-
aaaaiiiiight. wagnats tshirts will be there.4 points
-
Work on the end caps on the bumper underway. Its a lot of work playing round with the steel, Plenty of noise.4 points
-
Some things of late to note: So a while ago, I bought a T3 billet ITB manifold to suit a smallport. This will need portmatching to the head to be perfect (it was an "unfinished" item I scored discounted in their end of year sale) but it's a great start. This is a pretty beautiful thing though, and like all T3 things I have bought so far fits up like it was meant to. IMG_1939 by Richard Opie, on Flickr Then I decided, well, you can't go attaching dirty ITB's to a super nice shiny manifold right? I remembered Ryan had a set cleaned up by way of "vapourblasting" some time ago for his 20v, so tracked the joker down and put a couple of sets I have here through the same process. The finish is amazing - almost surreal! IMG_1926 by Richard Opie, on Flickr And then I thought, well hang on - I have a T50 I should probably clean up too. So following a degrease and waterblast (you cant give oily parts to the vapour blast man) this too was dropped off to be cleaned with the following result: IMG_1955 by Richard Opie, on Flickr Following a preliminary cert inspection on the rear axle mods, our friendly certification man Clint advised that the outer brackets for the 4 link were not cert compliant, as one half of the bracket was welded to the cast steel bearing housings at either end of the diff housing. After some head scratching and throwing ideas back and forward I ended up with a loose design brief to supply to Esprit (George) who then drew up the following replacement. Basically this one kicks in near the top to avoid the cast components, and additionally has a traction bracket setup built in to allow the diff to be setup properly when the car is at it's new lower ride height. image001 by Richard Opie, on Flickr These drawings were then sent to the laser cutter, the components sliced out of 4mm plate then the magical sheepers glued them together with his mythical steel hot glue gun. What a guy. IMG_1964 by Richard Opie, on Flickr IMG_1971 by Richard Opie, on Flickr In the next episode, the diff finally draws near to completion, and probably a host of heaps of other goodies arrives. Discussion below, in sig! Thanks for looking3 points
-
I got my 68 datto up and running I'll bring her down if I can3 points
-
Ah yes, passed you going up the Bombay's on Saturday, but you didn't seem to be struggling too much. I got off at the BP to get some cash out & it took me to Takanini to catch back up again... pic to prove it!3 points
-
Got the tyres on went with tubes 13" motivation is high !3 points
-
Forgot best part.. Bench seat column shift!3 points
-
I bought this car as a rolling body the week my oldest son was born. The agreement with the wife was it could come home as soon as the bathroom was finished. Another son, house renovations and life got in the way and the car got ignored for about 6 years. I did occasionally think about the car and put a plan into place. I saw an article in Street Machine mag about a guy who put an LH Torana front end under an EK Holden. It didn't look too difficult and one turned up on trade me a couple of weeks later. That was the start of buying bits to fix the car and a good friend came over and we ripped into it. We found lots of good stuff, like the floor pans the were rotten and had sheets of steel pop riveted and braised in place. Thank you Holden for the built in rust traps of rubber flooring with sound deadening underneath to hold moisture and make rust. Amazingly the rest of the car and the usual rust spots are really good. The car has been off the road since 1989 and that is what saved it. Back to the plan. The LH Torana front is in the car, there is an injected 5Litre from a VT commodore sitting on my engine stand waiting for the HQ sump and pickup to be fitted. The engine has a 4 speed auto with it. I found a narrowed HZ ute diff that is under the car. The steering column is out of a LC Torana, its the column auto one. In my world the right place for the gear lever with a V8 and auto is the column, especially with a bench seat. Here is what I started with
2 points
-
I had typed a long story buy closed the window by accident and aren't writing it again. Big thanks to nathan & greg for collecting and storing this until I could get it. I got it home saturday, chucked some fuel in the tank and water in the radiator and it started after a bit of encouraging. Found that the fuel pump was spraying fuel everywhere so now its running on lpg. plans are to fix rust, get a wof with the 202 and drop a 253/308 into it and drive Genuine holden service tool discussion://oldschool.co.nz/index.php?/topic/47520-chrisr-ness-hq-wagon/2 points
-
There 5 stud xr4/longchamp. Borrowed off a mate who imported them from Japan, and am trying to convince him to sell them to me2 points
-
Here's a couple of pics of my intake adaptors, manifolds and velocity stacks, the velocity stacks, ram tubes, trumpets are 50mm diameter, 3mm taper over the 95mm length, full 180' bellmouth I dropped the price on them last week purely due to the quantity I had machined, saving about $5 each also pictured are a couple of JZ intakes, I also do these for M series, RB's 4AGE's etc2 points
-
I can recommend m90 on a 2.0L engine is a good thing2 points
-
After a couple of months I finally spent some time on the car yesterday. It really needs to get to the panel shop before winter, the car was blasted in December 2013 and has been in epoxy primer since then. It is in a garage but the air gets really damp when it is cold. Before the body shop I want the mechanicals done to the point where everything is mounted so that all cuts are cut and shuts are shut before paint. The fun part is figuring out the order so that nothing needs to be redone. Something that I keep relearning is how small these cars really are. I stuffed around for a good hour or so figuring out where the steering column is going to fit. It is a juggle between having enough arm room, making sure the column shift wont hit anything and that everything at the bottom of the column misses. I thought I had it figured out until I decided to check that the pedals would fit. Of course not and the handbrake only make it worse. Back to the drawing board, the hard part is keeping the column break away intact in case of a big accident. On the plus side I have some budget again so time to start buying things again!! I will put up some photos soon.2 points
-
Long time since last update! Basically been using the ute on the odd occasion over summer, occasionally as a work horse as seen here haha. Pretty happy with it overall. Turns lots of heads, sounds great and goes well enough. Still sorting little issues as I go along but hey, its a 51 year old car! Thought I would post up the scare bird brake conversion that I did recently https://scarebird.com/index.php?route=product/category&path=65 Its a kit from the states that lets you keep the existing stub axles. The guy supply's the part numbers for everything needed to complete the kit, so I bought a lot of the stuff from Rock Auto in the USA real cheap. Brake rotors I got here. All you get in the basic kit is the bracket and 5 stud stub axles. (He does 4 stud if you prefer.) Lots of kits available for all kinds of old cars. Anyway, picture time :2 points
-
Burgerfuel Palmy Meet at; The lower undercover park at the plaza at 7:00pm We'll check out some cars, and walk straight over the road for some takeaways about 7:30-8 - Just a note, feel free to invite other cars/people along, but you will be responsible for them! Please leave no rubbish and no skids/rowdy driving in the carpark - We've been given permission from the Plaza to use this, and we don't want to loose it. We have a rain free car park, and the barrier arms go up shortly after we arrive, meaning no parking fees. Grab a camera and we'll seeya there1 point
-
Nah, more like being assaulted by a can of angry bees. THIS is underwater idle:1 point
-
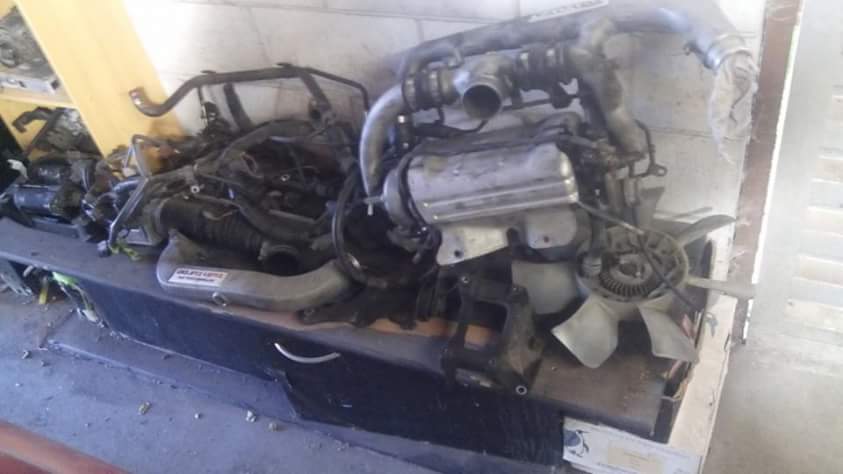
Oh I forgot to mention, I bought a running UK spec s4 na 13b, s5 turbo box shortened, another 12a front cover and a dizzy for a price I just couldn't say no to...this will be going in the coupe for compliance as it's nice and quiet and I ca use the same exhaust etc for when the BEAST gets dropped in.1 point
-
Always wanted to spin that motor to 9000rpm with that flywheel just to hear the noise......... Let us know when your ready.1 point
-
Looks good kurt, have to say it looks better than the others with spacers1 point
-
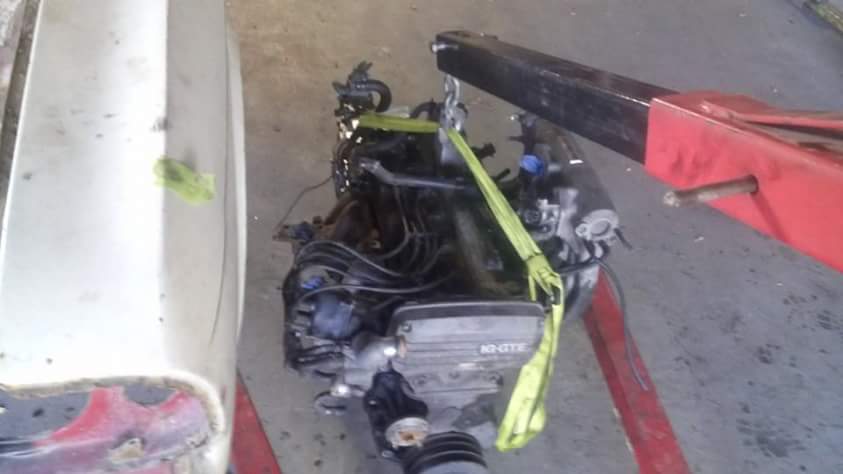
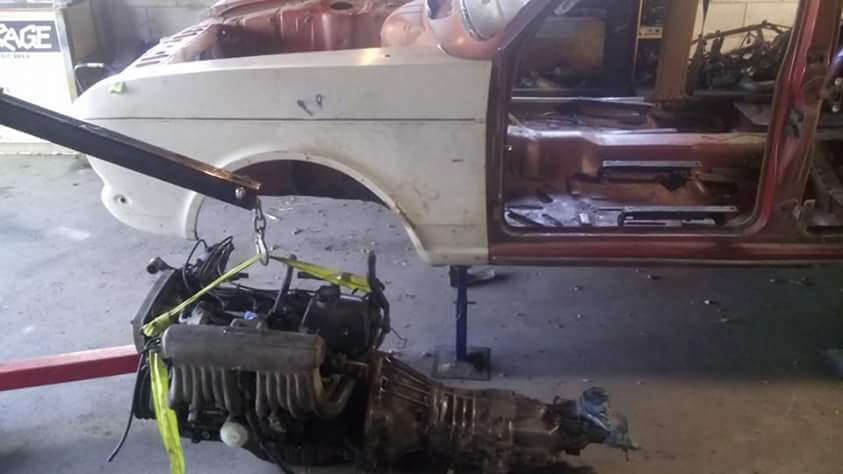
So everything has been removed from behind the firewall. And also a whole heap of shit from the motor to trick myself into believing its smaller then it is. And I believe with a wee bit of cuttie Curtis weldie weldie it will fit.
1 point
-
He might have a sweet fleet of cars he decks out with period correct audio gear. Like someone on here does1 point
-
Thanks to SR1600 / Mark1 point
-
Fixed it . . . and some free image hosting image ru1 point
-
None of us Might have to cut and shut a cheap sedan. Are you making more Trans-am fronts? Because that would be awesome!1 point
-
That would be silly1 point
-
That was me, they use to be $240 for 61 point
-
I'll be there and so will Bigfoot in the AU Falcon. They're a classic, right?1 point
-
New $25 http://www.trademe.co.nz/a.aspx?id=8604908481 point
-
John the polisher. Based at his house in Newtown, almost a dwarf, was an extra in Lord of The Rings, likes beer, polishes shit for cash,is a good cunt, 0218418201 point
-
Haha yeah I sort of figured it would but just thought I'd ask . Sealing up the fronts tonight n ill take to get front tyres put on 2m .. Cheers bro yeah from what they were what a difference. If anyones interested this is how I got them to this . they were orginally leaking so thought fuck it I'll get em all cleaned up while they are a part . Rears were tigged onto the Centre So sent them away to get chemically dipped then acid dipped so they return back to what you'd call a "mill" finish. Powerstrip industries limited in penrose are awesome for this they have like a KFC chemical dip that doesn't damage any chrome or nickel so would be perfect for stripping back old panels with chrome on em etc and also doesn't distort or damage the steel either so pretty good.. Got em back looking like this. Also git my bonnet hinges and radiator surround dipped n rust protected ready for a coat of primer. Was 30 bucks per rim and $10 bucks per kg to get anything chemically dipped n acid. From there they went to Dropped em off to braids n Whyte very reasonable priced . 40 bucks per rim to go metallic gun metal grey . 20 bucks per application so 20 for the grey powdercoating and 20 bucks for a crystal clear coat over top 3 day turn around. Came back mint. The lips were being polished at the time by progressive electro players n polishers in new lyn .. I took em the rears to remove the powdercoating n polish the outside lips as you'll see em with the tyres I'm using . Rear wheels Fronts1 point
-
runners i made for stu's 4agte manifold. used some heavy wall 50mm aluminum pipe, bored it out to size in lathe with a 1.5 degree taper, to improve velocity. will still need to sort a bellmouth. to weld onto the end, or machine into plenum base plate1 point
-
1972 Datsun 1600 Built by my Dad 10 years ago. Finally got to buy it late last year Z18ET turbo , 5 Speed, Intercooler, VL fuel pump
1 point
-
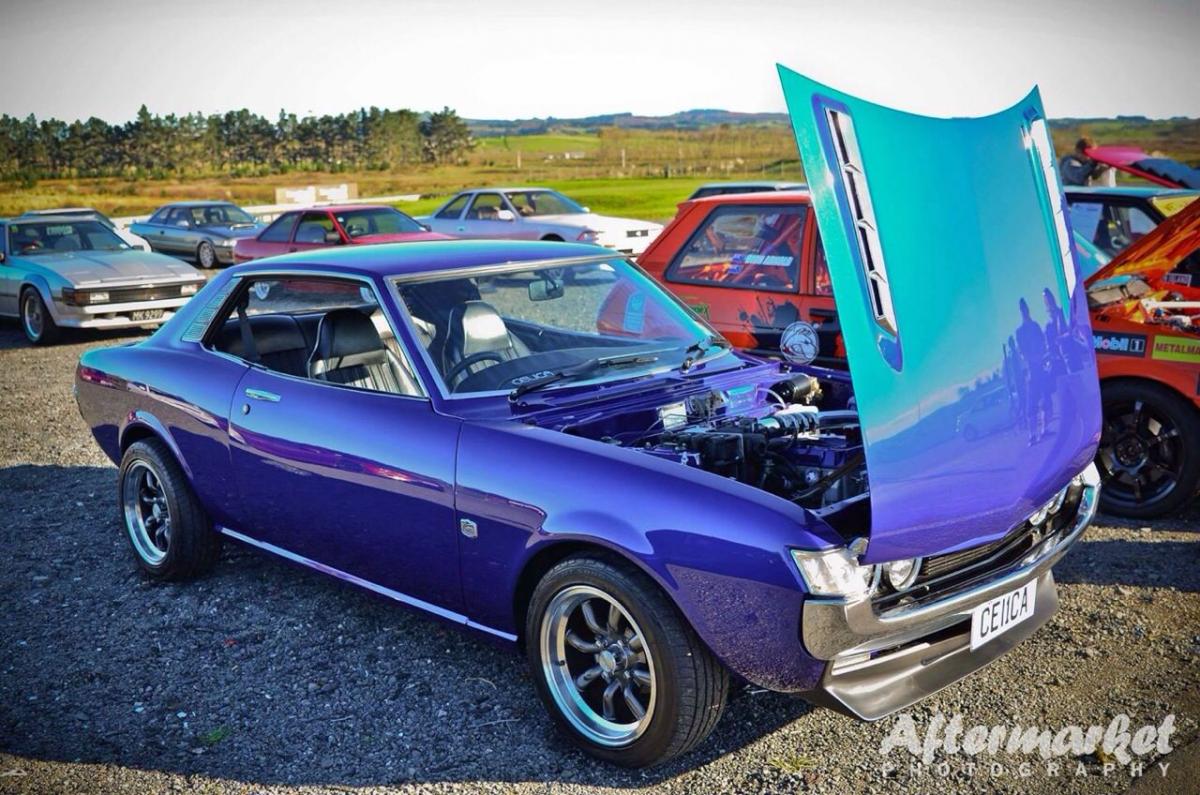
pretty tidy under bonnet
1 point
-
Mayte best tow vehicle/towed vehicle combo right there Mayte.1 point
-
More pics thanks neal1 point
-
courtesy of Mutiny - some pics from Mazfarm days1 point
-
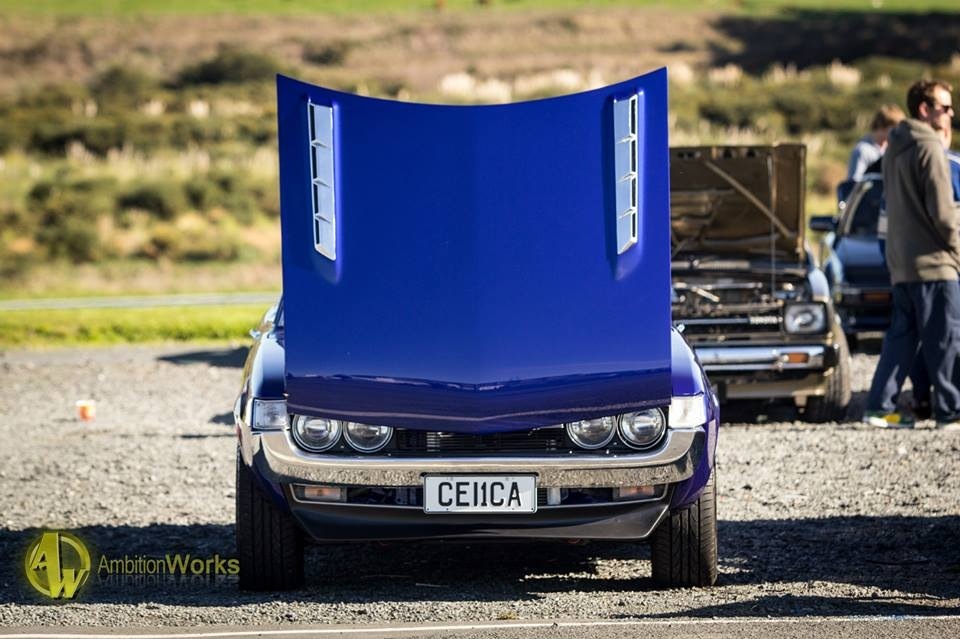
Hi Everybody! My names mitch. I have not been a member for very long on oldchool, neither have i had the chance to meet many of its awesome members yet. But like many of you ive had a project car for years and years sitting in the garage slowly getting disassembled and then put back together piece by piece. Finally its almost ready to hit the streets and go on some runs and forum outings! I have detailed photos from start to finish and i hope to post them all up here on my build thread. I have not had the time to go through all the forum build ups and i am unsure if there are any other celica builds so please post comments and leave me links So here we go.. First off a finished teaser shot of what this is all about.. This pic and the one above were taken at Toyota fest 2014 where she won best under construction. Fully striped and ready for the long haul all factory/filthy paints down after major body work ( wont bore you with the deets ) glossy getting rid of that old thing customized and recon'd out of a TE71 fits well with nolathanes all round ( pre under body coating pre under body post under body dont make em like this anymore reconditioned inside and out I will continue up loading more photos when i get the chance, hope they up load ok and that you all enjoy them!
1 point
-
looked at the one in pick apart, should be able to grab the front bar aircon radiator bonnet latch and headlight components off it, the guards arnt flash and im wanting 4x4 ones anyway, but should be able to get a few things.1 point
-
Almost 2 years to the day since an update which is not much of an update jeah. Had disc brakes put on the front a wee while ago, and had fixed that shit box ground smashing steering that eats tyres and is dumb. I flipped and swapped front spindles in it. But it makes the spindle below the rim which aint ideal. So will just leave it sittung like this in the shed for a year or two. And put some more paving stones in the boot to drop that some more. I purchased accuair air ride gear while in the states too, so might throw that at it one day. Kind Regards1 point
-
Well, Oldschool Nationals 2015 weekend was a hoot. Those that were there will know. Those that weren't there missed a long weekend of good mates, sweet roads (including gravel), hooning, boozing, yahooing. Holy hell was I surprised when prize-giving rolled around on Saturday night and the Eterna picked up Best Sedan. Shit the bed! There was a heap of other sweet Sedans there and it is honor to get the award. After driving the hell out of the car here is how it sits in the garage.1 point
-
Finally a trial fit for the left hand side, every single panel has been replaced and it feels like I've spent many nights cutting profiles. I pre-drilled every single hole on the new panels to match the existing chassis holes so I wanted to see it it all came together, couple of slight adjustments (0.5-1mm) here and there but in all it seemed to come out OK. A bit more shininess with a splash of etch primer.1 point
-
buried cables is better, just make sure you do it properly and put some warning tape about 300mm above the cable. and you shouldn't have silly buggers digging it up.. overhead is more of a hazard imo.1 point
-
I'll jump now to where the car has got to. The body has been sand blasted. It would have been cool to have kept the original patina by it was rusting too much under the paint and the previous owner had got carried away with PA10 and a brush. The floor pans have been replaced, there is still some finishing to do, the trans tunnel might have to come out to get the 4L60E to fit. The Torana front is bolted in still with the Torana disks. The original 13 inch wheels are there to push it round on. It will get HQ disks and WB statesman callipers. The doors and guards have been panelled and primed. Next stop is the panel beaters, I have a new LHS sill to go on, the original is rotten and wavy. The new one was bent up by a crowd in Wellington and goes right through to the inner sill. I also have a new rear panel to go on. Like all EJ,EH Holden's the original was rotten, no paint from the factory. The factory cutout for the exhaust is gone to give me options for where the dual exhaust will exit. Here is the latest photo
1 point
-
i was driving round miramar on weds and saw a marina, a viva, that wretched princess, a camaro and two different carry vans. cool story1 point
-
There was a boy with a sausage pipe on his bike. He had no vagina so must not be a dyke. Of his sexuality he was in great doubt, So he rode to Gays Knob to check that shit out. After a very long night of rectal destruction Russell arrived back home with some clear instruction... Dont walk through central park or you'll get raped by men, And never run a sausage pipe again.1 point
-
1 point
-
So, I got it running. Finally! Its been a hard slog, had a few headaches along the way (usual engine conversion stuff though really.) The exhaust headers have been a complete nightmare, mainly trying to make them fit with the column shifter linkages and I also struggled to find a starter that would clear everything but it least its all sorted now. Things are tight in places, that is for sure! Off to the exhaust shop tomorrow to get the open headers welded up to the existing twin exhaust mufflers. I also took the time to get heaps of stuff working properly that was not working at all before, like the horn, speedo, handbrake, lack of stereo etc. You know, the basic stuff haha Looking forward to a test drive to make sure everything is all ok! Will post a vid when that happens.1 point
-
Had a good day- hot and sunny and took my brothers old TVR out for a spin to a hotrod show I'm gonna post up photos of that elsewhere. And the truck- we made the pop out frames today! They ended up going together a lot better than thought. Just took it cruisy style and got into a groove. We made sure everything was nice and square by tacking the pop outs to the frame so they will fit nicely before welding them up. Next step will be to make the rollers. Plus add some bracing to the pop outs for floor support etc.1 point


.thumb.png.46e518f714cdc319554c389f990e75a4.png)


This leaderboard is set to Auckland/GMT+12:00