
Leaderboard


Popular Content
Showing content with the highest reputation on 09/16/14 in all areas
-
As some of you know Snoozin parted ways with El Cedrico on the weekend just gone. Full credit goes to him as this car wouldn't be the stunning car it is today without all his hard work and perfect eye for detail. The car Drove flawlessly down to Christchurch, fully loaded up with treasure there was some rear wheel arch vs tyre action as to be expected with a low car Gas stop in Sanson Waiting in line for the ferry (note the rear tyre that has jizzed on the wheel) And lastly I decided I should install the rev counter from the wrecked out hardtop today (excuse the crappy phone pic) Cheers Karl Discussion //oldschool.co.nz/index.php?showtopic=3152011 points
-
So, I got it running. Finally! Its been a hard slog, had a few headaches along the way (usual engine conversion stuff though really.) The exhaust headers have been a complete nightmare, mainly trying to make them fit with the column shifter linkages and I also struggled to find a starter that would clear everything but it least its all sorted now. Things are tight in places, that is for sure! Off to the exhaust shop tomorrow to get the open headers welded up to the existing twin exhaust mufflers. I also took the time to get heaps of stuff working properly that was not working at all before, like the horn, speedo, handbrake, lack of stereo etc. You know, the basic stuff haha Looking forward to a test drive to make sure everything is all ok! Will post a vid when that happens.8 points
-
Electrical done Jailbreak taillight YSS for the front to match the rear This worked mint for fitting the bump stops All new front end complete, feels amazingly tight, cant wait to feel what these bikes are supposed to ride like. Paint party5 points
-
An adapter / spacer for gearbox to bellhousing I made recently on the old milling machine. start with a lump of 6061 Wak a hole in to so i can set in the rotary vice Rough out one side rough out the boss on the other side cut to some sort of shape Drill mounting holes etc sink cap screws that are in the way of the gearbox etc Face off part And the all important make sure it fits part lol #whoneedsacnc5 points
-
new page time. been driving it and its still fucking awesome to cruse in. thats about it really, acquired a few bits for it that i was missing so ill make them fit and do a few more things i want to do as well. its hard work having 3 cars. I've been working flat out on the blue car which is fucking choice now but I've not done anything on this in a while. good problem to have i suppose. anywho, here are the boys together. Untitled by sheepers-ra28, on Flickr Untitled by sheepers-ra28, on Flickr4 points
-
Good progress. Body panels have been epoxied and ready for filling/primer. Body shell should go in the booth this week. Any week now shell be off to get painted which is exciting. Pic of hows shes looking at the moment. Also my airbag kit turned up. Bought a full accuair kit with Elevel set up. Super stoked with the quality of all the gear its well built, compact and looks the part. The complete valve box and control unit is below + the remote. Cant wait to get it in and get some slam! Discuss here > http://oldschool.co....a/?hl=westpala�4 points
-
Got a little sneak peek today as the last of the panel work is being finished off only the new window rubber to go in now. All going to plan It will be at the meet on Wednesday4 points
-
right sorry about the delay. standing in the fireplace in the middle of the lounge, looking south at the kitchen sink. the oven/cooktop will be at your feet here, in a bench dead ahead, ie a chicane coming out of the hallway straight standing in the 'hallway' looking south, can see the toilet in the bathroom. 'washhouse' on the left, just before bedroom door. plumber has put washer connections in the wrong wall likely due to communication issues, i cant afford to change it yet , so washer will be sideways for now. sideways sickness standing in the toilet looking north into the shower. note builder's artwork gift haha. on the right of the shower is a hallway cupboard standing in shower looking south at toilet and hand basin standing in the bed looking north. left to right: door onto deck, wardrobe, washhouse, cavity slider to hallway. it's blossom festival, love it4 points
-
Haven't done anything to this other than drive it, managed to get it legal again awhile back. Drove 2 1/2 hours each way to a drift day on Sunday. No drama's! Exhaust wore out, but thats normal. I was a bit rusty to start with since haven't done any drifting for close to a year. but kept it off the walls this time! Managed to win the mini comp, (track was kinda bias towards my car!) taking home a radiator, which was pretty choice end to the day. brother got a couple or short vids. will put them up later3 points
-
looking good man, just need some 4age power3 points
-
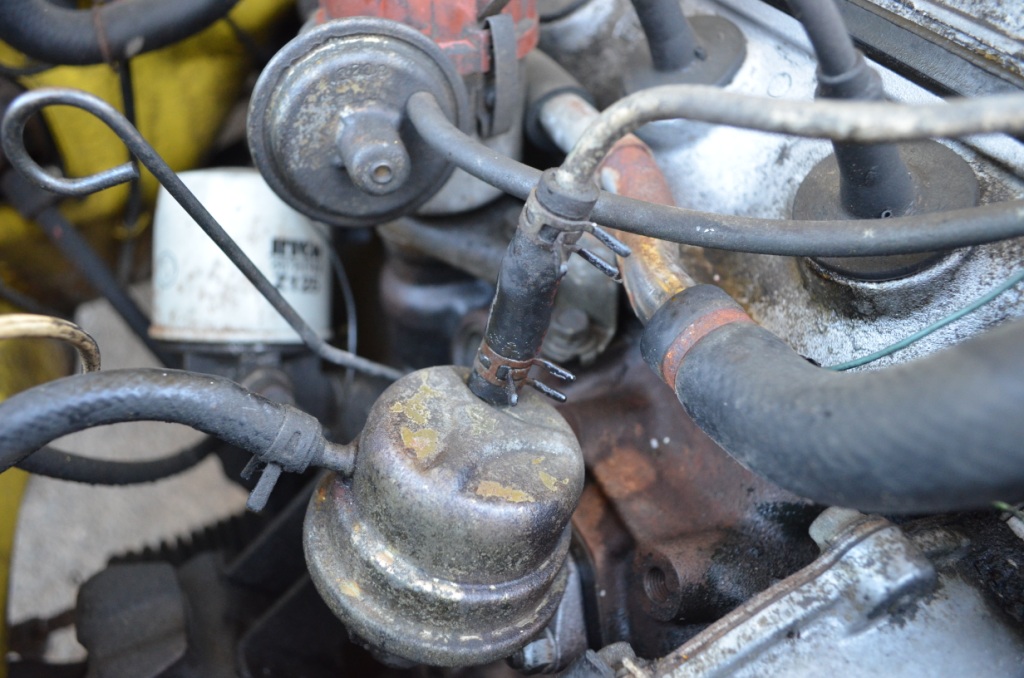
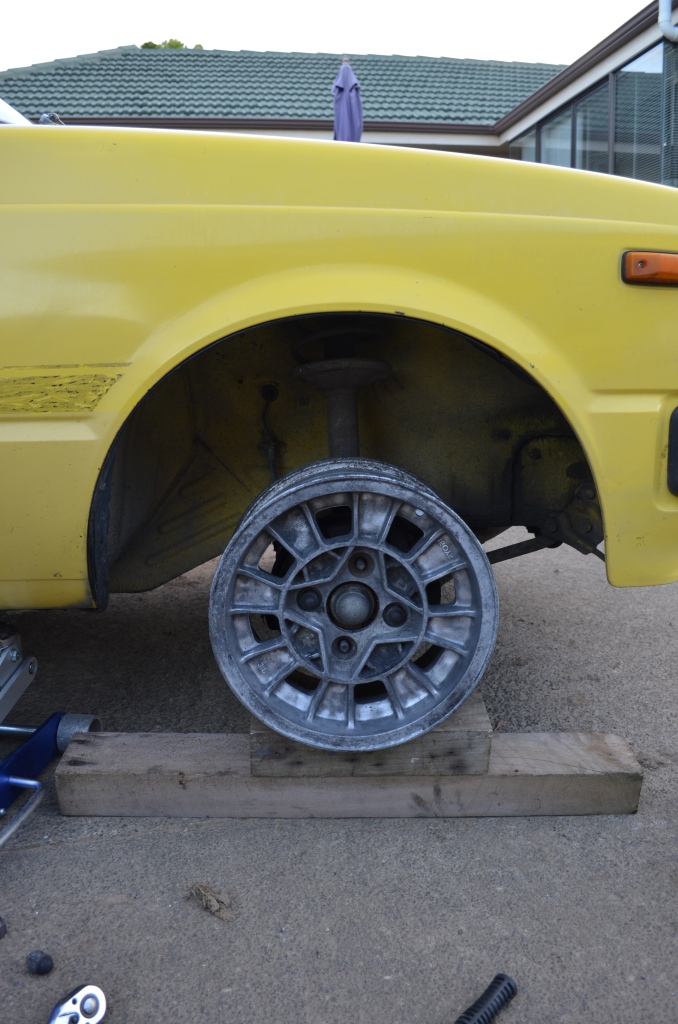
So basically my brother is going to help me maintain it and teach me a bit about these things. After getting the car home we discovered it actually had a fuel leak from the hose between the fuel pump and the carb hardline, so i replaced it with a new bit of hose. the starlet came on the original 12inch steel wheels but the tyres are no good, Shakotom had a set of 13x6 alloys that he had squirreled away for a future project; so he decided to give them to me. they need abit of a clean up but should be good. does anyone know what they are? they're stamped ryobi on the face and my grandad had them on his AE86 back in the early nineties. I just need to get some starlet sized tyres for them. maybe 155/70r13s?
 3 points
 -
No but have log book, so will tow it down and get scrutineered. Hope it passes, haven't put too much thought into that side of things. I'm pretty much committed now, so pending a test drive tomorrow afternoon and the wheels staying on, I'll be there.2 points
-
Just needs the ITBs off one2 points
-
Will get a photo or two but basically shed is going on that big pad that the Cabin is parked up on. The front wall of the cabin is pretty much where the front of the shed. The pad has been there like that for over 40 years with no a hint of subsidence. Just got back to nelson now after another good weekend of filling our knuckles with thorns. I was cutting down a massive hawthorn trunk that fell and just landed on my foot putting a thorn through the thick leather boot and into the side of my foot. Had to get hannah to get pliers- the fucker was stuck solid in the leather and 10 mm into my foot.2 points
-
wagnats?2 points
-
Well i have been wanting to build one of these wonderful machines for a few years now, i have just finished my engineering project at school (steam engine and boiler) and i needed something to fill in the rest of the year and this seemed like a good idea! About a month ago i got in touch with the guy in Oamaru who builds them down there and he kindly sent me his plans to use. Since then i have made a few parts for it but on friday he was up in Auckland and brought me the saddle, fork tubes and cranks with peddles so now i have enough pictures to start a build thread. Check out the Oamaru Ordinary Cycle club on facebook if you want to have a look at pictures to do with Penny Farthings. Each year the club does a four day long ride around the back roads of the south island on penny farthings , i will of missed out for this year as it is in november but hopefully it will be on for next year. Anyway here are some pictures This is the pile of goodies I got, leather saddle handmade by the local Oamaru saddler, seat spring, and the 1850s replica peddles and cranks, notice the 3 speed gears! Here are two of the parts i have made so far, they are welded up into the bottom of the fork tubes which are round tubes that have been squashed flat and the front axle bearing carriers are bolted to them. They took awhile to make because i could only take light cuts with the worlds bluntest endmill (high school abuse hahaha) I am planning to make the front hub at school and them go down to Oamaru to make the rim,spokes and assemble the front wheel and also bring back a backbone. This is exactly what i am building, taken off the oamaru ordinary cycle club website1 point
-
Hey guys, I've had this golf for around a year now and have done a lot to it. When I picked it up it wouldn't idle what so ever and just didn't run well generally, timing was so out. Kept cutting out (electrical problems as well) had AA get it going 3 times before I got it home (9 hour drive). That's basically as it's had a 1.6 KJET swapped in over the original 1.1 carby and had a lot of missing parts. Good increase in power but want to do something bigger down the road. Finally lowered it on $300 coilovers from china haha Really like how it sits but is quite bouncy, can't complain for $300 I've had the 4x114 volks for ages but could never run them all around as adapters made them stick out too much, finally found a set of 4x100 on Trademe for $80 (selling as trailer wheels) which are perfect for the front then 15mm adapters on the back. I highly recommend deathmat with ccf as I had to but earmuffs for the drive home, it use to be so fuckin loud with all original insulation stuff removed by the last owner.1 point
-
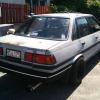
Hi all, I wanted to share a project that i have been working on for the past few weeks after coming to the last Auckland old school meet i was convinced i needed a second car to exercise my mechanical ideas on. It started as a 1987 Toyota Corona which was listed on Trademe, With its 2.0L Fuel injected engine and Front wheel/Automatic characteristics i figured i could get it cheap and make it an awesome weekend hack. After test driving it, and finding out that the thing drove great (No spluttering, jerking or grinding) i picked it up for $600, It needed some minor rust repair and a new battery. When i got it back to the garage i changed the plugs, oil, oil filter, checked the filter and picked up a second hand battery, After that it ran great! Some JB Weld and some spare aluminium i had covered up the rust nice, at the same time i got the windsheild replaced. We went to pick-a-part mangere and found some seats out of a volvo, we ripped all the carpet out, took out the rear seats/belts and mounted the new seats. I nabbed some cheap steelies which has been widened and got them redrilled by the good blokes at Arrow Wheels, I'm going to have to get some adaptors to fit on the fronts to clear the brakes, but the backs look great. Also we rolled the guards with a baseball bat, turned out pretty good. I'm going to be doing plenty more work on it, so i will keep this updated. And for the record, i know this may not come under 'old school' age, but i reckon it holds a lot of the old school spirit and the front still has that older toyota look, And this thing was built/assembled in Thames! Right in our backyard and that has to count for something. Shout out to: Mk2Marty and Benzover for the many many days of help Some more photodumping1 point
-
Craned on? Why not just back a truck up the drive and hiab it on?1 point
-
Sweet, cheers for advice. Will check that stuff and maybe some of the other possibly dodgy things. Nah, pretty much had baby 9 Months ago..... lol. I've fixed many of the problems I found last year at Hampton Downs though, so that's a bonus. I reckon set the rear slightly higher than the front and quite firm with decent spring rates, and set the front lower and softer in a front wheel drive. I've even taken out my front sway bar to try and soften the front and keep the inside wheel on the ground. Will be interesting to see if it helps.1 point
-
I even washed the fecal laced mud out of it, hardly even smells likes poo's inside.1 point
-
Bought a radiator fan setup off TM for a great price. The fans are off an AU. Then did a search for radiator fan controller and found this link http://www.autospeed.com/cms/article.html?&A=112617 And then bought the same unit off Trademe for $40 delivered. Compared to the alternatives this unit just cannot be beaten on features or price. Additionally, unlike most aftermarket electronics, this controller is made to very nicely mount into a flat panel (of any thickness) should you want to watch it.1 point
-
It went up for sale from me but then I took it off the market for you. Anyway. Karl has now owned two of my old Datsuns. Hah!1 point
-
Technically it never really went up for sale both times, one of those prearranged kinda deals haha. Anyway, best old car I ever owner, worst decision I ever made selling it but I'm stoked it will be looked after, had a million of fun in this old thing, put over 20,000km on it and it never once put a foot wrong.1 point
-
might just find the motivation to put the jalopy back together to take it for a hoon for this... but only if its not raining, the poor old thing doesnt like wet stuff1 point
-
Pretty sure all the shore dwellers meet at backyard bar at 630 to cruise over.1 point
-
Being back home is shit. Need me more travelling.1 point
-
Good stuff Mr Raines1 point
-
Man I was meant to try to get a wof today but did laundry and drank beers instead.1 point
-
caliper brackets- you can weld them but has to be tig and crack tested. its better to make them from 1 piece if you can. especially if the tig is going to struggle to get enough penetration a different design may be a better idea most welding on a vehicle can be done by anybody who can weld competently, and can be mig welded Some things are considered "critical" components ie brake caliper brackets, suspension arms, etc and have to be TIG welded and crack tested. you can do a chassis notch. best to talk to the certifier you plan on using about what their requirements would be1 point
-
got me an accuair kit with elevel for the 64. havent put in yet but stoked with the quality of the gear shes good stuff. Cool vid about accuair and how it started etc.1 point
-
Fuel pumps in these are ultra shit. Quite easy to replace and cheap to buy. Had to do my brothers p10 recently. Fuckin nissans eh1 point
-
pic from today,1 point
-
I tested my cyclone separator filter out with a vacum and handfulls of crap. It seems to remove everything apart from the fine dust. I have a 80 leater tank I was going ti make somekind of oil barth with a fiberglass filte. If I could get one of those oilbarth cyclone filters of some old earth moving mechaine would be good. Grit and moisture is the main problem with wood gas. An old guy was saying how on an old flathead 6 he ran no filter but had to remove the head and wirebrush everything often1 point
-
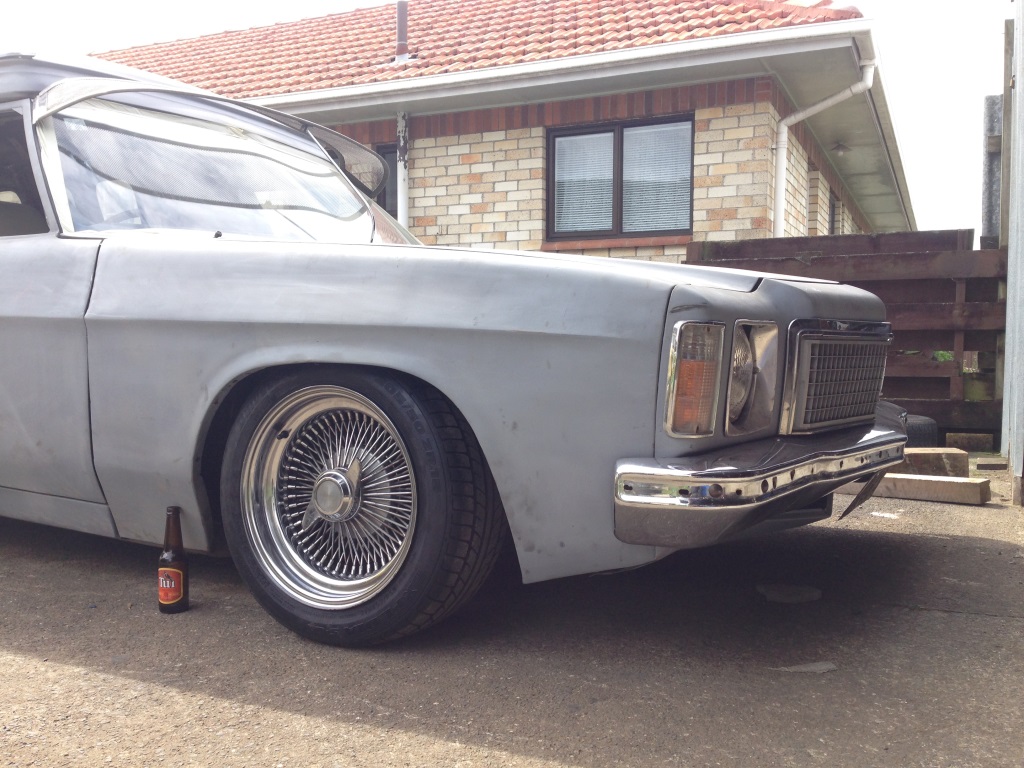
So with the custom springs I got off a guy on Facebook put in, it sat firmly on the bump stops in the front. so I removed them, and chucked the 100 spokes on. Stupid low. (its on 205/50r15s) I cant even fit my superlow jack under it ( 80mm) So probably gonna pull them out and give them back , and get some not so slammed ones (aim for around 100mm) and Ive lost one of the 2in blocks that came in the ute and the ubolts that I thought were gonna be able to be used are bent. so they're all junk. so probs new 2in blocks next payday and play with the leaves and get it to sit nice with the fronts. Should hopefully be back to the panelbeaters in the next couple of weeks to get rust in wiper channels finished, screen put back in and roof hole filled it. Its sat in the shed for a month, so Im really over it
1 point
-
cookie cookie cookie??1 point
-
Lewlz. Thanks for saving me again J5.1 point
-
Small update, have acquired a few more parts like some nice Dyna coils. Cylinders have been bored and are ready to go, will probably sort the engine in a couple weeks once work quietens down. Have been playing with the frame a bit, cutting some stuff off like the centrestand mounts and sidepanel lugs (haven't got any panels anyway haha) Spent ages thinking how I wanted to do the tail unit, fab one out of steel or fibreglass, buy an off the shelf unit blah blah. Eventually I found a GS550 tail unit which had the shape I wanted, height and length are good, just need to section the middle a bit to thin it down It's not sitting as far back as I want here, just mocking up the lines Bit too wide but pretty close1 point
-
When I was there, they told me they were practicing for their WOF assessment, and I heard one of them say "We better check all the stuff we don't normally check", lols.1 point
-
^one of their mechanics got DIC'd whilst road testing a customers car. Thats how you know they are good.1 point
-
1 point
-
had a look at a commode today, that "was a v6 originally and its had a v8 swapped into it" hmm. can see where the ss badges were on the boot and doors those rivets on the chassis tags dont look original, and theres little scratches on the one that lives under the windscreen its a 2002 and its only done 12,000km the details and stuff on the front page of the owners manual has been ripped out oh, and someones attacked the engine number with a chisel and if you can get the cops to say thats all ok, then it needs driveshaft loops, lol1 point
-
Oh got a new grille and fancy badge for the front1 point
-
Back to the Future or nout.1 point
-
I fucken love a good notchback!1 point
-
time to try get this back on the road. and maybe the track. sump has taken a few hits, so made up a sump guard. its fairly light weight so may get bent up, but will at least take some direct punishment away from the sump. doubles as a brace. well that's what i'm telling myself. so can deal with adding weight. hopefully wof man is kind, after all the holes i cut in the floor.1 point
-
Um different for each shot. Between 2 seconds for quick things like the final torquing of bolts and 10 seconds longer like piston assembly. Wasn't quite this detailed:1 point
-
I also took the car back to the town it was first registered in: Tokanui is miles away from anywhere, btw.1 point
-
So, I ended up Painting the sides of the roof and I also painted a spare correct model visor I had laying about. Looks heaps better now I reckon. Cheers to camel for popping around helping me fit up the visor, bit of a two man job as you have to stretch that sucker on. Been driving it heaps, nearly sorted all the bugs out of it. Needs a carb kit next, not looking too flash. Also need to put taller gears in it, its no good for cruising at 100. Luckily I still have the 3.5:1 diff from my XP sedan project, so will swap the gears over at some stage.1 point
-
I'm waiting for a flipped head/engine/upside down gearbox also Brad.1 point


.thumb.jpeg.384ff72c8d2b0ee0d34a7bdedb55bdcf.jpeg)


This leaderboard is set to Auckland/GMT+12:00