
Leaderboard


Popular Content
Showing content with the highest reputation on 03/17/24 in all areas
-
Well after the last novel length wall of text I'll try to keep this update shorter otherwise I'll never finish the thing. Lots of little jobs starting to pop up on my 'to do' list. Driveshafts. Connecting the scooby shafts to the imp axles. A job I wasn't sure which direction I'd take as there's so many different ideas out there on the nerdnet showing 'the best' way to join shafts. First thing I did was to double check the suspension travel allowed by the stock shock absorbers and then use those datum points to work out if there was any growth in the length of shaft required as the wheel moves through it path up and down. There was minimal amount, like maybe 5mm at the very most. I guessed as much because the stock Imp driveshaft doughnuts dont allow for much sideways travel. I then cut one of my 22mm scooby shafts down in length so I could work out the lengths required with the CV joint in place. This move I soon regretted. I was allowing for plenty of plunge into the CV joints to make sure the whole joint could be removed from the box stub axle with the box pushed sideways when removing the transmission. I was happy with the length and then decided to go visit a local hotrod builder friend for some advise. He's well known about for his many many full scratch builds and has done heaps of driveshafts in his time (a fellow machinist by trade too) I showed him the two ways I was considering doing the join. He showed me a better way. Shrink some bored out yokes cut off from some spare axles. Plenty of meat, will never let go and even if they somehow did loosen and spin they cant come out because there's not enough travel in the CV joint to allow them to. No welding needed. He's run axles done in the same way with some serious big block power and they never let go. Just has to be accurate and luckily its the sort of machining/fitting job I like. But i needed to start with almost full length scooby shafts to do it, of which I was now down on.. Roll eyes and back to the wreckers to see this beauty get pulled from the hedge... Hannah helped me remove the shafts. It was her birthday too so wow, what a treat. She got visit the wreckers and get oily. Got home and the shafts didn't fit my CVs. Bigger diameter end. Really weird because I checked online... ha. It lies. Turns out some late 4wd Leones had even bigger axle ends than the imprezzas. Also odd is that one shaft is 22mm and the other side 24mm, although both the same length. Back to the wreckers. This time I got larger 25mm shafts with the smaller ends from front wheel drive Imprezzas. I grabbed two pairs. Same again, 22mm on one side and 25 on the other. Now I had two of each. Got home and spent some time cleaning them up, outside because petrol fumes. Cleaned up the spare pair of axles in the lathe to make sure I had an accurate clamping spot for the later boring. Good quality steel! I turned them down to less than the 23mm bore size and chopped the yokes off. Made lots of swarf Bored out to bang on 23mm with nice radius. Double checked and triple checked I had my lengths required correct. Chopped the two 25mm scooby shafts down to length and turned a step down on one end of each, a radiused step to stop any stress risers. I went for .0015"~.002" interference. Go online and see the debates between all the barries about what a good shrink fit should be There's many variables as well. I consulted my old faithful machinery's handbook. I wanted it tight, but not stressed. Luckily the axle is of good steel. I also made a sample first, using one of the cut off bits of scooby shaft and some 4340 I machined to the same outer dimensions as the yoke. This way I was able to test how hot I needed to get it to expand enough to drop in place. I'll take this to a local engineers who have a press with a pressure gauge and see how much force it takes to wreck this thing Here's about a one hundredth of a millimetre (iirc) getting removed.. Then things got hot.. photos taken after it was done because I had to move bloody quick! Hannah would grab the torch and I would drop the yoke in place. It was a tense bit of time. If the yokes teetered and grab they'd pull the heat so quick and shrink in place before getting to the shoulder. No removing them without damage and I only had the one pair of spare axles. It went well. I was happy and relieved. The light rust flashing off on one is simply due to that one having been left nearer the front of the workshop to cool down and it was a chilly damp start to the morning. They wired brushed up neat as, got painted with black epoxy and when that was set they had new universal joints fitted. I cant try them on the car until I remove the existing axles from the hubs but it should be fine. Next up was to sort the fuel tank out to suit fuel injection. I brought the blue imp in and checked a few ideas out on what I could do. I don't really have room for a surge tank and I never liked the noise on my Viva from the external fuel pump anyway. Nor did I like the way the fuel in the surge tank heats up. Enter the humble Nissan Micra k11 intank fuel pump and surge container... It actually looked like it was just going to fit into the pressed depression at the bottom of the imp fuel tank.. With enough room to run the imp fuel float sender next to it. Cut a hole.. It fits. I'll cut the bracket off the side at bottom of pic and it'll move sideways a bit more.. Made some metal brackets Welded them in and now I have a cradle that takes two cable ties across the top to secure. I needed a flange.... Made this. Its designed to recess the lid about 10mm below the tank top. I want to keep the tank top as flat as possible. It'll have the usual layer of foam over top but I don't want things sticking up proud when the 'frunk' is being used (cant be tearing those bags of concrete now eh....) Many holes drilled and tapped.. Carefully welded in place. Was a tricky job. Thin steel on the tank that had some sort of (probably poisonous) coating. But happy with result. I made another hole... That takes the sender. Drilled and tapped more holes to suit. Now I needed to get fuel from the outside in and from the inside out. I machined up these in stainless.. Thought of a neat way to hold the little bits together for tacking. Blue tack. Or blue tack tack? welded up.. I made an angled recess into the hatch cover so the fuel hose goes even further below the tank line. Visible in that photo are the cable connections. Again - I needed to get power in. I machined some shouldered fittings in plastic.. Luckily the micra pump so handily just uses a simple connector with 6.3 spade terminals. Under the lid... Tank hard work done. I'll paint bits and cut some gaskets. Speaking of gaskets. One of mine between my oil filter pedestal and the block is weeping oil. Plus one of the bolt heads weeps. Typical. Put a Japanese engine in a British car and turn your back for a minute... I've already drained the oil cleaned it up and ran a smear of paintable sikaflex along it and around the bolt head. I didn't take photos because not really exciting. I'll paint it silver and no one will know. Except you the reader. Next up is the exhaust I think.10 points
-
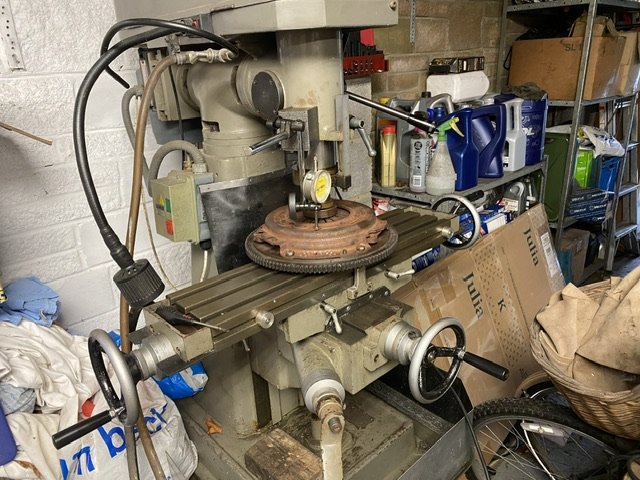
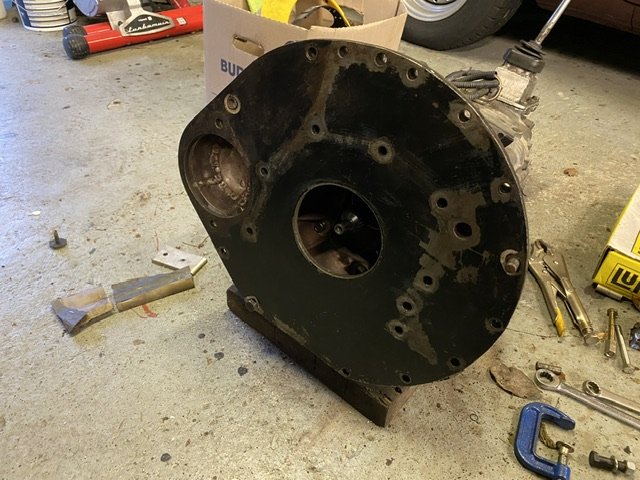
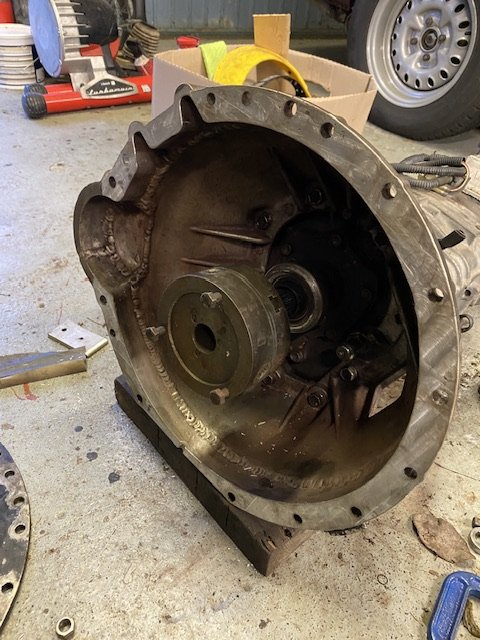
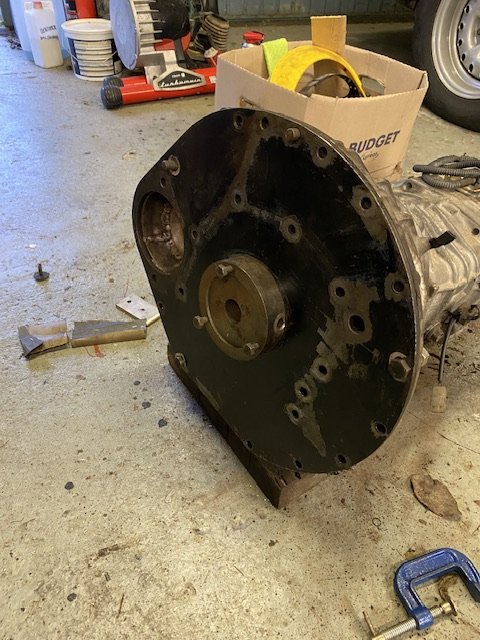
Update on this. Checked crank endfloat. 0.2mm. My build notes say it was 0.17mm when first assembled 28k miles ago. So that’s good. Did some testing using the mill That’s the combo that’s just come out. The friction plate is only about 1/2 worn at 7.35mm. It starts to release about 6.5mm but needs 8 to fully release as the spring has gone lopsided. That, with sticky splines will be the wide biting point I think. The same friction disc with my new Sachs cover starts to release at 3.5mm and is fully free at 4mm. I gathered up the wreckage and took it to my localish clutch shop. He was very polite, but I think he was telling me his competitors friction plate spline was made of cheese. No doubt on his thoughts on the QH cover…. Bin food (that was before I fitted it!). They made me a replacement friction plate in an hour…. And it was half the price of the last one. Top service! The new friction plate is 8mm thick and with the Sachs cover needs 5.5mm to start to release and is fully free by 6mm. Meanwhile, I put my hybrid bell housing on the mill. Engine side face was a little wobbly so I faced it. Took less than 1mm to clean. Fitted the backplate, flywheel and bell to my spare engine. Then posted the gear box in from behind. Spigot picks up in the pilot bearing first then the gearbox/bell dowels engage. Little bit of a wiggle and shove and on it pops. Alignment can’t be too bad. But to check another way…. pop the backplate on the bell and it’s very tempting to think that 4” (3.997” in fact) hole might be intended to be concentric….. but is it? Being both lazy and cheap I spent 10 minutes rummaging through my junk looking for a ready made tool…. Turns out I have this 3 jaw chuck which measures 3.993” and easy to nip onto the spigot. Pops right on, no wiggles needed. I think she’s good. Have also clocked the backplate on the mill. It’s a bit dished (0.5mm), but evenly so. Within 0.2mm. Better than my 2 spares…. Made an alignment tool Running out of excuses not to refit, except I tweaked my back a week ago and the refit is intensely physical…
 8 points
 -
It's been an interesting few weeks. I had a scare in the Alto, and more parts arrived. The weirdness started when I was taking the Alto to work the other week. I jumped in, started it up, and all was normal. I'm cruising along, jamming to some tunes, and hit the usual start stop traffic. I'm just crawling along... And BAM, ALL the dash warning lights suddenly light up and start flashing. They flash a few times and then the majority turn off, leaving only the Check Engine and Stability Control warning lights lit. I'm worried, will the car suddenly die stuck in traffic? Is the car about to asplode? I've never seen all the dash lights flash like that. I quickly jump off the highway at the next exit and crawl the car home. It was running fine, no misfire, no smoke, no leaks, nothing. Just the lights. I made it home fine, swapped cars and left it to think about what it had done. After work, I plugged in the tablet and fired up SZ Viewer to scan the codes. Ah yes, I think I have a couple of codes. None were current, but nearly all modules at at least one code. Reading into the codes, they all centered around one thing, the loss of CAN communication with the ABS unit. I checked all the modules and they were all the related codes, so I saved screenshots of the codes for later and cleared all the codes in the modules. Nothing came back. I've driven a few hundred KM since, and haven't had any issues, so hopefully it was a once-off and not an intermittent CANBUS issue. I did have a quick look at the ABS module and it looked normal, so I gave the plug a wiggle and left it While in the engine bay, I forgot that I hadn't shown my awesome duct tape duct. For whatever reason, either the intake rubber intake or the fibreglass duct are too short and they don't really meet up, leaving a large gap between and around the two. I made the duct tape duct before trackday to try and encourage more air into the airbox rather than slip out around the smaller rubber intake. Its fully enclosed and seals the two parts together. It withstood the trackday heat and is still there. I might look for a proper solution one day, or maybe not. The other day I finally had some bits arrive that I have been trying to get for months. Before Christmas, when I first got the car, I tried to order these bits through the local dealer. They asked Suzuki NZ, who asked Japan, and were advised they could be ordered, so we placed the order. Japan then proceeded to ignore the order and not process it. After a couple of months of chasing it, I cancelled the order. I enquired with Amayama, who I have been getting the majority of my genuine Suzuki parts through, and sure enough, they could supply and at a lower cost. Finally, those parts arrived. What are they? Well, the main one was the massive polystyrene insert that sits in the boot and gives me a proper boot floor. Without it, the floor of the boot is much deeper but tapers and makes it kinda useless for carrying anything in. The insert just slips into place All the shaped spaces in it are meant for things like the jack, tyre iron and flat tyre goo kit. I have none of these, so all it is used for is my tow hook I would like to find a water bottle for the intercooler spray that fits into one of the spaces too... Having the block in place means I could reinstall the coreflute "floor" and carpet. These are retained with two special clips with little pull tabs on them, so you can access the tools under the floor It's a kinda dumb thing to be excited about, but I can finally use my boot. The other thing to arrive was the LH and RH front A-pillar trims. The LH side had a big crack in it, and the RH side had a bunch of holes from when the Japanese owner had a gauge pod fitted there. To remove these trims, all you do is pull down the door seal And pull the trim free, starting at the top. It's hooked into the dash at the bottom, but easy to pull free. Refitting is the reverse, hook it in at the bottom and then push the clips into place. Refit the seal, and you're done. I've got a couple of other small things on the way and then that should be most things sorted. It's crazy how well priced genuine parts are for these wee things. I'm paying the sort of prices I would normally pay for secondhand junk on Facebook, for brand new parts from Japan. Future thoughts are an oil cooler for the engine, an SWK intercooler and water sprayer, and maybe some half-down lowering springs. All in good time, and depending on cost.7 points
-
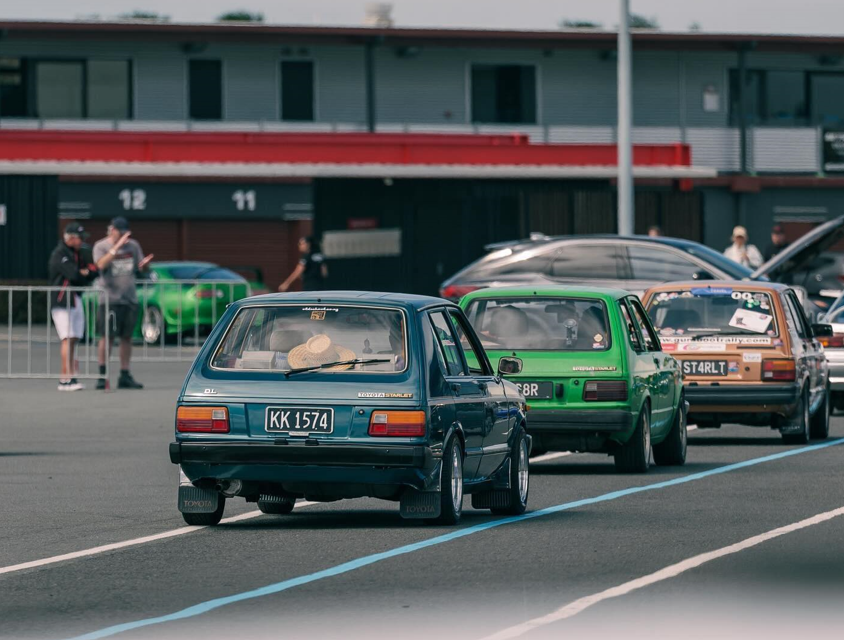
Just took this for its maiden voyage. Zero travel in the front . 50 percent of a exhaust. So bumpy and so rowdy. Love it . Still a shit load to do but darn it's a good feeling
7 points
-
Also, goals6 points
-
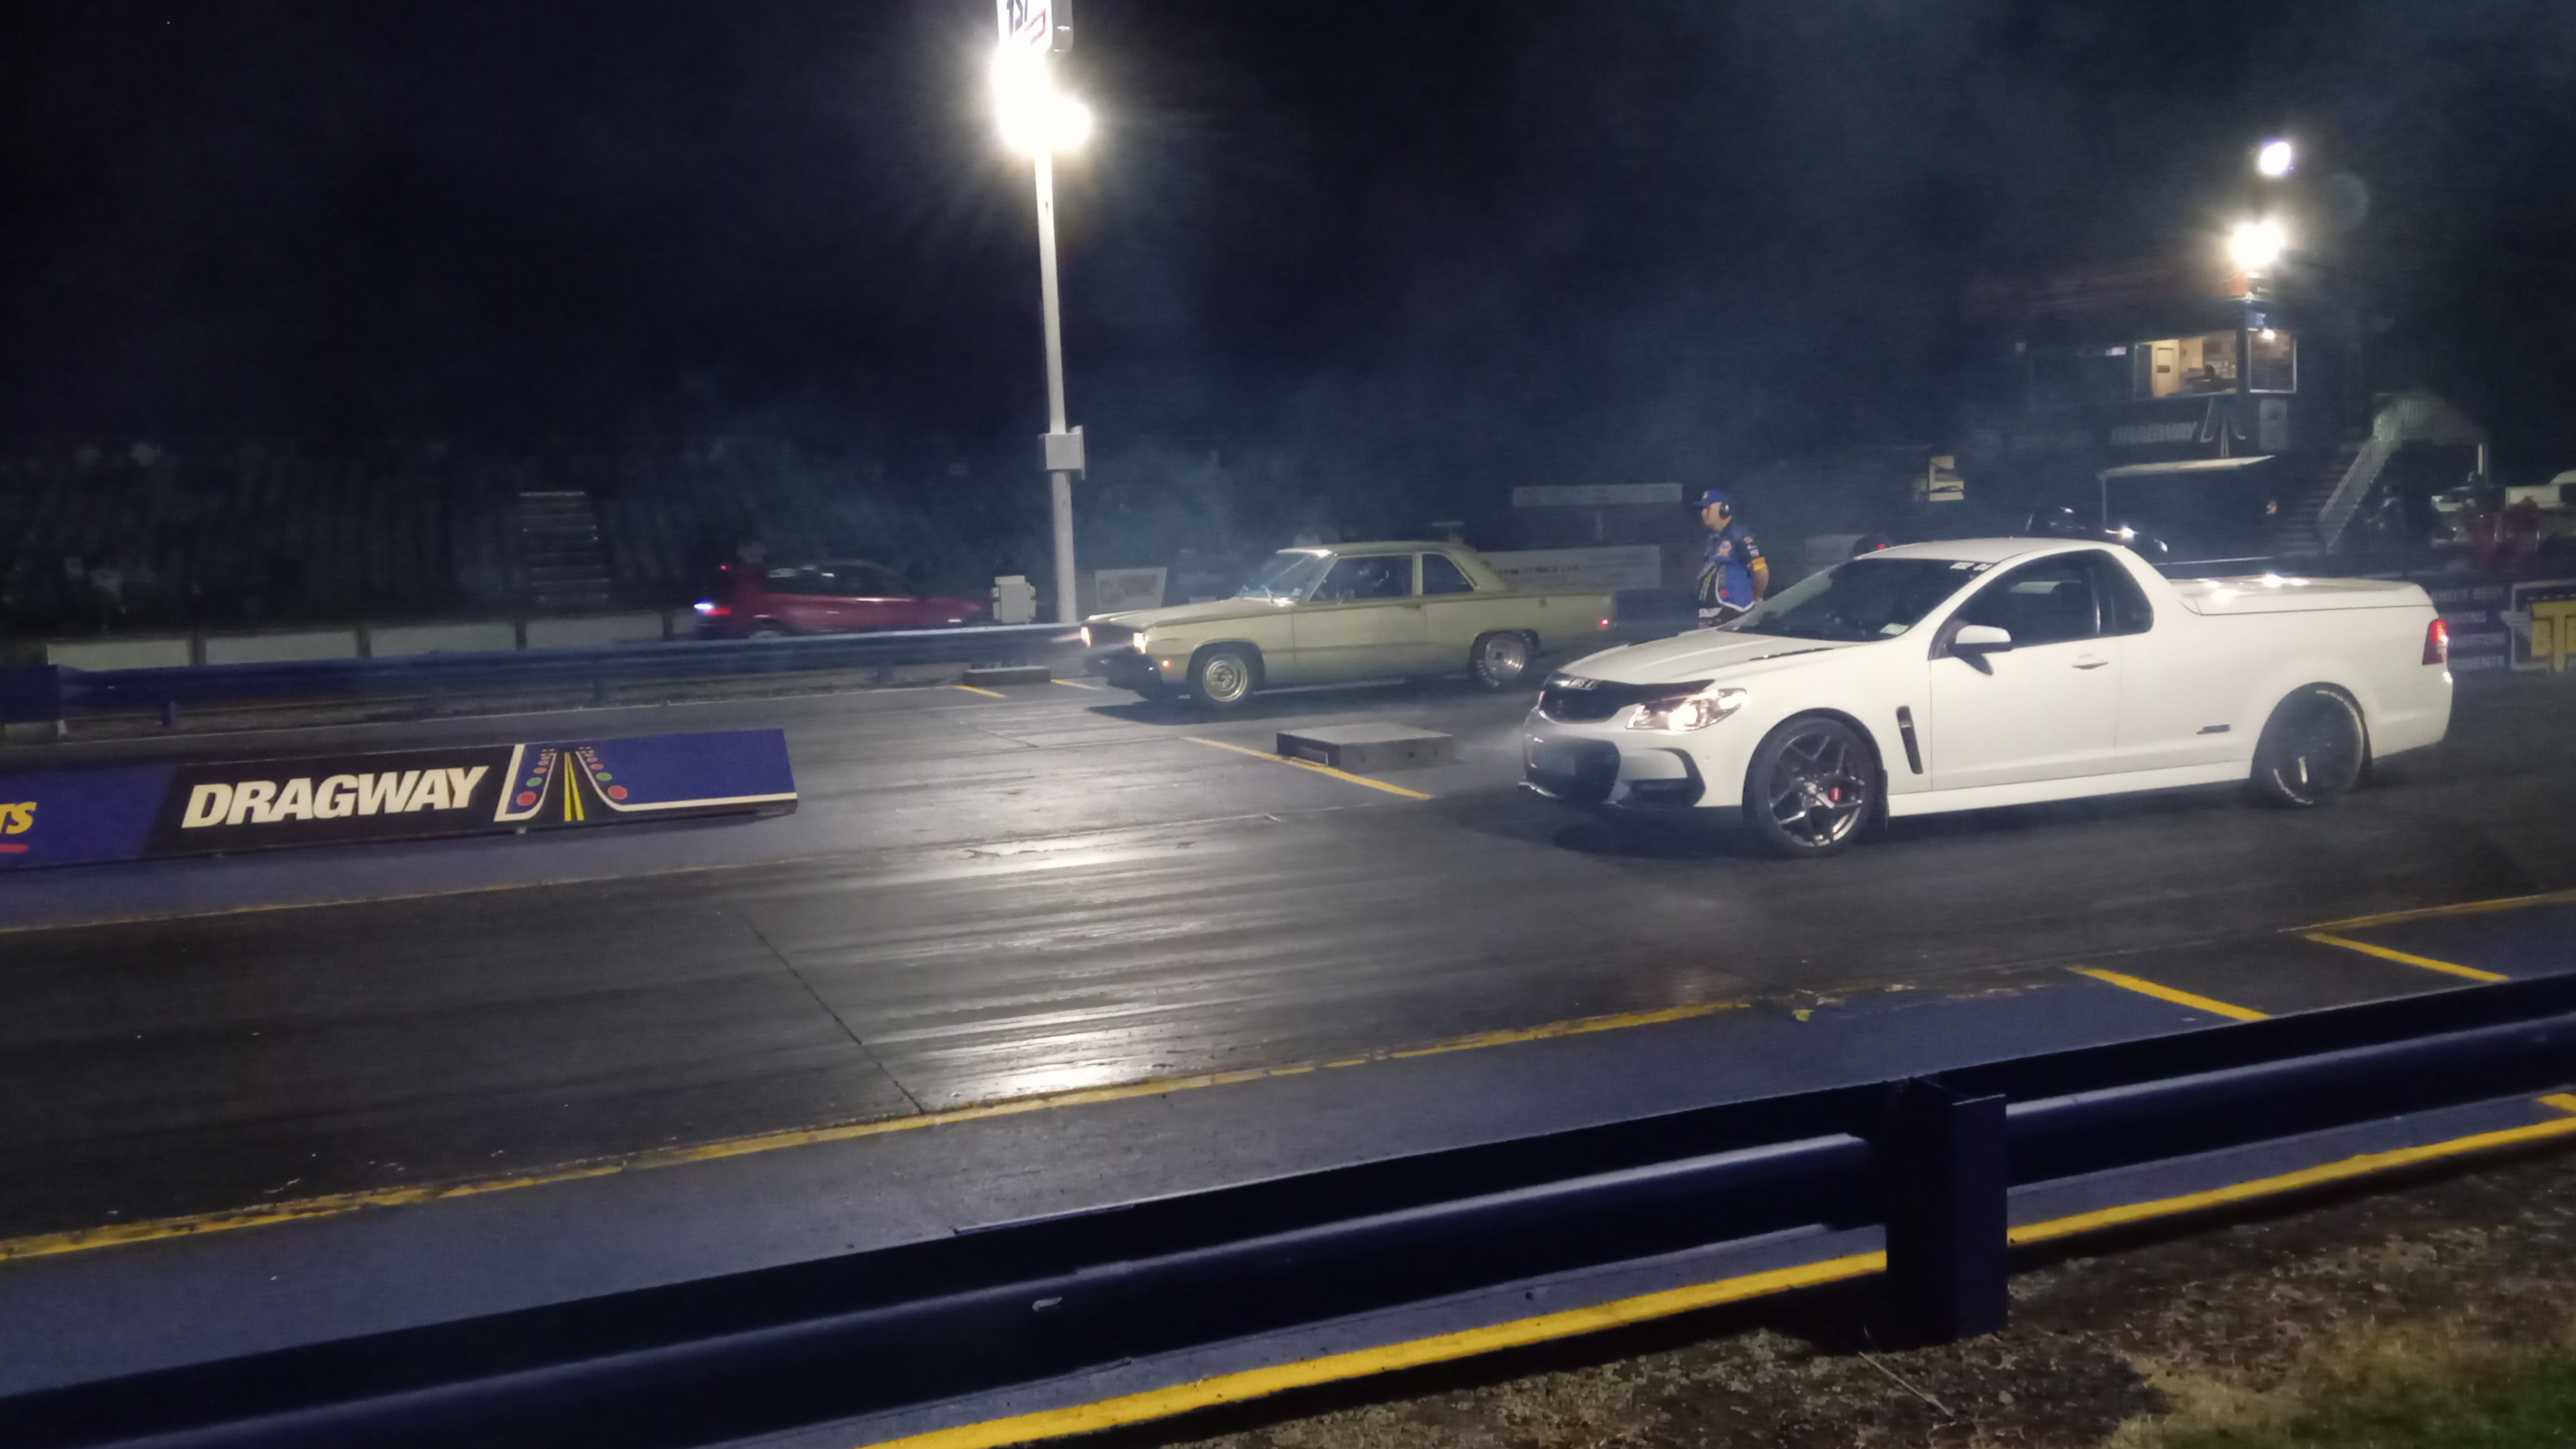
New springs made it more consistent,although slightly slower. Different wheels and muffler off when it did the 11.35 previously 11.5@118 every pass I have turned the 2 step rev limit down slightly as it was having trouble holding on the brake which I can probably fiddle with to improve I'd like to get it down to 11.0 so it's more competitive at the night drags https://m.youtube.com/watch?v=kdfGgT2pKHw&pp=ygUMVW5kZXJjYXJ2aWV3
5 points
-
Some bits from the UK arrived surprisingly quickly, a sump and tappet cover gasket, a boot for the gearshift, suspension bushes etc; I made a battery bracket to suit the most likely battery I found in my stash of many; All those untidy wires are not part of the car you will be pleased to know. I also printed some things; Cos that link for the lock on the passenger side has gone walkies somewhere. And over the last couple of weeks I have been designing and iterating a set of heater controls that I think actually should work. Cool beans. Also I wired up the clock. It works all nice. The clutch couldnt get uprated cos they couldn't find the parts to do it and additionally the man said it looked like that cover springs had been over extended, this might mean it was slipping due to wrong adjustment, so I will order a new standard clutch and see what happens. Also I found another X1/9, and have spoken to the owner, so there might be a very small Nelson X1/9 owners club.4 points
-
Plodding continues on the Armoured Recovery vehicle. No modelling time and I'm not feeling it like the HST but will hopefully get painting tomorrow & it'll all be better. Fancy doing the wheels for me, @Indiana_Jones ? /shit pics4 points
-
I had a similar problem with my volvo. It had a ECU controlled alternator, and it had been replaced with a slightly different alternator at some point prior to my ownership. Apparently it would overcharge and the car would shut off the alternator. So every now and then, the car would light up like a Christmas tree and be bricked, with the wipers running on full hah. (My only car ive ever used AA+ on, twice!) All modules would throw a code, and it was to do with canbus connection being dropped. The guy i sold the car to found this out (i sold it bricked as i had no idea what was causing it). Fitted the correct alternator and it was all hunkey dory.4 points
-
Re dash lights, check your alternator and battery. Often when there are codes everywhere it causes by low voltage. A lot of modern cars will turn off the alternator when idling until there is enough electrical load.4 points
-
Thought I had crossover pipe all sorted so did wee trial fit today found it ends up straight into sway bar mount. Fuck it re do it all. Turned out nice had a good few hours asphyxiating my self with argon loved every minute. Engine is now sitting at the perfect angle I can see it in garage from dinner table.
3 points
-
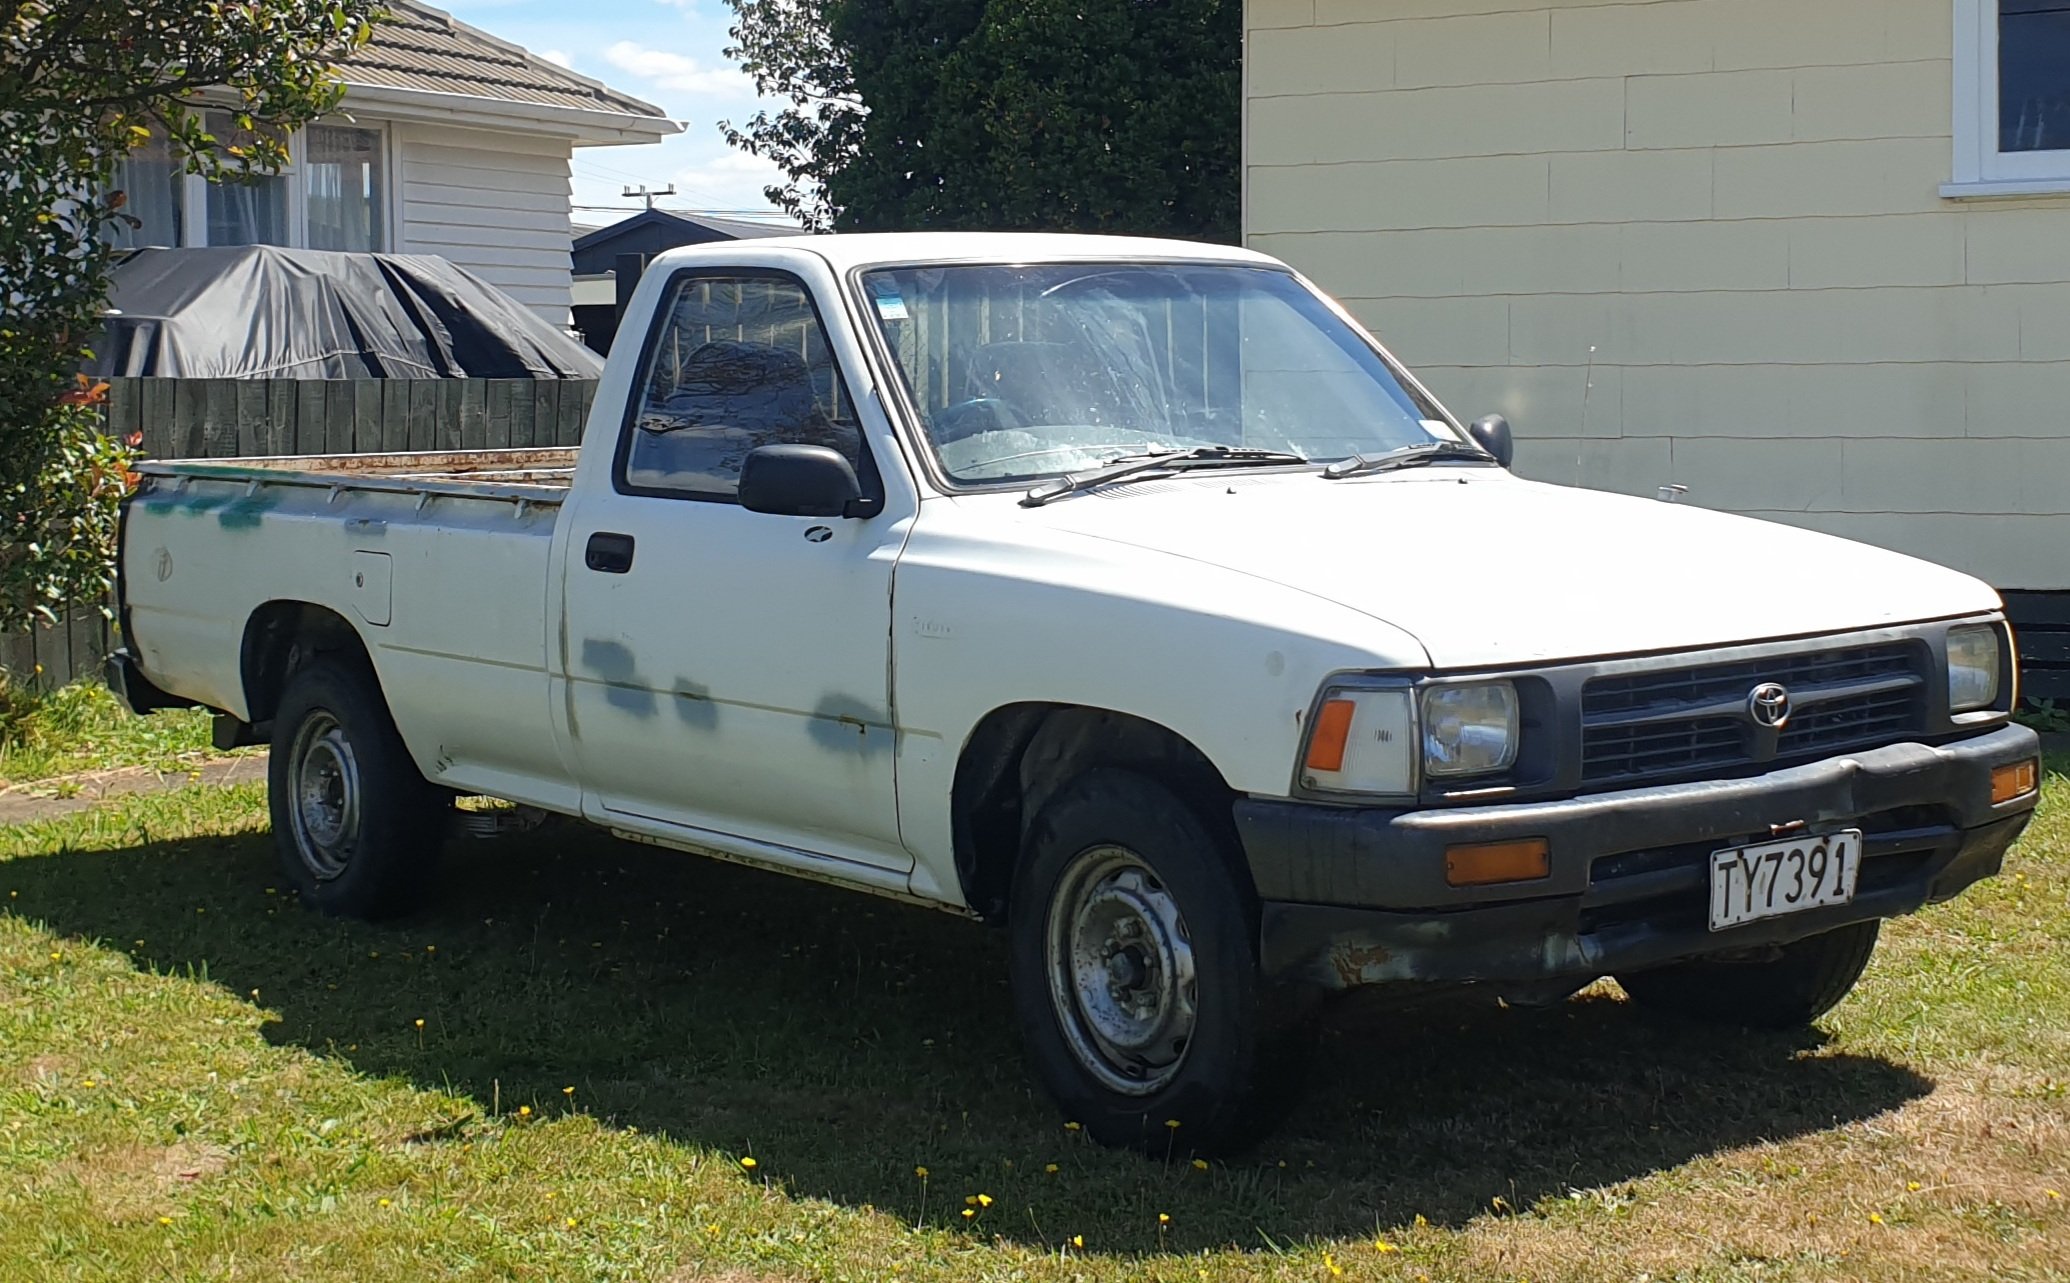
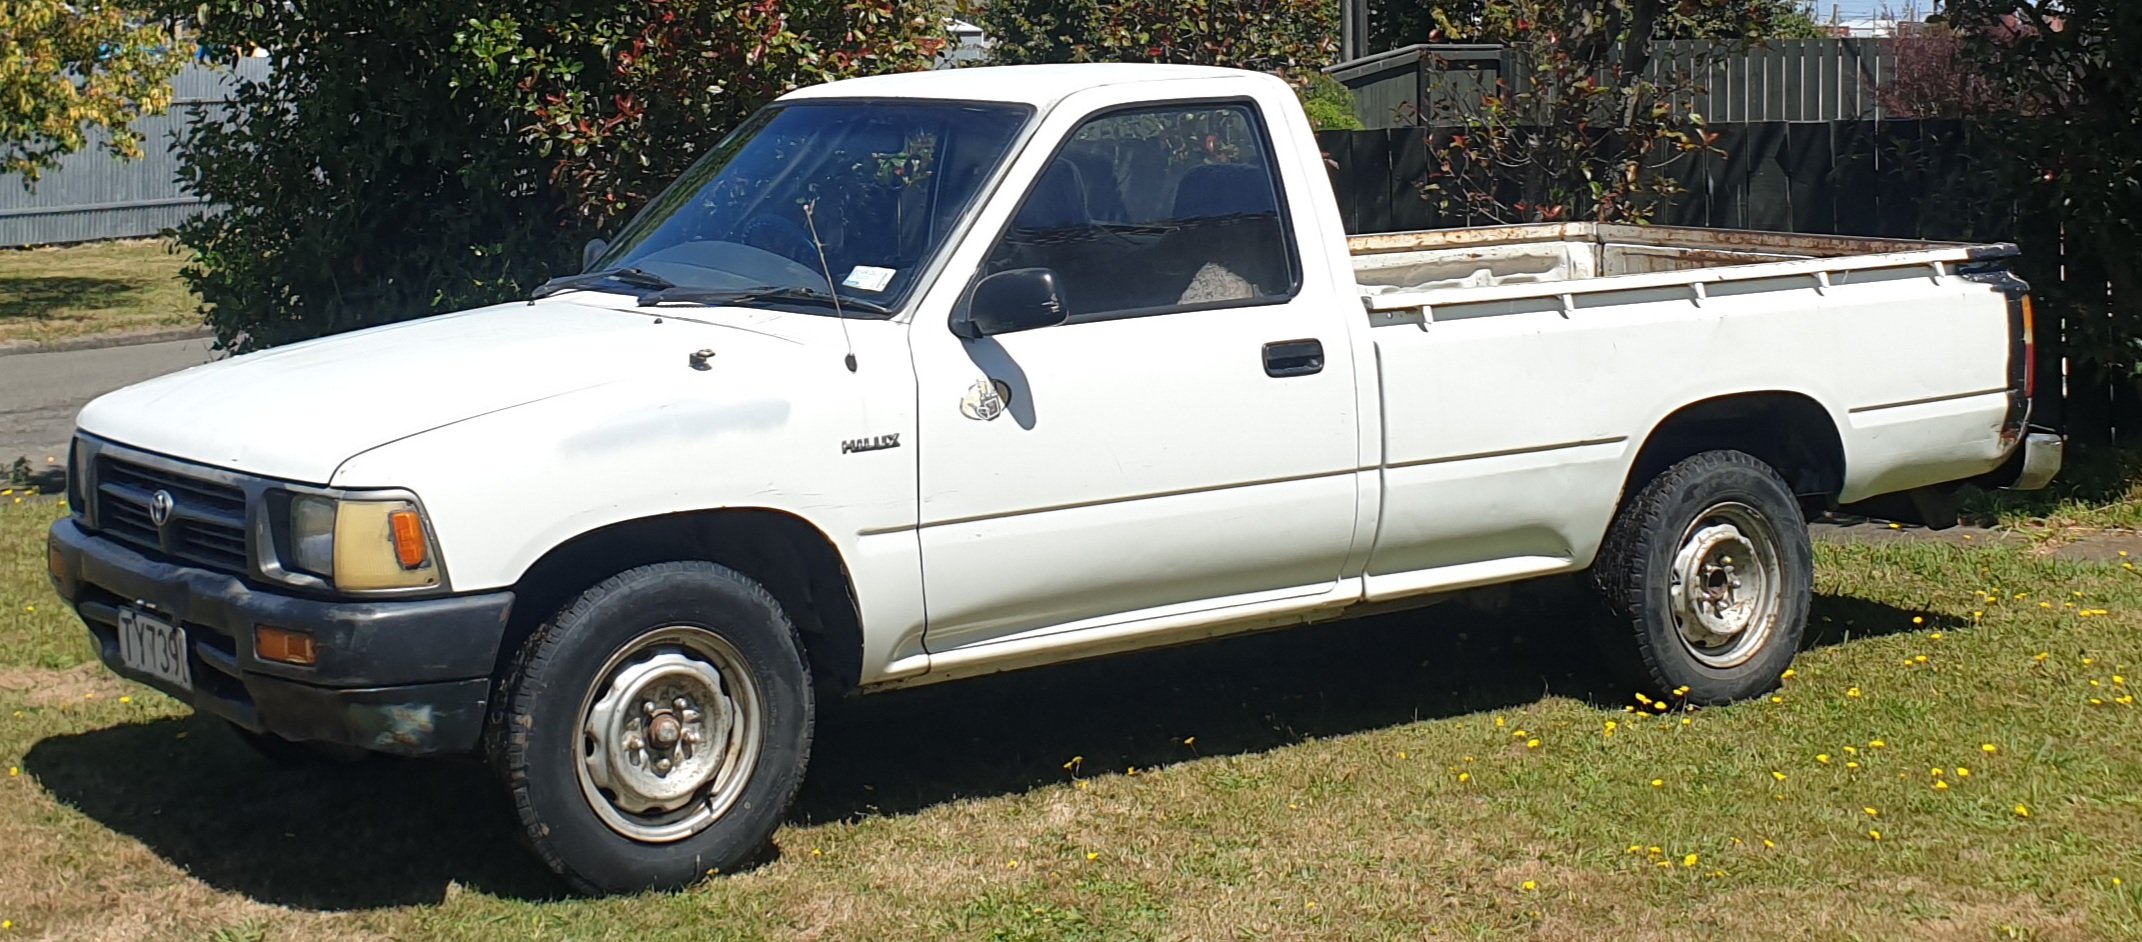
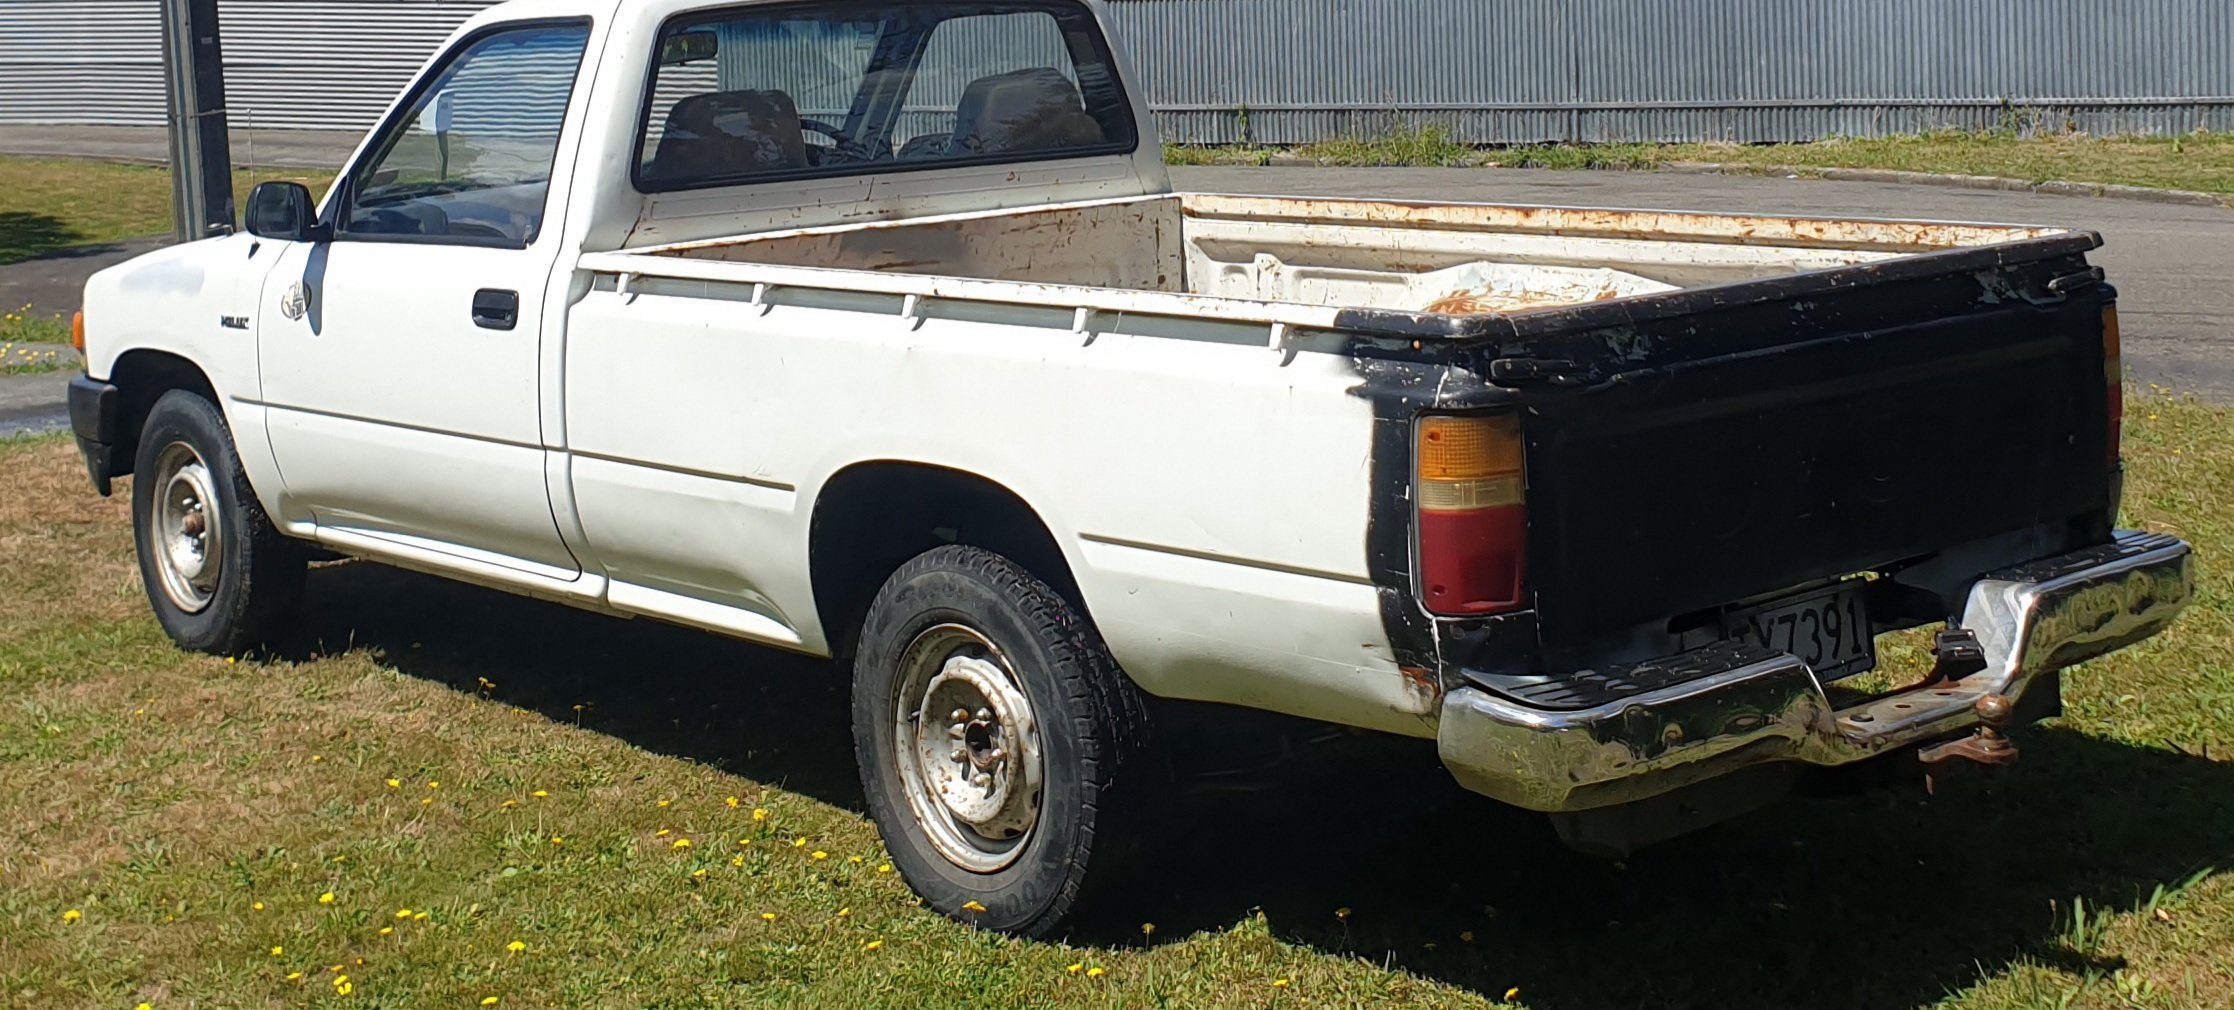
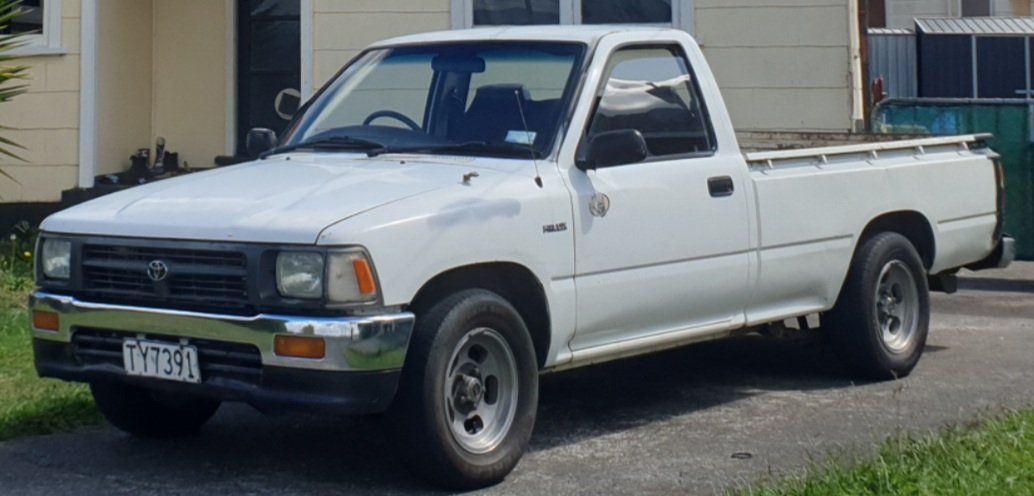
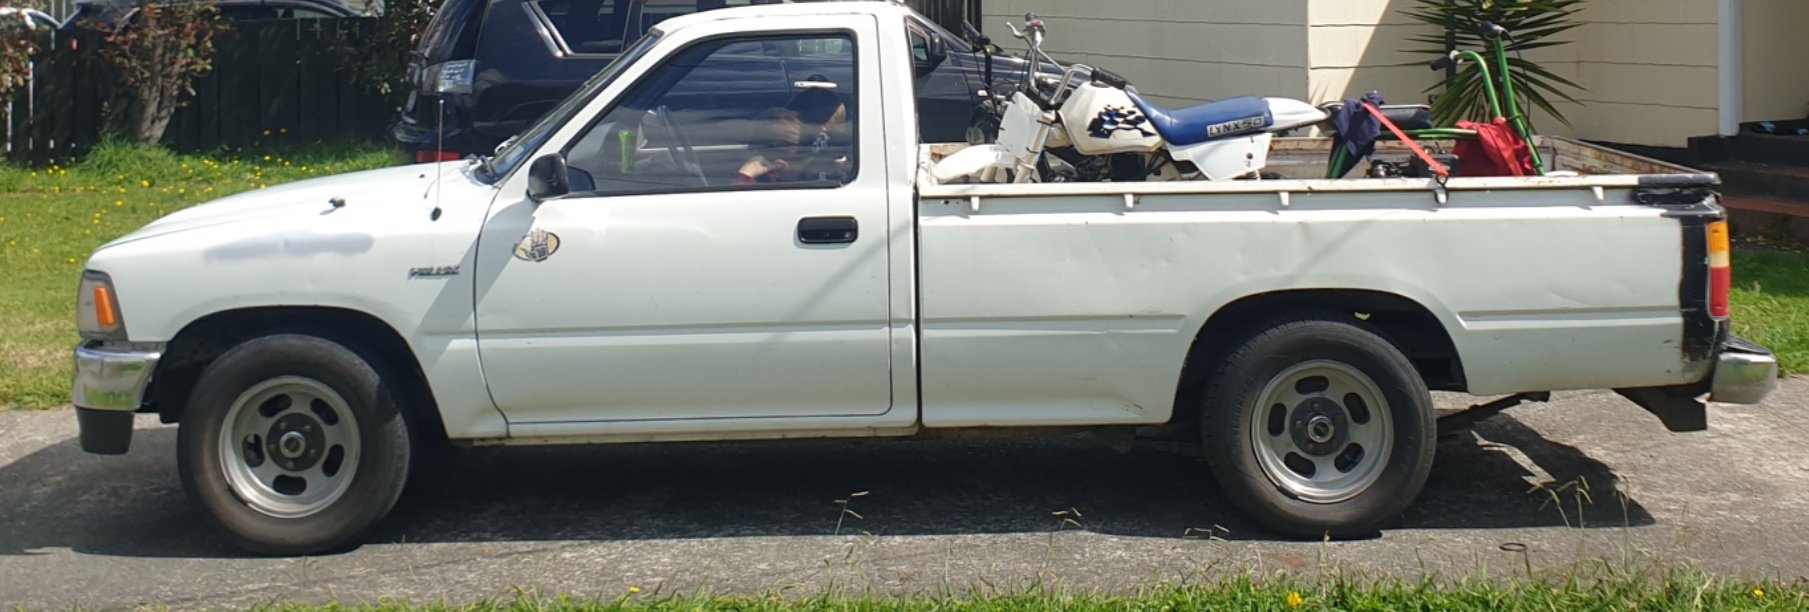
Oh k so wifes getting sick of me using the wagon amd stinking it out with gas so heres a new kinda project a 90s hilux ln85 4speed 1800 runs great. Alredy done New front bumper New indercator New seat cover Some door cards who removes them anyway haha 2inch blocks in rear lowerd bars front didnt want it stupid low is ment to b a hauler. Some og jellybeans. Plans r prety simple make it less crapy haha and haul my bikes
2 points
-
Did some more suspension fettling @Snoozin put it in print via nzpc Now looking to sell and onto the next one in garage! Would like 35k on the tomcats 25k on CHEVIOT TURBOS
2 points
-
How about nooooo. /looks like you're doing a smashing job, don't need a scrub like me getting in the way.2 points
-
A local clutch guru once streesed to me that getting all the fulcrums/strokes/throws set up correctly is beyond critical when setting up hybrid/mish-mash installs...2 points
-
I guess no benefit for them to do so since they can't do the work and get the upsell. Compared the normal garage where you get a list and say getterdone.2 points
-
I wasn't expecting to buy another bike this week, but you know how it goes. An old man came into work and asked "How's your mates gyro going" referring to @Raizer sick rig, so obviously I'd mentioned it to him in the past. He then says he's going to sell his, so I had to go look at it. I then proceeded to fall in love. It's so hilarious. The dude I got it off was 76, and the previous owner was also an old man that got it for his import wife to use, but she never did. So it has quite a few old man spec "improvements" which include LED strip lighting riveted to the body with a crap ton of rivets. Paint "touch ups" which means badly applied rattle can paint with lots of over spray. Lots of random holes drilled in the body, every fastener they have applied is a different drive, and an oil line blocked off with a cupboard shelf support pin and copper wire. So she needs a bit of love and attention, but I was surprised to see it had aftermarket rear rims/tyres and an expansion chamber, so she might be making a few extra microwatts. Anyways, the new bike/trike is a 2001 Honda Gyro Canopy Wagon: Note method of light attachment, and modified floor mat, The lean over/hand brake lever has snapped off, so I need a new one of them. I'll also have to try clean up the windscreen, it's a bit messy. Phat tyres, rice pipe, and old man reflective decorations. The OEM lock is gone, has old man spec latch, will sort something better, Douglas racing rims, and sweet dice valve caps. 100% I'm going to redo the white lettering, Powerplant. Needs an air filter and a few mounts made for fuel pump and coil, plus a few hoses need replacing. The pipe is quite neat, I fucken love these rims/tyres TBH, It's totally getting vinyl stuck on the headlights to make JDM angry slantey eyes, The LED lights are coming off because the are horribly fitted and stick out like dogs bollocks, but I will probably refit them underneath and a more discreet manner. They have like a trillion settings too, So yeh, lots to do, but pretty excited to finally have a gyro. Regards, VG.2 points
-
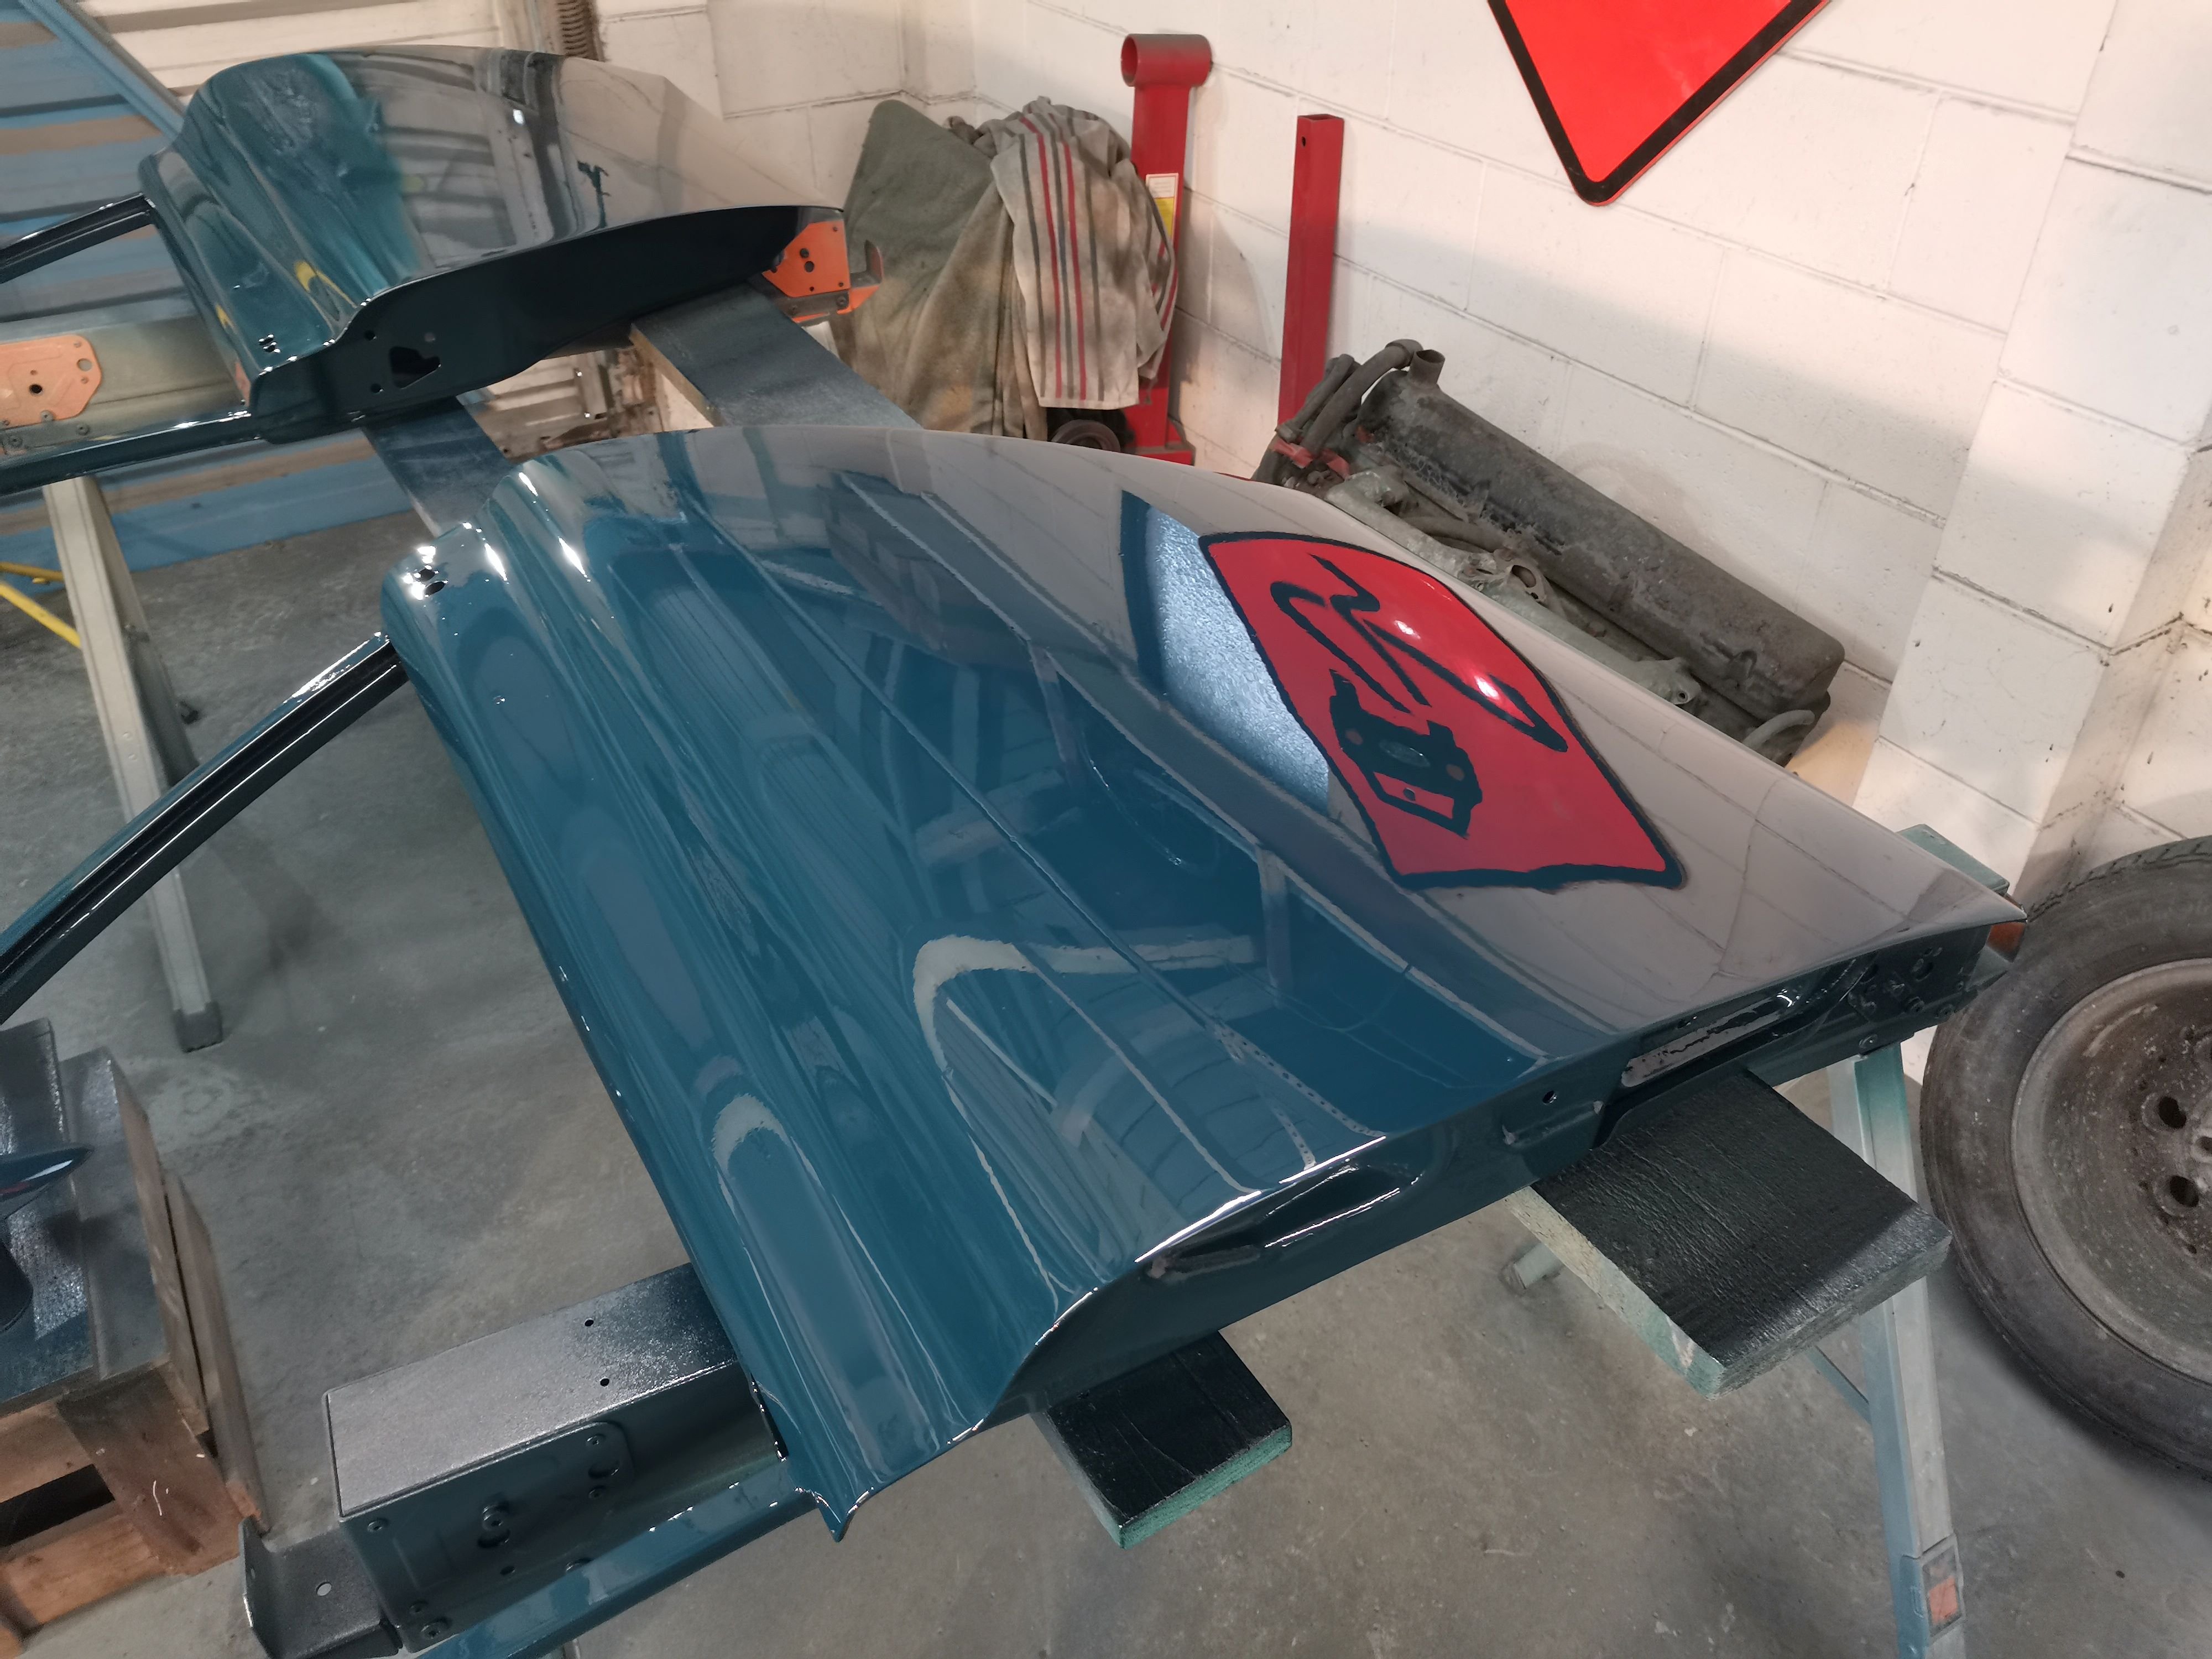
The door with the plasma cutting was pretty wonky, so ended up finding a replacement. Managed to get all of the doors paneled and into paint. A bit of dust and a couple of runs, but I'm definitely getting better with the paint gun. Now working on sandblasting the door hinges and cleaning up the boot lid, before reassembly, wet-dry sanding and a final coat. Stoked to be making some good progress again.
2 points
-
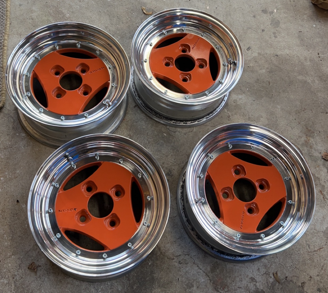
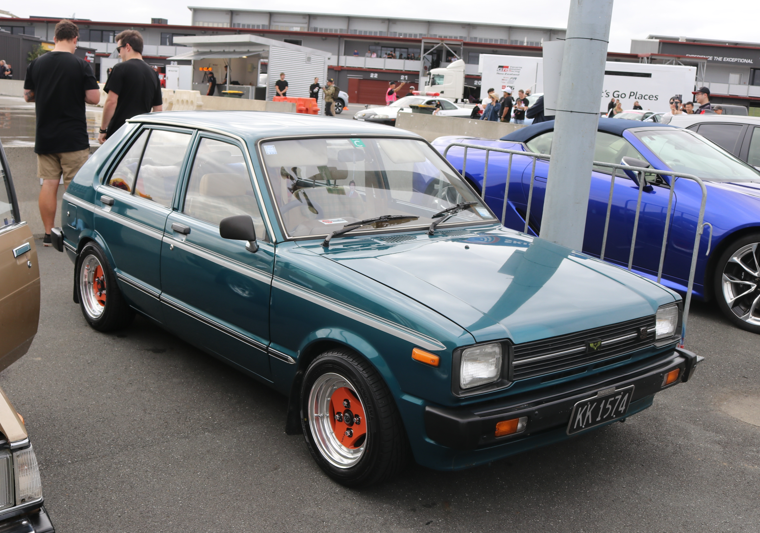
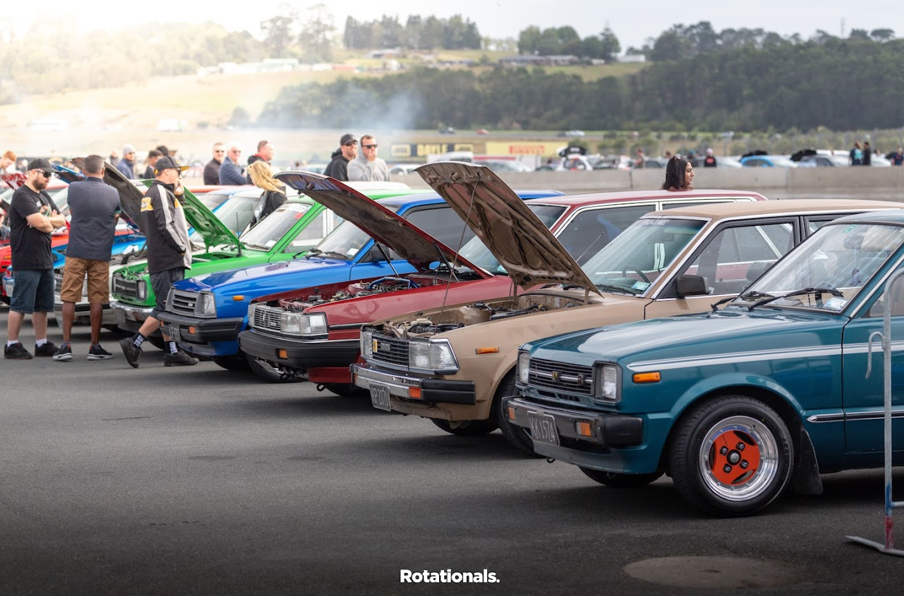
I have always loved Advan A3As and I managed to I pick up a set of 13x6s. I got the lips fixed, painted the centres and convinced the bro to polish them for me (not a member but cheers mate). Orange and blue is a sharp contrast, but it's grown on me Which brings us now back to first sentence of the previous post. I've just driven this from Wellington to Horopito to Toyota Fest at Hampton downs and back (1300 kms) with a couple of mates. There were a couple of small issues with the KP on the trip but those were quickly and easily rectified. It might be slow, but it got there ha } Have a squiz the oldschool.co.nz sticker I got over a decade ago and never used until now. That's all for now
2 points
-
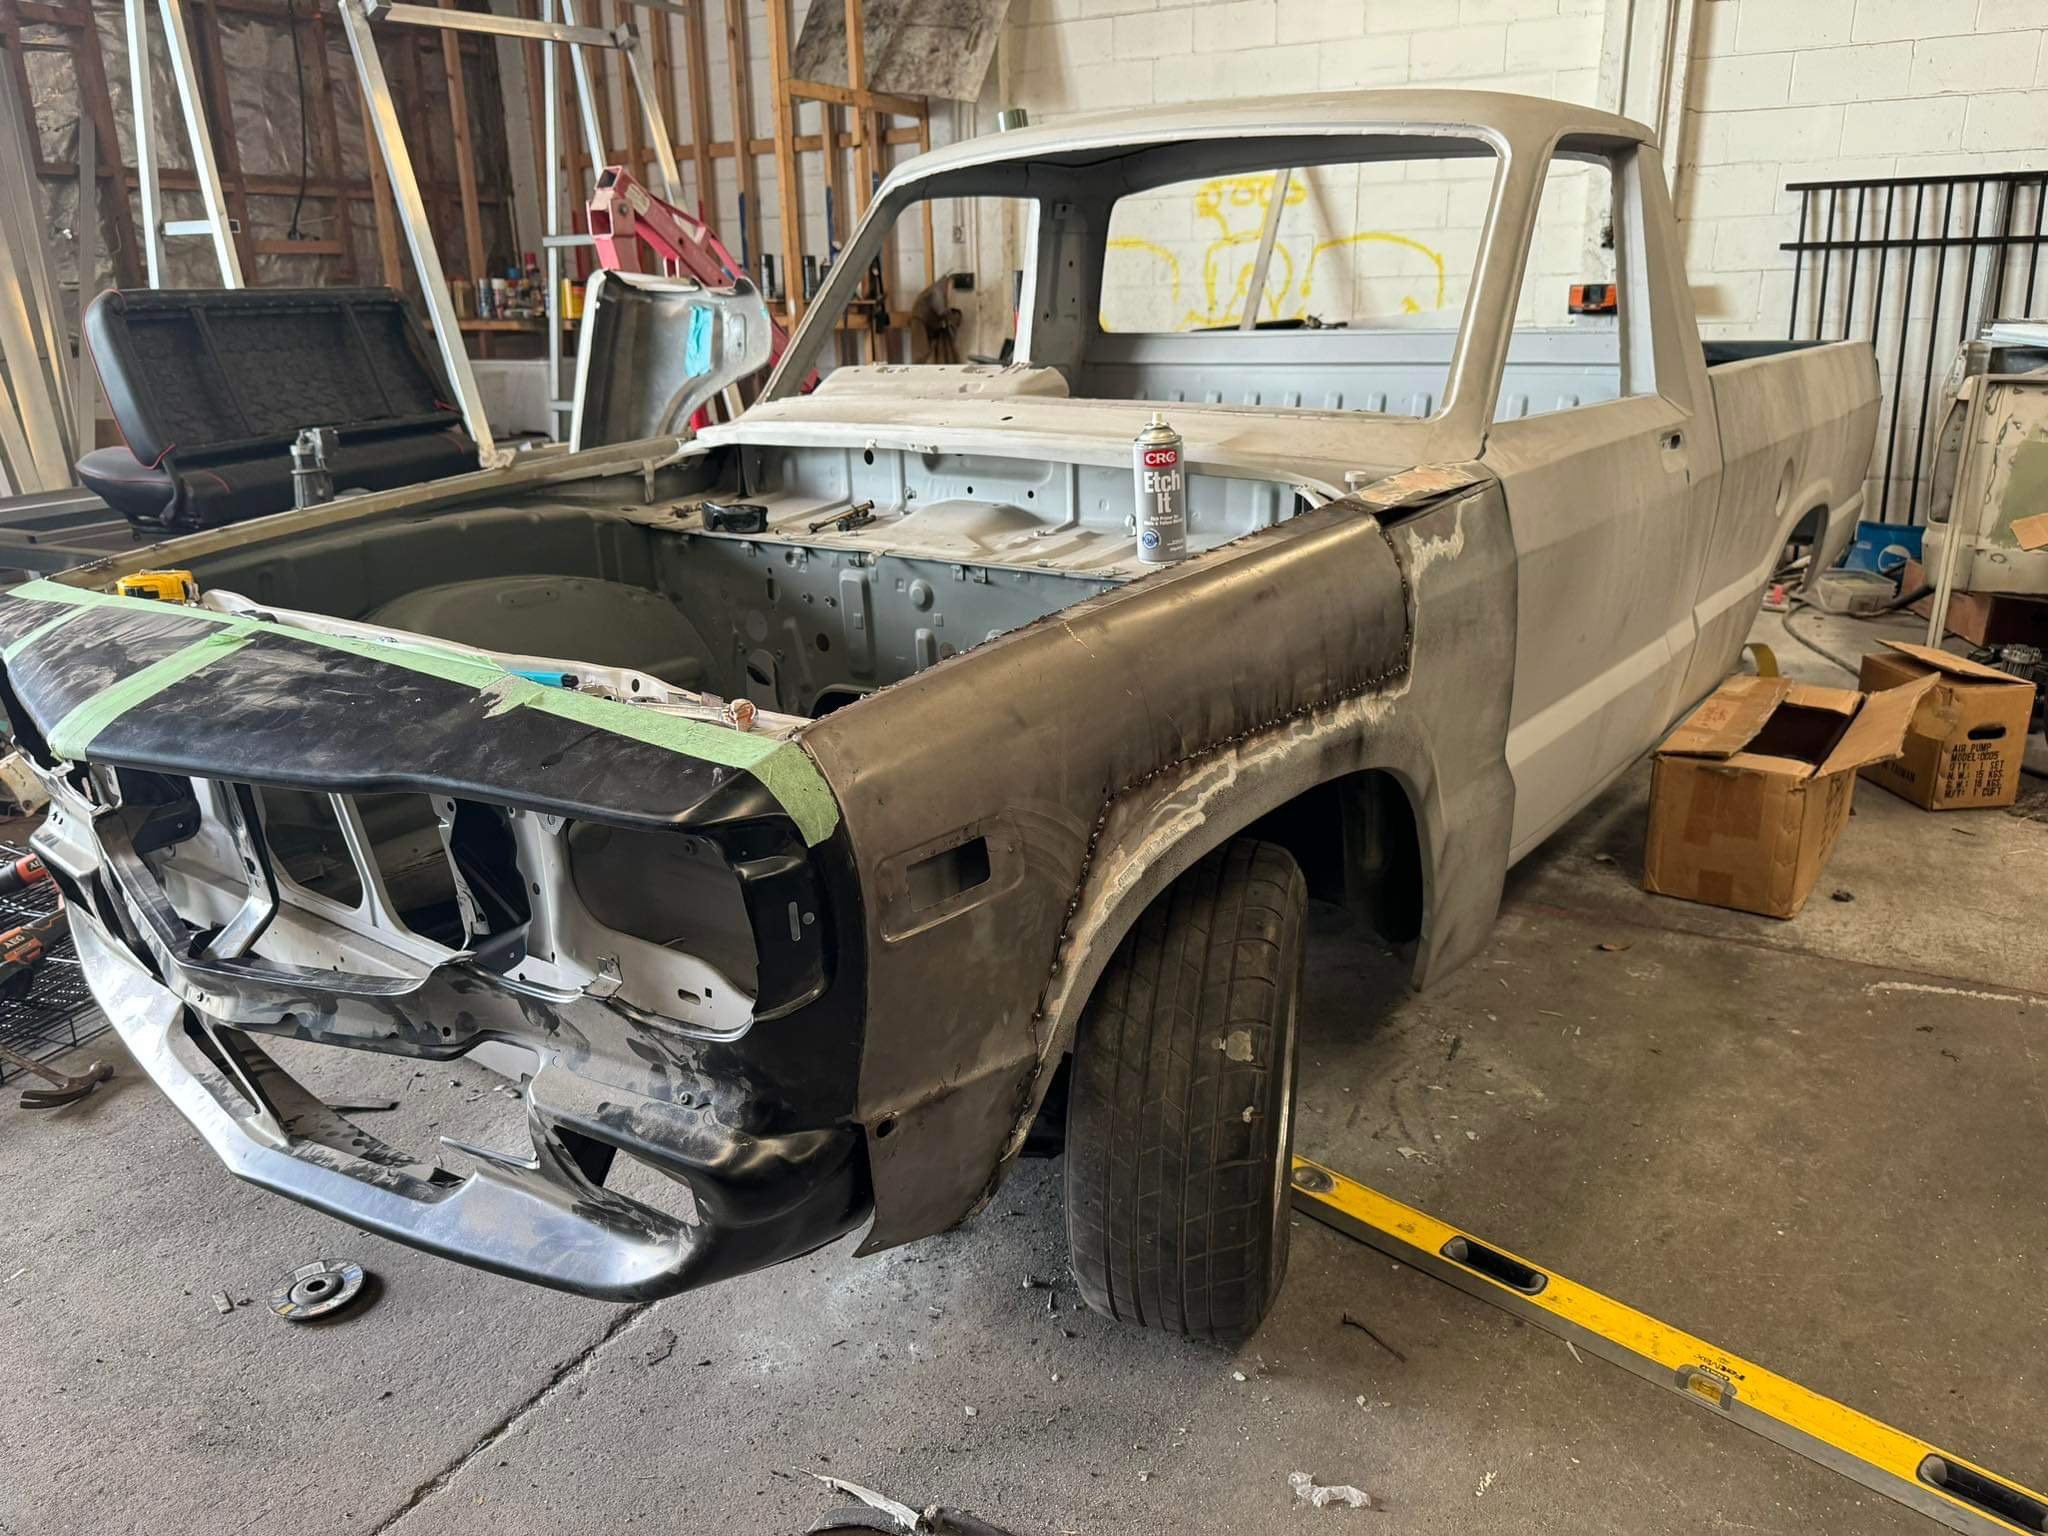
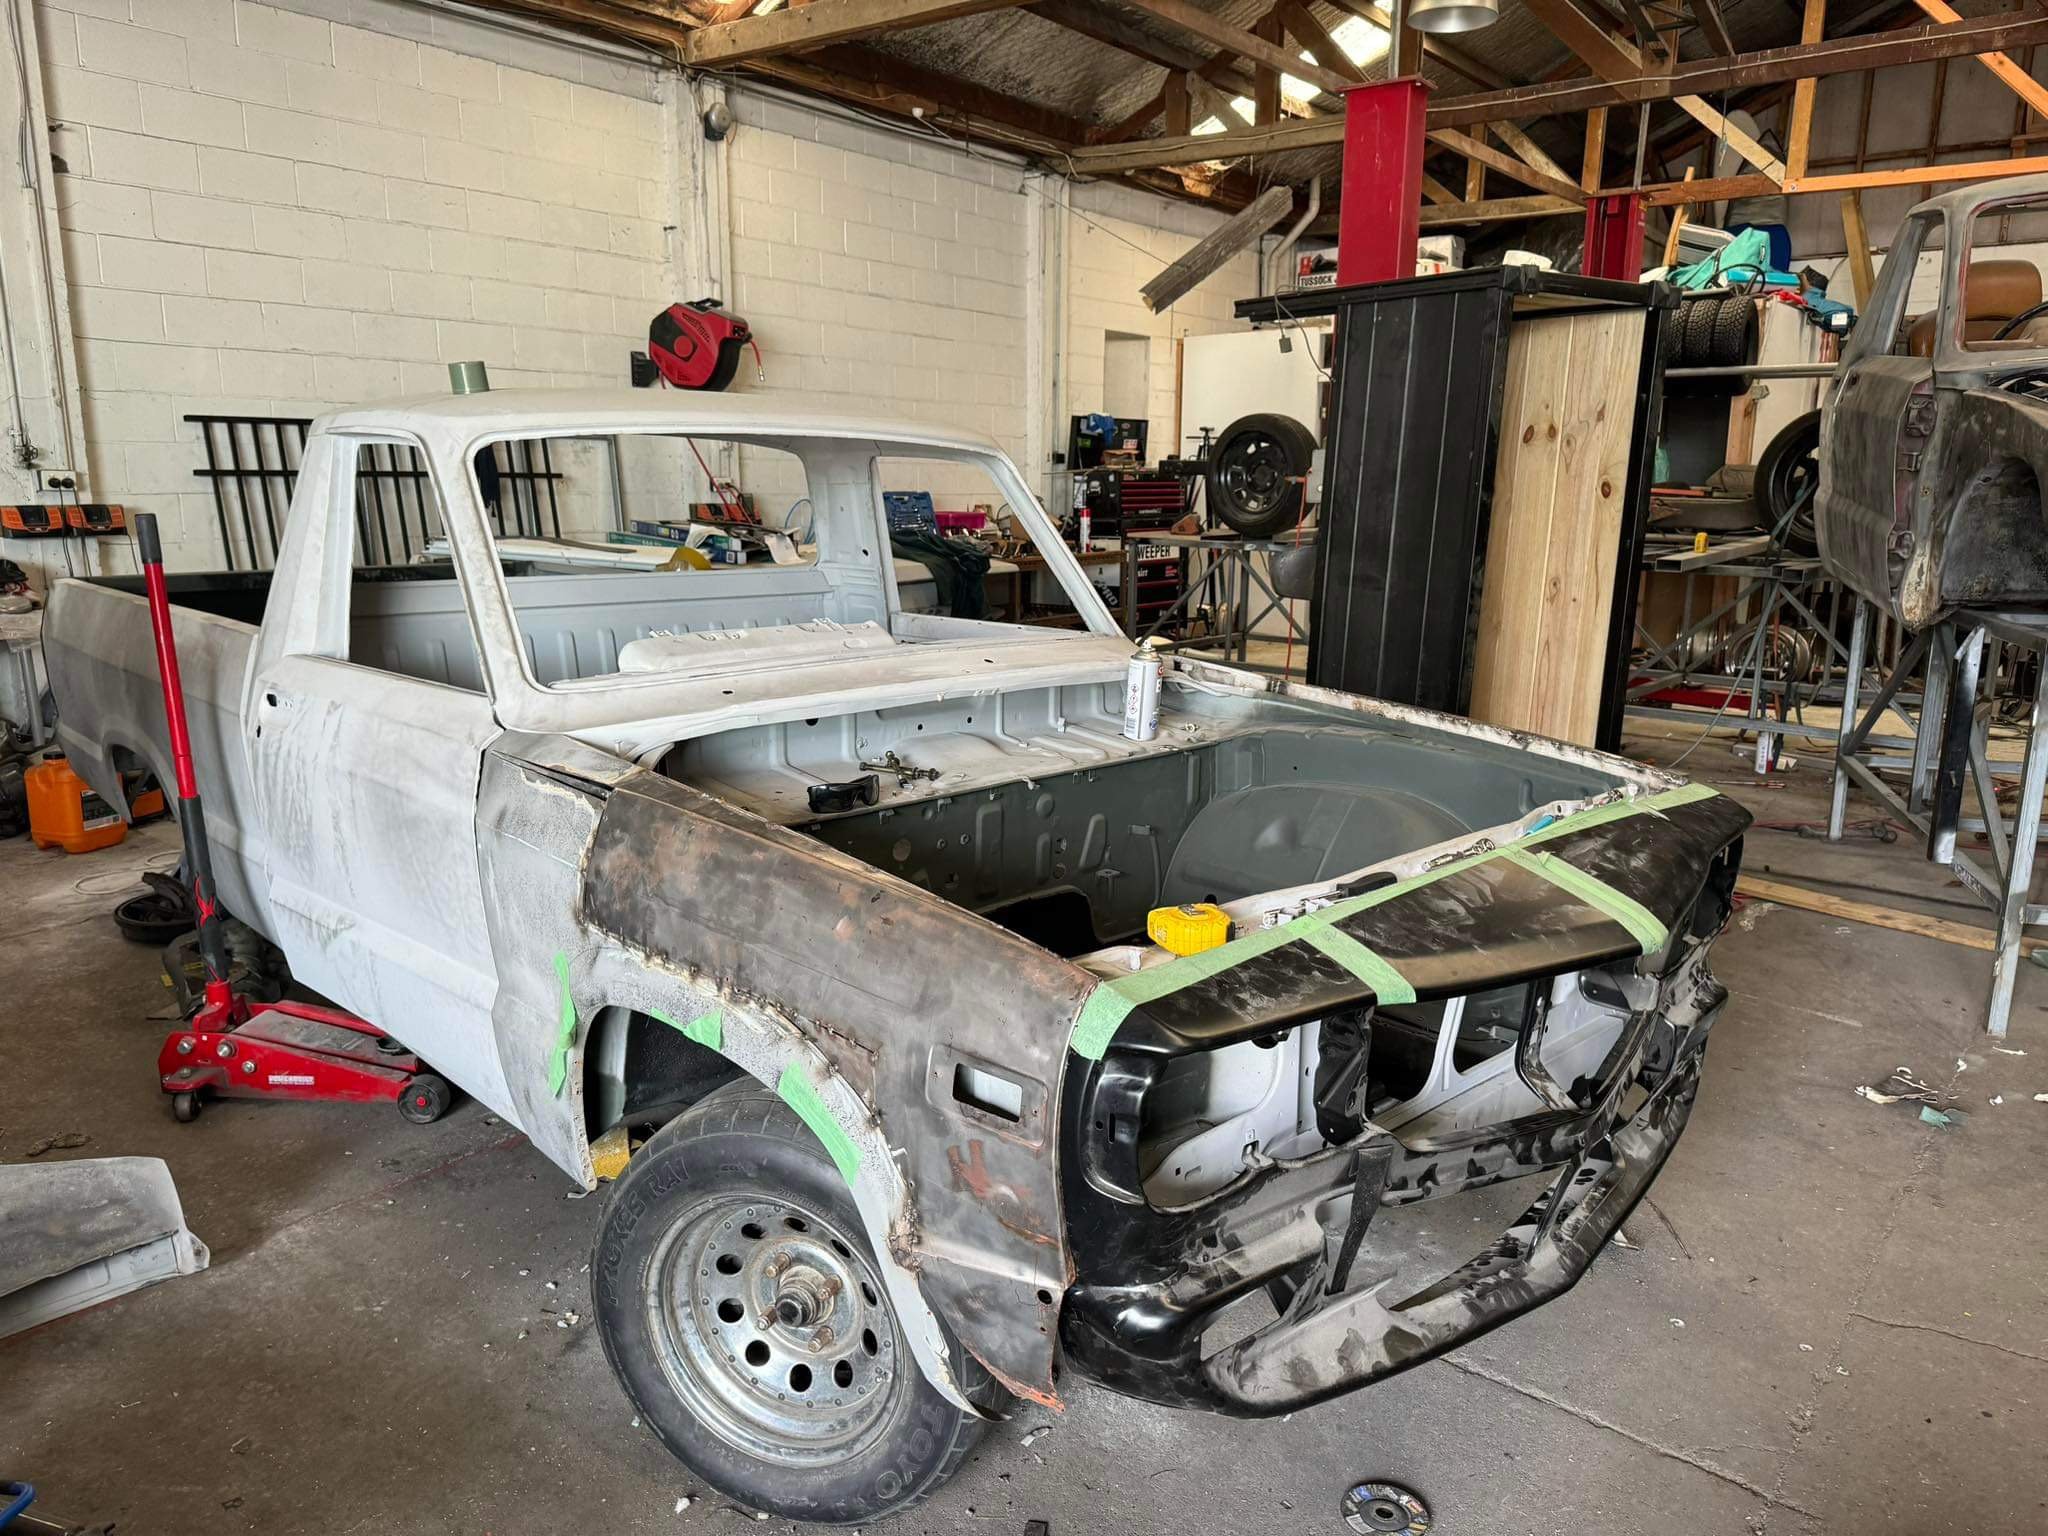
Nosecone is fully mounted, rough guards are on for mock up. this ute seems to be longer than the other ute. Probably built in a different factory as they are 4 years apart from memory.. im glad I chose to use this ute for RX3UTE, it is the same model and spec now.
2 points
-
Yeah. Looks like it may be the bolt on the end of the crank which fails. That's judging by the pics as i can't open the parts fische. In my experience those are usually a dry loctite coated HT bolt which is often put in on the line using a pneumatic tool. Very easy to overtorque I'd think. I once had a GS1000 in the shop which had never been opened from new. I finished up using a 2ft long bar with another 3ft piece of tube over that to get the alternator retaining bolt on the crank end undone. 12mm fine thread and way overtightened. I'd doubt if there's any offset on the bores. Very rare on flat engines.1 point
-
You can also have pretty wild voltage fluctuations with the ecu regs when they are on the way out. My commodore was all over the show charging voltage wise when the reg was on its way out but didnt throw any codes just noticed because i have a factory voltage gauge. Blairs auto electrical have a massive stock of parts was 120$ and i replaced the reg and rectifier for good measure was relatively simple just need a grunty soldering iron for the rectifier to the windings.1 point
-
I'd not be worried about that because one would still be stripping the engine right down and potentially cutting down the crank case/cutting off the transmission case like I did to lower the cg. There'd be no transmission to jam @NickJ I dunno and offset. I never really liked at that aspect but I have a feeling the crank centre line is inline with the bores and I can't remember seeing much, if any, offset on the gudgeon pins. But I guess there must be a bit of offset on the pins because the pistons are marked for fitment the correct way up. Not sure if the 1800s have hydraulic cam chain tensioners which could make things that bit more tricky. I have never looked into those engines myself but curious. They are pretty cheap to buy in the US and if 'easily' changed to clockwise rotation would be a neat engine for all sorts of applications.1 point
-
@Truenotch too soon1 point
-
Tldr. They are arse covering and i assume vtnz so won't look any further if you had asked them too. Not a fan of testing stations....1 point
-
Fuck that's a clean looking shed!1 point
-
some of the quick cars there was a Lexus GS-F that sounded amazing, the CT5 Blackwing (also on Michelin PS4S's) and some large overwight mild hybrid Merc/AMG thing that somehow was the second fastest vehicle all weekend
1 point
-
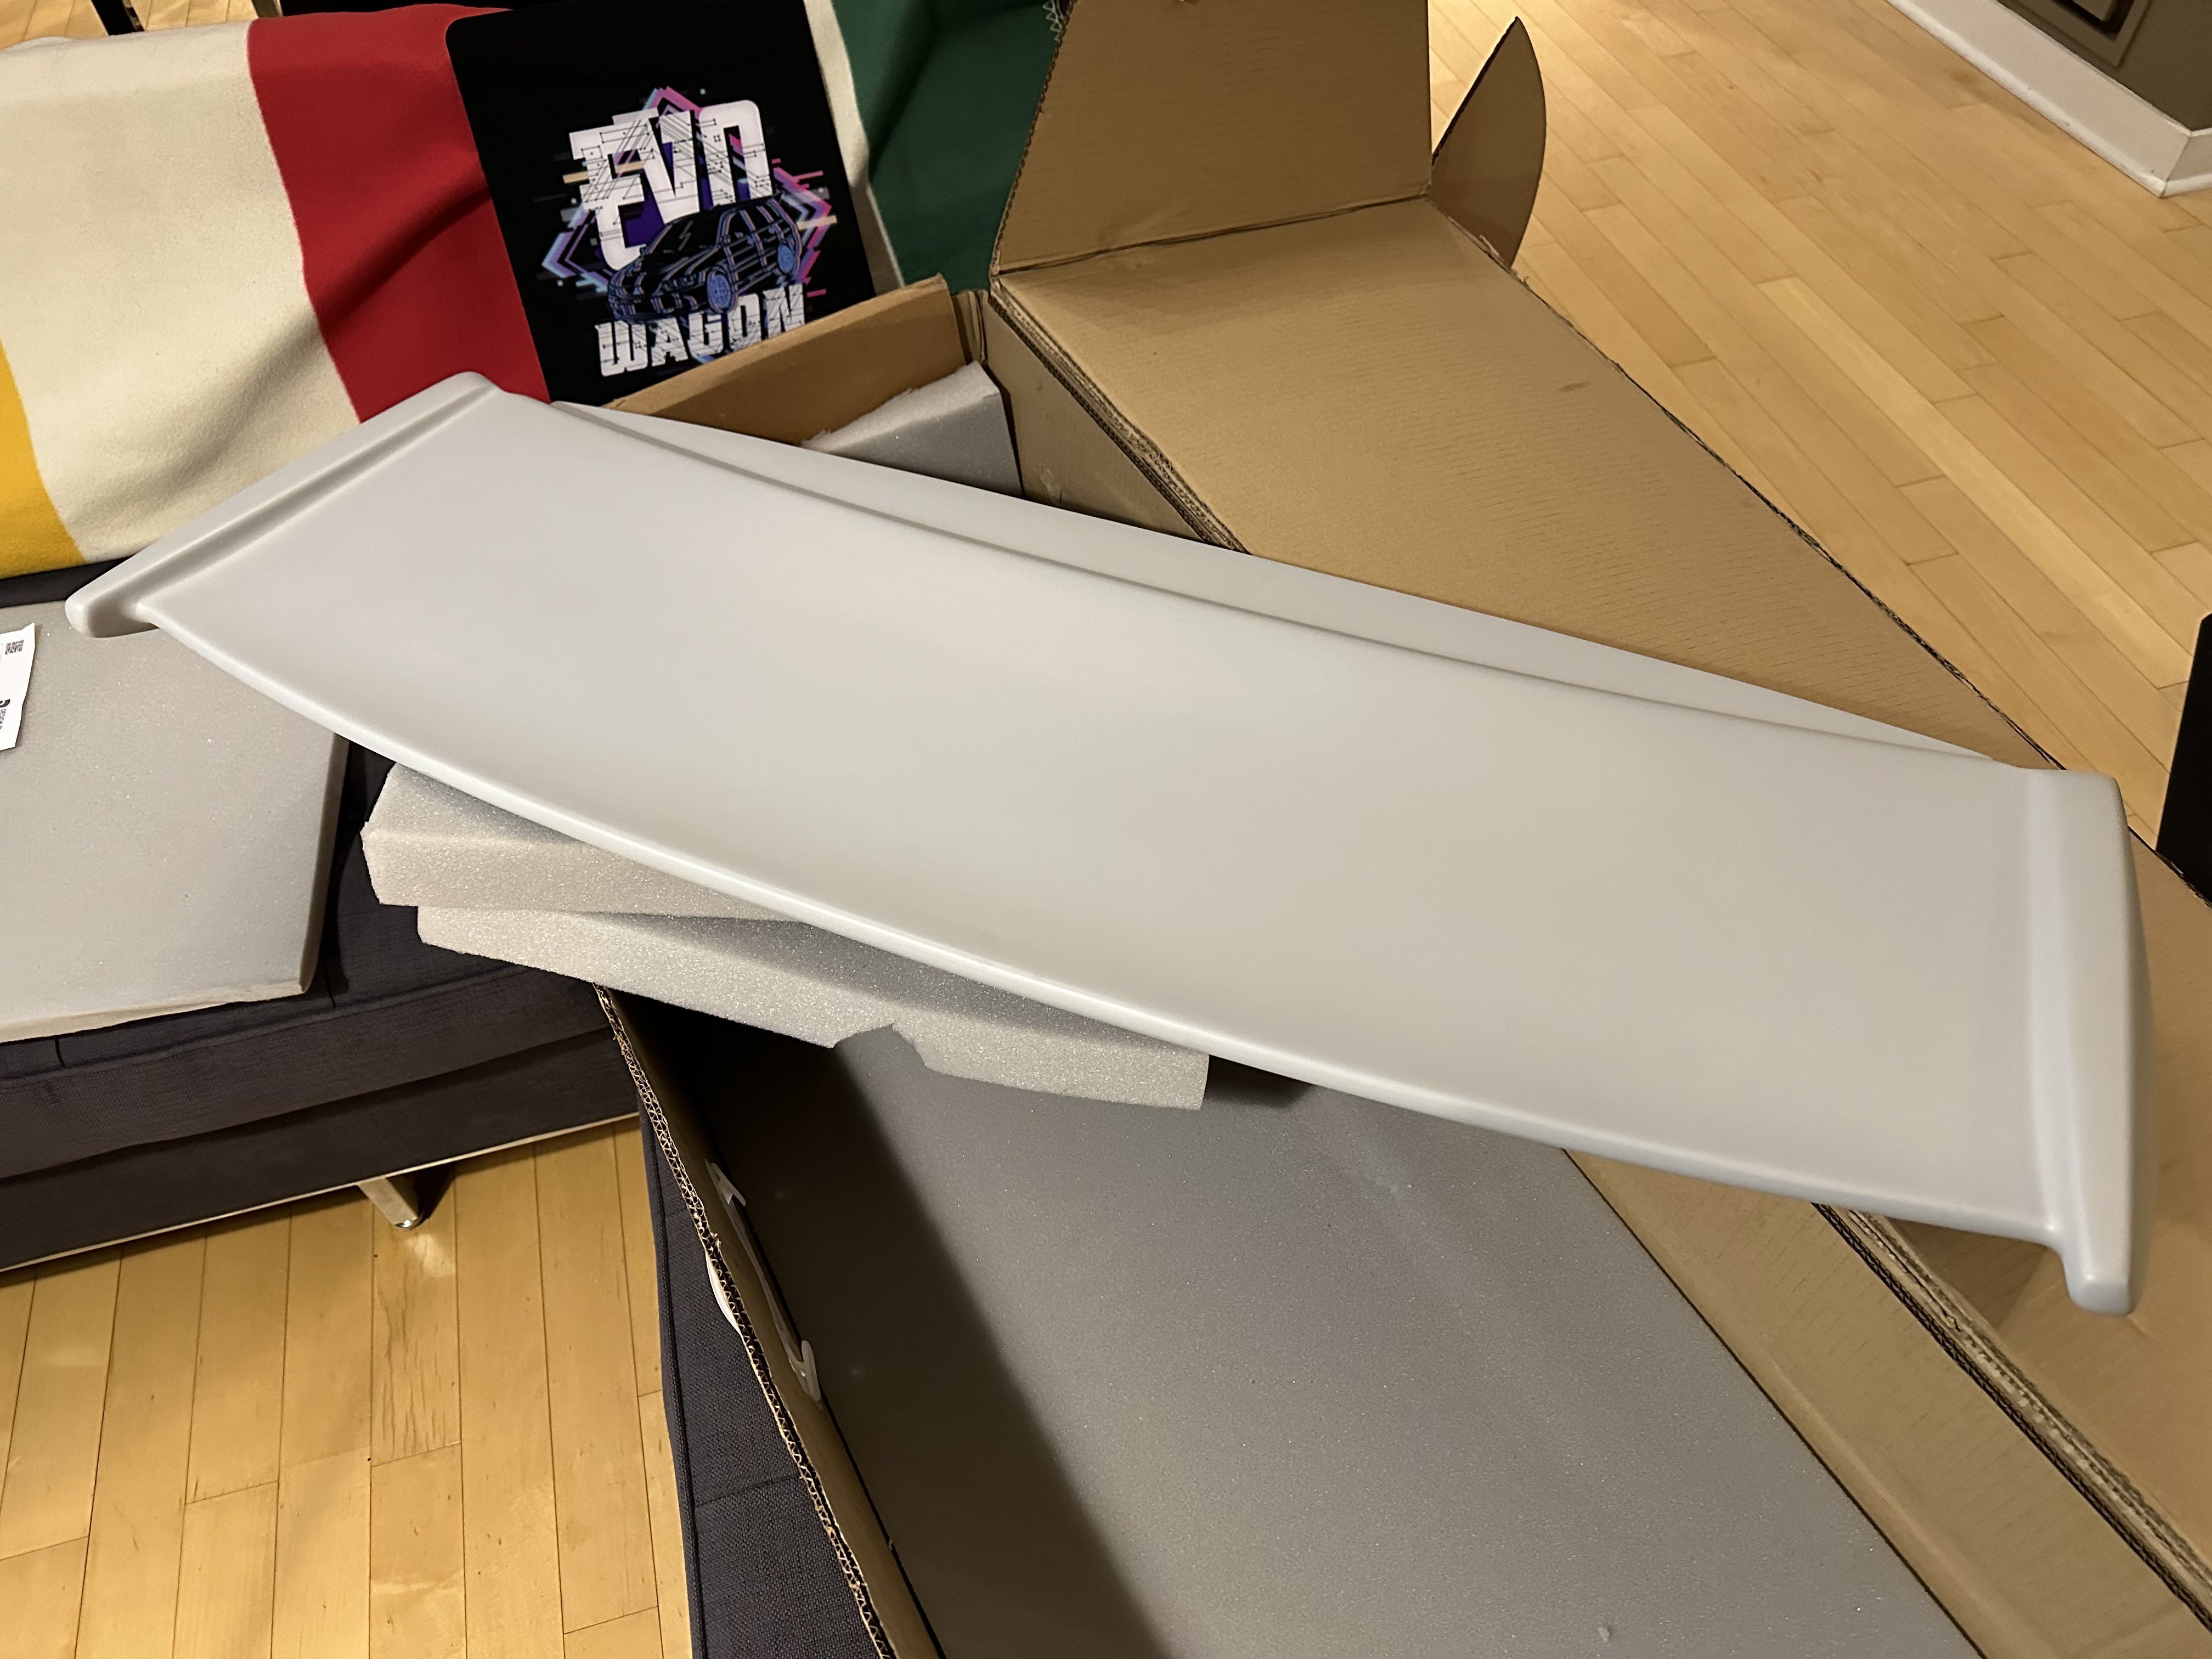
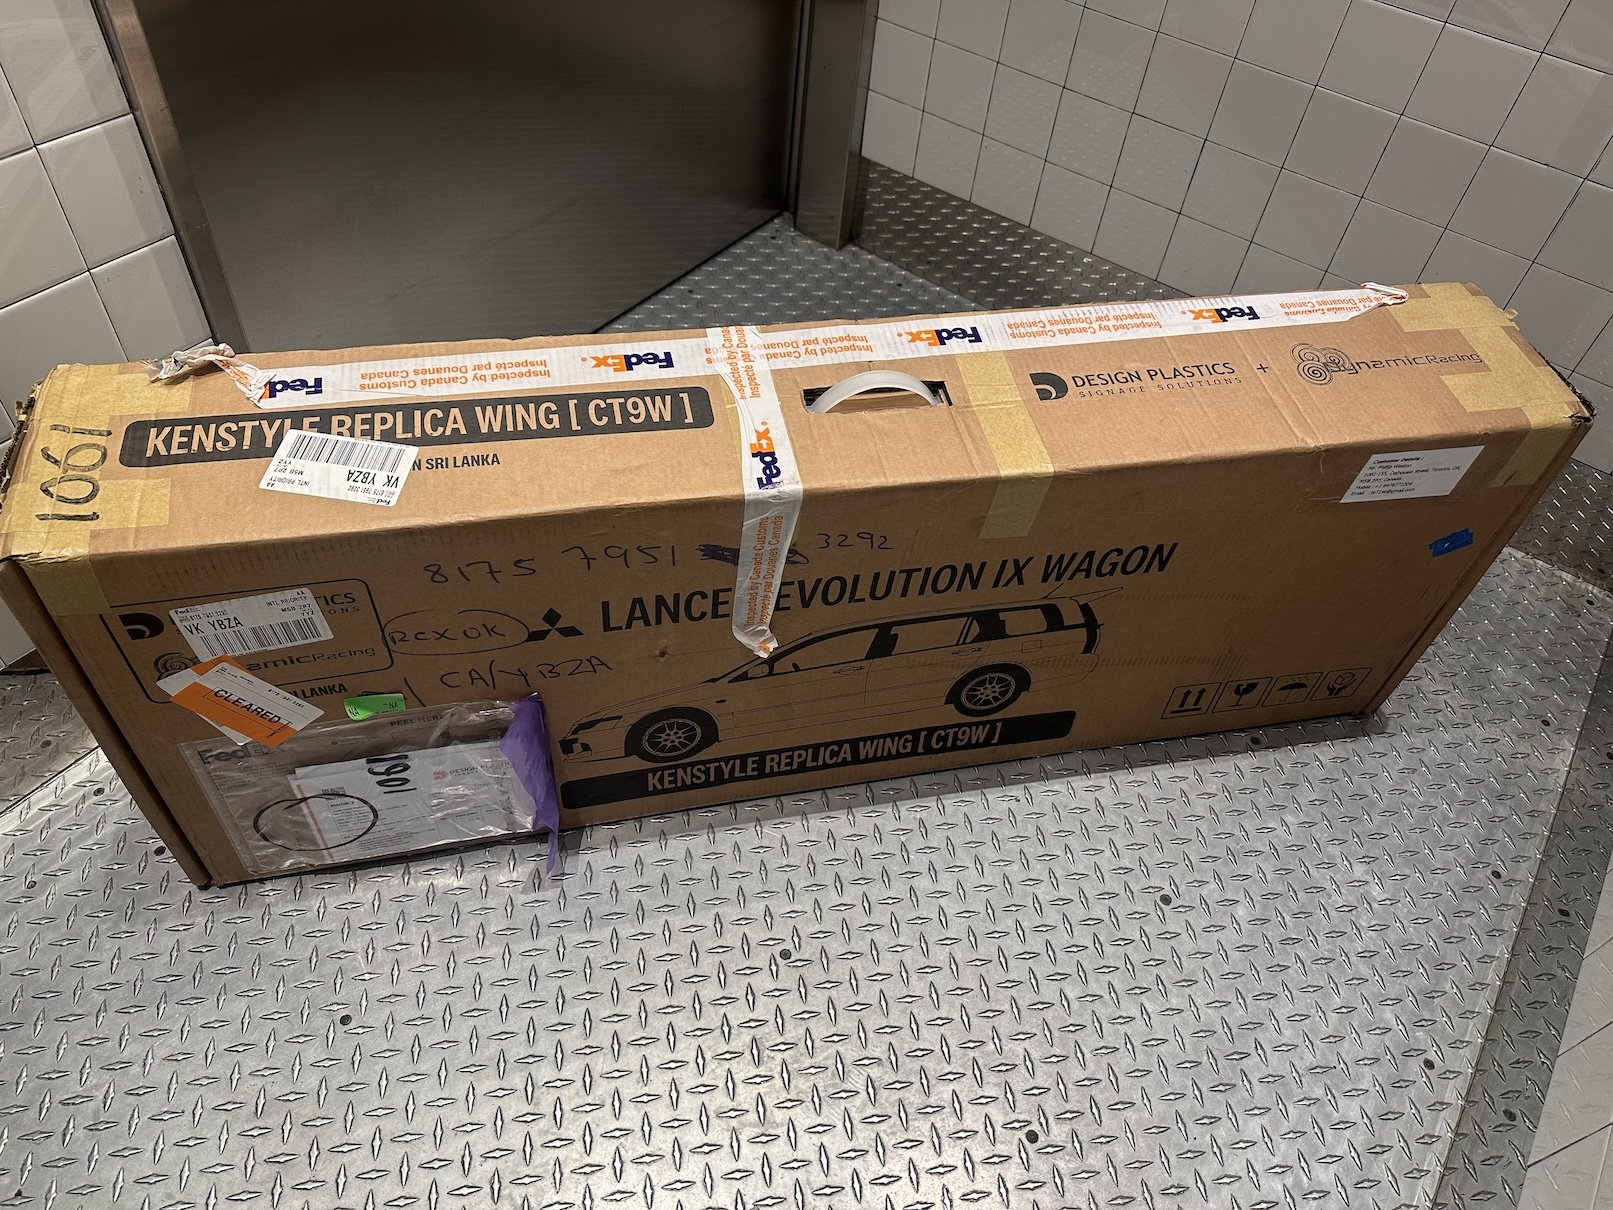
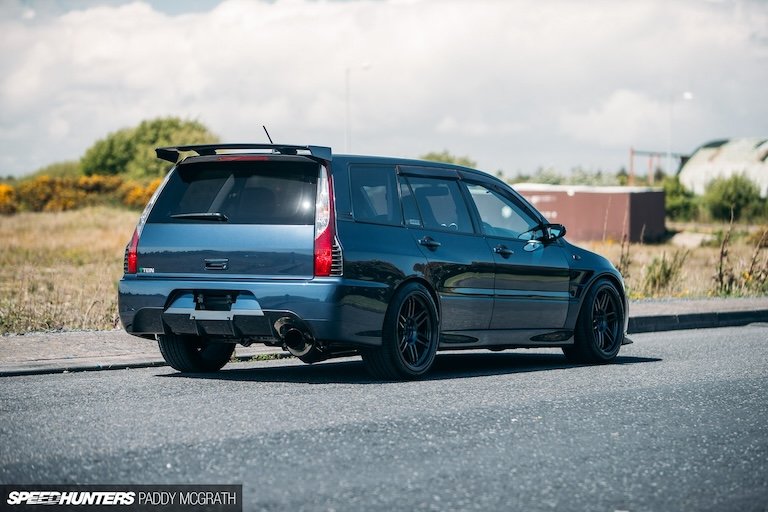
Having said that, finding a Kenstyle certainly isn't any easier and when they do pop up for sale they are too big $$$. I paid more than I wanted to for my Kenstyle in NZ, but still significantly less than the going rate because it was missing the regular Lancer wing base to make it complete. So enter in the Kenstyle replica, made in an initial small run of five units by a fellow Evo wagon owner in Sri Lanka who happens to have his own plastics manufacturing company. The replica is different in the sense that it combines the regular Lancer wagon spoiler into the Kenstyle mould, therefore negating the need to source a regular Lancer wagon spoiler, but also does away with the gap that is present between the regular spoiler and the Kenstyle wing that traps moisture and general muckyness: So here it is unpacked in its primer glory and will go on when I have some time to get it painted.
1 point
-
big wang arrived all the way from Sri Lanka. Canada customs definitely had a big nosey at what it is. So what is this 'Kenstyle' you may ask? It is a Japanese manufacturer of a rear spoiler that was originally destined for the Lancer Cedia in the early '00s, before the Evo Wagon was released: Out of the other wings available, such as the Ralliart which is big $$$ and hard to find and the Varis which has now been discontinued and even more harder to find The Kenstyle is by far my favourite - though it does have a caveat (as does the Ralliart) in that it requires fitting a regular Lancer wagon spoiler because they attach to the regular model spoiler rather than the larger Evo wagon spoiler. I did end up finding a genuine Kenstyle in NZ but it did not include the base model Lancer spoiler (which I have since found thanks to @Bluebird_U). I still was faced with the more serious and expensive problem of getting a rather large wang from NZ to Canada. Unlike the Ralliart CF front lip I was able to get away with cutting right in the middle at its smallest and least noticeable point, I can not do the same to the spoilers.
1 point
-
Changing the cams direction of rotation is only the start - and probably the easiest bit. Plus it's probably one of the ones affected by the recall. Honda haven't come up with a fix for the bolt breaking yet. The head gets stuck in the gearbox and locks everything up solid - which can and often does break the cases.1 point
-
A friend in the UK was given an 1800 engine from a fire damaged bike. He's not properly looked at it (because he's always starting new projects and never finishes anything.. He should be on os ) but he reckons the camshafts could be run in reverse and by changing the chain tensioner location the engine could be changed to clockwise rotation. I have not really looked into those engines because it's hard enough finding a 1500 and an 1800 engine would be moonbeams from a wrecker. But they are lighter and have fuel infection already fitted.1 point
-
Would I use a full size broom or a 1/35th scale one ?1 point
-
1 point
-
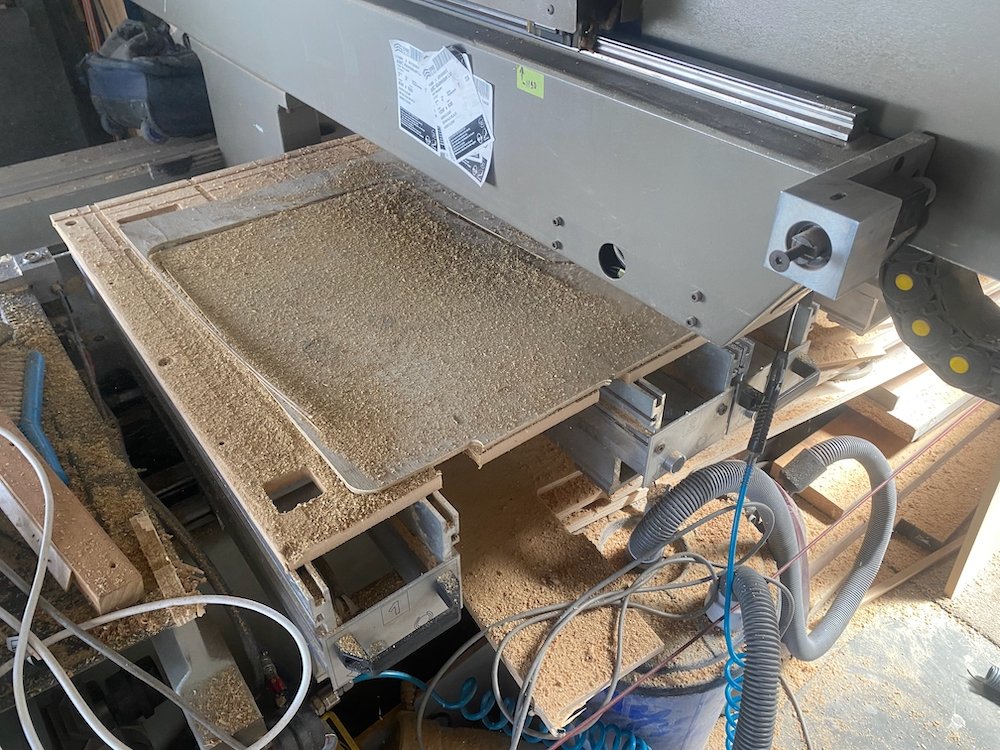
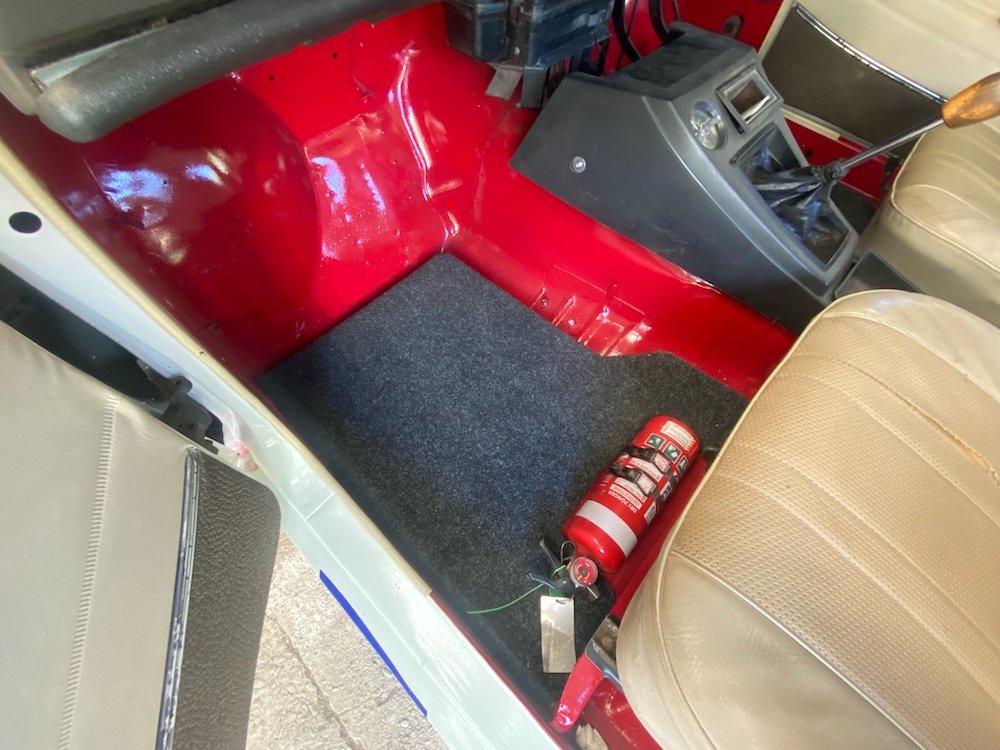
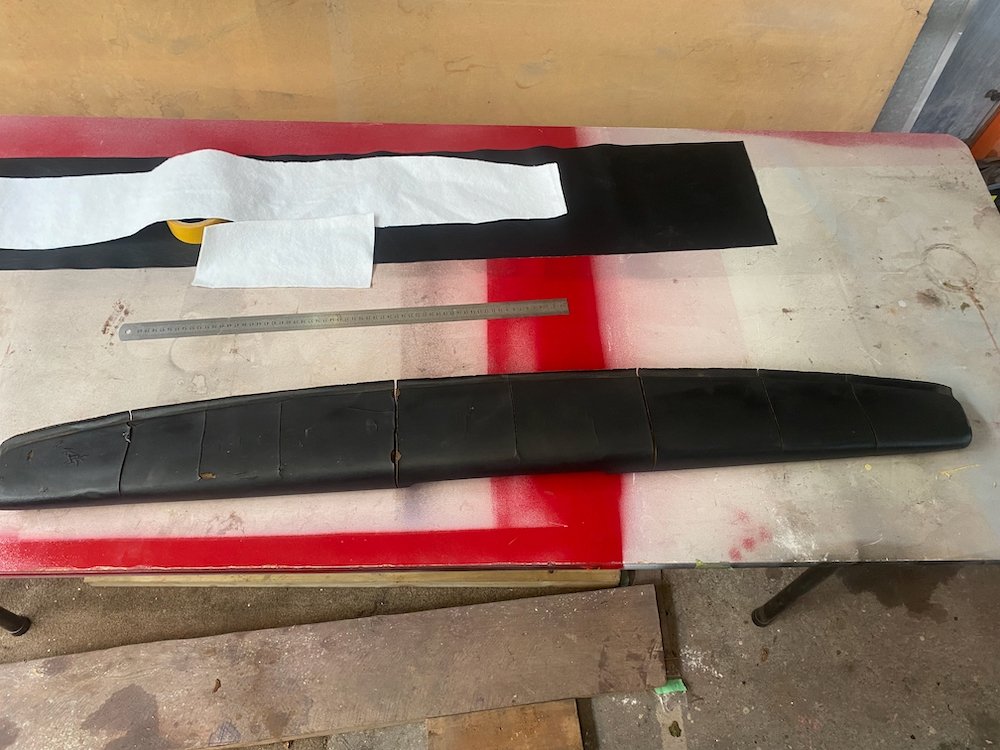
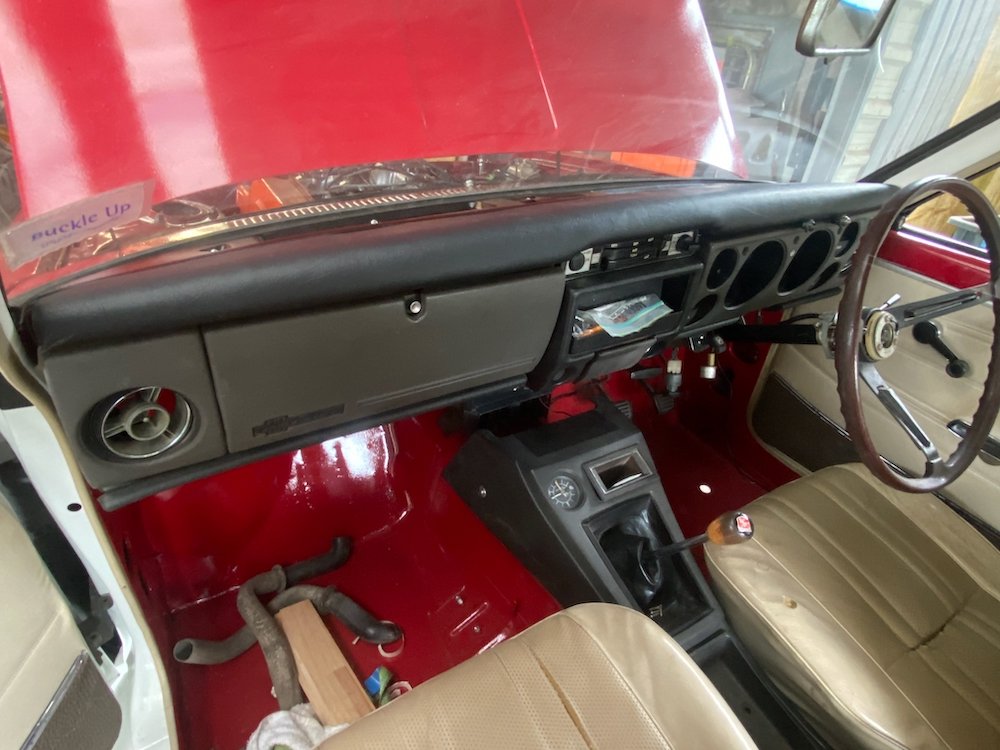
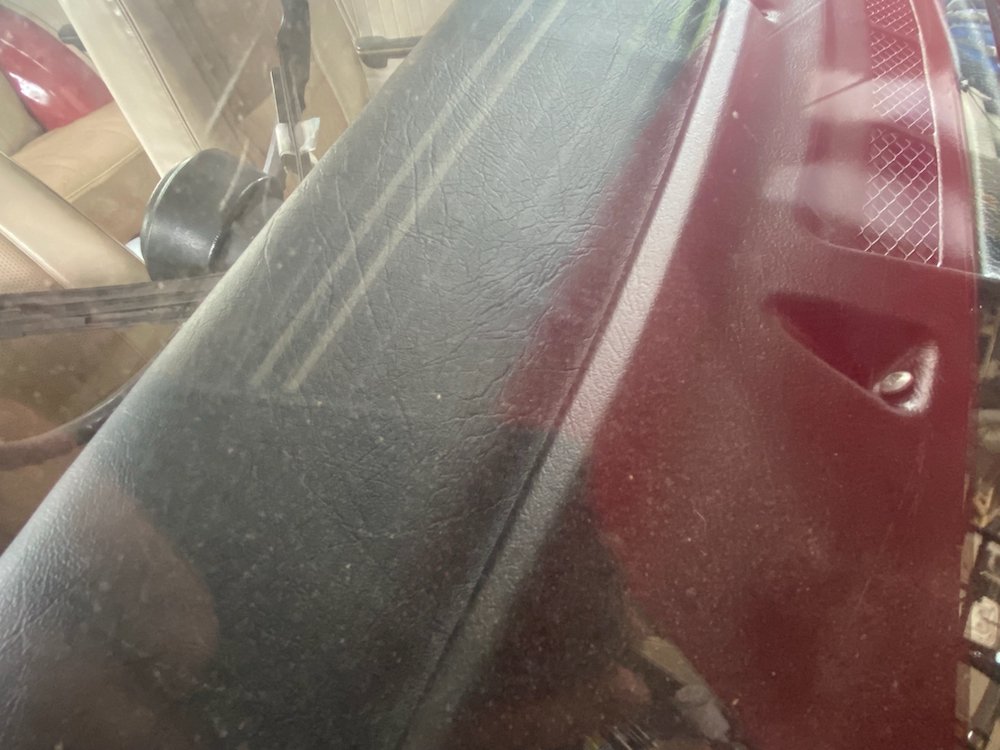
Interior polishing: Like most 50yo cars, the dashpad had cracked up pretty bad, long term i'd like to throw the check book at it, but in a budget friendly manner I called on my lovely GF and her knowledge of spotlight. We trimmed off the worst highpoints and double sided taped a layer of tablecloth liner to the pad, the idea here was the padding would hide the worst of the cracking once the vinyl leather was stretched over This was put on with the bare minimum of contact adhesive to keep the dashpad in close to original shape if needed for proper restoration further down the track. Finish result blends in well, of course the corners are a bit messy, but far nicer to look at than the old pad. Haven't been able to make a firm decision on the carpets but had an idea Chomp out some 7mm marine ply on the cnc, wrap in carpet offcuts from the 4wd.... Floormats that don't shuffle around.
1 point
-
Try adding some adblue to your fuel tank And then when insurance writes the car off, get something not french1 point
-
Did a chunk of the back end wiring today, not much to see as I have tried to keep things tidy so it pretty much blends in. I tried to fit a new power plant, amazing that for the size this unit only makes one pogpower.1 point
-
Actually our K11 gearbox has a decent leak. Spent too much time hanging out with the naughty British kid and learnt bad traits I suspect.1 point
-
This bit especially. The power of the British leak is a strong one and I guarantee this engine combo will leak.1 point
-
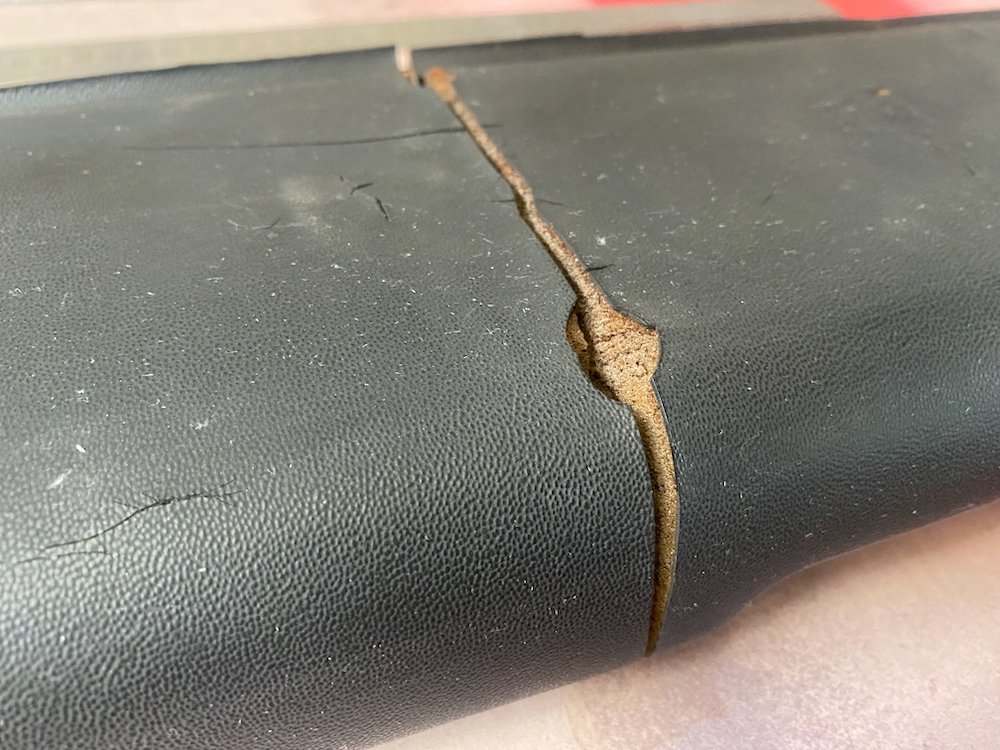
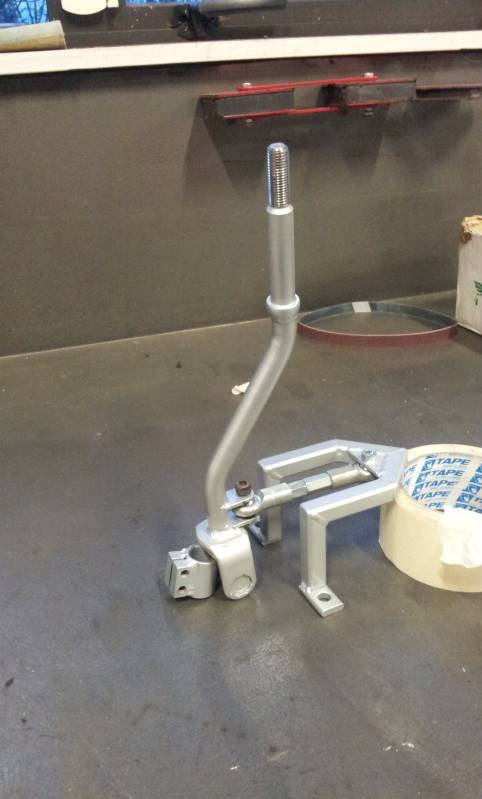
Yeah I should have mentioned that in the thread. Might point it out next time. Yes- there is a standard rubber cover on the imp shifter base that will still fit. I think it was pictured in the pic of barrys shifter. I'll just need to add a shoulder under the base (as seen in the bits I cut out) Then along the underside of the tunnel Imps normally have a full length cover that bolts in place. I say normally because I do have one but its been sitting in the frunk of the spare imp shell waiting for me to clean it up, paint it and fit it to the blue imp. It's only been since 2019.. I've not yet damaged anything in the tunnel but this new setup is more exposed so I'll definitely be fitting the cover up!1 point
-
Great job, Isn't it amazing how much time and energy can go into a single component.. oh yeah I'll just whip up a shift mechanism that does exactly what I want and doesn't fall apart, or make shit ho backwards.. This is what the mx5 one ended up looking like, the Nissan box didn't come with a shifter, and needed to come forward anyway due to engine position.. (Note this was version 2)
1 point
-
A heap of those Bren gun carriers ended up as farm hacks down my ways. #sharn Here is part of my current pile of shame. I might dig out that LRDG truck and have a look…
1 point
-
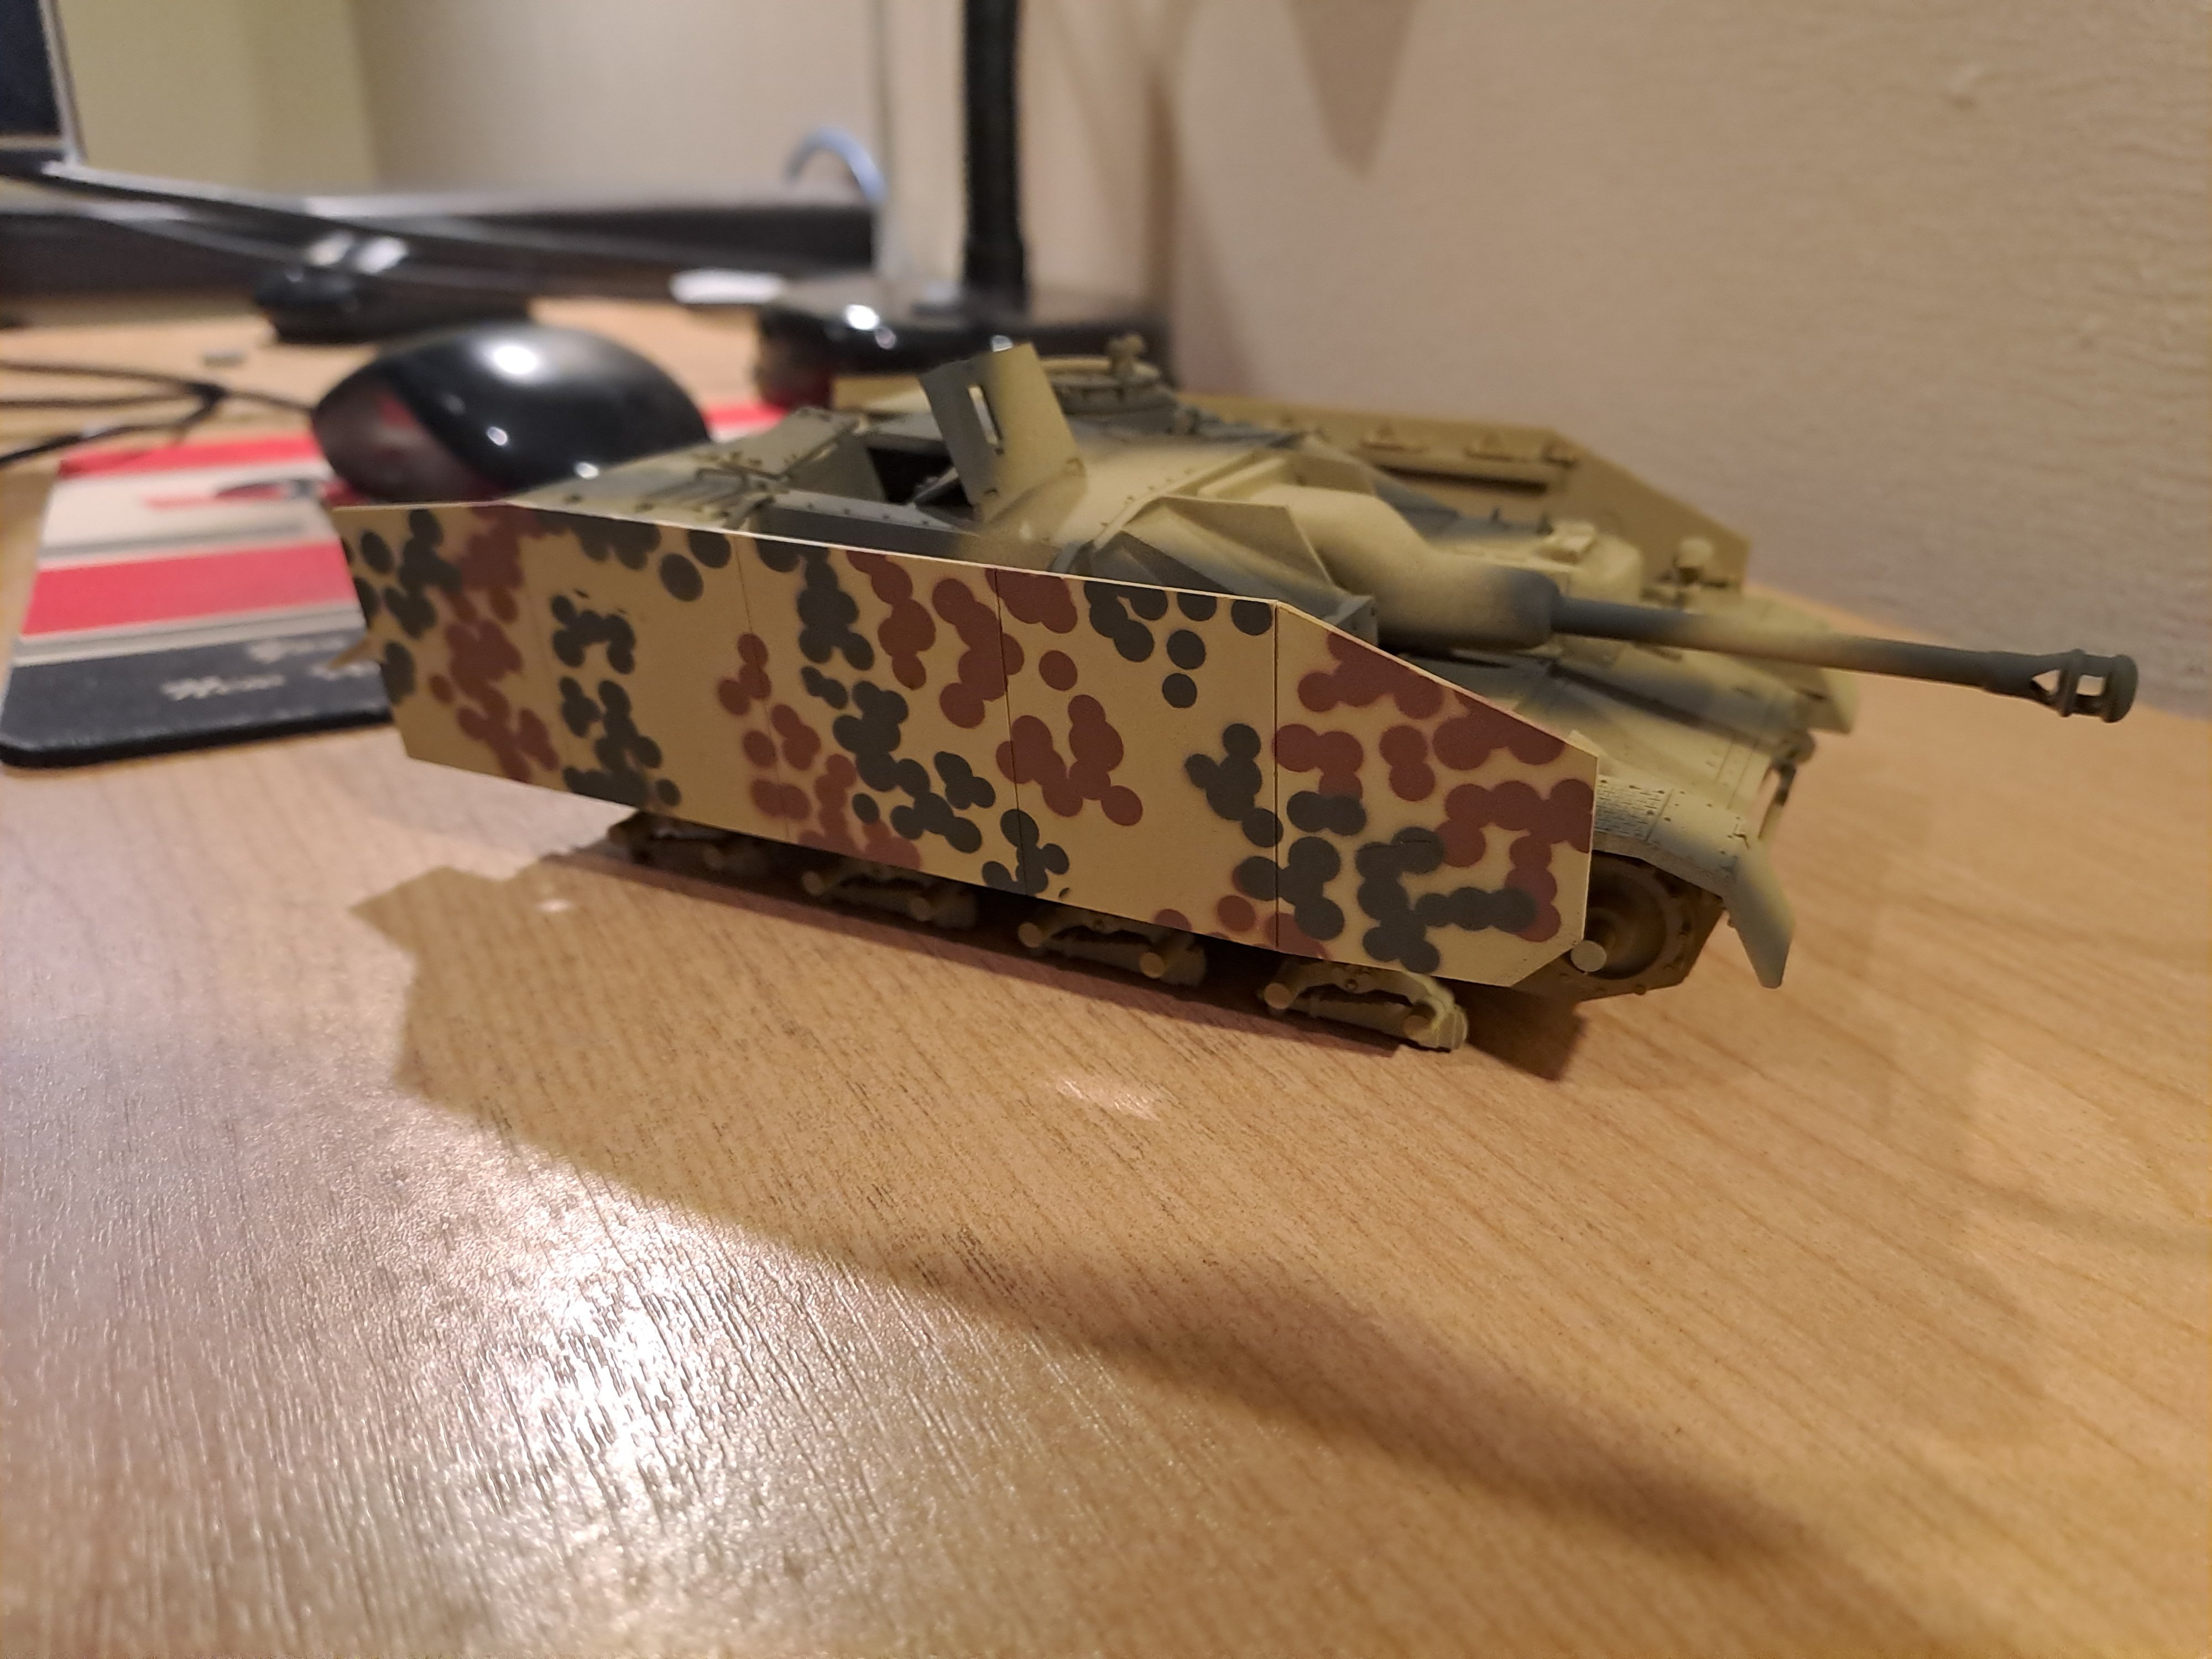
My next mission... M32 ARV. I wanted one of these years ago but they weren't available. I scratch built one on a welded hull Sherman at the time, it'll be interesting to see how close I got it. Anyway, it's going to be Kiwi spec for Italy in 43/44. Stone & grey camo. It may not be historically accurate regarding specific units, but what hell ? Progress so far...1 point
-
Progress is coming thick and fast now. Motor back in . Gearbox back in . Got it running today for a short moment. Seems to run like a champ. Waiting on a new waterpump then I can get it up to temperature.
1 point
-
I thought he only drank lattes?1 point
-
Congratulations @j.e.d. ! When I open my youtube apparel store you will be receiving a pair of Yellowhammer logo embroided socks1 point
-
ACHEIVEMENT UNLOCKED: Saying Nipple 300 times in one post1 point
-
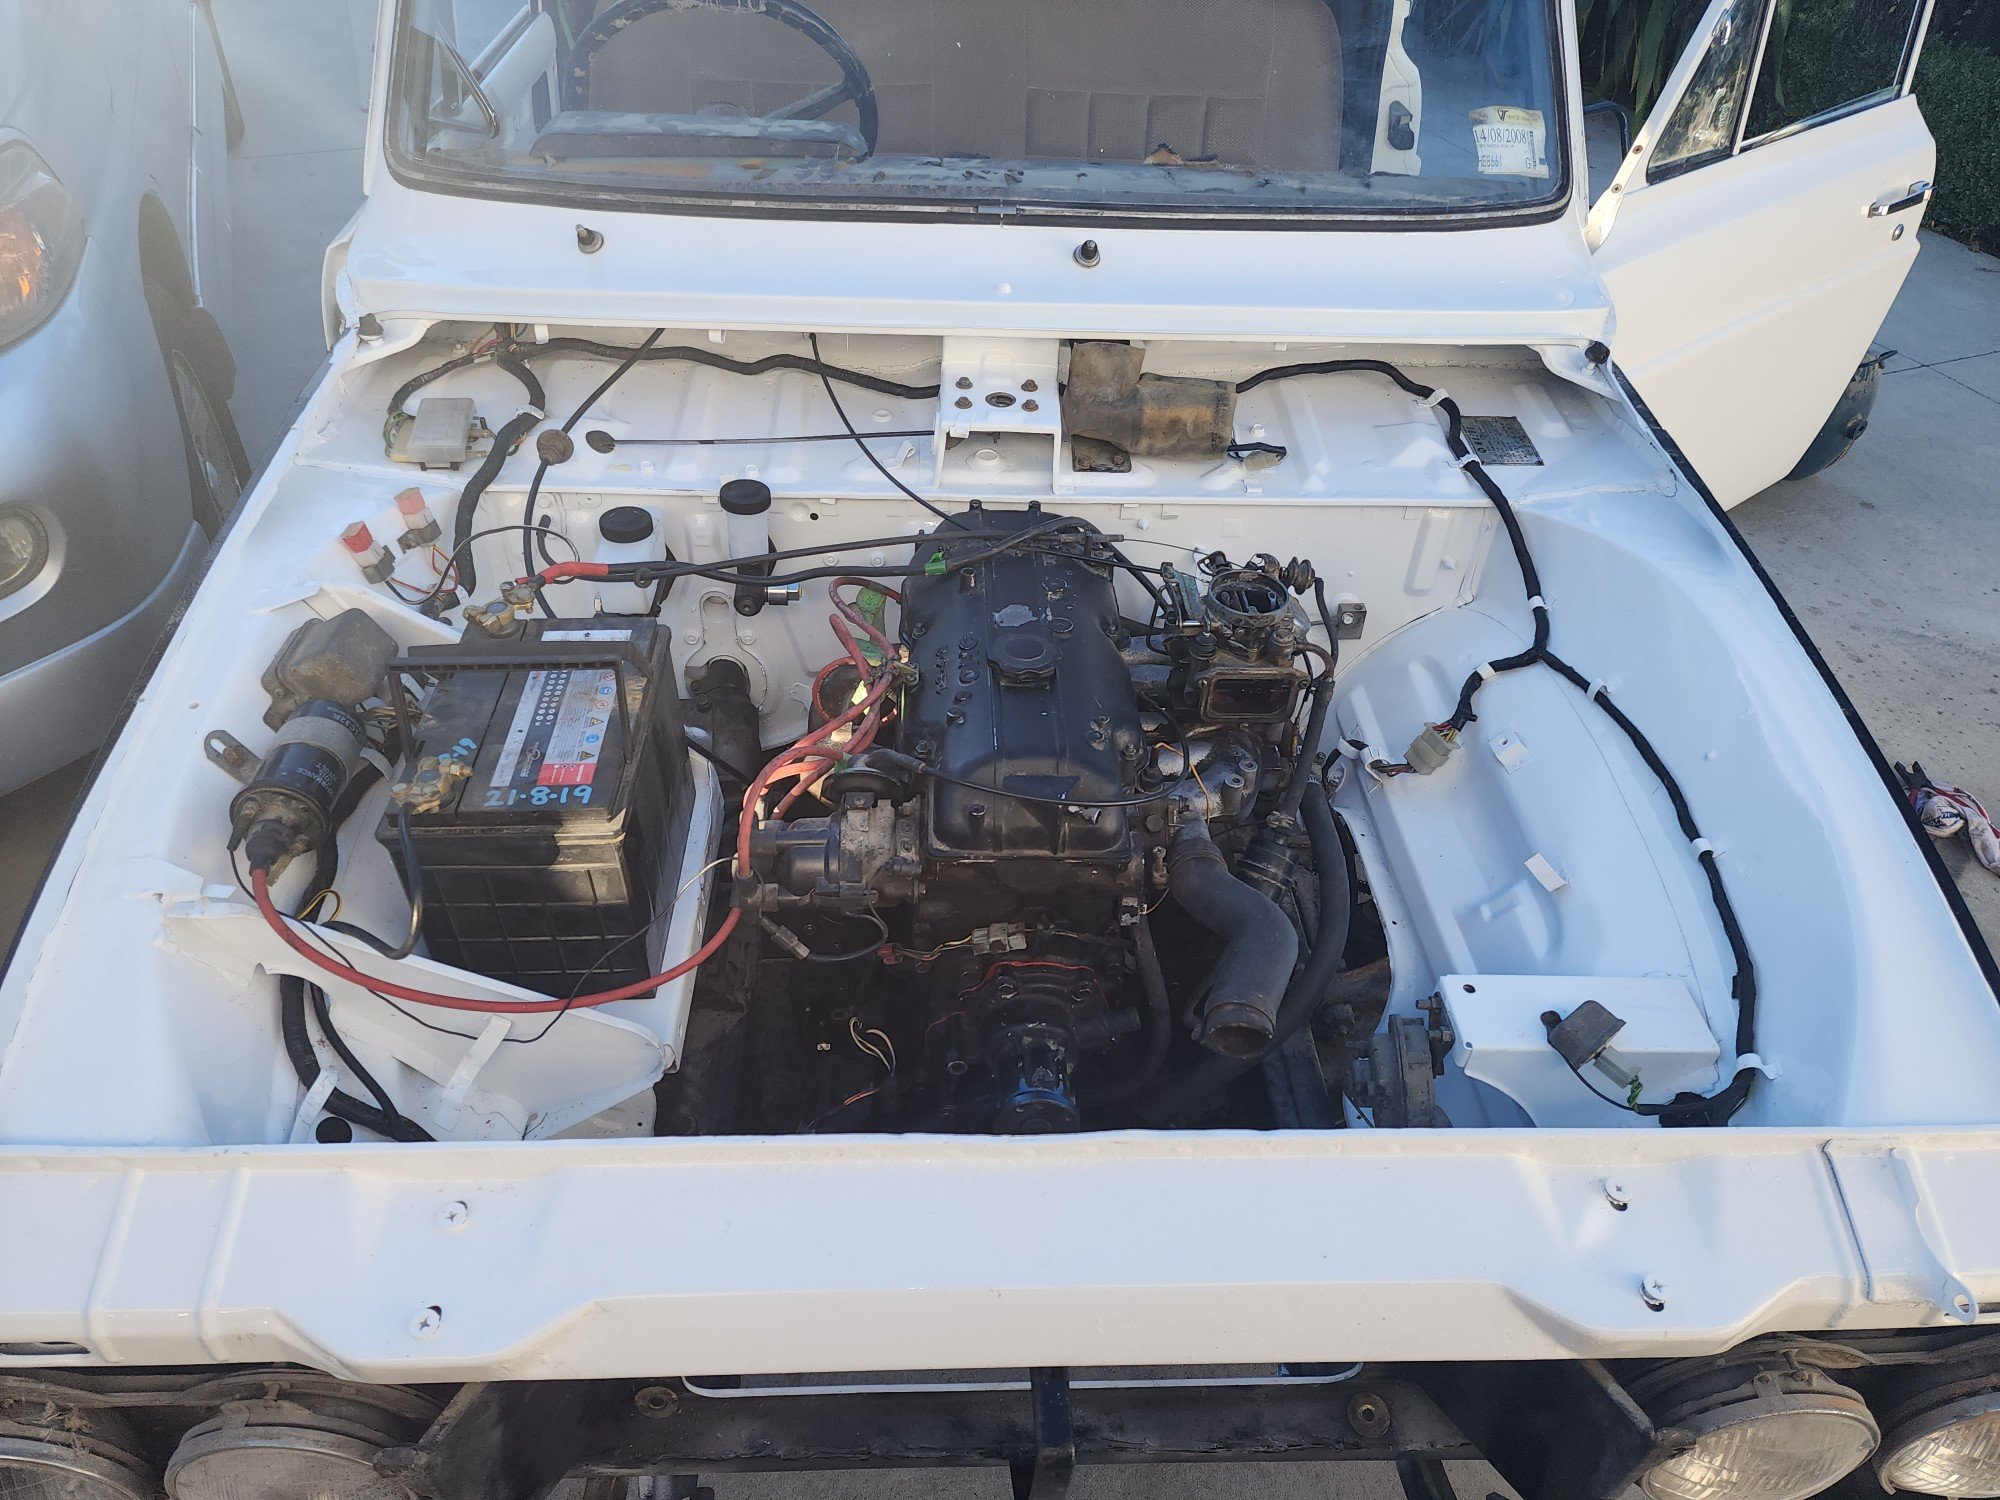
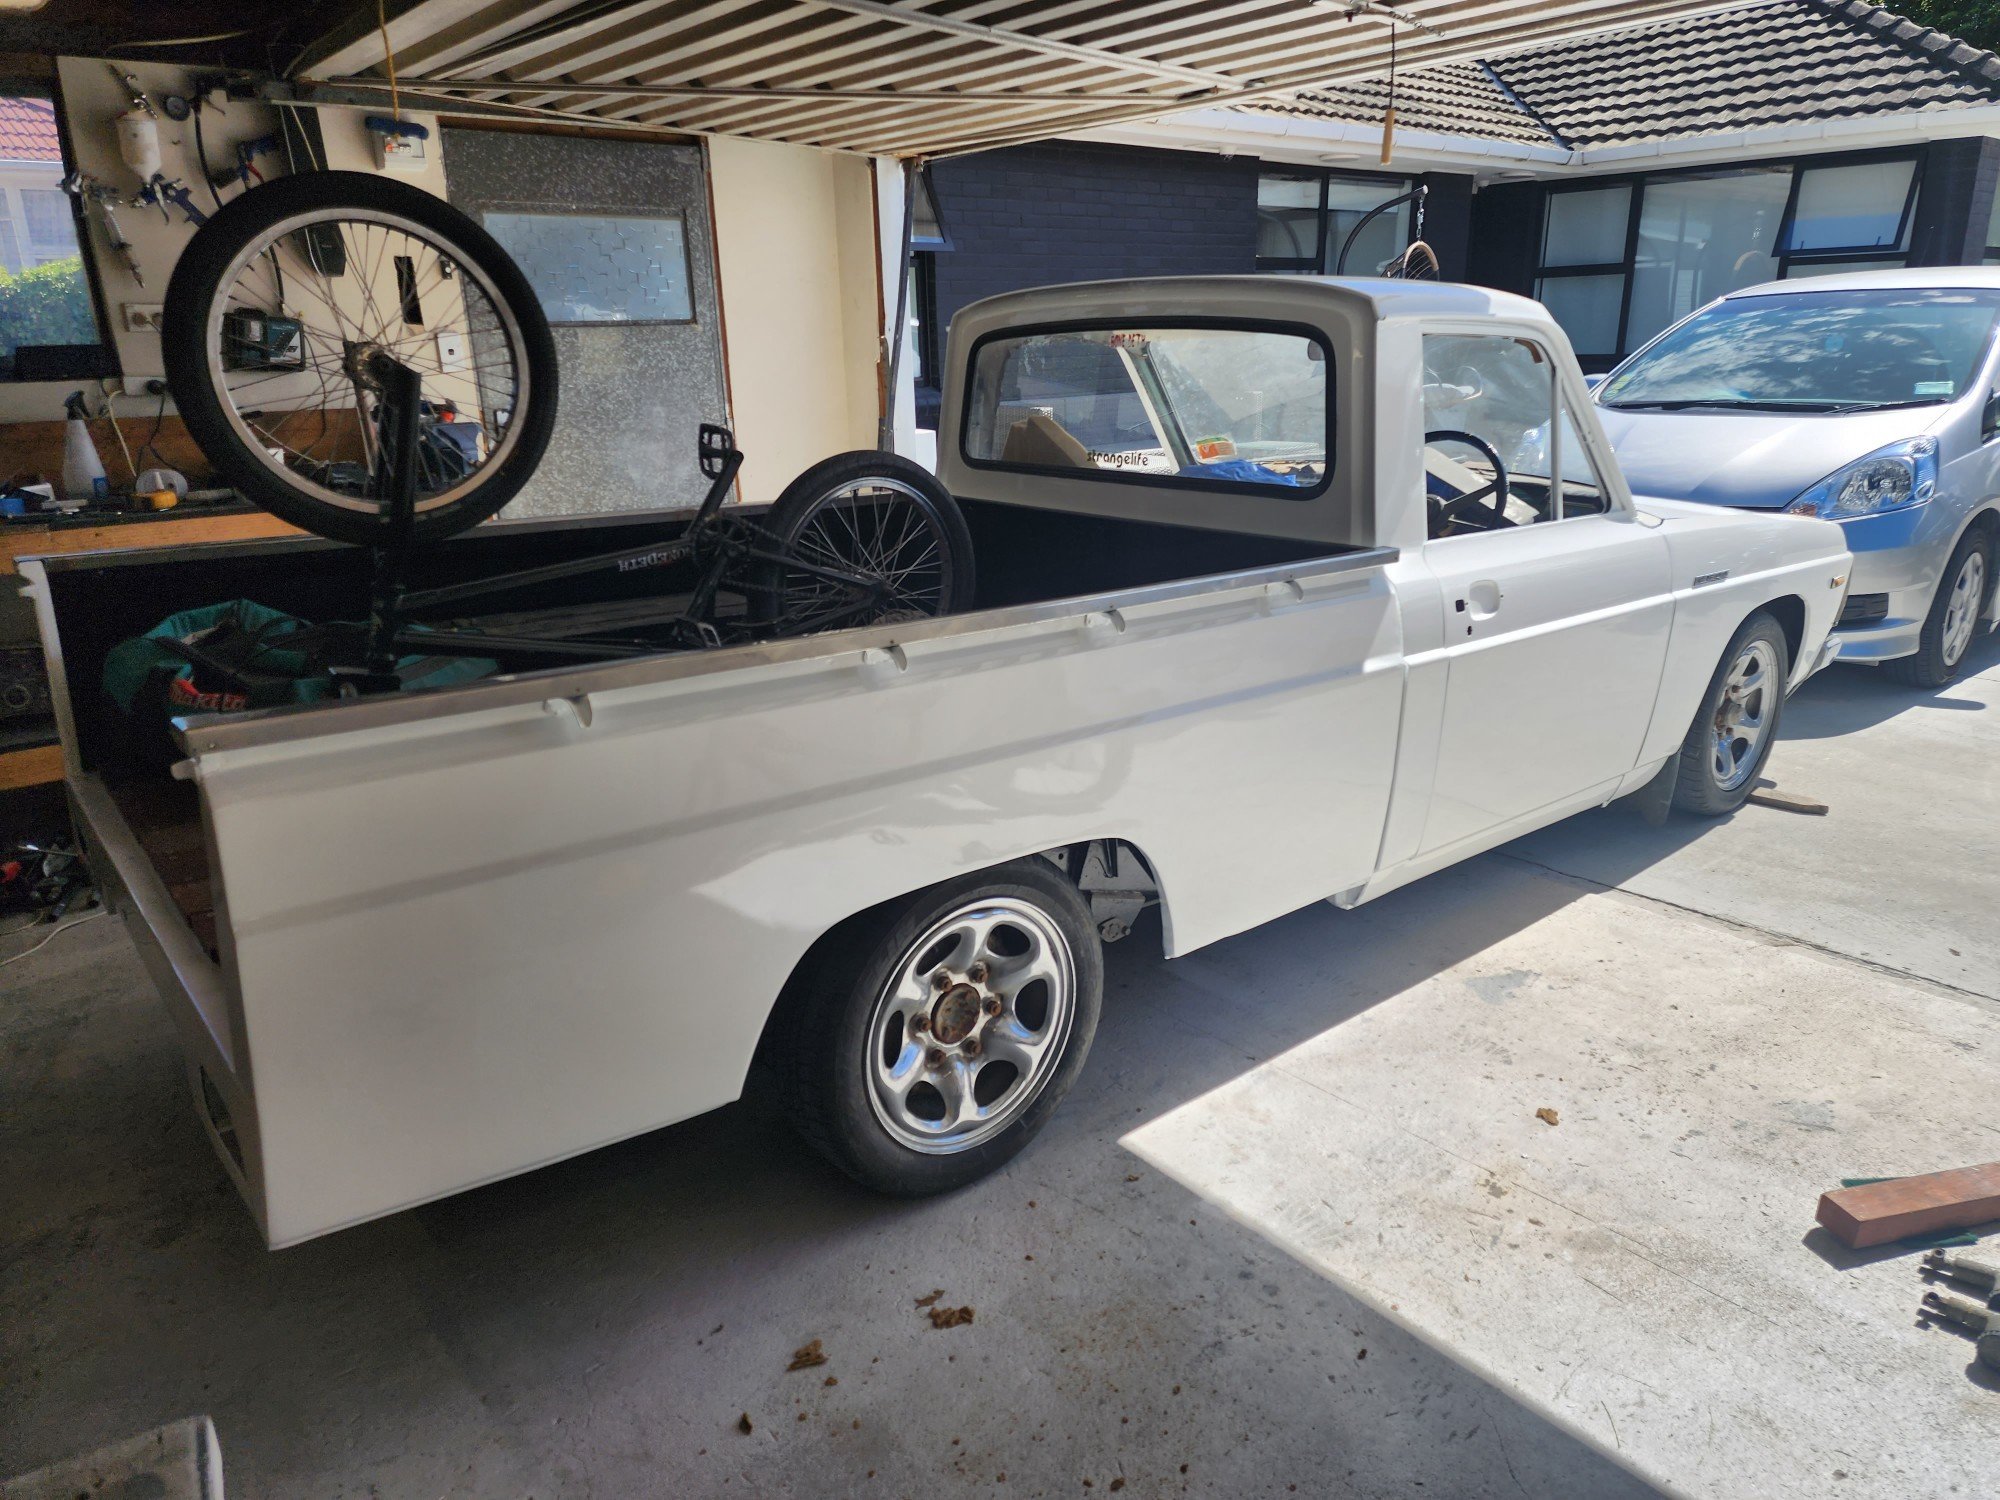
Bit more progress. Got doors and bonnet painted. Have slapped it together for some inspiration. Most panels need to come back off. Have started prep on engine bay and hope to have that painted in the coming weeks Damn it feels good to be making some progress after it sitting in the way for so long. If anyone has any leads on a 2l MA motor flick me a message
1 point
-
Sooooo cool! Also I'm blown away by how cool you've made that motor look. It's a work of art. That's not easy to do.1 point
-
Well done, an amazing project!
1 point
-
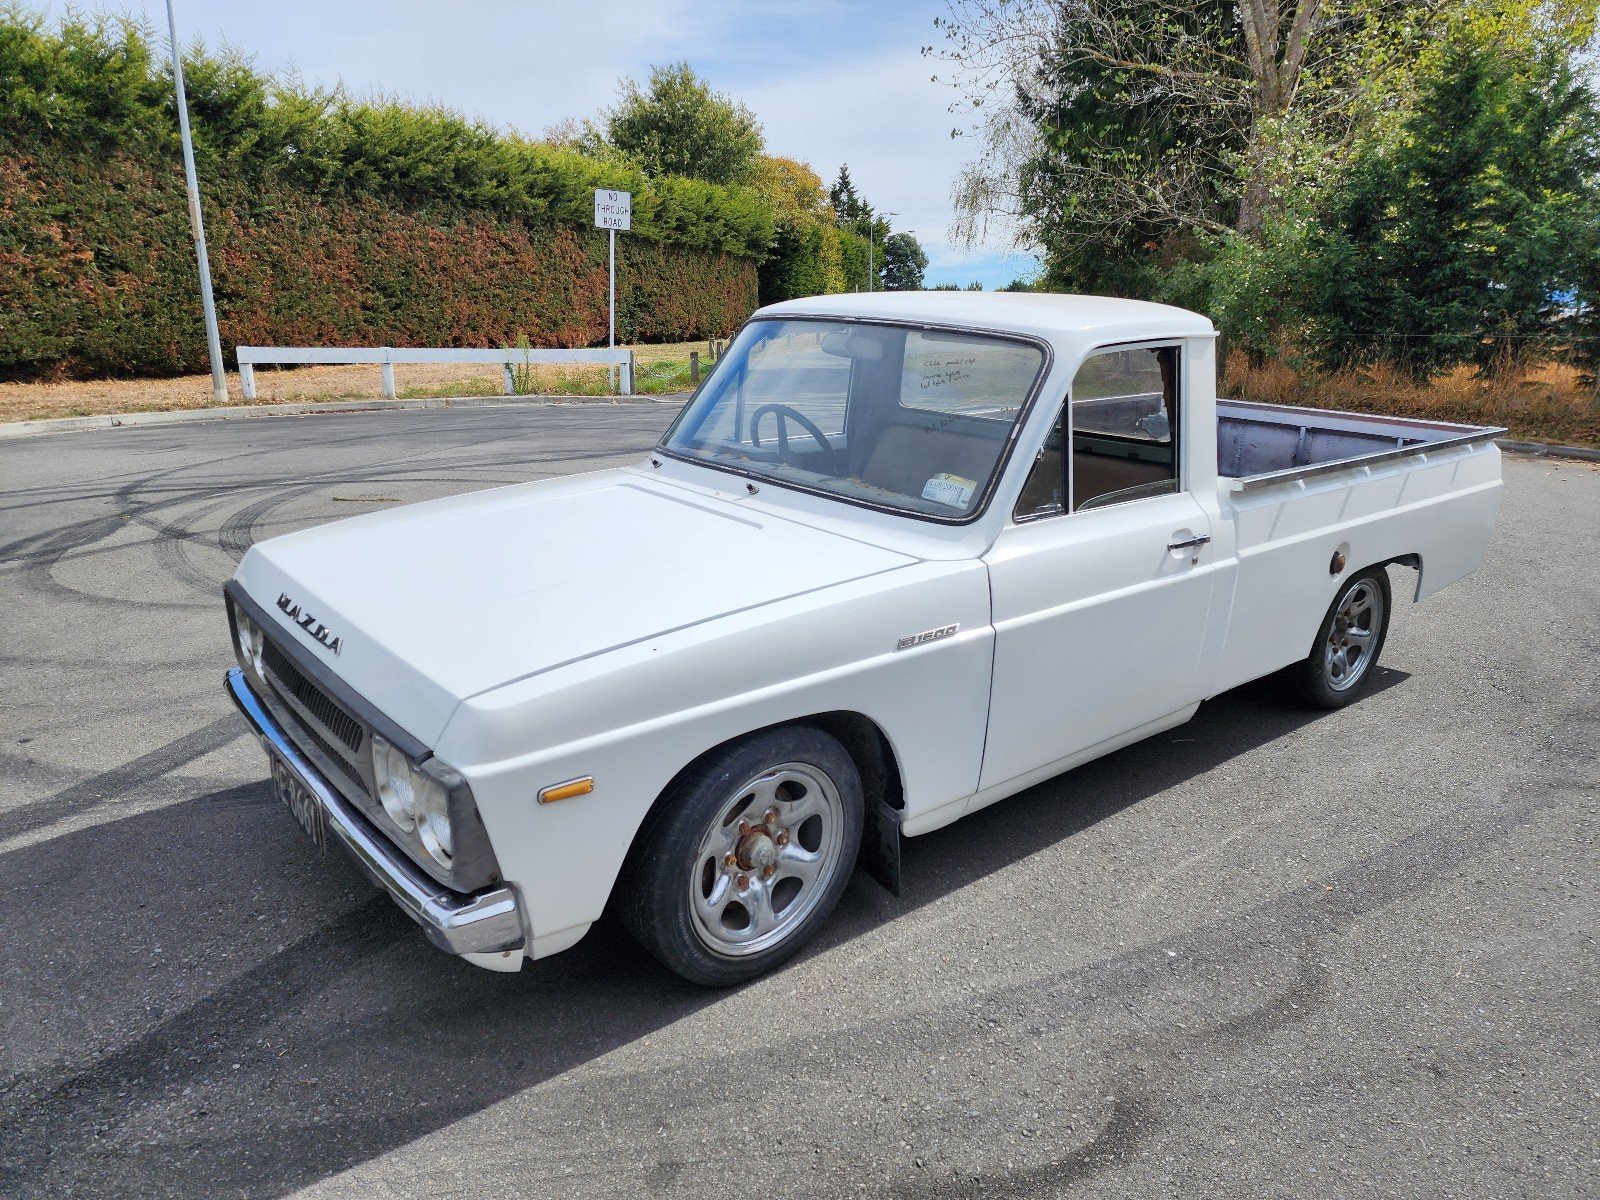
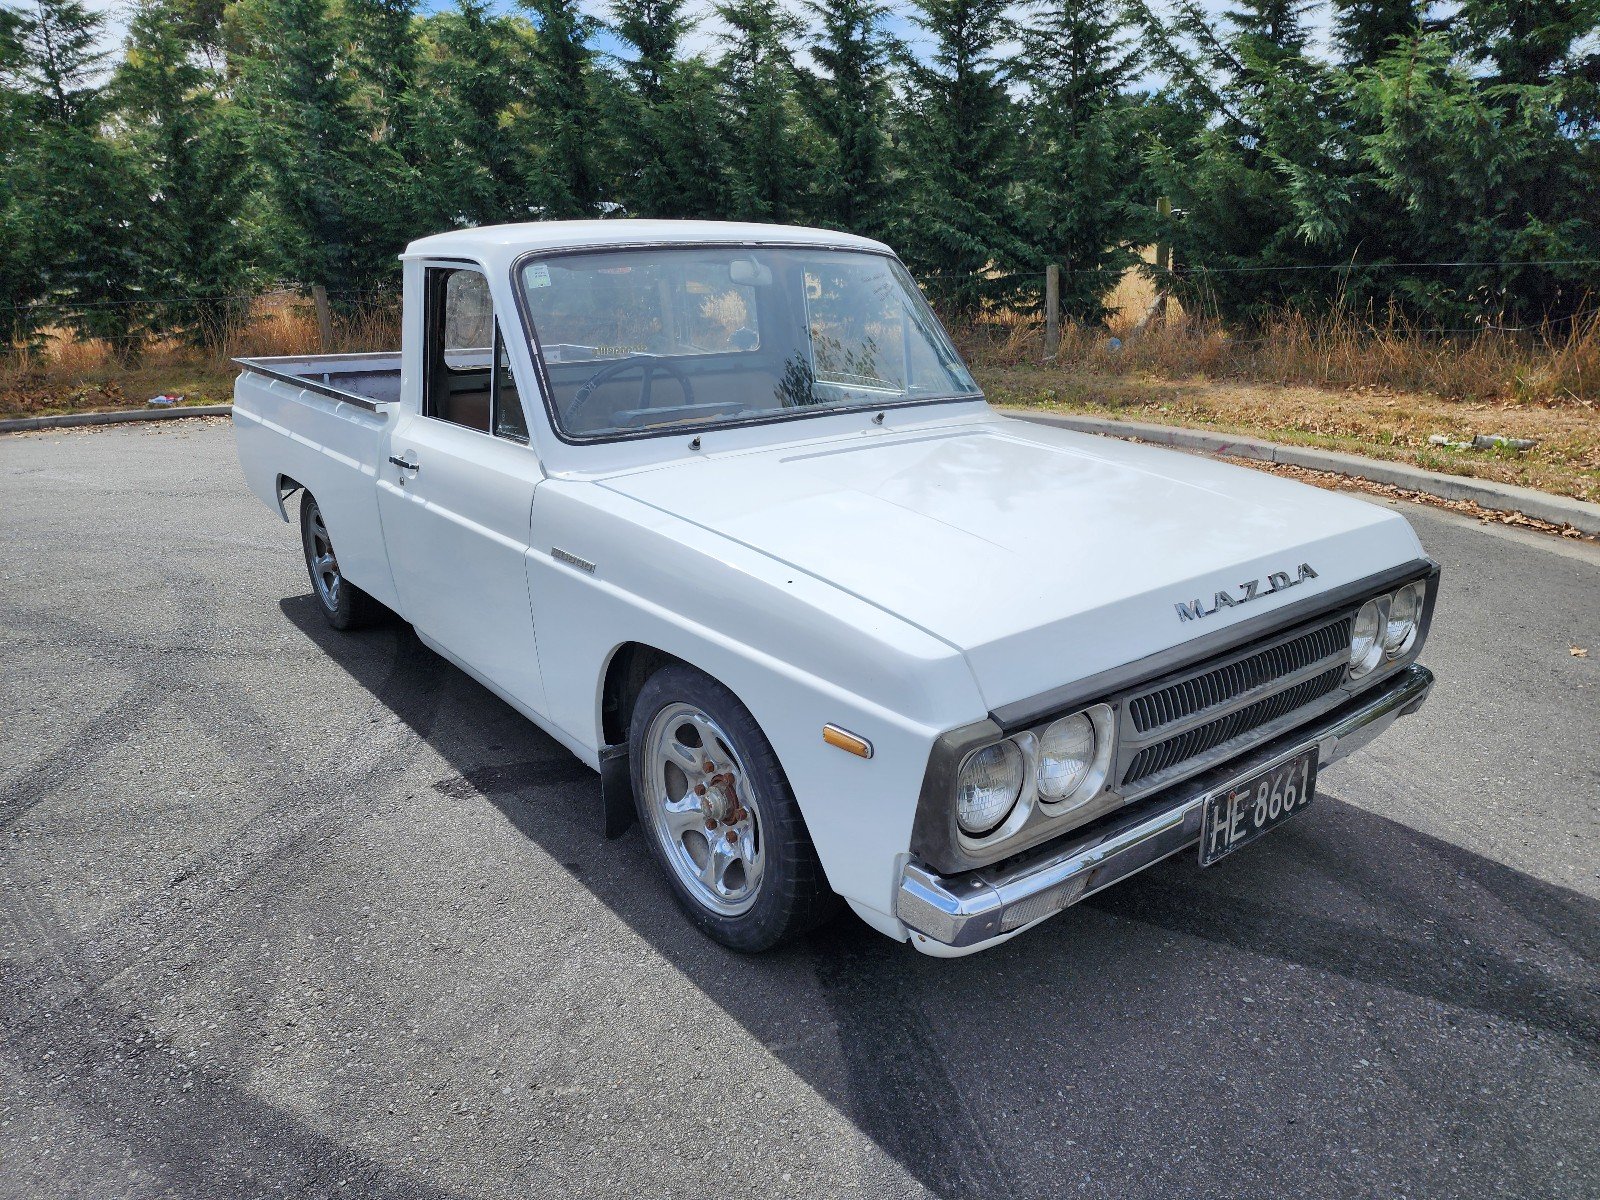
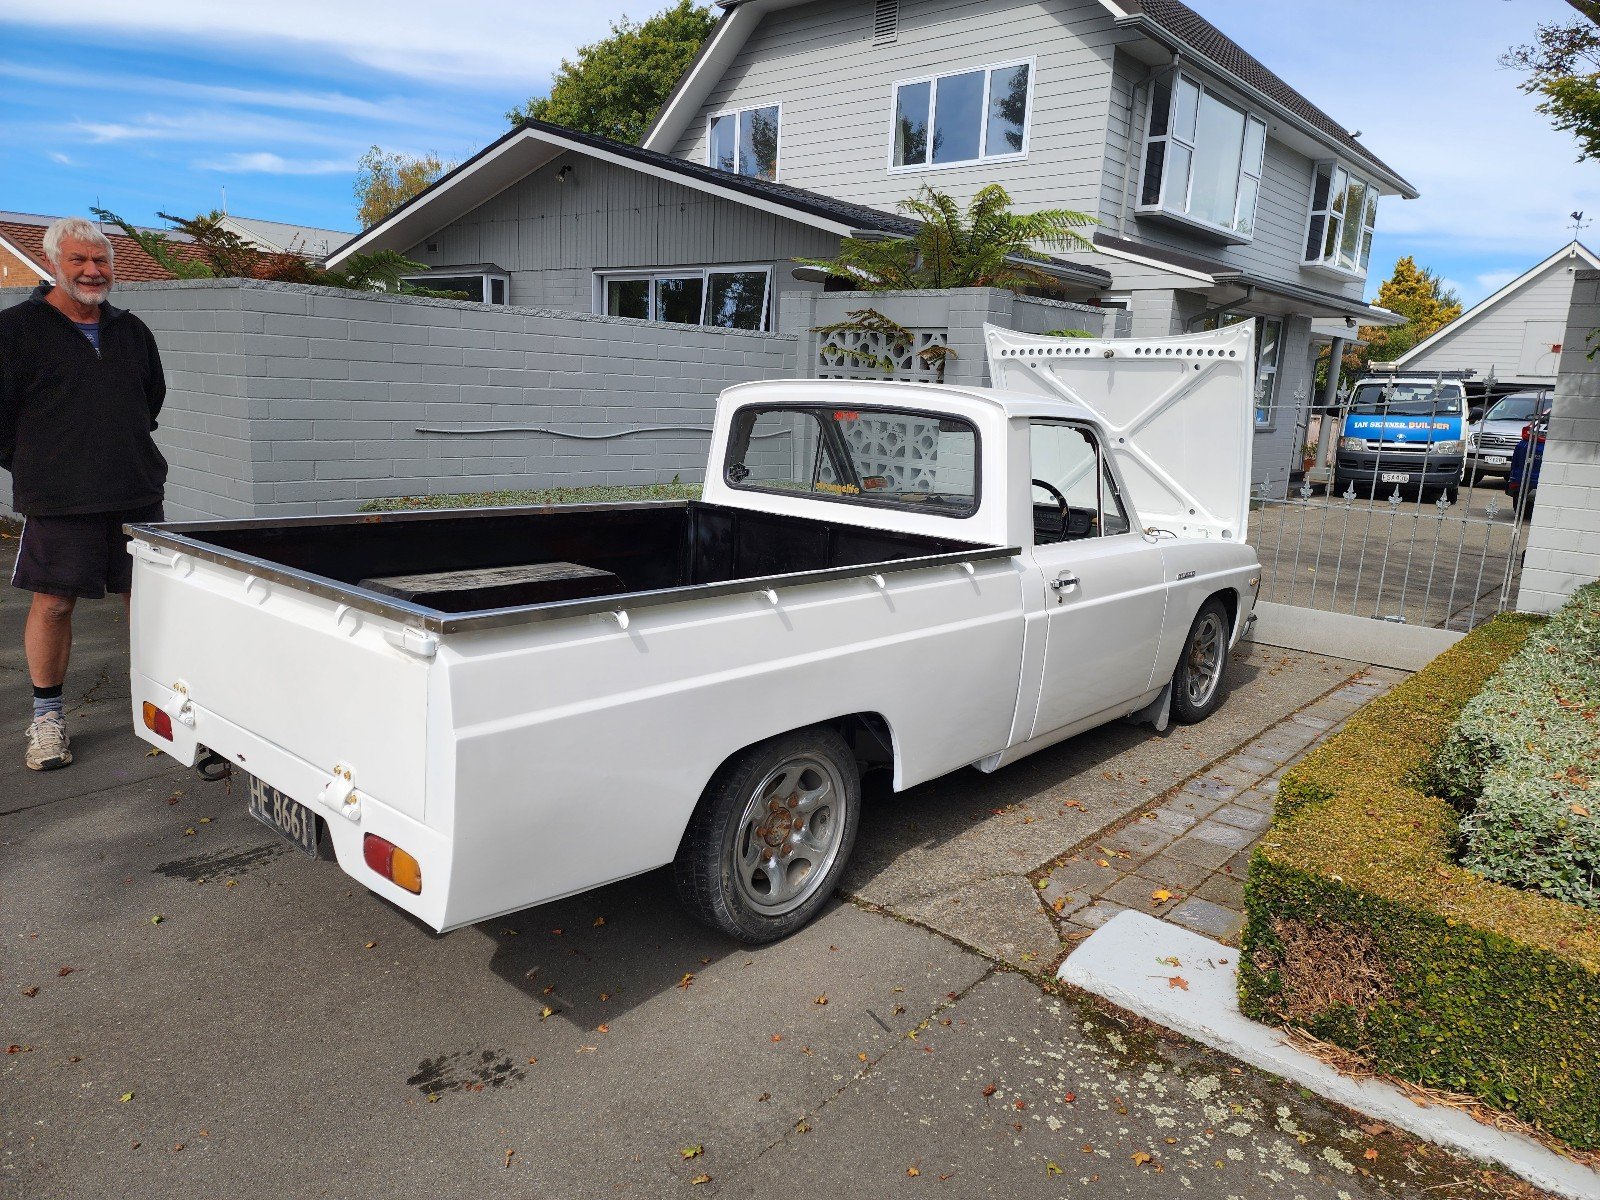
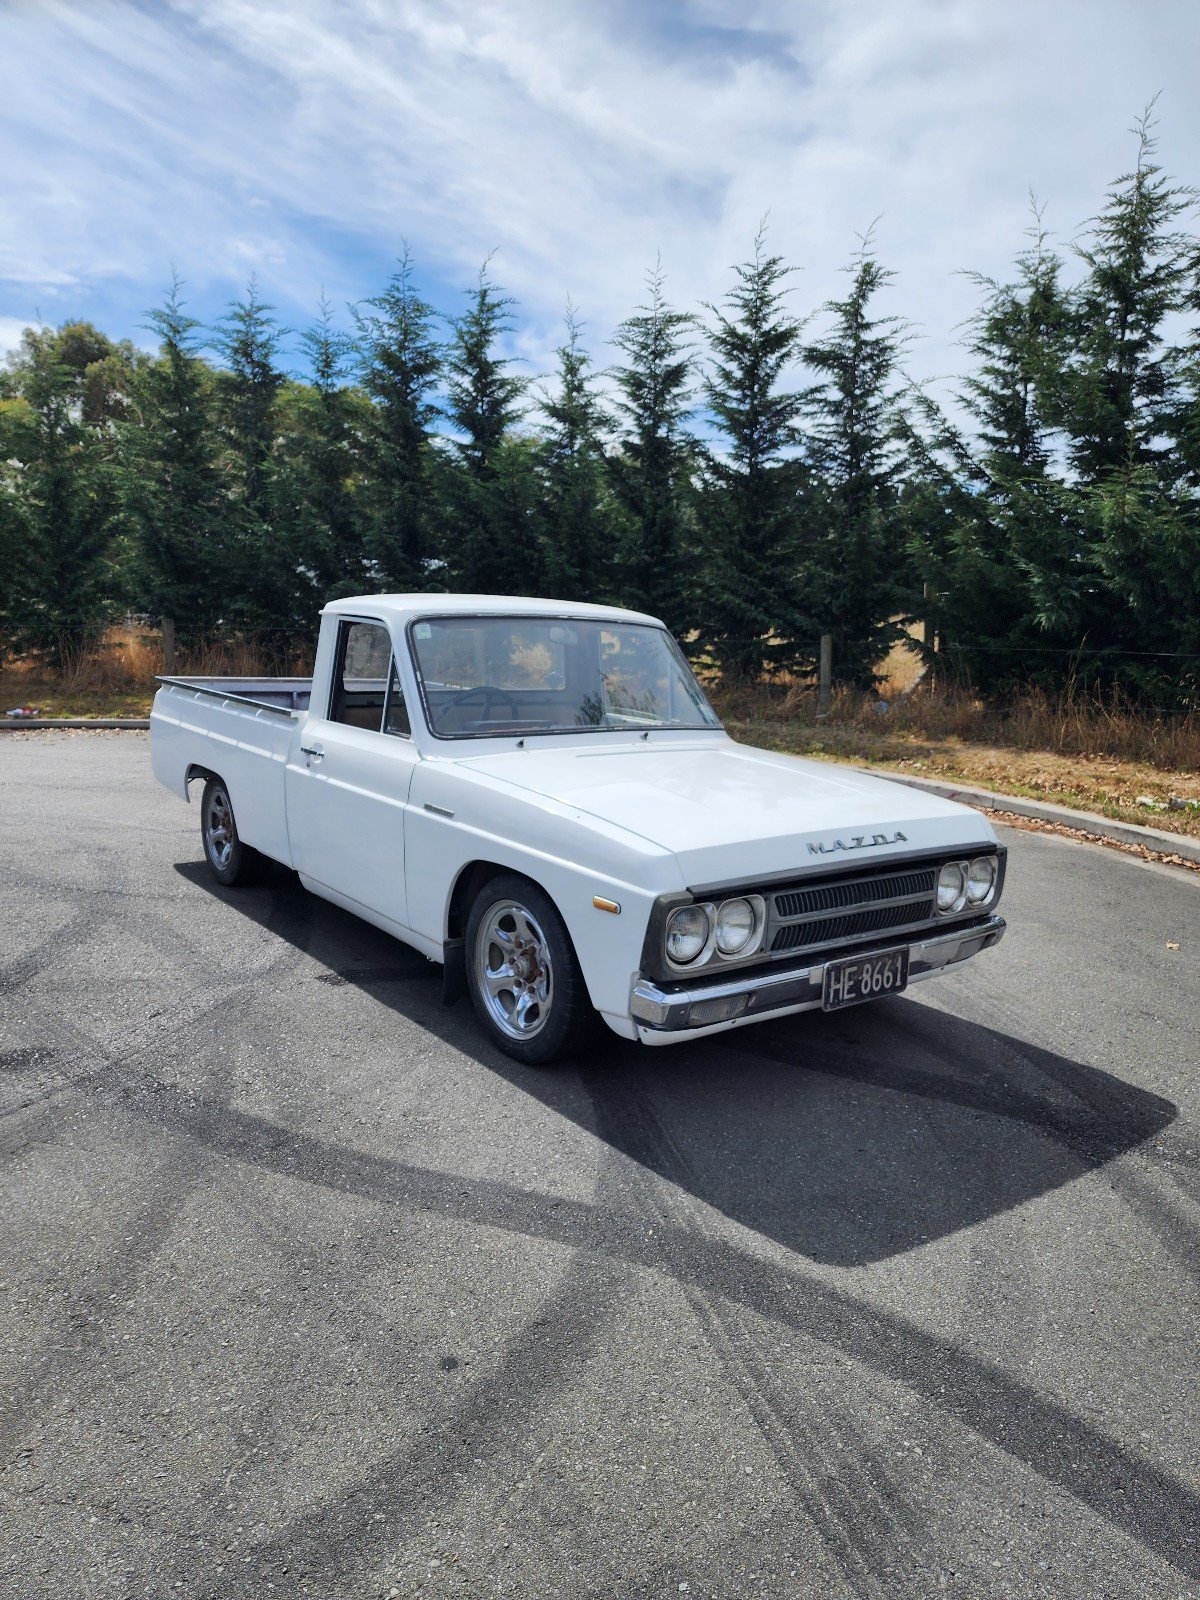
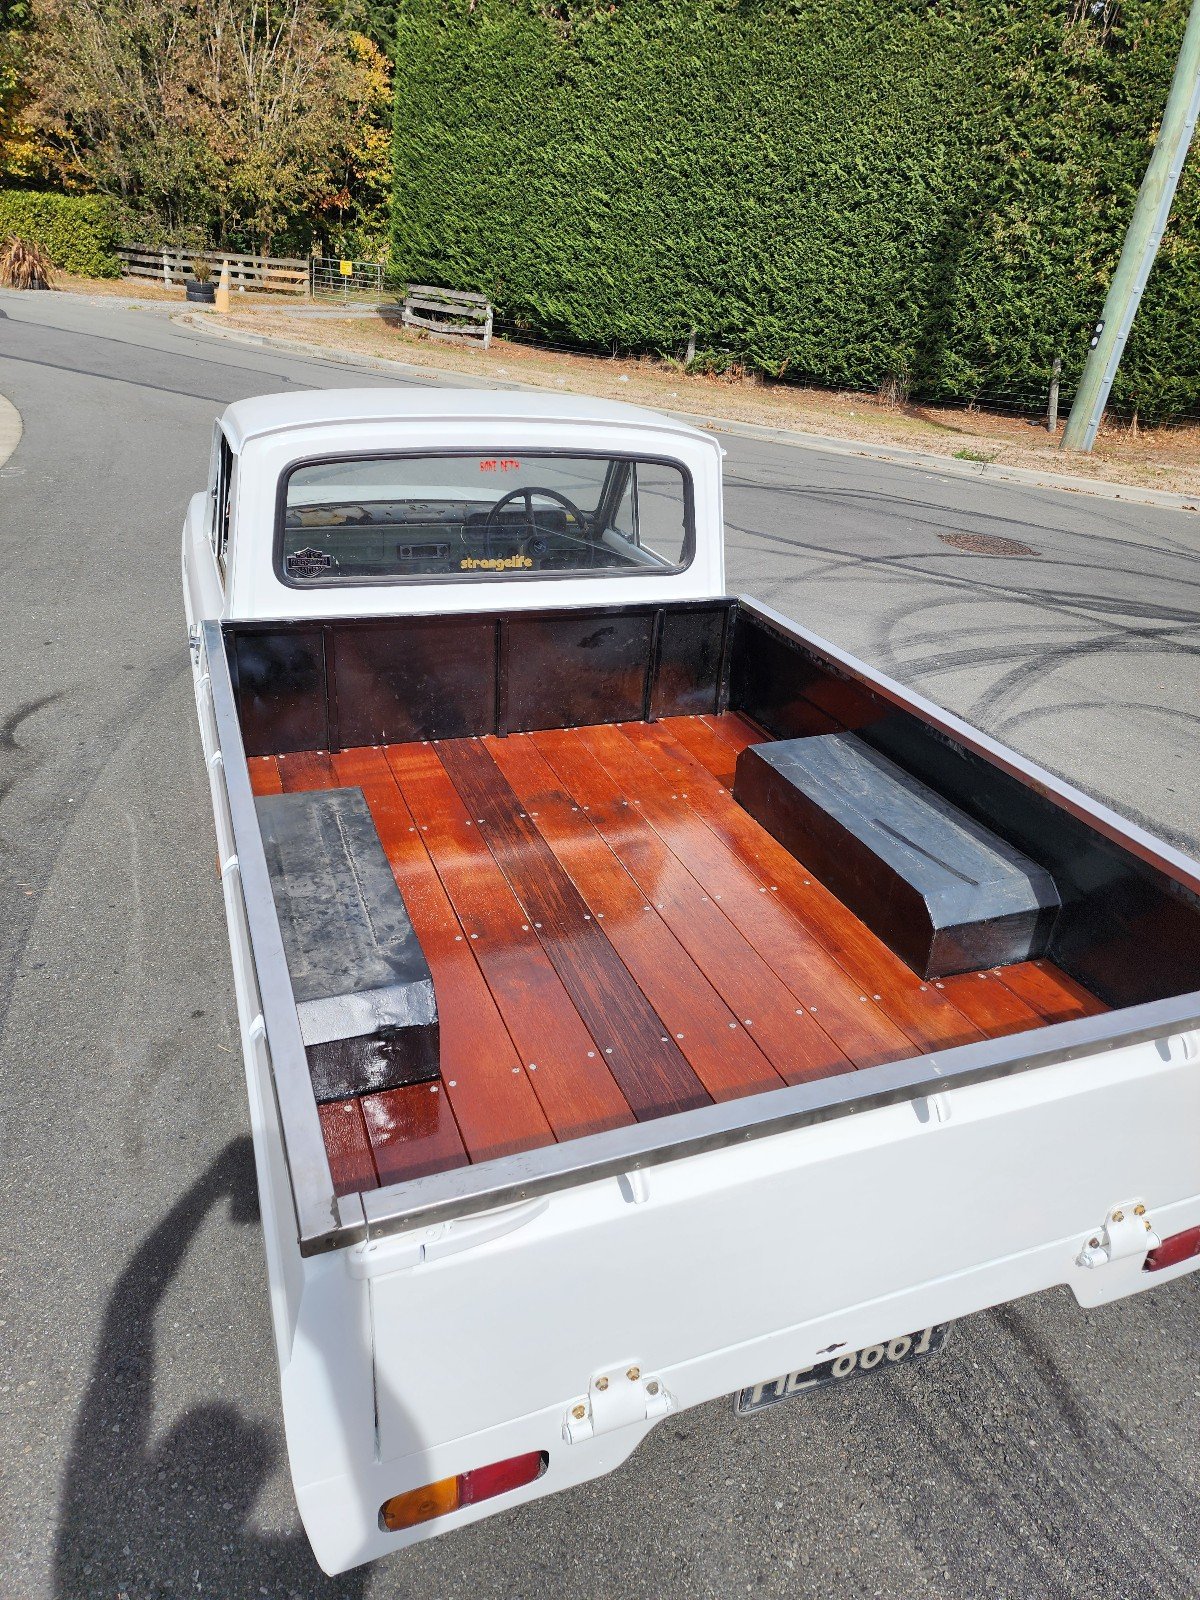
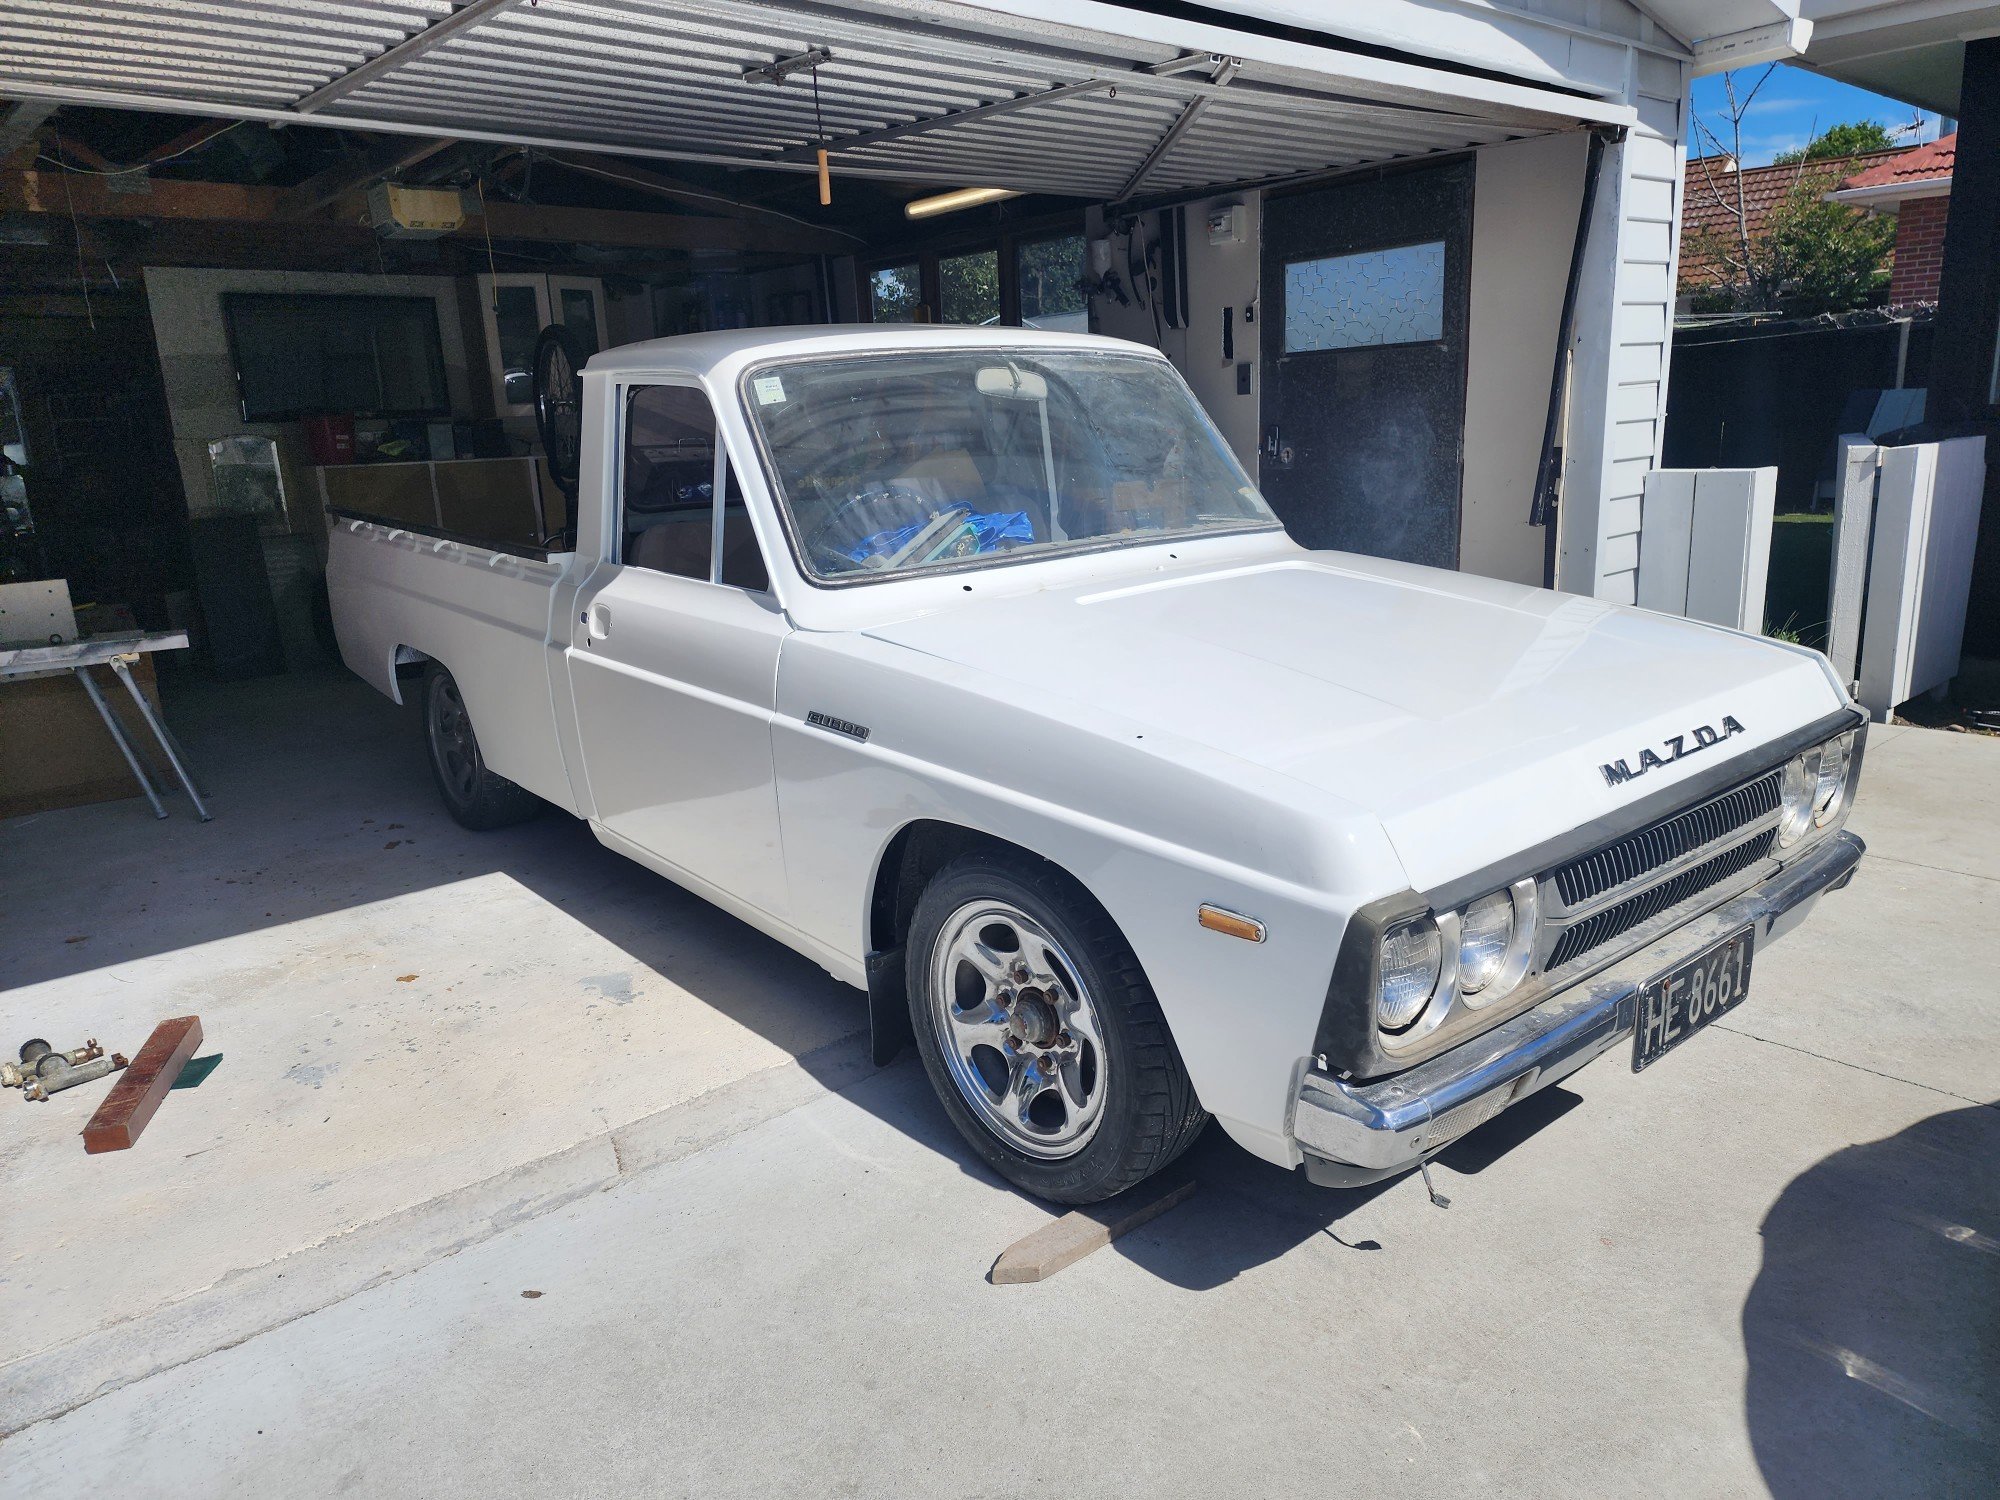
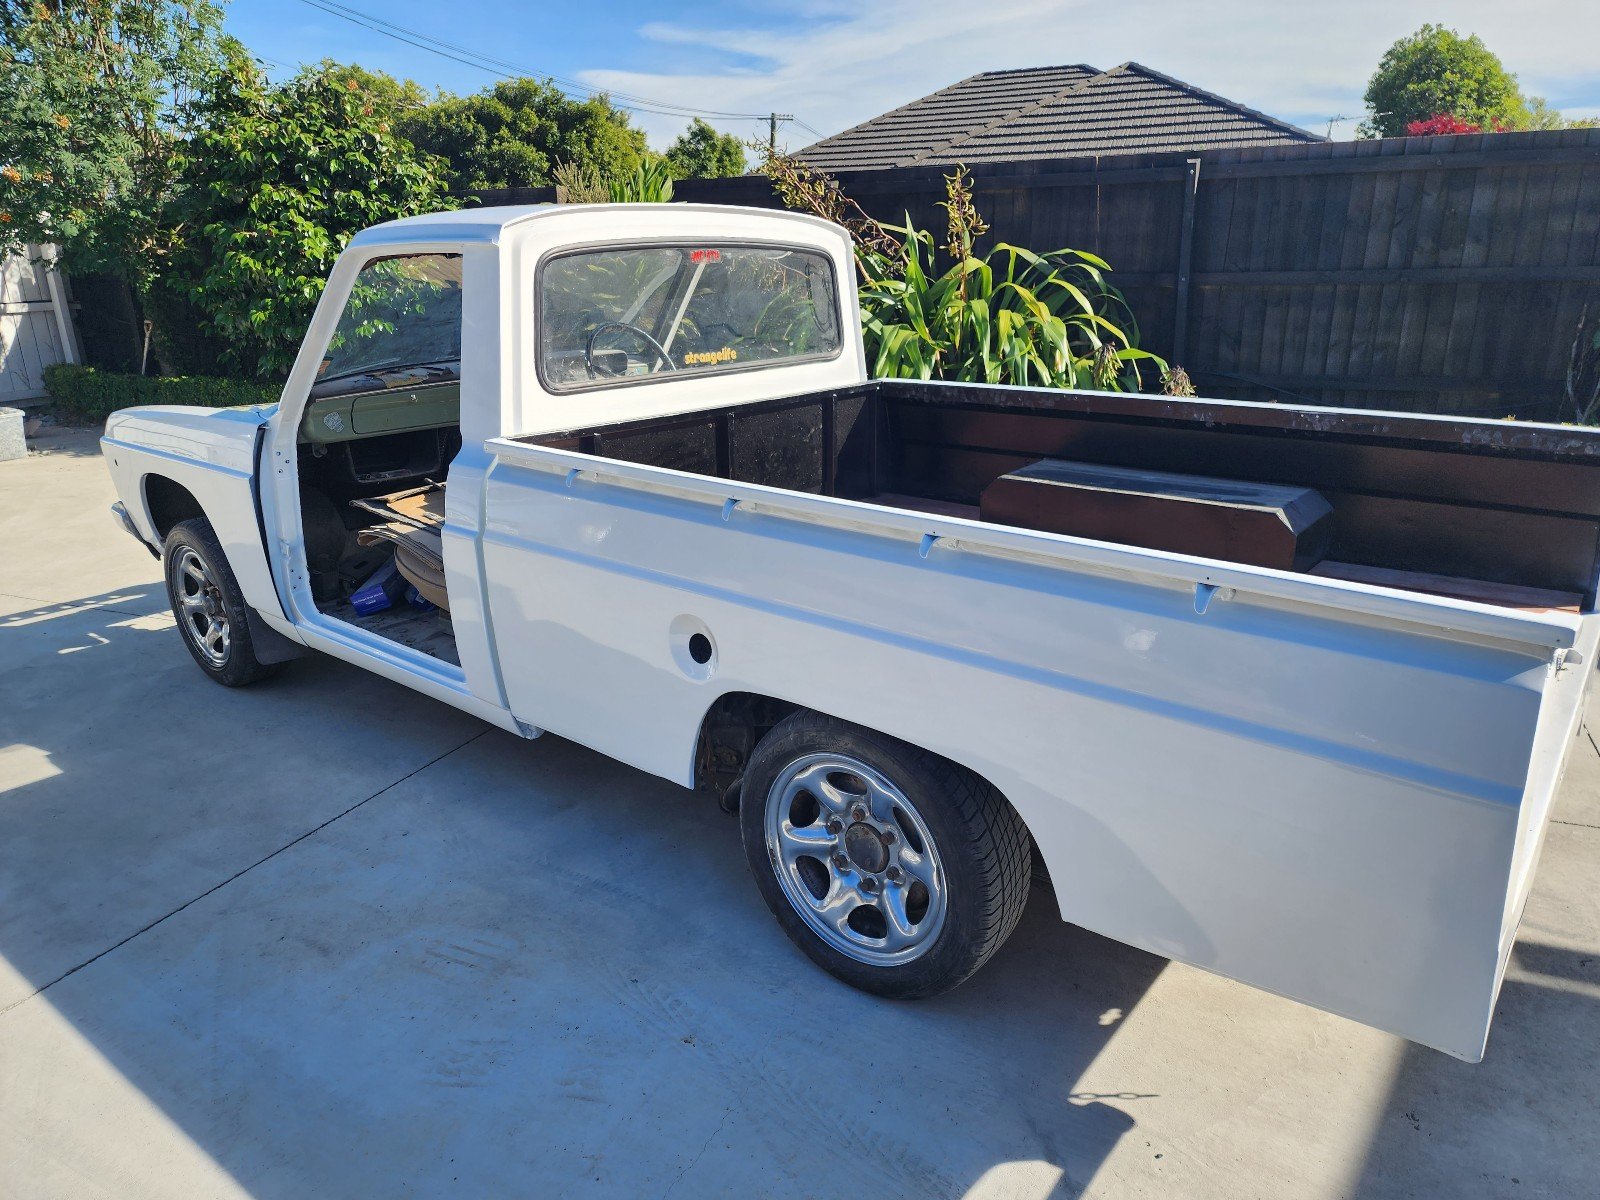
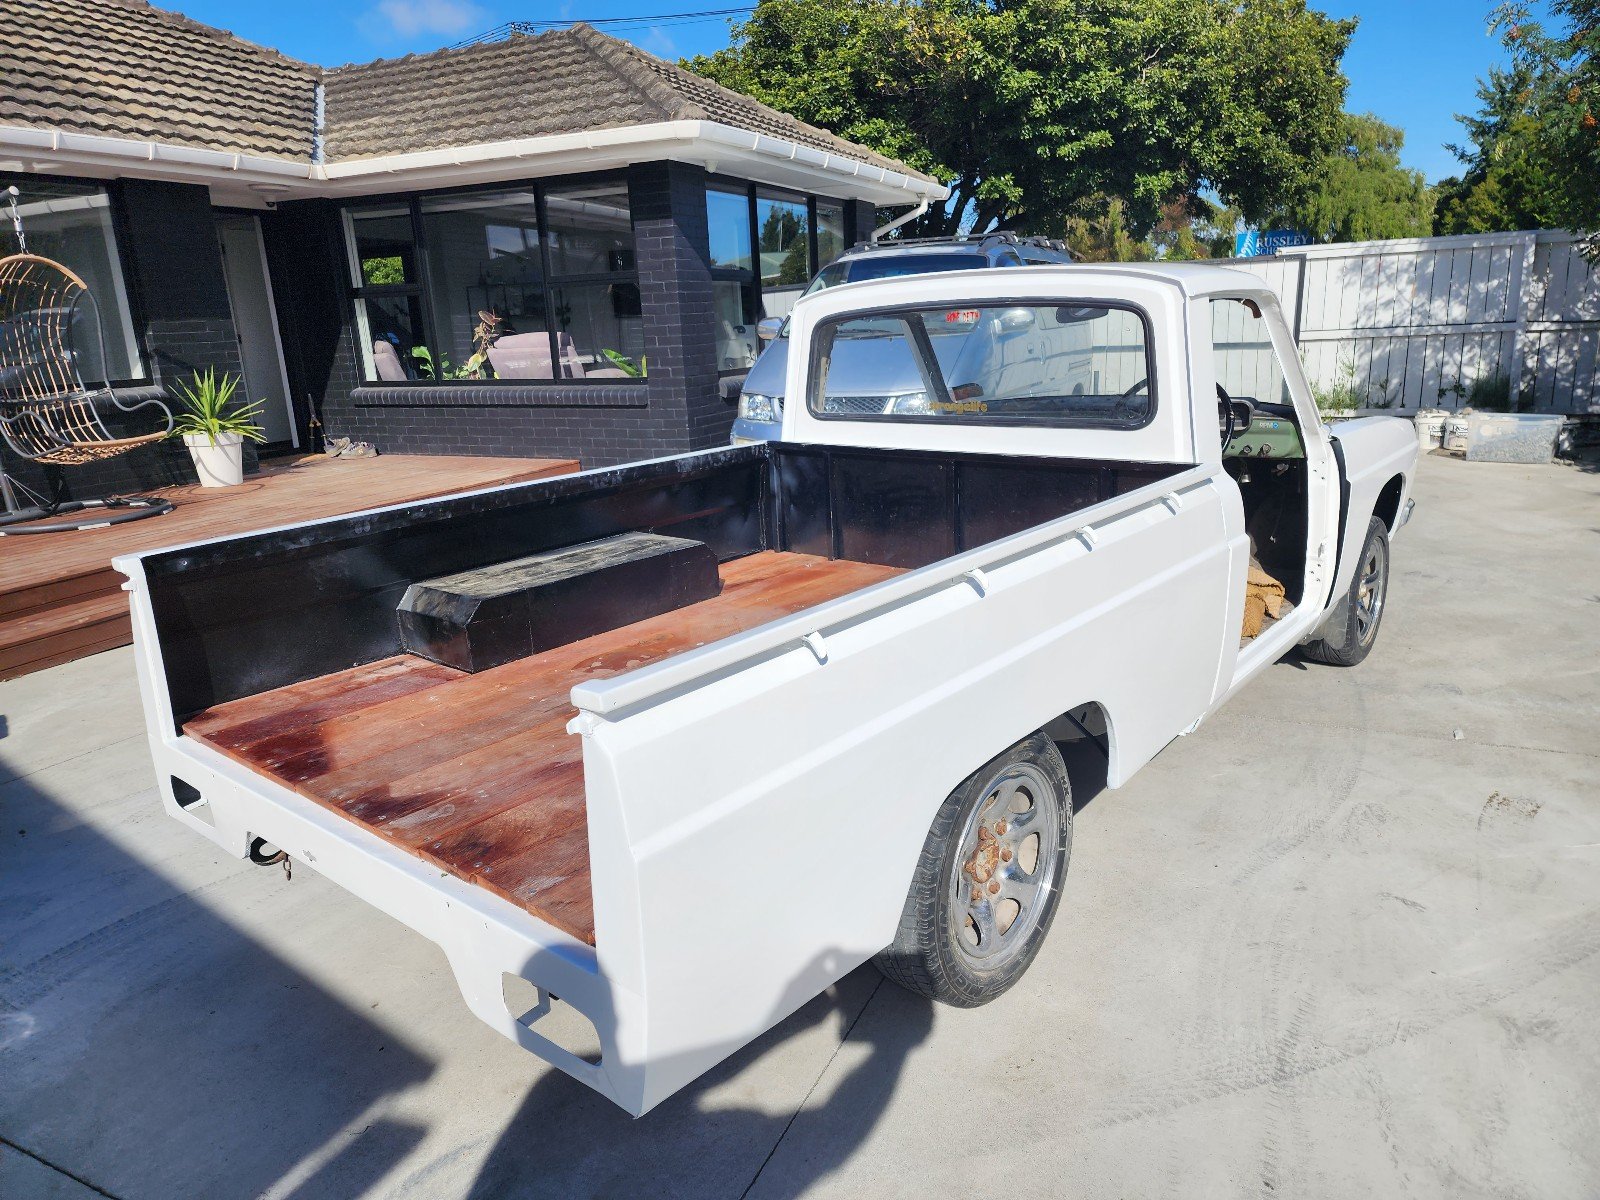
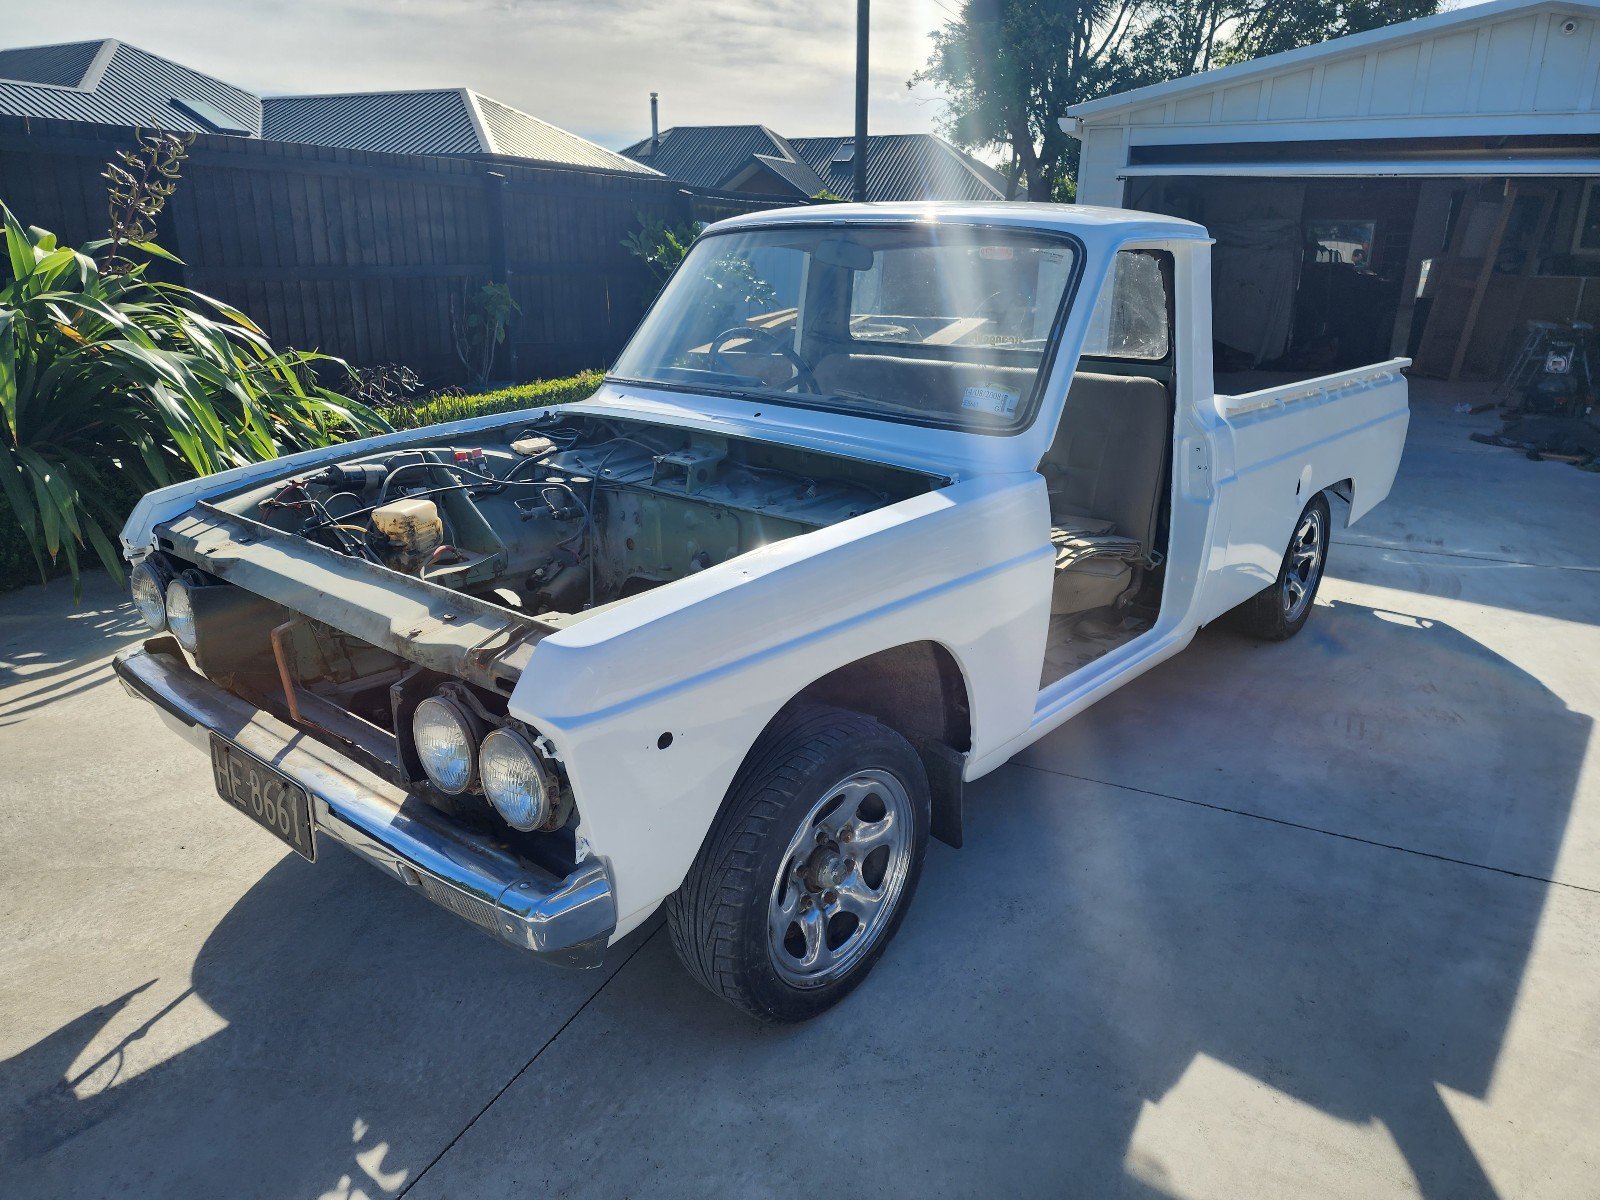
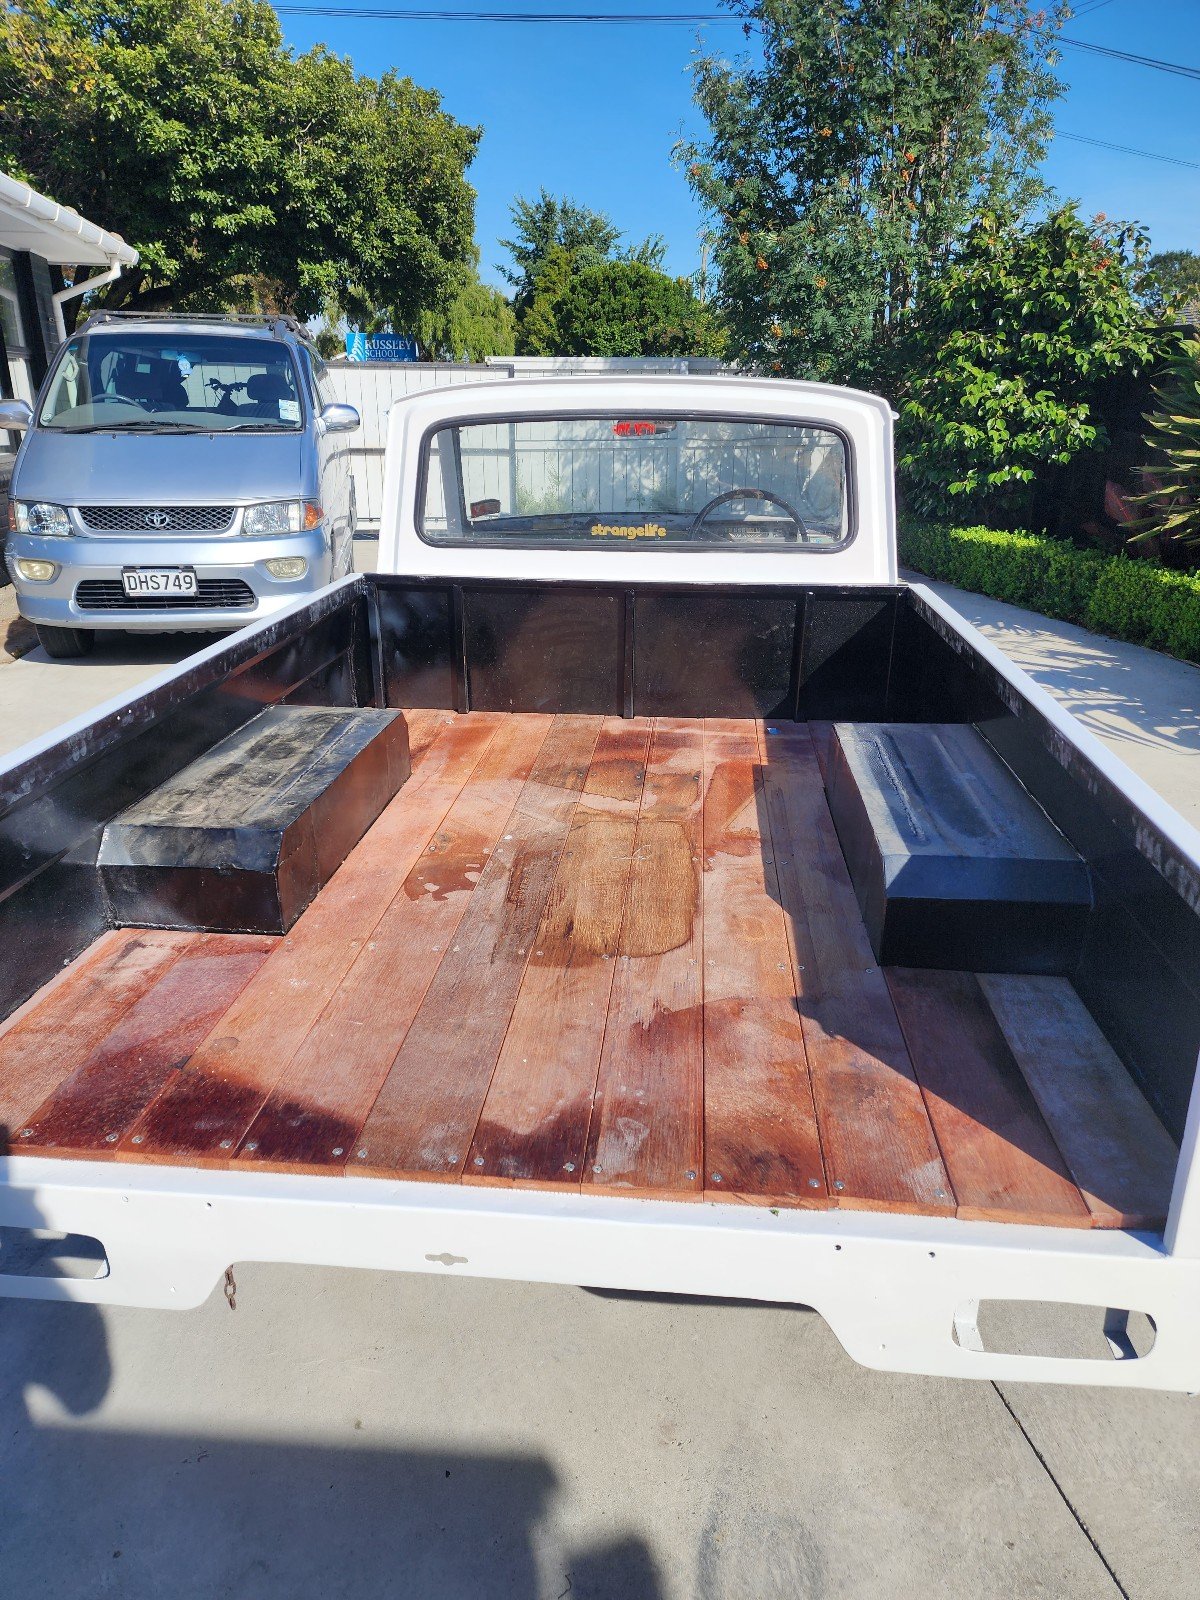
Thread dredge from a million pages back. I do still have this . Went hard over the holidays and got a few panels painted. Made a start on the deck ages ago. Still a bit to finish off.
1 point


.thumb.jpeg.384ff72c8d2b0ee0d34a7bdedb55bdcf.jpeg)

.jpg.9298a81b37527e20991ea9282033a829.jpg)


This leaderboard is set to Auckland/GMT+12:00