
Leaderboard


Popular Content
Showing content with the highest reputation on 12/11/19 in all areas
-
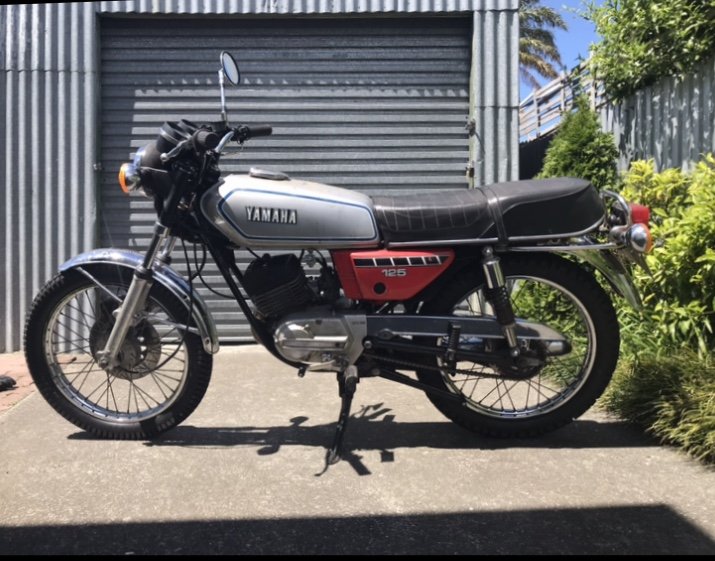
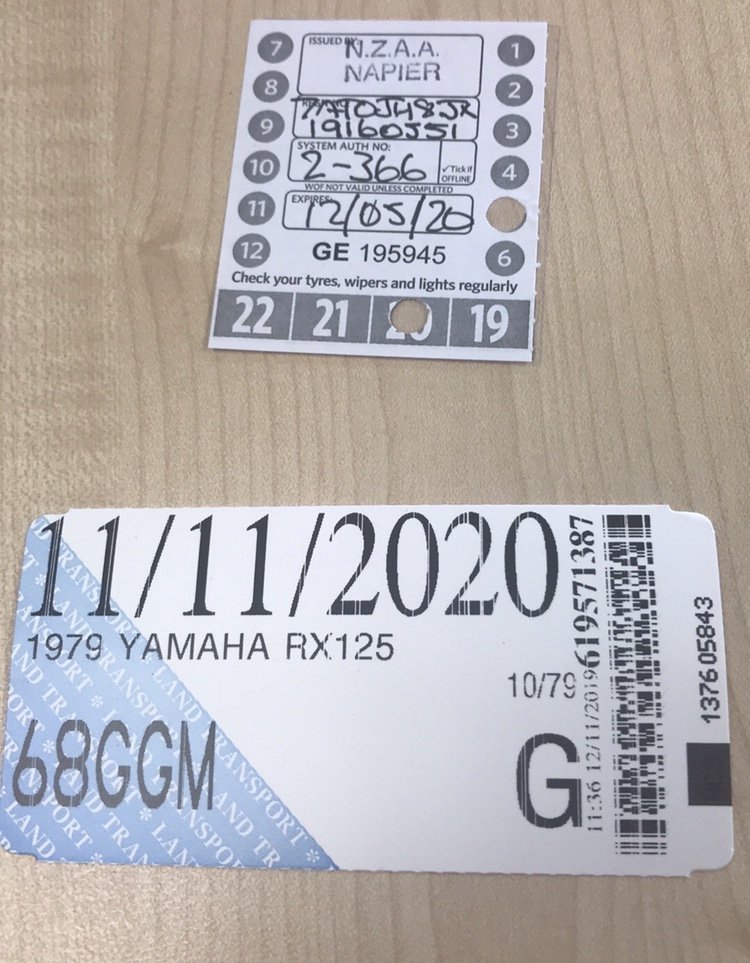
Hello all. I now have some first hand experience in re-registering a motorcycle that has previously been registered in New Zealand. so I thought I would re-cap the process for those interested. Note: may vary for cars. the motorcycle in question is a 1979 Yamaha RX125. This particular bike had not been registered since 1986 and was not recorded in the NZTA data. The only proof of previous registration was it’s original plate and attached wof tag. a few months back I walked into the AA testing station in Napier and asked for everything I needed before taking it in. The helpful gentleman told me I required two things; proof of ownership and proof of previous registration in New Zealand. He stated as the bike was pre 1990 I did not require a brake declaration. for proof of ownership, AA provided me with a standard statutory declaration form which I filled out and had declared and signed by a notary public at the Napier District Court. This took all of two minutes to obtain. for proof of previous registration all I had was the wof tag and number plate which the inspector accepted. i rung them up yesterday morning and booked the bike in for the following day (today). Dropped bike off at 8am and by 11:30 they text to say it was finished. When I got there the inspector asked me to show all the lights and indicators etc worked. Then they ran it through what I assumed to be a standard wof check which it passed with no issues. the cost was $180 then registration for 12 months on top of that. they even re-used my original plate, even without having to get the authority myself from that lady at NZTA which was great. all in all a very easy process and the guys at AA Napier were extremely helpful and efficient. hope this helps for anyone who wanted up to date knowledge on how the process works.14 points
-
Outer camtree patterns 1 of 210 points
-
Been a while since and update, headers turned up, pretty happy with them considering how cheap they were to buy and ship to NZ, started and finished de-burring the valley (what a crap job to do) next up was to clean it all down to get rid of and filings from the de-burr and to get rid of any solvents/etc from the machine shop, picked up a bottle brush for getting into all the little holes etc and grabbed a tube of engine assembly lube, Found a perfect use for the shower in the garage then started to assemble the bottom end, fitted new Clevite crank bearings fitted the new rear main seal and crank, put new Sealed power big end bearings in the old ones had seen better days, then fitted new Mahle piston rings and dropped the pistons back in, All in all a productive night after training on Wednesday I should get the cam in and timed up. Then I can slap the rest of it together, also I still have under seal to scrape, but I’m being a slacker and have left it for a while8 points
-
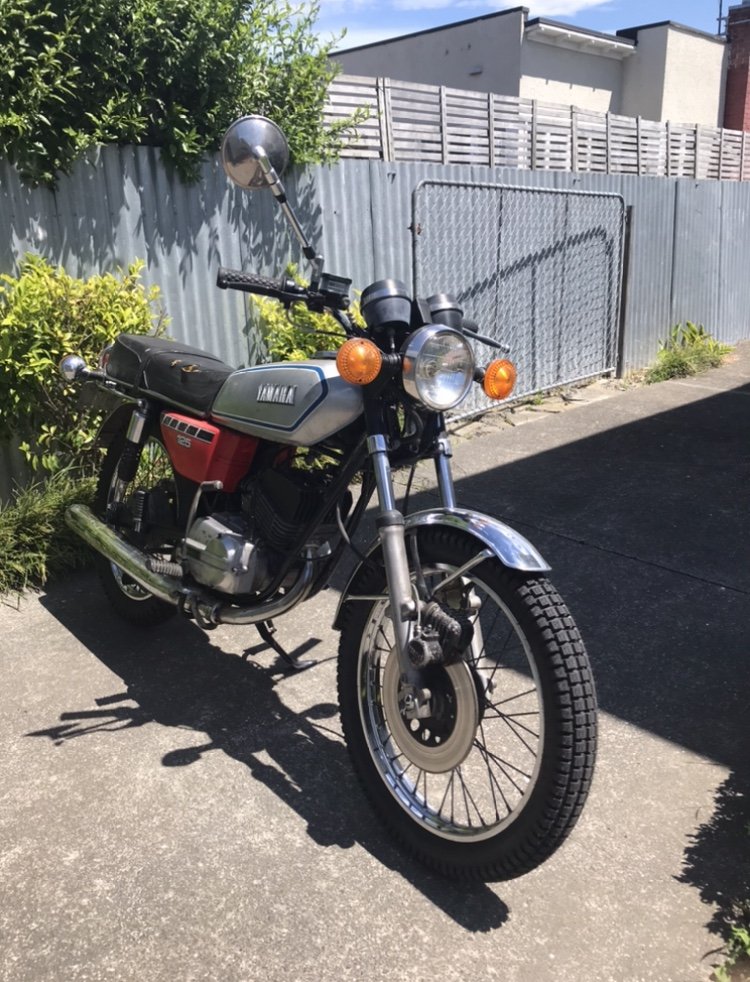
Aaaaand she’s legal as a drug sniffing beagle! i described my revin process in the revin thread, but today I got this thing back on the road. Stoked as fuck. even get to keep the original plate! 68 Gag em since last update I decided I thought I’d bang some off road-ish tyres on it considering my main premise for this bike is light off road duties. I managed to track down a PPSC control tyre Shinko SR241 in 2.75 x 18 for the front and a Shinko SR244 in 3.00 x 18 for the rear. The front needed a bit of a massage and some self clearancing to fit, but the rear fits comfortably. well what now!?!! I need to get the seat recovered and paint those side covers in original silver. Decided I’m gonna keep the OG silver tank and it’s patina, and get some decals done. then perhaps make some tasteful scrambler mods.... Bring on the Te Urewera Undertaking!!!
 7 points
 -
Yup, much the same as last year, we racing for slips this time?6 points
-
Probably have more from the build I can post, but not tonight. Have had issues with a nasty scraping clicking sound from the engine, at first I put it down to top end noise and tried to ignore it, but last time I had the cylinder off I got the Mrs to kick it over and the sound was still there, following my ear I'm 95% sure it's coming from inside the disc valve assembly. I'd noticed that at some point someone had munched up the heads of the 5 screws holding the inner valve plate in and the cross's were all jagged and rubbing on the plate, I replaced them when I put it together but the disc has a few decent gouges in it. I'm hoping the solution arrived today. Looking at the SGP stickers, there's NOS from the 70's, 90's and fresh new parts. Going to attempt cutting the disc for more nangs while I'm at it, have found a few timing specs to go off, so fingers crossed it works out!
6 points
-
Cash in hand mate, always cash in hand5 points
-
12-11-19 @johnnyfive @Vintage Grumble @MopedNZ @GuyWithAviators @Shakotom @cletus @tortron @datlow @keltik @Truenotch @TimShadboltfan27 @WankBankA100 @BLIZZO @MaxPower @Dolan @Mitch.W @Tumeke @Tumeke's brother Brett @UTERUS @Ned @RUNAMUCK @Zeubin @Atex Lee Dan Shannon @Deano Mike @mark105 @Geophy @Duke Blackwood @Geophy's Dad @peteretep @Beaver @Archetype Lance/Julio Ryk Chris/Tofa @anglia4 @anglia4's Dad Paul ThatSlowGuyOnTheRuckus/Dan @slacker.cam @sentra5 points
-
Wife gone out so back in the shed. Cleaned the engine block up but the paint pretty much fell off and was quite rusty under the grime... So 5 mins with a wire brush gave me this... and bombed it with some primer... Will paint it black if I find some suitable engine paint tomorrow...5 points
-
Yeah exactly. Theres always a stupid overhang detail like this that makes it harder than it should be!3 points
-
So I had a conundrum with the shifter where I could run it back to front and it would work easy but the shift direction would be reversed (race shift) and I HATE race shift, so I opted to engineer a new shifter linkage, sources tie rod ends etc and then Dad Blackwood was like “why don’t you just pinch one from one of the spare bike frames lying around?” So we did, and with little modification, it fit like a glove. Thankyou FXR150 frame haha. Also repaired kick starter and locked in a lot of the wiring, just have to repair fairings and install an Oiler really and we’ll be rolling for Rego! Pics to come3 points
-
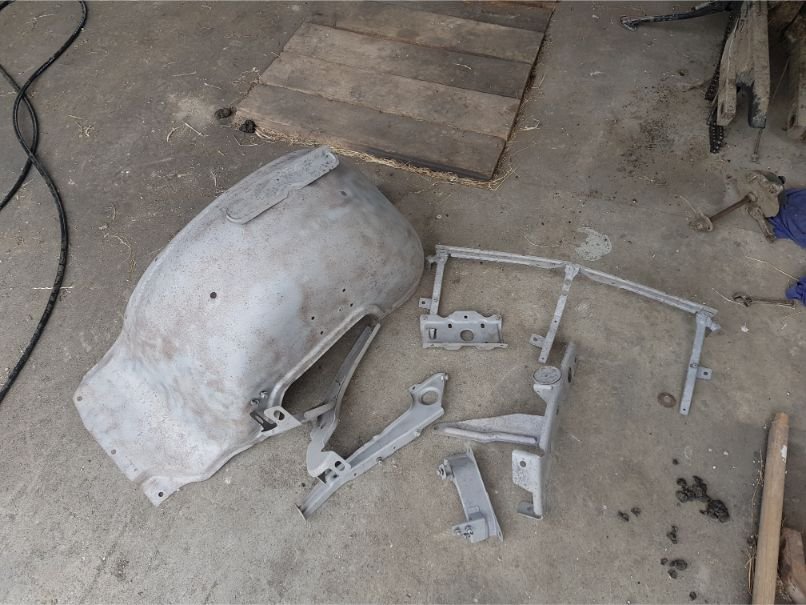
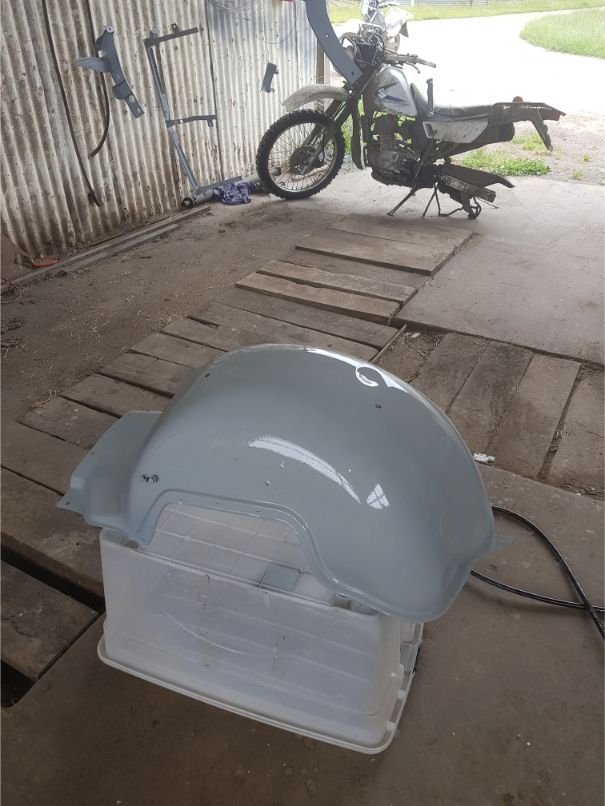
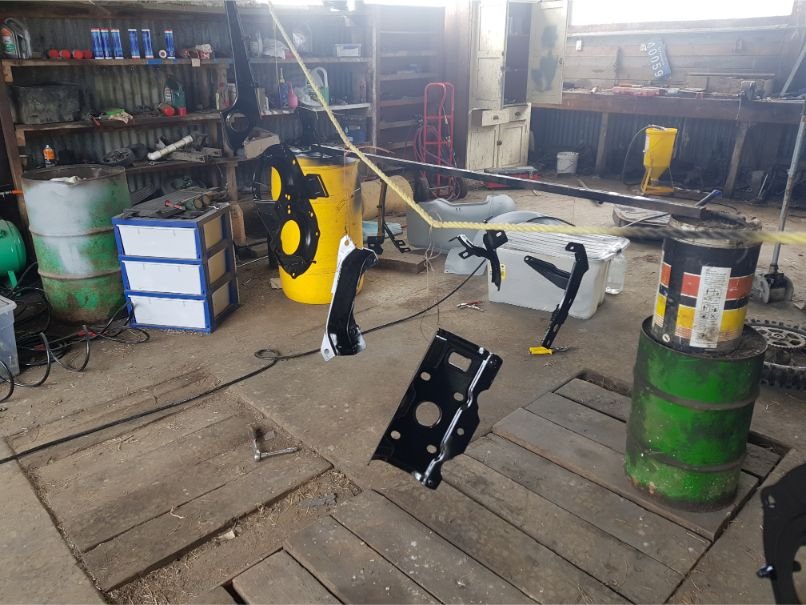
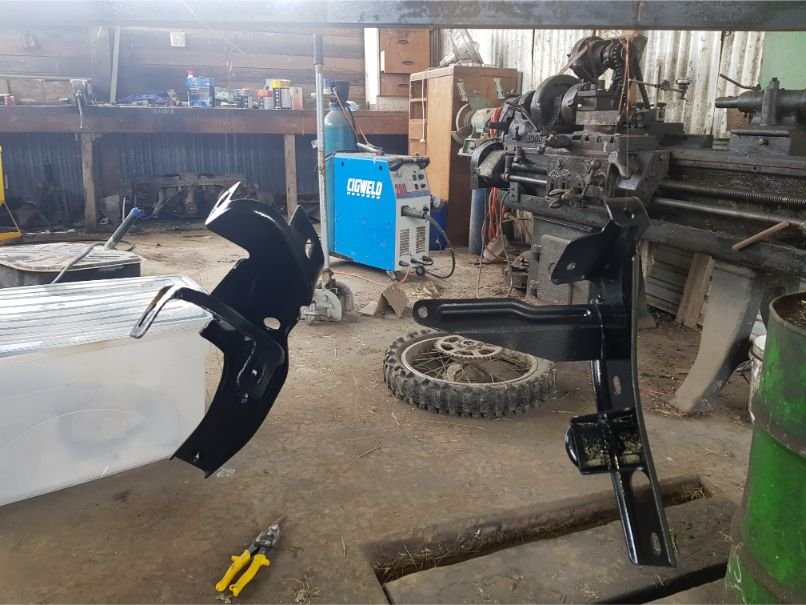
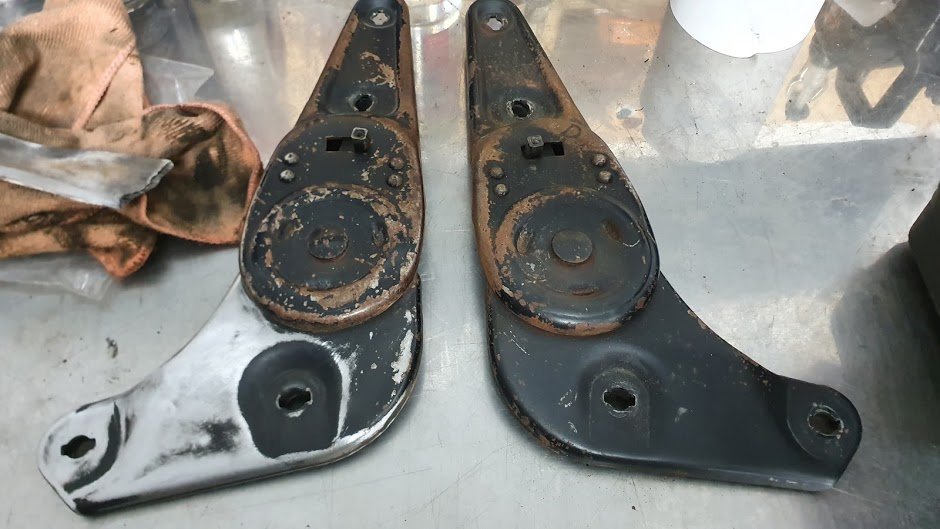
Blasted and painted anything I could. Pretty tedious work bit real happy with the result. Think from memory I replaced the bottoms of those inner guard things because they were all rust fucked too
3 points
-
My little ol town was covered in the sweet smell of Bogan(red neck?) perfume recently (tire smoke). The Waimate 50 NZs longest running street race was on for three days. Got to hand it to the drift boys – put on a wicked show. Primed up the old Nailhead. was so easy. With in 30 seconds oil started dripping and after a min or two of constant oil pressure we left it at that. Dropped the front seats back in – good old mexican blanket covers a world of horrors. Front fenders on, fluids added and it was time to push the old gal out the door to get a few pics and then finally turn the key. Oh My Golly it was an exciting time I tells ya. Sitting nice in low. Below is not even the lowest part of the car With the chief garage cat supervising on. We turned the key… engine turns.. oh so exciting ! the starter at least works and we have oil pressure!!! Then after VRROOOMMM it starts! no messing about it just roars right up. no feking about with anything at all. Happy grins as the un-capped exhaust loudly roars. …. hmm whats that I hear… Clunk! clunk! clunk! engine off. Kinds sounded like down below. hmm guess the crank weight was pointing up and wasn’t noticed when this was fabed up. bugger. Cat was about as impressed as I was. With that culprit removed and confidence high we start again. tick tick tick…. phuze nut! turn it off, shove some wet rags in the side pipe openings so we can hear better. https://drive.google.com/open?id=1KNN_1E4qhxXvlvvJkmMiKFL15qixBPxu Yip its ticking. cant seem to track it down and didnt want to leave engine running till we talked to engine builder. Drove it into the garage. Draining the oil. Builder says it could be the lifters. Doubts bottom end. But recommends we carry on with the Run In procedure. And see how it goes after. Will pull the pan and have a look. Will pull the rocker covers as well and run my eye it all as well. on the bright side… if it is lifters I can use it as an excuse to get a new cam ^.3 points
-
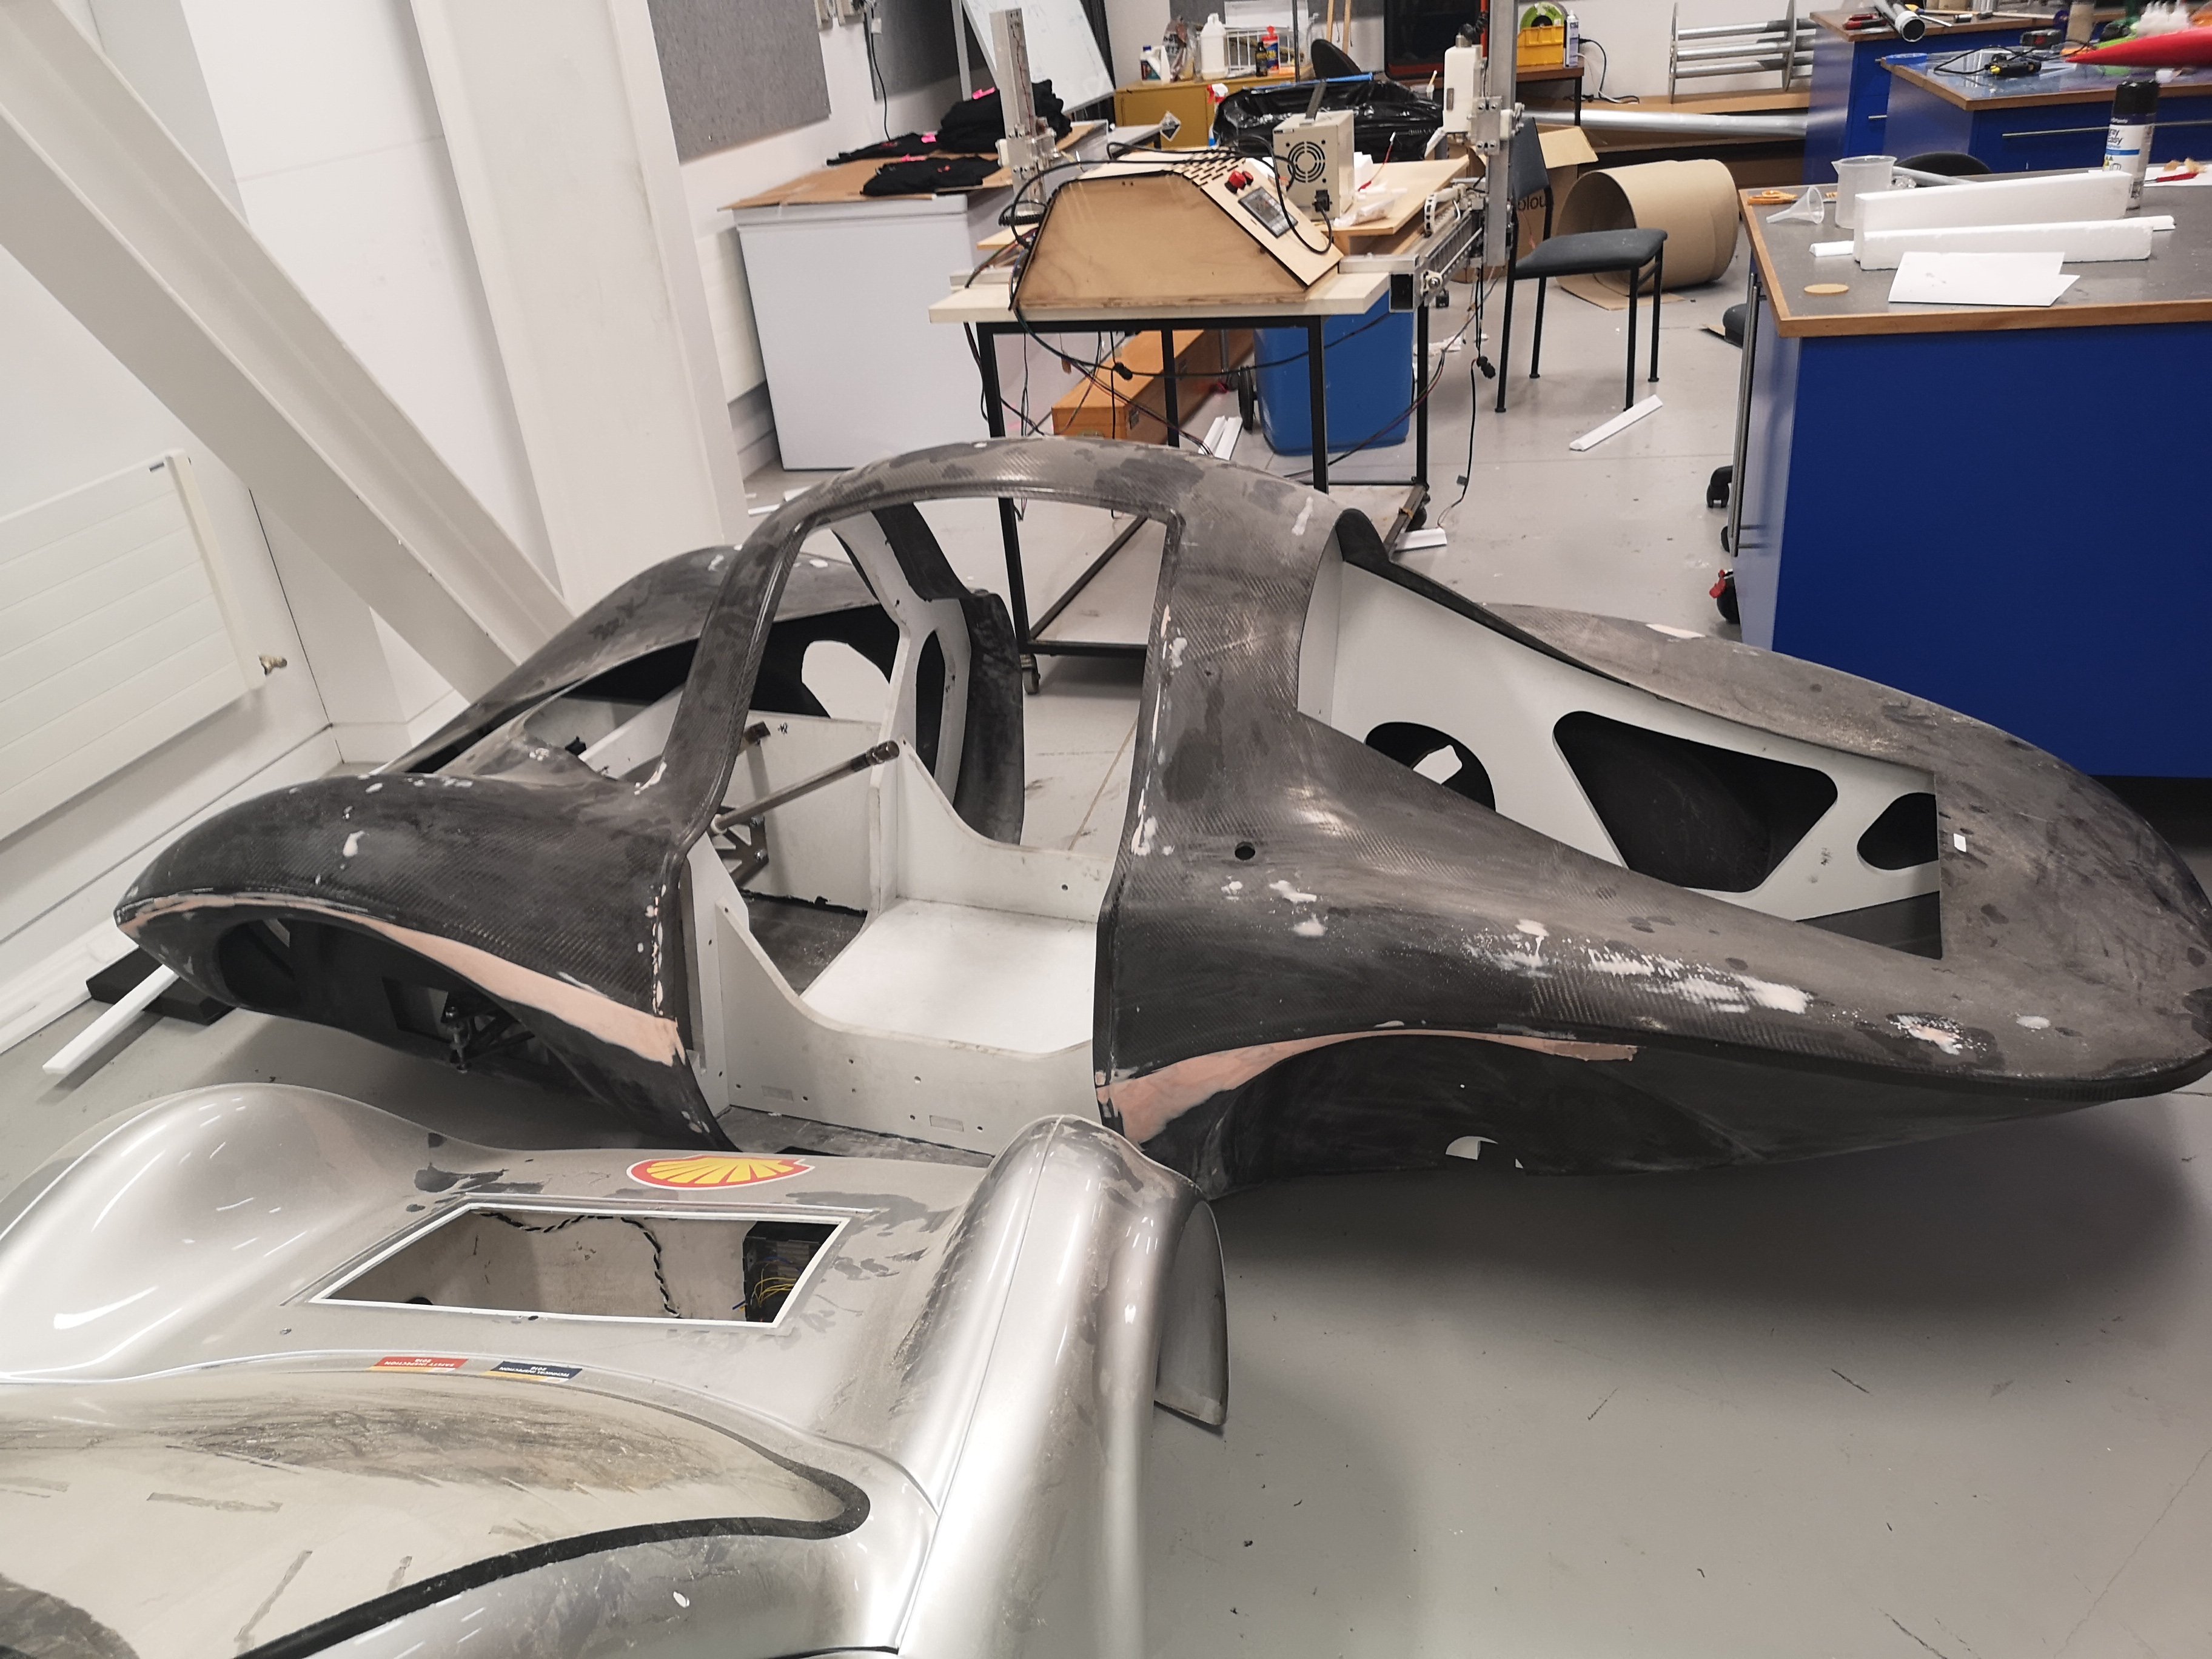
Carbon fibre go kart shell anyone?
2 points
-
Is it because the corners need to come out before the rest can be removed from the sand?2 points
-
My britool tool chest from the 50s is like that. It's a period correct coating. Just clear over it2 points
-
Don't lie. We all you know you've got their complete works stashed in your phone at all times.2 points
-
some exhaust bits turned up so i made a start on my 1st set of headers ive made.... just need to get somemore bits and ill fully make them up.
2 points
-
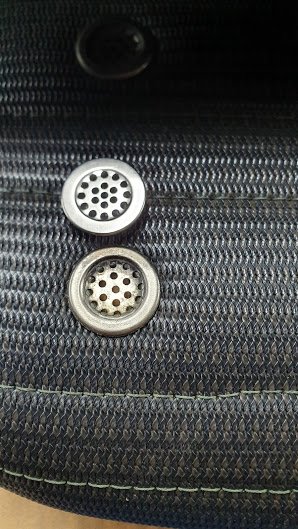
some bling
2 points
-
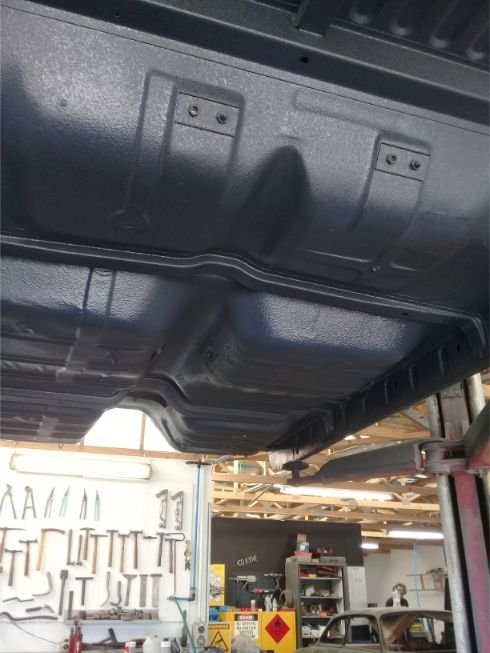
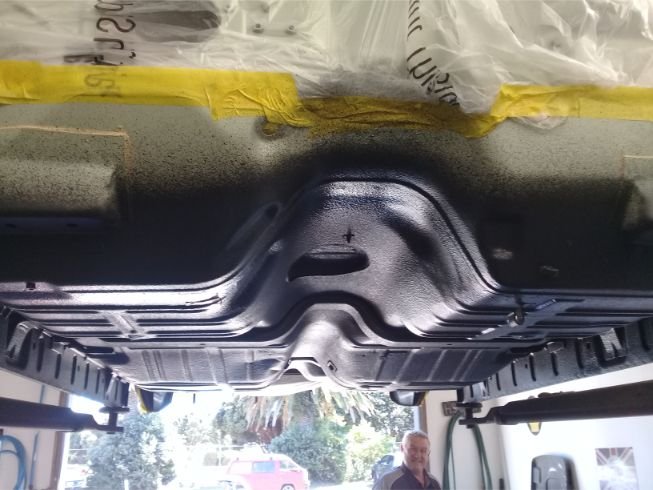
primed up and undersealed
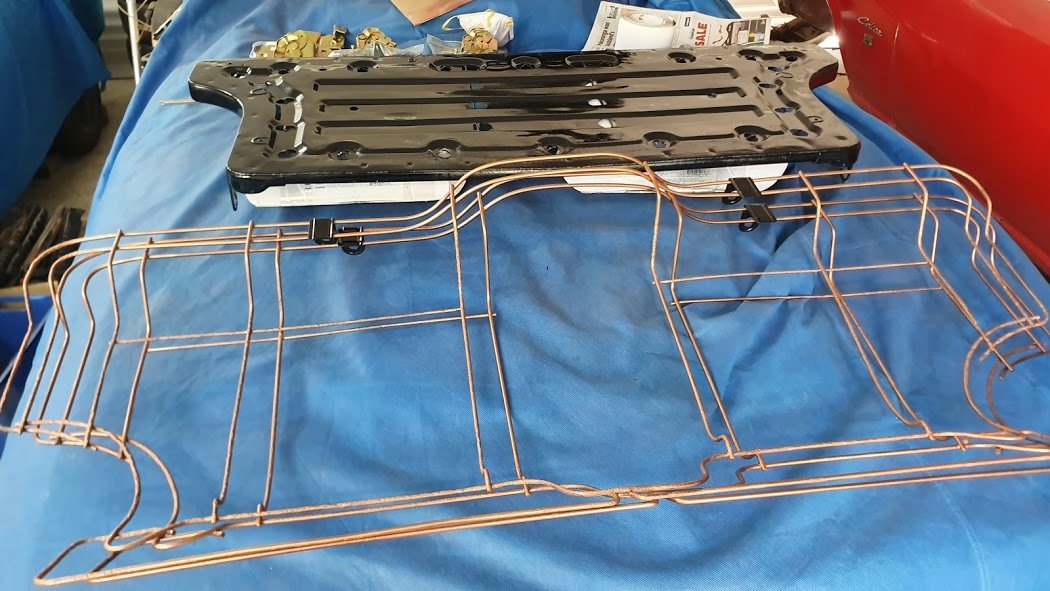
2 points
-
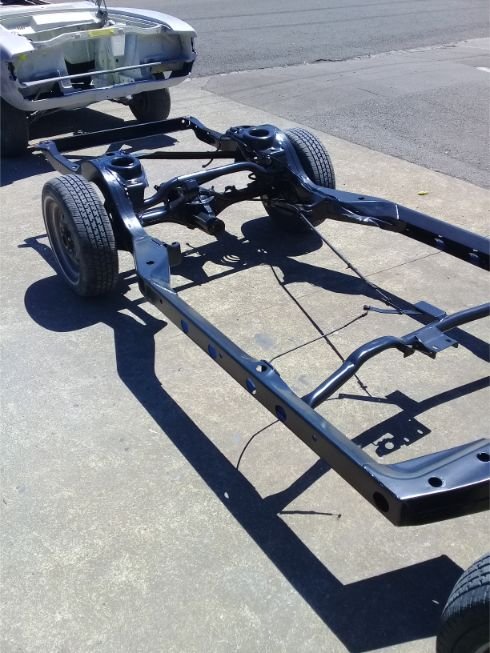
Heeps of work going on in the background while the body was getting done, sourced alot of parts from japan, sandblast and painted chassis, was all in pretty good nick, think it had only done 96000kms
2 points
-
This is running again. with some some mixed results. Makes the same power as the old setup, with almost identical power curve. This is good, wasn't expecting it to make anymore power. runs nice. Swapped in the big inlet cam. As on old setup made another 15kw on same boost, but ran junk. (see top of this page) Ran better on this setup but still rough idle. Now where it gets weird; Had to add a decent amount more fuel, but only had very small power gains over stock cams. Tried all sorts, no dice. Still unsure whats going on. Ended up swapping back to stock cams. One major benefit of the itb setup is how well it runs down at idle. before with the big plenum and single throttle it would stall out real easy. much below 1000rpm and would just die. now it will go right down to 500rpm and keep chugging along. Have also added a simple on/off air bypass solenoid. programmed for idle up on cold start and when fans come on. Also doesn't vibrate it self to bits like the old setup. Still need to fix and tidy some stuff up. plus finish the tune. then im a gonna go destroy the paddock Next up steering servo for full scale rc hilux:2 points
-
2 points
-
man, i better get ready for this! SOOO much vengaboys to download...1 point
-
Which steed you riding this year @sentra? Smokey Sue again?1 point
-
I've got both factory seats and will probably roll those for the wof. Pump up lumbar support is lush!1 point
-
This is a very sensible time to be checking things if you're like me and use your bike twice a year. Tyres Chain Sprocket Drive rubbers Brakes Wheel bearings Spark plug Fuckin bang out the checks over a weekend, or sneak in an hour after work. Enough time to order parts and get them fitted before the ride.1 point
-
Yo Johnny I think us ppsc dicks are Ken to stay st your pad Thursday night xox prob can tent camp on ya deck/dick/sleep inside the landy in ya shed if that’s ok. Kisses purple goanna walrus made my teeth hurt heck1 point
-
i may take you up on that offer when it comes time to build one. the boot in the chevron is actually behind the rear seats and the gas tank is where your rear stays go, my rear stays (and seat belts) bolt onto the very rear most lateral bar. and im not too sure whats underneath that. hopefully its a strong area. itll need some investigation.
1 point
-
40mm bump 40mm droop from ride height. Depending on the car and suspension and bumpstop type, can include some bumpstop compression in that figure1 point
-
Hells yeah getting pretty excited for some of this
1 point
-
Here is the original bar And here is the new bar Obviously I put the bolts in them when using it for real! The car is out in North Canterbury, you are more than welcome to have a look sometime if that is useful.
1 point
-
Inner core patterns for the cam tree complete.1 point
-
Yeah something like that would be good, try get here early enough to give yourself time to unload, fuel up, pack your bag, chase that fault, top end rebuild. You know1 point
-
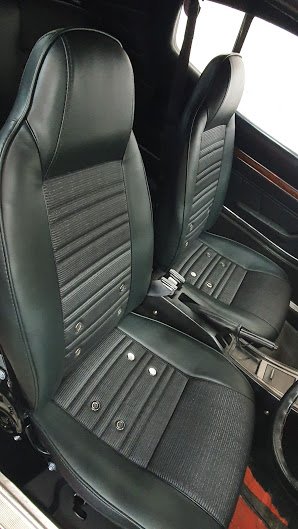
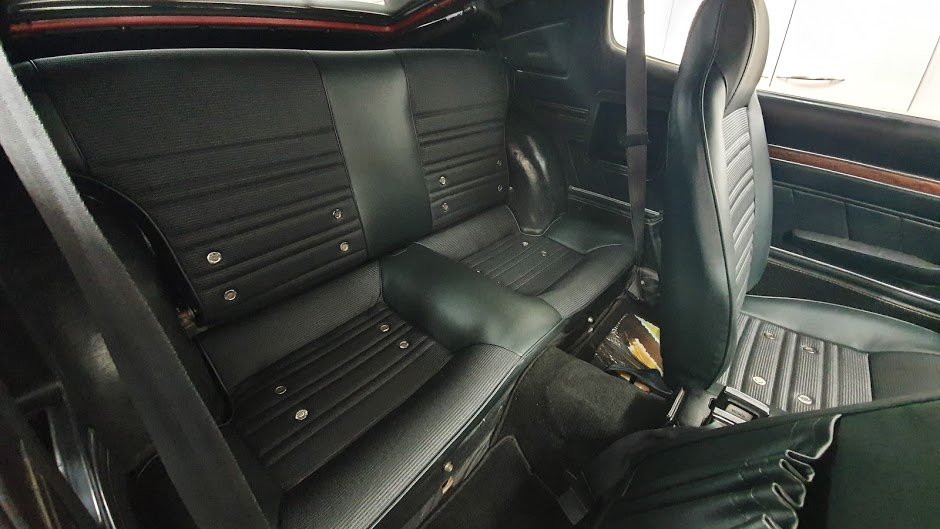
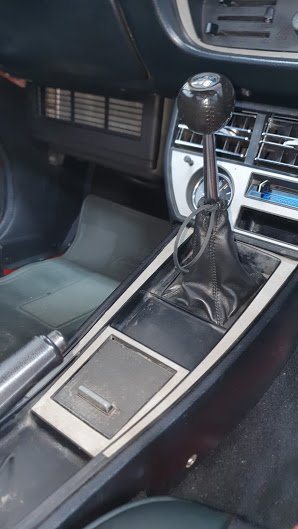
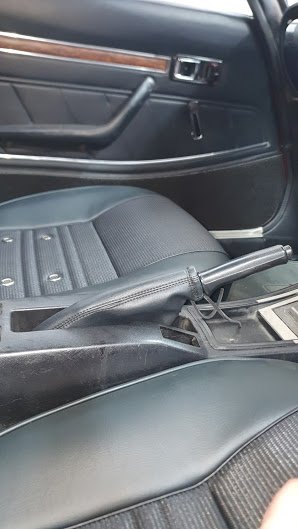
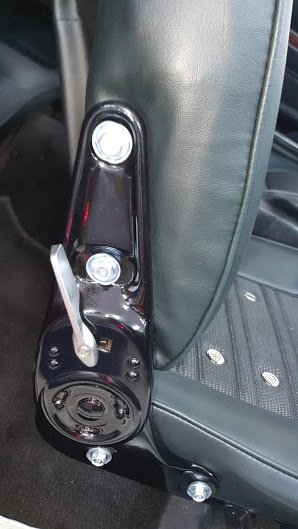
As well as the underside/diff above, In parallel i was called up by an upholsterer (Grant) I have been on a waiting list for about 2 years... He is known world wide for the fantastic replica celica seat covers he makes. I have had a roll of the original rare GT seat vinyl material squirreled away for years, waiting for the right time to redo the seats. I also sourced some seat vents that were as close to the originals i could get. Plus I sourced a second lot of Ivory vinyl to do the RA28 celica too - so i got 2 sets made by him. So i gutted the interior out. The back seat frames are known to get damp and rust .. So i repaired it and repainted it in copper paint like original. And repainted the back too. cleaned/painted the rails and tilt mechanisms I got the seat covers re-fitted by Grant and reassembled SLEEEK's seats at the weekend. He also kindly remade the original handbrake and gearstick boots
1 point
-
Cut small notches with Ali diamond dremel disc and seems to locate ok... And soldered a copper tab on for the HT contact. Snotted a bit of gasket paper underneath and it has a small dimple for the sprung HT lead contact... And finally separated gearbox cover, was really stuck on, and took some effort to get it off without fucking it. Many decades of oxidation holding it in place so big relief to get this apart... And been using the Stahlwille Whitworth spanner I picked up for 50c at a charity store. Knew it would come in handy one day... Then spent the rest of the morning tidying shit up and sorting bits in boxes. Ignition bits... Fuelly bits... And gearbox bits... So now just a case of cleaning and reassembling. Feel much more organised now...1 point
-
Tell that to Detroit.1 point
-
Is anyone going to have WOF & Rego? Surely noone actually rego's a motorbike...? React trophy for Yes. Laughing for No. Edit: can't react to my own post but1 point
-
Yeah eco friendly... One bit of online advice was to tickle the carb till you see rainbows on the water. That and the 10:1 oil smoke should make Greta very upset... Gave it a burst this morning. Was into it at 7:30 cos my carport gets glorious morning wood sun. Set up a chair to work in comfort... And gearbox goo, as expected. There is no seal so they run in an emulsion of gearbox oil and water... So nobody told me that damn near EVERY fastener shears off when working on seagulls... Although I got most gearbox screws out except this centre one. Resisted heat, spray and impact driver... So drilling the only option. Was a bastard to get straight as too tight to get drill in properly... And success. With this apart I discovered the water pump vanes were very worn... Same deal nearly everywhere. Not sure if i'll try to replace the buggered screws/bolts or tap out to metric. Is stainless a bad idea for galvanic reasons...? And the horribly dented exhaust tube received some very inexpert beating over a bit of old scaffold pipe... And came up surprisingly well with some scotchbrite and WD40... The driveshaft tube is pretty rusty however, will prob paint it. Enough for the day today though, will take stock and look at what bits I need/can make up to start putting things back together...1 point
-
Hmmm, that'll make changing the tyre a pain... Perfect! But then the K50 cylinder came with this: And just to make tyre changes easy Dropped it 25mm, ended up with the swingarm level, which for some reason is pleasing to my eye on any bike1 point
-
So this thing is still in a million bits, I'm still in the process of painting. All the bolt on bits are done, just have to finish and paint the frame. I wasn't happy with the battery tray thing, so going to redo that with a box of some kind. Story time: So a long time ago I got plans for one of these, I started collecting parts, but when I realised the cost and time involved in building one, I canned the idea. I had already purchased a second hand set of front callipers/discs/stubs from one, but the guy kept the hubs. Recently Edge products in OZ had a sale on, so I ordered the missing hubs, so I now have the compete set up. So sometime in the future I will make new front arms and put these bad boys on. I'd like to put flasher shocks on all round too, but they are spendy. Ages ago I also got a nice set of alloy rims and tyres from a racing ATV off trademe, they were listed retardedly so got them super cheap. And in a stroke of luck, the front rims are the correct PCD for the new braked hubs, neat. The back rims don't fit on the current hubs, but I've started collecting parts to make an independent suspension set up for the rear, so will make new hubs to suit when the time comes. Other than that, I've drilled some big ass holes in the 12mm plate at the back, to try shed some weight, and make it look racey. I also got offered an absolute abomination of a go kart for a box of beers, so got it against my better judgement. Its based on a kawasaki quad with a weird name that I can't remember, has front discs even. I'll probably just keep the front suspension and steering, rear axle and all the wheels, and bin the rest as its super grot. Plan is to make a simple two seater for the wife n kid to blast round in. Probably 13hp lifan with cvt set up or something. It has a 2 or 300cc honda atv engine on it, chain drive with low range, if anyone's interested? Regards, VG.1 point
-
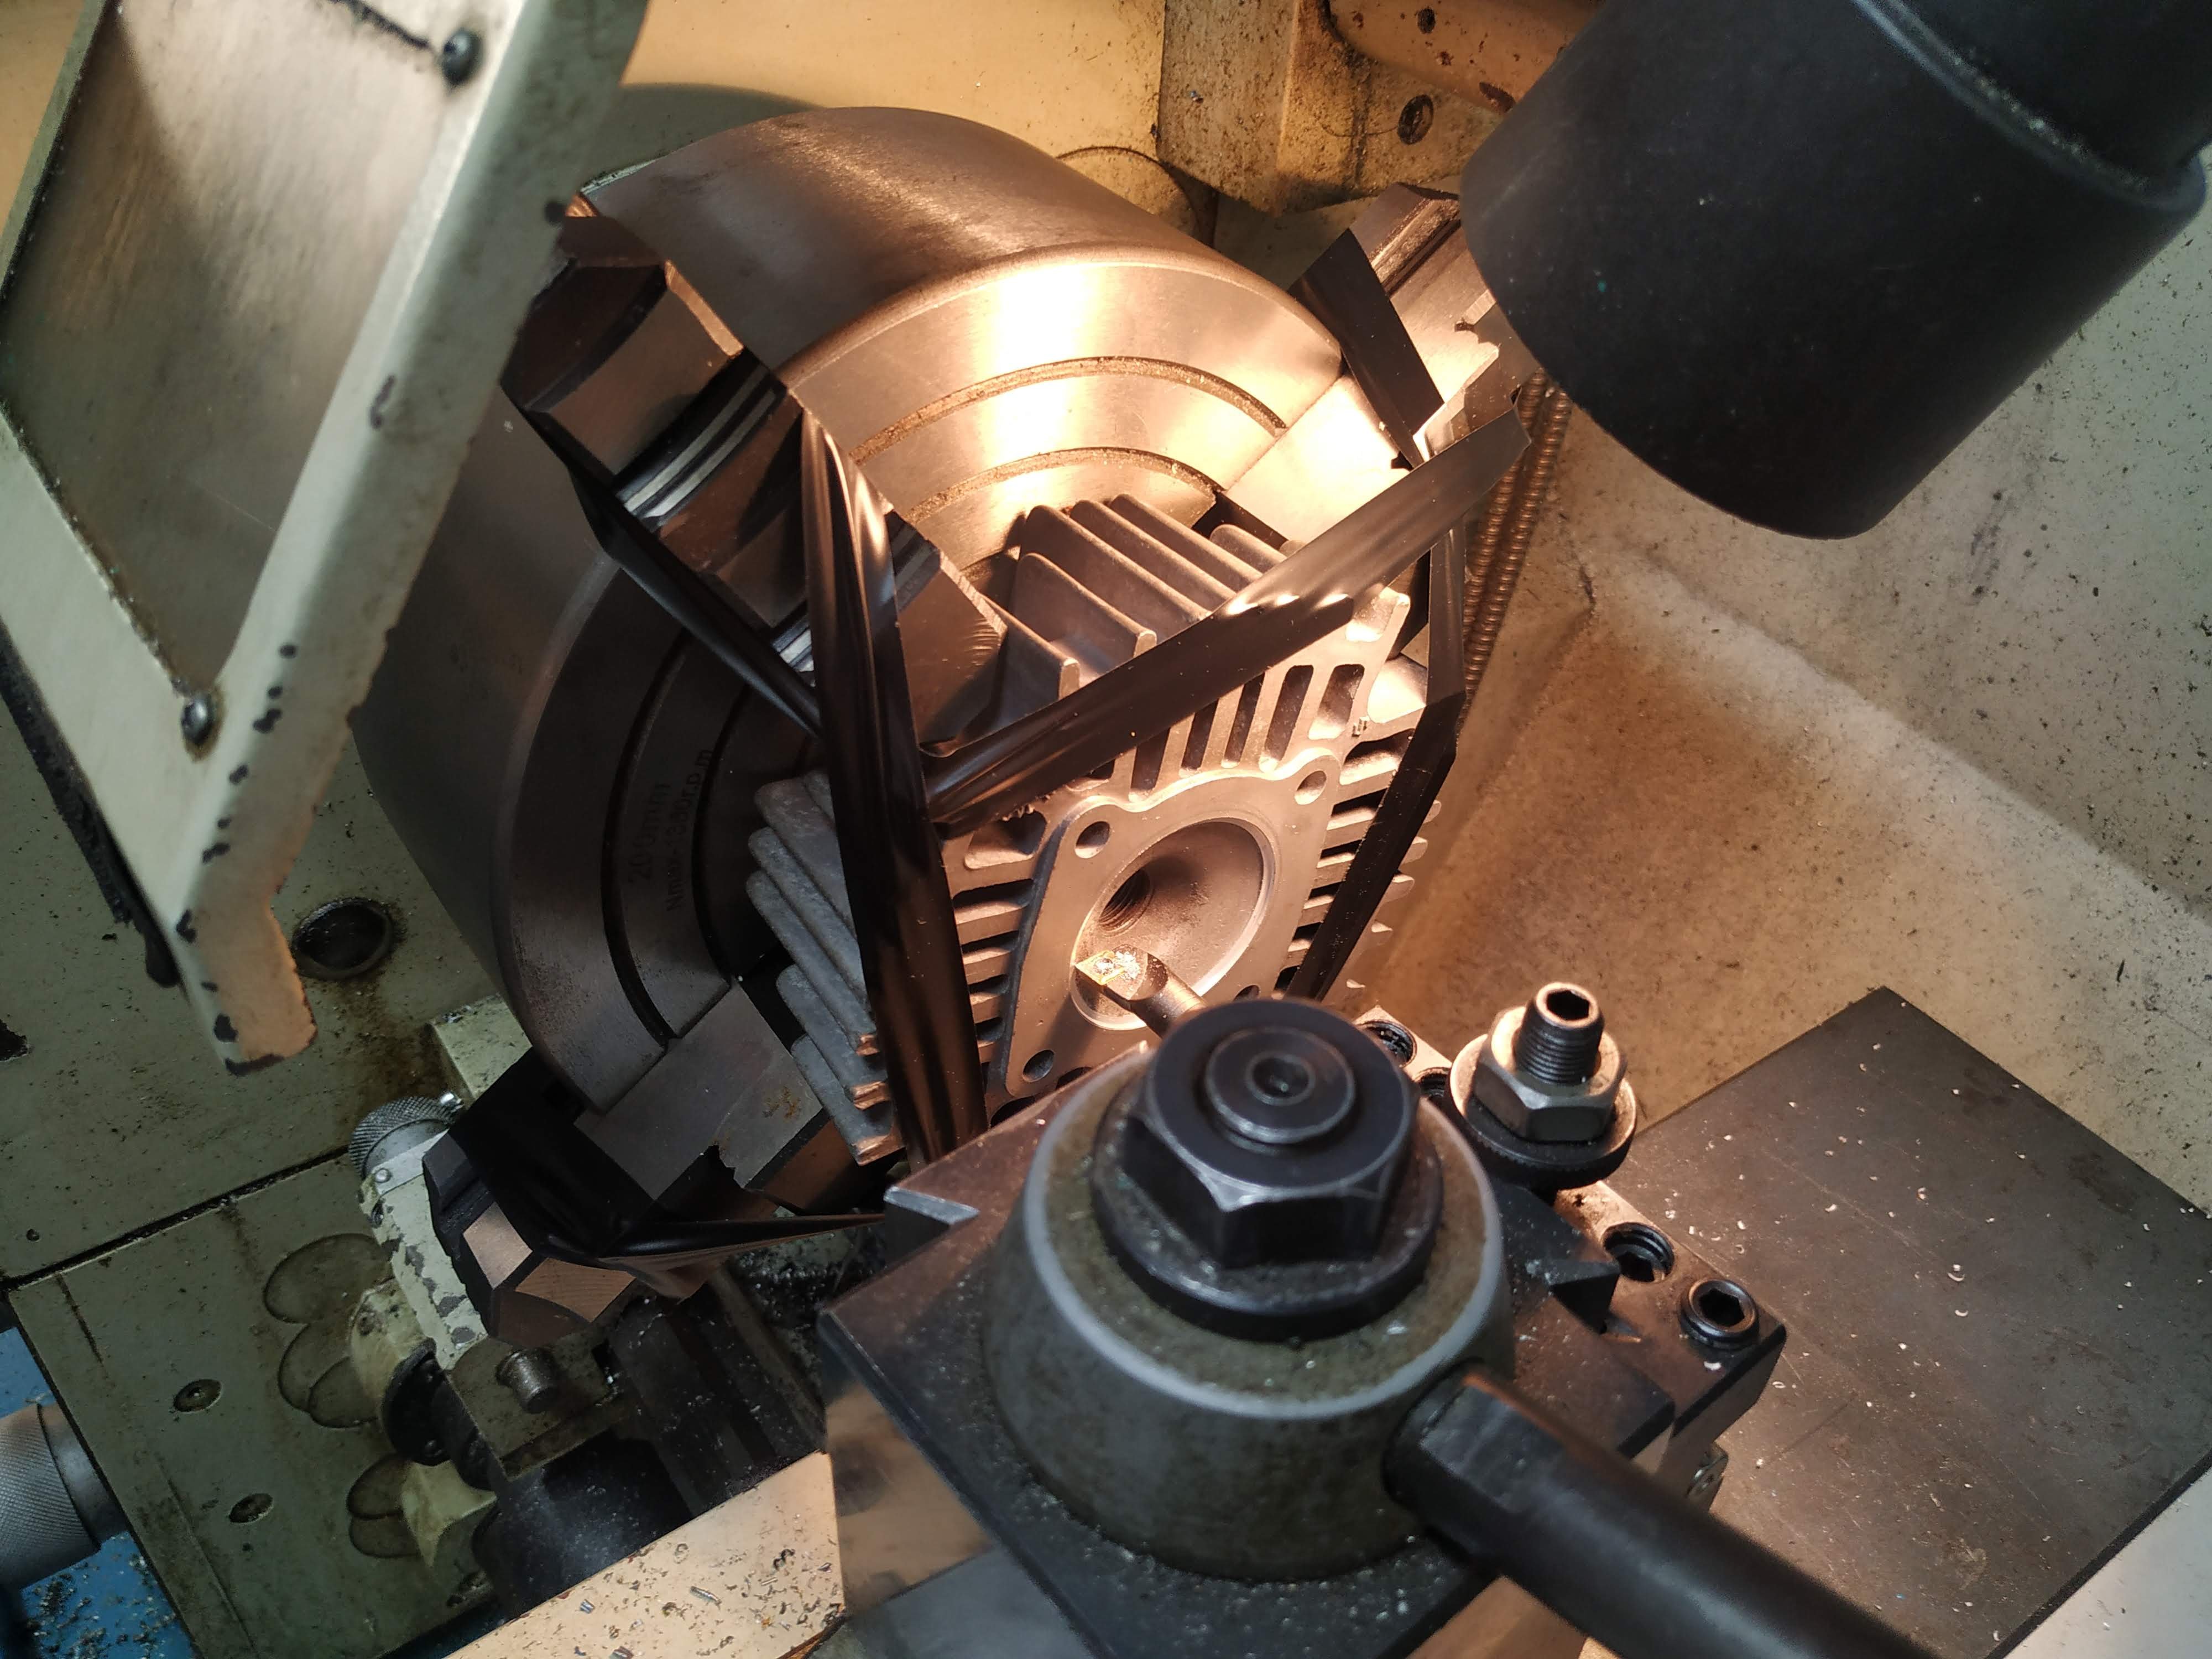
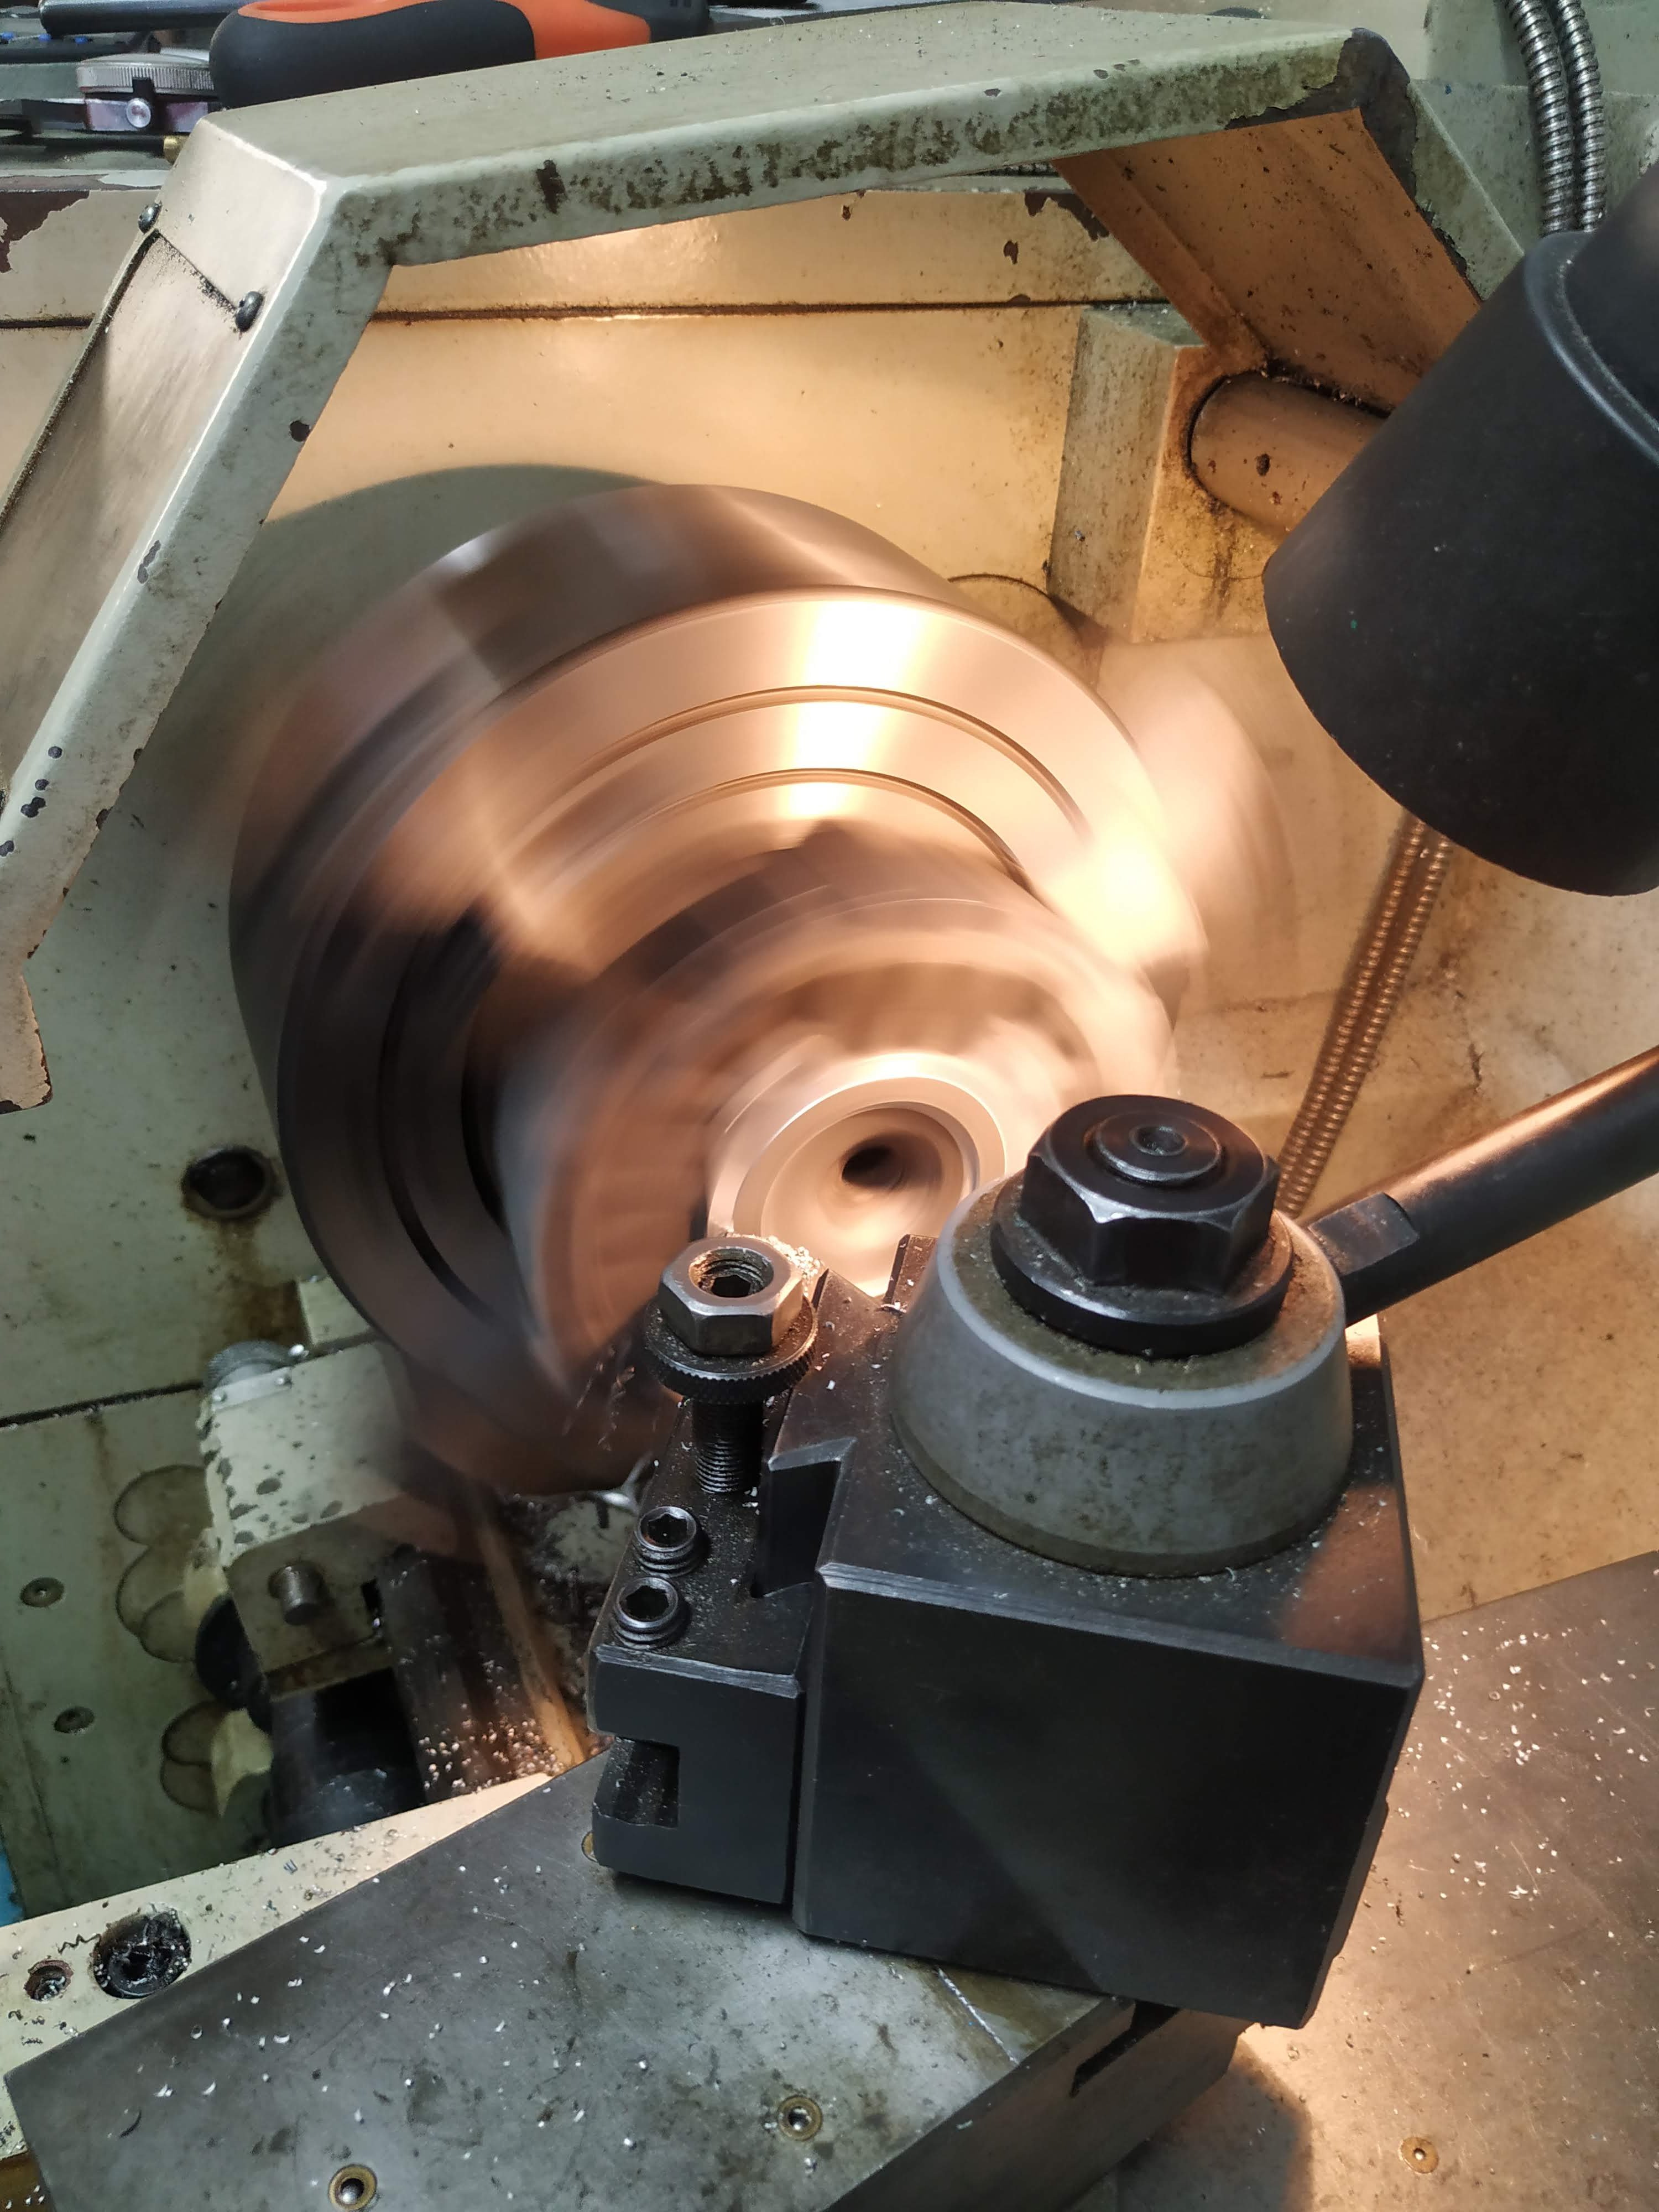
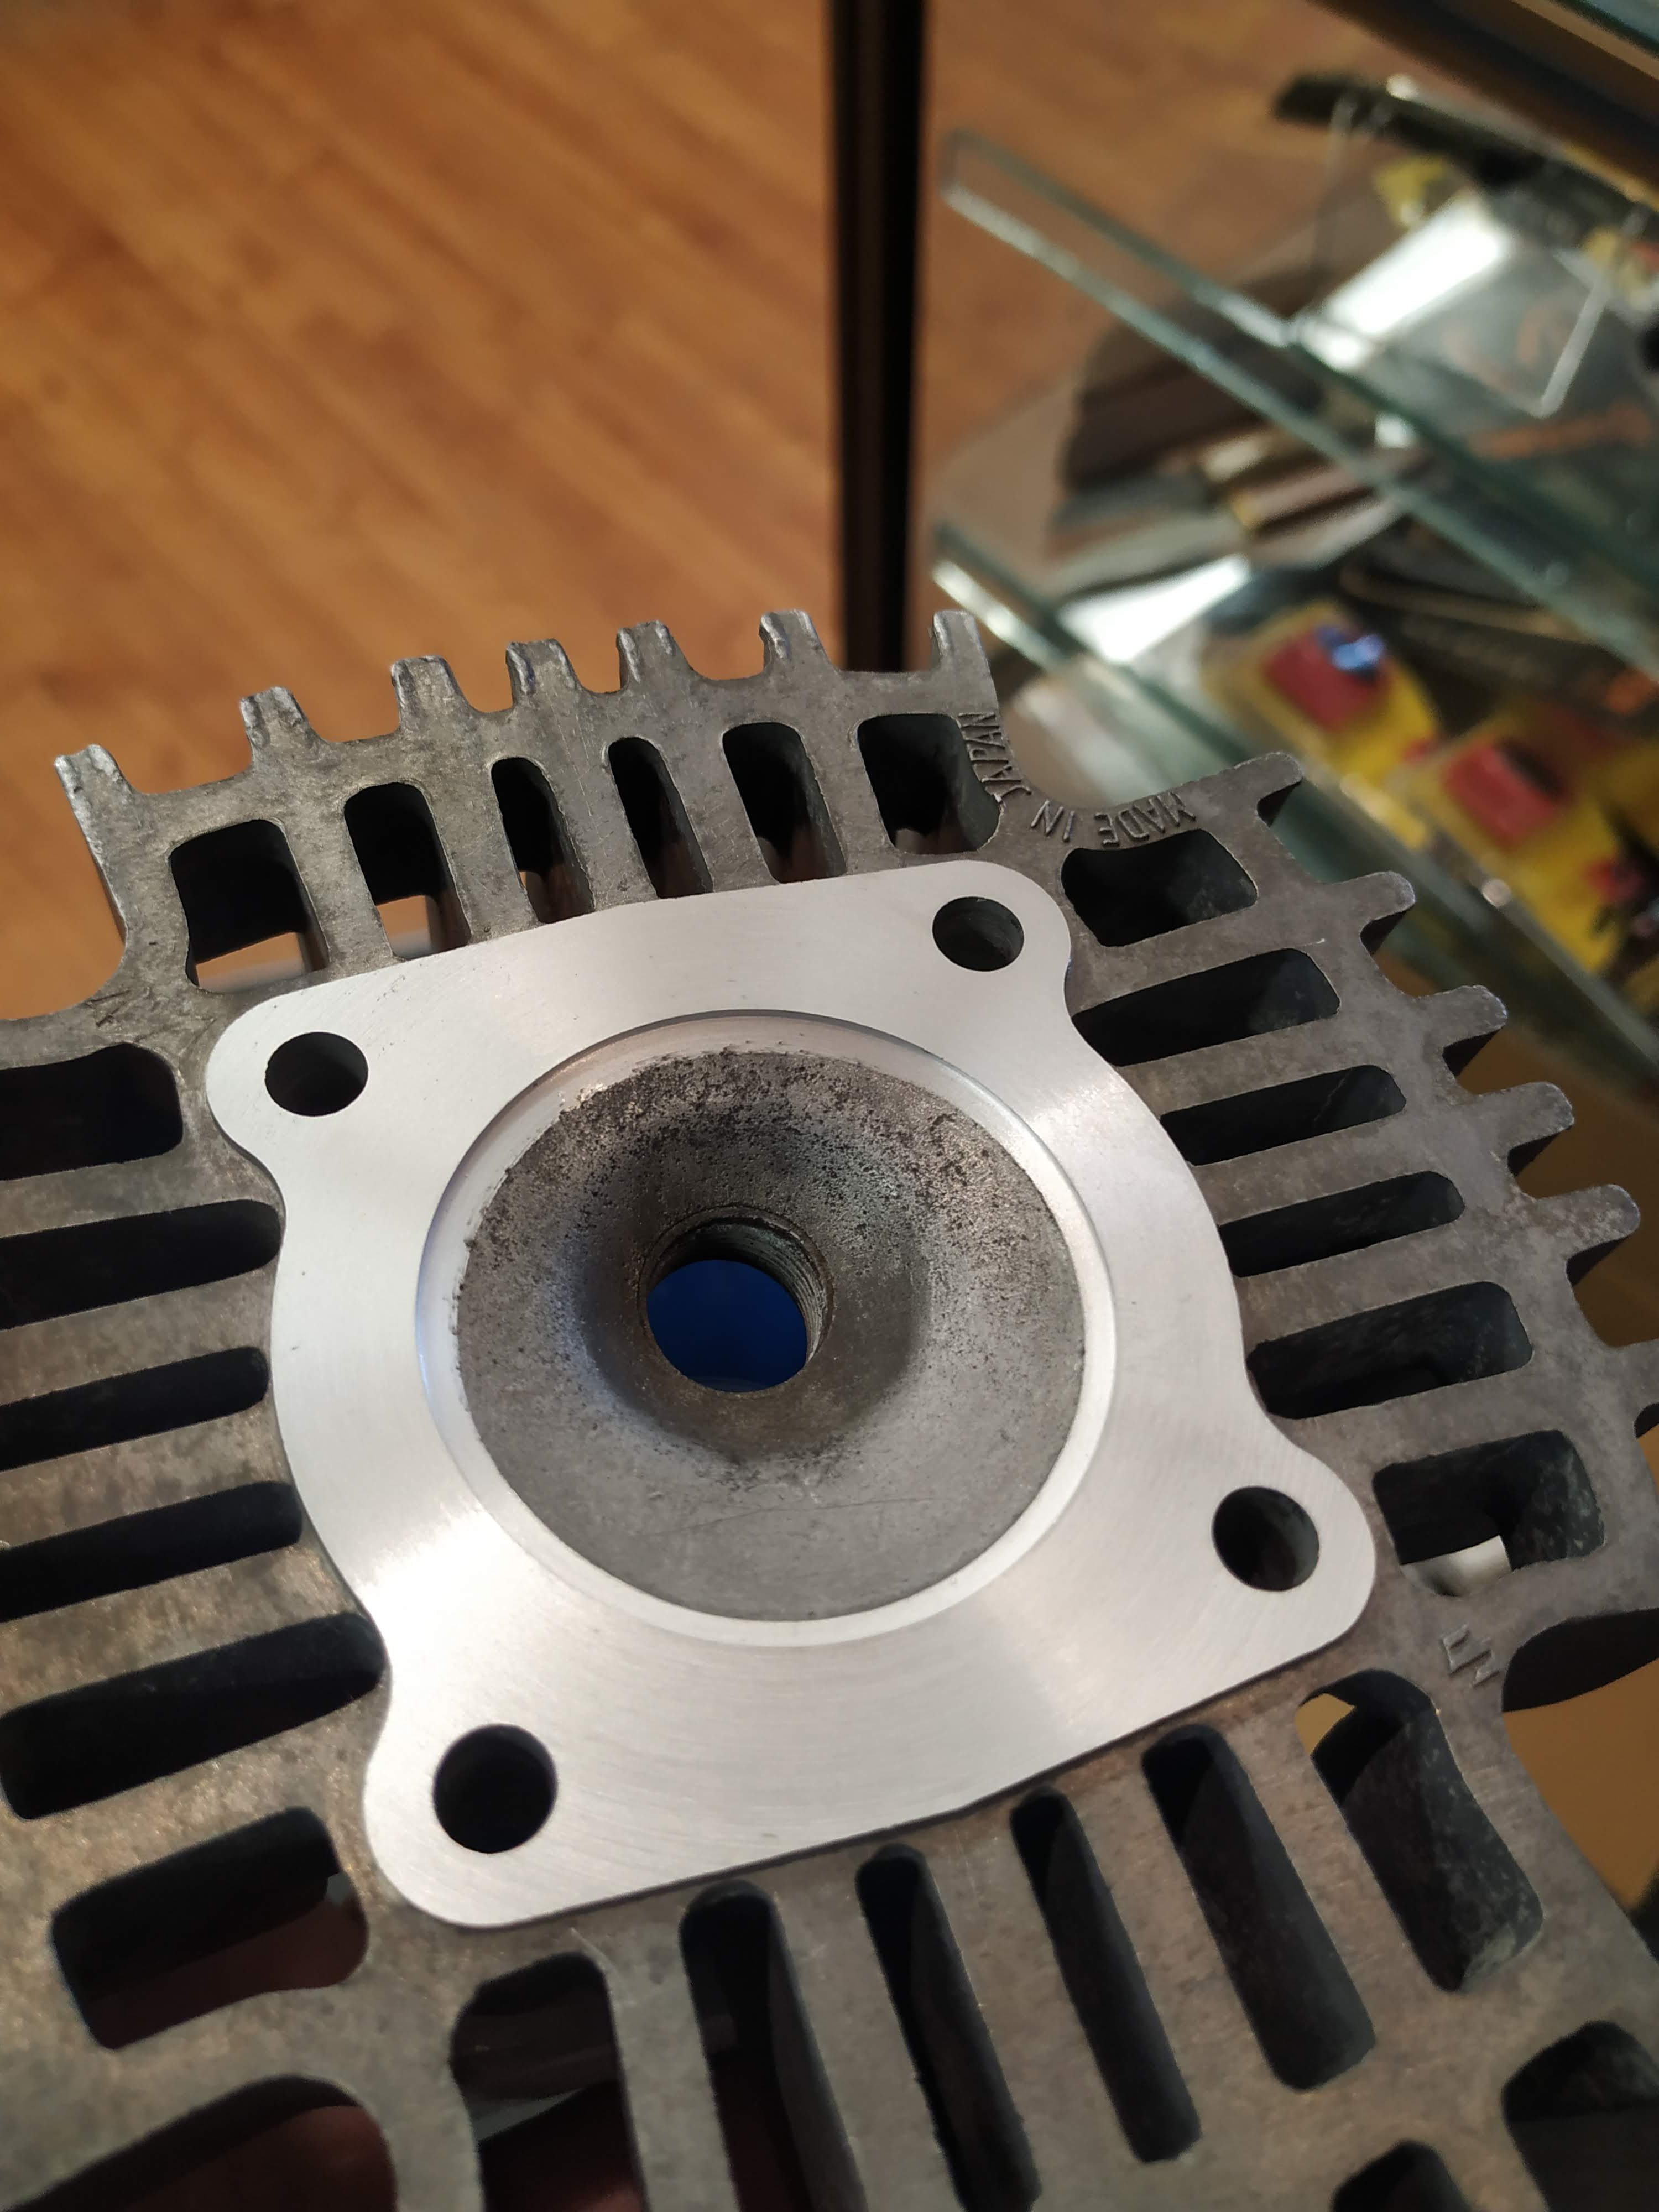
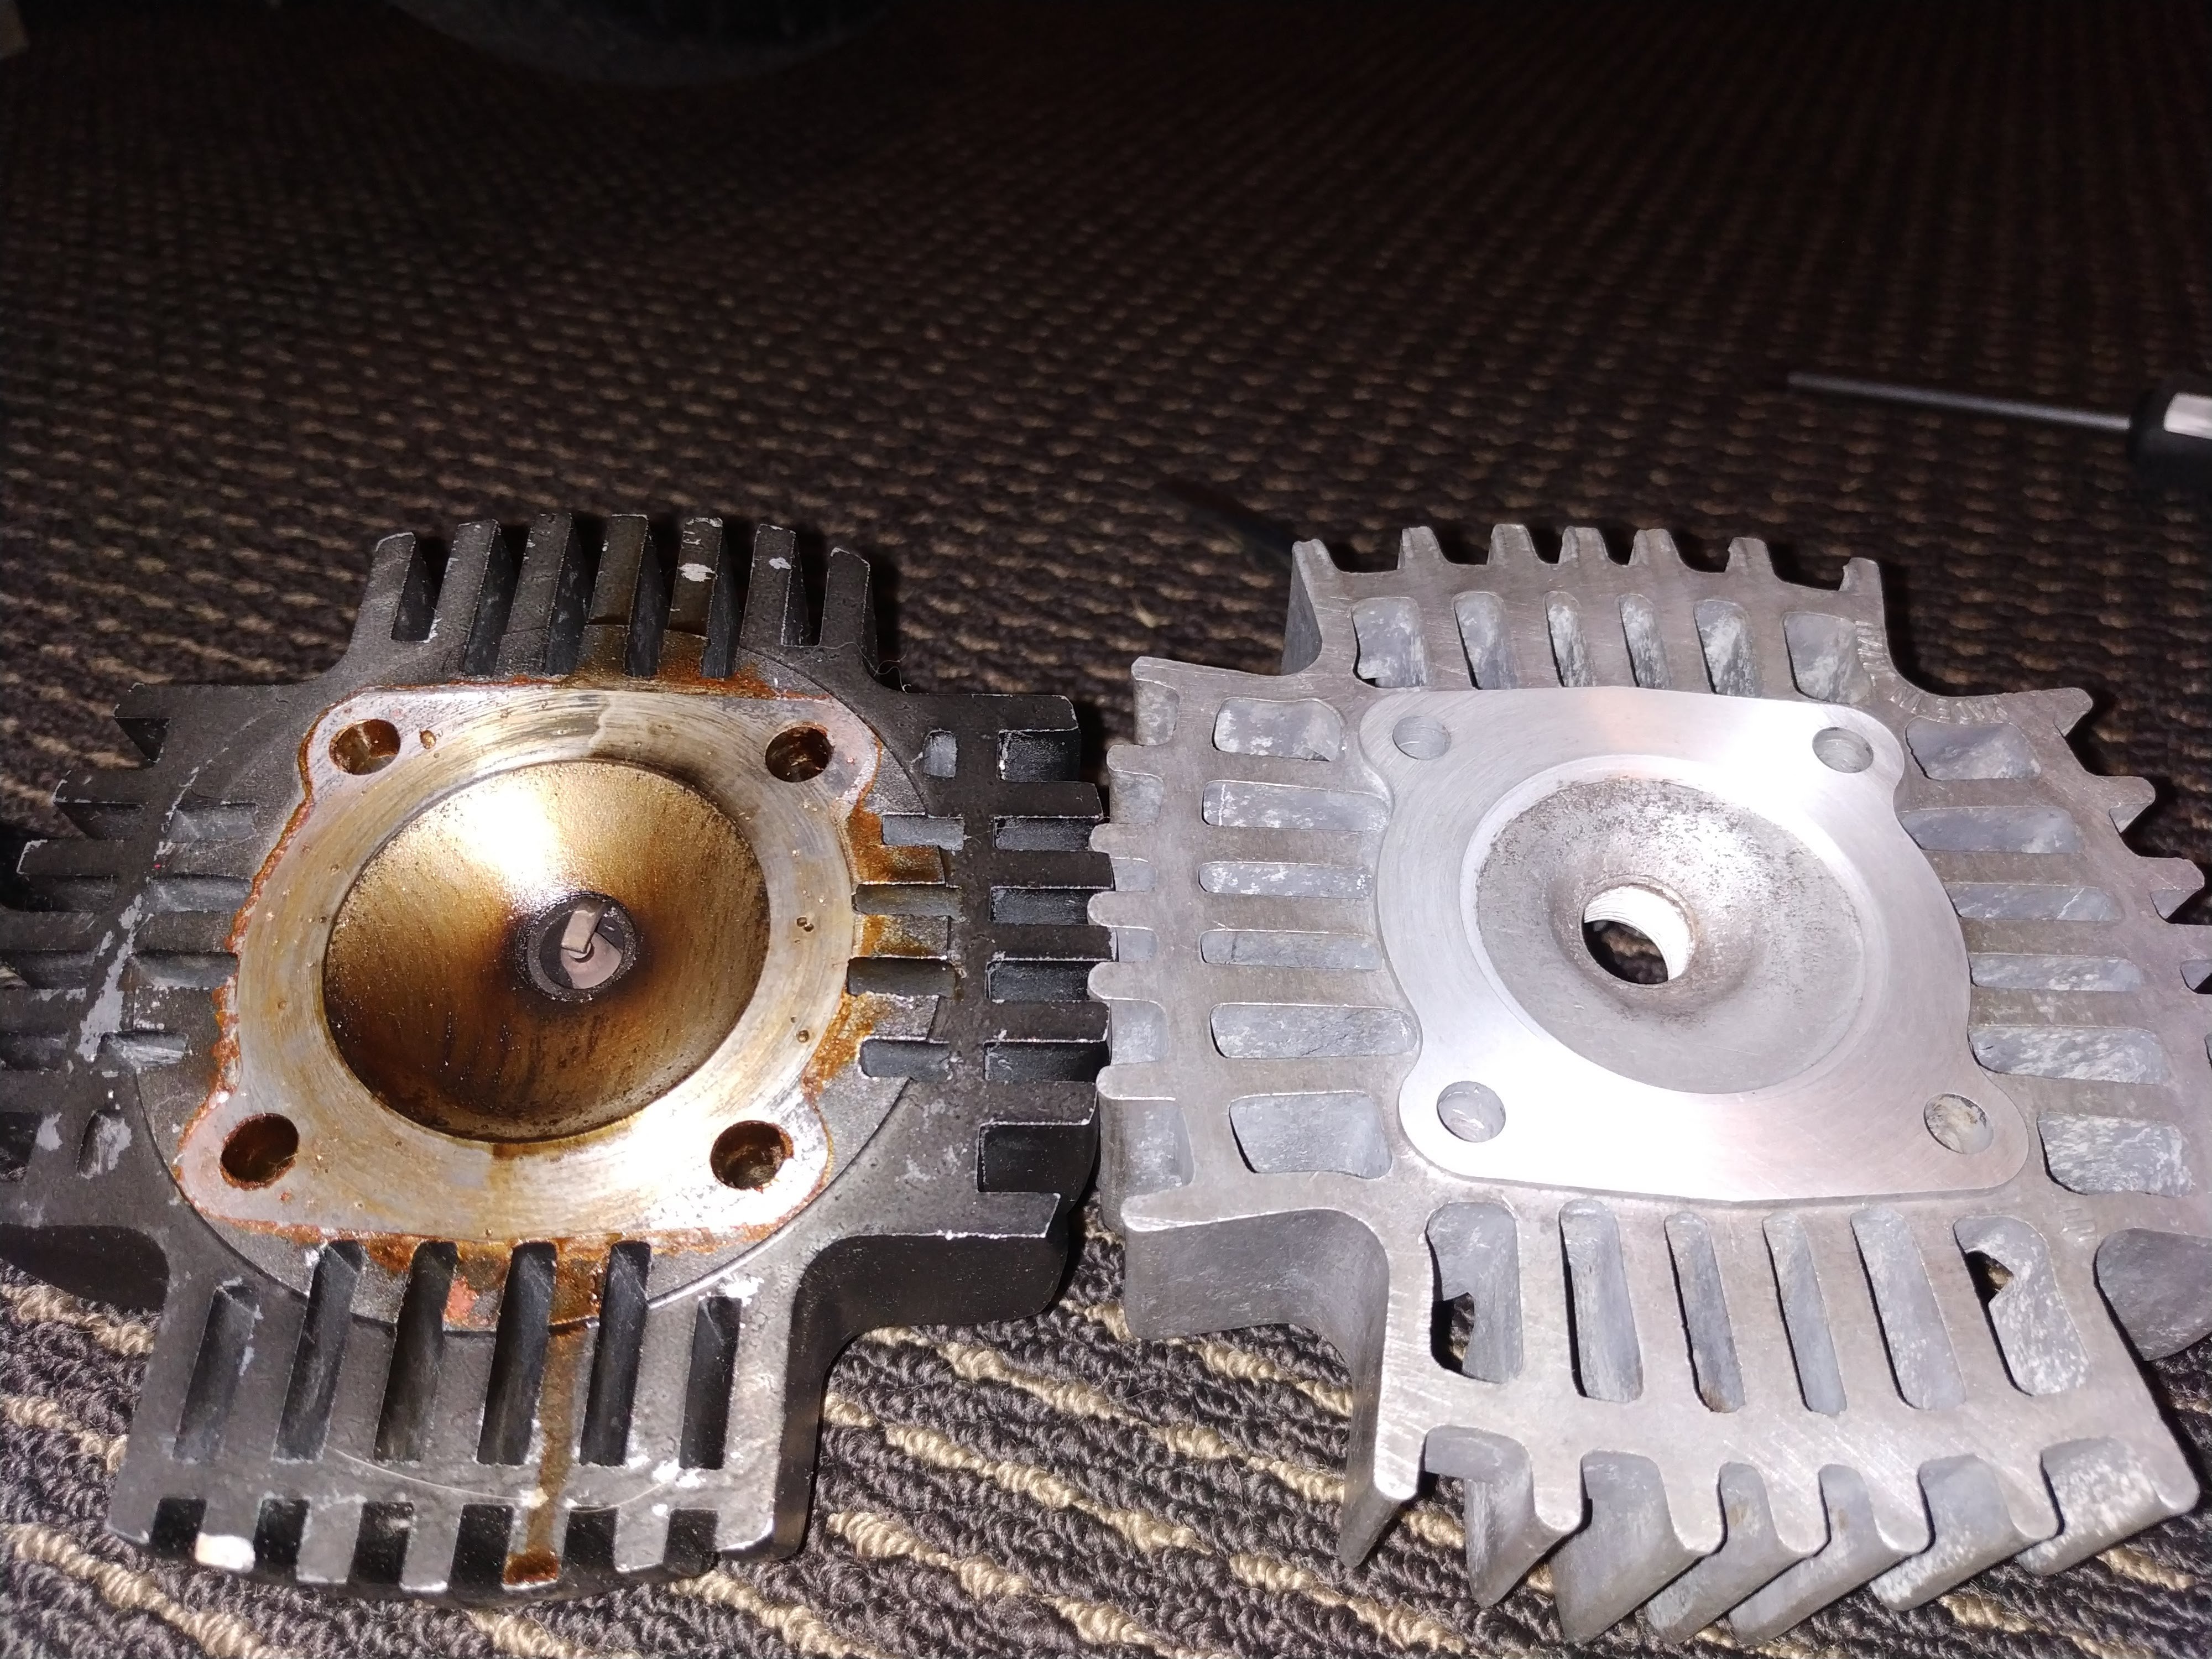
Back to the engine, 120psi-ish and zero acceleration in fifth or on any incline wasn't going to cut it!! Soo back to the lathe!! That's the factory 41mm bore head, added a 2mm squish band to take it out to the 45mm it needed to be to suit the cylinder and also took .5mm off the face for luck! Can see just how much deeper the aftermarket finned soup bowel is! And the plug after pesting about in Auckland, looking a touch rich if anything. So added another .45mm base gasket, .4mm head gasket and ended up at .86mm squish with the refreshed factory head fitted, looking for some .2 copper sheet to make another head gasket out of to gain just a little bit more nang. Much better! And I think it would have come up a bit higher if I could have got the rubber push in fitting to seal better in the plug hole. Drastic improvement to power, shift at the right time to keep it on pipe and it will pull to the top of fifth now! BUT now that it has compression it wants a lot more fuel!! Have to order some pilot jets from MikuniOZ for it as once warmed up it is running HOT and has the worst lean hang I've ever come across Suzuki used a non adjustable version of the Mikuni VM16 so there's no screw to fiddle with to try and make it happier in the mean time, so a little A50 waits again as I've put too much into this thing just to melt it down in the quest to pest! Oh and as it turns out, having more than 6 and 8 or so psi in the tyres really improves acceleration... Who'd of figured... Think this post has the engine work pretty much up to date, until the bits I ordered yesterday arrive in NZ at least So here's a pic of @Archetype hard at work transforming the whole look of the bike
1 point
-
So as it turns out there is NOTHING in the way of a big bore kit for an A50 available, I can find listings for them from no later than 2005 so a bolt on A50 kit quickly became not an option. But I did discover that until recently Suzuki made another model, the K50 that was essentially a 3 or 4 speed low power version that was popular in Europe, main difference seemed to be that the K50 used a reed valve set up instead of the rotary disc valve found in the A series. Pics looked good so figured the 45mm kit would be good to go, so I ordered a kit from Denmark along with a new head, center stand, kick starter and other bits, also learnt that Danish KR is worth almost twice the NZ$ of Swedish KR Looks good right? Wrong Close to throwing a cover over it and walking away for a while a mate took my factory cylinder, welded on a new fin and said he'd hone it out after I ported it to try and get rid of at least the worst of the chamfering gouging. WIN! Or at least a win until I started trying to port it... The cylinder wall was paper thin and crumbly between the bore and the port, even a light touch with the die grinder just ripped chunks off So back to the K50 option... Black K50, Green A50 CNC plasma cut adaptor Cylinder skirt hit the crank webs and the cooling fins fouled the engine cases, so a bit of high precision engineering took place Cut a couple 1.6mm base gaskets to get the port timing right Not great! But we can fix that, we have the technology The kit head seemed to have come from a soup bowl factory Close to 3mm came off that! Fitted the clutch cover etc and gave it a couple kicks to check compression Not great, but better than the factory 95psi rating at least. Fired it up at 10:30pm one night, in the house, using air freshener as engine start so I didn't break my Mrs no petrol or engine start in the house rule... 2nd kick and it burst into life!!! And since it was so late, the exhaust port was all the exhaust it had and I didn't warn her, my Mrs just about had kittens hahahaha Spare room smelt like a warm summer breeze and I'm now banned from the air freshener, but I was so happy to hear it run!! Next day I fitted the pipe and pushed it outside, tipped a few liters of premix in and ran it for a couple heat cycles, once the rings bedded in a bit compression came up to closer to 120psi too. Fuel tap leaked like a sieve though. Sorted! Still a bit more to cover on the engine, it's actually still an ongoing thing, but you've read enough of my drivel for now lol1 point
-
Just got in from a 770km journey over the long weekend. Whangamata, Tauranga, back to Whangamata, then back to Auckland. Car had minimal trouble, aside from the diff running itself out of oil just off the southern motorway, thankfully right outside a friends shop in which we swiftly jacked it up and threw some moreys/random gear oil into it. Made the rest of the trip down the line nicely, if only a little louder in the rear than usual. Little photo spam to follow from the trip. Car is at a stage where I'm happy with it, but there's still so much more I'd like to throw at it. Plans to accomplish before the end of the year: Custom dash mat, get MOMO wheel centre and fix horn, as well as repair cracked plastics in the interior and general interior tidy (maybe seat covers too). Swap diff centre for mint replacement and install new brake shoes for safety and general maintenance purposes. Front brakes and rotors. I'll also be looking into the S13 front strut conversion. Purchase new tailgate and paint/fit. Also would like to tidy up number plates somehow. Pinstripe, cause the sides are pretty boring as it stands. The push is on to get this thing prepped up for it's warrant next month. It cuts close with OS drags, so it'll be a fun little week if she doesn't make it through! I remain pretty hopeful. Chur1 point
-
Right lads I’m at a cross roads and have a decision I need help with. The TS185 has a three bearing crank, the outside bearing is on the left hand side and it WAS lubricated directly by the oil pump which also mixed oil with the fuel. My intention was to swap to premix, purely so I never had to worry about the pump failing or mounting a separate oil tank. But if I do that this bearing won’t be lubricated and will seize. I’ve heard of people drilling through the cases beneath the barrel to tap into the gallery that would have lubricated from the pump and allowing fluid in that way.... but is that huckery and unreliable? I’ve had the barrel off to investigate and the piston, ring and bore look mint. Pics to follow. And then, opinions please fletch has been making appearances at shed night and brought something along for show and tell.... a smaller bike, with a bigger engine!
1 point
-
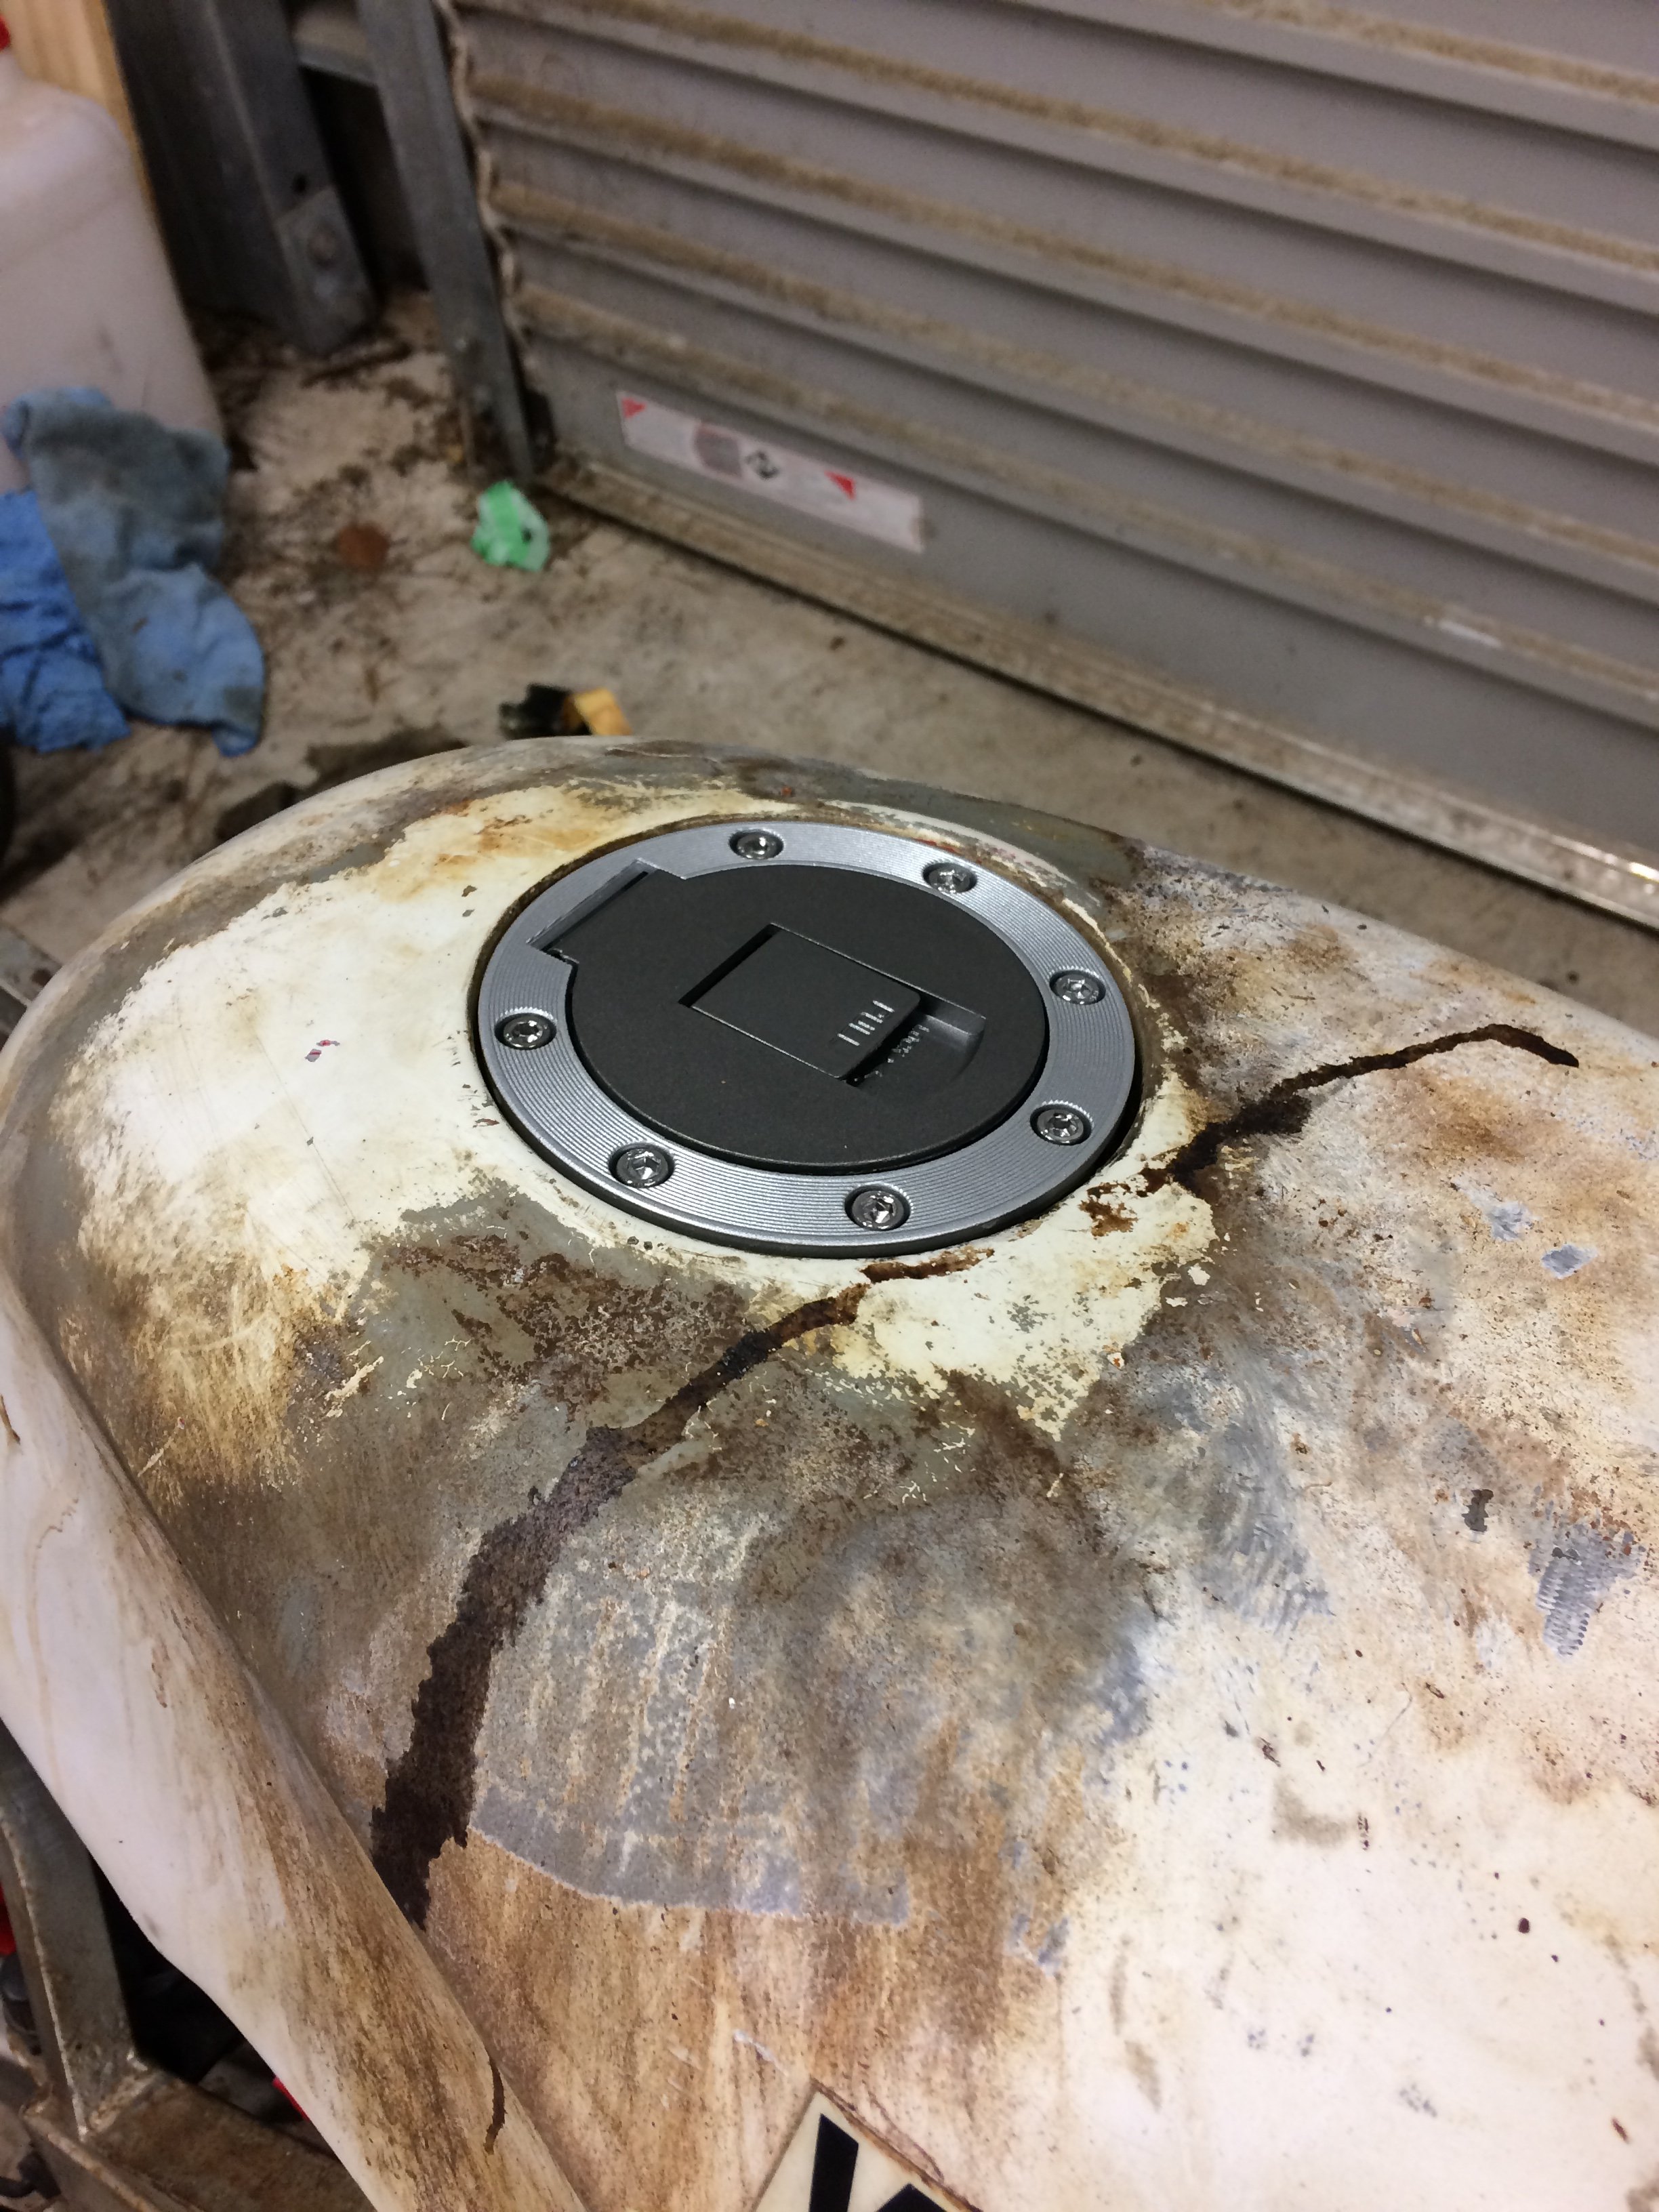
New fuel cap from China fits like a glove and cost beans, stoked
1 point
-
That's the plan, but I'm at work and I don't think the files on my computer are sufficiently abrasive.1 point
-
I dont know wire cutters but can give file to anyone here who wants it. Ill put in cad library tonight.1 point
-
I have an account with laser cutters so could even get it done for ya1 point
-
could get a few of them laser cut from 5mm plate and stick/weld them together? The teeth don't need to be super accurate?1 point


This leaderboard is set to Auckland/GMT+12:00