
Leaderboard


Popular Content
Showing content with the highest reputation on 10/01/19 in all areas
-
i havent posted any car ramblings in a rather long time.been here, there and everywhere. but since being home my daily morphed into something rather obscure. its been a long journey to this point with alot yet to come, many good times with much heart ache. one of the earliest photos moving things around when i got home this is the last trip it made with r160 rear end, but did have fc rx7 front end by this point many many axles and 3 gearboxes later i had to do what i do best and go way overboard so changed to a 6 speed box when all this went in and now it should last alot longer. felt reall good on track now it awaits me getting enough spare space for a long enough period of time to get design approval for cert and then have Clint come back and give me a big list to rectify. its been fun but there is a little car that some may remember that needs love again8 points
-
Only a page 4 thread dredge, definitely not the worst I have ever done... So I did some more work, and spent some more/a lot more money. Bought this: RB25DET Neo, rebuilt as far as sealing the engine, i.e sump and oil pump not properly in, just keeping things covered. Forgot to get a photo of where it is now but is more complete, has throttle body, water lines, alternator, power steering pump. Have purchased a new timing kit (belt, idlers etc), needs a new oil pump as the gears on the one that came with it are showing signs of wear. Thanks to some helpful advice I have decided to stick with a standard pump with new Reimax gears, so that should be sufficient as this won't spend too much time on limiter like it would in a drift car etc. Have new coils (in pic) but am considering a wasted spark setup, as these have a rep for overheating the rearmost coil, and this will be tucked in behind the firewall, so could potentially be worse. Got the right brackets for the mounts finally sorted, from an RD28 powered Patrol. Other than that, It needs a new clutch (considering just an Exedy HD rather than a button or puk clutch due to driveability), need a new harmonic balancer/crank pulley (didn't come with one even though it was meant to, but such is life). I have a turbo manifold on the way this week and the Masterpower turbo can be seen chilling up on the toolbox in the back. Should be good for roughly 350-400hp if I do it all correctly, I will, at least initially, be happy with anything over 300hp atw. So while the engine is waiting on me to throw money at it (mostly the clutch so I can properly bolt it up, oil pump can be done in place), I continued removing firewall now I knew exactly how far the intake would come out from the engine. Marked it up with dazzle, then cut it out, didn't get photos of the fresh cut, but it made the floor fairly weak haha, there isn't a whole lot of original firewall left at this stage. So i put 20x3 flat bar around the perimeter, and plug/stitch welded it in for strength. Strengthened it up heaps. Original mounting plate for the steering column stuck out into the intake area, so cut that. That whole area still needs work so that the cover for the back of the engine (that I will make shortly) can be removed without having to unbolt the steering column, and so they both have enough space and fasteners to make a proper seal. Made some plates and closed in some holes that will no longer be needed for the clutch master, brake master, choke, etc. Needs tidying up, but I ran out of time on Sunday so it got some primer to keep it covered in the meantime. Pedal box will likely be a Wilwood floor mounted pedal box. Put the dash in chocked up with a bit of wood to see what clearance I had vertically and behind the dash for a heater box of some description, the stock one will most definitely never fit again. Likely use something like this: https://www.aliexpress.com/item/32968868437.html?spm=a2g0o.cart.0.0.c0973c005VMSGm&mp=1 It's compact and will do for windscreen defrost and pushing air through the vents, will just have all working at the same time to eliminate the need for any sort of directional matrix, and run the standard valve to determine the temp. I am trying to decide whether to try and make a scoop to direct air from the intake up under the dash or just blank it off and have it only recirculate internal air. Got a bit of time in the shed yesterday arvo and decided to try the intercooler that came with the new engine. Just tied on to the rad support at the moment. Cut a whole lot more plastic out of the grill and it sort of fits, good enough anyway. It is about twice the overall volume of the original so should be a bit better. Have made a good start on the body mounts, it is sitting on two of them at the moment plus propped at the front, but need to sort the rest. Will get them all tacked in, then get them checked by the local certifier, and get someone with more expertise than myself to buzz them in. However, forgot to get any photos of these. Damn. If anyone can help with advice or knows of someone with any of the parts listed above, then hit me up. Chur, Hayden.8 points
-
Ohhhh gidday. On my way home from raglan on Saturday my left hand front wheel bearing decided to start making a lot of sound..... So tomorrow is a new month, I'll head out to the vdubshoppe, put a couple of wheel bearings on my account and forget about them till the 20th of November. Mate was nice enough to get me a bearing packer tool from super cheap for my 30th, so now I've got something to use it on. I'll report back maybe Wednesday once I've done this. And cause everyone likes pictures here is one of another westie I follow on the Instagram.
 6 points
 -
Bosozukodozer the barry aggravator4 points
-
Yeh nah yeh, so after that ^ I got a bit of 4140 CG shaft, had some keys chucked in it for a box, and slapped it back in. Keys are tiiiight and everything fits much snugger due to shaft being correct size, so that's tops. I cut the keys a bit longer, so everything had a key under its total length for strength, and I went for internal threads on the ends as its way easier to do. Once it was back together, we took it back to the beach again, to finish off testing. It was running much better (put tape restrictor back in) and we thrashed around in it for hours with no dramas. I didn't get video of it, but i'm blown away by what it can get up, considering it has no articulation in the rear. It was strolling up stuff that decent 4wd's couldn't get up. I tried to keep the vid short, and not totally mind numbingly boring. You can't really tell in the video, but the road is bumpy as all heck, quite pleased how well the suspension works for how shit it is/road bike shocks and pivoting on bolts. I accidentally drove it through a few small streams on the beach, so washed it down when I got it home. While pushing it back into the shed I discovered one of the back axle bearing housings was broken, I think it may have been damaged when the axle broke, as its on the side that got wrenched around when we were towing it off the beach. By reviewing the footage, I worked out it broke on the last run of the day, so didn't do any real damage, thankfully. Hows that serenity? I decided if the suspension and steering didn't break after all that testing, it was probably good enough, so stripped the whhhooollllleeeee thing down for painting. So now i'm going to clean up some welds, cut out some weight, and then paint it. Regards, VG.4 points
-
So this bad boy is all finished just in time for DGR, had a pretty lush day filled with a few ales and some quality @My name is Russell banter. tried to find some penguins to club, couldnt, so got a photo instead when i got home i packed my tent, themarest, sleeping bag and a shit load of clothes into my 40l bag to see how it will sit for east cape, perfect. Gunna be lush to be 100% self sufficient this year yea rad4 points
-
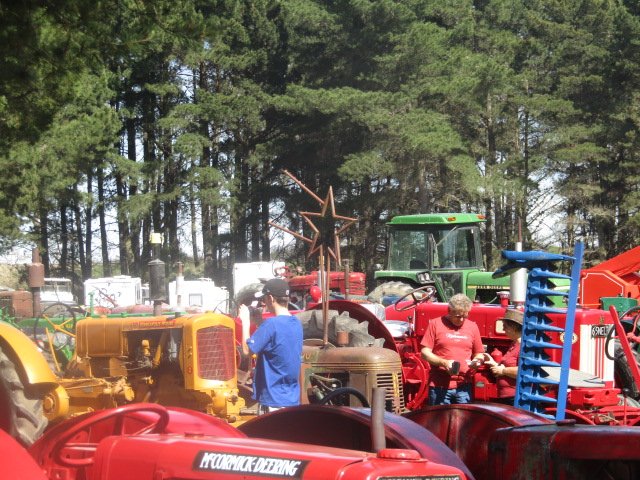
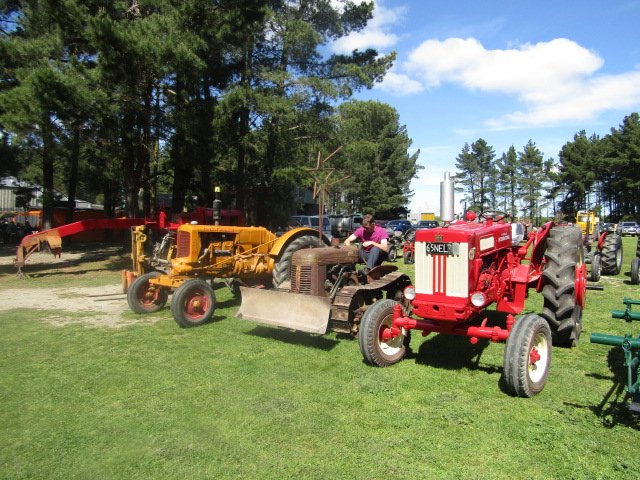
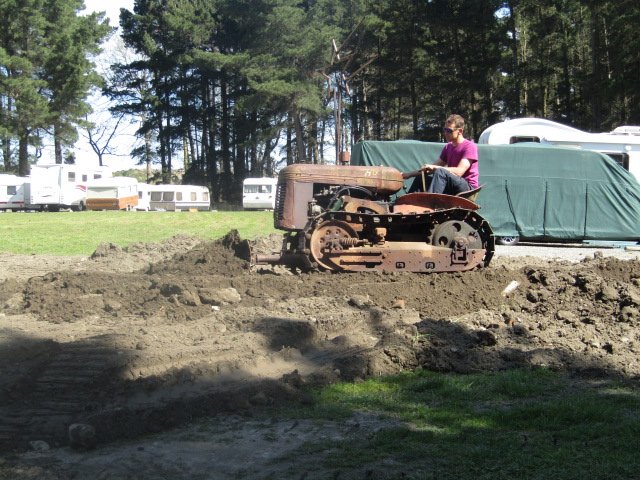
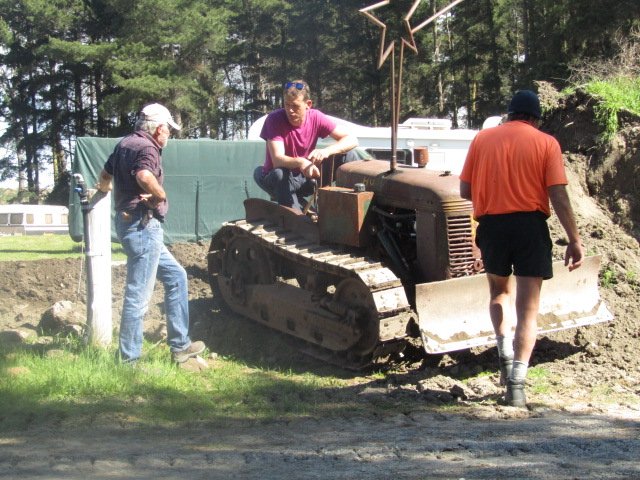
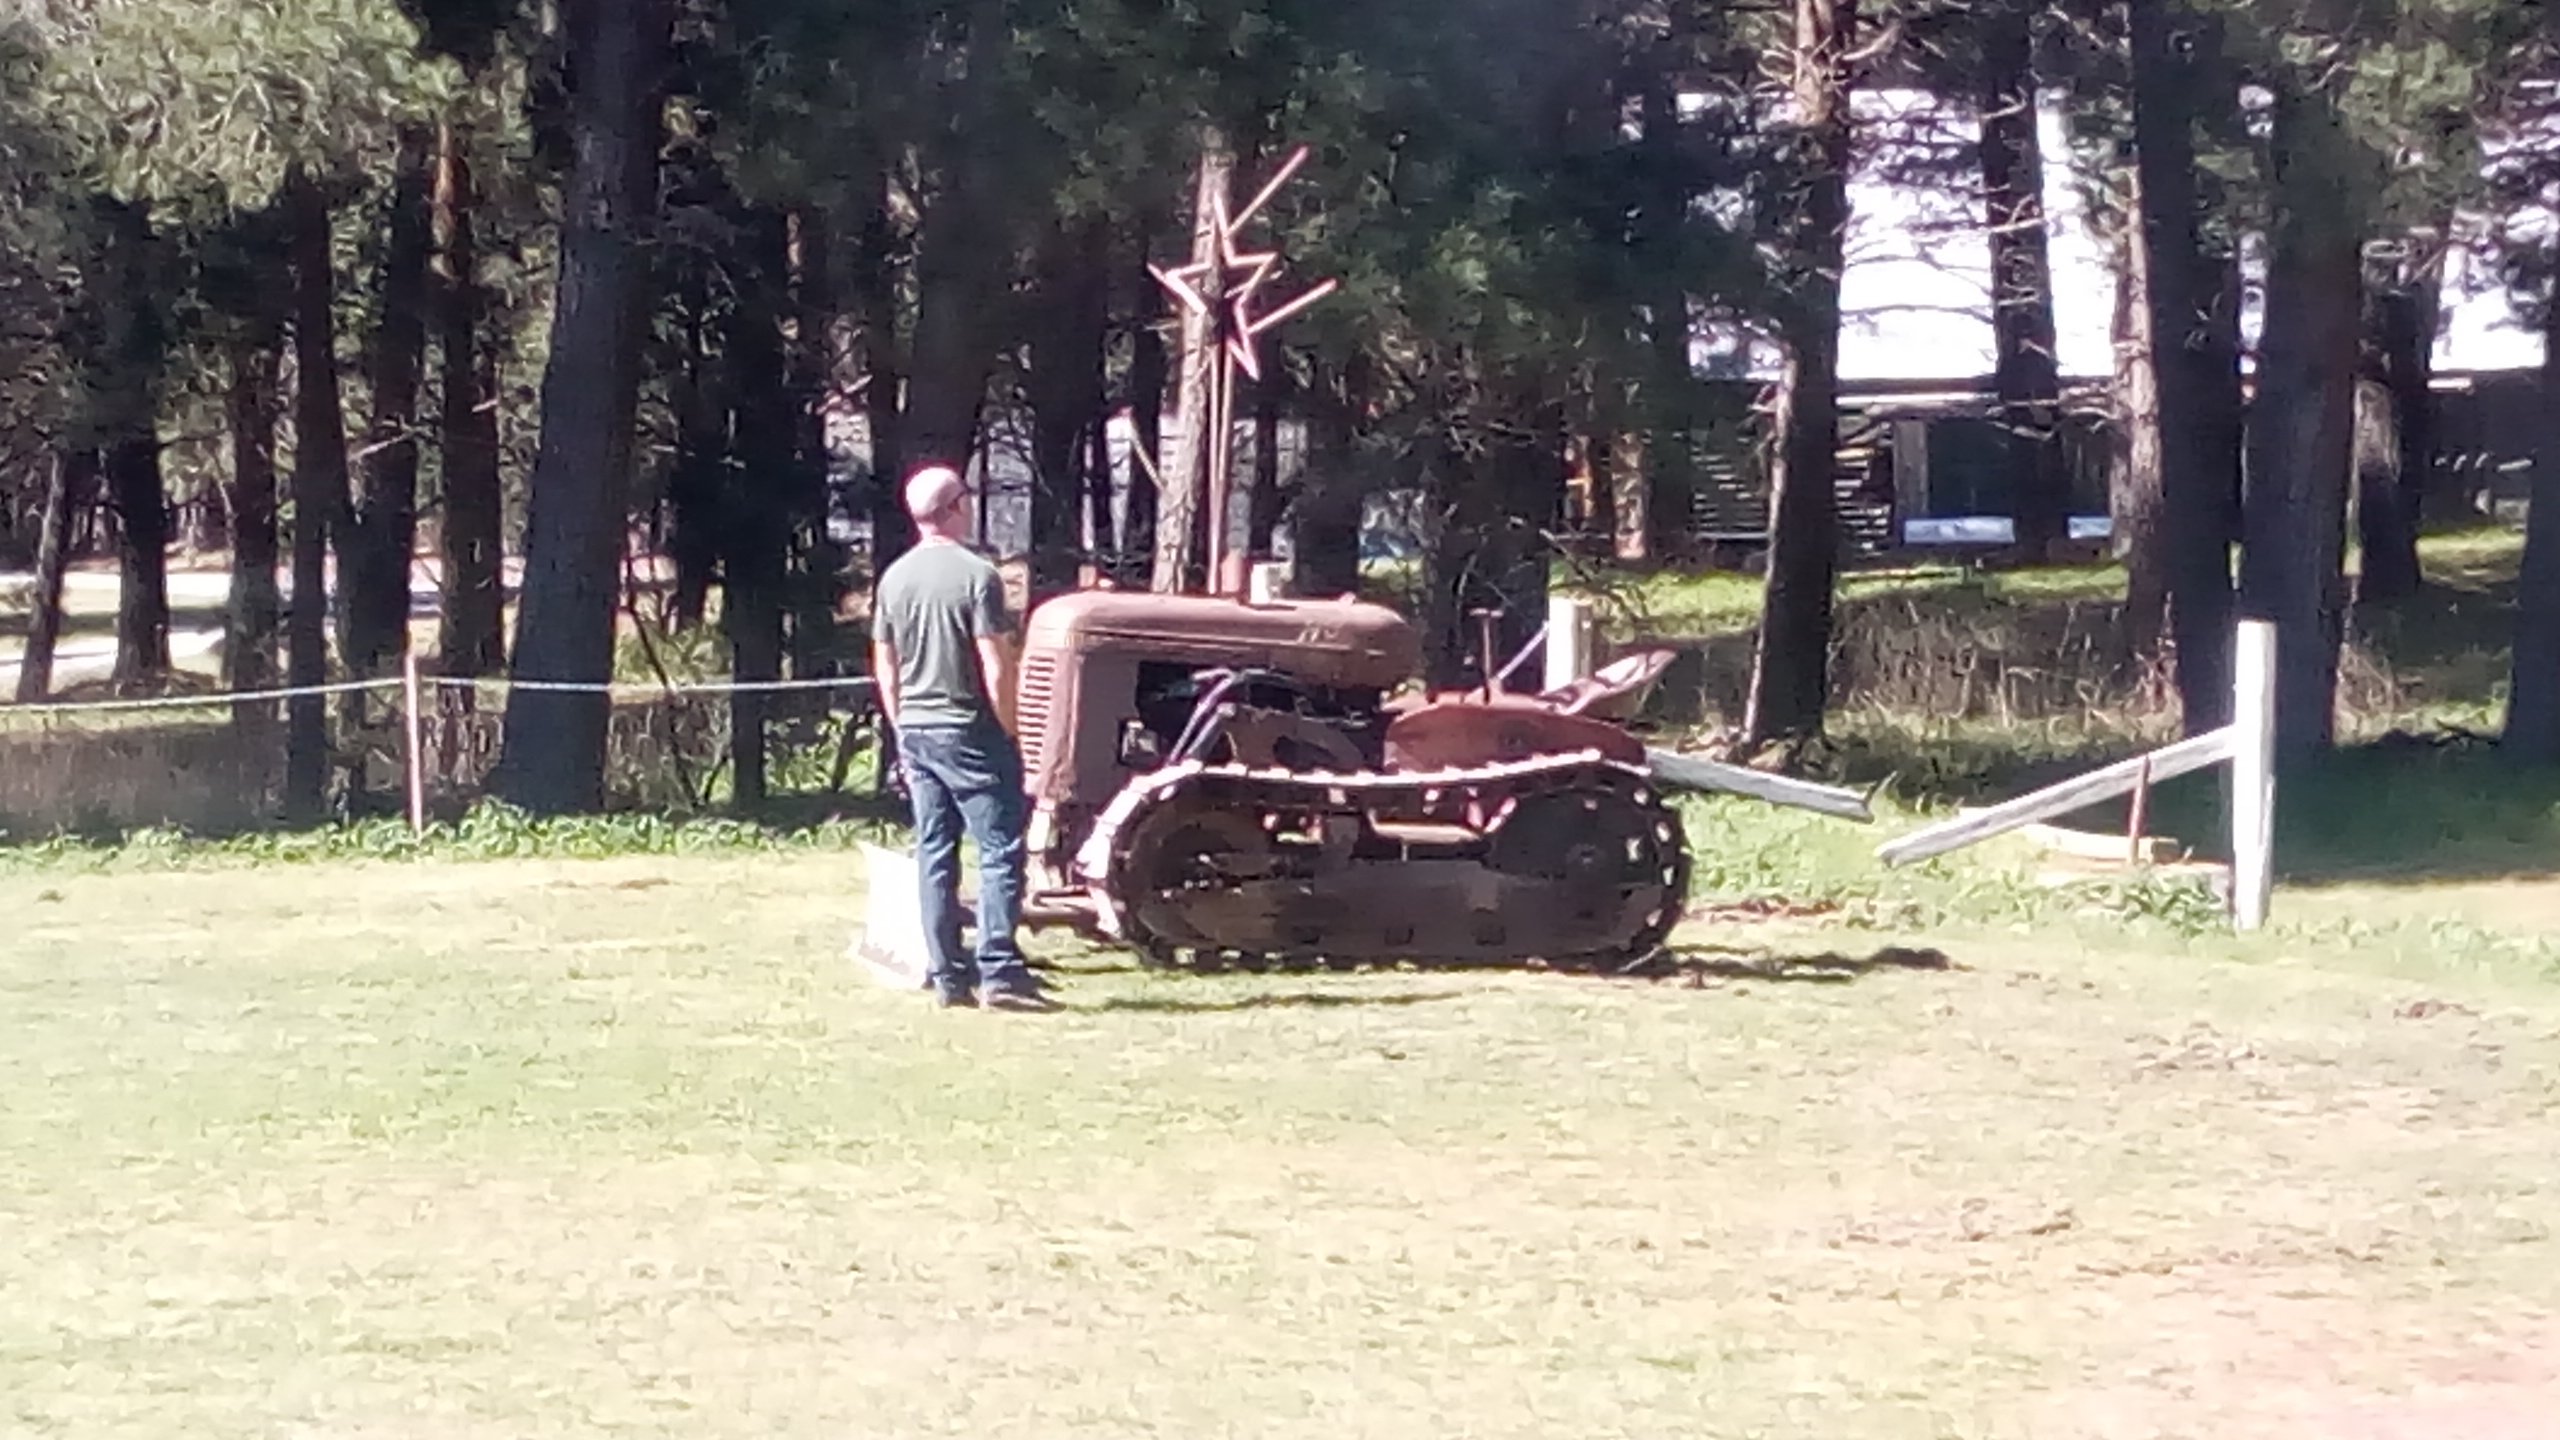
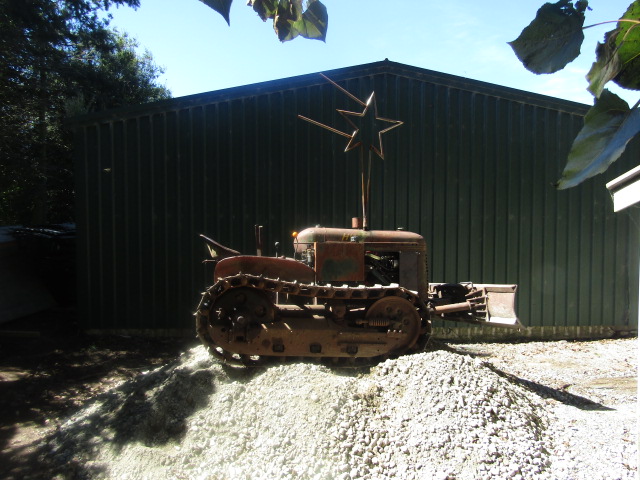
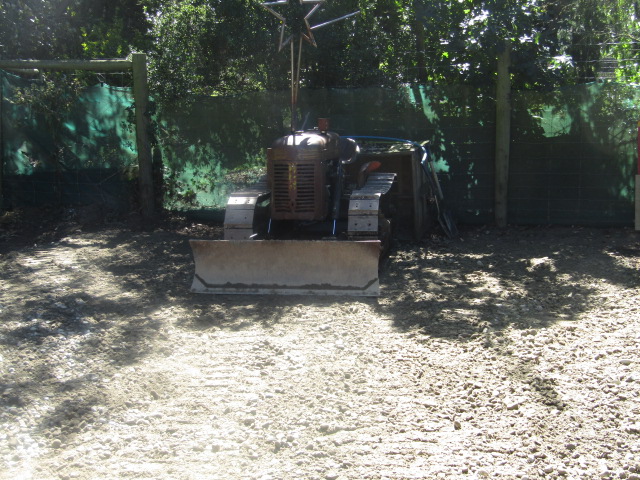
The Mcleans Island Vintage machinery club had its annual show this weekend just gone, It seemed rude not to attend. Ill post pics here, in the tractor thread, and or in the wombling Barry thread. In the show, standing proud Pushed some dirt. Had some sharns.
4 points
-
We use same style thing at work one for the main shaft that’s about 500mm and another maybe 150mm diameter for the brake disk they handle the 2000kw+ no worries doing them ups a right cunt nugget tho3 points
-
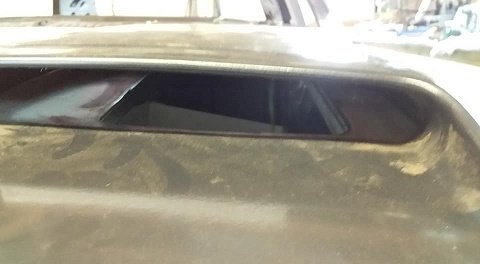
Gtfo rusty leaky sunroof Just a quick spray of colour to seal the primer. I'll give it a sand on the weekend and I'll go back next week to get the rear bumper and the roof painted. I'll do the sanding to save a bit of money3 points
-
3 points
-
Matt at tin tricks in east tamaki is good. 0212174158 He did some work on my car, fixed the floors, made a new inner guard to delete the lumps where the battery was mounted, and deleted the heater holes
3 points
-
take it out. you'll regret it later if you don't. especially when it starts leaking and you can't buy any bits for it. patching a sunroof isn't as hard as people make out, anyone with decent panel skills should be able to sort it. i know a guy but hes eye wateringly expensive. hes very good, i guess that's why hes so spendy. if you get stuck PM me.3 points
-
Dont forget your face bandanna and one of them Jap moped skid lids for max confusion, Bandanna for dust control and helmet because safety first ofcourse3 points
-
Not favourable. When I was leaving I almost drove through the sandwiches and tea area, many many disapproving looks were metered out. Edit. Barry on the left in the sharn pic liked the star. He said it made it stand out and was amazed what an effective muffler it was.
3 points
-
Yip big one with hydraulic wrench and 30+ bolts takes about 3-4 hours with two people other one is 12 bolts (cheat and use a rattle gun for most of it) and then swing on a 800Nm wrench after2 points
-
If the car is in the panel beater I'd spent the money now getting it removed. It'll cost more and be a pain later when it leaks and starts rusting stuff2 points
-
Il bring some 2x4 blocks and cable ties for the pedals2 points
-
I hope you have fitted a motorcycle throttle so you can play your "call" while dozing agitated barries into a heap2 points
-
Cool thanks that makes sense, I'm downloading PCLink now to install on my work laptop. Not supposed to but I have admin rights and I'm still being made redundant anyway Lol. What are they going to do? Make me extra redundant?2 points
-
Waiting on parts to finish the throttle & plenum setup. so pulled the radiator and intercooler out to modify the intercooler pipe. Then went full retard and cut up the radiator. cut a bit off the end and relocated the outlet pipes Why? more room for other stuff and that part of the radiator was mostly blocked off from airflow anyways. Redone the turbo side pipe, as well as the inlet side. the pile of pipes at bottom of pic is the old stuff that come off it. Yep that cast elbow looks horrible for flow ^ thats why i chopped it up, so goes from 2.5" to about same area as 3" pipe. The intercooler is on the list to go in the bin. because is heavy and junk. I brought the cheapest one i could get when originally built the truck. Staying for now but will go to a tube and fin one day. 2.5" hot side 3" cold side. old was 2.5" . even though the pipe is bigger have cut the length down quite a bit. so probably sill less area in the pipework than the old setup2 points
-
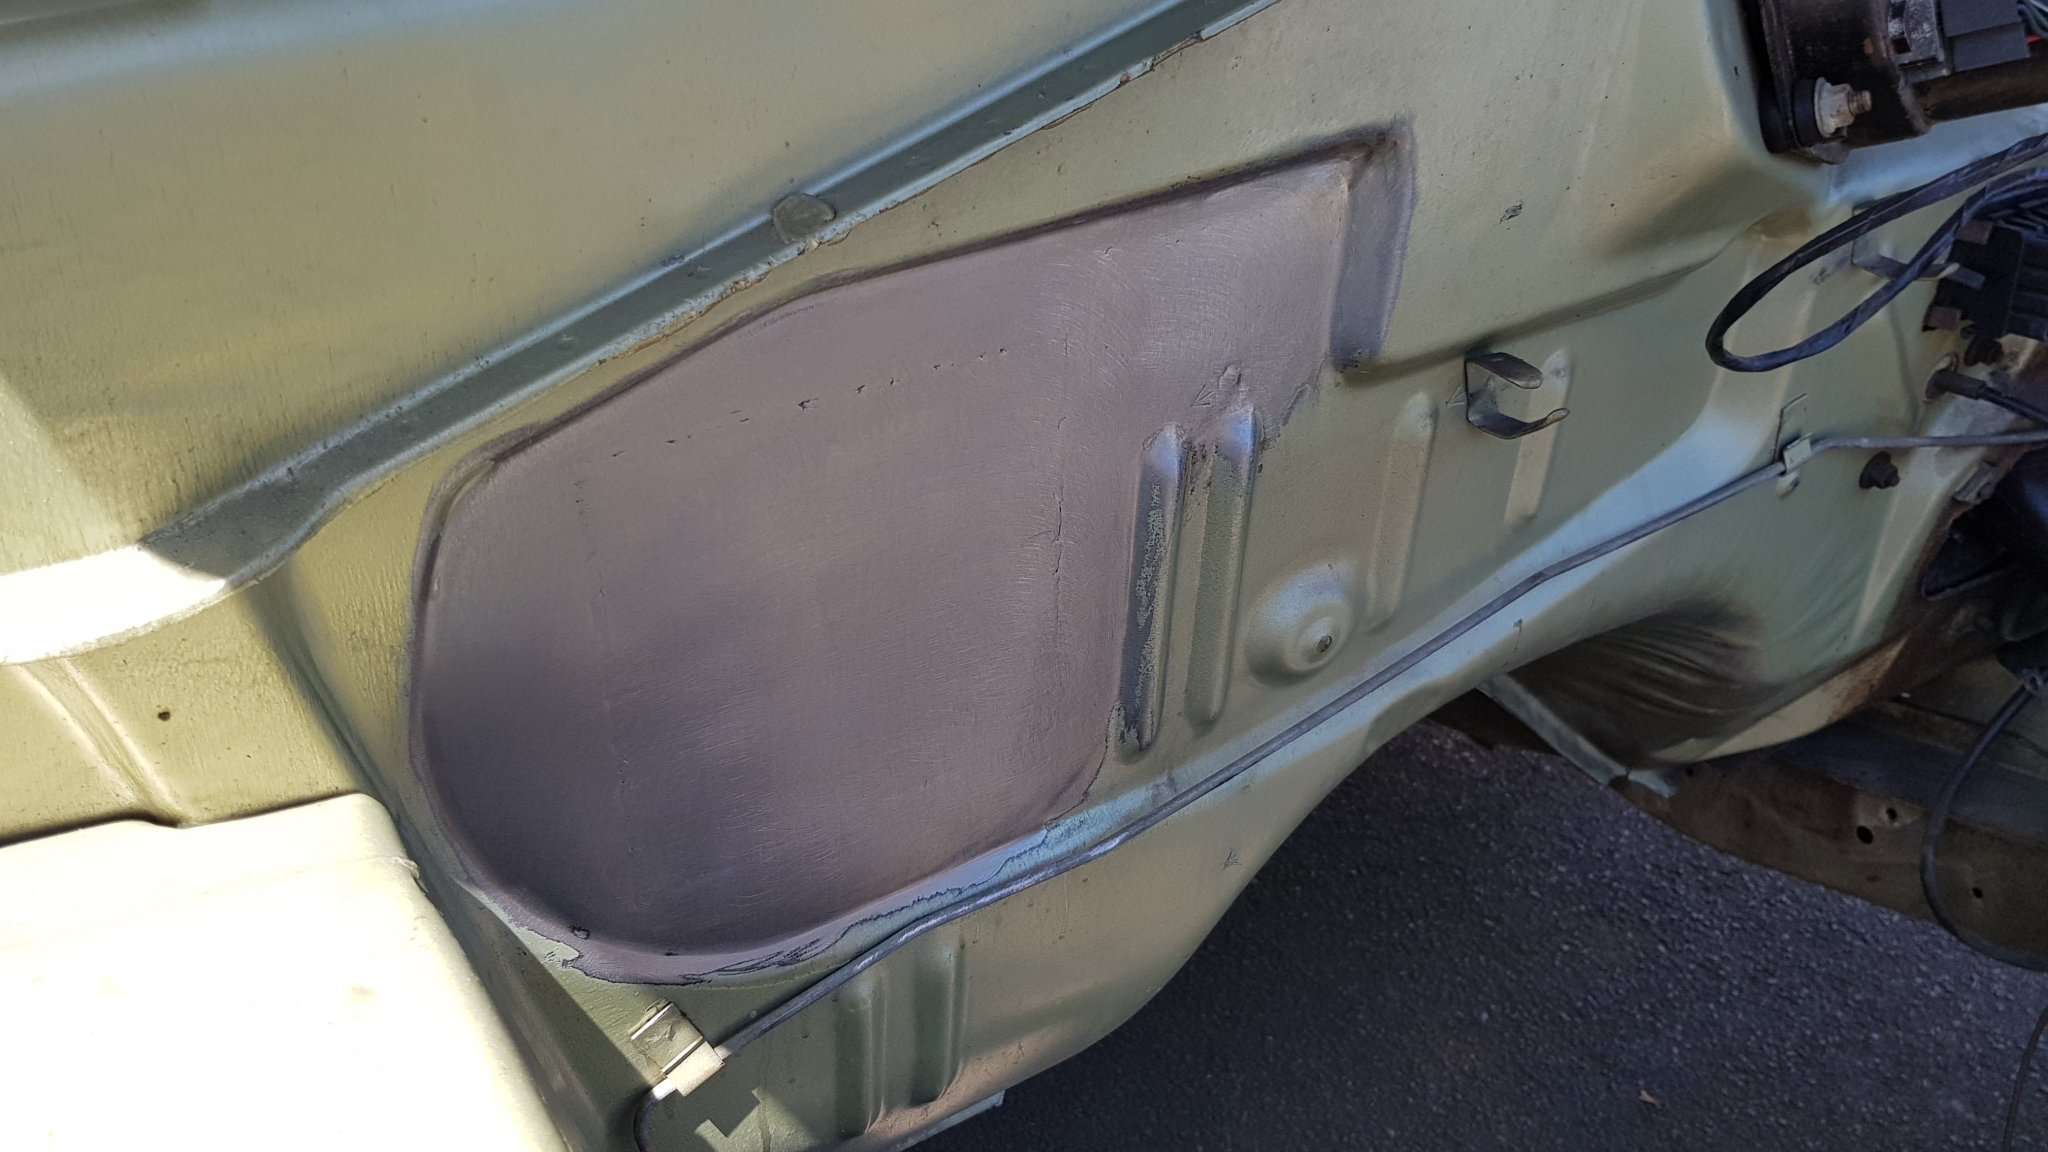
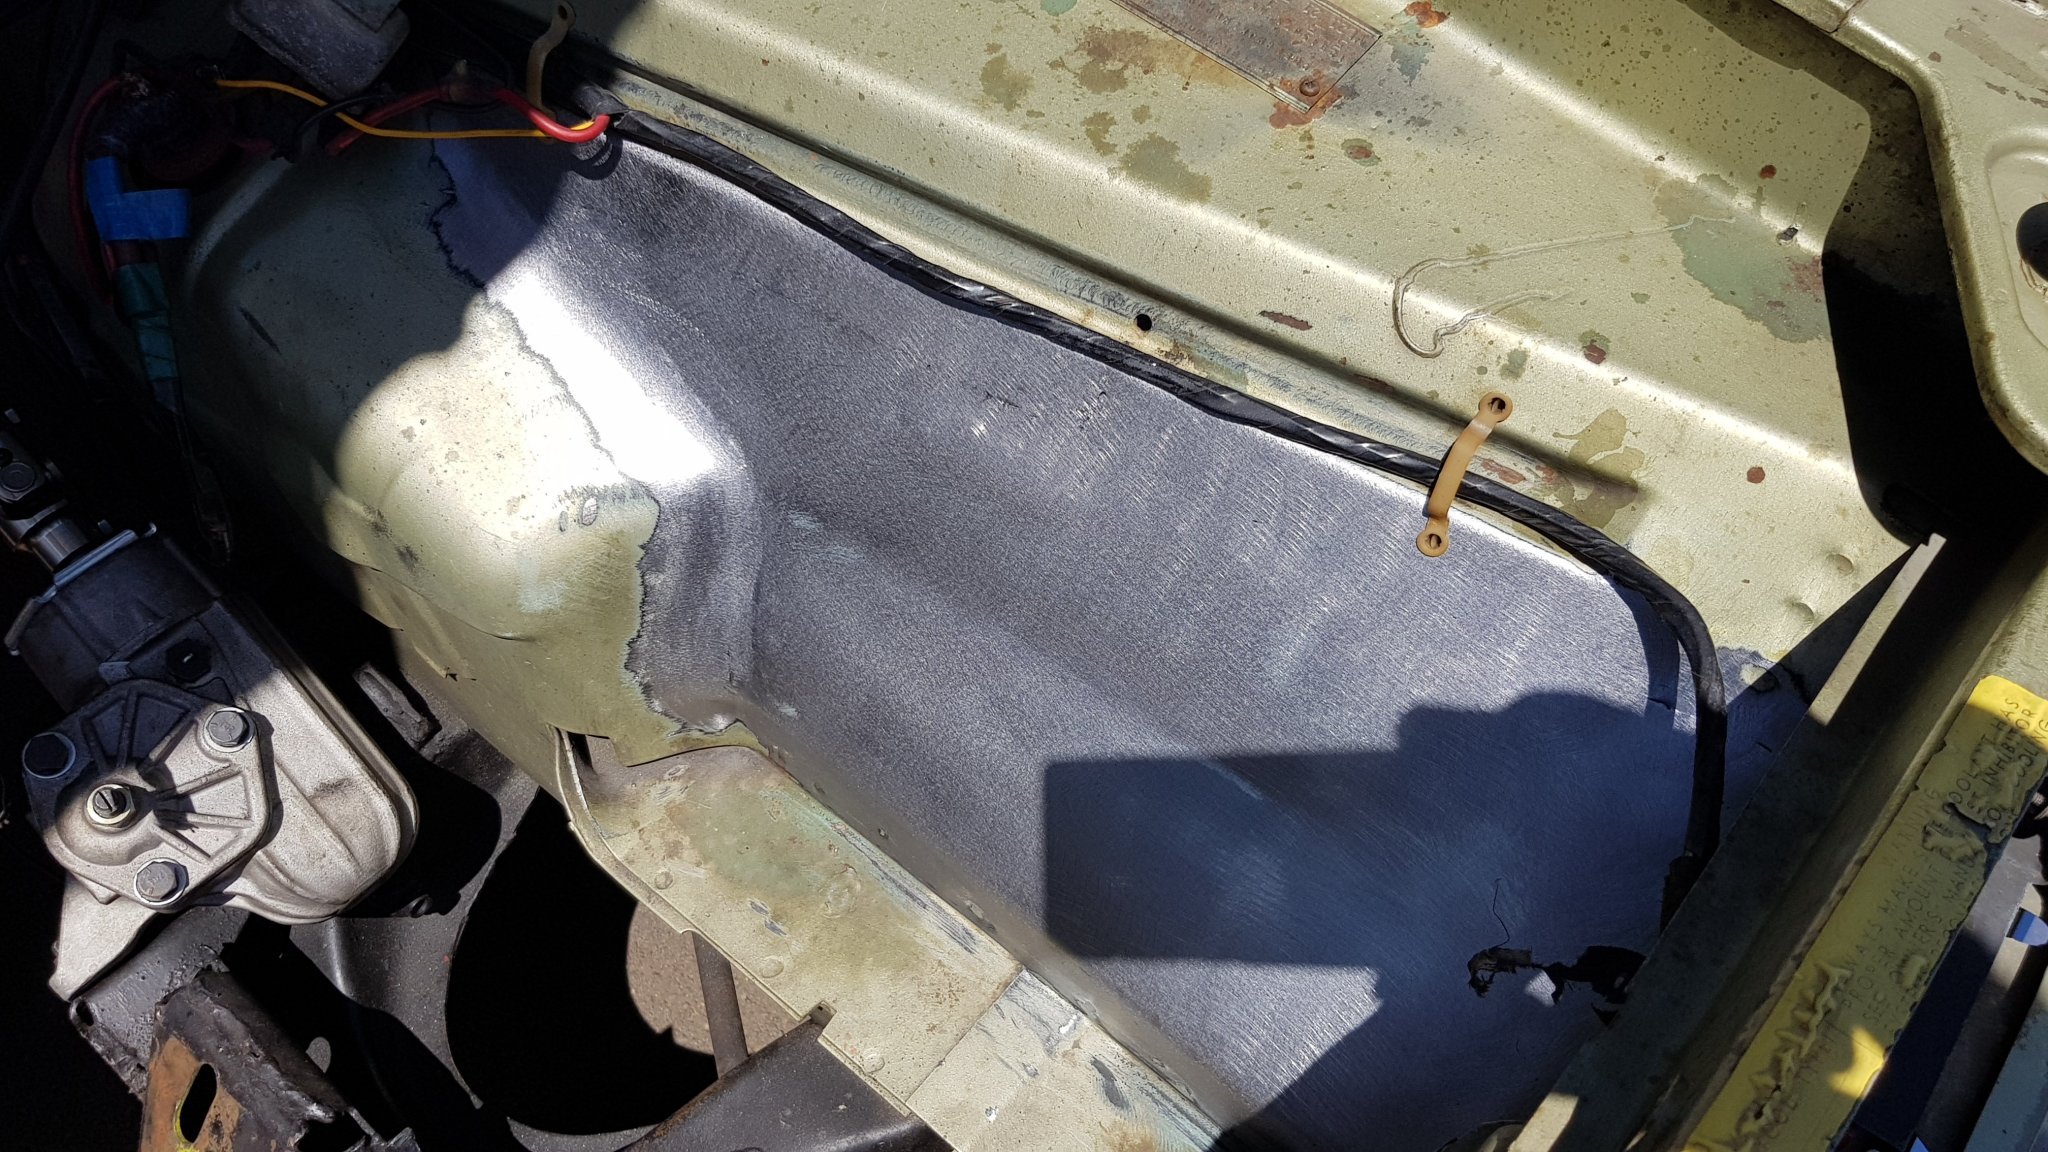
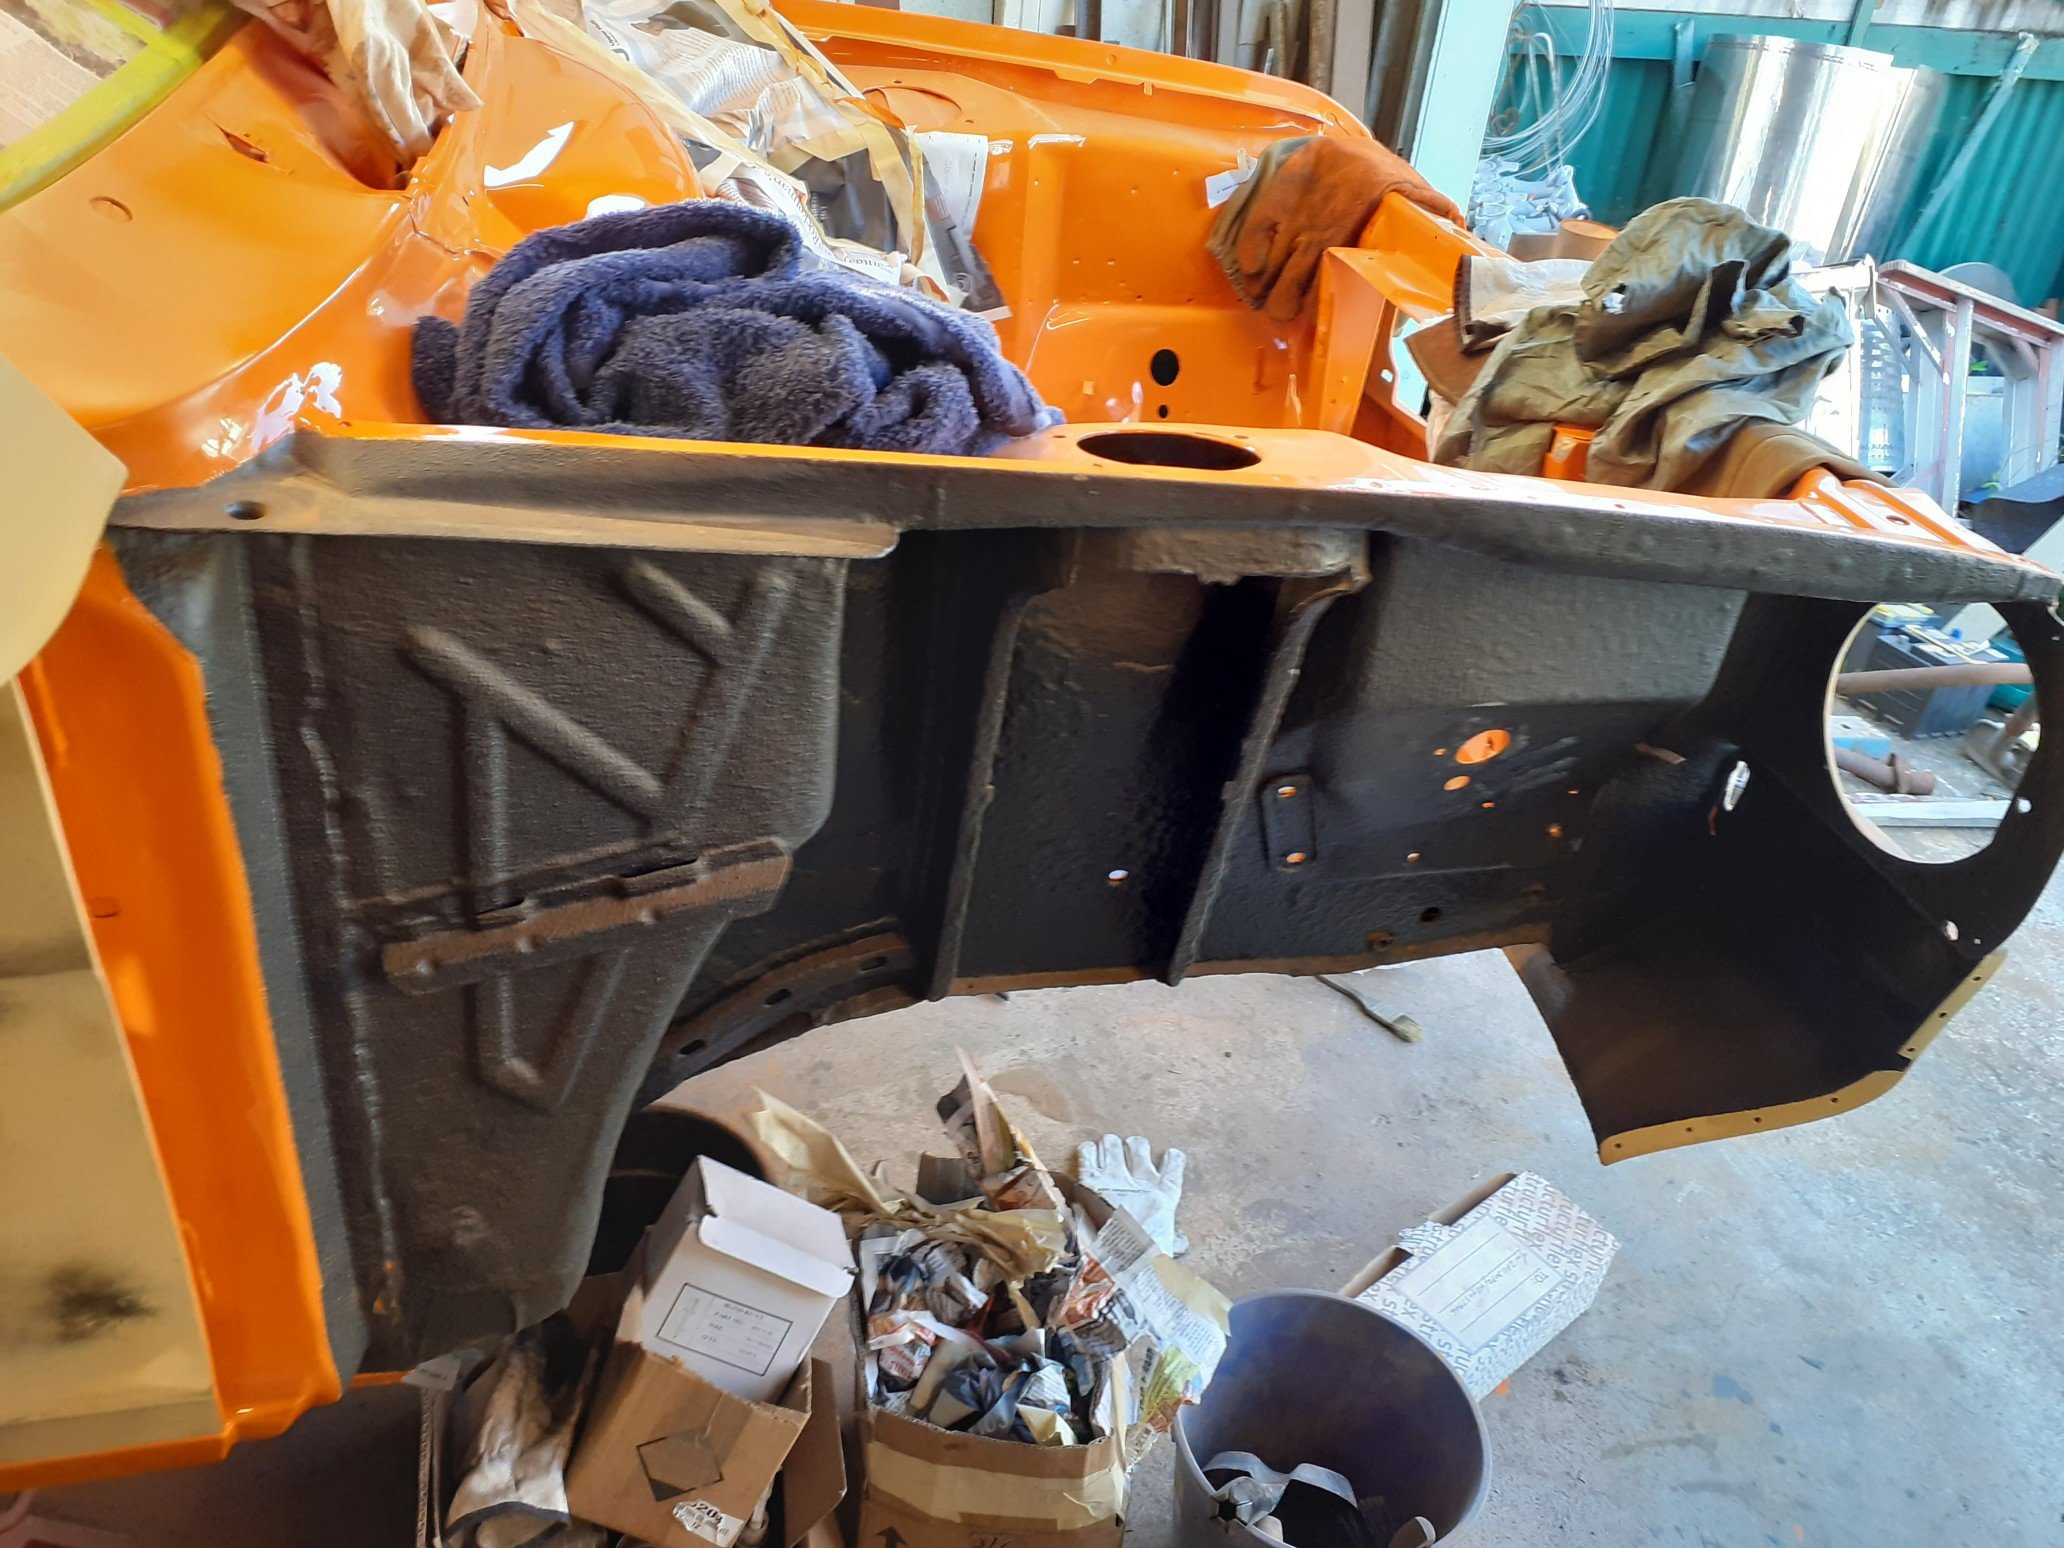
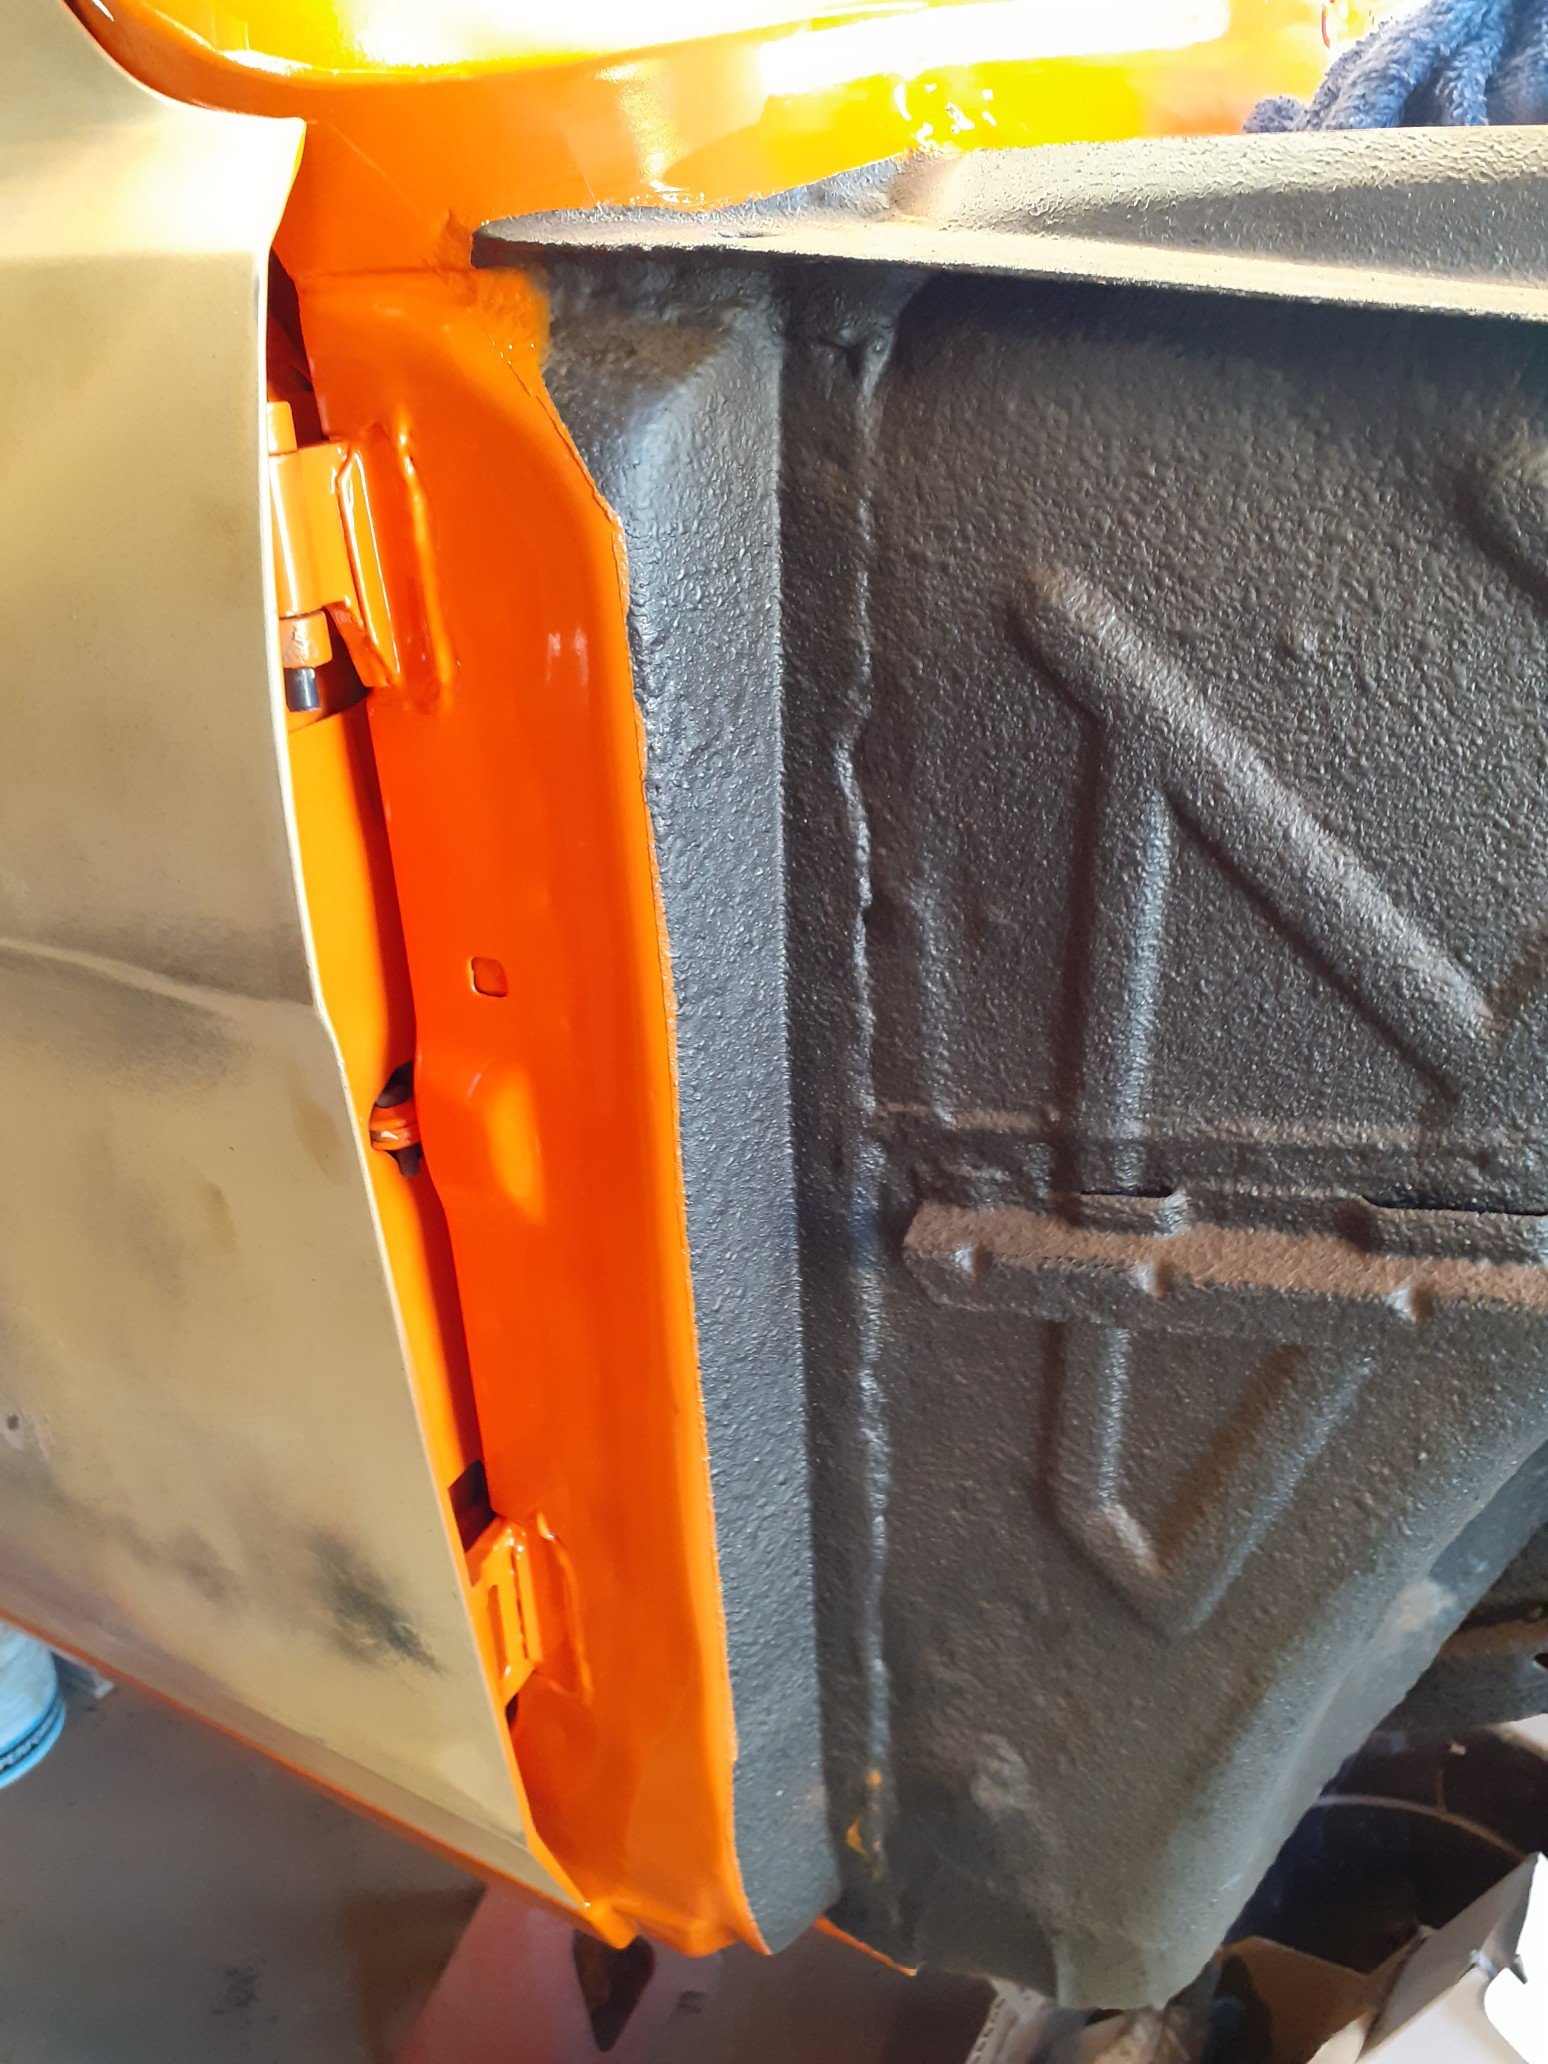
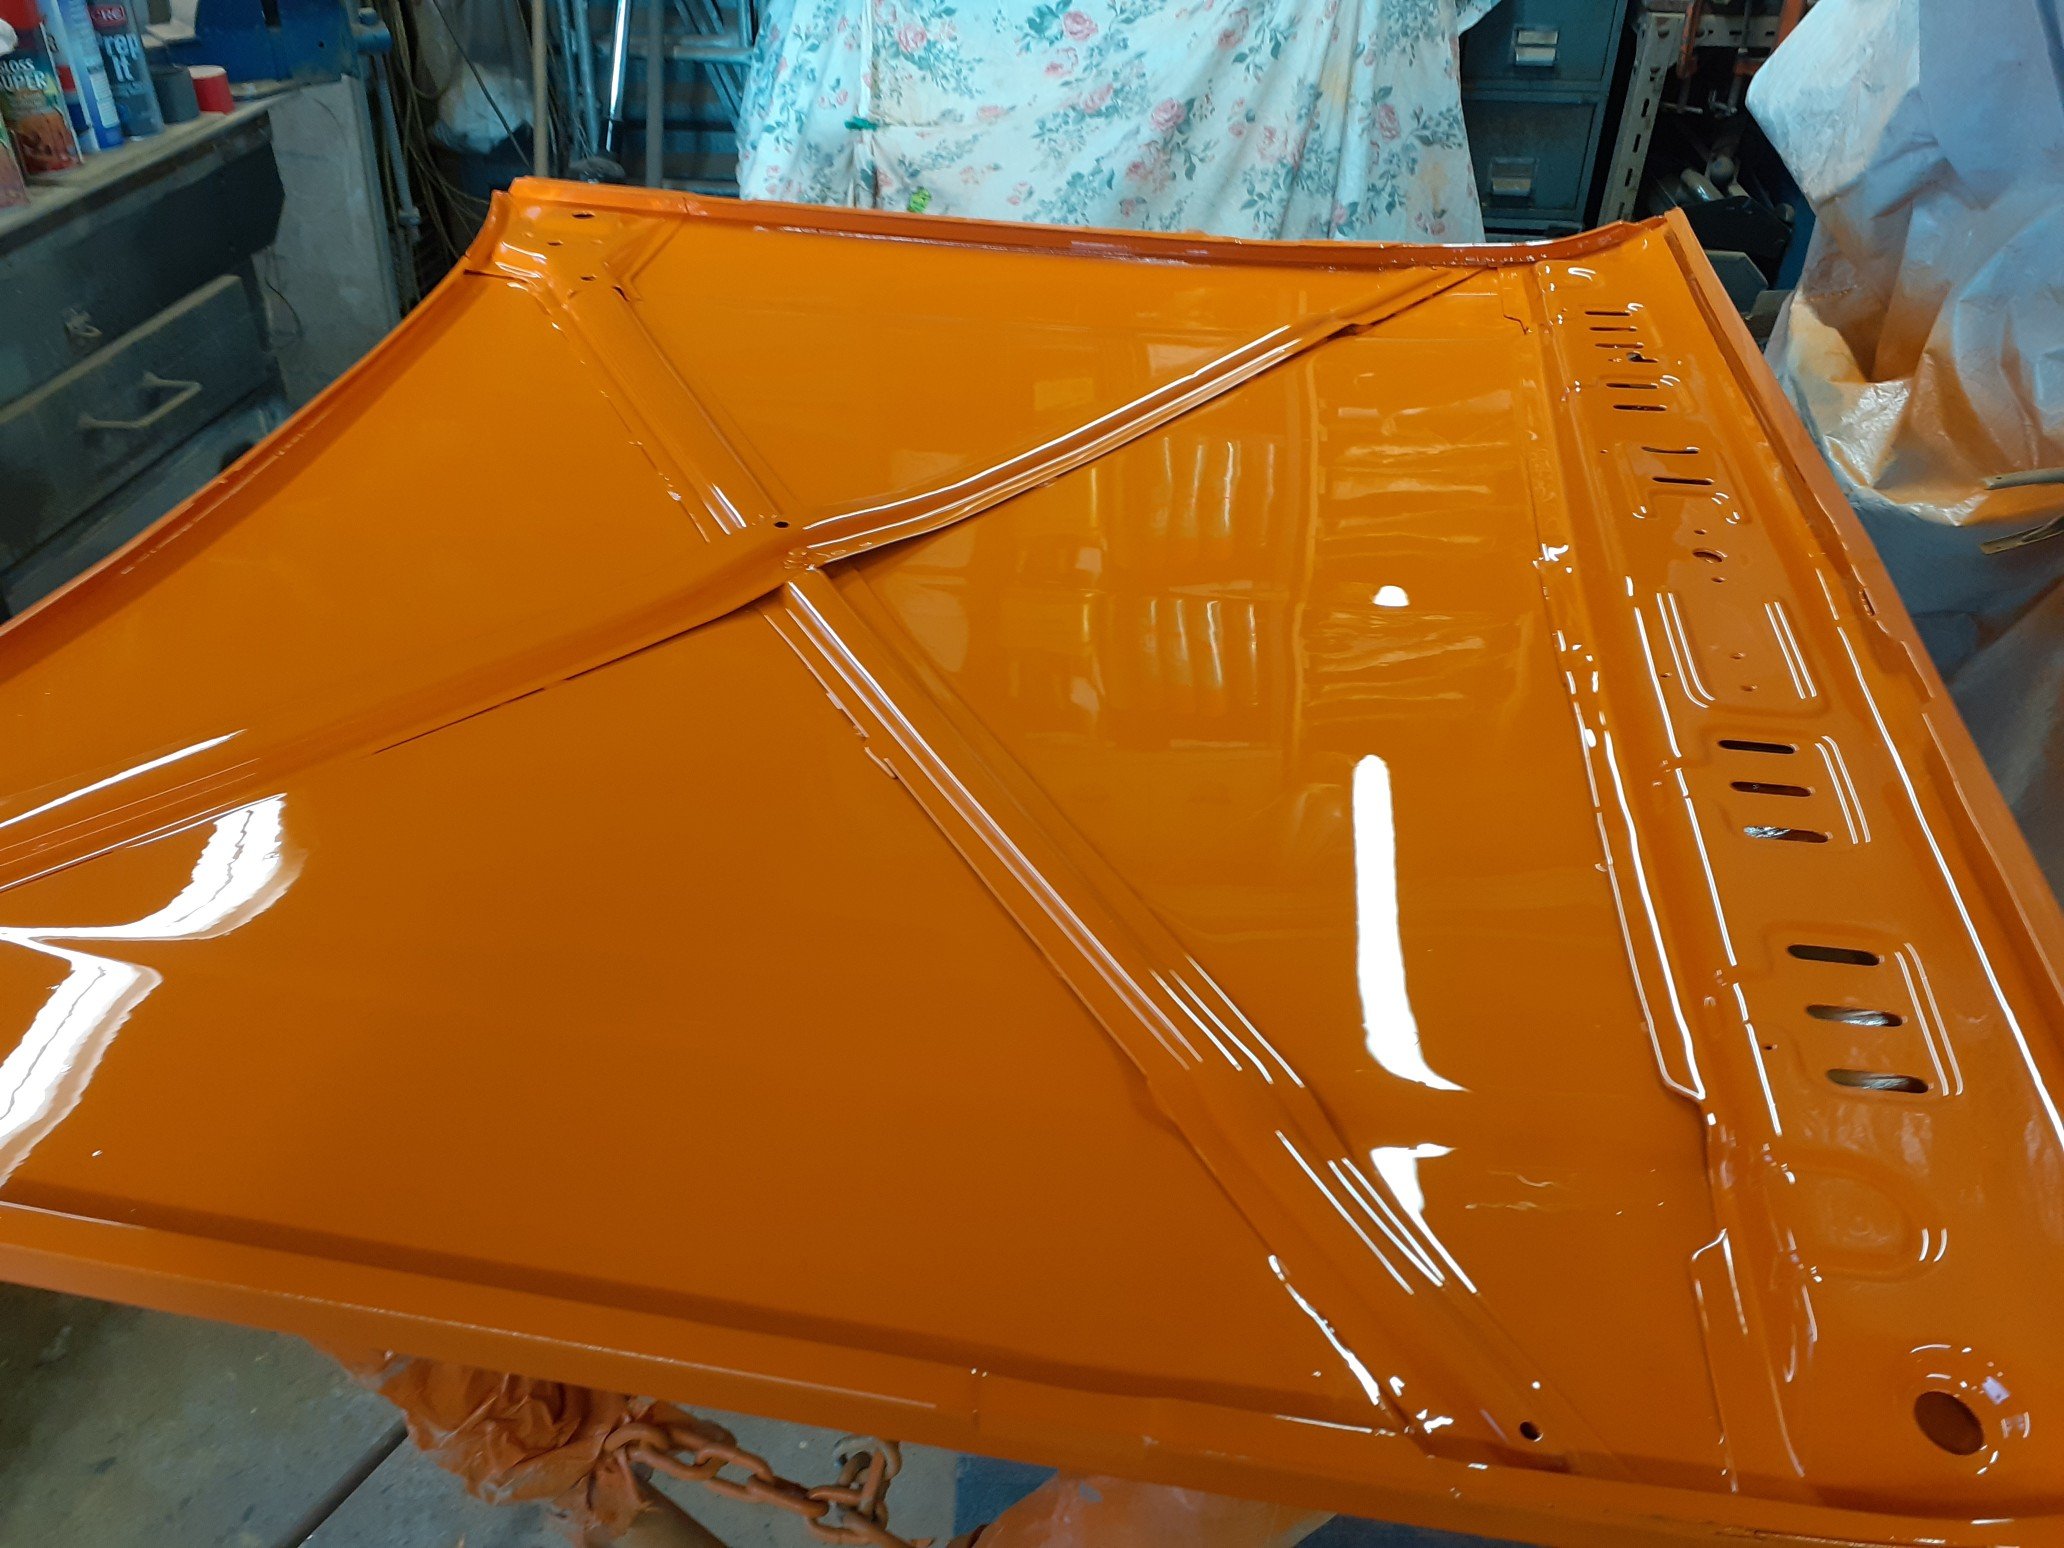
Have sprayed a few more items. Battery tray, all door jams, bonnet and had redone the engine bay 'bubble' because it was easier to do the whole thing then to fix a couple of runs. Couple of areas had to be touched up as I didnt wait long enough between coats and had solvent boil. Aligned the rear doors for final assembly before paint. Will put some seam sealer around the hinges to lock out any water. Put in the new door pins on the drivers door and sealed in the drivers guard. The sealer is a soft material that will provide protection from the wheel well but wont 'glue' the guard on permanently. Originally the guards are welded on but I've decided to reattach it with sealant and bolts. Will align the passenger door with new pins then I can start prepping the body for paint. Also made up a new base plate for the subframe and welded that on.
2 points
-
I'm currently rebuilding an HQ Monaro Coupe, it is at the panelbeating stage and I'm wondering whether or not I should get the sunroof hole removed from the roof. Someone put it in back in the 80's before I bought it and while I'm nervous about getting it done, as it needs to be done properly, and I don't really have the extra cash to spend, I don't want to regret not getting it done when the build is complete. Can anyone recommend someone who specialises in doing this kind of work and knows they do a good job? I'm in the Auckland area. thanks!1 point
-
Genuine Webers had a center punch in the brass screw to hold them in, if someone has 'serviced' them and not re-punched, they fall out real quick. One review I read mentioned the carb ran like junk, all it needed was stripping down and cleaned of excess swarf.1 point
-
?? You mean because you go over the screws about 200 times before they come up to torque? Lol1 point
-
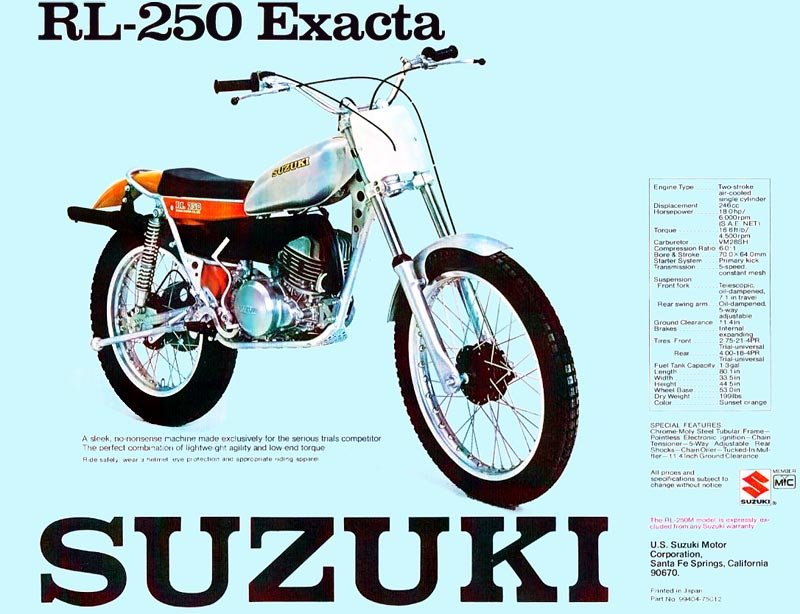
I've recently purchased a '92 Toyoace 4x4 (same as a Dyna) which has a 14B engine. It was cheap. That's a non turbo, basically no electronics, 4 cylinder 3.8 litre Toyota engine. It may be worth looking at one of those as they seem simple and evidently have as much torque as my V8 petrol Lexus, but I dunno how easy they are to slot into a 'Lux chassis 14B 98 hp (72 kW) at 3,400 rpm 177 lb·fts (240N·m) at 1,800 rpm1 point
-
What were the reactions from barries like regarding the exhaust?1 point
-
I wasn't, but it is possible.1 point
-
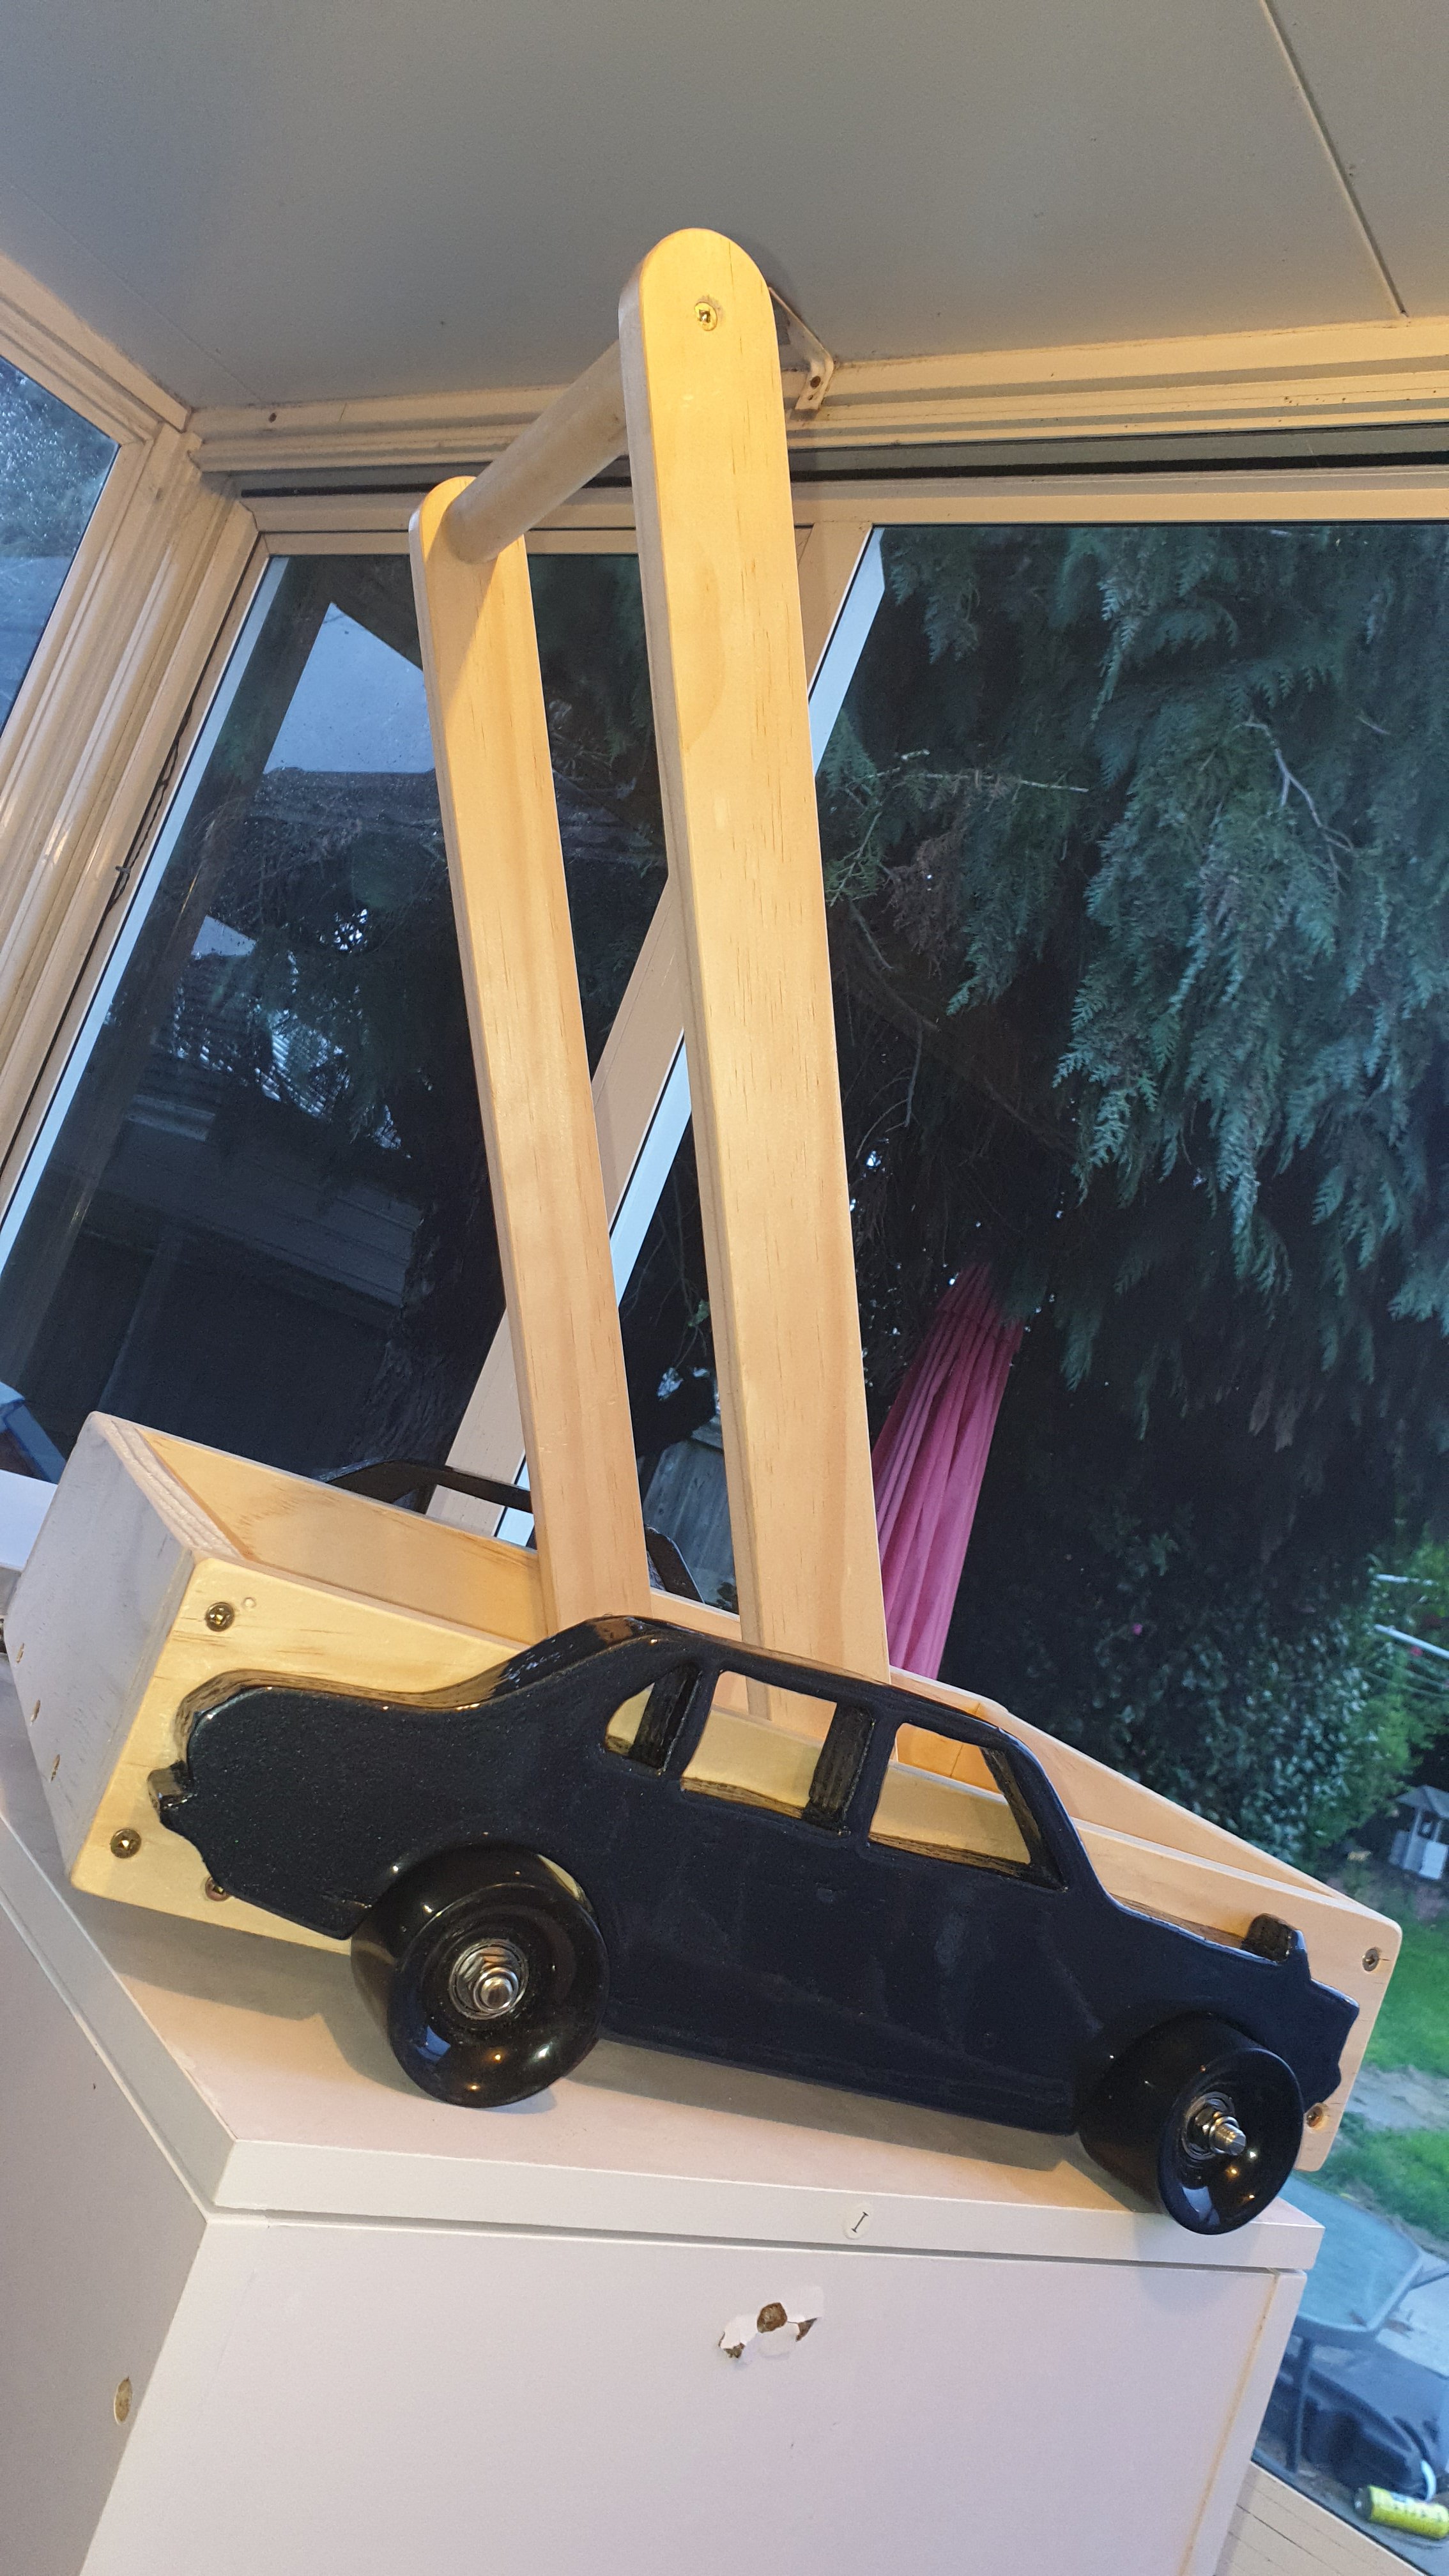
Made this baby walker trainer for my daughters upcoming first birthday. Silloette of my corona painted in its actual paint. I never work with wood so super stoked on how this came out. Kmart fishboard skateboard donated its wheels and that's about all I needed to buy. Bonus is it gave me a chance to test out my new to me, Sata 4000b spray gun. Shit it's awsome! Can't wait to paint to crown with it, colossal step up from the supercheap auto guns...
1 point
-
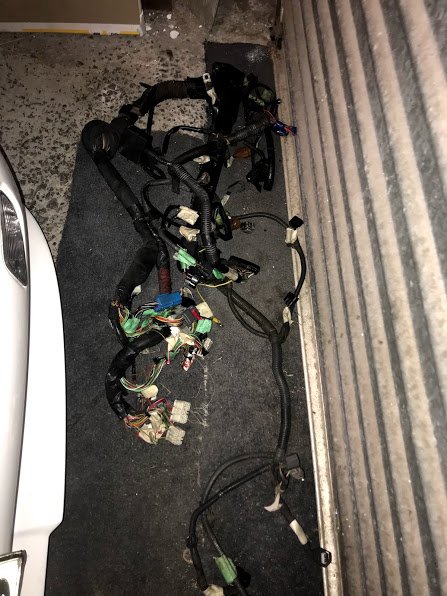
Oh yeah, I think a good amount of wiring weight will be saved since there are so many unused ones in this: Haven't picked up the R35 coils and plugs yet, I asked if he could source some Toyota plugs but he's having trouble finding someone with stock. I'm not sure if the ones NZEFI etc sell are aftermarket or if they source from Toyota. Maybe I could try Toyota genuine parts.
1 point
-
Injectors arrived, got Xpurt 1000cc's. Silly name... But they fit nice: I cleaned up the intake manifold since I had it off to remove the factory wiring loom: While there I decided to remove the fuel damper to simplify the fuel lines, less connections and probably less restriction. Plus whether it would be working as intended after 20 years and also a much more powerful pump with completely different injectors. Plus its weight removed...not much but it add up. I want to weigh the difference between the factory loom + ecu + MAF and the Link + looms once I've finished cutting up the loom. Might even be a few kg? Damper jobby which normally sits under the intake manifold inline between the fuel filter and rail: Some spaghetti: I need to read through the Link help file but am I correct in thinking the Link injector and coil wires are providing the positive current rather than being a switched ground? If so, will the ground wires need to come from the ground wires from the ecu loom or are they ground straight to the block?
1 point
-
I am coming down again this year, will stop by for a yabber.1 point
-
Small steps my arse, I will be cranking this motherfucker. Although I do need to take some time and care getting the engine back together...1 point
-
This txt looks to be the same and its bigger.
1 point
-
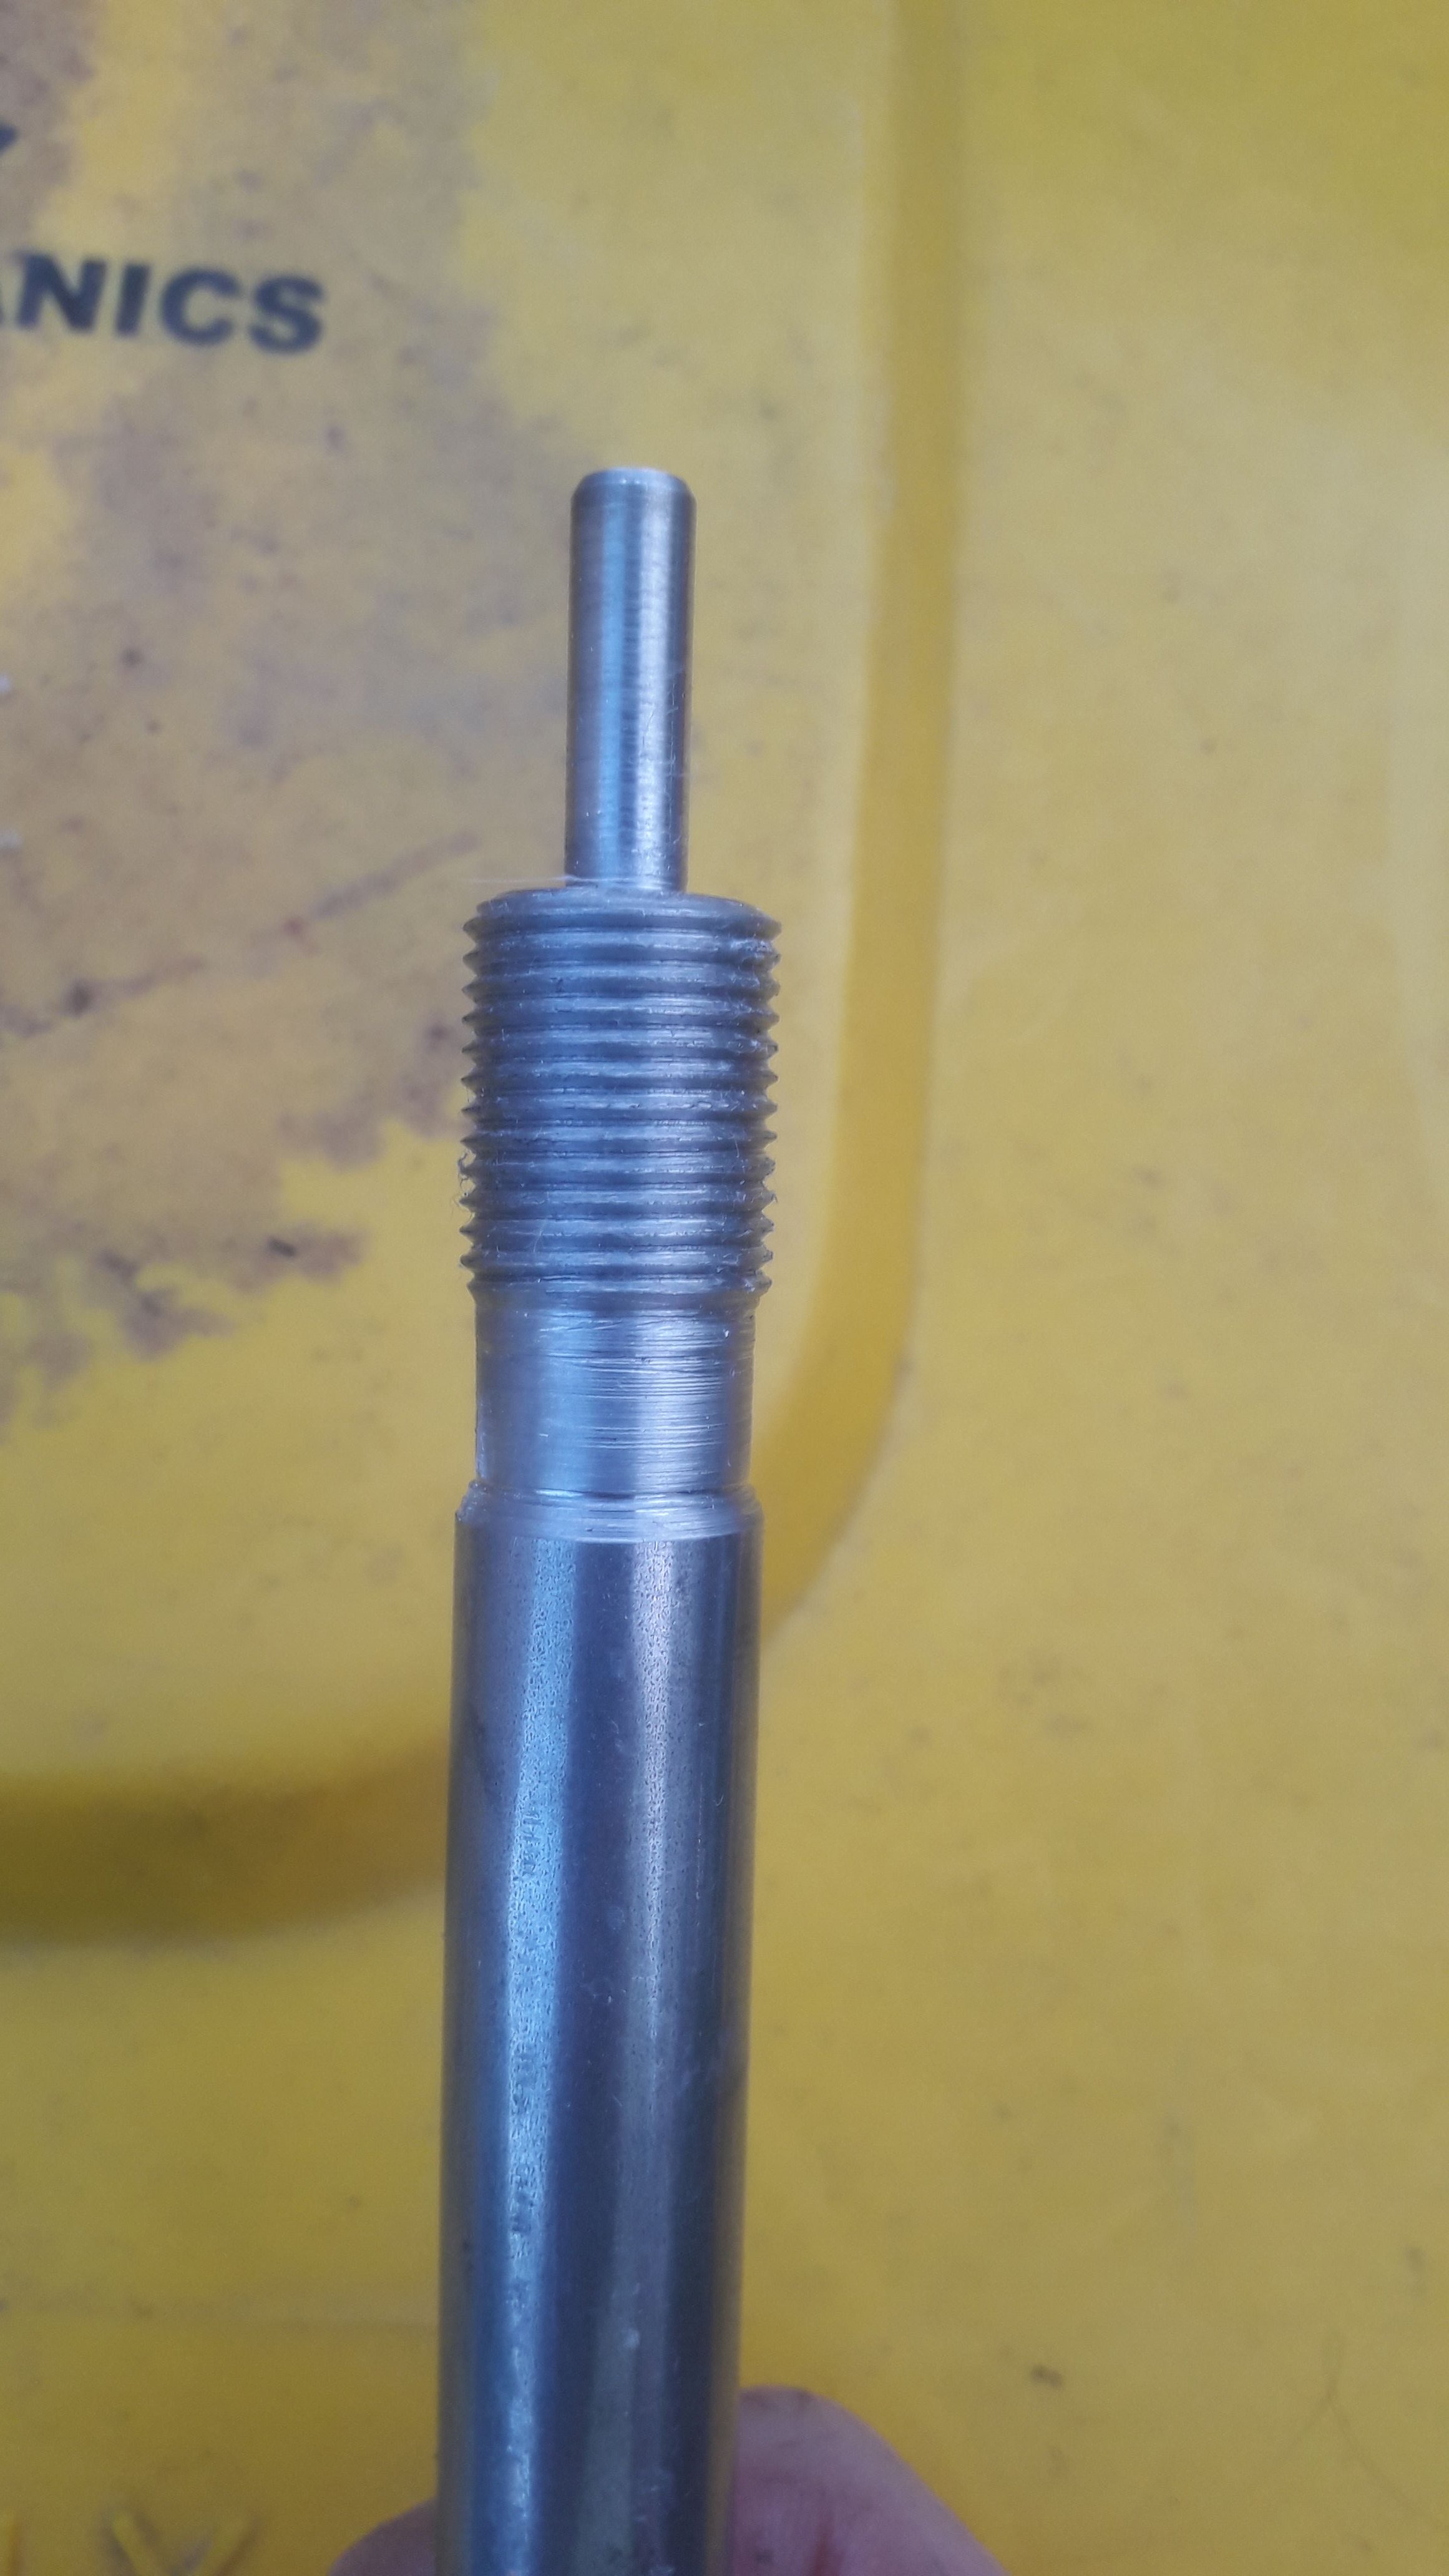
I managed to get my electronic leadscrew on the BarryLathe to cut its first thread today. The lathe probably hasn't cut a thread in 20 years. I still need to wire up a control panel so I can set the parameters without reprogramming it, but it is great being able to cut literally any thread pitch without changing a single gear. (Thread in image is a bodgy attempt at M16x1.5 with a random piece of HSS cutter)
1 point
-
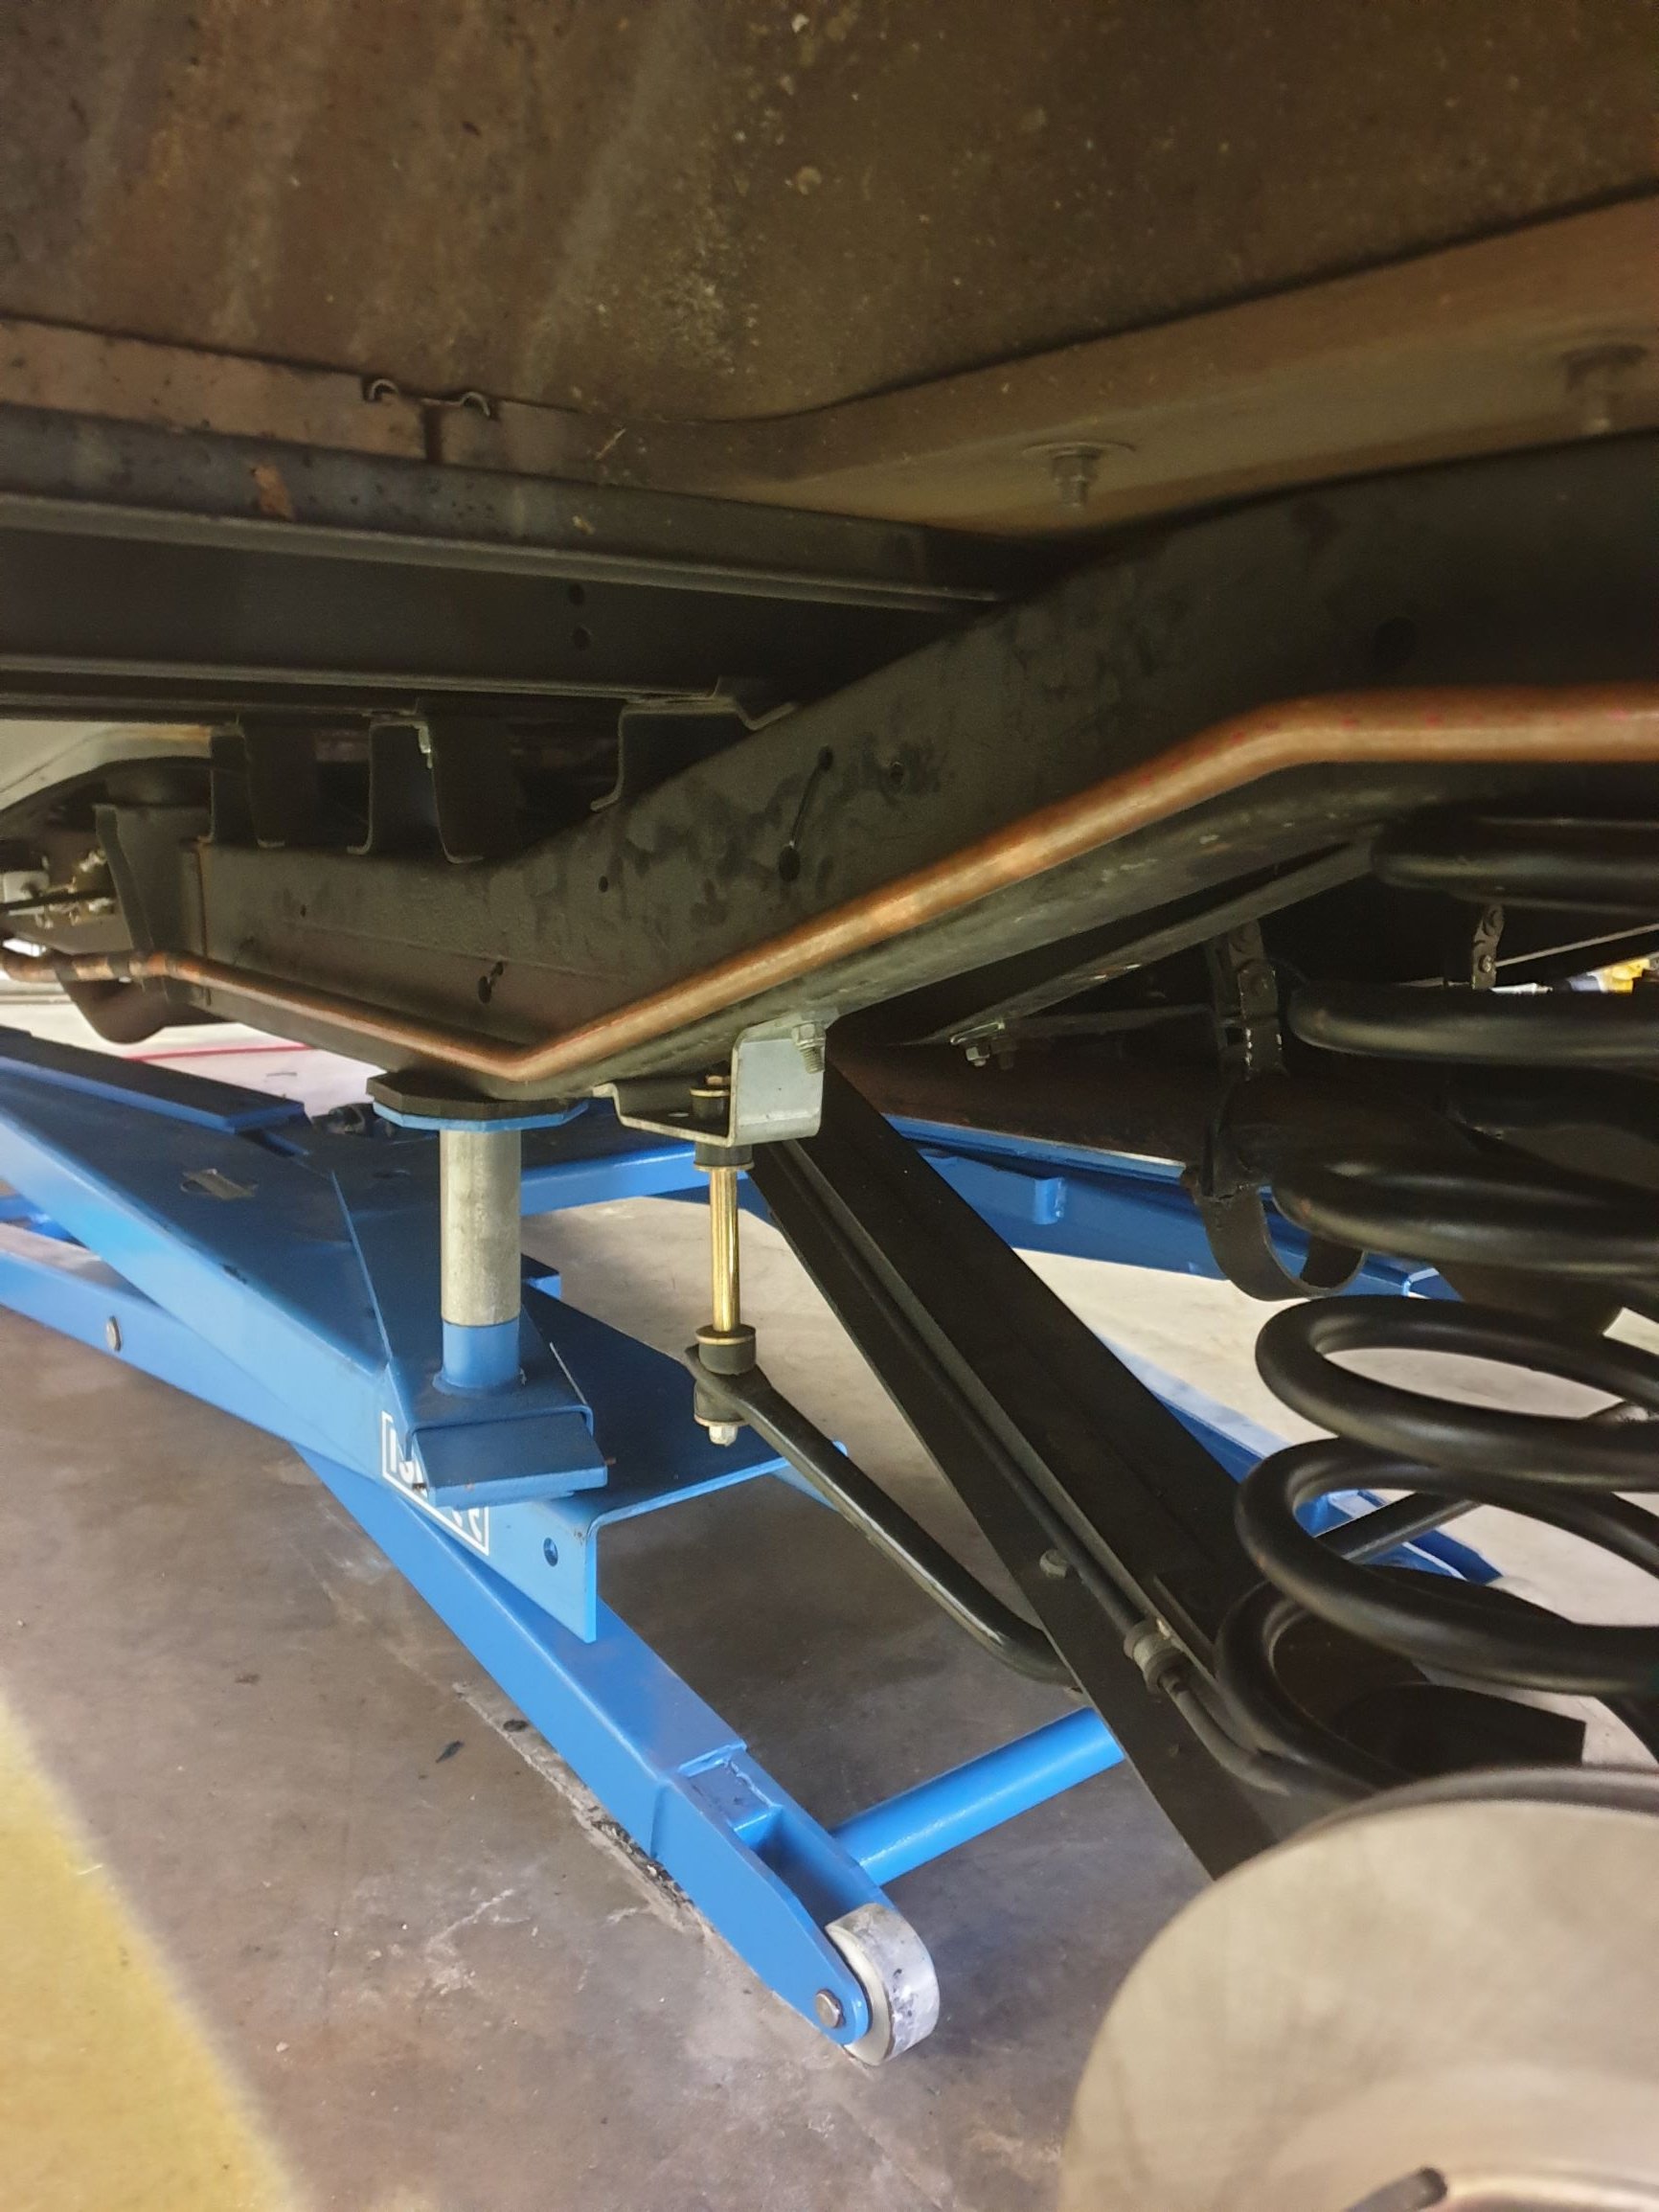
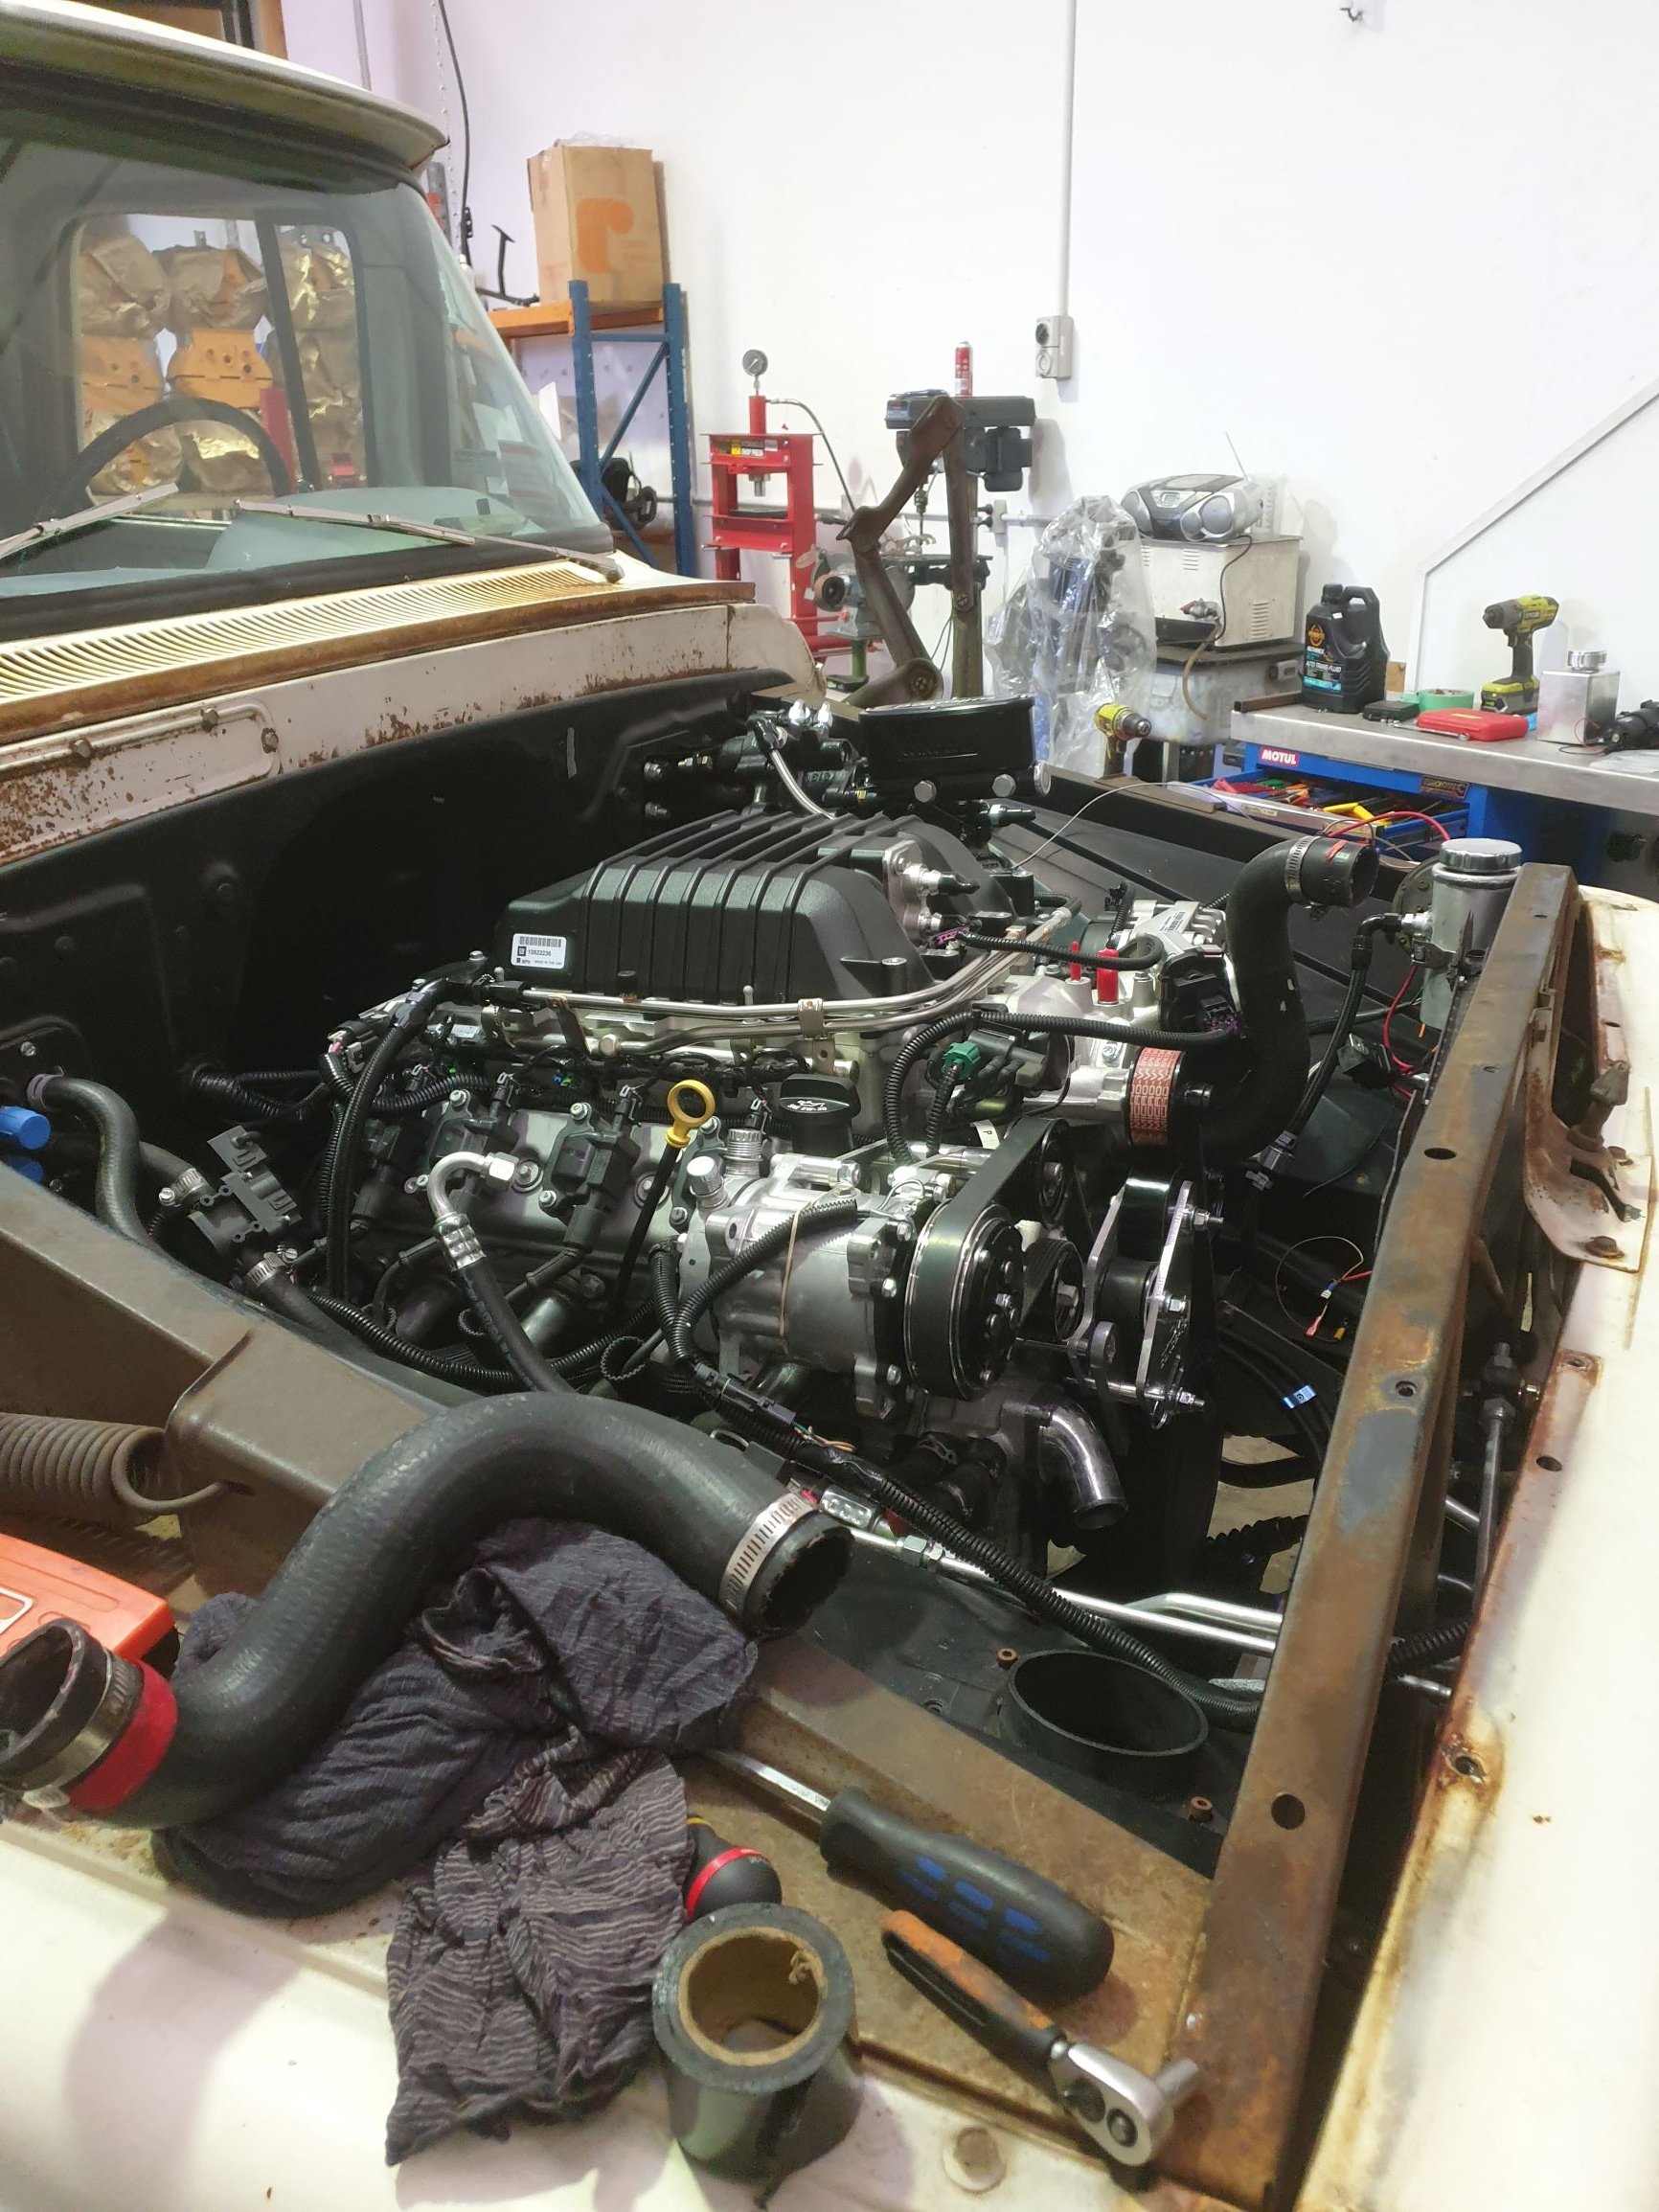
And it runs, briefly, usual dramas with brake line leaks etc... Managed to fuck a supercharger belt in 15 seconds - 8 rib belt and it was a rib to the left, but barring that electrics are all good, bit of wiring to finish off, trans cooler to secure and wire up (fan #4 - hovercraft spec), last of the copper line for Heat exchanger to sort tomorrow, mess around with fuel system pressure a bit and then burnouts.
1 point
-
so from here i have now got new tyres that are a bit bigger. got a 205 75 14 which was the biggest 14 i could get and just started clocking up some kms of to the mt to go to a mates party. went the long way so get some nice views. 1st night for @Mrs 64valiant and i in the kombi together. i put some stripes on the side to see if it was something i was after im not quite sold on them yet. also got a 2nd plate made from @Archetype after loosing my one. i dont even know how i done this. had a couple of peaces of paint that were cracked and water was just sitting in them so i just sanded it back to metal and put some primer on it & painted it white to just seal it and keep the water out of sitting in it. check out the layers of paint. no time for body filler i was just wanting it sealed. now i was about to do a trip to Fielding with old @Geophy i thought i better fix some water leaks. i found it was leaking through the wiper mechanism so pulled the wiper blades off. clean these wiper blades up and paint them black might not be much but man they look so much better been black. now the trip to fielding with young geophfey, wouldn't be a trip south of taupo with out snow right? both times i have driven this way in my vws it has snowed and both times with this guy. hold up. take a few steps back, we were making our way down the line. when my wheel bearing started to make a little noise, say an hour in. So an hour from anywhere with a dry location. A few phone calls later @Ned was home and was welcoming me to his dry garage and a few of his tools. a wheel bearing, fish & chups later and we were back on the road. thats right snow. we made it to the ding hotel were we proceded to get drank on cheap big bottles an i slept amazingly in the bus again. next day we done some swapping of the meat and went for a little drive. i got a brand new kombi that day pretty proud owner of a nice new kombi..... with that new kombi we went for a cruise on some back roads to which i heard my wheel bearing again...... but we made it home safe thanks to @Bistro skillful driving. got drank again and another lovely sleep in the bus. then it was time to head home, better re pack my bearing before we head on home....... then we hit the road again. which brings me close to where i am now. how to get a vw bus in and out of the shed we had. so no longer we are at that address and the bus is living out side which means i have been driving it a bit more daily... which is were i noticed a some what noisy wheel bearing...... new bearing races inserted new bearings and a wheel alignment tomorrow. and now i should go make my rx3 carpets before i have to drop them off tonight. we are off to raglan on Saturday and i see labour weekend everyone is going camping so we might go to that in the bus. laters dudes1 point
-
Took it for its first ride last night, even with the weird ergonomics, unstable idle and shitty brakes it was a success.1 point
-
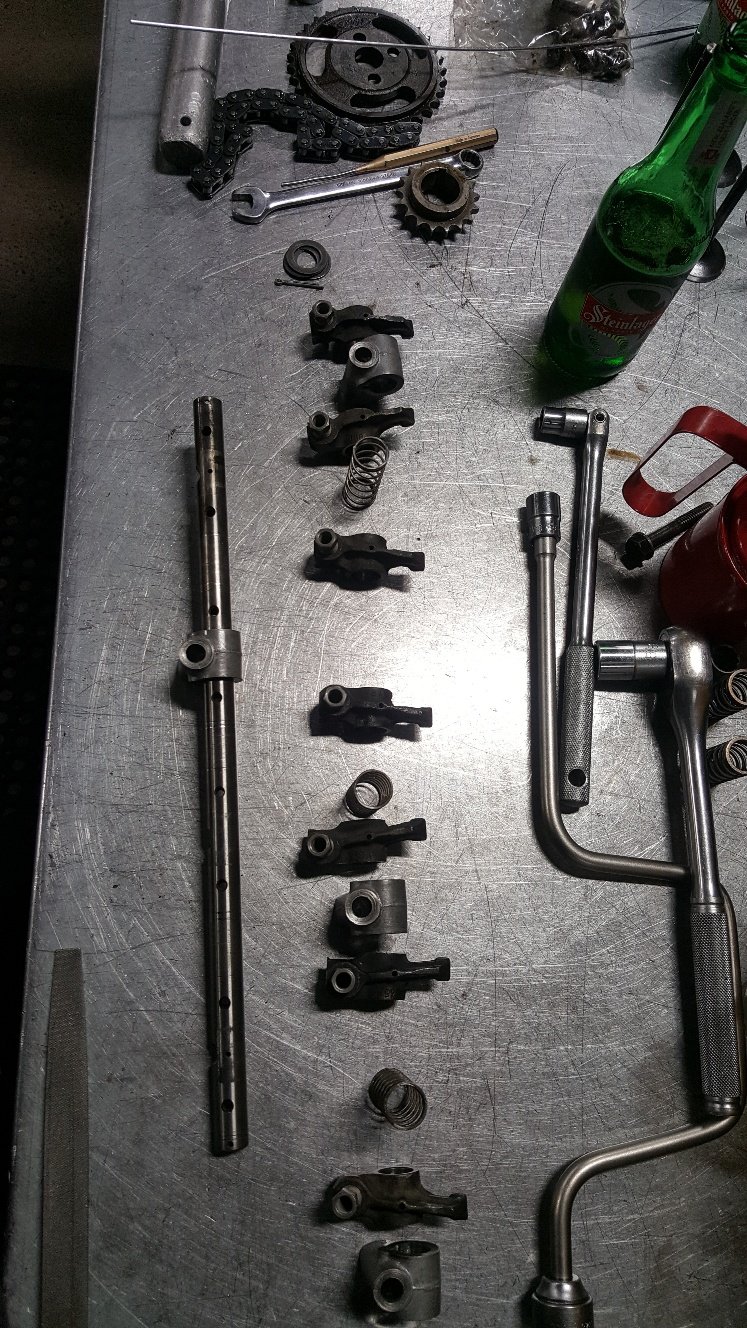
So Al my work mate was good enough to give the intake manifold a bit of a tidy up with the die grinder while I was assembling the engine With getting the engine pretty much together I thought it was time to get onto a few of the bolt on items. I know from my mk1 cortina that I was wasting my time the orginal alternator. So I found a old Nissan alternator and fitted that. Redrilled the holes and it pretty much lined up. Changed the pulley over from the old Lucas alternator. Which just ment turning the hole out to suit the Nissan alternator. So it's pretty much together just have to sort the flywheel out next.
1 point
-
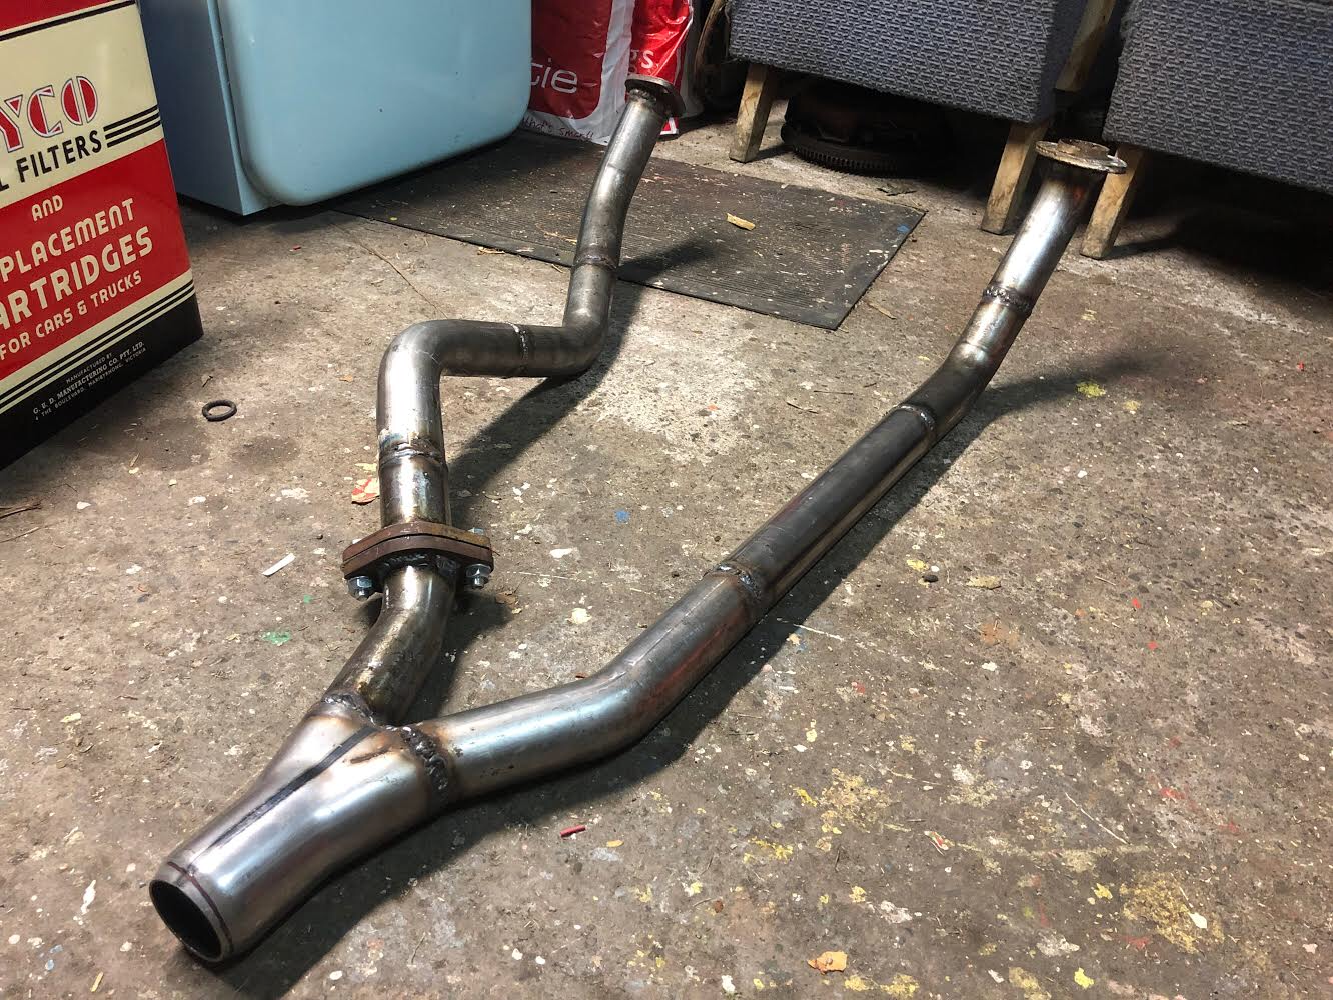
The exhaust front section is pretty much done, I’ll just hook it up to the old system for now and finish the rest on a hoist.
1 point
-
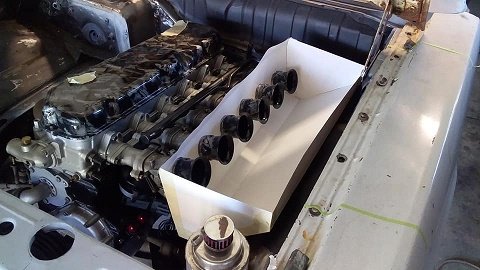
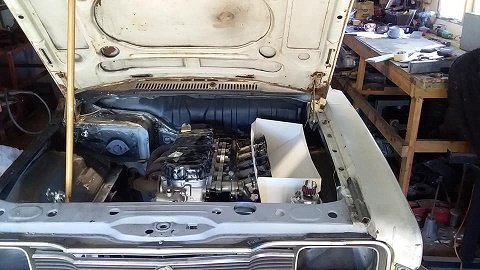
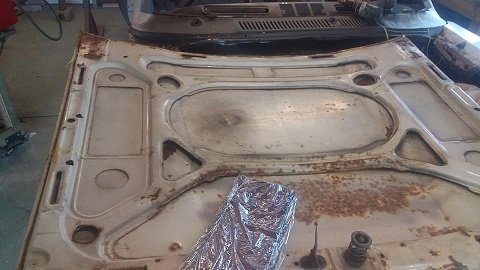
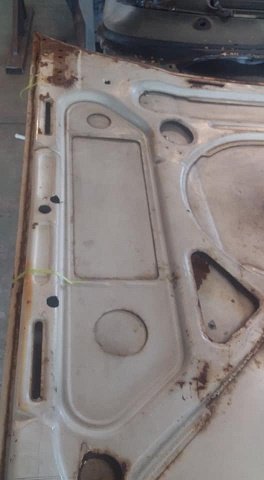
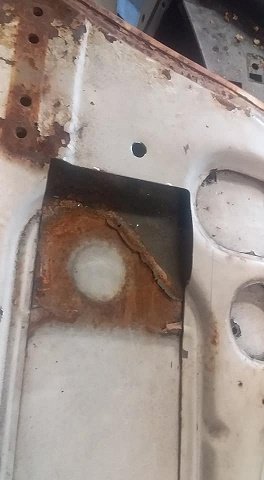
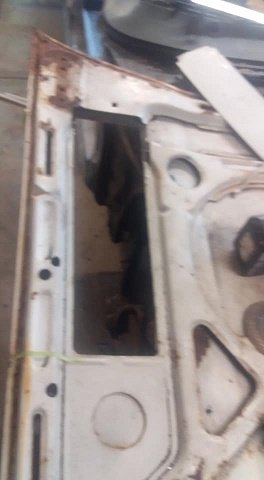
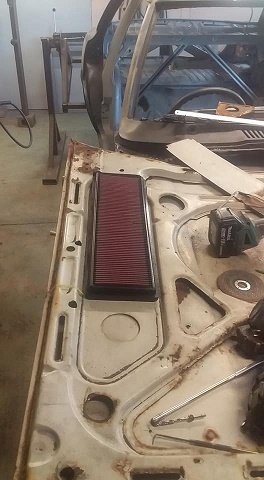
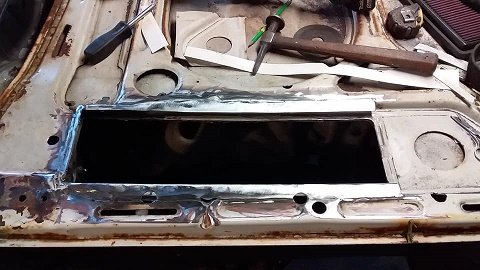
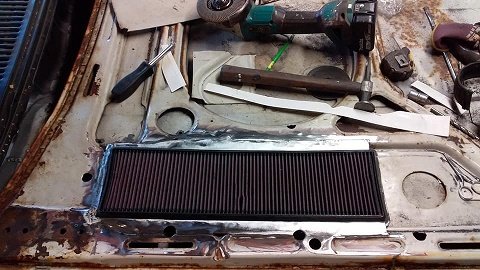
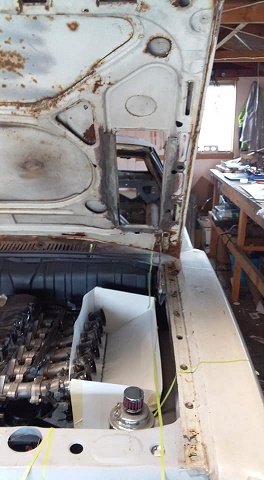
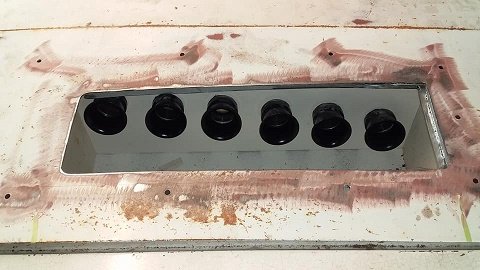
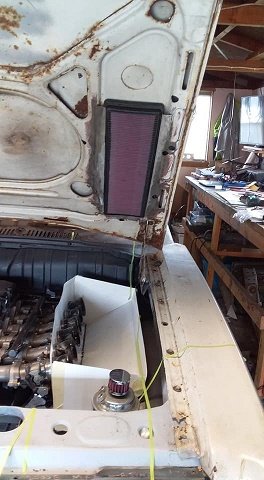
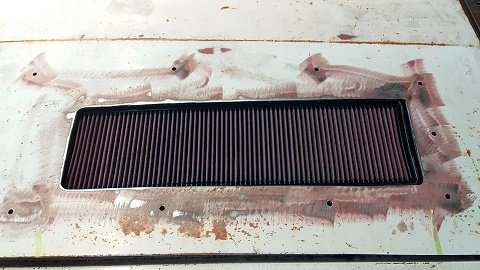
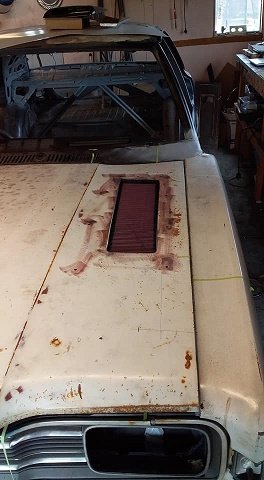
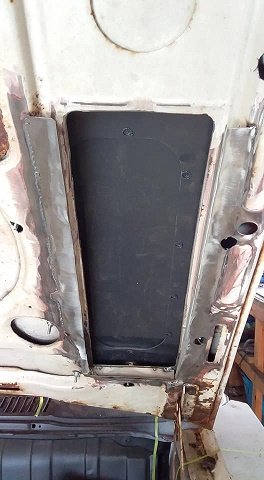
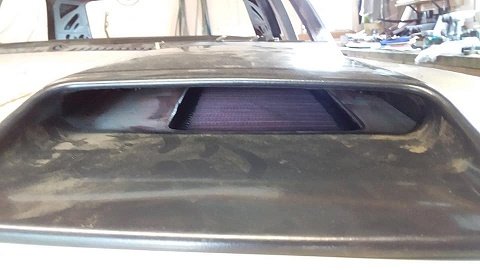
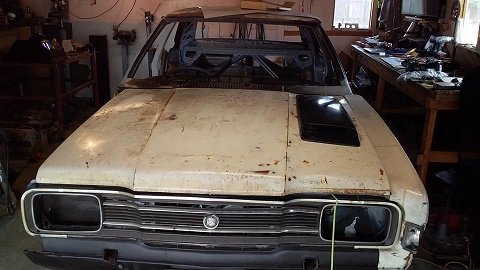
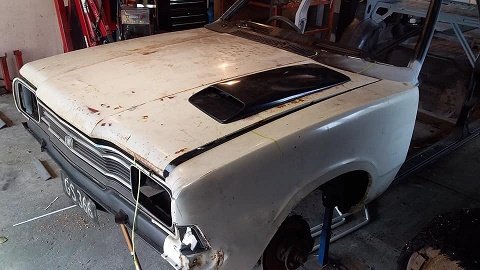
have been thinking about the air feed and was going to weld a recessed plate into the bonnet for the scoop but the bonnet has so many curves i think i might stuff it up.....so had a re think. made a card board airbox to see how much room i have to play with once i had marked out the area on the bonnet and drilled the holes for the scoop i took the bonnet off and flipped it over. the bonnet its self has indentations on both sides and they are almost perfect for the Porsche air filter.. i marked out the area needed for the filter and cut it out....needed to make a wee bit more room. trial fitted the filter again i then made some sides and back so that the filter can now slide in from the front and be held tight and sealed to the bonnet refitted the bonnet and checked the hole for placement filter in and scoop on. im pretty happy with it so far
1 point
-
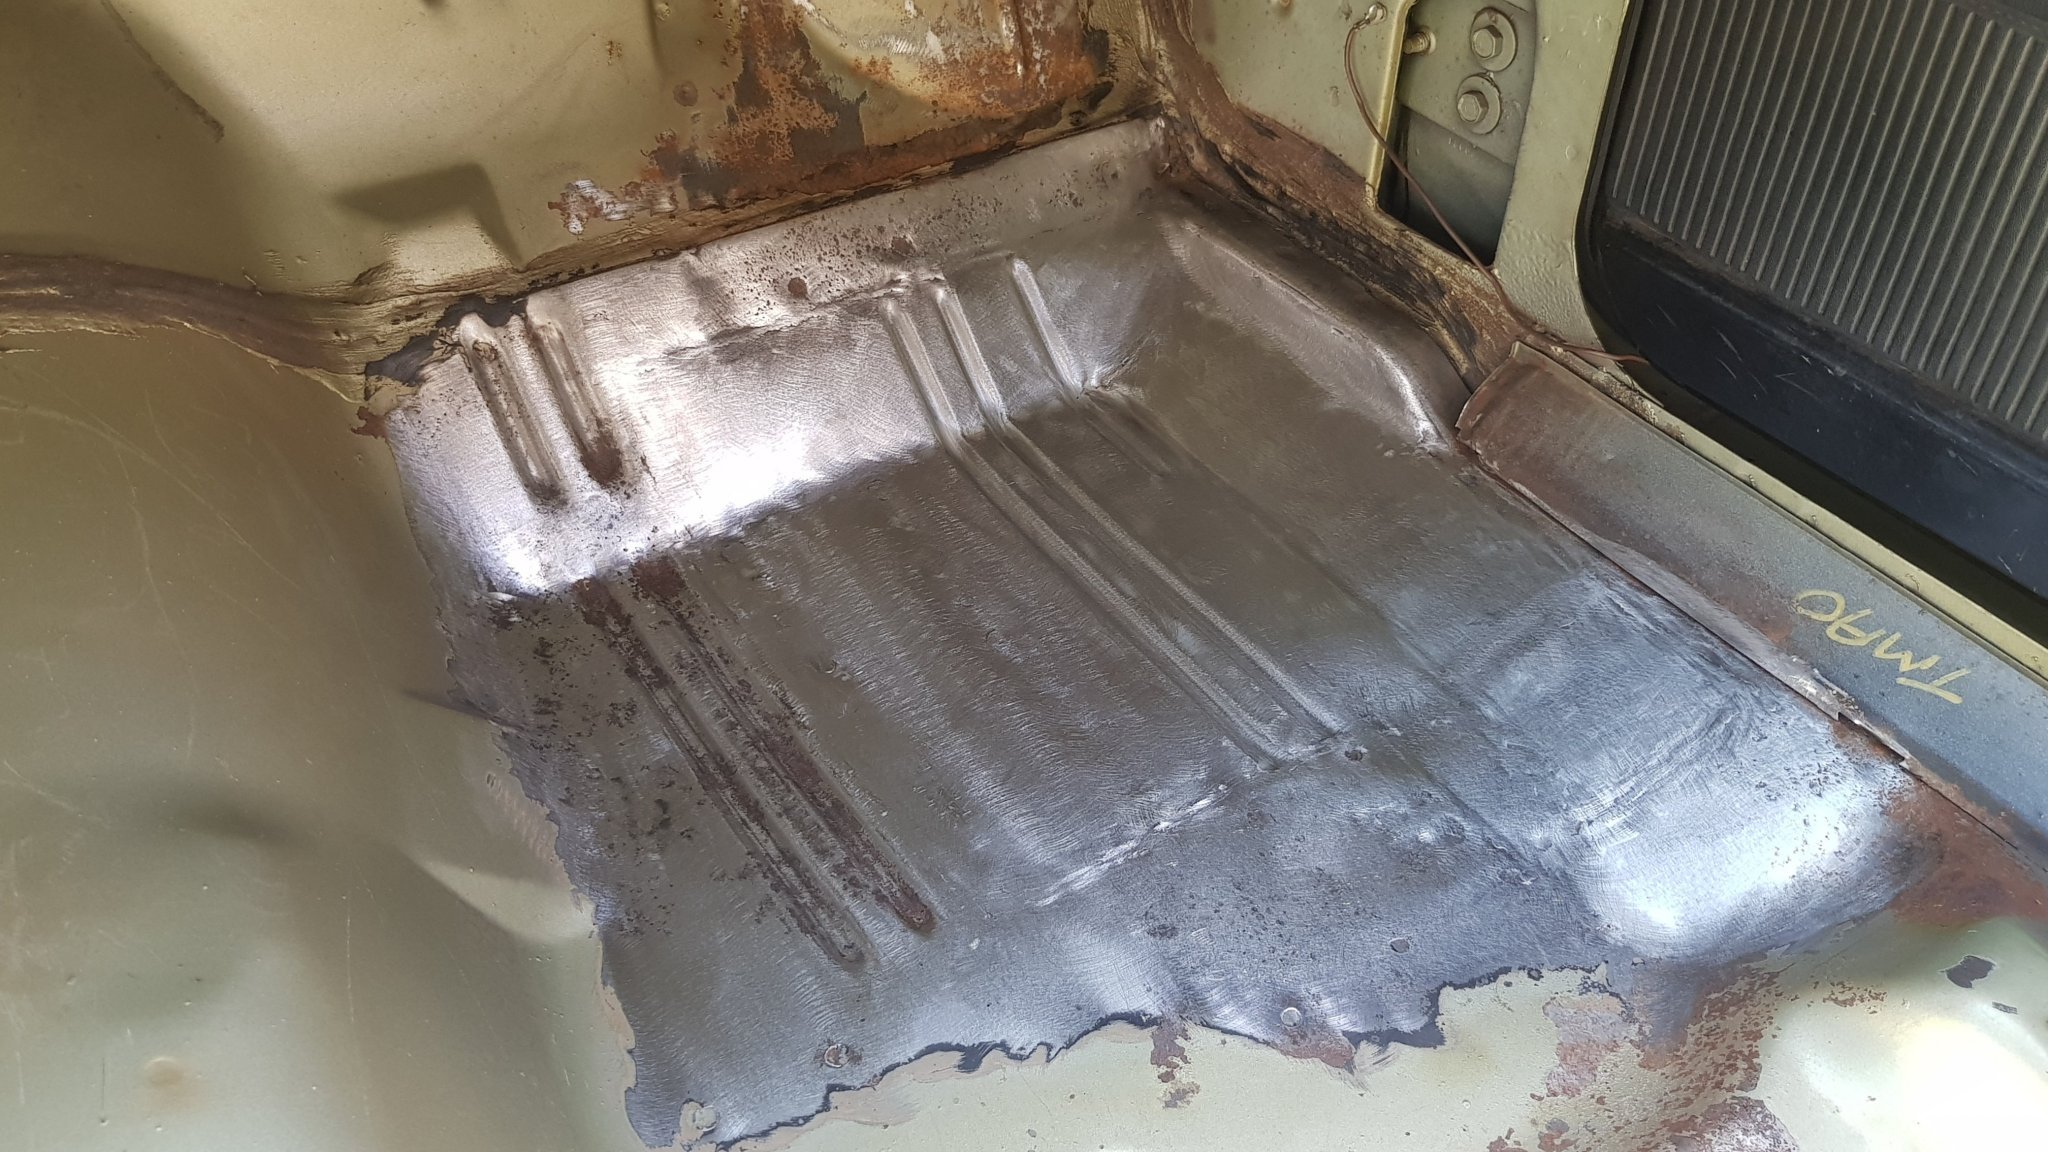
Rust repairs and painting gives me the shits, would much rather be doing exciting things... like smokey 11's Anywho, some more progress, back bumper was hiding some gems which needed dealing to.1 point
-
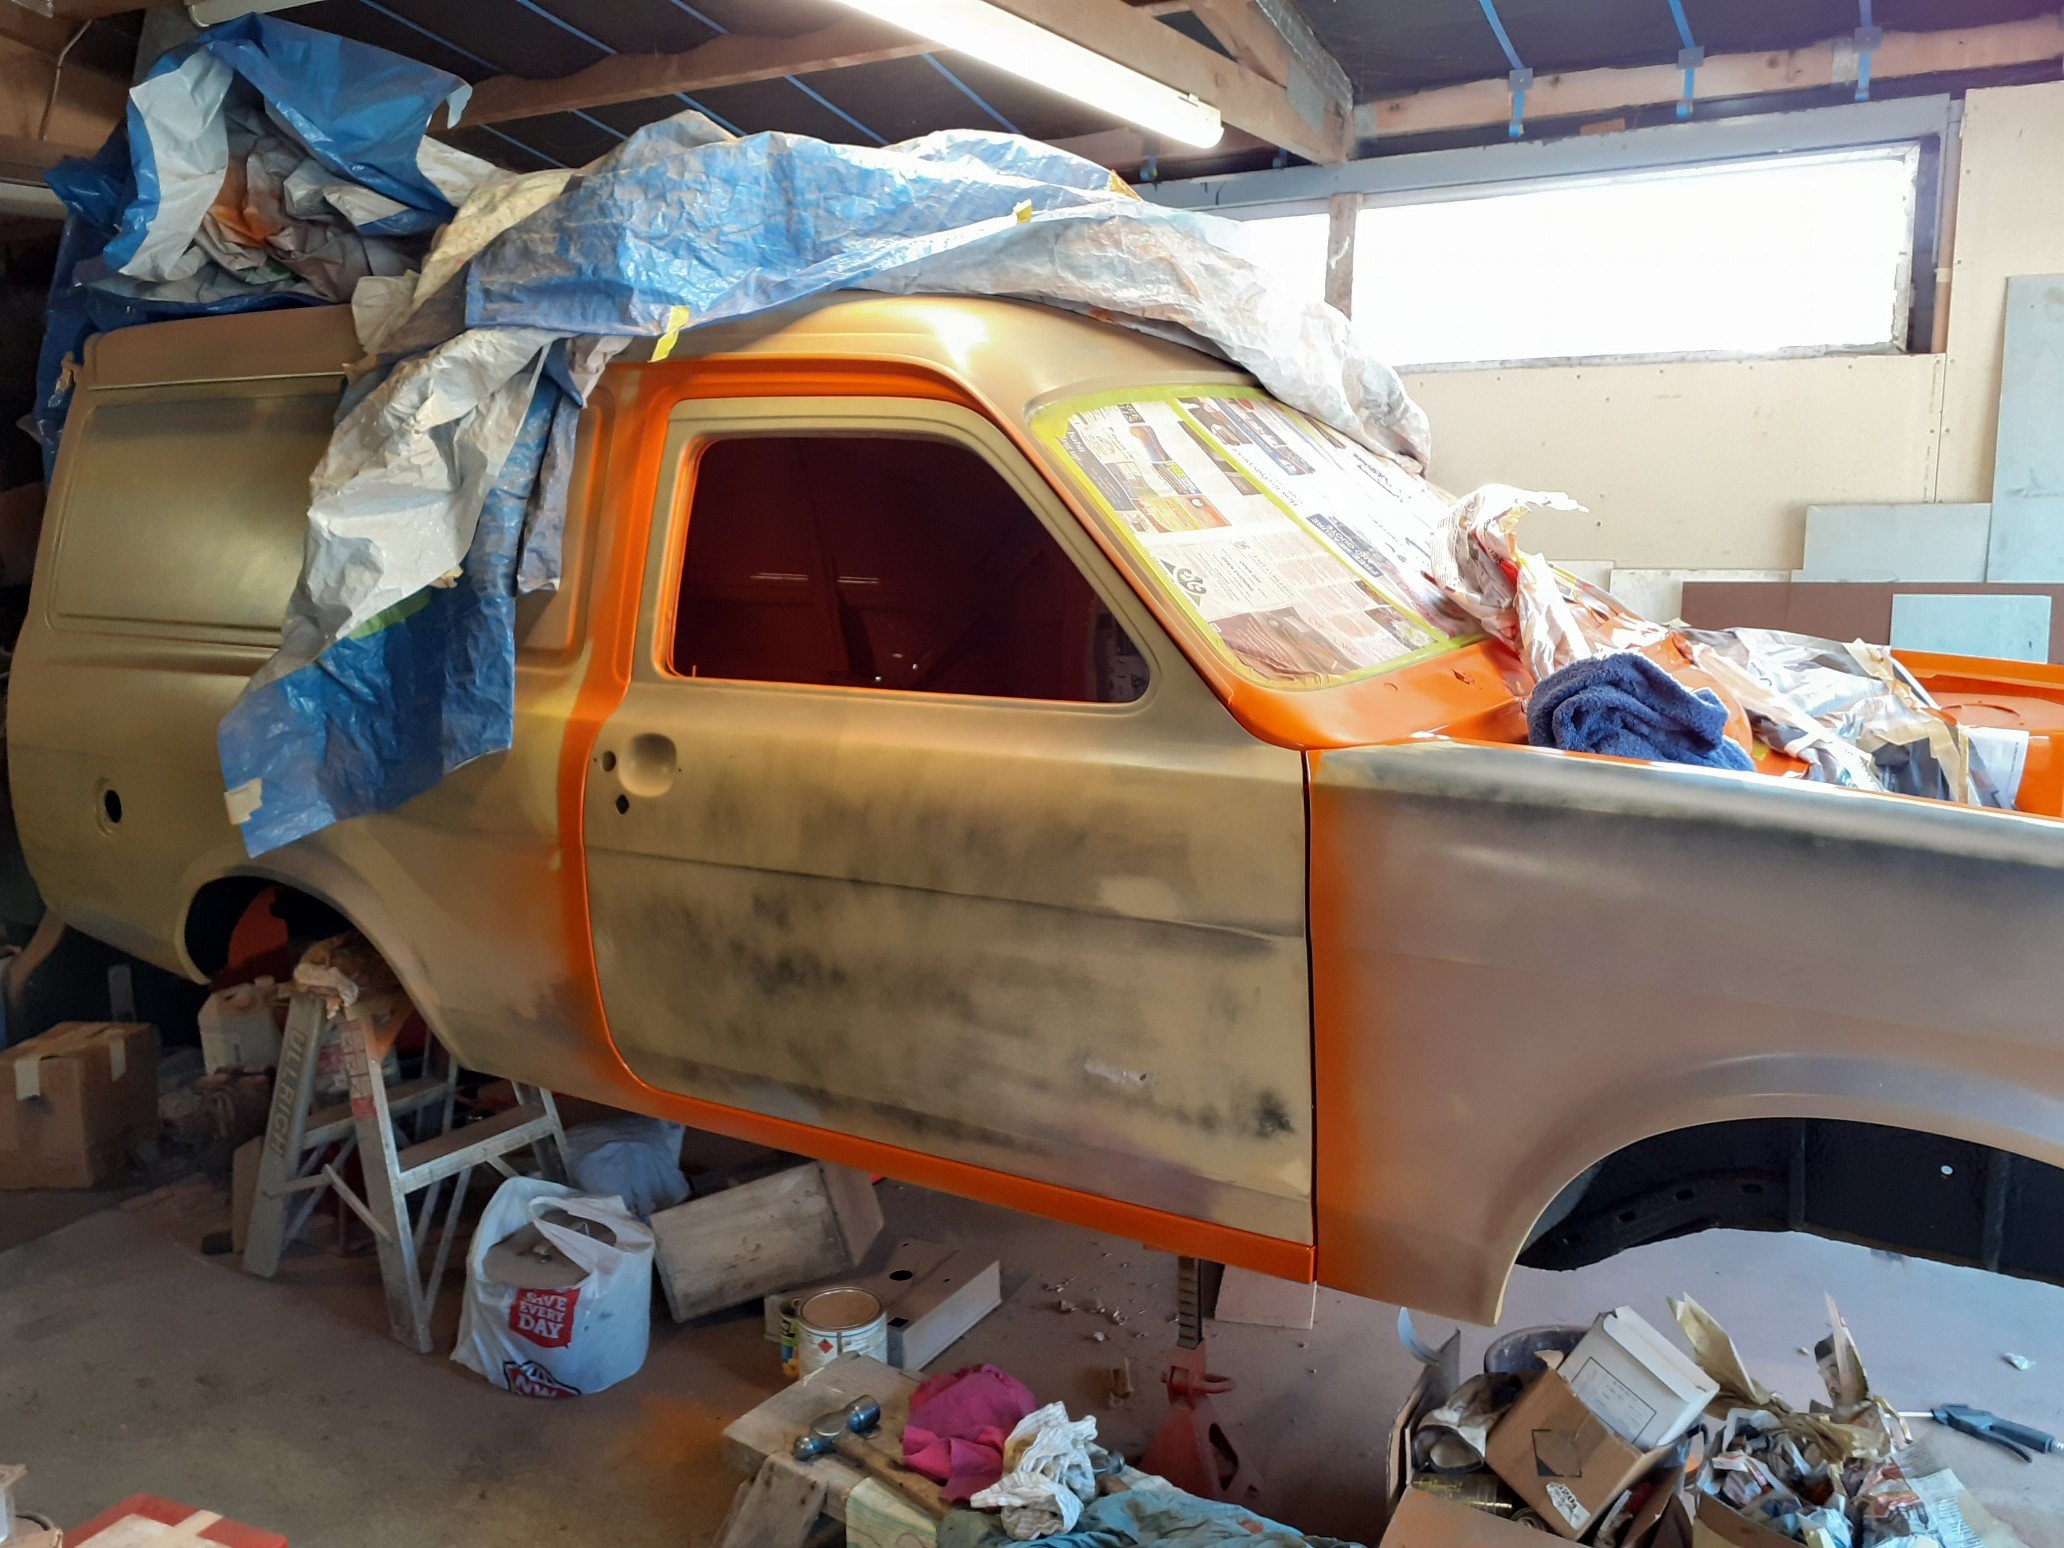
Just a waiting game while the painting guy does stuff. I decided to take the side trim off so the guards needed a bit more work but are all in primer again now. Body is coming along very slowly. Front bumper is off to get fixed as theres a few cracks in it. Painting is boring so just one photo for now. In other news these arrived... finally. I run FA stuff in the EP and its pretty good, so thought Id have a stab at it for the AE too. Spenny, but hopefully worth it. Went with 8kg and 6kg and the shortest possible rear shocks. Will order some new bearings and maybe rotors sometime soon. No rush without the car here.1 point
-
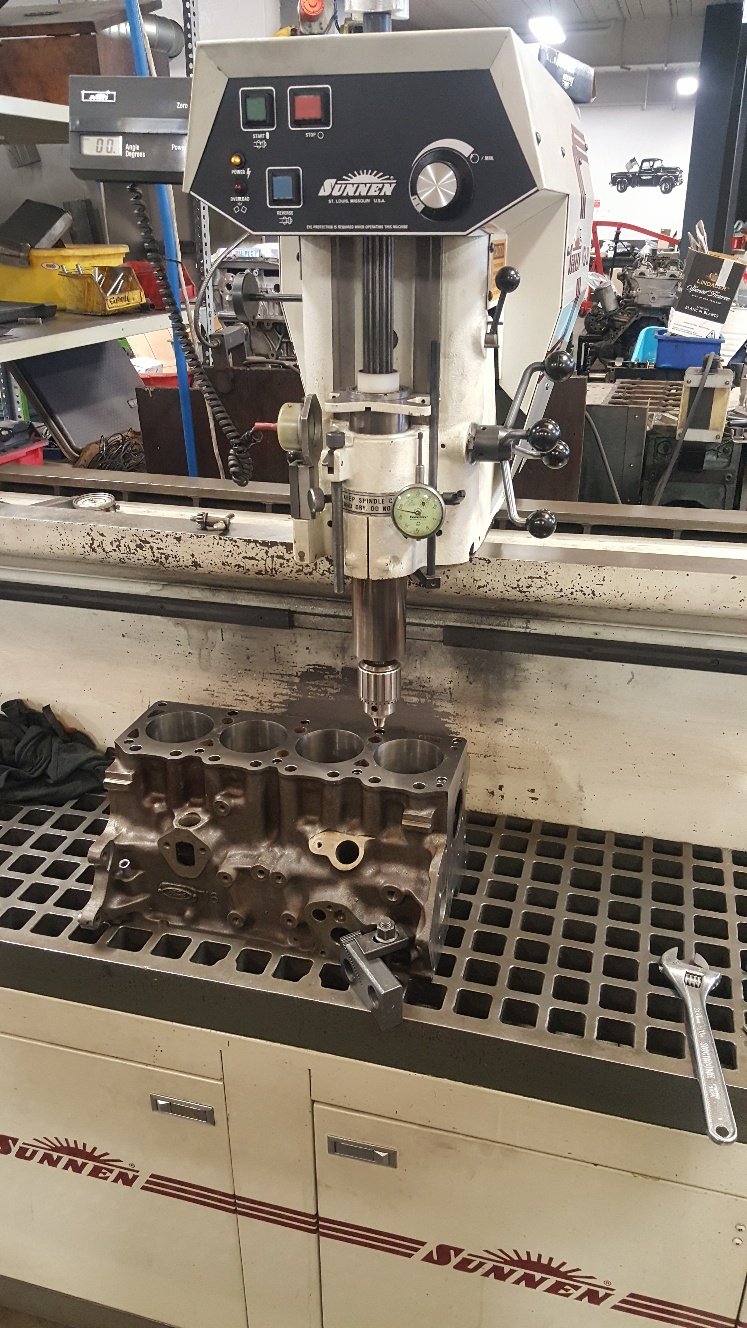
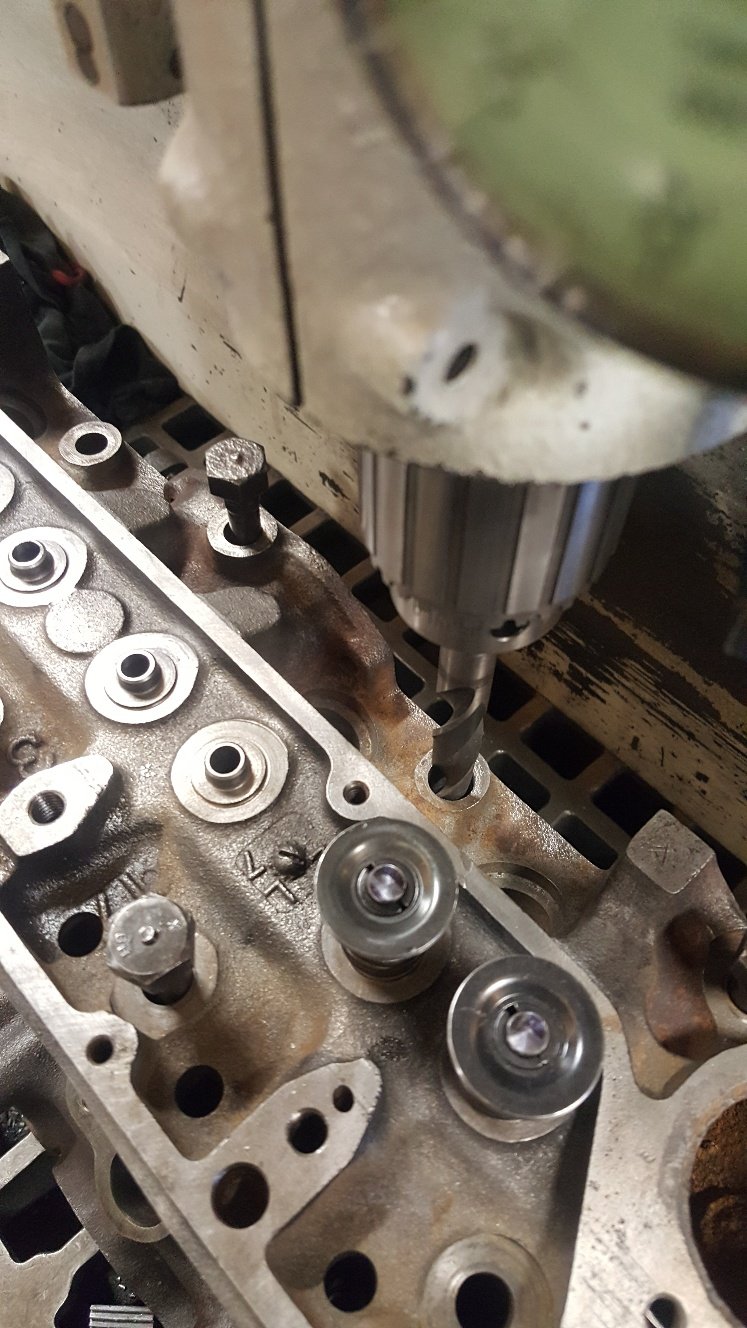
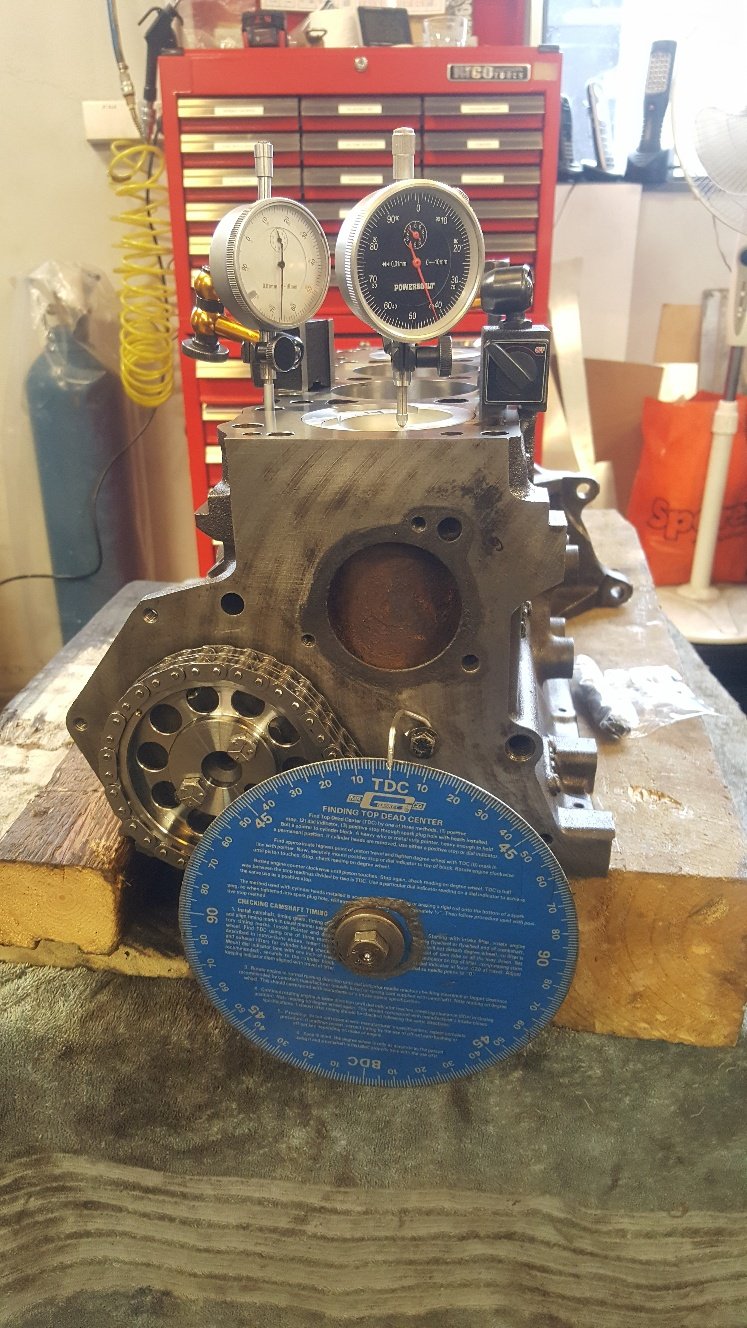
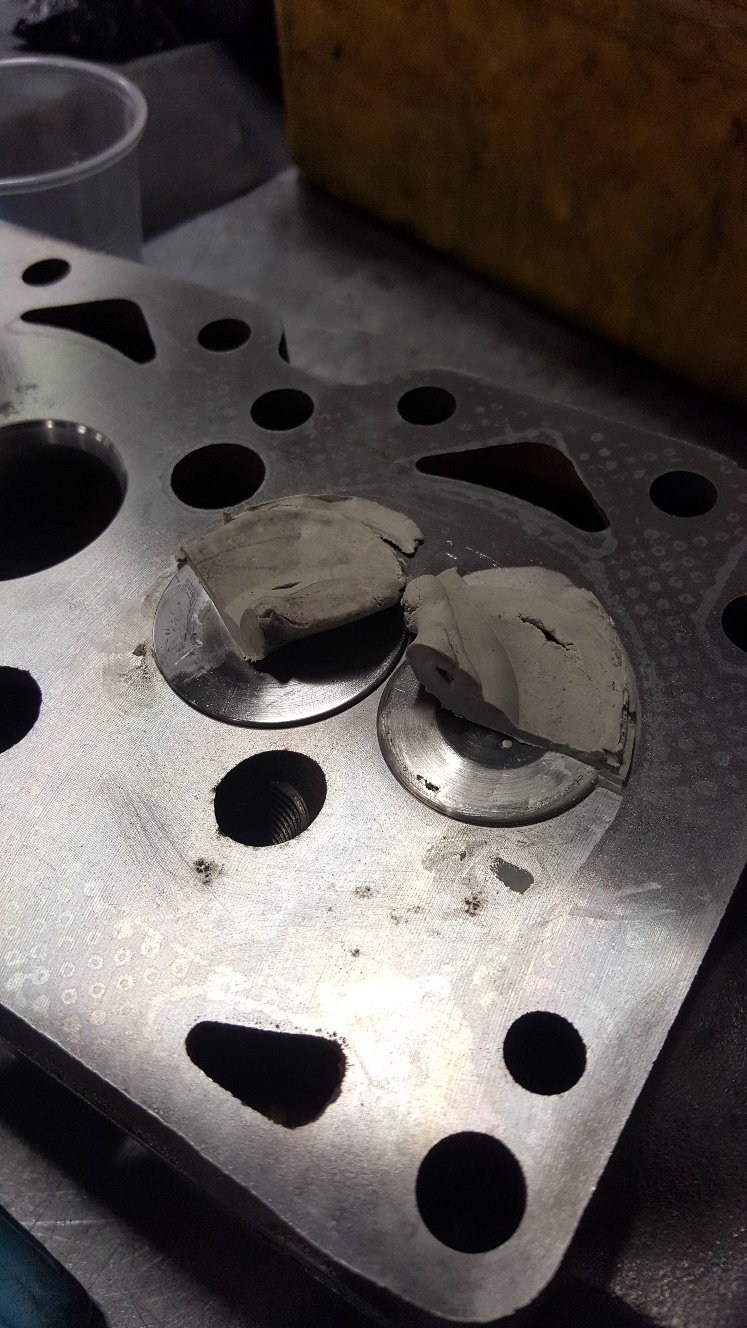
With the head sorted i can put the camshaft in and check piston to valve clearance. But first I need to dowel the head to the block. These old beast come from the factory without any location other than the head bolts. So I center off one of the head bolt holes and drilled it to 14mm. Then bolt the head one without moving anything and drill the head bolt hole out to 14mm. Then fit the head on the dowel and drill the other head bolt hole for the second dowl. So dialed the cam in. Then bolted the head on and found my rockers where a little worn so gave them a tidy up. Forgot to take pictures of the head fitted. But basically fitted the head, put two layers of plastersene on top of the piston in the valve cut outs. Then turned the engine over to get the valves to in print into the plaster. Then I cut half the plaster away to see how thick it is. This gives you a good indication of the piston to valve clearance.
1 point
-
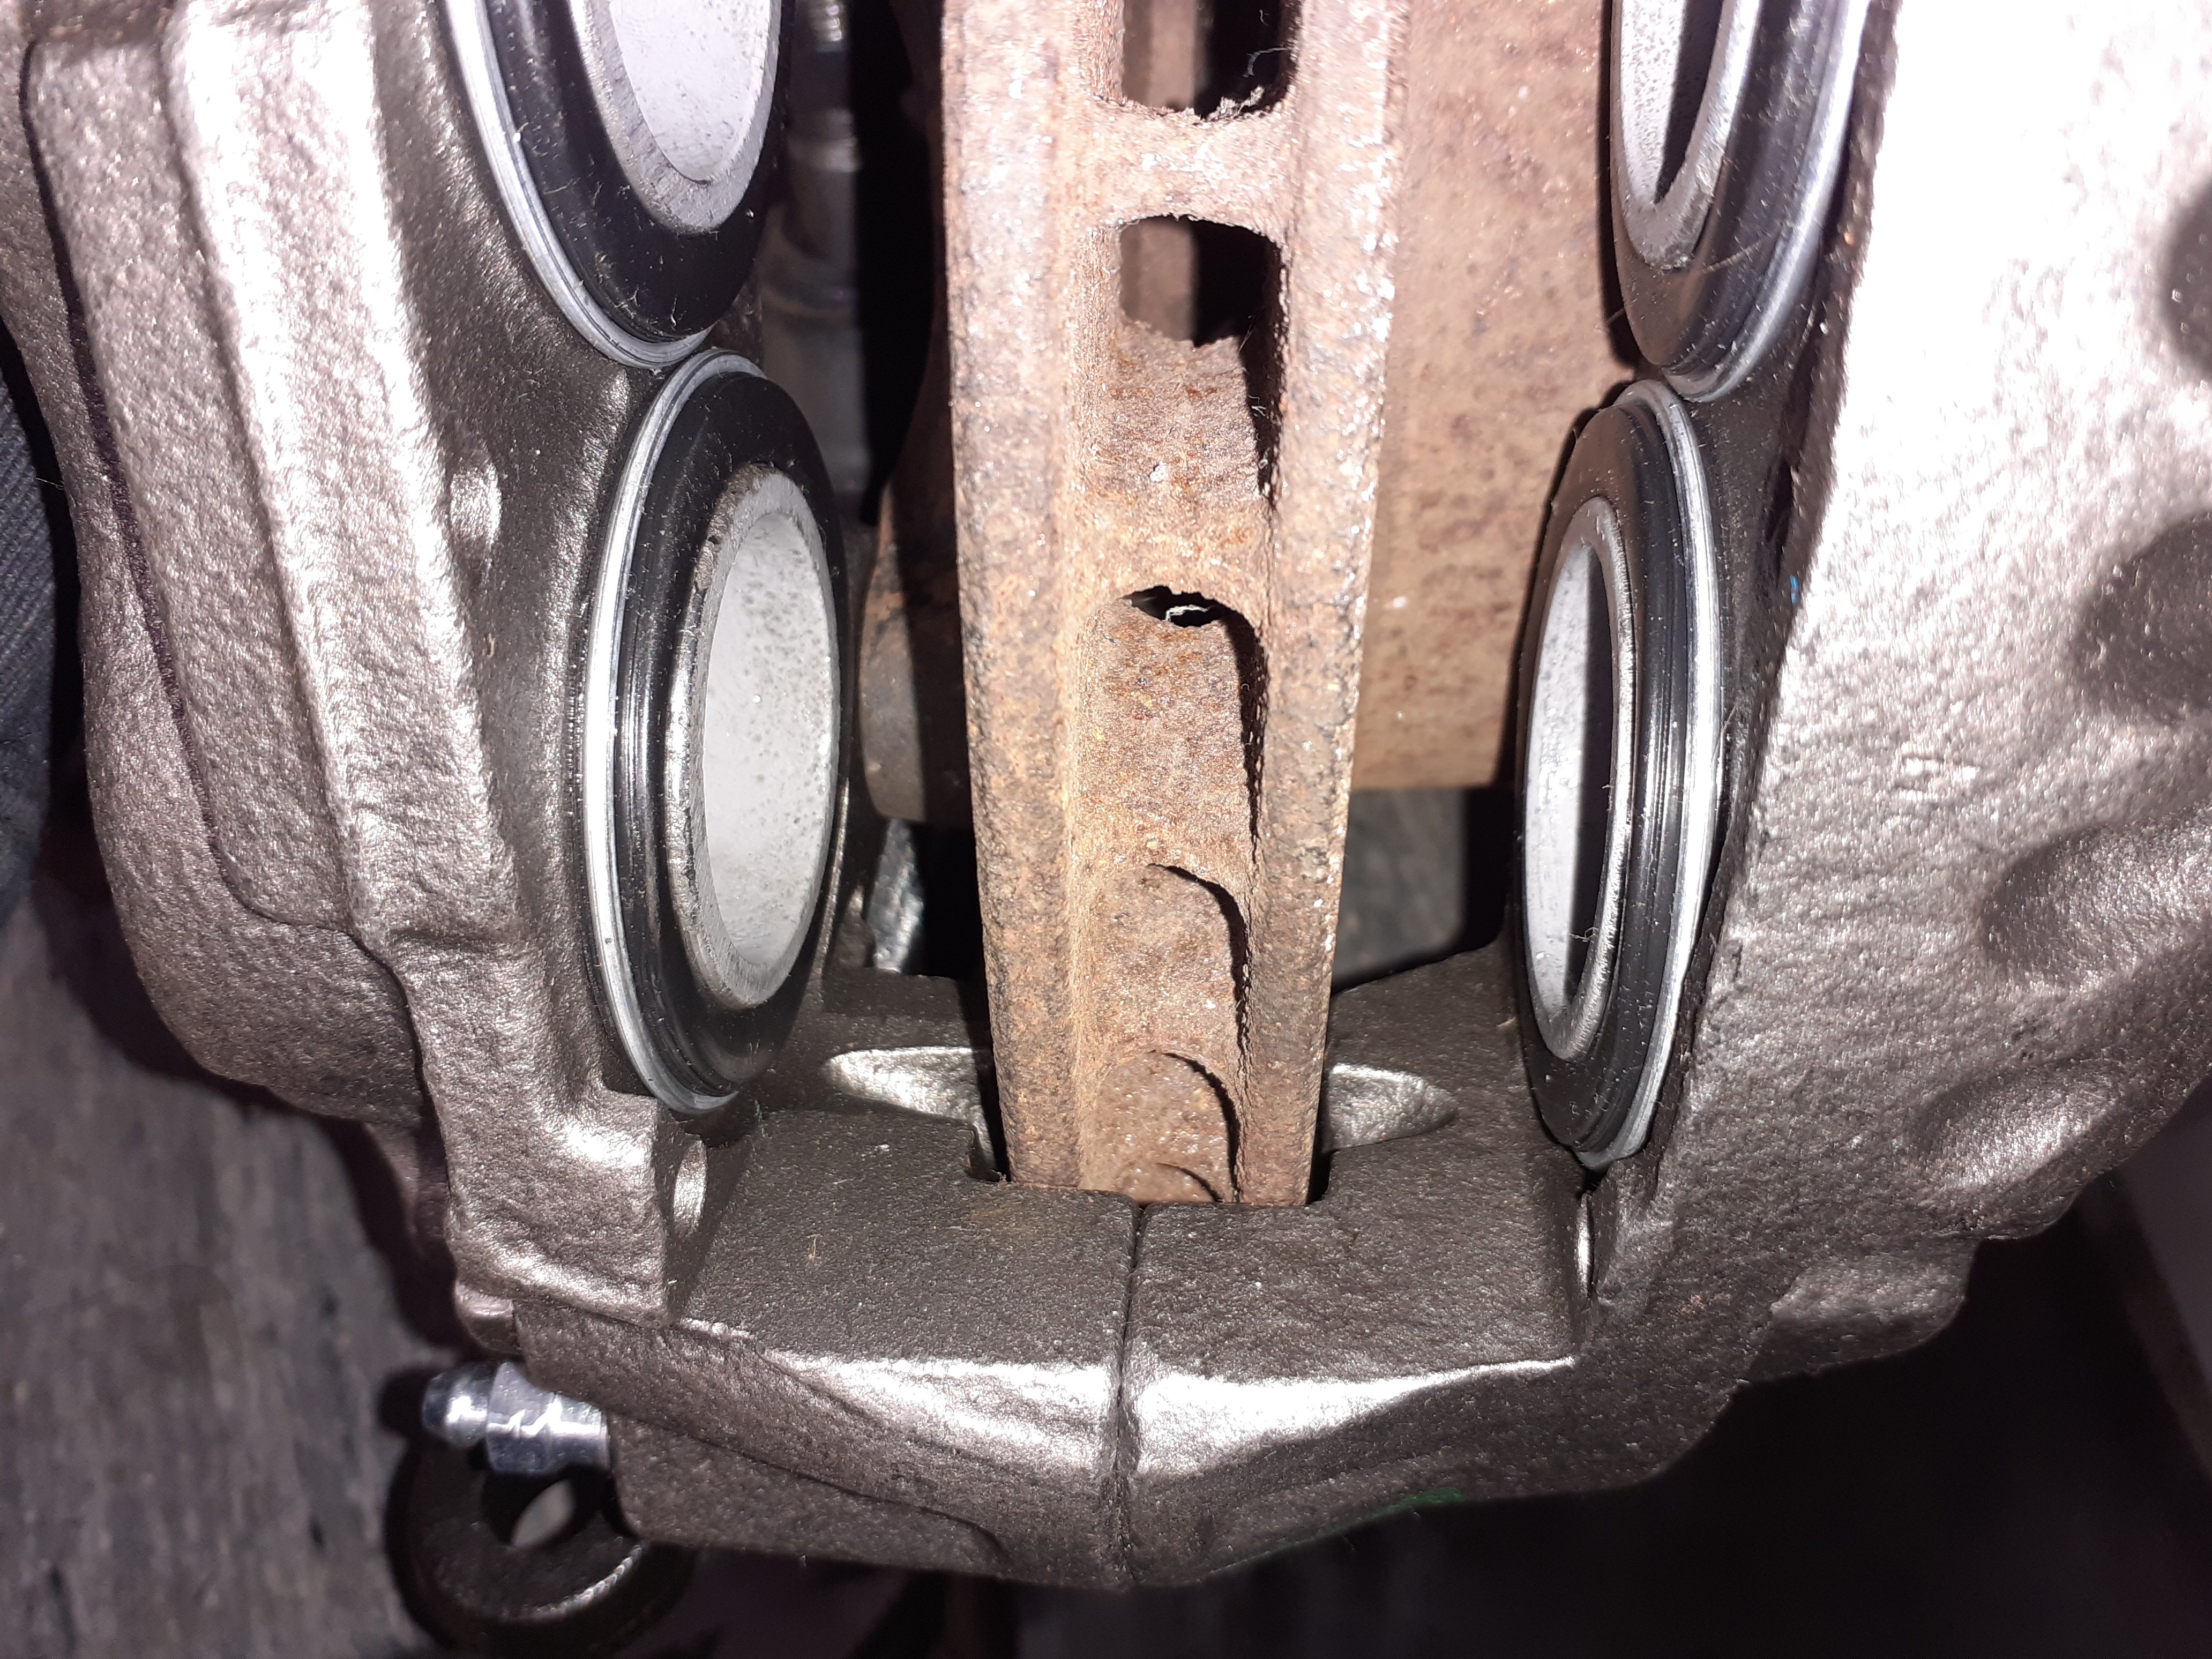
I love rockauto. Have been fiddling about with brake calipers for the front, I had previously got some 4 pot surf calipers from pick a part but the surf disc is narrower than the valiant ones and slightly smaller diameter so I was going to have to mill the caliper slot bigger and then I wasn't sure if the pads were going to be too fat I went to cardwells to see if there was wilwood caliper that was a bolt on, and there was 1 option, but it would have needed a bigger disc and I don't think they would have worked with the wheels I have I was doing a cert on a surf the other day, and saw it had fatter discs than the one I had got the calipers off, went on rockauto, found a v6 one of the same year had the bigger discs so ordered a pair of reconditioned calipers, $25usd each and here within a week. So now all I need to do is get the disc diameter machined down 3mm or so and it will all bolt up, yuss
1 point
-
Slowly but surely1 point
-
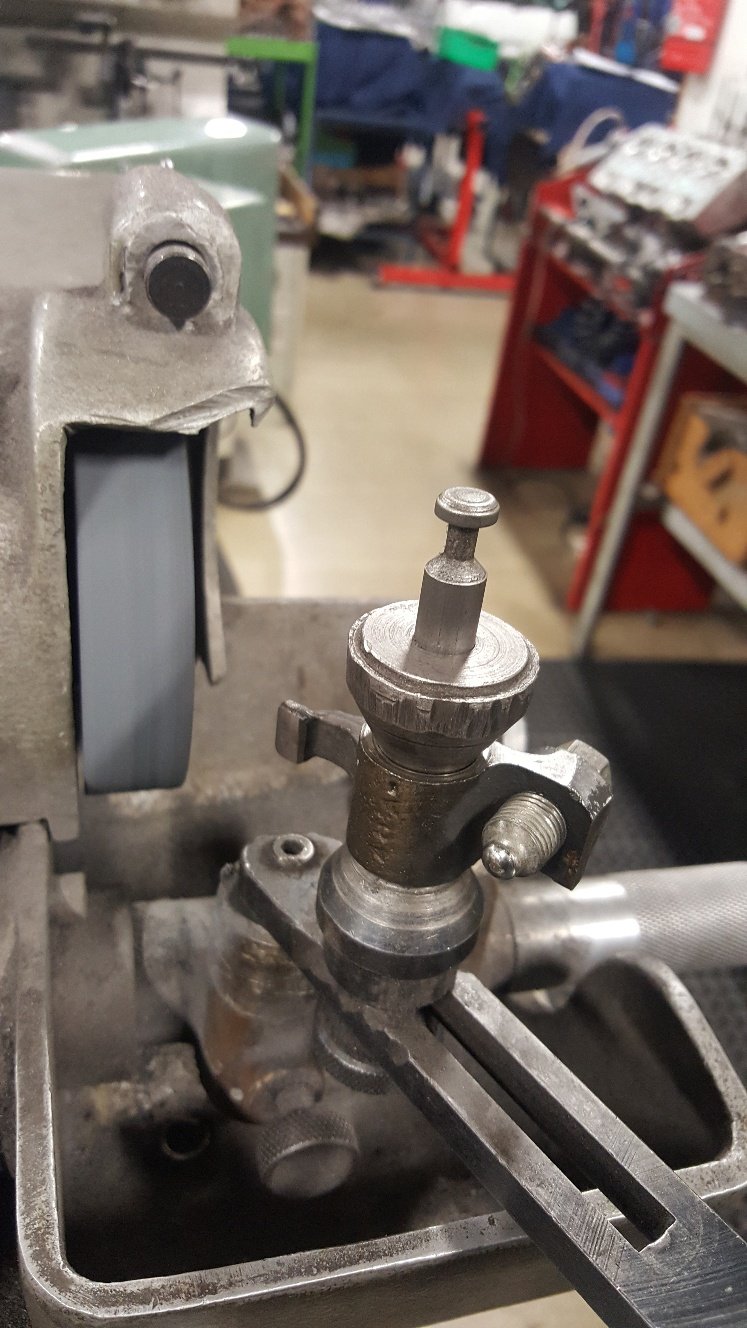
I'm happy with the valve size. So I cut seats into the new valve inserts. I cut all the seats as close to the same height as possible. Al my work mate had done some research into the best seat angles, and we used a radius throat cutter profile. Once they are all cut to the right depth and right size to get the 45degree seating where we want it on the valve face we are ready to synchro seat the seats with the stone gear. We believe this gives a good sealing finish on the seats. I didn't get any pictures of this, but basically you face the valve seat grinding stone on the valve facer to get the same exact angle. Here's a picture of me stoning the seat. You can see the seats are polished up. I now check to see if they are seating the whole width on the valve face. I didn't get a picture of this. But we use a engineers blue to wipe on the valve the put the valve into the head and push the valve onto the seat and look to see if the engineers blue makes full contact from the valve to the seat. So the valve and seats are done. So I need some valve springs so I went down to Kennelly Cams to see PK and Adam. They have a good selection of springs in stock. This is also where I got my cam reground. So running the FE Mazda valves I need to use a different valve spring retainer to the stock xflow item. I looked at using the FE retainers but unfortunately that was going to make my spring install height to tight. The spring install height is the measurement from the spring seat on the head to the valve spring retainer. Stock xflow is around 33mm. So that's what I'm trying to get close to. So Al grabbed a Toyota 1kz retainer and we took a measurement and they looked like they would do the job with a bit of turning in the lathe. You can see the spring isn't sitting in the right spot. So I made a arbor to spin the retainers in the lathe Finished retainers sitting on the spring.
1 point
-
Small progress is better than no progress: The fuel rail looked pretty shitty and I want to run -6 lines so I did the old weld it up trick that I've done for many customers over the years. Also needed to add a wideband bung and slightly change the angle of the collector outlet as it was a bit close to the floor: But shit news, the LSD I have is dead and I really cant be arsed measuring and drawing it all to make new parts on the mill. Anyone have a decent T series LSD for me before I go and buy one? TRD/Kaaz/Cusco etc, anything considered.1 point
-
So following on with my 1 step forward and 2 steps back theme, I pulled this apart again... I was mulling over the engine and its unknown history so decided to do some preventative maintenance before slamming it back in the hole. So the box and fly came off again, the engine got slammed on the stand and its front and pants taken off. Had a bit of a look at the bottom end , all looked very clean - almost suspiciously clean, but looks relatively stock I think. There's a metal head gasket on it and the ports have definitely been played with but who know to what extent. Its got some HKS cams apparently but haven't pulled the top covers off to look yet. Anyway, put the new oil pump on, glooped the windage tray and sump back on, dummy fitted some new Toda cam wheels and a fancy belt. Ive got a new idler pulley for it but need to drop in to Toyota for the new water pump so will fit that next time. Fly, clutch and gearbox went back on then dropped it in the hole. Headers fitted and some other bits and pieces. The clutch hard line was a bit fucked up so made a new one from braid and bled that up. Making progress very slowly. Yes the cams are not aligned, the belt is just sitting there poser spec. All has to come off again so I can fit the hall effect sensors. Will have a CAS for sale shortly if anyone needs one. Fuck theres a long way to go. Anyone know where to buy new passivated bolts for this turd? I can't bring myself to put the old shit ones back in - especially as most are missing.1 point
-
Not as much progress as I'd hoped but slowly getting there. Gave the engine a quick rattle can rebuild, swapped on a lightweight flywheel/clutch setup that KPR had lying around, and got the gearbox on and ready to go in the hole. Will fit that all next time and put on the new oil pump Ive got etc. The -3kw comment is a standing joke between KRP and I. Years ago he helped street tune my EP in preperation for a dyno day that I ran. His EP82 came out with 198kw , compared to the 195kw in my EP71 . So from that day forward I claim that everytime he touches or has parts that end up on one of my cars the power figure deliberately reduces by 3kw. I also made up some billet radiator brackets and a battery clamp at work, might make a few of these eventually. Anyway, its ready to go in the hole. Ive got a whole heaps of parts waiting to go into the car, just need to find the time to do it. ,1 point
-
Ii haven't done anything to this. Today I did some things with it today. Things like pushing piles of AP65 about and making a nice parking space behind the garage. Mint!
1 point


.thumb.jpeg.384ff72c8d2b0ee0d34a7bdedb55bdcf.jpeg)


.jpg.2739ceea4562b1a4c9bc4bec0498464c.jpg)
.jpg.8457b1bcdd62d060a0169e5117ec3a54.jpg)
.jpg.78418e84f1243825758bab88a226bc27.jpg)
.jpg.f3bd77e0f27702cd07f897e06d2f1487.jpg)
.jpg.6e7fb716077b37ca5360f0280318290c.jpg)


.jpg.6bad9a6445b94f09aa1f2c7b8234b610.jpg)
.jpg.545f8d51bfdc7a5686662b67bbd75739.jpg)
.jpg.3227af7b75300c0b66faf772e209db31.jpg)
.jpg.5f805a6cfb842fa8306033f88f8916e3.jpg)
.jpg.85d77c8af690c47279b517535edb8caf.jpg)
.jpg.581c90704662574e0a970a55f37722c7.jpg)
.jpg.5fa267efc35a6bf42cb348ed931d77c3.jpg)
.jpg.af1c754ef7f486cec470f40f3756f389.jpg)

This leaderboard is set to Auckland/GMT+12:00