
Leaderboard


.thumb.jpeg.384ff72c8d2b0ee0d34a7bdedb55bdcf.jpeg)

Popular Content
Showing content with the highest reputation on 05/01/19 in all areas
-
OK so as you can sort of see in those initial shots, the wheels have seen better days. The rest of the car has definitely seen some paint in it's life, it's a bit peely and not super amazing but luckily white tends to hide it a bit. But those wheels. Yeah I needed to do something about those. DC2R Phone (7) by Richard Opie, on Flickr One short trip down to Kwikstrip in Te Atatu, and these were done. Old mate turned them around THE SAME DAY. Who even offers that level of service anymore? Admittedly he did say they didn't have a lot on that particular day so yeah, result. I chose to dip, as it preserves the edges on the spokes nicely, if a blaster isn't careful they can be rounded off etc, end up with slightly different profiles on each spoke. Not ideal. Next step. GT Refinishers. Grant and Ben gave em a coat of champ white. Pretty fresh out of the booth when I picked them up, look not bad at all. Went out for the night so popped them in the living room with the heat pump maxed to try and get the paint to harden a bit quicker. DC2R Phone (8) by Richard Opie, on Flickr The idea was to have them ready to fit tyres on the Saturday. But when we got home it still smelled of paint fumes a bit, so figured they should probably spend a day in the sun. And I just wanted to see them in the daylight. DC2R Phone (6) by Richard Opie, on Flickr Anyway, I didn't fit the tyres then... they were sorted out yesterday. On the car now but ran outta time to go take a reasonable picture. Shit it lifts the appearance maaaassssively.9 points
-
Guy going balls deep in Ferrari engine mods https://grassrootsmotorsports.com/forum/build-projects-and-project-cars/frankenferrari-v12-ferrari-308/148959/page1/8 points
-
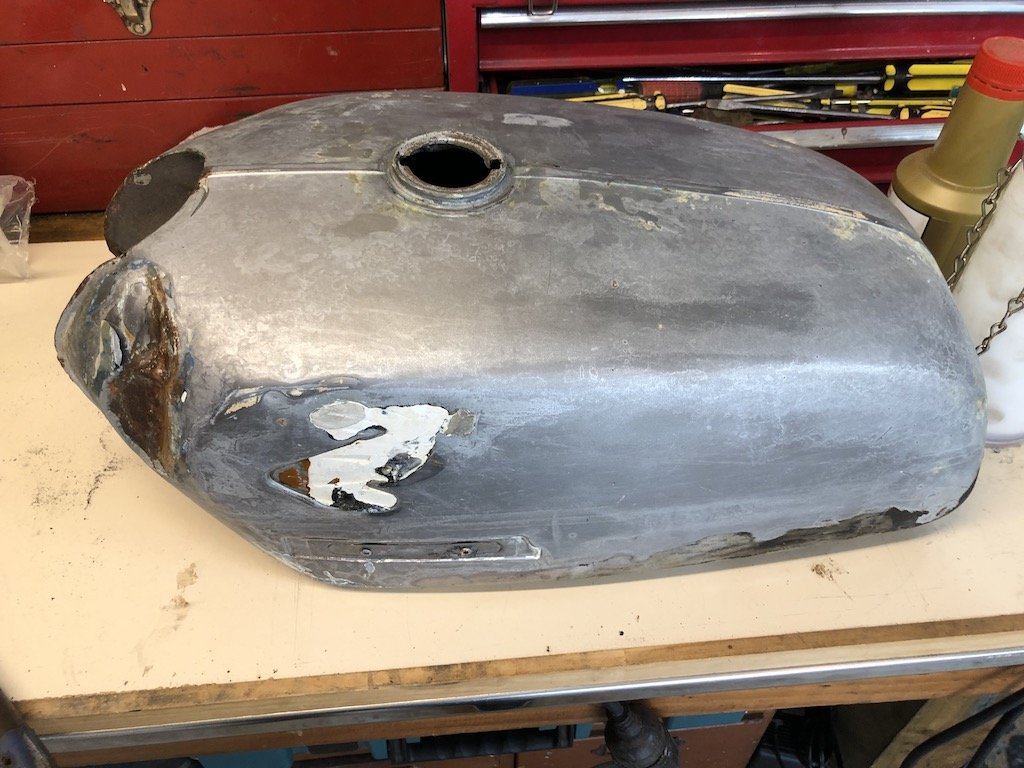
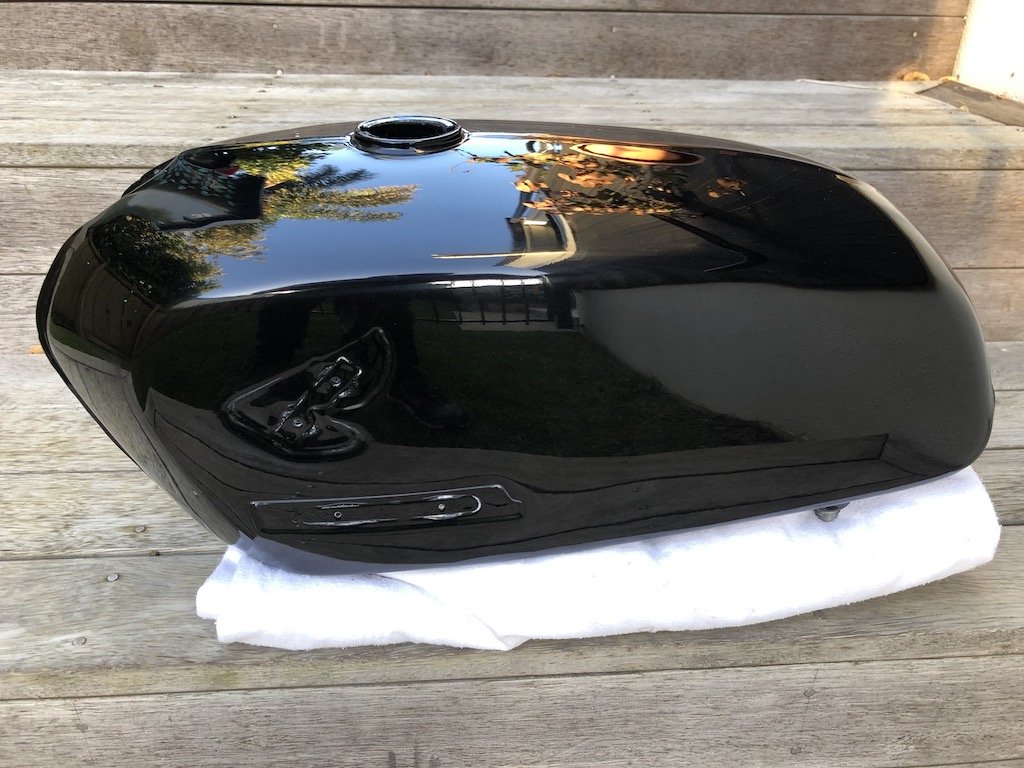
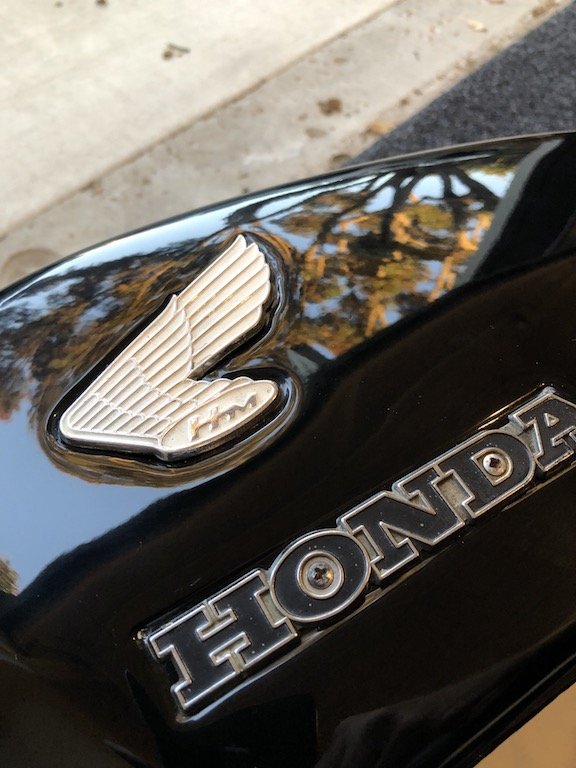
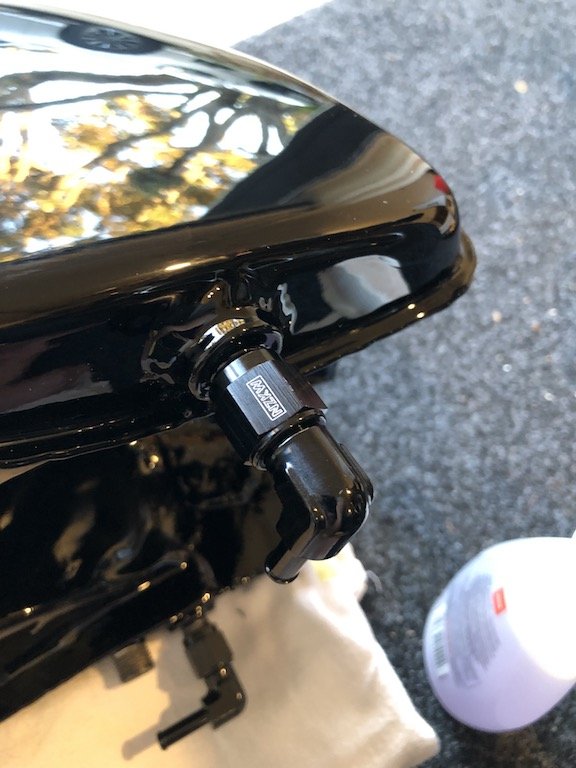
So after a whole lot of work by an extremely talented motorcycle refinisher in west Auckland the tank went from this: To this: Super stoked with the outcome, the black paint is perfect and now has nice black AN fittings for the fuel sharing. I'll chuck it on tomorrow as the paint was still a bit fresh.
 7 points
 -
There's fuck all work on at the mo so took the day off and put the LSD in. Yay for twin spin.6 points
-
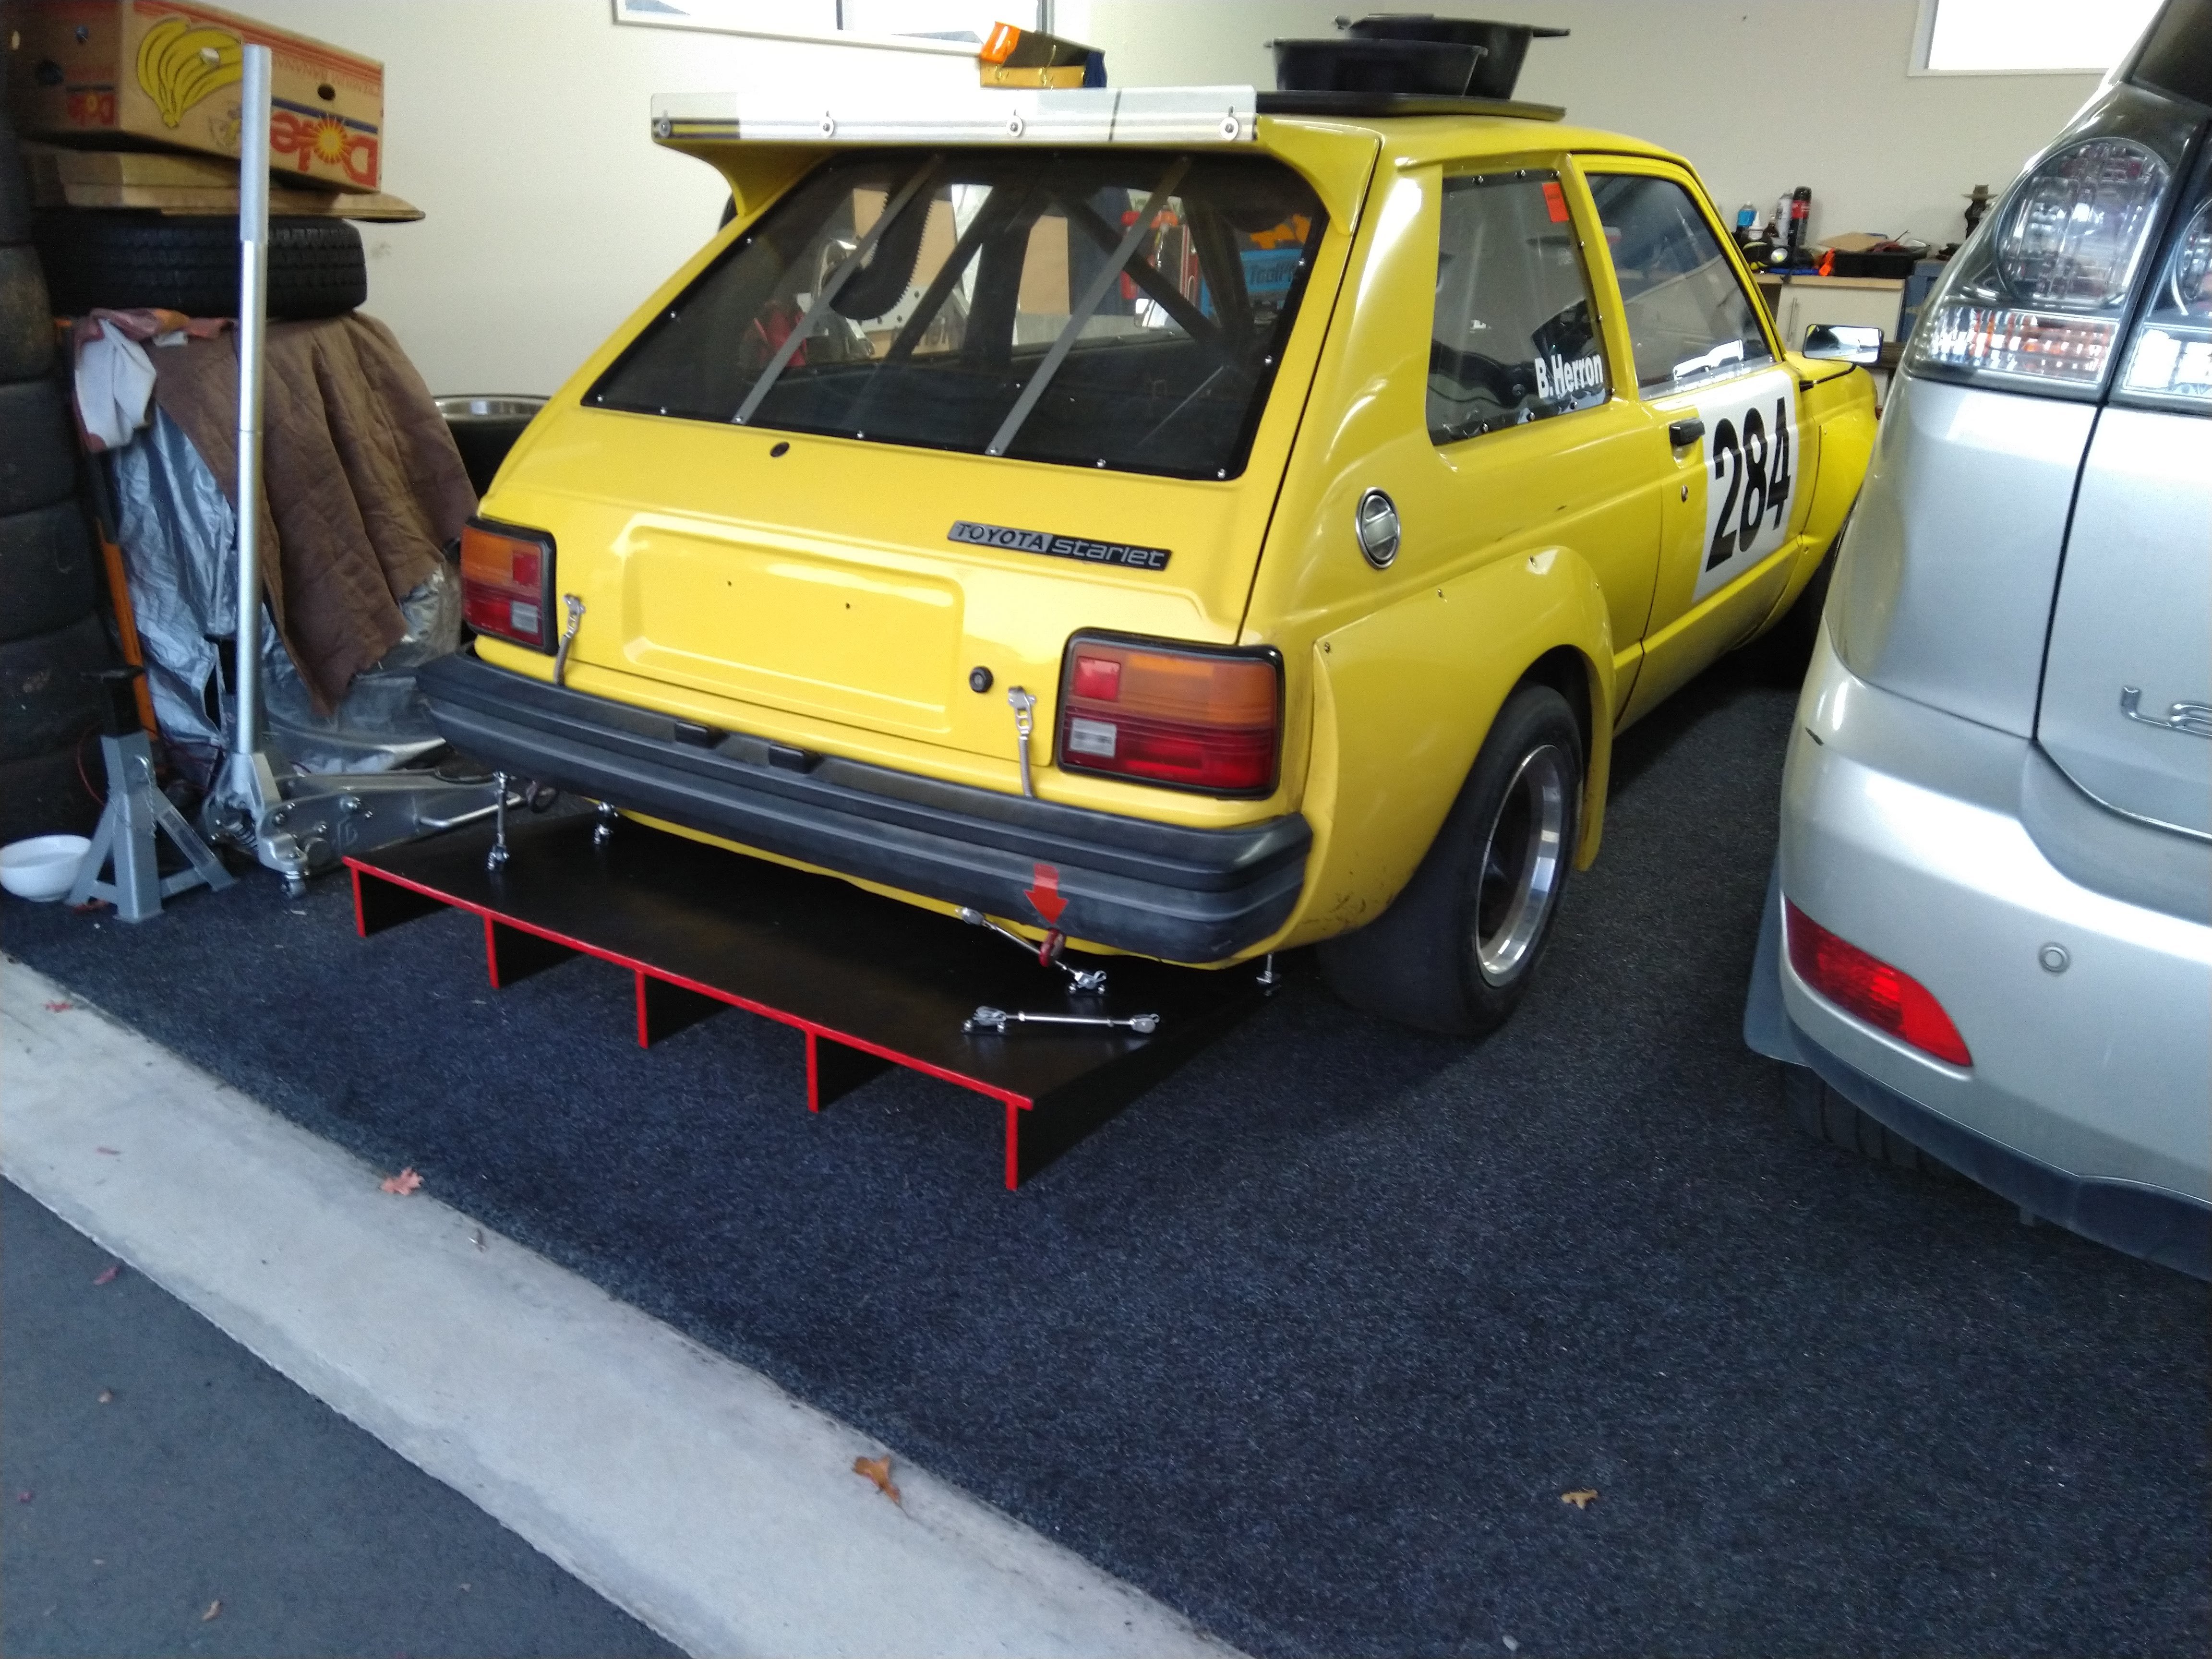
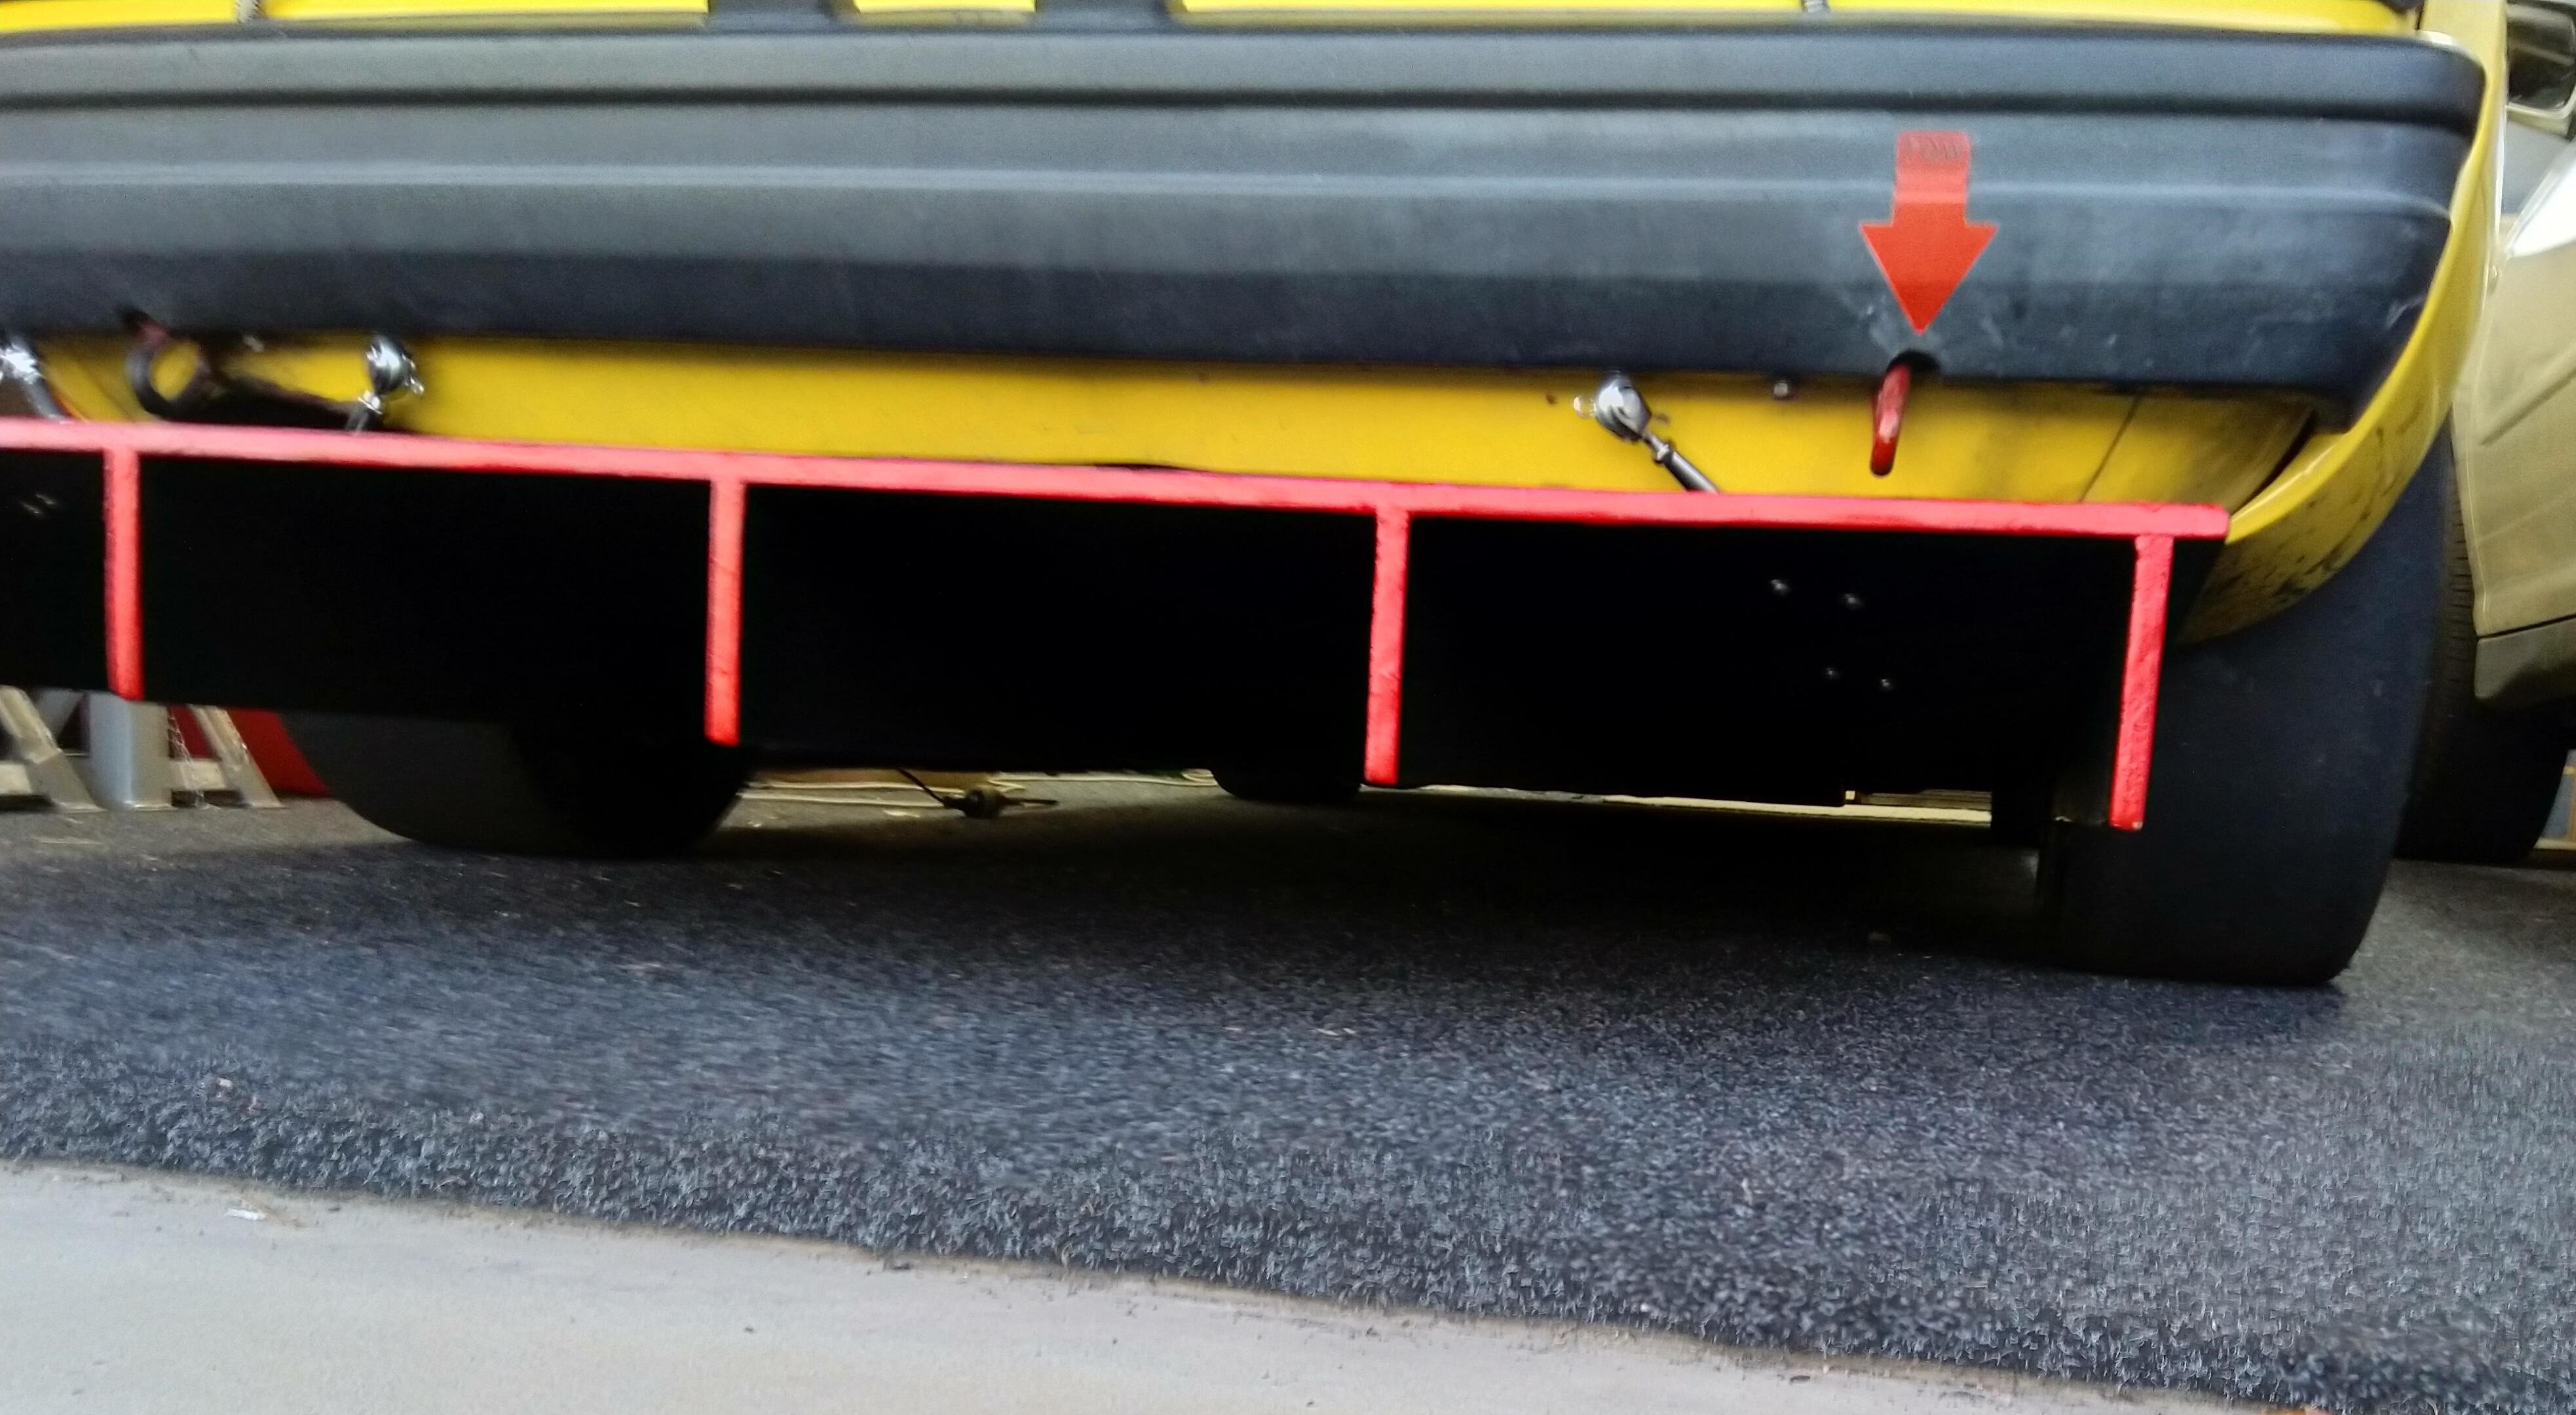
Finished Version, just waiting on one mounting point to arrive. Ended up sticking out further then what i was originally planning as I moved it back from the diff for clearance. But shouldn't have a negative affect on the aero (opposite probably), and could still go out another 200mm within the rules! Can always cut it down later if needed Only concern is it getting hit by another car, so painted the back red to stand out...
4 points
-
I reckon the light fitting would be shower proof if mounted up the right way, but the fake rust finish they come with would soon turn into real rust. I bought two, so there's still one in the cupboard for future ideas. Here's a little project that's still on the go. It's a TradeMe bargain educational skull made of resin, and I cut out his eye sockets and stuck in those 230V neon spring bulbs. He's headbanging thanks to a car's rear wiper mechanism running off a battery charger. His headbanging is so slow that the only music I'll be able to play is Funeral Doom. Unless I give him more voltage, then perhaps we can have an Electric Funeral.... As soon as I've stopped the mounting from eventually working loose, I'll make some shoulder framing, give him some death shrouds and bogan hair and work out a power source.
3 points
-
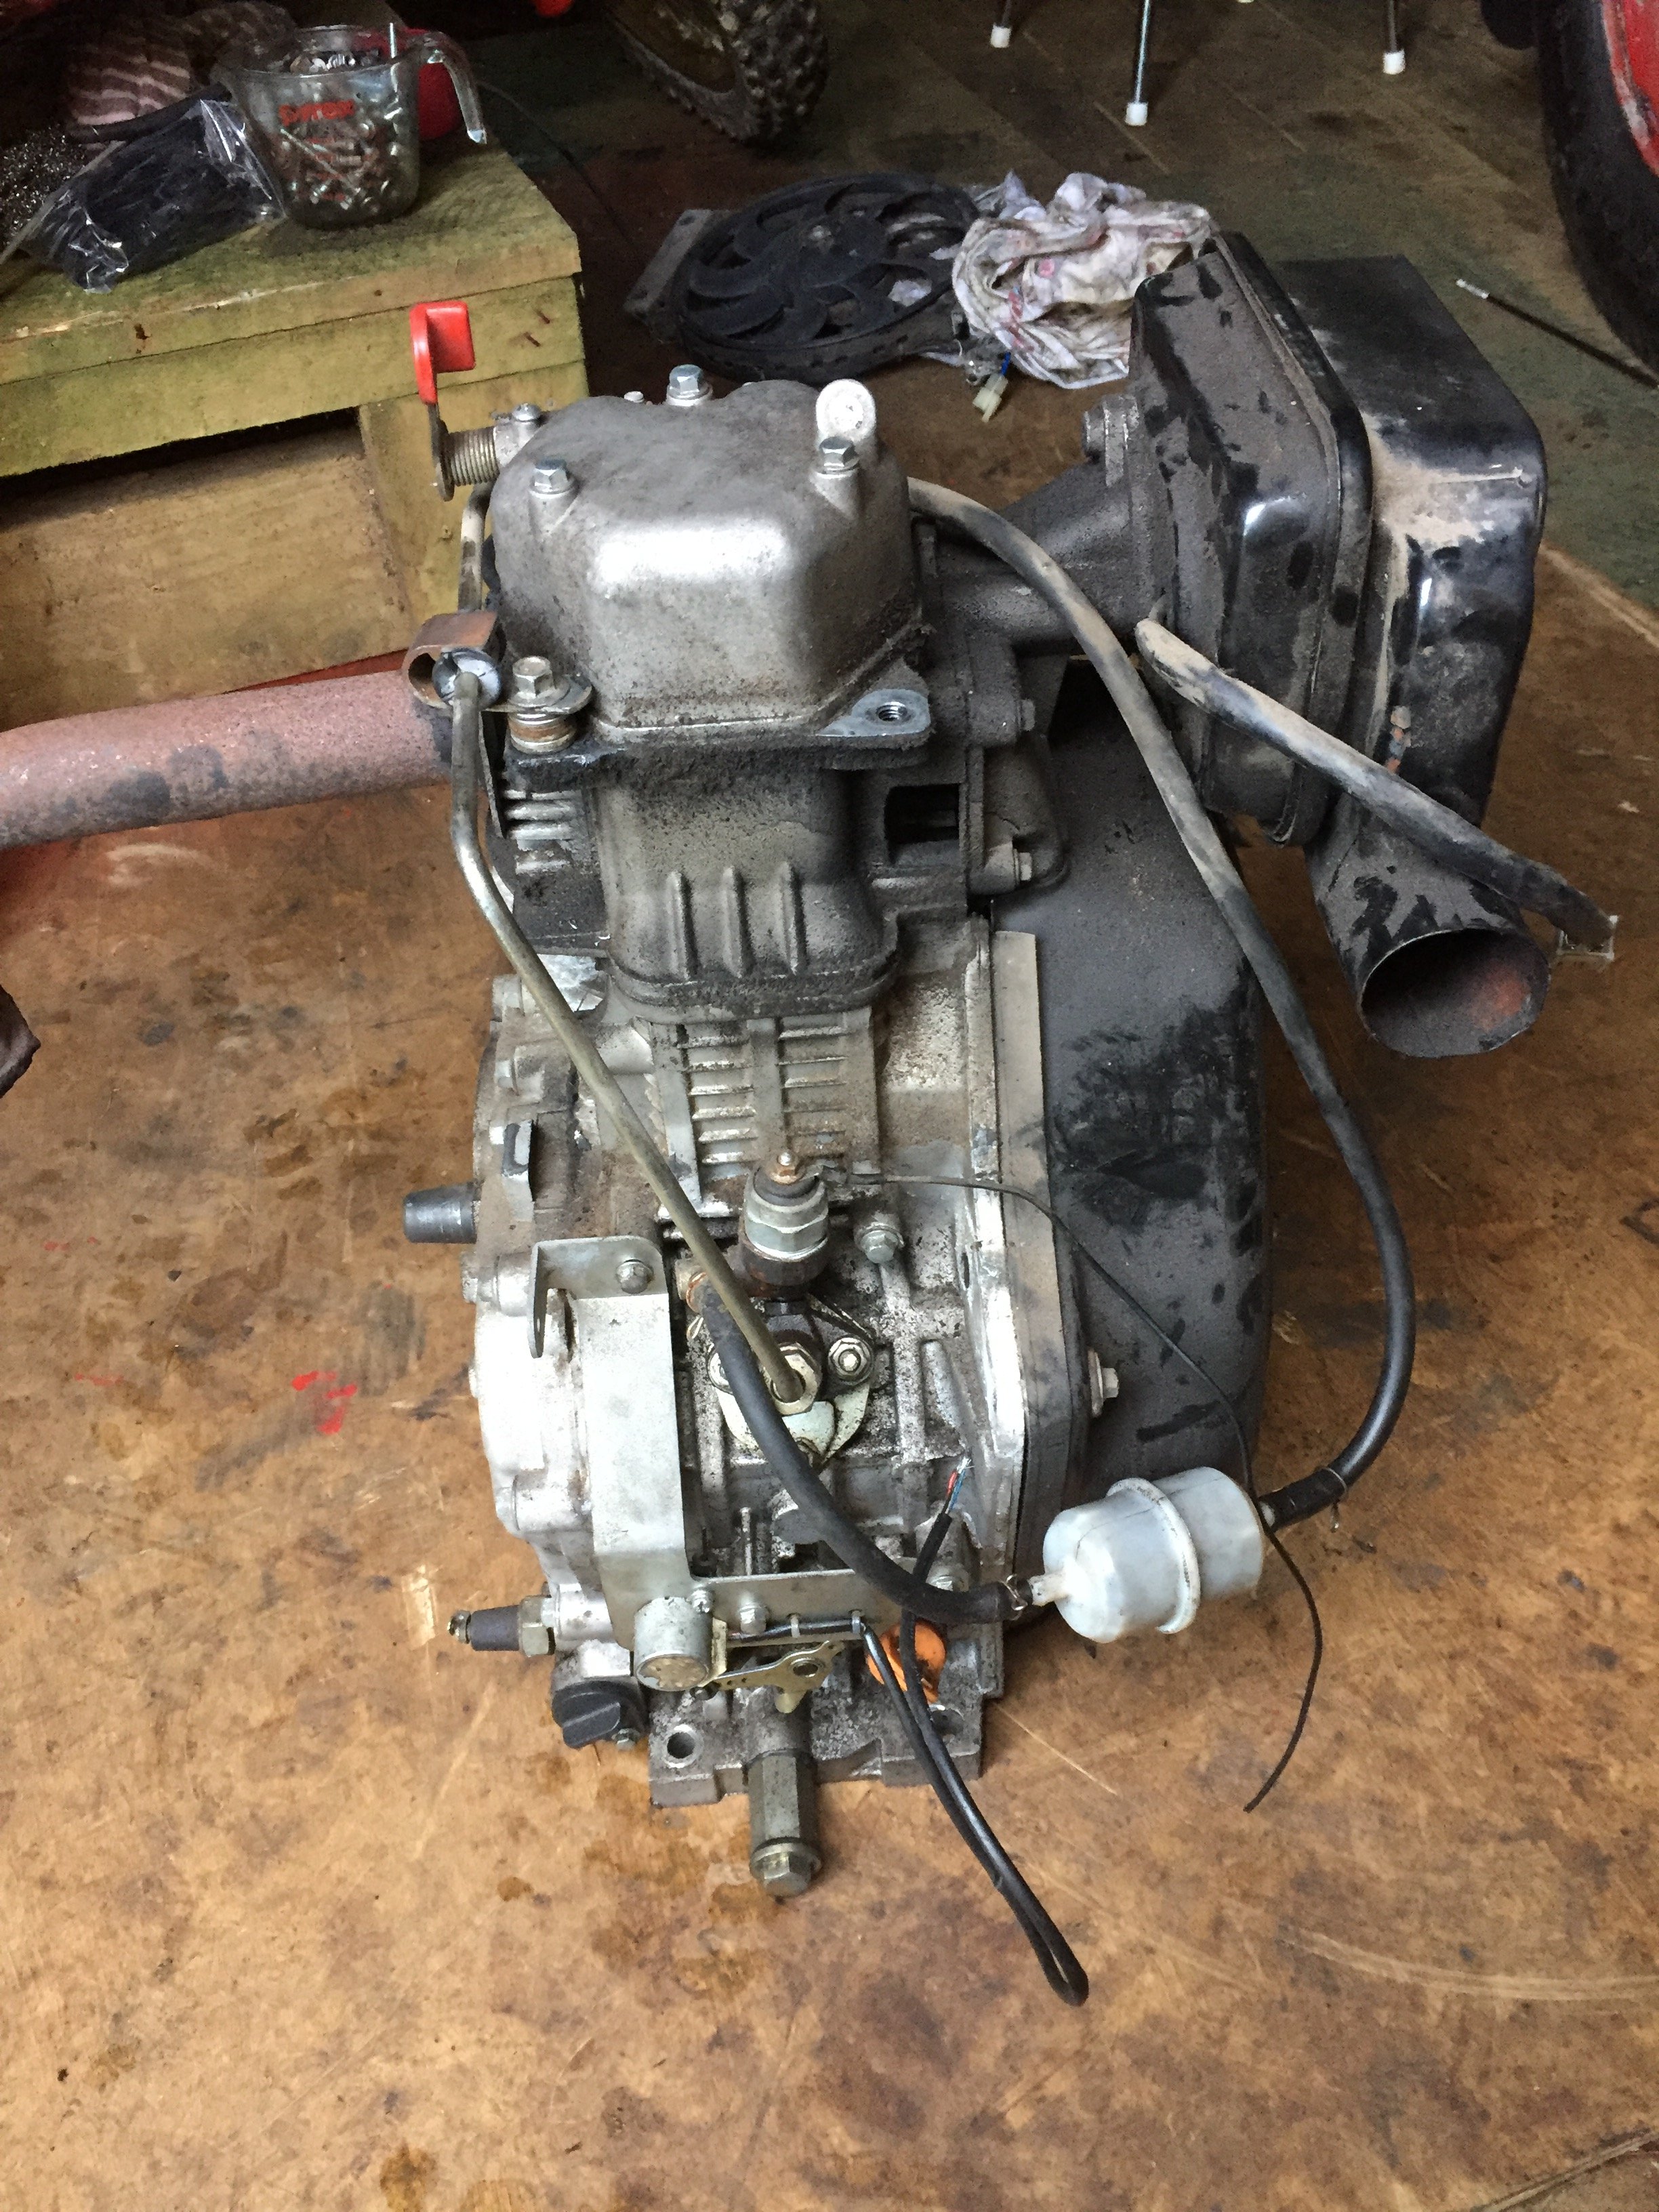
Sold the smaller bike, and I am thinking of putting this diesel motor in the stretched bike. its 15 odd HP and fairly small but tall. I need to find a crankshaft with a 1" PTO shaft as this one is a short tapered shaft, I would swap the electric start system off this motor for a pull start if anyone has one?
2 points
-
@AllTorque is a WOF inspectorator so should know his stuff.2 points
-
Those /\ are different. They sit between the top hat and the chassis. The rubber spacers siting on the spring are all good for a wof.2 points
-
Thanks. I agree. I think it's the perfect balance of tough and sleeper, any bigger and it wouldn't look sleeper, but any smaller then it wouldn't look tough. I got the data from the "New Zealand vehicle fleet open data sets" https://www.nzta.govt.nz/resources/new-zealand-motor-vehicle-register-statistics/new-zealand-vehicle-fleet-open-data-sets/ It's a spreadsheet that they update each month of currently registered cars (including rego on hold), and you can download the spreadsheets and search. They have one big file for pre-1990 and then a separate file for each year after that. Basically unless it's deregistered then it will be in the database. It is quite a pain to find every car, because some were registered wrong, like some Hillman Avenger Apline's we registered as just a Hillman Alpine, and same with the Avenger Supers. So I did a series of searches looking for the chassis number pattern, model, name and then finally just skimmed through all of the hillman's and Chrysler's just to make sure I didn't miss any. The number I came back with was Total: 276 Avengers!!! Of those Saloon: 245 Wagon: 28 Van: 3 I could then break it down by year, colour and engine type. So I did up a little census of all the Avengers left. http://www.avenger.co.nz/forum/index.php?topic=1114.0 The database is just a snapshot of cars that are still registered, including ones on hold. It took me a couple of nights of filtering the data and coming up with the lists but it will be a pretty accurate snapshot, I might have missed one or two but I went over the data pretty thoroughly.2 points
-
I lol heartily at these 1jz comments dropkick posts. Don't even sound like a six.2 points
-
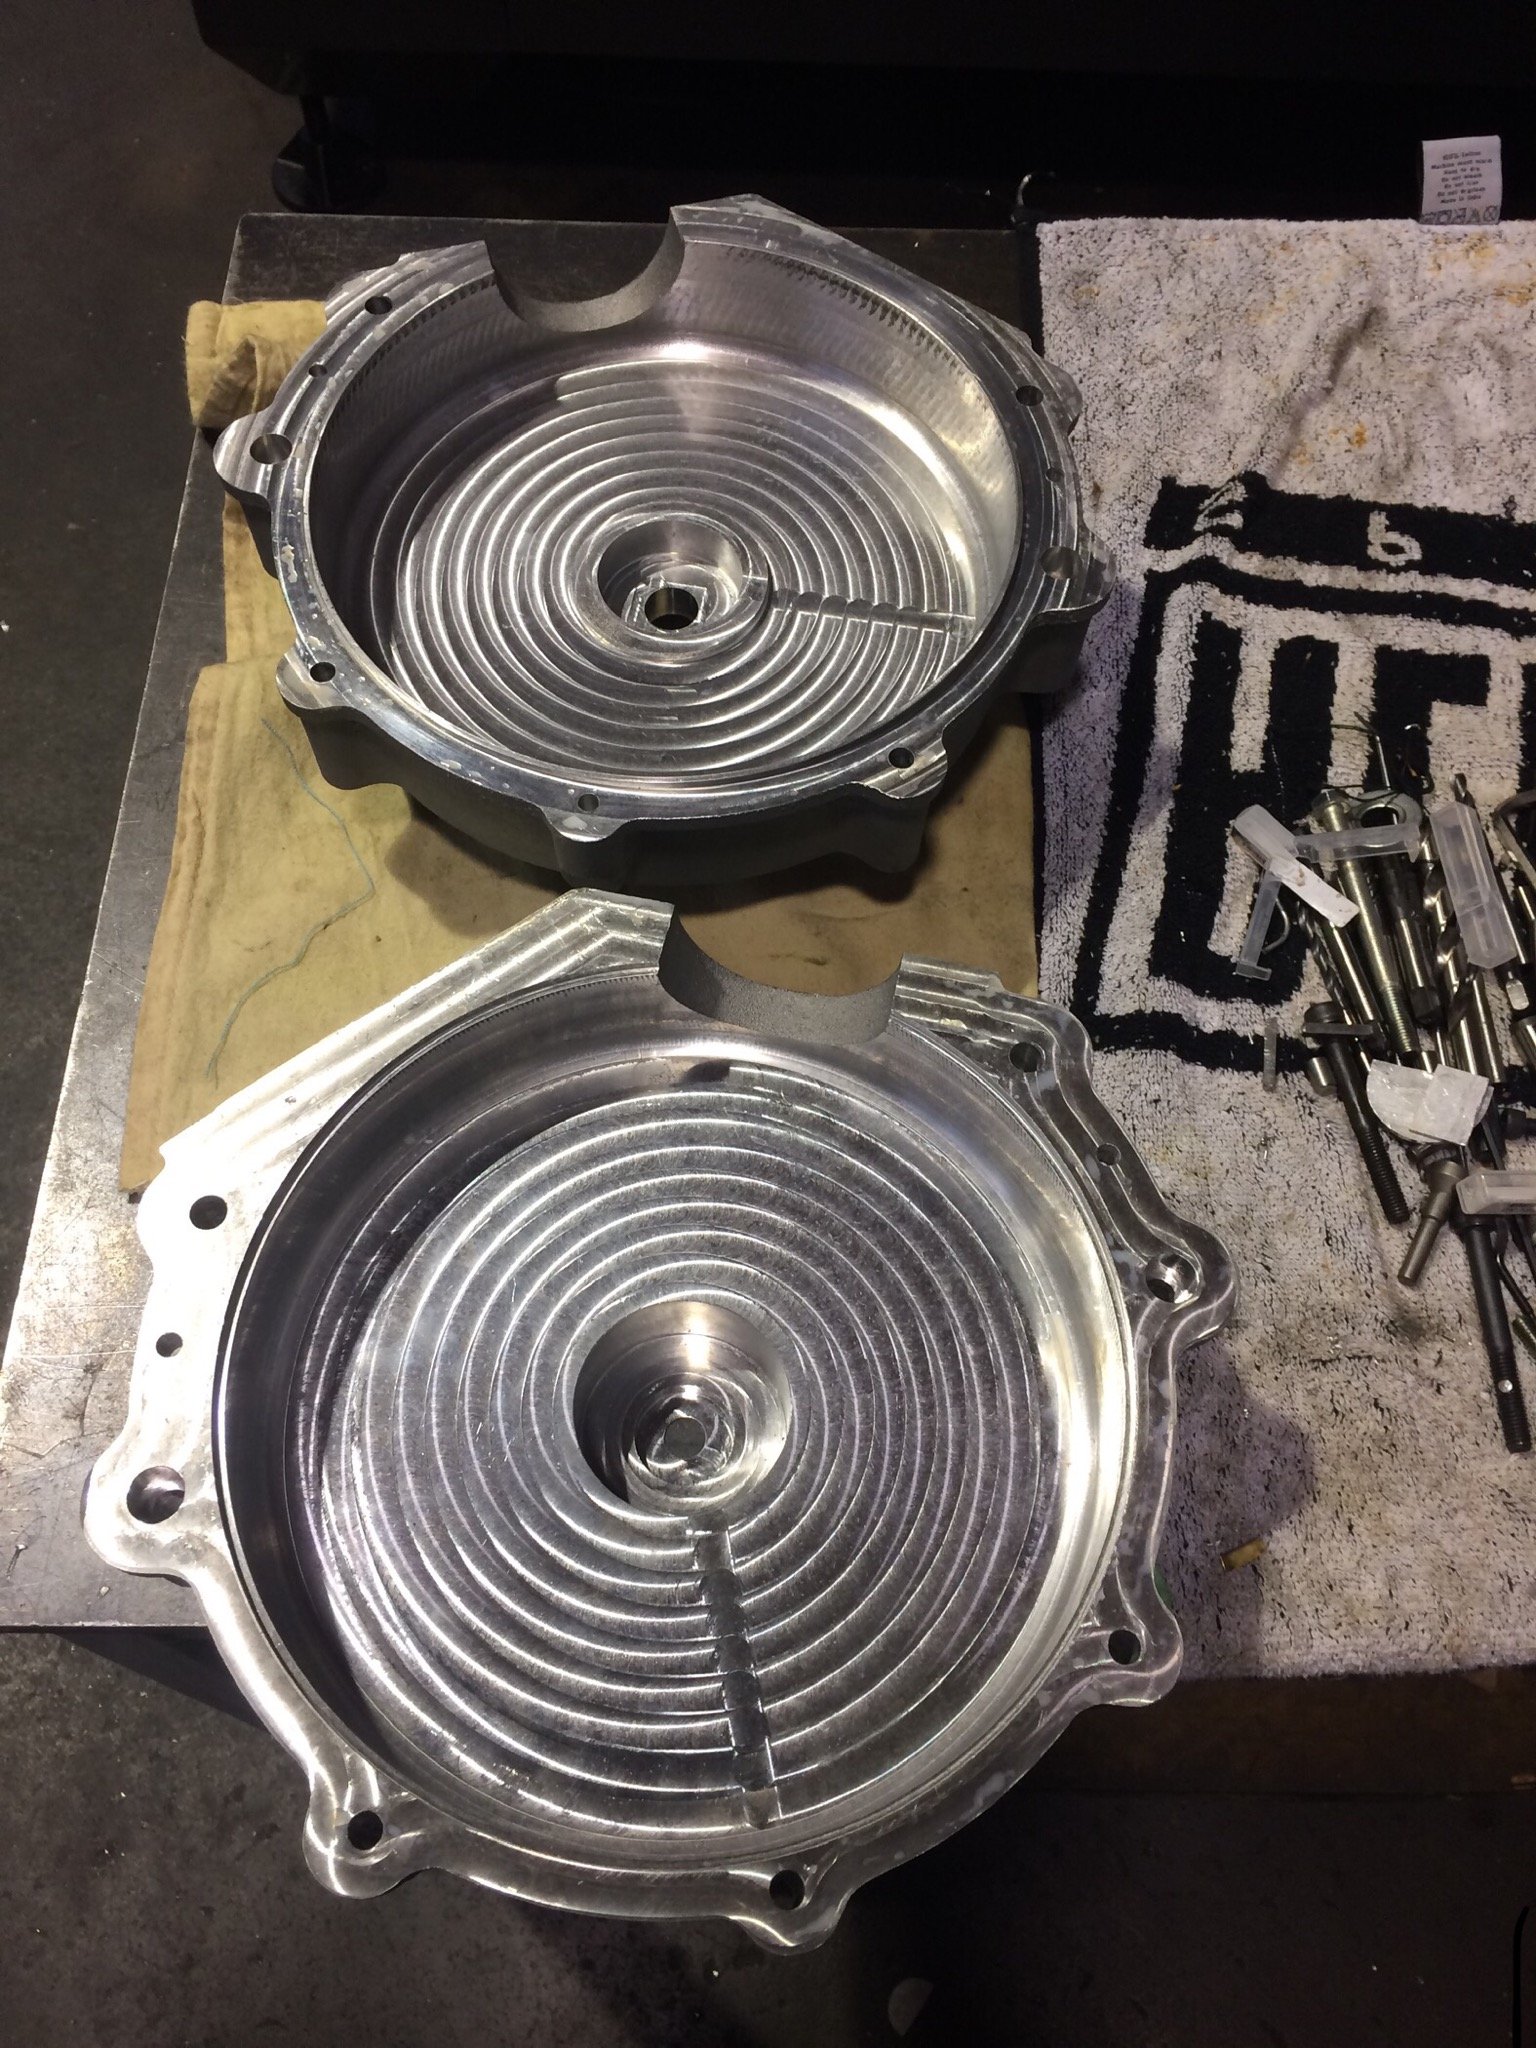
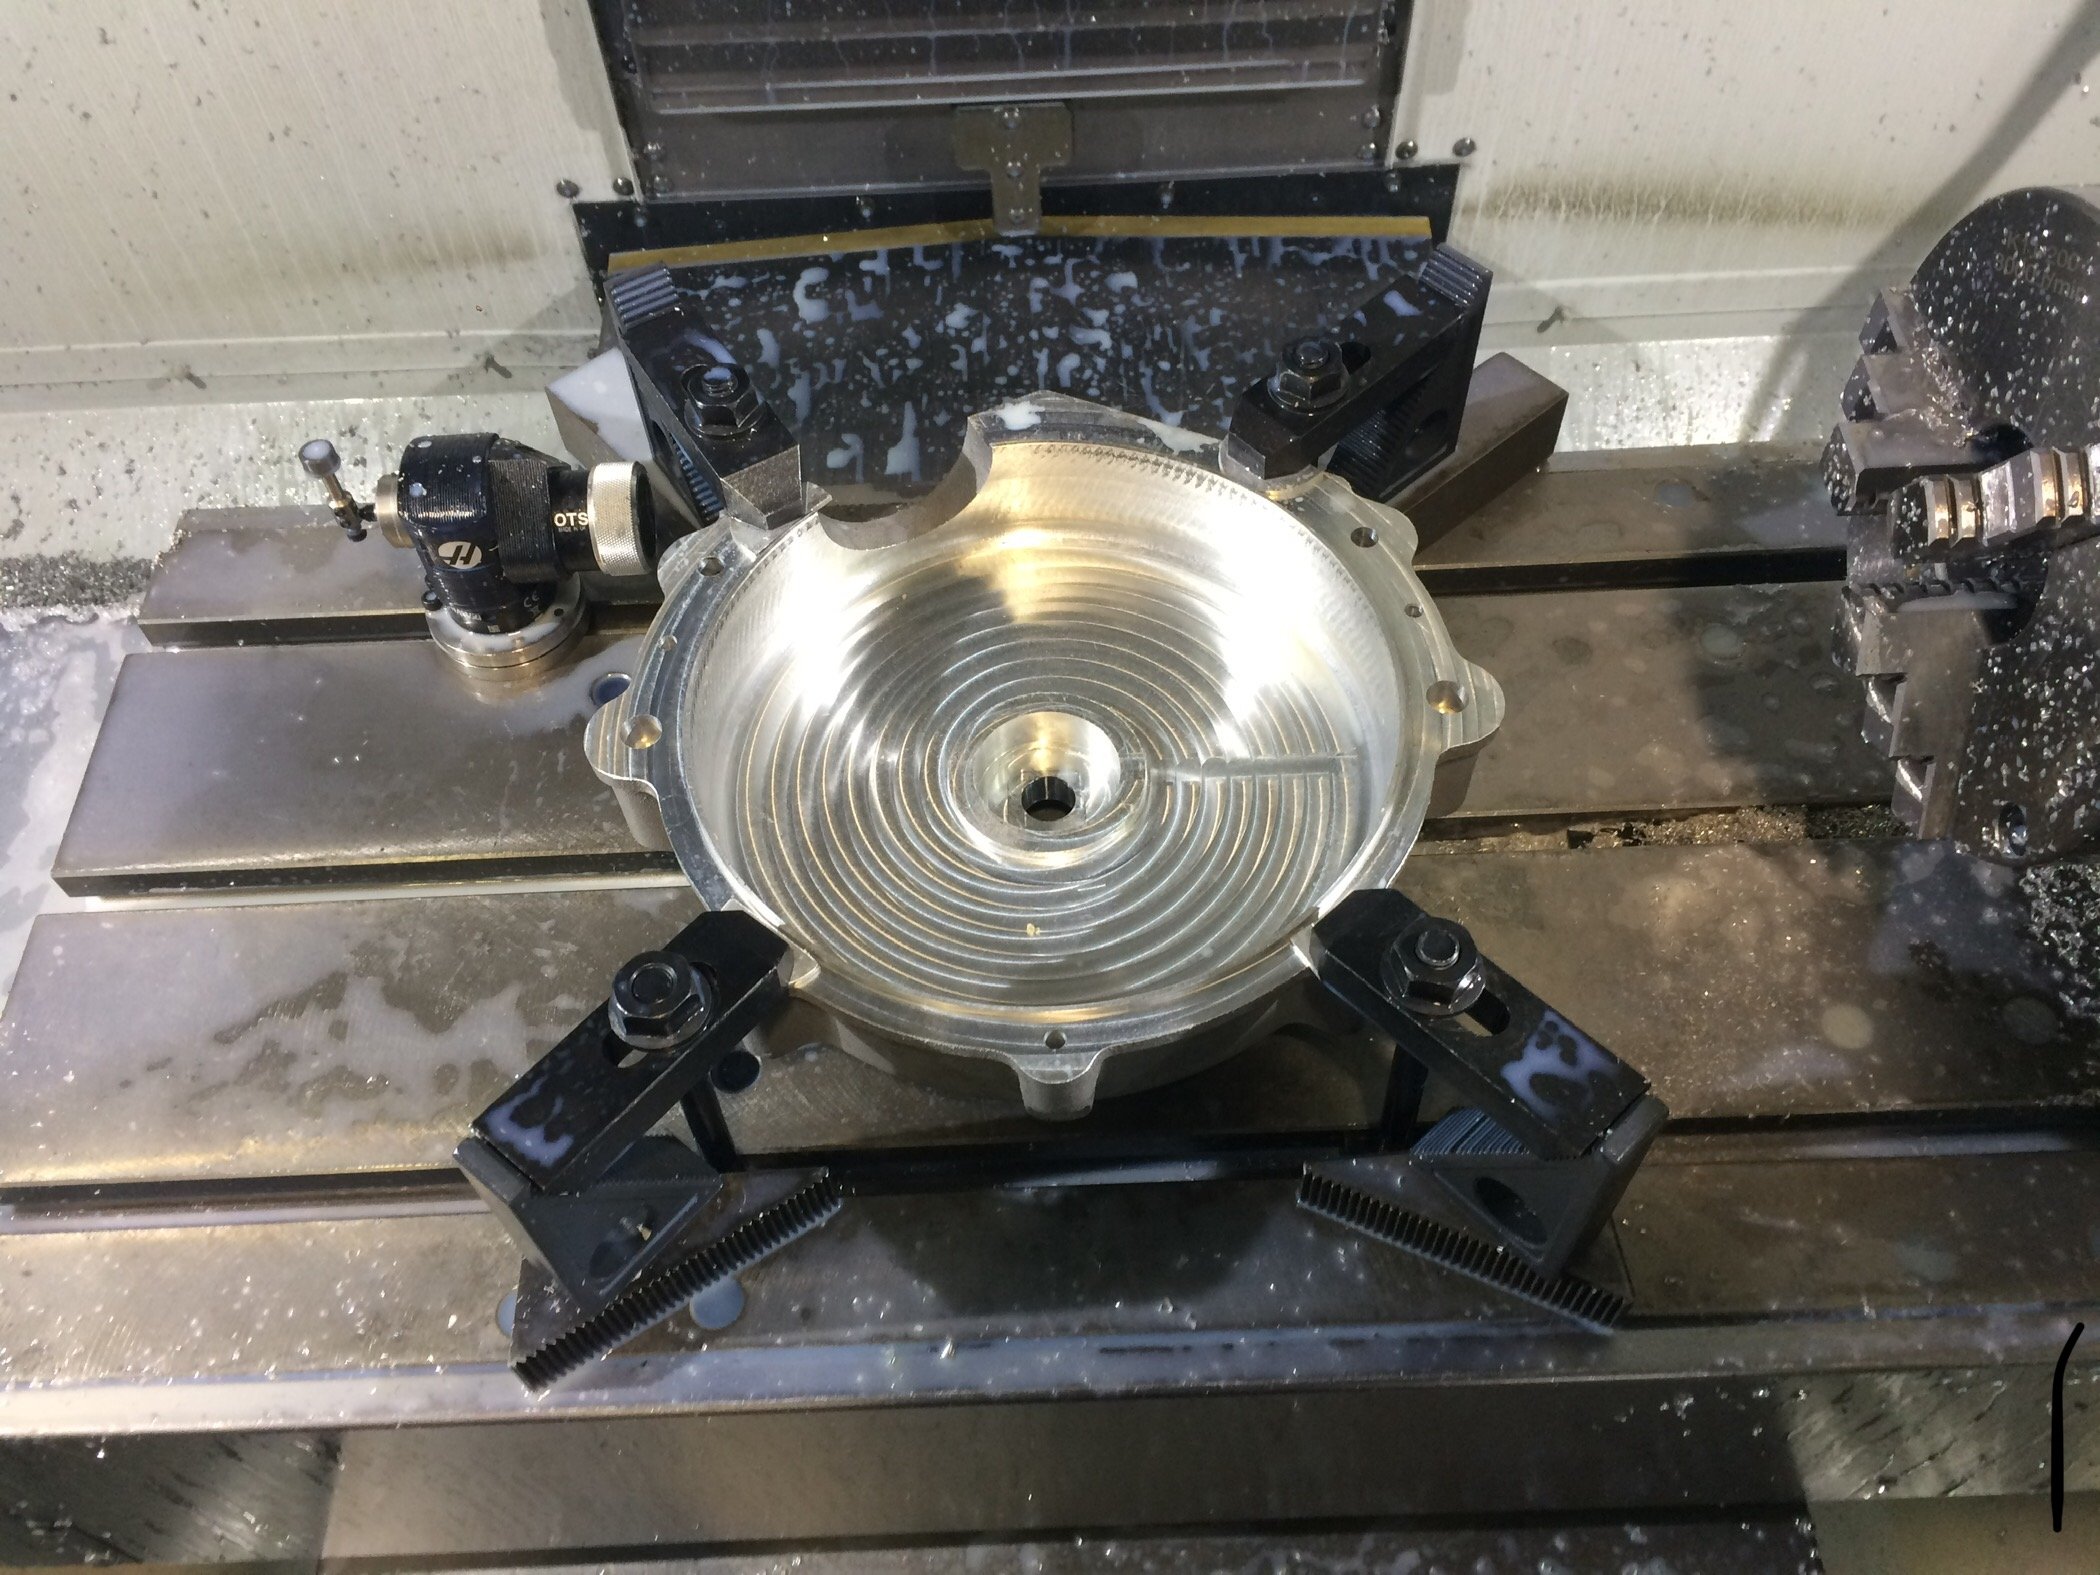
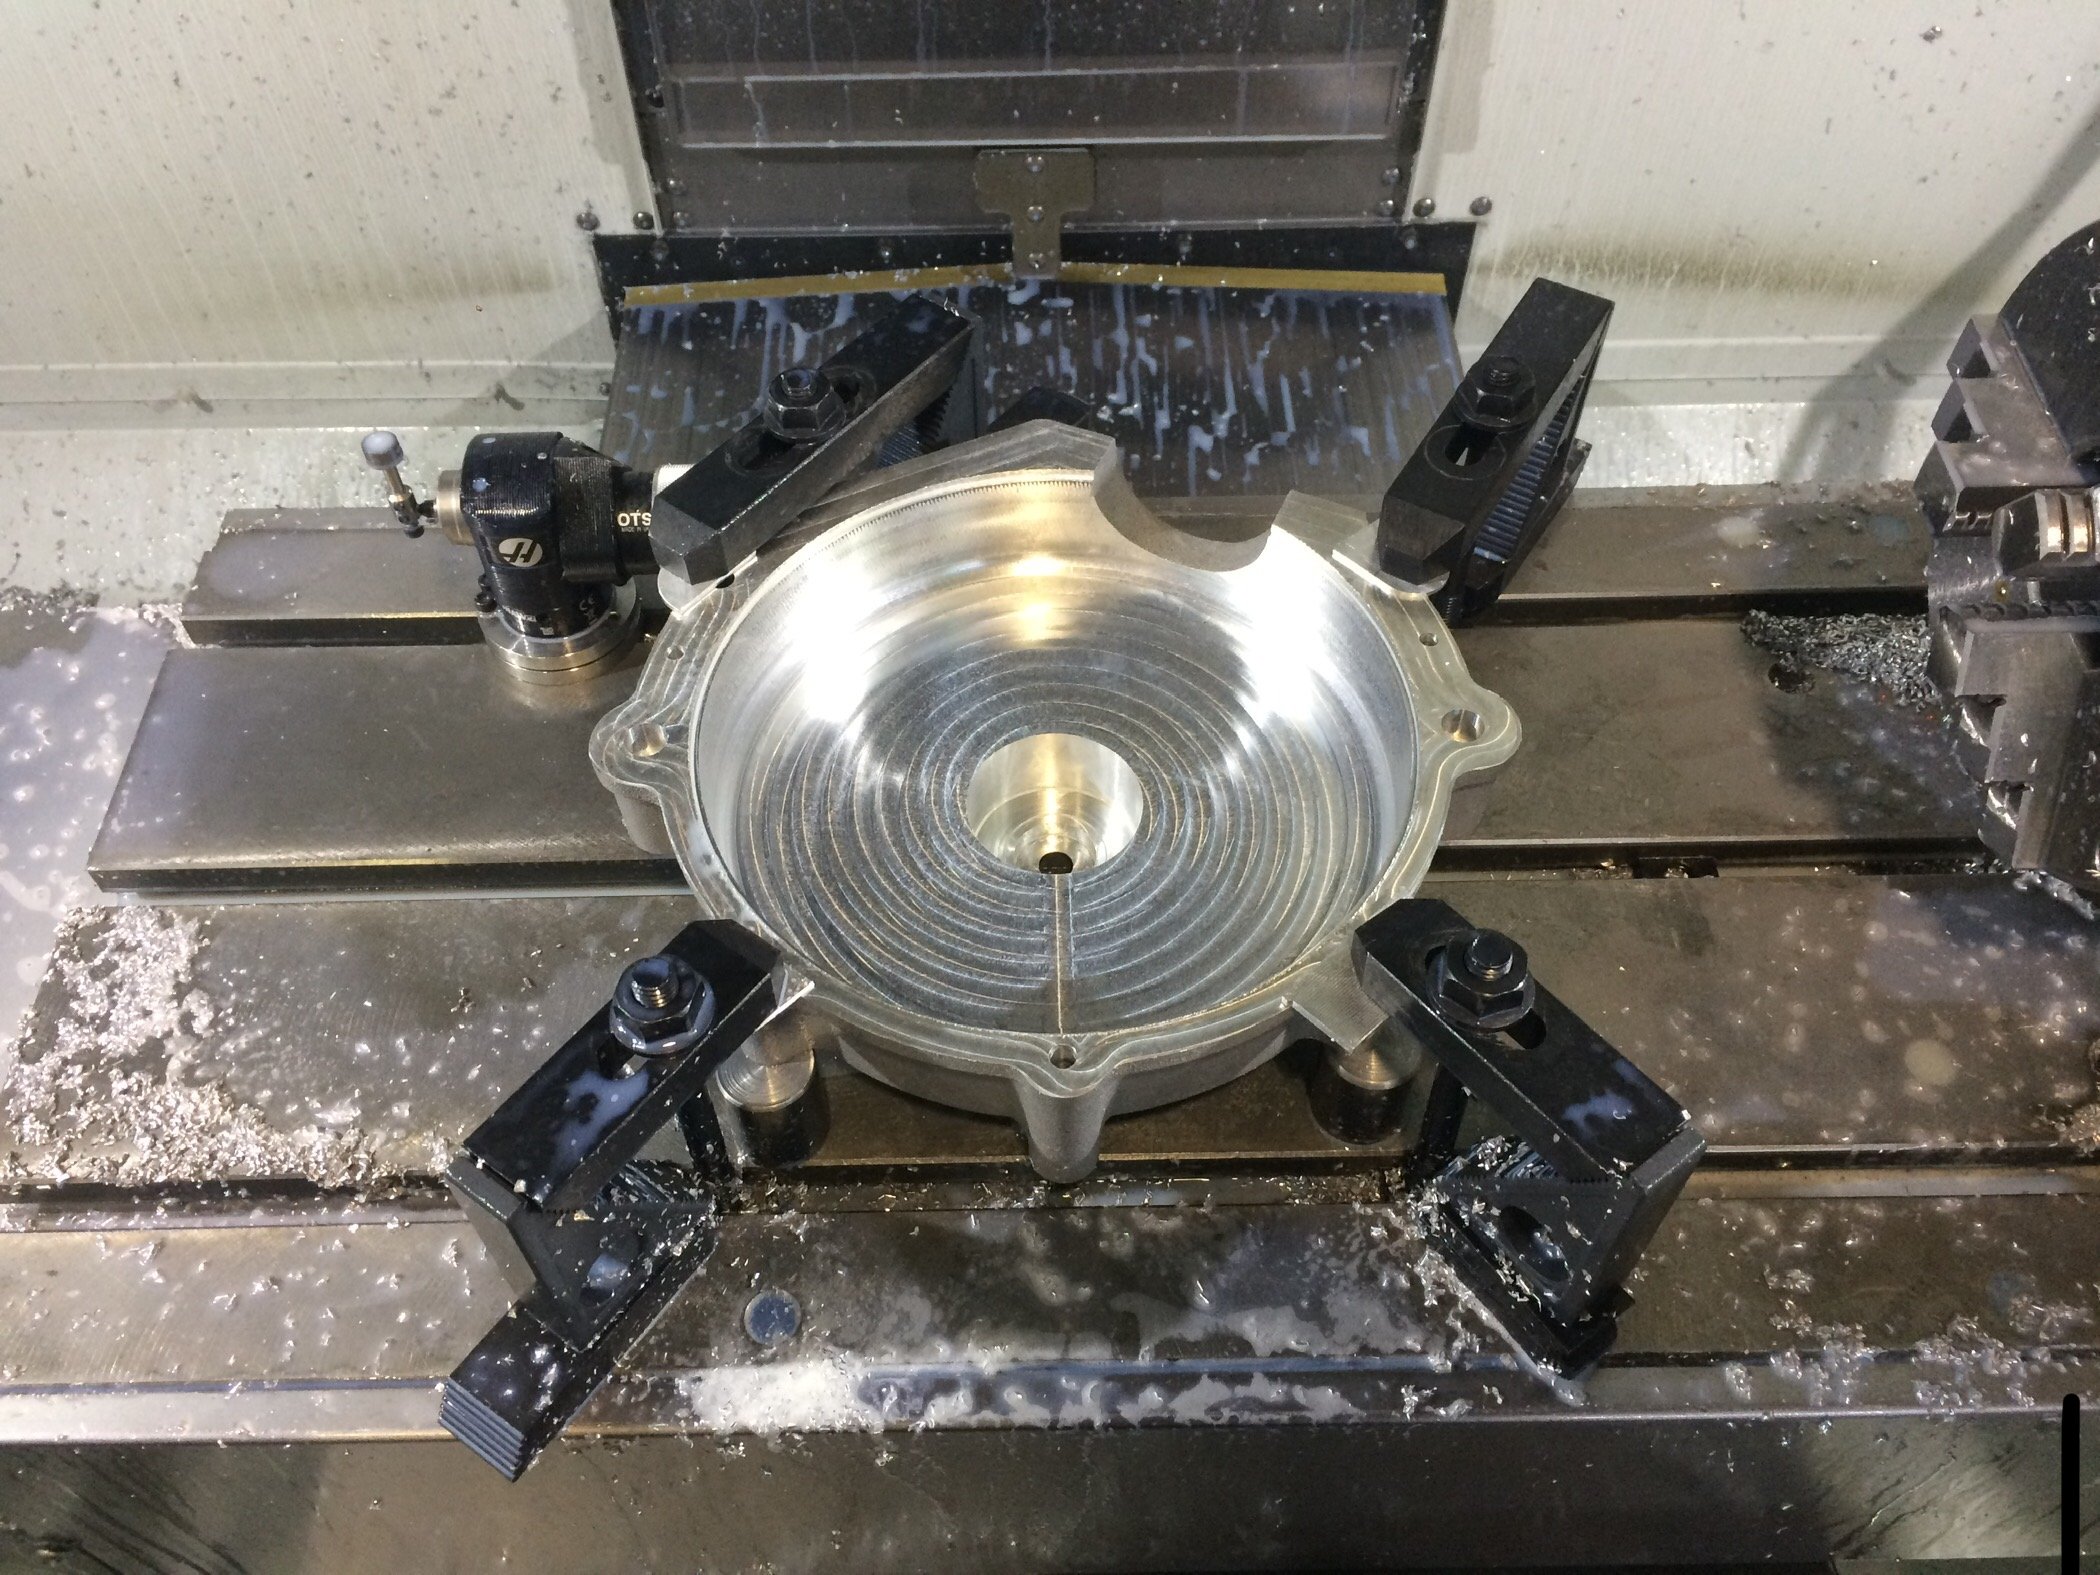
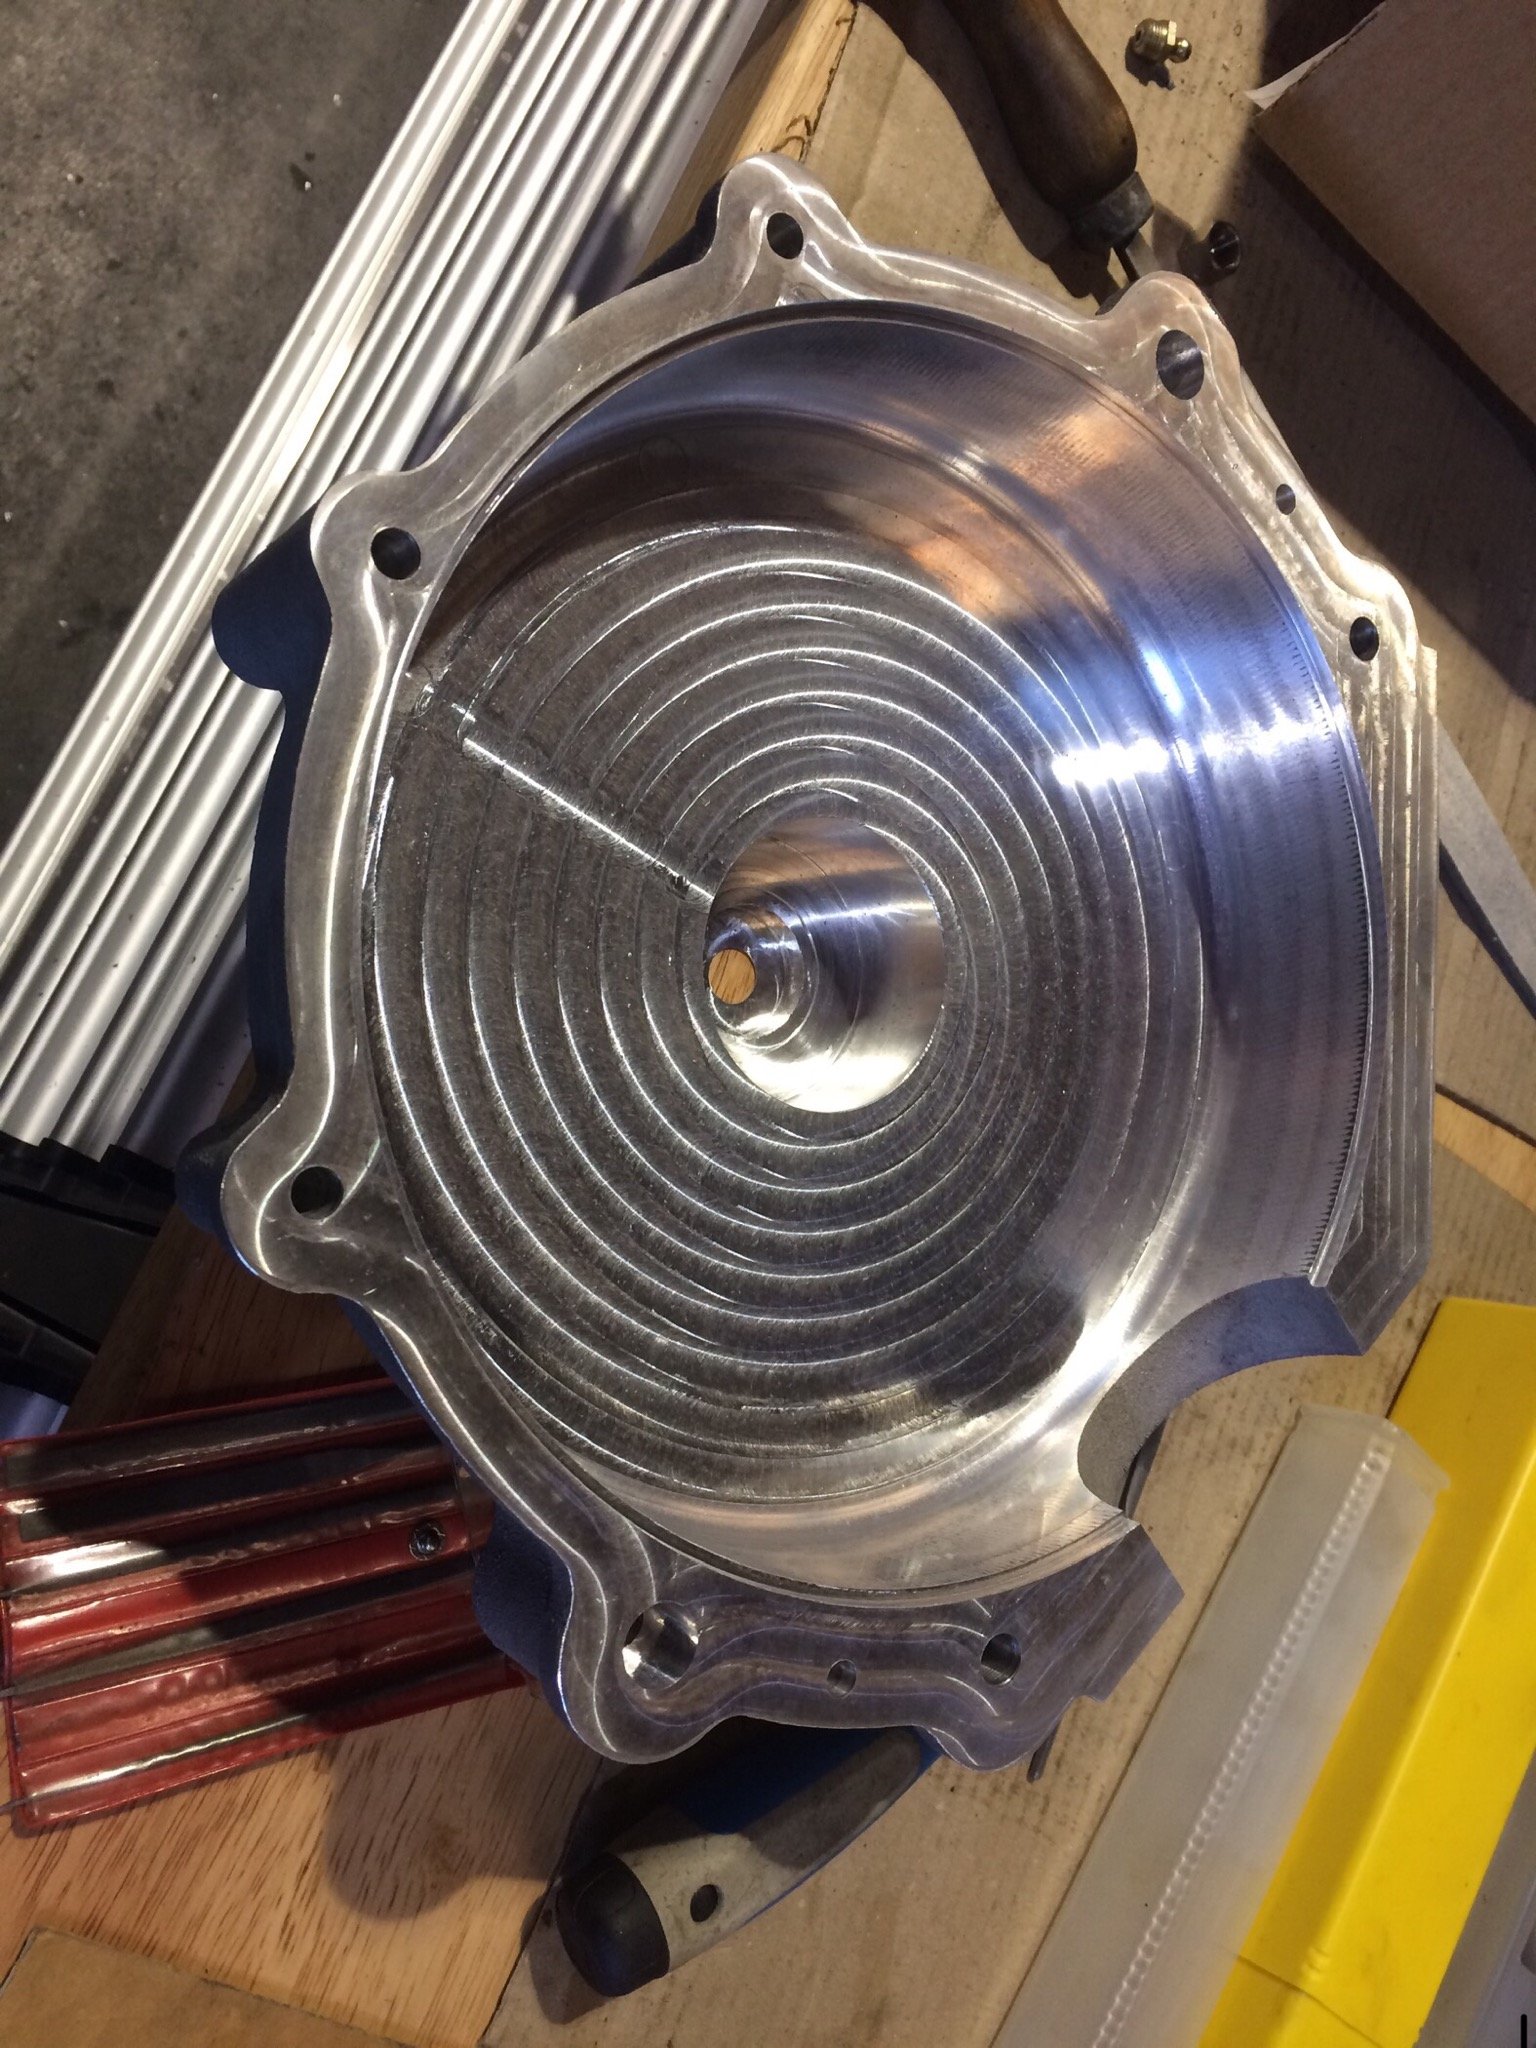
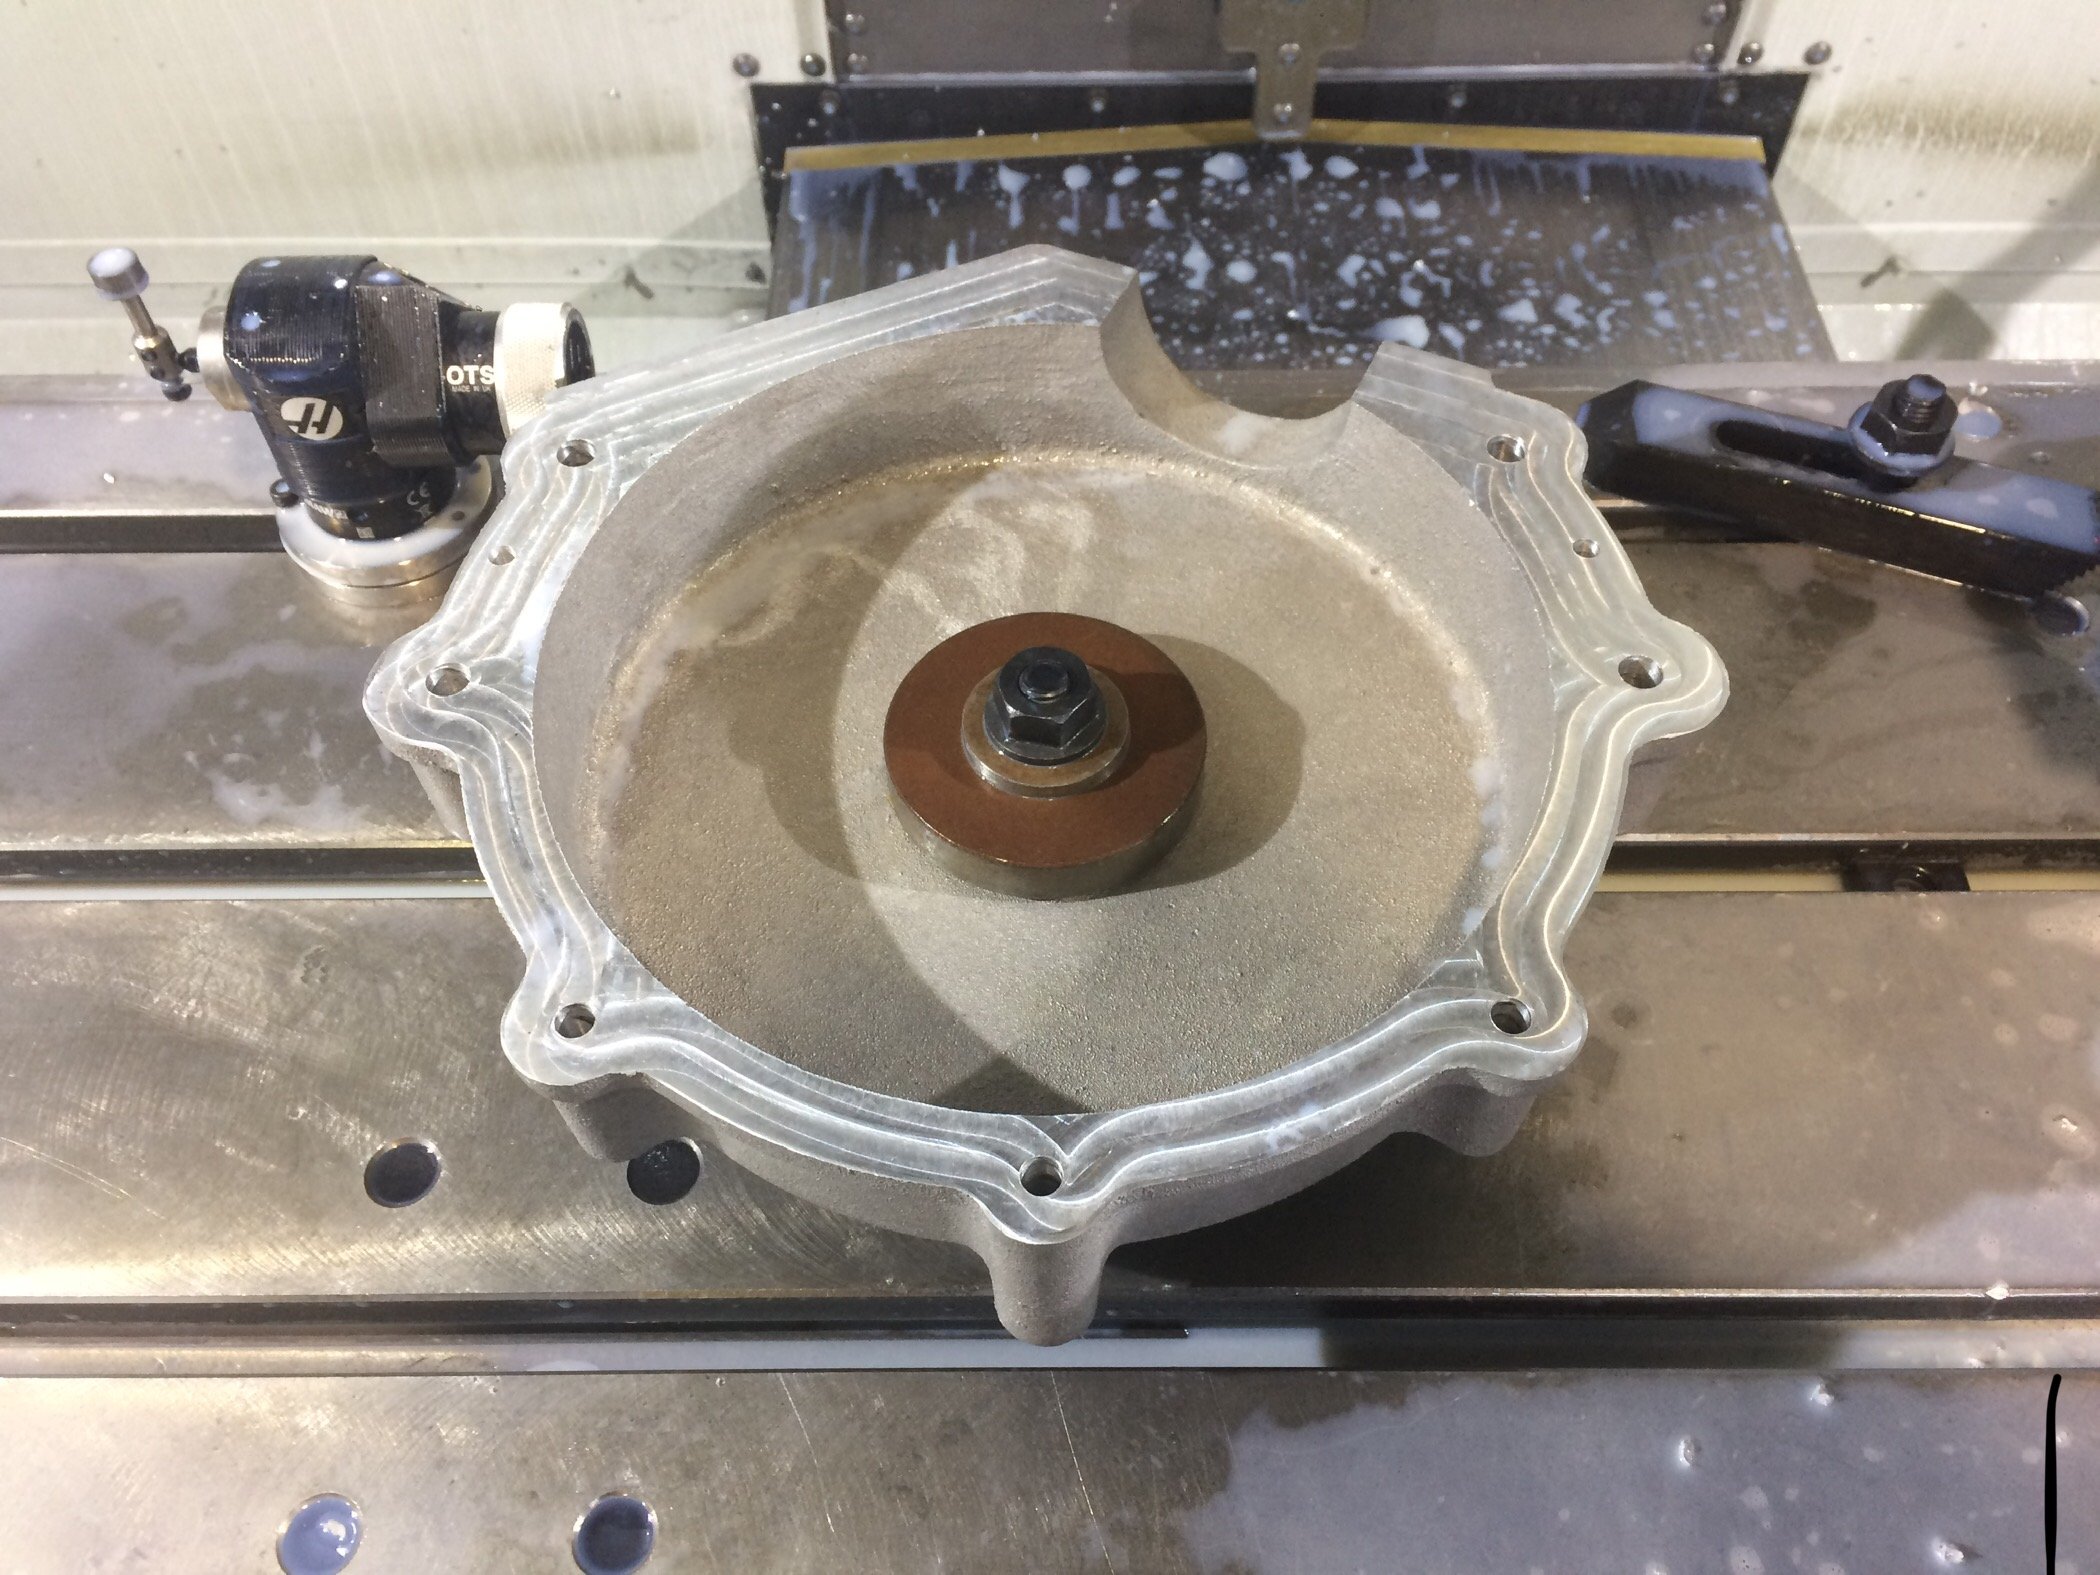
Cheers mate, na I think I will be doing some flicking through the Wiseco piston catalogue when it gets to that stage... Wow awesome, would of been great working at Mcintosh. I think I saw that engine run a few years ago when I was visiting Ken. Were the Hemmings heads original upgrade parts for sidevalve engines? I take it the guy with KTOR on the floor would never part with it? I’ll be making my own flywheels with press fits throughout, will get a 1.5” dia drive mainshaft with the bearings in have. A bit better that the original..... Have got the timing side case machined to the same stage now. Facing the timing cover mating surface as first reference. Flipped over and same stuff done as first half Internal features finished on both half’s. And with a couple of bolts holding it together. Next job get the timing cover bolted on
2 points
-
2 points
-
I have been extremely lucky and fortunate to have been at the right place at the right time to now own a very special piece of kiwi engineering. It was built by a very clever engineer called Dennis Smith in 1969 and is powered by a 1.5L Johnson V4 2 stroke outboard motor. Dennis built every part of this car apart from the basic engine block and gearbox casing. He made his own wheels, suspension uprights and components, brake calipers and discs, designed and built a mechanical fuel injection system, the list goes on.... About 25 years ago it had a slight accident on track which resulted in the front of the body being damaged and it has sat untouched since then. I brought it of Dennis last year and have set to work fixing the body. It is very important to me that it stays as original as possible and is preserved as an historic racing car. The car in Dennis's garage And back at home Got pipes? And the slightly damaged front. luckily we found a large box full of all the broken pieces under Dennis's house, these will make great patterns and will mean i can get the body exactly right. The body construction is plywood with foam glued on for shape and then a layer of fiberglass for the outer shell. The body is extremely lightly constructed and it would not of taken much impact to do this damage. Here are some pics of it back in the day Dennis on the left. If anyone has any pics or info from when it was active i would love to hear. There is so much info and technical detail to write about i will get to it all in the next posts.1 point
-
Do we have a bolt supplier who has a reasonable selection of oddball fasteners in stock? Weirdo heads, odd shank lengths/widths, military spec - blah, blah, blah.....yes, I know Steelmasters and the like, just thought somebody might have a corner shop that specialises in outside the square as far as bolts etc are concerned....1 point
-
Atom Fasteners have come through for me in the past.1 point
-
@AllTorque yes that’s the point I’m referring to. Sounds good enough for me!1 point
-
Do you mean this “replacement springs are self-retaining in their seats at full extension, without the use of non-standard devices such as wire-ties, straps, or external spring locators” I don’t believe those rubber spacers fall into that category. I have used the spacers before and passed wofs with them in.1 point
-
There is something funny going on with the cert info though, Both of my Avengers have had engine swaps 1300 to 1500 and 1600 to 3968, and they both show up in the database with the new engine size. But then I know of 2 Rover V8 rally cars, and I'm pretty sure at least 1 of them is certed, and they don't show up, they still show as 1600's. So I'm not sure if the cert info only shows up if it was certed after a certain date or something.1 point
-
As @kpr says above, 6.25:1 ratio pedal box in mine (and in his one). Sorry for late reply.1 point
-
Yeah they would be sitting on the spring itself, my front springs have some that look factory, which is why I assumed all good.1 point
-
Yeah so the 155s on this have been getting a bit low on tread so figured a new set of tyres was on the cards. Was also kind of sick of the stretched look and the fact that they had fuck all grip around any corner. So shelled out for some 185/55r14s. Much happier with how it looks and drives now, wish I'd done it sooner!1 point
-
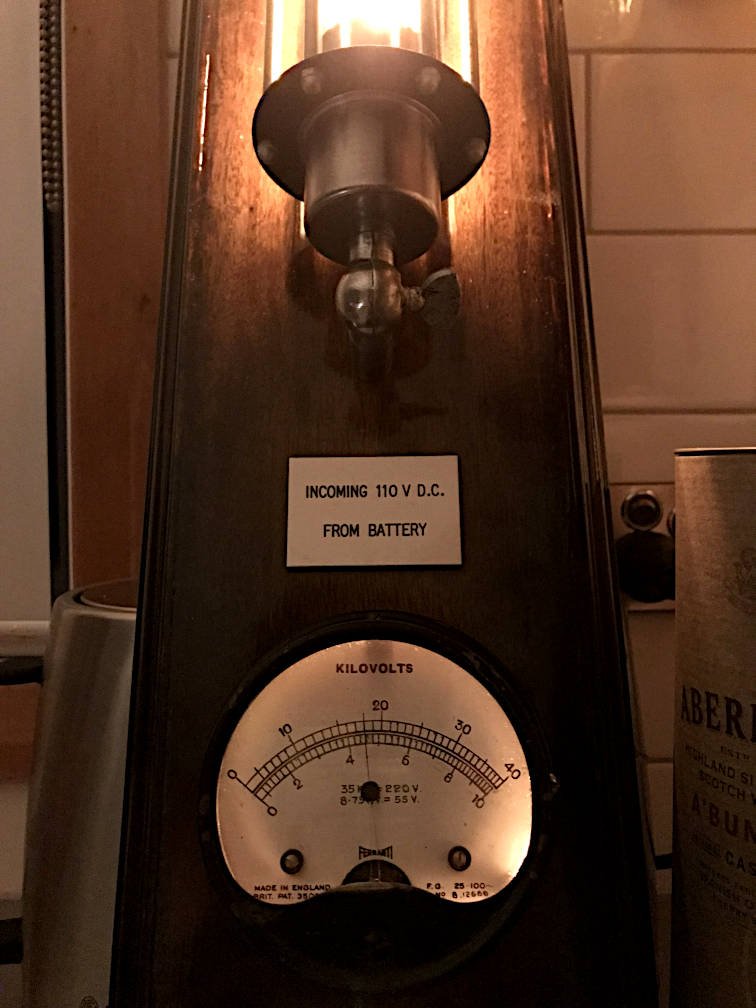
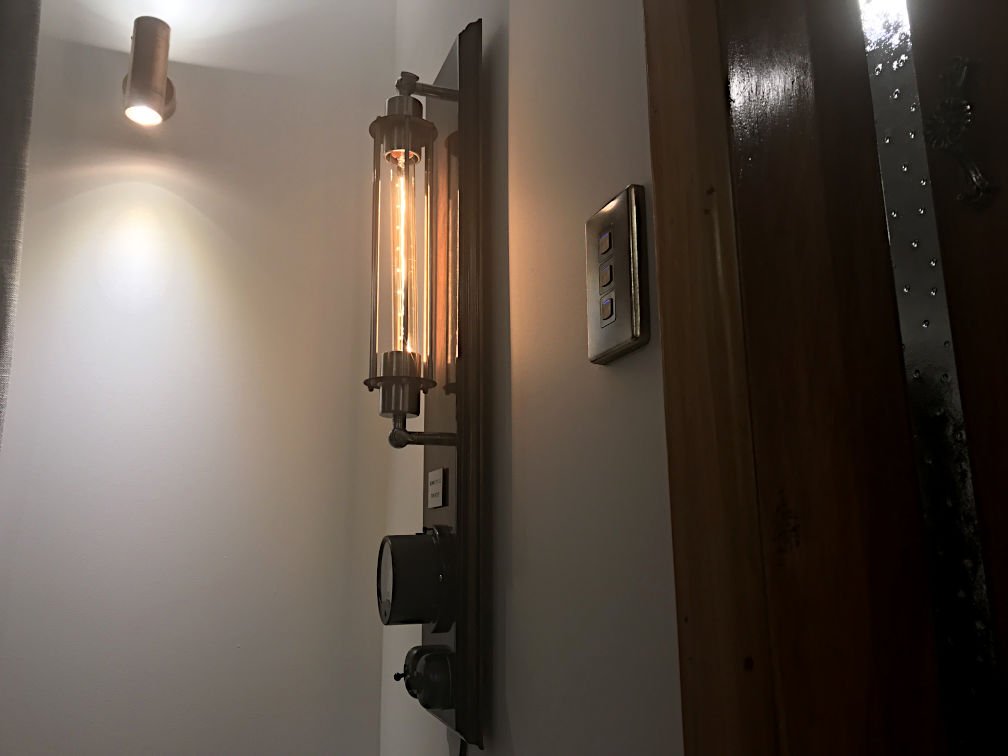
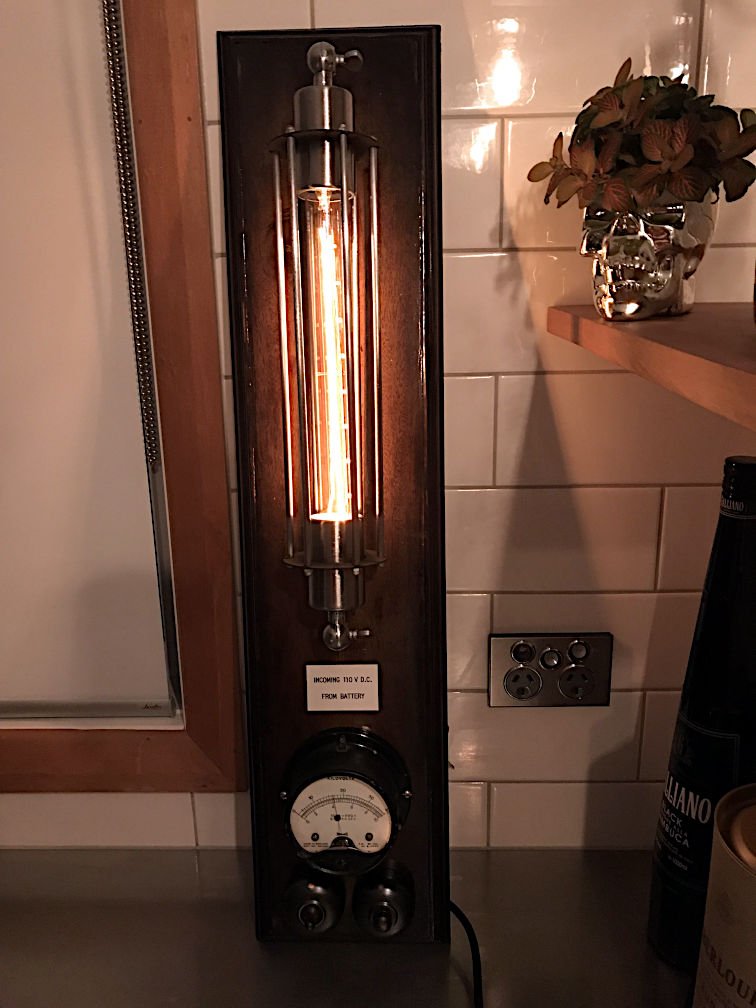
Another one of my patented useless projects which didn't turn out as good as I hoped.. I added some decorative edging to a plank of wood, stained it, mounted an Edison cage sconce light thingy, a retro switch and dimmer, an 'incoming 110V DC' plaque from oldschool Secret Santa, and this old analogue voltage gauge I got off TradeMe: I've attempted to add backlighting to the gauge, using period-correct incandescent bulbs for that extra crappy glow. Conveniently, if you use the right input terminals on the gauge, full scale is about 245V so you get to watch the needle go up and down as you operate the dimmer. Entertainment value: ~5 seconds. Eventually I'll pick a spot on the wall for this stupid thing to live, and if I'm feeling extra keen, I'll find a way to run power to it inside the wall. Artist's impression: The trouble is I really messed up the staining and varnishing of the board, and I don't know if I can be bothered taking the whole thing to bits and redoing it. I sanded through the dark stain in a few spots while trying to fix my first attempt at varnishing. =(
1 point
-
Of course the first club day I had the splitter on and got punted off the track (first time for me). From Behind: I was very lucky, minimal damage all round, his wheel hit mine and the rear axle took the brunt, he then ran down the side of the car and hit the front splitter which protected the front of the car, I ended up with a couple of bent brackets and turnbuckles, but actual splitter was in pretty good nick. Aero wise the splitter also had a major impact in high speed braking where i was getting huge weight transfer to the front and so the rears were locking, diffuser was now on the cards. However I have dropped my PB from 1:37.187 to a 1.36:2001 point
-
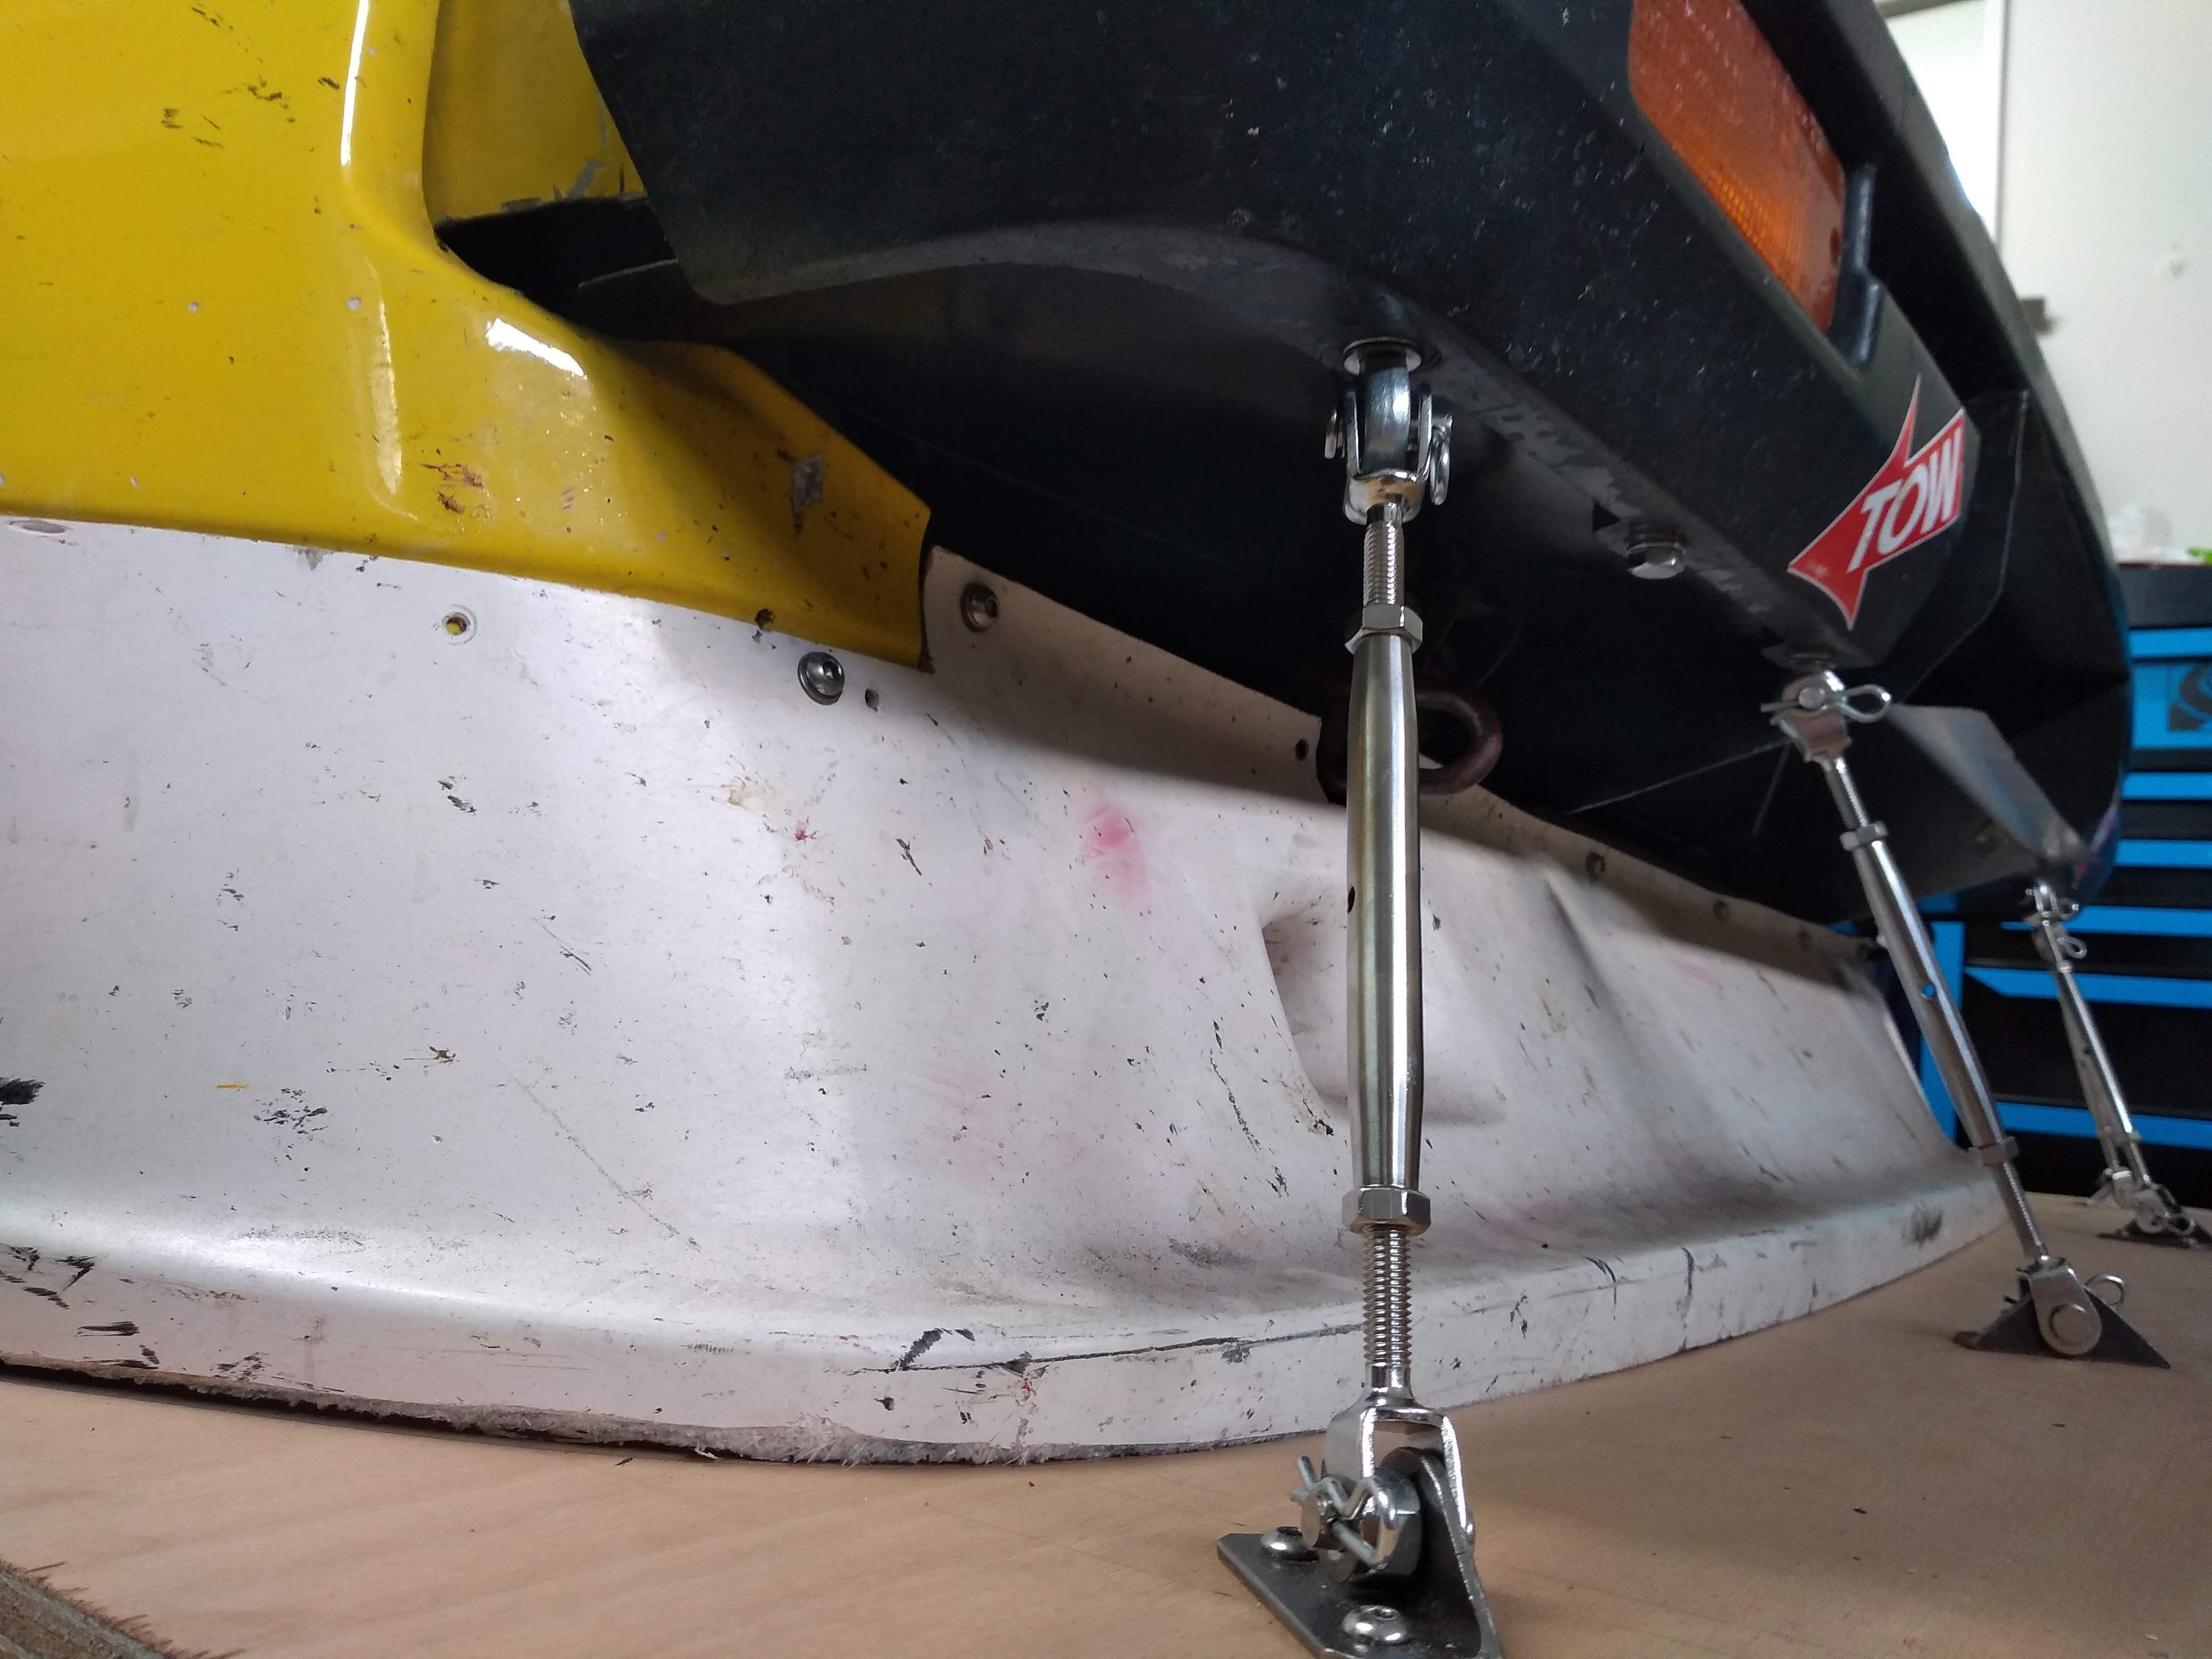
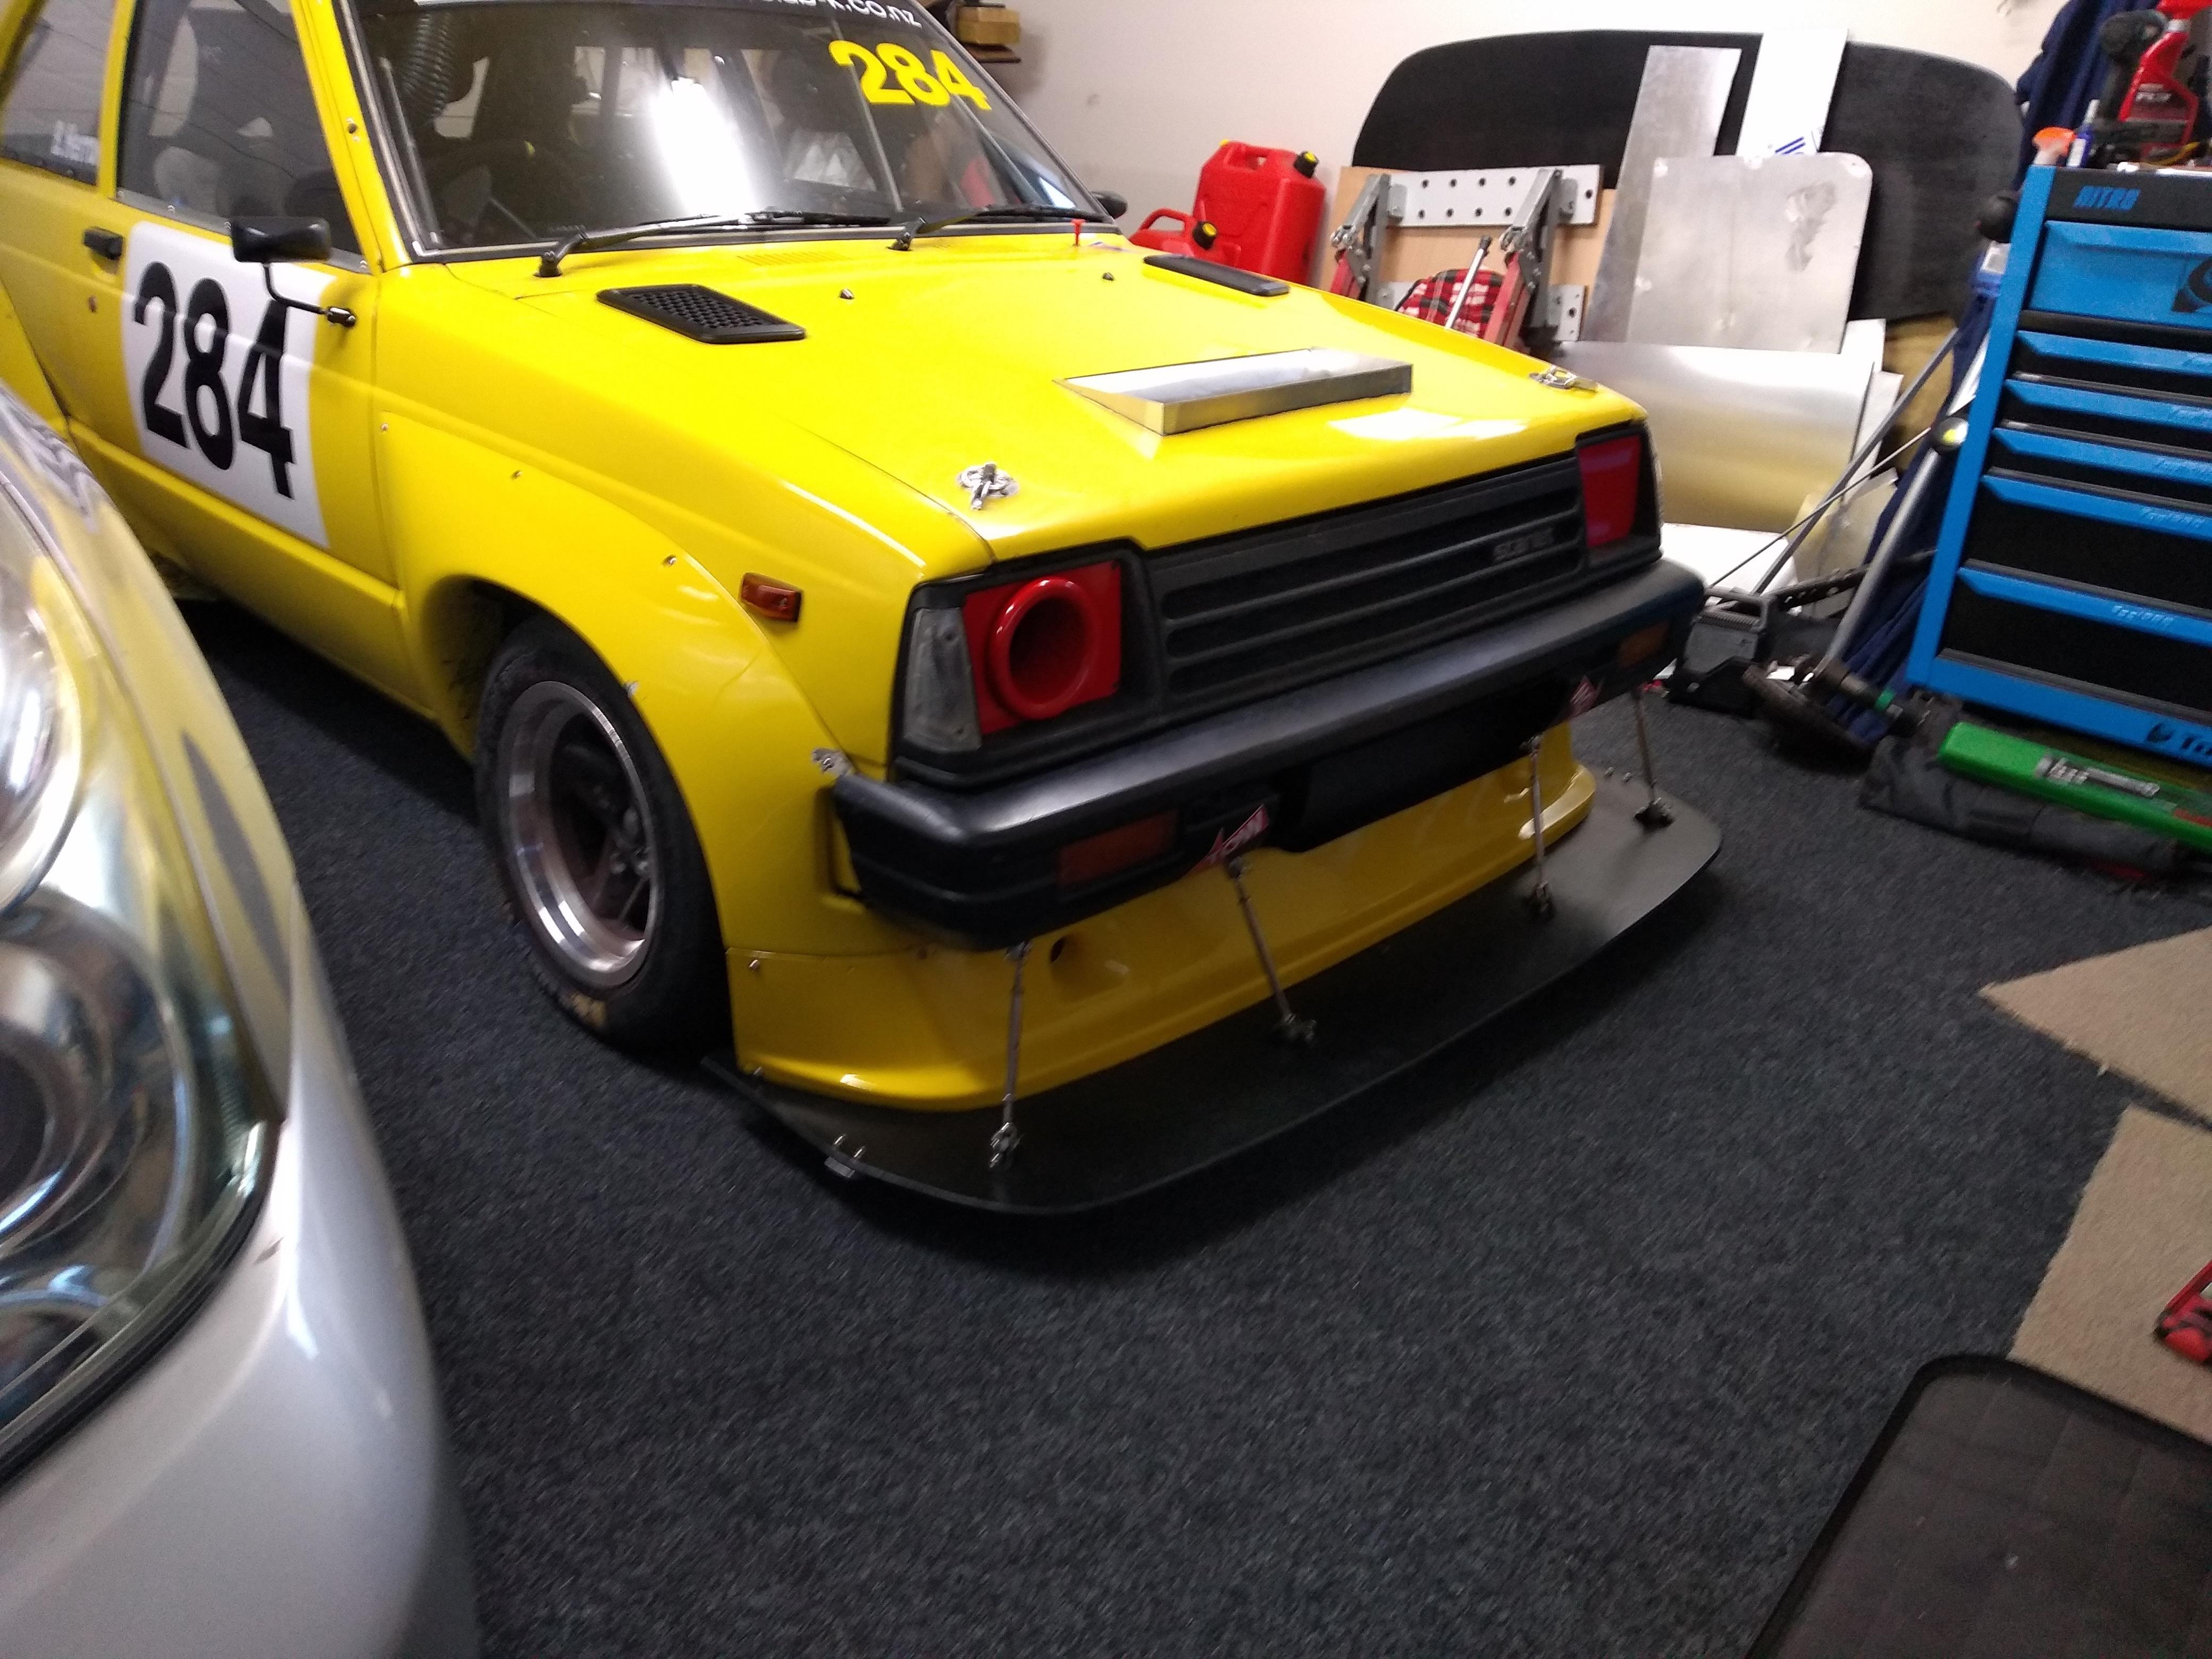
Splitter Finally! got round to finishing off the splitter, I ended up going with 12mm marine ply (the lightest i could find) which ended up being 12kg total. I chose ply after looking at all the options, I wanted it quick release which meant it needs to be held up by the front and back with nothing in the middle. ACM was flexible and pretty heavy for the size you would need. I also wanted it to be easy to replace if it got hit for mounting I went with Stainless Steel Turnbuckles (8mm Jaw Jaw) with 8mm tie rod ends (all sourced from AliExpress). Some minor grinding on the tie rod ends and making up the ali rear adjustable brackets, and I now have a really solid mount. It's also adjustable in height and angle and takes my weight standing on the front. The splitter is all quick release and I can install in about a min, which is great as the car won't fit on the trailer with it.
1 point
-
the PV skyline ones are big compared eh. unfortunately I found another car on Facebook that’s very similar in colour to what I had in mind for all these years. Essentially, I’ll have more stripes and gold pearl.. so will press on with plan, lol.1 point
-
So as per normal, my best laid plans when to hell and i had other issues to sort out before the splitter. Brake Cooling: Brakes have been a continual pain, they are just getting to hot, it's not an issue in races as I'm running good pads, but it means the life span of the rotors and the pads is a lot less then they could be, and I keep going through piston seals. So I made up some better cool air feeds, basically the air has no where else to go but through the disk, at the same time I went to a smaller hose diameter hose (2") which meant the whole thing didn't really work as I had planned. Polycarbonate rear hatch: Tried to get some weight out of the car to help the brakes, so went polycarbonate for the rear hatch. This was enough to get me though the last club day and I won the overall Canterbury Car Club Championship and came 2nd in my class (1600-2000cc) With the season over the intention was to get back to the splitter...
1 point
-
So yeah, took this to the beach. About to go out to the shed and watch it dissolve into a pile of rust. but for now a video: Gearing isn't the best for sand. but other than that and melting the clutch once, it went real well1 point
-
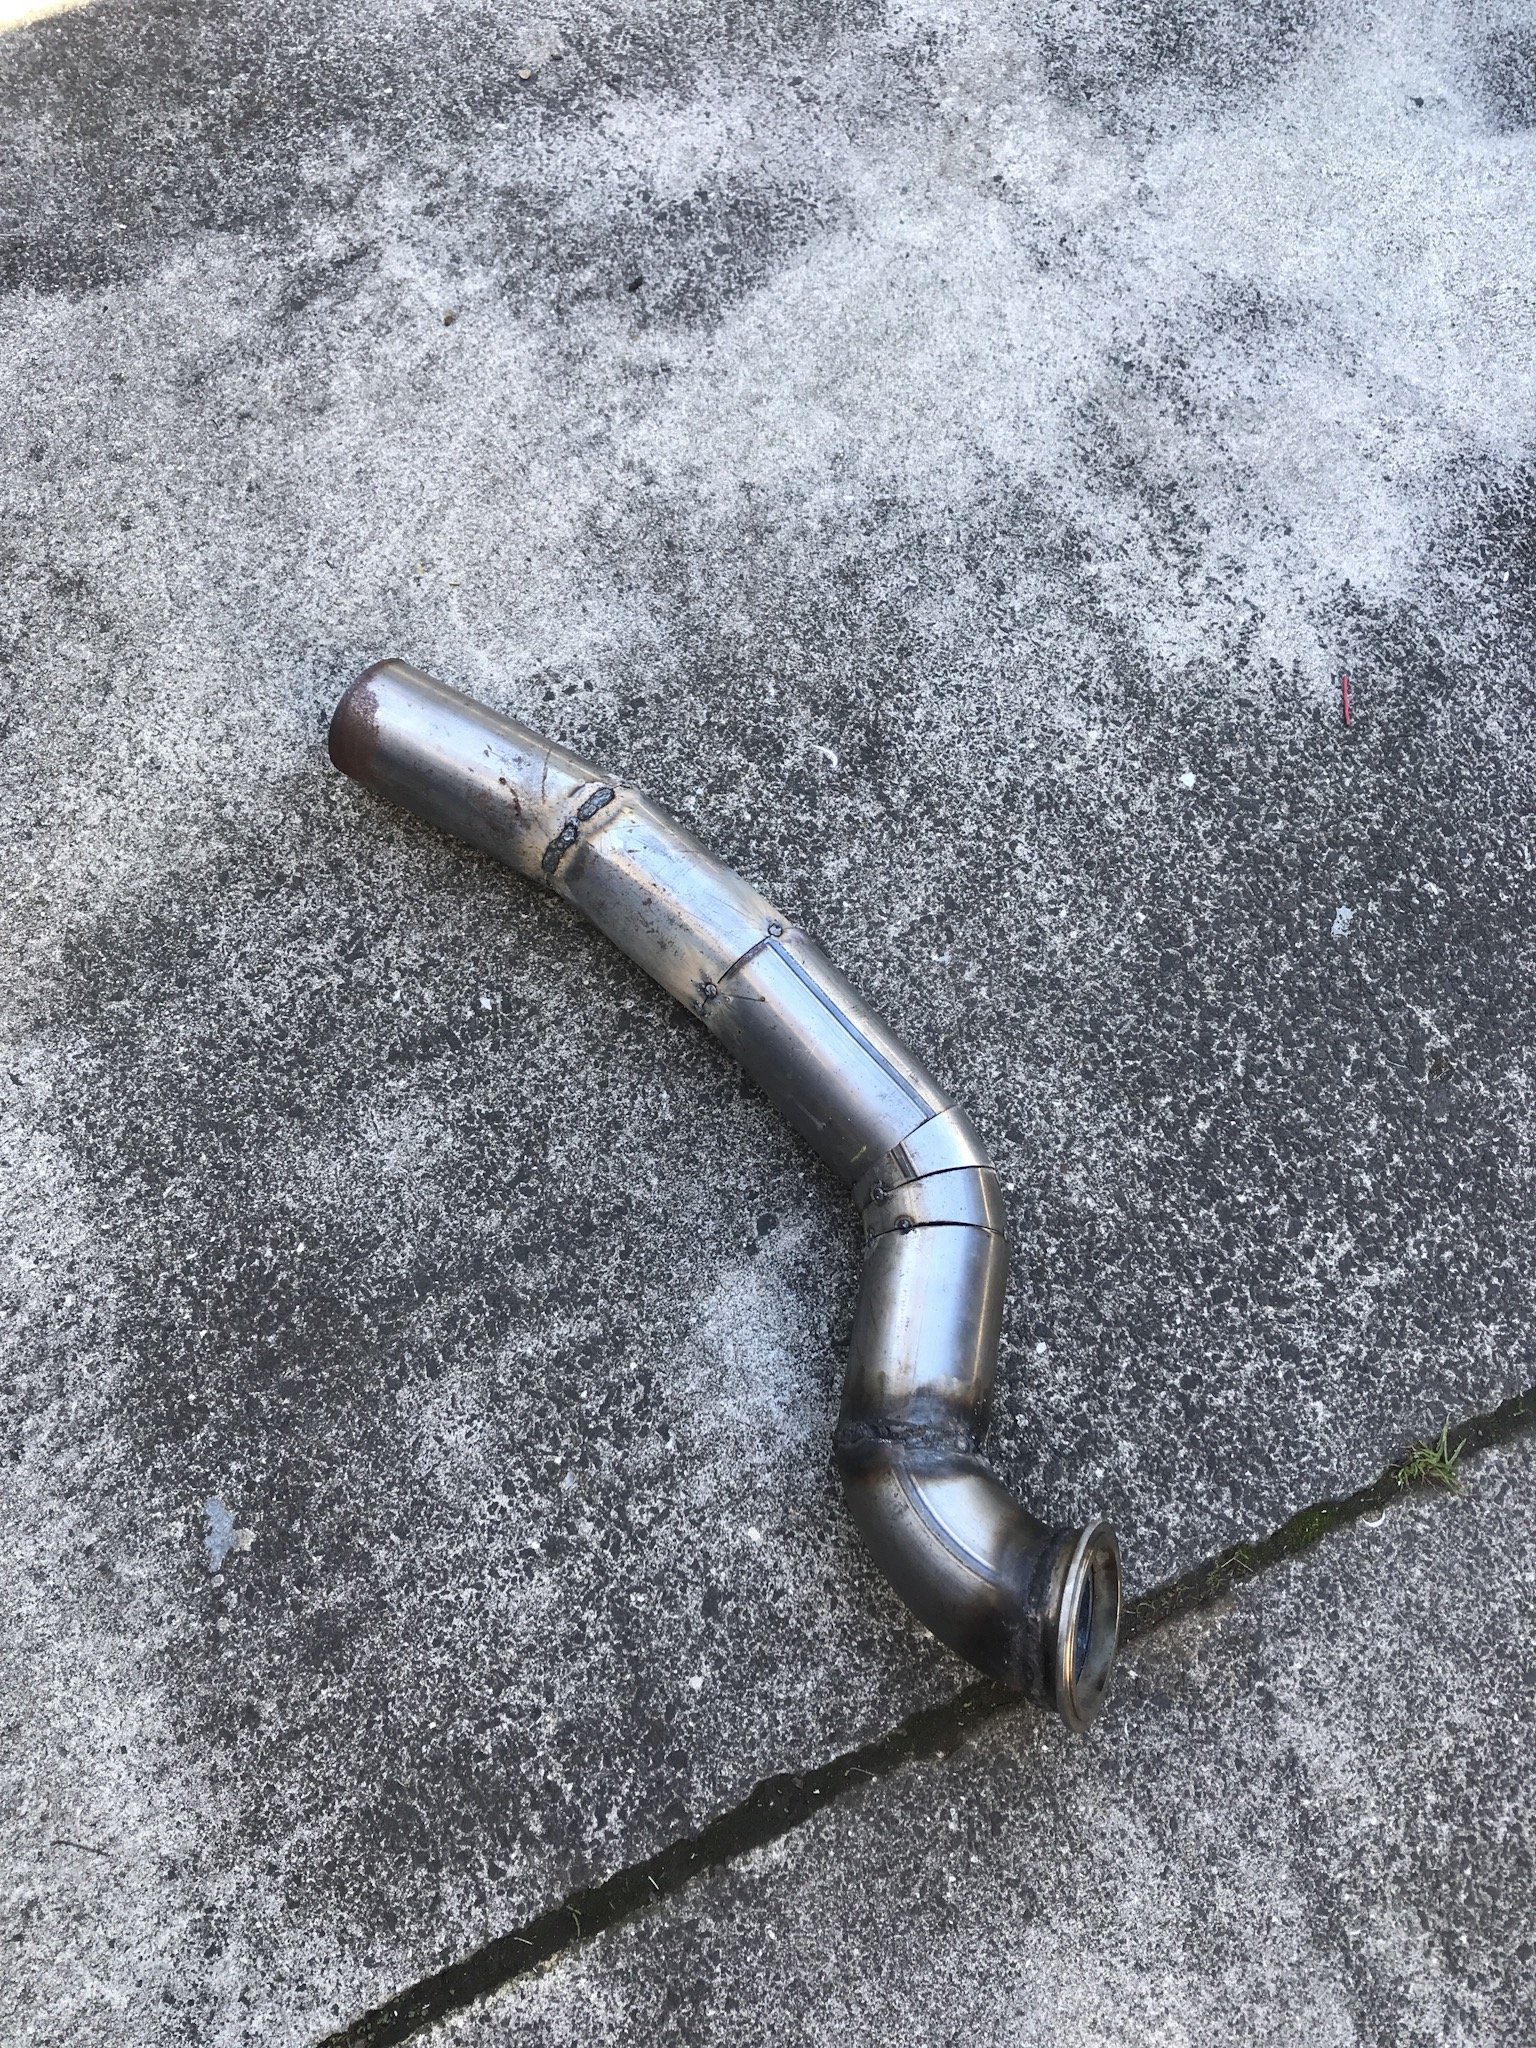
So first driving impressions were ‘who the hell thought it would be a good idea to put this much power to the front wheels’ but I’m very happy with not going any bigger of a turbo as it seems to have the power right where I want. It has great low end torque and a decent top end aswell. Anyhow, the car was running so good and even though I never really intended to build the car for it the last night speed drag was were coming up. There were import things to do like change the engine oil and get some semi slicks mounted up. But I did also have a bunch of left over exhaust pipe and a spare v band so it would be silly not to make a side pipe first? don’t worry I finished welding it and then gave it a bit of exhaust wrap and paint. installing it at the drags cause I didn’t need any attention from the police. had a tonne of fun, only managed 4 runs and blew a tire on the last run. First time ever drag racing so times were nothing special (14.6 was my best and I missed a gear) but I’m already looking forward to next season night speed wars.
1 point
-
Car was closer to driveable, clutch feels great apart from it doesn’t go all the way to the floor but the tune was a bit of an issue the car would surge a bit from 3 - 4K rpm. Got a friend to log it as I drove around the block, did a little pull and lost power he said I was making 18psi then nothing almost like the map sensor had blown. Got back to the driveway thinking the worst, turns out I’m just a muppets and couldn’t do a hose clamp up tight enough. With this done we were able to send some of the logs off to some people overseas who did some wizardry and came back with the first solid tune that I am running and the car drives awesome! After this I did some of the usual spanner checks as well as changing the gearbox oil and checking fluids.
1 point
-
anzac day progress. been feeling pretty good lately with the old back, im down to half my pain killers (except for today where i took some after breakfast because leg was turbo sore) so with that in mind ive been doing a bit more on the coupe. today i installed new inner and outer tie rods, new upper and lower ball joints and a second hand but pretty good pitman arm. i also topped up the steering box with Molly grease which has made quite a big difference. lets be honest, the steering on these things is pretty hard but its slightly less shit now. i have a power steering box to put in this which ill do after compliance. i dont have a bracket for the pump if anyone has one for a square port 4M.... so with that done i decided to go for a drive. the longest drive ive ever done in it, about 5Ks around the neighborhood. went up to westmere then down to the beach. this thing goes so well. the suspension is fucking ace, it dosent rattle or vibrate, the auto is smooth and changes perfectly and the motor hasn't turned to shit yet. the radio works and the heater /fan all works mint too. its fucking ace. and your not gong to believe this but it did a skid turning right onto the main road! ive got a few little things to tidy up but then its on to compliance!!! 2019-04-25_04-50-20 by sheepers, on Flickr 2019-04-25_04-50-11 by sheepers, on Flickr 2019-04-25_04-50-03 by sheepers, on Flickr1 point
-
Hey Duncan, sorry only saw this message now, the car goes awesome, I’m slowly updating the progress a little after it happens, I started the thread a bit late. Come by sometime and you can take it for spin some time dude!1 point
-
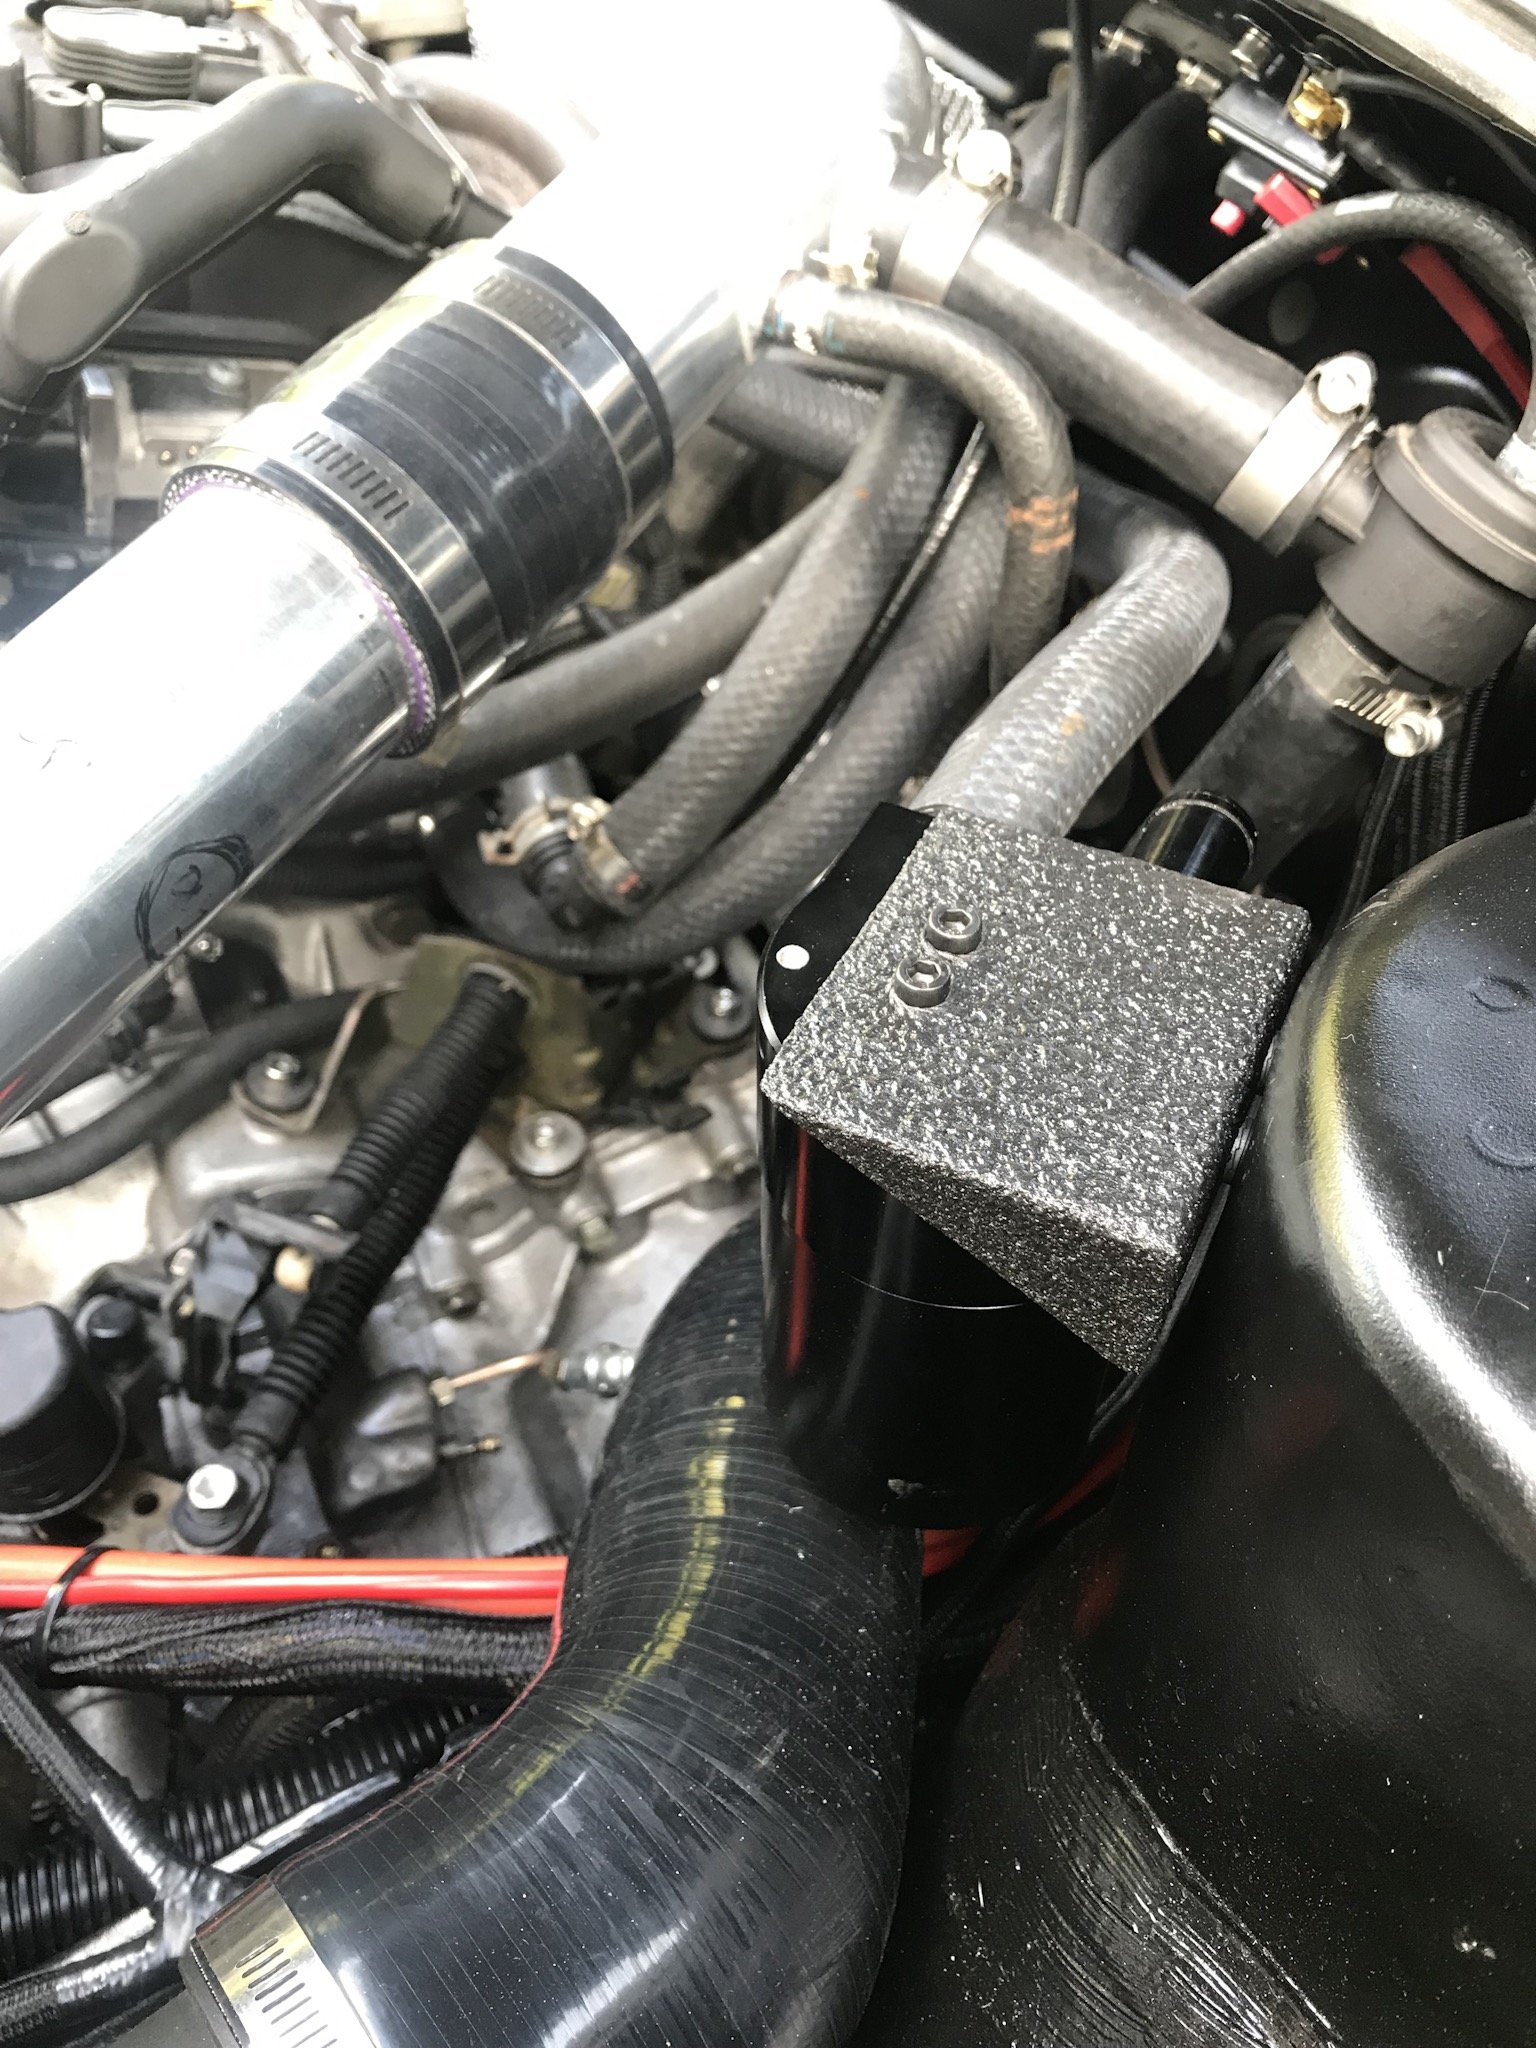
So the car was running, not good (needed a tune to manage those big ass injectors) but was back to fixing and problem solving. I never knew how brilliant having some sheet metal and a weldering was, bit of Pajero bonnet and utilising some cardboard aided design I managed to make a catch can holder added some textured paint and installed. It still needs the return to the intake for cert but for now it’s just breathing to atmosphere. Also my first radiator was leaking and it was from a mk1 so I had to try and source a new one. Turned out to be difficult but I got one similar because we had already raided partsmasters rad hoses and have it all positioned perfectly.
1 point
-
Thanks @tortron and @Sambo for getting this diff for me, legends. I picked it up from @Adoom ‘s place on Sunday and parked it behind the Honda. Will get back into this once I’ve hopefully got the 200sx certified. Either I’ll need to shorten it and/or use some wide Mini miglia flares with fwd offset wheels. But the 2.9 diff was the major and it’s a good size diff that’ll actually fit under there.
1 point
-
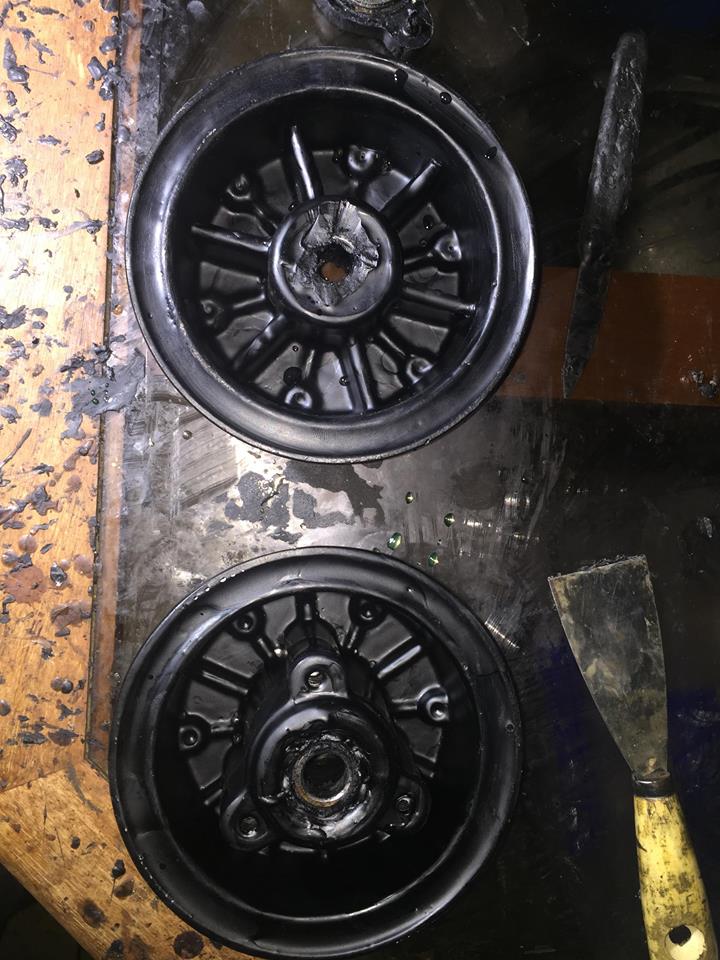
Sorry I’ve been a bit quiet, been busy with mrs car, change of work, wee motorbikes and then lazy. i did do the H165 diff swap! My boss went away for 3 weeks and left me his car so I took the opportunity to sort it then. No great pics but after I cleaned it up I hit it with some black zinc and then spare 2k black my flat mate was using. black zinced the springs and bolts and brackets and shit, swapped the shoes and cylinders etc over, cut the old shock mounts off and welded to new diff, swapped the hose mount to opposite side, tidied and swapped hard lines and handbrake cables and made a small bracket to move the cable mount about 50mm across. Cbf cutting it off and rewelding and painting again. had to shorten and balance driveshaft using the larger rear flange off Ute to suit the new diff. Also scored a factory style output seal for the box with the the steel shell through a supplier at work. i don’t like the new ratio ill keep an eye out for a different head I guess. Have spent ages adjusting the brakes and starting to get somewhere. Then a yarn cam up of a NOS roof skin in a blokes shed roof. calls were made and it showed up a few weeks later. Was damaged in transit yonks ago and the guy tucked it away for a rainy day. well everyone knows my roof is fucked from a fire way before bart and I had this so it’s forever changing shape and now the bog has cracked. Time to re-roof it. Now because it’s a datsun, of course the cunt was rusty despite never touching a car and being dry its entire life.. It had a few dings and scrapes but most hammered out well, the rest will be done when it’s stuck to the car so I have some rigidity. i buzzed it All back and wire wheeled the Deep bits and hit it with 2K epoxy etch to seal away the baddies. The inside was much better so just got rust converted after wheeling. sorry to the neighbourhood for 90 minutes of this bitch singing on the panel stand, very harmonious for a Good Friday. so yeah, dunno when I’ll attach it now. Means I should do new rubbers and change to a better screen, a real headlining at the same time too. $1 point
-
1 point
-
Its been a while since the last update but i have been chipping away at this project. I finished the weldathon on that bus and it was picked up the next day. The owner is really happy with my work and it turns out he has quite a collection of classics. He now wants to bring me some of the cars, including a mk1 mini cooper, for some rust work. Cool! While the bus was taking up space I had been sneaking in some work on the wee Imp. I fitted the engine up to the transaxle, weighing the engine first. 87kg with the flywheel in place. Not too bad at all. Not super light like the standard Imp all alloy unit however I have moved so much stuff to the front that it should still be well balanced. I do love the idea of an all alloy Nissan cg13 twink from a K11 Micra- however that would require a full re-certification. I prefer the idea of a Goldwing engine engine more! I digress. So anyway- I had slung the engine in place using a lump of timber and a ratchet strap. Worked fine. Then started making new engine mounts and cross member. I was not happy with the state or look of the old one and knew it could be far better. Not really a lot to say about making fabricating it all- the usual story of lining the engine up exactly central and building things to connect. I wanted to make sure that the exhaust manifold and starter could be easily removed without touching the cradle. I probably over built it with extra bracing (I even ended up adding extra gussets just before painting it, because ocd paranoia) but all up it still only weighed in at around 7-8kg. In photos. I didn't take many as work progressed on this bit really quickly.. Clearance under the car was still really good, considering how low the sump looks from the back. I think an optical illusion due to the rear panel not being in place. Then painted in black epoxy.. Next up was the exhaust. The manifold that came fitted was running really close to the drive shaft! Enough that it would contact when the car was lifted off the ground. There was quite a bit of damage, dents, poor welds and other bits that needed attention so I chopped it all back and carefully shortened the bottom pipes then systematically pieced it back together. I required quite a bit of forward thinking because the access to weld to pipes all the way round was really tight. No photos of work though as I was so immersed in the process I forgot to take some. Really happy with the result though. Fits perfectly, cleaner runs and still equal length (as if a Datsun A12 with a carb the size of a small cup would care. But hey, every little helps ) Later on I painted it and then wrapped the upper pipes to ward off heat from the inlet and coolant pipe. I know some dont like heat wrap but I think its great! Its worked well on my last several car builds. Luckily I live in a dry enough area to get away with it and not worry about potential corrosion. With that sorted I moved onto the rest of the system. I have always had a picture in my mind of what I wanted it to look like and I wanted it to be rear slung with a side exit to avoid the car filling with exhaust fumes. Apparantly these early Imps with the roof vents can suffer from fumes being pulled into the car by the vacuum. I also had a rough idea on how I would build my own silencer and there wasnt anything available that fitted my ideas with a price I liked. I had built one for the Mazda Rx3 and it worked well. Money is tight (I'm too tight..), time is plenty and I love making things so I started building. Using the pipe from the original straight through muffler.. Then fabricating my silencer using some ideas I nicked from Google along with extensive coffee fueled airflow thinking in my mind. I have no idea on what it will sound like but it was a fun process and looks neat. The stainless pads worked well in my last muffler along with some glass matting I got from the neighbour. I'll report back In photos... I had a pipe bent to 90 degrees and added mount points to the muffler so it slings up under the rear valance. I made a stainless heat shield to deflect heat away from paint and bottom pulley. You'll see that later. I have yet to decide on the length of the exhaust tip, cut it and then weld it on to finish. Then the inlet. Because the Datsun engine sits flat in this Imp, unlike the rear sloping angle in its usual Datsun 1200 home, the carb is not level. I chopped off the mounting face and milled the manifold at angle to suit. Then I welded it back in place. Carb is now level. I filled in an unused vac hole, cut off the extra unused lugs and gave the whole thing a clean up till it was nice and smooth. While I was playing with alloy I made a new alternator bracket... and had to rebuild a very corroded thermostat outlet. it was knackered... I was given a better spare by a nice fella with a Datsun 1200 ute but it pointed upwards. My outlet, most likely from a van, points down and suits the pipework routing I wanted to do. So I had to fix it. I found a suitable piece of alloy pipe on an old scooter handle I had rescued from the local scrap metal pile at the dump... Much better! Then onto the pipe work in the back... Just a case of sussing out a neat route to suit my tastes, remain easy to work on and remove and allowing for a potential Davies Craig electric water pump just in case the Datsun pump is not up to the task (and also because I do rather fancy the geekiness of the little display unit not to mention how much better it could work) With the pipes sorted I replaced the transaxle output seals because well, for $20 it made sense to do them now. I machined up a stepped tool to make sure they went in straight and to the correct depth. New seals.. Then mounted the brand new BMW couplings I bought from Rockauto. I had to make some spacers to suit as they are narrower then the stock Rotoflex couplings. With the car on the ground the driveshafts sit almost bang on parallel to the ground which is good for their longevity. I didn't fancy reusing the red Nolathane couplings that came with the race car because whilst strong in shear and rotation they didn't have much flex in and out which would impose quite large stress on the transaxle casing as the rear suspension went through its motion I felt. I then did some fun little jobs (but its all fun really..) like cleaning and painting the starter and alternator... I dug out my old art oil paints and mixed up a suitable orange to paint the inside of a very faded rear indicator lens. It'll do for now but I do look forward to locating and buying some better ones when I go to Blighty in July! Then began the wiring! Like all my other previous car projects, I enjoy this part immensely. I love the challenge of hiding as much of the wires away, re-configuring the circuits to suit add ons or just to make them better. In the case of the Imp, which has no fuses fitted at all (until the later mk3 Imps came along) this was an essential item to address. It also has a terrible dash wiring layout whereby you have to unplug everything to remove the instruments. Almost everything seems to run off just one piddly feed wire coming from the key. I'll sort that lot out with some plugs. Add in some relays for the lights, fan. Wires for a potential electric pump, sound system, high stop lamp (I have a neat idea floating about in my head for that) and making sure its future proof because later on I would like to inject this engine. I have also added in a tail to attach a trailer plug to. Because that will be a thing So I had two extra looms going spare which I pulled apart. I now had a large amount of extra wires for my project. Wiring isn't the most exciting thing to take photos of. I have now finished the engine bay wiring and I'm pretty happy with it. Now I've refitted the rear valance panel and exhaust and can lower the car down and start on the interior wiring. I'll be making a removable fuse box/relay unit and fit it under the dash if all goes well. Some photos of where I'm at now...log burner in use as the nights get colder. Sofa wheeled over to middle of workshop for max stereo imaging whilst I drink beer and play with wires... Wires hanging from engine bay.. Engine bay completed (missing hose clip noted..) but for an over flow tank from header tank to fit. I will build a better two part tank in the future I think. Exhaust tip length yet to be decided and cut. Note stainless heat shield. Bumper also to go back on, with bottom mounted rego plate.1 point
-
Back in the late eighties I built a ford pop which I sold to a guy in Aussie. He contacted me the other day and sent a couple of photos through of it all painted. I had it finished in black primer so all he had to do was tear it down to paint an upholster. I had it roof chopped 3 inches and we channeled the body over the frame 3 inches also. ran a 302 Cleveland c4 and 9 inch. Came out pretty good I thought.
1 point
-
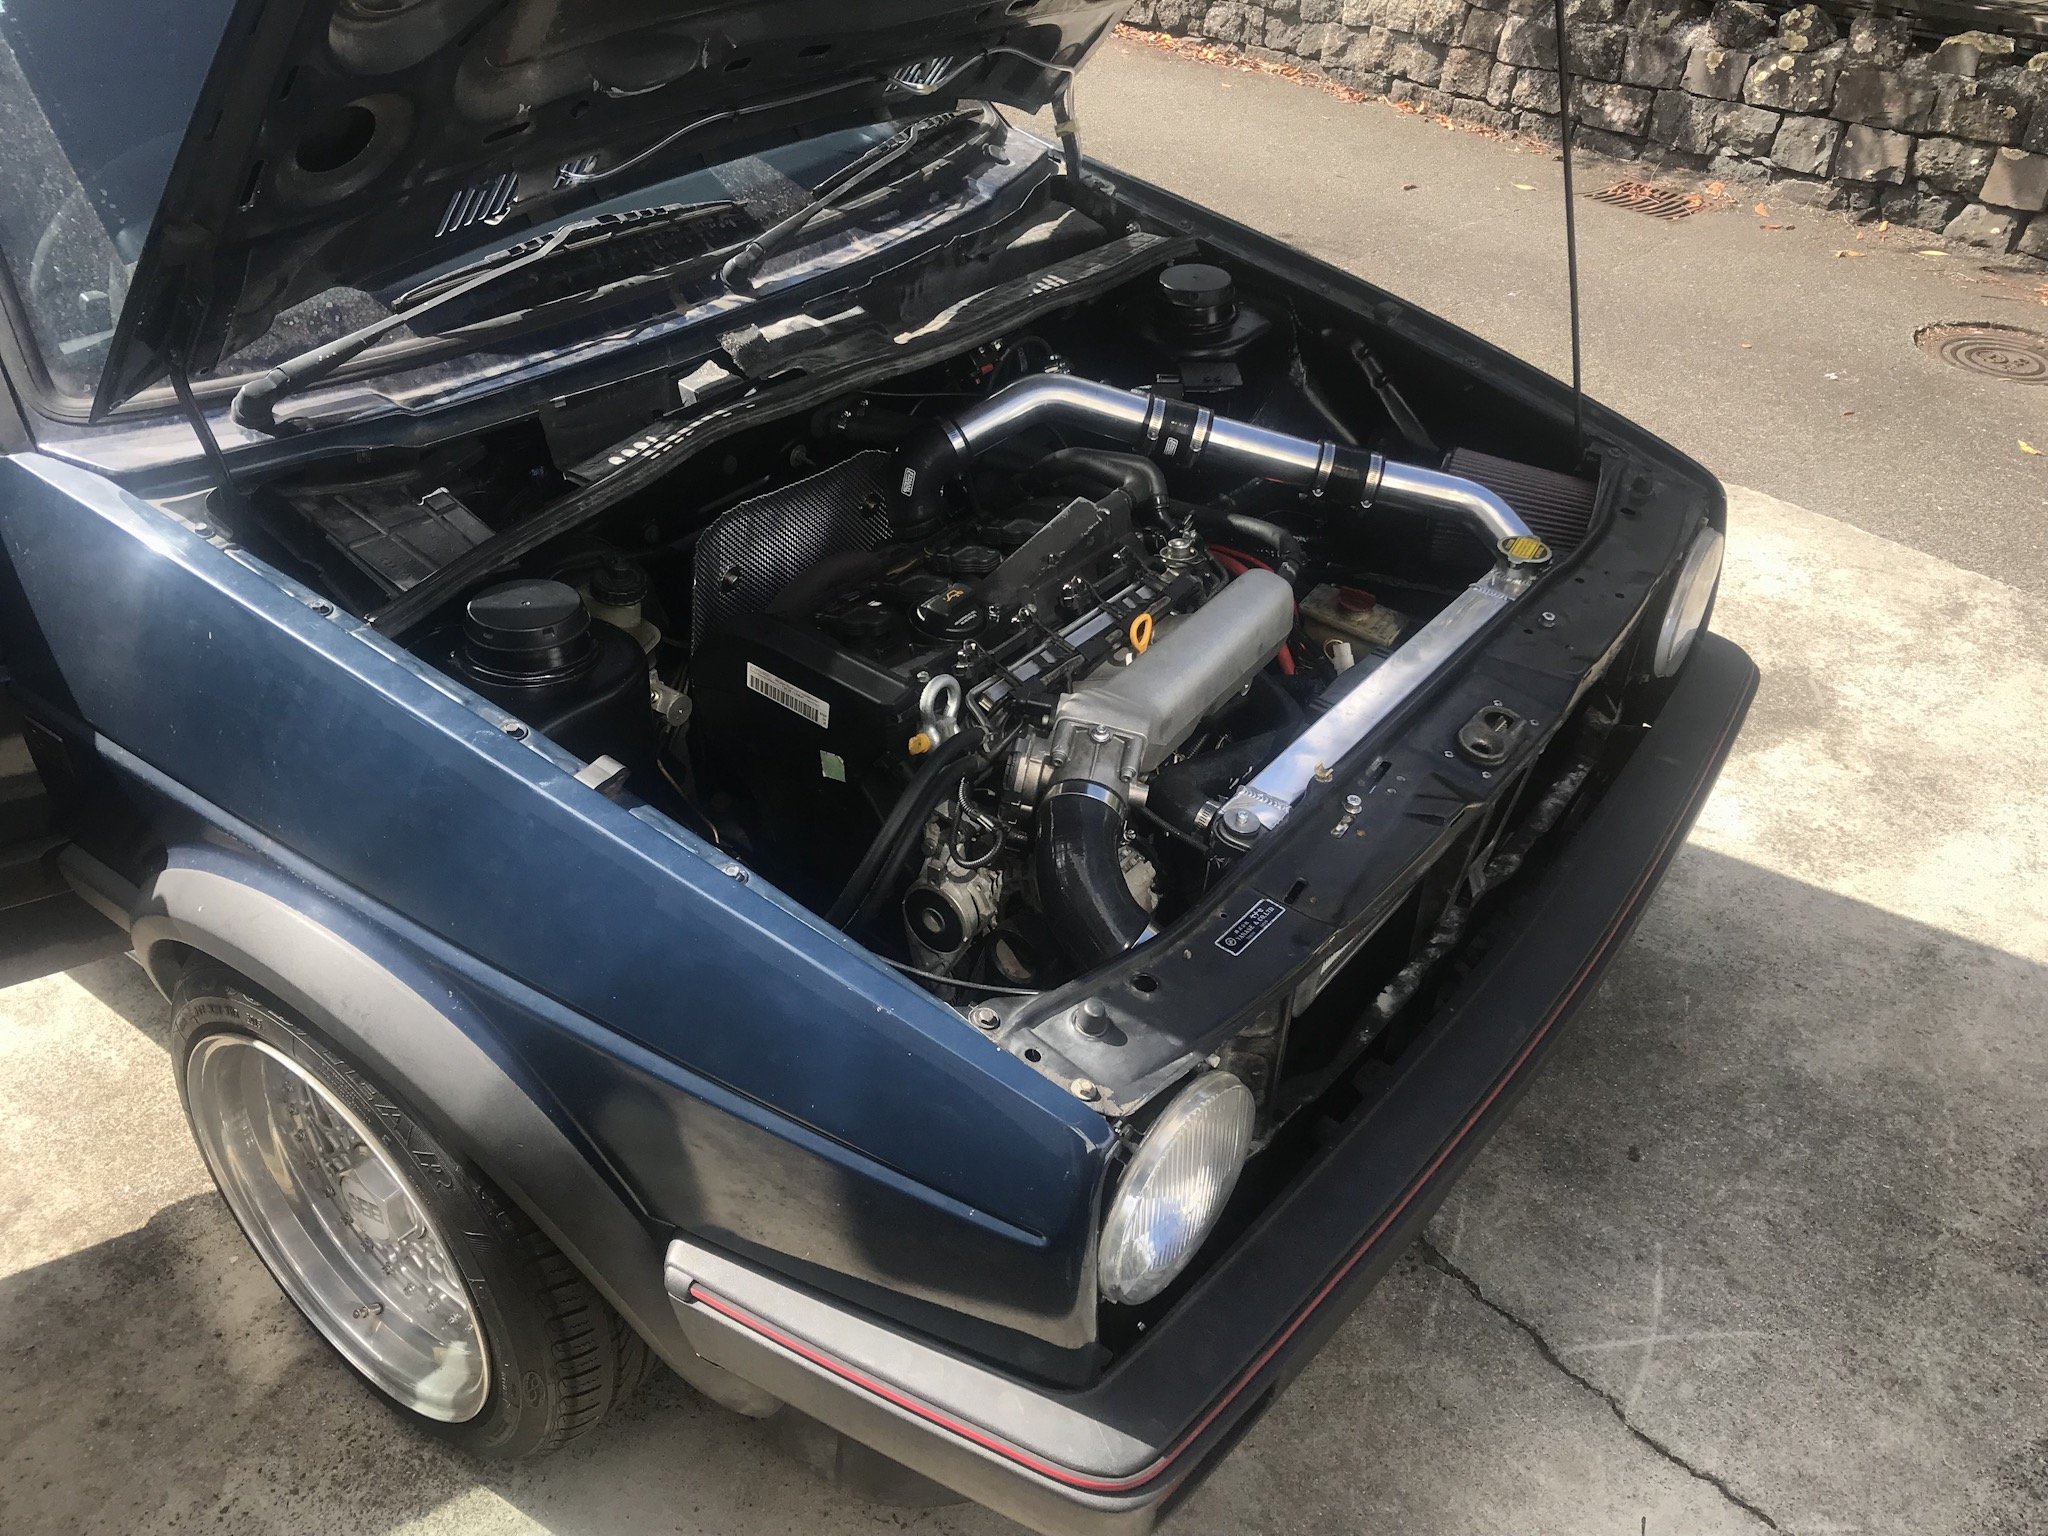
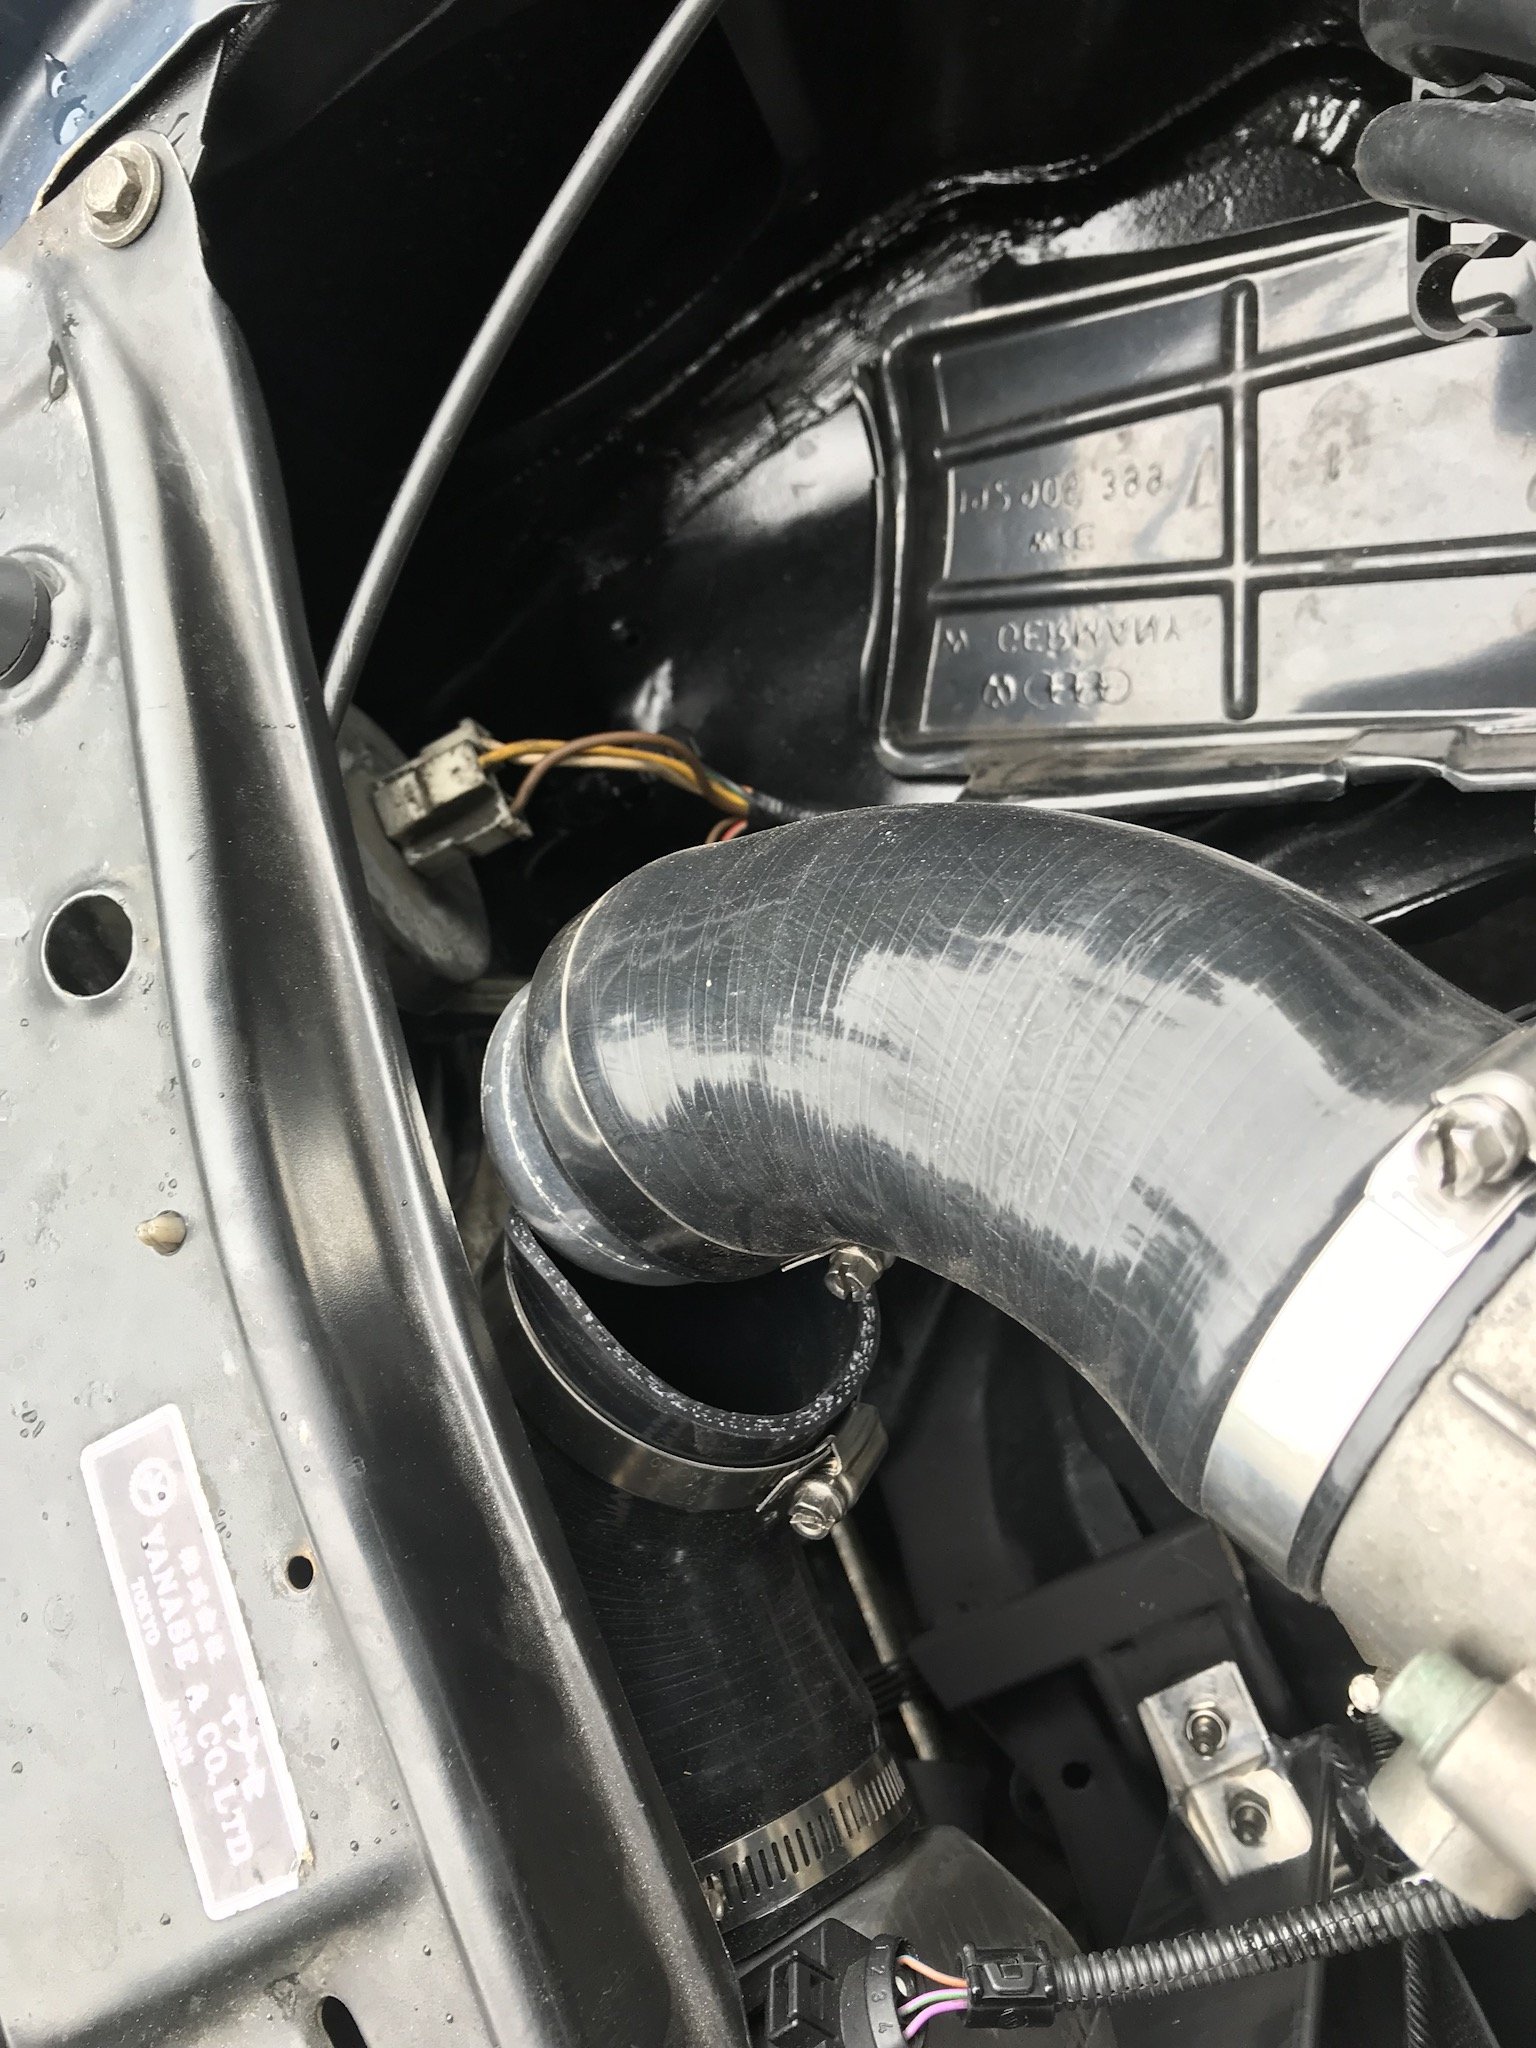
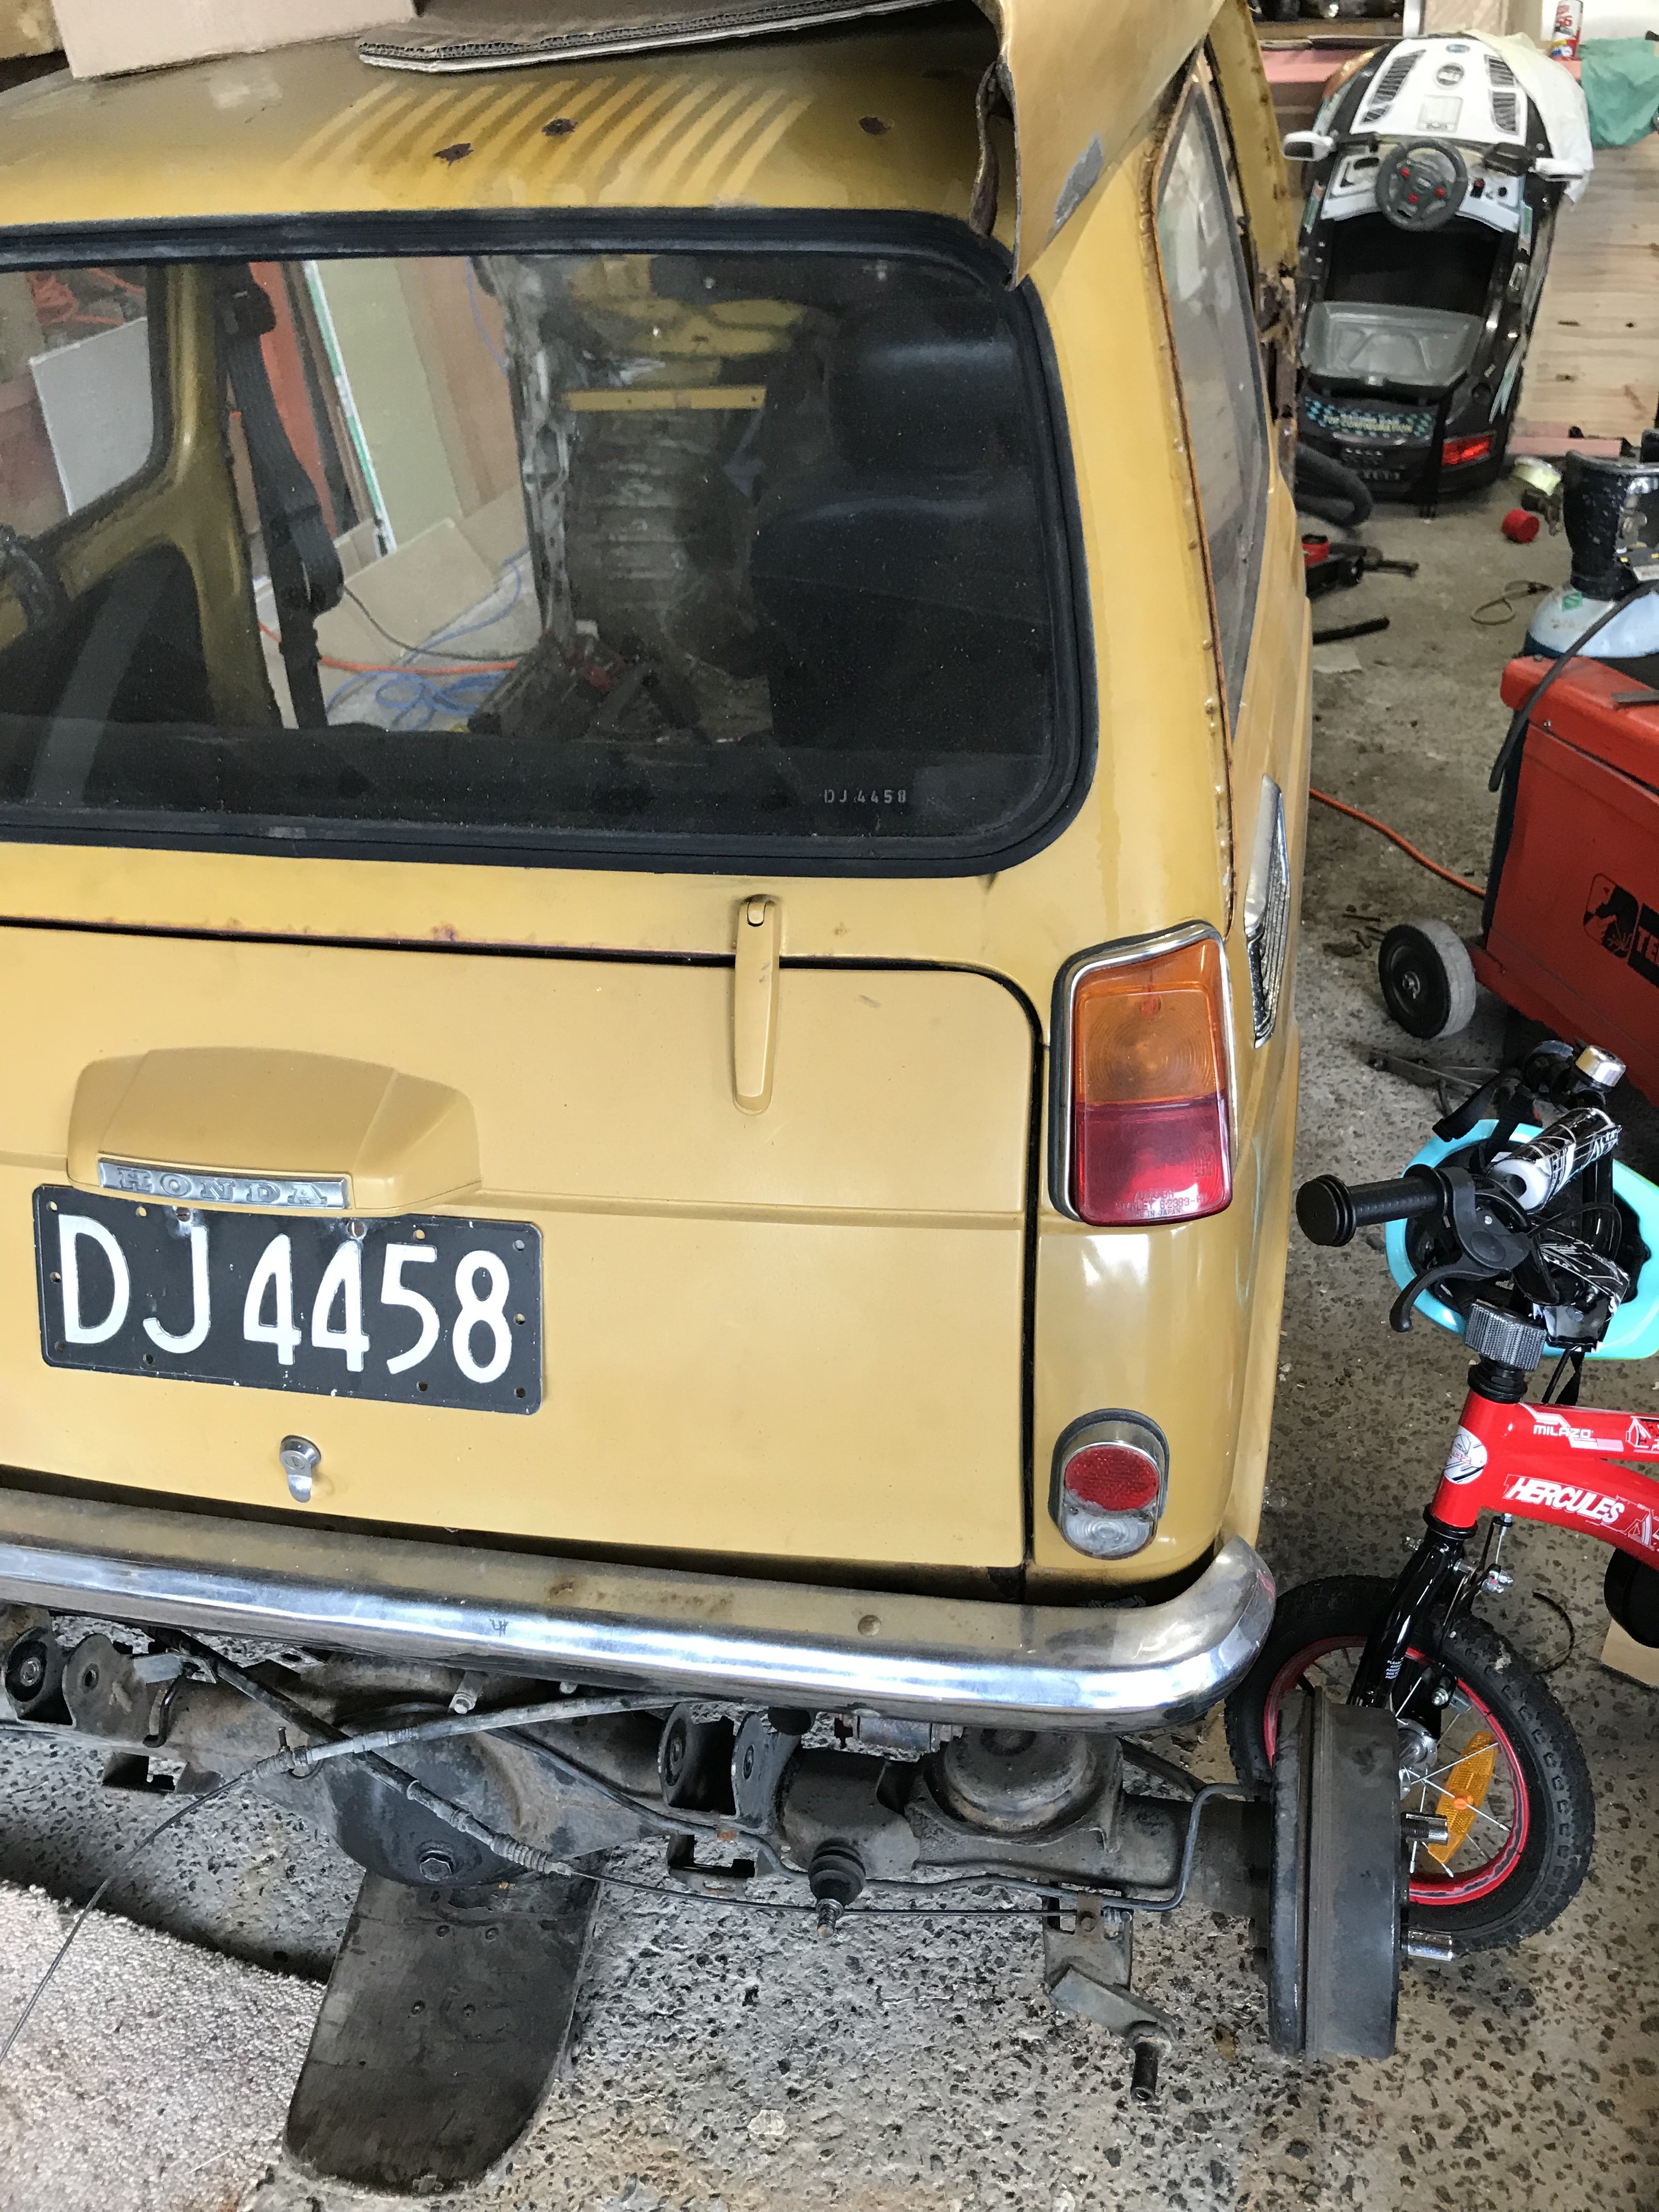
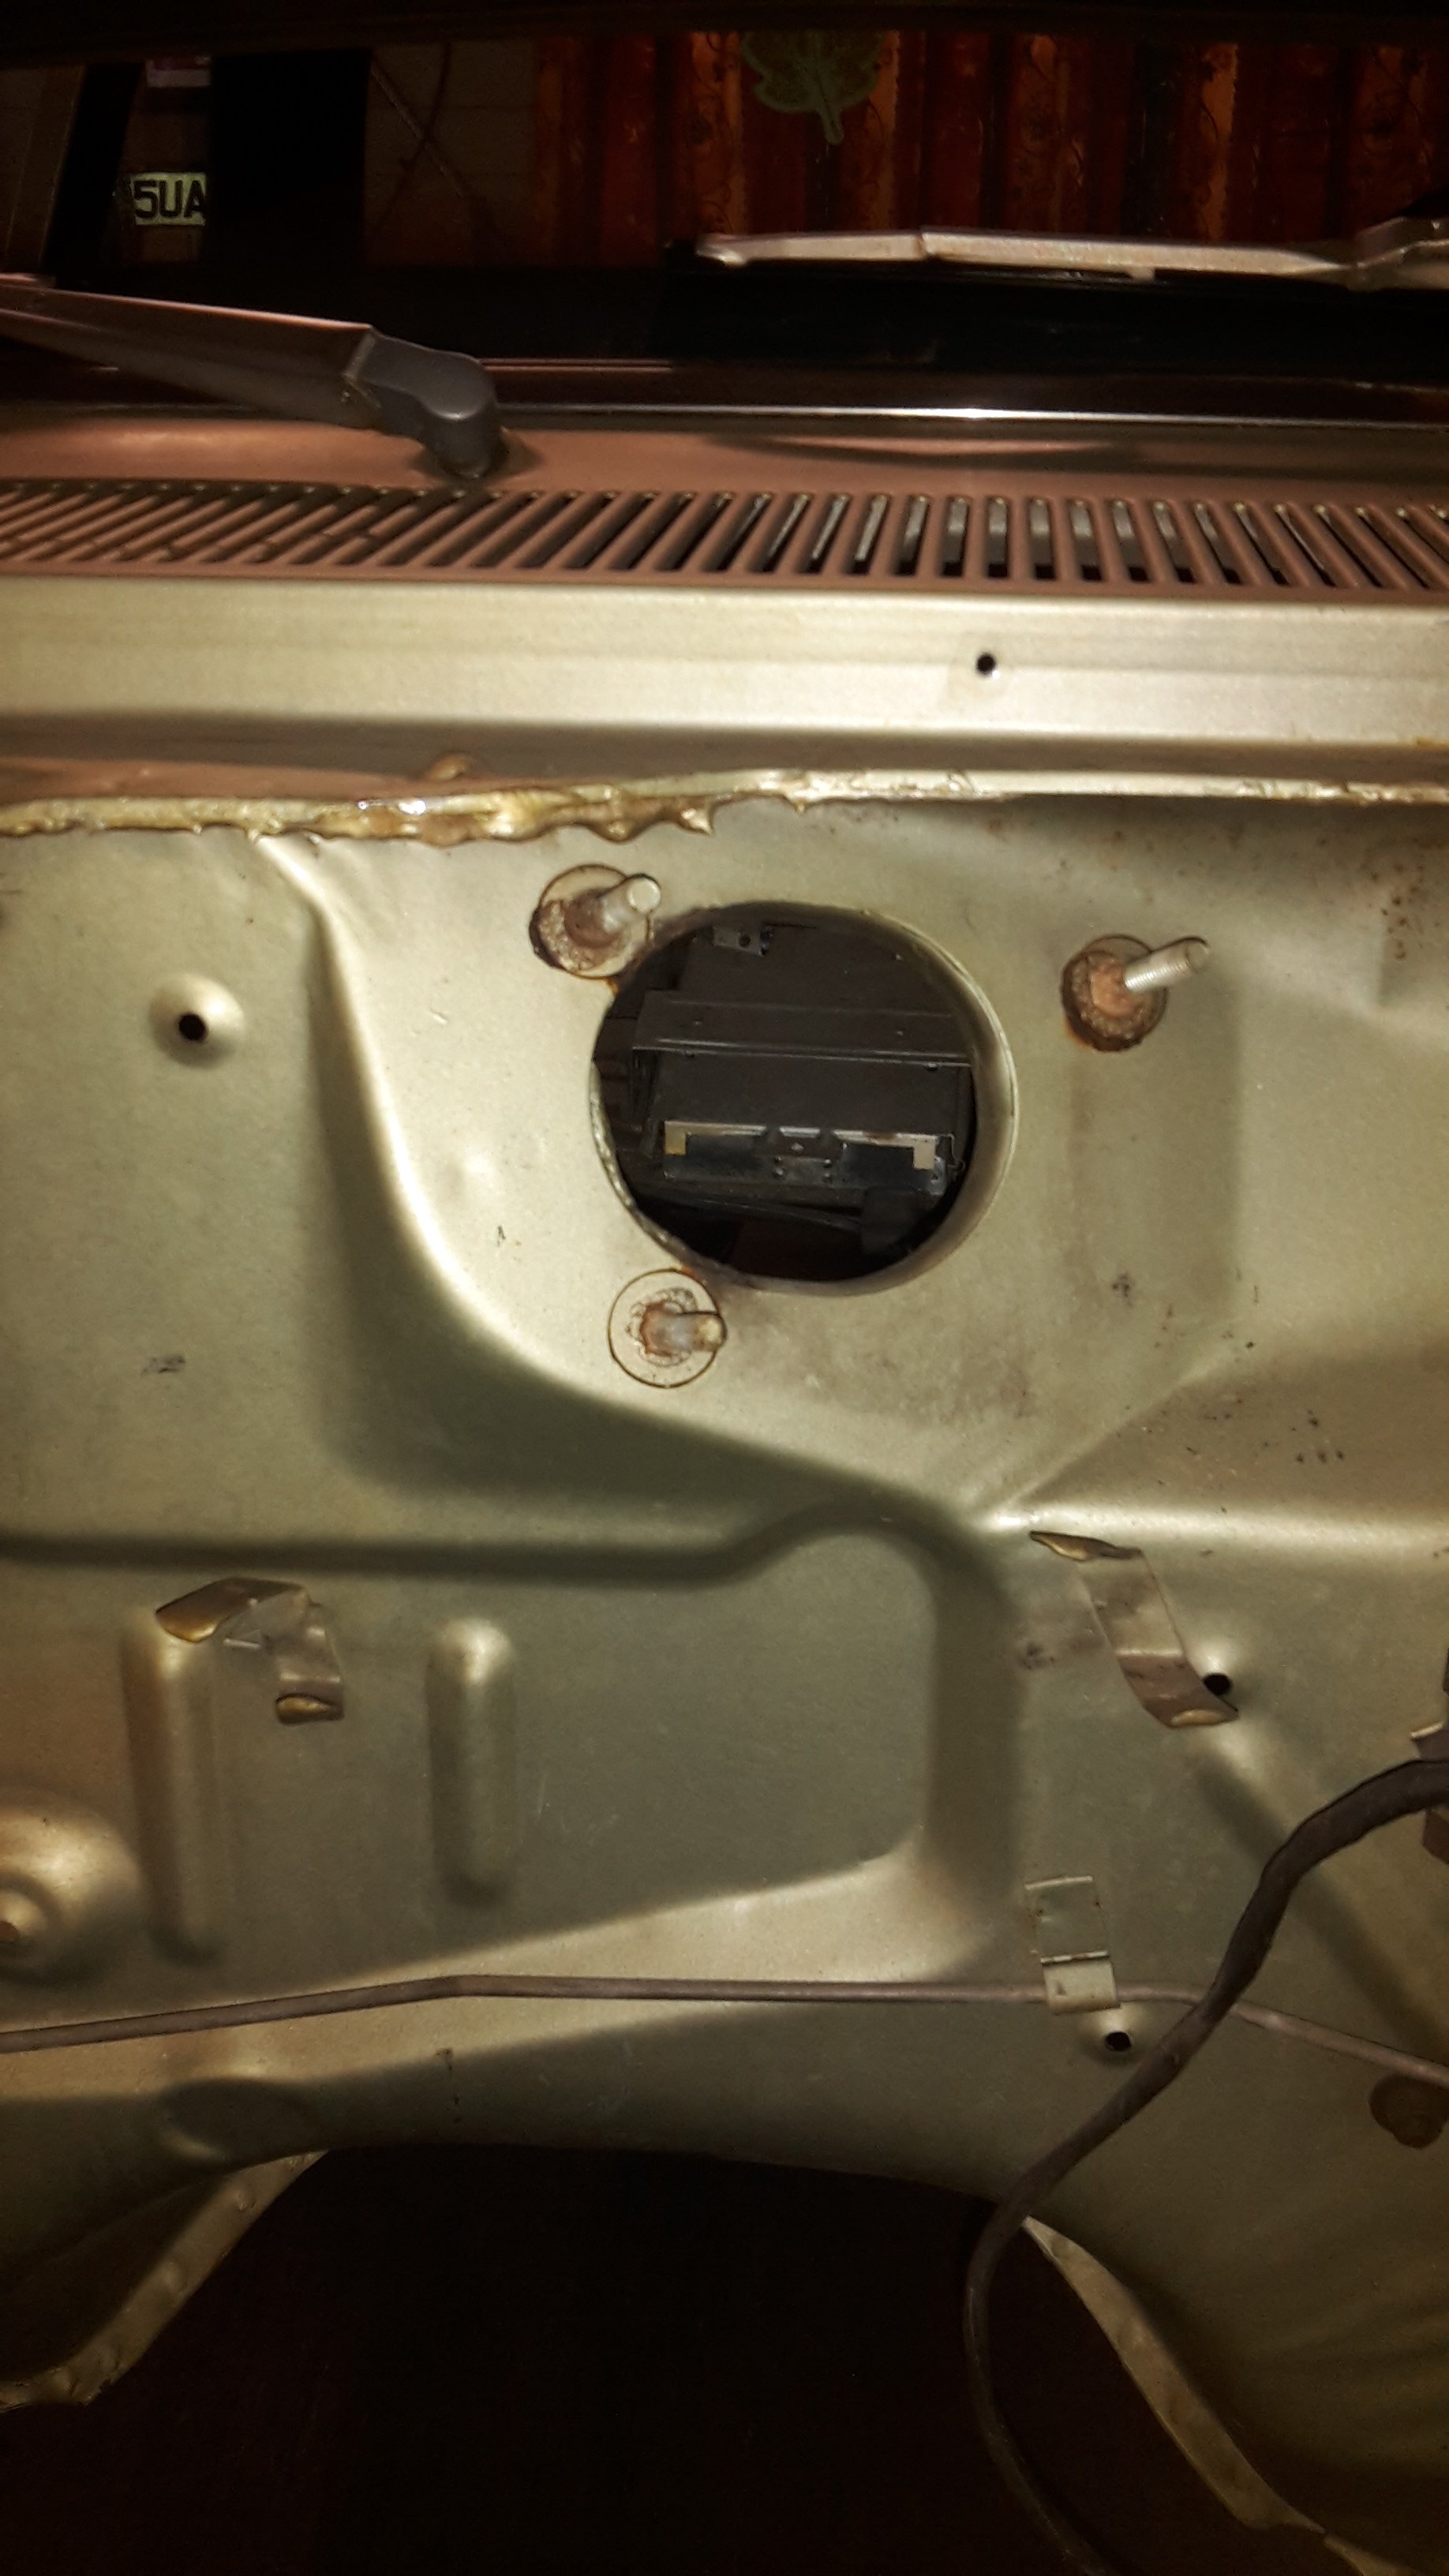
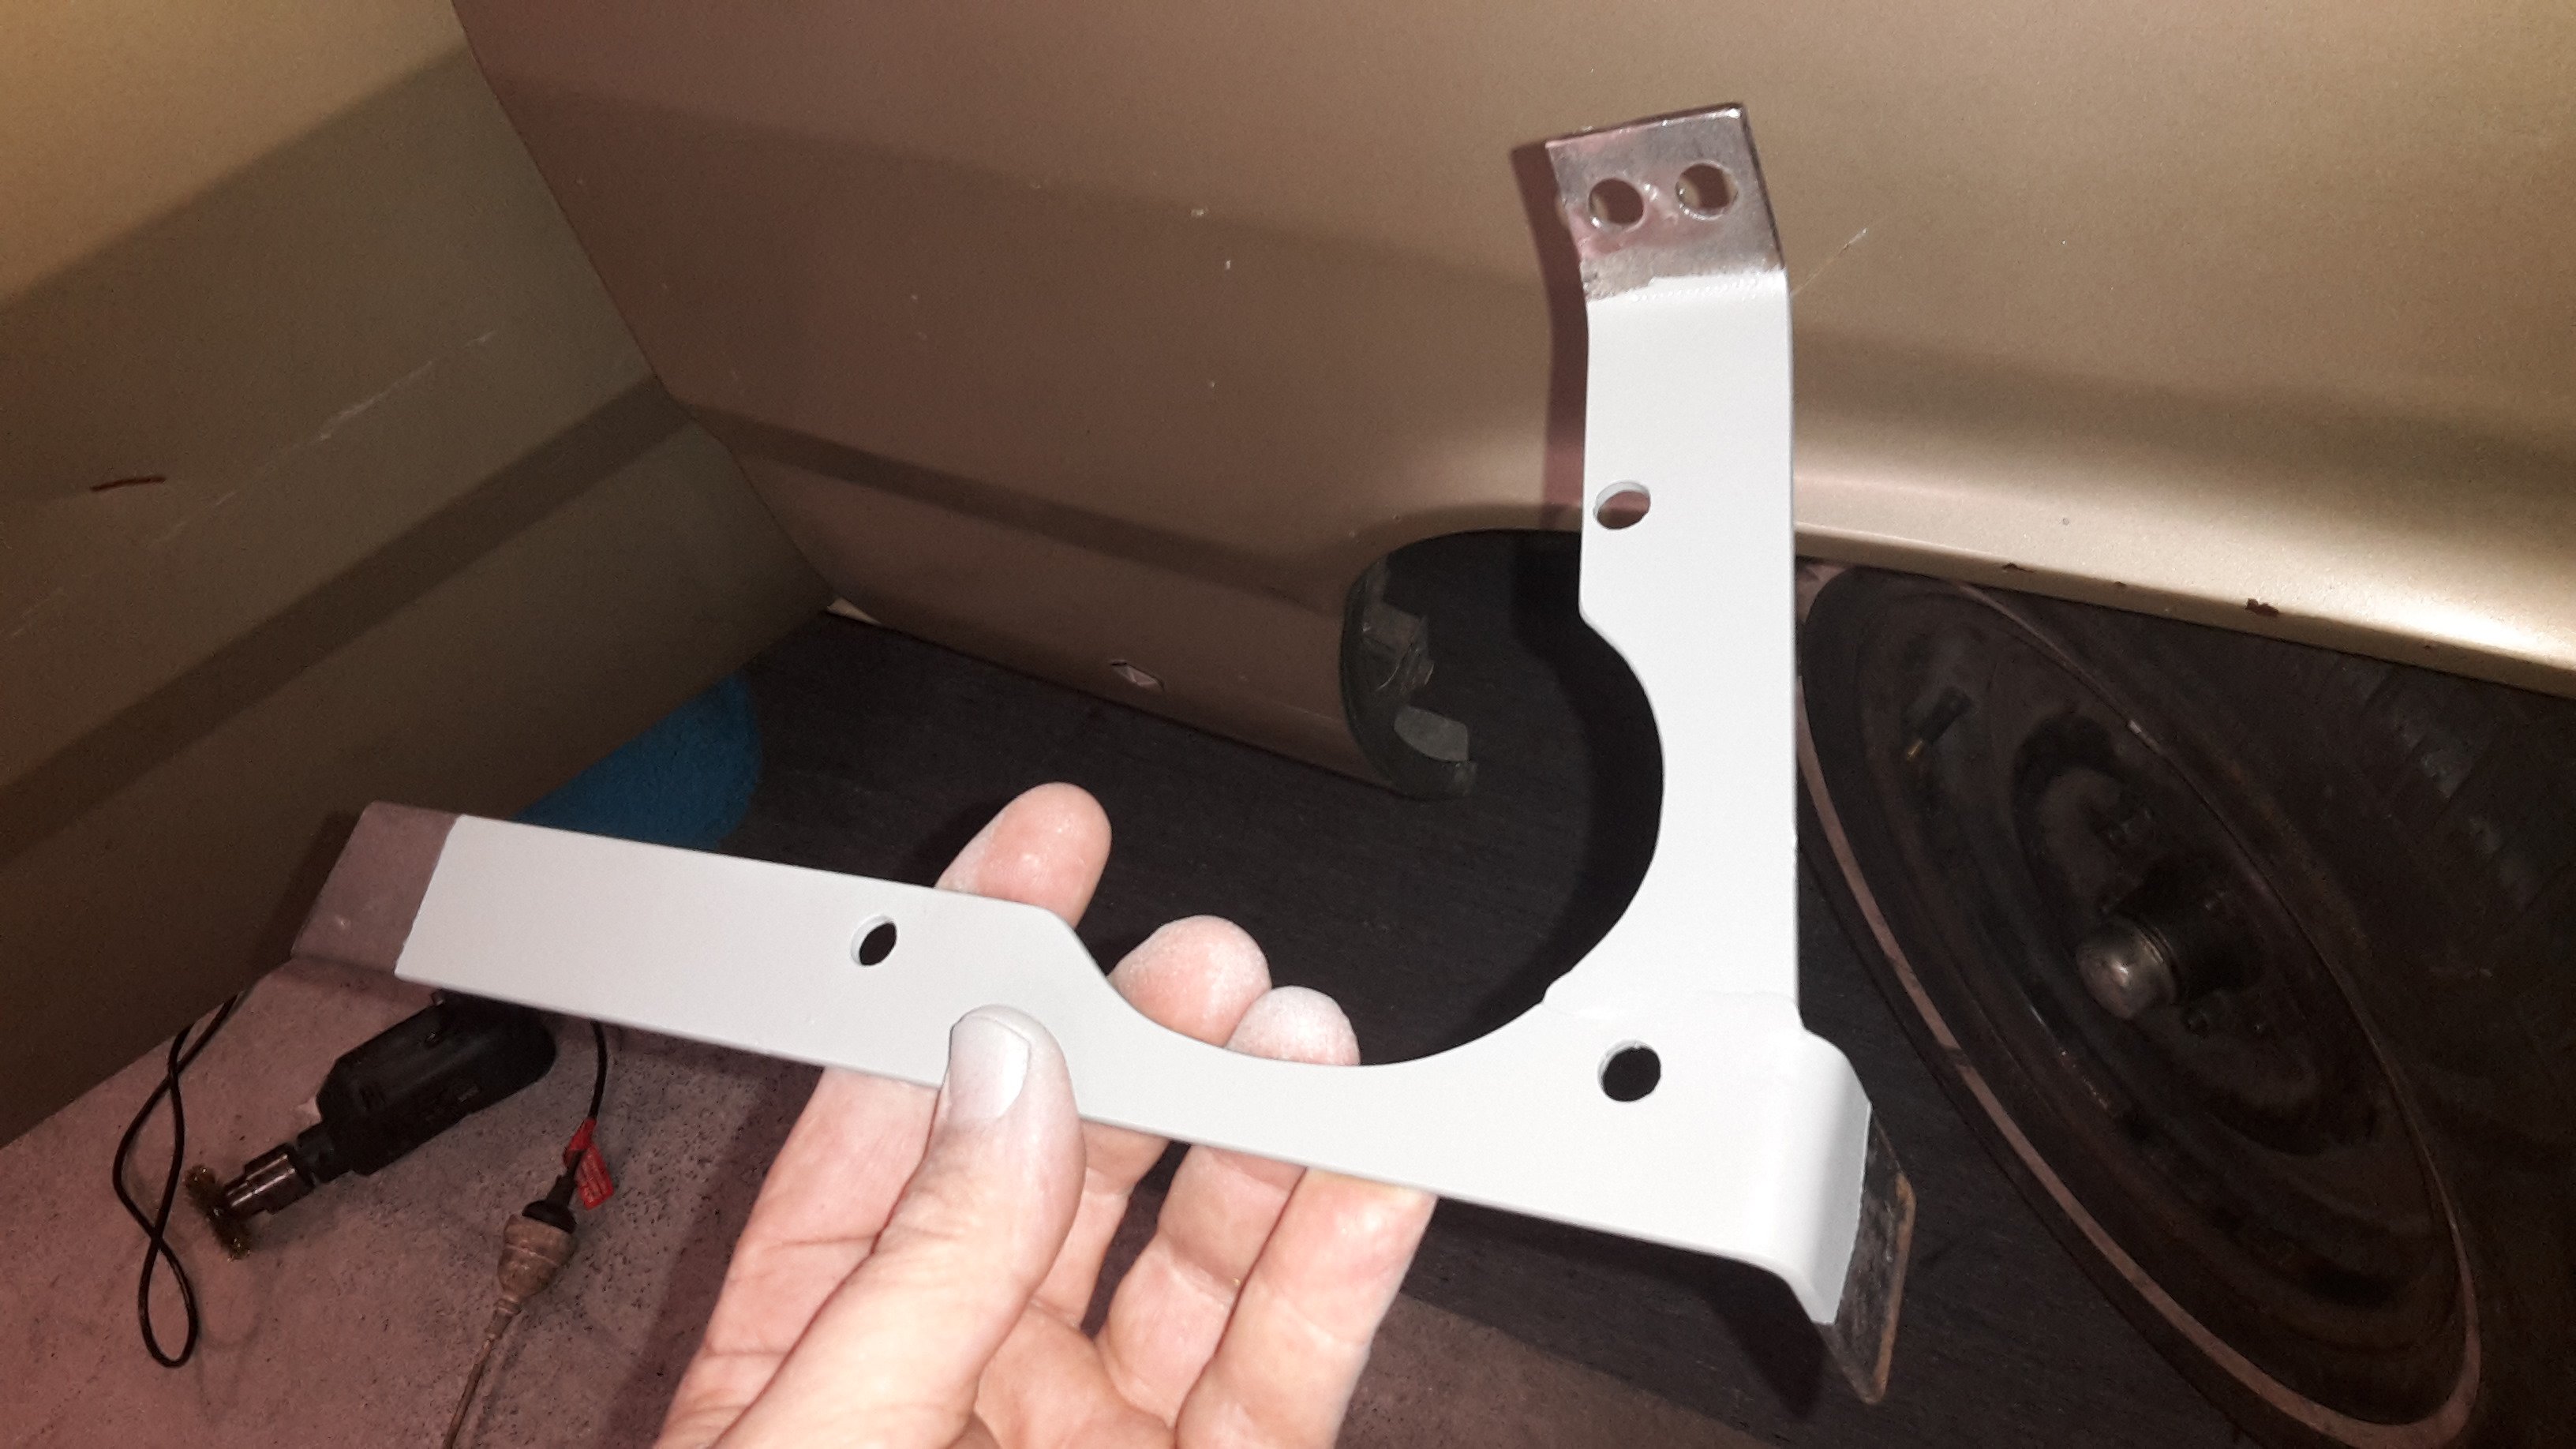
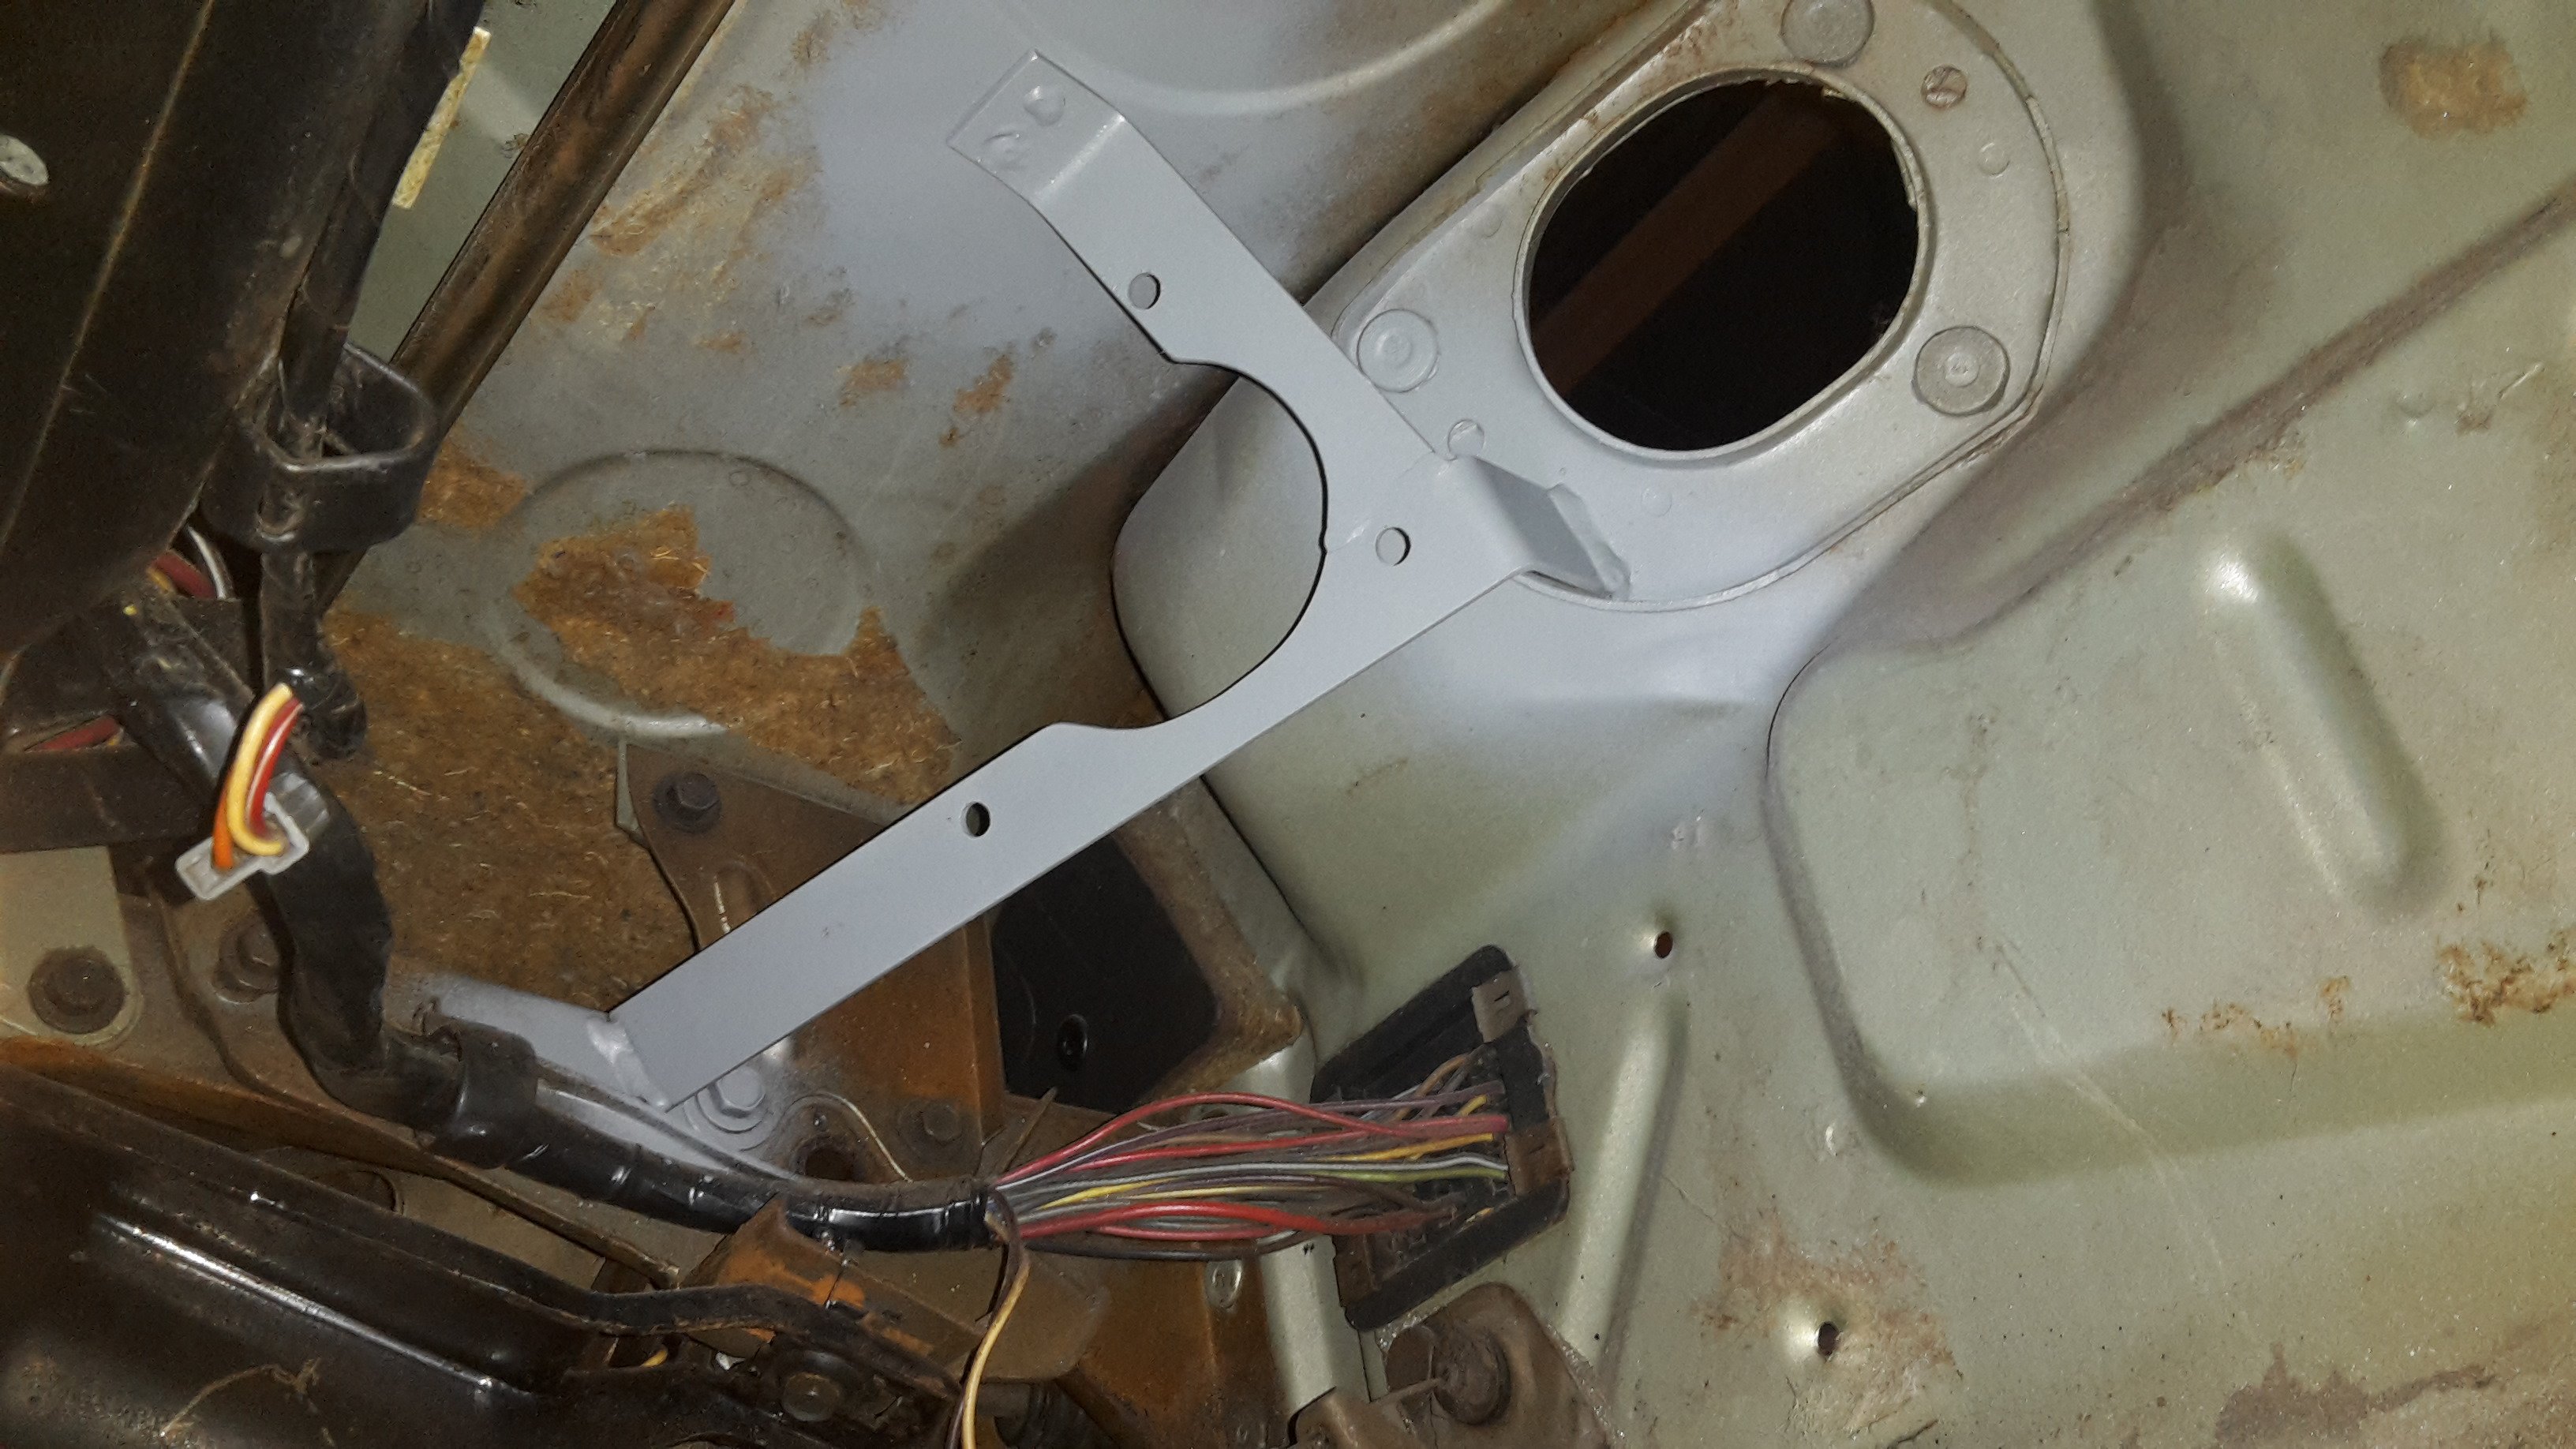
Have decided to use a water air intercooler this time , I'm going to mount it in the passenger side footwell/ up against the firewall where the heater was This means the intercooler pipes can be somewhat hidden. I'll run a pipe from the turbo under the rh guard thru the firewall . Out of the intercooler there will be a pipe thru the hole where the wiper motor was, straight into the carb hat This meant I had to shift the wiper motor to inside the car under the dash which is also a bonus cause it's very ugly. So I mucked around for ages getting the position right and made this thing. Shit update but it's progress at least...
1 point
-
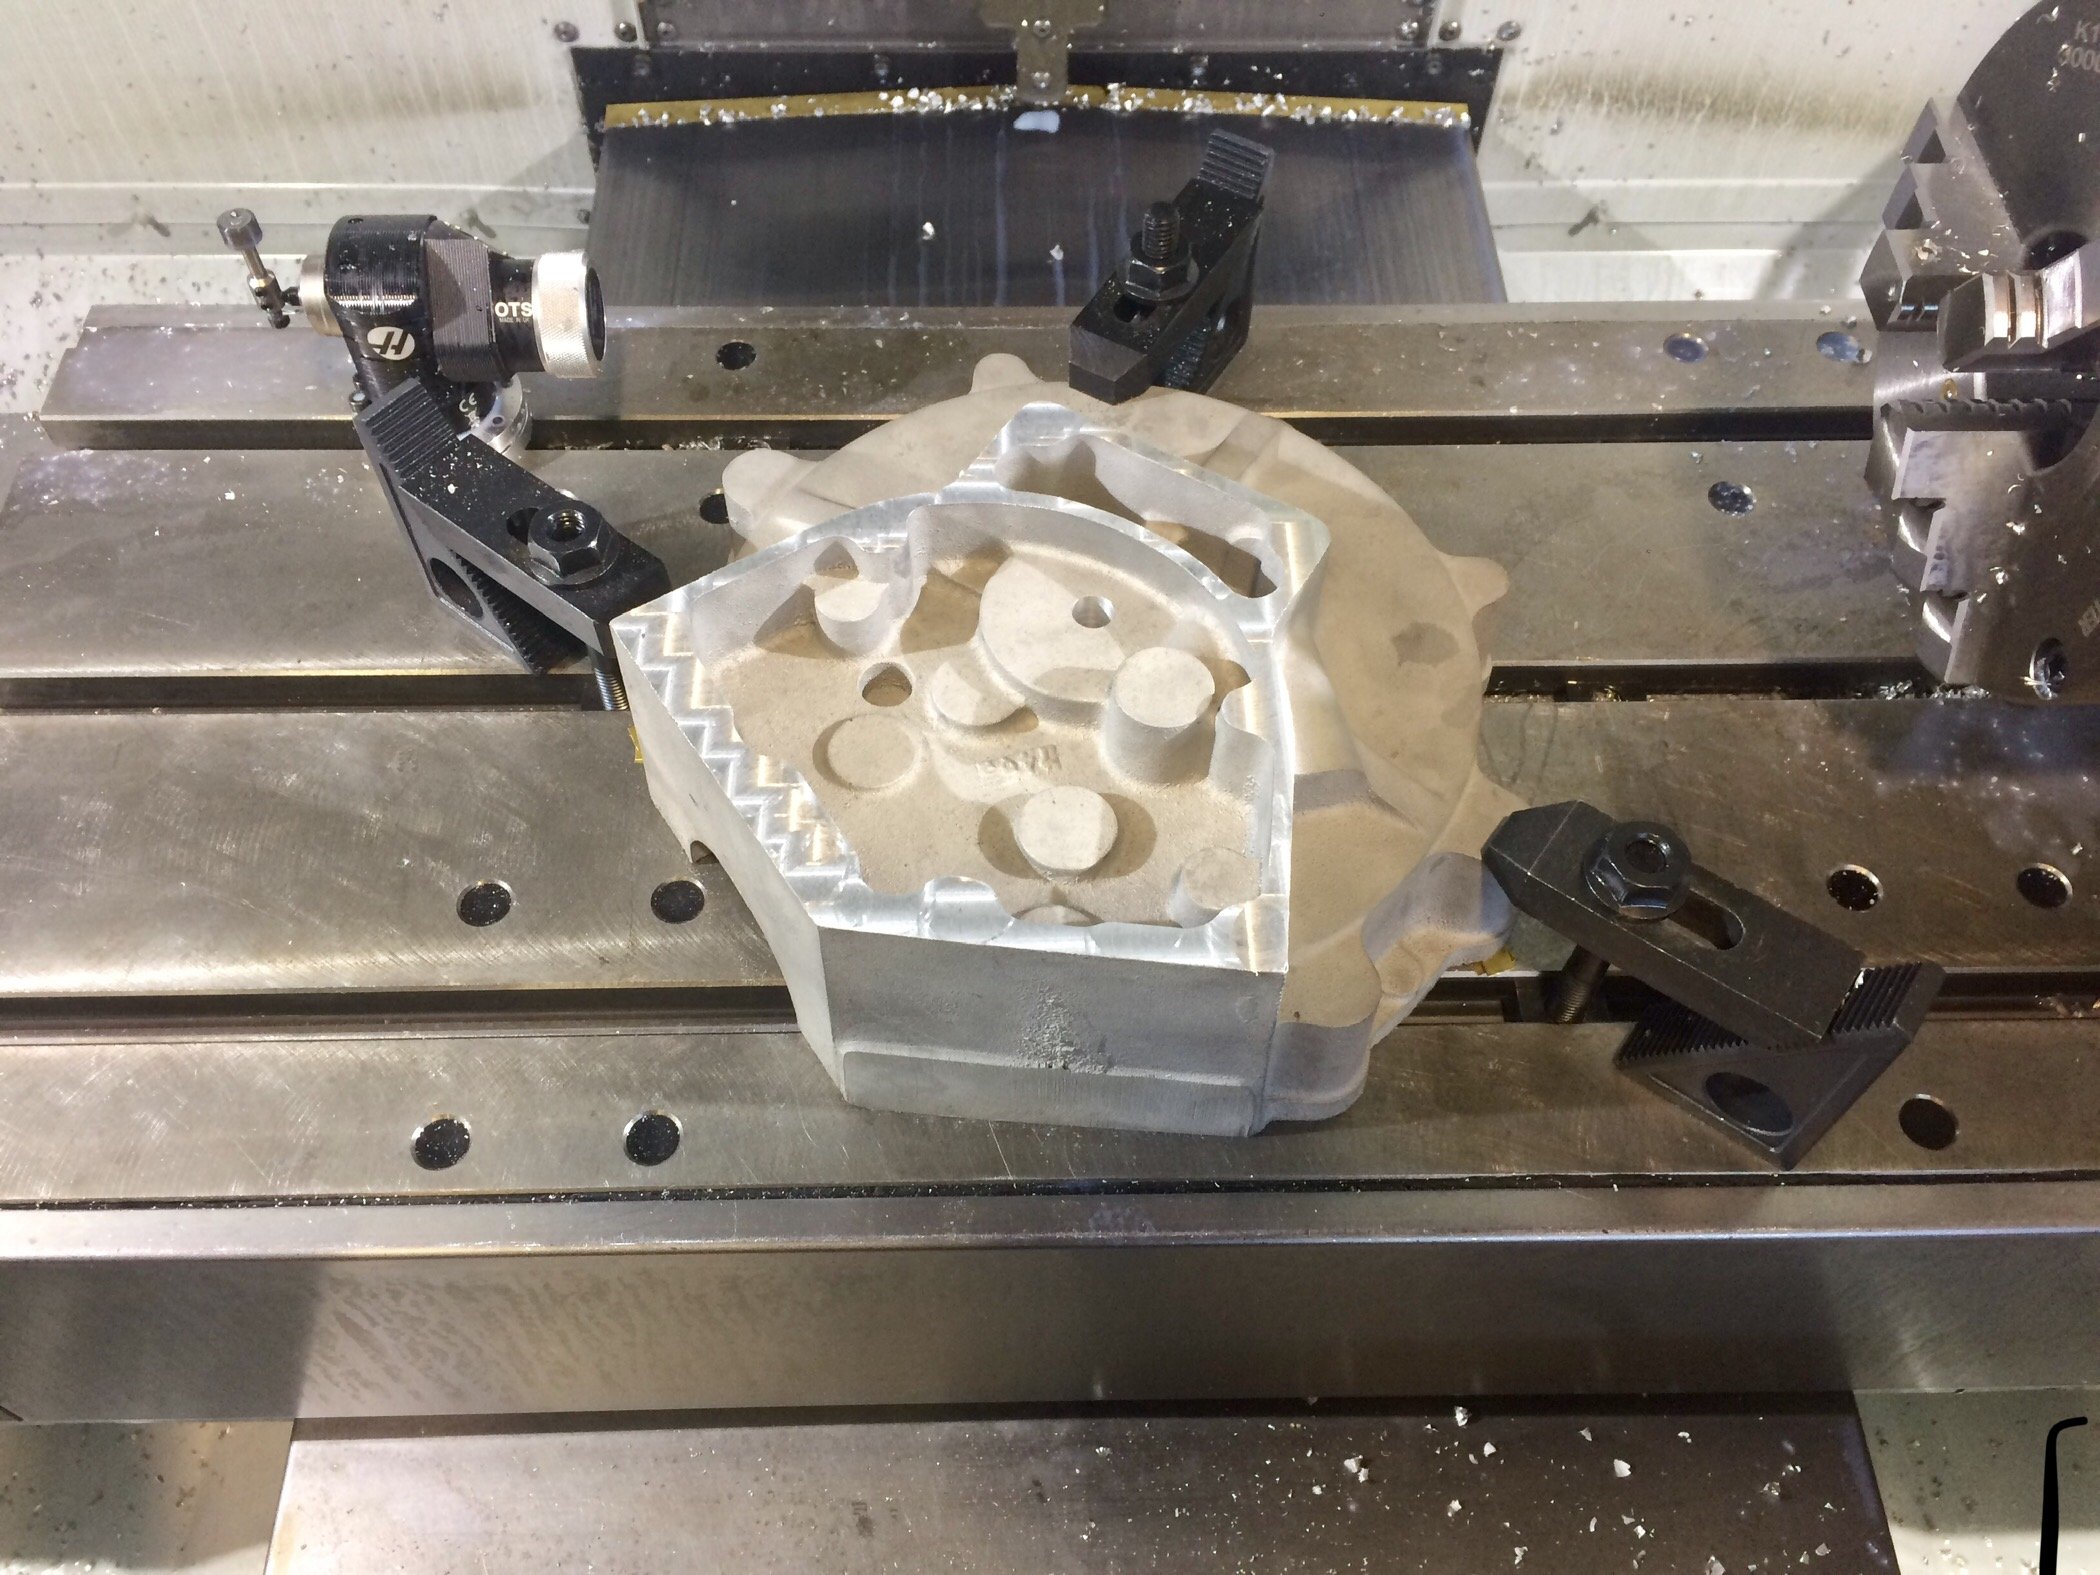
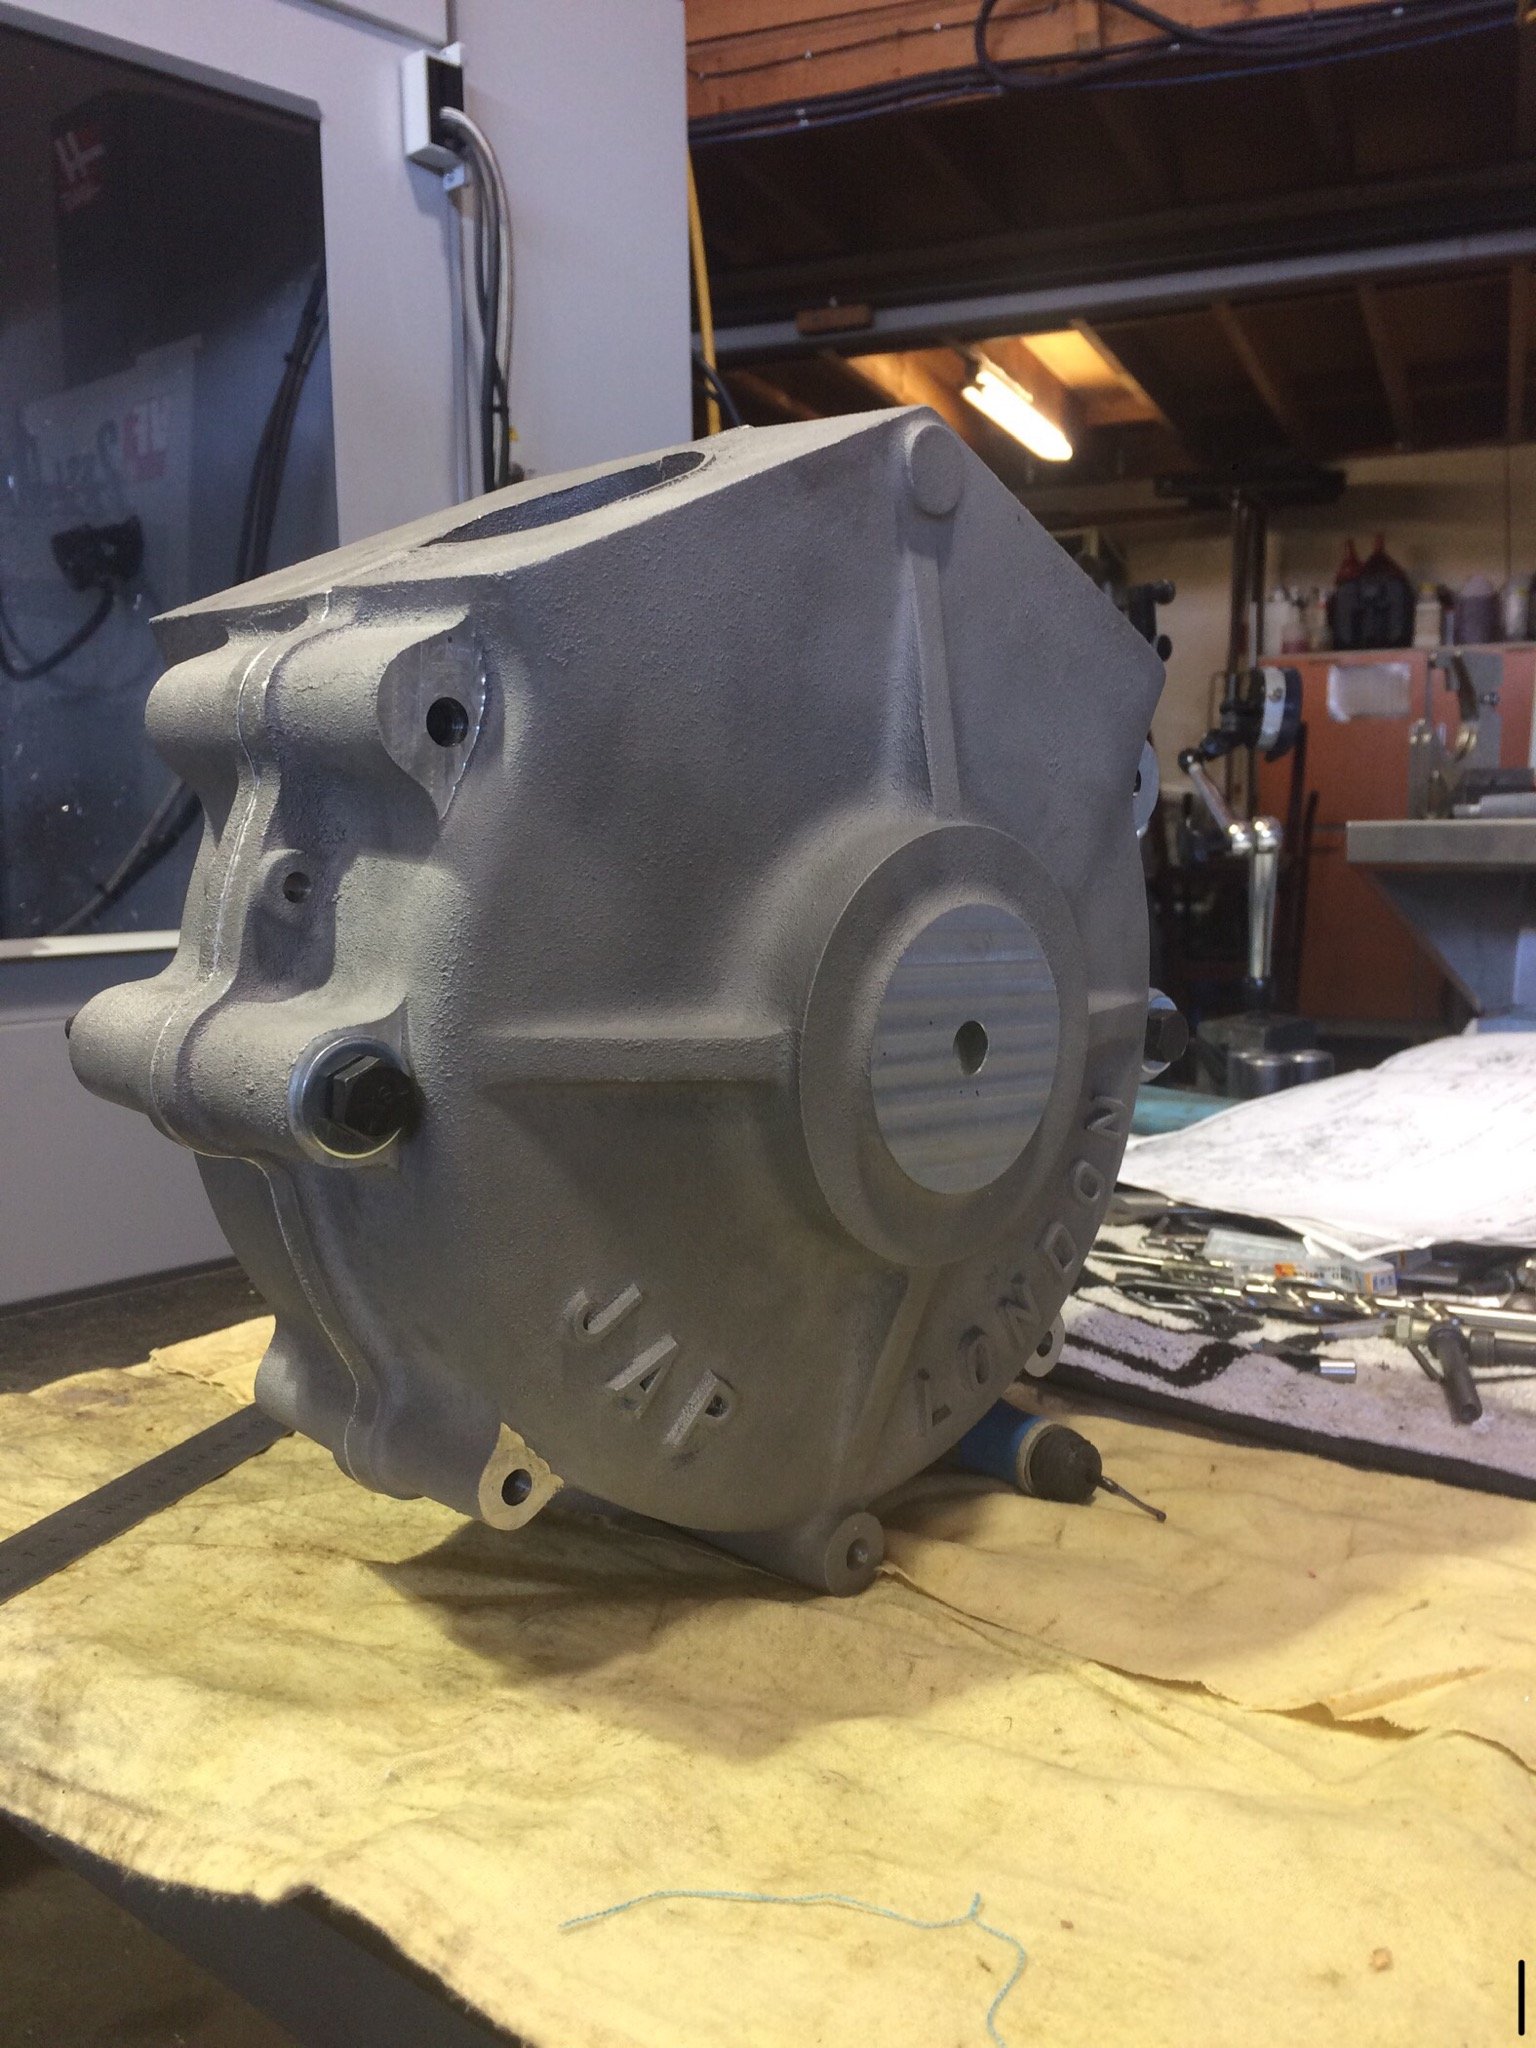
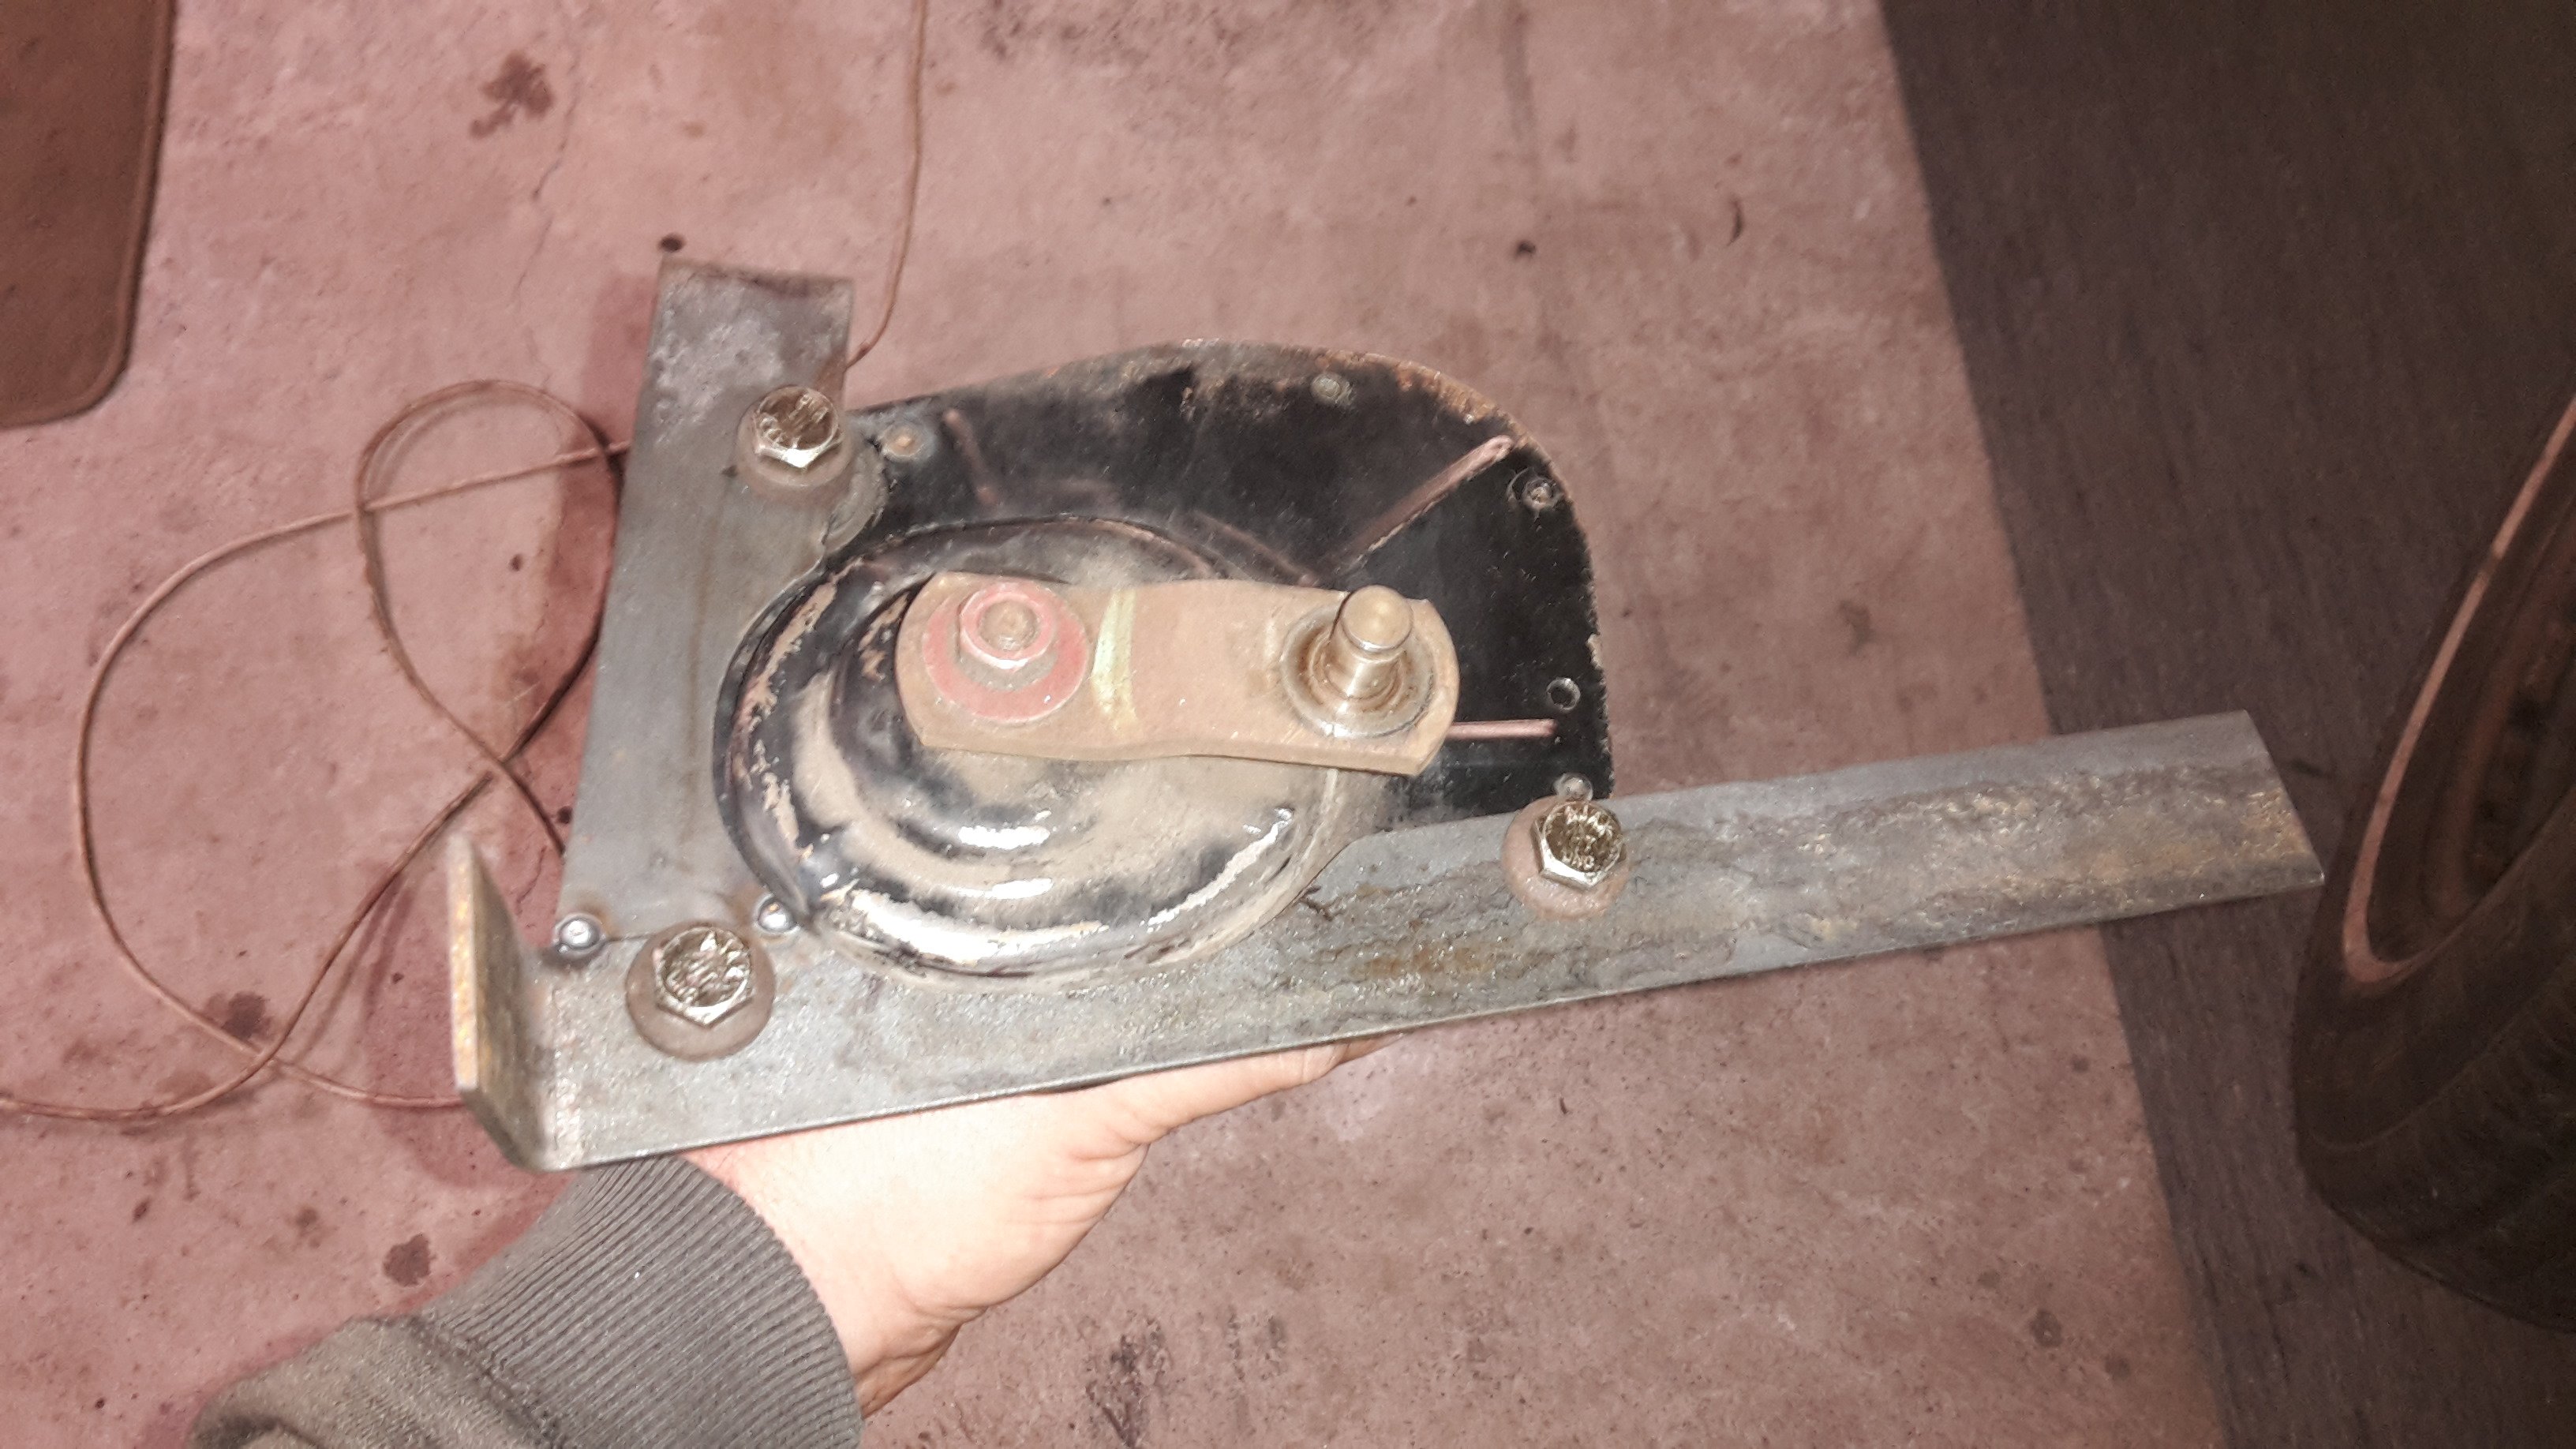
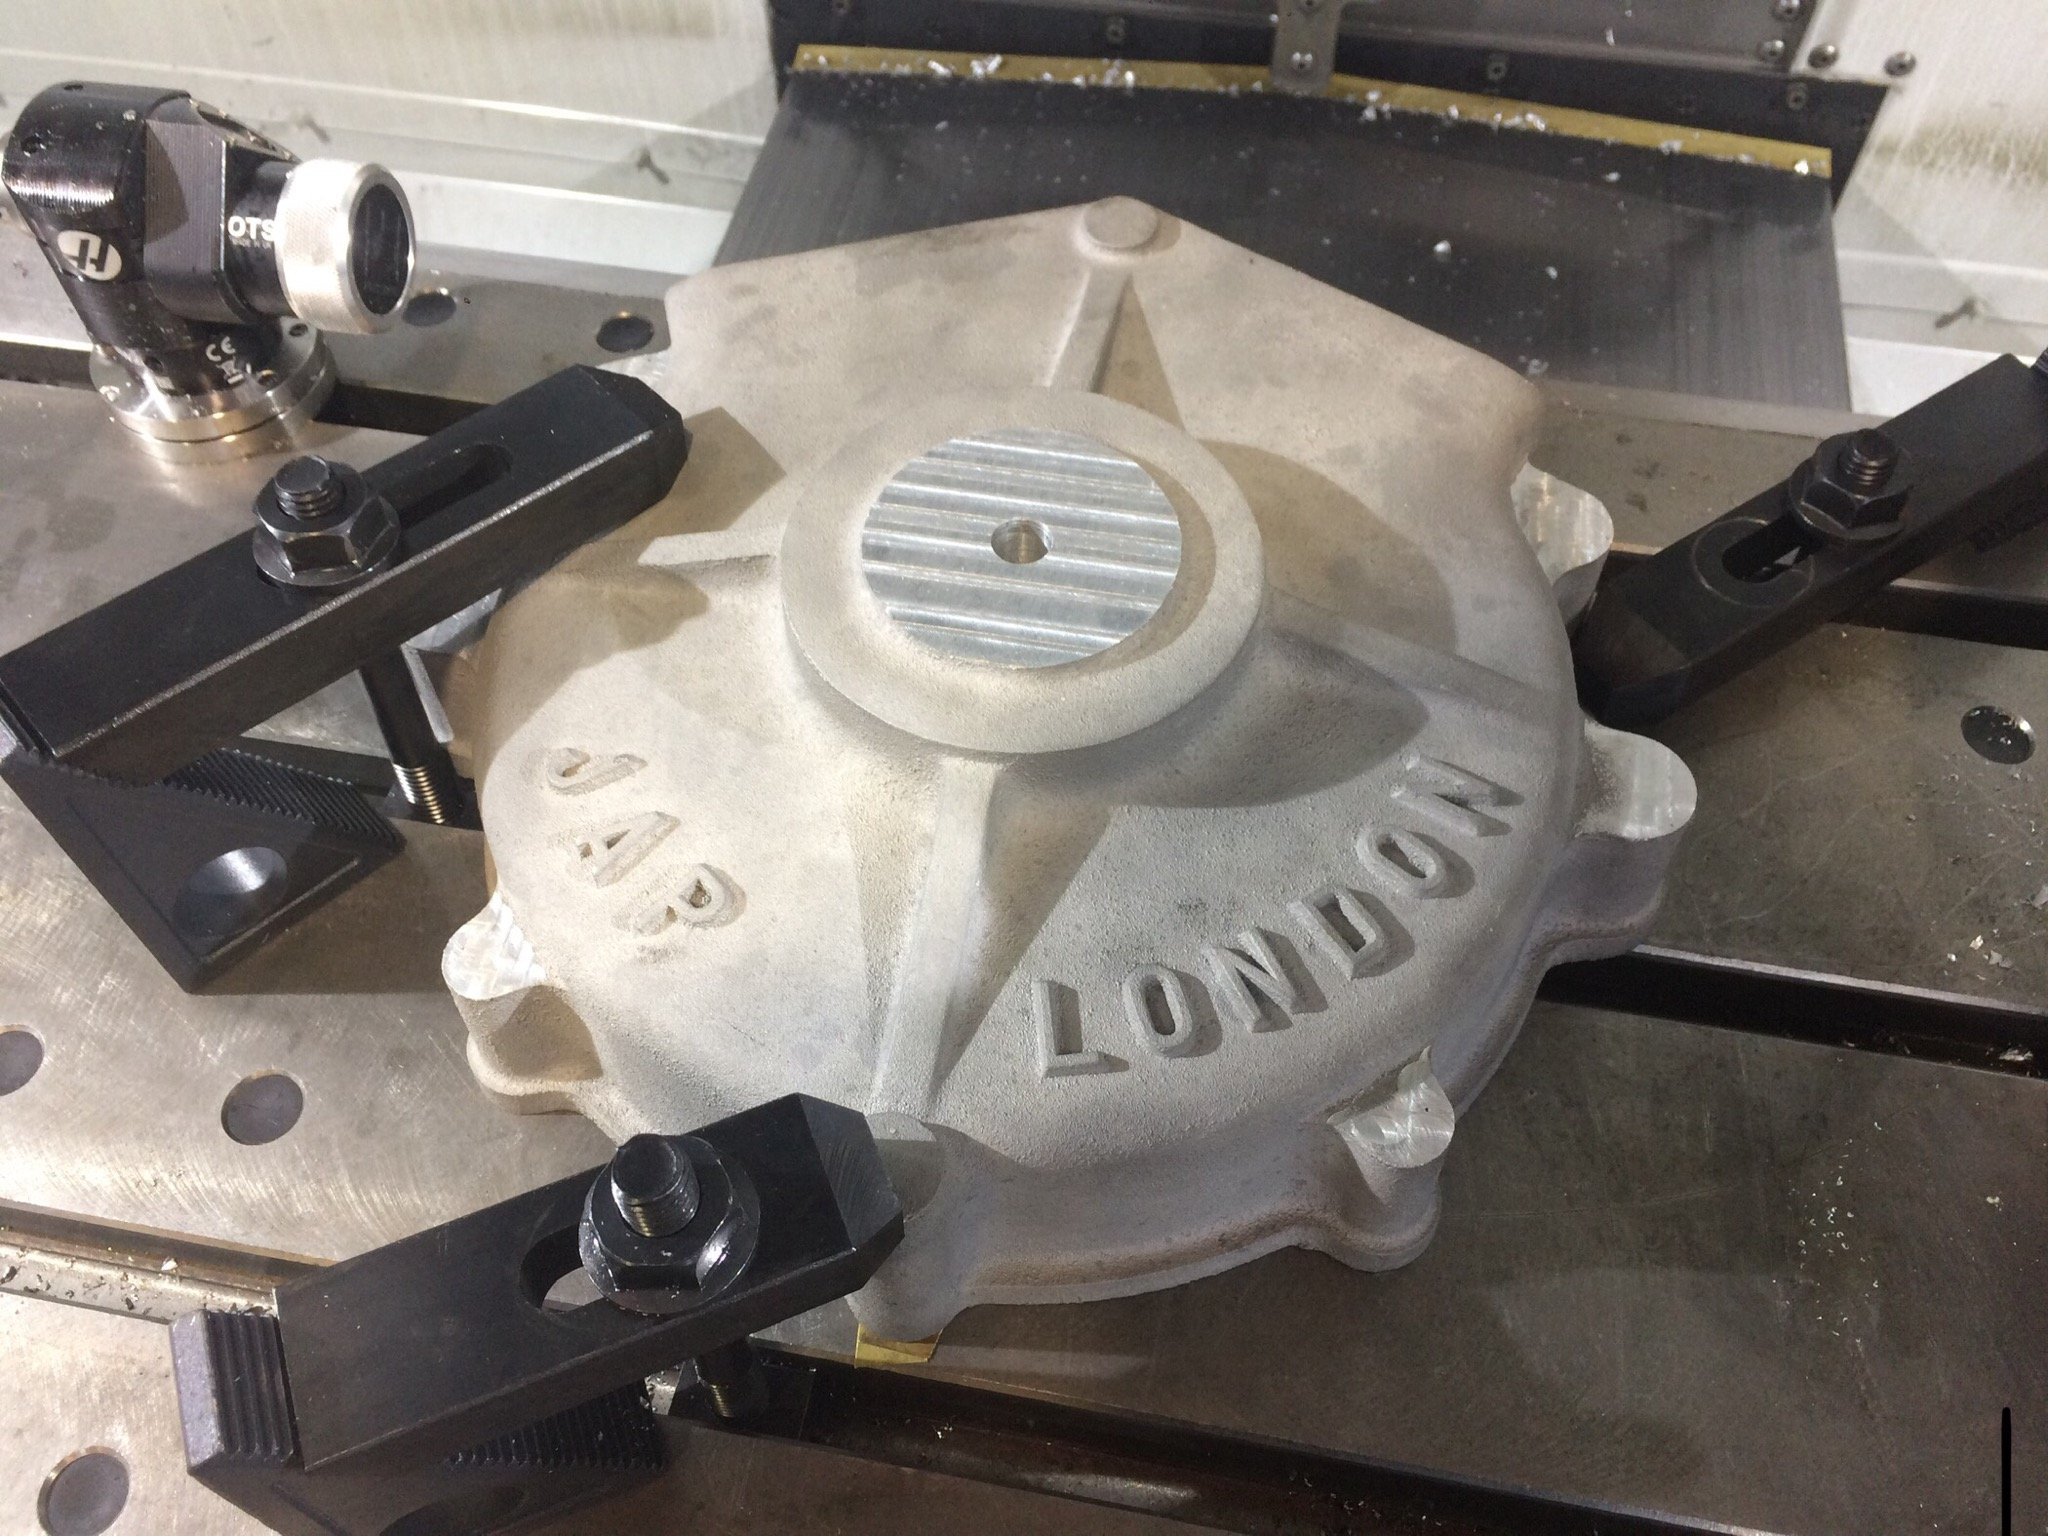
Did you ever see the engine run SOHC? A bit of info on this engine. It’s a 1930 JAP JTOR long stroke racing model of 1000cc. They were used in racing 3 wheel Morgan’s and Brough Superior motorcycles. These v twins are very rare these days and are worth a large amount of money. Lucky a place in the UK has reproduced some accurate castings for anyone mad enough to try make their own. I will be changing a few things with this one to try and get a bit more capacity and power out of it. Made a start on machining the drive side crankcase half. Bearing boss faced off to become the first reference surface Flipped over, mating surface faced and holes drilled. Now clamped down with spacer blocks to machine inner surface and bearing bore Inner features finished Next up timing side
1 point
-
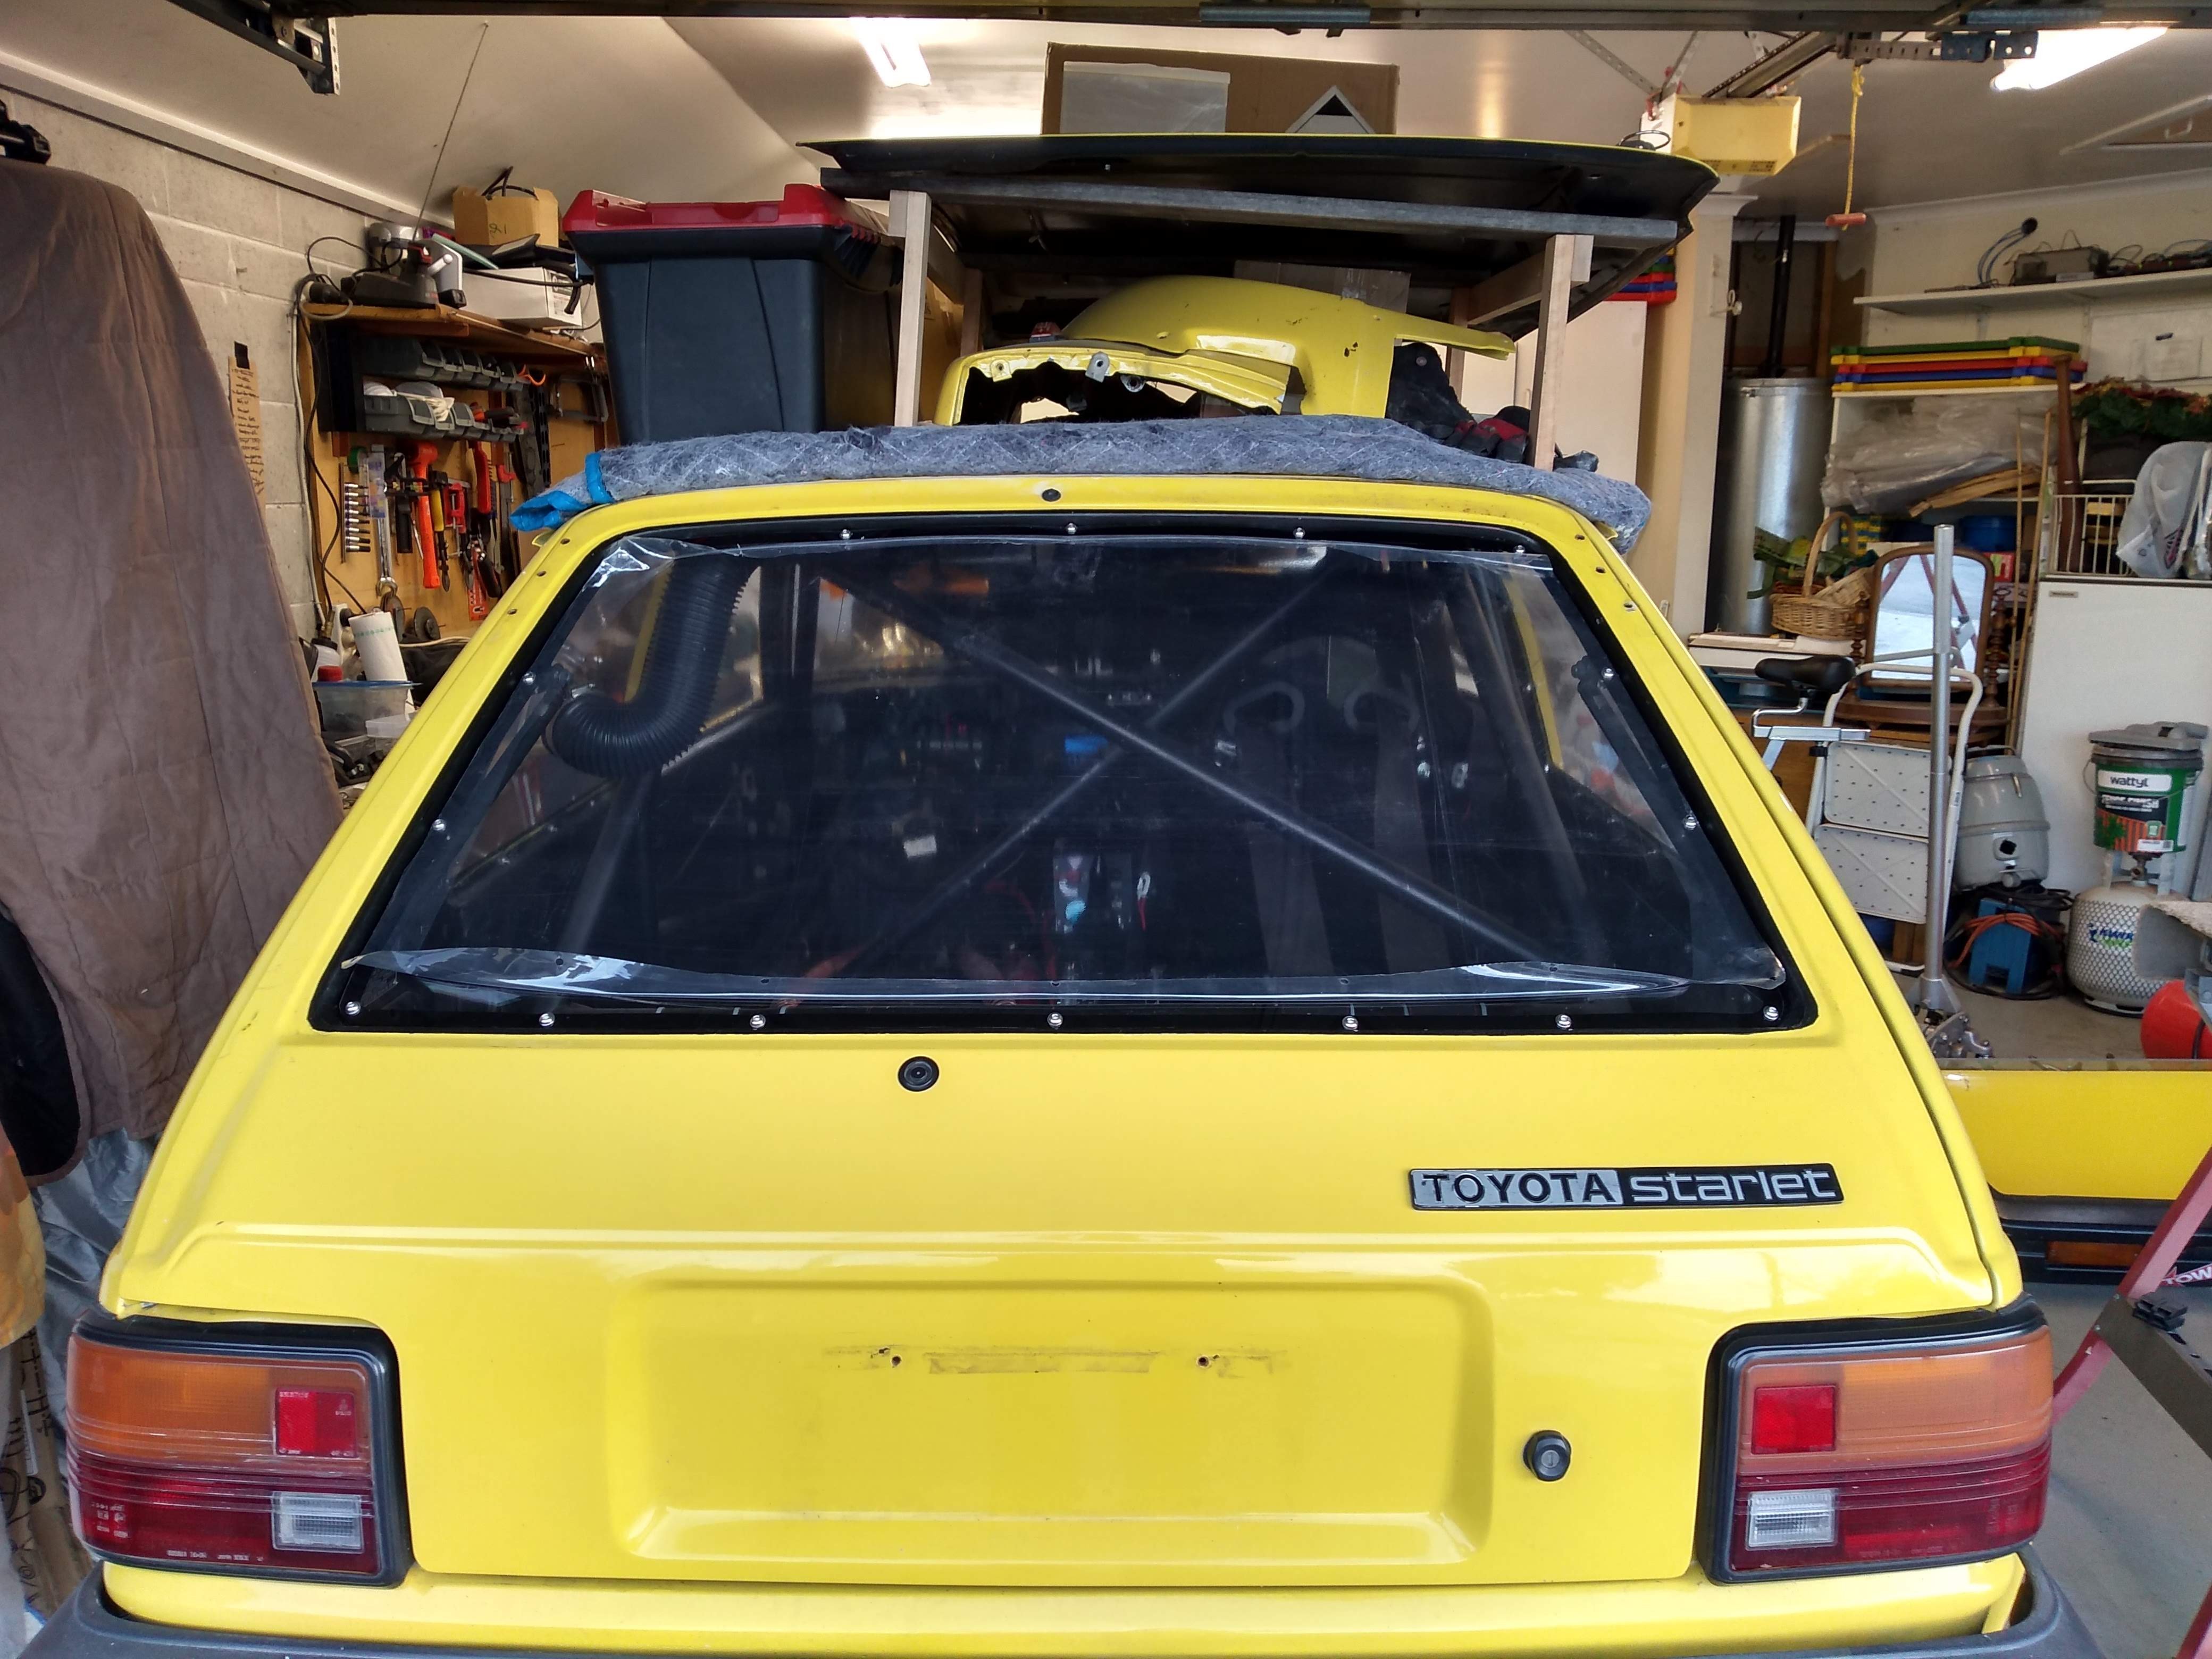
Looks like i-force has pooped itself and all my images are gone. Bummer. Anyway, drove out of the garage for the first time in who knows how long to give it a bit of a rinse and rearrange the garage. Got a real ratrod vibe going on here. Out and about 1 by Thomas Addison, on Flickr Out and about 2 by Thomas Addison, on Flickr Pretty much done with stripping now, just finishing up the underside of the bonnet. This is the first thing I will paint, get some practice in with the paint gun on a big area that doesn't matter much. I've also been buying things. Found a single NOS fender mirror. These are usually astronomically priced for a pair, on the rare occasion they turn up at all. This one was surprisingly cheap and is super mint. There's one slight scuff on the side which I think will probably polish off completely. Nice. NOS mirror by Thomas Addison, on Flickr Got a cool gear knob to match my kitty cat headlights. Gear stick by Thomas Addison, on Flickr And lastly some 70s galant hubcaps. Really tidy and shiney. One has some curb scuffage, but no big deal. They came up on TM pretty cheap and I thought they make for another nice nanna spec wheel option. My current thinking is to have these, widen some steel wheels with the little centre caps and trim rings I have now and get a set of 14 inch japanese, period appropriate mags, as wide as poss without flaring the guards hubcaps by Thomas Addison, on Flickr1 point
-
"Test Drive" turned into blasting around in it for large parts of the afternoon, reckon I've done about 45 miles or so. Brakes are fine and it goes pretty hard (for what it is). Handles really nice and is no way stock in the springs & shocks department. Tweaked the timing a bit and it's just rattling a little under heavy load, I'll try some octane booster tomorrow that will sort it out hopefully. It was blowing oil smoke for the first 5 miles but a couple of hot & cold cycles seems to have freed the rings up a treat. Haven't revved it beyond 4 grand yet but it feels pretty strong. Over all I'm pretty bloody chuffed with it, it's a really nice car. Bit of a clonk in the drivetrain but it only sounds like a UJ. Water pump bearing's a bit wobbly and it needs a new rad cap but it held temperature & oil pressure despite some enthusiastic driving. Vids for your entertainment... What ? Skid you say ? So, it's all good. Gonna do the wheels bronze and paint the rear panel black between the lights but apart from that, roll on summer.... * Also, side-sharn.... About 5 years ago I was chatting to the in-laws neighbour about cars. Started telling him about the Hako and he said " Fucking Japanese shit, I'm not interested in those useless bits of crap". We popped round to Carols folks earlier and the neighbour drove by as we were leaving. He fucking loved the Skyline, was all over it and asked if I wanted to sell it. I ignored him. Silly bugger.1 point
-
What happened was..... Had a big fuck off pizza for lunch & then got stuck into the car around midday. First job was the clutch, thought the master &/or slave might have been fucked but a bleed & adjust sorted it Brakes next. Calipers were a bit sticky but freed them up to a usable state. For the moment, at any rate. One rear was perfect, if dusty. Nice use of thumb... Other side fucked. Or so I thought. Cleaned it all up, took the cylinder apart and it all seems fine. Once I'd refitted & bled the system there was no sign of a leak, even with repeated pedal stamping/ continual pressure. Go figure... We''ll see how it goes. I wonder if the reason it was all damp and shitty was because on top of the drum was the fave spot for rats to have a wee. Put new plates on. Think I'm going to join the rear lights with a black panel edged with chrome trim. Mrs Shuzz said " Oh, FFH....Fucking Hot Hako ?" Good girl. Finished off as the sun went down touching up the paint on the rims & taking a blurry pic. Messed about with plug leads, etc and came in And that was a bloody good use 7 hours of my Saturday. Test drive tomorrow. Sweeeeet.....1 point
-
Got the intake all done with a K&N filter, looks pretty good I think. Took a guy for a drive that knows transmission things up the road and back and he reckoned the trans was sweet, shifting how it should, just the engine was massively down on power. Tried to diagnose the problem myself but I couldn't really figure much out. It was throwing error codes for the secondary throttle and knock sensors. Discovered the secondary throttle sensor was only used for traction control so I didn't need to worry about that one. Was hoping the knock sensors were just reading high because the timing was out, so I took it to Danny's Autos in Palmy to go on the dyno and see if they can tune it and figure out what's wrong. They got it on the dyno, they were just bringing it up to speed and fuel started pissing out everywhere. One of the fuel hoses going up to the fuel rail split, don't know if it just happened or if it's been like that for awhile, but we never noticed any fuel in the valley before, where as there was heaps in it then. So off came the intake and manifold to replace it. Whilst they had that off they had a look at the knock sensors and they had seen better days. The wiring pins were pretty corroded and the casings were cracked. They sourced some new OEM ones and chucked them in. They also found one of the breather hoses had a split, as well as one of the igniter modules was only firing 1 of 4 cylinders on that one side. So basically this has only been running on 5 cylinders all this time. Thought it didn't sound quite right haha. The steering rack also decided to start leaking power steering fluid out of a place the fluid shouldn't be. Beach Hop was the next week and the rack had to be sent to Auckland to be rebuilt. Managed to get the engine back together and drive it home on the Tuesday night and pull out the rack to be sent off on Wednesday. Luckily they got around to rebuilding it fairly quick and sent off again so it arrived first thing on Friday morning. Got a different igniter module from the wreckers off a SR20 and it ran waaaaaay better! Chucked the rack back in Friday morning and took it for a WOF, passed with flying colours, so went and got some rego and now it's all legal!!!! On Friday/Saturday the fuel pump must of came out about a dozen times, half of which were on the side of the road. Went for a bit of a drive and the fuel pump kept dying for some reason, thought maybe the wiring in-tank was a bit dodgy, replaced it all and soldered every connector, that didn't make much difference. Discovered that if I gave the pump a good smack it would start back up pumping a bit more fuel or just die completely. Decided to get another fuel pump from Repco and chucked that in. Turns out the brand new "genuine" Walbro pump I got off ebay was shit. Went sooooo much better again!! Took it to the 4 & Rotary Jamboree show and shine at Manfield on the Sunday and took home the Best Commercial Piston trophy. Then on the Monday took it back into Danny's Autos to get dyno'd. Made 100kw at the wheels which I thought wasn't quite right (should be closer to 200kw?), but he reckoned it was running right and just the reading wasn't that accurate, he had trouble getting into 4th, kept changing down, so had to do it in third and that was maxing out the dyno's rolling speed. It had good consistent 02 sensor readings. Took it up to Beach Hop on the Wednesday. Had no issues other than getting some brake fade through the windy bits between Waihi and Whangamata, we think there must of still been some air left in the lines. After that happened I was changing it manually between 2nd and 3rd gear through the windy bits, rather than just leaving it in drive as it engine brakes way more. Survived all through Beach Hop, including going up to Whitianga, Kuaotuna and Onemana as well as cruising up and down the main street lots, the rear bumper took a few scrapes, I think it needs some titanium stripes underneath! I think it was one of the cars that got some of the most attention. Managed to get all the way back down to Marton, then when I was overtaking up a hill, noticed smoke coming from under the dash, so quickly pulled over and checked it out. The transmission sump had either smoke or steam since it was raining coming off of it, also smelt very burnt and the oil was quite dark. My parents caught up and we decided to just keep driving. I then noticed it was revving at 3500rpm at 100km/h, where as it's usually around about 1800rpm. It was only changing from first into second gear and that's it, if I took my foot off the accelerator it would drop straight down to idle. It was a slow drive home from there at 70km/h. Next couple of days I pulled the trans out, pulled off the sump and it had quite a bit of metallic build up at the bottom and just smelt very burnt. I guess it's always been slipping, as to why it didn't make much power on the dyno. Dropped it off today to get a quote on being rebuilt, so hopefully it's not too bad. It used about $400 worth of petrol over Beach Hop, which I think worked out to be 15 l/100km. After driving it for about 1200km I have decided the seat definitely needs redoing, it's way too hard, would also be nice to sit a bit lower and further back as well. Also the accelerator pedal has your foot at too much of an angle back, so gets sore rather quick. Shouldn't be too hard to fix as the seat changes should help and just modify the pedal a little. Also the door latches + door seals are terrible, takes way too much effort to get them closing right. A softer door seal might help, and you can get bear jaw latch kits that are basically a bolt in thing for these which might be the go when I have the spare money.1 point
-
Update for those interested Repair Cert PASS Compliance and WOF all PASSED apart from the below 2 points - tighten hand brake cable - fix slight leak in return line to gas tank brass fitting Cert Clint did the cert on Friday and I’ve attached the list. I just need to work through that list and take it back for the brake road test. I also need the old old owner from USA to email that he sold me the car - I keep in touch so that won’t be an issue. Now to work through the list and get this sled legal. Am I happy? Yes, the answer is YES!
1 point
-
Can relate with project disillusionment, my Cedric now has a new home. A long long time ago I can still remember how My project used to make me smile And I knew if I had my chance That I could give it some sweet stance And maybe I'd be happy for a while But 2018 made me shiver With every reg on hold I'd apply for NZTA mail on the doorstep I couldn't take one more step I can't remember if I cried When I thought of all the OS stickers applied But something touched me deep inside The day the project died I think the Starlet deserves one more shot though, it's a sweet project1 point
-
Pretty cool and its being made in NZ!1 point
-
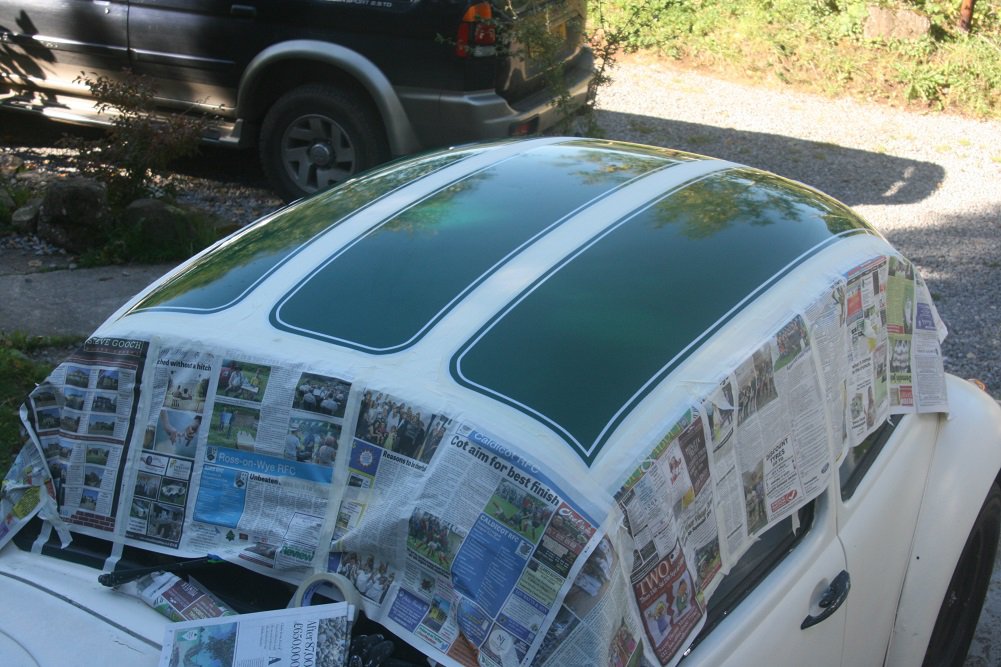
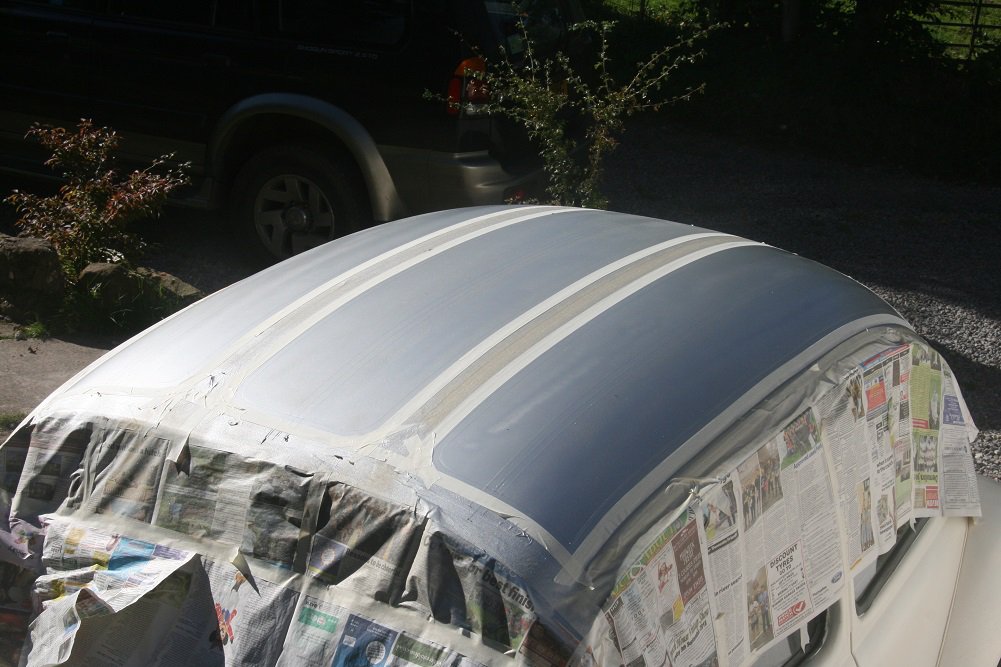
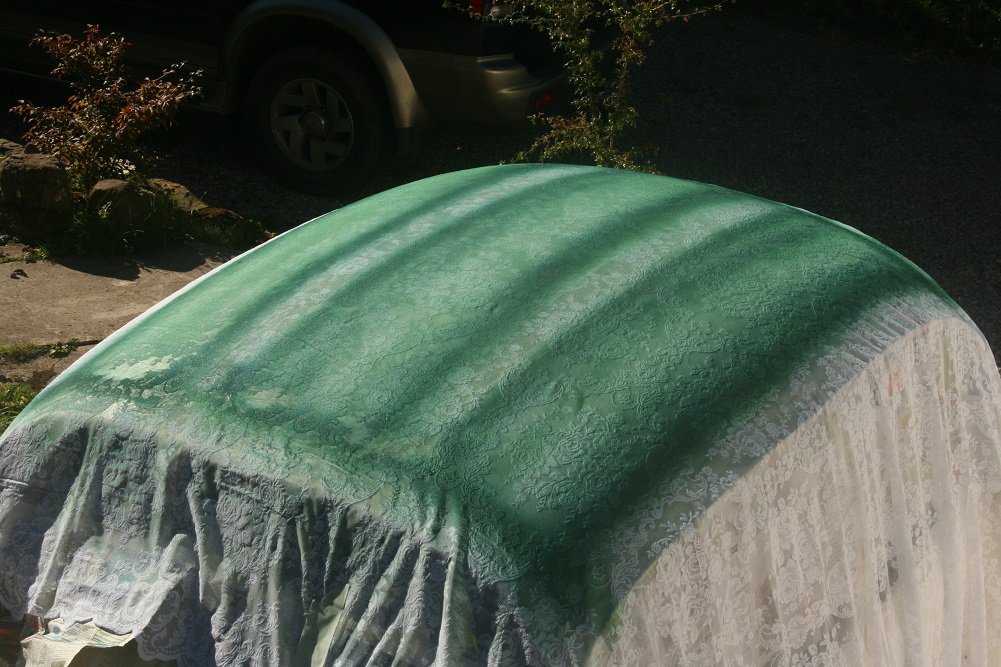
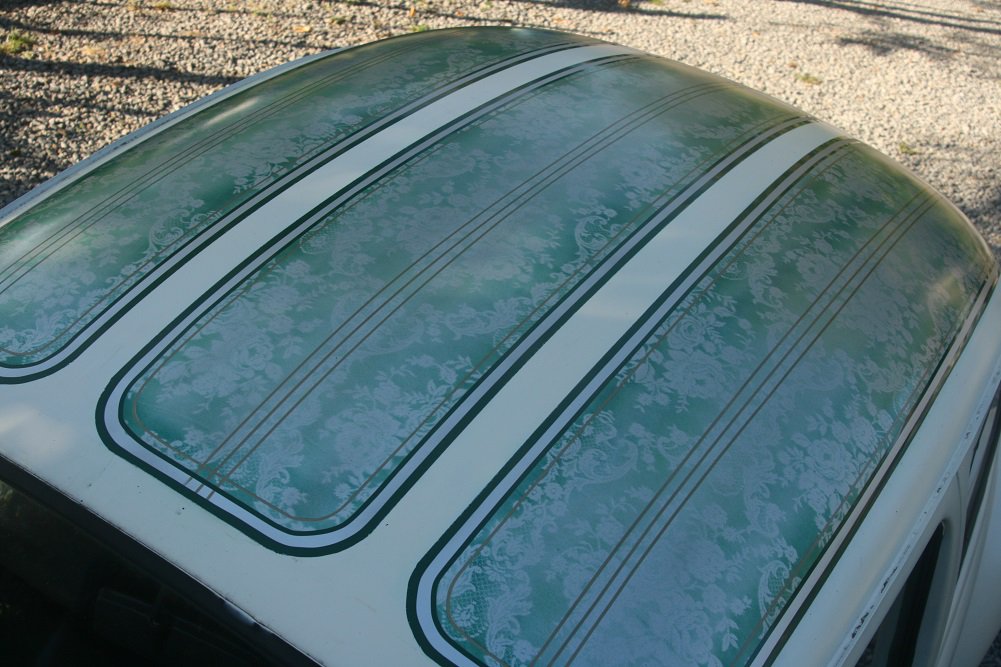
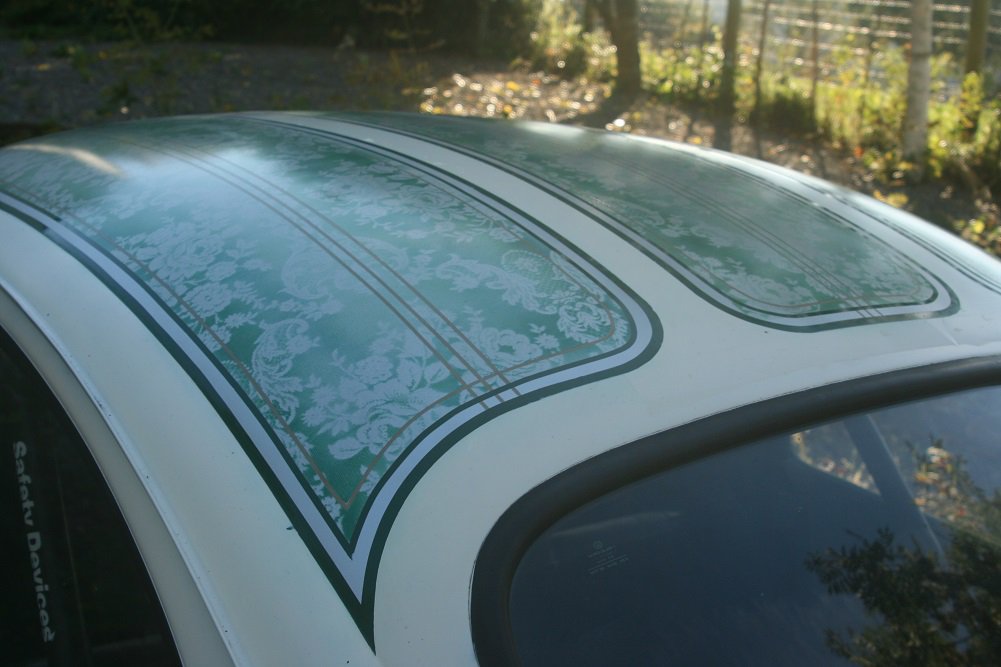
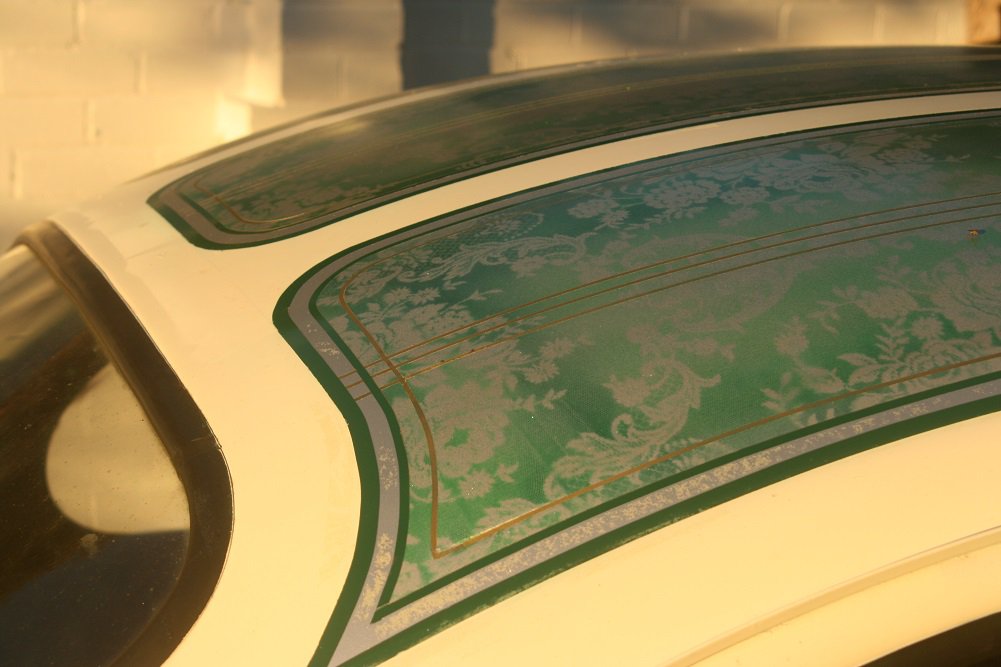
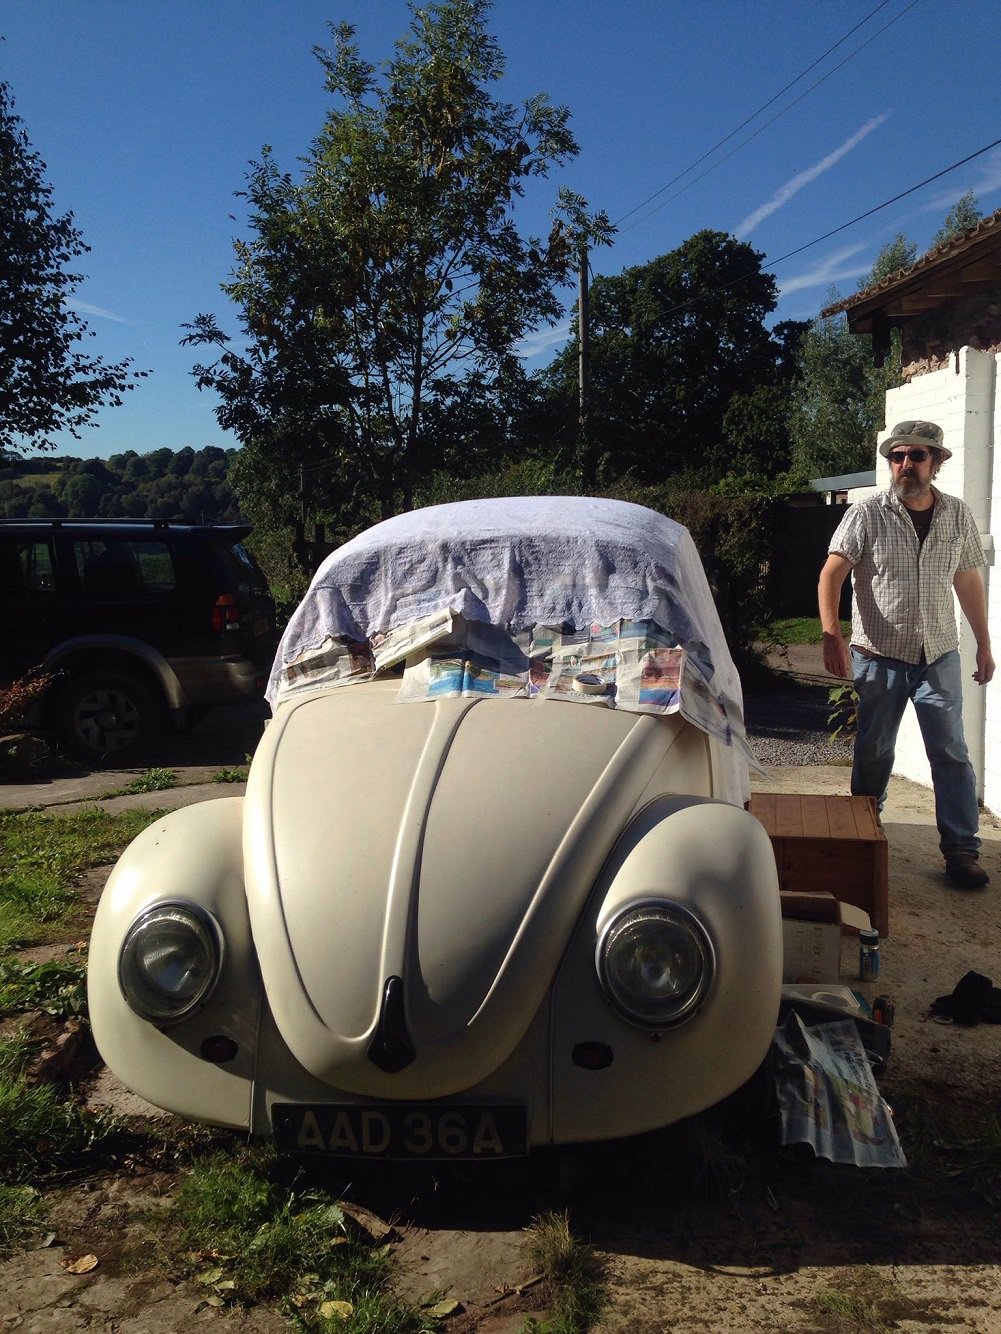
No work that can't wait till tomorrow, sun's out, 20 degrees, not a breeze. Perfect day for a bit of slap-dash beetle roof painting. * If any of you do this sort of thing for a living, it'd probably be best if you look away now.... Needs a load of clear & a good polish but you get the idea. And that was my rattlecan flake n lace Thursday.
1 point
-
Here are the trutest wheels, I am building them up then I will take a mold of them.
1 point
-
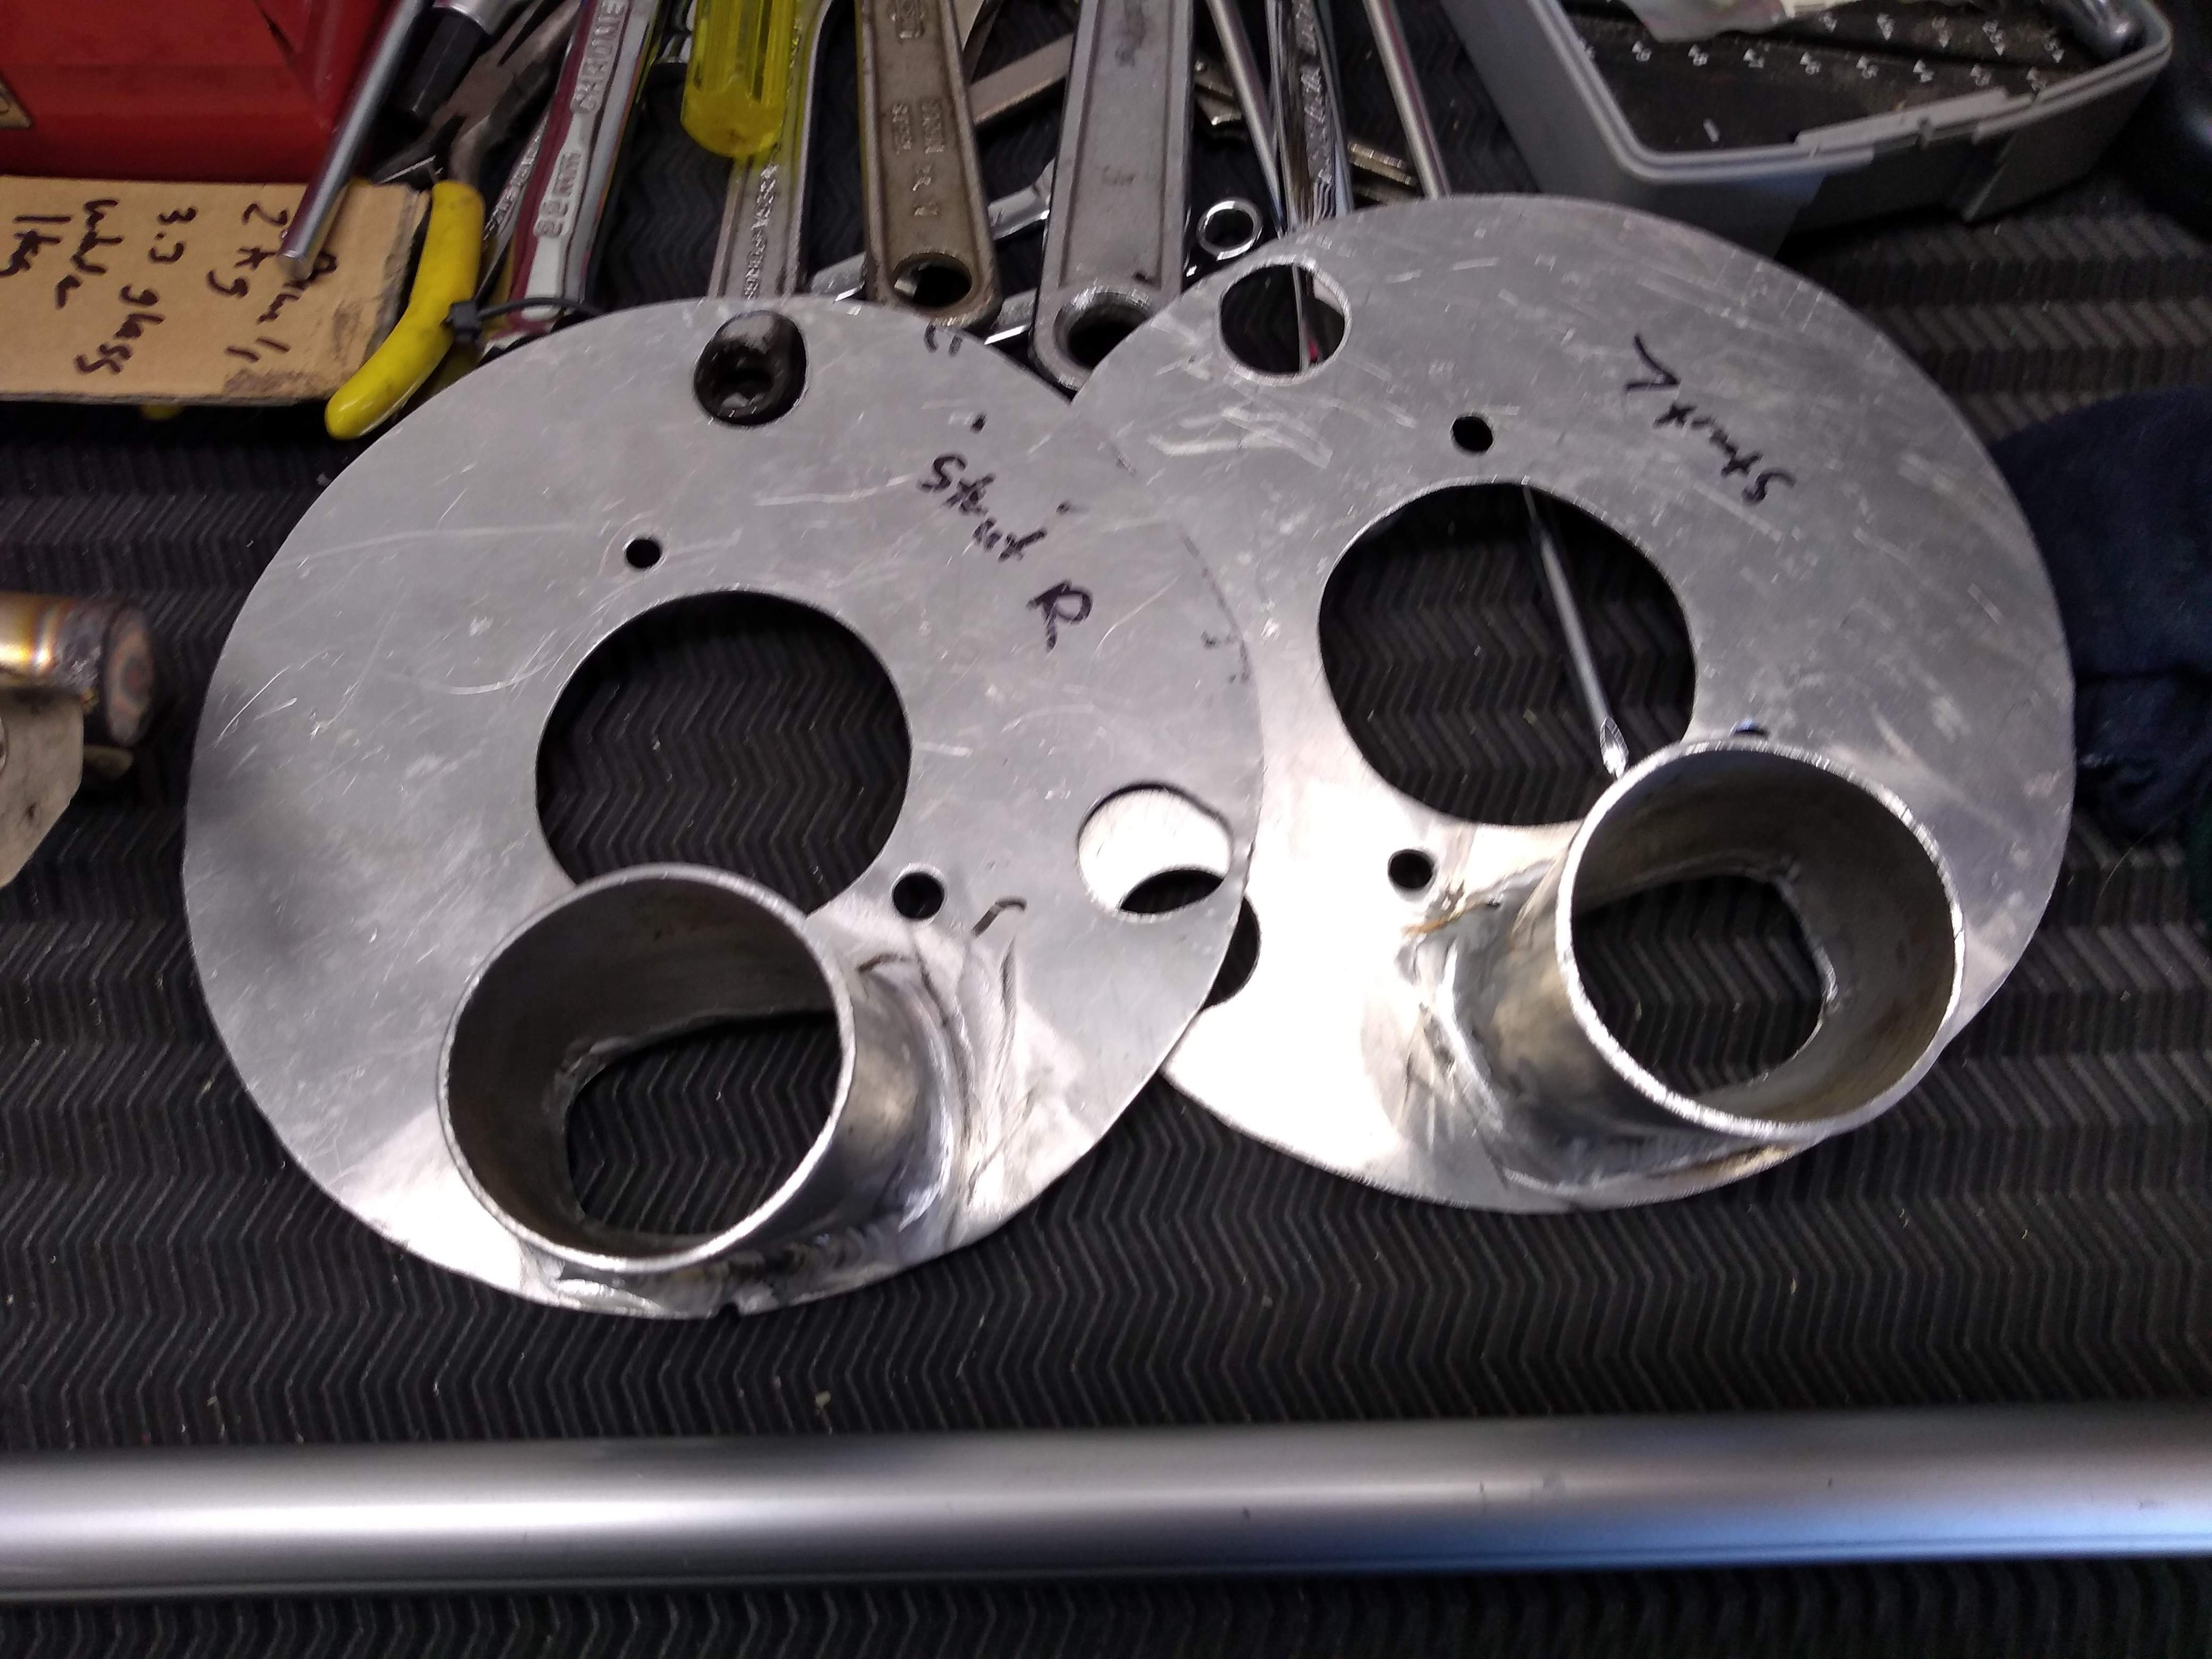
As is always the case, of the list of things I wanted to do before the next club day, I only ended up doing a couple... First job was new headers and exhaust, I had been running stock Altezza 4-2-1 headers (shortened at the 2 section) 2.5 inch steel system with two old mufflers under the rear diff and out the back. This was a pain as it was one piece all the way from the headers back and was bolted such that it could not be removed without major work (infact I never had it off as it was to hard). So the goal of the new headers/exhaust was: * Make it eaiser to maintain. * Side exit so no more diff issues * Gain HP * Save weight I was "lucky" when I spotted some TRD headers come up on Yahoo Japan in really good condition. Unfortunatly when we went to fit them, they ended up being 100mm to low, and there was no easy way to modify them to fit However they gave me accurate measurements, so on to plan b which was to get some custom headers made to the same specs. As the TRD ones were meant to give 13kw across the rev range. Being Made: All Wrapped: Next was to get rid of the indvidual trumpet filters. While I would like a cold air intake plenium, I just didn't have the time or desire to make one at the moment, so decided to go with a Pipercross filter and a backing plate to suit. Now space is quite limited in this area, so both the backing plate, filter and firewall had to be massaged to fit in and still allow the bonnet to close normally. Luckily there was enough meat on the filter to take the plastic frame down while still keeping its integrity, it means it's no longer quick release, but it will do the job. So then off to the dyno for a retune. Old Dyno Results: 134.6 kw (180hp) @ 6929rpm, 215 N-m @ 4560rpm (Hub Dyno) New Dyno Results: 149.9 kw (201hp) @ 7250rpm, 235.4 N-m @ 5150rpm (Rolling Road) Very happy with that result! So off to Club Day 4 with some new tyre pressures to aim for too (after advice from someone in the know) now running 21psi hot instead of 24psi. Race 1: Race 2: Race 3: So previously my best laptimes across the 3 races were: Club Day 2 1:39.040 1:41.980 1:40.270 Club Day 3 1:38.824 1:39.307 1:39.911 Club Day 4 Was: 1:37.187 1:37.400 1:37.424 New PB of 1:37.187 down from 1:38.824. What was most pleasing however was in race 2 every single lap was in the 1:37's where as previously they had varied quite a bit, I think that's mostly down to tyres as they used to feel like they were getting slippery in final laps. Car is now lifting it's front left wheel a lot out of the corners due to the grip, acceleration, and in some cases the back tyre was also lifting. It's performing a lot better now, and I can actually keep up with the competition down the straight so have a chance of getting them under brakes, where as before I was just to far behind. Next major items before the last Club Day 5 are around aero and improving the drag/downforce: * Duct cold air to the filter. * Front splitter/tray * Rear diffuser (If I get time)1 point


This leaderboard is set to Auckland/GMT+12:00