
Leaderboard


Popular Content
Showing content with the highest reputation on 04/03/19 in all areas
-
Last piece was to fit the 3pt seatbelts to rear outer seating postions And she flew through with no issues at all!! three days before Toyota fest, was a massive mish but we made it Still have a stack of things that i want done, climate control panel is toast which i have a replacement for, rear light seals need replacing etc. Have everything there to go but will slowly get through it all and get the car to where i vision it to be.12 points
-
Oh man I haven't updated this for so long. Six months ~ time fly's and all that guff. Didnt really do anything to the Hudson over the Summer. Messed about on the old 52 Buick a bit as it has been playing up but other than its all been work or play I guess.Anyway thats my lifes catch up hour complete. lets talk old jalopies & do a quick catch up on to where the Hudson currently sits. And then with luck I will pull my finger out so to speak and start updating this more regularly.I should warn you all now this might be a tad pic heavy. Photobomb you all since I plan to follow the old saying "A picture is worth a thousand words". Oh and images are all odd sizes due to camera settings at the time. dratted updates.First off the engine was put back in and tight tuck headers thrown on.Left hand side had clearance issues so we put spacers on the engine mounts raising the engine a fraction to cure the issues. Although we have clearance at the firewall it will get cut more to tidy things up and give a tad more room.Wheels on, engine in and sitting on the ground... better jump in and visualize cruising.Radiator slotted in. Happy that we modded the thing to have twin fillers and a central top outlet. Purely for aesthetic reasons really. Just hope it will work well.Was a bit concerned about the amount of space between the rad and engine at first. but once the custom fan shroud is on and other junk is in there the gap should fill up I hope.With the engine in and headers on next steep seems logical enough - fab up the front exhaust. Was surprised how easy it went. Heap of room on each side so no issues getting to the oil filter or anything else. Still is rock solid.Welded all up ready for a quick paint and fitting. H balance pipe just at the tail of the trans. the two extra out lets poking out the sides are for the lake pipes - I like the idea of them being functional if i want. Looking at the above pic and below you will note they are situated in a low spot. this is not just cus it is just where they should be body wise but also to stop the possibility of any water pooling.Shiny sh!tFirst off i will say IDIDIT sales are top blokes. Why they never just blocked my emails is beyond me. For two years one, two or 4 times a month I would email them asking when there RHD column shift steering column would be ready. Patient bunch always emailed back. After a year or so they made up a column - it failed Aussie testing as it was to strong and didnt collapse enough. Will point out NZ cert laws are also extremely tight around steering columns with only four or so aftermarket brands being aloud. Rightly so as it is a big spear that could impale you. Anyway im waffling. To cut a long story short they have now made up a RHD column shift column- although its still not on the website. Since I had to wait so long they gave me a huge discount.Was a happy boy unboxing all teh steering crap.Initial fit up. Wasn't to thrilled on how the column sat at the dash. column drop was to low(as pictured below) so decided to order in a new one. Slightly cutting up the dash but will be worth it to get it to sit up in the stainless strip more.Whilst we waited for the shorted column drop it was decided to cut up the firewall a bit more as next we would need to figure out the lower floor mount for the column that currently dangled in the air.Three double D universals will be used. Bit tight near the headers but still will be easier than some setups.Below looks closer to the headers than it really is. has near an inch I guess of clearance.Its all nice and tight no slop or wiggle and more importantly no binding.With the front exhaust and steering done its time to move to the gaping hole in the floor and firewall.Top of the firewall all buttoned up. Will get cleaned up down the track but for now at least we have an area to bolt the trans cover to. Heap of room to fiddle about on the distributor etc.Skellington framework being made up for the trans cover. Bit by floor mount will get altered as I dont want it to be incorporated into the trans cover. Who wants the bother of removing the column to get the trans cover out? Will get it all folded up. Note the columns new position up further in the dash. Tilt column so should be ace.Been teaching myself Solidworks. Designed up the fan shroud and got it cut n folded.A couple of Spall high performance fans sit on the the shroud. I figure if they are good enough to cool NASCAR and high end sports cars then they should suck air through the four core copper rad and keep the old donk chilly. The rubber flaps are for highway speeds to let trapped hot air out. Middle rivets hold a divider in place that separates each fan. Thinking here being air follows the path of least resistance. So if only a single fan is running then air would draw through the other fans opening and not through the rad. Being in separate chambers hopefully will stop this happening. So yeah thats me pretty much! All caught up with the Hudson project. With luck will be getting back to it more now its coming into Autumn.One side note is the missus has got her self a new car. Just a small grocery getter / run about. A 1956 Morris Minor split window series II coupe. Seems to be rust free and mechanically sound little car - totally road worthy and legal. Owned by a nursing home from new till the old couple who she purchased it off got it. Garaged and loved all its life.So what do you do when you get a honest survivor in good condition? Cut it up of course!TheMoose on HAMB photoshoped it doing all we asked. chop roof, fade-away fenders, skirts & lower it. Like an old 47 buick just compacted. Once the current warrant of fitness runs out (6 months) the fun begins. Oh and old 30HP factory engine will be going as well.9 points
-
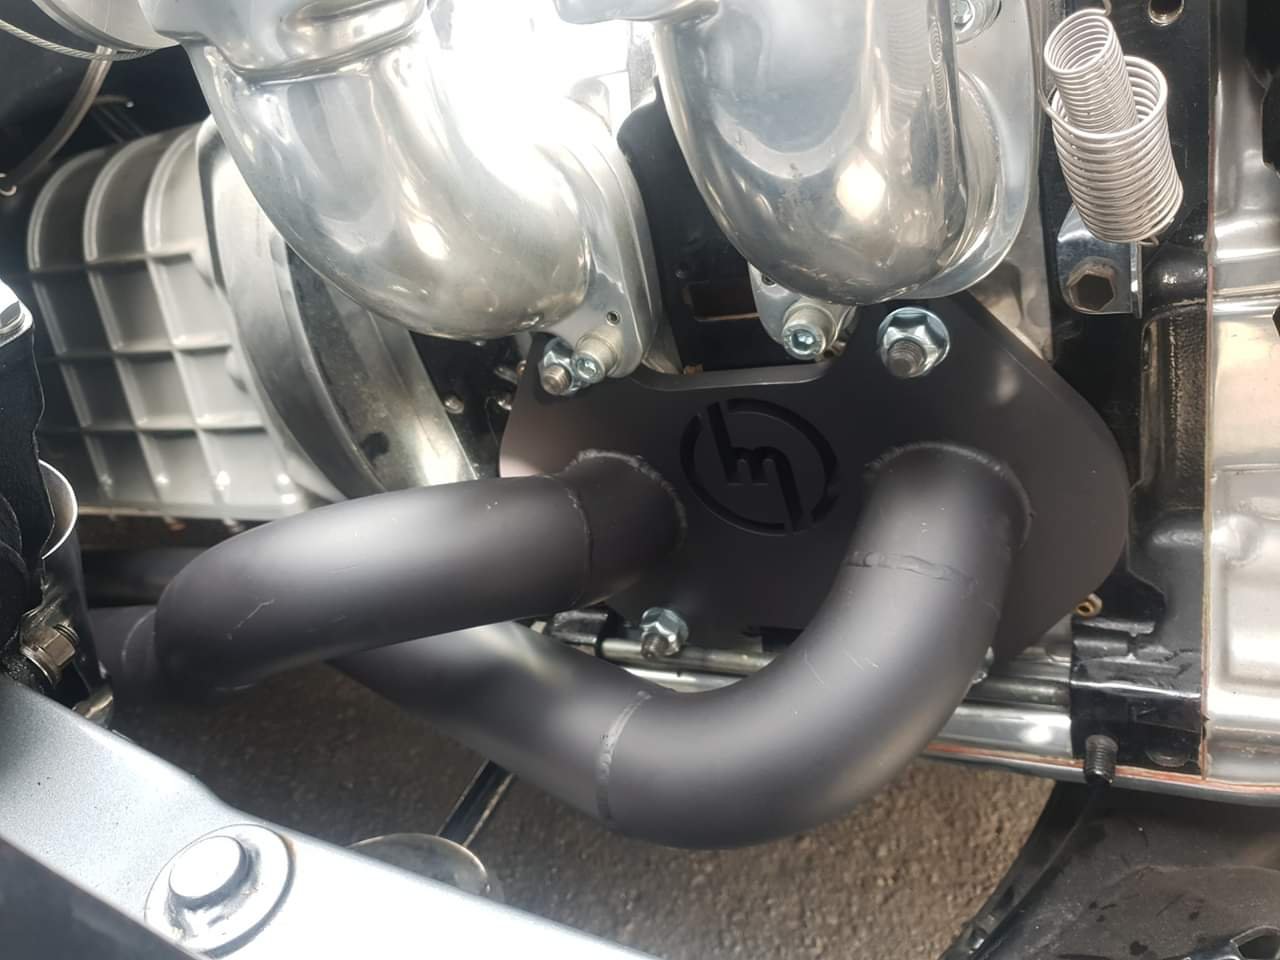
Finally went and got ol mate @EURON8 to ally weld the holes in the already hacked up side draft manifold so i could space the carbs apart about 4mm from where they were but without fouling on the dizzy or loosing room to seal or flow. some careful 'linishing' later Without any trimming the inner barrells will be 49mm apart, manifold spacing is 40mm, min i can get away with on the carbs is 45mm, max on the manifold is 44mm. its pretty flippin tight and doesnt add up... shaft need trimming by 3 to 4mm and the nuts thinned down a bit as well - i ended up spinning about 3 out of the vice, so i need some more M7 nuts to fit back on the venturi retainers i stole my spares from! no need for retaining washers :/ You can also see how offset the carbs are to the manifold Redrilled and tapped - had to open a old NOS packet to get a 5/16 NSP tap out that had been floating around in my grandads too box for who knows how long before that Fitting the o ring holders show where the manifold needs a smidge of smoothing, about 15 seconds with the belt file. The outer edge of the o-ring diameter is just inside the edge of the manifold face. linkage mod, toyota corolla cable from the old single carb set up to twin weber linkage, all this is sandwiched between the carbs boom AS mentioned in a previous post, these carbs came from a very hot mini, and apart from the drilled and soldered main jets, they all looked very close to what various books and setting tables suggest would be ok for 1500-1700cc engines. 32mm chokes, F9 tubes, 45 idles, 185 airs and random sized but soldered and redrilled mains I had previously ordered 125,and 135 mains so popped in the 125 to start with. old manifold off. Removed the (pretty new) old leaky mechanical fuel pump for good, and installed a factory engine blanking plate. Dumb photo cause it shows the old pump. installed and with new linkage mount and brake vacuum routing, both way better than before. Fuel hose routing will eventually be jiggled to look better (i had orignially wanted to have fule coming in from the firewalll side, but the double ended banjo is a bit long to have the hose make the remaining curve without a kink or rubbing. May try bending it a bit, or maybe just buy a bent one. Clearance is ok, but I cant install the bell mouth into cylinder 3, nor will the air filters i have fit - i will look into making an airbox - i have a Strada 125TC airbox with 'ABARTH' and a scorpion stamped on it that i really really want to make work some how but whatever, lets worry about that after! plugged the fuel in, then spend an age jiggled the timing around and carefully power filing the manifold, then trying to find the best combo of a limited ability to clock the dizzy (it fits in only two more or less fixed positions, maybe 5 degrees rotation?) and dizzy drive tooth alignment , and then it fired up and idled. and revved. Sounds good, and AFRs are ball park YAY! DOORTS!5 points
-
Since 'finishing' it in Janurary, Ive put close to 1000 trouble free km on it. Theres a few things I need to sort (raise foot pegs and replace the brake pedal as its rubbed through from dragging while cornering) but overall Im pretty happy with it. Its turned out pretty much the way I envisioned it. However, I have a couple of plans for changes to be made. Id like to sort the carb issues with its original motor and get that back in, A few asthetic refinements and as I get more confident with welding maybe some wilder bars... But theres a couple of other projects under way in the shed so stay tuned
 5 points
 -
Ye gods, the parts diagrams for that stuff..... all pretty easy given that I have used your rego to get the exact illustrations, but man, they're messy. practically impossible when someone's like "I've got an 06 Caravan, and I need the left hand rear most heater pipe that connects to the hose that's got a bit of an angle on it, and that one connects to another pipe that has a couple of bends, but it's on the drivers side, but the left pie......." BTW if you need any genuine part numbers, just let me know.
3 points
-
wow - i dont believe it...... Top work, now push it back in the shed for another 3 years, just to be safe3 points
-
Rinse, repeat. Photo album (and a couple of vids). https://photos.app.goo.gl/LH9moaASkxJuNtV8A3 points
-
Links shouldn't be dead? I'll check now. edit - nope it's there https://lvvta.org.nz/documents/infosheets/LVVTA_Info_01-2009_V3_Tyre_Size_to_Wheel_Size_Compatibility_Guide.pdf Will hopefully be updating that again sometime soon. (I have the wheels and tyres standard on my desk for updating)3 points
-
fyi it might be changing/have your say/buy some teddies etc @Bling3 points
-
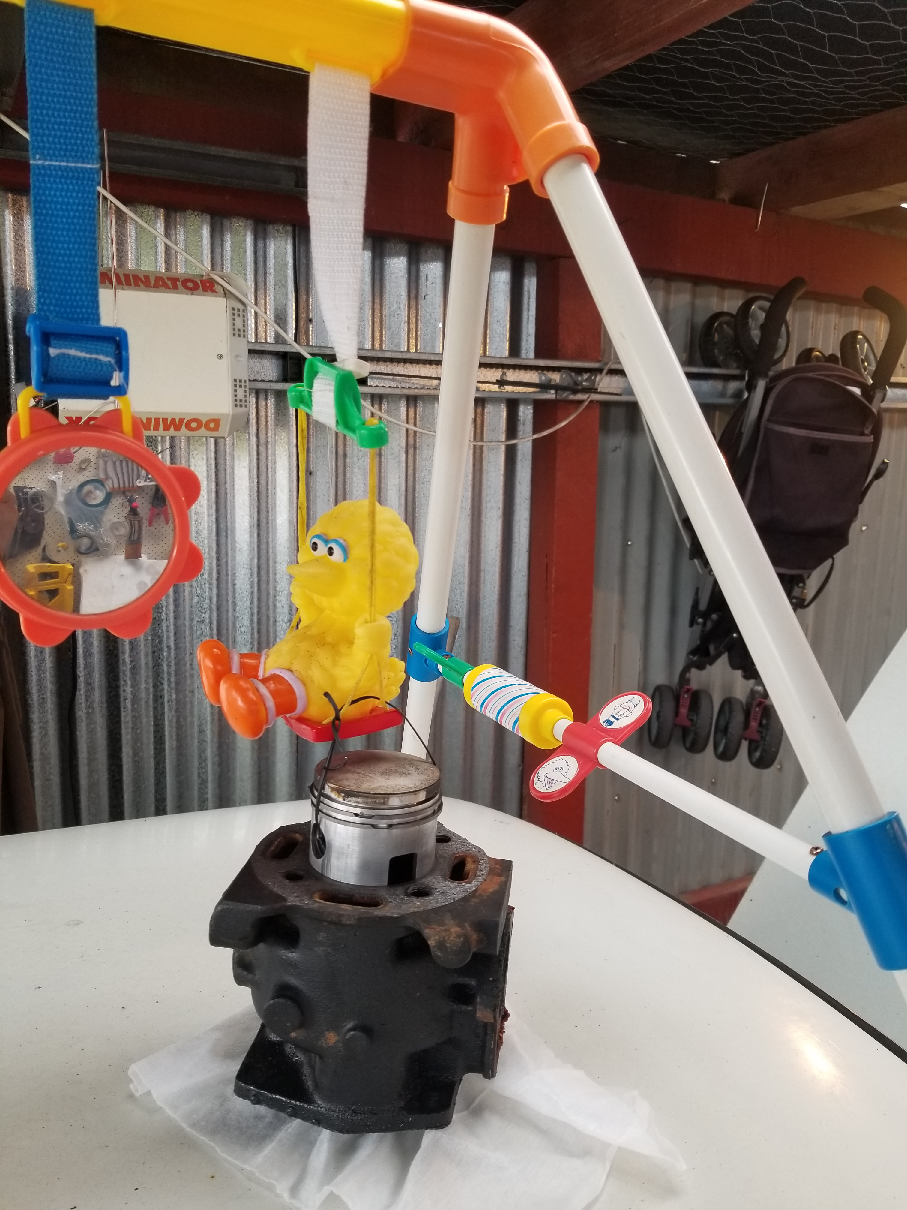
Engine crane.
3 points
-
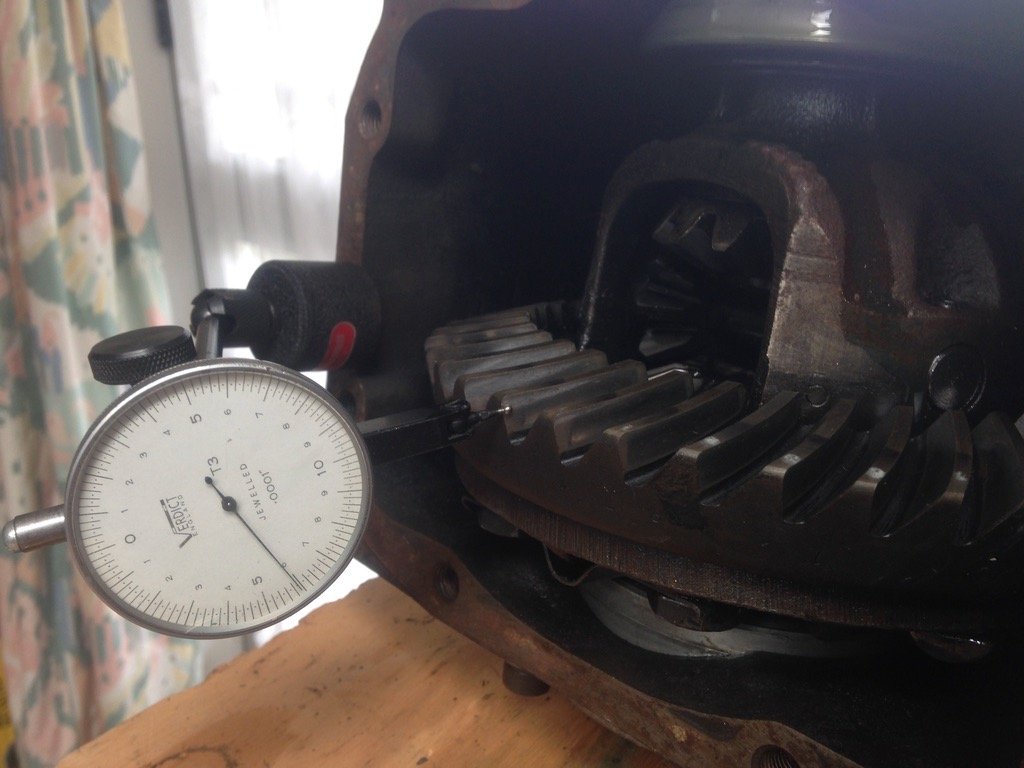
I'll measure your gap2 points
-
I had been using a different link previously, this one, which is linked on page 2: https://www.lvvta.org.nz/documents/infosheets/LVVTA_Info_01-2009_V2_Tyre_Size_to_Wheel_Size_Compatibility_Guide.pdf I guess the document has been updated since then though. Also found it linked of this wheel site: http://ssawheel.co.nz/technical_id_69.html so I guess people need to update their links. I'm lazy so just used google and came up with the dead links. Will go via the site next time. When visiting the old link (above) the "home page" link doesn't work, so that's why I thought it was gone.2 points
-
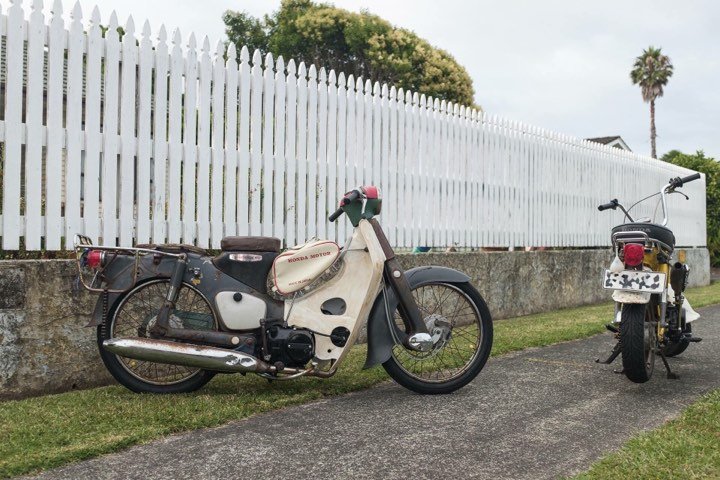
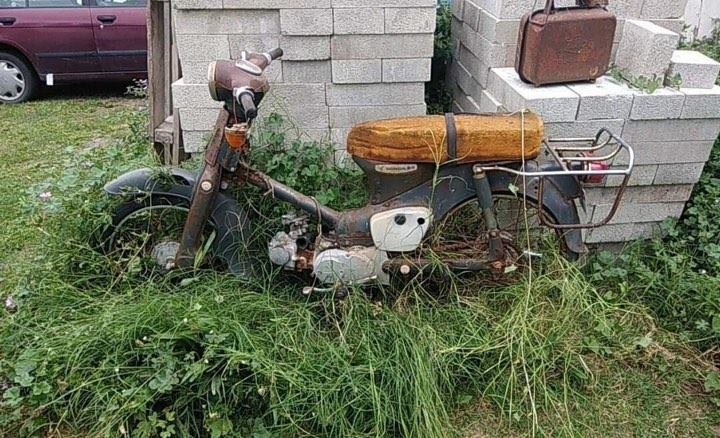
So after getting rolled by the 5.0 on the Chaly, that got its innards stripped to finish another bike. @Raizer found this in a garden in Gisborne, and pulled it from its slumber. It had been sitting under a tarp in the long grass for a while developing a killer patina while actually staying fairly complete with all OG parts, I collected it off him and dragged it home in a 12+ hour round trip from Auckland. The 'GardenCub' Its pretty sweet, fairly ratty and suprisingly solid. The externally rusty wheels were found to be immaculate internally after removing the super cracked tyres. It even had the original, matching patina legsheild. The engine was seized, the carb had an ant nest inside it and the seat base disappeared aftter the strands of foam holding the corroded base together cried enough in the trailer and scattered rust flakes all through the gorge. Id been wanting a Cub since, well, probably seeing QCR on the news / in NZPC and pined over the Peaks Mopeds type style of OG paint, maximum slam and chopped up standard bars. This had been in the corner of the shed, and over time I progressively stripped it down, washed all the gunk out of its crevices, renewed wheel bearings, freed up seized pivots on the brakes, ordered replacement cables, brake shoes, pestered @MopedNZ to find me the style tyres I wanted (He had to get his work to open an account with a supplier just for me <3), put feelers out for a few parts my bike was missing -taillight etc ( hoarded all the old stock parts people were removing to customize there cubs} all while trying to preserve as much of the patina on any externally visible surfaces as possible. I stripped and rebuilt the original engine with a new top end, all gaskets/seals, reconditioned cylinder head and got it running but had a terrible time with the carb so it sat in the corner of the shed while I was caught up with a few other things, Then the chaly got decommissioned so the motor got pulled and Chaly motor swapped into this along with a trailtech, and rewired from scratch. In my pile of other peoples discarded parts I had a spare stock ehaust, so the front of that got chopped off, muffler hollowed and a new header made from misc larger diameter stainless bends to suit the new engine. Handle bars were a spare I acquired to use as a trial for my first attempt at fab work / welding before I committed to butchering the original bars. They've been narrowed about 100mm over stock to get rid of the indicators, aswell as being pulled back and down to match the angles of the legsheild. I also remade the bar cover to follow the lines of the bars while still trying to keep them fairly factory looking in the way they tuck into the switches. I reused the original grips, slide throttle asm, speedo and switch assemblies. They're not as narrow as Id like them to be, but they're the same width as the rear rack, and have super comfortable angles. Fairly happy with them as a first attempt considering at the time I wasnt quite confident enough to go butchering and re making the handlebar mounting points. Bag and spine rack were an ebay special -rate these for chucking drinks/junk in, Legsheilds a repro thats been aged to match the bike as I couldnt bring myself to cut the OG one to fit the carb off the chaly motor, Deluxe fork cover and legsheild clamp are OG stuff pulled from my pile of parts Ive added to add to the OEM+ spec asthetic I was going for. @MopedNZ was kind enough to bring me back a set of Draft Kustom Shop Lowdown links from his previous trip to Thailand in 2018. These are sweet and give a 30mm drop over stock, but that wasn't enough for the look I was wanting so when installing them, along with fresh bushes, They also got the QCR mod done to prevent lift under braking and a couple of other custom touches to chop closer to 60mm out of the ride height to get the guard destroying ride height I was after. resulting in the front guard and fork cover being clearanced nicely by the radial tread pattern of the tyre. PERFECT. The rear got bought down to match via shortening of the factory springs/shocks. Still retains a very little bit of suspension travel which is nice.
2 points
-
Thought I would try a new look 17x8 d windows looks good to me just need white lettering on the tires
2 points
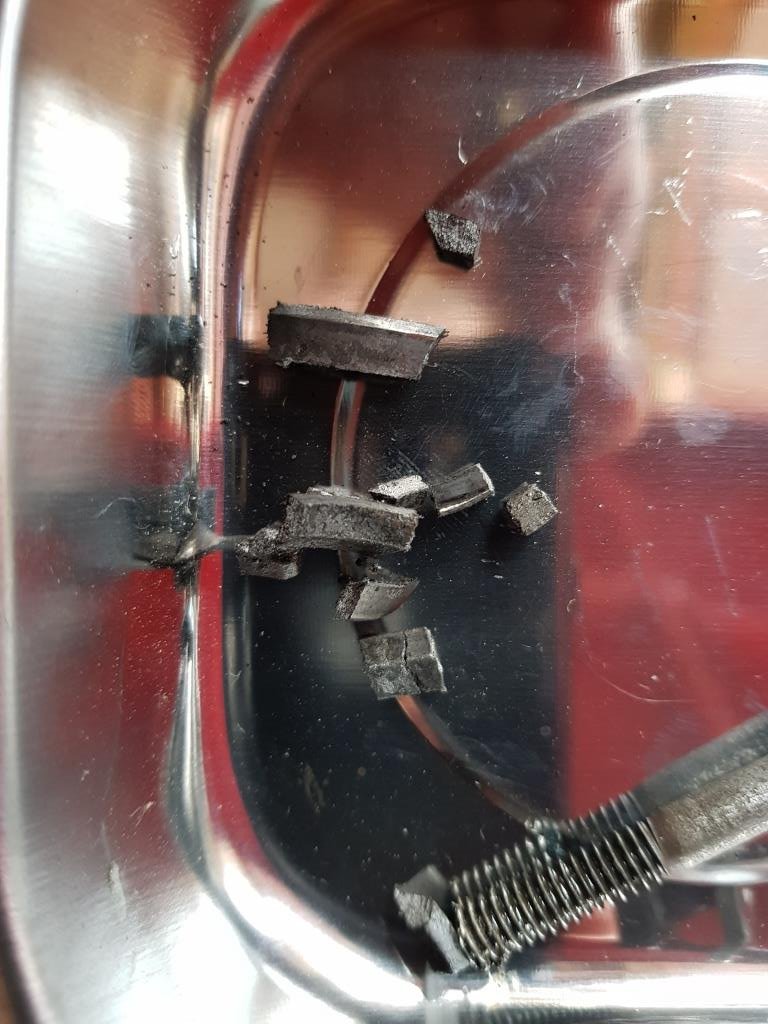
-
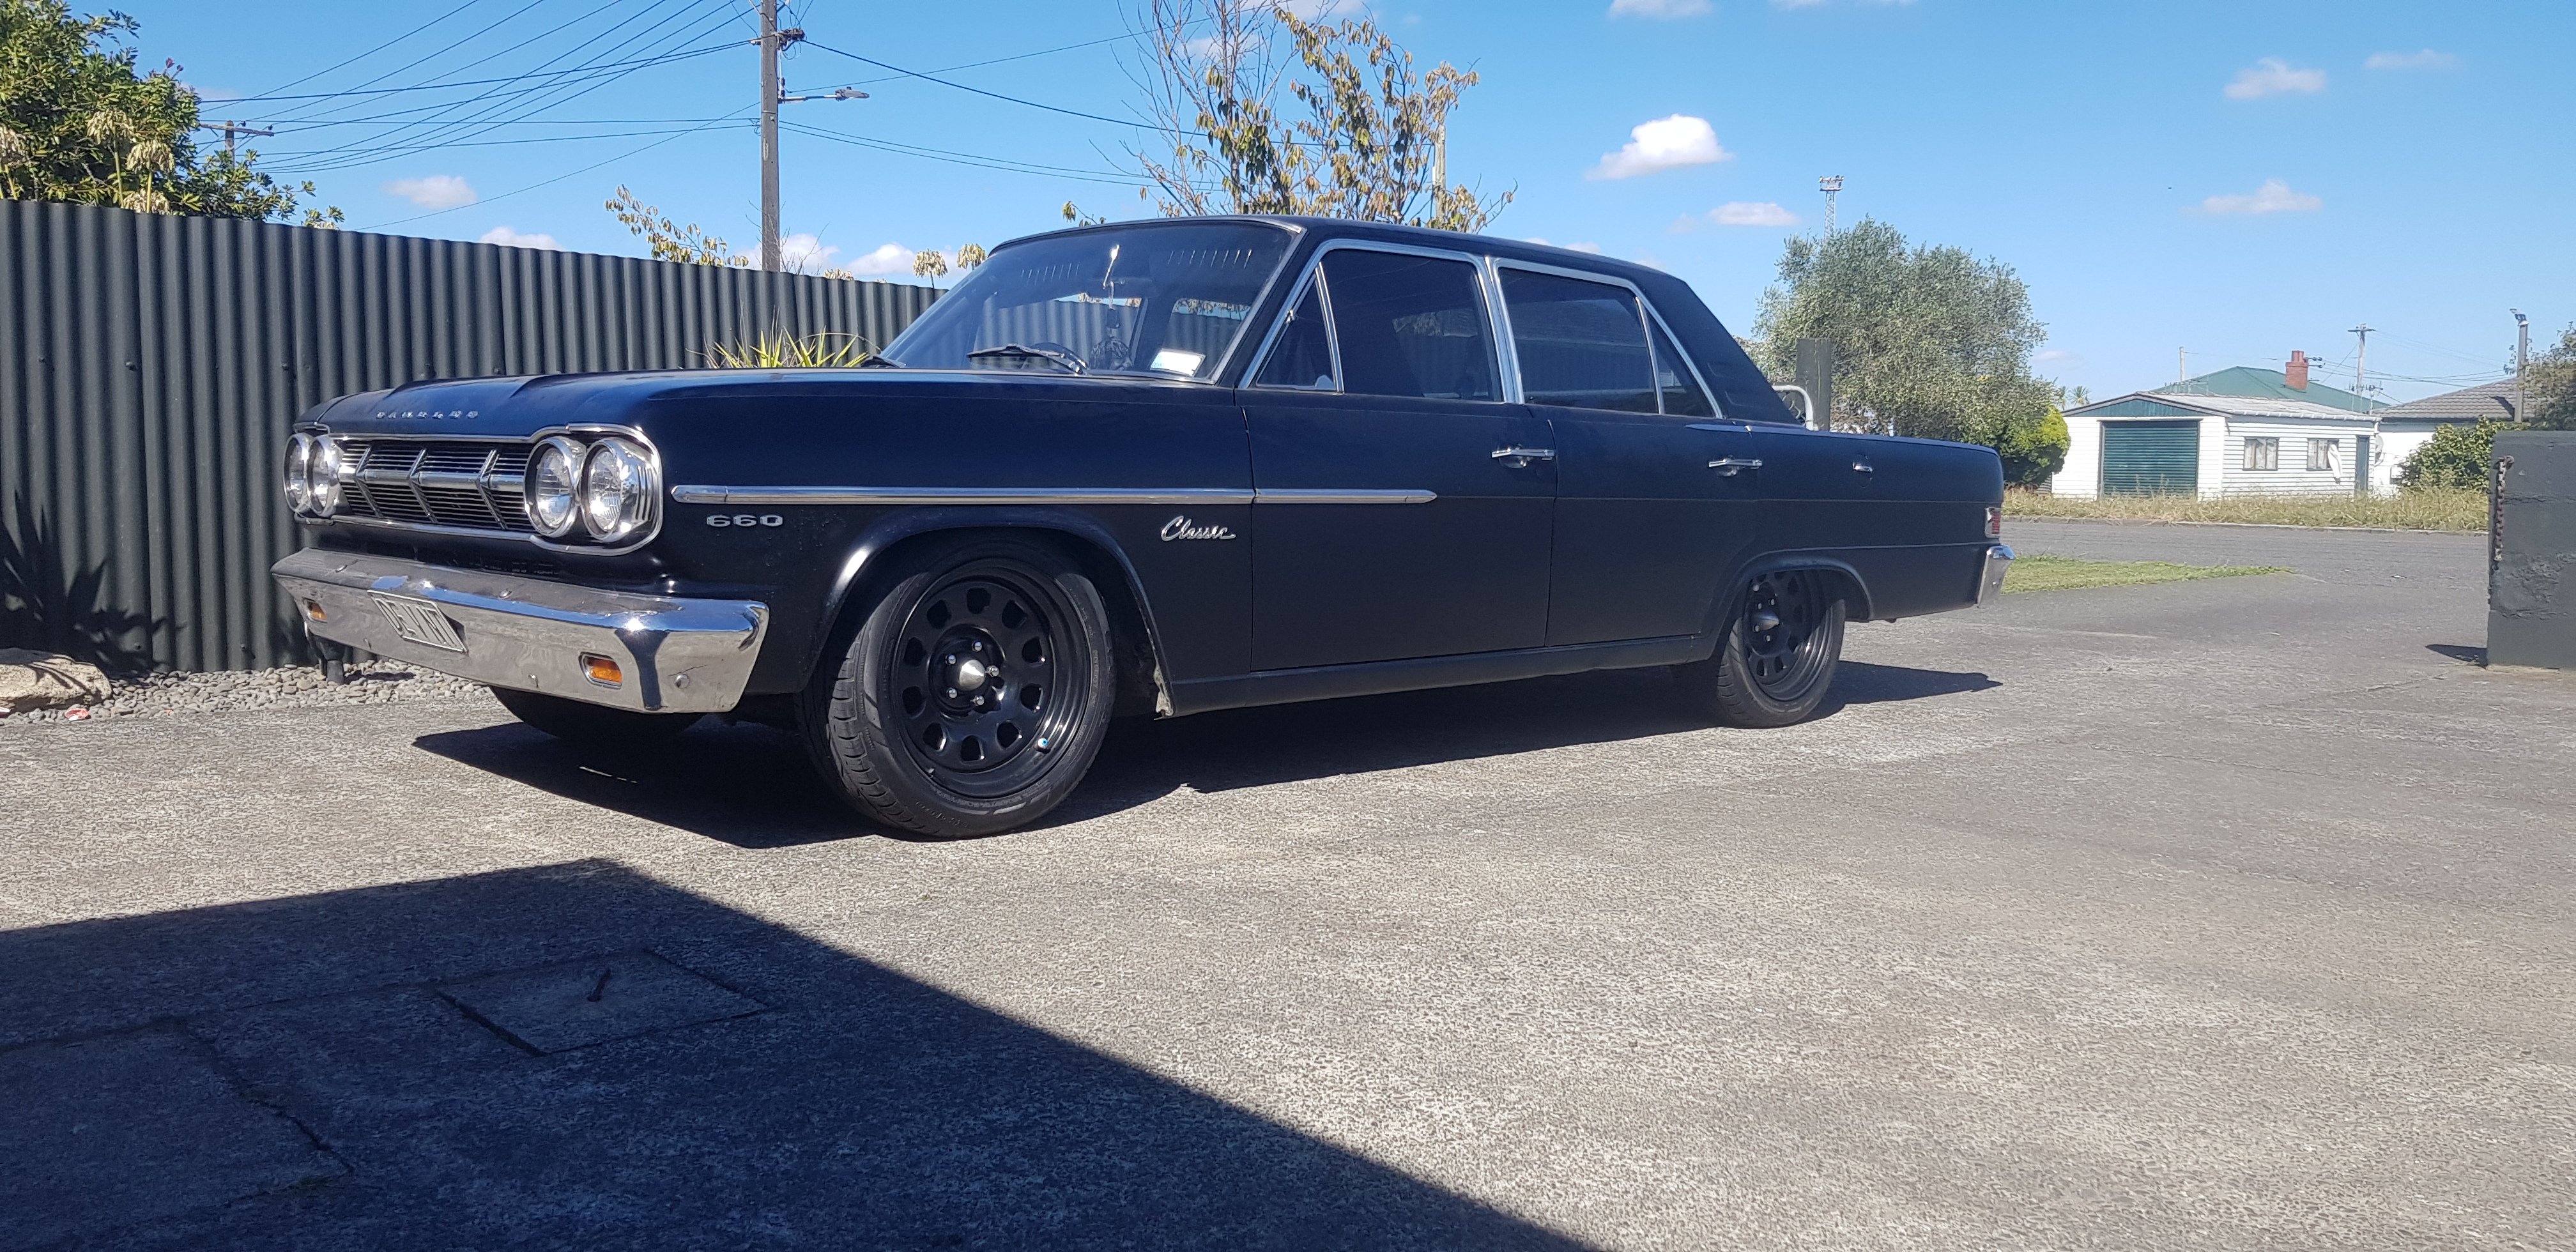
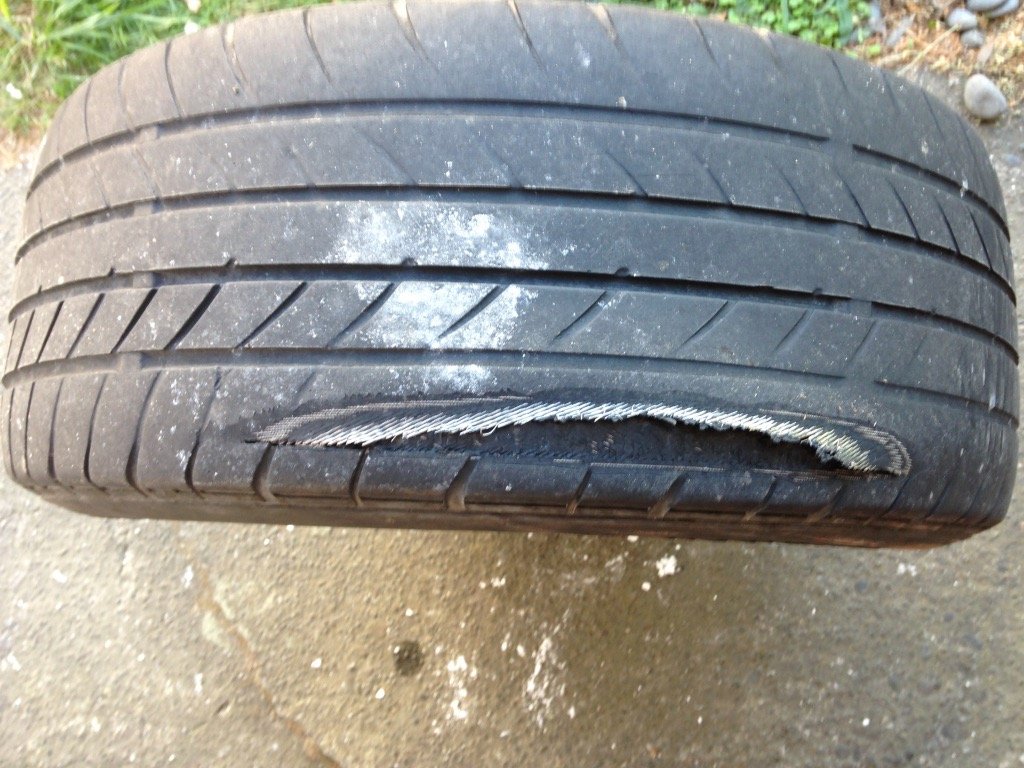
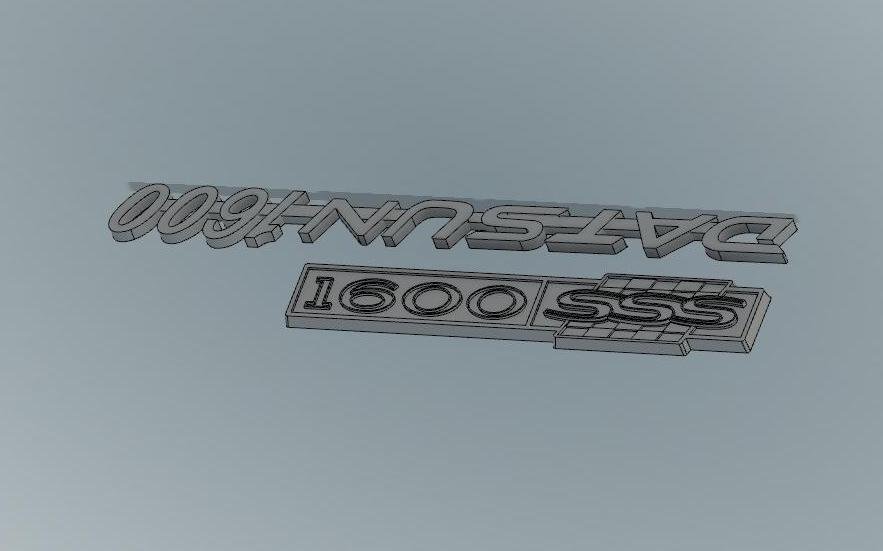
Electrical issue turned out to be worn brushes in the distributor, after a solid tour of Chch looking for a replacement brush housing I ended up finding a young fella at Repco who took one look and said, you need bush set xxx, see, they can be soldered in right there. Not often you find someone at a parts store that has the right knowledge, he set me off to another branch with stock and the repair was made in 5 minutes for less than $10 Valvetrain tick investigating time...... Once again, couldn't find much, but one lashpad and rocker had a burr which I took off, unsure if it really changed much. After some more driving and a worsening sound I rechecked the gasket, turns out the new gaskets don't have reinforcement around the exhaust ports, didn't last long! Put the old one back in with a helping of sealant, so far so good. Whats really odd is the tick is most noticeable in the cabin, with the bonnet up it is there, but is drowned out by general engine noise and you'd struggle to pick it up. I'm starting to lean further towards i'm just being paranoid. The only thing I am yet to do (and probably should have done first) is check clearances when hot, that might offer a different view. Went for a hoon down Central Otago way Was a bloody good drive, midweek and late afternoon meant little to no traffic through all the fun bits, until overheating at lake Pukaki on sunset, I topped up with water and limped into Wanaka, unsure to the exact cause as it drank quite a bit of water, wasn't down on power or using fuel and the oil was all good. Turns out I had blown a heater hose and thankfully the old L series is a tough beast, a quick visit to tractor services for some tube to bypass the split hose and she was all go again. However I no longer had a heater. Calling around the usual suppliers and Nissan didn't provide any replacements, the hoses are all listed NLA so to the parts shelf I went Generic Gates hose 01-0005 covers the heater feed behind the block and a Holden commodore hose Gates 02-0912 was just enough for the return line. While in the mood, next on the list was to get the 3.5 R180 diff into place. Standard R160 top, R180 bottom. Quick check up, close enough. Out with the old In with the new. Needed a pair of sump plugs which were happily provided by pick a part and their solid collection of R180 equiped Subaru wagons. This should bring the 100k rev limit down around 3200rpm, it may be at the cost of of the line go, but the car is more of a cruiser than racer now, its worth a go. During the process I cut my hand on the wheel, not sure if its from being old or due to damage, but a new set of tyres is now on the list. Bloody happy to have found it here and not on the Lindis! Have also sorted CAD files for the badges, currently waiting on some tiny carbide end mills to feed the machine, this is so I can keep the actual badges on the shelf and not be paranoid of them falling off. Numb nuts put them in the scanner opposite which is why one is upside down!
2 points
-
Just tidying up all the loose ends. Added aditional brackets to the new rear soft brake hoses so that they don’t touch the diff. Venting the gas tank. Wrapping wiring. Bonnet on My rear brake diff hard line might need another flaring as I have a slight leak at one junction.
2 points
-
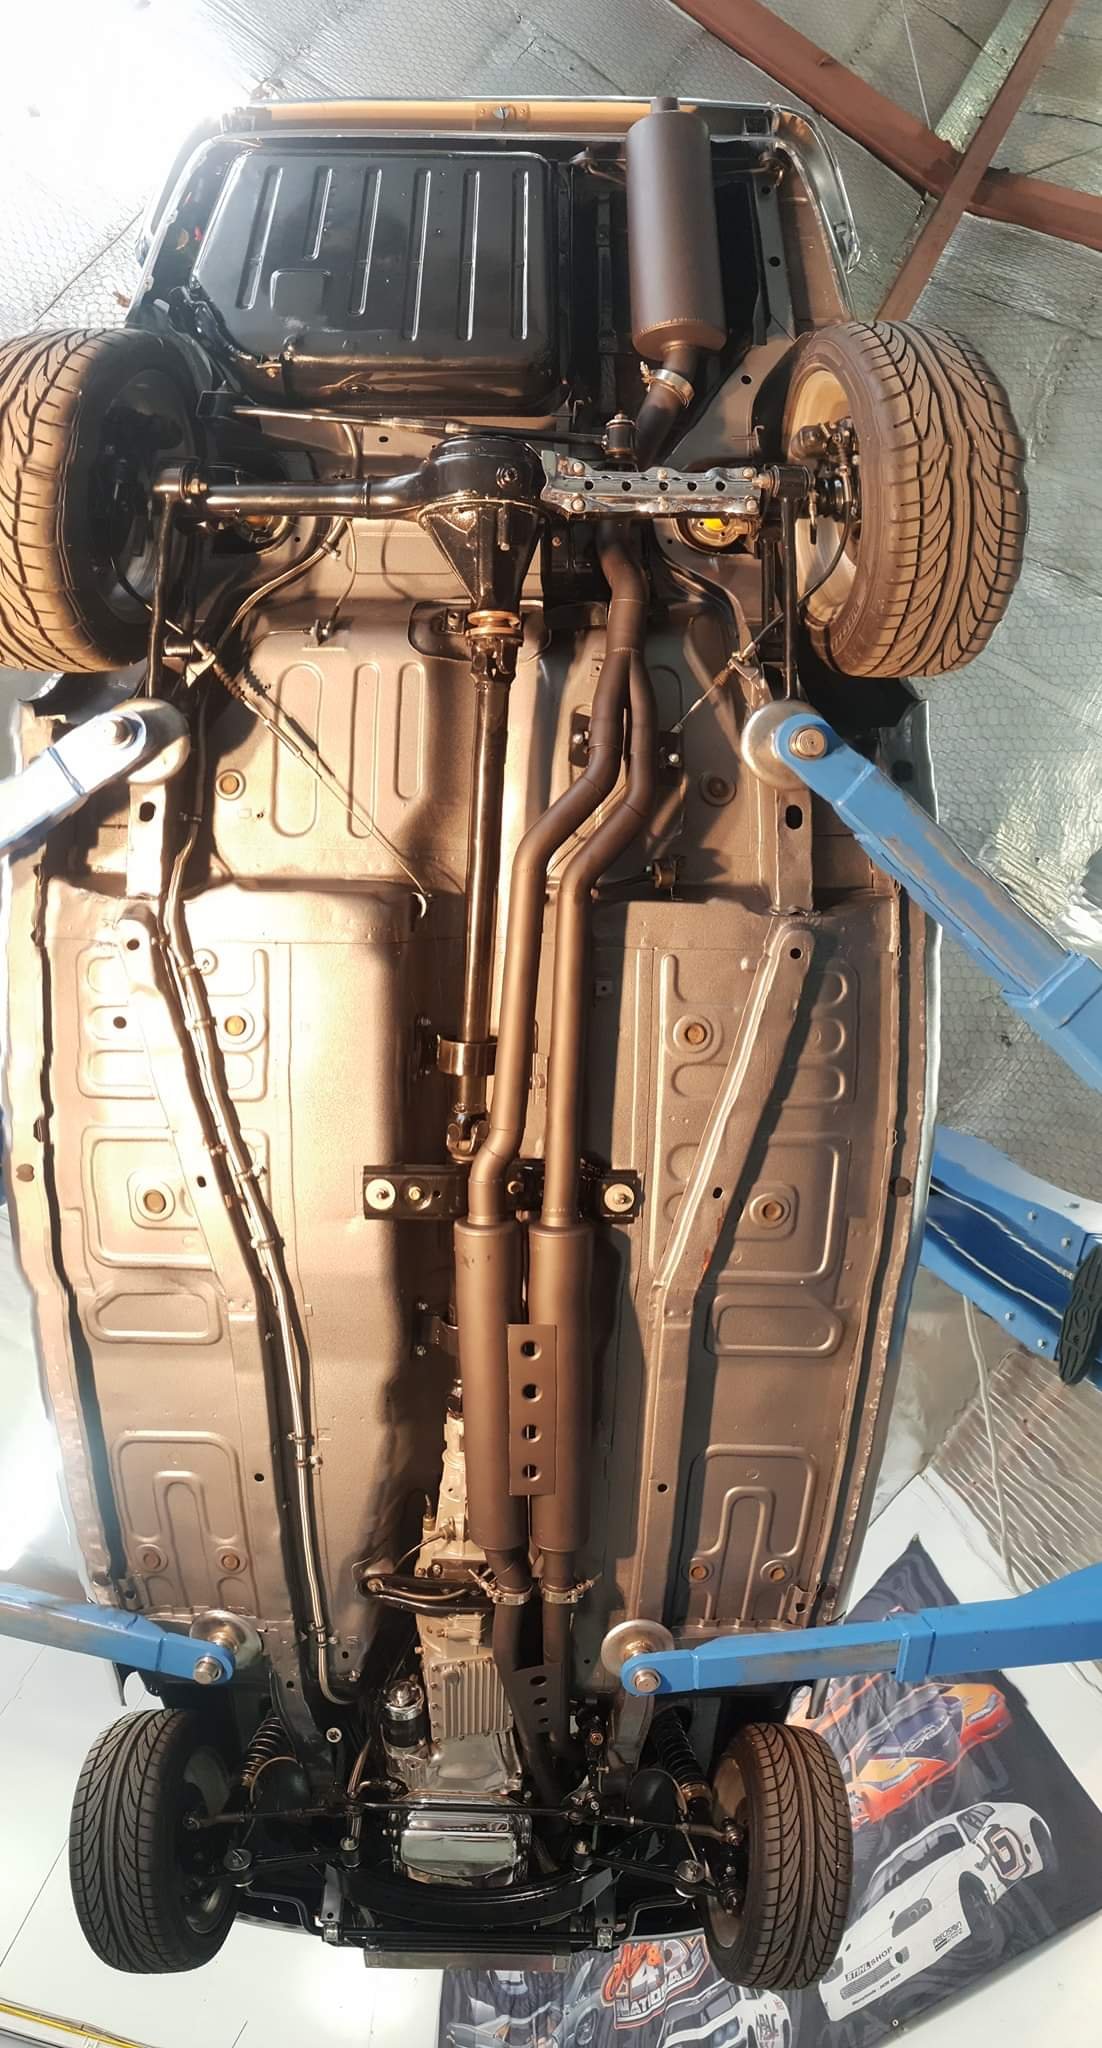
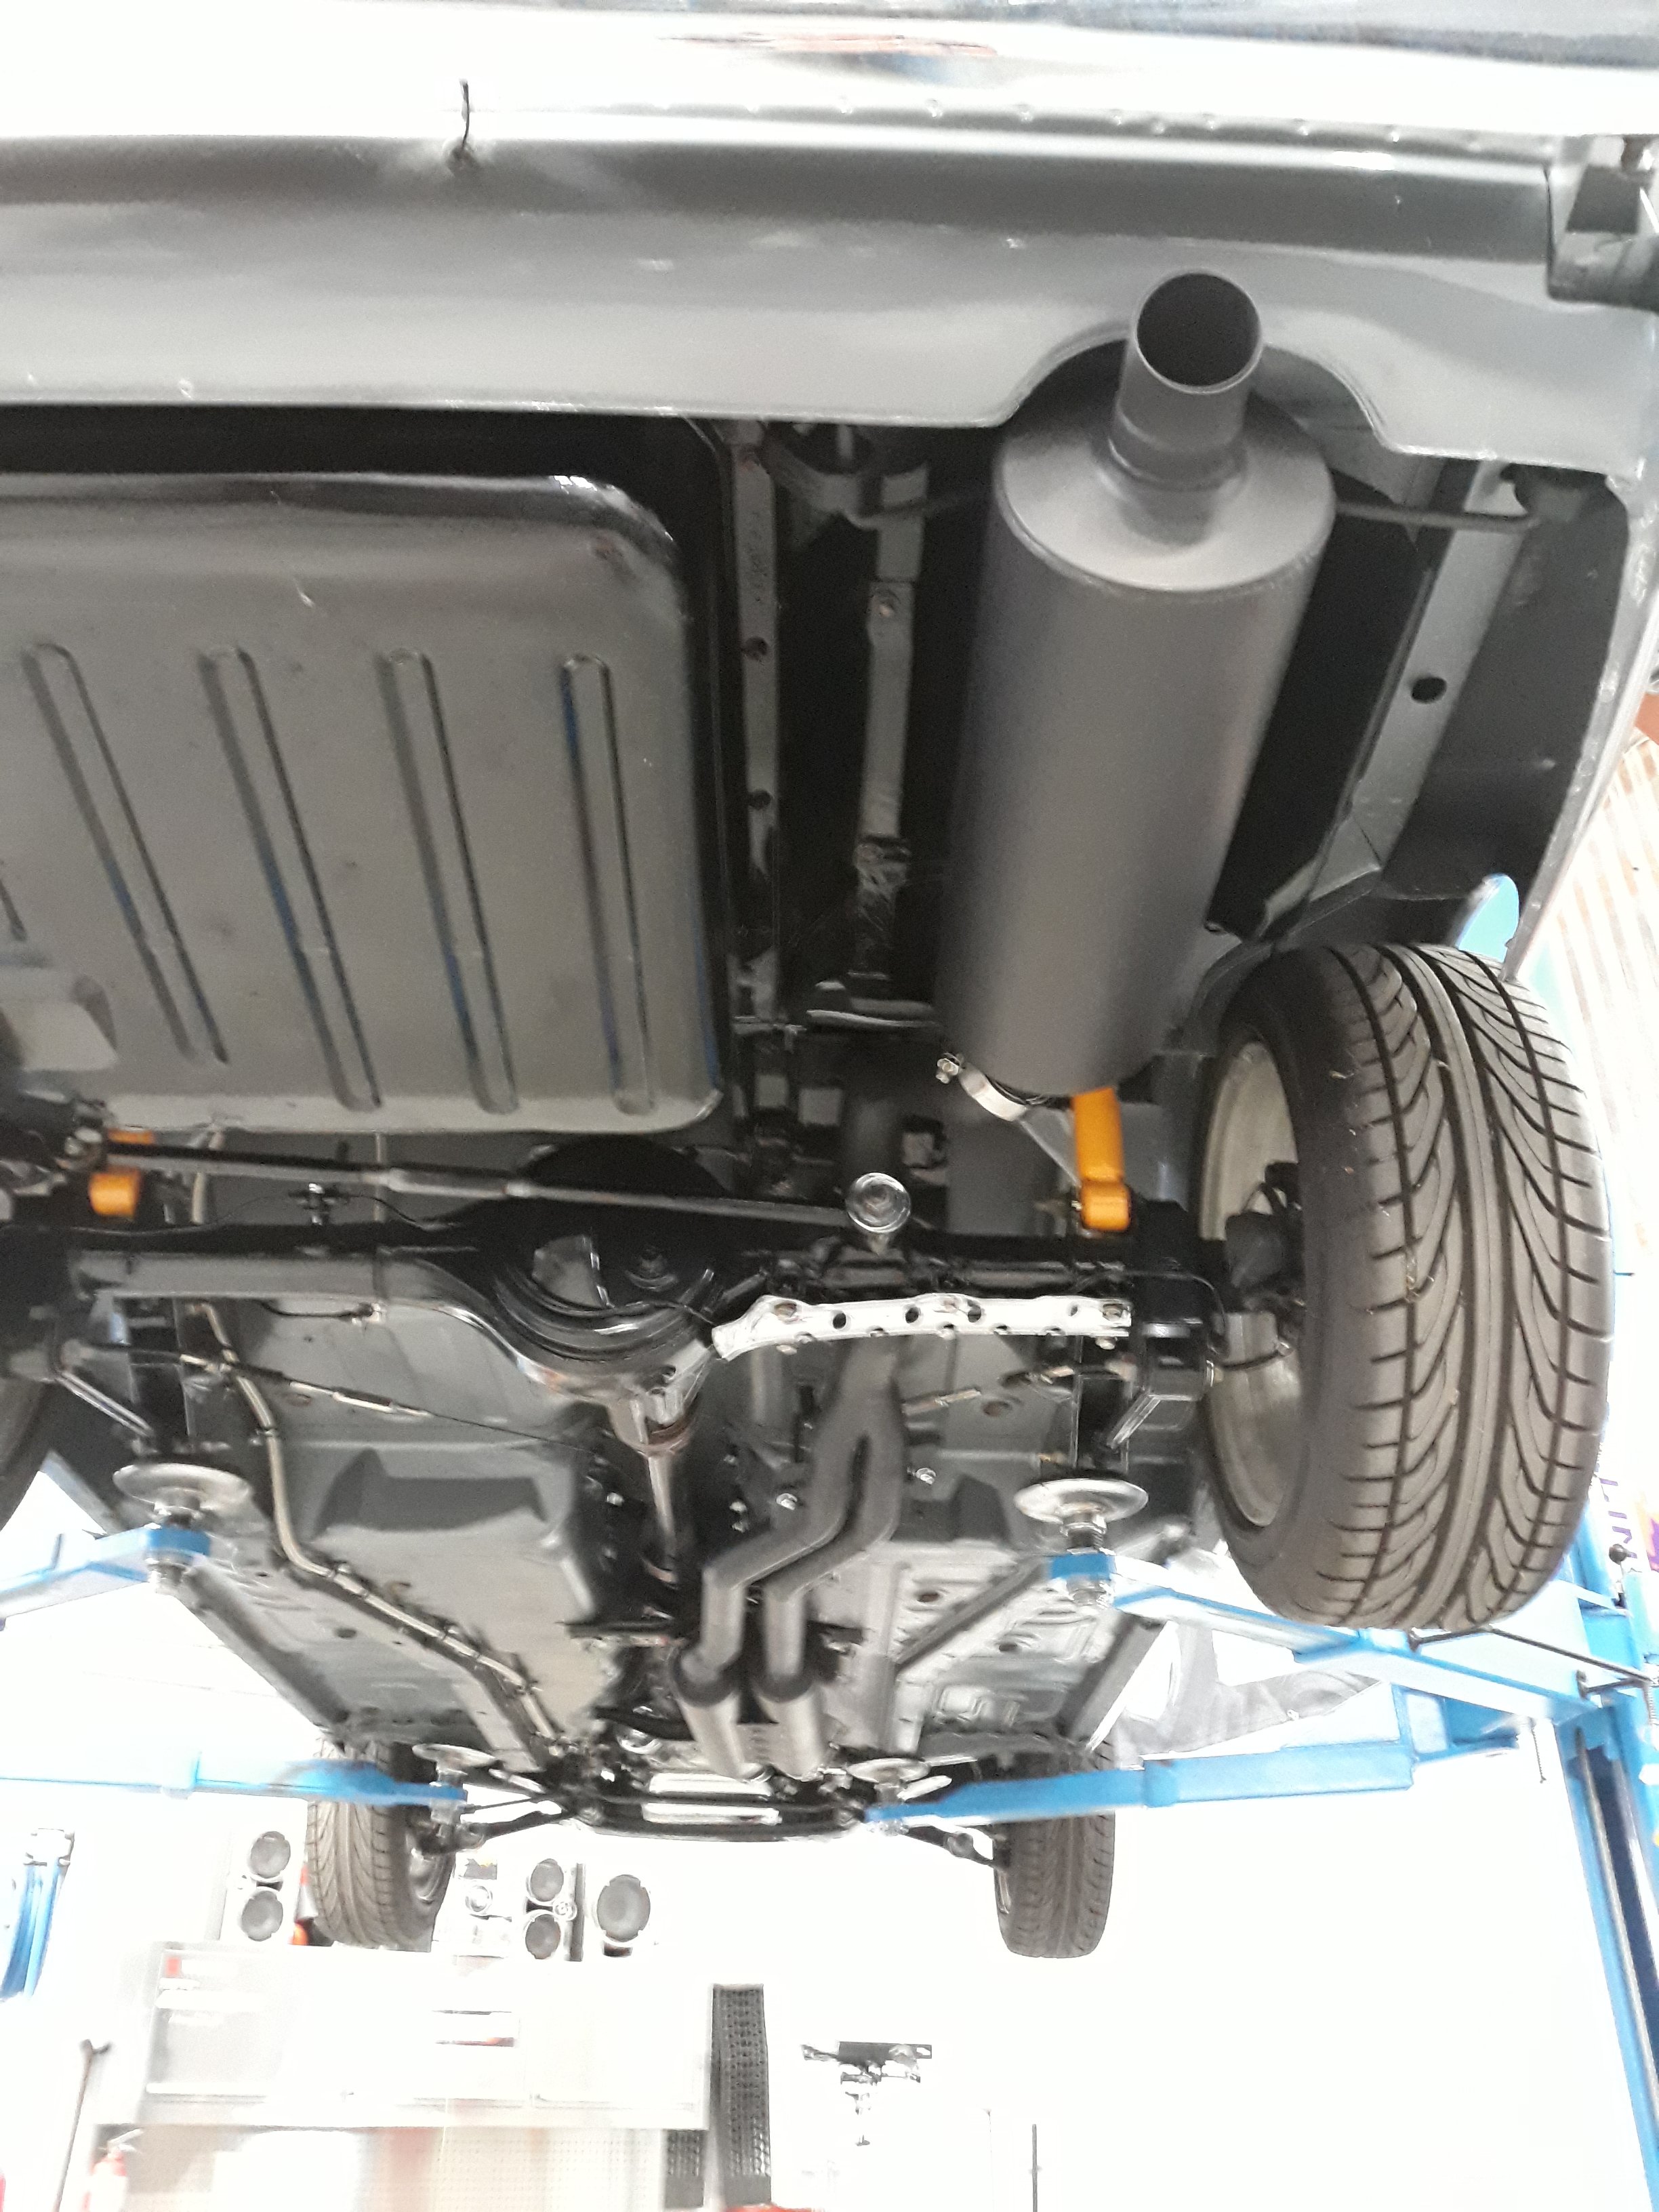
Exhaust is done for the time being. Sure we will take it off to weld up and paint in the coming weeks but this is as far as we will go on it until it is sitting back on ground. Added in the two mid/front sections of pipe. Had to off-set one slightly to get better clearances etc as it comes forward to the trans. the H will be in the next section. As for the back. Well cut the holes for where the exhaust will pass through the frame but really need the car on the ground with the bumper on to get this bit sorted. Will tidy this up next week I guess. As you can see in the below pic everything is tucked up nicely. Those mufflers are 5 inch thick. Yip the big fat mothers are sitting flush with everything else and not dangling low whilst they have about half inch clearance from muffler to heat and sound treated floor. Also started the park brake. Using a Lokar kit. The Wilwood disks at the back have a drum assembly as well for the park brake and everything just clipped together easy. Routed the cables through the frame. Used a bit of airhose to insulate/protect the cables even though they are in a heavy duty housing. Thats what the blue pipes are on the top pic. Yeah not the best looking I know but really who cares. They will get painted up and after driving will be coated in road gunk in no time. Made up a mounting plate with a access hole to get to the bolt under it. Idea is the front handbrake cable(using the stock Hudson one) will run along the inside of the outer frame to a lever we will make up next week that will attach to these brake cables. Lever so we can apply more force and thus lock those brakes up more effectively. You might of spotted the brake booster is in place. Was all very good chatting about levers etc for the handbrake but with real-estate under the car being restrictive we had to make sure both the brake booster and park break lever would fit in the same area together. As you can see – plenty of room for the rest of the park break system/lever. The placement of the brake booster worked out ace. way better than I hoped for to tell the truth. All I had thought was along the lines of ” I want it out of sight maybe hidden away under the floor like the original Hudson system.” Well how Flockie designed up the front sub frame works so well with the setup. Will bolt right up to the frame as you can see and it aligns right up with the hole in the firewall for the brake pedal assembly. Only issue was we had to cut a bleeping hole in the floor. Sigh. But what can you do? It hardly pokes through and with luck once its carpeted up with wont be noticeable. Guess I will give a run down on what im using. Hydrotech hydro boost unit. Supposed to be the bee’s knees with more stopping power than a vacuum booster. Runs off the PS pump not the engines vacuum so may free up a few HP. Has an accumulator that gives three or so full pressure presses of the pedal should a failure happen to the PS pump or something. Then the system would work like manual brakes. Then a dual master cylinder. Bore of 1.125 in./1.578 in. Have a remote cap & reservoir to throw on it so I dont need to worry about access holes in the floor and lifting carpet etc to check the brake fluid etc. More on all this latter down the track I guess. Will reposition the proportioning value under the MC instead of pointing down. Will also change out some of the hydraulic fittings to banjo’s /90’s. But yeah happy how it all mounts up & aligns up. Was thinking we might have to make big brackets to hold it in etc but how it lines up and mounts up with the frame is ace.2 points
-
Making your own PCB isn't too hard. With all the cheap fab houses around these days it's no big deal if you make the odd mistake or five. I made one for a project and only screwed up a dozen or so times https://www.hackster.io/davemckelvie/making-an-led-matrix-display-controller-58b1ab1 point
-
Yeah, Easter sounds fine. It does have a gap in the middle. I can’t measure it at the moment as @64valiant is using it, but I brought the Midget up from Wellington on it, and it didn’t fall off.1 point
-
Sold the old van, woooo! New one was a relatively cheap upgrade, but will take me longer to pay off based on fuel cost savings. I like driving it a lot better anyways. TInted the windows, and made a window blank/insulation panels for the rear side windows beside the mattress. 5 layers including the last of the foil backed stuff on the sheet side. Got a few dog hairs in the glue >:| Fiat shelf and and new tints in the background looking cosy baby one for the shag, pile, port, hole thread Tested in the most gruelling environments as proven by the following two photos: the background of this family facebook photo from my Aunties 60th and this picture of a road sign and another silver van project TO DOs - new mattress, oh god my back - cheap water pump is shitty, need a self priming one - ventilation - this van is way warmer but also stuffier than the old one with the fancy interior, roof liner and side panels - want to find a slider window for the window behind the drivers side ideally - wheel alignment + get them to wind up the front torsion bar about 10-15mm (more on drivers side) as the tyres rub on big bumps and has quite a soft spring rate (i did this on the old van and it handled much better) - boost gauge1 point
-
Most of them drink either Speights or Tui... but the pub had pretty much run out of beer when I left last week. I heard the ship arrived this morning so there's going to be 300 4x4 utes lined up at the port to collect pallets of grog. Lol. Oh, in other news:
1 point
-
The last few days I have had elcrrical issues. Lost wipers/washers , lights and horn. Fml Matt my auto sparky came over from Redline and fixed all my issues tonight. I couldn’t be happier. He even fitted the brake light switch to the pedal box so we are all go. Compliance and WOF Thursday - along with hopefully the repair cert sign off. As I understand it, the WOF automatically fails due to the need of a Cert. Friday is cert check so I guess I have the to do list after that and have 21 days or something like that to rectify. Busy time and hope everything still works as it should for the checks - I’ve literally driven it 50metres up the road so Thursday will be it’s longest voyage in the new engine. Once this is all sorted, I will dyno it (perhaps earlier if required). Cheers1 point
-
Hacksaw blade with the sides ground down was what I have been told works. Get in there and scrape it out. Then flatten with a bit of hard wood and hammer/ press. No heat. Any hammer marks will result in a fail at inspection time. Used to work at a truck place, this is what I was recommended by cof inspectors .1 point
-
@Testament runs R888's on his Fiat 124 and has done quite a few Ks on them. They'll blow away any road tyre in performance and will be fine for a weekend car. They can be a bit noisey, but otherwise are great.1 point
-
They've been on for about three years and I think I've done about 10 on it.1 point
-
Sell it and make it someone elses problem. Looks pretty fucked to me. But i'm used to dealing with tin can thickness rust, not whole chassis encased in rust spec stuff.1 point
-
Recently I've been developing the ignition system for this car. Ever since I put a brand new starter motor in, I was experiencing interference with the ignition system during cranking so I decided to finish building up the EFI distributor that started life in a 7K-E. The 7K-E distributor differs from a 4K distributor in that it has no advance mechanisms, is about 10 mm longer, has a bigger cap diameter and different rotor. Usually a 7K-E distributor cap is of the type that you clip the leads onto instead of pushing them on. I found a 22R distributor cap at repco that pretty much fits onto the 7K-E distributor, only needing the mounting holes drilled out slightly. This allowed me to use the original push on 4K leads. I also had to make up a spacer plate to put between the distributor and the engine block, this was relatively simple to just make out of some steel. The 7K-E distributor uses the same rotor as a 4A-FE and I'd assume 22R. This rotor worked perfectly with the cap. Having only 4 points for the VR pickup, the distributor wasn't exactly suited to a megasquirt based EFI system. Toyota used a system known as VAST, which basically used the distributor for base timing and would fire a spark when a signal came from the distributor unless the ECU overrides the module. I had no VAST module, so this setup wasn't exactly ideal as the megasquirt would just have to guess at the base timing (10 deg BTDC) based on the average speed of the engine. If using a basic 4 point distributor trigger setup you need to phase the distributor so the trigger comes in earlier than the most advanced timing you are going to use (ie 50 deg BTDC). Anyway, I did try to use the distributor with the factory 4 point setup (this was before I changed to the new starter), but I had problems with getting the engine to start. If the engine started, it worked somewhat well but the timing as no very precise. It was pretty clear that more data points (teeth) were needed. After that failed attempt I changed back to fuel only EFI and just kept using the car. Then the original starter motor stopped, the solenoid contacts were a bit burnt. I rebuilt the solenoid but I didn't trust it to work again so I bought a new aftermarket starter. The new starter was interfering with the ignition during cranking, causing tach spikes. The starter would also crank at a randomly selected speed every time I turned the key. This was making it somewhat annoying to start the car as it wouldn't always start on the first try. So I decided to go back to ECU controlled ignition and see if I could get it to work properly. I was considering using the flywheel of the engine as a VR trigger wheel, but I think they have 105 teeth, which isn't divisible by 4 or 2 so it wouldn't have worked with the megasquirt. My Barry lathe came complete with a broken quick change gearbox, and it just so happened to have a 20 tooth gear with an outside diameter of 35 mm - perfect for the distributor. I clocked up the distributor shaft in the lathe and turned the toothed portion down to 19 mm so the gear would fit over it. I welded the gear on, removed some of the thickness and knocked a tooth off to make it a 20-1 wheel. This first attempt actually worked quite well, the car ran great and the timing was accurate but I still had issues getting sync while cranking. I figured it was due to the small diameter of 35 mm not giving enough tip velocity at cranking speed to get a good signal from the VR pickup and decided to redesign the system. I used this setup on the dyno, and tuned in a good ignition map. The next attempt was to make a trigger wheel that went over and around the VR sensor, almost doubling the diameter of the wheel (so almost double the signal). The VR sensor needed to be modified slightly to sense from the outside. This modification consisted of welding a bit of gauge plate to the existing sensor so it would stick out more and removing some material from the VR sensor housing. I epoxied the sensor together after, to reduce any risks of bits falling out over time. I made a 30-1 wheel for this, but as soon as I put the details into TunerStudio, the ECU said "no". I somehow missed the fact that 30 isn't divisible by 4 and the ECU wasn't having a bar of it. The hole in the wheel is mainly to allow for screw driver access for assembling/disassembling the distributor, but it should also help (or make worse) the balancing from the missing tooth. In a bit of a huff, I ripped it all out and went back to fuel only mode for a few days before I built up the motivation to cut all of the pretty teeth off the wheel and try again. I used my Barry lathe to remove all of the teeth and then used a mill with a DRO to put 23 holes on a 61 mm PCD (set to 24 equispaced holes). These holes were 2.4 mm. I then cut up a 2.4 mm diameter mild steel TIG rod to use as teeth and welded them all in. After making the wheel, it was a simple case of heating it up, slipping it over the distributor shaft and hoping it would stay put - it did! Then I faced off the welded surface and reassembled the distributor. At this point, the new starter motor started to smoke and quite often not even start turning. I put the original starter back in the car and it worked perfectly (turning twice as fast with half the power). The car started up pretty much first try. After adjusting the distributor phasing in TunerStudio it now works perfectly and starts first time, every time. Looking back, the 20-1 setup probably would have worked fine using the original starter motor but this new wheel should be slightly more robust to signal noise. The car just runs generally slightly better all around. It now uses about 15% less fuel at idle, about 3.5 L/100 km at 50 km/h and 5 L/100 km at 85 km/h so I can't really complain. I also bodged up a cover for the J121 igniter module, so it looks a little more factory. Hopefully I will get around to making it a little more permanent one day but this will probably last 20 years. So basically I achieved my goal of having an OEM looking ignition setup that uses the ECU to control the timing.1 point
-
1 point
-
1 point
-
And now thanks to the awesome boys at Vinny Fab. I now have an exhaust. Better pictures to come
1 point
-
More chemotherapy for the little Honda. Not the tidiest welds, I was very conscious of not putting too much heat into it. But its solid and straight and rust free.
1 point
-
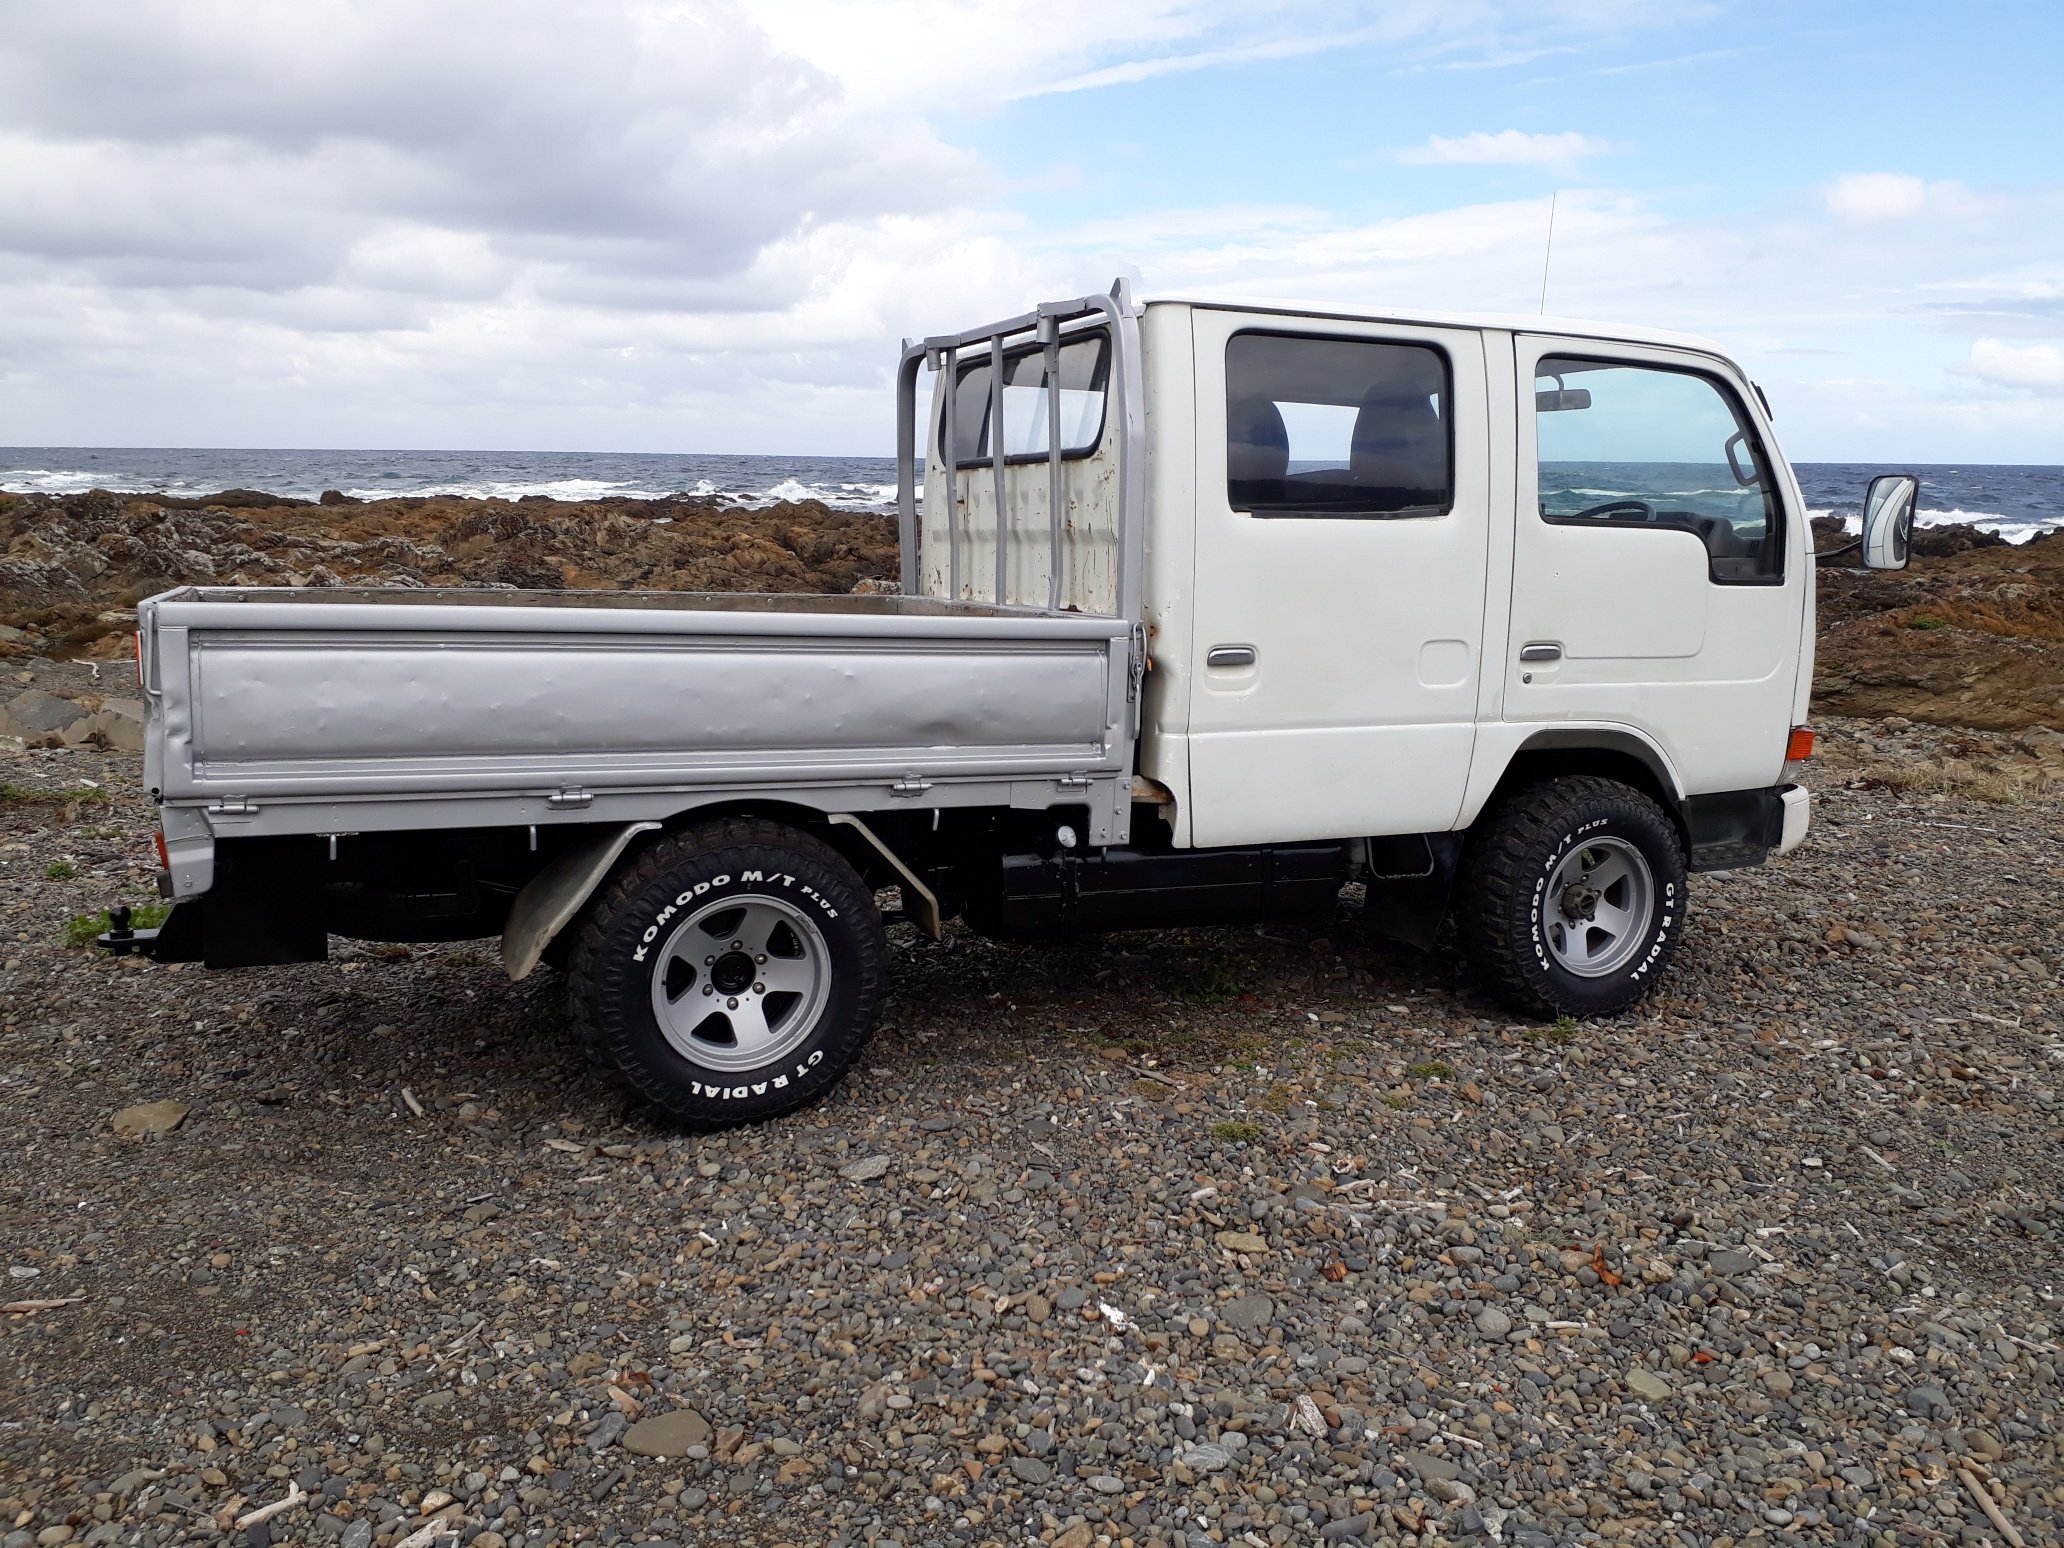
Lifes been CRAZY busy at the moment, me and the mrs are up most nights till 12 in the morning after work slaving on our old toyotas to get them ready for toyota fest (i keep meaning to show her how to forum). But finally making progress and have a bit of free time to update. Carrying on from previous post, assembled the brake caliper adaptors to hubs Next day after work, into fitting all suspension components so to have it driving and in for wheel alignment for cert. Spent quite awhile bleeding the whole system, wilwoods were a bit of a pain with their tiny bleed nipples but came out mint and brakes soo much better than stock as youd hope lol Relbuilt rear calipers and new rotors on rear, nice to have my handbrake working again.. Made up these hoops being the last piece for cert and had my friend whos a ticketed welder to glue them together Went for cert today and she flew through no worries!!! Just needed to raise front slightly but no issue The cert plate should arrive next week so just need to piece interior back together and add a high stop light then fingers crossed for compliance!1 point
-
Meanwhile i also bought a dish, some nylon plumbing fittings, vinyl hose and an electric tap + pump. With all that and a pile of left over materials, and a basic idea of form i came up with this A small storage shelf, and everything mocked up. I couldnt find any stainless bowls in my (very low) price range that looked likley so ended up with this bluey enamel baking tray. What a flipping mission to drill through the enamel for a plughole with a holesaw - blunted two of my cheap shitty set - ended up wazzing it with the jigsaw, and ended up dropping it and chipping the edge. I was looking out for some cheap (retro) formica for the bench top on trademe, but In keeping with the low budget build, i remembered i had this left ally sheet over from the big 'sign of the times' trailer, with a bonus factory smooth edge and fold. All pooped up and screwed on. Needs a going over with a scotch pad on a grinder to polish it up a bit but pretty happy with how it tuned out. And in, plus the inverter (laptop charger) 20l Water tank and pump ready to be plumbed up (need 2m of 10mm ID vinyl hose) , plug waste exits via the old ash tray hole. With the coolant lines and ducting it was a hell of a fishing exercise to get the 20mmID pipe out of teh factory hole on the inside of the sill. Its just hanging there like all the old vans as we only use the sink for teeth brushing, hand wash and the mrs to do her contacts, but there is a lot of room under the floor for a waste tank to be installed, or pop a bucket under if required. And added a bit of an electrical board to better keep track of my addons, should make it easy to install solar in the future too. This battery is a bit dead too (pretty new looking base model Bosch, but wont hold a charge above 12.5v ) , so when the old van sells ill splash out on a fancy new one Still no boost gauge installed.1 point
-
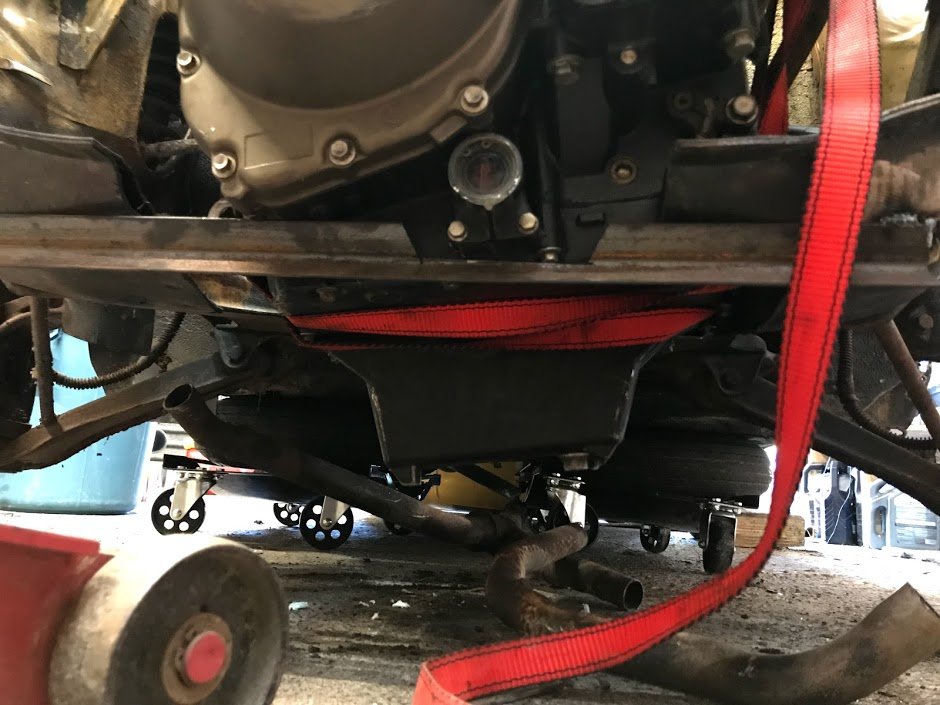
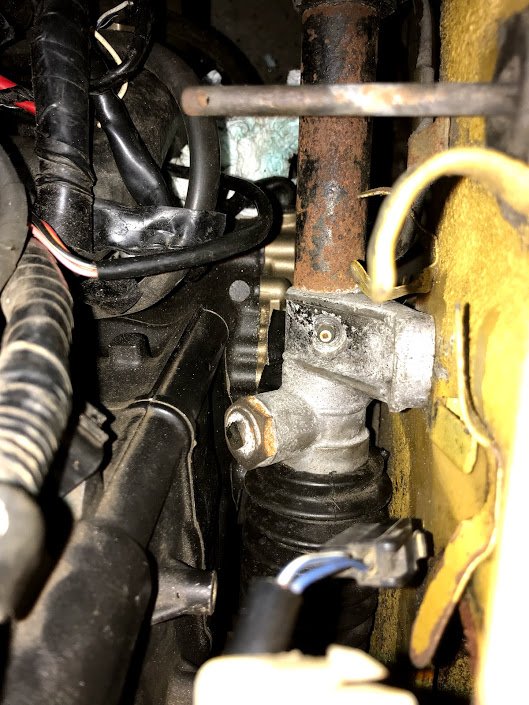
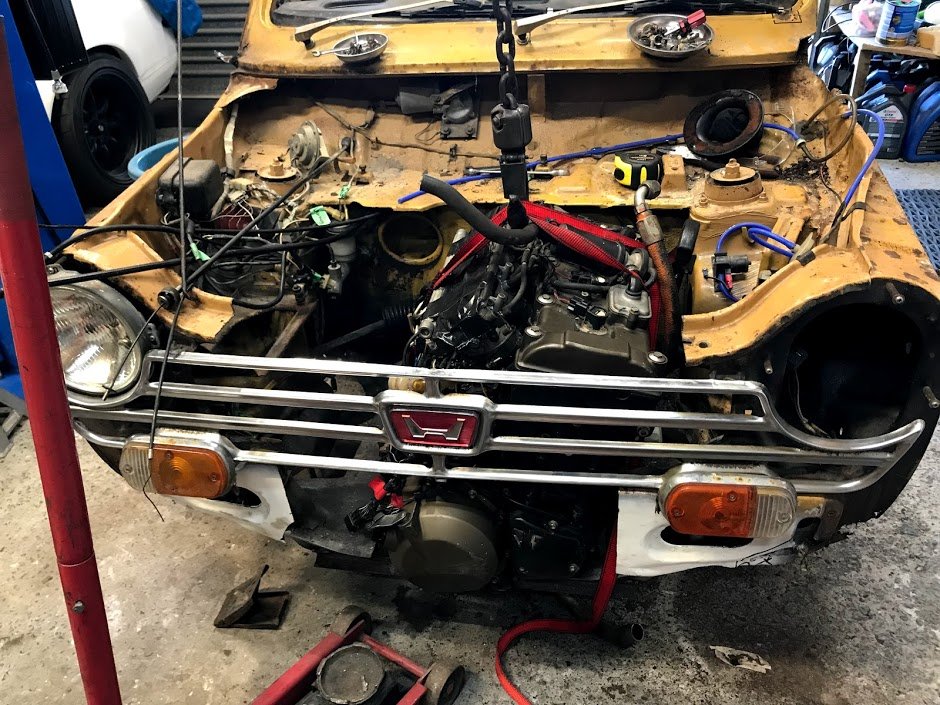
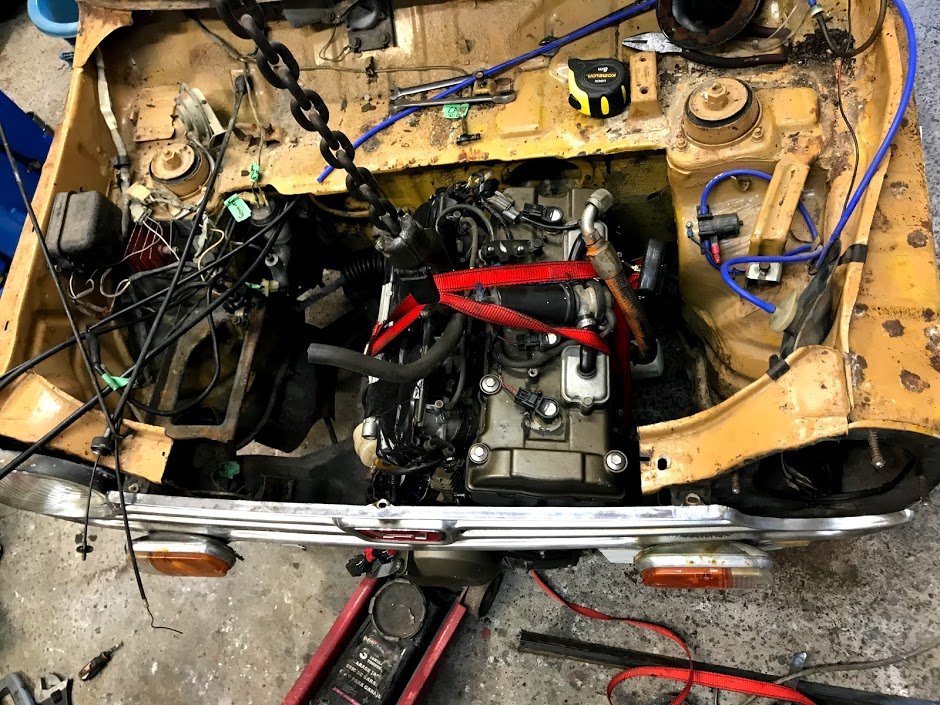
Well no turning back now, I've started cutting the subframe of which I'll make up new sections once I've finalised the position etc. I thought I might be able to keep part of the front section but it all had to go, to stop it from moving I welded on a bit of angle steel. This dropped it down nicely but the angle steel needed a notch cut out for the oil level sight, it still needed to move over to the passenger side too. So more cutting. Looking much better, the oil filter sandwich plate is resting on the subframe now so the engine isn't level yet but far better and is about 10cm further to the passenger side. This is as far back as it can go without cutting the firewall, but it is within 20mm of the closest protrusion from the steering rack. I also bit the bullet and cut the tab off the stator cover which is the oilfeed because it was almost impossible to get it to fit around the steering rack. This is a magnesium casting, so I cut it slowly and manually. Didn't burn down the house. Plan is to block the original feed then tap into the casing and have an oilfeed that way. No reason it shouldn't work, but if it doesn't I can just get another casing. They seem to be easy to get, I guess because they get damaged when riders drop their bikes. It's sitting much better in the engine bay now, I will try get it a bit further over because I'm worried about draiveshaft UJ angles. But for now it fits behind the grill! The front clutch cover was always going to stick out, I'm not sure what I'll do here but at least clutch changes will be easy access....
1 point
-
Got to work today ticking off the growing list of things to get her ready for cert the biggest being the addition of a seatbelt mounting point in the c pillar. As per photo you can see the captive nut on the drivers side but nothing on the passengers... As per certifiers request, have a doubler plate behind the center skin and weld on 2 8mm nuts, then some how squeeze the other plate between the inner and center skin, bit of prying and such was ok. spent a good 15min vacuuming all the swarf out, i hate the thought of rust since this old toyota actually (from what i can see) isnt too badly rusted...yet.. Zinc painted the welded hubs and redrilled the new rotors to suit hub for the wilwood calipers. scored a Toda flywheel from my friend! and purchased a bunch of other niggly bits and pieces like the heater tap which is jammed, also every time i stepped out on the track the wiper switch would fall out lol. Overview of some of the driveline components to go in Will head to work tomorrow and finish rebuilding the hubs and rear calipers then should be ready to fit up and last things to get are rear disc rotors/pads and have front brake lines made and we should be ready for cert...almost1 point
-
I had a 2 litre auto one for work for a while. that was a hungus turd Replaced it with a BA wagon and everyone was all HOMG FALCON GUZZLER USE ALL THE FUELS Falcon used less fuel due to not WOT all day just to get anywhere. Also weirdly the van used to send me to sleep quite often. Have not ever had it happen since. TLDR GLWS1 point
-
So I've made progress of sorts on both the crx and the the shuttle. My friend jason came around and helped remade the crx exhaust for me. Its tucked up nicely and the muffler is actually level and nothing rattles which is a win. I pulled the gearbag out and that is currently at the gearbox shop getting a new synchro and the mfactory diff fitted. The shuttle went for a wof and failed on a leaking master (that explains where the fluid went) and a rear seatbelt. I found the seatbelt while looking for other stuff in my hoard which was great. I had taken the door card off when I parked it ages ago for some reason and when shutting the door I managed to smash the speaker. Que replacements for both the shuittle and crx. I also got a new head unit and put the shuttle one into the crx. I started putting sound deadening mat on the doors but ran out when I got to the drivers door so I'll have to get some more. I've also ordered new engine side plugs so I can make a new engine loom for the shuttle as i'm not too happy with the current one1 point
-
Super happy to hear that you have orange peel to deal with.. Not happy for you but happy that I'm not the only one who will be sanding sanding sanding. My imp paint job is like a moon surface..1 point
-
PROGRESS!!1 point
-
Smashed some seats up for it today. Brings the grand total to $0.00
1 point
-
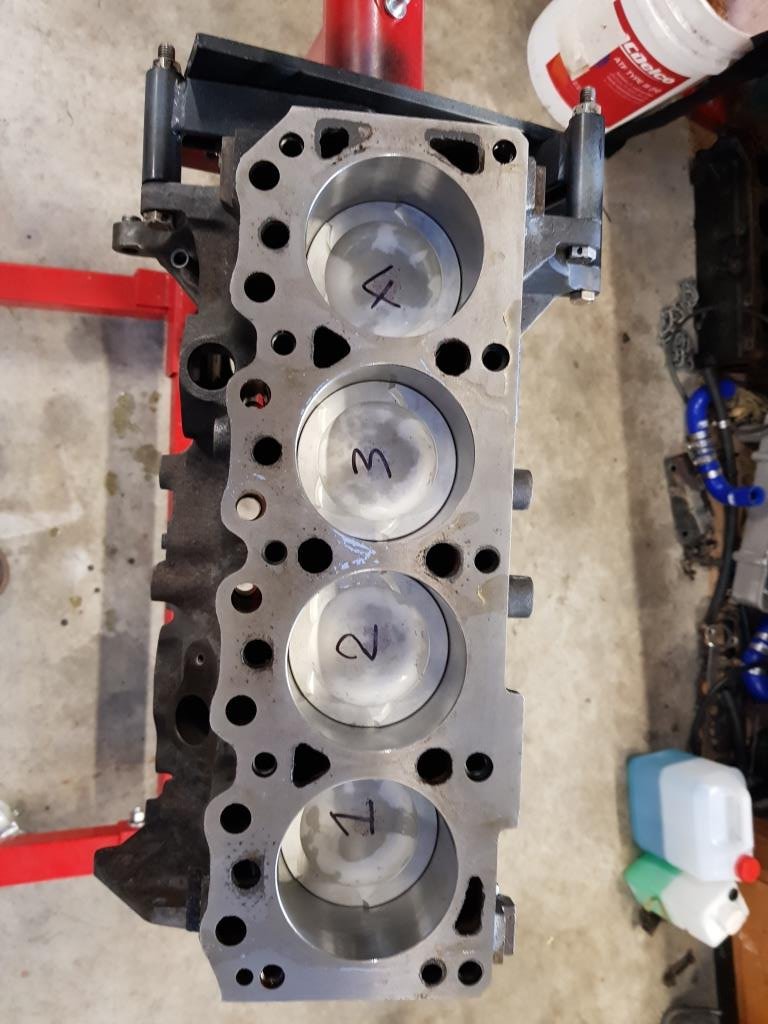
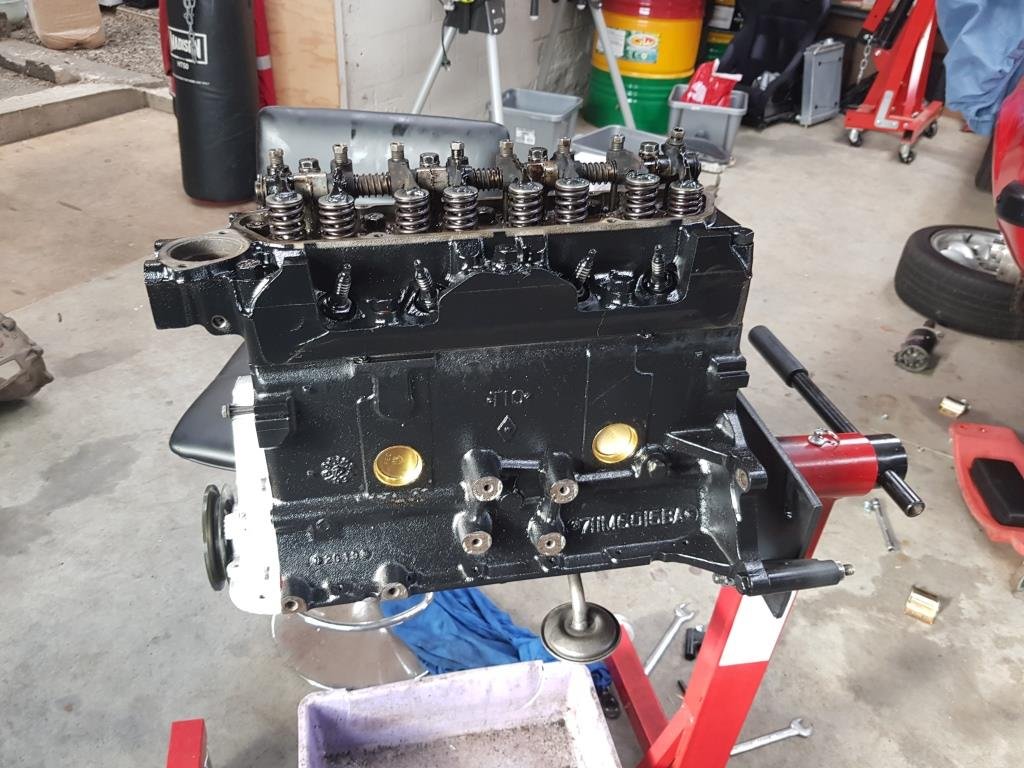
And then this happened. Engine started rattling at idle while I was working on tune. Found some metal on top of the piston. Pulled the head and found it had dropped a hardened valve seat. Damage was very minimal due to it happening at idle. The engine had always been a heavy breather since I bought it so decided to freshen it all up. Bore was worn and was already at .60thou so I had it sonic tested and got it taken out to .90 thou. Crank was ok so fitted new bearings. Reused the Kent 234 camshaft as that was all ok. Fitted a NOS dual row timing chain. Had my worked cylinder head overhauled with new guides and hardened seats. Plus he opened up the ports a bit more. Currently almost all back together and ready to put in. Engine came back at 1690cc and 10:7 to 1 compression. Should go much better.
1 point
-
1 point
-
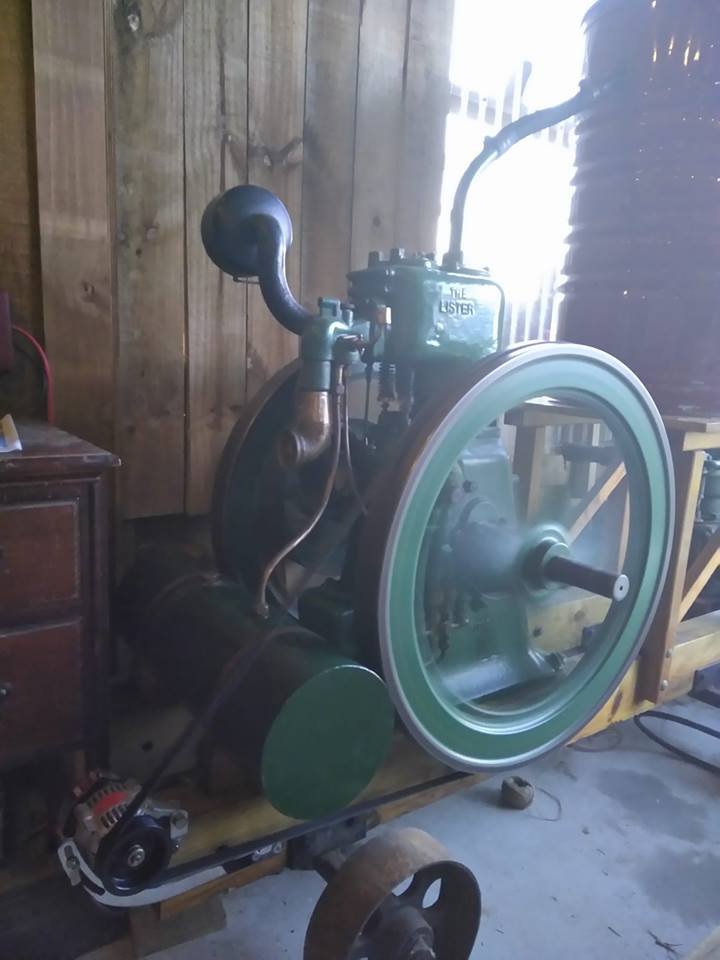
This 1912 Lister powers my off grid house in winter. I've since plumbed in a 10 meter exhaust to outside which means I only hear the rhythmic clanking of the valve train and flywheels. It runs a tractor/drag racing alternator then goes through a sterling 3 stage charge regulator to my house batteries. Runs on 850ml of fuel an hour and the longest I have had it run was 24 hours straight with zero dramas.
1 point
-
Our South Island trip was 100% AWESOME, as is the South Island generally, which is great because our mission was partly holiday, partly visiting family and friends, and part reconnaissance for a future move to Dunedin. Definitely keen, wont be happening tomorrow but the brain cogs are certainly churning on it. The map below is from the googs, but it only allows 10 destinations per 'trip', and so doesnt show all our diversions, side trips and backtracking. By my reckoning (odo before and after) we drove closer to 4500km, which at 13-14l/100km wasnt exactly cheap motoring, but the cheap accommodation more than made up the difference!. Some pics from the trip that feature van 1st stop, 1.5hours from home, Raglan Stop 2, Raetahi, was a good test! Our coldest night was -6^C in St Arnaud But worth it! Somewhere down south. We paid, promise! Tekapo Orari Gorge Kidd Bush Reserve, Lake Hawea. Lucky we only have a small camper van Kaikoura This was a bonus extra nightin the South thanks to the ferry cancelled due to the weather. Whatamango near picton which is a bird santuary, saw lots of odd birds, heard a couple more too, Was only pissed cause I drove away from great waves at Mangamanu to make the cancelled sailing, and got the text once we got to Blenheim. And picked up a 'small pop top camper' at the port in Wellington to tow north for @Otodat, van handled it fine, just chugged even more gas (got up to 18l/100km!) Anyways, van was a champ, no dramas at all, except for the (factory) interior lights not working now. Would have been a pain if there wasnt extra lighting already, but there was, so meh i do have some plans for a few tweaks to the interior, but its making whats pretty good already even better.1 point
-
in prep for the south island trip i pulled finger and attached all this junk to the roof doggo approves subject to test drive mrs reckons "its ok, i guess" fuck yeah, its ok1 point
-
Specs! As i said earlier its an se spec ae85 body Full black interior and all genuine Trueno floor mats Started its life with the old 3au and an auto slush box behind it. Then someone in japan wanted 86ness but loved the body so someones gone all out and swapped out the entire driveline right down to the accelerator pedal and looms. Everything... im amazed and happy Theres a couple of teltale signs where they have added in fuel line brackets and rear sway bar mount holes but besides that and the lack of oil pressure gauge youd never tell. There are zero oil leaks...couldnt believe it, i checked the oil..golden, checked the air filter...brand new oiled k&n, checked the radiator fluid...solid toyota genuine like red. Kms say 130,000 would like to say the engines done that many kms by how mint it runs but never really sure. Wiper cowling panels been replaced with a carbon fibre item which is sweet! T series open diff, that i checked in a certain manner.. lol T50 gearbox Ae86 front brakes Stock suspension Only real mod was the watanabes, nardi and catback exhaust which is too big for my liking1 point
-
We all pass gas. Cars are no exceptions right. The louder it is the better it is. And I like a good deep tone. Time to tackle how to get the stinking unwanted gas out the backend of the car. 0.0′ to much? ok seriously I will stop farting around. First off a general run down on the plan for the exhaust system overall. Running 2.25″/57mm pipe. Seems to be the favored max pipe size performance Nailhead guys use. Fine with me as I dont have much room to go larger. Shiny headers up front that Tee off to 2″ chrome sidepipes. Single exit not triples. These will be capped most of the time but will be functional. H to balance the gases and get a better sound and maybe better low end torque all going well. Couple of big ol mufflers. Exiting out the back through a Kaiser overrider. Christ it looks simple enough on paper right. How come thats always the way of things? So picked up the Headers and Lake pipes from the states at a sale way cheap. Pipes are 80″ single exit chrome 2″ jobbies you see all over the place. Using Patriot Tight Tuck headers. Reviews on various sites only showed good things – better than Sanderson and TA Performance. The ceramic chrome finish looks good. Mufflers im going for Flowmaster Super 40 series delta flow center/center. I know what a bloody mouth full. Big monsters that are 5inch thick. Always hard to tell when getting the right muffler even after watching/listening to so many sound bytes and youtube clips of Nailheads with the same muffler. Still they didnt seem to be to droning whilst still giving a nice deep sound. Only time will tell if this is the case. Always will have the side pipes to uncap and roar if we really want to let people know we are coming. Got some flanges laser cut up. Came with gaskets and bolts and worked out cheaper than off the shelf. Went for the thicker tube & bends pipe wall than standard. Easier for welding, sounds a bit better(apparently?), and with luck will last a bit longer. Also using Rubber bobbins/cotton reel style mounts through out the exhaust system. Starting in the middle at the hardest point. From bearing to muffler then over the diff. Many cuts & welds made the custom exhaust sit nice and snug whilst still allowing good clearances of about half an inch at the closest points to any other structure. May sound simple but took forever to get it to sit just right & point in the right direction whilst not dangling lower than the frame. Bloody happy how it turned out. Originally we had thought we might need to roll the pipe to flatten it a bit as we didnt think we would get it through the old Hudson center driveshaft hole. The mounts will carrying the exhaust load not hanging it. No matter if at Air out, ride height or Air up all looks good. Took ages getting it just right with so many tiny tweeks its just silly. But do it right and do it once. Very happy with the work Flockie did here. So ya. Thats where we are up to at the moment. Next weekend will C notch the rear frame to allow the exhaust to pass through so it can go through the stock Hudson bumper then through the Kaiser over rider. Similar to the below.1 point
-
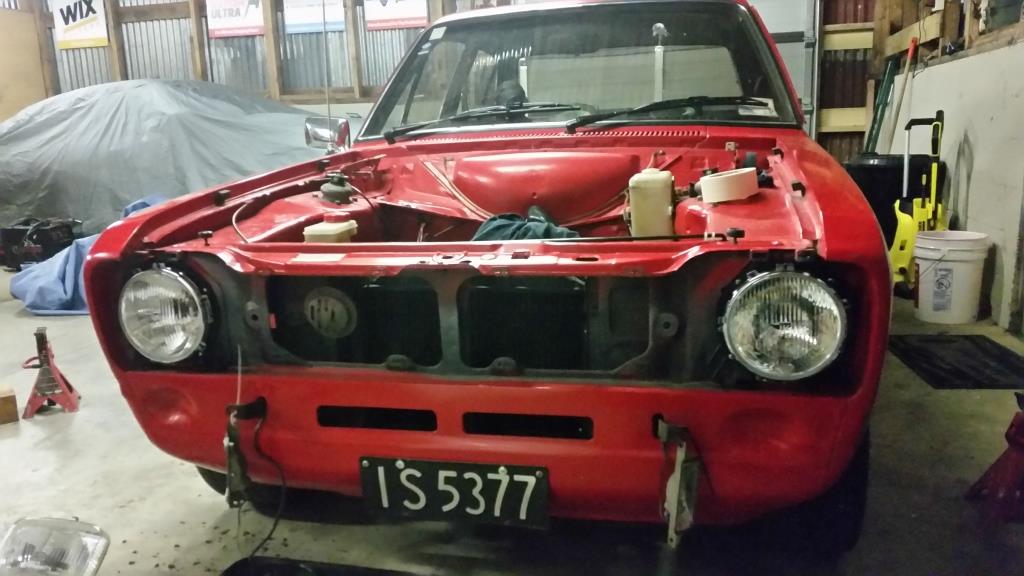
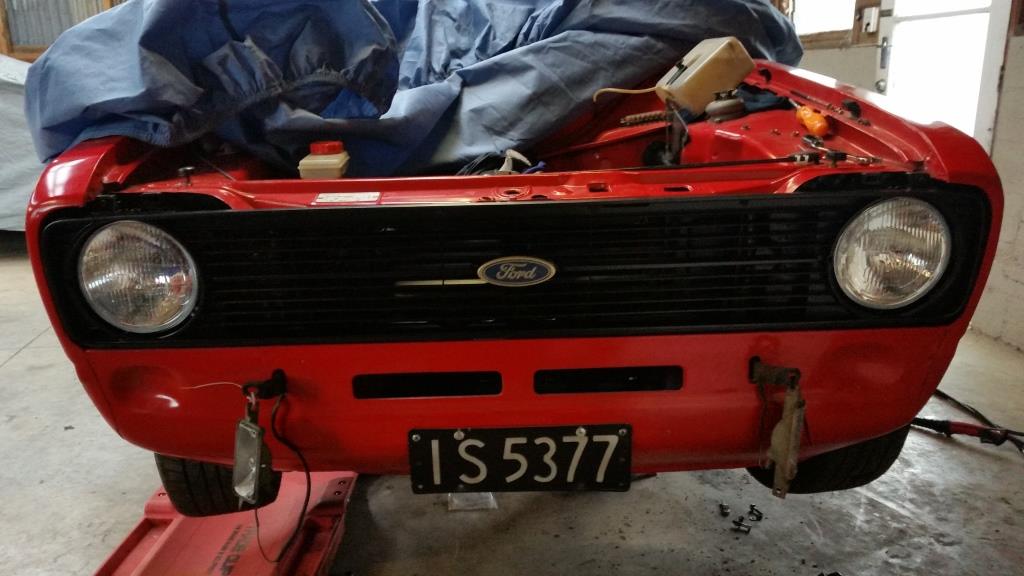
Did a round headlight conversion. I forgot to take a pic when it had square eyes. A mate scored me a grille for $40 at a swap meet which I had plastic welded to repair 2 small cracks and then painted in Satin Black. Same mate who is also a auto sparkie got me some new 7 inch semi sealed round lights. He also relocated the battery to the boot and tided up the dash wiring for me. Got some light retainers from Palmside and modified the square buckets to take these. At the same time I removed the chrome and plastic bumpers and fitted up some front 1/4 bumpers and a fiberglass rear that got the satin black treatment also. I eventually plan to remove all the chrome work and do it in black.
1 point
-
Up until this point, I hadnt had anyone else work on the car except myself, but I was just getting to busy with life to spend time working on the car, I also had a bit more cash flow to do things properly compared to 10 years earlier which lead me to take to the car to a fabricators to help get the car to the next iteration. We started by removing all the crap from the boot, the W2A resoviour, sub, surgetank and fuel pump and in the bin. What is left is just an nice, lite, empty boot space. The lunch box on above the battery is the fuse & relay box for he fuel pumps. Which has been moved under the rear passenger seat with a custom surgetank and new ½” lines to the front of the car. Future proofing if corn juice is to ever be needed, though I would probably need something a bit better than an 044. What happened to the W2A resoviour? It was moved into the engine bay. The fabricator made a new intake for the turbo and built two resoviours, one closest to the air box is for the barrel cooler, next one across is the overflow for the radiator. The W2A pump was moved to the front of the car which has helped significantly shorten the piping run lengths and helps reduce total water volume and weight. I pissed off the air horns and replaced with a set of dual tone Mitsubishi 380 ones. With the larger 6 piston Wilwood’s the 1” brake master was a bit small. I grabbed a 1” 1/16 brake master from an Evo 7 and a Legnum brake fluid reservoir and had some custom lines bent up to take a brake bias valve installed on the rear lines. The car does stop good, but as I mentioned before it still feels very under assisted, you need a pretty strong leg to get it to pull up. There must be something I can do about the booster, but I haven’t found any other options. Something unfortunate happen during this time, I seemed to have gotten fatter, much fatter and could no longer fit in those stupid Bride fixed back bucket seats. I put the stock passenger seat back in and found a genuine Bride recliner that is sooo much better, Worlds apart compared to the fixed backs and people of normal size can actually sit in the damn thing too! Here is the engine as it sits today, changed most things over to black silicone. And it was just recently tuned again… On a different dyno and a totally different tune, it made 300hp @ about 21psi, or 25 hp more than before – but it’s hardly an apples-to-apples comparison. This tune is much nicer, they spent far more time getting the idle and cruise conditions perfect which has made the car much nicer to drive. The tune is also running very rich at 11.5:1 and there is only a max of 17 degrees’ total advance compared with 20 degrees previously. So, over all its made slightly more power but with a much softer tune. High five! It has been nearly 9 years since I had the car in a drivable mode and I am amazed at how old I’ve gotten. The car is raw, grumpy and takes a lot of effort to drive – god it’s fun – but this isn’t something I would appreciate driving every day and I don’t think it’s something I could.1 point
-
Right, got my hands on my good camera, less my good lens..... bastard. Ah well, these will have to suffice. The plates that are on it some how appeared on there, will be sure to make sure they don't sneak back on there!! I will be getting the plate P AE86 put on it, should be here within a couple of weeks. Here we have all of the interior bits so far that I have acquired. I lastly need a gearbox surround piece. I have eyed up on on Yahoo! so should be able to pick that one up. So newly installed are -New center console lid -New Alpine head unit -Accessory surround unit, with new ash tray too. Though I will probably end up trying to find a black one -Instrument surround unit -New gear knob. Can't remember the brand. It feels so bliss to change gears! The two red wires are going to go to the fog light switch that I will have to find (Should be able to go down to the wreckers and pluck anyone from an 80 series toyota) fa And lastly I edited this image a bit, looks prettier All in all very happy with how it is looking. Going to see Mr. Cert man tomorrow and get it all booked in.1 point


This leaderboard is set to Auckland/GMT+12:00