
Leaderboard


Popular Content
Showing content with the highest reputation on 10/04/17 in all areas
-
figuring out shopping list of what else i need to complete fuel and oil system plumbing. just like work, everything has different thread and fitting size so you have to step through each connection one by one and think which adaptor, which hose end etc. is needed, plus measure and check threads because you cannot believe anyone or anything until proven right. e.g. a 3/8 -18tpi NPT male fitting goes about 5 turns into a 9/16 -18tpi female thread because of the taper but its wrong. would seal with loctite 567 and ptfe tape if you had to but trying to do a better job on this occasion. up next.....giant flaming hole in wallet16 points
-
Someone had deemed these "junk" and left them in a fish bin full of water outside for a year. Some time ago i cut open a dead RB25 coil hoping to see what was inside. Such fine wire, so many windings. About a million of the finest wire windings i had ever seen, trapped in resin plastic, sealed and unable to be unwound at all. At least by any methods i could see. These 100 year old ford ones remind me of the same thing, except the wire is slightly thicker and there is 2 lots of 1million windings. 2 per coil around a heavy primary winding. Accidentally put a chisel into the primary and is still works. Not for 100 years anymore as it'll corrode now it's damaged but still... not many ignition coils you can pull the windings out of, involving chipping away or melting the tar they were packed in. Those brown paper things are capacitors. Condensers effectively, like you have for a distributor. While i'd heard of old timers making their own from paper and chewing gum wrappers back in the 1940s when they were poor kids fixing their first car... i'm not that keen. These had real tin foil, not the alloy foil we have today so they solder really nicely. A couple tested within spec' so i re-used them. Others i replaced with orange things. Mix and matched the wood. And going ot do the same with the burnt out windings so i can turn 8 burnt ones into 4 good ones... hopefully. Had some burn up after 10 minutes of driving because i didn't realize how keen they were to have inch long sparks jumping inside the box if i didn't put the glass plates and tar back in. Opps. Bit marked up, some have clear borer holes in them but not too bad for 100 year old ignition parts. How many of you are still running original coils and points at 1/3rd the age?10 points
-
Time for a little update I think. Thursday arvo I chucked the bracket that the battery hold down bolts to/the battery cover attaches to along with some very rusty bolts into some white vinegar to soak for a couple hours, then I promptly forgot about them on the bench and went out of town for a few nights lol. Took my AF35 front wheel and one of my spare CVT covers along for a ride to Auckland, can't remember if it was this cover or the worse one now @Mr Vapour worked his magic on them and they now look like this Bit of a drastic improvement! Grabbed a Pirelli SL26 and a couple (wrong) lights from Scootling And then today my levers arrived from Aliexpress and I got my parts back from the powder coaters, so happy I went with satin black, looks like the factory Honda finish! Of course the levers aren't going to work though. Aliexpress indicators look the part to me though! Remember the bolts I forgot? I didn't get any before pics, but they looked trashed and the bracket was 2 tone bad black paint and rust. We got home early hours this AM and the Mrs complained the house stunk of vinegar and metal... oops Quick rinse under the tap I'm impressed!8 points
-
Okay soooooooo as awesome as it was living in a beautiful place and having a cool Automotive related job, life in Cromwell/Queenstown wasnt quite right for me. It was awesome fun working at HPA, made some friends and great memories which will last a long time. But, it just didnt quite feel like somewhere I wanted to settle down and in some ways it wasnt the career direction I wanted to take. So for a variety of reasons I ended up coming back up to Auckland. Being landlocked so many hours away from the ocean just didnt feel right! It was a bloody awesome experience though and it felt like it reinvigorated my life and got me back on track after some hard times lately. But anyway! It was good that I never got to the point of attempting to drive the Carina down, as the new driveshaft combination wasnt good. It took a bunch more mucking around after I got back to get this right again. But sadly it looks like the previous incident may have stuffed the bearings in the gearbox as it's pretty noisy now and leaks fluid out the rear main seal even after replacing it. Pooz. But it was great to get back home and be able to go drive it around again! The R888s are on my normal wheels so I've been driving around with a 15x6 running 205/50/15 and have noticed no negative effects to handling. Possibly because the sidewall of the AD08R is so stiff. Since I've been back, I started with a fresh sheet of paper on the tune file in the ECU. As it had some old junk in there, as well as some stuff that I setup when I ahhhh knew less than I do haha. The staged injection seemed to work well enough in terms of delivering the right amount of fuel and blah blah... But it was always a bit crappy in transient conditions. I decided I would turn on the outer injectors 100% of the time and try tune the car using just those, and get the accel enrichment and so on working as best I could. But it just felt boggy. When I reverted back to 100% inboard instead, holy moly the throttle response difference was amazing. And so the pull out of corners was much better and it felt like you could more accurately mash the gas and know what the car was going to do. So I ditched it and put a standard manifold back on. My theory is that since my intake manifold is thermally isolated from the head, it is not able to use the heat of the runner walls to evaporate the fuel so you have massive fuel pooling issues... Which means you lose control of your fuelling as some fuel you squirted in several cycles ago is only just entering the combustion chamber as it evaporates. So fuel you add at say 5800rpm only enters the cylinder by the time you get to 6000rpm and so on. And so if you tune your car with the acceleration rate of say 3rd gear fuelling isnt right for 1st gear anymore. Just lots of headaches that you cant really address well enough with the accel enrichment available on a G4+ In the documentation from Toyota on their wall wetting experiments they note that on a cold port (engine cold starts) fuel can take over 1.5 seconds to evaporate and contribute back to fuel in the engine so even if it was only half as long on the runner walls. It's a massive surface area covered in fuel which is always going to be a ball ache to compensate for. Going back to a standard manifold looks to have cured a vaccum leak or two as well, haha so the idle and so on is much better too. I've been playing around a bit with a few variables such as injection timing and VVTI advance as well. I have found that changing the injector timing so it's injecting fuel as the intake valve is open helps a lot with cold starts, and results in a lower fuel consumption when the engine is hot too. Since it's been cold I've also spent a bunch of time getting the cold idle really nice, closed loop lambda adjustment works really well if you set the adjustment rate to 1hz so its only slowly adjusting it. Otherwise it makes the idle surge if you try to run closed loop at say 20hz like you could if you were doing 4000rpm or whatever. Under cruising conditions it seems that advancing the intake cam at all just means worse economy. This may relate to the tuned length of the primaries and secondaries of the exhaust causing some undesirable something something at cruising rpm compared to a standard exhaust manifold... But for whatever reason, it isnt beneficial to advance the cam. And at high rpm low load, rather than retarding the cam I figure I may as well keep the cam advanced so when you stab your foot back on the throttle the cam is not having to "catch up". And this seems to have made the throttle response even better as well. So the engine response is better than ever! I picked up a cheap Altezza engine, planning to give it a freshen up and at some point swap it over. I'll be losing the fancy ported head of my current engine, but will be gaining: -Exhaust side VVTI -Higher compression ratio -better alternator position -Better water line setup -Better engine mount setup -Better PCV valve arrangement -And a few other minor advantages so I think it's worth the trade but will be interesting to see. The state of the oil and colour of the coolant in the altezza engine though is bloody disgusting though so it'll need a strip down and hot tanking or whatever before doing anything with it. So might be a while until it's ready to swap in. But looking forward to having a play with the exhaust side VVTI. I think I'll wire in an exhaust pressure sensor when I do an overhaul of the loom to suit some of the changes needed. Will be interesting if this will show anything relating to tuned lengths of the primary and secondary pipes. In the immediate future however I'm just really enjoying living at the start of Scenic Drive in Titirangi now and being able to go for some awesome drives on some backroads making doort noises again6 points
-
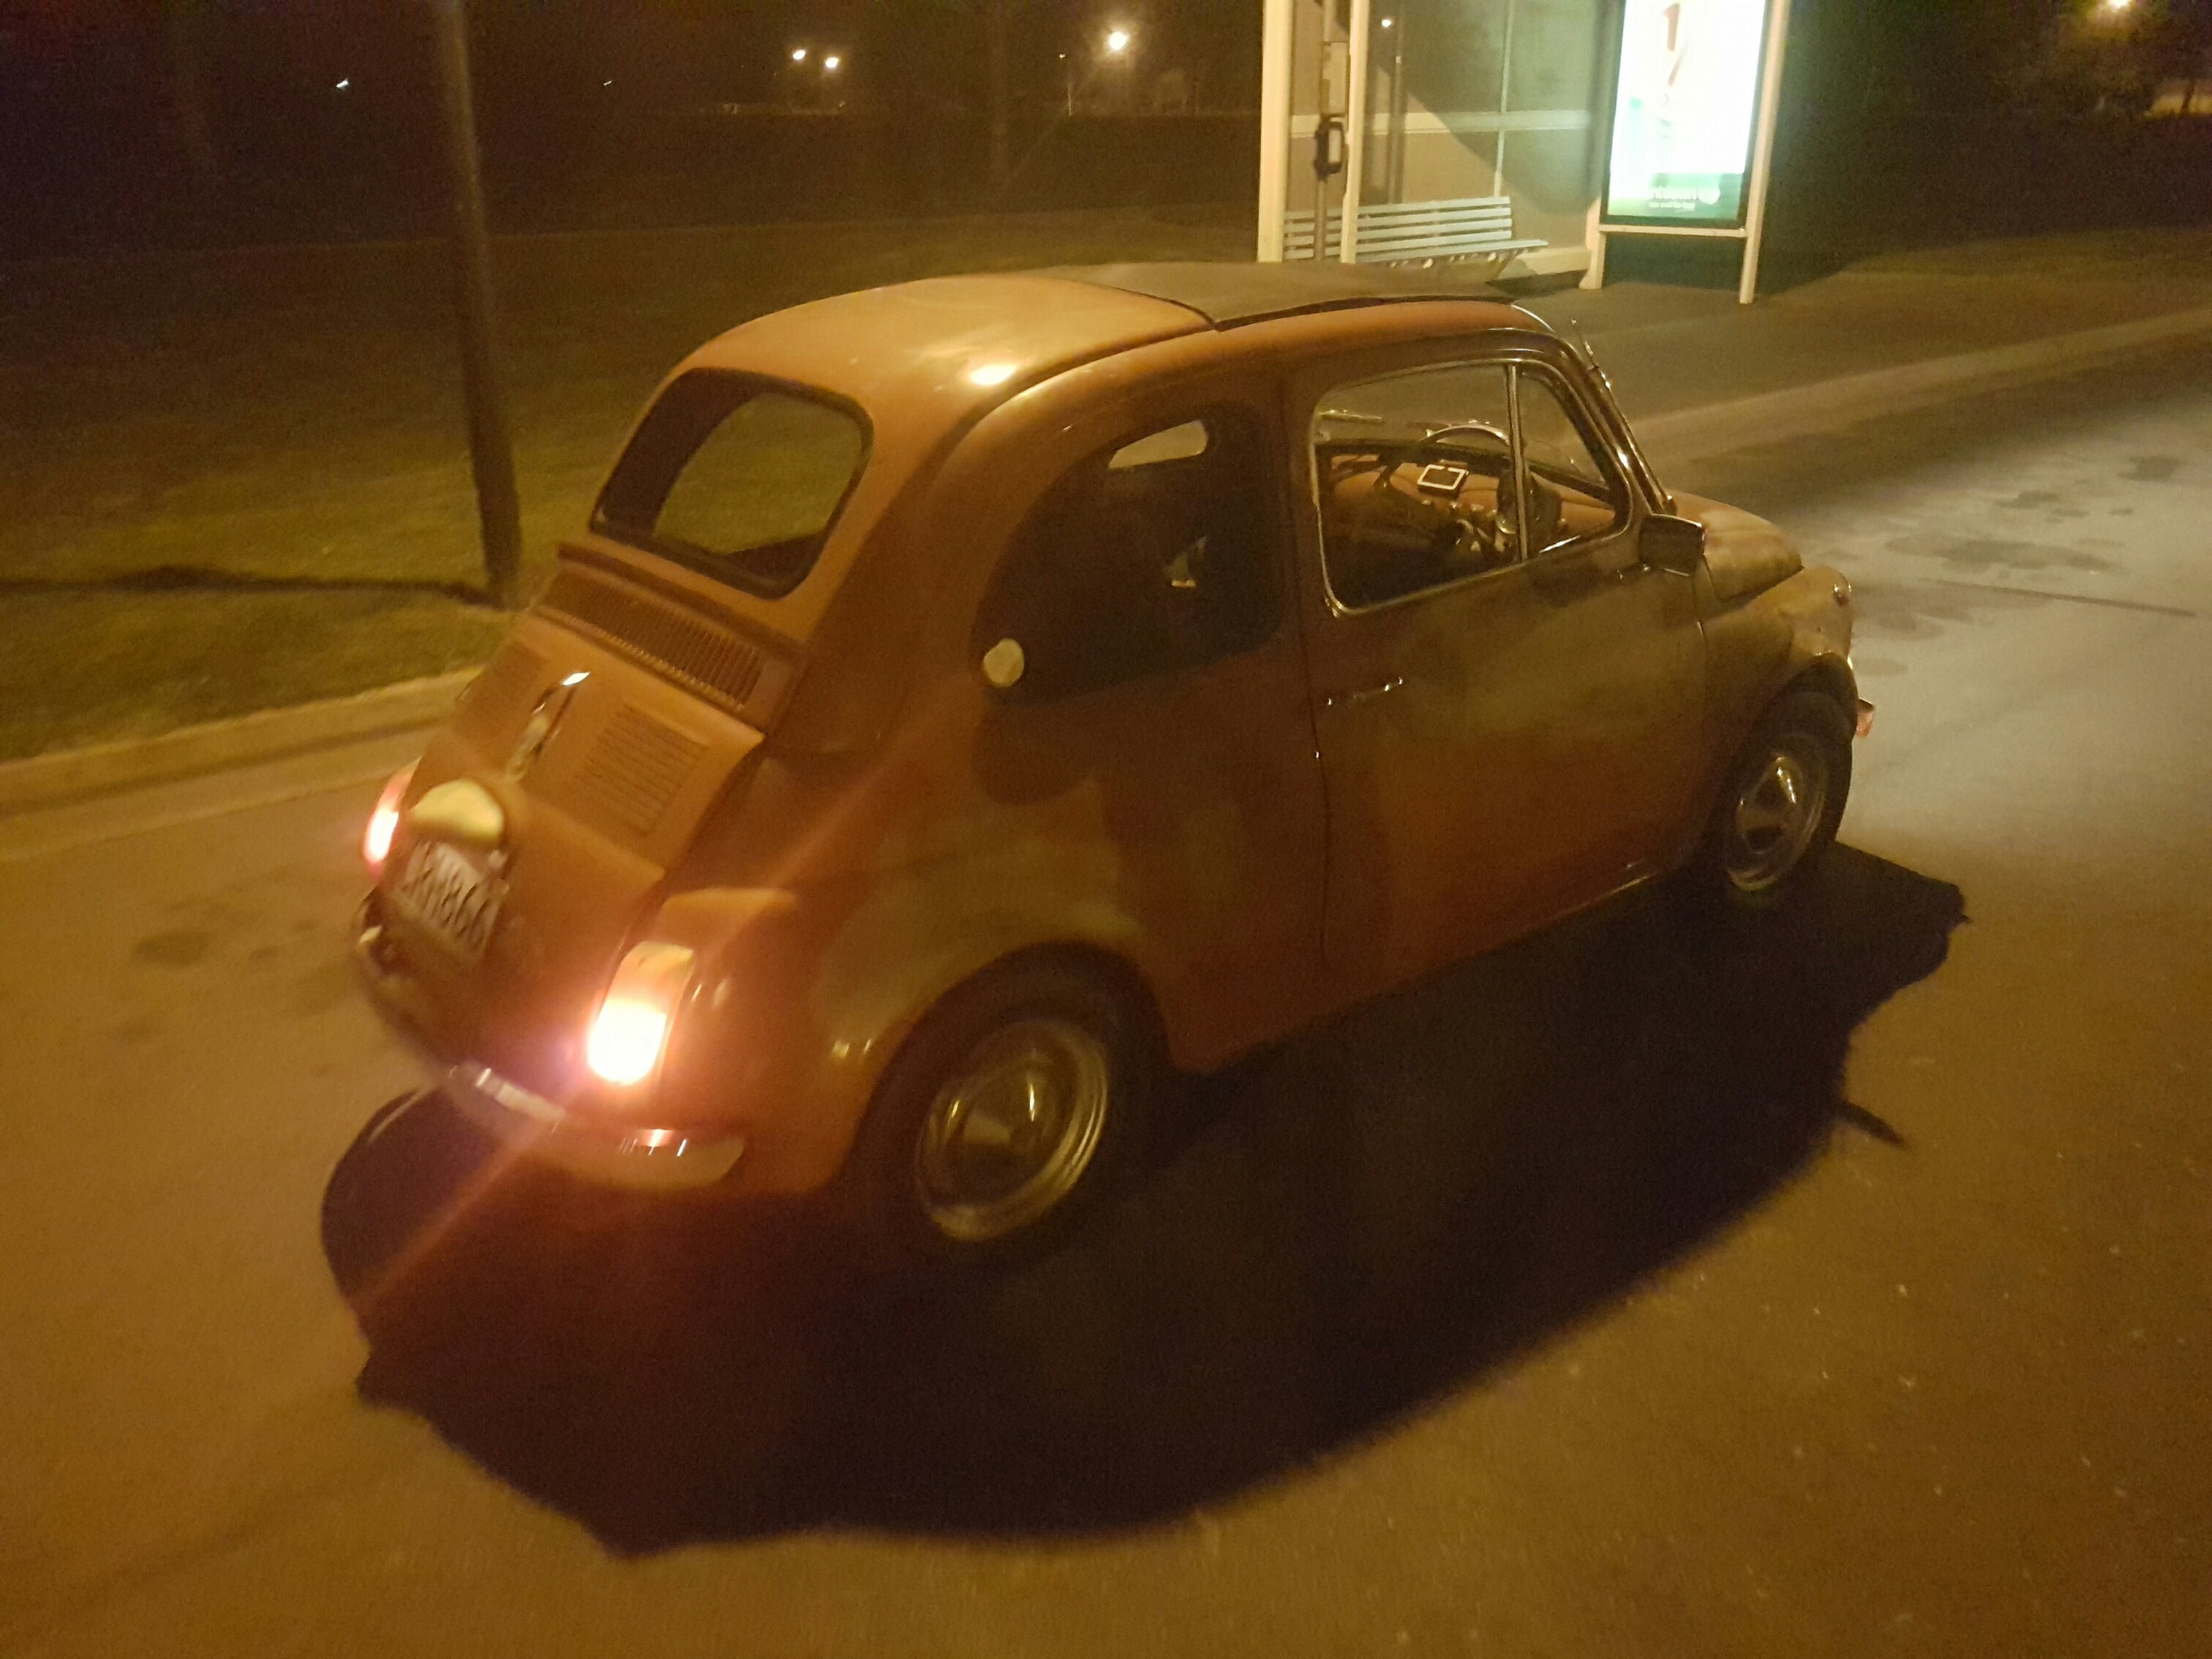
Replaced the front wheel bearings, and it's now all road legal and still owes me sub a thousand. Now the boring bits over time for some fun. Also took it back to the old owner and he said he still has its original black plates and will dig them out so I'll hopefully get them back on the car
 6 points
 -
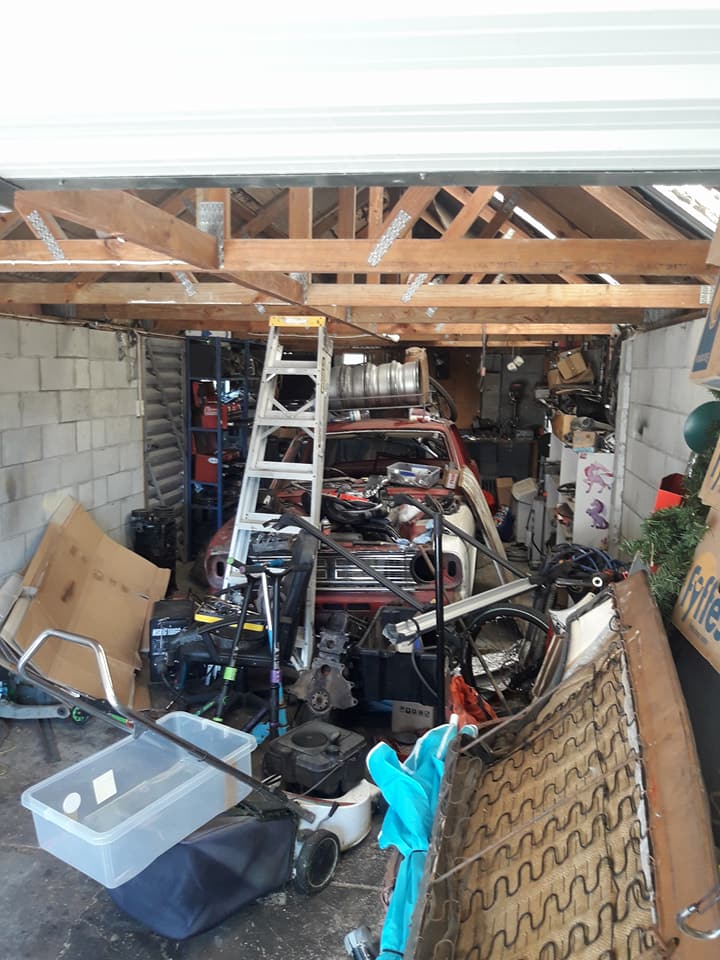
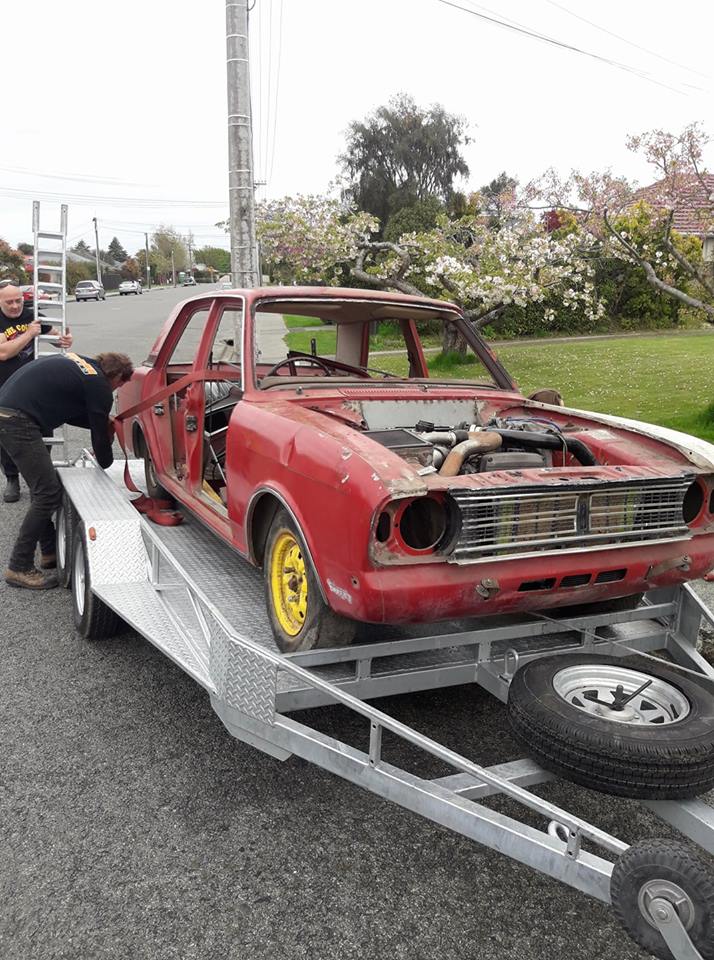
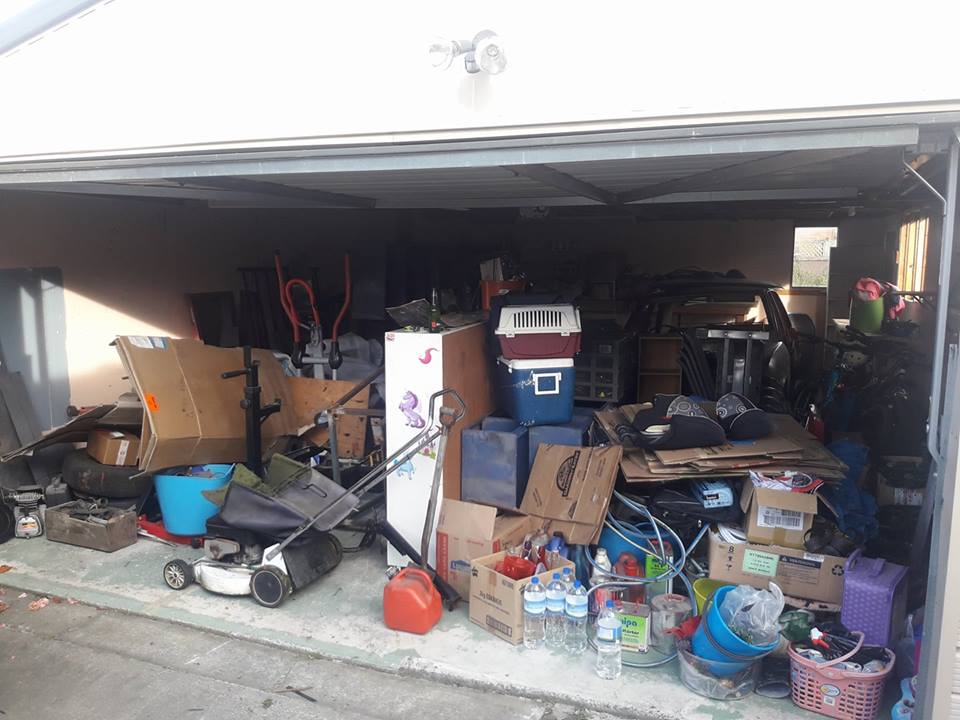
well its been about 15 mouths since i actually worked on this (not just fucking around with it.) ..we said we would have an awesome holiday last xmas as it will be the last for a while so stopped working on it and saved .,took 5 weeks of work over xmas and we took the kids on a road trip around NZ...... during this time the wife and i decided it might be time to bite the bullet and buy a house.so we decided that what we would do this year ...so once again i put the old girl on hold till we had our own home. we we finally managed to buy a house .....so our gilrs have a place to call home and so do my projects.(twice as big as the last garage) i had done 2 trips to the new house and i could kinda see the mk2 in the old garage. and the 1st time she has been out side in a while. and after move all my shit i have come to the conclusion the old garage was the fucking tardis as i have no idea how it all fitted... as its fulled the new garage. so once i get all of this sorted i will be back into it......normally i would have sold this off agers ago but i love it to bits and i bought the mk5 after xmas to keep me amused .. also bought a mk3 last week so i will see what thats like when i get around to picking it up. cheers
5 points
-
Ok sorry for the late reply, firstly had a good night at the Auckland meet a couple of months ago since then had a few things come up. A ) breaks are good until they are on gravel... B ) once on gravel they lock the wheels and you end up in the side of a levin... C ) levin doors are no match for a front right corner of a P6. so yea basically just got a shipment of new panels to replace the front corner with a new light fitting as the current one is permanently attached to the wing now... as a side note i have a new T5 box and a 3.9V8 to replace the 4 speed that may or may not have 10mm of play in the output shaft (that may explain the dodgy speedo...) It will be ready for Nats promise...4 points
-
the ol' quiet flatmates was looking at the light setup in the panel shop next to my new spot, they've gone to 1.5ish metre long LED strip lights (look like flouro tubes) linked up along the walls/ceiling and they're amazing. said they'll be ditching the remaining fluoros for mo' LED ones. he has a couple on leads for under cars etc, all of the lumens4 points
-
Right! I've made a good start on the mechanical's by getting into the little 850, and the front sub-frames. The engine is rumored to have traveled a mere 40,077 miles since it's birth in early 1962. It even had its original cast iron water pump and fan belt! I've deconstructed it enough for my liking (Short Block, the crank doesn't need to come out), and as soon as the gaskets and assorted new bits arrive it will be going back together. No lip on the lifters, bore, or any other parts. The clutch has a ton of meat left on it, and I didn't even snap any of the bolts off in the strip down That's always a plus! The grand plan is to give the engine a big birthday, new gaskets, thermostat housing and thermostat, water pump, hoses, fan belt, paint up, plugs, points, leads, extractors and a better carburetor. If the engine is anything to go by, then I'm expecting the gearbox to be in great shape too! As far as subframes go, I'm happy to have a pre '64 Mk1, as 1964 was the year hydrospastic suspension was introduced to the mini. Since my two front rubber cones sat still for 23 odd years, they've been naturally compressed and are holding their, so I'm expecting the car to sit a little lower in the front. After we construct a rotisserie, the body will be properly rust proofed and under-sealed. Then paint will follow. Even though I can understand doing a period correct colour, there aren't many solid colors that I actually like. I'm liking the looks of the light metallic blue on the new BMW mini's. Was thinking I could do this with an old English white roof for a sort of modern take on a classic (old mini with a new mini colour scheme kinda thing). Anyways, I don't currently have enough money to splash out on paint at the moment so I have plenty of time to think! Cheers -Jack4 points
-
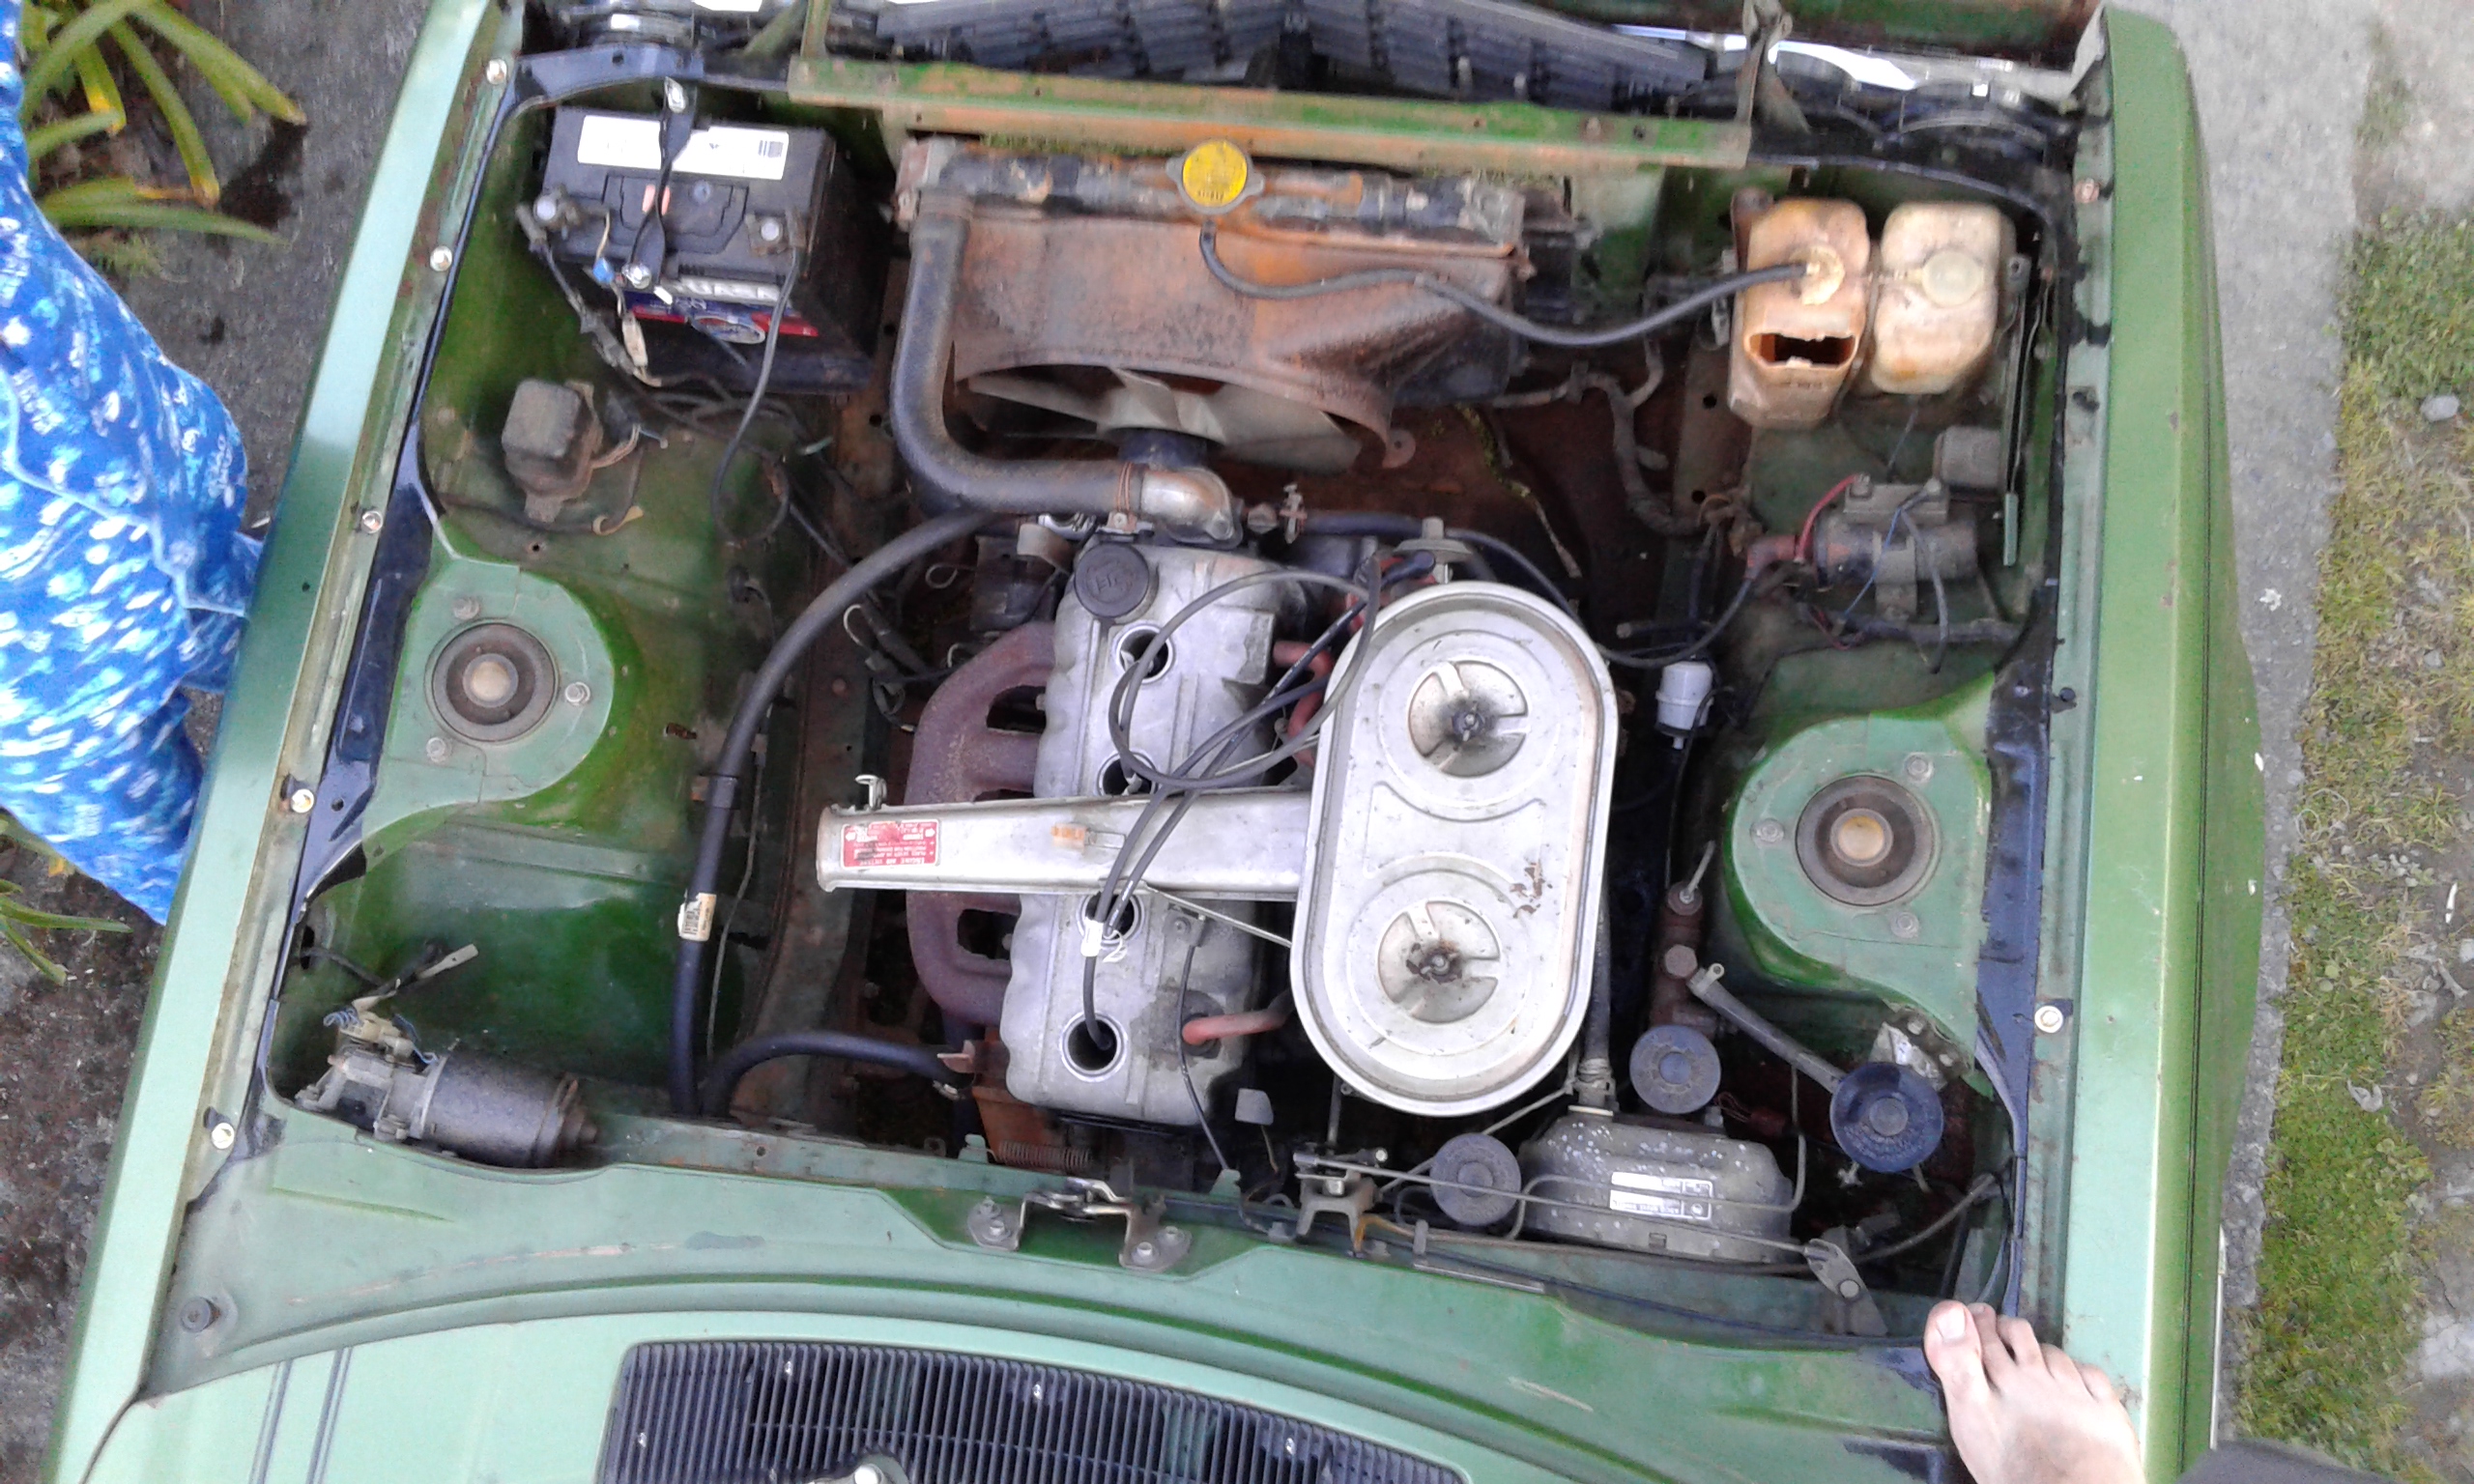
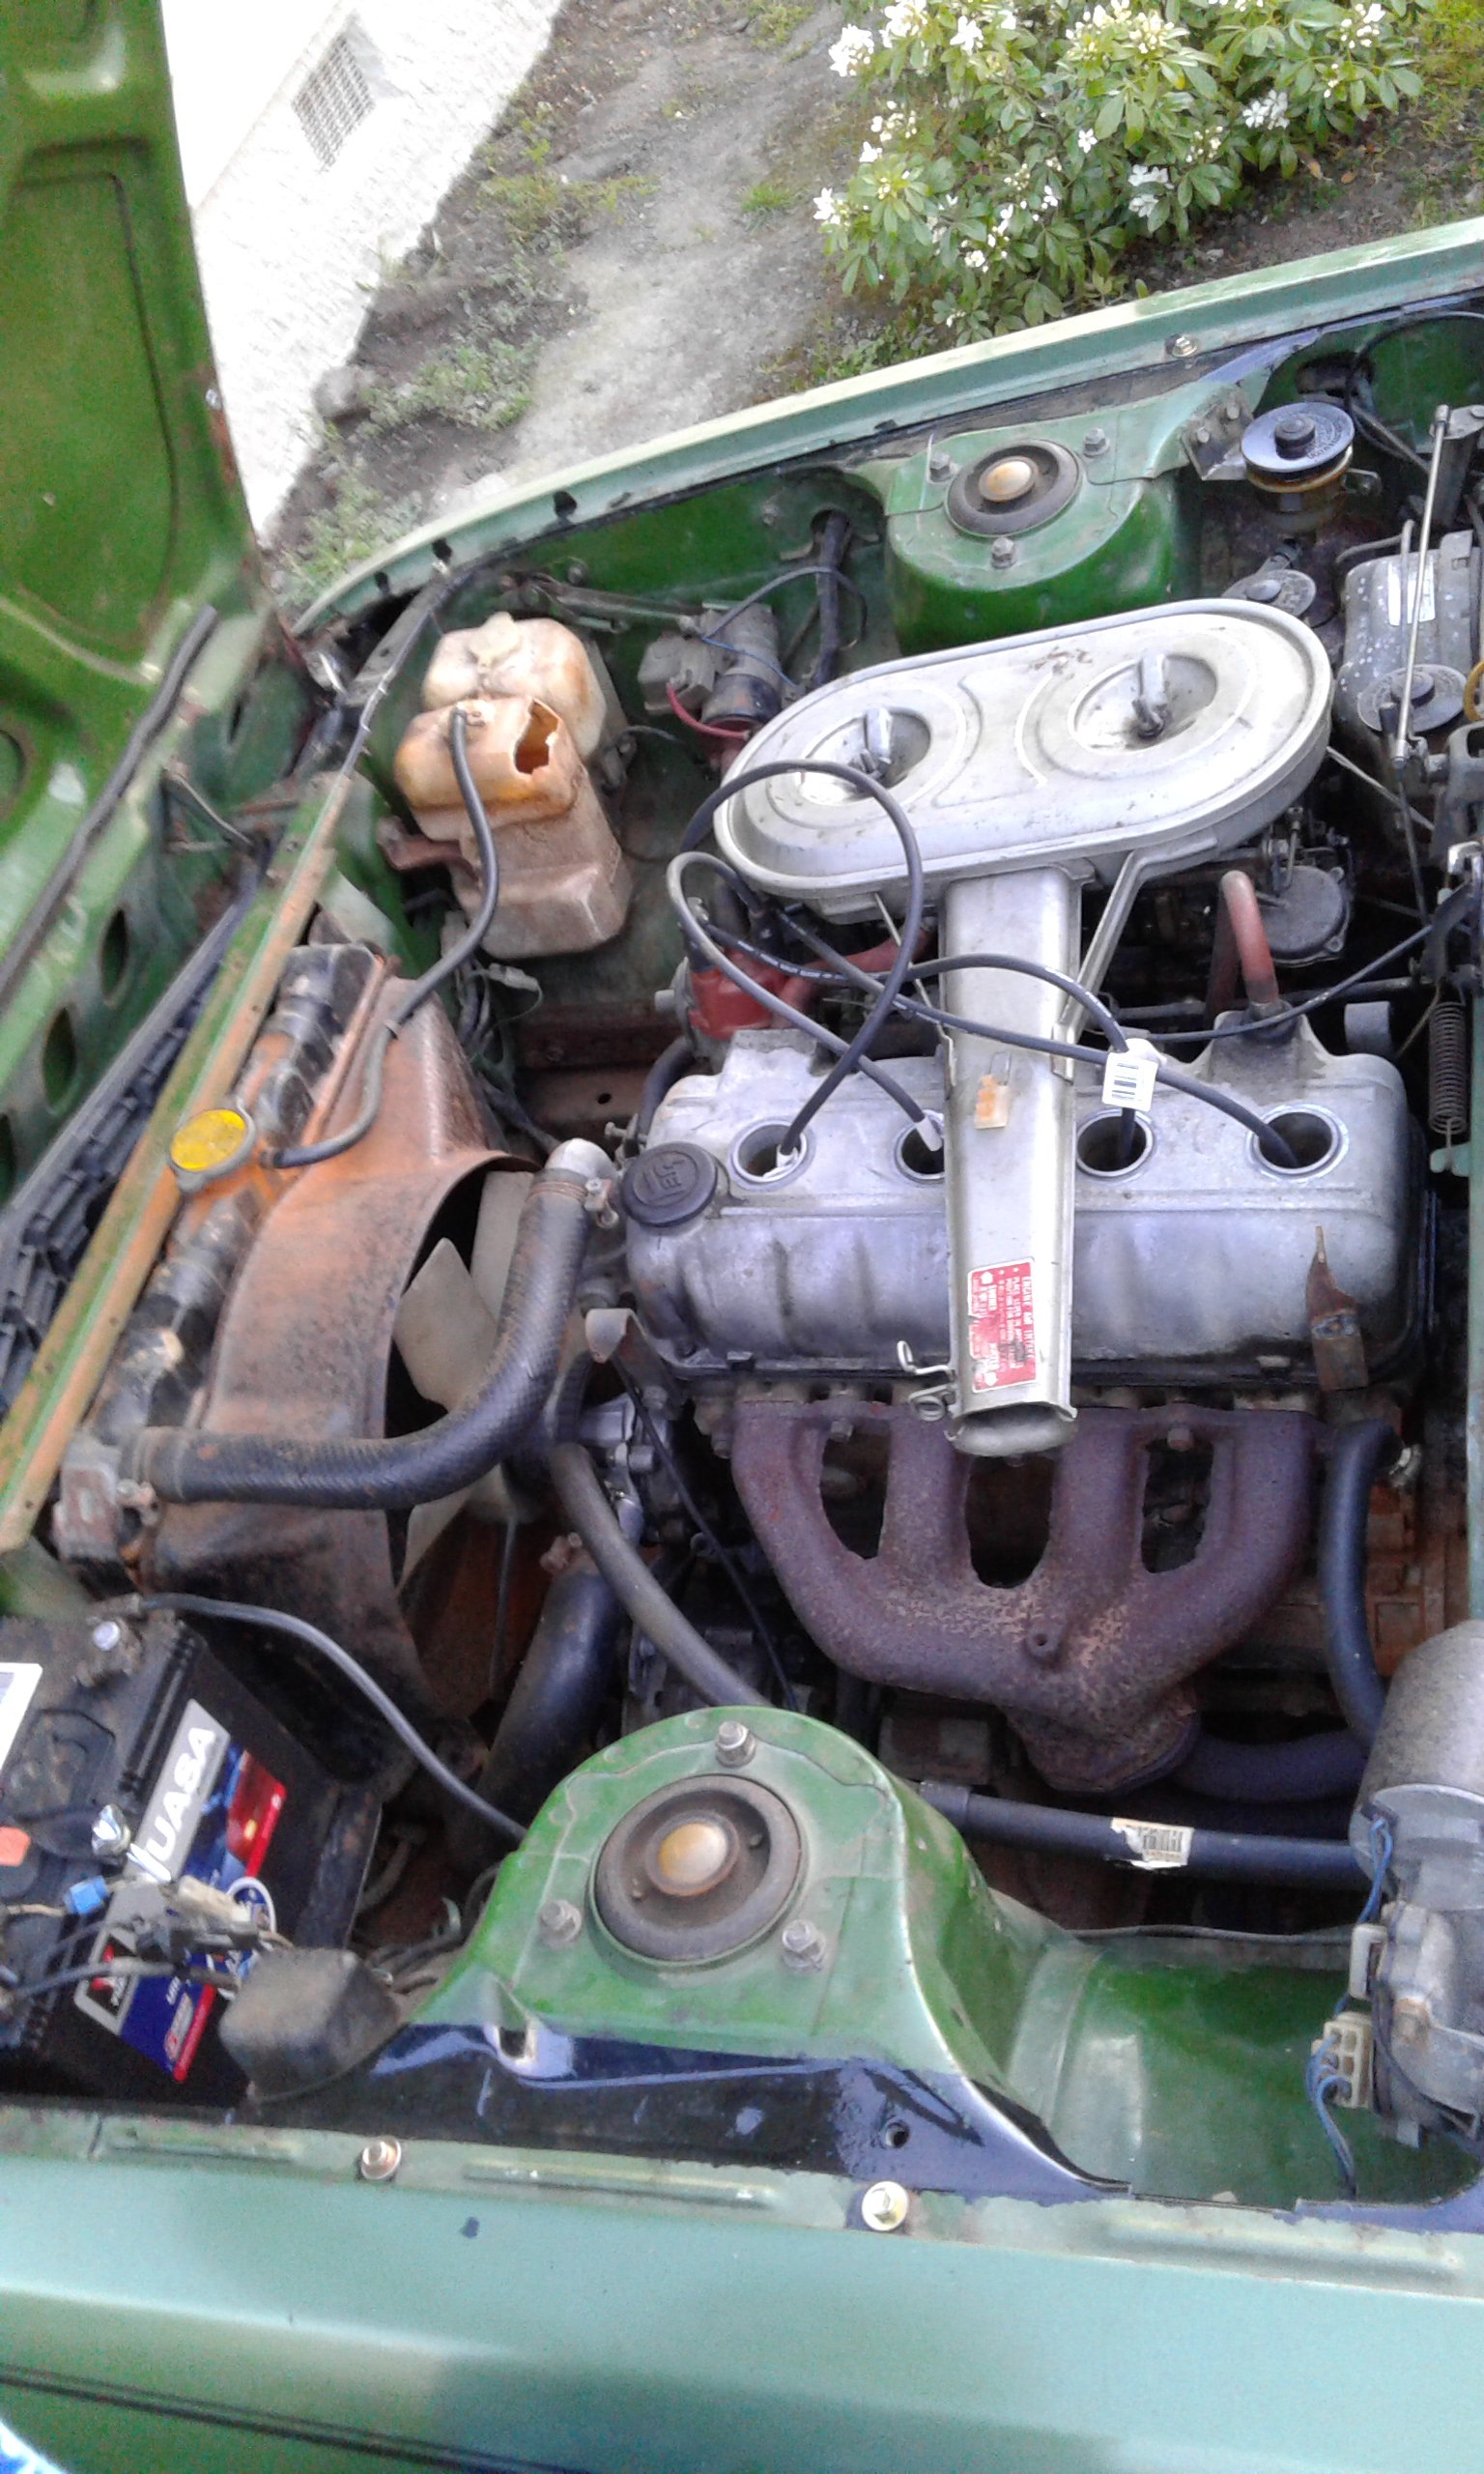
Couple pics of the powerhouse,amazing reliability really goes hard for what it is? Filled the sump right up with fuel the other day,going to pull the carbs down and rekit think the front float must be sticking open sometimes Changed the oil and filter let it run on the hoist got up to temp then repeat Shifted leads 1 to 4 round sending compression up through the carbs Worked a treat! Must of had a blocked jet somewhere idles way smoother starts a bit better and for now floats not wide open Still try to sort some carb kits just not as urgently as I first thought
2 points
-
try it with the standard setup first. timing requirements probably wont change a whole lot. unless its a real aggressive setup. As above use some kind of knock detection, and some small base timing adjustments maybe enough. With the higher compression it will more likely want to knock. but the best answer isn't retarding the timing. Throw some decent fuel in it. 98 or at least 95. cam may screw up the vac advance a little if its fairly aggressive. which will give you less advance at cruise. but again try it before spending the money on another setup2 points
-
Jah pays my powerbill2 points
-
thems some holes in my tinfoil hat Ah well, at least its clean inside2 points
-
I was looking forward to driving it to work the other Saturday cause my work car is boring, but when I did it was flat as fuck, boring and generally disappointing. when I got home I put the timing light on it to find it had moved a little, so tightened. Needed a warrant so I put a standard carb on, so it had choke and wasn’t a jerk to start for them. hosed gas into the engine when you shut it off. pulled it apart and cleaned it, did the same thing. then discovered the power valve actuator was frozen up Freed that up and it was mint, but The morning of the warrant it started doing it again. passed with a clean sheet! Was a totaI knob to start afterwards so I hotwired it and wouldn’t rev out, popped and banged, so chugged it home. They didn’t mention it doing this to them so she must have behaved. more of the same. Have since thrown the twin carbs back on. it pulled a bit under brakes so I ripped the other caliper off (did the opposite side before last warrant) and: one Piston was a bit scabby so used a spare and got it back together, cheers to mint16 for the bleeding help! cheers also to the above for making my sweet rocker shaft spacers. likely overkill but it’s a cool old school mod which replaces the springs with a brass bushes to stop the rockers moving laterally under revs I also modified the mazda air box a while back so the bonnet closes over it. required me to cut most of the base, push down at front and then fill the pie-cut section with panel steel. and found out the hard way that if you leave the key on while you go check something else, it can get ultra hot,produce a lot of rank smelling smoke, drip Brown shit out of it and fail! Lucky I had a spare generic one, cooked one was a GT40. I have a new one, but I’m planning to go electronic dizzy soon so needed to be a non-resistor type. Heres a shot of the current state of play. I used to have the fuel line running over the rocker cover into a tee, but discovered that the factory hard line will reach with a little bending. Much tidier and safer.2 points
-
Turned left after doing a bit more reading. Made front mounts and a trans mount. Assuming I have all my measurements right, its in the middle, and I have about 1.3 degrees slope on the 1st section of driveshaft which is where it needs to be according to the interweb. Im swapping the rear end to a 12 bolt, so I can set up the pinion angle. Been pretty productive really ! All just tacked together at the moment. Everything is just sitting there in the photos, need to drill a few holes and bolt it all up. not 100% happy with the trans effort and may rejig it a bit yet.
2 points
-
Made a start on the bed over the past week, first thing was to remove all the old brackets and supports. They were a bitch to remove since they were spot welded ever 150mm or so and you couldn't see where the spot welds were, eventually got there after doing 1/4 of them each day after work. Decided to put the c-notch up through the deck because I think they look terrible with a raised deck with hardly any depth. After that I made up a frame out of 40x40 box section that fits on top of where the original wood would of sat. That means the deck will be about 40mm higher than standard, which is good because it will hide all the rust/corrosion behind where the old brackets were removed. Need to sandblast/paint where those brackets were and everywhere below the box section and fix the rust up the front of the tray. Was thinking of making the whole deck lift up so you can access stuff underneath it, but I couldn't figure an easy way to do the hinges. Then I realised I only really need to access the airbag stuff and the fuel tank so I'll just make the back third lift up. Made a mock-up in Solidworks to test how the hinging works. The pivot point needs to be above the wooden boards so that they clear the c-notch panel when it lifts up. Seems like it works well, can lift up to 60 degrees before it hits.2 points
-
2 points
-
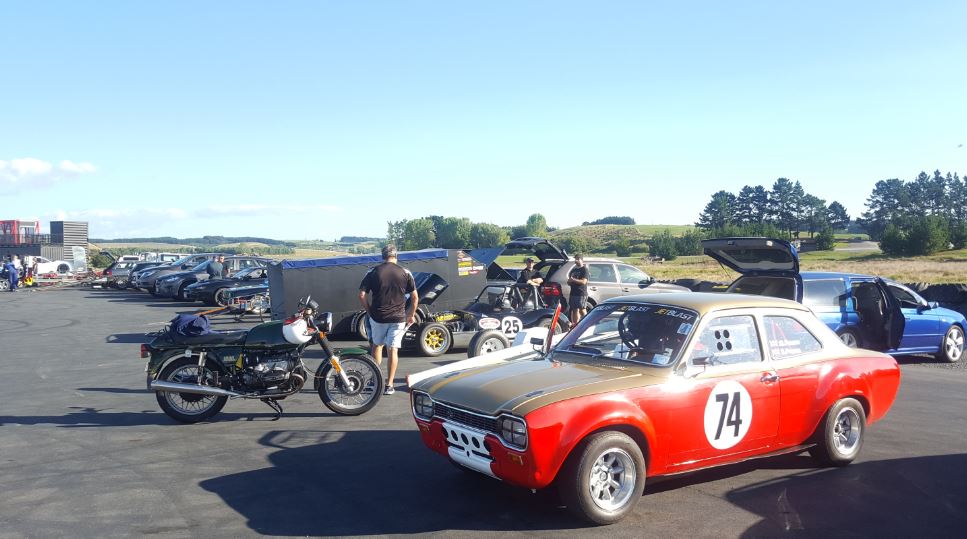
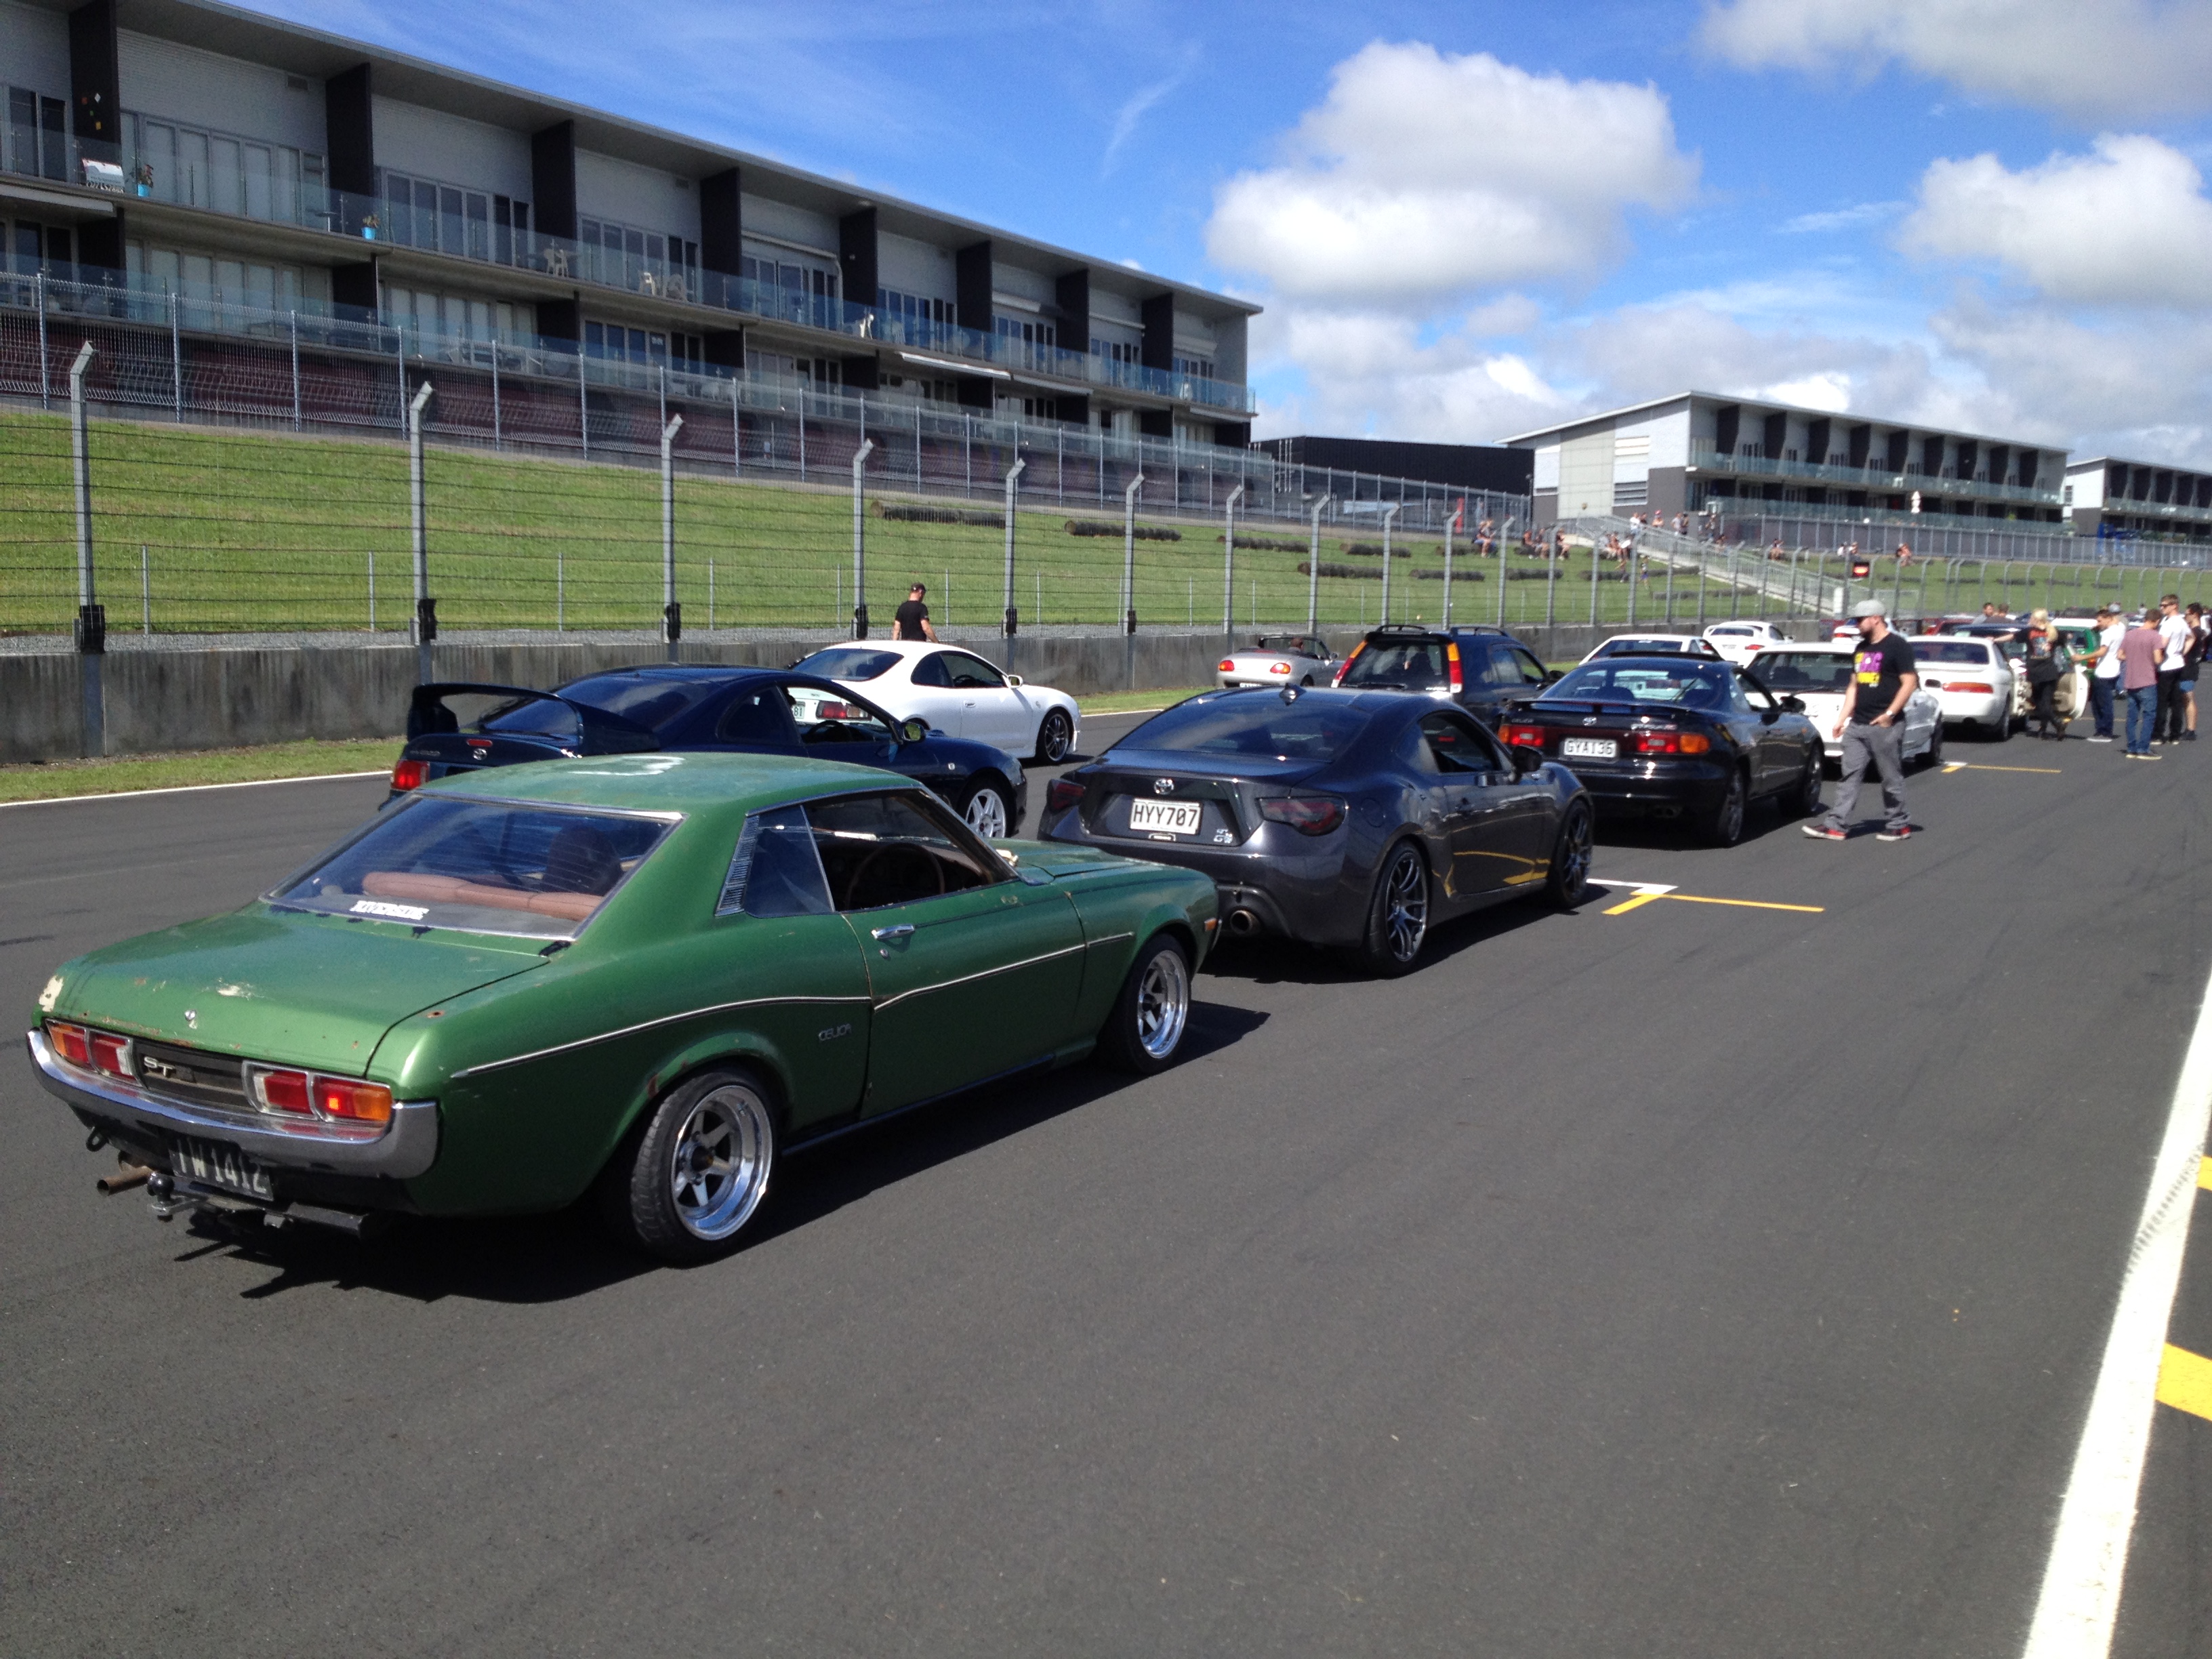
RCIS - Race cars in sheds track day at the Hampton Downs Club Circuit Incar Footage with Racing Ray Williams Thanks heaps to the RCIS crew for organizing a great afternoon of racing and Racing Ray Williams for the driving training
2 points
-
man i have been fucking around with this thing something shocking, need to commit and just finish it as i have everything to do so now. Shed is currently taken over my honda monza red, cams C50 is in for a new exhaust treatment and sparkle has given me his CT110 to chop Quickly hacked the rear guard off sparkles CT at lunch today, looks gay as frig now with the extremely large postie seat but once he gets a new one it should be lush Mocked up my cub with sparkles brown seat off his C50, i have ordered one of the same but in black which should look pretty lush. The bars are on now but i need to cut them down as they are too wide for the wheelbase of the cub and look a bit out of proportion Scratched my head with the wires a little bit but got all that sorted the other night. I know i could get away without running a battery but it thought id be a good boy and run one, then lights can work if engine isnt running etc which could be handy at times, and the new gel battery was only 30 bucks went to put the side cover on and realised i didnt have a screw for it, bit of threaded rod and an old imperial spanner later and jobs done jim Hope sunday will be a good day, will mod bars a bit and get them straight (seems forks are slightly bent) make some changes to the exhaust and get that on properly, re jet the carb with the jets that arrived today, slap the chain on, mod the rear brake pedal then slap some gas and oil in it and go do a skid, yeowww!2 points
-
Well i decided i wasnt gunna be cool enough with the Dio nifty, and my CT110 compared to the rest on the penny pinches clan on C50s, so when a pretty rough one came up for $100 i jumped on it. As i picked it up - mostly complete except once side cover (new ones on their way) and a buggered legsheild (will get a new one). Shes an early 1969 model, still has MPH on the speedo. I have already written a letter to transport new zealand requesting to keep the black plate when i re register it. Plans at this stage are - keep the glorious patina, maybe a nice hard cut and rub on some marine wax to preserve -Ct110 rims (slightly wider) painted black, with black hubs and new chrome spokes - get rid of front guard and slight trim / strip of rear guard - nice new single seat -nice new leg sheild and side covers -bar adapter with risers and black bars -gpx 140cc engine for max wheelies - will probably find some nice small indicators and ideally want to run an old patina headlight and tailight, taillight mounted off bottom of rear shock along with black plate on its side. hopefully i dont get distracted / doesnt take me forever to do Im calling on this thing here for inspiration, except with patina / i dont like the straight bars or twin headlights1 point
-
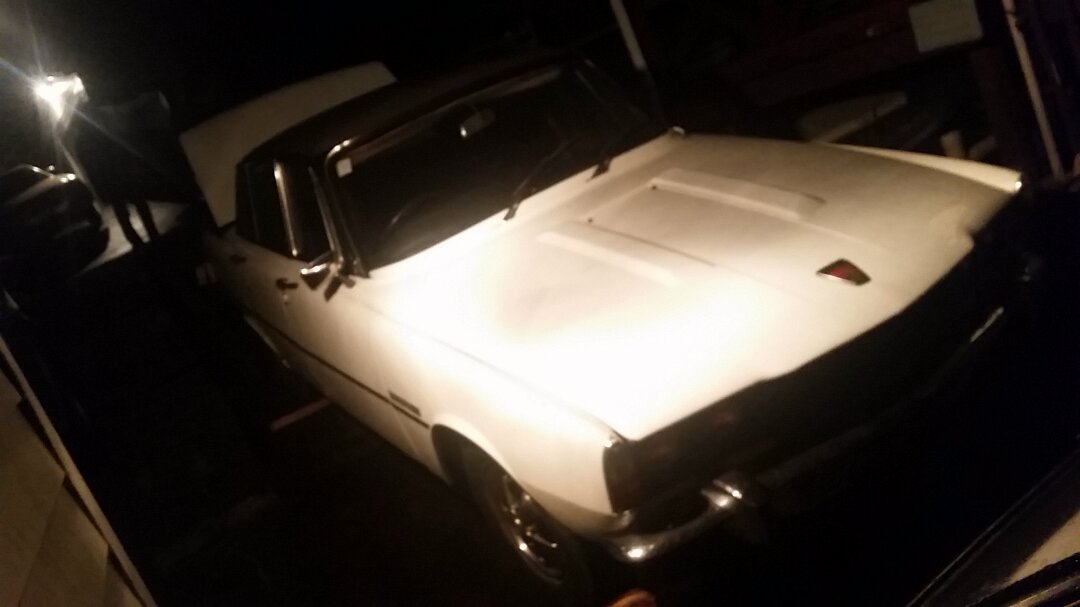
Well just picked up my new project a 99.9% rust free P6 V8 rover in white. list of what to do: 1) rebuild breacks 2) rewire ignition to starter 3) fix gearbox bushing (or find an SD1 5 speed) 4) take for a spin and find more bugs Discuss here:
1 point
-
after selling GP125 it was time to move on to the next project. so i picked this thing up yesterday! 1983 Yamaha SR250, fully road legal and ready to go. at an extremely sharp price it was hard to say no. the dude i bought it off had gone overseas and was chillin in storage, hasnt been used for 4 months so took a wee bit to start it and warm up. gave it a good run today and blew off the cobwebs, such a great ride being able to keep up with open road traffic. sits at 100km/h no troubles if the wind has nothing to say about it. Experiencing finer luxuries like electric start, 12v charging system and a neutral light are a delightful bonus. ' will be a slow build but i plan to tidy it up and turn it into a street tracker/brat style bike. theres a few minor things to get sorted, few gaffa tape side cover repairs and some questionable braking ability at the top of the list. already ordered tracker bars, small speedo and a megaphone muffler. will probs buy tiny battery and gut out the midsection for max lushness. also bought a flat seat with great optimism, but after looking at the frame it is gonna be a real mission to get it to fit nicely without taking to it with a grinder. ideally id like to put a rear hoop in and get it super tidy so we'll see how we go. pix for inspiration1 point
-
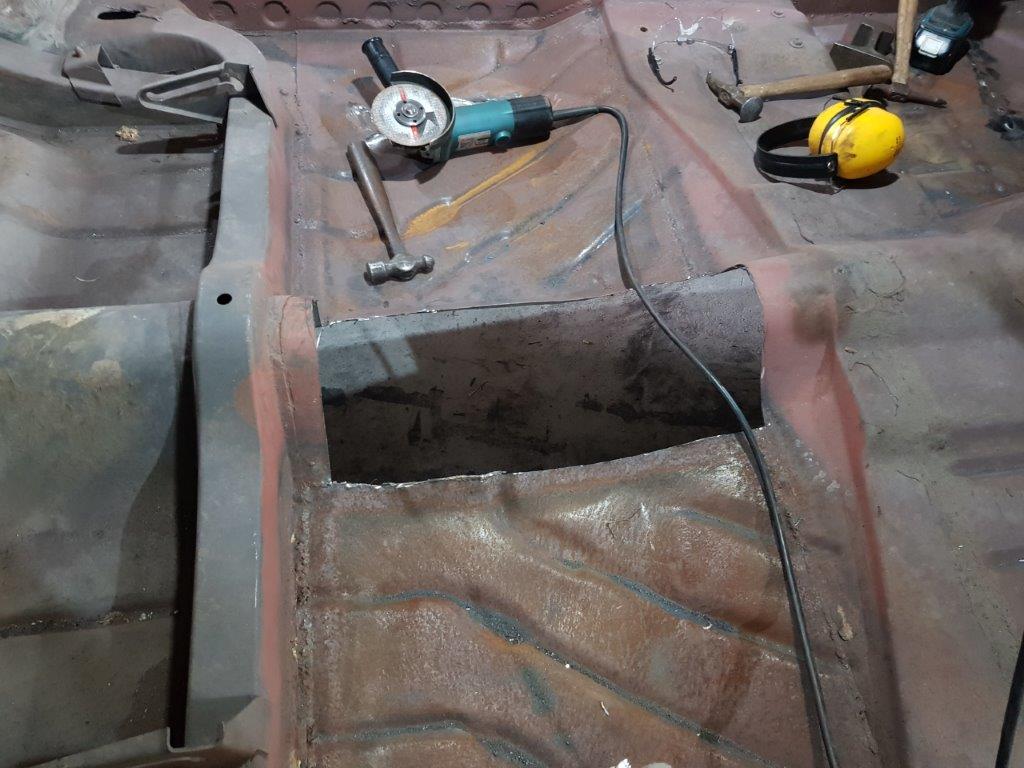
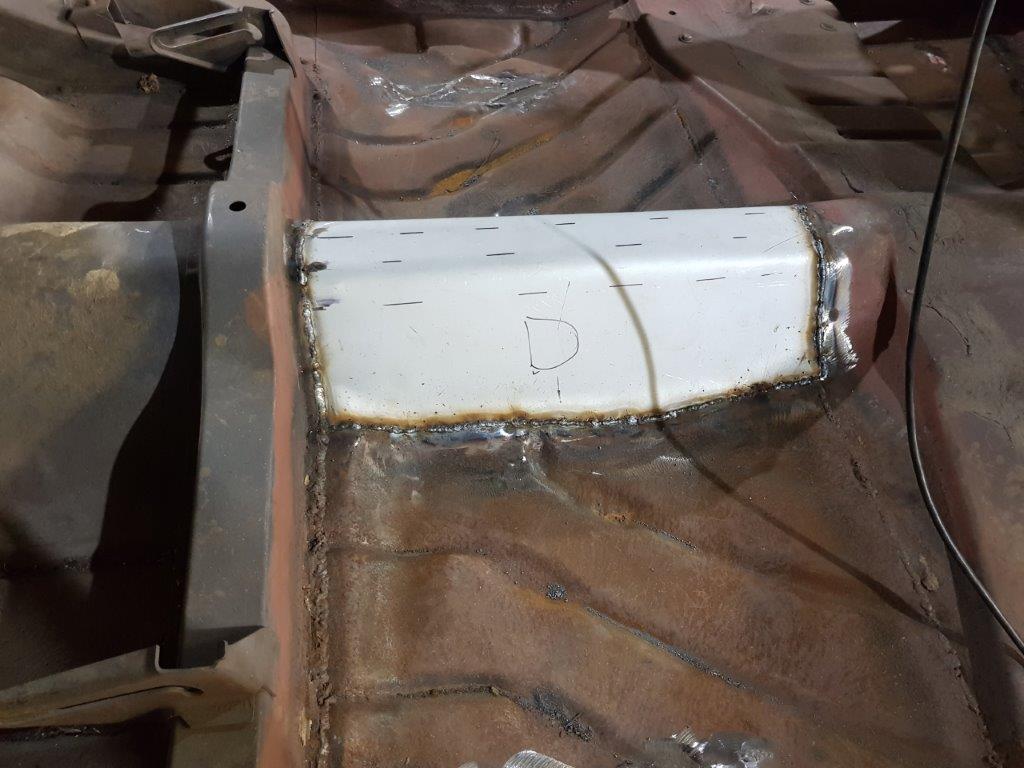
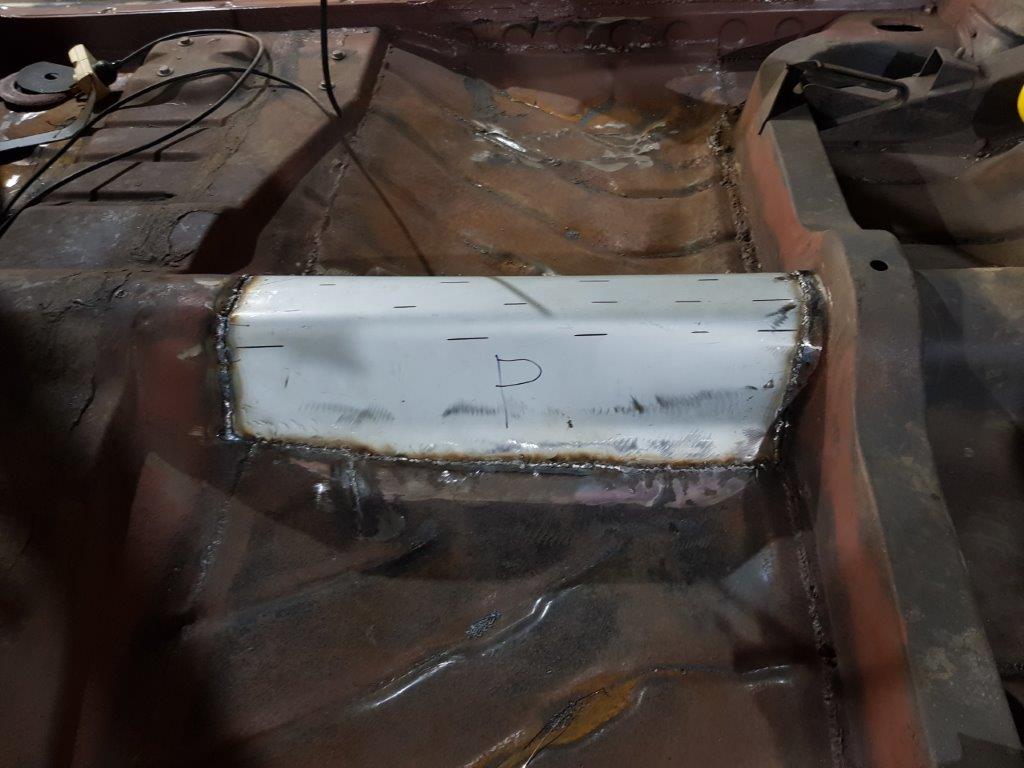
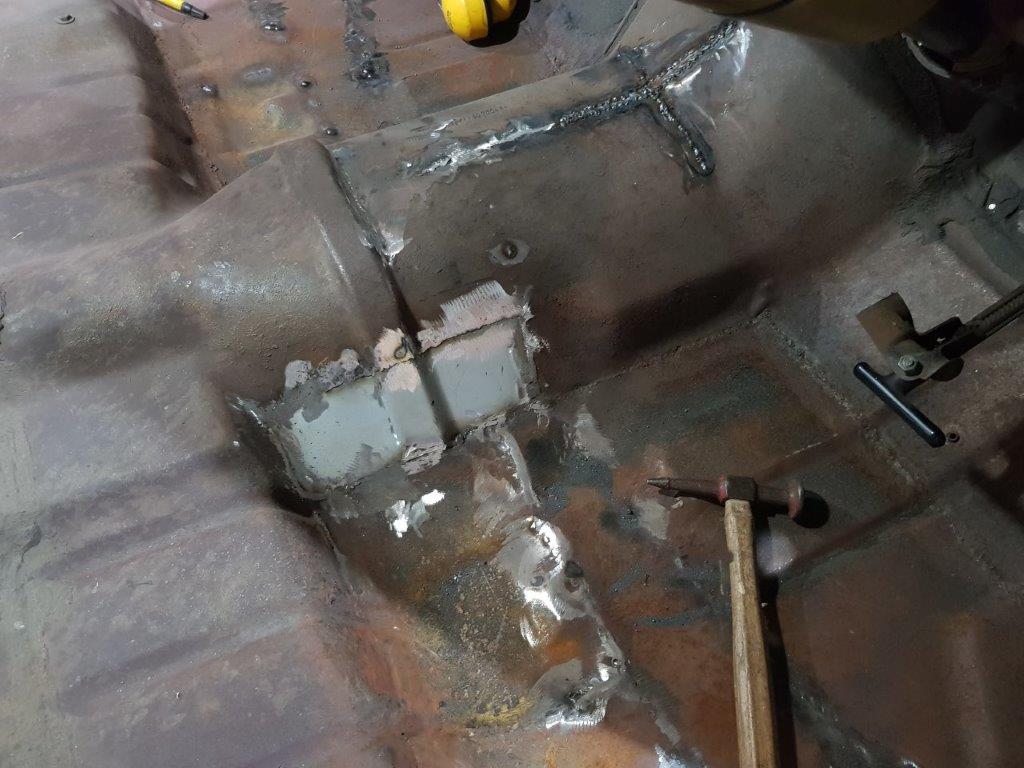
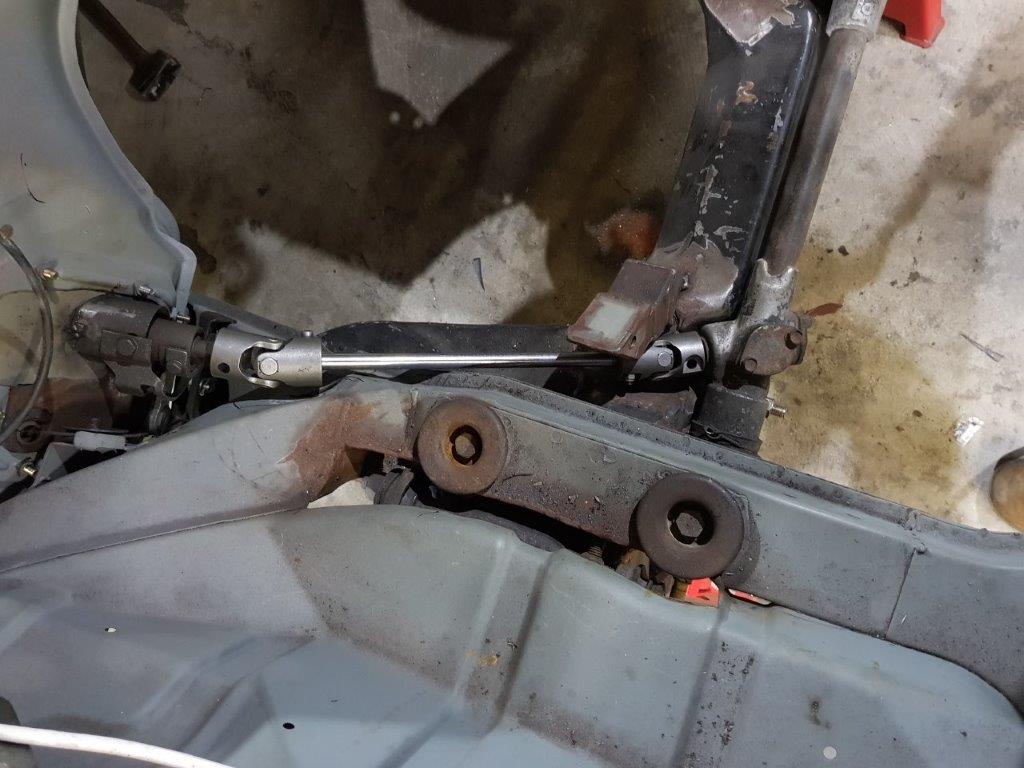
At the last monthly meeting I got told off for not putting up photos. Here are some updates. Section of the trans tunnel that looked like swiss cheese cut out New section welded in. Sounds really easy in 2 pictures but took about 4 hours to get right And some more swiss cheese gone as well as the big cut I put into the tunnel to make the trans fit welded up. Here is the steering shaft. With universals fitted. Amazingly enough nothing touches. The lip on the chassis rail will get removed beside the shaft as a precaution.
1 point
-
1 point
-
Yeah well its been proven to work by others, its also possible that it just wasnt fuelling evenly between cylinders on mine as the runners arent exactly the same. But either way, in my case the benefits werent worth the downsides. Also if you have a quad throttle setup where it's at the same temperature as the head then you'll probably have a better result as the fuel evaporates a lot quicker. Something interesting, I saw someone post a factory inlet manifold for an SR16VE N1 and it has staged injection from factory. The other 4 injectors are in the head.1 point
-
did some sweet hoons on this thing couply weeks ago down at DGR welly. Had a good ride with Russ and the boys on saturday out to makara beach and she ran without fault, its pretty deafening / hilarious to ride and gets a good share of attention. So i can tick this project off as complete, on to the G/S paris dakar resto now1 point
-
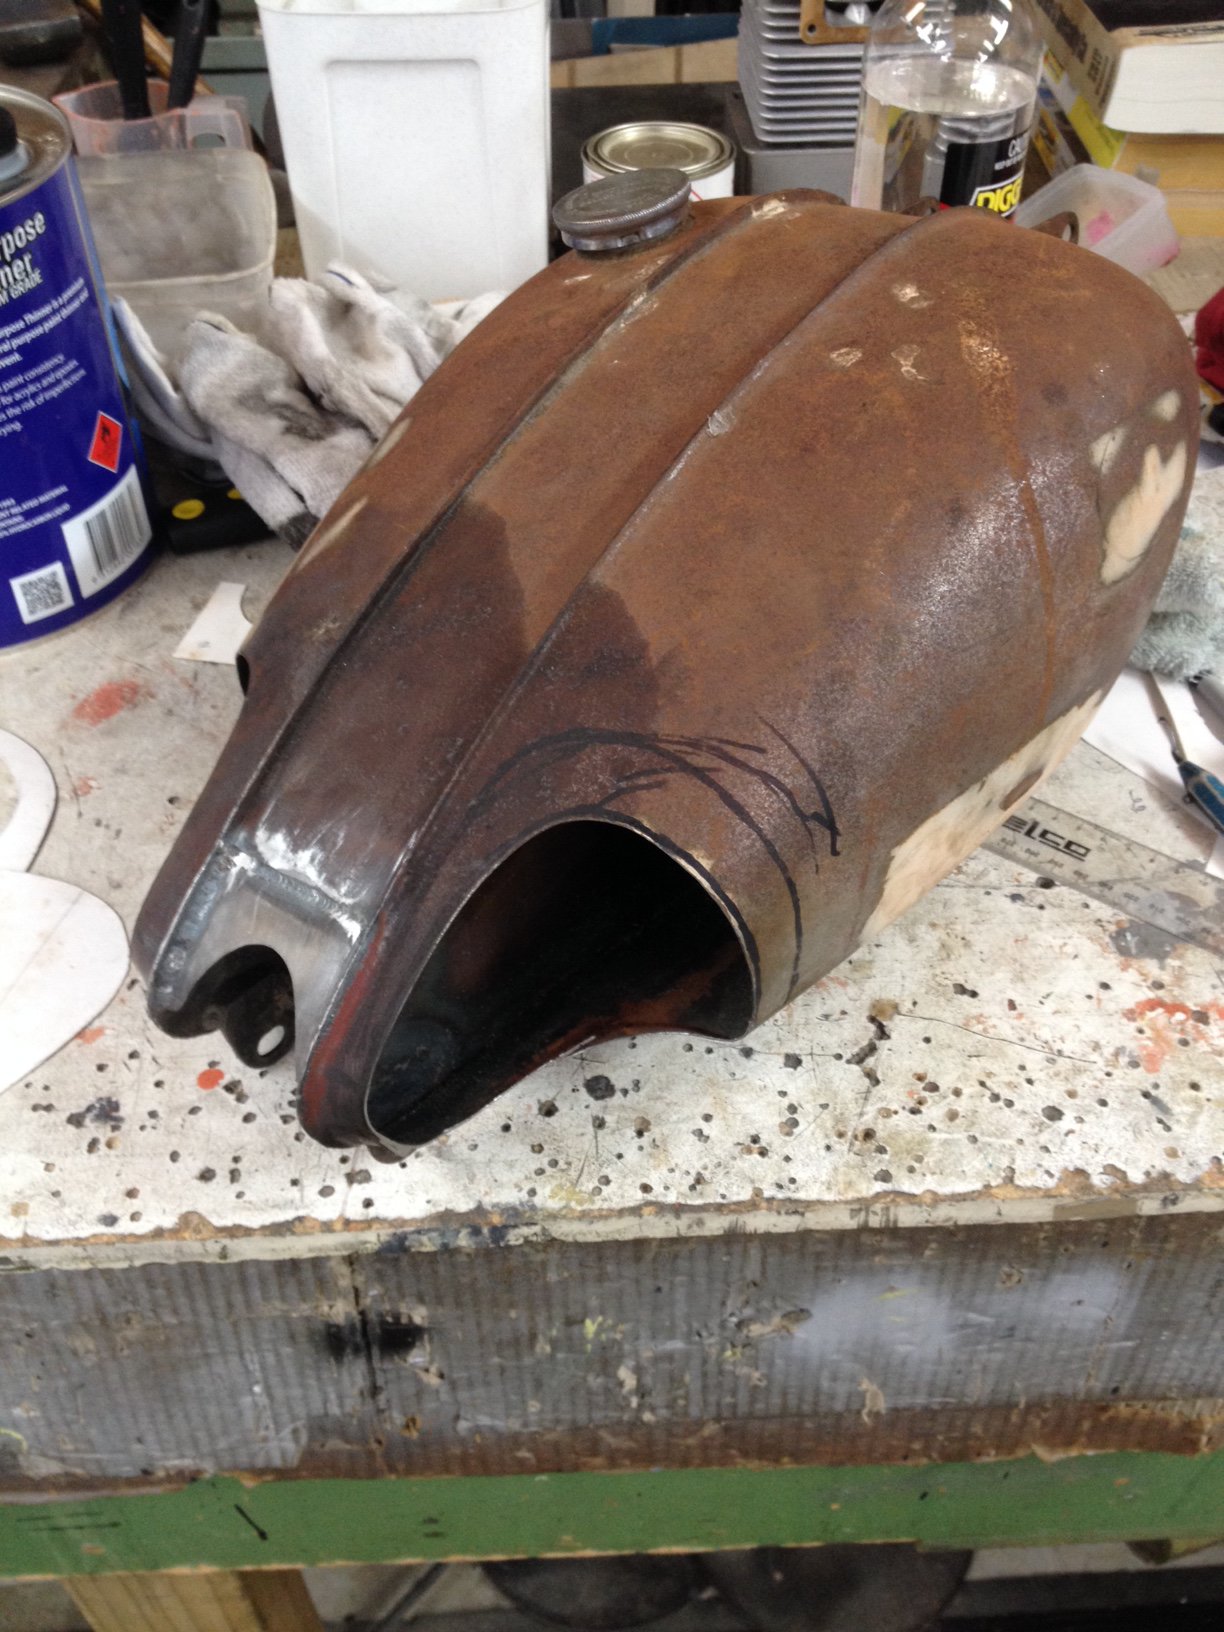
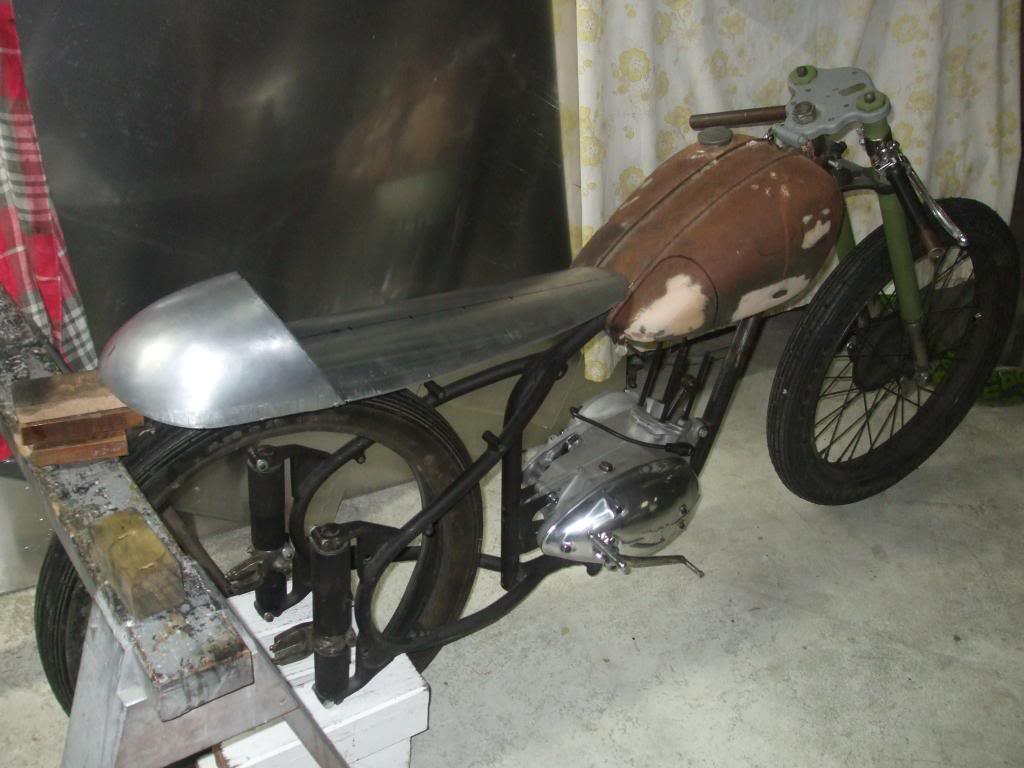
much work over the weekend mott came round on saturday and helped a bunch finishing welding up all the exhaust stuff that I had fitted up and tacked togethe,r while i worked on the thesis for my turd polishing doctorate. not only had the good old boys bo and luke of north taranaki been trying to emulate randy campbells greatest ever stunt and bashed the crap out of the fuel tank, it had some epic corrosion paint coating chemistry going on which took several hours of wire wheeling to remove and find out what specification colander i have. Im guessing the combination of the rustpaint protective coating and the holes being on the top of the tank meant no one ever noticed previously. anyway got all the paint and rust and shite off, cleaned and treated the rust. will have to cut and weld and patch in the top and the one pit hole in the bottom and some of the dents will get sorted with the fitting on the sump. also made up a frame and and brackets to mount the tank and got all that done. will get onto fitting the sump and repairing the tank next. PS thanks again jack ma, can vouch that these all in one drillytappy things with impact driver hex drive are astonishingly better that what i expected actually work awesome1 point
-
experiments with scrub radius. so the front end is less than perfect with the 245s on the front and a really positive scrub radius its pretty twitchy. i couldn't get the wheel any closer to the strut, its basically touching now. i started thinking about the clevis type mounting of the strut that lots of modern stuff has. that design would allow me to move the wheel inboard and decrease the scrub radius right? so, choose one that has lots of parts available and is really well supported by aftermarket shit. S15. parts for days. so i bought some S15 front hub carriers and LCAs and had a bit of a measure. straight away its clear that the Nissan design moves the ball joint 30mm closer to the centre line of the tire. whilst all other things remain basically the same. win. on first inspection it looked like it could work. there were a couple of things that might throw a spanner in the works but i rang the guys at Techno Toy Tuning and they could supply me with a fabricated lower control arm that would bolt into the AE86 crossmember and have the right balljoint taper for the S15 hub. good. so with a bit of fucking around i amassed the following parts that in theory would all come together seamlessly to make it work, S15 hubs S15 Tein coilovers MX70 cresseda inner tie rods TTT LCA's made to adapt S15 to celica/AE86 (ring them, they make heaps of them apparently) complete with castor arms stock S15 tie rod ends bolt it all together then attach it to a celica and it all fits. bump steer measured at +2mm from ride height to full bump and + 2mm from ride height to full droop. a total travel of 140mm and a total toe change of 2mm positive. that will do me just fine. have i fixed the scrub radius? well its all theory at this point because i only trialed it today. i need to get the struts rebuilt and find the bracket that came with my front brakes that will bolt my calipers to the S15 hubs. but, the ball joint is 30mm closer to the centreline of the tire. at 2 degrees camber the strut top is much closer to the center of the car that it was before. when you draw it all that change in line angle makes a big difference. also there is now a 20mm gap between the strut and the wheel so i could move the wheel in by 20mm and decrease the scrub radius even further if i need to. im calling it a win. im going to get the struts rebuilt and find the brackets then bolt it all in and see what happens. here are some random pictures of things. 2017-09-30_04-59-07 by sheepers, on Flickr 2017-09-30_04-58-57 by sheepers, on Flickr 2017-09-30_04-58-39 by sheepers, on Flickr 2017-09-30_04-58-30 by sheepers, on Flickr 2017-09-30_04-58-21 by sheepers, on Flickr 2017-09-30_04-58-05 by sheepers, on Flickr1 point
-
Shout out to GC @Vintage Grumble, sorted me a couple belts, chur my bro1 point
-
Have been uber slack for the last few months, things gt too hard. Finally got around to buying some engine mounts (arrived today), after the replacement ones sourced from Japan didn't actually exist. SO have some out of a 260c which are very similar and will/should bolt to the car, but possible some fiddling of the engine brackets to get it sitting right as they are a bit taller. So this weekend will look at getting the flywheel and clutch etc all bolted back up, and have a crack at putting the engine back in the hole. Progress. Hopefully.1 point
-
So to prove Datsun reliability we tried to get the red petrol Cedric running. Battery, oil pressure check, fuel, and ......1 point
-
Pipe finished, only forgot to put the nut on once before welding on the megaphone haha Wheel trued up pretty easily The trimmer sent me a pic of the seat today. Really pleased with how it's turned out, will chuck a pick of it up tomorrow once I get it1 point
-
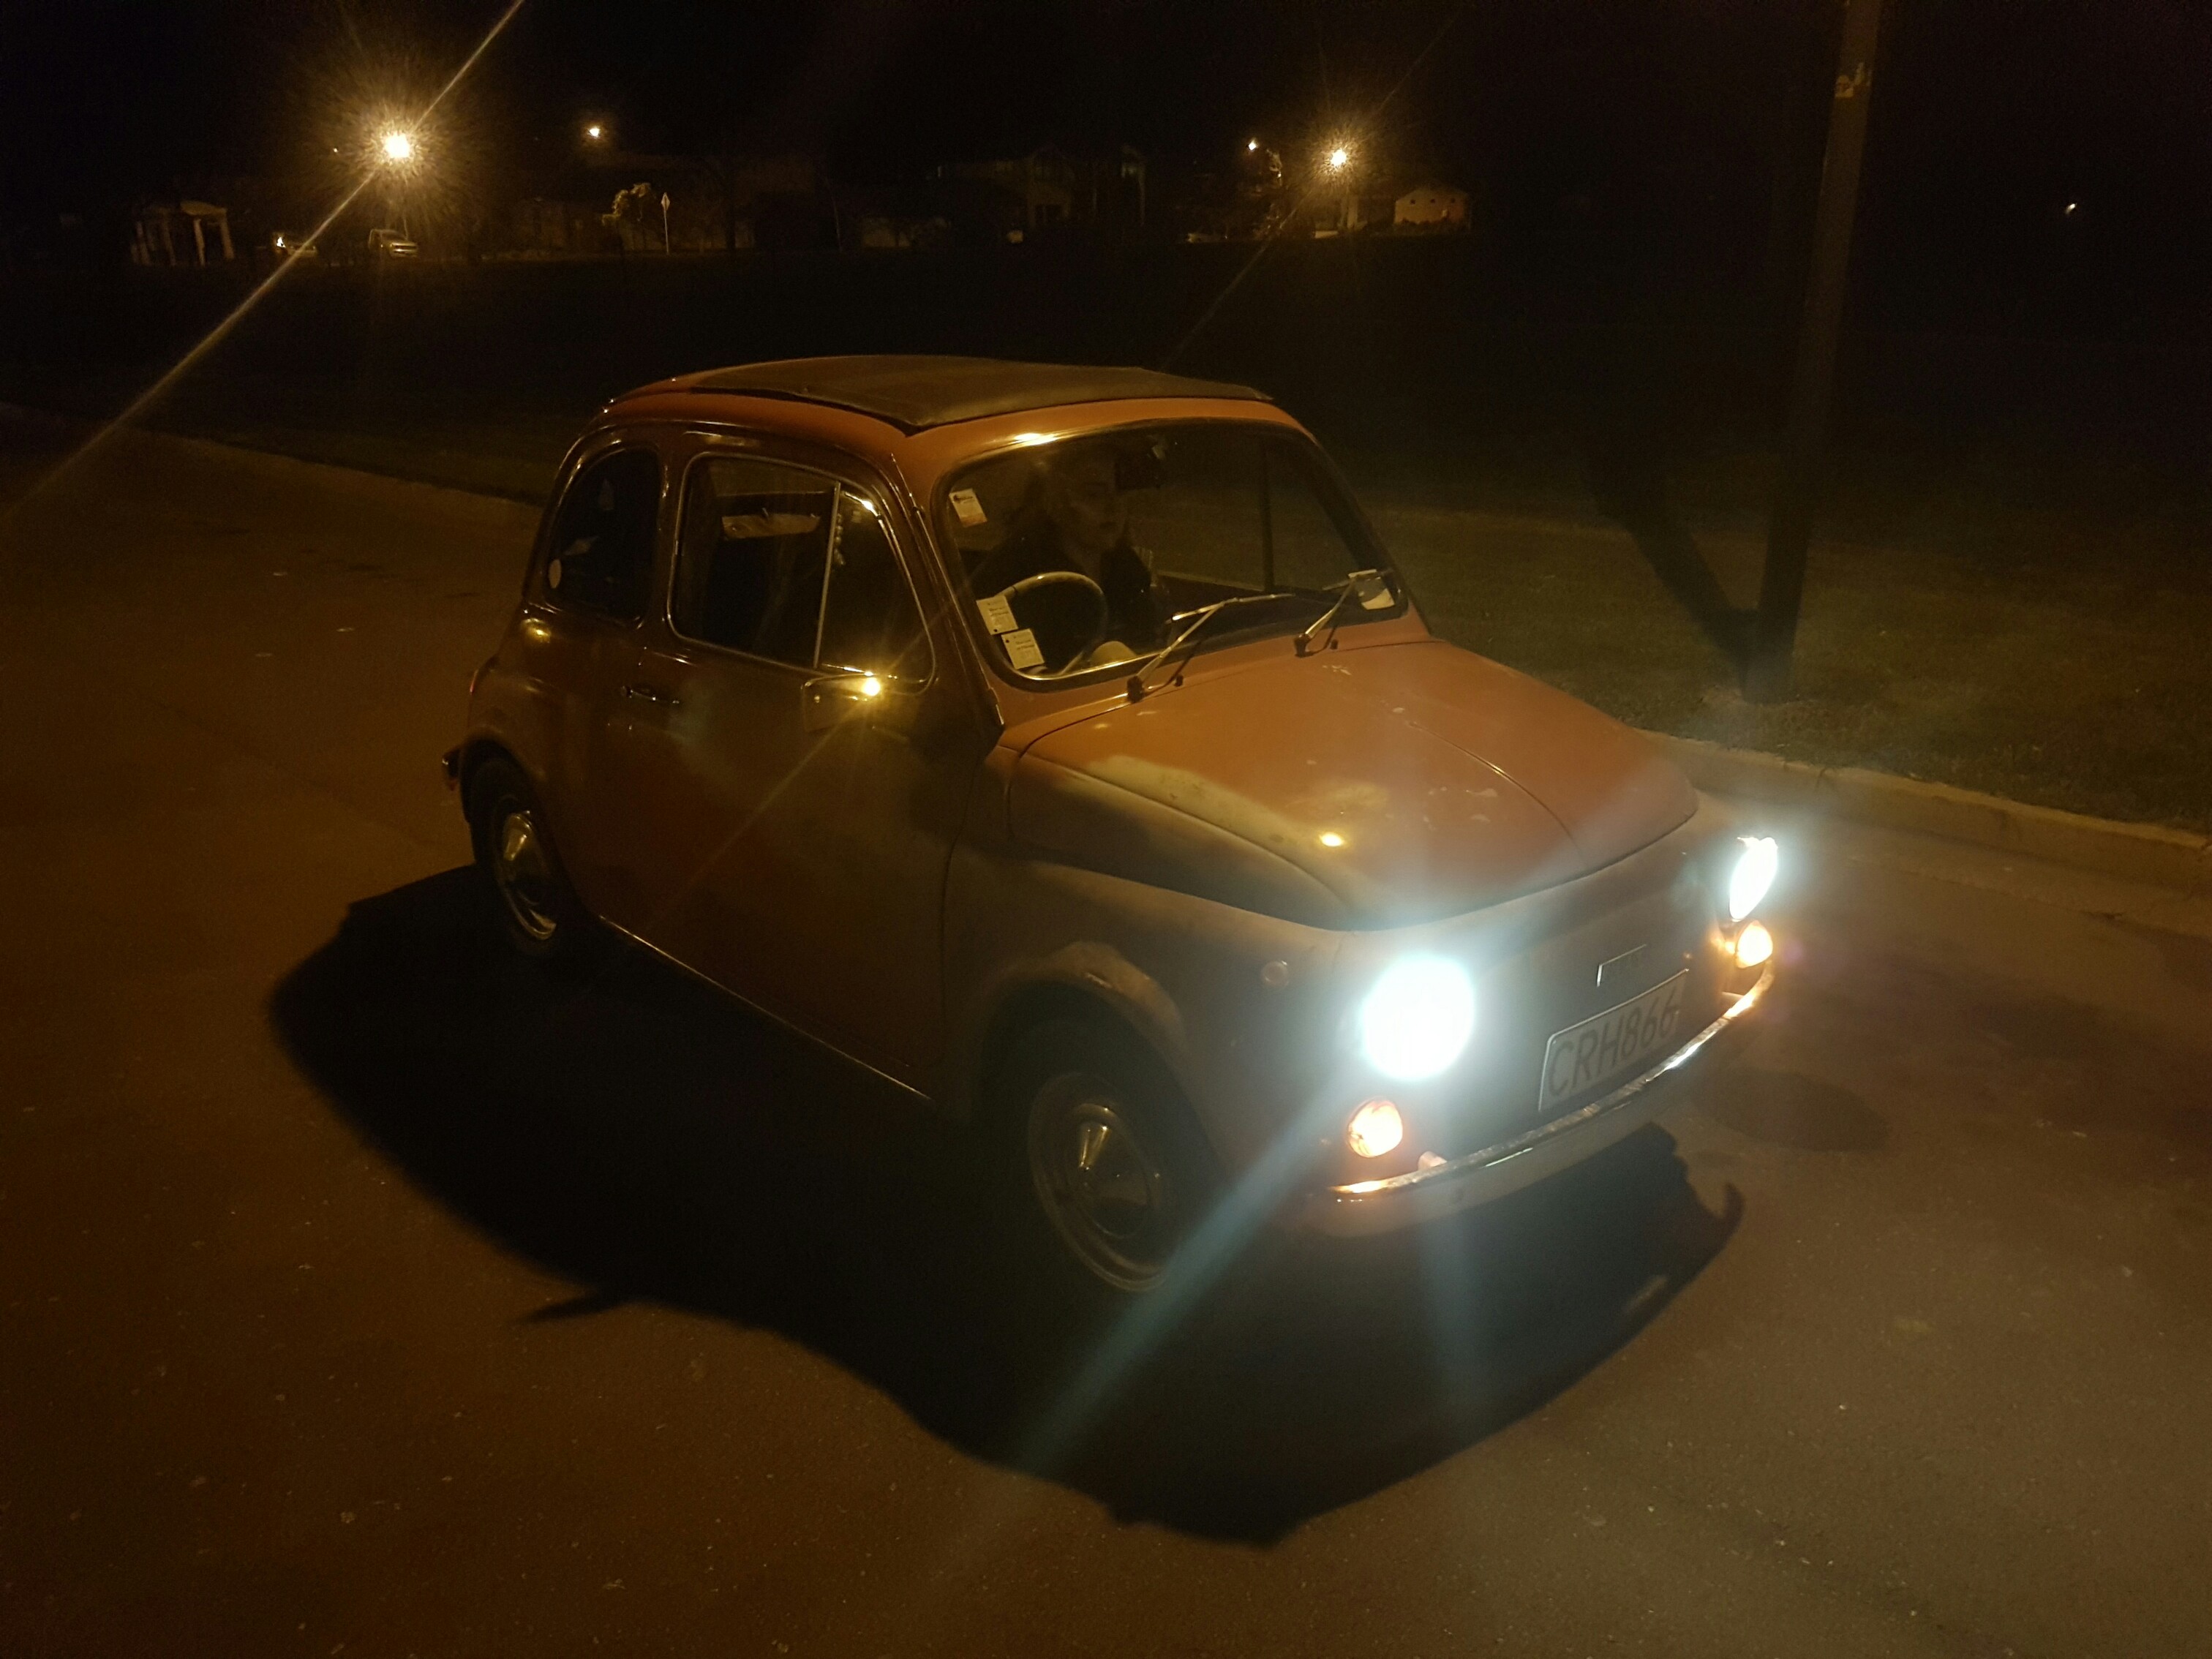
I didn't plan on doing a thread so photos so far are lacking, I will sort that for future posts. Here's some photos from when we went out driving in it
1 point
-
Front forks and rear suspension all assembled up. I masked up the tank tonight so will get the tank insert painted tomorrow. Have dropped the seat off at the upholsters, hopefully that will be ready early next week. Also Tom Morris from wheel and spoke services has made me a set of stainless spokes for the front so will lace that up next week. Have just realized that the classic bike show is in a couple of weekends time so if i can get this looking some sort of finished i might take it along1 point
-
Made it to Hampton downs and back for toyotafestival even had a good hoon round the track Wasent quite smooth sailing got hot on the Napier taupo rd couple of times Developed a dirty miss under load didn't get to suss out another lead set till on the way home cheers Huntly repco!! Was an awesome journey with the boy's got to have a yarn with a number of people who blew me away with there positive comments and admiration Really was an eye opener as to how few there are on the road now days
1 point
-
Fitted a 10" Dio rear wheel with 3.50-10 tyre. Tight squeeze, had to bend number plate a little and the tyre just touches the ground when on the stand. End result...... top speed of approx 70kp/h (goes well off the end of the 60kp/h speedo)1 point
-
parts arrived yesterday, so spent the morning chucking them on. new tracker bars sit much lower, took way more effort than swapping handlebars ever should, powdercoat is super thick and none of the switch blocks or levers would slide on so spent a bit of time sanding and persuading them to fit. sadly snapped the right indicator switch that goes into the block, but was already held together with gaffa tape so it was expected. new megaphone muffler fitted straight over the header, no shims needed. sounds so good!! a lot less sewing machine sounding now. has removable baffle also for max wannabe harley spec. sadly the hanger doesnt fit so will have to make one up, but other than that pretty stoked at how easy this bike has been to modify so far. ebay seat is not gonna fit nicely without chopping the rear end off and starting again, which for a $80 seat i dont think will be worth it. there's a company that makes a custom seat that fits over the factory frame, only needing a few tabs and brackets grinded off. its expenny but looks so lush. pix1 point
-
Awesome fab work! Mean.1 point
-
Like, like, like! Awesome project, and so beautifully engineered.1 point
-
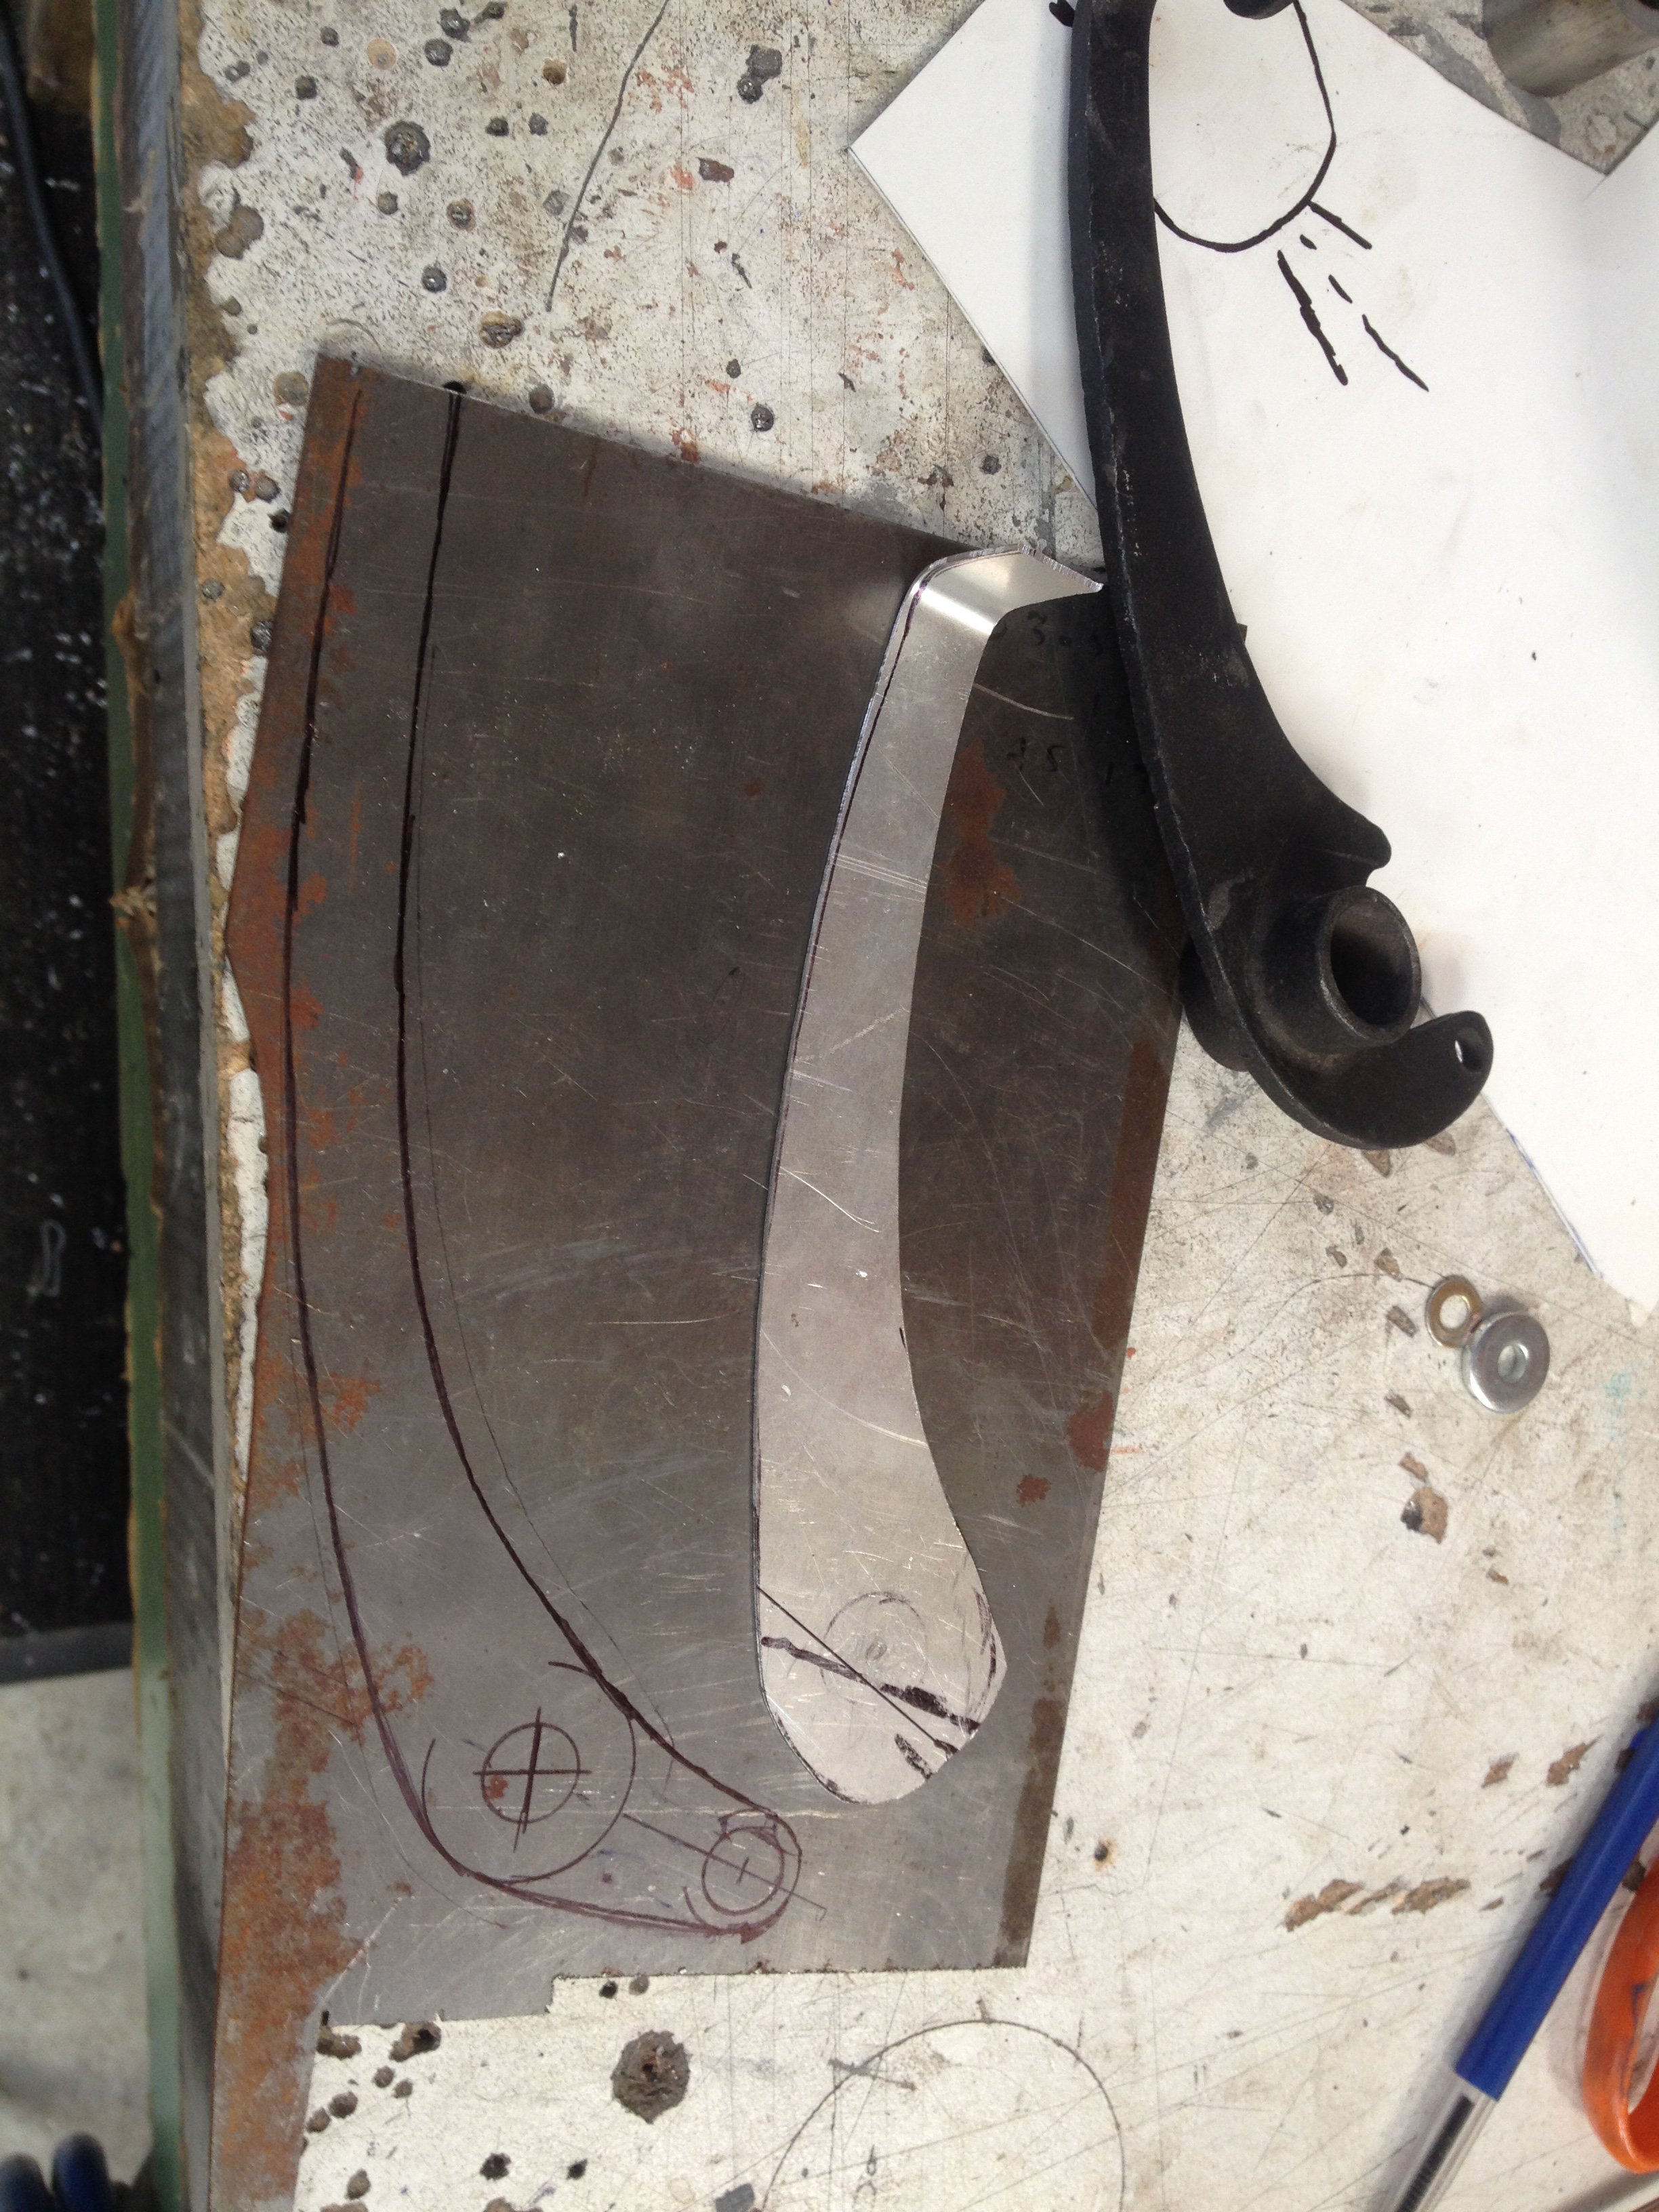
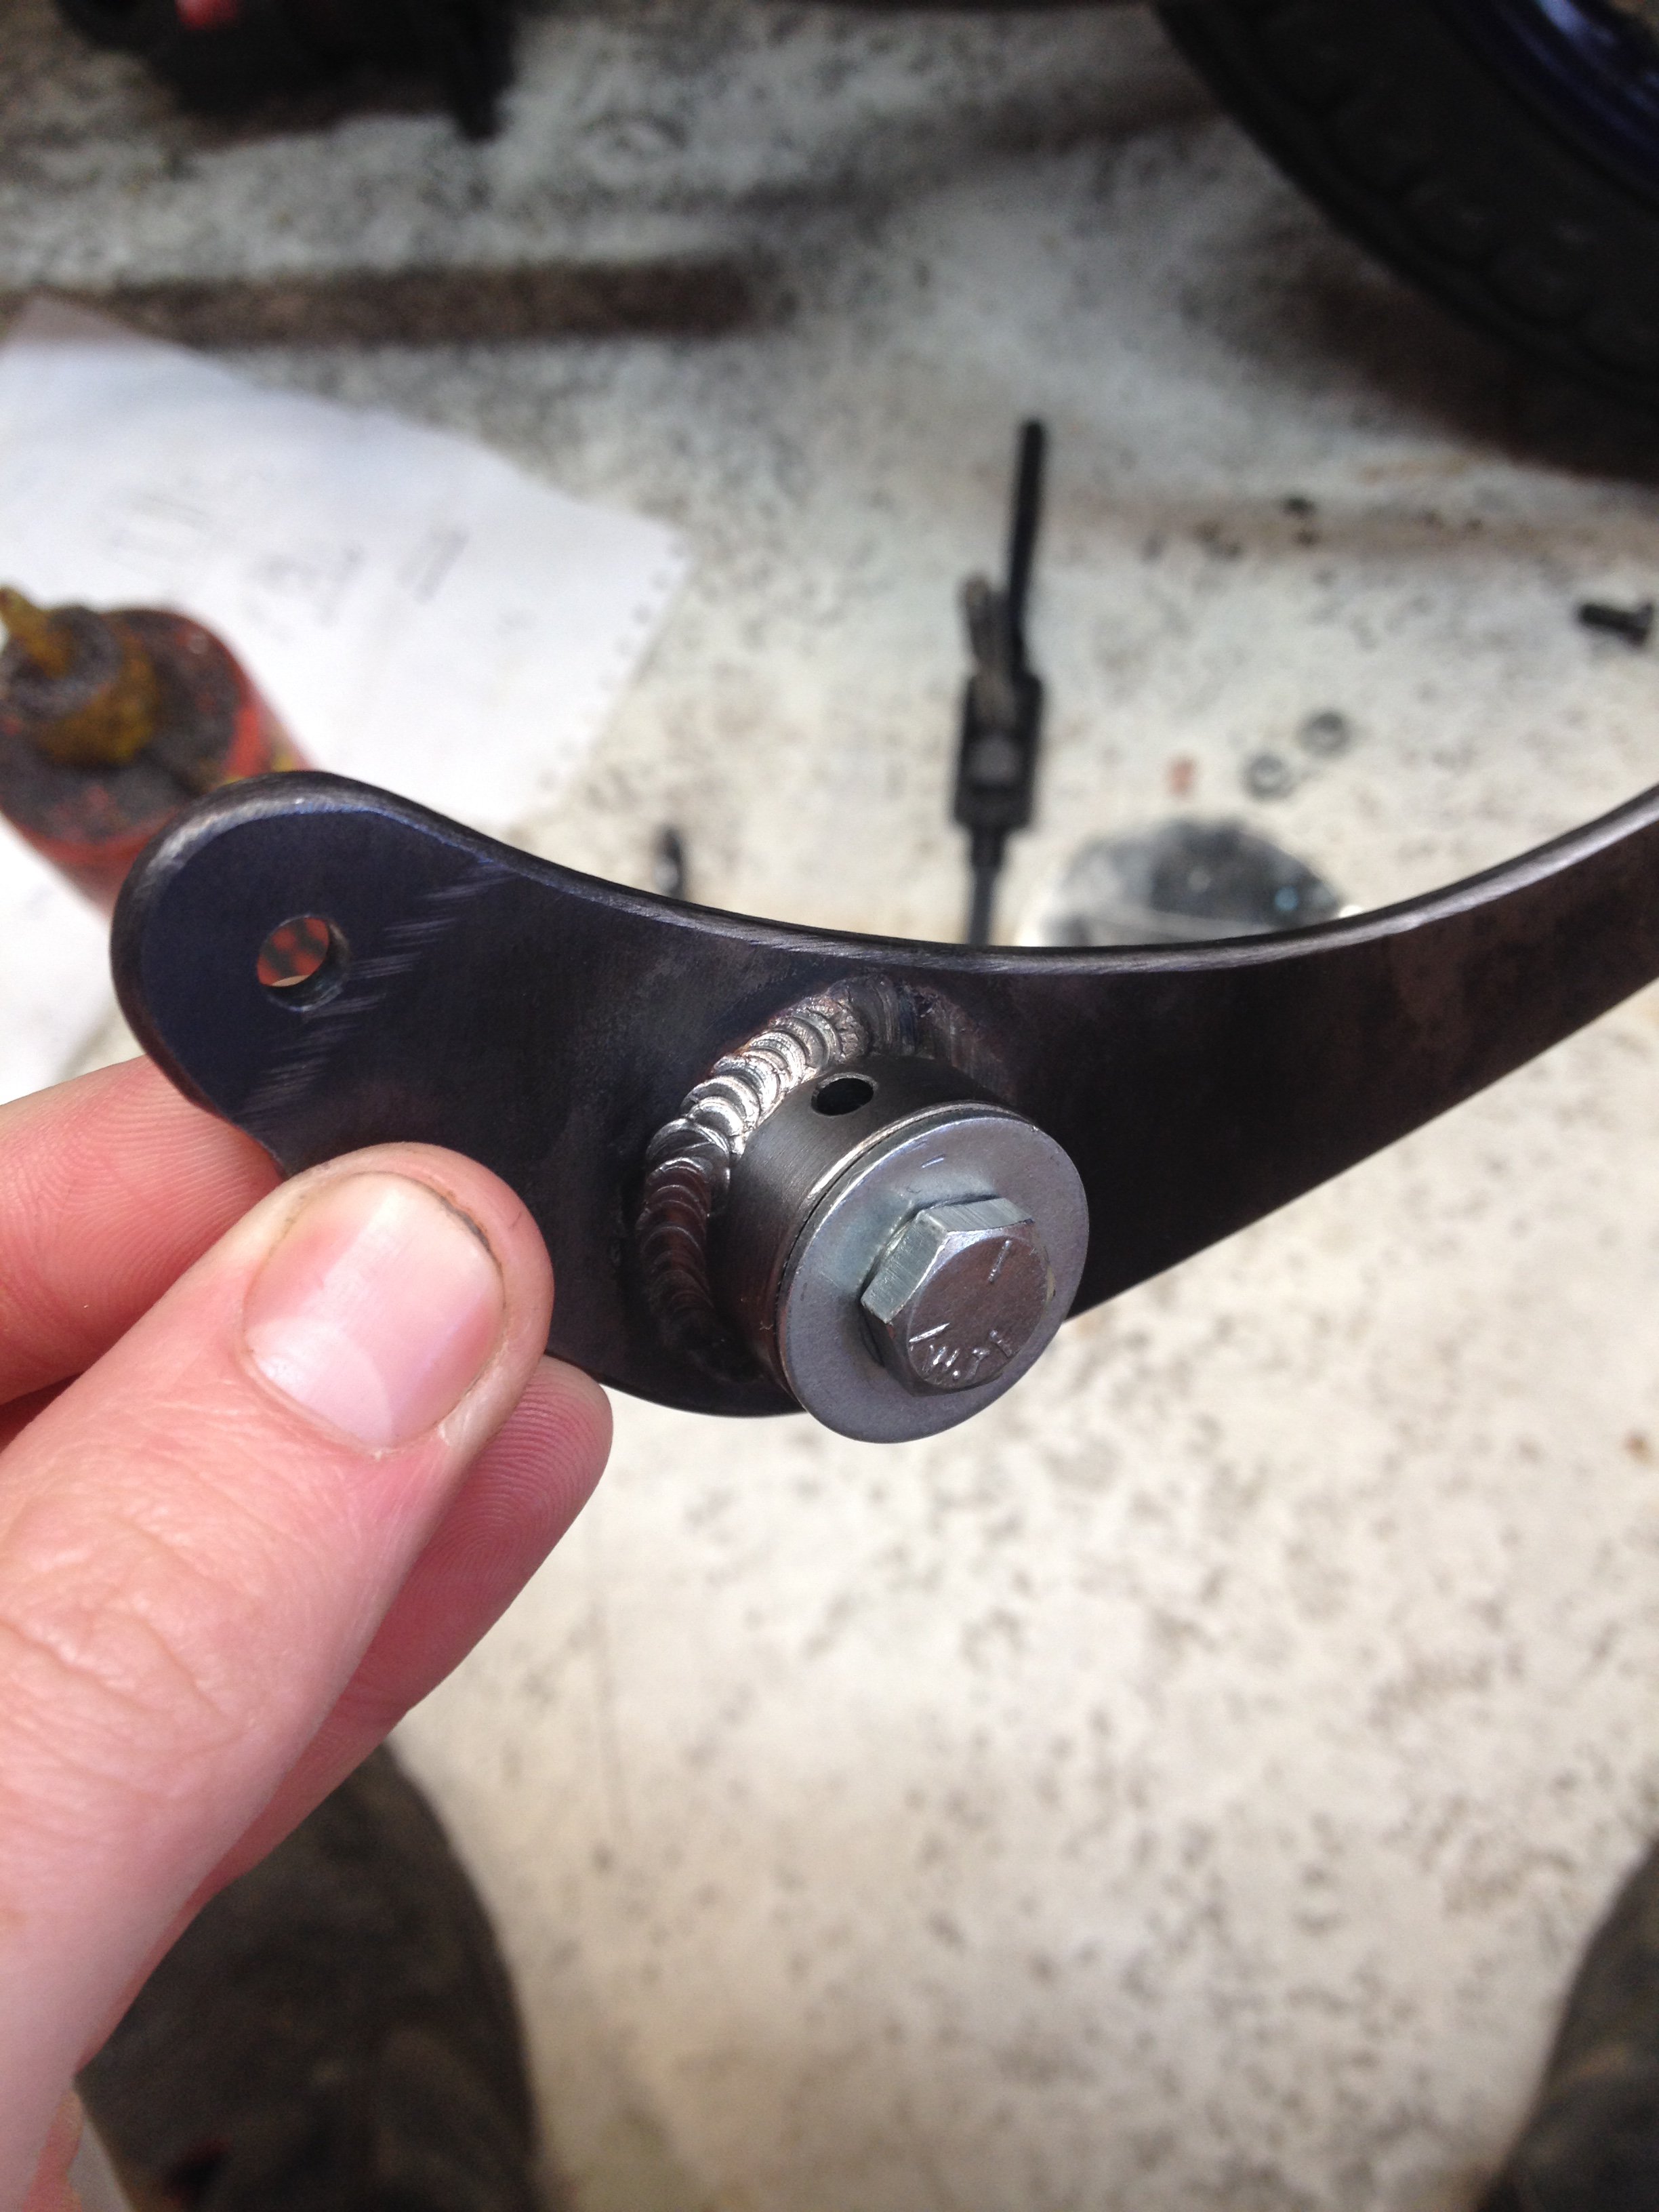
As the original bantam pegs and foot controls are in the wrong place for the new seating position i need rear style pegs and controls Making the new brake lever, 4130 sheet. Original on the right Pivot boss welded on
1 point
-
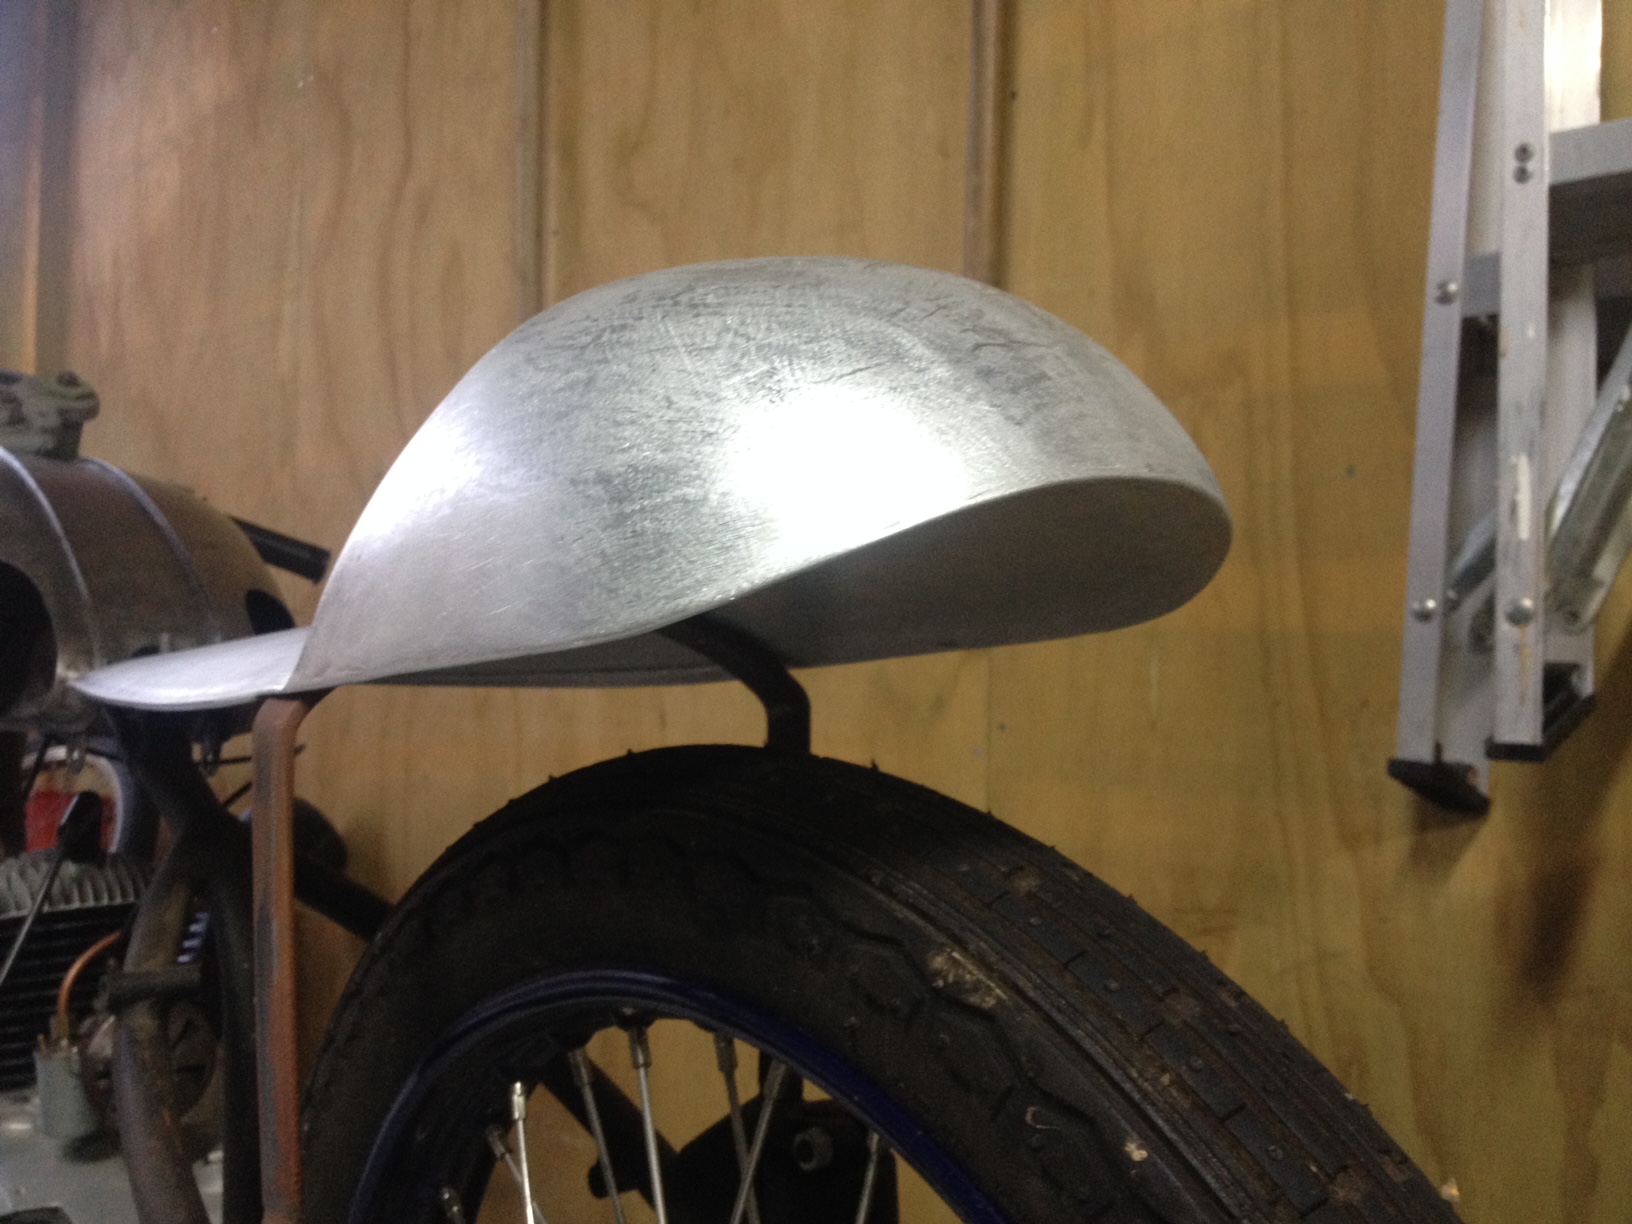
I cut out some holes for the go fast knee scallops, these large openings were quite handy as after i ground out the large amount of filler i could get in there with a dolly and get rid of all the dents, the tank is now real smooth and fair also made up a little fill in patch for the front of the seat to blend into after a good sanding to remove the surface rust
1 point
-
That brings us to a couple of months ago where i saw that the bike was starting to rust and corrode from sitting around so i got back into it. first off was getting the seat finished cut out and fitted welded and filed up
1 point
-
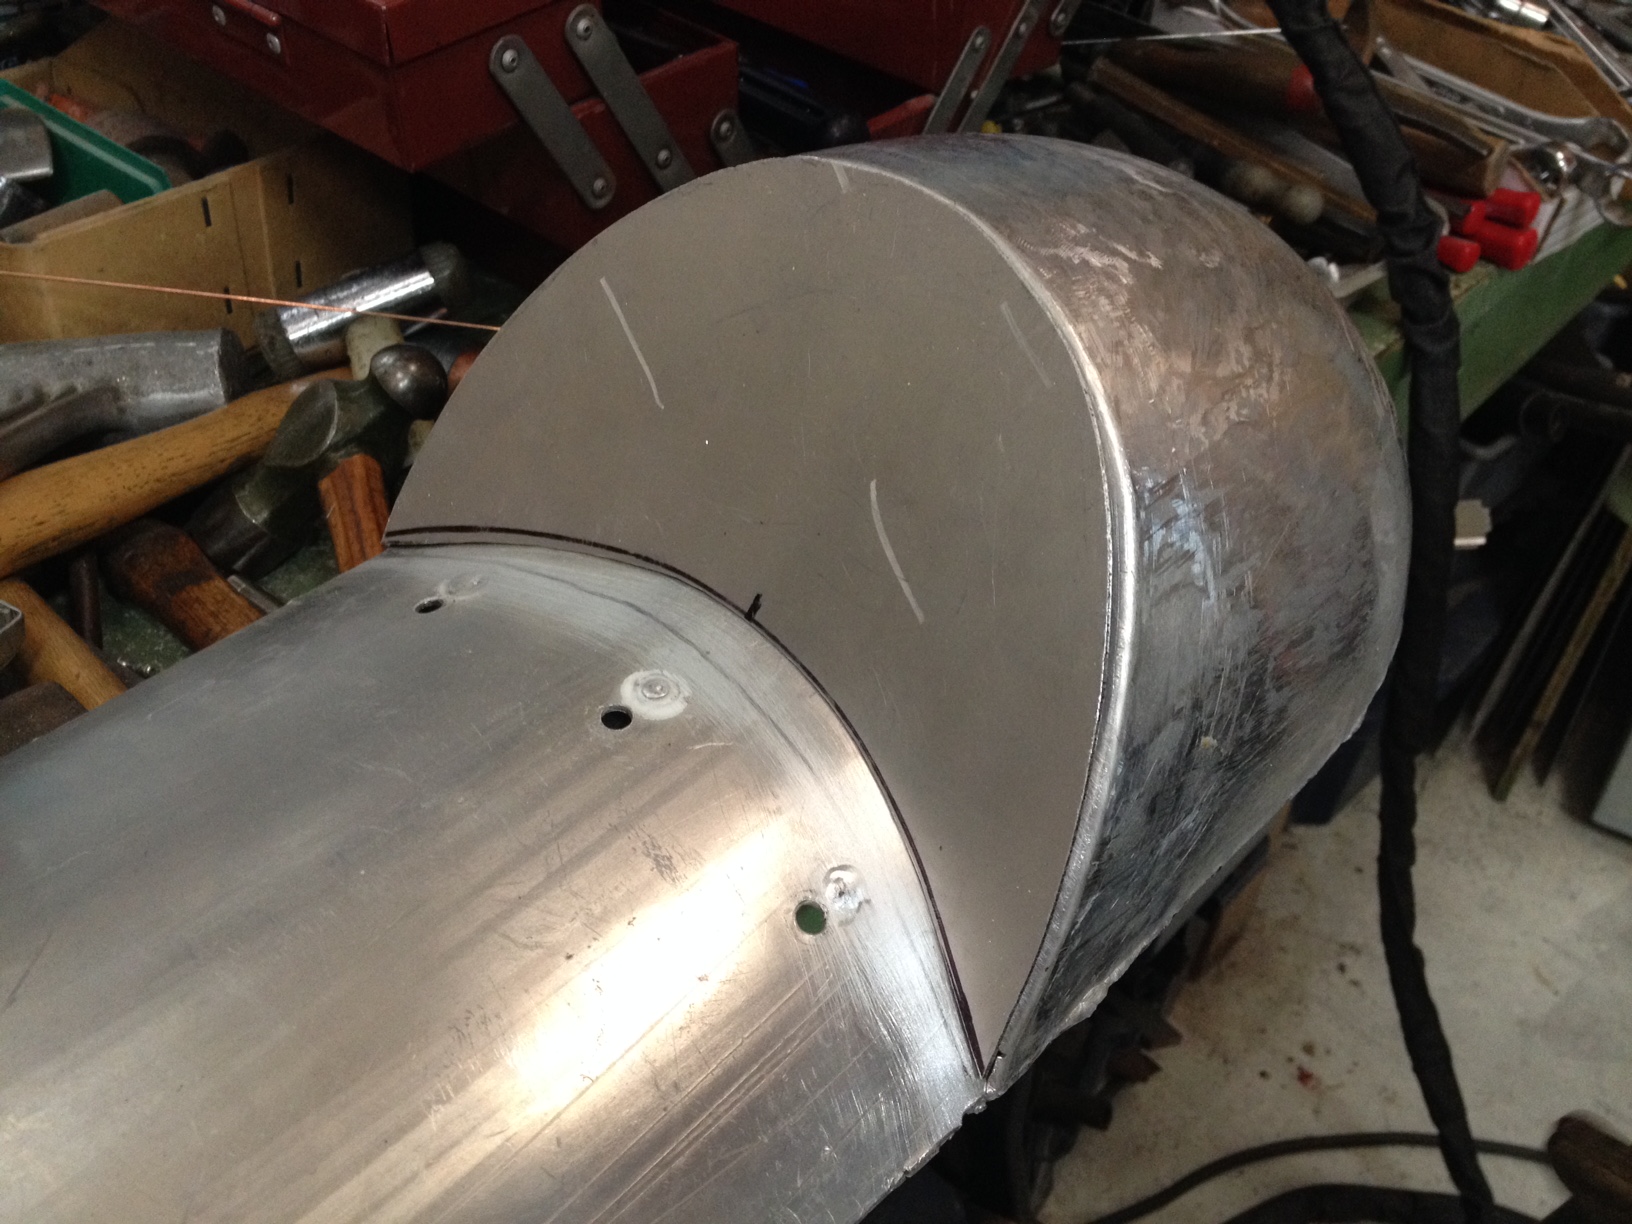
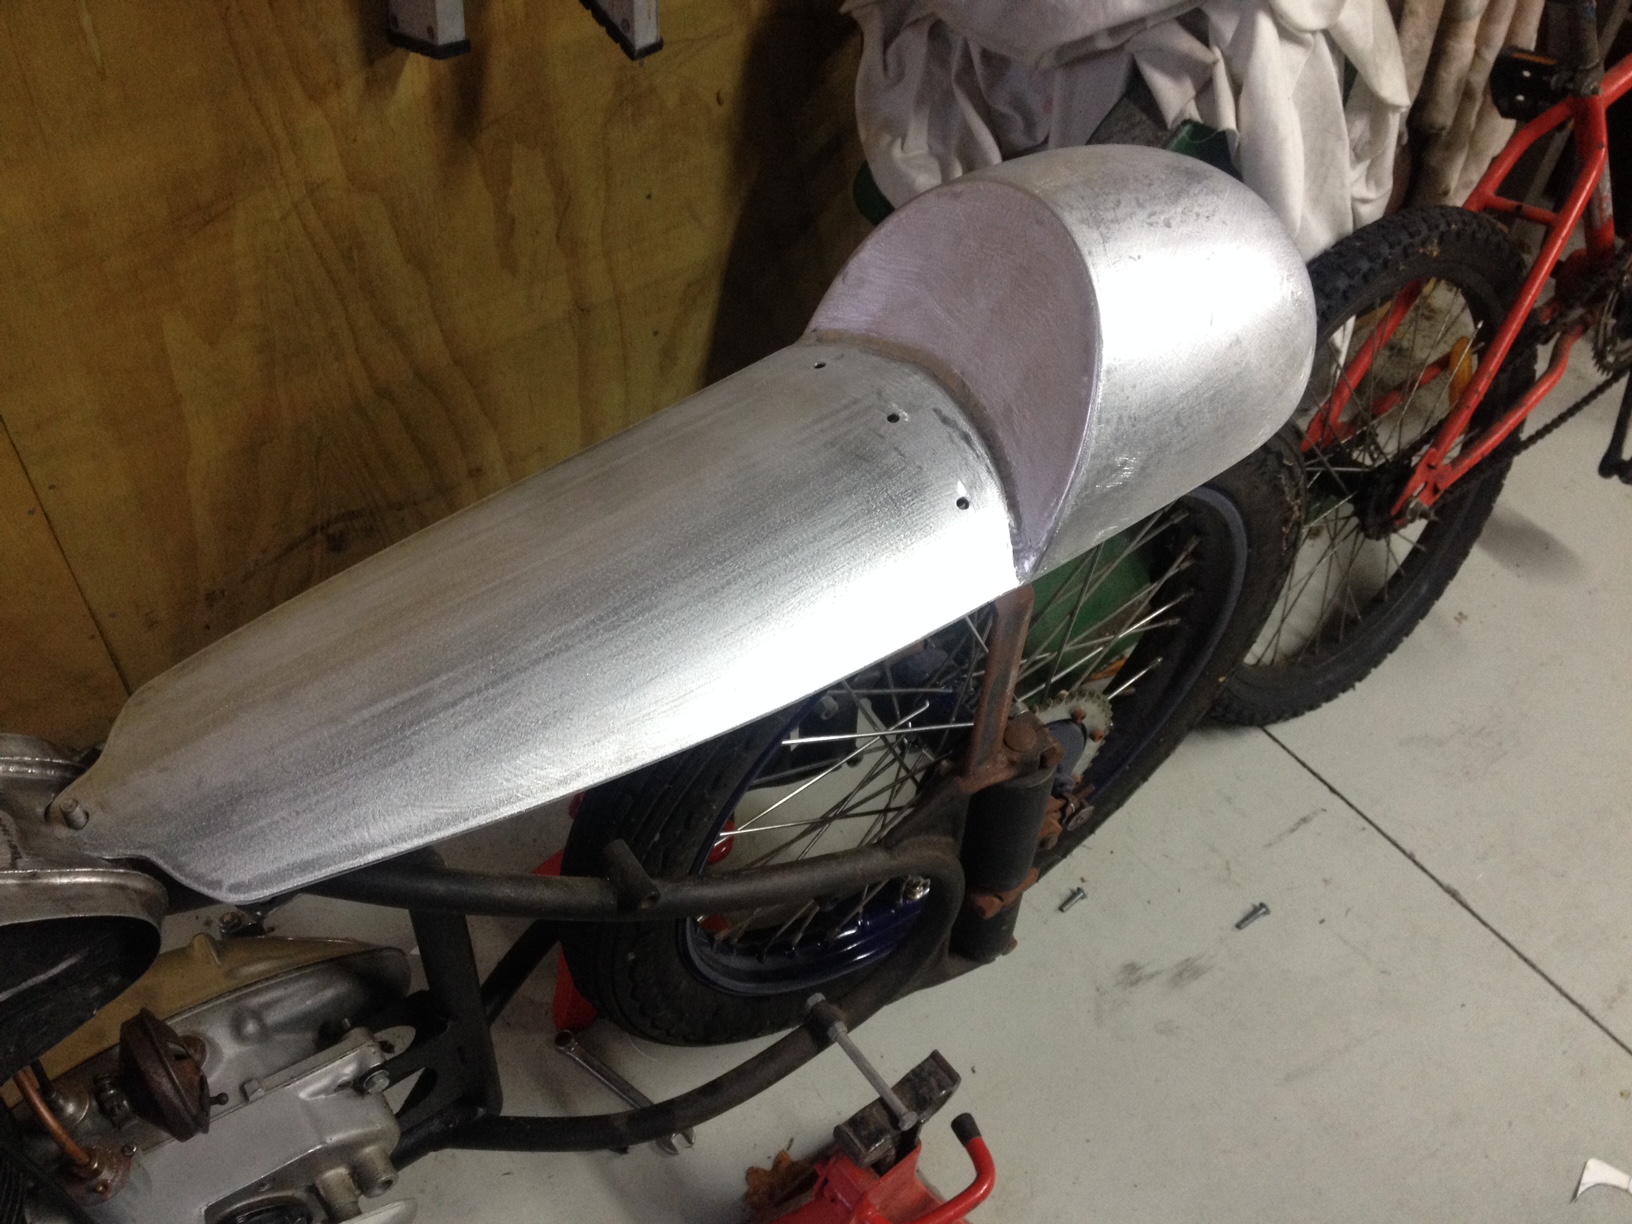
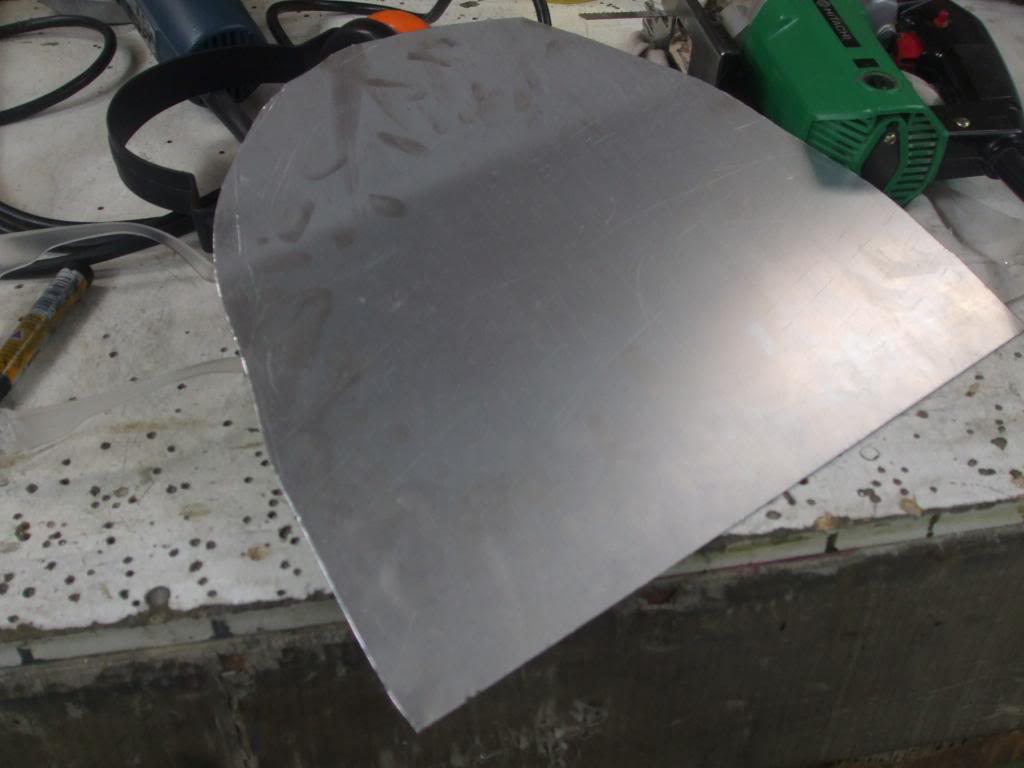
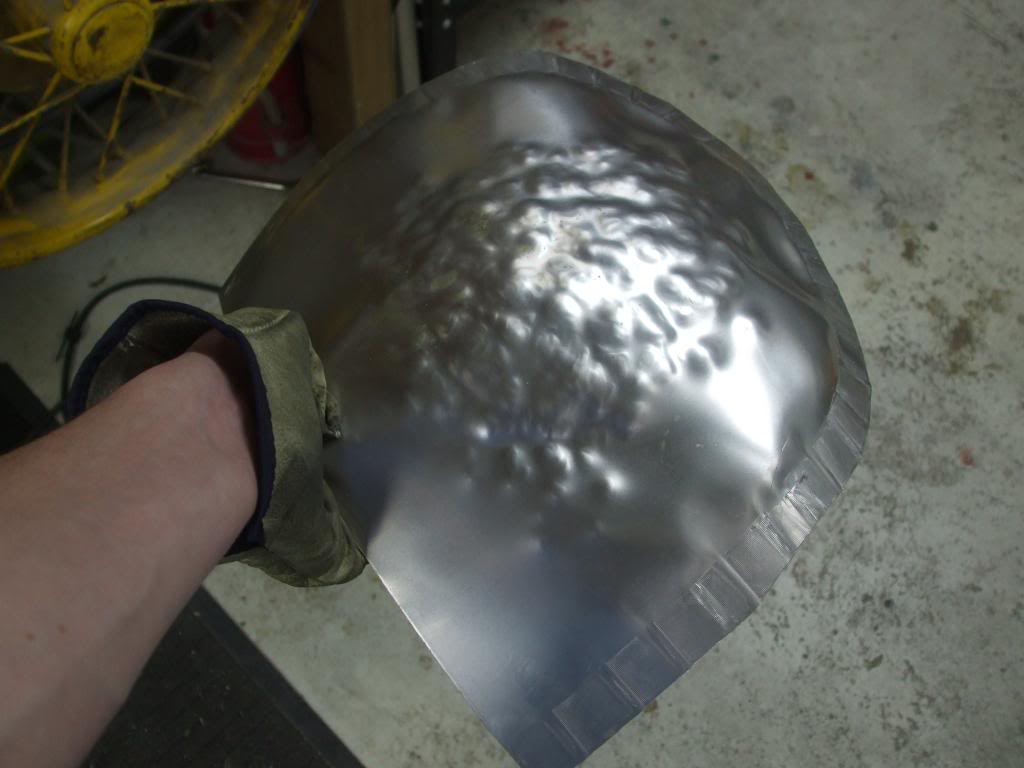
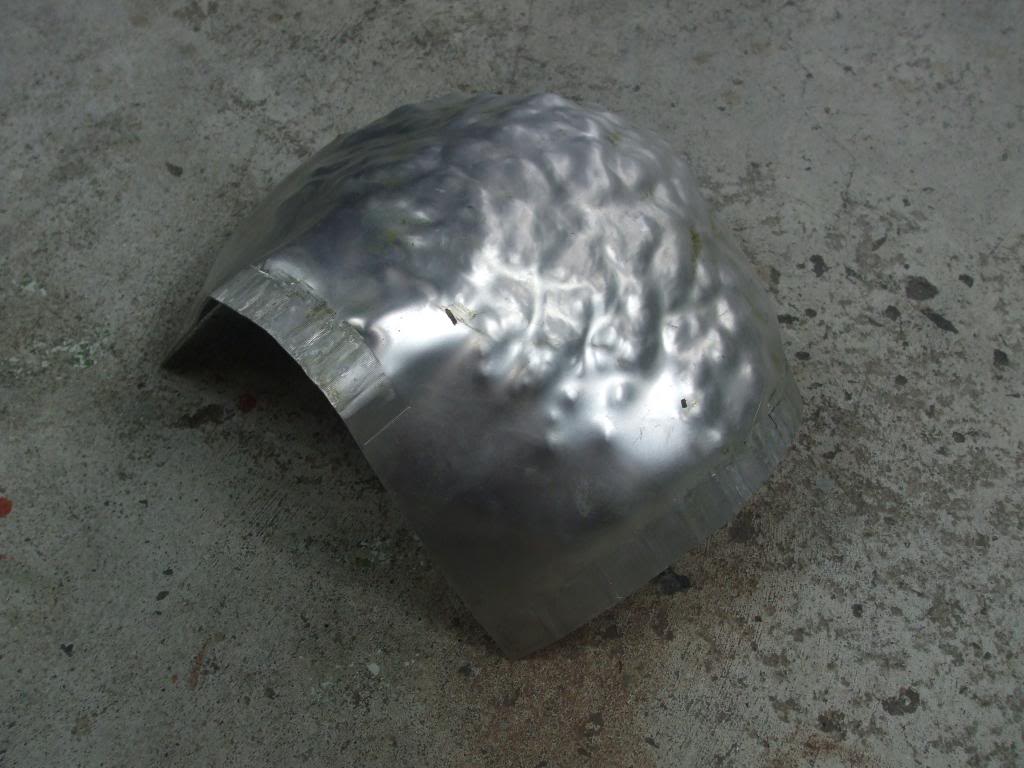
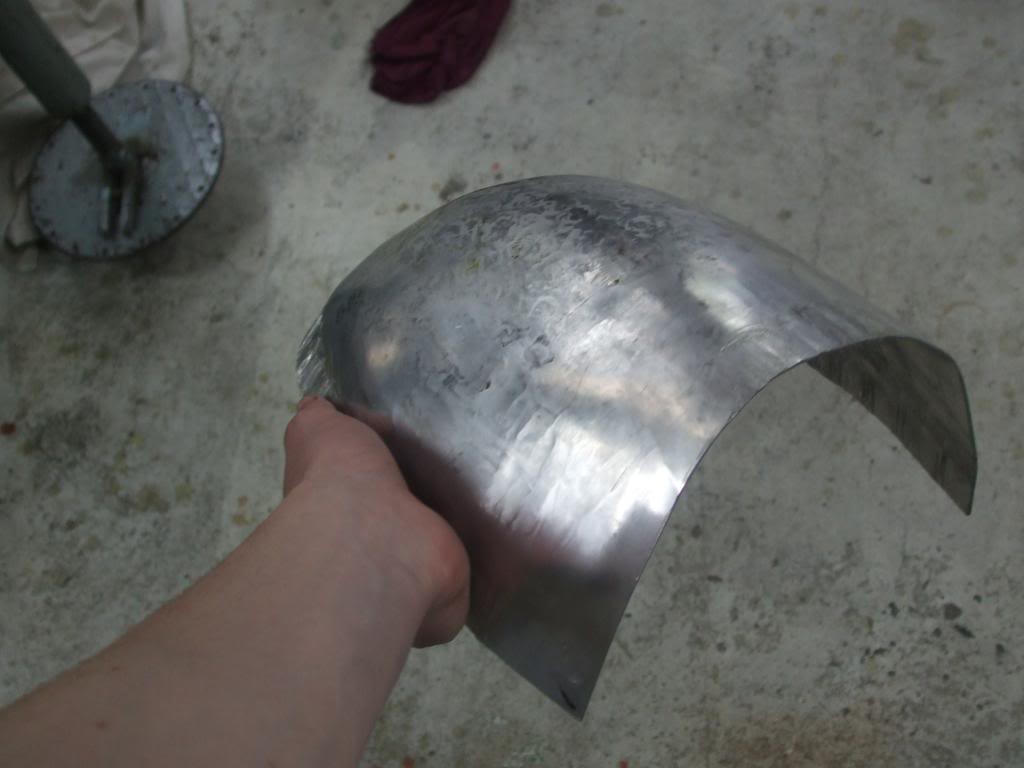
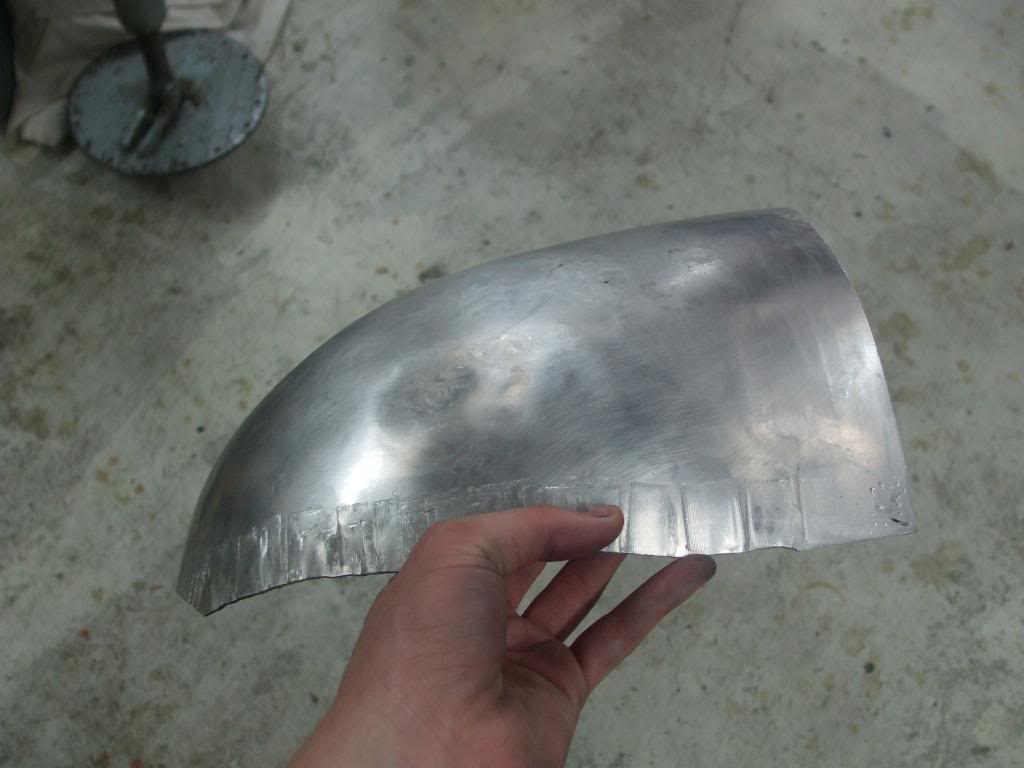
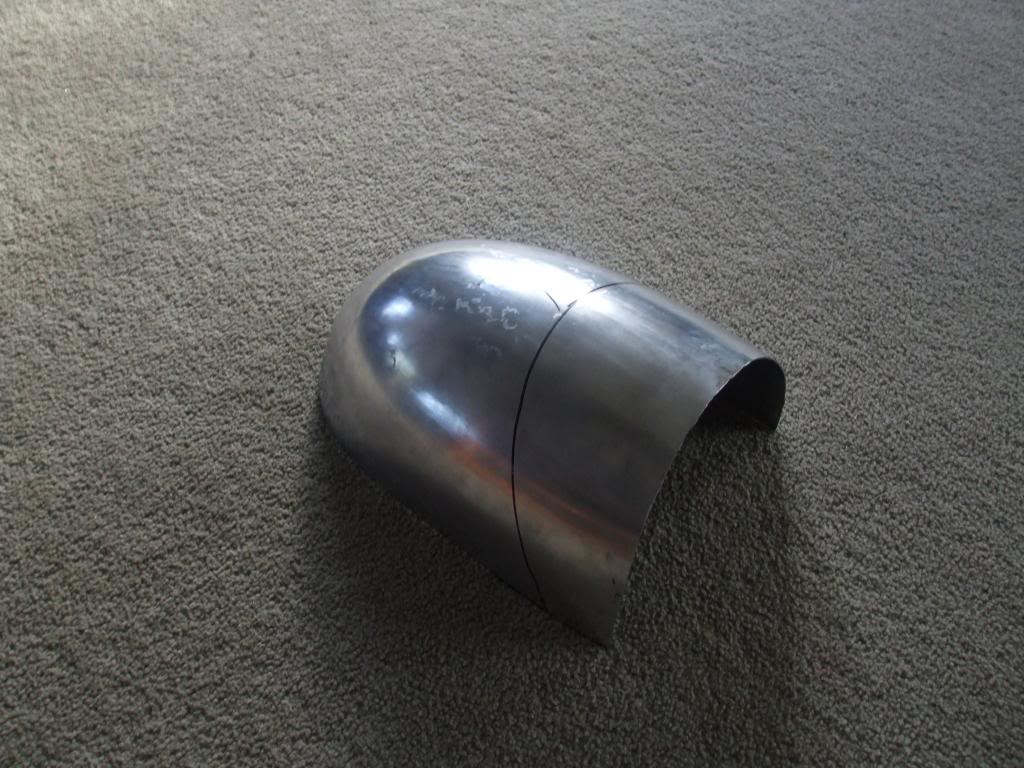
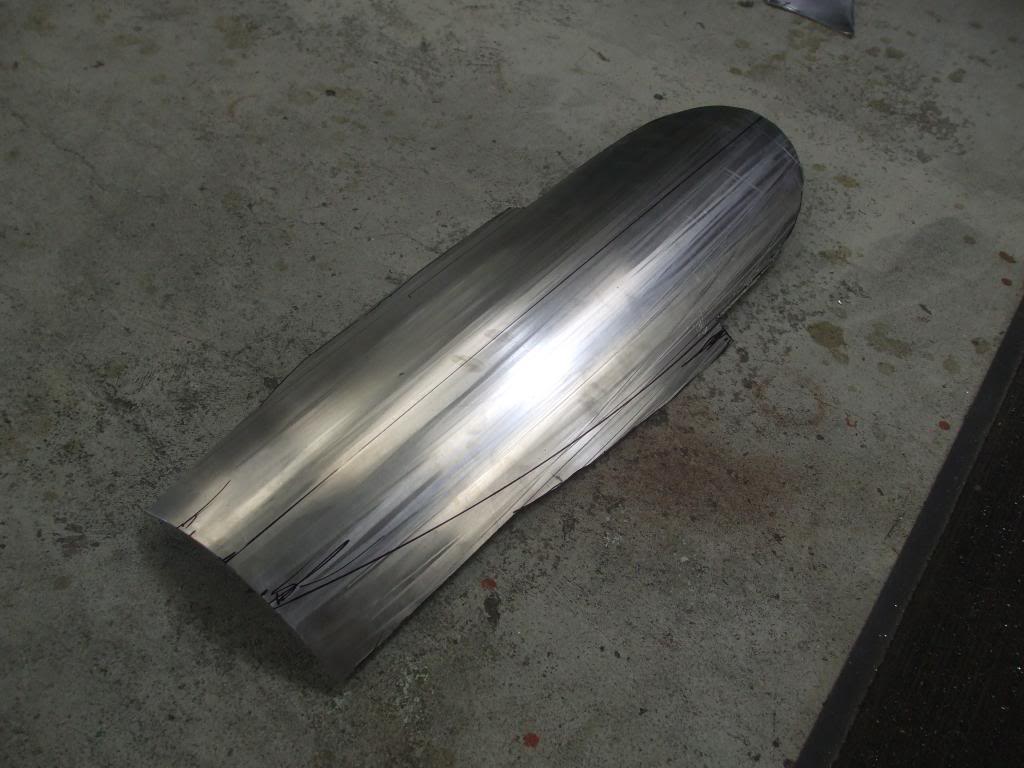
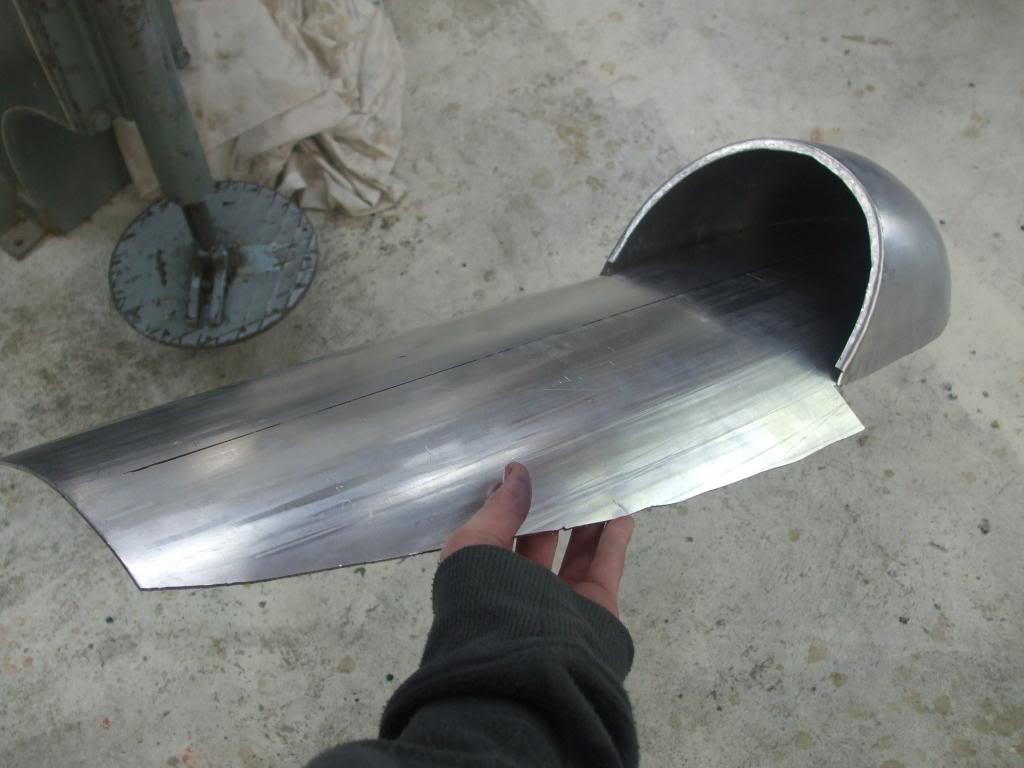
Here's the pics from making the seat 1/16 ally blocking the sheet to shape lots more hitting and shrinking around the edges A few passes through the wheel and its starting to look like something After final wheeling and trimming The base was made out of slightly thicker material, no blocking required though just a few passes through the wheel Mock up This is how the bike looked sometime in 2014, after this pic was taken progress pretty much stopped while i was working on other things
1 point
-
Got carb and manifold last night, not sure when I'll fit it yet though. Tryed a test drive last night and found the rear calipers are not adjusting up. So yay more rebuild kits
1 point
-
Hayden Rowe does, for getting a thick aluminium plate cut. He has a project thread on here from memory. Patina and full rear guard is the way of the future IMO imgur free upload pictures1 point
-
The last few trackday events I've done, they have all been on very hot tracks in summer time... lots of grip for R888s which were coming up to temperature nicely, very quickly! Thanks to all this grip I've had, I've been able to wind the brake bias heaaaapppssss more rearwards than I ever have been able to previously. Which is awesome, it stops the car up great. Then, the Manfield round of Superlap... I was greeted by an intially damp, very cold track. First run out, feeling a little too confident... by lap 3(?) I still had almost no heat in the tyres, was pushing it a little too hard, and the brake bias caught me out. I spun off turn 1, ending up stuck in the kitty litter which was embarassing, and I felt bad for delaying the session while I was towed out. I went back to the pits, took a few winds out of the brake bias (it isnt adjustable in the cabin) Second session, wowzers! Track came up to temp nicely and the car was running great. I was still getting familiar with things as I've never driven there before. But had an awesome time. I was driving conservatively as I didnt want to be "that guy" that crashes twice in a row haha. Feeling confident lining up for the third session of the day, and ready to push a bit harder. I get waved out onto the track and my driveshaft makes a clunk noise. Try go forward again... same thing... shit. I head back to the pits, and it looked as though the hanger bearing had crapped itself, so the centre of the 2 piece driveshaft was free to flop around. It felt okay to drive "normally" so I said my good byes to friends at the track and went back to accomodation (Thanks Lachlan) I packed the car up and started driving home. I got about an hour out of Manfield, and driveshaft noise was getting bad going up a hill when it was under load - Boom! The front UJ broke, and the driveshaft went smashing around in the tunnel like a MFer! Lucky I had driveshaft loops in place or it would have made a bloody big mess. Once I got safely to the side of the road, and had a look under the car. It dawned on me that I am 6-7 hours drive from home, with a car that's fucked haha. About 1/2 an hour later, something magic happened! Some other competitors saw my car on the side of the road, and stopped up. They couldnt really help, but wanted to see if they could assist. Then some more competitors came past - this time with their track car on the trailer behind tow vehicle. They stopped up, unloaded their track car from the trailer so they could tow my car home - and drive their track car instead. These guys lived near Hampton downs, but drove all of the way to Glendene in the pissing rain to help me get my car home by about 2am. Which meant they didnt get back to theirs until 3 or 4am after a very long day. Absolutely blown away by the help. Big thanks to Jakke and Matt for being awesome well beyond the call of duty. Sometimes when you're up to your eyeballs in shit, and someone helps you out - The sort of thing you remember for a very long time. Some good memories and good friends, made by a bad situation.1 point
-
So the Dax has arrived, wee bit rougher than expected but not unfixable IMG_20161012_175218 by Andrew, on Flickr And the "collection" IMG_20161012_175145 by Andrew , on Flickr1 point
-
Have done a bit more, still need to connect all the wiring and finish up the front end (wheel is just sitting there, no brakes or speedo) Quite pleased with the colour scheme IMG_20160820_153735 by Andrew, on Flickr IMG_20160820_153726 by Andrew, on Flickr IMG_20160820_153721 by Andrew , on Flickr1 point
-
pushed it outside for a wash. Pic for motivation!
1 point


This leaderboard is set to Auckland/GMT+12:00