
Leaderboard


Popular Content
Showing content with the highest reputation on 09/18/17 in all areas
-
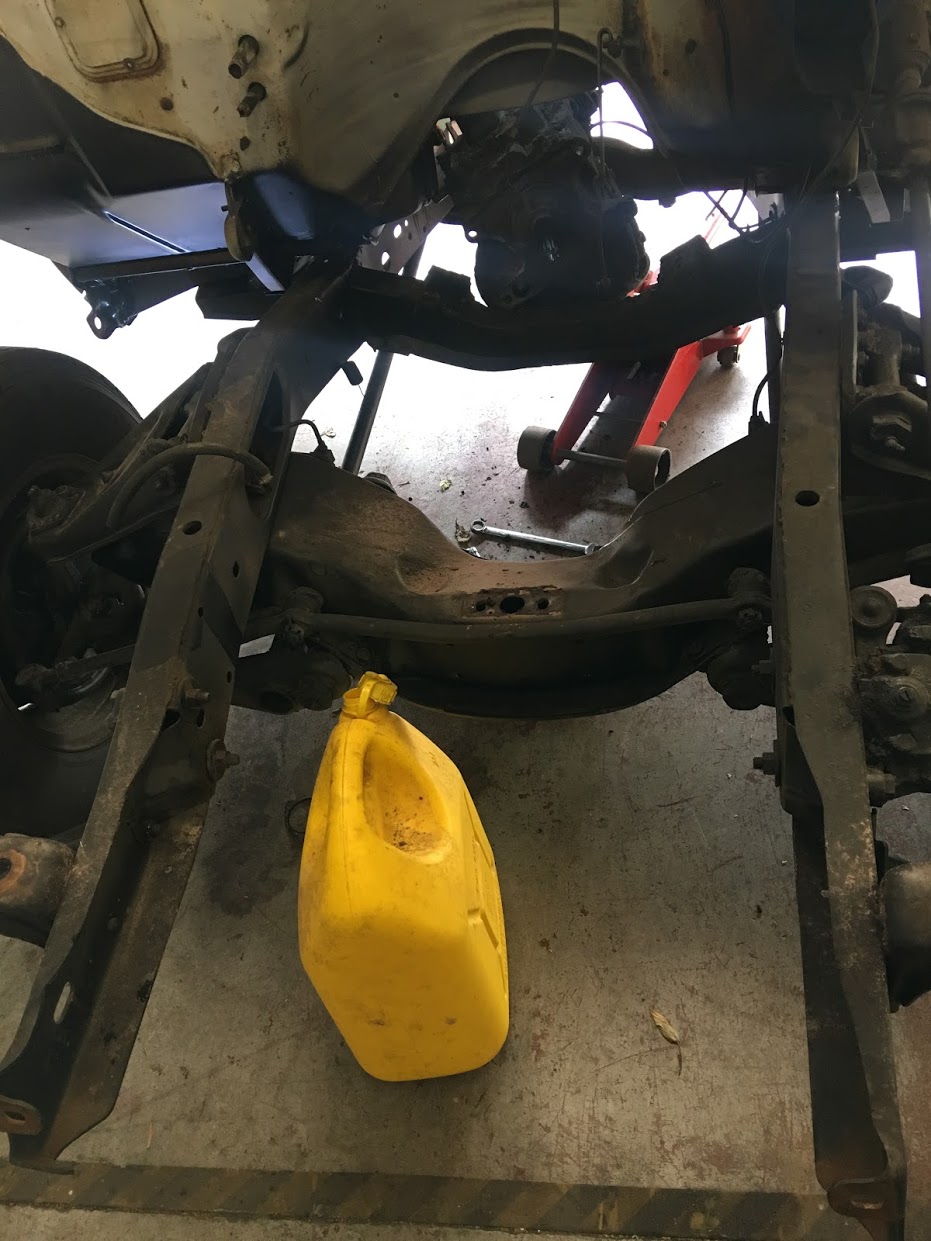
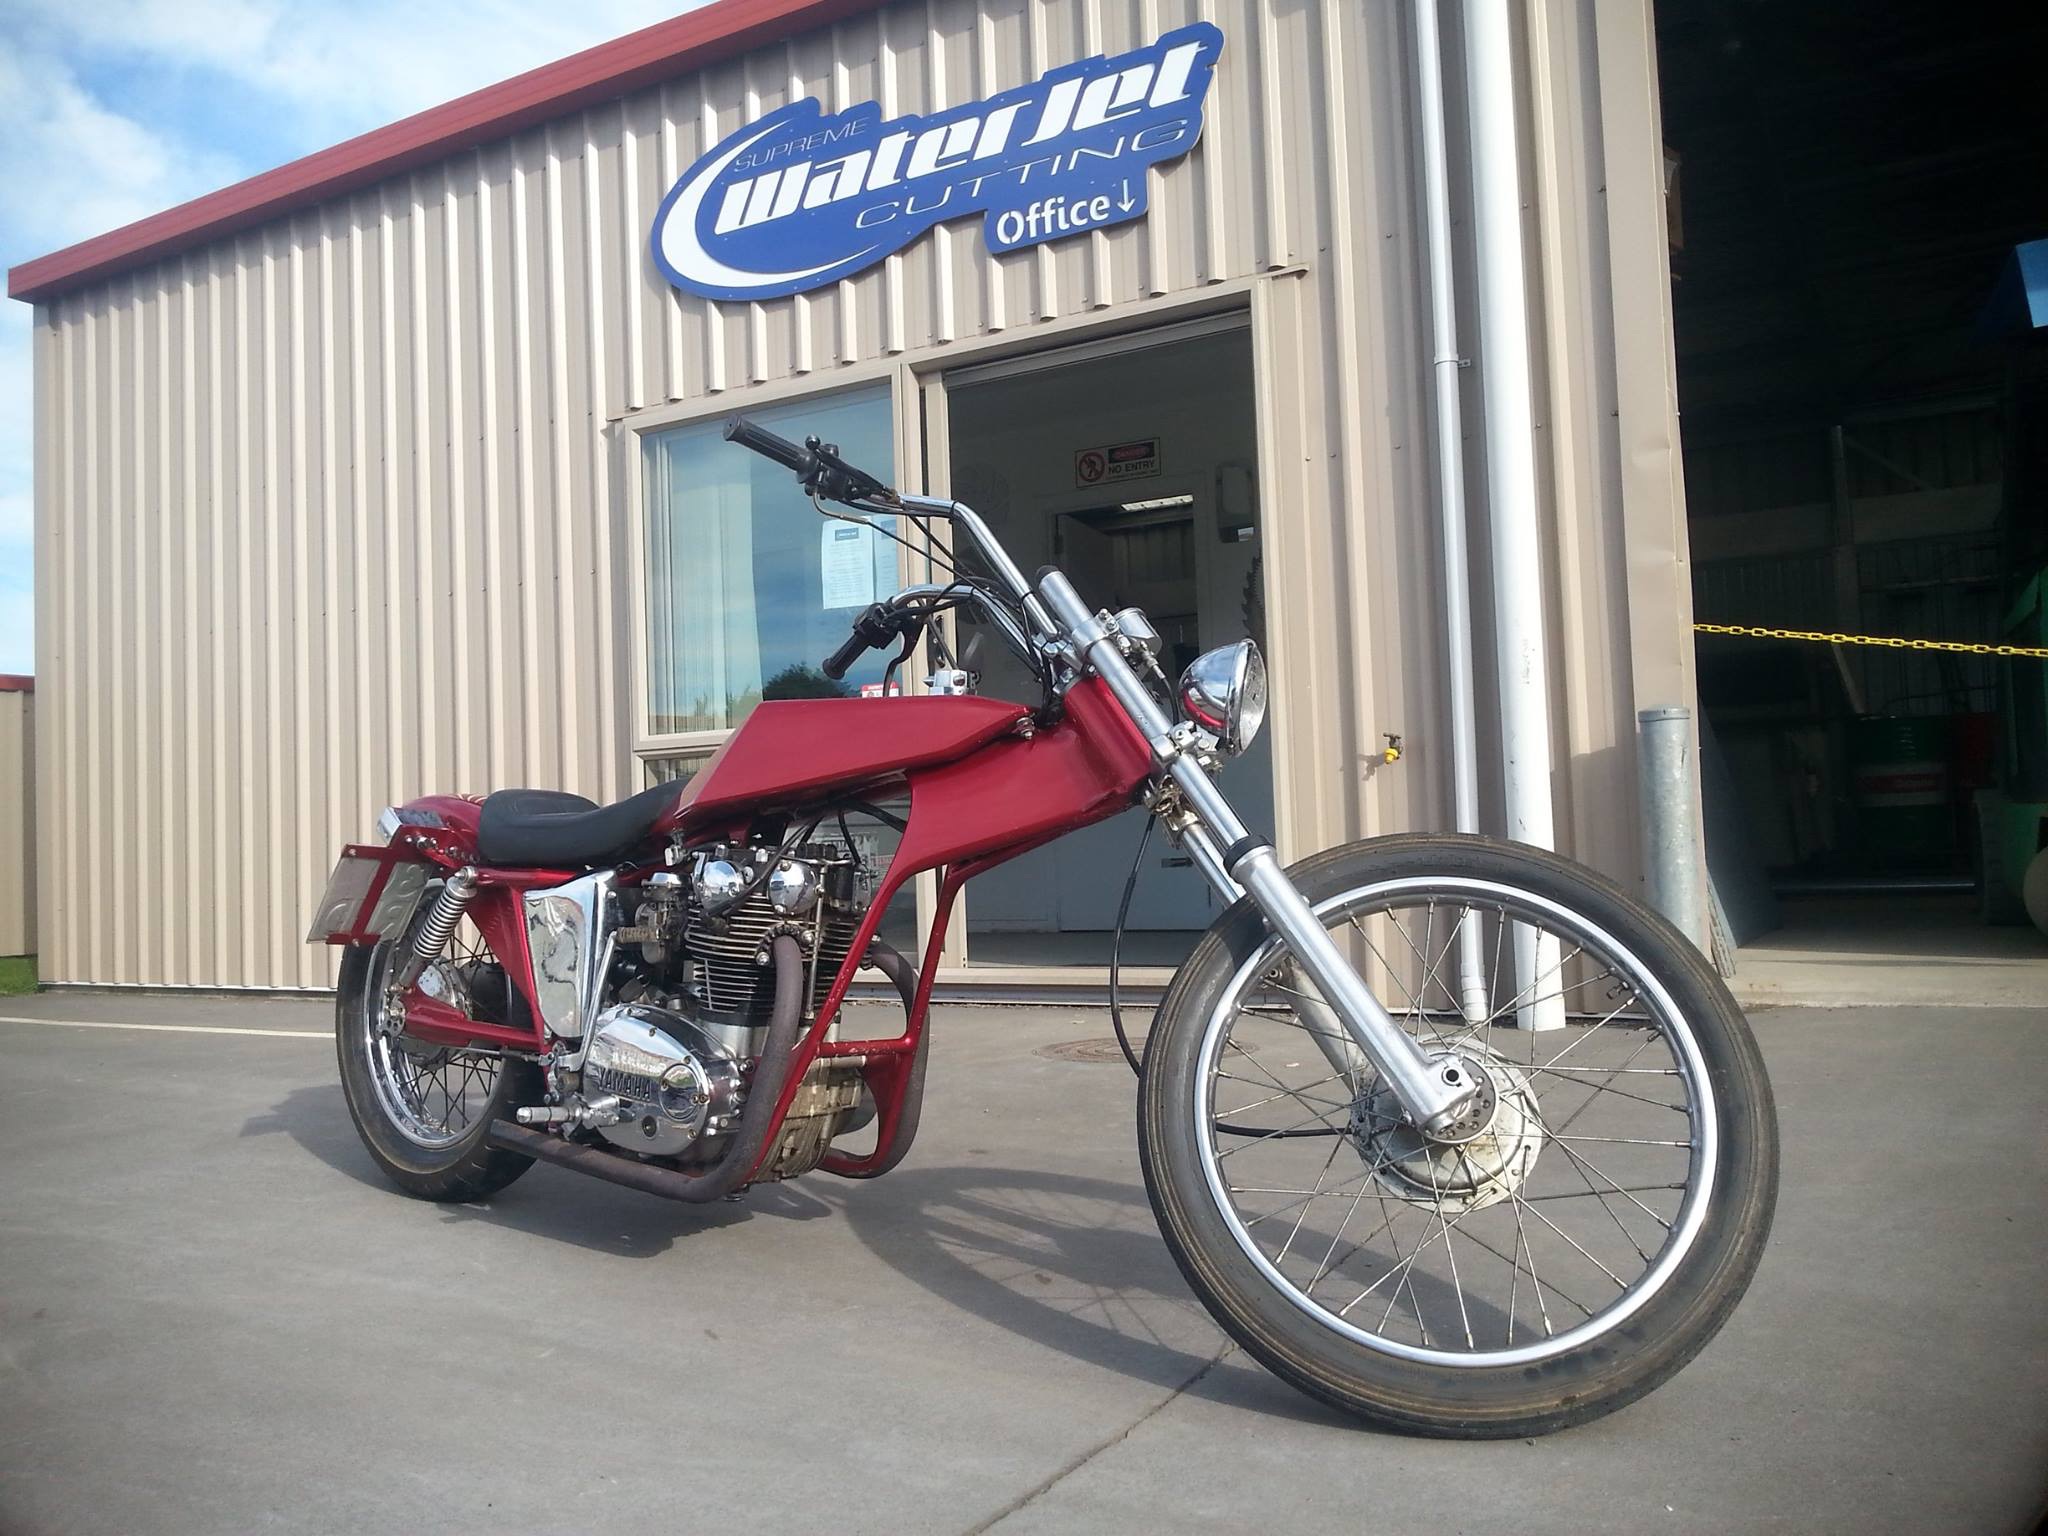
keeping on smashing at this nugget quite a bit of time in welding up a bunch of seams, small holes and little reinforcements here and there. working on getting everything on the bottom of the car sorted. a bunch more measurements to figure more or less where things will likely sit. got prehistoric on the back end of the trans tunnel to make some more room for the drive shaft. fiexed up the hori gearbox mount rookiedave and mott made ages ago. ground off the bits they had glued on, welded up all the holes and re machined the crossmember to suit a factory GM powerglide mount. started on the exhaust next. with it being 3.5"/90mm really trying to tuck it up to the maximum possible to avoid getting beached at the still relatively unslammed slammedness that will be possible. to further this following some stick poking, umming, ahhing decided to make a nascar boom tube inspired rear section. keeps the same or greater cross sectional area with 40mm more clearance. still a bit of work to go go from round to rectangle but happy with the progress. need to get some more tube in 22x3 this week and try to scrounge a section of 200NB steam pipe for the driveshaft hoop. once those are done re fit the fuel tank temporarily to figure out how to mount the fuel system and get all the mounting points for fuel lines, trans cooler lines and such things done.21 points
-
Usual story, browsing TradeMe on a Friday night while having a few beers. Que some peer pressure from mates. Sunday morning I trekked down to Te Aroha and loaded this thing into the Sentra Sportwagon. It promptly leaked all the oil/water mixture out. Then headed another hour down the road to visit @MopedNZ in Tauranga and have a 4 stroke wank fest with his new Honda Chaly. So, the bike is a 1973 ish model. Listed as a CT110, but turns out it's a CT90. Sold new by Paeroa Honda and been used on a farm since then. Has some goodies like the Hi/Low gearbox and the rare auxiliary reserve fuel tank. Been suitably barry'd around, wiring hacked up and roofing galv riveted over the rust hole in the rear guard. Tried to get it to run with @MopedNZ after draining the rest of the water and oil out of the crankcase. No luck though, couldn't produce a strong enough spark. Had another go at it today with the battery and coil out of my car and got it to run for a second on some brake kleen down the carb! Carb has been barry'd too so that will need sorting, couldn't get it to run off petrol. Will order a new 6v coil for it and go from there. Plan to replace anything that needs replacing, tyres, wheel bearings etc and just roll as is on some 50 plates. Here's the updated faded red paint fleet picture. Something 70s, 80s and 90s. As always any advice is appreciated! Just got my head around the 2 stroke Yamaha and now onto this thing.9 points
-
Spring clean. Before: After9 points
-
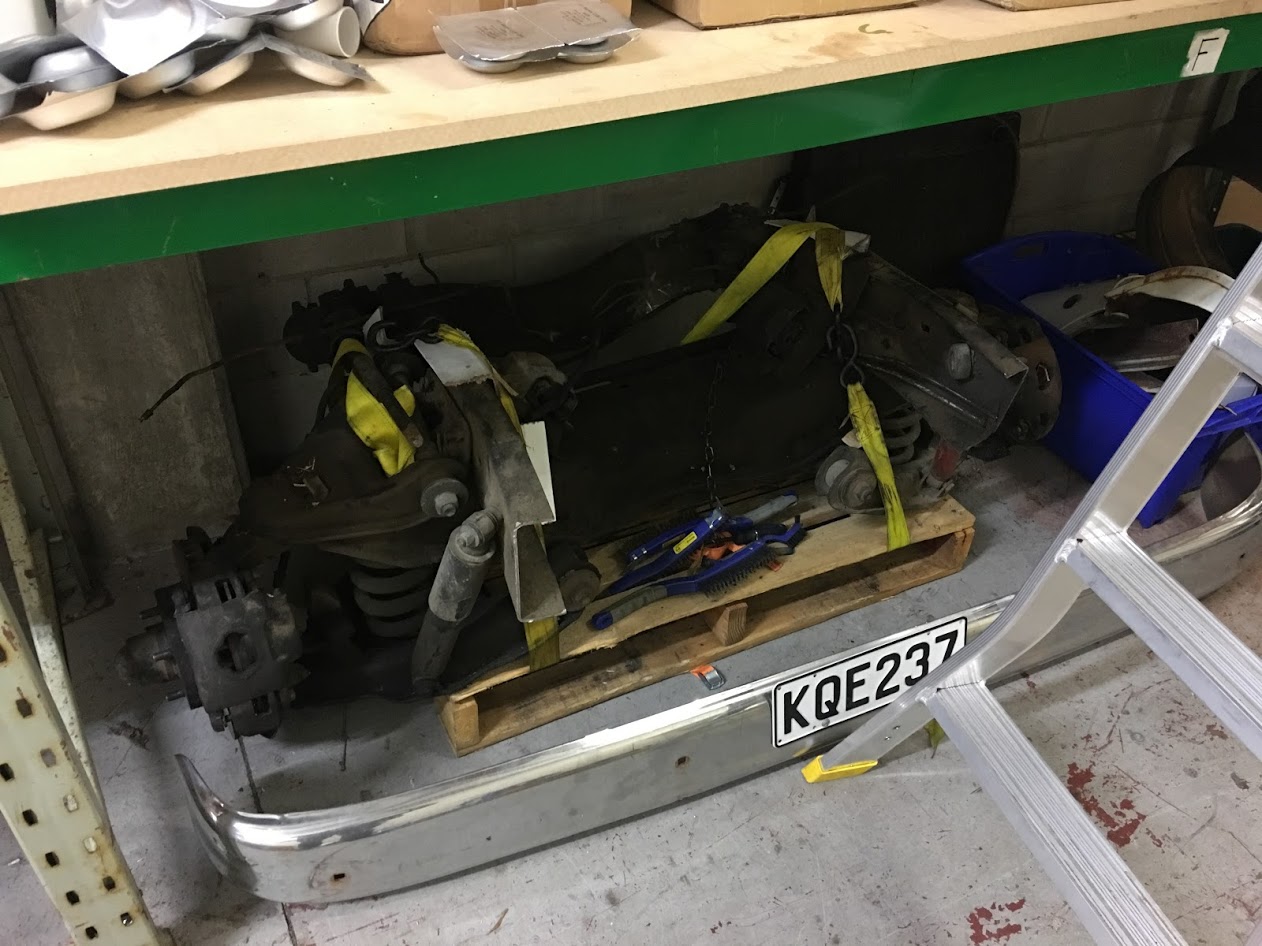
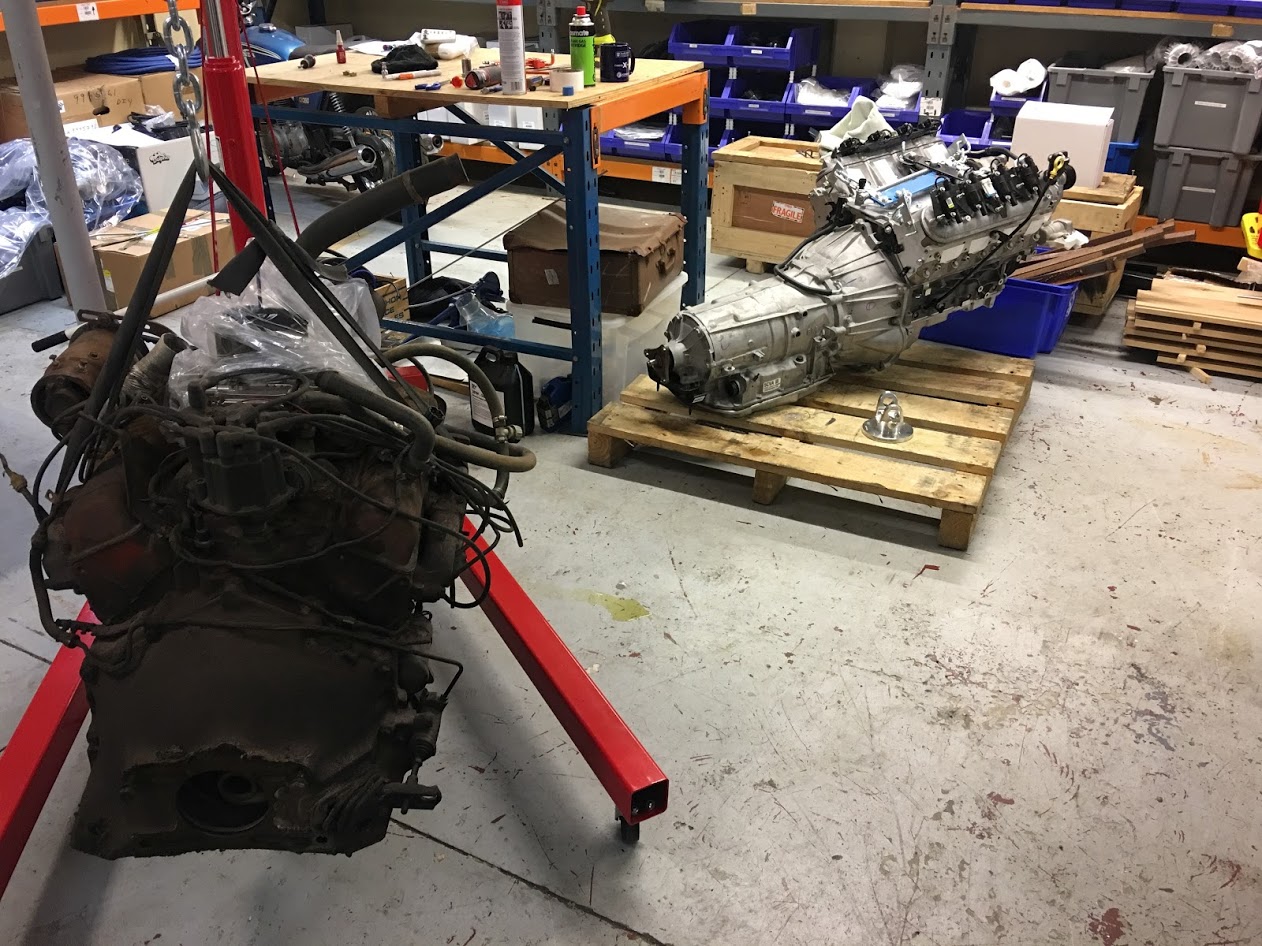
So pulled the front end off and engine and box out over the weekend. Gearbox/driveshaft fought me for a couple of hours before admitting defeat at the hands of a bigger hammer. Have taken all the extraneous crap off the LS and changed the sump so it will clear the crossmember, will need to hang the AC compressor and the alternator off the heads, rather than off the base of the block they are in the Holdons. Pretty much every conversion I have managed to find, the torsion bar front end has been pulled in favour of a later model, basically the crossmember the torsion bars attach to is in the way. Im going to test fit before the front end swap happens, Id really like to keep it how it is... Also have obtained a 12 bolt rear end, this is off to be rebuilt and an eaton posi chucked in it because 11's. I will be doing the bulk of the conversion myself, the front end swap (if I have too) is basically a bolt in barring one mounting hole. The front end I have is out of a 77, and fortunately it is a front cut so lots of measuring to get the steering geometry right. What I do need is someone to do the welding on trans crossmember, once I get to that point. Any suggestions would be great, also at what point should I get a certifier involved, Im not cutting it up, rear diff is a bolt in, may go to a one piece drive shaft... etc... If anyone wants the old exhaust, come and get it, no holes, not rusty, but I chopped it in half to get it out
 8 points
 -
Even though the sills are missing in this car it runs and drives so I think this will be the first in the road as long as @- i5oogt - lets me have it. The thread will mainly focus on Reddy the Ceddy.5 points
-
Tailgate parts both painted and somewhat shiny. They have been rust-proofed inside too, so shouldn't be an issue for a while. Took one rear window out for new seal. Naturally there is a bit of rust in evidence. Odd that it is on the vertical section. I also cleaned up and painted the lower edges of the floor panel that goes in the back over the petrol tank. I'm not going to paint the whole thing right now.5 points
-
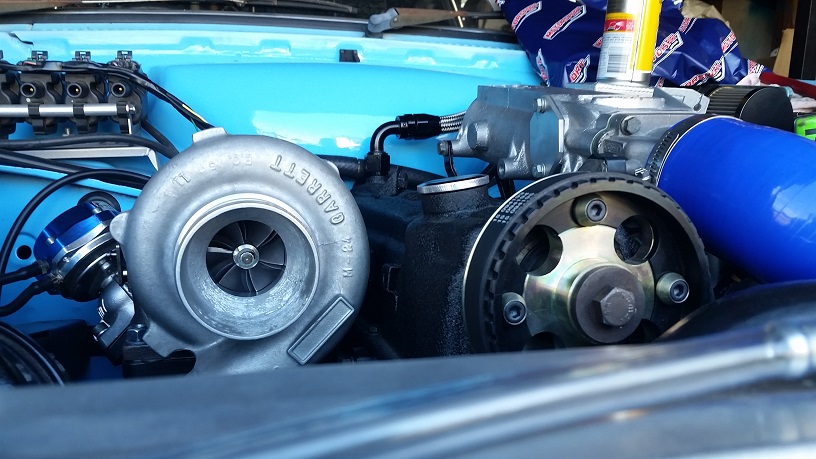
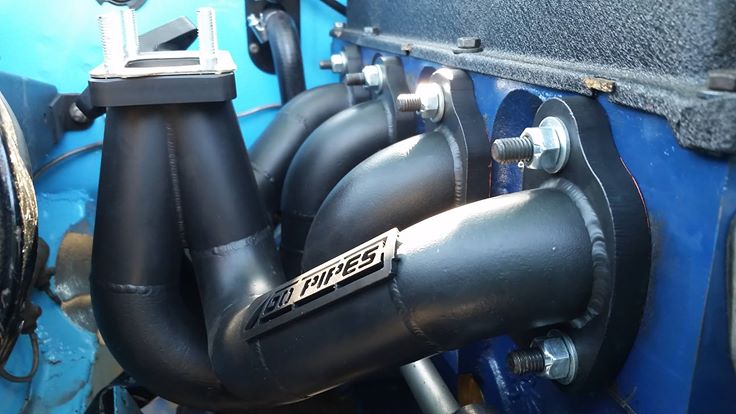
Ok that was a fail ^ and a few more followed. Did some more runs and wasn't happy how unstable boost was. Put a bigger 40mm gate on it. inc bigger pipe off manifold Was just as bad, if not worse. Probably should have brought a 45mm and may have worked. Decided to try mount the gate on the turbo housing, before buying yet another wastegate Grill weld Grill cut a patch out of an old collector fixed Finally holds boost perfect now.5 points
-
I promised to post a review ages ago, wrote half of it and finally finished it. Here it is: 1. Dometic CFX-DZUS. The first fridge I received from Amazon had a defective screen but cooled fine, after some messing around with Amazon it was replaced. The new fridge has been running constantly since March now, no issues. We really love having a fridge and freezer, it has allowed us to keep a really normal diet. We keep frozen meat and ice cream, popsicles, freeze leftovers etc. It's great. The cooler style layout is a bit annoying to find stuff in versus a normal fridge at first, but stuff seems to stay in place really well on rough roads. The fridge side has two compartments, the shorter one above the compressor is good for veggies (stays a bit warmer) and the deeper one is great for milk, cans, jars and is a bit colder at the bottom. The fan is nice and quiet, no louder than a computer fan, and it doesn't seem to pump much heat into the van. Comes on maybe twice an hour for a few minutes. The slide that we bought with it is good quality, my only gripe is that it is shared with the 95 liter model so it sticks out about two inches further than it needs all around. It a cheaper than the Engel and ARB slides though, and about what I could have built it for after buying full extension slides and latches, and could work with other fridges as it has space for straps in addition to the holes for bolting the fridge directly to it. The insulated cover seems good, no no issues and I feel like it helps with the efficiency. It's getting a bit of wear from sliding in and out a bunch but it's not really an issue. 2. Camp chef oven- I was a bit worried about the durability of the oven when I got it but it has held up fine. The oven combined with the fridge really has helped us eat well. We go out to eat maybe one a week or two, so the cooking great has probably saved us it's price in food. We have made pork roasts, brownies, muffins, etc with it. There were two things i picked up from the Amazon reviews: buy a separate thermometer (I got a $7 stainless one by Rubbermaid) and buy the pizza stone for the oven. The pizza stone is important because there is only one burner in the oven so if you leave it on the bottom all the time it helps to distribute the heat. Otherwise it gets a hot spot in the middle. The oven is a bit underpowered (3000btu), tops out at about 180c/375f. Some things take longer to cook but that's usually ok. The two burners on top are great, good heat control and nice and wide flames. It's a bit big for a weekender camping rig but for us doing this full time I'm all about it. I also have an MSR pocket rocket canister stove with me that we use to make coffee in the morning when we're too lazy to get the big oven out. Get the adapter hose and a big bottle. The 11lb bottle of propane lasts about six weeks and costs $10 to refill. Much cheaper than camping canisters. 3. Eccotemp L5 propane water heater- I've used this a few times and it's ok. There is a finicky pressure valve inside it that needs adjustment or else it turns off after 10s. We've used this about ten to fifteen times in five months but mostly because we’ve found places to swim or shower. 4. Water system - 100l of water is great. We fill up at paid campgrounds or RV sani-dumps weekly when we check in to town to do laundry and other stuff. I haven't even come close to draining it, maybe 1/3 left at the lowest, so we could easily do about 10 days, and we aren't sparse with our water use, constantly washing dishes, drinking, cooking etc. The sure flow pump is good, maybe even more pressure and flow than I need. 5. Renogy solar system - works great, super happy to have it. The highest I've seen it on my volt meter is 8-9 amps, which is about 60% of it's theoretical efficiency but I've never really tried pointing the panels directly into the sun as they aren't adjustable. If I find a hill pointed in the right direction sometime I might give it a try. As I said above, this with the two batteries seems to work well for our loads. My recommendation is to get as many panels and batteries as you can fit/afford. I did a bunch of research on MMPT vs PWM chargers and couldn't really come to a conclusion if mmpt was worth the extra money, the PWM Renogy charger seems to work fine for vehicle use/what I'm doing. 6. Blue sea wiring gear - all great stuff, good instructions/cutout templates. No complaints, worth the price. Love the ACR, it's great to have two ways to charge the house batteries. Being able to self jump start is cool too. By the way I didn't use the start isolation feature because I didn't feel like pulling another wire from the starter solenoid(don't know if anyone does this in vans) but everything seems fine without it. 7. Lighting The 6in strip lights I installed above the bed are very bright, so I never use them. I just use the round lights. I wish I had installed a reading light, similar to this https://www.amazon.com/Dream-Lighting-Flexible-Motorhome-Spotlights/dp/B01DBT0OAM/ref=sr_1_1?ie=UTF8&qid=1497837608&sr=8-1&keywords=rv+reading+light Those reading lamps were my original plan, but I was worried about them sticking down too far and hitting my head on them and got those strip lights instead. They are decent enough lights, just not right for what I wanted them for. I guess I could install a cheap remote control dimmer inline too. The 6 little round lights are great. We use these all the time, perfect light colour and brightness. The two lights I have above the awning are Alpina Hexfires. Two issues with them, for some reason my auto parts store only had one in stock when I bought it and ordered the second. They are actually slightly different as one had sat on the shelf for awhile and they changed the light a bit (you have to look pretty close but the housing and bracket are different). One of these has some condensation behind the lense but is still working, but I’d call it a quality issue. I can't tell which was the newer model, so not sure what to say. 8. Van layout, bedding etc - we love the rv queen-size bed. The layout is a bit unconventional (bed towards the front seats) but it seems to maximize storage area for the equipment we have. The bed is a bit high, but it really wasn't a bother after getting used to it and learning how to best move around inside the van after the first week or so. For two people worth of gear(biking, climbing, camping), clothing, water and food to do a long continuous trip this is working for us. It's hard to tell from the pictures but the front of the bed is a bit back from the seats. In my regular cab 1500 I really liked having that stash space behind the seats, so the panel in front of the bed is about the same distance back. We have a toolbox behind the driver's seat and an organizer behind the passenger seat we keep snacks and essentials in. I really love the 8in memory foam mattress we have. Super comfortable, honestly better than the mattress I had at home before leaving on this trip. A total win for $200 delivered. Since it's a standard size we were able to get fitted sheets, we have two sets which we rotate weekly. 9. The l-track has been nice. It was nice to allow us to figure out our storage a bit at the beginning. Mostly the hooks stay in one place now and hold our helmets and camelbacks, but we have moved them a few times to string up line to hang wet bike clothes. They were also useful after watching 50 shades of grey one night…. 10. Insulation/sound deadening/interior. The Noico liner was ok, not as nice as dynamat but much cheaper. The easy cool insulation was easy to install and I like it better than reflectix, since it's foam lined vs air I think it will hold up better. The van is whisper quiet on the road now. Much better than an empty cargo van. We have the right amount of insulation for a three season rig. There have been a few nights that got close to freezing at the beginning, so we just got out the sleeping bag and were fine. For winter camping another layer of insulation, a vent fan and a heater would be nice to add. I don't know if I'd do another interior with 5mm underlayment ply. It's not as flexible as I'd like, but then again I also hate wood work… I'm much better with metal. Maybe if I could find some reasonable priced plastic I'd do that. That said the ply is really sturdy and holding up great. The carpet we ended up using is called Trunk liner, it's half the cost of Hull liner, a bit thinner (still 1/4in or so) but more color choices. Really easy to work with, wears well, would use again. As I said before...HHR Contact cement from a spray gun is the way to go, no glue failures yet. Regrets: Not installing a roof fan. I really didnt want to cut a big hole in the van when I was building it (I fretted about even doing the cable glands for awhile) but now that the nights are getting warmer it would really be nice to have. I do have a cheap plug in fan that I use on hot nights but it hasn't been that hot very often since we're mostly traveling “north of the wall”. 2. I kind of regret not lifting the van (but much less than the fan). The transmission crossmember on these things is really really low and seems to scrape really easy (like when trying to jump a curb). I should have lifted it even though I was keeping the stock wheel and tire size.4 points
-
Well its all relative, but it is only rusty sheet metal. This bit went well for me because the big outer patch fit very nicely nearly first time. Chop it out, CAD it up, birdshit it in, flapwheel it back. All my patches are made with cereal boxes, snips, a vice and hammers. You can do eet!4 points
-
Ok so I haven't been documenting this car very well so here's a rundown down from the past year or so. The car blew it's third auto trans, so one night after work I put a manual box in it. Conveniently I had everything I needed in stock so it was a quick and easy job. Later I got bored and removed some coils and fitted the above posted AGX shock absorbers. The fronts are SW20 rears, and the rears are some Ford Focus units. The fronts are shorter than MX73 shocks to they're held in place with some T3 spacer top nuts. T3 RCAs are also fitted to correct the lower arm angles. The engine BHG'd over new years (yeah, yeah..) so I put in a spare engine that I had laying around intended for my MS65. It's a stock standard 5MGE but built on a 7M block coz it's a bit stronger and has piston oil squiters, the guy who built it was gonna turbo it. As far as I'm aware the internals are stock 5MG. I then fit an Altezza LSD. Later my rear tyres wore out (funny that) so I bought some cheap Advante 17x7s in the wrong offset and wrapped them in some 215/45 Nitto NT555s. Bought some spacers off eBay to make the wrong offset right, Manu spun me up some hubcentric rings to fit them all together and now I have plenty of grips. I've also had to repair plenty, the brake master cylinder shat out, the shifter position on the gearbag was wrong so swapped that to the correct one, which cost me way more than the gearbox did, rocker covers were leaking, driveshaft was incorrectly phased, balljoints were shot, windscreen was leaking, seatbelt jammed up, radiator split, radiator hose split, heater core split (what a shit job that was), I attempted to revive the AC but the compressor leaked all the gas out aaaaaaaaand probably some other bits. Still to fix is the a pillar rust, boot lip rust, shot passengers electric window, leaky tailshaft seal, very leaky crankshaft seal, horrible engine vibration (pretty sure it's flywheel / clutch out of balance), some of the instrument backlights not working, excessive rear wheel camber, pathetic brakes, pathetic head lights, cracked indicators, falling off boot trim, worn hanger bearing, worn subframe bushes, worn caster arm bushes, and anything else that fails in the near future. Stupid car.4 points
-
the valance, the last stop on my round the 125 tour of rust. doesnt look toooo bad, i guess? LOL. Dirt and crap from off the front wheel gets into the upper panel from the bumper irons hole and makes its way to the lower section that has no drain holes of any note, so it rod rots out the front of the control arm mount. Top stuff. pretty happy with the patch i made Also let in a later model radiator vent. My car has never had cooling problems even with the 2 litre engine and a radiator that is a decade over due for a recore, but seems silly not to have extra flow - the big holes end up behind the bumper. Also seems silly cutting out solid metal You can seen the cross-member closing-panel all in above as well, double skinned like factory. pick below is from inside, you can see the curve of the valance panel opening by the bumper holes, so dumb. tac tac tac, grind grind tac, tac, grind, etc, pretty stoked with the patch tbh, always seems to comes out better on the bits no one will see! Thats all the rust on the body (till next time!) so i can start layering on the bog now, and start on patching/swapping the doors around4 points
-
New blower pulley arrived today - smaller pulley = more boost! I removed all of the wiring, pipework, radiator etc and gave the engine bay a paint in Ford Diamond white3 points
-
The heads are interchangeable I think but not sure about combustion chamber shape and overlap - e.g. smaller bore may have a problem on the 1256cc head. There used to be a thing where you could do something like mismatch 1256cc and 1159cc parts and make high compression or low compression depending on turbo or non turbo. I figured it all out a decade or more ago and have now forgotten all of it, including what benefits it offers. Pleasingly, I have lost some knowledge of Vauxhall OHV engines. Shit yarn!3 points
-
Did some testing today, I found that a street near my place works for wide open runs, one corner requires some bravery if there are cars parked on the side of the road. Got a good 1.2k's of WOT on a spankers new plug and..... Shit's whiter than out of sync clapping along to music Also, just to keep me on my toes, the plug cap snapped in half when I pulled it off. At least it was mostly downhill back to my place. So now I'm waiting for my jets and a new plug boot to turn up before I do anymore. Actually I should probably fix the slow leak in the rear tyre, then clean up the rim, then clean up the front rim, then clean up the front forks cos they'll look shit otherwise.3 points
-
That's along the lines of what I want, sufficiently slammed, unsure on reyums though, I'm a big fan of whitewalls on stock steelies with hubcaps, trims etc all on. Like this3 points
-
*Loooooooooooooooooooooooong whistle.3 points
-
6BT!!!!!!!!!!!!!!!!!!!!!!!!!!!!!!!!!!!!!!!!!!!!!!!!!!!!!3 points
-
Break in time after a dyno. Came in at 21hp with a solid amount of toque. Pretty happy with that. Scooter rally in 2015 and first run on the new build. Left from Wellington with a loop around the central north island. Day 1, 50kms from start line and team mate had a good seize. Team down to 3. Came across this shop, and this old legend ( I think his name was Bill?) let us use a bunch of his tools and talked for hours. Some amazing bikes stashed in side, well worth a look if you are in Upper Hutt. Open carbs and gravel roads... Great pub though. Late night re builds. Buddy crashed on the way into Waiouru, went on to fix his bike and continue. Gentle Annie road from Waiouru to Naiper was awesome, such a fun road. Finish line in Wellington. Very exhausted after the 1600km. Stoked on how well the untested bike went! Took a while to clean all the grim off it! Fresh coat of tyre paint too More to come if you are still following...3 points
-
So @mark105 came over this arvo and helped out with a few things. Started with putting new brake hoses in cause old rear one was just going on and locking up. So new one for the back and thought while I was there I better buy ones for the front, all on. Almost ran the system dry trying to swap them out. Bleed the system up and sweet. No more problems with the rear brake hose been a egg. Chucked the tyres back on and put it on the ground. Time to start it. Needed a battery and since I'm not using the beetle atm I stole 1 of its batteries. Dam thats the old one. It's kinda flat also so that didn't help it start at all. Better put the other one in then. Yup bit of start ya bastard down the carb and away..... Running on just start ya bastard but running. Slowly sucking the gas up. Wasn't the best a couple of big flames later and some high revs she's idling away. So a pretty productive arvo in the shed. Drives forward and stops. Will keep an eye out for a mint carb see what pops up. Time to get some steel and start filling some holes in the floor. Will take the seats into town find a good upholstery to trim them. Also highly don't recommend doing a key banger in the shed with no tail gate on. Ears hummed for a bit.....
3 points
-
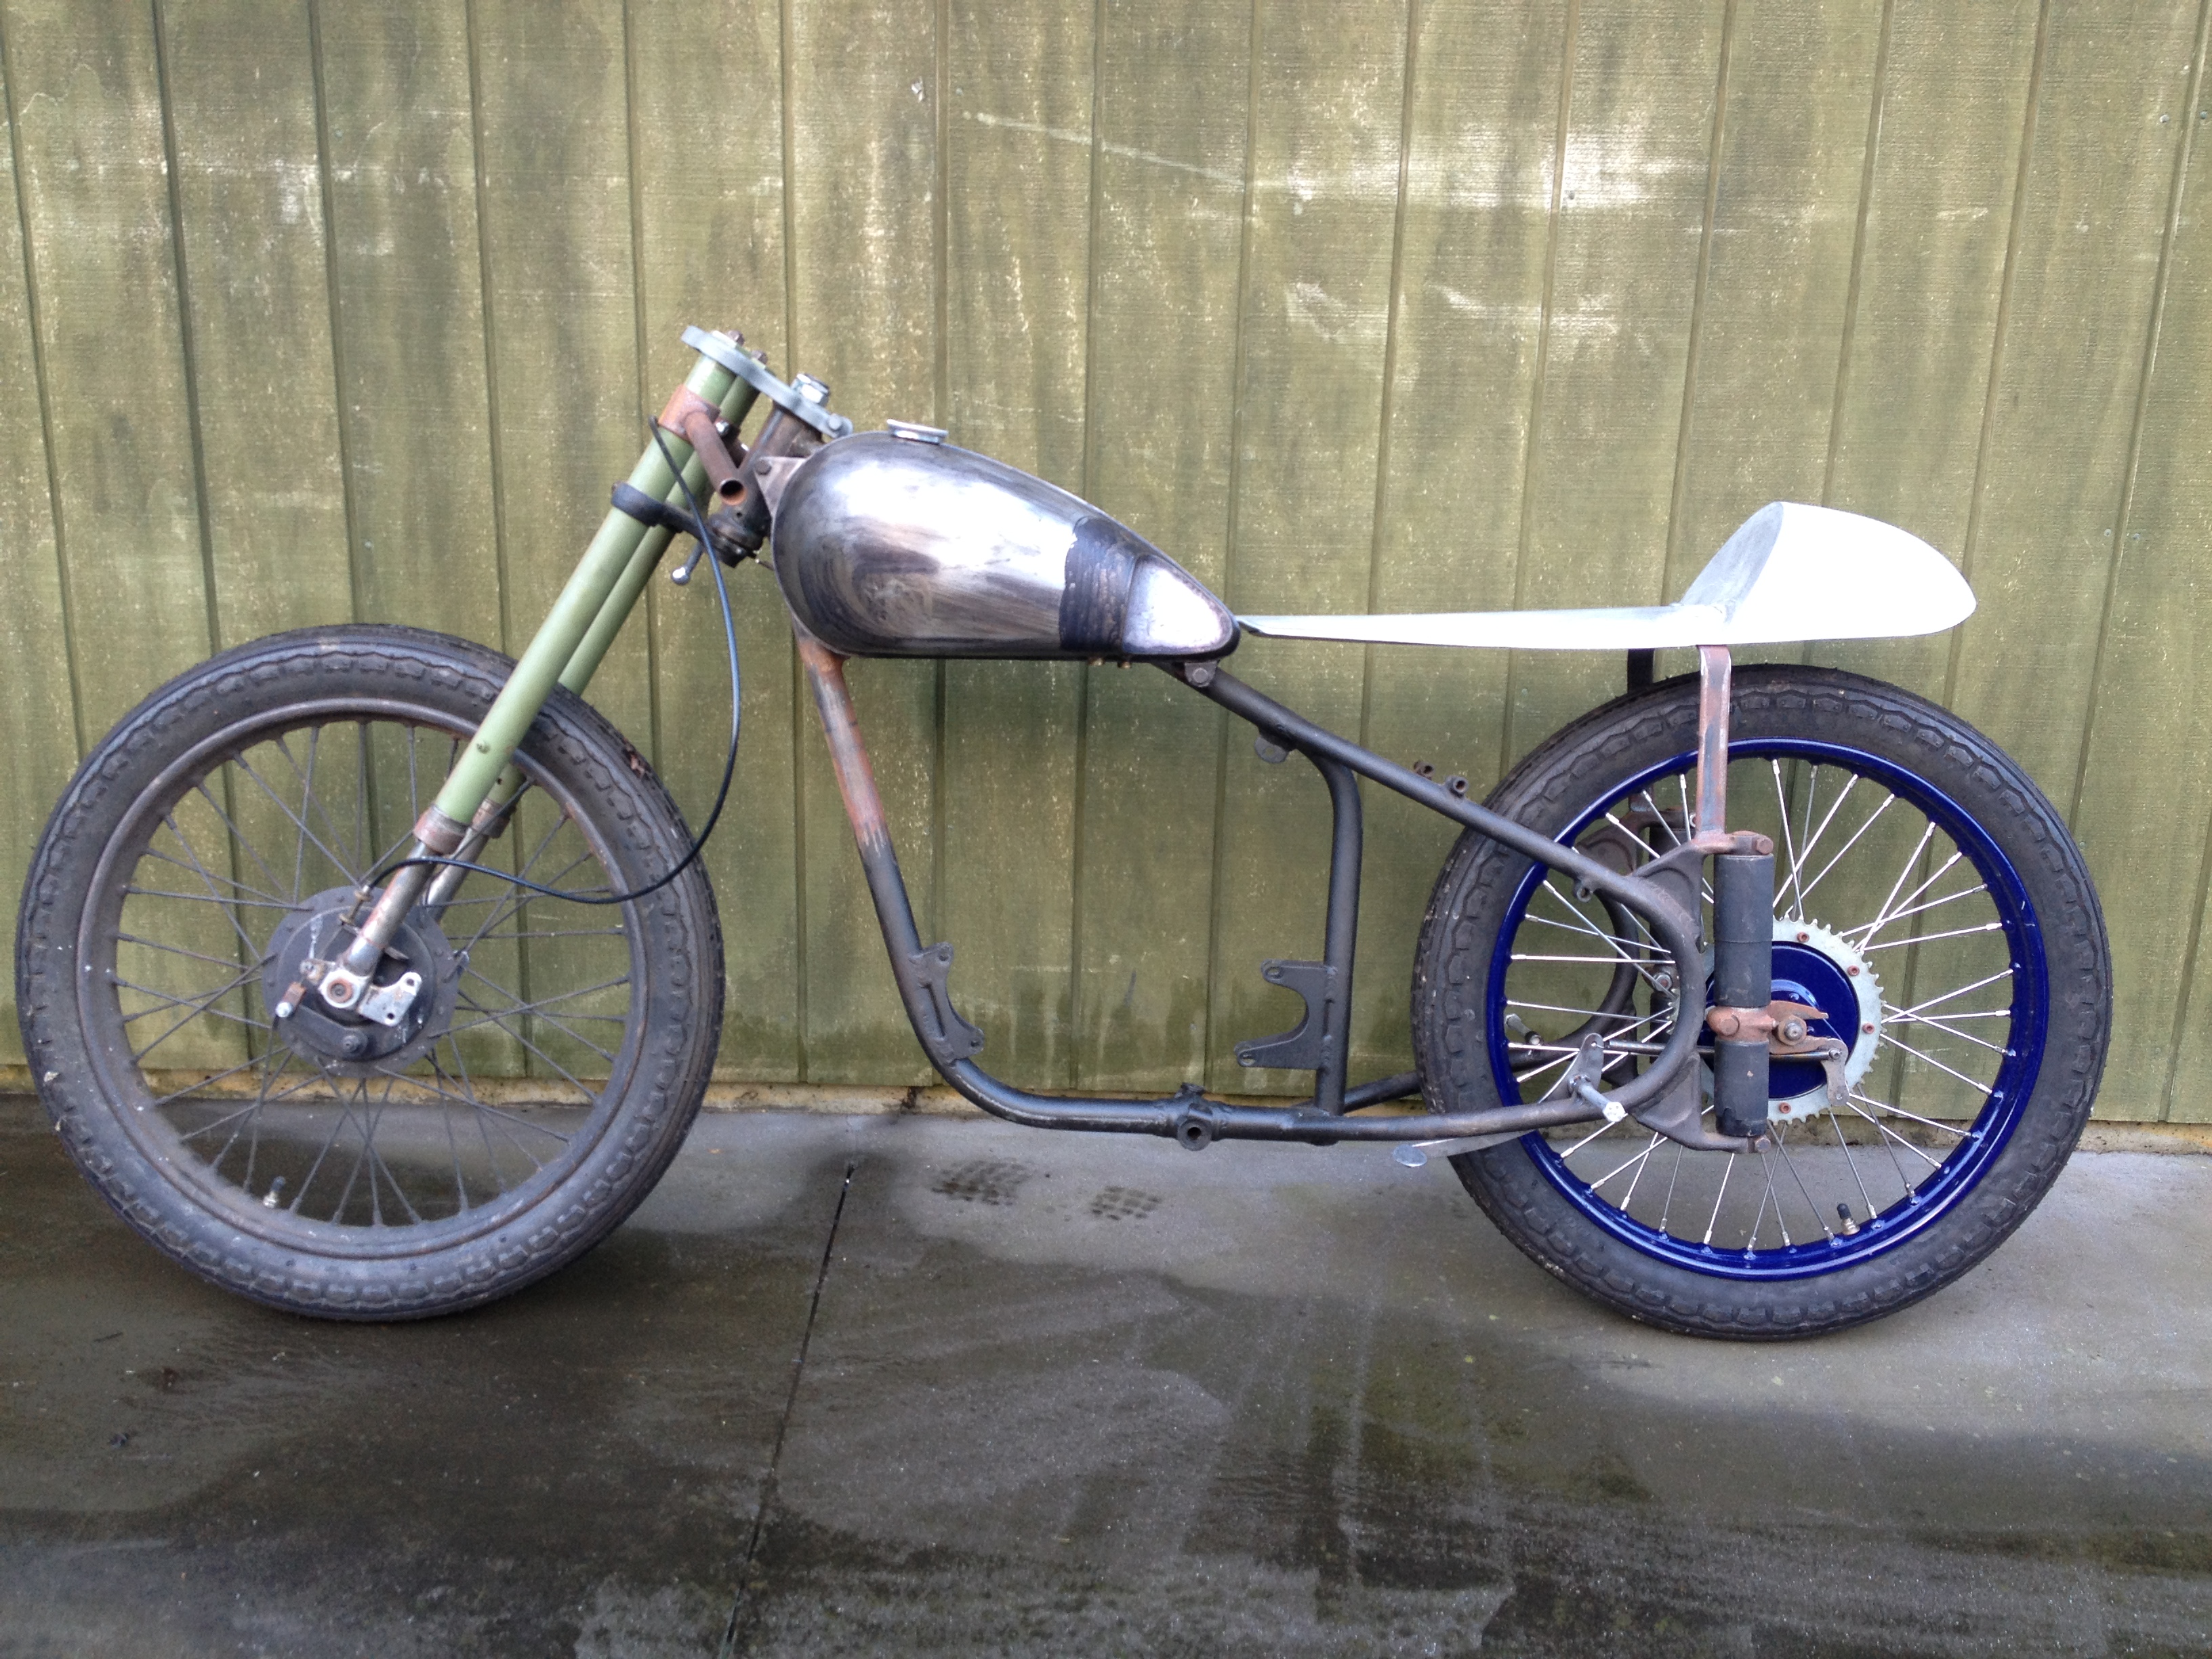
right side up upside down welding removed even more car made a C notch for more slam and got fully sideways3 points
-
Roof has reached the 'good enough for me for now' stage, so removed the masking. Put the fuel pump in and moved it out of the garage today. I need to sand and buff the clear coat on the tailgatess before they go back on. Also the steel floor panel needs some attention as it has a bit of surface rust on the lower mounting surfaces, and I don't want to mess up the new paint in the back. Metalflake I'd rate as 'OK for a first attempt' I need to 'phone a friend' to help with the windscreen reinstall.3 points
-
I'm named after my dads cousin, Stephen Winmill, and in the 80s and 90s he made some badass shit in his shed in Stratford. There was a V8 escort, a V8 drag bike called the widow maker And a host of TT500 Yamahas. He also made an XS650 Chopper in the wild 'digger' style made famous by Arlen Ness. I have recently come into possession of the bike and I want to make it legit! The obvious route is to get it LVV certified but it's expensive and will require lots of work to get the bike up to modern construction standards. But the other day another option was suggested to me... A mate is revinning his early 50's Triumph and says he doesn't need to meet any standards at all? He says because his bike is more than 40 years old it will be registered as a classic and it doesn't even need to have legit tyres. The guy is an industry honcho and has registered vintage bikes before so he would know. My question is, does anyone think that wil work with my bike? The XS registration was cancelled in 1991 after it was chopped up. The bikes year is listed as a 1988 but that can't be right because they stopped making them in 85? So I'm thinking if I take the plate off and claim it's a '76 or something can it fly through its revinn with period tyres and a chopped up frame? Because they wouldn't have been a problem in '76... Any advice would be appreciated, as usual the govt websites are useless and every prick I talk too with any authority just wants money....
2 points
-
Bung fizzing up here too. Picked up this fine specimen over the weekend, plenty of time to get it ready for the ride.2 points
-
Yeh, right from the start we decided to avoid the gorge, not keen on become truck squeezed meat jam.The route should have very minimal traffic most of the way round, and maximal sights and adventures. AUDIBLY FROTHING BUNGUS2 points
-
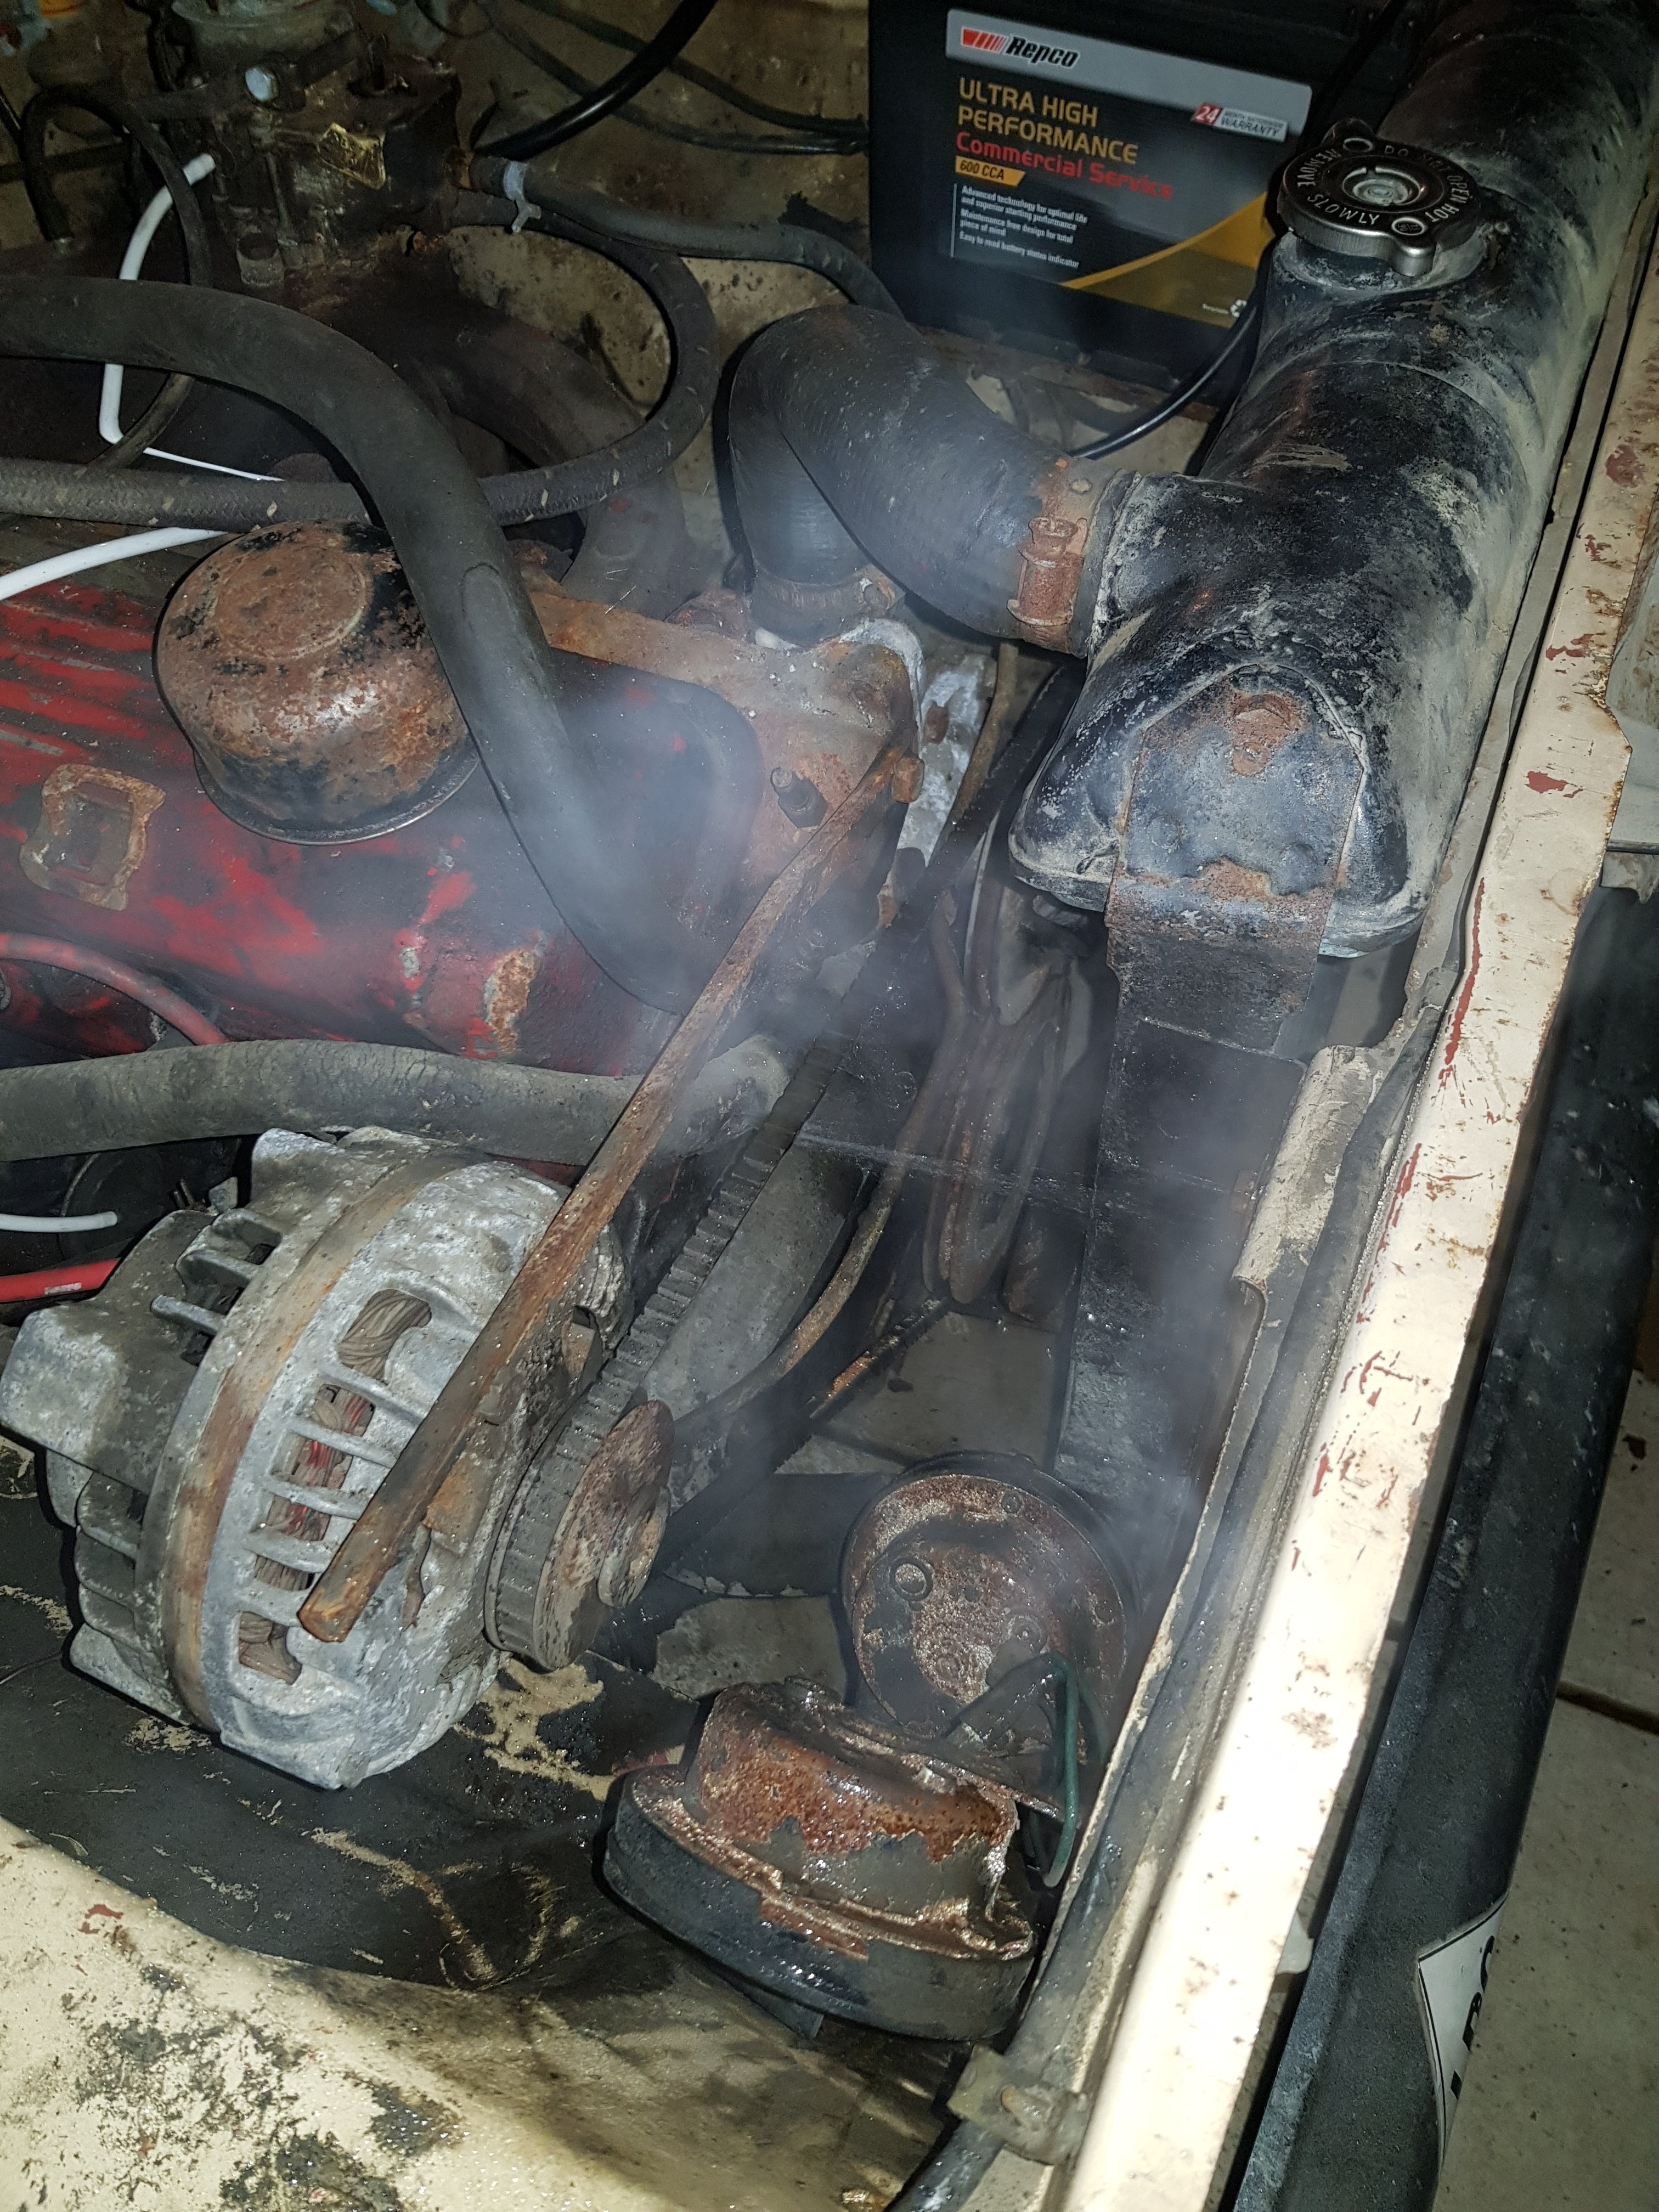
So to prove Datsun reliability we tried to get the red petrol Cedric running. Battery, oil pressure check, fuel, and ......2 points
-
Ive got a phone book size Pi tr6 injection manual somewhere that the BL geezers used at the service centers. Will have a look for it. The previous owner hooked a decent 2nd gear peel outside my house in this i sold him a efi manifold i had on mine and a few other bits and pieces.2 points
-
The end is in sight. I've got the handbrake & throttle cables in at a Control Connections being modified. Car is booked for mid October to get custom wiring done. In the meantime I have a bolt in steel half cage to fit. It came from a 4 door so the rear legs need shortening. Then after it's wired, will get it tuned and on the road
2 points
-
only took another year and a half to get all barred up about this again2 points
-
Hey Team, dug out a heap of photos of my old Lambretta project. Warning - a lot of photos and wofting on from the last 4 years or so up to present day so I will split it up into a couple of posts. First off, much like my Range Rover project I blame my parents. Dad used to have a 180SS Vespa and travel all over the South Island on it. They then got me a brand spanking new Vespa PX200 for my 21st birthday which I still own. Any how, all their fault and then my mate Rob's - who let me have a hoon on his Lambretta one lunch time. I was sold, I needed one! So much more fun to ride than the fat bottom Vespa. The hunt was one! It took me a while to find an Italian built Lambretta, most for sale are the Indian ones from the 80s. I got this 1963 Lambretta LI125 Special from a chap on the shore who built it many years ago and really liked matt black spray paint... It had a few trick bits on it and went pretty well. It had a pretty spicy Ralph Saxelby RS175 small block kit on it, ported barrel, suzi piston, snazzy AF crank, 30mm Delorto carb and a clubman exhaust. It was dyno'd around 15.5hp and a lot of fun around town but only really made power high in the rev range, not so good for long distance hoons. Any way, time for some photos. Chronological order up until present day. As I got it, naff GT badge and a lot of mat black paint. Nice Yamaha R1 shock on the rear and the old RS small block. It used a lot of gas but made a great sound. The small tank was soon swapped out for a larger long range tank in preparation for a 4 day 1600km scooter rally (race). Looking back, kind of dug this look. Tyre paint helped! Scoot all prepped for rally. We road from Auckland up to Cape Reinga in back over 4 days. Around 20ish scoots in teams of four and averaged 400kms a day. A few road side repairs and tunes along the way. Clutch cable change at the Cape Reinga 90mile beach run with open carbs... Side panels not wanting to stay on at 100clicks... Any way scoot went great over the four days. Used a heap of 2stroke oil at 4%... My first DGR ride, good fun but a really heavy race clutch and slow a ride was hard work! Next years scooter Rally on my mind. Time for face lift and the need to be faster! Time for a re build that ended up getting really out of hand and still in the process today... To be continued tomorrow...1 point
-
Sweet... Might want to clean the oil screen. Just a crude filter that can get blocked, have to take side cover off. Oh and check the acorn nuts are on the correct cyl head studs for oil flow. Can't offer any more advice as mine parked up still waiting for shakedown run...1 point
-
Damn, that's friggen choice, well done.1 point
-
Shipping and associated paperwork will be about $2500. Looks like I won't have to pay much import duty as it's over 10years old and I've owned it for 3 years. After it's in the country I'll need to put it through an MOT (wof) and pay road tax. Suspect it'll be about 3k all in.1 point
-
Did they get vaped by Brent the vapist?1 point
-
So far the list of jobs to do is: - remove weird brake things, - tidy engine bay - replace strut tops - fit superlow springs - attempt to get the master window switch and windows working better. - take centre muffler out (leaving only the rear muffler) -steamclean under side of vehicle and was to out where all the oil leaks are coming from1 point
-
Thought I'd try a video blog style update, just dealing with fiddly bits and pieces now. Big bit of news, some of you already know - I'm moving back to the UK in December, and taking the Starlet with me. Aim is to get it road ready by then, so I can MOT and register her straight away on the other side...1 point
-
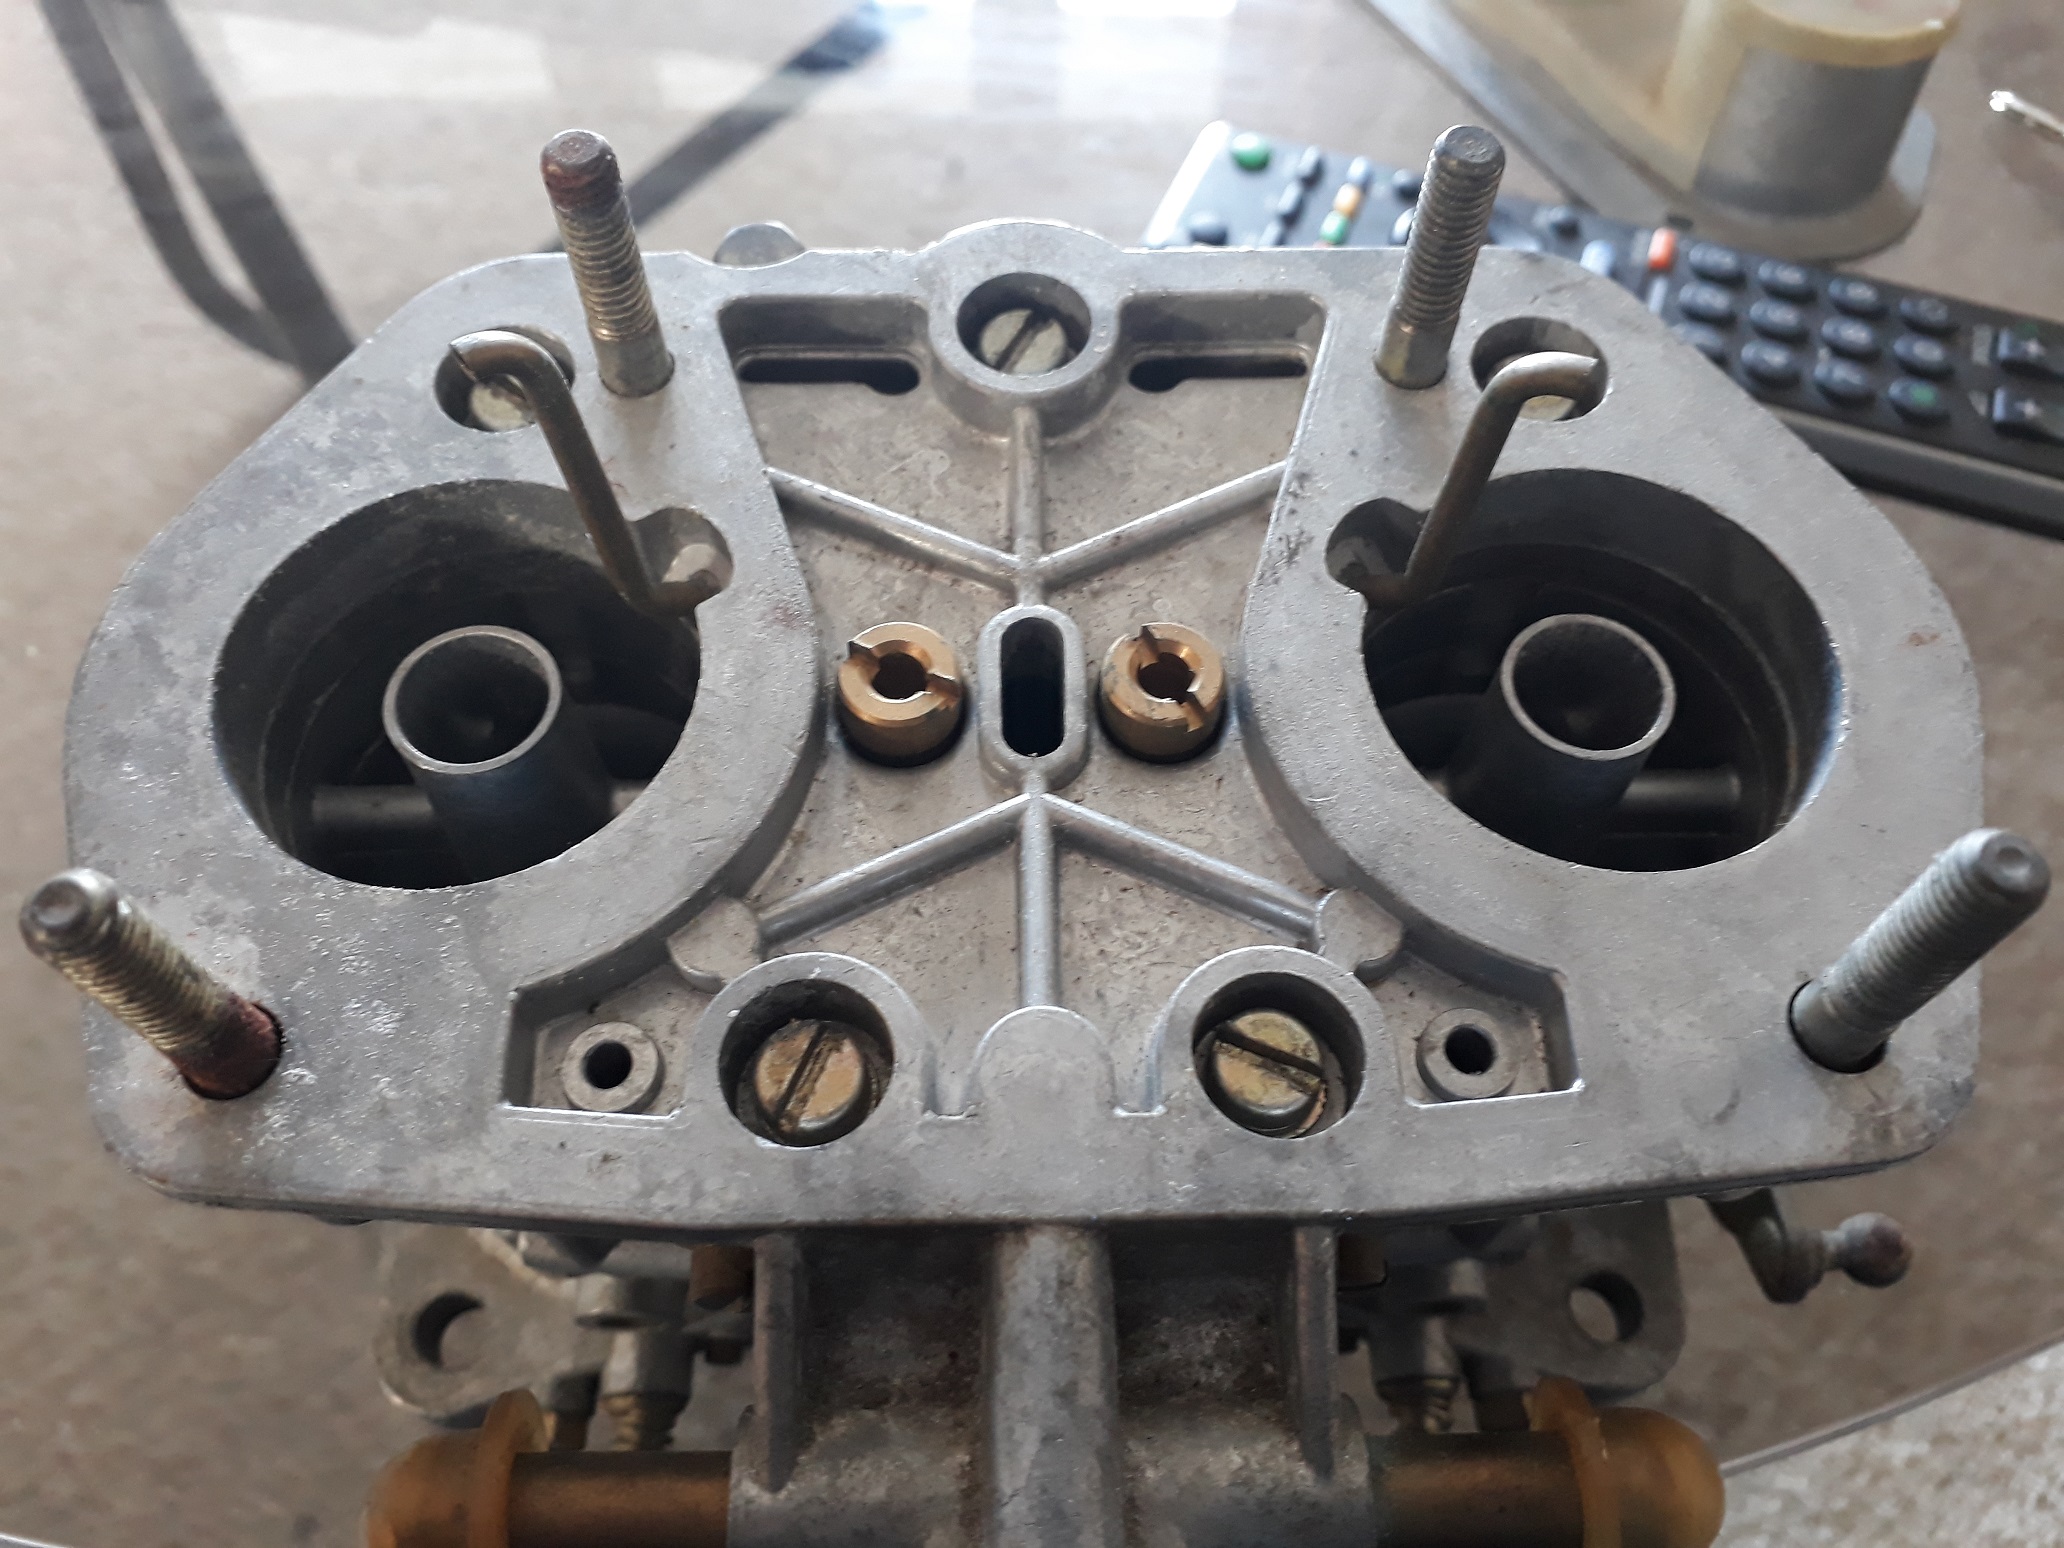
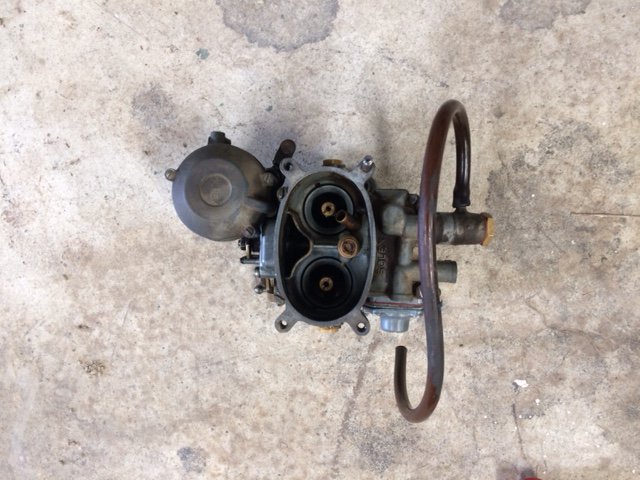
Also get a load of this for some Carburetor foam. I put up a wanted ad on here for some more 40mm Weber IDF type 13/15s. Someone said there was one on trademe, it's mine now. When I saw the ad I thought it was weird that it had all the caps on the fuel line pipes and on top plate, no matter it's the right type so I brought it. When it showed up I set about pulling it apart so that I can get it vapour blasted like the other 3 I have, the remarkable thing about this one, is that is appears to be brand new, although it is dull and a bit dirty on the outside I don't think this thing has ever had fuel though it. Remarkable for something that is 40 years old, Once I get around to getting it blasted I'll slap it back together and put it next to the other 3. Still on the hunt for another 2 if anyone knows of any.
1 point
-
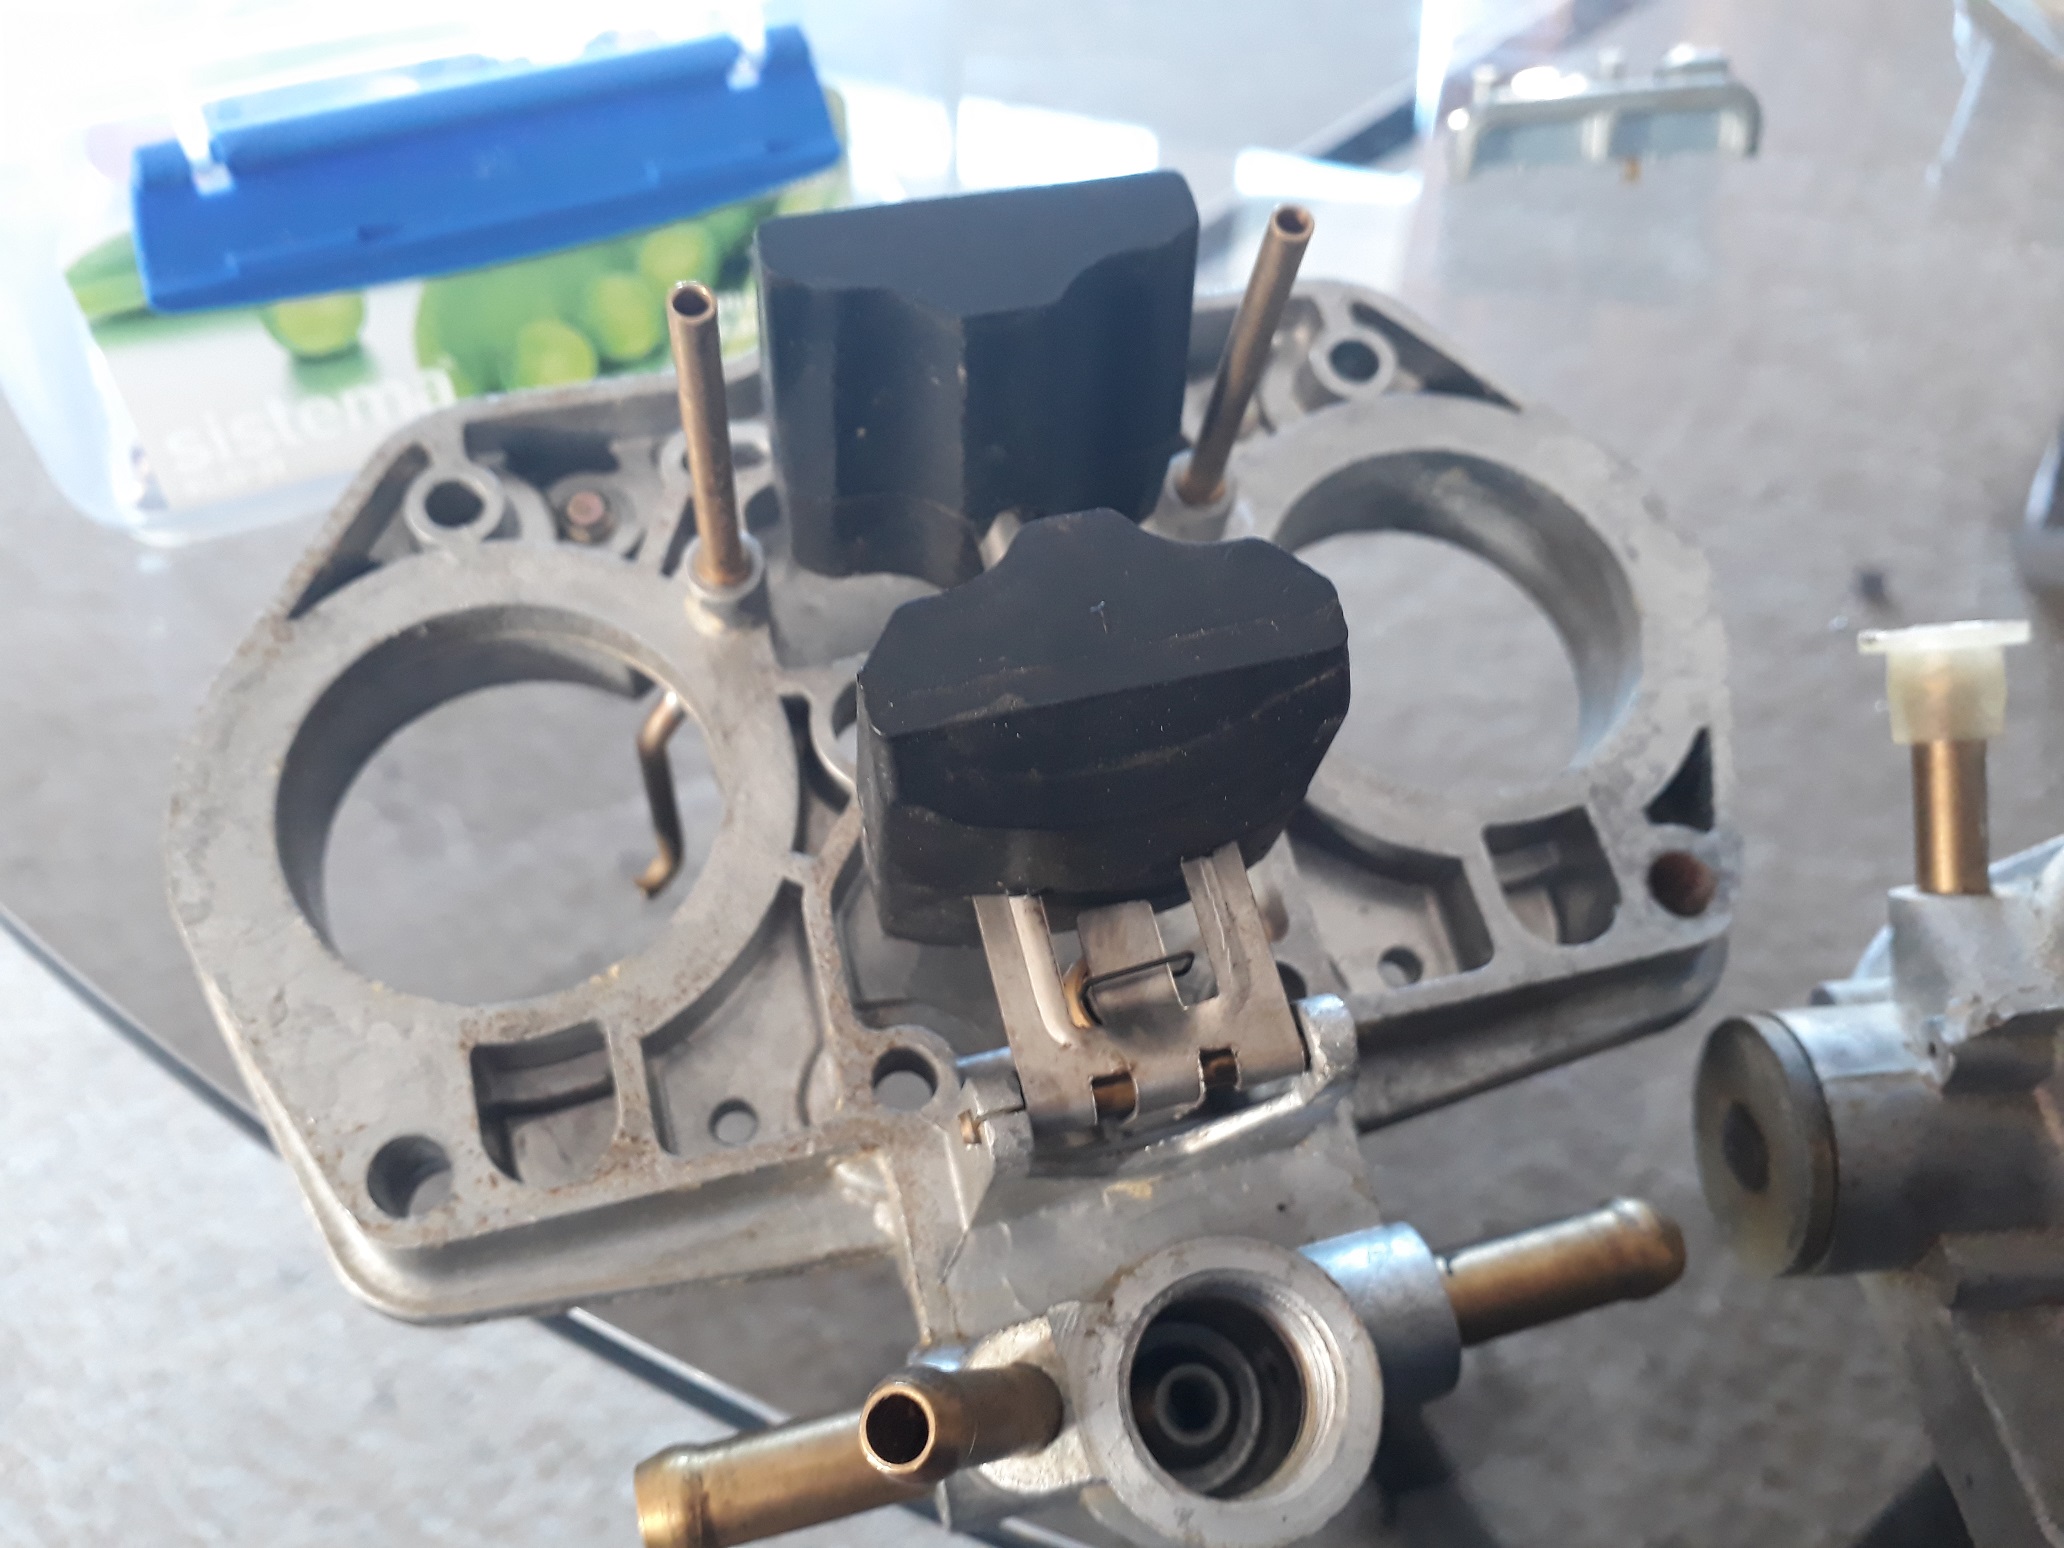
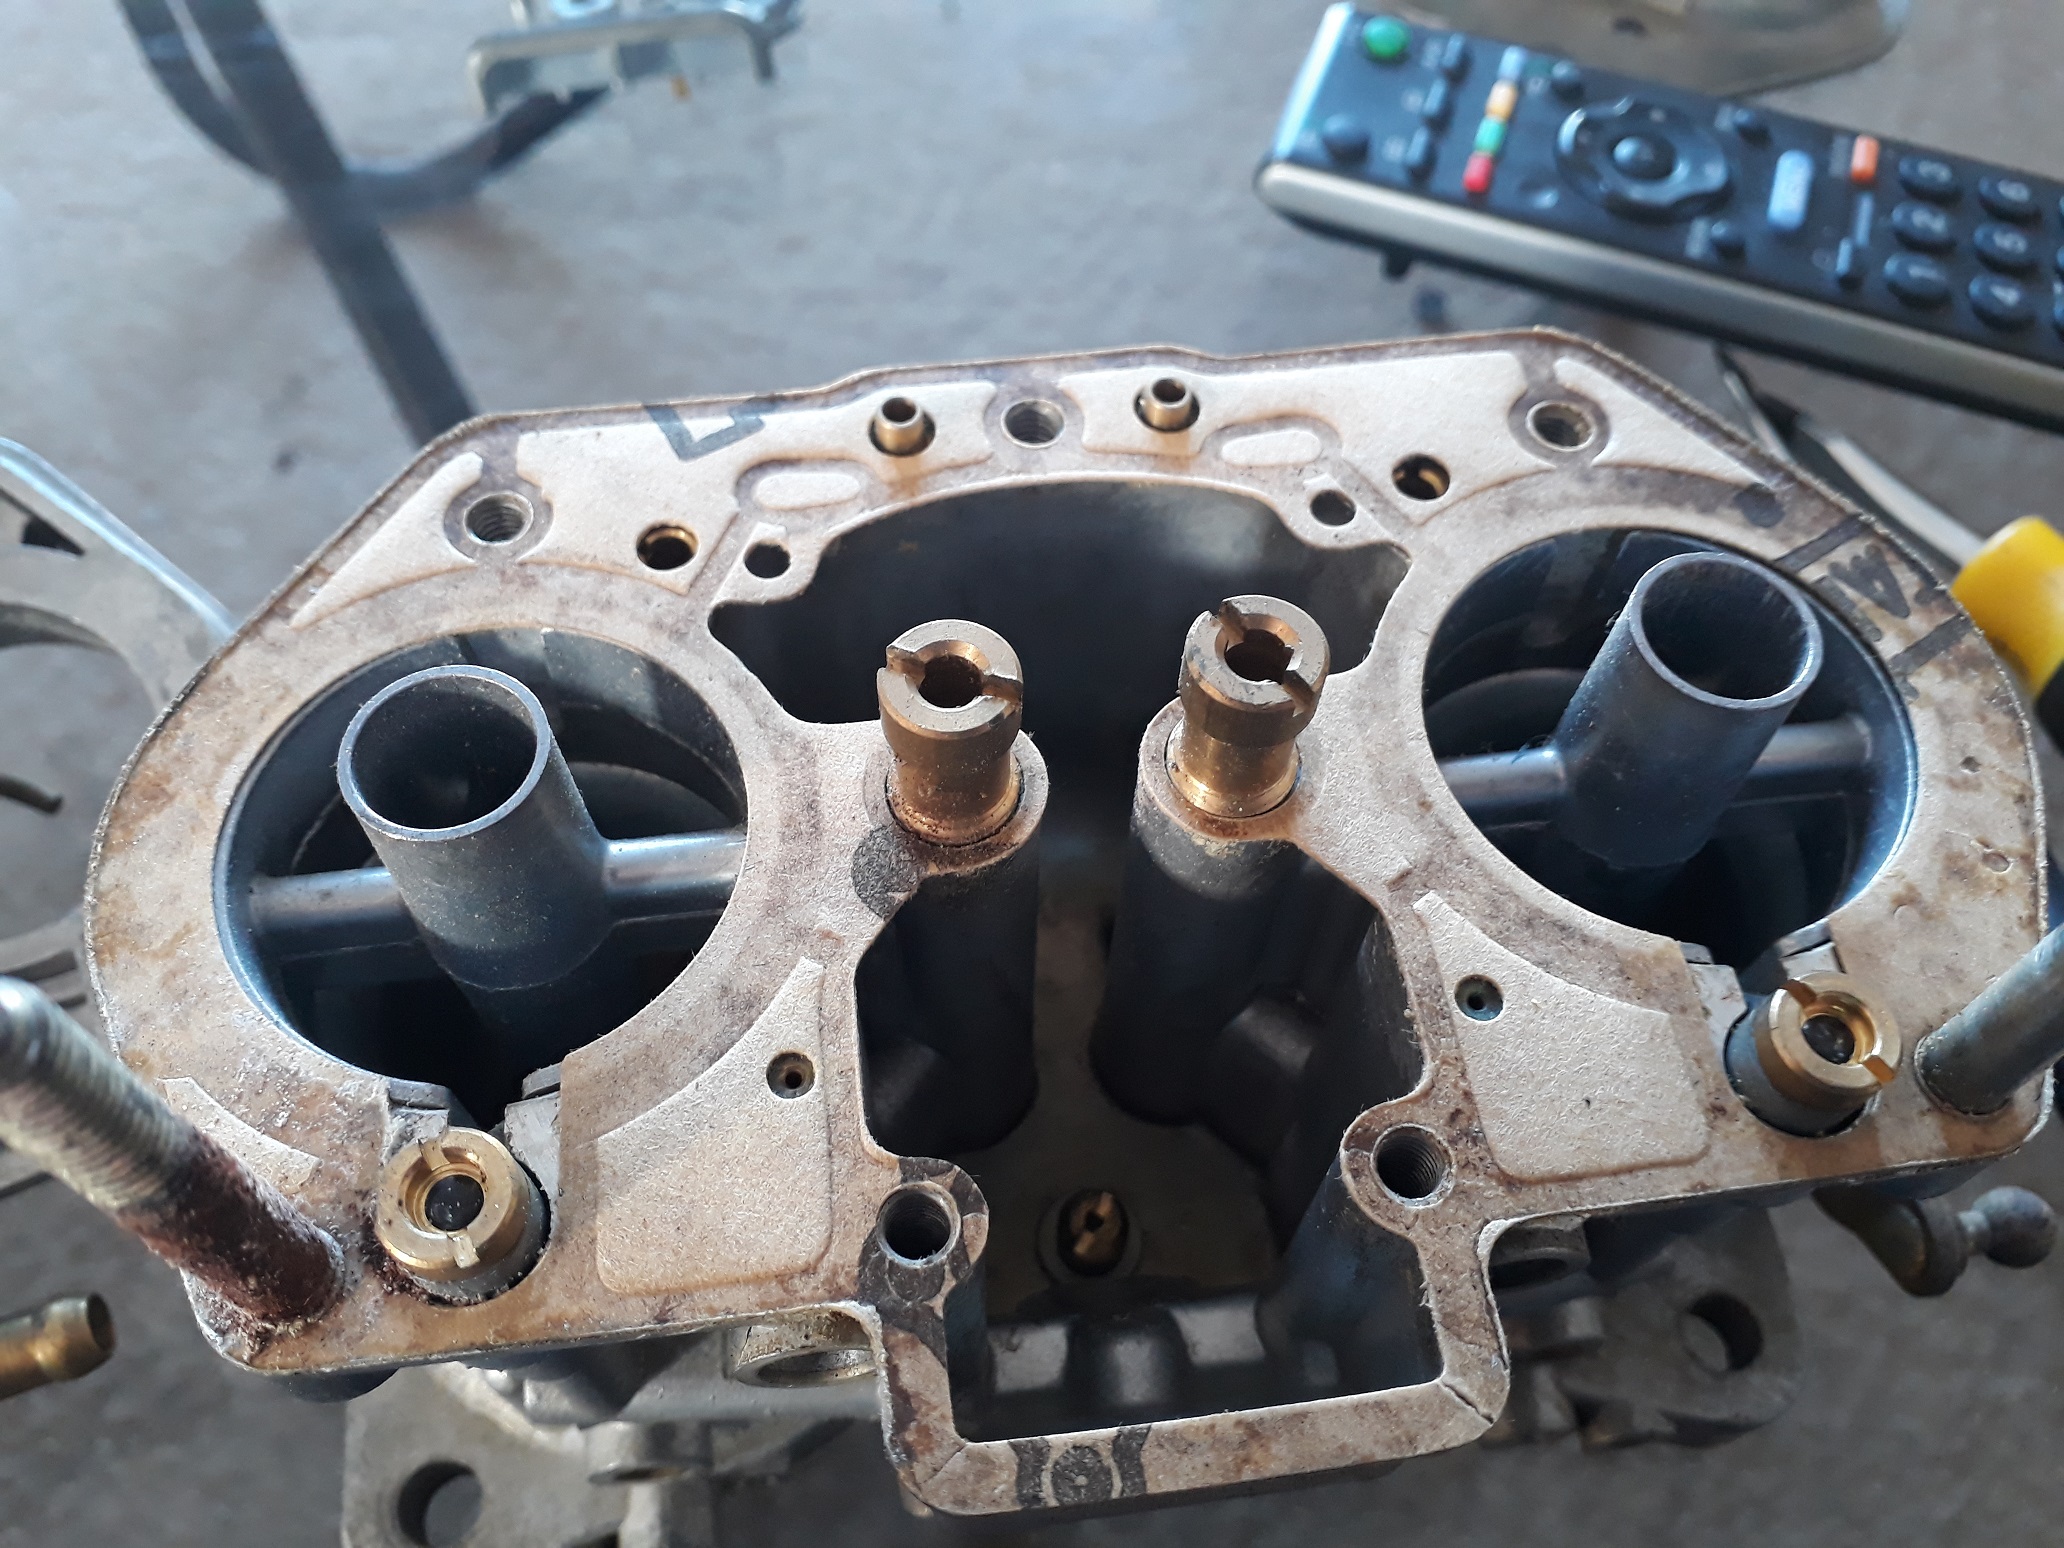
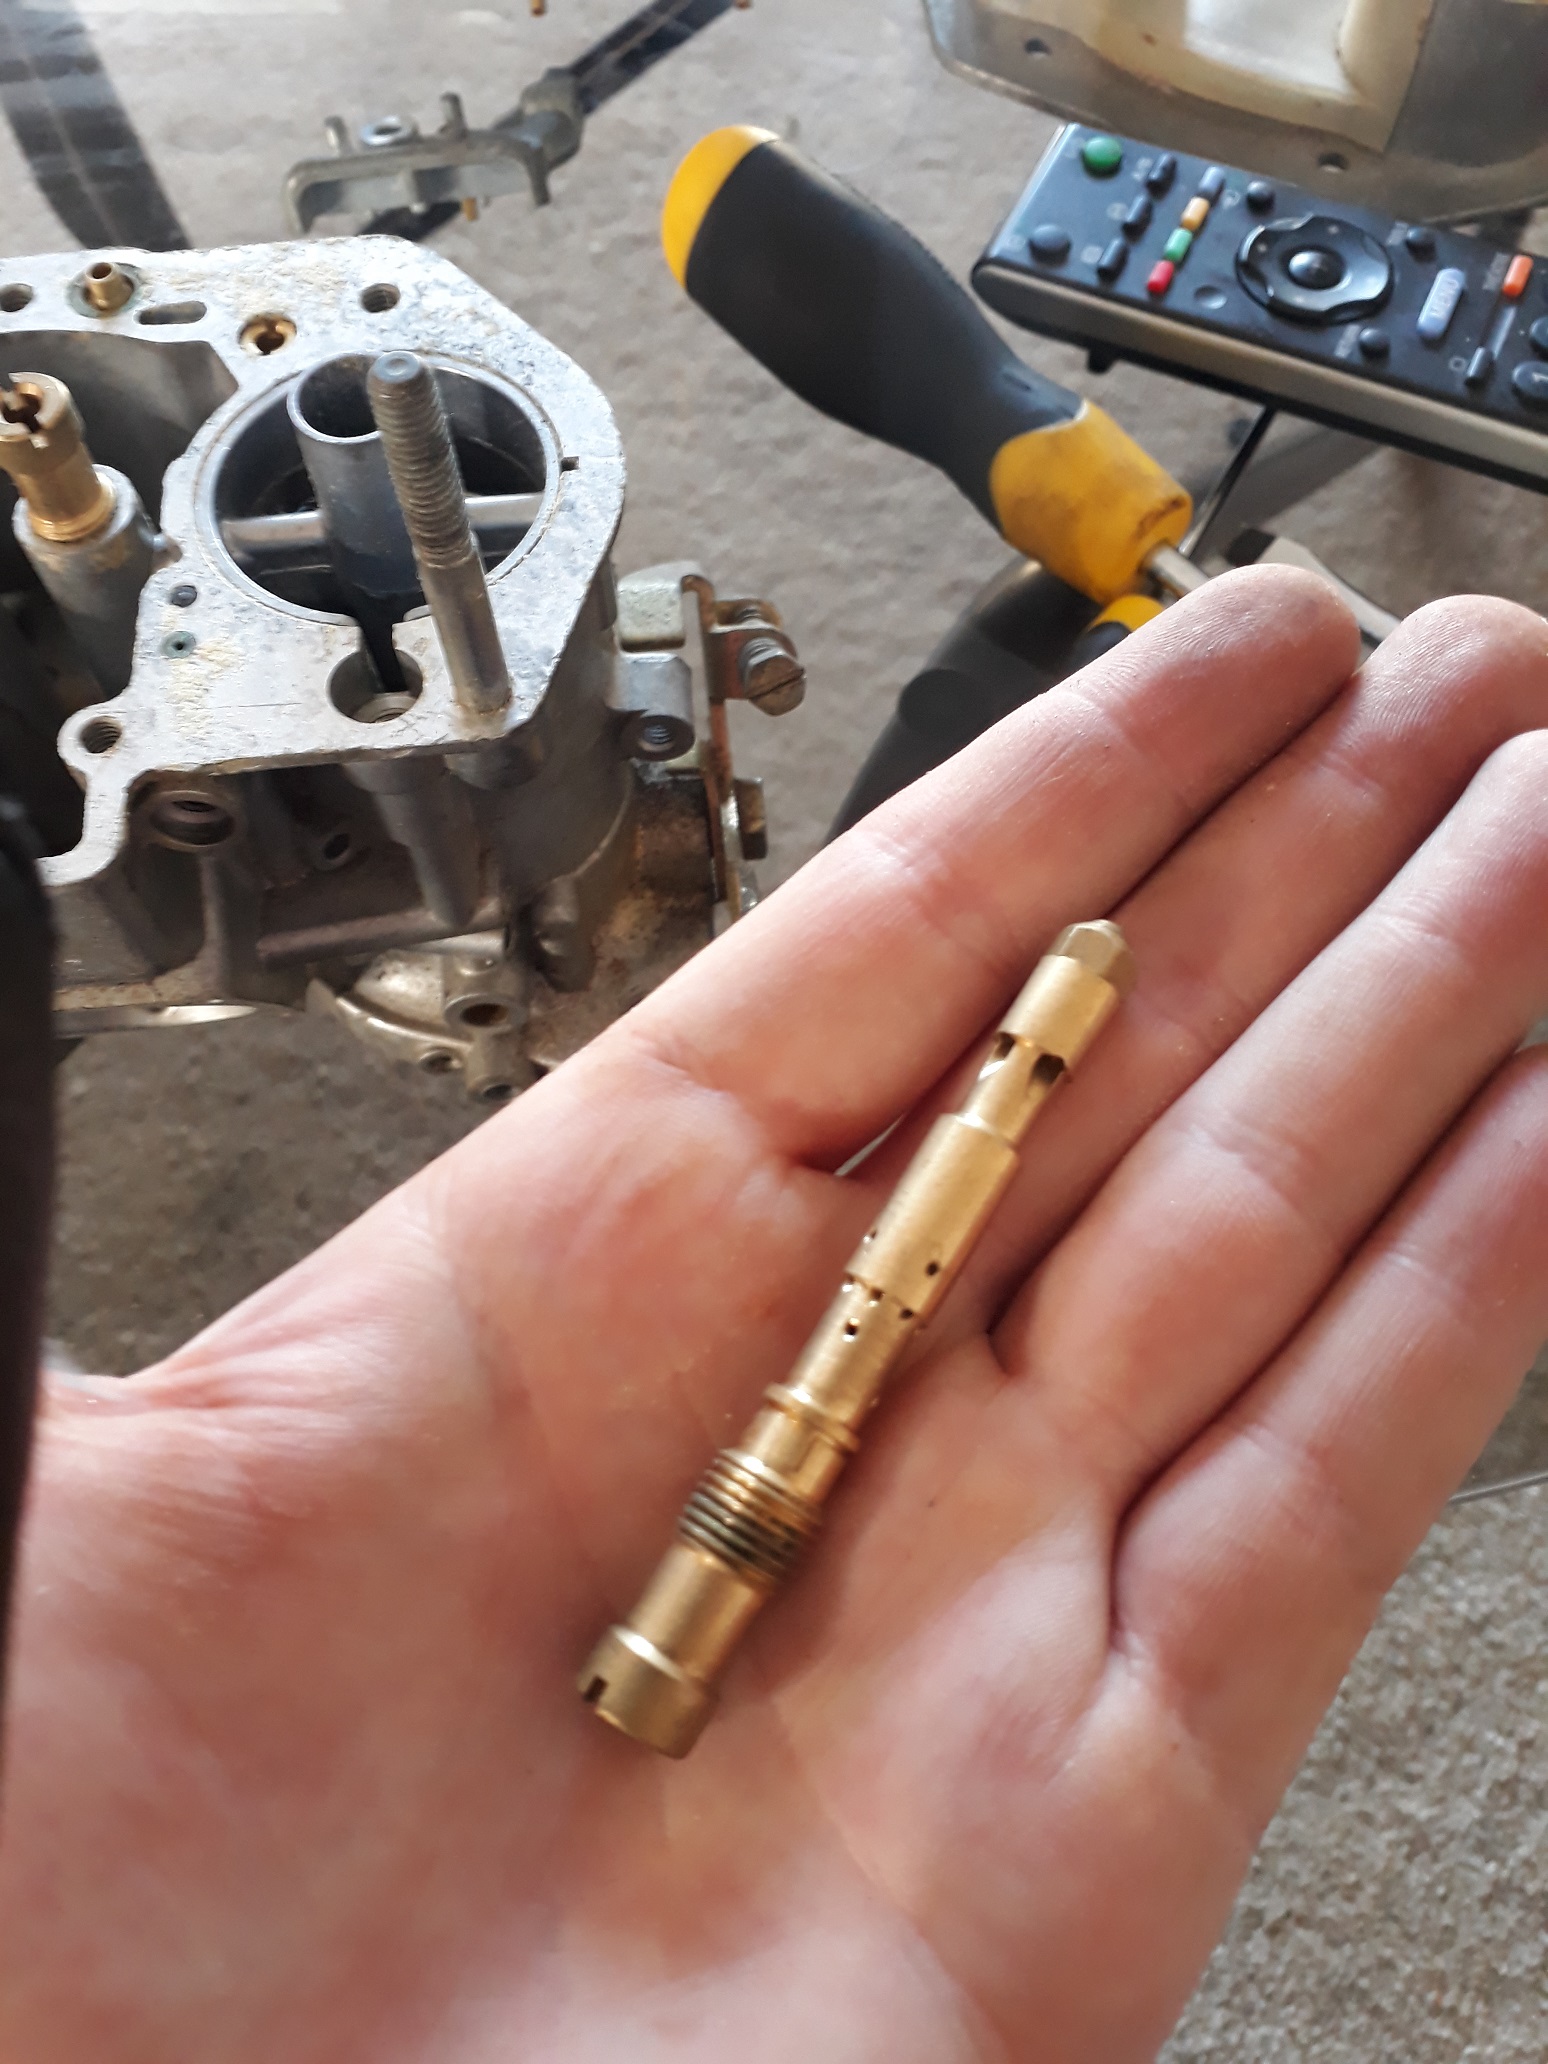
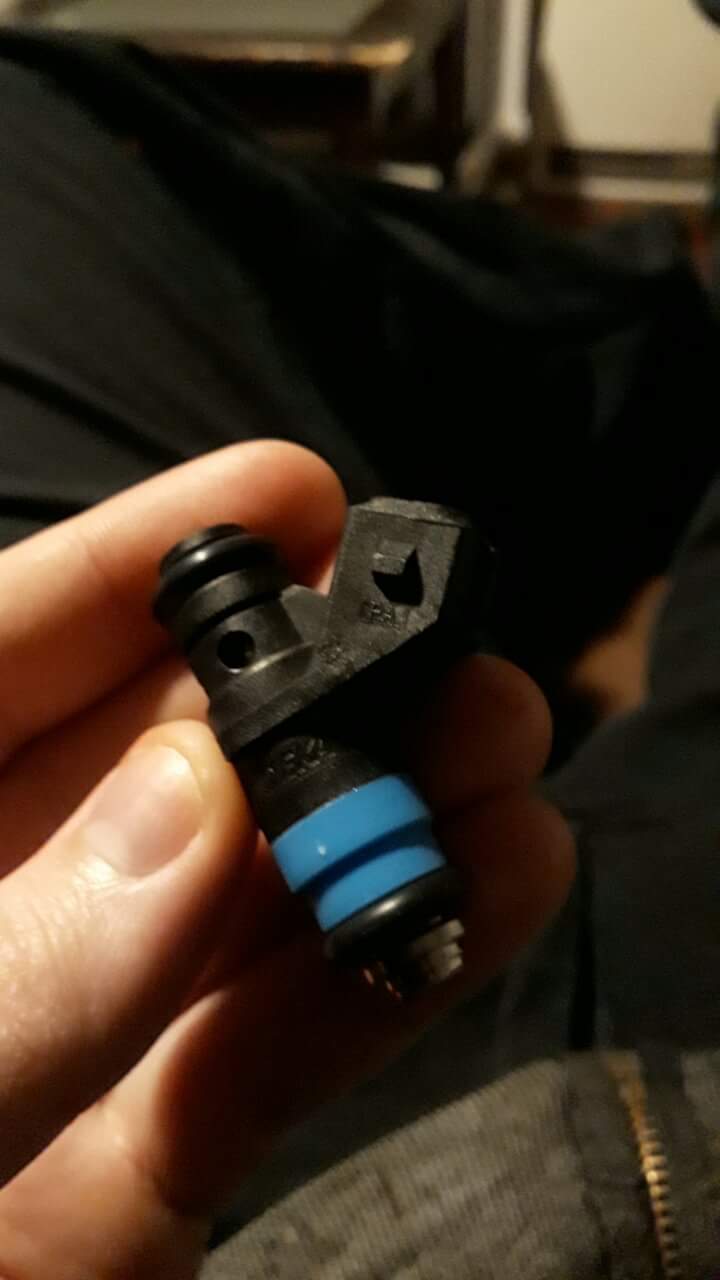
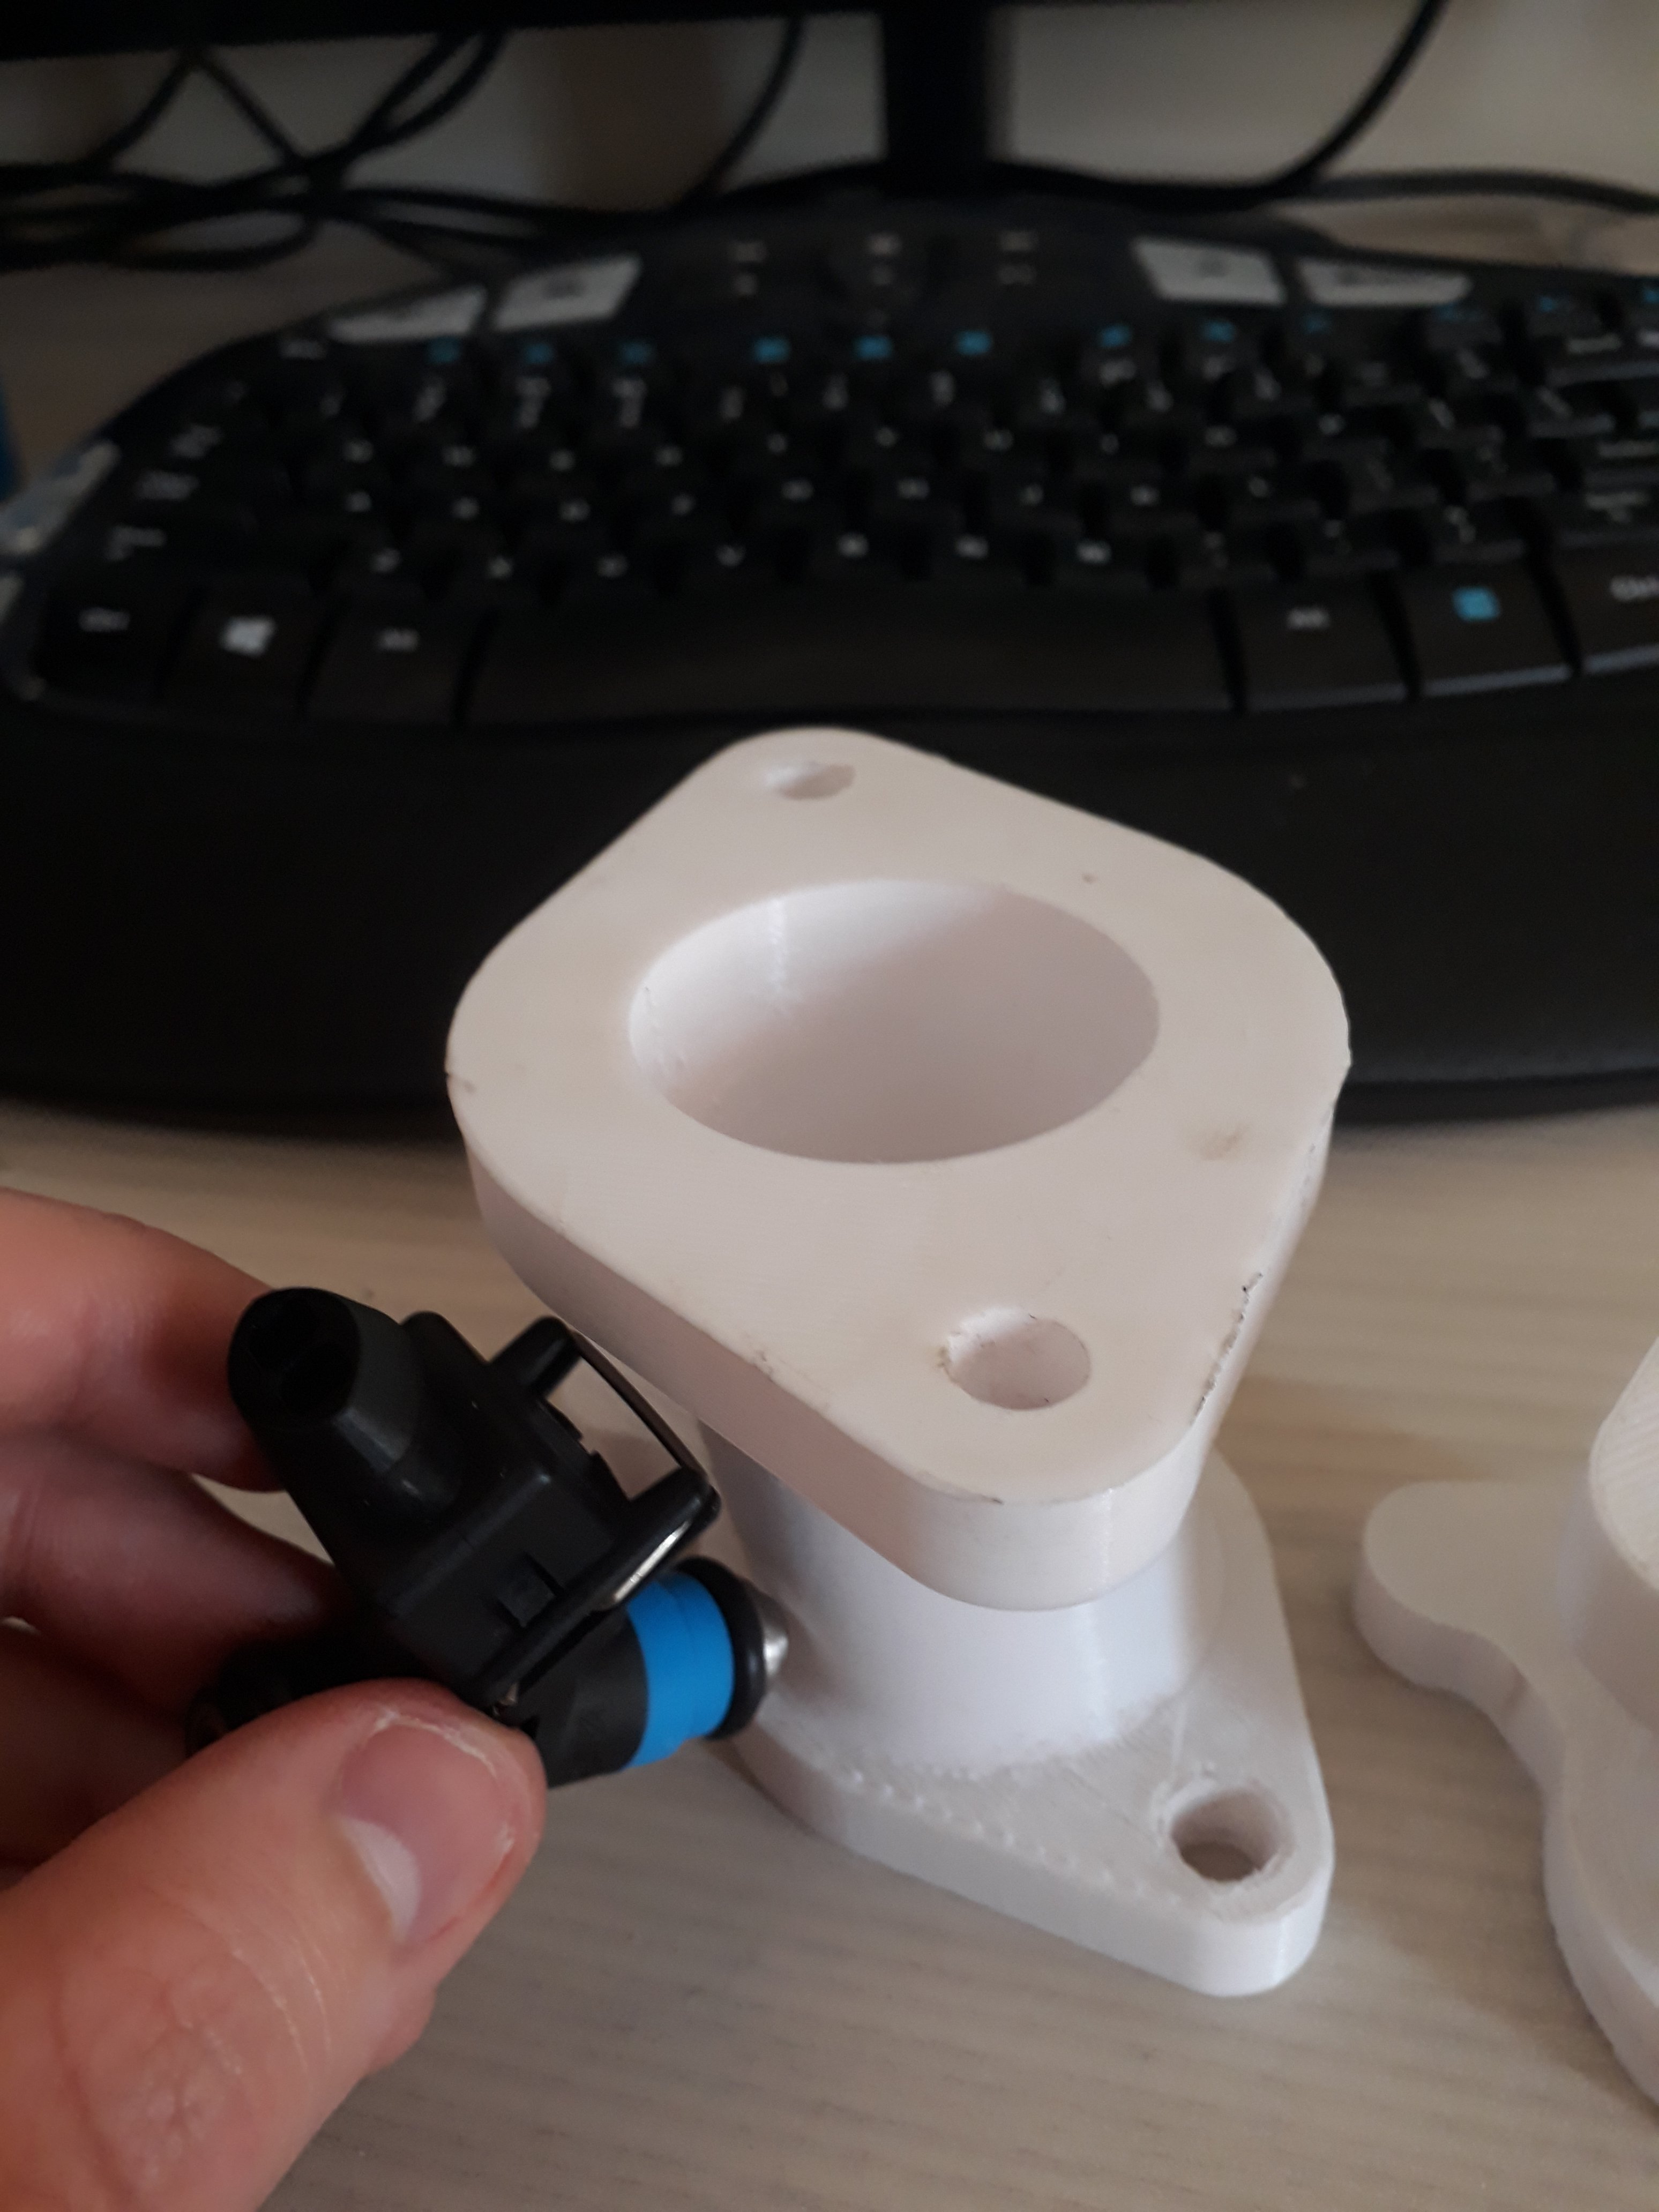
So Mr Vapour let the cat out of the bag earlier on about having the Webers act as throttle bodies with the injectors sitting in the manifolds underneath. Hopefully this gives an illusion of running on carbs when really it isn't. Buying 6 of the Heritage setup shown above would be cheaper (maybe) but where's the fun in that? Also I don't think they do an IDF/IDA style - only a DCOE rep - might be wrong on that one though. So I picked up a lone 'short' injector from NZEFI to get some basic dimensions off and see if things are going to fit. I have concerns about the amount of real estate between the two banks of intake manifolds and whether or not there is enough space to fit 2 rows of injectors and fuel rails, at this stage I think things are going to be ok. That injector is a Siemens 600 and something cc job that should be more than plenty, it's 42mm front to back. Originally I then drew up some injector bosses on the model shown a page or 2 back with the injectors put in at a 90 degree angle to the intake runner, so they are spraying perpendicular to the airflow. not Ideal but at the time I was too scared to try and draw them on an angle because I don't know what I'm doing/ learning as I go. 872463 people said that was dumb so I watched some more youtube videos and redrew it with the injectors pointing down, can't get too carried away with the angle because the wiring plug is going to clash with flange the Weber bolts to So picked a number of 20 degrees from horizontal and called that good enough, also added a bar to tie all the pieces together and give the fuel rail something to bolt to. Have ended up with:
1 point
-
All the shit out of the way, ready for the RB conversion Wasn't the easiest, but wasn't the worst. Tidy up time. Getting it back in will be interesting.1 point
-
Everyone should have one of these. They make it super easy to get into tight spaces to clean up welds etc. They're on special for $99 at the Toolshed this month too. Got stuck into the engine bay with the powerfile and a flap disc. Still a bunch of finishing work to do, but the powerfile did an awesome job of the radius on this weld: Also bought myself a set of step drills. Their first job was to make the correct sized holes for the new engine mount threads: The nuts sit in there really nicely. It's a slight hammer fit to get them below/even with the surface and they can't drop any lower because the hole steps down as it gets deeper. The nuts need to be tigged in and tidied up, then that job's done.
1 point
-
Thanks to @azzurro I have another carb to try. Out with the old: In with the new (well, older actually) I'm getting quite quick at removing and installing Fiat 125 Carburettors. As you can see, it is slightly different around the fuel inlet side and is missing the breather hose thingy. Must have been pretty well dialled in because it fired up straight away. I then took it for a hoon down the road and maaaayte it's much better. Some fine tuning to be done with the idle but very driveable. I'm calling it a win.
1 point
-
Nah that will stay, thats the special shitter haha1 point
-
back to the middle of this side, i was thinking about how to attack this area while doing the other bits. Annoying design and lots of acute angles bleahhhhhggg oh well, chop chop. You can tell why they always rust here! Right behind the wheel into a tight corner with factory leaks into and around the A pillar. This is was replacement (not new) fender, but i needed to chop a lot out to get at the a pillar properly anyway, and it is sized nicely to the end section of the fender thats not welded. the the 'channel' is actually a hook for the top of the fender as there is no access to weld it, so i could just pull it off once i drilled out some spots where it folds over behind the door recess. I rebuilt this whole area last time, all the rest is still good. looking a the piece from the engine side, the 8mm lip hooks on the channel. Thusly: I put a good bead of seam sealer on both sides before tacking it in, and more on after from under neath. The channel will be filled to just below level with seam sealer too, like the other side (i didnt do this last time) And done. A couple more patches on the front valance to do, then its all filler, no killer1 point
-
Bump. This bike now lives in a fish bin pending motivation after it devolved into a pile of turds. Got this trademe special to hoon around on. Someone had bought the spendy bits and then given up on it. Came with all the bits I just had to get it rideable and reg it. Done!1 point
-
Perhaps register one and photocopy the plates and tags onto the rest?1 point
-
Turbo No# 3 Left - old turbo gtx2863r. Right - new turbo gtx2860r Gen II So new turbo is smaller, but later version, which on paper should flow the same. but spool better having a smaller compressor wheel. Yeah i hate that silicone elbow off the turbo too. but some diddle put a tower in the way. clutch is still broken. so no test run yet.1 point
-
36+1 trigger setup seems to be working good so far. nice smooth rpm plot. Was attempting to check the tune, but fun ended pretty quick. above is a part throttle run, just to check the new trigger setup works thru the rpm range. more than half throttle and the below happens.. Its had a hard life. originally was in my trueno Have also moved the battery to the rear. in an attempt to move the weight rearwards and lower down. I put those ugly spring covers on. as the roost off the front wheels was pumping the whole spring full of a grass/mud combo1 point
-
The bike is pretty much ready for stripping down and painting now, just have to finalise a couple more details
1 point
-
made a tree Started gluing things together1 point


.thumb.jpeg.384ff72c8d2b0ee0d34a7bdedb55bdcf.jpeg)


This leaderboard is set to Auckland/GMT+12:00