Leaderboard
Popular Content
Showing content with the highest reputation on 04/22/16 in all areas
-
Car's back together and running better than ever! Surprisingly the $120 Aliexpress 1000cc injectors performed very impressively in testing. Idle is way more stable and the autotune function etc seems to be working great as well. Part throttle seems way punchier. I've been tossing up what to do for tires. T1Rs are just hilariously miserable on the track. But R888s are idiotic to drive on the street. They sound like gillies for your wheels haha. I was looking at other options, found the Federal 595 RSR. Supposed to be only a second or two off the pace of R888s, but more streetable and still prone to overheating. Tried to buy some but were sold out... The guy on the phone mentioned the Yokohama Advan AD08Rs as a good middle ground option for trackday and street that arent too expensive. So I did some digging around on the internet to see what people think. People say that you need to get a few laps to get them up to temp to get the grip. Perfect! It's the control tire for the World Time Attack series in the street class, so cant be too shabby! Some cars are going well under 1 minute at Tsukuba on these. So I had some fitted today, and went out for a test drive tonight to refine the engine tune a bit and see what the tires are like. So far so good, cant really form much of an opinion yet as I'll have barely scrubbed off the casting marks. But really looking forward to having some better consistency with tire temps at Hampton! Tread pattern looks fancy but I'm not gonna try push my luck driving these in the wet as apparently they're not great at clearing standing water away.9 points
-
I apologise for the lack of updates over the last few days, I've been busy working on the car. It is now all physically back together, drivetrain, exhaust, brakes, engine etc all done. All coolant hoses etc are hooked up. I have also relocated the battery to the trunk using e36 parts. Tonight and over the weekend I will be doing the last few small jobs and doing the wiring. The plan to have it driving by the end of the weekend looks very realistic. More to come soon.7 points
-
All the way though this project I've been conscious of being overwhelmed with the size of the task at hand, attacking one mini project at a time, ticking them off, moving on to the next one. Looking though my photobucket the other day I noticed how few of the photos actually look anything like a car, just red,brown, grey metal shapes, every now and then it's great for the motivation to mock up a few panels, sit back with a beer and bong, and picture the day it's all back together and rolling the streets again. photoshop is also great for this. hell yeah.5 points
-
Success, went into AA this morning asked for MR2B, filled it inand was given a plate and 12 months rego for $109 Sucess by Andrew Whalley, on Flickr Figured id try AA as its just a couple of office ladies rather than grumpy vehicle inspectors. Only trick is that on the form the vehicle type is not on the list of options. Options list starts at "02" but a moped is "01"5 points
-
Lol me and Neal are just about to announce a cruise this weekend! Not to my place tho I'm a construction site at the moment. Thinking going Hamilton swapmeet then to gregs midnight upholstery open day. I'm starting a thread this weekend5 points
-
Was looking fwd to long weekend to sort out some painting, but forecast looks a bit shit, so took yesterday off as it was a cracker of a day and I'd rather be skinning my knuckles on something interesting than processing paperwork. Stripped and prepped the air cleaner base, rocker covers and misc brackets etc, and got a couple of coats of epoxy on them. Some I'll leave as-is, the others will get a top coat of colour... The shed of 1000 projects... I had intended to prime the front grille section too, but it was a bastard to strip, all angles and sharp edges, and couldn't get any tools inside the recesses, so all hand sanding. I thought I'd just rub it back and spray over, but found my half-arsed effort umpteen years ago just meant rust under the shoddily applied spray-bomb, so needed to come back to metal. Just ran out of time to get it done properly, another day of labour required unfortunately. I'm thinking of just applying aluminium silver wheel paint once it's primed, should be a fairly hardy paint, and easy to touch up when it gets chipped... So, a job frustratingly half-done, but still better than being at work...4 points
-
engine/gearbox removal. it begins. i thought it a good idea to do a compression test before i took the motor out. very consistent readings of between 160 and 170. well, on the front 5 cylinders there was, number 6 however decided that 70PSI was the most it could muster. so the motors fucked and will need a rebuild. tomorrow more motor disassembly . 2016-04-22_08-20-19 by sheepers, on Flickr 2016-04-22_08-20-10 by sheepers, on Flickr 2016-04-22_08-20-03 by sheepers, on Flickr 2016-04-22_08-19-56 by sheepers, on Flickr 2016-04-22_08-19-48 by sheepers, on Flickr 2016-04-22_08-19-33 by sheepers, on Flickr 2016-04-22_08-14-06 by sheepers, on Flickr3 points
-
pretty happy, today i got it running with the MA engine and its not smokey, no strange noises from the engine and no strange noise from gearbox/clutch….. success. took it for a small drive around the block but not very far as it needs a fan belt to drive the water pump as the old one won't fit as MA has a different alt set-up and a different water pump pulley. so off to get a belt tomorrow and bolt the bonnet back on then proper test drive3 points
-
3 points
-
Considering I live only 5 minutes’ drive away in Milford I've got no excuse not to turn up for a look. (Sadly only in Mrs sr2's modern 'Mazdabator'). Until now I've never been brave enough to throw aside any concerns I have re personal safety and actually meet a group of psychotic Oldschool members en-masse. (I did however meet SOHC and it only confirmed my worst suspicions). Look out for a stunningly handsome old bald prick, wearing plastic sandals with socks, a raincoat with the bottoms cut out of the pockets dribbling out of the corner of his mouth because there's a girl's school next door to Smales Farm! (If I'm being pursued by two gentlemen wearing white dust coats carrying a strait jacket I've never seen them before in my life). Cheers, Simon (sr2)3 points
-
3 points
-
i dunno, i dont deal with bikes. Alex Gee would be the man to talk to. 027 264 72822 points
-
2 points
-
Really? Have you got a place down there like I used that is an AA purely for licencing and registration? Not part of a workshop or anything just a office. The ladies here didnt even mention an inspection, just told me "no speeding" and laughed when I told them I probably couldnt if I tried Even better, its B8EER2 points
-
My girl-friend at the time (now wife) took some pics of me actually working on it. Not sure if welding this close to the petrol can is OSH approved! Definitely OS approved though. Things have moved on a bit now - just welding in the steering shaft support bearing - you can also see the Trans oil cooler I built from an old fridge compressor. cars054 I had trial fitted a seat to determine the pedal placement - note the G-Clamps holding the steering column on - I seem to remember driving it around like this - just because I could - brakes are entirety optional cars0552 points
-
2 points
-
Looked into pushrod sizes, and after seeing the price thought I'd better re-check things, so shot home at lunchtime and re-tested with the head torqued down (onto an old gasket) and took a bit more care measuring. The results are much the same, but I am more confident in spending some coin after measuring twice... With stock pushrod, got the same pattern indicating the rod was a little short (stock rod is 174.75mm... And setting adjustable rod to 177mm, got a nice neat pattern centred on the stem... Now, pushrods have theoretical, actual and gauge lengths (to account for oil holes and where the ball seats). Looking at the Comp Cams website, the actual length is approx 0.017" longer than gauge length, so I need a rod 177mm - 0.017". So maths... 177mm = 6.968" 6.968" - 0.017" = 6.951" And I see the 5/16" Magnum hardened rods come in 6.950" (as a check, 6.950 + 0.017 = 6.967, which = 176.96mm) Sorted, and ordered...2 points
-
2 points
-
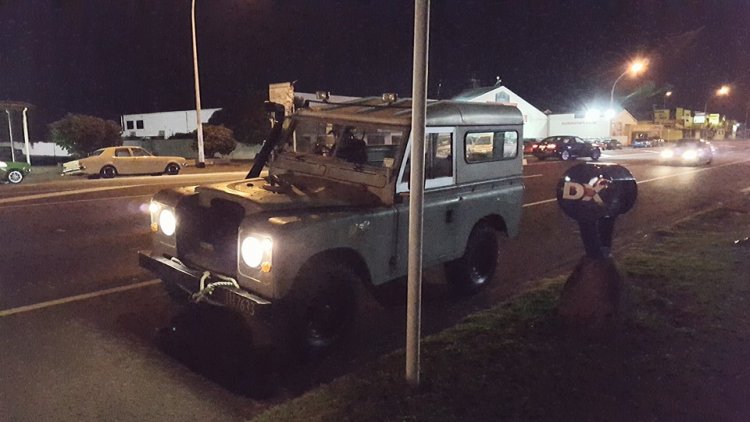
so i managed to find myself two weeks ago checking my messages from a mate to find him sending me a trade me link of an ap5 safari in wanaka. about 3 phone calls later and yup it was mine. he got it running for me so i wouldnt have to pay moon beams in freight so a week goes buy and on the transporter it goes. few more days and WABAM!!!!!!!!!!!!!!!!!!! its now in my garage. along side of my sedan!!! 1st things 1st here are some pictures of it so i think the foot brake doesnt work but the hand brake is very good under the hood is a bit of a mess there is also a bit of bog in the tail gate the spear wheel well had a bit of rust as well and some rust else where and yeah my mum and partner didnt think i would fit them both in the garage. it was a tight fit but they are in there and i cant get to my room or up stairs any more haha my bad thats it for now im sure il find more and il see you on the chit chat side of this latter1 point
-
While not an official oldschool event Caffeine and Classics is generally popular for many oldschoolers and general car enthusiasts. Sunday 24th April (this Sunday) Smales Farm, Cnr Taharoto and Northcote Roads, Takapuna 10:00 onwards (get in around 9:30 to guarantee a park) If we get enough numbers a pre meet can be arranged at Partmaster on Wairau Rd. More info - https://www.facebook.com/CaffeineAndClassics1 point
-
as far as a cert is concerned, if you do that to mount anything, it should have a crush tube if it bolts through the chassis rail.1 point
-
Of course! Monthly meet will always happen.1 point
-
new module worked wonders and now its going well. its running better than it ever has now so thats a bonus.1 point
-
Fuck me a Coon 6 would look lost in a bike that big!! Maybe a triple engined one 3 XR6 Turbo engines, air ride. Actually it would look good in the next Mad Max movie1 point
-
1 point
-
1 point
-
1 point
-
1 point
-
I'll probably head down, I'm too embarrassed to bring the Firebird out with it's bashed up and copper coloured back guard. The Chevy must be oldschool, its got chrome bumpers, bench seat, column shift, leaf springs in the back and uses lots of petrol.............. Not sure how I'm going to pick out Simon (sr2) that description fits most of the guys over 40 who turn up.1 point
-
Can i pay you to register my c50 for me plz ? I always get grumpy people that tell me there is no way it can be registered, blah blah mumble mumble blah. haha.1 point
-
1 point
-
The Dunlop Star-spec's I got for the sebben made the same statement re: standing water and thus far I've found them to be fairly good in the wet, probably because I was expecting them to be shit. That said, it certainly sticks in your mind to tread carefully around standing water.1 point
-
1 point
-
spent ages (like fucking ages) at Nicks shop last night trying to get spark. no joy, the module we were trying to use wouldn't switch the trigger coming from the dizzy pickup. but, i did manage to take the best parts from the two distributors and build one good one so the action plate is now a lot better and the air gap on the pickup is much more consistent. late in the evening we found a module for a 2TG on line so Nick is going to order that today and that should make it go. 2016-04-22_06-25-32 by sheepers, on Flickr1 point
-
Good meet last night, found a 42" inch? Dick Smith branded LED TV on the side of the road not far from the meet. And it seems to work fine too. Bonus.1 point
-
20m is not far to carry stuff Campfire plus damper, marshmallows, potatoes in embers, rabbit stew bubbling in a camp oven hanging over the charcoal on a tripod, port for the dads, I think this is ideal.1 point
-
I'm hoping the steel rockers I bought will fit ok under my stock covers, being smaller (and more expensive) than alloy rollers. There's not too much info on line unfortunately, most people chuck aftermarket (tall) covers on. The polylocks obviously hit the baffles on a test fit though, so I 'borrowed' some playdoh from my girls to see what the score was... No too bad really, decided to try knocking some holes in for clearance. Just used a 1" hole saw in the supercheap drill press... And cleaned them up a bit... And clearance looks ok. No idea if these holes will affect the purpose of the baffles, will see how it goes. I'll recheck clearances with more clay after the valve lash is set, while rotating the engine. If I had to I could rivet some stepped baffle plates in over these holes I guess... And stripped the covers for some fresh paint, hope it sticks as well as this stuff did, it was out of a rattle can and took a lot of effort to get off. Wish I could remember the brand it had cured really well.. Getting bummed about the short evenings now too, makes it harder to chuck paint around, so will be a weekend job...1 point
-
I really like that dyno sheet with the top tips at the bottom. It matches the car perfectly!1 point
-
Now, the hinge side of things, bit of a mission. first I had to cut what was left of the old hinge out. I managed to separate the hinge cleanly from the 3rd rivet, and drill a hole through the center of it, which would help in lining the new hinge up in the right place, after much beating and grinding I was happy with how the hinge was sitting. then I made up a patch to fill in the gaps welded it in place and ground smooth. using the dremel on the inside so I could fit another even smaller patch to the inside panel. the steel I'm using is actually a little thicker than the vw stuff, but this is not a area I want to crack in the future. I also stuck a few spot welds between them because I could and just in case. the inside had to be smoothed out so the hinge would sit right and I also welded up the 3rd hole/mess once the hinge could be bolted in place. like this! nearly a door again. stay tuned for next weeks adventure!!!!1 point
-
# 1 daughter was sick today, and I kindly offered to stay home to care for her and let wifey go to work. Was awesome, got to sleep in, watch movies with a 6 yr old, score some Dad points, AND blag some bonus time in the shed. Having (slightly) sick kids is a great gig... Here's the temporary solid lifter I'd bodged up to check the pushrods, just washers and shims cut from a speights can to pack it out... And I pulled the head to refit the valve spring and new gasket, and gave the heads the first torque after lubing new head bolts and bushing/washers with ARP torque assembly goo. Never used this before, seems good stuff, it just 'felt' right torquing up the bolts... Also fitted water pump as the gasket had arrived... It's really starting to come together now, should probably do a lot of the remaining fiddly jobs while I'm waiting for those pushrods, though it'll seem tedious after playing with shiny engine bits...1 point
-
Dinitrol. dinitrol fucking everywhere. 2016-04-12_05-51-56 by sheepers, on Flickr 2016-04-12_05-52-05 by sheepers, on Flickr1 point
-
Had to check pushrod length before I order hardened ones. Since I have a lightweight (ie cheap) adjustable pushrod and didn't want to break it, I tried fitting a spring from the old heads, but it was about the same weight as the new ones, so tried just the inner with some washers. Didn't work worth a damn. As soon as I screwed up the locknut, instead of the rocker tightening on the pushrod, the spring compressed, until the valve hit the piston. Failed bodge... So just decided to use what I had. I'd packed an old lifter with washers so it was effectively a solid one and wouldn't compress... With a stock pushrod (approx 174mm) the pattern the roller made on a bit of vivid maker was ok, but a little close to the intake side, indicating the rod is too short. This would probably be fine, but I wanted to experiment while I had the chance... Screwed the adjustable rod out to around 180mm and the mark was too far towards the exhaust side (blurry as shit sorry)... And at around 177mm it was spot on, perfect narrow pattern in the middle of the valve stem. Just got to order some hardened rods that are approximately this length and I can start properly assembling things... Yet to see what lengths are available, and what the imperial equivalents are. Bit of a bugger waiting for this but couldn't check things till I had it together...1 point
-
Cleaned up the block in preparation for her new top end, while I could turn it upside down and not get shit in everything. Started chasing out the threads but I was concerned my cheap tap was going to screw up the threads (felt like it was cutting too much) so backed out, and cut down an old toothbrush to use instead. Worked well with a bit of solvent to flush out any bits... And the pistons had a good costing of carbon. I used a sharpened chopstick to scrape it off (soft wood so no scratches) and cleaned up with a bit of brakleen... Then an oily rag to clean up any debris. And loosely fitted the first head, just to see how she looked...1 point
-
been doing lots of little bits and pieces. finished painting the last of the engine bay bits. these bits are the oil filler cap, the support bracket between the intake and the cam cover and the radiator over flow bottle. so now those bits are on the car and the overflow is plumbed up. the only thing left to do in the engine bay is plug in the windscreen washer pump and run a hose for the windscreen washers. I'm pretty sure thats all? I've started on the dash resurrection now. all the plastic dash bits had been painted with some crap paint so I've had to very carefully bead blast them all and give them a coat of VHT plastic dye. they've come up looking really good but one of the parts that always cracks on celicas had cracked and someone had tried to fix it but they made the plastic deform around the break so now I've glued it back together but it looks shit. what else? the dash pad ill be putting in this car will be the one out of the V8. it was re-covered in auz about 15 years ago and it looks fine but I'm getting a dash fully redone at dashboard restorations and ill put that into the V8 and use the V8 dash in this car. all the hearer box is back in and I've put new foam seals on all the joints. 'oh, and I've got new inner and outer belt line seals for this car and they just turned up today so i can put them on as well. oh and also I've found someone in auz with an original pair of seat belts that they are willing to sell so they are on their way too. 2016-04-07_06-51-00 by sheepers, on Flickr 2016-04-07_06-51-46 by sheepers, on Flickr 2016-04-07_06-52-02 by sheepers, on Flickr 2016-04-07_07-00-13 by sheepers, on Flickr1 point
-
fuck this thing need a massive dose of low. anywho i installed radiator shroud. you can see the fan is a bit closer to the radiator and might do a bit more than move air around itself. 2016-03-20_06-18-07 by sheepers, on Flickr 2016-03-20_06-17-53 by sheepers, on Flickr1 point
-
modified a fan shroud to fit. it didn't have one before and proper TA23 fan shrouds are pretty hard to come by so i made this one fit. then i sand blasted it and I'm in the process of painting it right now, just waiting for the primer to flash off. the other thing is that the fan sits a long away from the radiator and i wasn't happy with that so i made some spacers to move the fan forward about 30mm. now it will sit inside the shroud and actually do something. i should also paint the fan black i suppose. 2016-03-18_07-08-02 by sheepers, on Flickr 2016-03-18_07-08-11 by sheepers, on Flickr 2016-03-18_07-08-41 by sheepers, on Flickr 2016-03-19_12-57-34 by sheepers, on Flickr 2016-03-19_01-35-53 by sheepers, on Flickr 2016-03-19_02-21-48 by sheepers, on Flickr1 point
-
Hi people, I would like to title this post: The success of rubber and the failure of man. Last trackday at Taupo - I only got a handful of laps and managed a 1:56 which is a new personal best! So I knew the car had some more time in it with a bit more practice. This thursday just gone, I gave it another attempt. With some better lines, I managed to scrub a whole extra second off my time, I was super chuffed with that! One of the differences to last time though, is more negative camber in the front (going from 0, to -2 degrees) So the car was feeling great, the initial turn in was superb. I was feeling suuper confident, doing some kamakaze runs into the sweeper which I overcooked a few times trying to brake too late... And then for the first time at a trackday this happened... Woops! I had a huge lockup, and flat spotted my front left tire down past the tread level. It felt like I was driving on a cube, not ideal. So off I go to the local tire shop. "Hi, do you have any 205/50/15?" "Sorry dont stock these" "wtf? Shit." "Try the place around the corner" Off to the second place, same answer... nothing in stock.... shit shit shit. until... "Oh, I've got some second hand semi slicks though" "Go on" "Two R888s for $60 fitted" "Done deal!!" Frigging amazing! So I get them fitted on the front wheels, then smug face back to the track. After running out of people to smugface to while telling my story, head back out... Very mindful that I'd have a lot more grip up front but still the same out back... So I wound out a bunch of the rear bias. Out on track... Holy shit! Sector times keep tumbling and tumbling, GPS is showing going faster and faster through sectors. Life is good I had a few... err.... incidents while getting used to the different grip level Getting more confident on the brakes... Sector times dropping like crazy... And theeeennnn.... Smoke coming from the front left, brake fluid smell and a knocking noise... shit I hope this isnt the wheel hitting the caliper or something. Back to the pits... I take the wheel off, and all is well. What made that noise and smoke then? Oh... Oh fffs. GNNARRRRR! My first experience with semis, over in about an hour because I noobed the braking again. All smugness instantly erased from my face haha. My fastest lap was only 0.2 seconds quicker than road tires, because it was hard to string a whole lap together without having the rear of the car come loose with the grip imbalance. Regardless, I was absolutely fizzing about how well the car ran. The 8000+ rpm rev limit now has just brought the car alive. I called it a day, and headed back down to the tire shop with my tail between my legs. Feeling like an absolute noob for wrecking the tires they fitted about an hour ago. "So, ahhh... I wrecked one of the tires, my bad. Do you have anything like a 195 or 185 that I could get home on? Just a normal road tire" "Yeah I think we've got some 185s here, same deal as before... $60 fitted" "done deal!" While he was taking the semis off, he said "Oh yep, this one is flat spotted pretty bad! Leave this one with me, and take one of these others so you've still got a good pair" Holy crap, could an experience with a tire shop possibly get any better? So with my car amazingly intact, and a decent pair of second hand R888s in the boot. I head off for another 2 days of tootling around the central North Island, as pictured below. Smashed through a few tanks of gas, with the engine running like an absolute dream. Ran 90% of the time with cruise control on, and enjoyed the scenery. I made it back to Auckland in one peice with no major issues. Best trackday experience ever! Big thanks to Tom / Testament for helping me out over the weekend.1 point
-
1 point
-
it also came with the likes of white wall flappers and a box of spear parts and a couple of books but i was juts going threw it all and found this so put it on. oh and it even came with these hopfully i find some time and chuck them on.1 point
-
here are some more photos of the bug the battery has been moved to behind the seat. going to need some long ass jumper leads if any one ever wants a jump and if you look at the back bumper here it looks a bit broken..... well yeah it was broken.... some one didnt fix the bolt they just got out a welder so i got the grinder out and fixed that last night and it had all this gay straw all over the place so yea removed all that. enough to wrap up some hay now. and yup it sure is the company run about found out what the straps on the side are good for hanging my glue gun on! perfect even fits a crappy holden seat in it. oh and yeah i did this sadly gave up and just cut the handle so i can try and fix why its not opening. so hope to fix that situation later today then go buy u new handle. dam it (face palm)1 point
This leaderboard is set to Auckland/GMT+12:00


