
Leaderboard


Popular Content
Showing content with the highest reputation on 08/31/15 in all areas
-
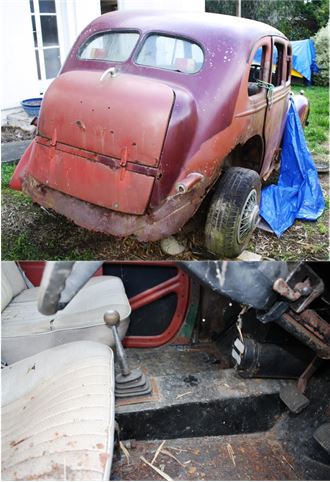
Suddenly our son is 19 years old; the latest race car (135I BMW) doesn’t need me working on it every night and Sharon’s dropping none too subtle hints about cleaning up the back yard. Could it be time for a Rigamortice resurrection! With some trepidation I pulled off the obligatory blue Warehouse tarpaulin and surveyed the remains of a car that I’d bought 43 years ago…. It was obvious that the ravages of time and damage from the last accident had reduced my old ride Rigamortice to the stage where she needed one big resto job…….
 11 points
 -
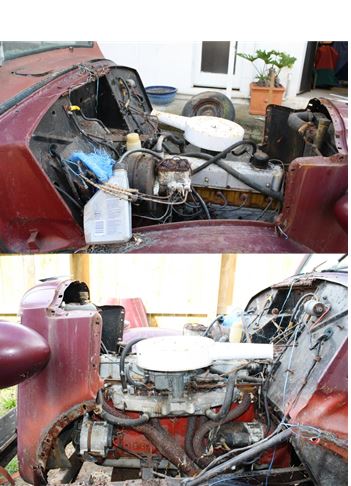
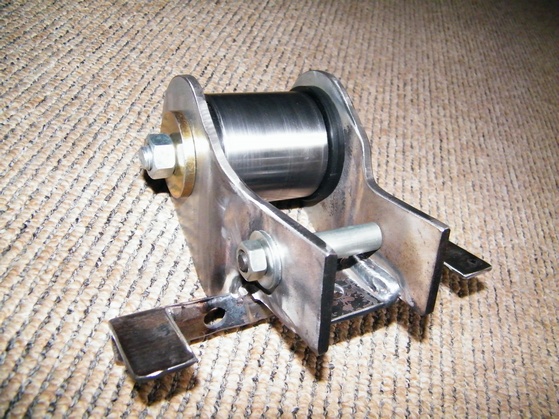
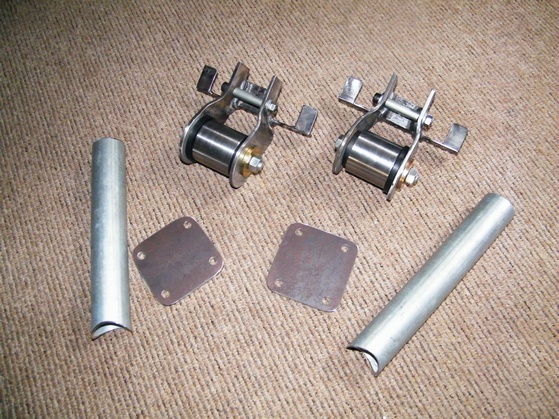
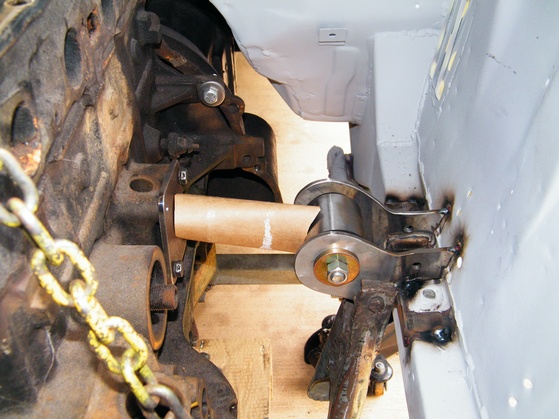
Decided to make my own chassis mounted engine mounts The machining begins many hours later mocking up for tubes to be scalloped
9 points
-
Made it to hanmer and back completely without fuss. I probably should have got a wheel alignment and bled the brakes again, but she was sweet. Brewing up a coffee with the thermette after a hard bike ride on Saturday..9 points
-
Here are my bicycles that I ride (or at least would like to) on a regular basis. Thought I'd post some pictures as some of you may be interested: The first is a Schwinn Fair Lady. The next is my trusty old Raleigh 20. Factory sport model with no luggage rack haha. I picked up a brand new old stock Brooks saddle for it in Napier during Hawkes Boes last year. I still need to give it a proper going over and improve the brakes, gets the gears working better and polish some parts again. I picked up another bicycle a few weeks ago. It's a Morrison something-or-rather (stickers say Mustang but that doesn't seem right to me) featuring a handy peep mirror, pennant flags (Kaikohe HardKore) and whitewall tyres. The rear hub seems to be seized but I will open it up and see what's going on in there. I'd like to be able to take it out for a spin. In the first picture of the yellow bicycle you can see another Raleigh 20 in purple. This belongs to another forum member who will be testing the frame strength at upcoming events.6 points
-
Pulled the cab off the chassis today. Flipped the chassis upside down so I can finish welding the c-notch. Once that's done it can probably go to get sandblasted. Heaps of room under the bonnet for a supercharger6 points
-
^yuck if you are only running 7-12psi. stick with 10:1. even if you cant quite get that much boost out of it, a few psi less isn't going to the end of the world. will have a more responsive engine with the extra compression, and wont lose much power. ramp the timing off aggressively past your max boost, so if it over boosts no drama. plus keep good gas in it and will be sweet5 points
-
Monty Checking out how grippy lol Not sure if please with his new living room ornaments.. Thanks to MM for the springs, we swapped my Original alloys for - sent them off monday morning, and received the springs along with the carbs from Japan on Thursday.. Put the springs on Saturday after work... Discuss; http://oldschool.co....ith-added-moss/5 points
-
Took this to OS Hamner meat's. 300km trip. BC Coilovers are amazing. Had them on full hard with 3 people and a fully loaded car and it was good! Need to raise motor as it had a few hits, 1 overfull gearbox dumped its excess onto exhaust while overtaking and made some smoke and it needs a longer diff as 3800rpm is not fun for 1.5hours each way. Photo By BeardedBastardPhotography Aka Beachlander4 points
-
Reunited and it feels so good. Feels weird tbh, happiness of getting it back/sadness of its state of repair. First job is done anyway, replacing smashed drivers door glass. I suspect the clips holding the lifter winder rusted out allowing the window to drop inside the door. Lucky I had spare clips. Something interesting I forgot about this car - It was rustproofed when new in Singapore by a company called Tuff-Kote. The interior of all the panels is coated with a tar like substance which is probably what has saved this girl. Still has rust however especially around windscreen. Will cross that bridge when I come to it, just happy to have it back.4 points
-
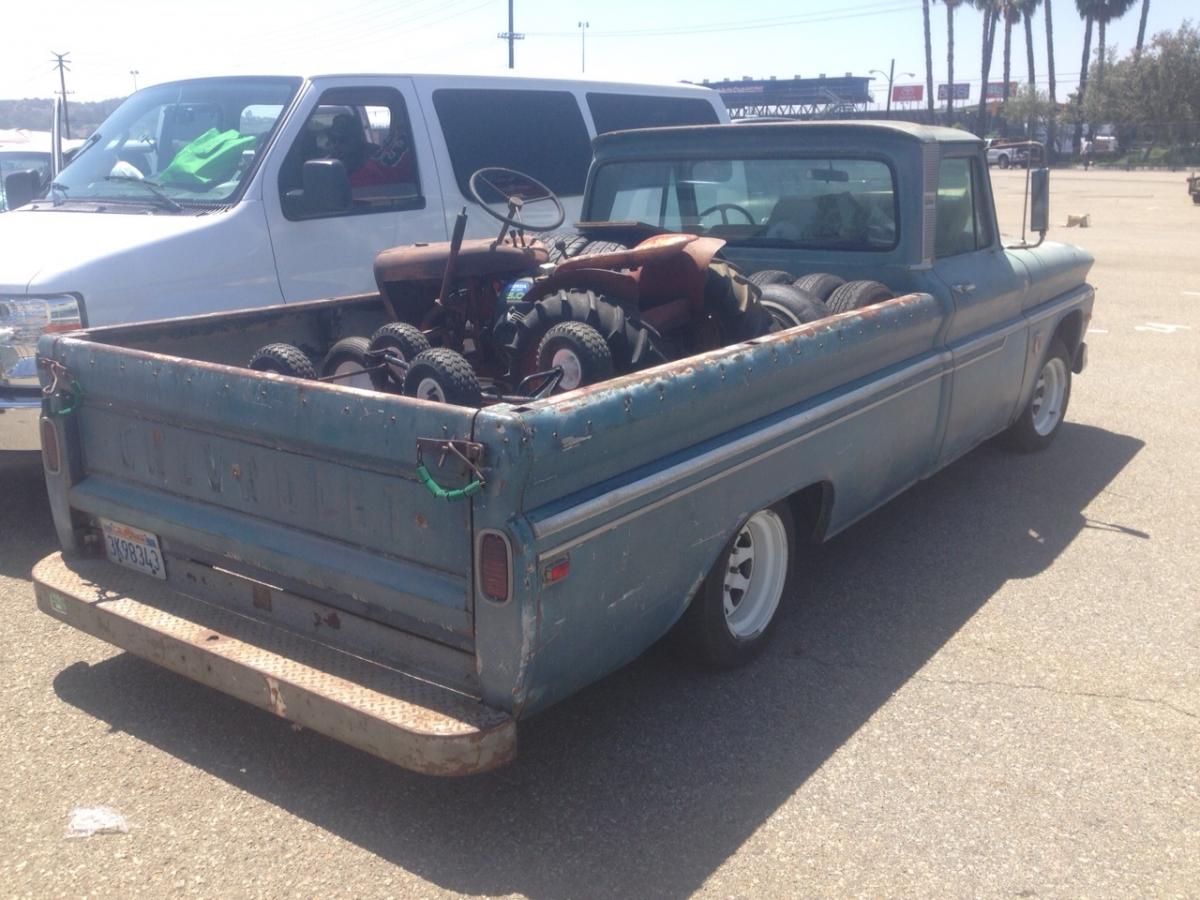
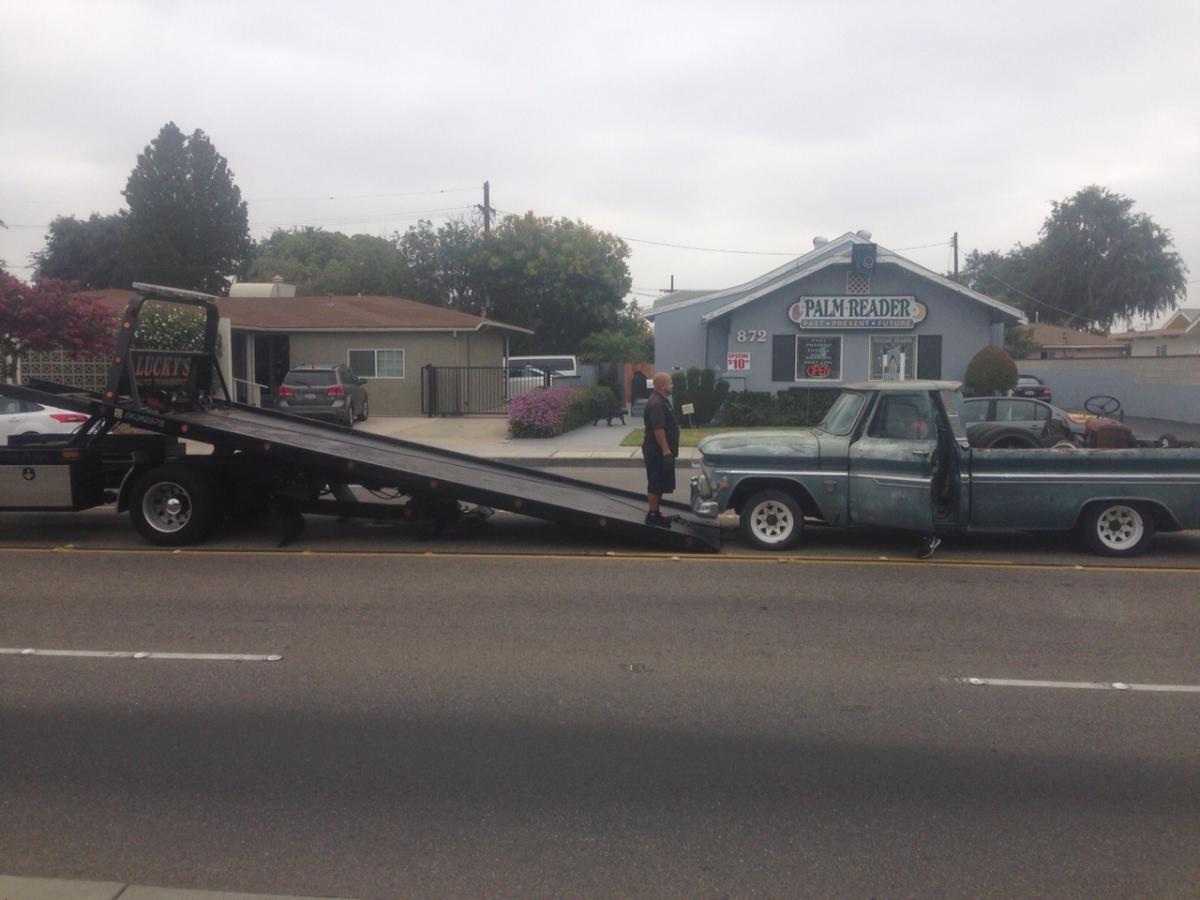
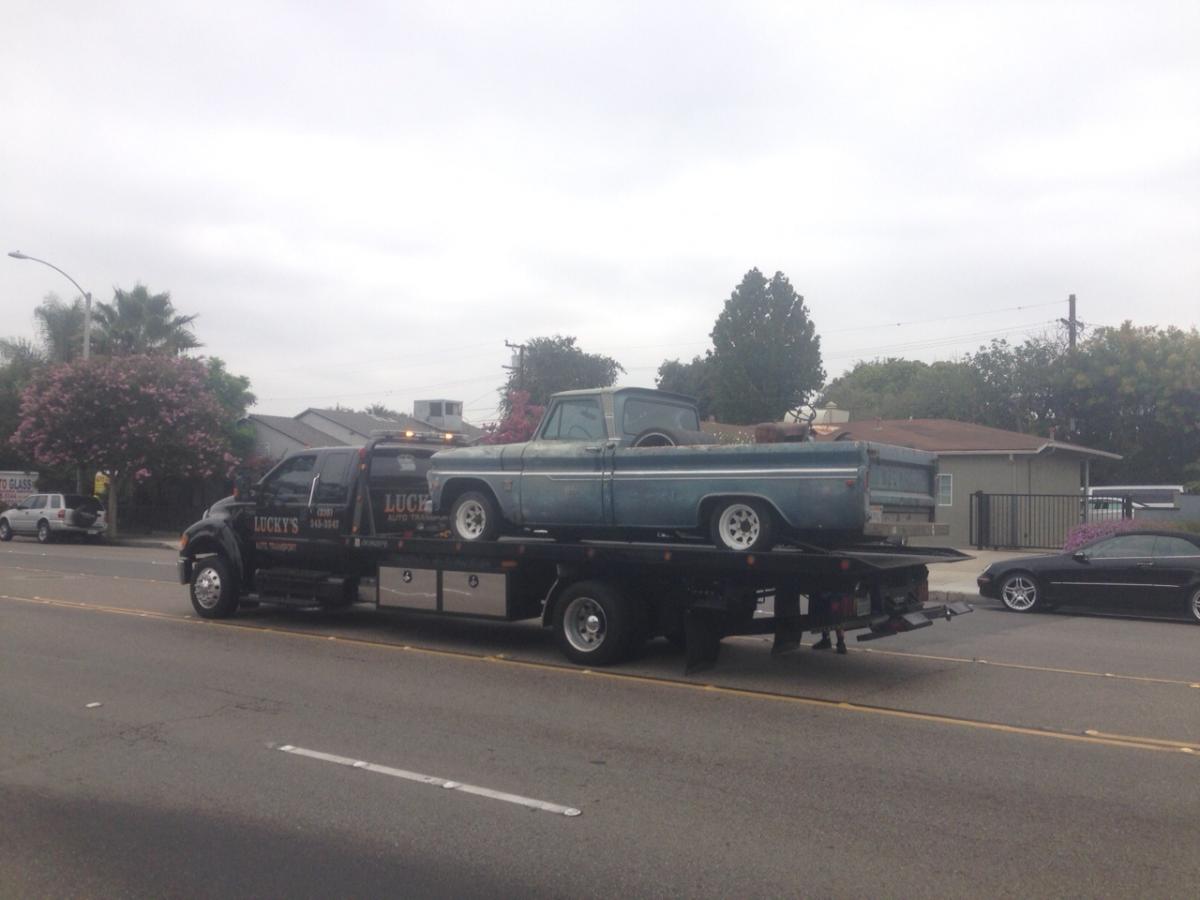
Hi, Just got back from the States. Picked up a C10 Fleetside truck, Custom cab, big window, factory v8 engine, manual. Found it at Pomona swap meet, was one of the more realistic priced car/trucks there. Bought it off some nice Spanish low riders. Pilled heaps of stuff on the back and drove it 100 miles to the next hotel. Got hold of Lucky's towing and had it sent to the shippers to be packed with some other crap and sent back to NZ. Also while there visited a lot of rod shops and car places. Picked up a airbag kit for it, drop spindles and stud conversion. which I'll be installing when it arrives in NZ. Now its just a waiting game. Discuasion Thread
3 points
-
Drove the car for the second time ever since it landed, from the panel shop back to compliance. Already noticed a couple of things that will need fixing interior-wise, but I'll cross that bridge when the time is right. Marvelled at how smooth and rattle-free everything is, having less than 100,000km will do that I suppose. Discuss: http://oldschool.co....1-sc-chit-chat/3 points
-
Awesome. Can I book my machine in for a service?3 points
-
OK so just to confirm- after I do this work I would have to send vehicle to tsda to have tags reattached?I do know when I had my safari I went to vtnz and the guy removed the body tag and refixed a new one to the chassis for me (I was doing a body swap) Could I rock up with car on trailer and have them do this in my case to avoid any issues? Sorry if it's not your area..just don't want to fuck things by being sloppy Edit. Just phoned nzta (spoke to lots of peoplr and got put on hold lots) and they said that legally I'm not allowed to remove those tags at all SO the most fool proof way I can do this is to trailer the vehicle to a vtnz or other agent and they will remove the tags and HOLD ONTO THEM for me until I can take car back to have them refixed in position. What a load of shit.3 points
-
Hey team I am new to this forum business but I thought that I'll give it a shot! The ke30 has been in the family for a good 17 or so years ever since my sister purchased it as her first car. It was pretty much standard, rocking a 3k and a four speed manual gearbox. It also had a lovely mustard yellow paint job. While in Kate's (sister) possession she had it painted ford blue, swaped out the engine and gearbox for a 4k and a five speed manual and put on a sweet set of 14" tridents. The car was then daily driven for around four years until Kate decided to upgrade to a newer car. However she could not bare to let the trusty old Rolla go so it resided on mums lawn for the next three odd years slowly but surely being eaten away by rust. When I was 14 I had finally managed to convince her to hand the ke30 down to me, cheers sis! Having no money though the best thing I could do was to get into dry storage at the old mans as it was now no way warrantable and I had already decided it was going to be a big restoration project. Many years had past until last year when I decided enough was enough! And managed to convince the old fella to make the body rust free for a few boxes of beer, he is a panel beater after all. So currently the car is now fully rust free and strait all primed up for a coat of paint this summer. I have also purchased a near complete worked 5k, was missing the block and one con-rod. I'm sure you guys can put two and two together there. I now have the block just need to get it bored out and skimmed, haven't located a set of stronger con-rods yet. Still a lot to do on the car and a long road ahead but I'll keep chipping away and keep this thread up dated!! Also still trying to figure out how to upload pics but I'll upload some when I do!3 points
-
Nearly forgot... I scored an AW/AE/KP long boss kit from Richy at this month's Burgerboes, which now gives me the option of fitting an aftermarket steering wheel to the New Kid. Cheers dude! And after wanting a Twos R Us engine cover gas prop kit for ages, buying one for the previous car, and being quietly impressed by its simple yet functional design it became a mandatory upgrade for the new AW11. Also in the same shipment: a K&N drop-in filtercharger (on special) and TGP key blank (cheap). Discuss: http://oldschool.co....1-sc-chit-chat/3 points
-
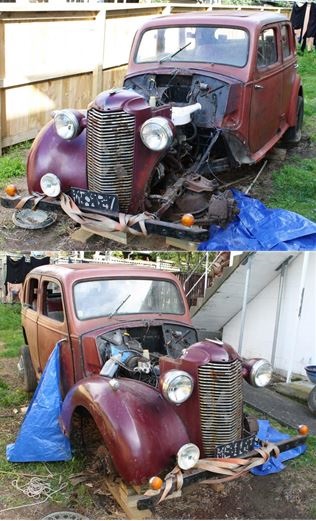
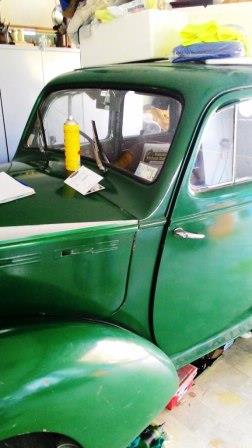
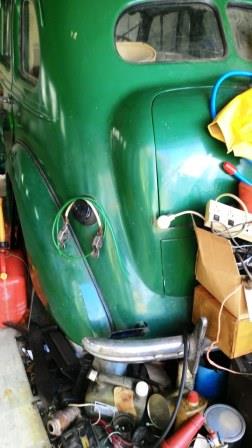
When I finally got the jack out and had a good look at the lower rear section of Rigamortice’s shell the panic started to set in. There was no denying how bent she was as a result of the L300’s untimely demise but my early teenage attempts at rust repairs, (galv sheet brazed with an overlap) had created a corrosive time bomb; after too long in the back yard the lower part old girl’s rear end had simply dissolved. My initial brainstorm was why not reincarnate Rigamortice as the world’s first 1947 J14 Vauxhall ute? Problem was I didn’t need a ute and if I did it would have to be certified which would involve Rigamortice and I feeling obliged to attempt to be nice again to the “angry certification men”. Despite having experience with certifying a number of tarmac rally cars, (in Targa we drive on public roads in the touring stages) having to compromise a restoration project would have been as pointless as the rules and regulations the “angry certification men” would have been trying to make us adhere to. Sitting in Rigamortice in the back yard at 2:30 am in the morning after a ¼ bottle of Wild turkey (I’m a cheap drunk) the solution was as drastic as it was obvious, I needed to find a donor shell. The next year was spent visiting smash palace, following up false leads, finding cars in dilapidated conditions, falling in love with complete cars that were crying out for original restoration and after almost giving up I was finally given a lead to a car that was for sale up North. Que the dramatic background music... "In an ordinary garage, on an ordinary suburban street, in an ordinary town, I found...... this….." Sometimes you just get lucky……….. My initial impression was that I’d found yet another original car in need of restoration until I looked closer. Although appearing to be in good condition the body panels didn’t line up properly and it was confirmed when I was told that the car had been rebuilt (obviously by an enthusiastic amateur) from a rust heap some 15-20 years ago. Sometimes you just get lucky, I’d just found Rigamortice’s donor shell and unbelievably it was even the original color. (To be honest it was more than too good to be true, it was downright bloody scary!).
2 points
-
Right hand drive conversion?2 points
-
2 points
-
nvmyvl that would be awesome, they're not deep, just from cups rubbing against them etc... Invite for Shed tour/ regulars I know : This thing needs a workout, Shed coffee's in a couple of weeks time, weekend morning/afternoon better? Kempy2 points
-
The plans I have have got wetback options. They have a 20mm copper tube entering into the bottom of the burn tube (longer burn tube more like the first one pictured on here) just above the old disc brake, it runs up the center and exits out the top beside the flue. Apparently one tube runs a modern style radiator 1.8m long up to 5m away from the burner. Could fit a few wetback tubes in there and run your hot water cylinder plus a few radiators in the house while the main unit heats the workshop, Everyone wins2 points
-
sorry for late reply, have been uber busy. these ones ^ look like they would be ok. the ones mentioned in the newsletter that are no good, are adjustable- basically a threaded bar that you use 2 jam nuts to hold the tie rod end on, so it can be 80mm away from the steering arm, which is a cockup for a number of reasons2 points
-
I expext this to come out as a thai spec drag scooter thanks2 points
-
Also while talking to Tom/VG about pick up, he mentioned that he had the bones of a scooter that he may sell, so a deal was made and I added this beast of a AZ50 to my collection It's got AN125 suspension front and rear, a good engine and a live rego, so once I figure out the wiring it'll be a goer. At this point the plan in my head was to put the engine/suspension/plate onto the ZZ and the ZZ front end onto Sandy's SJ, had thoughts of a simple swap taking a couple of hours max, more on this soon... Today's effort = 399.9k round trip to go pick them up Fairly lightweight trailer, Altezza still didn't like towing it uphill. Got the scoots back to Gisborne with no issues, unloaded them into the shed and even though I really wanted to go home and eat I just had to have a bit of a play. Well it turns out that my plan up there isn't going to work quite as I had imagined, as it turns out Suzuki decided to change things up a bit with the AZ50, the 2 bikes have completely different frames and engine mount locations, no chance in hell of bolting the AZ engine into the ZZ Figured in that case I might as well try to just get the ZZ going, hooked up a battery, flicked the key on, pulled the brake and pushed the starter = nothing. Fitted the kick start which ominously was in the helmet hole and tried to kick it over, nothing, no engagement, grabbed the fan and tried to turn it by hand, it locks up every turn and clunks a lot, no sign of compression and a metallic jingly rattle from the variator side...I do believe it's fucked! Also the brake disk is bent, and the front wheel has a ton of play, so might not even be able to use the front end on the SJ. The plan now = 2000 Suzuki AZ50 ZZ Frankenscooter/Aliexpress special! Think naked Honda Ruckus style like VG had started doing, but with the finest (read cheapest) LED lights, air filter, exhaust and anything else that catches my eye that Aliexpress can provide! And with me attempting to wire it all up results should be hilarious! Also as I don't have a welder there is likely going to be a LOT of cable ties and creative bolt on bits involved... Hopefully I'll be able to salvage at least some bits off of the ZZ to use on it. Check back tomorrow for progress and what I find when I start stripping the ZZ. For those of you that made it through my rambling attempt at a build thread have a gold star TL;DR? Tough.2 points
-
Asked around a few places locally, but haven't found much more than a Passola needing a coil "at least" and a crashed Jog -I may still buy both to combine. So I turned to trademe, where I came across a complete Sepia ZZ being offered as a parts bike, which I snapped up as I was thinking it can't be that bad... Note the "spoiler" instead of a carrier rack and the high stop light Suzuki was so proud of they emblazoned the front with a sticker telling you about it haha I mentioned it in spam the other day to see if any one would be able to get it at least closer to Gisborne from Tauranga and if Mr. Grumble would be keen to store it a couple days if I could get it to Whakatane. As it turned out he was going to Tauranga a few days later (Friday just gone) and would be able to pick it up for me as well as store it! Sounds like it was an interesting area to pick it up from too. So yeah BIG thanks to VG for picking it up!2 points
-
I haven't updated this for a few weeks but there has been quite a bit happening in the background, my rear calliper mounts have been made, they are getting a small bit of machining done but I should have them back this week, my 3D printed steering arms have also been done and are due to arrive in the next couple of days but this is a picture of them I have a plan for checking the amount of toe change which I will work through once they arrive. I have also made new engine mounts and a new crossmember that sits a bit higher And how it will sit I have test fitted it and it is all looking good so I will get some paint on it then get it all mounted up and finally I had some new wheels arrive old one on the left, new one on the right they are Koya BN-Teks, pretty much look identical to the ones I had but without all the bolts. So these ones have a load rating on them so are good for cert. Bit of a shame that I can't use the old ones but there were some other issues around those anyway which these fix as well.2 points
-
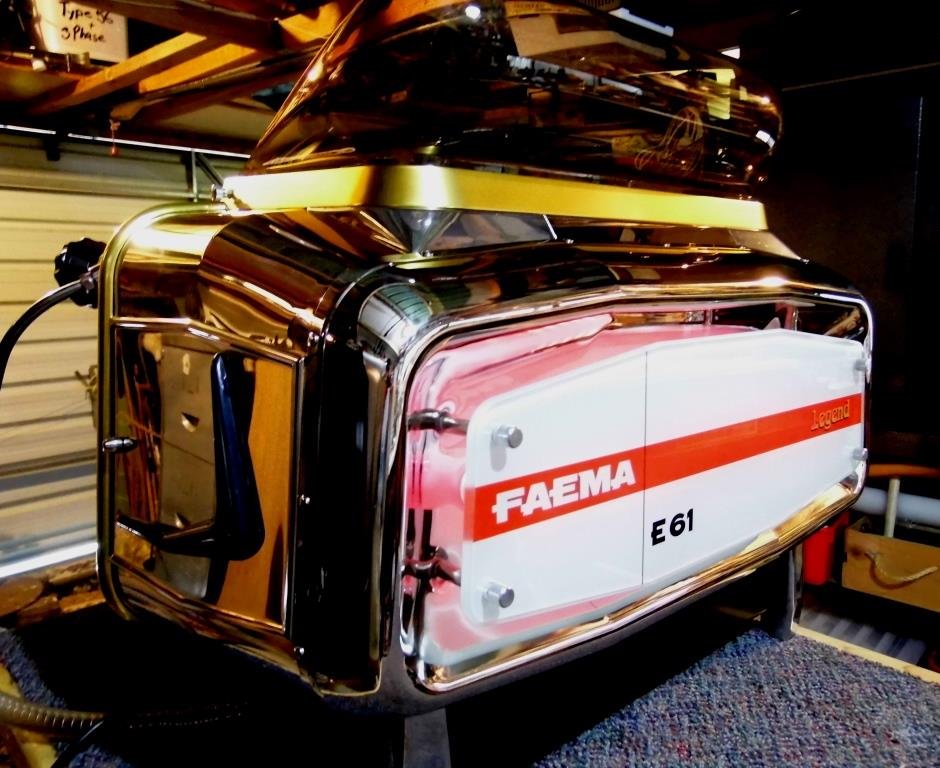
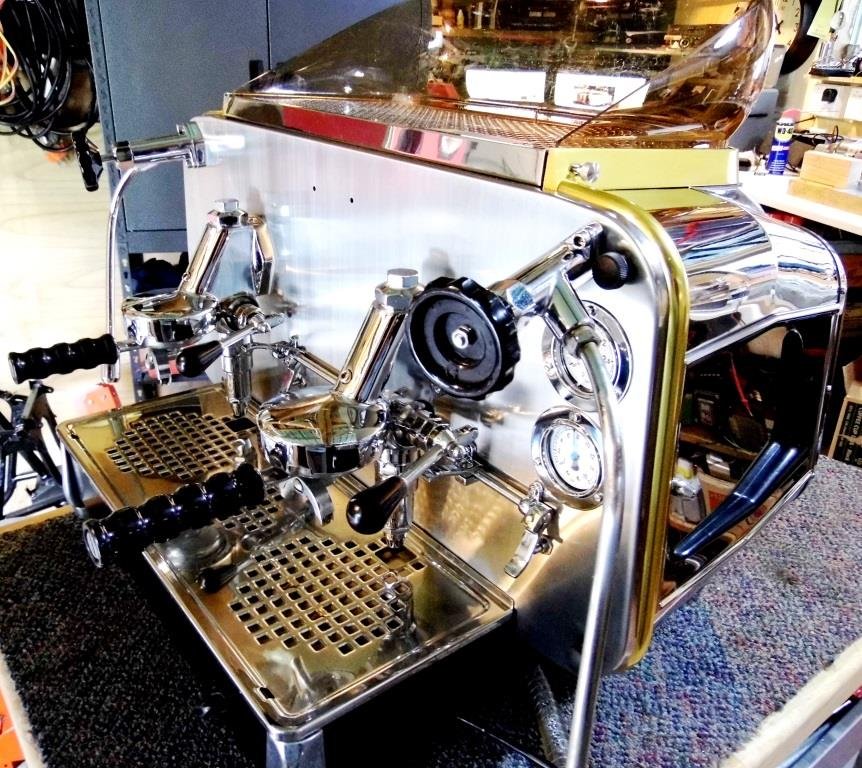
On their way mate. Here's a couple of pics with the stainless all polished up and after a couple of coffee's made. Still have the final decals and brass nameplate to go on as well as the flexible steam wand, various bottom section covers and somehow polish the scratches out of the perspex cup holder on the top. I like the bottom section left black as you see it now with the under body showing so I'm pondering painting the stainless covers black... ( the covers you see with 'FAEMA" written on them in the first phoyo on page one)
2 points
-
Here is the engine after I cleaned and painted it.2 points
-
It could have been the plugs, and if it was I'd say that's the way it was when Brad got it. It could also have been a bunch of other things, definitely not worth dwelling upon. I did about 50k's in it this afternoon, and apart from the high idle (around 1500rpm) with a slight burble, it's been faultless . Oil pressure was great and temp was rock solid (although the factory temp gauge is shit-house, I'll have to de-linearise it). The thing is so damn responsive it's hard to keep out of boost. I just want to keep driving it, but I've had to come to uni to get some work done... Still, I live about 35 minutes from uni, so I've got the drive home to look forward to . I think I'll tidy it up further, fix a bunch of interior squeaks and rattles and enjoy it for a couple of weeks.... But the (hopefully tasteful) mods are coming2 points
-
Whatever you do, don't build one of these .... and definitely don't stick a comfy little seat between it and the work you went out into the shed to undertake You will find your arse being drawn towards the seat while you start to look for a jobs you can do sitting down. Then fuck it - you just sit down anyway and enjoy the heat This free heat. You sit amused, slightly amazed even. How can a simple flame burn with the intensity of a blast furnace with no fuckin power cord? Physics and ummmm other shit you knowingly nod. Fuck off Johnny - youtube more like it, lol. As you heat up a wry grin creeps across your dial ... that smug look one gets when they know that they have done something ... accomplished something that flies in the face of every fucking power company and probably council. You have made a source of free heat that runs friggin hot, extremely clean on stuff most have to pay to get taken away. Scrap metal, grinder and an old arc welder ... I fucking luv it!1 point
-
You might be able to make the calipers and discs you have work with a new bracket design. Two pieces of thicker steel welded together(no little upright bit) or with solid spacers to set the caliper alignment could work. Do yours look like this - the scarebird kit for 64 Chev? Here is how I did the ones on the Mercury. 10mm plate which can be drilled and tapped directly. More in build thread.1 point
-
The ZZ exhaust bolts straight onto sj50 and gives a bit of a performance improvement. I have one on my nifty fifty which has a SJ50 engine in it. known as the Niftsj in our household.1 point
-
I got to say Mazda and Brap Brap on a Hot Rod Show. /rotas4lyfe.1 point
-
How bad are the scratches? I have a product i use at work called plexus. I will have a look and see if there is any left. If so, i will flick you a can..1 point
-
Today has been a day of fails, wins and then more fails! Cleared and covered my bench this morning ready to crack into things Started by mostly stripping the ZZ down, labelling the loom etc as I went Turns out the starter does work, the wire is brittle and had snapped by the button. Starter doesn't engage on either engine though. Didn't take much investigating to find what had stopped the ZZ Turns over nicely by hand now, and has good compression. Had a go at deciphering the wiring, managed to get spark but only with a battery hooked up, so gave it a squirt of either I then proceeded to fuck it up trying to get spark without a battery and I believe I have killed the CDI unit or possibly/less likely the coil The ZZ doesn't have a CDI type ignition system either so I can't rob it for one. Using a mates Fluke meter we have figured it is putting out voltage from both the stator wires that it should be, so at least I haven't fried that! Tried the ZZ exhaust, it's going to need to be cut and modded to fit, but a couple of inches of tube and removal of half it's bracket should sort it. As it sits now. Am really racking my brain on what to do with the frame, as while the fuel tank Tom has made for it is neat, it's just too small for what I want to do, and I'm also thinking of trying to find an oil pump for it to go back to selfmix.1 point
-
Sorry I should've explained better. Is 25mm from carb to booster. Excluding trumpets. The one currently on the back is a cut down one thats about 12mm1 point
-
I probably cant comment on that, but in a delica! Haha crazy... Met a guy on a sports bike on a dirt road in the middle of nowhere the other day, and see the odd low budget clapped out overlanders. These people have the better stories, the fancy ones have it too easy1 point
-
I like the front fork ends will you be adding any lug detail? If anyone is wondering $700 is a great price for a full custom bicycle1 point
-
^ that doesnt look rainy at all! after that the filming thing in Kumeu was pretty funny, Mr 'John' Kiwi808 has a special cameo, supoposedly will be the September 17th episode Sky channel 83, Face TV, every Thursday at 9:00PM and every Saturday at 9:30AM, or http://www.thehotrodshow.com/1 point
-
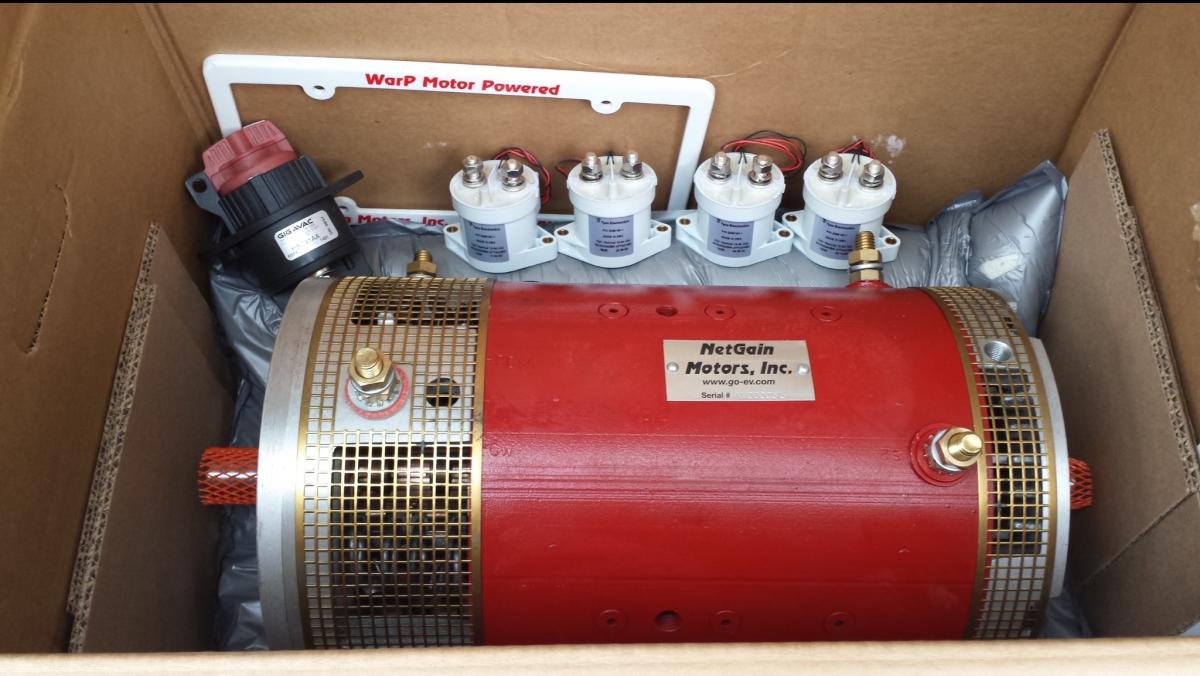
Today we received some really good news and bits! Firstly I got the bonnet chrome installed! Although small really complements the car and makes it complete. I also recieved the WarP 9 motors, Tyco EVC500 contactors and maintenance switch which will be off to the engineer next week to get installed! We also meet with our biggest sponsor Peter, the CEO of ETCO who has opened big oppurtunities for the KEV70!
1 point
-
Turns out this particular cert men agree'd that they should be disabled due to them being cunts in general, and that they don't function correctly on a lowered ute, so in my case, it was allll good that it had been removed.1 point
-
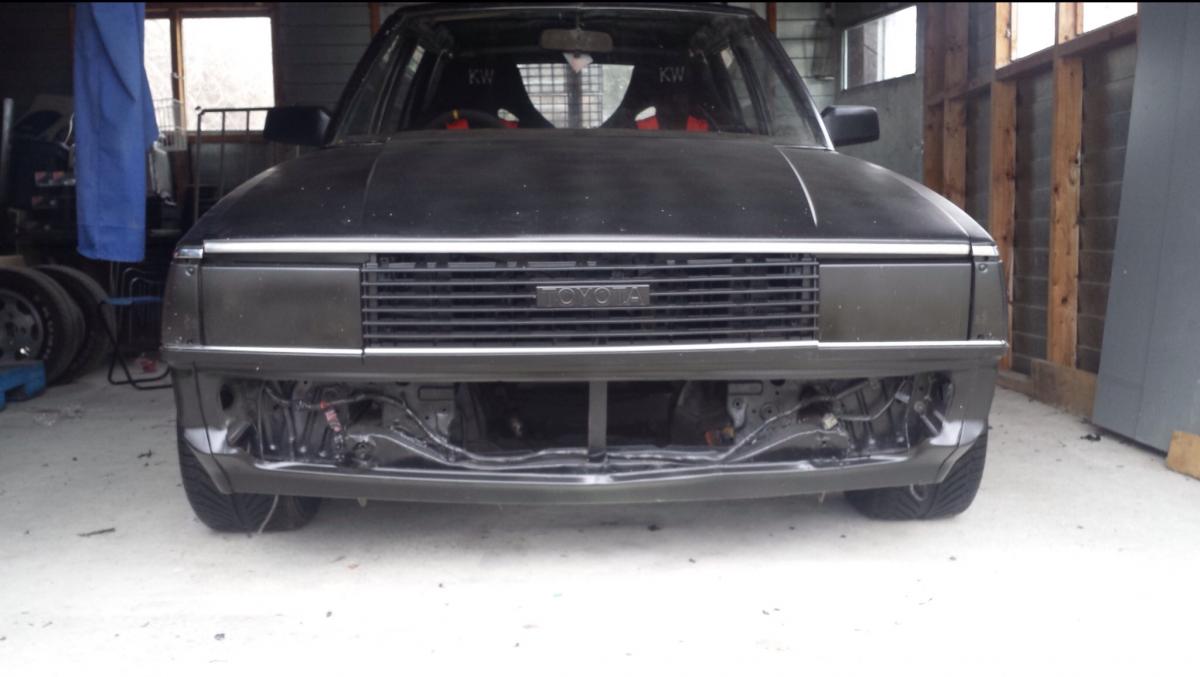
FAIL So Hellux failed, but not by much! Have a small list of fairly minor things to sort, which shouldn't take long, and more importantly should cost stuff all. So the seat belt buckles were bolted to the seats, which meant a whole bunch of extra rules applied around the mounting of the seat, so I thought I would just simply bolt the buckles to the factory mounting points on the body. WRONG. Turns out it has no holes/nuts, had a bench seat it did, which seemed odd for an SR5, but guess it was an option or some shiz. So I made up another set of doubler plates for the belts, as seen below, WRONG. The eagle eyed of you, will notice that I welded std M12 nuts to them, they have to be metric fine. Bugger. So I need to change these. Thankfully I got the seat ones rite, so they are all gravy. He also wasn't happy with the floppy material buckle storks, so I have to change them to cable ones. It has to have an engine check light, which I think is slightly odd? Needs a fan shroud, which makes sense. Have to slightly change the front drive shaft loop, easy. And then I just have to take pics of all the doubler plates and hoop mounts that are under the carpet/seats inside the vehicle, and its done. And here's a pic of the old girl in all her hideous glory, ready to set sail for a fail. Grott. Regards, VG.1 point
-
What's the worst that could happen? (Hahaha)1 point
-
Thanks to Classic Towing the lolvo has landed in friendly Feilding, 14 times winner of NZ's most beautiful town.1 point
-
I went through this process, not too tricky just fiddly. Definitely just start from scratch. A method I used: Basically you just want to use a scissor jack or whatever to hold the gearbox in the right place. Then make cardboard templates for each side that bolts to the chassis, to the most suitable set of holes. then make another cardboard part that bolts to the gearbox mount. (Assuming SR20 gearbox bolts down flat) Then from here to can sketch up a side profile of how much lower it needs to drop, distance to holes, etc. Then build another template one from cardboard as you'd expect to make it out of steel, fit that up and see if you're happy with it. Then cut the steel bits as to those dimensions and get someone to weld it up. I live reasonably close to you now so I can maybe give you a hand with the template part, but when it comes to steel I'm on borrowed time against cutting a finger off and cant weld worth a damn haha.1 point
-
Got the lower airbag mounts all done. Chucked the airbags in. They sit good, just a little too close to the lower rear arm so might grind a little off. Cool video:1 point
-
Man I can't even make breakfast without wearing shoes.1 point
-
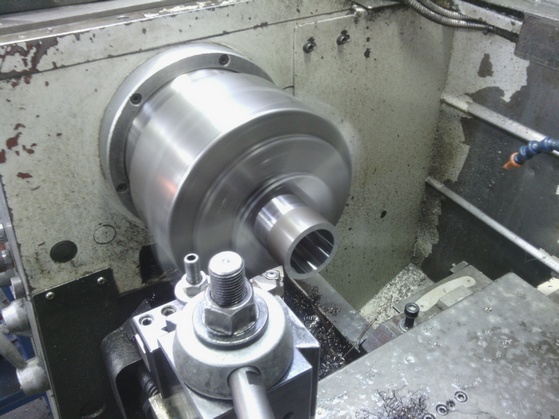
Back due to popular demand! I've been slowly spending time and money. New radiator purchased. Car ones just aren't the right shape and the little Honda ones are just too little. I measured up a friends Massey Ferguson TE20, it was spot on. I brought a new replacement one from the radiator shop. It will need it's inlet and outlets changed but that won't be a problem. Next up is a way to drive the hydraulic pump. I have a pump with a pulley, the pulley is a giant ugly thing as seen here. So I turned it down into a hub and redrilled a RB20 waterpump pulley to fit it. I don't know what the original pulley was mare out of, it was as hard as hell and took hours to turn down! To drive the pump it needs a pulley on the crank too, another RB20 gave up it's water pump pulley as did a Mazda b5. I turned up a hub to hold it all in the right place and a friend cut a key way in it for me. It's gone a bit rusty from sitting, nothing some scotchbright won't fix. Last of all. I had planned to drive this directly off the engine as the tractor has it's own gearbox. But. The more I have learned about them the more people I have come across saying they are too high geared standard with a motor that revs to 1800 ish rpm maximum. The common solution seems to be adapting a Ford Model T gearbox to them. I think that Datsun will rev to easily twice that of the original, I'm going to need an auxiliary gearbox. Luckily I have the Vanette box that came with the motor. It looks like it will be just about back to the start which is a bummer but hopefuly the result will be worth it.1 point
-
That ackerman angle looks quite extreme in the photos? could just be the angle of the photo though... but DAMN that looks good!1 point
-
Finally have the old girl back home.Starting to get all the bits together to pull the engine and box out.Ive been working on it mainly at smoko at work,making little bits and welding up the intake manifold.Also have redone the rocker covers in a flat black powder coat finish as i wasnt happy with the out come of the VHT wrinkle paint.1 point
-
DONT LISTEN TO ANYONE ELSE ON HERE. IM EXPECTING TO SEE A TURBOCHARGED STARFIRE. "I don't know who you are. I don't know what you do. I do have are a very particular set of skills, skills I have acquired over a very short time. Skills that make me a nightmare for people like you. If you turbocharge that starfire, that'll be the end of it. I will not look for you, I will not pursue you. But if put any other motor into this car, I will look for you, I will find you, and I will remove it and reinstall a starfire." Hi, Im Thomas. My VK was a starfire powered example, but i regretfully pulled it out and replaced it with a RB30e. I sort of miss it being starfire powered and actually was thinking about turboing back when it was in it. but now its just sitting in my garage. YES I HAVE A THING FOR STARFIRES OKAY. Would be super awesome to hear hectik dose noises and have people be like is that rb30et? and you like nah.... its better...... TURBO STARFIRE ZOOOOOOTUTUTUTUTU1 point


.thumb.jpeg.384ff72c8d2b0ee0d34a7bdedb55bdcf.jpeg)


This leaderboard is set to Auckland/GMT+12:00